HOLIDAY DONATION DRIVE - SUPPORT MSW - DO YOUR PART TO KEEP THIS GREAT FORUM GOING! (Only 36 donations so far out of 49,000 members - C'mon guys!)
×


Flyfisher
-
Posts
31 -
Joined
-
Last visited
Recent Profile Visitors
1,160 profile views


-
 g8rfan reacted to a post in a topic:
USS Constitution by Flyfisher - BlueJacket Shipcrafters - 1:96
g8rfan reacted to a post in a topic:
USS Constitution by Flyfisher - BlueJacket Shipcrafters - 1:96
-
schooner reacted to a post in a topic:
USS Constitution by Flyfisher - BlueJacket Shipcrafters - 1:96
-
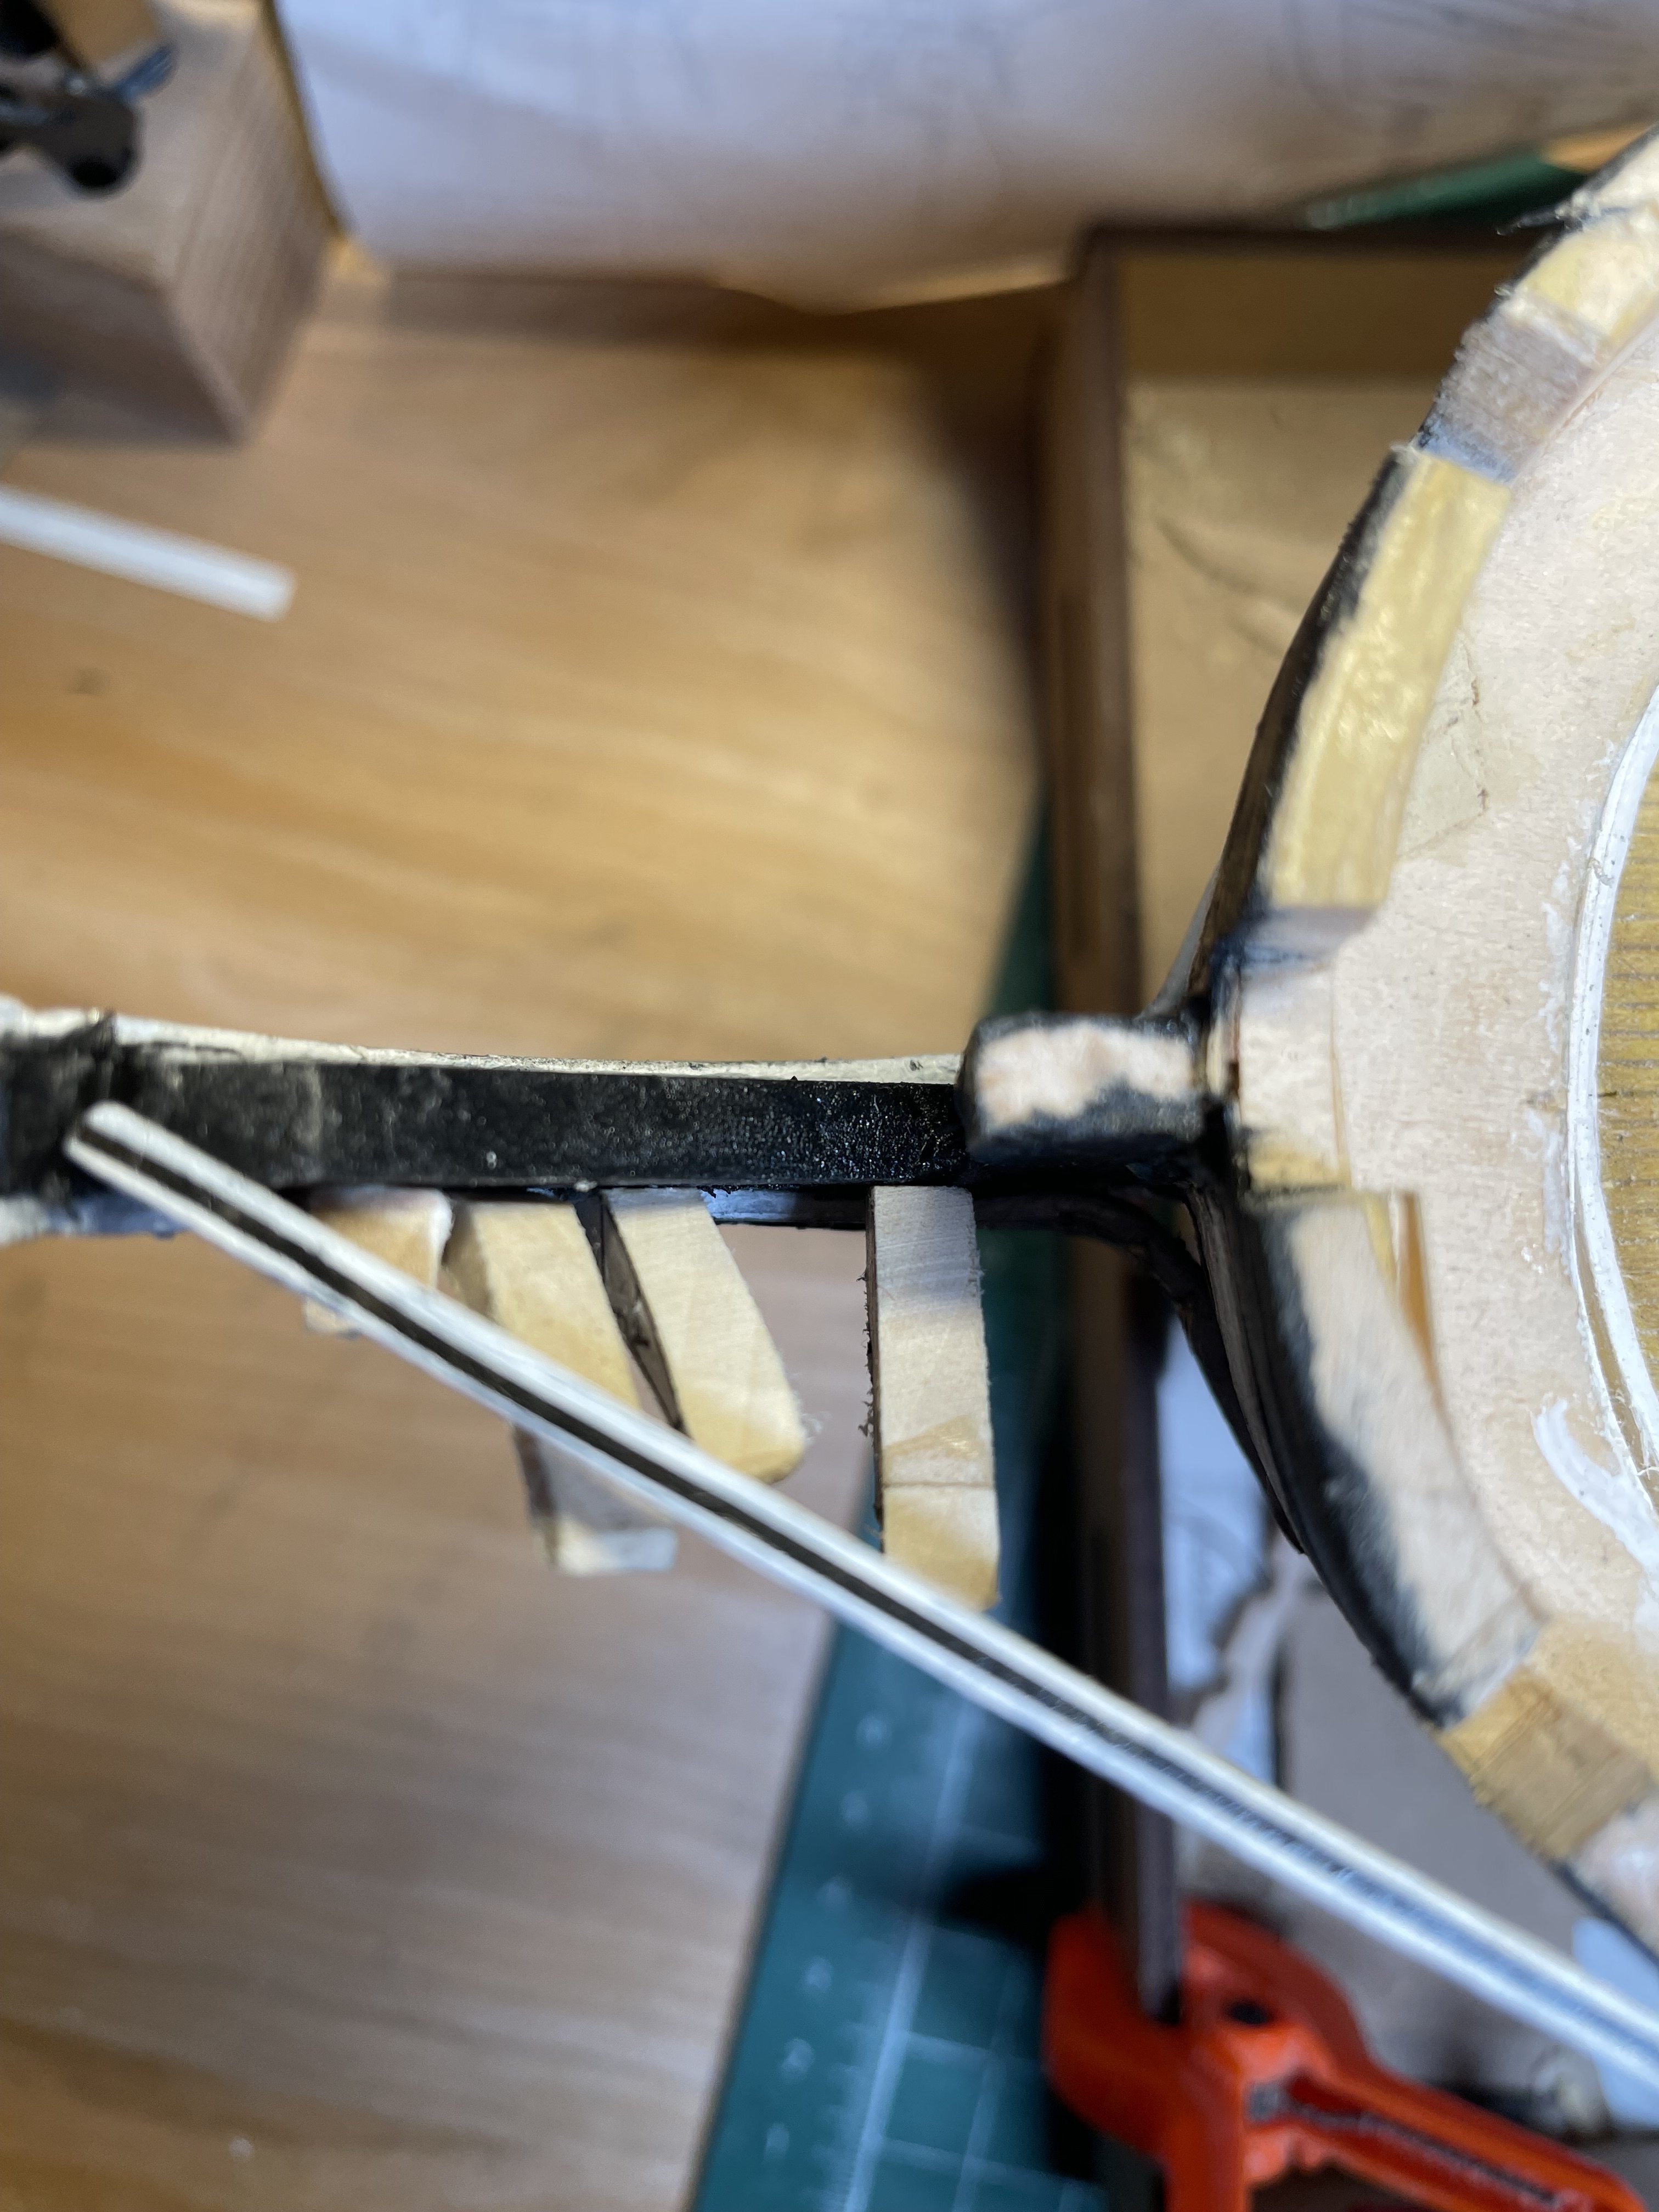
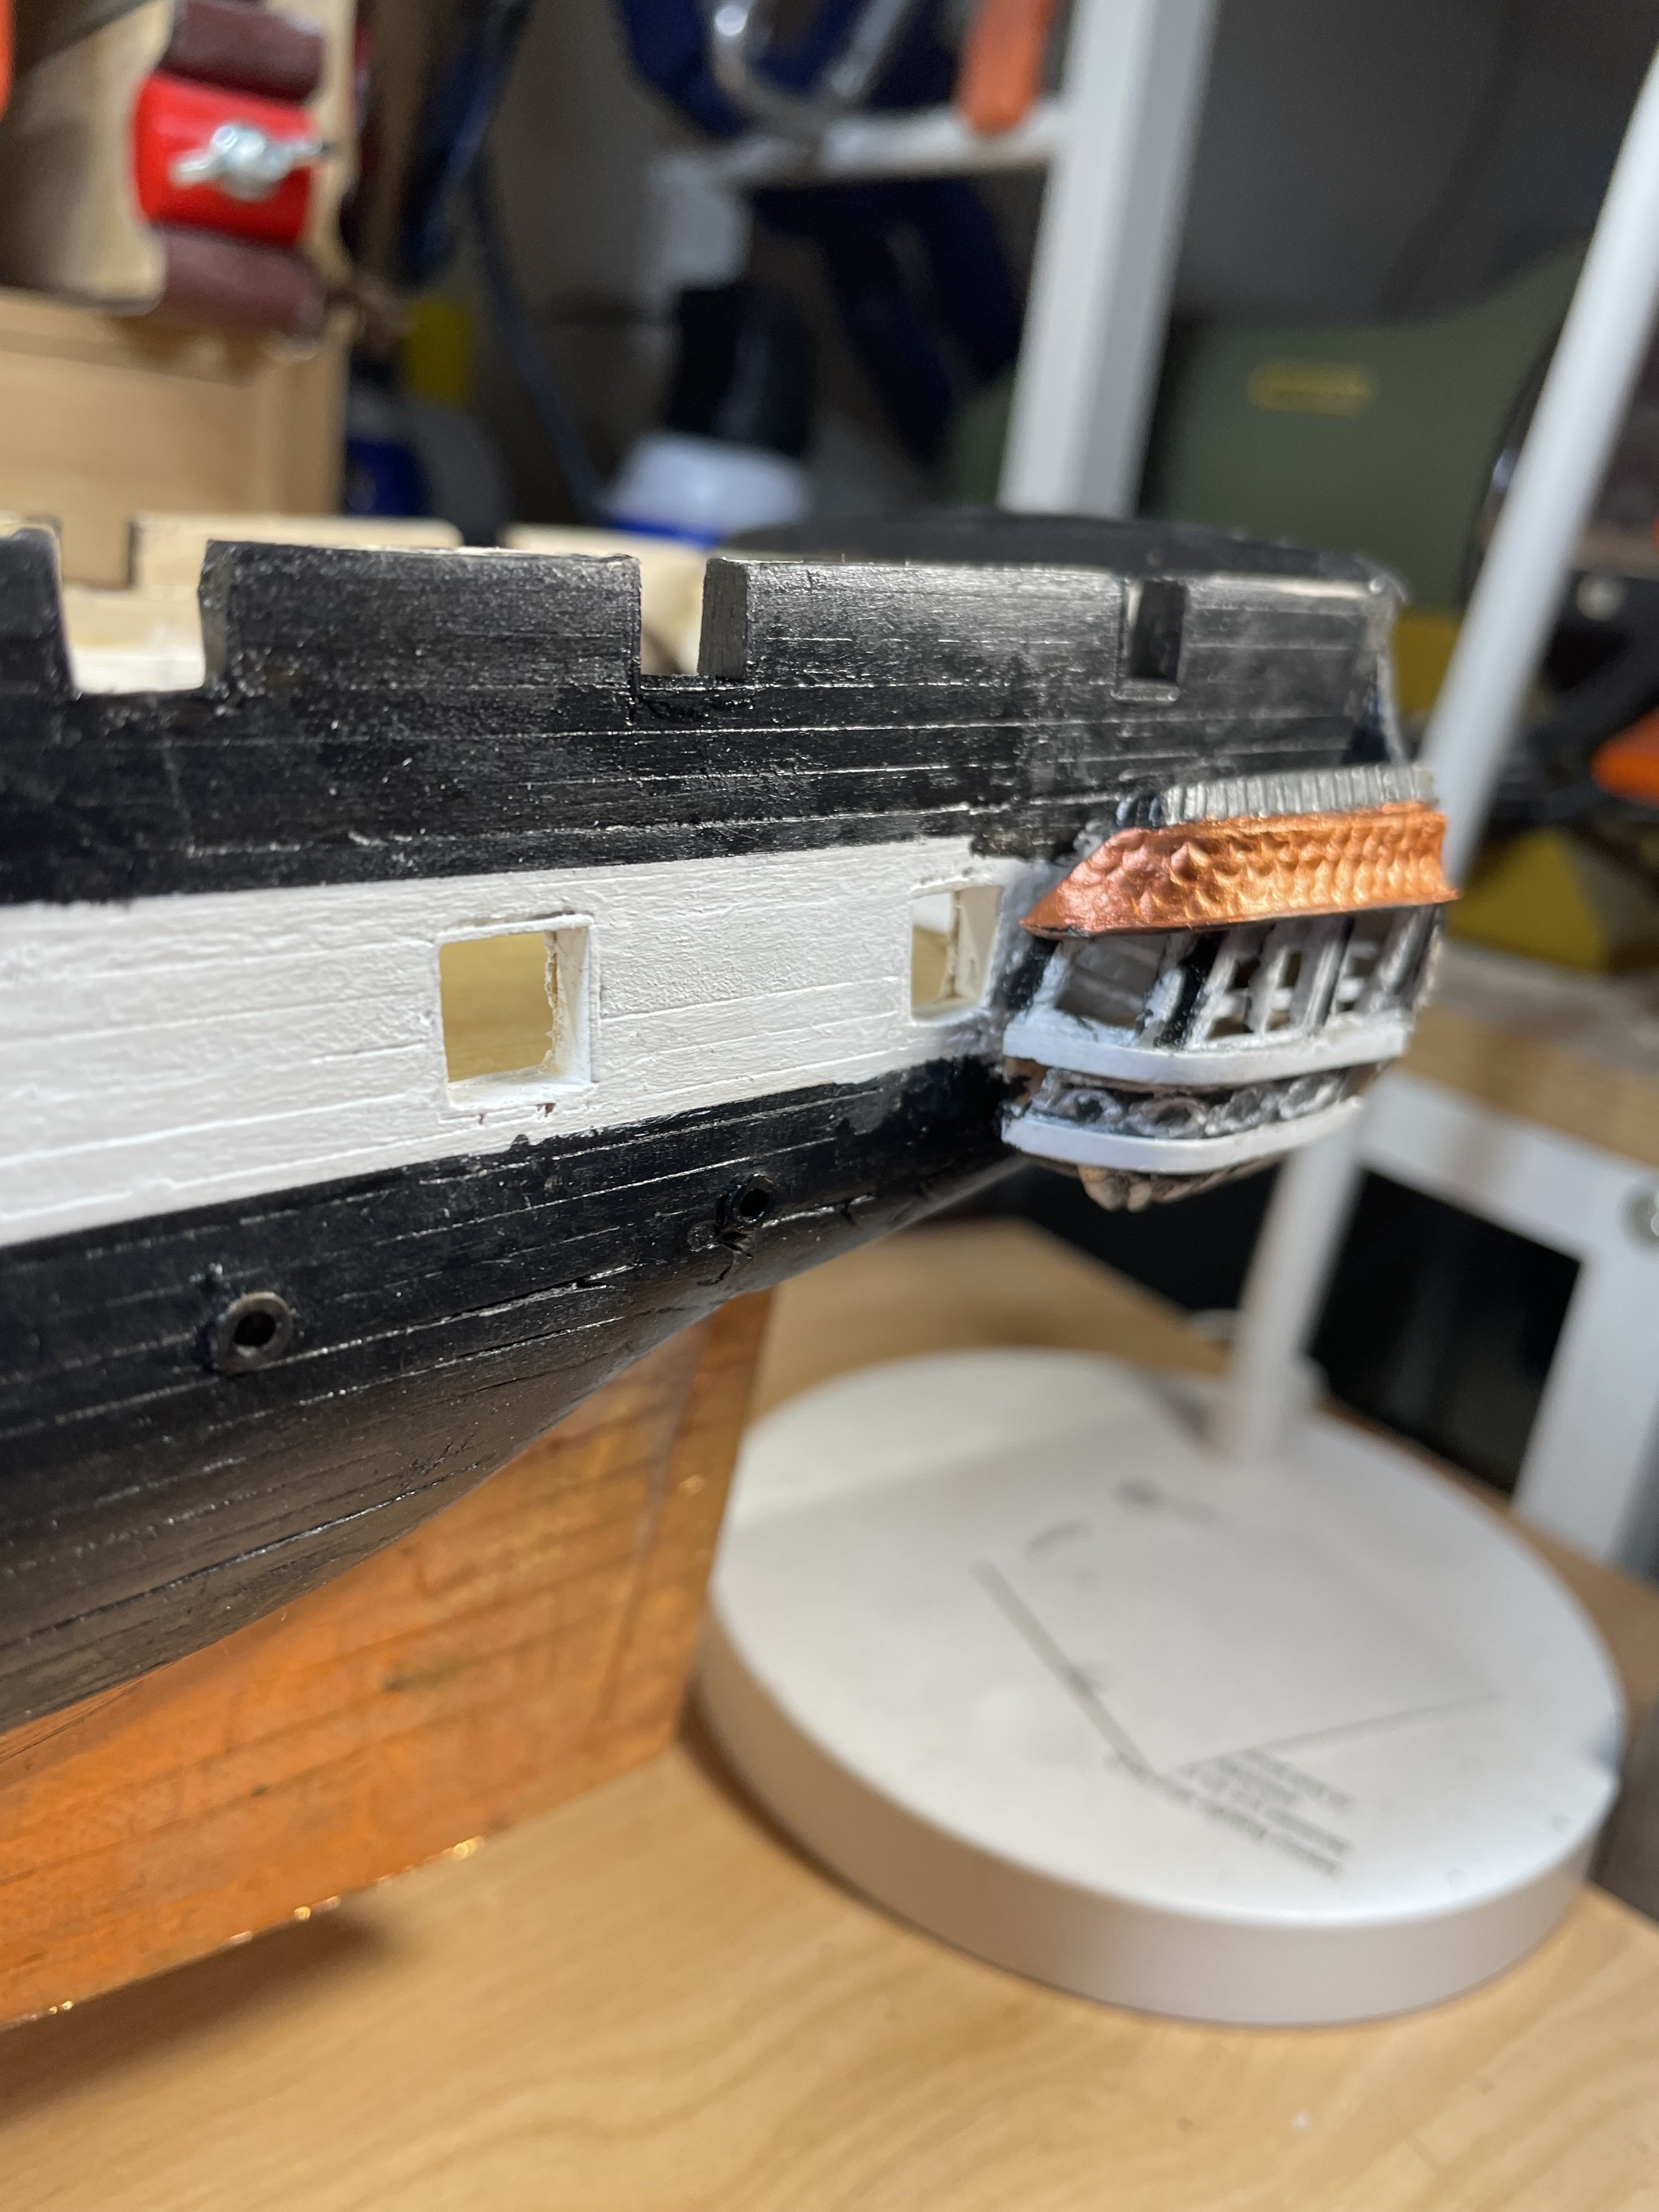
 Bowhead Structure, part two I stripped the misshapen bowhead timbers and started experimenting with different timber shapes that would support the cross timbers and fit the middle rail. The new design was less vertical but provided a better base for the cross timbers and grates. After getting a shape that I was satisfied. with, I painted the pieces and used 1mm art tape to define the outline. Then I added the cross timbers and shaped the head grating. It made more sense to cut the grating and create a step down to help the shape. Then I modified the seats-of-ease to fit against the bow. Finally, I used some scrap sail cloth to fabricate the canvas covers. The fabric was dunked in water then painted with a mix of gray and black acrylic. Two coats made it stiff but flexible for shaping between the top and middle rails. So, I’m pretty satisfied with the results, even though it wasn’t according to the instructions. Next up, the catheads. Semper Dienceps Jim


-
Flyfisher reacted to a post in a topic:
USS Constitution by Flyfisher - BlueJacket Shipcrafters - 1:96
-
Bowhead Structure The bowhead assembly poses some challenges on the Bluejacket model. There are no images (I’ve found) that show the superstructure; the images all seem to have vertical timbers that support the rails; and the details to support the grating are hidden; and none of the current modelers have tackled the assembly. And I’m not good at reading the plans. This became a multi-step/ revisionist approach. In other words, I was making sh*t up to get to a reasonable look. The first step was to add the top rail, then trying to use the templates in the plans to create the supports that attach to the stem. Ideally this would create the vertical structure. I shaped the supports and spot-glued them to the stem, keeping in mind where they will butt against the second rail. Didn’t work the way I thought. Needless to say, the supports will need almost a complete overhaul to fit. Semper Dienceps Jim


-
Flyfisher reacted to a post in a topic:
USS Constitution by g8rfan99 - BlueJacket Shipcrafters - 1/98
-
Flyfisher reacted to a post in a topic:
USS Constitution by g8rfan99 - BlueJacket Shipcrafters - 1/98
-
Wow! Beautiful work on such a small scale. Lovin’ the detail Jim
-
 Flyfisher reacted to a post in a topic:
USS Constitution by g8rfan99 - BlueJacket Shipcrafters - 1/98
Flyfisher reacted to a post in a topic:
USS Constitution by g8rfan99 - BlueJacket Shipcrafters - 1/98
-
Flyfisher reacted to a post in a topic:
USS Constitution by Flyfisher - BlueJacket Shipcrafters - 1:96
-
Flyfisher reacted to a post in a topic:
USS Constitution by g8rfan99 - BlueJacket Shipcrafters - 1/98
-
schooner reacted to a post in a topic:
USS Constitution by Flyfisher - BlueJacket Shipcrafters - 1:96
-
schooner reacted to a post in a topic:
USS Constitution by Flyfisher - BlueJacket Shipcrafters - 1:96
-
GGibson reacted to a post in a topic:
USS Constitution by Flyfisher - BlueJacket Shipcrafters - 1:96
-
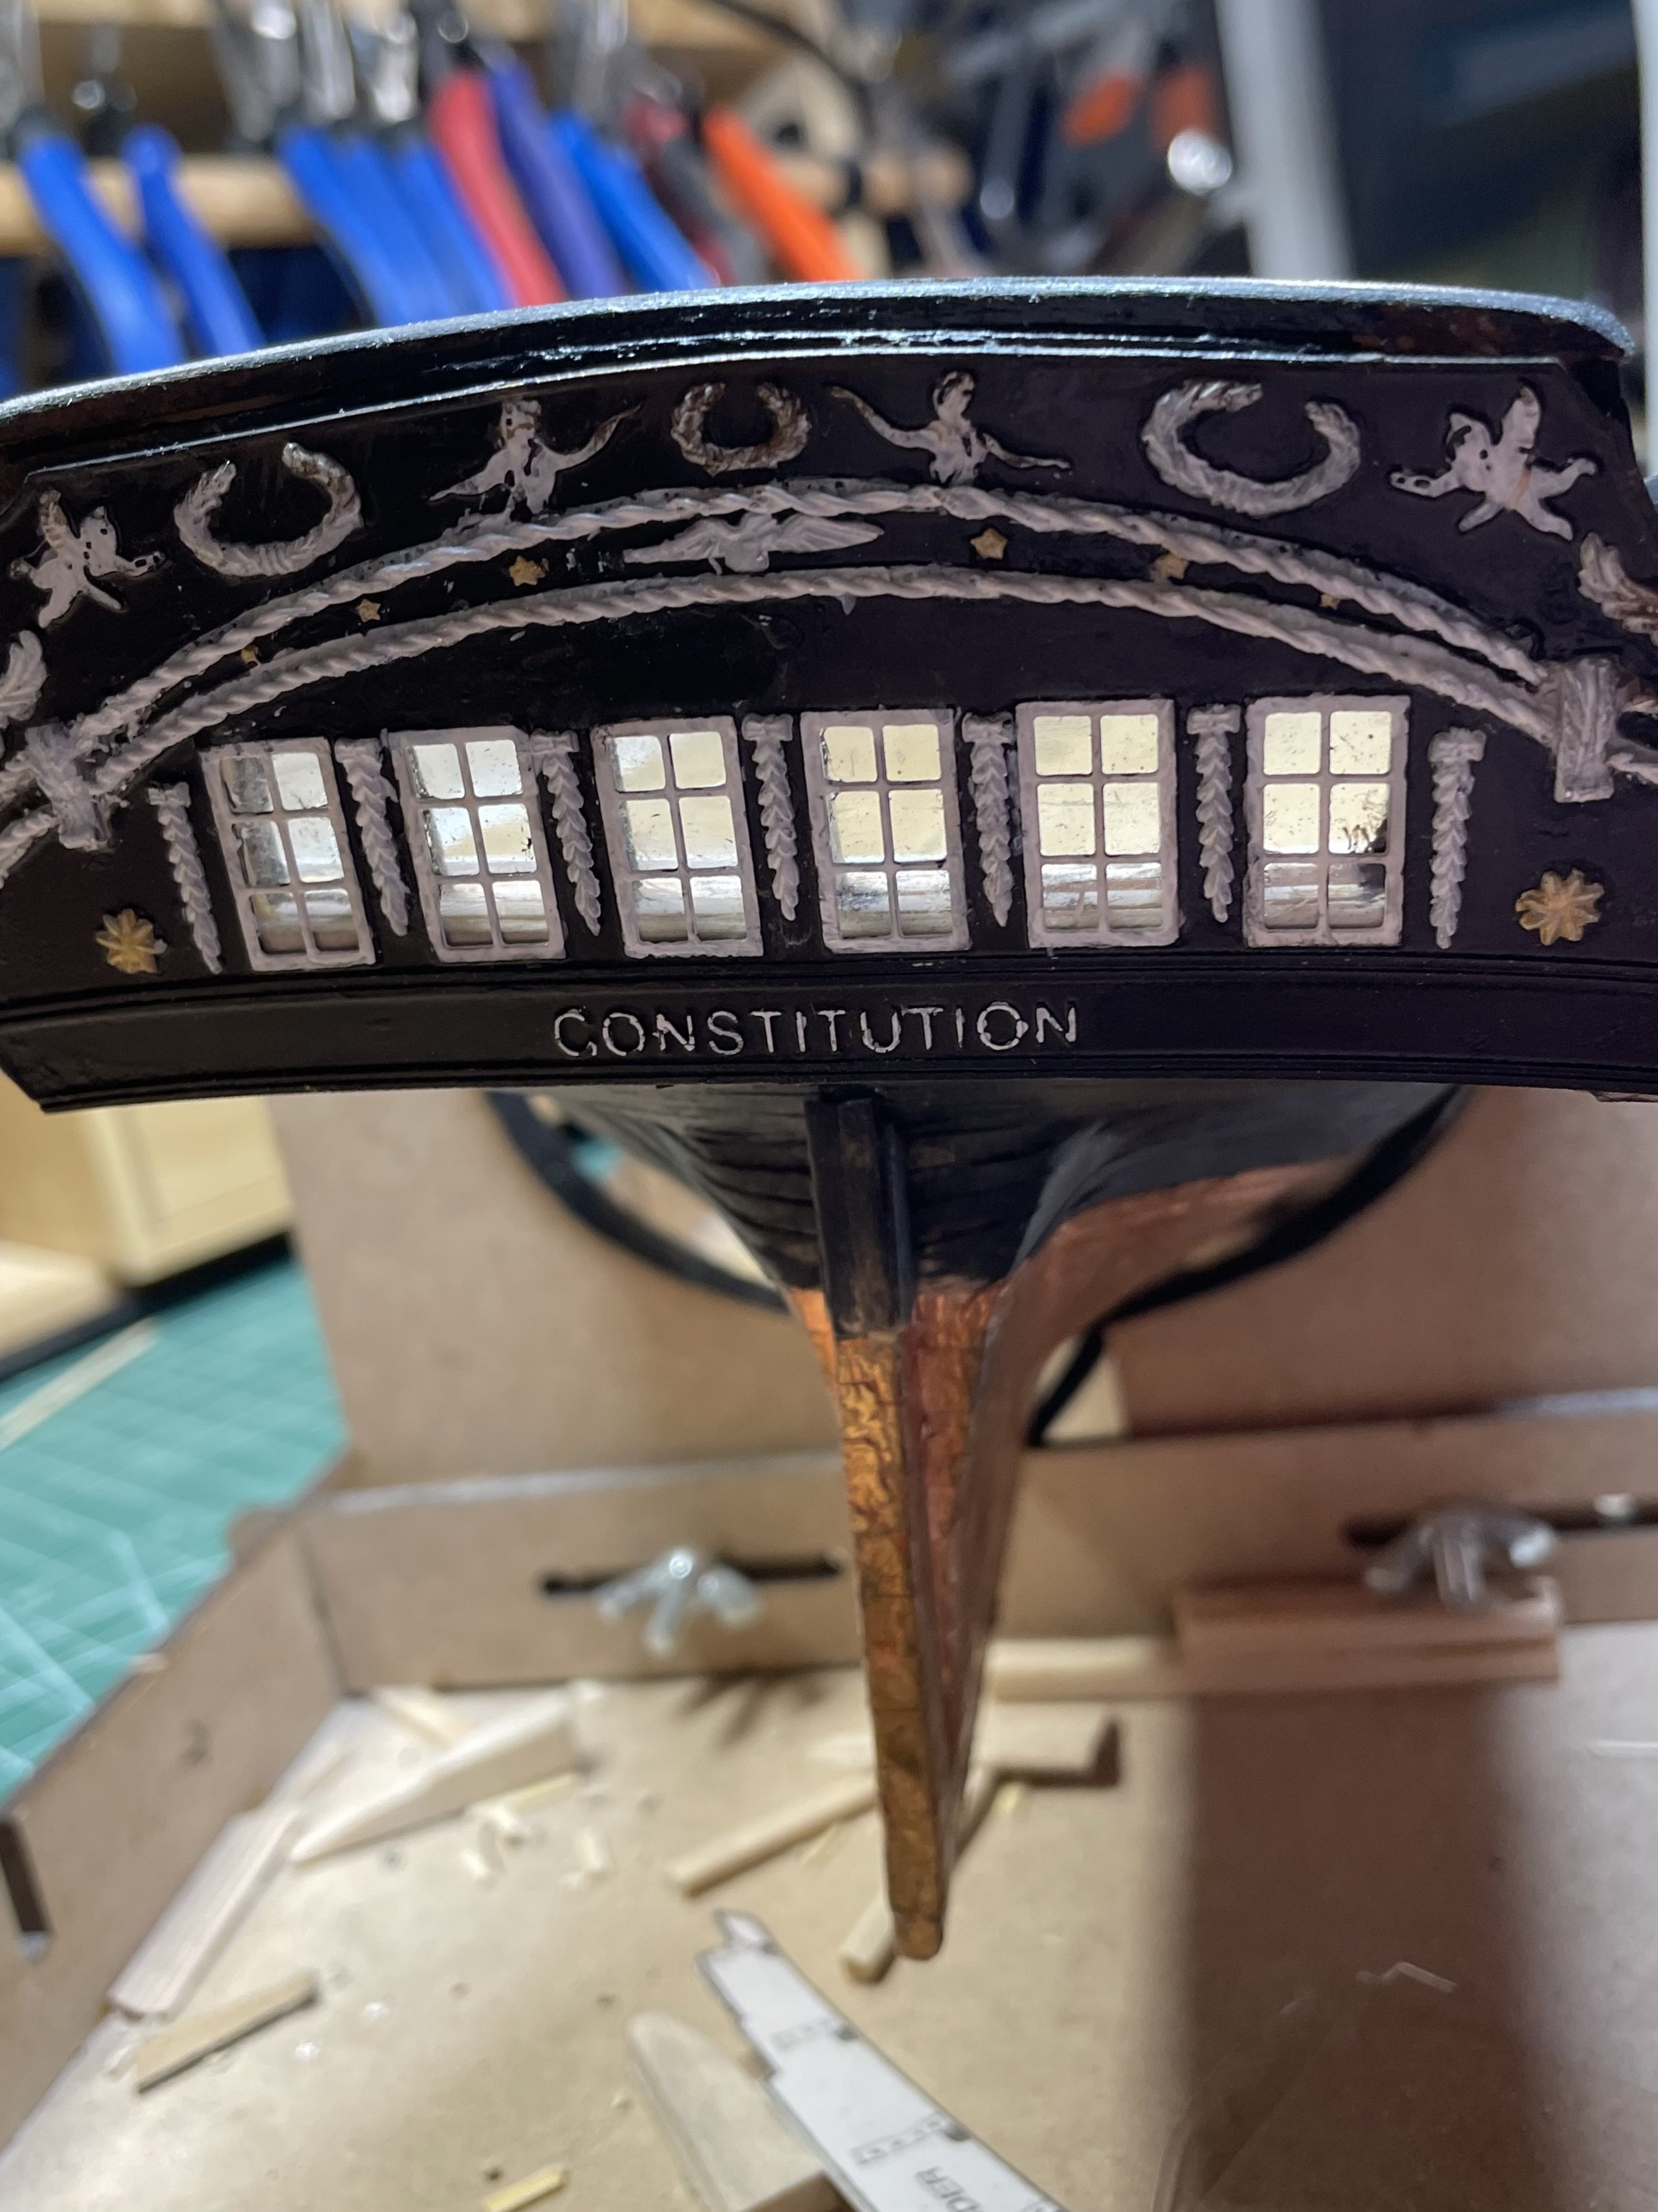
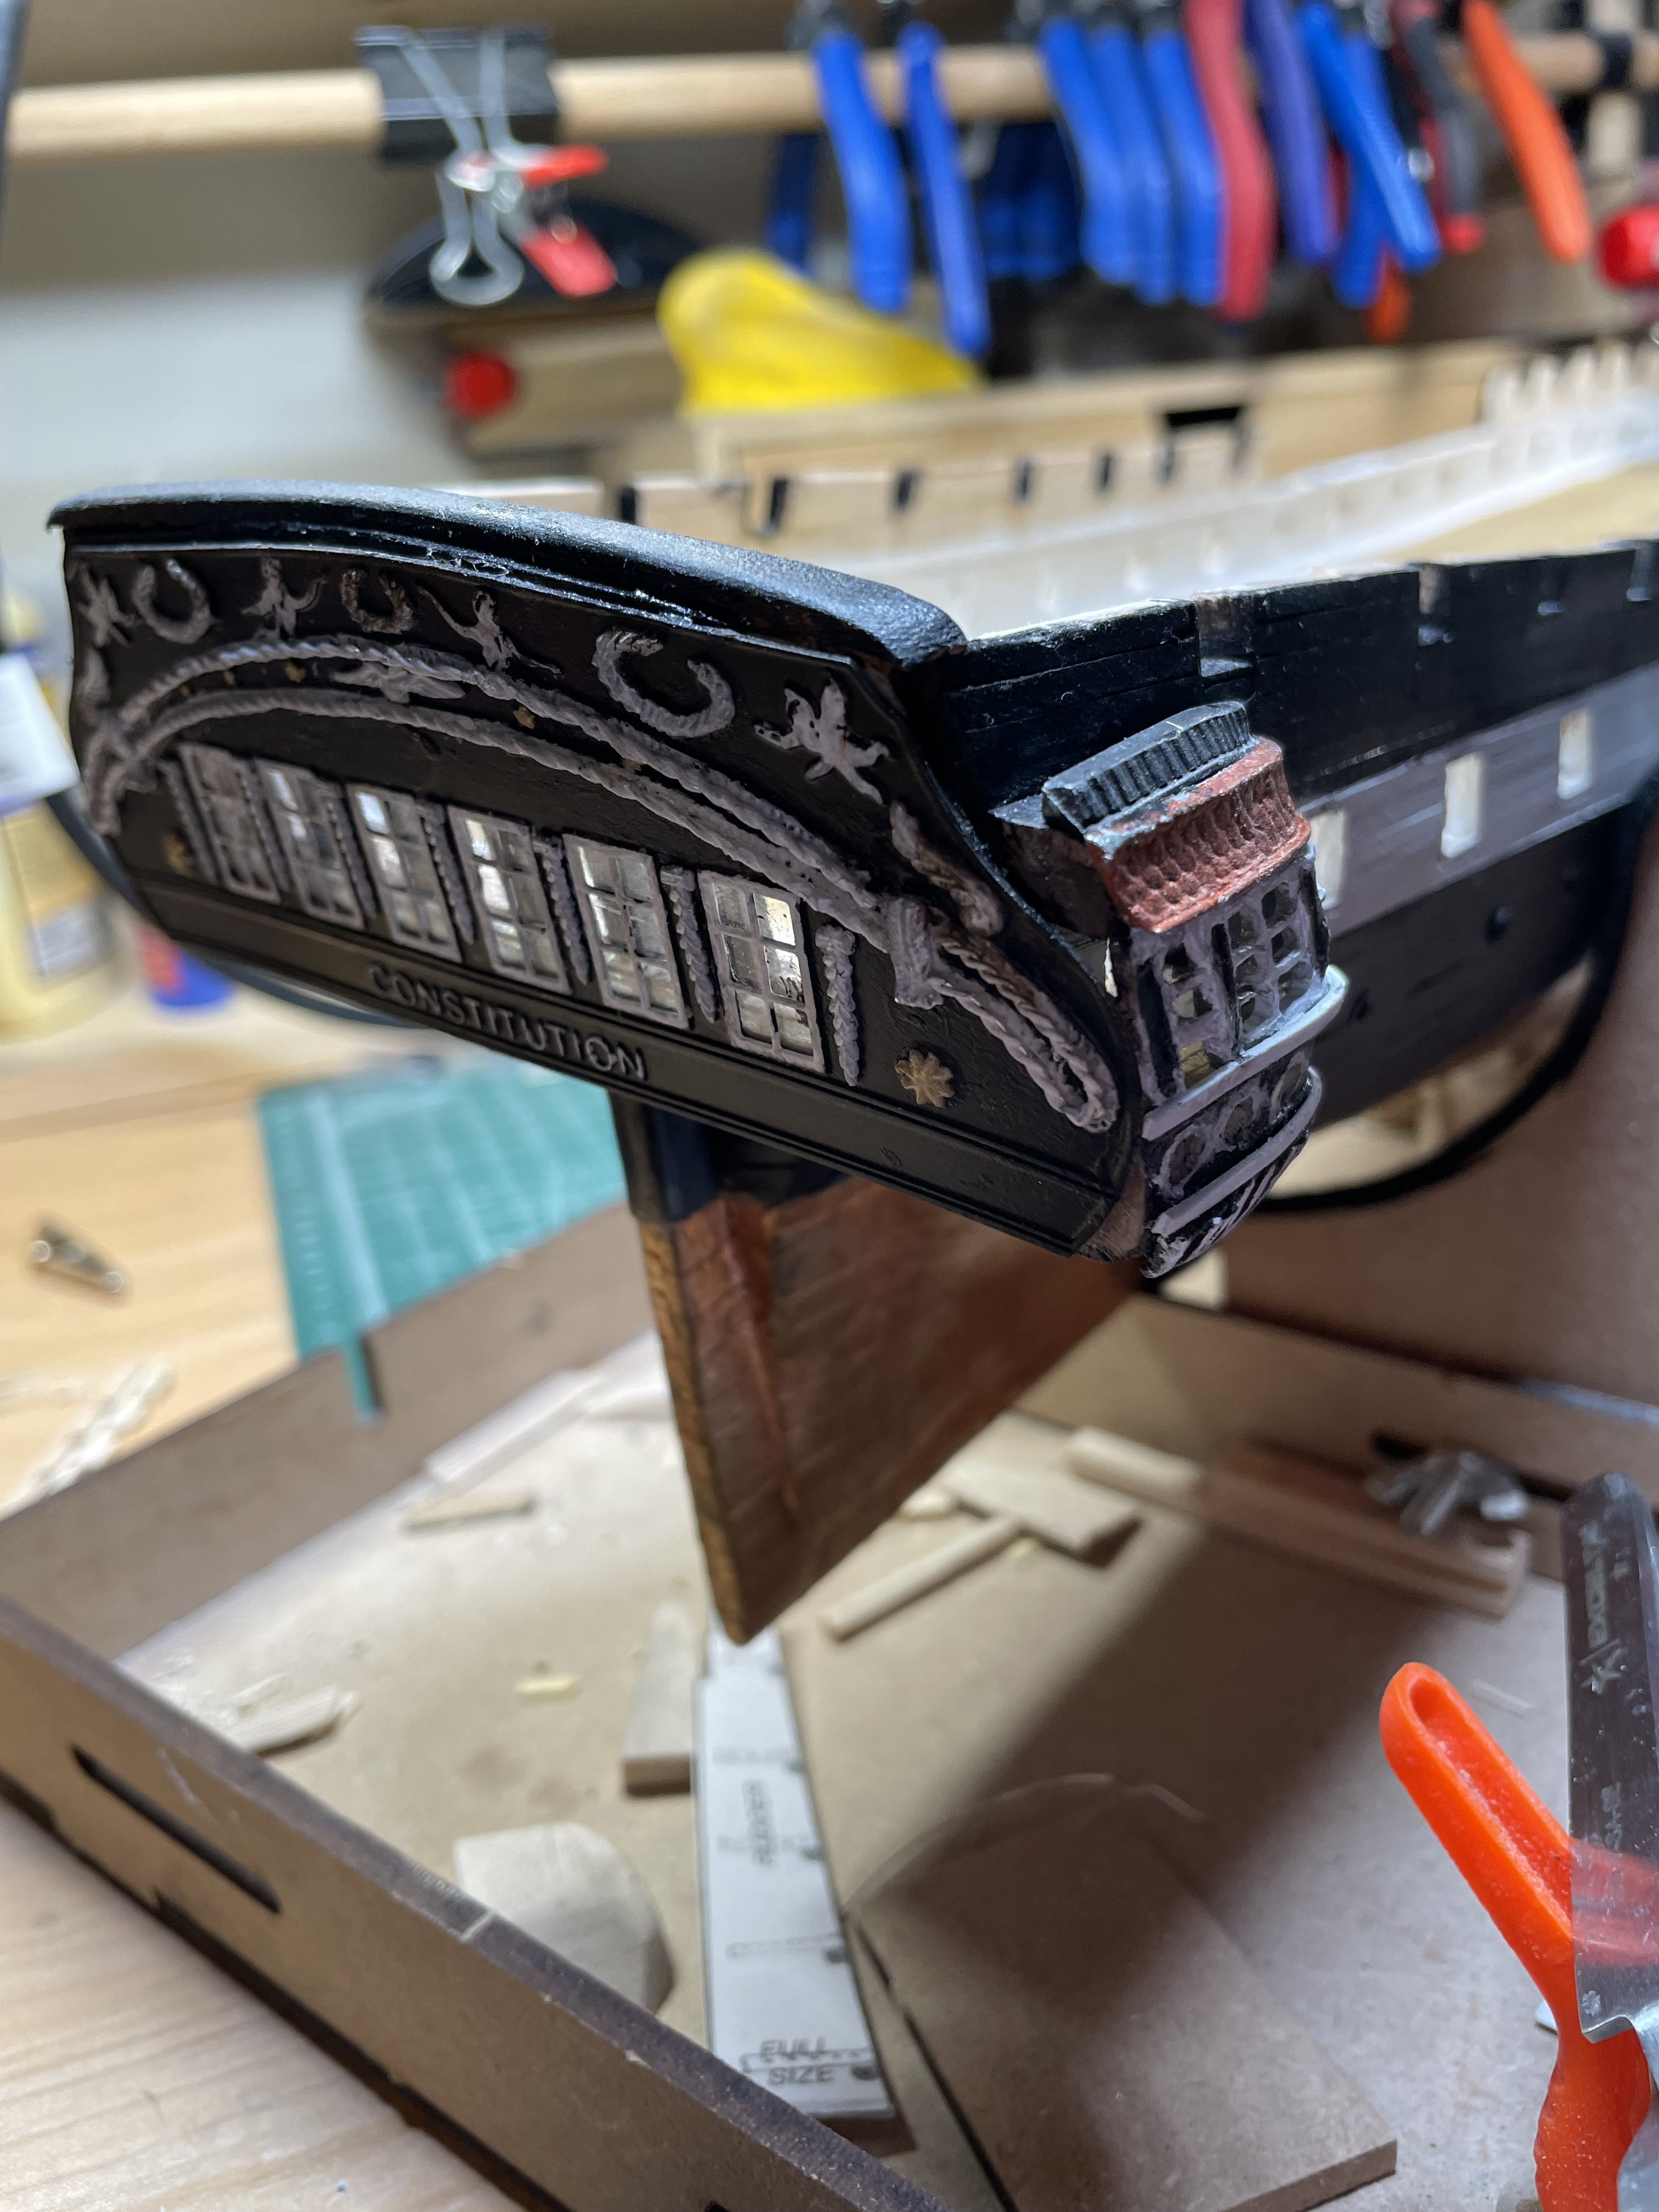
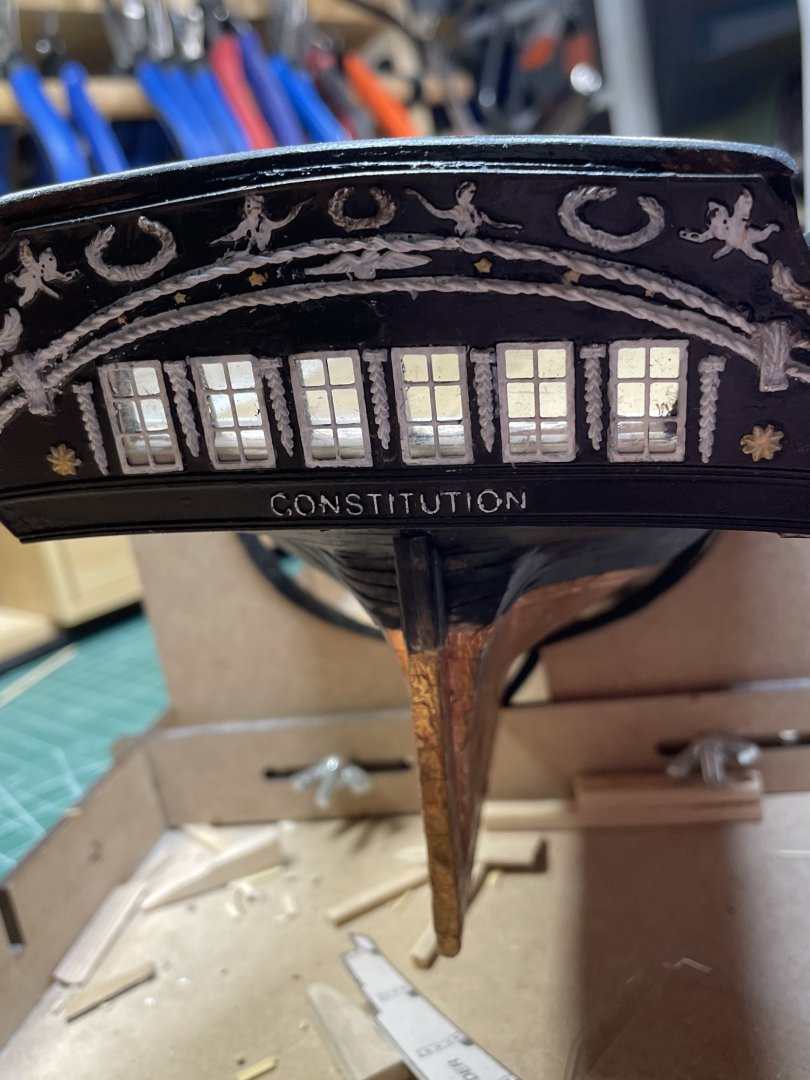
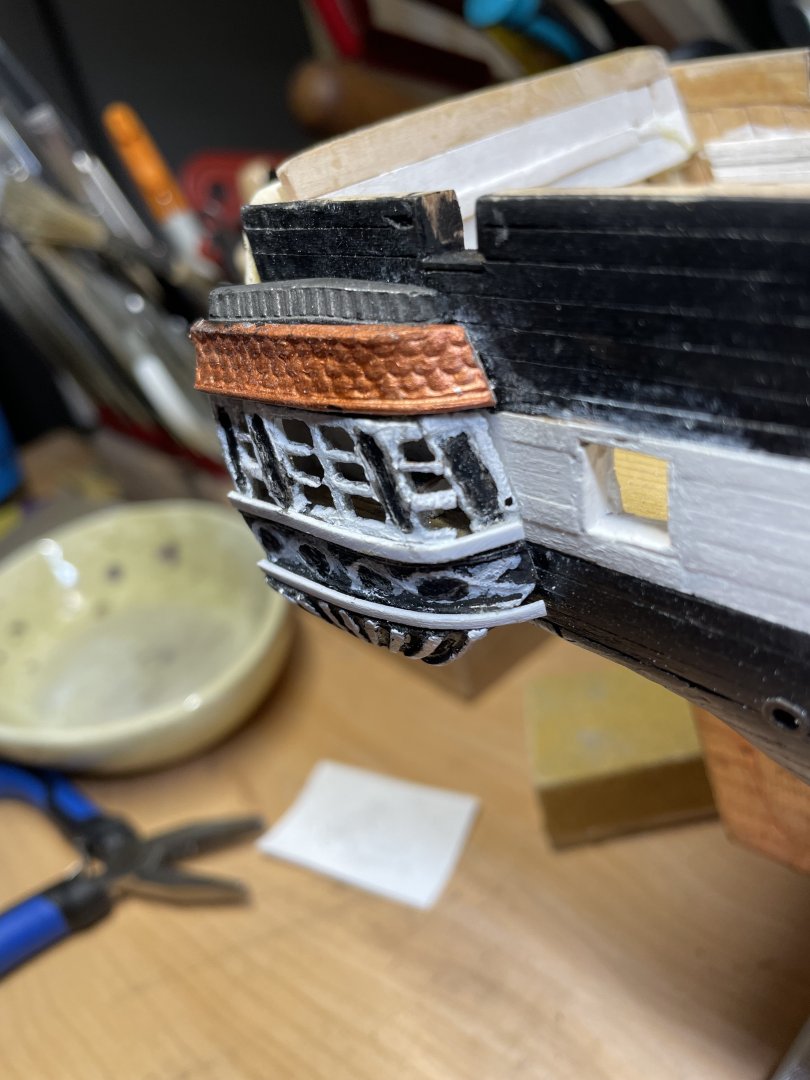
It was much easier to make the transom. I stuck with the instructions and I’m fairly pleased with the results In summary, this thing is getting tougher. It humbles me to see the fine work that others are putting in, and realizing I’m trying to eat an elephant. Semper Dienceps Jim

-
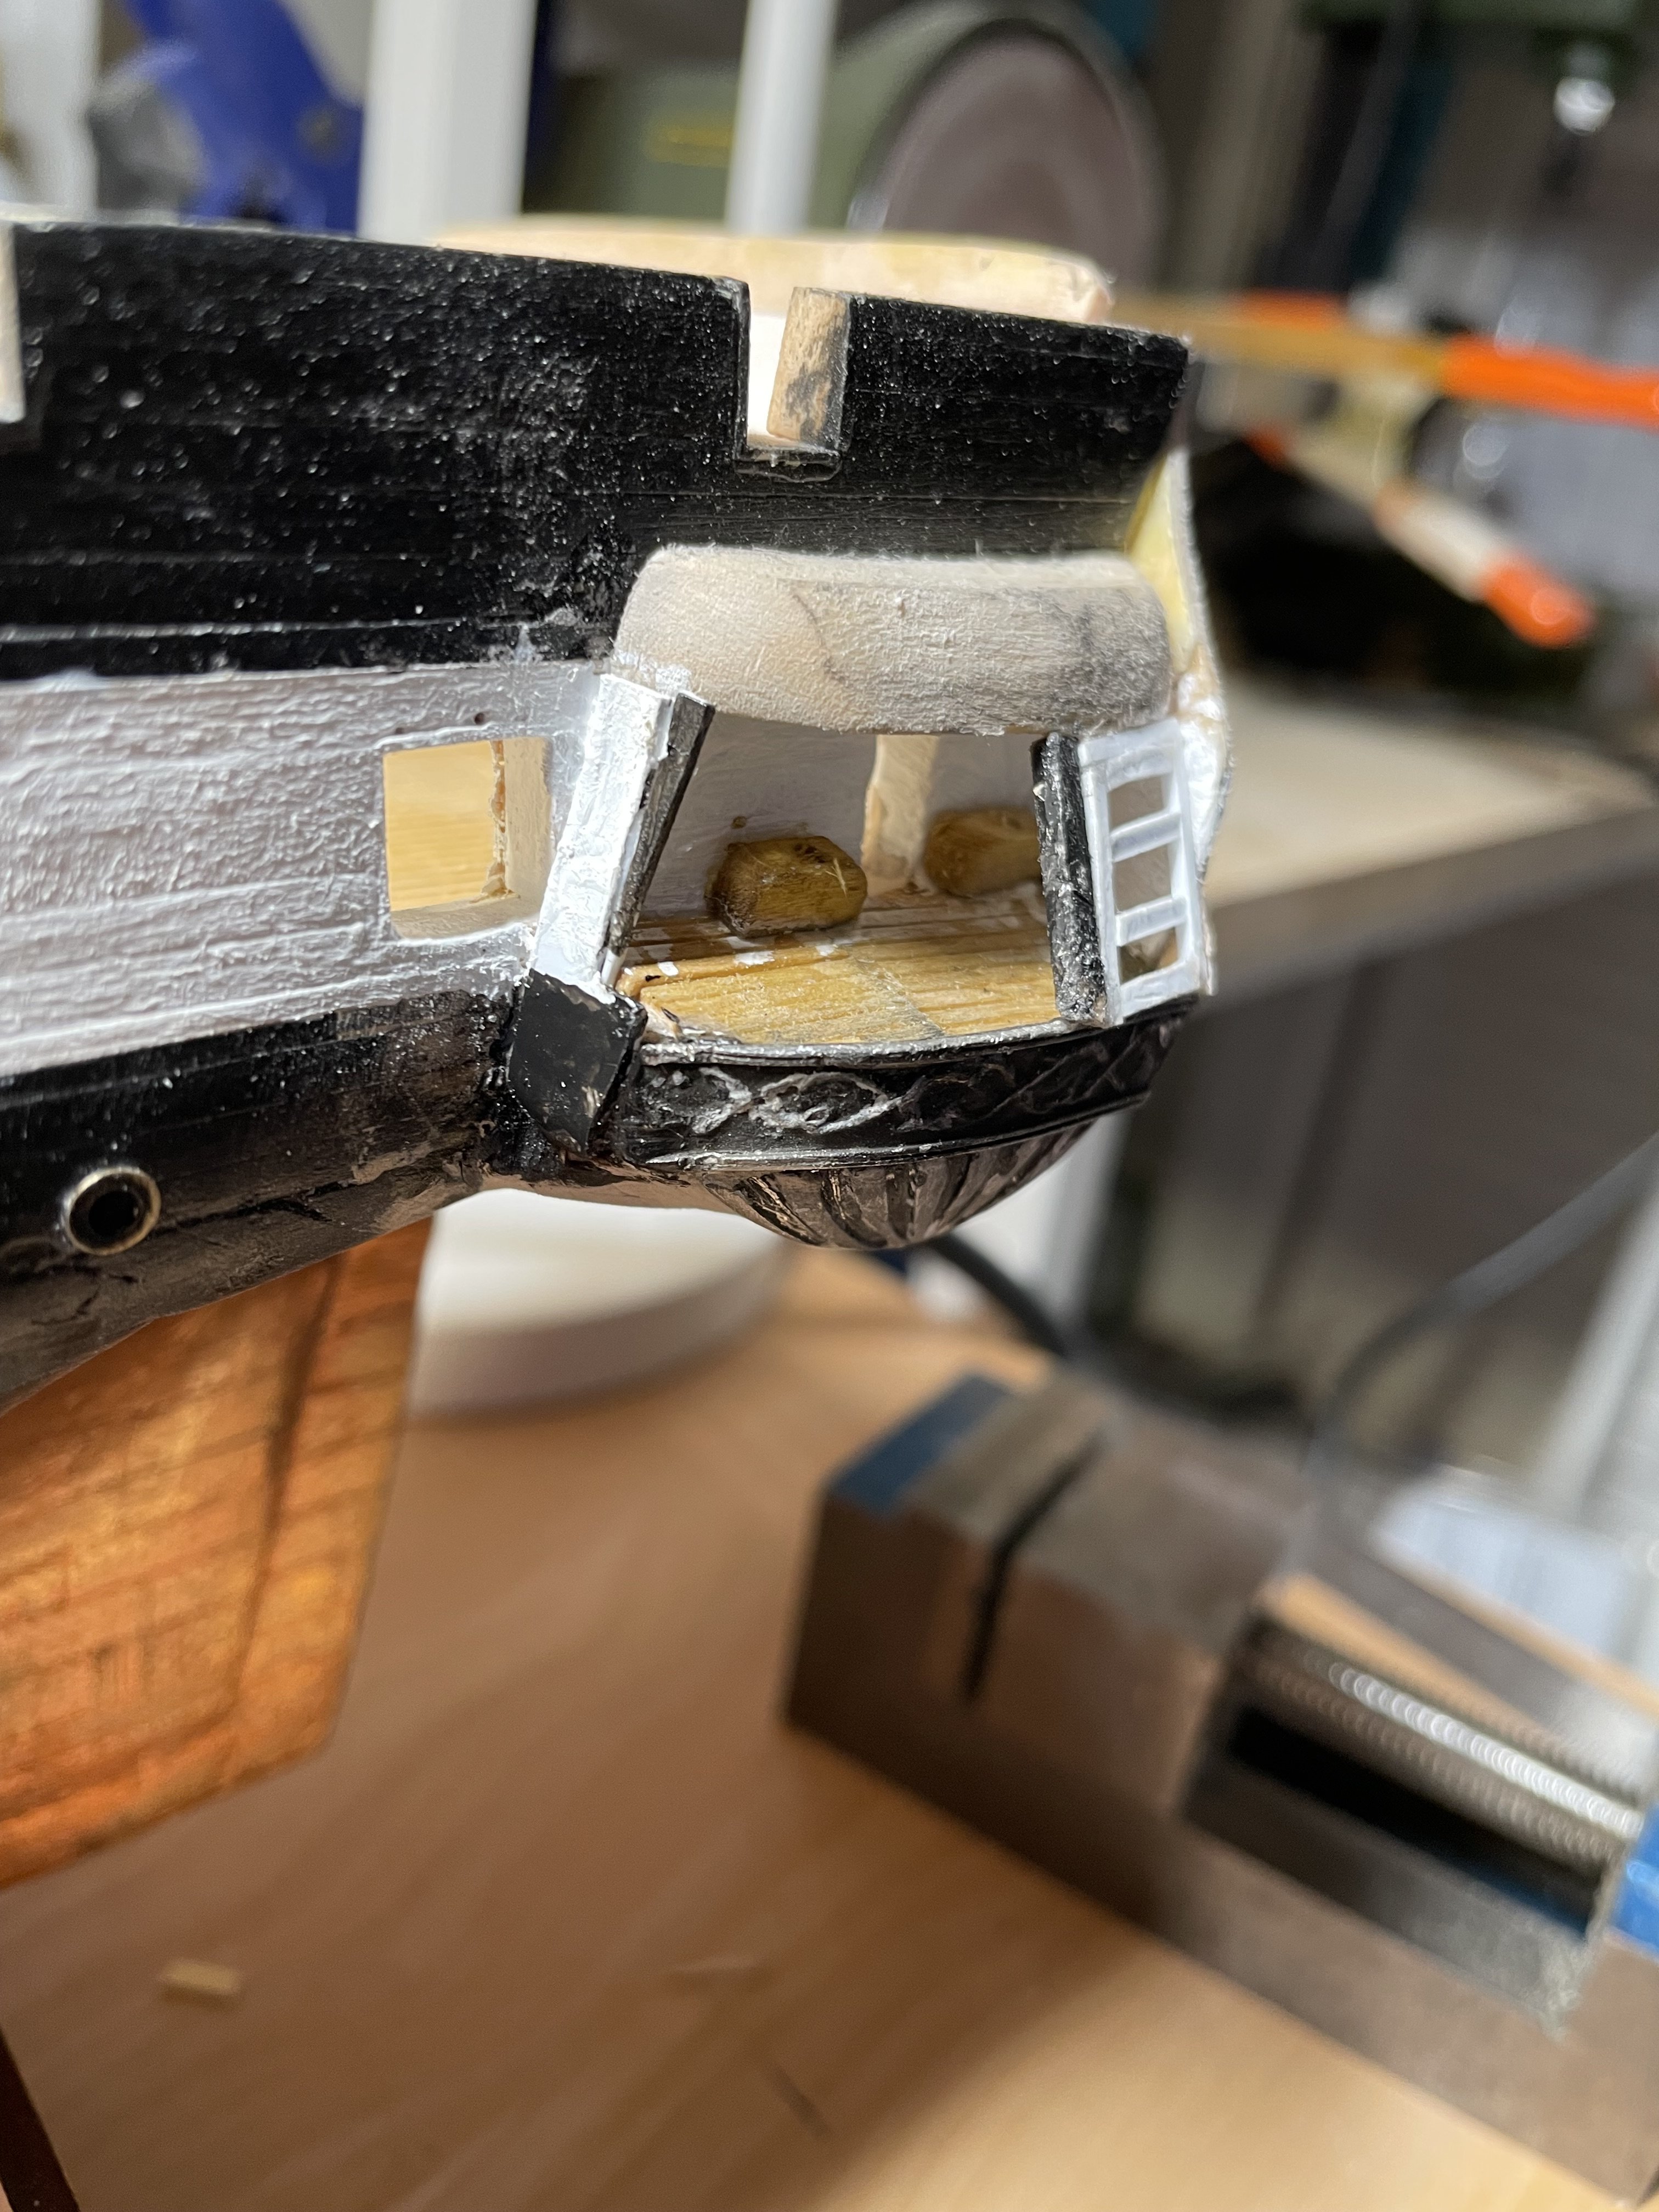
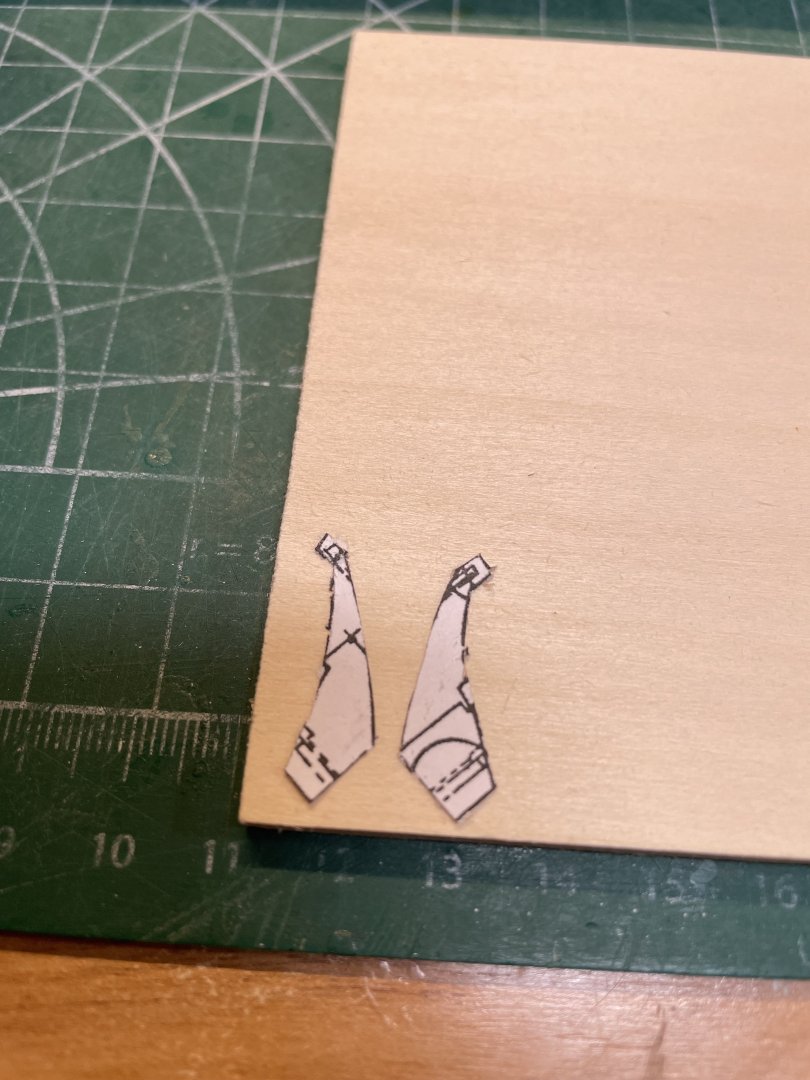
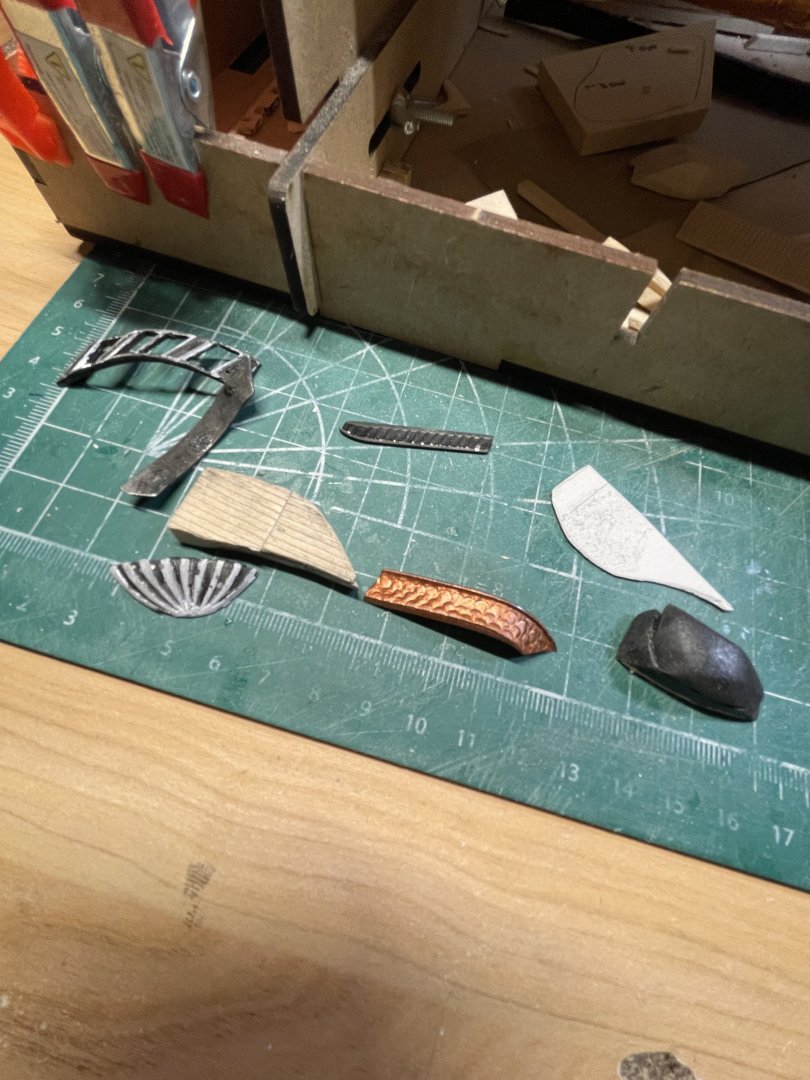
It has been a trying time for the past few weeks, as I attached the transom and quarter galleries to the model. The instructions are vague and I think I had a mind block on solutions. I had removed the machine-carved galleries at the beginning of the build,and now I had to replace them. I started with smoothing the edges to make sure it fit I intended to use as much of the original Britannia metal form as I could. I cut the lower deck portion with a saw and glued the metal seashell and railing to the piece. Unfortunately the deck assembly was too big and cut into the gunport. You can also see the disaster that I made with the windows. So it was necessary to remove the assembly and start over. This time I reached out to other BJ modelers, especially @g8rfan for some advice, as well as rereading the logs describing these parts. That meant trimming the deck, and reapplying the seashell and rails. So,the windows are funny looking, the trim looks out-of-scale, and the shape is shortened. I’m going to keep these as is for now, warts and all. If there are any tweaks you can suggest, please feel free to chime in. Semper Dienceps Jim


-
Flyfisher reacted to a post in a topic:
USS Constitution by Flyfisher - BlueJacket Shipcrafters - 1:96
-
Flyfisher reacted to a post in a topic:
USS Constitution by Flyfisher - BlueJacket Shipcrafters - 1:96
-
KurtH reacted to a post in a topic:
USS Constitution by Flyfisher - BlueJacket Shipcrafters - 1:96
-
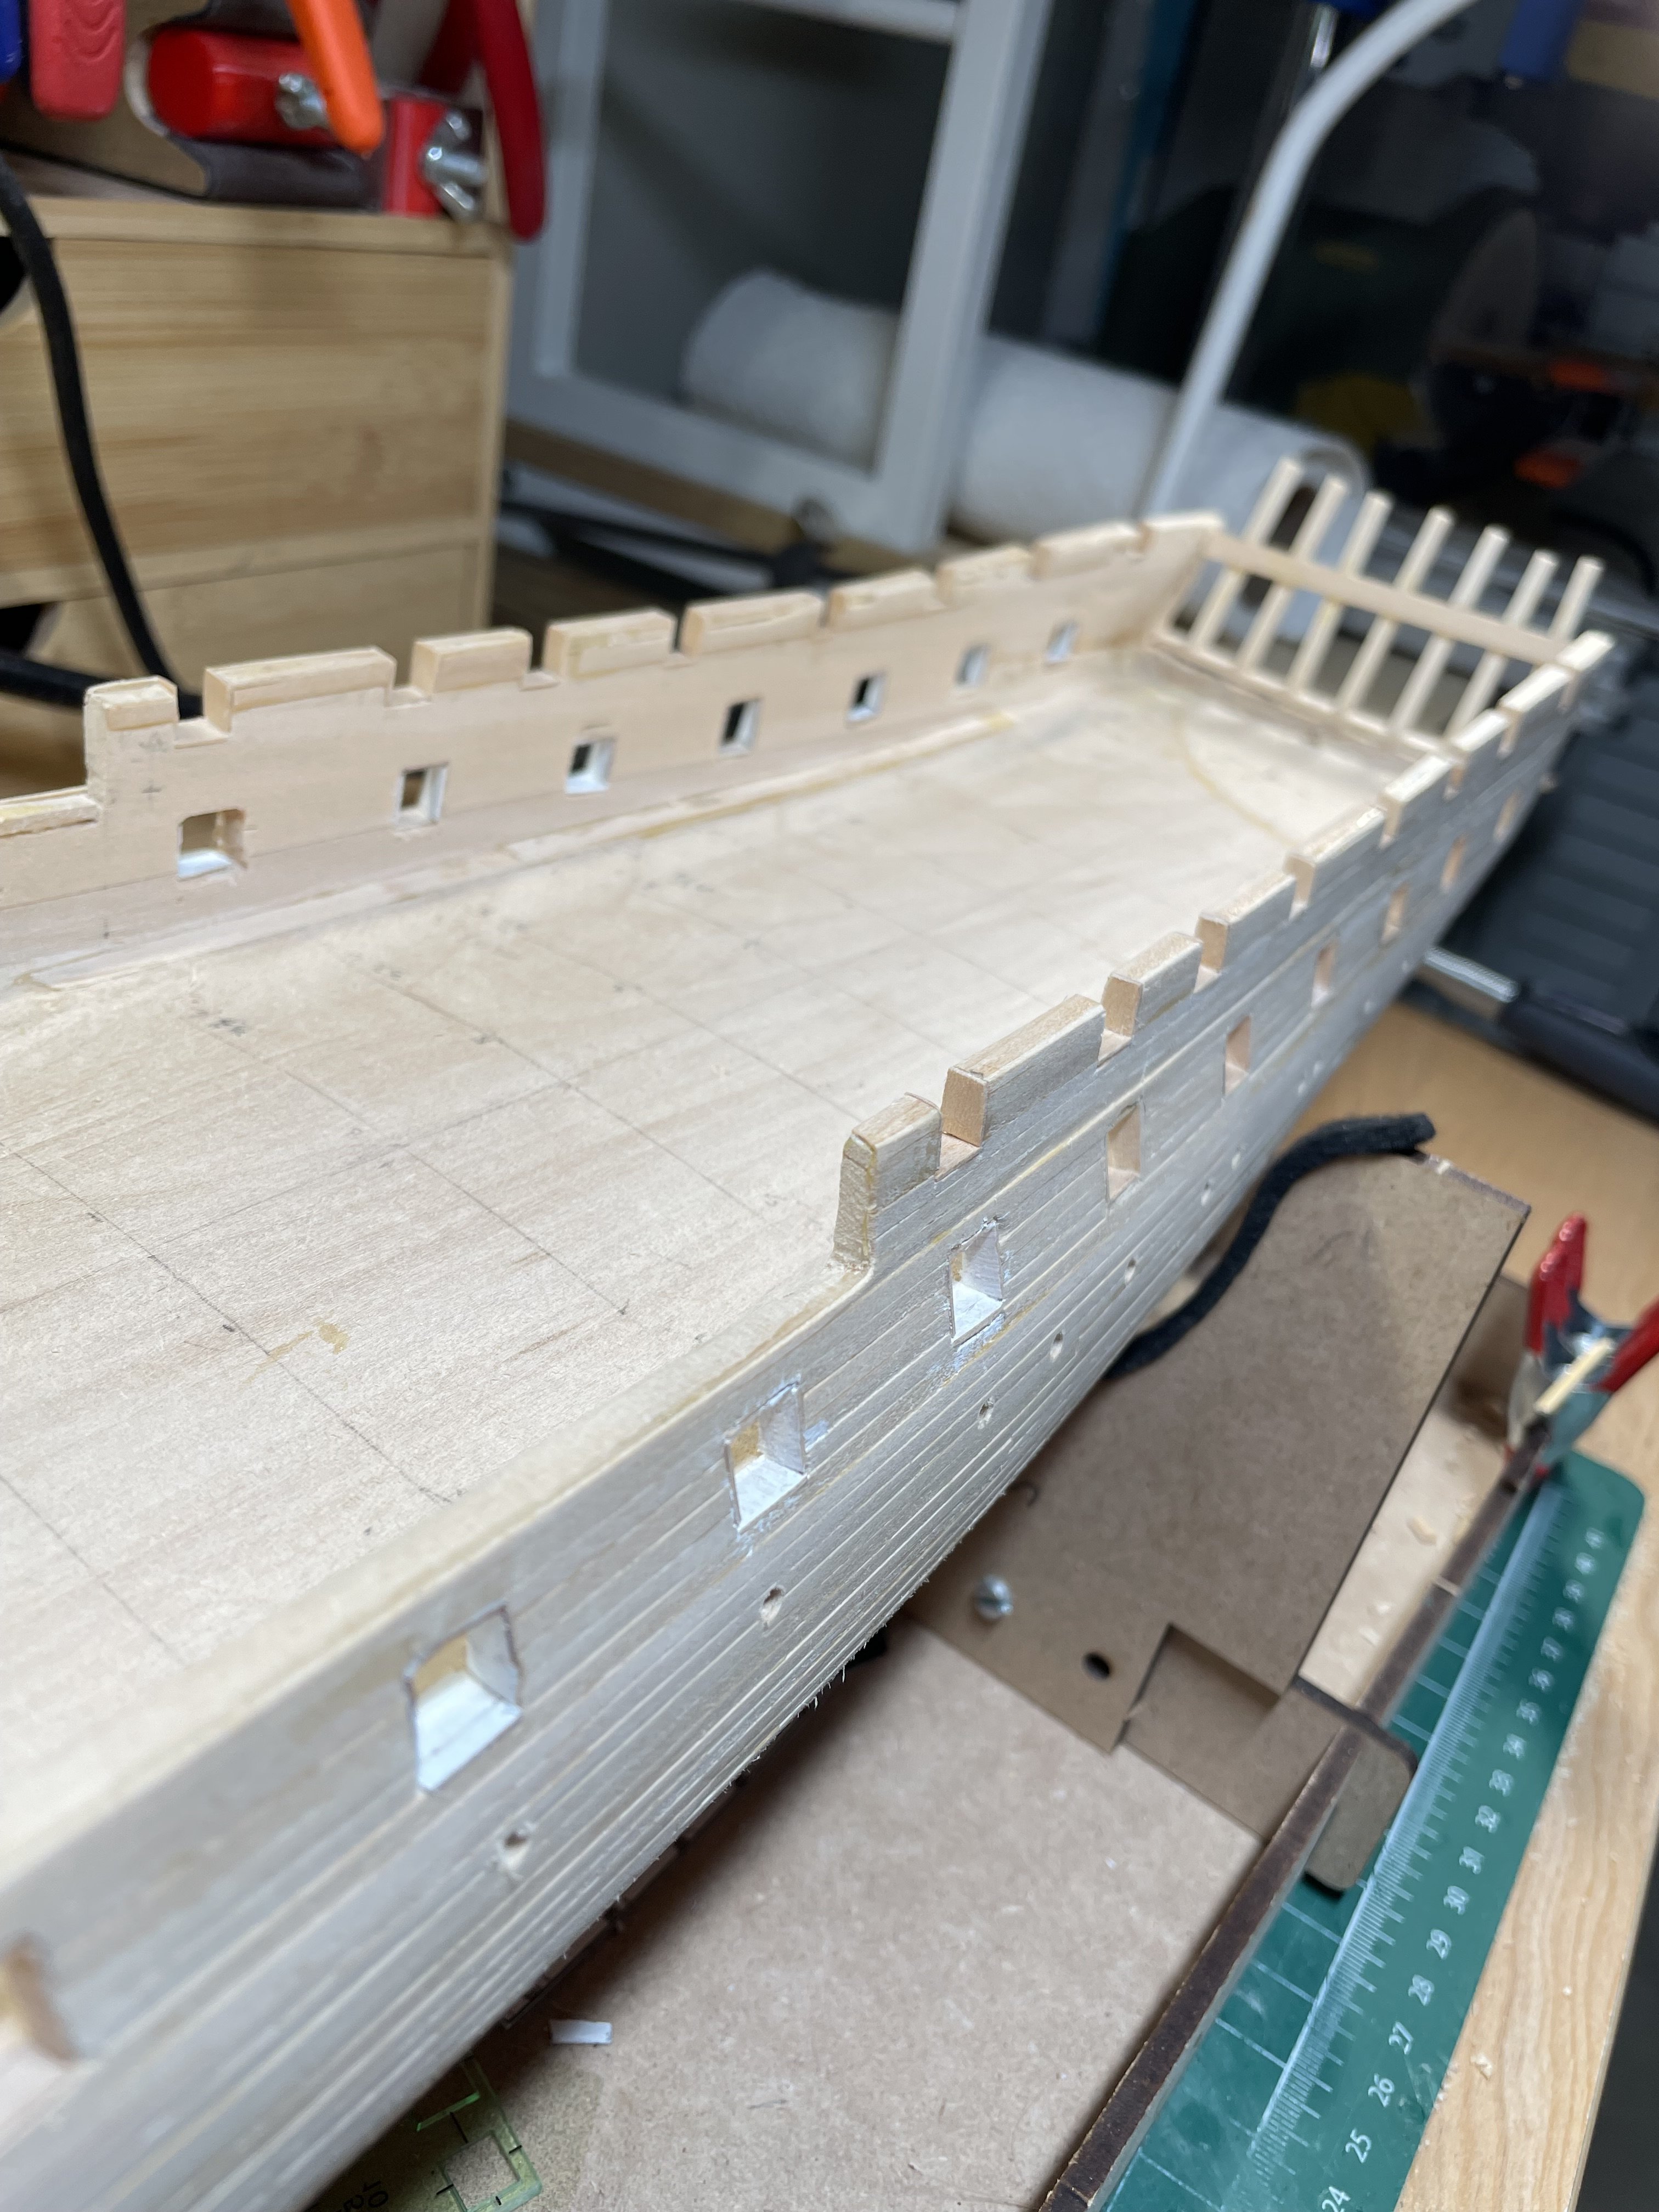
The kit-supplied deck is made in two pieces. I cut a template from the plans and discovered some surprises. My model is narrower than anticipated, no doubt because I didn’t exactly get the bulwarks thinned to the 5/32nd depth overall. They’re close, and only cost a few planks to get the fit right. I also cut the openings for the berth deck and masts. The only thing that bugs me is the obvious split down the centerline where the deck halves meet. I tried some obvious solutions, but it was of little benefit. If anyone has any suggestions, I’m all ears. All this happened about six weeks ago. Since then I have been trying to fabricate the quarter galleries and stern. Oh Boy! Has that been a headache. But, it’s almost finished so I should have a post soon. Semper Dienceps Jim


-
KurtH reacted to a post in a topic:
USS Constitution by Flyfisher - BlueJacket Shipcrafters - 1:96
-
Flyfisher reacted to a post in a topic:
USS Constitution by Flyfisher - BlueJacket Shipcrafters - 1:96
-
ccoyle reacted to a post in a topic:
USS Constitution by Flyfisher - BlueJacket Shipcrafters - 1:96
-
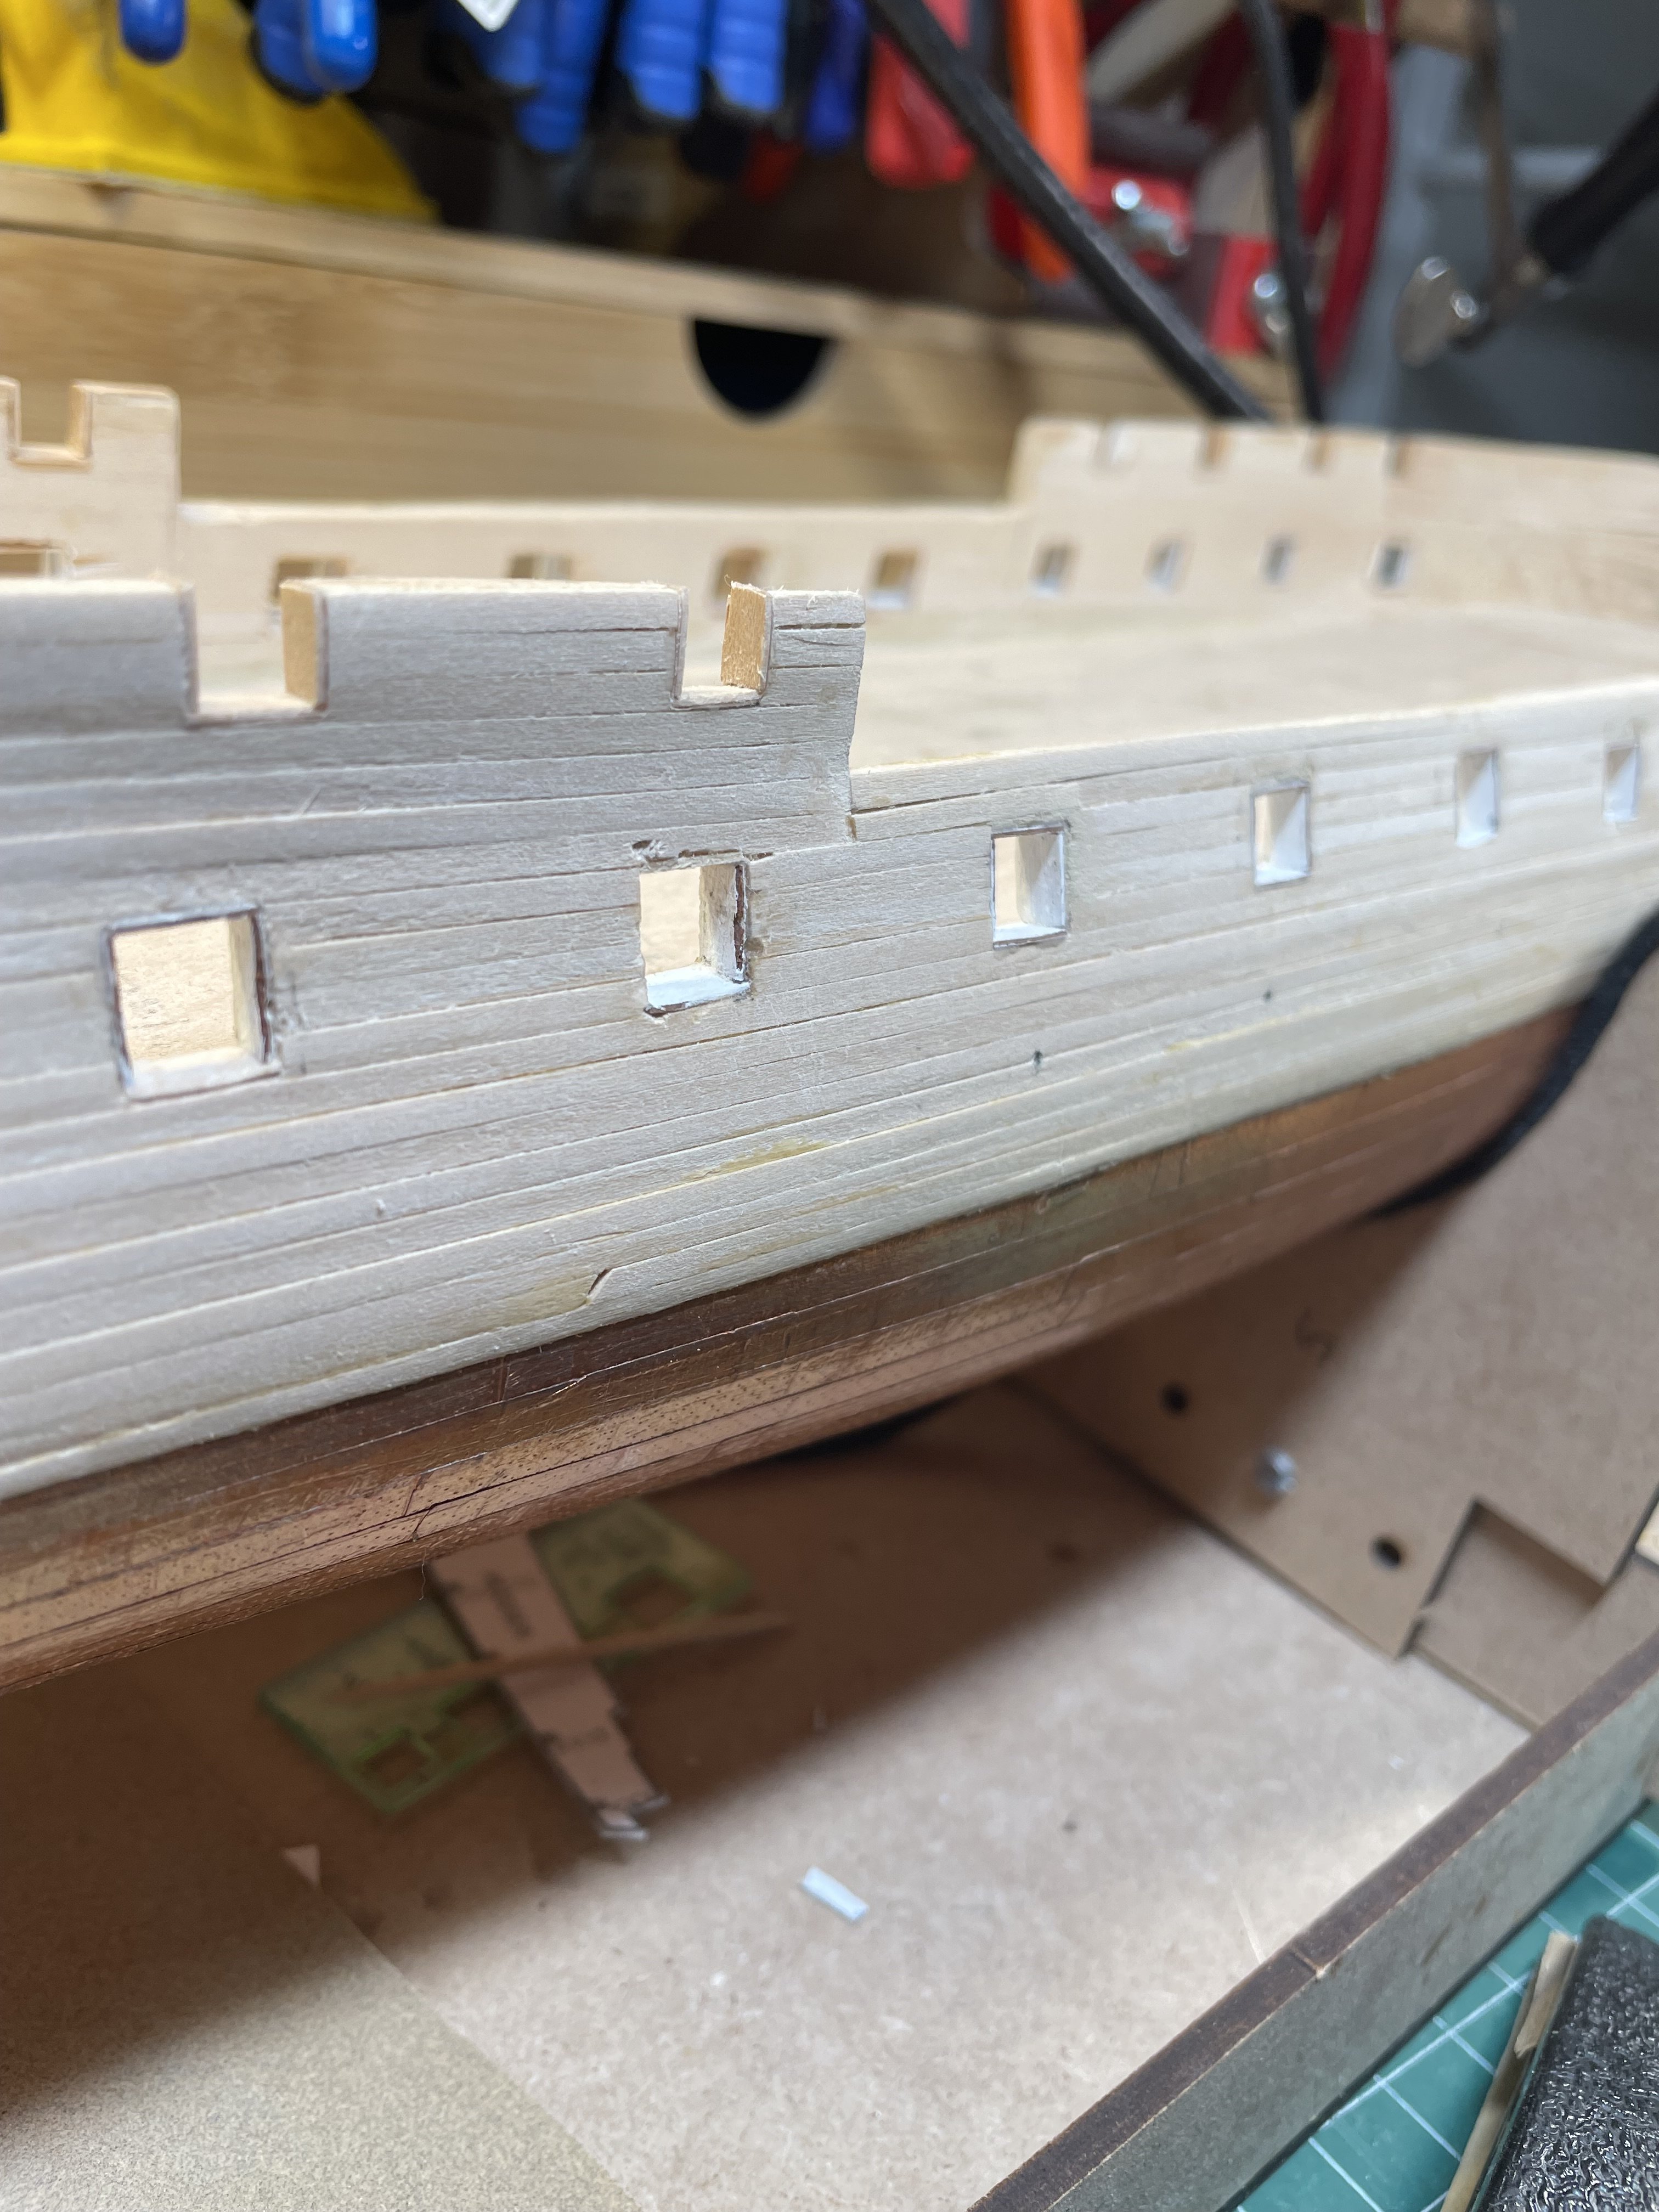
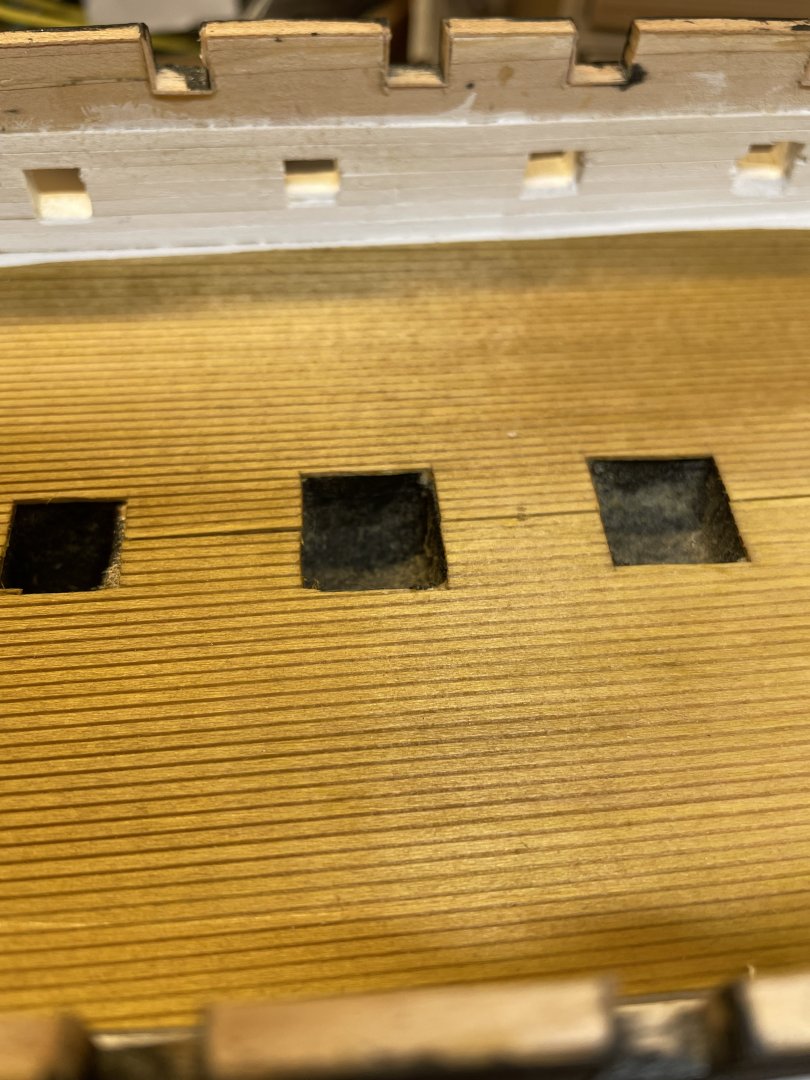
The gunports are all cut and painted. I discovered that my bulwark was not 5/32 throughout. It called for wider frames to cover and level each of the ports. I hope this doesn’t create issues when I add the cannon to the deck. I filled the gaps with putty and then added framing pieces to create a flush-ish surface. The waterway was also installed. It was time to plank the interior bulwark. Next steps are to paint the bulwark white and get the deck ready. I’m concerned that the line between the gundeck ceiling and spar deck will fall somewhere above the top part of the gunports and I’m going to need to peel off some decking to put the waterway in place. That’s where we stand now. I’m pretty sure I can get the deck in this week. I’m using the premade deck that is part of the kit. Questions and comments are always welcome. Semper Dienceps Jim
-
mort stoll reacted to a post in a topic:
USS Constitution by Flyfisher - BlueJacket Shipcrafters - 1:96
-
schooner reacted to a post in a topic:
USS Constitution by Flyfisher - BlueJacket Shipcrafters - 1:96
-
Flyfisher reacted to a post in a topic:
USS Constitution by Der Alte Rentner - Model Shipways - 1/76
-
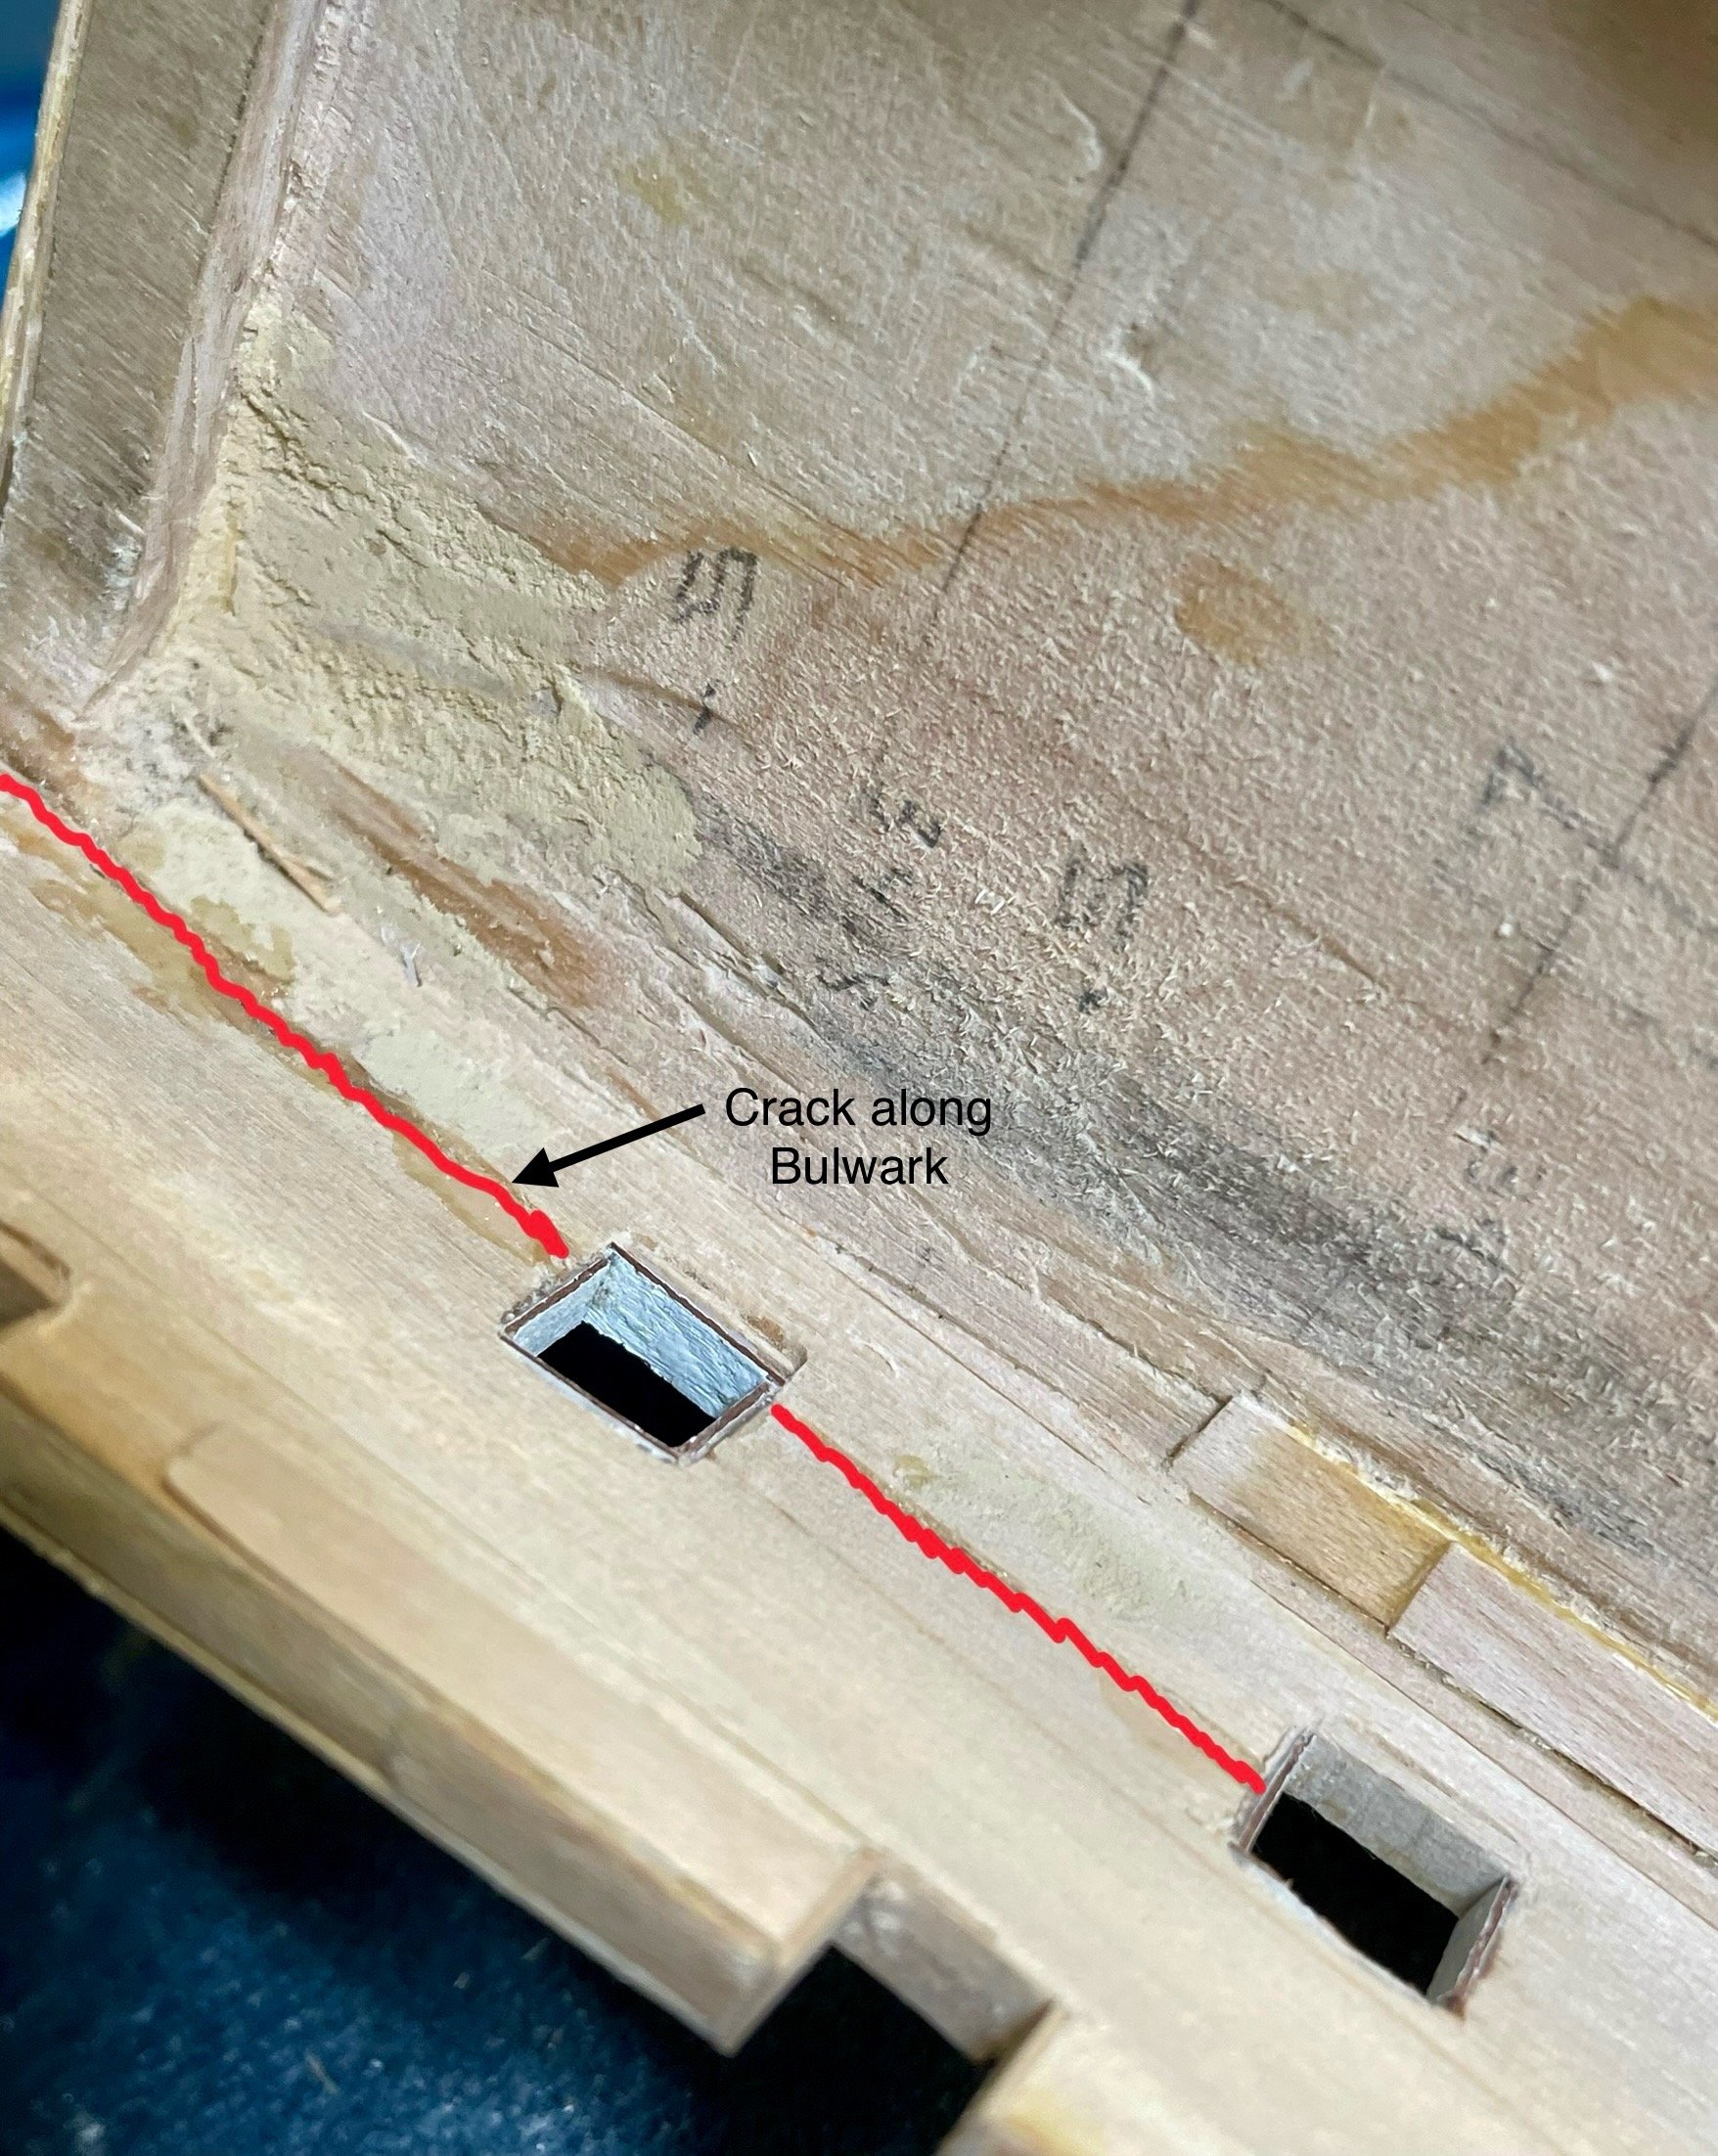
Hull Work This week I made good progress on the hull. The gunports on both Gundeck and Spardeck have been cut. I thought they were kinda ragged, so I lined all with 0.20 planking from a previous kit. During the process, I managed to crack the starboard side bulwark, which made that side weak. I tried to strengthen that area with epoxy. The epoxy helped, but I needed more stability, so I placed the transom supports at the stern. The combination of vertical and horizontal struts seemed to fix the wobble. It still scares me a bit that the bulwark can move. If anyone has any suggestions please feel free to share. And, as you see, I added the airports below the gundeck. The hull is just about ready to paint. After painting, I think it’s time to finish the rudder and the stem. Semper Diencep Jim


-
Good luck with the surgery, do a little rehab, and get back to work. Best wishes Jim
-
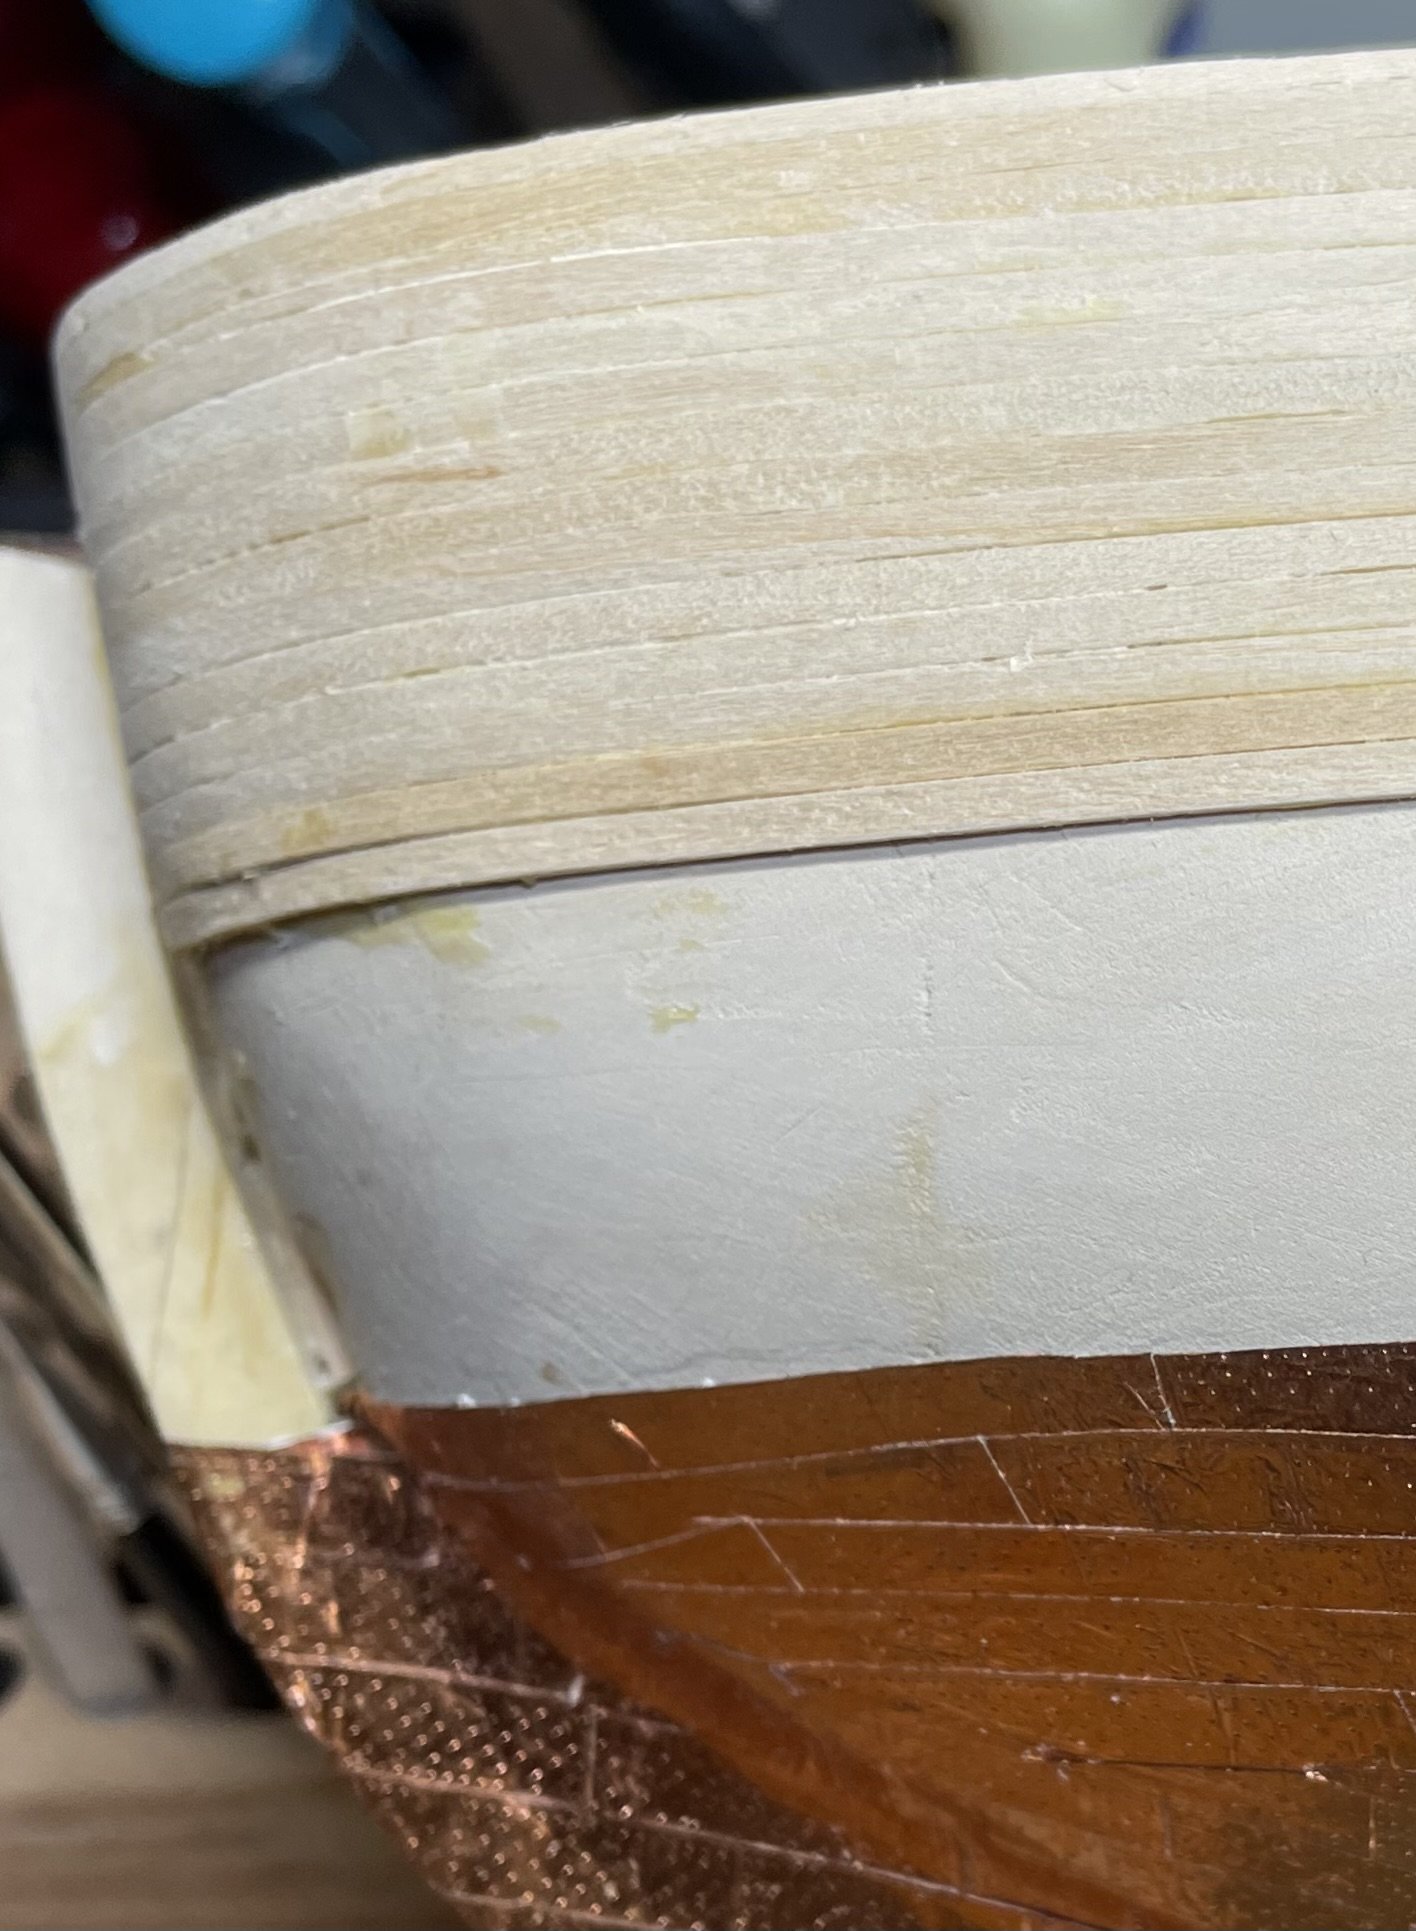
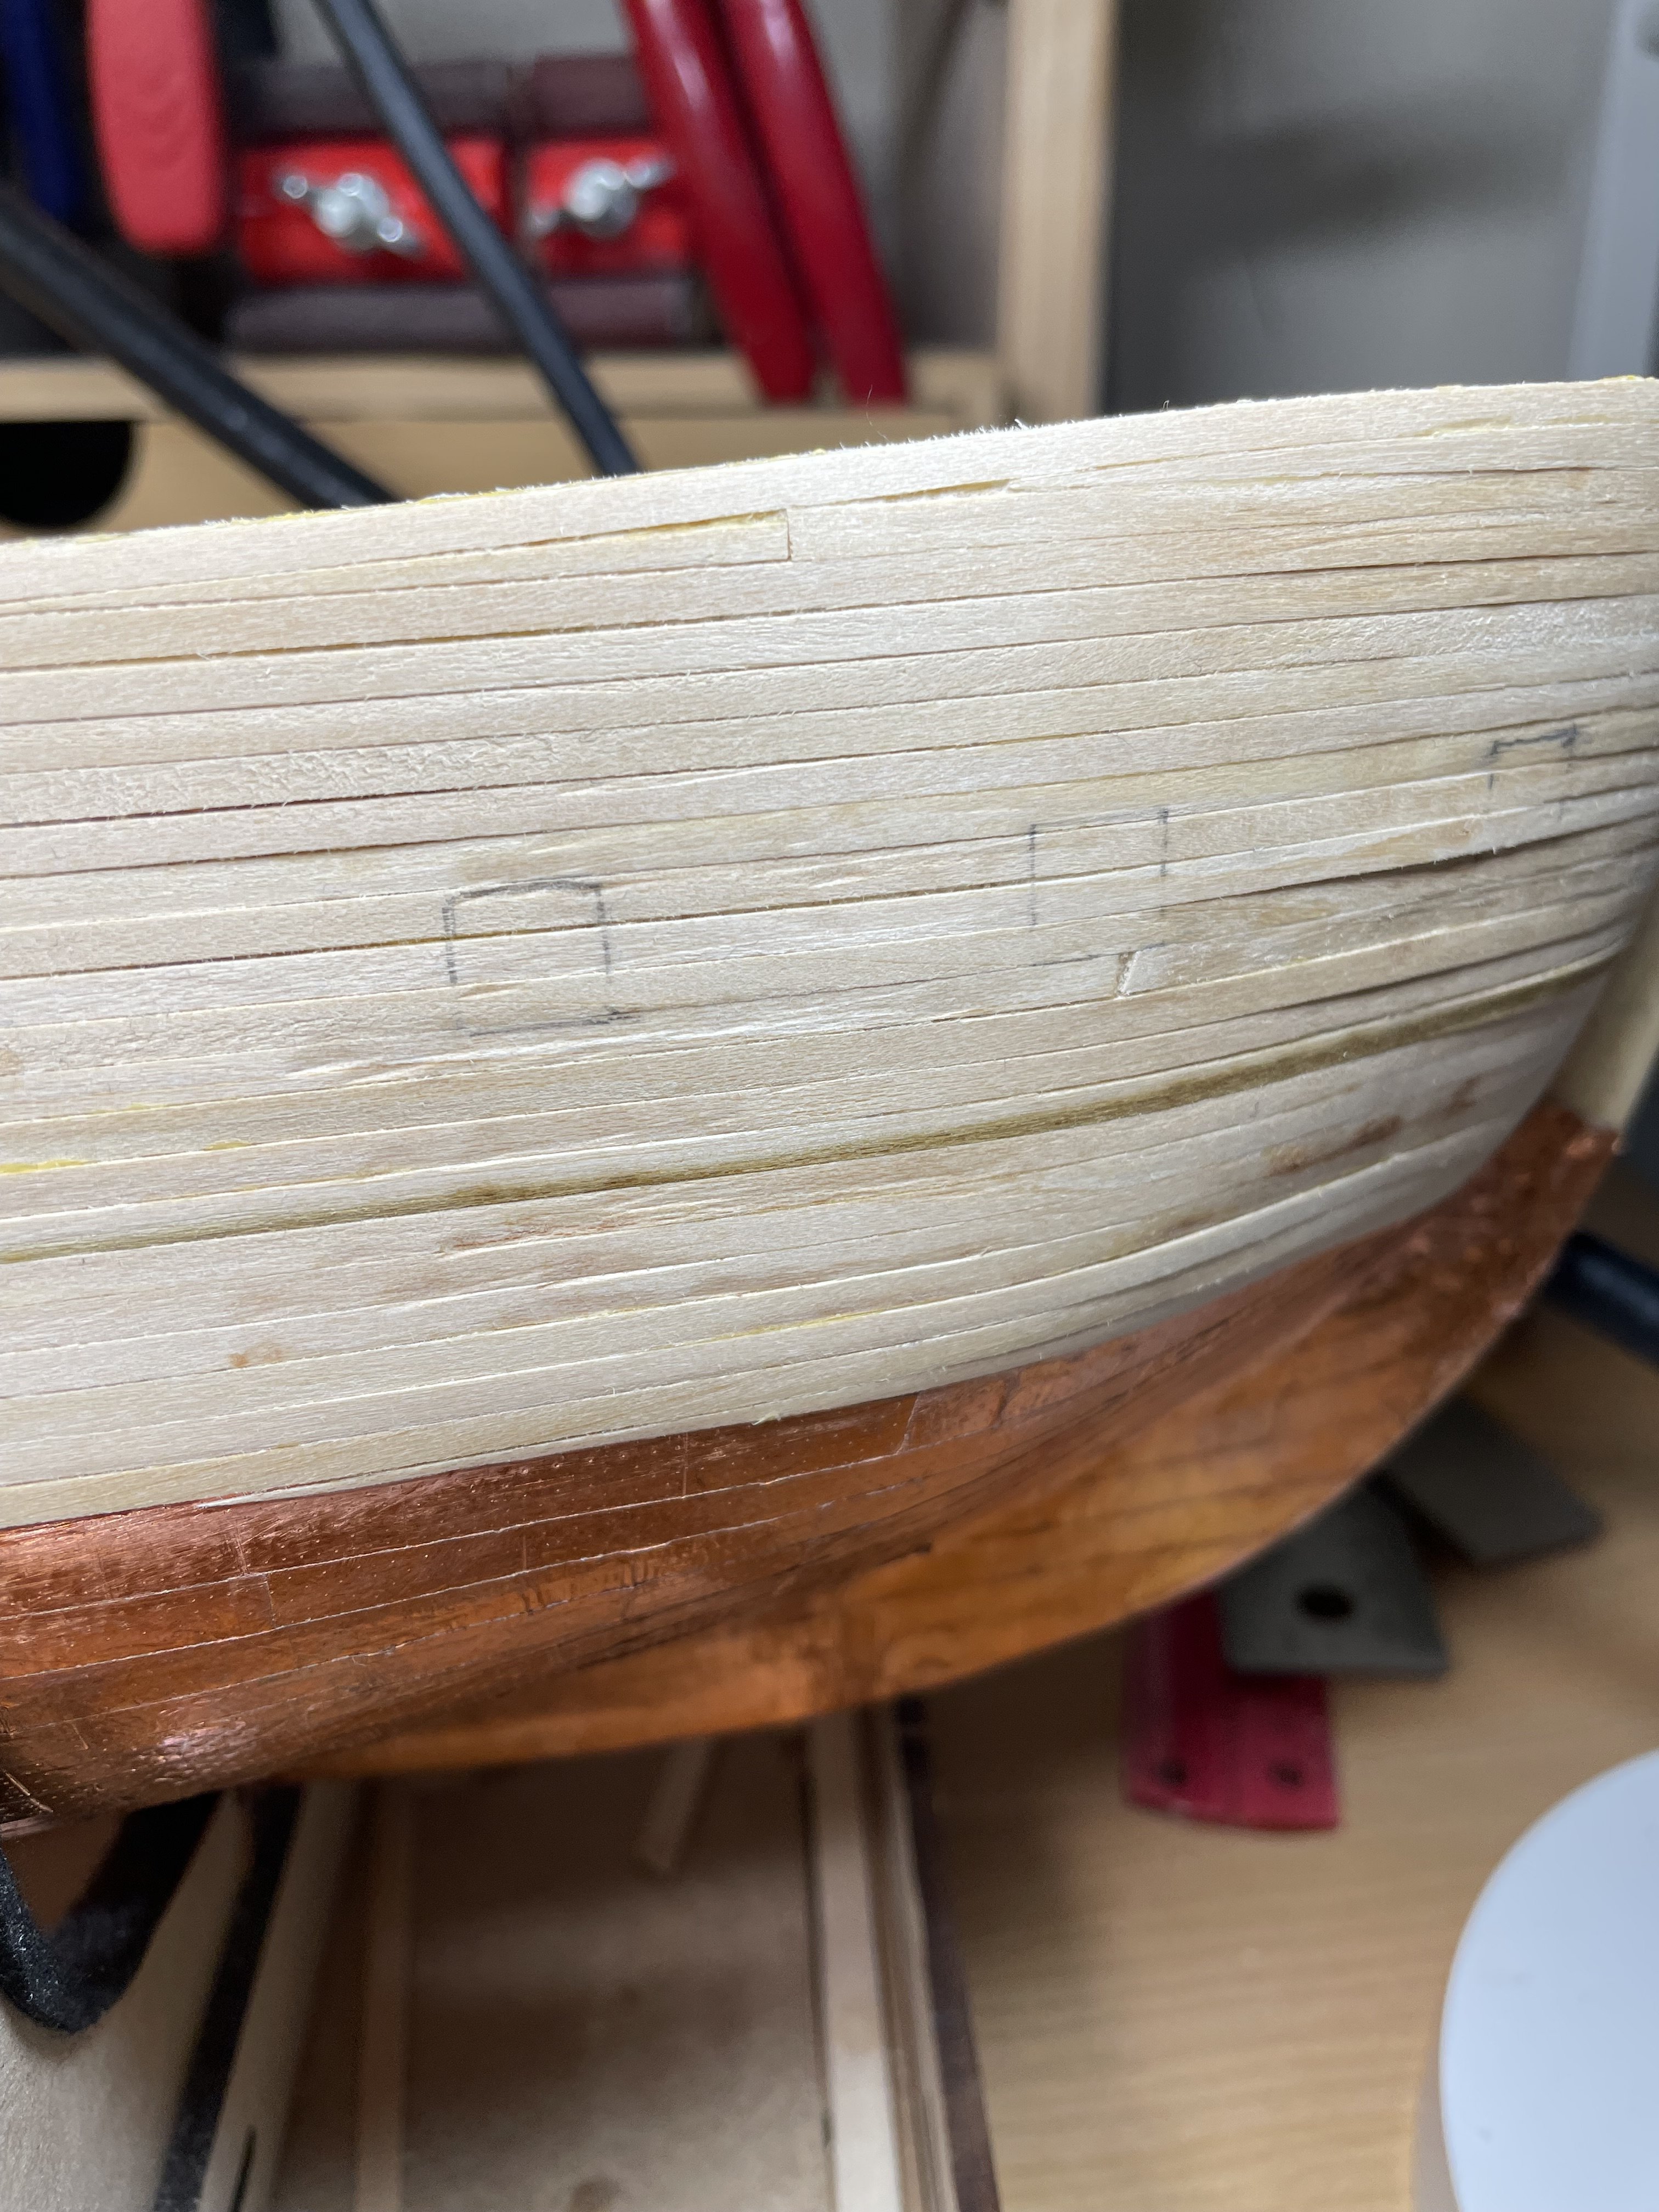
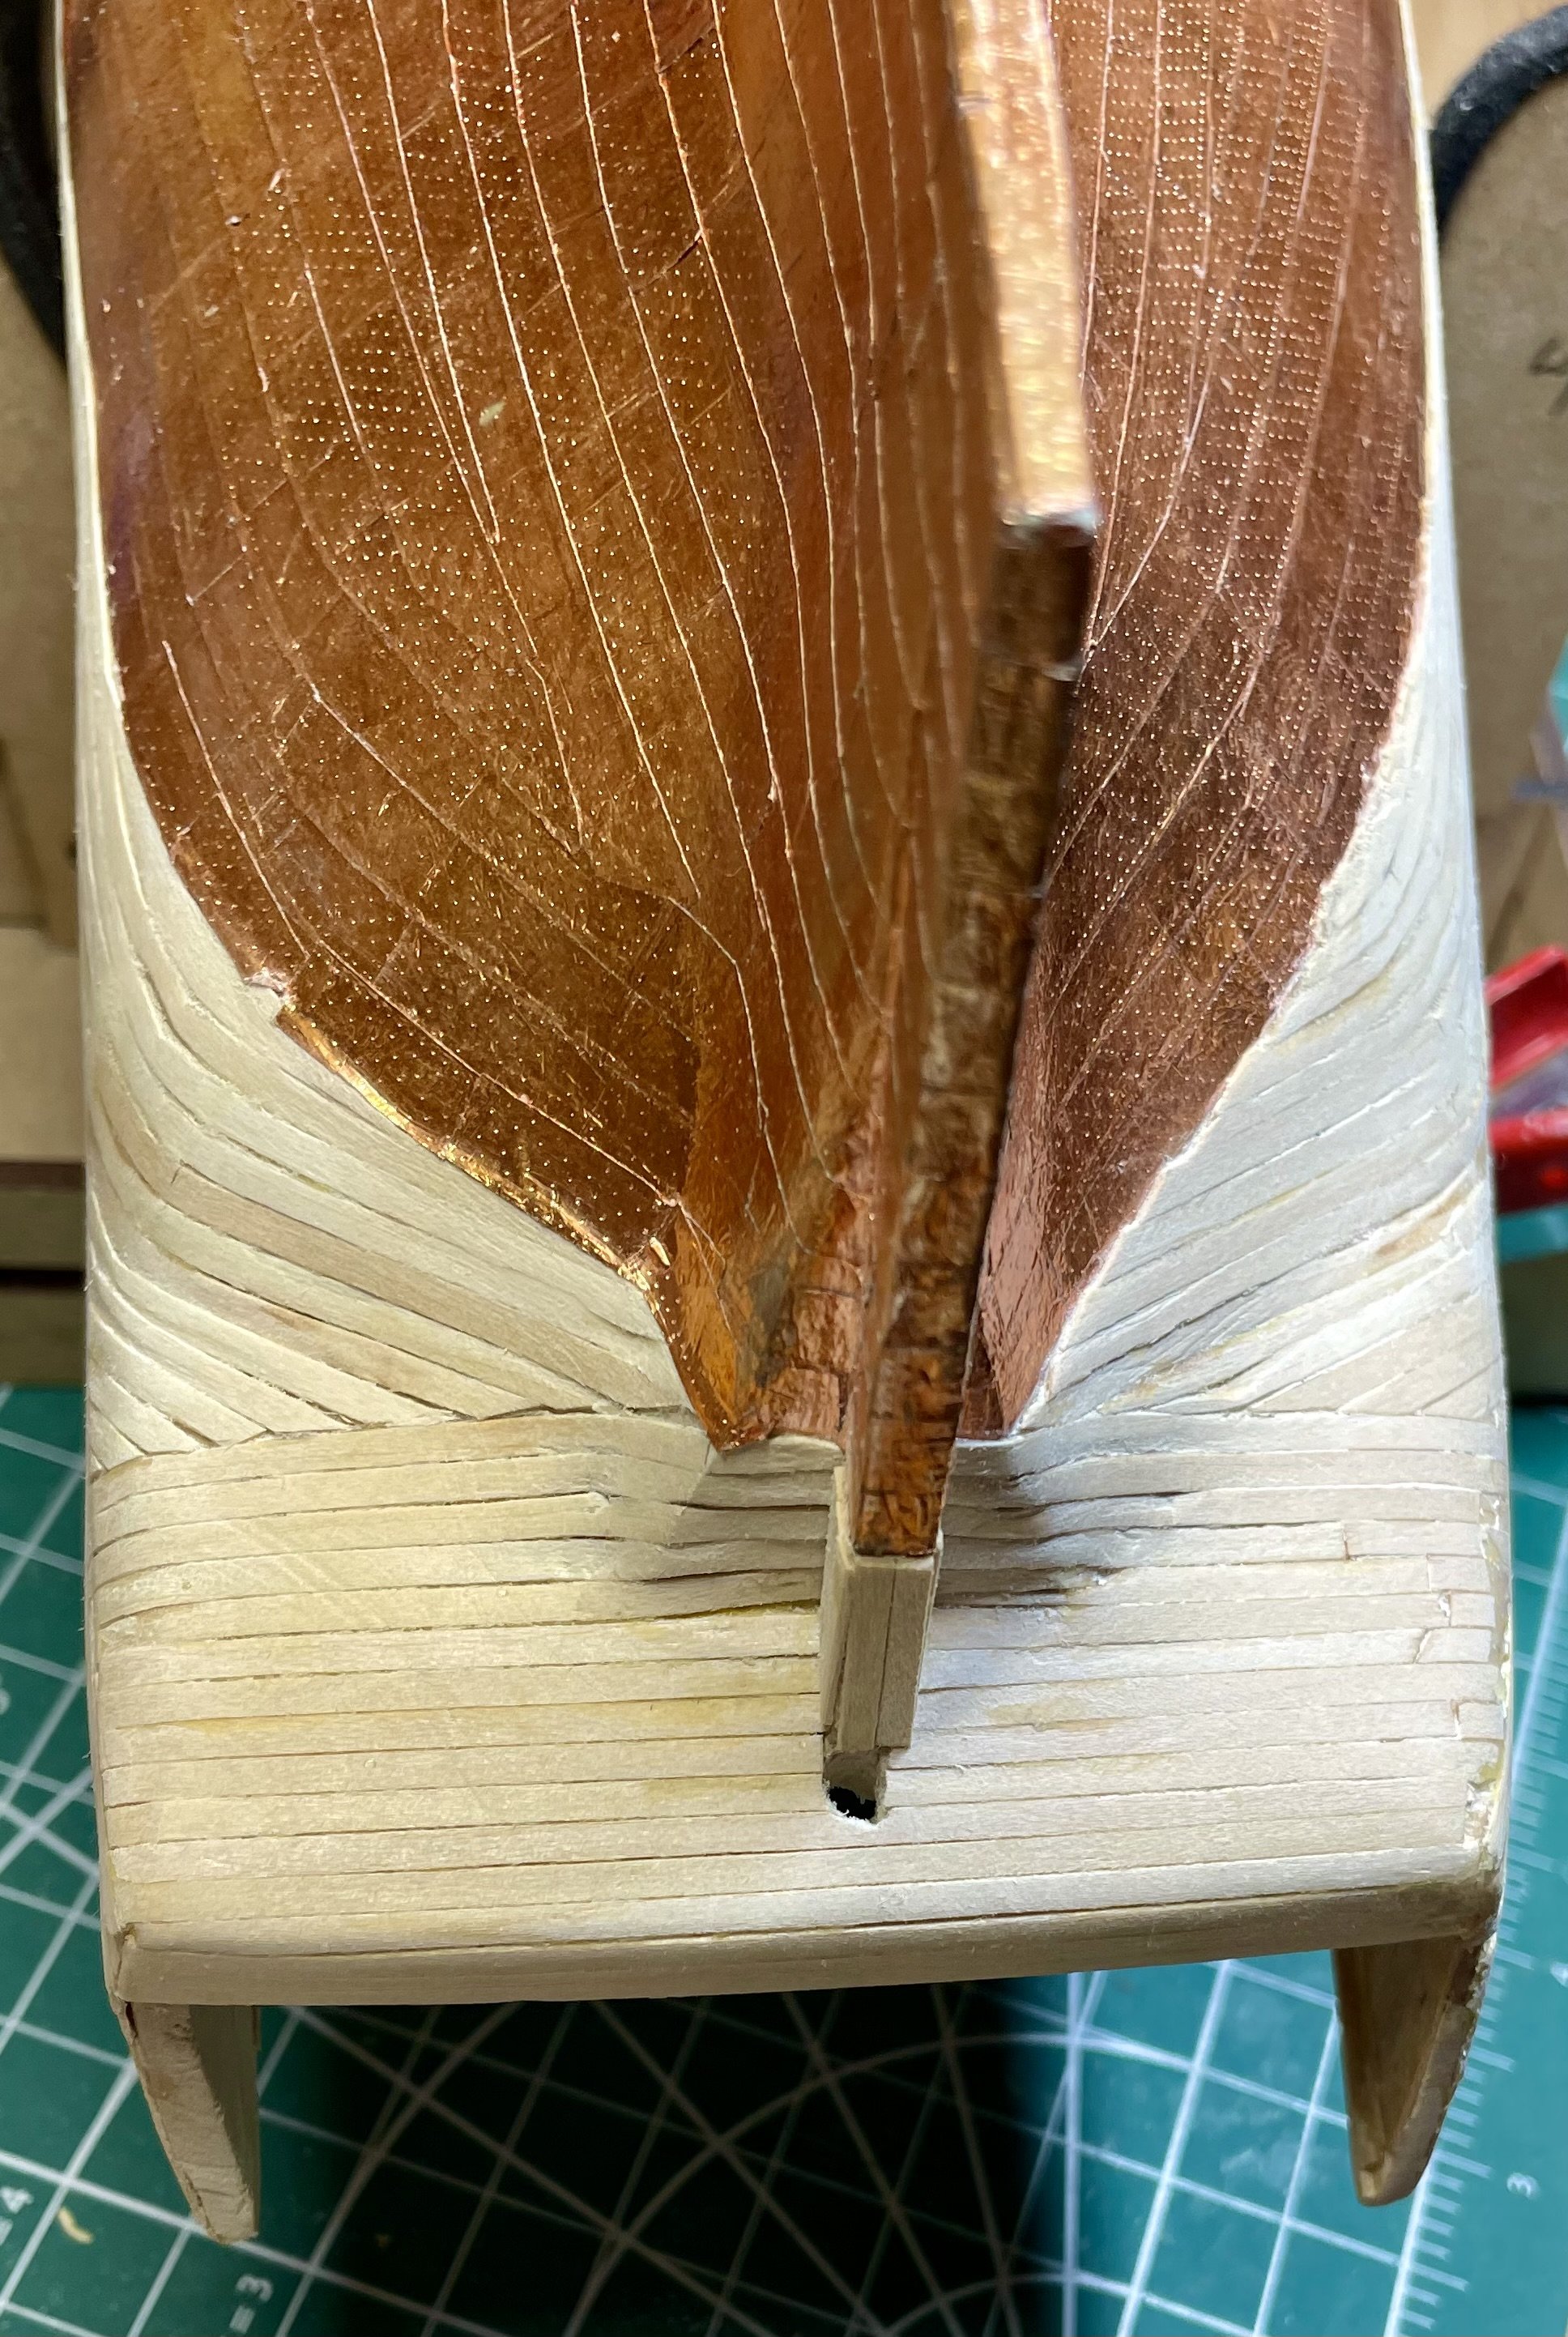
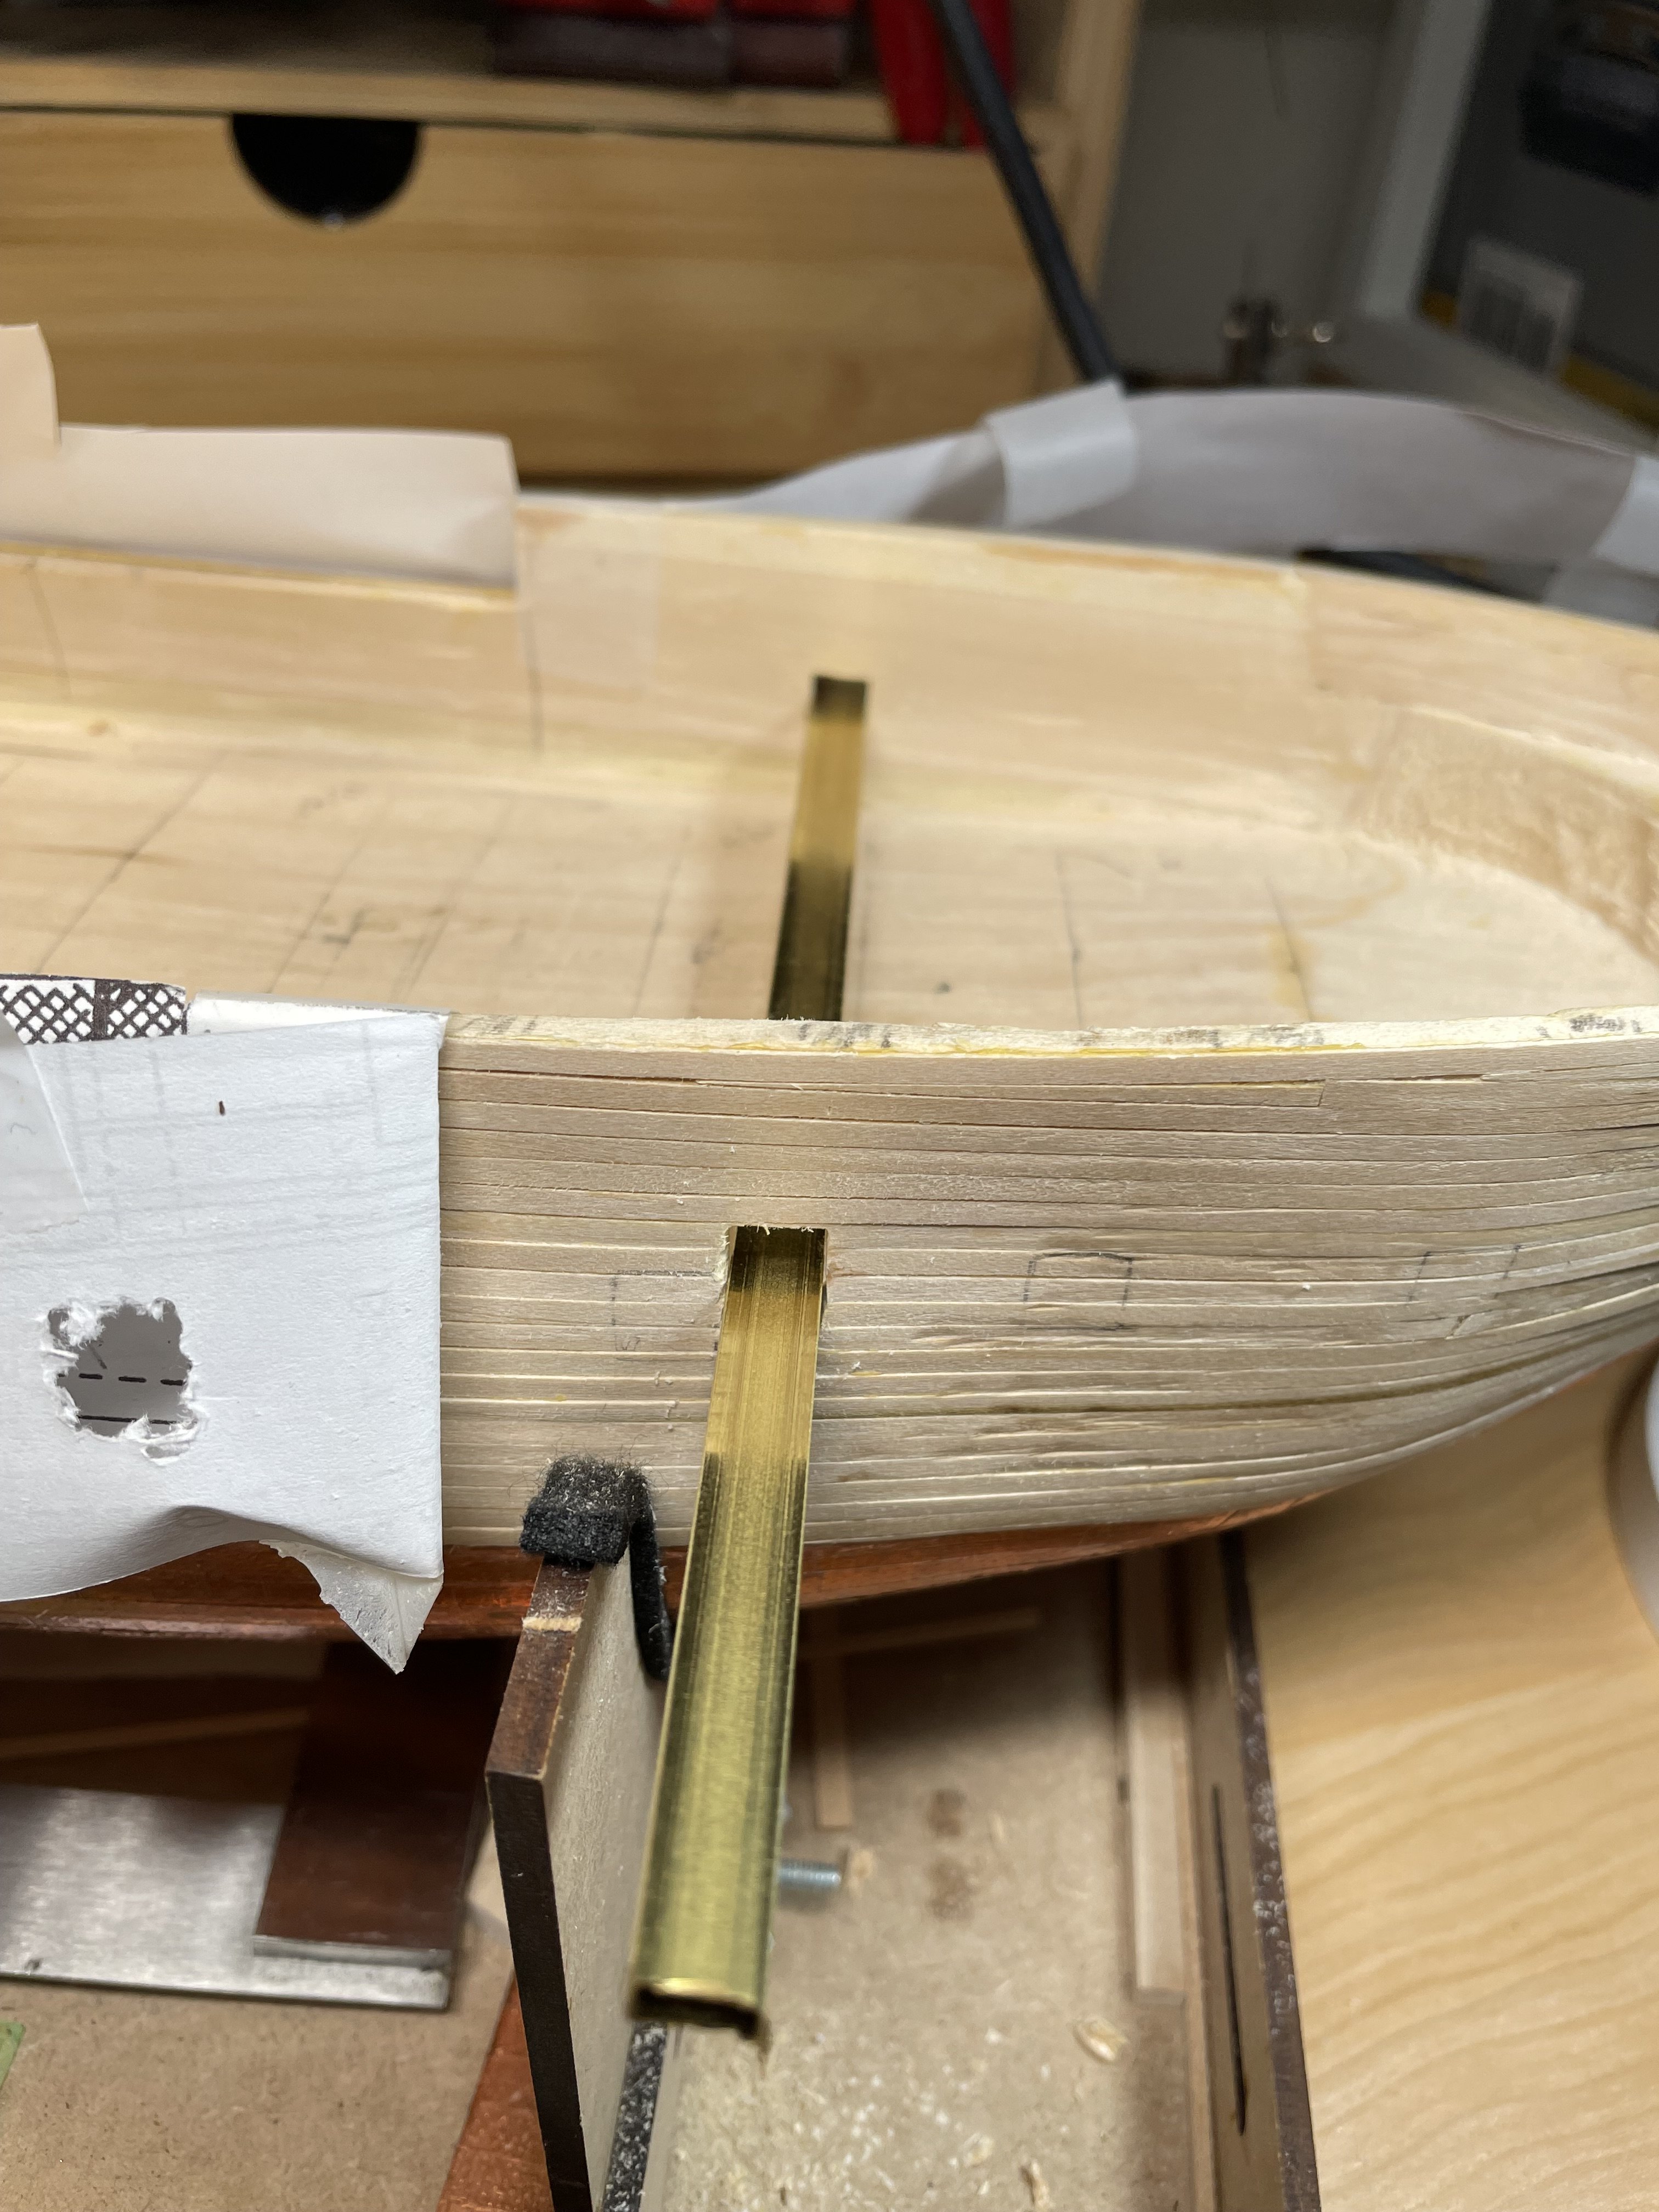
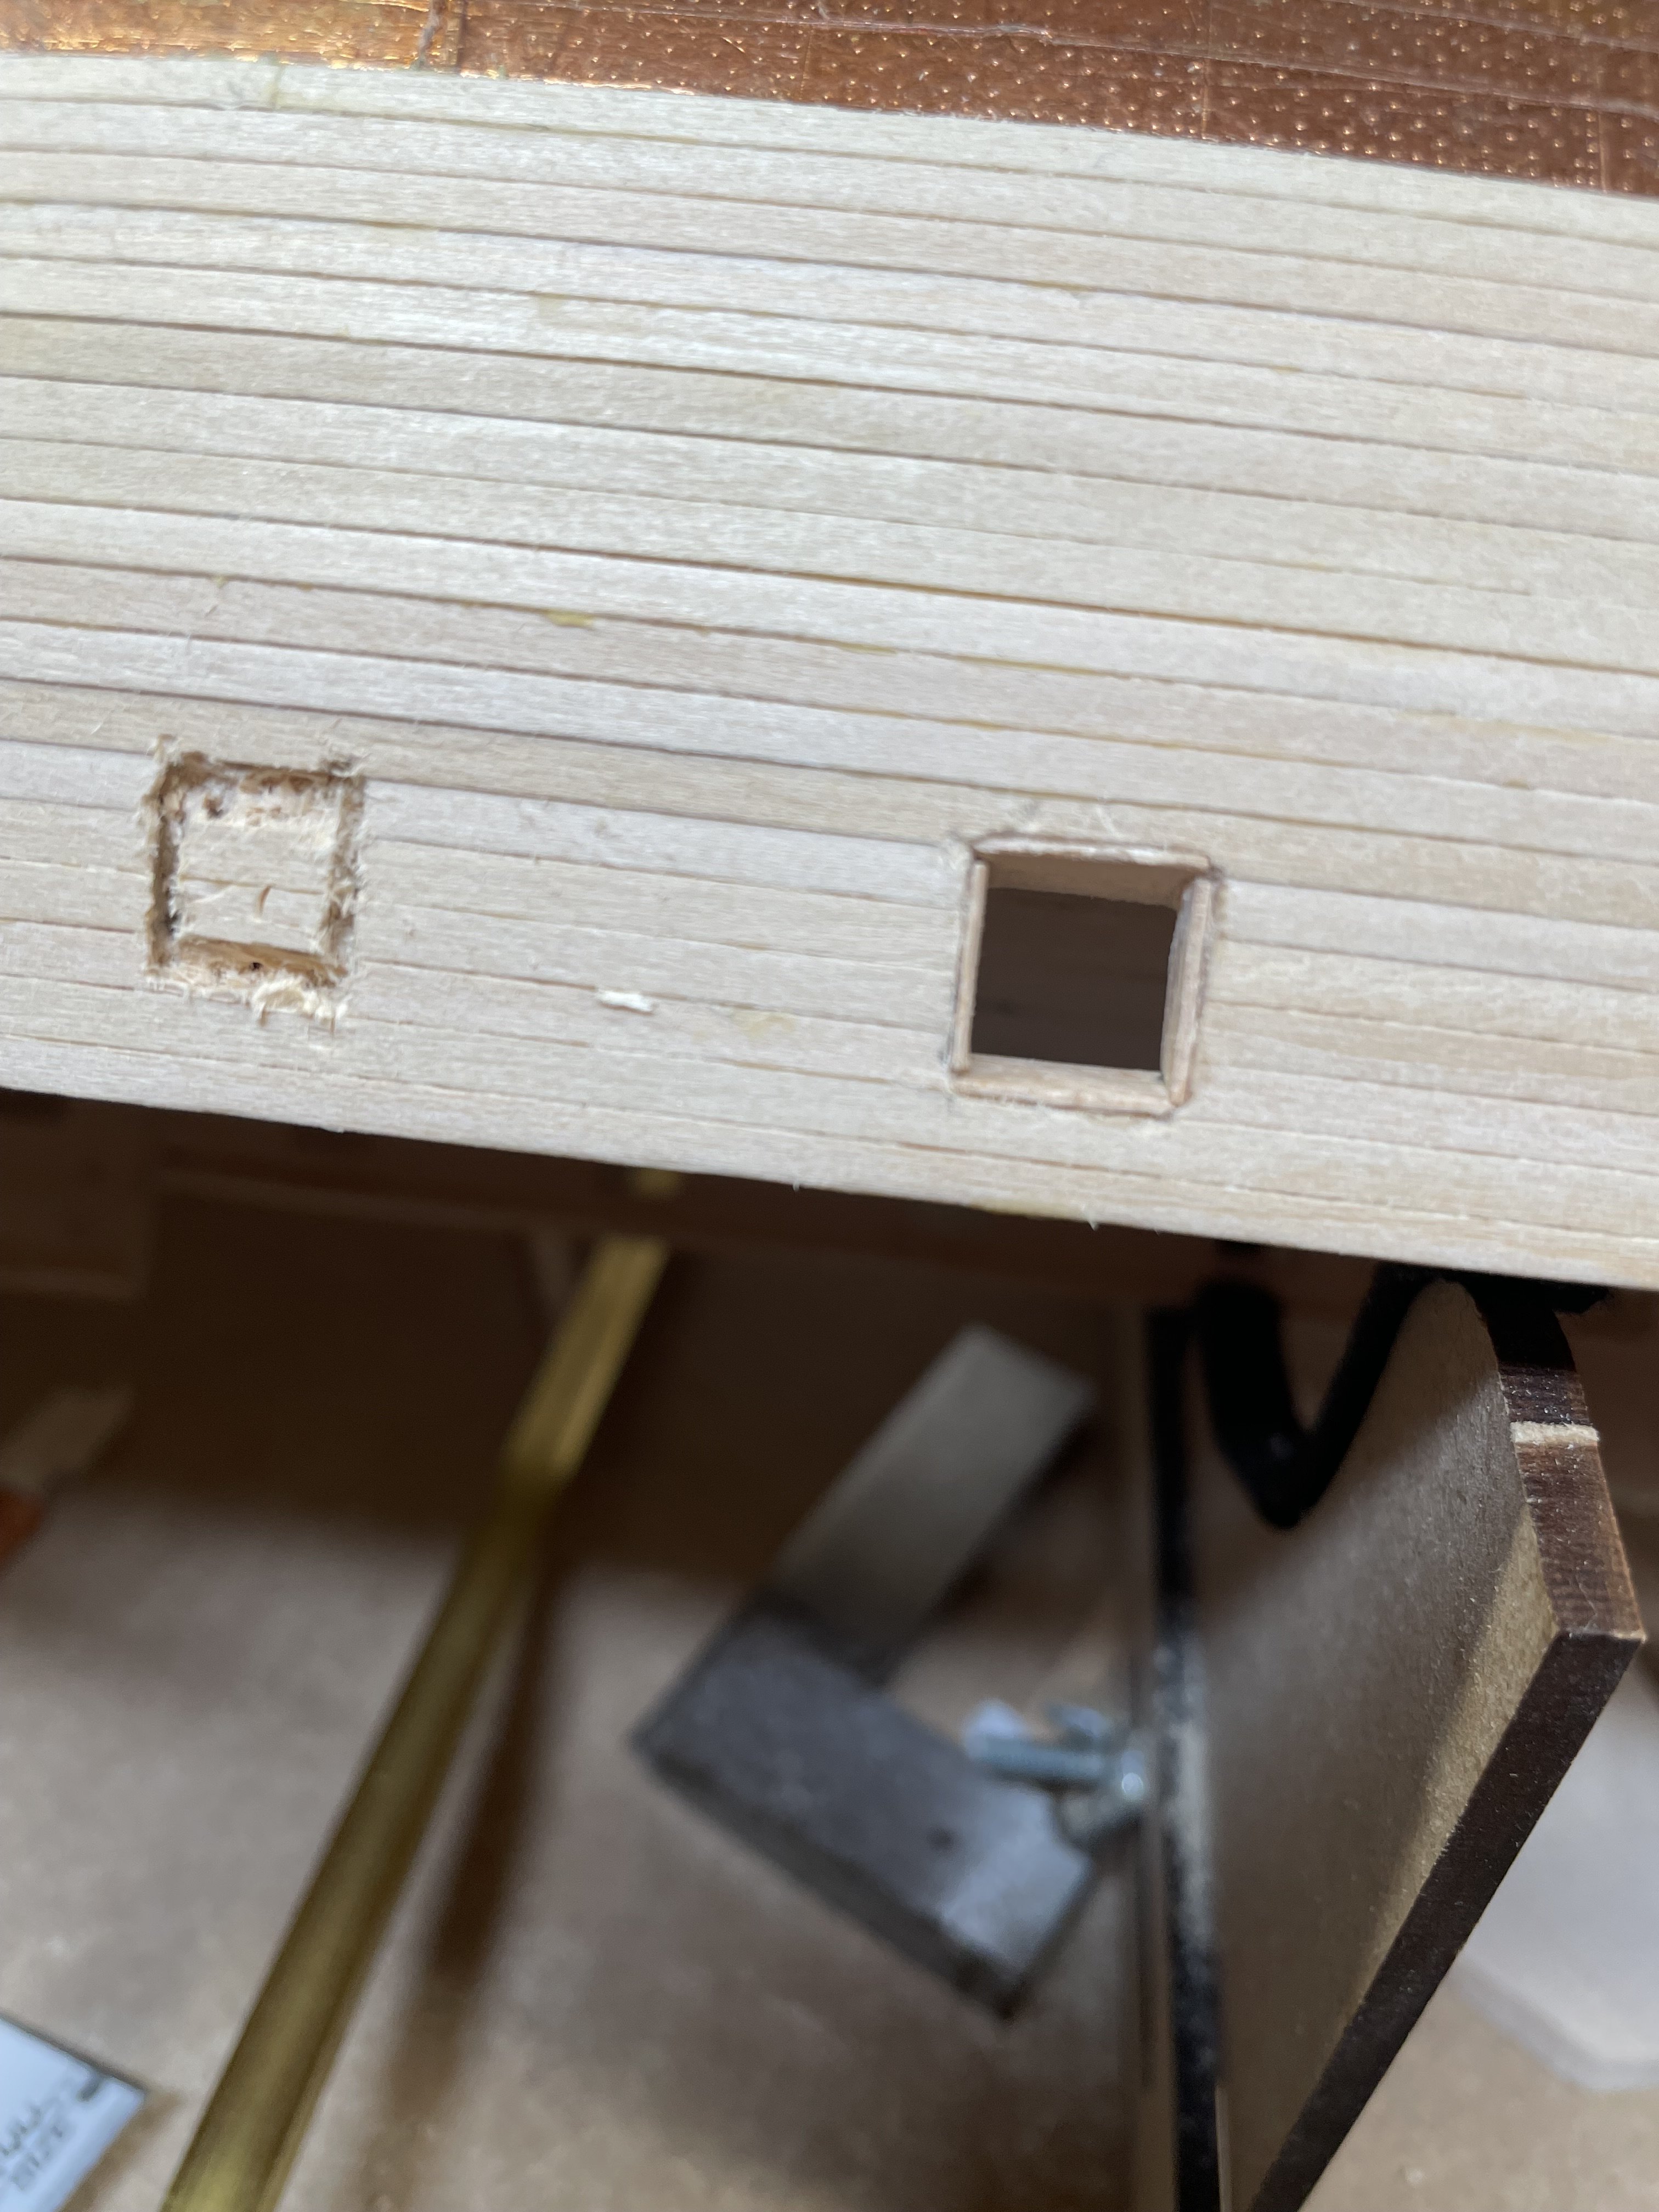
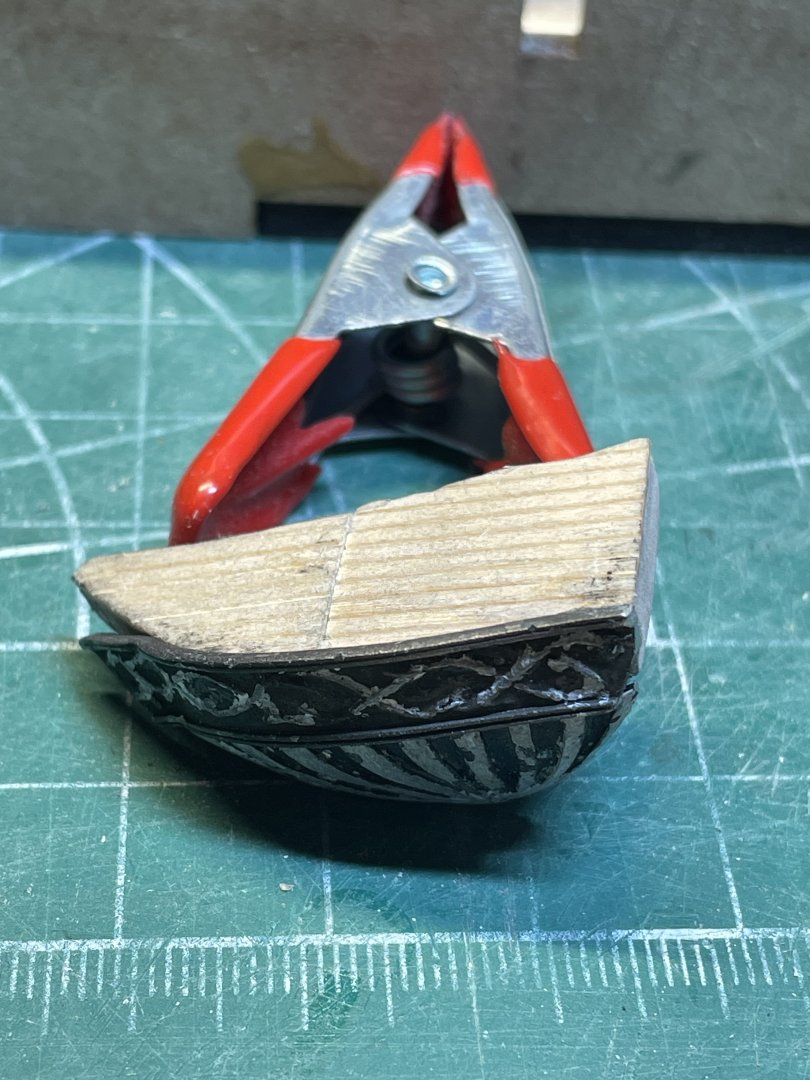
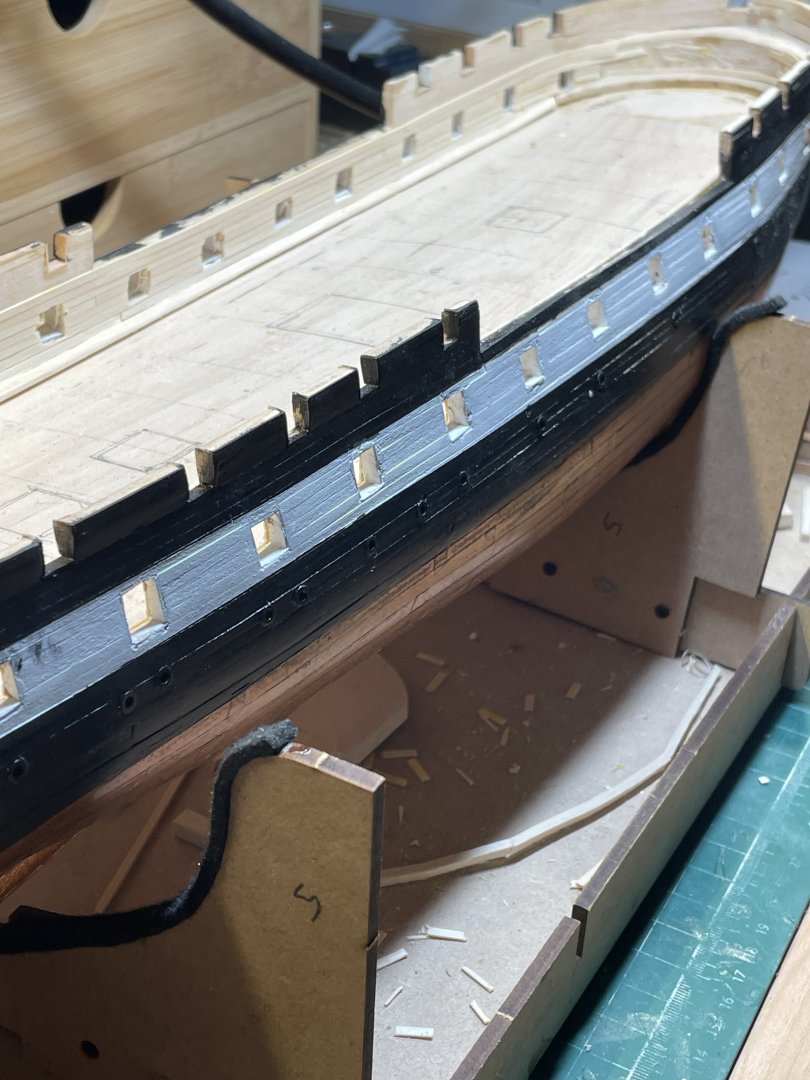
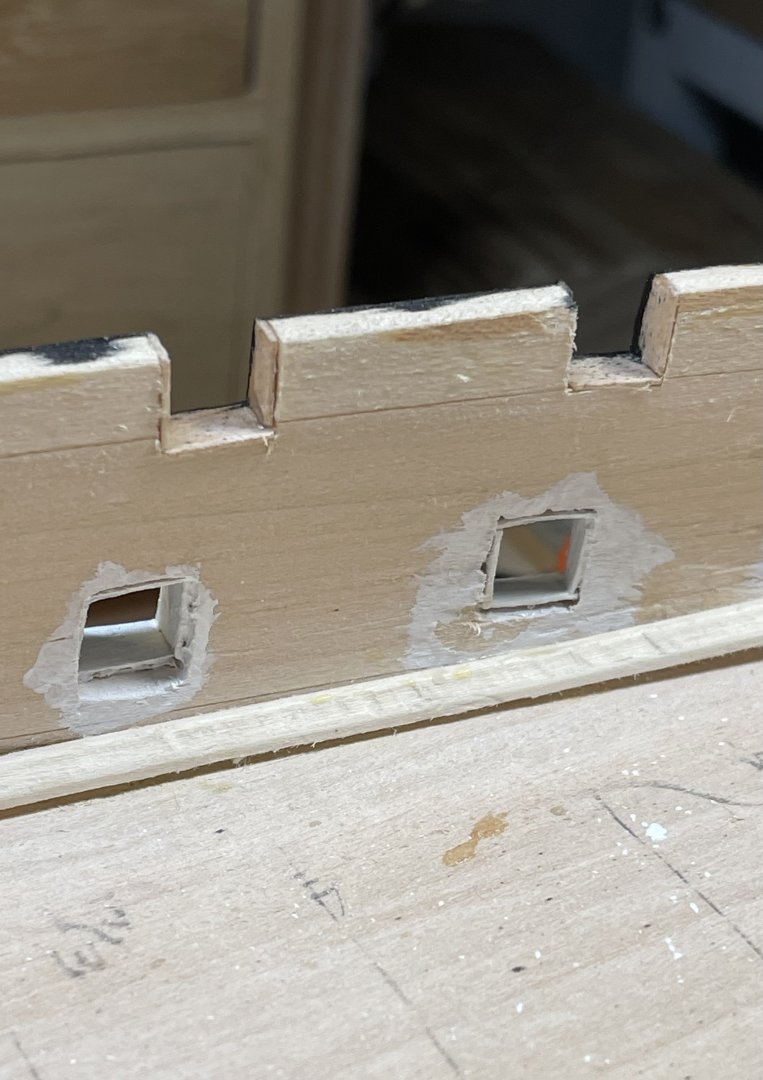
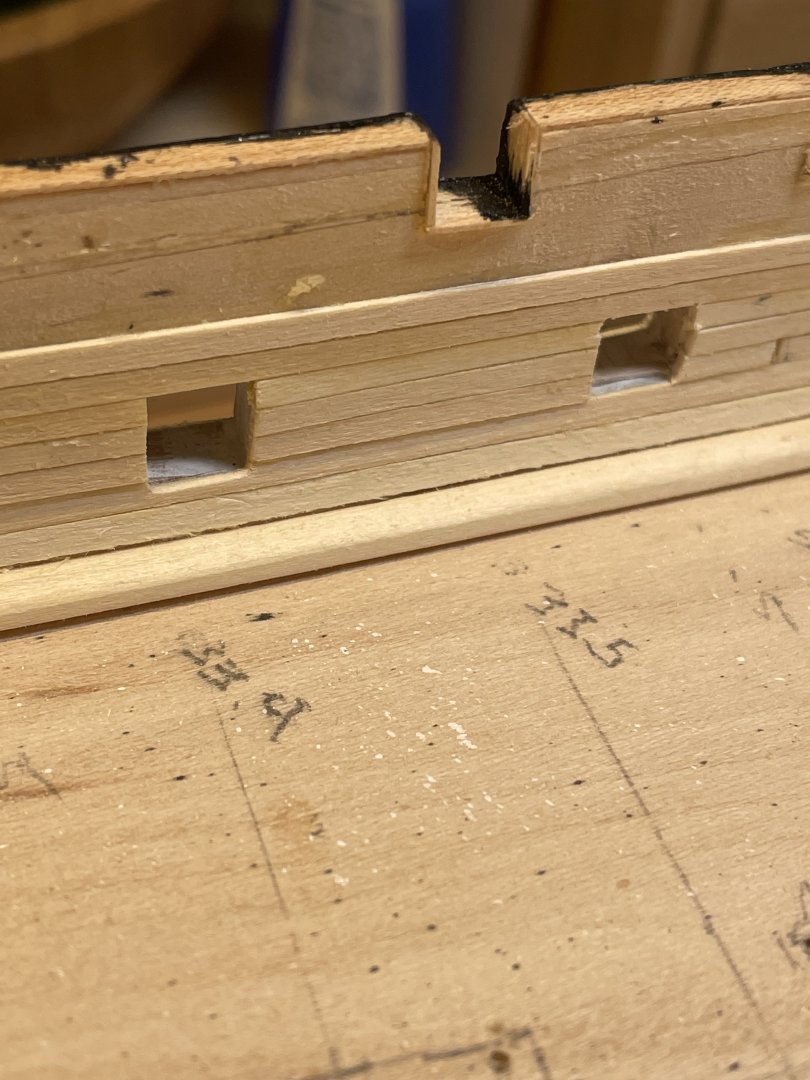
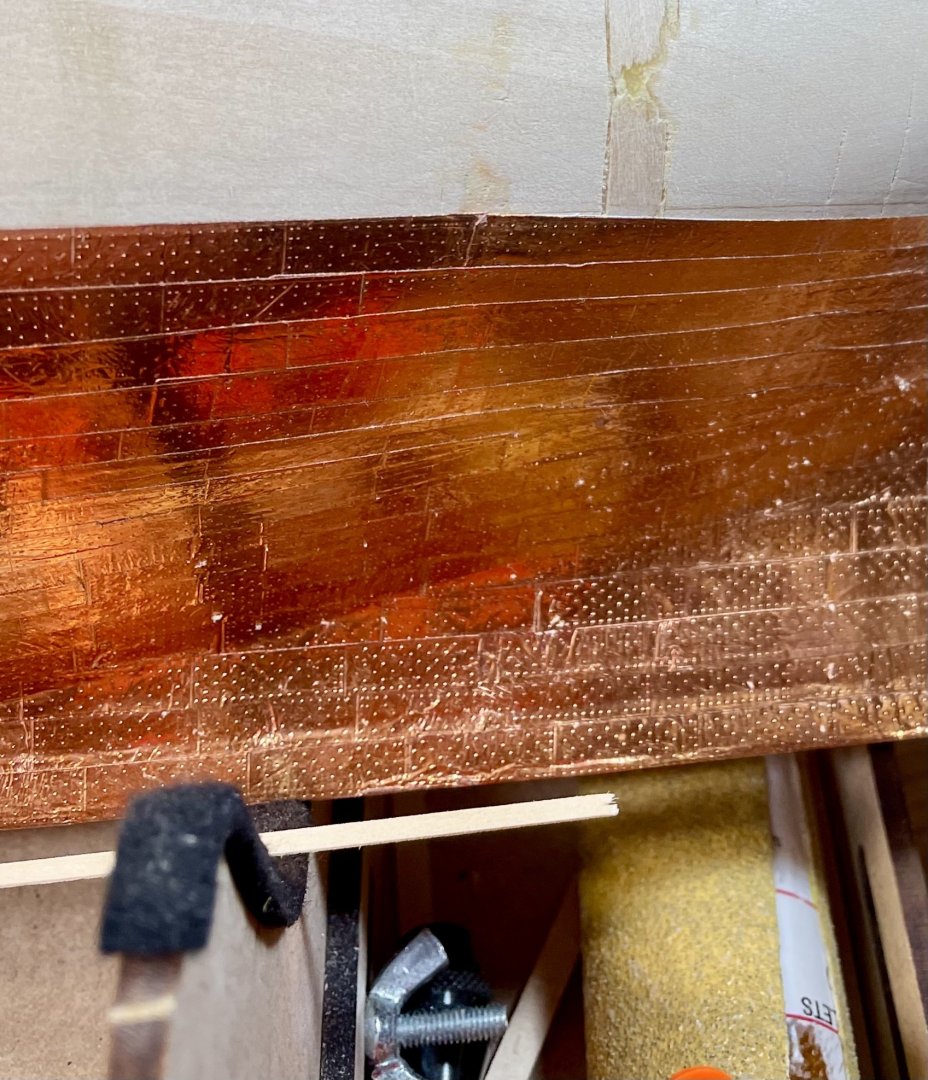
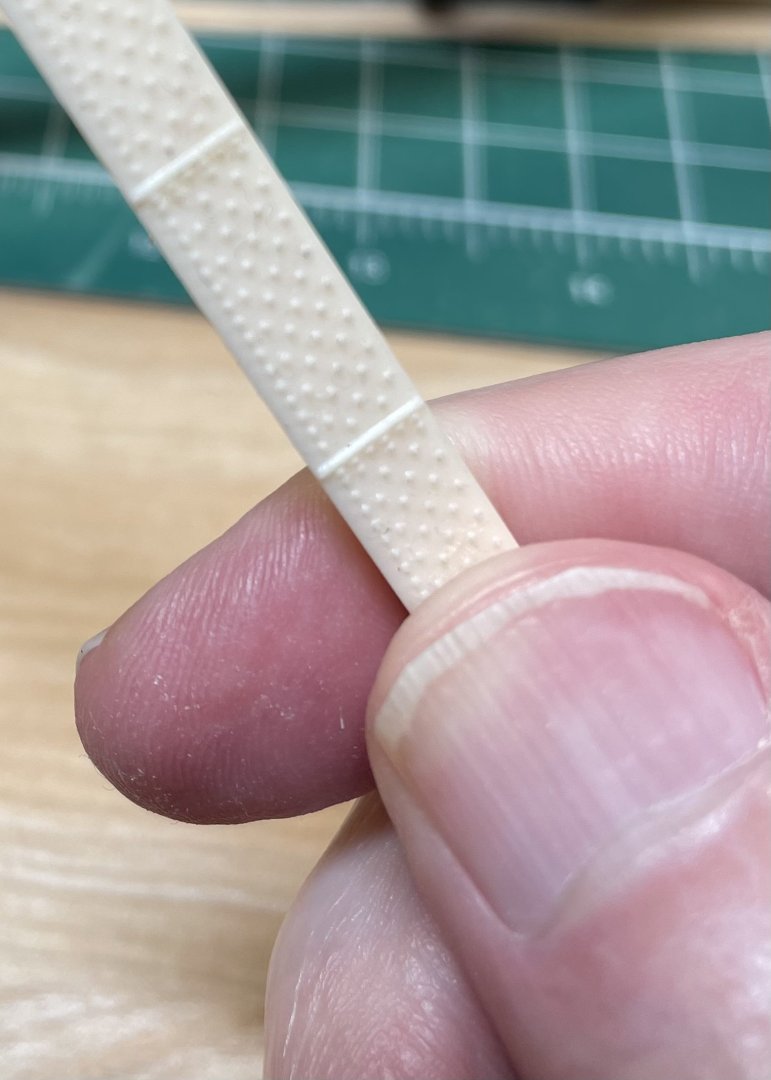
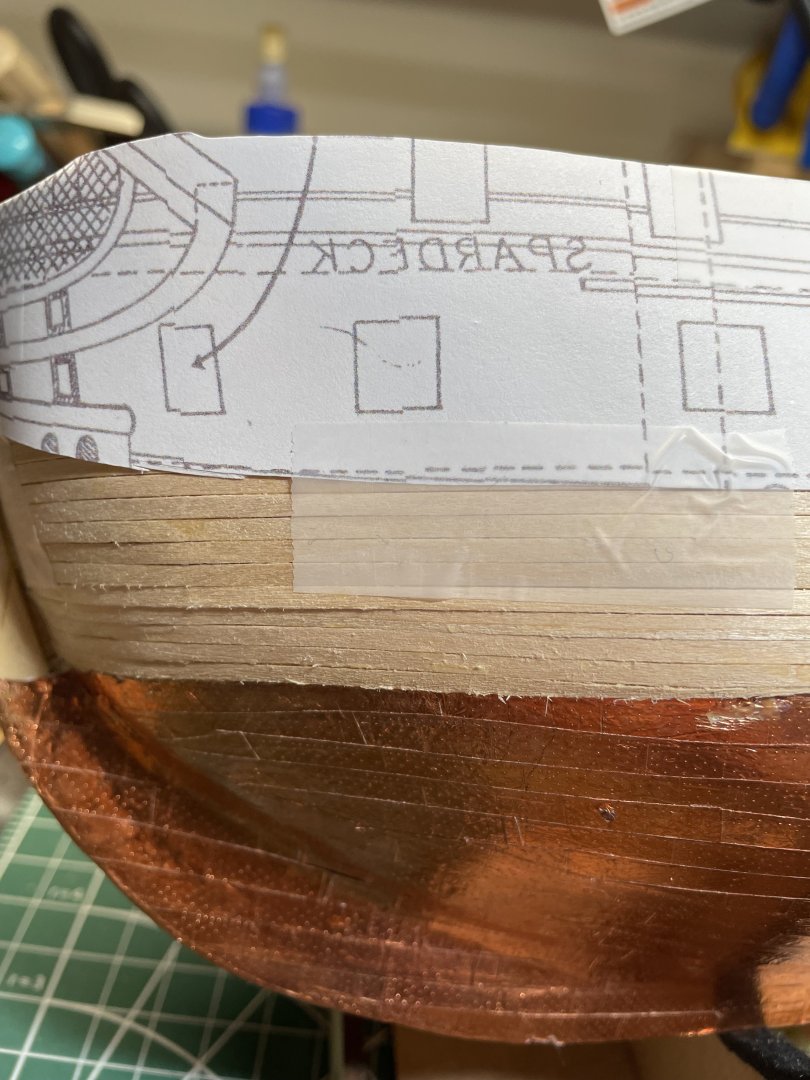
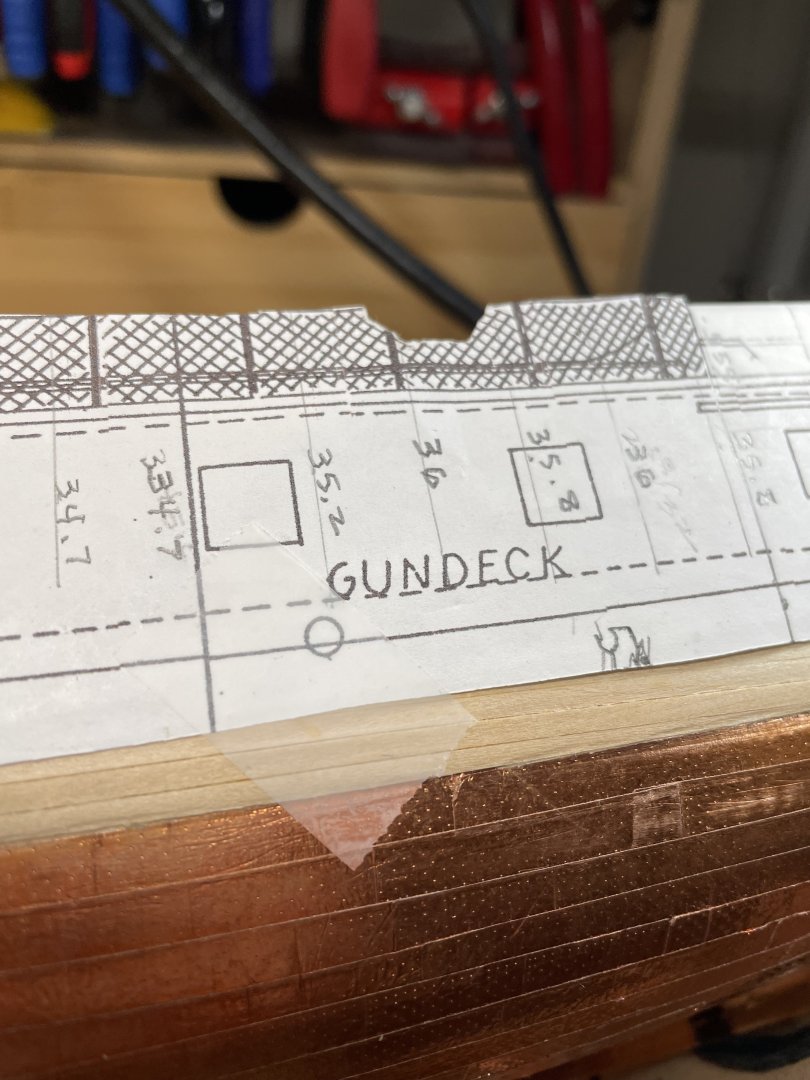
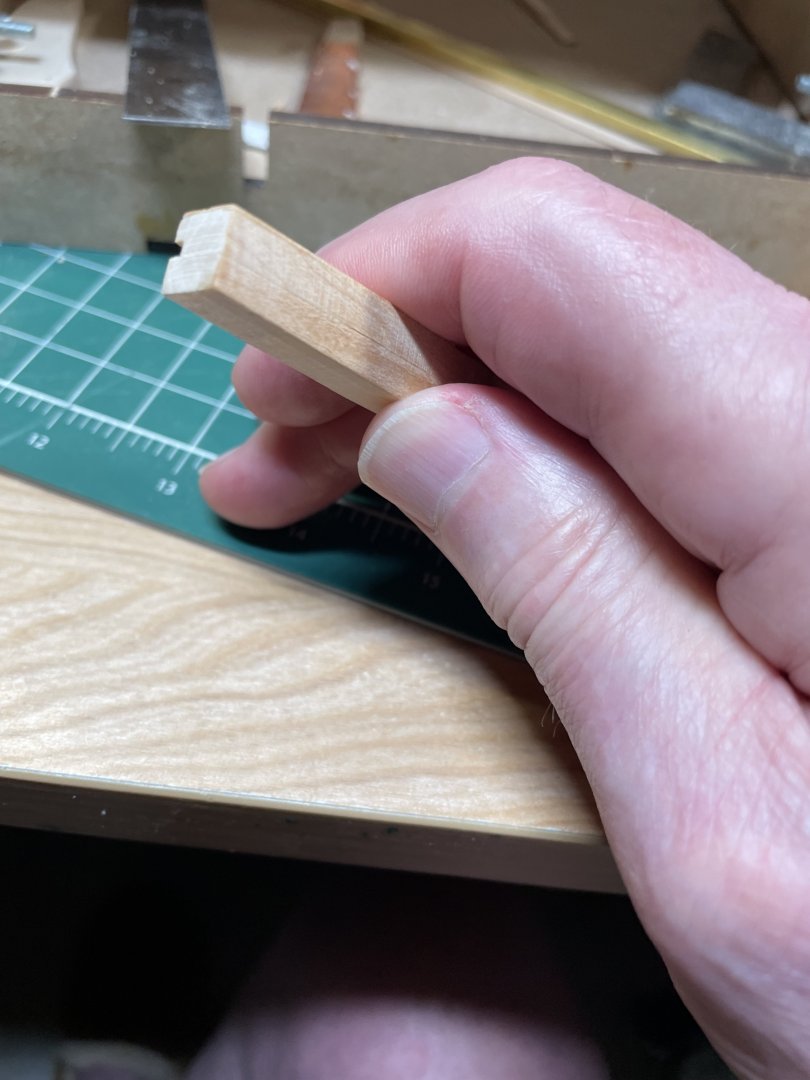
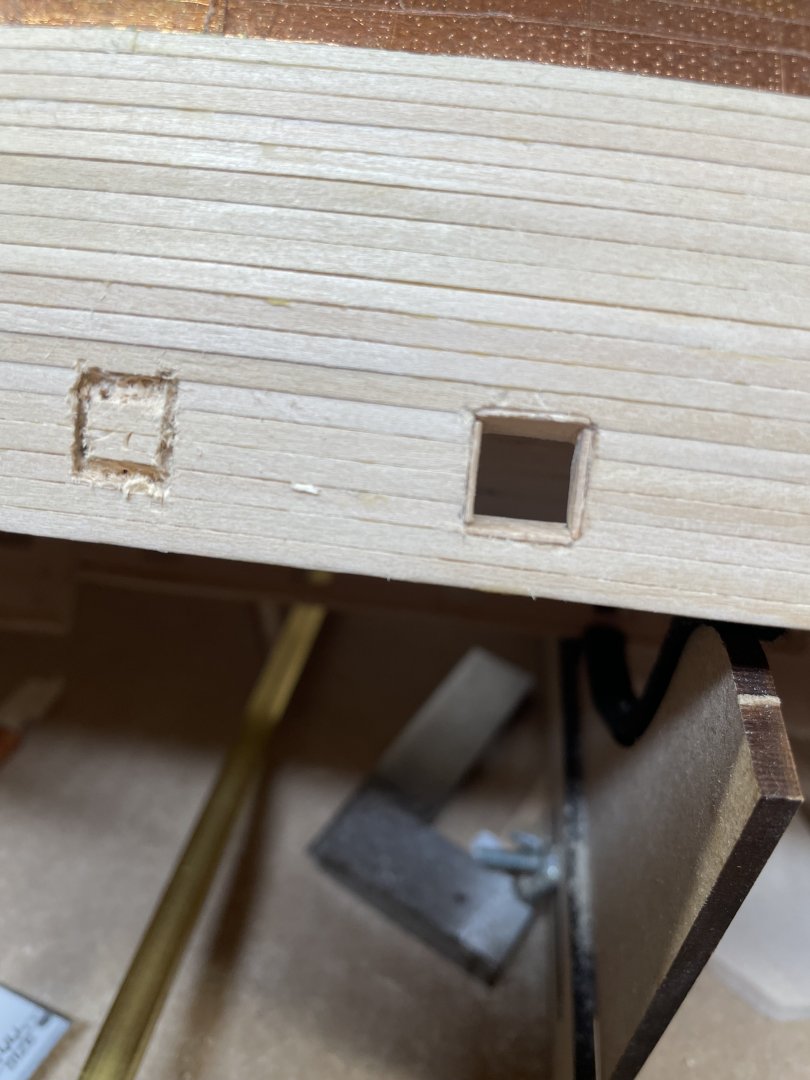
Well, I think it’s time for an update and I’m pleased to say that I’ve made some decent progress on the ship. (Knock on wood in case there’s any bad karma floating around.) I decided to copper and plank the hull before cutting out the gunports because they’re fragile and I’m clumsy. This allowed me to hold the hull in different positions while applying the copper tape. COPPERING THE HULL I had painted the hull below the waterline a shiny copper color to hide any blemishes in my application process. I cut the tape to mimic three plates and just butt-joined the ends. To create the pattern in the foil, I used a stamp from @g8rfan who sent me one of his spares. I like that it’s not too complicated, but still shows detail in the finish. PLANKING This step was pretty straightforward through most of the process. I bought additional planks from Bluejacket to cover the inside and outside of the bulwark. I gently bent the planks for the curve in the bow. At the stern, the planks needed more manipulation to follow the shape. Looking at the stern, I realized that the flare at the top of the sternpost was wrong. Too late now. CUTTING THE GUNPORTS One of my fears was cutting the gunports in the right spot, so they were the right height above the deck, the right size and that port and starboard lined up. I started by making a mirror-image of the side view plans, then taping those on each side. I used the edges of the waist to align my template. Then I used a 1mm drill on a dremel to score the outline on the template. My first attempt was pretty successful. The holes were in line and the pert side was 0.49” above the deck, while the starboard was 0.48”. I made a little jig to test each opening. Just a few scraps glued together, whose sides were 11/32” or as close as I could get it. To finish the holes, I would add slim wood strips or sand down high spots. And that’s where I am. Thanks for your interest. As usual, I would welcome any suggestions or advice moving forward. I plan to continue with the gundeck gunports, then the spar deck. Next steps are to attach the stem and paint. Semper Dienceps Jim


-
Wow! Incredible progress in two weeks. Do you ever sleep Jim
-
Howdy and welcome to the club. Looking forward to seeing your progress and innovation. Jim
-
Thanks Greg I do think the people building the Constitution are awesome. I only count myself as the junior varsity to their skills however. Luckily I can steal, er…learn from their skills and apply them to my ship. There is almost a subset in this forum of Constitution makers. I know I read all of ‘em. I wouldn’t count on the instruction manual as a good guide. It rambles and makes suggestions, but you’re better off with the logs of other builders and looking at lots of pictures. But, I’m happy with this big chunk of wood. Just now planking the outside. Just remember to have fun. Jim
-
Thanks Jon. I’ve been following your build as well, because once we start planking and outfitting our ships, both the MS and Bluejacket versions face many similar challenges. I’m DM-ing with most of the other Bluejacket builders, although they are much farther along than I. They have saved my bacon a couple times already. Anyway, it’s nice to have several South Carolinians on the forum to share the torture.
-
Thanks @KurtH for the tip. I rigged a plumb bob and scored my stem line off that. After some aggressive digging and sanding I got the stem straight and the keel more or less back in line. I know the stem is too long; I’ll trim it later. With that fixed, I was ready (again) to start building a ship. First up was coppering the hull. I followed the same process that @g8rfan did and smoothed the hull with 400 grit, then applied two coats of gesso, followed by a shiny finish of copper. I only used one coat of copper because it’s just got to hide any boo-boos in the copper. I’ll be using copper tape along with the little device g8rfan sent me. Semper dienceps Jim