cdrusn89
-
Posts
1,921 -
Joined
-
Last visited
Content Type
Profiles
Forums
Gallery
Events
Everything posted by cdrusn89
-
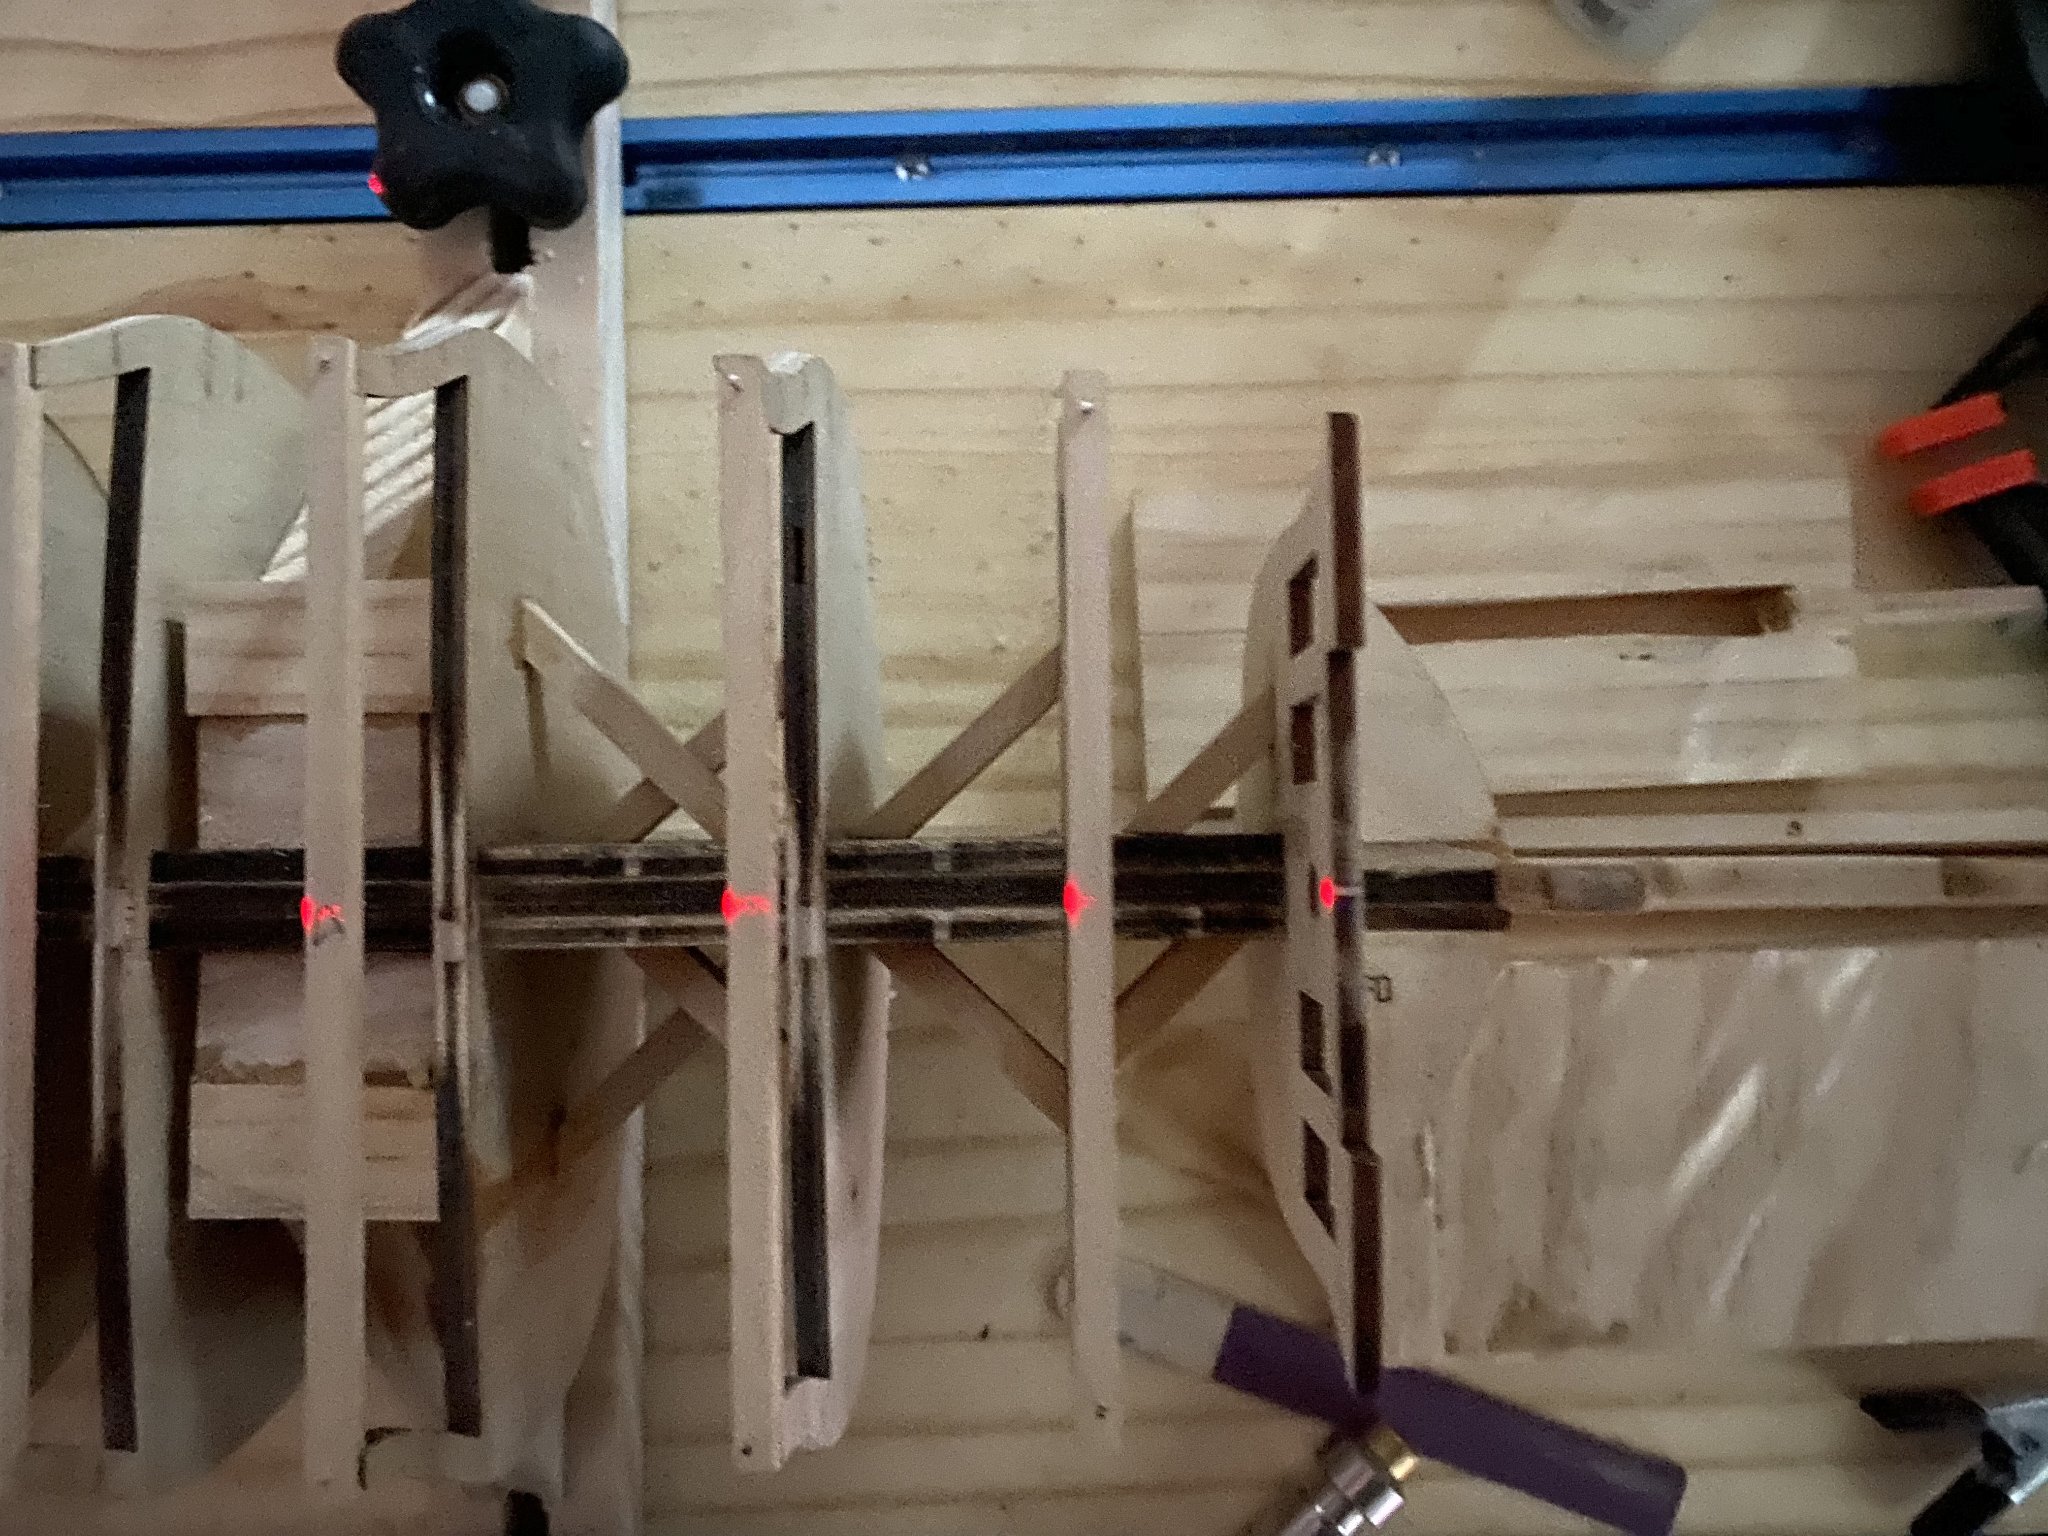
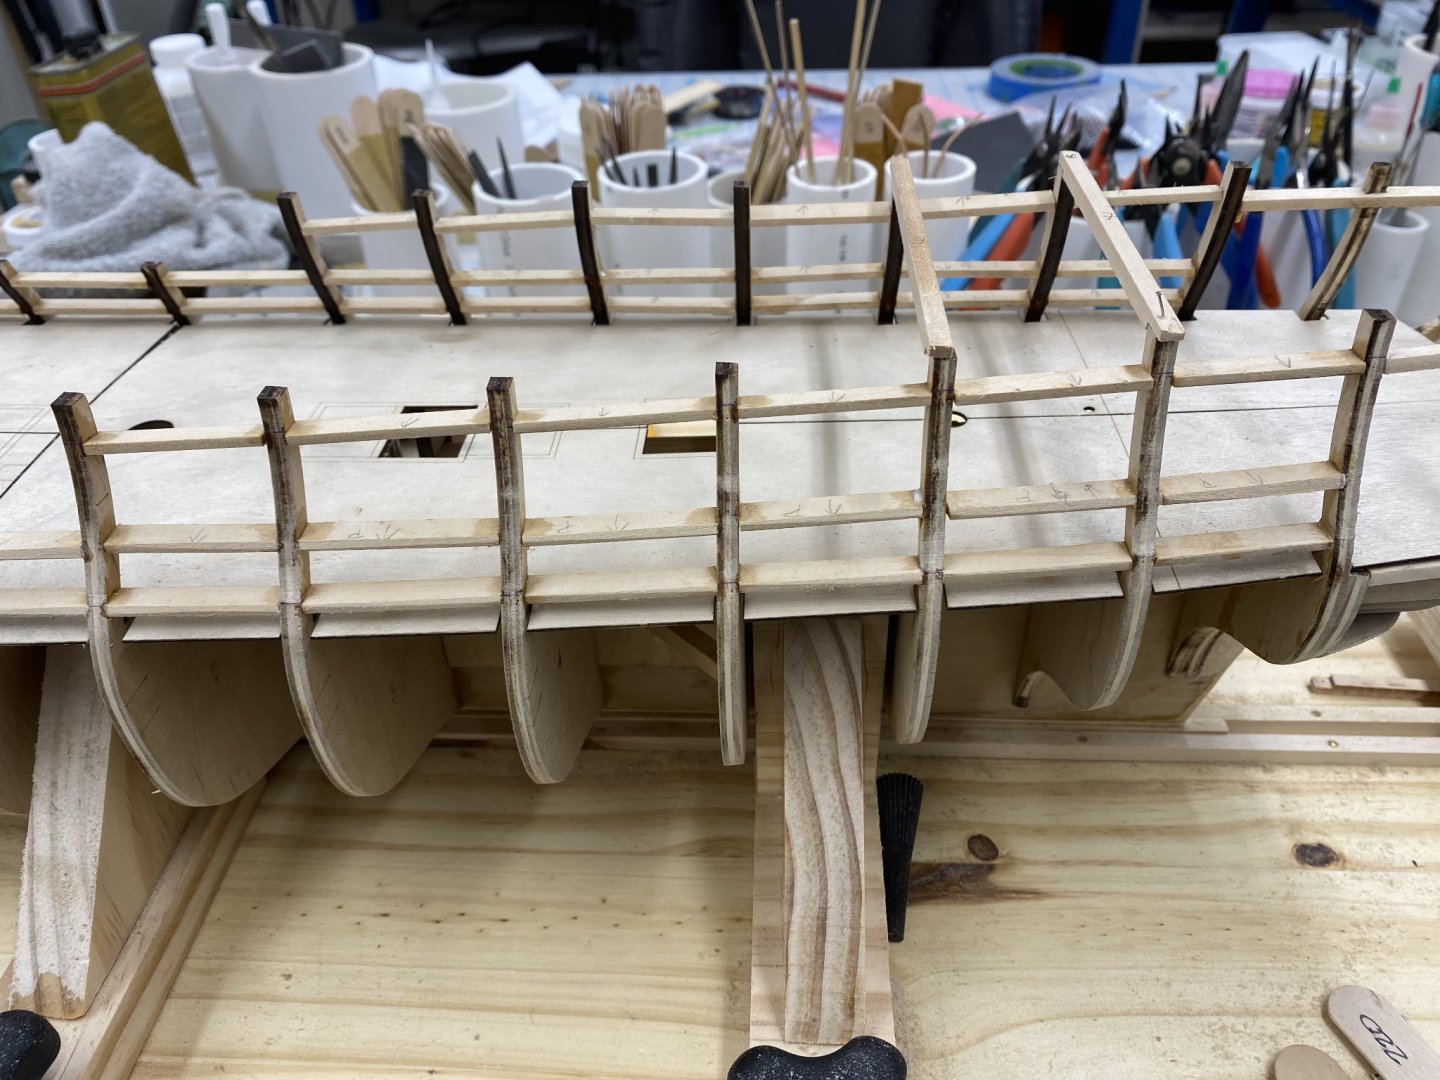
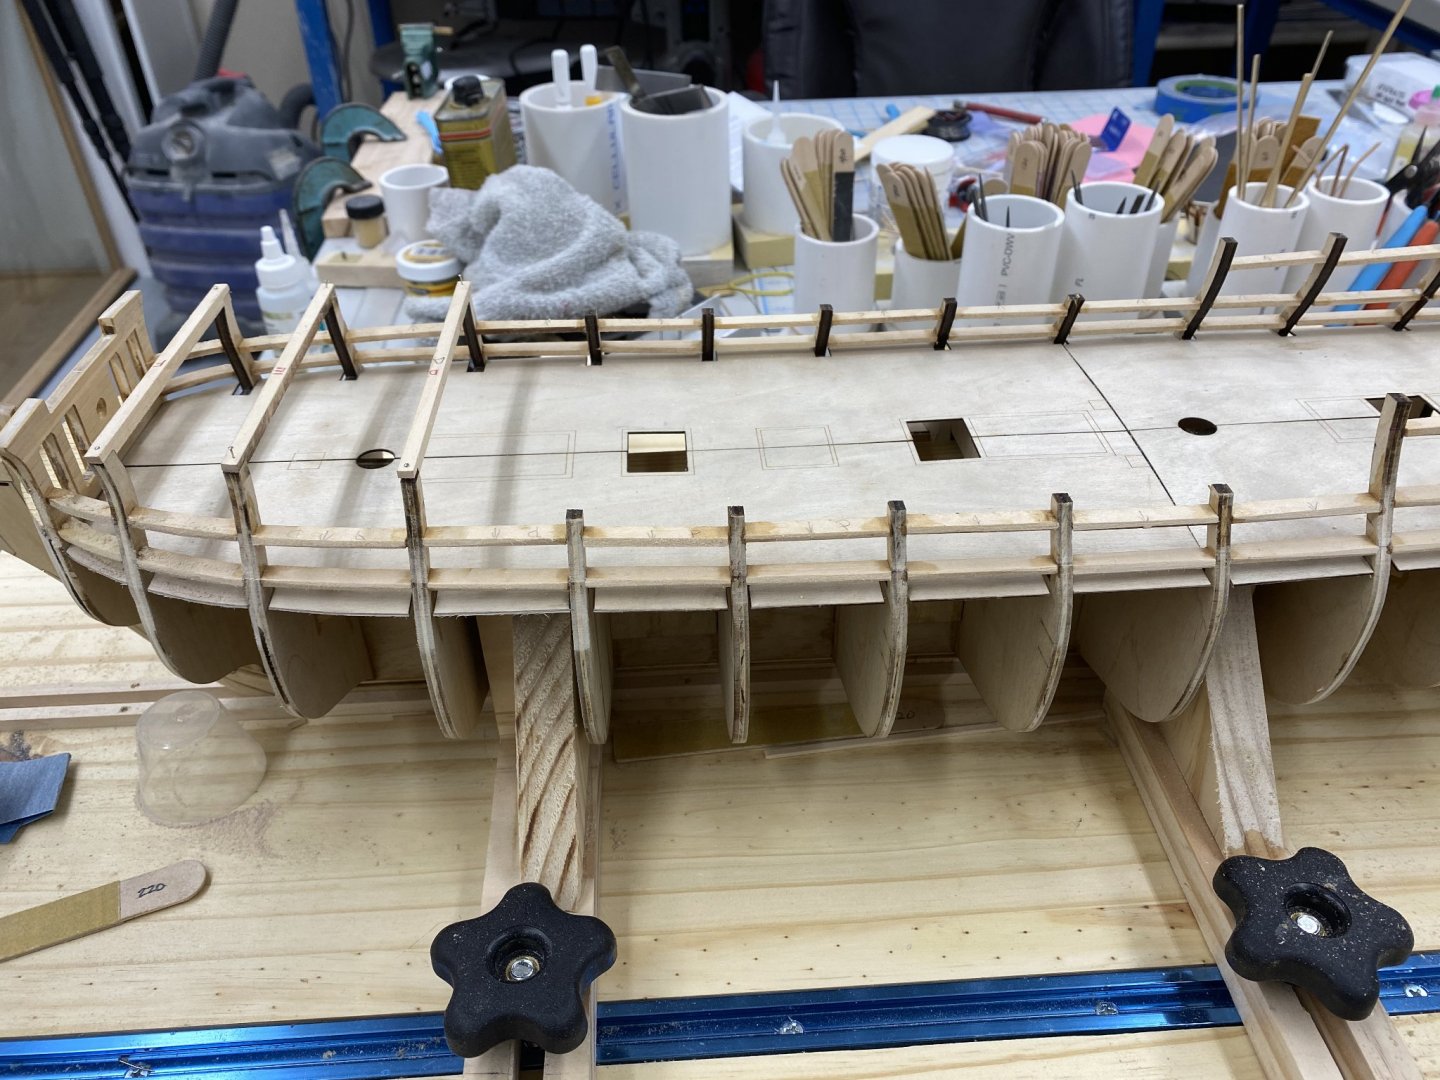
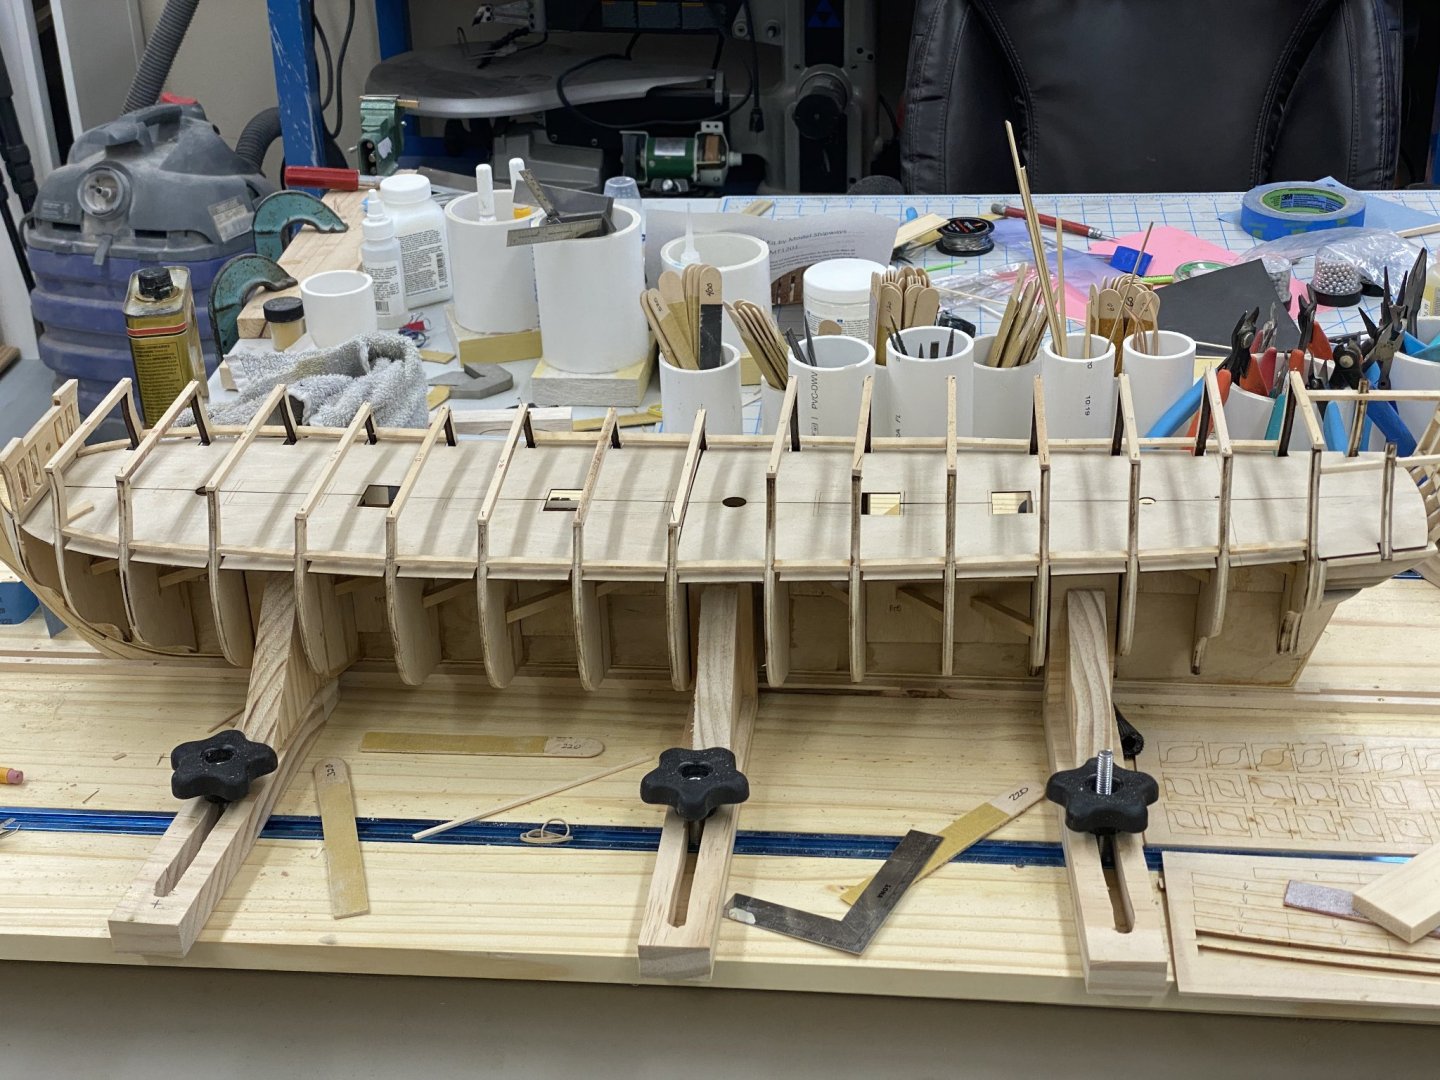
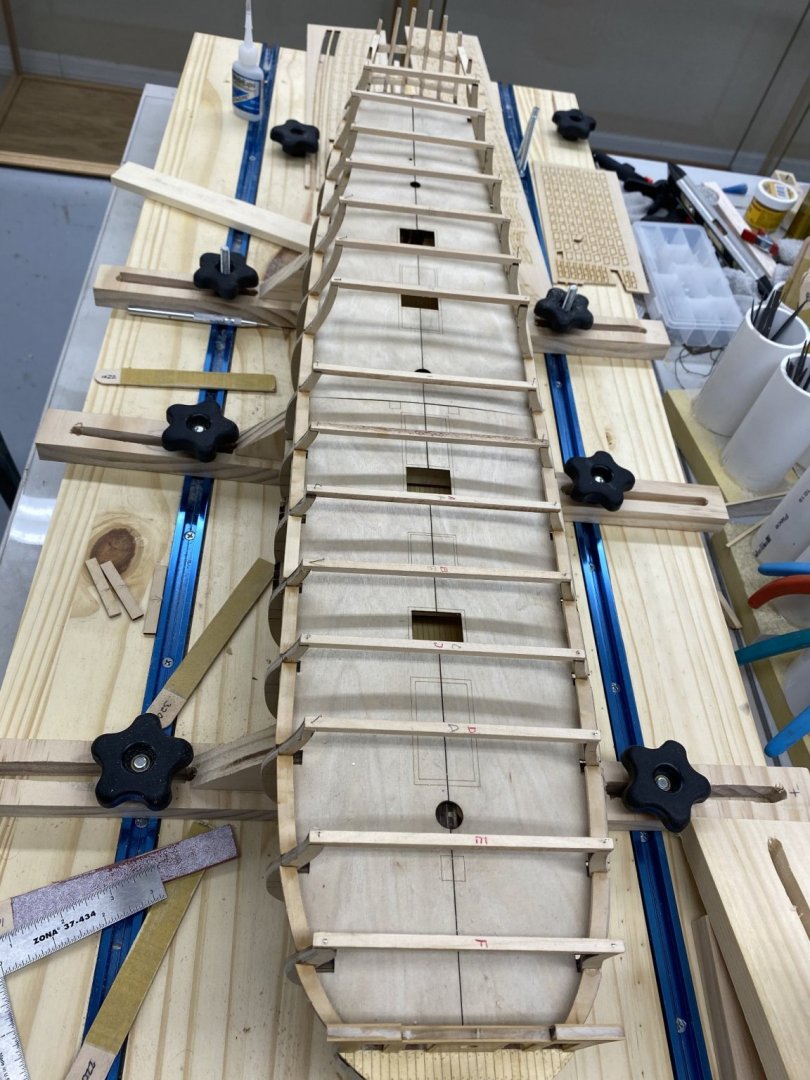
 Continuing with the port sills and lintels. Gun deck is complete and sills for the quarterdeck are in place. I noticed that the bulkhead extensions on two of the bulkheads (6 and 7) did not seem to align correctly with those on either side. Not sure what happened (maybe the gun deck sills and lintels forced them out of position somehow). So before I glued the quarterdeck sills in place I adjusted the extension protectors to try and get them closer to the correct position (as best I can tell). Hopefully when the quarterdeck sills and lintels are in place they will be "good enough". Upper rail on quarterdeck is next. Then the "real" fun - the templates to locate the port sides and dealing with 70 something little pieces that have to be "perfectly vertical" per the instructions.
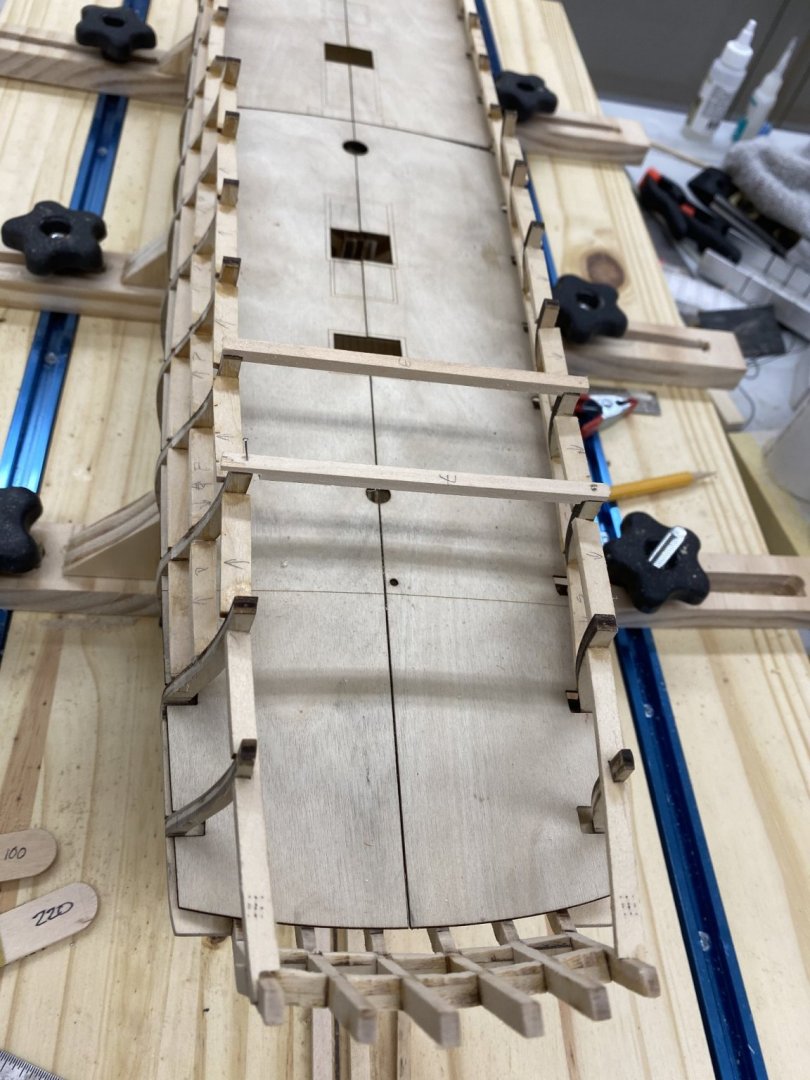
- 370 replies
-
- 2
-

-
- Model Shipways
- Confederacy
- (and 1 more)
-
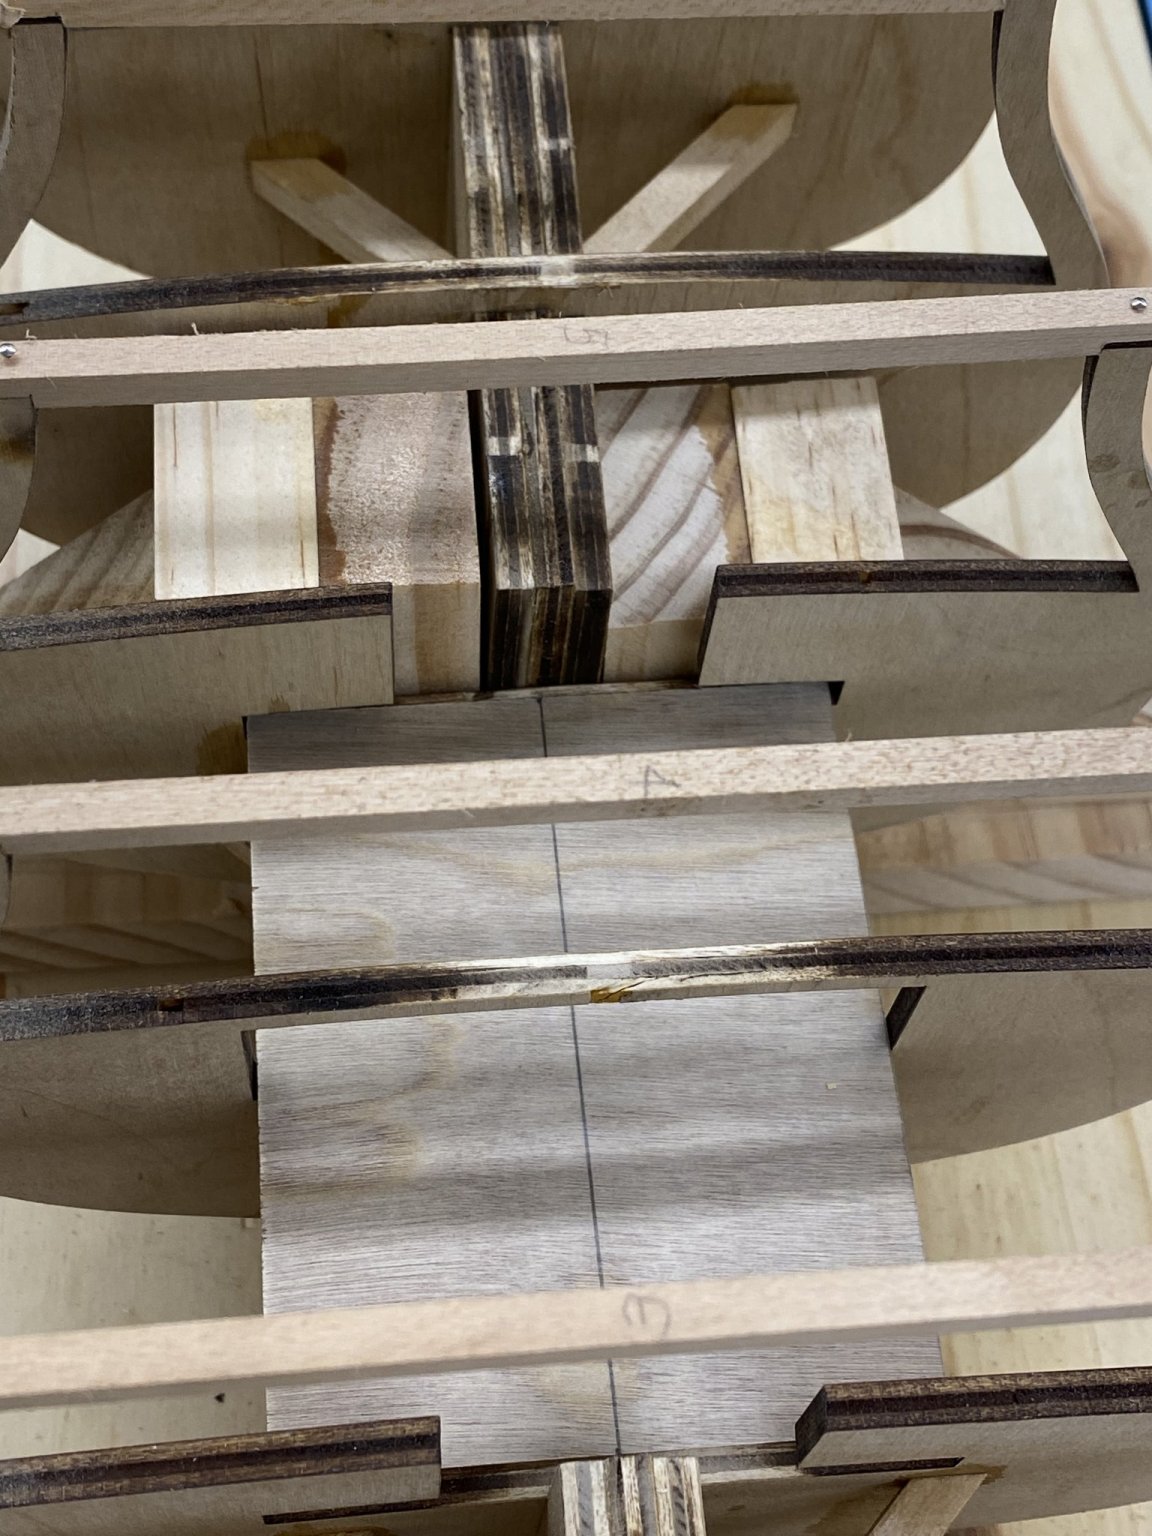
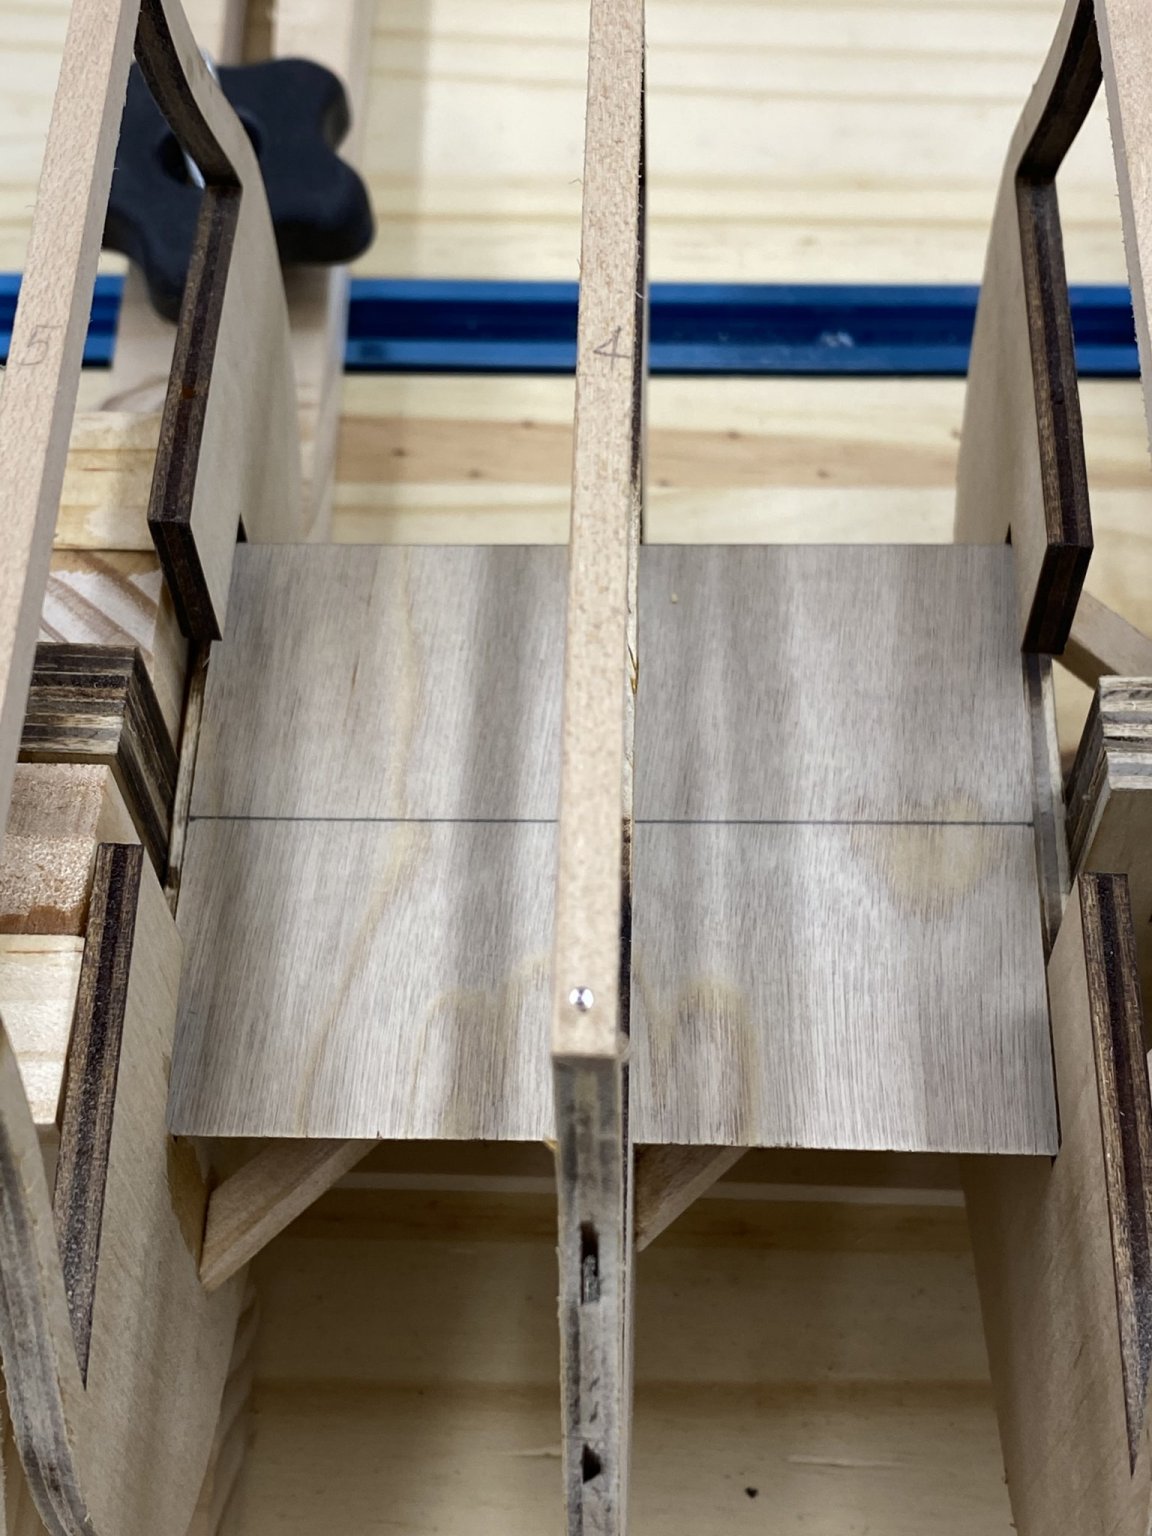
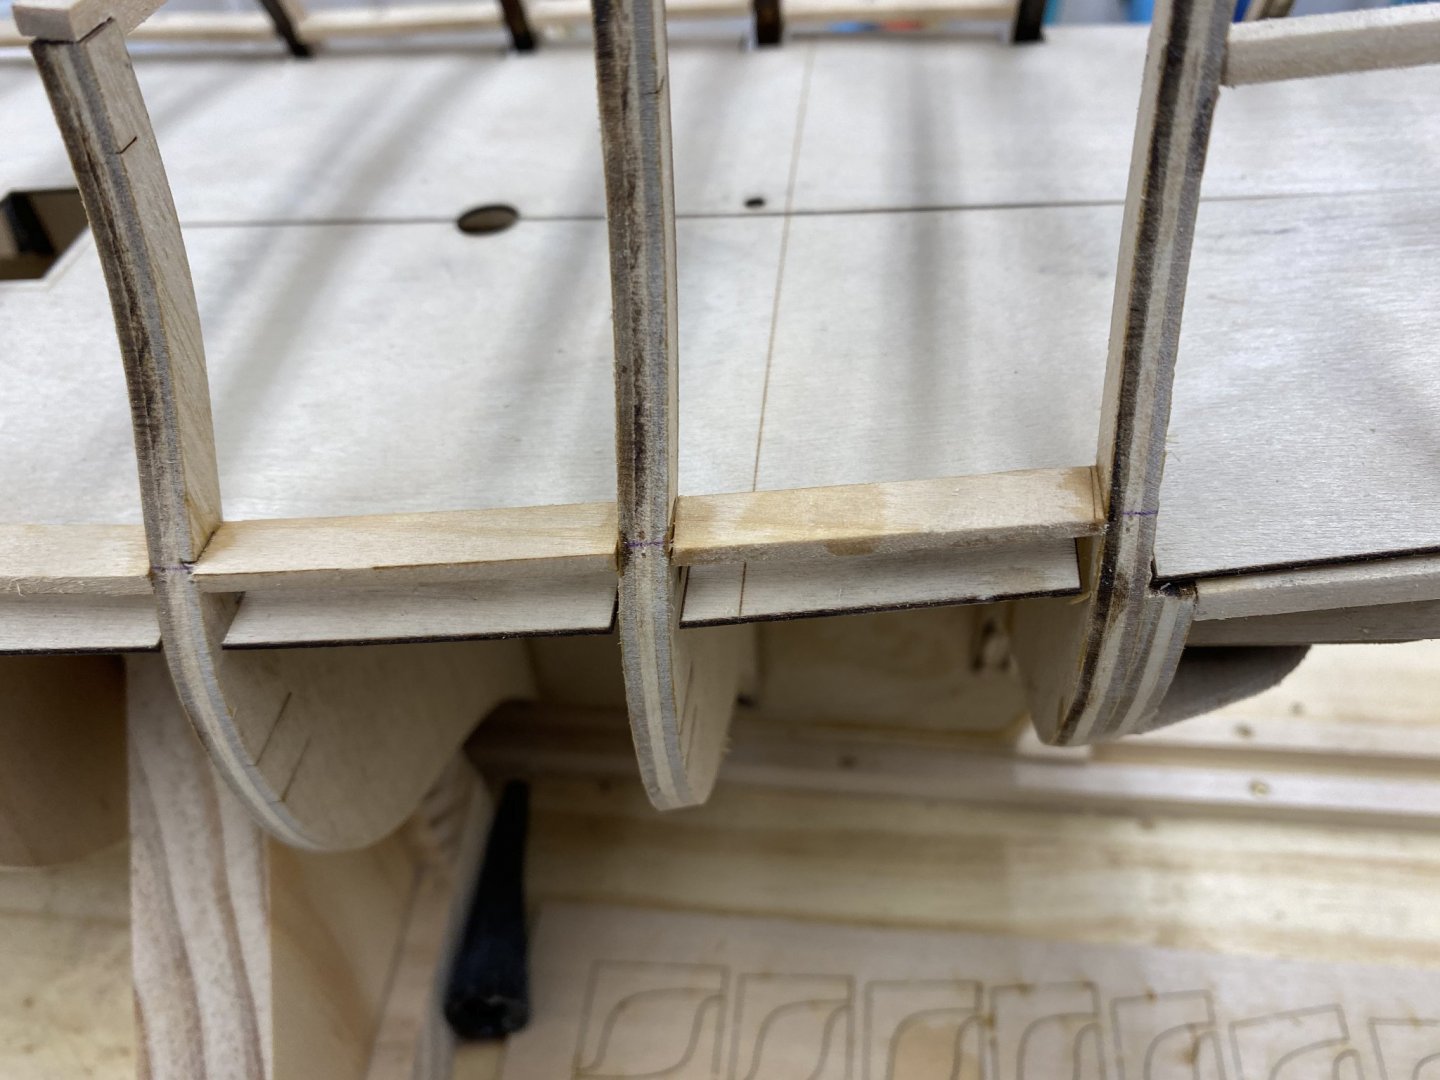
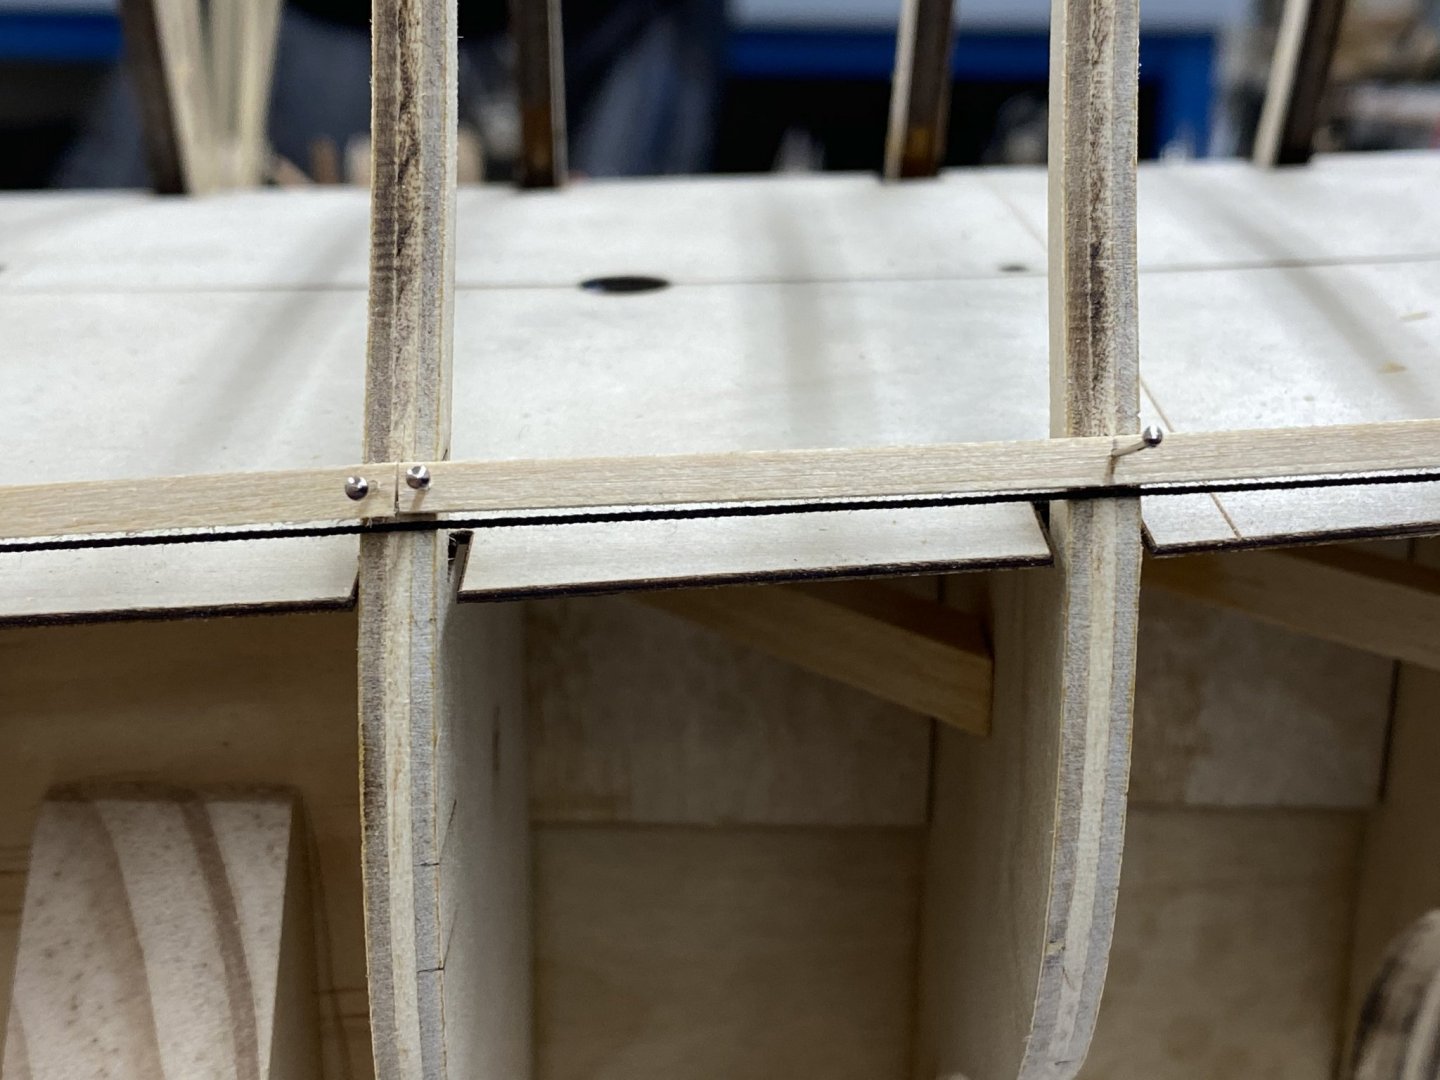
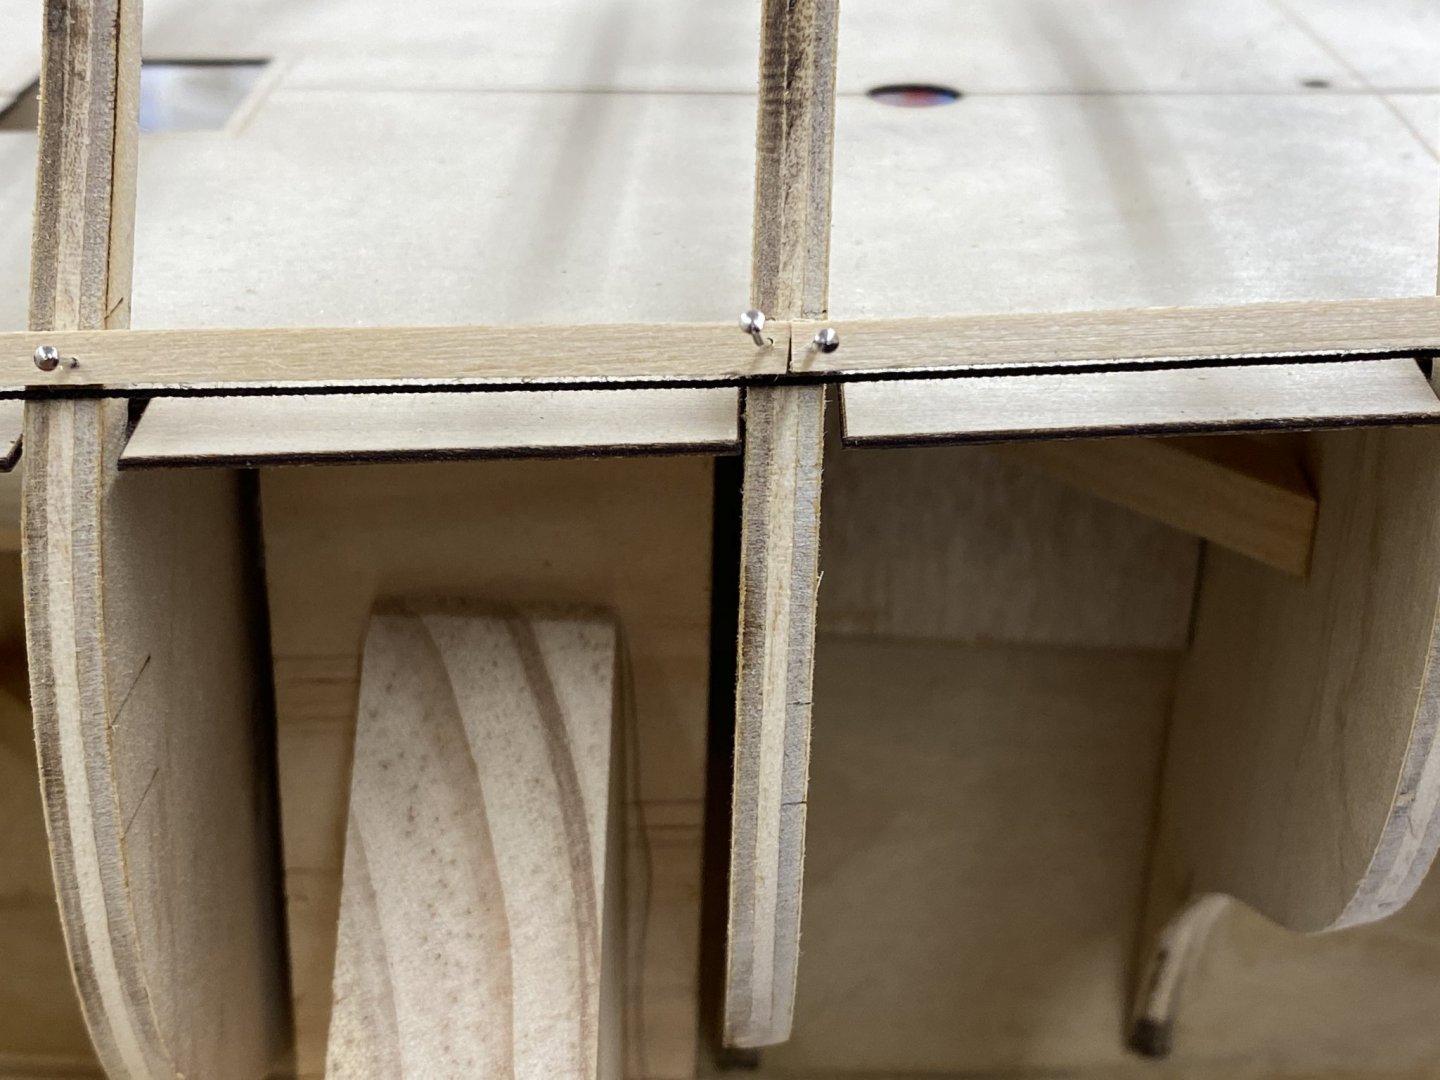
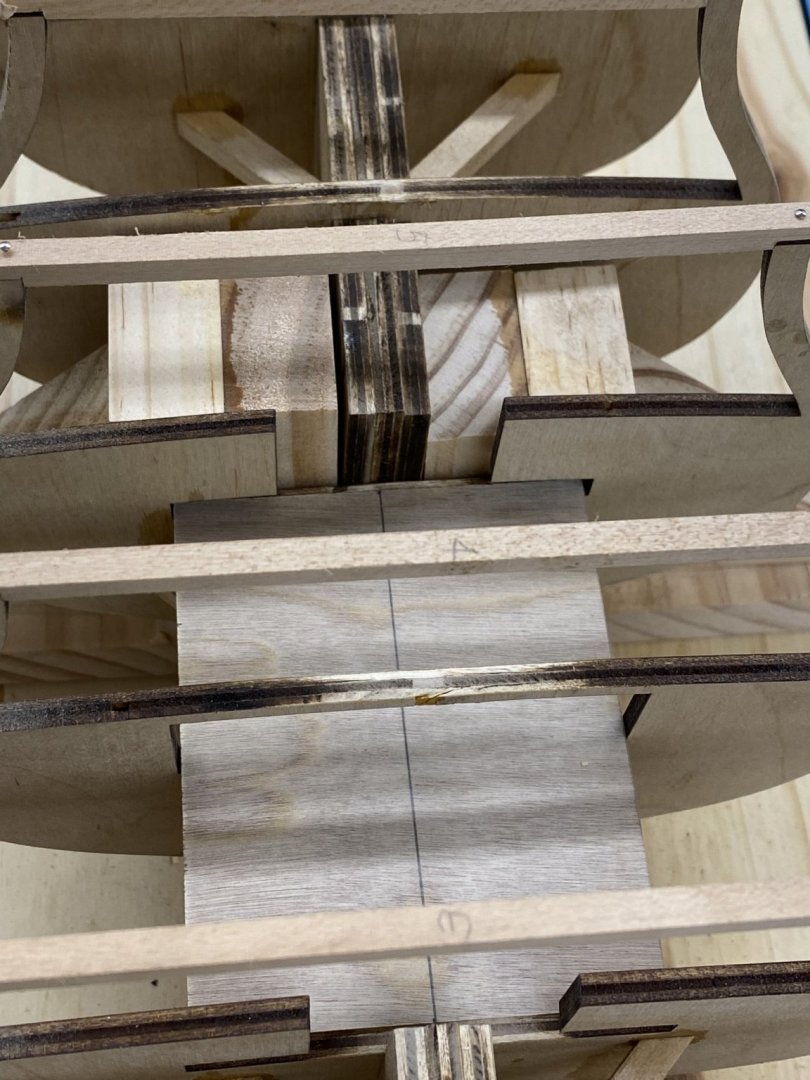
Added the port sills on both sides (per instructions). Once I figured out which sills went where (see above post) it was relatively simple. I used the disc sander to take most (but not all) of the "extra" length off the precut sills. After I had one side done I cut a "template" narrow enough to fit between the bulkhead extensions, long enough to fit across the hull, and the required 3/16" thick to use as a gauge of the "flatness" (across the deck) of the sills and later to set the height of the lintels. Here is a close up of two of the sills - I used thin CA to glue them in place. I am going tom paint the gun ports red so am not too worried about getting glue on the sills.
- 370 replies
-
- 3
-
-
- Model Shipways
- Confederacy
- (and 1 more)
-
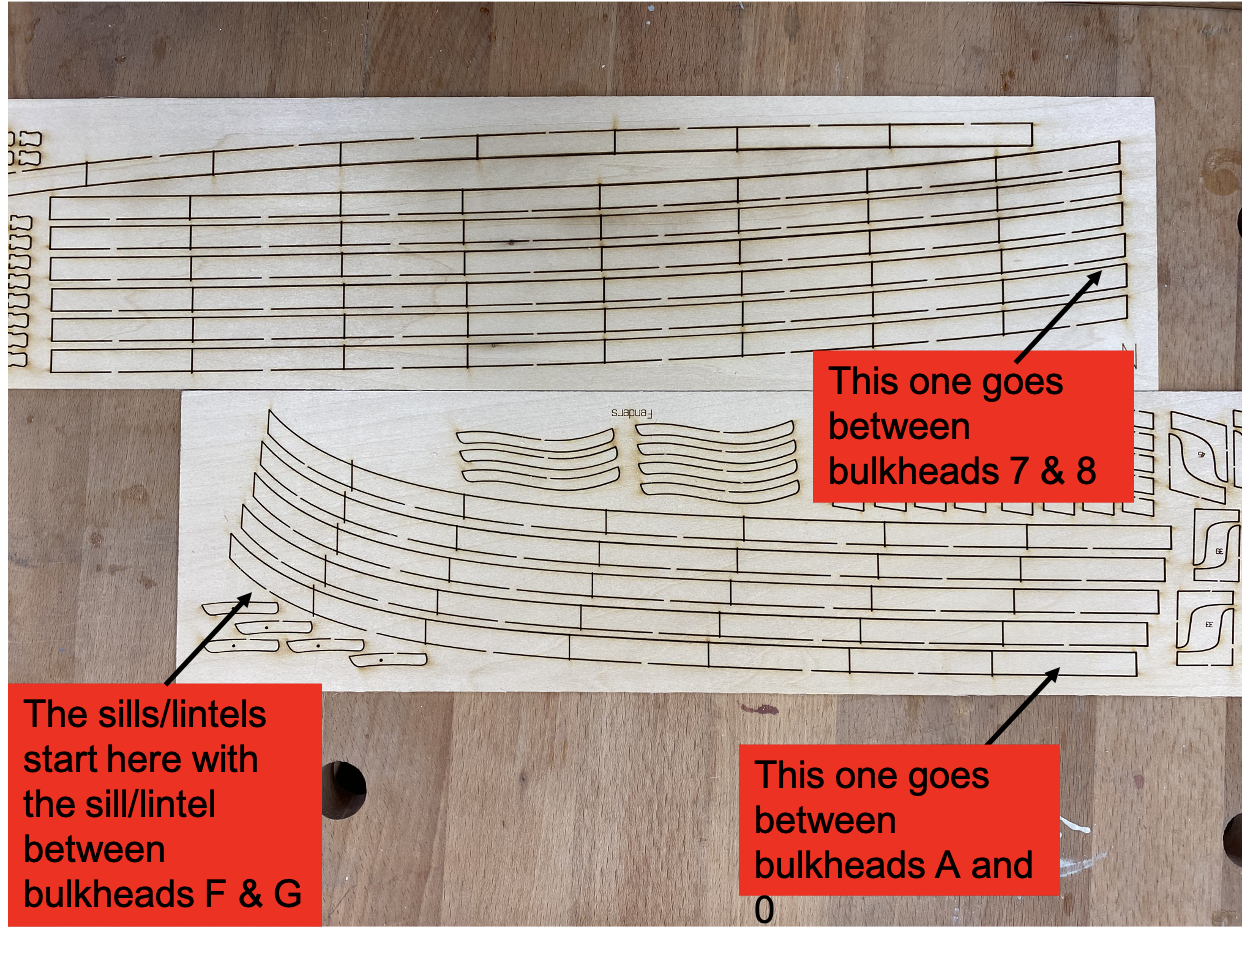
Another note for those who come later - While it is obvious to me now how the sills/lintels are provided it was not a few hours ago. There are two 3/32" carrier sheets that contain the laser cut sills and lintels (among other things) - sheets L and N The instructions show one of the sheets but I think they have relaid out the laser cut sheets since the instructions were done so I had a hard time finding a carrier sheet that looked like the one in the instructions. Anyway here are the two sheets and an explanation of where the various pieces go on the model.
- 370 replies
-
- 3
-
-
- Model Shipways
- Confederacy
- (and 1 more)
-
While the filler is drying in the treenails on the beakhead bulkhead I ran the batten for the gunport sills on the port side. After making some minor adjustments based on the Mark 1 Mod 0 eyeball (which is noit as good as it used to be) I thought I might try using some line to locate deviations in the "smooth" run. If I ran a piece of line (Syren .018 dark brown in this case) on the underside of the batten (since in generally curves upward) if the line deviated from the batten across two bulkheads could mean that the batten is too high somewhere in this area. It seemed to work okay as I found a spot (unremarkedly where the junction in the batten was located) and I adjusted the junction to reduce the gap. It was more obvious in real life than in the pictures.
- 370 replies
-
- 3
-
-
- Model Shipways
- Confederacy
- (and 1 more)
-
I have completed the beakhead deck and treenails but have not yet added any WoP. Sorry about the shadow I can't seem to find the correct place to put the lights. And I have planked the beakhead bulkhead (boxwood) on both sides but have yet to add the treenails. i will probably only add the treenails on the outside. The inner bulkhead will be hard to see with the bulkwarks and at least half the forecastle deck planked. Not sure it is worth the effort and it will be considerably harder to drill the holes with the bulkhead extensions "running interference". After looking at this picture I can see a few places where some additional trimming is required. I thought I had all that done. Maybe it is time to dry fit a door or two to make sure they will fit. Easier to modify the openings now before the treenails and WoP.

- 370 replies
-
- 2
-
-
- Model Shipways
- Confederacy
- (and 1 more)
-
Thanks for the kind words Tim. Sometimes I believe I tend to "Overthink" things.
-
Thanks Bruce.
-
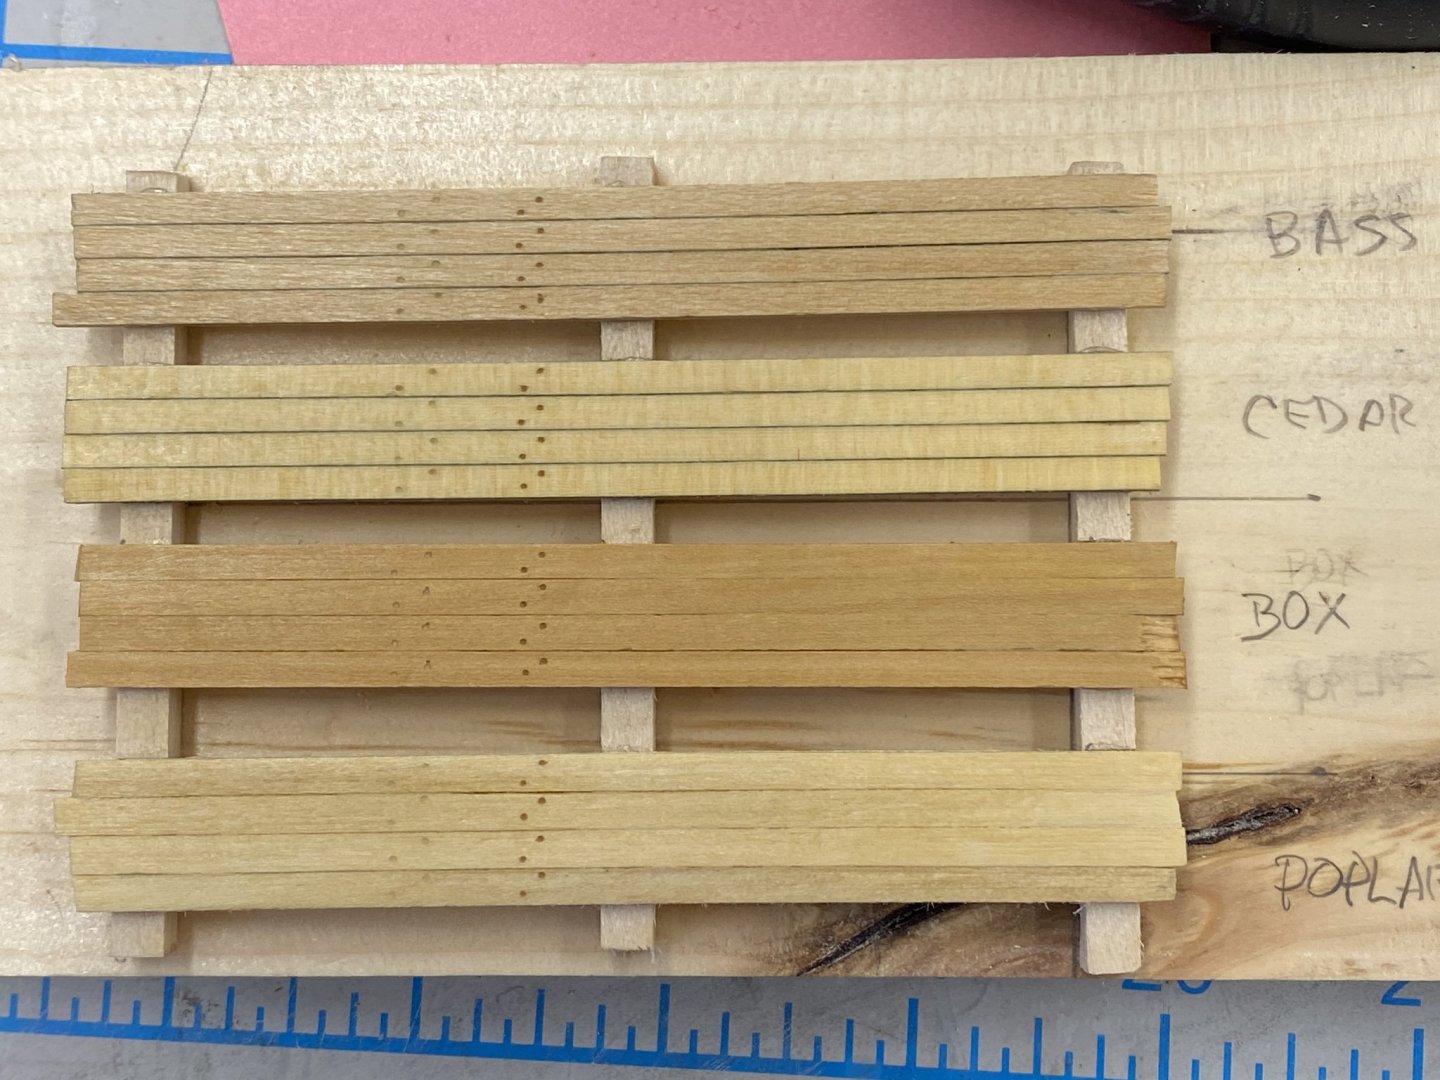
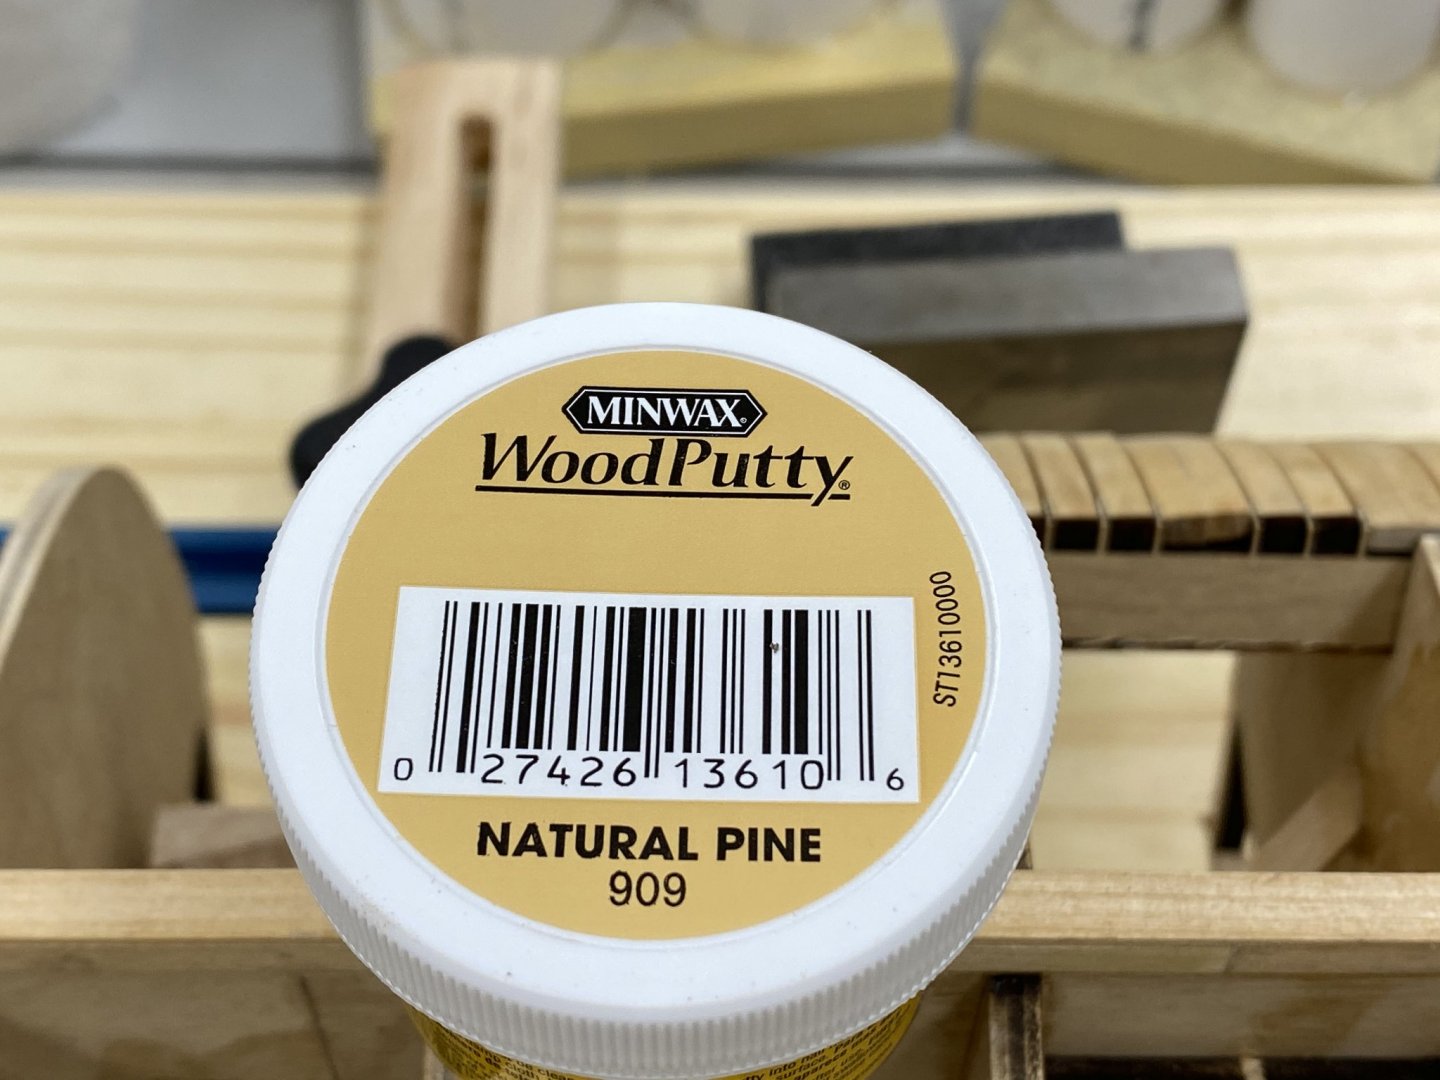
The next step per the instructions is to add the planking to the beakhead deck and bulkheads. In preparation for this step I build a test strip for the various woods that I can choose from for the deck and bulkheads. I used Alaskan yellow cedar (with caulk simulation) for the lower decks so that is one of the options. The others are the kit supplied basswood, boxwood which I have from some previous model and poplar which came with the timbering kit from The Lumberyard. I put a four plank wide same of each on a simulation of the bulkhead spacing and then drilled #75 holes for the simulated treenails. I made two sets of holes and filled one set with Minwax Natural Pine wood putty and the other set with Minwax Golden Oak putty. After drying I sanded each set with 220 grit paper and applied two coats of Wipe-on-Poly to see how the various woods and putty would look. Here is what they look like - the Golden Oak putty is on the right. At least for the beakhead I will use the cedar and Natural Pine putty for the deck and for the bulkheads the boxwood and Natural Pine putty. At least for these woods the Golden Oak is too dark. Maybe on the hull where I am going to use Swiss Pear the Golden Oak will look better but that is another test strip coming up.
- 370 replies
-
- 3
-
-
- Model Shipways
- Confederacy
- (and 1 more)
-
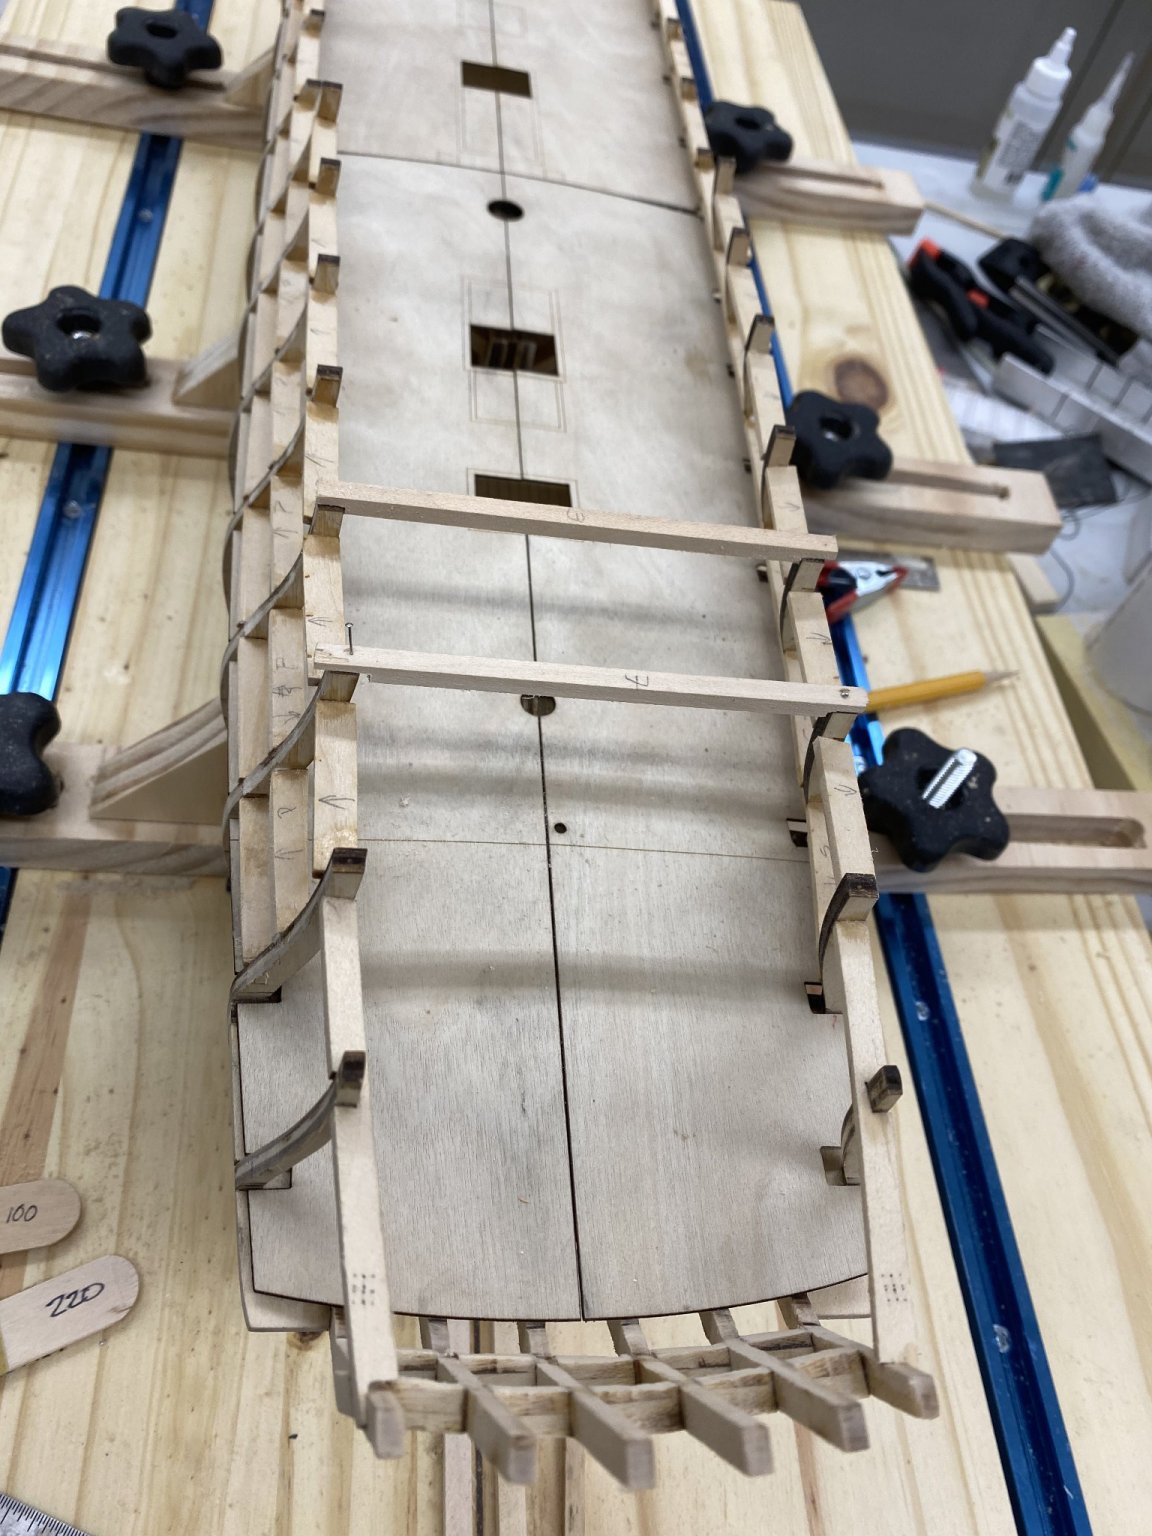
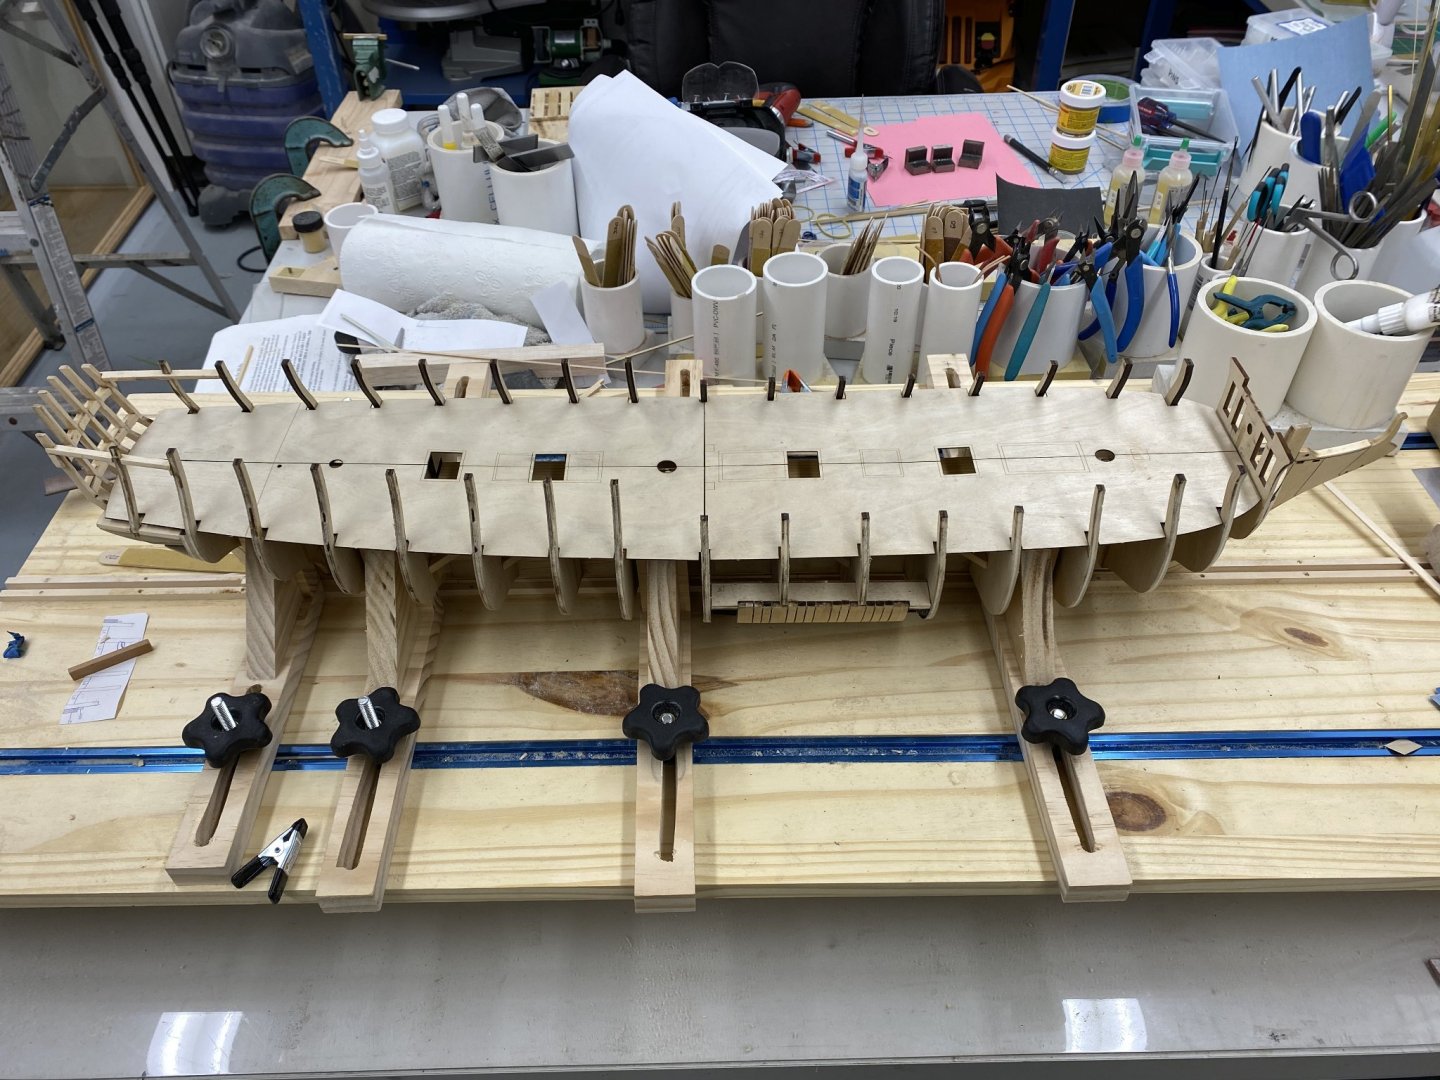
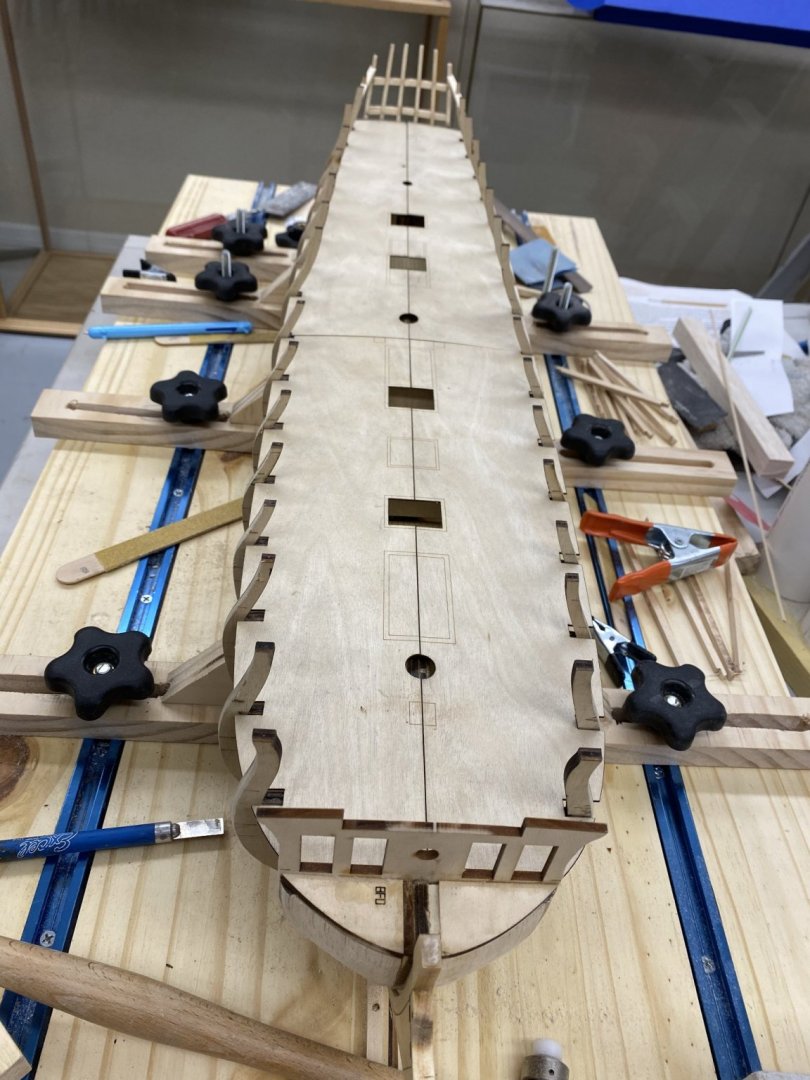
I followed the directions and installed the false deck. I did the stbd side first (instructions say to start on the port side - reason not specified). No significant difficulties (at least that have reared their ugly heads so far). I had to take all the bulkhead extension "protectors" off to get the false deck installed as it took several attempts at adjusting the false deck notches to get a satisfactory fit along the center where the mast and hatch cut-outs need to match. Here are two shots of the hull with the false deck installed (before I returned the extension protectors to their positions).
- 370 replies
-
- 3
-
-
- Model Shipways
- Confederacy
- (and 1 more)
-
Bruce I am just starting my Confederacy - just putting the false deck on. I have a question that maybe you can answer. On the carrier sheet that contained the FR1-15 filler blocks that went on each side of the bulkhead former at each bulkhead there were six additional pieces labeled as Fore, Main and Mizzen Mast Filler - two of each. I checked the Fore Mast Filler and it indeed would fit between bulkheads D and E where the fore mast would be. I also checked the provided mast dowel and the bulkhead former and the fillers already installed are thick enough to fully support the masts. The instructions seem to be silent on when (if ever) to install these. In fact I have gone through the instructions and cannot find where the masts are addressed at all. Did you install the mast fillers? Have you found where the masts are addressed in the instructions?
-
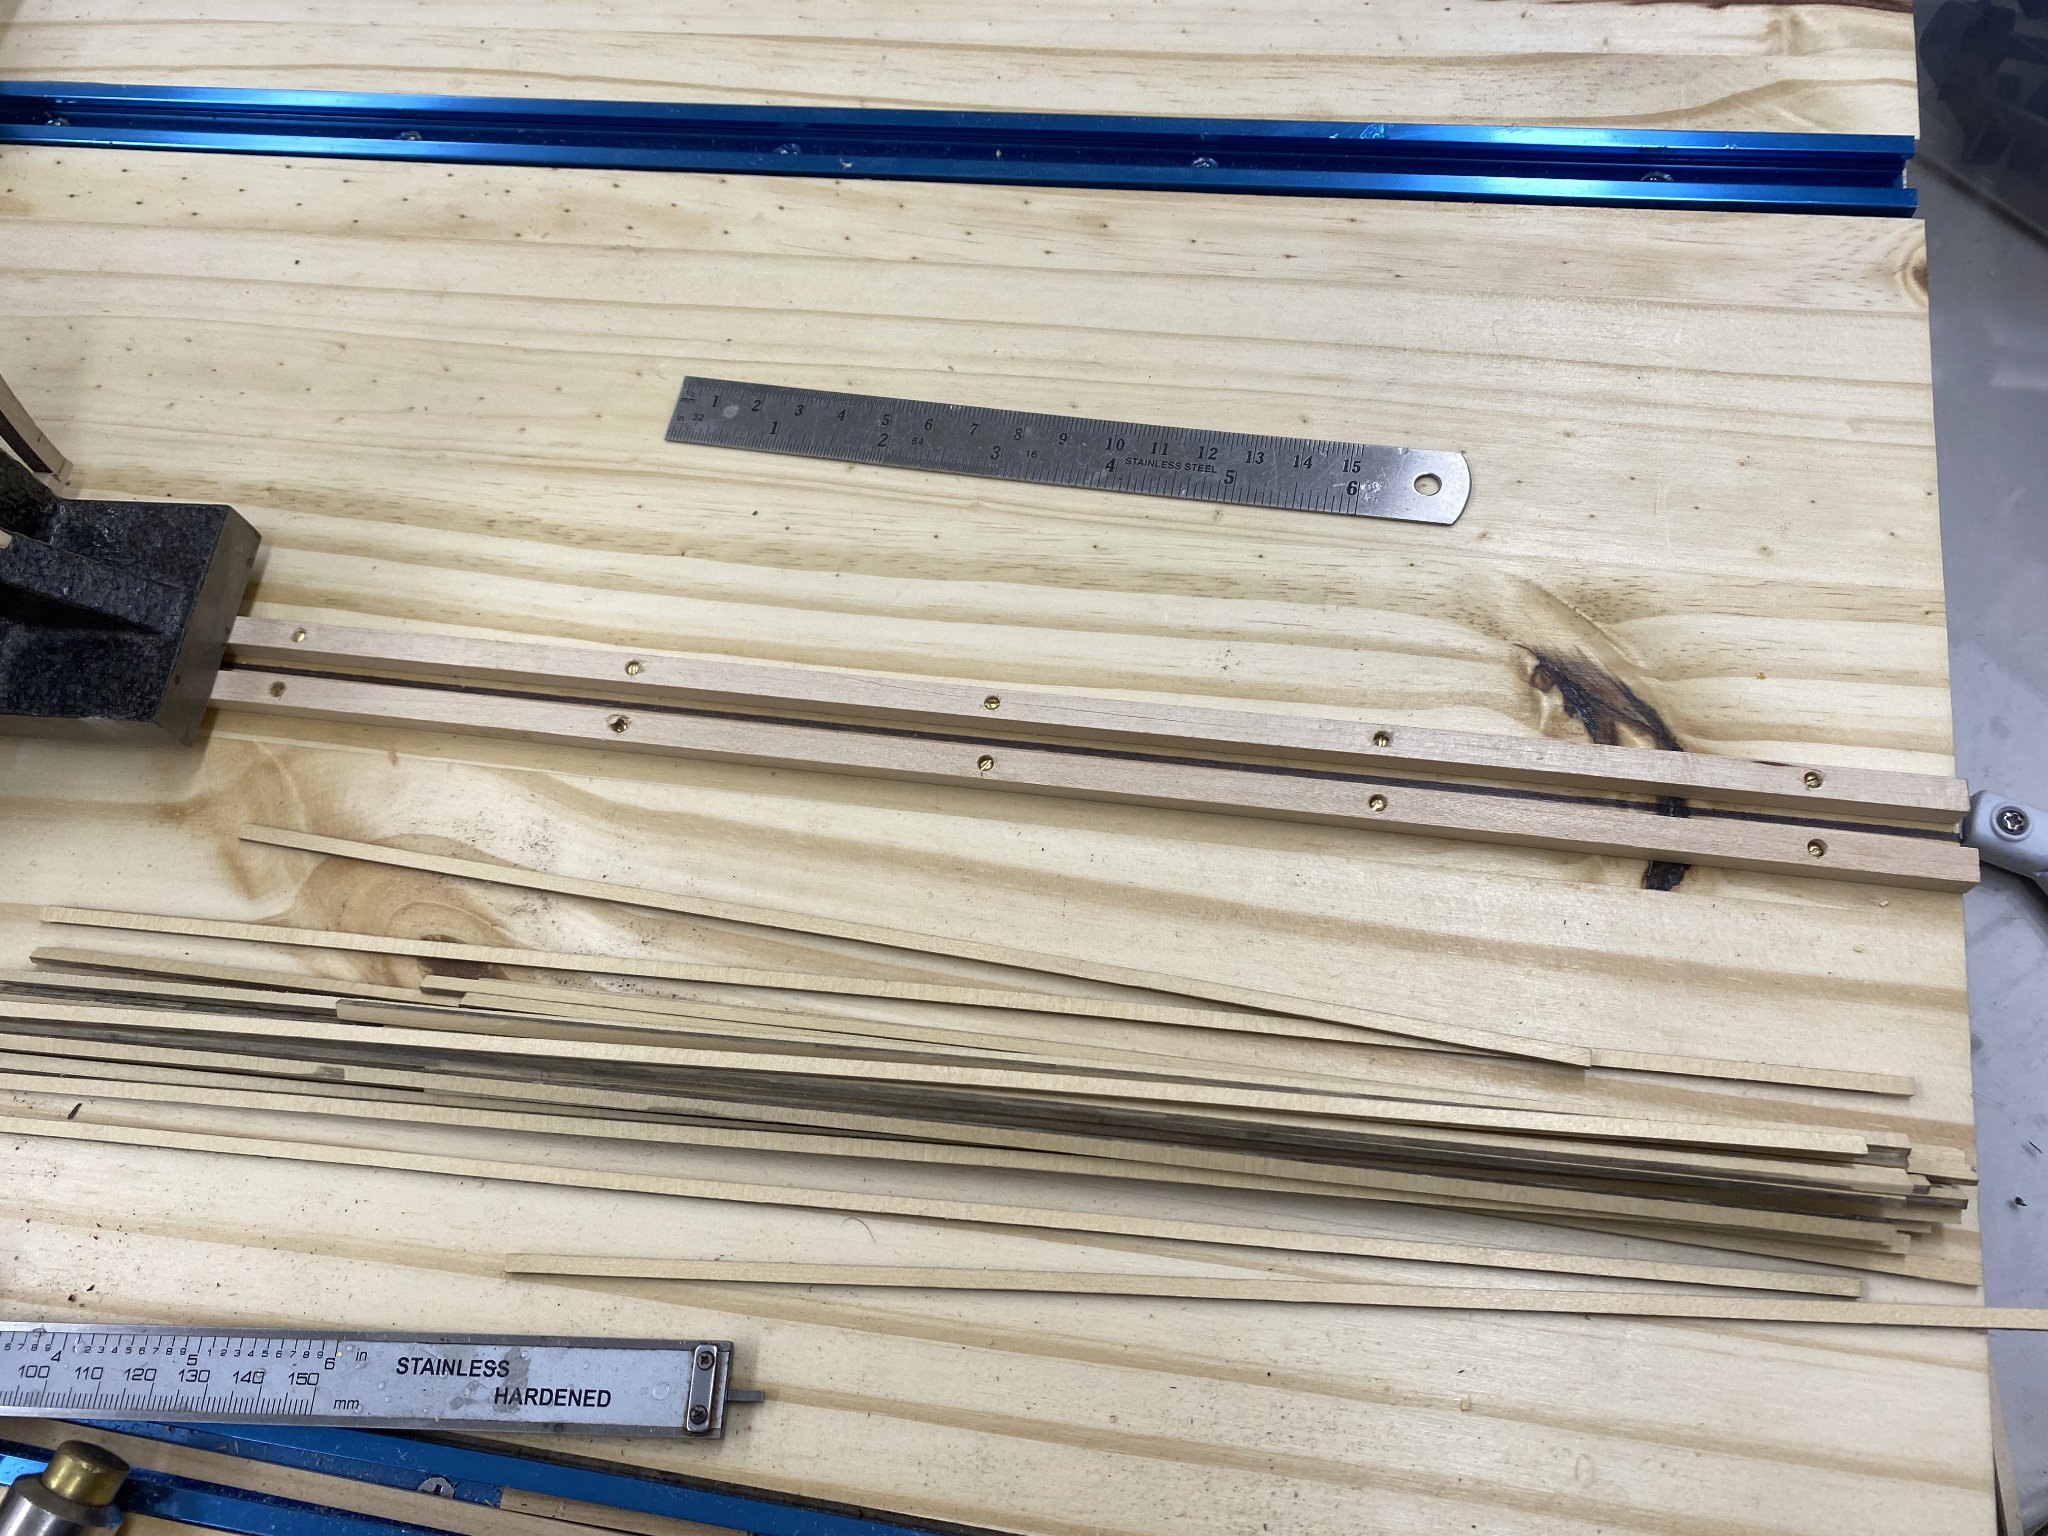
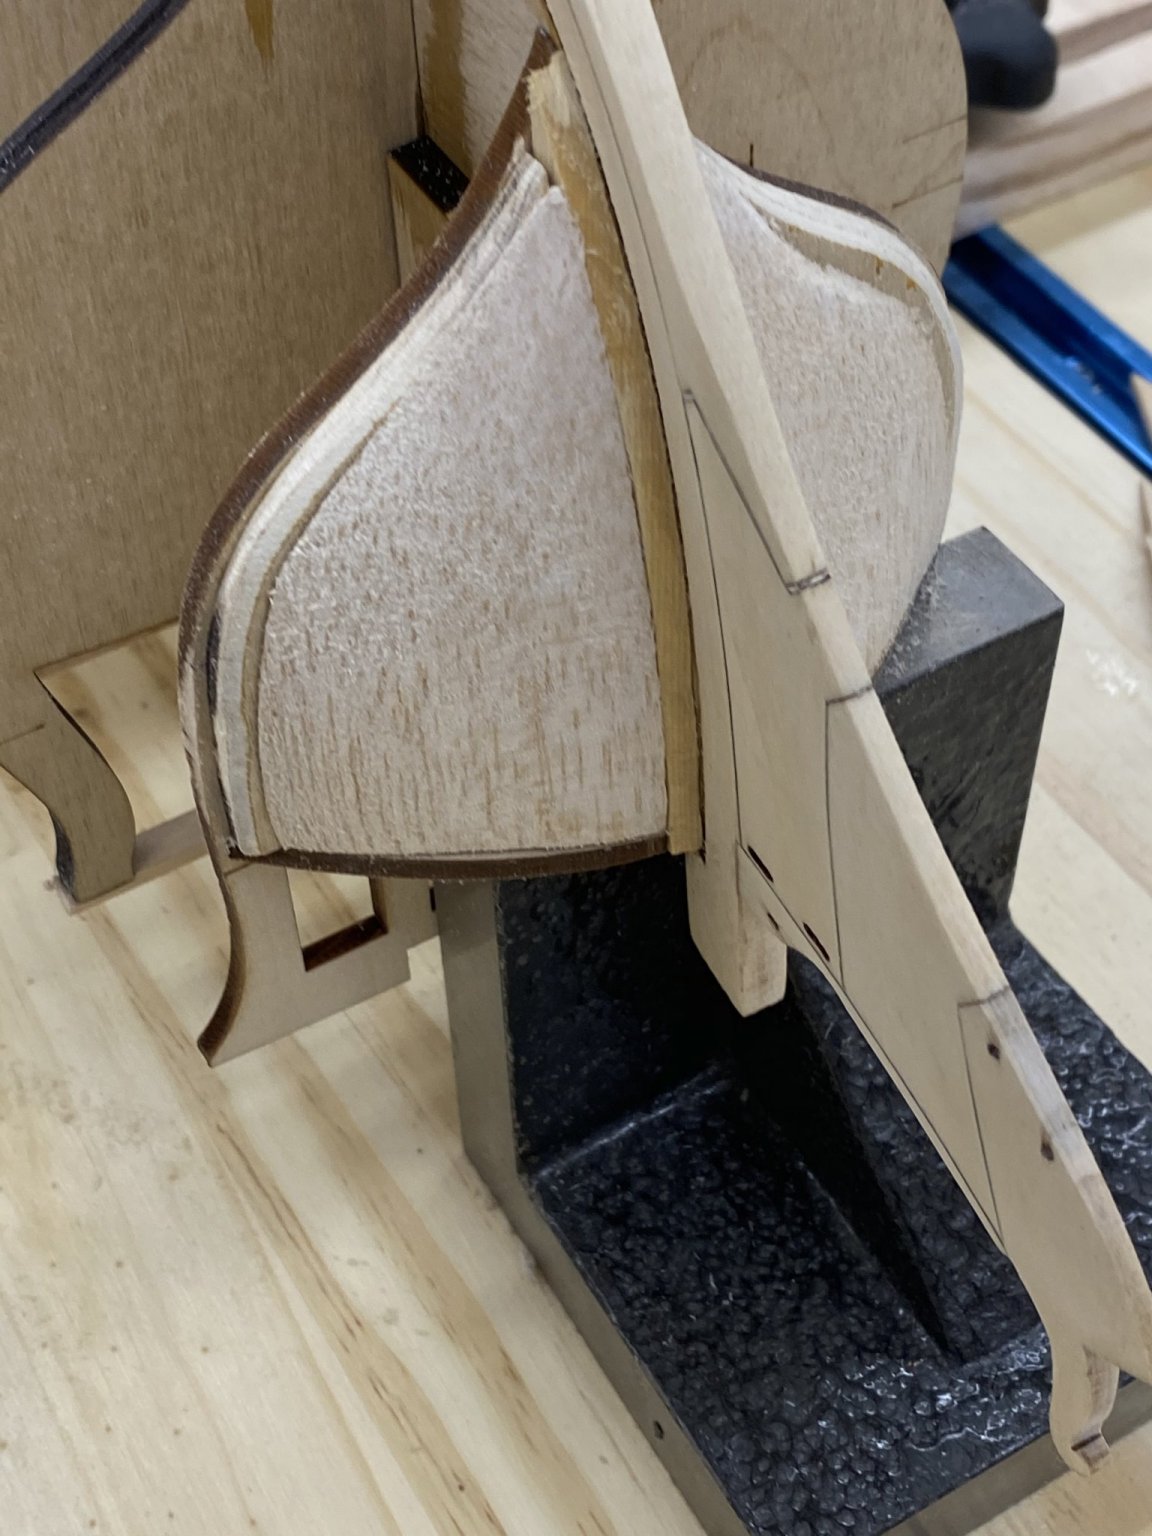
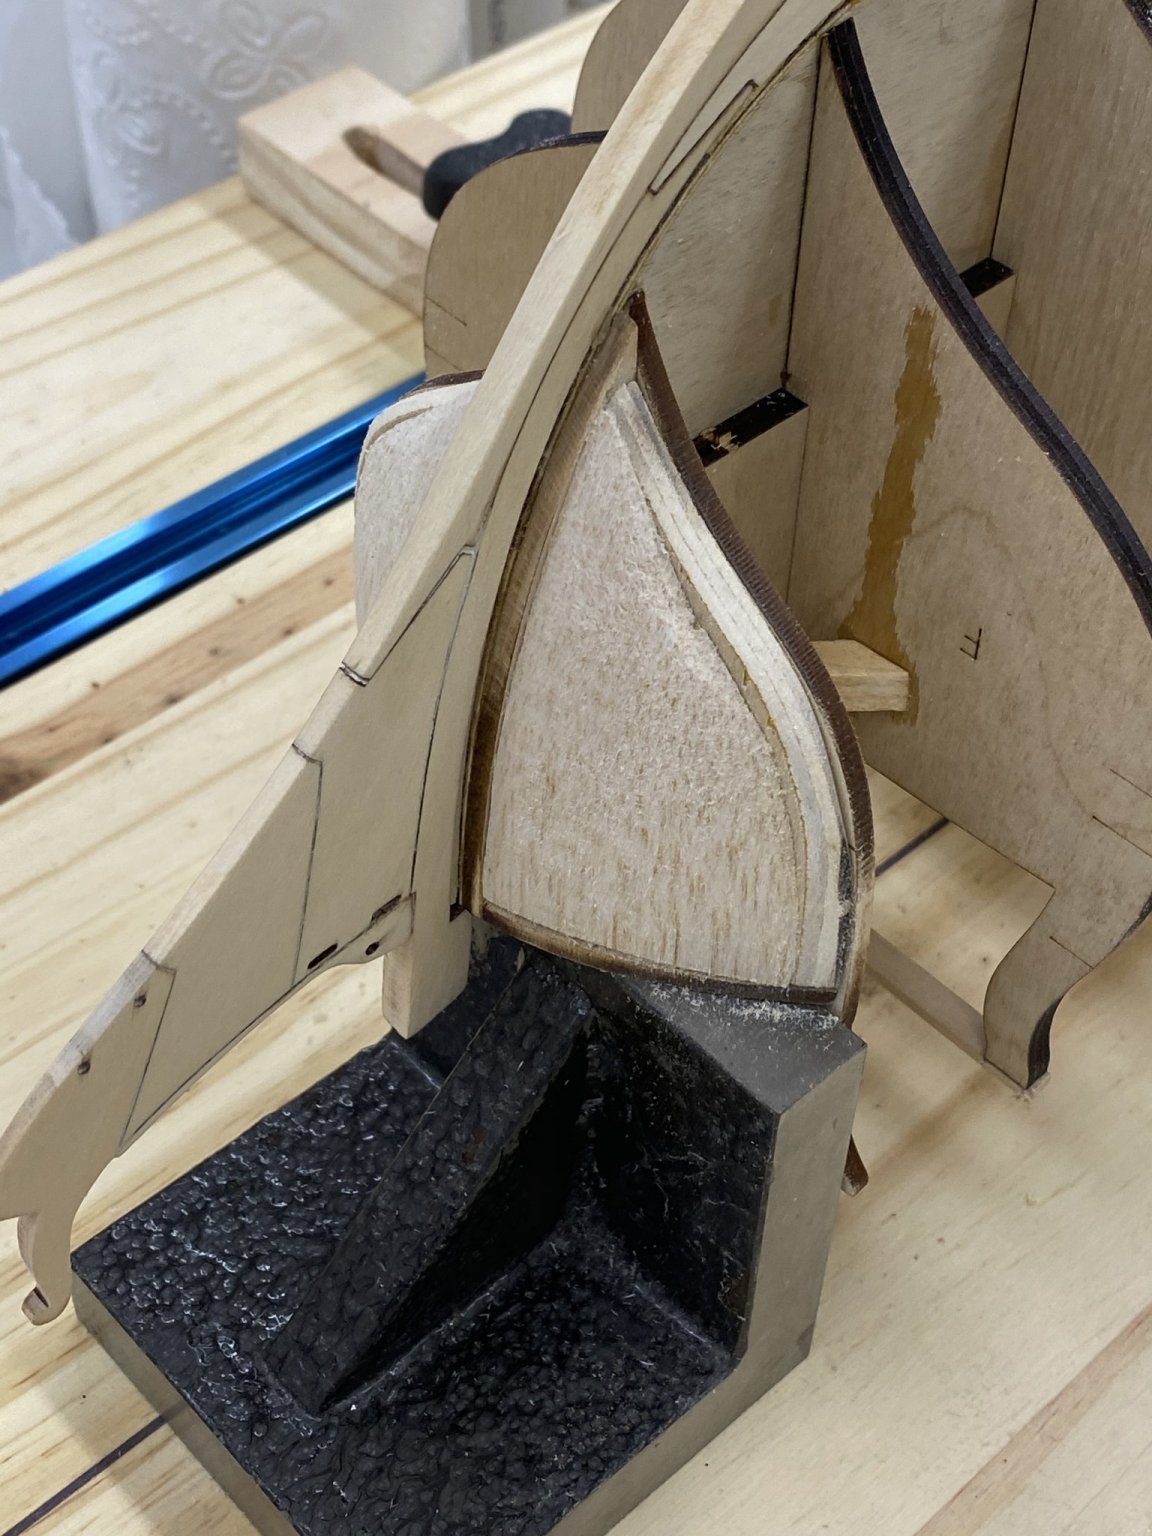
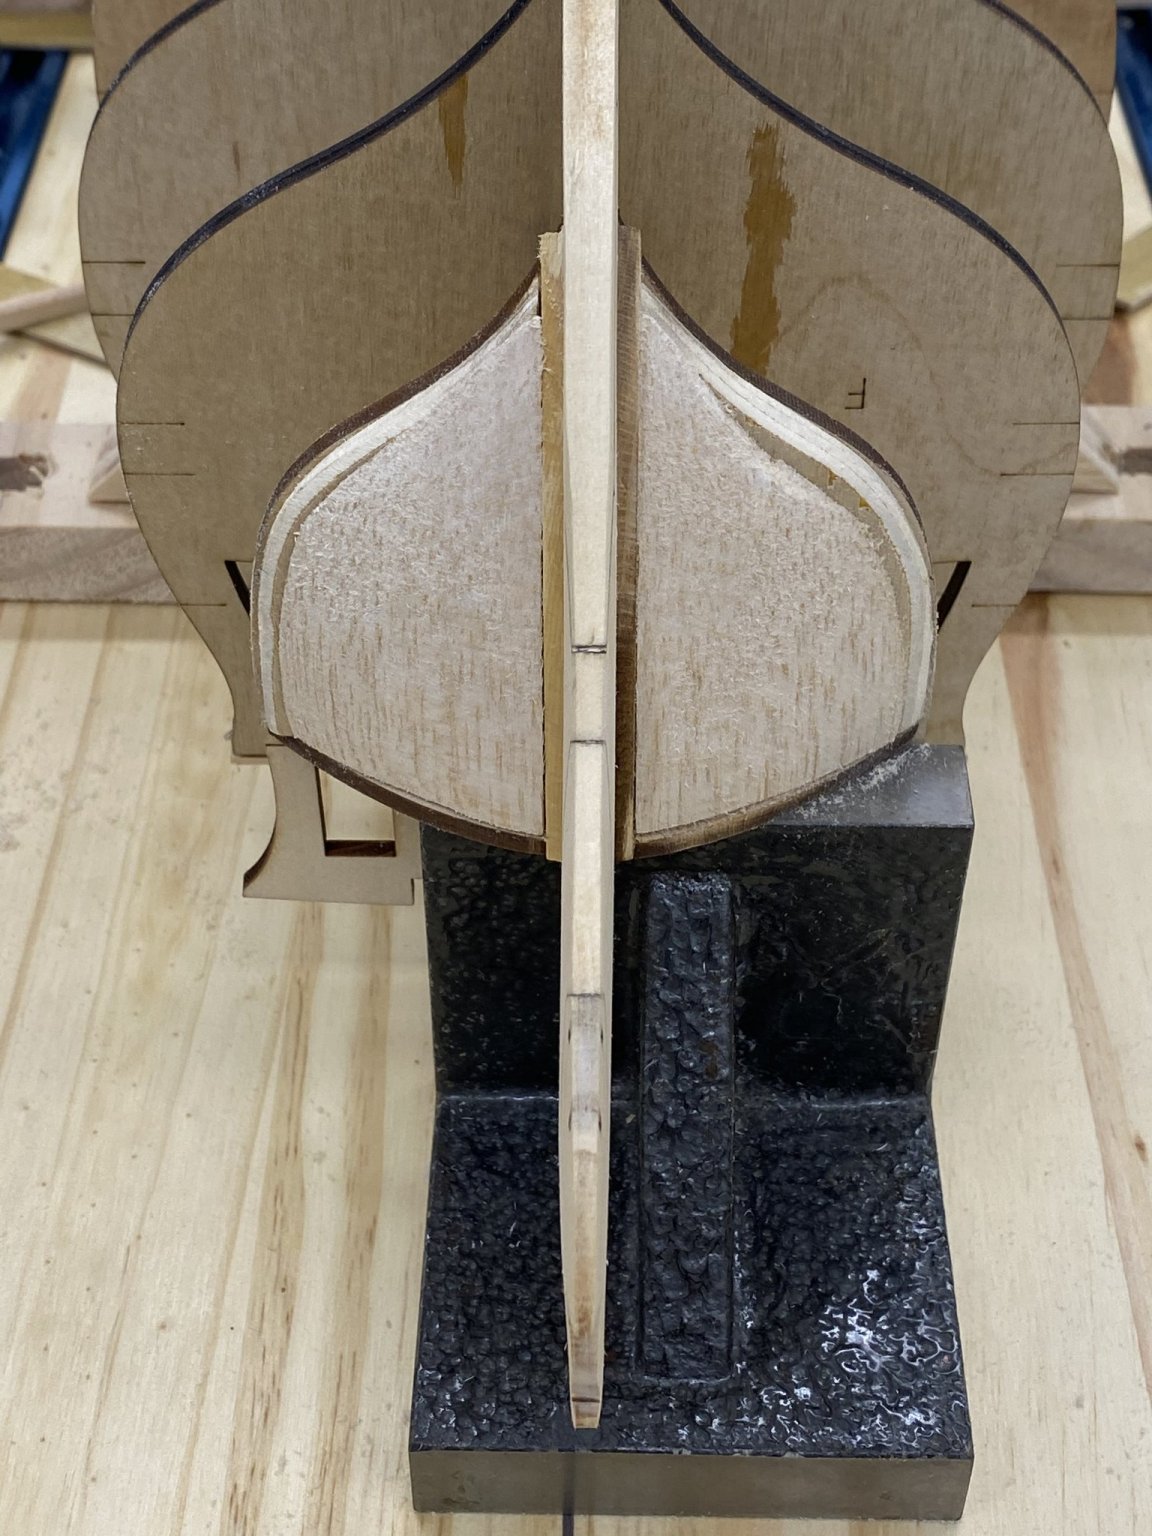
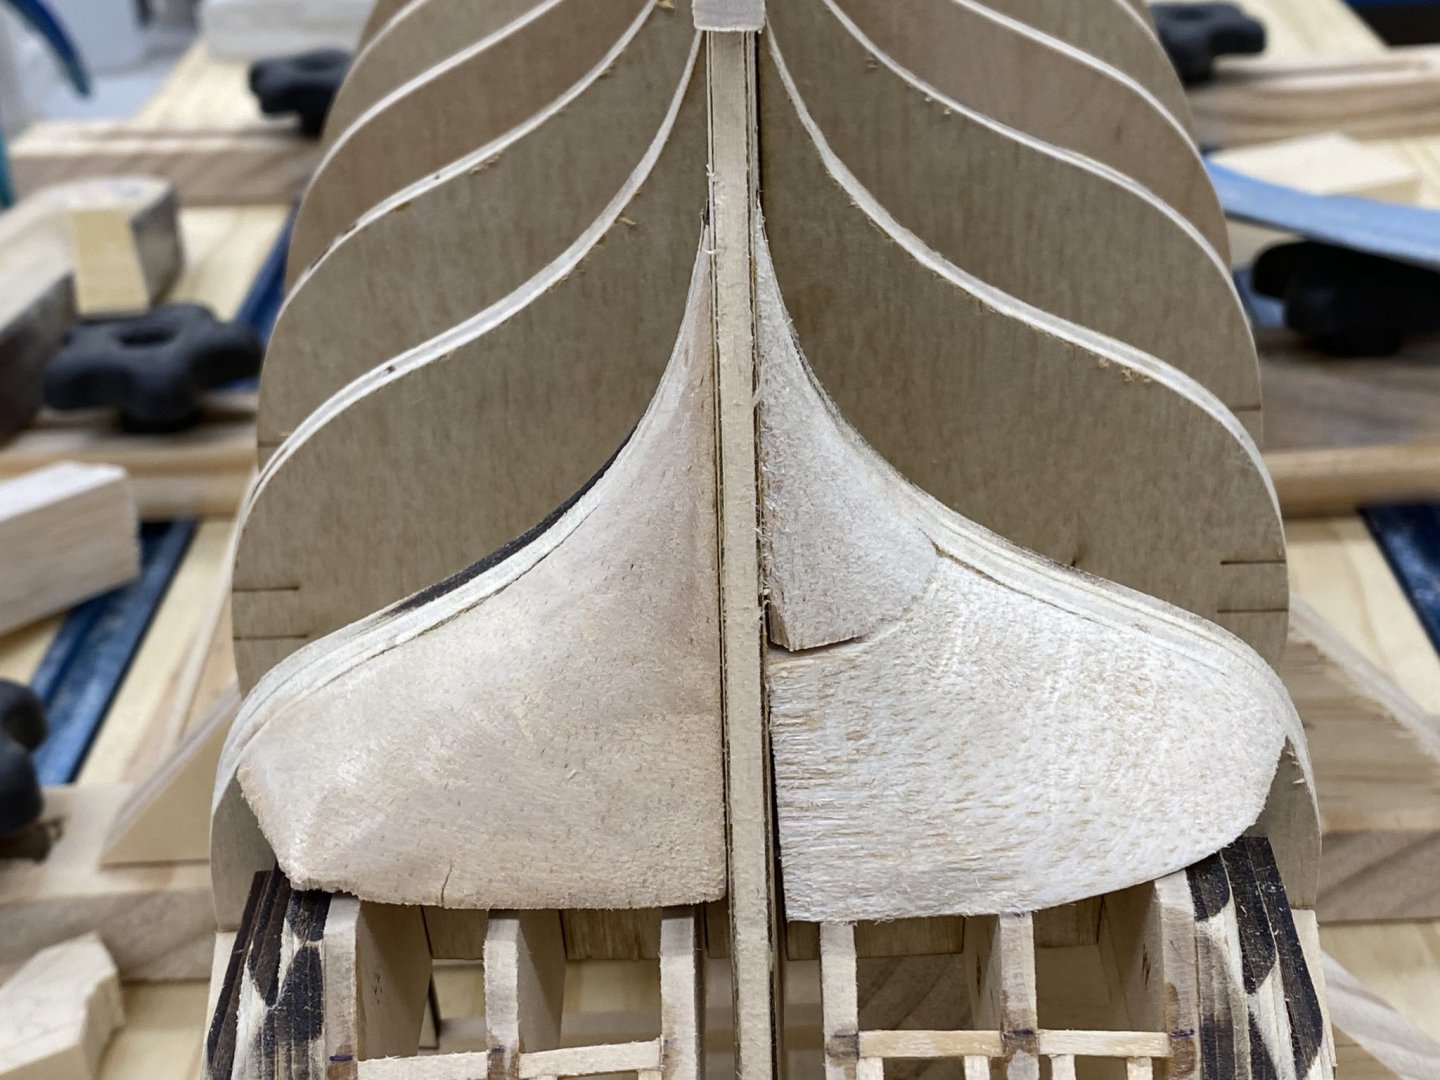
Since I had the balsa on hand I decided to use that to fashion the filler pieces at the stern post. It took more work than I anticipated but I managed to get both done before the football games on Sunday. Next up is the false decking which will be "after football". Here are the stern fillers in place. I suspect that some more "fiddling" will be required once I get down to actually planking this area.
- 370 replies
-
- 2
-
-
- Model Shipways
- Confederacy
- (and 1 more)
-
Hey Bossman - I have a question that maybe you can answer. On the carrier sheet that contained the Fr1-15 filler blocks that went on each side of the bulkhead former at each bulkhead there were six additional pieces labeled as Fore, Main and Mizzen Mast Filler - two of each. I checked the Fore Mast Filler and it indeed would fit between bulkheads D and E where the fore mast would be. I also checked the provided mast dowel and the bulkhead former with the fillers already installed are thick enough to fully support the masts. The instructions seem to be silent on when (if ever) to install these. In fact I have gone through the instructions and cannot find where the masts are addressed at all. Did you install the mast fillers? Have you found where the masts are addressed in the instructions?
-
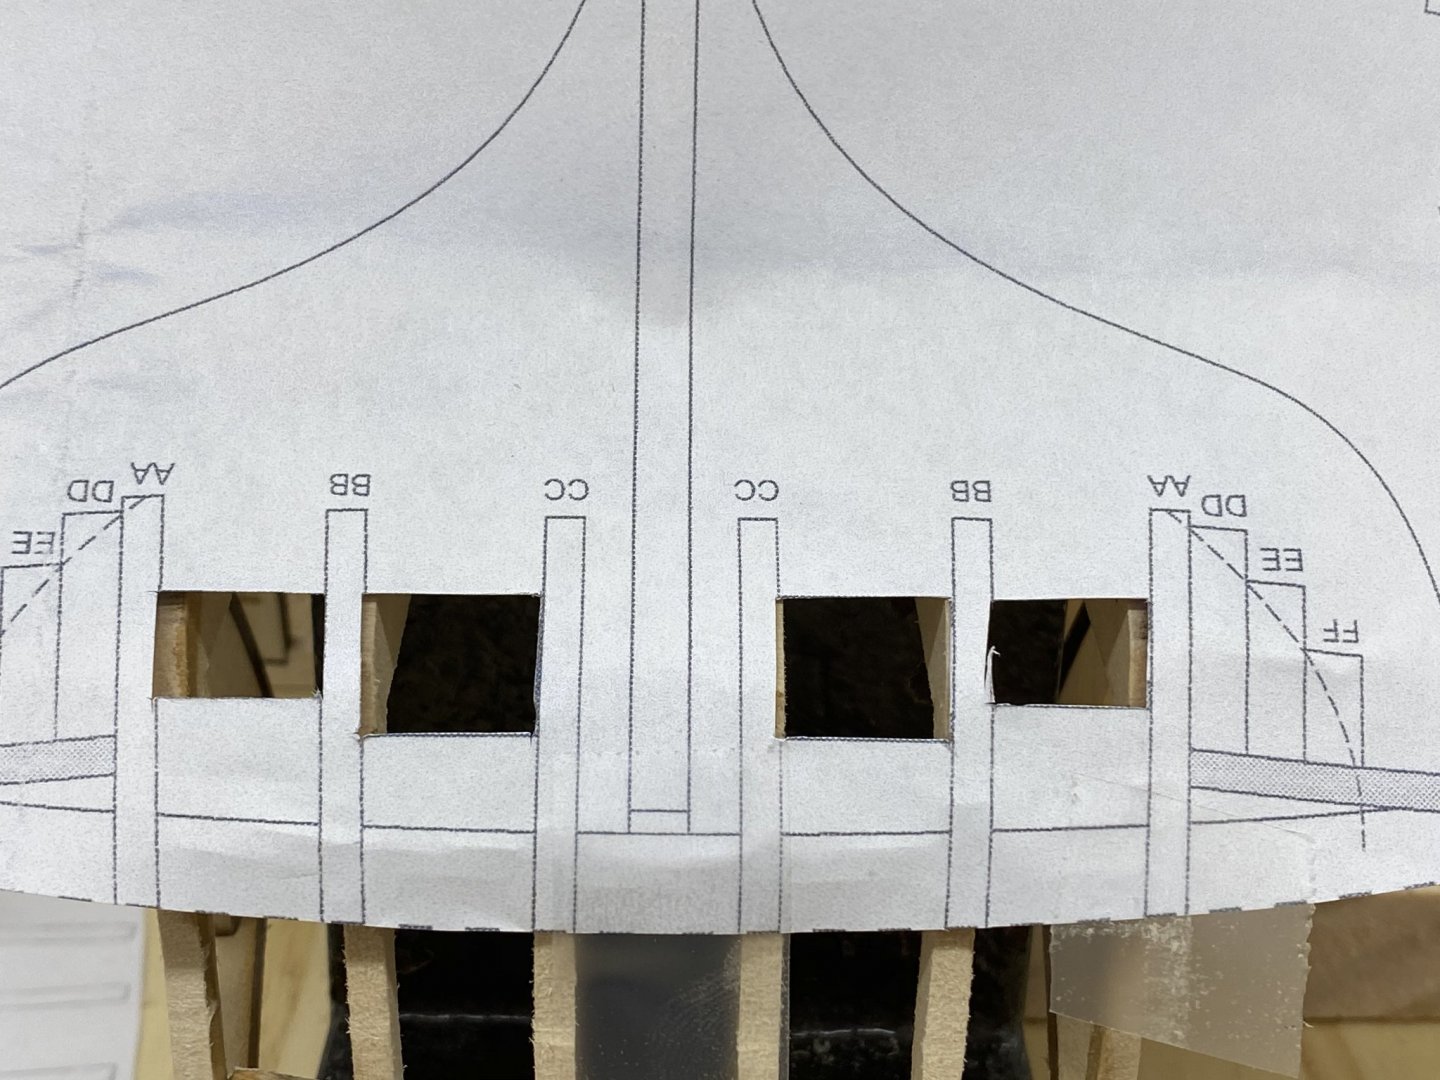
I completed and faired the four ports on the transom without further drama. I used thin CA to secure the lintels, sills and sides as an expedient since getting clamps in place was going to be a challenge and these are not really structural - all this will be hidden behind planks and closed port doors. I also faired the stern quarter fillers per the instructions. Probably more work here as we get closer to planking the area. I had rubber cemented a copy of the stern drawing to a file folder and cut out the windows (which I saved for later use). Here is the stern template clamped onto the completed stern framing.


- 370 replies
-
- 3
-
-
- Model Shipways
- Confederacy
- (and 1 more)
-
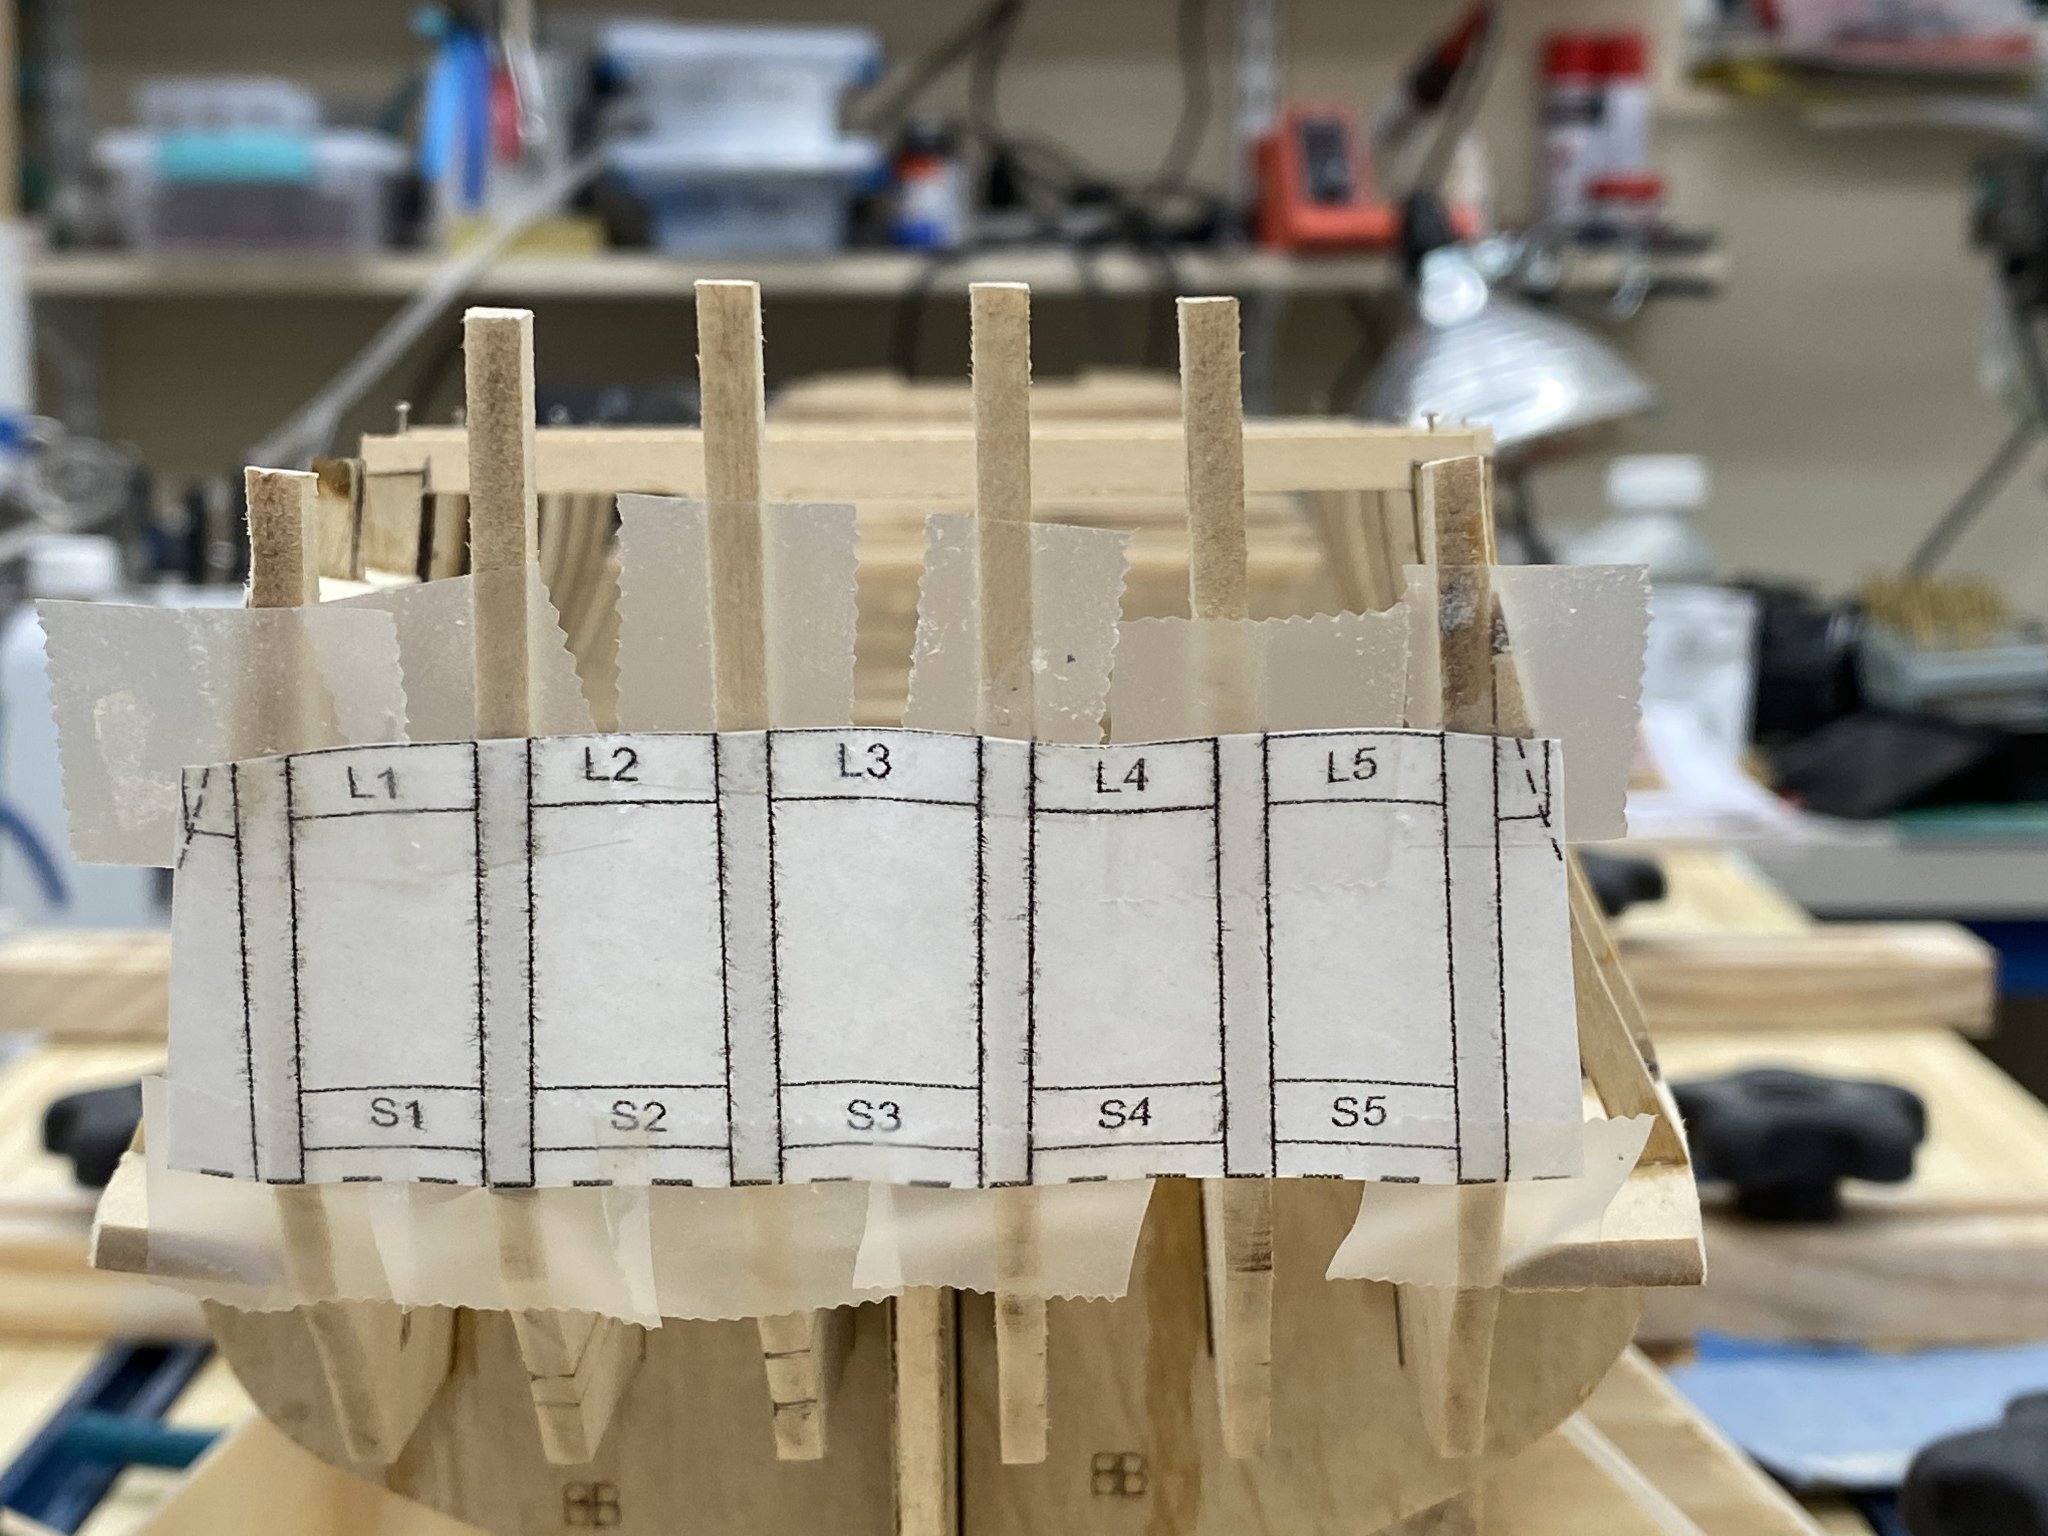
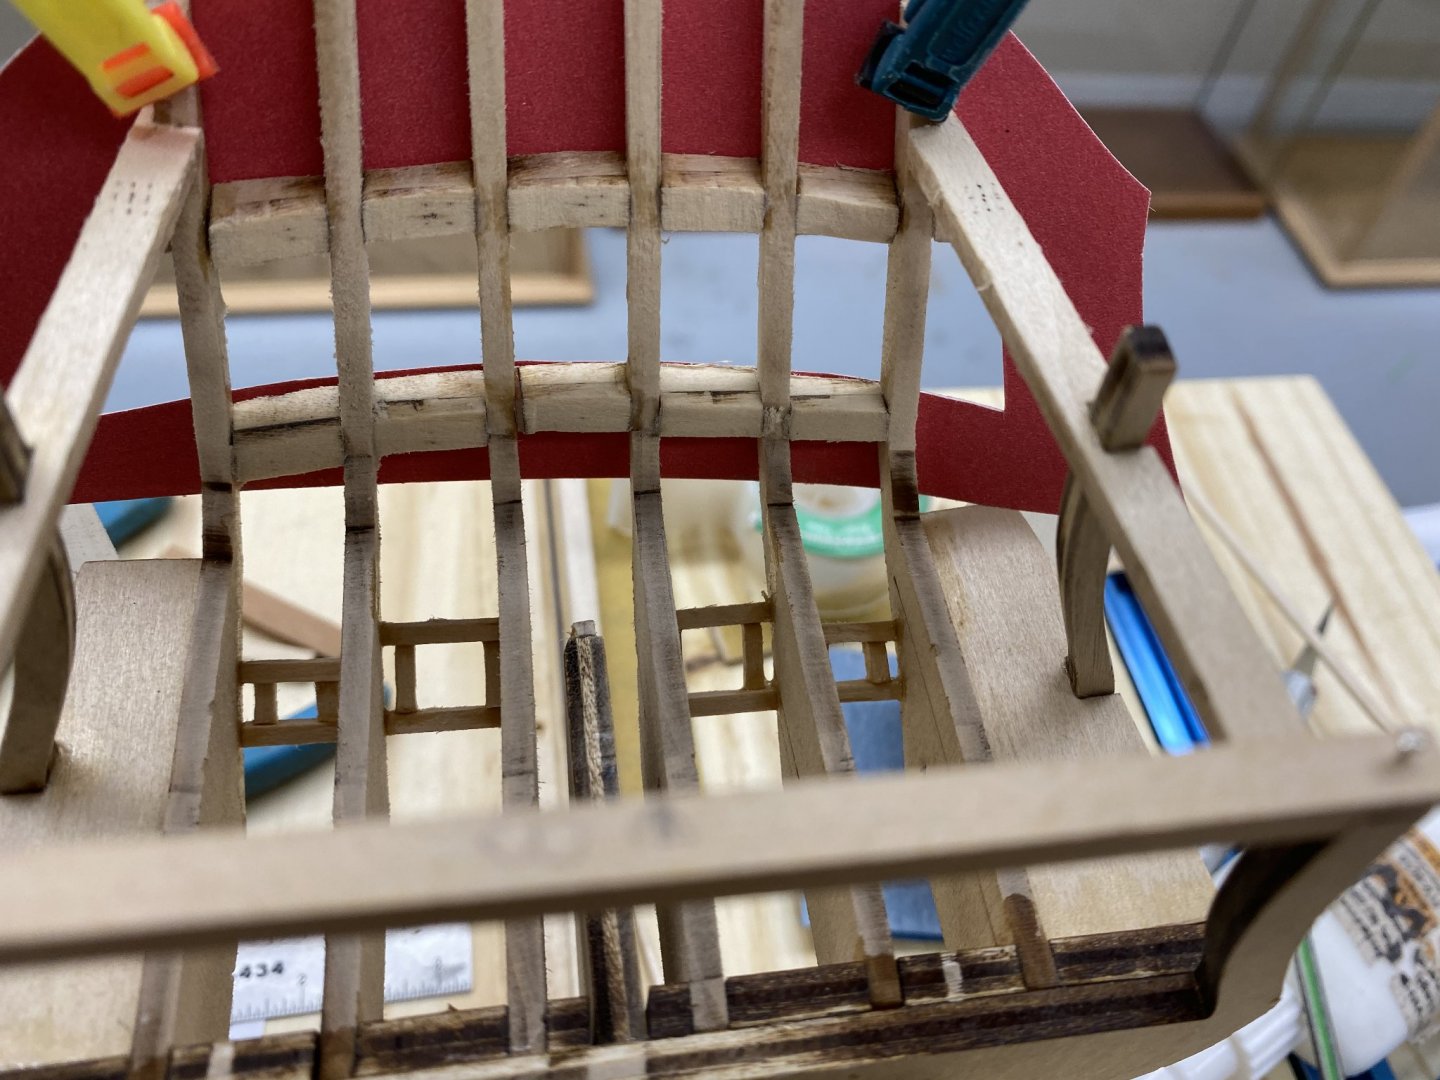
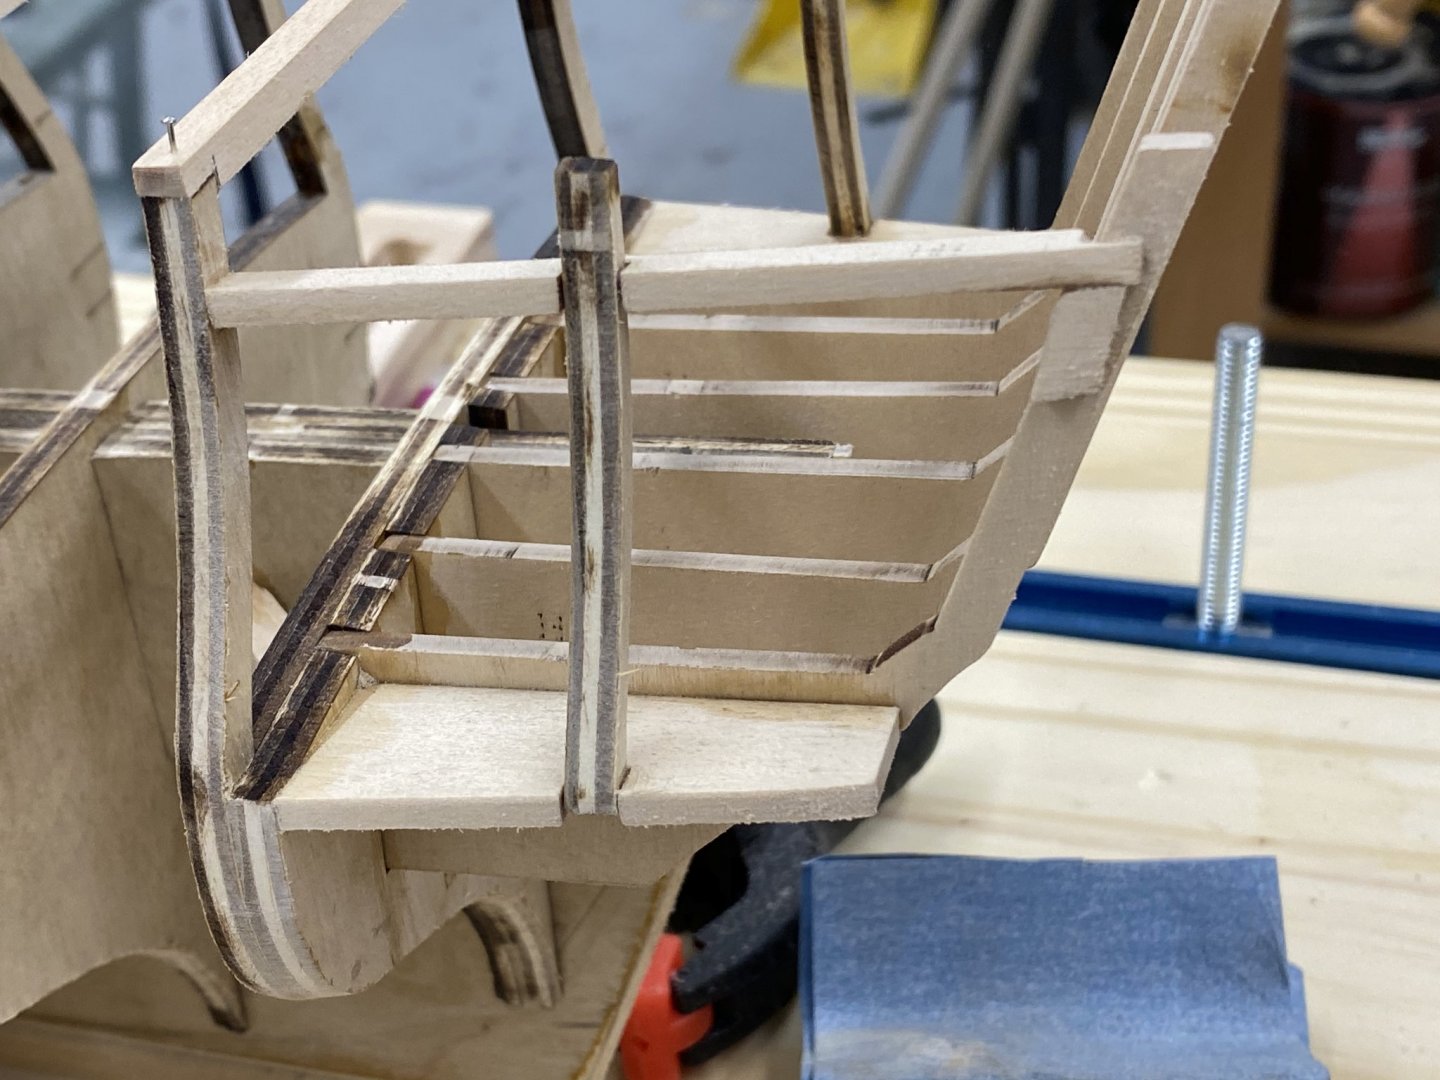
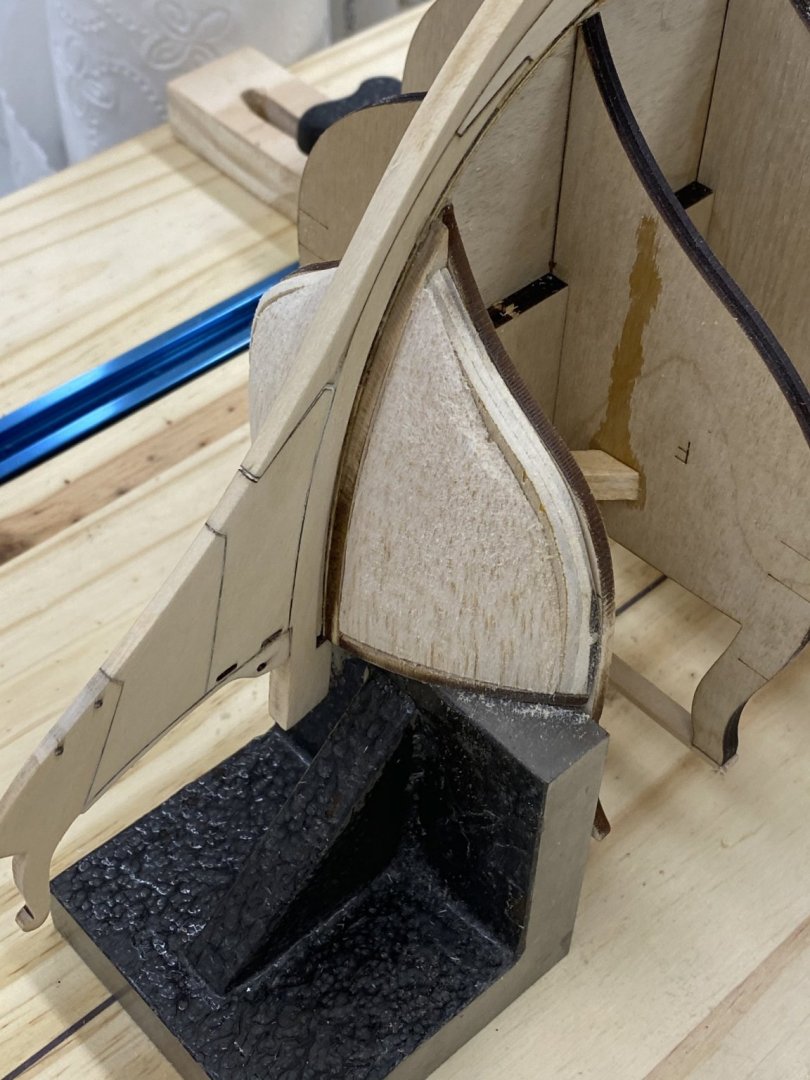
I struggled with the ports on the transom. First I cut a section out of the template and attempted to mark the stern timbers with that - before I reread the instructions which mentions the laser etched marks on the stern timbers. If I had proceeded I would have had ports considerably further up than transom and slanted somewhat. Another example of using a 2-D representation on a 3-D surface (IMHO). Here is what the template looked like on the hull. Once I located the marks on the timbers it was pretty straightforward to get the sills (at top of picture as the hull is now upside down on the build board). I purposely kept the sills proud of the stern timbers to make fairing a little easier. Only sand until I start to take wood off the stern timbers. The multi-colored marks are from my "other" attempts at locating the sills. Now on to the lintels and the port sides. Much fun.
- 370 replies
-
- 4
-
-
- Model Shipways
- Confederacy
- (and 1 more)
-
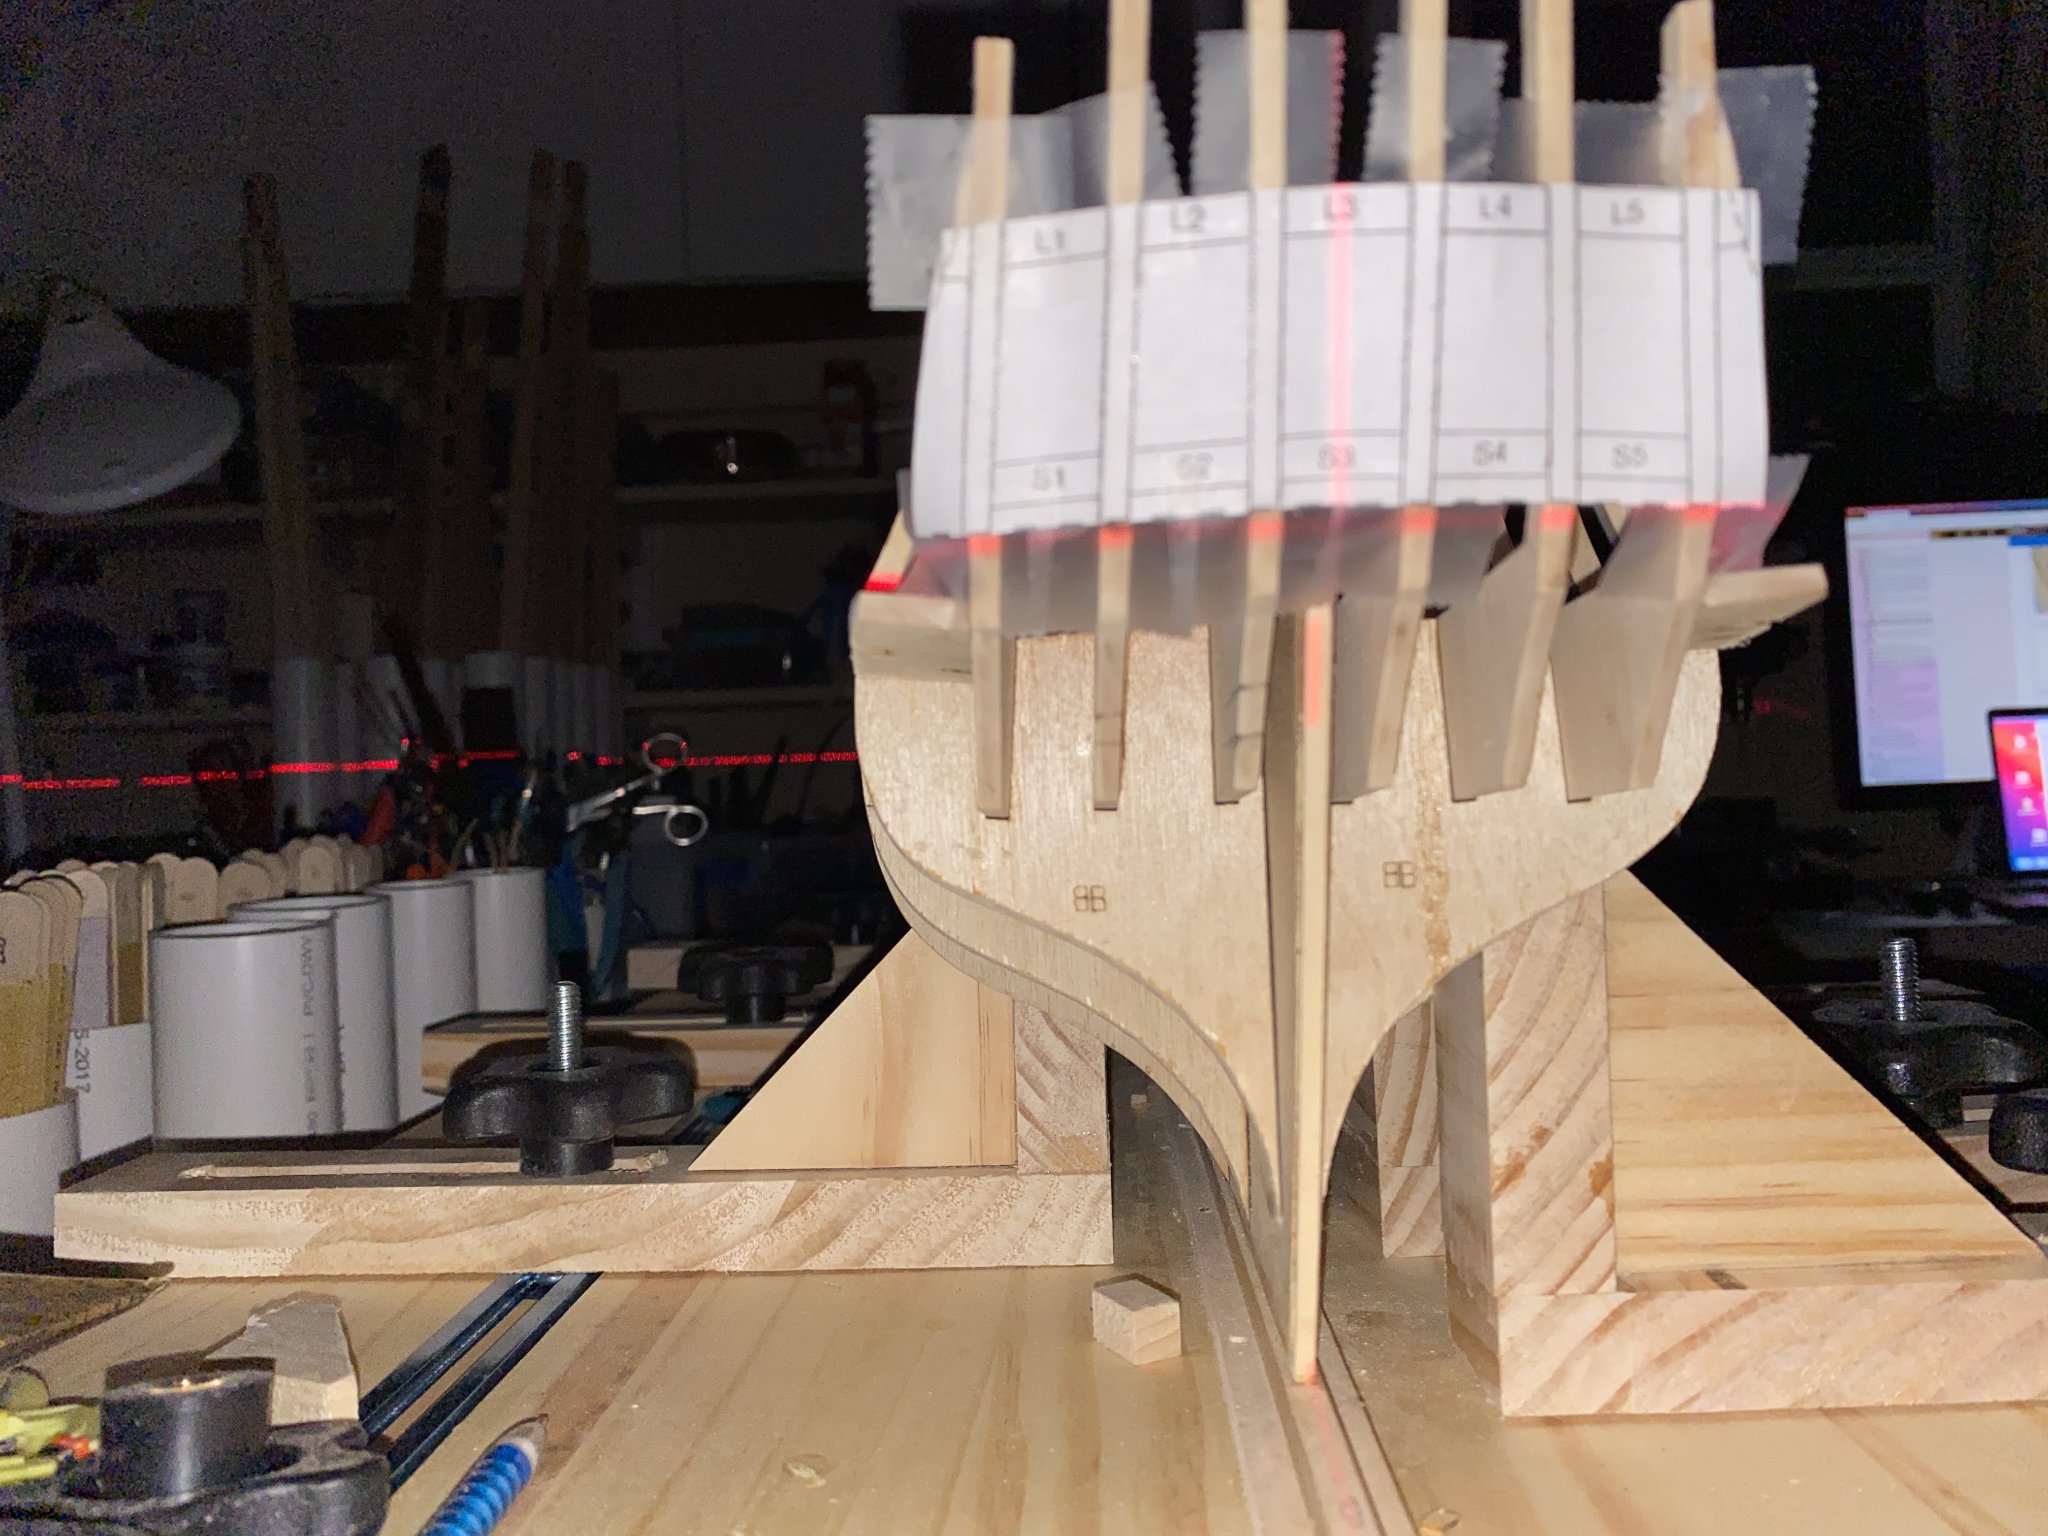
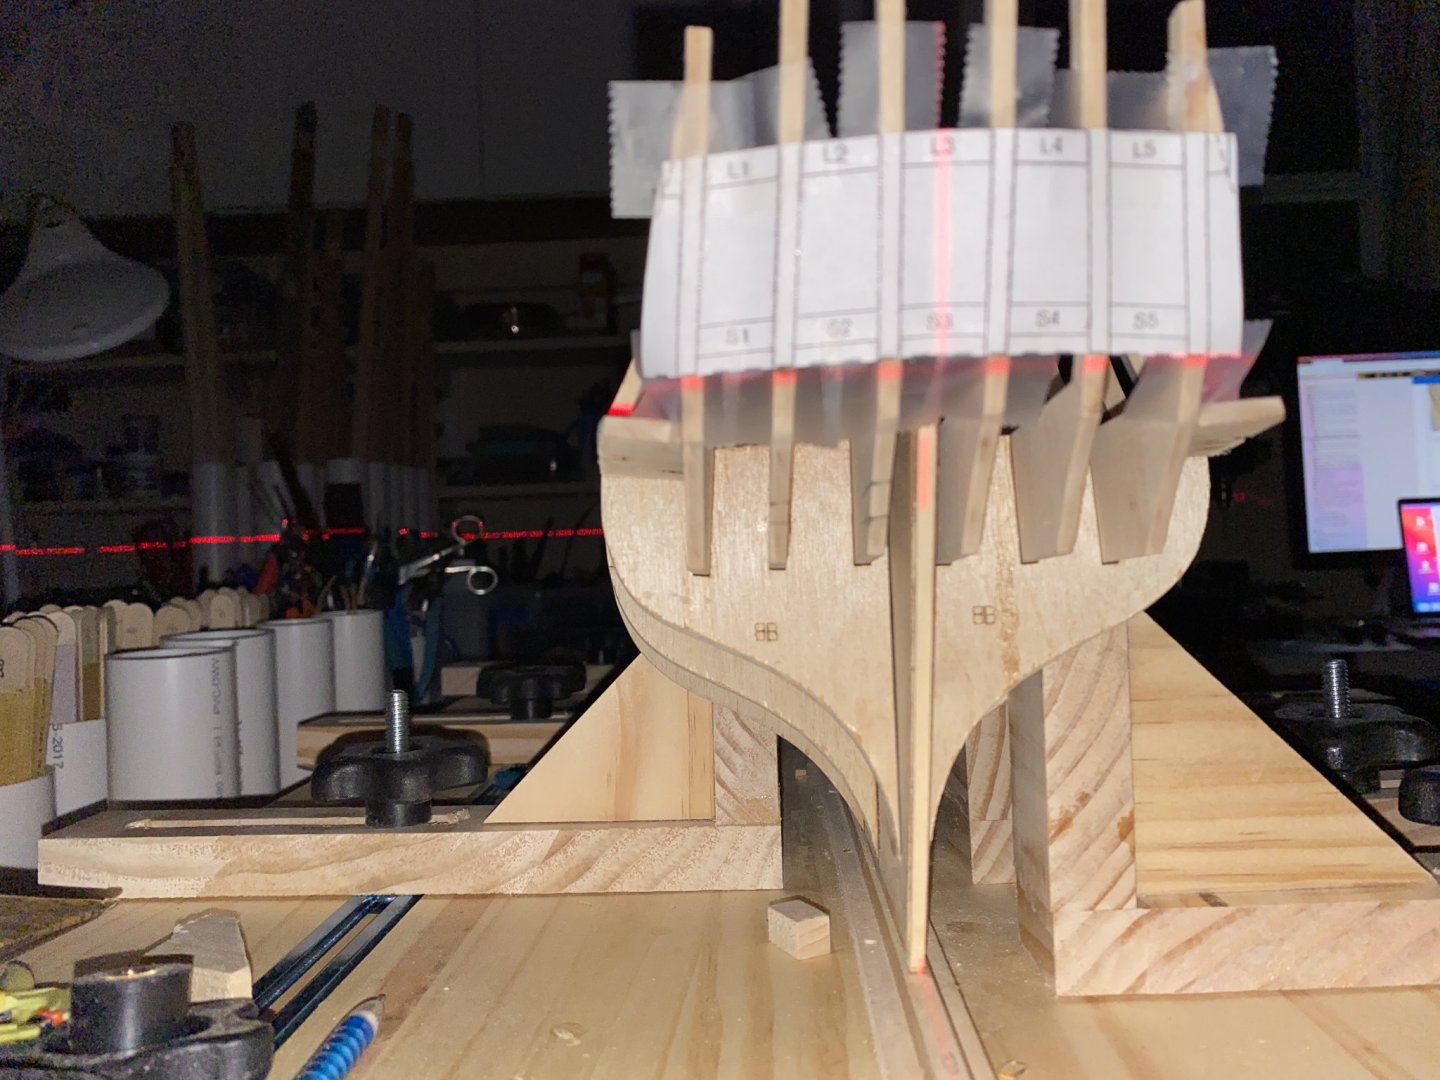
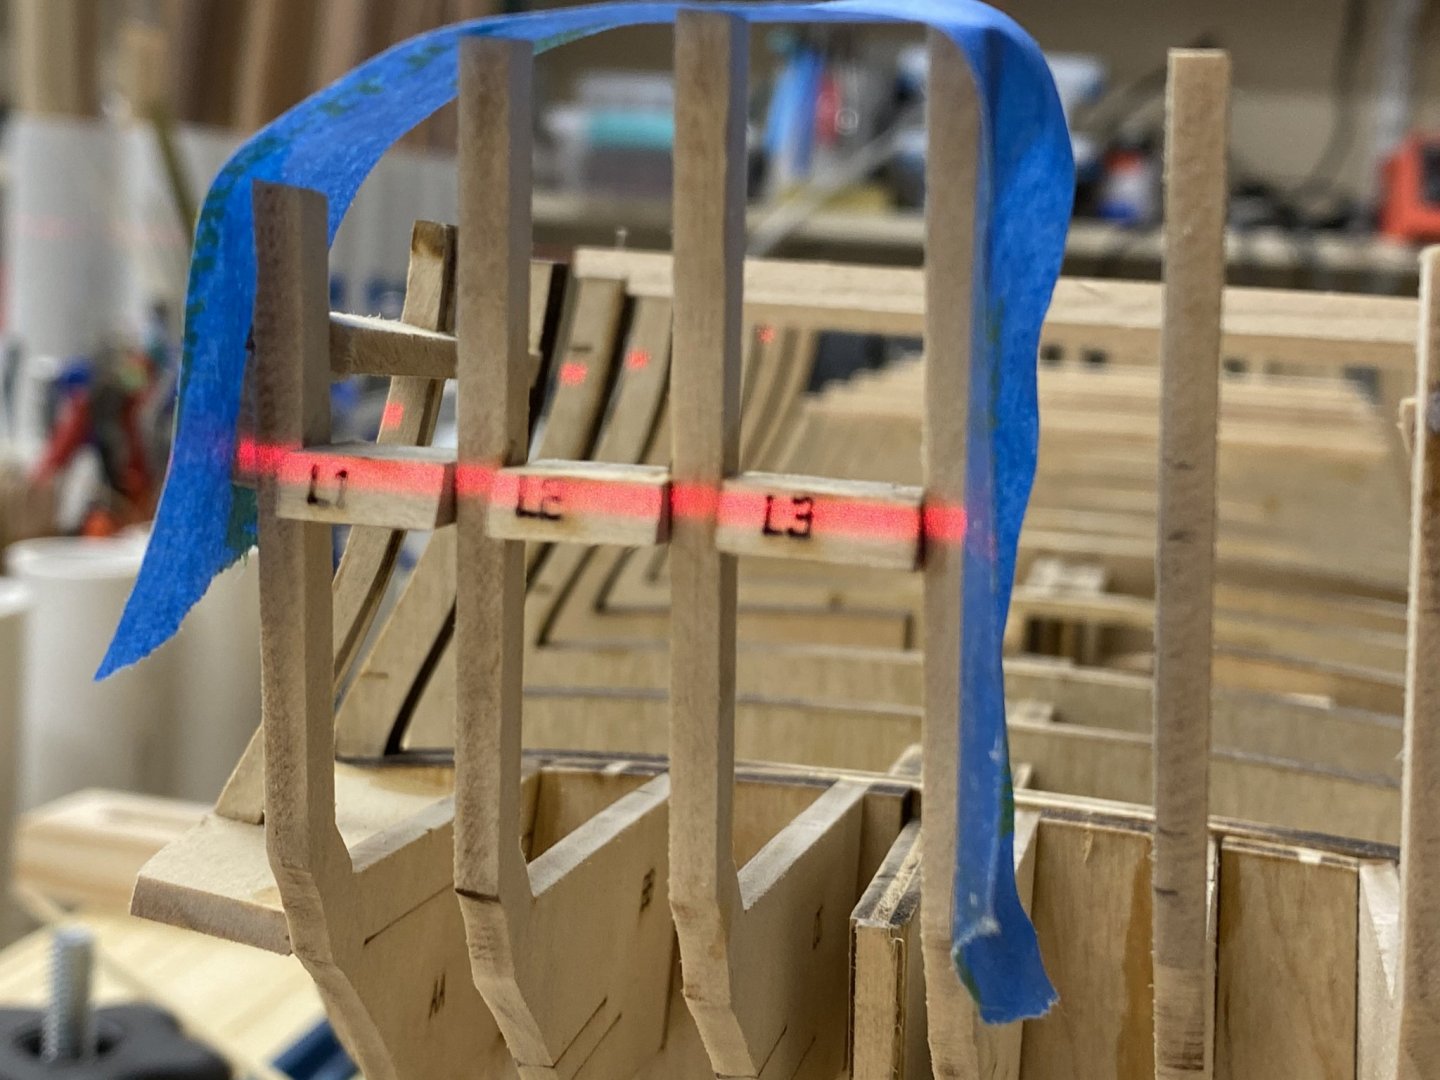
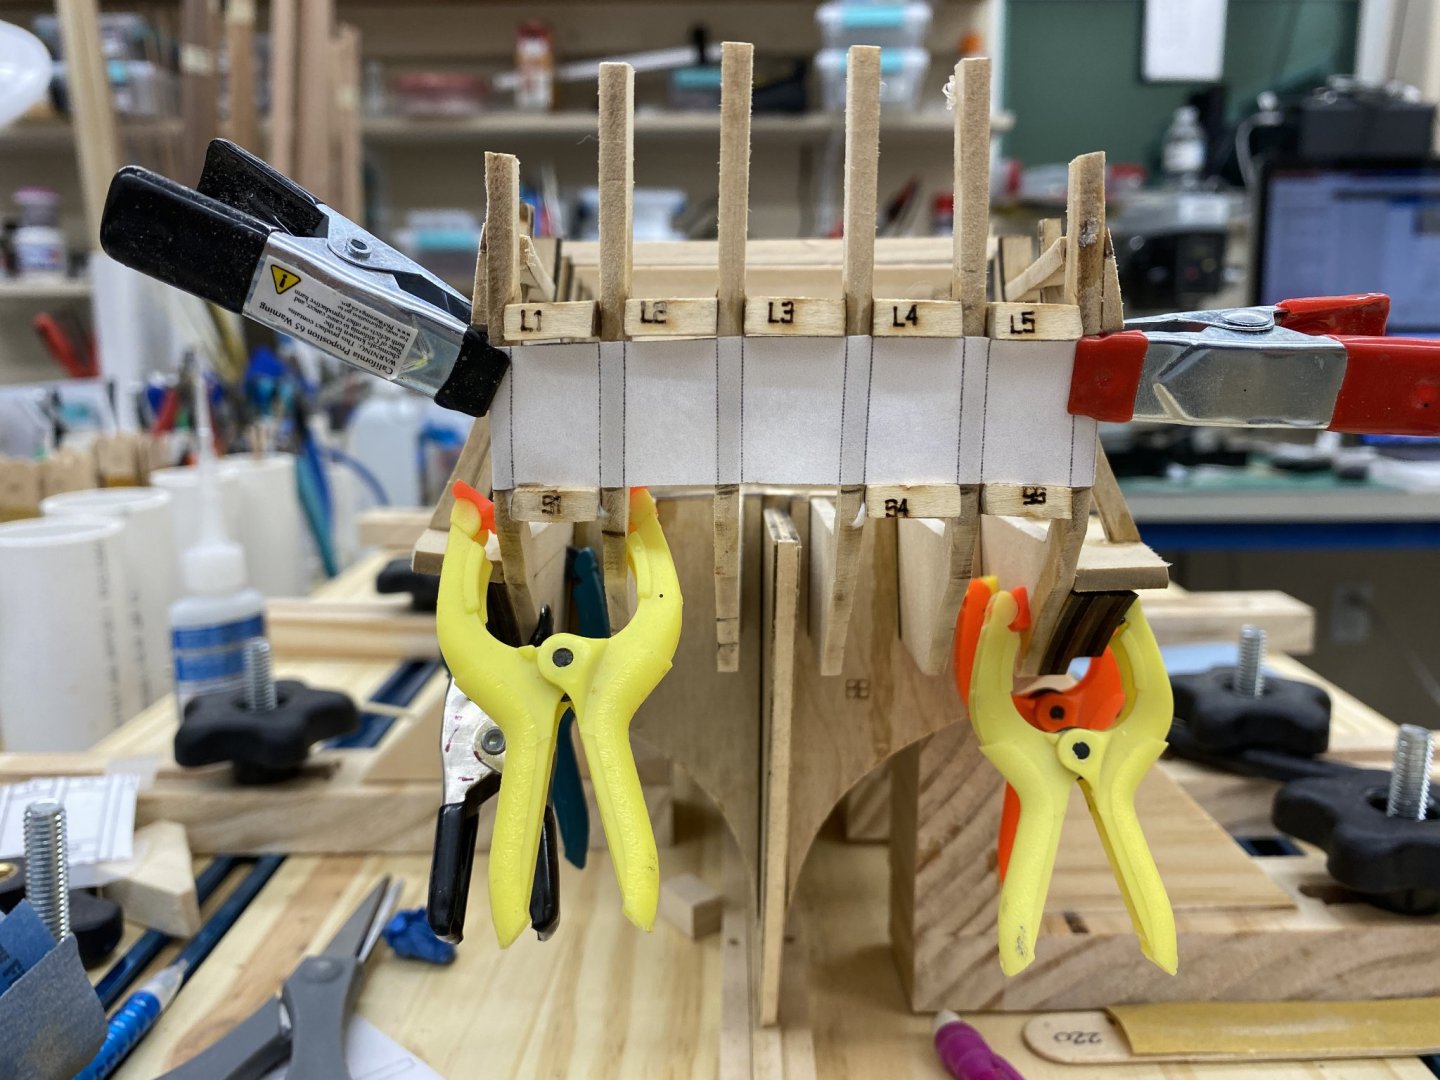
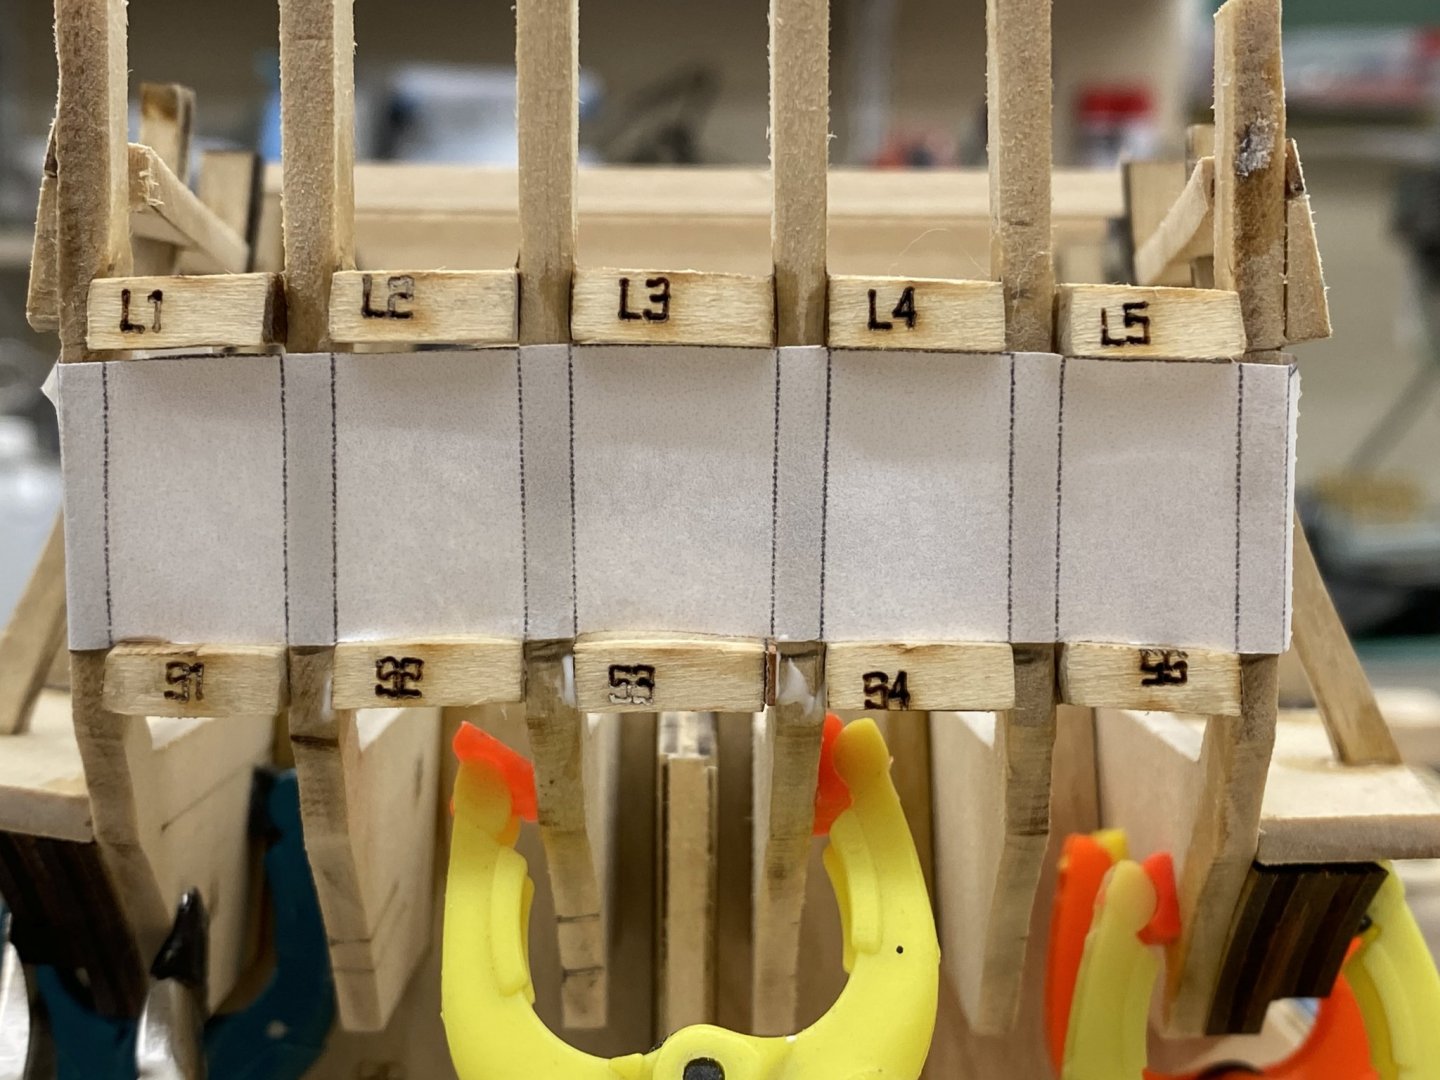
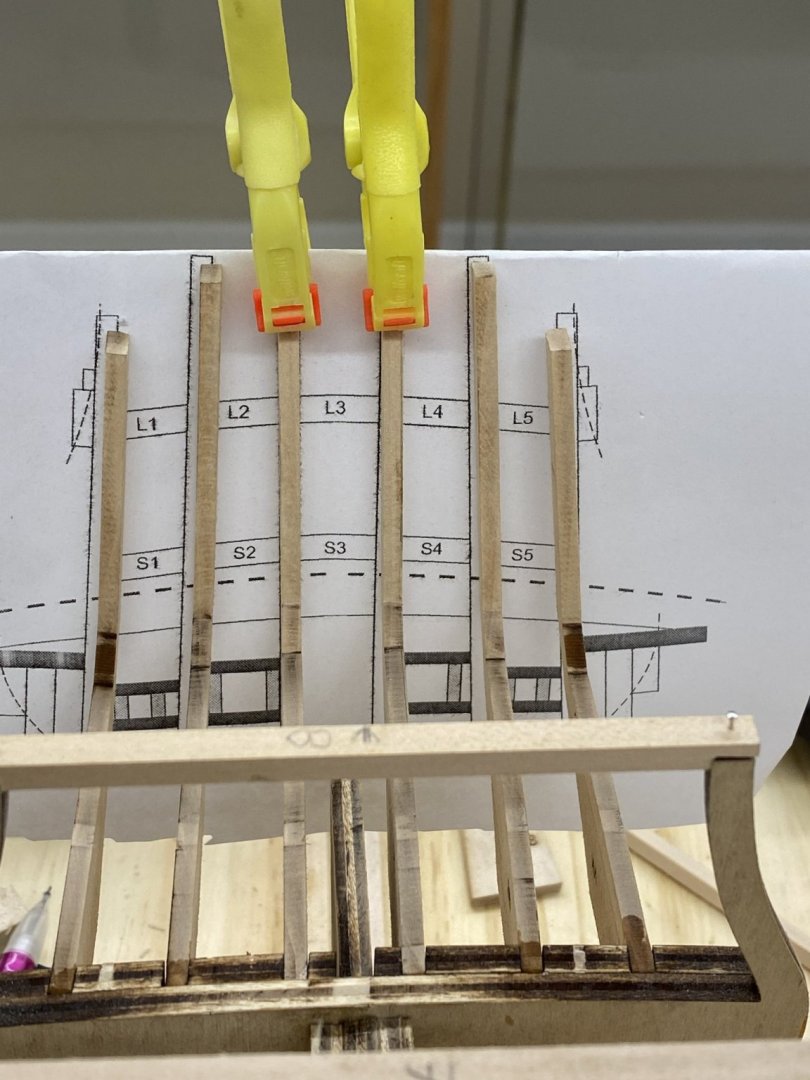
With the stern timbers and other pieces secure I taped the template to the stern as directed in the instructions. I broke out the laser level to make sure I had the template on straight. Sorry - I did not notice to poor focus until I was writing up this entry - too late to do over. I think I got it on straight. With the template in place I started adding the lintels. One of the problems I encountered was trying to hold the lintel in place while simultaneously adjusting the position. I could not use a clamp (after L3) because I do not have any that are sufficiently weak to not distort the stern timbers beyond their template position. So I resorted to that old standby - masking tape. Here I have L1, L2 and L3 in position. I used the laser level to help get them straight (aka - not tilted higher/lower at the fore and aft ends of the lintel). I lined the lintels up with the marks I made on the stern timbers (per instructions) and the laser shows that L1 is just a little bit lower than L2. I cannot see any difference between L2 and L3 but it is hard (for me) to see any difference on the template either. After I got the lintels installed (more or correctly I hope) I moved on to the sills. For these I cut a new template (I scanned the one from the instructions in and printed several making sure to set the scaling to 100%) along the top of the sills and mounted that on the stern using some clamps to hold it up to the lintels and with the stern timbers correctly located. This was pretty easy as everything is held pretty much in place by the glued in lintels. I added the sills one at a time starting at the outside. here you see S1 and S4 and S5 in place. The other clamps are holding the stern filler pieces in place while the glue dries. Here is a shot with all ten lintel/sills in place. The clamp is holding the S3 in place while the glue dries. The shape eyed should notice that I had to add a spacer to the stbd side of S3. Hopefully this is tolerance build-up. The spacer is less than a 1/32" wide. and the stern timbers seem to be in the right places. Maybe I was overly aggressive taking the laser char off (LOL). I will fair this area tomorrow after I am sure the glue is set.

- 370 replies
-
- 4
-
-
- Model Shipways
- Confederacy
- (and 1 more)
-
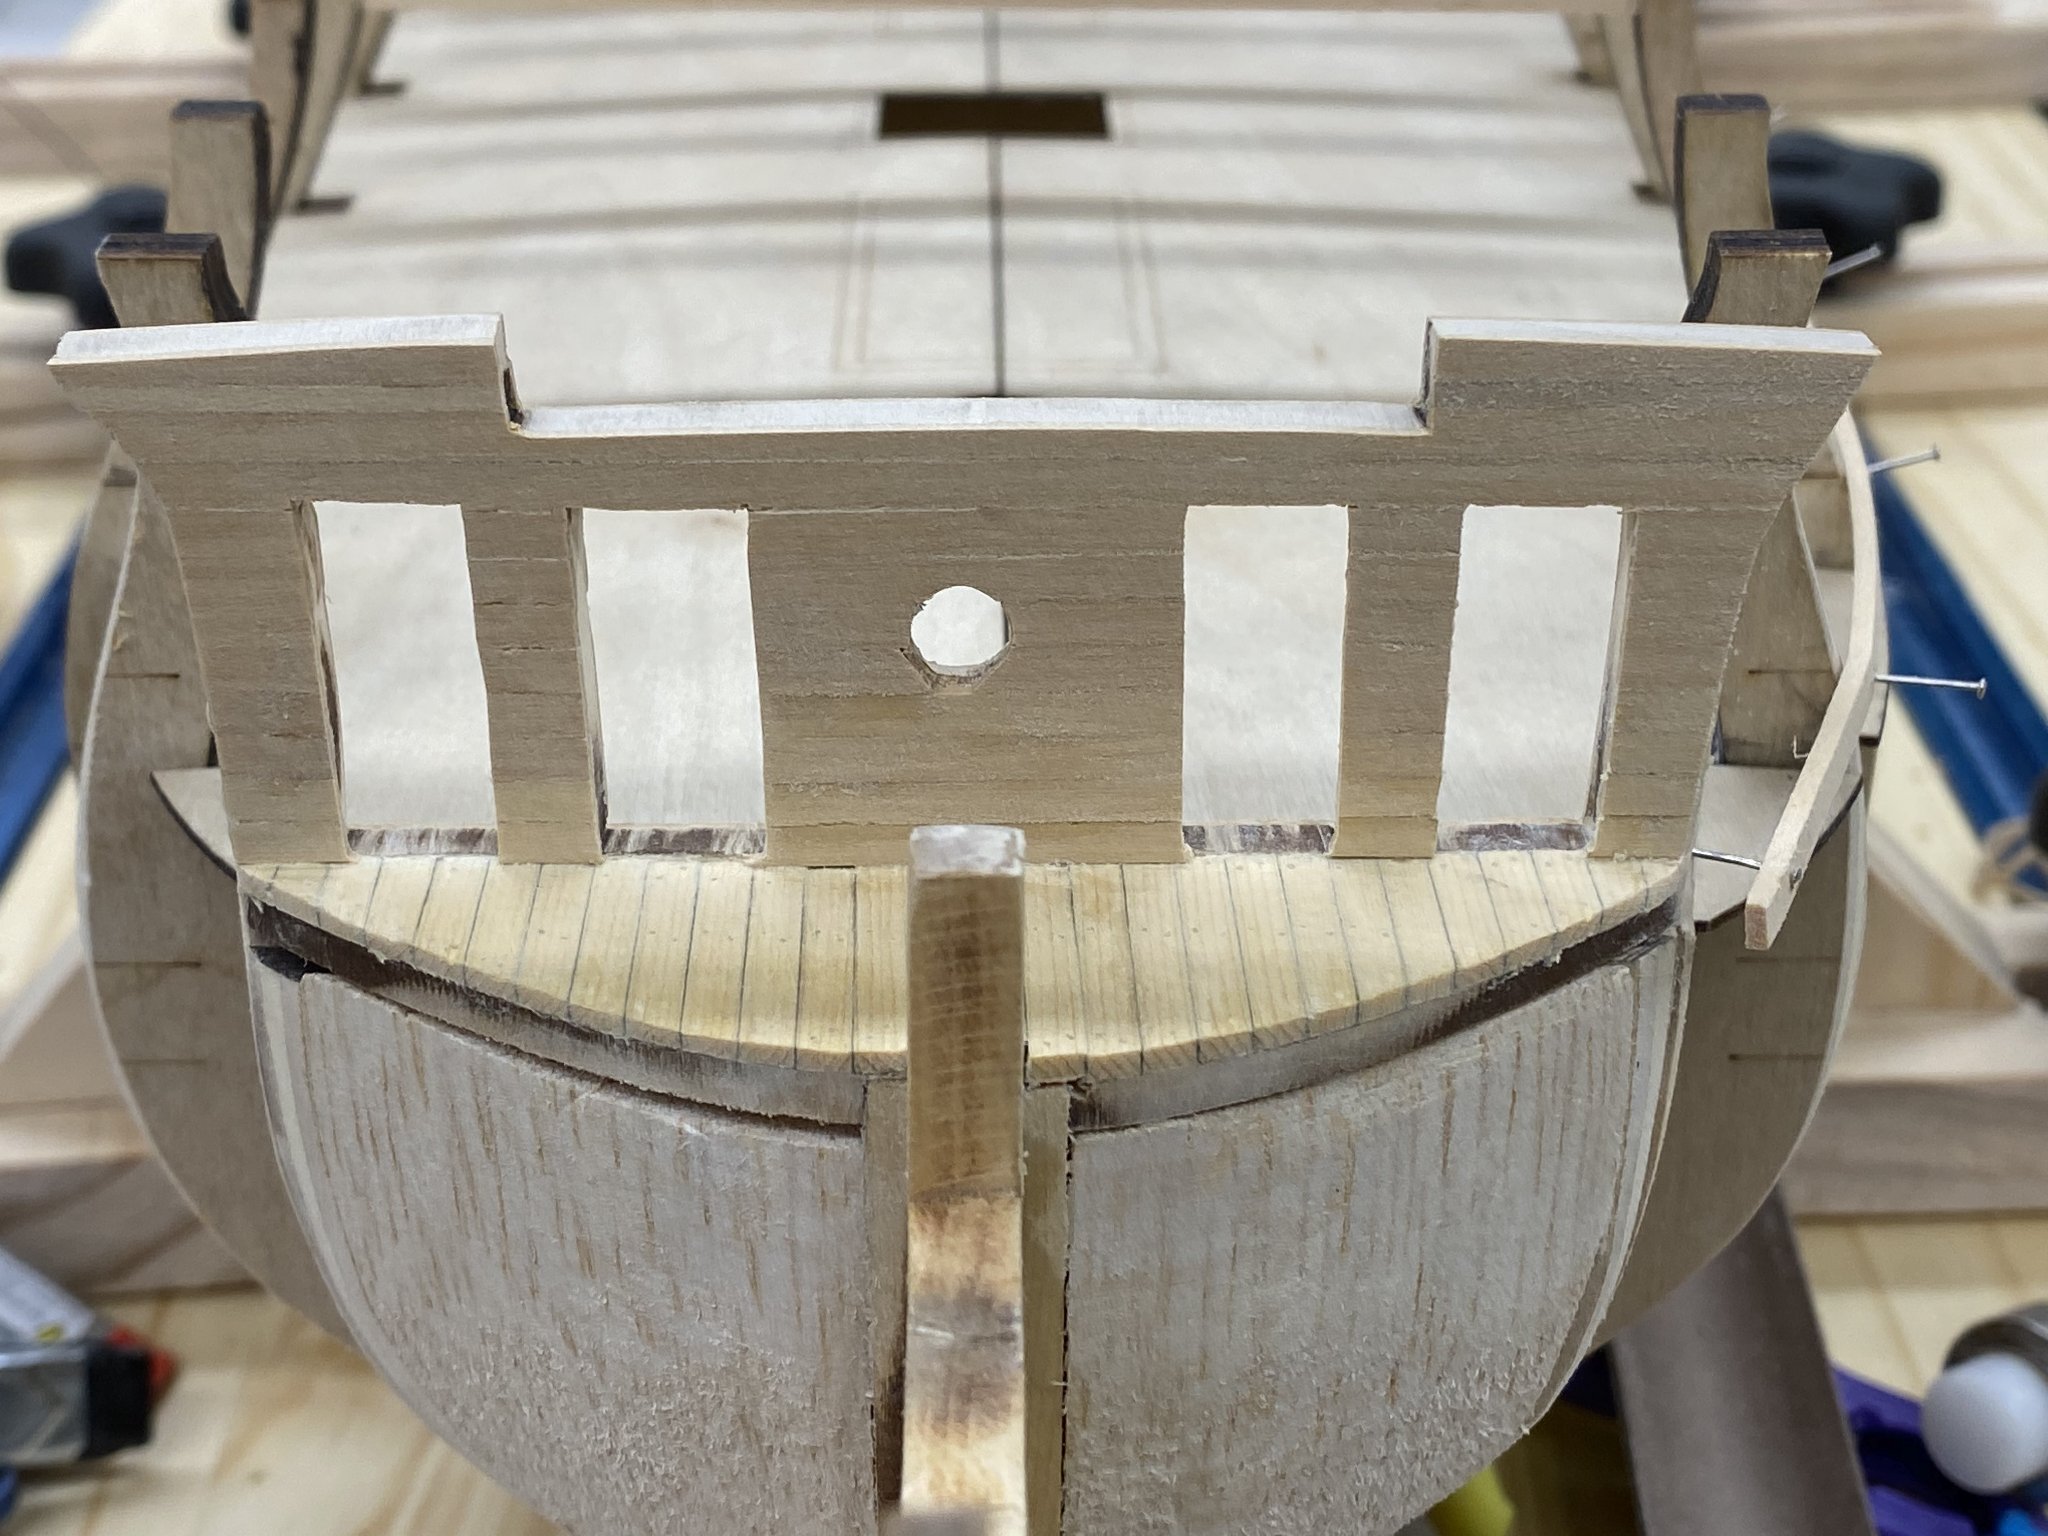
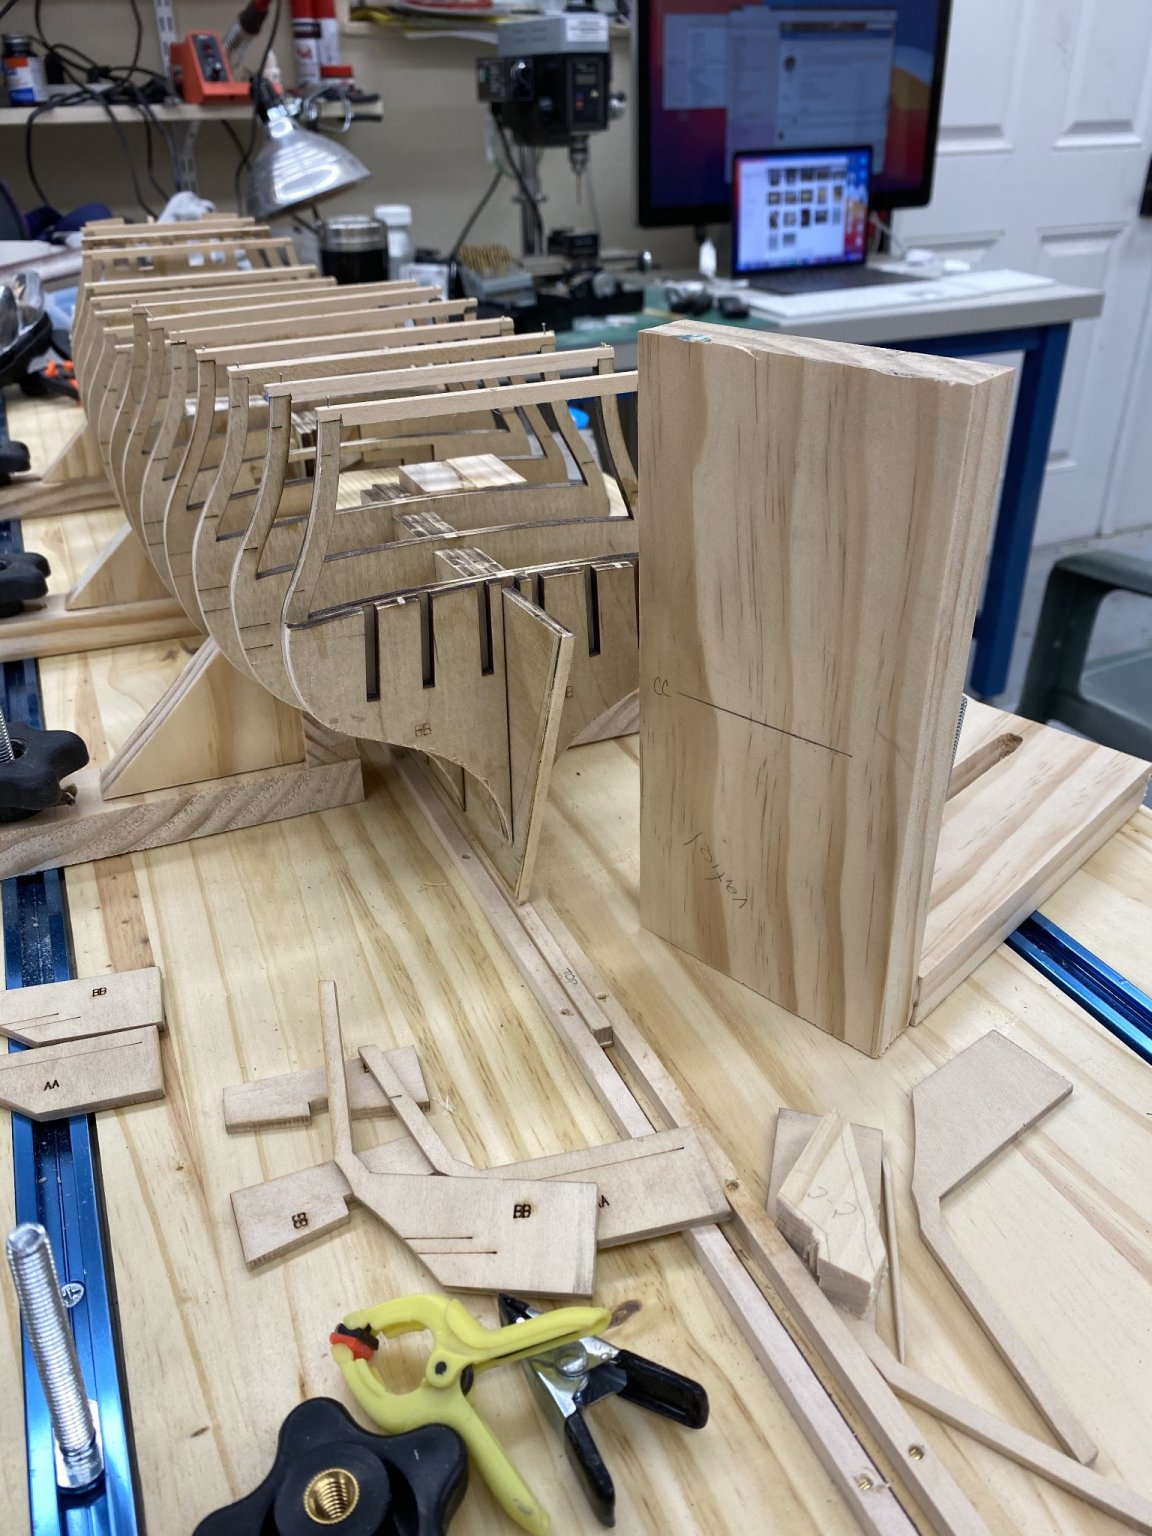
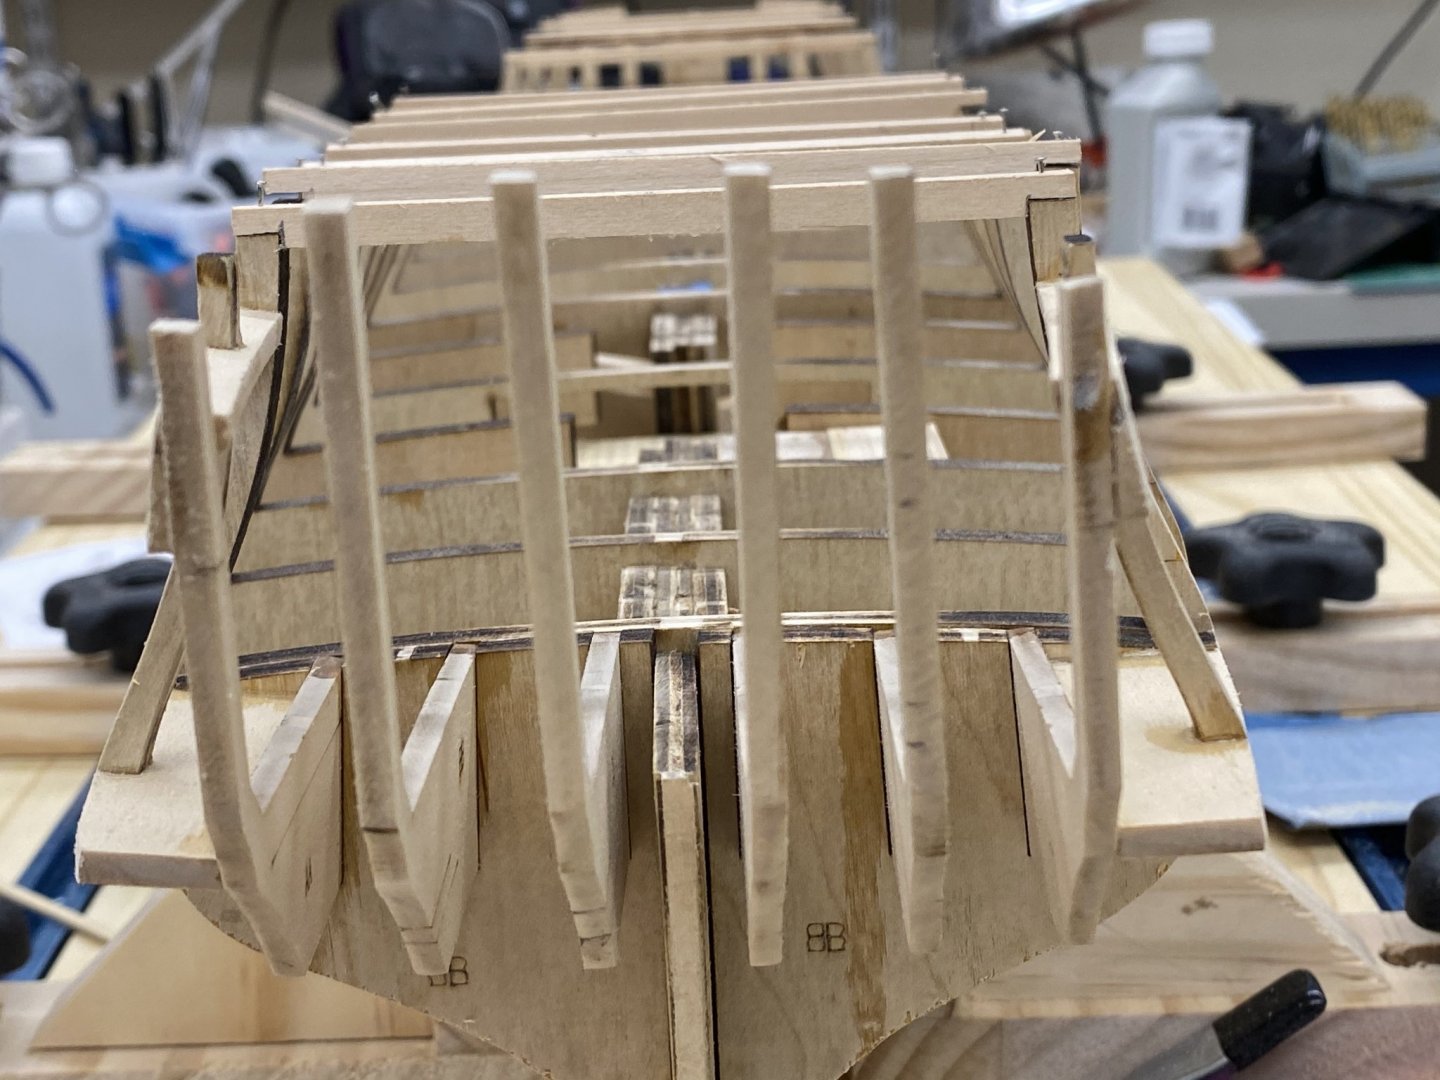
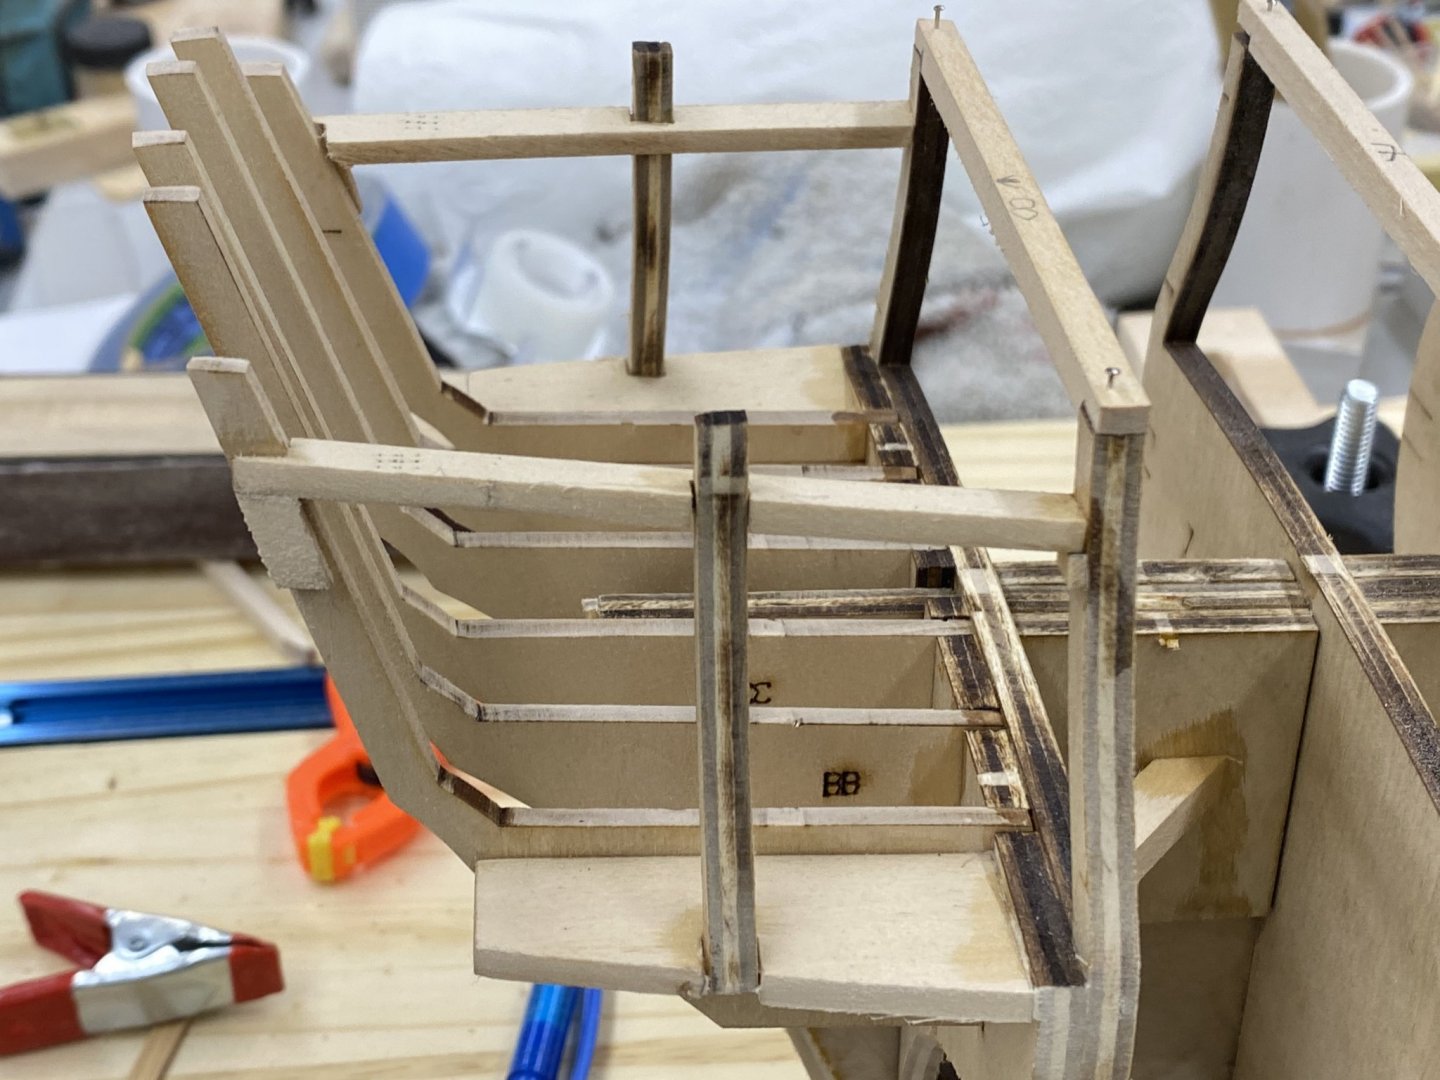
Stern timbers and associated pieces are complete - on to the sills and lintels. You have to be very careful doing the fairing. in fact I probably would recommend waiting to do the fairing until the sills and lintels are in place. Without them it would be more than easy to break sometime while fairing. Here s what my stern looks like now.

- 370 replies
-
- 5
-
-
- Model Shipways
- Confederacy
- (and 1 more)
-
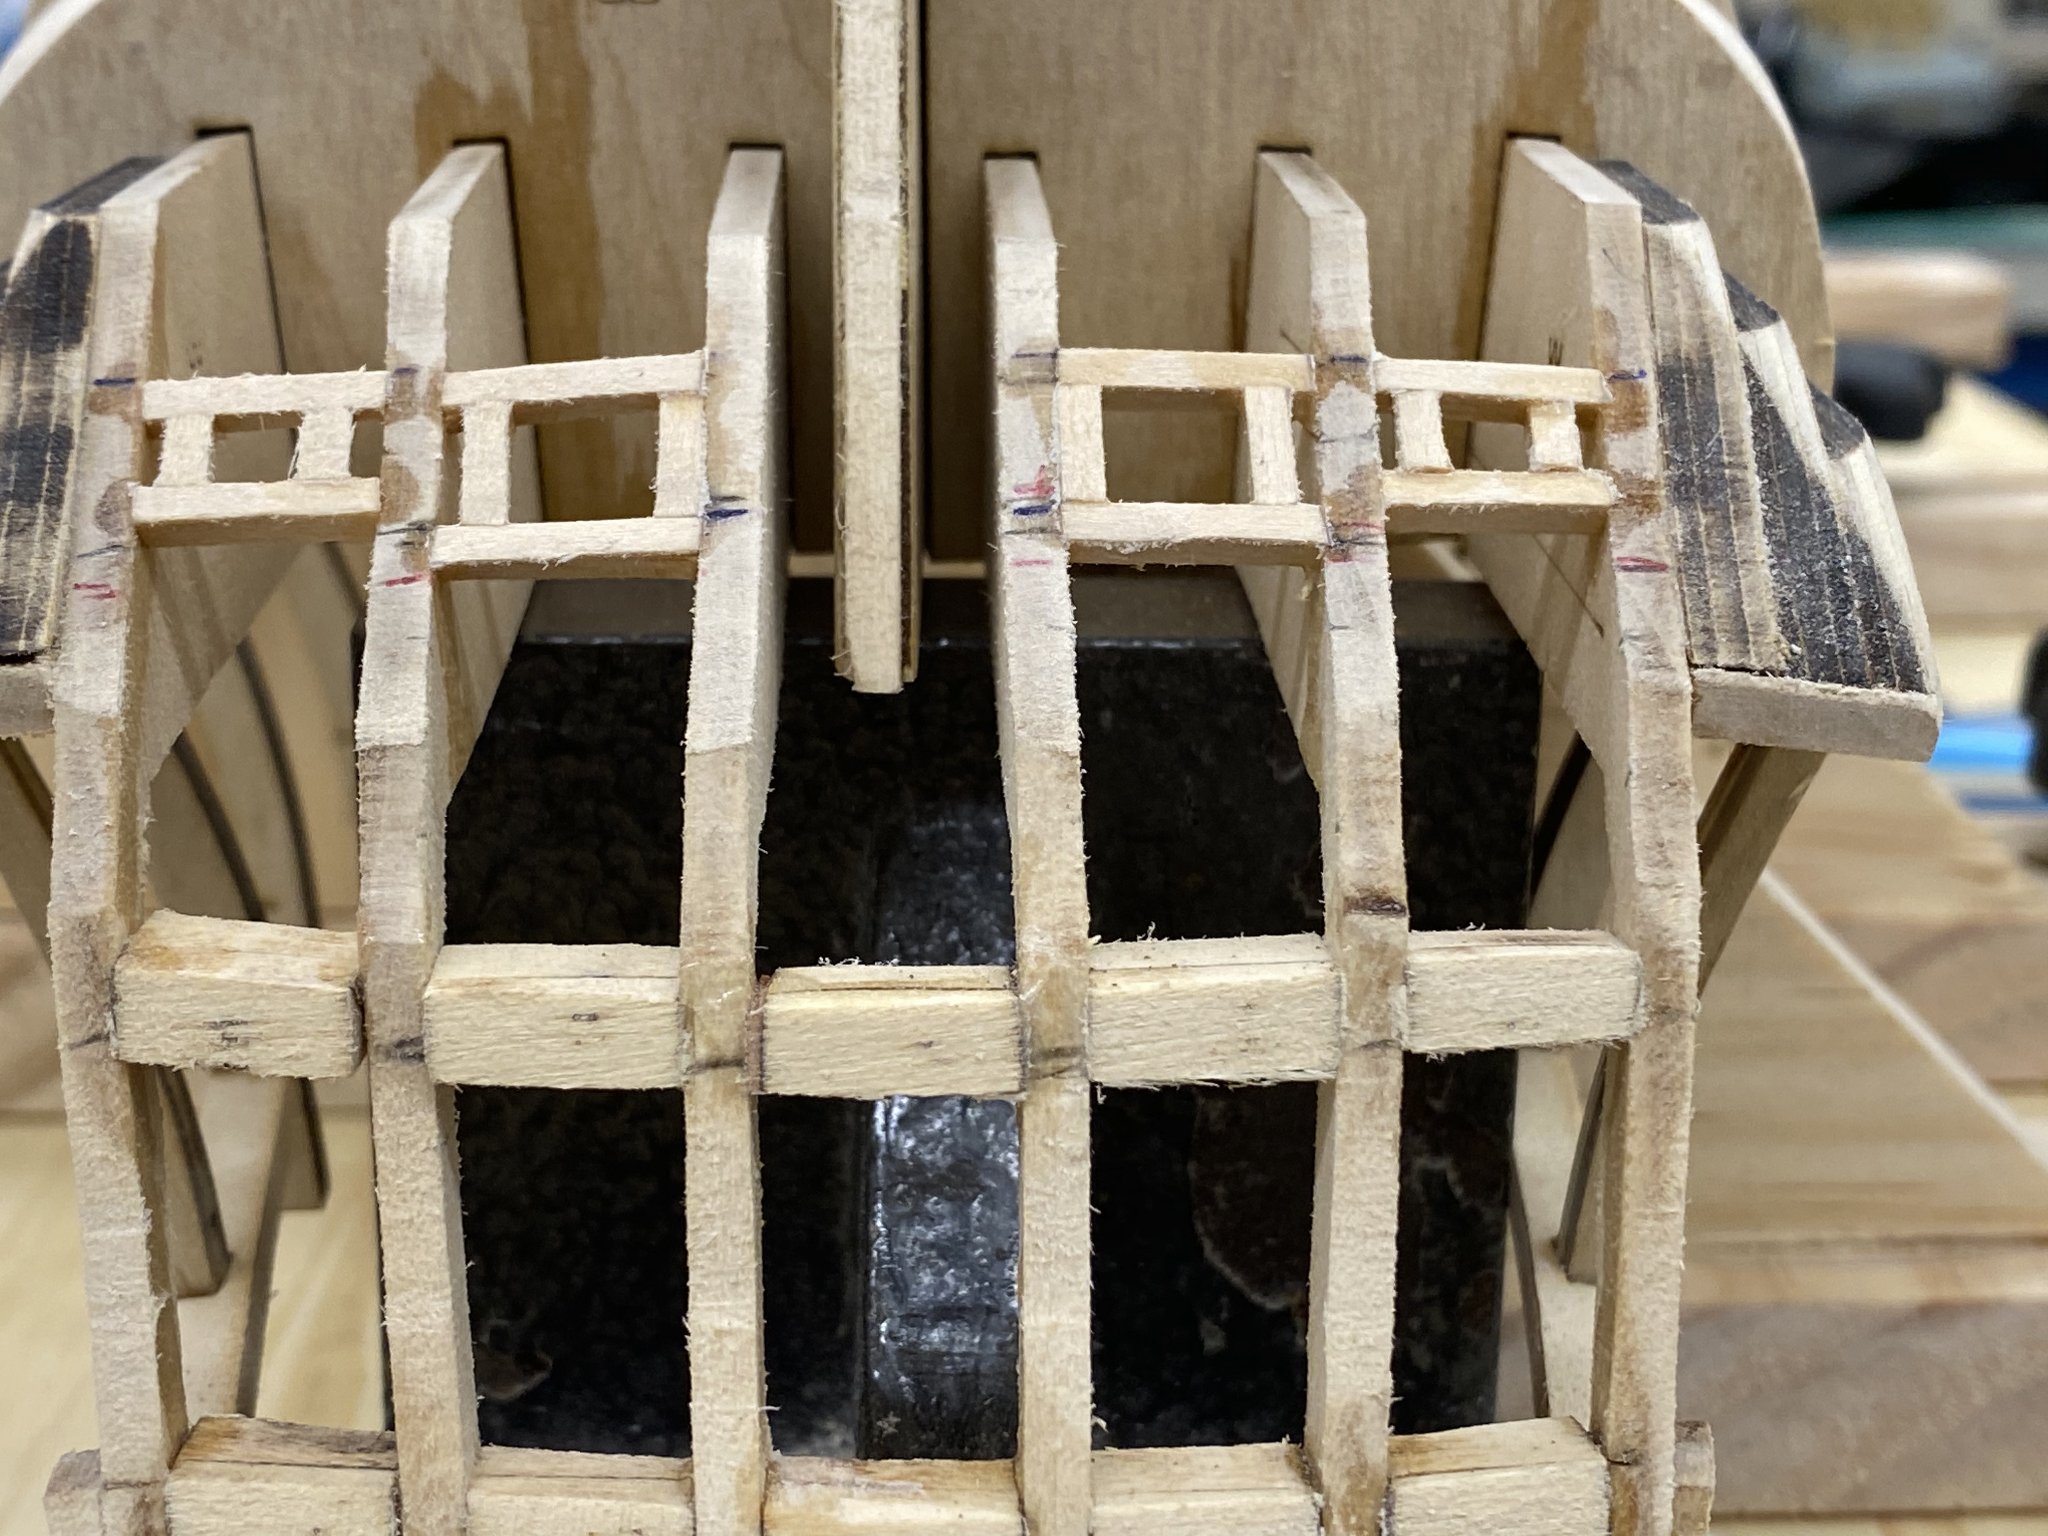
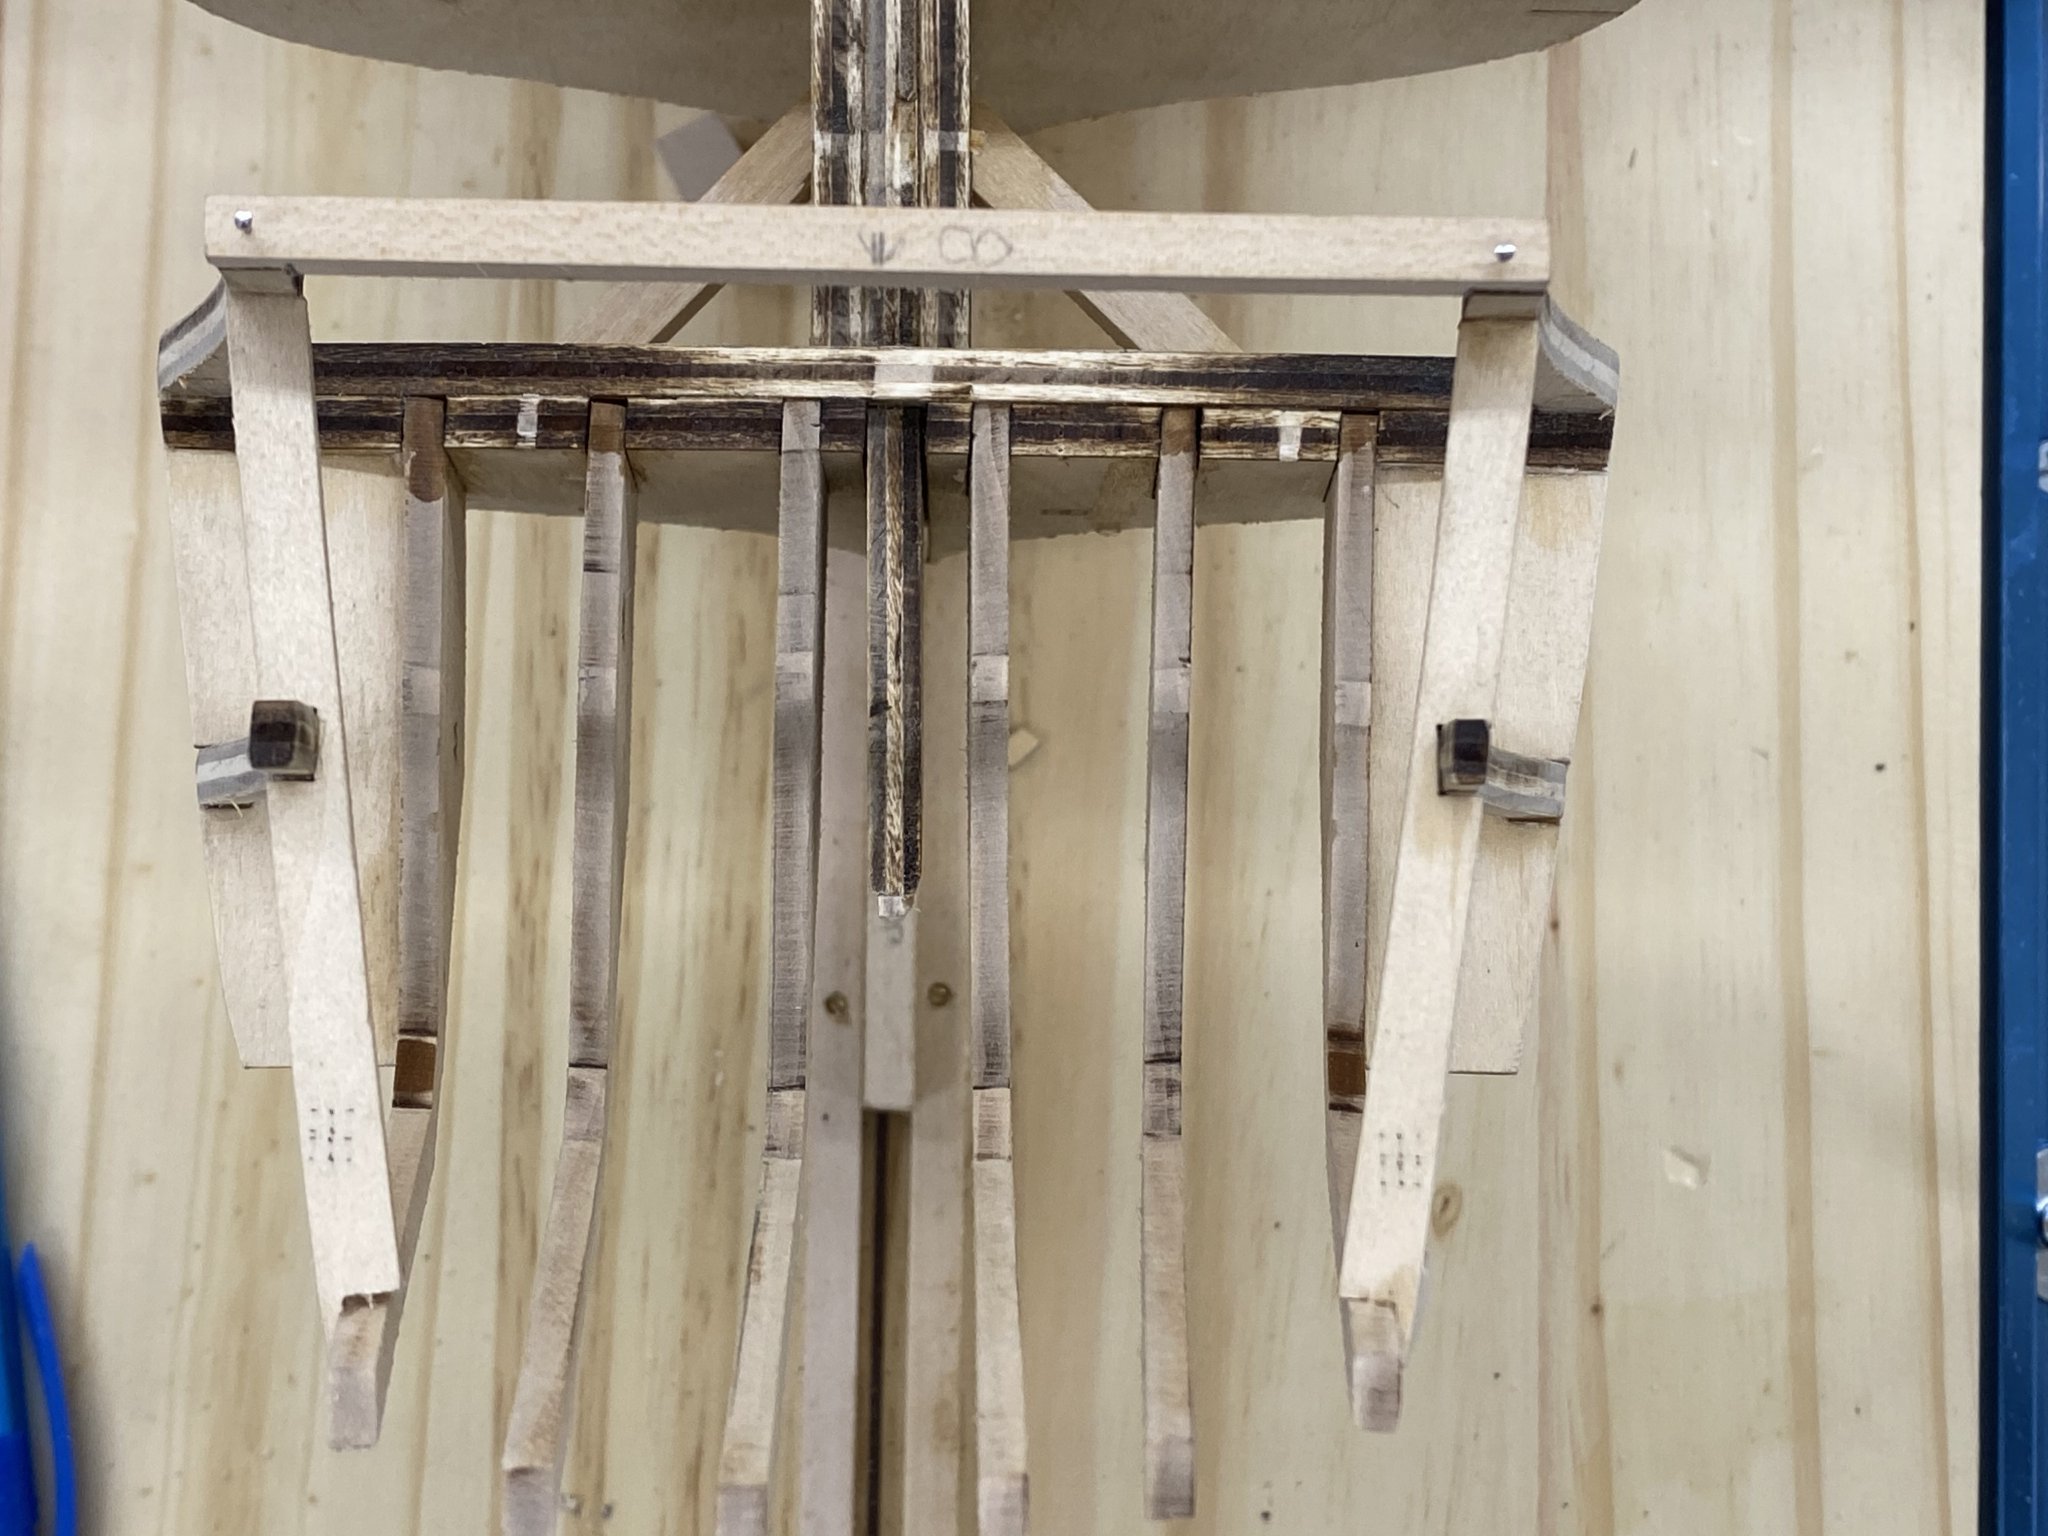
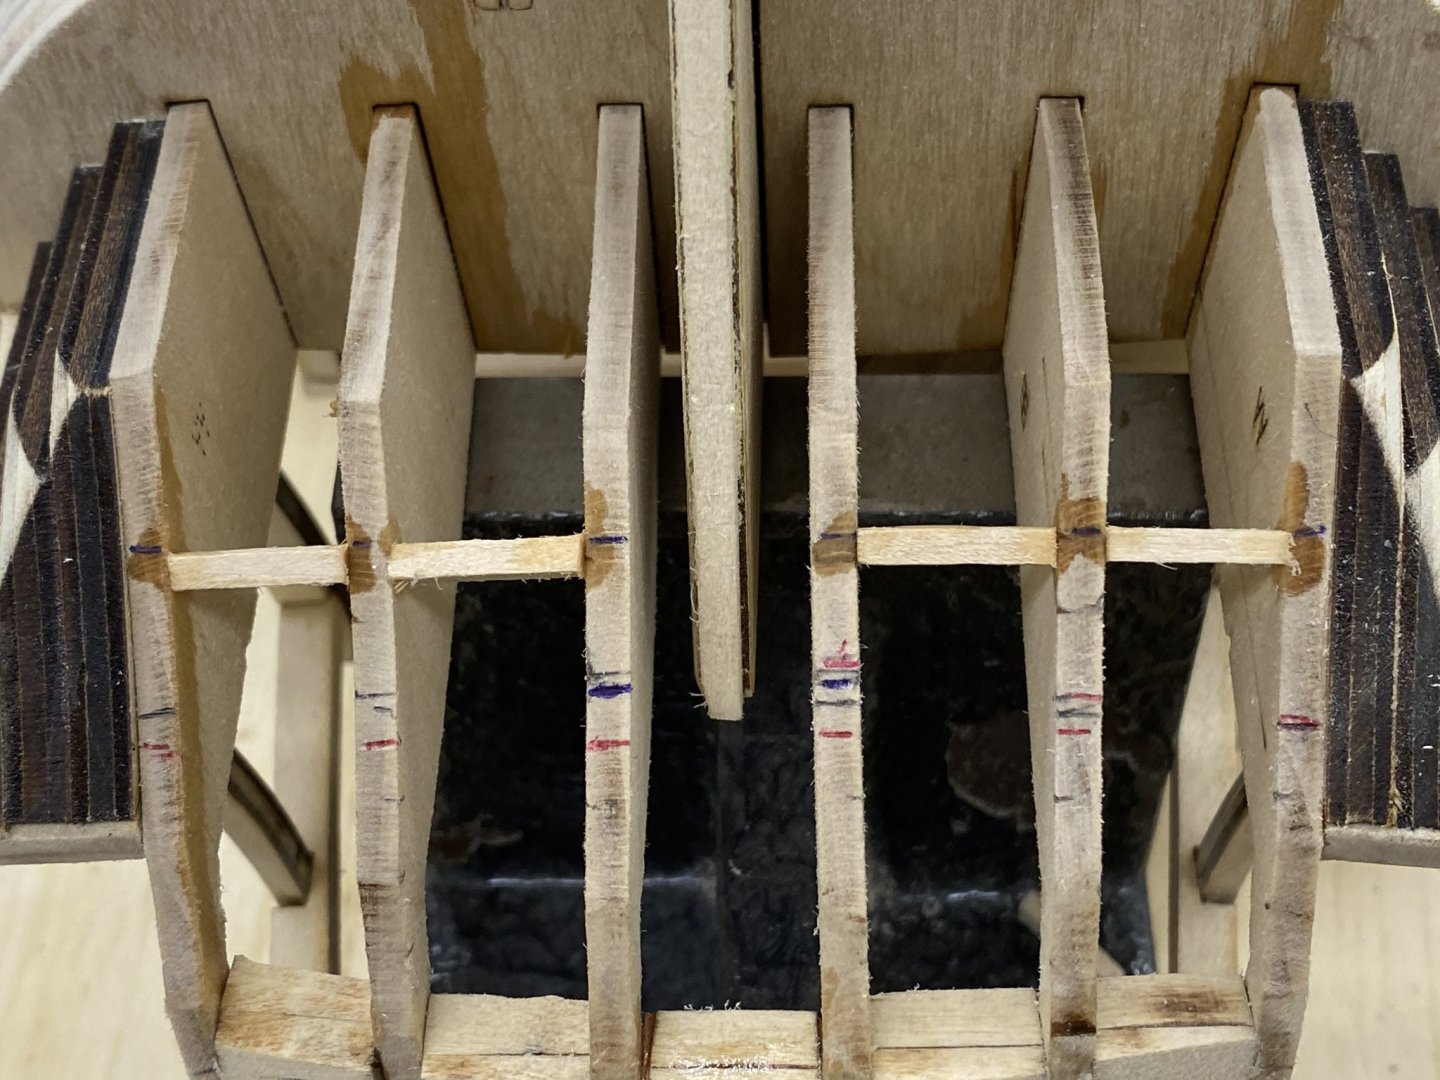
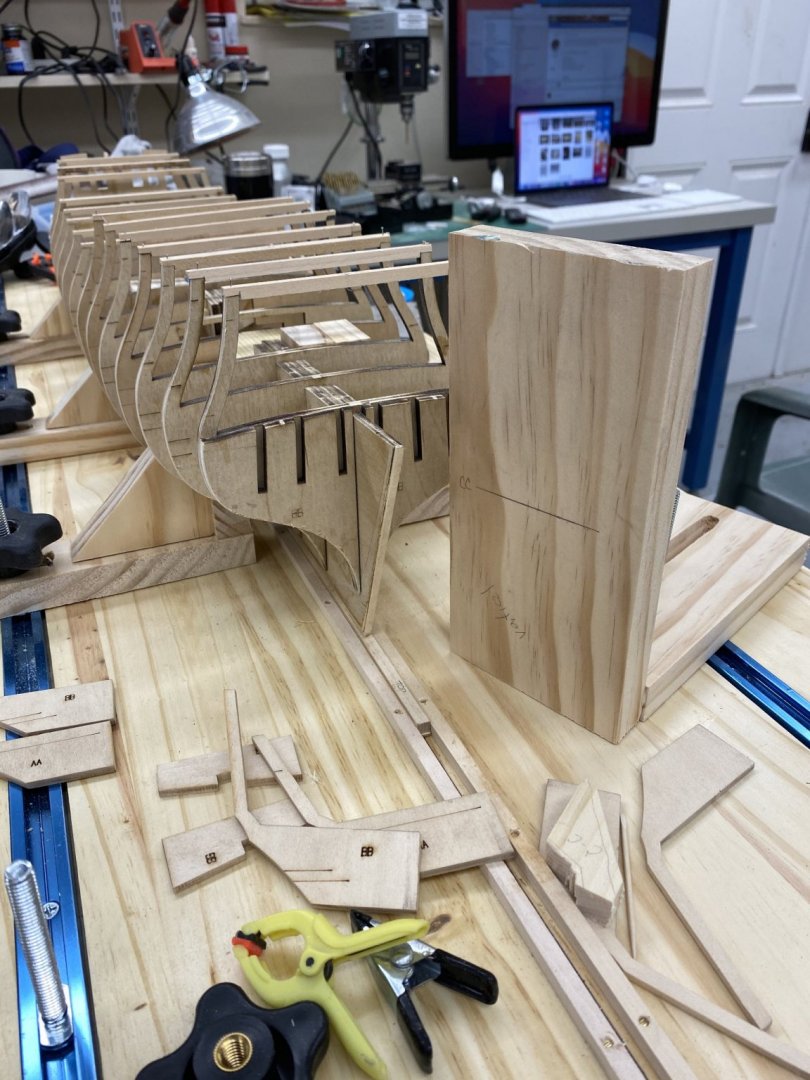
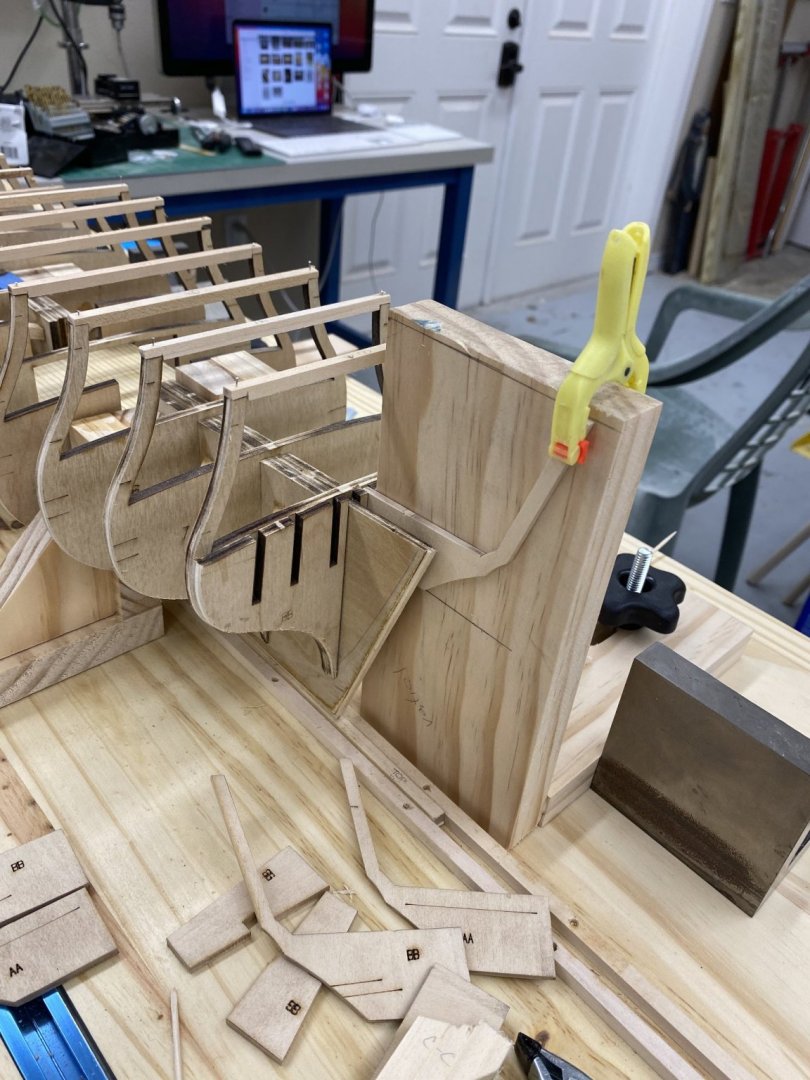
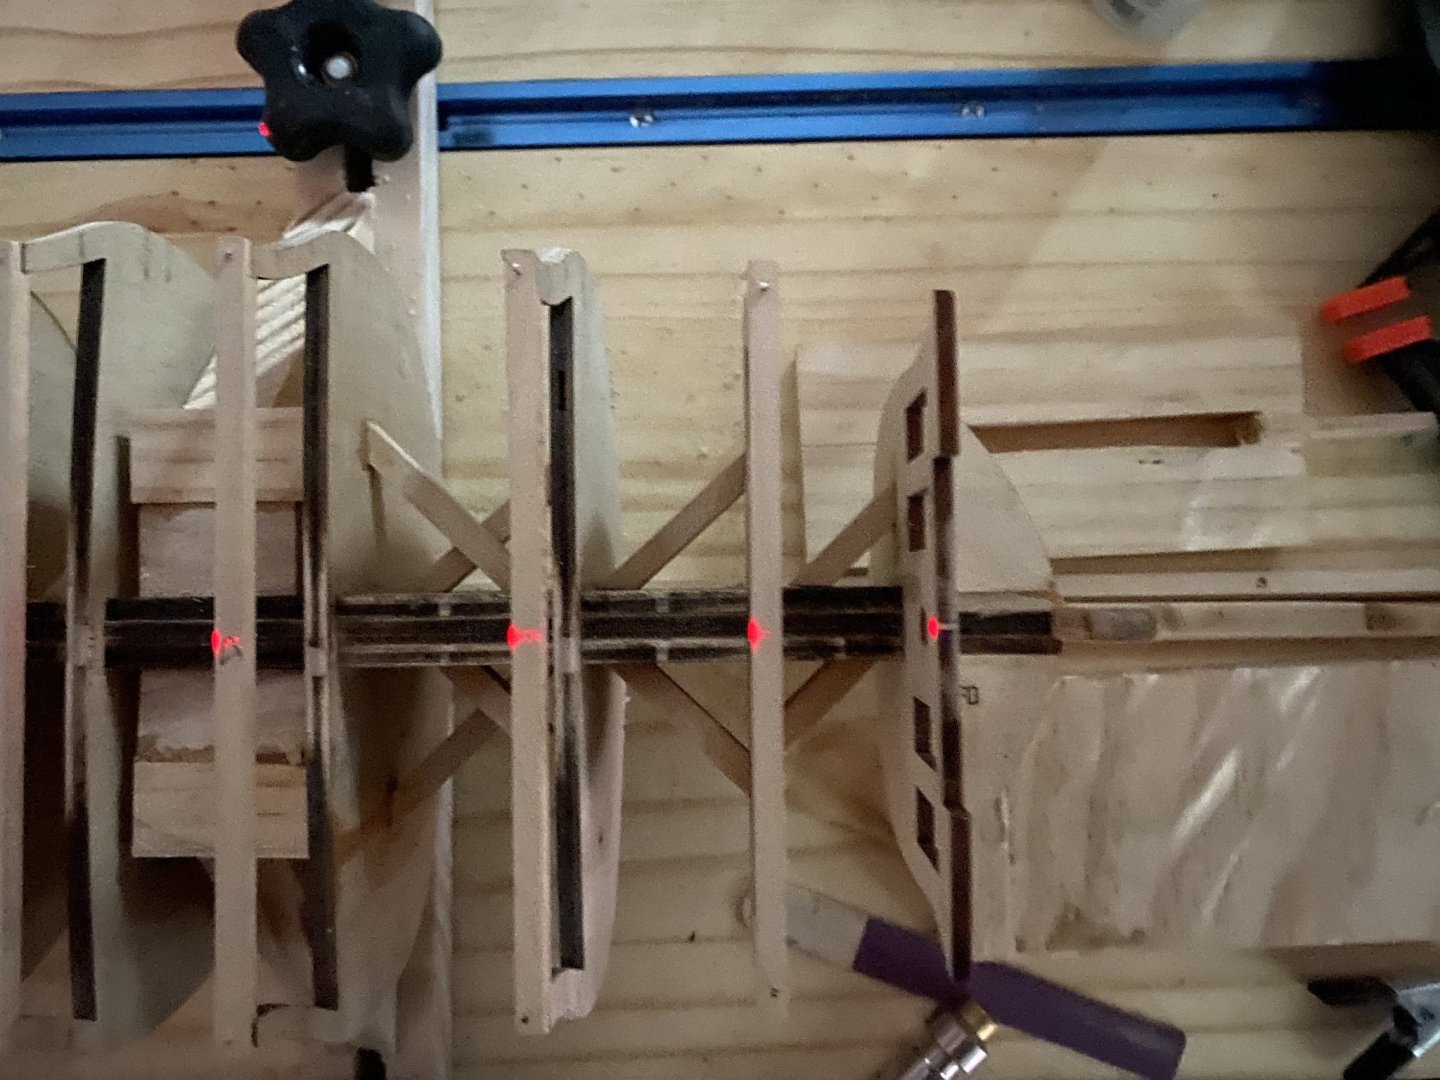
After some careful thought and a long look at the stern with the two stern timbers installed, I decided that doing things with spacers was probably not going to work - trying to replicate something in three dimensions when all you have to go is a 2-D representation is asking for problems. Per the instructions the provided template is what matters (well actually the supplied window frames but...) so I decided to install the other four stern timbers as close as possible to what is shown in the template. With that in mind I clamped the template to the two existing stern timbers and using a series of pointed shims got the other stern timbers lined up with the template (more or less - there is only so much you can do about where the outboard end is in the port/stbd direction). When I got one as close as I could to matching the template I used thin CA to fix the timber in place. So here are all six timbers as they fall on the template. Now the trick is to use the other pieces of the stern (especially the sills and lintels) to line up with the template.
- 370 replies
-
- 3
-
-
- Model Shipways
- Confederacy
- (and 1 more)
-
Cindy, You are most welcome.
-
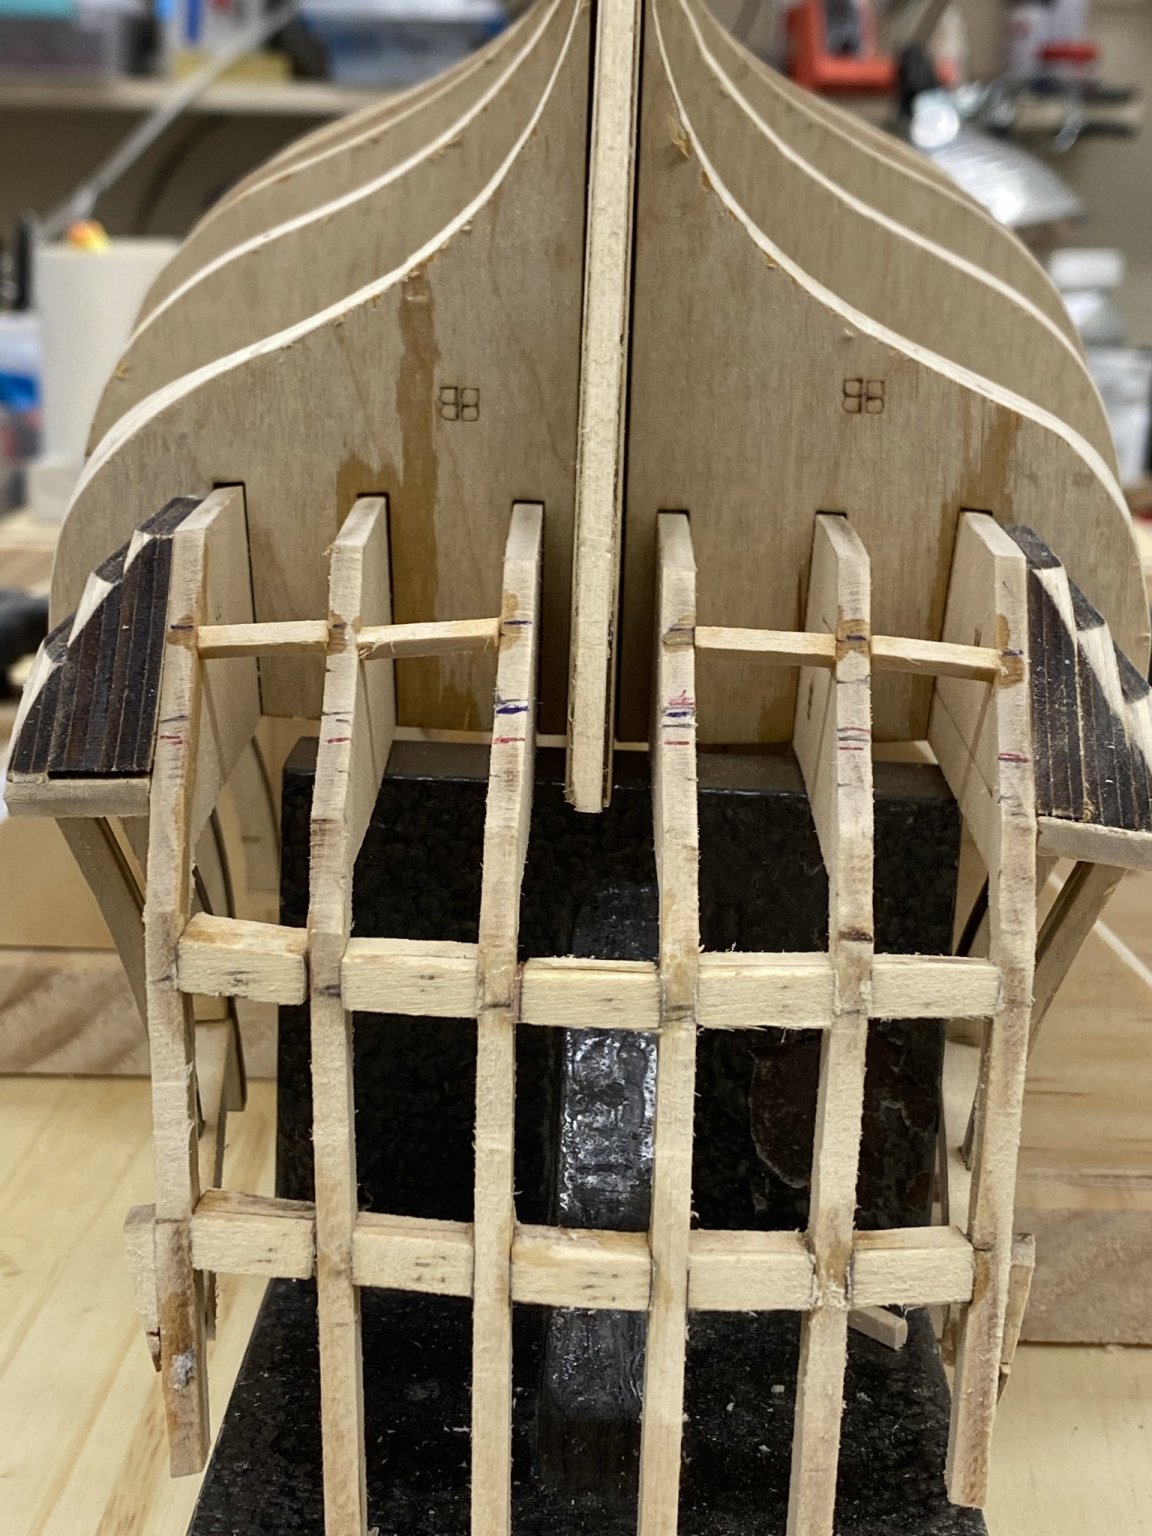
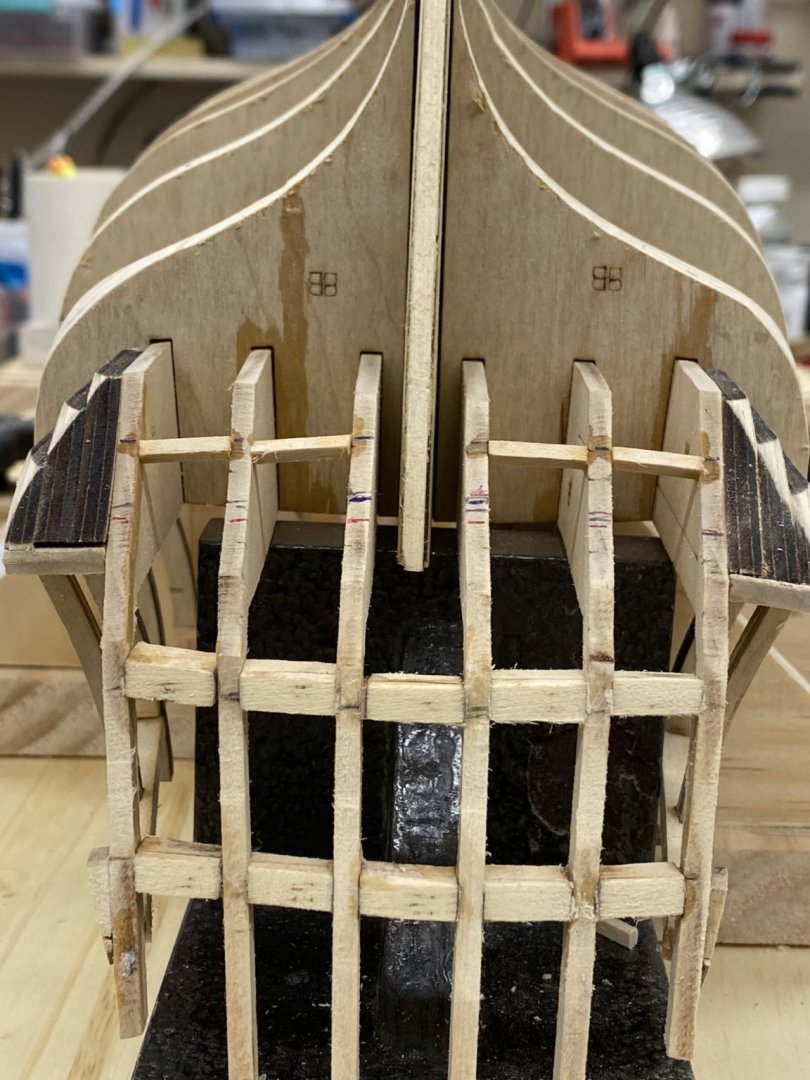
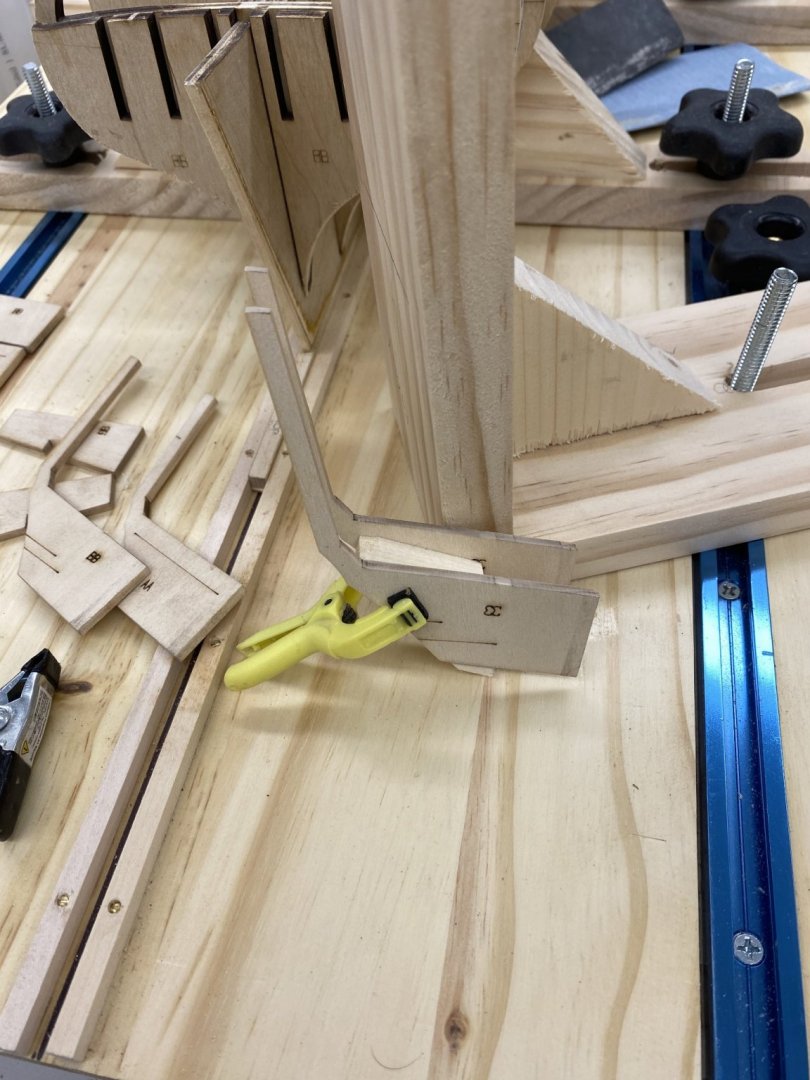
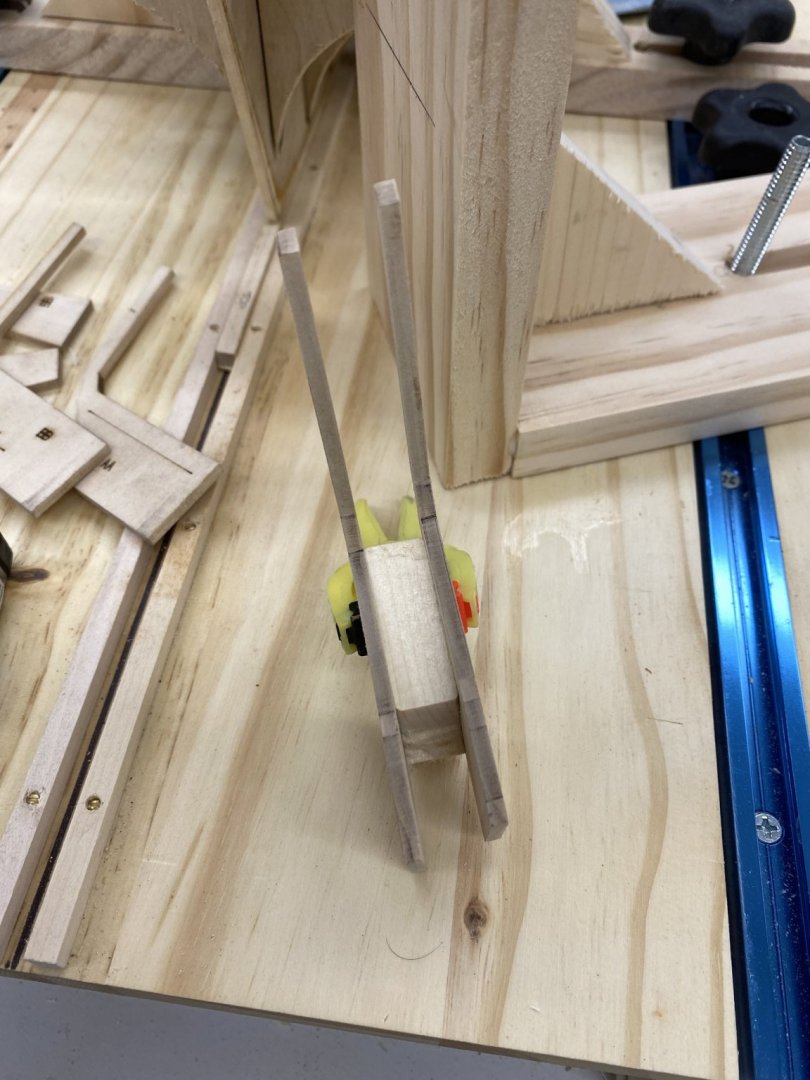
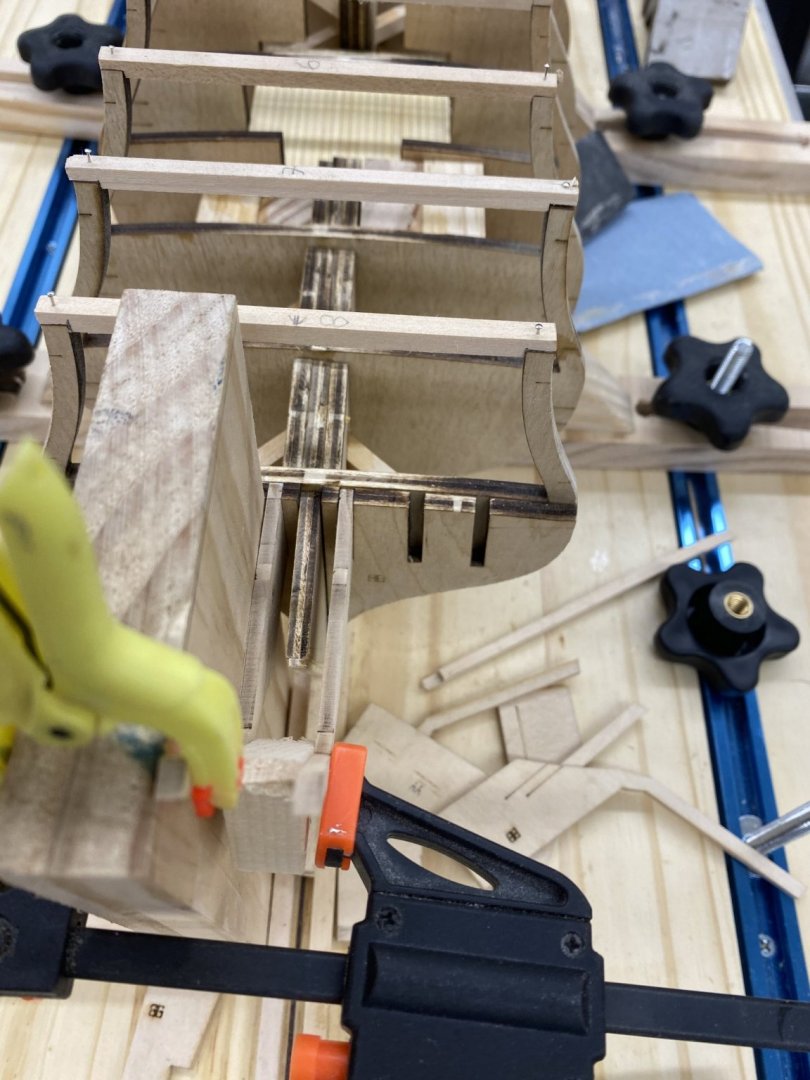
Thanks Bossman. So I decided to start the stern timbers with the inner (CC) set since it appears from all the drawings that they are truly vertical with the bulkhead former. Here is how I did it in case this could be useful to a future Confederacy builder. I built a new jig for the T-track that was wide enough to span the entire stern timber - from Bulkhead 8B to the farthest extent of the stern timbers Then I measured the provided lintels (S53 and L53) which both measure .50 inches confirming my belief that the "CC" timbers are vertical. I used the thickness sander to create a spacer .50" wide to fit between the two "CC" stern timbers. Next I needed to mark the jig with where the top of the "CC" timbers should be so I laid the jig on the drawing and marked the top of the "CC" stern timbers. I secured the jig in the T-Track, inserted the stbd "CC" stern timber in the slot in bulkhead 8B and adjusted the tilt so the top met the mark on the jig. I checked everything again and then took it apart, added glue and reassembled. When the glue was dry I moved the jig to the port side and repeated the process and included my spacer between the two "CC" stern timbers. I used a square to make sure the tops of the two "CC" timbers were aligned (not really trusting that the two T-tracks are exactly on the same level) then glued everything up and waiting overnight to make sure the glue was truly set. Now for the somewhat more difficult BB and AA timbers which are NOT truly vertical. By my measurement the BB timbers are 15mm apart from the CC at the bottom and 10mm at the top. I better get busy making at least two spacers, maybe three (10, 12.5 and 15mm).
- 370 replies
-
- 3
-
-
- Model Shipways
- Confederacy
- (and 1 more)
-
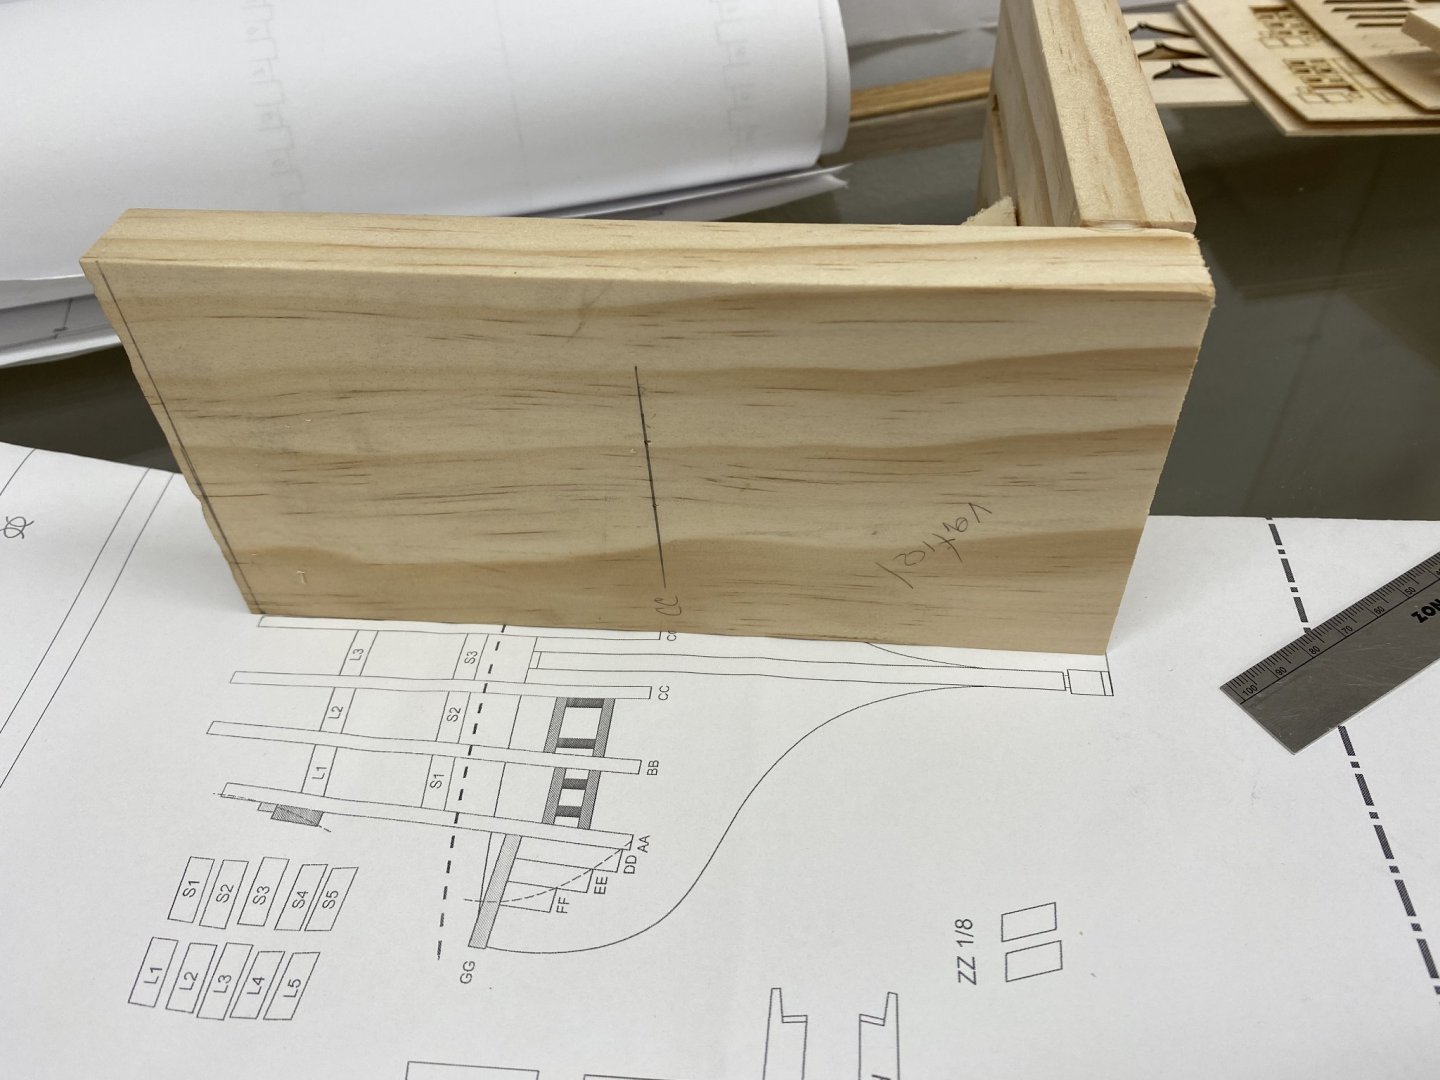
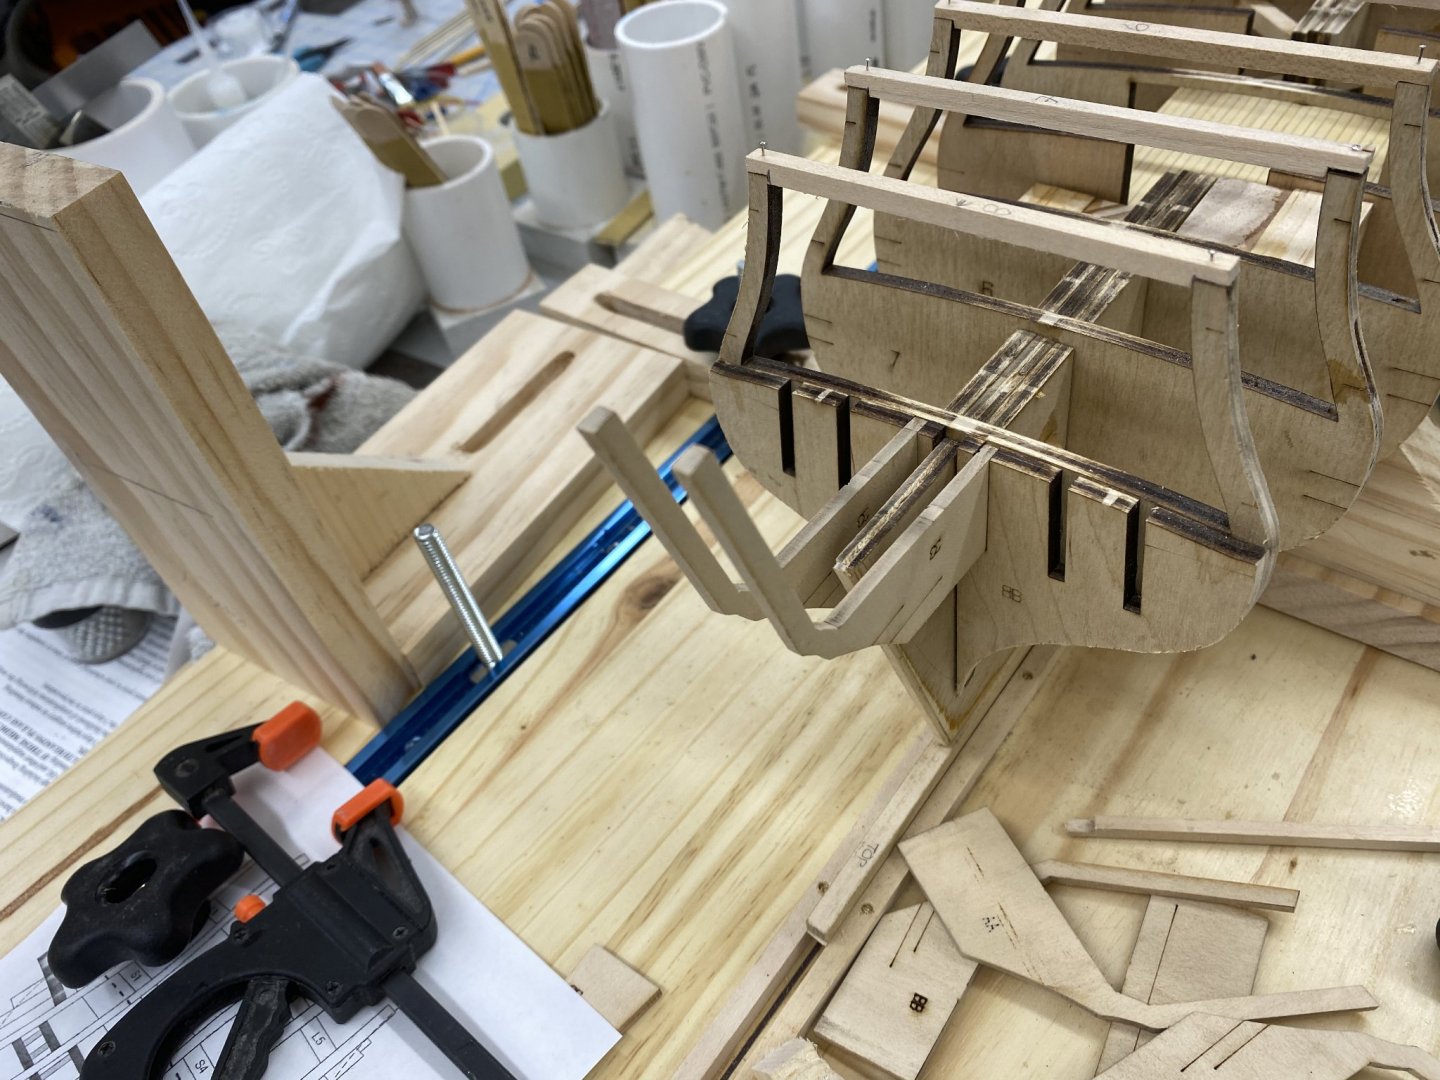
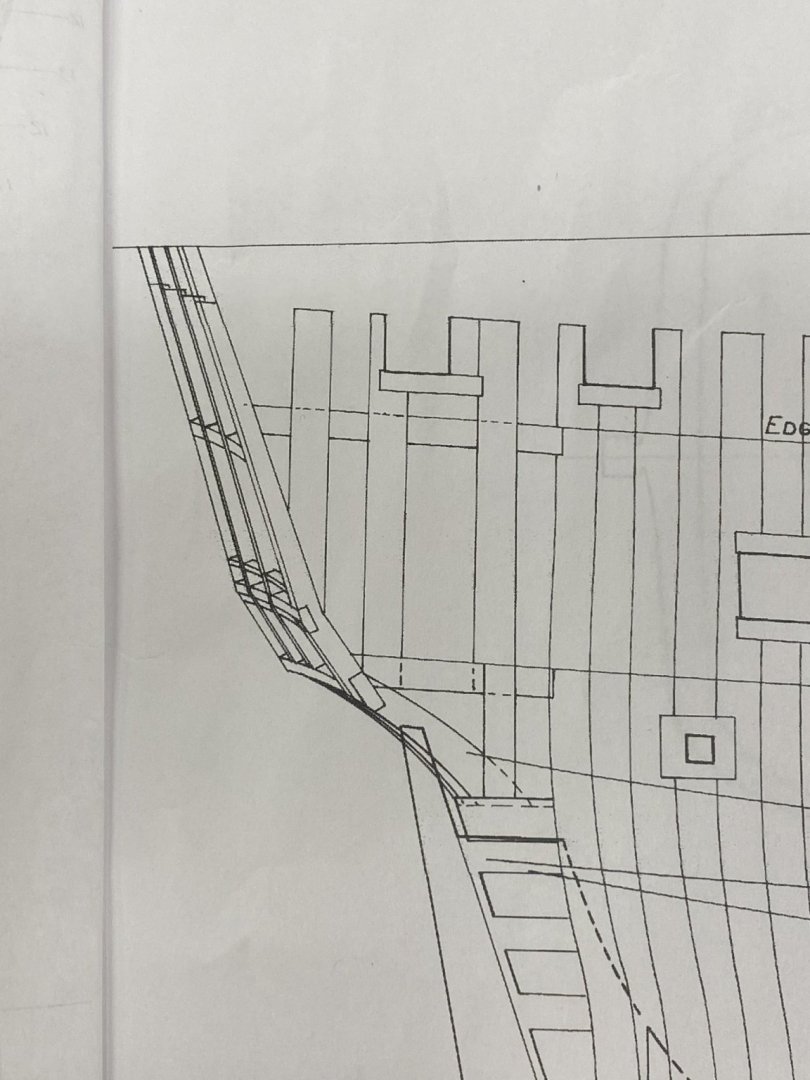
Bossman, Thanks, I had not thought of the spacer. I assume you built the spacer to keep the 2 middle frames the correct distance apart - correct? You used the string line to get the tops of the timbers where they needed to be? I was thinking of building some kind of framework to span across the stern high enough to accommodate the inner (tallest) timbers and then moving it down and forward to accommodate the next two, etc. I have looked at the drawings and it is not obvious that there is an acceptable drawing which shows the stern timber location in all three dimensions. The port/stbd and vertical is shown in the template but I can't seem to find something that shows the fore/aft locations. The best I can come up with is Plate 2 of the Harold Hahn plans which show the stern timbers. It would allow you to measure how far back the tops of the timbers are but you would have to measure from some common point (base of stern post perhaps and allow for the fact that the stern post is not yet on the model hull). I have the T-track along the sides of the build board so moving the framework should be easy enough. I just need to know where to put it along the track and how high so I can clamp the timber tops to the framework while the glue dries.
- 370 replies
-
- 1
-
-
- Model Shipways
- Confederacy
- (and 1 more)
-
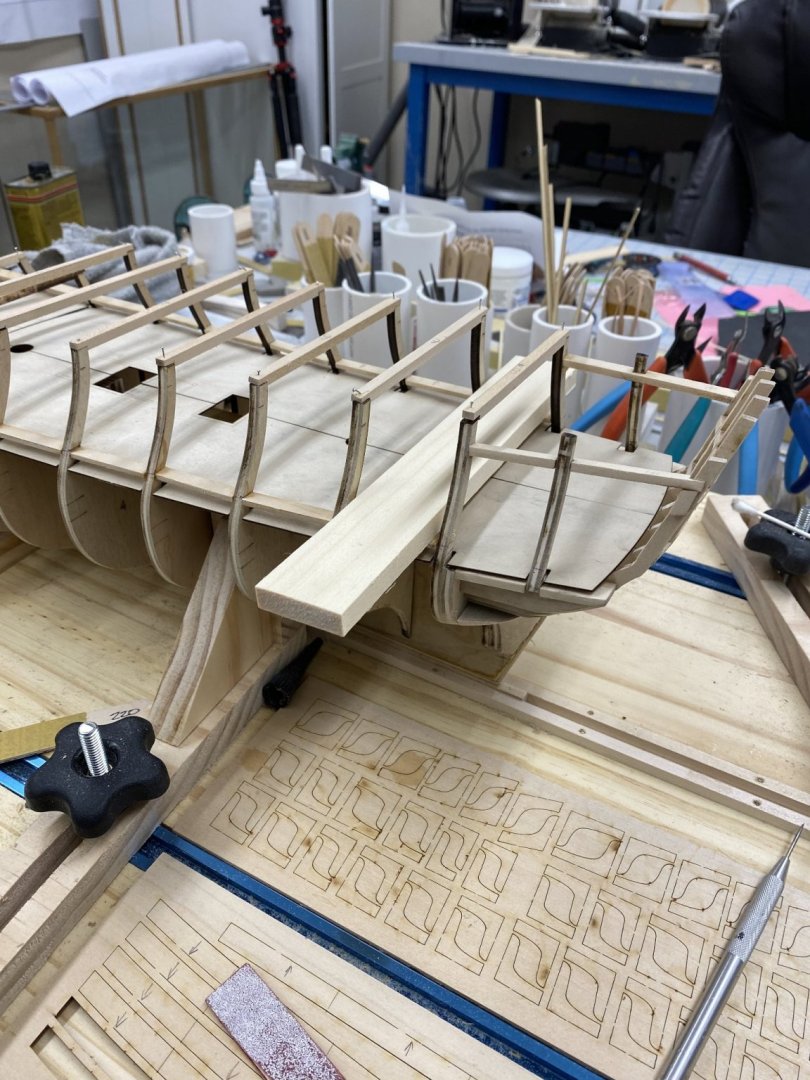
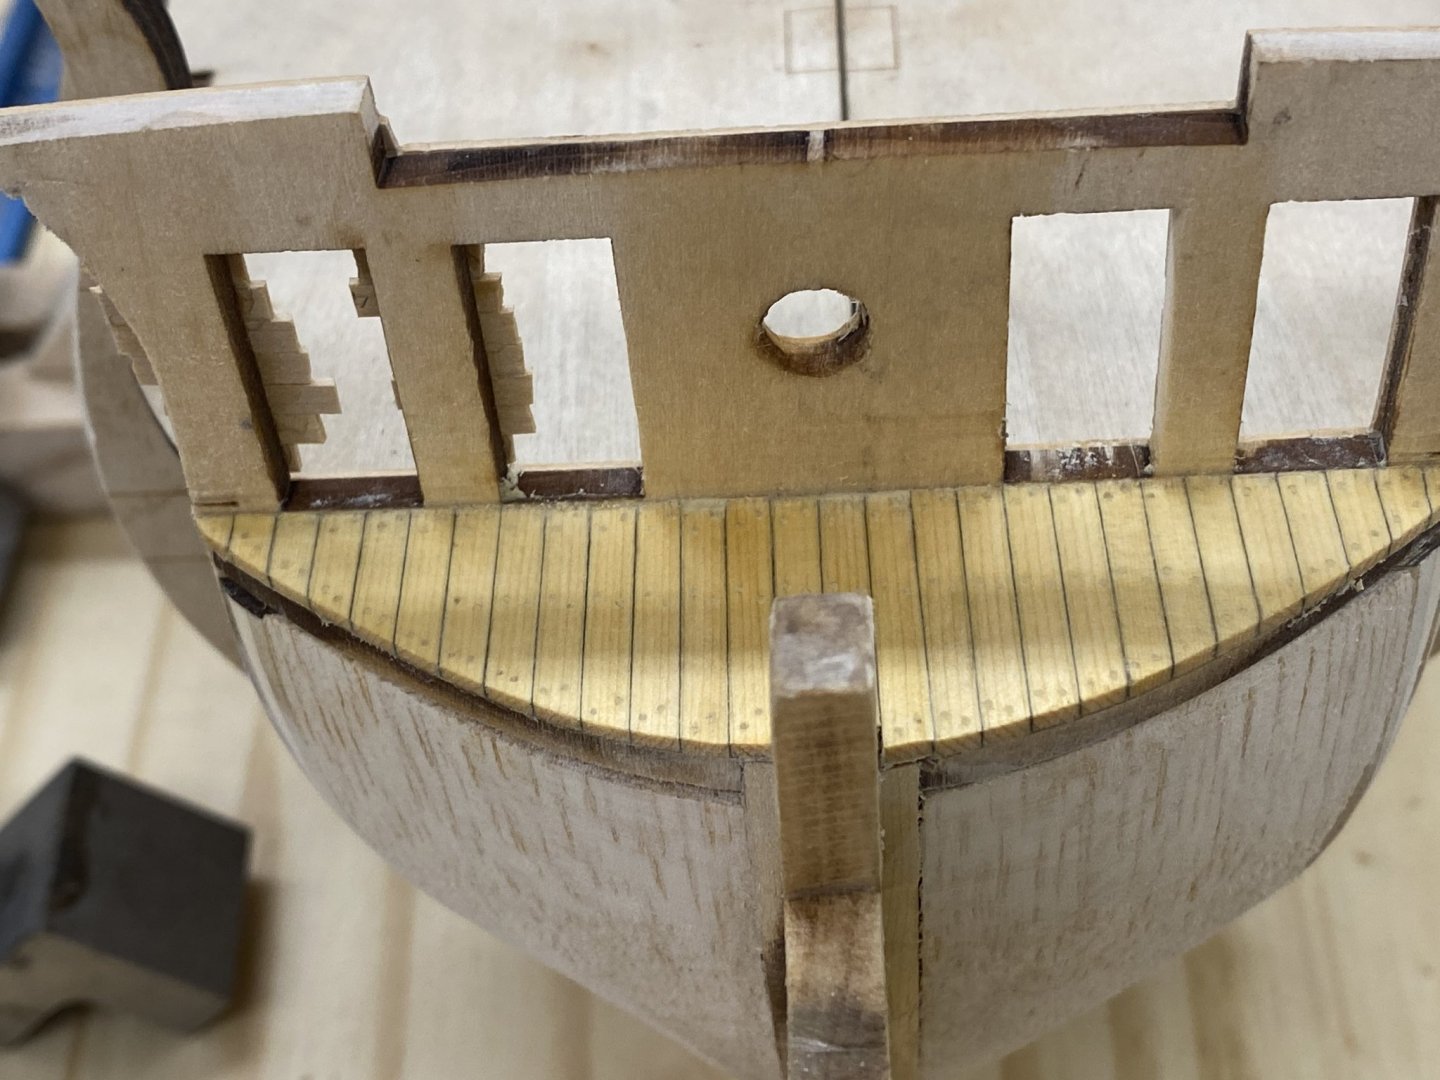
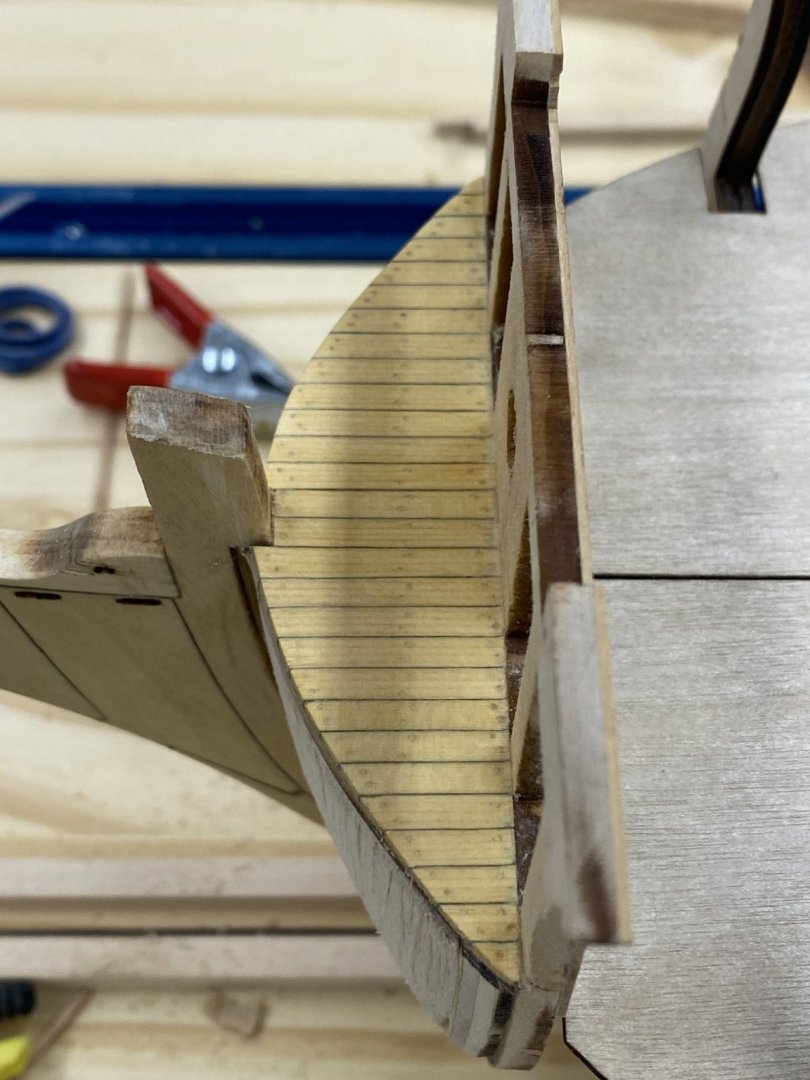
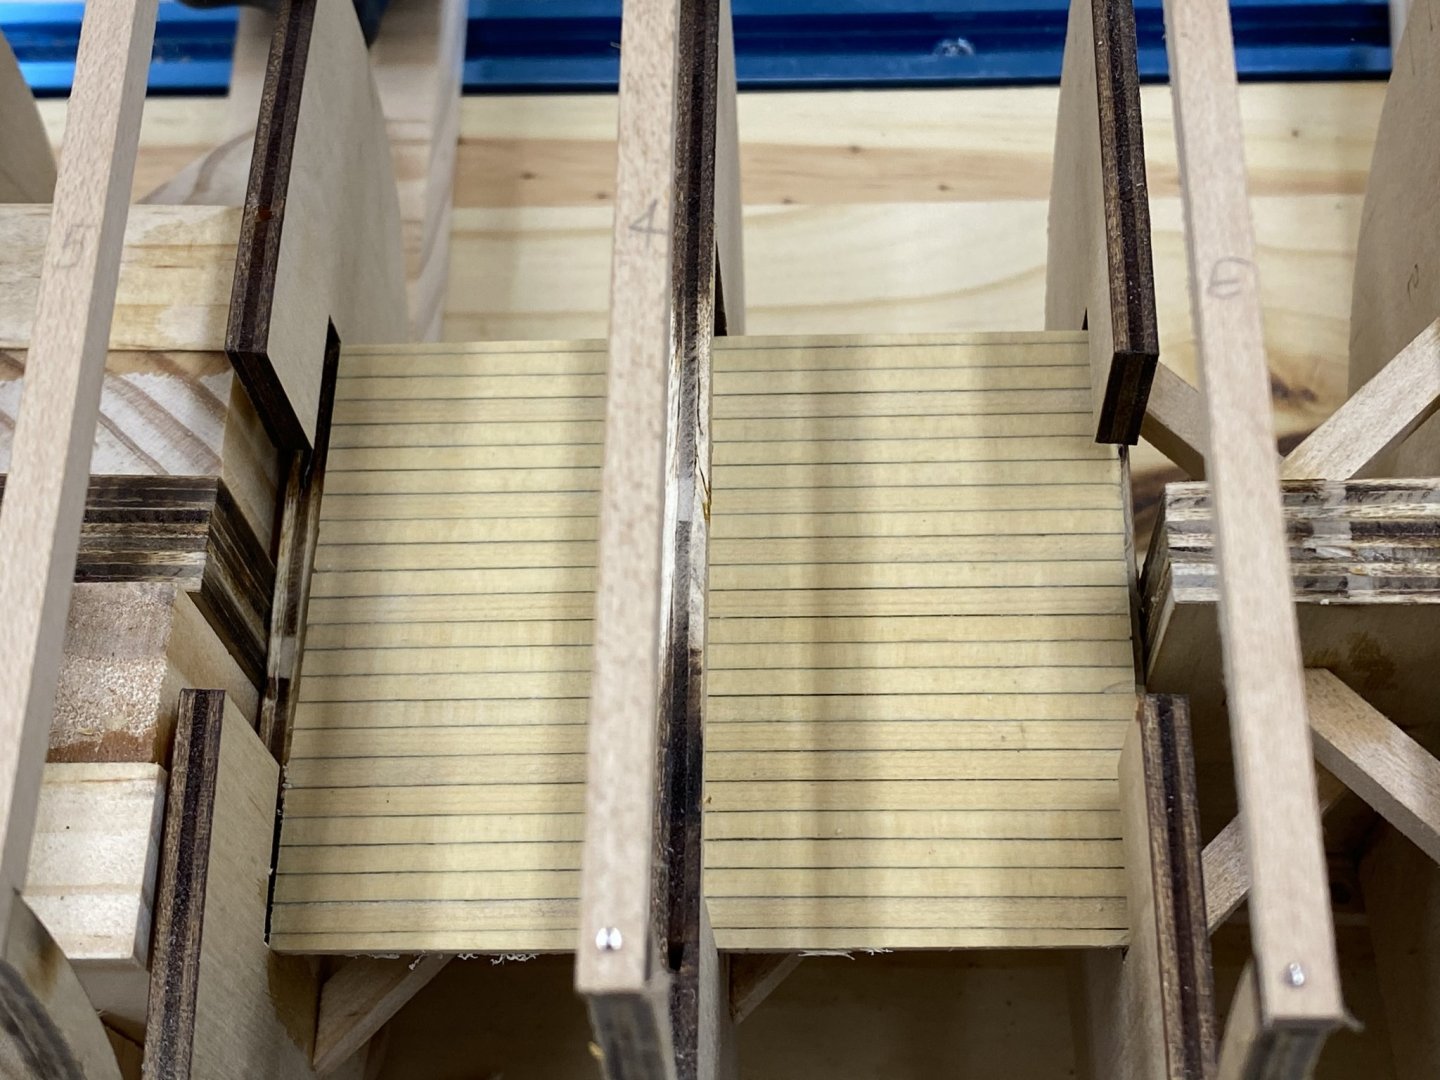
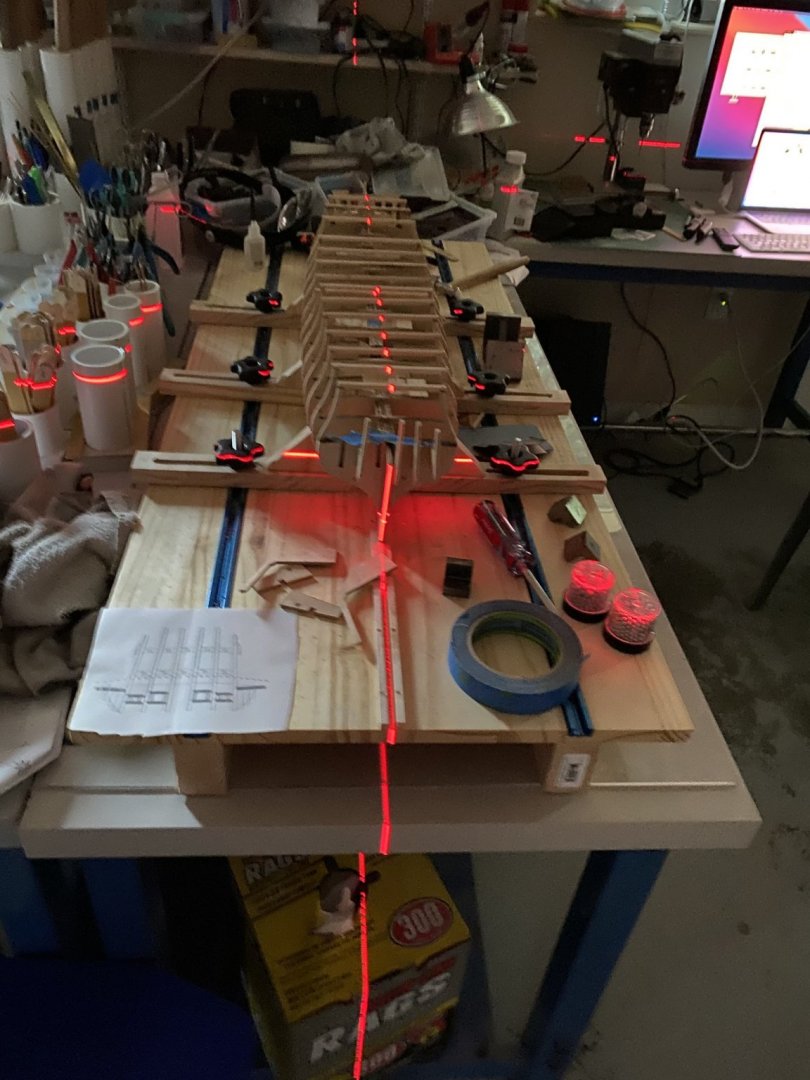
After looking at the areas of the lower decks to be planked and reading the instructions that there are ~ 23 planks for each platform I decided to resurrect a technique I used on my Niagara (although on her I used it for the bulwark planking) of using a 1/64" thick plywood carrier sheet to hold the planking. This will allow me to plank at least the two bulkhead span off the model and then glue the entire sheet into the hull. I cut the plywood and test fit it to make sure I could get it into the desired location without bending, as bending will be very difficult with the planking glued down. Here is the carrier sheet during the test fit in the hull. You may note that rather than having the bulwark extension protectors held in by friction per the instructions I pinned them as during the fairing (when you really need them) they kept falling off. I was not terribly careful cutting the planks for the deck carrier. I will use the disk sander to trim the ragged ends and adjust the overall length and width to make it fit. Here is the planked deck carrier after a coat of WoP. Here it is after trimming and installation in the hull. While I am gluing up the other two lower decks I decided to start looking at the stern framing. In preparation for that I used the laser level to make sure I had the hull squarely on the building board and standing as close to vertical as I can measure. After some minor adjustment I got the laser in the center of the hull former at the after end and I have the hull aligned on the laser center since I have the vertical light on the center of the forward most bulkheads- or as close as I can measure. I hope to use the laser to help me get the stern timbers aligned correctly but I am not optimistic that it will be much help since it is hard to not get in the way of the beam while messing with the stern timbers. I am planning on reviewing several of the Confederacy build logs to see if there were any "tricks" employed by previous builders.

- 370 replies
-
- 3
-
-
- Model Shipways
- Confederacy
- (and 1 more)
-
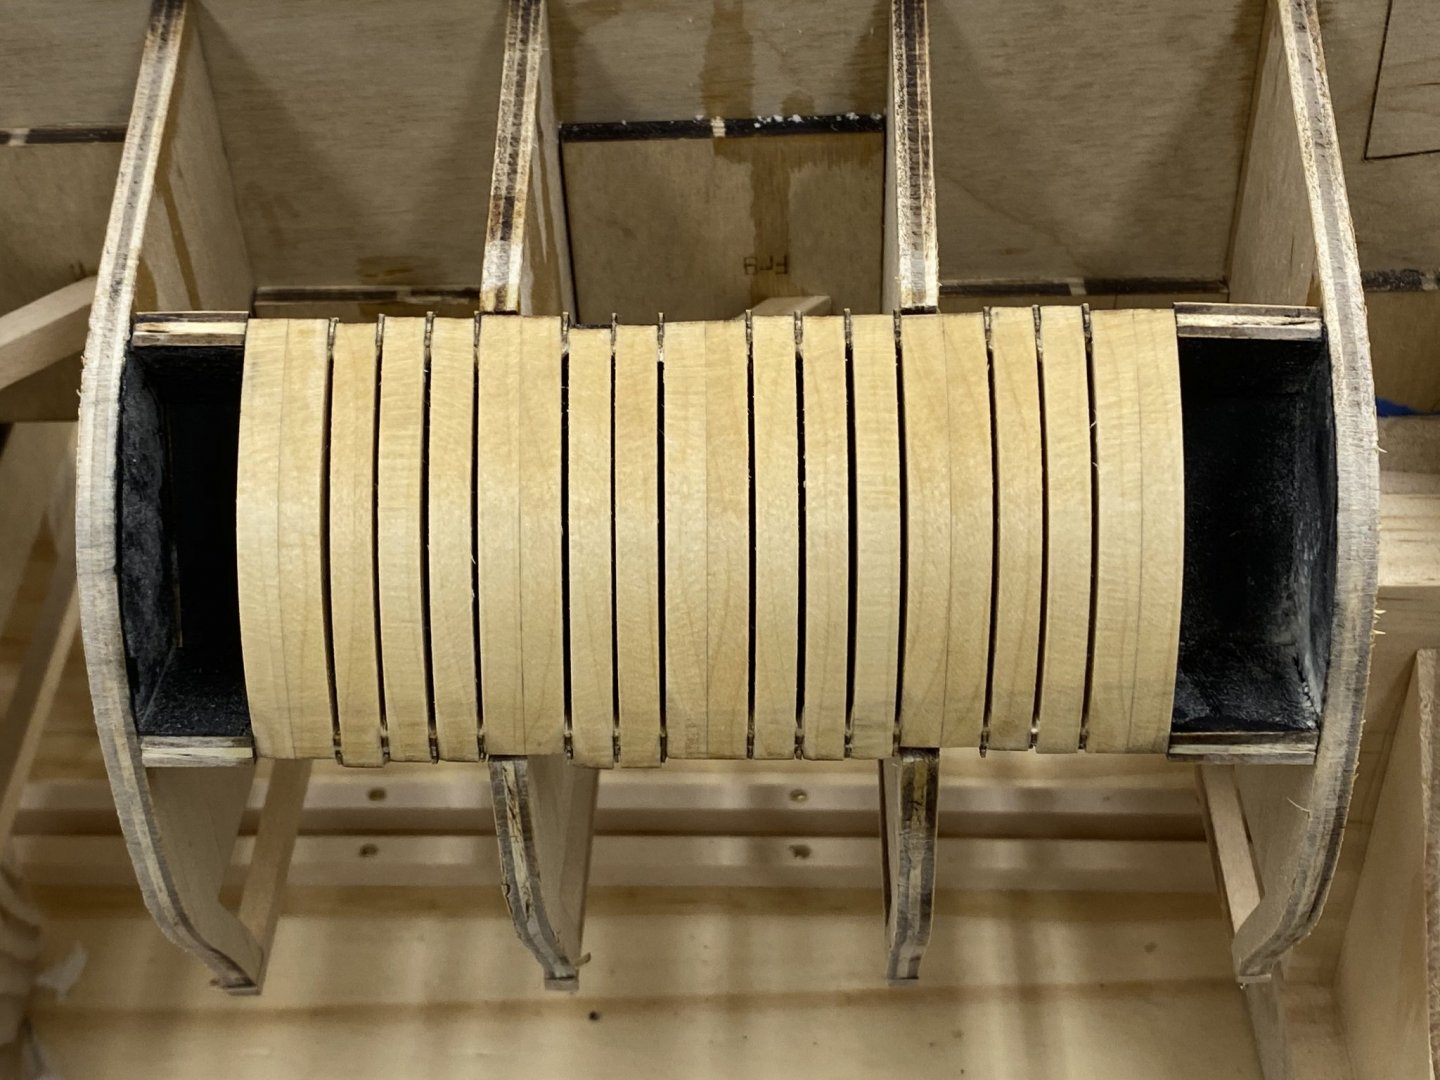
Bossman - thanks, I have a ways to go to catch up with you, in progress and quality. I got the shadow box of ribs faired and then a coat of WoP on. I have noit decided yet whether or not to cover the ribs but now I can plank over them if I wish. As installed they are quite "proud of the surface. I had to resort to 80 grit sandpaper to take it down in a reasonable time frame. Two of the ribs came "unstuck" during the process and I used medium CA to get them back min place - previously I had used Weldbond. Here is the area after fairing and one coat of WoP.
- 370 replies
-
- 3
-
-
- Model Shipways
- Confederacy
- (and 1 more)
-
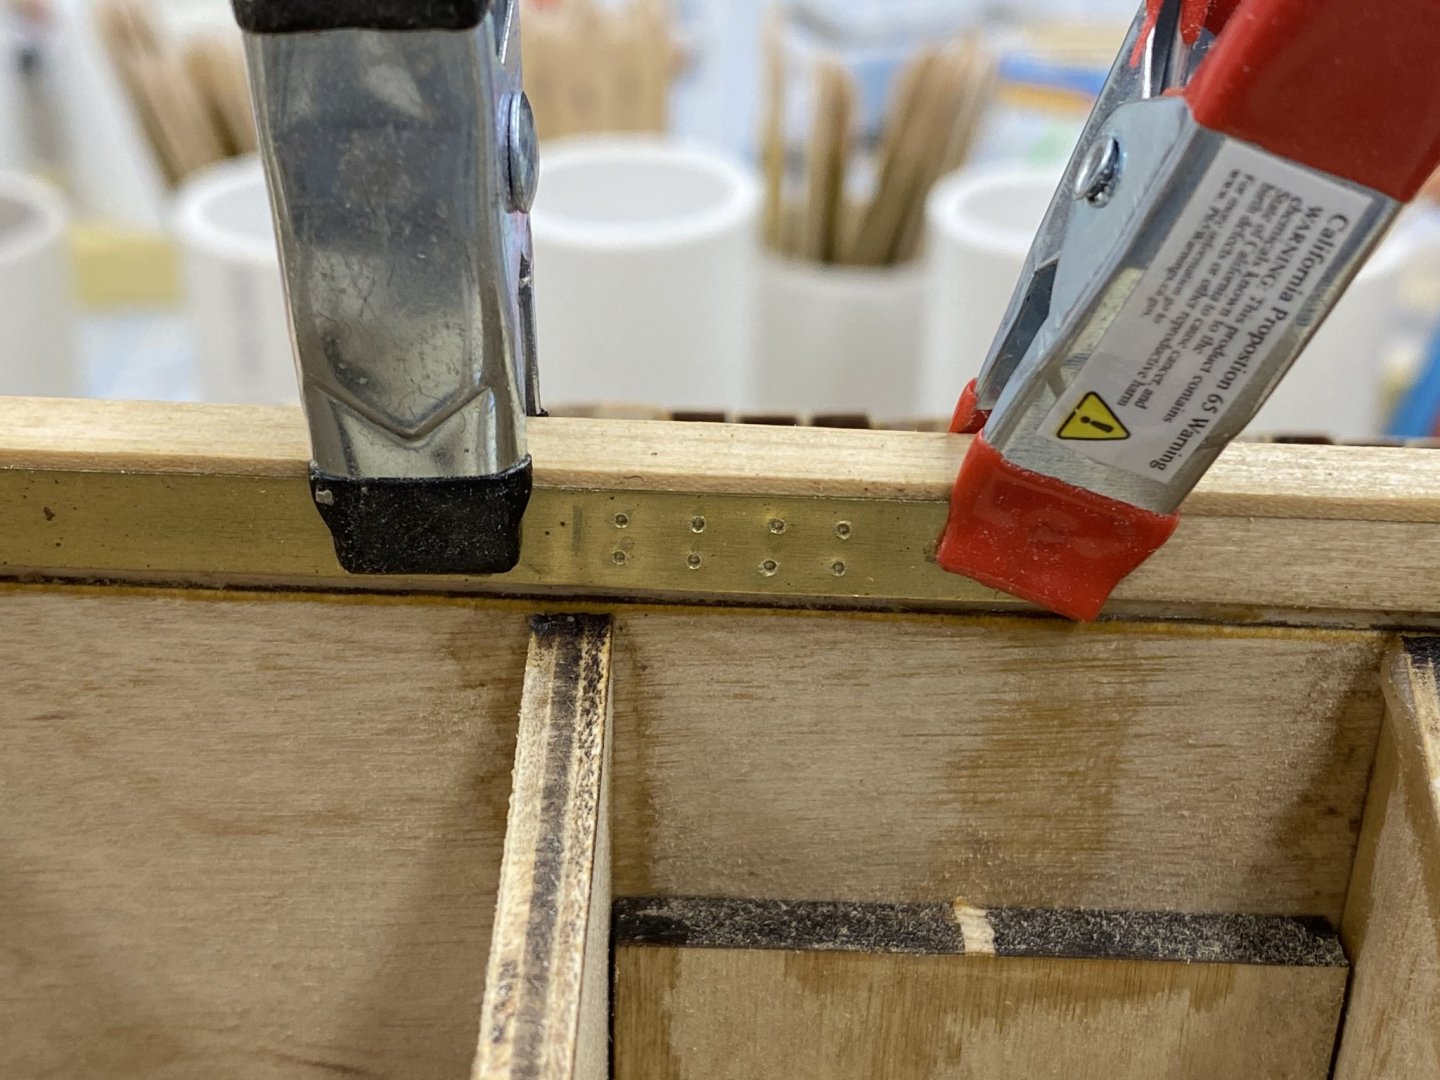
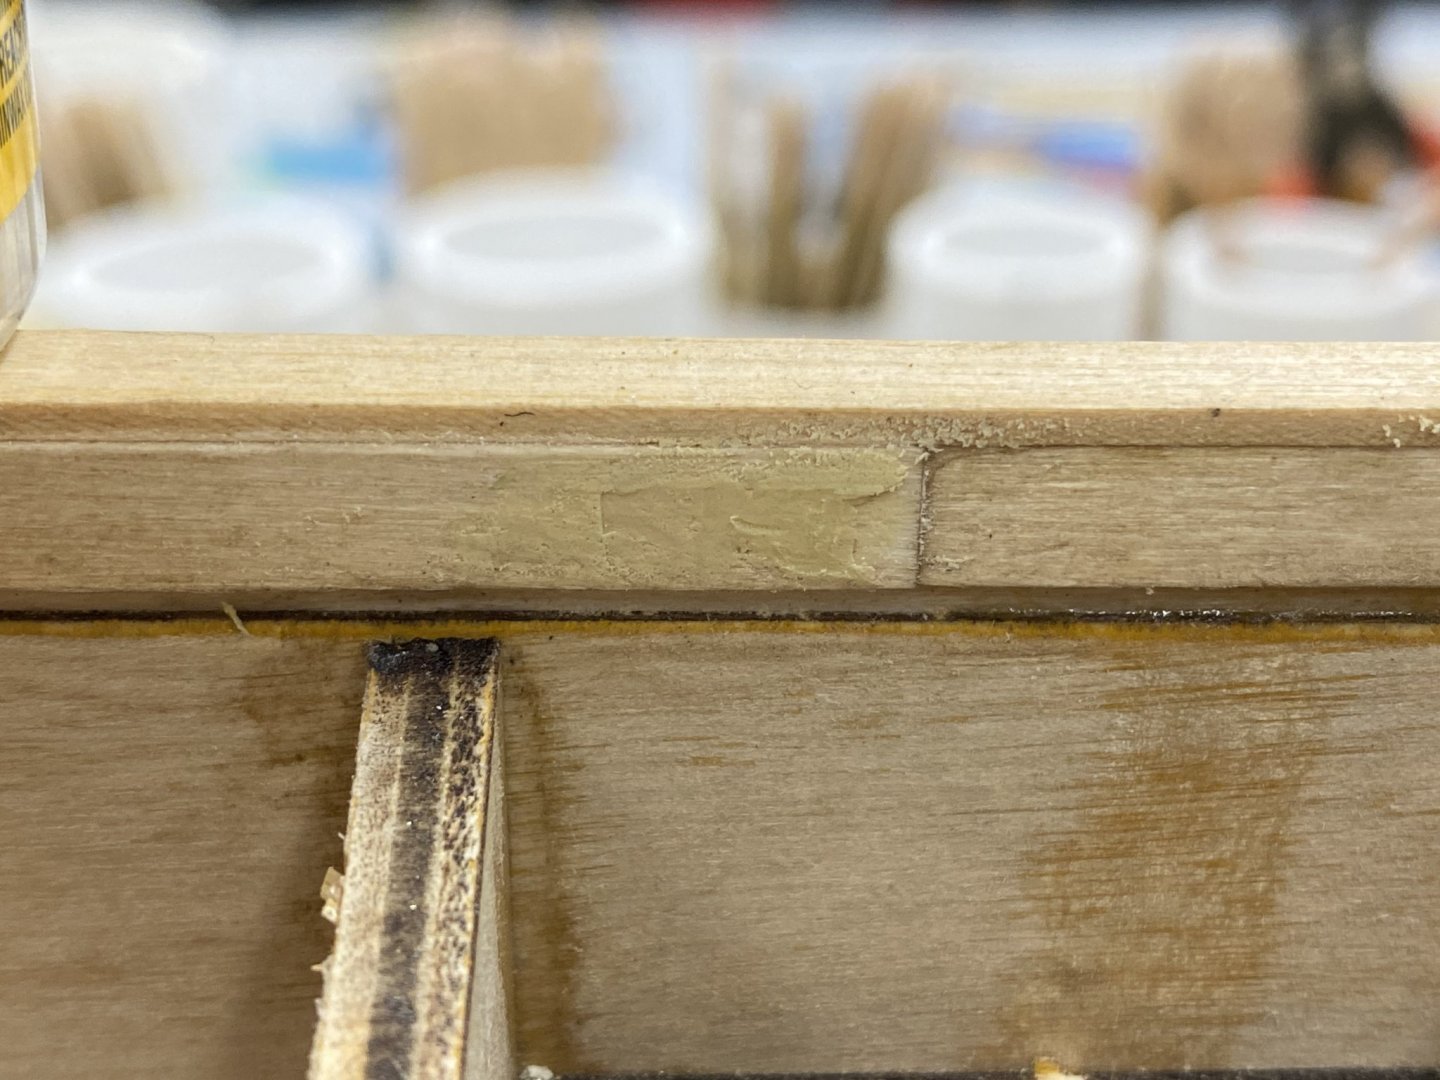
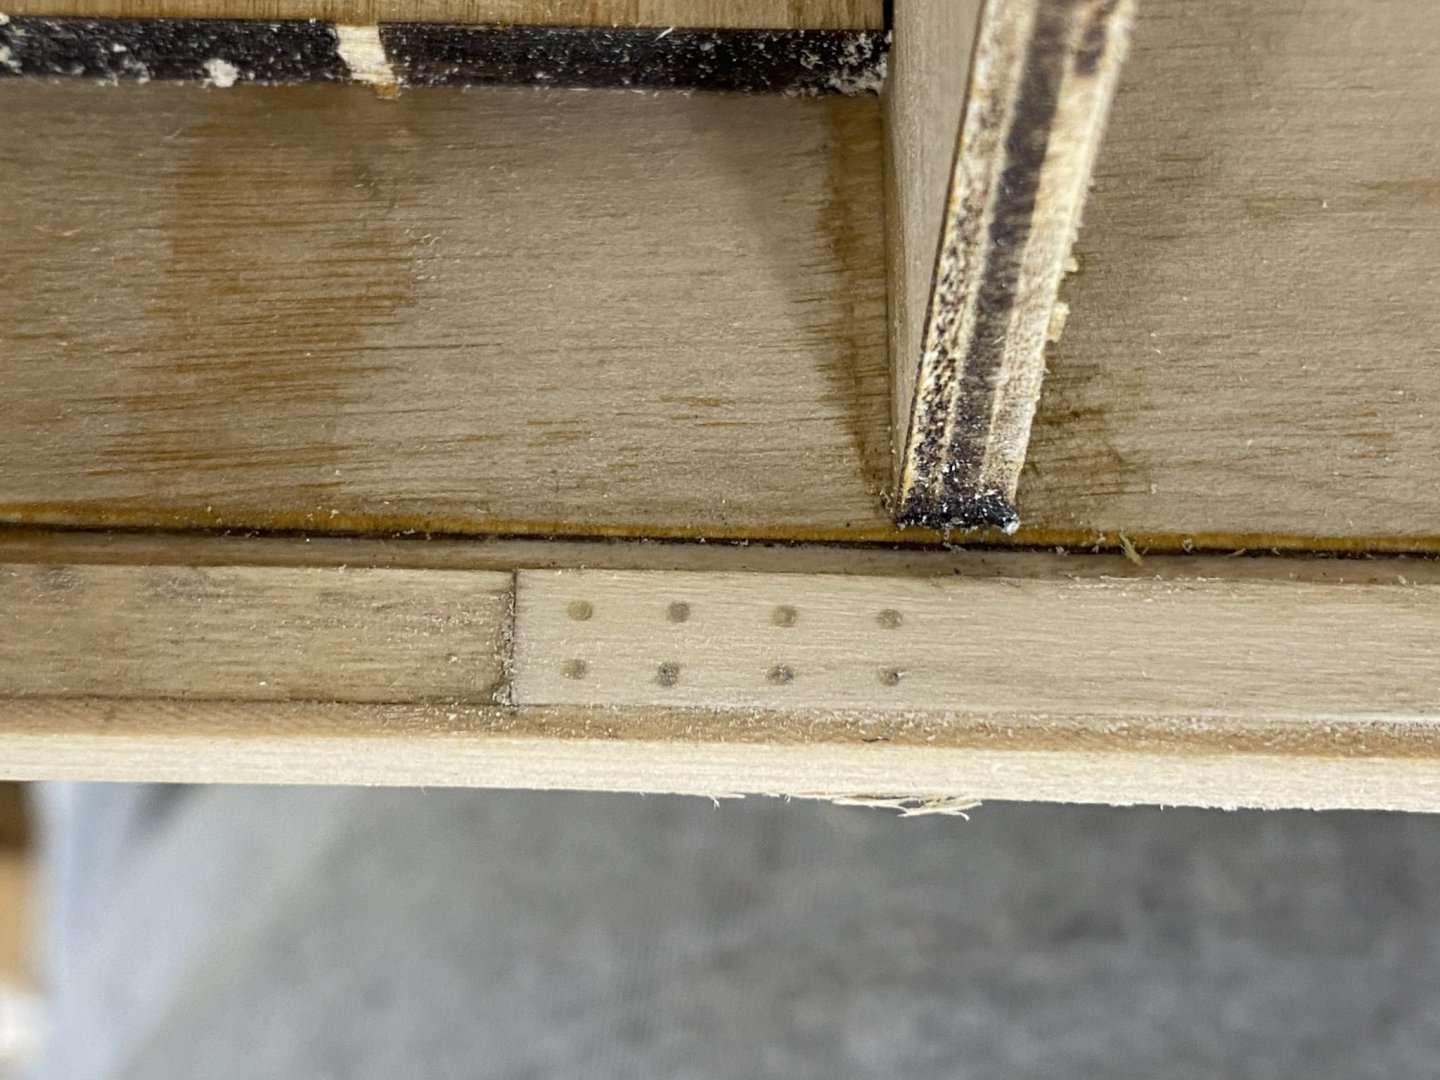
With the sample ribs waiting for glue to dry I decided to simulate the scarf joints in the keel per the instructions. My first issue is that I normally only have Bondo filler because it is much finer than the "regular" wood fillers. The bad news is that it comes only in black or red so it will not work for areas which will be stained/varnished. So another trip to Lowe's and I got two shades of Minwax wood putty. I think the natural pine is what I will use on the keel since it will has the natural basswood color (no stain). Here is what I got With the putty issue resolved I decided to build a jig to get the same pattern at all four locations. I assumed that the iron bolts extended all the way through the keel so there would be heads covered with plugs on both sides - two joints thus four sets of bolt heads. The jig is a simple piece of 1/4" X 1/16 brass plate with the eight holes (two rows of four) drilled out with the instructions suggested #70 drill bit. Here is the jig clamped to the keel ready to drill the holes. I cleaned out the holes with a sharp pick, sanded and applied the wood putty. Yea, it is hard to see but trust me the holes are there. After the putty dried I sanded the area first with 220 grit then 400. And this is what the first one looks like before the WoP. Yea I know itb is upside down - the MSW site did that - my photo is right side up??? It clearly needs a wipe down with paint thinner but I will wait and do the entire keel in one pass. Only three more to do.
- 370 replies
-
- 5
-
-
- Model Shipways
- Confederacy
- (and 1 more)
-
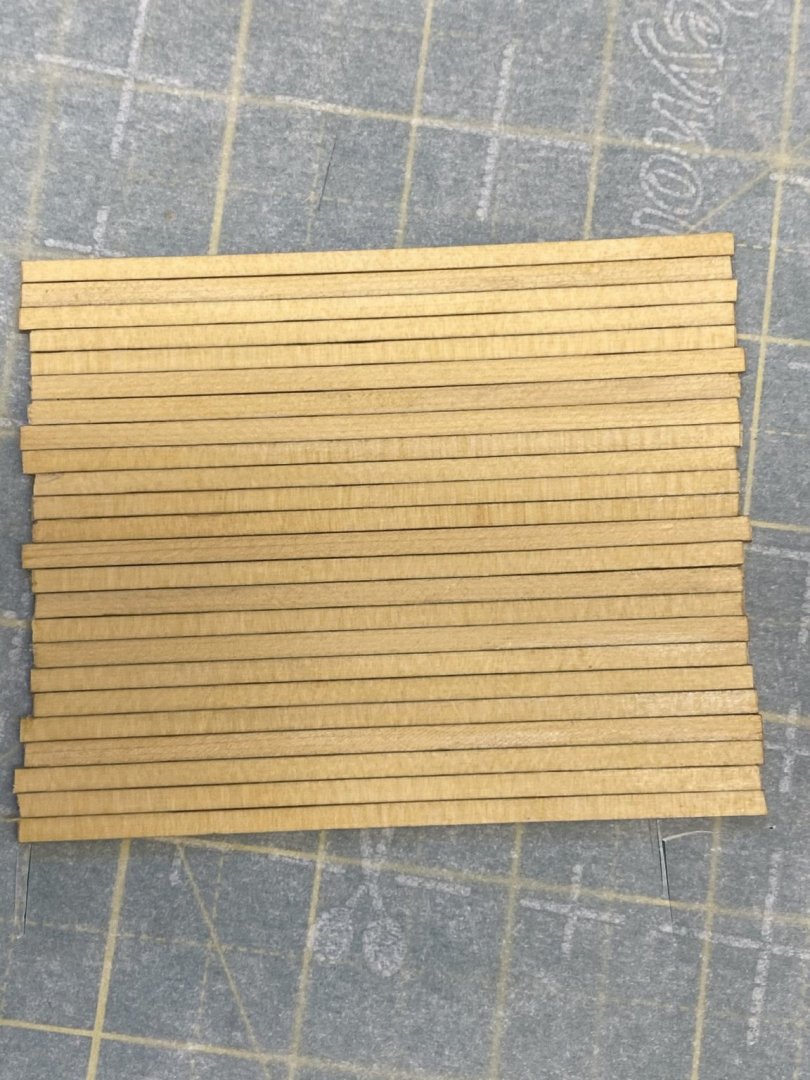
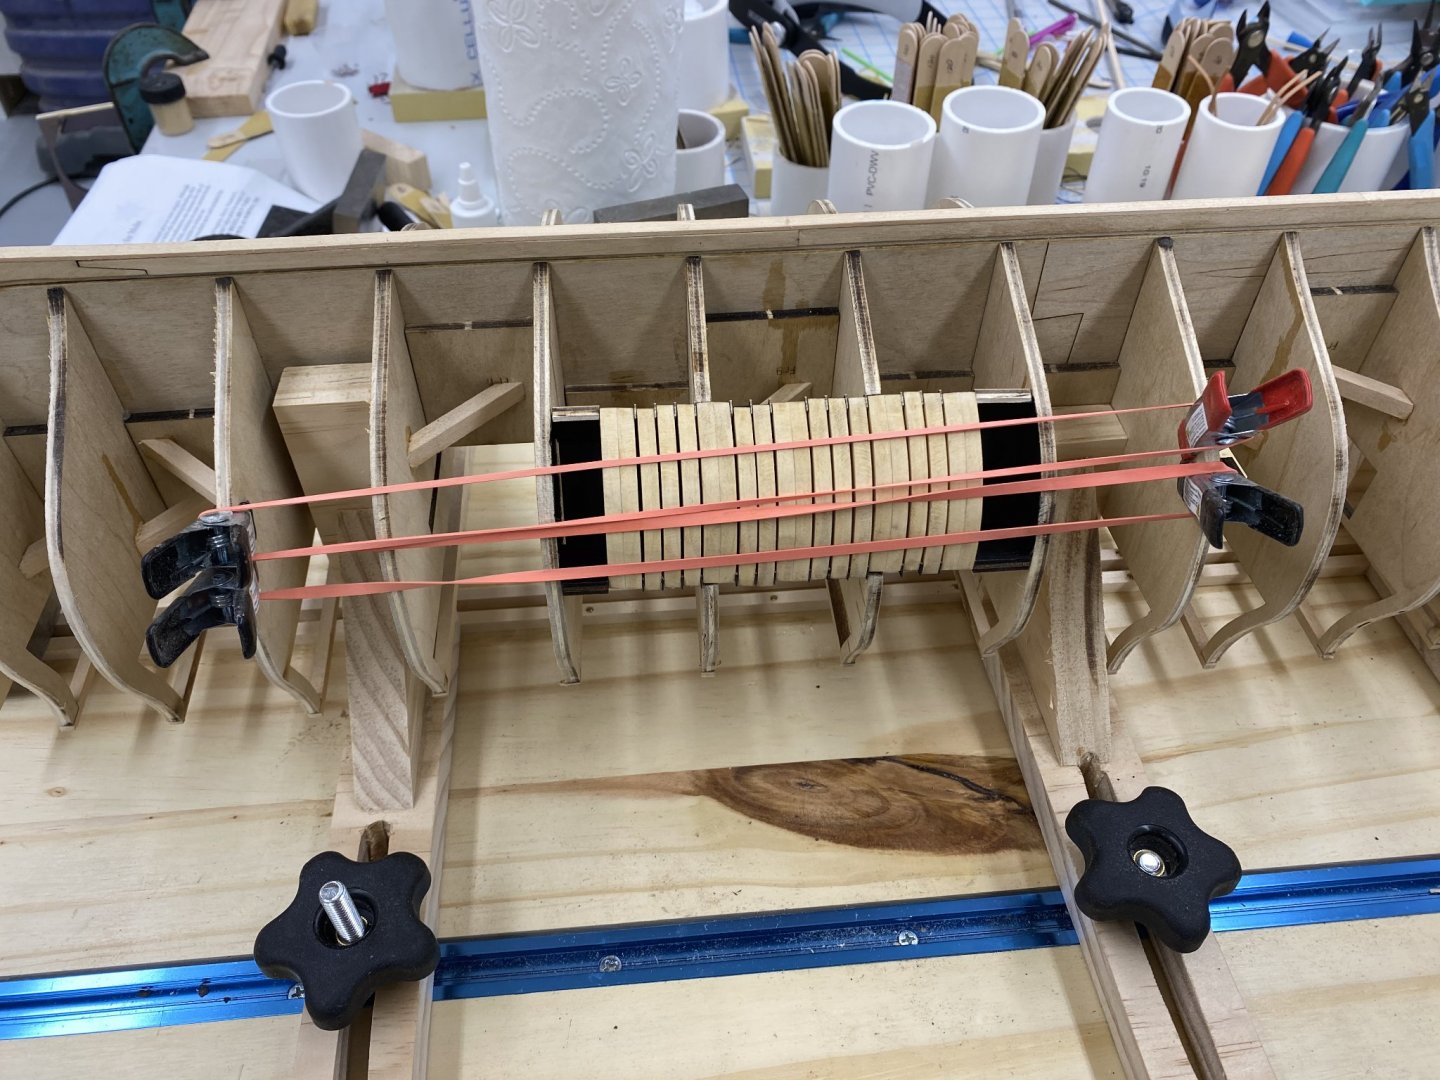
I believe I successfully faired the hull although the actual success will not be know until the planking is done. I did not get ALL of the char off EVERY area but I checked with a batten what seemed like a hundred times and everything "seems" to be okay. I will probably check some areas again before the planking starts to try and catch any "bad" areas before I stumble across them while planking. I did the fairing before planking the lower decks as I was waiting from some more Alaskan Cedar from Syren. I discovered enough odds and ends min the "wood bin" to make enough 1/8" X 1/16" pieces to cover the three lower decks so I can start that next. In the mean time I decided to follow along the instructions with the shadow box and sample hull ribs. The instructions say the ribs "stand slightly proud of the hull shape". So I guess I could have glued them up with the laser char still on them and made sure I got it all off during fairing. My mistake, I spent a good deal, of time sanding the char off and gluing the wide frames up. I wish I could make the seams almost disappear like Chuck did on the prototype shown in the instructions (page 13). Here they are with the glue drying. The rubber bands was the best I could figure out to keep some pressure on them while the glue set. Having moved the hull off of and back onto the build board several times (plus turning in over once or twice) I decided that I needed some way to keep the hull straight as it is quite easy to get in at least off-center if not actually misaligned with the current method of securing. So I added two 1/4" X 1/4" strips down the center to hold the keel. I decided to screw them down (my default method would have been CA) using some very small wood screws I got from Micro-Mark so I can easily remove one so I can use the board again with a different keel size. The holder extends the entire length of the build board - square stock was in two foot pieces so this way I did not have to cut it. I used piece of carrier sheet that held the keel with a piece of masking tape on one side as the satnd in for the keel when securing the second piece. It seems to have worked as I managed to get the keel min the slot without significant force so I will call this one win. Here is a shot of the slot and the cedar pieces for planking the lower decks - I already used a carpenters pencil on the edges to simulate caulking. Although I wonder how much these decks will actually show considering all the other "stuff" that will be in and around the hatchways.

-
Bow fillers are done installed along with the other pieces so it is on to the stern framing.


- 370 replies
-
- 1
-
-
- Model Shipways
- Confederacy
- (and 1 more)