cdrusn89
-
Posts
1,940 -
Joined
-
Last visited
Content Type
Profiles
Forums
Gallery
Events
Everything posted by cdrusn89
-
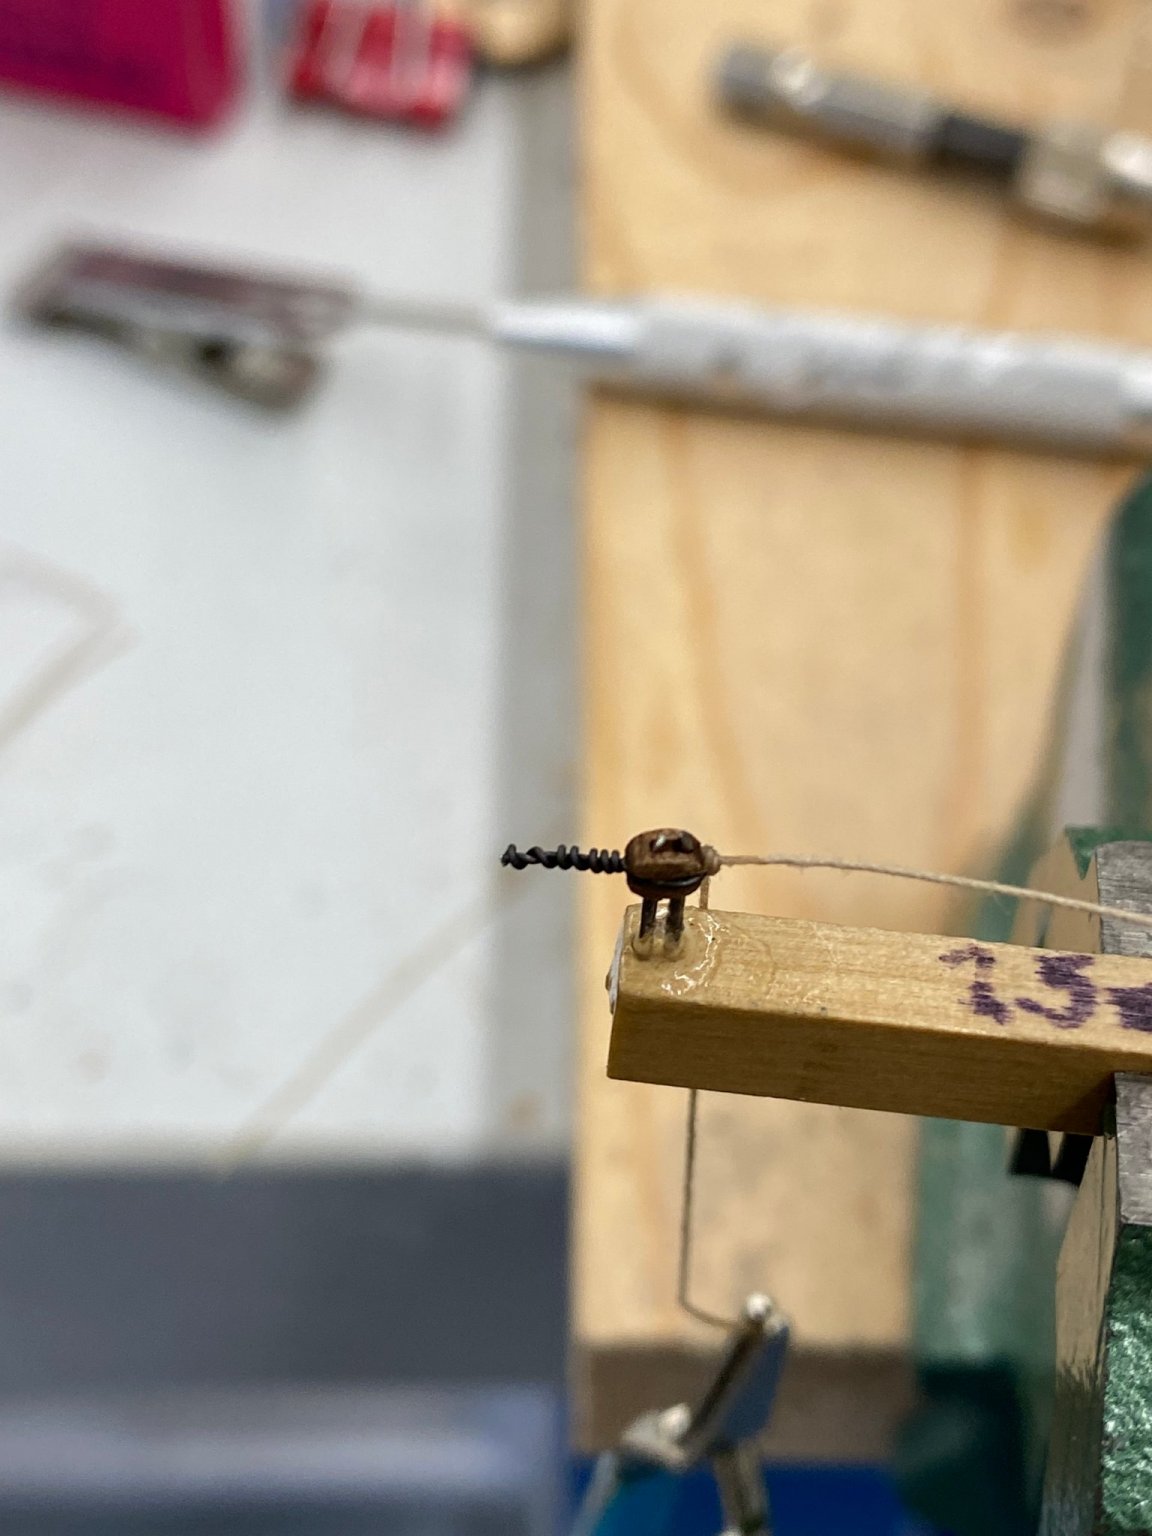
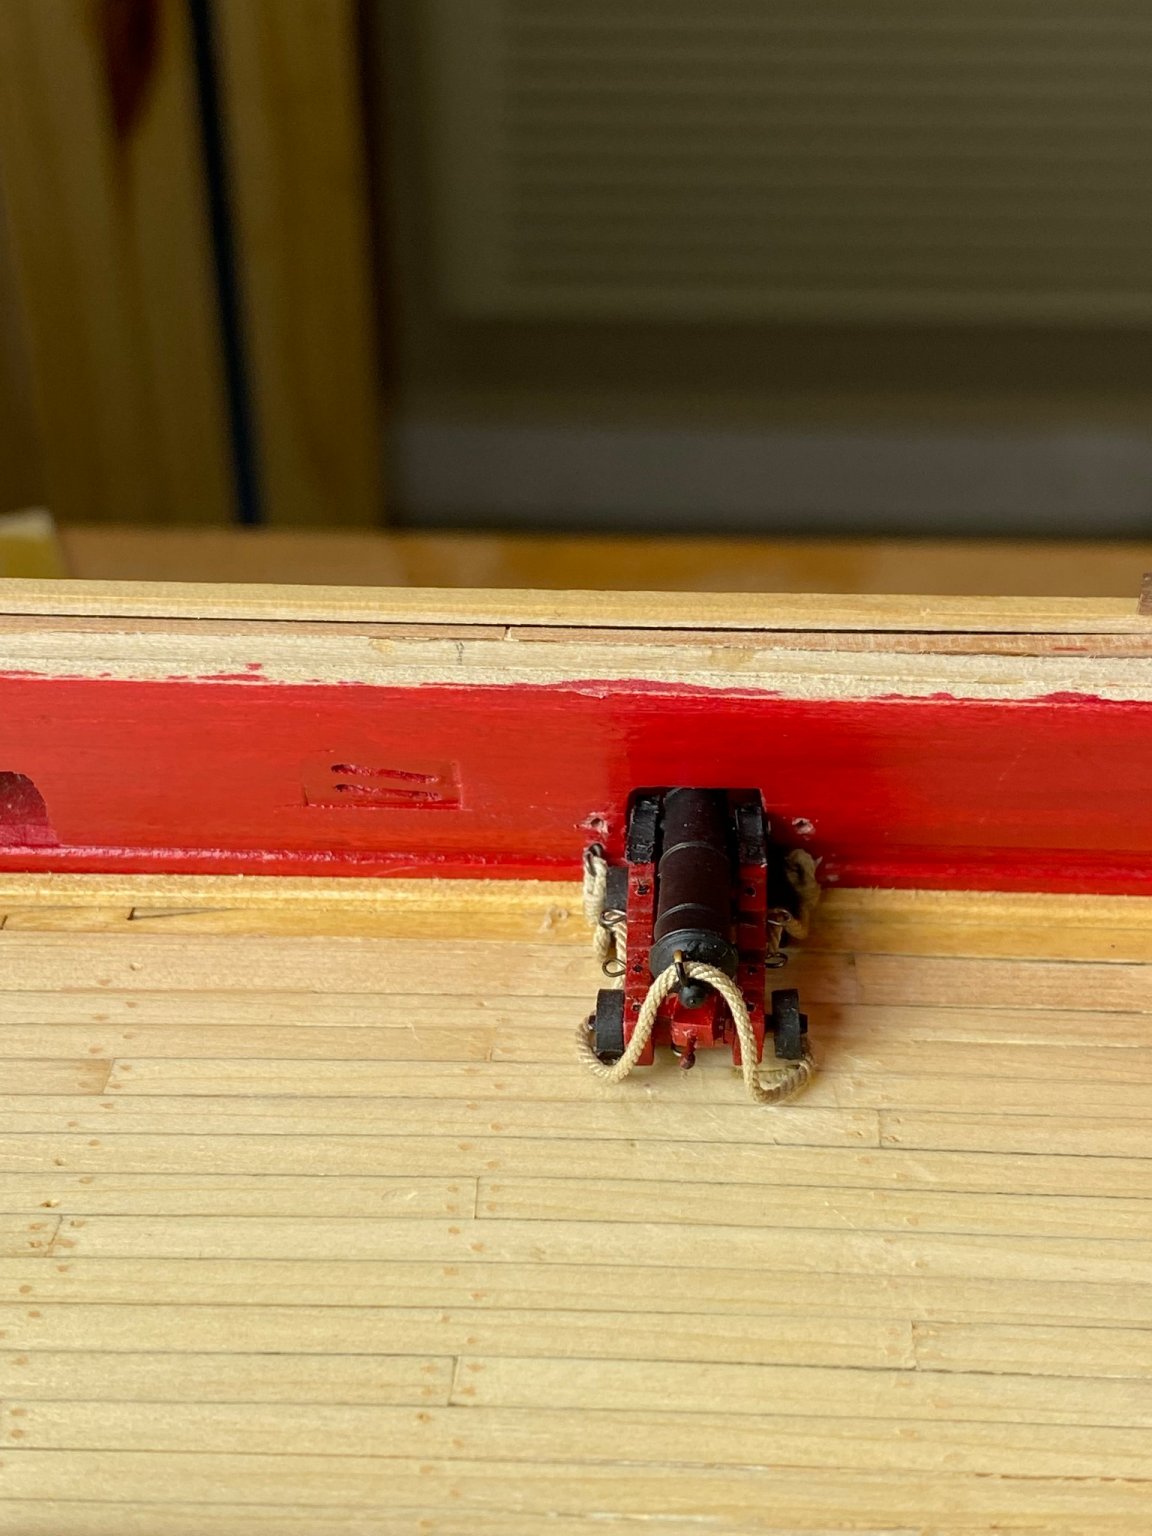
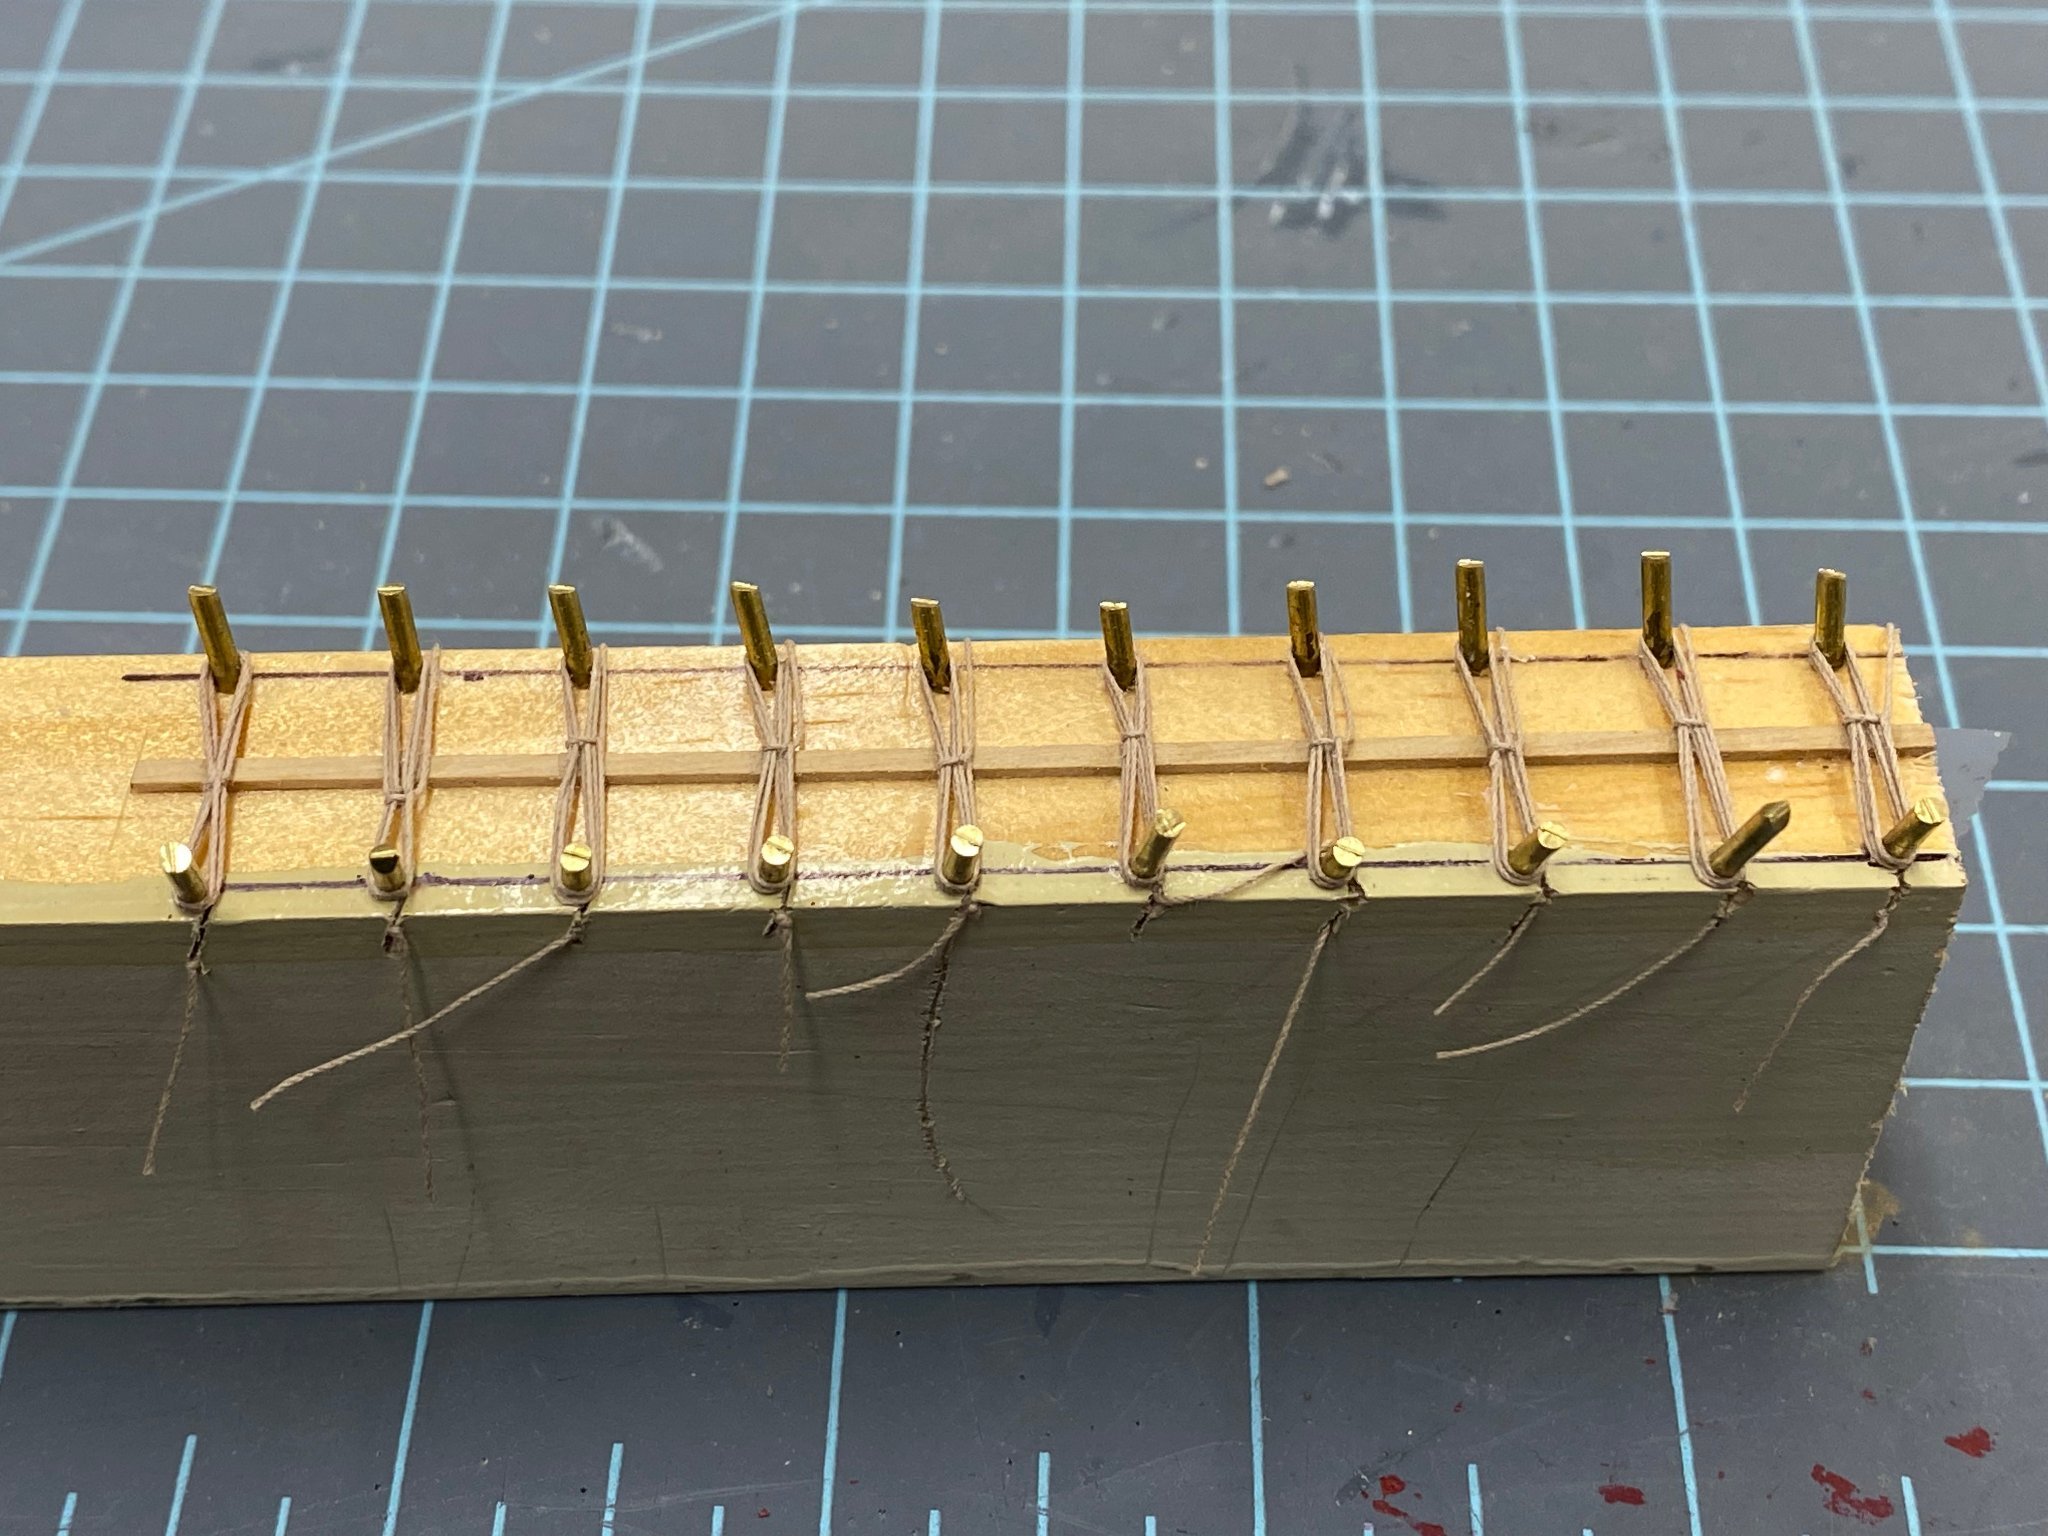
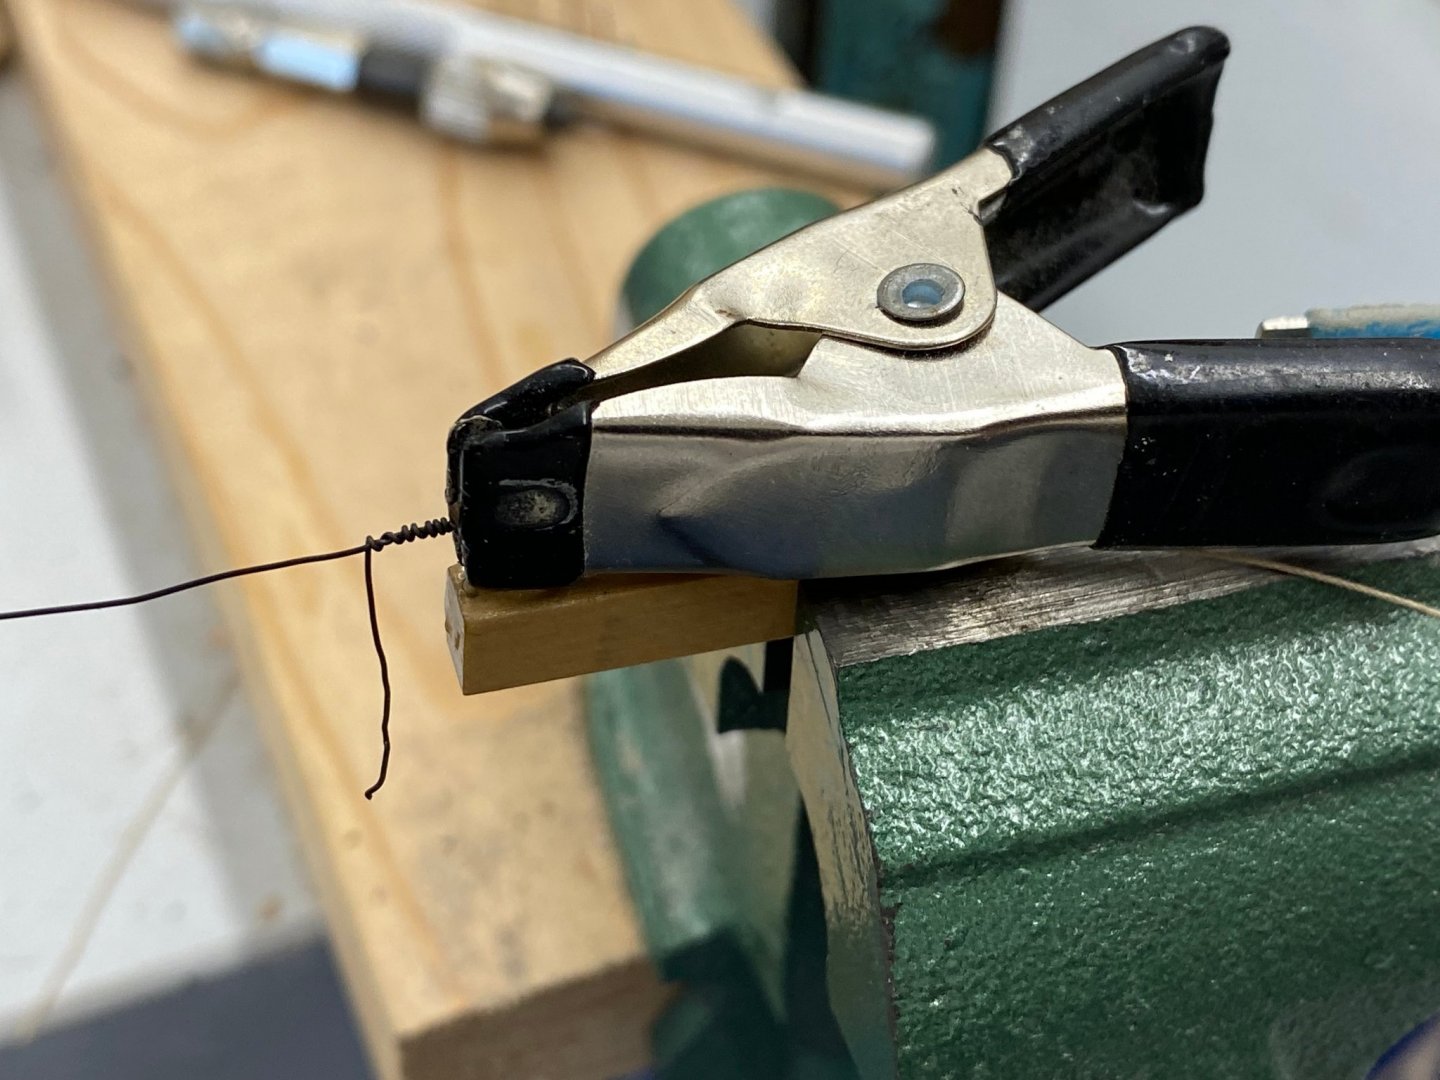
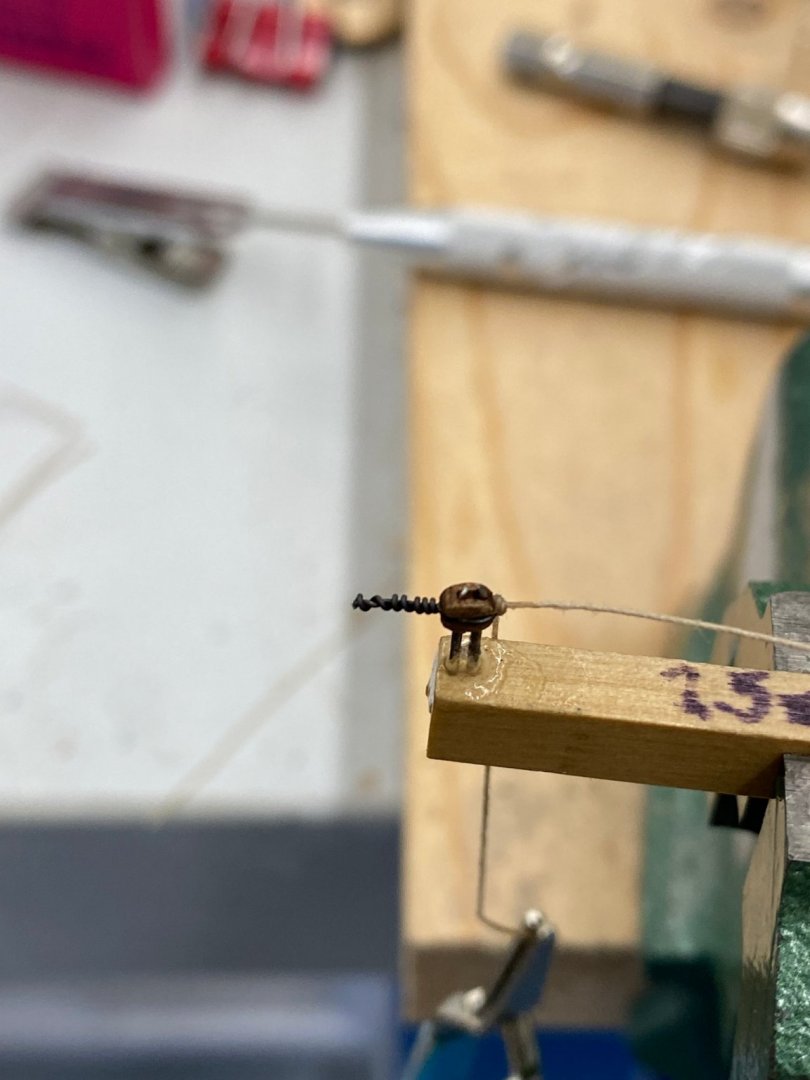
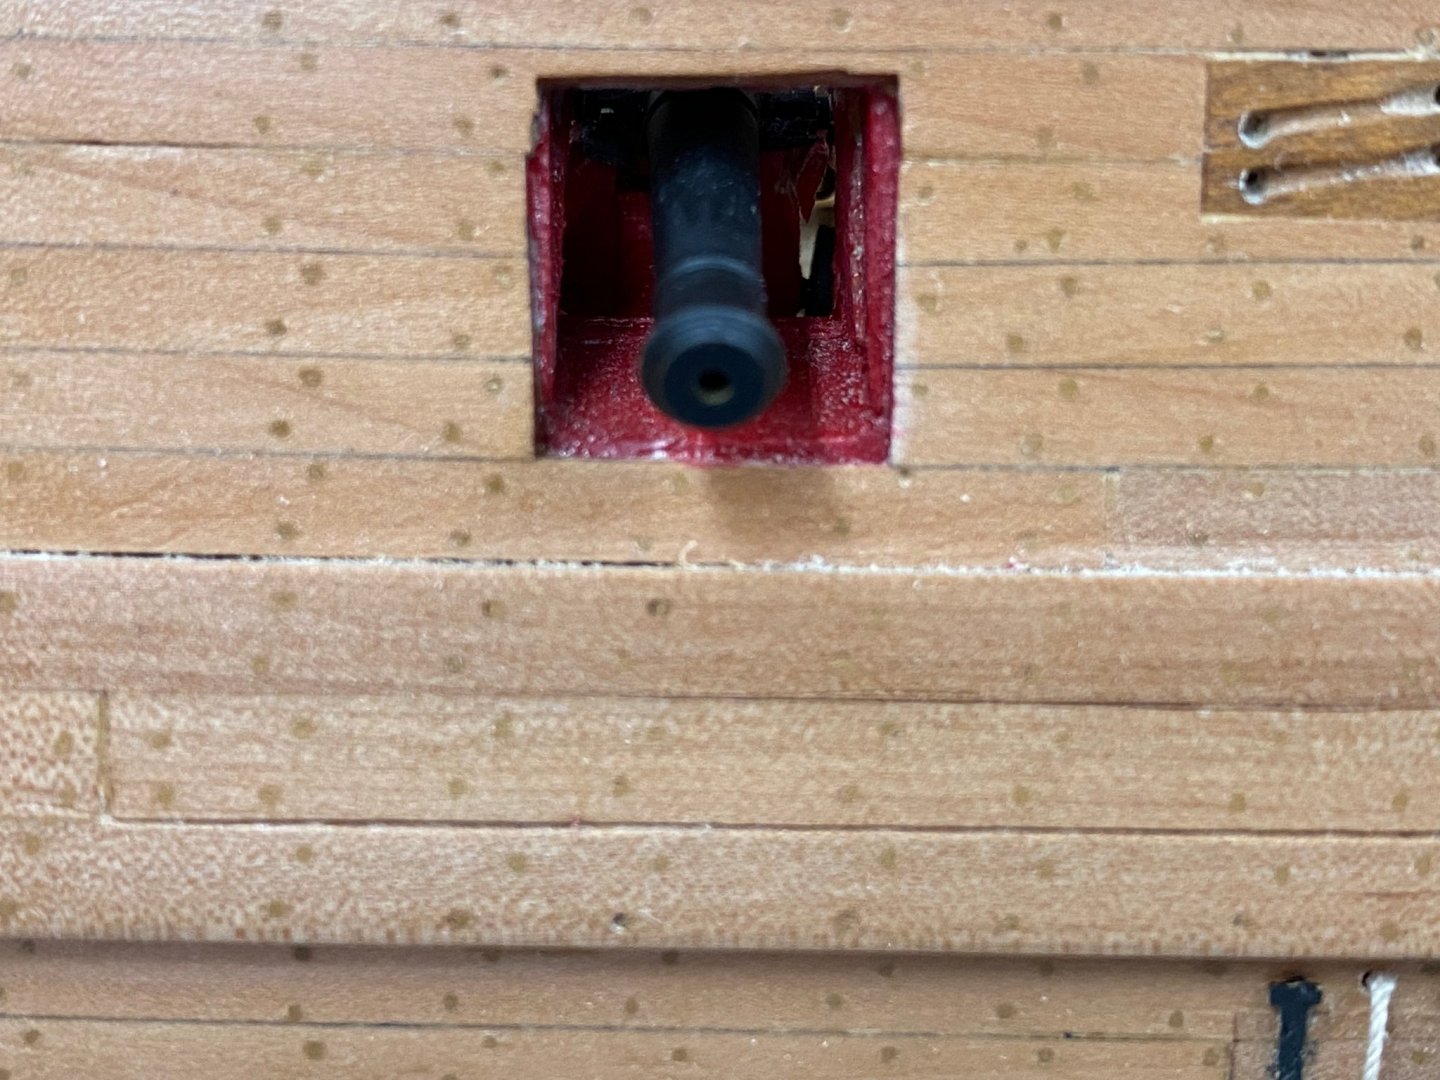
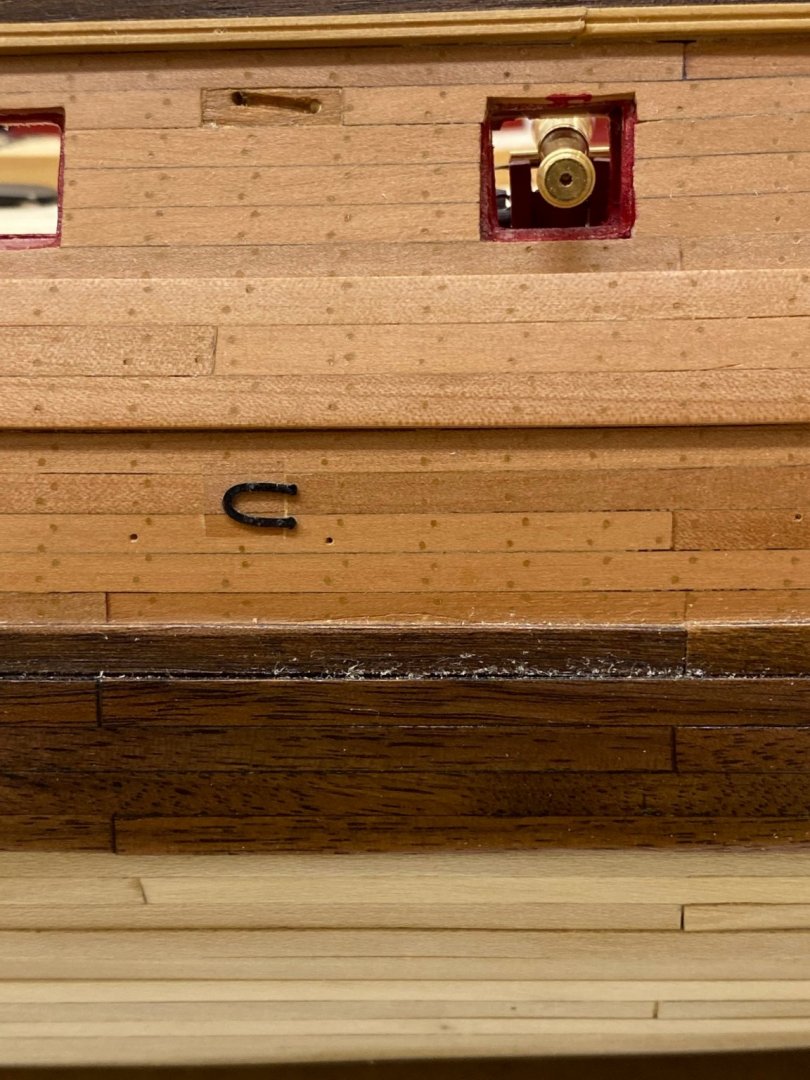
 After having the "hook" that I formed out of the annealed steel wire (32 gauge I think) that I used to "strop" the 2.5mm blocks broke on three successive blocks as I was trying to hang the block on the eyebolt in the bulwark (for the out-haul tackle) I decided that I was going to have to try another approach. That and finding that the connection to the becket on most of the blocks I already had made was going to be too large led me to begin redoing all of the remaining 25 sets of out-haul tackle blocks with becket. Not much fun but I think I will go crazy trying to use what I already have. Lesson learned, try to use what you pre-make before you get too far down the road. Sometimes what seems like it should work, actually doesn't. So I got my jig for holding the 2.5mm blocks and after removing the existing stroping and line I put the block in the jig. Make a loop in the line that becomes attached to the becket and loop it over the block. Make a "U" shaped piece of stropping wire (I use 32 ga) and catch the loop of line against the end of the block. I sometimes gently press the wire into the slots in the block with a pair of pliers. But be careful it is possible to crush the block both with the pliers and in the next step. Do not ask me how I know. I use a clamp to hold the wire for the next step which is to wind the two ends of the wire around each other to form a "shaft". Cut the excess wire off and cross the ends of the line over each other a time or two and put a dot of CA on the juncture and cut off the short end. Now the "shaft" goes into the bulwark and with a small amount of CA will stay there in the correct orientation so that the line from the block on the carriages comes out at the bottom of the bulwark block and down to the deck where it is secured with a dot of CA and covered with a rope coil. Not the way it would look in "real life" but close enough for "government work" as we used to say in the USN.

- 370 replies
-
- 2
-

-
- Model Shipways
- Confederacy
- (and 1 more)
-
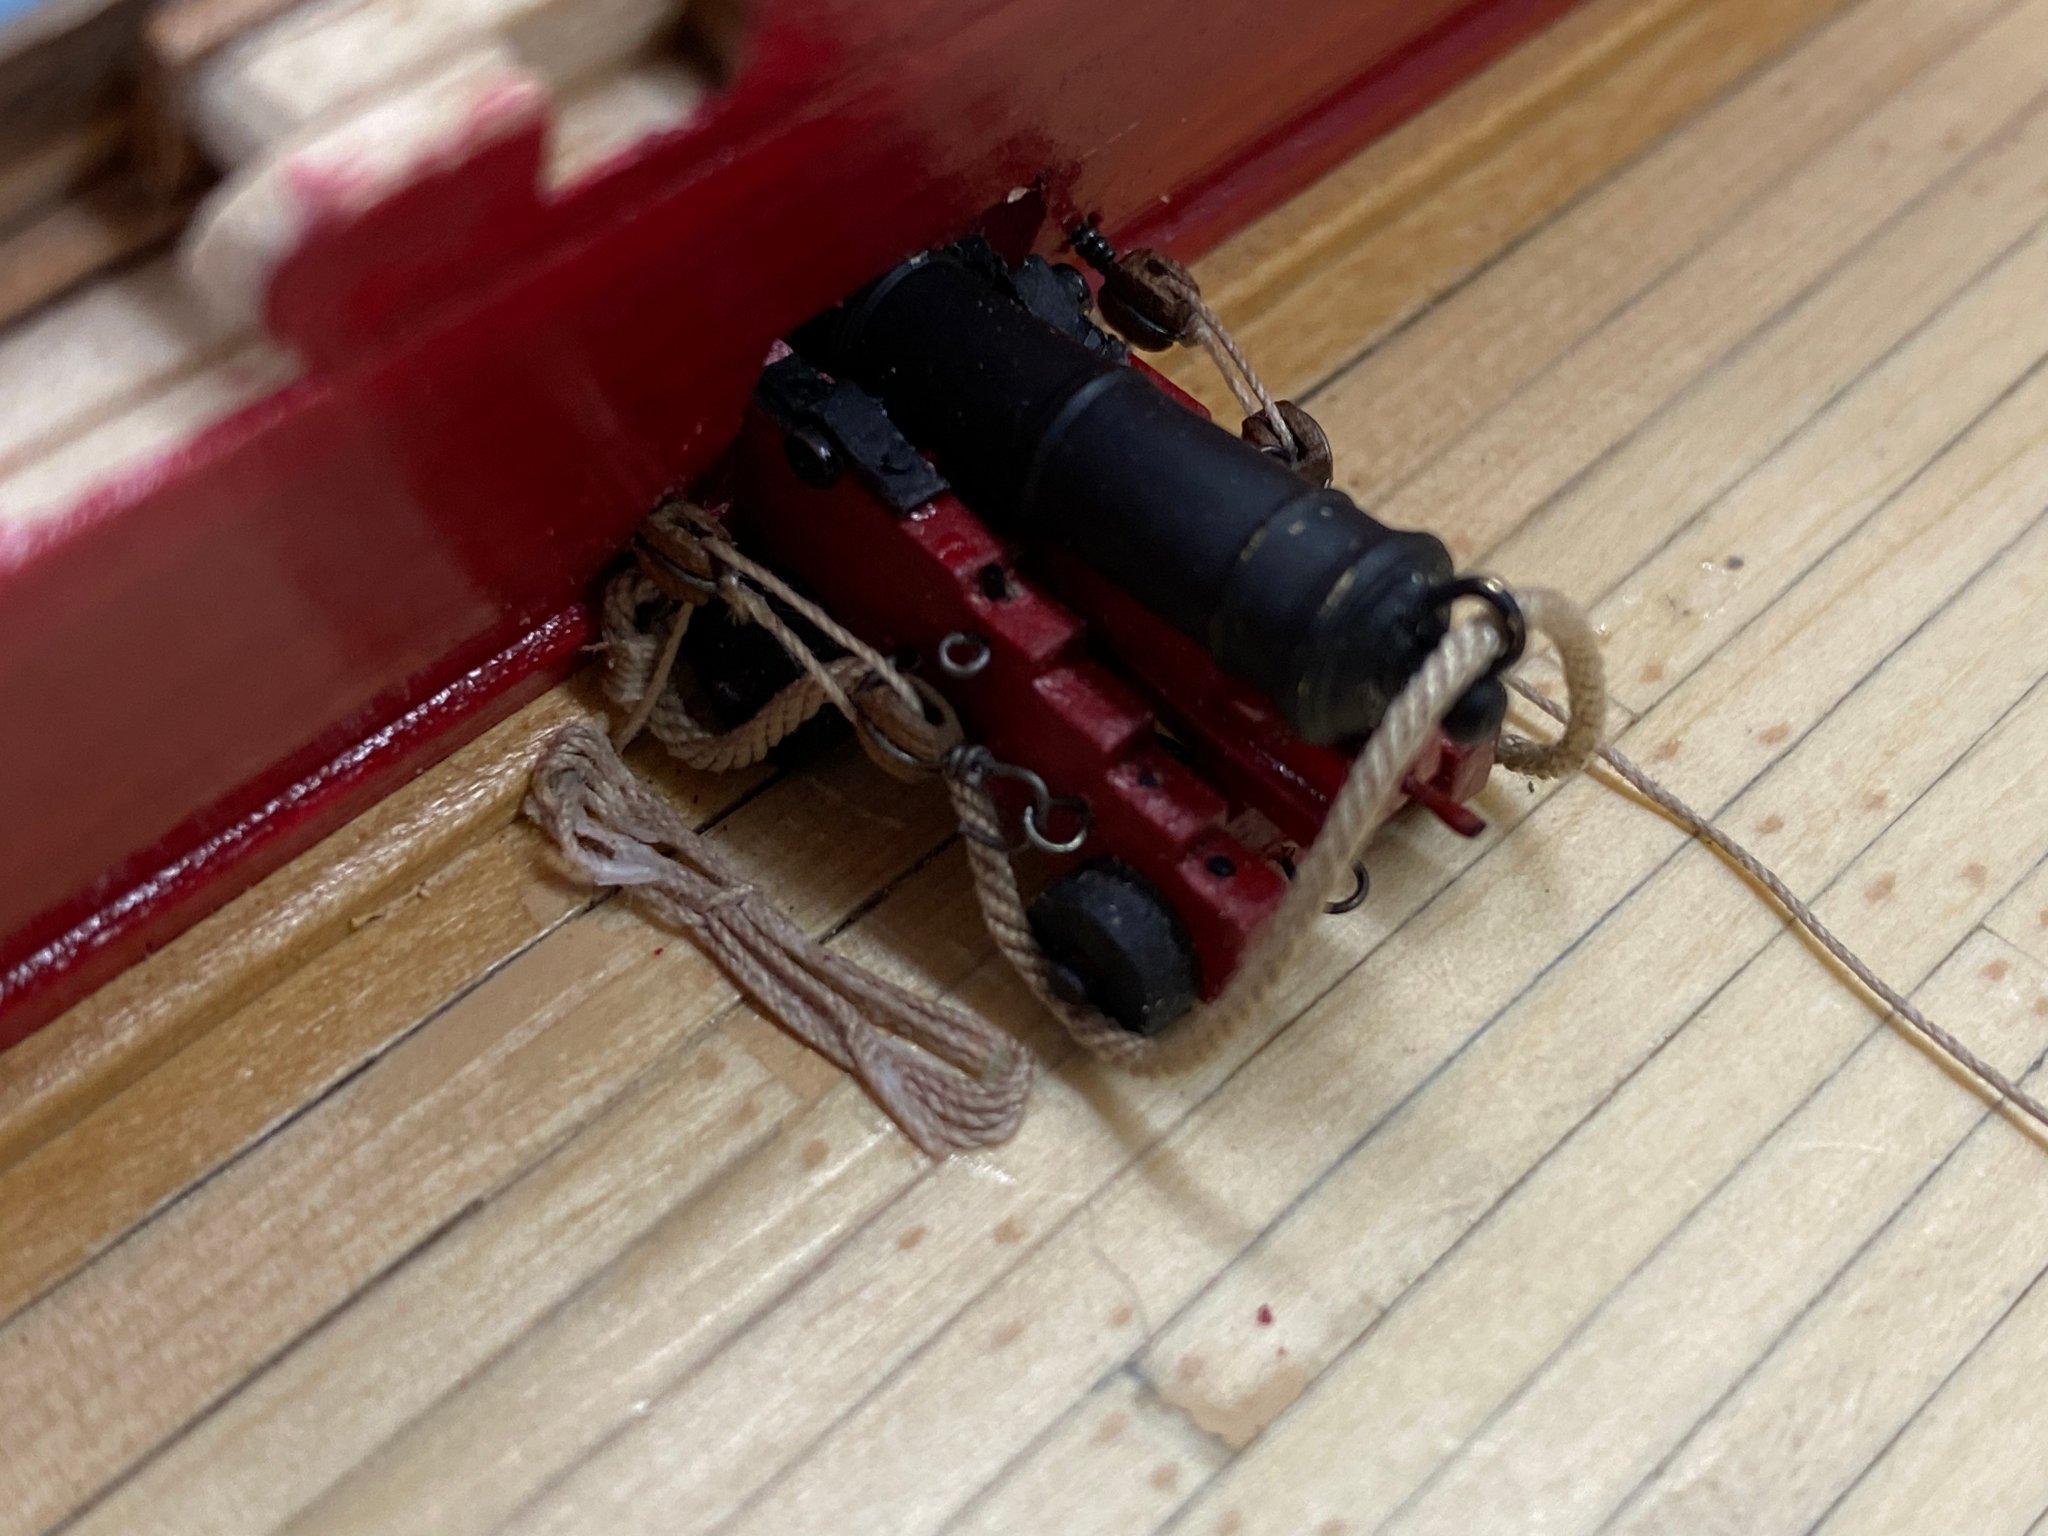
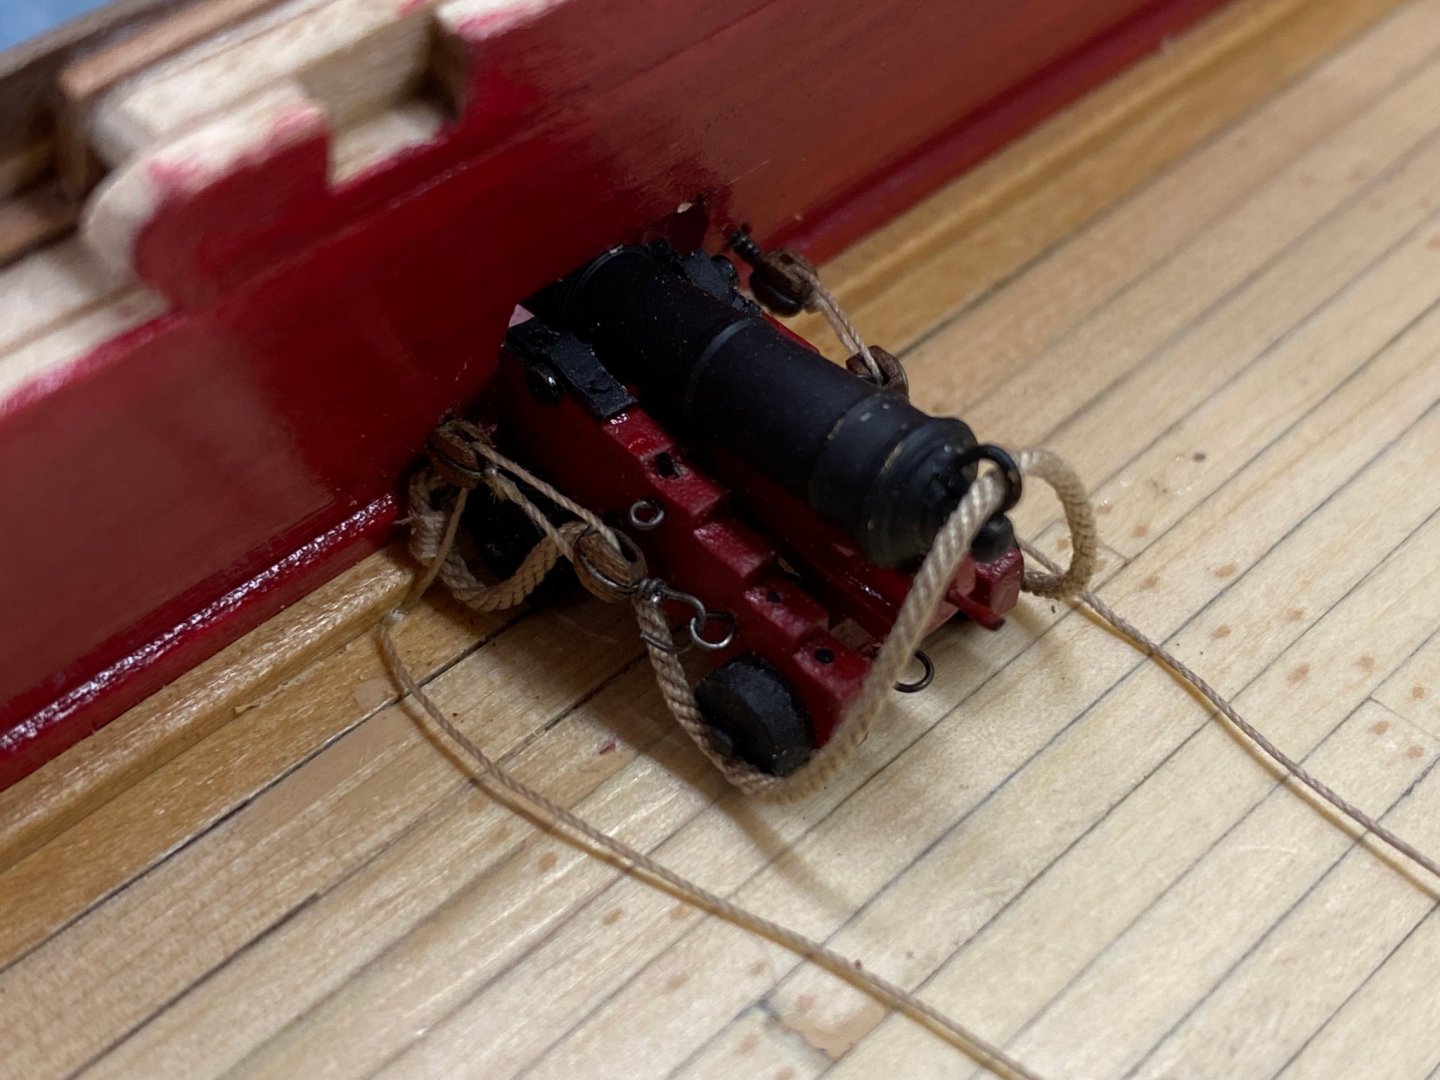
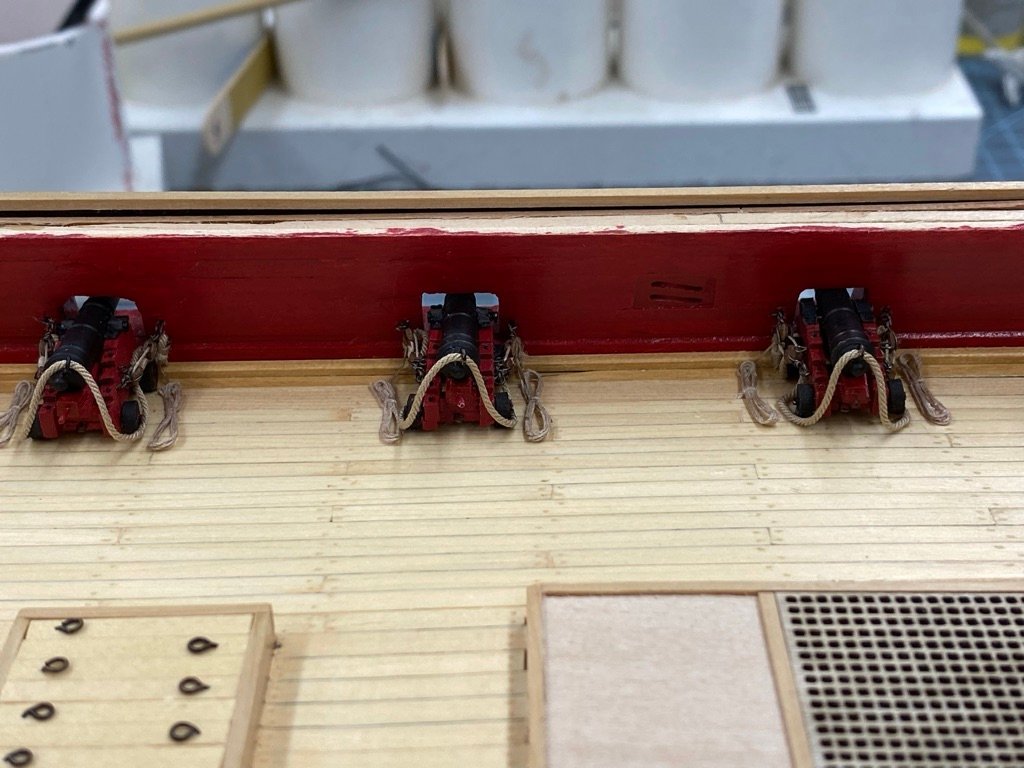
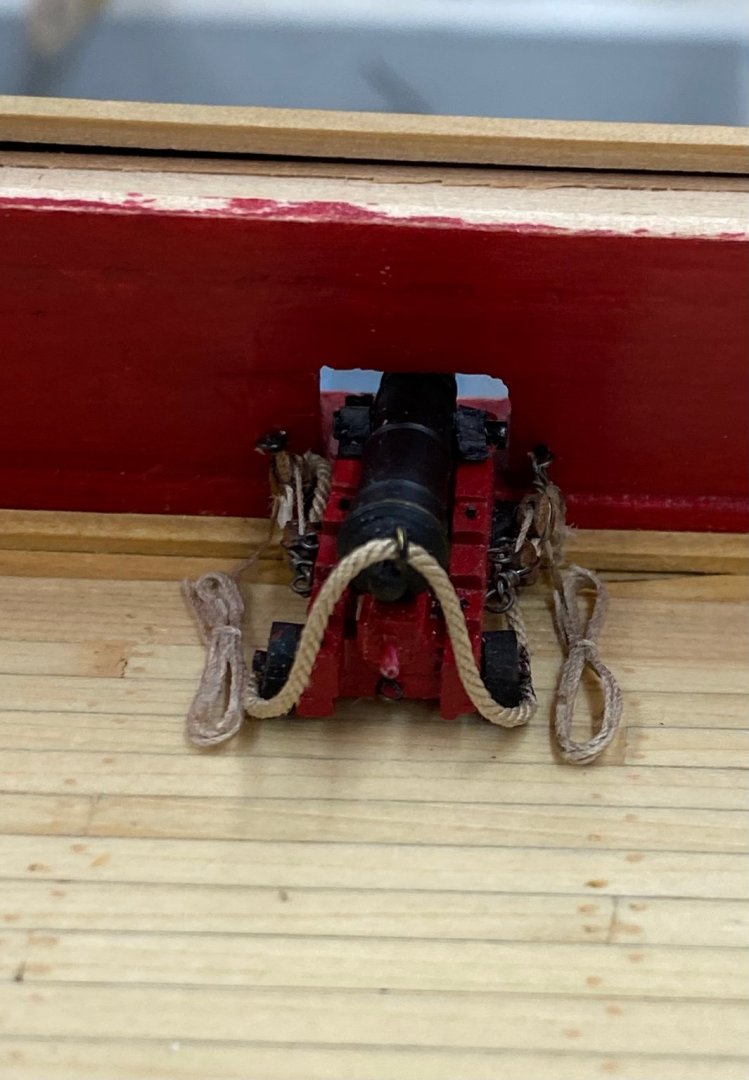
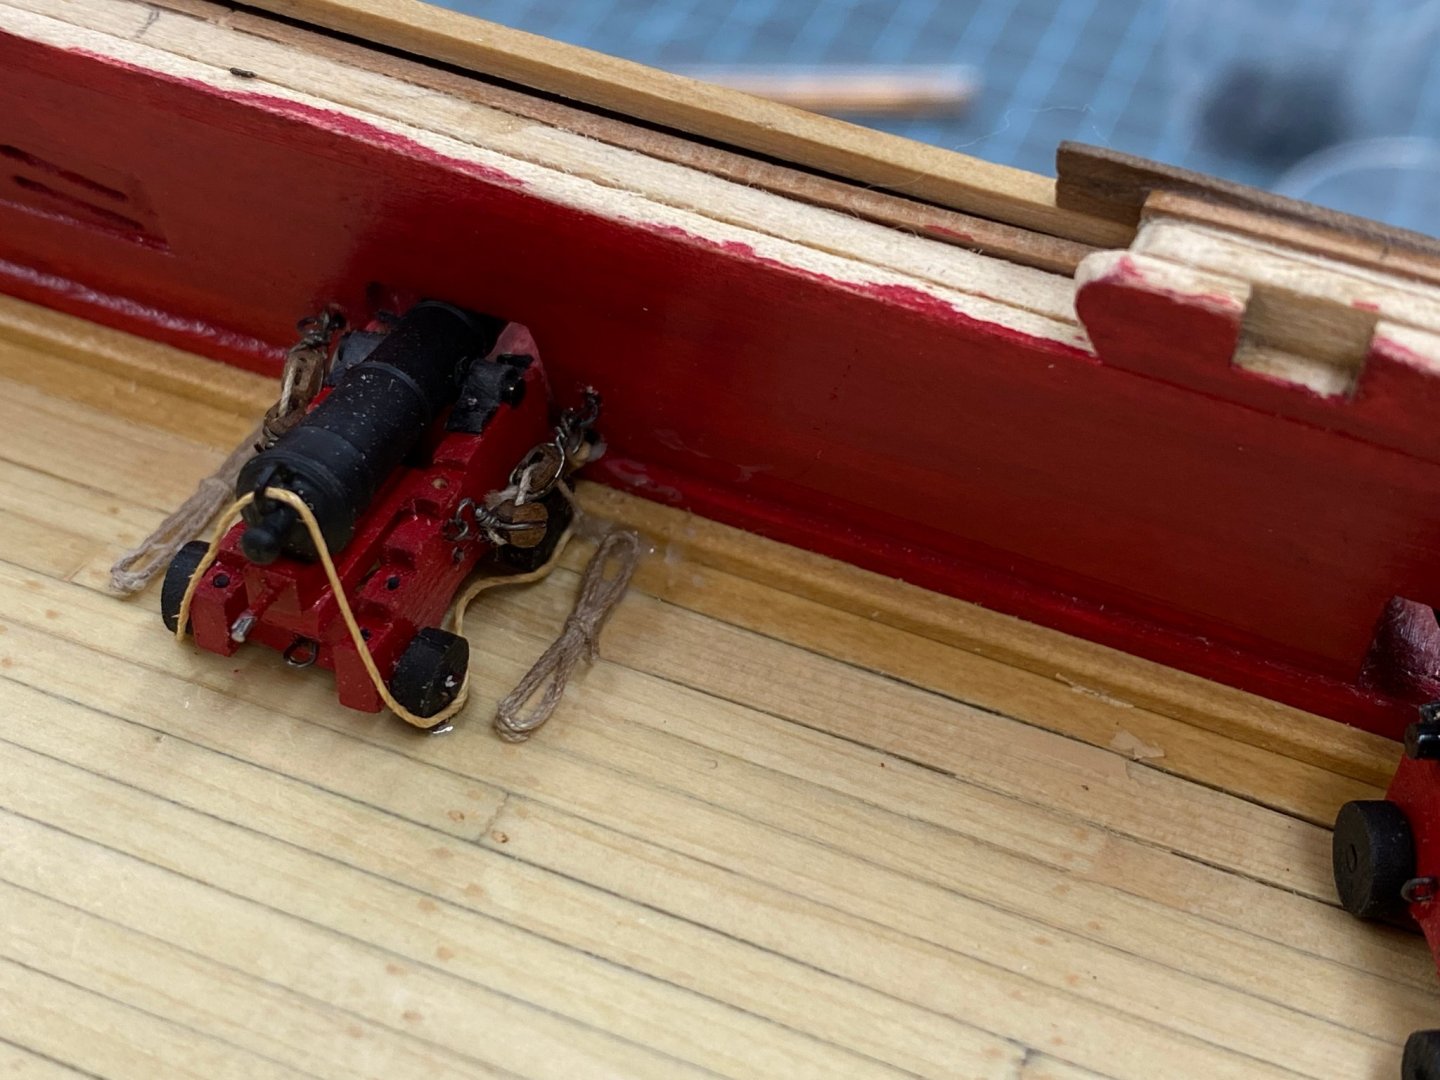
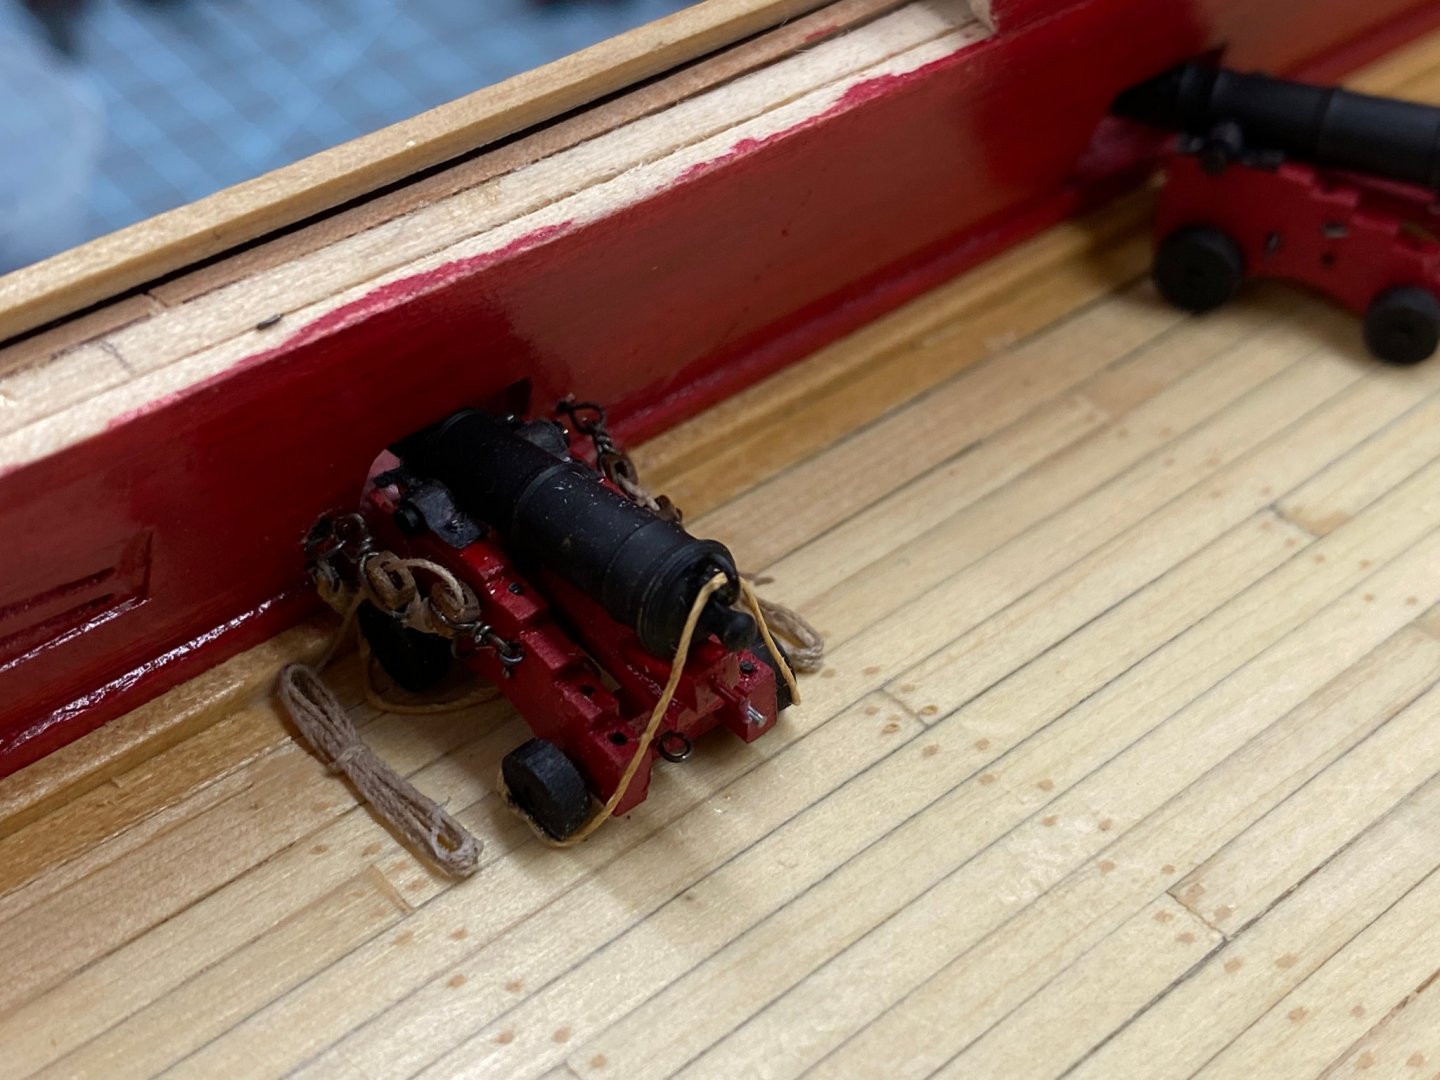
Slow going, have three cannon installed with tackle. Trying to find the best way to install the tackle. The breech tackle as to be done before installation more or less per the instructions. It is the out-haul tackle that is the more "interesting" problem. Should the blocks on the carriage be installed before or after the carriage in onboard and secured? Should the block/becket/eyebolt be attached to the bulkhead as a unit or separately. I haven't worked through all the permutations/combinations yet but have done all three so far differently with no clear "winner" yet.
- 370 replies
-
- 4
-
-
- Model Shipways
- Confederacy
- (and 1 more)
-
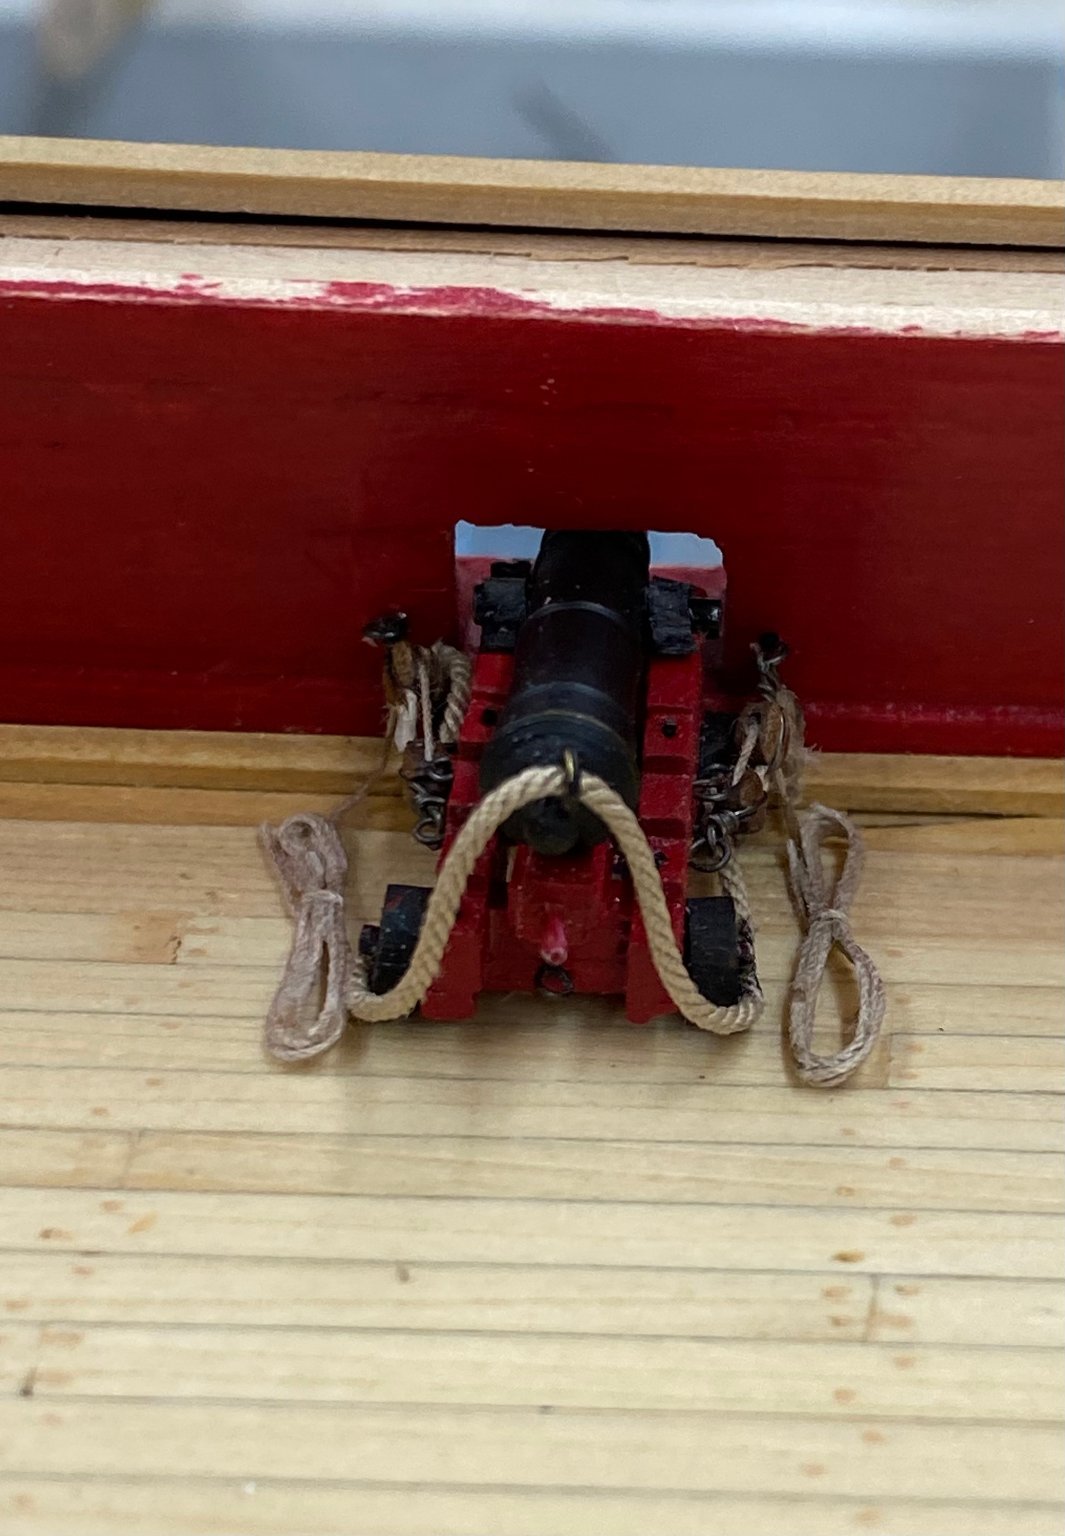
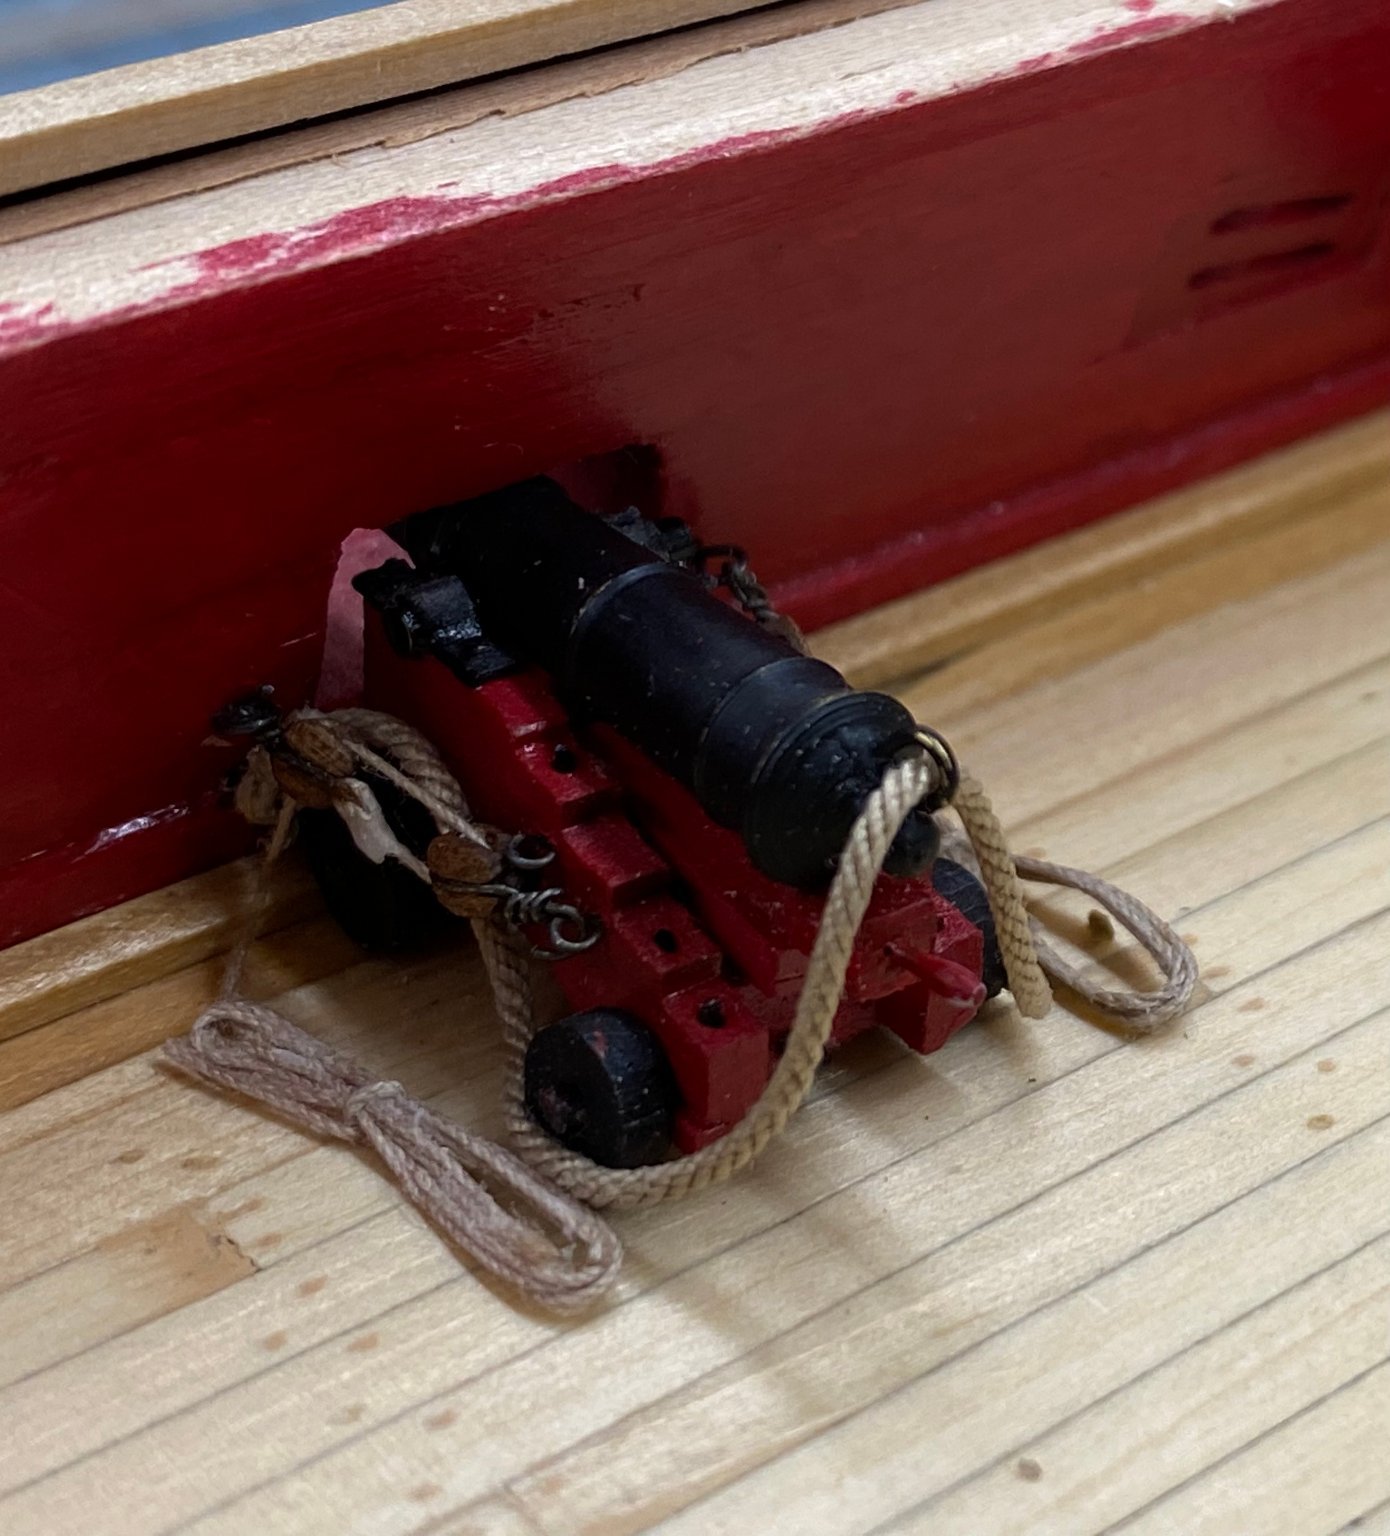
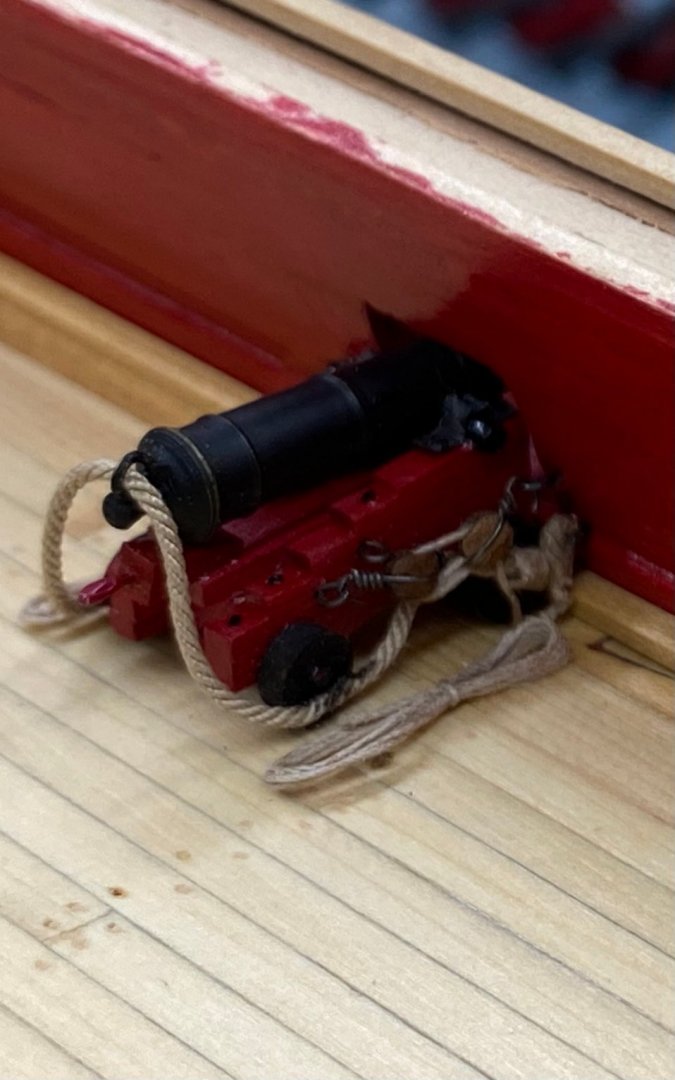
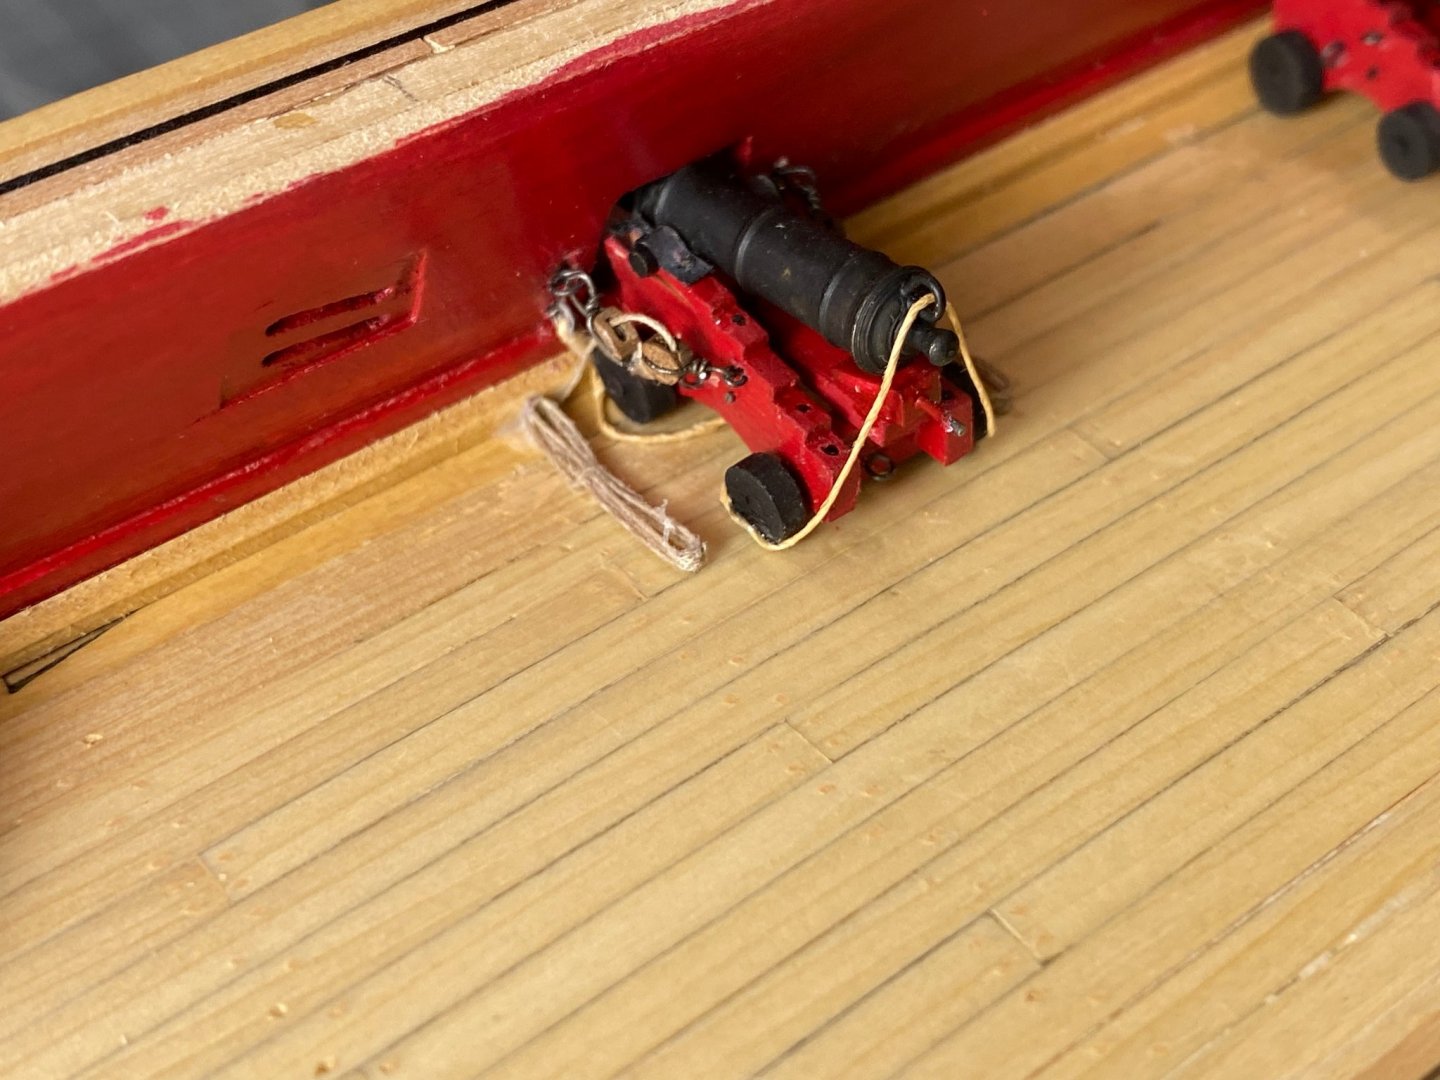
Back from cruise and have one gun carriage and associated tackle installed - only 27 more to go. I have to choose the out-haul tackle components carefully. I try and reduce the size of the hook to the greatest extent possible (and still be able to hook it on the eyebolt) on both blocks before I start rigging and fear at some point I am going to have to redo some of the blocks with the becket to reduce the size of the seizing. Hopefully not too many will have to be redone but... Anyway here is the one completed gun, carriage and tackle.

- 370 replies
-
- 4
-
-
- Model Shipways
- Confederacy
- (and 1 more)
-
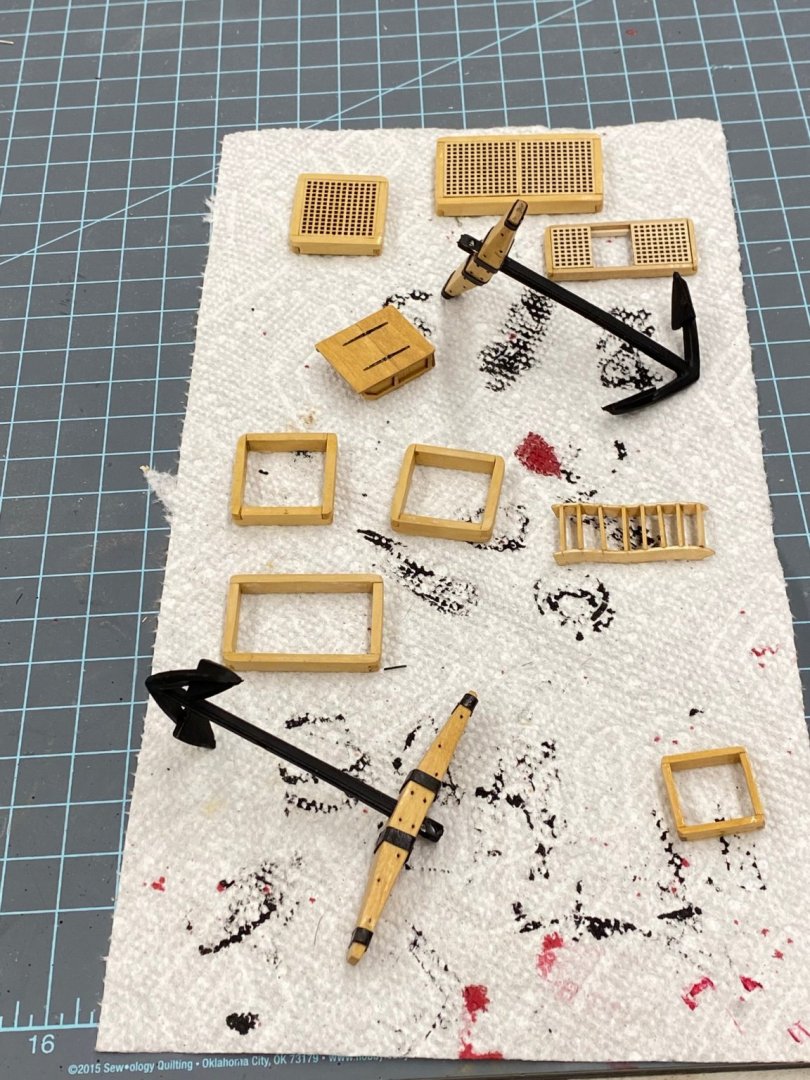
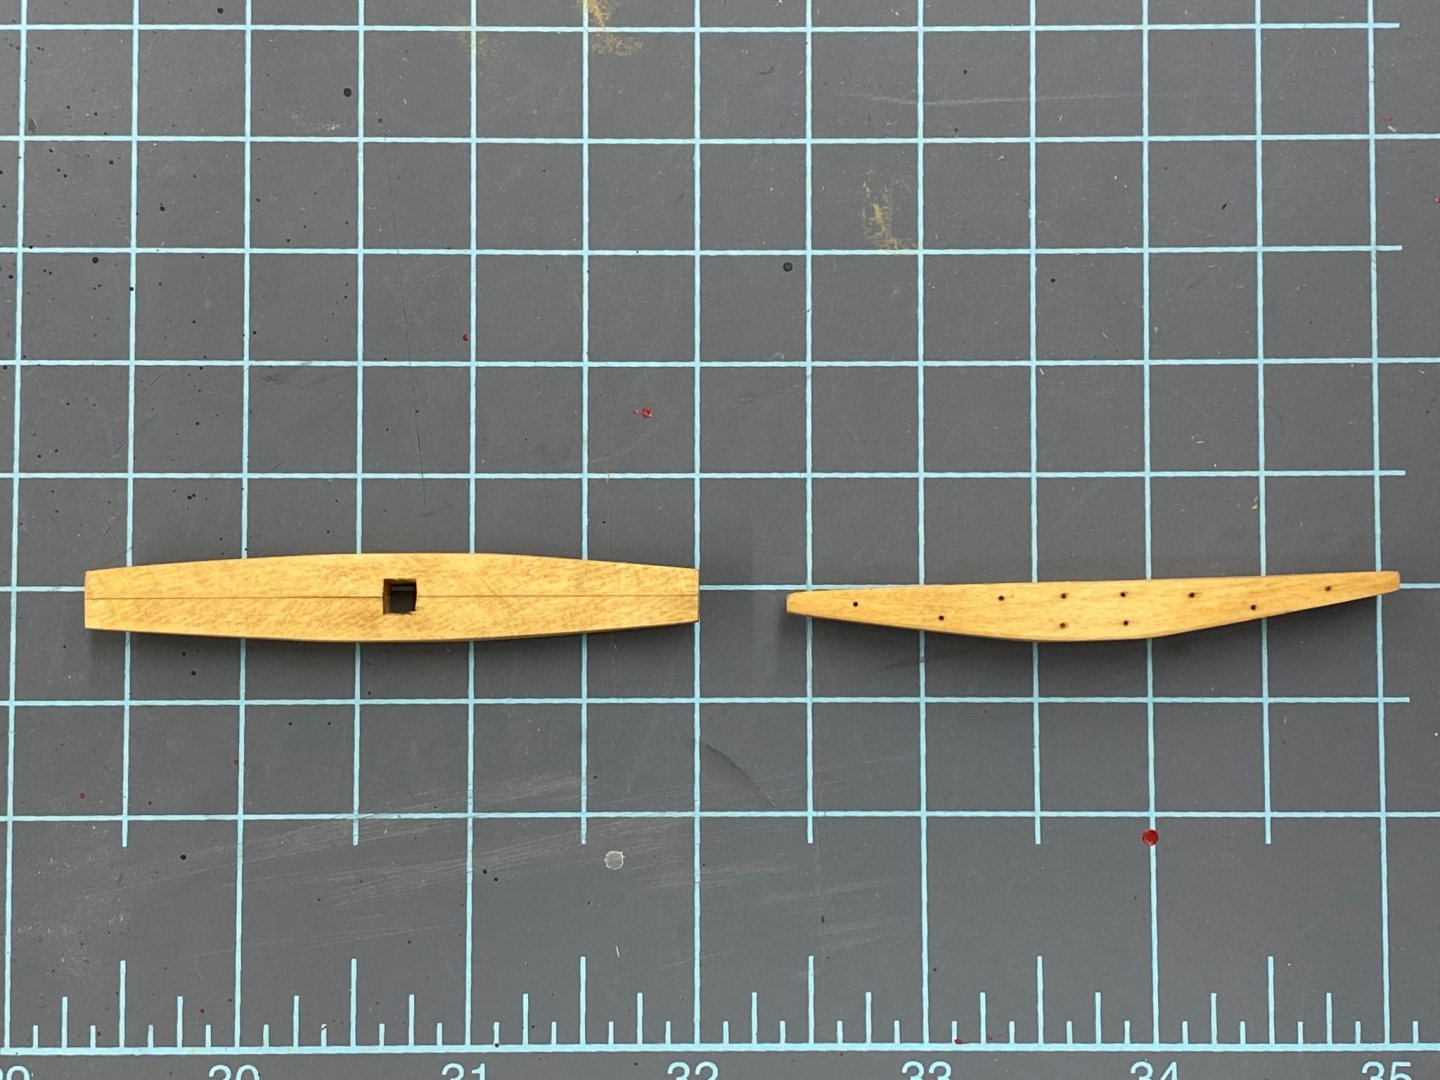
I decided to keep going on the coamings and get those out of way along with the anchors. So here are the seven coamings for the quarterdeck and fo'c'sle deck, the ladder, the rudder box and the twomanchors. As soon as the flat finish is dry they will join the stove, capstan, and binnacles in storage until needed. Now I am out of excuses for not installing the guns. Except for the 7-day cruise my girlfriend decided we cannot live without - it leaves this Saturday. So not many guns are going to get mounted before we go.
- 370 replies
-
- 1
-
-
- Model Shipways
- Confederacy
- (and 1 more)
-
Thanks Schooner. The Alfred is "looking good"!
-
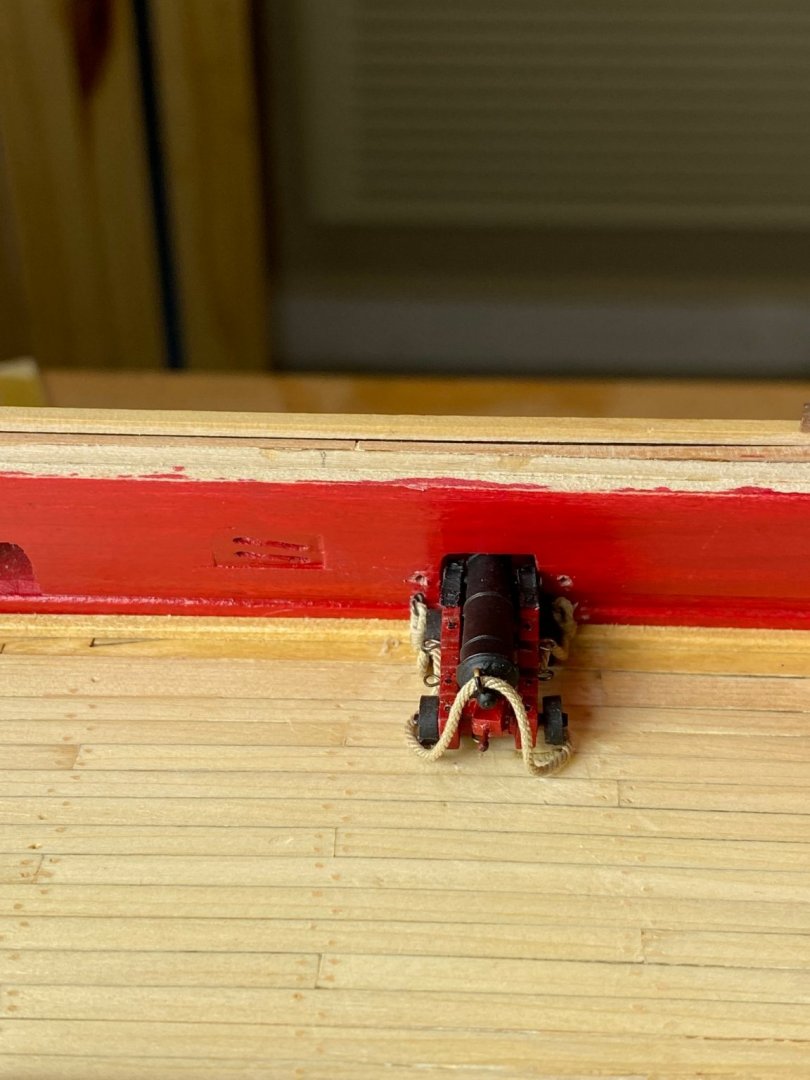
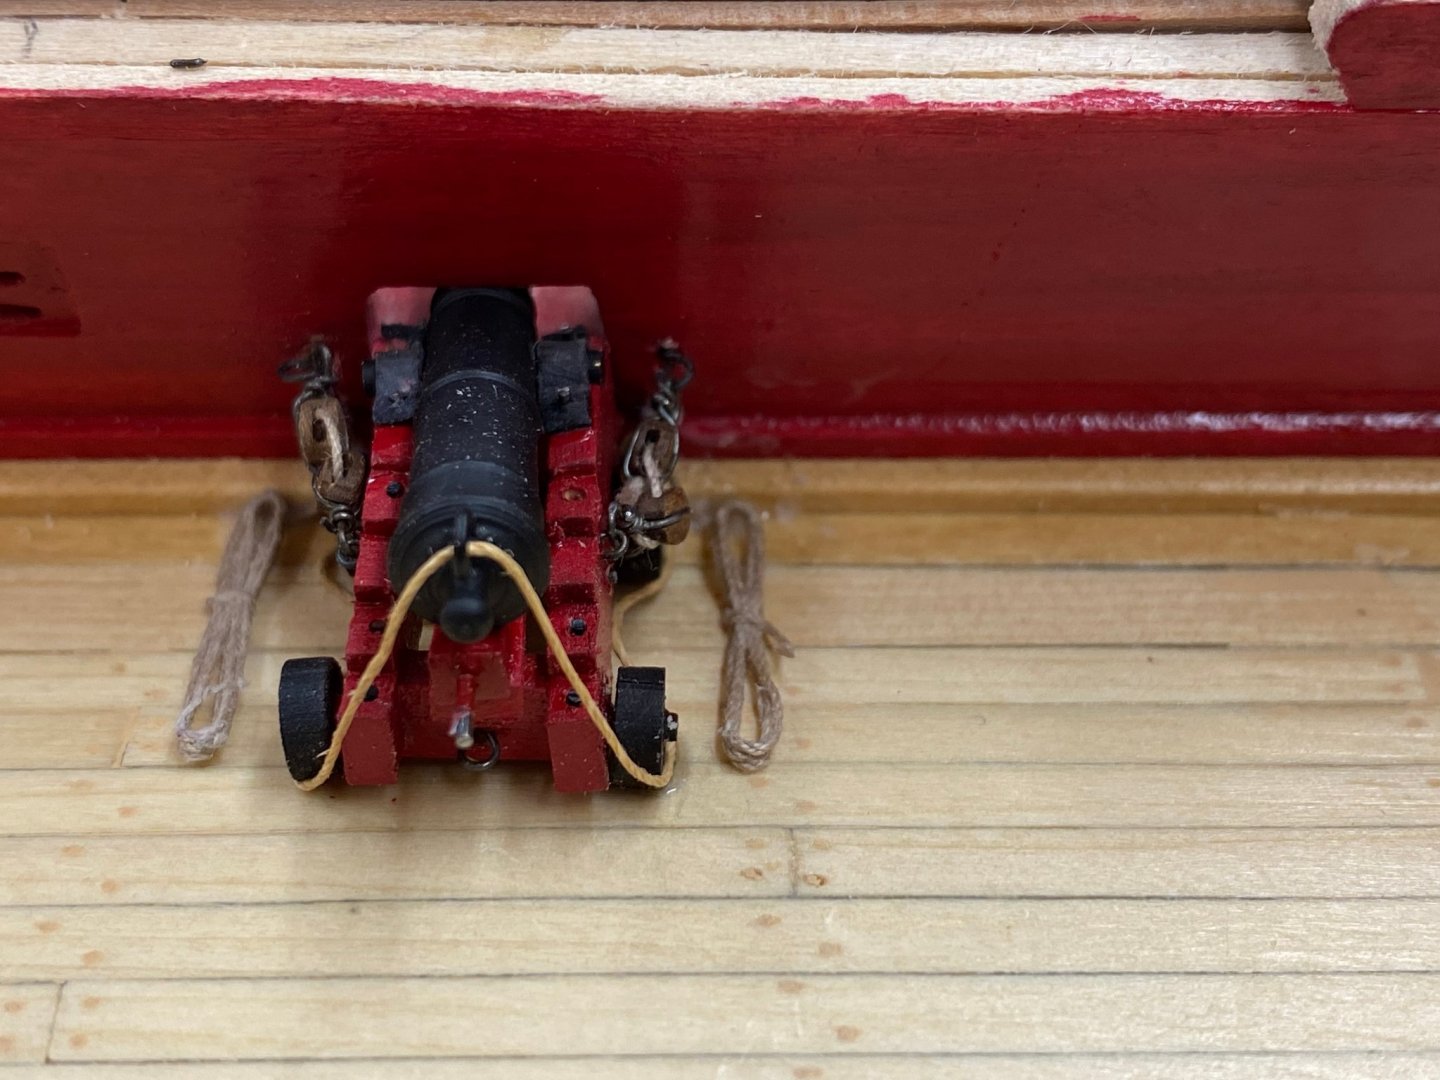
And here is what we have waited for through the trials and tribulations associated with the guns! The first gun back onboard with the new .035 breeching rope (out haul tackle is next). So here is the first one!
- 370 replies
-
- 1
-
-
- Model Shipways
- Confederacy
- (and 1 more)
-
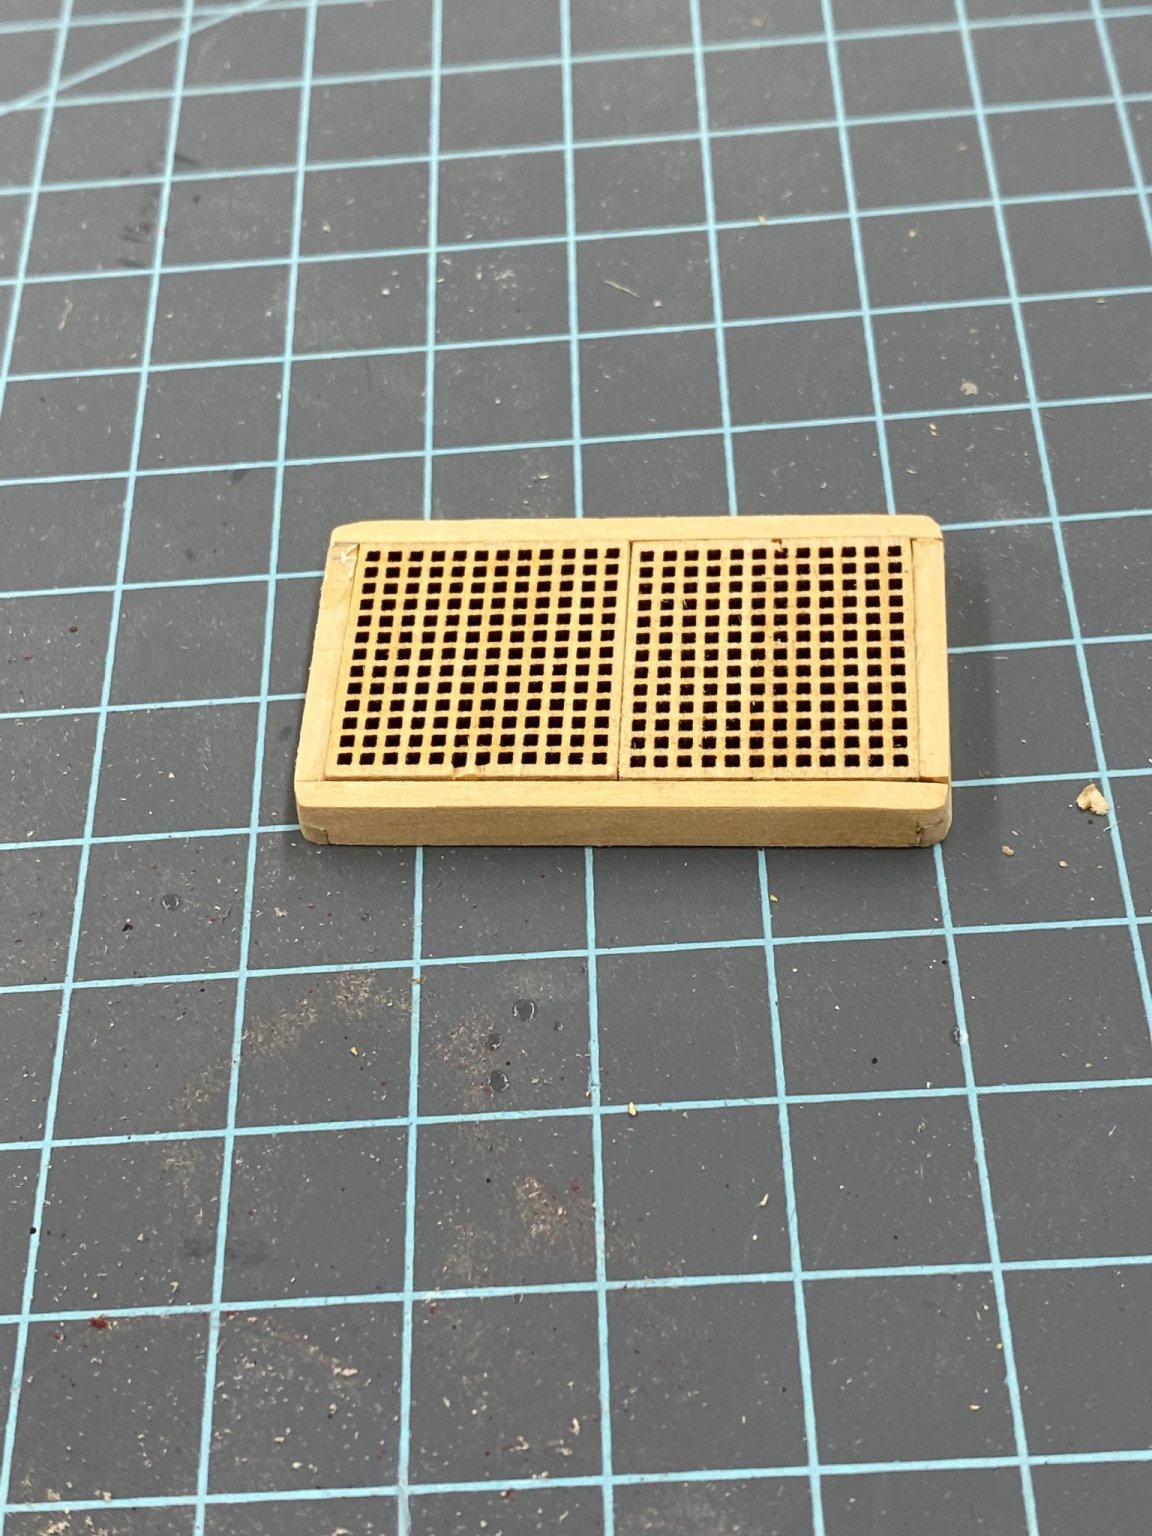
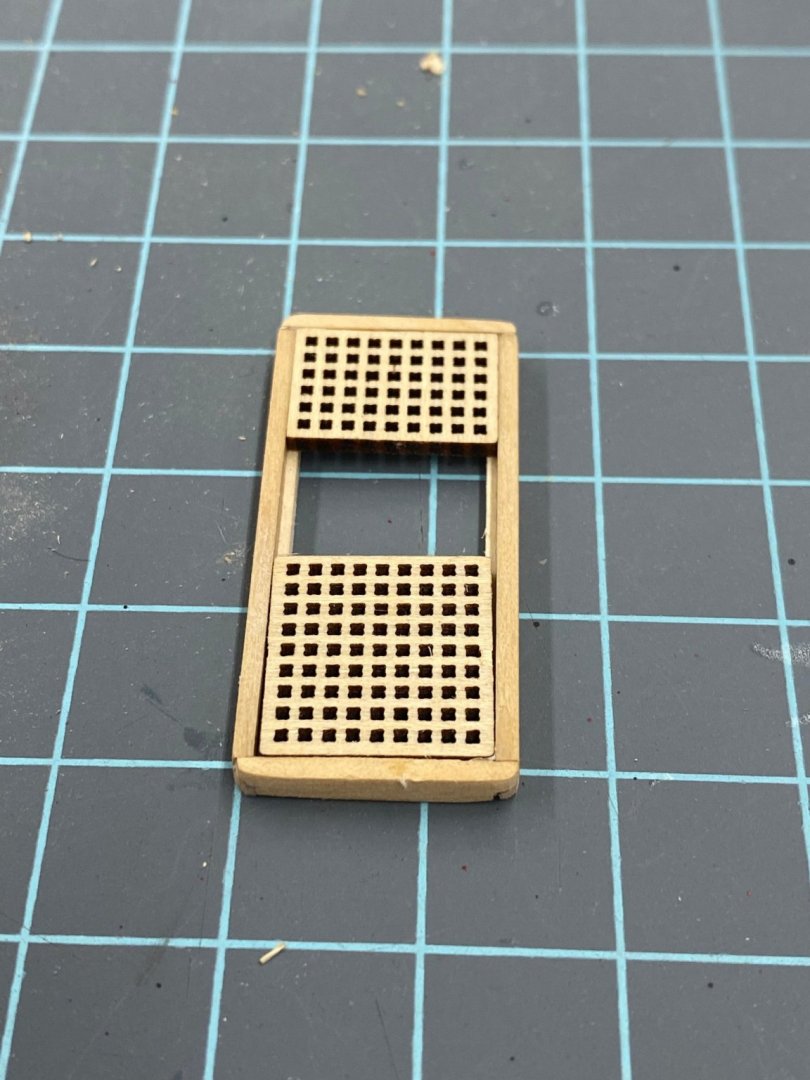
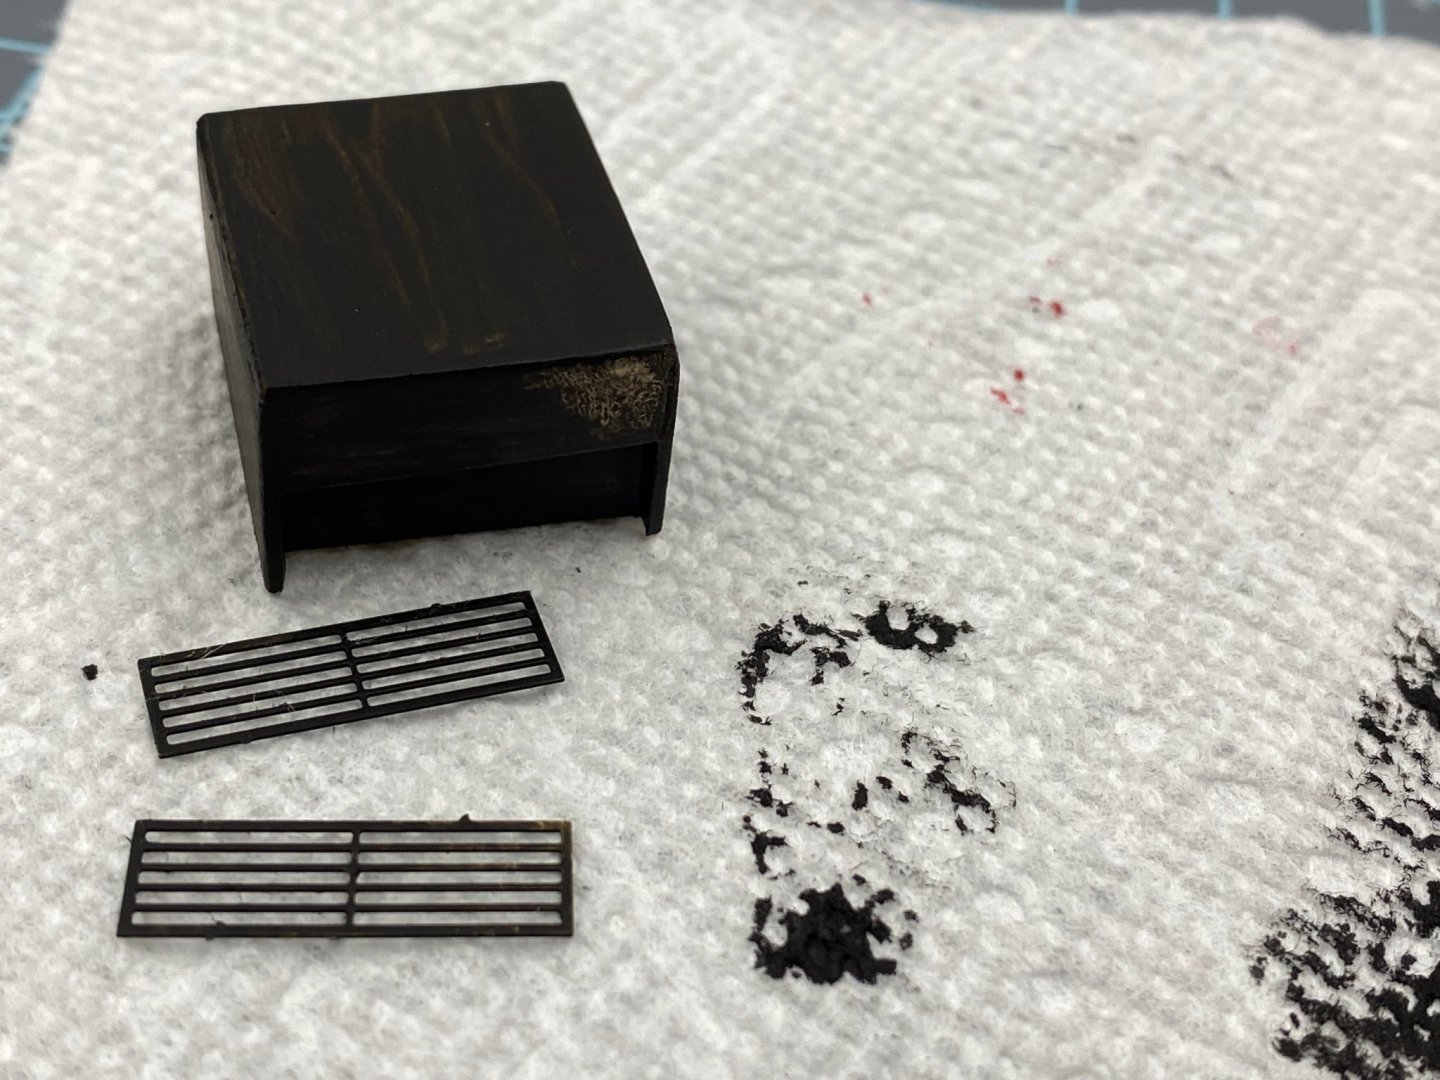
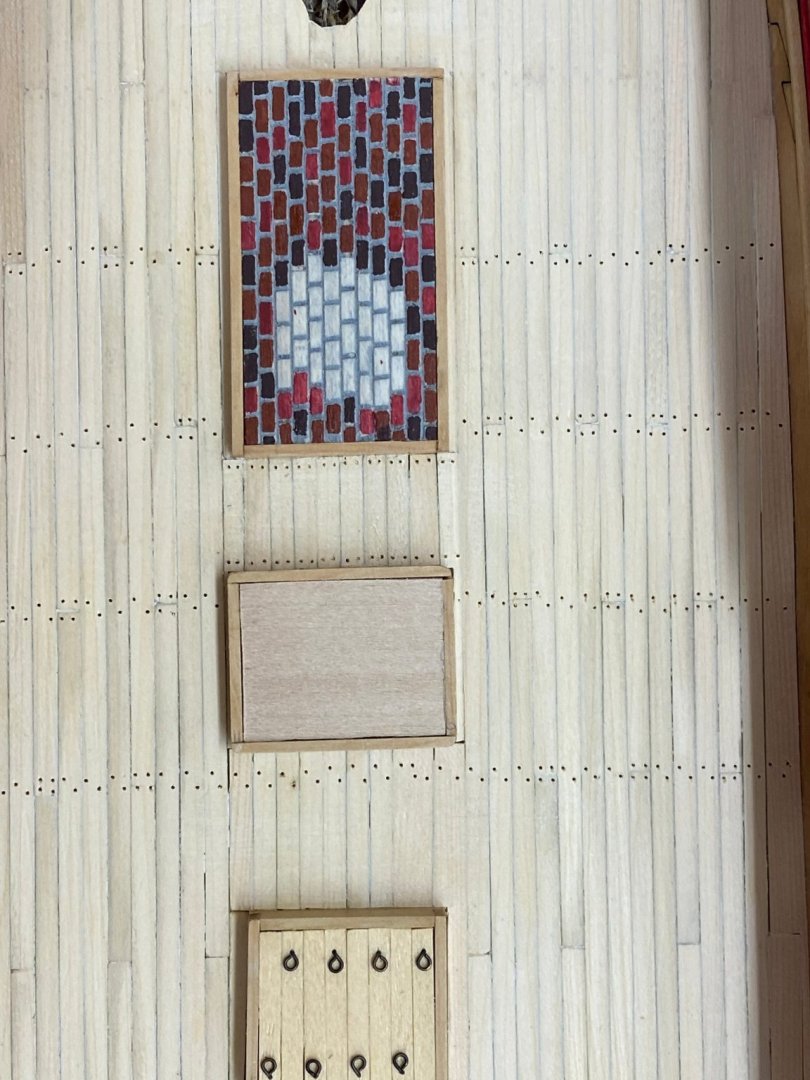
So now that the breeching rope is in I decided to go ahead and fab the coamings for the hatches/companionway on the quarterdeck and fo'c'sle. The instructions say to use 3/16" X 1/16" wood for all the coamings but the drawings show otherwise. All of the coamings (except the one around the stove flue which has a grating in front of and behind the stove flue) are 3/16" tall. The coaming around the mizzen looks to be 1/16" wide, but all the others measure more like 3/32". The other "trick" is to build the coamings around the gratings that they enclose. I am not that good and hitting the measurements exactly (assuming they are even that accurate) so I use the grating as the final arbiter of how long/wide the coaming needs to be. Here is the stove flue coaming with the two gratings installed (not glued). No finish yet, just the bare boxwood. The drawing shows some sort of material around the stove flue and in he pictures in the instructions it looks like wood but I can't do much more until I know exactly where the flue will come through this opening. And here is the upper aft hatchway (over the capstan) also without finish.

- 370 replies
-
- 2
-
-
- Model Shipways
- Confederacy
- (and 1 more)
-
Here is the capstan and the two anchor stocks stained and drilled for the bolts. Need to add the pin stripe or card stock. Breech tackle has arrived !!

- 370 replies
-
- 2
-
-
- Model Shipways
- Confederacy
- (and 1 more)
-
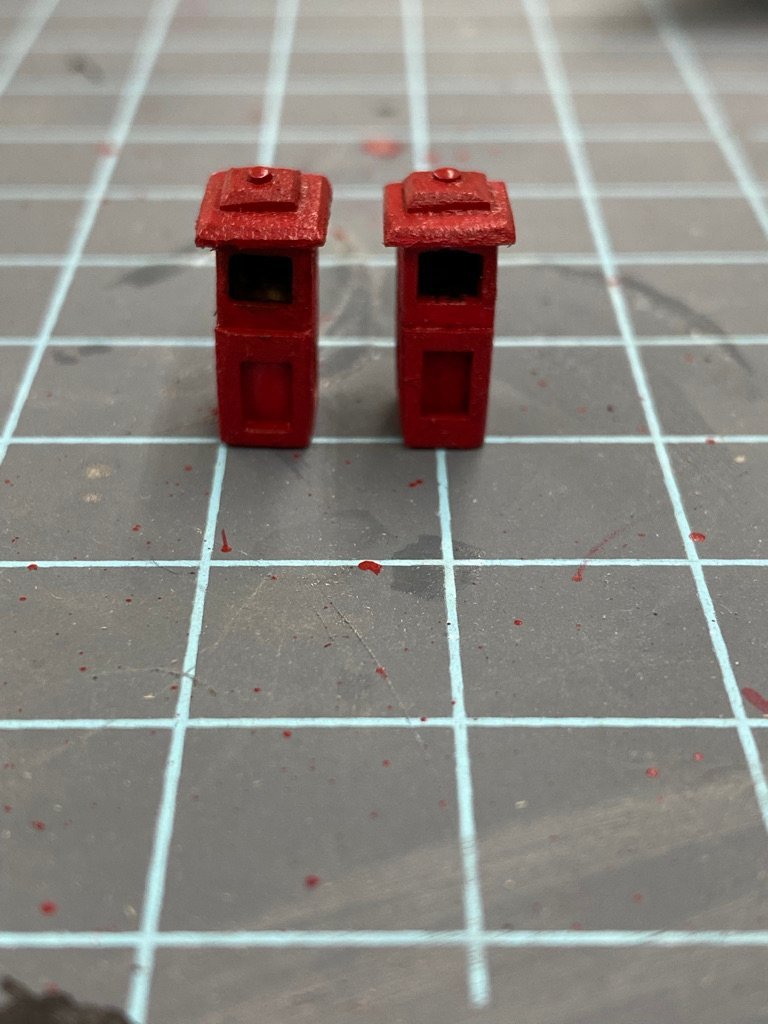
Here are the two binnacles after painting. I will add the windows shortly (using the Model Master Window Maker). Hopefully the .035 breech rope comes today. The tops don't really look this bad in "real life".
- 370 replies
-
- 2
-
-
- Model Shipways
- Confederacy
- (and 1 more)
-
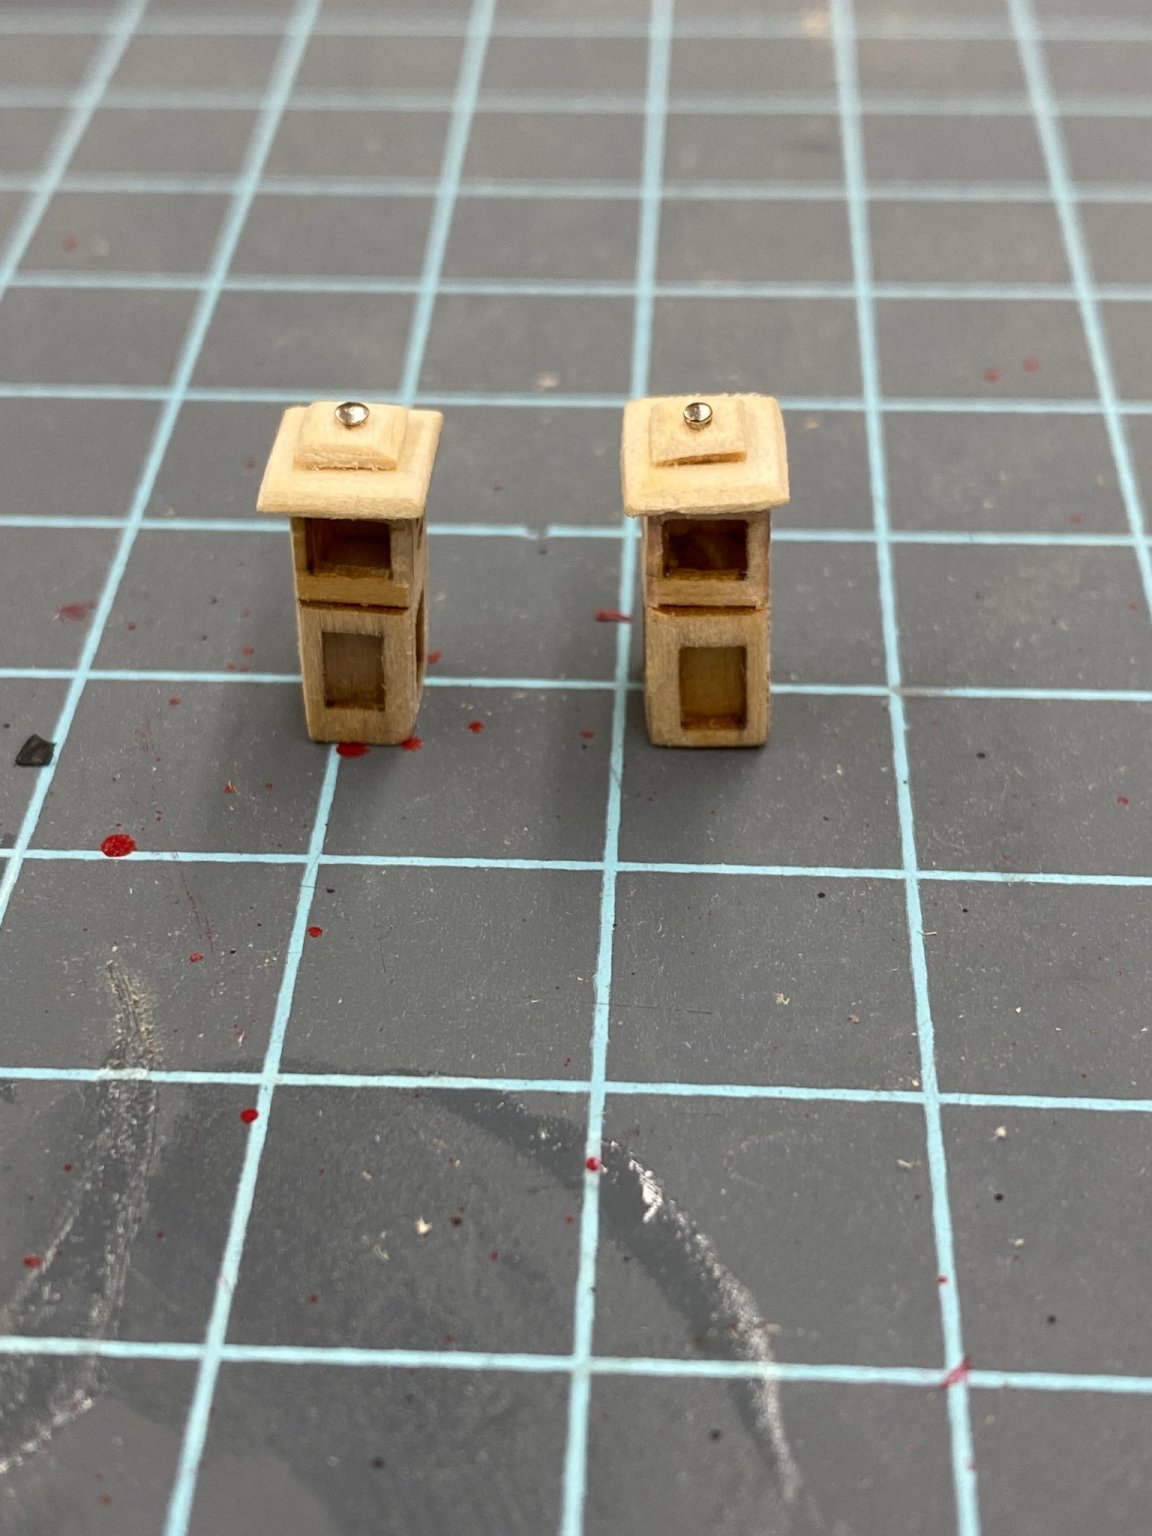
On to the binnacles. First I followed the instructions and used a 1/8" X 1/8" piece as the basis for the base (you glue the two side pieces to this square section base). Unfortunately, (at least for me) this is a bit too narrow and when I fit the front and back I had to narrow them so much that the borders around the openings became very thin (and at a 45 degree angle to boot). So I decided that trying to bevel these very small, 1/32" thick pieces and getting them to fit together in something resembling a square was probably (for me at least) a bridge too far. So I cut a piece of 1/4" X 1/4" square stock so it was as wide as the base pieces and 1/16" (twice 1/32") narrower in the other dimension (.251 X .154 as it turns out). This makes for a rectangular binnacle but I think it will be really hard to notice. I had to make up new pieces for the tops since the kit provided pieces assume the binnacle is square. There is plenty of spare 1/32" around so other then trying to get the same overlap on all four sides (twice since there are two binnacles) this was no big deal. So here are the two binnacles ready for paint. It is taking a good bit of restraint on my part to not paint one green and the other red but I think the green one might stand out too much since it is the only green item on the model.

- 370 replies
-
- 2
-
-
- Model Shipways
- Confederacy
- (and 1 more)
-
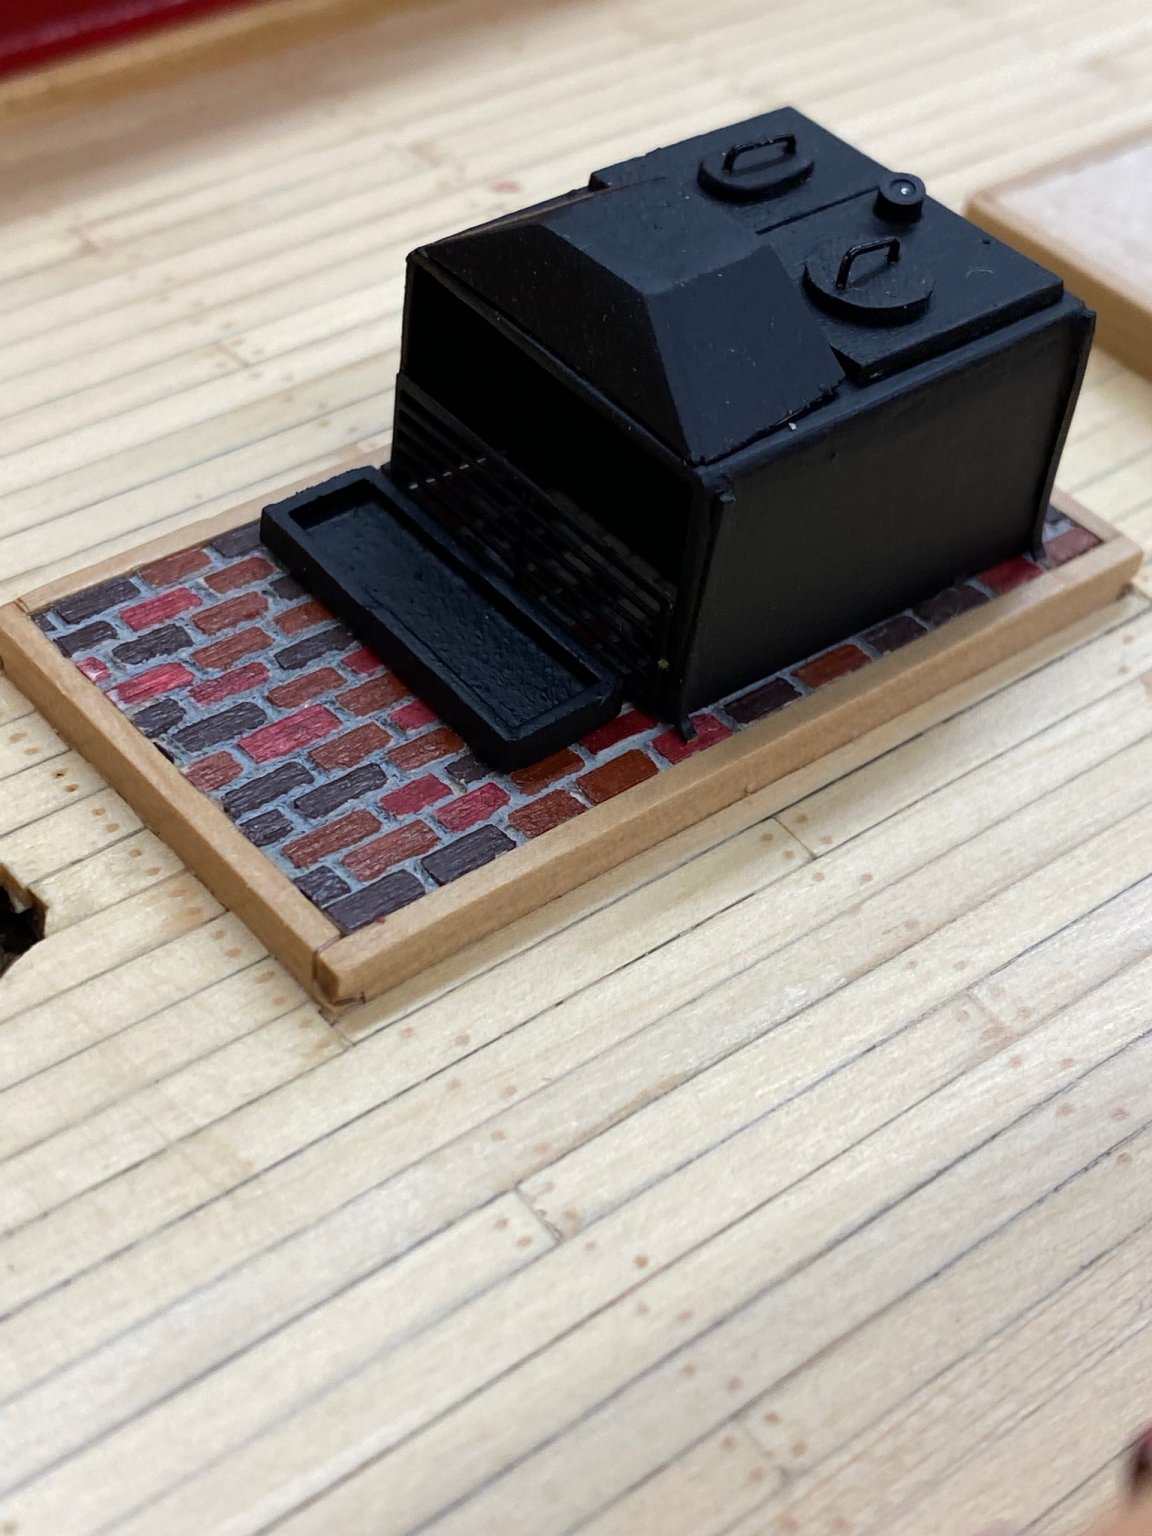
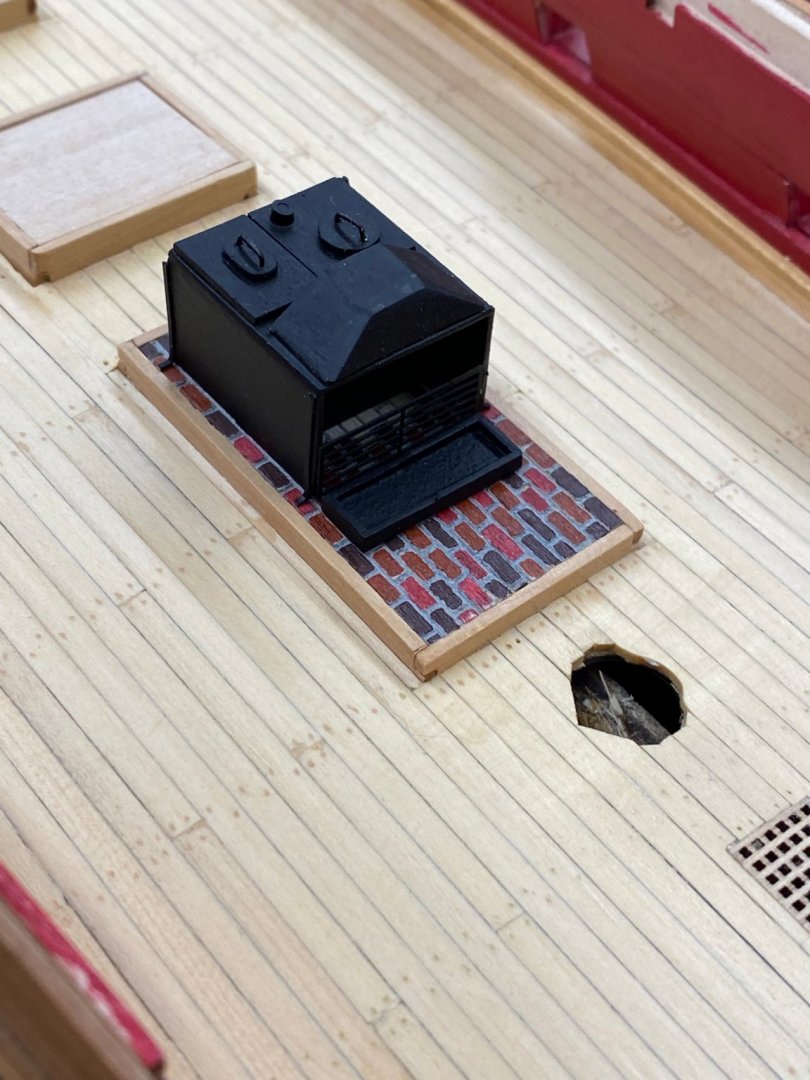
The USPS web site says the breech rope will be here Tuesday. In the meantime I got the stove finished (except for the rotisserie) so here it is sitting on its platform.I may wait for the rotisserie since it looks pretty delicate and it will be "awhile" before I can actually install the stove.

- 370 replies
-
- 4
-
-
- Model Shipways
- Confederacy
- (and 1 more)
-
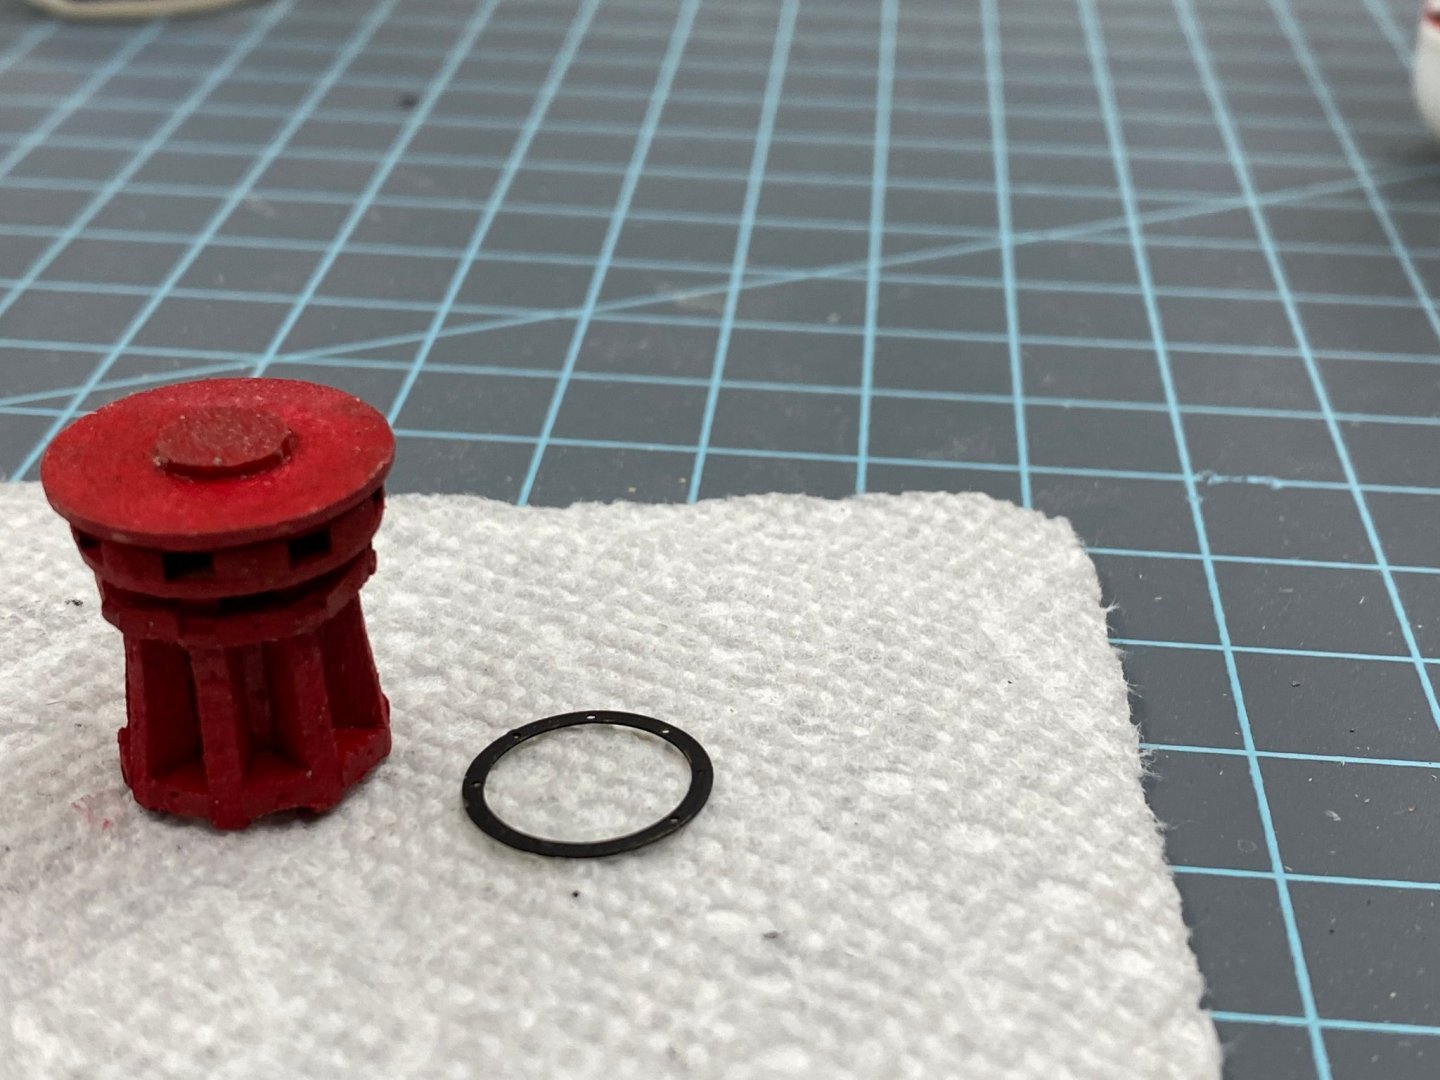
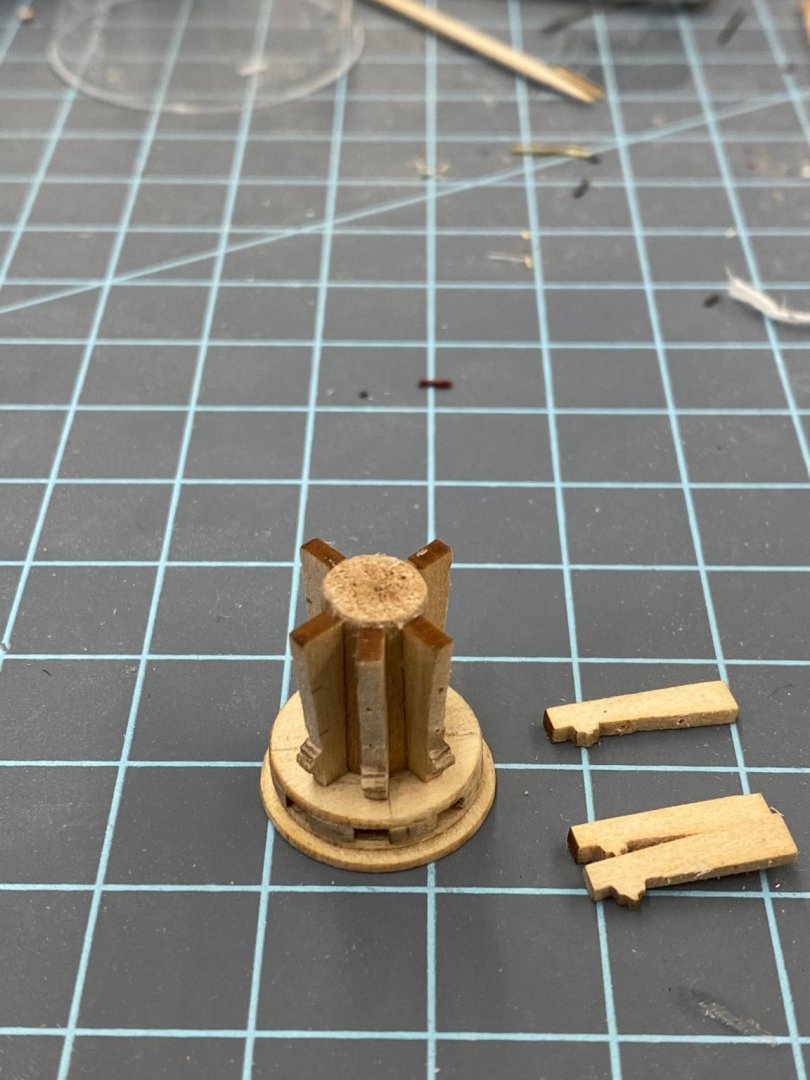
Working several items while waiting for breeching rope from Syren. Build a jig to make the rope "coils" for the out haul tackles. I have about fifteen done so far, with the 10 above I need another 30 or so. Here is the assembled capstan with the first coat of red paint. I decided to use the monofilament fishing line for the bolt heads so I drilled (#74 bit) holes in the photo etched ring and then painted it black. I have made the initial assembly of the stove, sealed the wood with several coats of sealer and a first coat of flat black. Need to add the metal strips, drain pipes and the details on the top. If I get all these done I can start on the coamings for the hatches/masts on the quarter and forecastle decks.


- 370 replies
-
- 3
-
-
- Model Shipways
- Confederacy
- (and 1 more)
-
Capstan under construction. I drilled the holes for the simulated bolts in the whelps before assembly. Not looking forward to dealing with the chocks, they are going to equal dealing with the 2mm blocks.
- 370 replies
-
- 2
-
-
- Model Shipways
- Confederacy
- (and 1 more)
-
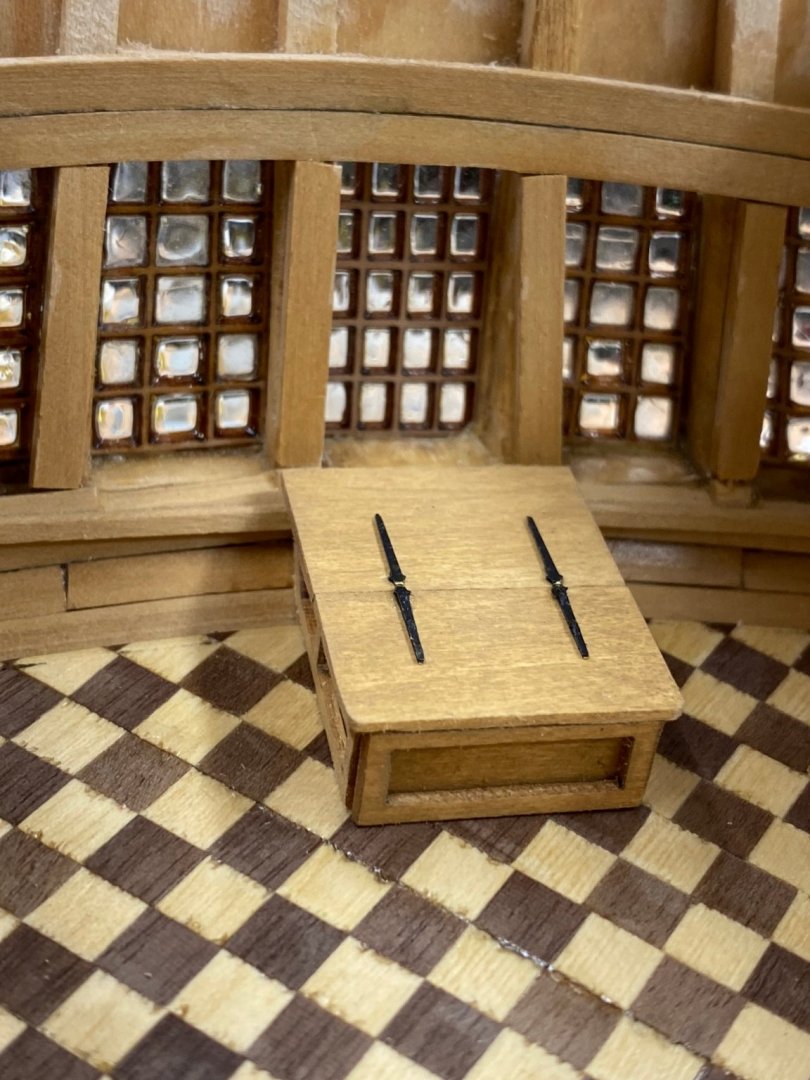
Rudder box sitting in the Great cabin. I will glue it down after I put a coat of WoP on.
- 370 replies
-
- 3
-
-
- Model Shipways
- Confederacy
- (and 1 more)
-
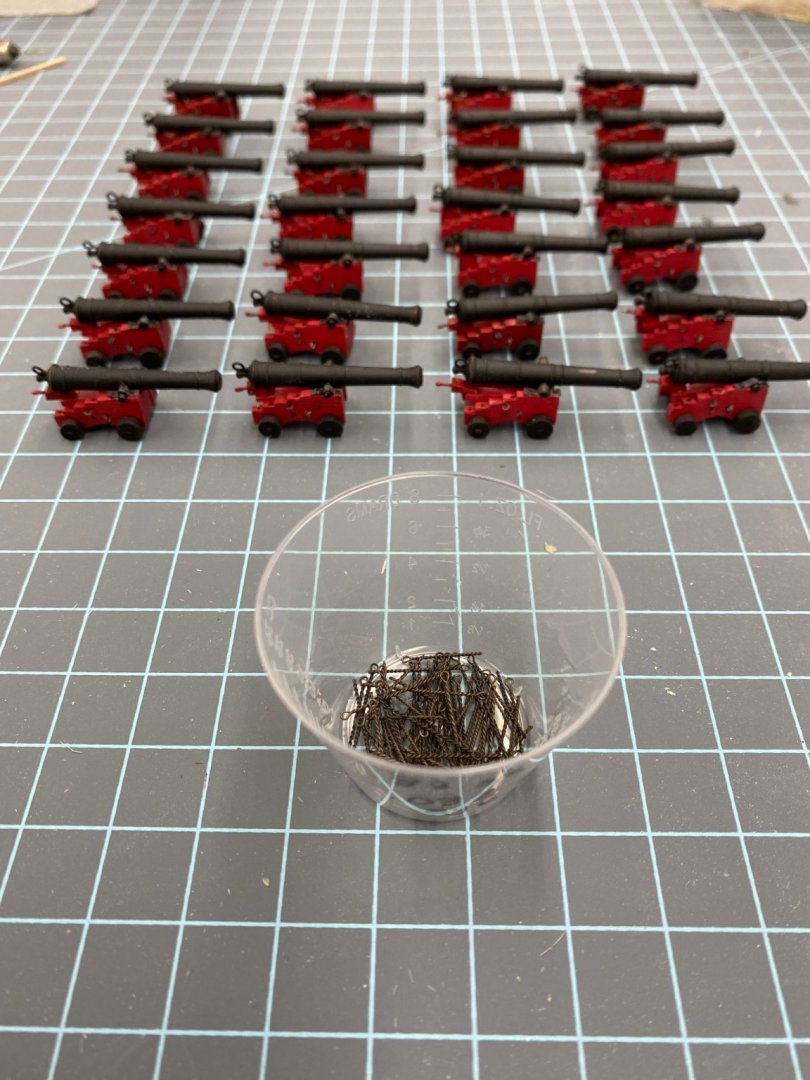
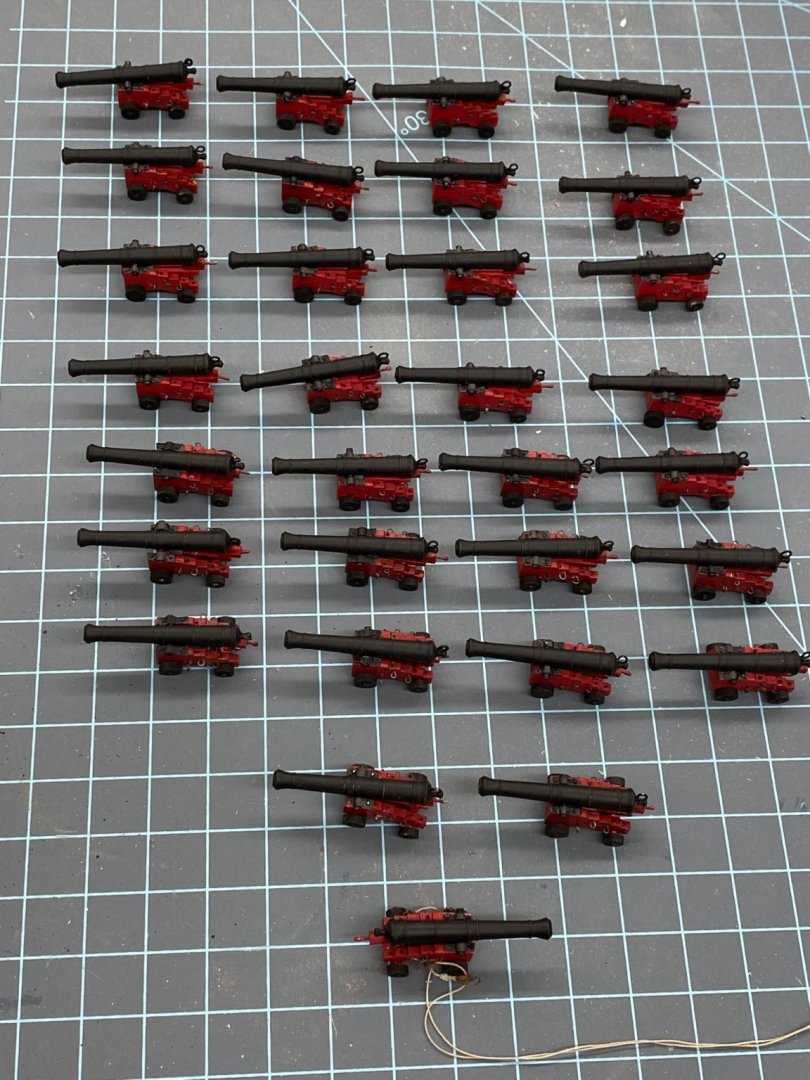
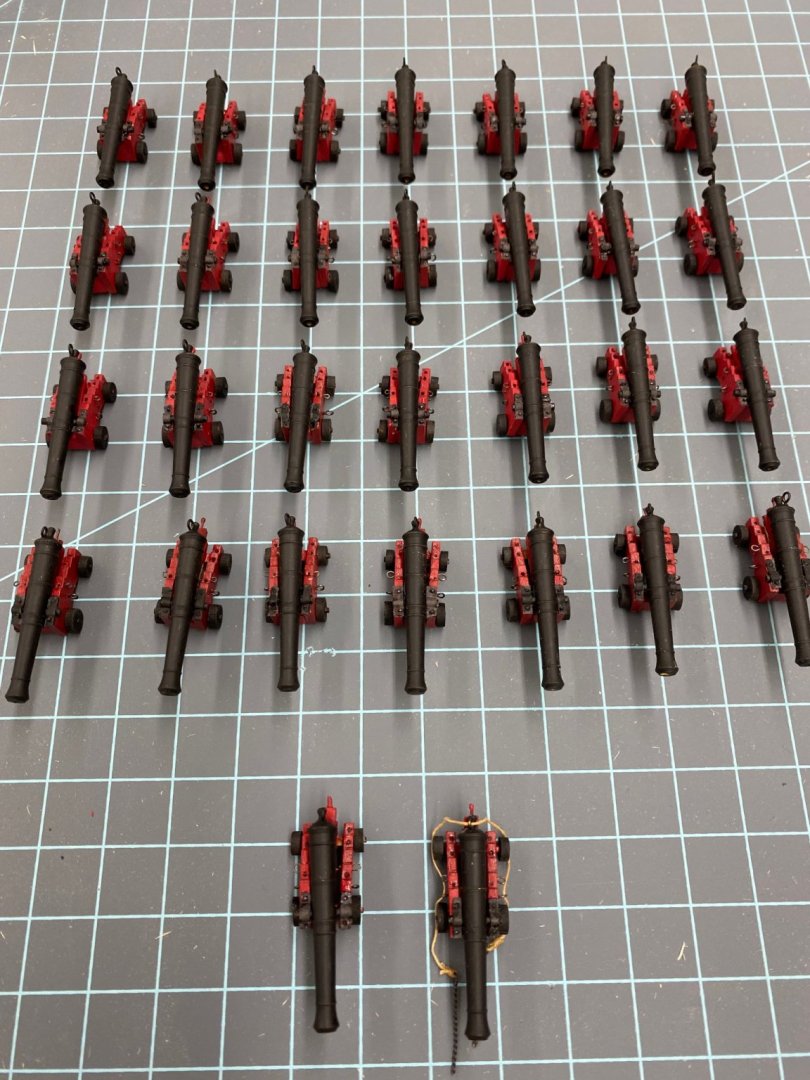
I fabbed the necessary eyebolts. Here are the 28 cannon and the eyebolts in the medicine cup. And here are the 28 plus three spares including the one that had been glued to the deck as the original test article. Now all I need is the new breeching rope. Next week (I hope). In the meantime I am going to build the rudder box and then the capstan if the breeching rope is slow getting here.
- 370 replies
-
- 2
-
-
- Model Shipways
- Confederacy
- (and 1 more)
-
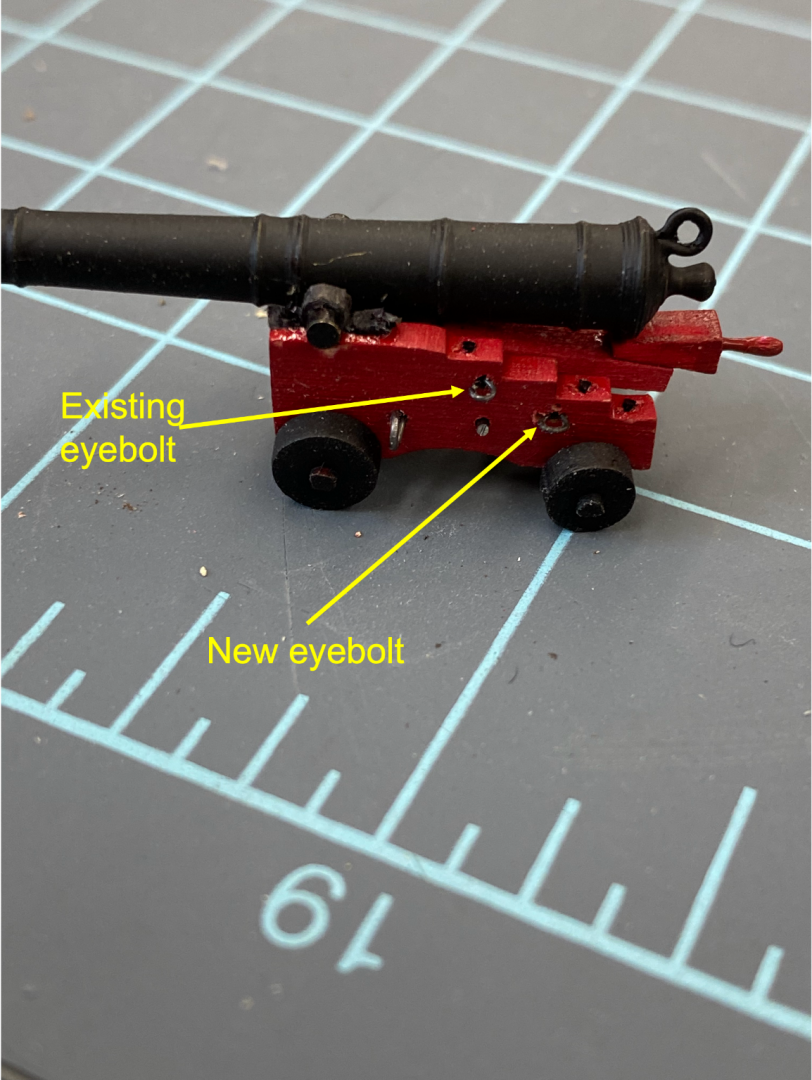
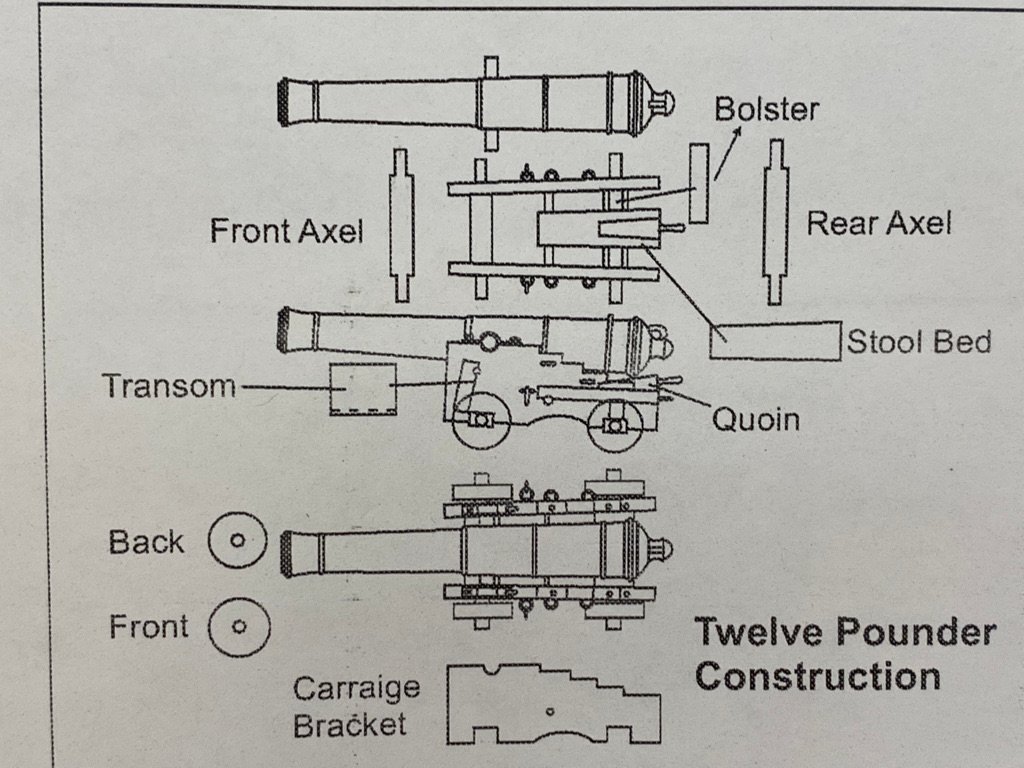
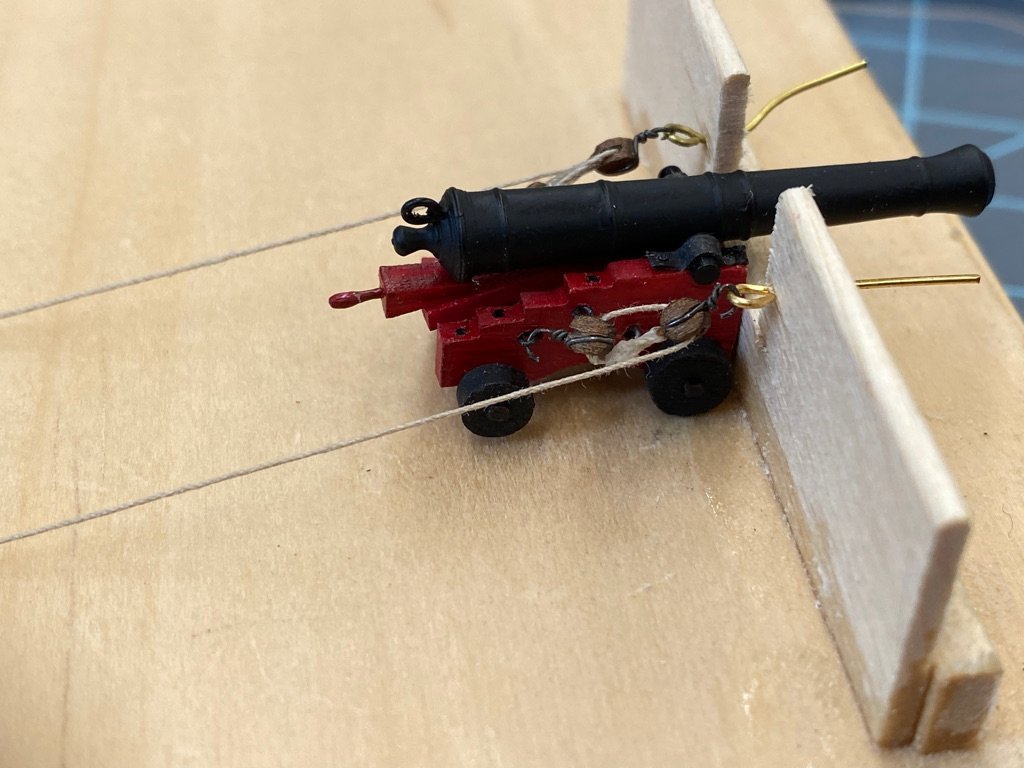
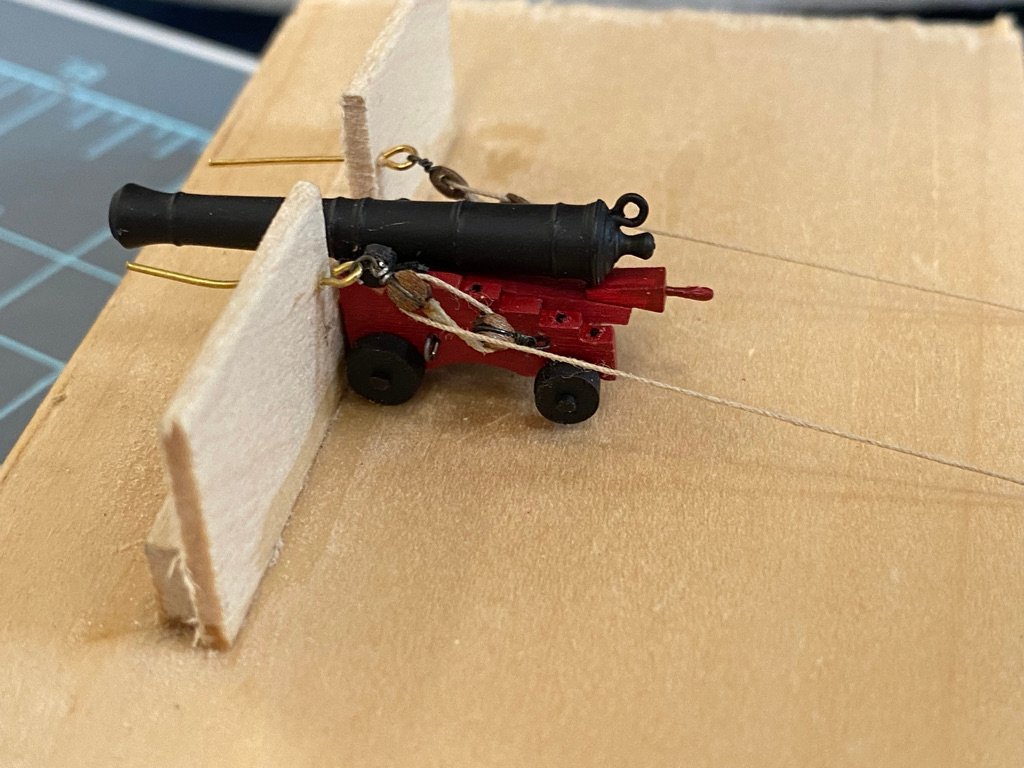
So I messed around with the 2mm blocks that I had on hand. After the first three split apart as I was trying to mount them in my custom built block holder I decided this was not going to work. And I don't think an additional half mm is going to buy enough room to make an appreciable difference. So, I decided to look at the drawings - novel idea. Both the Syren and the Confederacy drawings of the gun carriages show three eyebolts on each side. The forward most one is for the breeching tackle. The other two are (I assume) the out-haul (to move the gun back up to the gun port) and the train tackle (move the rear of the carriage from side to side). It would make sense that the rear most eyebolts would house the train tackle since it is the rear of the gun carriage that needs to be moved. I will not let that minor detail deter me from getting more real estate for the out haul. Here is the Confederacy drawing which clearly shows three eyebolts on each side (breech, out-haul and train). The instructions would have you install all the eybolts but only make up enough tackle to fit one set per gun (56 sets). The instructions (who follows them??) say to hook the tackle to the rear-most eyebolt so I will follow the instructions - now. So, I am going to add two additional eyebolts to each gun carriage (maybe not to the one already glued to the deck) and thus gain almost 5mm more space for the out haul tackle. Here is the "test" gun carriage with the additional eyebolt. And here is the "test" gun carriage in my "test" gun port (too bad I did not put the "top" on the gun port. I might have noticed that the carriages I started with were going to be too large BEFORE I built them all. The starboard side tackle is not my "best" work attaching the line to the becket but even that one manages to fit (more or less). Still waiting for the new breeching line to arrive so I will busy myself making 50+ new eyebolts (32 ga wire, .032 eyes) and mounting them on the carriages. After than on to the stove and/or capstan.
- 370 replies
-
- 3
-
-
- Model Shipways
- Confederacy
- (and 1 more)
-
I found out today that Syren Ship Model Company is back in the miniature rope business - but their .025 tan is sold out so I ordered some .035 in tan to use for the breeching tackle. That should be "good enough". I also ordered more of the 2mm single blocks (Model Expo "beautiful" blocks) and will try and rig them up to replace the 60+ 2.5mm ones I have already rigged. I wonder if the half mm saved is worth the effort but since I have to wait for the new breeching tackle line I might as well. I am also considering only having the starboard side cannon at the gun ports. I can utilize the rest of the tackle I already have if I have the guns with their barrels inside the bulwark. It had always been my intention to display the model with the starboard side "out" so maybe that would provide a nice contrast. I am going to rig the 20 or so 2mm blocks I have now to see if it really matters. Maybe I will start the stove while I wait.
-
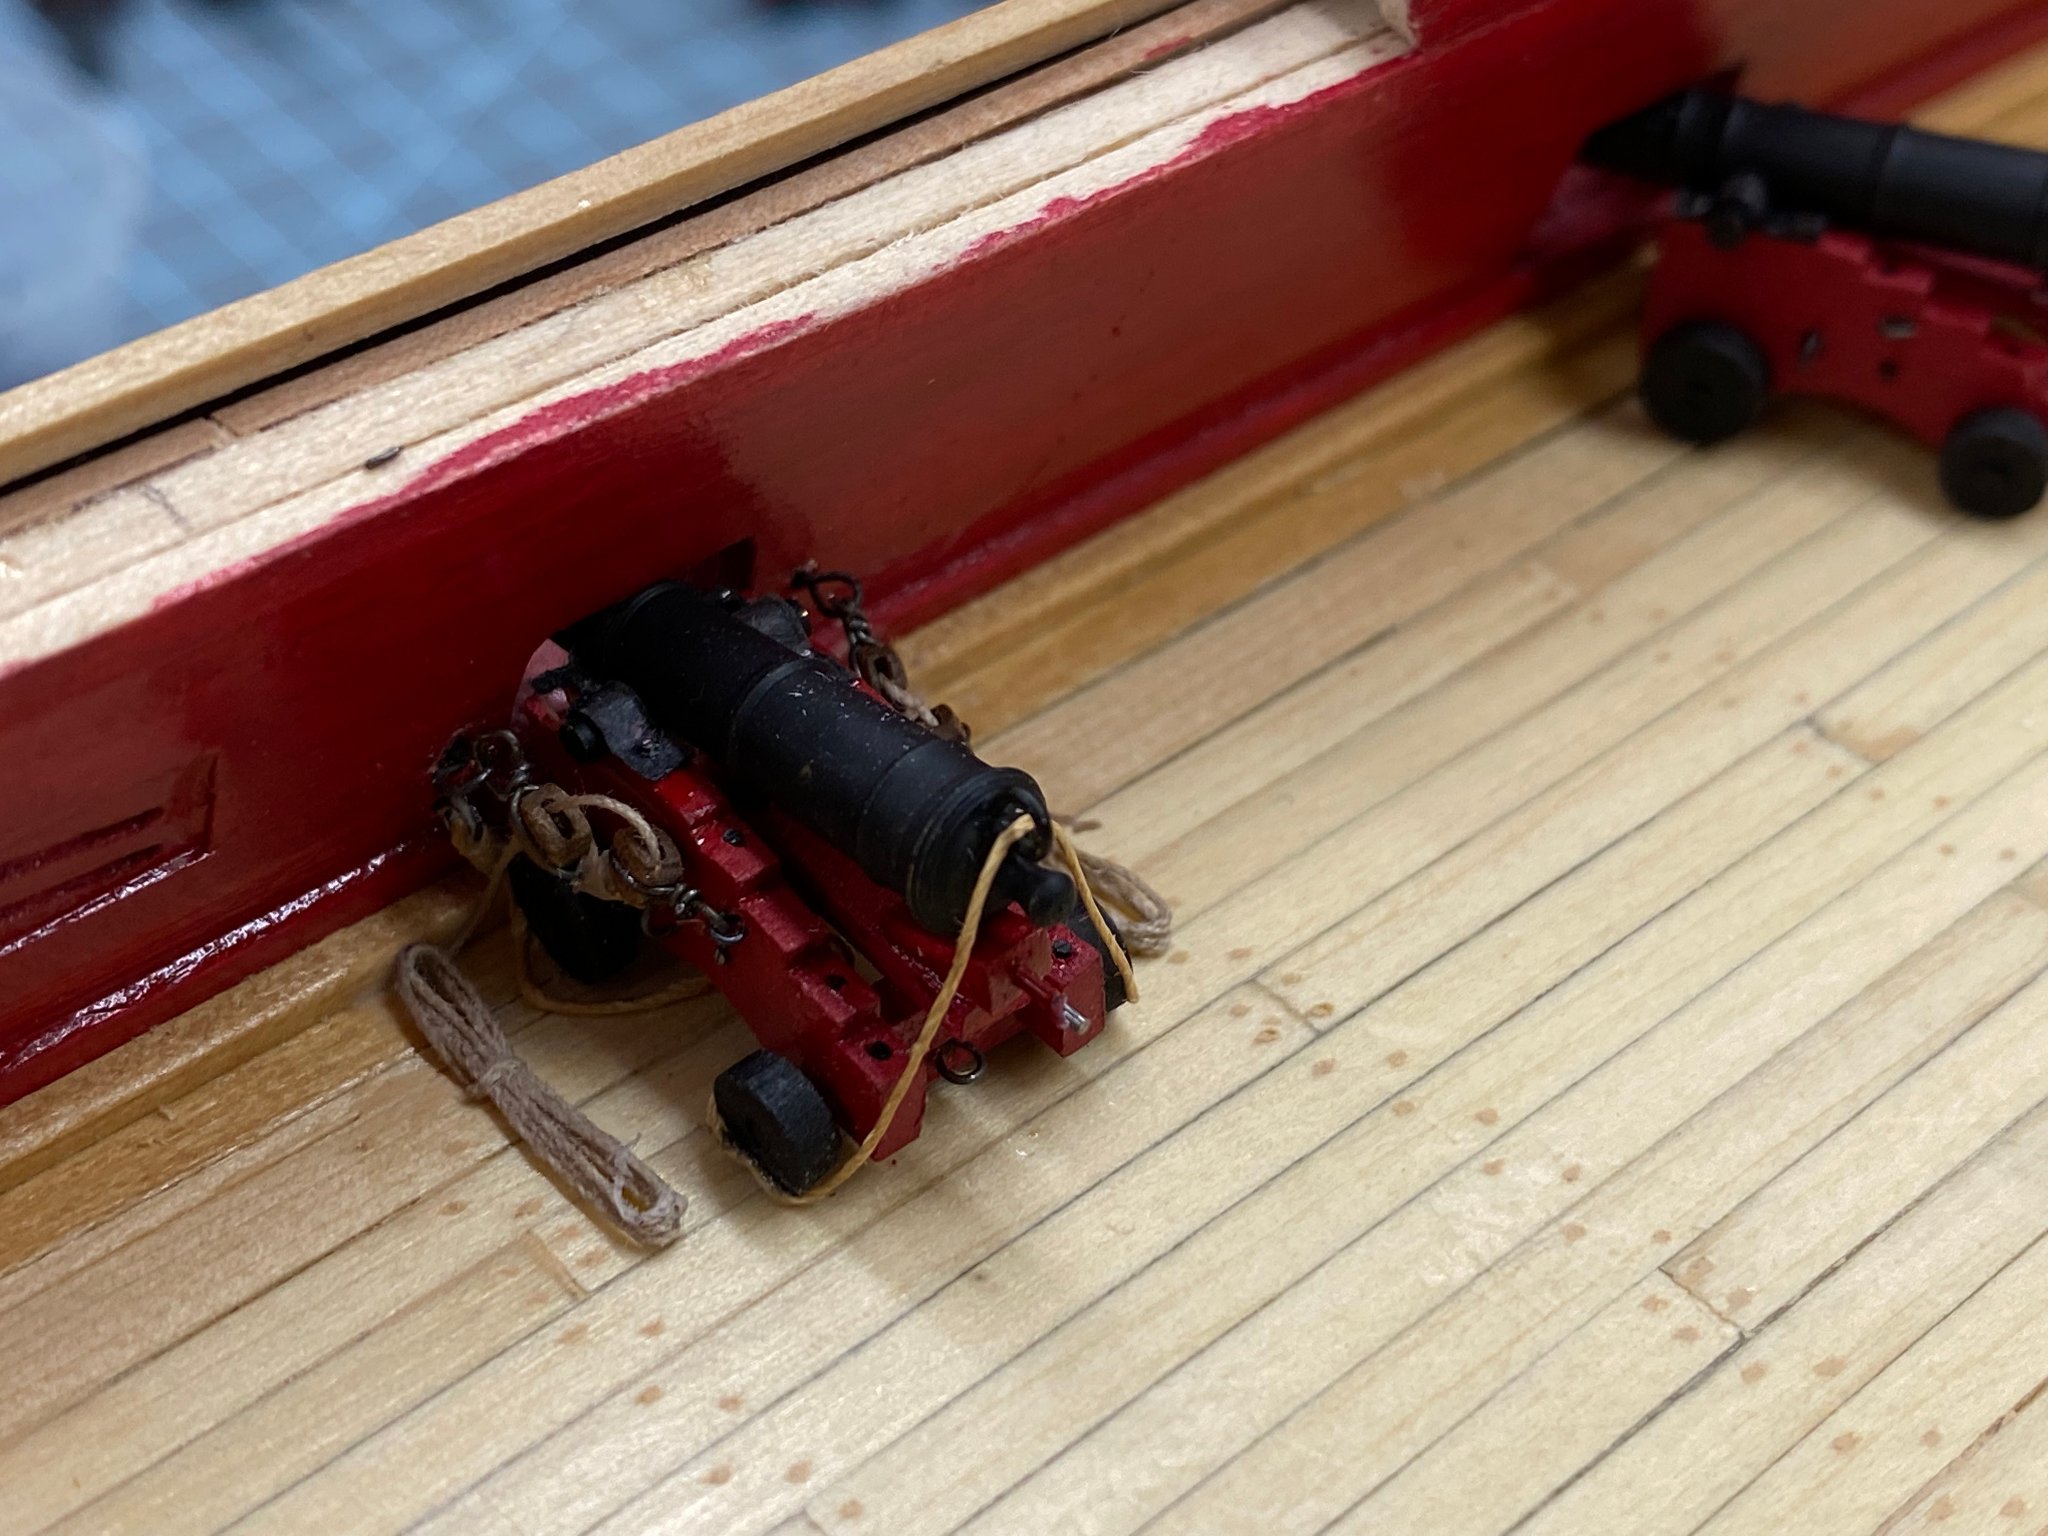
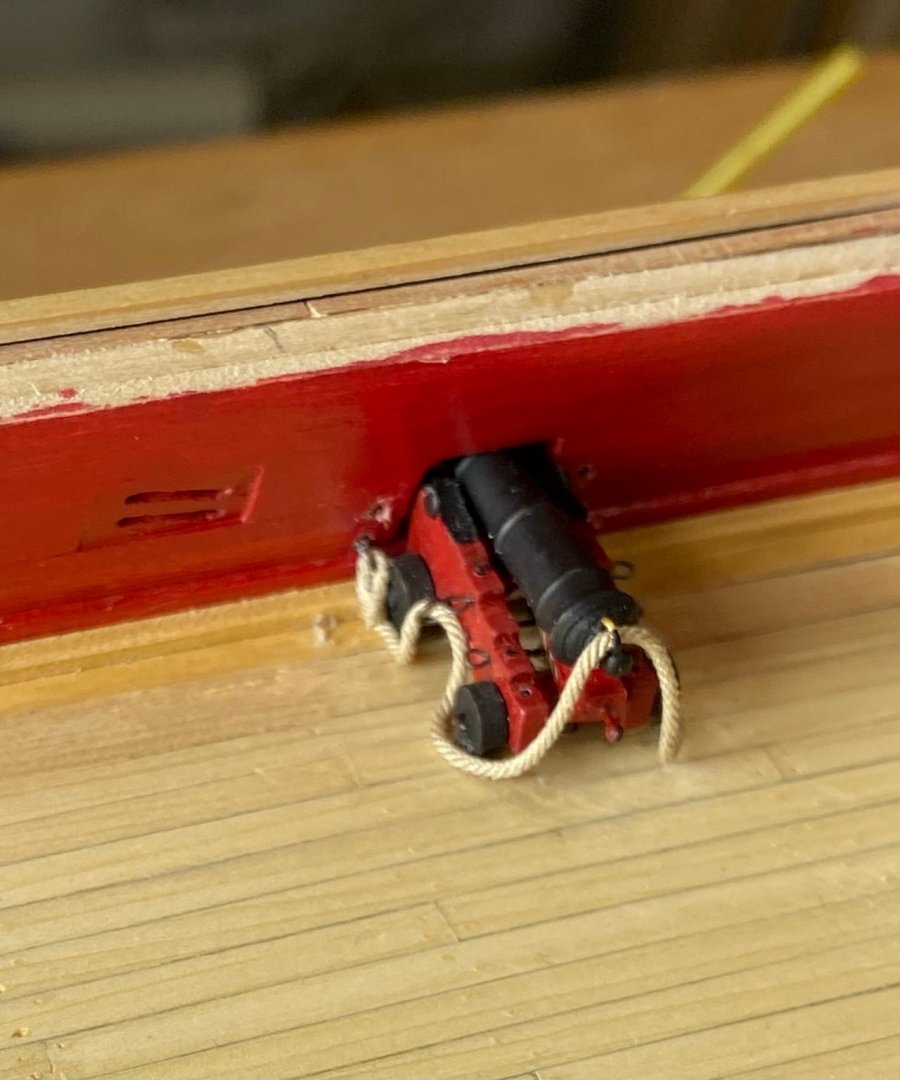
Hit return too quickly - sorry. So the first problem is that the eyebolts I used for the breeching tackle are probably a bit oversize (made from 26 ga wire with .039 eyes). I had to cut them very short in order to get them in the holes I drilled (#68 drill bit). Also, although I used .027 line from Bluejackets (instructions say use .028) the line looks too small. The second problem is with the out-haul tackle. With the gun carriage at the bulwark the two blocks that make up the tackle are almost touching. This means that the way that the tackle line is attached to the becket of the block at the bulwark needs to be very small. When I was making them up I did not know this and at least some (maybe many) of these attachments are too large to allow the blocks to get as close as they need to be. Here is a close up of the in-haul tackle with some auxiliary lighting to make it easier to see the out-haul tackle. Had I known how this would play out I would have moved the eyebolt on the carriages further back and might have used the 2mm blocks instead of the 2.5mm ones that I did use. Working with the 2.5mm was "no fun" so I can only assume that using 2.0mm would have been even less so. I am staining some .040 line that I had in the parts drawer to use for the breeching tackle and considering my options on the out haul tackle.
- 370 replies
-
- 3
-
-
- Model Shipways
- Confederacy
- (and 1 more)
-
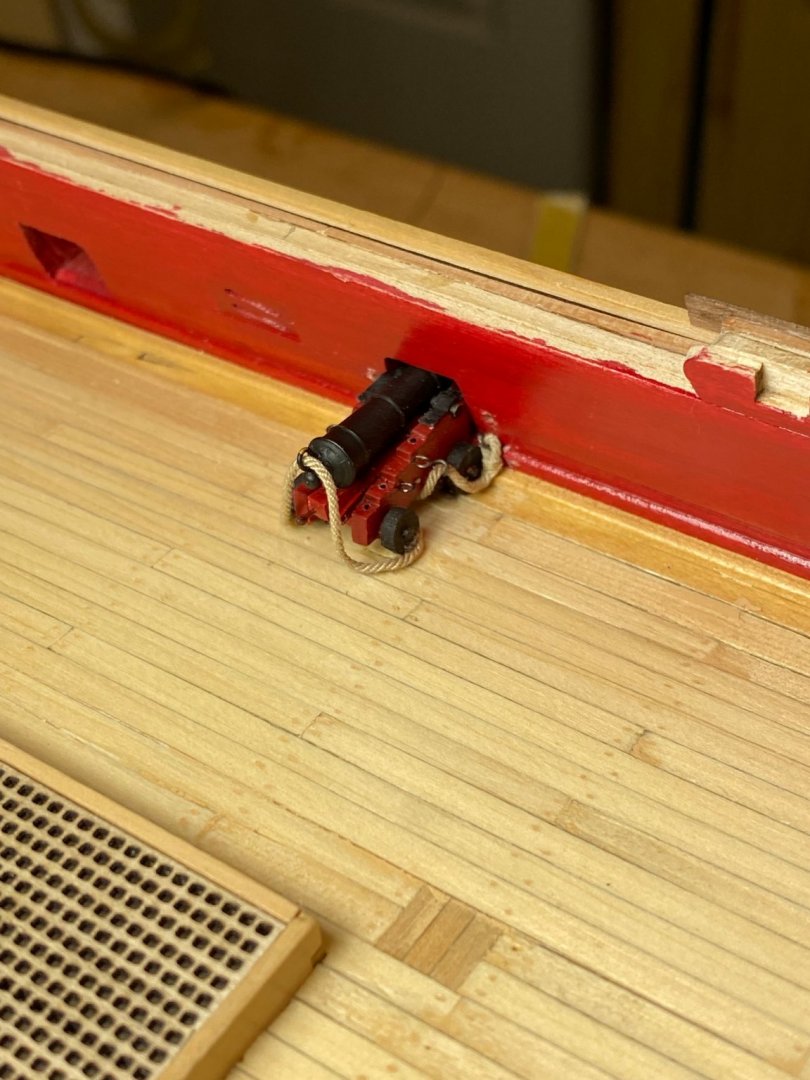
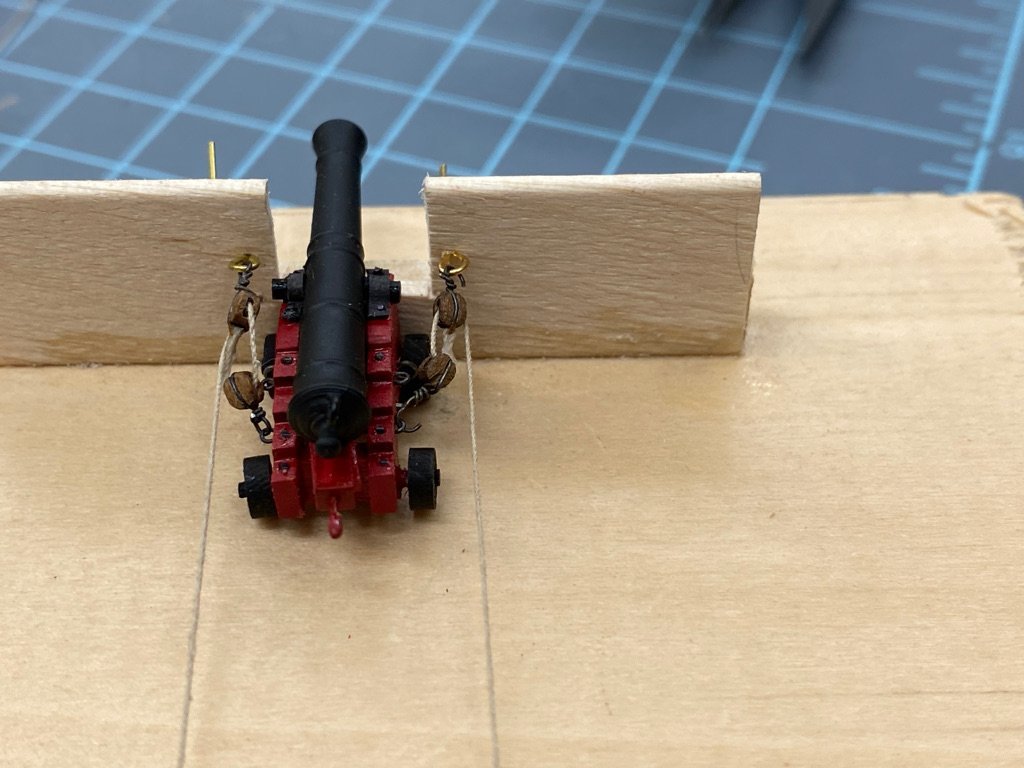
So I made a "test run" mounting one of the cannon and rigging the out-haul (I assume this tackle was used to return the gun to "battery" after it was reloaded) and breeching tackle.
-
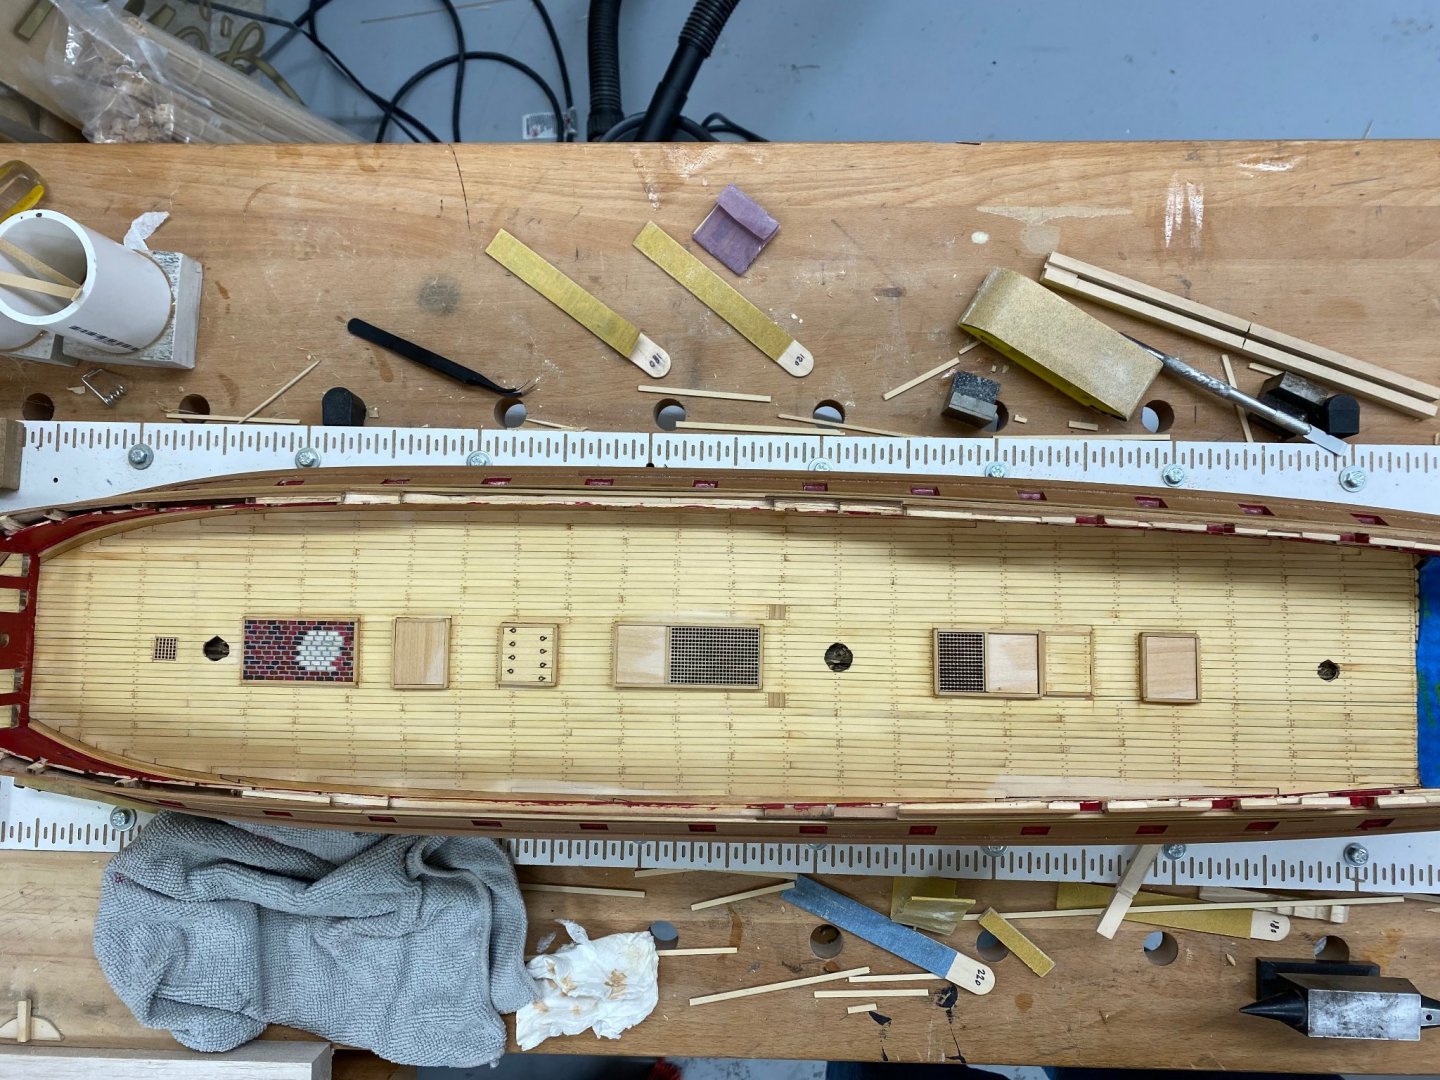
Three coats of Wipe-on-Poly later here is the Confederacy deck. Treenails are darker than I would have preferred but not really objectionable. Deck is covered in many areas so you can't really see it very well except in spots. And I am out of ideas to make it better (the enemy of good enough as I have been told). And I got the guns finsihed except for the breeching tackle. Here they are 28 plus two "spares" just in case. I did rig the breeching tackle on one as a test. I think the correct strategy (for me) is to glue the breeching tackle to the bottom (outside) of the rear wheels to get the line to "flow" correctly from the breech ring. I thought (briefly) about using 50/50 glue/water to try and stiffen the line as it comes off the breech but besides being somewhat messy the line does not want to cooperate. I will mess around with this some more on my two spares before commiting to doing the "real" 28.
- 370 replies
-
- 4
-
-
- Model Shipways
- Confederacy
- (and 1 more)
-
Thanks WalrusGuy - I see you are making substantial progress on your Confederacy.
- 370 replies
-
- 1
-
-
- Model Shipways
- Confederacy
- (and 1 more)
-
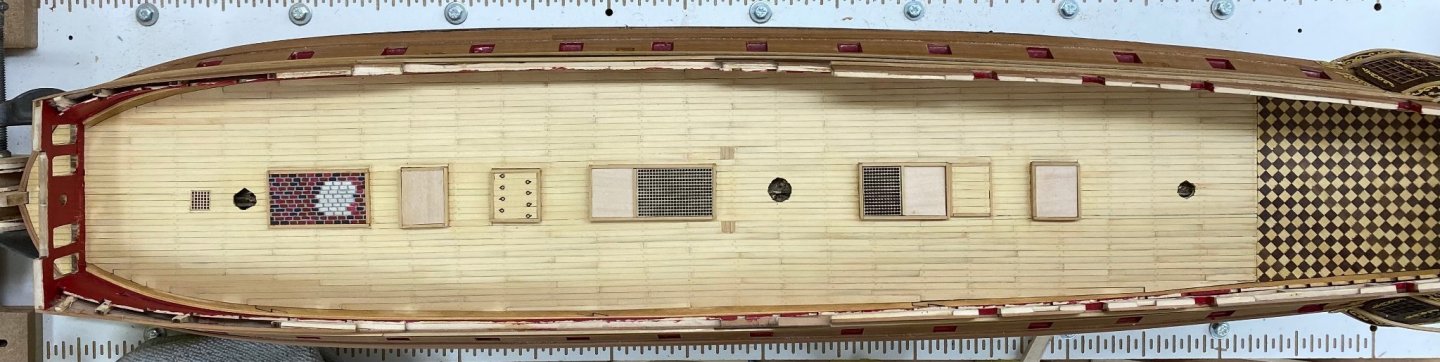
It has been almost a month since I last posted. With a new job and a trip to Hawaii I have been working on Confederacy but only very infrequently. I did manage to get the deck treenailing completed and am ready to apply the Wipe-on-Poly. Below is the deck after being wiped with a paint thinner dampened rag. I am hopeful that the woP will not cause the treenails to darken this much. I think I tested this combination (yellow cedar planks with "natural" filler) but I threw all my sample sets out in a fit of "let's clean up the shop" just before I left for Hawaii. Not sure there is anything I could do about it at this point anyway. I am continuing to work on the guns - have about half of them mounted in their carriages and am working out how to get the breech ropes rigged. I need tyhe deck completed beffore I start on installing the guns.
- 370 replies
-
- 5
-
-
- Model Shipways
- Confederacy
- (and 1 more)
-
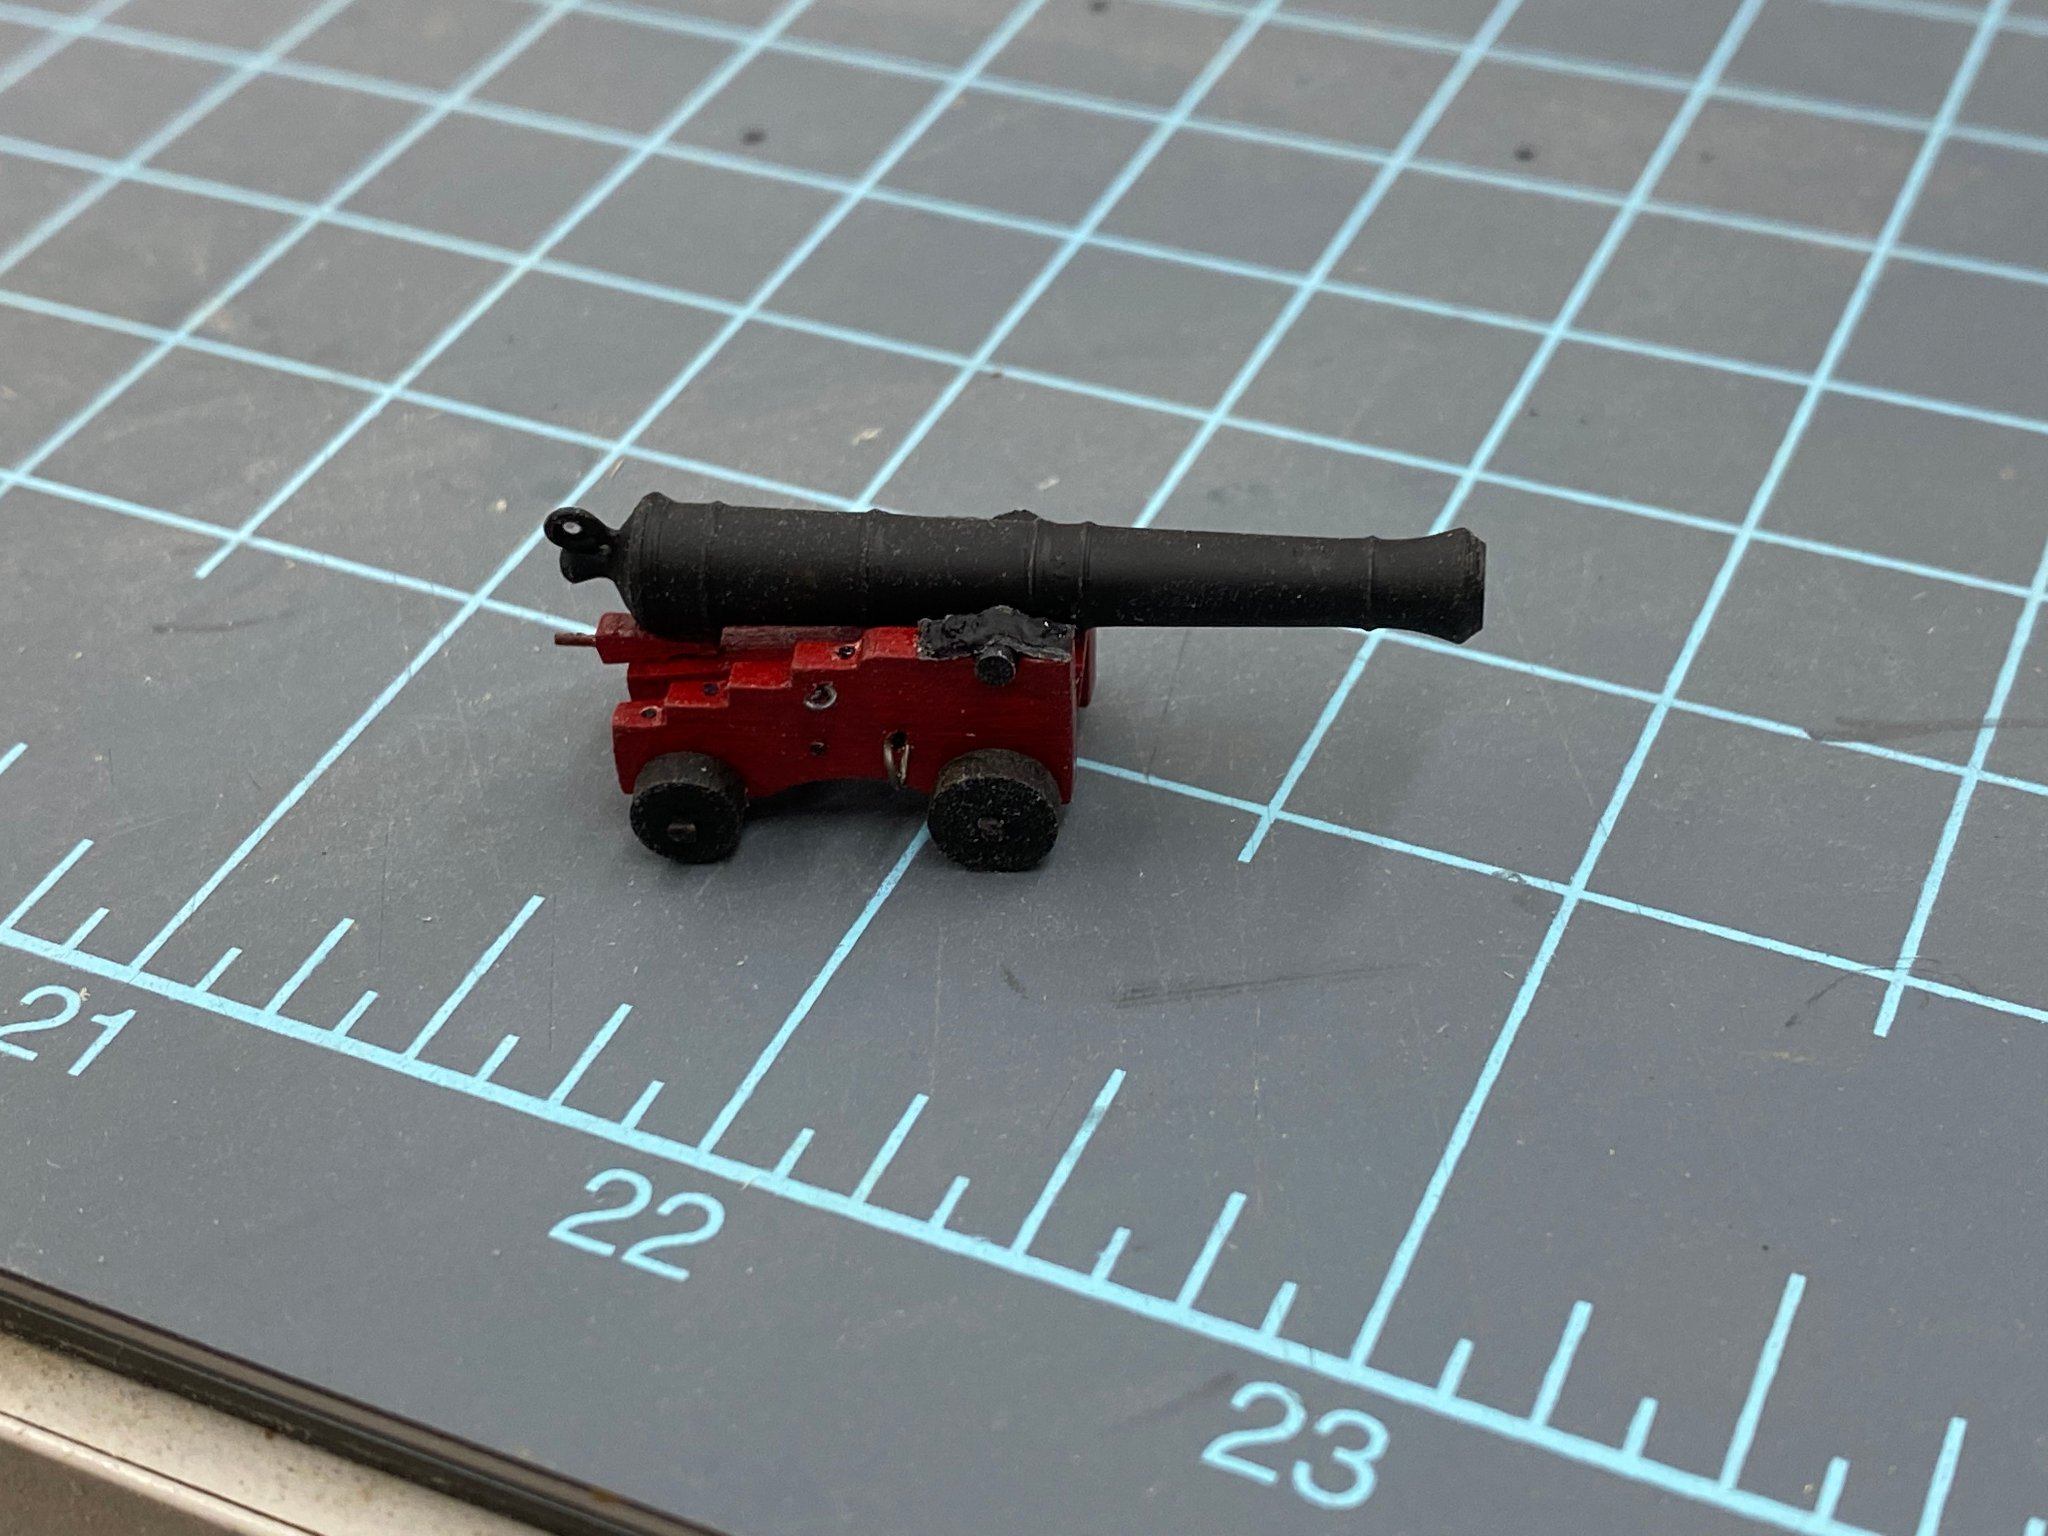
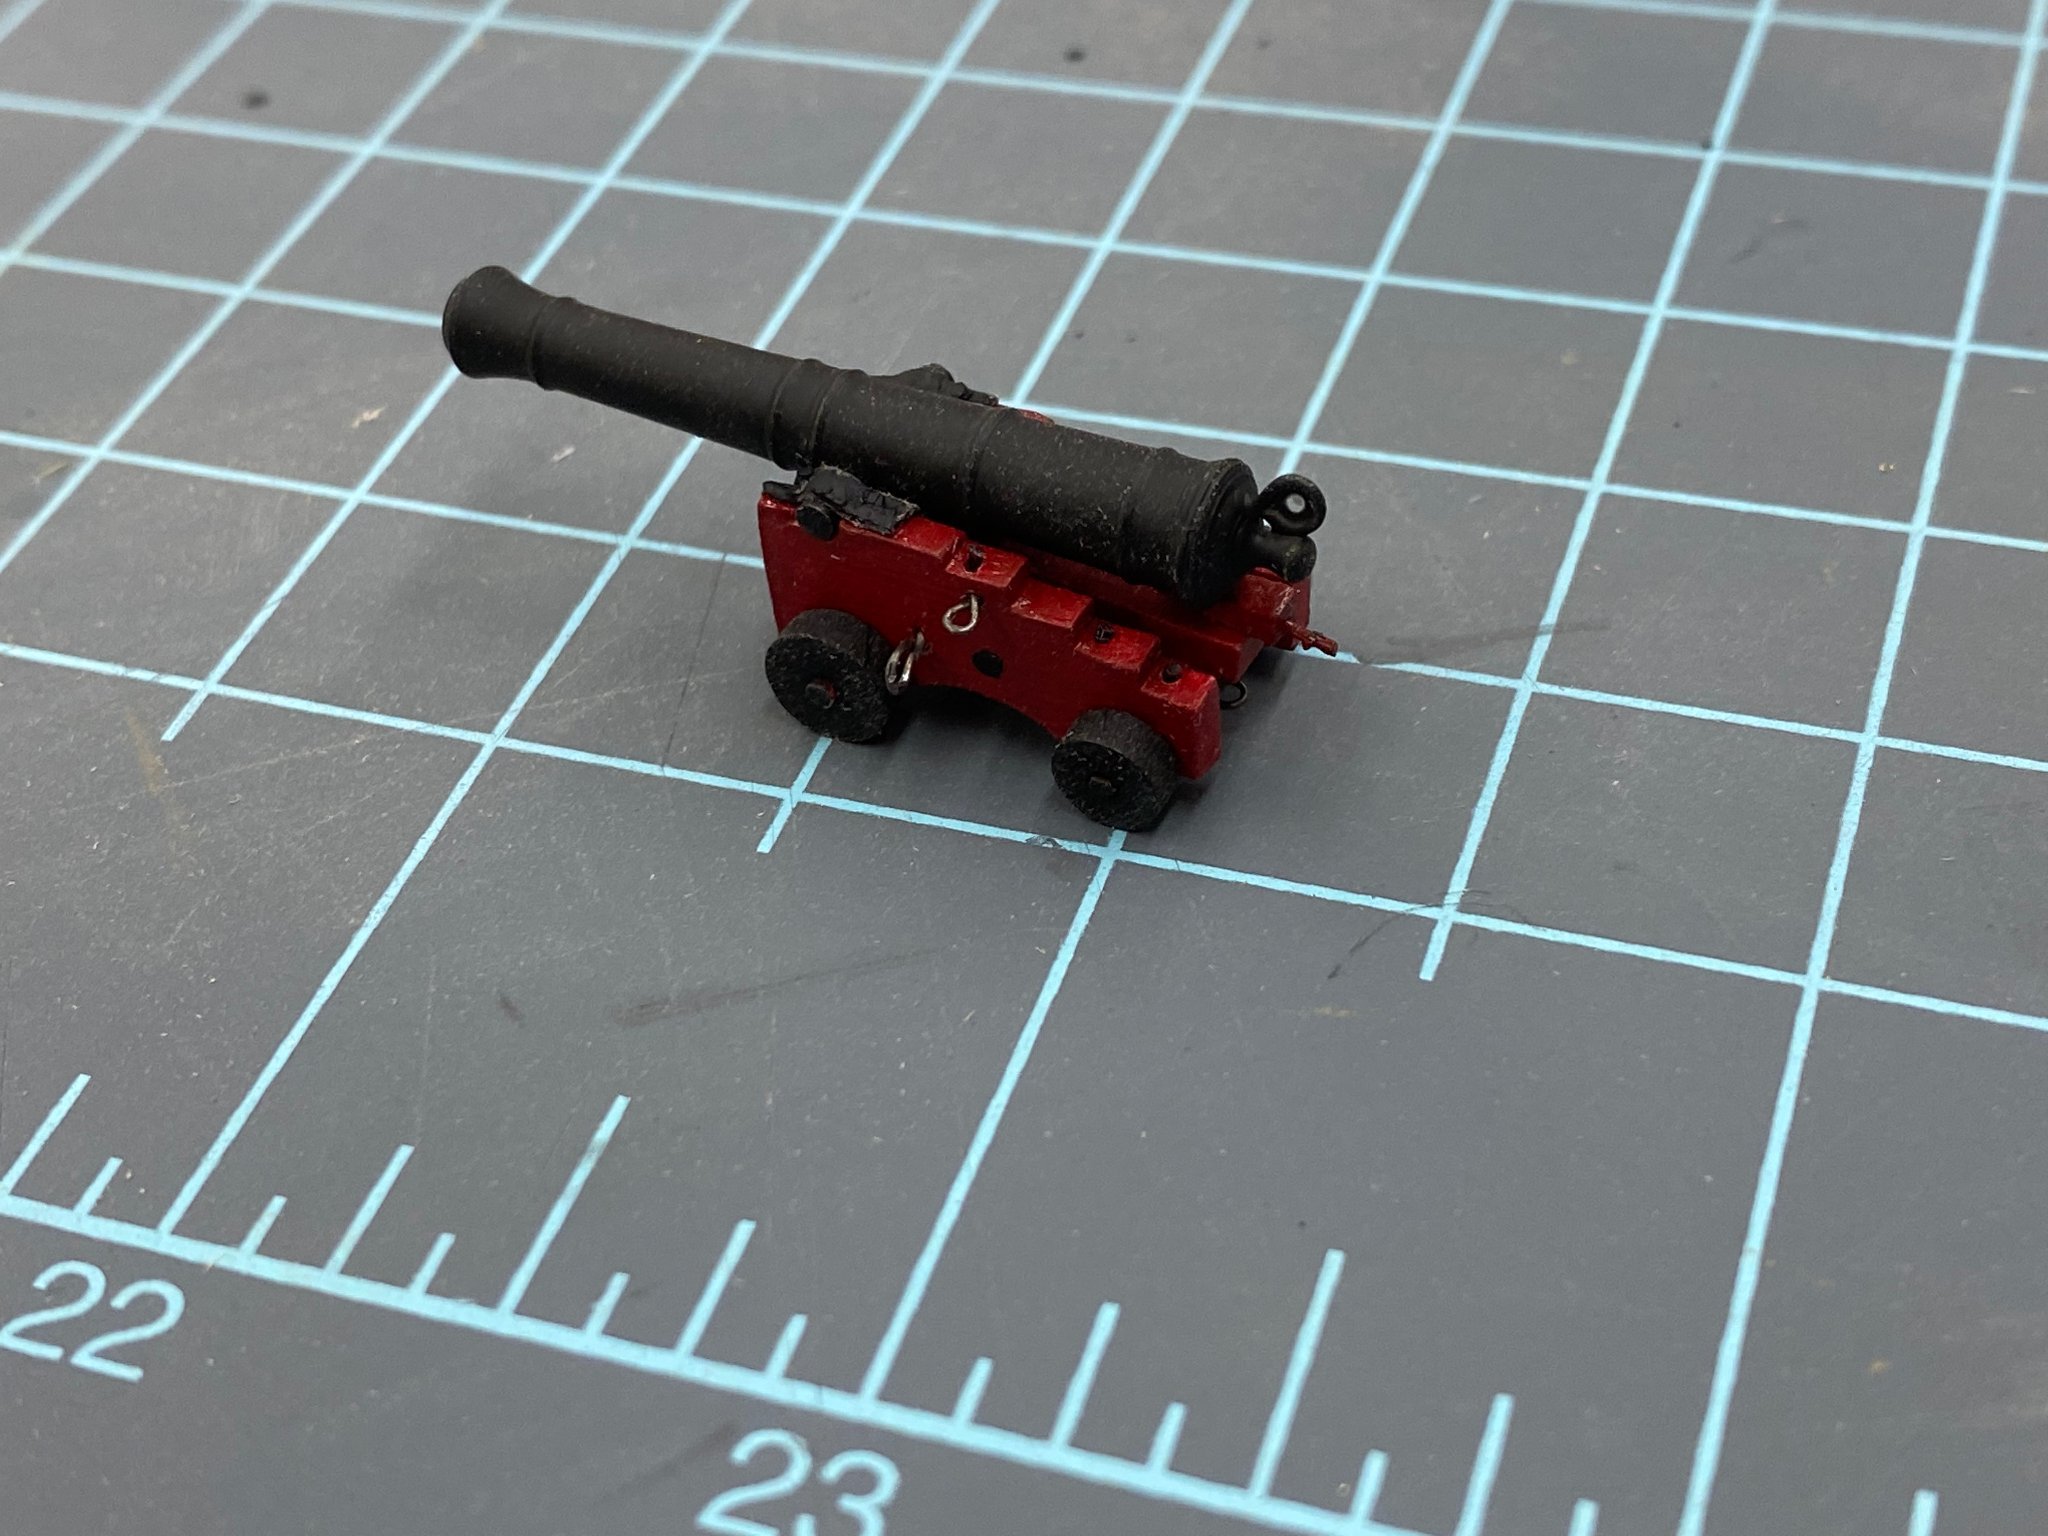
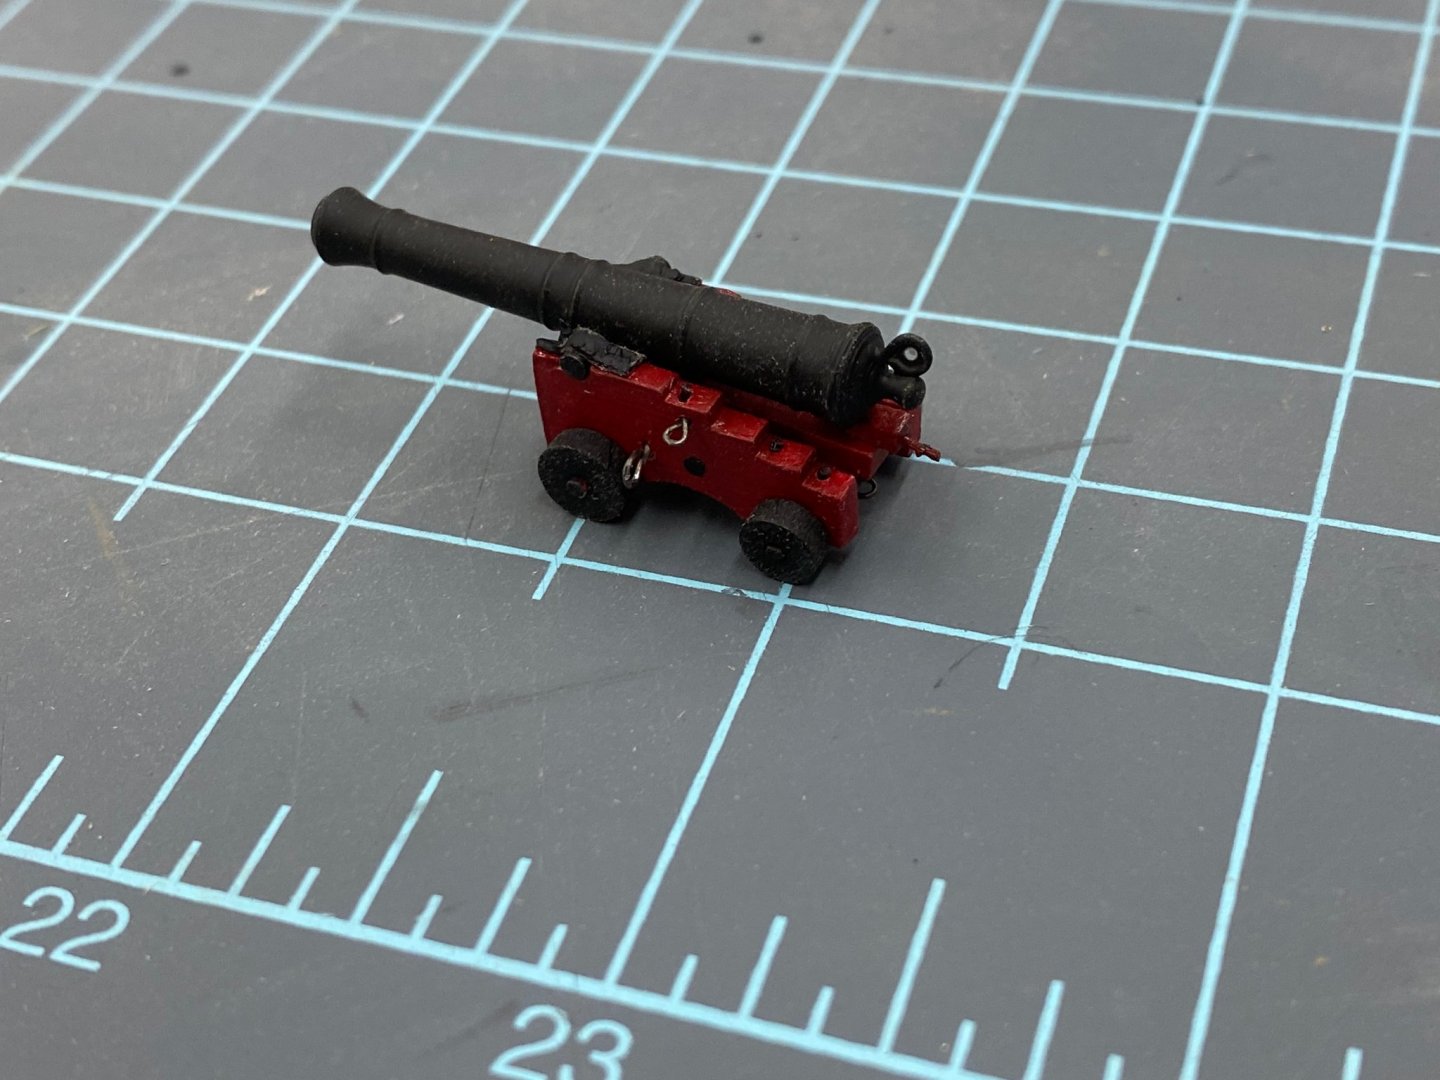
I took one of the new gun/carriage assemblies to completion to see if there were going to be issues and here is what that one looks like. I painted the brass barrels rather than chemically blacked as I have not had great luck getting them to stay blackened.


- 370 replies
-
- 3
-
-
- Model Shipways
- Confederacy
- (and 1 more)
-
It has been awhile since I managed to get anything done in the shipyard. New job, girlfriend wants to see people, etc. I am slowly getting the treenail holes drilled. I can only do about two rows at a sitting (actually standing and bending over the deck) before my back starts to make my life difficult. Here is today's contribution. I will put the filler in tomorrow or maybe drill some more holes.
- 370 replies
-
- 7
-
-
- Model Shipways
- Confederacy
- (and 1 more)
-
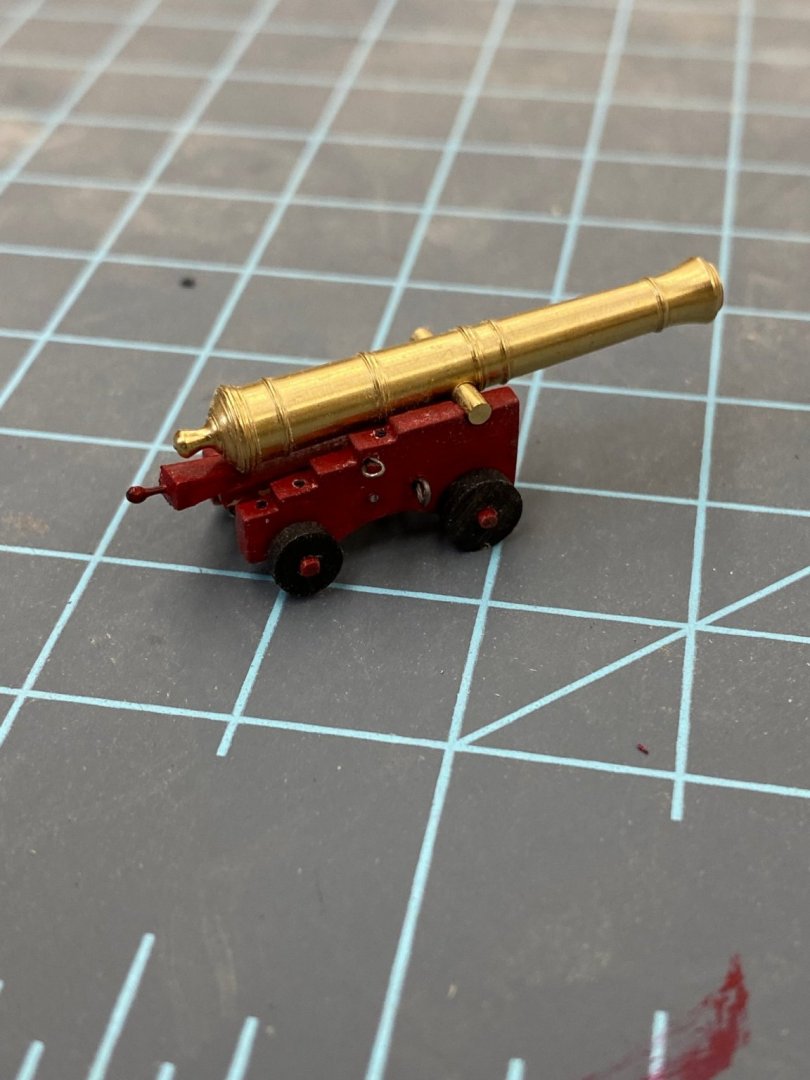
Progress will bve a little slower from now on - I went back to work (part time/remote) last Monday. SO less time in the workshop but more money to buy "toys". Anyway I built the eight carriages that I material for while I await the rest as they wend their way from New Jersey. Here is the first one as finished as it will be until I have the rest on my "stuff". I am going to finish all the barrels at the same time rather than set up to do it twice. Of note - on the larger carriage version I used a part of a brass belaying pin as the quoin handle. This time I used a piece of 26 ga wire as the quoin is quite a bit smaller. I formed the "bulb" on the end using Mr. Surfacer 1500 (it is black). I dipped the short piece of wire glued into the quoin in the Mr. Surfacer and then let in dry with the wire hanging down. Gravity does the rest. I also decided to forgo using both a split ring and an eyebolt for the breeching rope fitting. I think it will be hard to notice with the breeching rope hiding most of the detail. I also used black monofilament fishing line to simulate the bolt heads in the top of the carriage sides. Saves having to come back and touch up the shiny ends when you cut the wire off "flush". I mistakenly ordered 450 meters of the #9 line (0.0205"/ 0.53mm diameter, 26lb test) which should last me several lifetimes since you use less than an inch on each carriage. So I ran a test onboard the hull to make sure this one is going to fit and here she is: And from the outside:

- 370 replies
-
- 2
-
-
- Model Shipways
- Confederacy
- (and 1 more)