cdrusn89
-
Posts
1,940 -
Joined
-
Last visited
Content Type
Profiles
Forums
Gallery
Events
Everything posted by cdrusn89
-
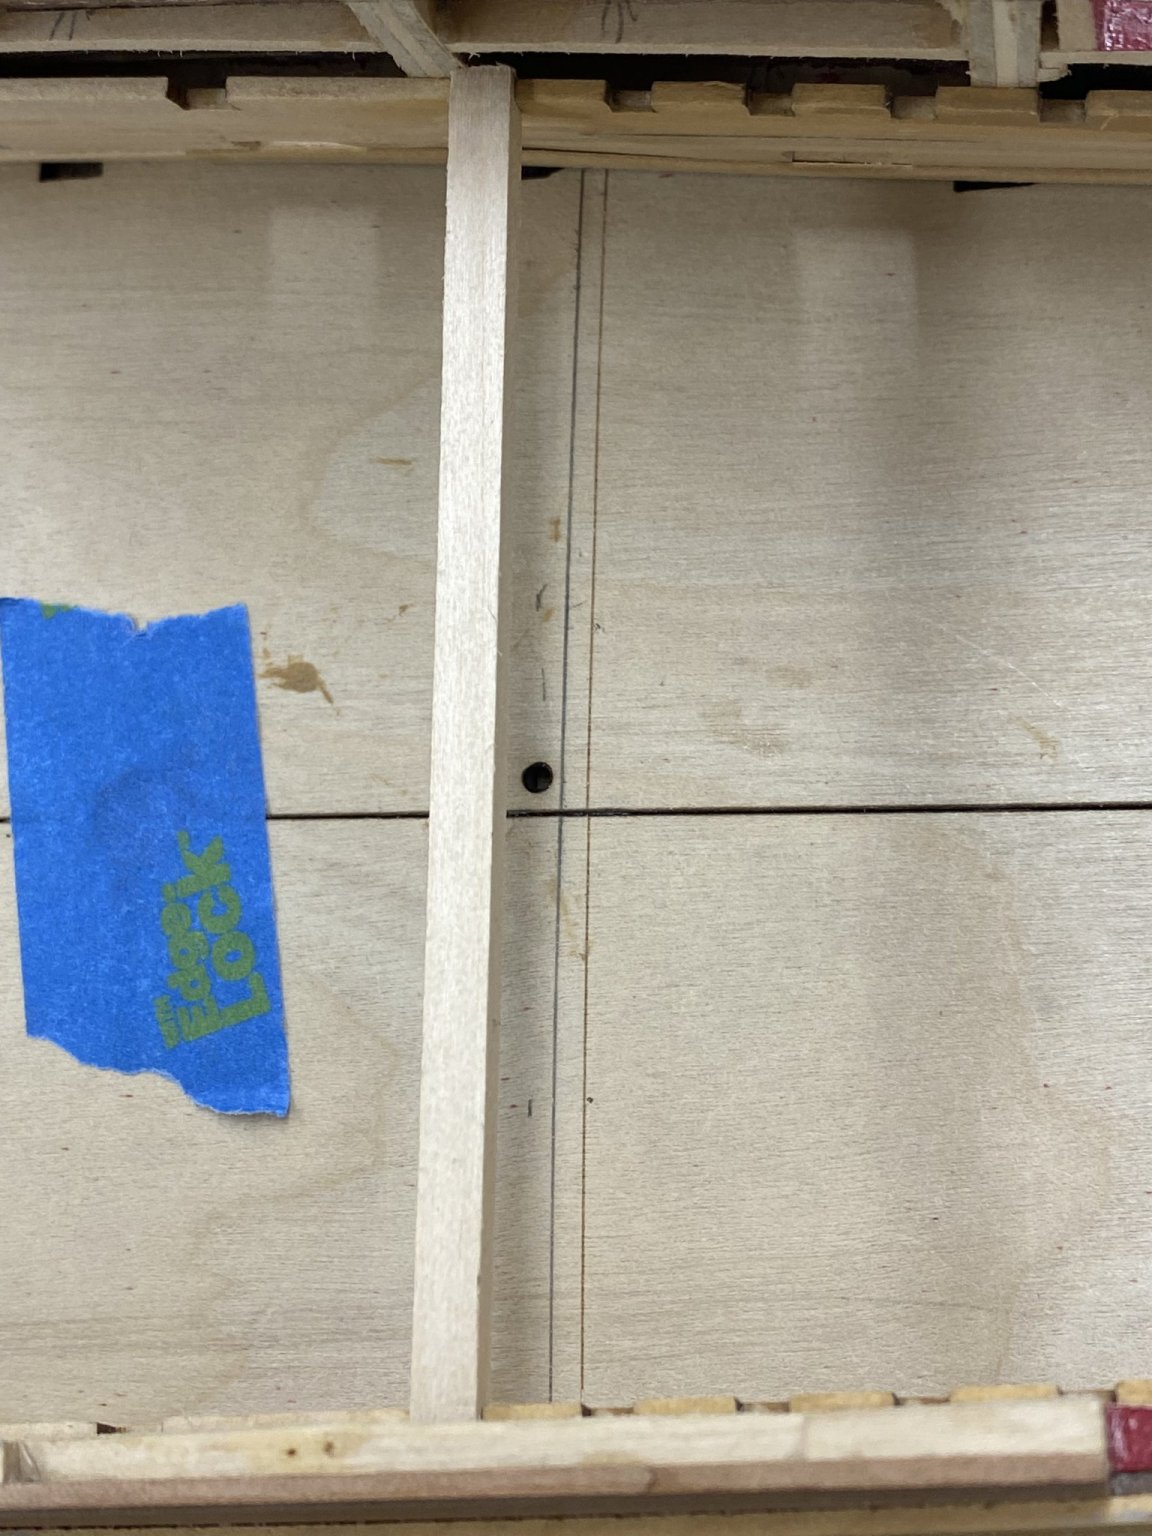
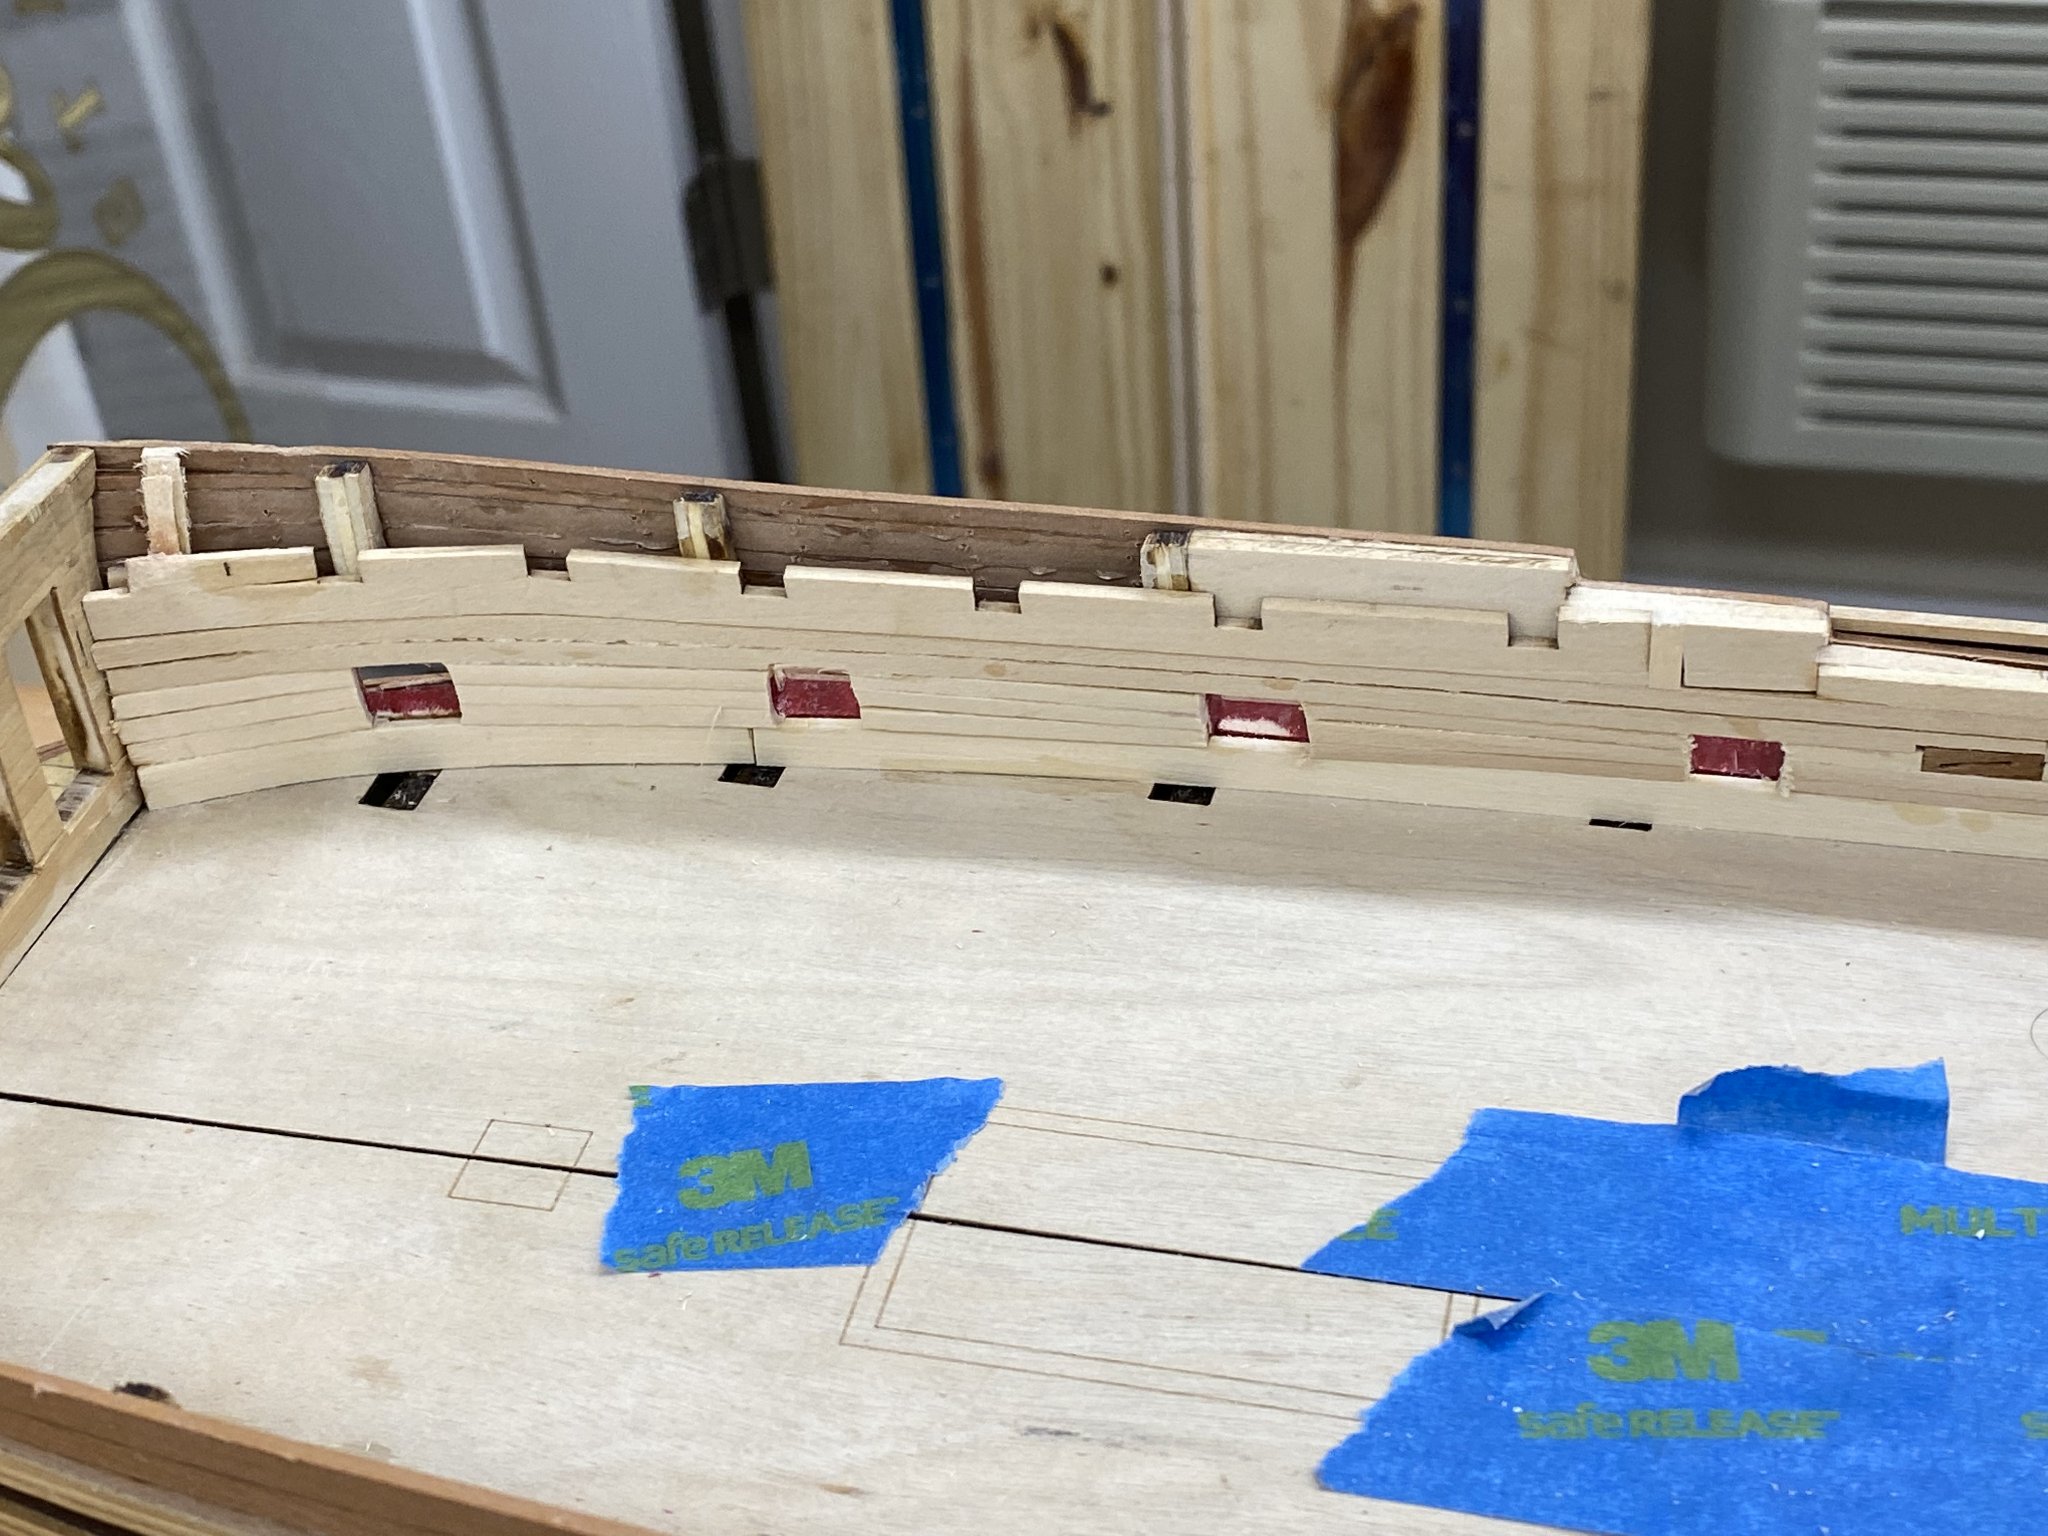
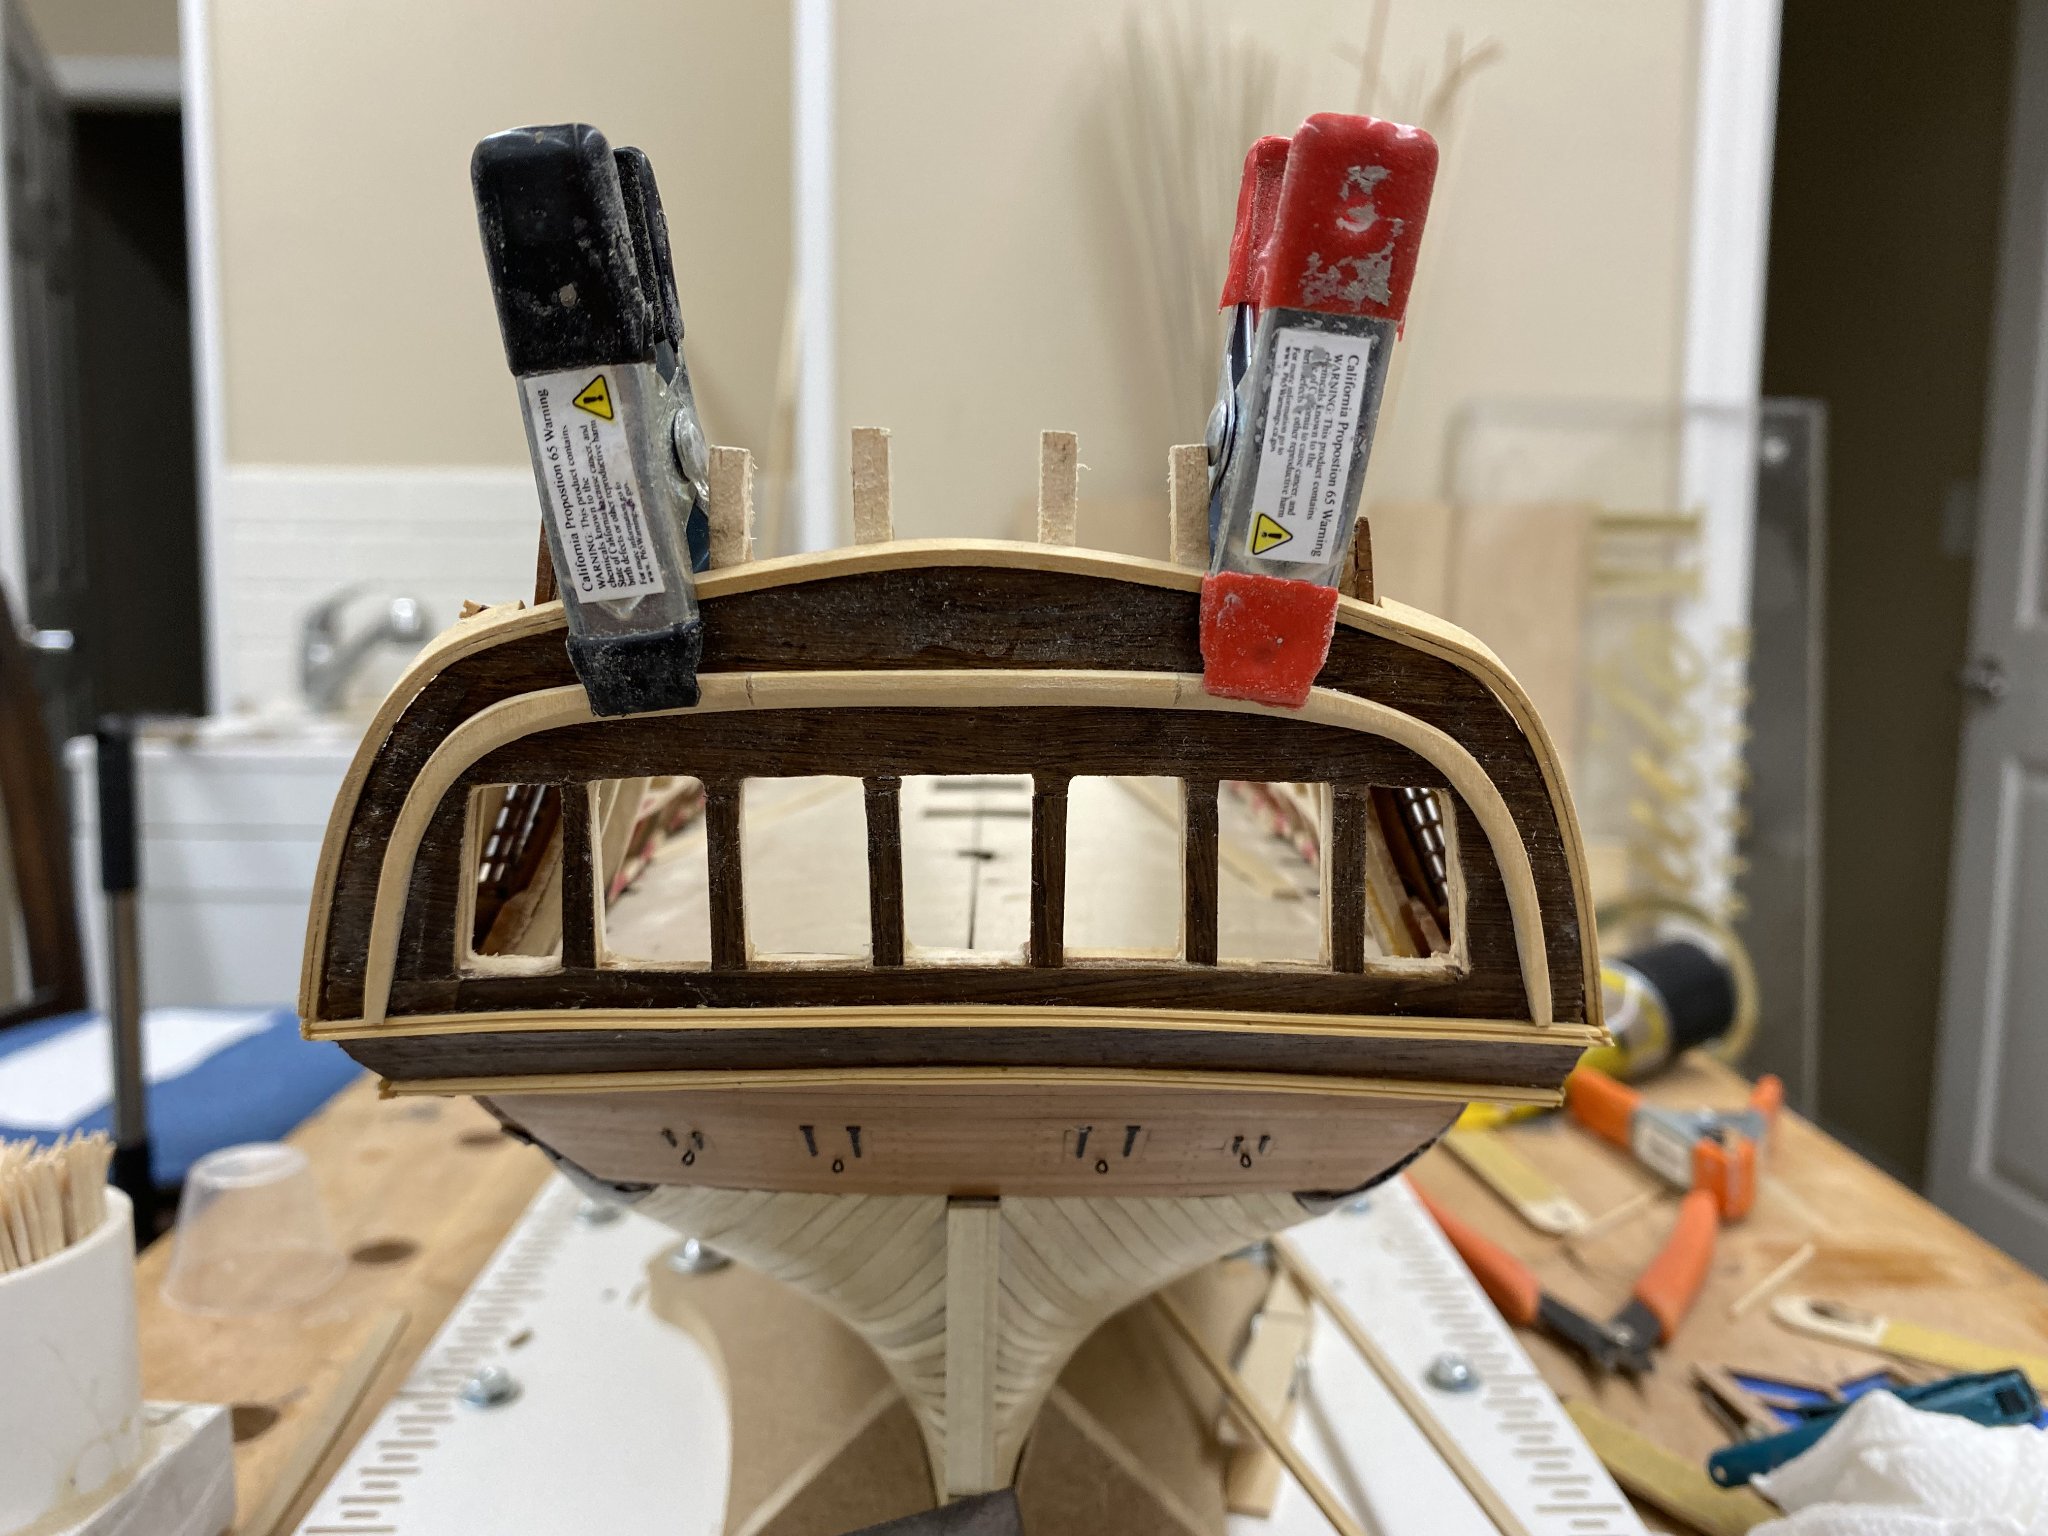
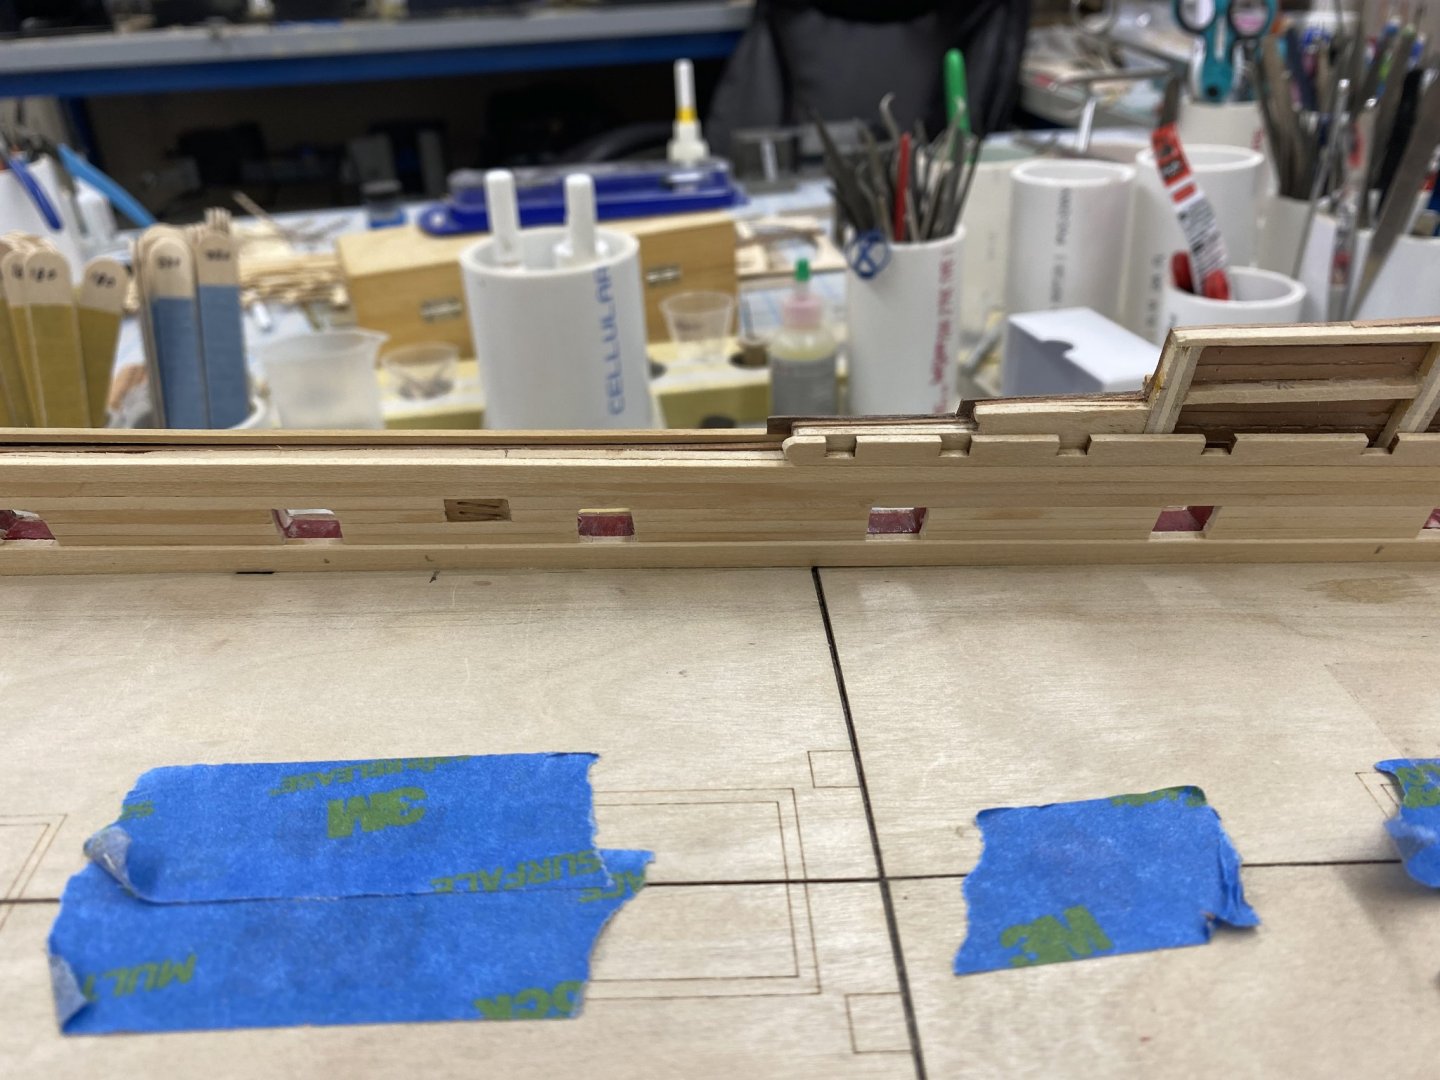
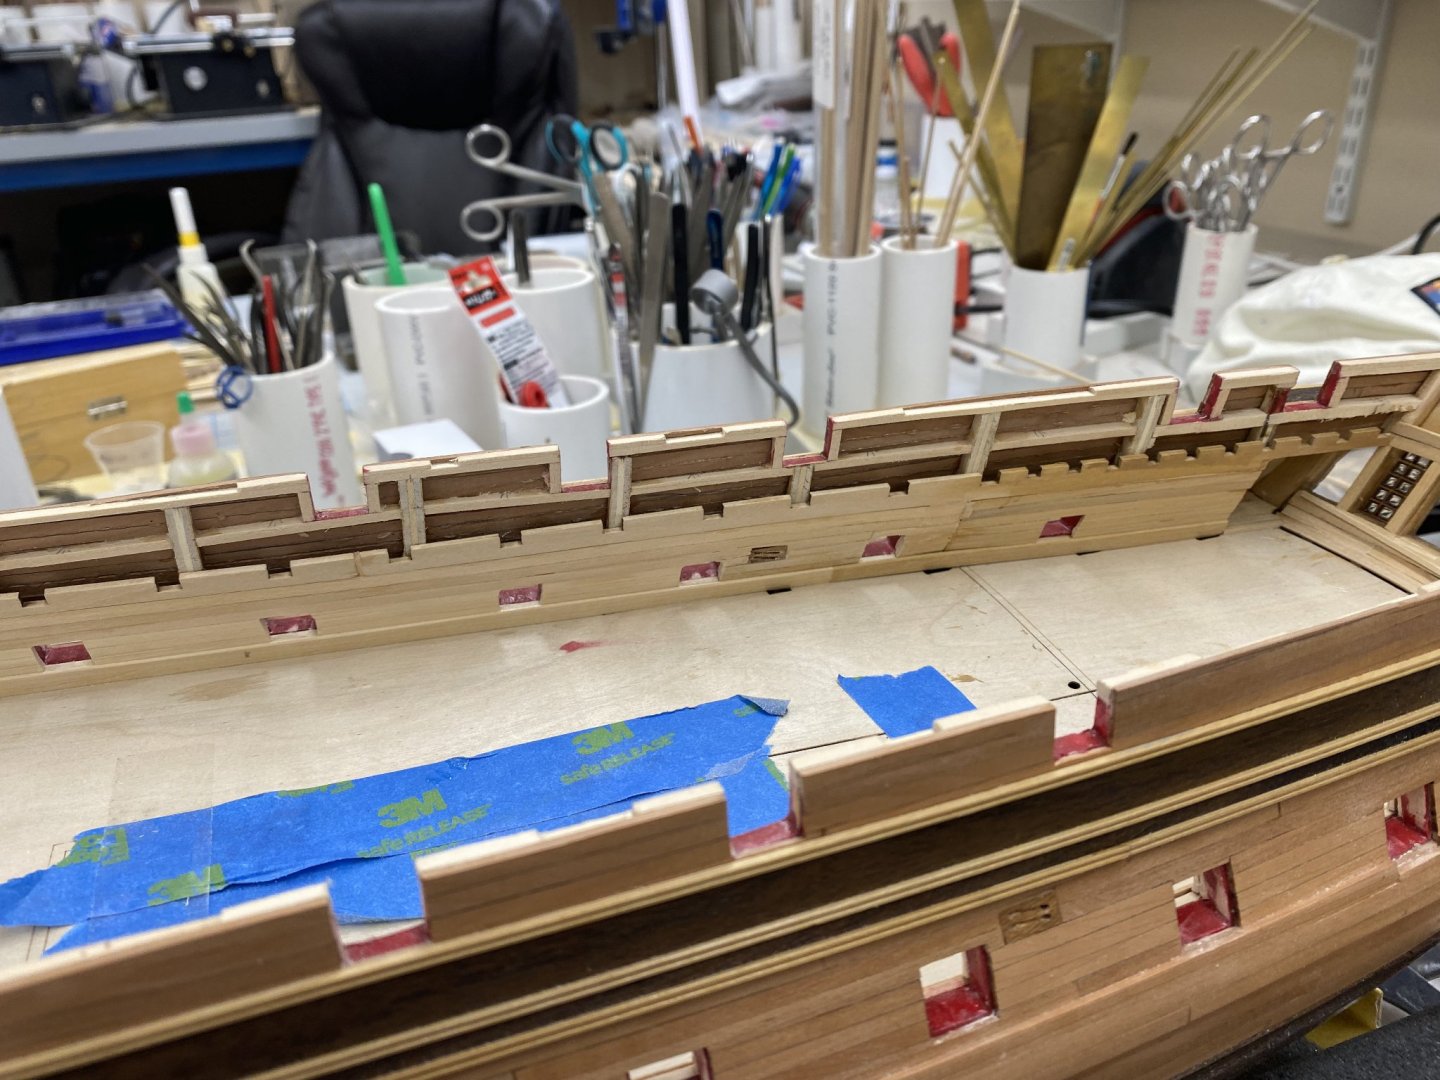
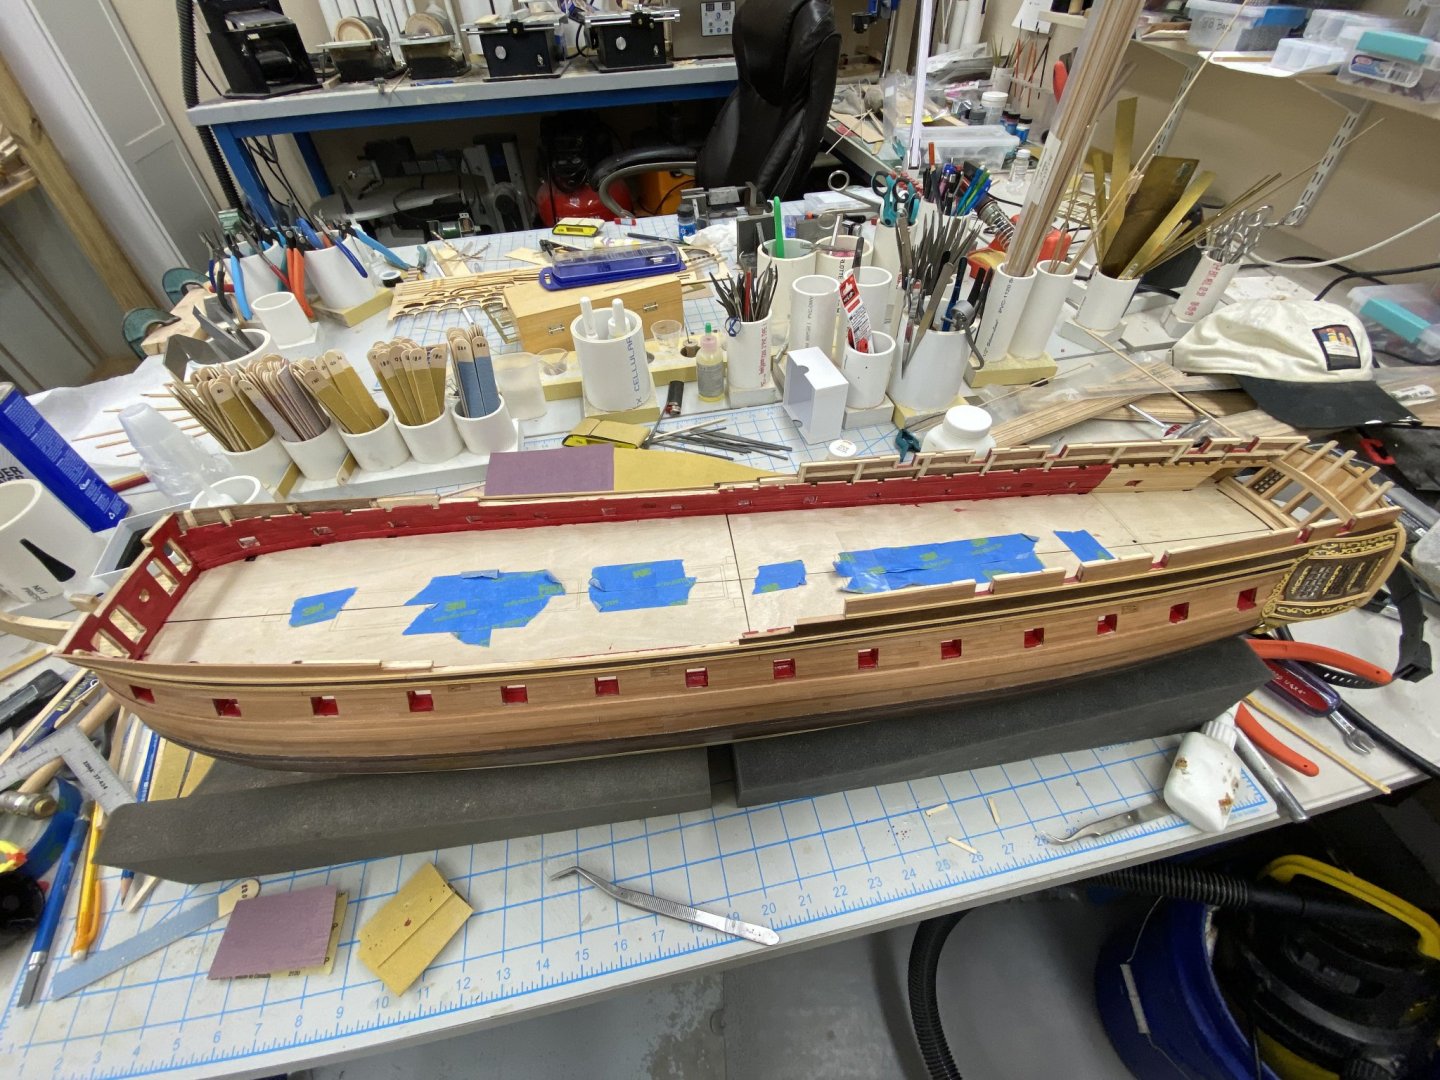
 I decided to actually measure where the division between the great cabin and the rest of the gun deck would be now that I have glued the deck clamps in place. As it turns out I am about 2mm forward of the mark on the false deck - so I redrew the line and carried it up the bulwark so I would know where to stop the red paint. I finished up the bulwarks by adding the spirketting on both sides and cleaning up some of the obvious gaps in the planking. Here are shots of the interior before the first coat of paint. Speaking of paint - here she is with the first coat of red. I will need to CAREFULLY touch up the gun ports, both from the inside and outside but not until I get two coats on the interior and see how that looks. As you may notice some of the stern lights are missing. For those who may build this in the future I would recommend to wait until this phase (aka chapter 9 in the instructions) are complete before installing the windows. There are many opportunities to stick something through one of the stern lights while adding the bulwark planking that it would save effort to wait and put the windows in just before starting on planking the gun deck.


- 370 replies
-
- 4
-

-
- Model Shipways
- Confederacy
- (and 1 more)
-
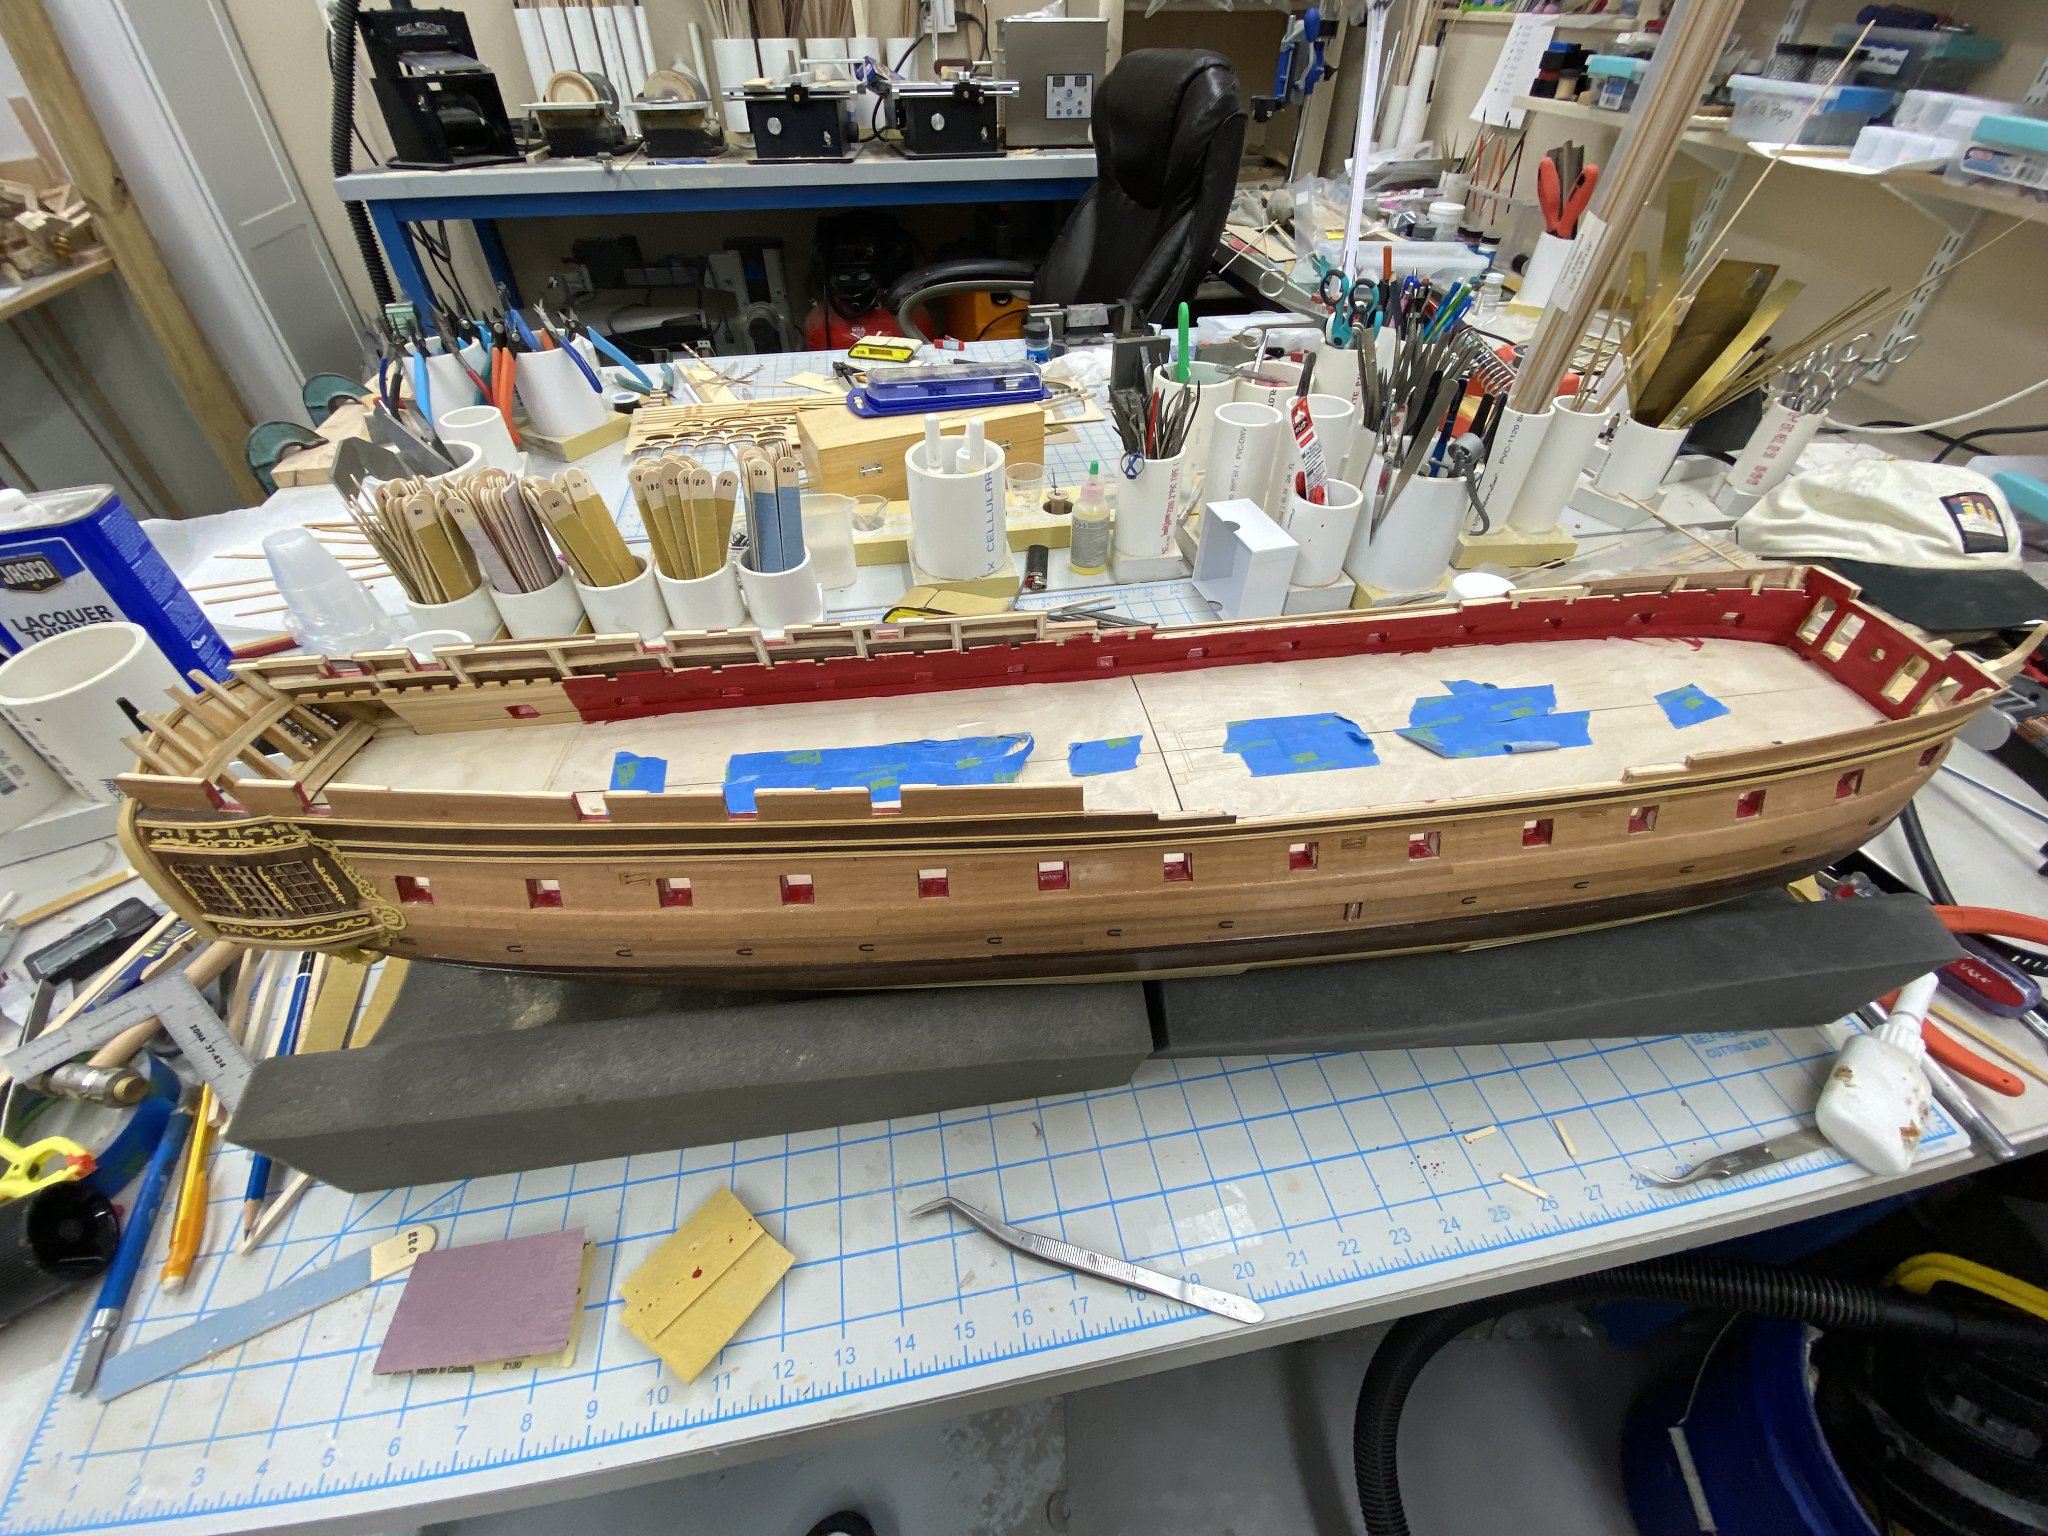
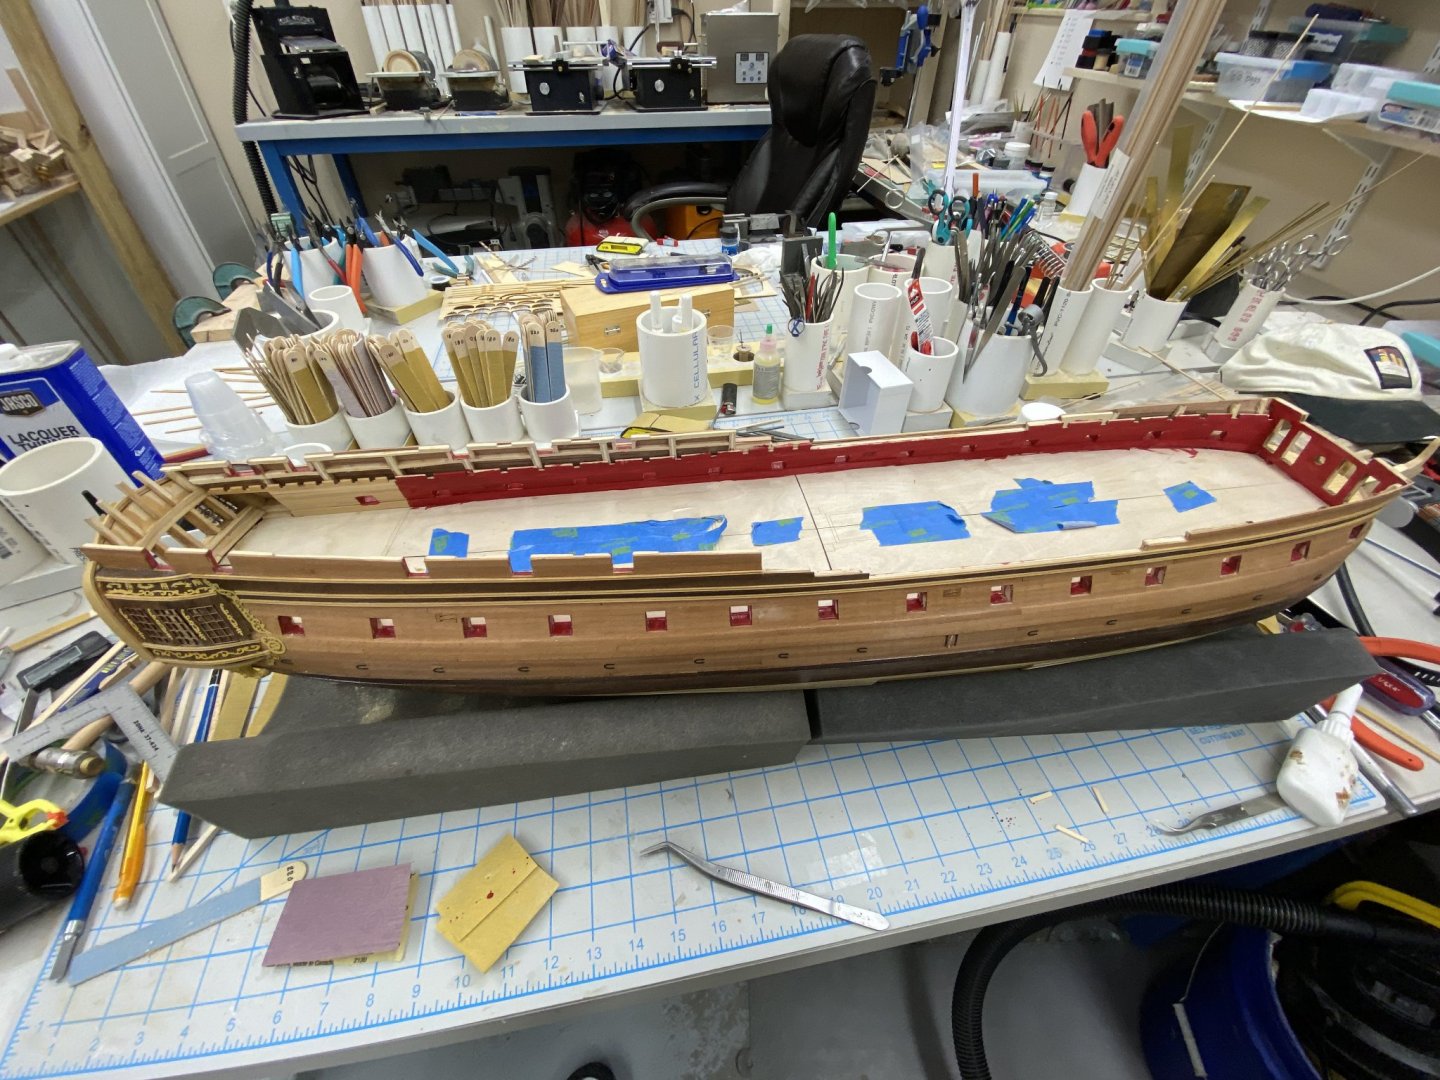
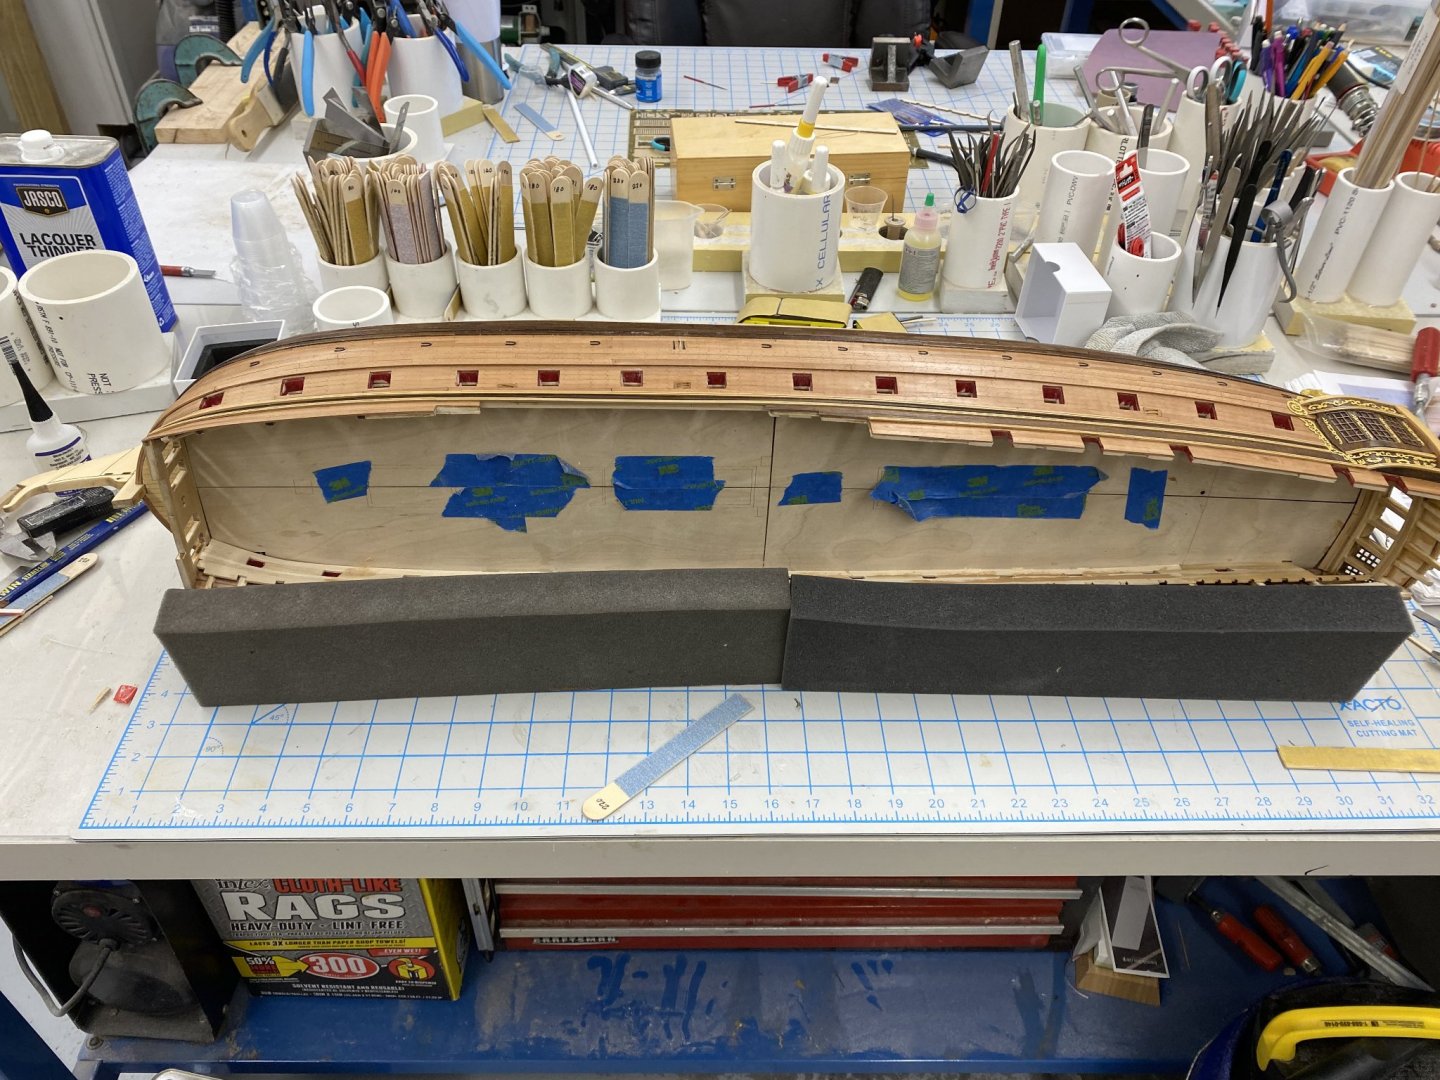
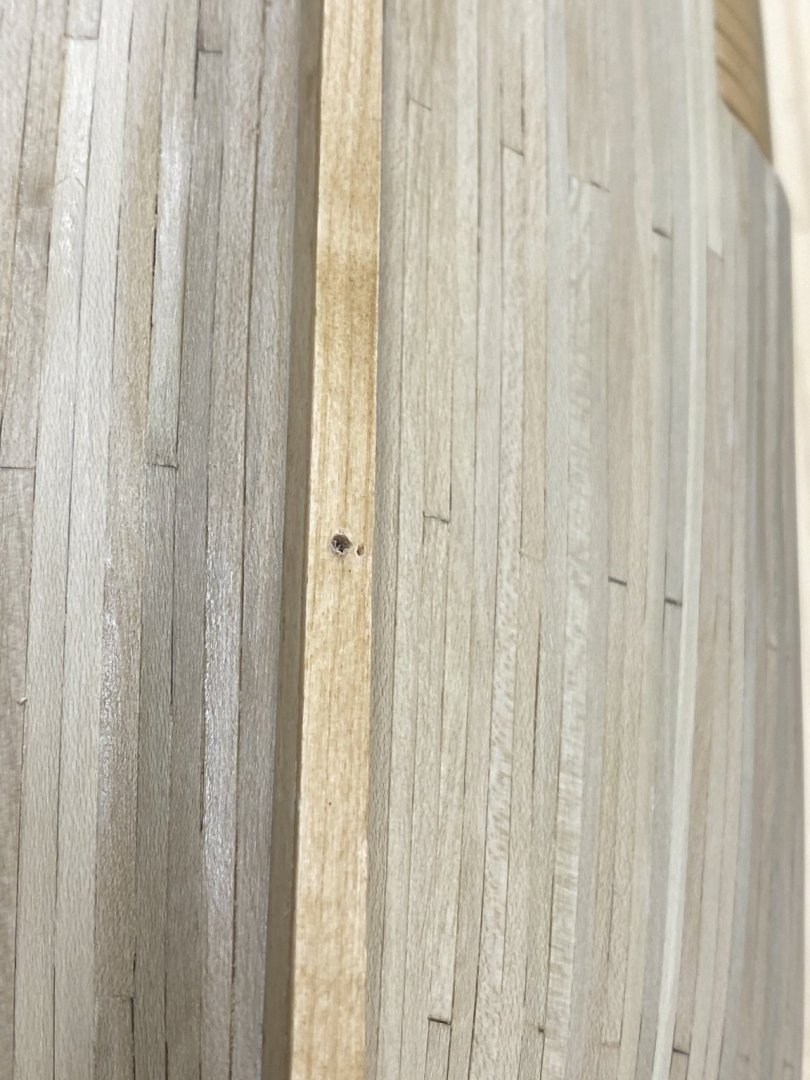
I got tired of bending over the hull so decided to move it into two of the Micro-Mart foam holders. I am now glad I did not put the sweep port hinges on both sides yet. I have not lost one yet but that is not out of the realm of possibility. For those that are going to build thisa (or any kit for that matter) it is a good idea to check the dimensions of each piece before you use it. I found that the thickness of the nominal 1/16" X 1/8" pieces from .0600 to .0725. Each piece was typically the same thickness end to end (plus or minus .005) but if you have to sand off that extra .0125 with 220 grit sandpaper it will take awhile. I of course did ot take my own advise until I was nearly done but... Here is the hull in its new "home".
- 370 replies
-
- 3
-
-
- Model Shipways
- Confederacy
- (and 1 more)
-
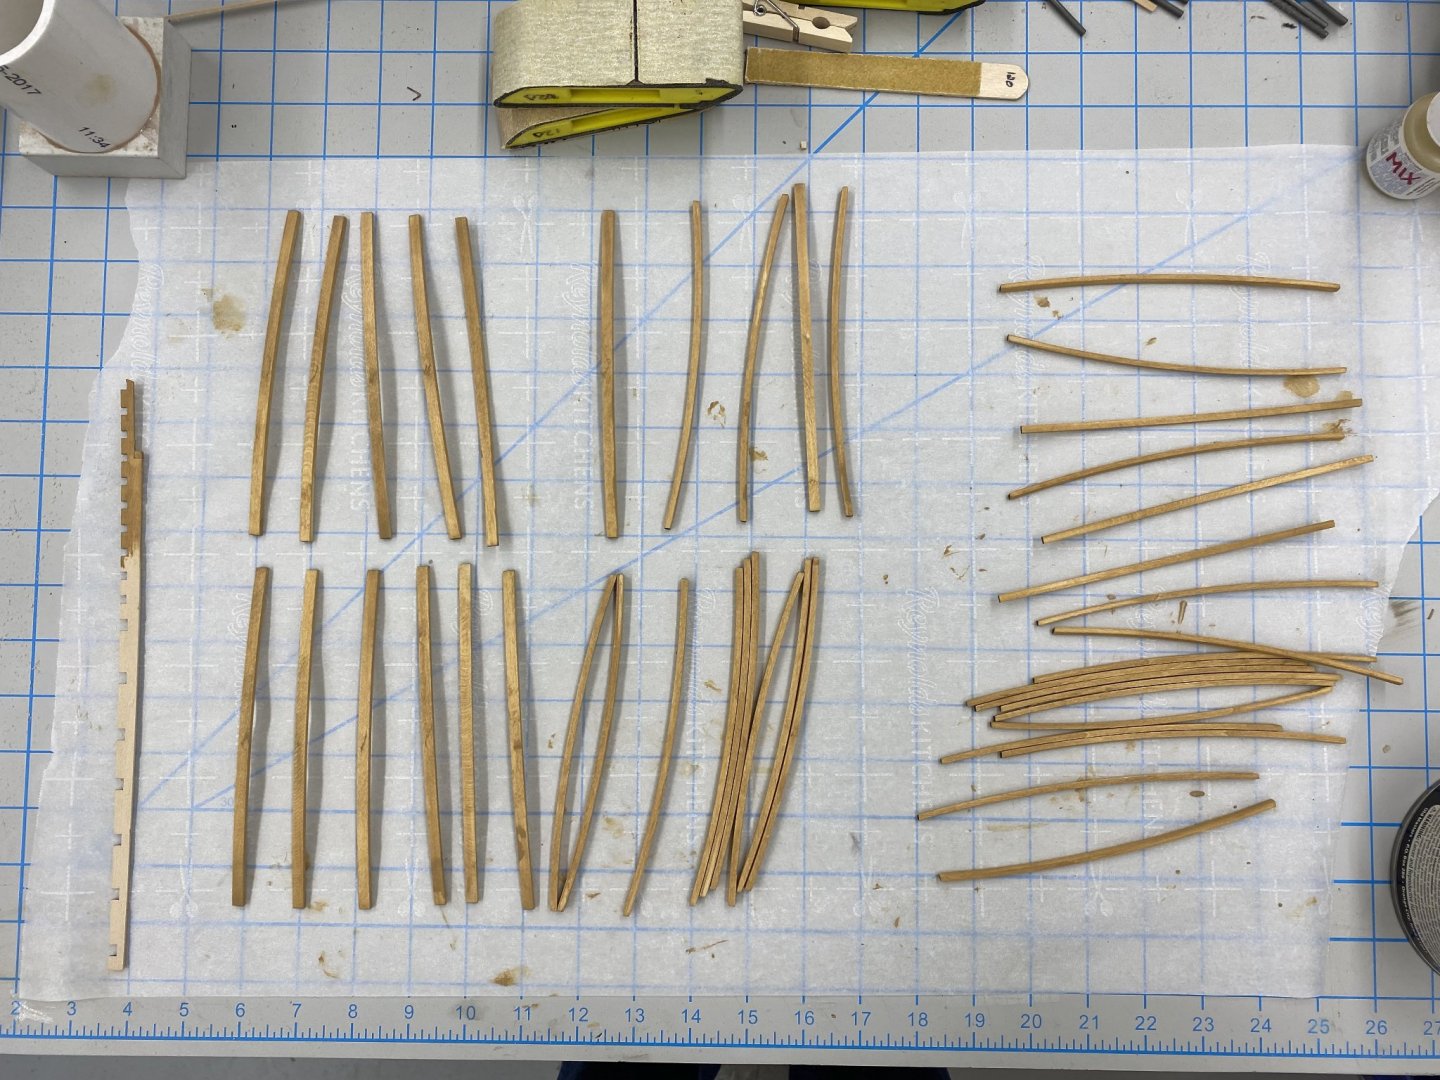
While waiting for glue to dry (and looking ahead a bit) I decided I was not interested in trying to replicate the basswood deck beams in the kit in boxwood as I assume it a good idea for them all to have the same curvature. Something I would have some difficulty in meeting since I would have to use my not very good scroll saw abilities. So I decided to use the fruitwood gel stain to try and get the kit provided ones to look like boxwood. It took much more effort than I expected to get the laser char off of 40+ deck beams. I think I generated two cups of sawdust! Anyway here they are after staining. I need to build a jig so I can cut an equal amount off each end as they are all going to have to be trimmed to fit when installation times come.
- 370 replies
-
- 2
-
-
- Model Shipways
- Confederacy
- (and 1 more)
-
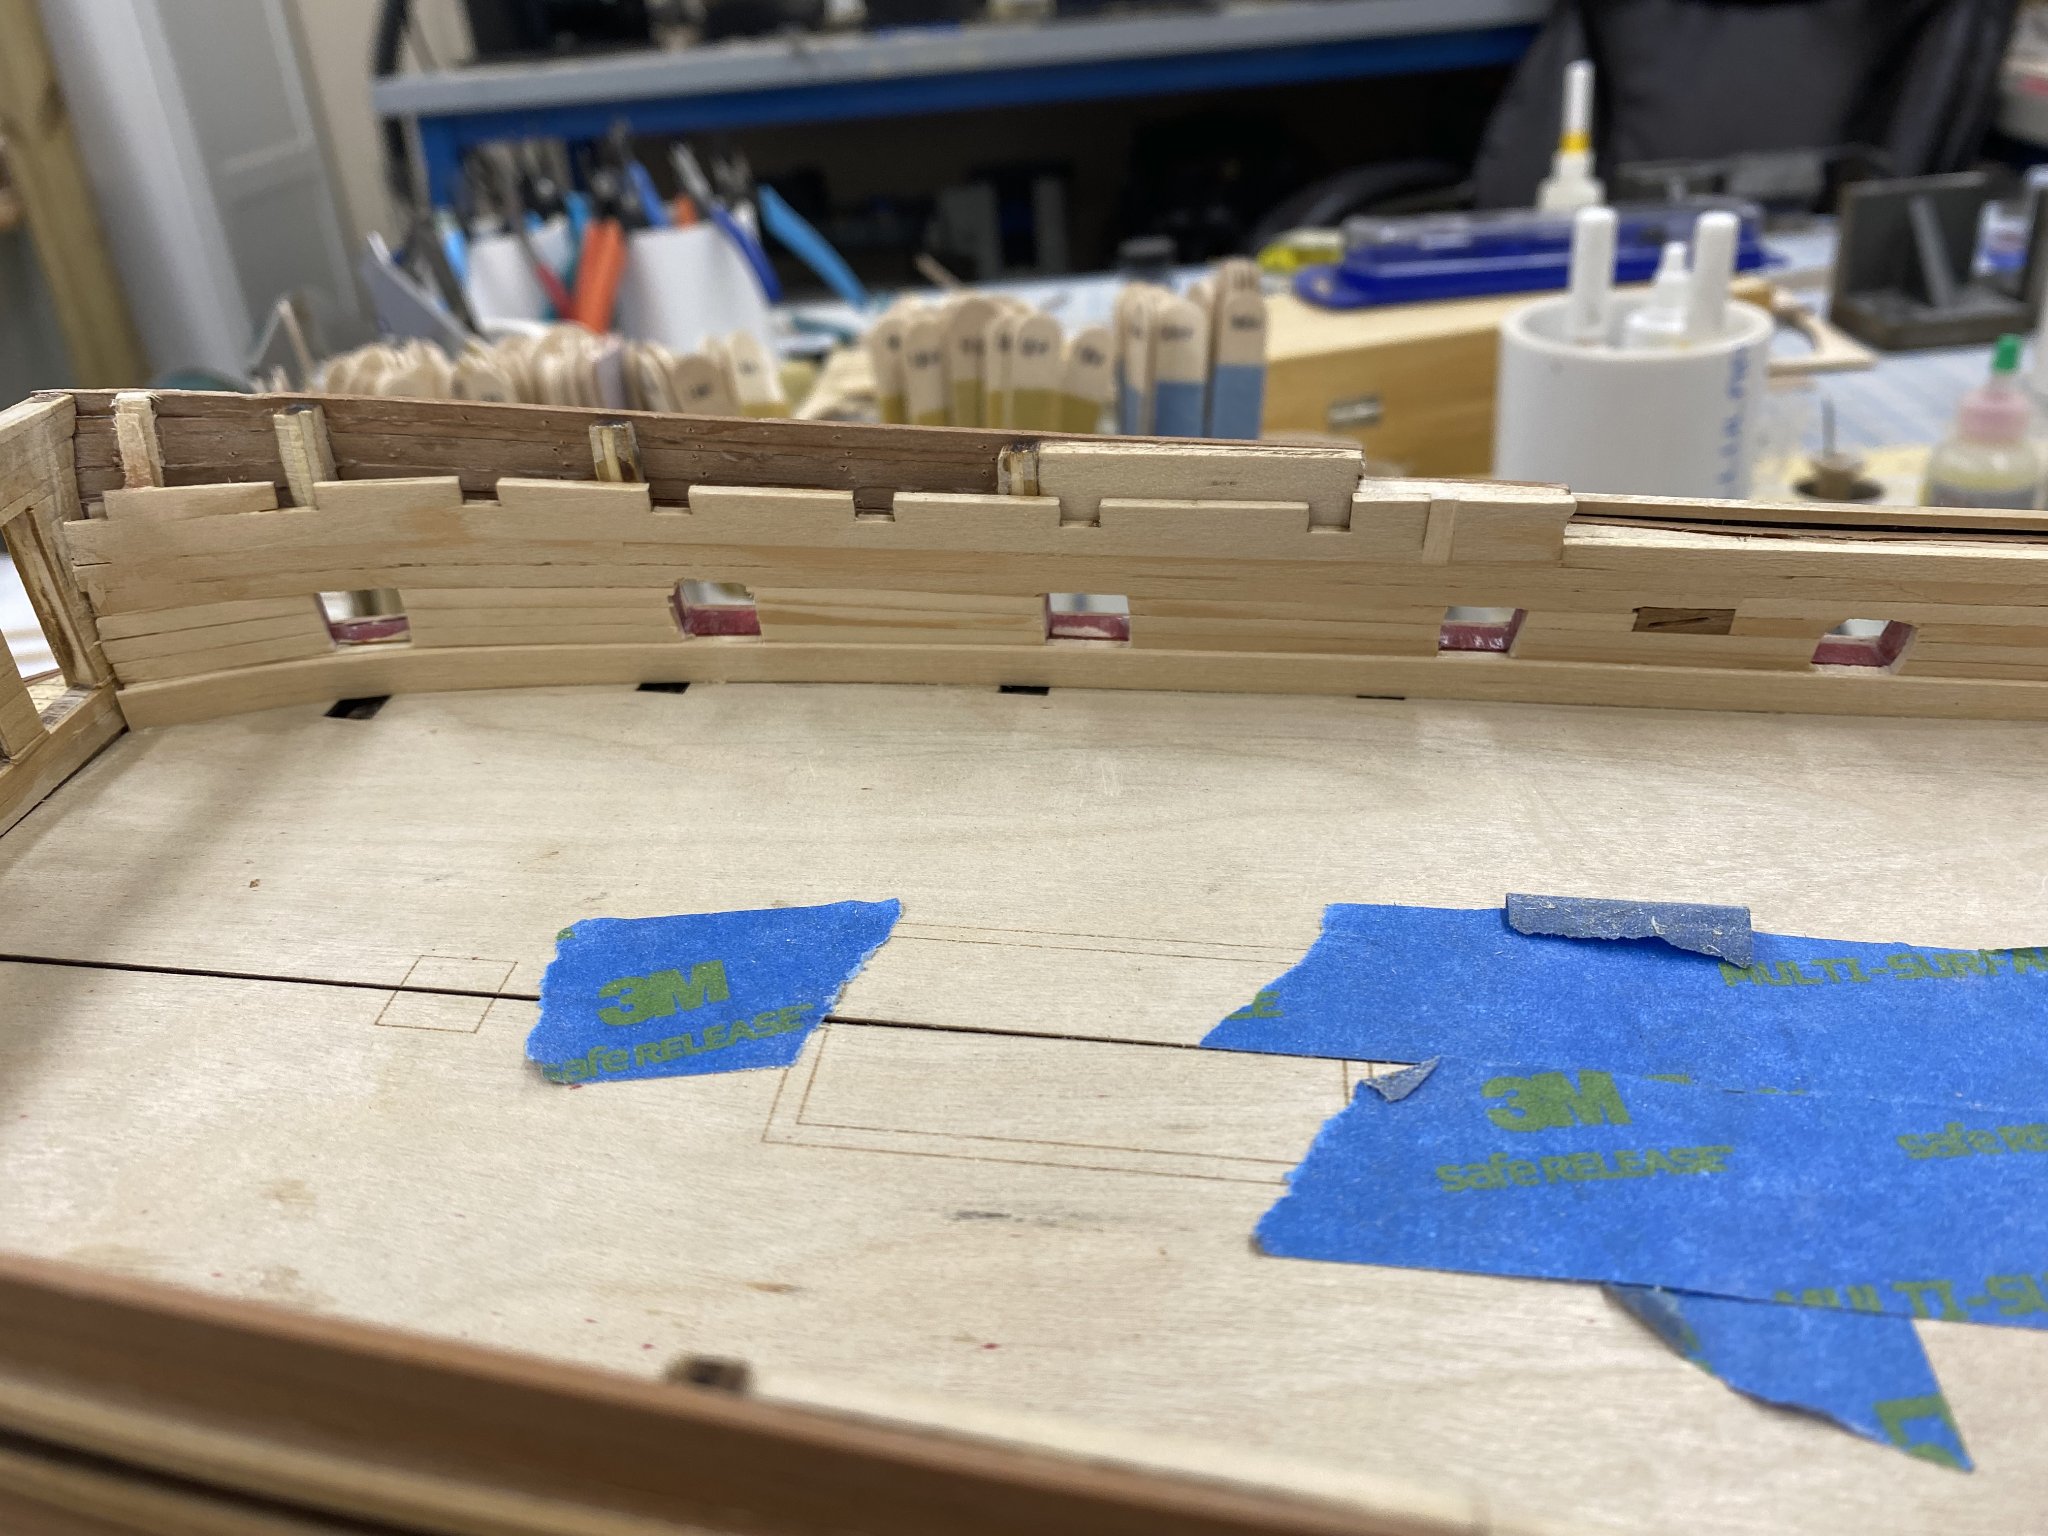
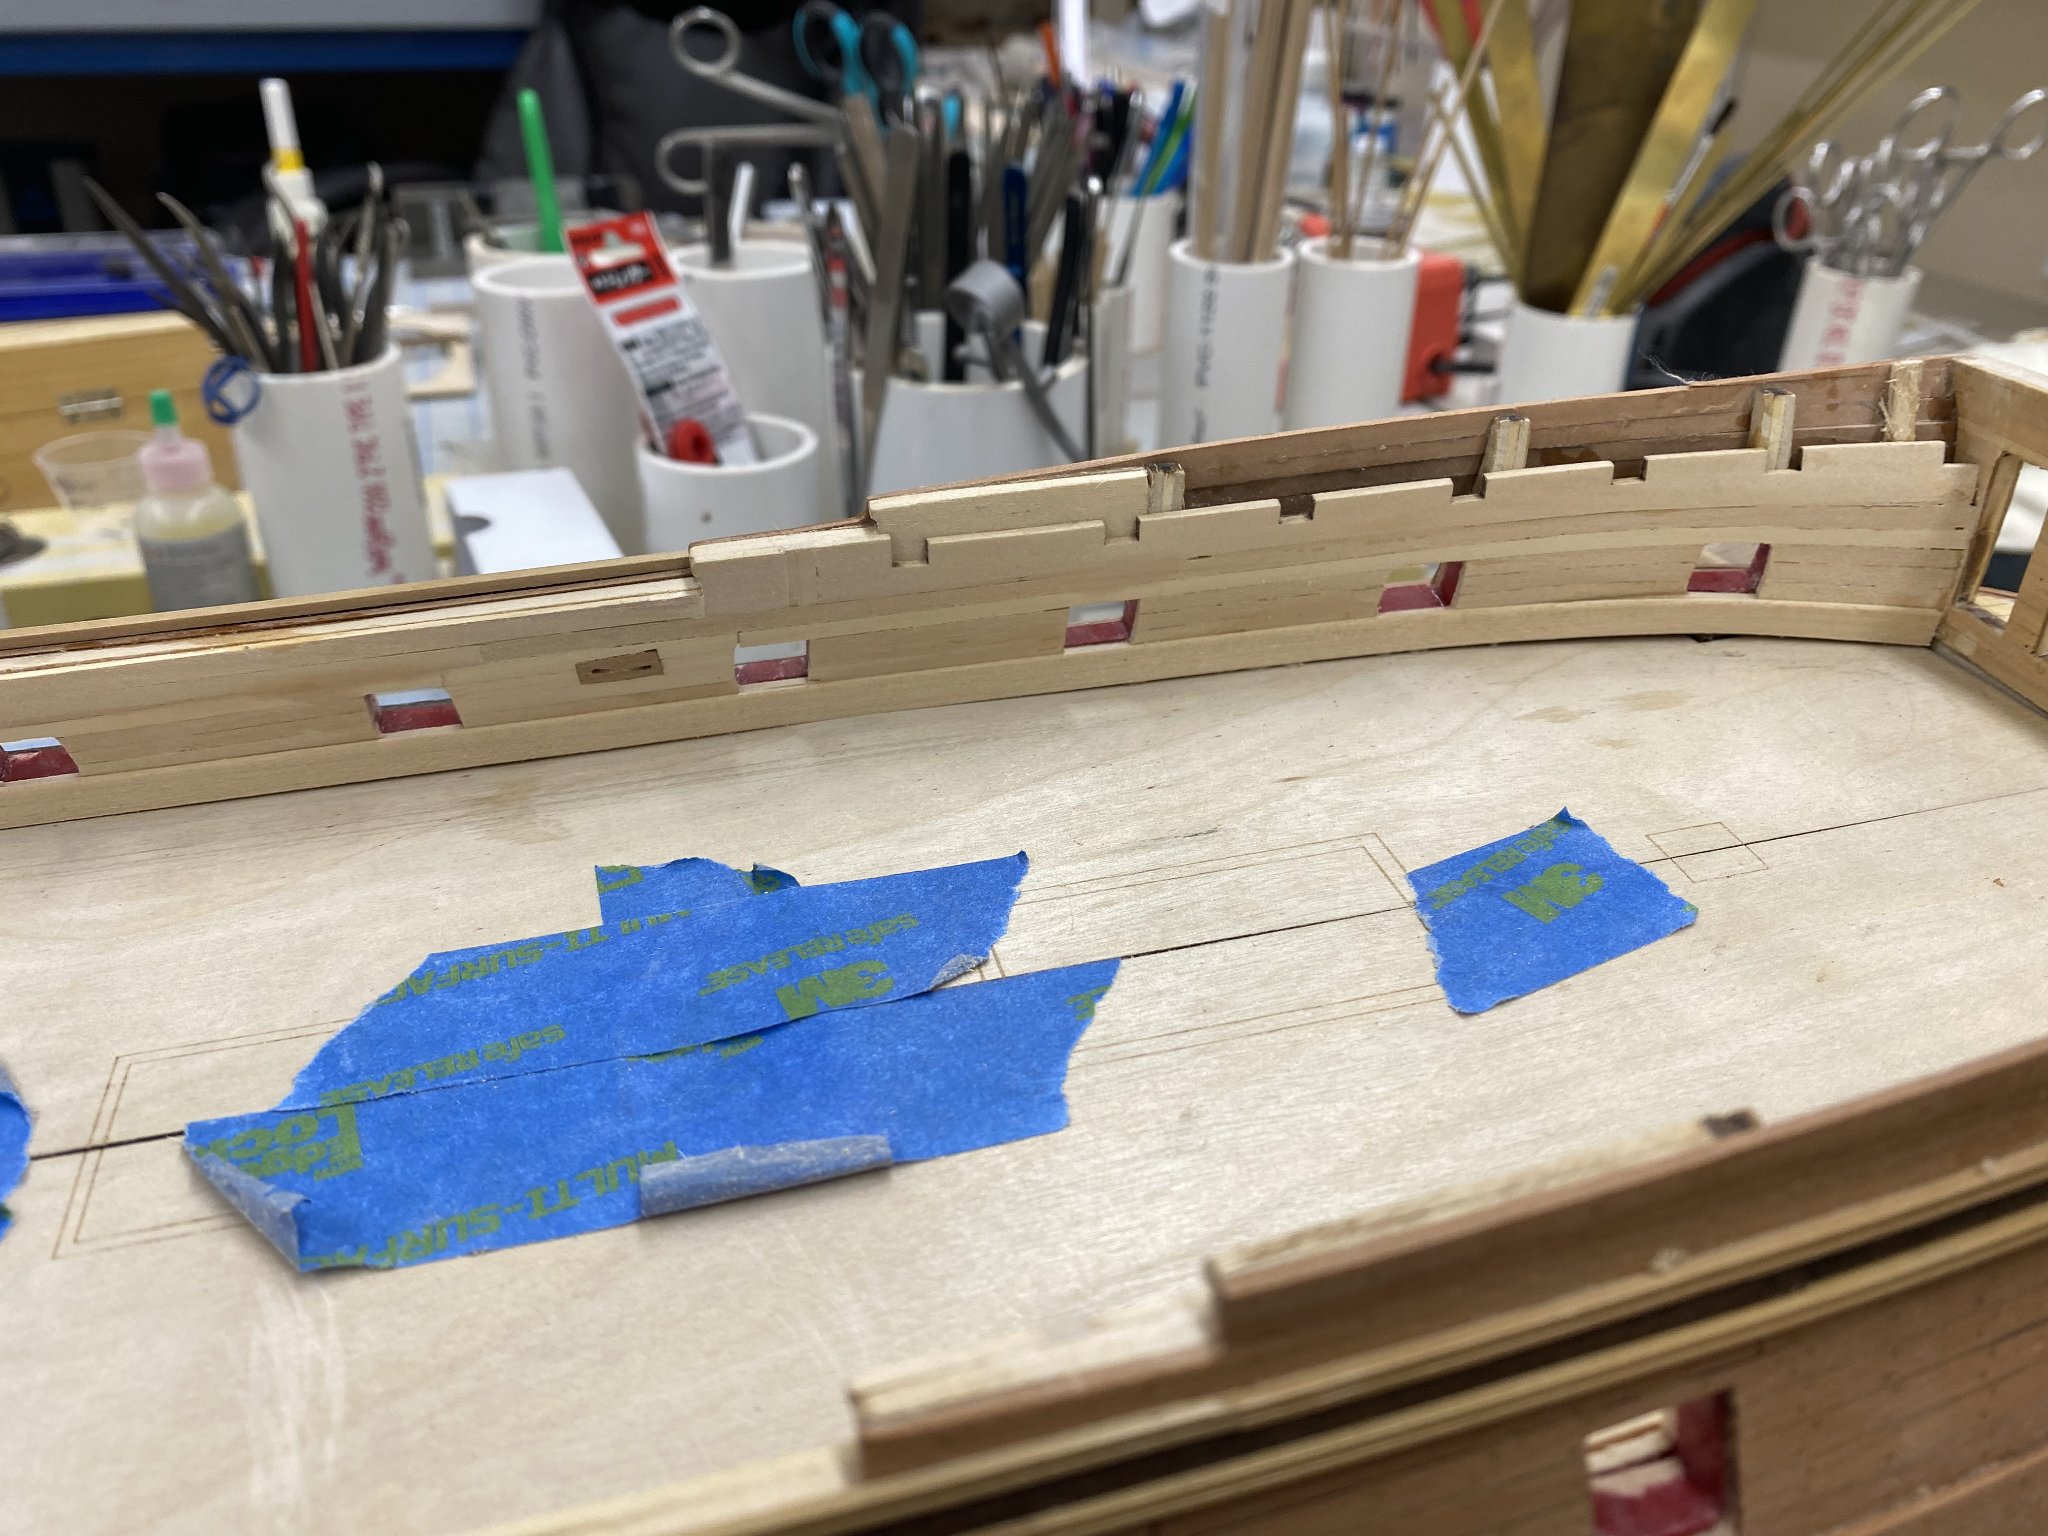
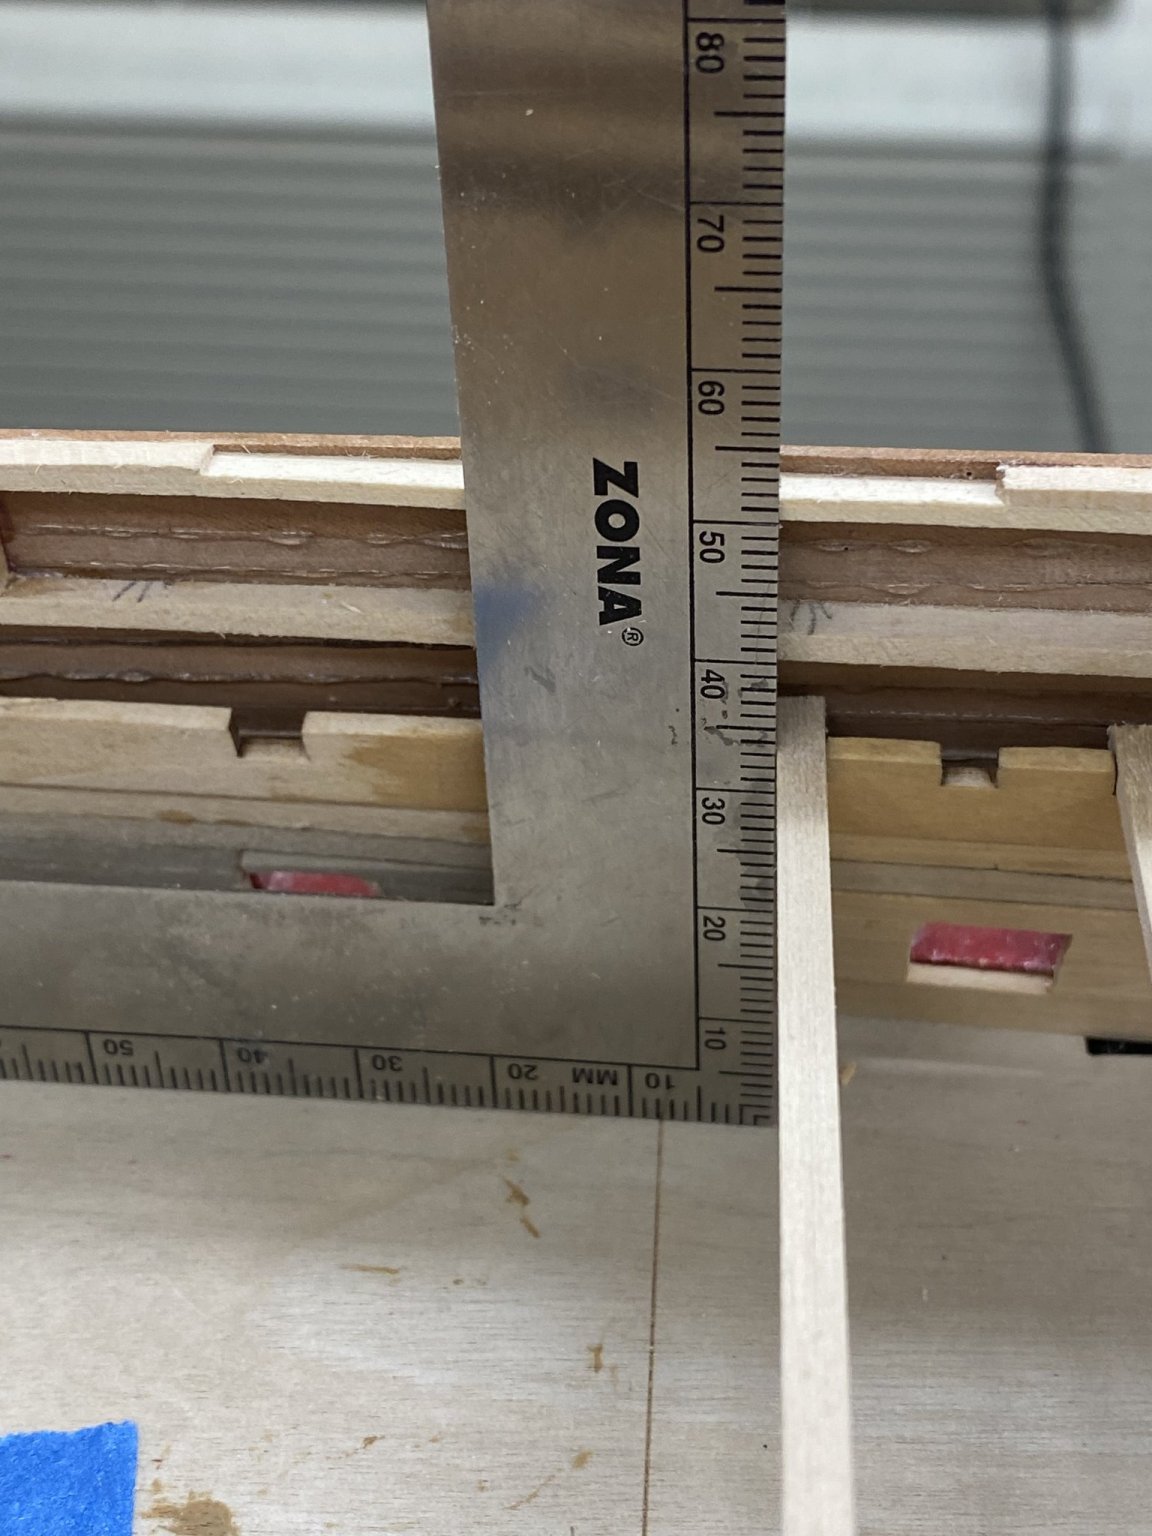
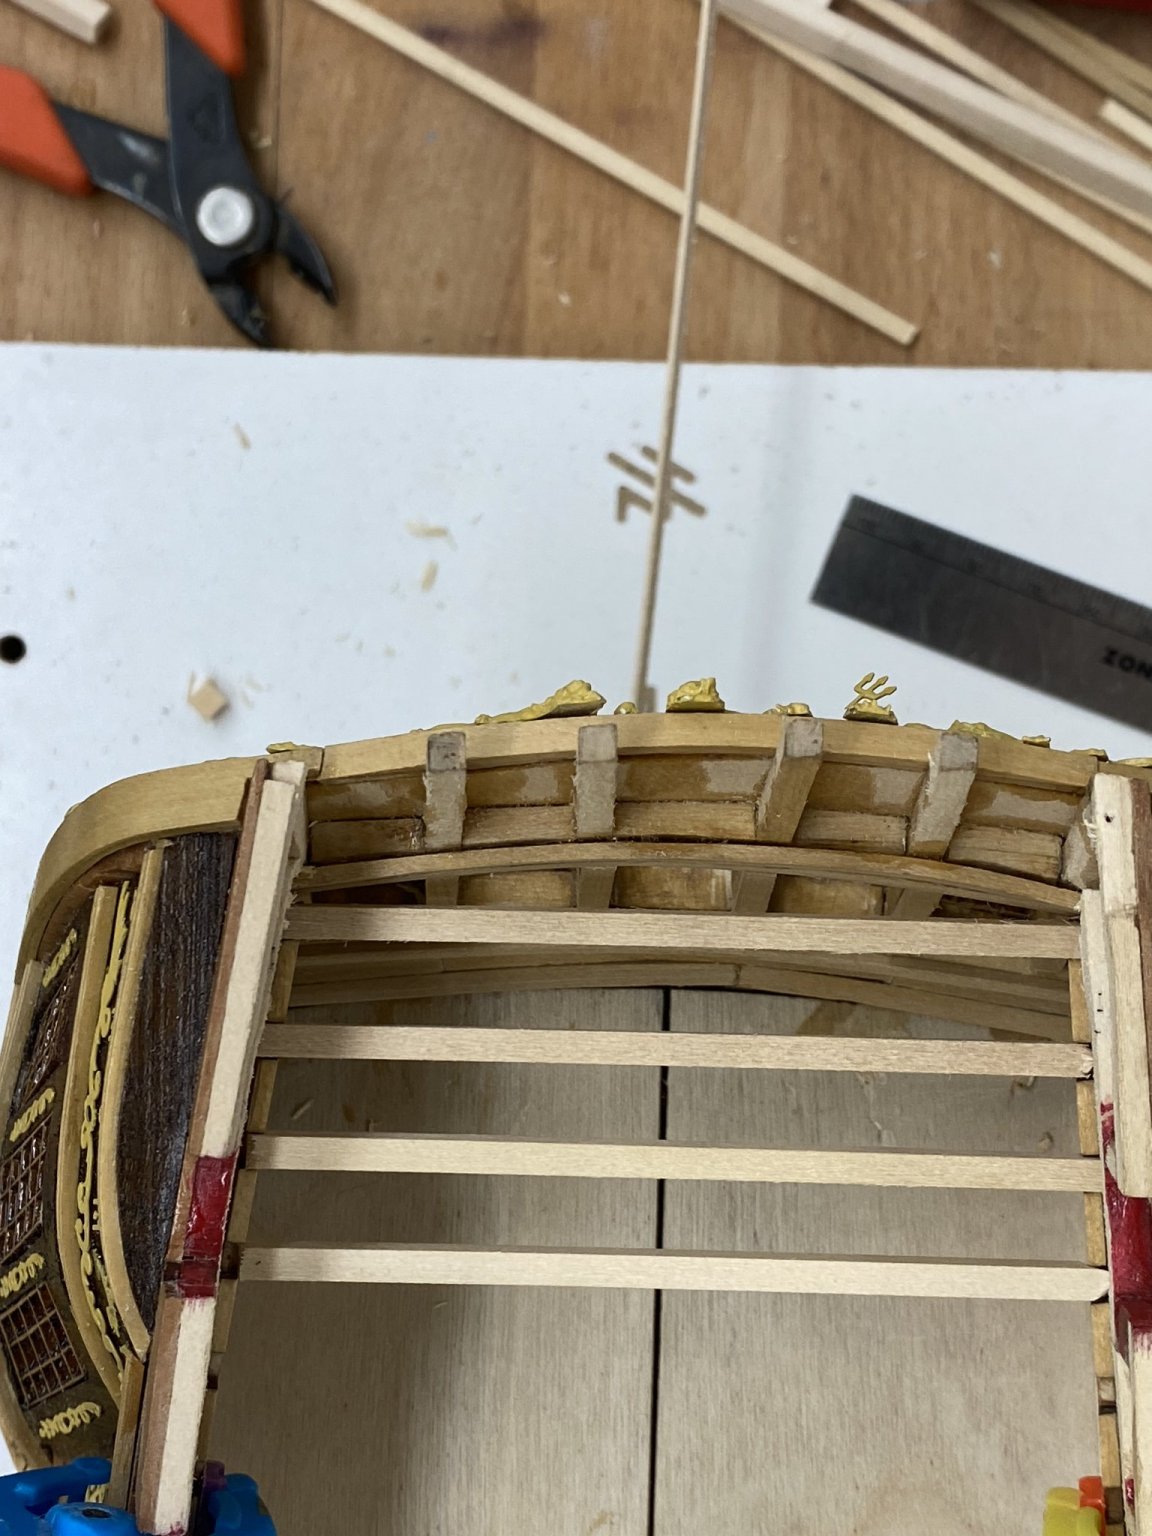
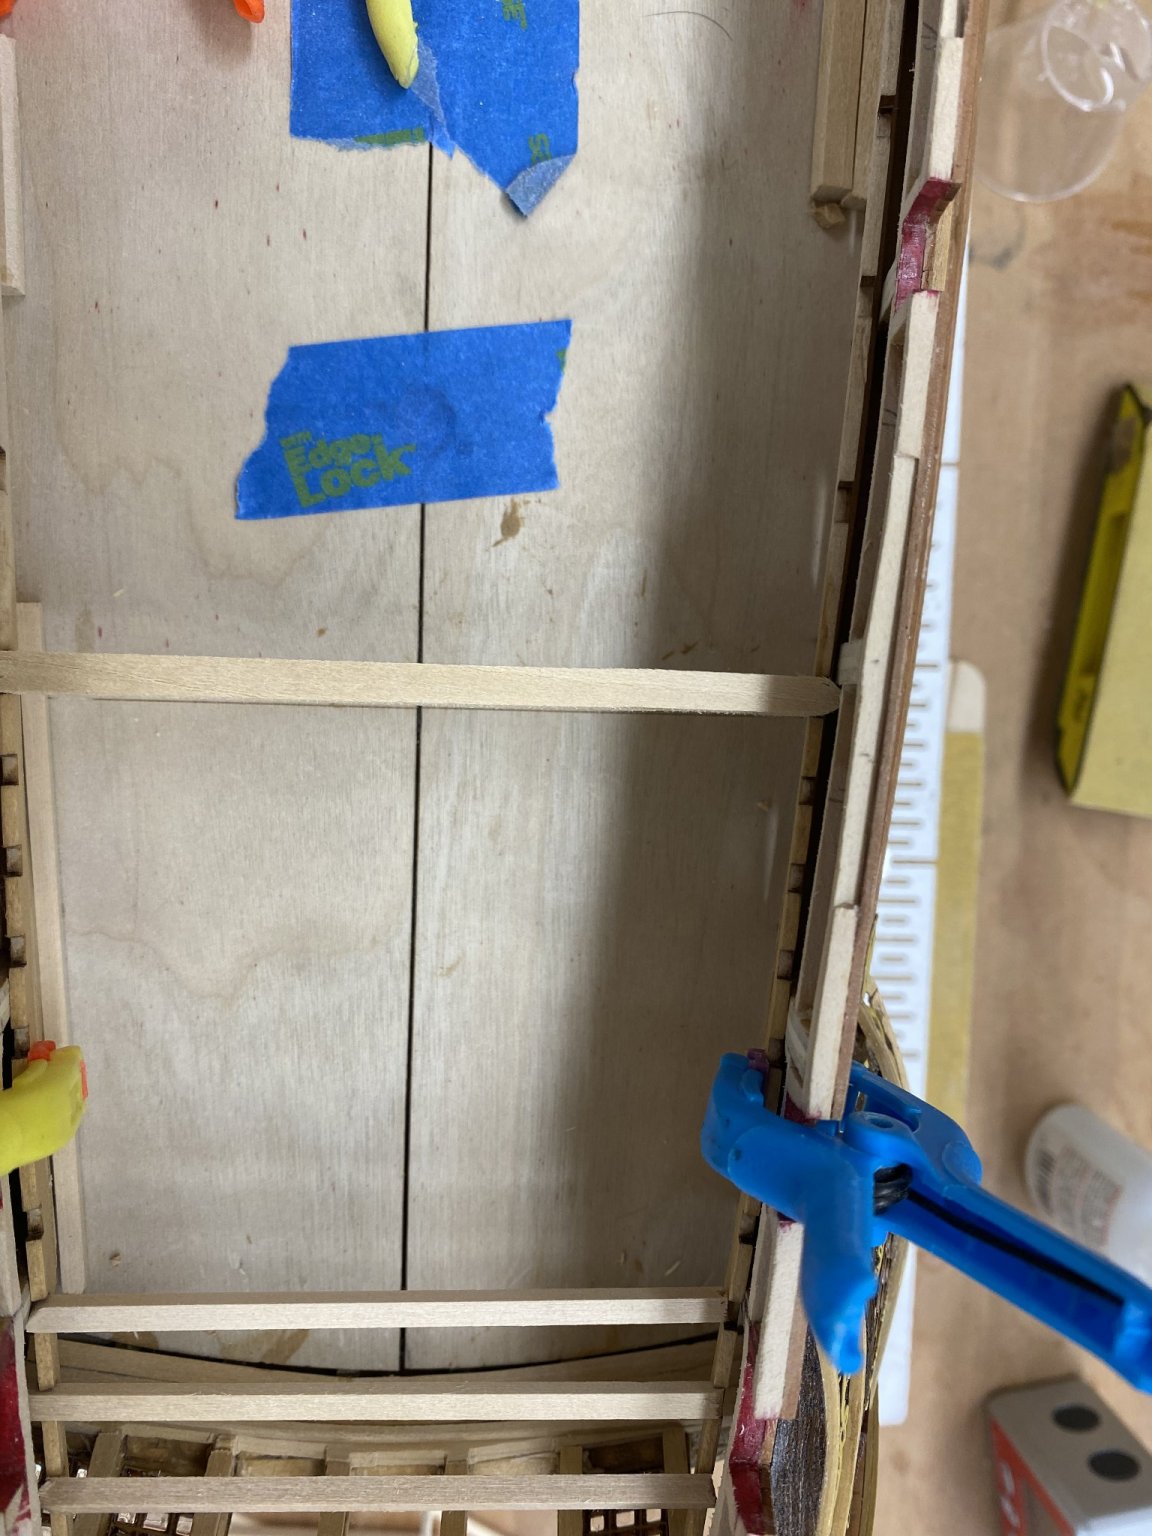
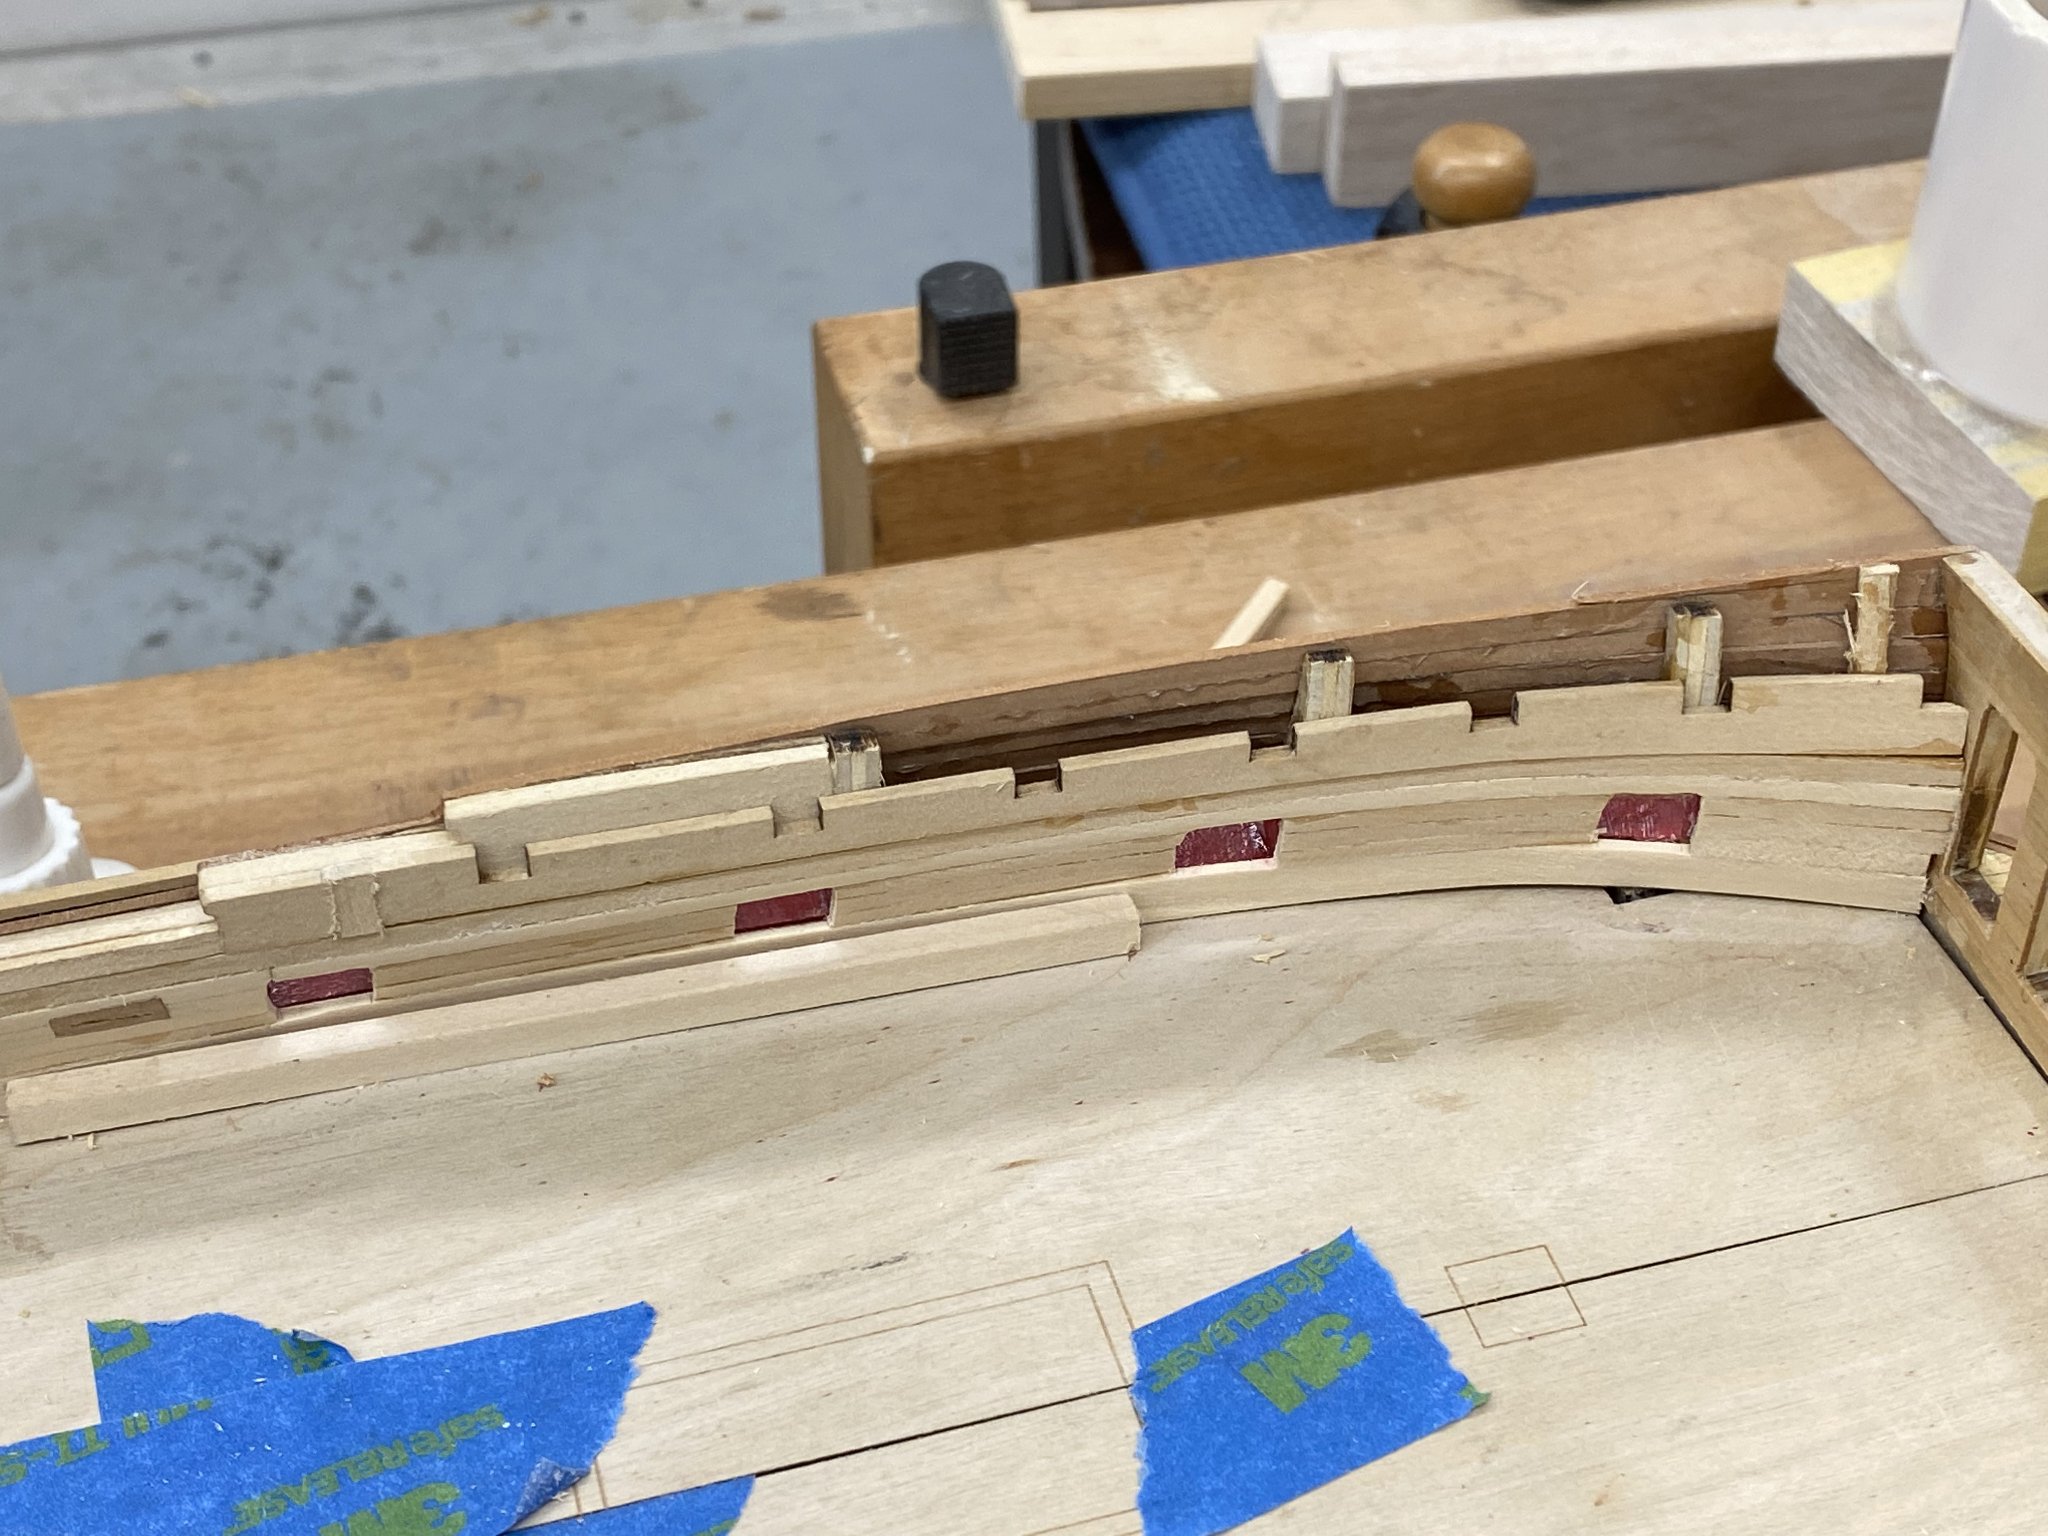
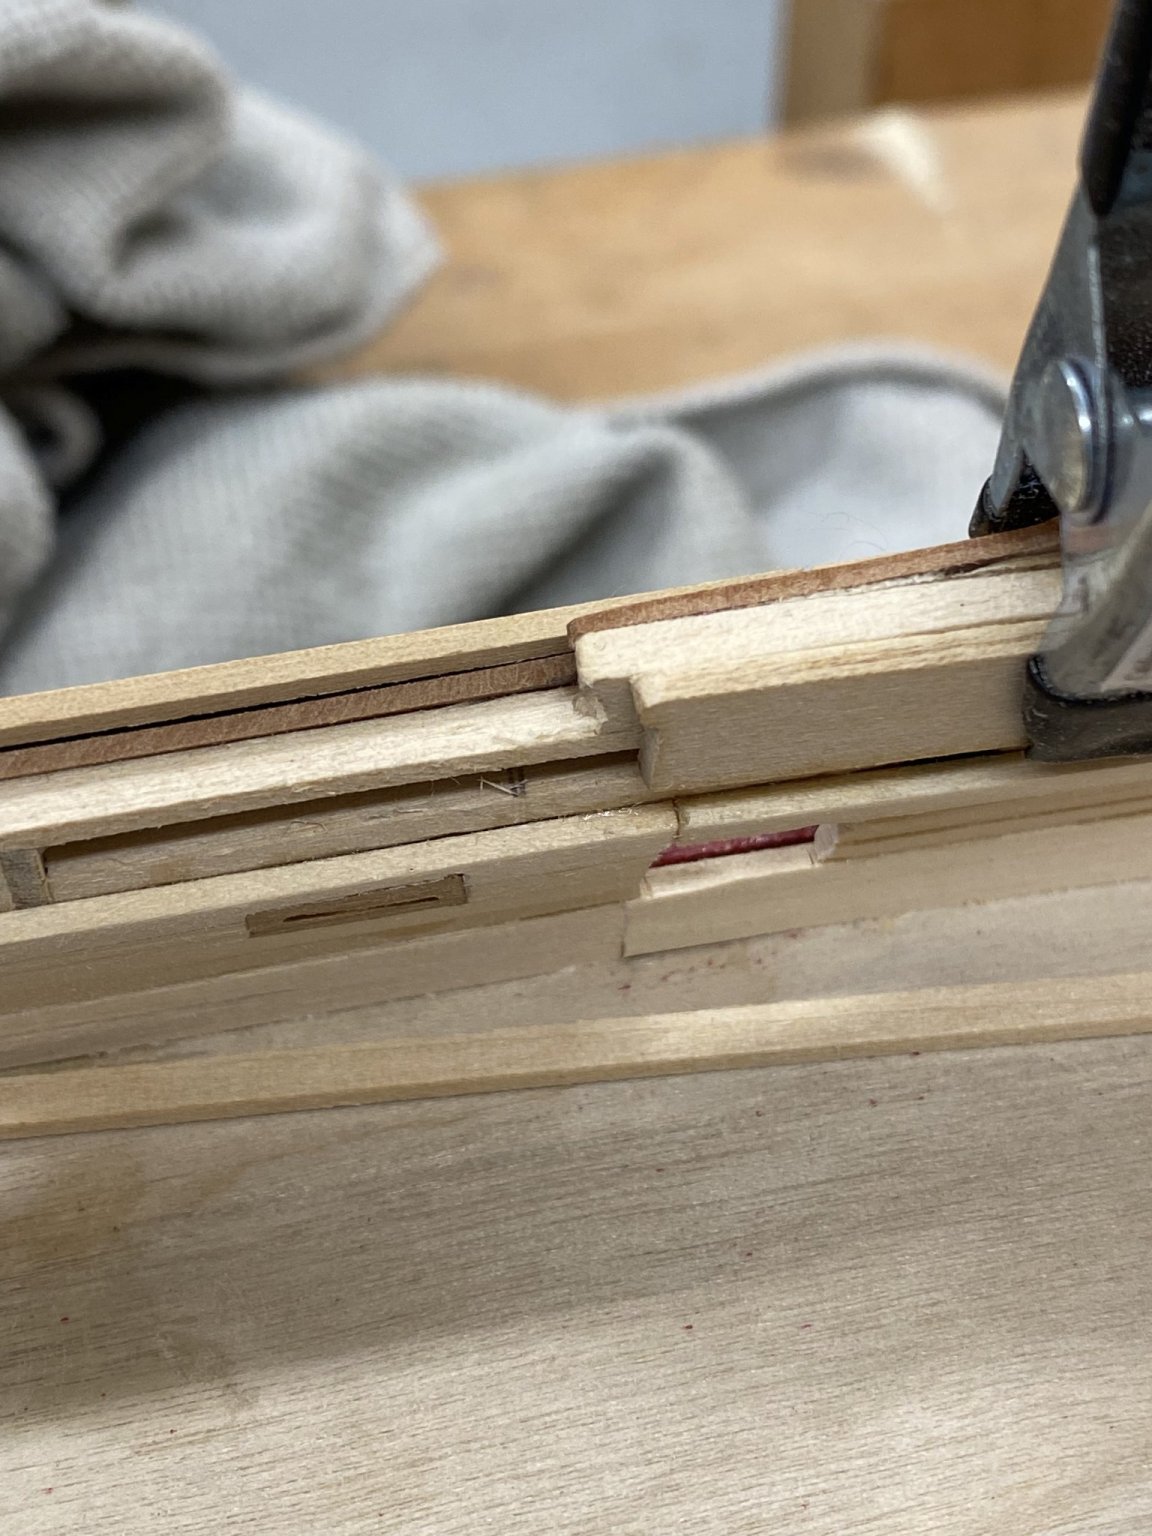
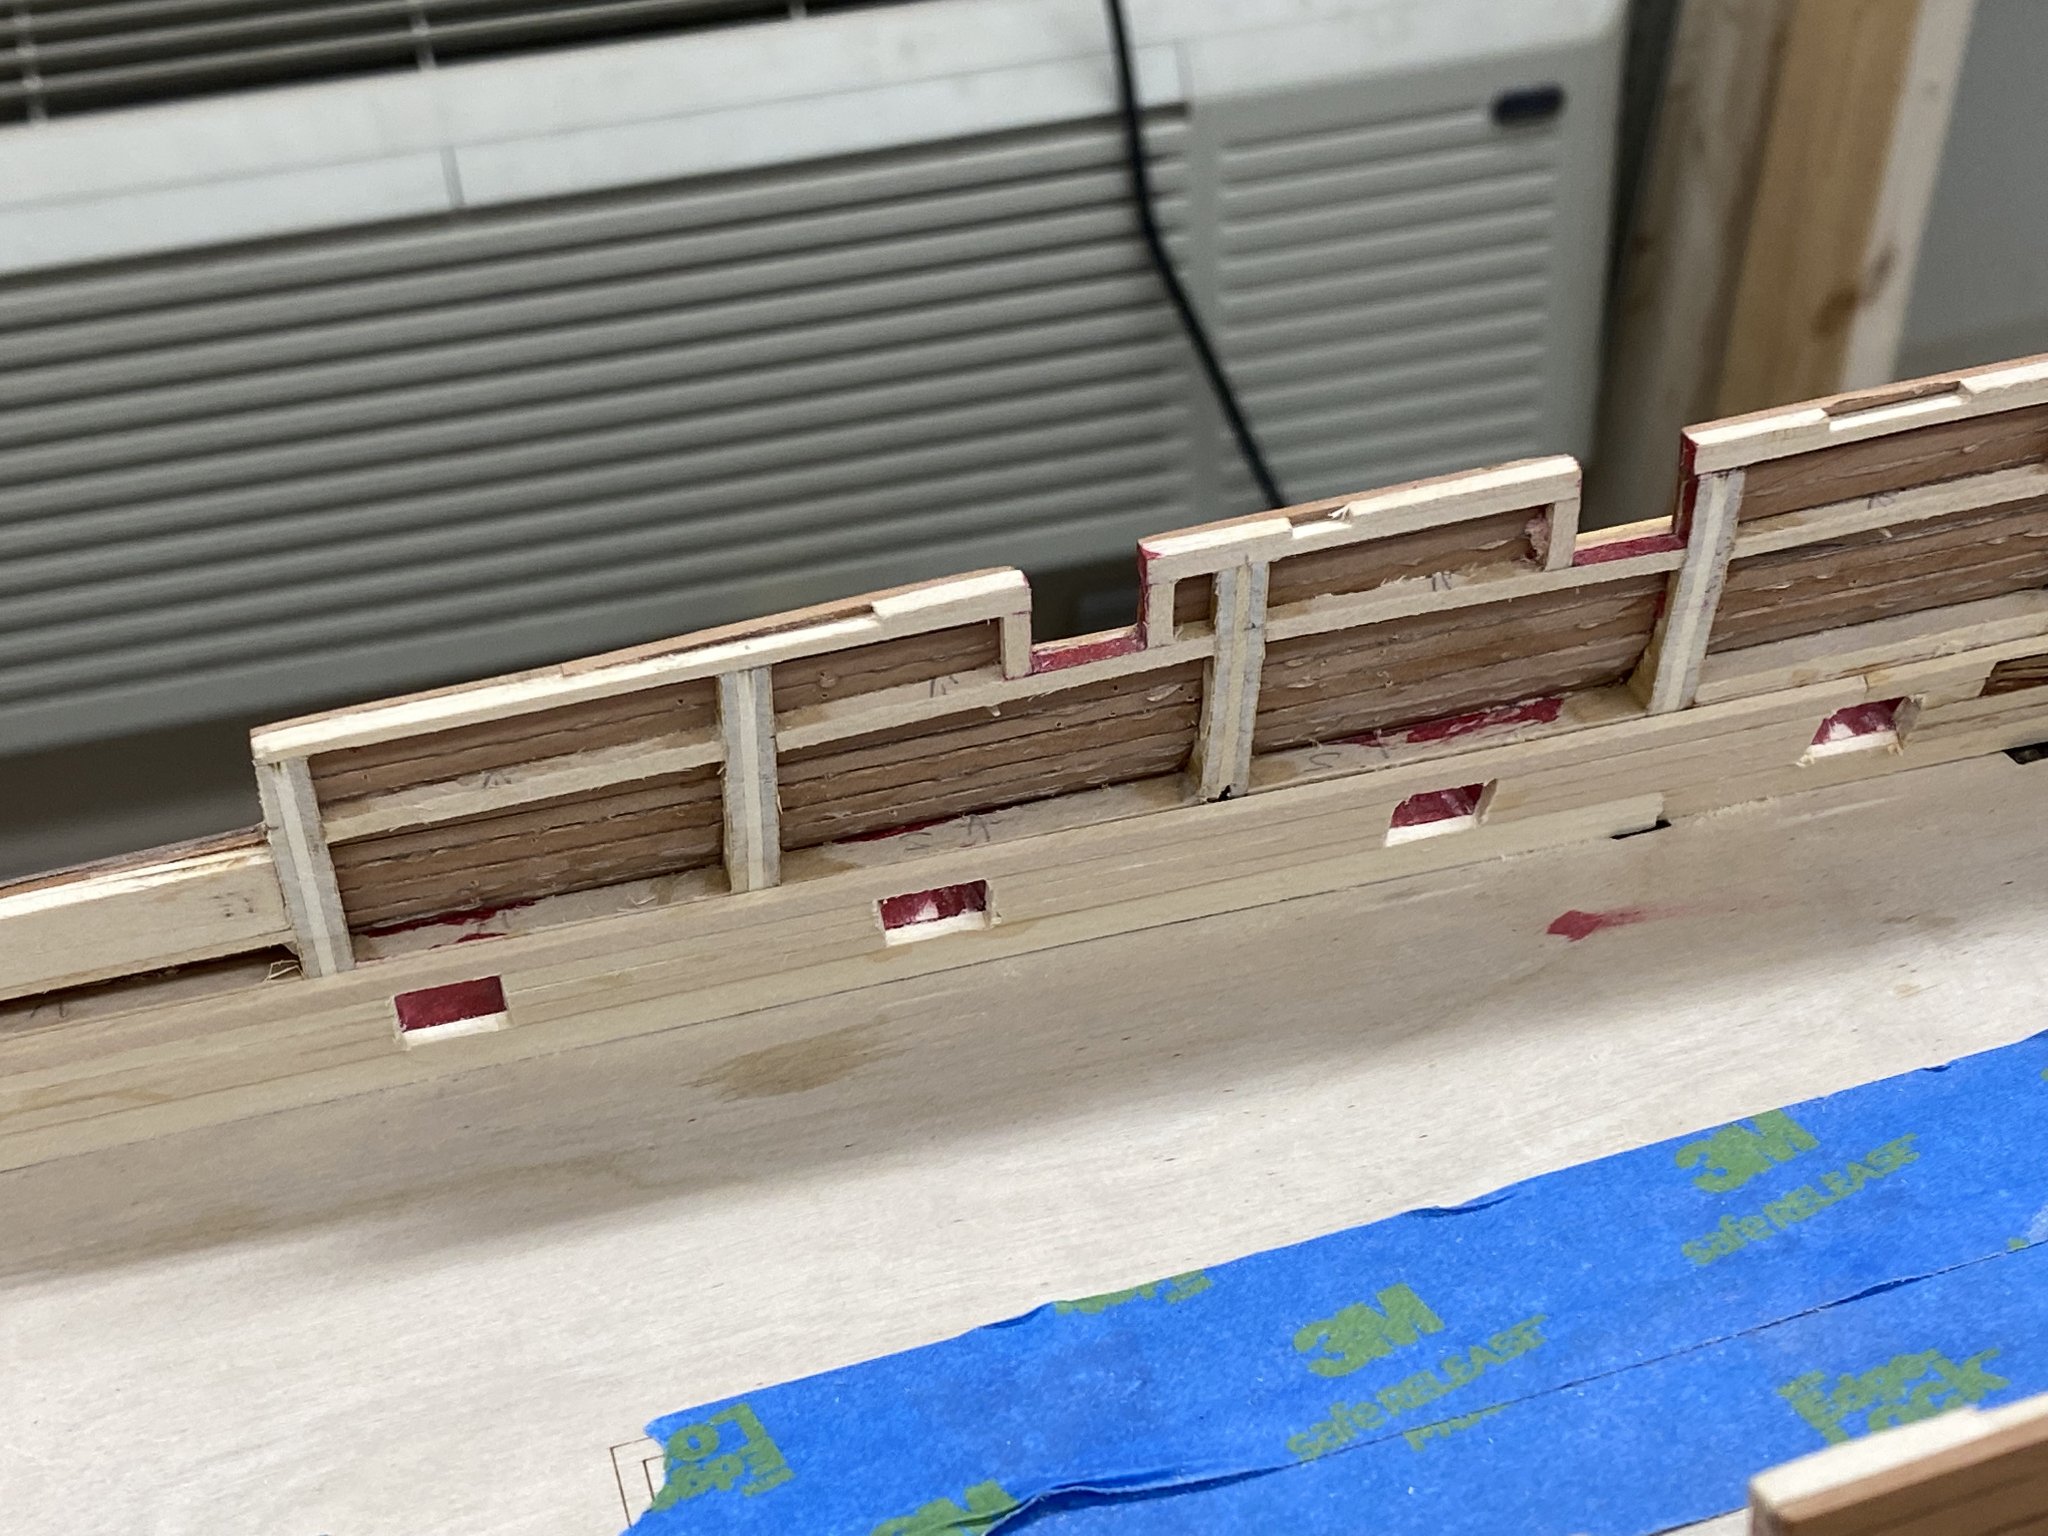
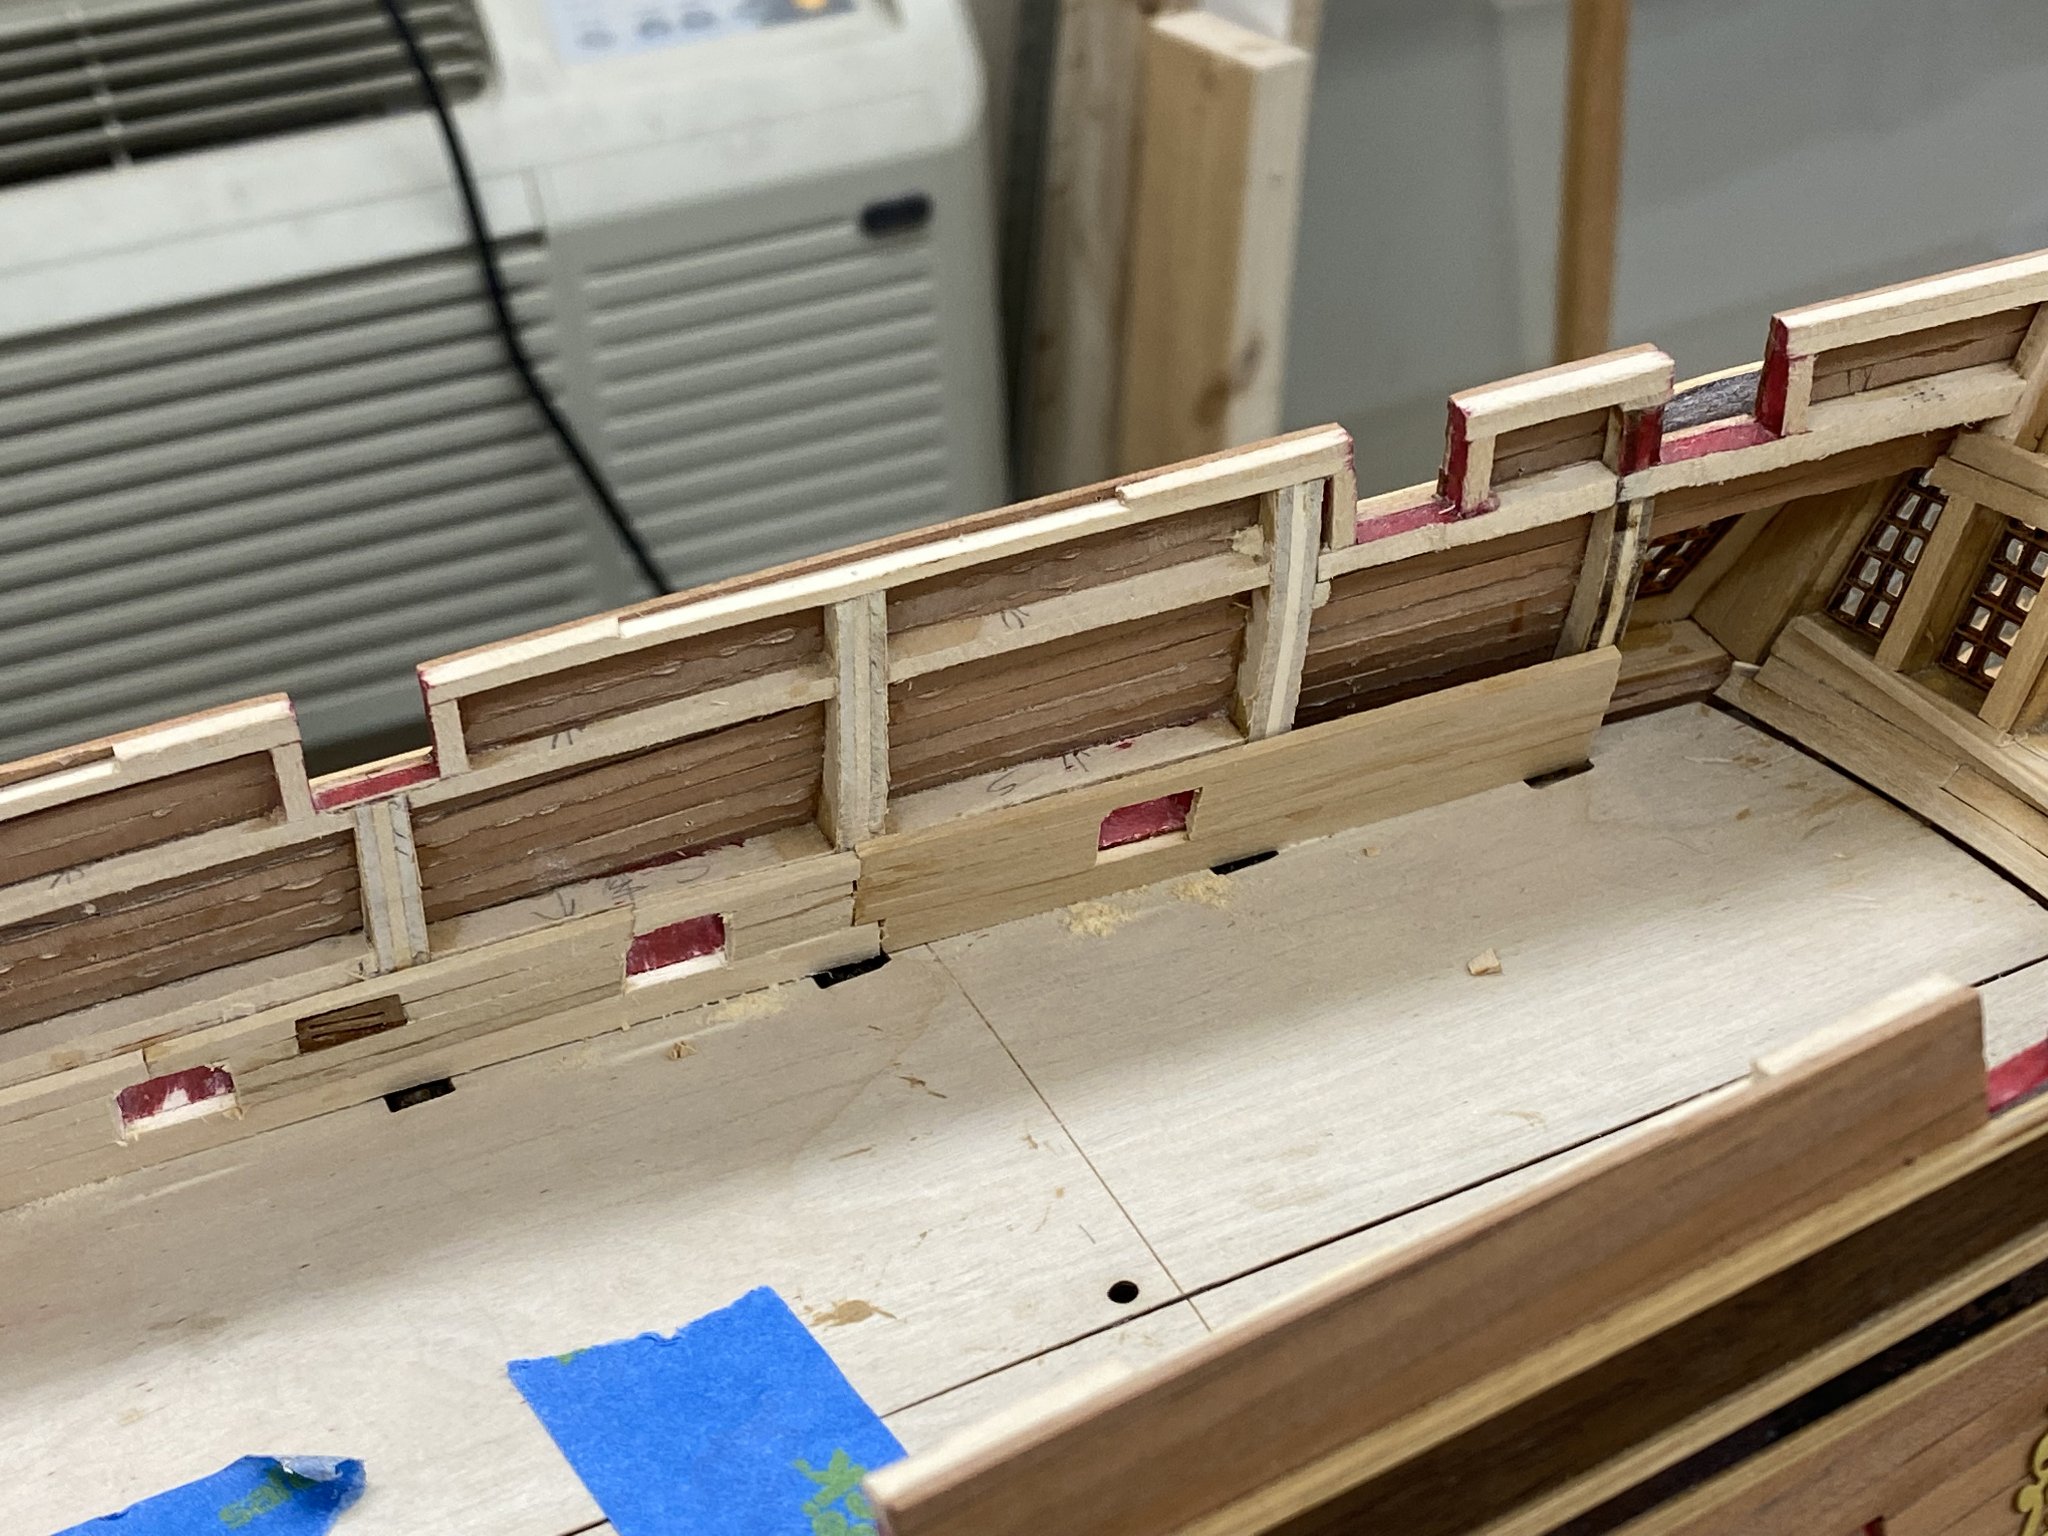
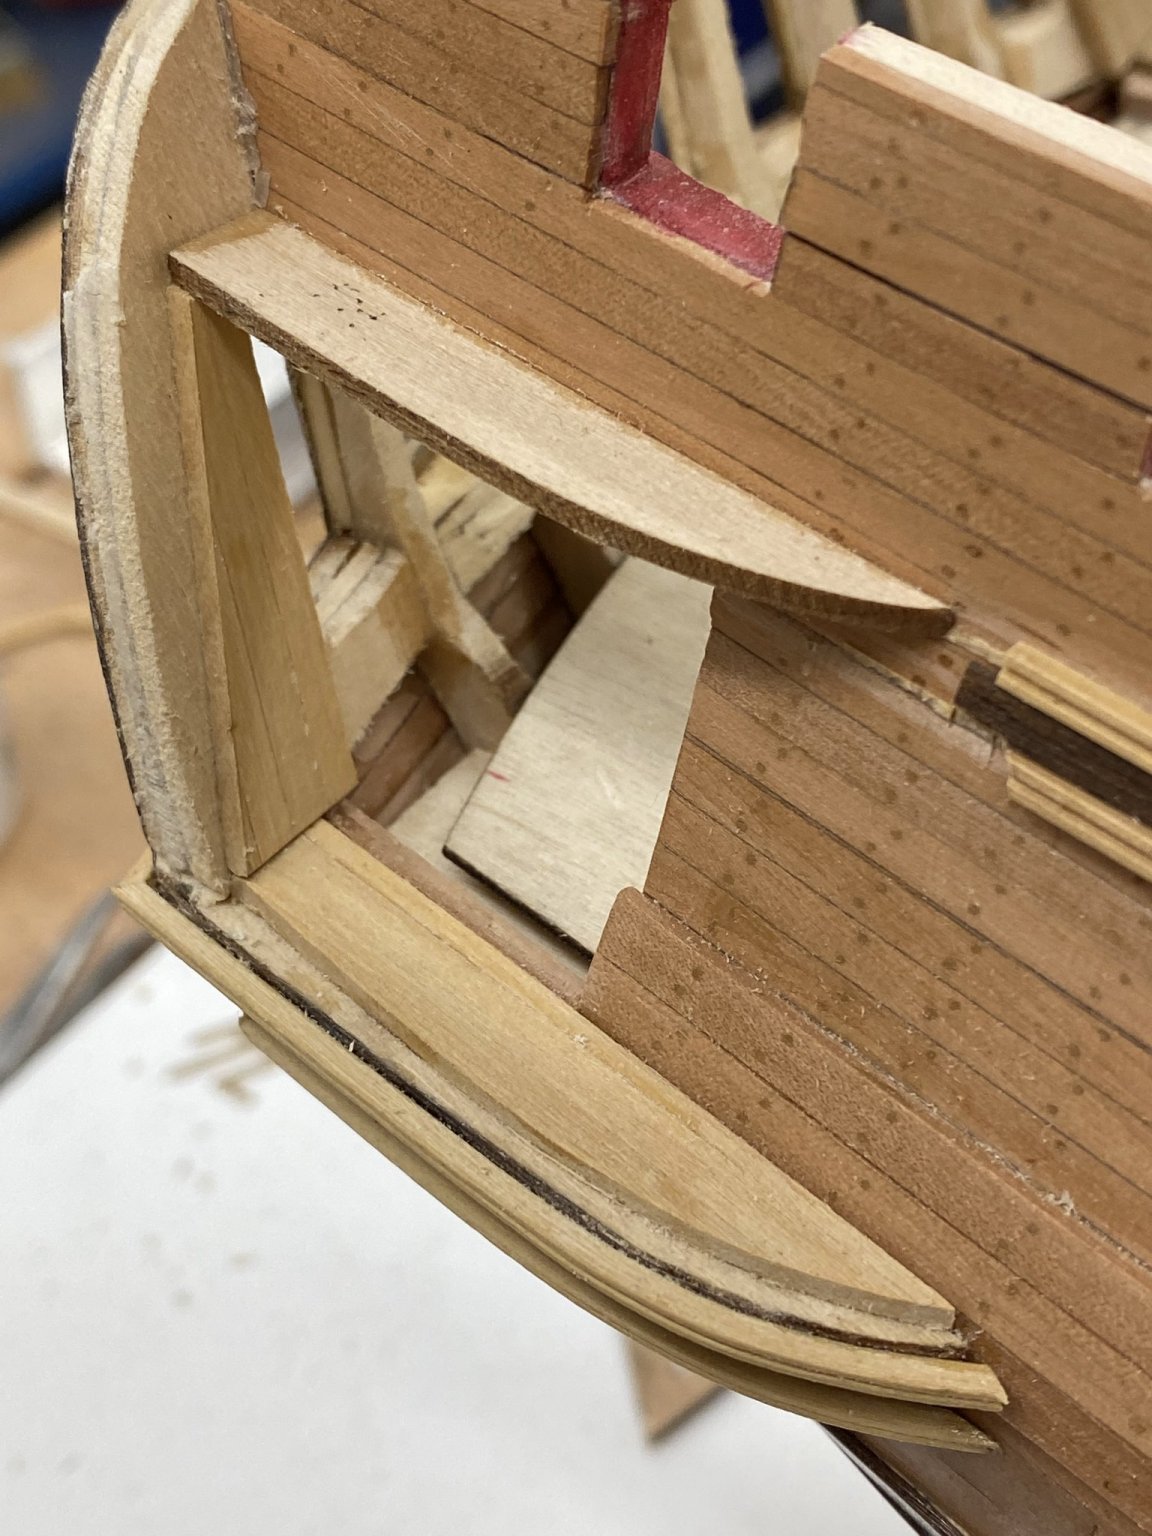
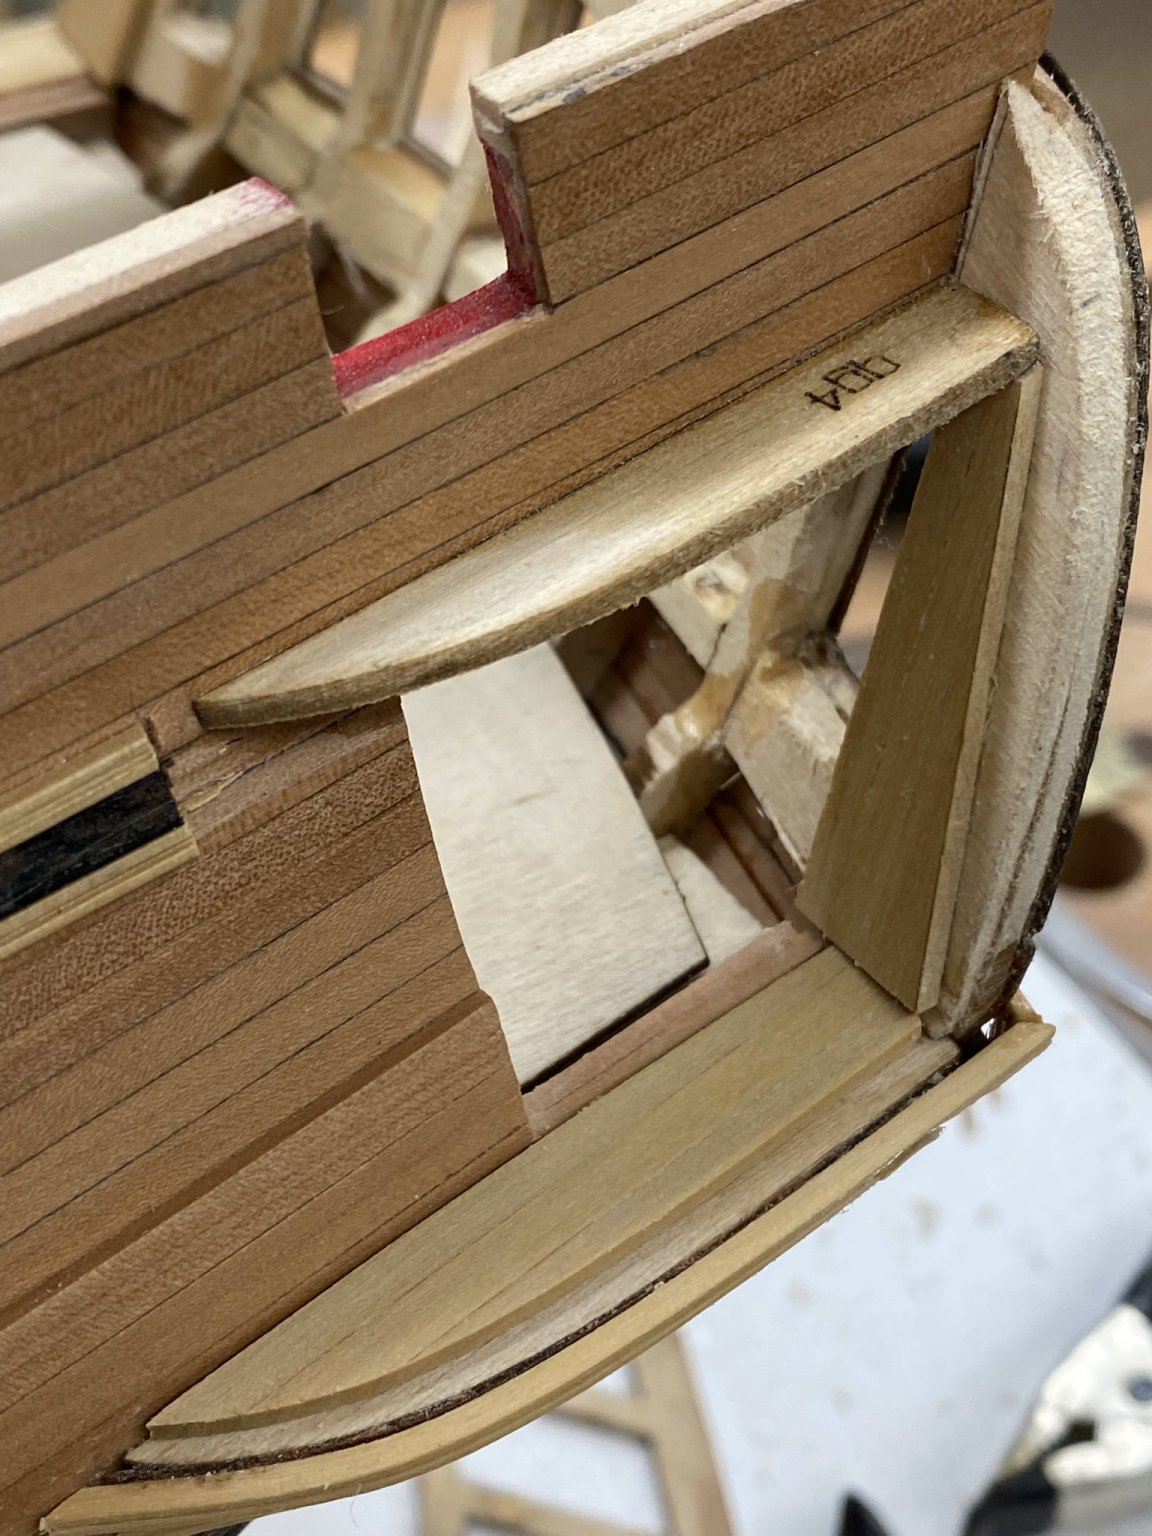
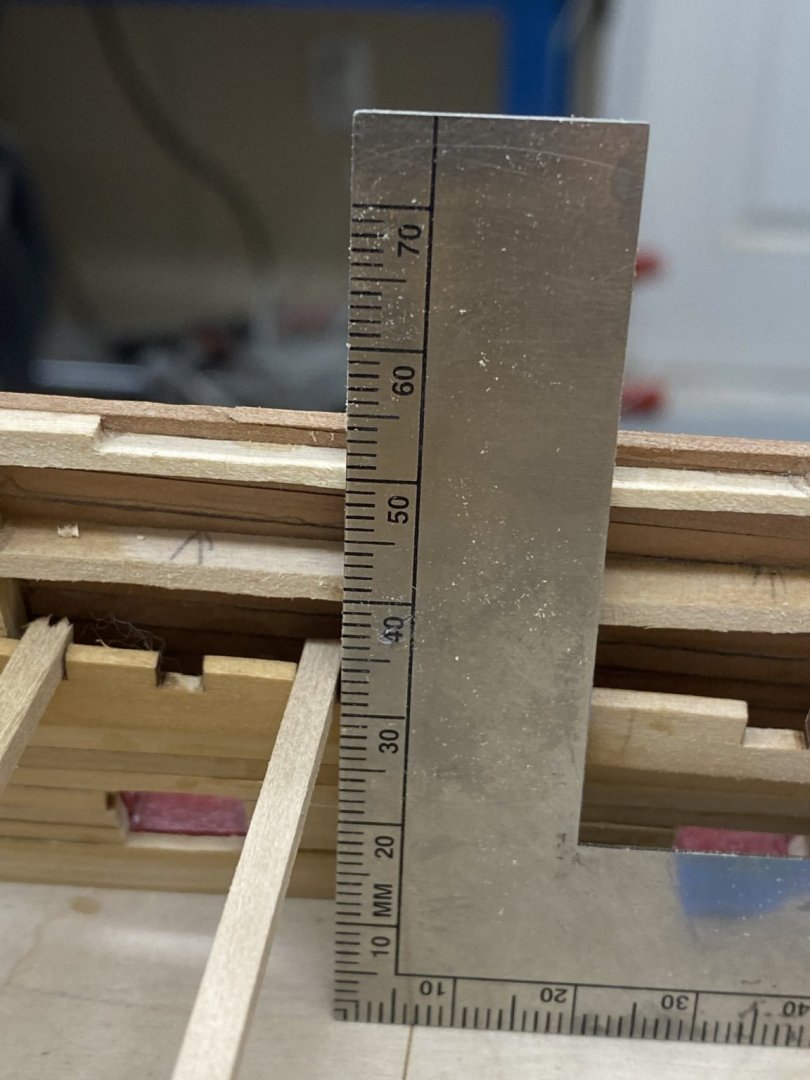
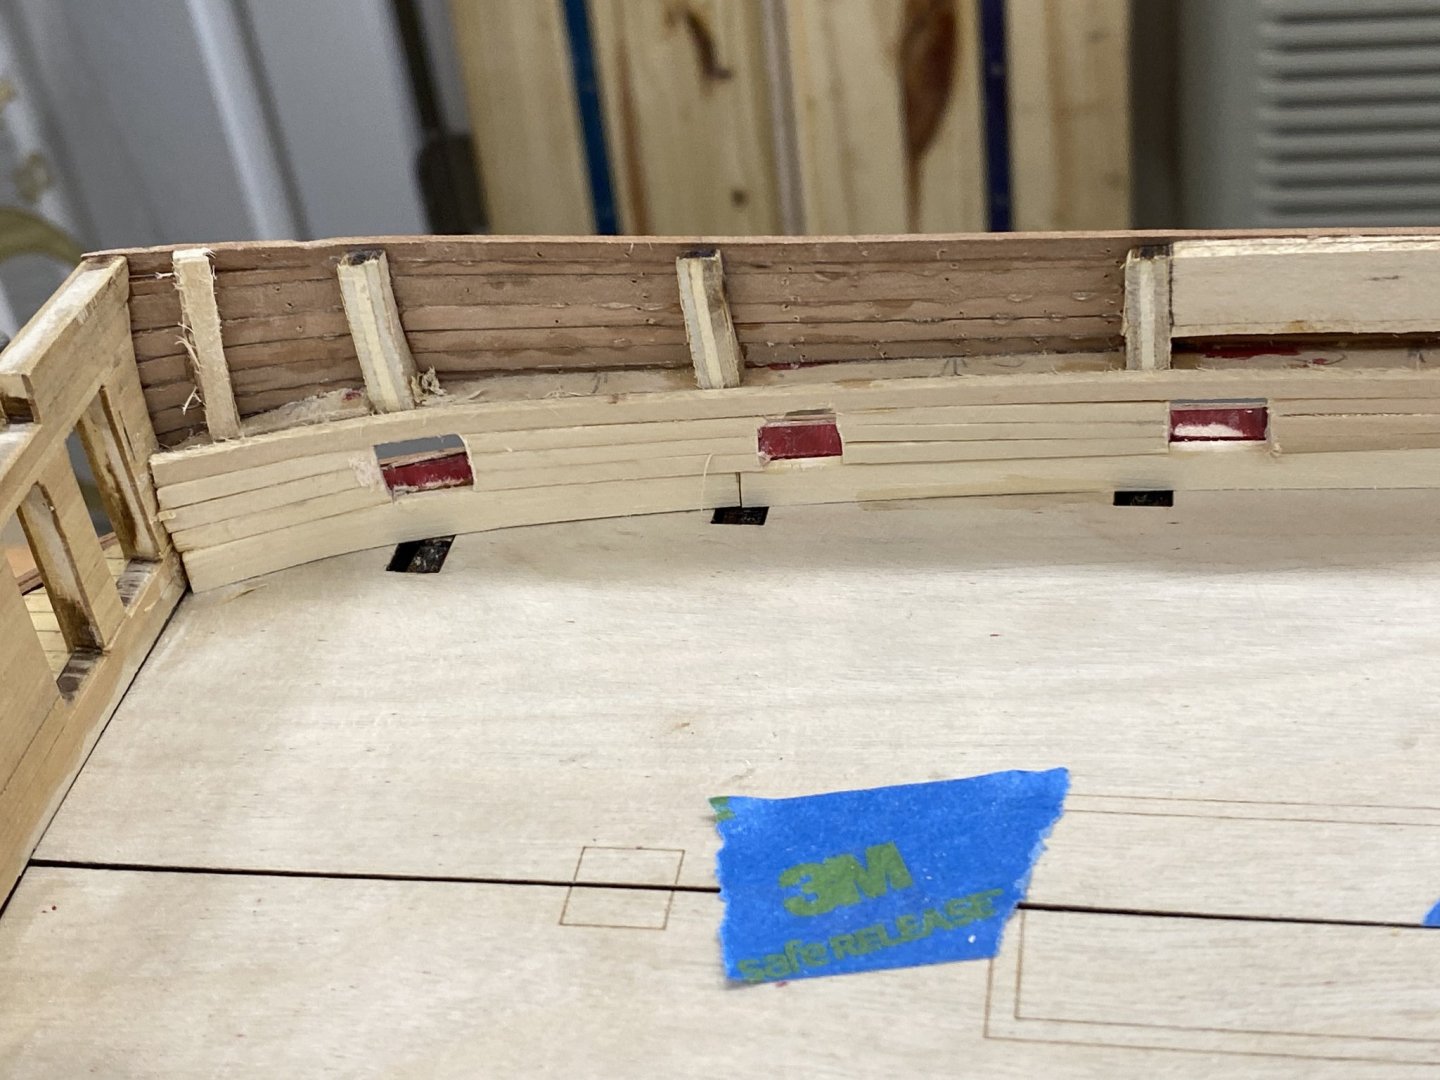
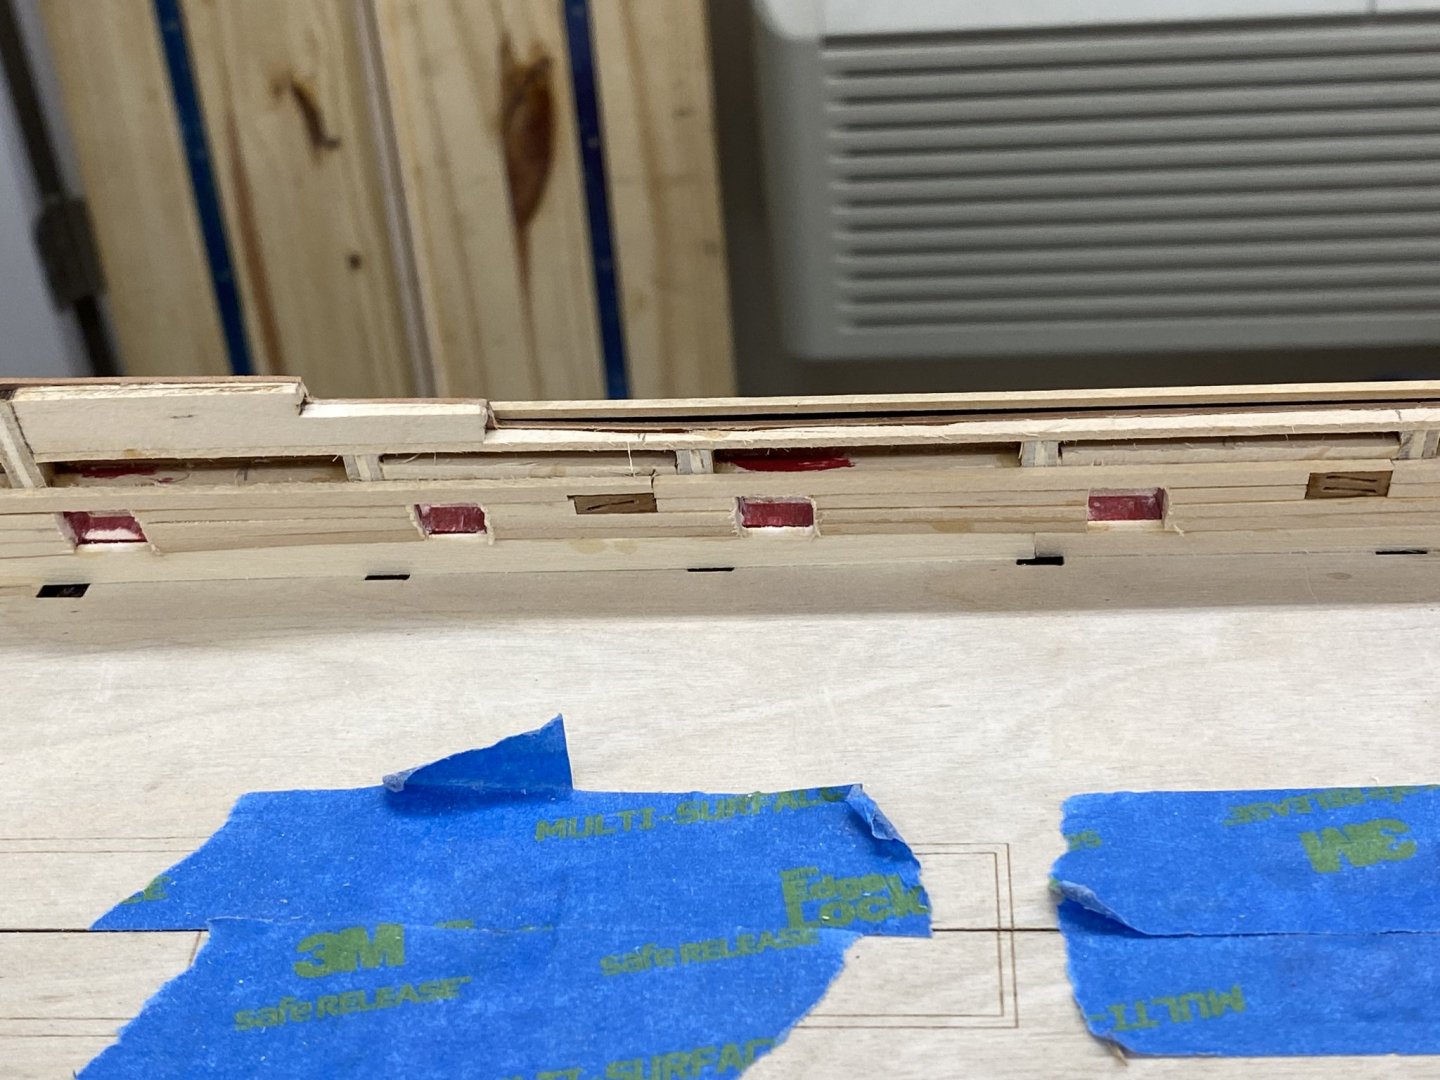
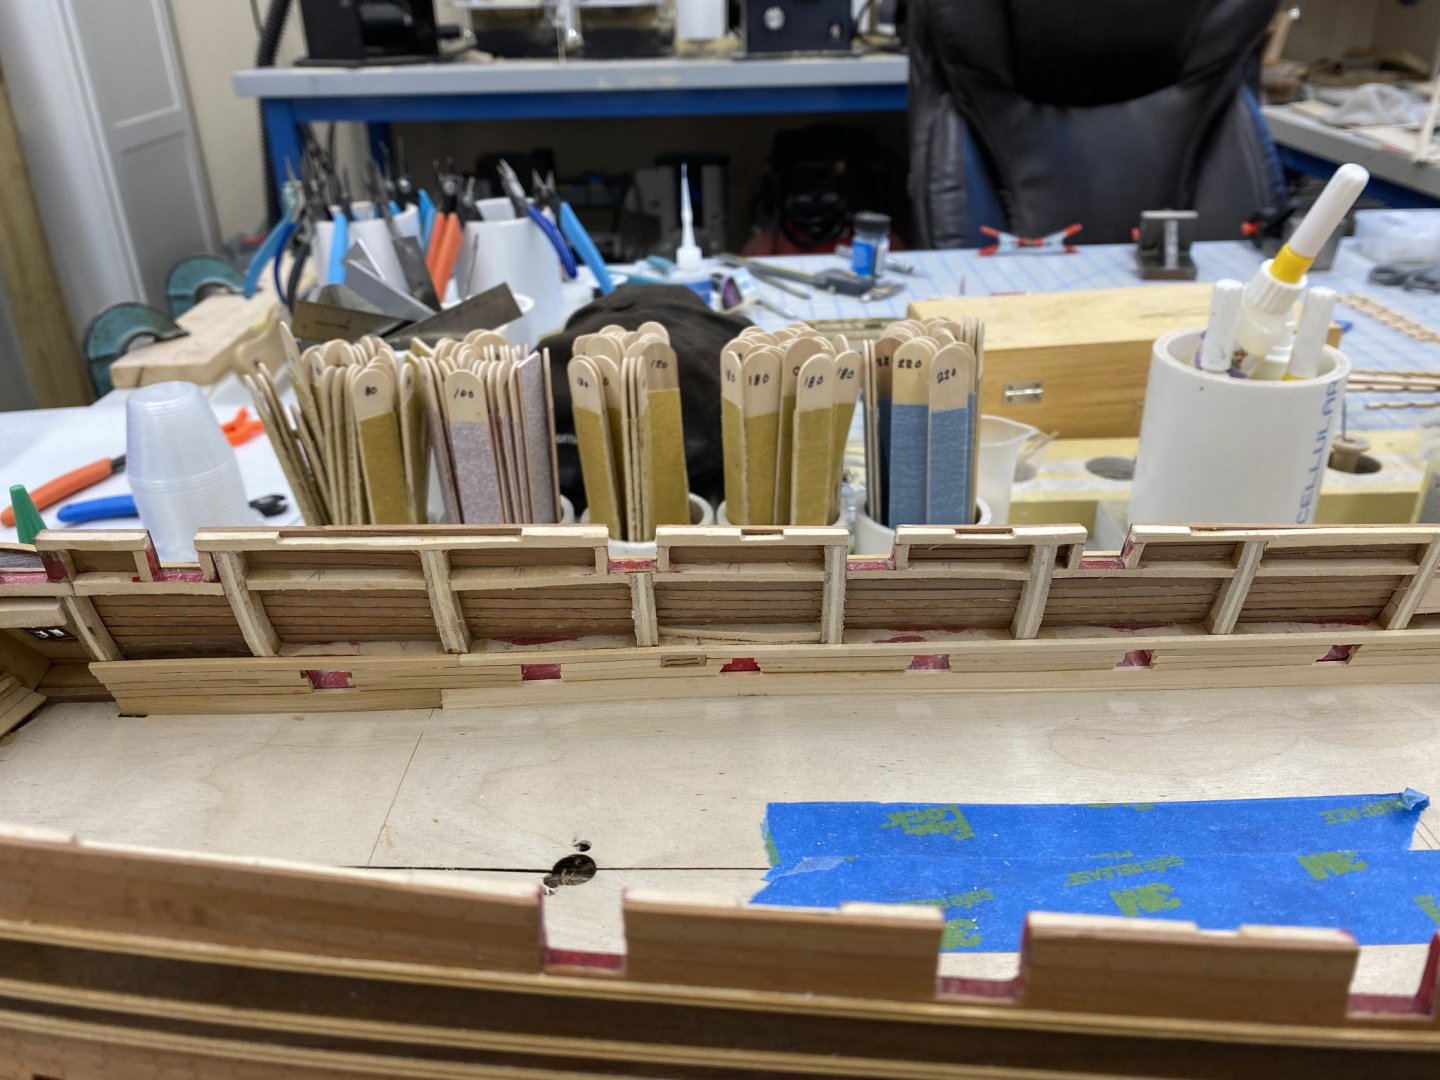
So now for the quarter deck clamps. According to the instructions the important dimension is with the forward part of the quarter deck clamp and I used the same technique as on the forecastle clamp. Here is the deck reading and on the forward most and after most sets of deck beam locations. I had to mill a sixth bulwark plank that was .020" wider to get the deck clamp to line up with the hance piece on the port side. Without the Byrnes table saw with the micrometer adjustment I fear this might have consumed many a piece of stock to get one the right thickness. The after deck clamp presents more of a problem as this is the one that is going to determine how the forward lines up with the hance piece laterally. The aft piece needs to be trimmed at the aft end to get the "step" in it to align with the opening for the quarter galleries. This is turn establishes where the junction with the forward piece will be. Since the deck beam spacing (according to the drawing) is not consistent from beam to beam (it varies from 22 - 26mm) it is possible to adjust (by a mm or three) the junction between the two pieces to get the end to line up with the hance piece. For the moment I am concentrating on seeing if the beams are level and perpendicular to the center line. I decided to check to see if, while being level the deck beams were the same height above the false deck. At least the one I measured was 33mm on each side. I put the four aft most beams (1/8 " X 1/8" straight pieces not the real beams) to see how things looked there and they look okay, at least in real life. I am not sure the picture is really accurate. It looks a bit straighter on the stbd side but I can't see that in "real life". Finally I add the beam at the great cabin junc tion to see if it matched the line on the false deck. It looks okay at first blush but I think it may be best to wait until everything is glued in place for a final determination.


- 370 replies
-
- 3
-
-
- Model Shipways
- Confederacy
- (and 1 more)
-
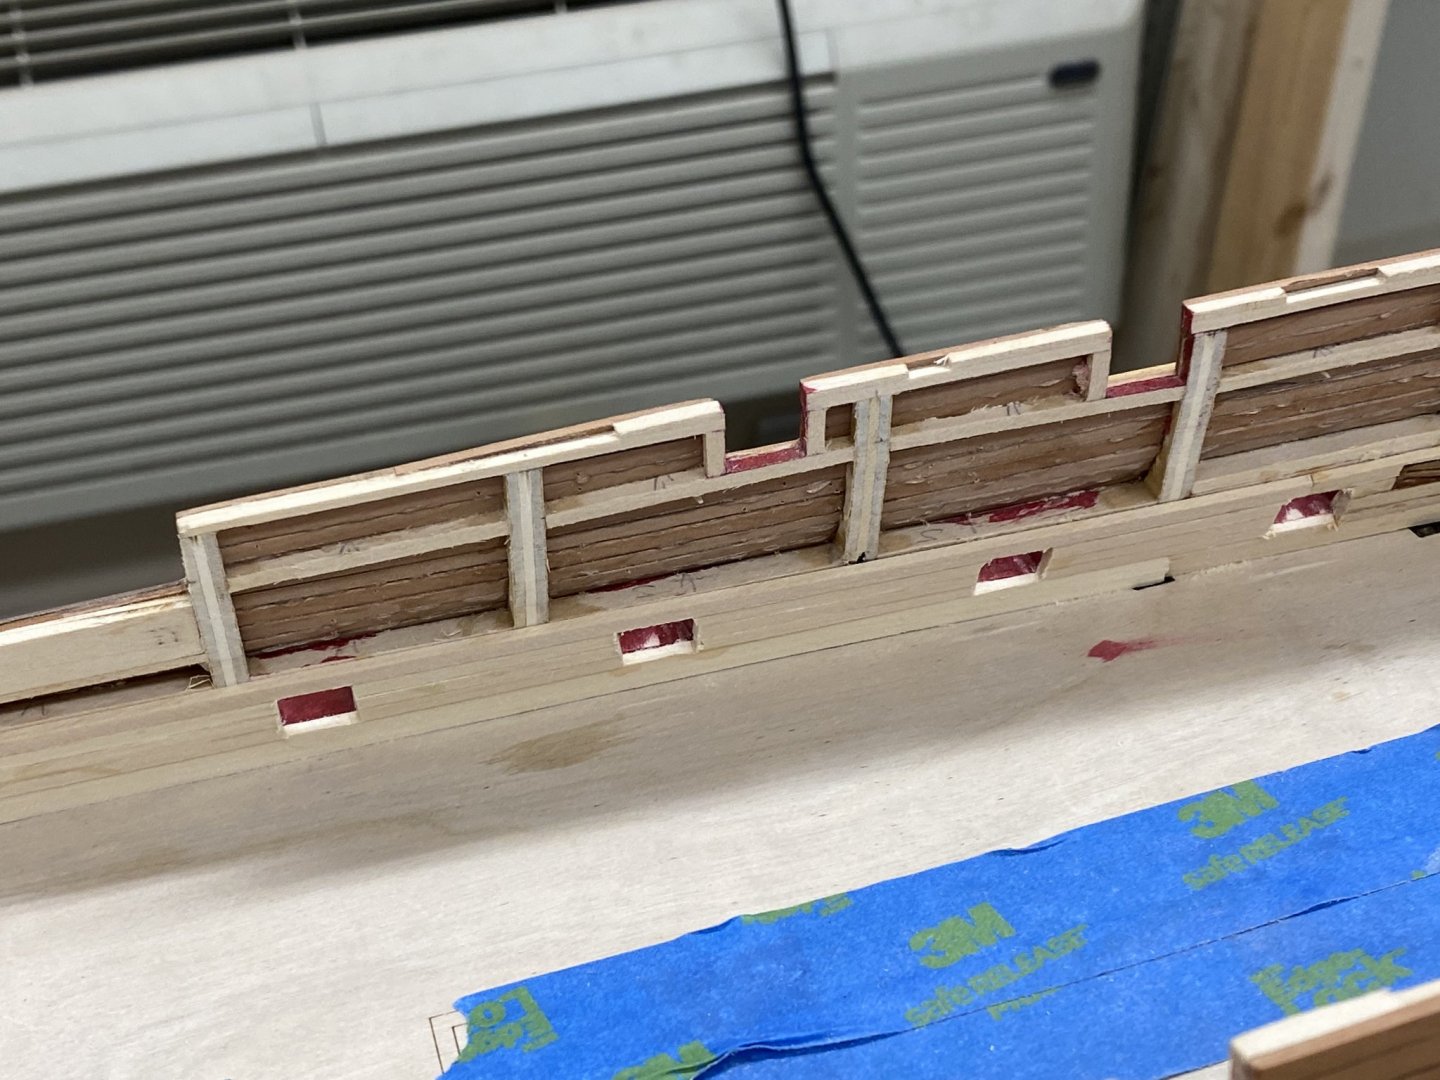
I got the forecastle deck clamps glued in. In the final analysis the stbd side needed a 5/32" addition to align with the hance piece and the port side needed 1/8". So here are both sides before the clean-up sanding. Hopefully the two "additions" will not be too noticeable after the red paint is applied.


- 370 replies
-
- 2
-
-
- Model Shipways
- Confederacy
- (and 1 more)
-
Allan, Thanks and for the record this version of Confederacy is when she was a United States vessel. She was captured by the British in 1781 and was taken into service with the Royal Navy (although the name was changed to Confederate). The kit provides the name letters on a .020" photo-eched brass sheet (along with many other pieces of the ornamentation) so I just followed the instructions. A "decal" might have been a better solution but I have not had great experience making them "work".
-
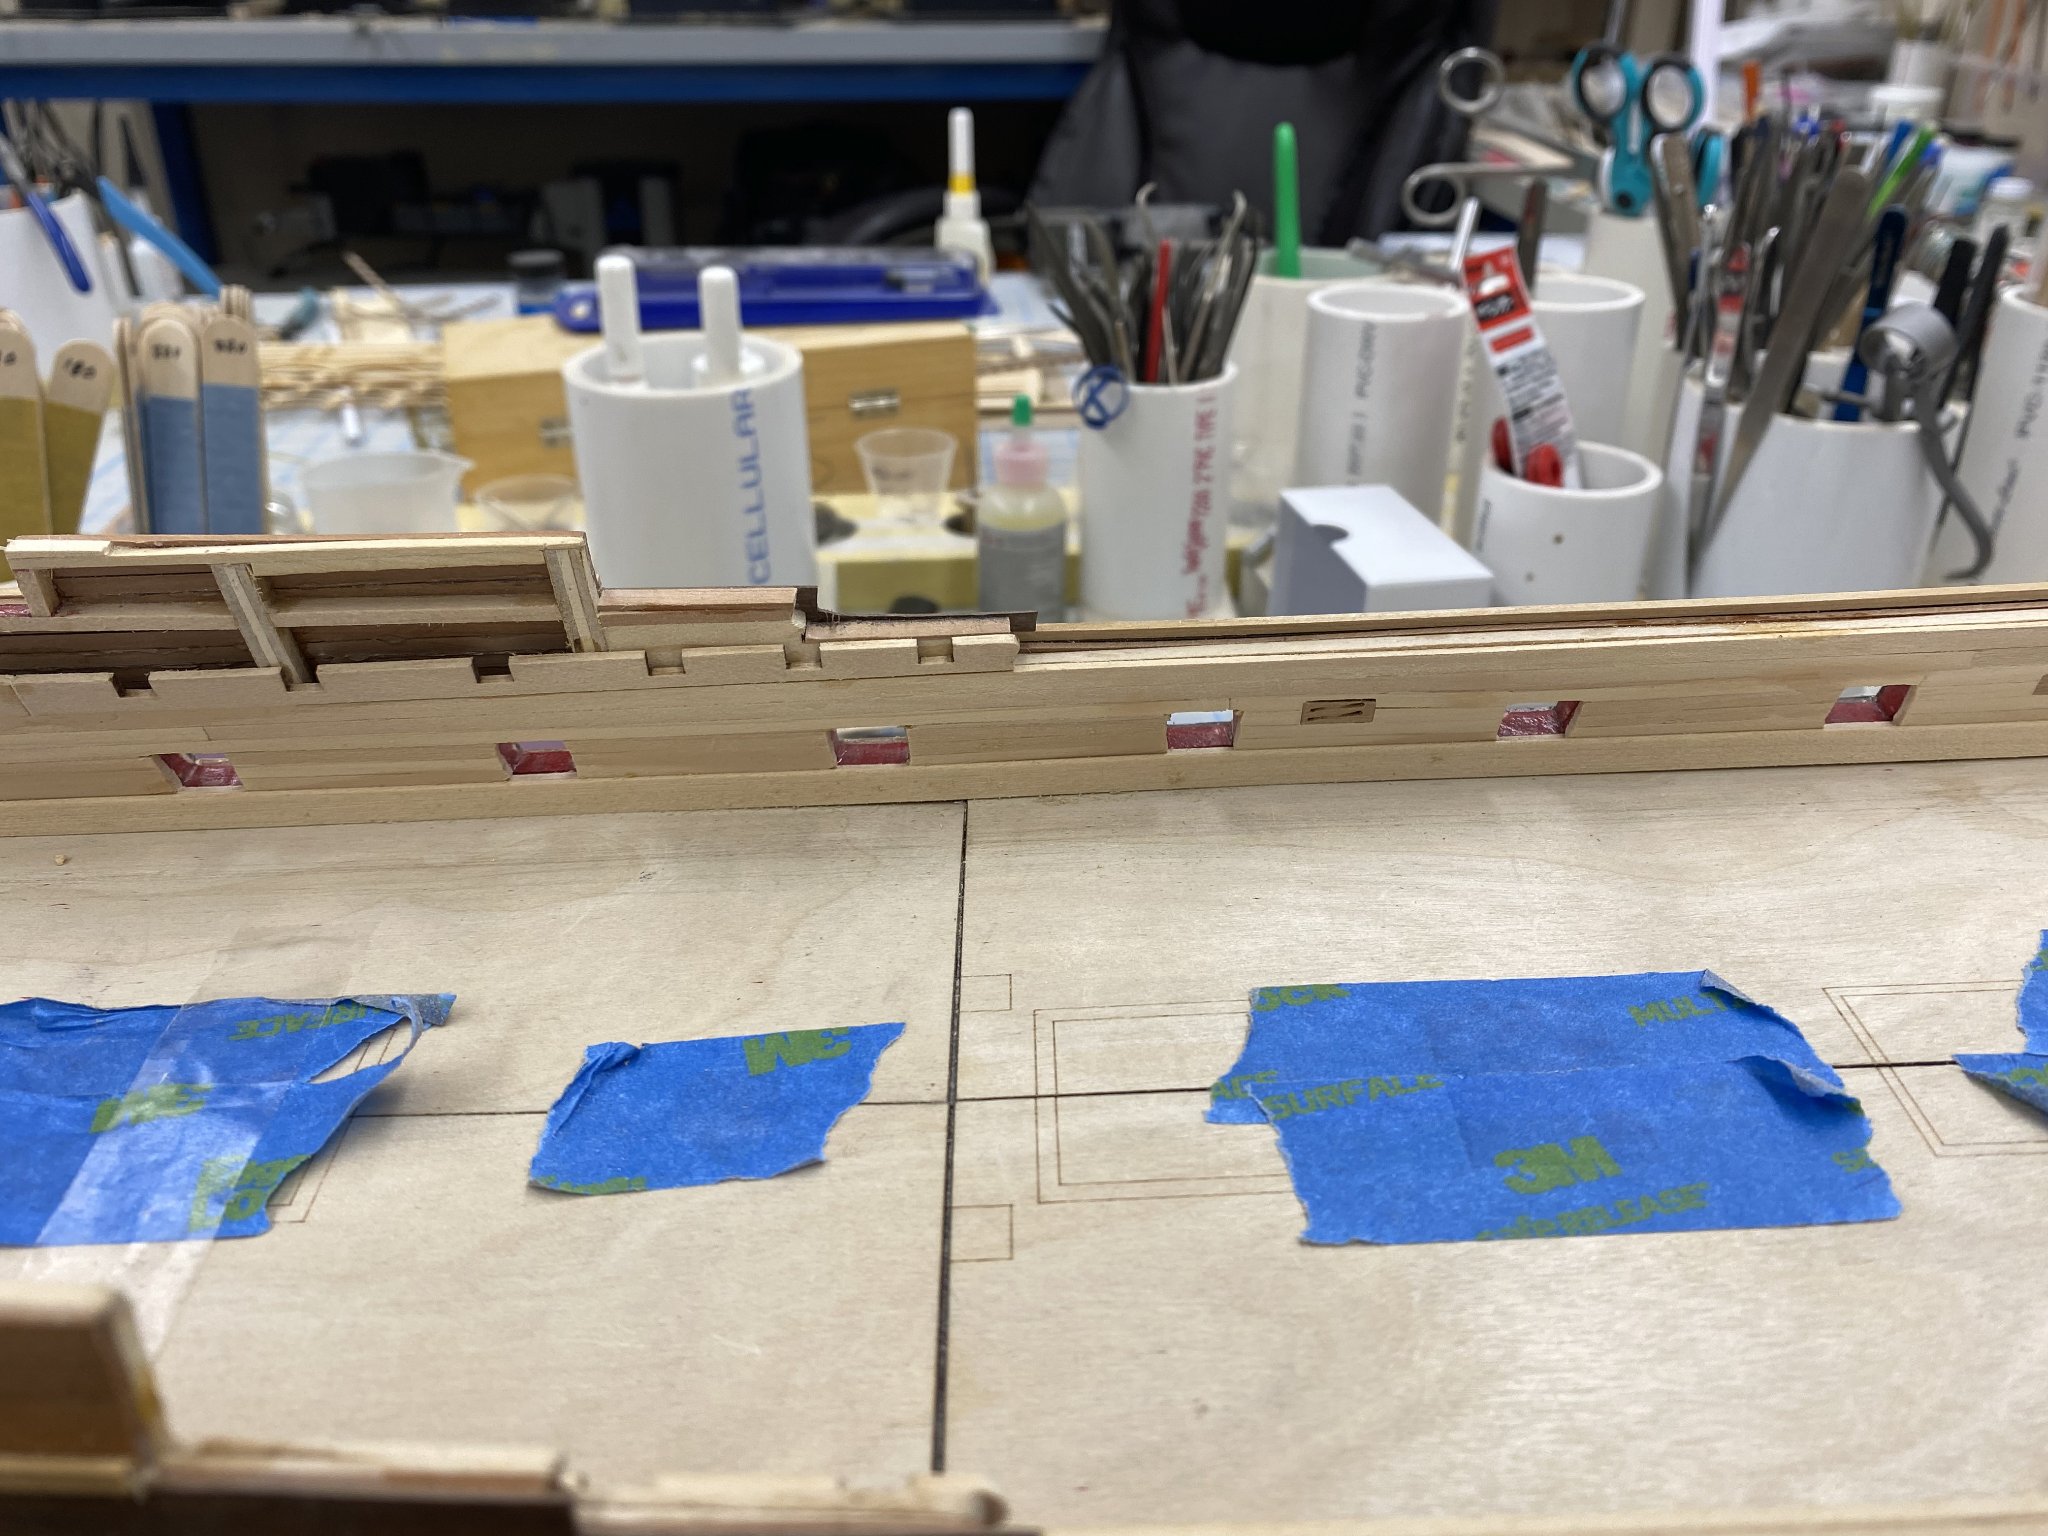
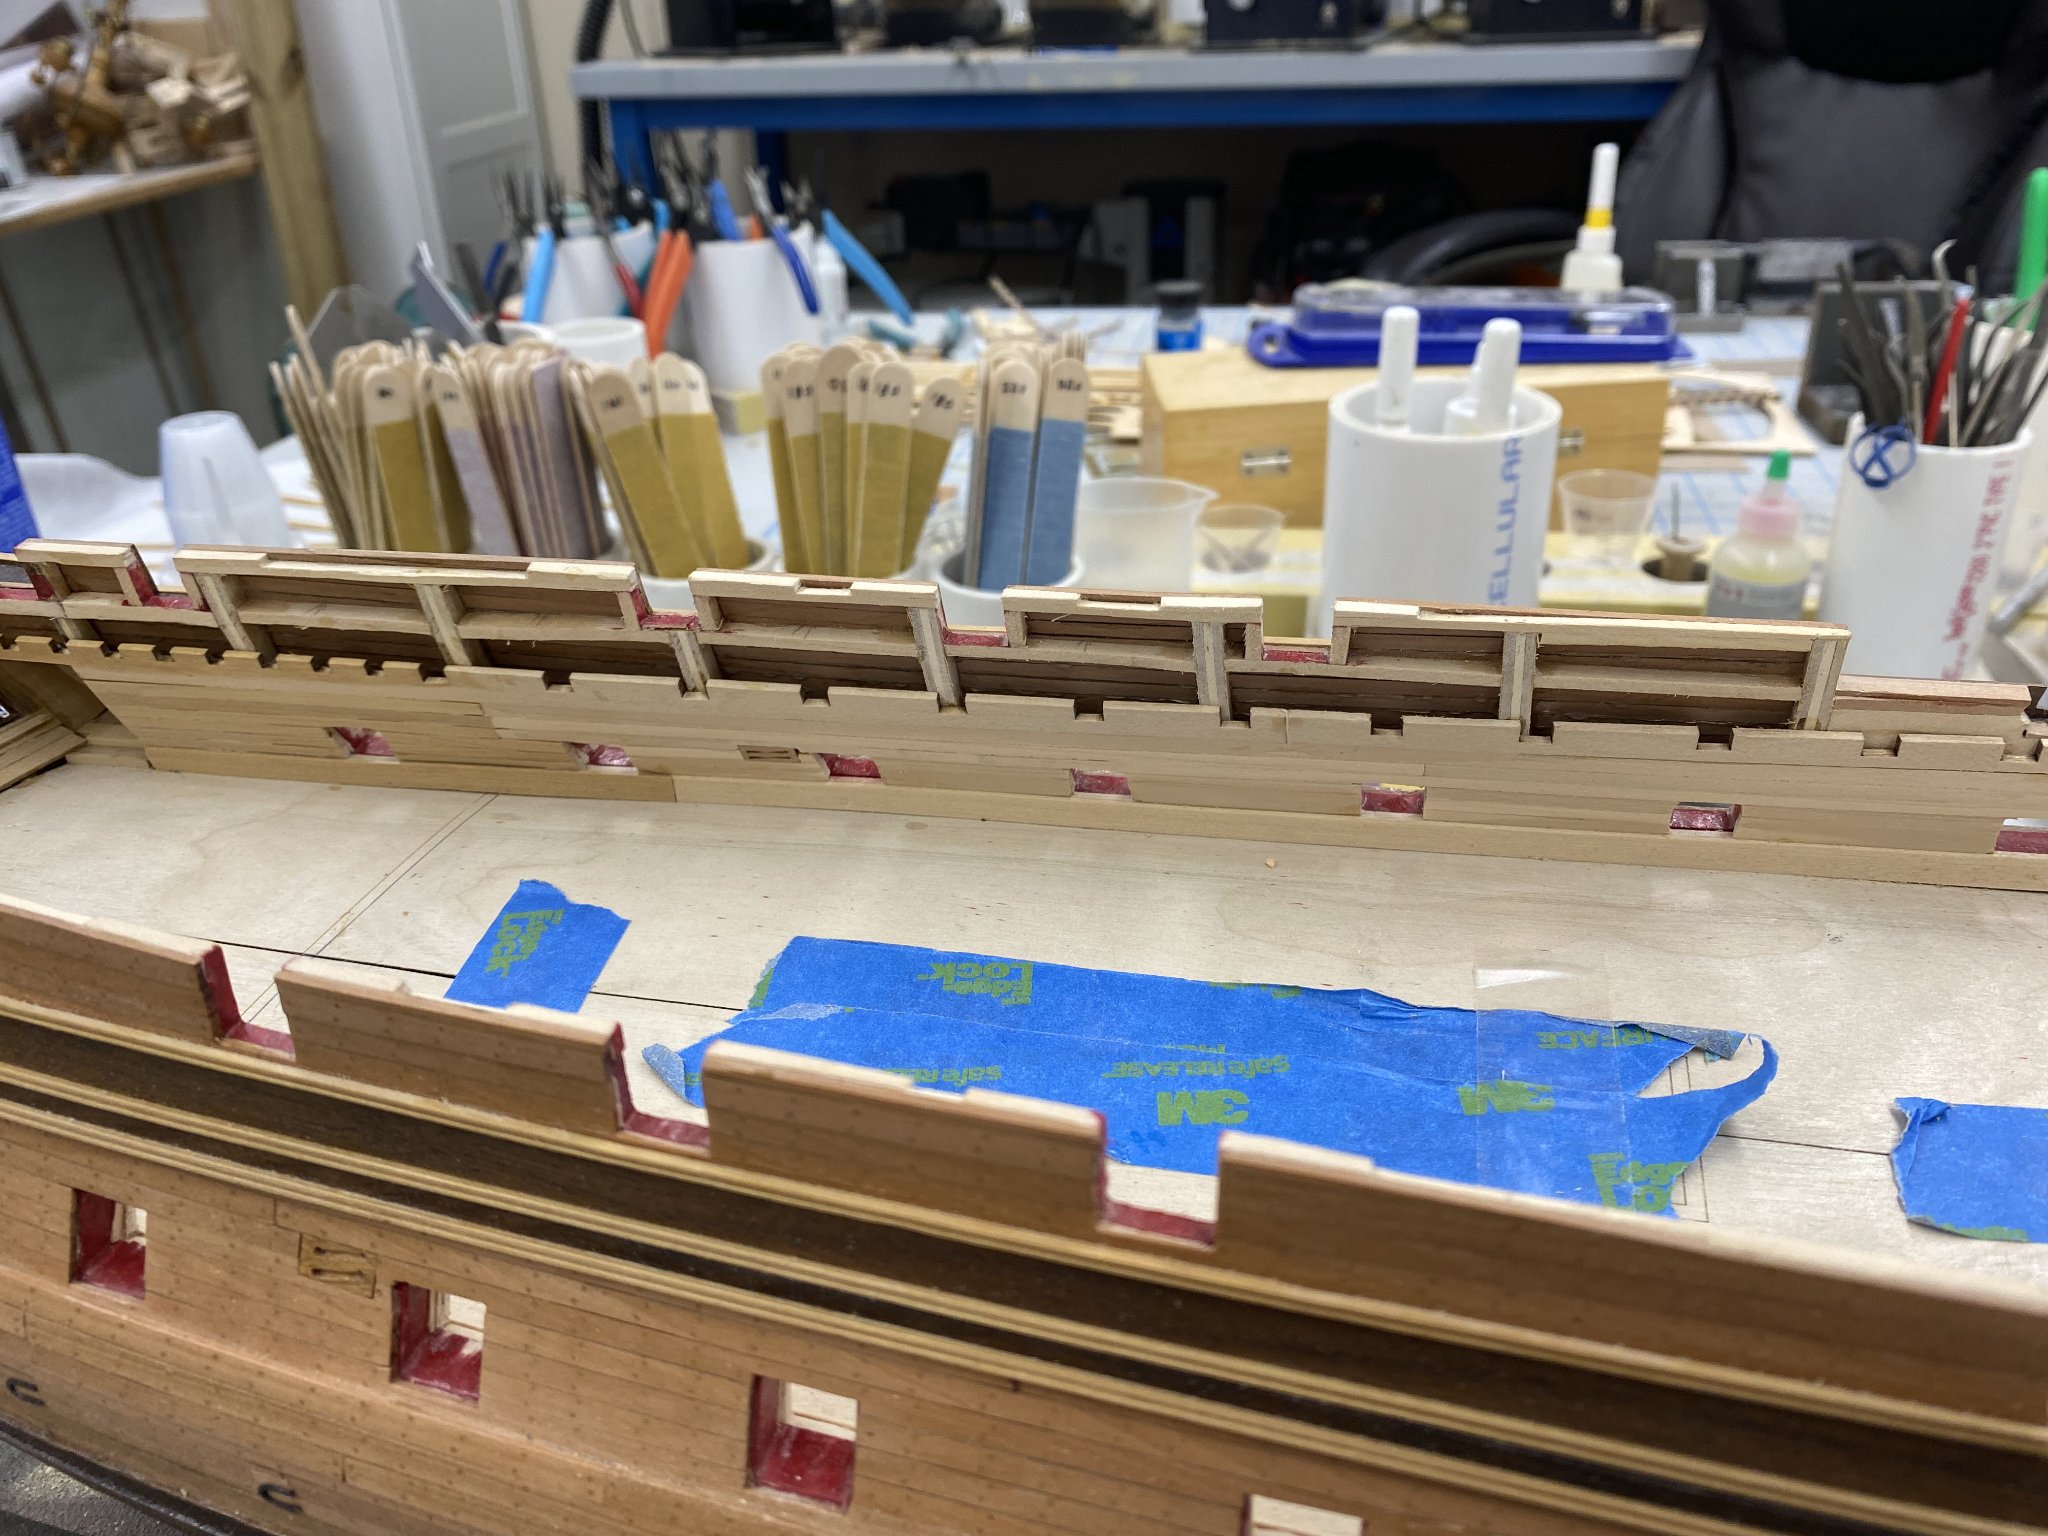
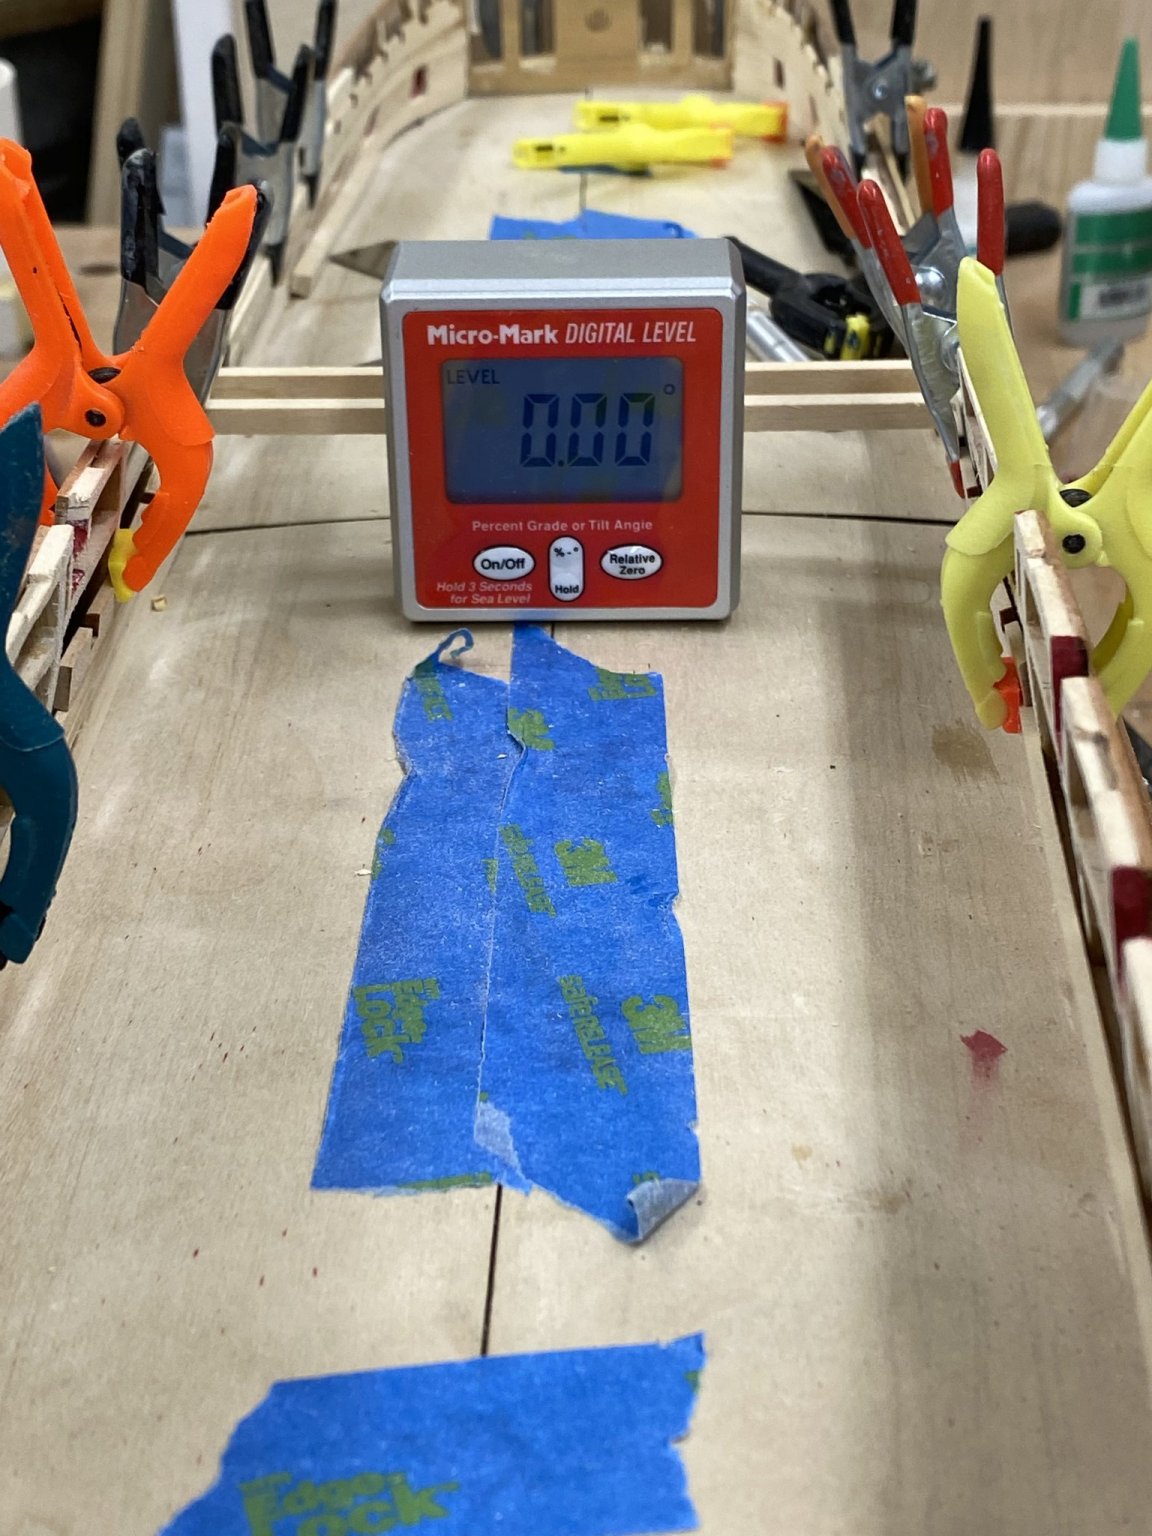
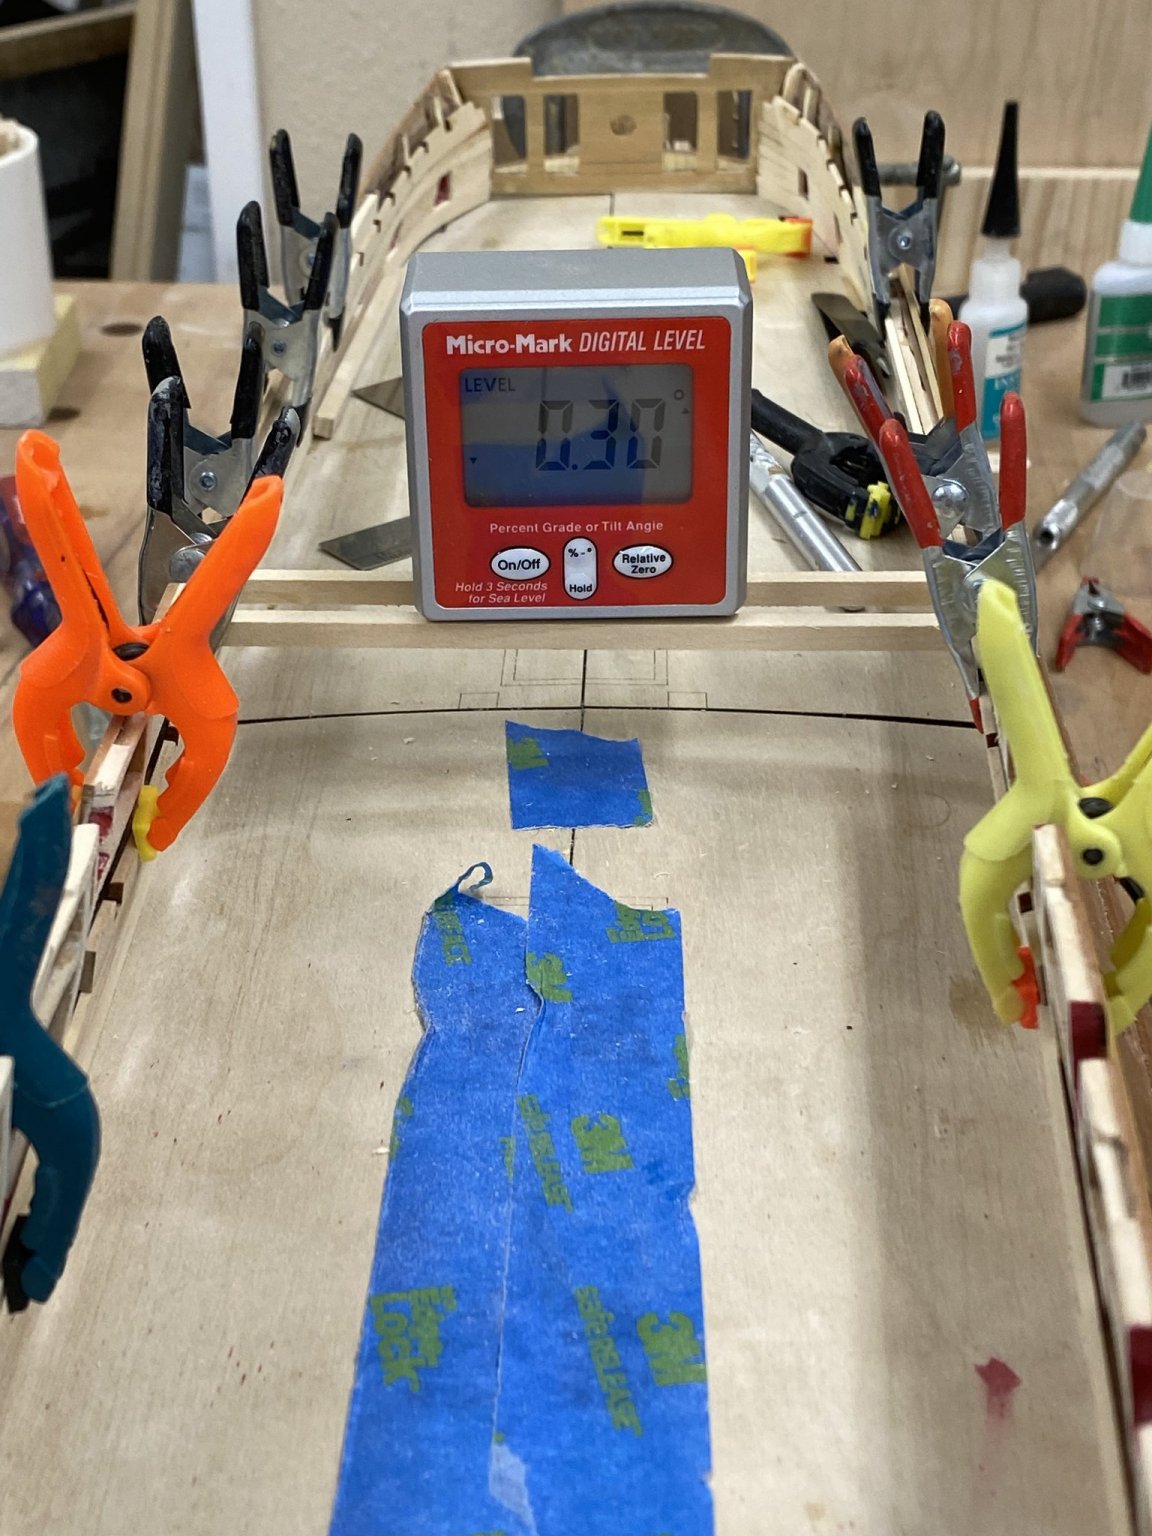
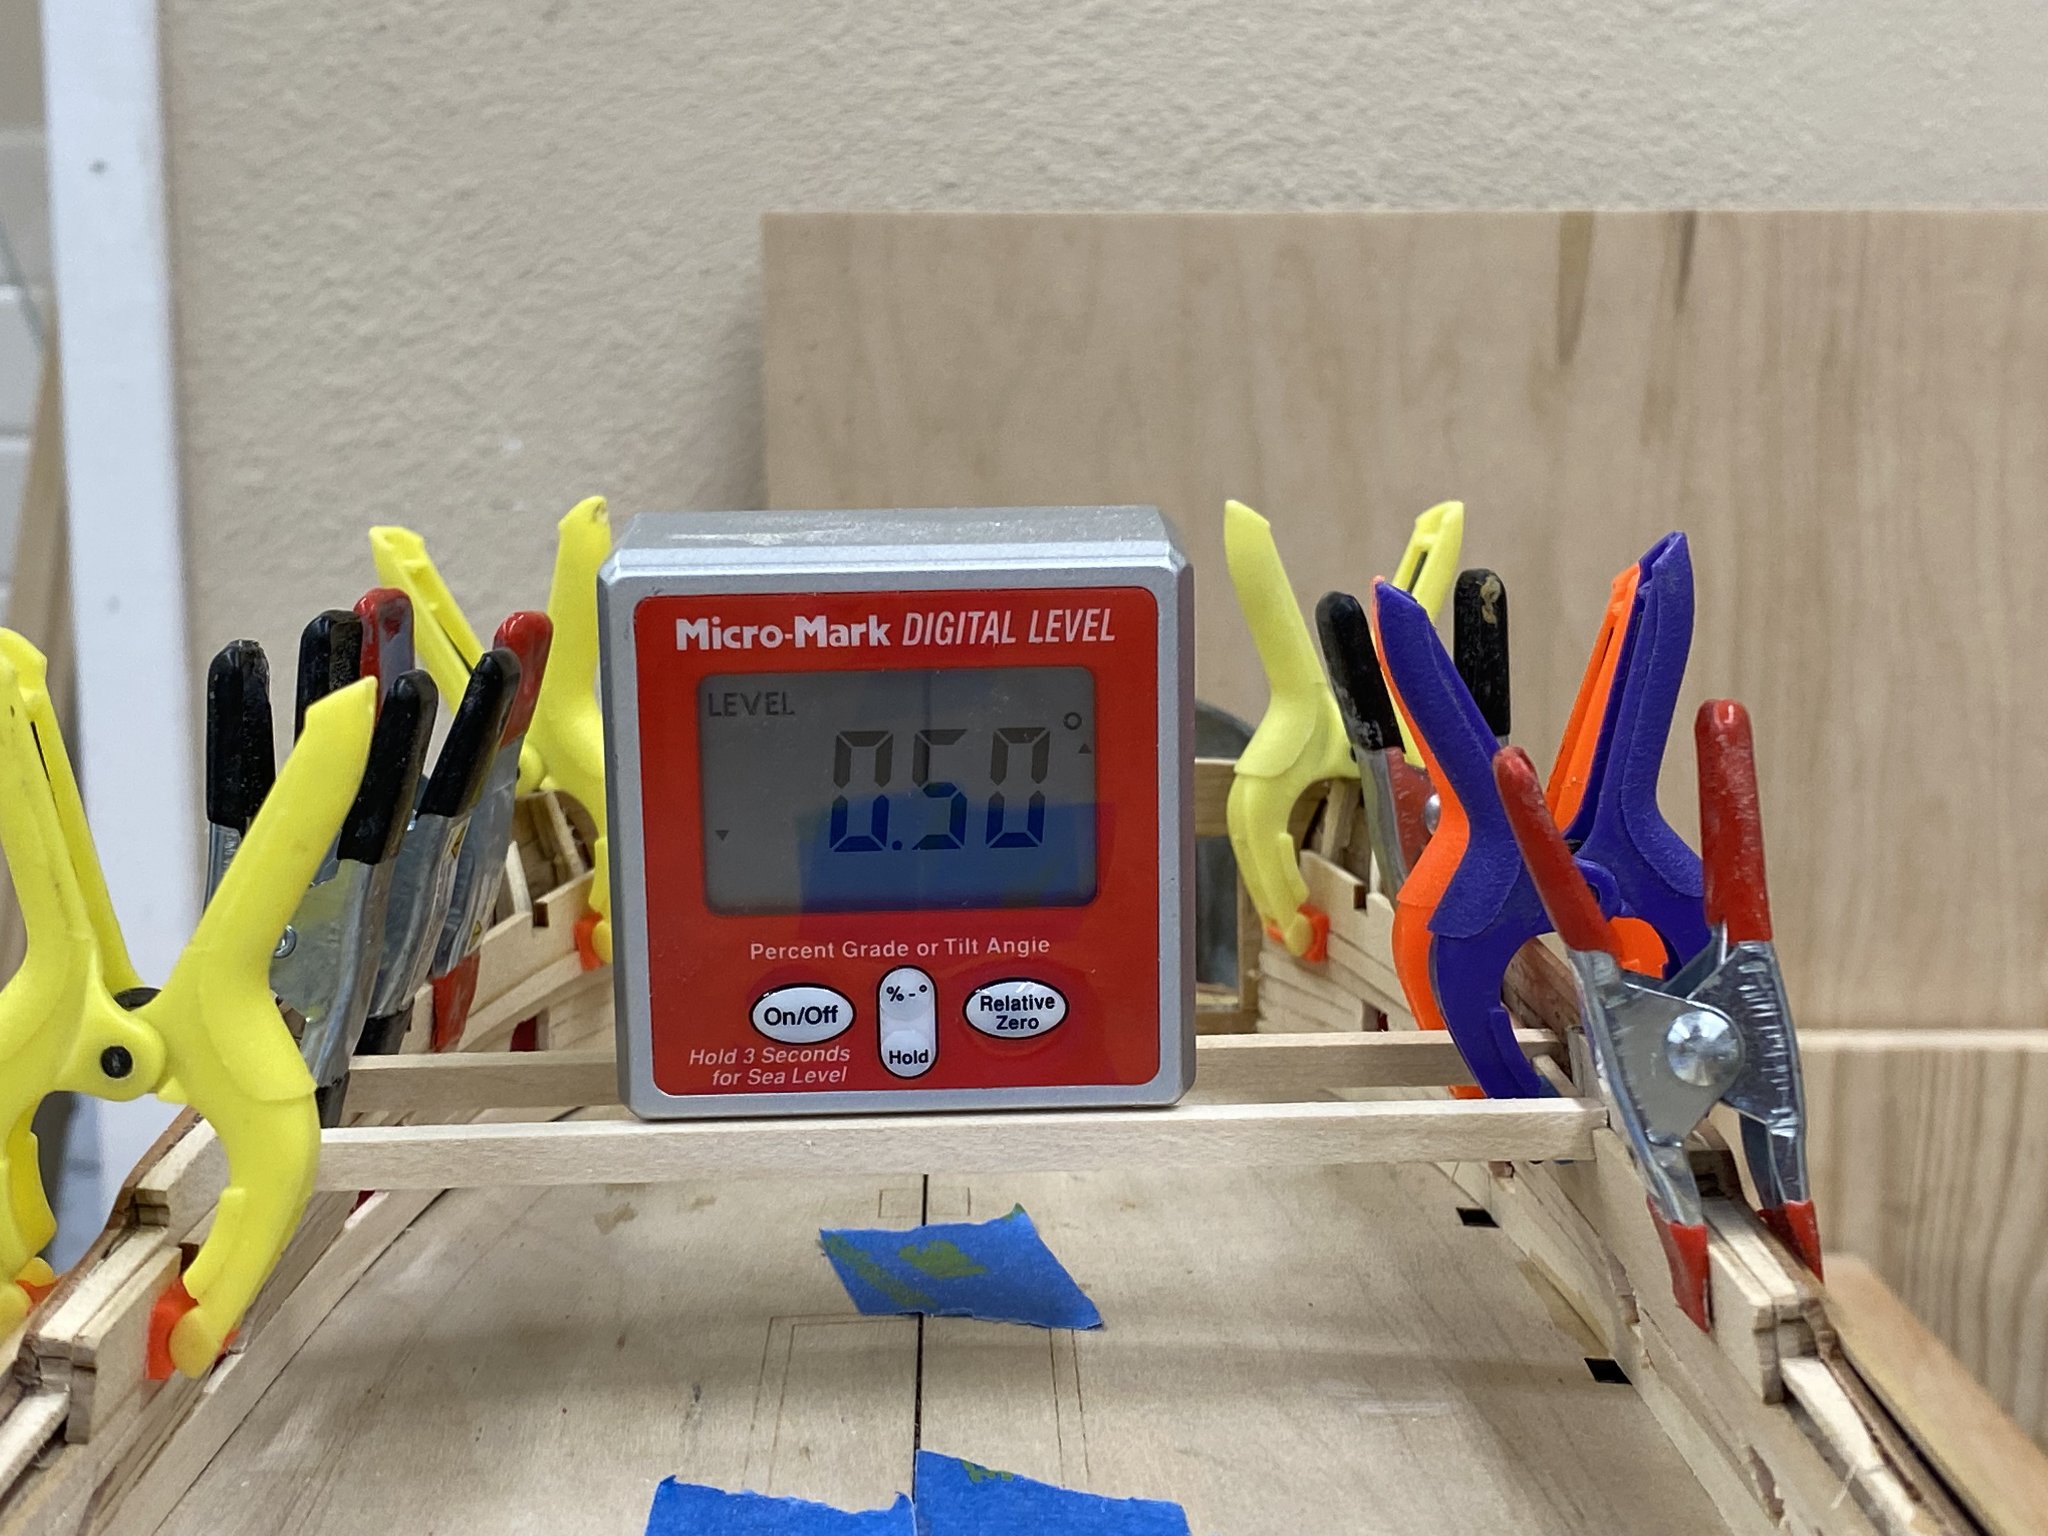
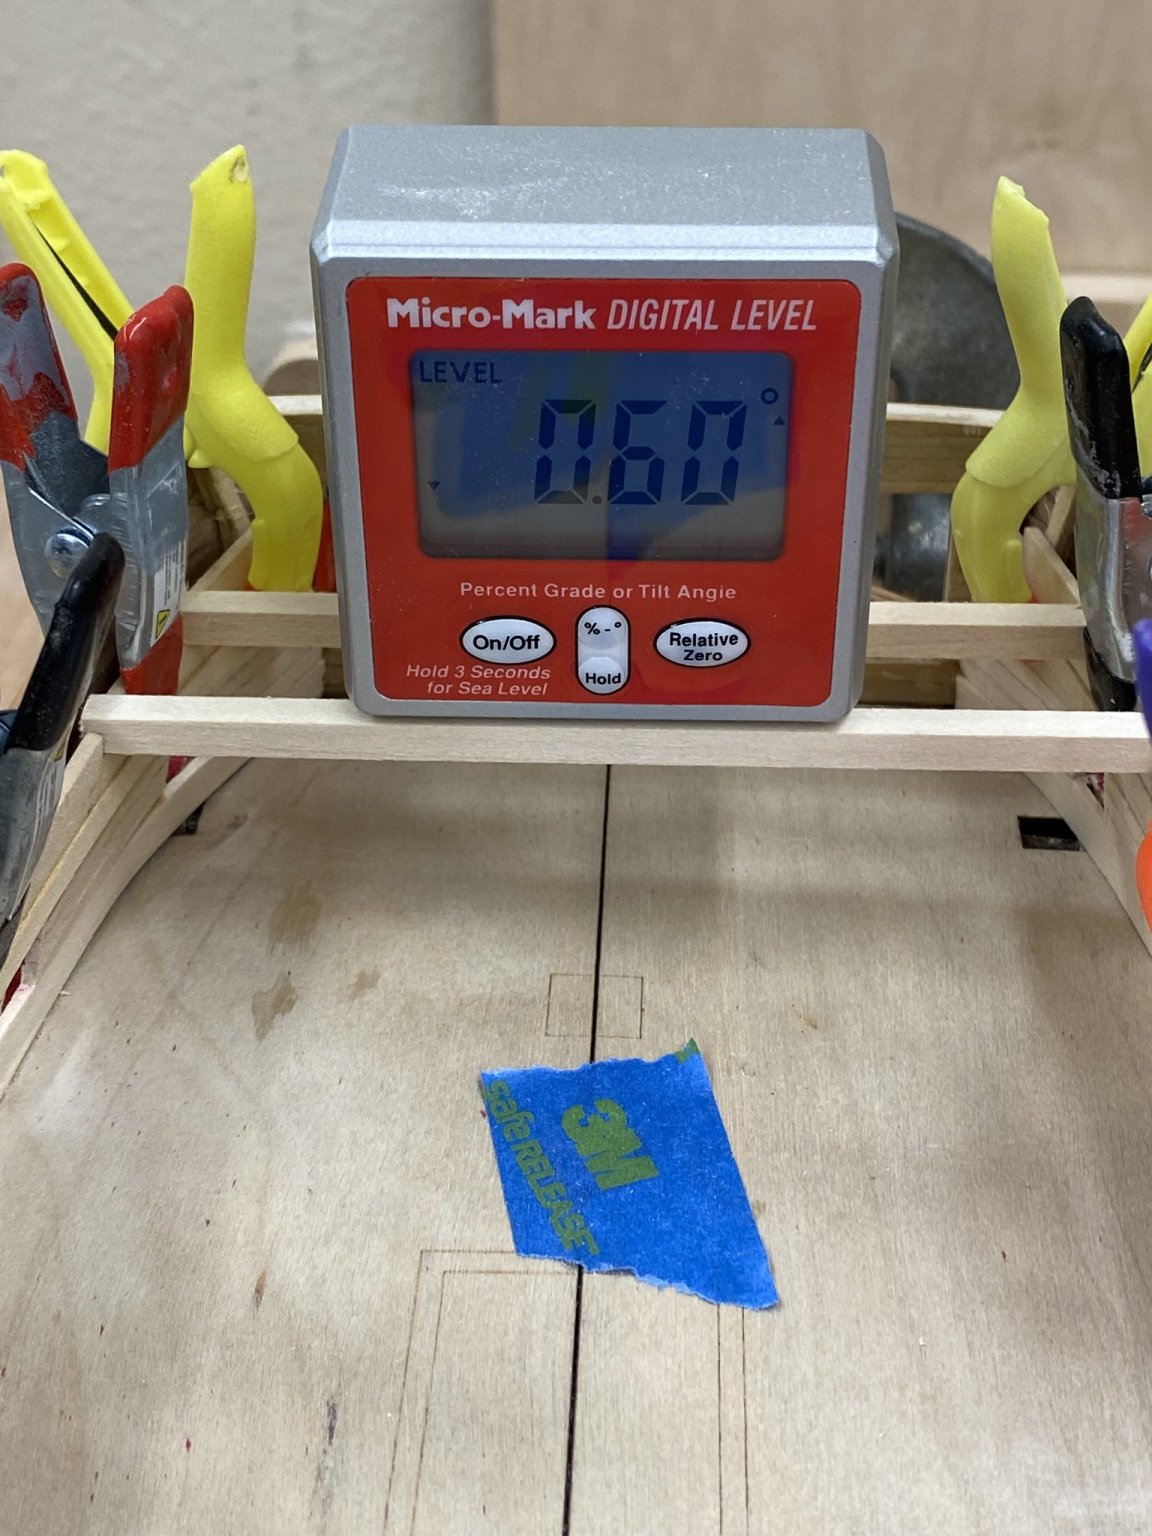
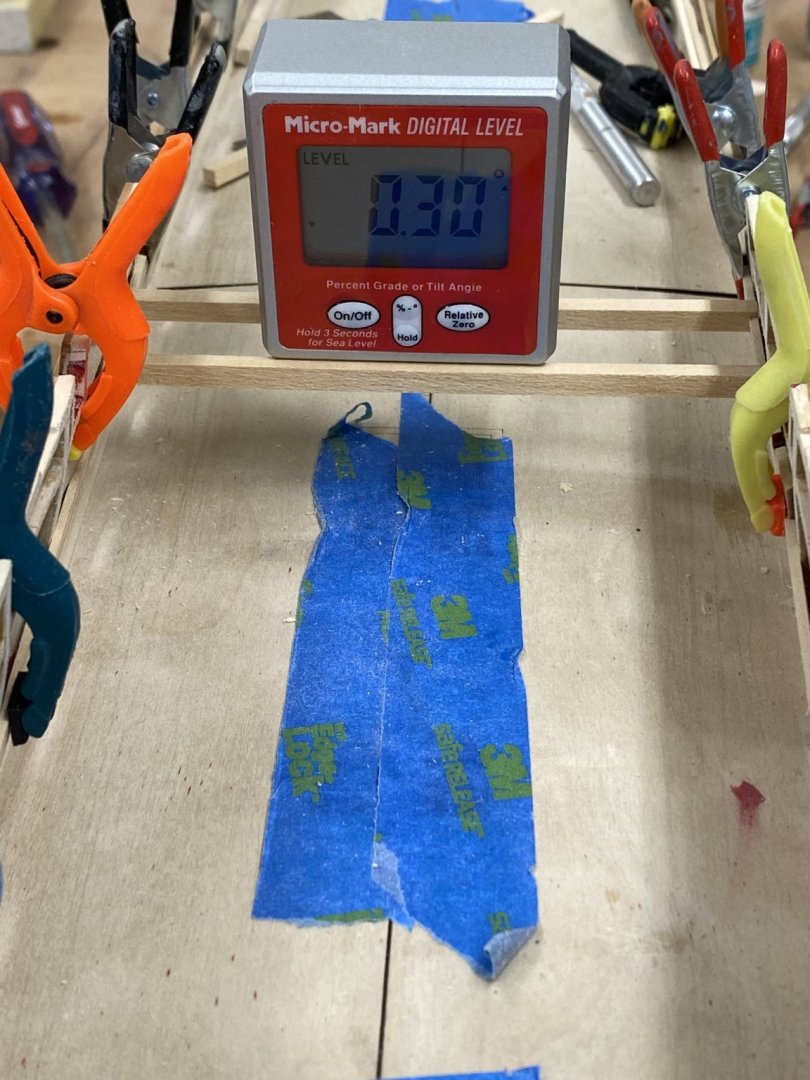
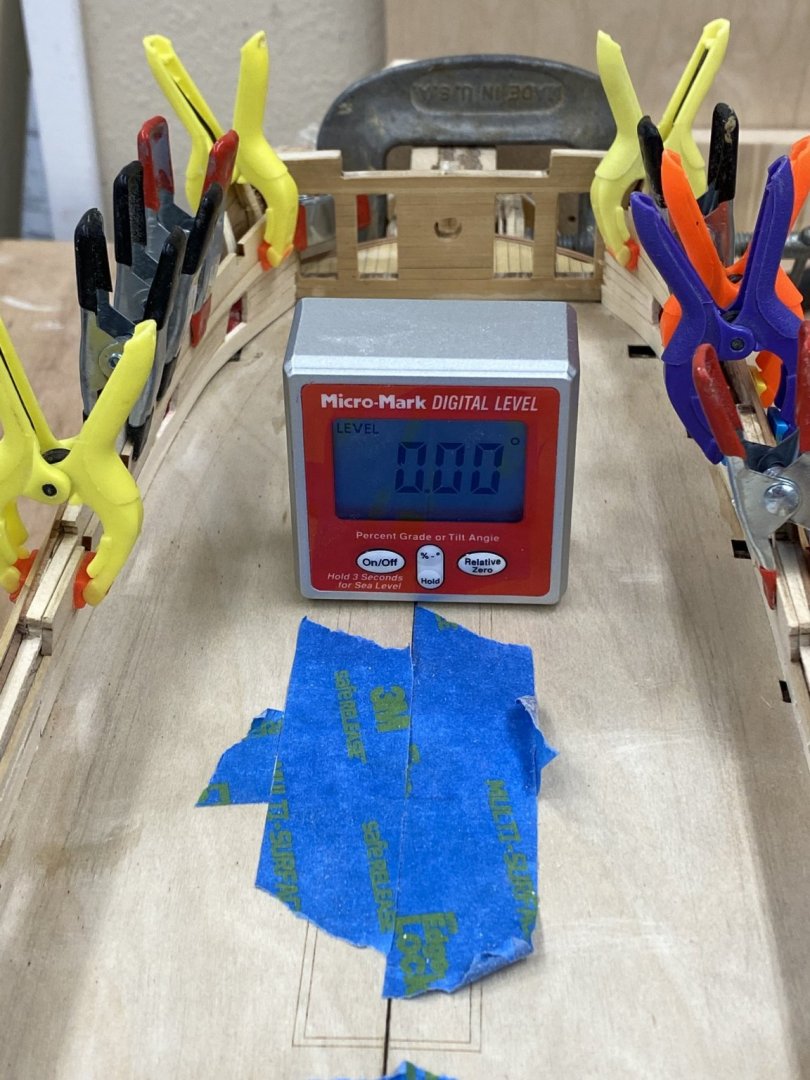
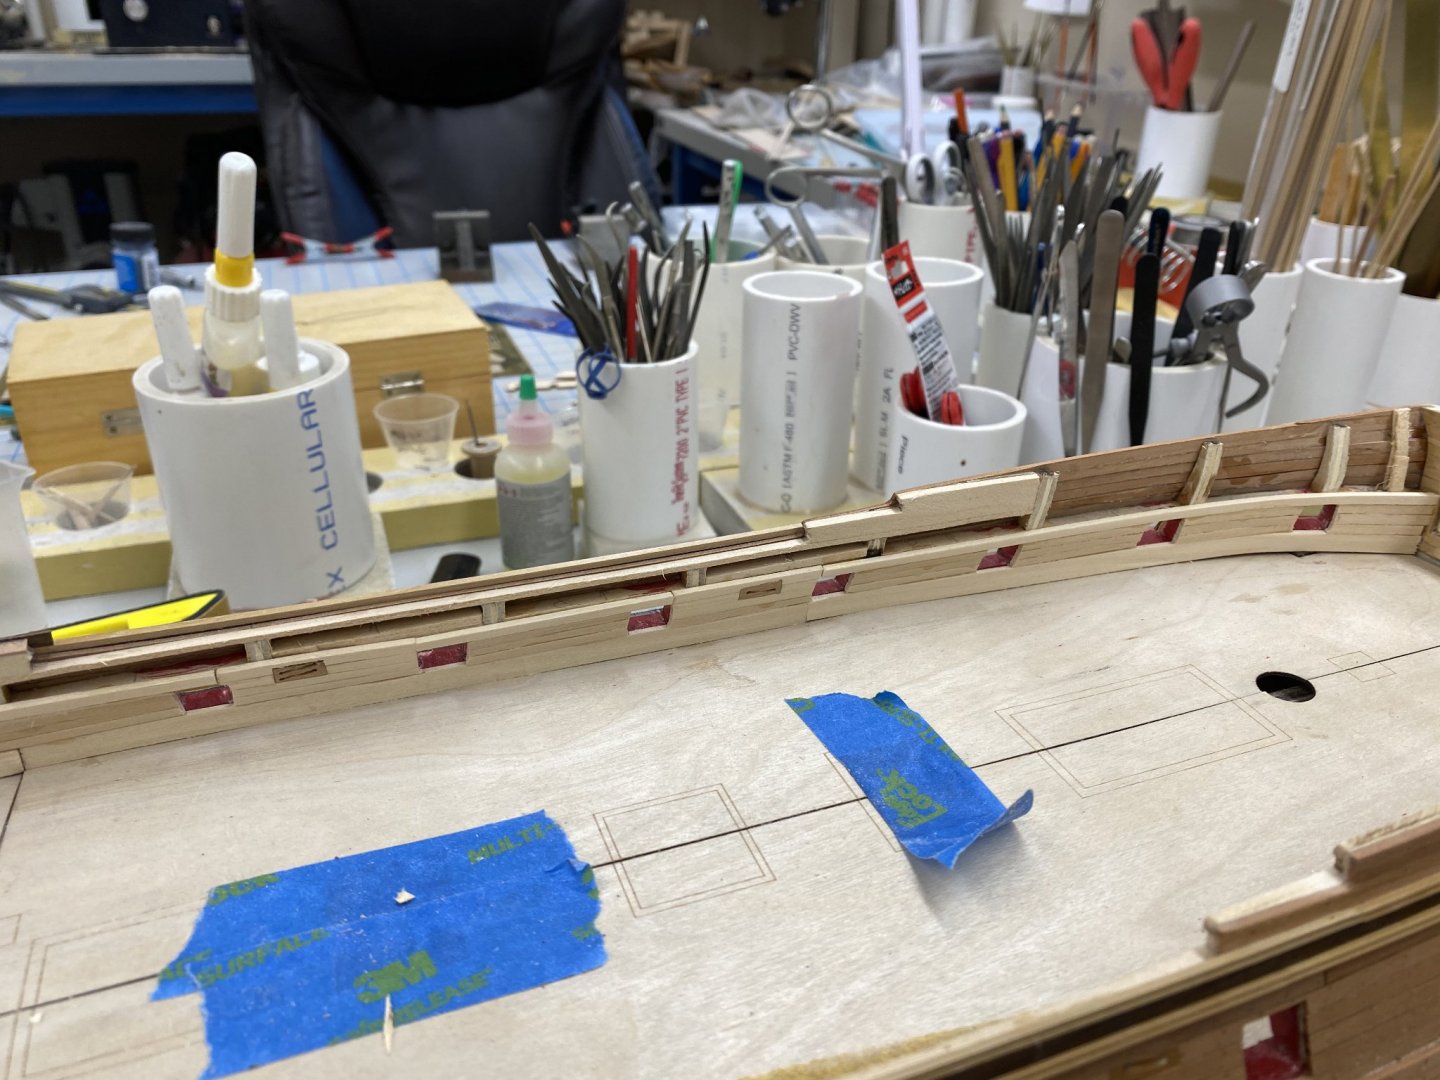
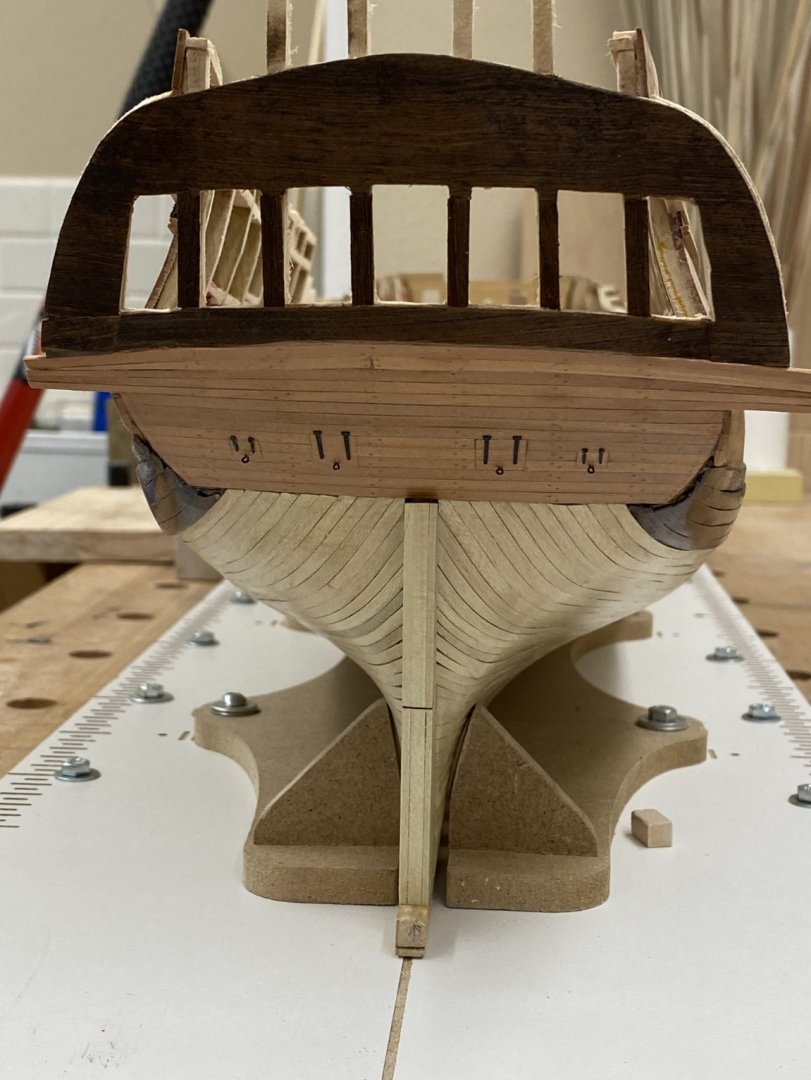
To try and evaluate the deck beam positioning I first wanted to establish that the hull is level as it sits on the build board. To do this I used a digital level from Micro-Mark. I used some small shims where the hull meets the build board components to get a 0 degree reading with the level spanning the seam in the false deck. Then, per the instructions I clamped an additional 1/8" X 1/16" plank on each side and then the forecastle deck clamps. As it turned out both sides lined up (vertically) with the forward hance pieces. However, they both came up a few 1/32s" short of the end of the hance piece. I am not sure why this might be, perhaps my interior bulwark planking has more curve than it should thus making it a bit further around than it should be. The instructions say the deck clamp was made with a bit of extra length but you coulkd not prove that this model. With the deck clamps in place I cut some pieces of 3/16" square stock to fit in the slots and used the digital level to check if they were level. I did a set of beams at each end in case there was some difficulty longitudinally. Assuming the hull is still level the deck beams are out of level by, at most. 0.6 degrees. I think that is close enough. I doubt the kit beams are accurate to even 1 degree so with them in place I think everything will be "fine". As for the disconnect with the hance pieces I am going to try and graft a piece into the deck clamp to move the ends to where the hance pieces are.


- 370 replies
-
- 2
-
-
- Model Shipways
- Confederacy
- (and 1 more)
-
I tried to do a more workman like job on the stbd side bulwarks although if the stbd exterior is shown then it will be the port side on the interior - oh well. For those who come later it should be noted that the fairing of the interior, especially at the lower parts of the ribs is relly important. You should strive to have the interior pieces flush with the gun ports. I did not and ended up adding small pieces of scrap wood to fill in where the bulwark did not meet the gun port frames, usually at bottom of the port. Here is a better look at the stbd side interior with five rows of planking. Next step is figuring out if another row of 1/8" ,planks will put the fo'c'sle deck clamps at the right height, parallel to each other and perpendicular to the centerline.


- 370 replies
-
- 1
-
-
- Model Shipways
- Confederacy
- (and 1 more)
-
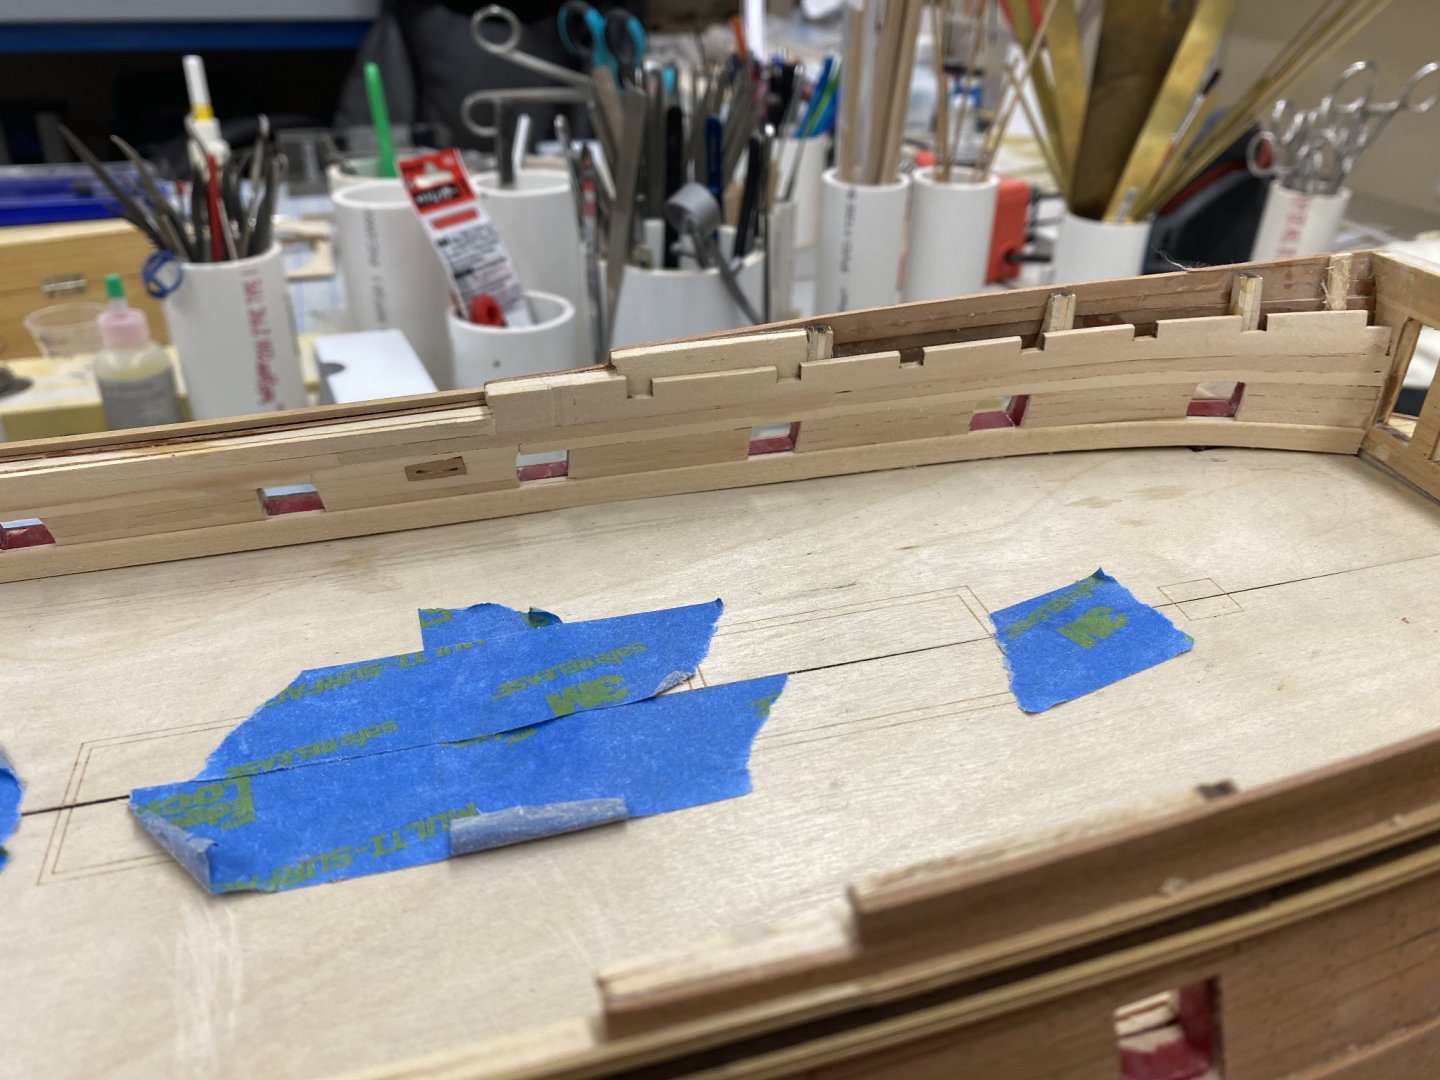
Working on the port side interior bulwark planking. Got the first five rows (1 3/4" and four 1/8" wide) of planks. In some places the transition from the 1/4" to the 1/8" is at an angle that makes a smooth seam difficult at best. It probably will not be as obvious when the wood is painted but I will attempt to smooth is out some with sanding, although it is not in an easy place to sand effectively. I am going to do five rows on both sides and then see where we are with respect to the deck clamps per the instructions. Digital level may come in hand although establishing that the hull itself is horizontal is not all that easy since everything is curved and there is no guarantee that the bulwarks are exactly the same height on both sides. A problem to be encountered shortly. I made the basswood to boxwood transition a bit bragged but hopefully the paint will cover that adequately. Here is the five rows of planking on the port side before any at cleaning things up at the gun ports. The blue tape is to keep small items from finding their way into the companionways. It can be really hard to get them out once they get in - don't ask me how I know.
- 370 replies
-
- 2
-
-
- Model Shipways
- Confederacy
- (and 1 more)
-
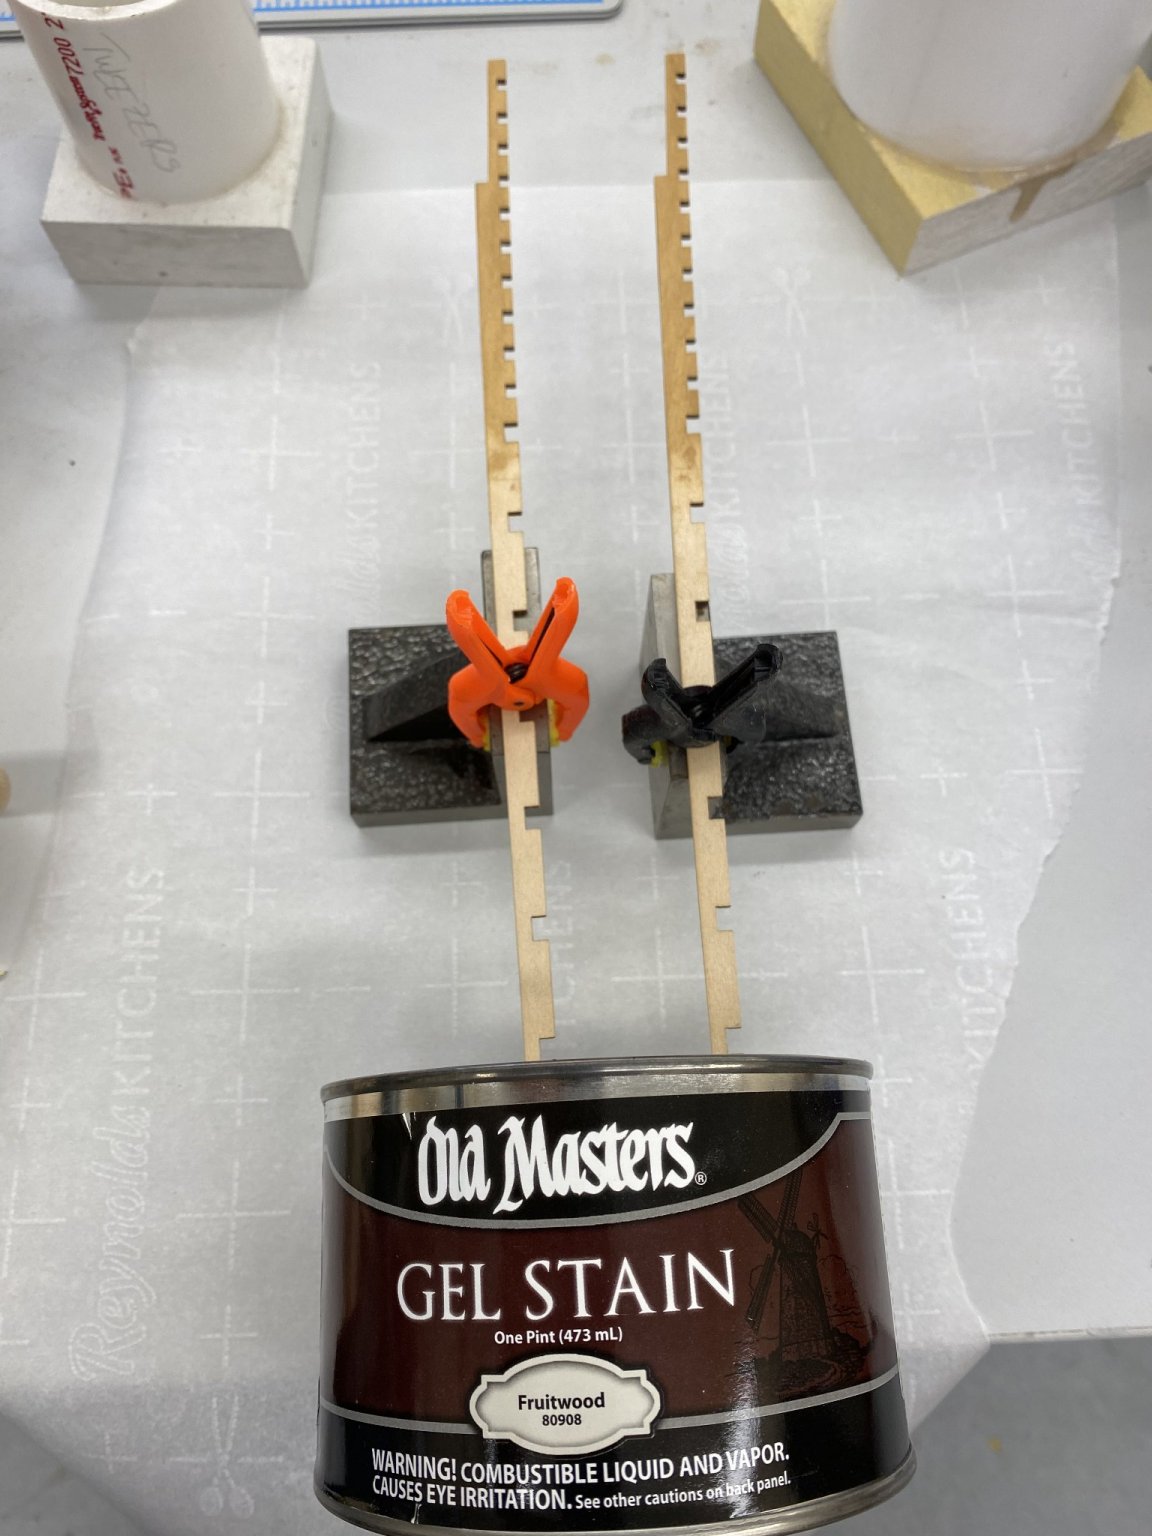
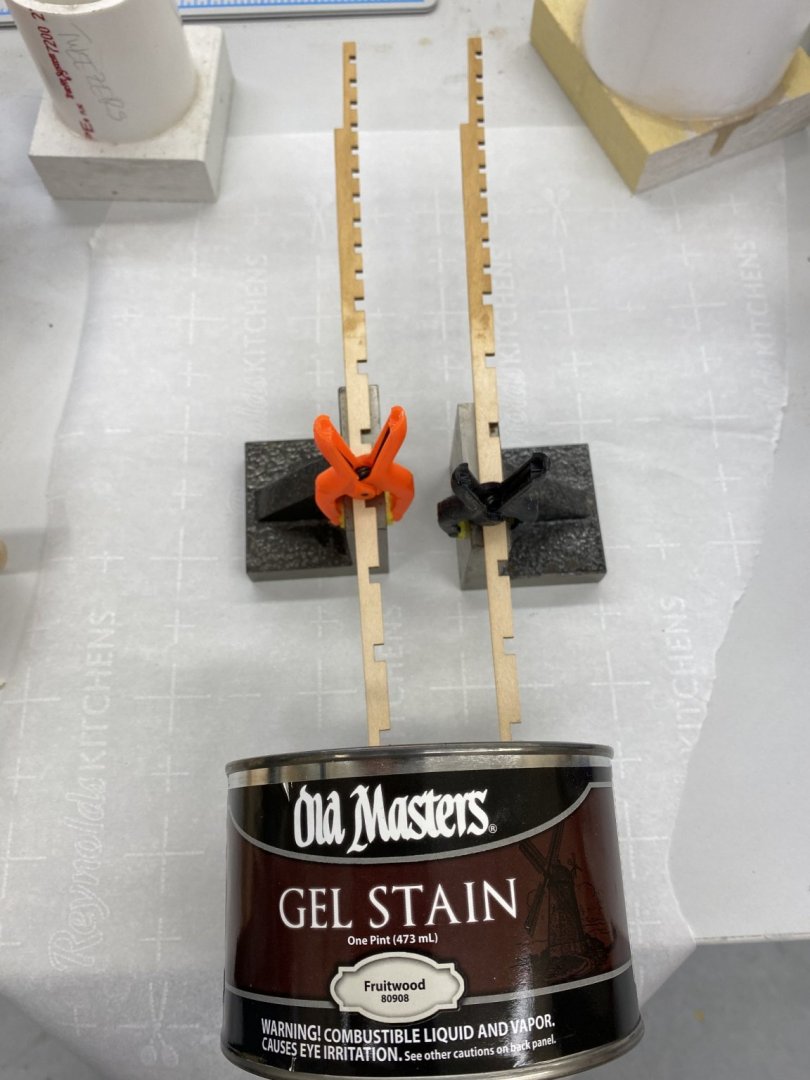
With the stern done it is on the the interior bulwarks with the stern first on the list. So here is what it looks like after I added the planking above, below and between the stern lights. Not the greatest job. Working in the confined space I split the lower two [planks under the stern light) into pieces, and still had to pre-bend them to get them to fit. With the windows in place there is really no way to clamp the one just below the windows - at least I don't have any clamps that will do that. I am still working on trying to get the seams leveled out before I put the WoP on (probably with a brush to get everything covered). I also added the sweep port and ballast port hinges on the stbd side and the eyebolt and lanyard on the ballast port. Looking ahead since I plan on using boxwood for the interior of the great cabin I took the quarterdeck deck clamps off the carrier sheet and briefly thought about trying to replicate them in boxwood. However, given the critical nature of these pieces to getting the quarterdeck beams where they need to be I decided against it and decided to use the fruitwood gel stain that has been identified by others as the "stain of choice" for getting basswood to look like boxwood. So I stained the portion of the quarterdeck deck clamps that will be in the great cabin using that. I intend to use a wood sealer on the non-boxwood plan king to (hopefully) have an easier time getting a smooth finish when I paint them red. Here are the deck clamps drying and the stain I used.
- 370 replies
-
- 3
-
-
- Model Shipways
- Confederacy
- (and 1 more)
-
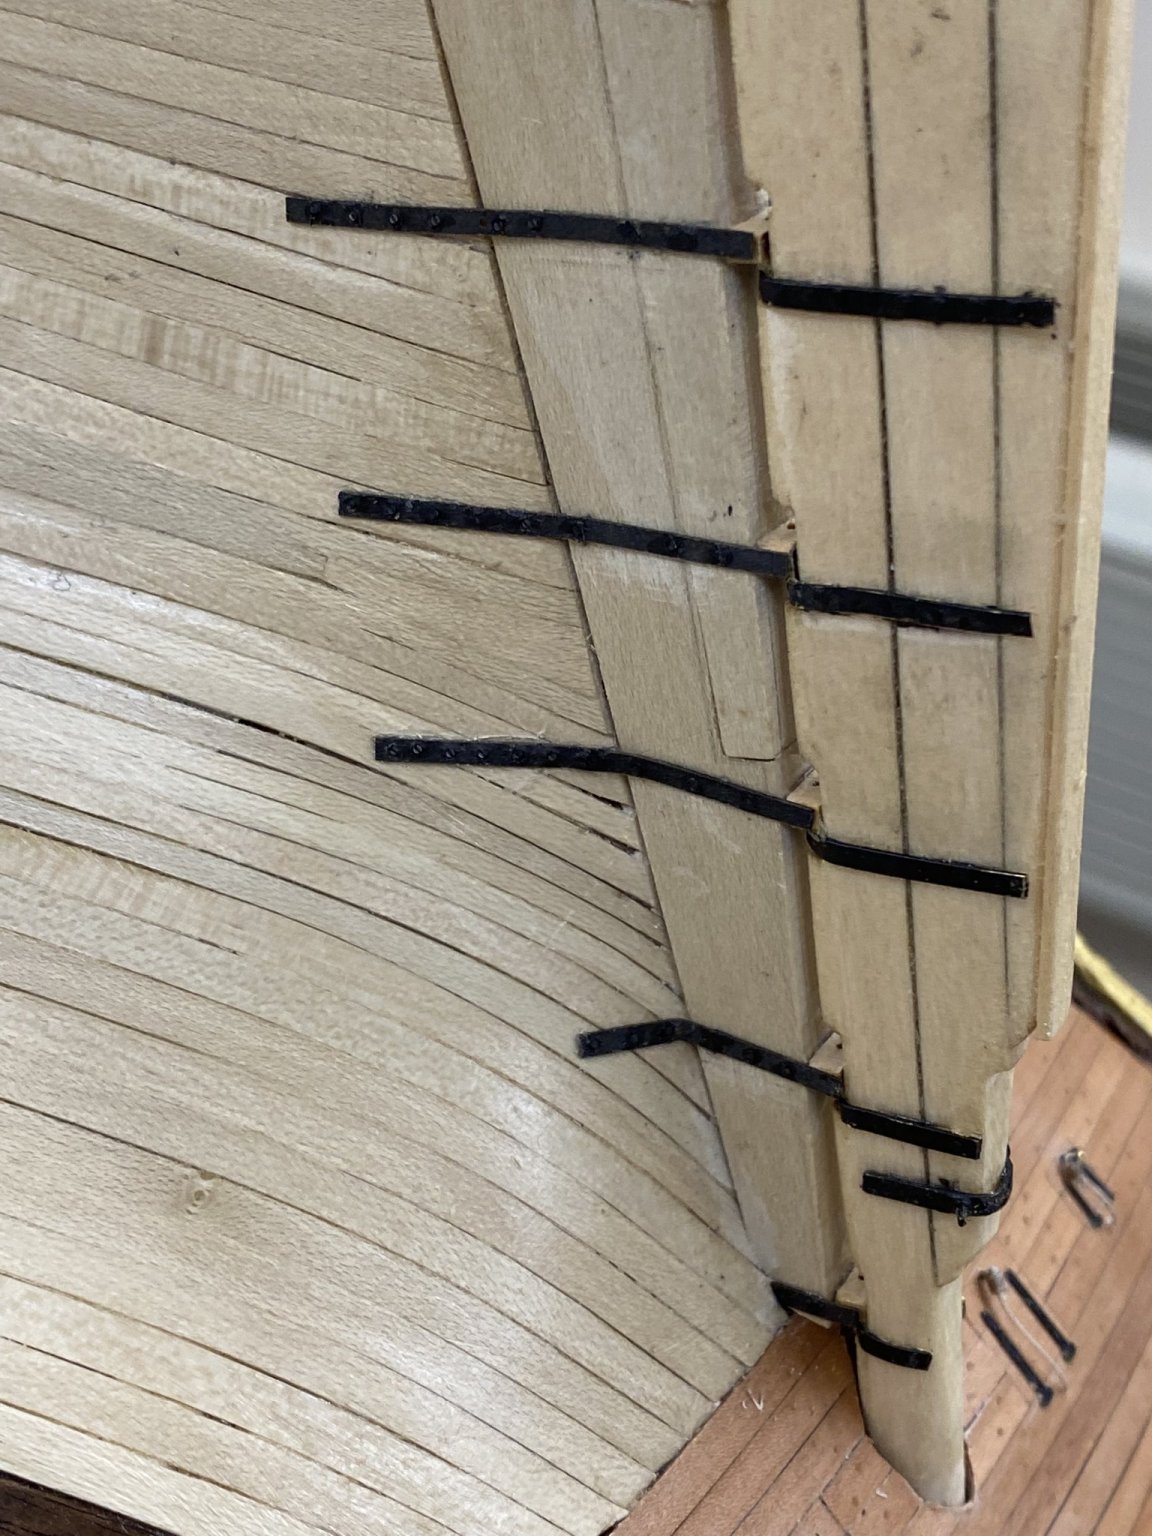
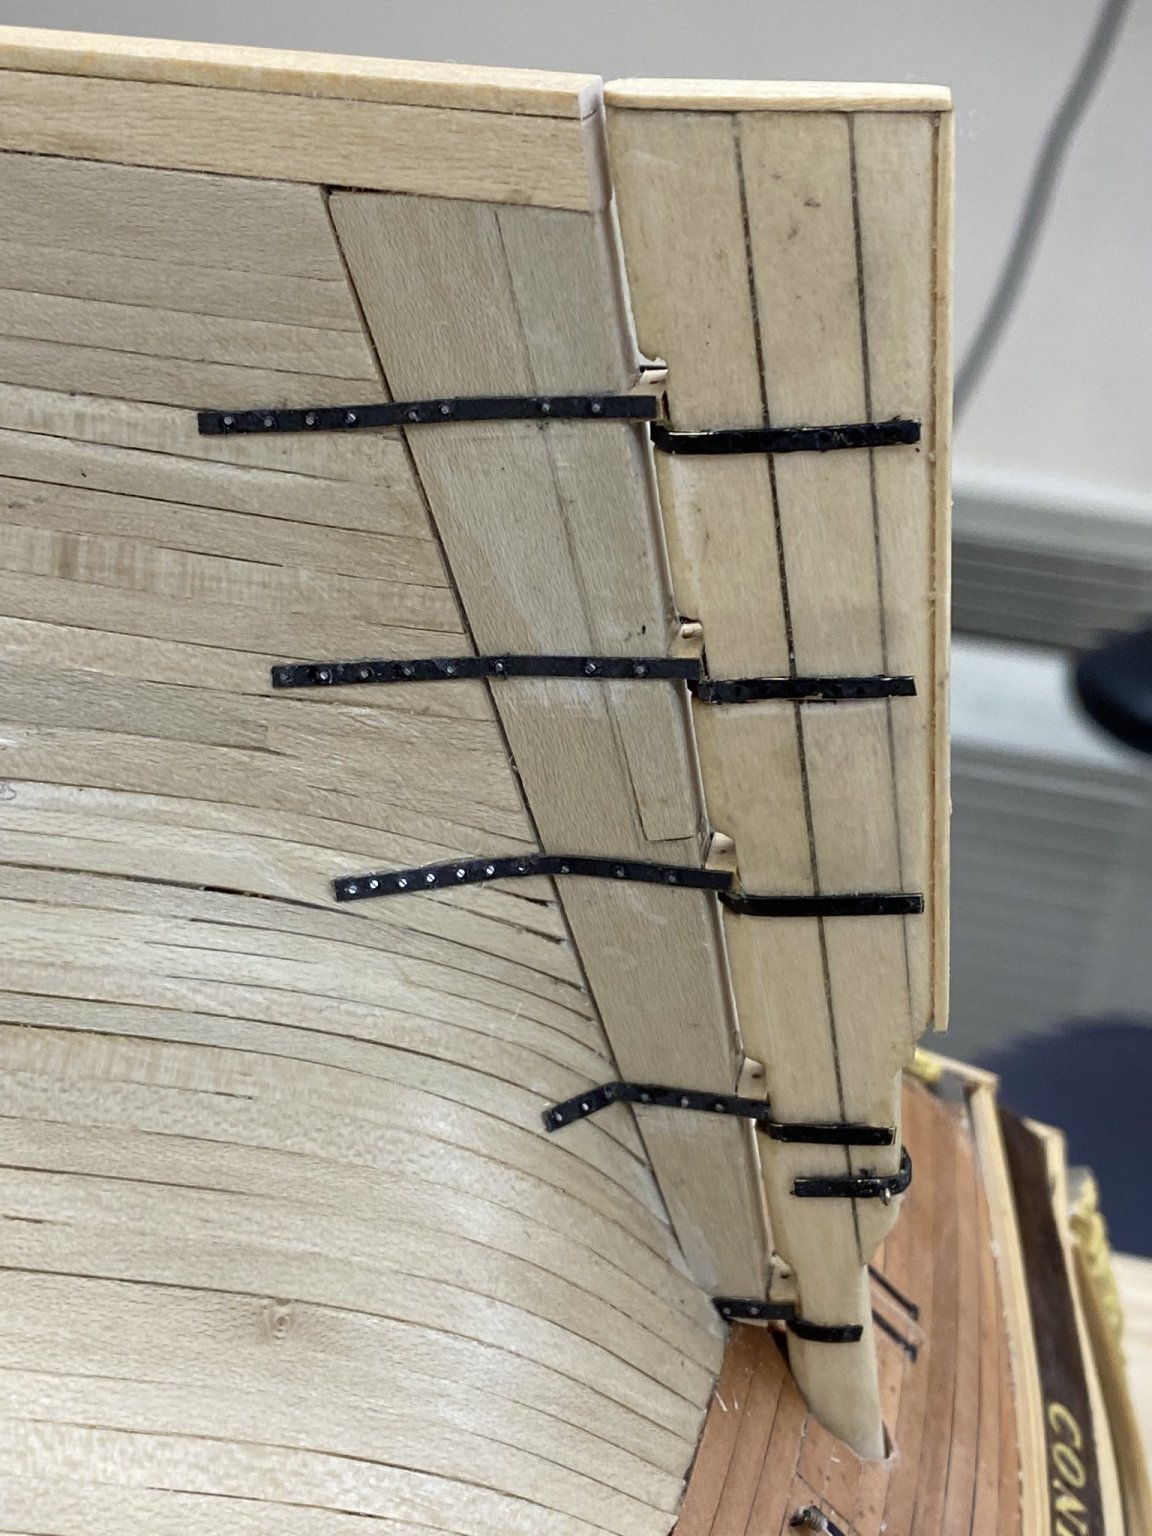
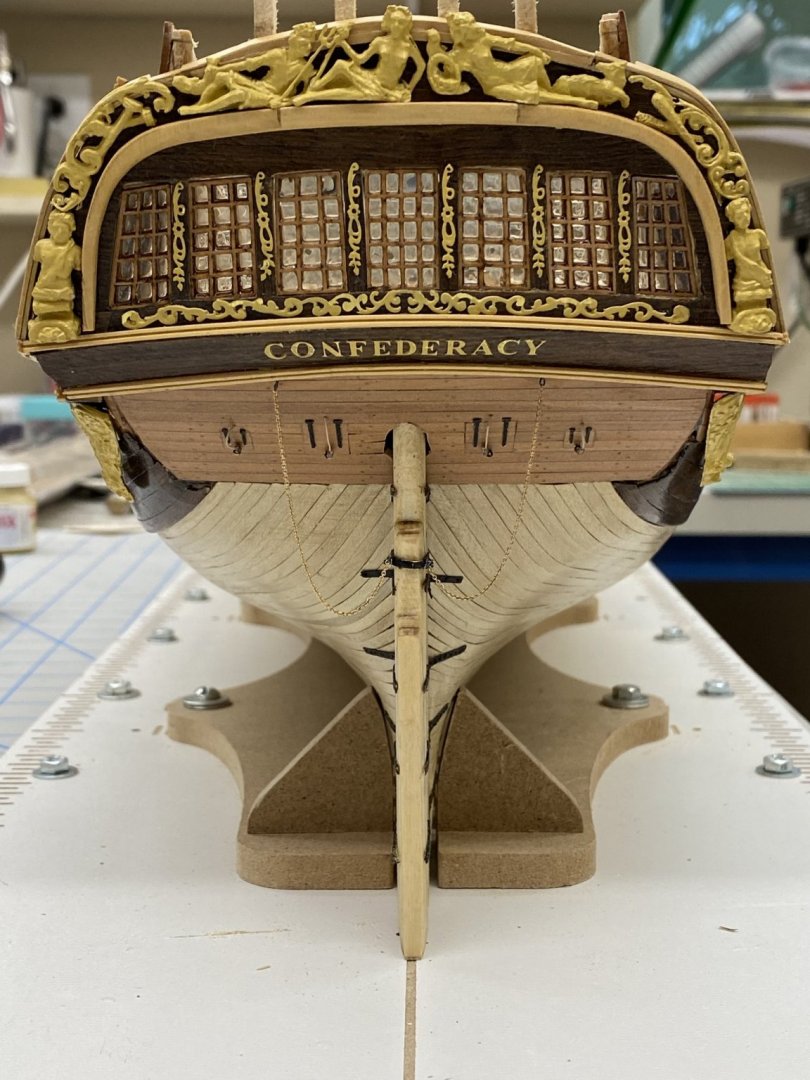
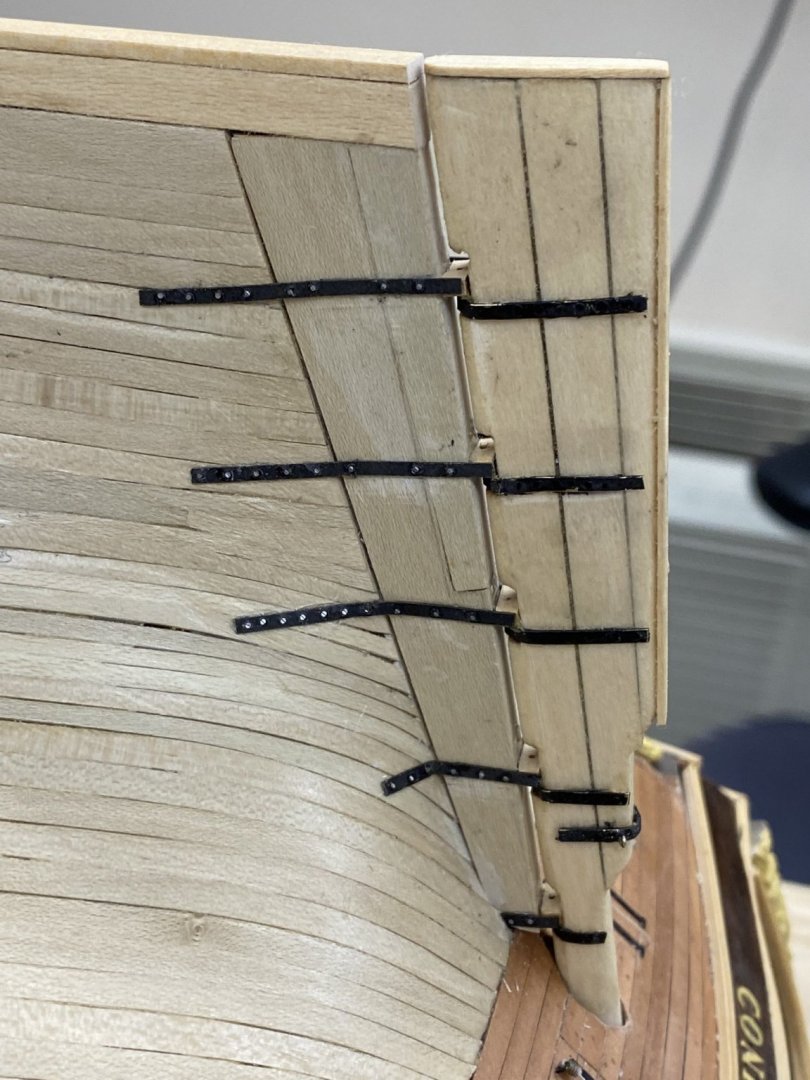
I am declaring the stern "done". I installed the gudgeons and following the Syren instructions drilled holes in the laserboard gudgeons and put a short piece of 28ga wire in the hole with a very small dot of medium CA. When that dried I cut the wire off as close to the gudgeons as possible. Here is what the stbd side looked like at that point. Then a spot of flat black enamel (water based paints don't seem to work as well here) on each "bolt head and... I added the eyebolts for the rudder preventer and attached lengths of chain (brass in this case - but it will turn dark in short order). I put the hull back in the other build board and then attached the chains to the spectacle plate and stern is DONE! At least on the outside. (I may try and do something about the burn marks on the back of the rudder. I wonder why I did not notice them until now??? Now for the internal bulwarks

- 370 replies
-
- 4
-
-
- Model Shipways
- Confederacy
- (and 1 more)
-
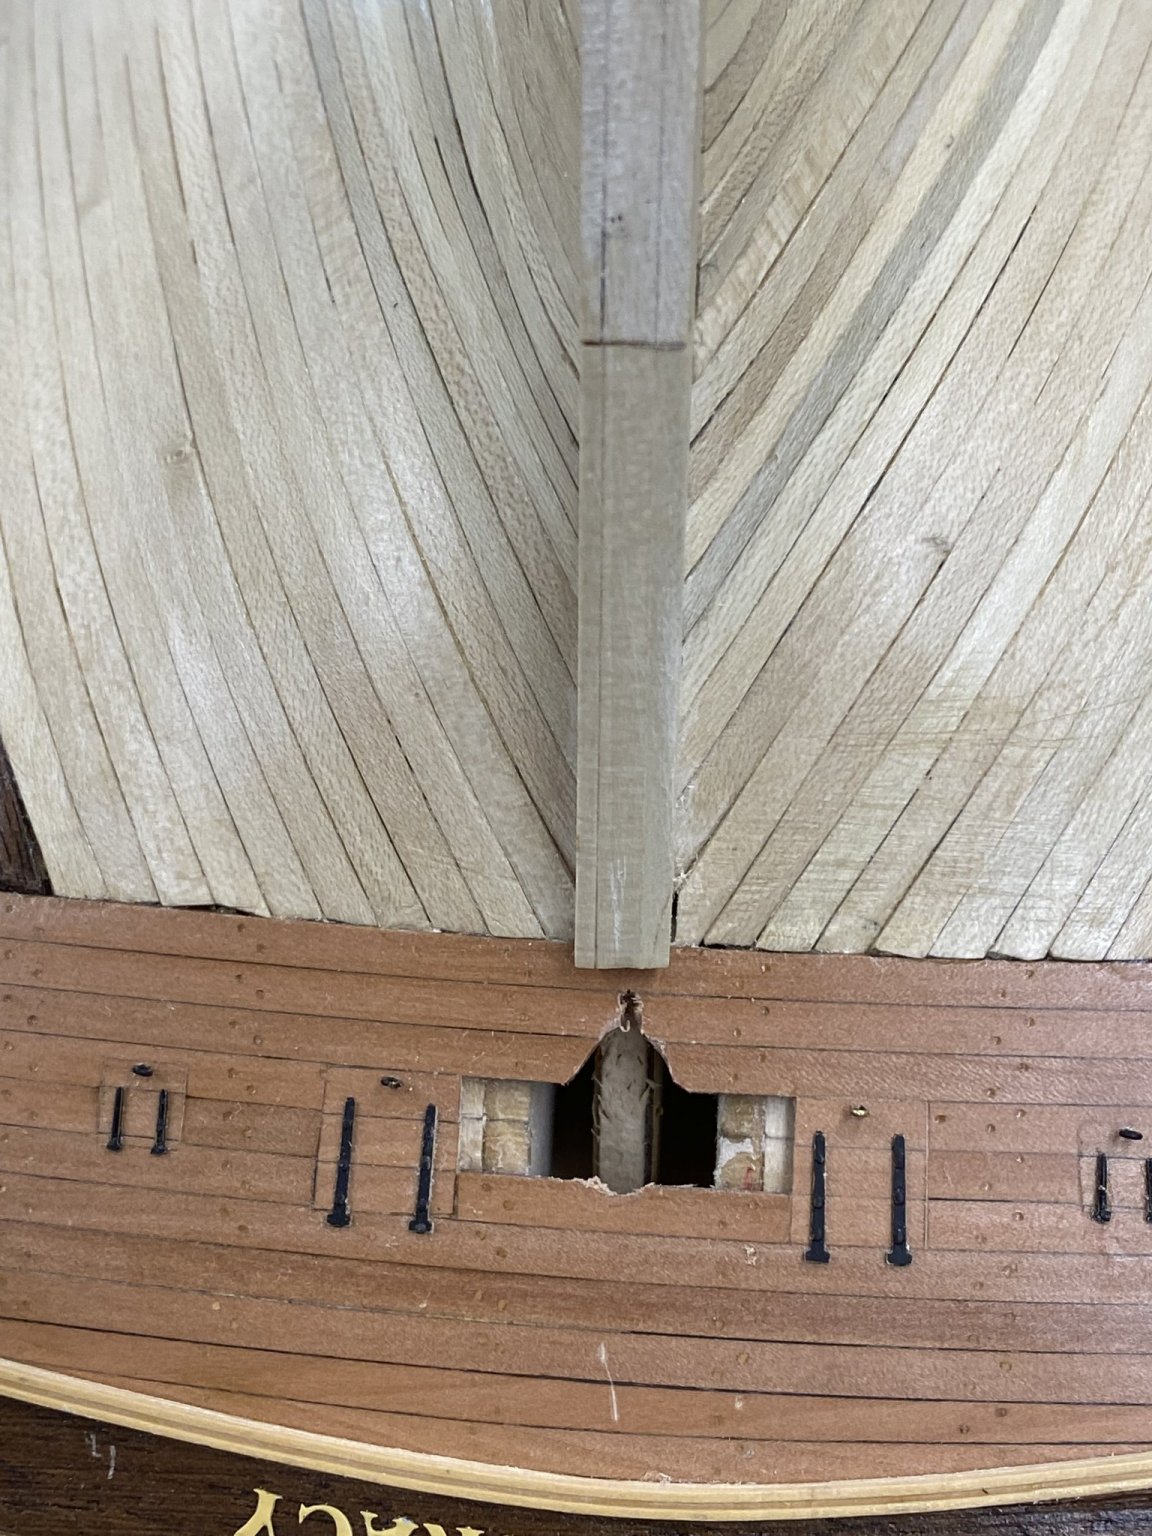
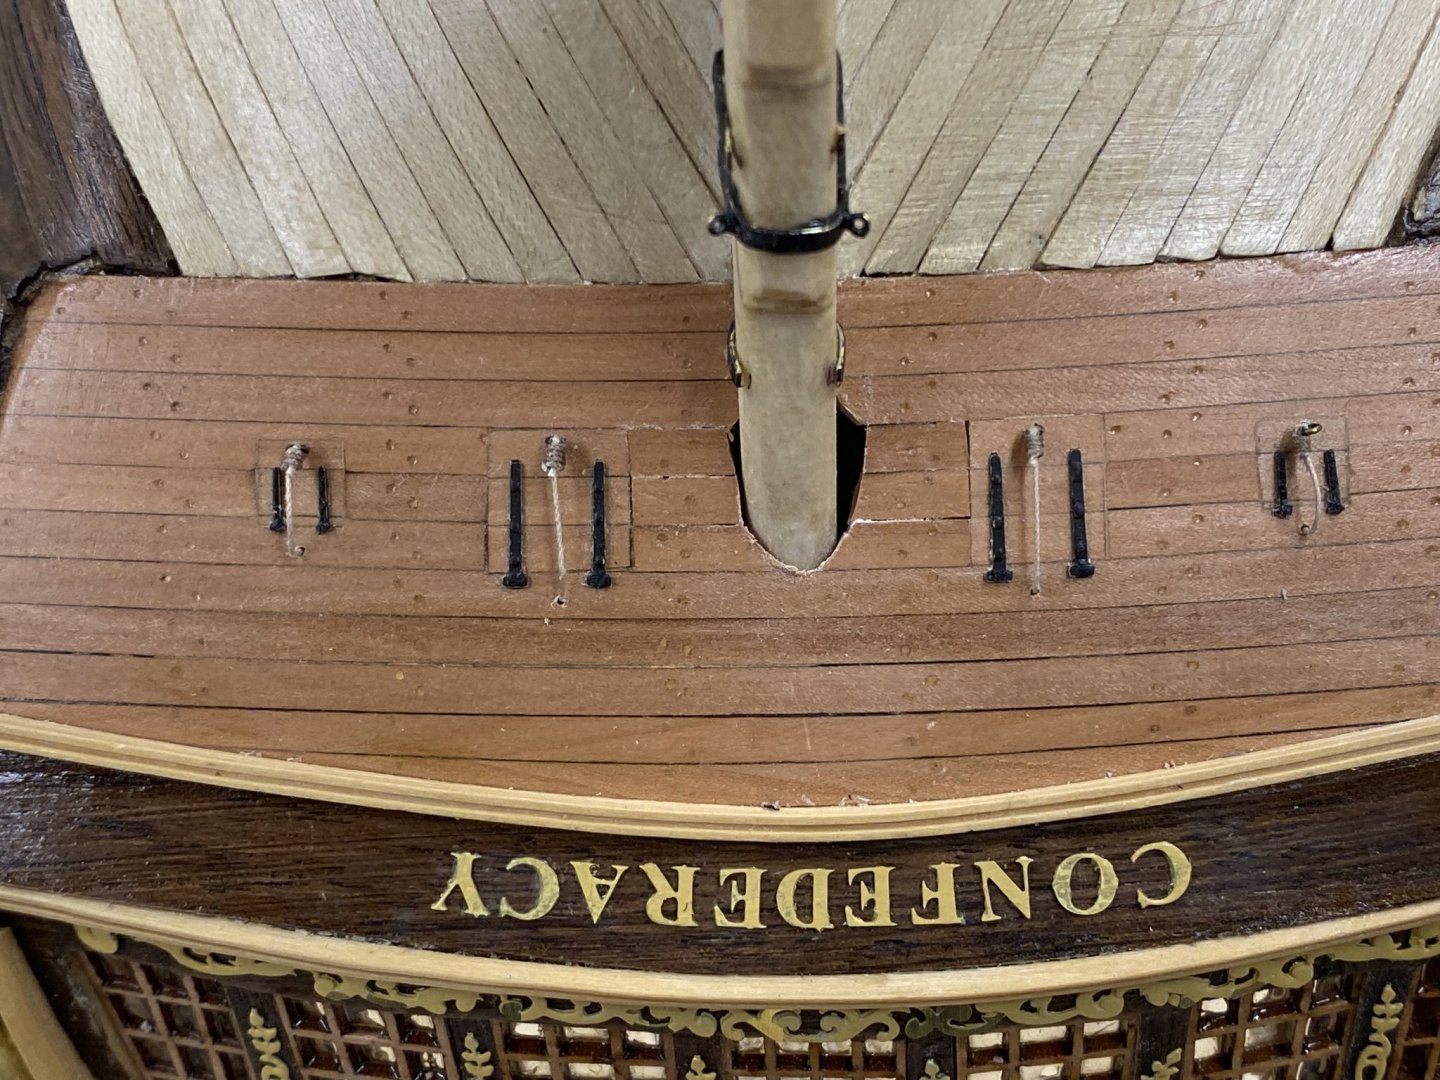
While I had the hull inverted and was messing around with the rudder I decided to add the lanyards for the stern ports. I have no idea what they might have used these ports for (garbage disposal?) but the drawings show the holes for the lanyards so I decided to rig them. Clearly I could have done a better job on the rudder post opening but it will be really hard to see that on the finished model so I am inclined to not try and do anything about it at this point.
- 370 replies
-
- 4
-
-
- Model Shipways
- Confederacy
- (and 1 more)
-
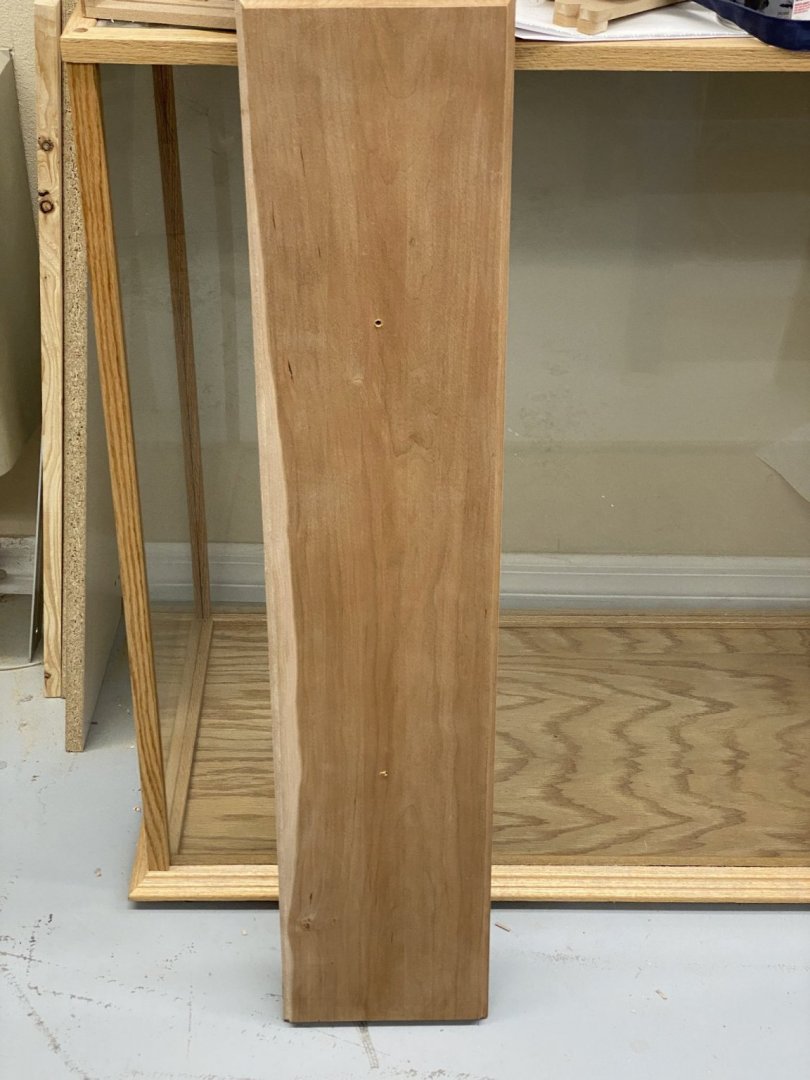
With the hull inverted and the display board already here I decide to drill the holes in the board and then mark and drill pilot holes for the display pedestals in the keel now rather than trying to perform some unnatural sex act to get them done later. Here is the display board (interesting piece of wood) and the keel holes.

- 370 replies
-
- 2
-
-
- Model Shipways
- Confederacy
- (and 1 more)
-
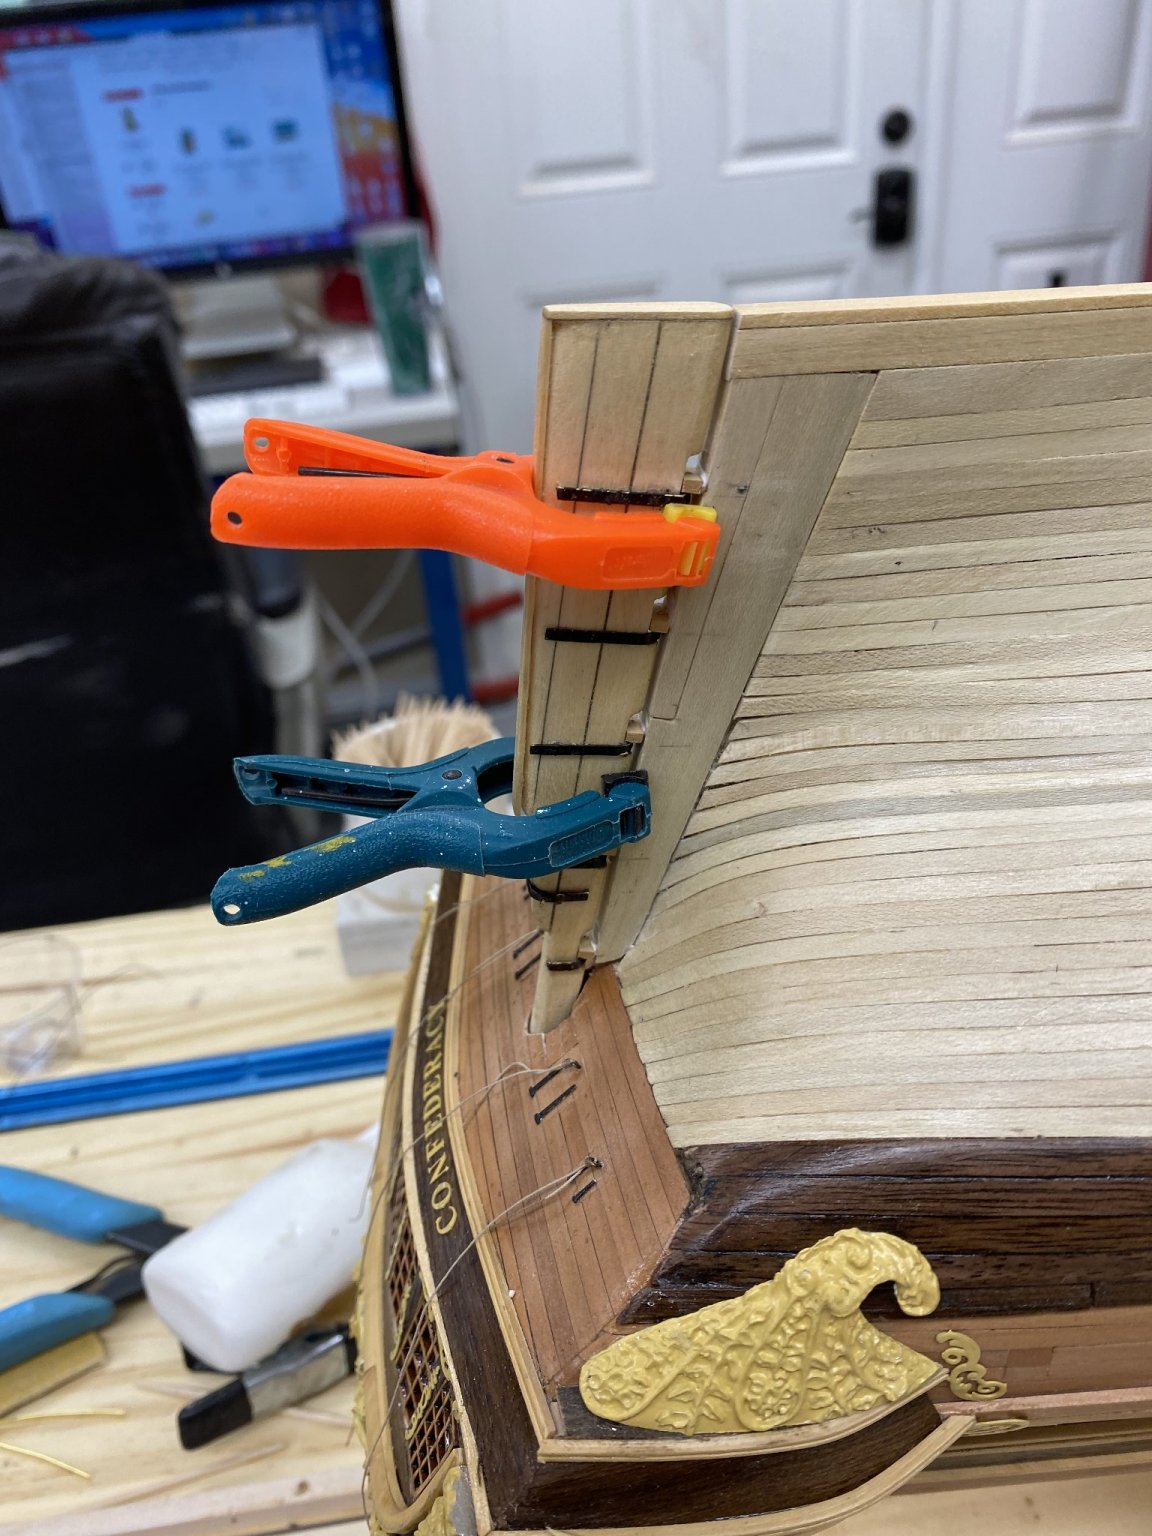
Thanks Tim - I had to figure something as I had absolutely no luck creating something similar to what is provided in the kit from boxwood. After creating the gudgeons from the brass strip included with the kit I found (while looking for something else) a pintel/gudgeon "kit" from Syren. This uses a wooden block (with a hole for the "pin") to replace the "notch" that I was having a hard time creating in the brass. Since I have no real interest in having the rudder capable of moving I decided to create similar wooden blocks for this model. The Syren supplied ones are a bit too narrow to fit all the way to the edge of the 1/4" wide Confederacy rudder. These blocks provide a surface (five surfaces actually) to allow me to glue the rudder to the stern post. Once that is mset I can fabricate the gudgeon "runners" from the brass strip or use the "laserboard" ones that come with the Syren "kit". Here is the rudder glued in position. The clamps are (hopefully) keeping in lined up with the stern post.

- 370 replies
-
- 2
-
-
- Model Shipways
- Confederacy
- (and 1 more)
-
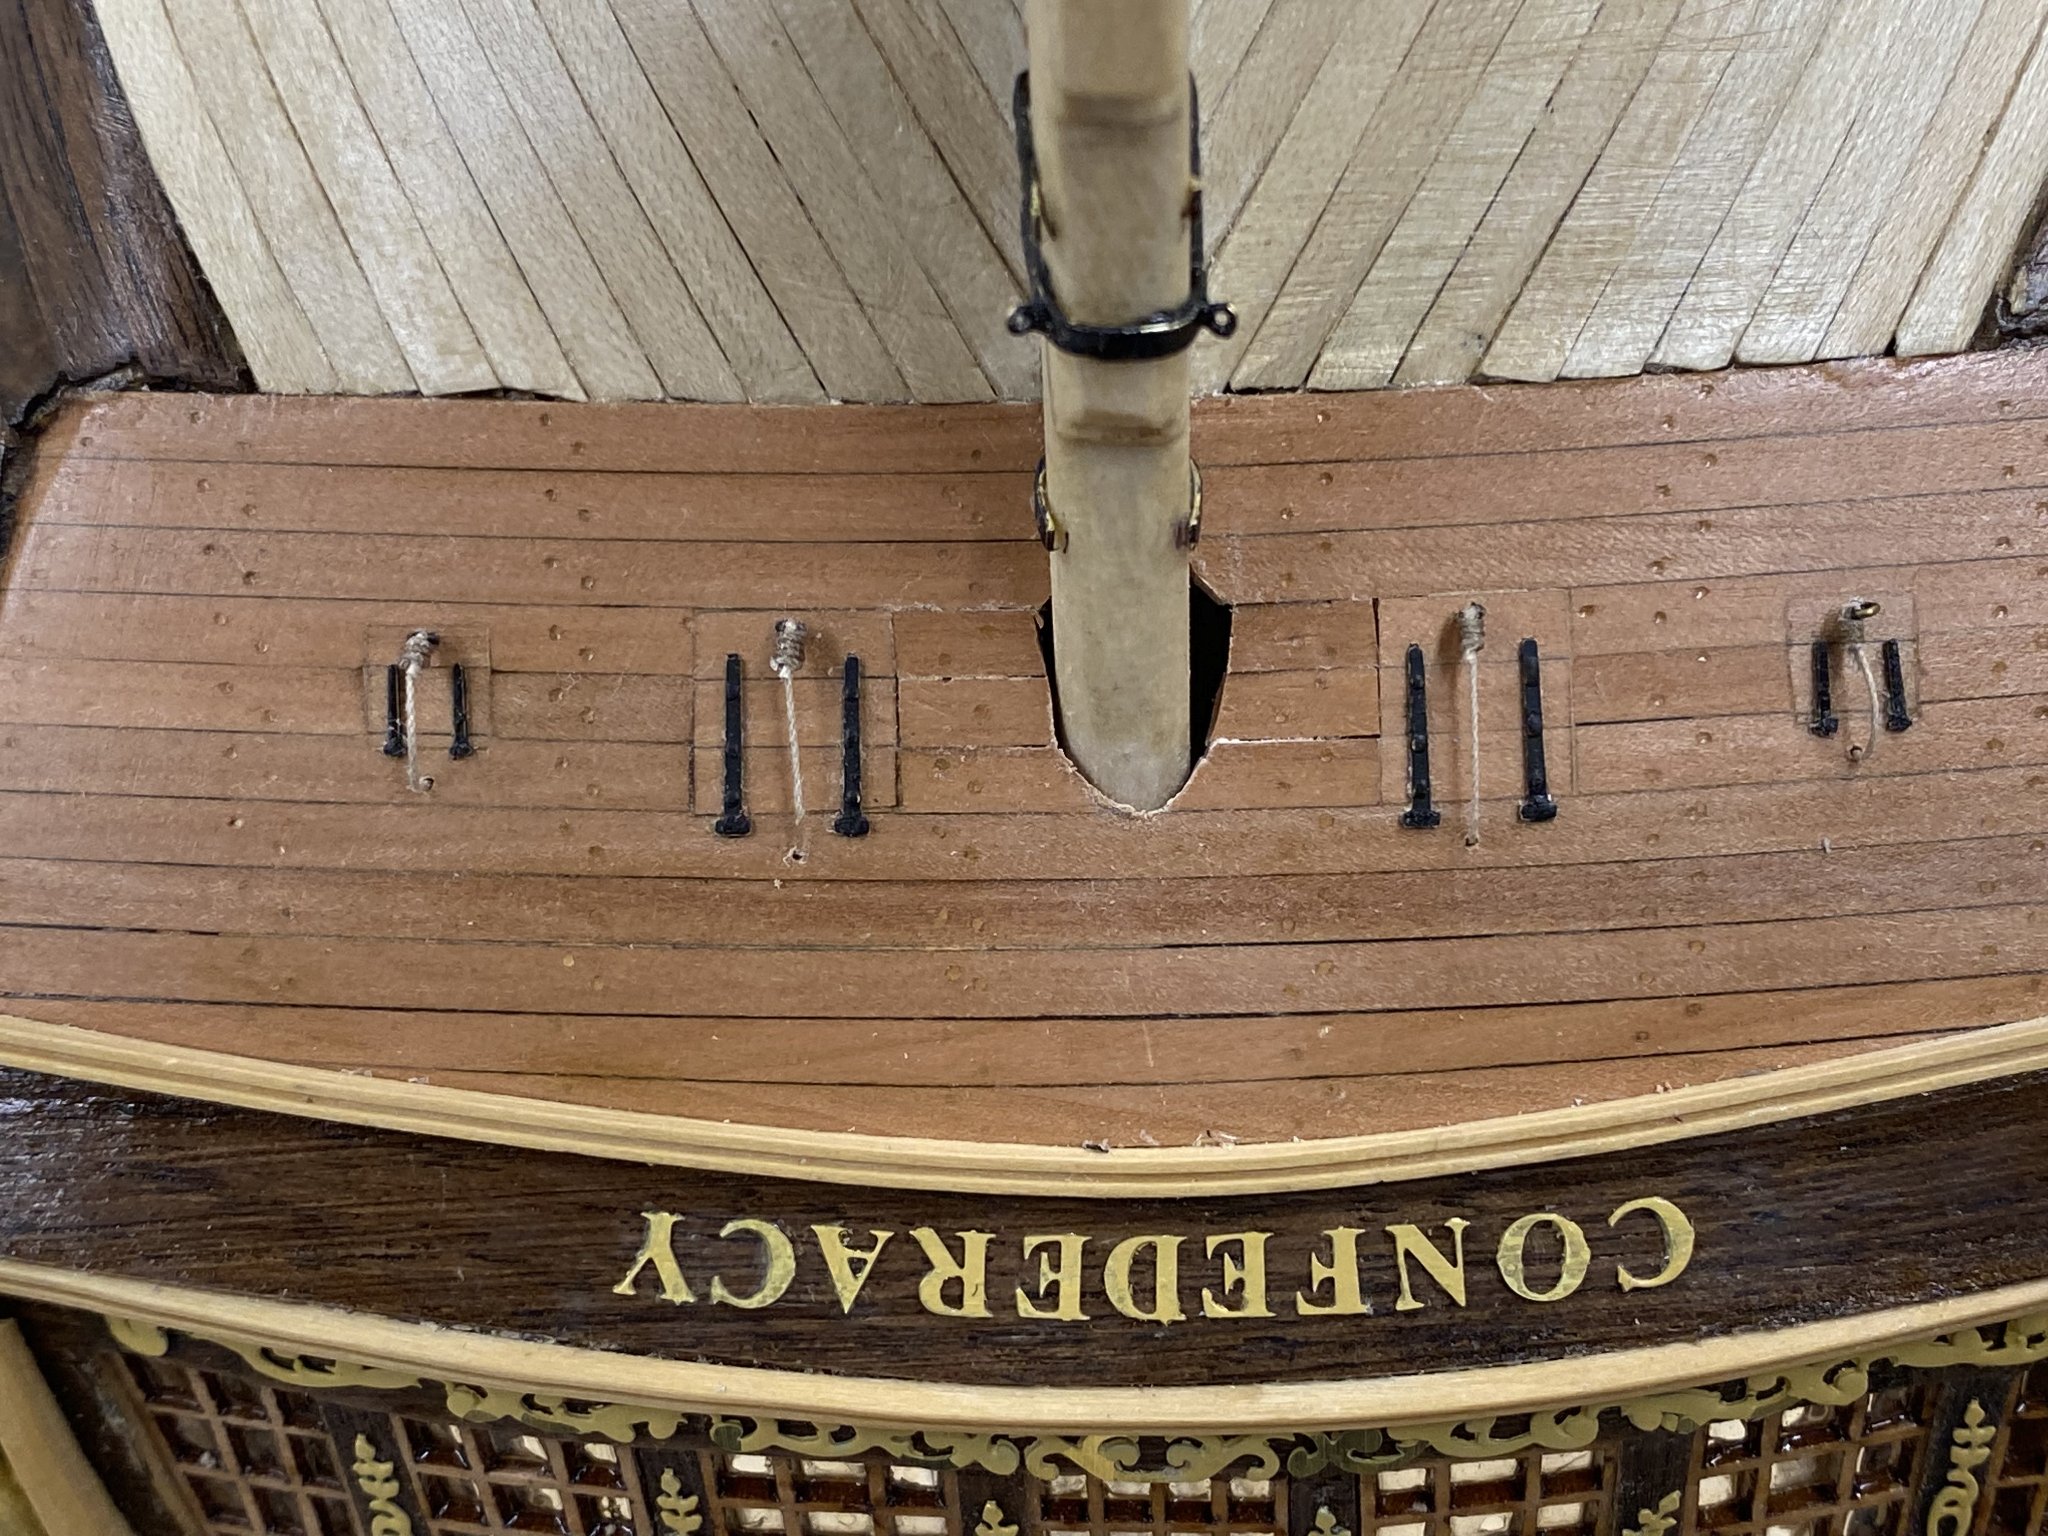
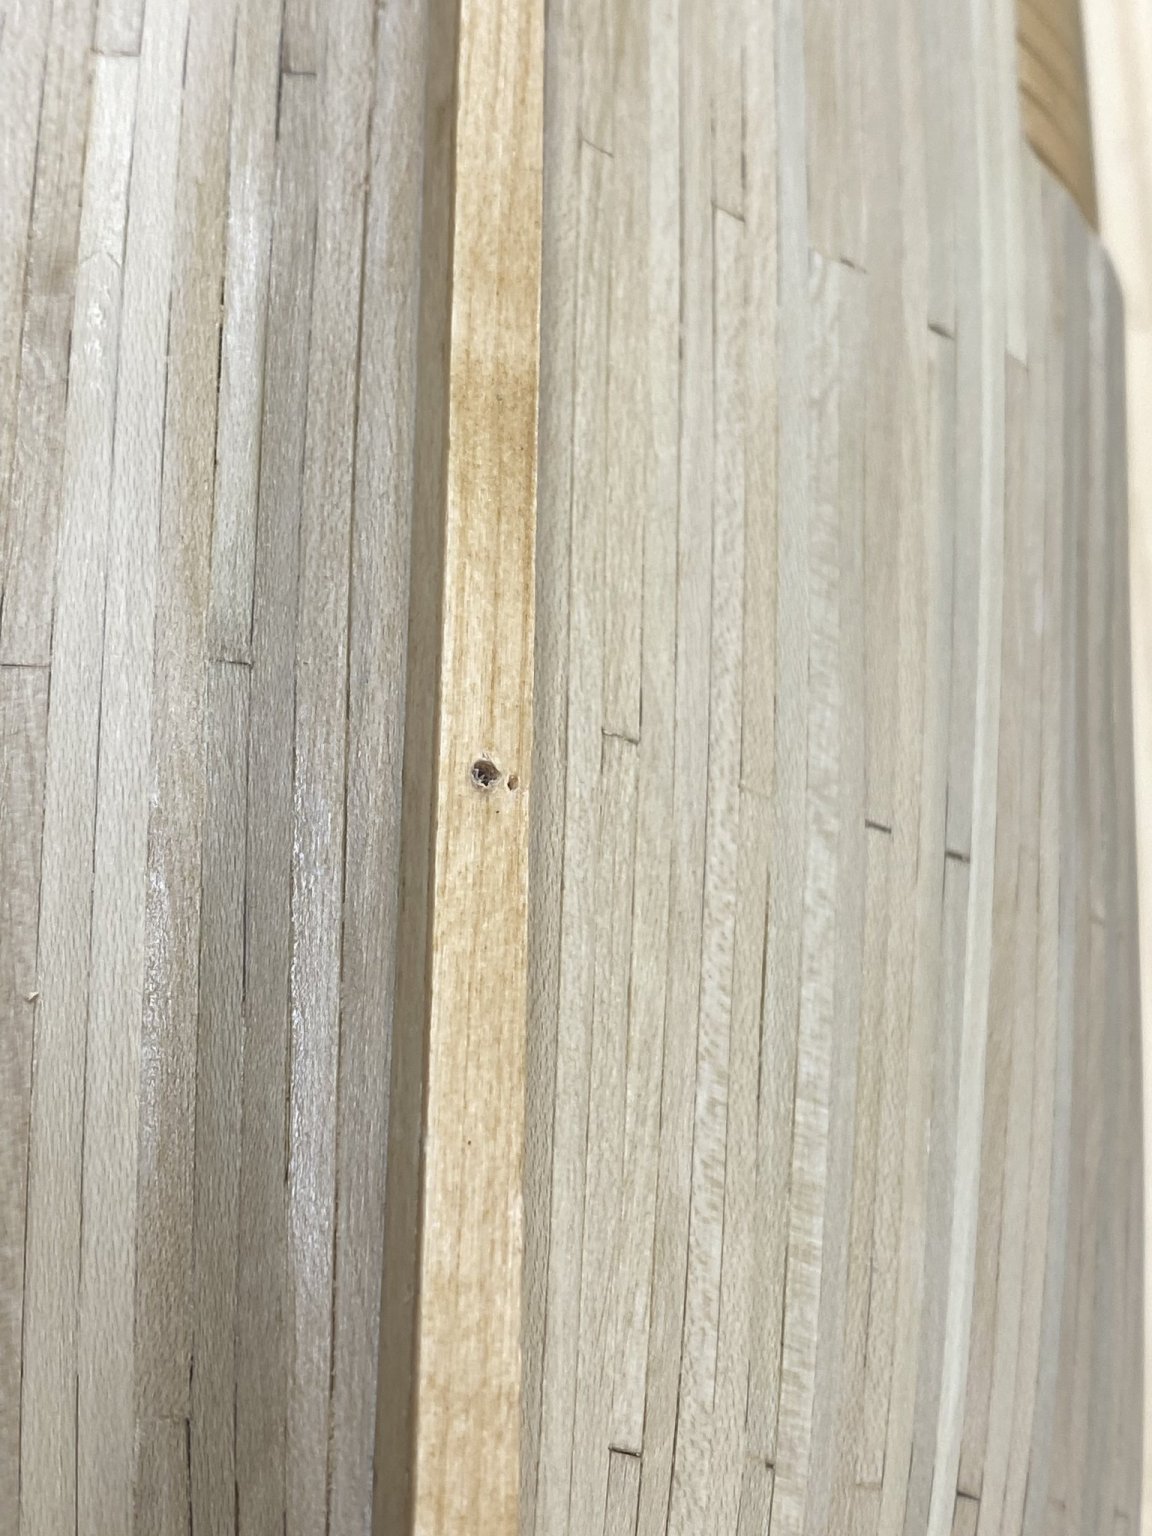
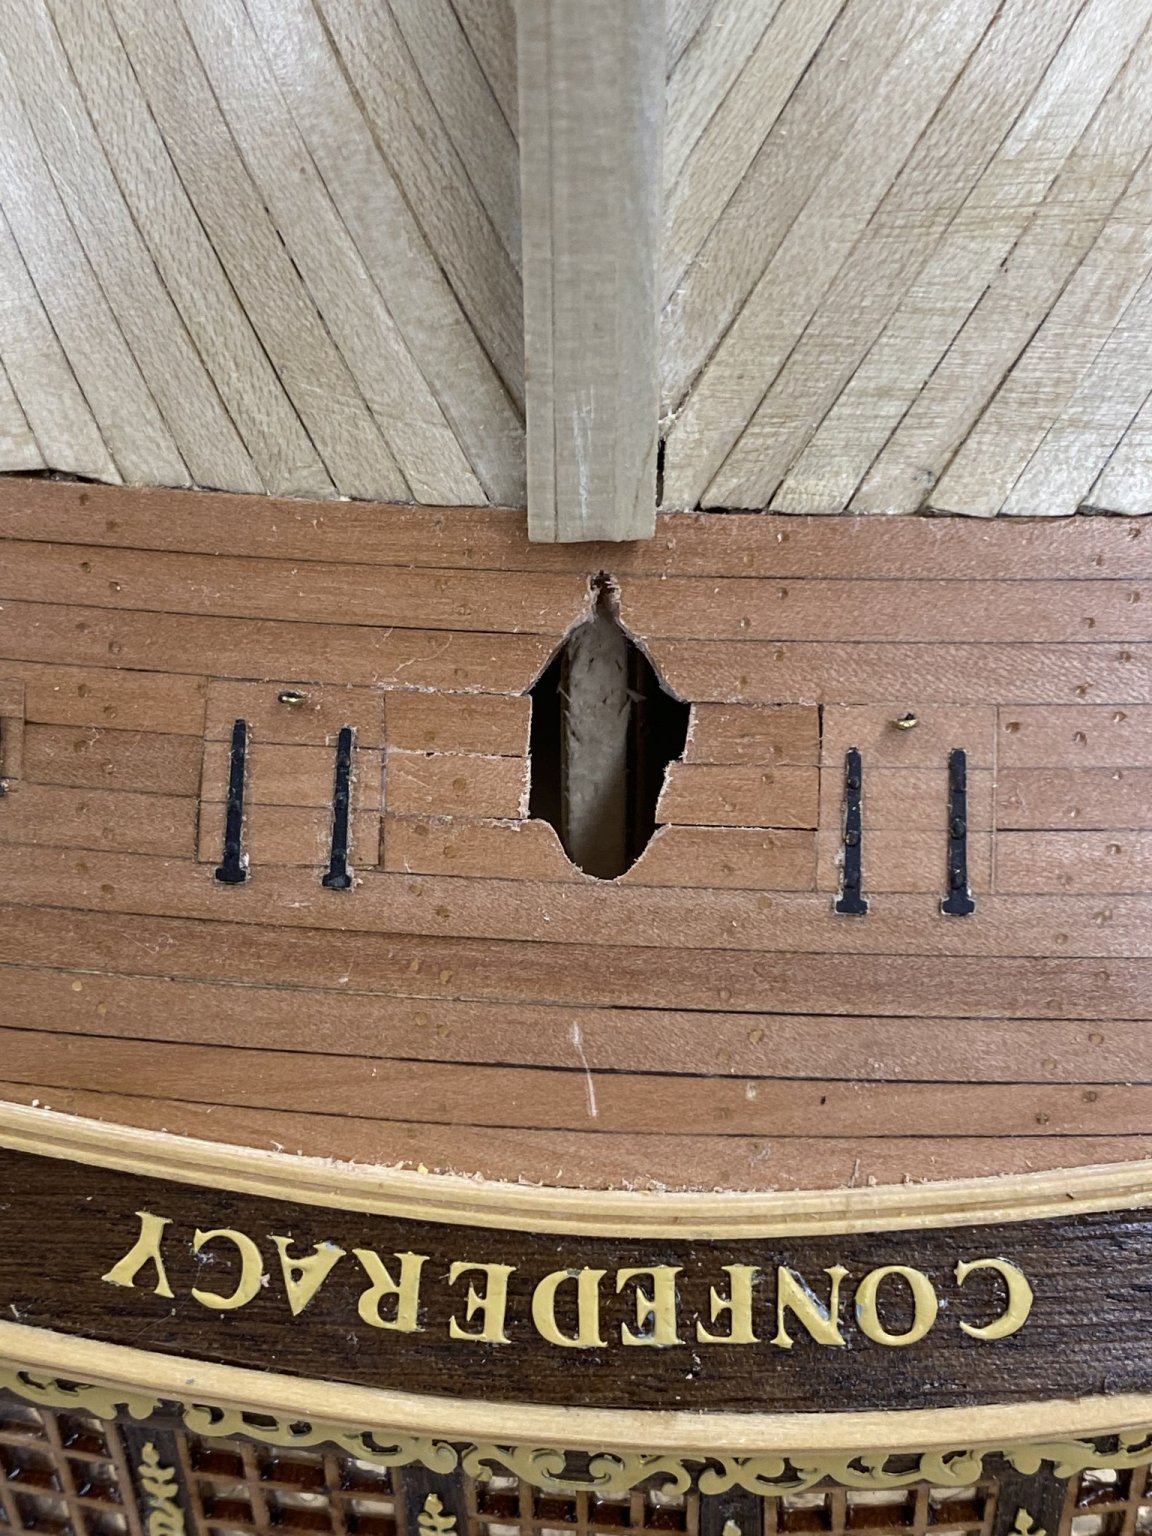
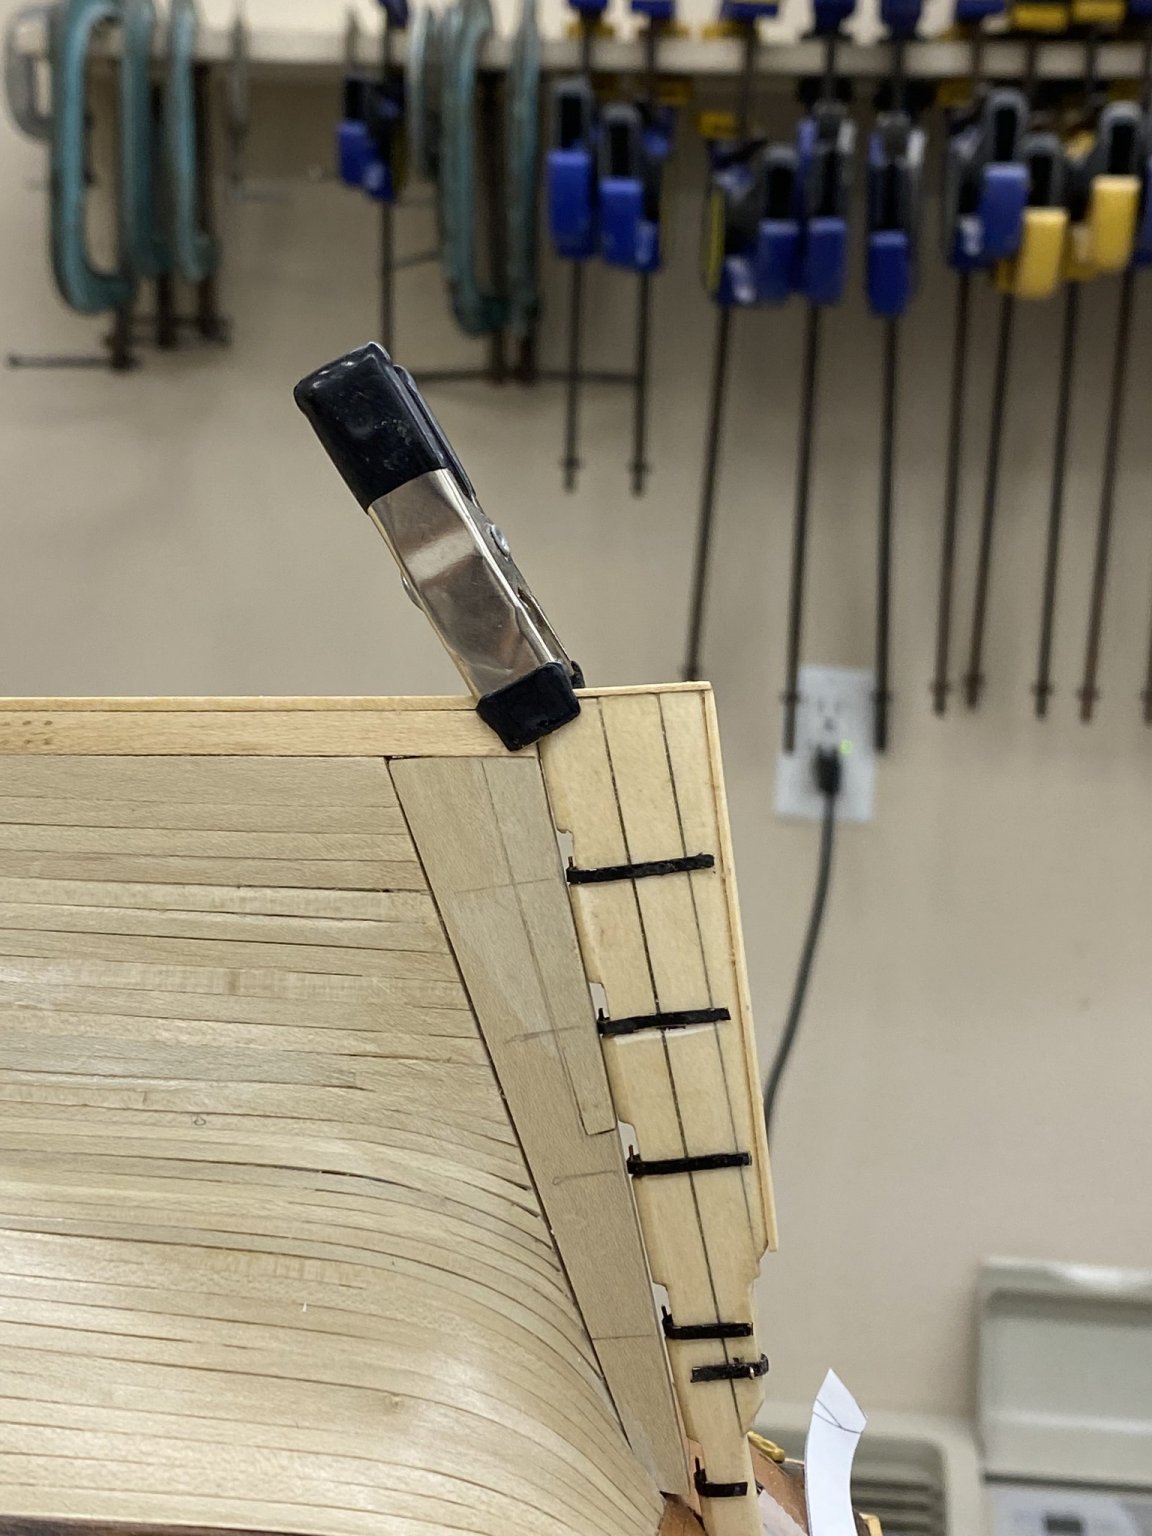
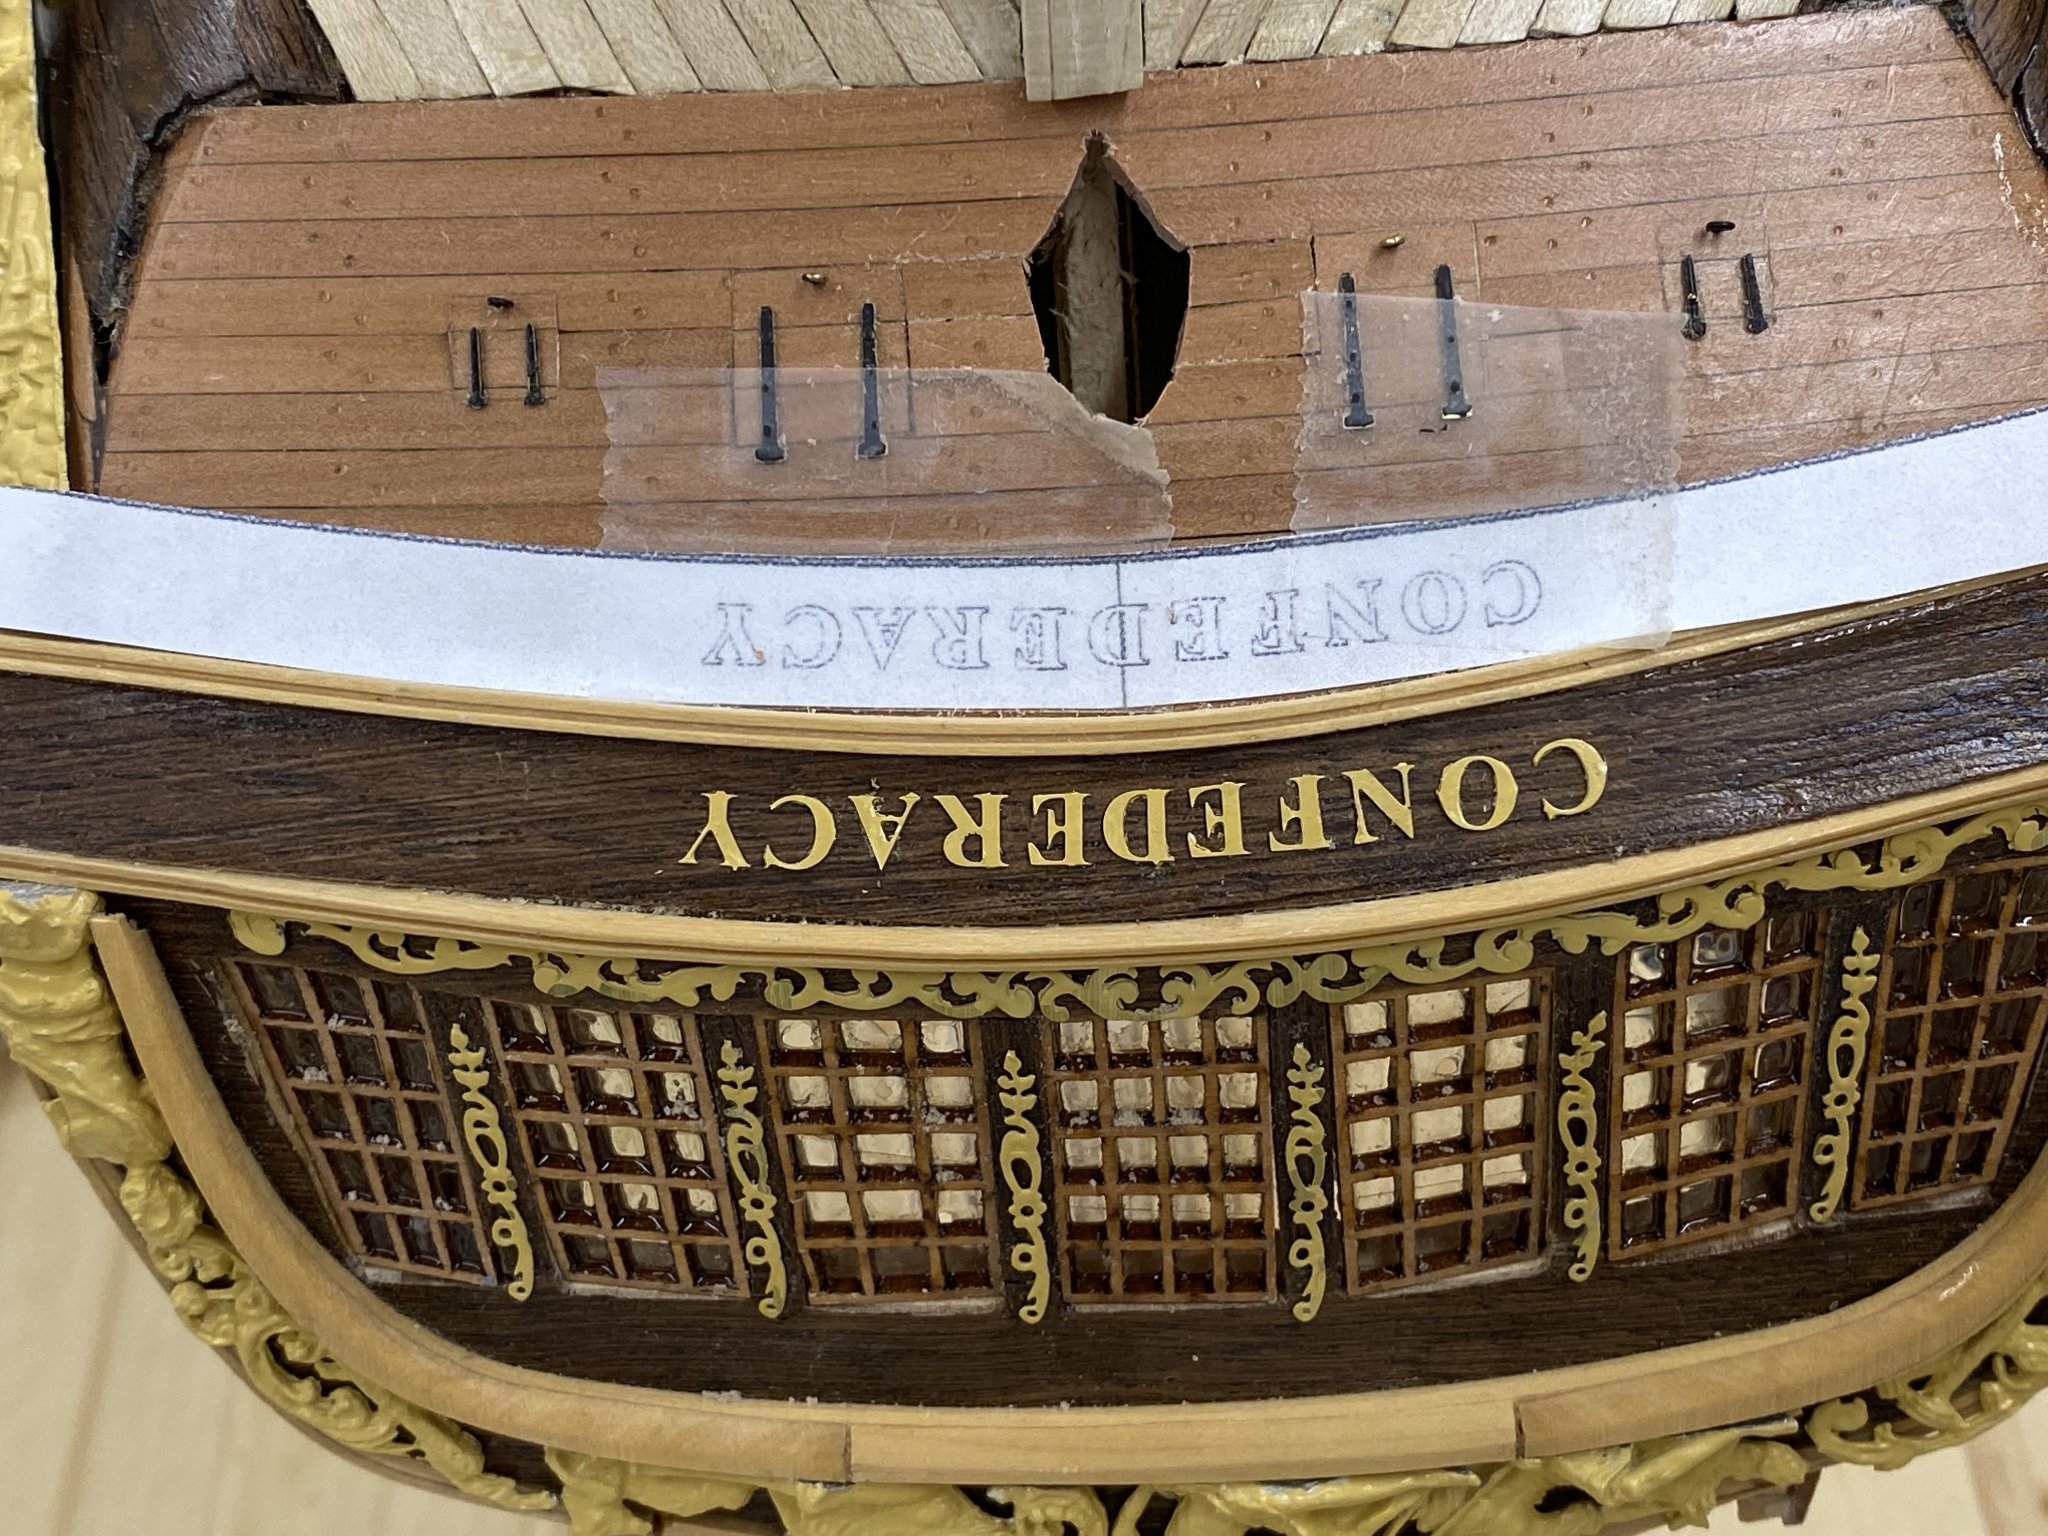
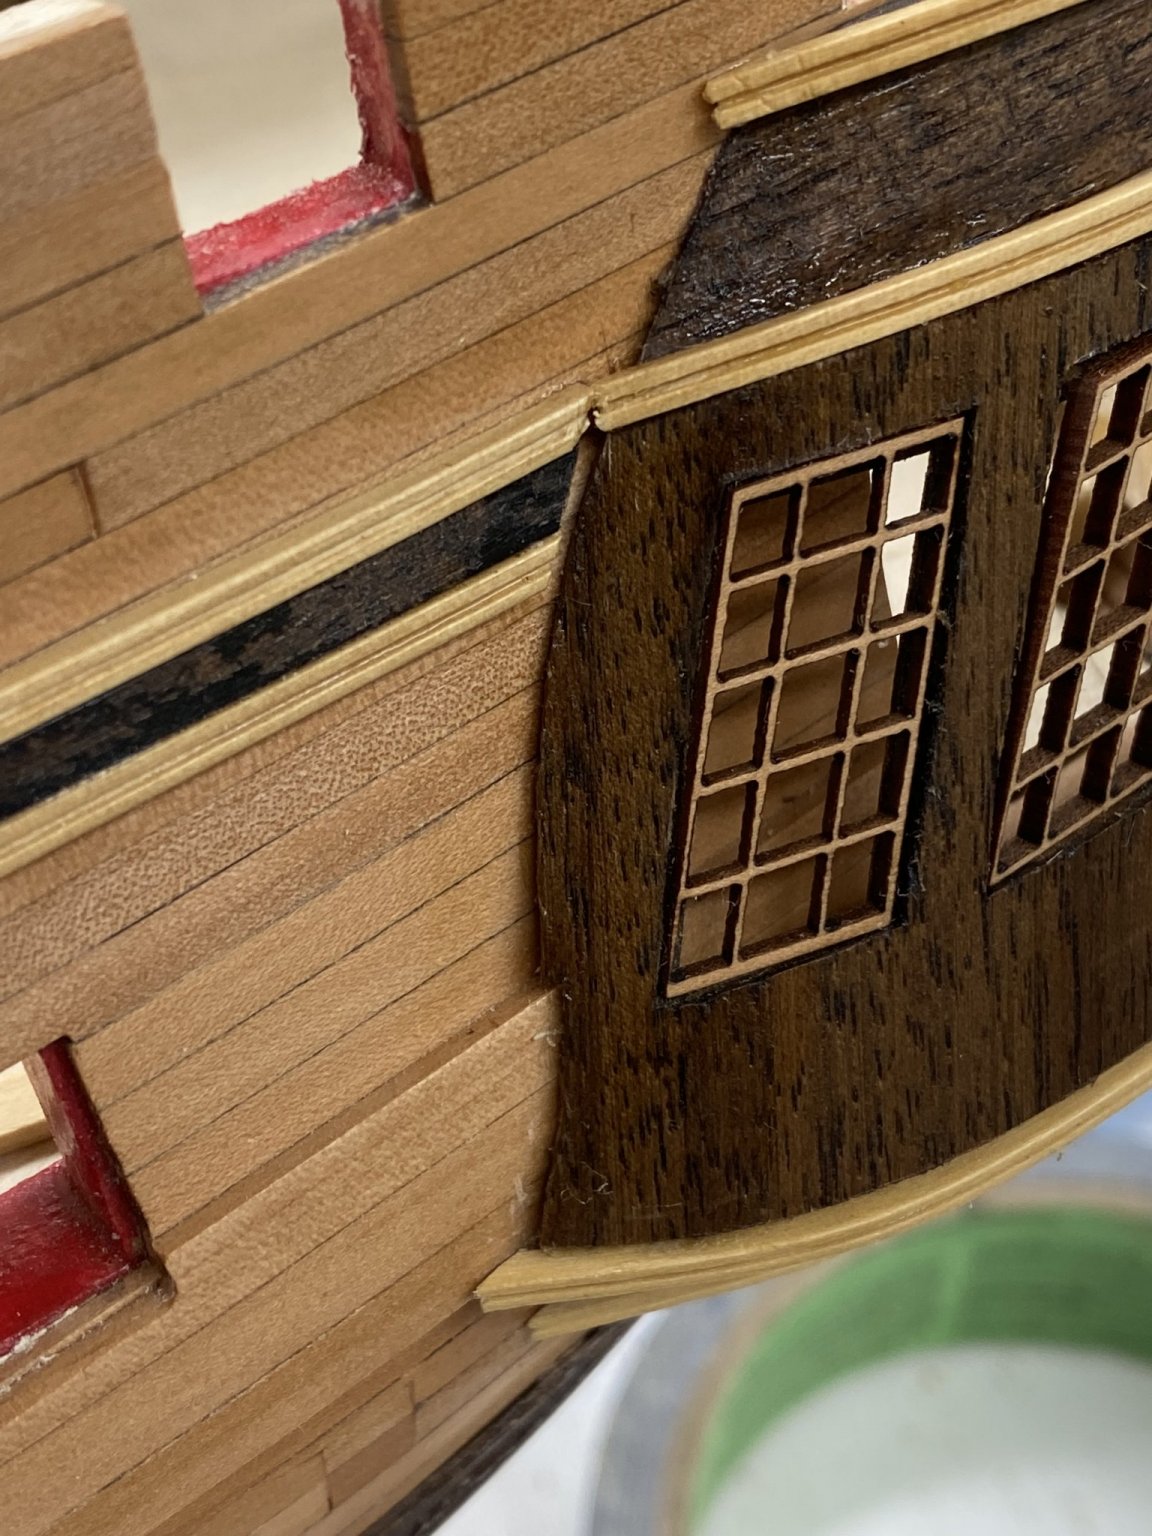
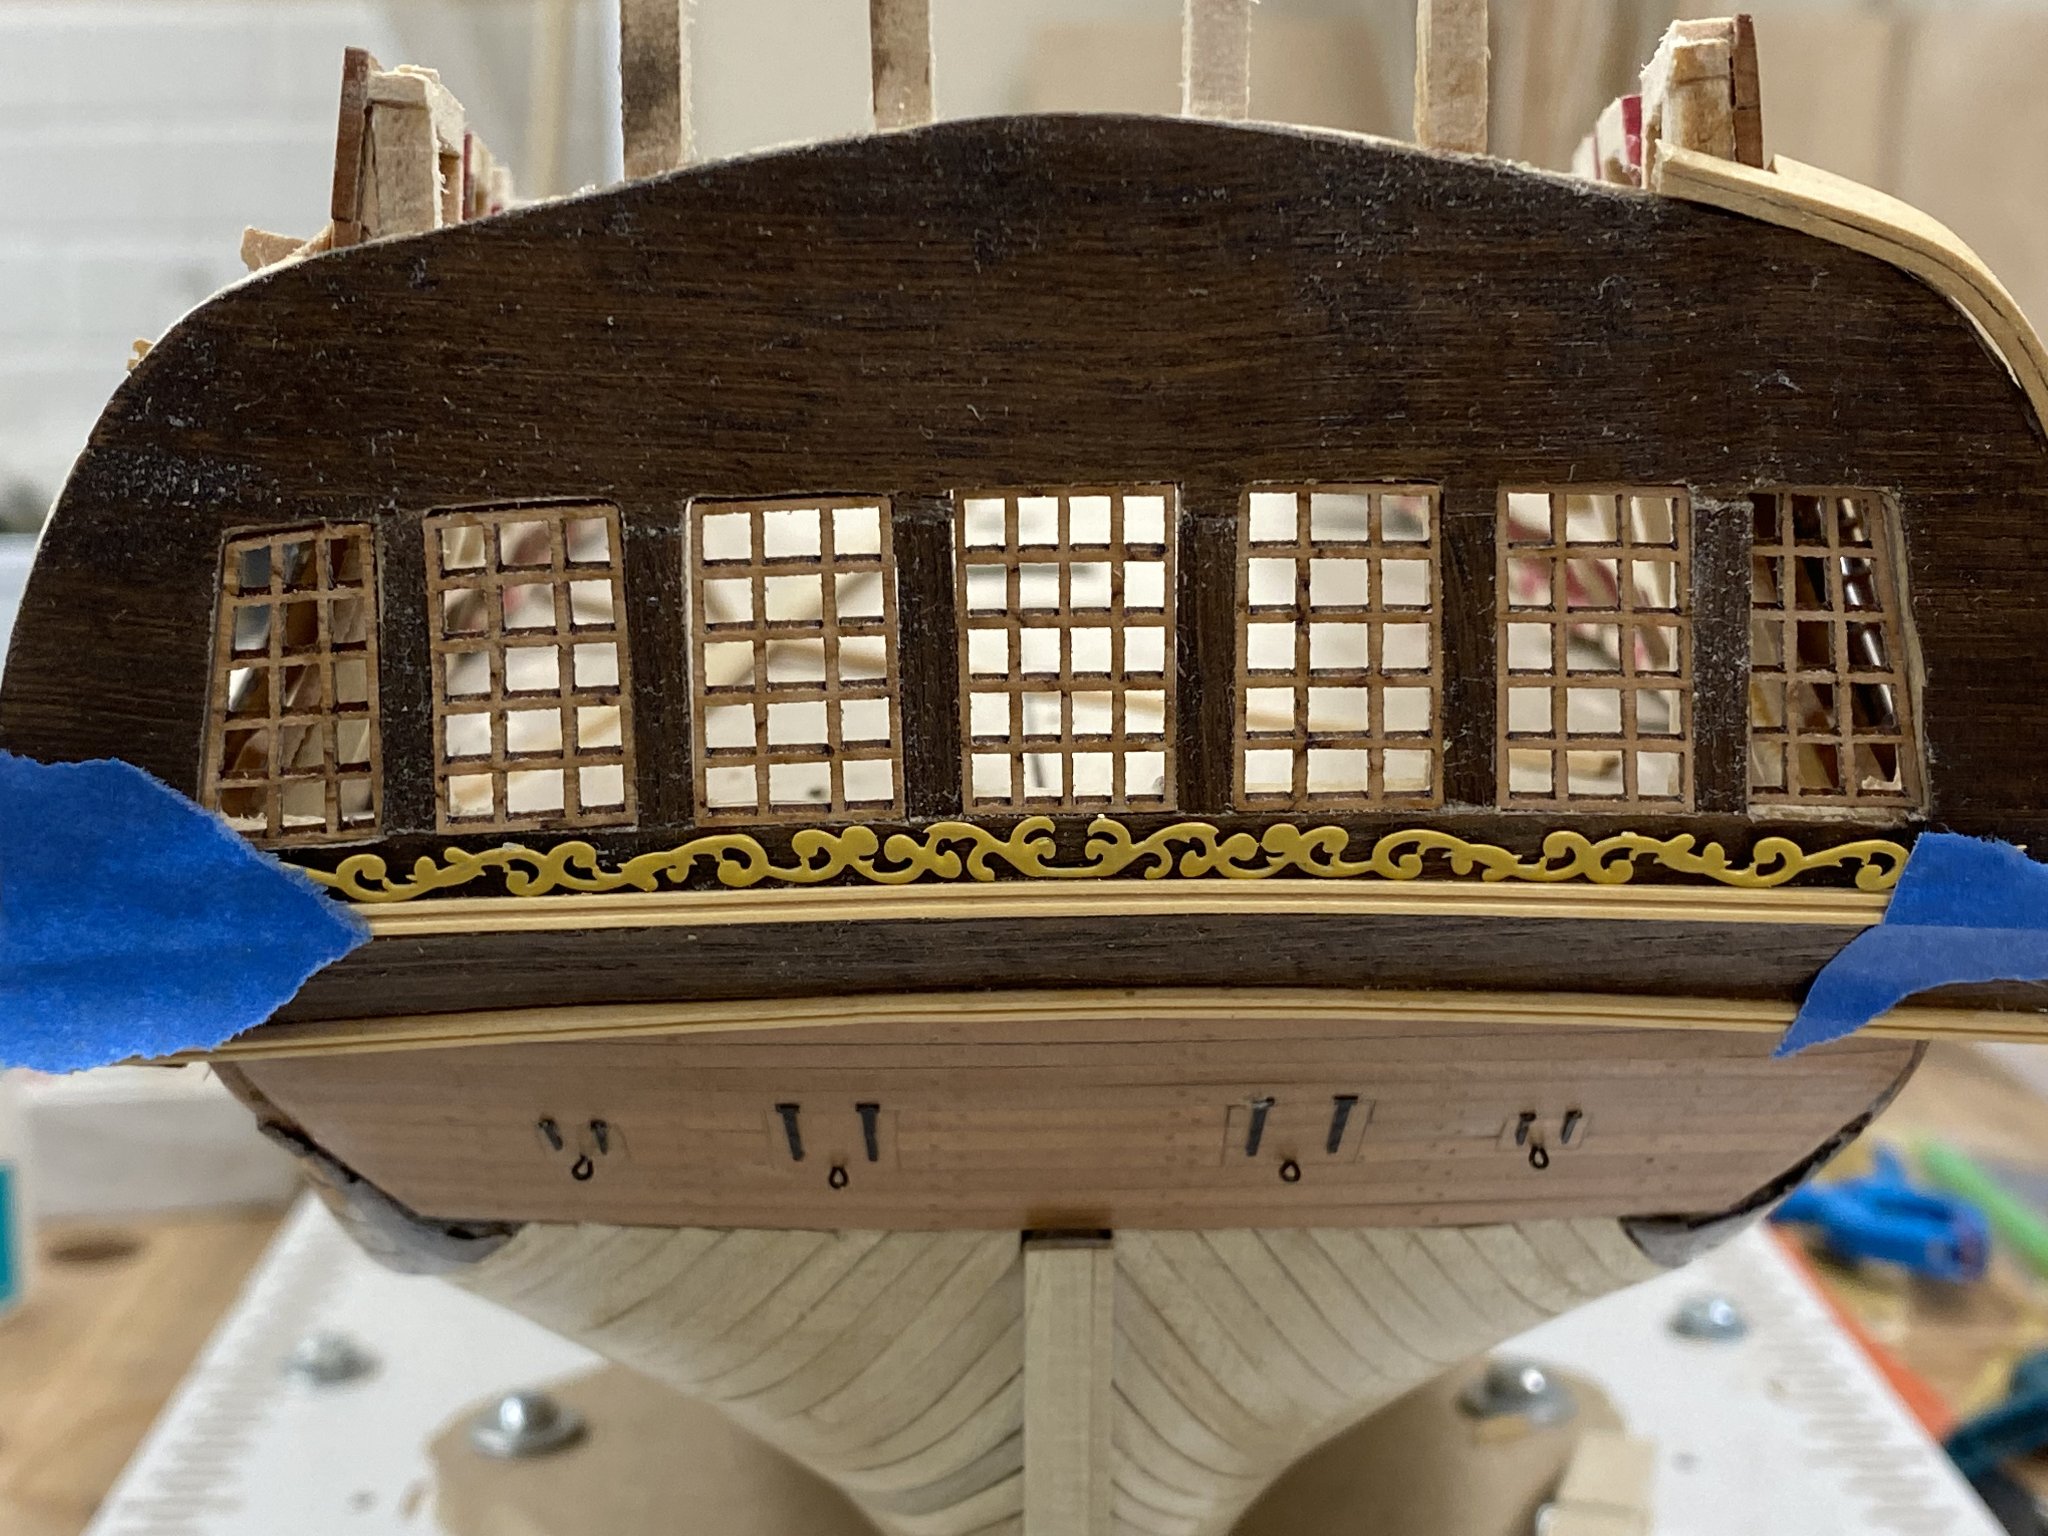
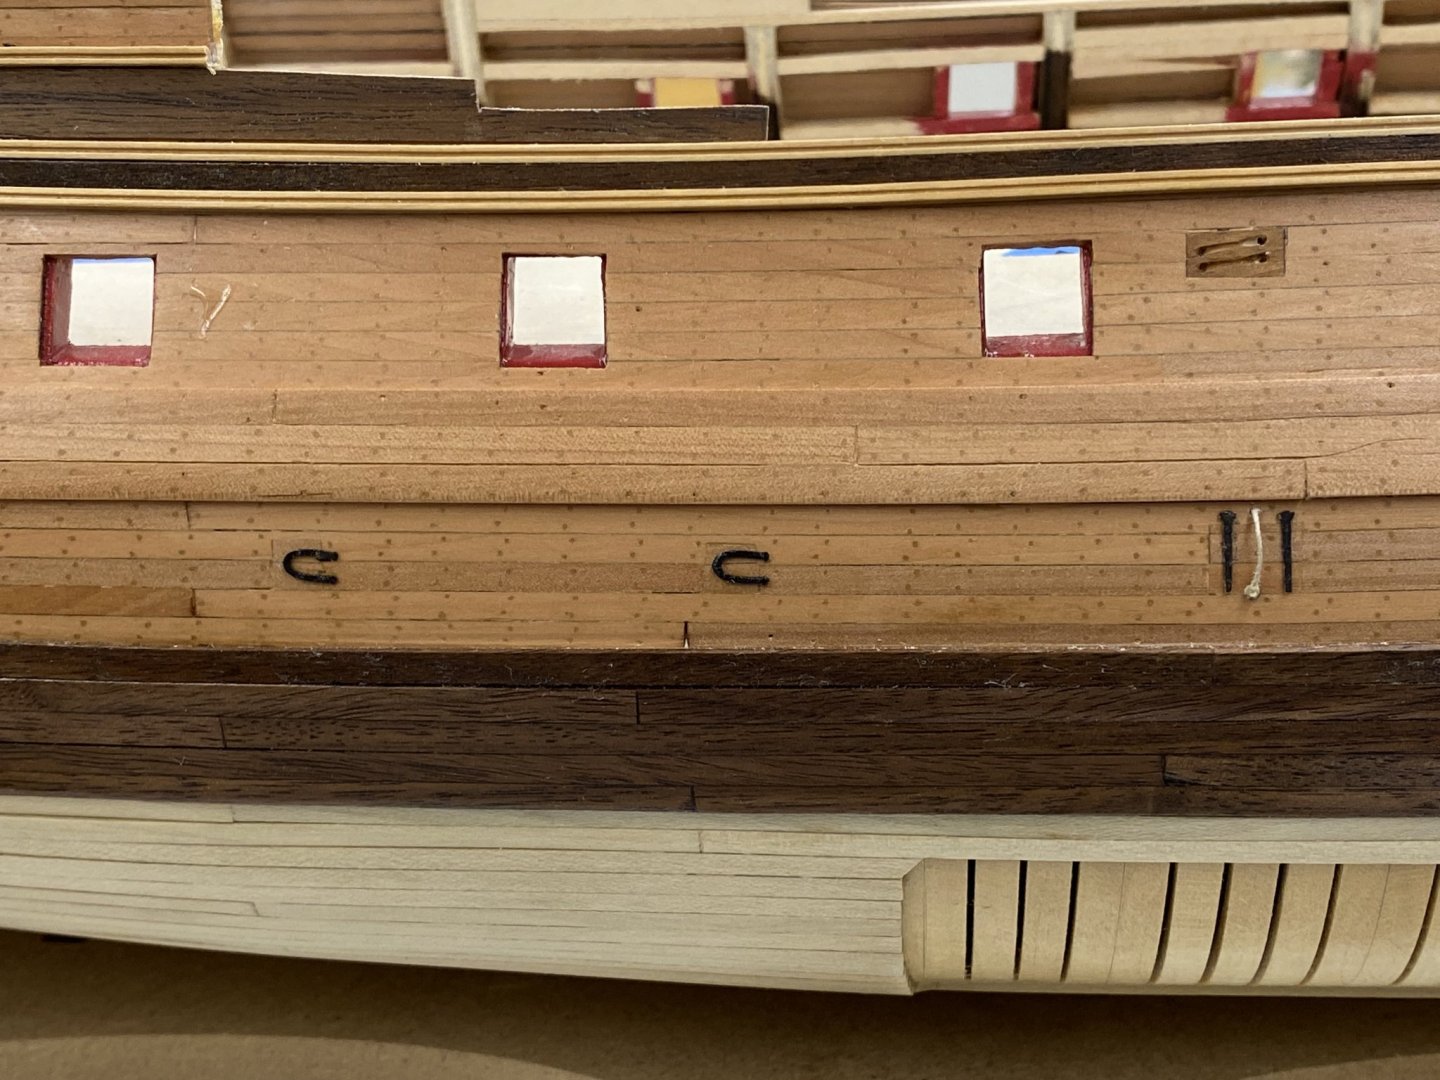
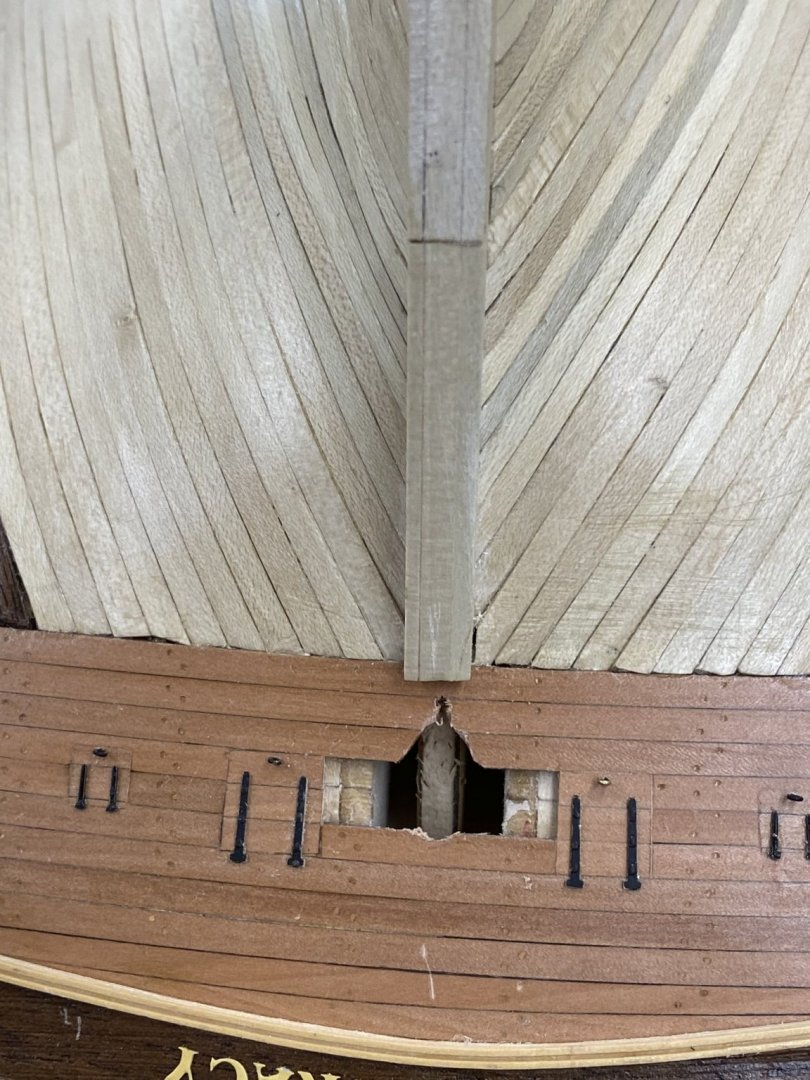
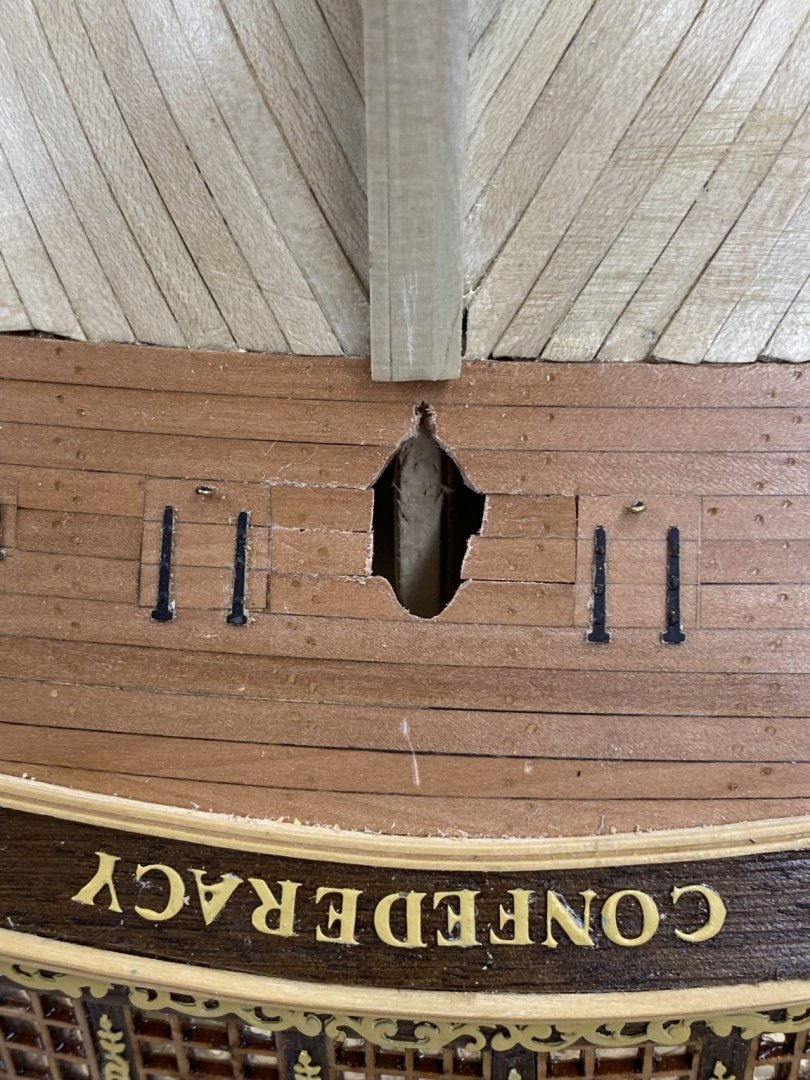
After the small set back have to paint the "other" side of some of the photo-etched pieces I managed to get the starboard side quarter gallery finished, the upper molding and walnut strip on the starboard side. Here is how it looks now - am considering brushing a thin coat of clear/flat on the entire stern/quarter gallery area to help protect these areas as construction proceeds. I decided that the rudder work needed the hull inverted again so I switched build boards and installed the strongback on the hull (hopefully for the last time) - maybe it is time to drill the holes for the mounting hardware while I have the hull upside down. As I was trying to cut the opening for the rudder post two of the planks in the transom came off. As it turned out this was probably just as well. I was able to trim the pieces one by one and get them glued back in without further incident. Here is what it looked like before I replaced the missing pieces. And here is after I got the pieces glued back in but still need to clean up the opening. I got he rudder itself fabbed and the pintels installed. Here it is held in place while I mark where the gudgeons are going to go. While I was looking at the rudder post hole I decided that the name needed to be done more carefully (and aligned too) so I pulled off the set of letters that were they and decided to use the "other" set (there are two complete sets on the photo-etched sheet) to replace a few that did not survive being removed in pristine shape. To assist in getting the spacing correct I took the name off the plans and taped it in place below where the letters will go on the model. I also took a piece of masking tape and established a curve about 1/16" below the molding line. Hopefully this will keep the letters on the same line. Here is the stern waiting for the letters to be added. And here it is with the lettering. I was not able to correctly follow the curve of the stern despite the tape. I probably should have moved the tape up (down) a little more but I think this is enough better than the first try to quit while I am ahead.


- 370 replies
-
- 3
-
-
- Model Shipways
- Confederacy
- (and 1 more)
-
As I moved to the starboard quarter gallery to add the trim pieces I came to another realization (which I should have noticed before but ...) that the trim pieces (specifically the long scroll pieces that go below and above the gallery windows and the scrolls forward of the quarter gallery) on the photo-etched sheet are all in the same orientation; i.e. are all identical and thus need to be painted (or however you are finishing them) for the port and starboard sides on opposite sides of the photo-etch sheet. I (of course) painted them on on one side so now will have the pieces on the starboard side painted on both sides. Probably not the best situation for adhesion but these pieces are not under any stress besides gravity. Live and learn. Probably would be a good time to check the trim pieces that go on the bow. So while I wait for the starboard side "ornaments" to dry I put the name on. I had given some thought to building a "name board" to mount the name on and then mount that on the stern but this did not come out terrible. The spacing could have been more even but given that it is hard to see the name clearly given the location and slope of the lower transom I will put the name board on the "maybe" list. Here is what the stern looks like finished (except for the rudder and associated fittings).

- 370 replies
-
- 3
-
-
- Model Shipways
- Confederacy
- (and 1 more)
-
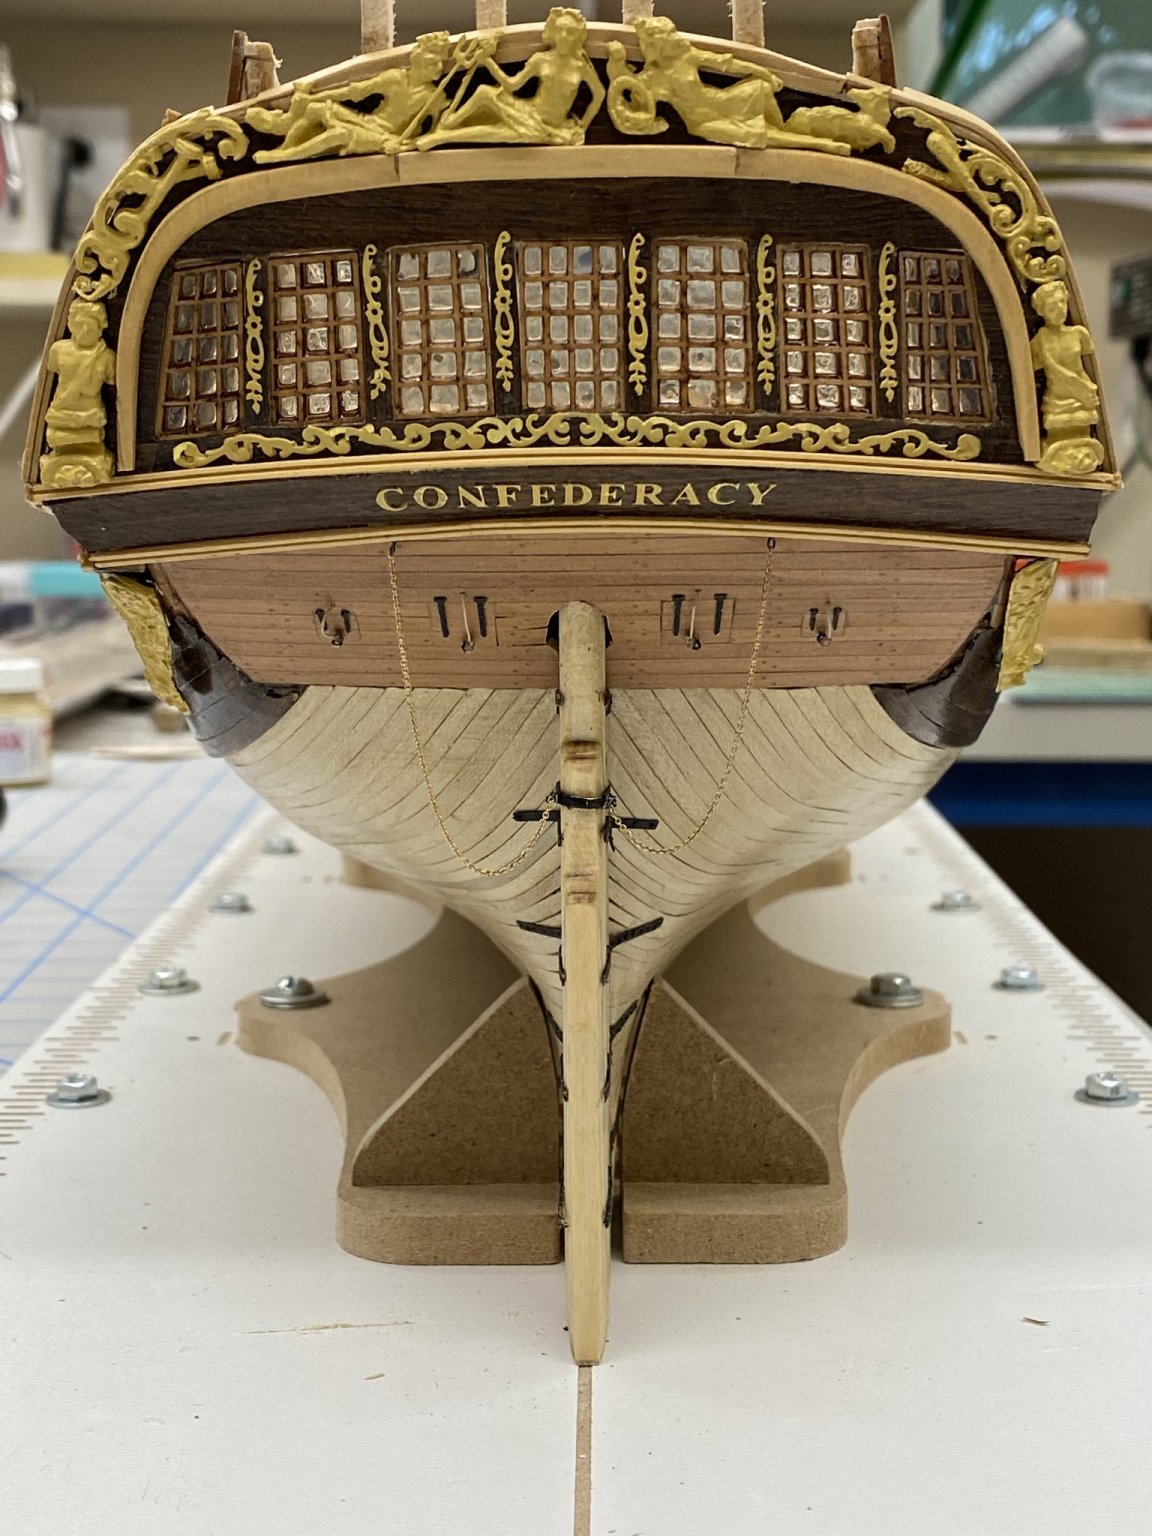
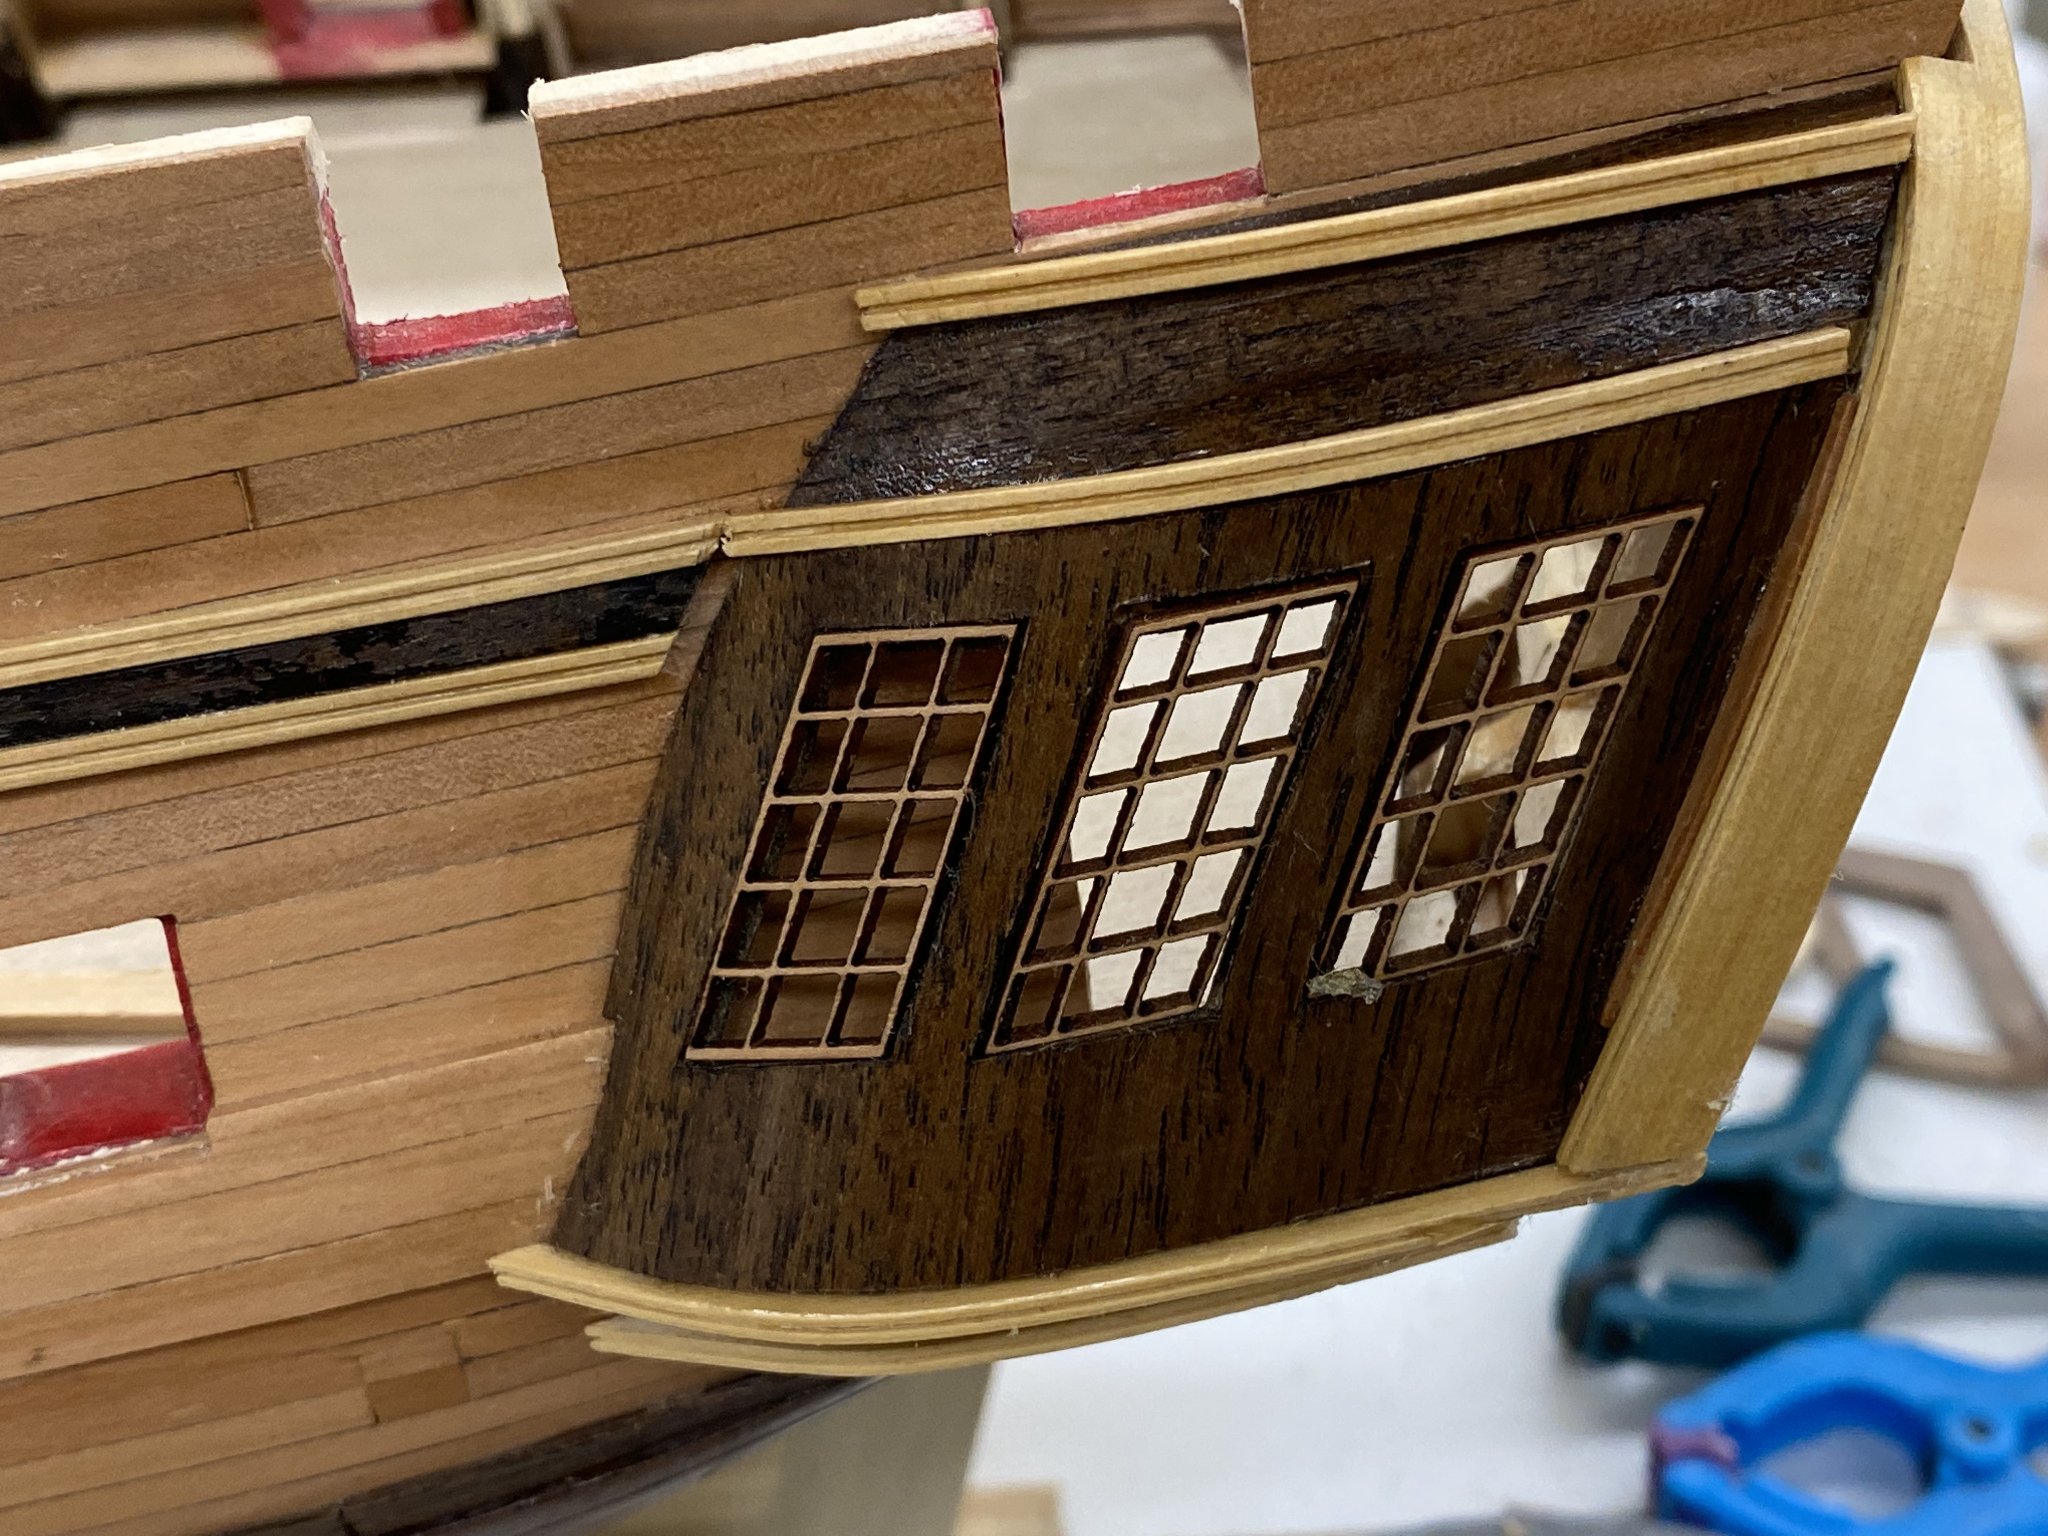
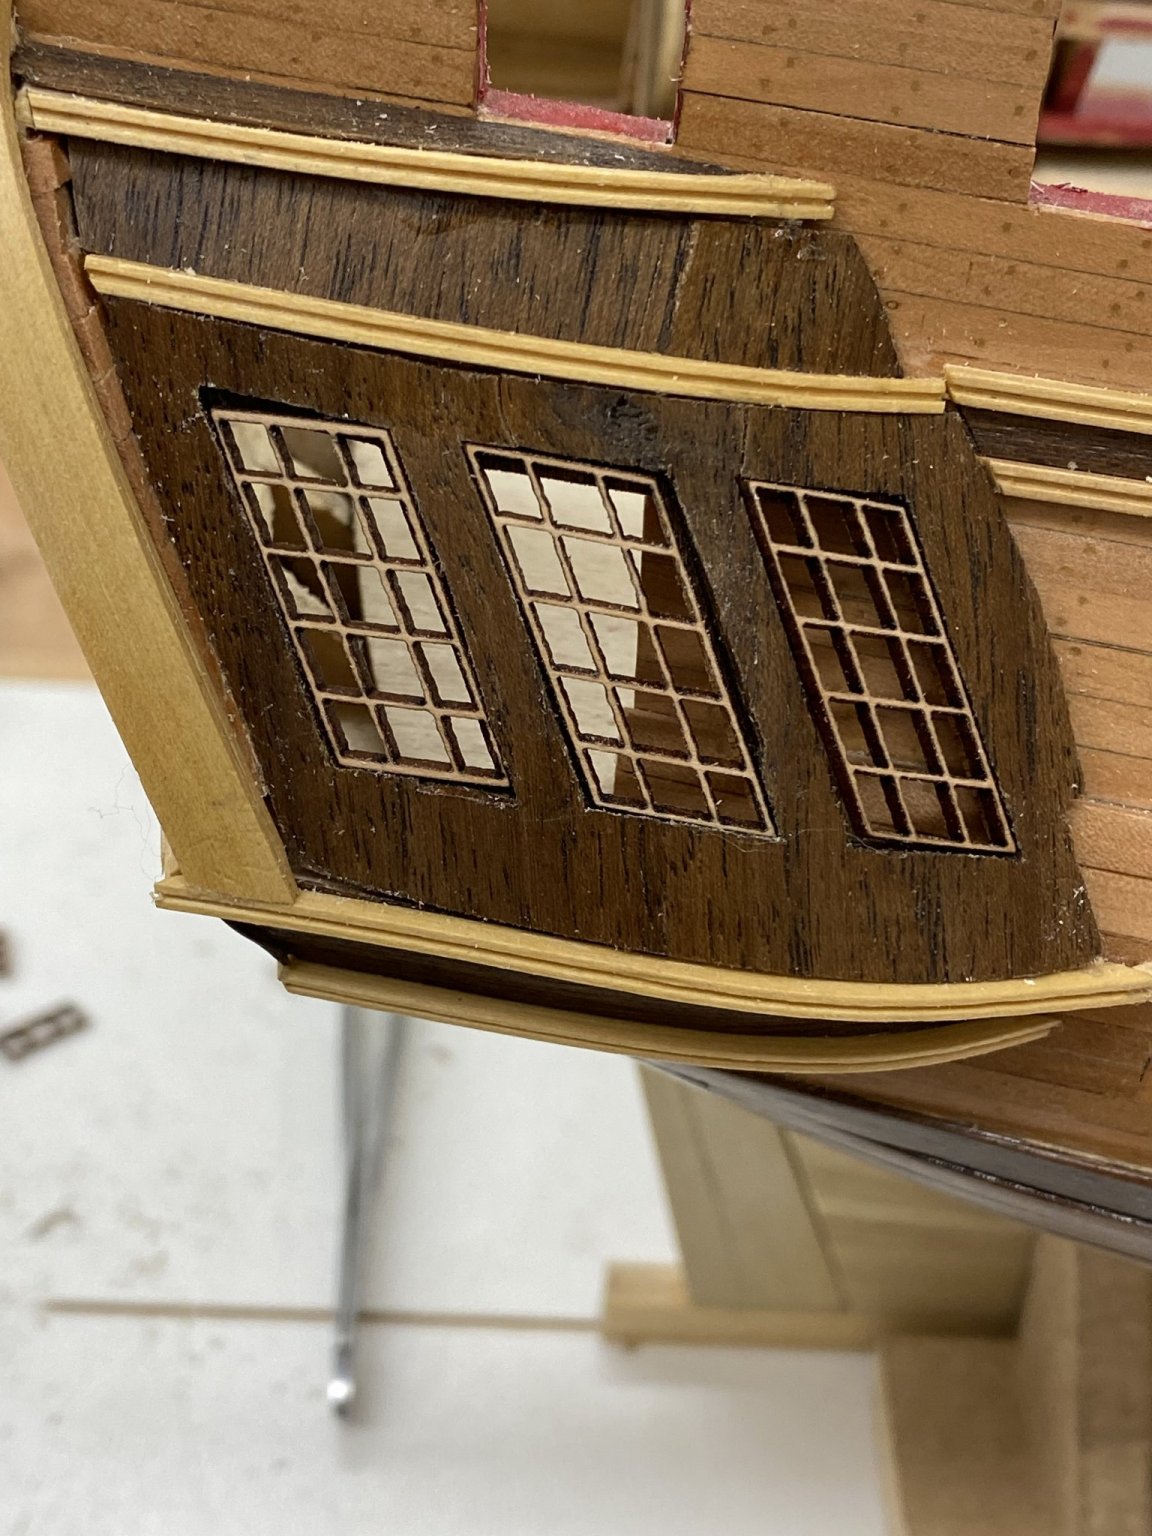
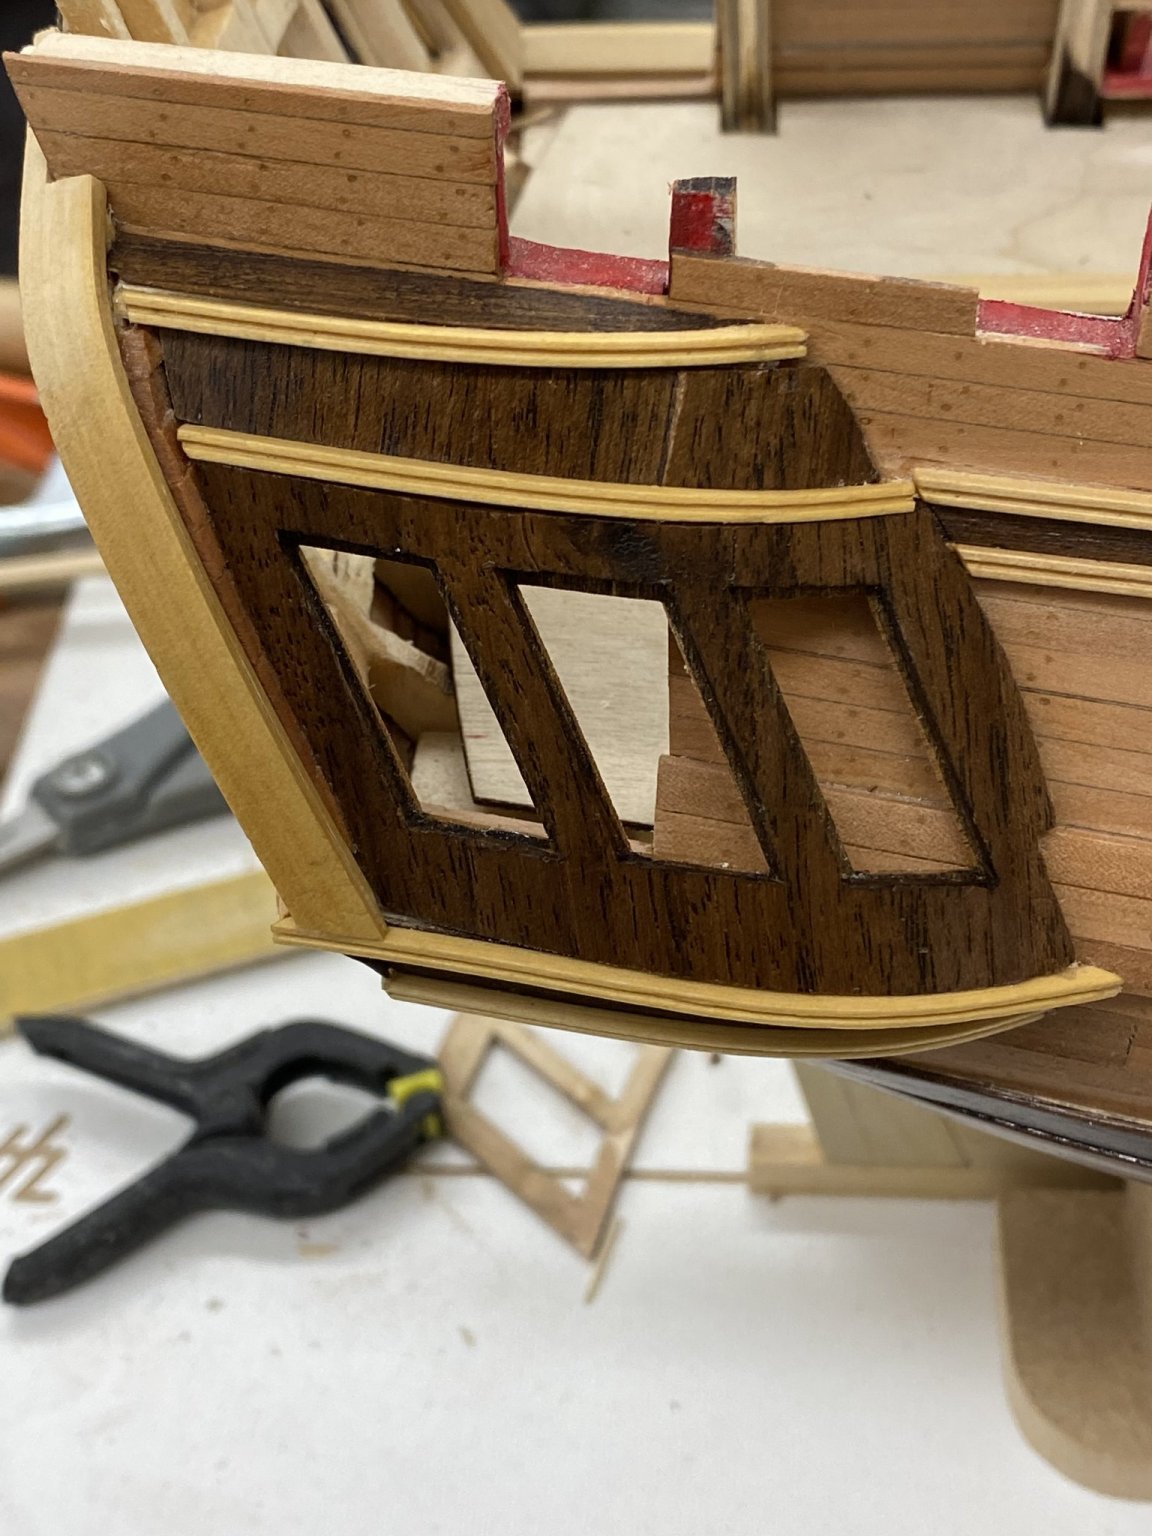
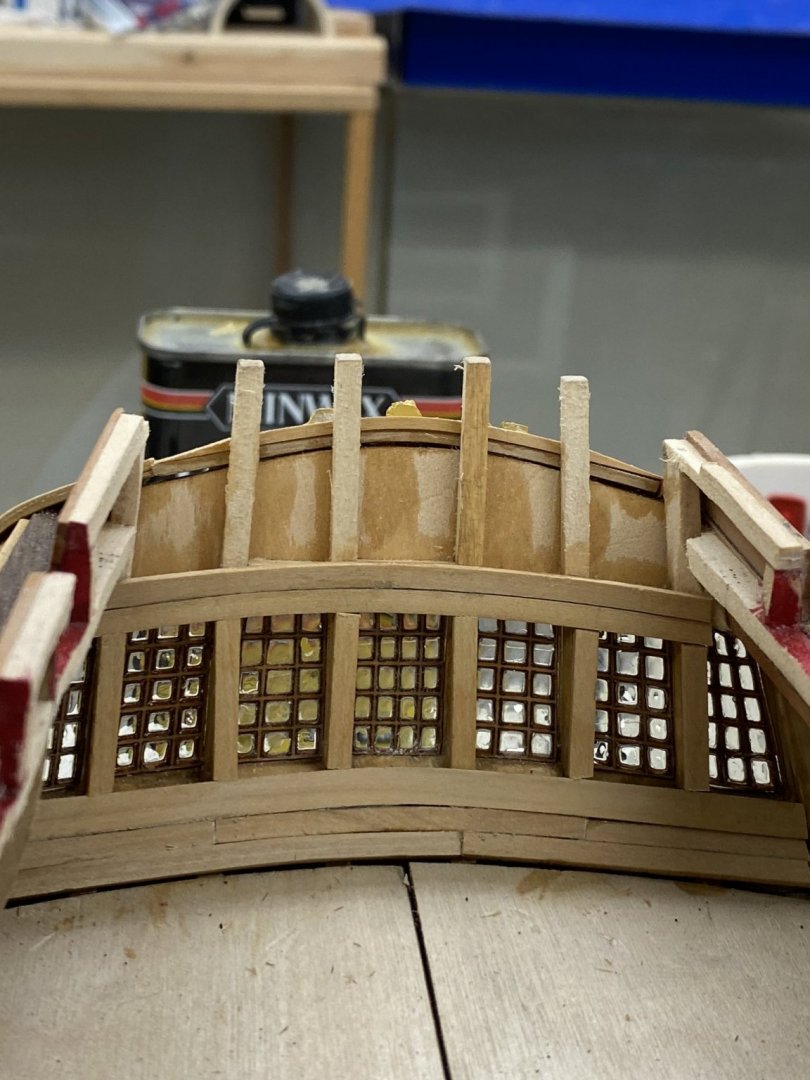
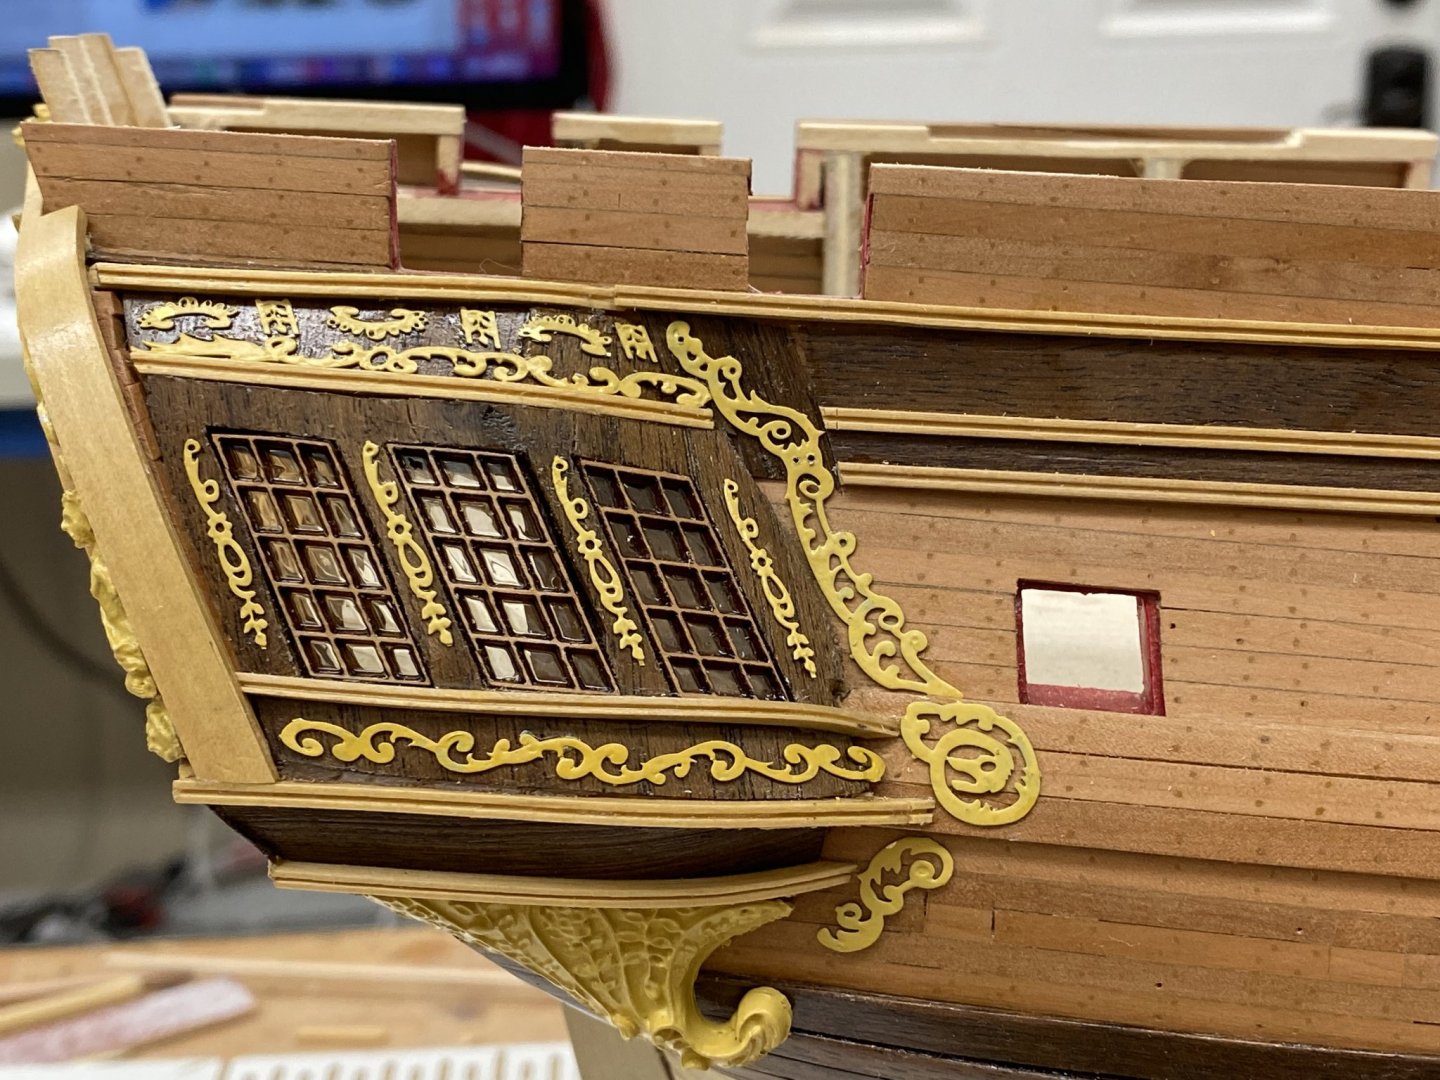
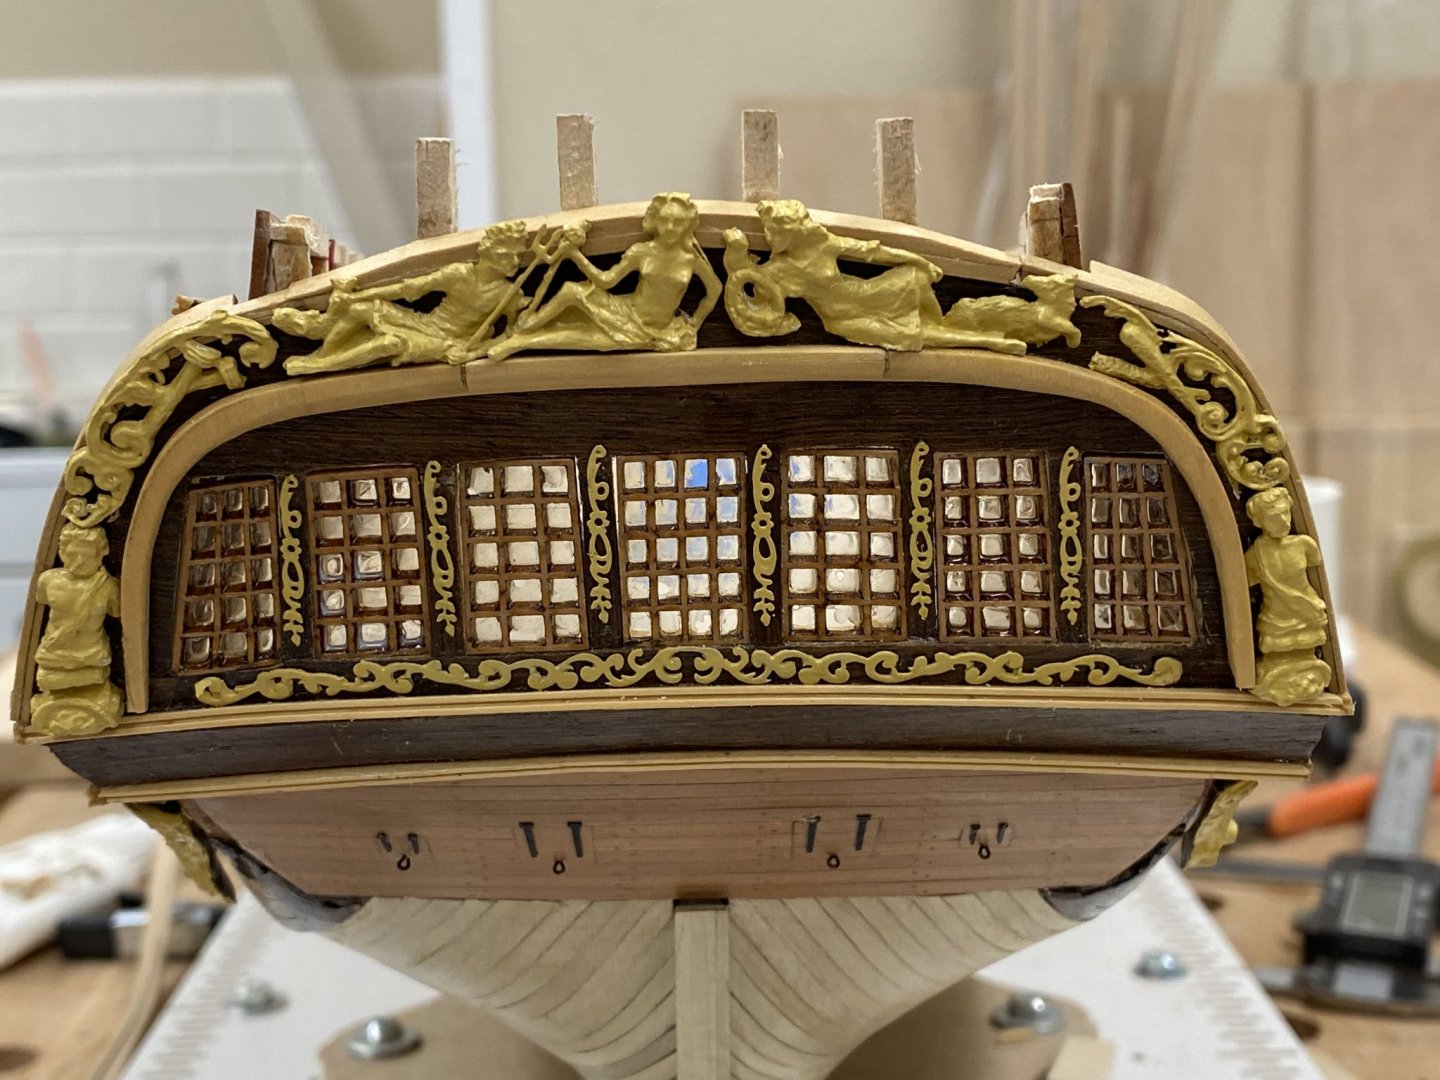
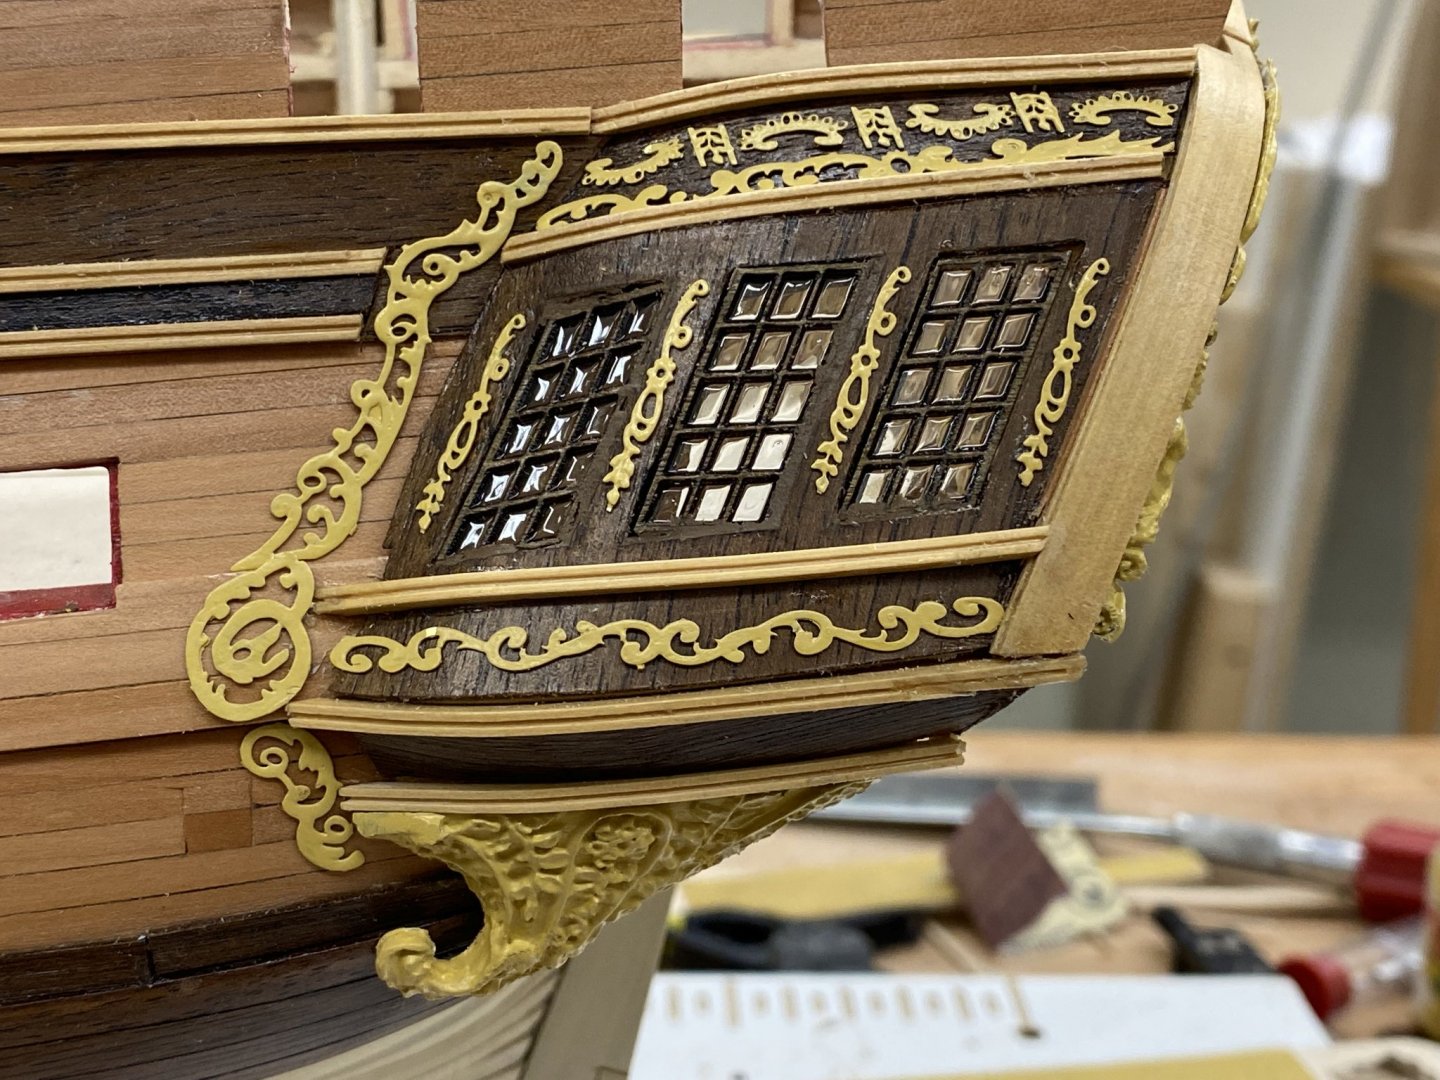
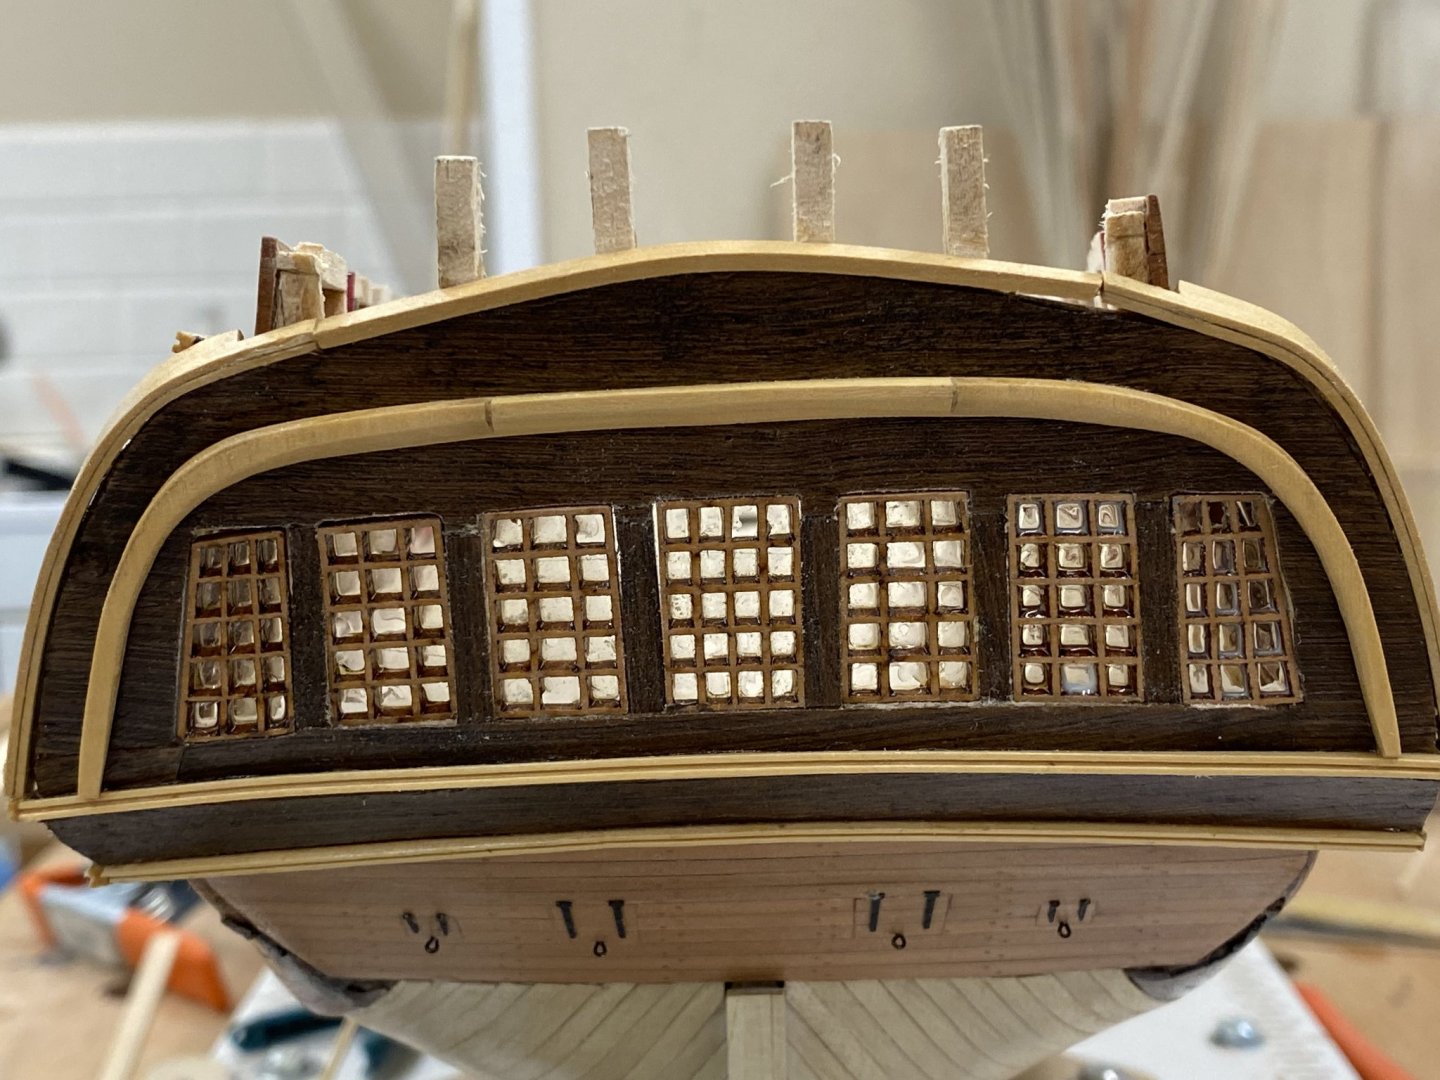
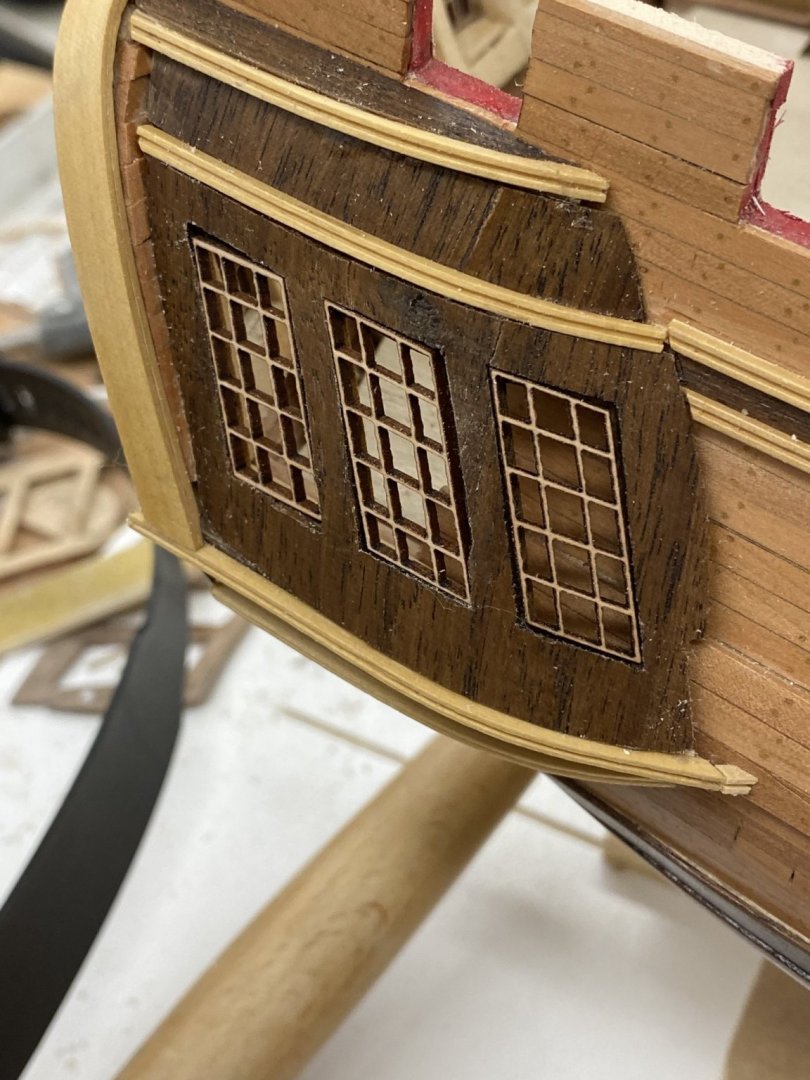
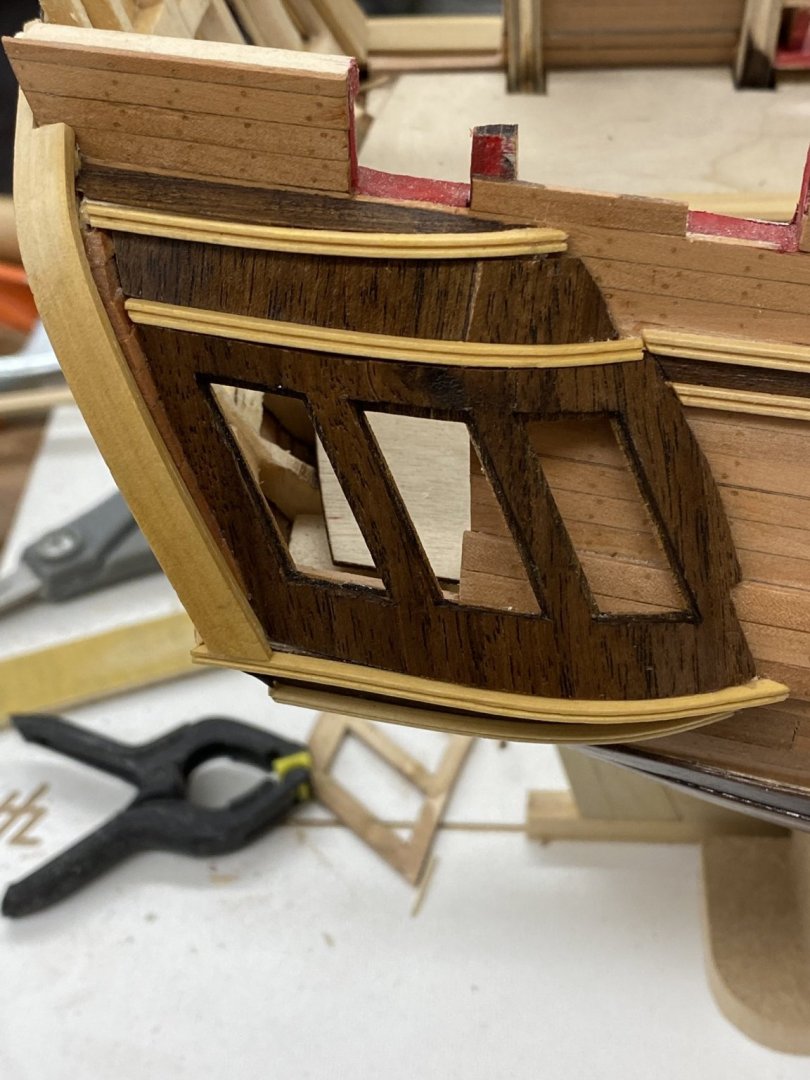
Now back to the stern and quarter galleries. As I mentioned previously the stern on my model is "mis-shapen" or something as there is not the same distance between the bottom of the stern windows and the lower molding to accommodate a molding strip directly under the windows and the provided decorative scowl work so I opted to not add the additional molding. I have installed the windows (and yes one of the panes at the top of the center window has gotten "poked out" - I will deal with that "later") and all the figures and decorations on the stern and here is what it looks like: As you can see from the "light leaks" around the windows they do not fit as well as I might have liked but I am reluctant to try and fix them for fear of making things worse. With the decking and cabin bulkheads installed it will not be so easy to get a light source directly behind these windows which is when the "leaks" are the most obvious. Next job back here is the ship's name but I need to position the model differently to make that easier. So I am working to complete the quarter galleries and have the port side completed. I was hoping to make all my mistakes on this side so the "good" side will benefit from the experience. We shall see. As at the stern I did not have enough room at the top of the gallery to fit a piece of molding and two row of decorative carving in so I opted )as on the stern) to not fit the molding. I even tried a piece of 1/32 X 1/32 material just to provide a divider but that also was too big. However there was room for an additional set of carvings, the drawing shows five pieces but I can fit seven here - oh well! So here is the port side gallery with all the "fixins".
- 370 replies
-
- 4
-
-
- Model Shipways
- Confederacy
- (and 1 more)
-
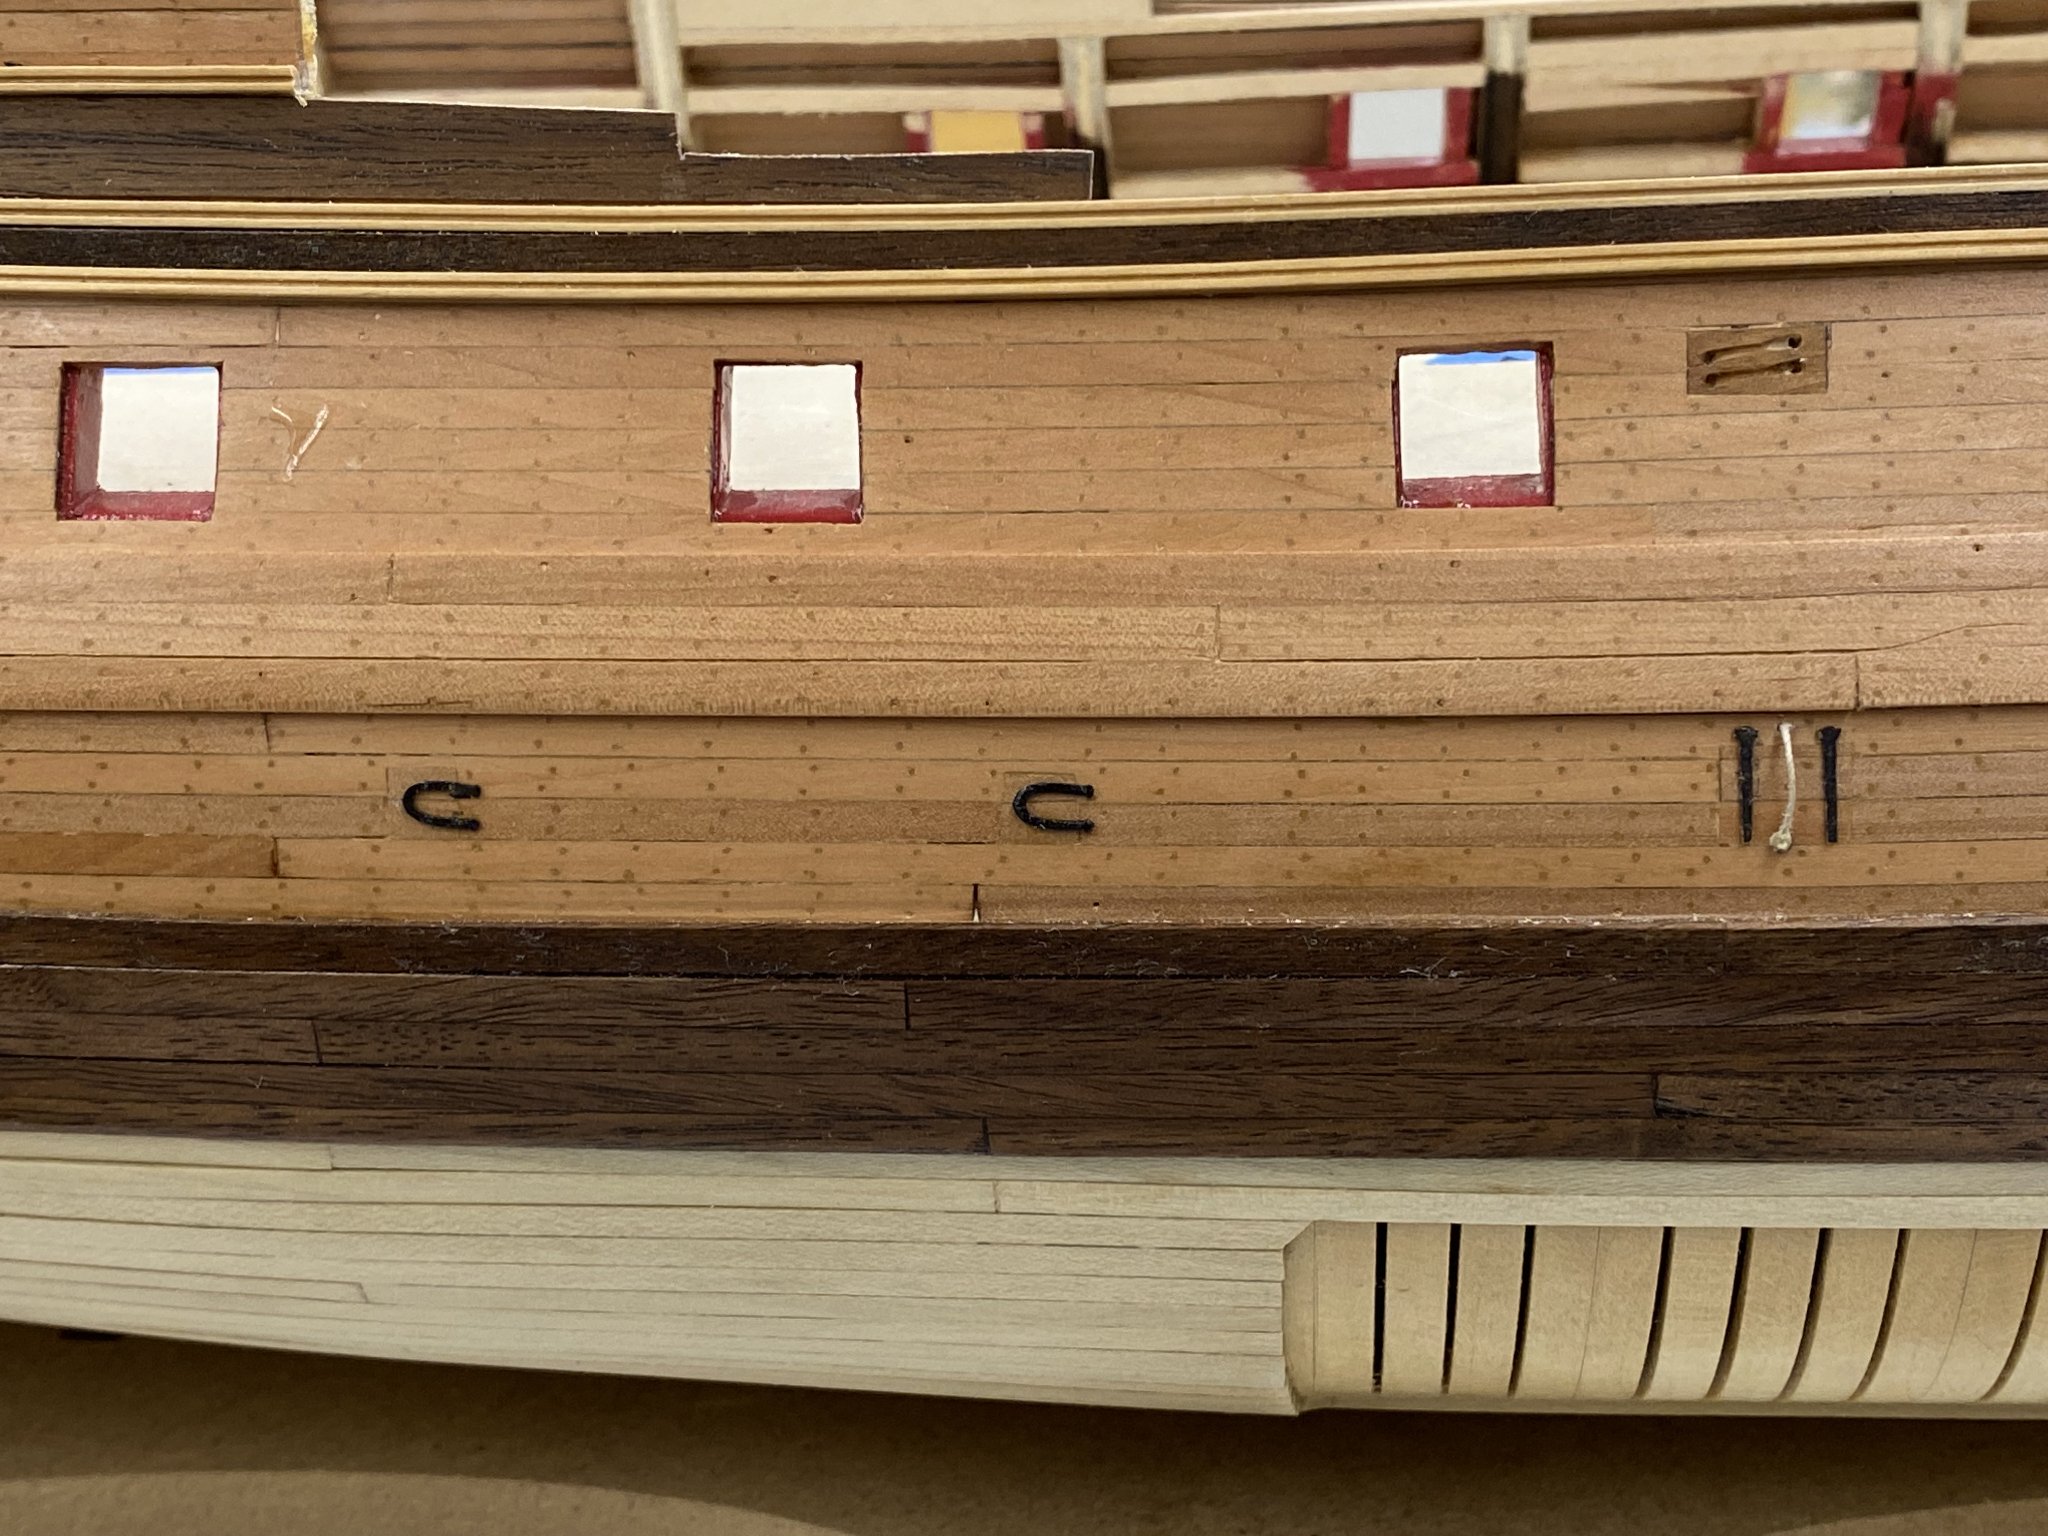
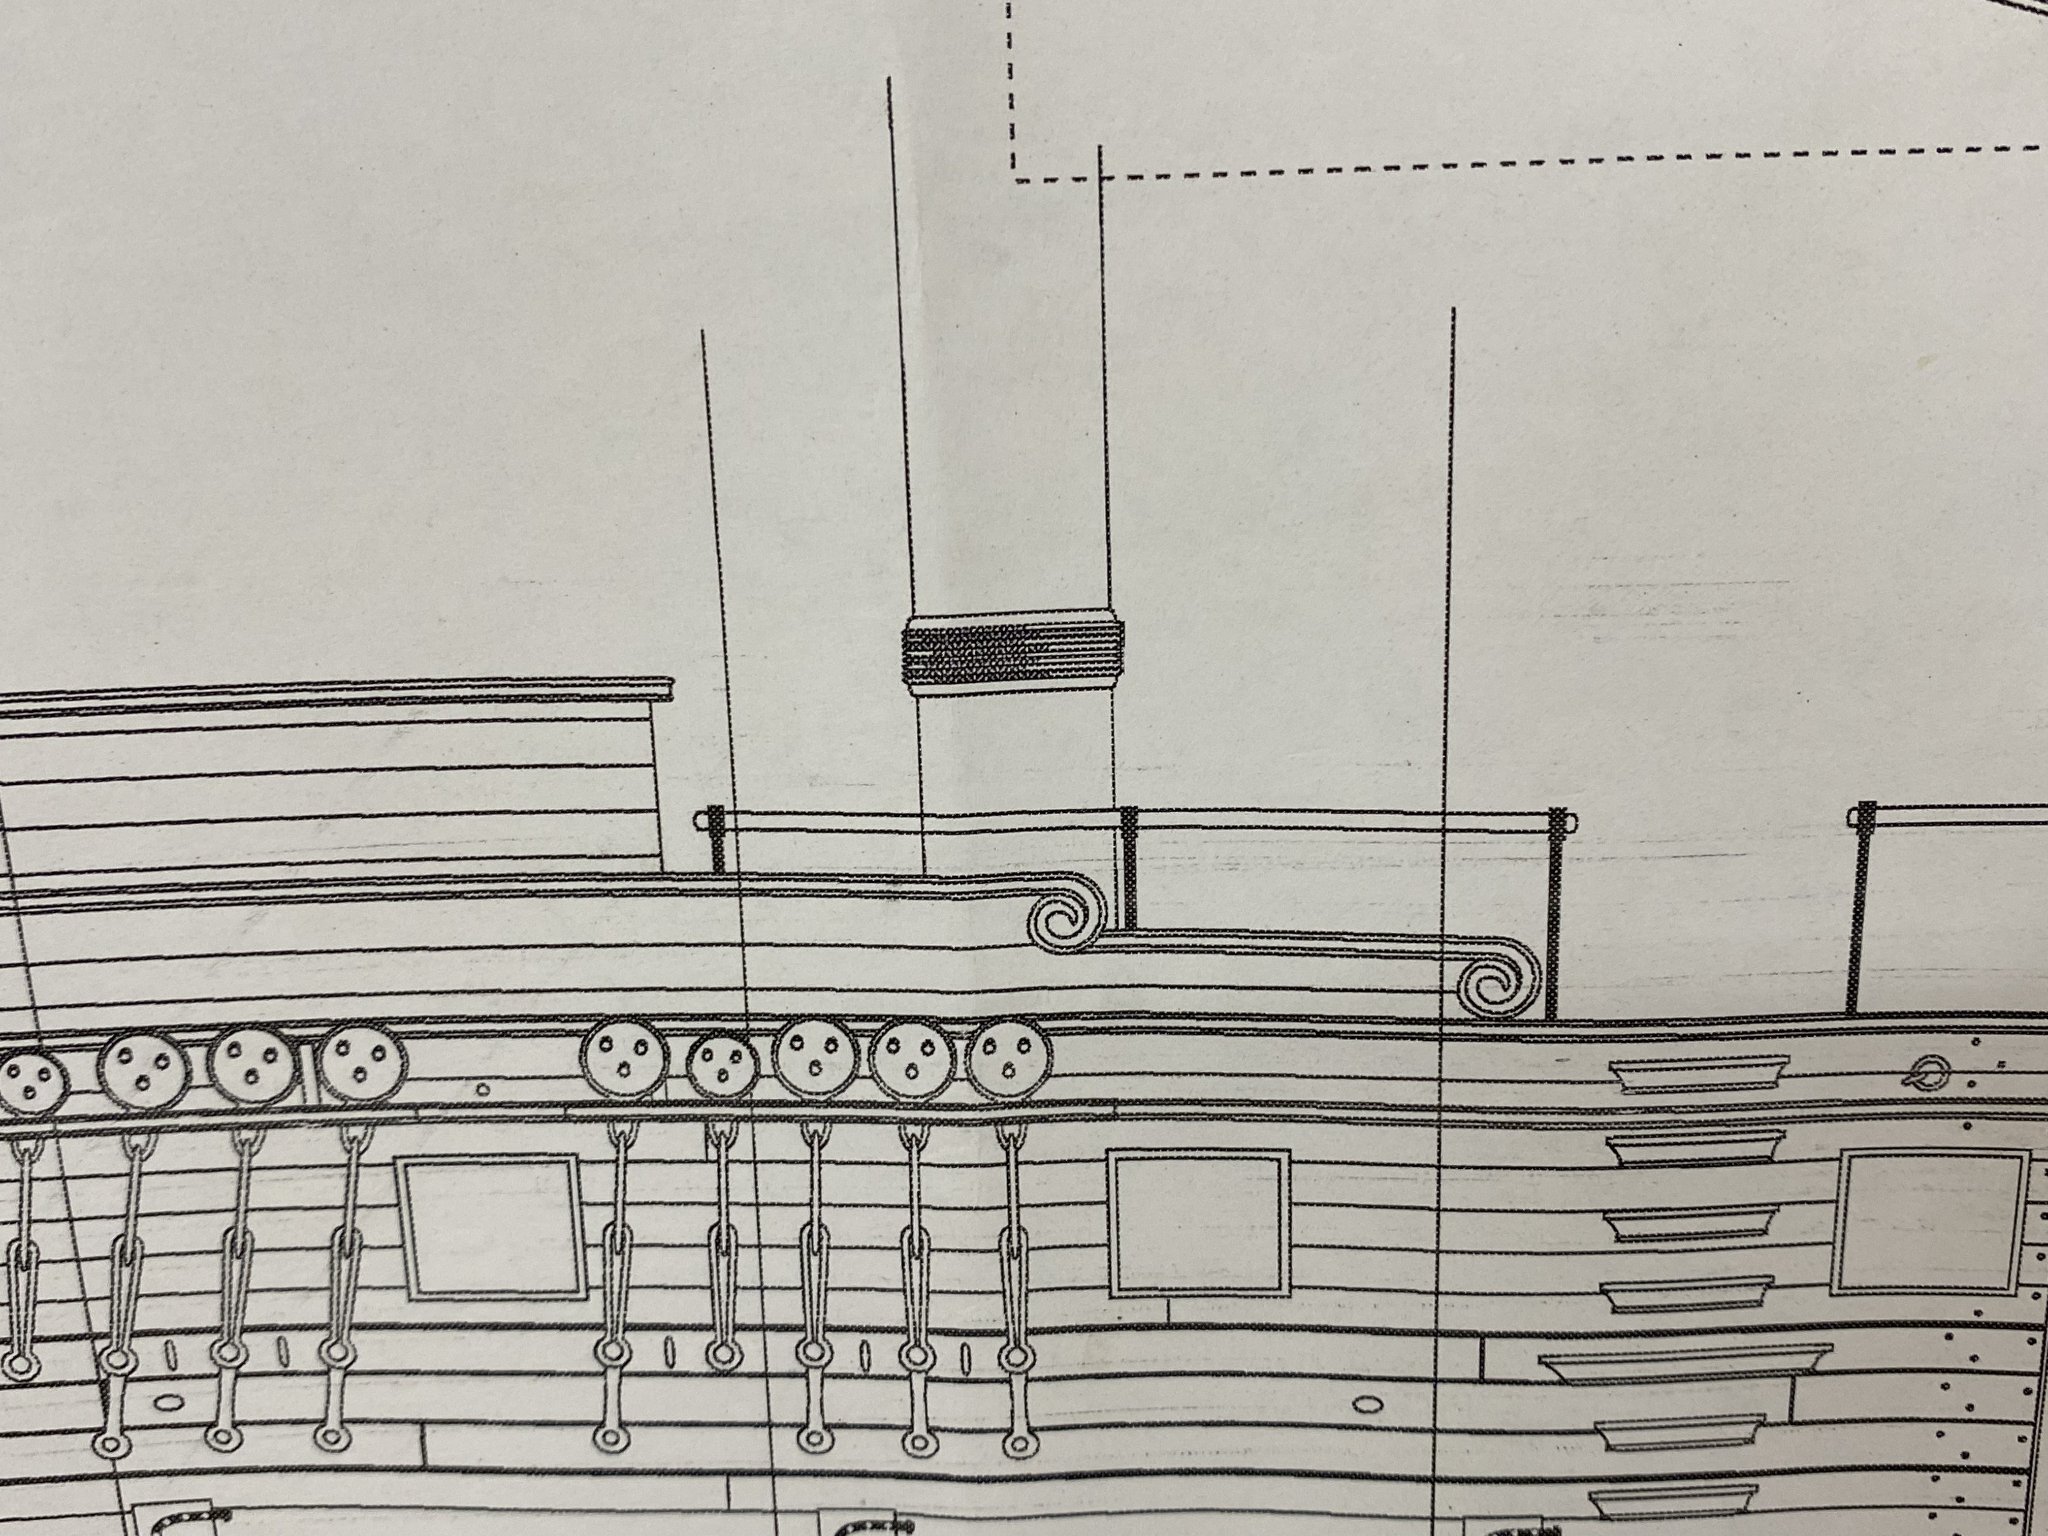
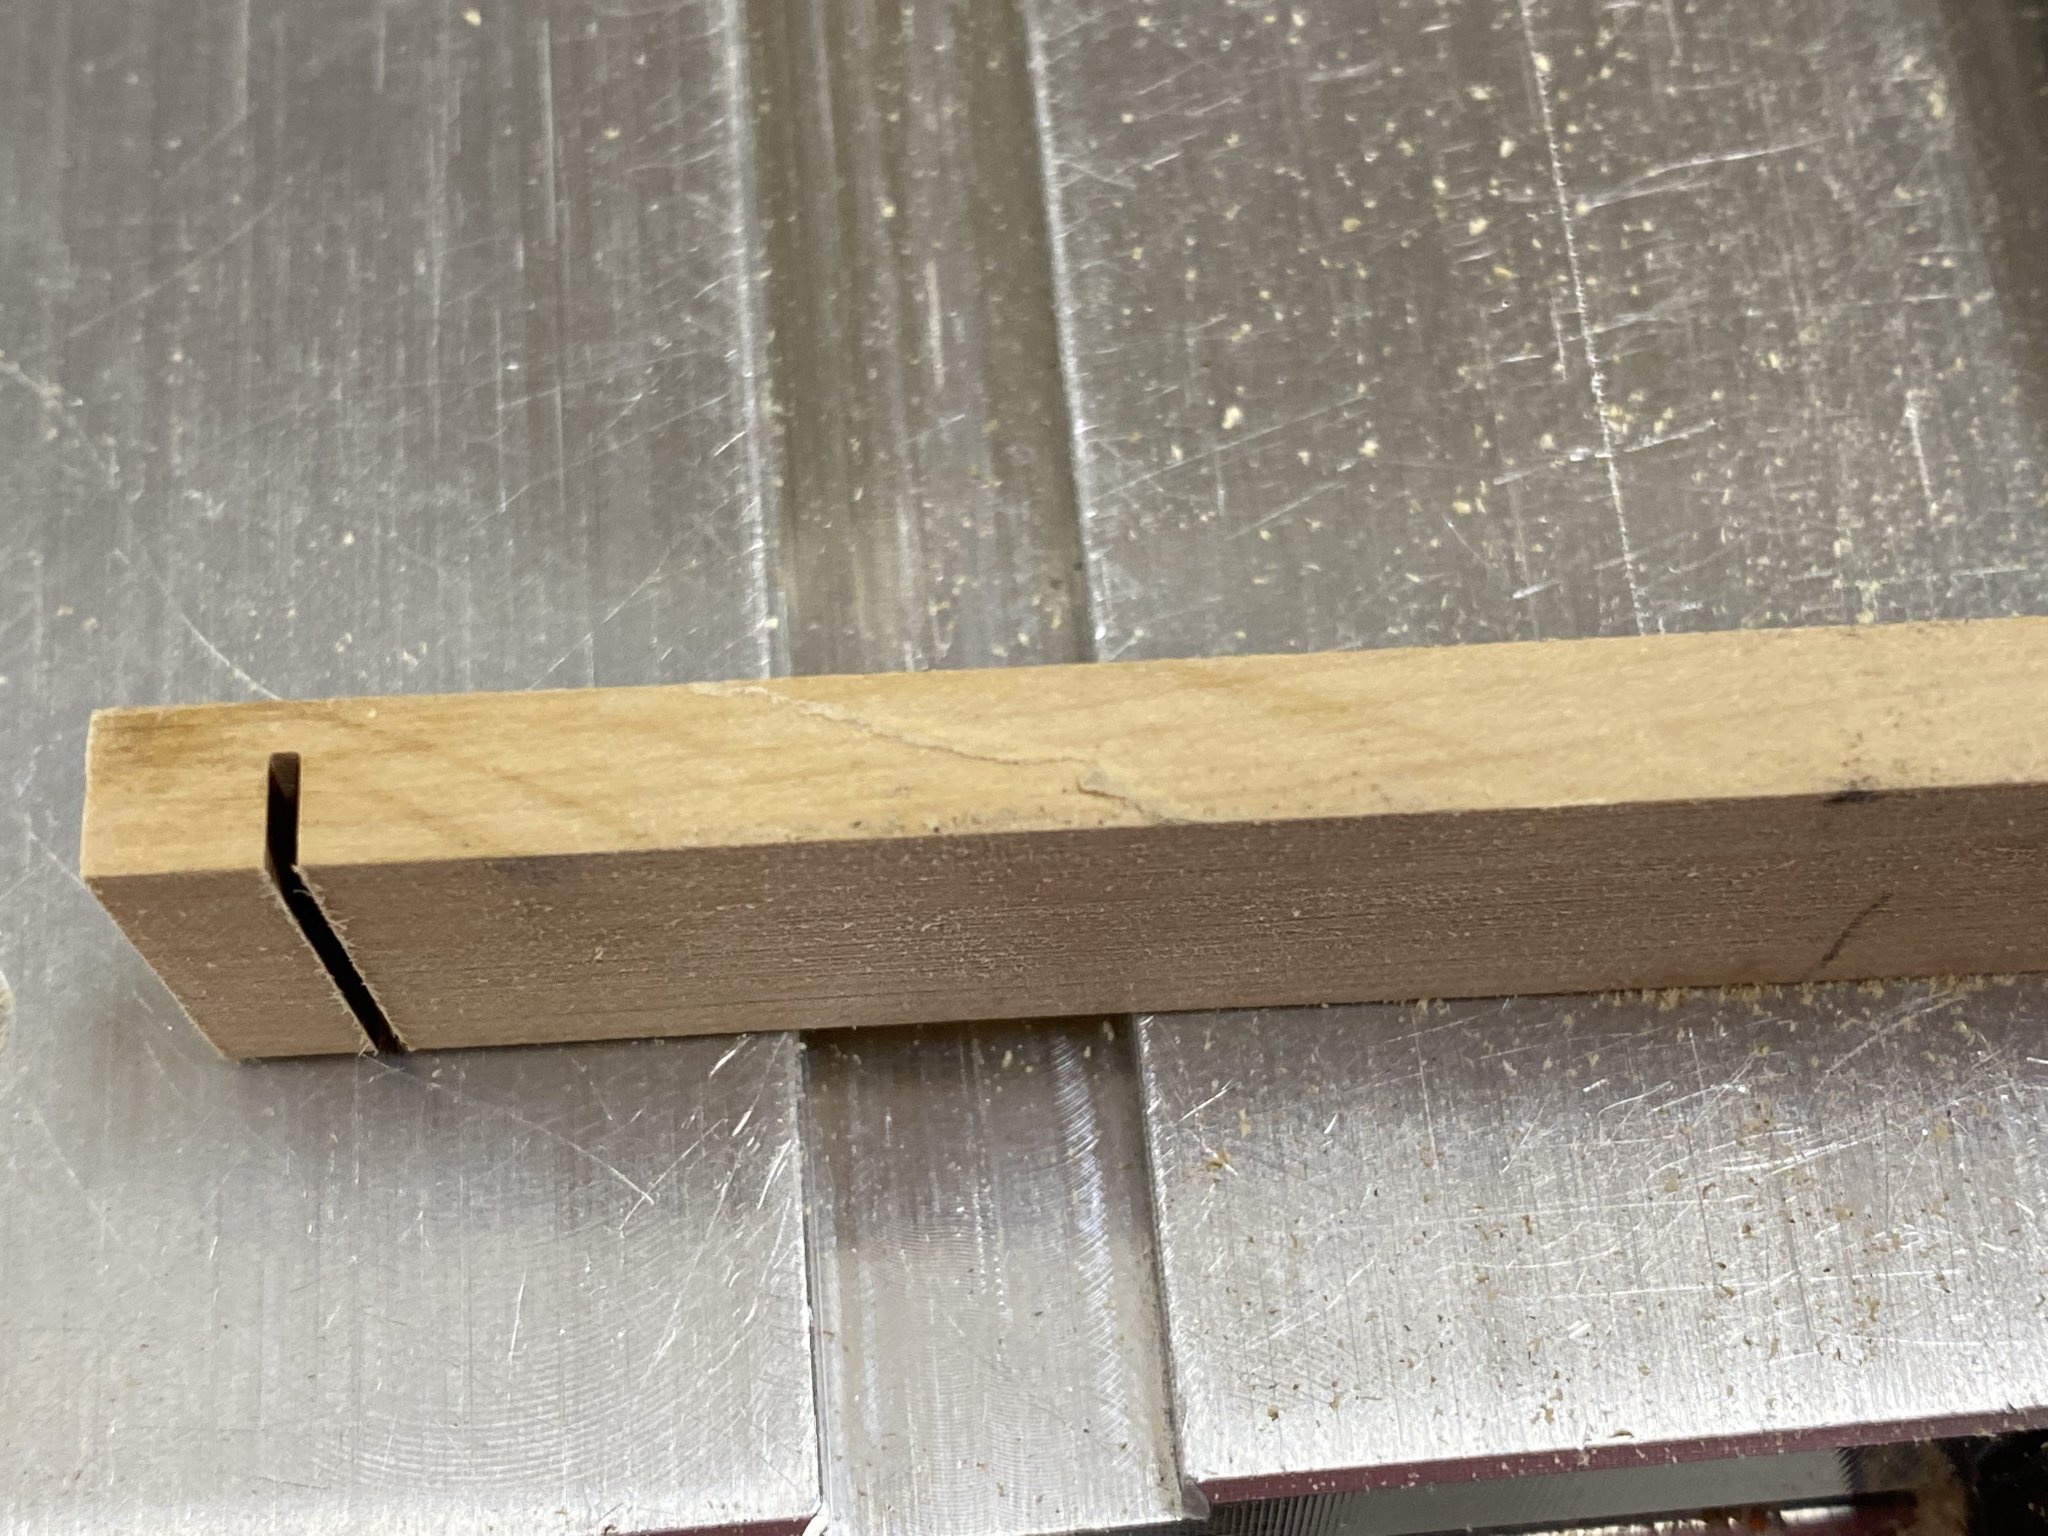
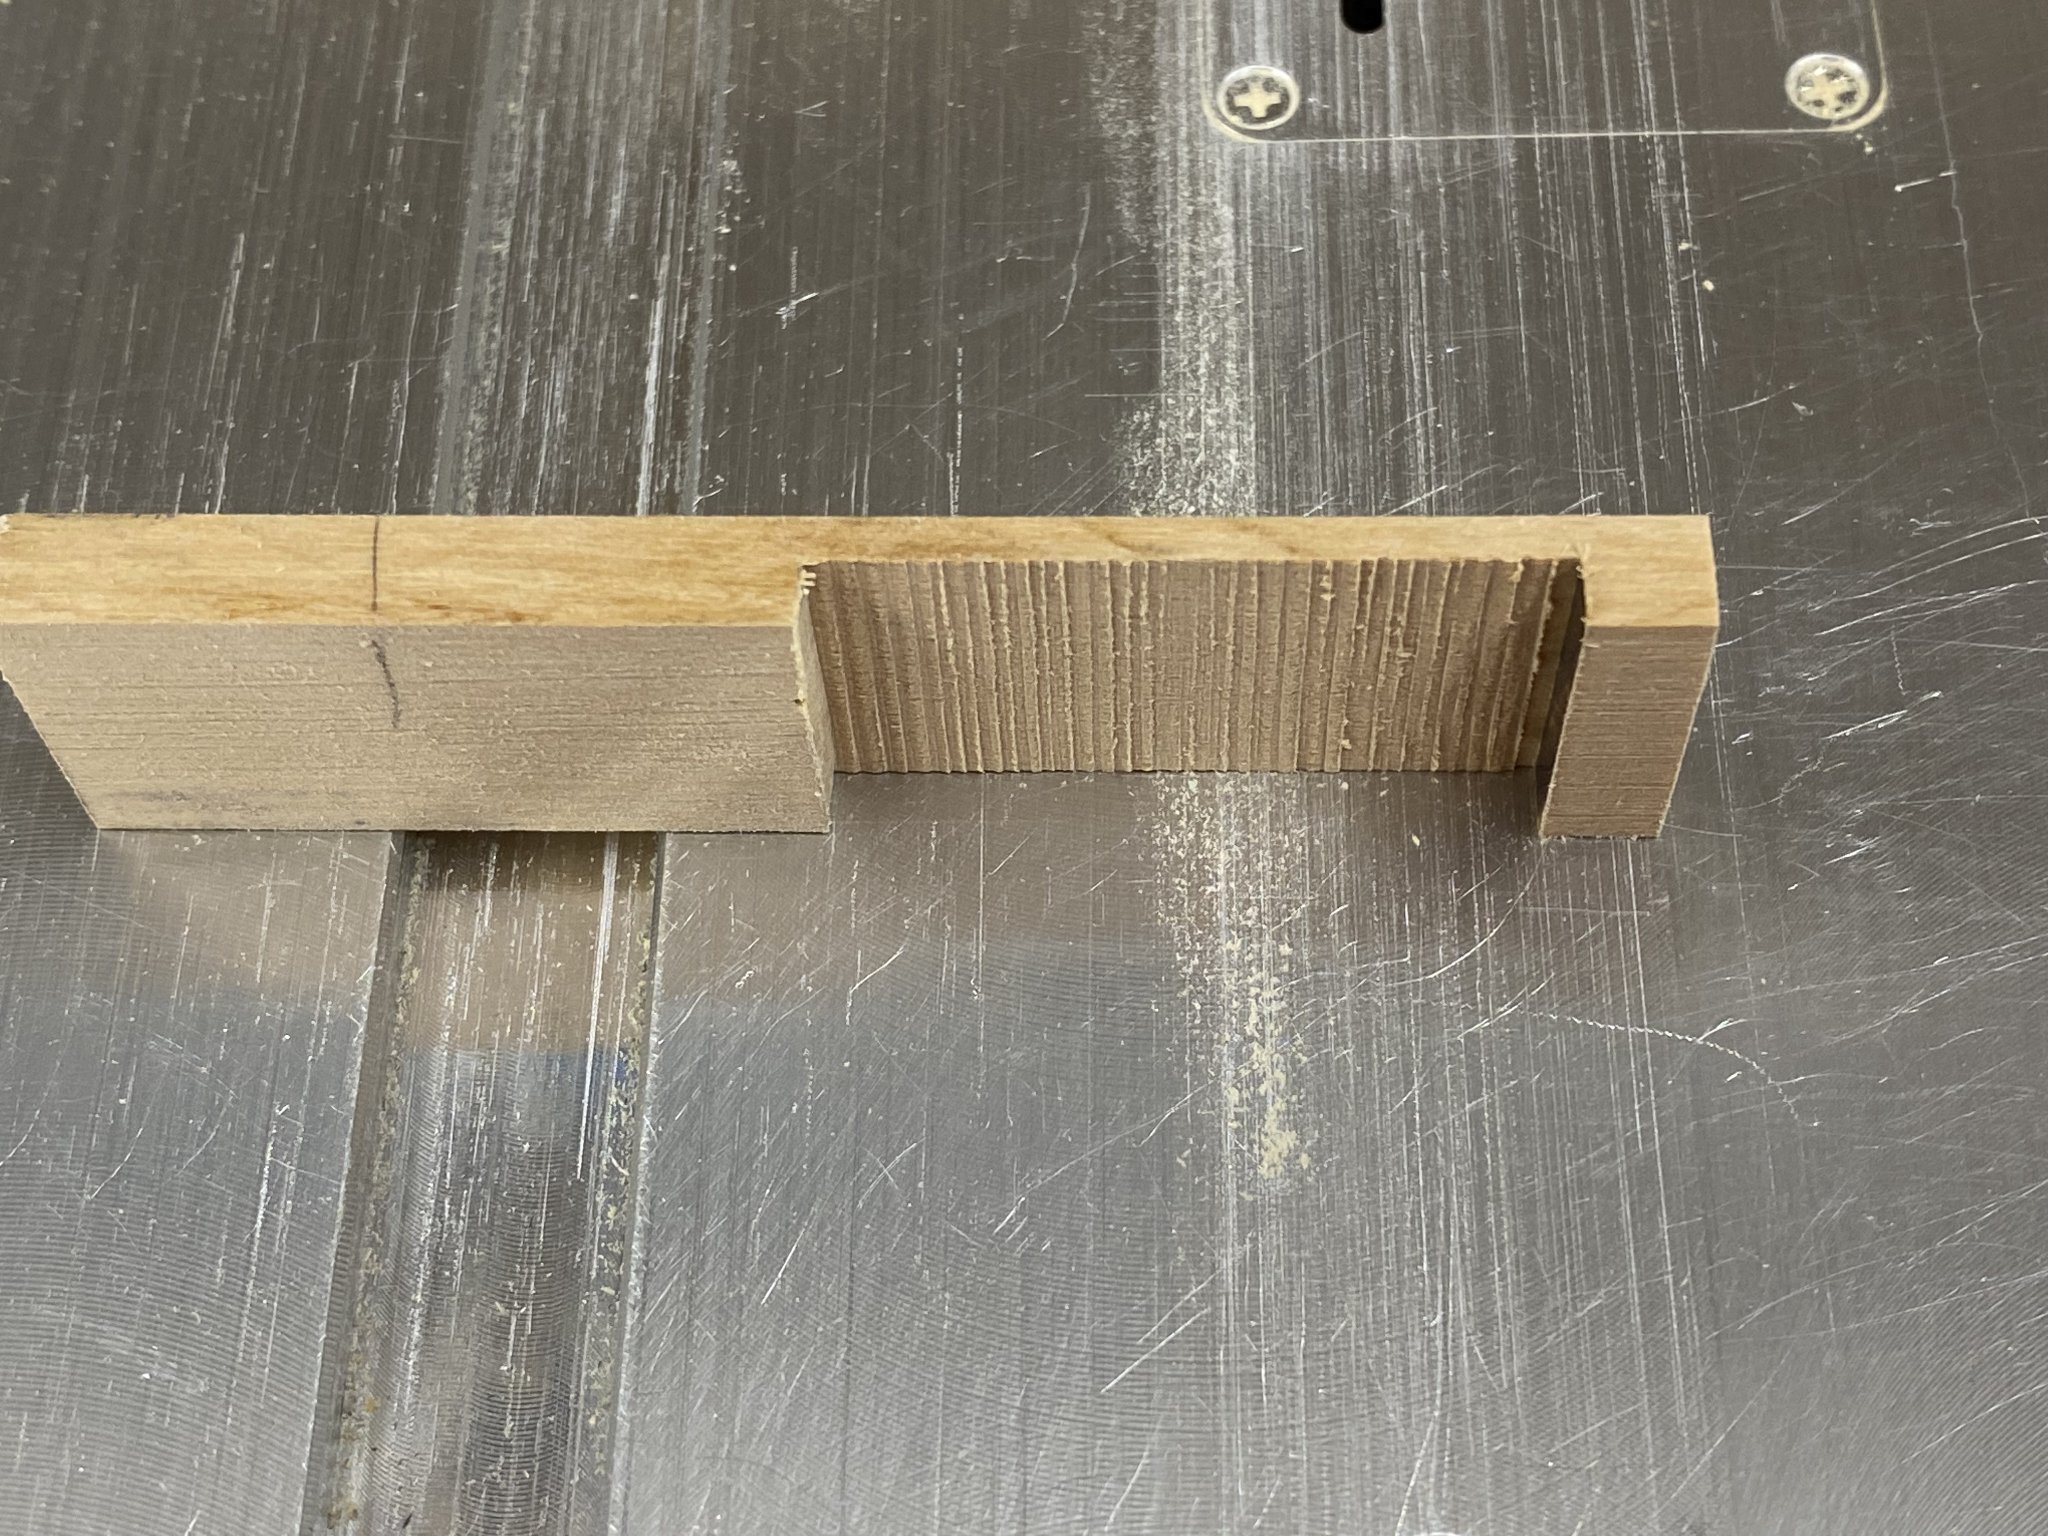
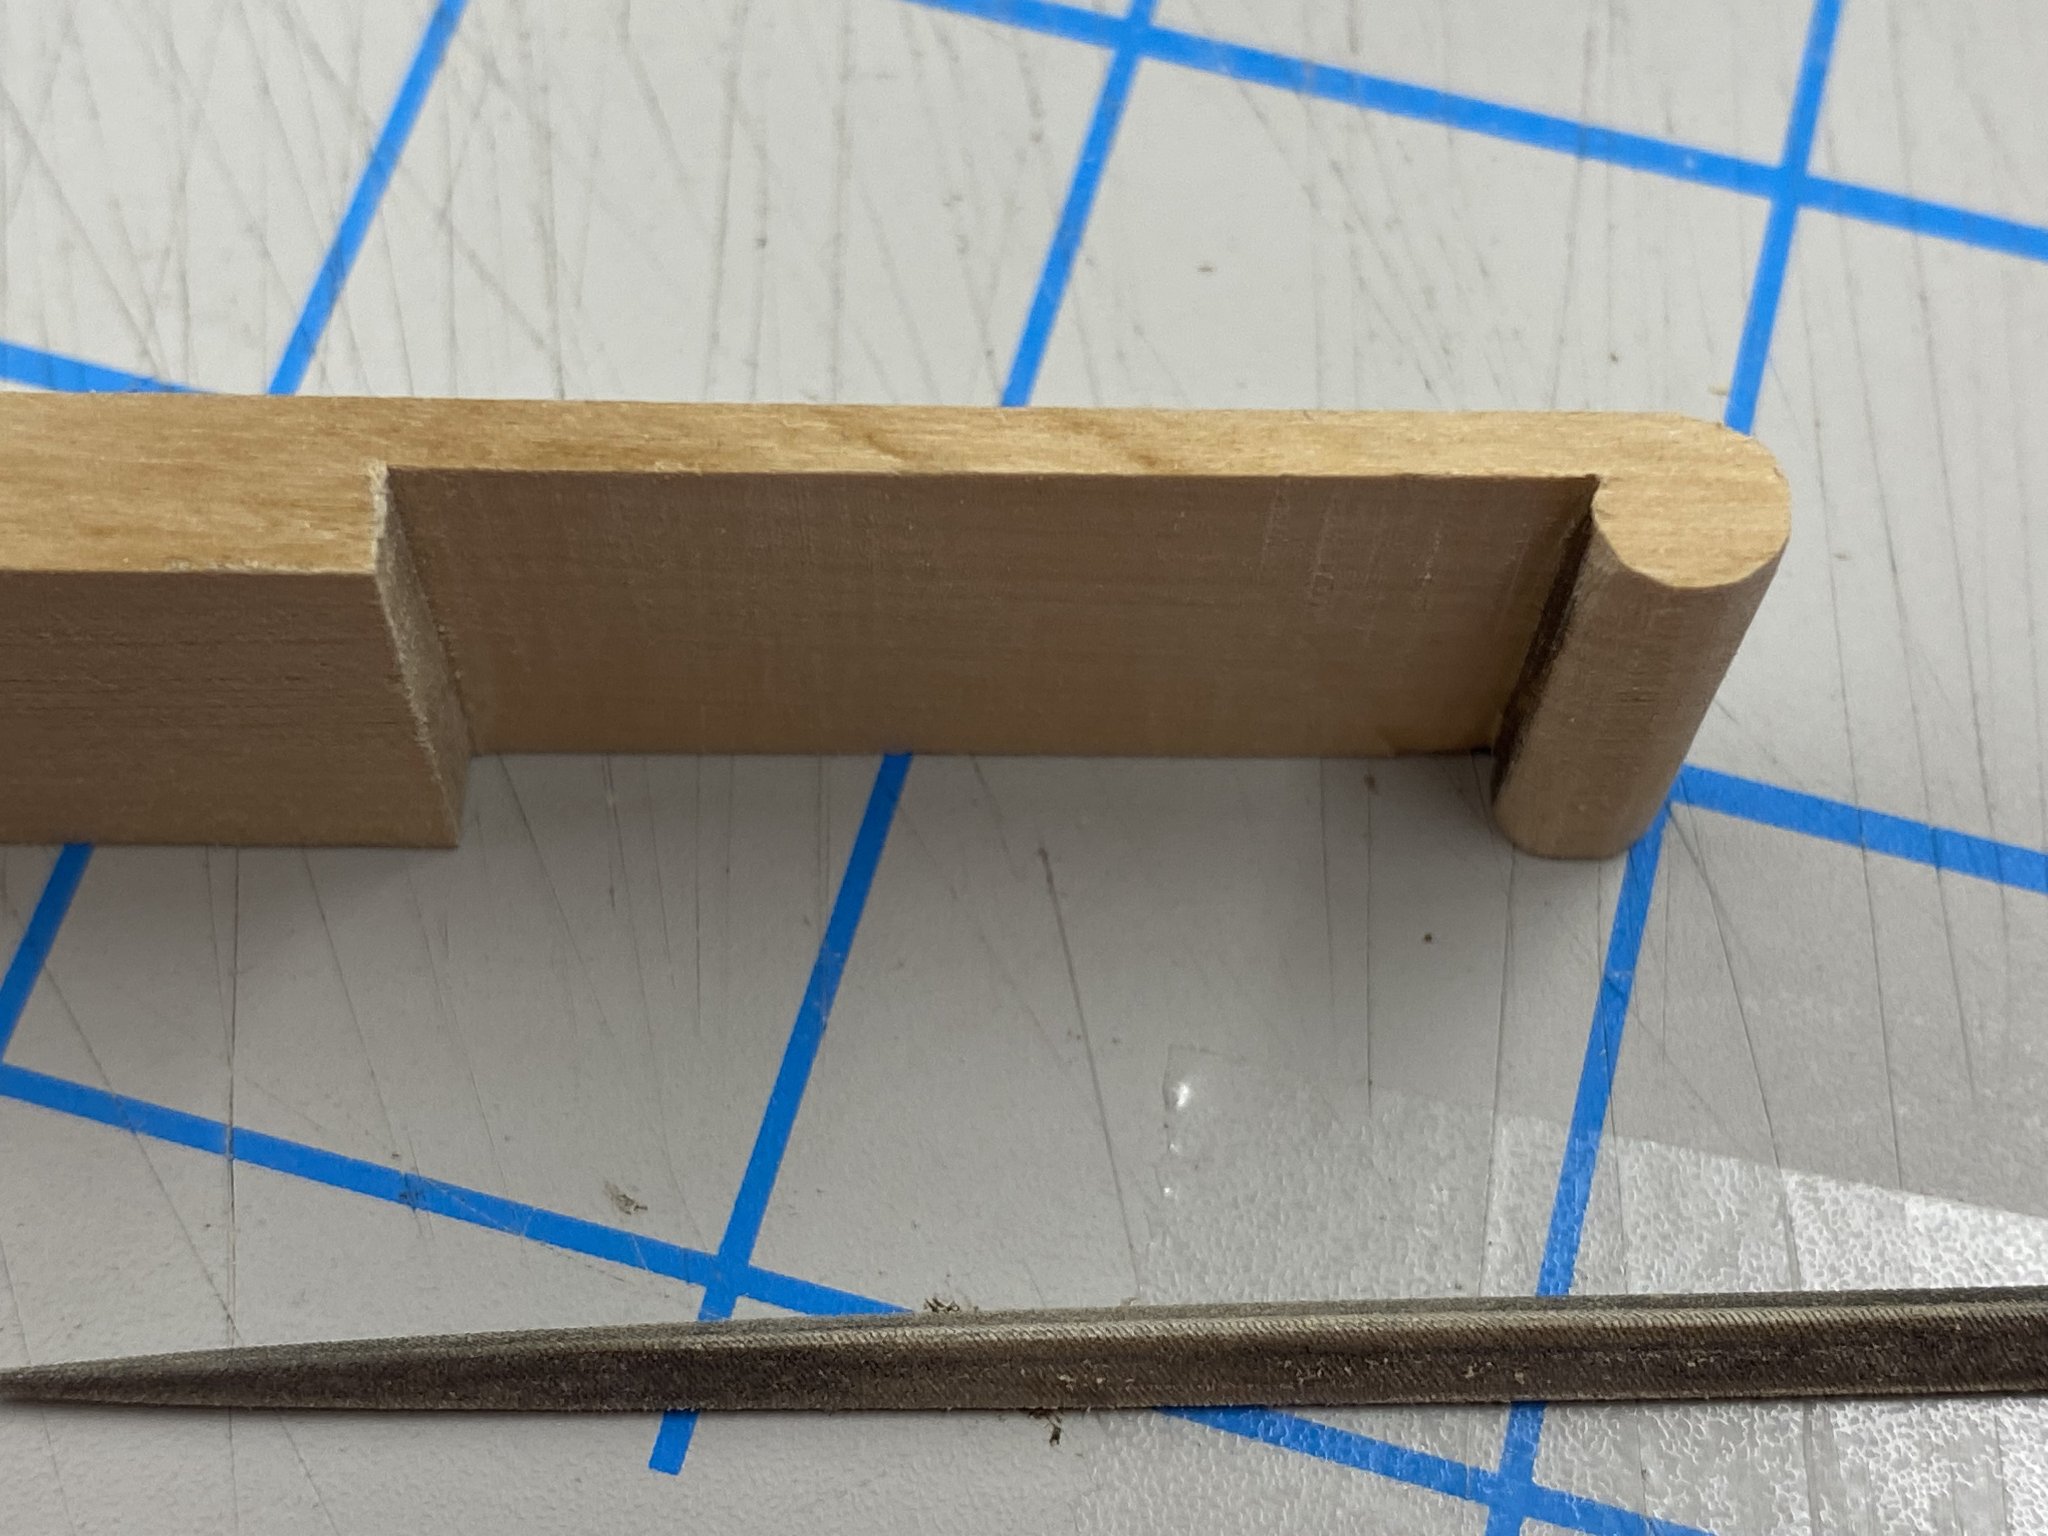
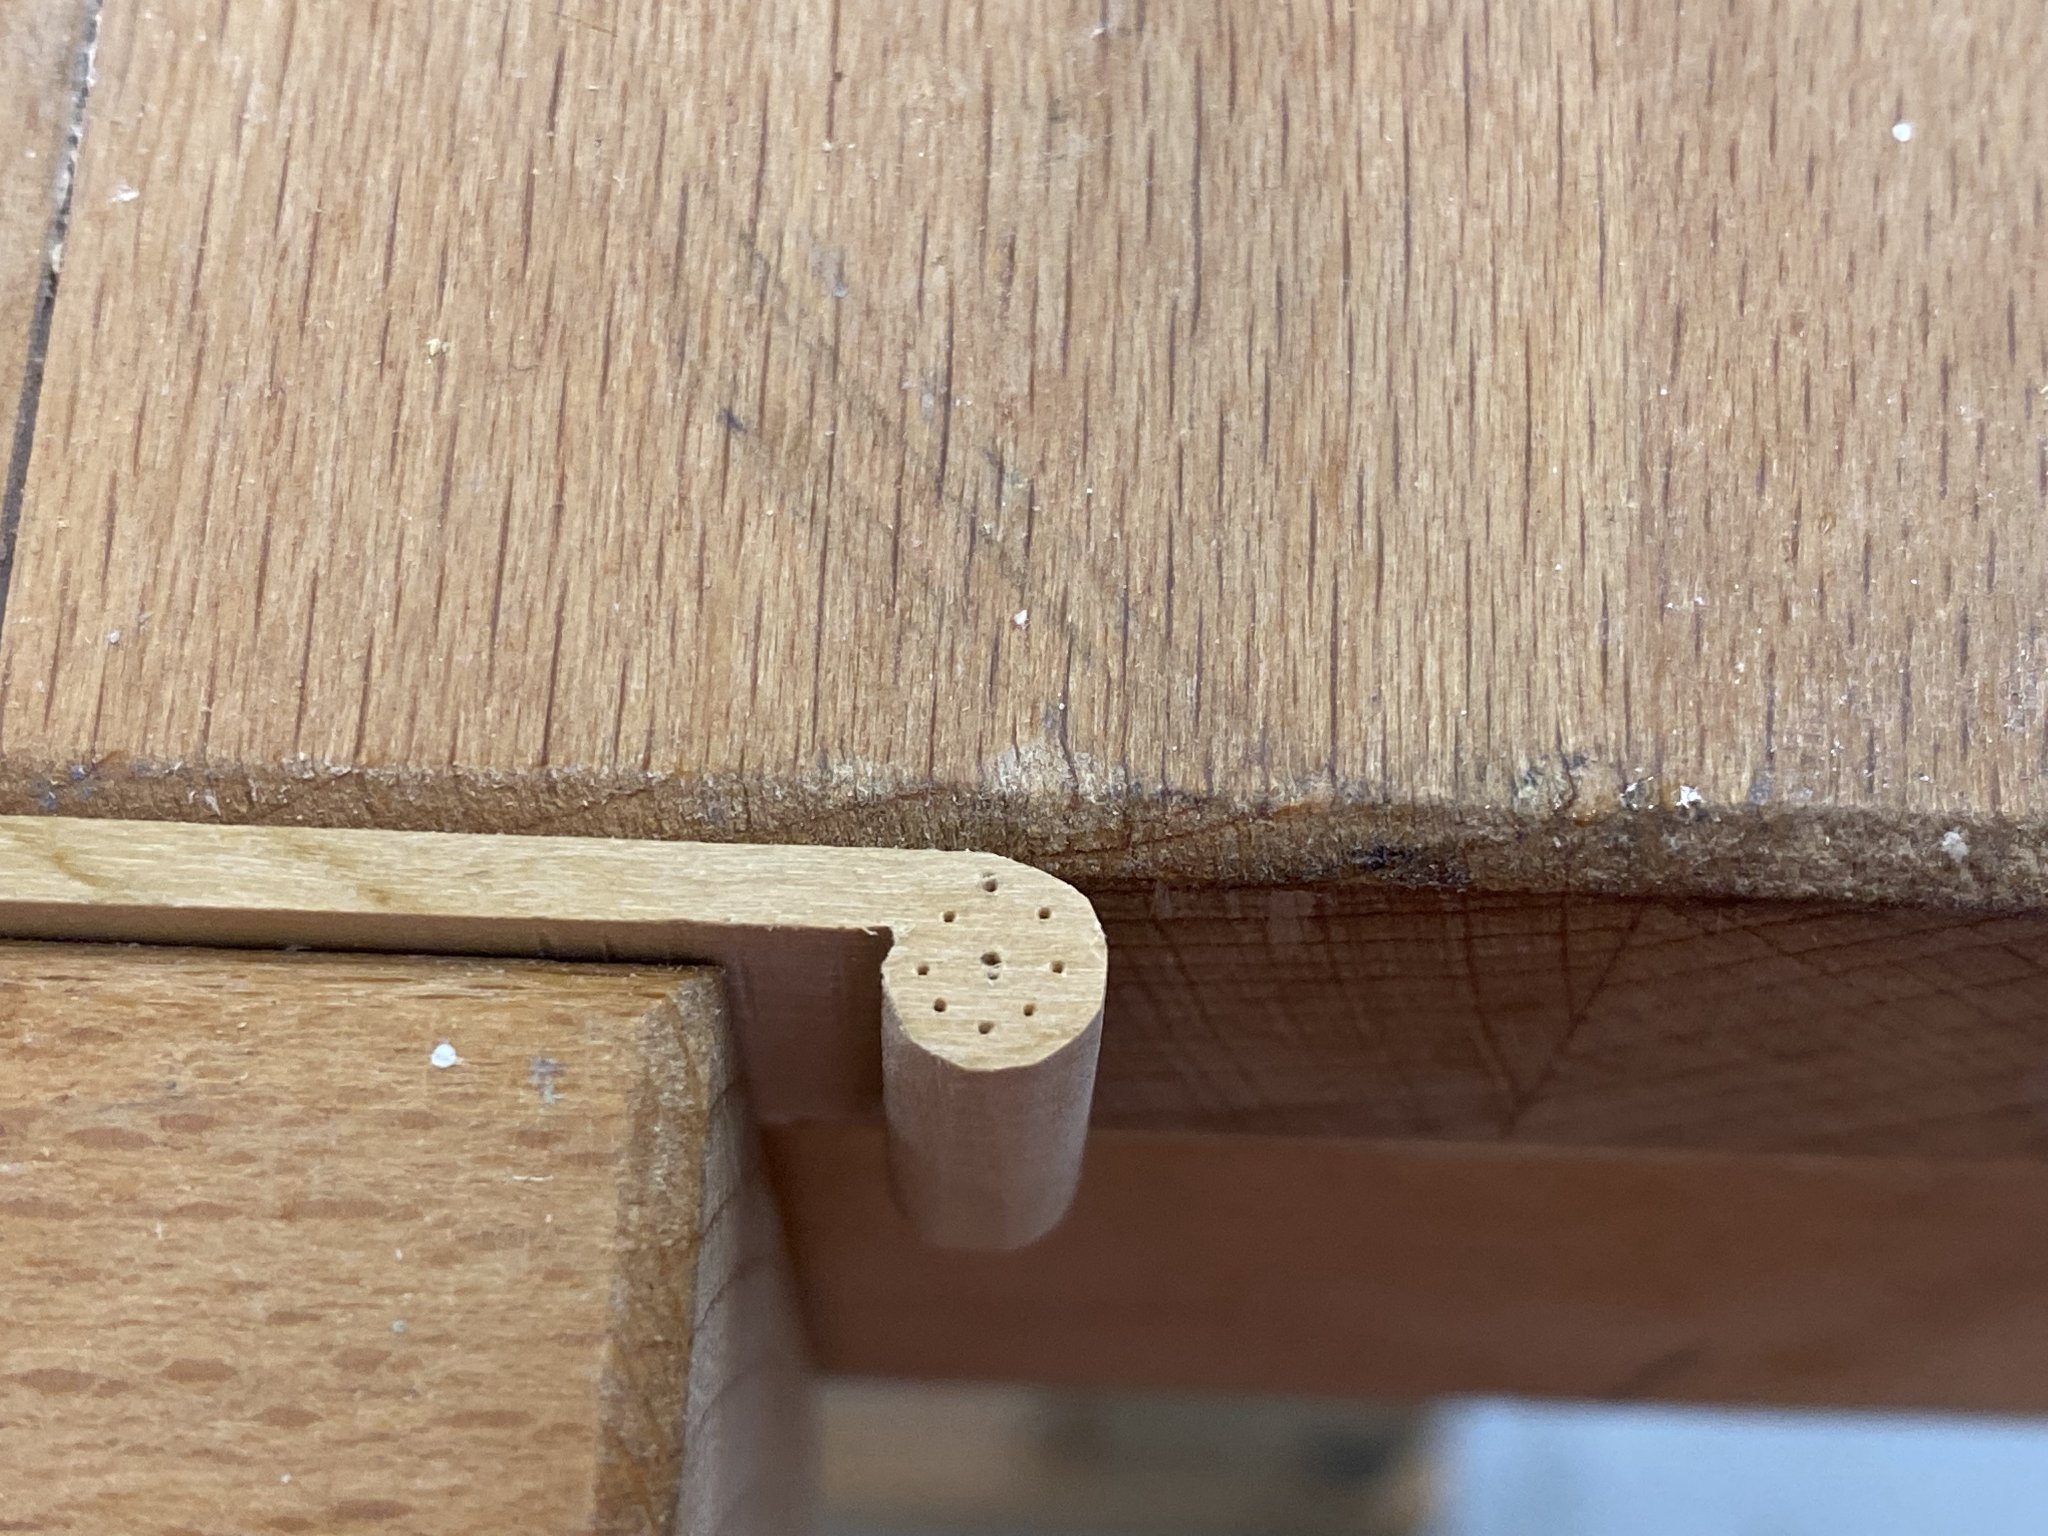
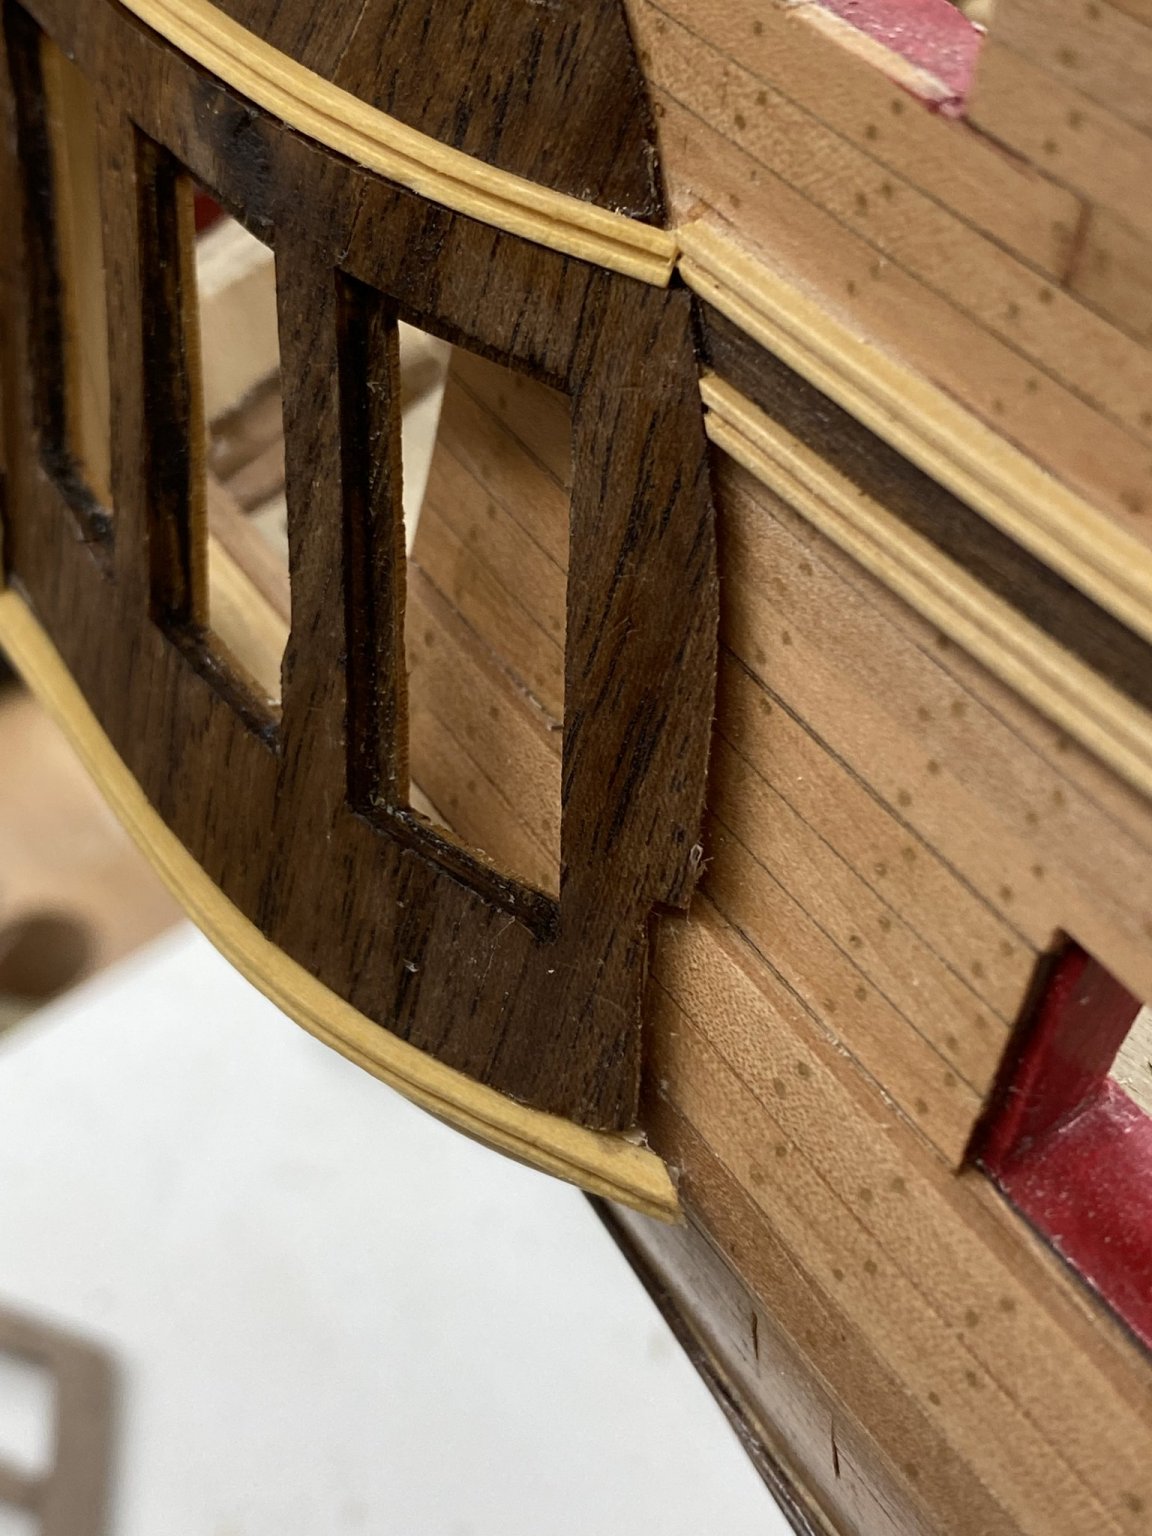
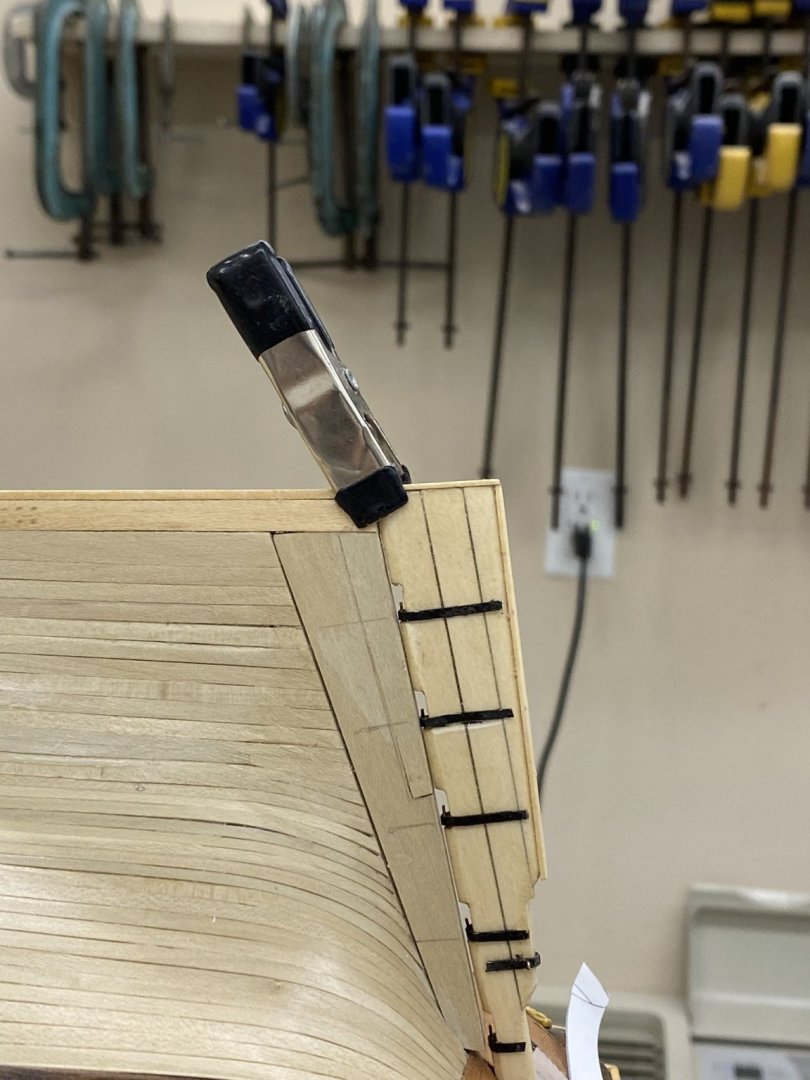
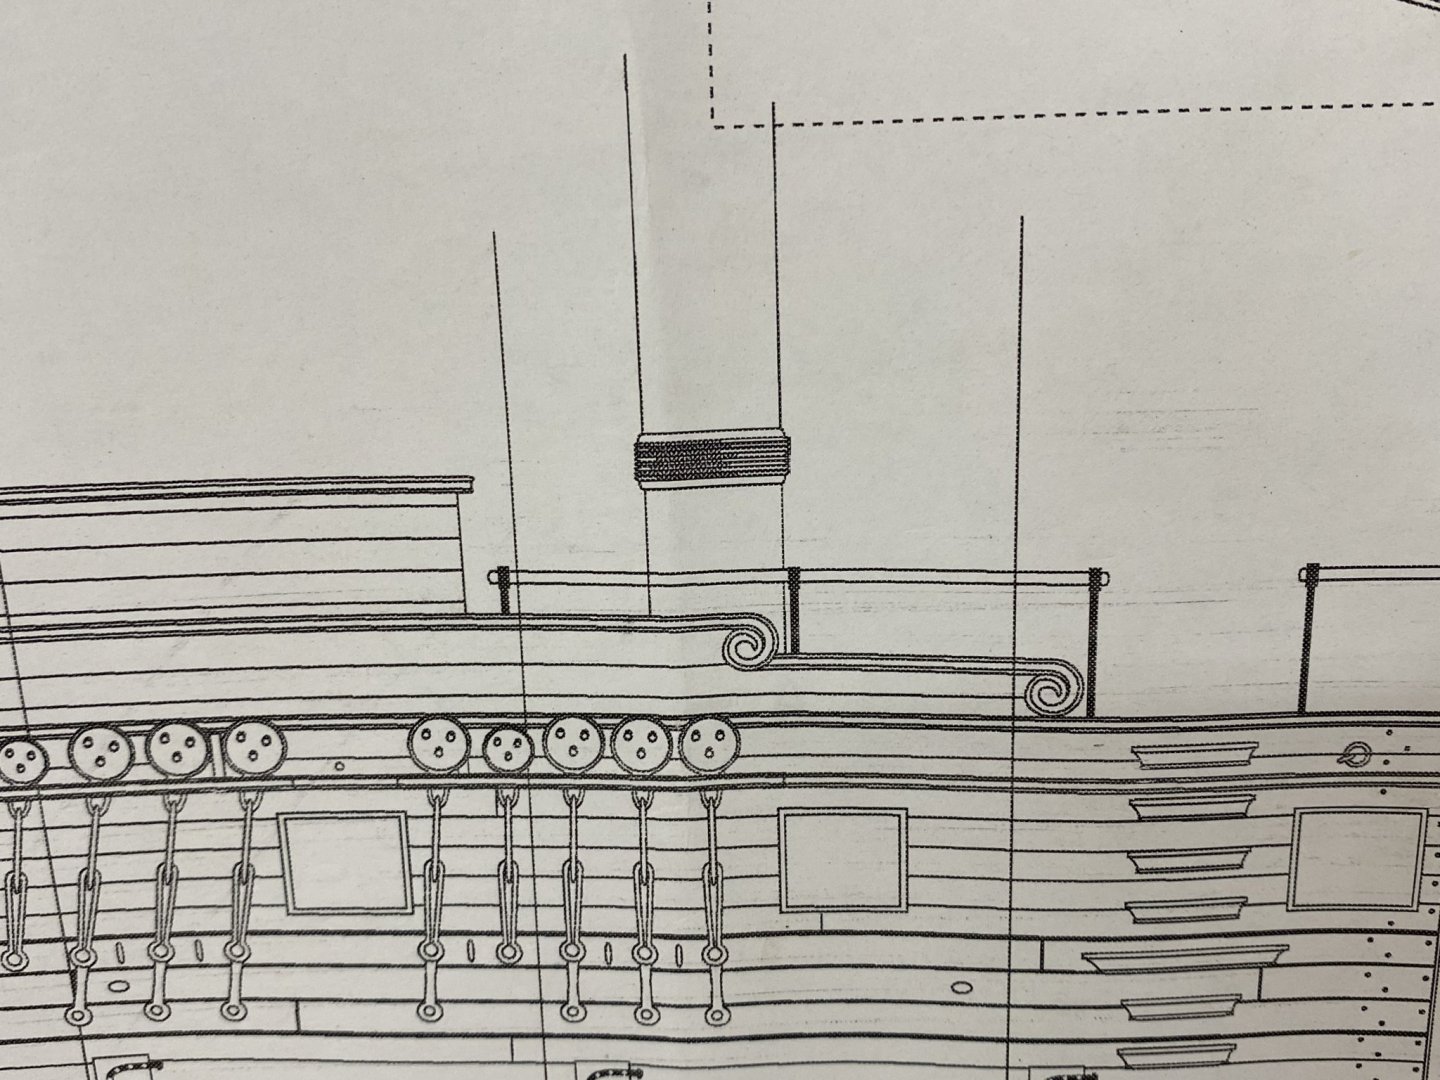
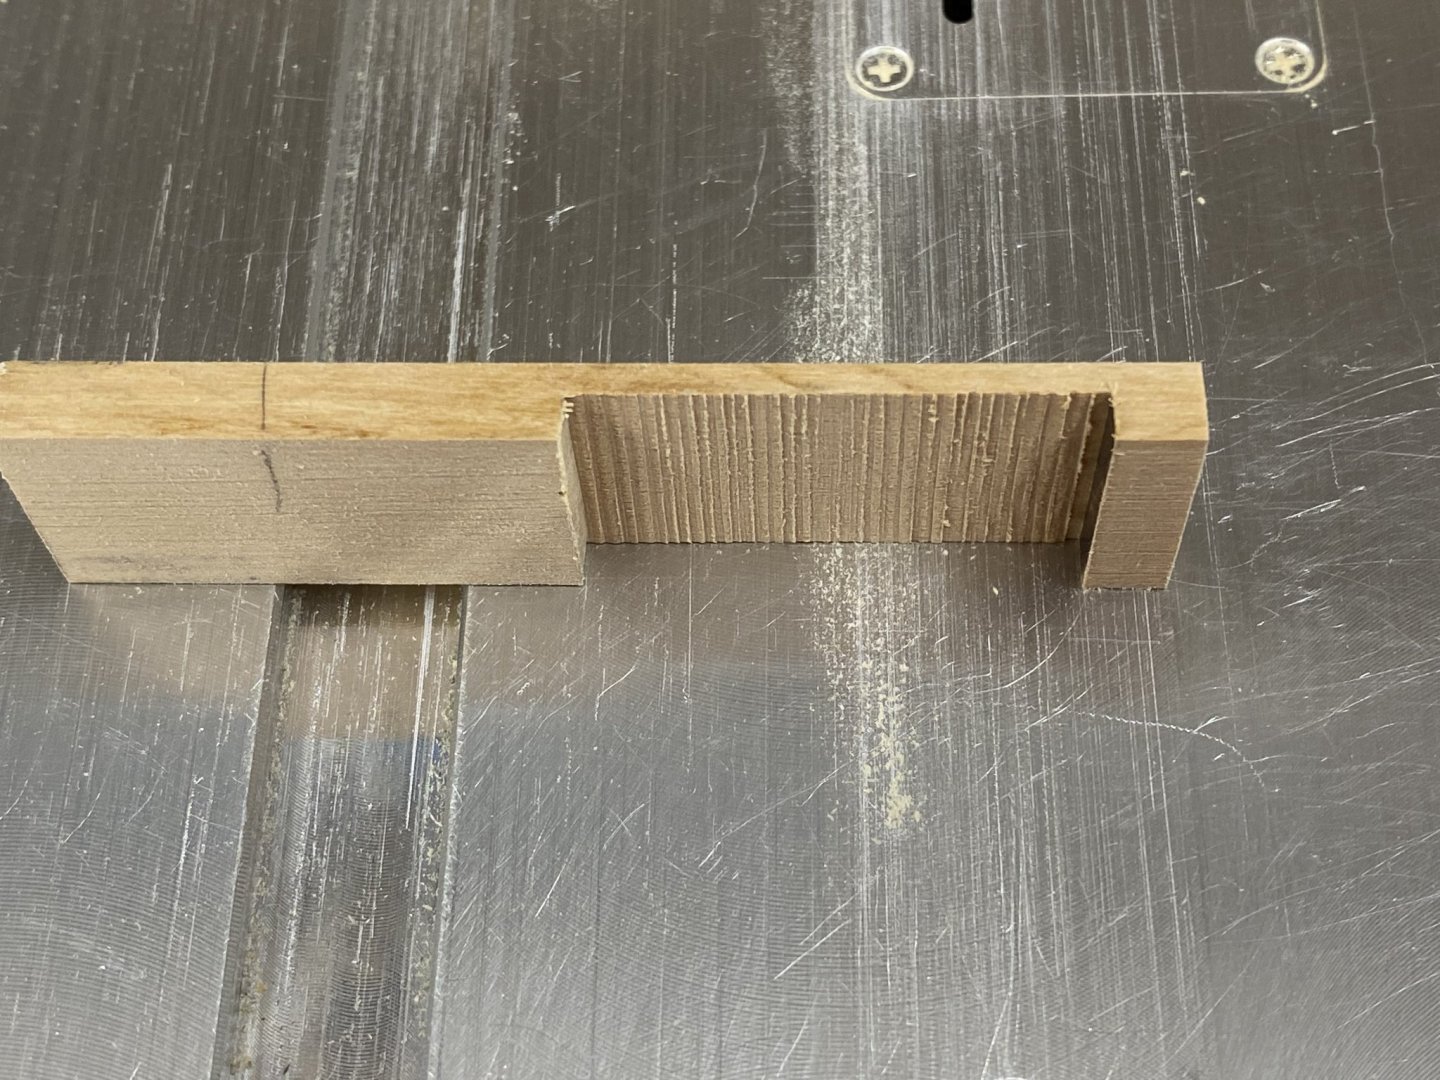
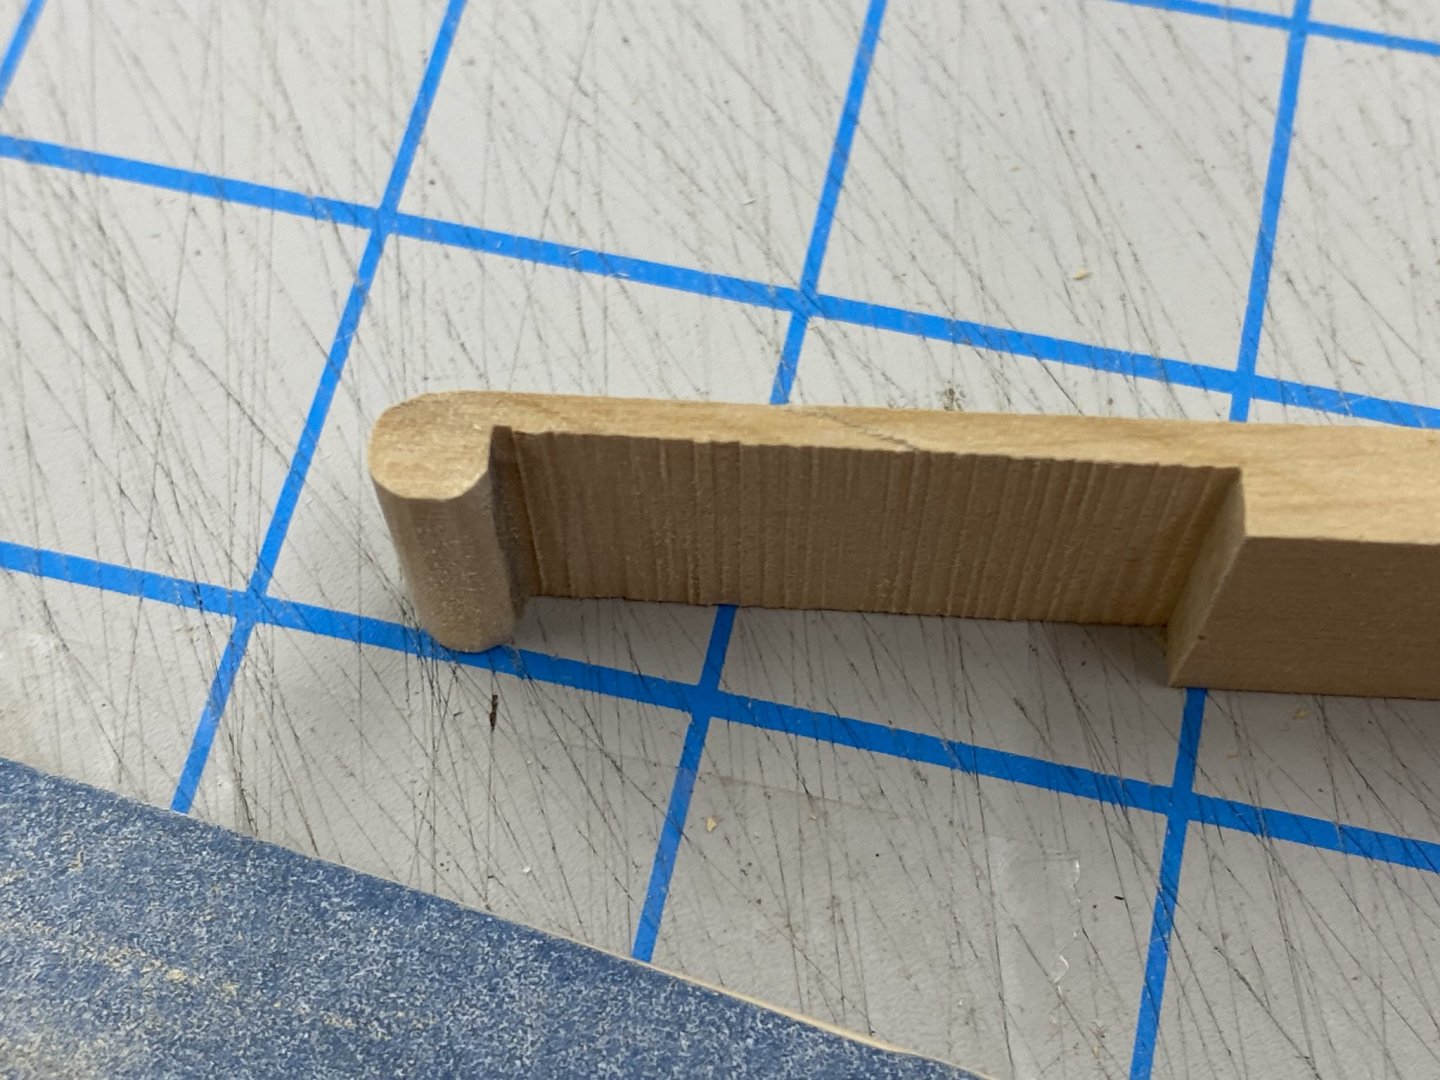
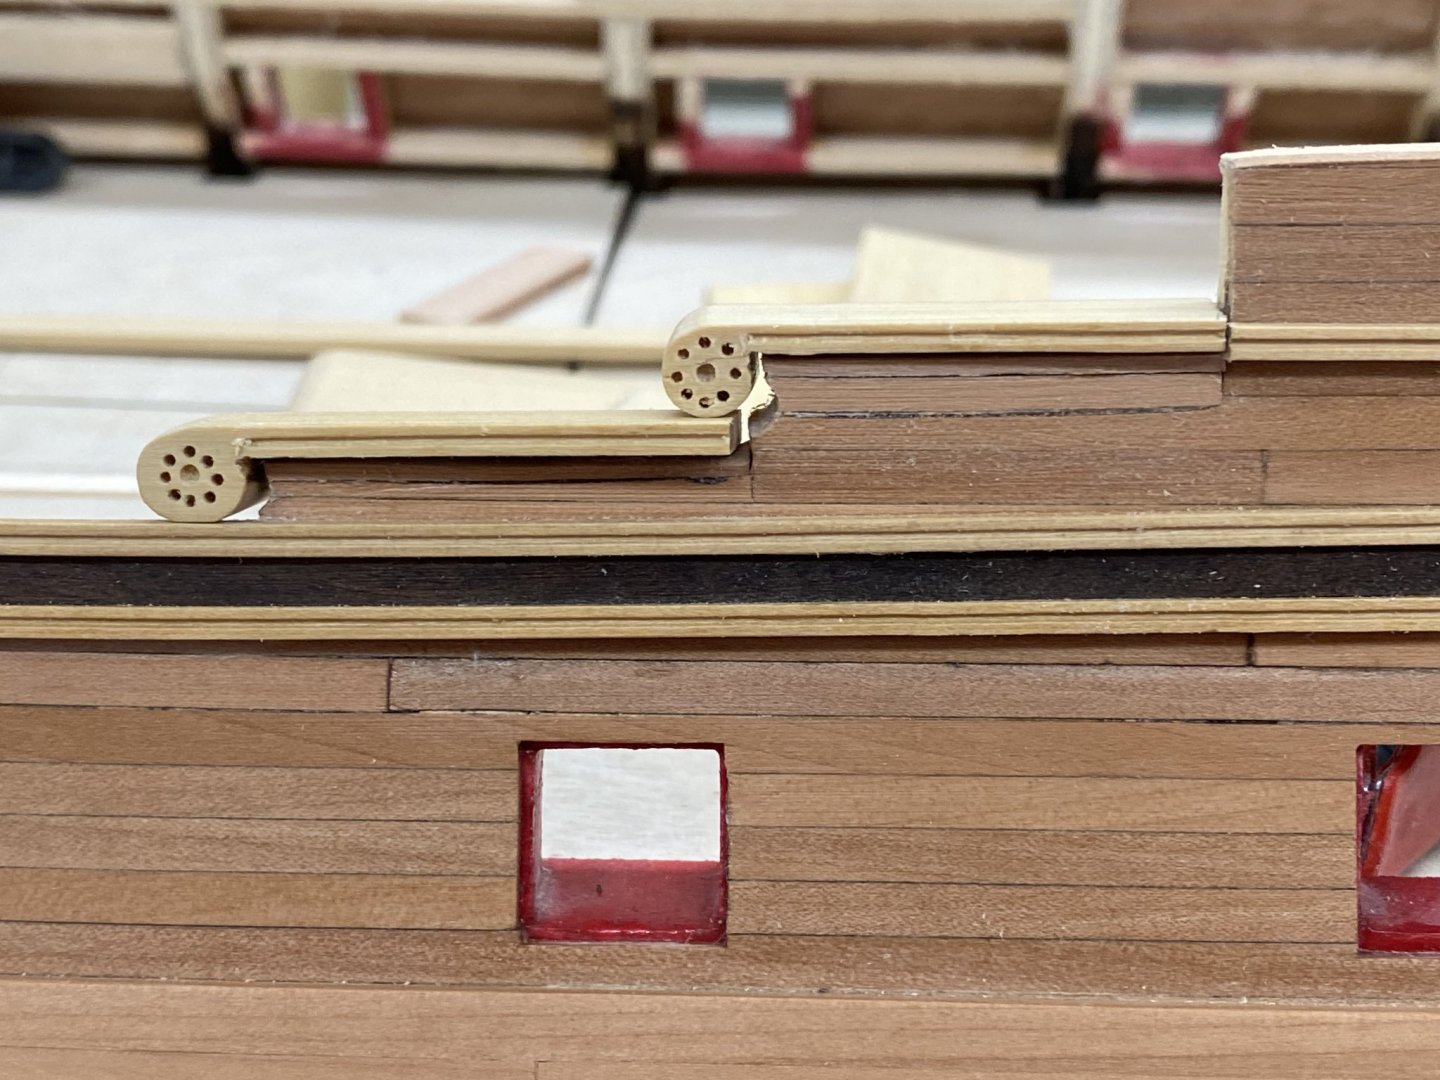
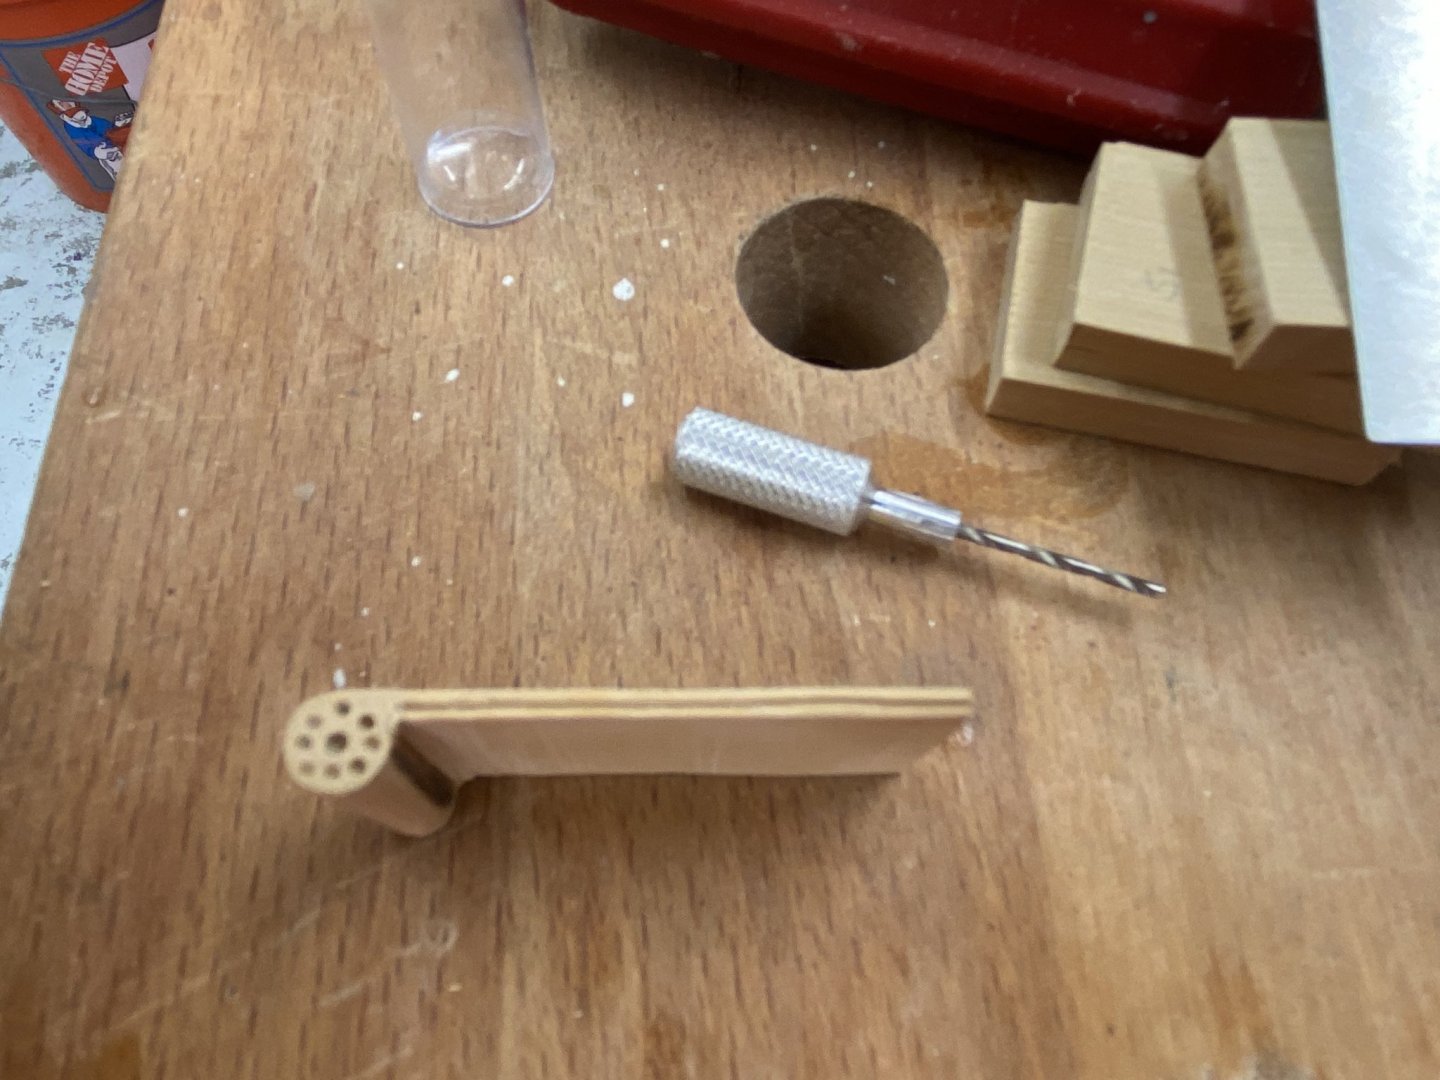
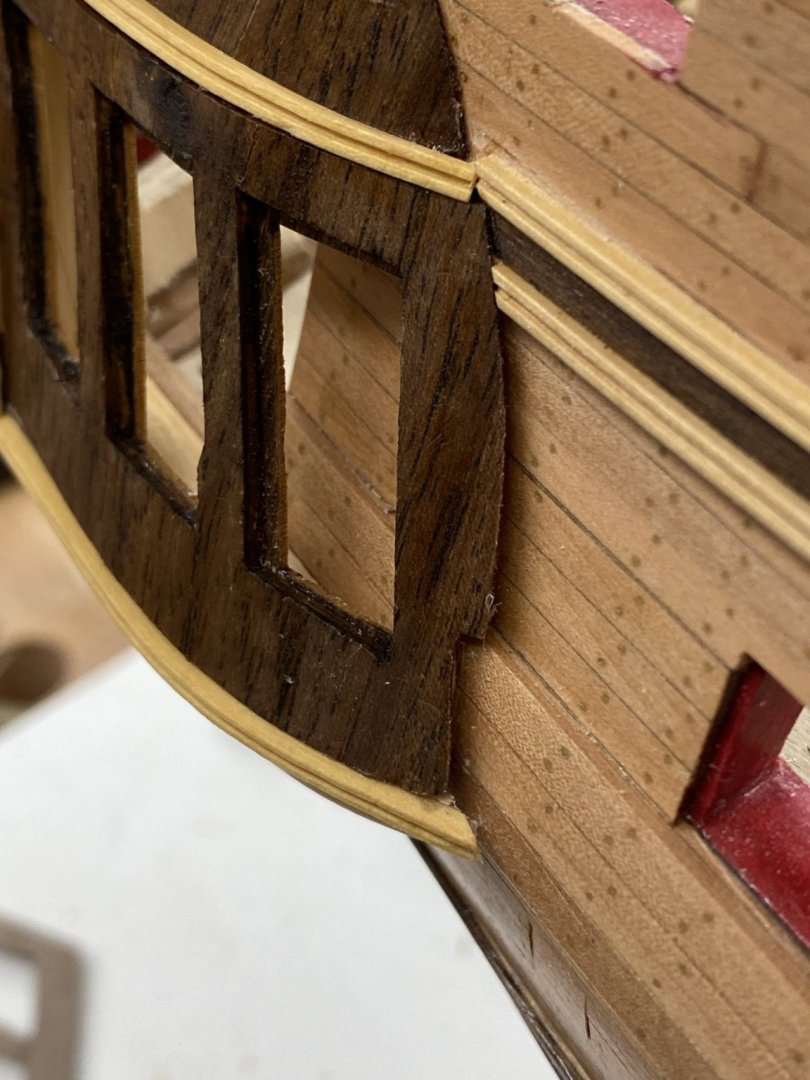
With the quarter galleries in place I needed to add the additional molding on the sides (the one that aligns with the top of the quarter galleries). The molding on the top of the quarter galleries establishes the aft end of this molding run and the forward end is established where the quarter deck and main deck bulwarks meet (the corner formed where the quarterdeck bulwark begins). However, I thought it unwise to just accept that point as currently defined by the hull planking since I know that there is some difference in how the planking runs on each side. An additional consideration was the volutes that form the ends of both sets of molding at the waist. Here is what the drawing shows. From the top of the rail to the bottom of the volute is 1/4" so the volute extends 3/16" below the top of the bulwark. Examination of the bulwark on the model shows that on the port side there was not enough space between the top of the bulwark and the bulwark below to allow the volute to sit where the drawing shows. So I had to add a spacer (of Swiss Pear since it might show later) to get the necessary clearance with the molding below. Similarly with the second volute where the molding extending back to the quarter galleries would start. It is my intent to use boxwood (natural) for at least the rails on the gun deck and forecastle instead of the painted ones of the kit so I need to figure out how to make the volutes from boxwood. I made some boxwood dowels and tried to duplicate the design on the kit provided volutes (continuation of the molding (see above)). That effort was unblemished by success, using either a Demel tool, manual files or both. So I decided to try something different. I started with a piece of boxwood a bit over twice as wide as I expect the final main rail to be (3/4") and a bit longer than the longest of the steps in the bulwark. I set the table saw to cut a groove 7/16" from the end that leaves just over 2mm of material left. I used the table saw to remove the same material as far back as was needed. Then I used the disk sander (and 220 grit sanding sticks) to round off the end on the outside and inside edges. I used a triangular file to try and make the junction with the flat part look more like a part circle and a sanding stick to smooth out the saw marks and get the straight part down to 2mm thick to fit my molding cutter - European manufacturer. I used an awl to mark the center of the "circle" and add marks 2mm out from the center at the eight cardinal points. Using thumbs drills I drilled a 3/64" hole in the center and 1/32" holes around it. I added the holes to, both sides of the piece then cut it is half so I will have pieces for both sides. The side of the piece that will be inboard I left without the holes. After the holes were lightly sanded and cleaned out I used the molding cutter to add the groove to the straight part. (Sorry about the focus) Here is what two pieces sitting on the port side as an approximation of what it will look like. You can see the molding that extends back to the top of the quarter gallery on the right. It is not glued on yet. I needed to establish exactly where this will be so it meets up with the piece I just created. I intend to add a piece (possibly pieces) of walnut veneer between the two pieces of molding as I did between the lower pieces. Hopefully this will cover up any gaps that remain after I get these pieces mounted.


- 370 replies
-
- 5
-
-
- Model Shipways
- Confederacy
- (and 1 more)
-
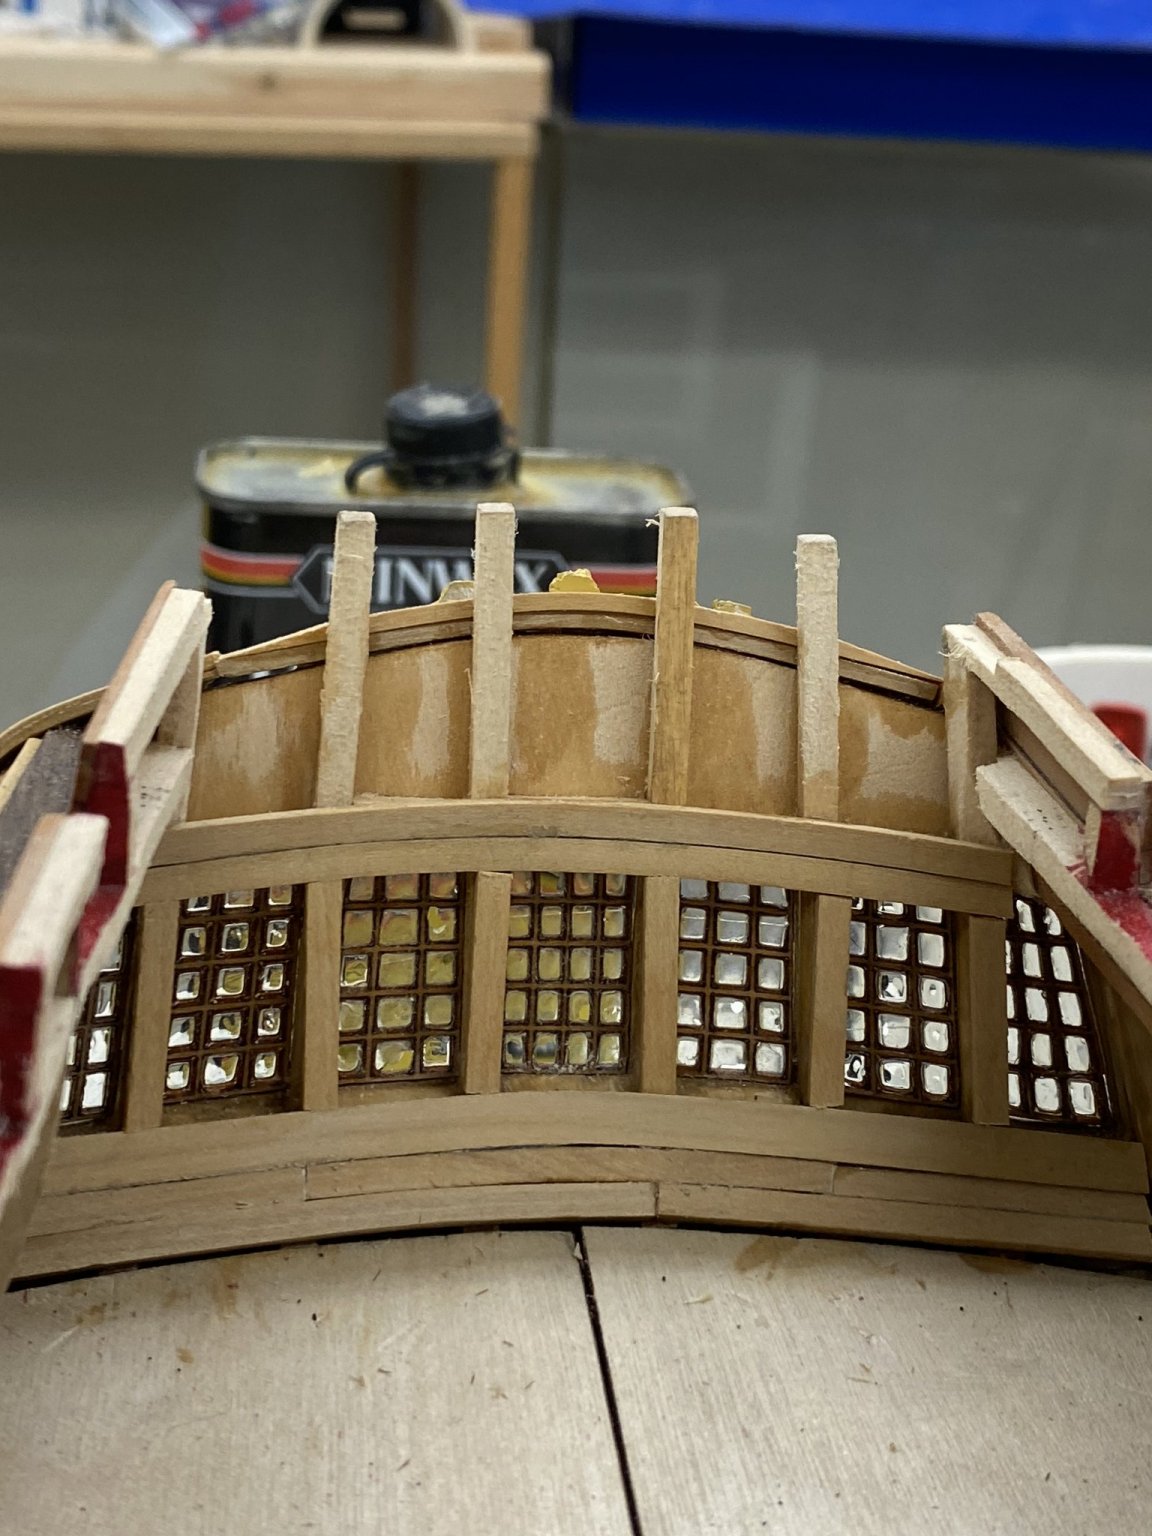
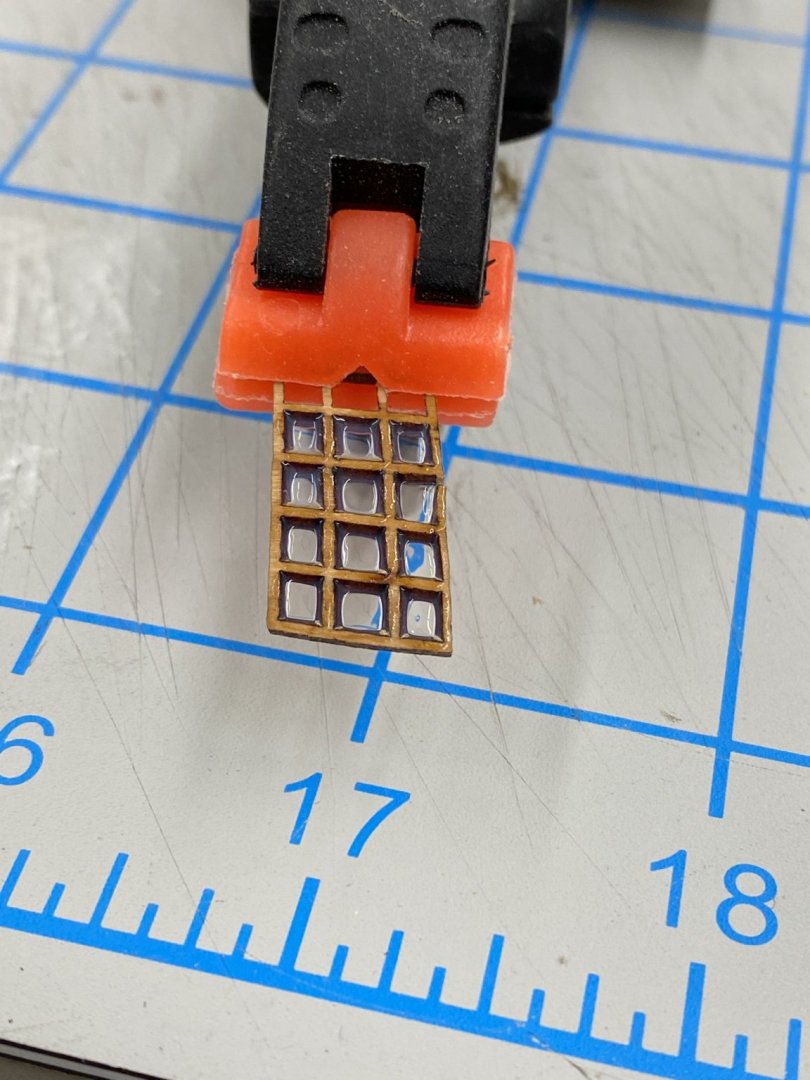
I decided to work on the stern windows first, hopefully this will make the quarter galleries "easier". I trimmed the openings/windows so the frames would "slide" in before I added the windows using the Master Model canopy and window maker "glue". There is a learning curve with this stuff. The trick is to get only just as much as will hold across the opening. Too much (which it is easy to do) leaves a cloudy border around the window. Don't ask me how I know. The tool of choice for me was a round toothpick that had been sharpened on a sanding stick a bit. As the glue starts to set in whatever you are holding it in (30cc medicine cup in my case) you get a bigger drop on whatever you are using and it takes fewer dips to cover the window. As I said too much is not good - I used some fine "brushes" from MicroMark to "suck" the extra out of a window if I got too much in. After adding the "glue" with the windows on parchment paper and then scotch tape using various weights to keep the window flat on the surface I finally decided that holding the window more or less horizontal with nothing under it produced the best results. Here is one of them in a clamp with the visible windows filled in. The bad news with this method is it takes two steps as some of the windows are obstructed by the clamp. But then if you are in a hurry there will be much trouble ahead. However when I went to put the windows back in the stern none of them fit without additional trimming. Apparently the glue or moisture is enough to distort the window frames - at least the ones I was using which were custom cut from Swiss Pear. Anyway, after more trimming here are the windows installed it the stern.
- 370 replies
-
- 2
-
-
- Model Shipways
- Confederacy
- (and 1 more)
-
A close inspection of the photo above reveals that for whatever reason there is not enough space between the upper piece of molding and the bottom of the window openings to have an additional piece of molding as shown in the plans. So I will have to bring the cove that supports the carvings above the windows come all the way down to the upper molding. That brought me to my next problem. I broke the kit provided cove piece while removing the lower half of the carrier sheet. It probably would not have been long enough anyway so it appears I will have to fabricate my version of the stern cove molding. The stern cove molding provided is 1/8" thick and tapers from 1/8" wide at the center to about 1/16" at the ends. It also needs to be tapered in the fore/aft dimension as shown in the instructions. I want the cove to be in boxwood as the rest of the molding is in that wood and i really do not want to draw attention to this piece as it really is just the support for the stern carvings. Given the size and thin dimensions I was hesitant to try and fabricate it from a single piece of wood as no matter which way the grain runs it is going to be very hard to shape without breaking. My solution was to create a piece of 1/8" boxwood plywood. I had a 1/16" thick piece of boxwood that was wide enough to fit the stern cove vertically but not horizontally so I was forced to make the second ply in three pieces. I glued this up and then after it was dry and the edges sanded smooth I used the kit provided carrier sheet to draw the required shape on my plywood. I extended the ends another 1/2" to make sure I would have enough length to reach the existing upper molding. I did not take pictures of the intermediate steps but here is the stern cove on the stern waiting for the glue to dry. I should have made sure the side with the continuous sheet was facing out since you can clearly see the joints in plywood. Hopefully the seams will be less noticeable after a couple of coats of WoP. I also got the port side quarter gallery finished (the windows are just sitting in their frames). I think I did a better job of getting the forward seam less noticeable than on the stbd side.


- 370 replies
-
- 3
-
-
- Model Shipways
- Confederacy
- (and 1 more)
-
While I worked on the port side I got the window frames dry fitted into the stbd side quarter gallery. These frames are done in Swiss Pear, although I have been considering hitting them with the walnut stain so the gaps between the frame and the gallery will not be so obvious. Not sure what I will do at this point - I have walnut wood filler and wood putty but I have not tried it alongside the walnut stained walnut veneer that I used for the gallery facing. Perhaps I should experiment some before deciding. I also (against my better judgement) mixed up a combination of tru-color flat off-white (TCP-817) and SP&S Yellow (TCP-48) to get a color that is pretty close to the shade of the boxwood that I have used for the molding on the stern. Here is the piece of trim between the windows (also dry fitted) held in place with two bits of masking tape.


- 370 replies
-
- 3
-
-
- Model Shipways
- Confederacy
- (and 1 more)
-
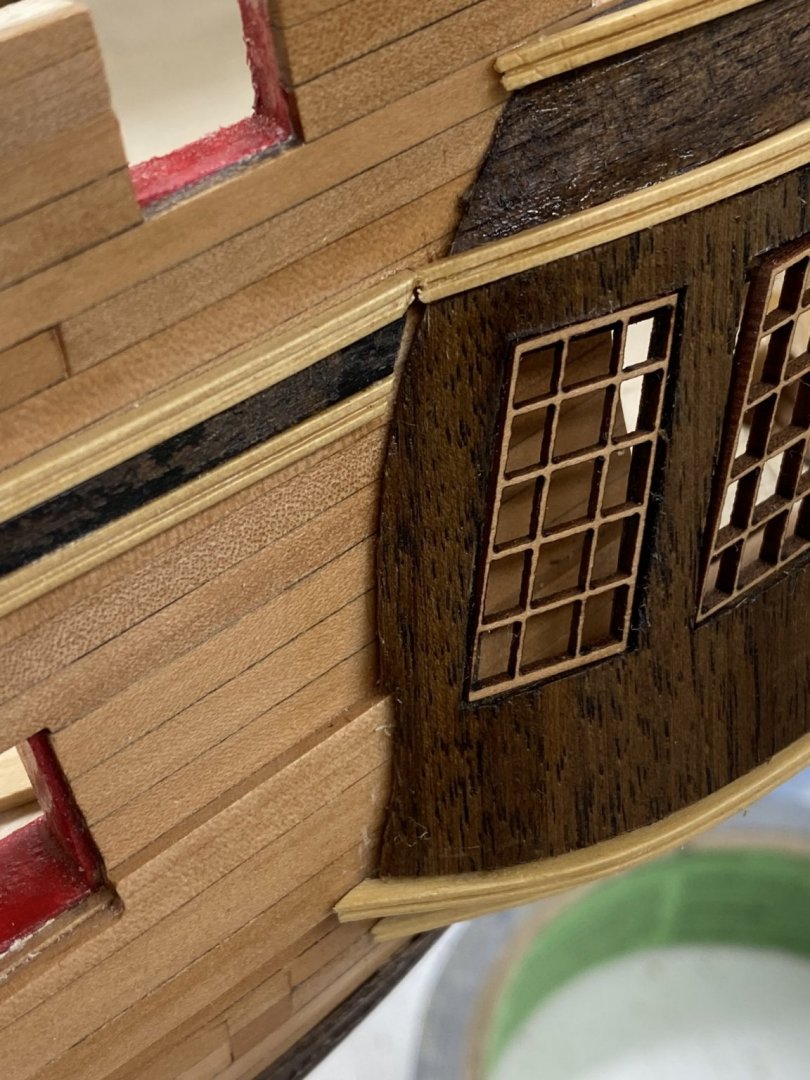
The starboard side quarter gallery - wiped down with paint thinner. And yes I see that the bulwark is broken off - that happened while I was thinning the bulkwarks. It was the only one so I mcount myself lucky. I will fix it when I get the port side finished. I did not get the forward junction with the hull as close as I wanted but... I am putting the glass in the windows with the canopy and window cement (Model Master Clear Parts Cement and Window Maker to be exact) instead of the acetate sheet. I think I am going to wait until I get the port side done and then put all the windows in at the same time. Now it is on to the port side.
- 370 replies
-
- 2
-
-
- Model Shipways
- Confederacy
- (and 1 more)
-
I decided to use boxwood in place of the kit supplied parts for the "floor" of the quarter galleries. But I did not have any boxwood in a wide enough width to span the entire area so I glued up four pieces of 1/8" wide strip which I will use for the bottom and aft part of the quarter gallery interiors. I used the kit piece for the inner "top" of the quarter galleries since it will be really hard to see them. So here are the quarter gallery "foundations" ready for the two layer "skin" to be applied.

- 370 replies
-
- 5
-
-
- Model Shipways
- Confederacy
- (and 1 more)
-
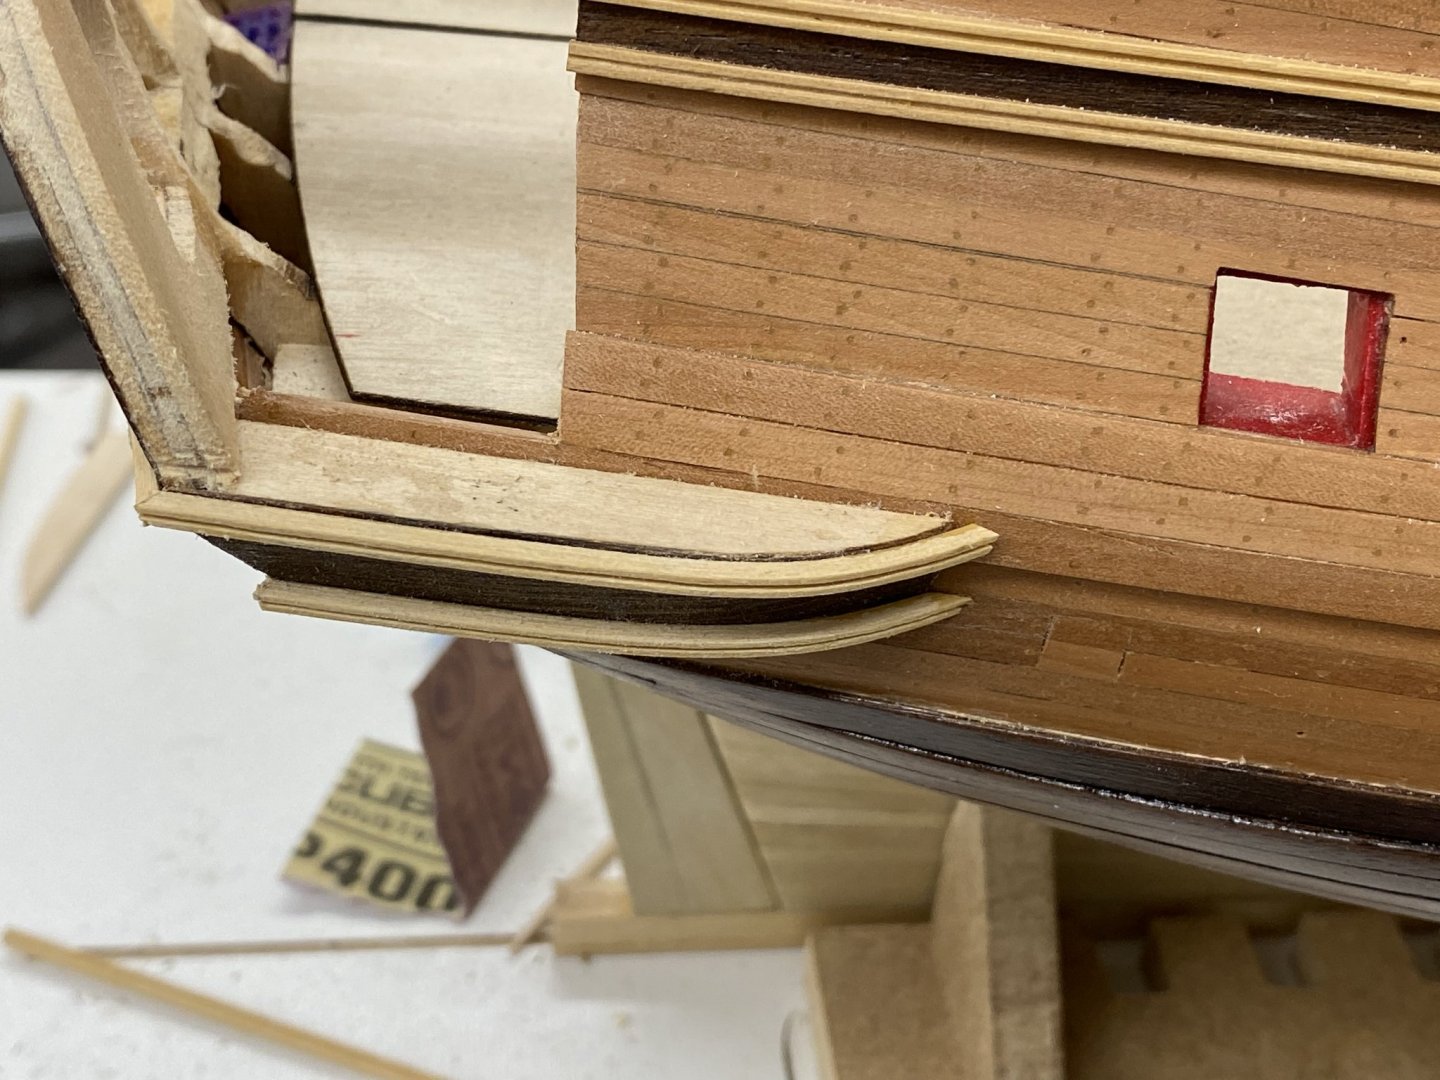
It was only a matter of when the dreaded "tolerance build-up" would rear its ugly head and that time is now - at least the first instance where it is causing a "real" problem. The issue came to light when I was installing the QG1 and 2 pieces that define the top and bottom of the quarter gallery "foundations". The directions say that the upper (QG1) piece should be 1/16" below the lower opening for the quarter galleries which are defined by the bulwark planking. If the planking on each side are not "aligned" (at least vertically) then the quarter galleries will appear at slightly (hopefully) different locations relative to the stern transom. However, since the ends of the galleries will be connected by molding pieces top and bottom even a slight difference will cause the molding to not appear to be "level". On this model the difference was pretty close to 1/16" with the port side higher than the starboard. Unluckily I did not recognize the problem until both sets of QG1 and 2s were glued in place. So I tore the port side pieces off. I decided that the stbd side was going to be the "display" side (it has the hull planking cut-out) so would use that as "ground truth" for the quarter galleries. Here is the stbd side quarter gallery "foundation" as it stands now. I used the thin walnut veneer to cover the QG1 and 2 pieces. I saw no reason to plank this area since I was going to cover it with walnut. Now that I have located the stbd side of the upper molding strip (you can see it in the photo above) I have to extend it across the stern and hope it comes somewhere close to where the port side QG1 should be. We will see.
- 370 replies
-
- 2
-
-
- Model Shipways
- Confederacy
- (and 1 more)
-
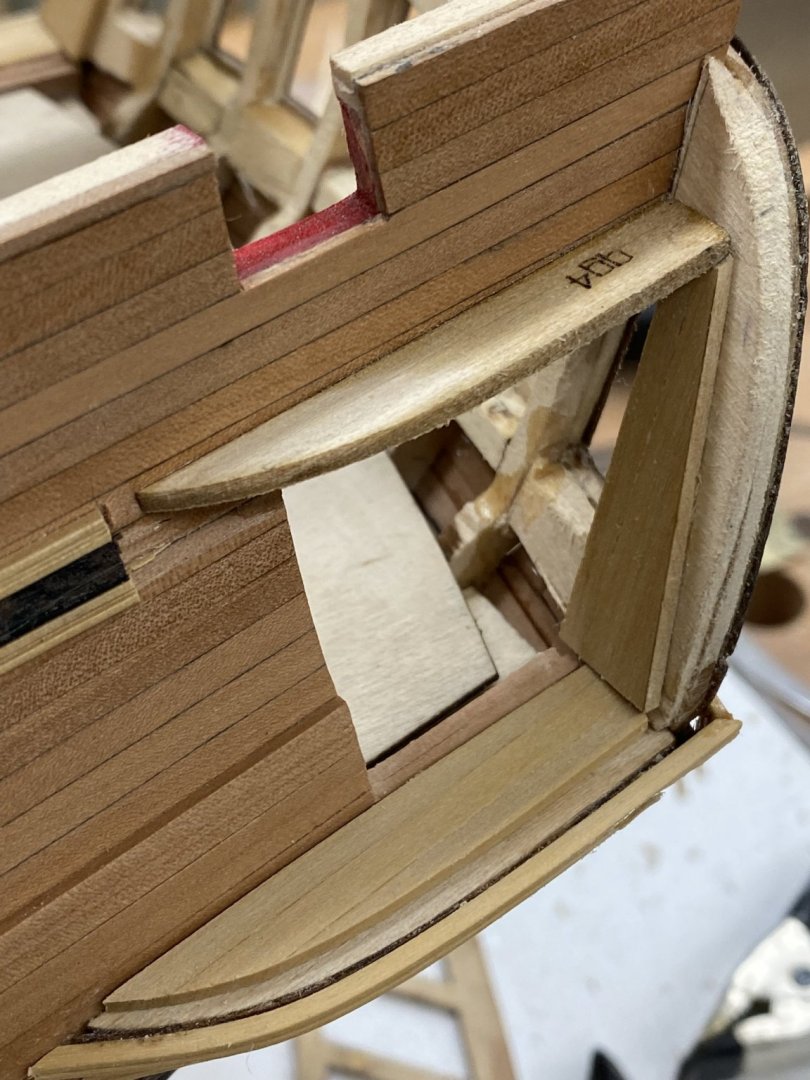
I had to invert the hull again to add the "details" to the lower transom as well as providing a better perspective to plank the upper transom. I added the walnut veneer to the transom and now the hull is back upright. I should have taken I picture before I turned it over but... So here it is as I start the construction of the quarter galleries.
- 370 replies
-
- 3
-
-
- Model Shipways
- Confederacy
- (and 1 more)