cdrusn89
-
Posts
1,915 -
Joined
-
Last visited
Content Type
Profiles
Forums
Gallery
Events
Everything posted by cdrusn89
-
 Thanks Frankie. I hope my log is of some assistance. I know the others on this site have helped me. I am going to Eire in August to see the real Niagara (and the rest of the tall ships on the Great Lakes this summer). Probably will not check out the Tops - I grew afraid of heights after a trip up the pole mast on the USS Rathburne in 1977. While in Australia late last year I got to take a "three hour cruise" on the James Craig (1873 iron hulled three masted barque) where we set eleven sails. Quite an impressive sight.
- 367 replies
-
- 2
-

-
- model shipways
- niagara
- (and 1 more)
-
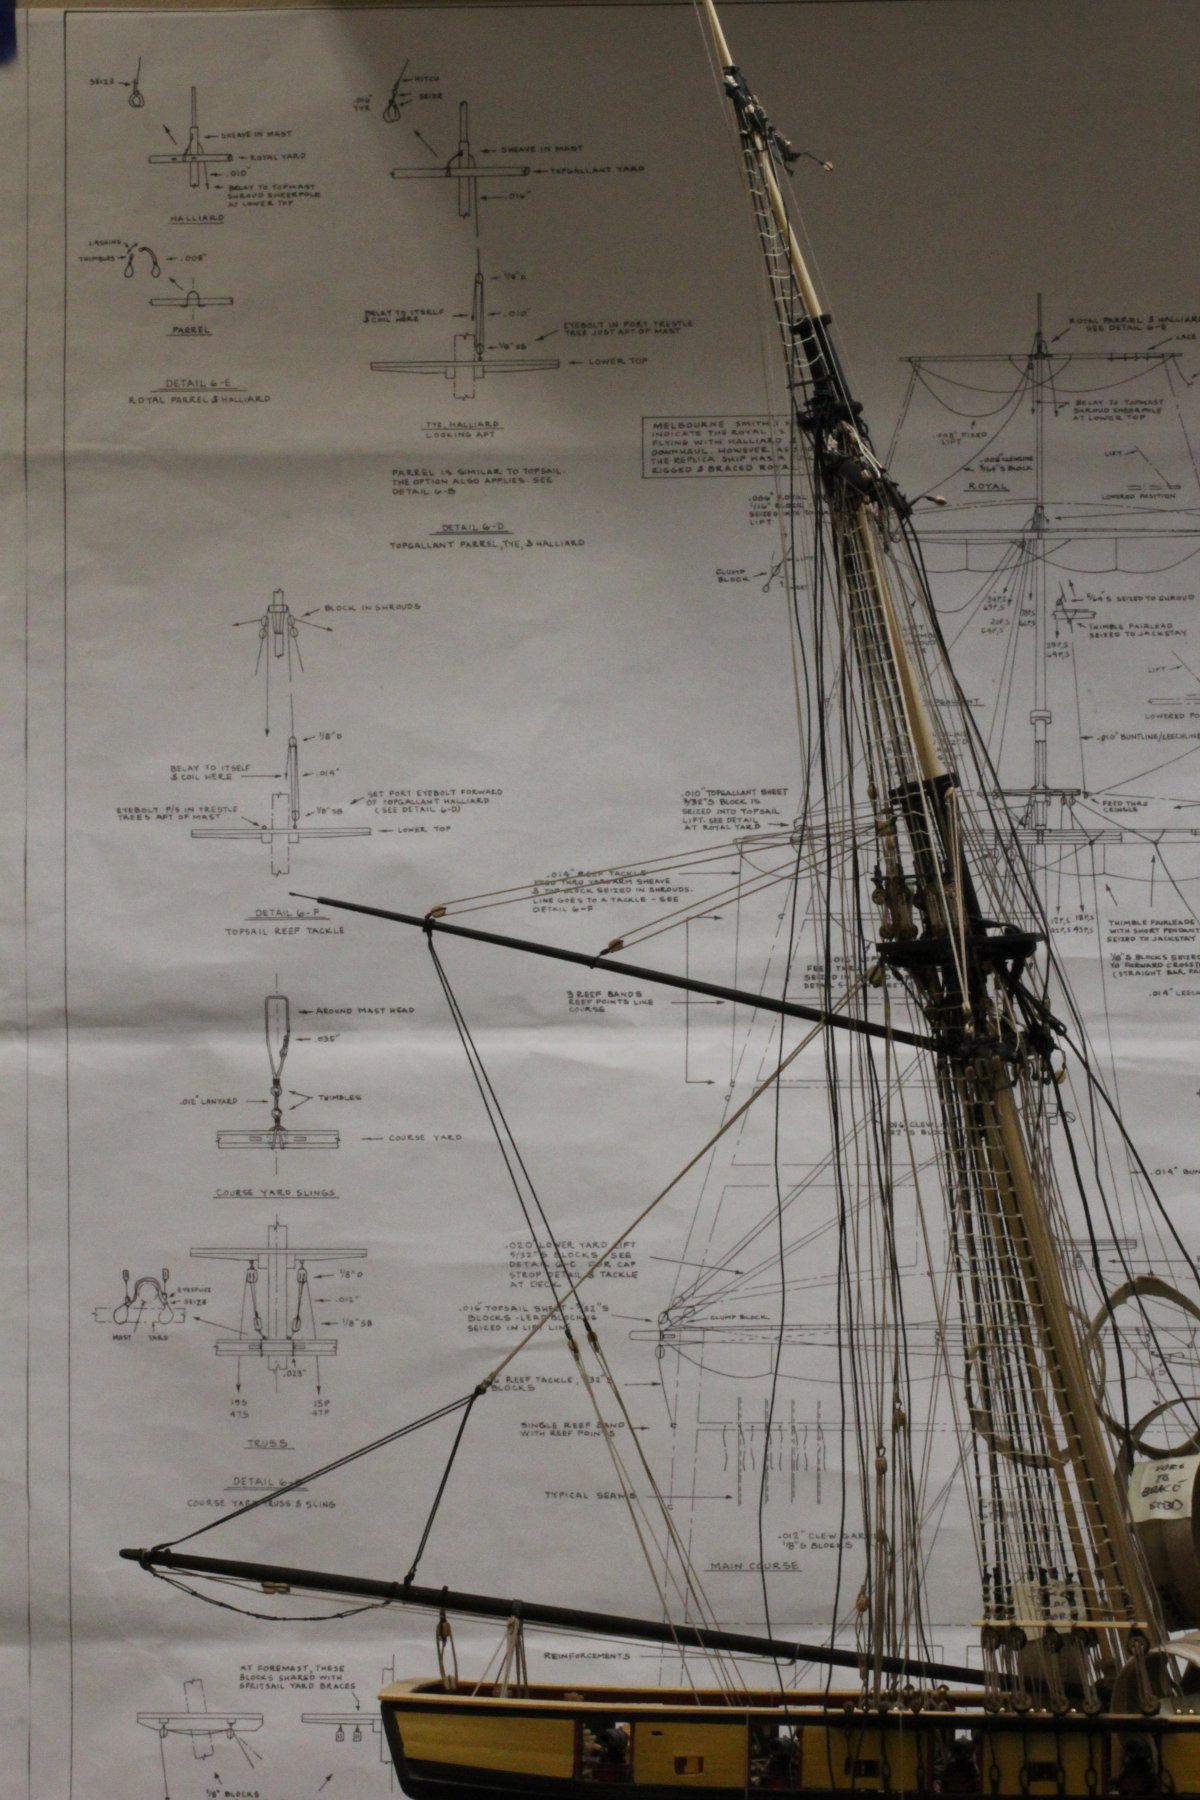
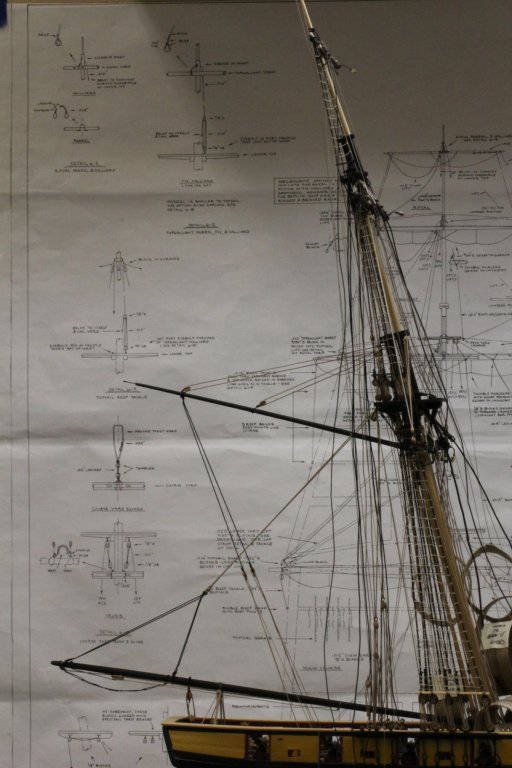
Finally am moving to the Fore Mast. Here are the shrouds, stays and course yard truss in place. Will alternate between assembling and rigging the Fore Mast and installing and rigging the bowsprit. Touching up the paint on the bowsprit now.

- 367 replies
-
- 5
-
-
- model shipways
- niagara
- (and 1 more)
-
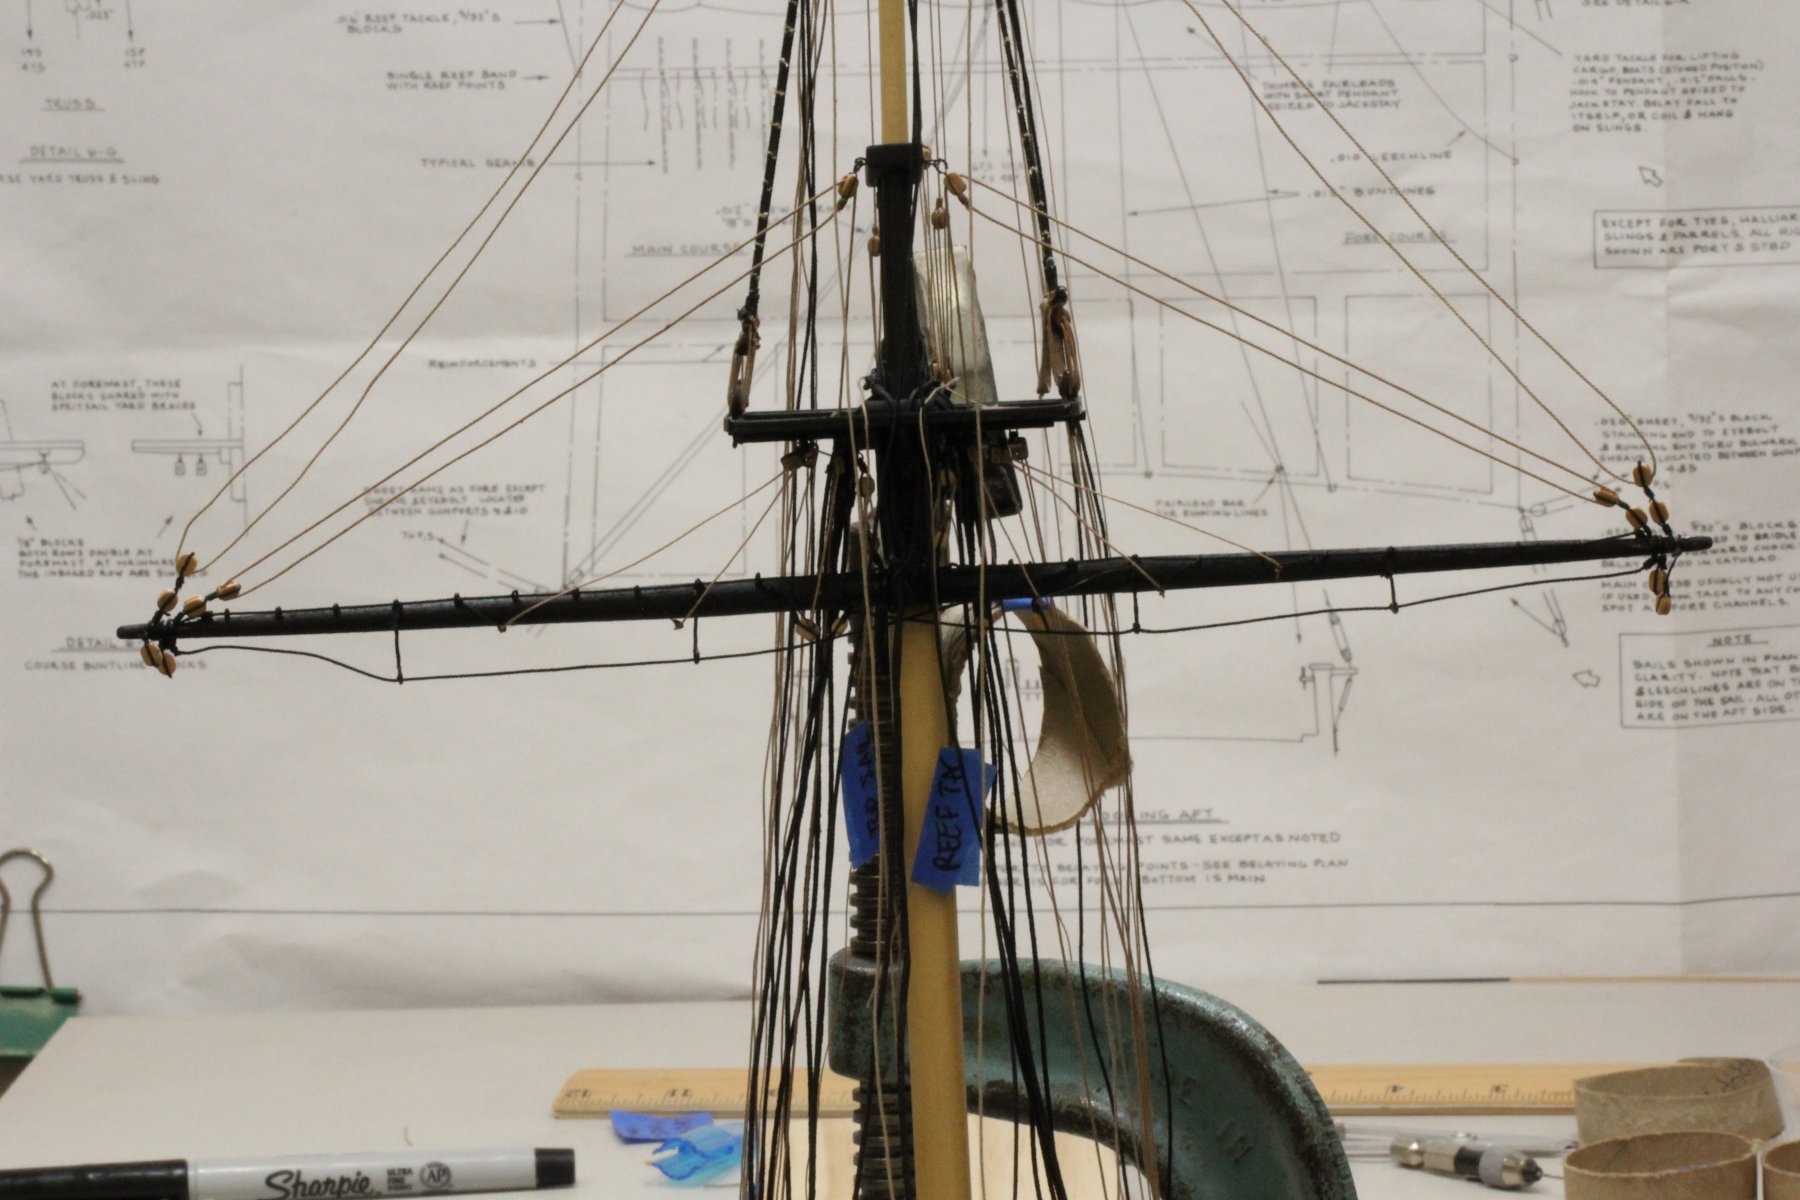
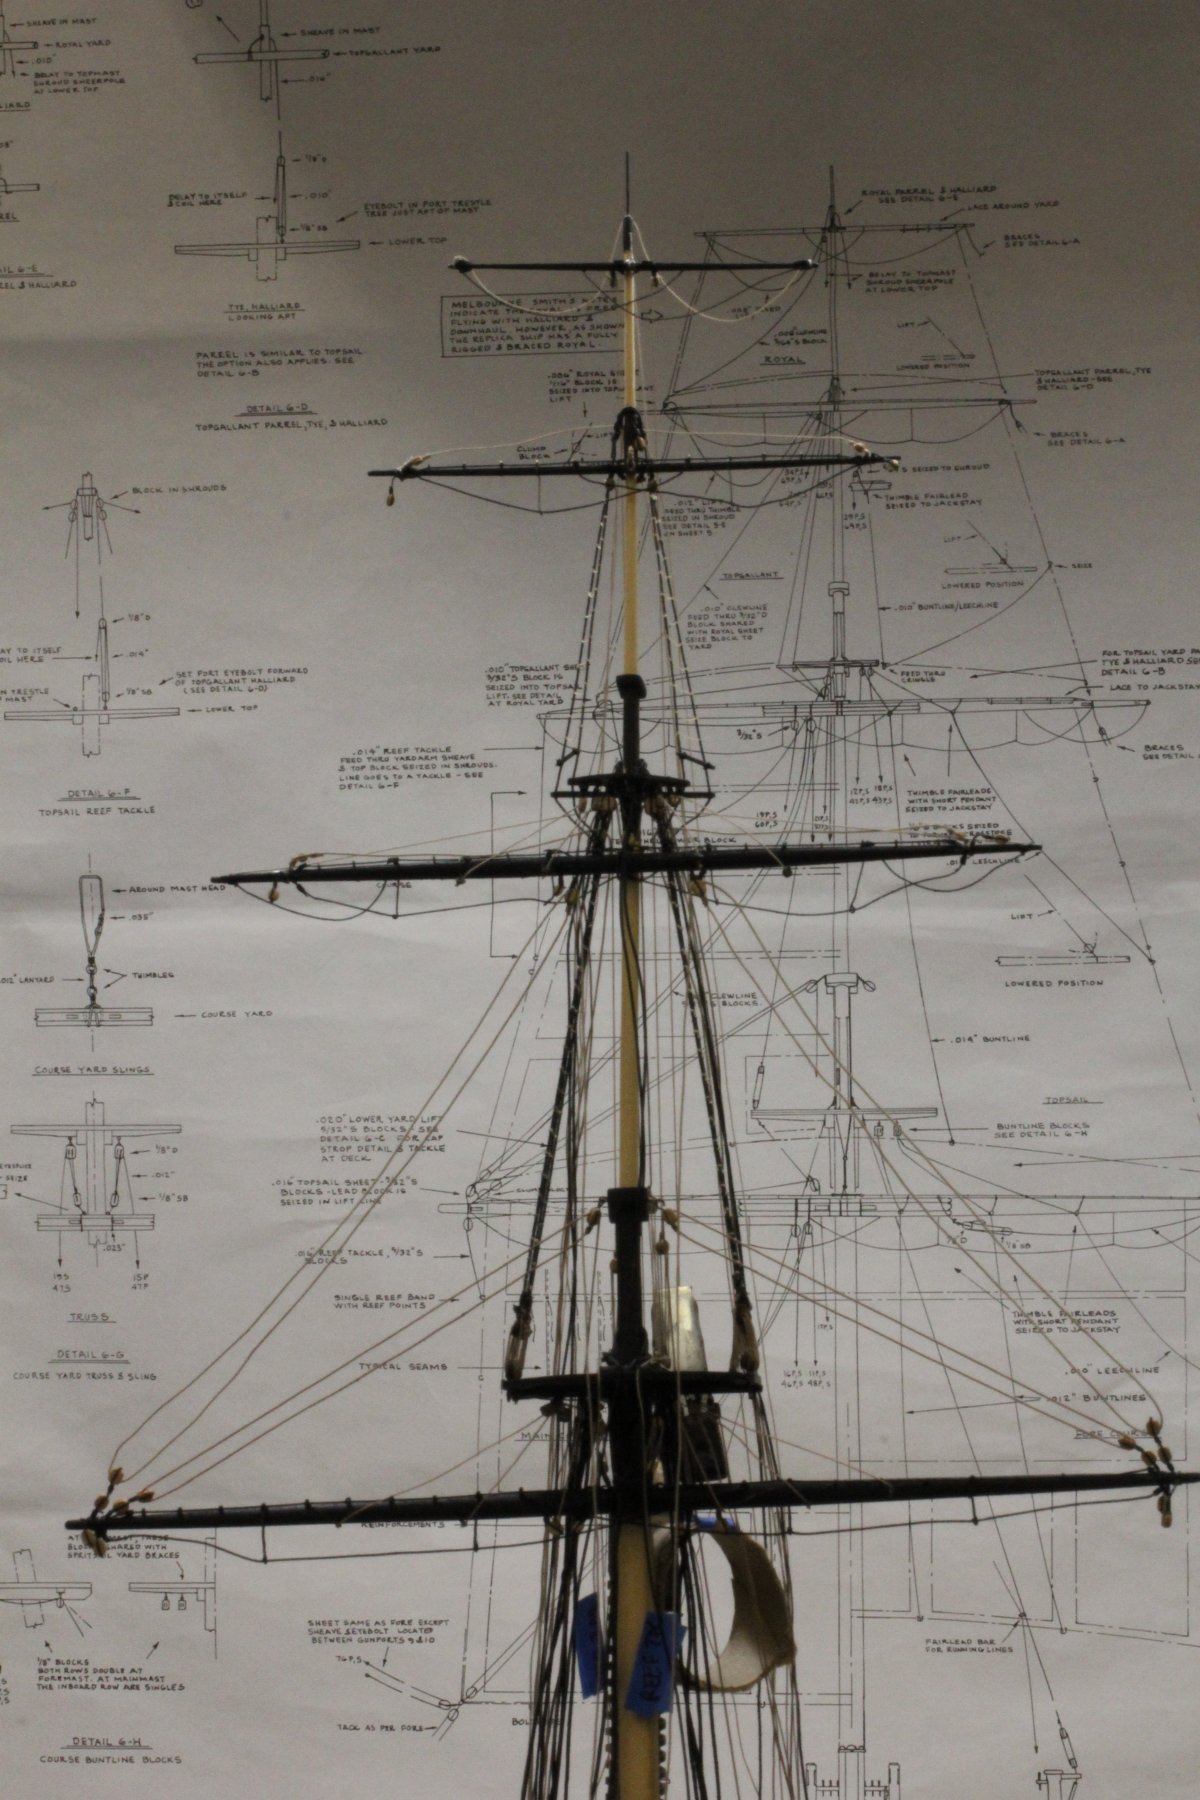
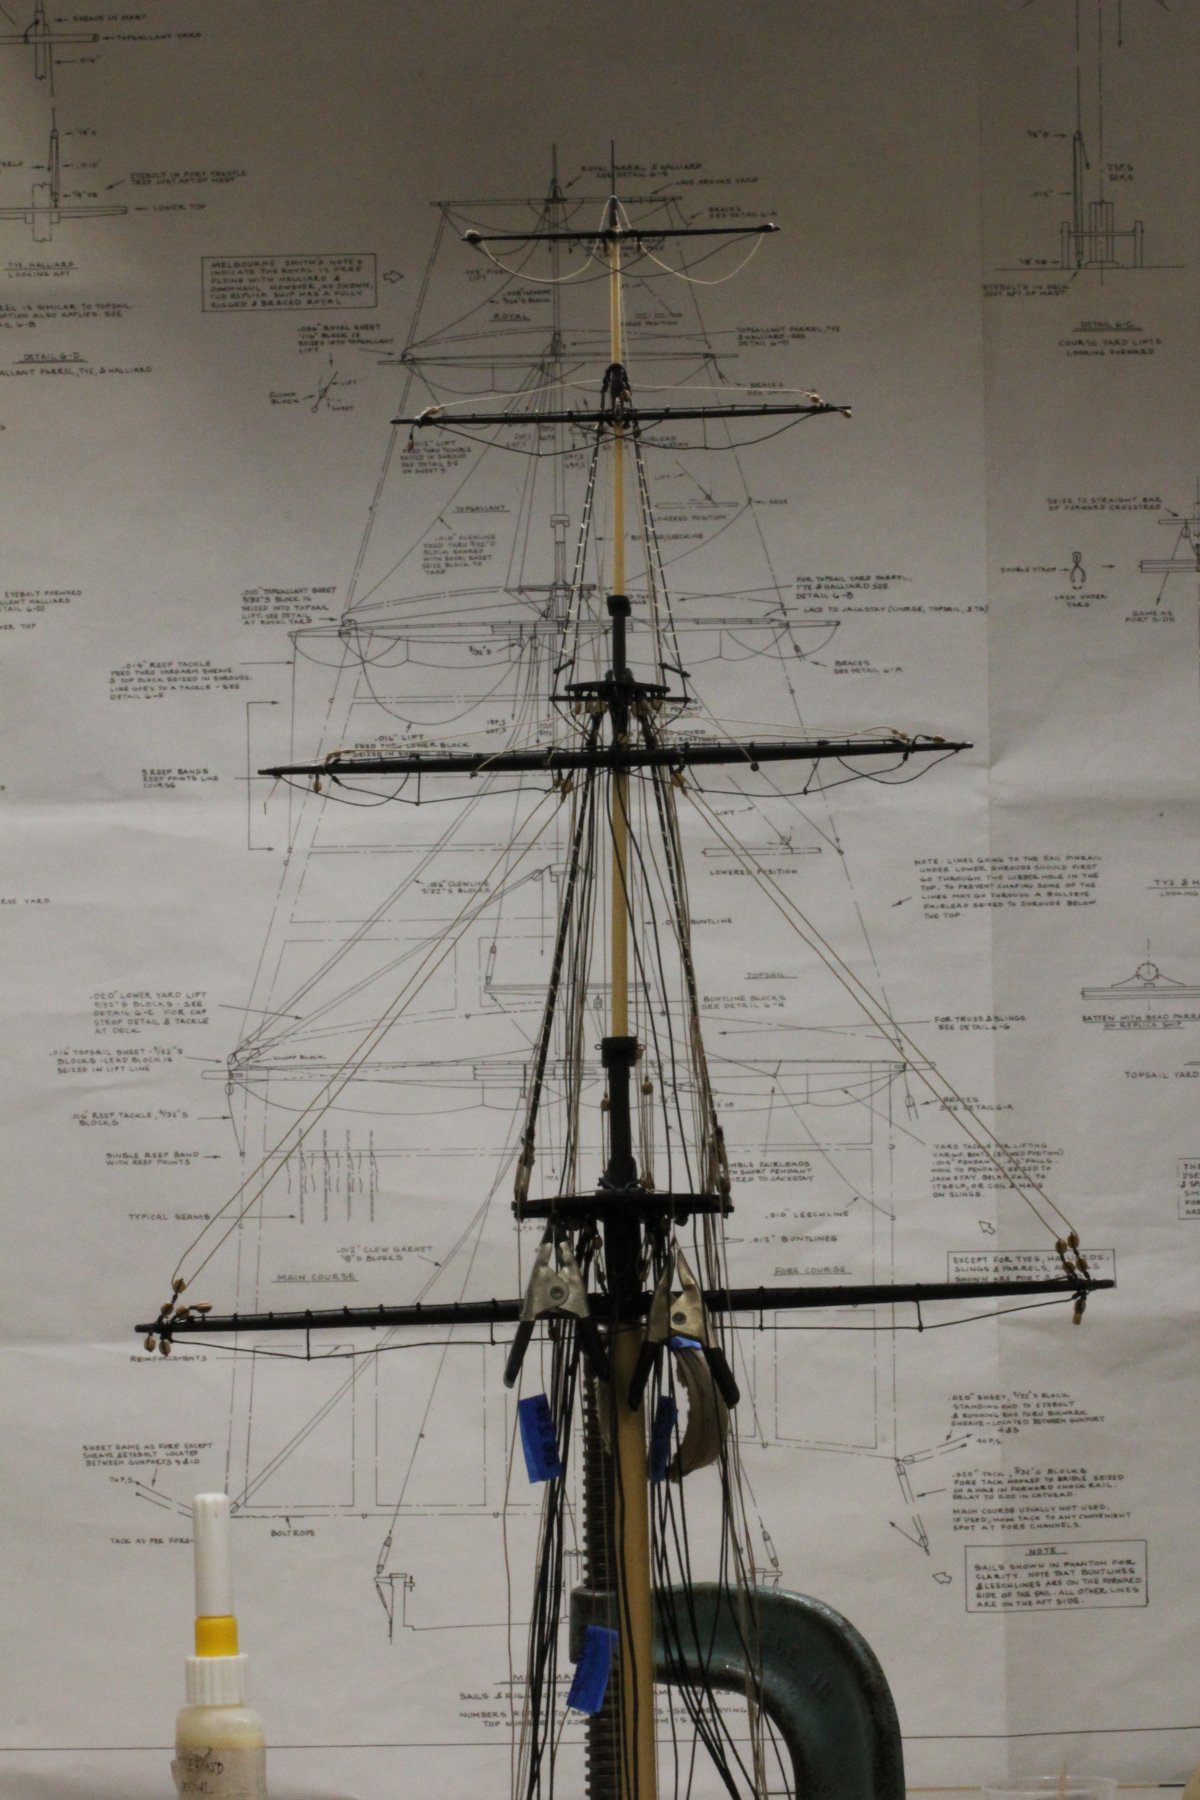
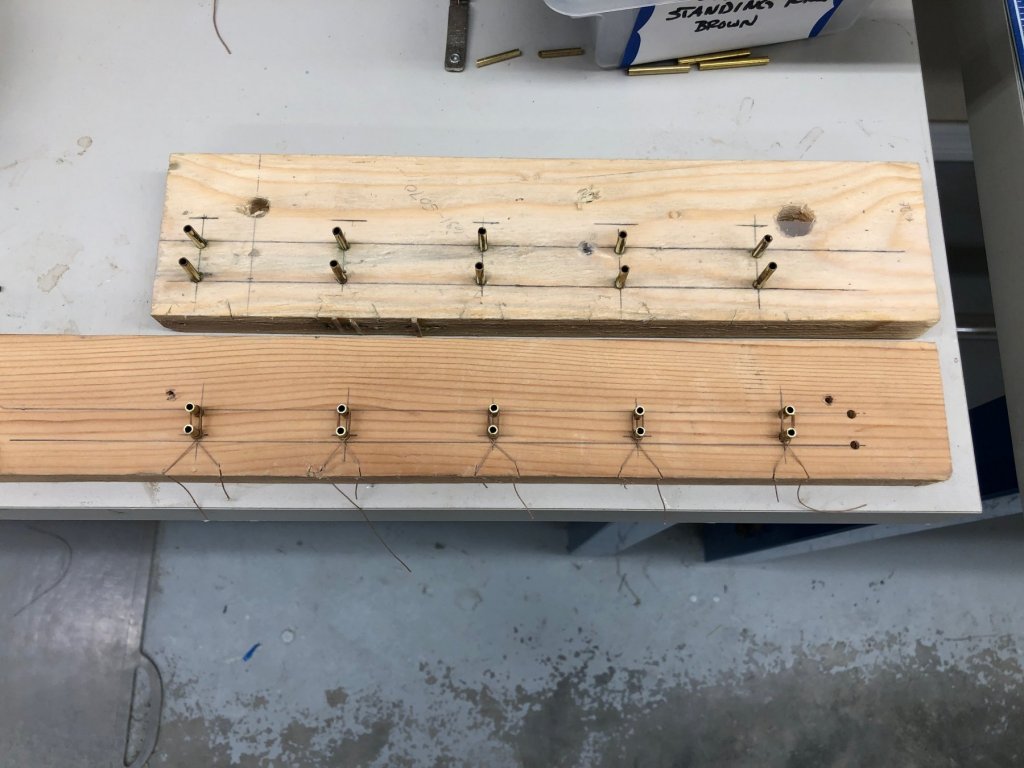
Main mast is as complete as it is going to get until the bowsprit and fore are installed. I ran the fore yard braces as far as I could, those are the toilet paper tubes you see hanging down. The ratlines went easier with the template. I am not sure they look any better but at least it was quicker and easier. Now that I have the template there is no reason not to use it in the future. I have not rigged the Top Gallant or Royal back stays yet as I am afraid that I may bend the main mast more than I can correct with the stays connecting to the Fore Mast. My plan is to connect them together (aka the royal back stays and the royal stay, and the top gallant back stays and top gallant stay) and tension them together to keep from bending the mast. When I built my jig for making rope coils to go on the pin racks and fife rails I neglected to notice that there are two different lengths required for the fife rails. Spent part of the morning building a new jig with closer spacing to make shorter coils. Here are the two jigs. Hopefully these will stand me in good stead for future builds. Here are two shots of the completed (more or less) main mast and my rope coil jigs.
- 367 replies
-
- 4
-
-
- model shipways
- niagara
- (and 1 more)
-
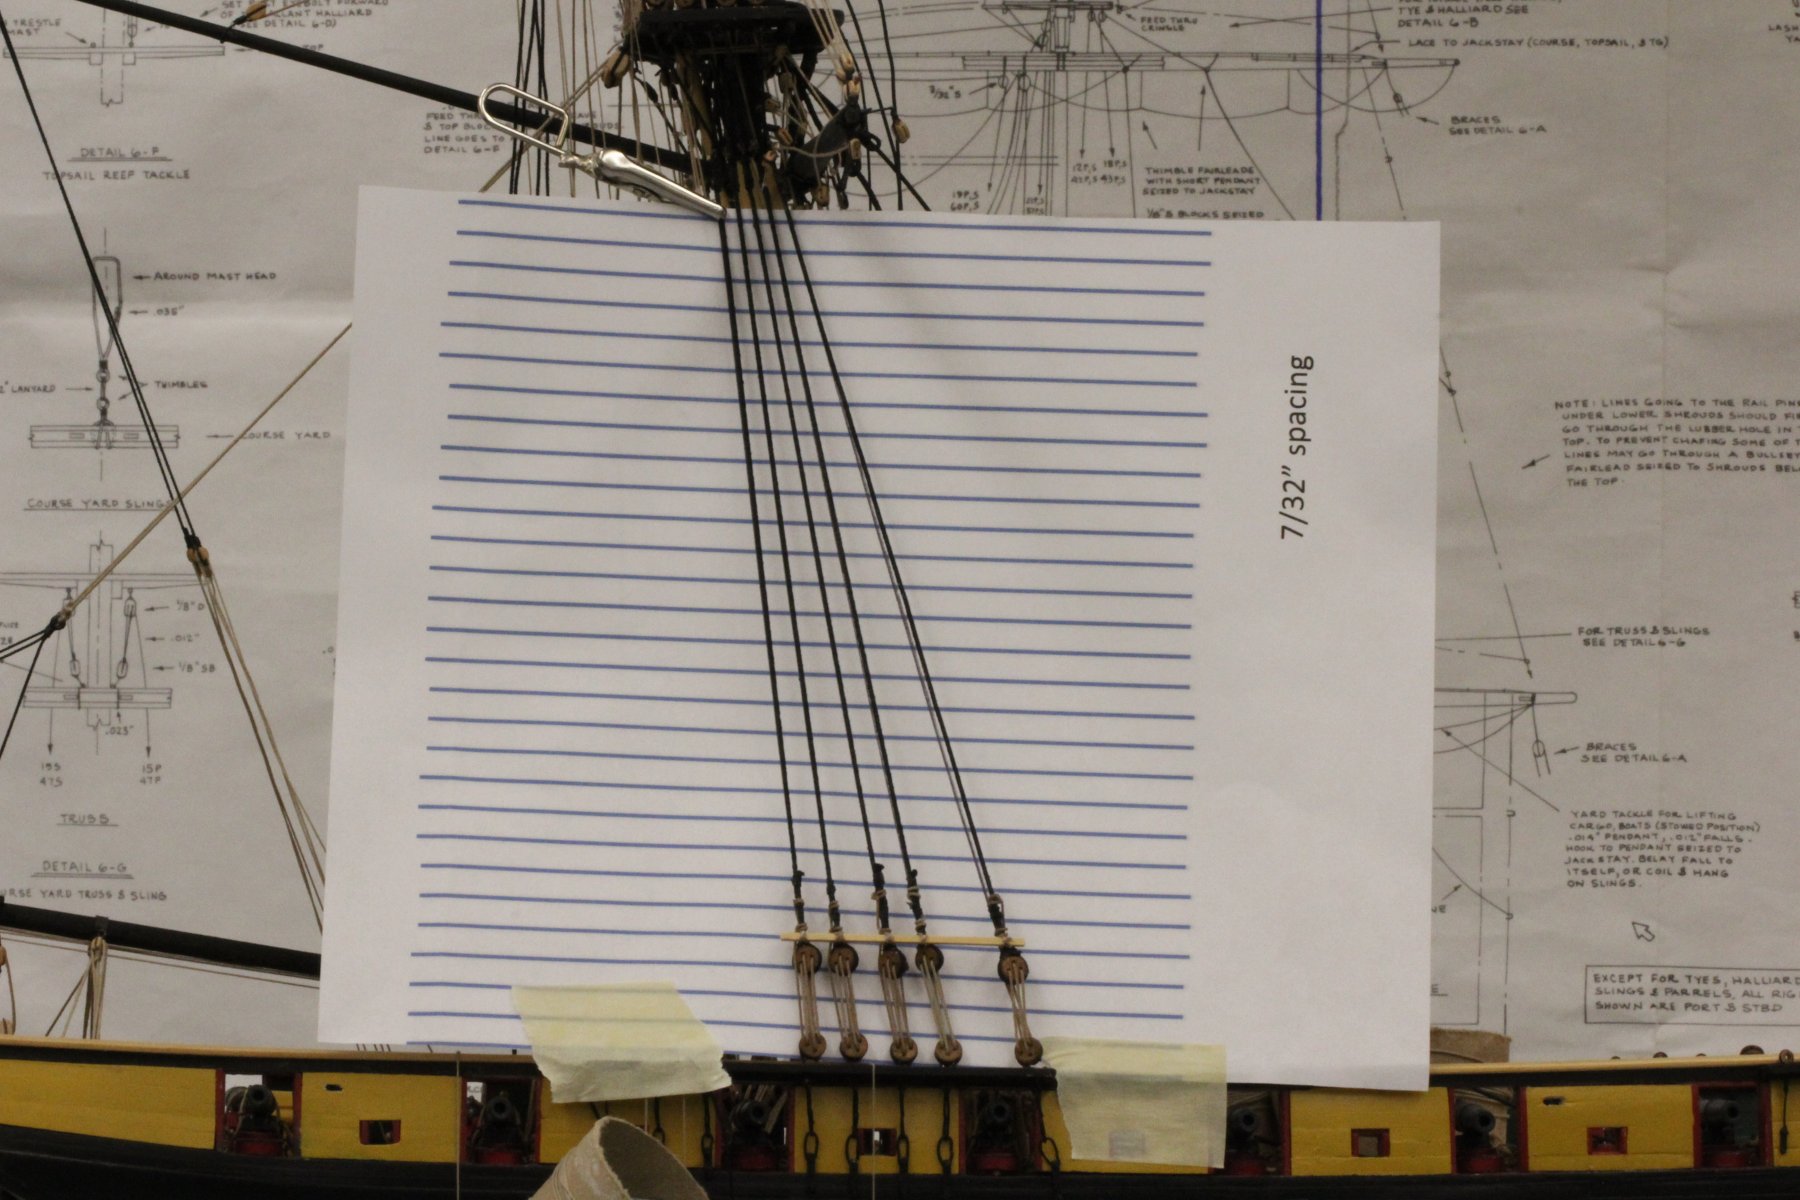
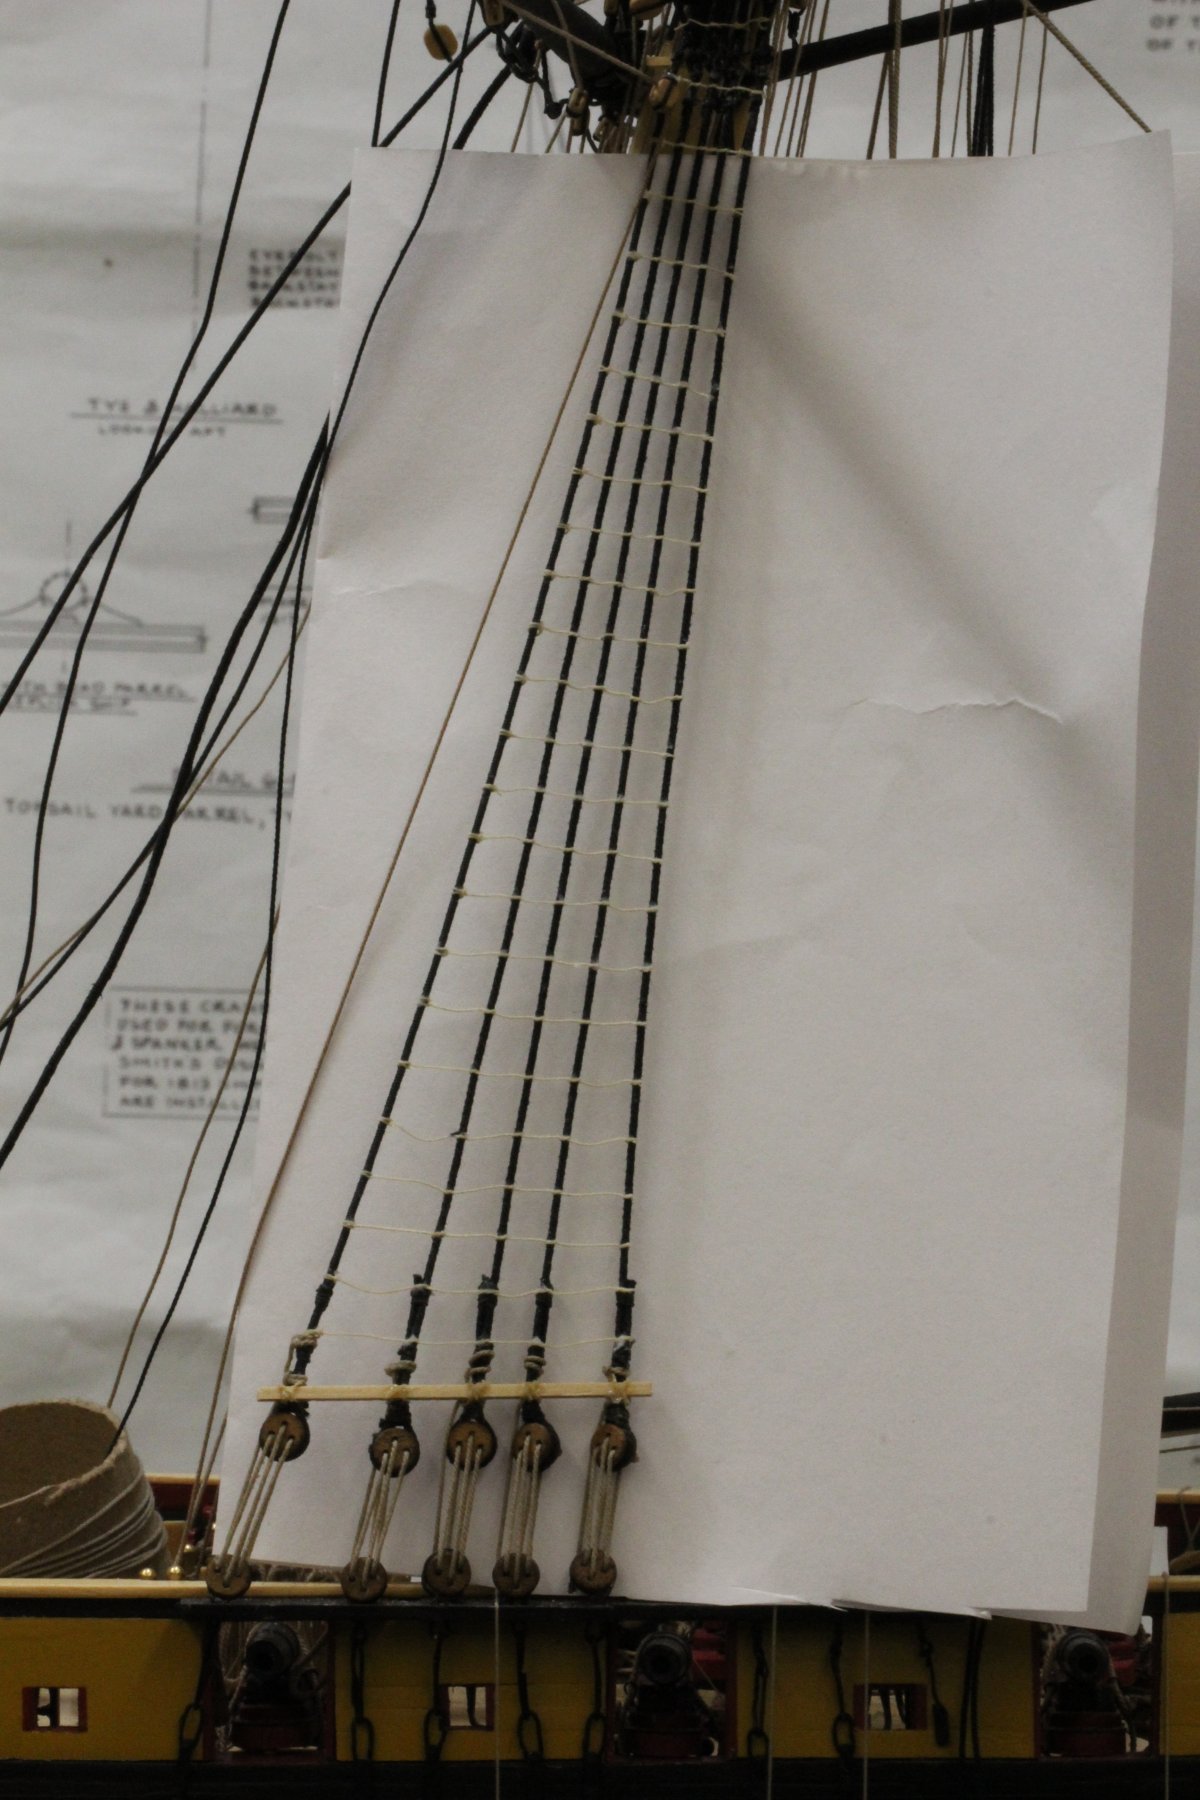
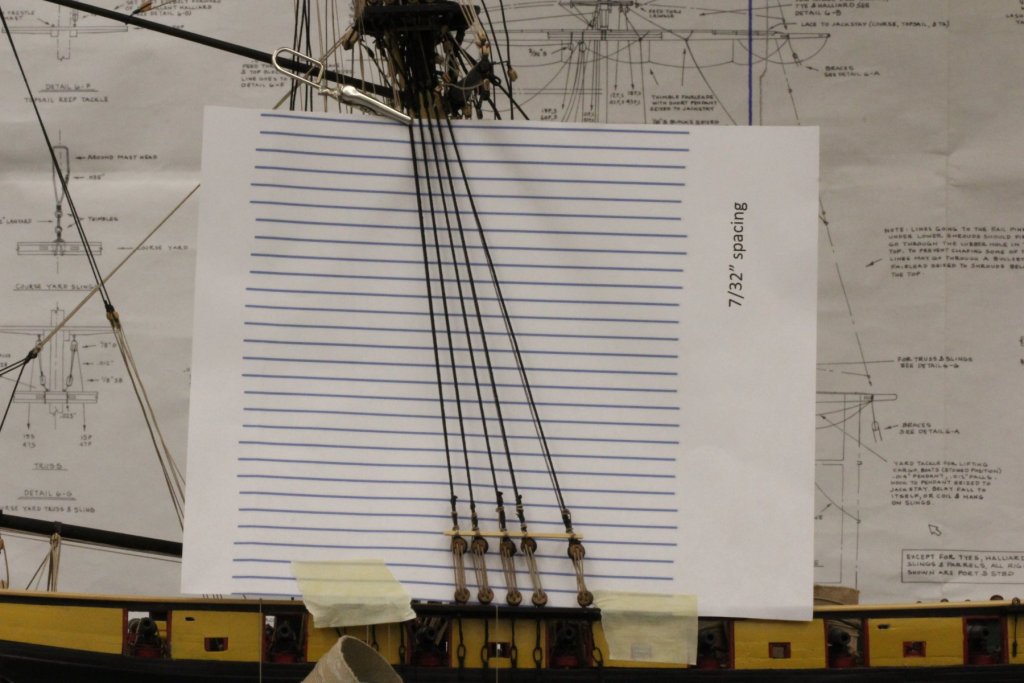
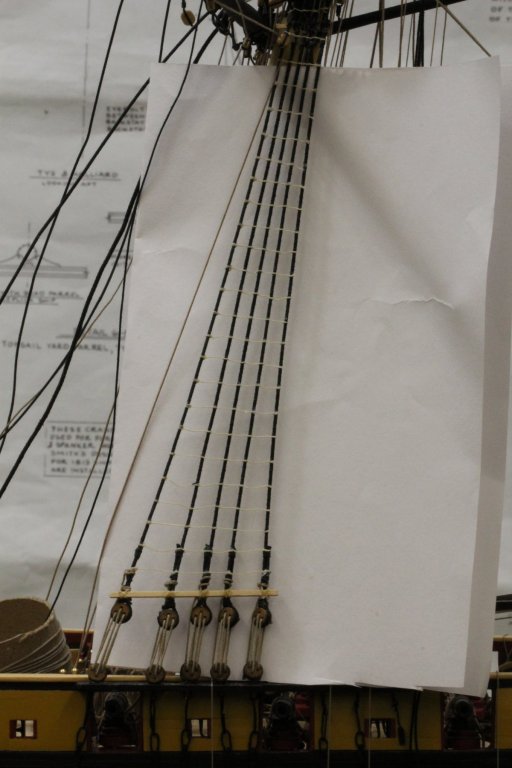
Now that the port side is more or less complete (never say complete) I have shifted to the stbd side. With the port side experience things are going somewhat faster as I got the two sheer poles and the futtock shrouds completed this morning. Now on to the ratlines (UGH). I did the port side ratlines "by eye" using a piece of 7/32" plank to get the spacing. On the stbd side I decided to use a template. Since I do not have a CAD package (nor how to use one) I used PowerPoint to create a series of parallel lines with consistent spacing. Then I printed them out to see what spacing I got - hard (for me) to get accurate measurements from PowerPoint. Anyway, I measured, resized, printed, measured again and after three tries got the 7/32" spacing called for on the plans (scale 14"). To reduce the chance of "hour-glassing" the shrouds I added them to the template too. Here are the stbd main sheer pole and the template ready for "ratline making". *Futtock shroud picture won't load for some reason - the dreaded error -200.
- 367 replies
-
- 4
-
-
- model shipways
- niagara
- (and 1 more)
-
Thanks Sea Hoss. I replaced the third one up and continued to add to the port main ratlines. Kept looking for a reason to stop. But didn't (mostly) until I got the port side finished. Here they are. Although you can't tell, at the very top I switched over and used the cow hitch (I believe I incorrectly said it was a clove hitch) on the first and last shroud. I think that is how I will try and do the stbd side as well as dampening the line before using it - a "trick" I got from the sails and rigging forum. It appears I need to pay better attention to getting the ratlines parallel to the deck - hopefully a better job on the stbd side. Now for the sheer poles and futtock shrouds on the stbd side - I already put the l line and blocks on for the braces. Much easier without the futtock shrouds to deal with. In doing these I did not encounter any serious interference with the running rigging that I installed previously. This was an experiment to see if putting the running rigging on before the shrouds (other than the forward and rear most ones) and ratlines (which is much easier without having to work around the shrouds/ratlines, at least for me) was workable and from this single example it appears so. I will follow the same sequence on the Fore Mast.
- 367 replies
-
- 3
-
-
- model shipways
- niagara
- (and 1 more)
-
Sorry, forgot a hit the Tab key by mistake. Anyway, I started using clove hitches but after a few (two I think) I started using a clove hitch only on the first shroud (typically on the left since I am right handed) and then switch to overhand knots for the other four shrouds. I started using 50/50 glue/water on the joints but shifted to straight white glue. The 50/50 was taking to long to dry and tended to go places I did not want (like on the deck/channel). So far I have six rows done but not "finished" (excess line cut off). By my count only 18 - 20 rows to go UGH! And then there are three more lower shroud sets and two more Top Sail and Top Gallant shrouds. I think I will find something with no ratlines for my next kit - maybe the Endeavour in 1/35 scale. Here is where I am on the port main ratlines. PS, I may decide to redo the third one up - the line broke and I tried to "save it".

- 367 replies
-
- 4
-
-
- model shipways
- niagara
- (and 1 more)
-
Thanks Jonathan. I am working what is prob ably my least favorite task - ratlines.
- 367 replies
-
- 1
-
-
- model shipways
- niagara
- (and 1 more)
-
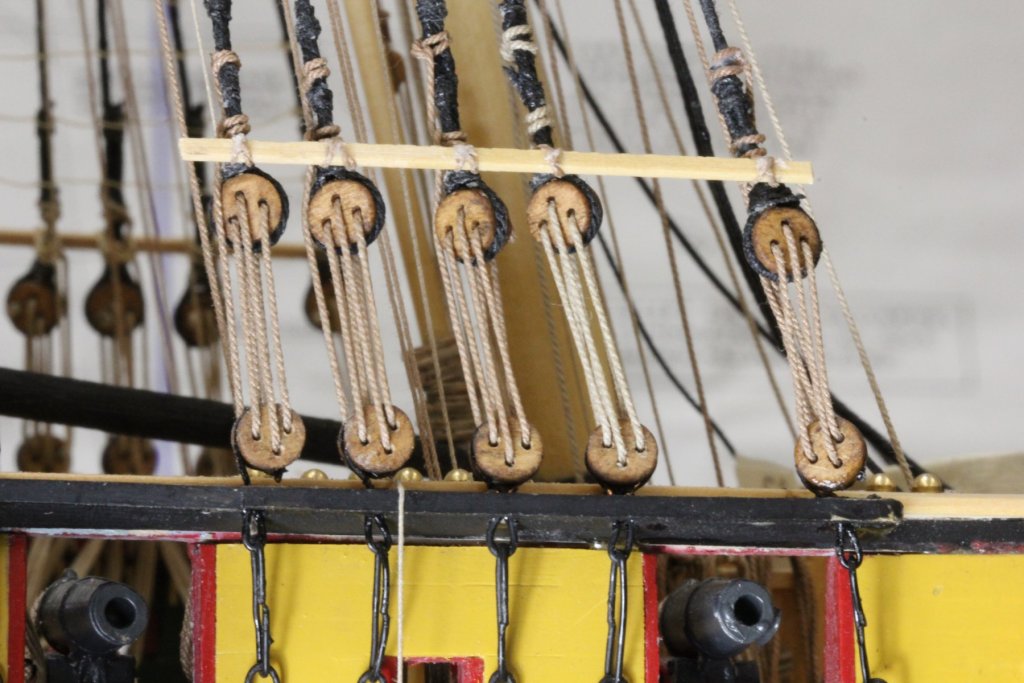
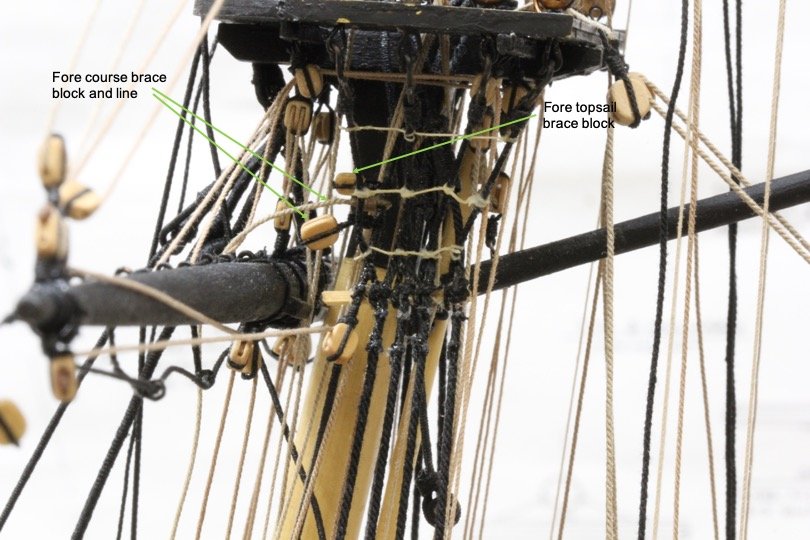
Thanks Javlin. Added the futtock shrouds and ratlines as well as the block and line for the Fore Course and the block for the Top Sail brace on this side. For anyone who does this on Niagara (or really any square rigger with futtock shrouds) be sure to attach the necessary blocks (and lines - in this case the Fore Course Brace bitter end is seized to the forward most main lower shroud) before you rig the futtock shrouds. It is much harder to get the blocks where they need to be once the futtock shrouds are in place. It would be close to impossible (absolutely impossible for me) to get these blocks in place after the futtock shroud ratlines are there. Here is the port side futtock shrouds and associated "stuff". I need to be a little more sparing with the glue it would seem although things always look worse in the pictures than in real life - at least that's my story and I'm sticking with it.
- 367 replies
-
- 5
-
-
- model shipways
- niagara
- (and 1 more)
-
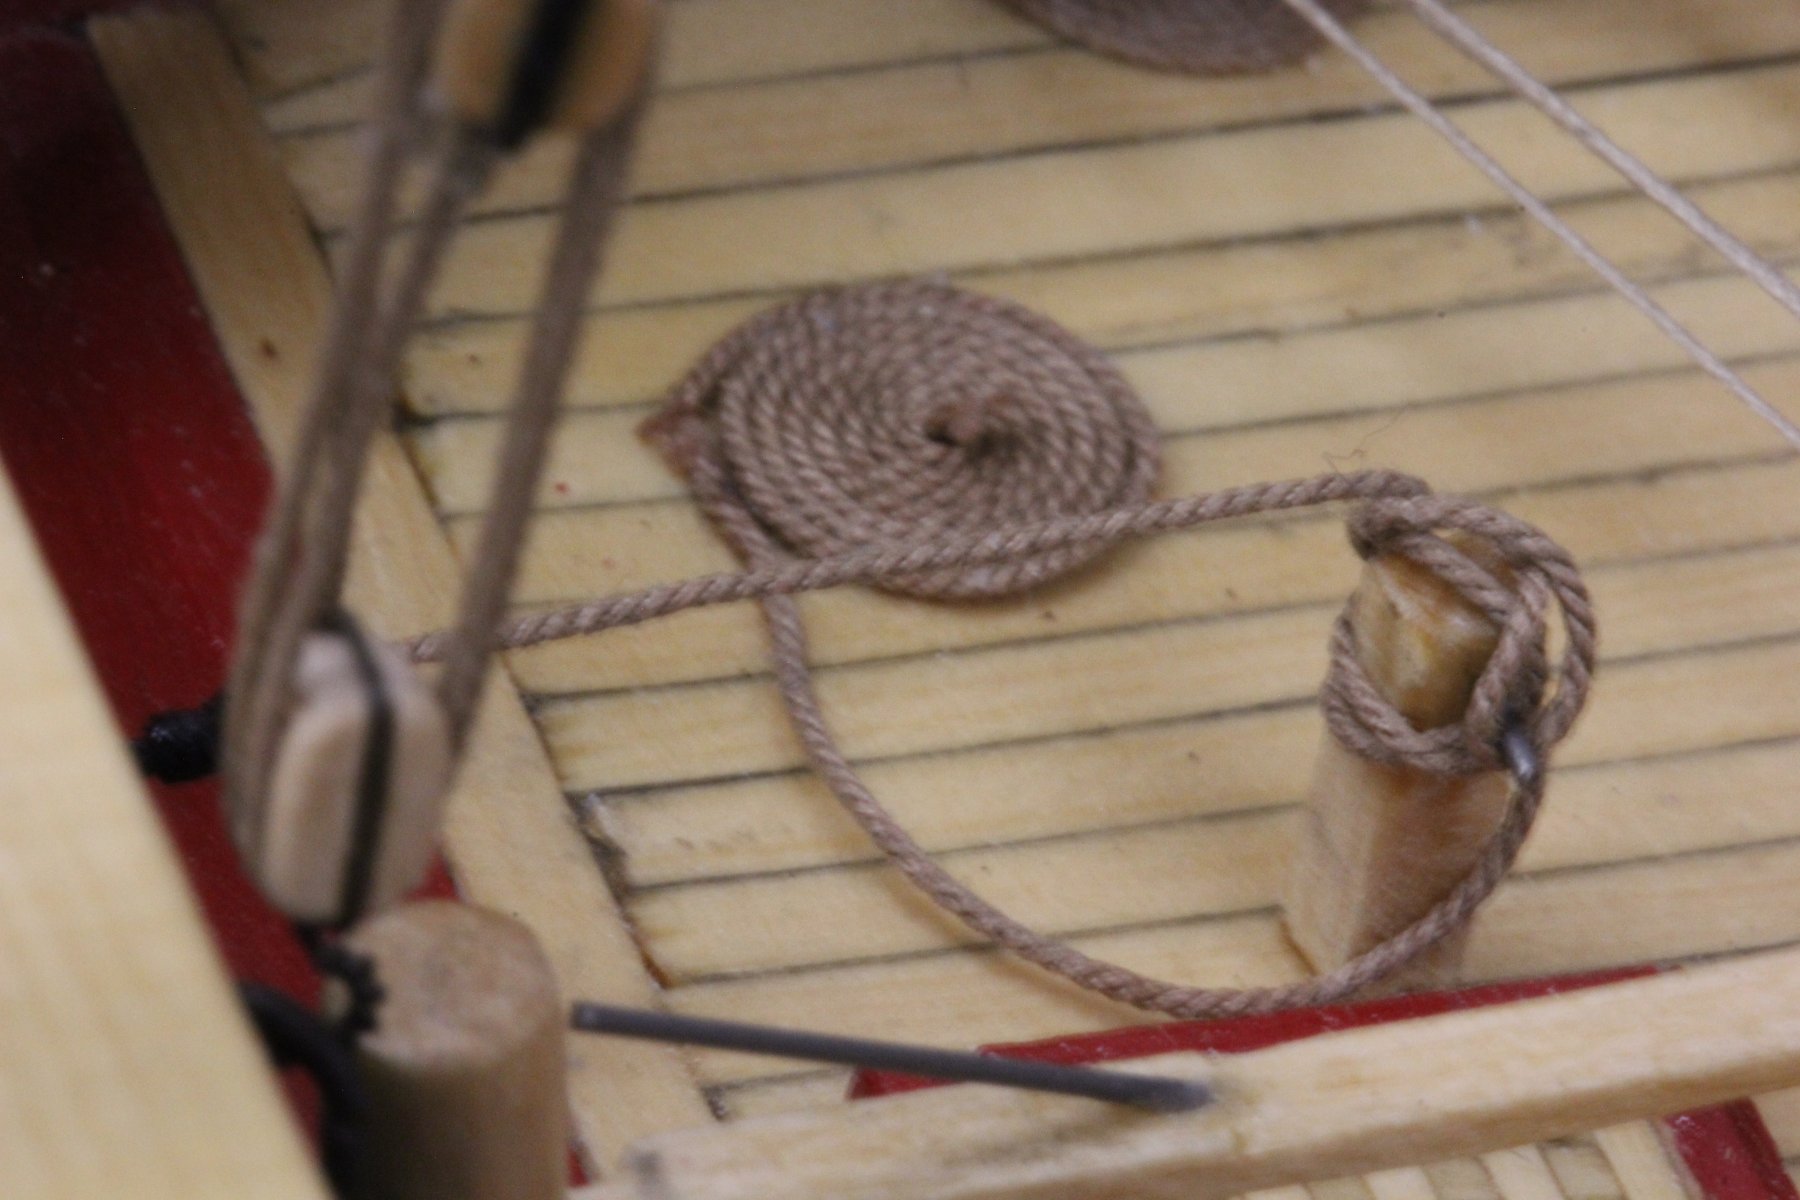
Continuing to work the main mast. Got the port side lower shrouds and sheer pole (not really a pole on Niagara - rectangular cross section). Not as neat as I would have liked - will hope to do better on the Fore mast. Got the main sheet rigged and belayed - made up a rope coil form the extra line - even remembered how to do, it from all the coils I made for the guns - seems like a long time ago.


- 367 replies
-
- 3
-
-
- model shipways
- niagara
- (and 1 more)
-
Added the Spanker Gaff and associated halyards and vang and vang tackle. Also working on installing the rest of the lower shrouds. Getting close to my favorite part (NOT) ratlines. Here is a view of the gaff, the belay points for the vang tackle (line going over the rail) and the throat halyard (last pin on pin rail) and the mast block for the peak halyard.
- 367 replies
-
- 4
-
-
- model shipways
- niagara
- (and 1 more)
-
Scott/Javlin - thanks; I am starting to wonder if this rigging ever ends. All my previous builds were schooners - may go back to them after this. Worked the port side pin rails and spanker boom. Added a few lines (staysail halyards, braces - those are the lines wrapped around toilet paper tubes you see in some of the photos) to make life easier when I get further along. Counted and there are 16 more blocks that need to be added to various places (mostly to shrouds) for the braces. I have the ones that are on the yards but need to get back in the block stropping business.


- 367 replies
-
- 4
-
-
- model shipways
- niagara
- (and 1 more)
-
Slowly adding the lifts, sheets, bunt lines, leech lines, etc. to stbd pin rail abreast the Main Mast. Port side is next. Debating on whether to add the spanker boom and gaff now or wait until the bowsprit and Fore mast are aboard.
- 367 replies
-
- 4
-
-
- model shipways
- niagara
- (and 1 more)
-
More rigging on the Main file rail and cleats on Main Mast. More work outside too but we will not talk further about that. Another cruise tomorrow so no shipyard work until we return on Friday.
- 367 replies
-
- 3
-
-
- model shipways
- niagara
- (and 1 more)
-
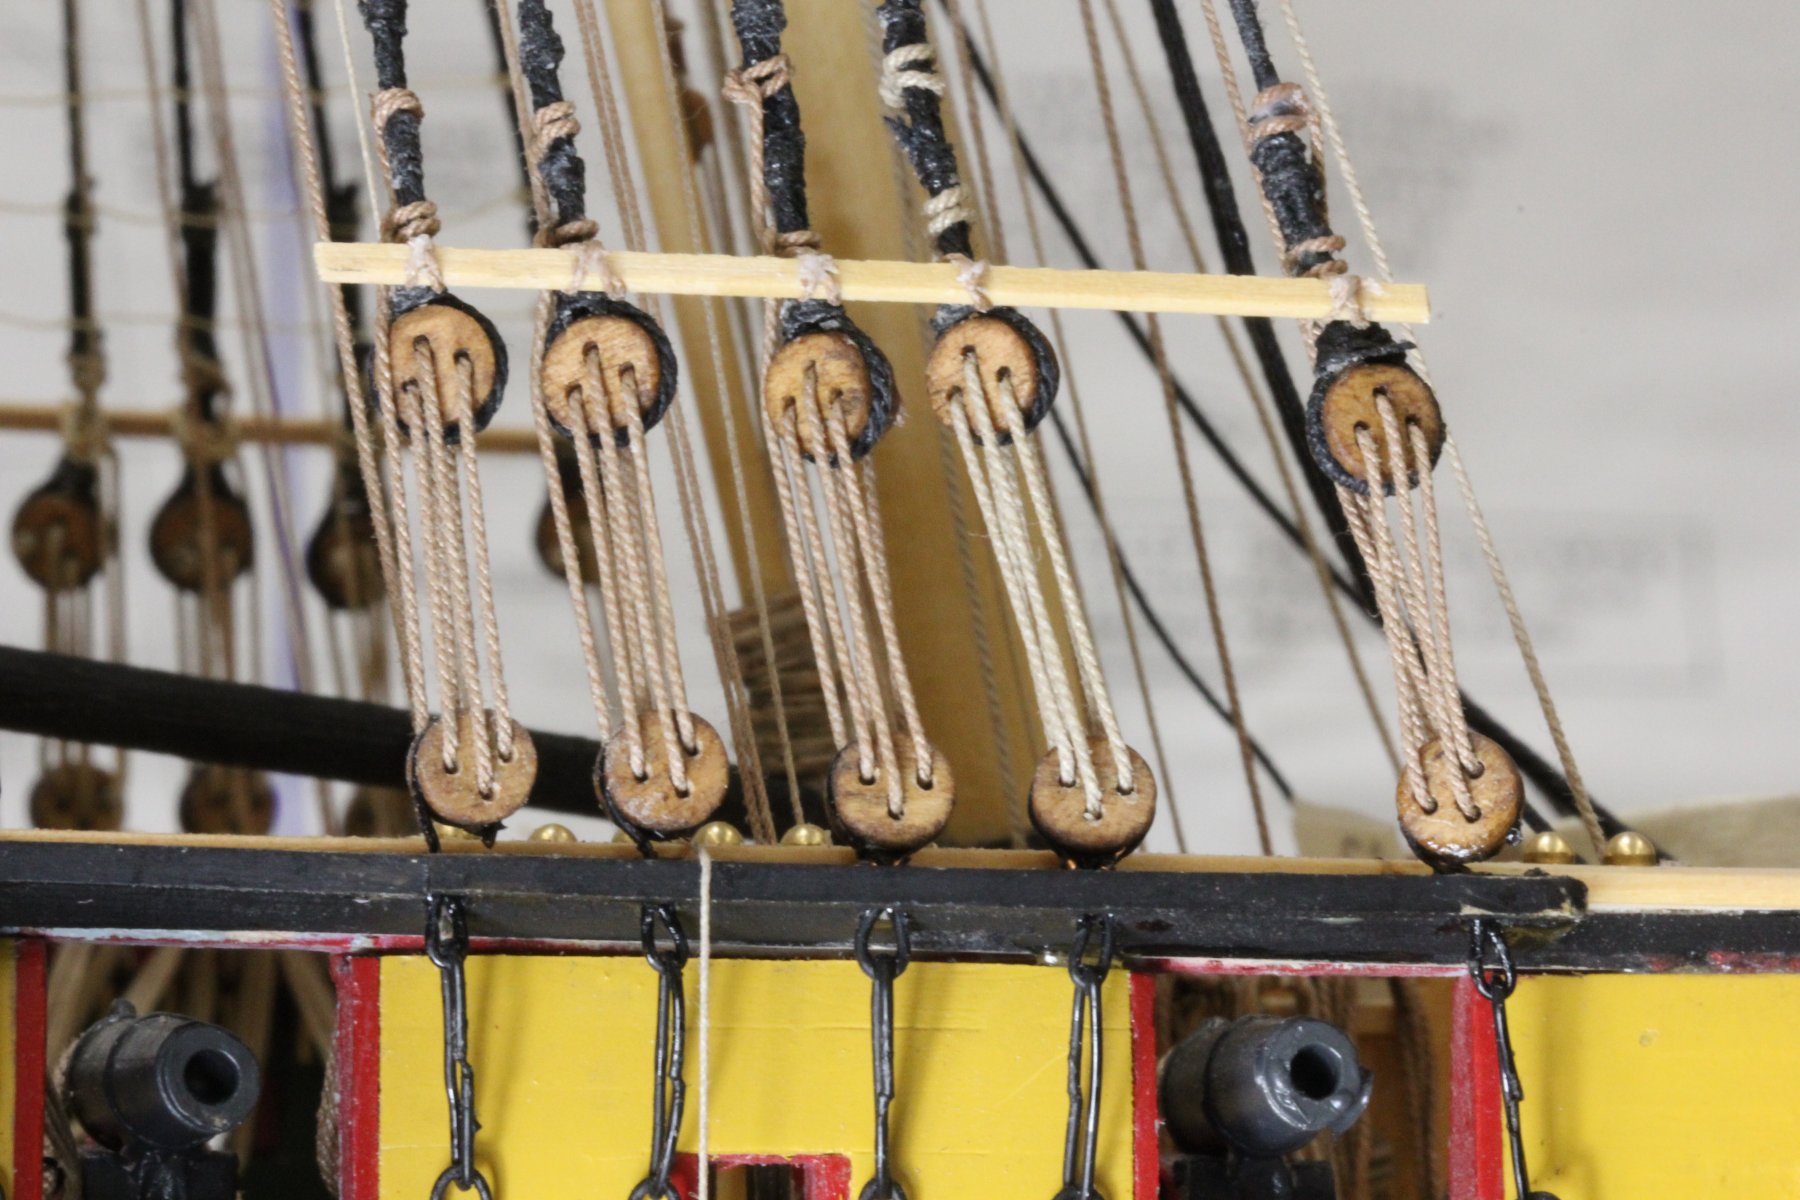
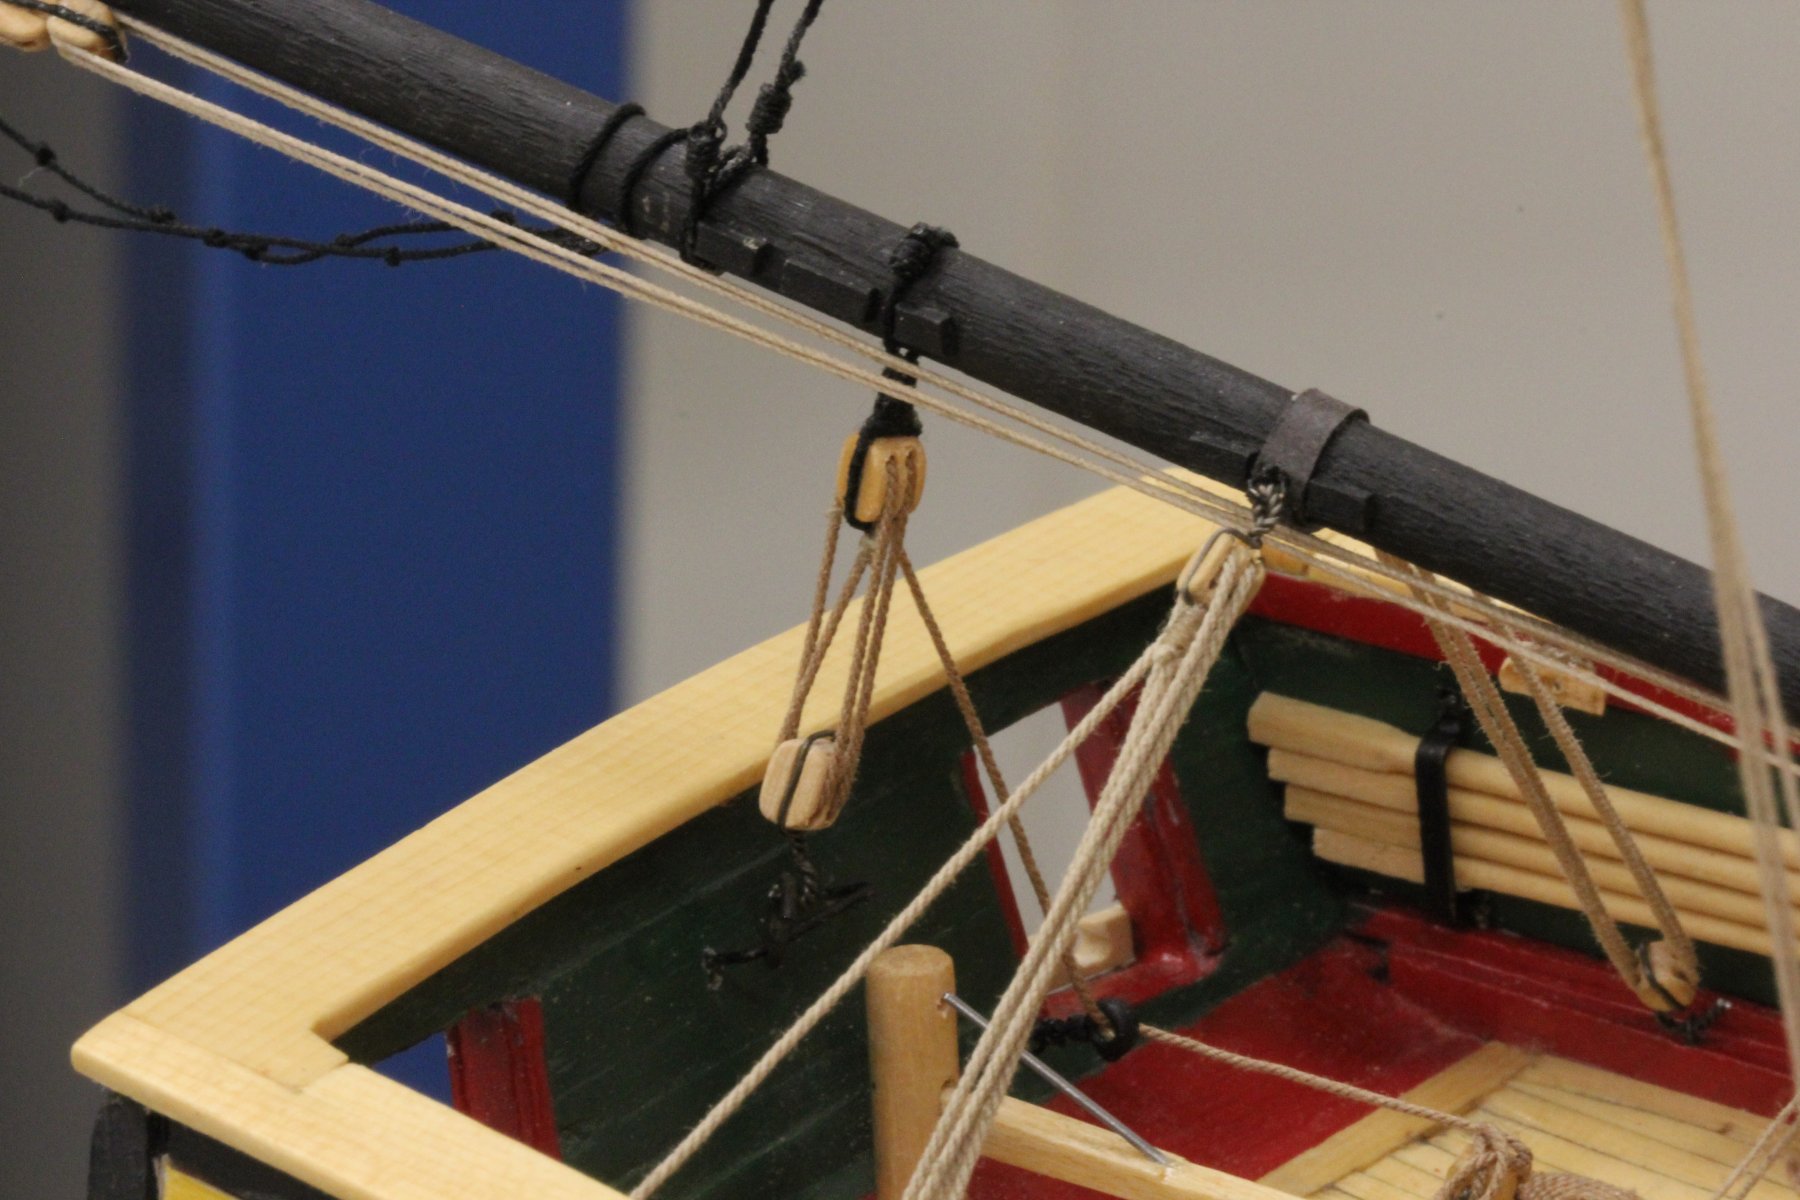
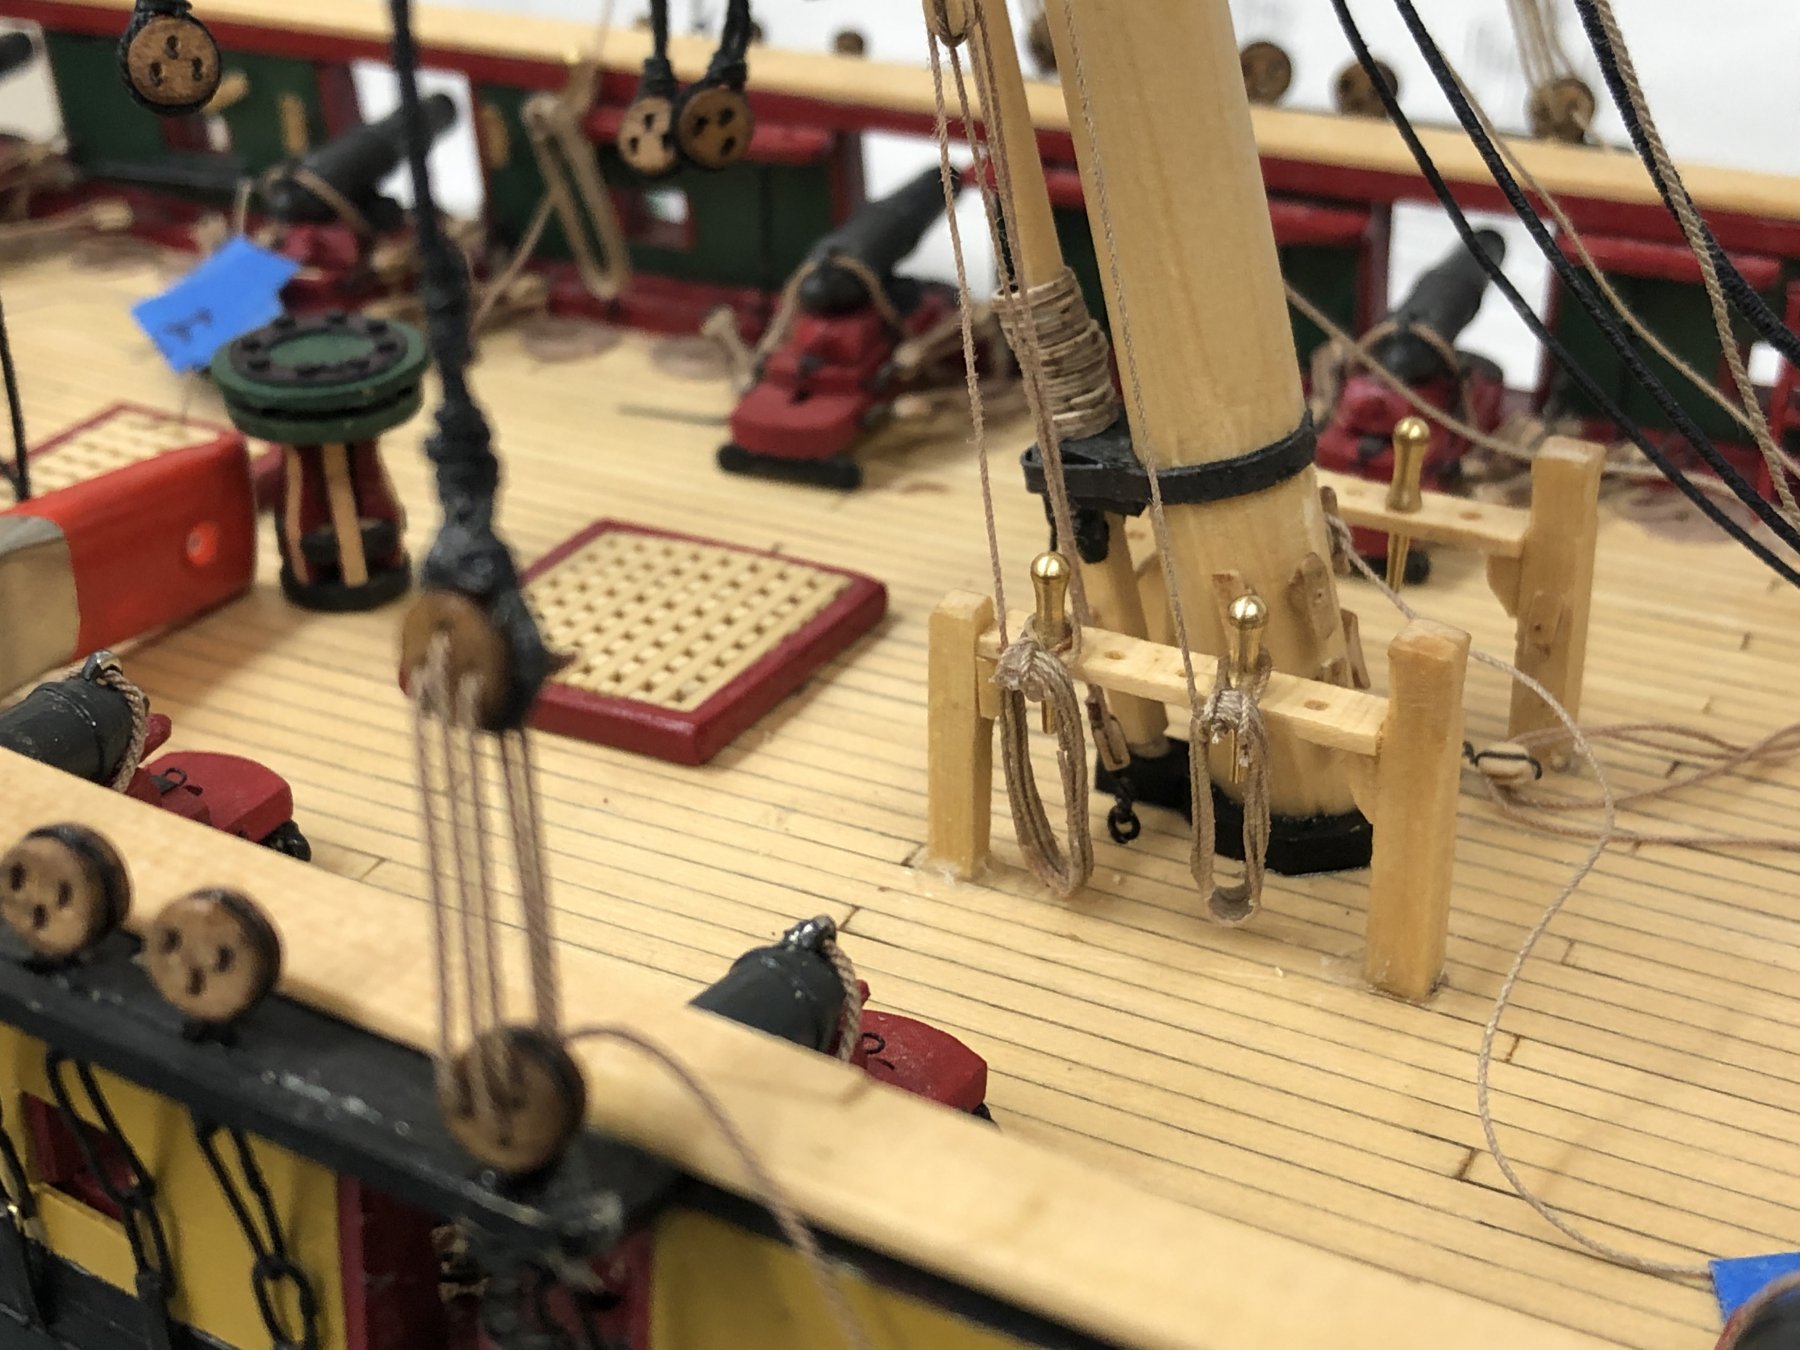
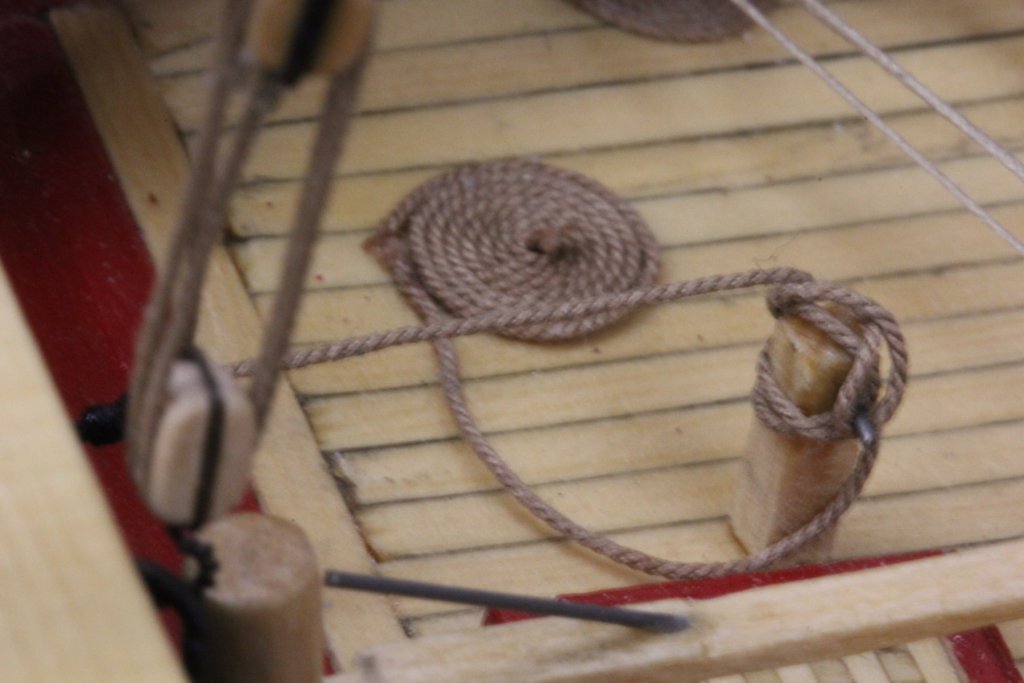
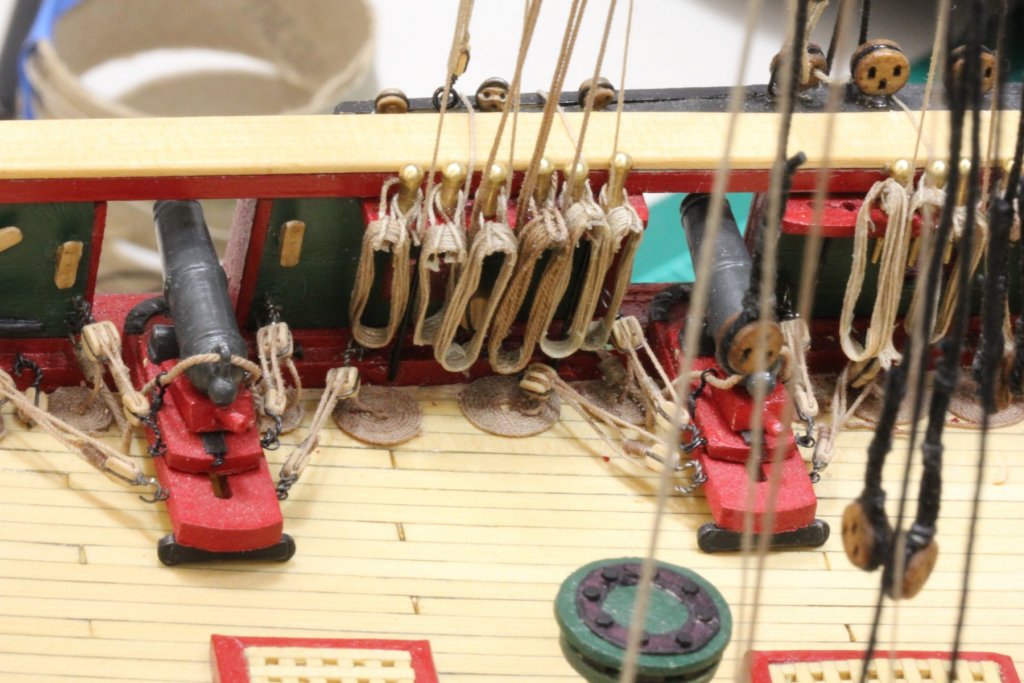
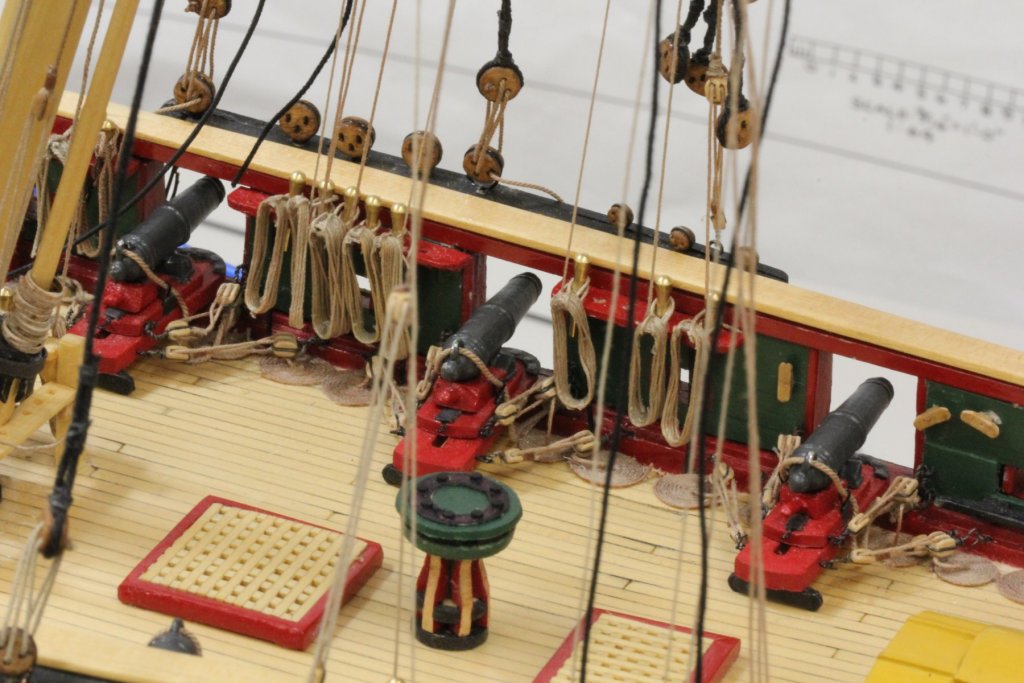
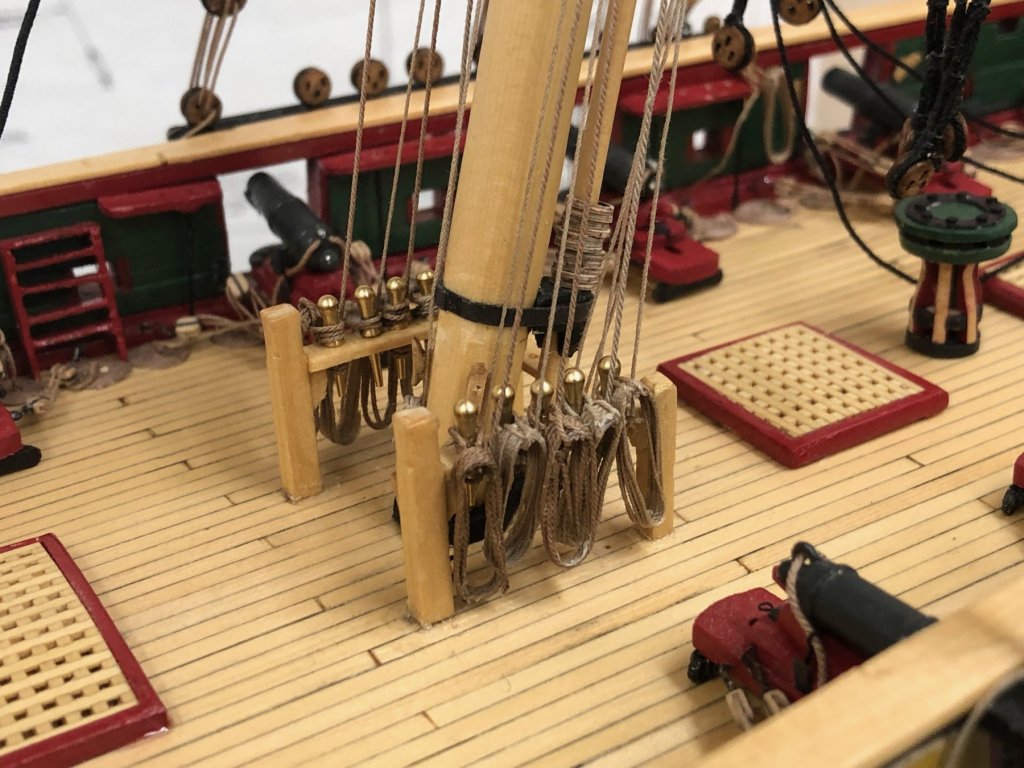
More outside work (in Florida, in June) detracting from ship rigging time. Anyway I got all the deadeyes stropped to their shrouds and rigged the lanyards on the forward and aft most shrouds on both sides. Checked the main mast alignment again - still okay. Rigged the course lift tackle and course truss to their pins (for the record I decided to leave the belaying pins the factory brass finish - adds a bit more color to the deck areas) and added a pre-made rope coil of the correct size and color (mostly tan, I had planned on using both Syren tan and light brown pretty evenly but never got around actually doing it). Here are the main mast course lift tackle and course truss on the starboard side. More outside work tomorrow - hopefully early, before it gets REALLY hot.

- 367 replies
-
- 4
-
-
- model shipways
- niagara
- (and 1 more)
-
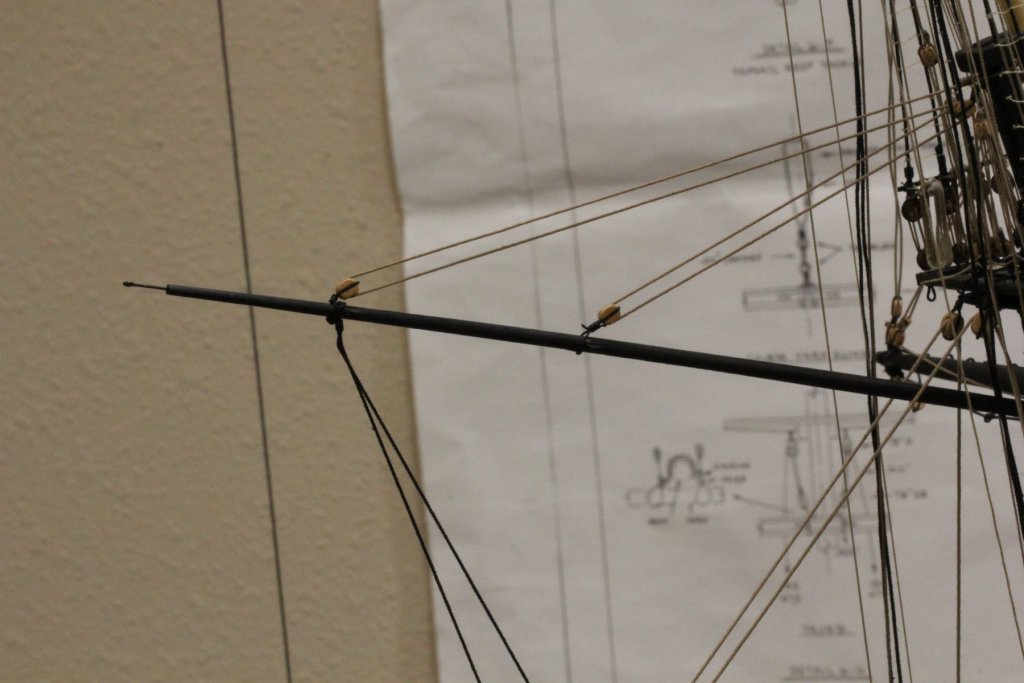
GrandpaPhil and Steve, Thanks for the info. Bowsprit should go before the Fore mast. It is ready for installation and I may do that next in between assembling the Fore mast and rigging the Main mast running rigging. Need things to do while glue dries.
-
In spite of some difficulties getting the shrouds min the right order I managed tom get the port side deadeyes rigged to their respective shrouds and not pull the mast out of alignment. So far so good. Work the Starboard side tomorrow and consider the next step to get the mast stabilized enough get the running rigging attached.

- 367 replies
-
- 5
-
-
- model shipways
- niagara
- (and 1 more)
-
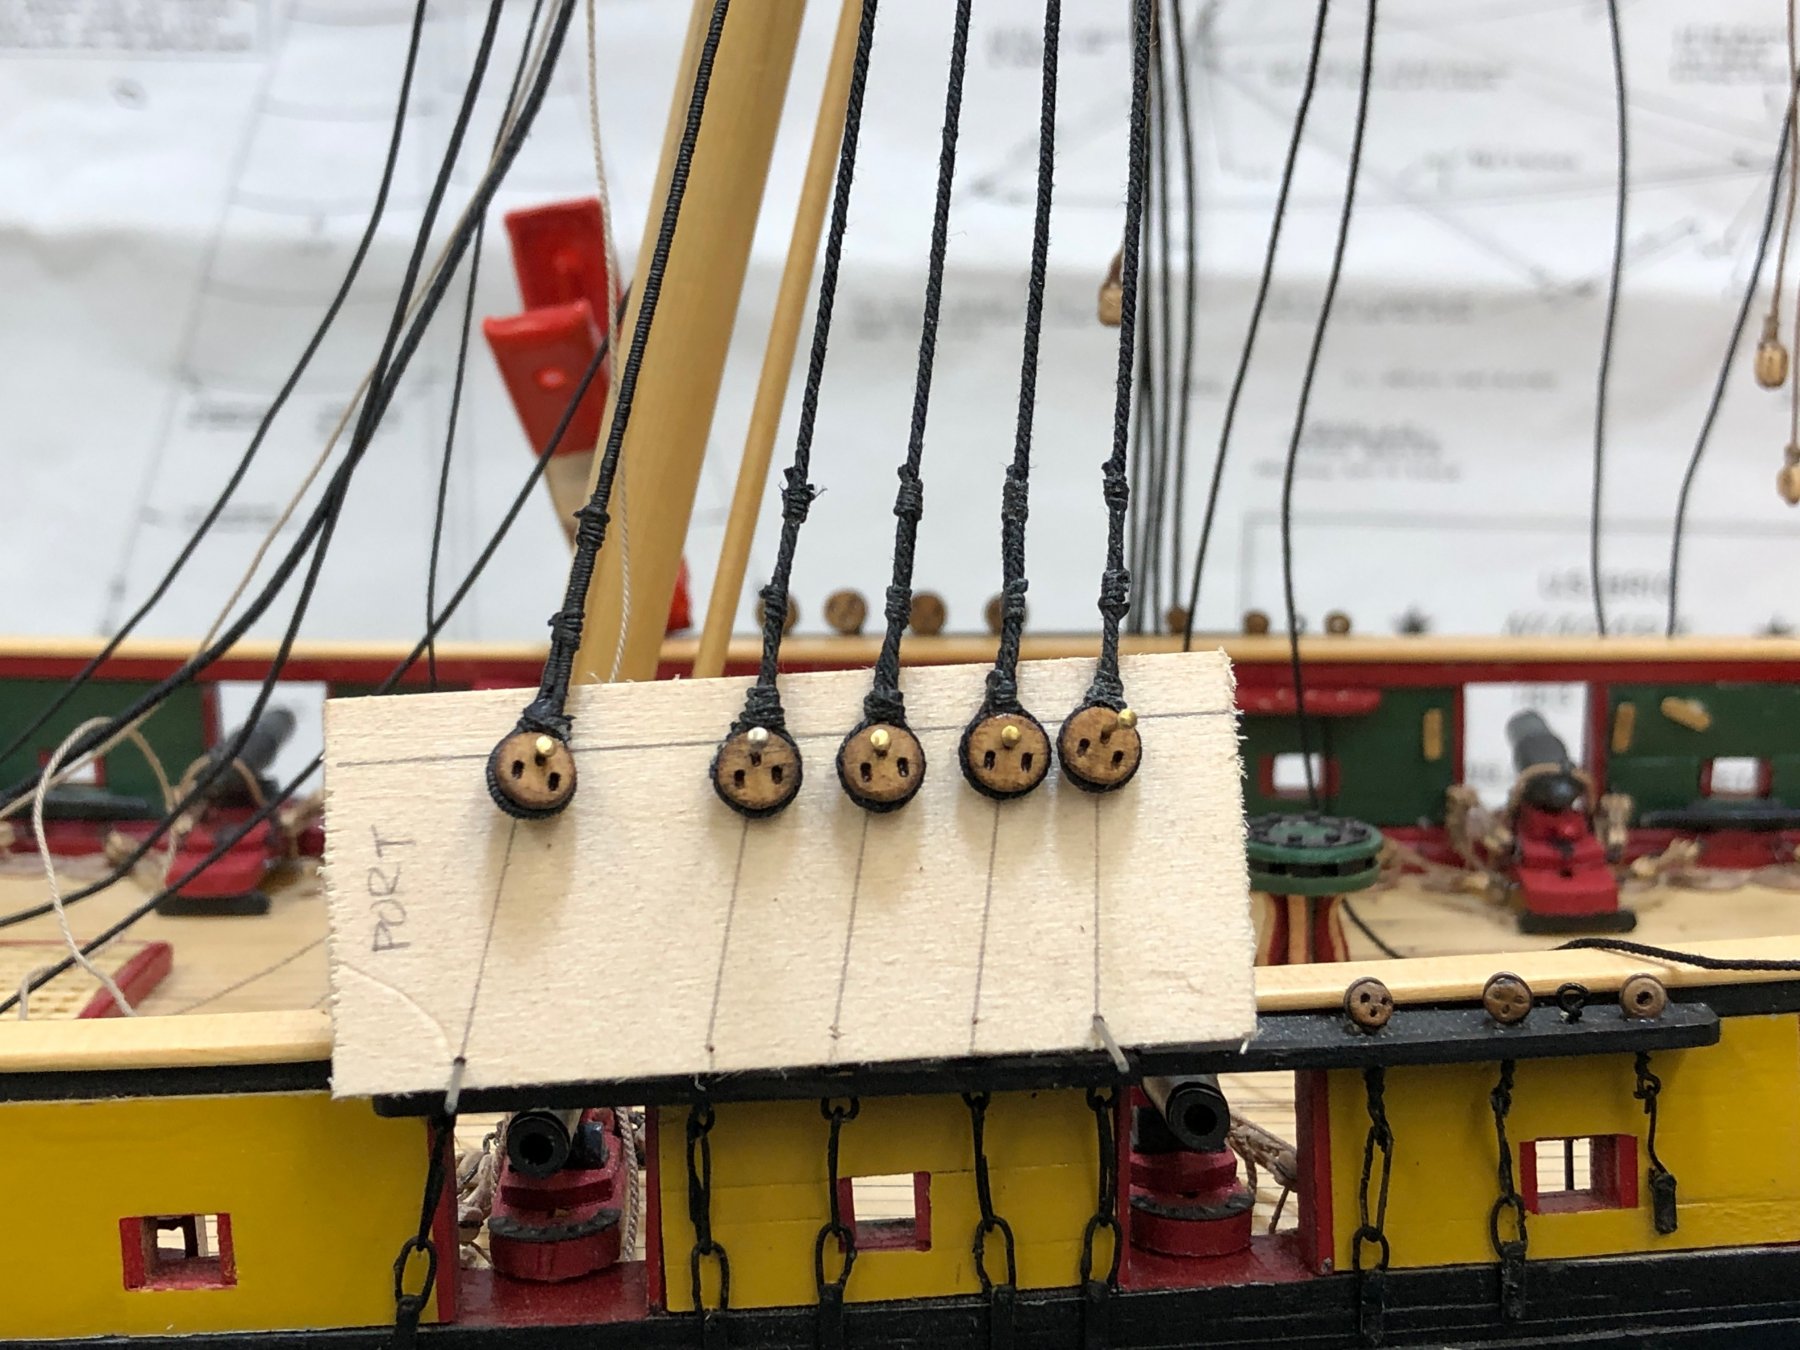
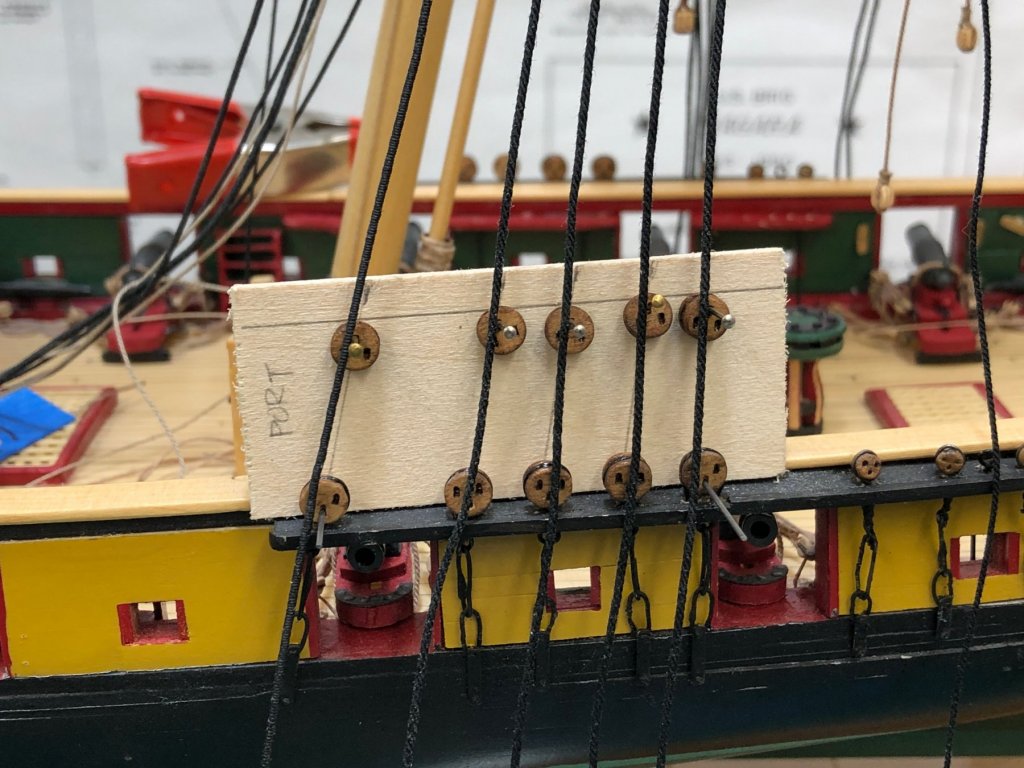
So here is my "daedeye gauge" mounted on the port side abeam the main mast and the first deadeye stropped to the forward most shroud - the one that is served its entire length.
- 367 replies
-
- 6
-
-
- model shipways
- niagara
- (and 1 more)
-
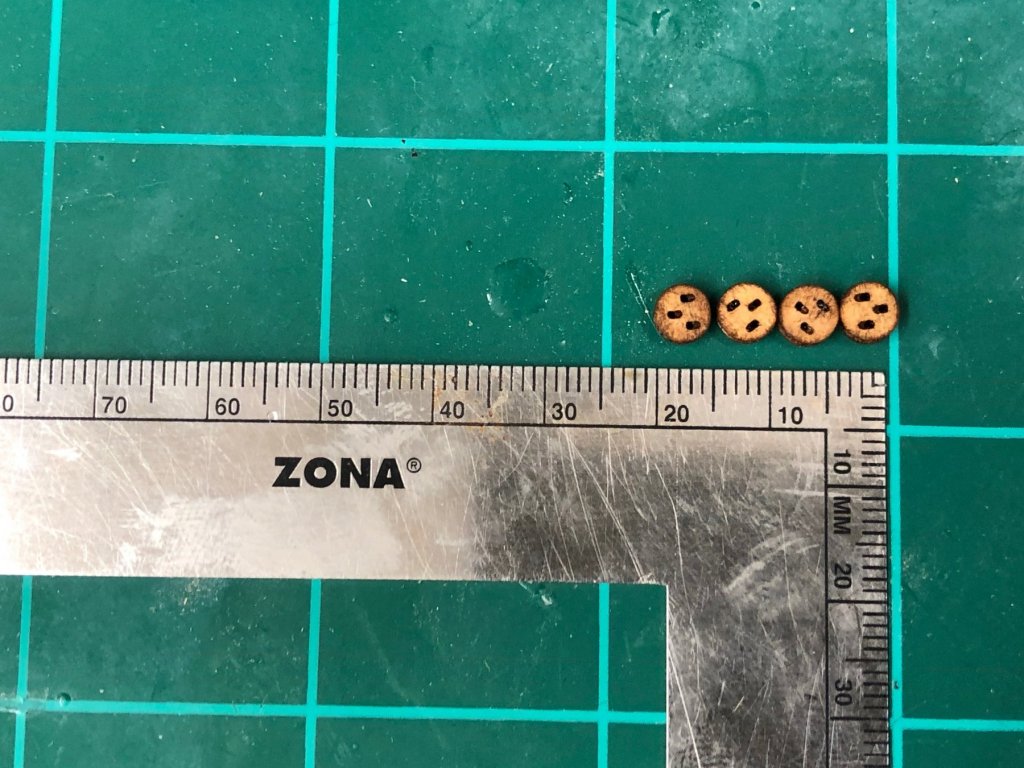
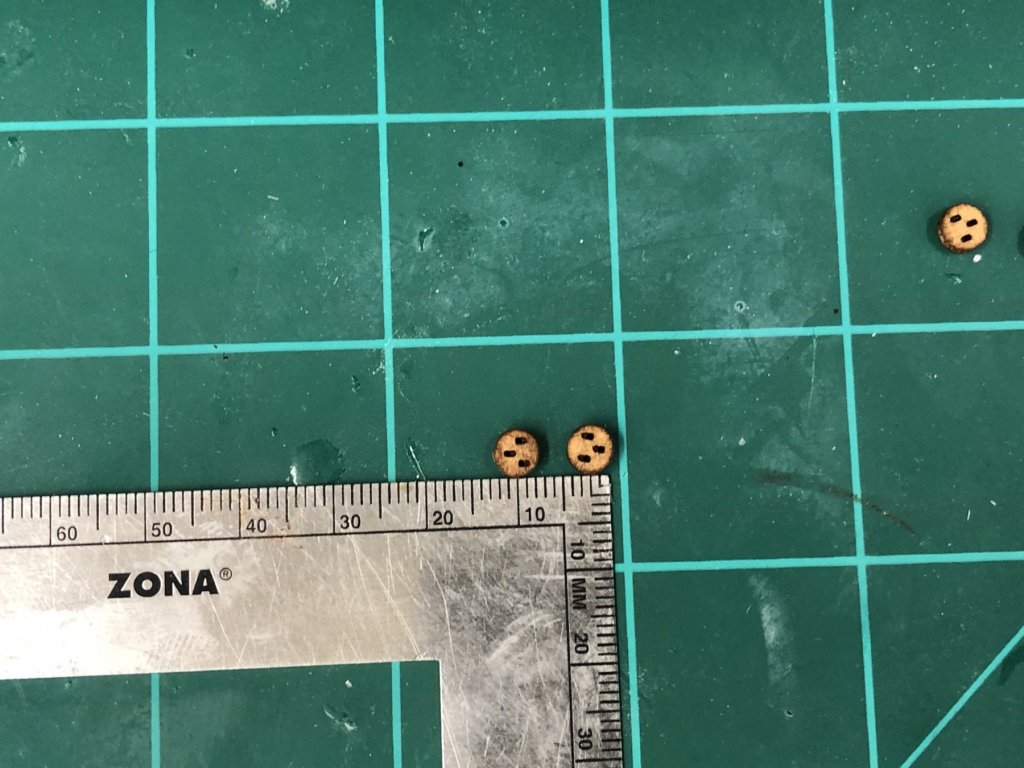
While trying to build a gauge for locating the deadeyes for the main lower shrouds I encountered some difficulties. According to the plans it is just under 12mm between center holes of the deadeyes. However, I am using somewhat bigger deadeyes than are shown in the plans and if I use two deadeye widths as the gauge for the nominal distance (although I have seen both two and three suggested in various books) the distance is close to 18mm. 12mm is clearly too close for this size deadeye so I am going to build my gauge (as suggested by Srodbro in a previous response on this blog) using 18mm as the nominal spacing. Hopefully this increase will not have unforeseen consequences later.
- 367 replies
-
- 4
-
-
- model shipways
- niagara
- (and 1 more)
-
I have reviewed most of the Niagara build logs (at least the ones labeled "FINISHED") and have not found a consistent methodology for getting the rigging completed. My experience (and this is largely confined to two masted fishing schooners not square riggers) is the getting the belying pin racks populated after the shrouds are completed and the ratlines hung is a major problem (at least for me). Too many things in the way of getting you tweezers (regardless of shape and size) where they need to be. So my plan is to only rig the forward and after lower shrouds after the main mast are is raised. Once most of the running rigging (especially that which belays at the pin racks behind the shrouds (which is everything that does not go to a fife rail pretty much) I will rig the rest of the lower shrouds and back stays. Then the ratlines. We will see if the pain of doing the ratlines with the running rigging behind the shrouds is worth it. I am planning on working from aft forward, following a similar methodology except that the standing rigging between the masts will be done before the running rigging and shrouds/ratlines. Bowsprit will be last. Does this make any sense???
- 367 replies
-
- 1
-
-
- model shipways
- niagara
- (and 1 more)
-
Space Saver
-
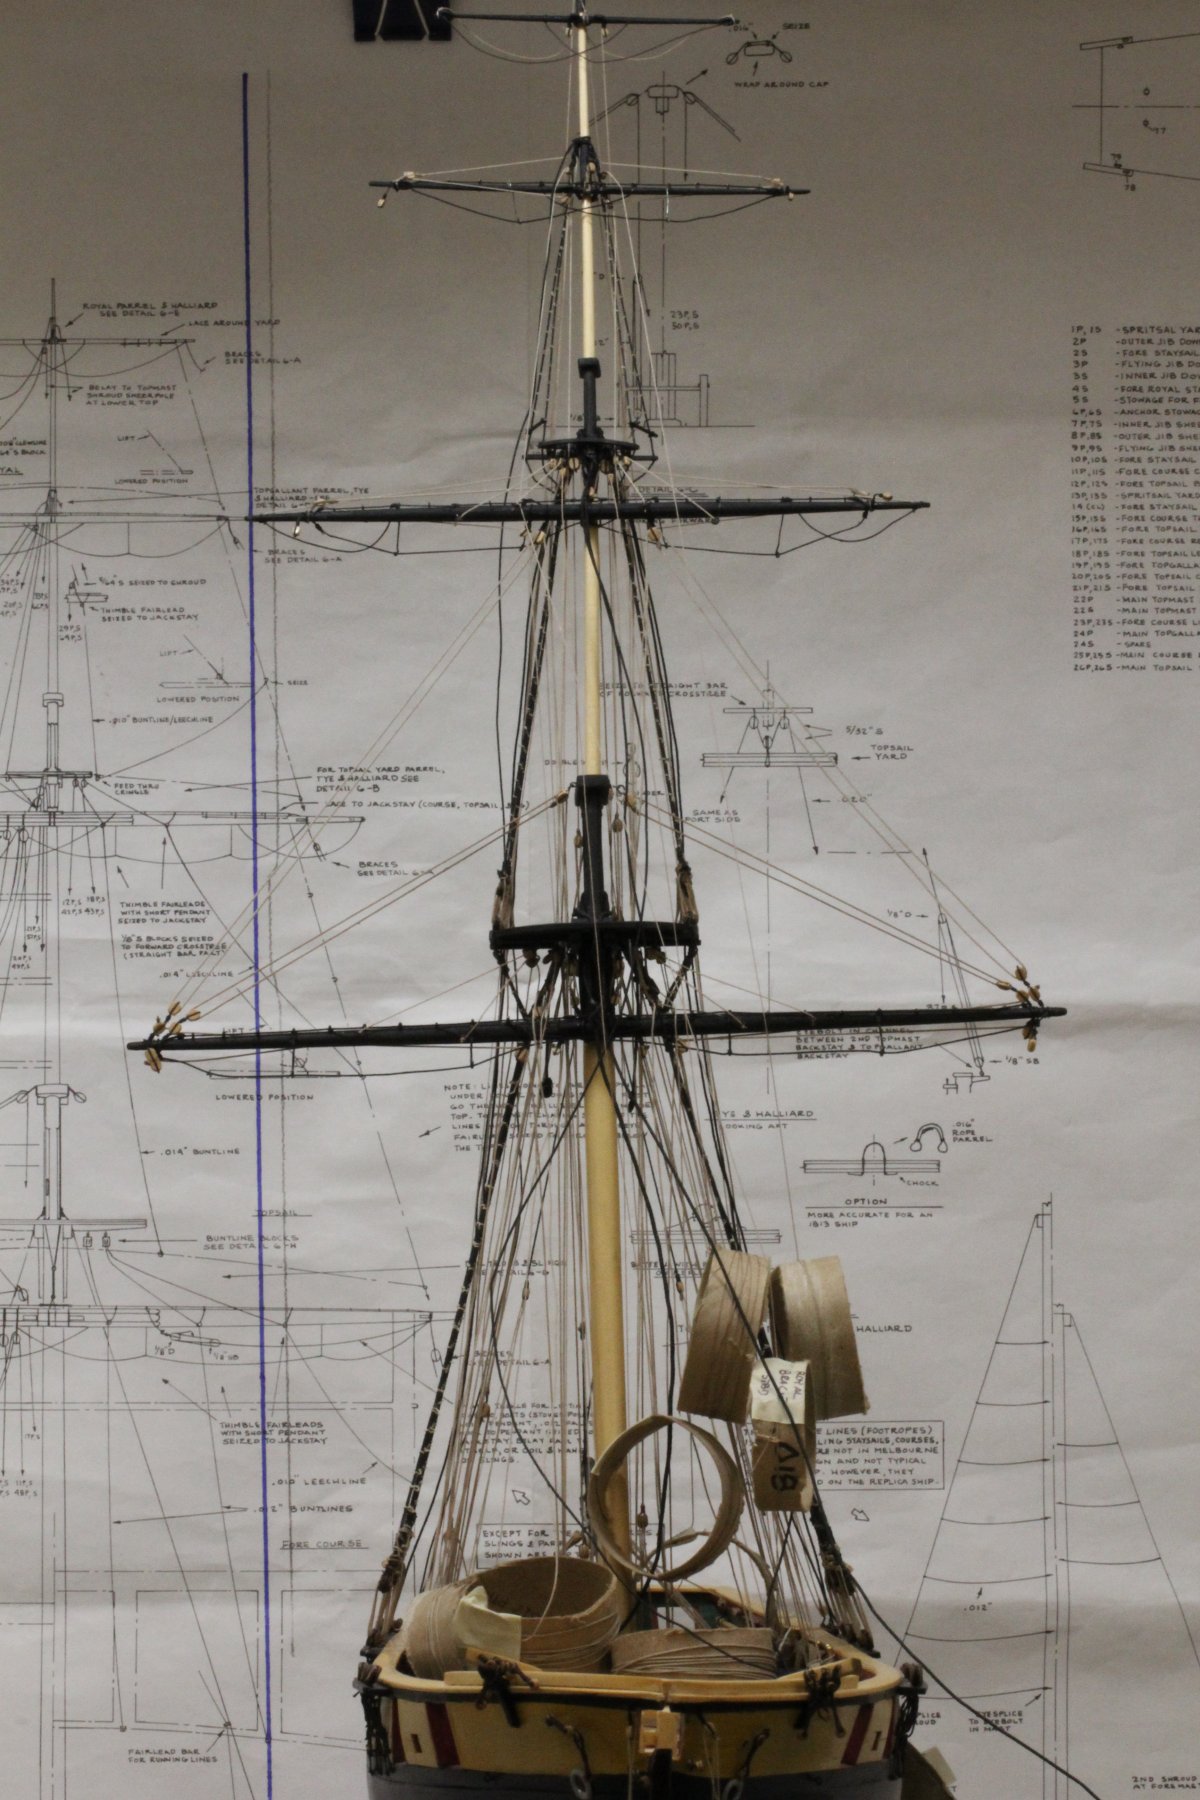
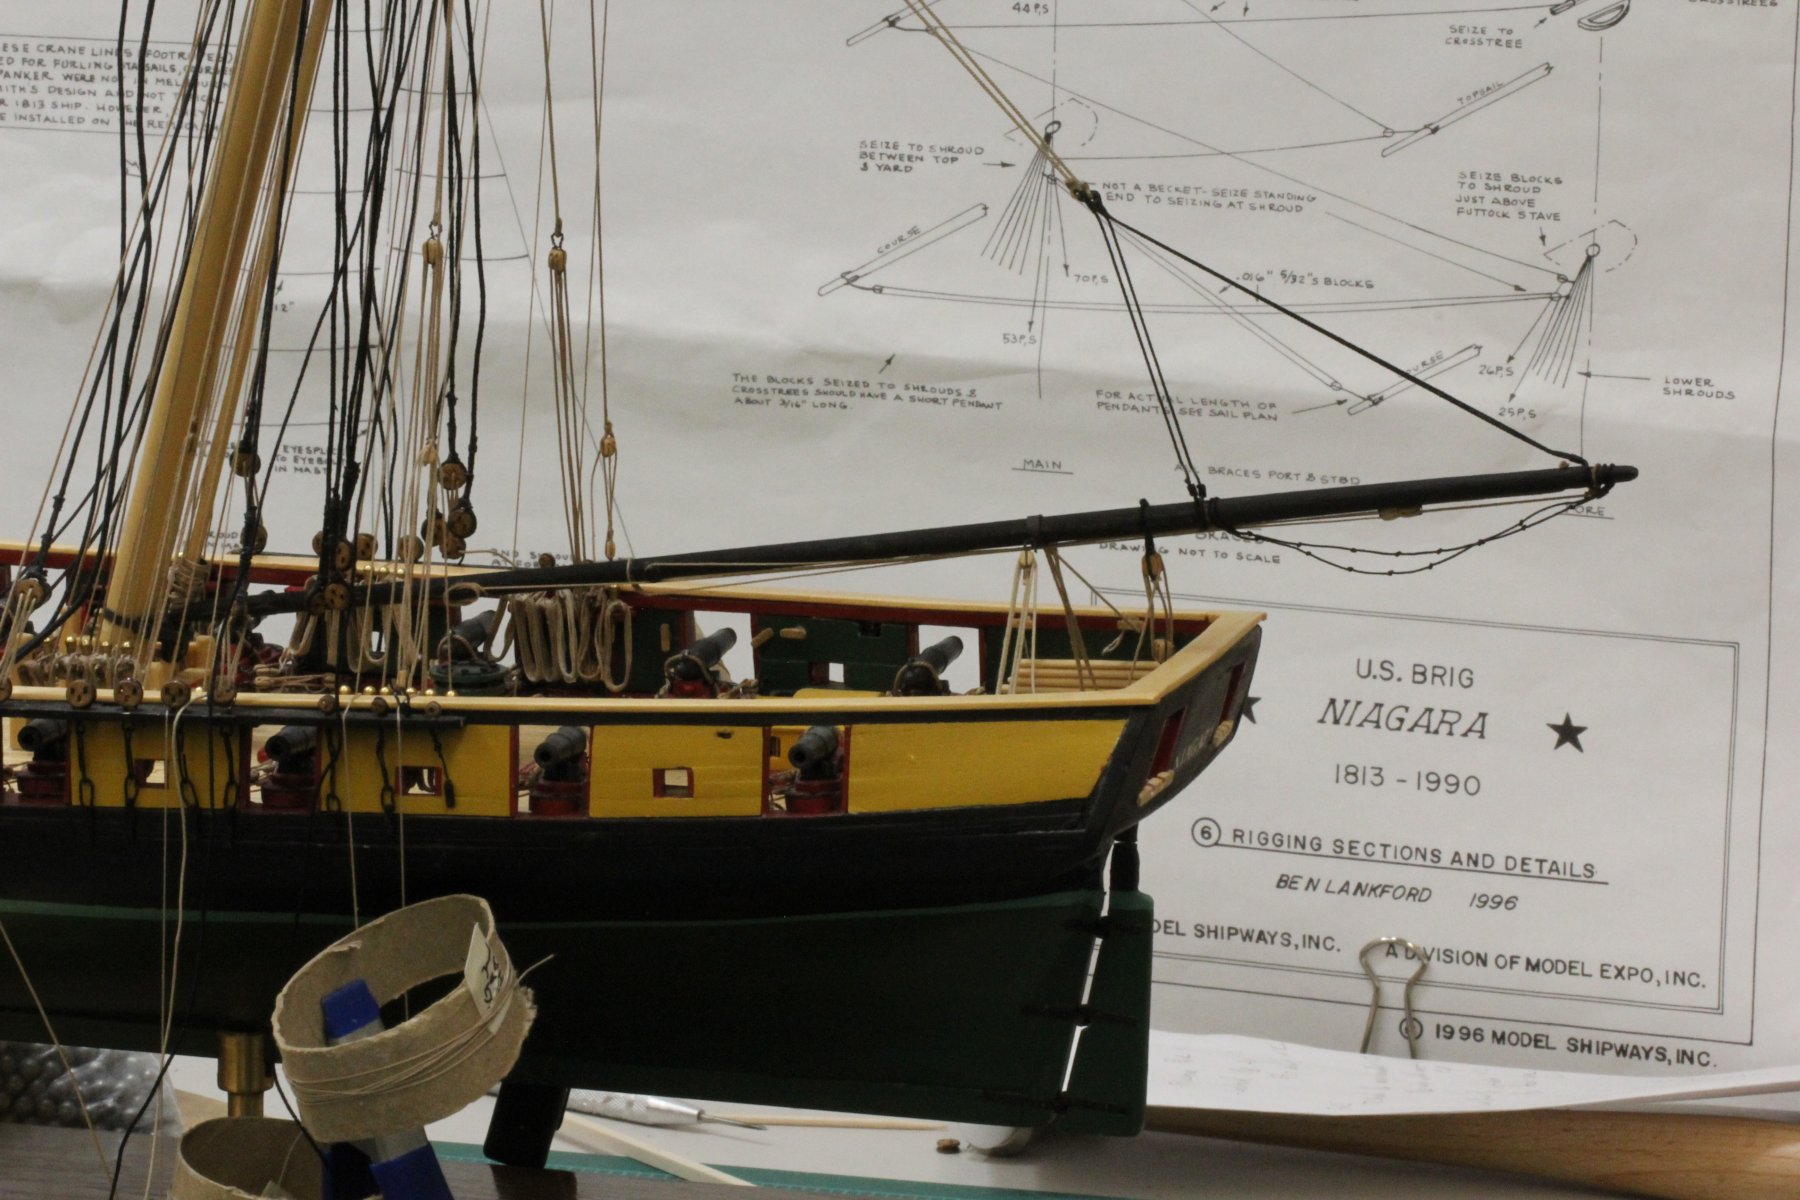
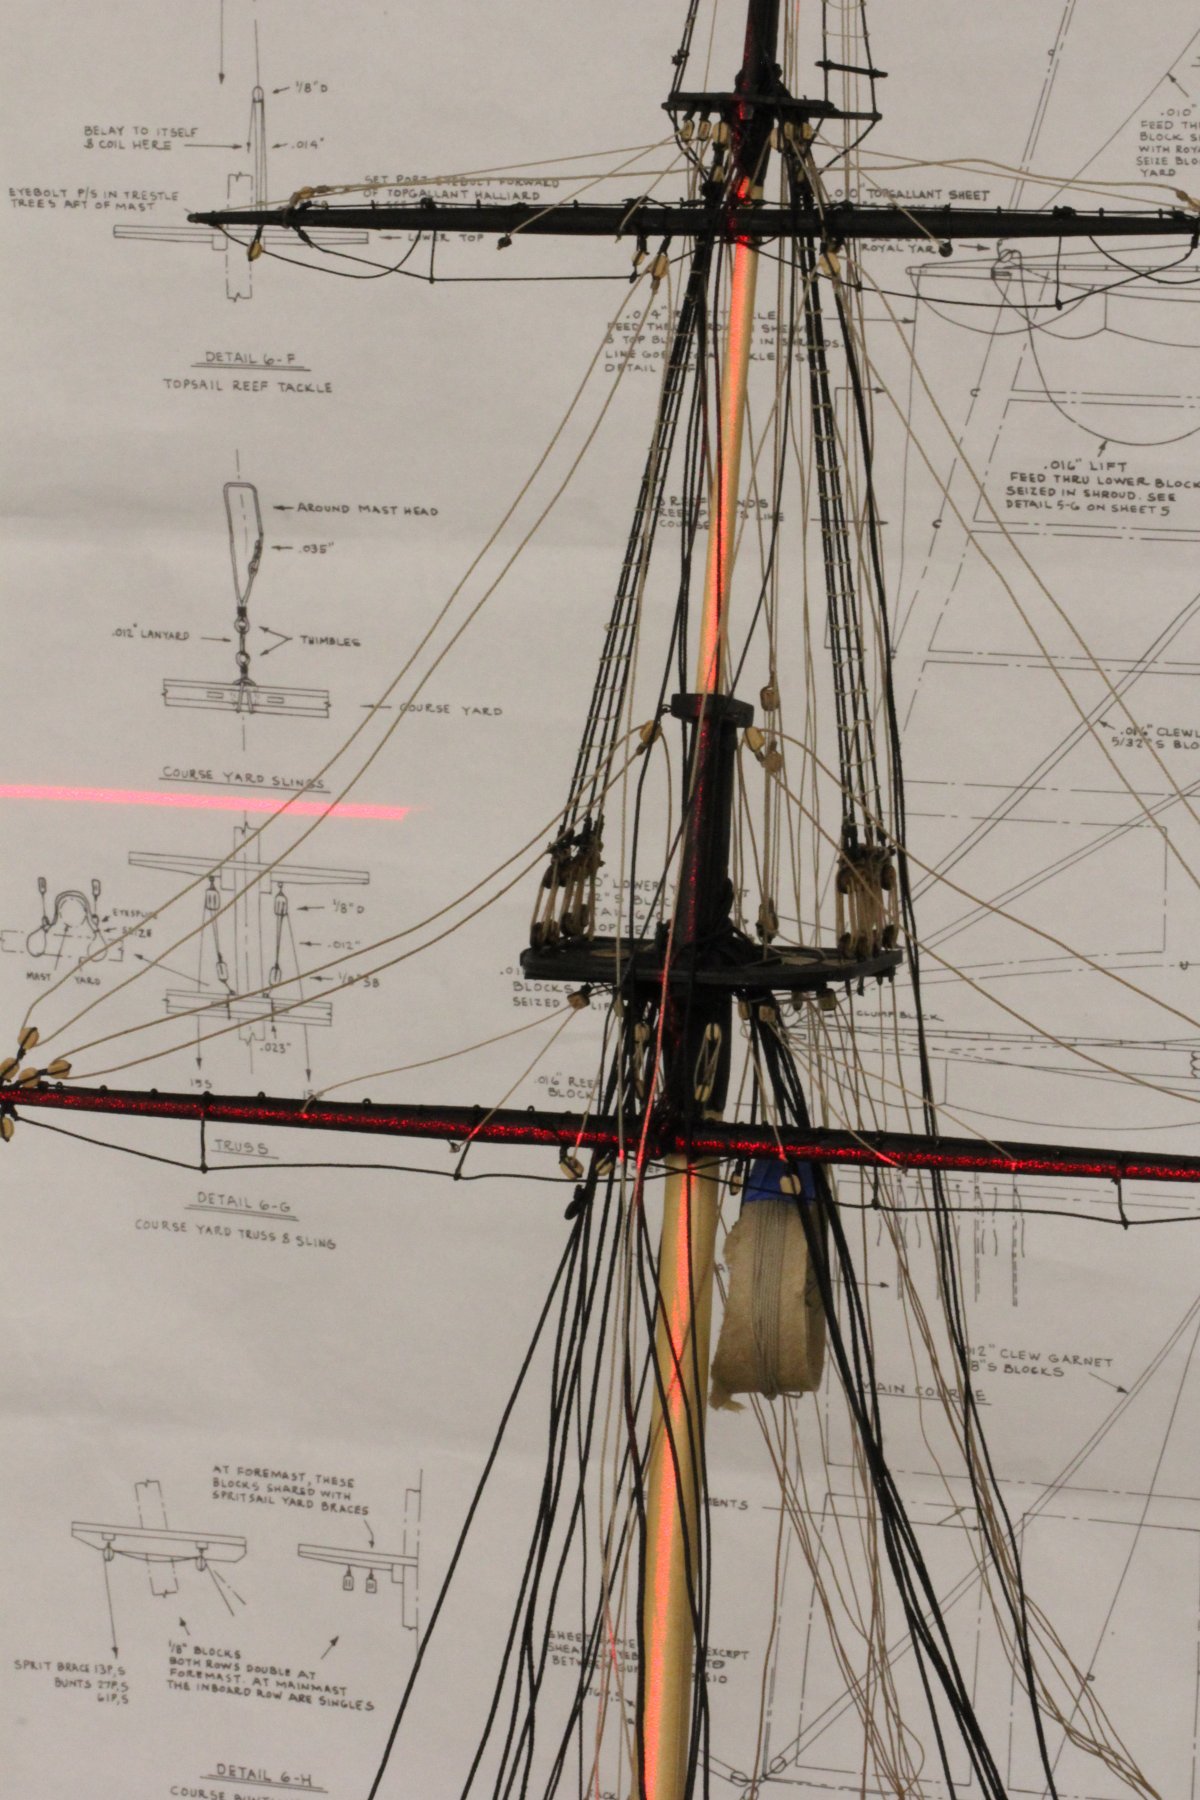
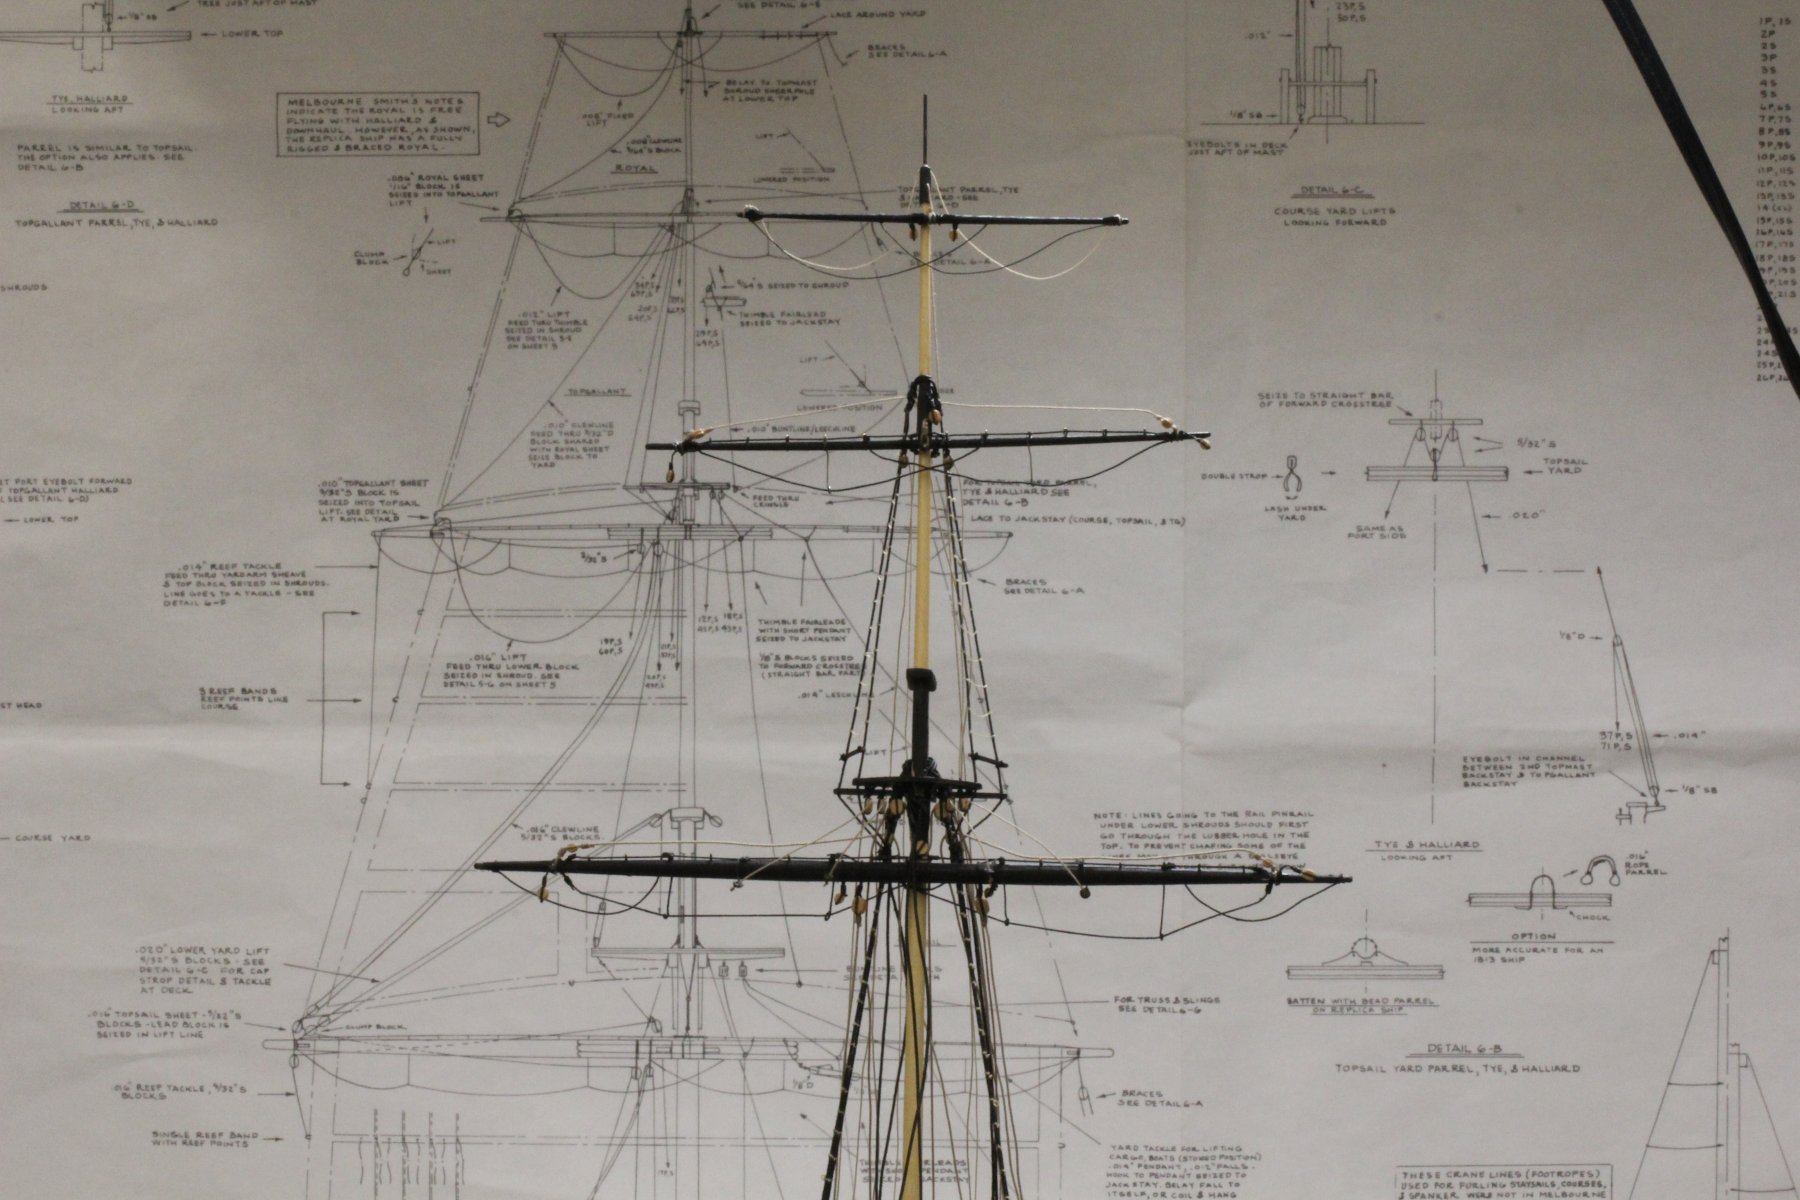
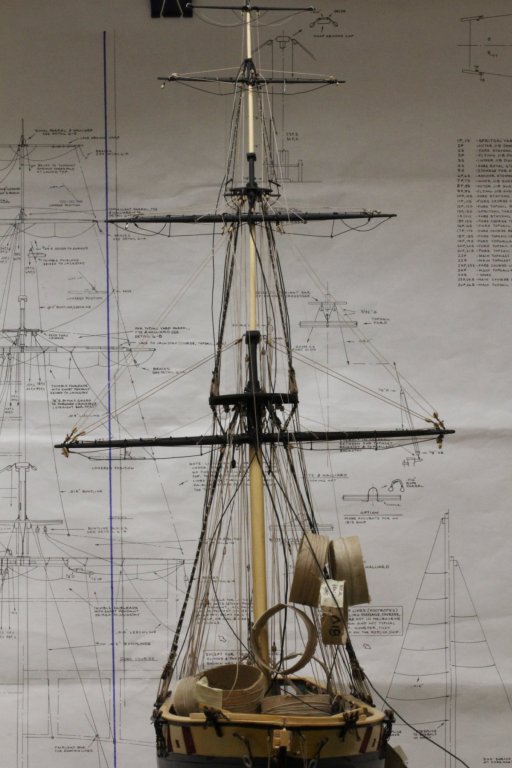
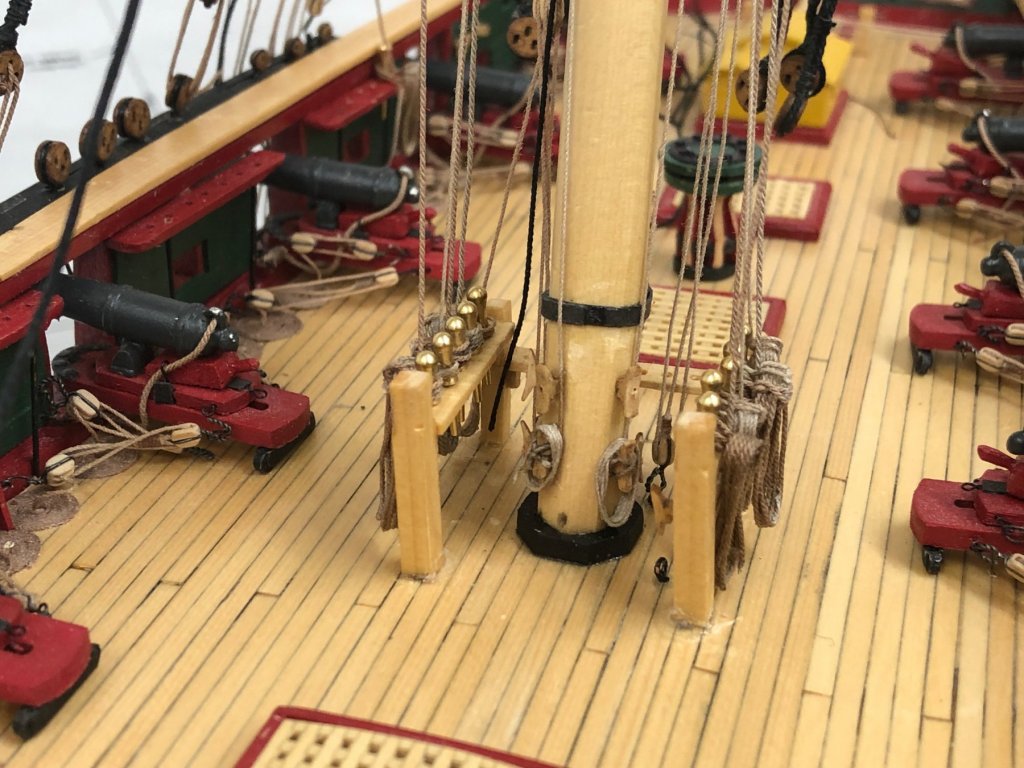
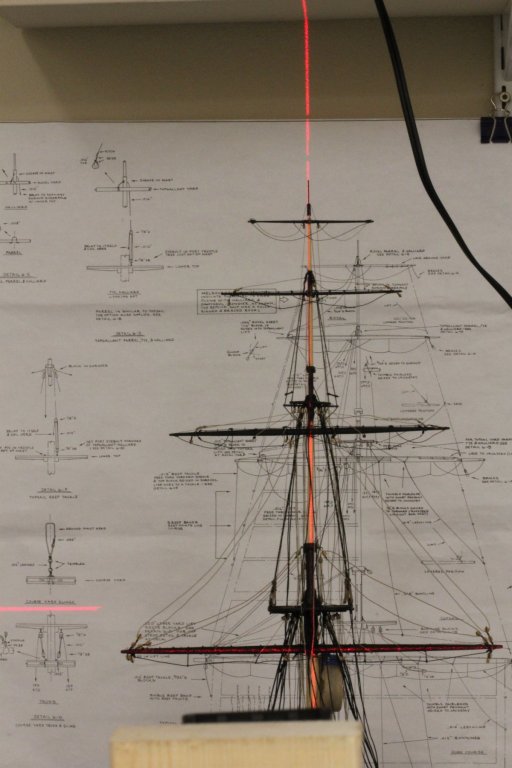
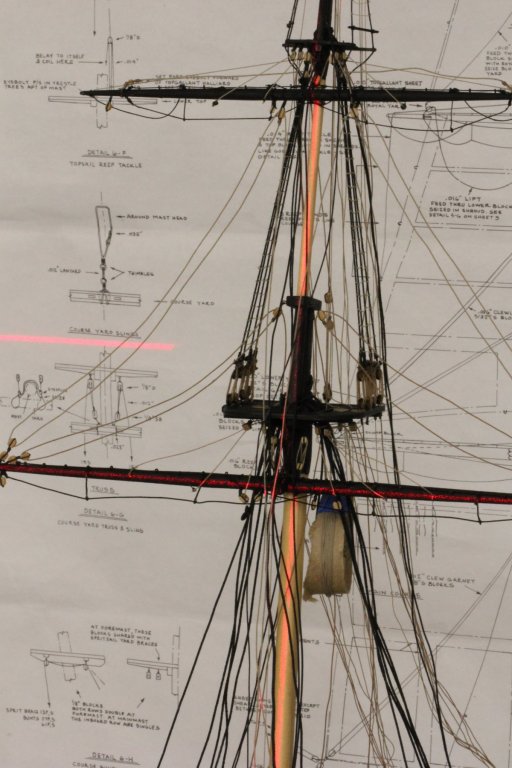
I got the Royal Clew Lines belayed at the sheer poles and moved the main Mast assembly to the hull. Before I set the mast I hooked the tackles for the Course Yard lift to the eyebolts inside the fife rail - one less thing to try and fit in with the mast coat in the way. Once I had the mast in place I checked the rake using the file folder template I made from the plans. As best I can tell it is pretty close and I made the tendon on the mast a pretty snug fit fore and aft so if the mast notch in the center bulkhead was at the correct angle then so is the mast. Then I used my laser level to check the mast and course yard for straight and square. As the pictures show it looks pretty good. At this point the mast is being support side to side by the forward shroud on each side clamped to the forward deadeye. I am tempted to pour CA all over the base of the mast and call it done but that would be very difficult to undo later if required.
- 367 replies
-
- 6
-
-
- model shipways
- niagara
- (and 1 more)
-
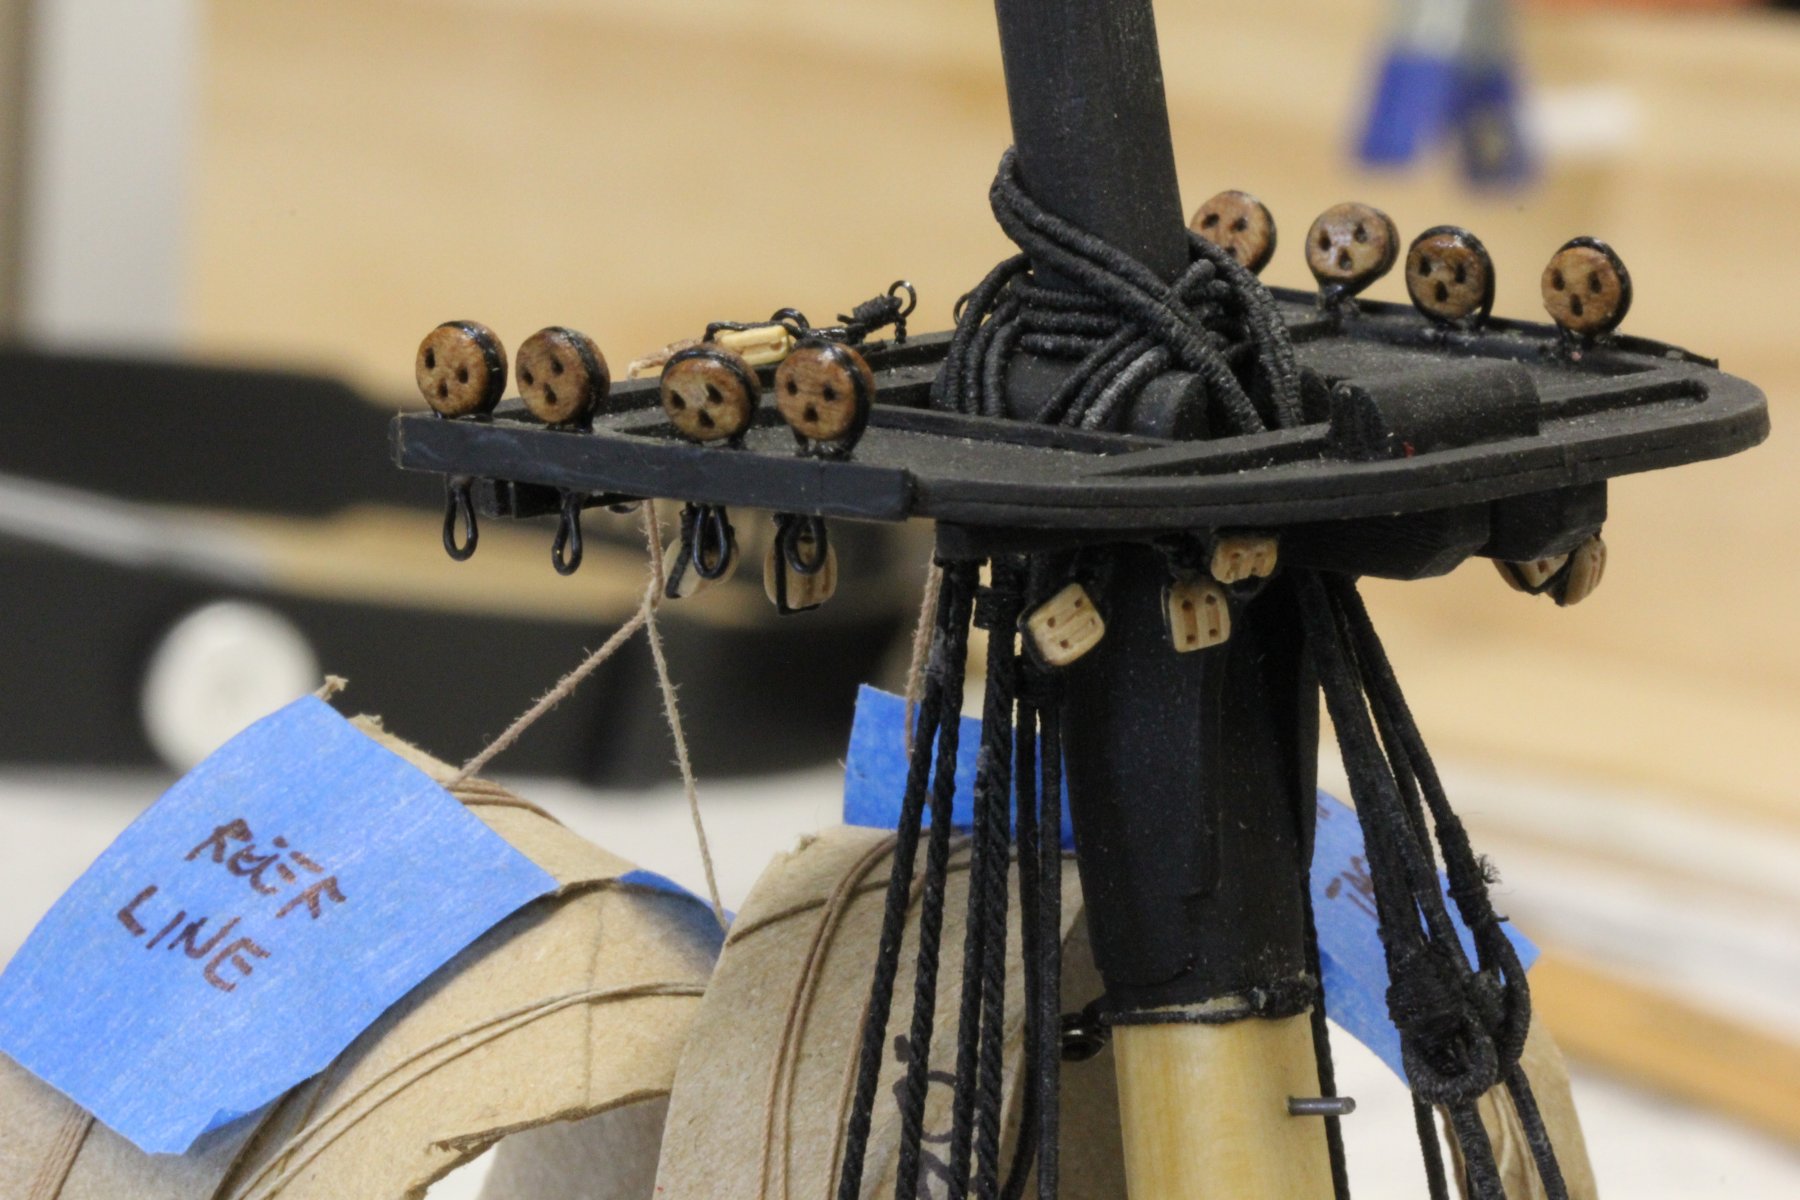
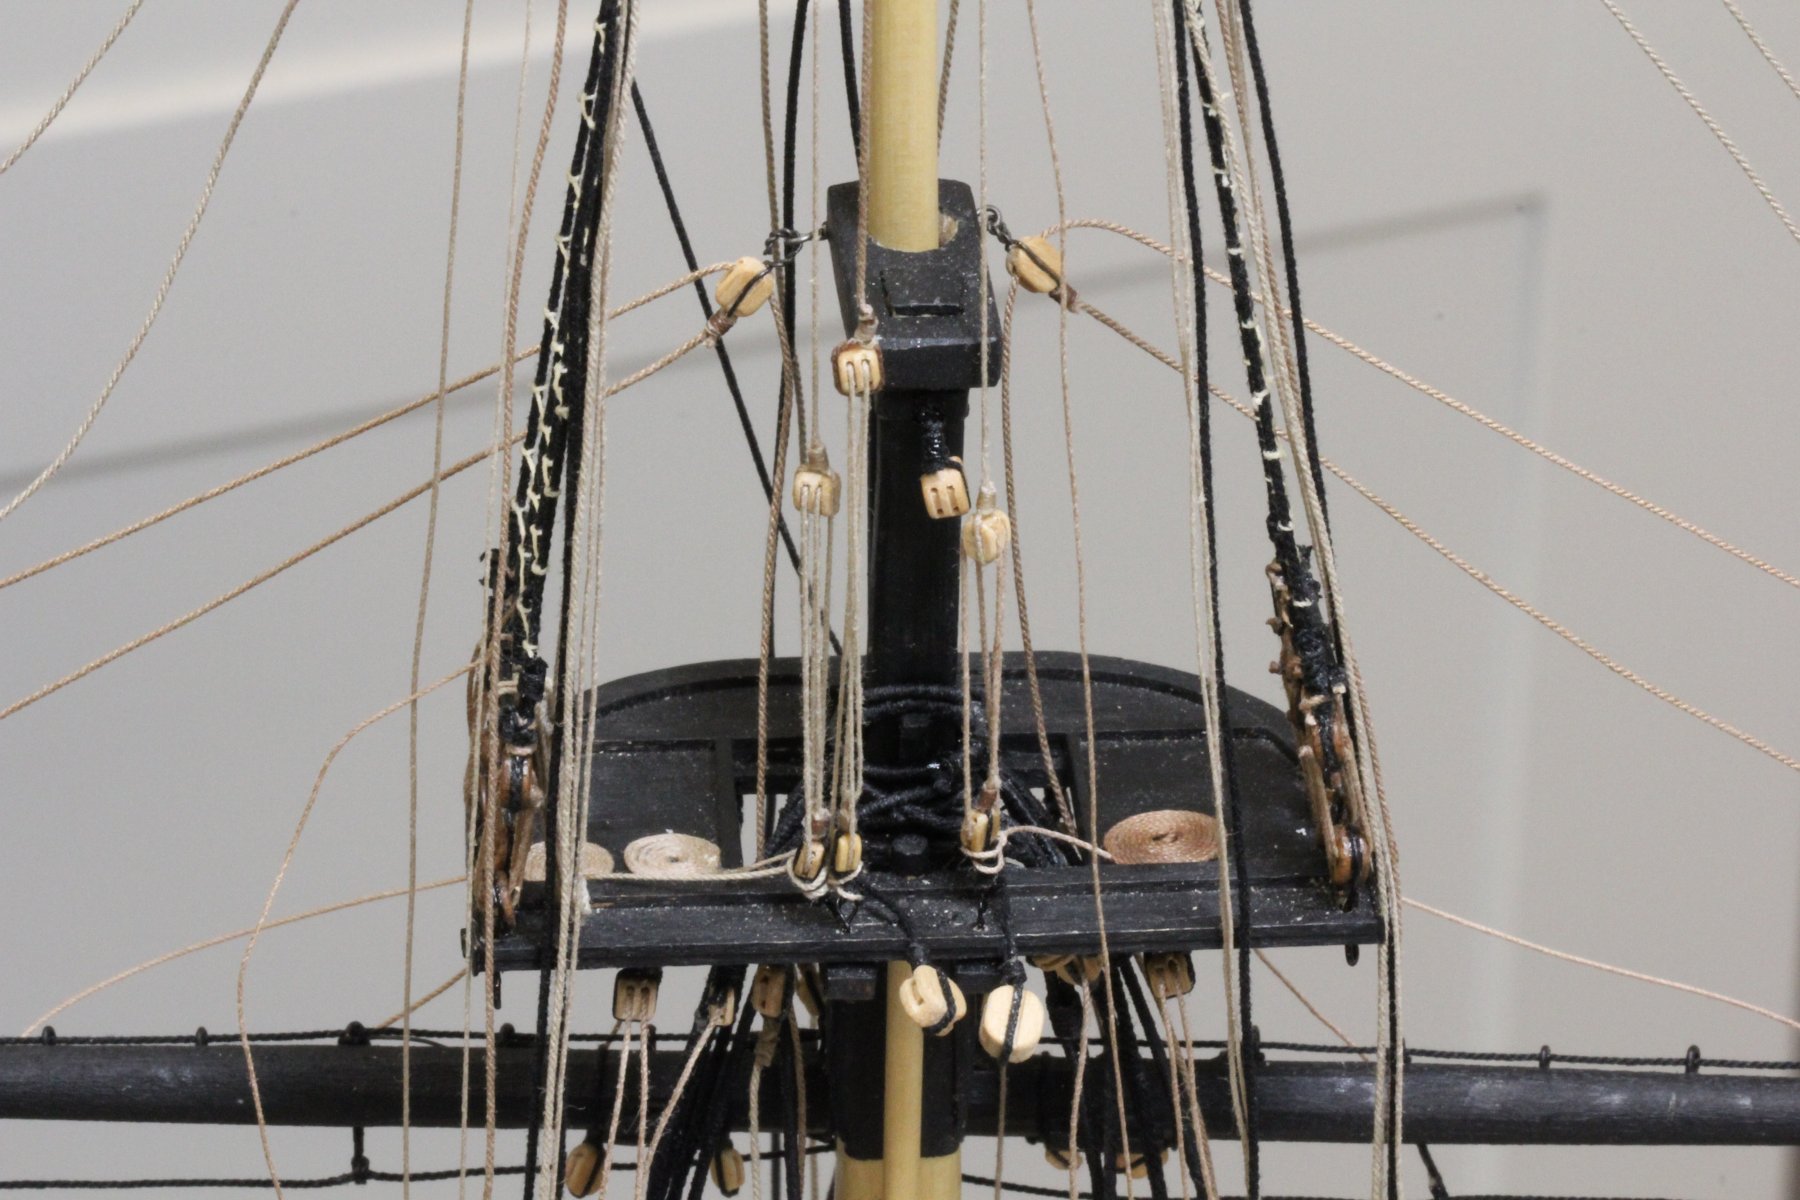
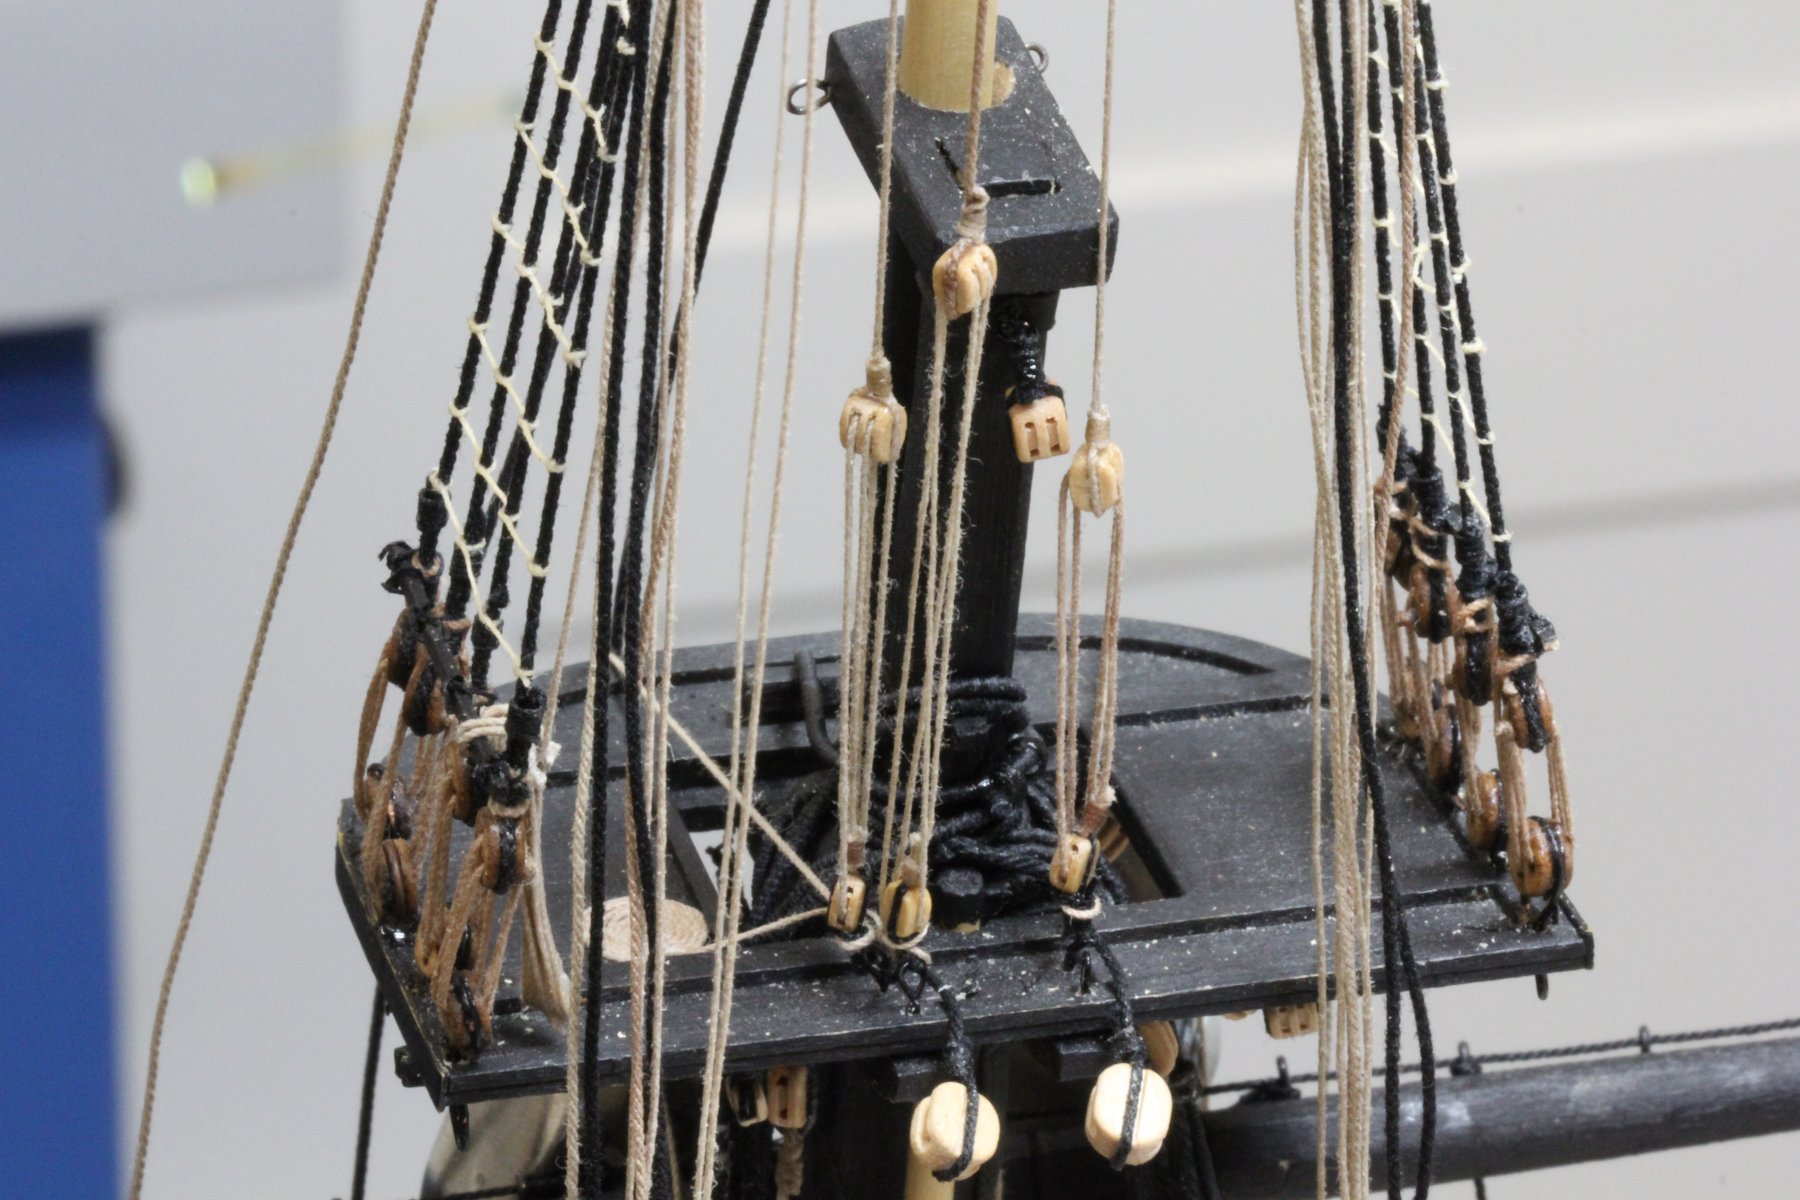
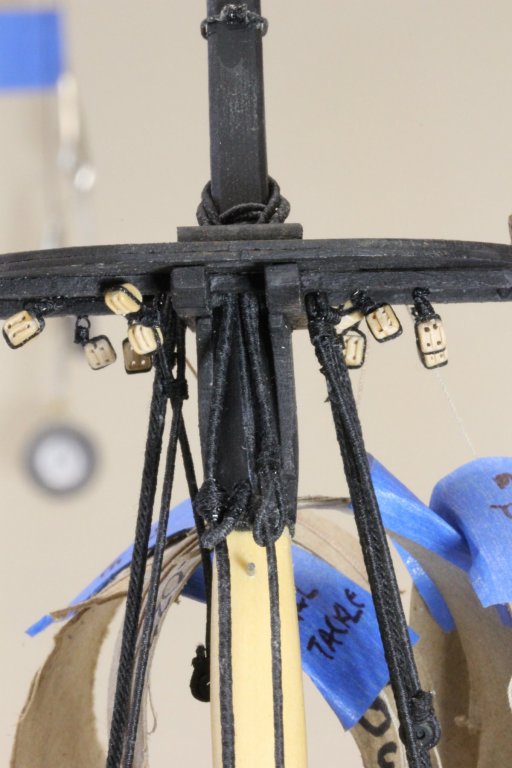
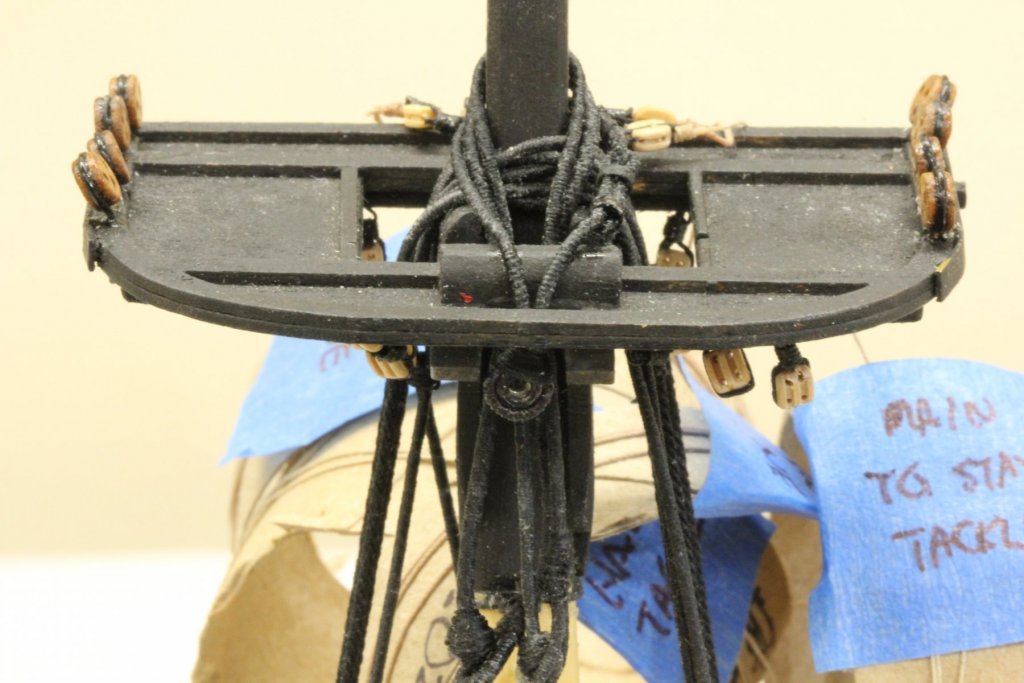
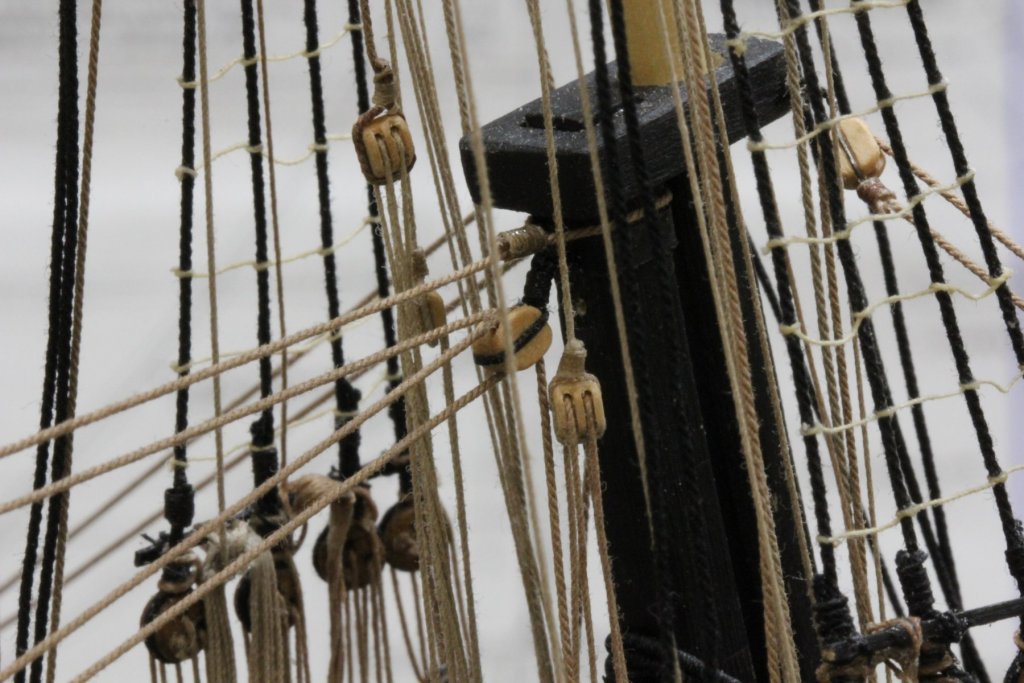
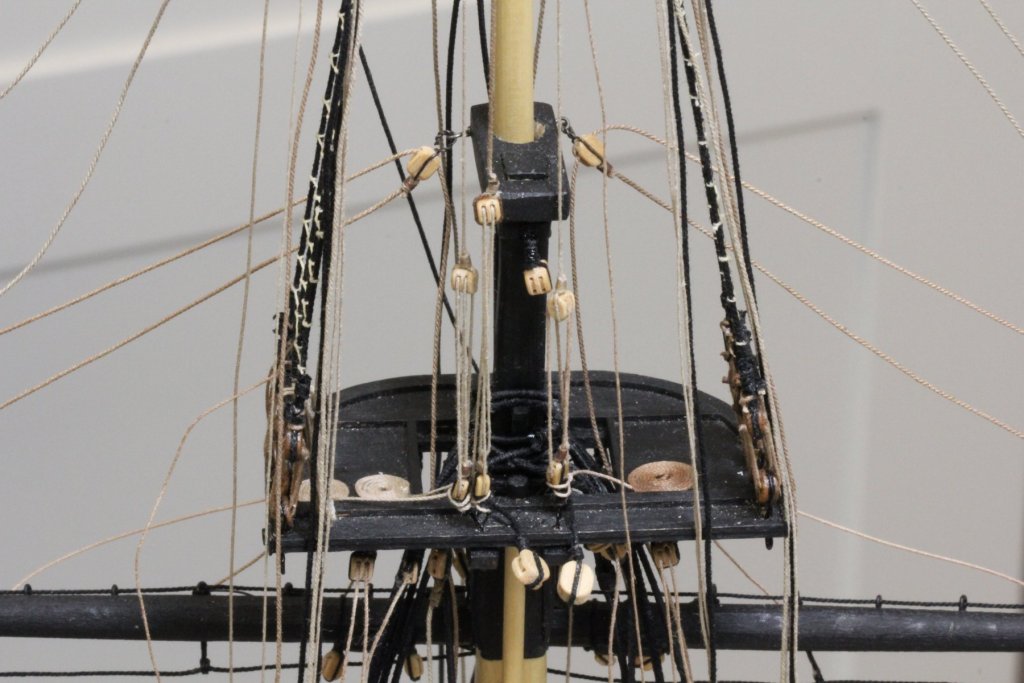
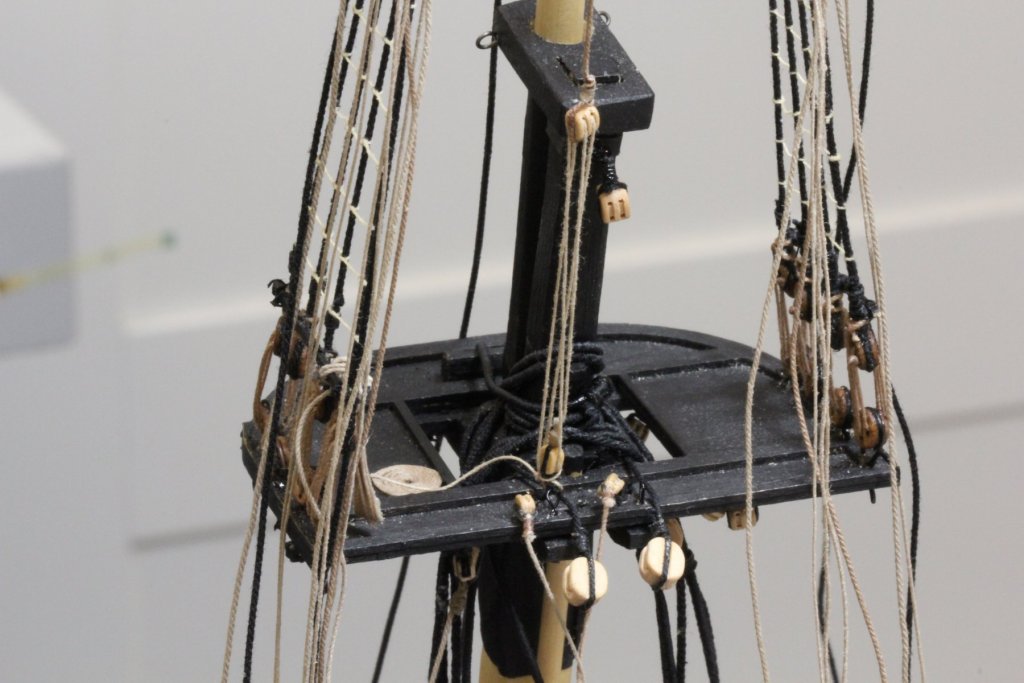
Working on cleaning things up and tying things down that can be tied down now. Finished belaying the Top Sail Reef Tackle and used a few of the rope coils left over from the guns. Wanted to get the mast coat for the main done so I don't forget to include that when I put the mast onboard. I looked through some of the other Niagara logs and think they were generally painted flat black (simulating tar I assume) so I did also. Here is a look at the maintop with the Top Sail reef tackle and Top Gallant halyard in the center. Although difficult to see the Royal Halyard is secured to the sheer pole on the port side with a coil of rope hung from the pole. Am working now to get the Royal clew lines secured to the sheer poles as well. When that is done and the mast coat paint is dry we are headed to the hull.
- 367 replies
-
- 5
-
-
- model shipways
- niagara
- (and 1 more)
-
Spent the rest of the day adding more lines to the main Mast: Course yard lifts, clews, four buntlines and two leech lines and a Royal clew I somehow forgot. Except or terminating some of the lines with blocks (Course yard lift, Top Sail halyard to name two (actually four, two each) that come to mind) I think the Main mast is almost complete "off the hull". I have to move it "on the hull" or make another mast holder so I think I will move it to the hull when the block terminations are done and I have checked for missing lines one more time. It will be interesting to see the mast finally "on the hull", hopefully tomorrow.

- 367 replies
-
- 4
-
-
- model shipways
- niagara
- (and 1 more)
-
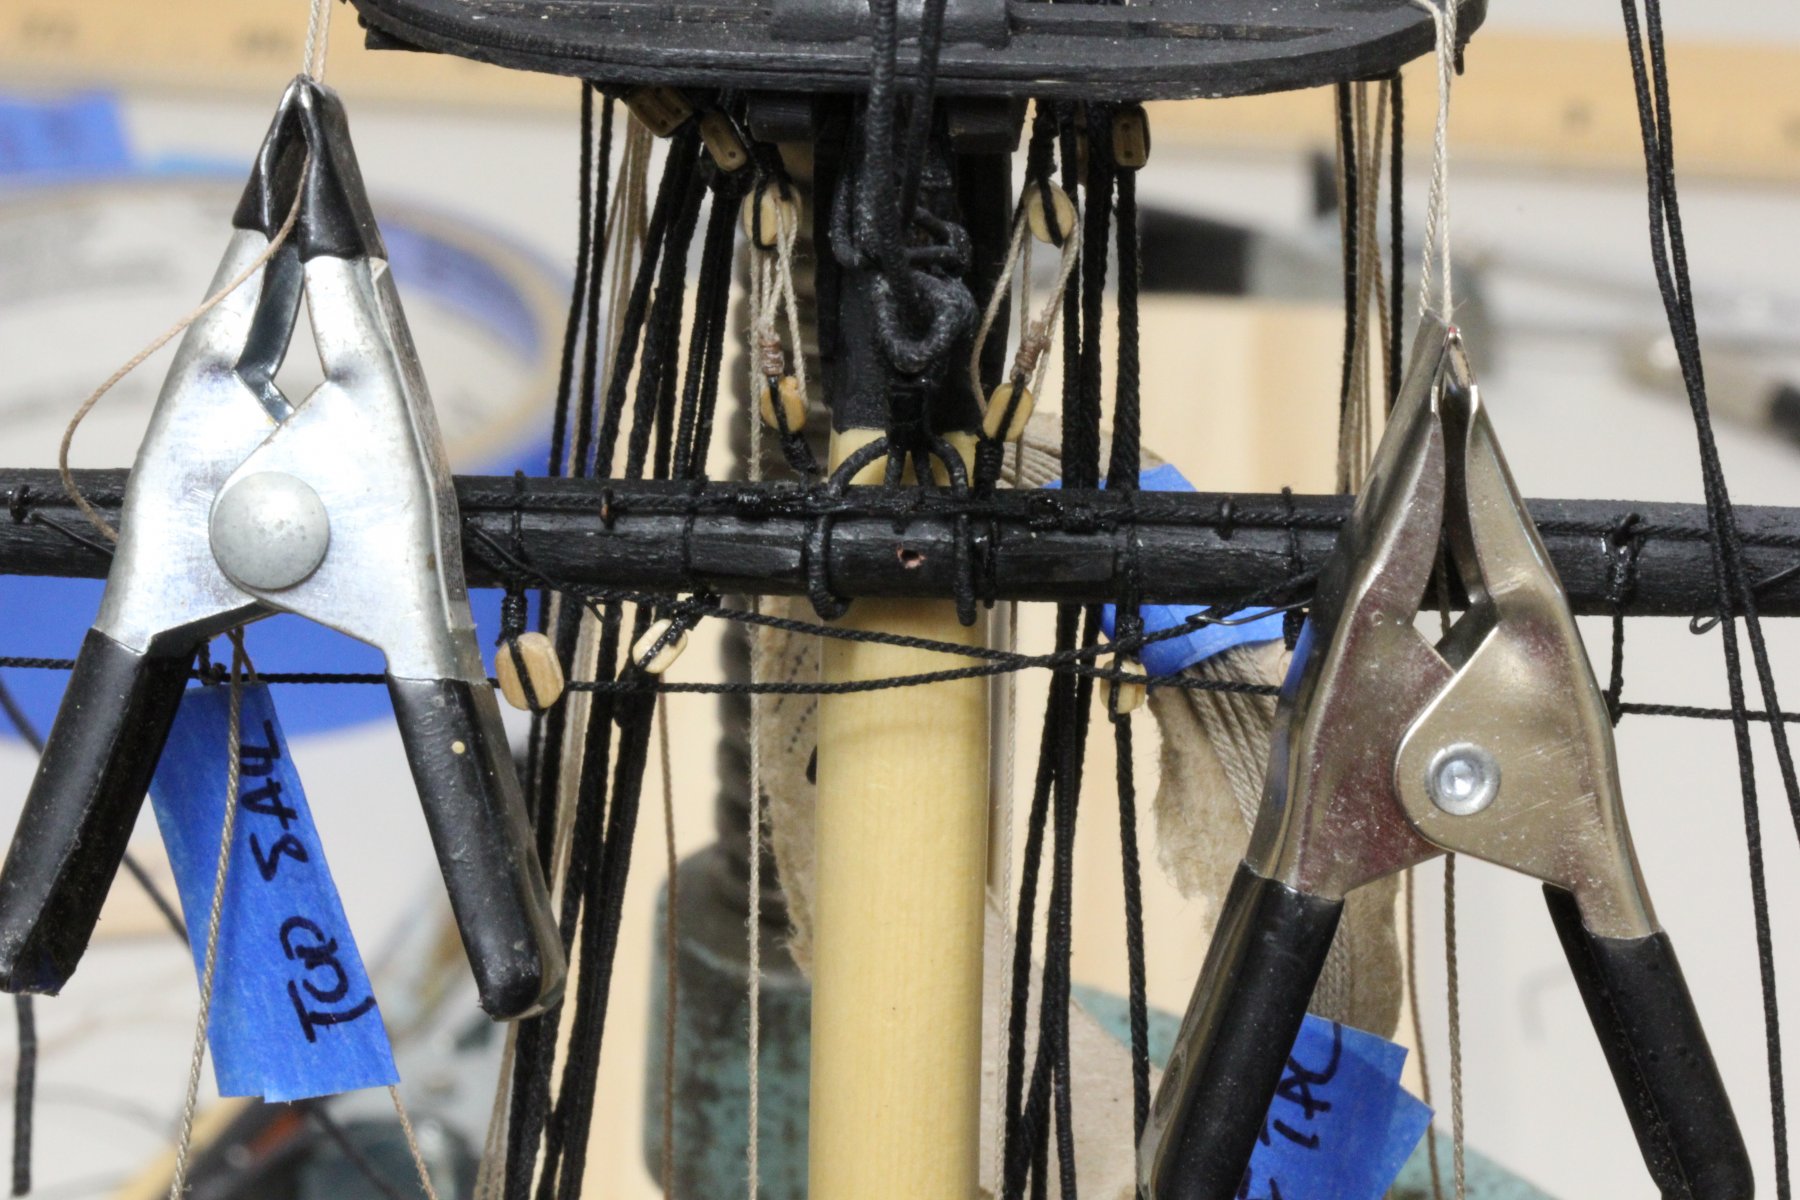
Moving right along now that the Royal yard is mounted. Got the course yard installed and the halyards (one on each side) and the truss/sling lanyard wove. Top Sail clew lines added and Top Sail Reef tackle added but not "belayed to itself". I am waiting to complete most of the lines that can be installed here before belaying these as there are more than a few lines which influence the "tilt" of the Top Sail yard. More clew and bunt lines to run for course yard next. Then a final run through to see what I've missed than can be done with the mast off the ship.


- 367 replies
-
- 3
-
-
- model shipways
- niagara
- (and 1 more)
-
Royal Yard back in place. Now have three yards, the hard one remains. I added clew and bunt line to the Top Gallant and Top Sail yards although they are knotted off at the fairlead or block since there are n o sails. I debated for sometime whether or not to include the blocks and lines for these. I am putting a piece of tape on the end of each line with the pin number where it belays. I also now have the first complete piece of running rigging. The Top Gallant halyard and tackle are now "DONE". I am going to finish the Royal halyard too before I start on the course yard.
- 367 replies
-
- 5
-
-
- model shipways
- niagara
- (and 1 more)