HOLIDAY DONATION DRIVE - SUPPORT MSW - DO YOUR PART TO KEEP THIS GREAT FORUM GOING! (Only 75 donations so far out of 49,000 members - C'mon guys!)
×


cdrusn89
-
Posts
1,915 -
Joined
-
Last visited
Content Type
Profiles
Forums
Gallery
Events
Everything posted by cdrusn89
-
 Keith - thanks, I can get Beadalon wire here in the US from Amazon (who would have guessed?). I have ordered some .47 mm thickness stainless wire. It come 30' to a roll so hopefully one is all I will need.
 -
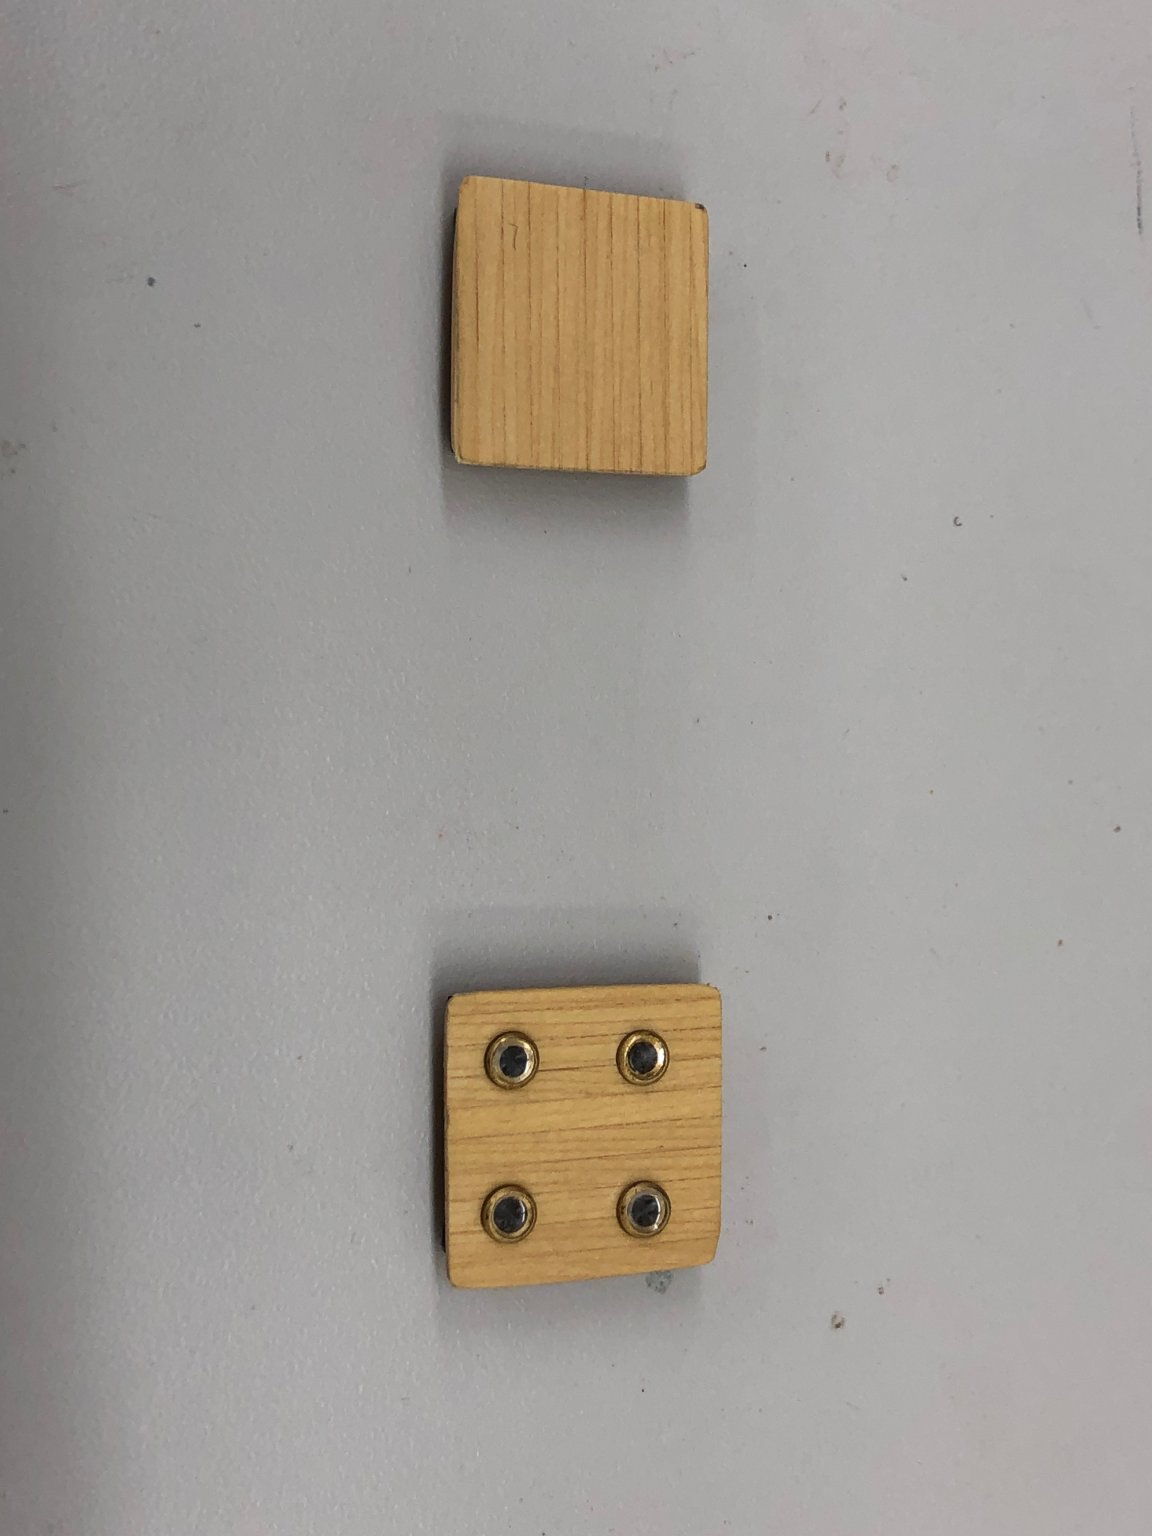
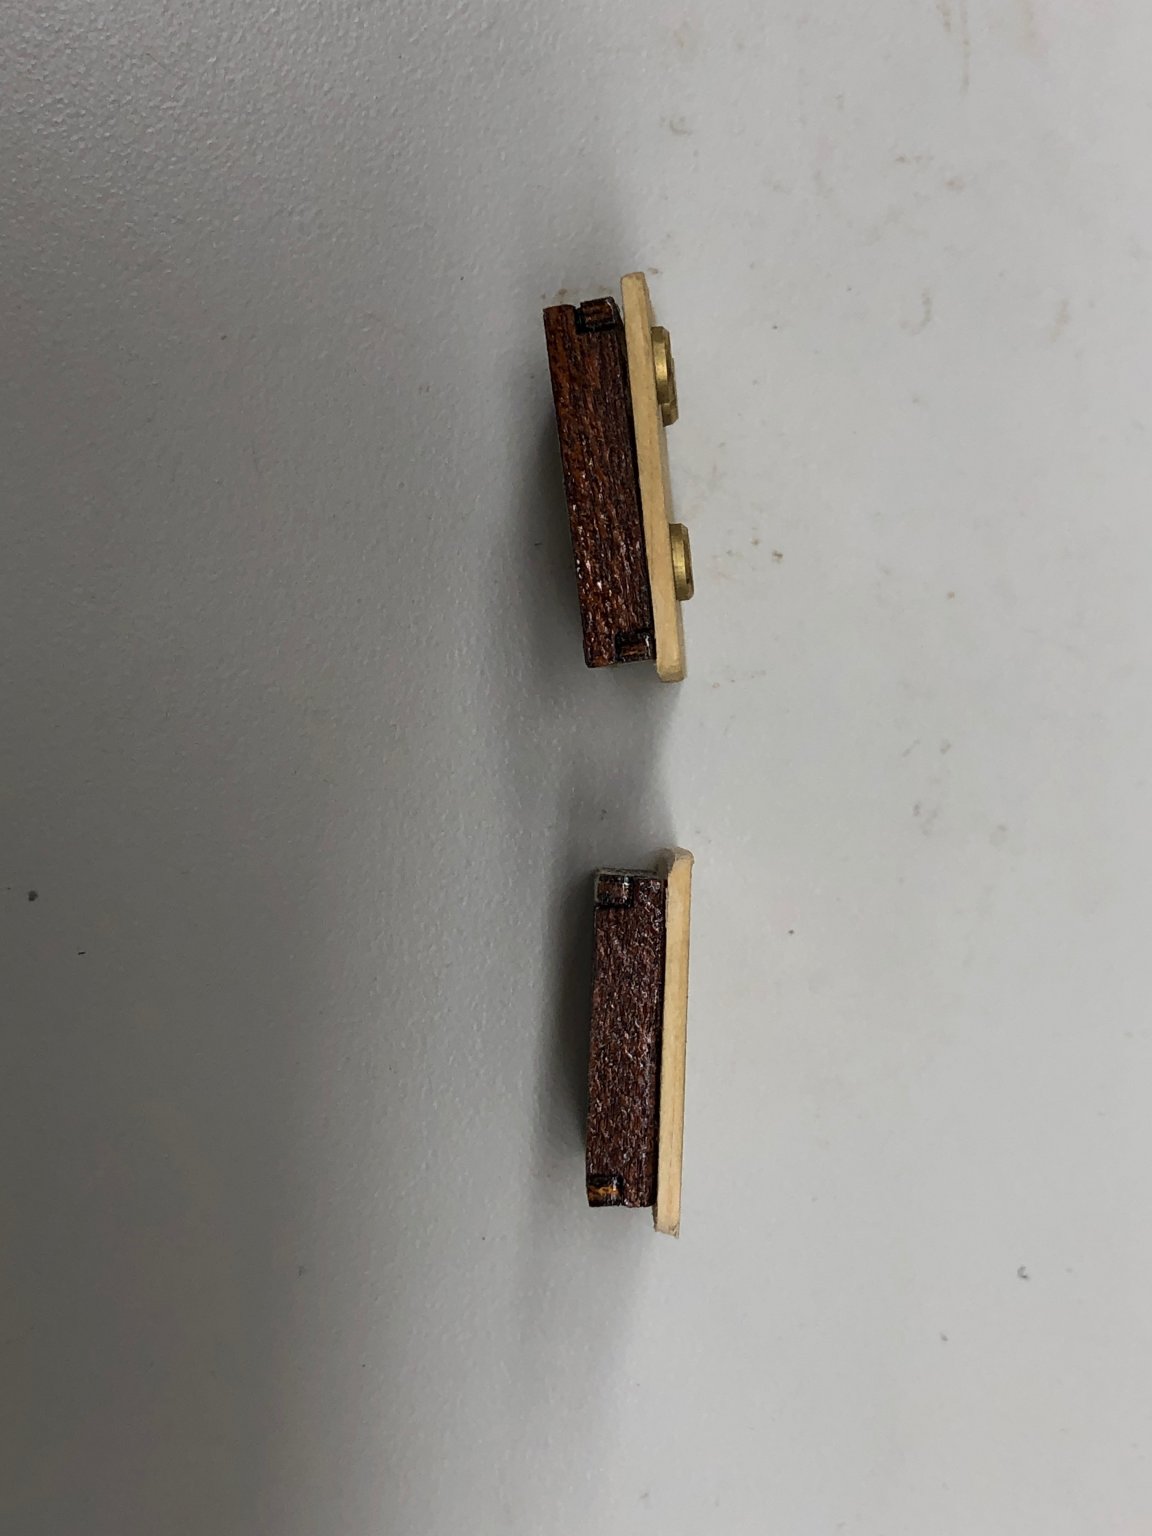
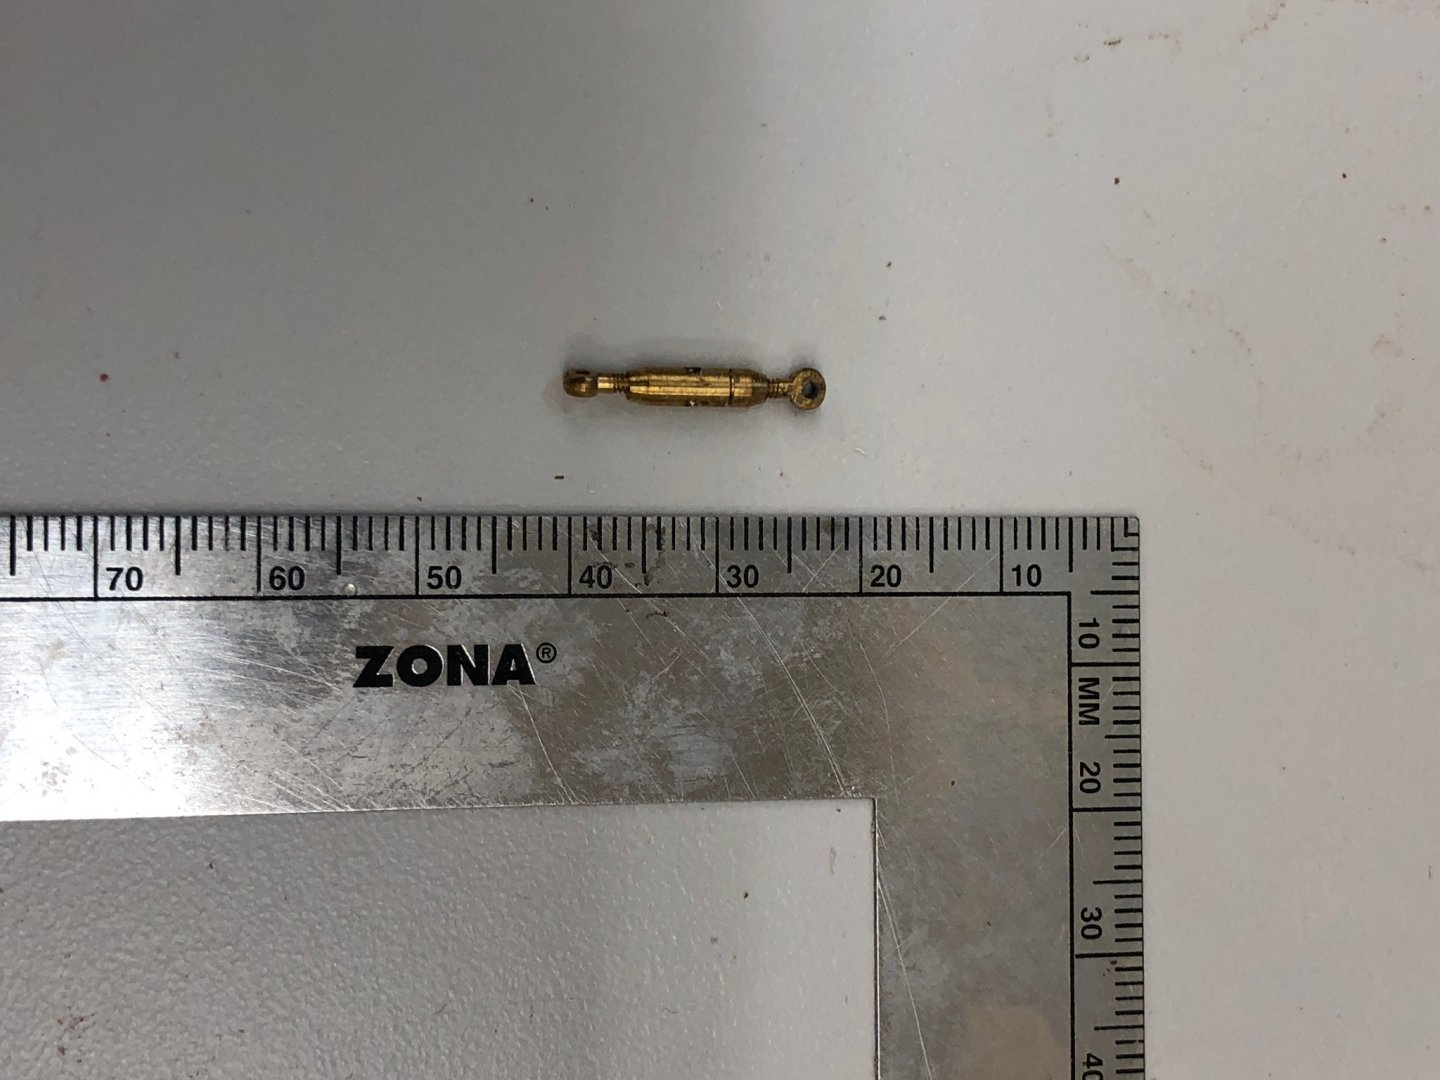
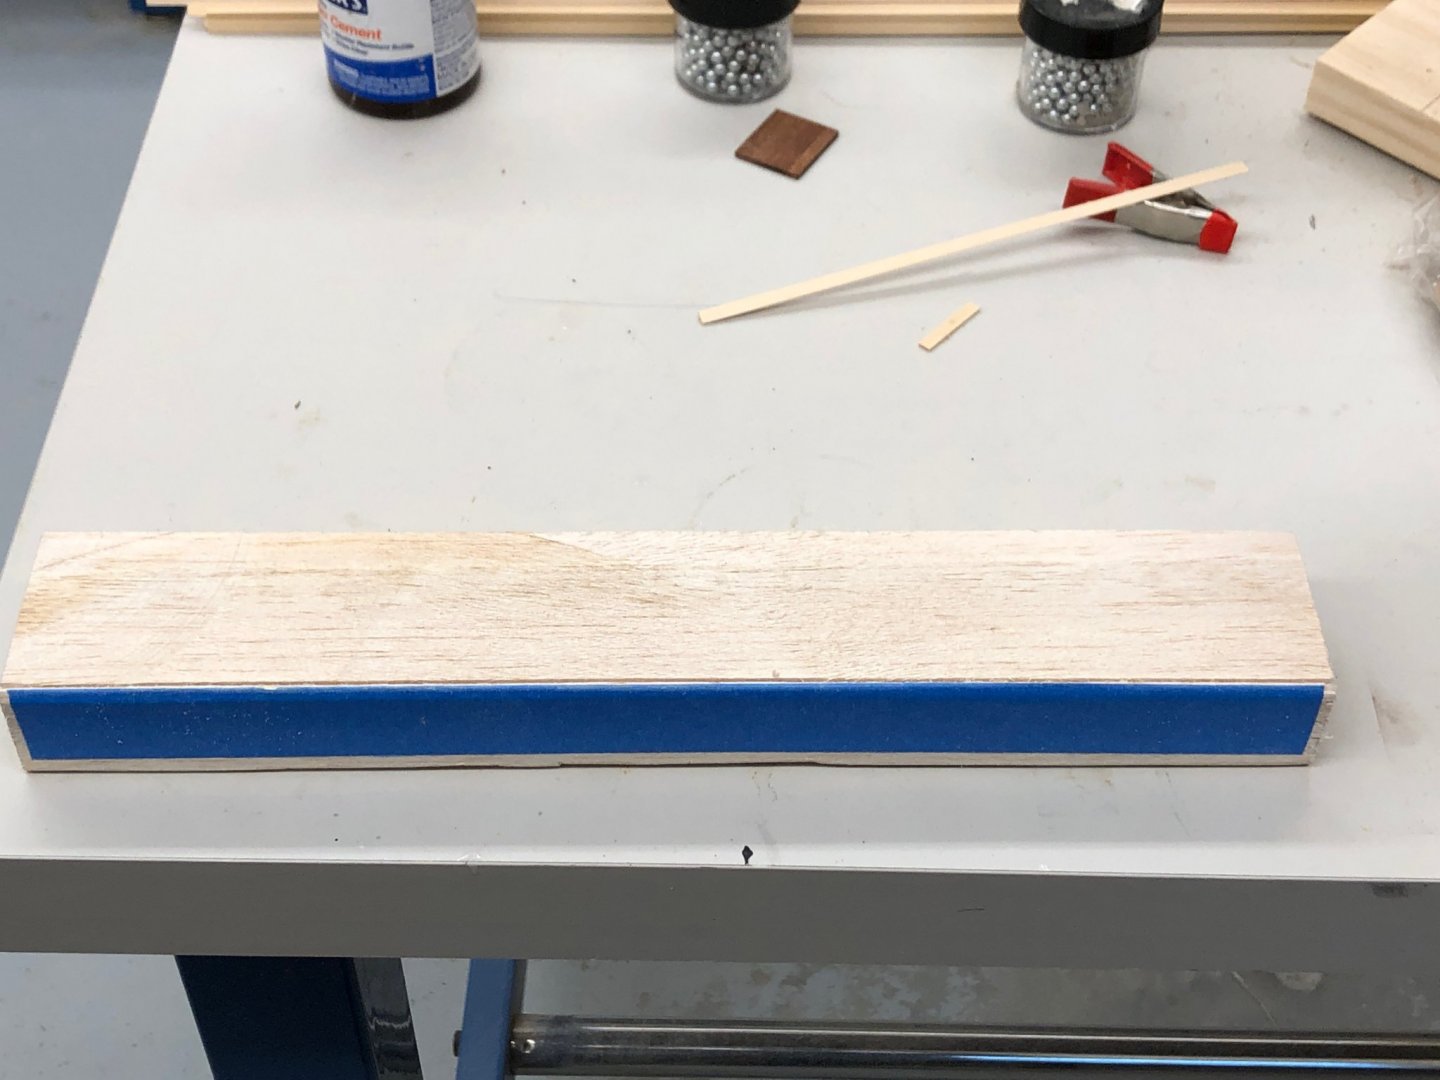
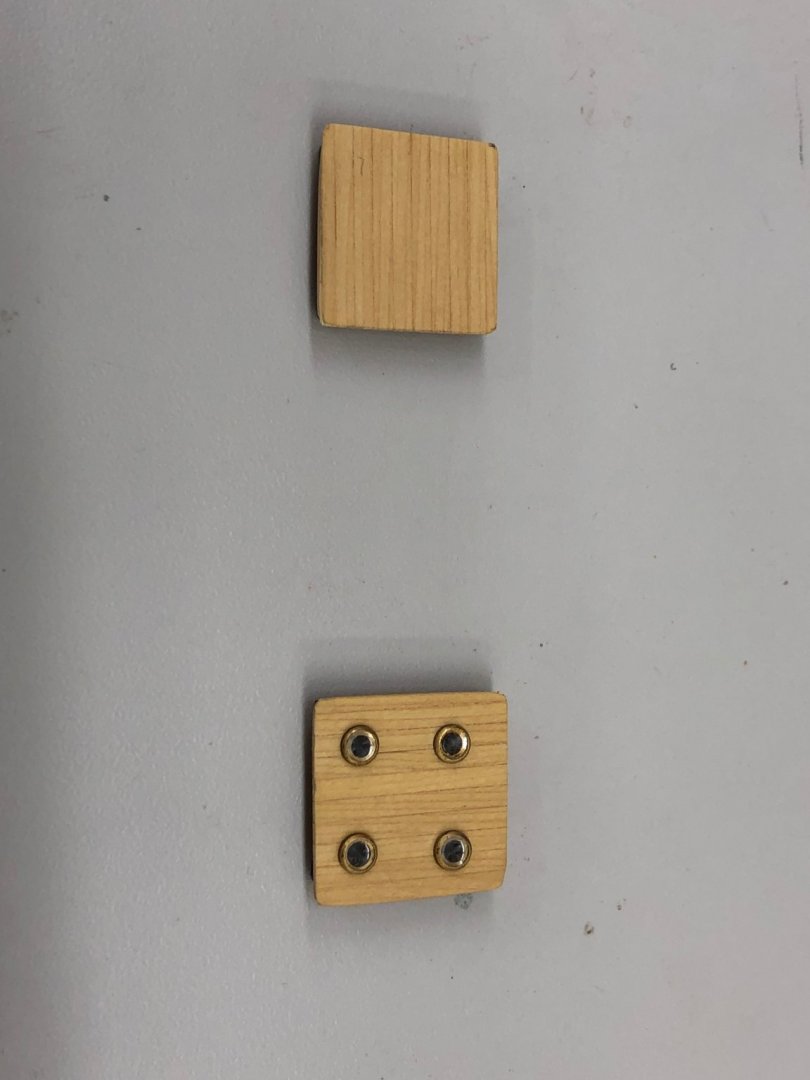
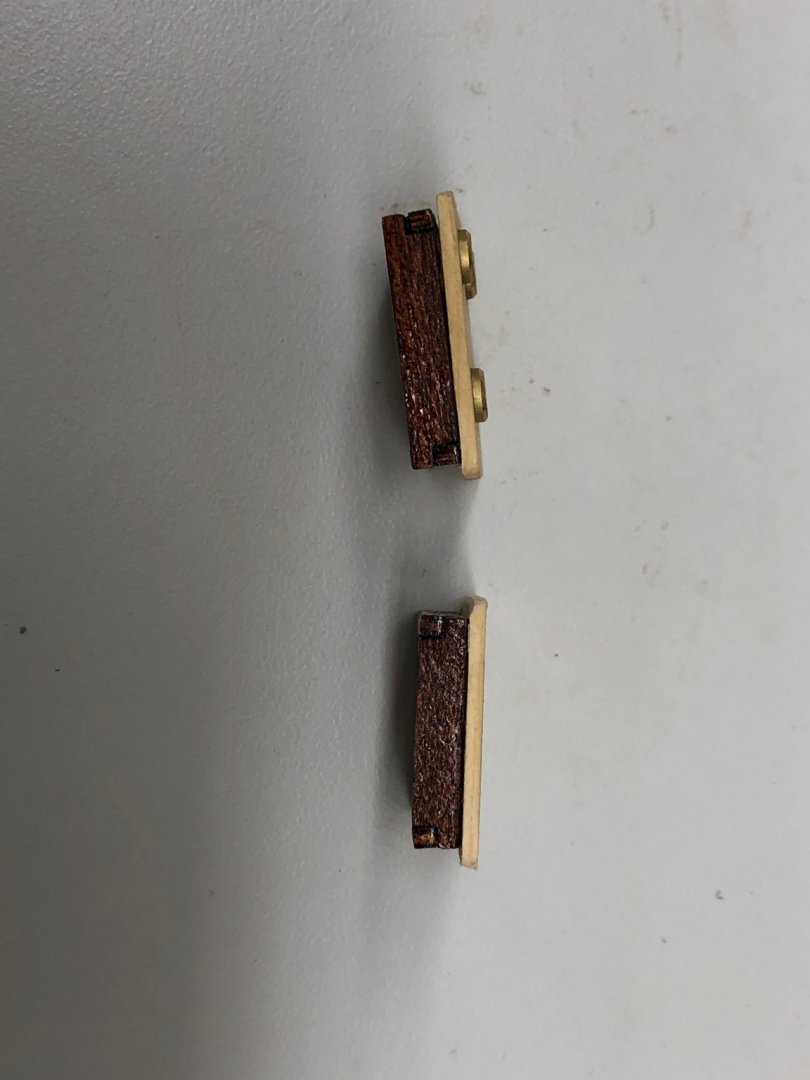
With the hull planking almost complete I was thinking about the standing rigging while waiting for glue to set. The kit provides 1 mm diameter black line for the standing rigging but little detail. It shows the shrouds looped through the chain plates and the ends lashed together. Clearly (IMHO) a racing sailboat of this era would have had turnbuckles or some other way to adjust the shrouds. And I am reasonably sure they did not used tarred hemp for the shrouds. More likely it was wire rope or possibly solid rod rigging. 1mm diameter would be about .04 inches or about 1.4" at full size (.04 X 35). I was toying with the notion of using piano wire instead of the provided black line for the standing rigging. Music wire is hard, strong and not easily bent so it would be a bear to work with, but annealed wire is so easy to bend I doubt you could keep it straight once it was in place. I am planning on trying this out on some music wire that I already have, but I need longer lengths that the 24" inch pieces I have. I have a few (not enough) turnbuckles and have ordered some more of several sizes to see what might look appropriate but have to figure out how to connect them to the kit provided chain plates and how to connect the music wire to the turnbuckles. Here are pictures of the chain plates (still on the etched sheet) and a sample of the turnbuckle. At .75" it would be about two feet long at scale which I think is too short for a boat this size.
-
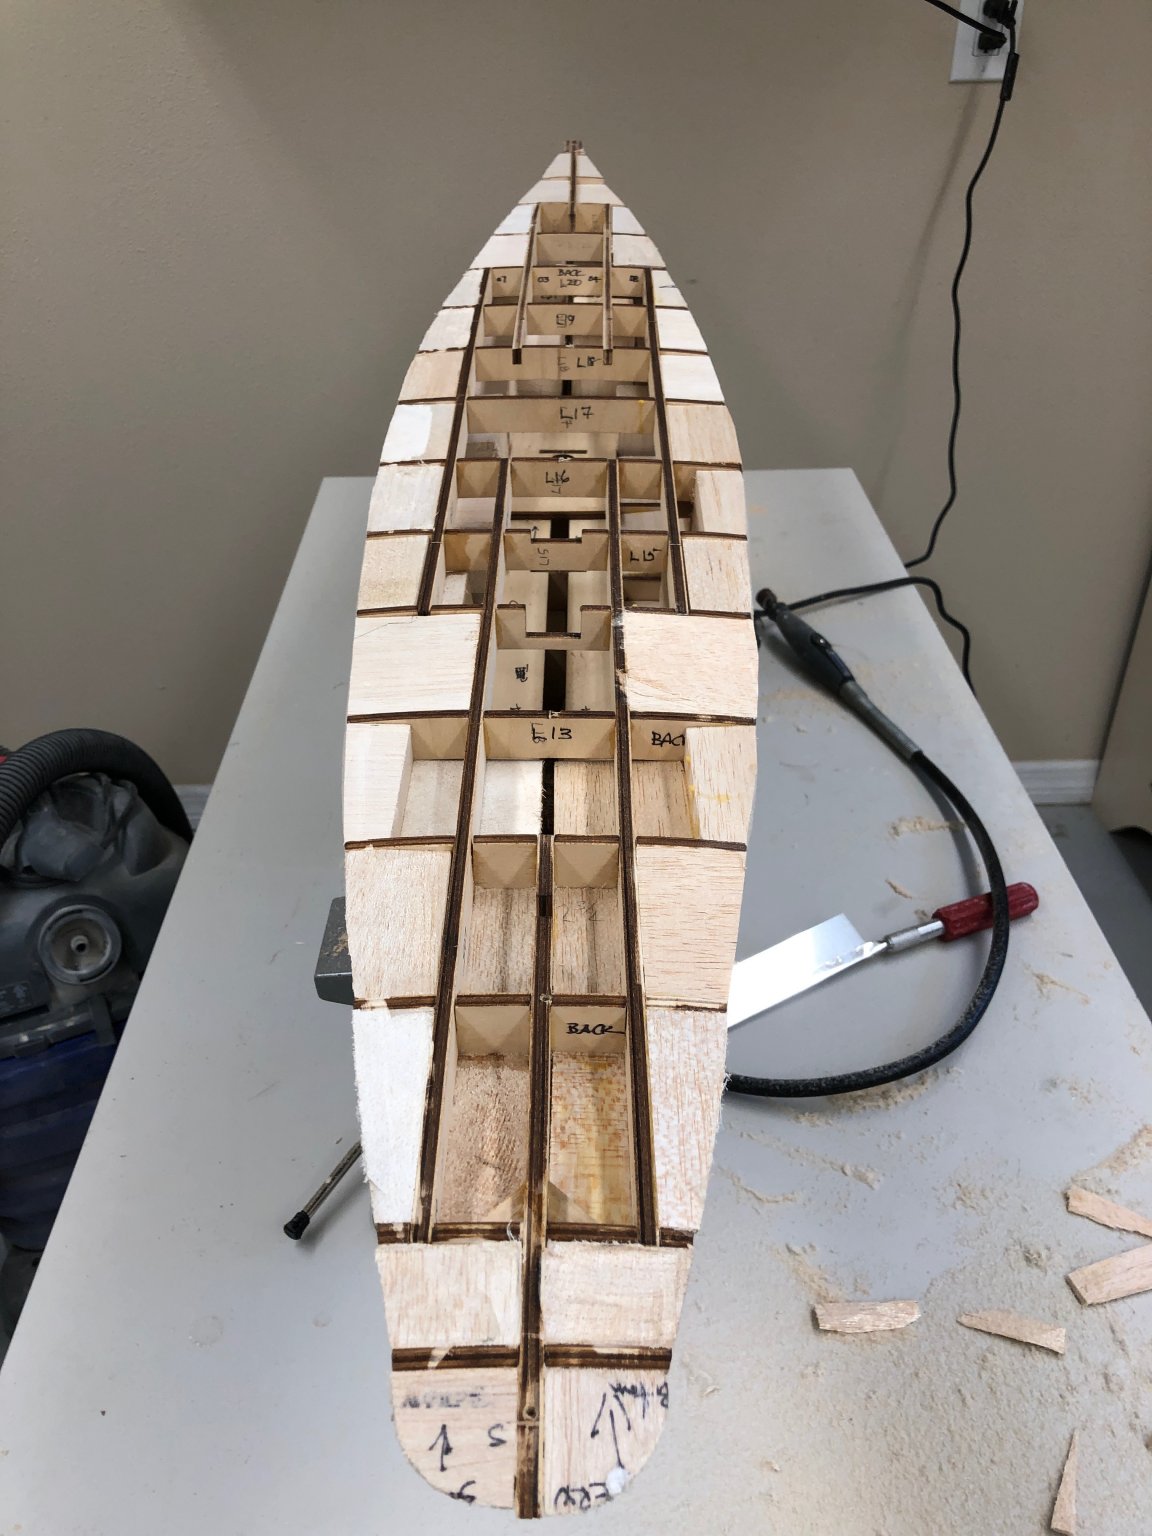
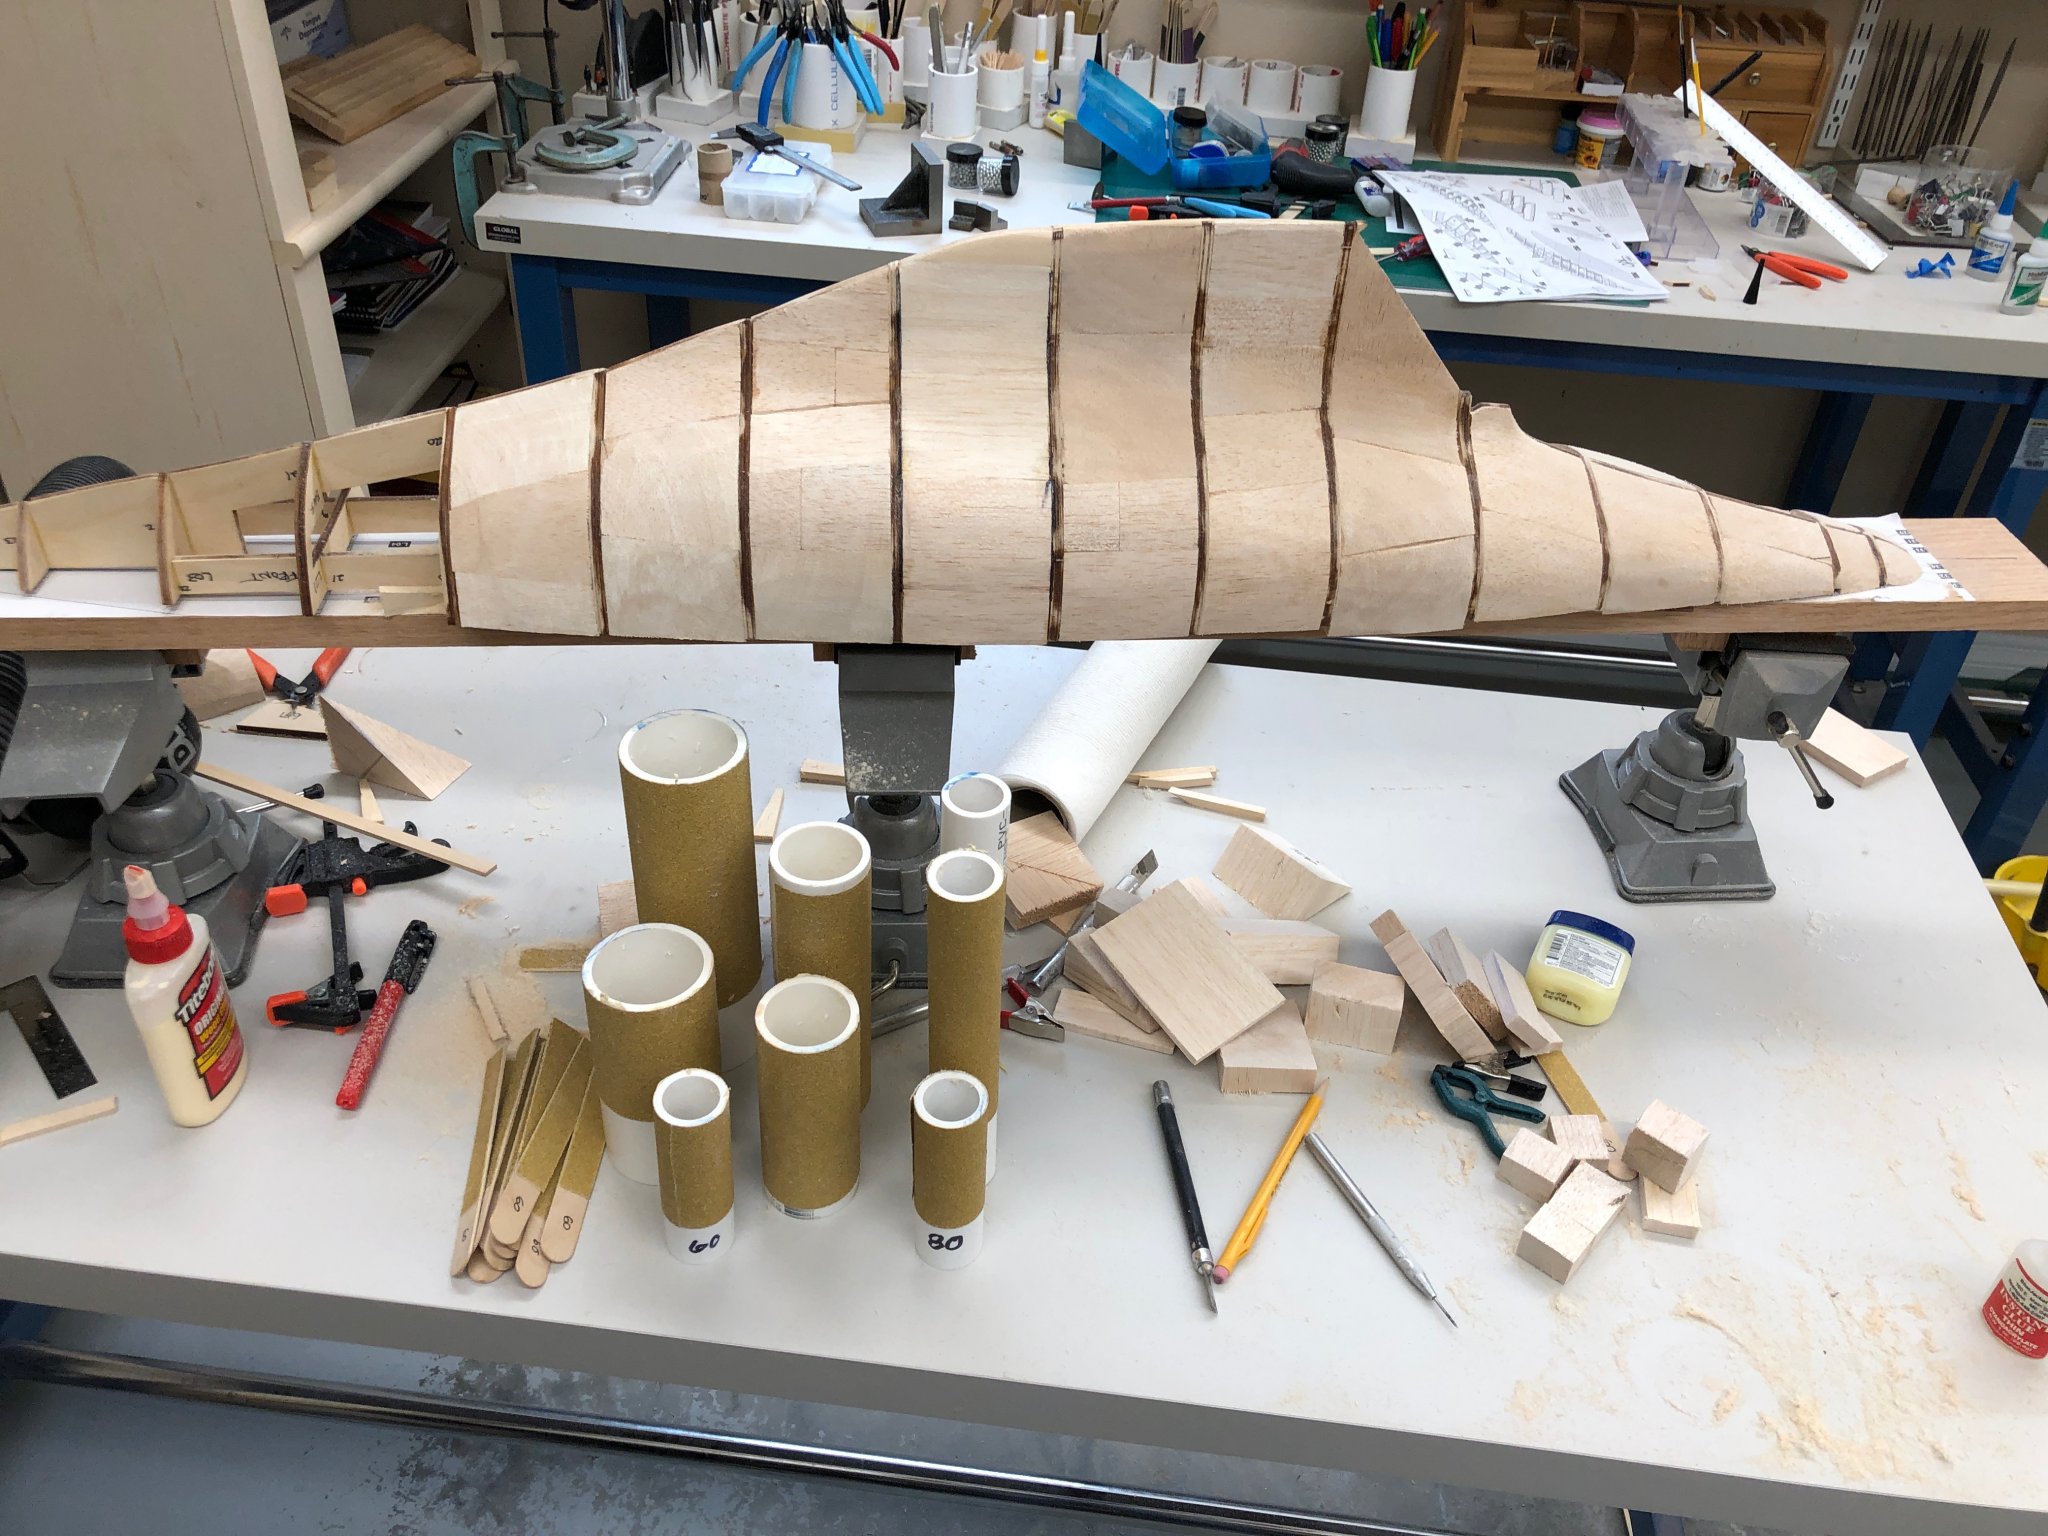
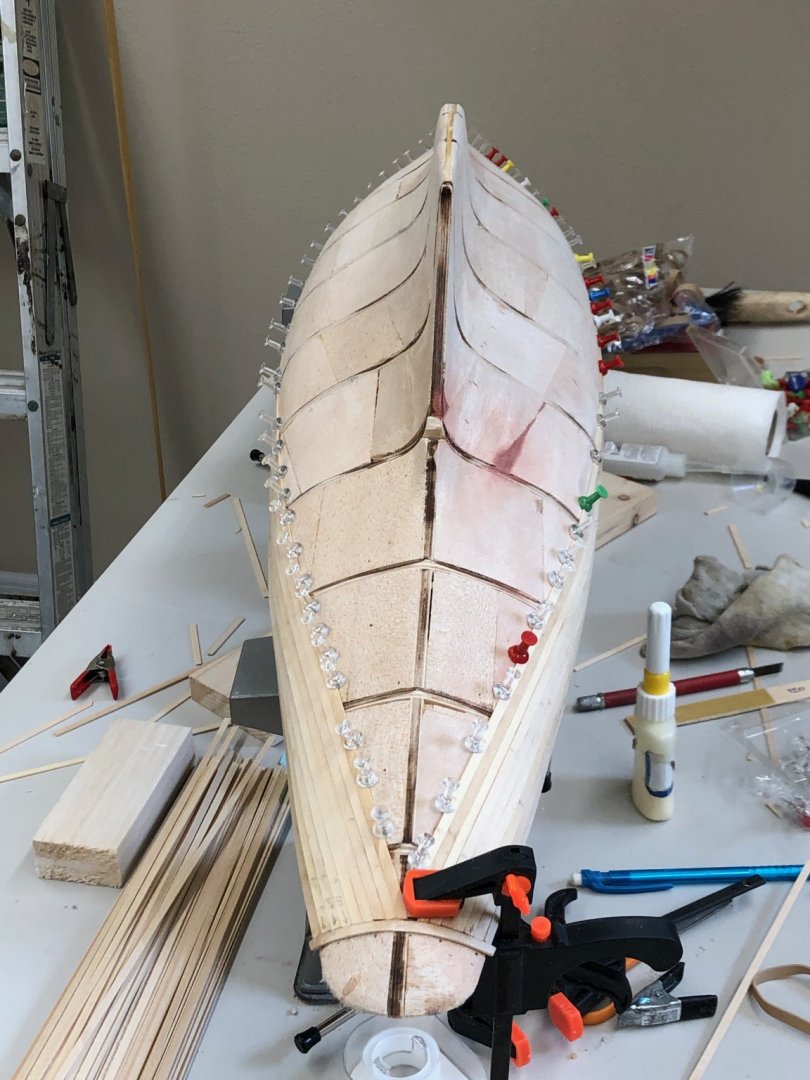
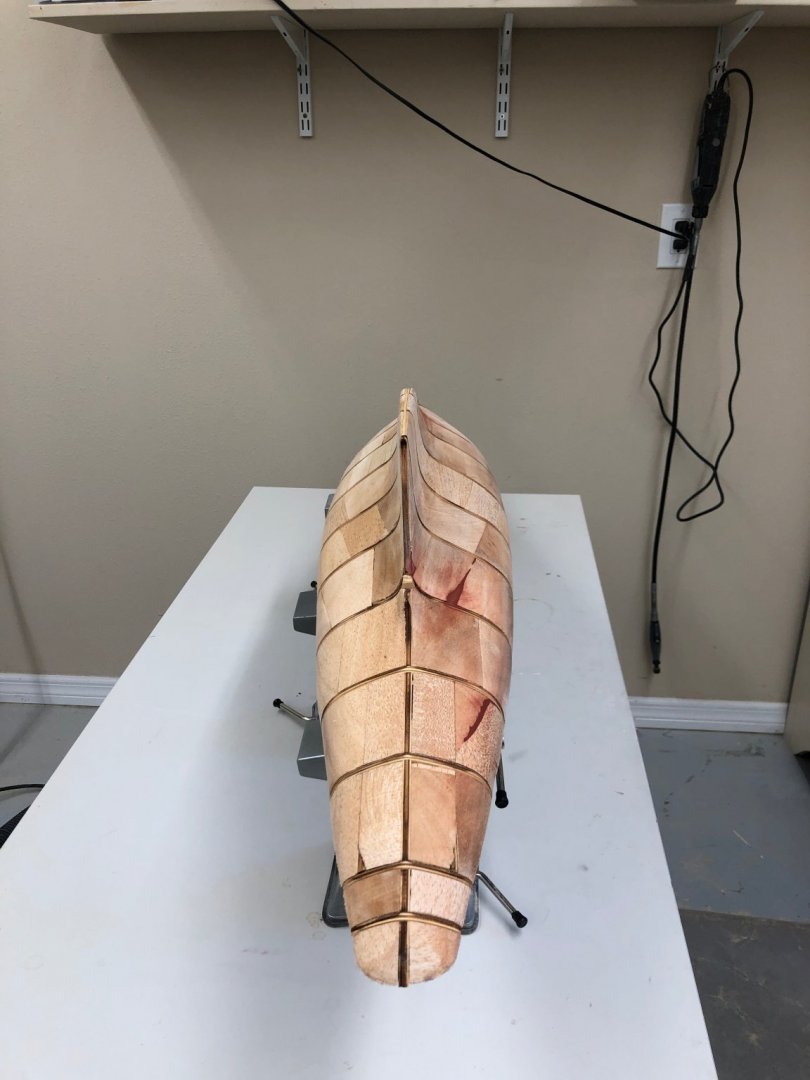
Here is a look at the stern counter planking. I probably will need a good deal of Bondo here. I purposefully left the planks long as I am not at all sure that the counter fillers are the correct size. I will not know for sure until I get her turned right side up and can see where the stern decking will end. My plan then is to trim both the filler and planking to match the stern deck configuration. Hopefully it is not off by much but I will not know until I get the rest of the hull planking done which should be today. The planking continues up the keel. I will need to add another row to the bulb planking soon, only another row of keel planking I think. I bought a new tube of Bondo yesterday - I think I am going to need a good bit of it.


-
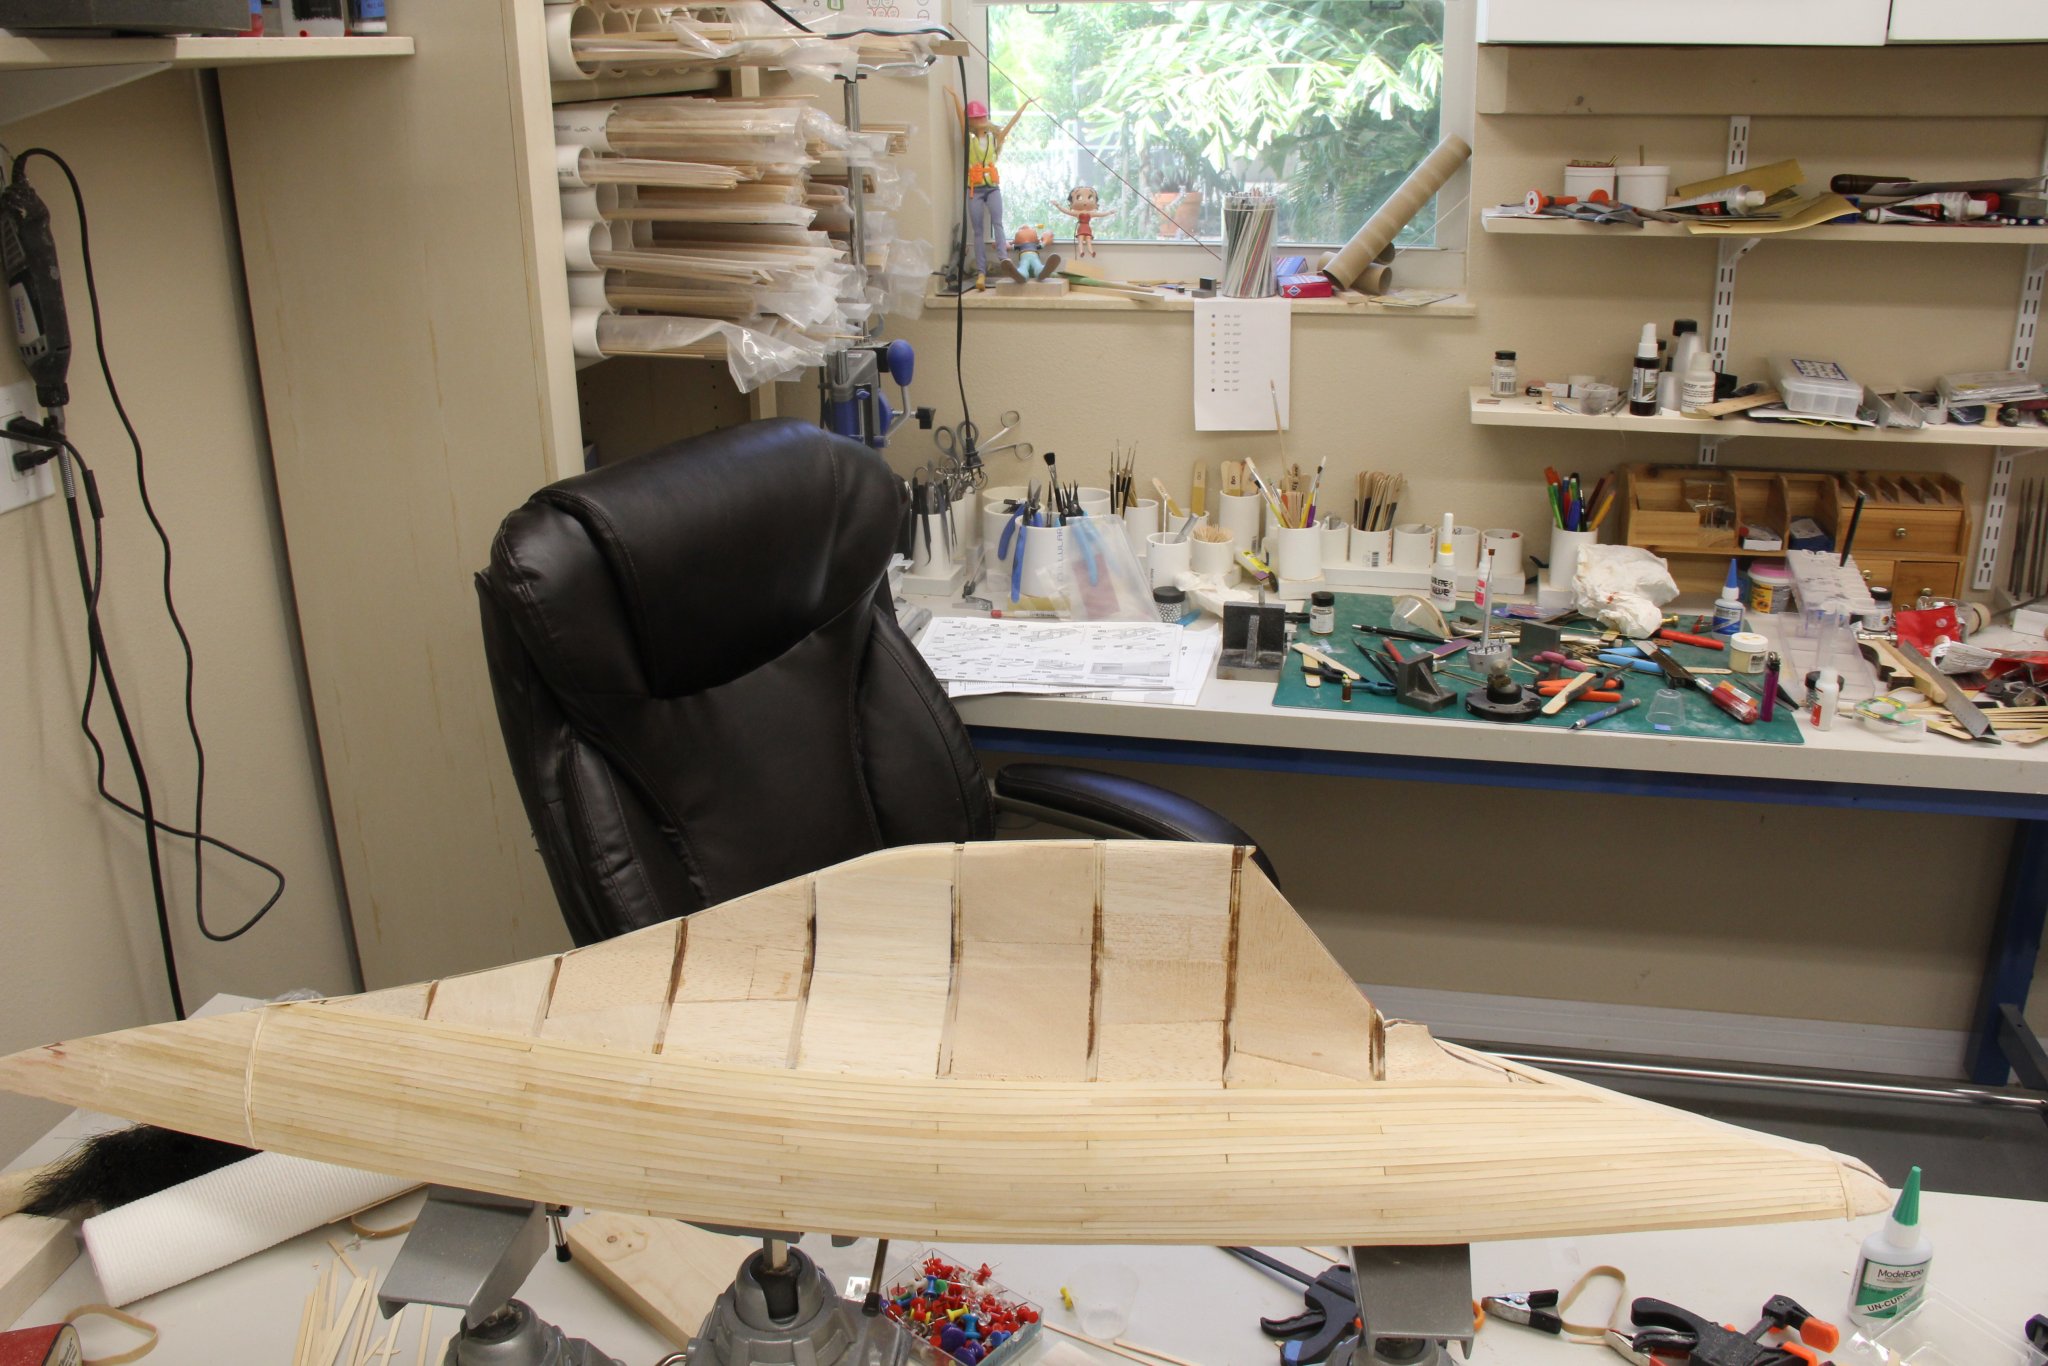
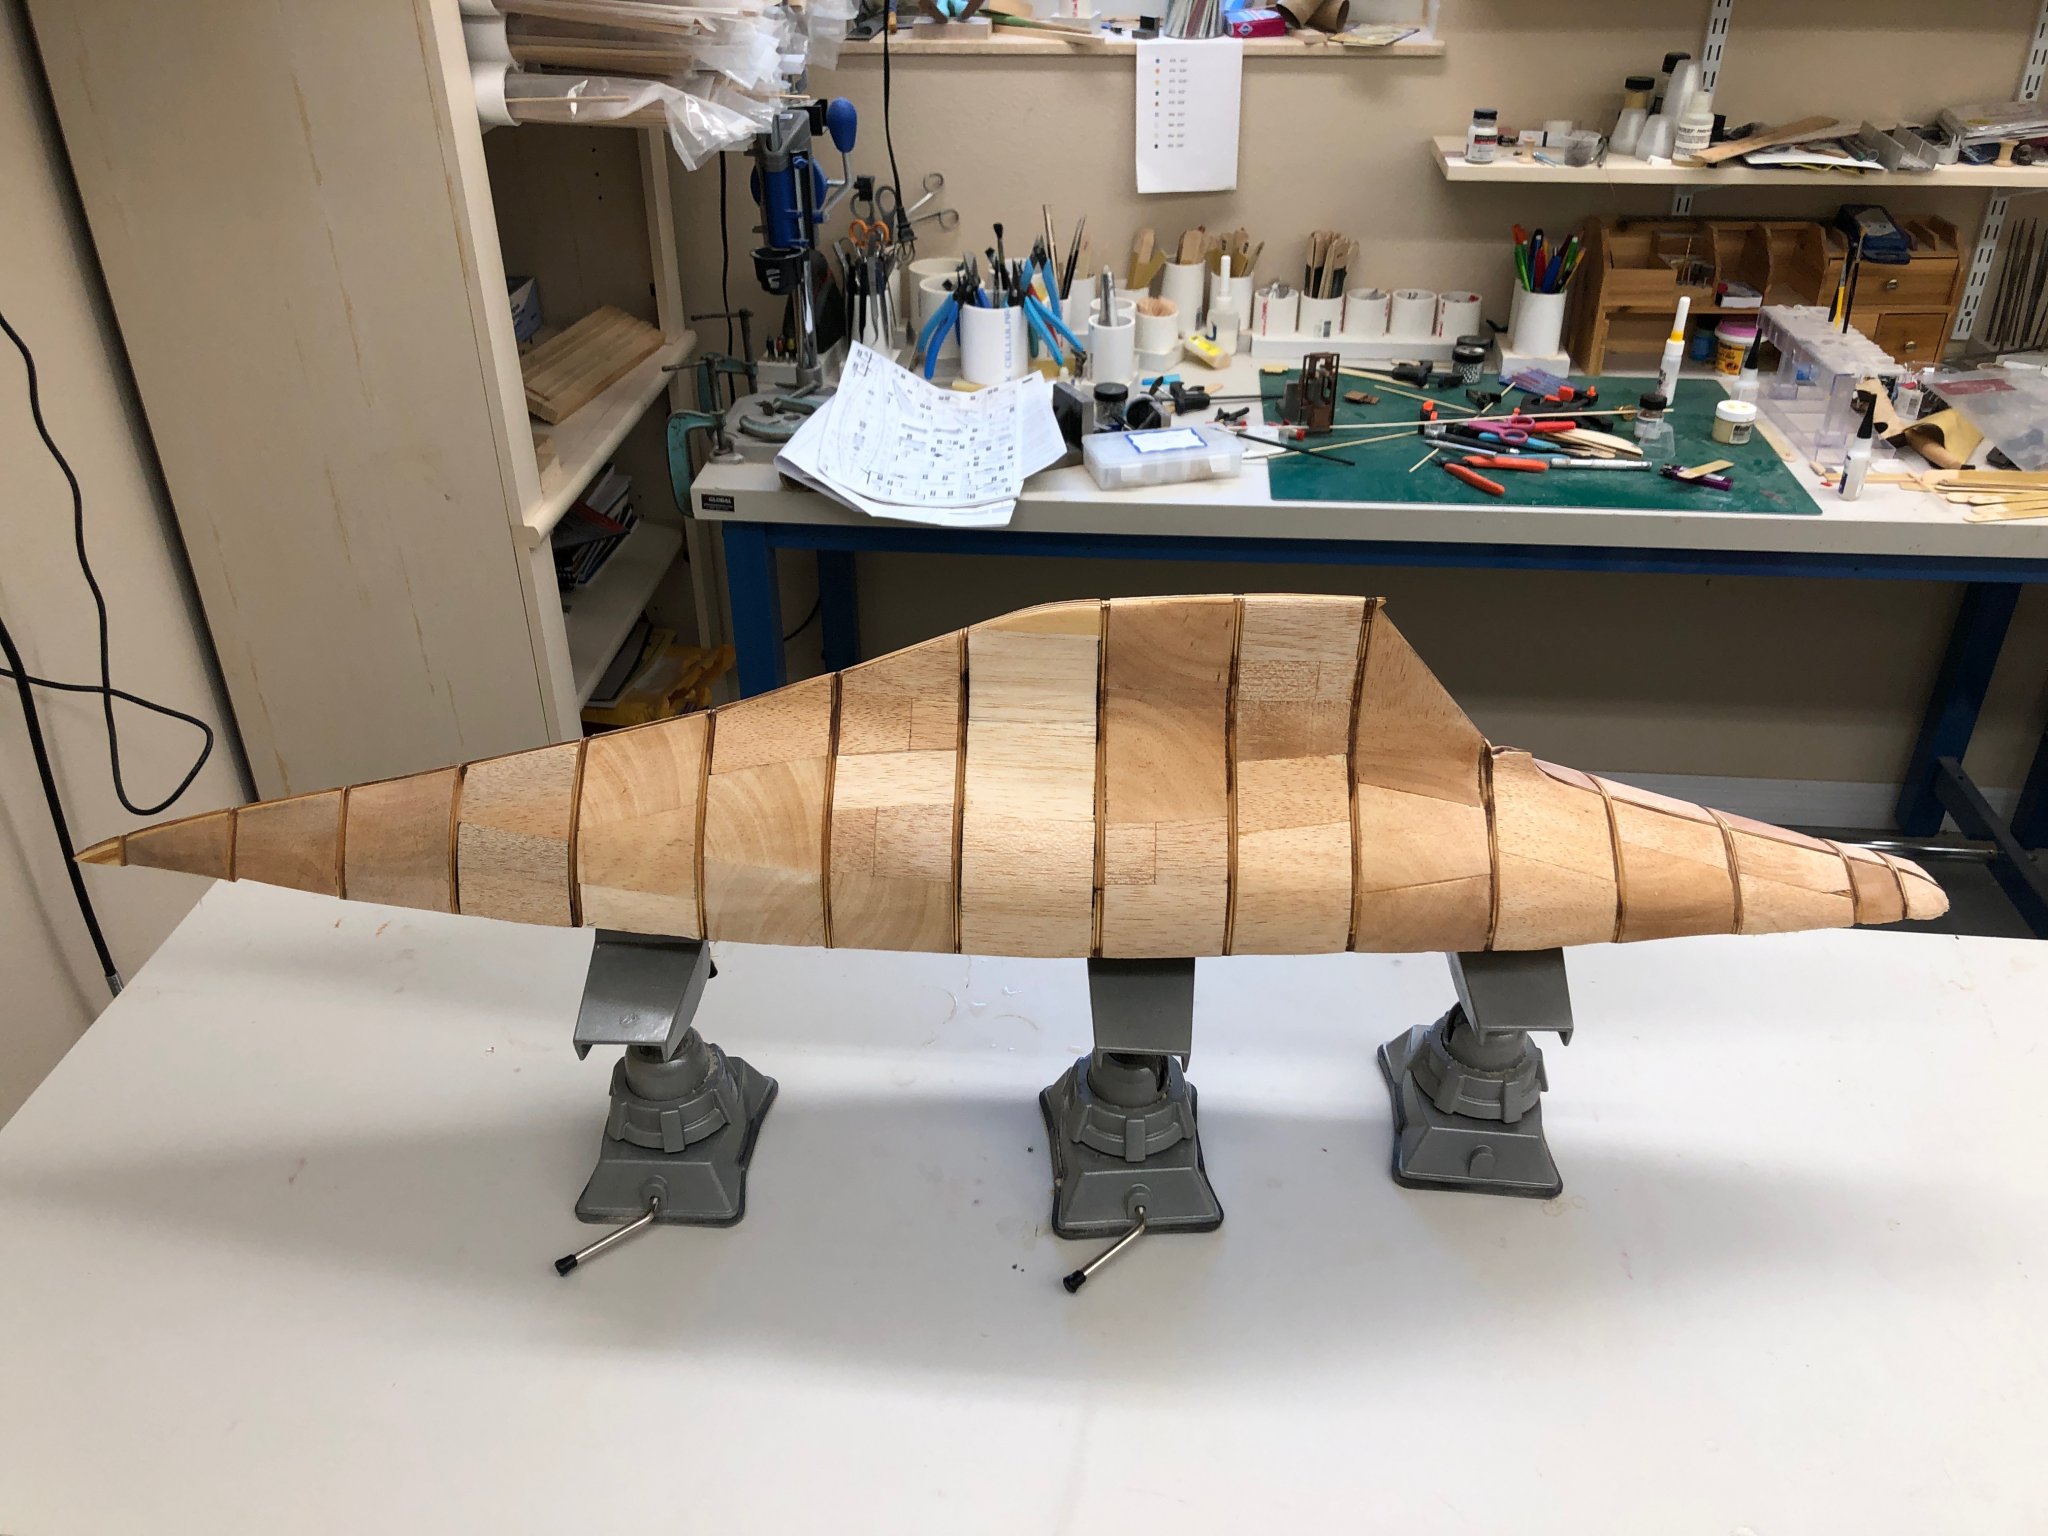
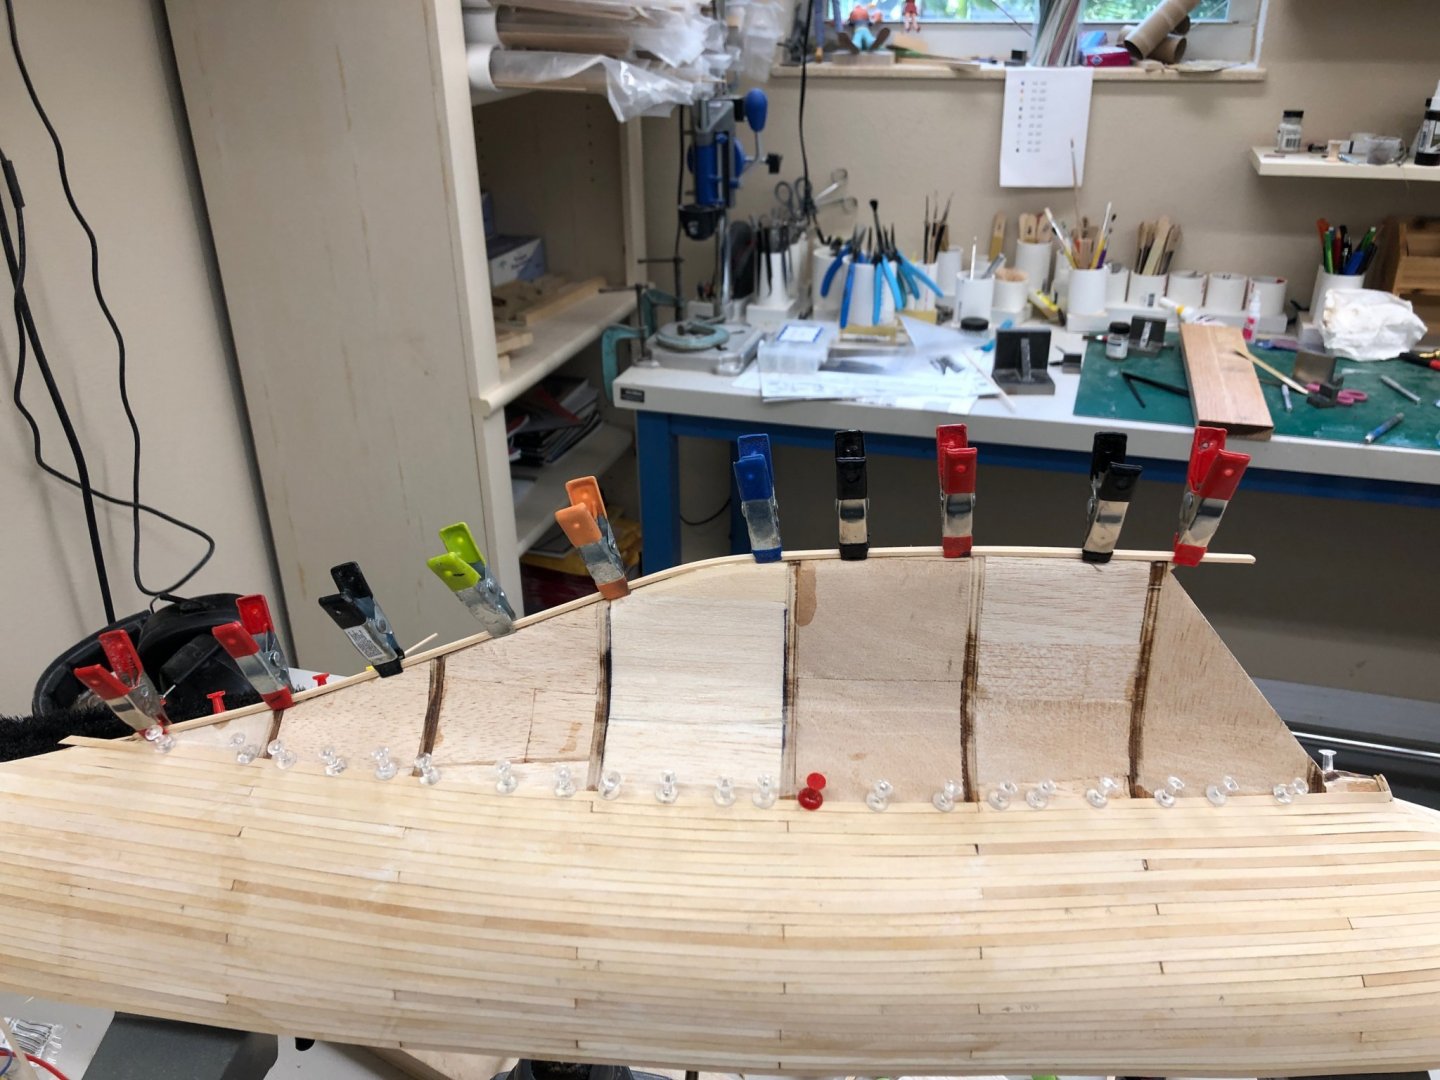
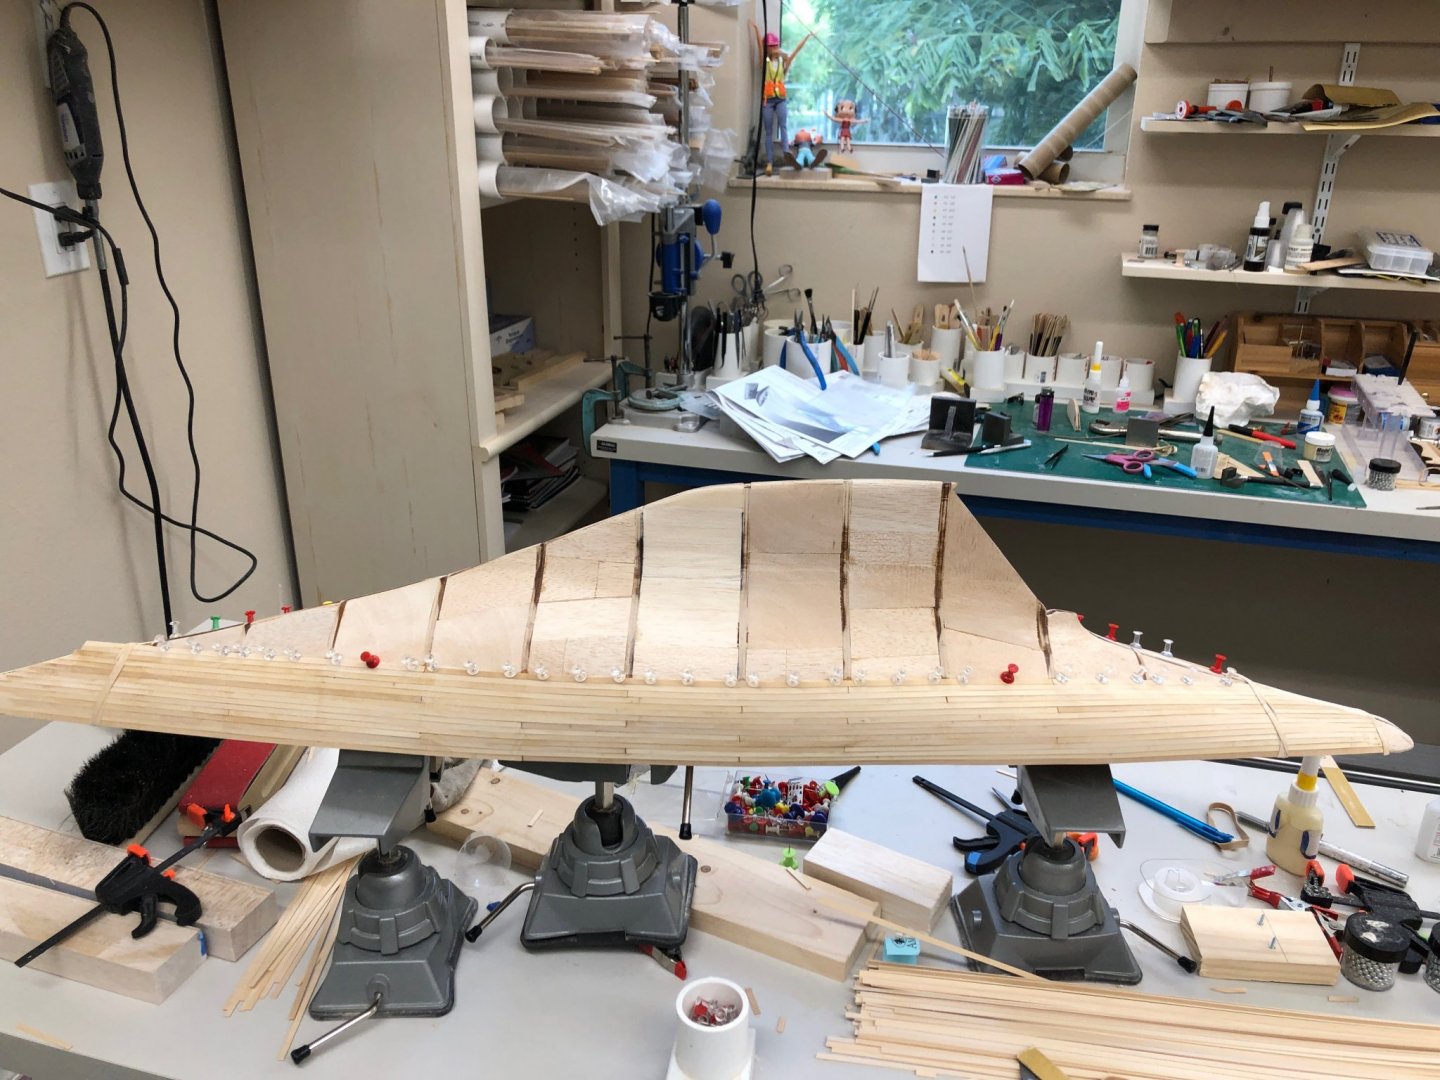
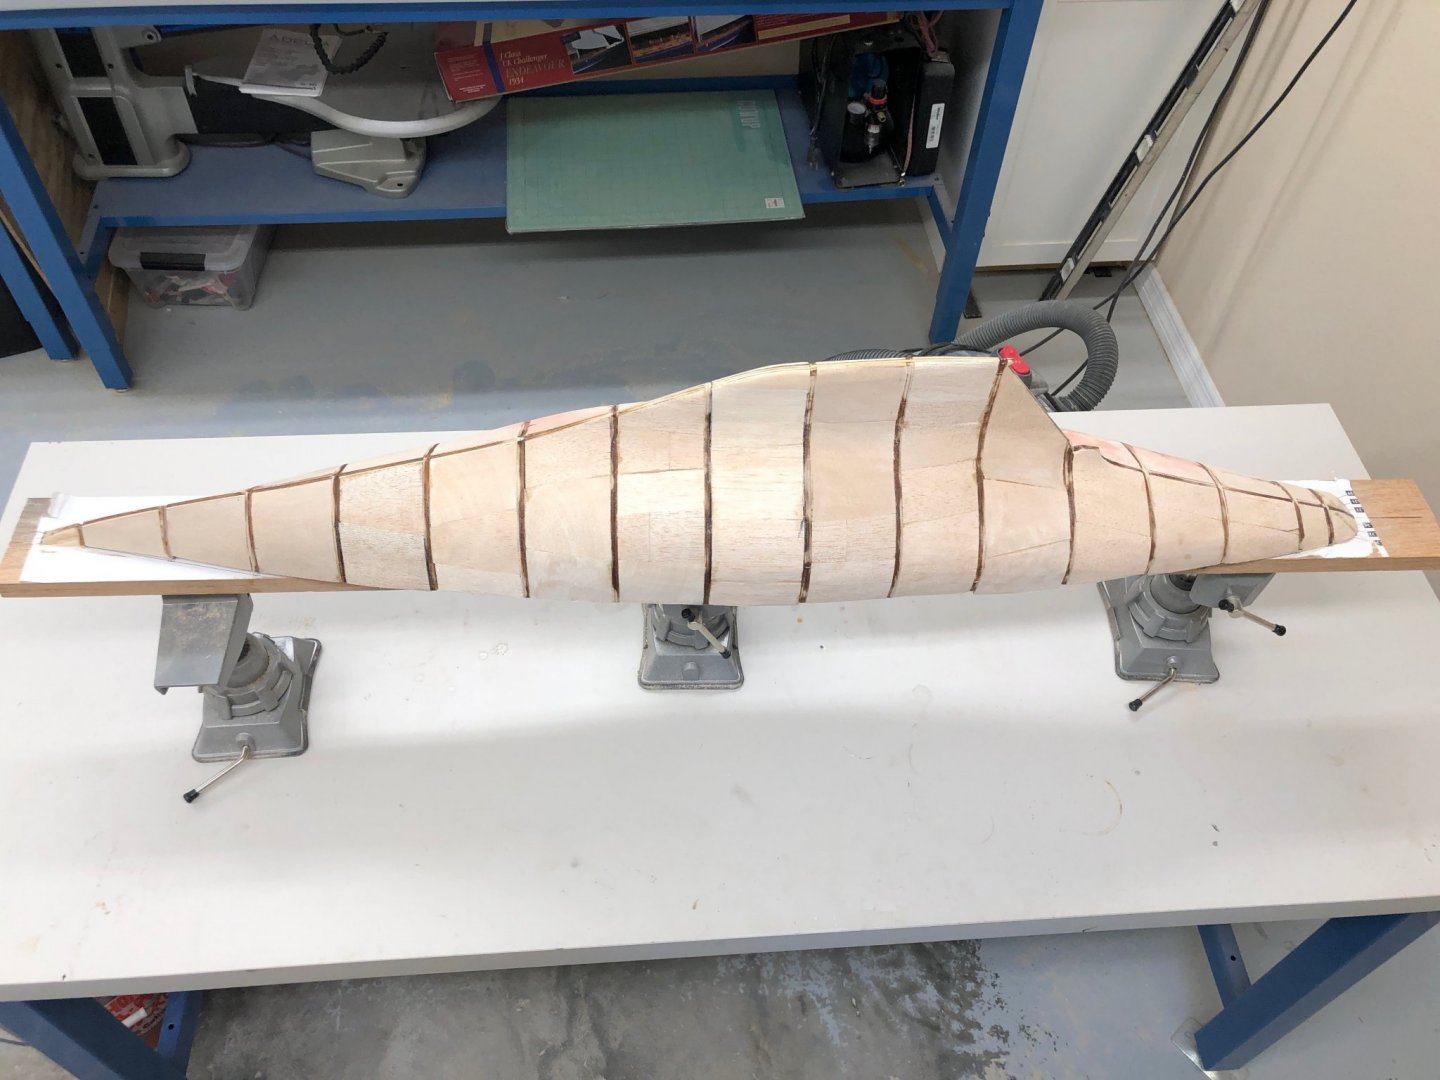
I have the sides planked up to about half way between bulkheads 18 and 19. The bulb planking I added at bulkhead 20 is no longer wide enough to fit the hull plan king under so I added another row of the 2X2mm planks on each side. This should hold for another bulkhead or so. By the time you get to between bulkheads 16 and 17 the bulb keel has reached the maximum thickness and at least one more row of bulb planking will be required. To my amazement, but as predicted in Keith Aug's build log, the planking is coming together and it appears that the rows will progress nicely up the keel without having to taper any planks but those in the last row. The picture shows the port side with the top row of planking almost horizontal. I never found plank tapers to be all that rewarding an experience so I for one am happy if things turn out as the appear to be headed.

-
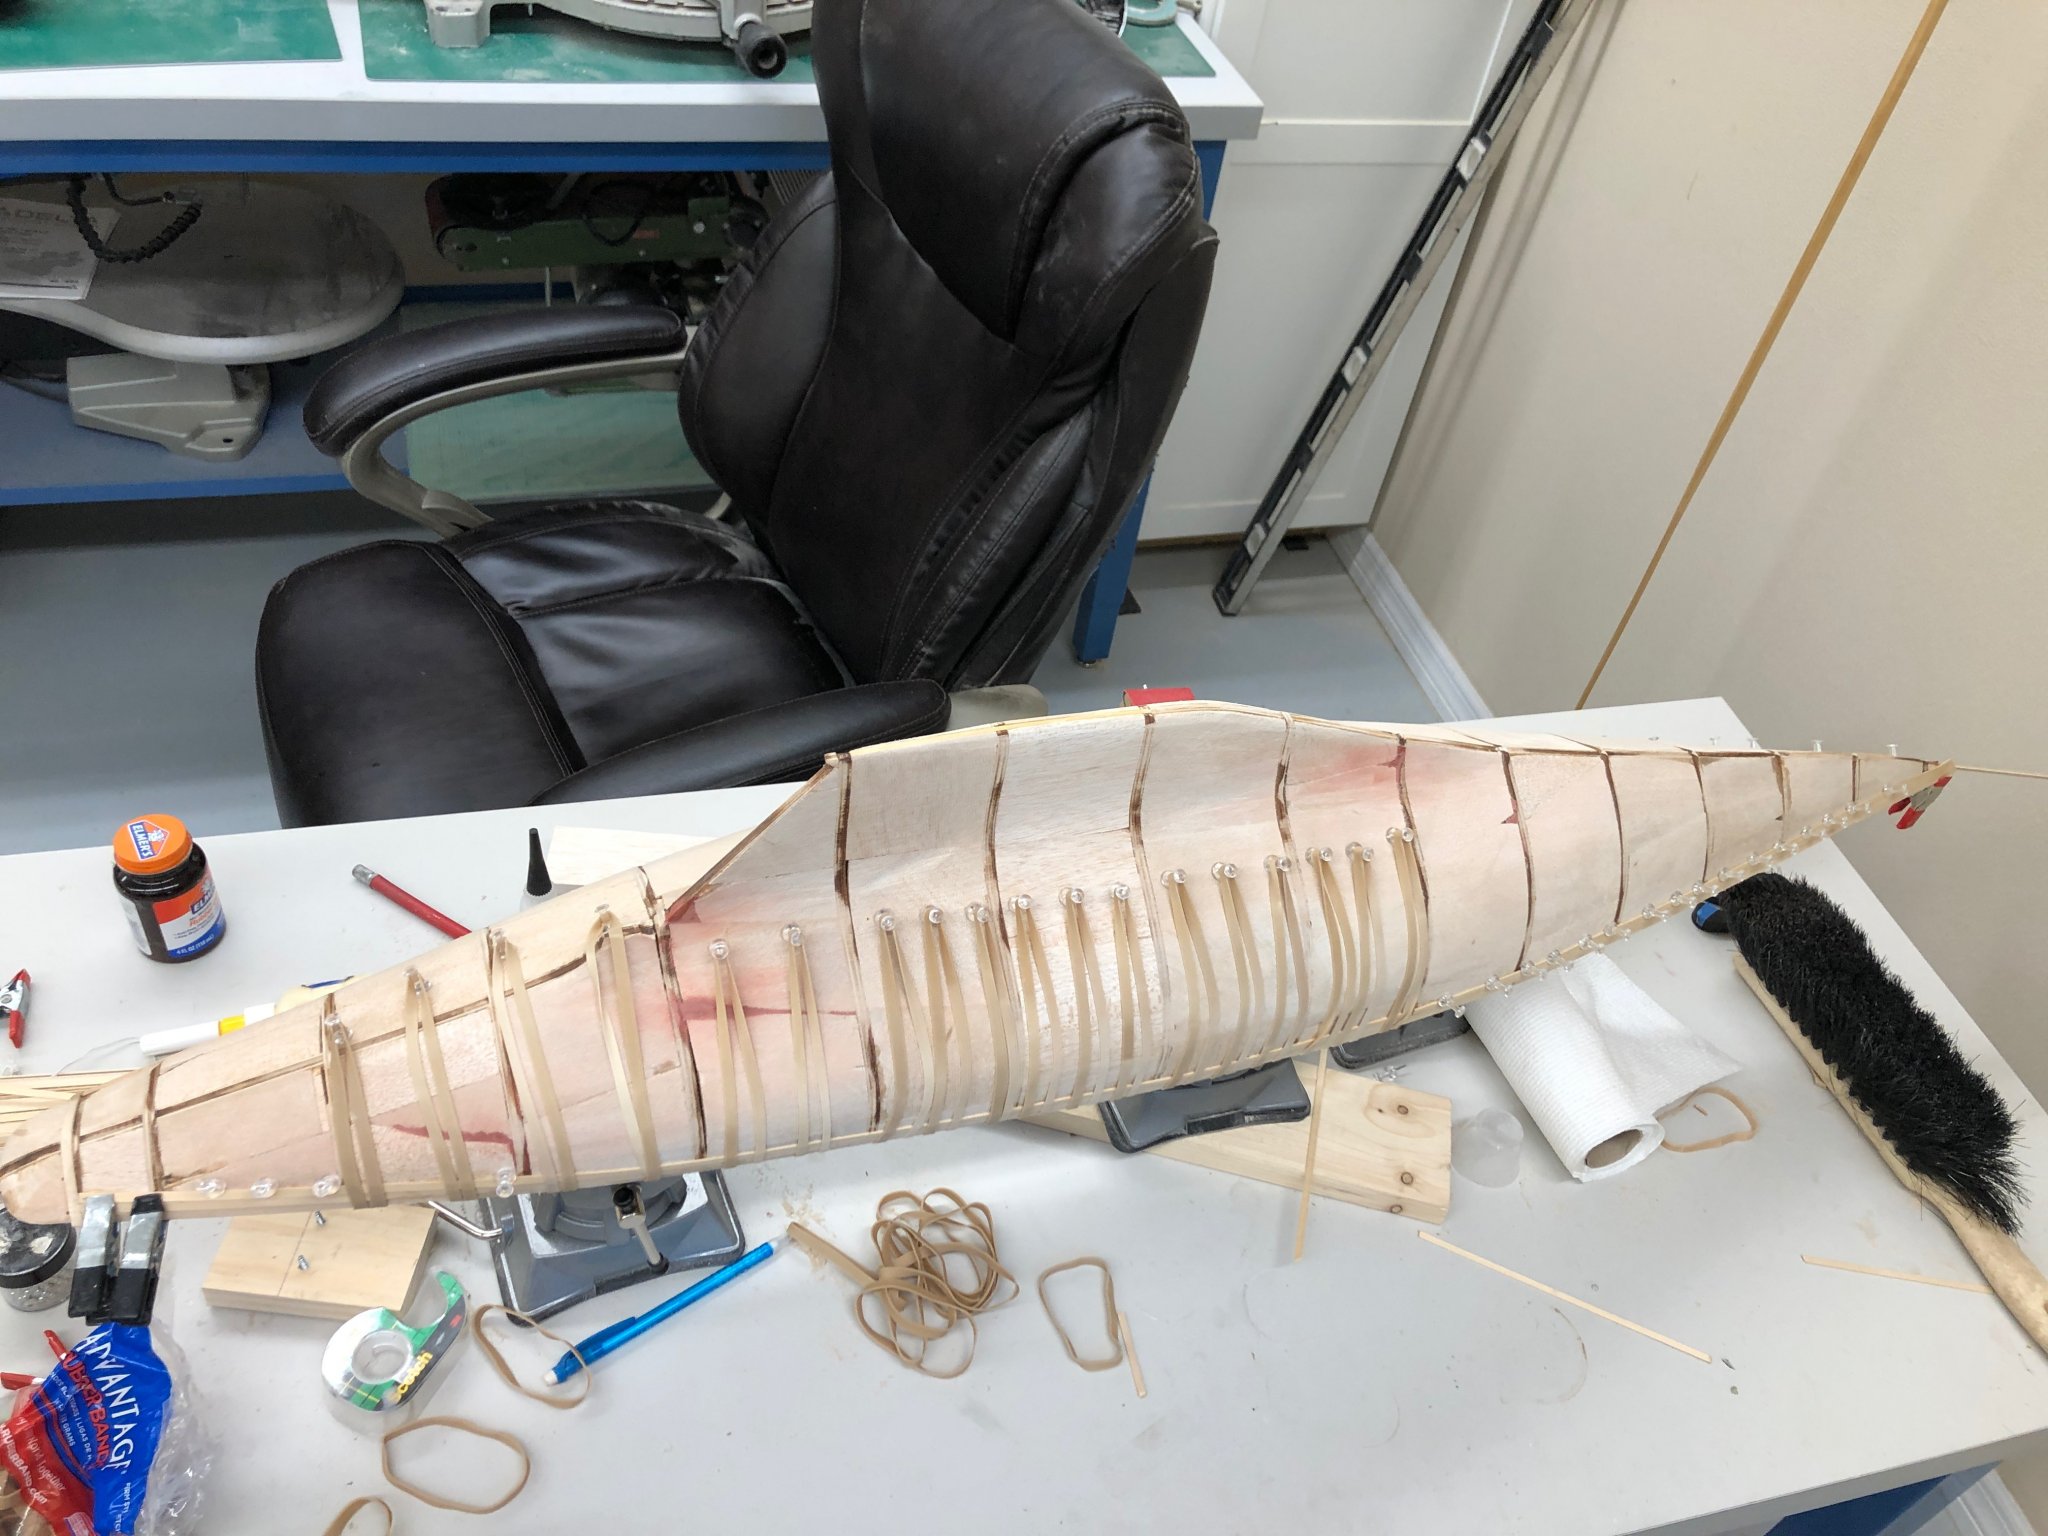
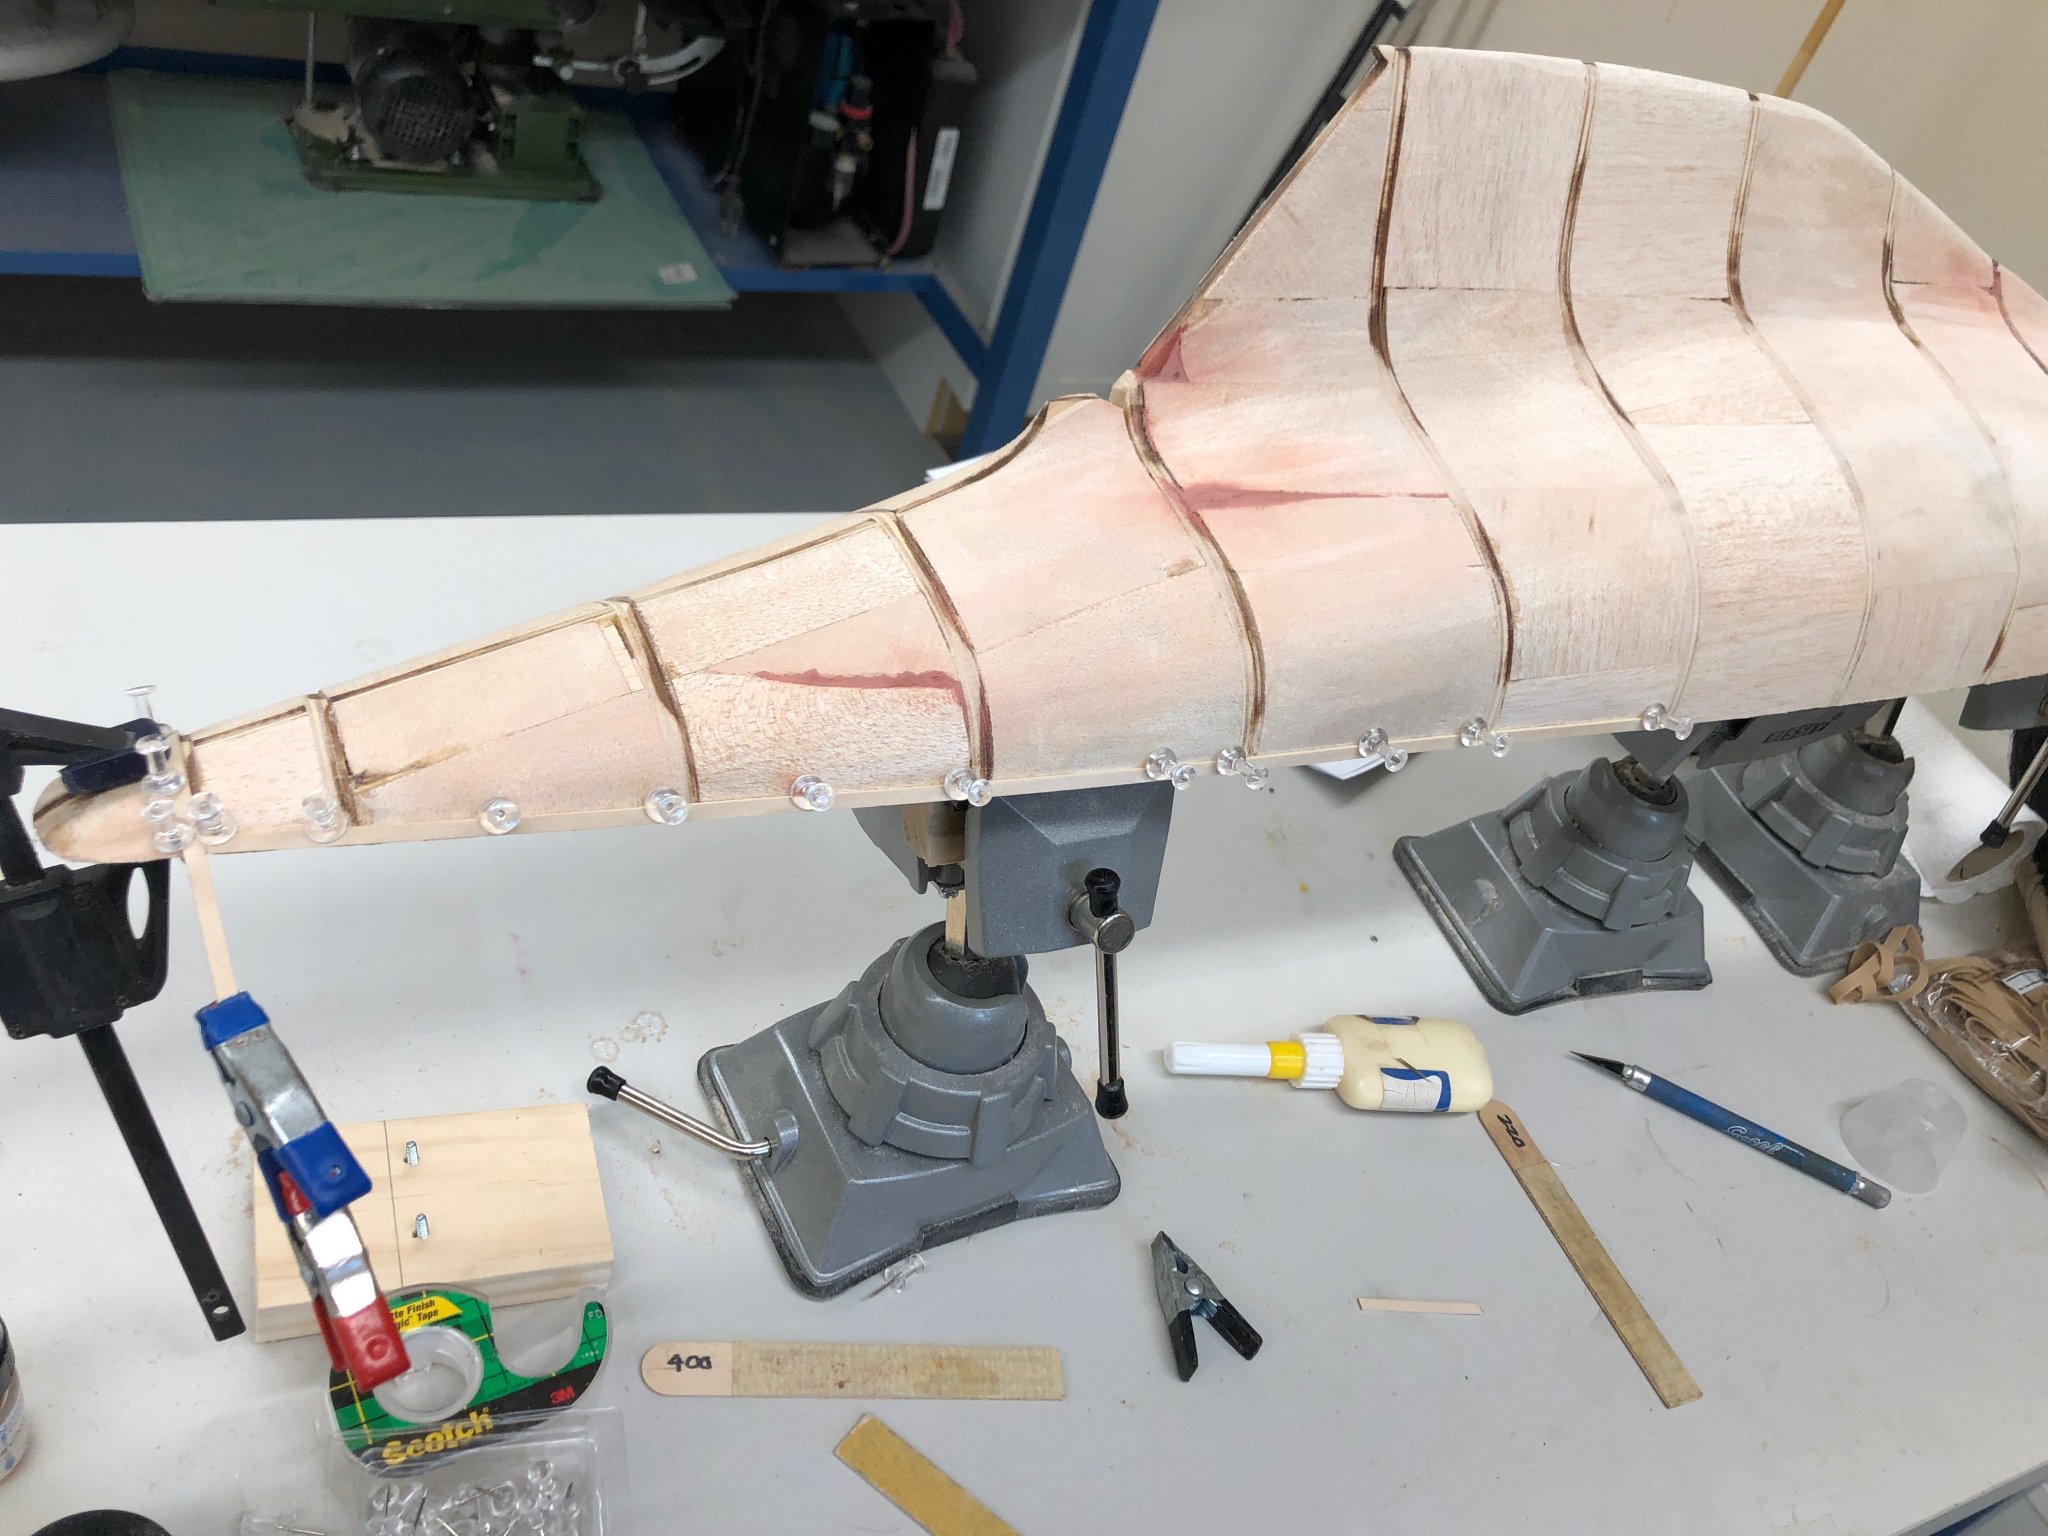
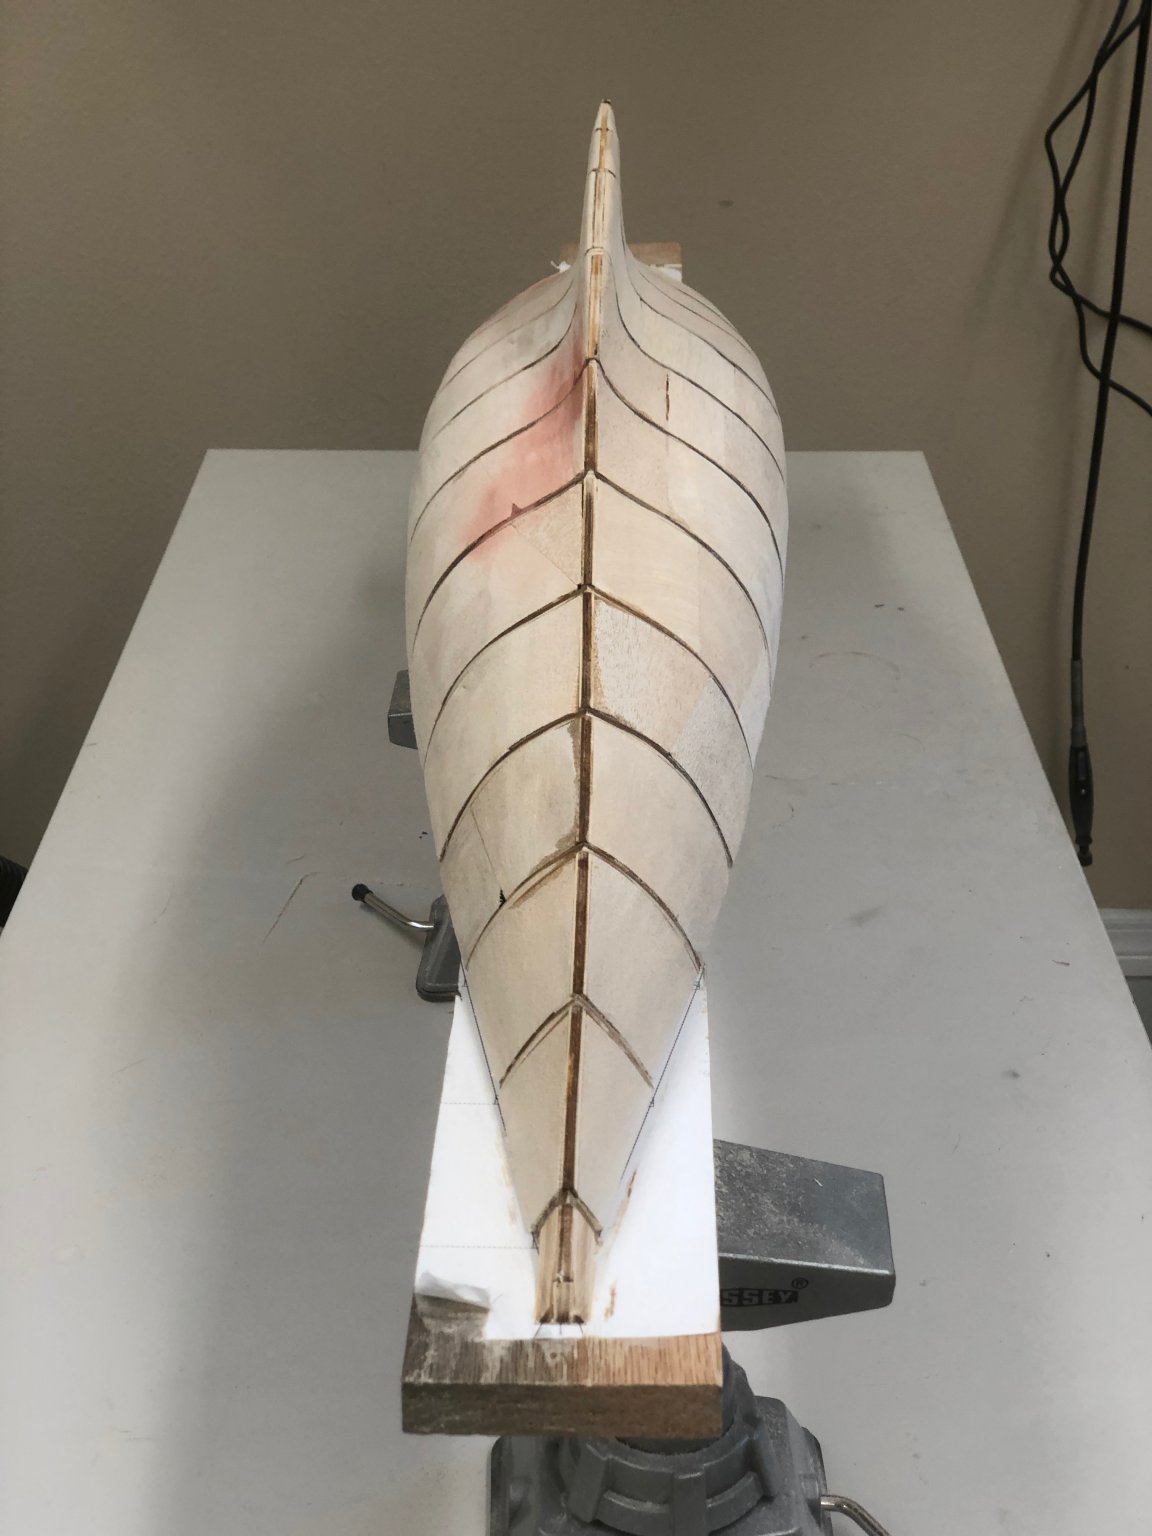
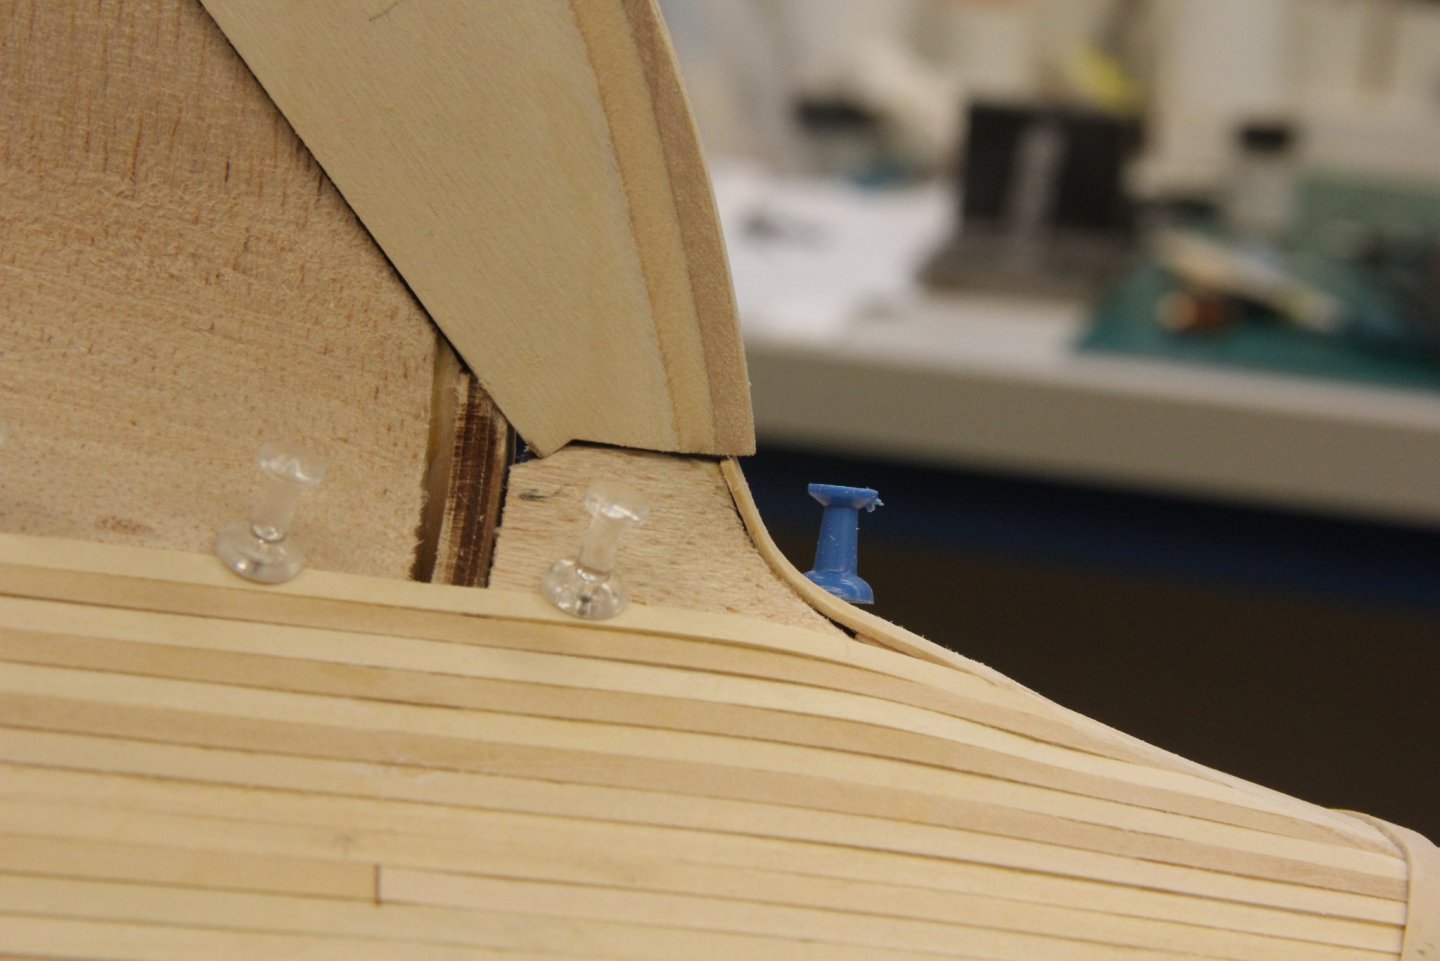
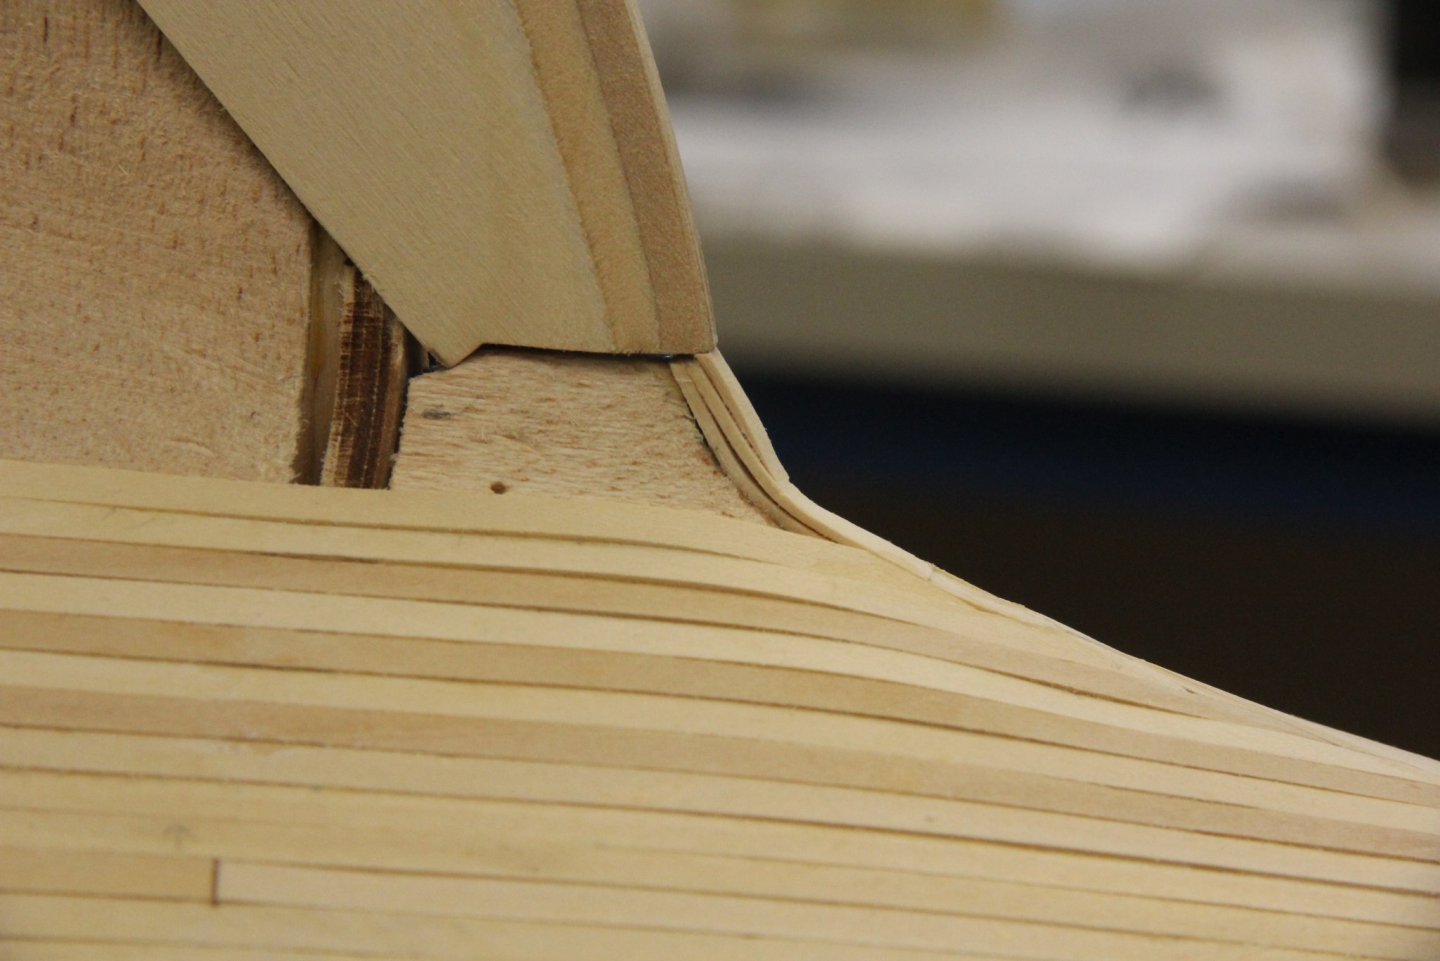
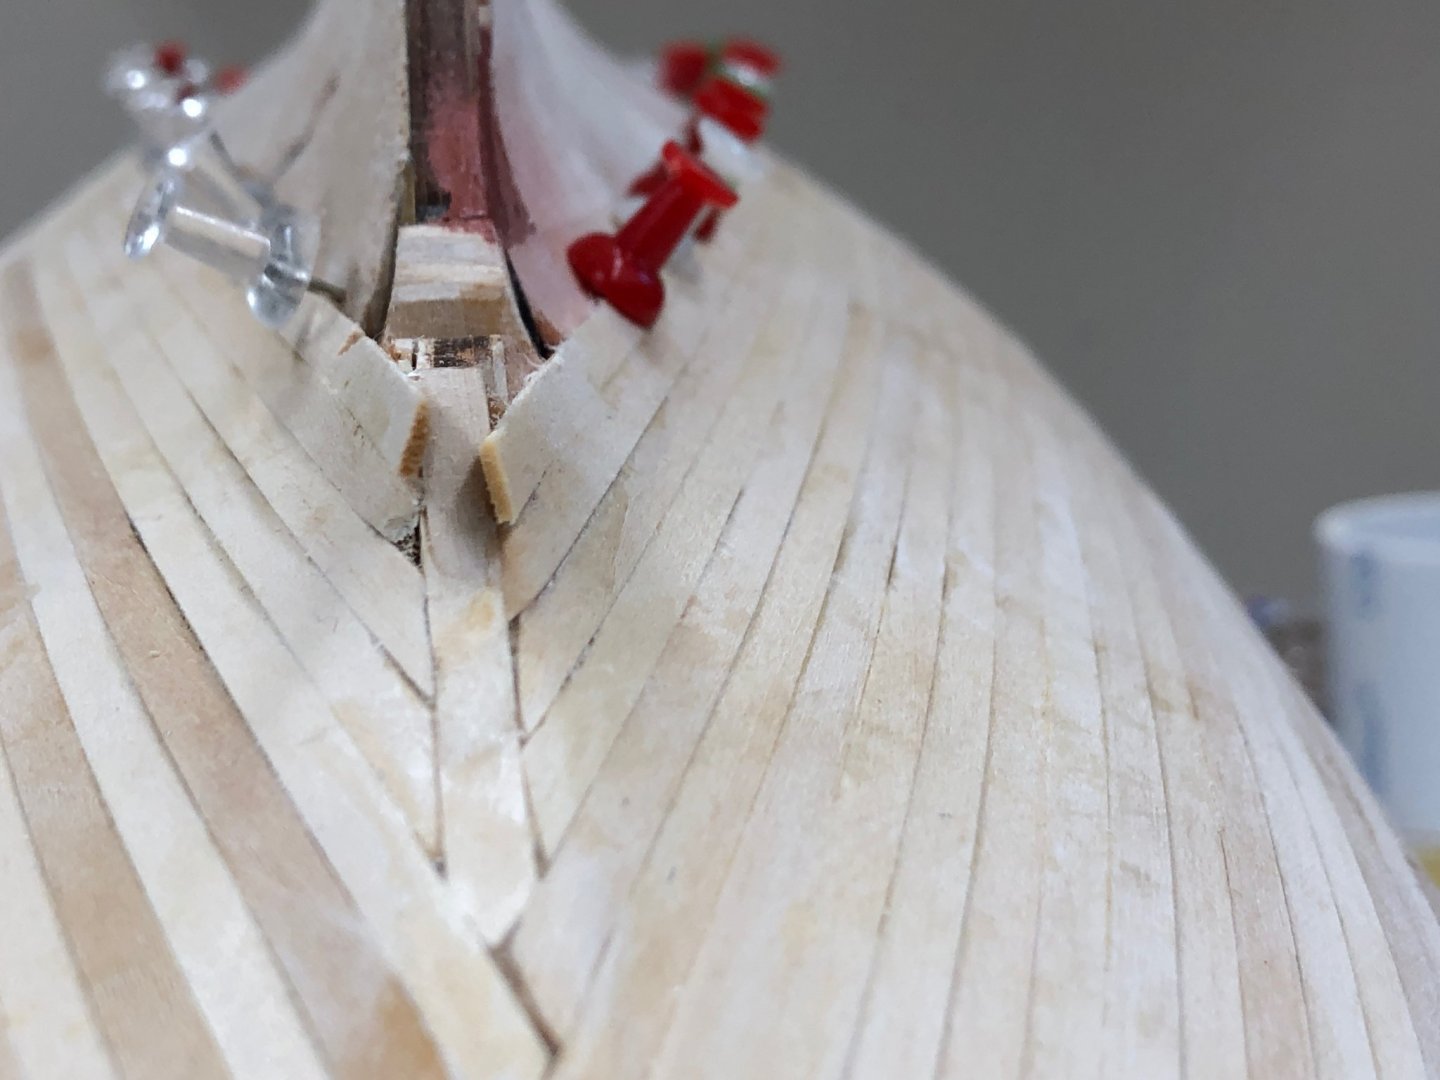
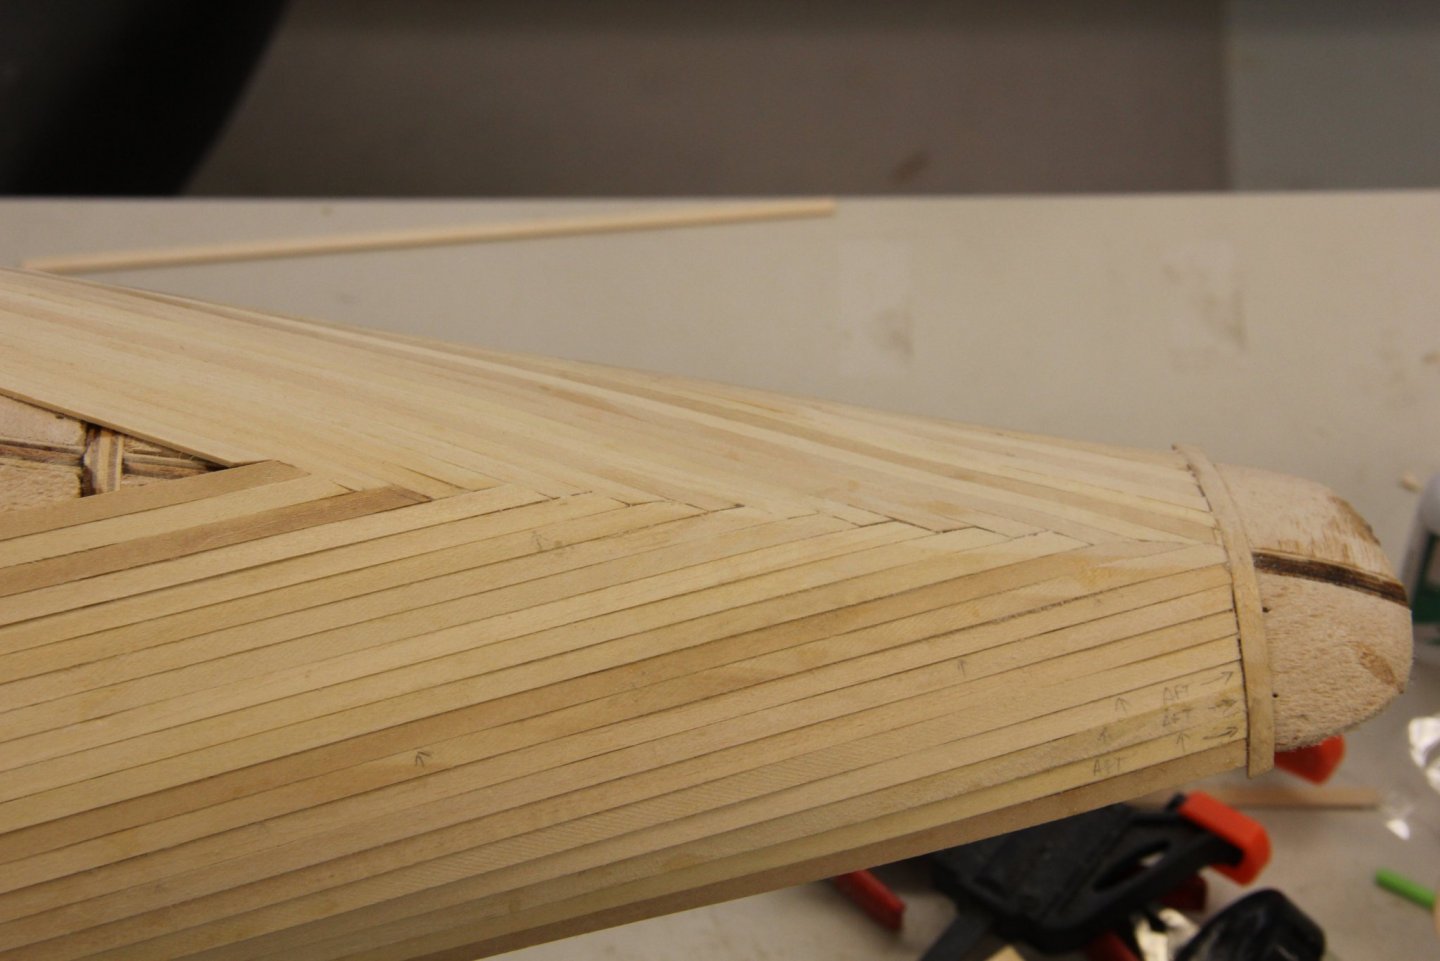
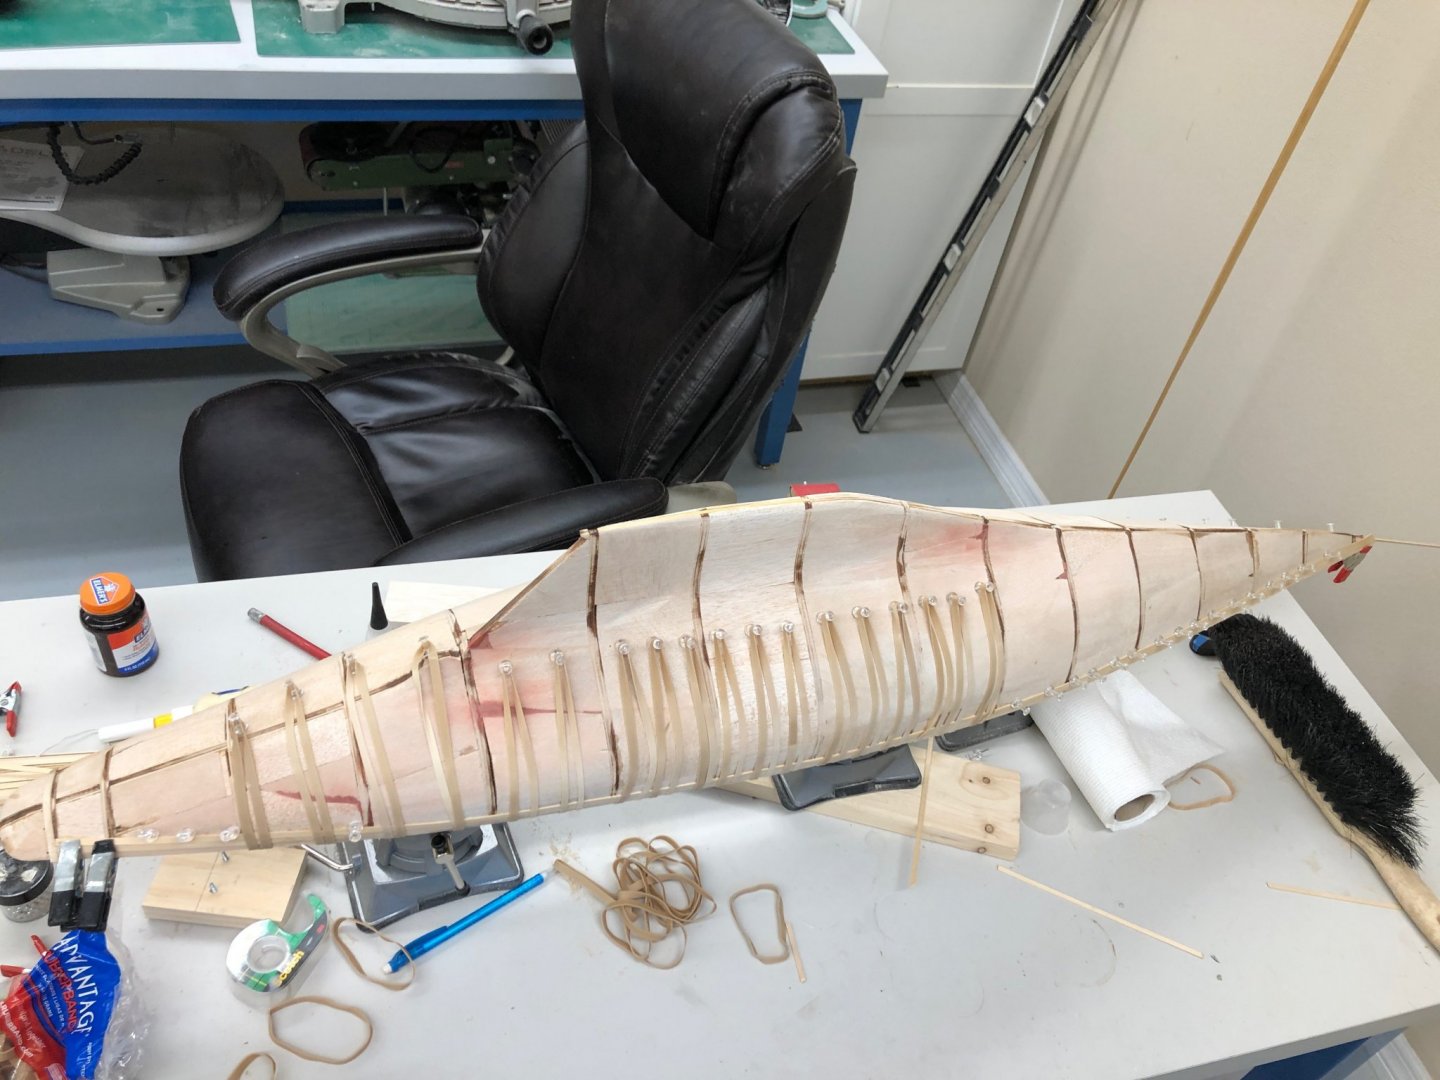
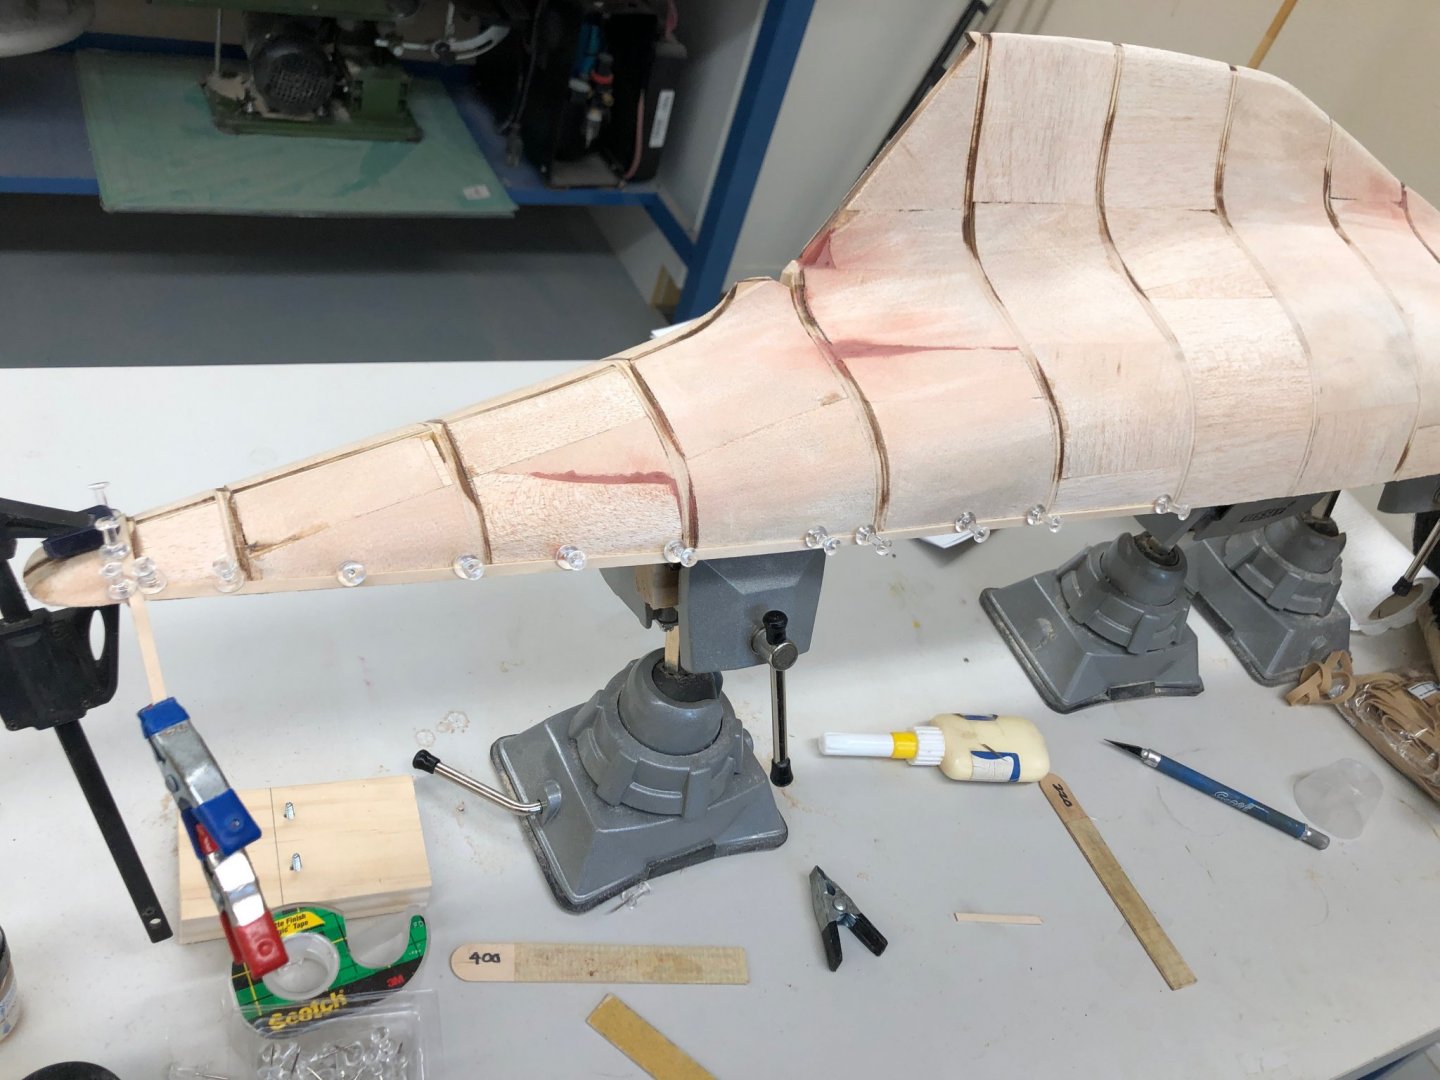
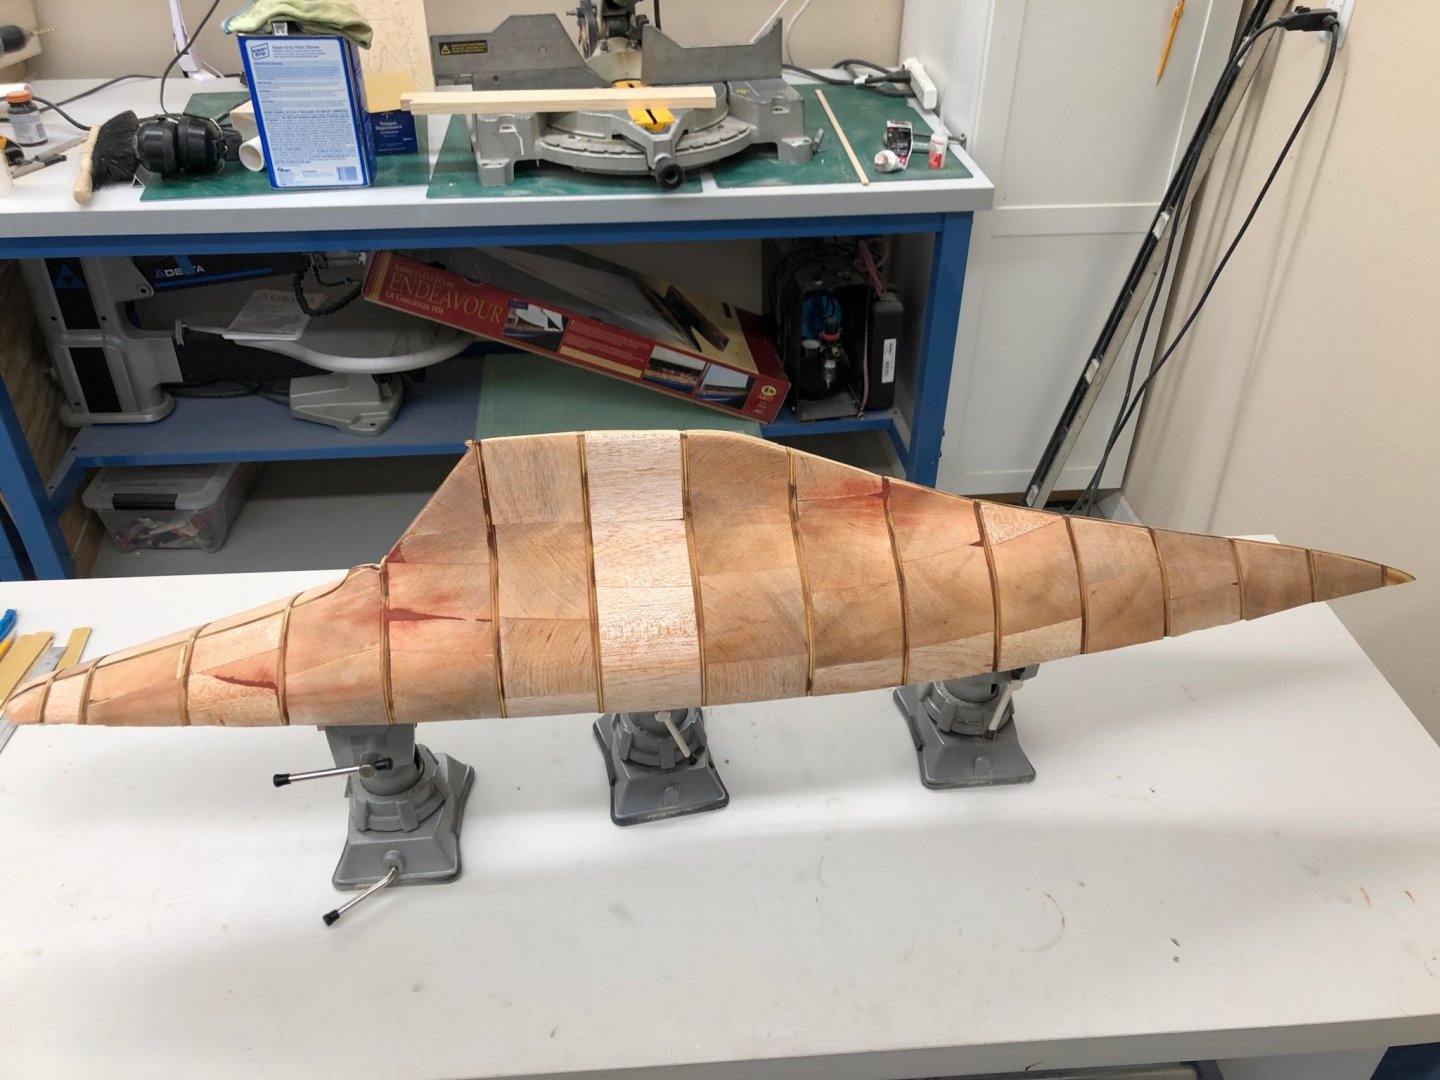
When the planking got near the bottom of the rudder I added the rudder to see how things looked and was shocked to find that the kit supplied pieces (structure and rudder do not fit together better than they apparently do - or I have made an error in the assembly. The aft edge of the rudder does not fair into the hull as neatly as it should. I had already added one plank thickness (1 mm aka 1/25") to the keel when the photo was taken. As it turns out it took 3 thickness to get the rudder and hull to fair properly IMHO. At the other end the planking was starting to meet at a flatter and flatter angle - getting closer to horizontal and thus harder to keep an "edge" so I decided to follow Kieth Aug's example in his build log and added three rows of the 2mm X 2mm bulb planking starting at bulkhead 20. This was I think two bulkheads further forward than Kieth did but my fairing job on the balsa inserts was probably not as accurate as Kieth's. So anyway, I now have the beginnings of the bulb keel planking. Having now planked up to the bottom of the rudder I find that the planking on the sides are off by about half a plank width (2 mm) at the rudder post. I am willing to declare victory as this is the best result I have ever achieved and that is after 28 rows of planking. Hopefully it will not show under the paint (or the second planking should I decide to do that).

-
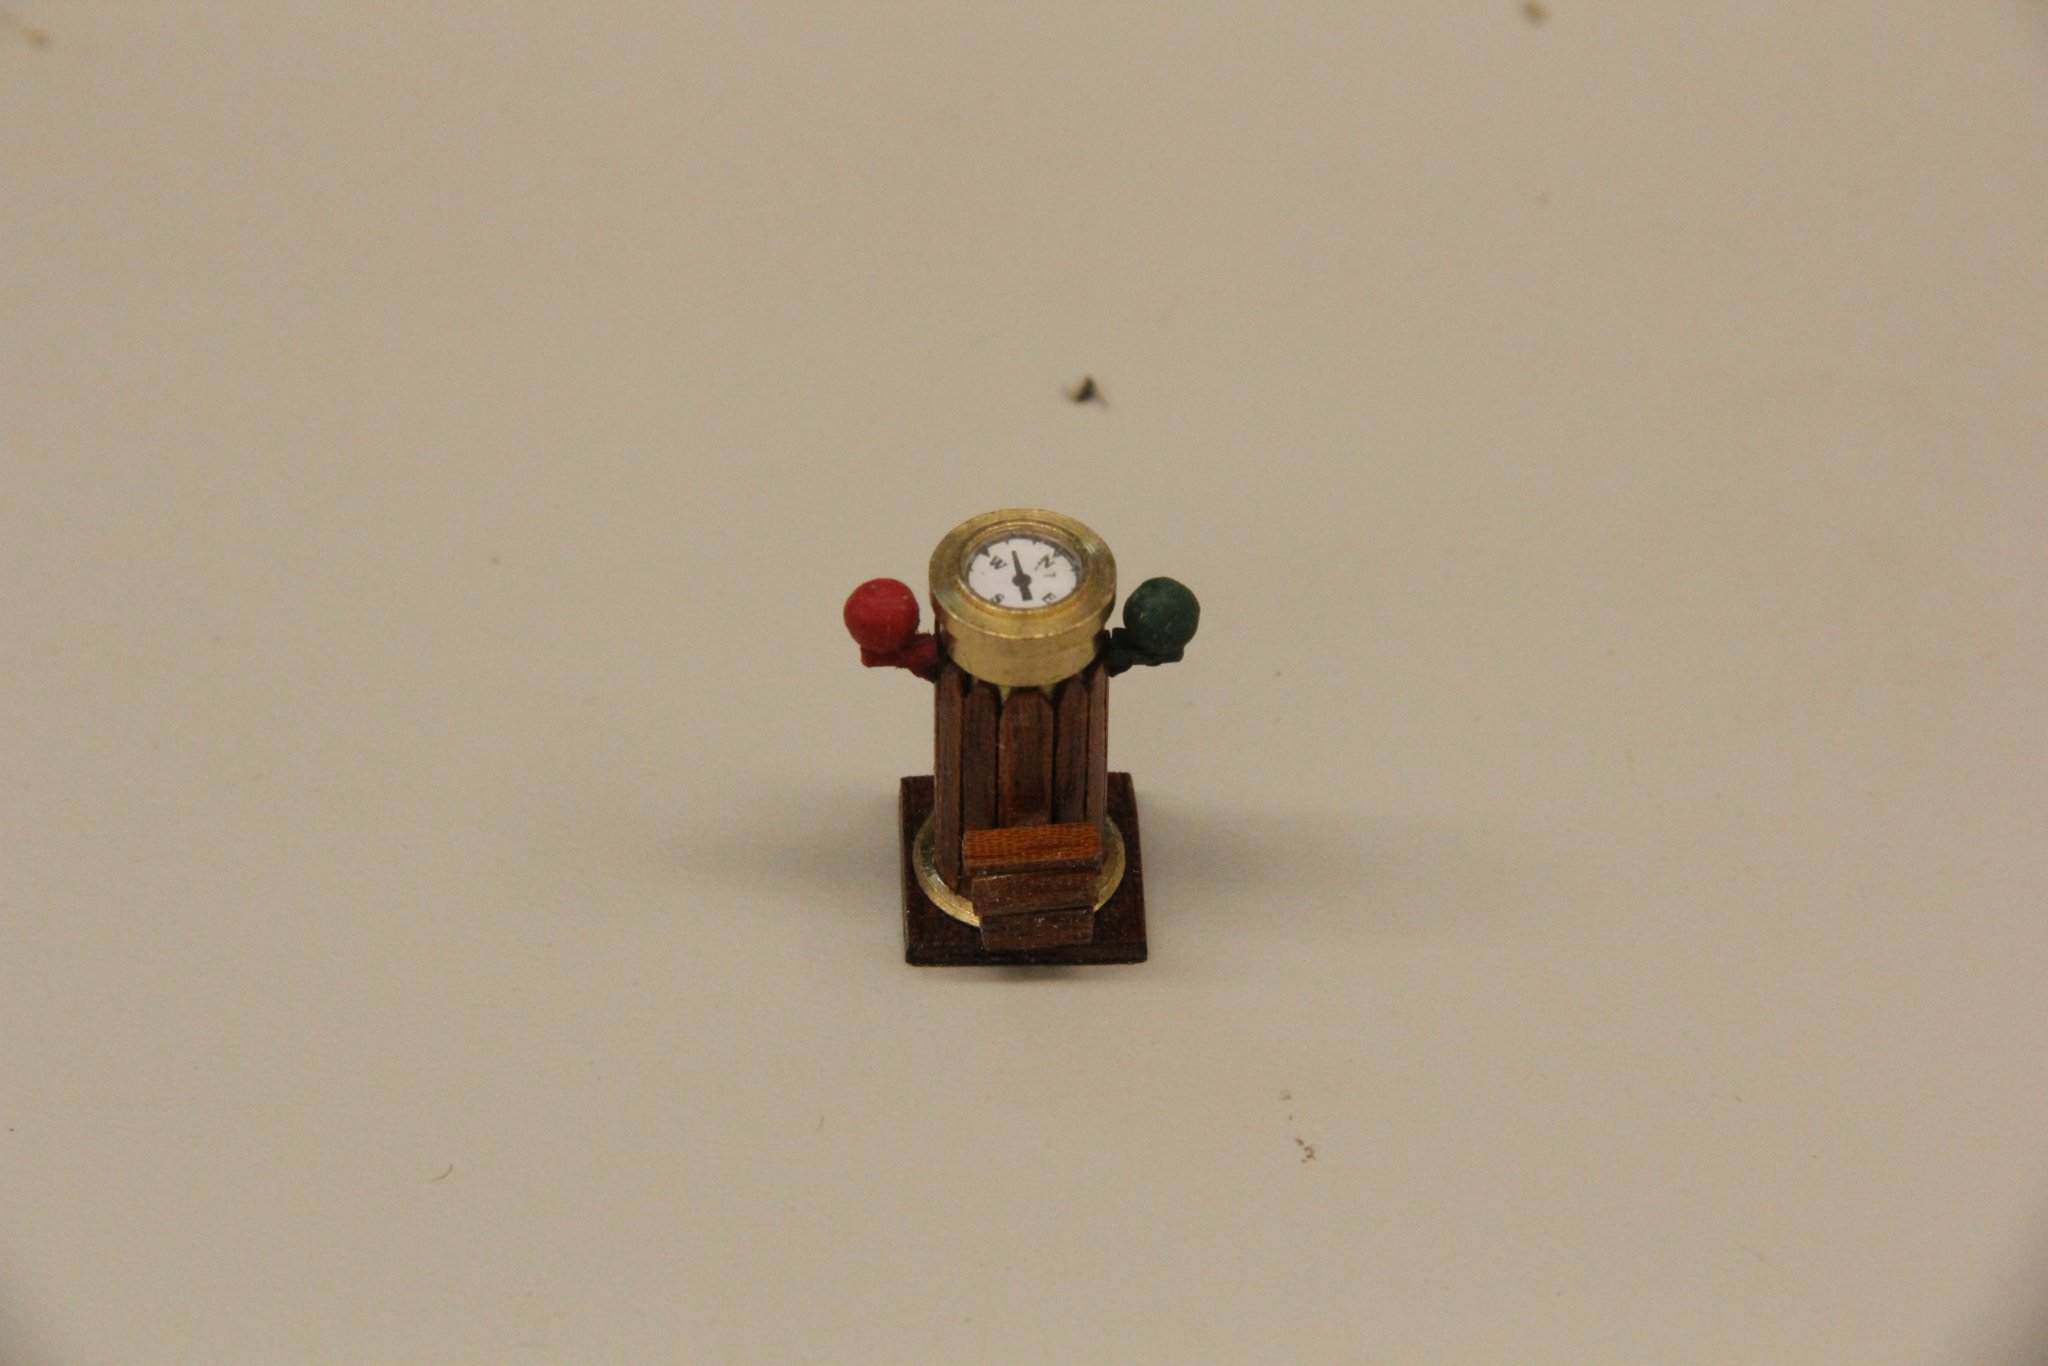
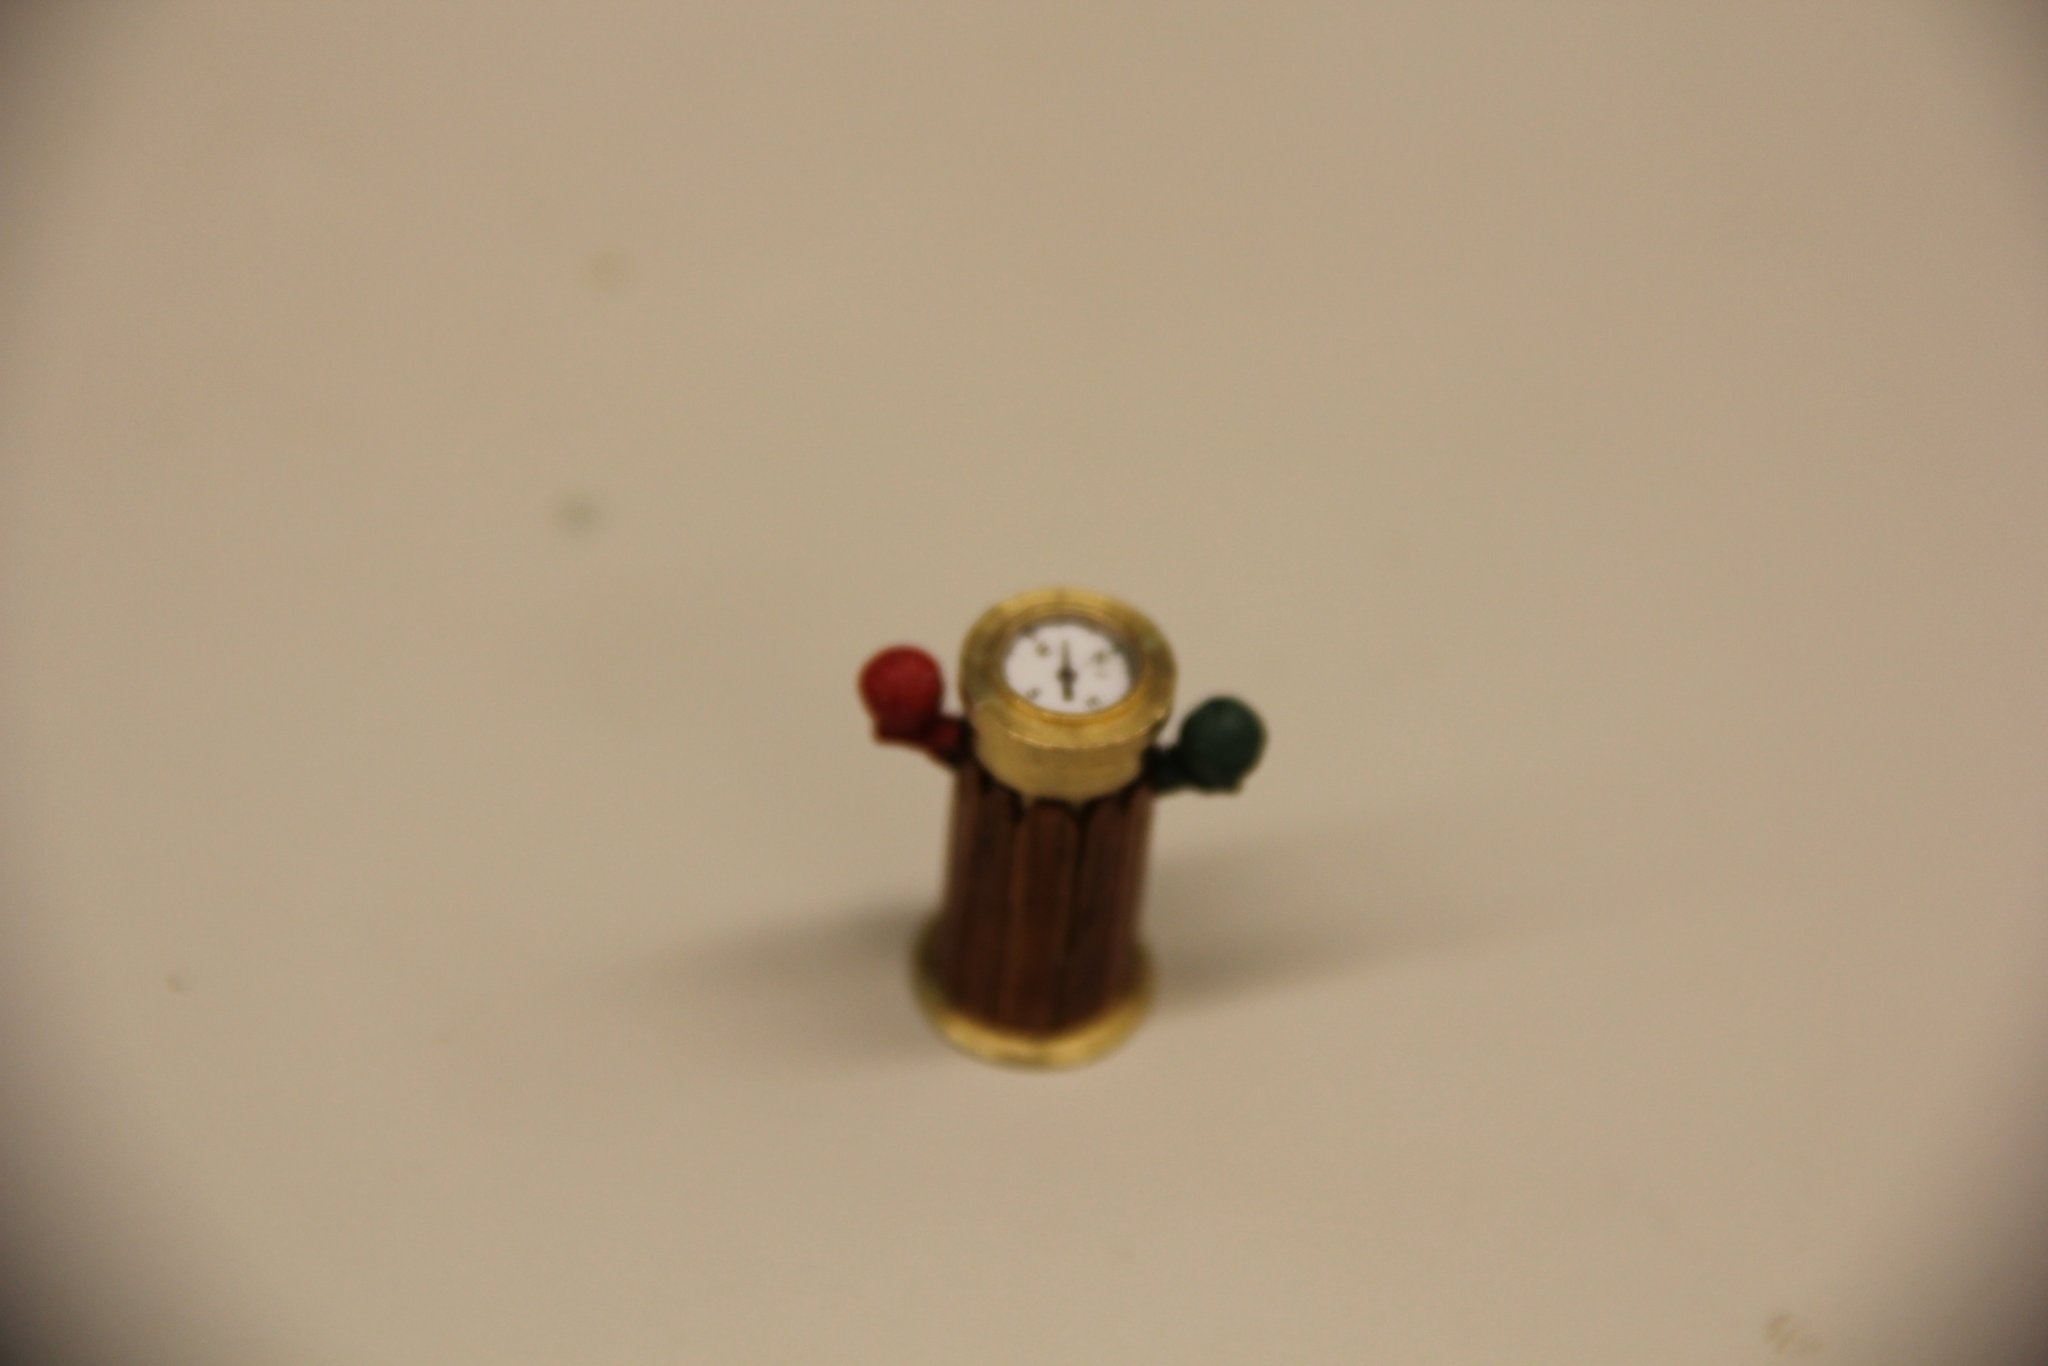
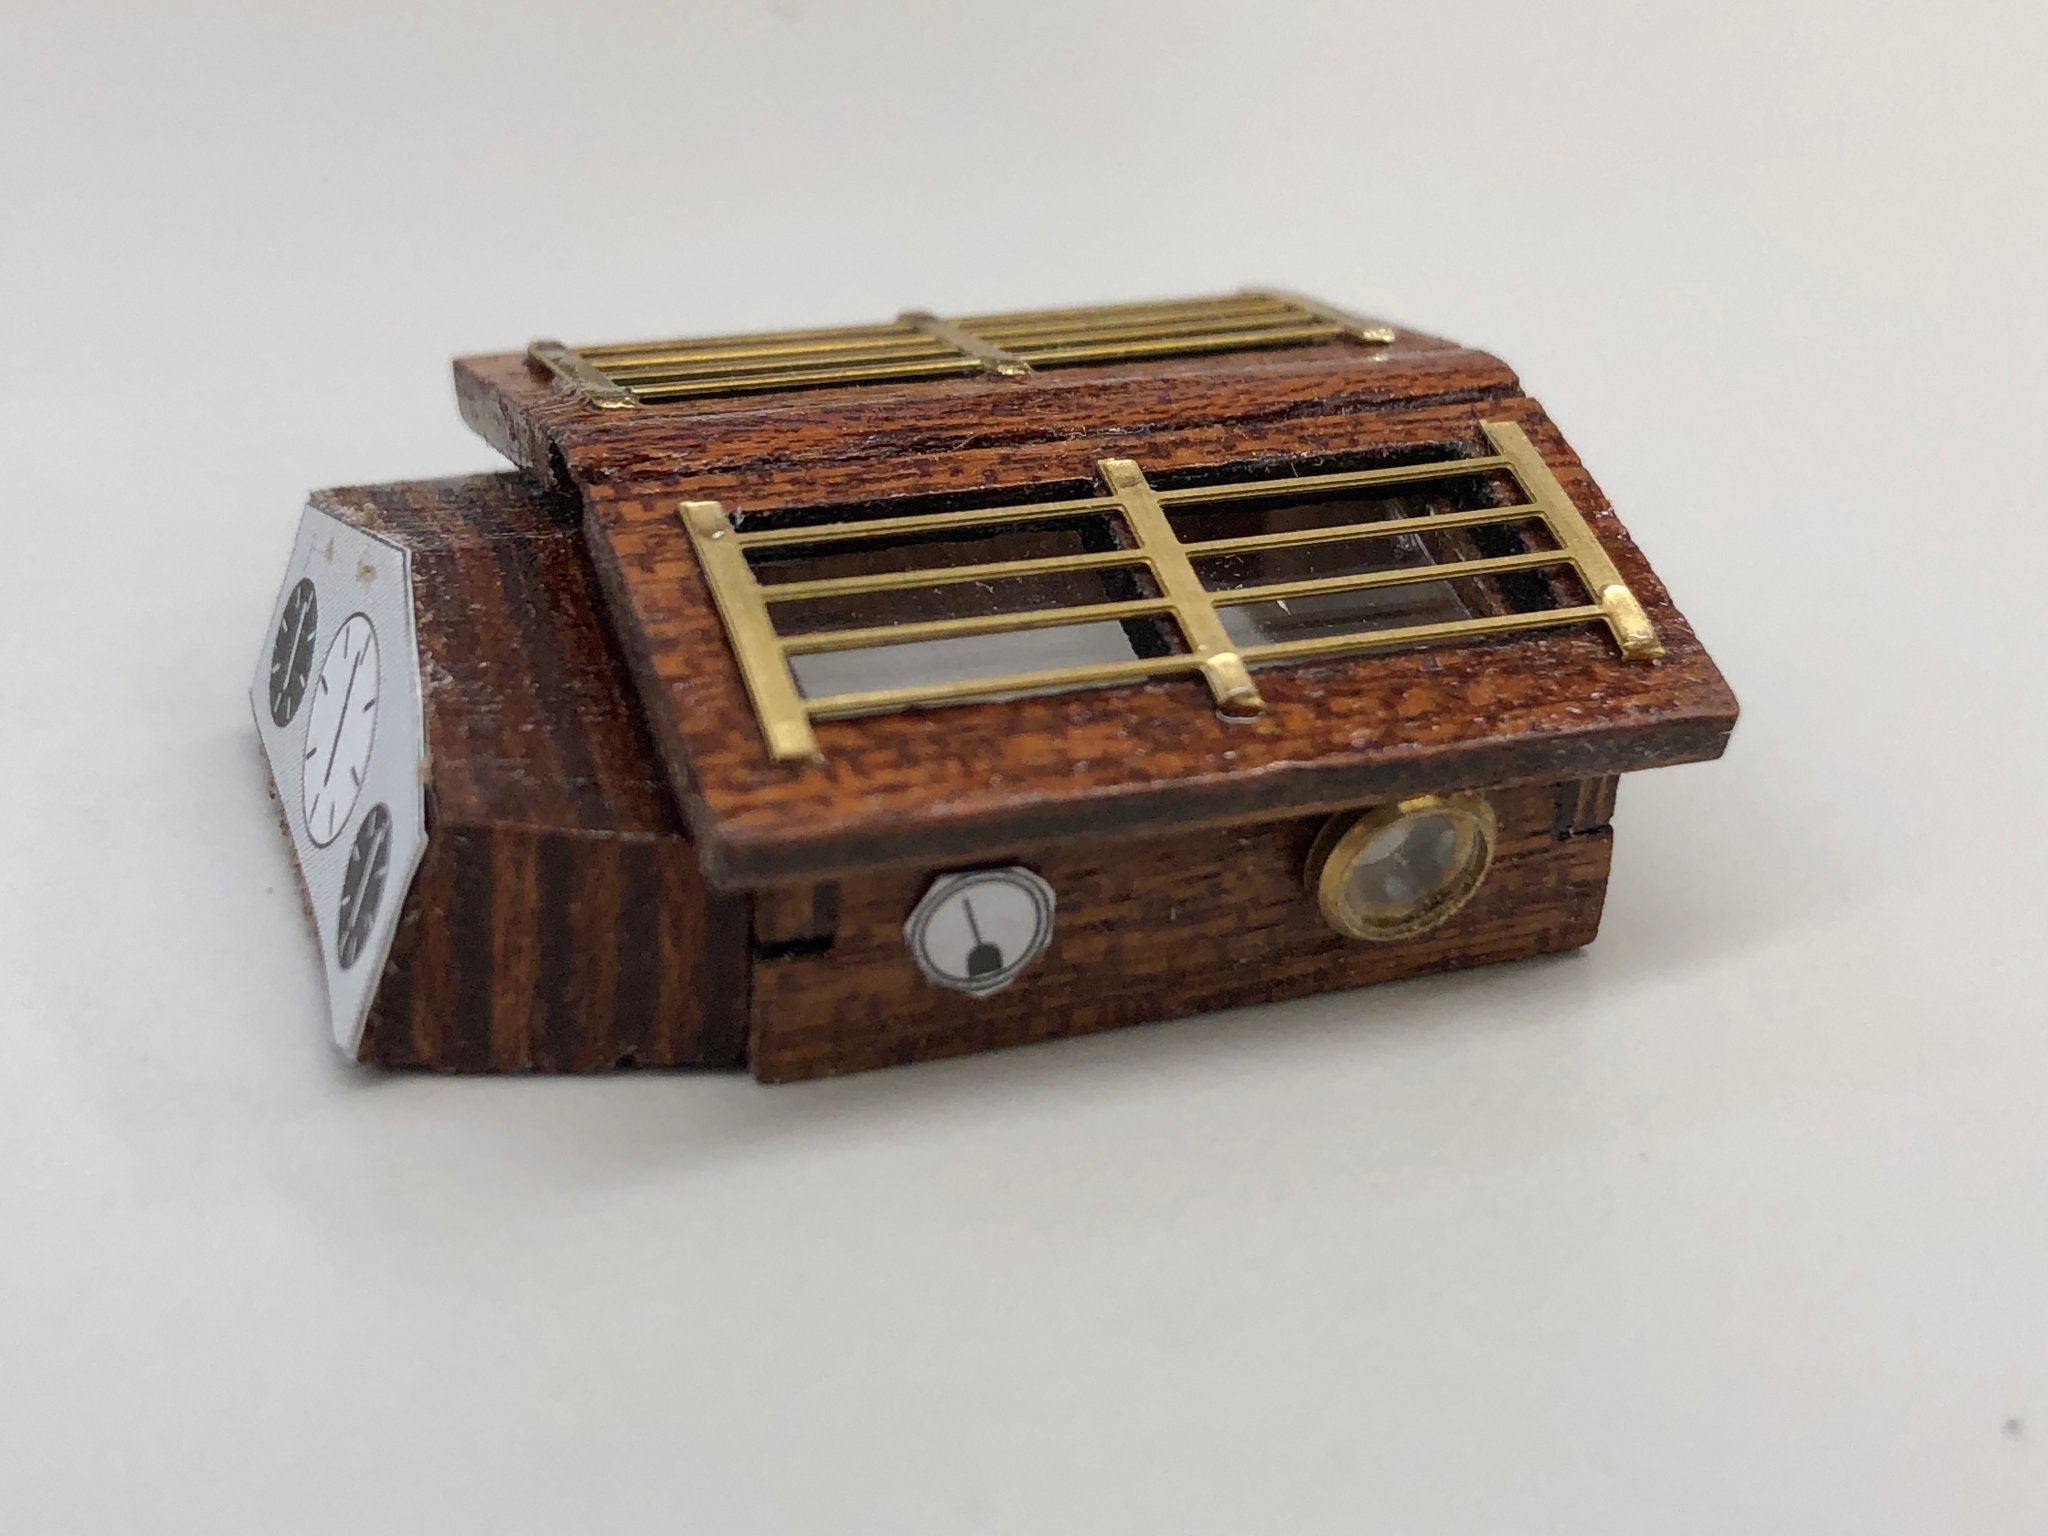
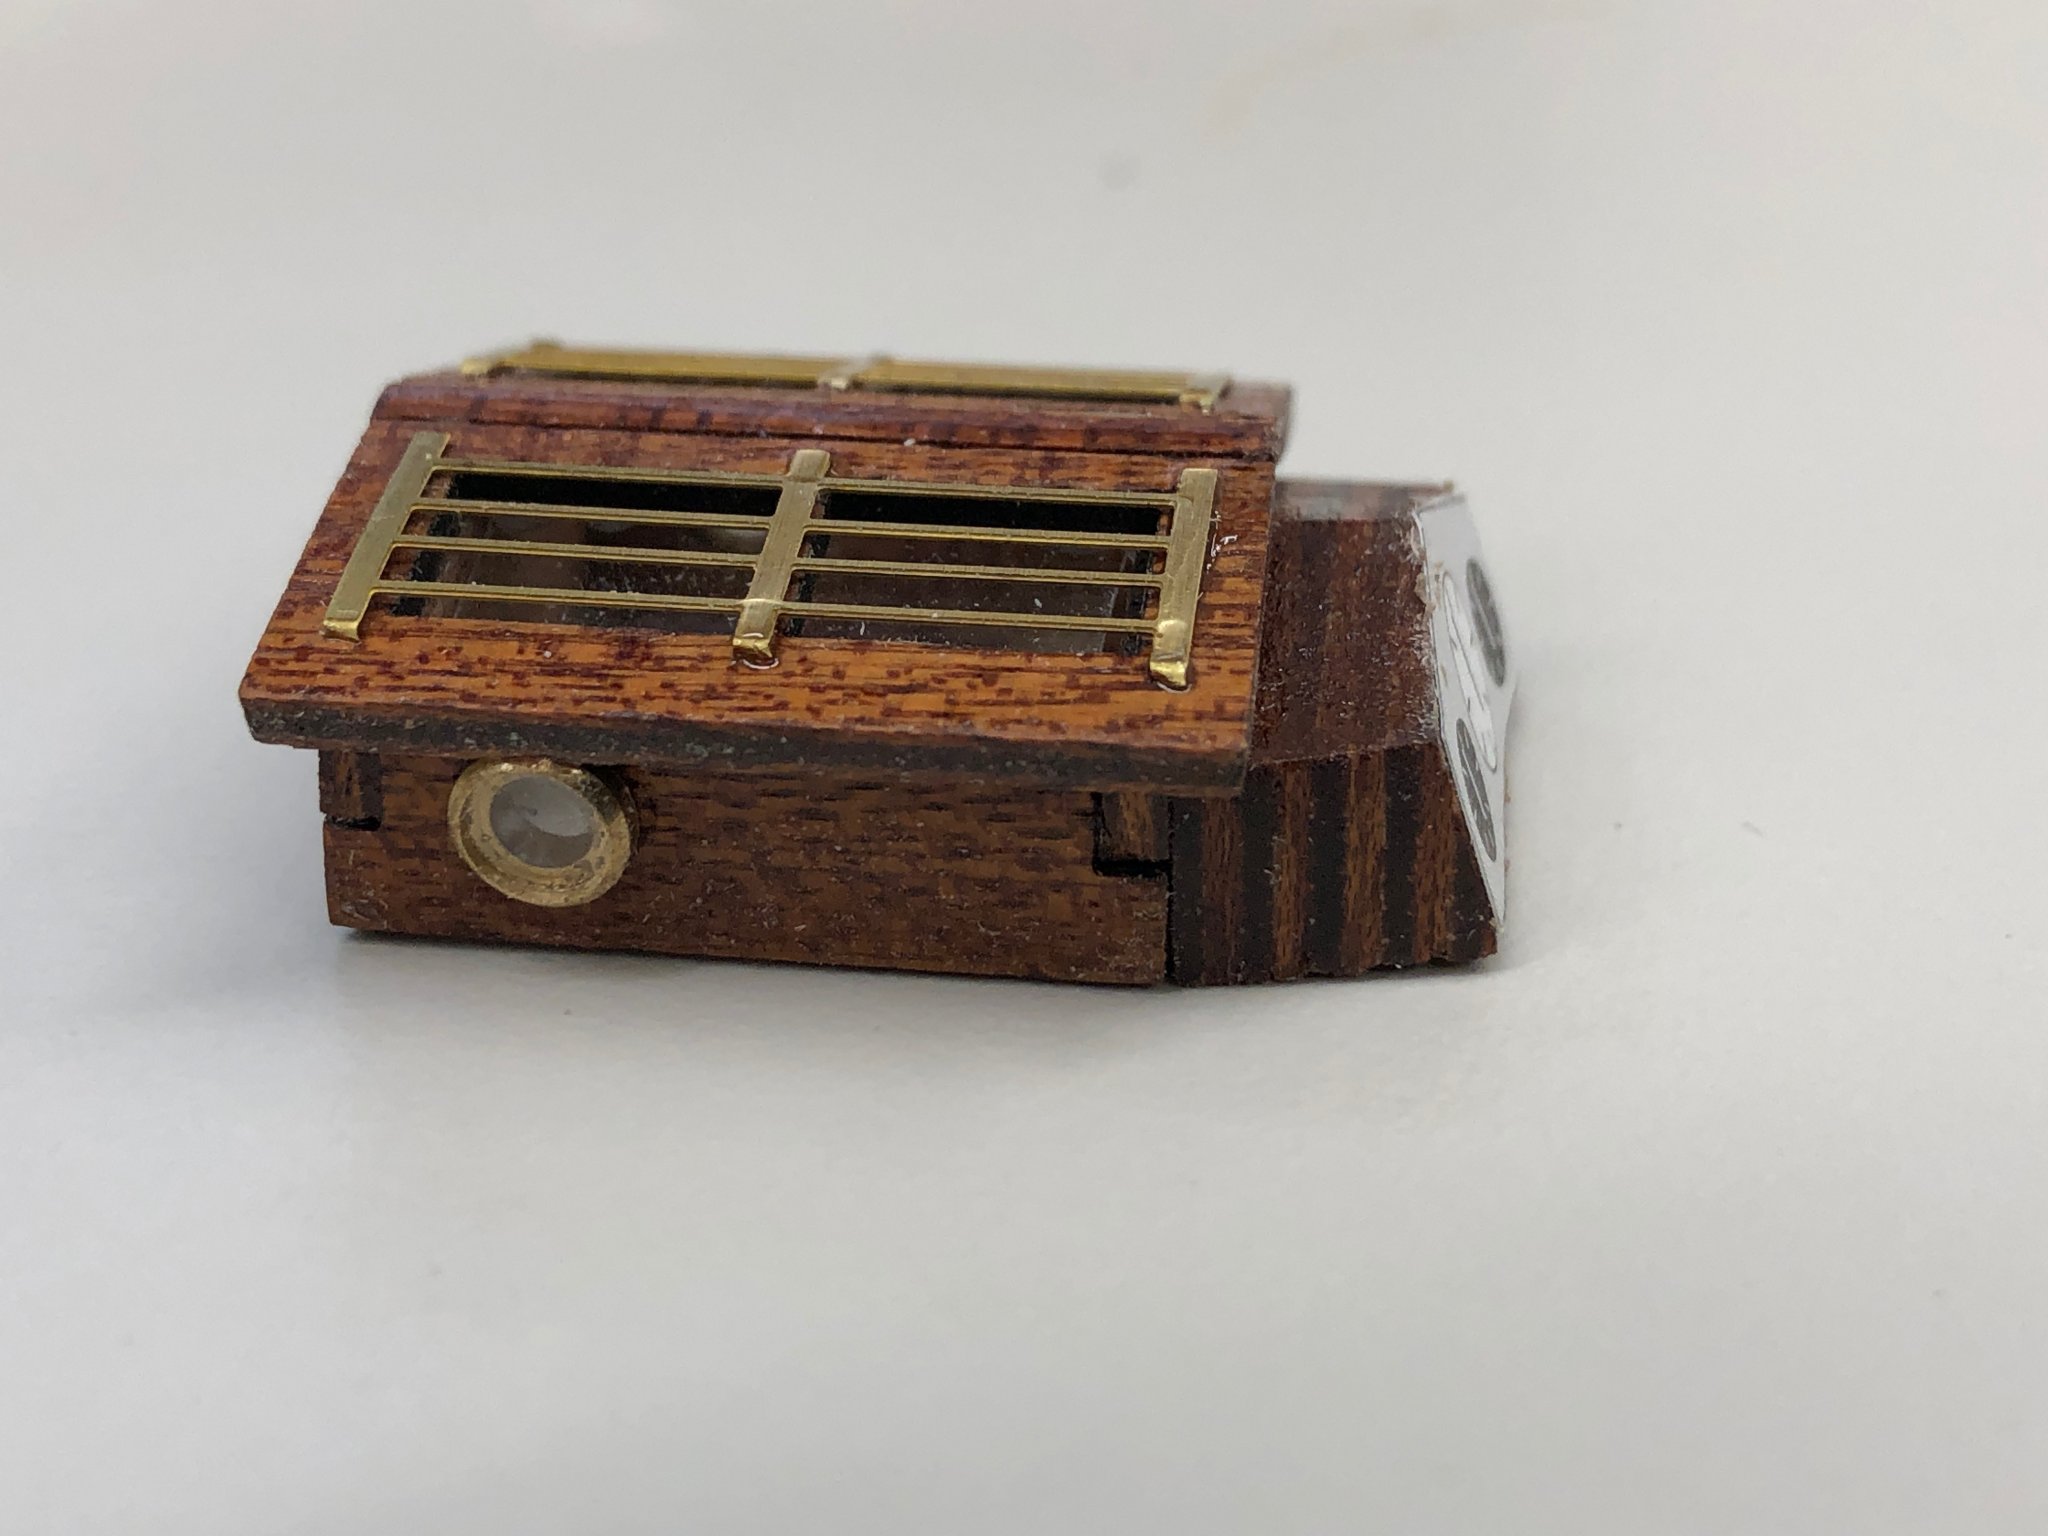
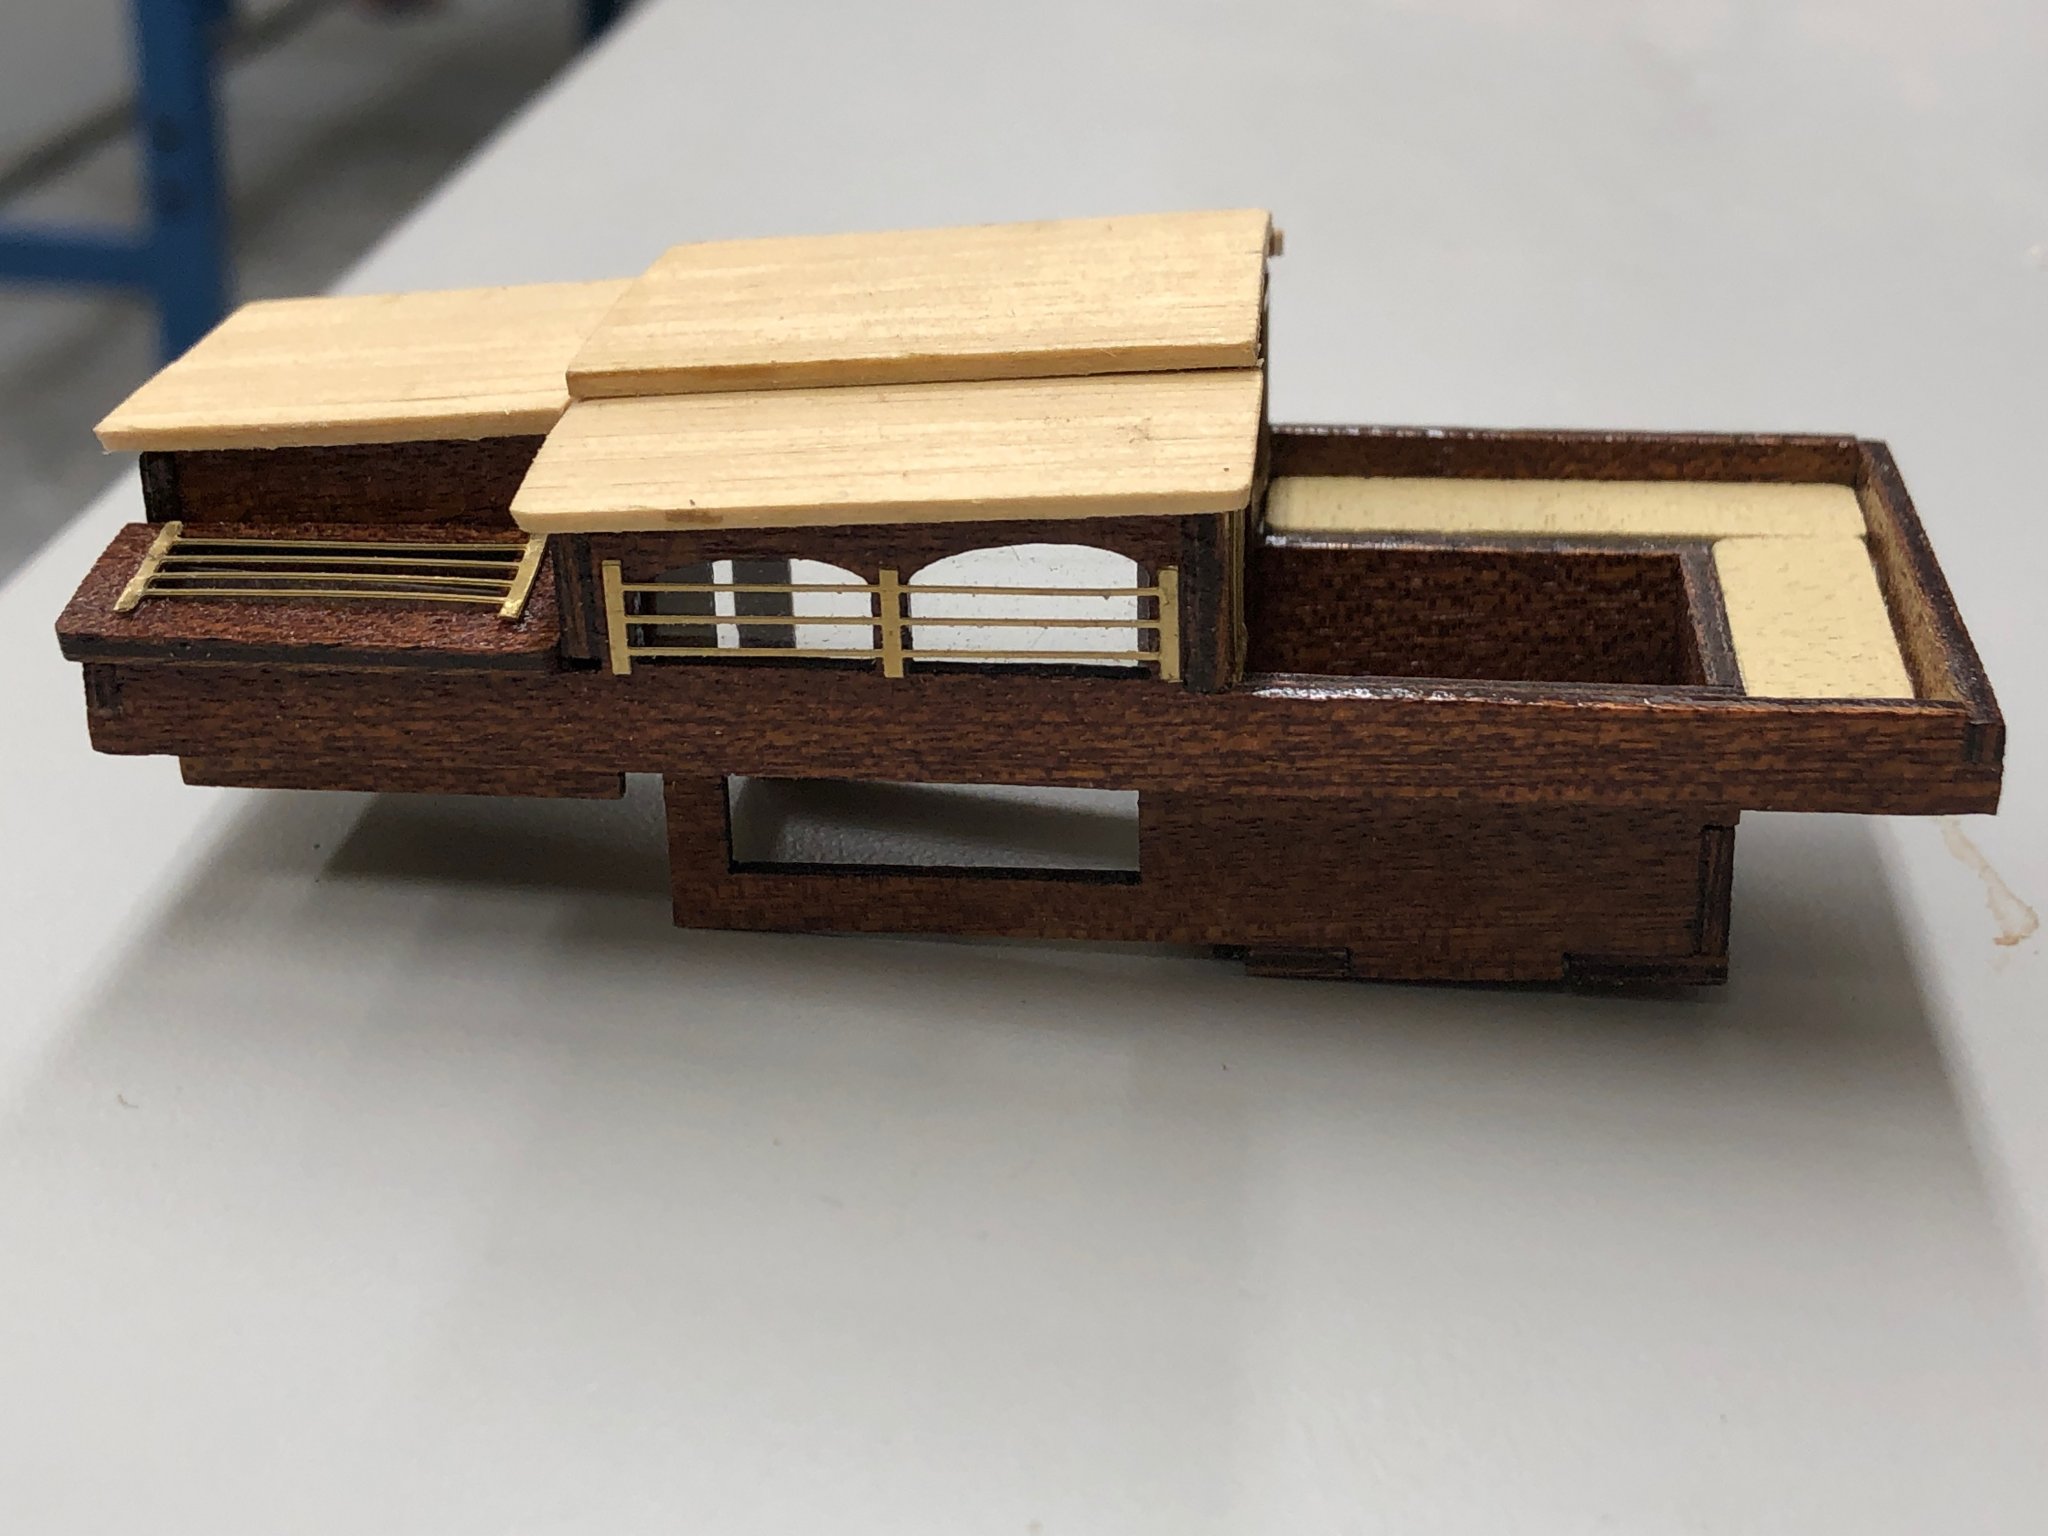
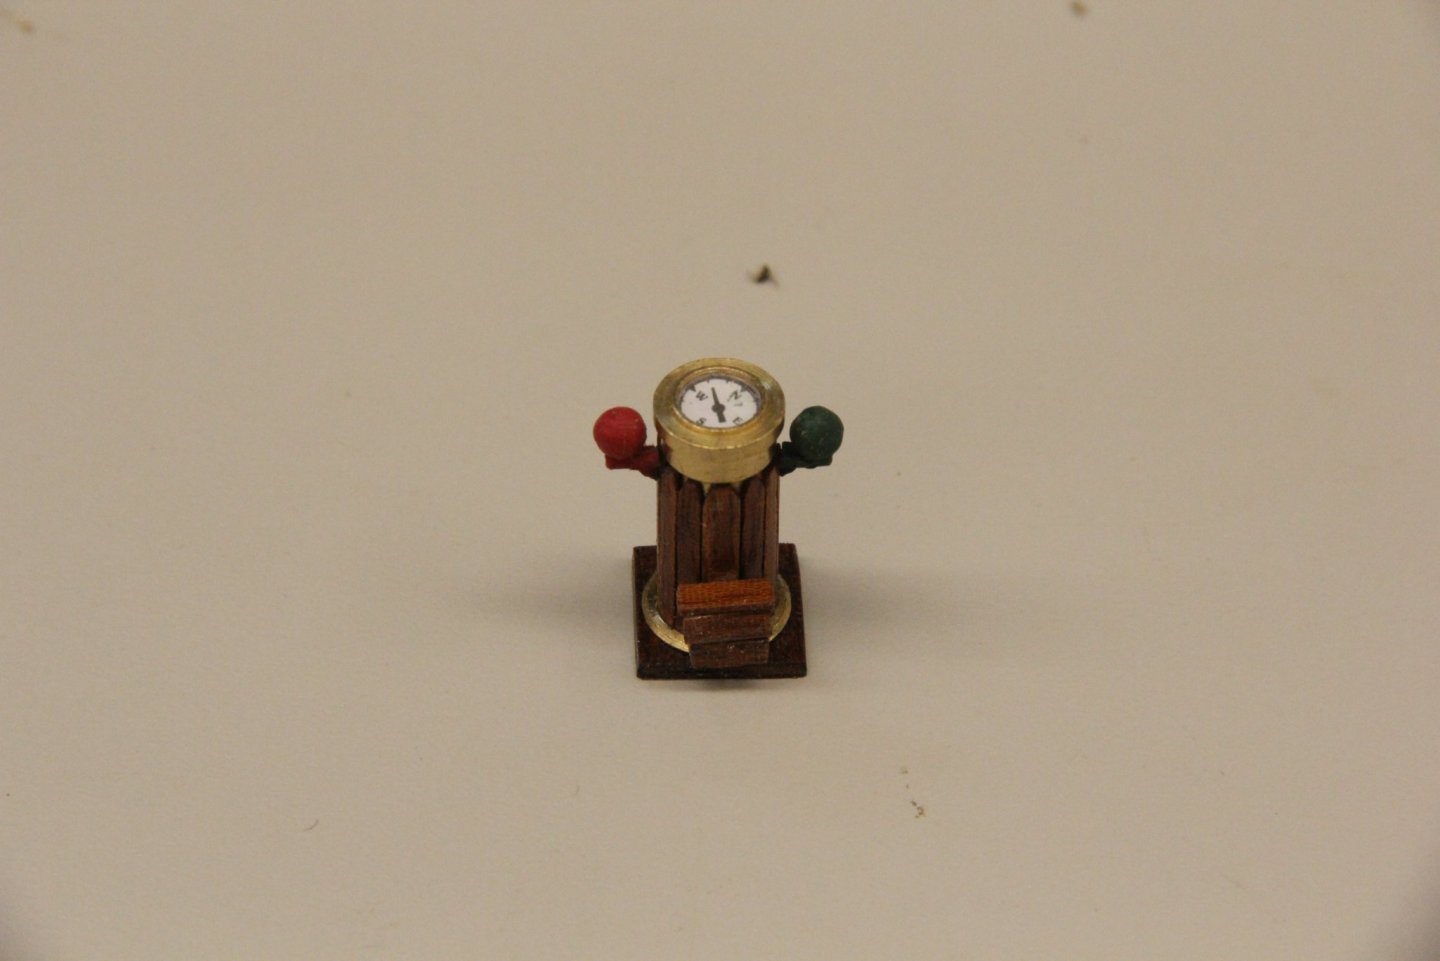
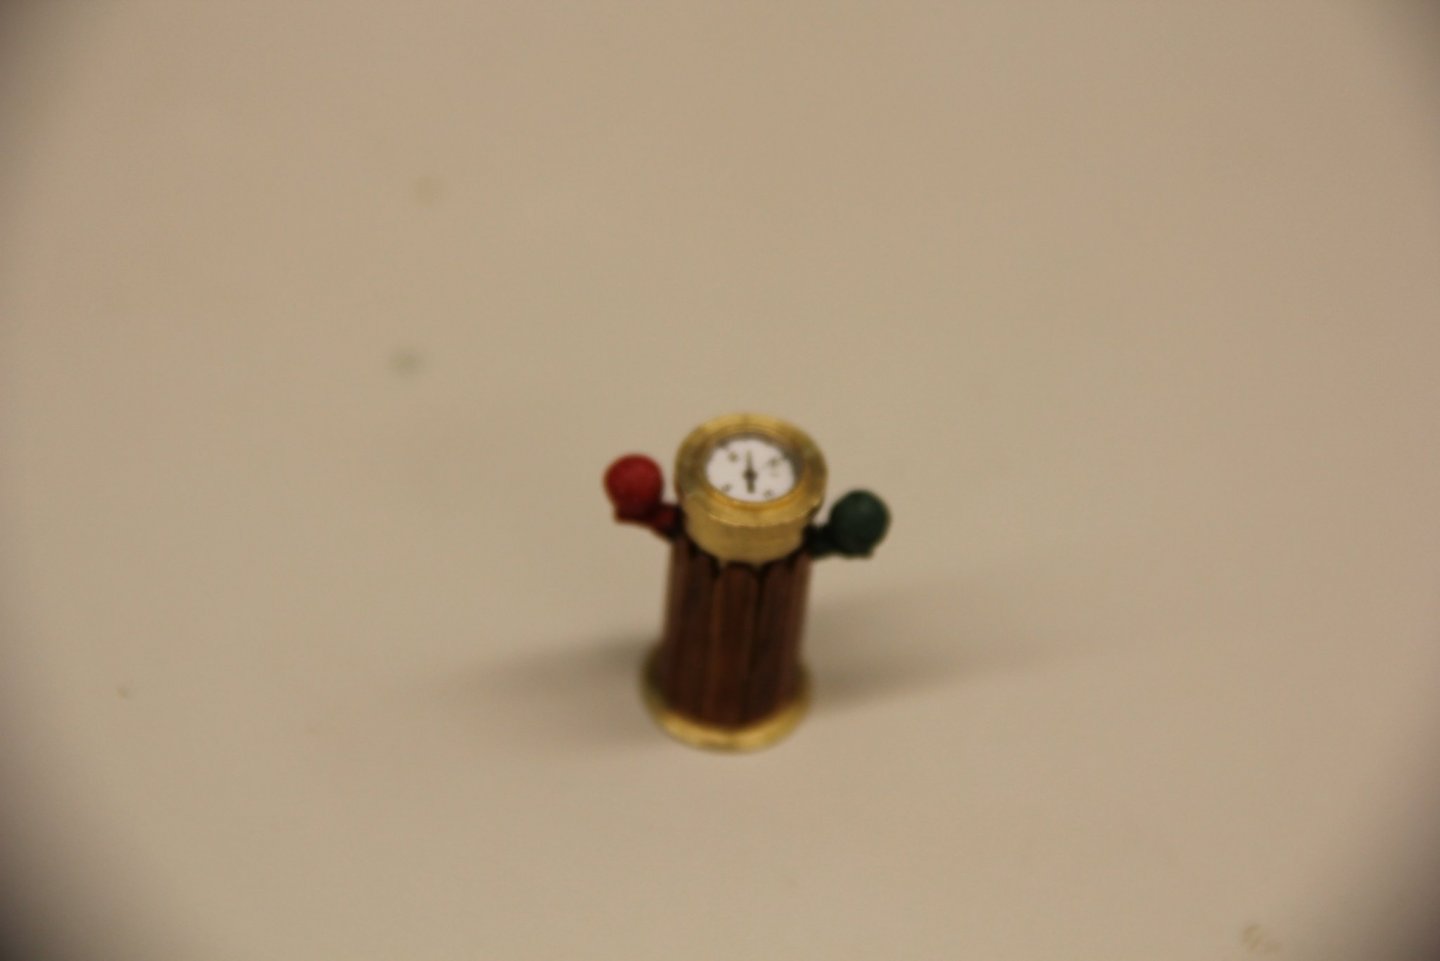
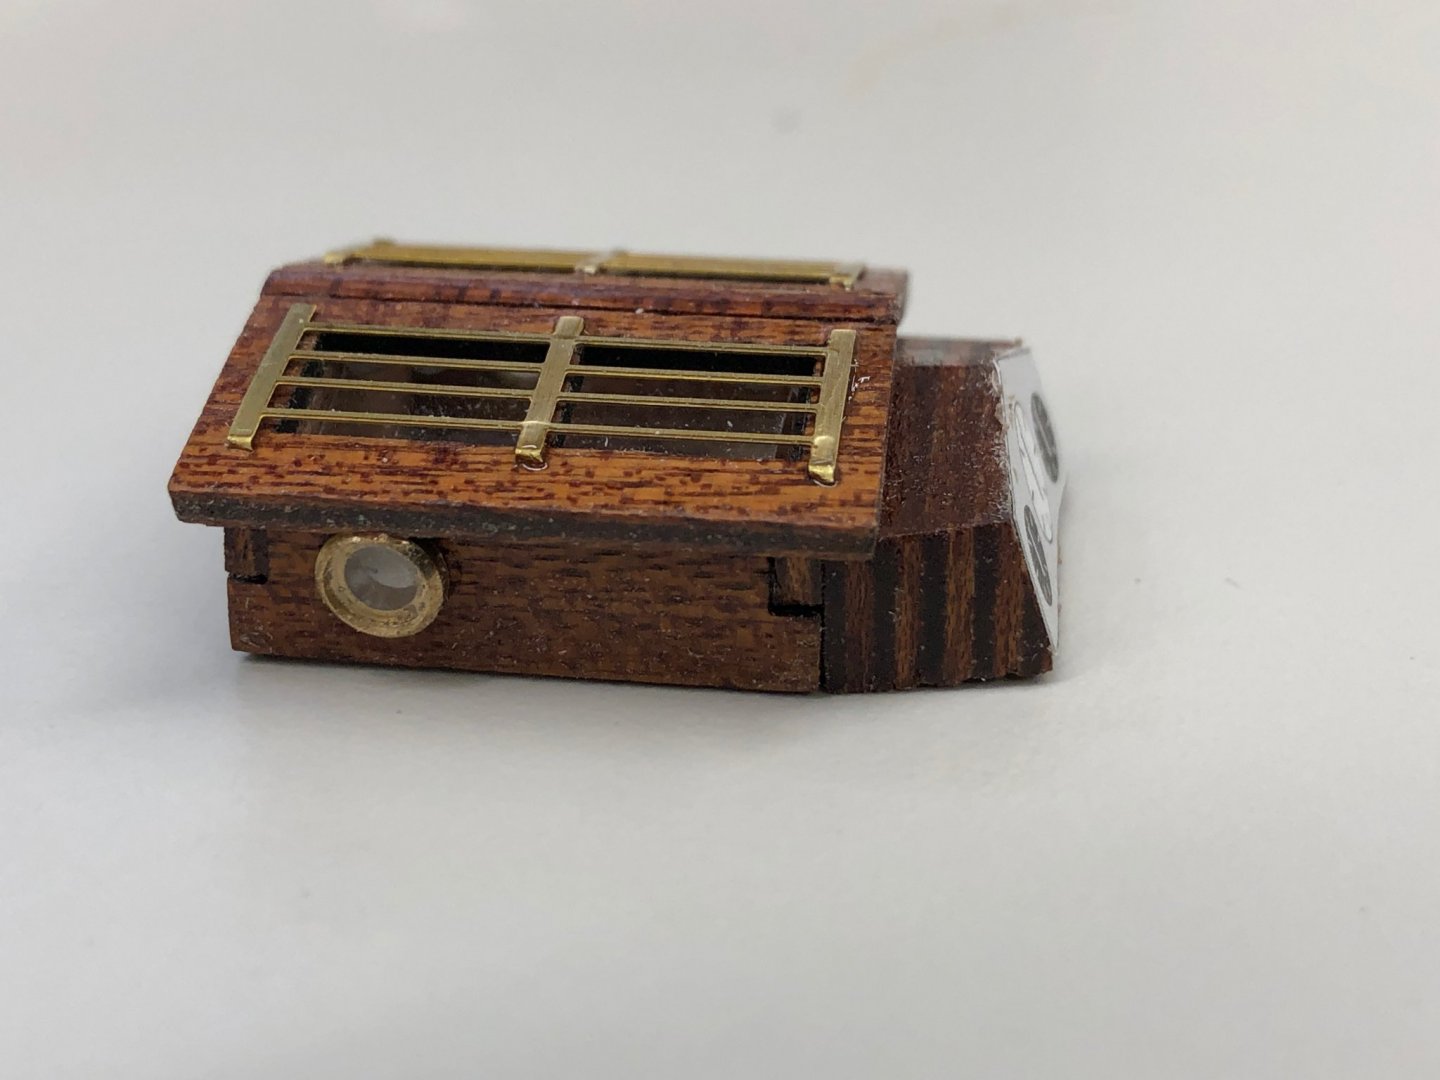
Yikes, that compass picture is terrible. Here is a better one of the completed assembly. I used some of the mahogany strips to cover the "plug" for the chart box at the bottom instead of the birch provided in the kit. The "spheres" provided for the "Navigator's Balls" looked more like beads, they had holes all the way through them. And the pieces provided for the arm and support for them were so small I had to hold them with tweezers (and carefully at that) to get the laser char off and glue them together. I used CA to glue the spheres to some brass rod then cut the rod off, filed a bit and painted the spheres. I decide to paint the supports red and green also. The "Compass Rose" is paper cut from the instruction sheet. I did manage to cut a fit a piece of the acetate provided for the skylights to fit the compass. Not sure it was worth the effort - you only notice it at specific angles and I doubt anyone looking at the completed model would notice. The compass is the last piece I am going to assemble before they go onboard. The winch looks a little fragile, especially the etched brass handles. I will wait until closer to when it is needed to assemble the winch.
-
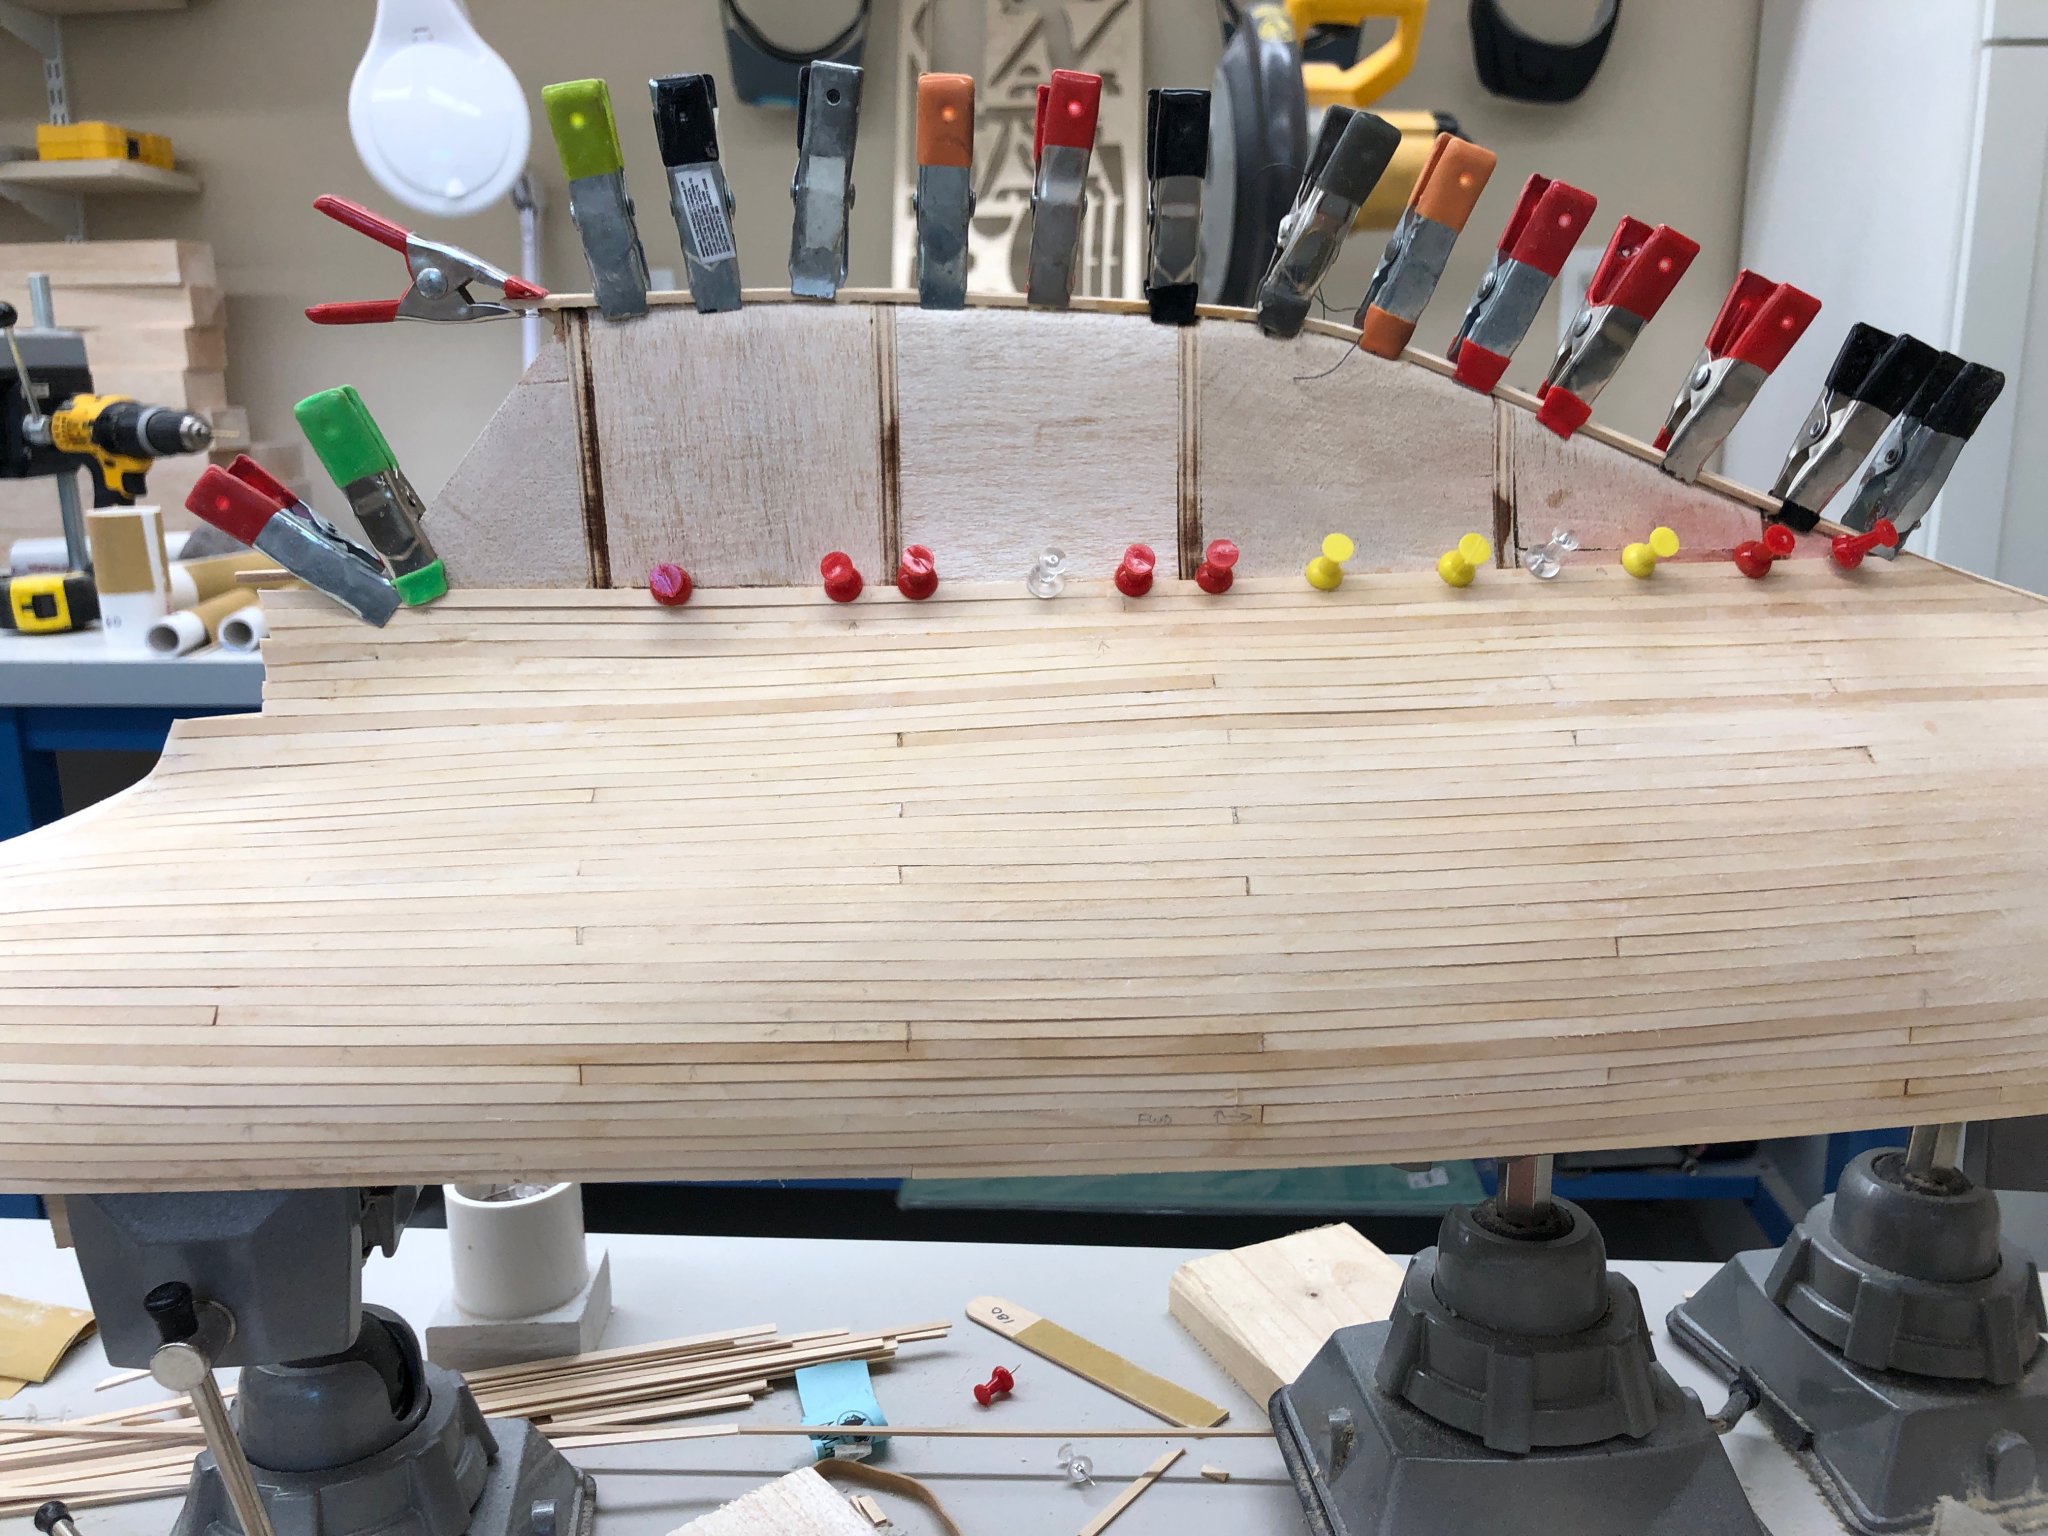
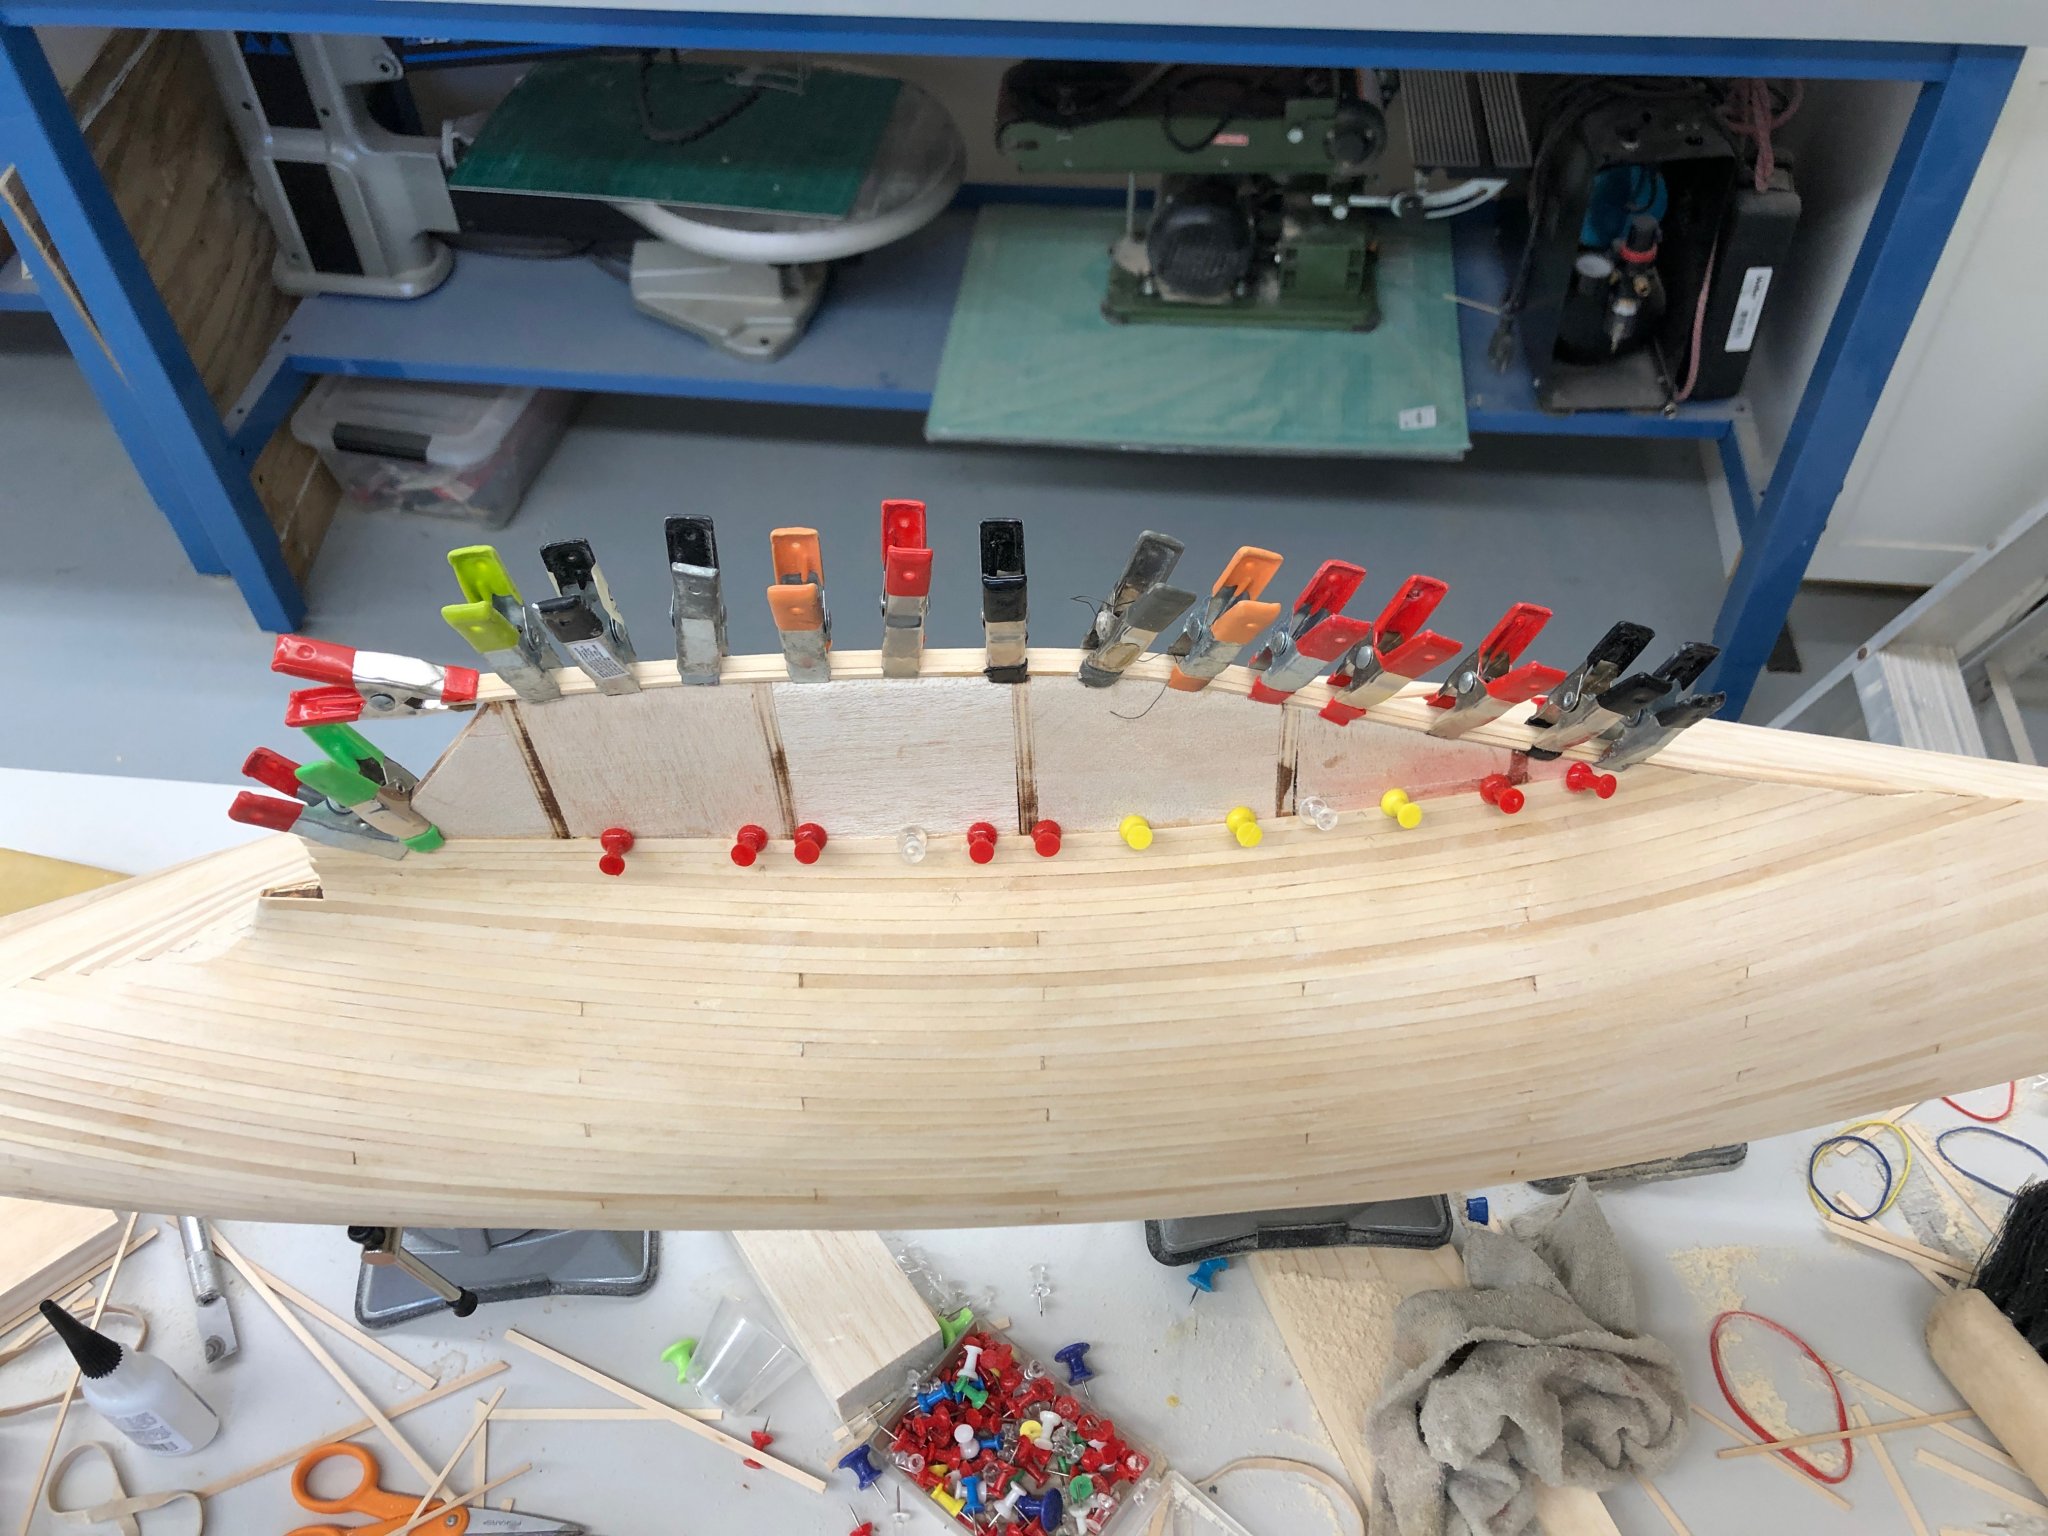
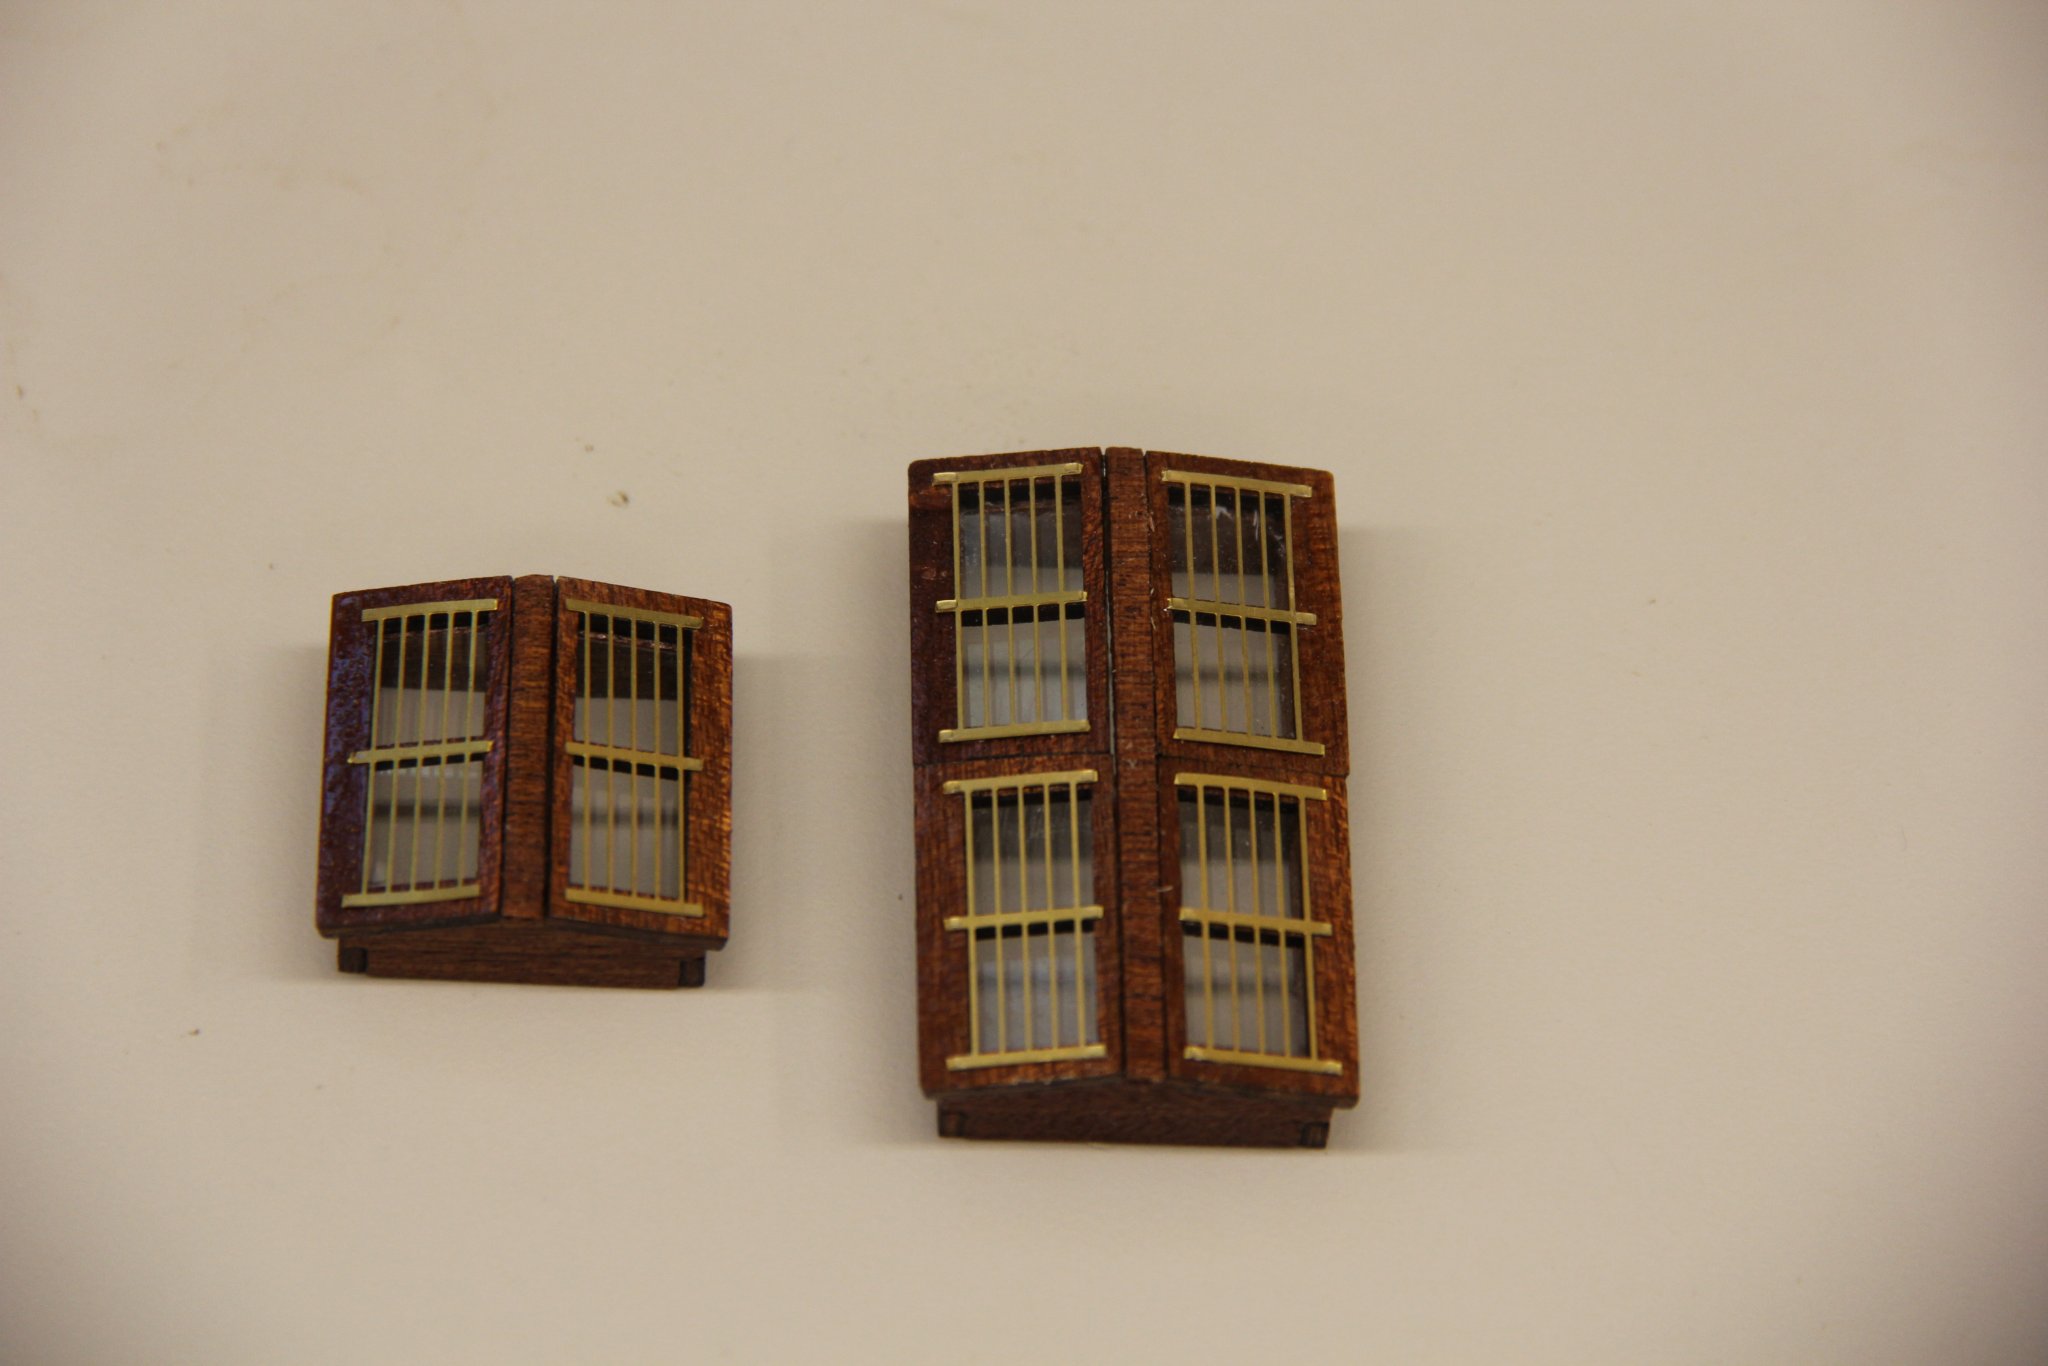
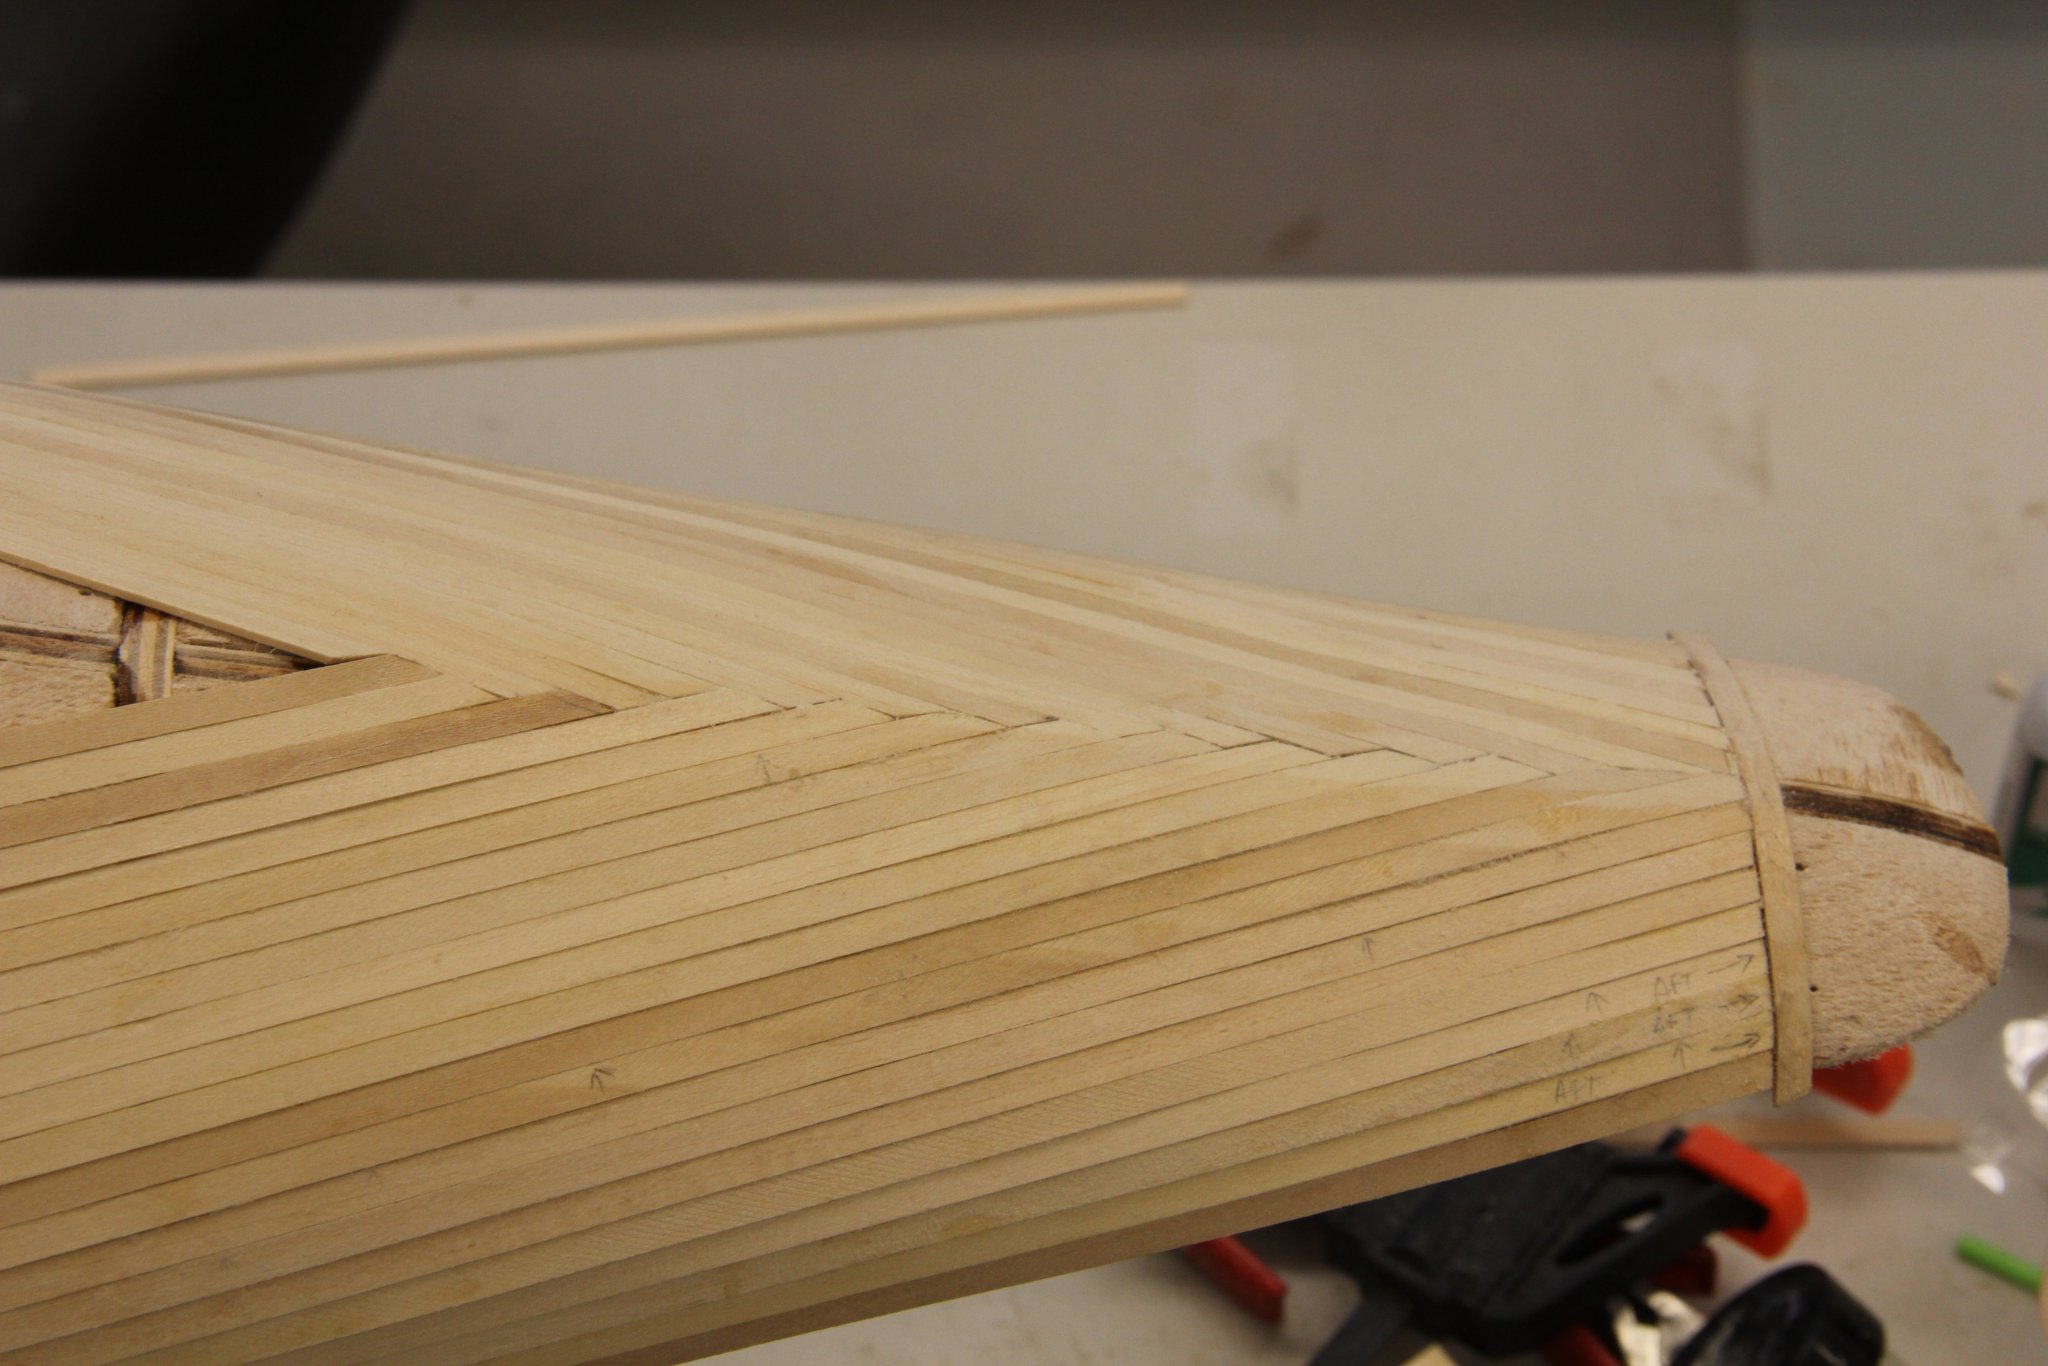
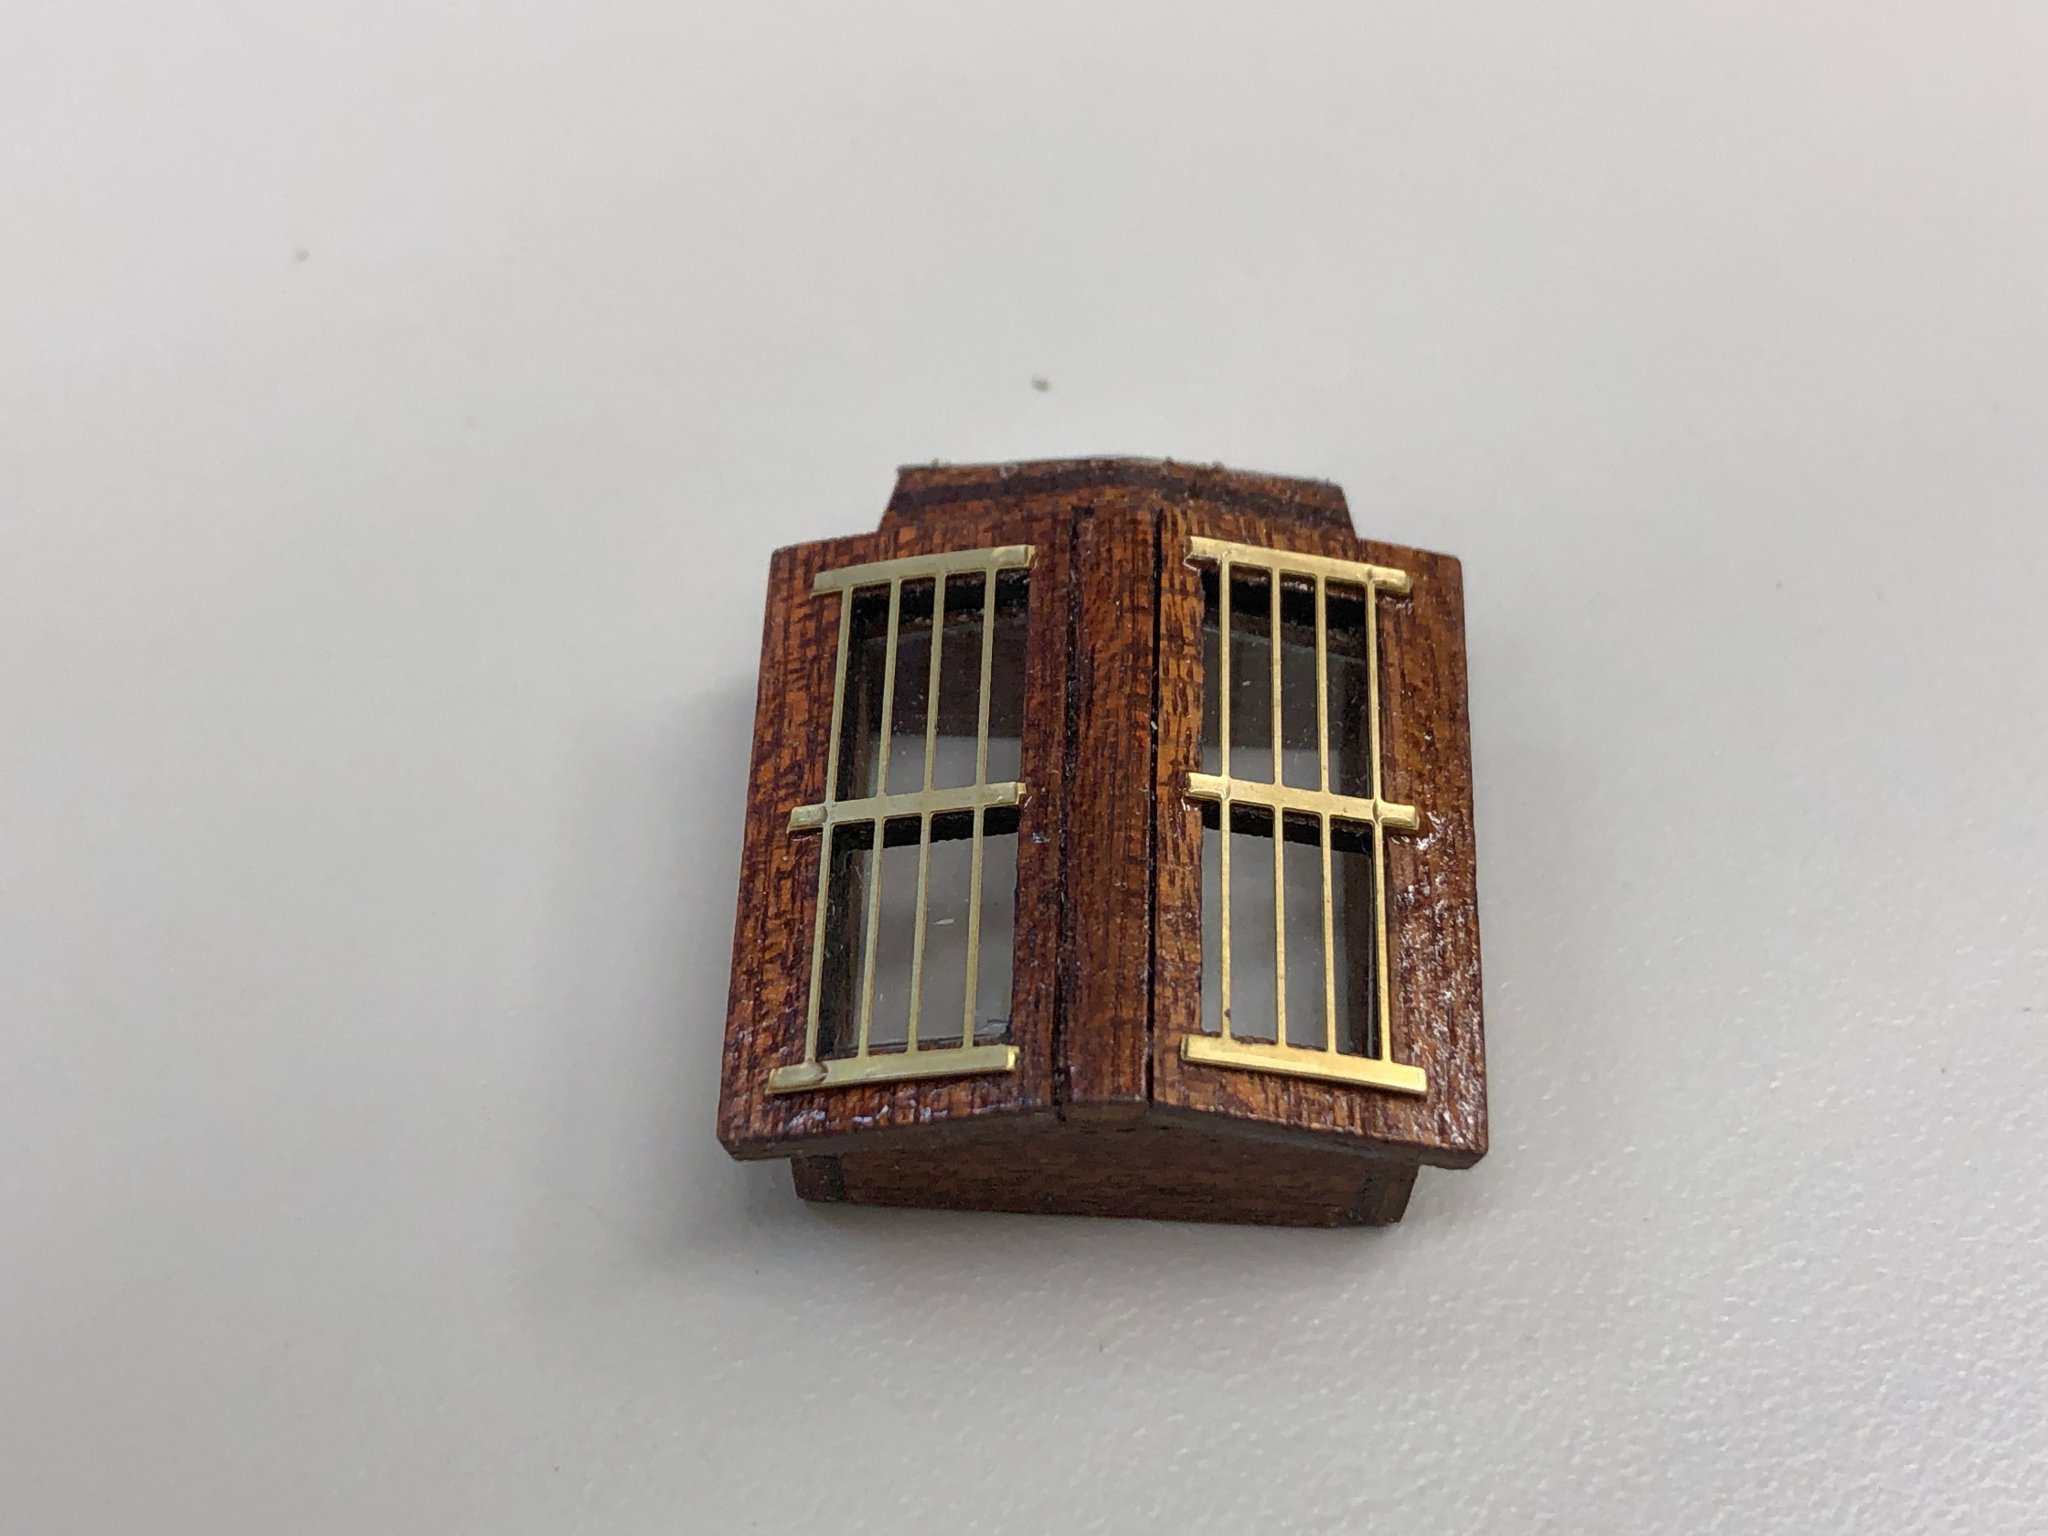
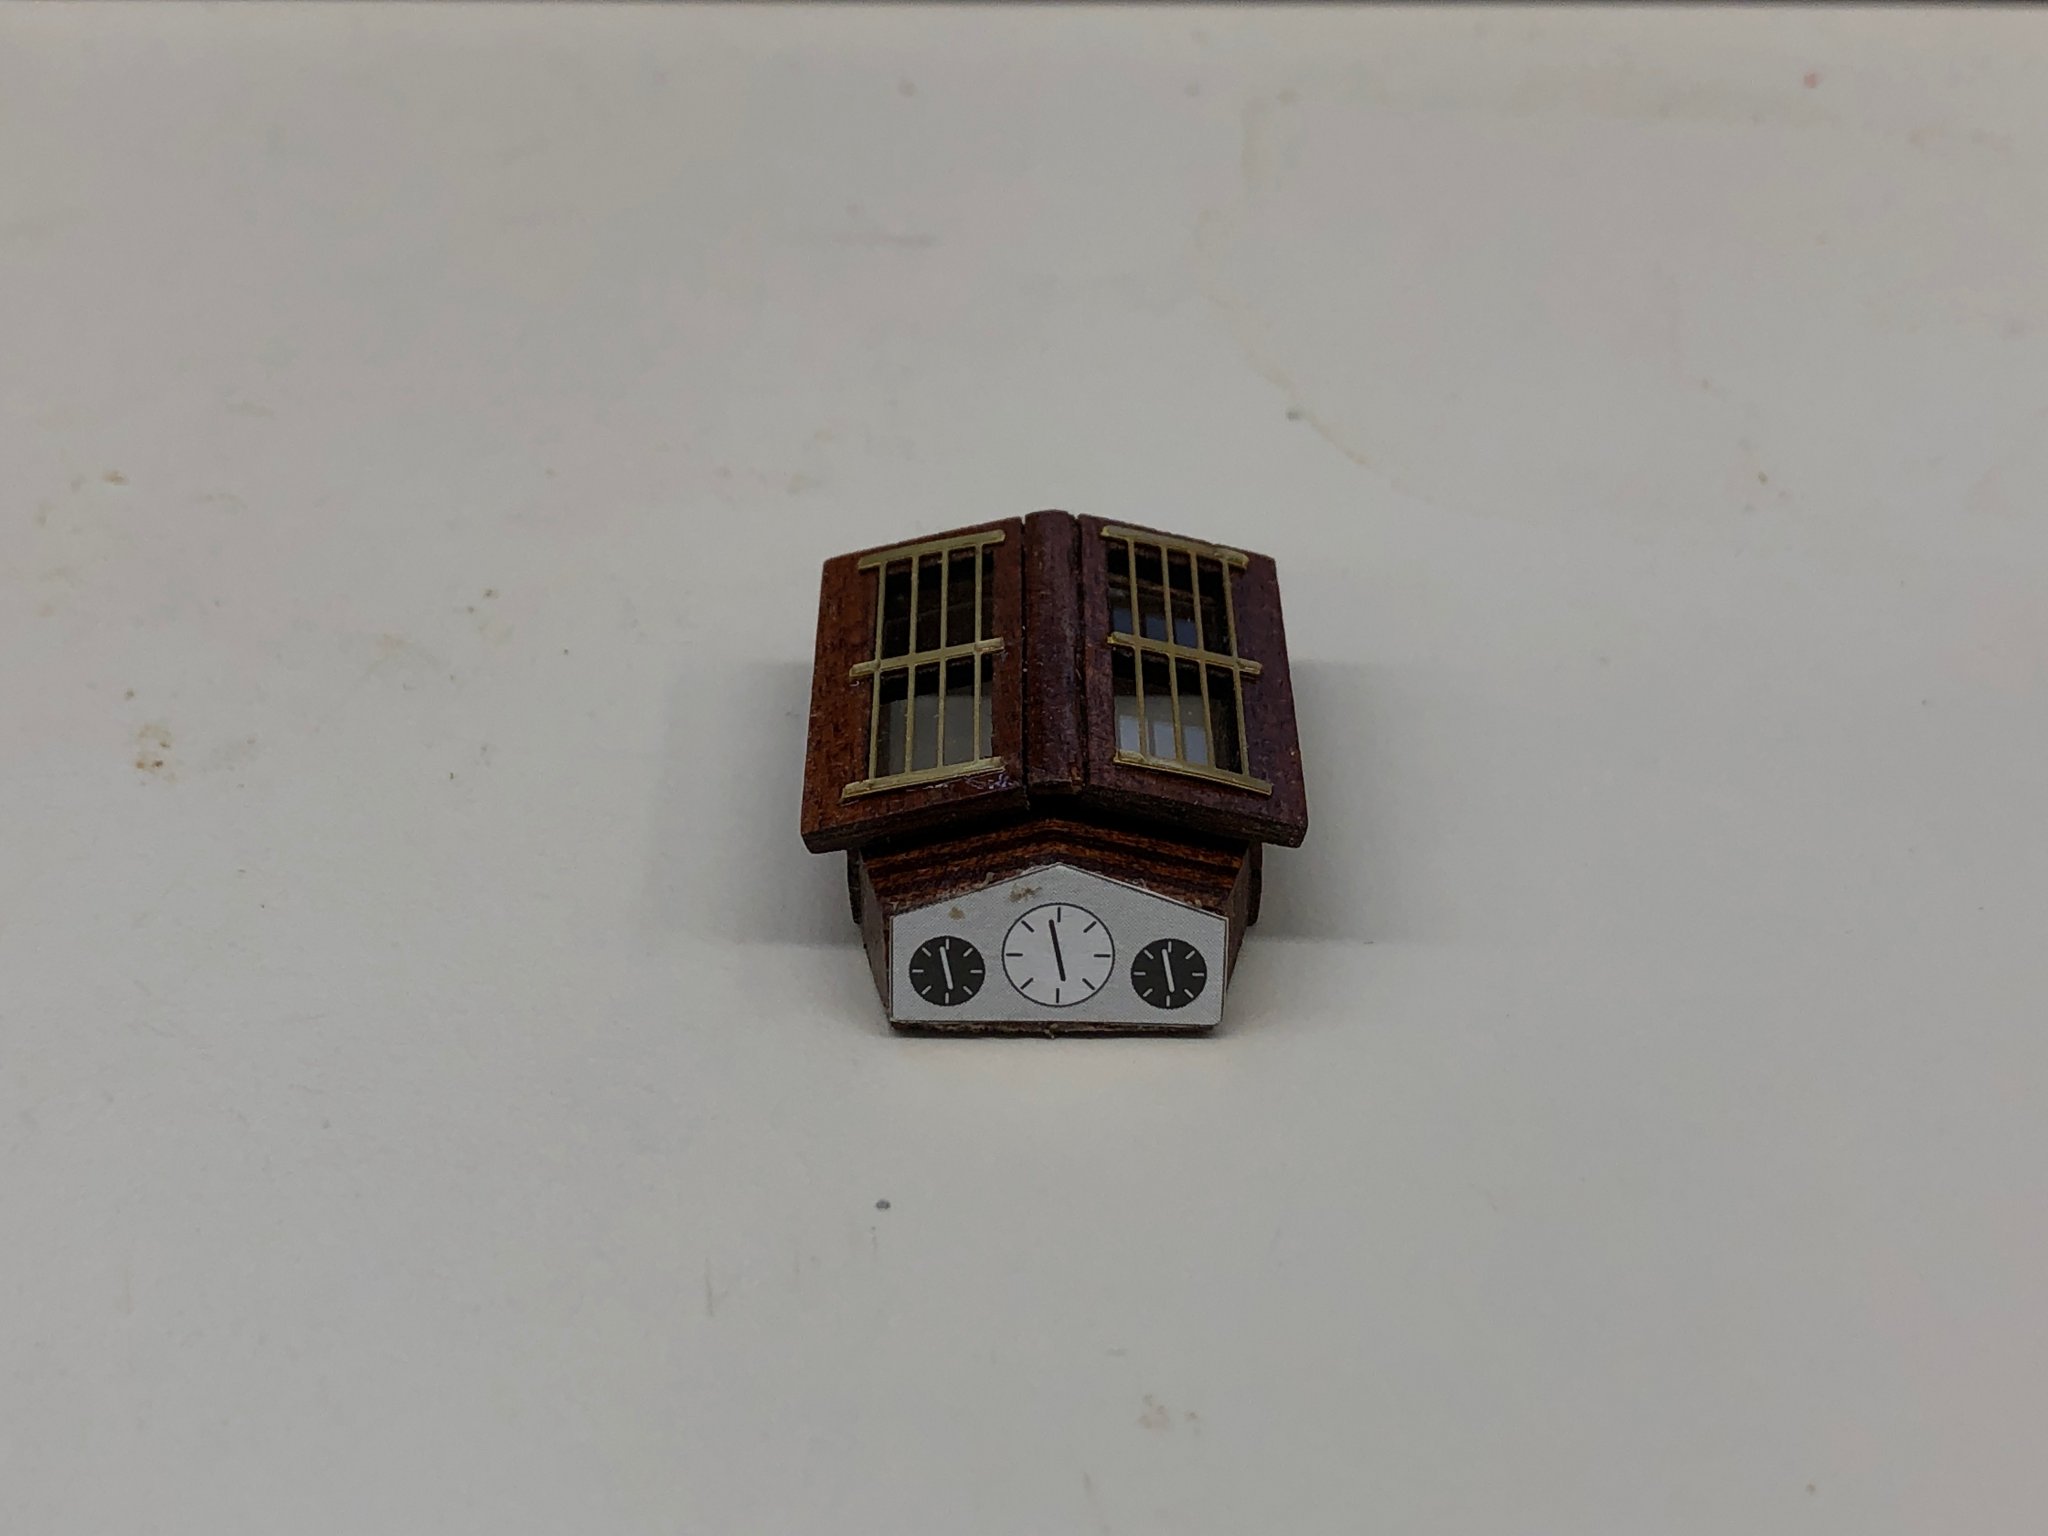
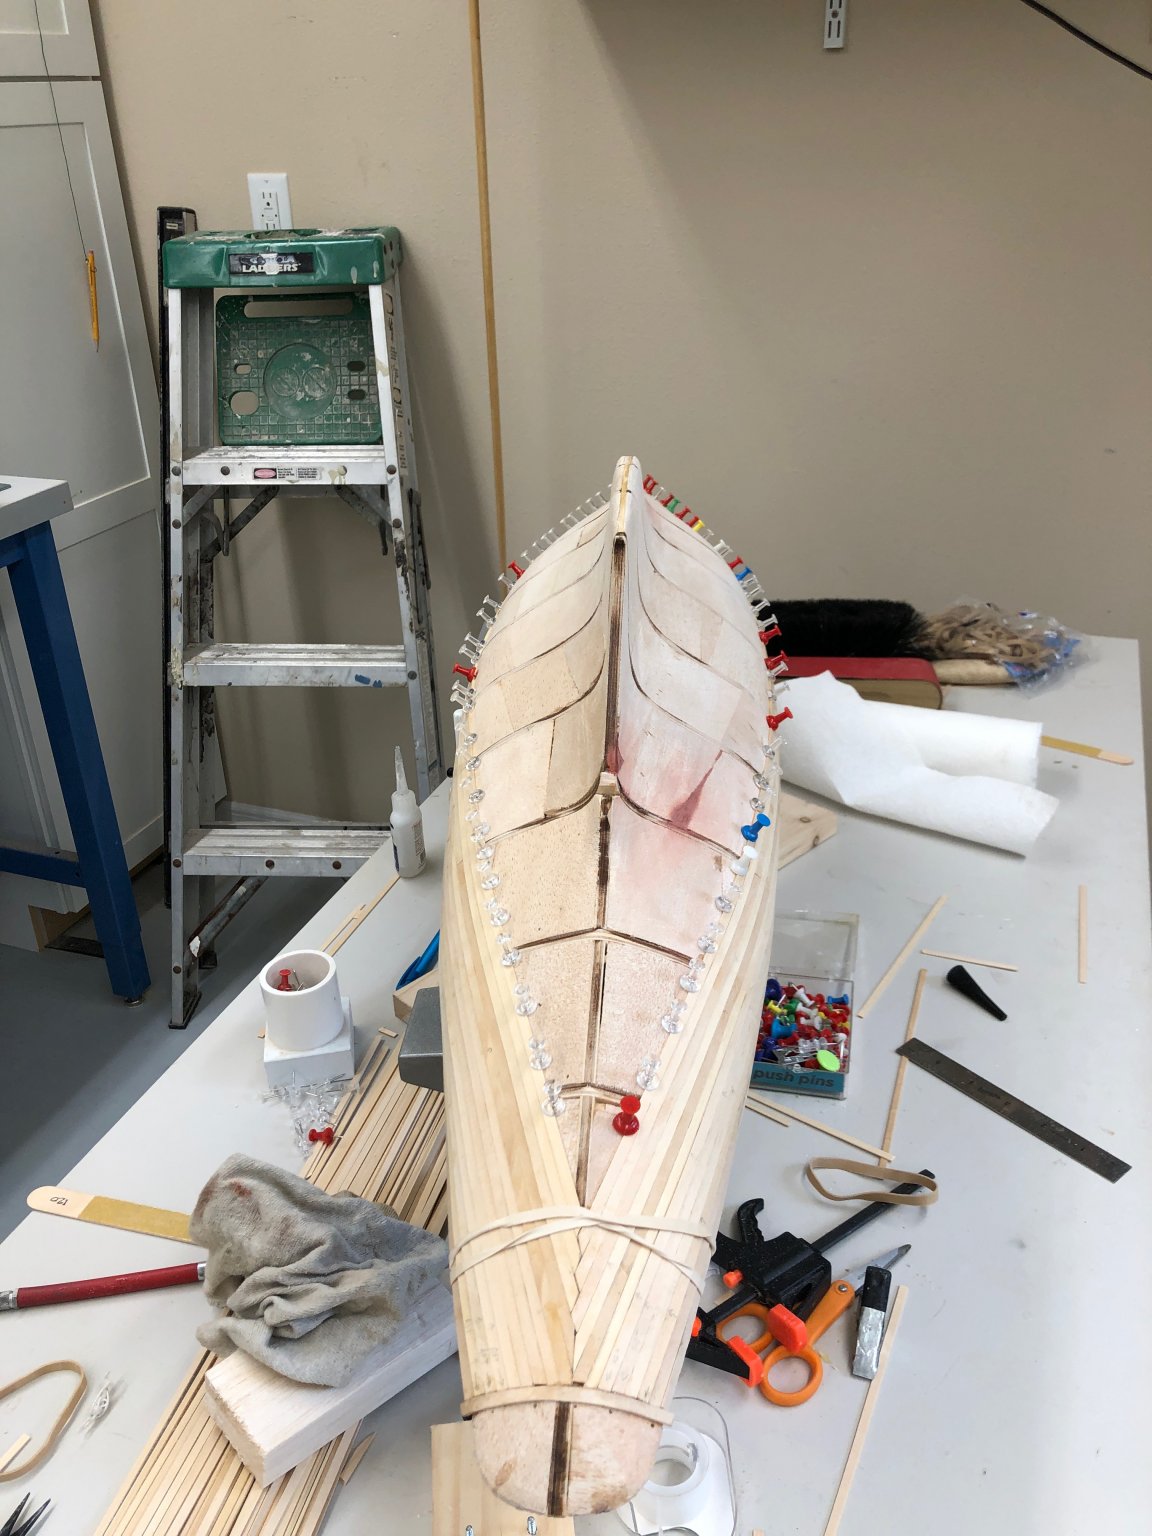
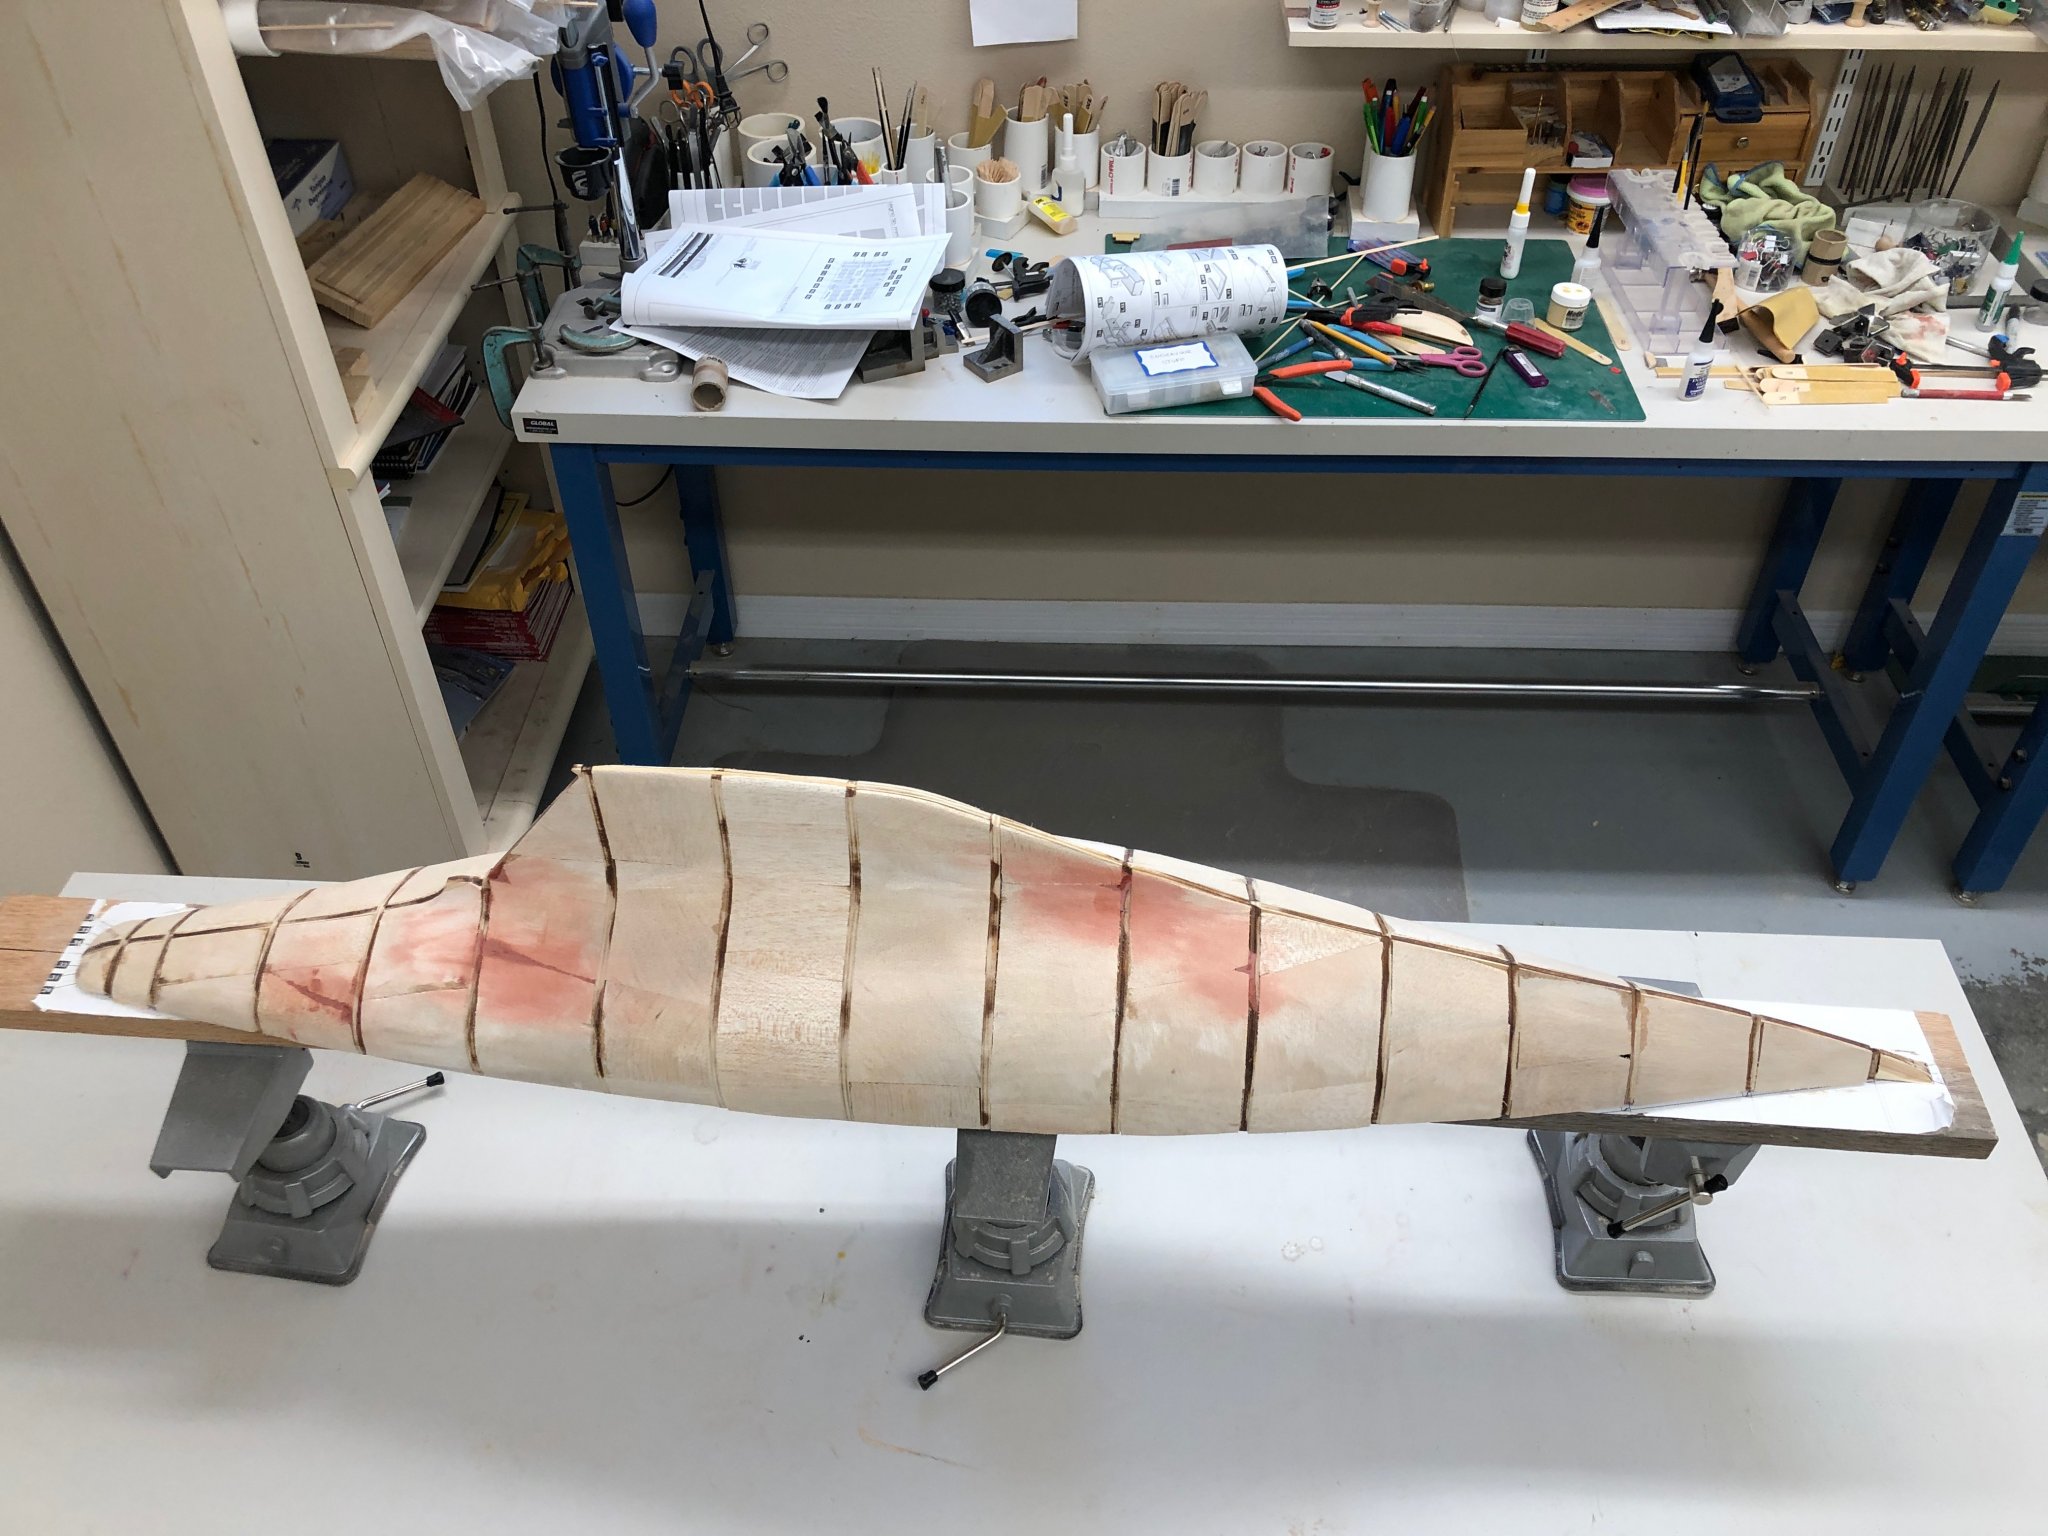
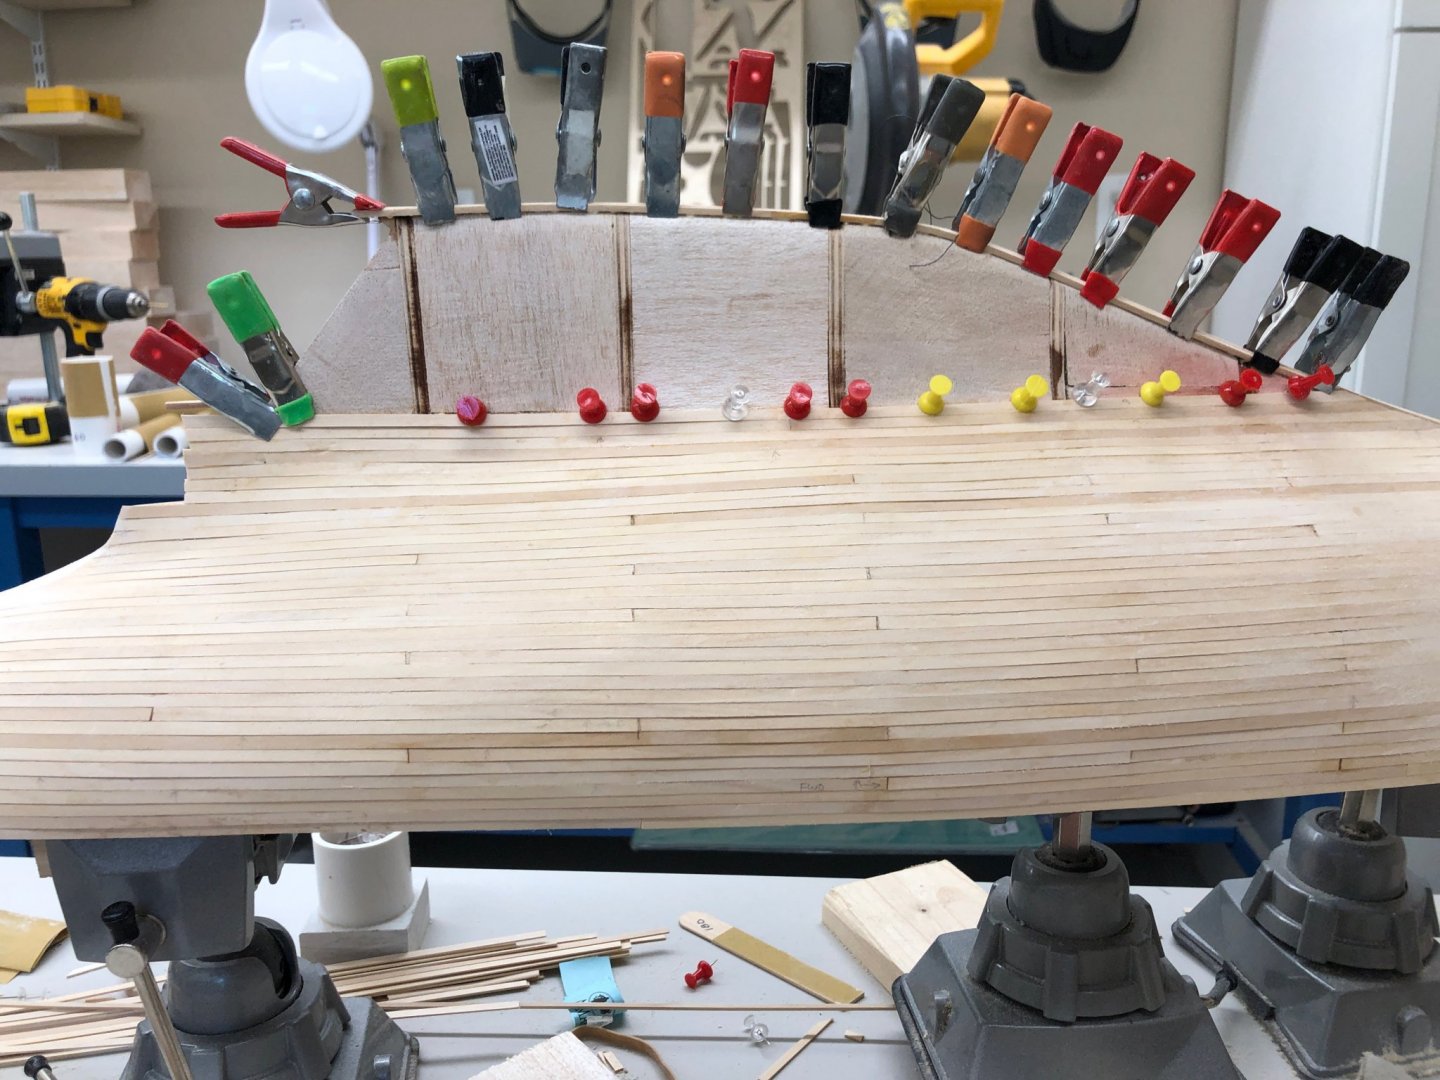
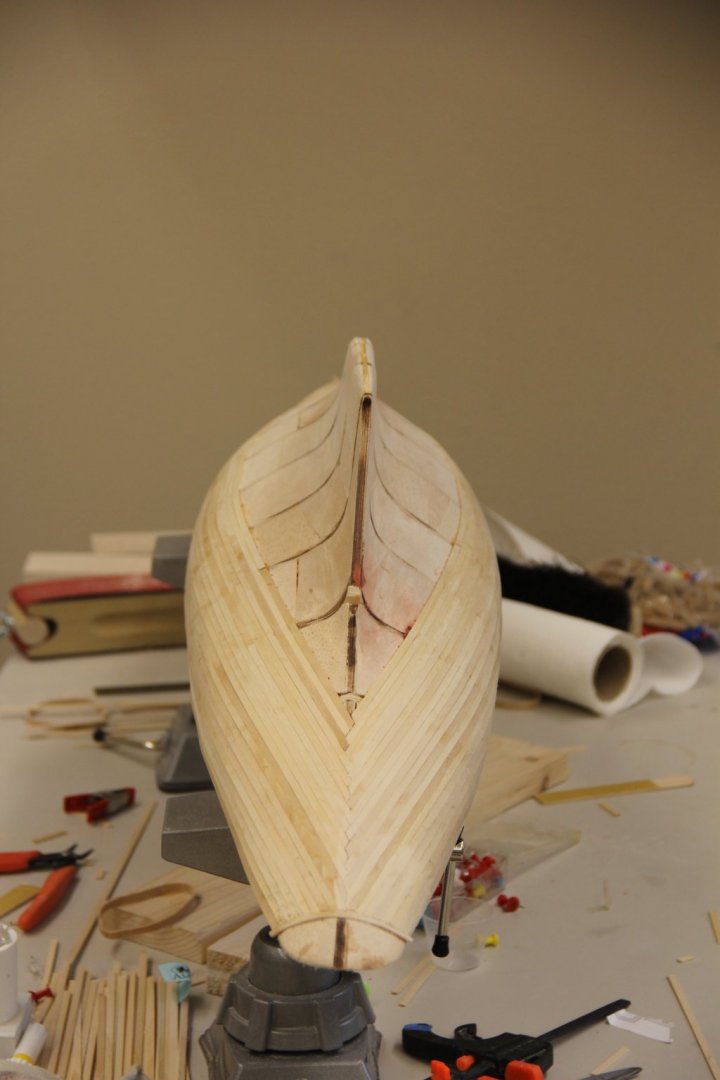
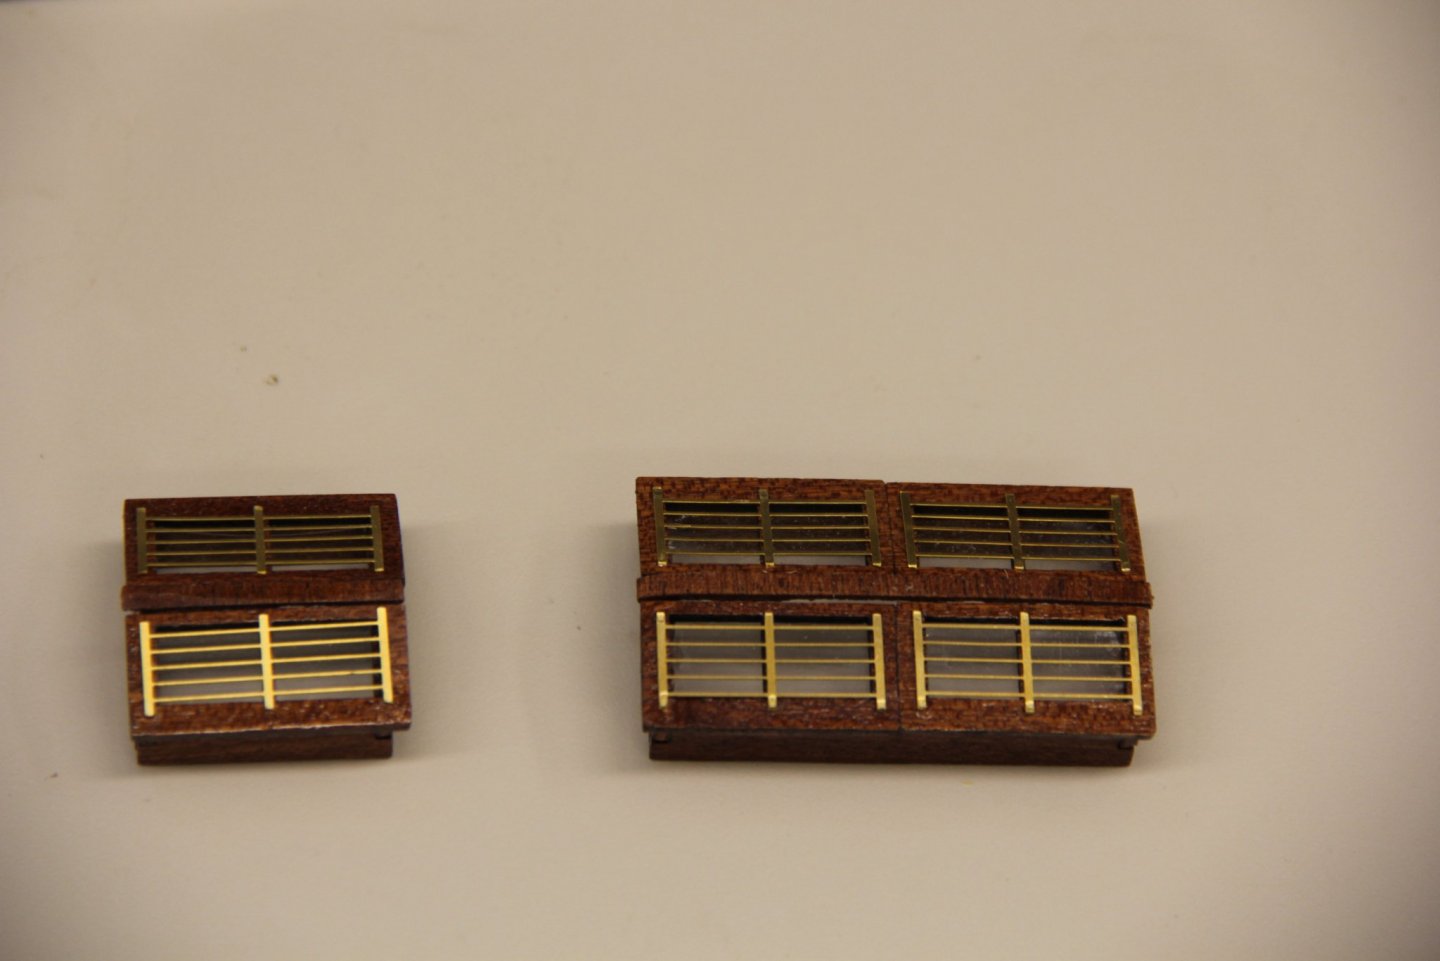
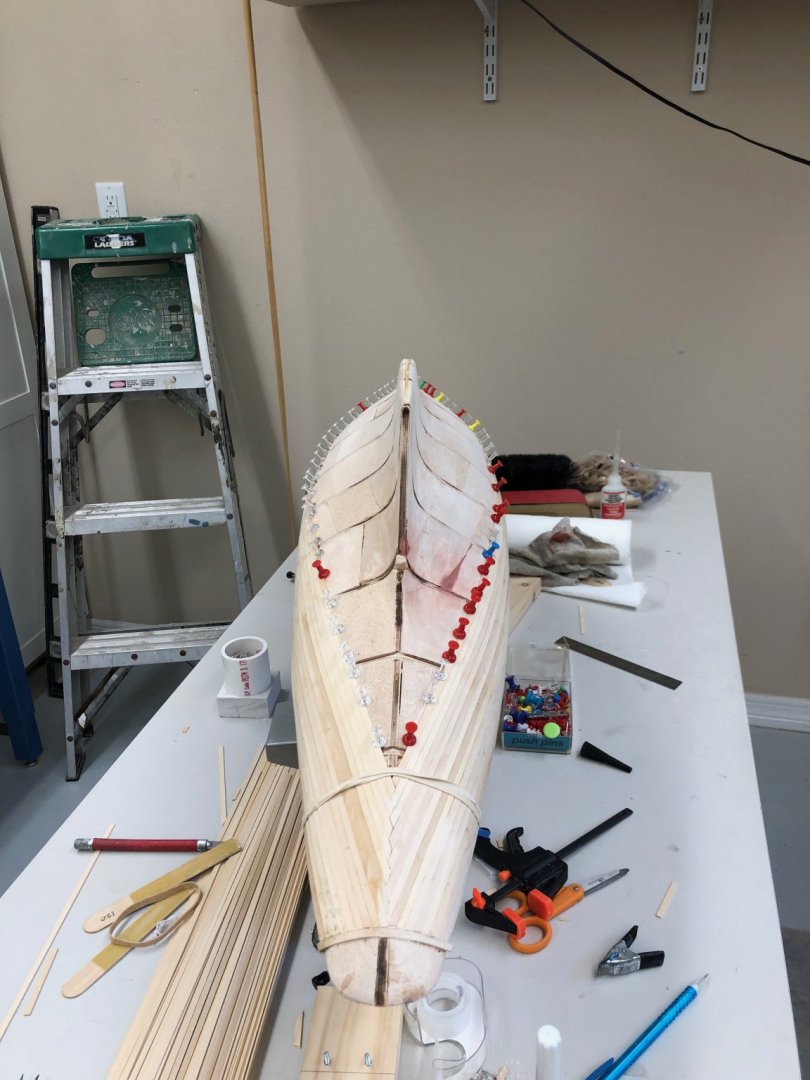
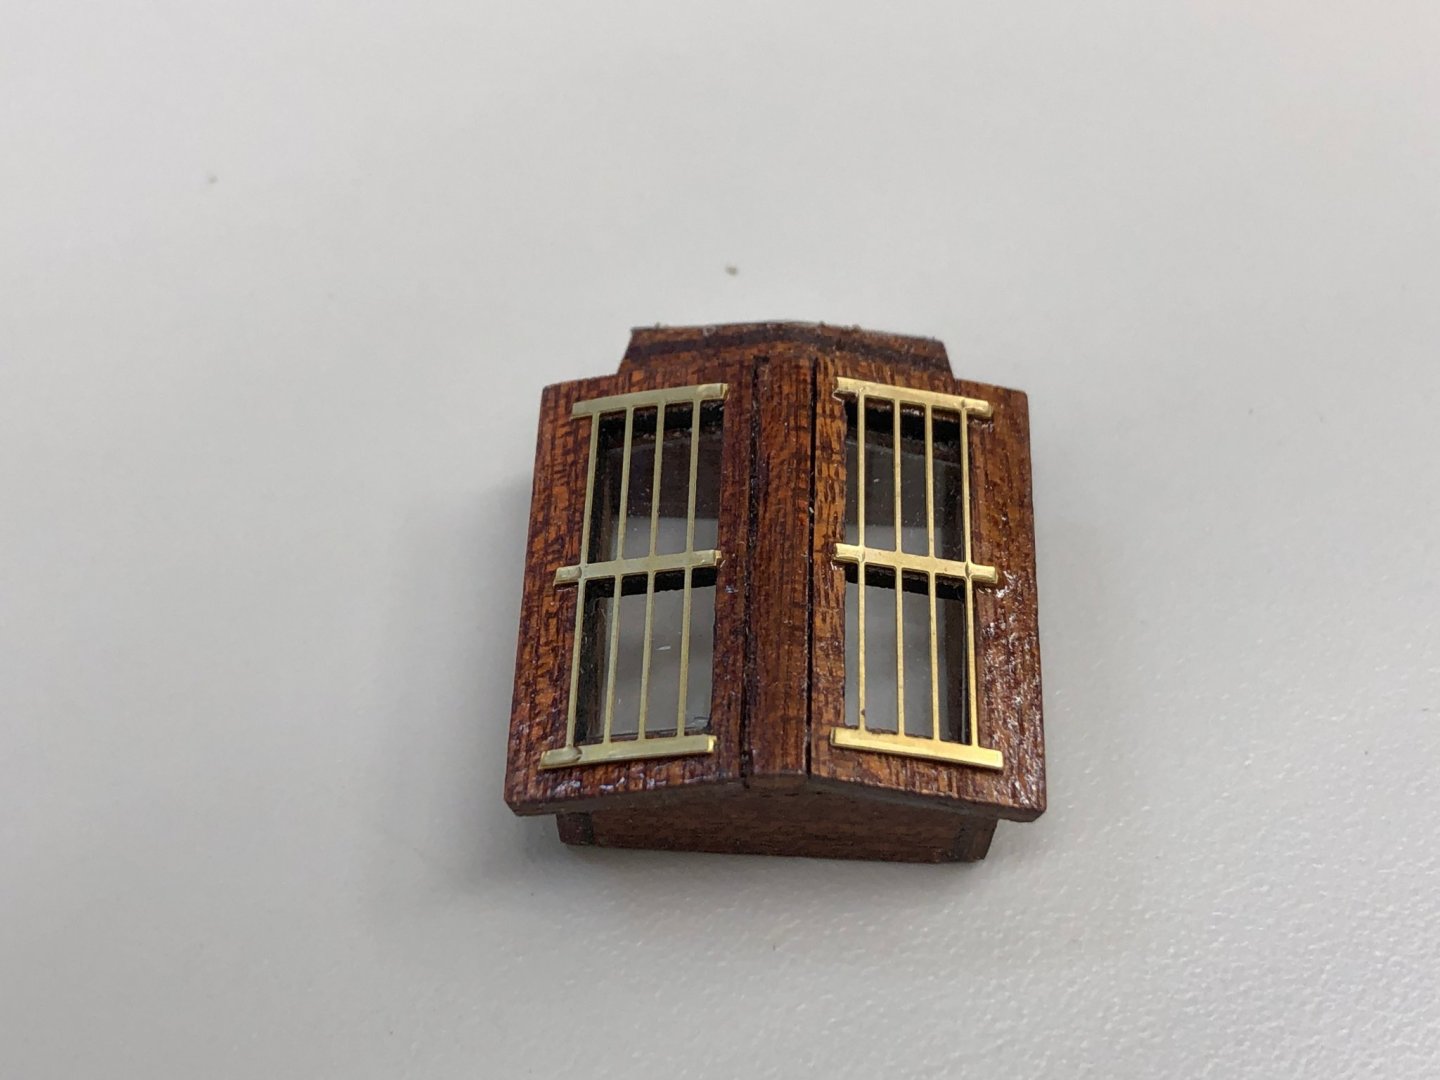
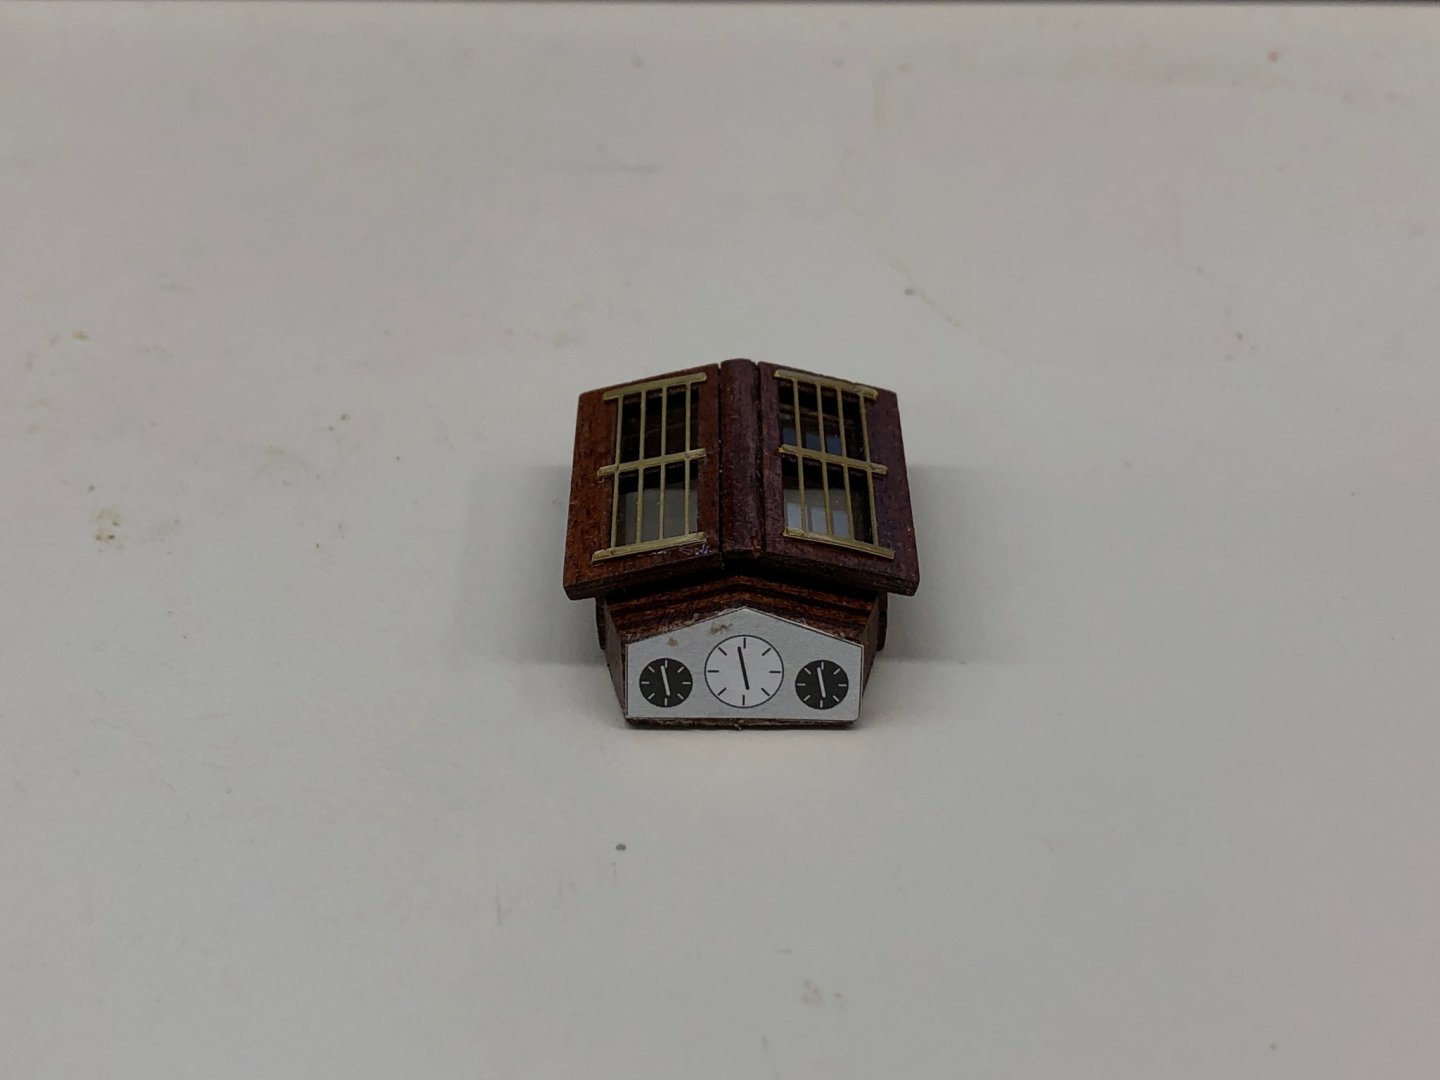
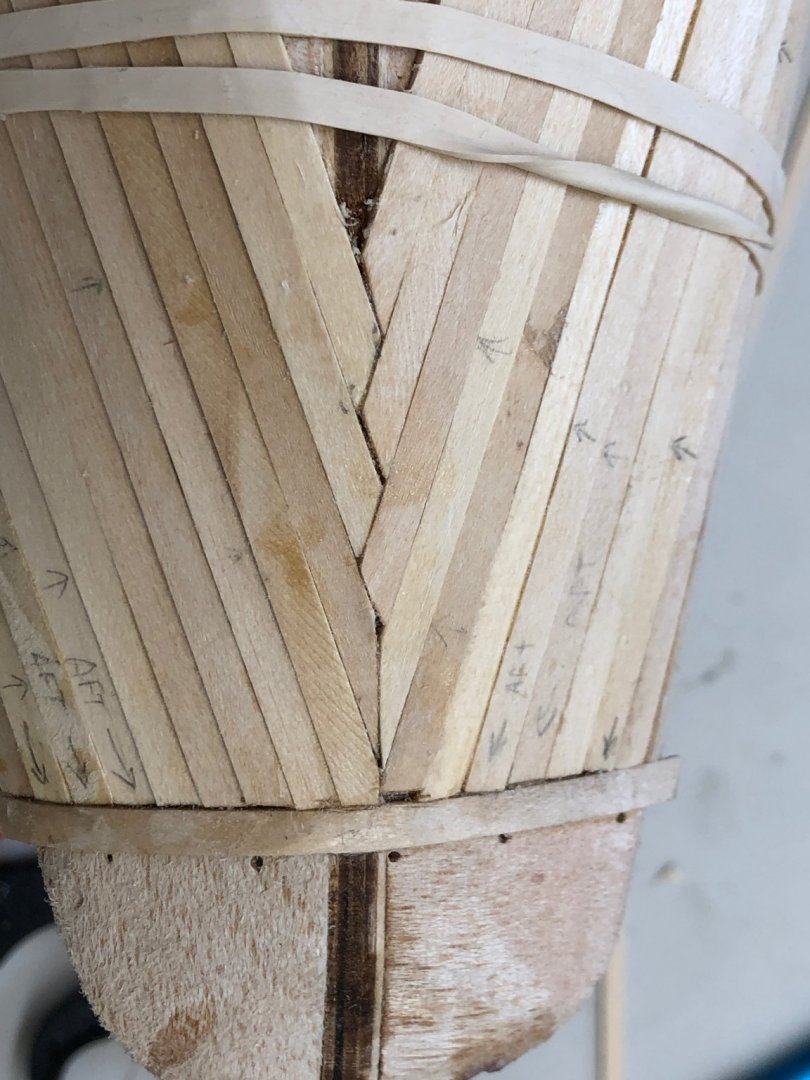
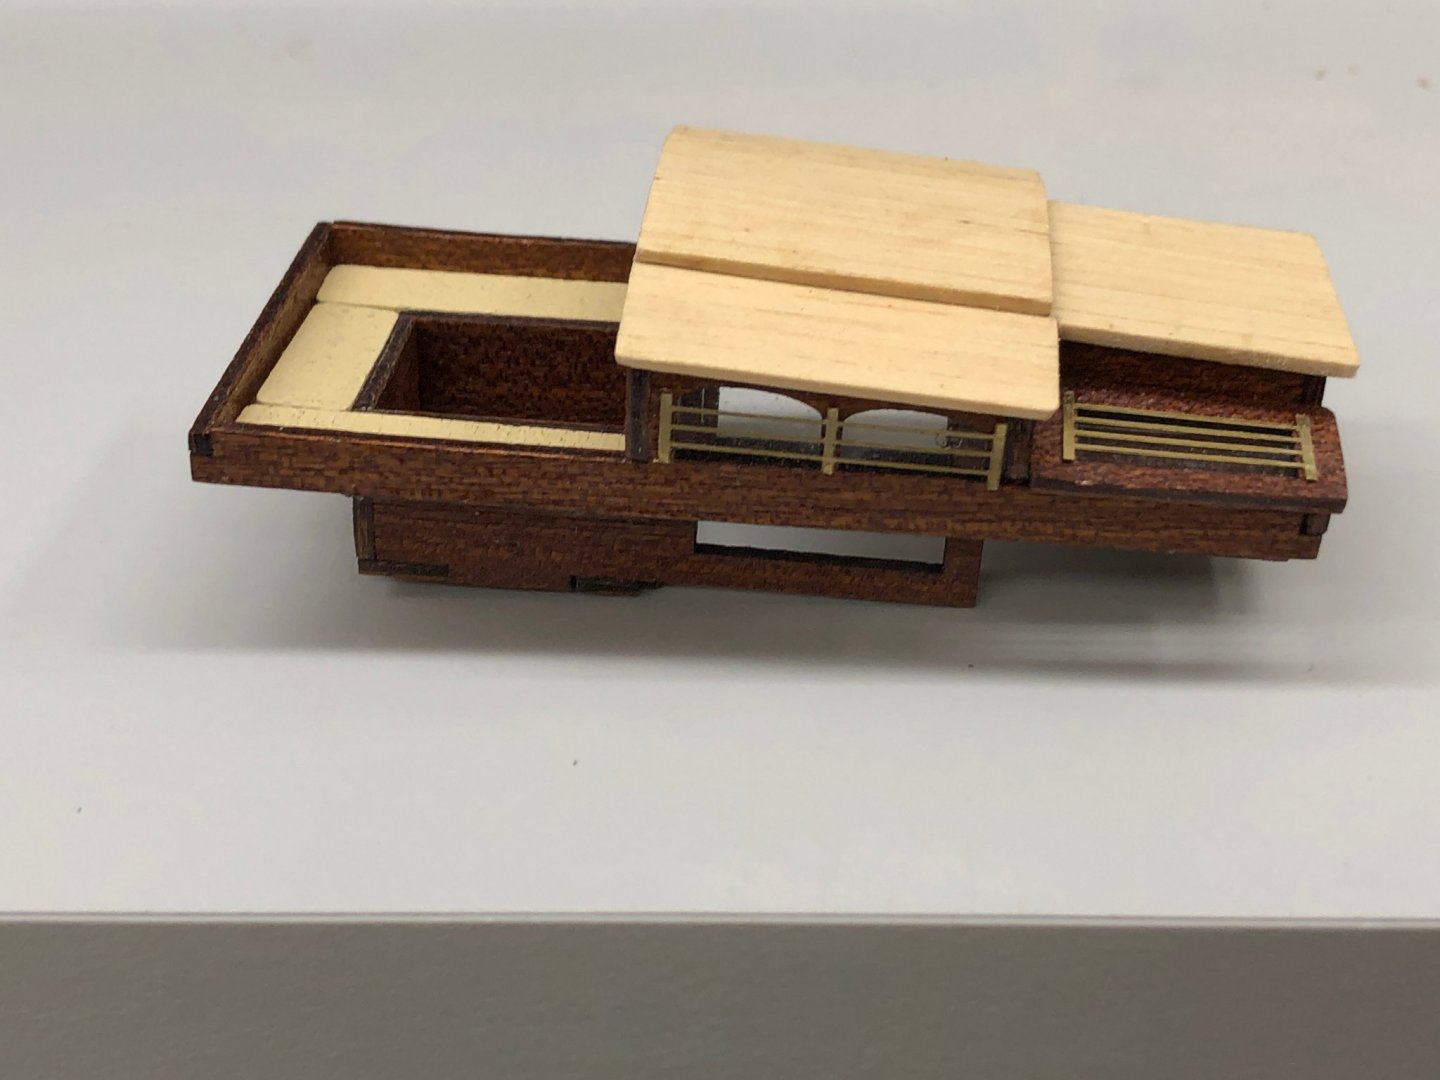
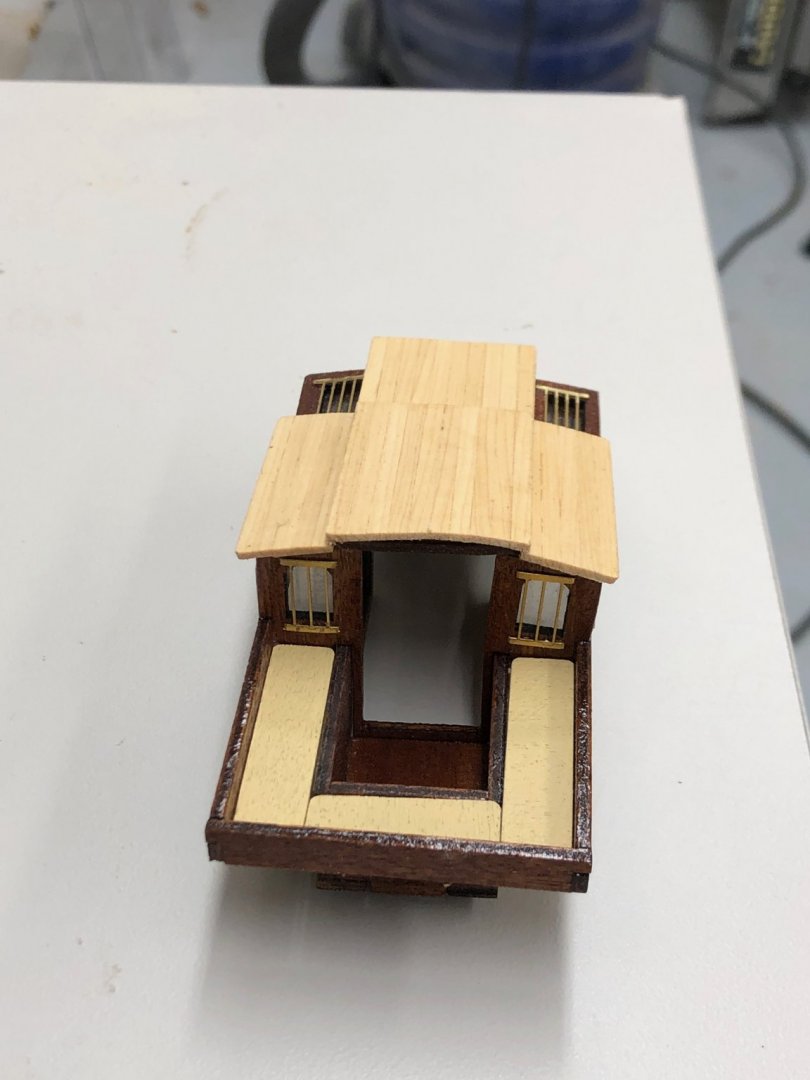
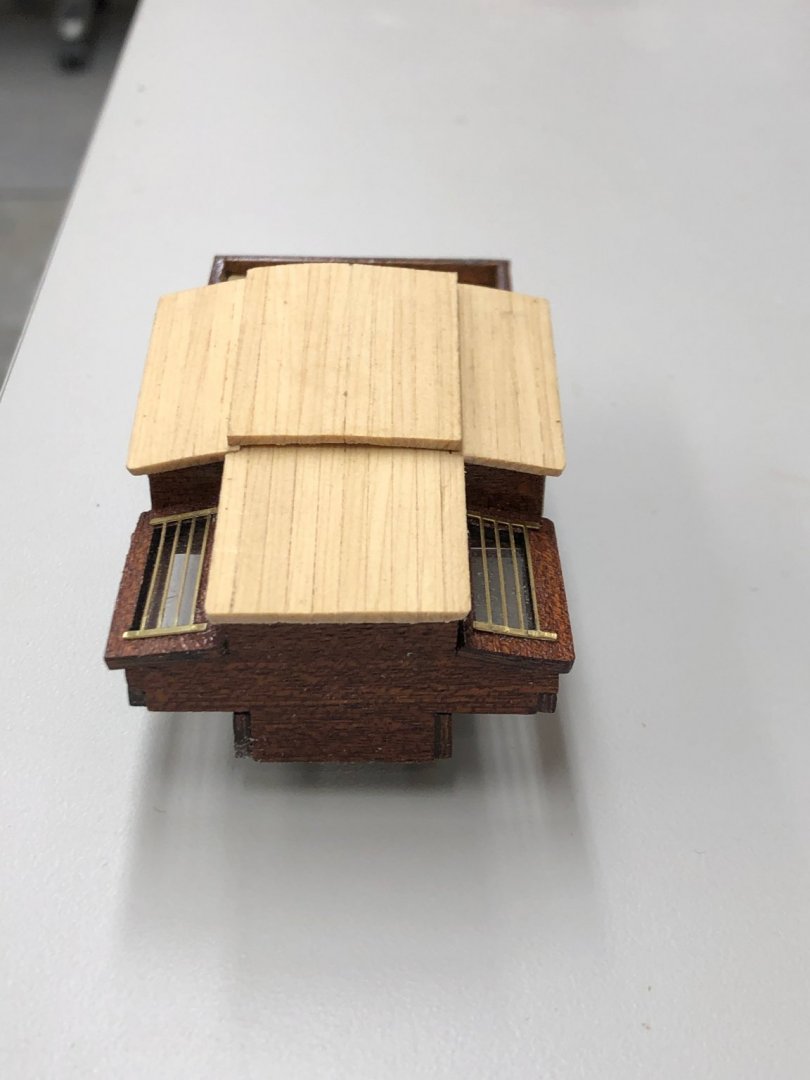
Planking continues, 21 rows on each side now. Here are pictures without all the pin heads. I also noted an error in the stern herringbone. I apparently started again on the same side I finished the previous planking session so had to correct that to keep the "seam" more or less on the centerline. I am almost to the point where I have to decide how to handle the area just above the rudder. I am not sure but my initial take is to put a piece of planking down the centerline and mate the hull planking to that. Trying to bend the planking around that flat seems to be in the "too hard" pile and it would make little if any difference under the paint. Also have much of the rest of the deck furniture completed. Here are them other two skylights and the compass less the chart case and base which are still in the "paint shop".

-
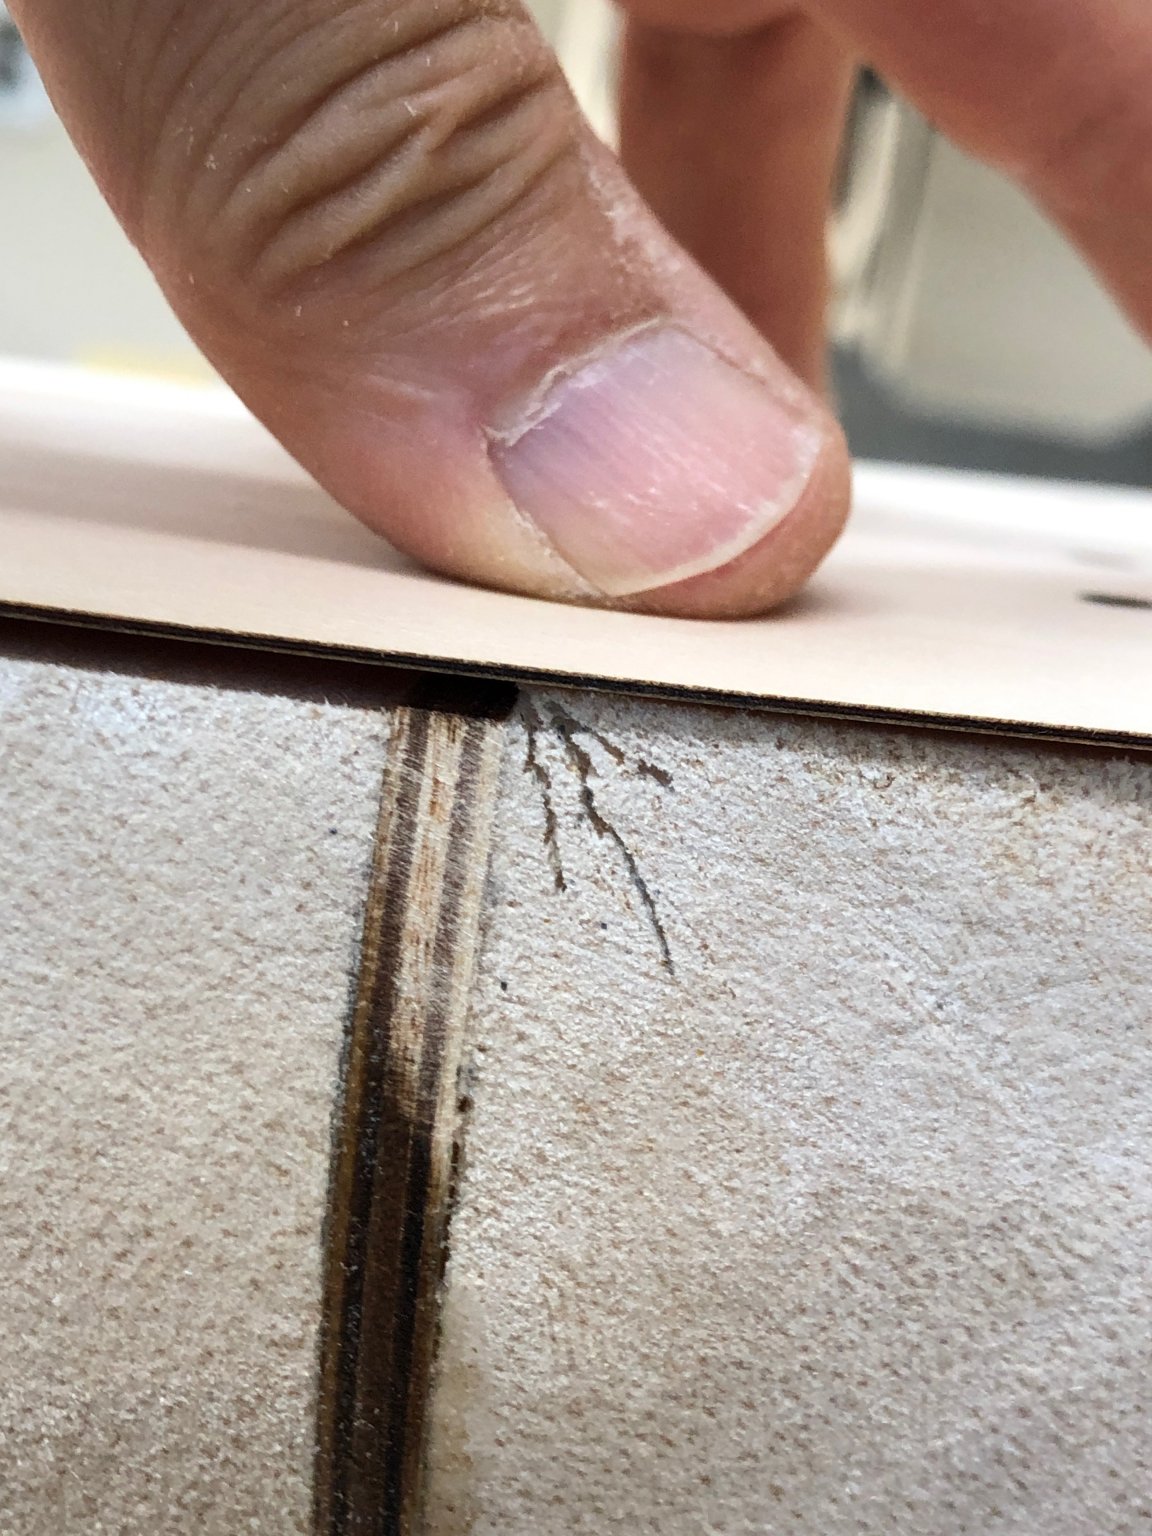
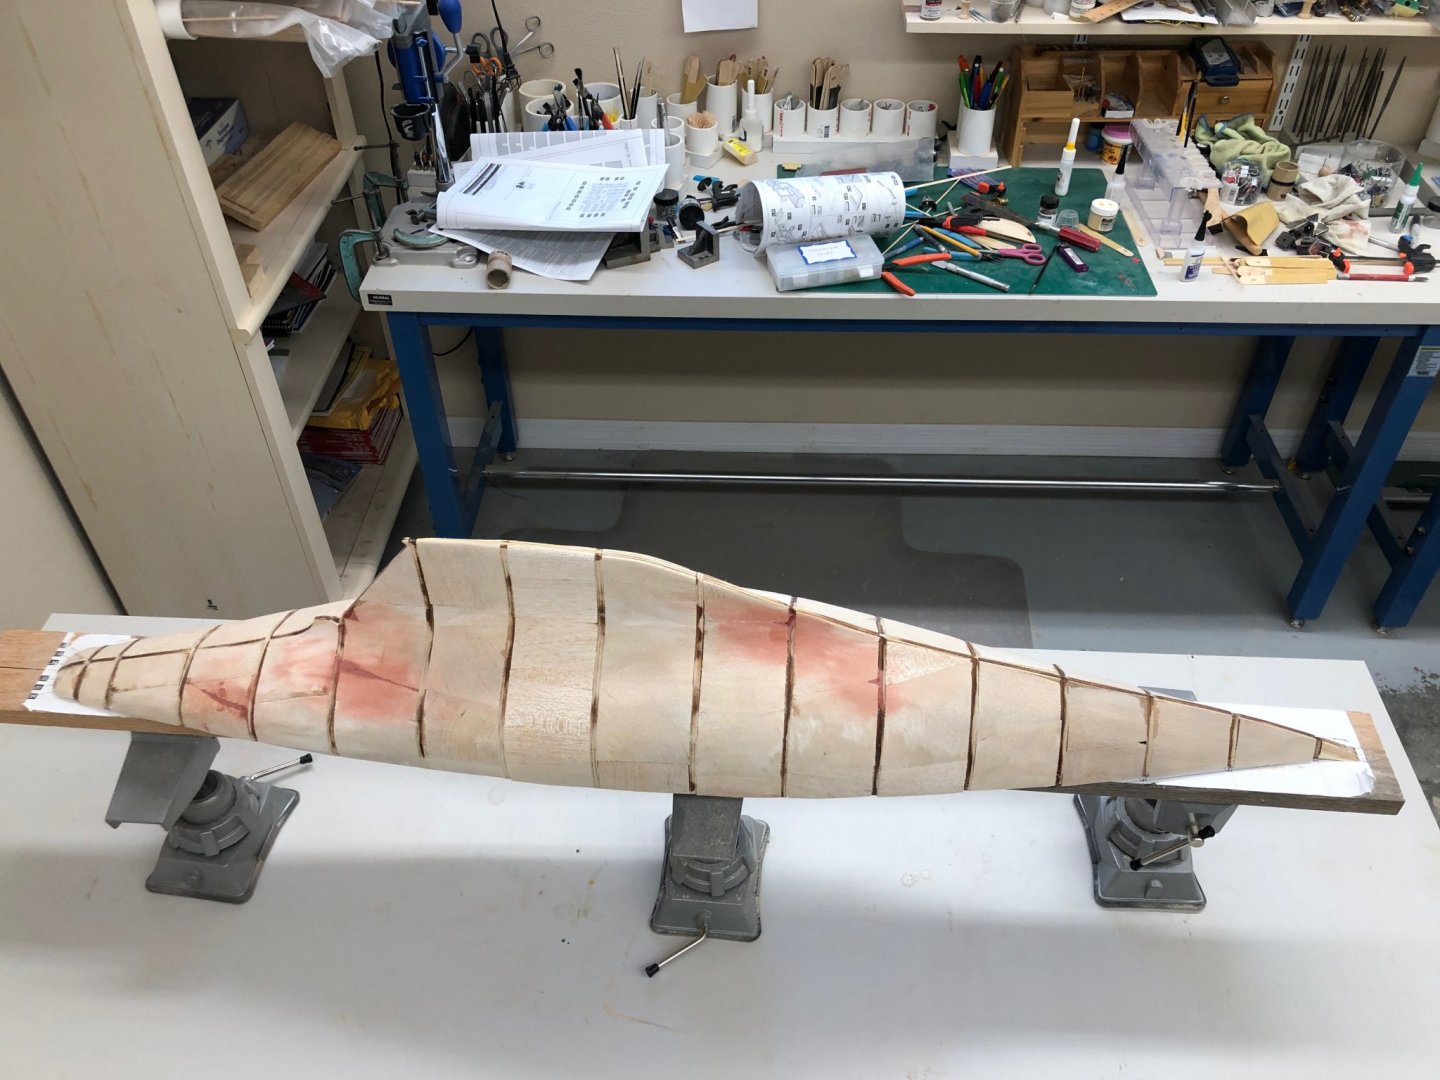
Yves - much as I would like to blame something else I am pretty sure (since the planks were not wet) that this is just another case of modeler inattention - I was focused on the other end of the plank and failed to notice that I had pulled the forward end "off the mark" so to speak. Yes, Bondo will cover this and the other "errors" (of omission and commission) that have already happened or are yet to happen.
-
Welcome Keith - I can make pretty quick progress since I am retired and have got the other "To Do" list more or less under control. Fifteen rows done on both sides. Finished the "Skylight C". I decided not to use the kit pieces for the instrument cluster extension on the front since it was from the birch (or at least light colored wood) plywood. I cut some of the edge from the mahogany sheet and glued them up to approximately the correct thickness then used the disk sander to get it shaped per the instructions. Seems to have come out okay. Not sure I care for the edges of the plywood showing but I can live with that rather than having to paint.

-
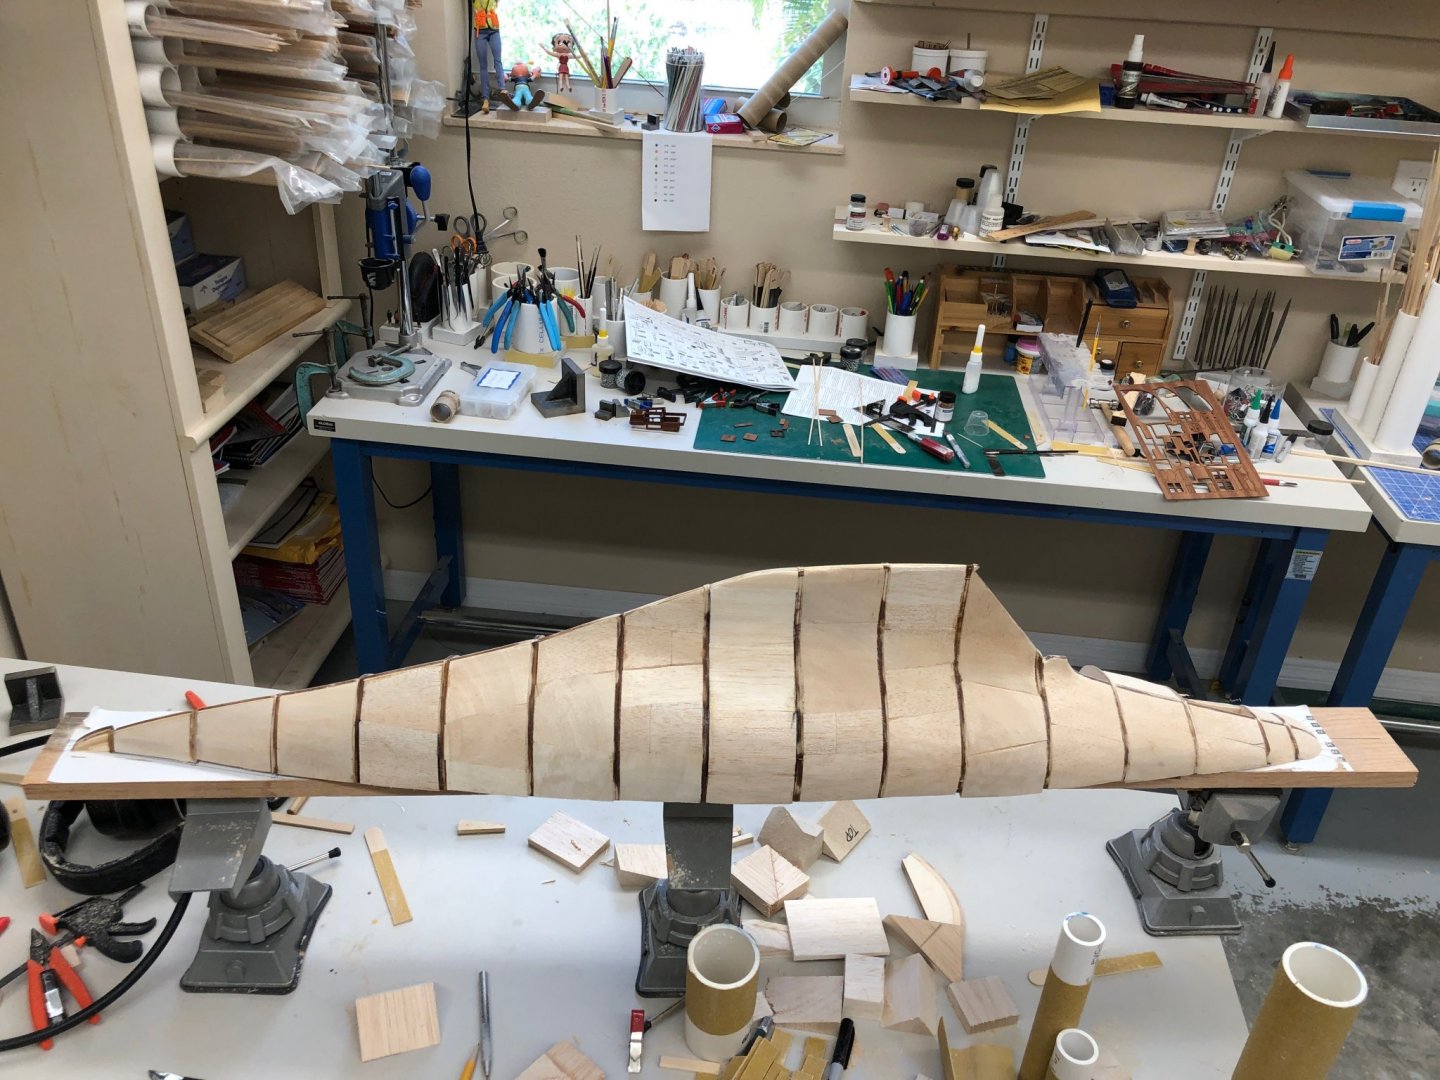
The planking seems to go on and on. I trimmed up the bow and clearly something slipped about row 8. Not sure how I managed to not get that seated correctly but hopefully Bondo will fix it. Decided on the herringbone treatment mat the stern "seam". Will have to try harder to get the seams tighter although Bondo can cover a lot of errors (so can a second planking but I am giving serious consideration to not doing the second planking if I can get the first one smooth enough. The "mahogany" provided with the kit for the second planking is not really suitable for a good glossy paint job. I think the grain is too course - at least that has been my experience with the small pieces that I used in then deck furniture. I am sure it would look great with a natural finish but that is not my plan, at least not today. So, here we are with 13 rows on the starboard side and 12 on the port.


-
Plugging away on the planking - here we have 9 rows done on both sides. Seems to be going okay, the planks are very close to matched up at both the bow and stern. Just starting to hit the center line aft. Will have to decide very shortly (row 10) whether to have the stern "seam" herringbone or just butt joints on the centerline.
-
Tom, I took the cowards way out - I used a piece of 1/32" brass rod above the hounds on the Top Gallant masts.
-
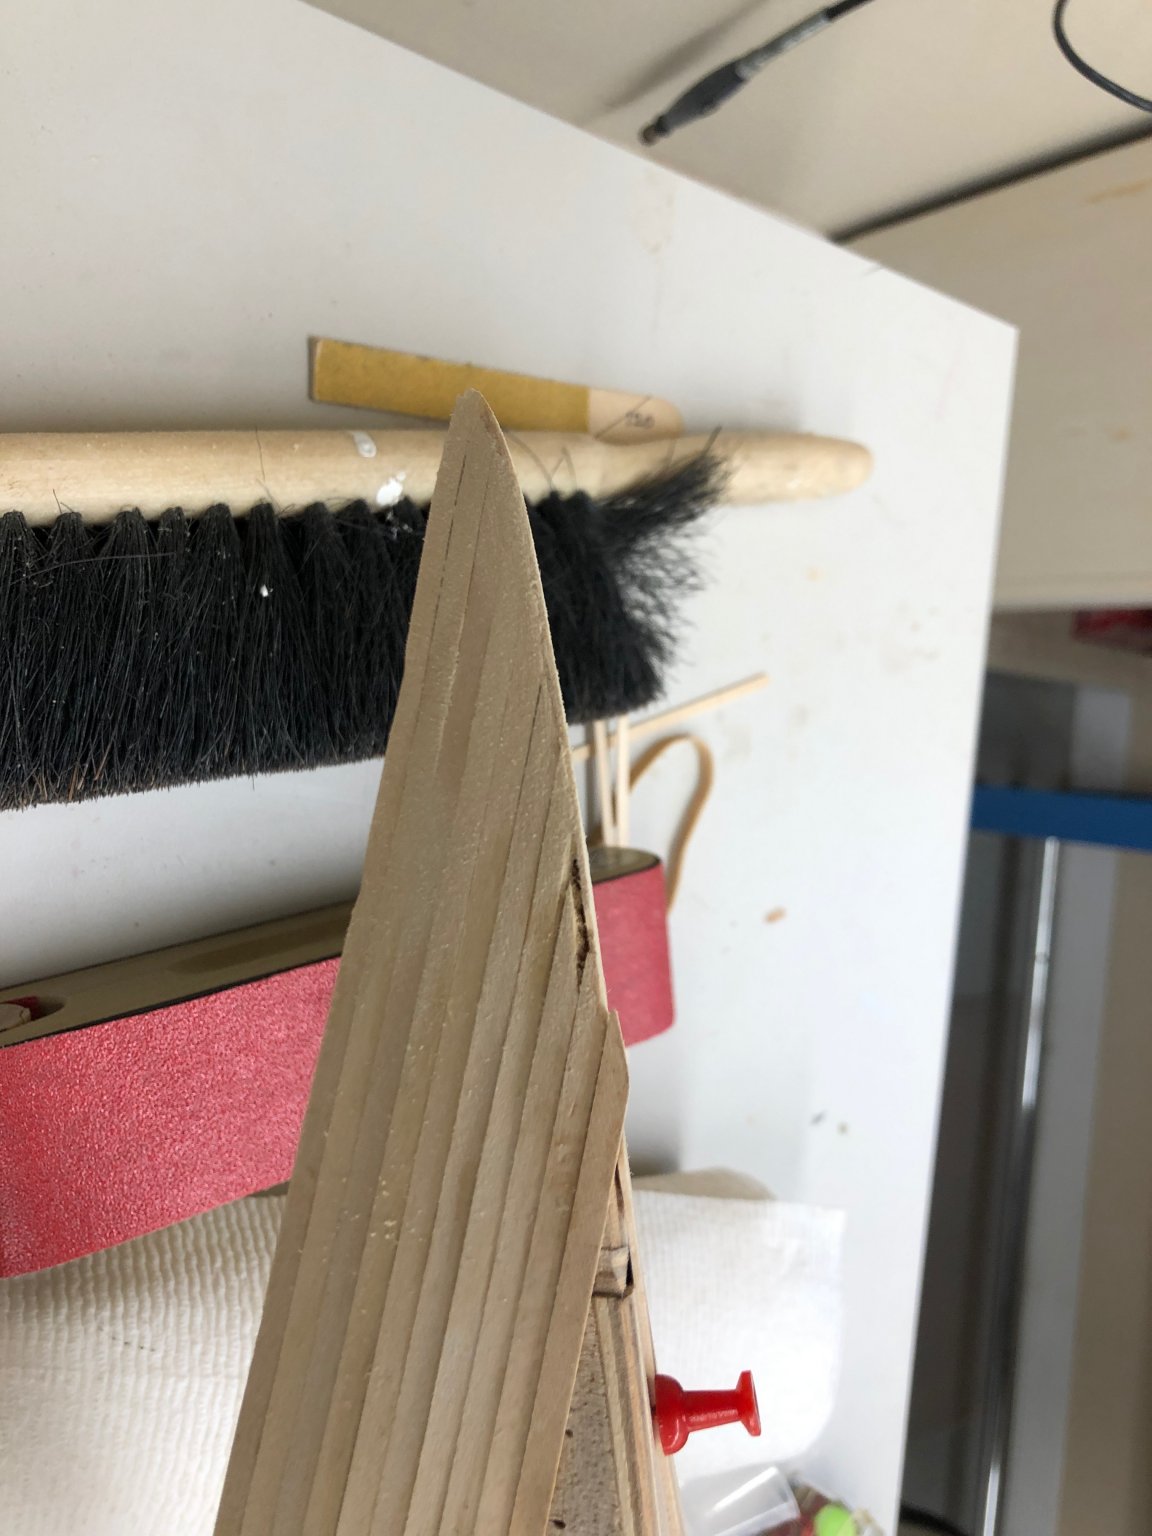
Let the planking begin. As mentioned previously, in contravention of the instructions I am starting at the deck and working down, at least until that proves untenable as some of the build logs shift to the bulb as the sides approach the forefoot. Anyway, for now I have one row on the starboard side and three on the port. I started using only push pins but decided to use rubber bands amidships where I can get enough spacing between the pins to stretch the 3" rubber bands I bought. I will have to get more pins tomorrow as the 100 I bought don't seem able to do what I did on the port side on the starboard as well. It takes something like 40+ pins to cover the part shown in the pictures. So far things seem to be going okay - I use wood glue (Titebond Original) on the balsa filler and thick CA on the frames. I have the wood glue in a squeeze bottle with a .025 tip which seems to put out enough glue to bond without lots to clean up. I built a guide out of spare balsa for beveling the bottom side of the planks to get a better fit. I used the disk sander to put a bevel on the balsa the cut a slot with the table saw ab out half the width of the plank then covered the edge of the balsa with tape to keep from sanding it as well as the plank. With the plank in the slot I use a sanding stick to bevel the exposed plank edge. I mark the plnk ahead of time so I know which side goes where - I don't want the bevel on the outside - don't ask me how I know. Here are two pictures if anyone is interested. I also finished the other two pieces of deck furniture with yellow cedar roofs. So here are some pictures of them. I am working the rest of the deck furniture between plankings. Some day I will figure out how to get the pictures in the correct order - but not today.

-
With the stern plank in place (I recognize that the stern plank is not in accordance with the plans, but I prefer this orientation and since the hull will be painted it really doesn't matter) I added the top plank on the port side. The instructions recommend starting at the keel bulge, but build logs on the site all started at the deck and worked down so I am following suit. While waiting for the balsa to arrive and various things to dry I did complete the major deck house structure. As I mentioned earlier I decided to use Alaskan Cedar (same wood as will be used for the deck) for the roof of the deck structures that do not have windowed skylights. This includes four sections on the deckhouse (two on the sides, and two on the centerline). I glued up sections of 3/32 X 1/16 cedar planks to make the roofs. I also painted the cockpit cushions a buff color so they are similar to the roof color (the picture on the kit box cover shows red cushions). Here is the first plank on the port side and a couple of views of the deckhouse.

-
I decided that the first plank should be at the stern so I have a place to start the first rows. I soaked the plank and have it pined down to dry. Hopefully this will make it easier to keep against the frame/filler.

-
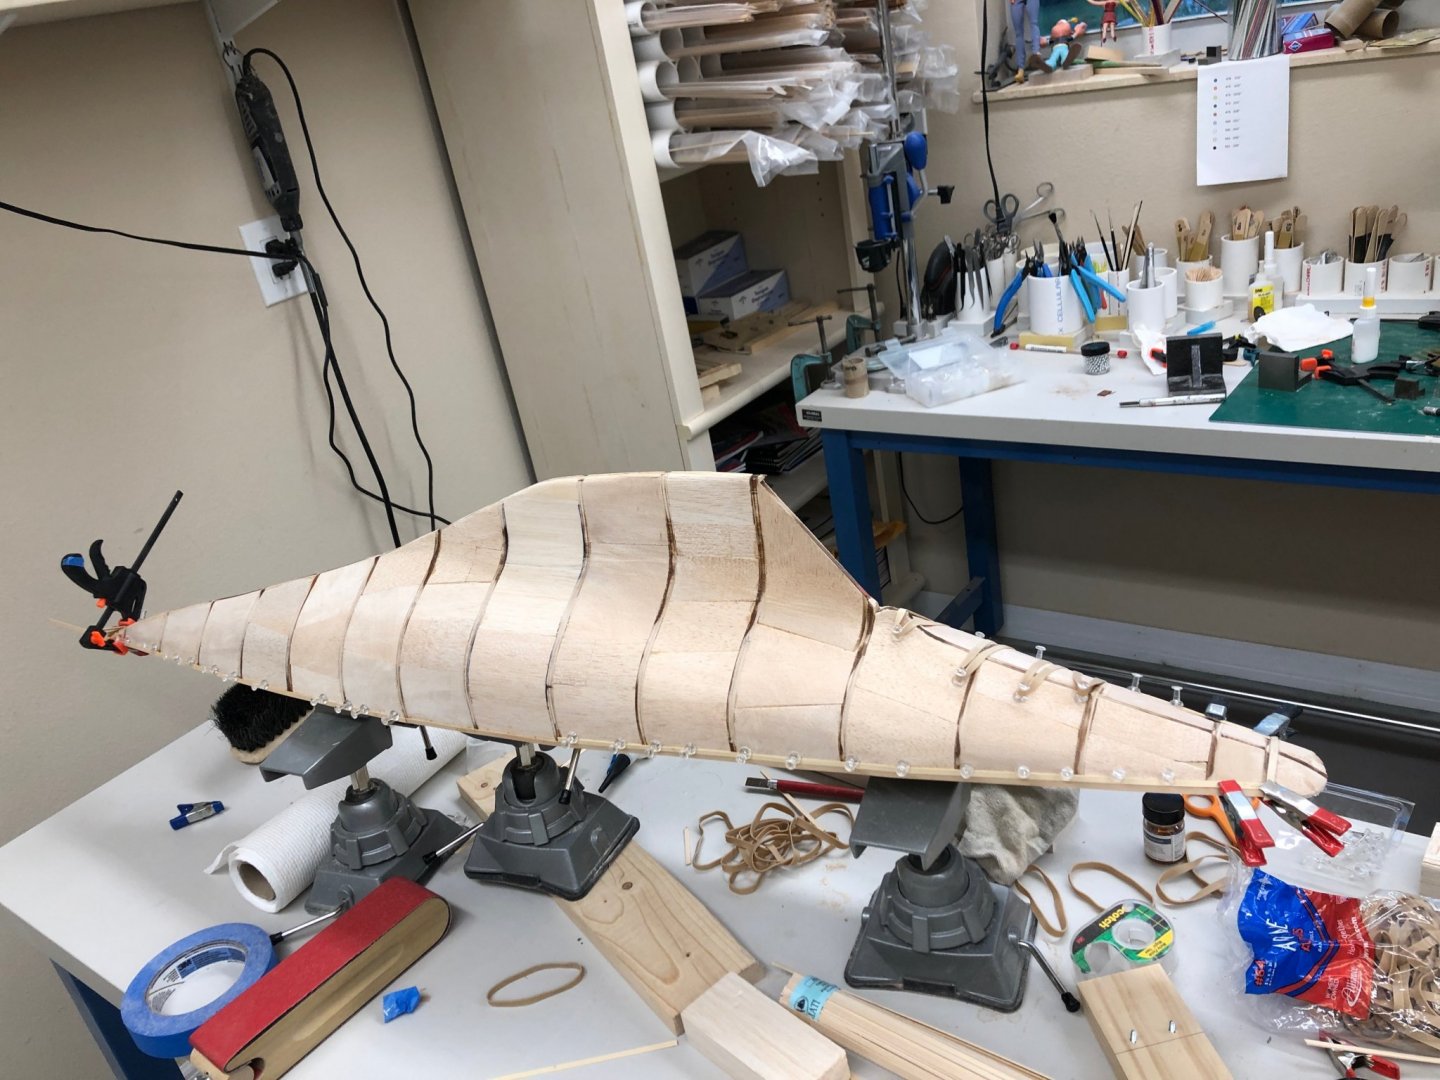
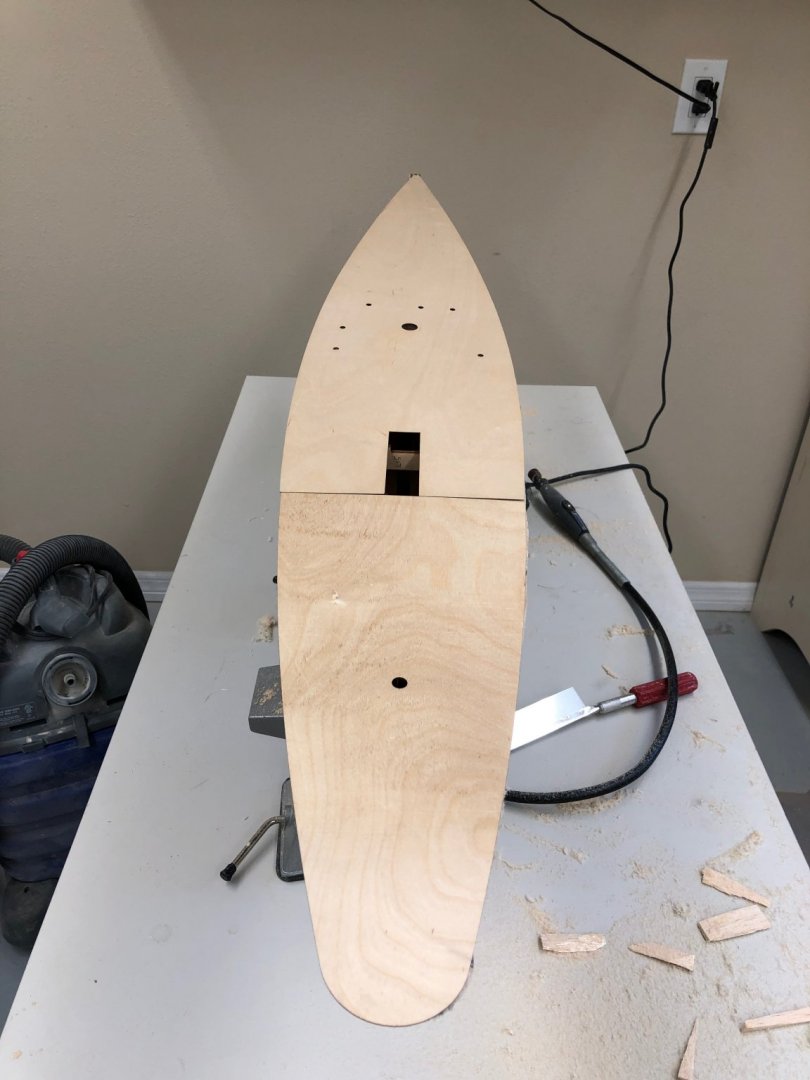
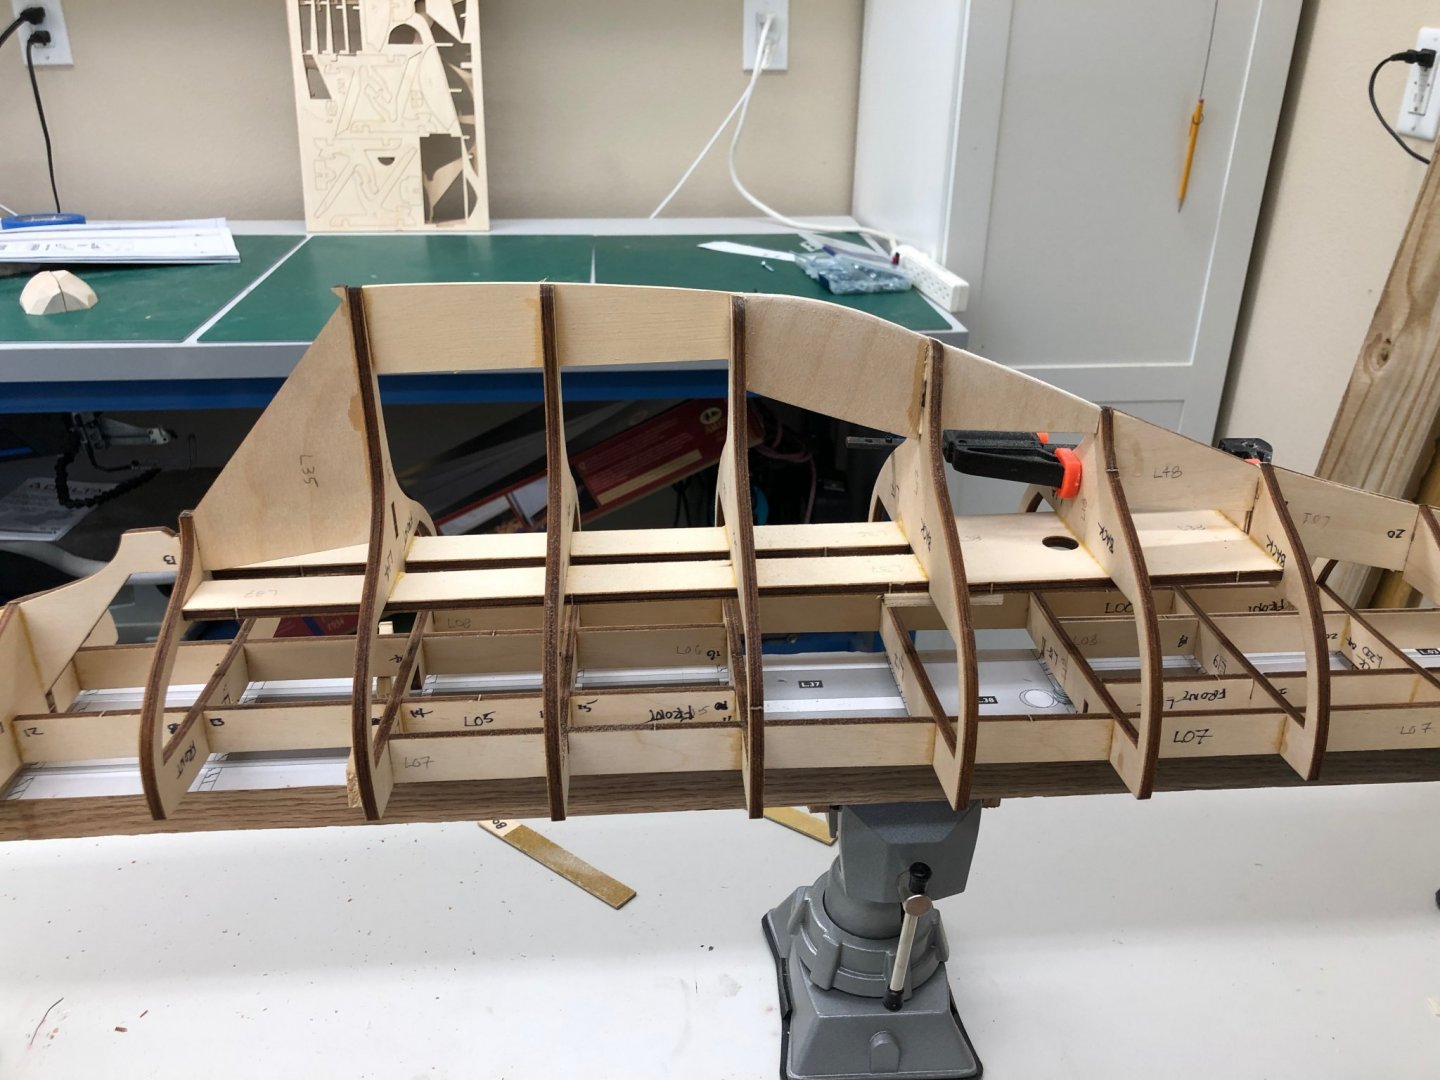
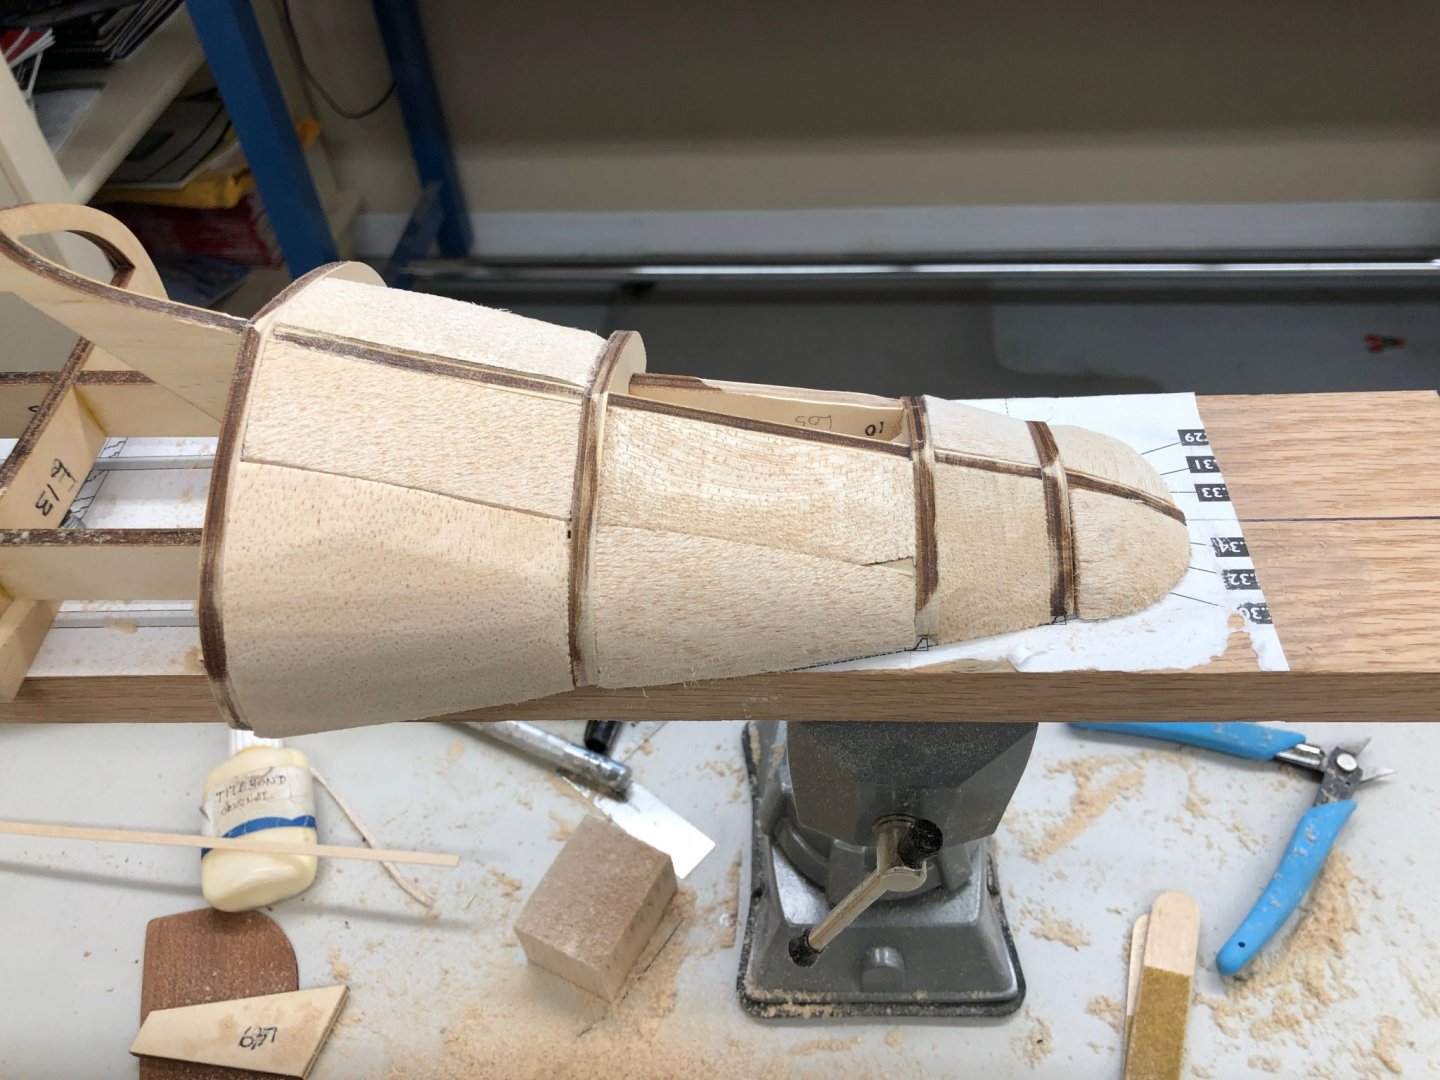
I added three "tabs" and from 1 X 3 to the structure (wood screwed into the structure) to provide a way to hold the hull and mounted it in the three Bessey vices I used for the backbone board. This gave me the access I needed to properly shape the bow. I took a good deal of effort to shape the plywood but I think I got it more or less correct. With the bow done I used a 7" sanding block with 80 grit paper to smooth out the transitions across the bulkheads, working to eliminate the high spots that I created with the filler blocks. I sanded until I got the laser burn off at least one side of each bulkhead. Both sides in areas where the hull is generally flat. I have made my first pass and cleaned off the surface with paint thinner and am going to use a planking strip to see if what areas need more attention.

-
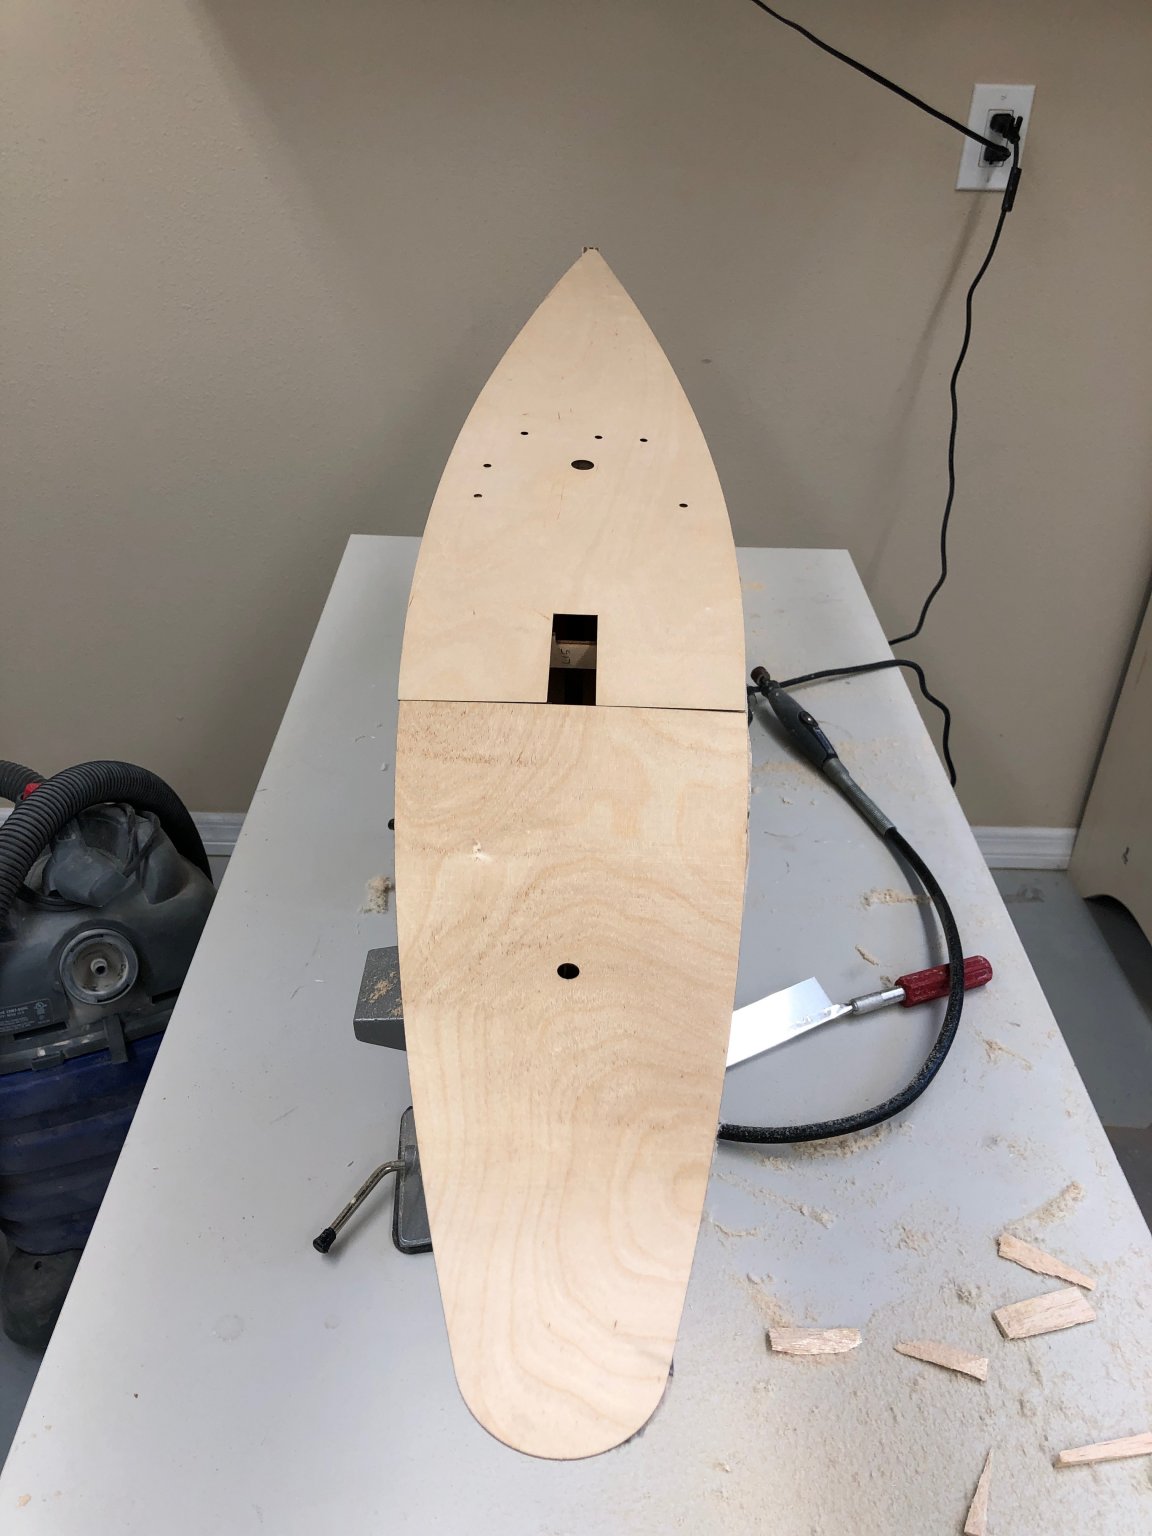
I found that with the backbone board in place, I could not get the bow shaped as it should be because the board will not allow me to get close enough to the bow. The fact that the bow "build up" is the same plywood as the other structure does not help either. Anyway, with the filler in place and glued to the structure I do not think the backer is necessary any longer so I decided to remove it. All the screws came out okay and none of the CA I used to secure the filler blocks leaked somewhere inappropriate so the backbone board came off without incident. I mounted the hull in two of the Bessey vices with towels wrapped around the keel while I sawed, and sanded (Dremel) off the areas where the filler blocks were obviously above the hull structure and would interfere with the deck. I then put the deck pieces on the the hull and checked every junction between the deck and the structure, marked those where the filler was too high and then corrected them.


-
I got the new balsa and completed filling in the other side of the hull. I may have violated the "better is the enemy of good enough" on this side as I used Bondo in a few places where my measuring was not up to snuff. Probably should have left well enough alone but... So here is the hull structure with all the filler in place and sanded as each piece was put in place. I know that when using the belt/disc sander to shape the pieces I had a tendency to get the edges very close to the line taken from the model but the center tended to be bigger than necessary. I tried to correct this once the piece was installed on the hull but was not always completely successful. I am planning on taking care of these areas when all the filler is in place.

-
The additional balsa arrived and I finished the starboard (or is it the port) side. Now on to the other side. While waiting for the balsa I started building the deck house. Here it is after three coats of gloss varnish but before the windows, roofs and cushions are installed. I am thinking about planking the roofs using Alaskan Yellow Cedar instead of the walnut panels and hull planking per the instructions. I think the lighter roofs (hopefully very similar to the eventual deck planking) will help make the deckhouse a little more noticeable. Per the instructions the four roofs (two centerline and one on each side) are painted "mahogany", al;though the two centerline roofs are made of the same materiel as the deckhouse. I want the "mahogany" material finished in gloss (as you might expect it would be on a "yacht", even a racing one). I am looking through my wood supply to see if I have the correct material. FYI, the non-mahogany pieces are supports I added to make it easier to get the pieces together with 90 degree corners. The tabs supplied with the kit are only good up to a point. I am not sure if the lower parts of these will show when everything is put together so I may paint them a dark color just before attaching the deckhouse to the hull. I have two of the three coats of Wipe-on-Poly on the mast, one m ore coat and it will be ready for pictures. Sso here is the one side of the hull and a few pictures of the deckhouse.

-
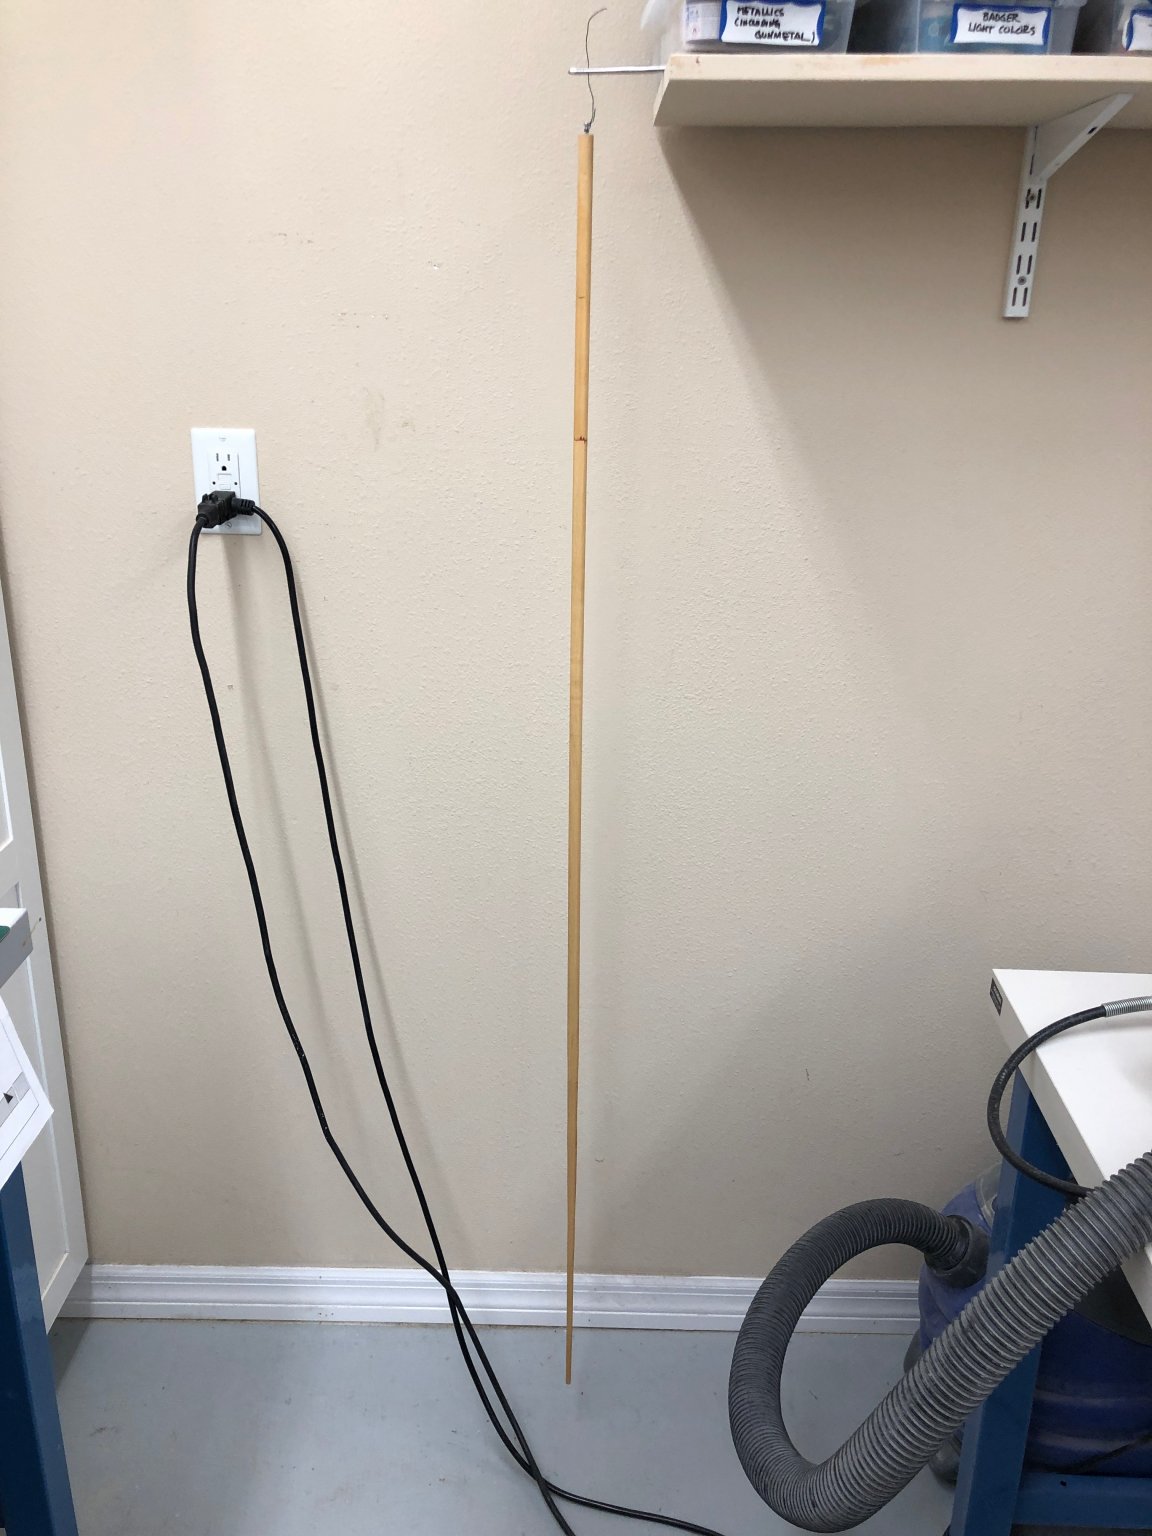
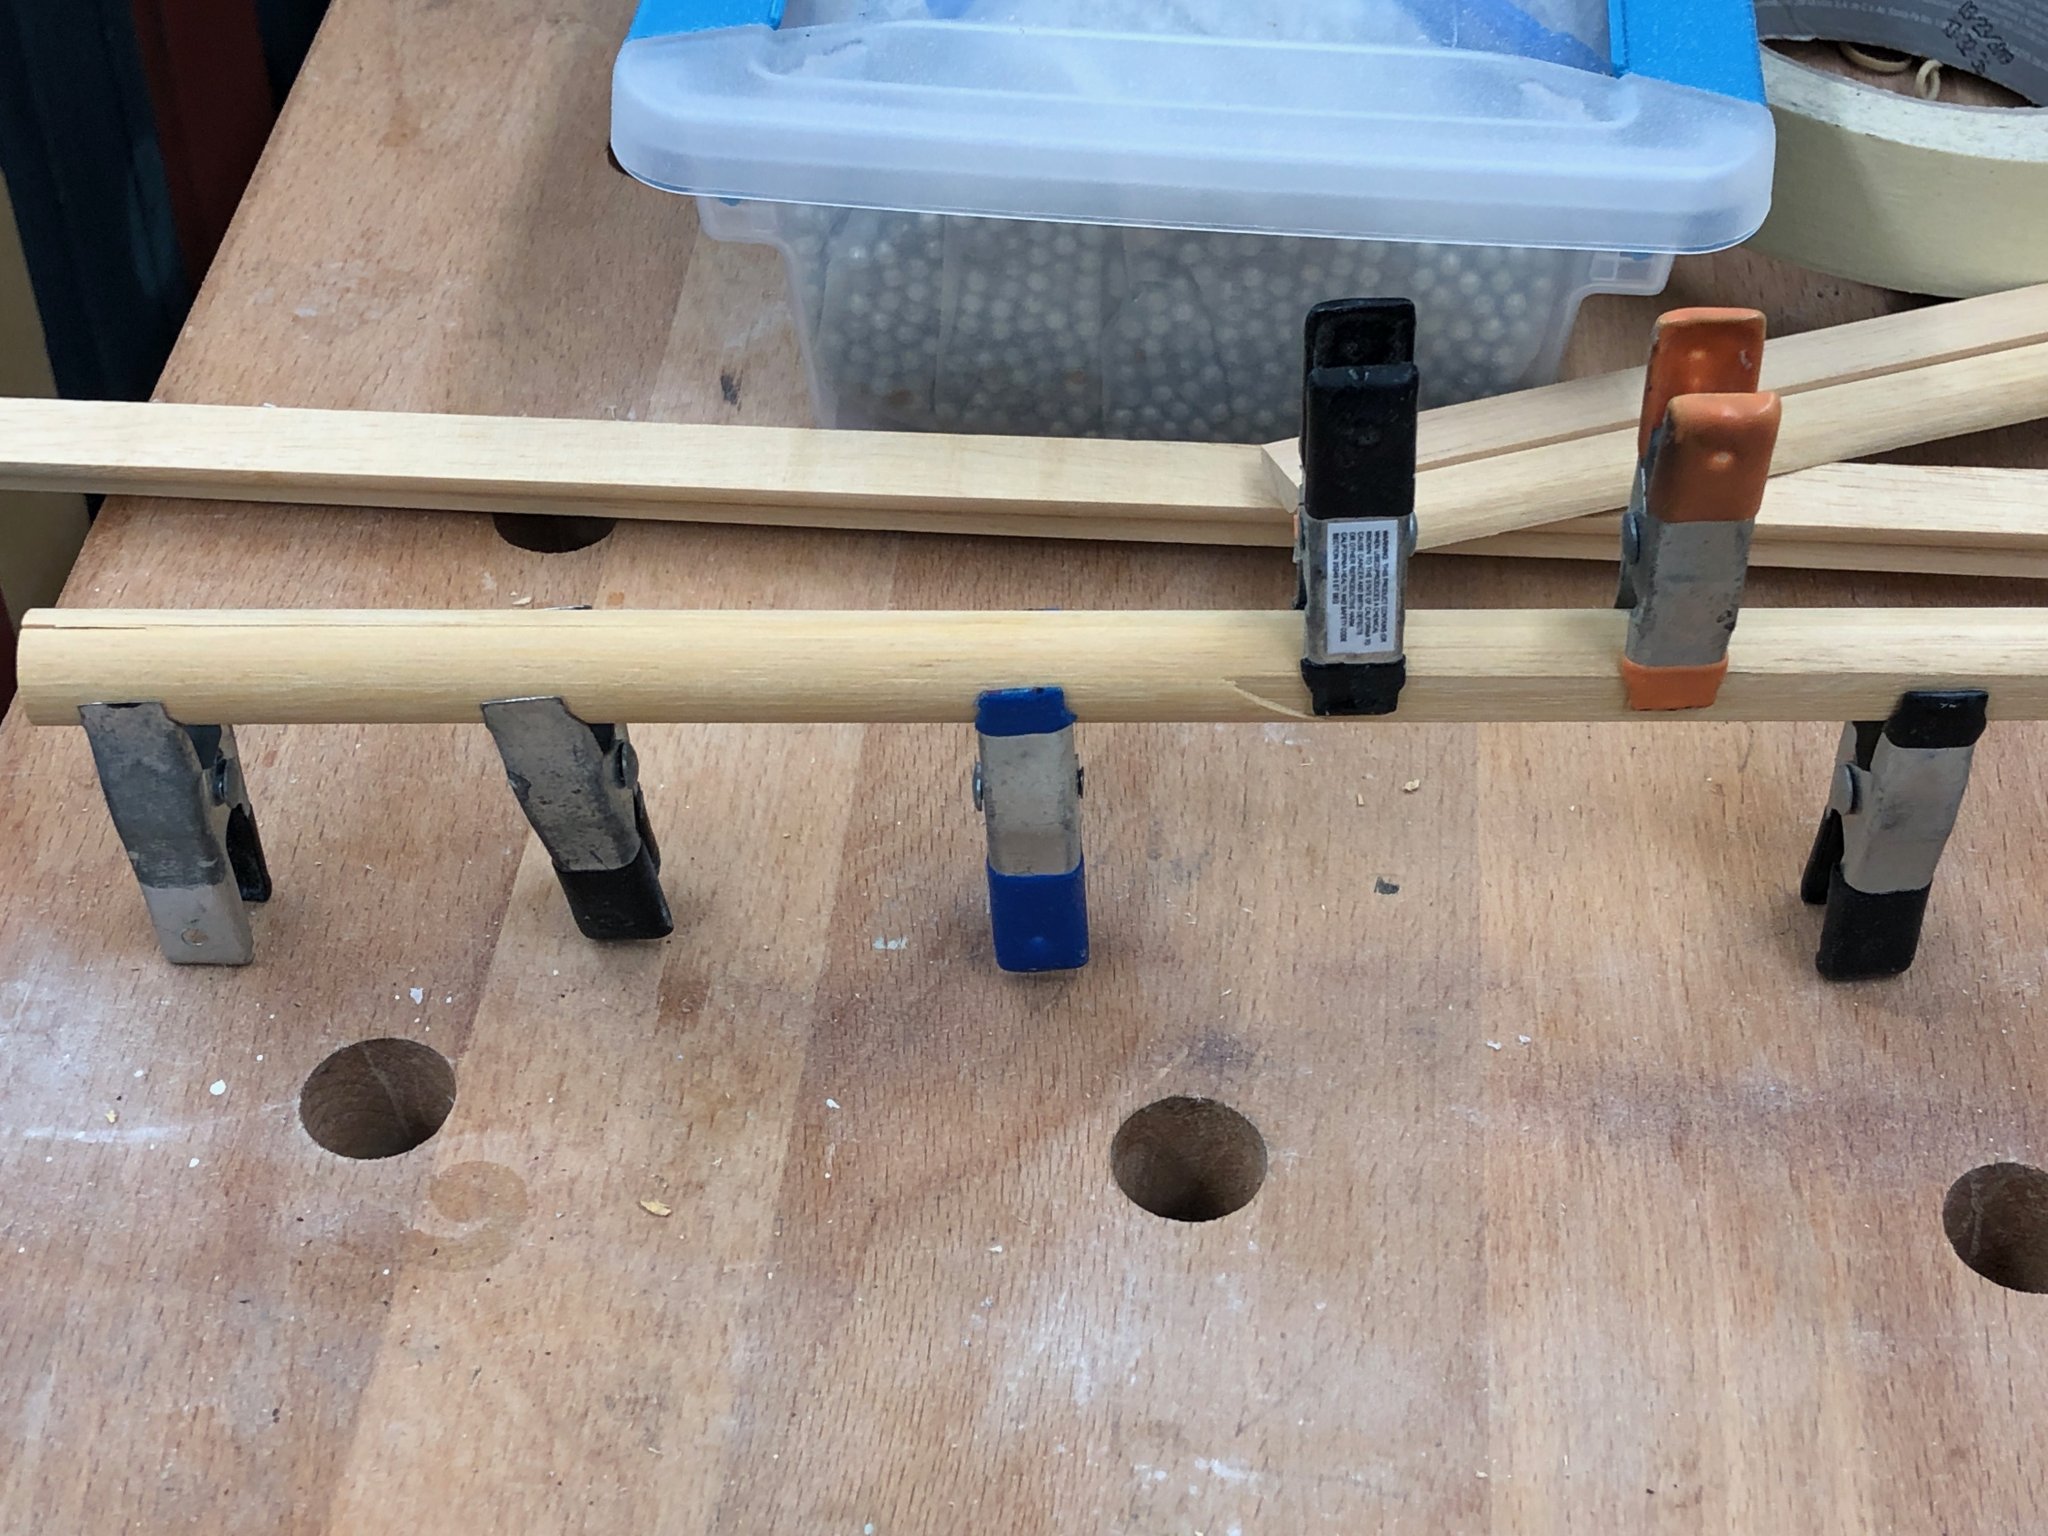
I have finished shaping the mast. What a job! According to the plan, the mast tapers from 14mm at the base to 4mm at the top, over a length of 52" (above the deck). I started with a somewhat oval shape (two sides of the round material flattened with the table saw) then started tapering. I used a belt sander and a powered vibrating sander and sanding sticks. It is not the smoothest taper in the world but I think, with the sails up, the mast is not going to be all that noticeable. It does bend a little to starboard but hopefully not so much that the stays can't correct. It will be awhile before I will know. Here is one picture of the mast drying after the first coat of Wipe-on-Poly. I am going to put a few coats on for protection until I get it painted - which will have to wait until I get the hull finished. Too much saw dust to try a spray paint and there will be more dust to come. I will get some more pictures after the Poly is applied. The red line is Bondo I used to smooth out the lower joint in the half round pieces.

-
I have run out of balsa, used four 2" X 4" X 12" blocks and got most of one side filled in. More balsa is on the way (from National Balsa in Massachusetts) but given the hurricane I am not sure when it will get here. In the mean time I decided to start assembling the mast. I decided that a round mast was just not that interesting. The kit provides six pieces of half-round wood to assemble the mast. Three really long ones and three short ones. I decided to try for an oval shape by flattening one side of each half-round piece. I started assembly with one short one and one long one per the instructions. Here is a picture of the hull and some of the sanding sticks and tubes that I used to form the balsa to the hull profile. Also the beginning of the mast (which will be close to five feet long when fully assembled). Should be a real project to taper something that long. Youn can see the flattened side starting at the upper black clamp. I will have to complete the flattening where it transitions to full round as it goes through the deck.

-
Tom, I know you are not there yet, but when you get there I have a suggestion for the brace blocks that go near the end of the yard arms on the course, top sail and top gallant. I used line (Syren .012 or .008) for stropping the blocks and the pendant that holds the block a short distance off the yard. I would recommend using wire to strop these blocks and for the pendant. What happened to me is that in the course of running the brace lines through the blocks it introduced twist (more accurately more twist) to the lines that I had a devil of a time keeping the lines to the blocks from twisting, even when I put as much tension as I dared on them. If you used wire I think this would at least reduce the problem if not eliminate it.
-
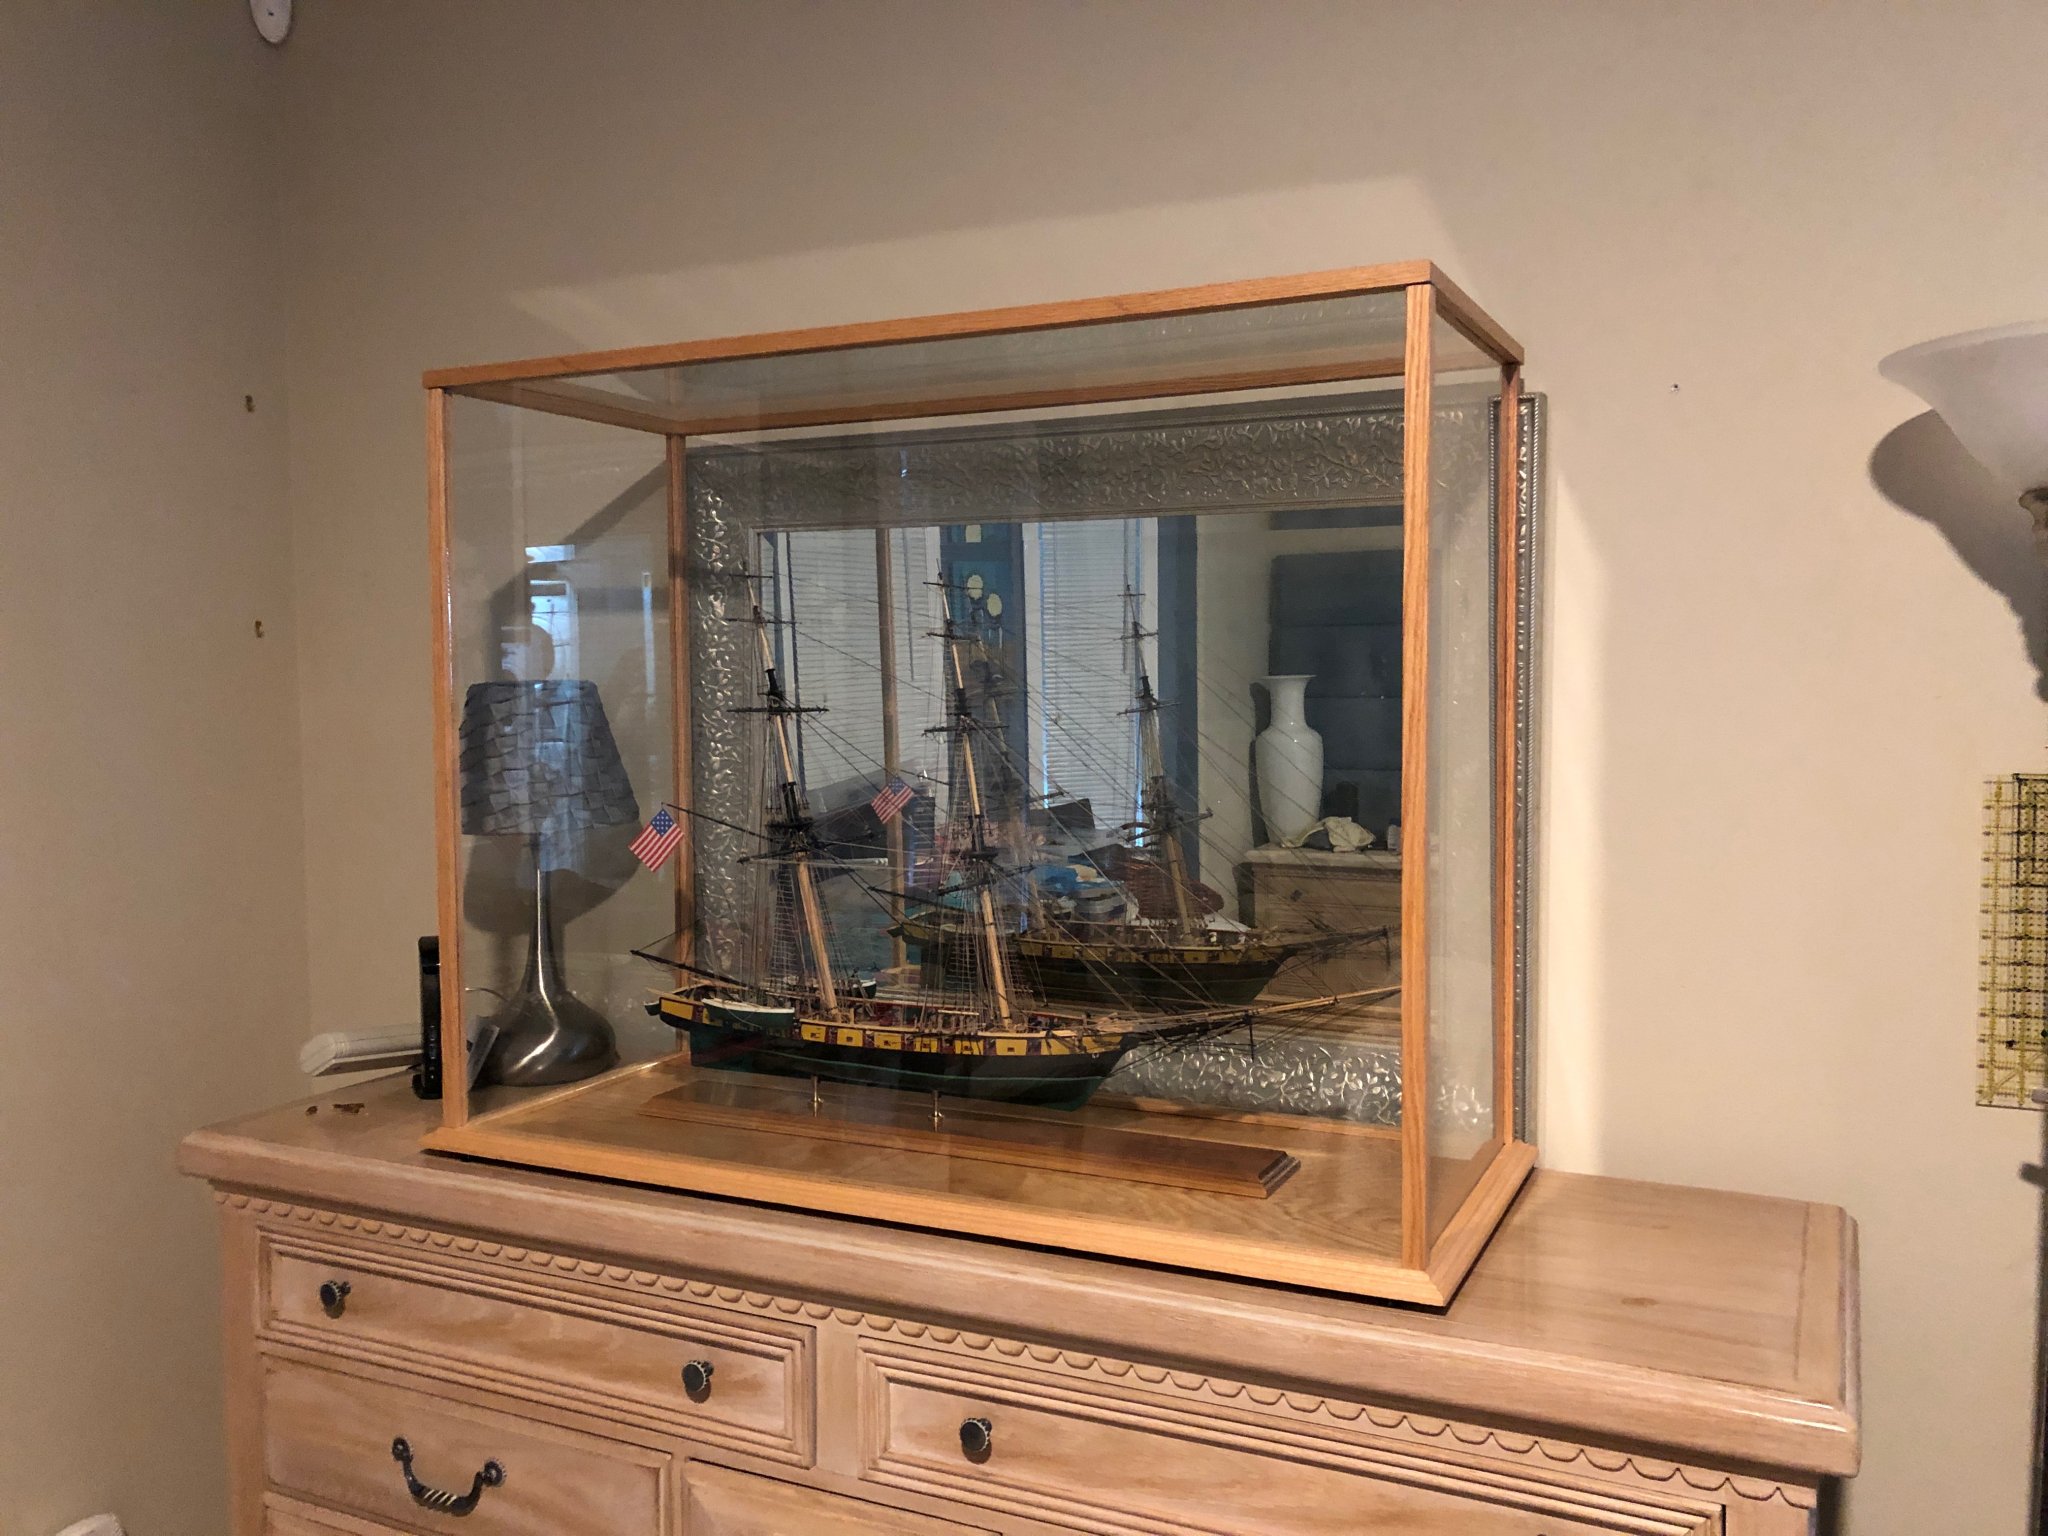
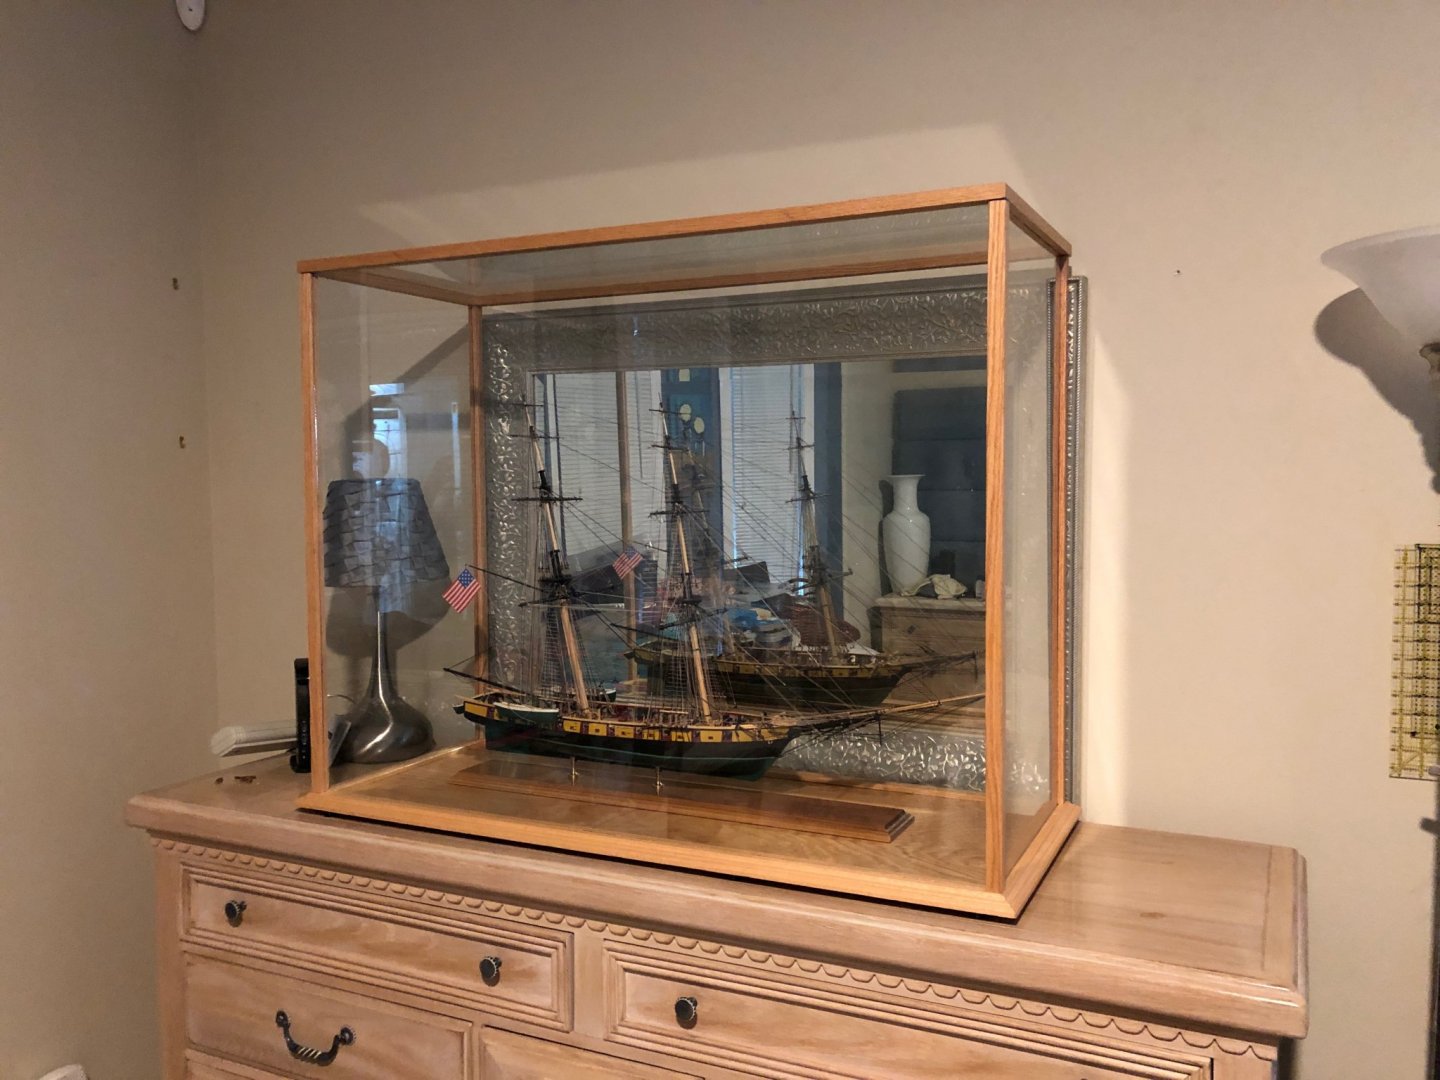
Final Picture, Niagara in its case. Home, at least for now.
- 367 replies
-
- 4
-

-
- model shipways
- niagara
- (and 1 more)
-
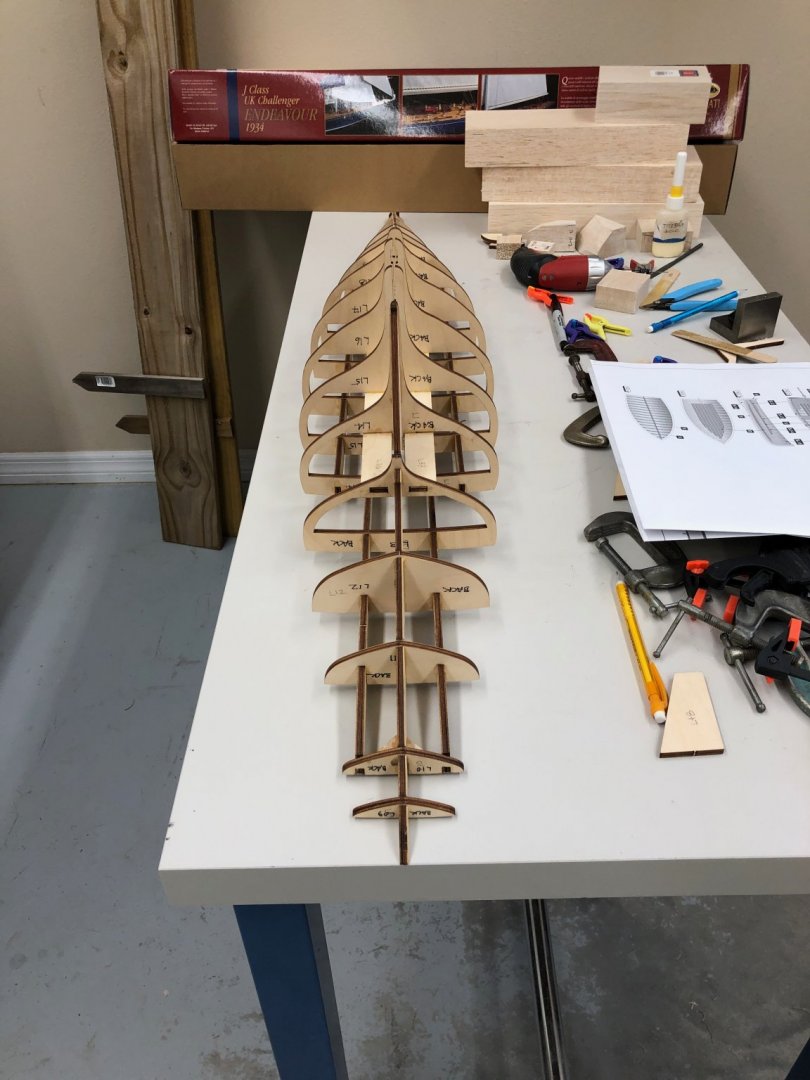
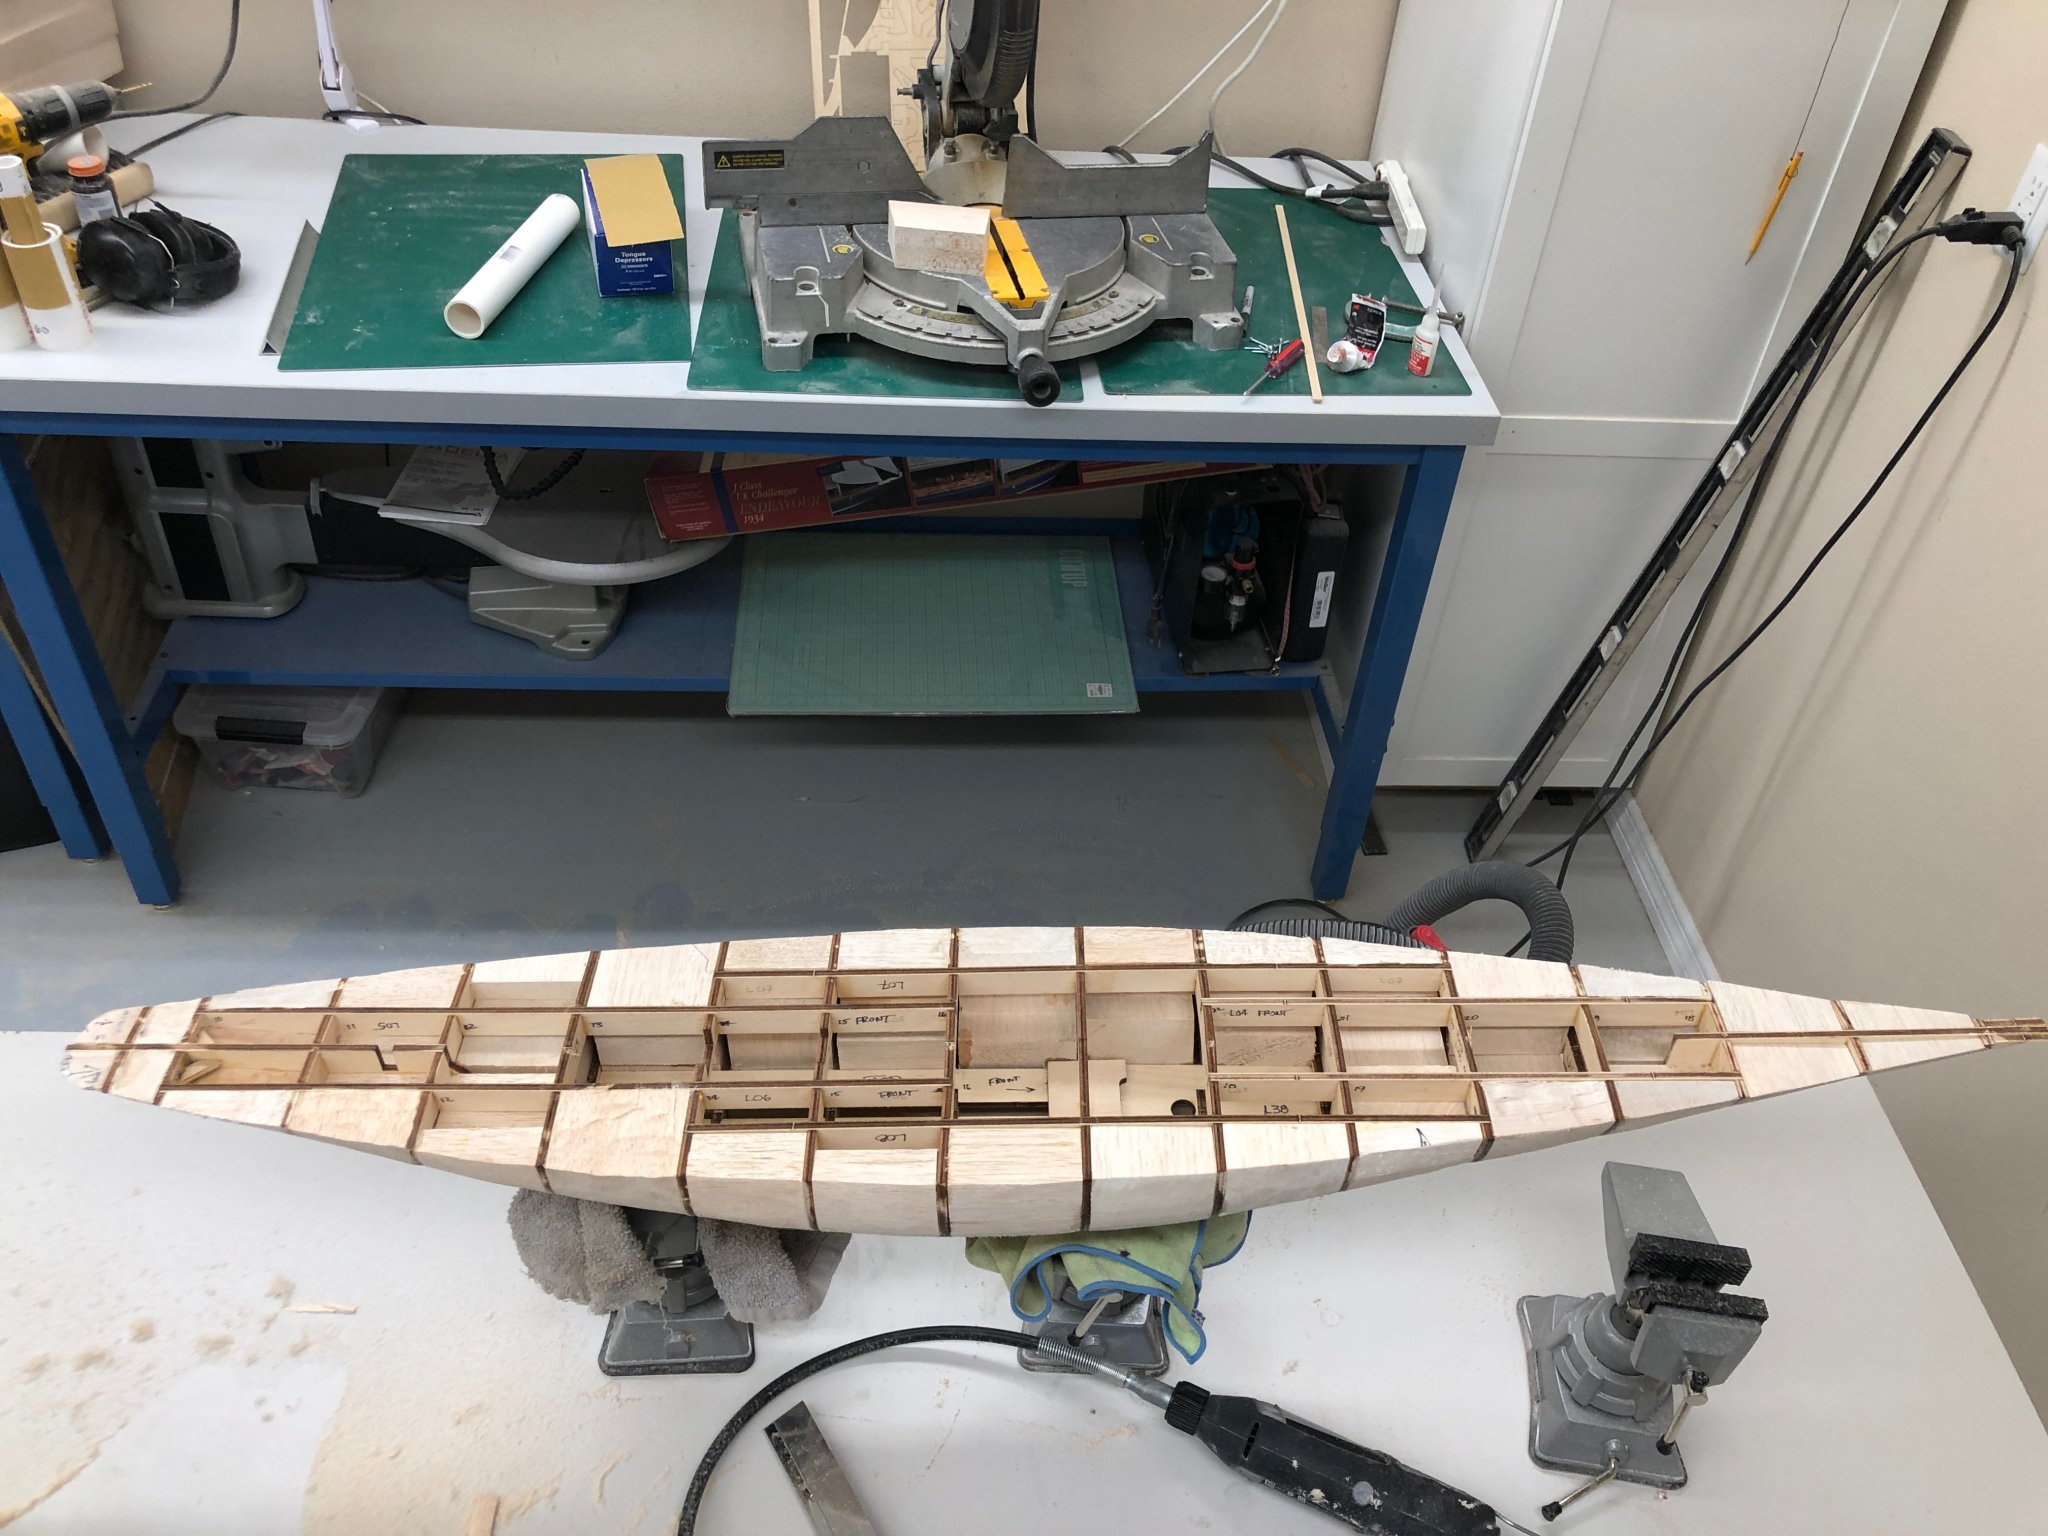
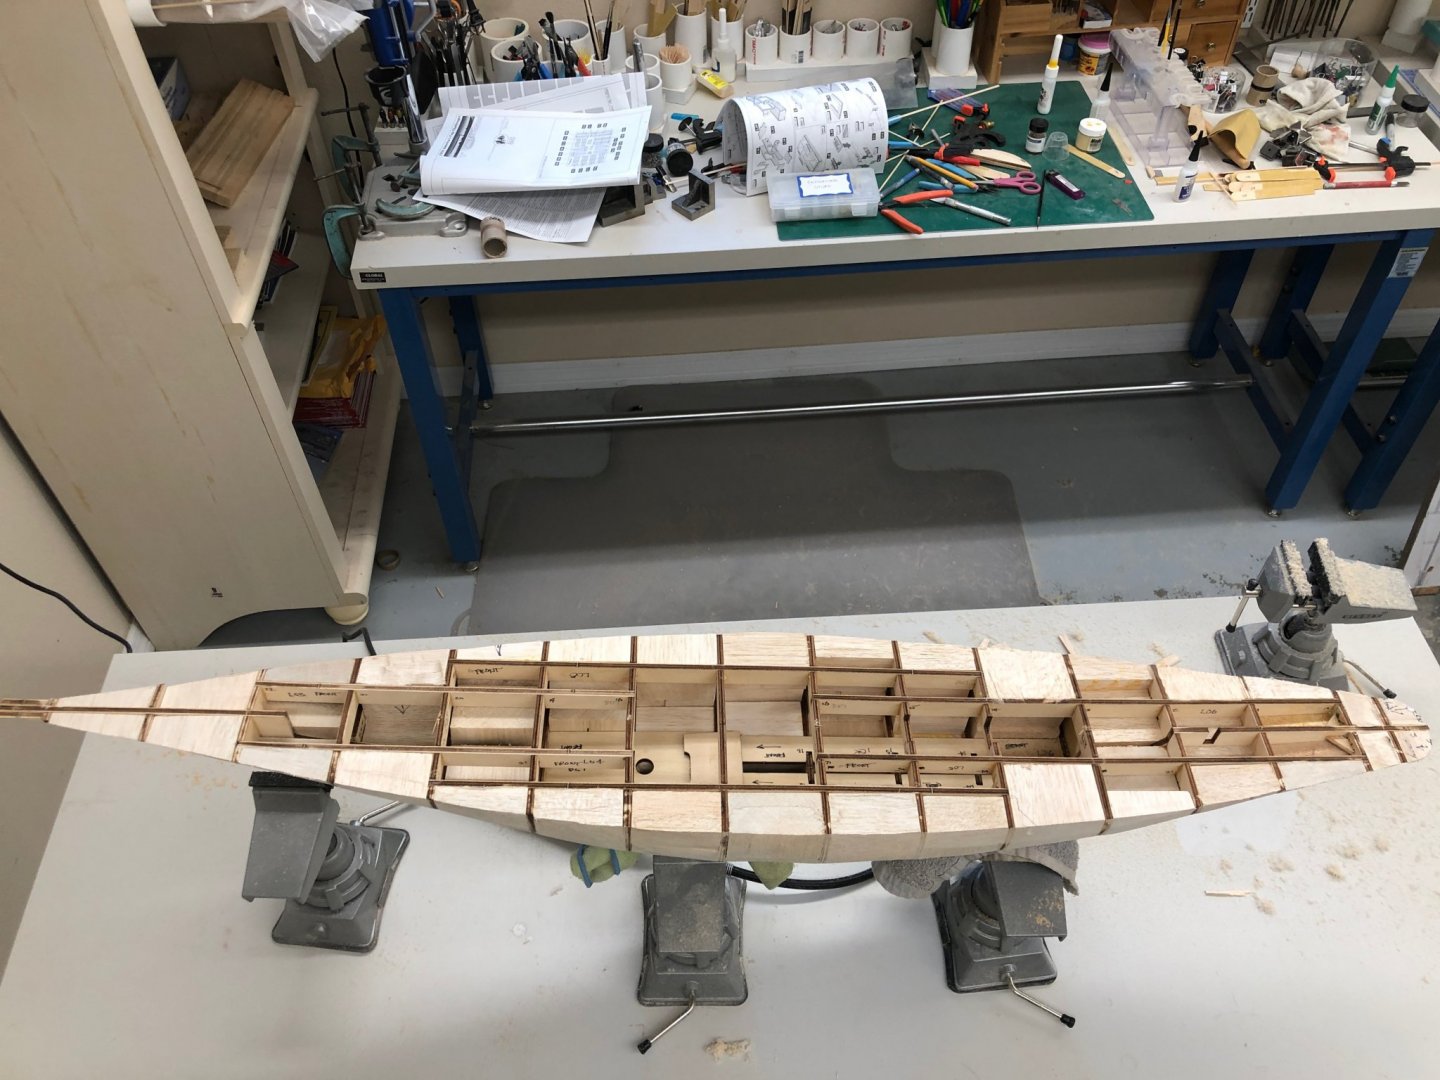
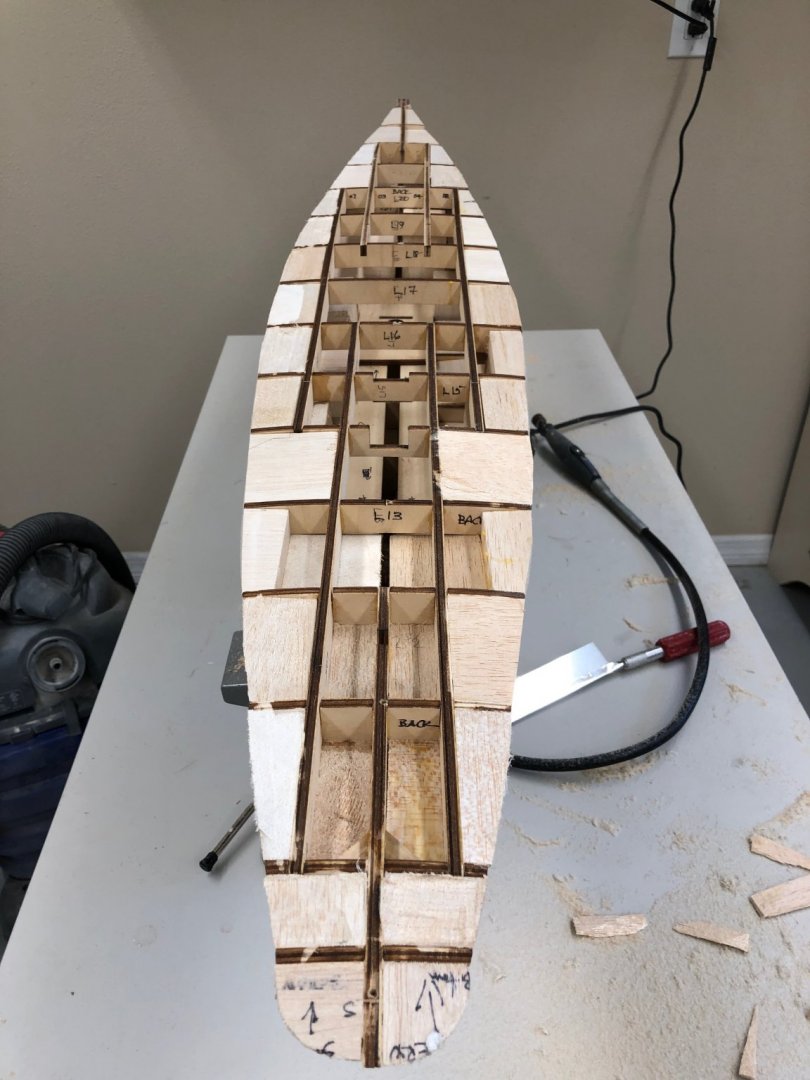
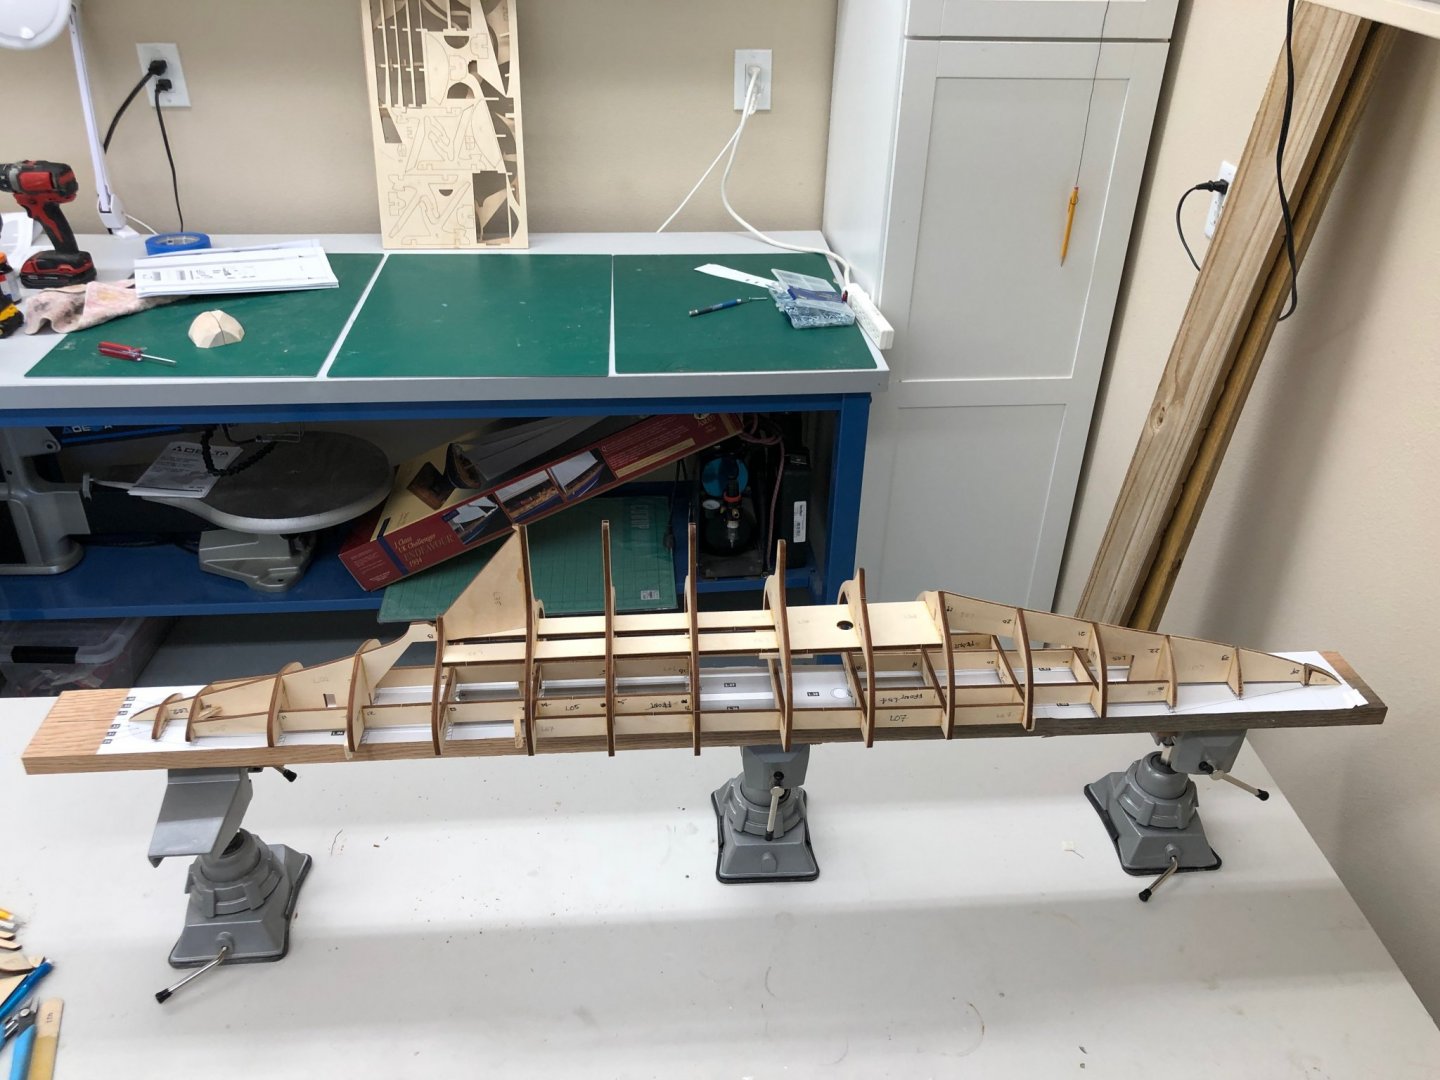
With the structure firmly mounted on the strong back I added three 3" X 1.5" tabs to the underside and used three Bessey vices to hold the structure to the top of then workbench. I decided against including the centerboard so fabricated some reinforcements to maintain the underwater profile. I added one in front of the rudder post just for completeness (the kit leaves that area open. Now the messy part, creating the Fillers from balsa wood. I discarded the kit provided pieces for the counter filler and used balsam for that as well. It is slow going and generates a lot of saw dust. I use the Model Machines disc sander, Dremel drum and 80 grit sanding sticks. Here is what I accomplished this afternoon.
-
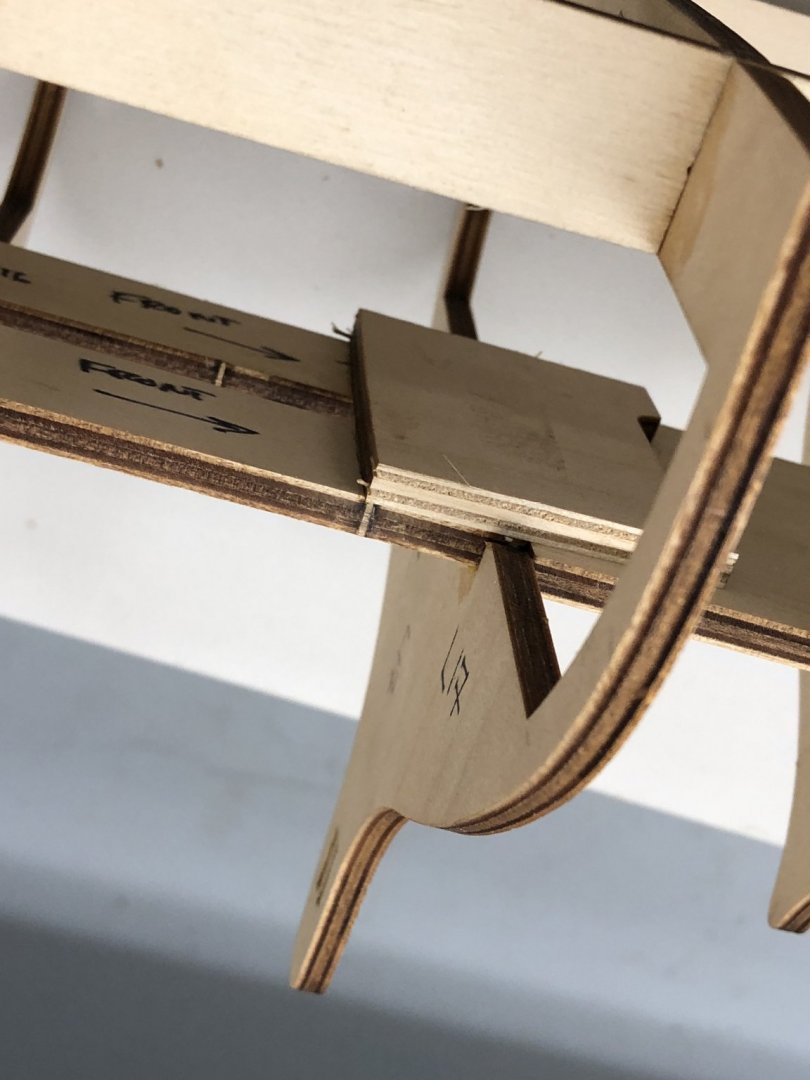
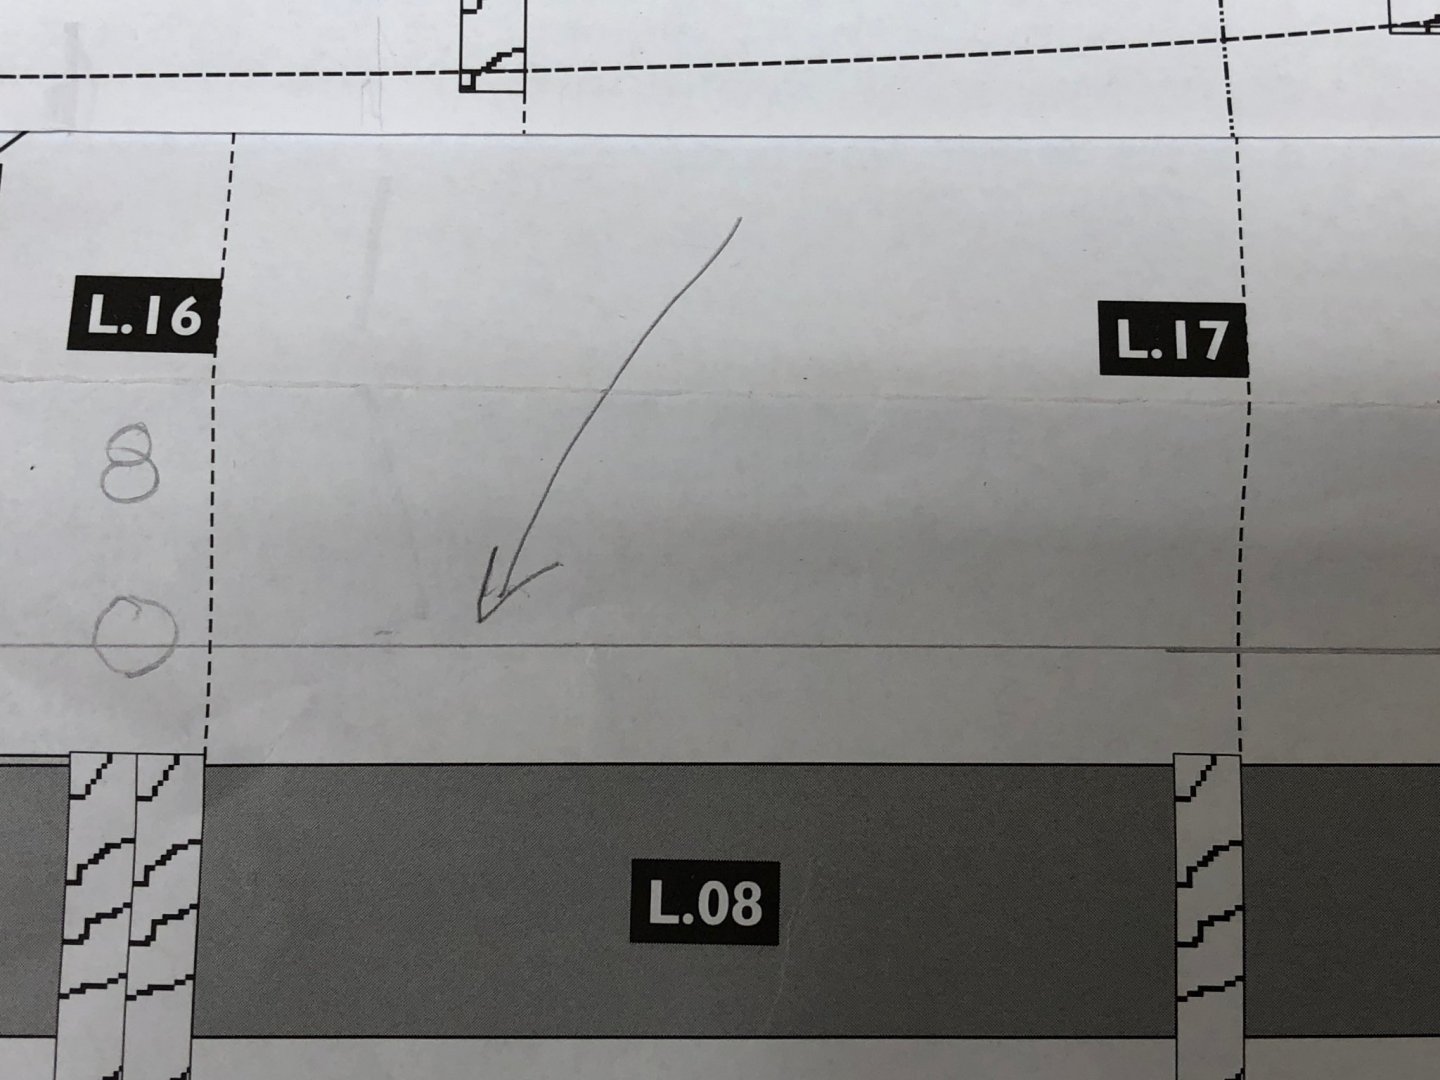
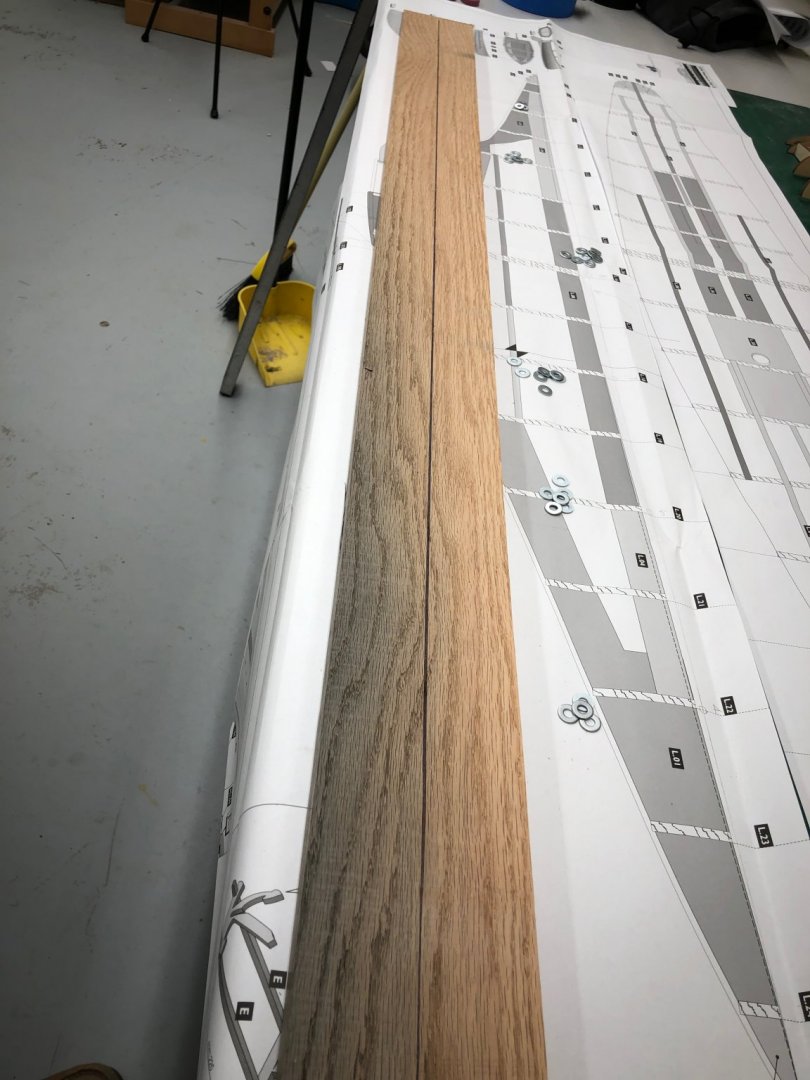
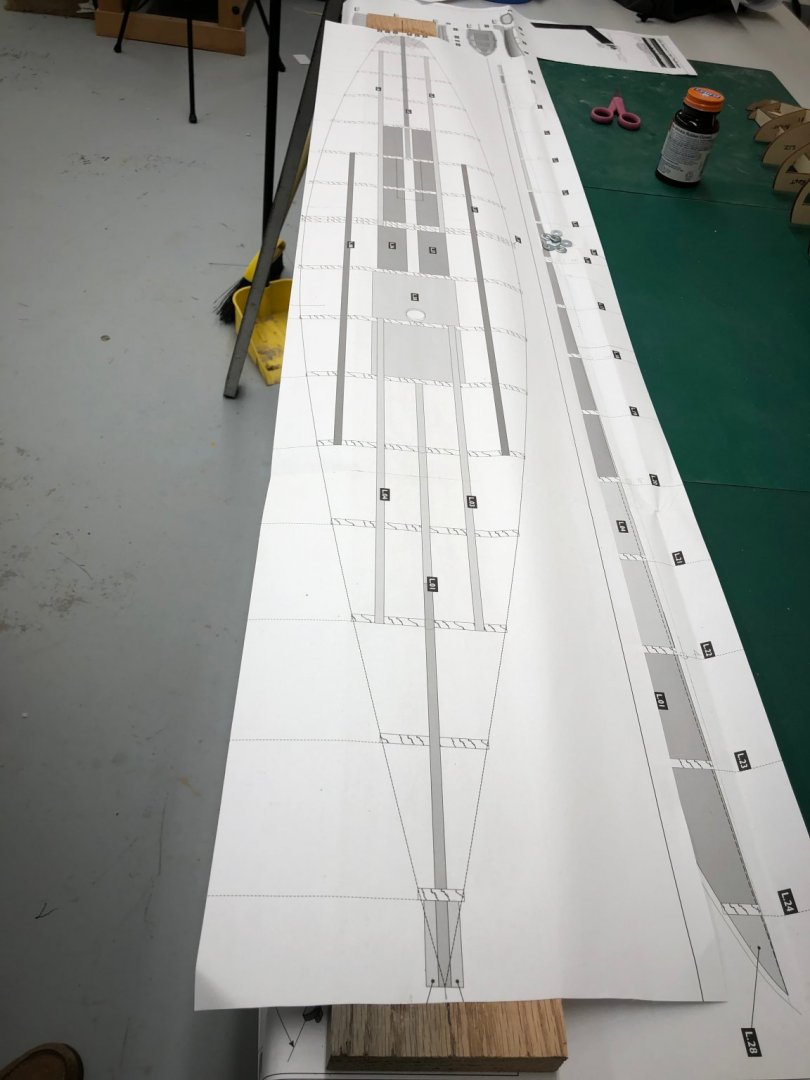
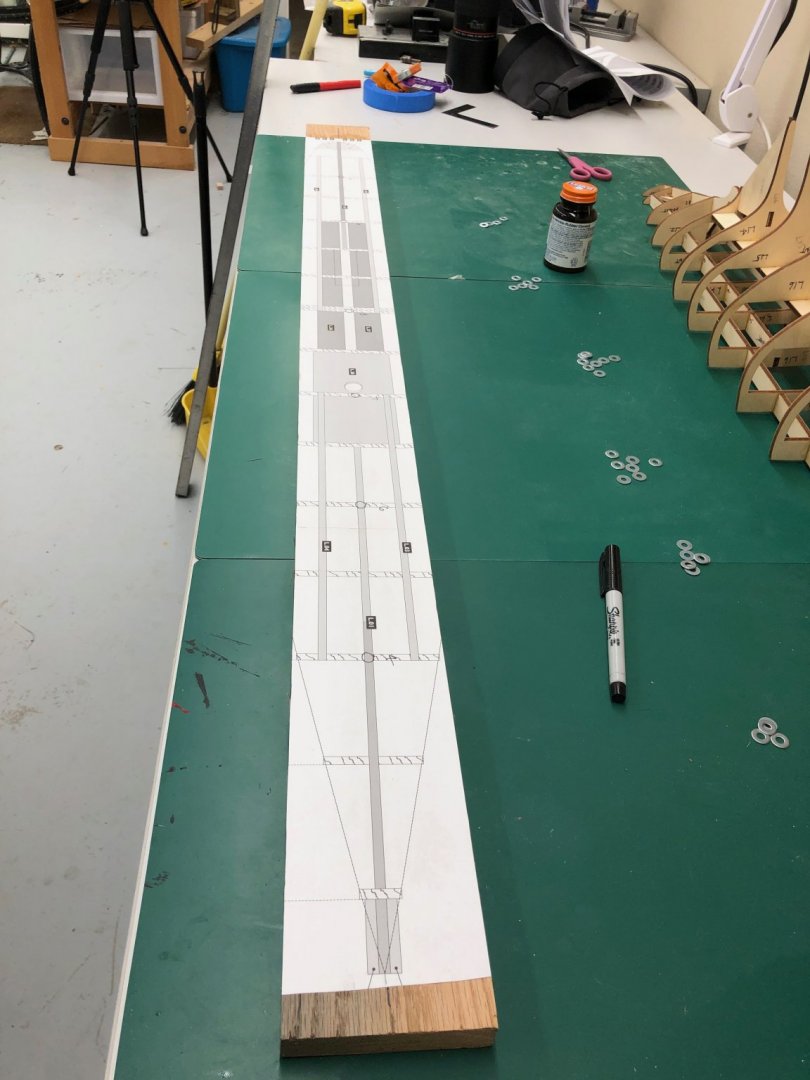
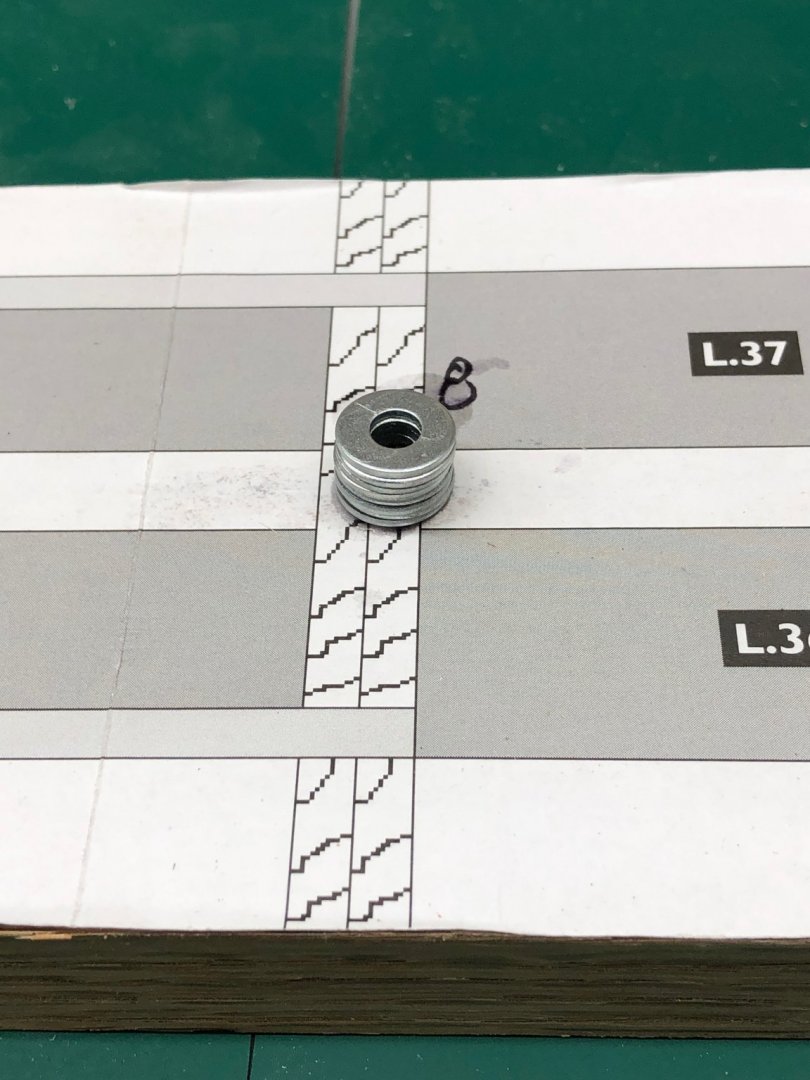
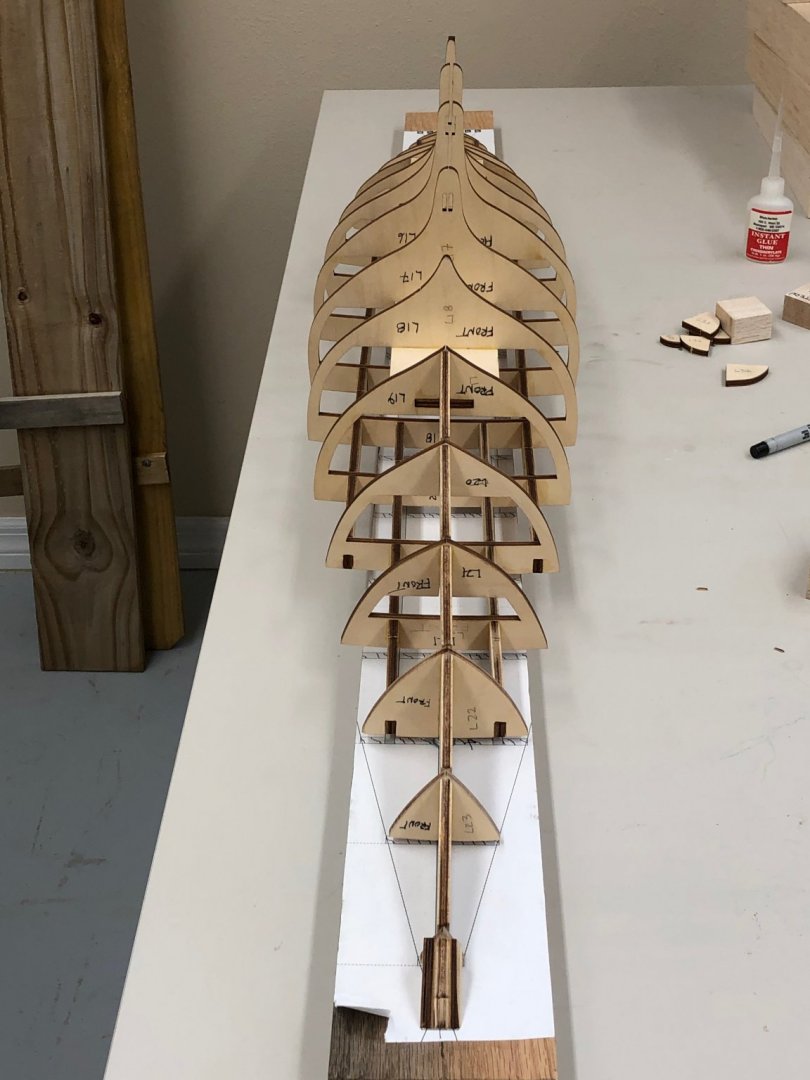
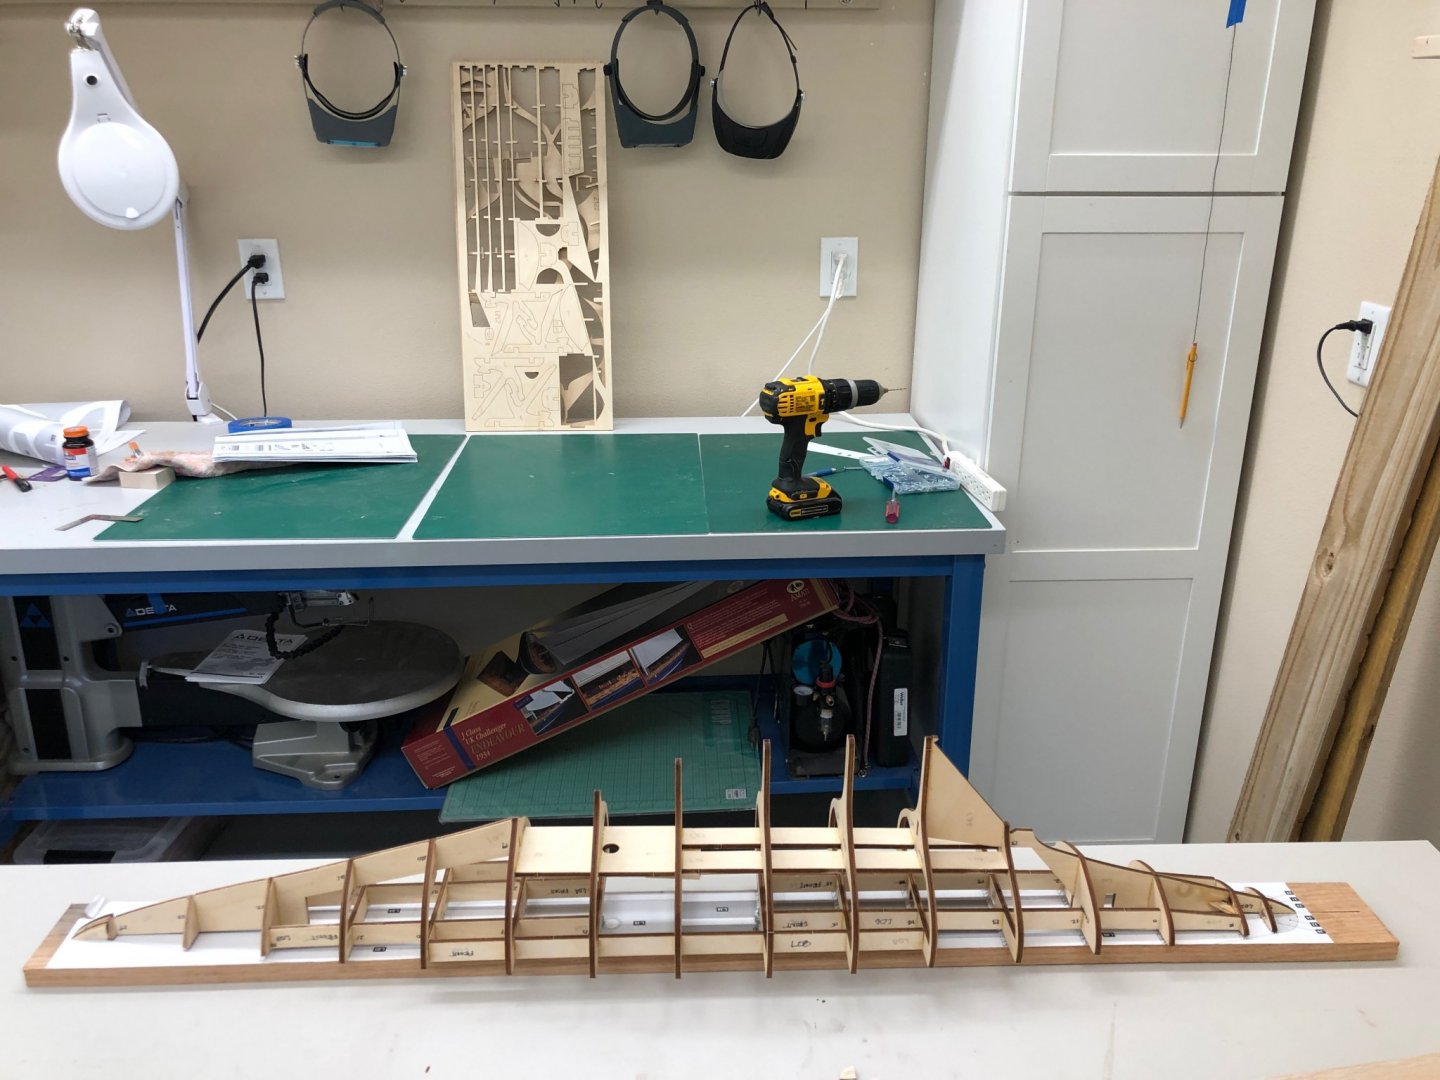
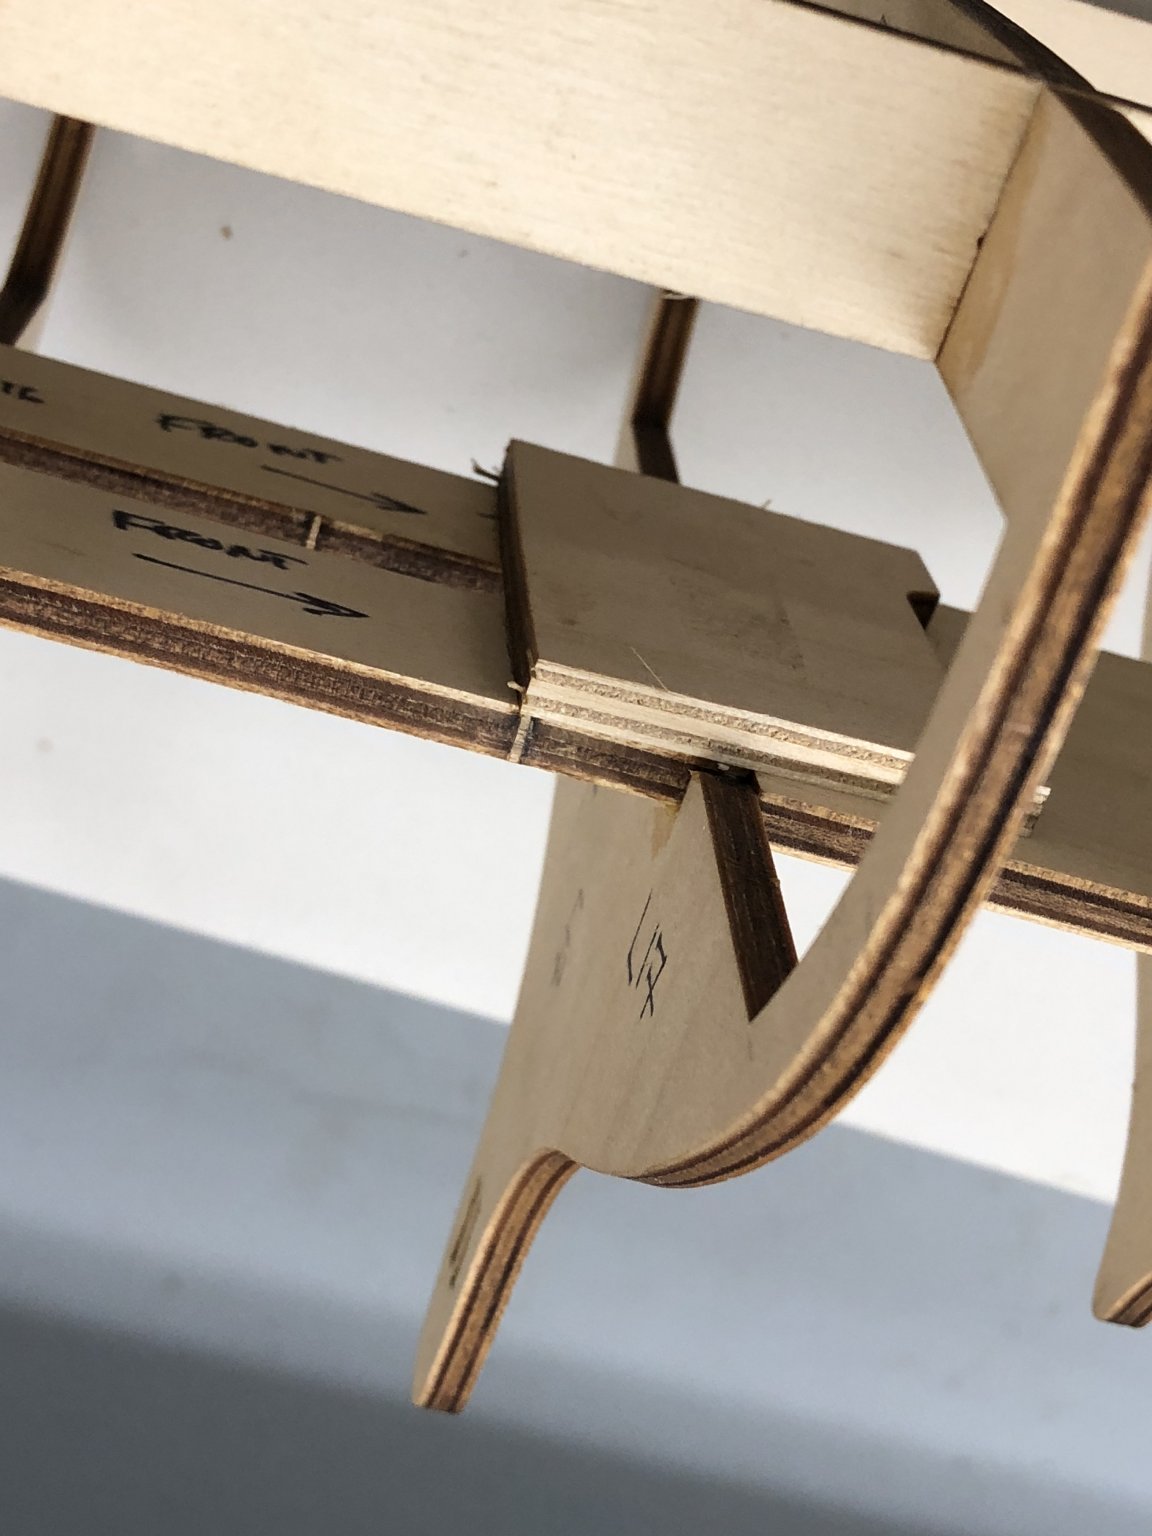
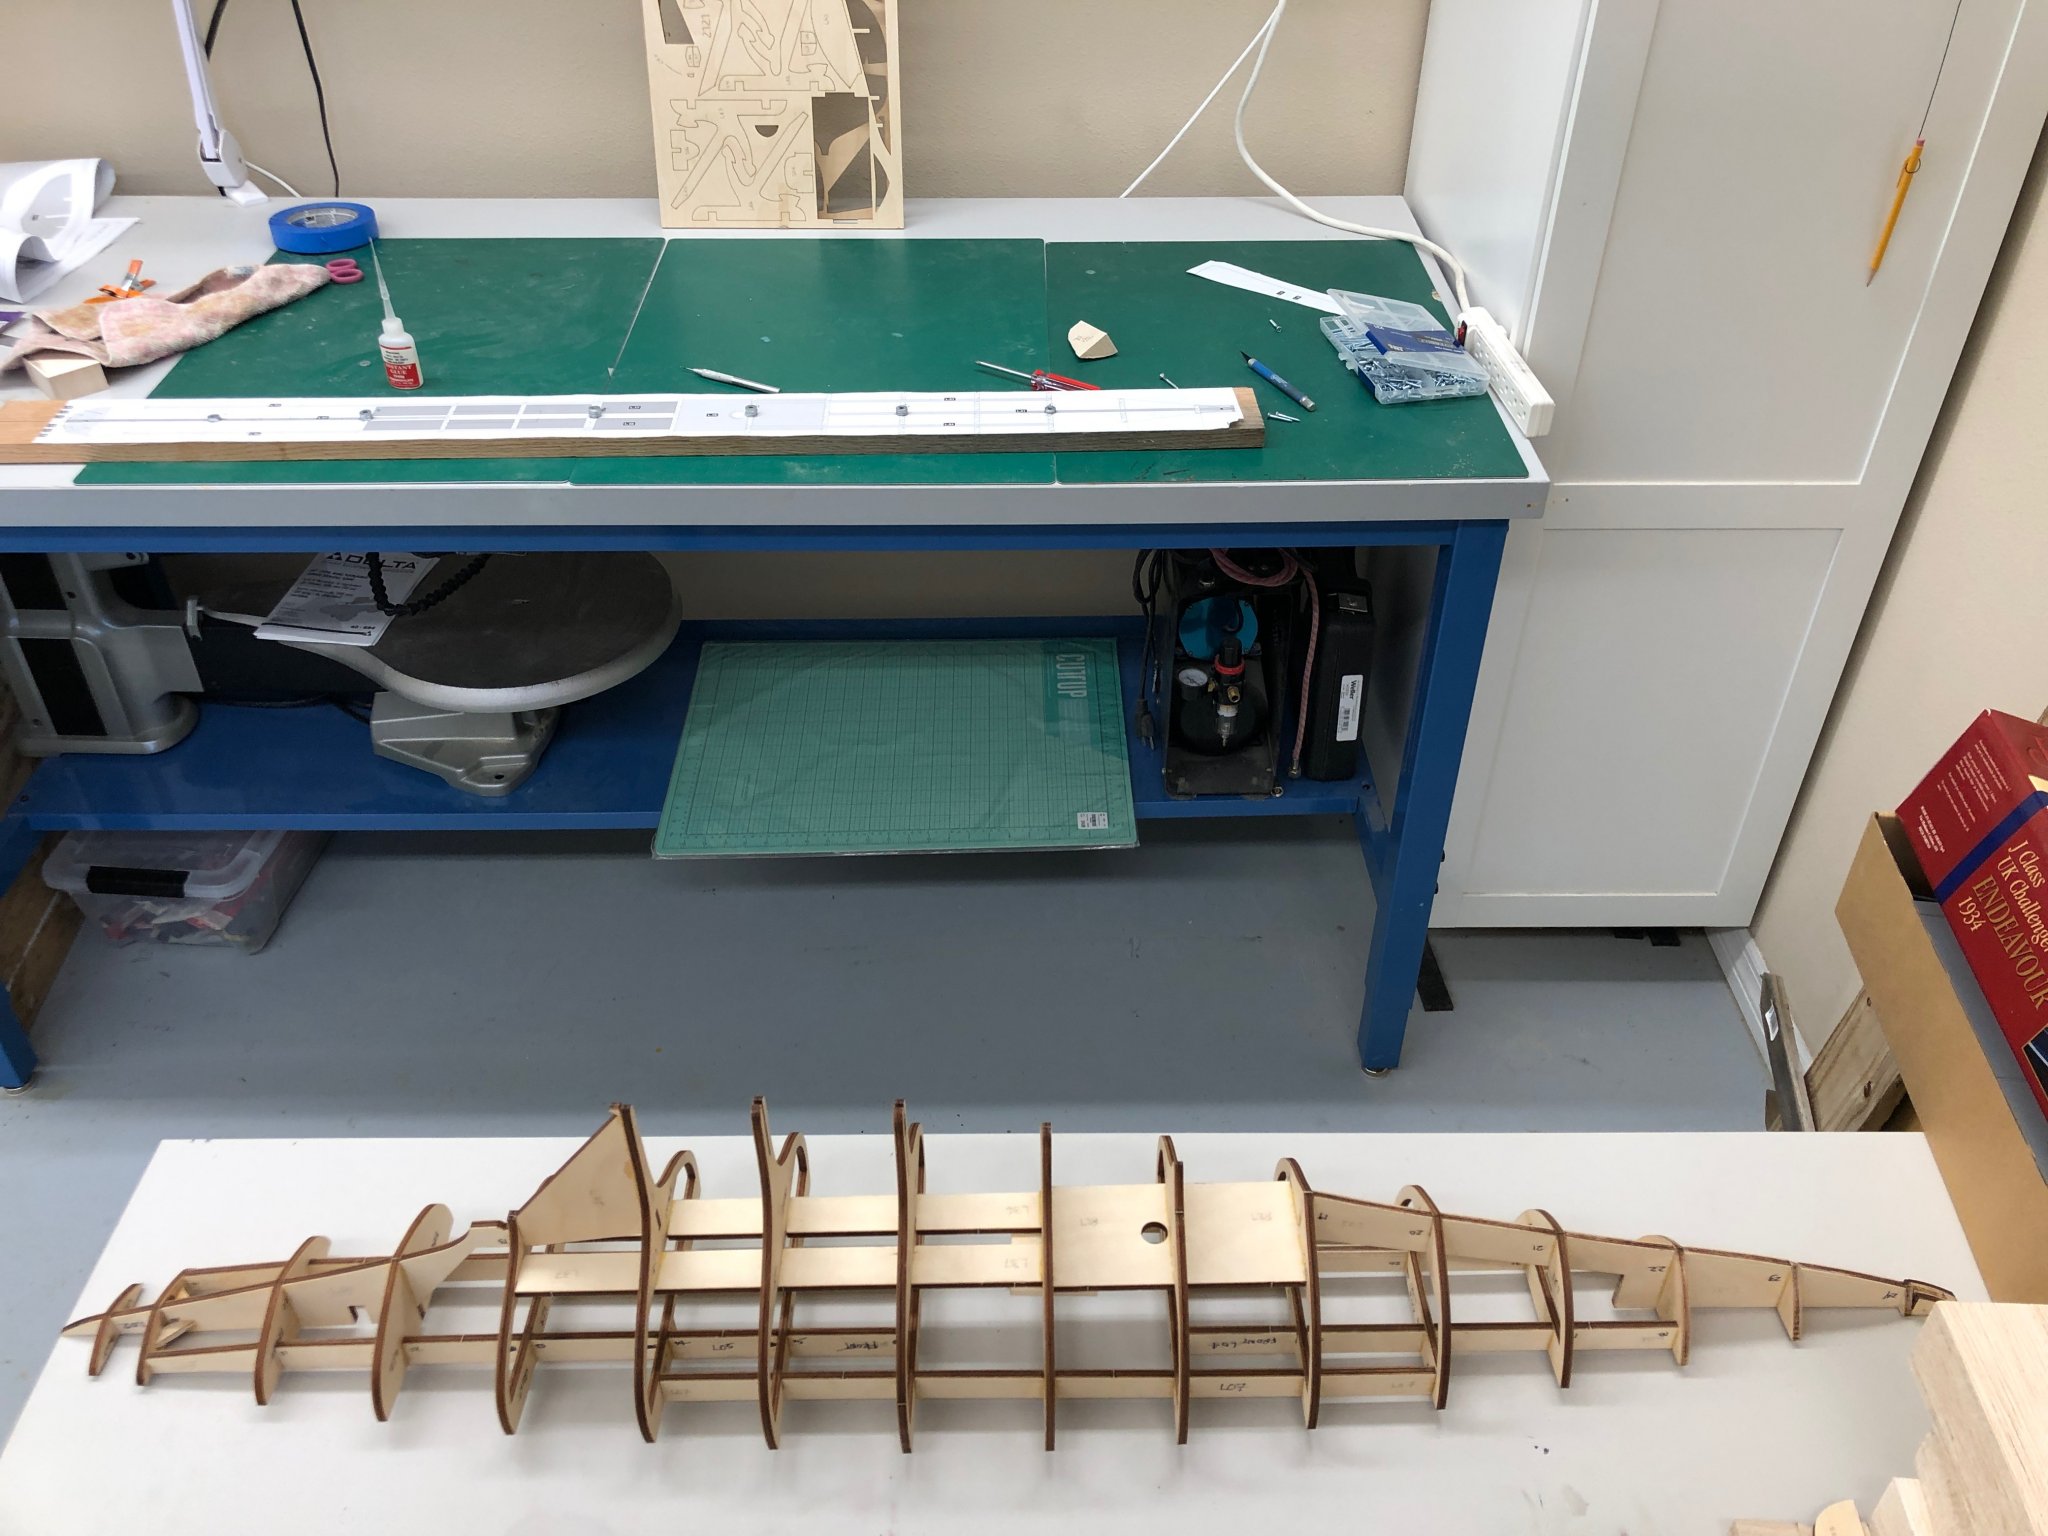
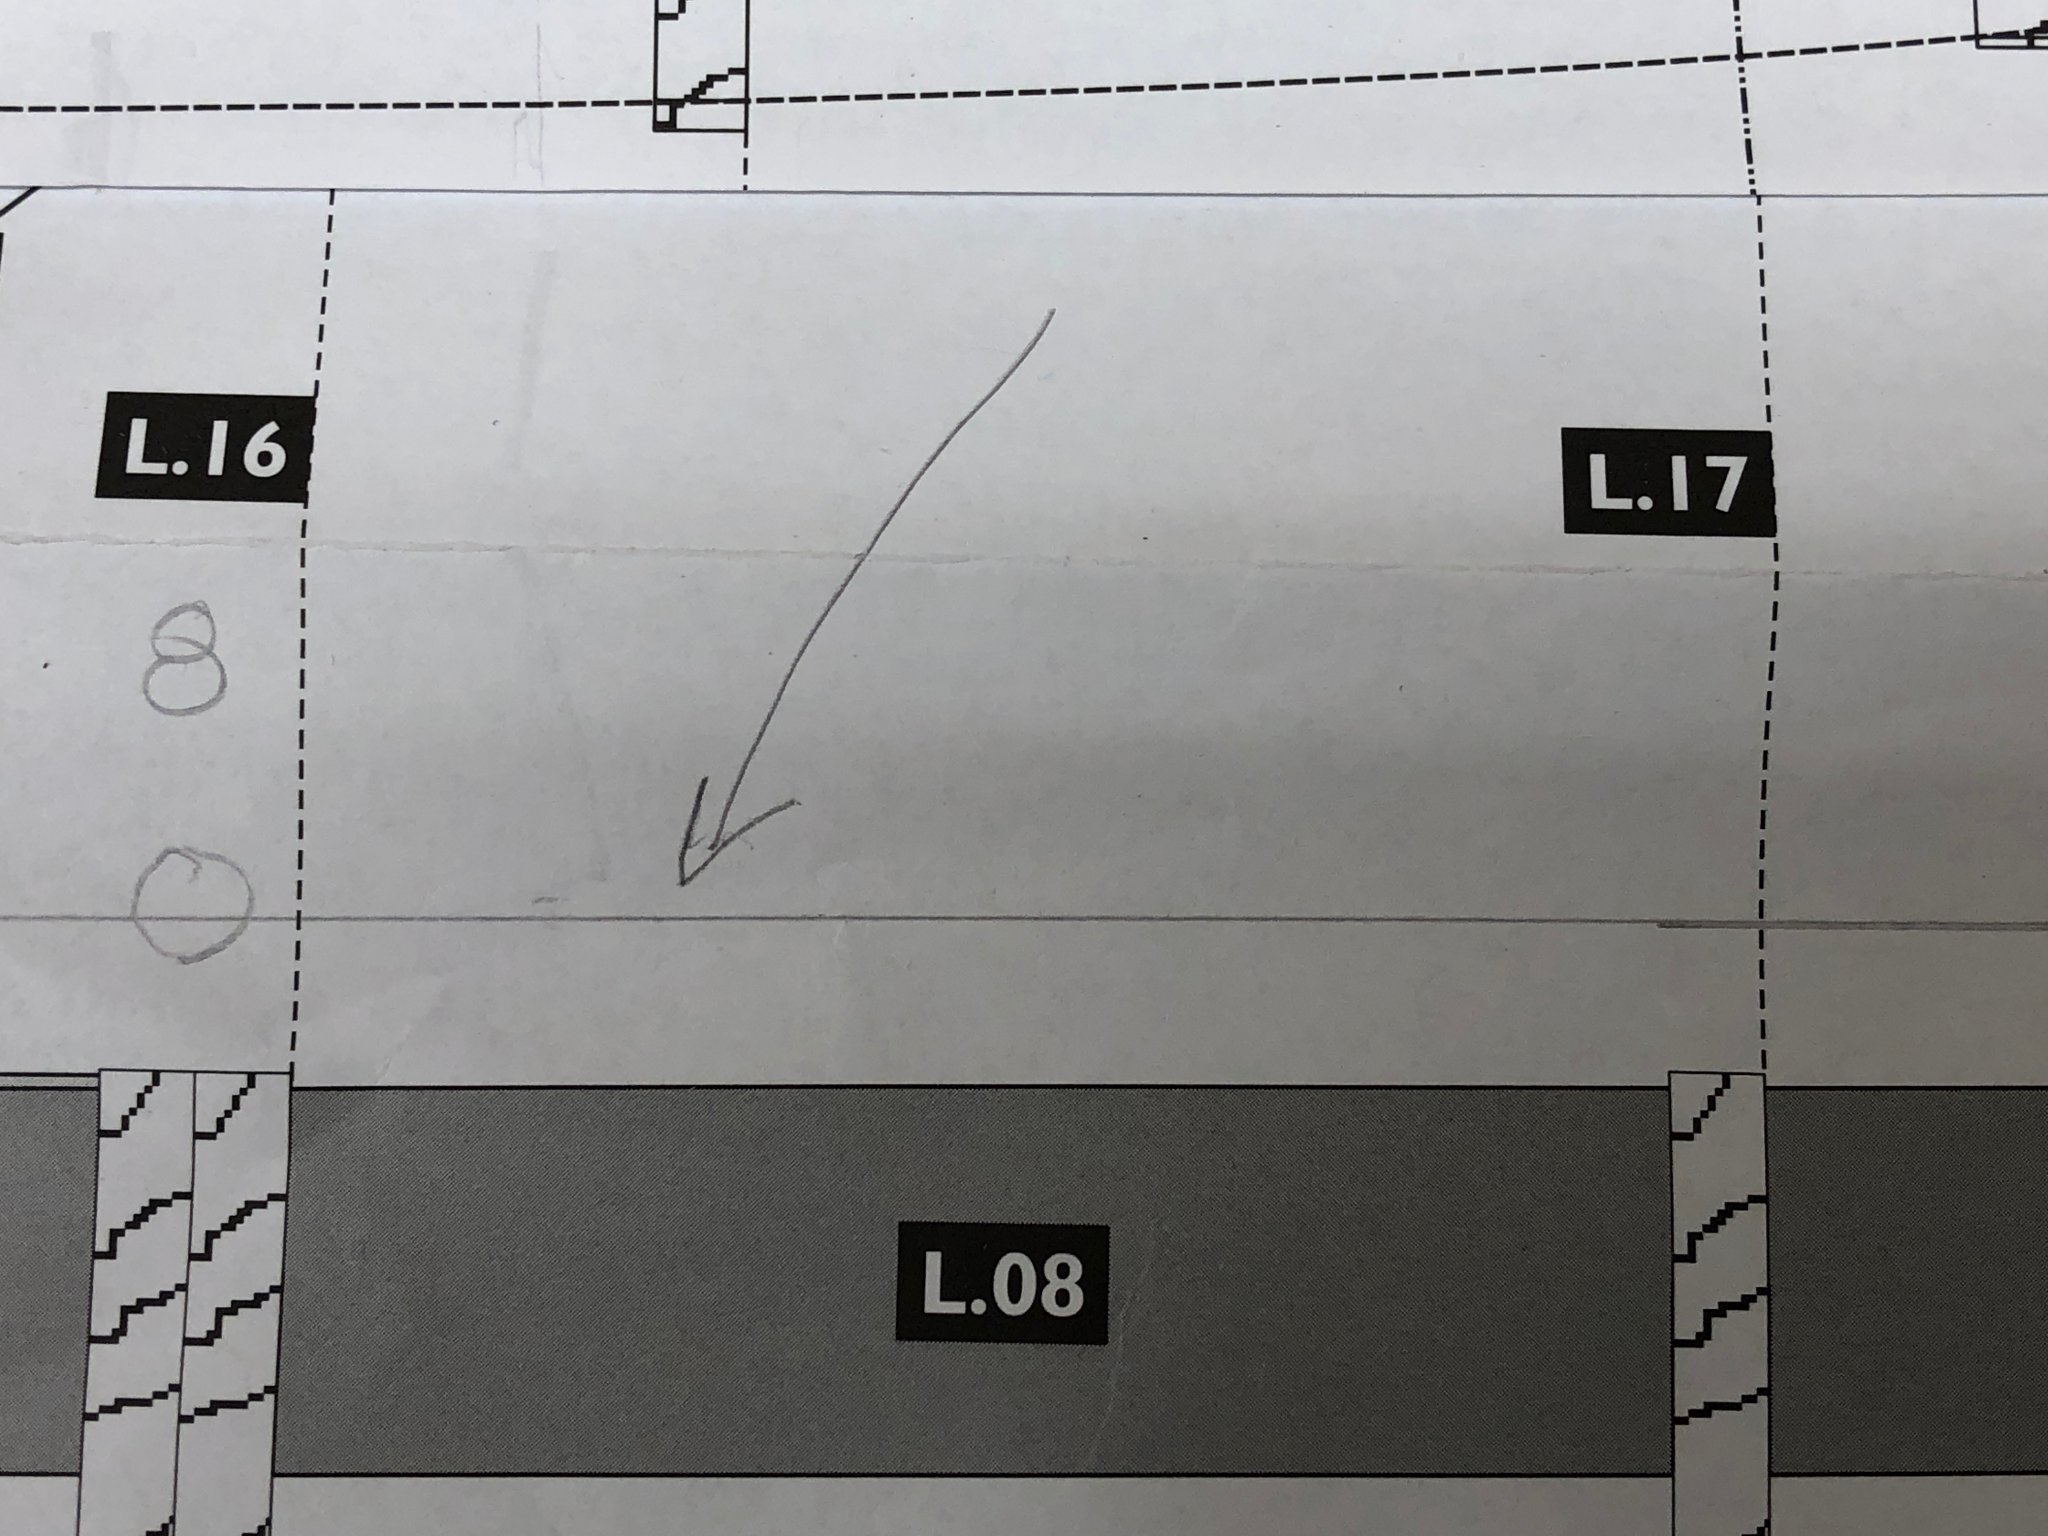
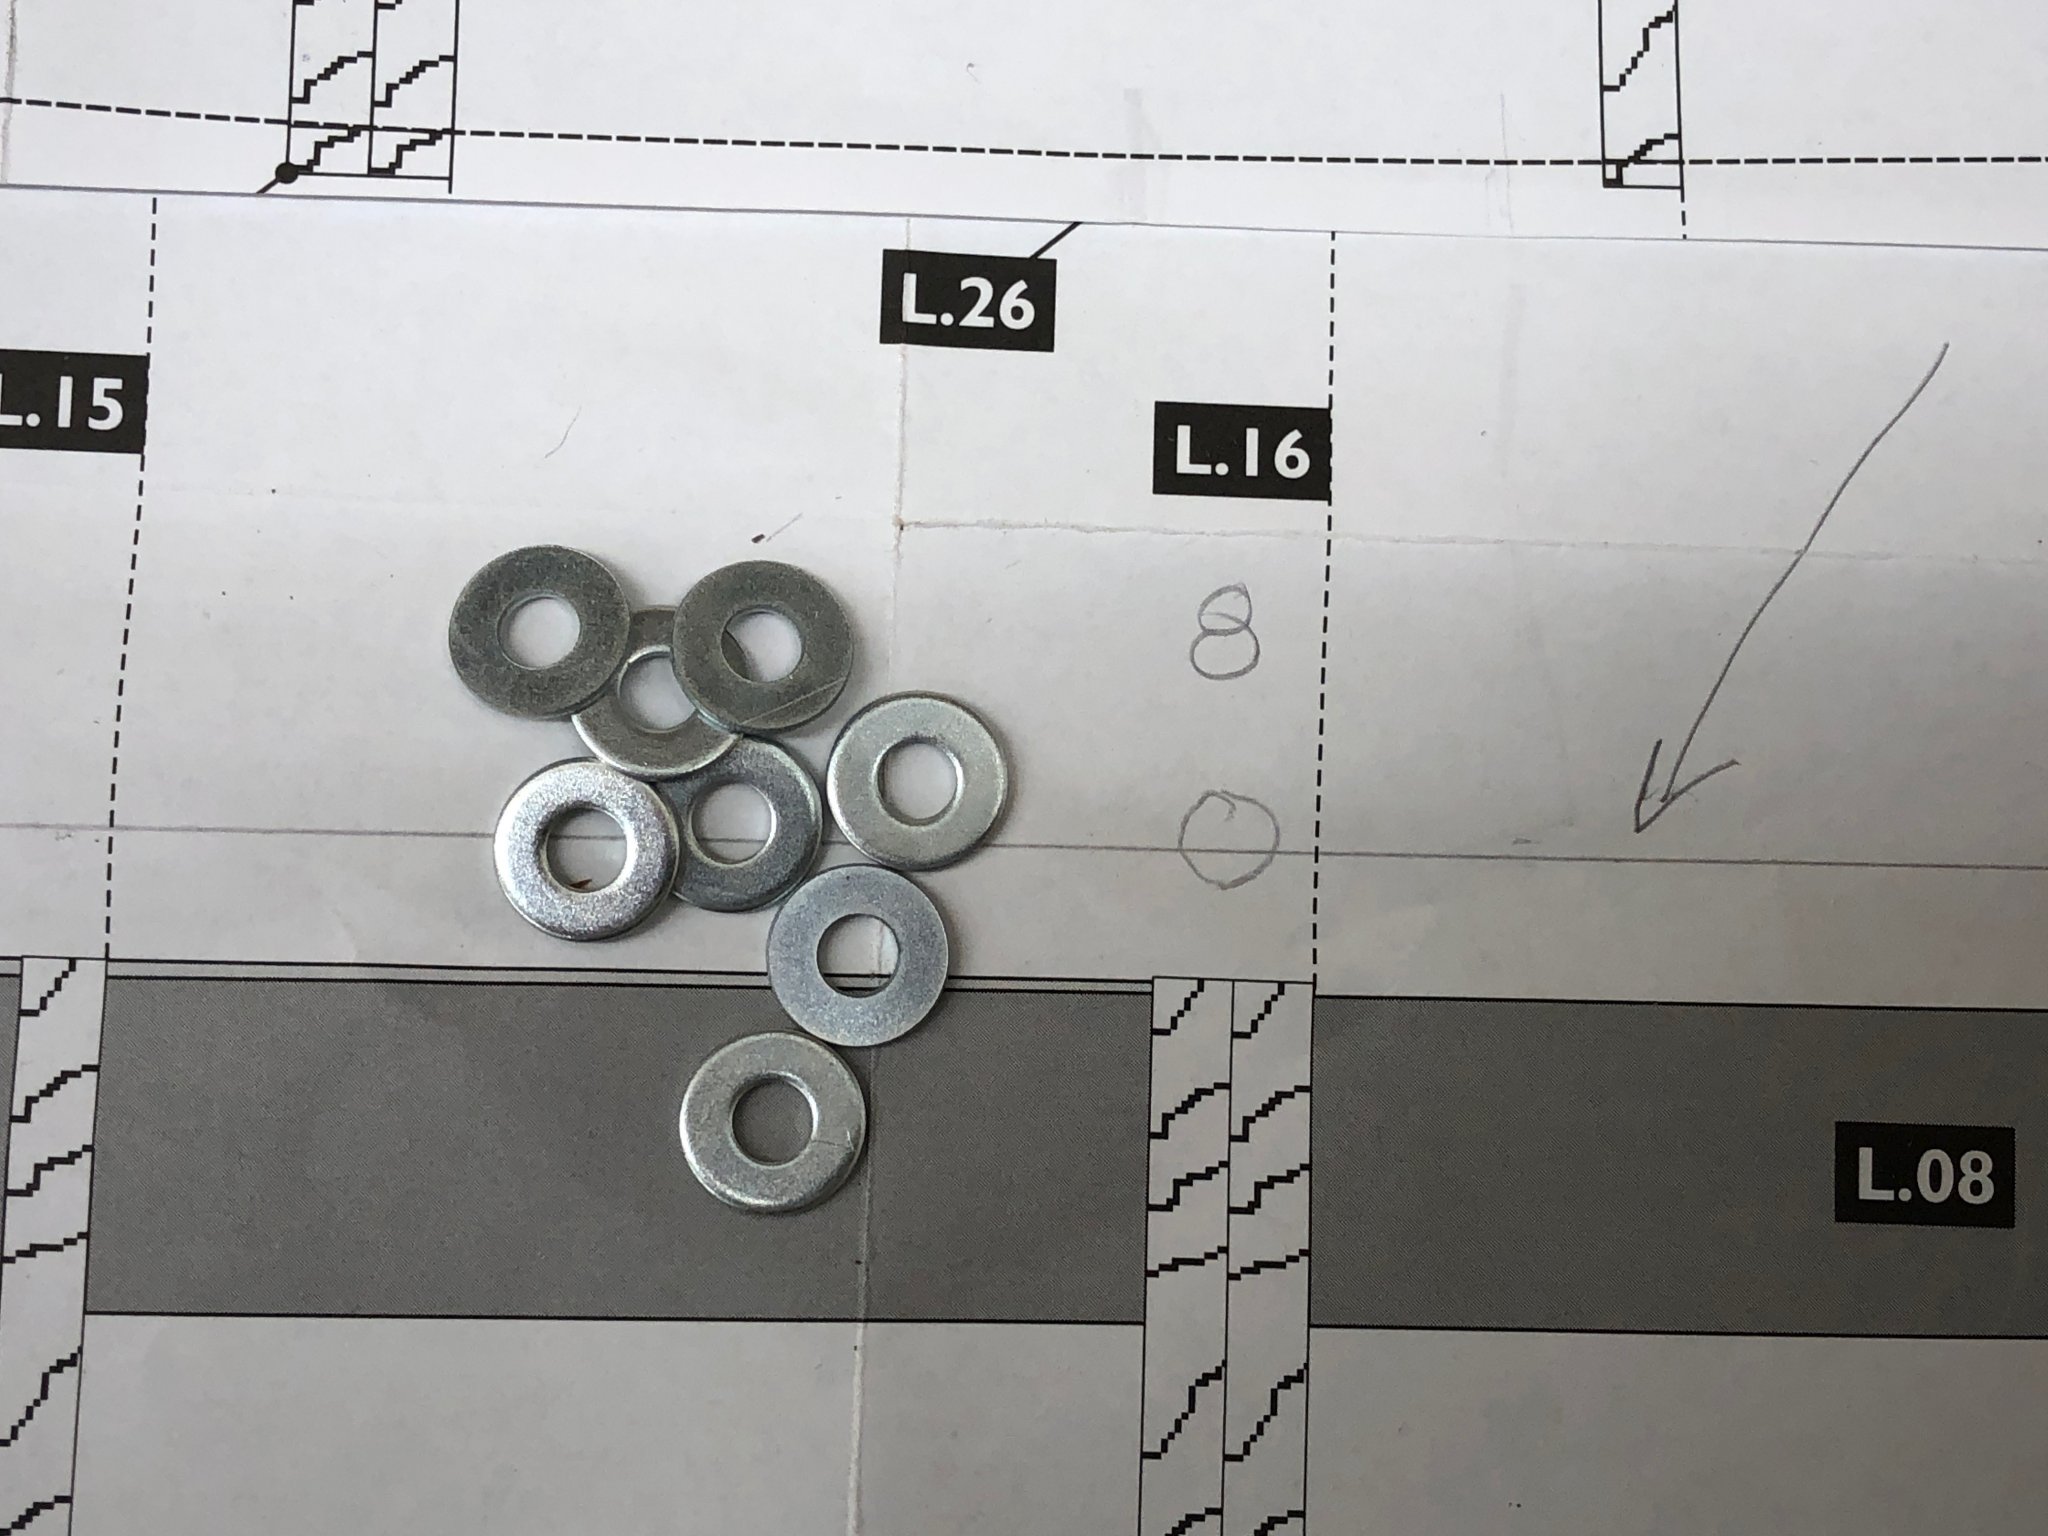
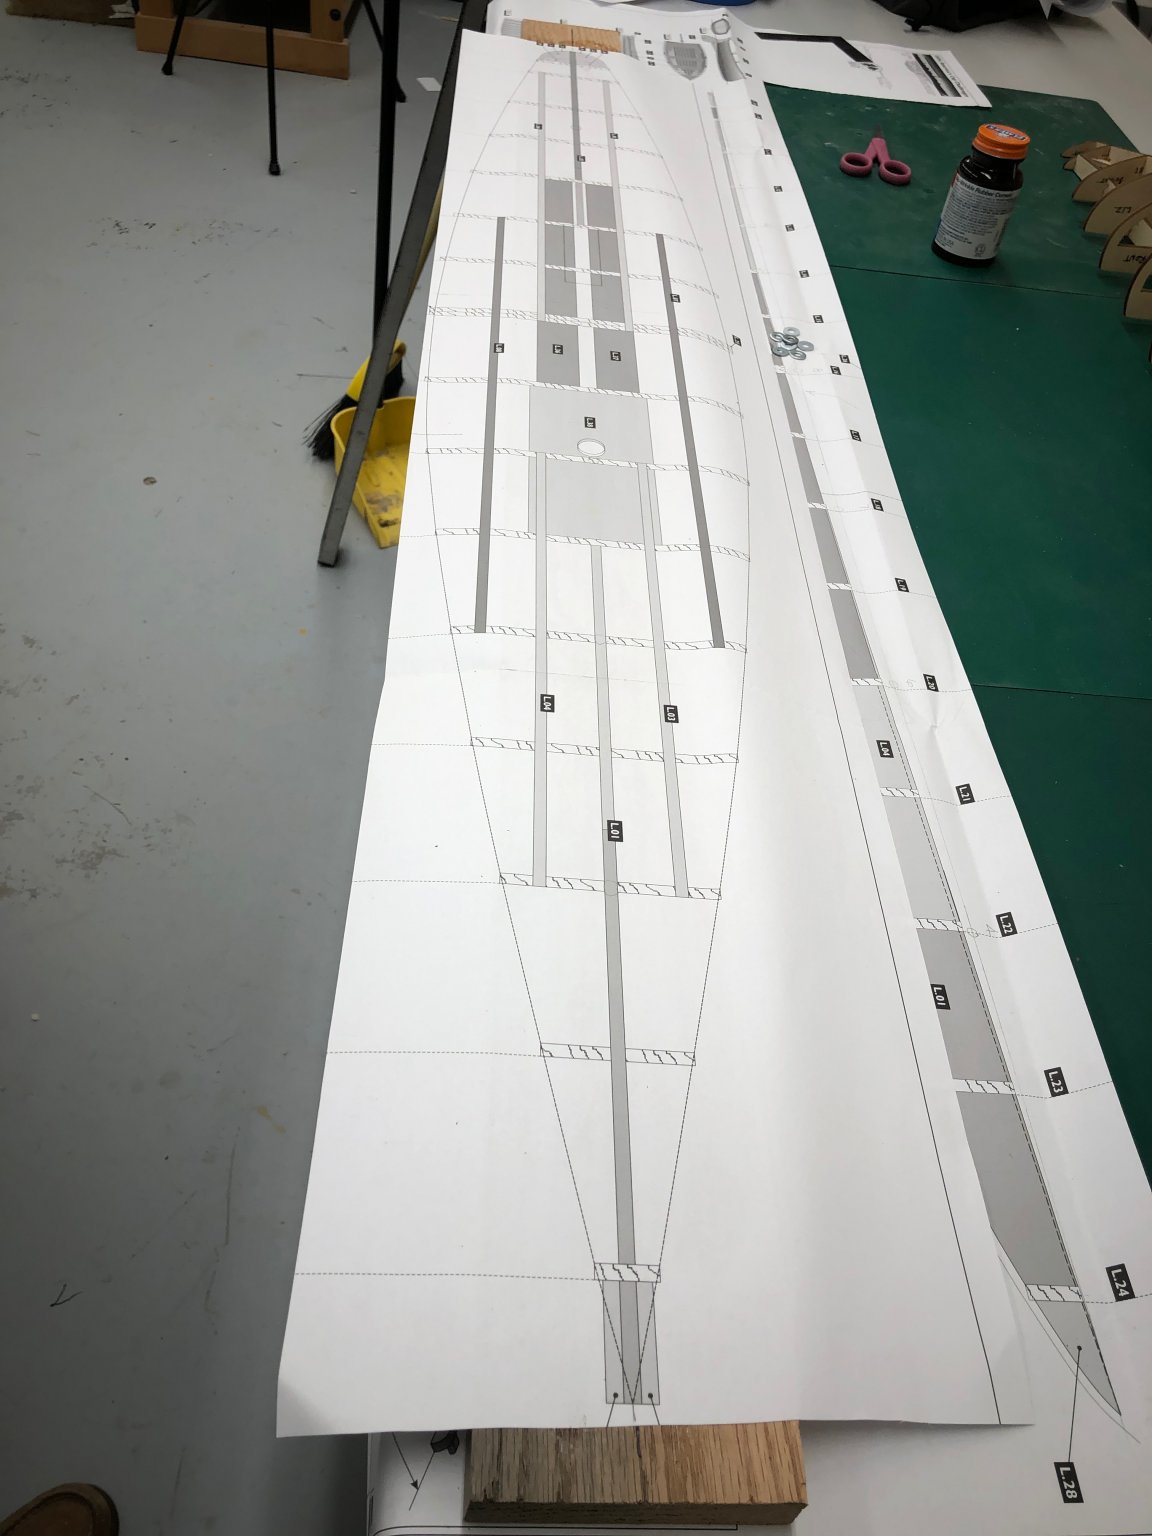
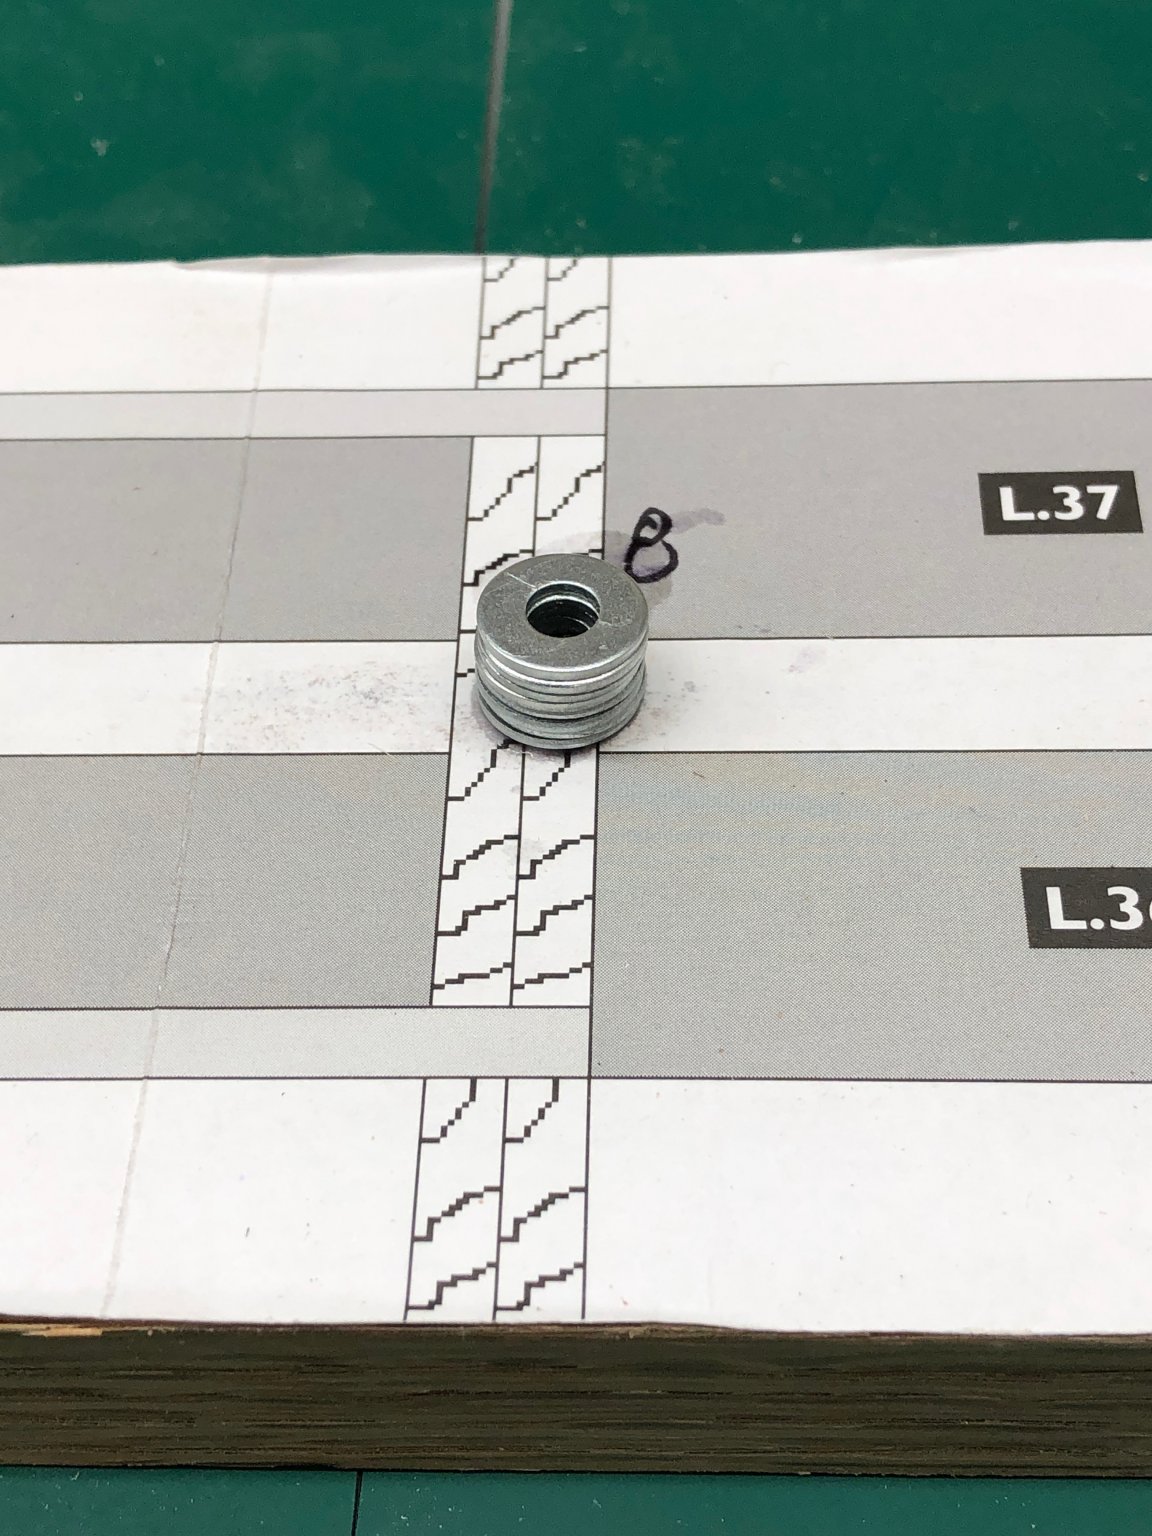
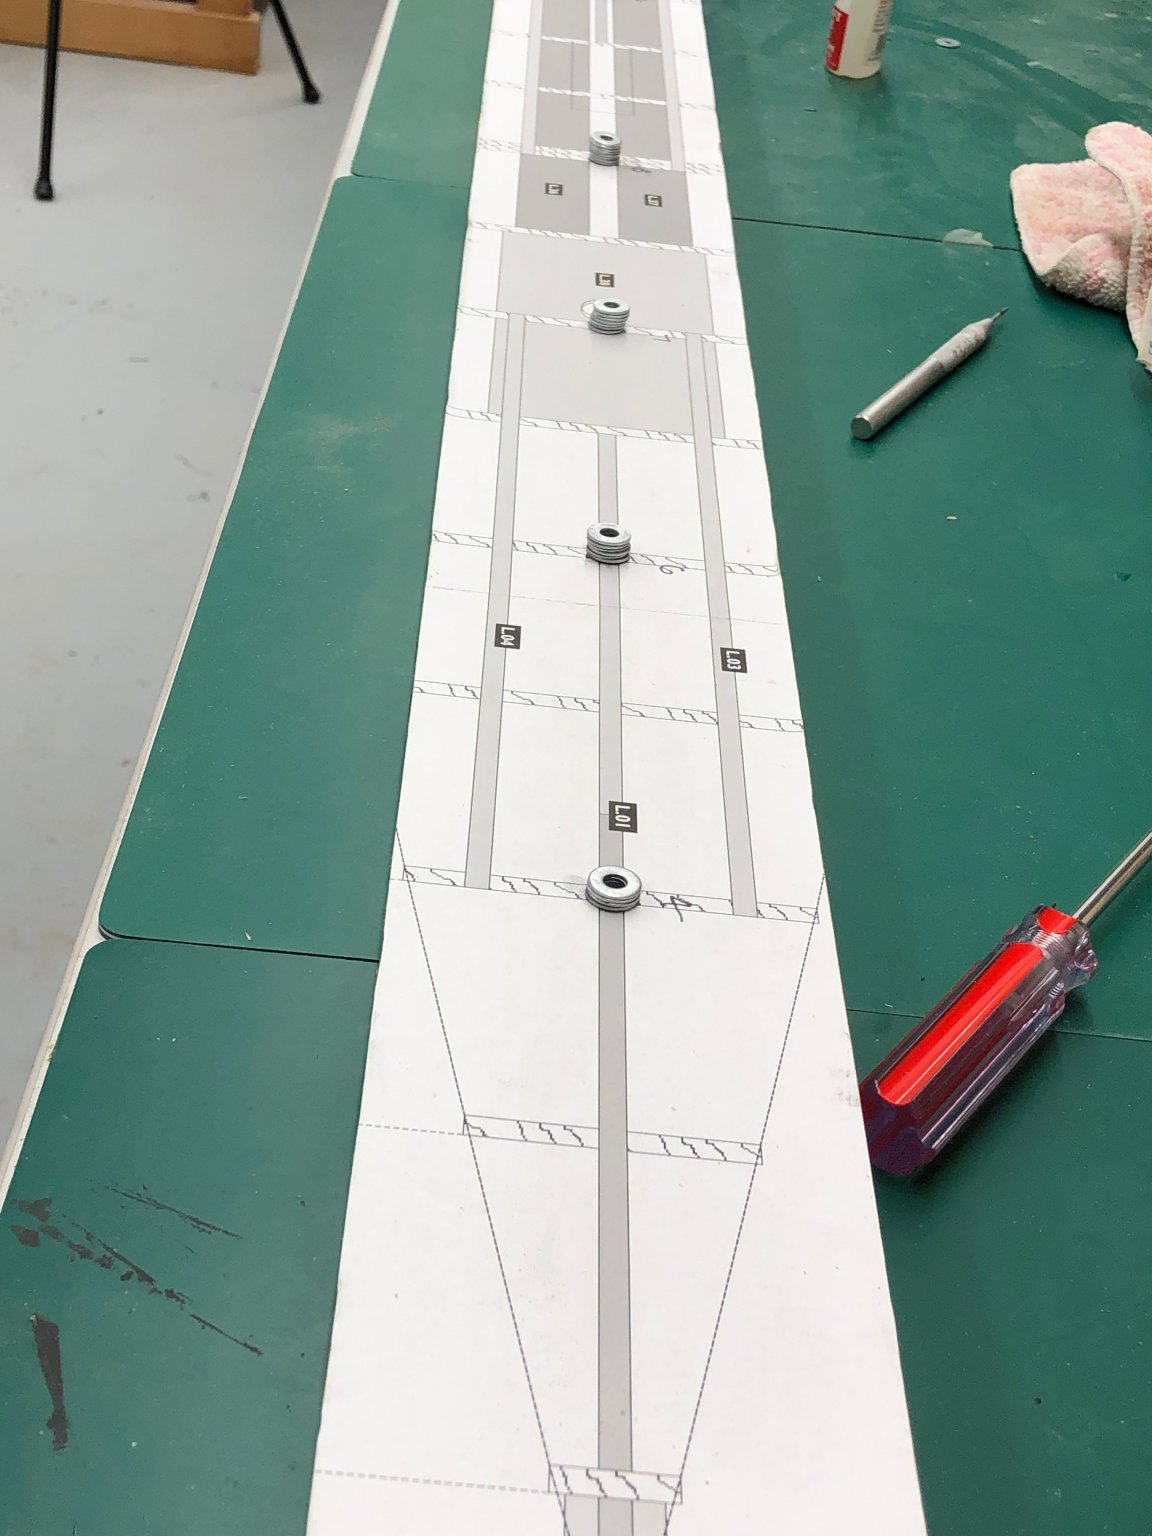
So I got the hull structure put together. I had to add a reinforcement at the juncture between L.38 and L.36 and 37. My first attempt at that joint failed when I had too many clamps on the forward section. I used a piece of the same plywood that the rest of the structure came from. So here is what the structure looks like at this point. I have not added the "extra" pieces at L.16 or the reinforcements between L.17 - 18 - 19 yet. Following the practice espoused in the few build logs that have built this version of the Endeavour I am going to put balsa "fillers" between the bulkheads to make planking easier (but generating considerable sawdust). Given that, I am not going to add the "extras" at L.16 since I will be able to put the hull plank joints wherever I want. I am also considering not worrying about the centerboard and leave those pieces out (or maybe add reinforcements) and plank over where the centerboard would be. Given the size of the model I do not anticipate making it any taller by having the centerboard down or anyone bothering to look at the very bottom to see if the slot is there. While considering those items I decided to make a "strong back" to mount the hull structure on while the fillers and hull planking are done. The instructions say to "tack" the deck pieces onto the structure presumably to add additional rigidity to the structure while planking. I think a strong back is a better idea, plus it will provide a place to mount the structure while planking. I bought the straightest piece of oak 1X4 I could find to act as the strong back and cut it to just over the length of the structure. It is not as wide as the structure but the next size up (1 x 6) was going to make things that much heavier and it is pretty heavy with the 1 X 4. So I got my 48" level (only presumably straight edge long enough) and drew a line on the elevation plan from the deck at the bow to the stern. I picked several convenient points (six) and measured how far the deck was from the line connecting the bow and stern. I used stacks of #8 washers to get as close to this spacing as possible at each point (8 was the largest pile). I then cut the plan view of the deck from the plans and rubber cemented it to my strong back. After trimming the plan to fit the strong back, I drilled and countersunk holes in the strong back where the washers would go and super glued the stacks of washers to the strong back. I then carefully drilled a pilot hole into the structure through the strong back hole and used #6 wood screws to attach the structure to the strong back at the six points plus the bow and stern. As I started this I was somewhat concerned about the stability of the structure from side to side since the deck camber means the outer portions of the structure are not supported, just the centerline. Although I have not done so yet, my plan is to cut wedges to stabilize the structure and possibly glue the wedges to the strong back, although it is pretty stable without them. Now on to sanding balsa - what fun.