
sixtythousandbees
-
Posts
5 -
Joined
Recent Profile Visitors
98 profile views


-
 druxey reacted to a post in a topic:
Lowell Grand Banks Dory by sixtythousandbees - Model Shipways - 1:24 - first build
druxey reacted to a post in a topic:
Lowell Grand Banks Dory by sixtythousandbees - Model Shipways - 1:24 - first build
-
allanyed reacted to a post in a topic:
Lowell Grand Banks Dory by sixtythousandbees - Model Shipways - 1:24 - first build
-
robert952 reacted to a post in a topic:
Lowell Grand Banks Dory by sixtythousandbees - Model Shipways - 1:24 - first build
-
allanyed reacted to a post in a topic:
Hello from British Columbia!
-
GrandpaPhil reacted to a post in a topic:
Lowell Grand Banks Dory by sixtythousandbees - Model Shipways - 1:24 - first build
-
GrandpaPhil reacted to a post in a topic:
Hello from British Columbia!
-
JacquesCousteau reacted to a post in a topic:
Lowell Grand Banks Dory by sixtythousandbees - Model Shipways - 1:24 - first build
-
AJohnson reacted to a post in a topic:
Lowell Grand Banks Dory by sixtythousandbees - Model Shipways - 1:24 - first build
-
sixtythousandbees reacted to a post in a topic:
Hello from British Columbia!
-
sixtythousandbees reacted to a post in a topic:
Hello from British Columbia!
-
mtaylor reacted to a post in a topic:
Hello from British Columbia!
-
MAGIC's Craig reacted to a post in a topic:
Hello from British Columbia!
-

Hello from British Columbia!
sixtythousandbees replied to sixtythousandbees's topic in New member Introductions
@allanyed, thank you so much for those resources! I’ve bookmarked them now. They'll give me something inspiring to look forward to as I work through my beginner projects. 😃 And @Wawona59, your kind comment was very well-timed. I’ve emerged from my first attempt at planking, and mistakes are definitely being made. 😂 It feels good to start from square one on a new skill though, especially with such a great resource/community like this site behind me. Right now, I’m more of a Stephen than a Jack when it comes to my boat-related knowledge—but we’ll get there!! One step at a time. -
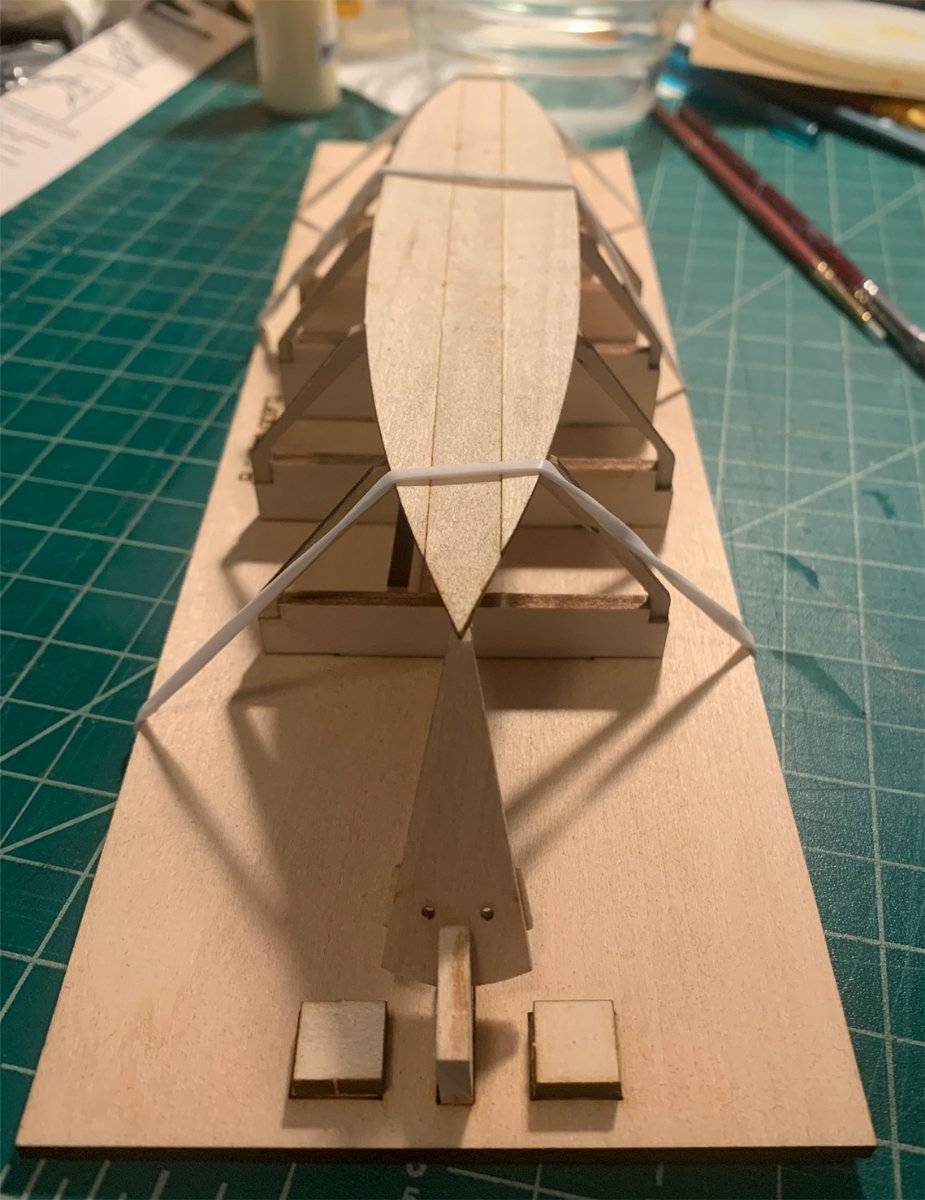
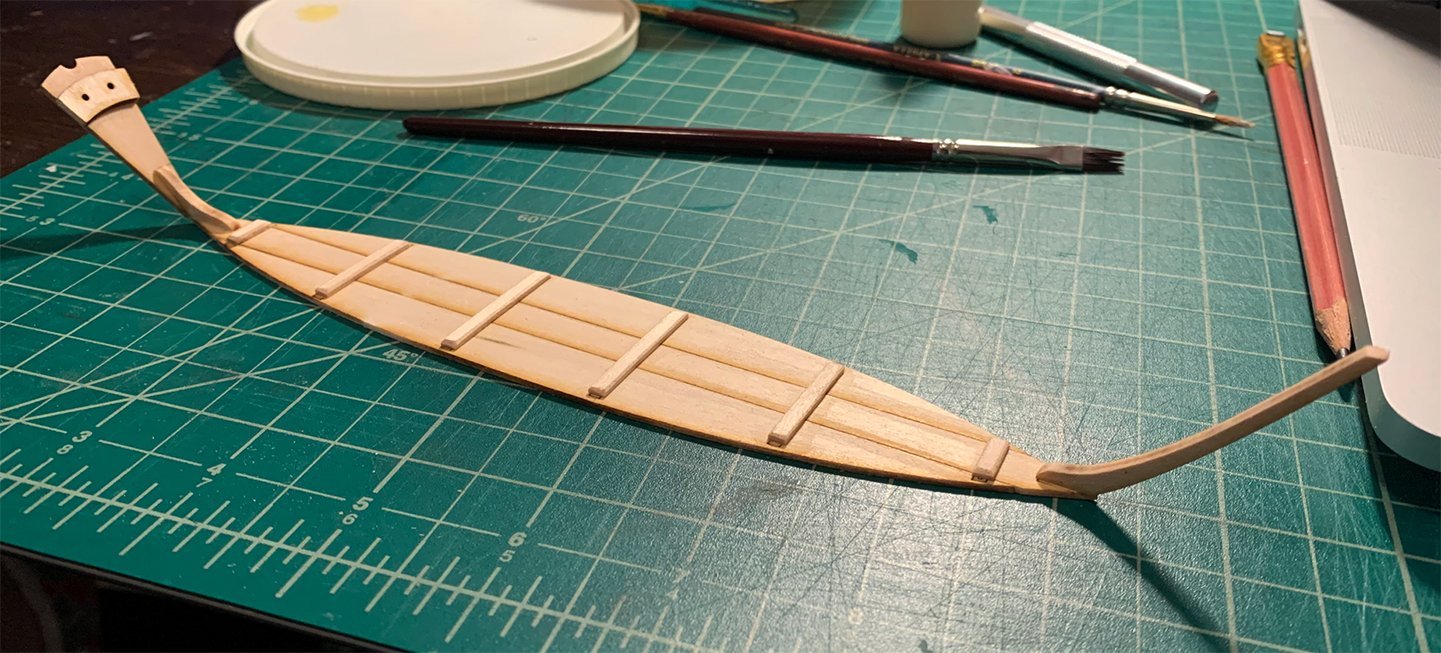
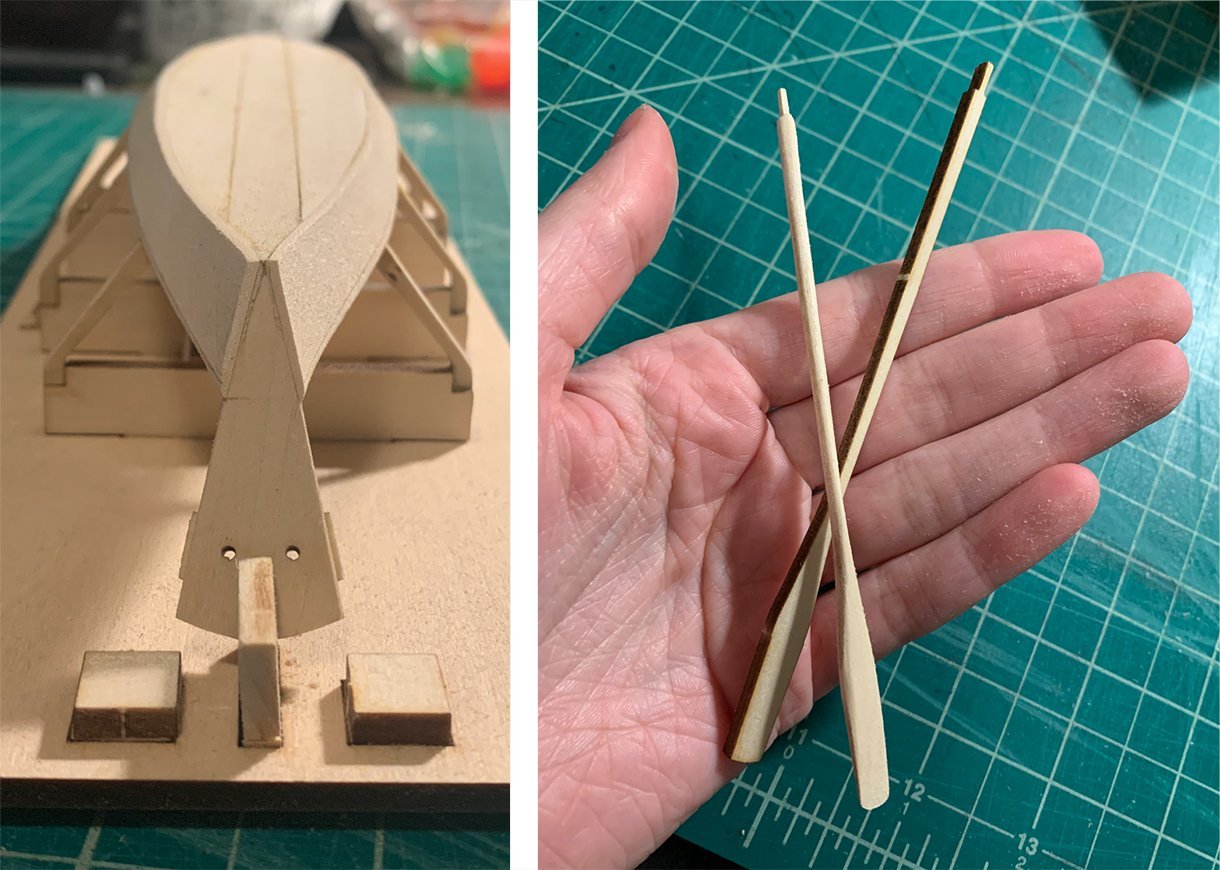
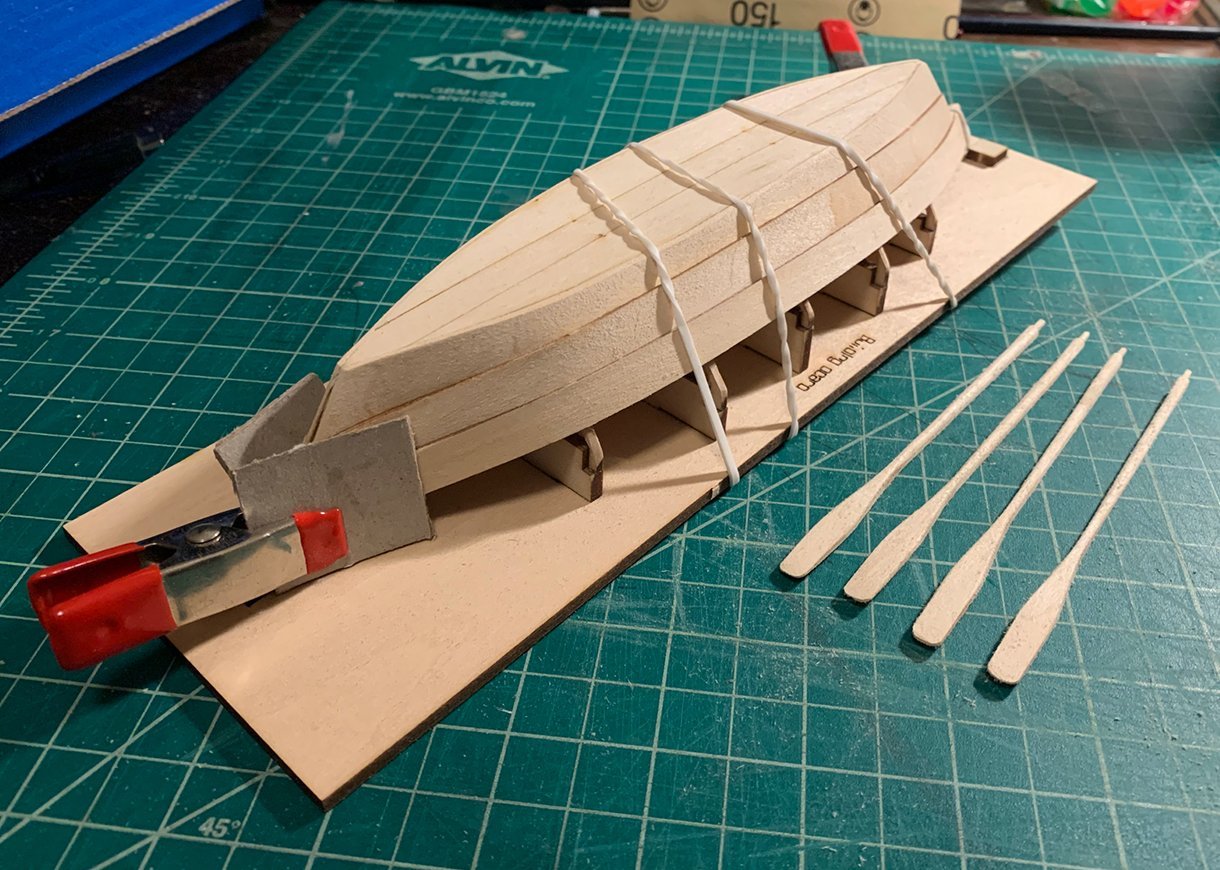
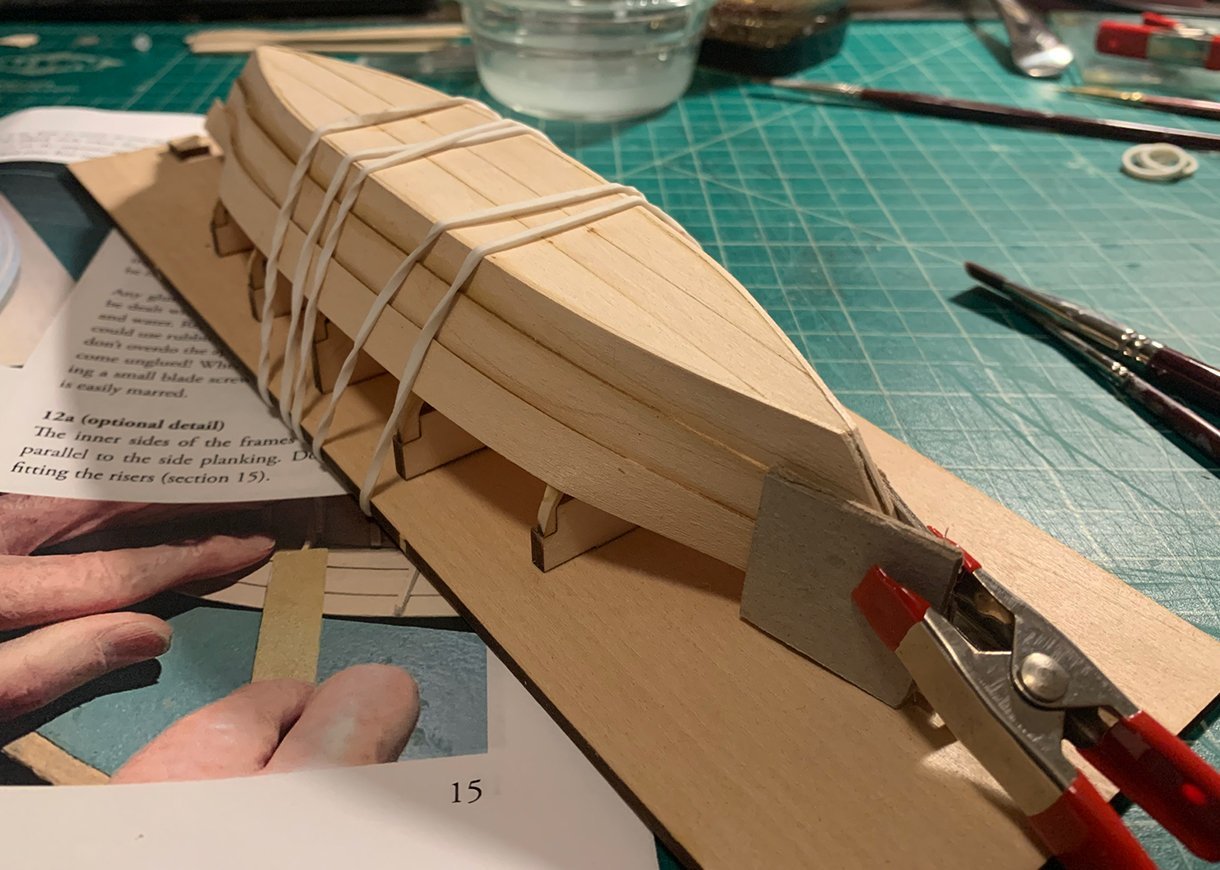
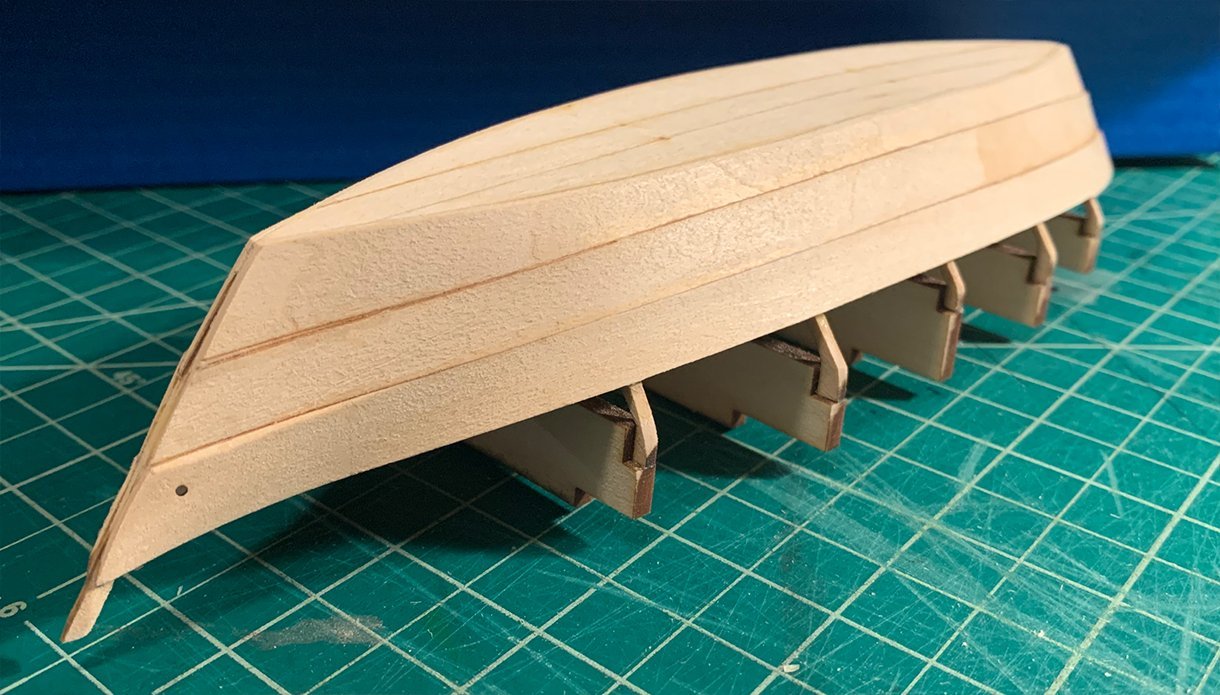
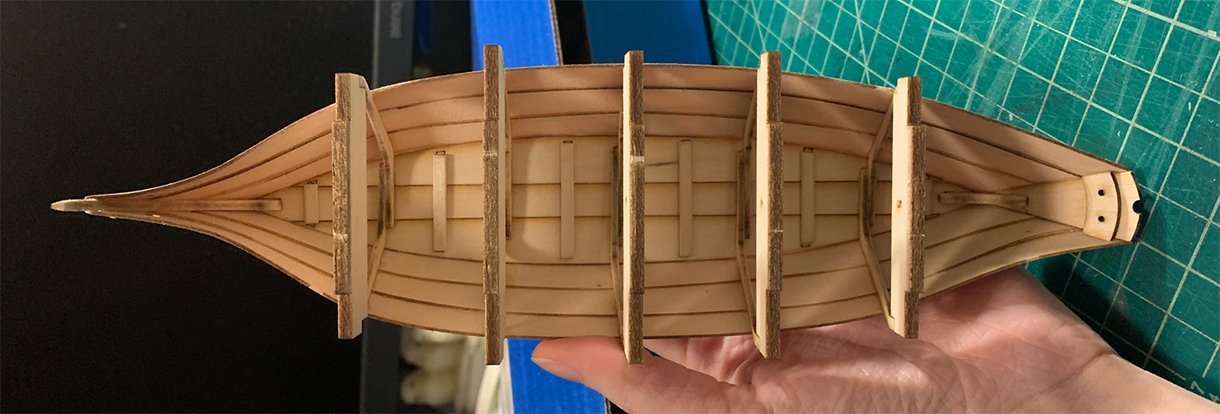
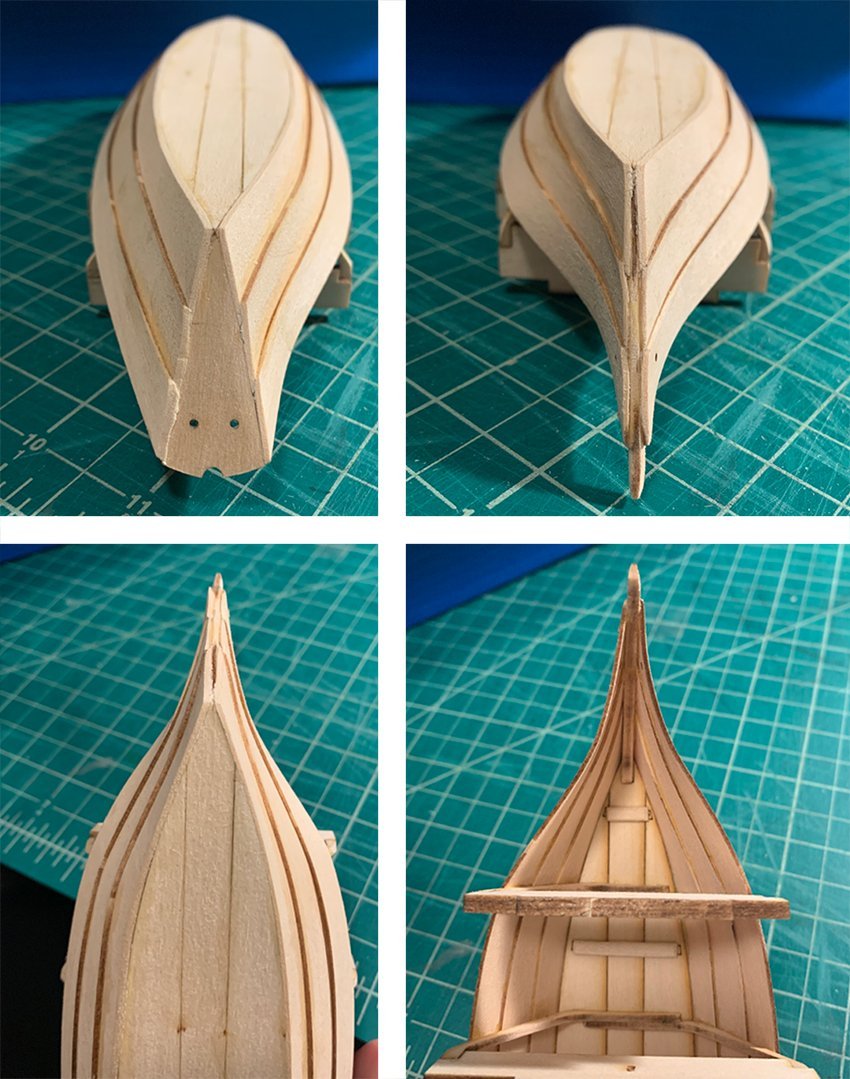
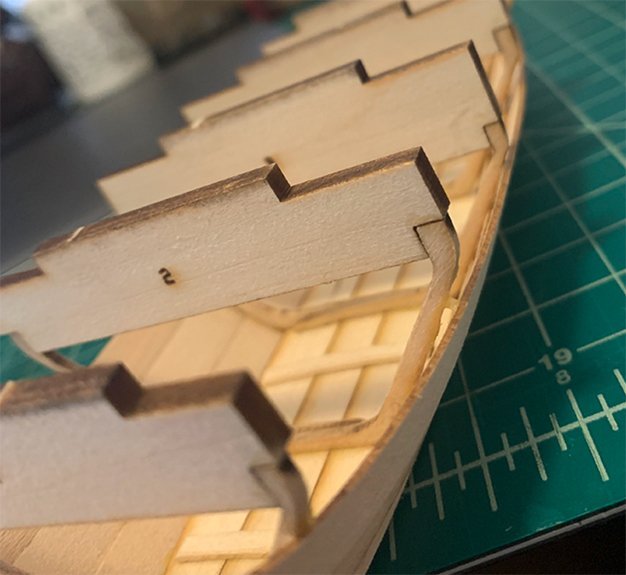
Thank you so much for the kind comments!! They’re really appreciated, this is such a lovely community! 😄 I have an update for you, filled with emotional highs, emotional lows, and a few in-betweens. Planking! Up went the frame. And looking back, this was mistake number one. (I never said the emotional highs were coming first. 😅) When the sawdust cleared and the glue dried, the base was eeeever so slightly shifted to one side. I didn’t notice it at the time, but I sure would later. Naively, I carried on. My stick couldn’t reach the tip of the stem, so I decided I would finish sanding it down once the boat was released from the board. I found the garboard gluing process was 40% hemming, 40% hawing, 20% “Oh! That was easier than expected.” I was very focused on making my planks level at the bow and stern. Pencil marks helped guide me, keeping both sides symmetrical. This was the first time an alarm bell rang in my head, warning that something might be going awry. The framing issue was noticeable now—one side sat at a slightly different angle than the other—but after determining my planks were still seemingly level, I decided to press ahead. As my next plank dried, I churned out some oars. A high point—I’m proud of them! I didn’t have the recommended clamp, but with some sandpaper and careful carving, they whittled down nicely just held in my hands. Not a single casualty. Attaching the broad plank was a bit tougher. I still don’t really understand one of the directions—we add a rolling bevel about ¾” long at both ends (which makes sense), but then we glue starting at the stem, cutting off overlap at the transom. Which…also cuts off most of that bevel? To combat this, when I started shaping the sheer plank I pre-marked where it would likely cut off and sanded my bevel a little longer to ensure it made it onto my dory. At last, it was time to free it. Excitement. Euphoria. A boat! I made a boat!! I made a— Very…misshapen boat! Huh. Well, not ideal. I was so wrapped up in making sure the planks lined up, that the overlap was just so, that my glue wasn’t messy—I didn’t pay any attention to the overall shape. Effectively, I didn’t see the forest for the trees. Or more accurately, the boat for the planks. The stern was dented on one side, and the bow was—for lack of a better word—pinched. Despite my best efforts, the transom had somehow shifted askew, too. Some of the frames weren’t fully touching the planks. Tragedy. I stared at it for a while, willing the poor thing to suddenly look better. (It did not.) I assume I’ll need to take it apart and try to get the planks to sit in a more pleasing shape. Question: If there’s anyone available to lend me some advice, should I strip this back all the way to the framing stage? Do I only need to go as far as the broad planks, taking extra care to give them and the sheer planks a better outward curl? I worry that’ll just exacerbate my issue with some of the planks and frames not meeting—though I suppose I can fill the gaps in afterward. A few shots of the problem areas: You can see above, like a bad plot in a murder mystery…my attempt at framing was full of holes. Mistakes aside, I’ve been having a blast working on this! A lot went right and a lot went wrong. If nothing else, it’s quite a fitting dory for my aforementioned injury-prone sailor. I’ll have to come up with a suitable name for it. Maybe “Clum-sea,” or “Sea la vie.” 😅

- 9 replies
-
- 7
-
-
- Lowell Grand Banks Dory
- Model Shipways
- (and 1 more)
-
sixtythousandbees reacted to a post in a topic:
Lowell Grand Banks Dory by sixtythousandbees - Model Shipways - 1:24 - first build
-
sixtythousandbees reacted to a post in a topic:
Lowell Grand Banks Dory by sixtythousandbees - Model Shipways - 1:24 - first build
-
sixtythousandbees reacted to a post in a topic:
Lowell Grand Banks Dory by sixtythousandbees - Model Shipways - 1:24 - first build
-
sixtythousandbees reacted to a post in a topic:
Hello from British Columbia!
-
sixtythousandbees reacted to a post in a topic:
Hello from British Columbia!
-
sixtythousandbees reacted to a post in a topic:
Hello from British Columbia!
-
sixtythousandbees reacted to a post in a topic:
Hello from British Columbia!
-
sixtythousandbees reacted to a post in a topic:
Hello from British Columbia!
-
Hello from British Columbia!
sixtythousandbees replied to sixtythousandbees's topic in New member Introductions
Thank you all for such a warm welcome, I really appreciate it. 😃 Chris, a kindred spirit! I’m a copywriter. I like to say that I get paid to make puns. And Allan, it is. I’m glad to hear it was a good place to start! I stumbled across a post here recommending it for beginners. I suppose I owe that mystery user a thank you—here I was, naively reaching for an Enterprise-class frigate. 😂 Dory first! 28-gun frigate much, much later. -
Hello! My name is Monique. It’s lovely to meet you all. 😃 For the last few months, I’ve been on the hunt for a hands-on, off-screen hobby. Inspiration struck while listening to an Aubrey-Maturin audiobook. Why buy a gym membership (destined to go unused), when I could pick up a craft instead? I found myself on this forum, wondering what it would take to build a model of the book’s HMS Surprise. The answer? A lot! It would take a lot. A lot of skill, a lot of time, and a lot of money. Setting my new white whale aside—but still determined to start—I purchased a dory kit instead. I figure this will be a good chance to test the waters without jumping straight into the deep! I’m new to model-making, but it feels right up my alley. I have a degree in illustration and have done some bookbinding, meaning a surprising number of the tools are already on hand. I also write for a living, so spending too much time on tiny little details is my bread and butter. Fingers crossed these skills transfer over. Although I’ve only made a few posts, this forum has already helped me a ton. Build logs have been an incredible resource. I can only hope something in mine helps the next person too. If you’d like to follow my build, I’ve started my first log here. Thank you for reading! I hope you have a great rest of your day. Monique
- 15 replies
-
- 12
-
-
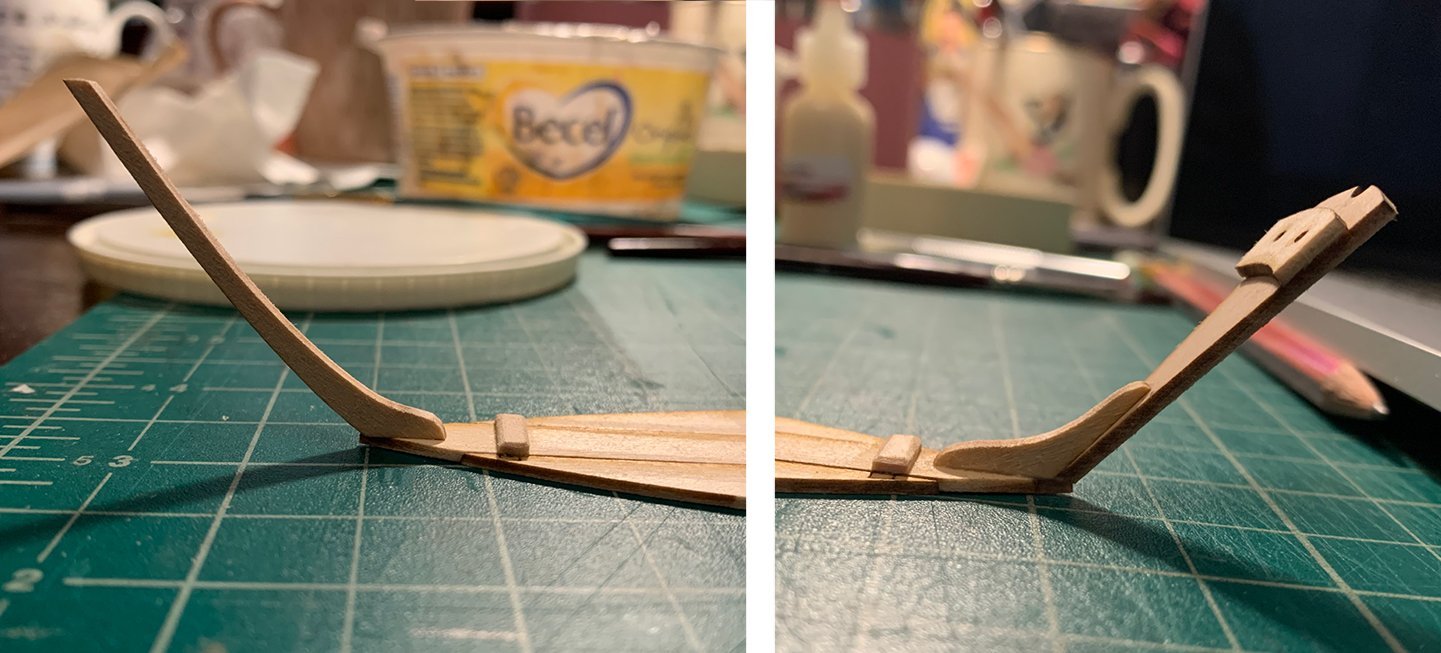
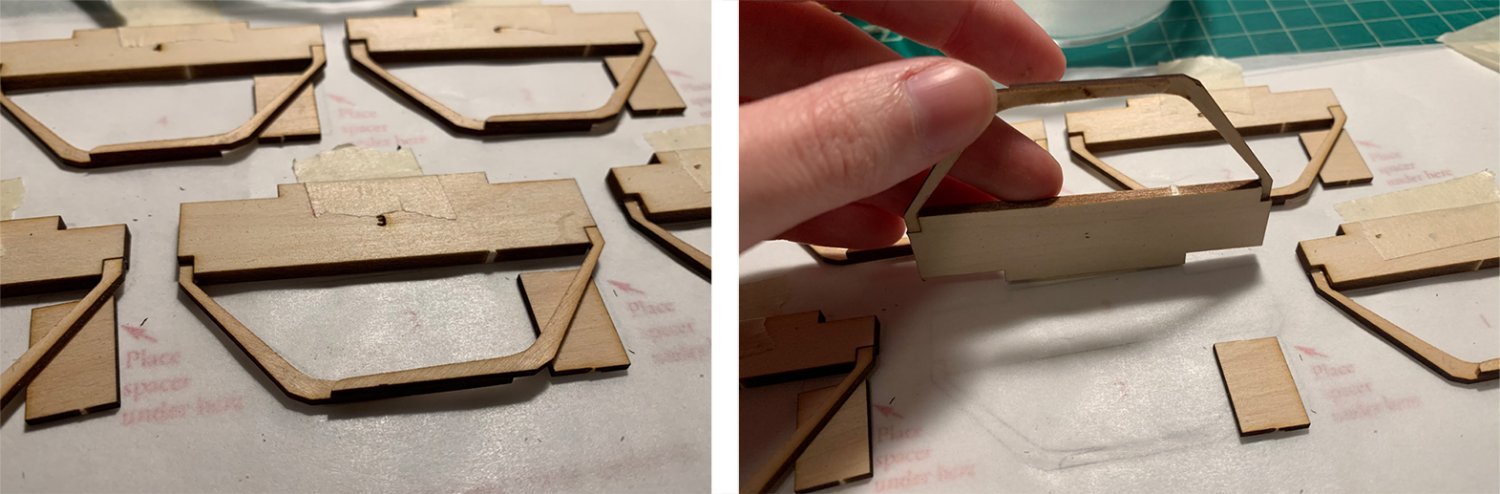
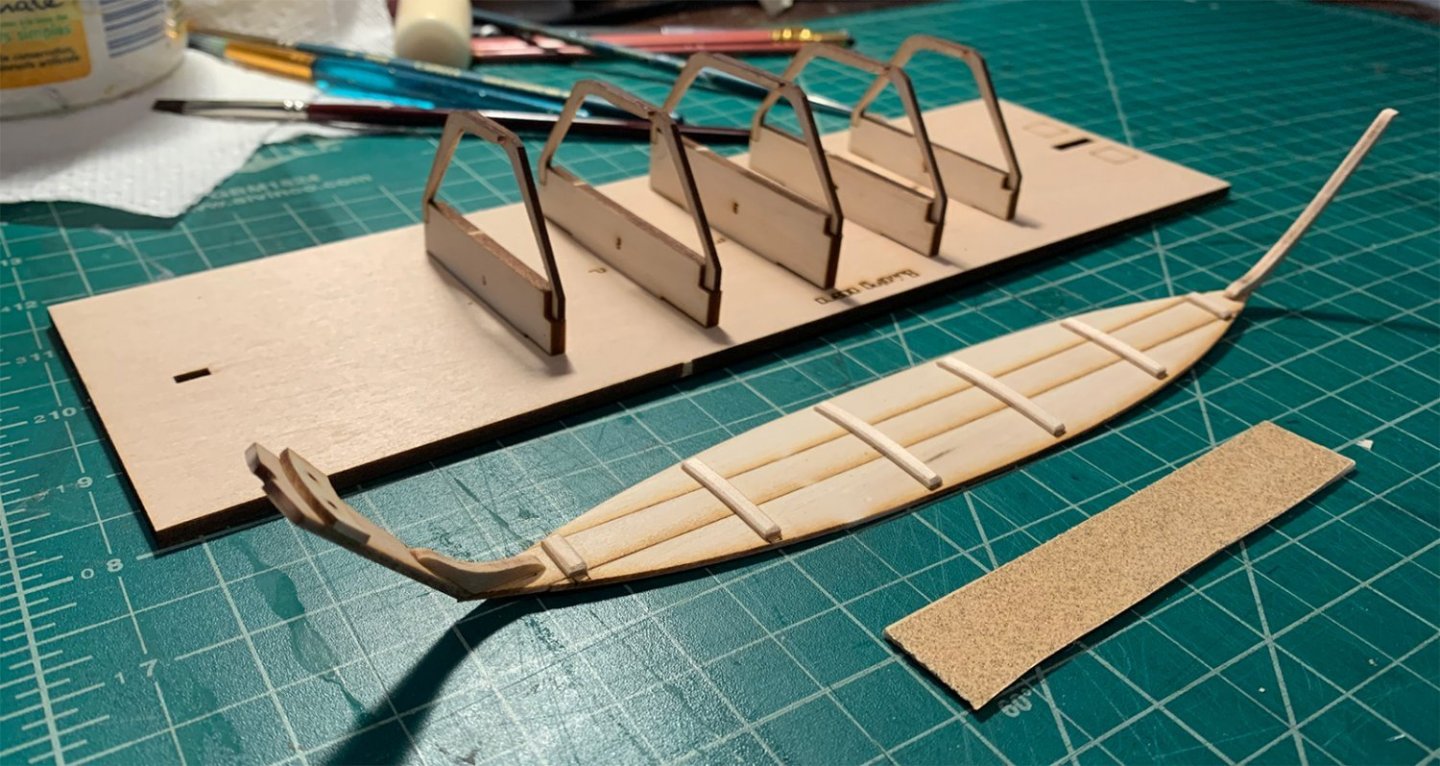
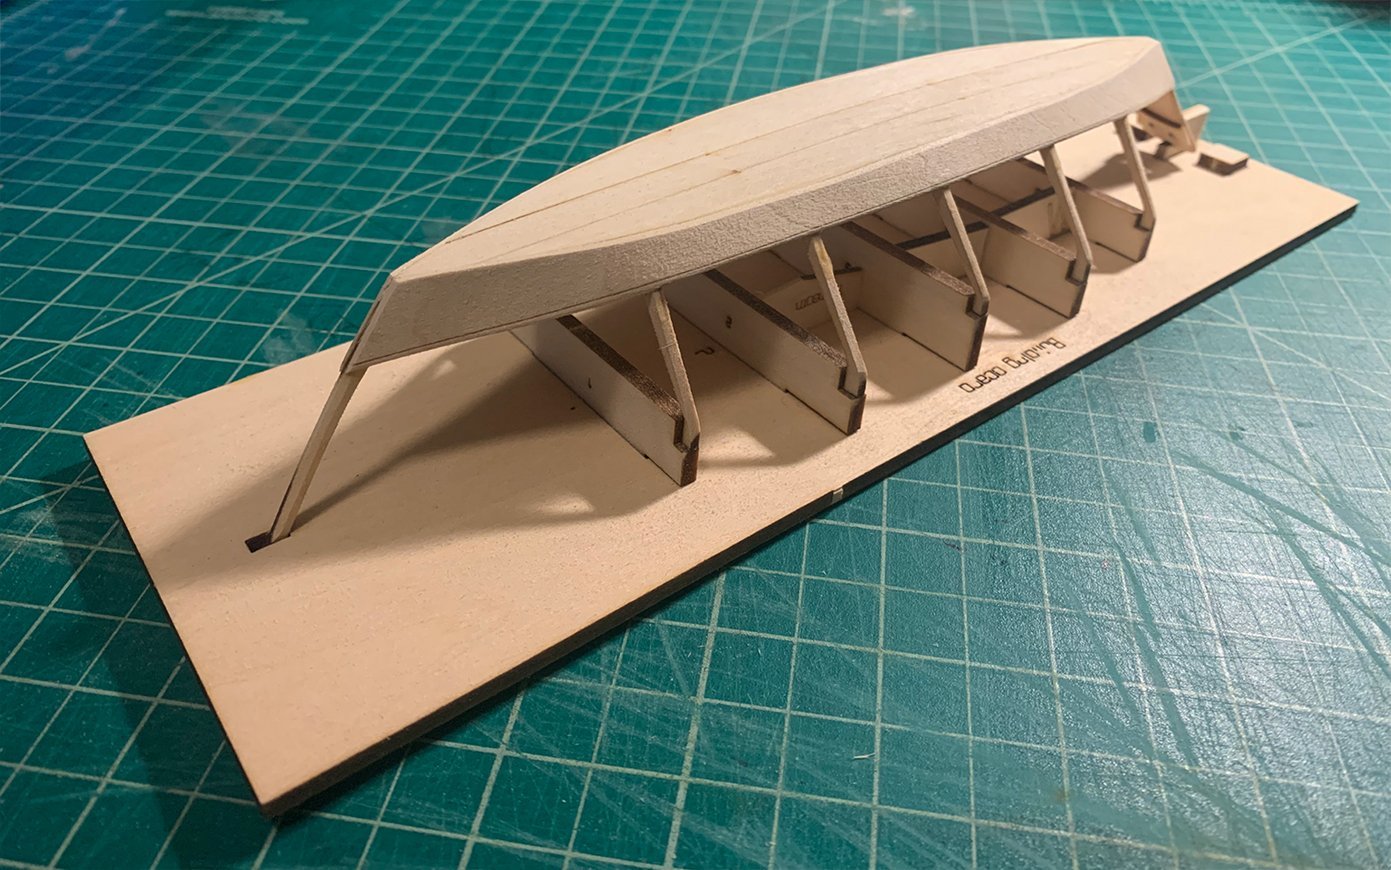
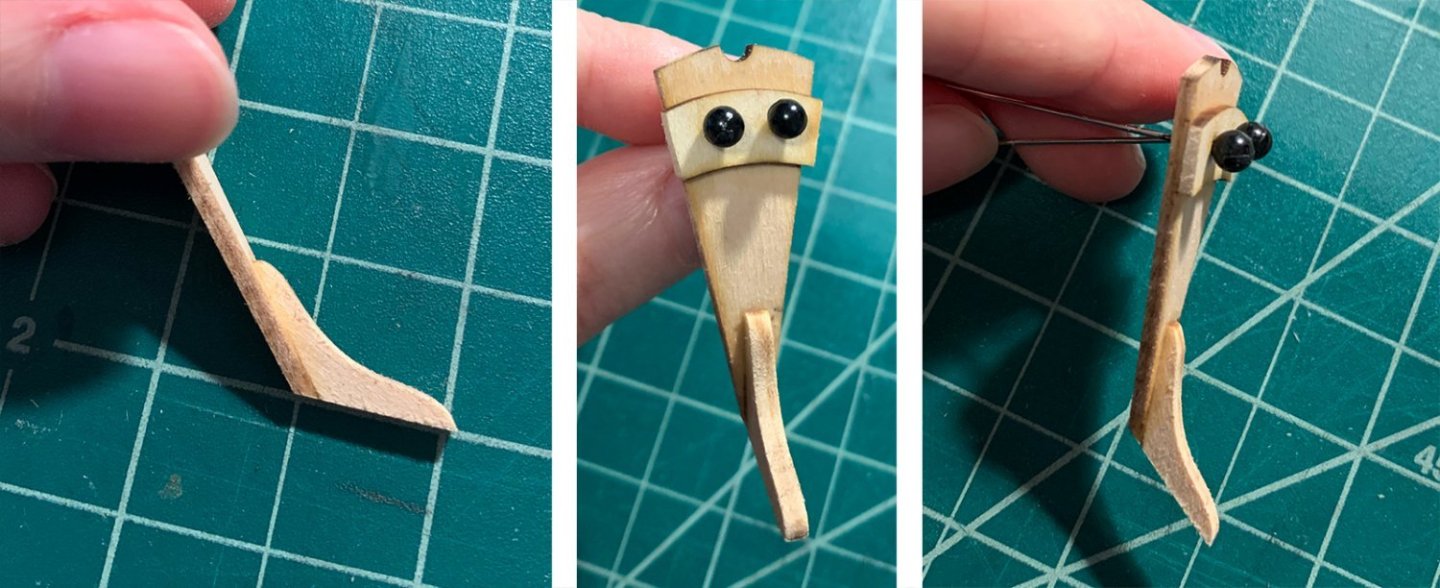
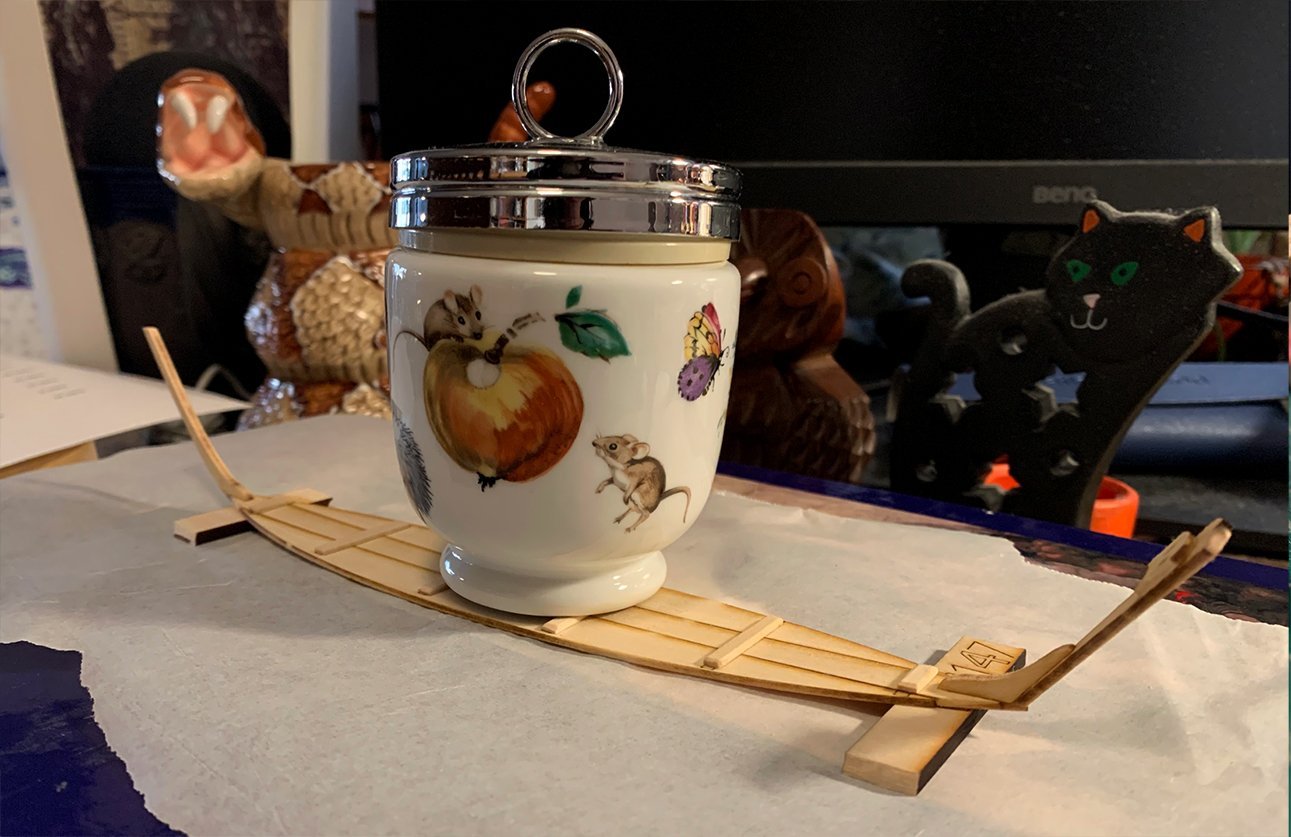
My first build! As exciting as it is intimidating. After staring at the box for a bit, getting over my nerves, I cracked my knuckles and cracked open the lid. Step one admittedly wasn’t photogenic—I made sure all the pieces were present, gave the full instructions a careful read, and then poured over multiple build logs. The next day, the real fun began. I opted to build the bottom from scratch rather than use the pre-made piece. This meant cutting, gluing, and sanding—so much sanding. I was skeptical at first, but low and behold, the instruction’s tip about moving the piece rather than the paper worked. Instead of a sanding stick, I opted to just tape some sandpaper flat to my working surface. A great decision for these long, straight pieces! Not so great for others. (More on that later.) Hoping to spare my fictional sailor a tumble into a sharp corner, I studiously over-sanded the edges of my cleats. The instructions spoke about removing edges to prevent injuries—but…what about the thole pins? They make sense to have, but I can’t help but think they’re a stab wound waiting to happen. A poor fate for a clumsy sailor… When sizing the cleats, I ignored the length of the burnt guidelines. Instead, I followed what other builders had done and made sure each one had some breathing room before the edge. After sanding and gluing the stem without incident, the transom gave me pause. I decided to go a little off-book, sanding it and the stern knee together before attaching the stern cleat. It seemed to me like a choice between vigorously sanding three freshly glued, breakable parts or two. (I opted for two.) I’m really proud of how it turned out! After adding glue to the transom and plopping the stern cleat on, I strung the two together with sewing pins. This let me squish the pieces together without fear of misalignment or gluing the holes shut. It also made it a million times easier to brush away excess glue. A simple strategy, but very effective. Should the edges of the stern cleat be softened as well, for our clumsy sailor? The instructions didn’t mention it so I refrained, but I feared once again for his poor noggin. After that, I was humbled. I spent far, far too long attaching the pieces to the bottom. I thought about it, researched it, did it, fussed with it so much the glue gave up, then had to do it all over again. I just couldn’t decide on the alignment. Should I follow the burnt template line, allowing a bunch of the stern knee to hang over the edge? Should I keep the point of the base and the outside of the transom lined up? Other build logs seemed to differ, and I couldn’t find many clear shots from the side to compare. I’ll upload pictures of mine. If it turns out I made a bad choice, others will know what not to do. If it works out—whew! One of the things I’ve enjoyed most about these dory build logs has been seeing what random things people scrounge up to use as weights. For mine, I made use of an egg cup my grandfather gave me. The whole kit and caboodle was set aside to dry, with a few other rejected weights keeping watch behind it. Onto the frames! I’ve seen many people comment on the template being the wrong size. I actually found it to be exactly 1:1—which makes me think I’m either lucky or doing something wrong. A few things I found helpful: I taped a sheet of parchment paper over the template to avoid gluing the paper. I numbered and labelled each left and right piece in pencil before cutting them free. This saved me almost immediately when I cut out and sanded a “2R” instead of a “3R”. It occurred to me I could have used this labelling as an opportunity to practice “port” and “starboard”. Then I realized I’d be adding additional challenges to an already daunting project. Left and right it was. A note to myself for next time: this worked great, but the pencil was difficult to erase before gluing. I’d write lighter next time. I prepped the frames one at a time but held off on gluing. The process: pick a number, label the two frame pieces, cut them out, sand them down with a scrap of sandpaper, then dry assemble it on the template. Once all of the frames were sitting primly in place, I could go through and glue them all at once. Since the glue dries so fast on my palette, I found this more economical (and it saved me some brush washing). I taped down the crosspieces. I’m so thankful I taped down the crosspieces! It meant I could easily lift the whole thing upward to clean the excess glue beneath, then settle everything right back into place. Free spacers were helpful to tap the freshly glued bottoms against, ensuring they were flat. This stage was when I really started feeling my lack of a sanding stick. I’ve got an old wrist injury, and it was starting to complain. So were my fingers, which had been slowly filed down alongside my pieces. Ah well. Funny how every tip I followed treated me well, and I regret skipping the one I didn’t. Almost like I should listen to the experts… After gluing up the frames, I checked the status of my now-dry boat bottom and found it lacking. Out came the water again, and a book was added to the weight mix. That’ll show it. I seriously debated continuing, but as I’d just spent half the day squished up at my table, a break seemed in order. I’ve got the itch now! But planking is intimidating. A problem for later…after my new sanding stick dries. 😄


- 9 replies
-
- 12
-
-
- Lowell Grand Banks Dory
- Model Shipways
- (and 1 more)