
PvG Aussie
-
Posts
402 -
Joined
-
Last visited
Content Type
Profiles
Forums
Gallery
Events
Everything posted by PvG Aussie
-
 Bloody oath we do! Specially in Queensland ... hey? Peter 🍍
- 235 replies
-
- 6
-

-
- Banshee II
- Bottle
- (and 1 more)
-
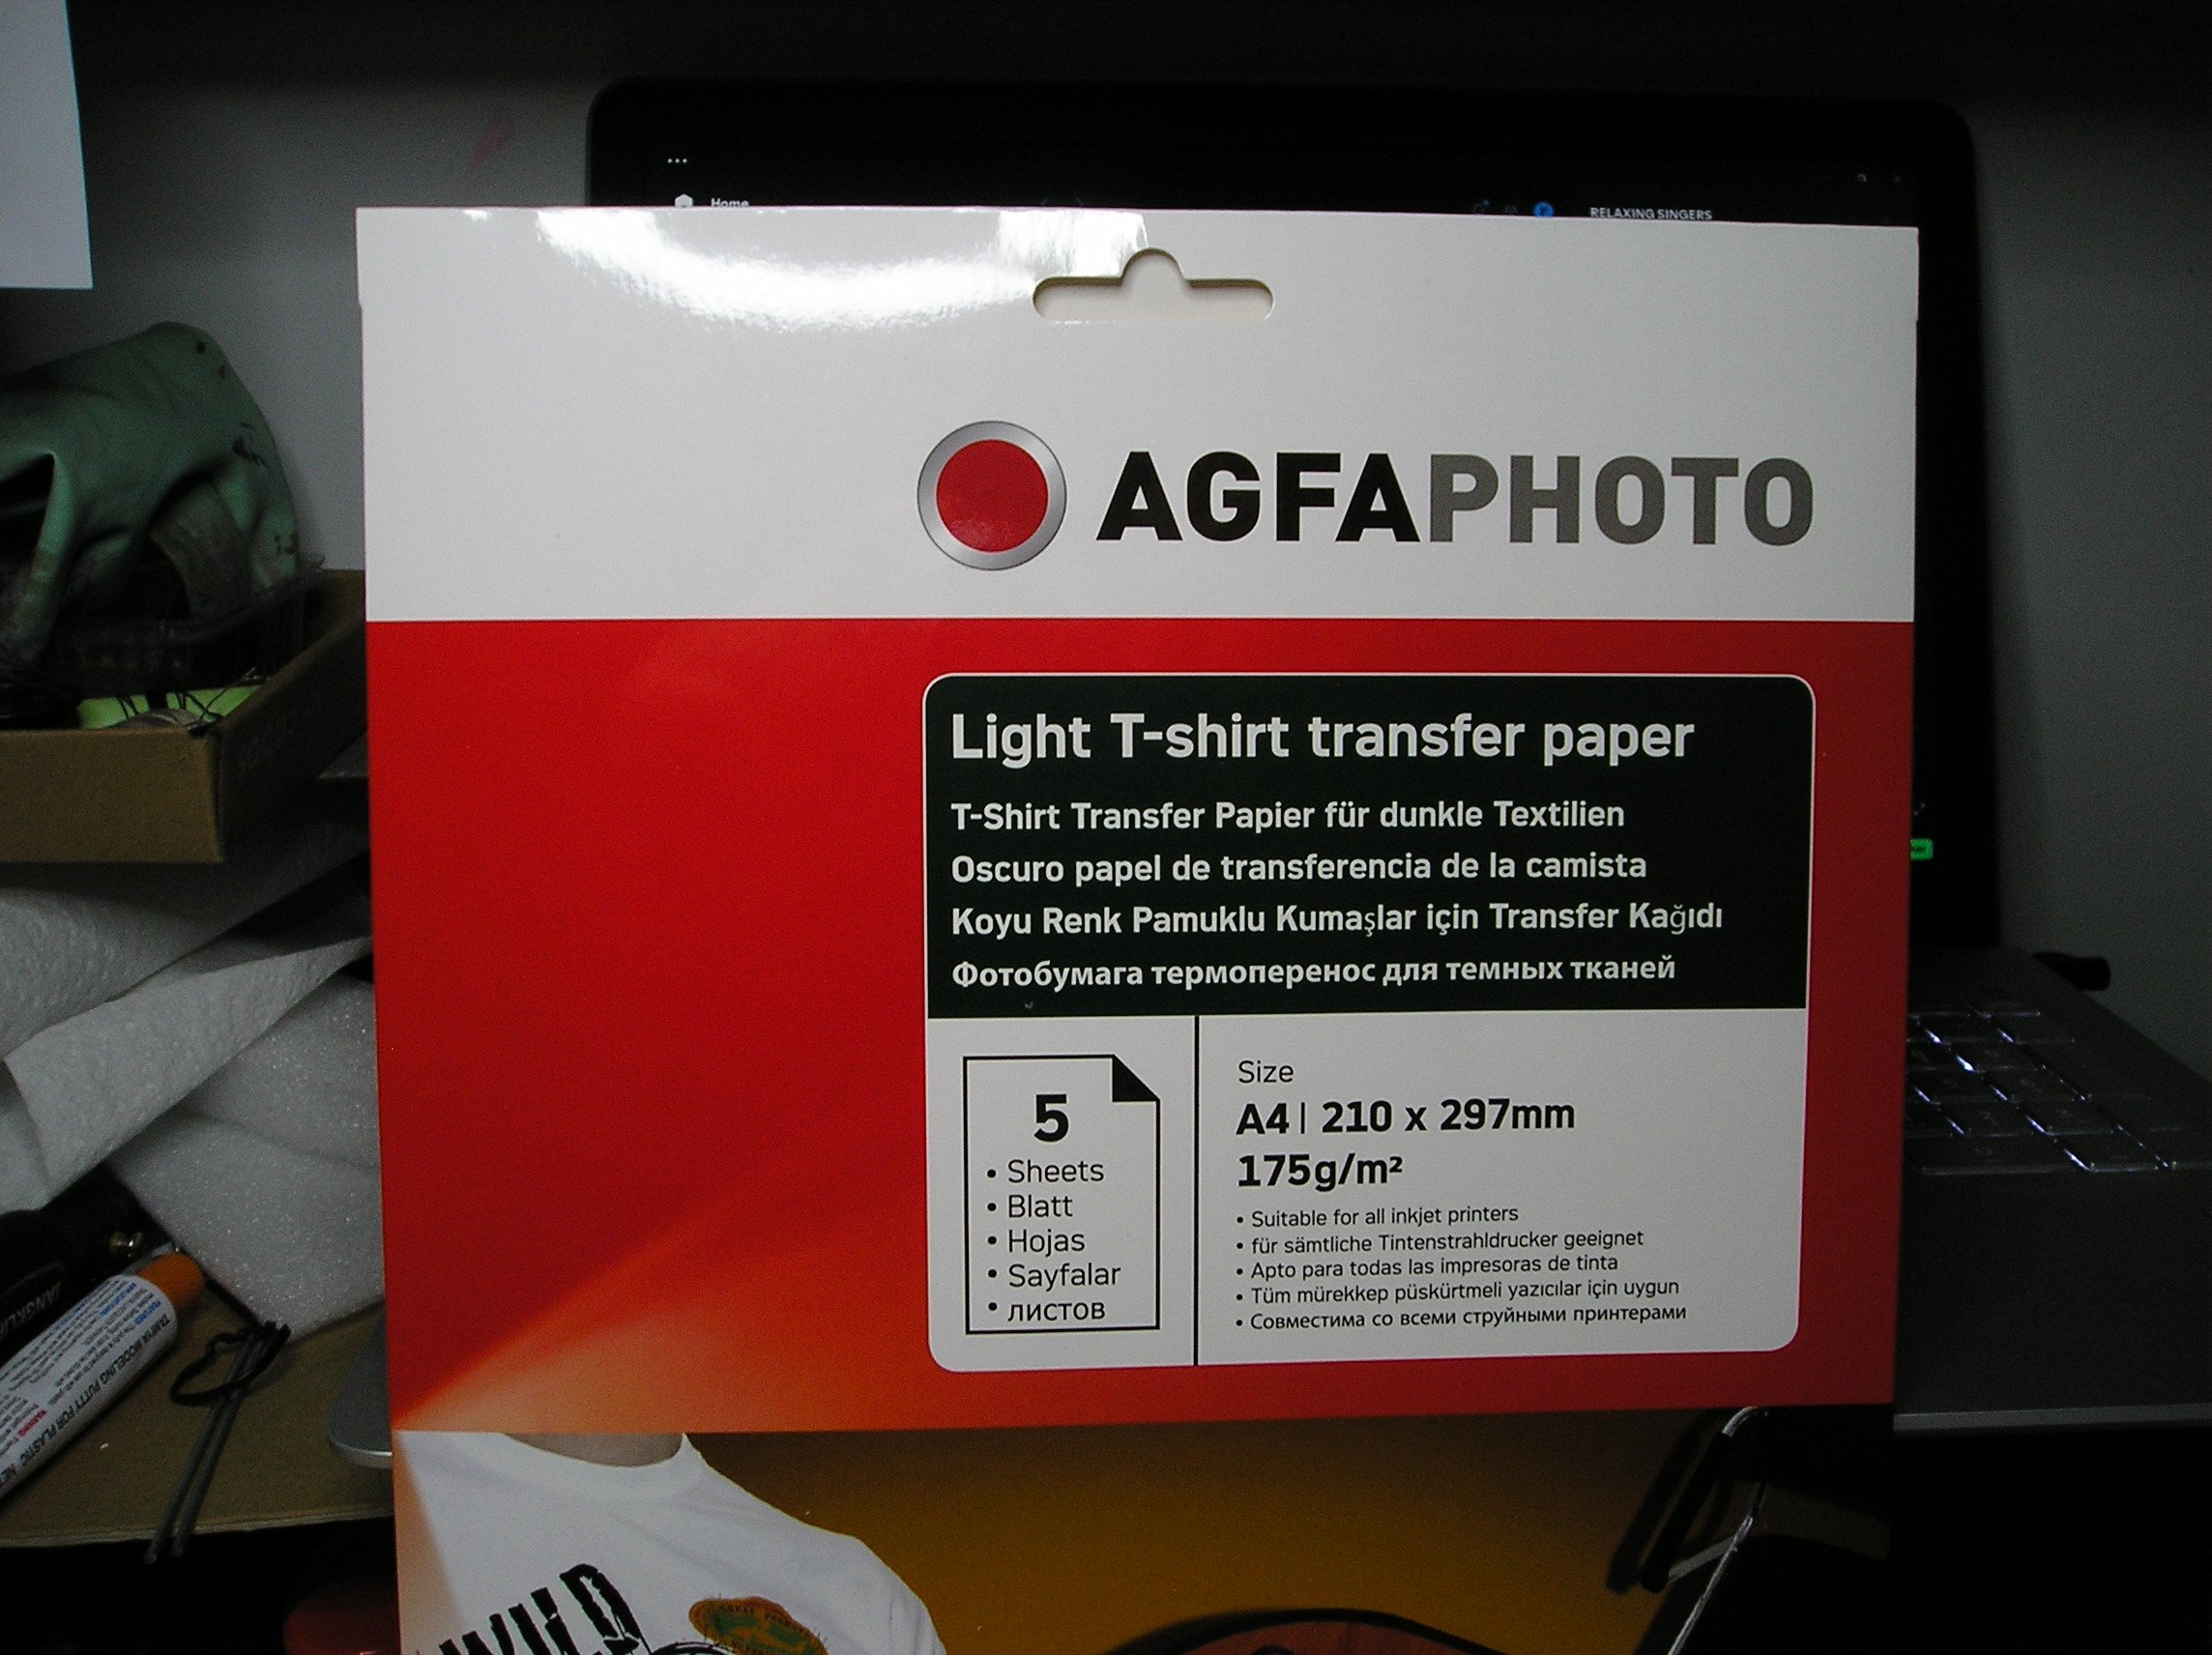
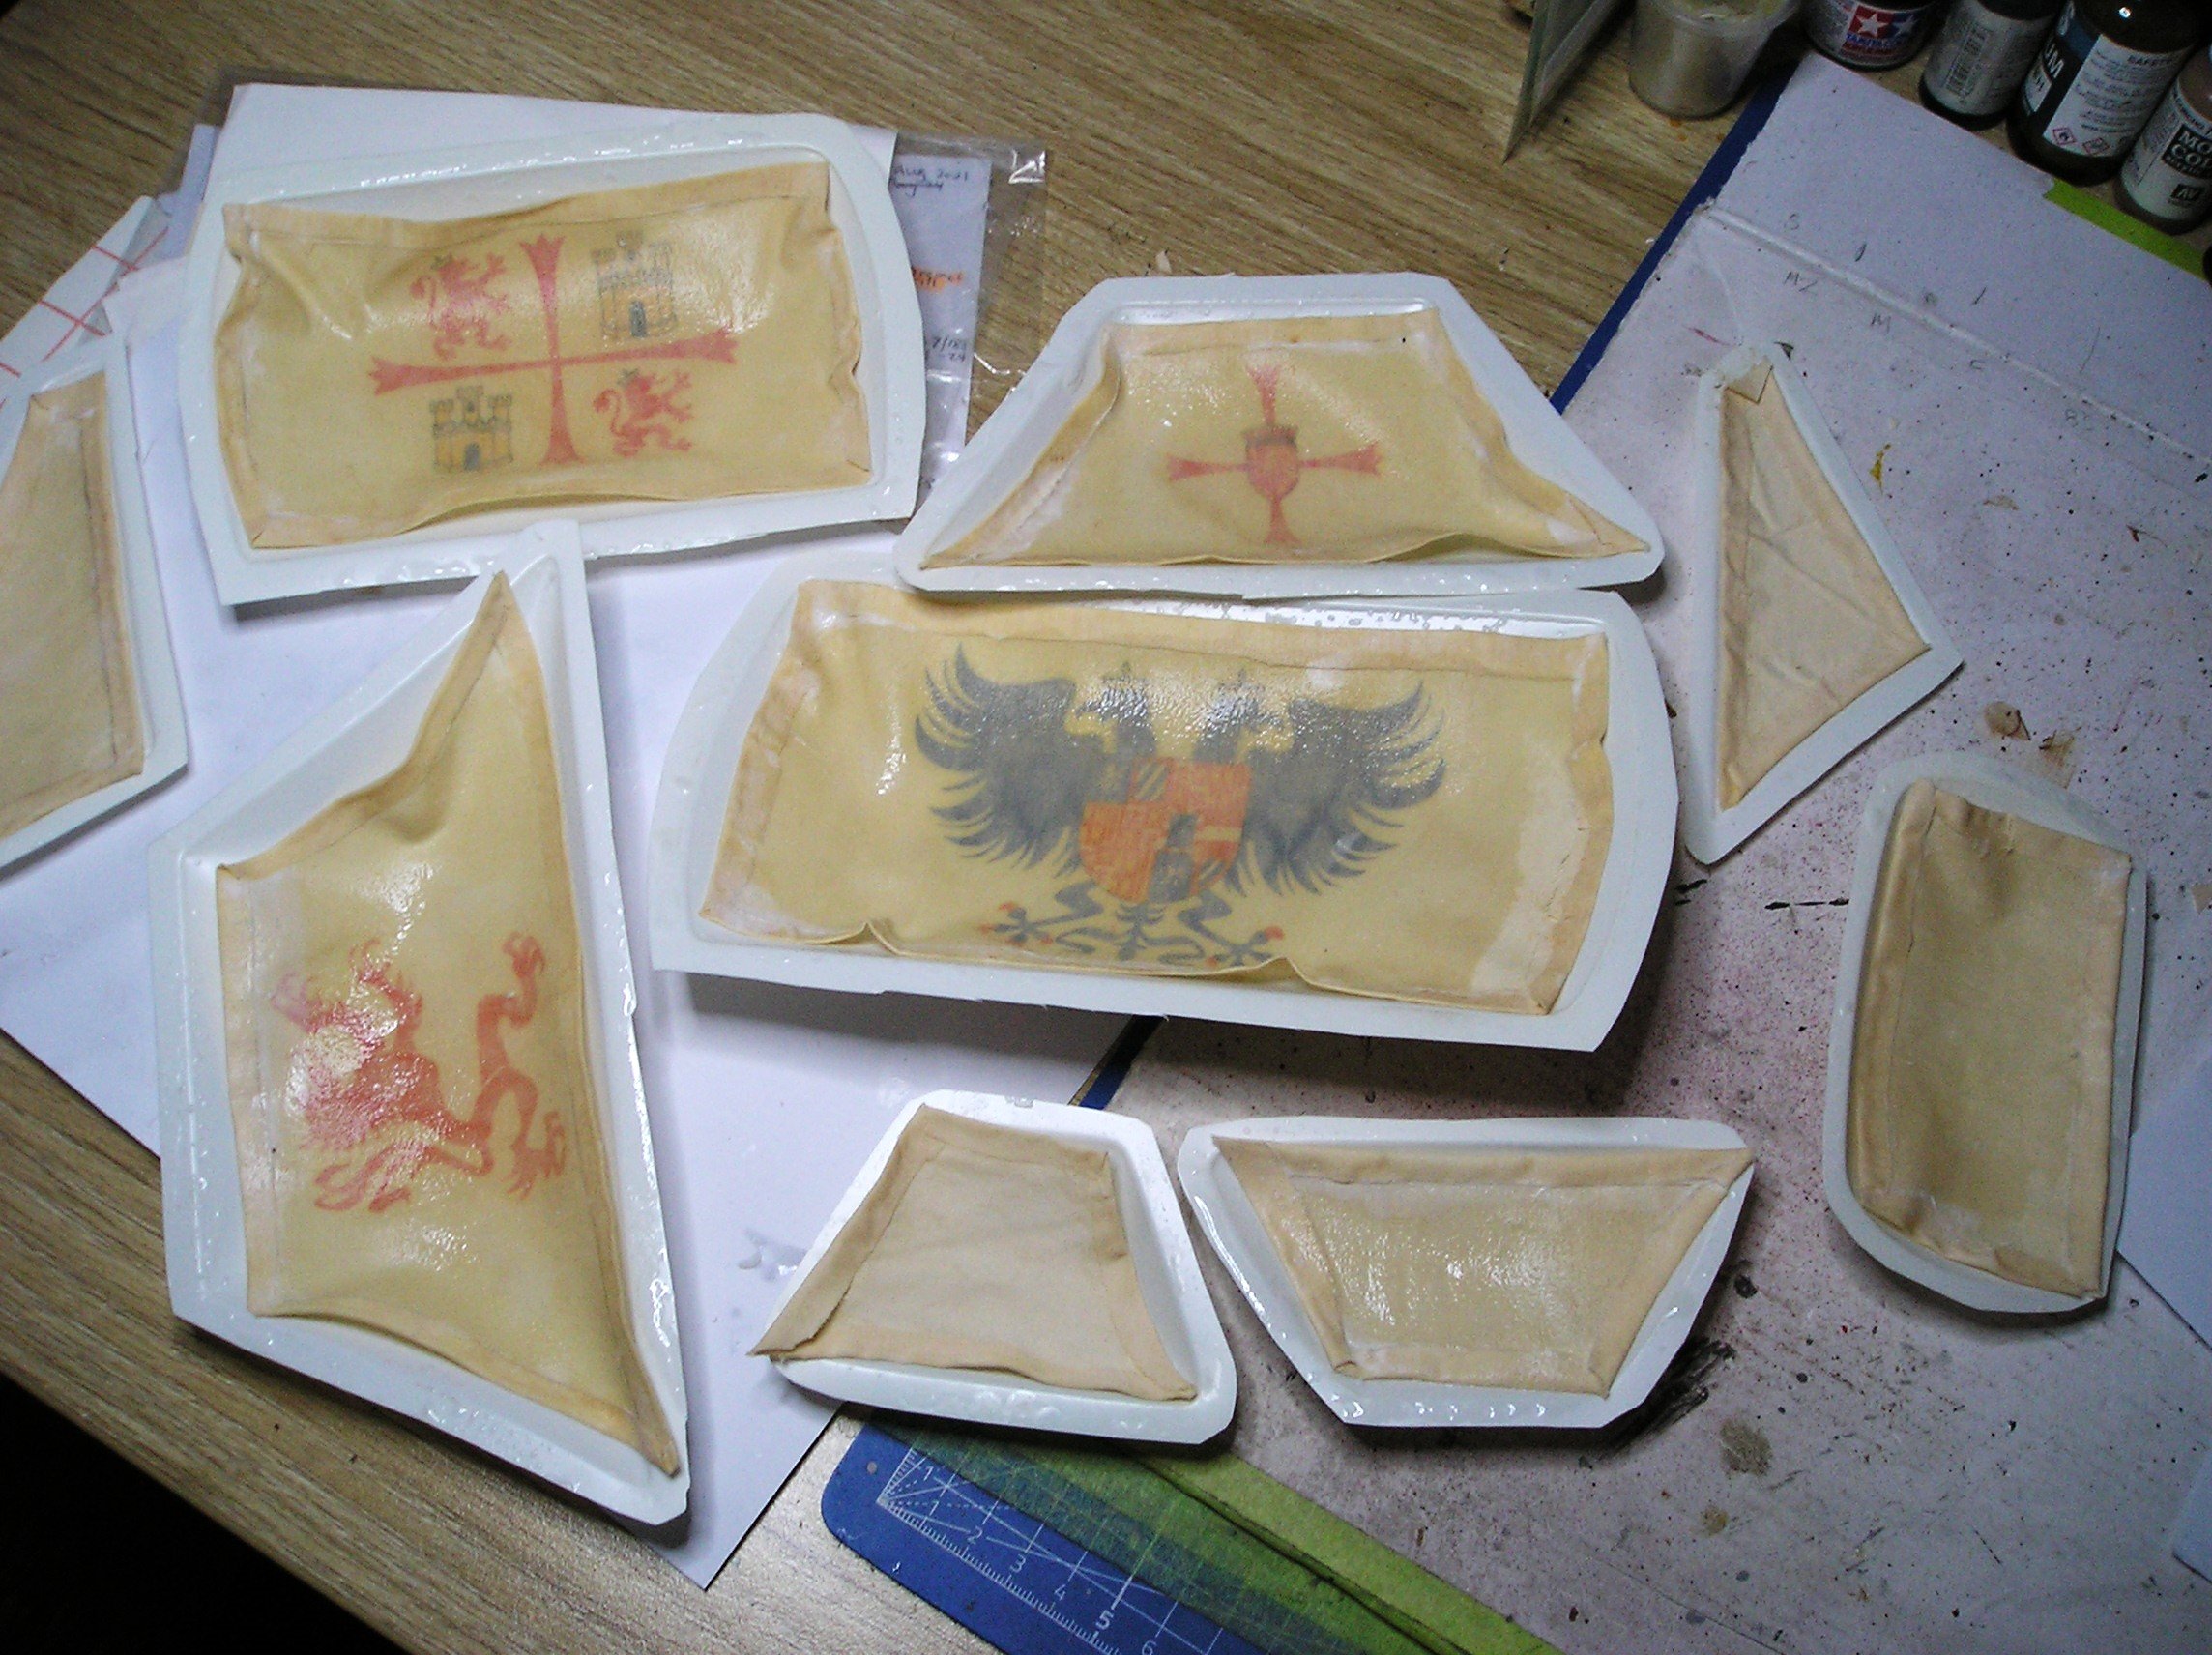
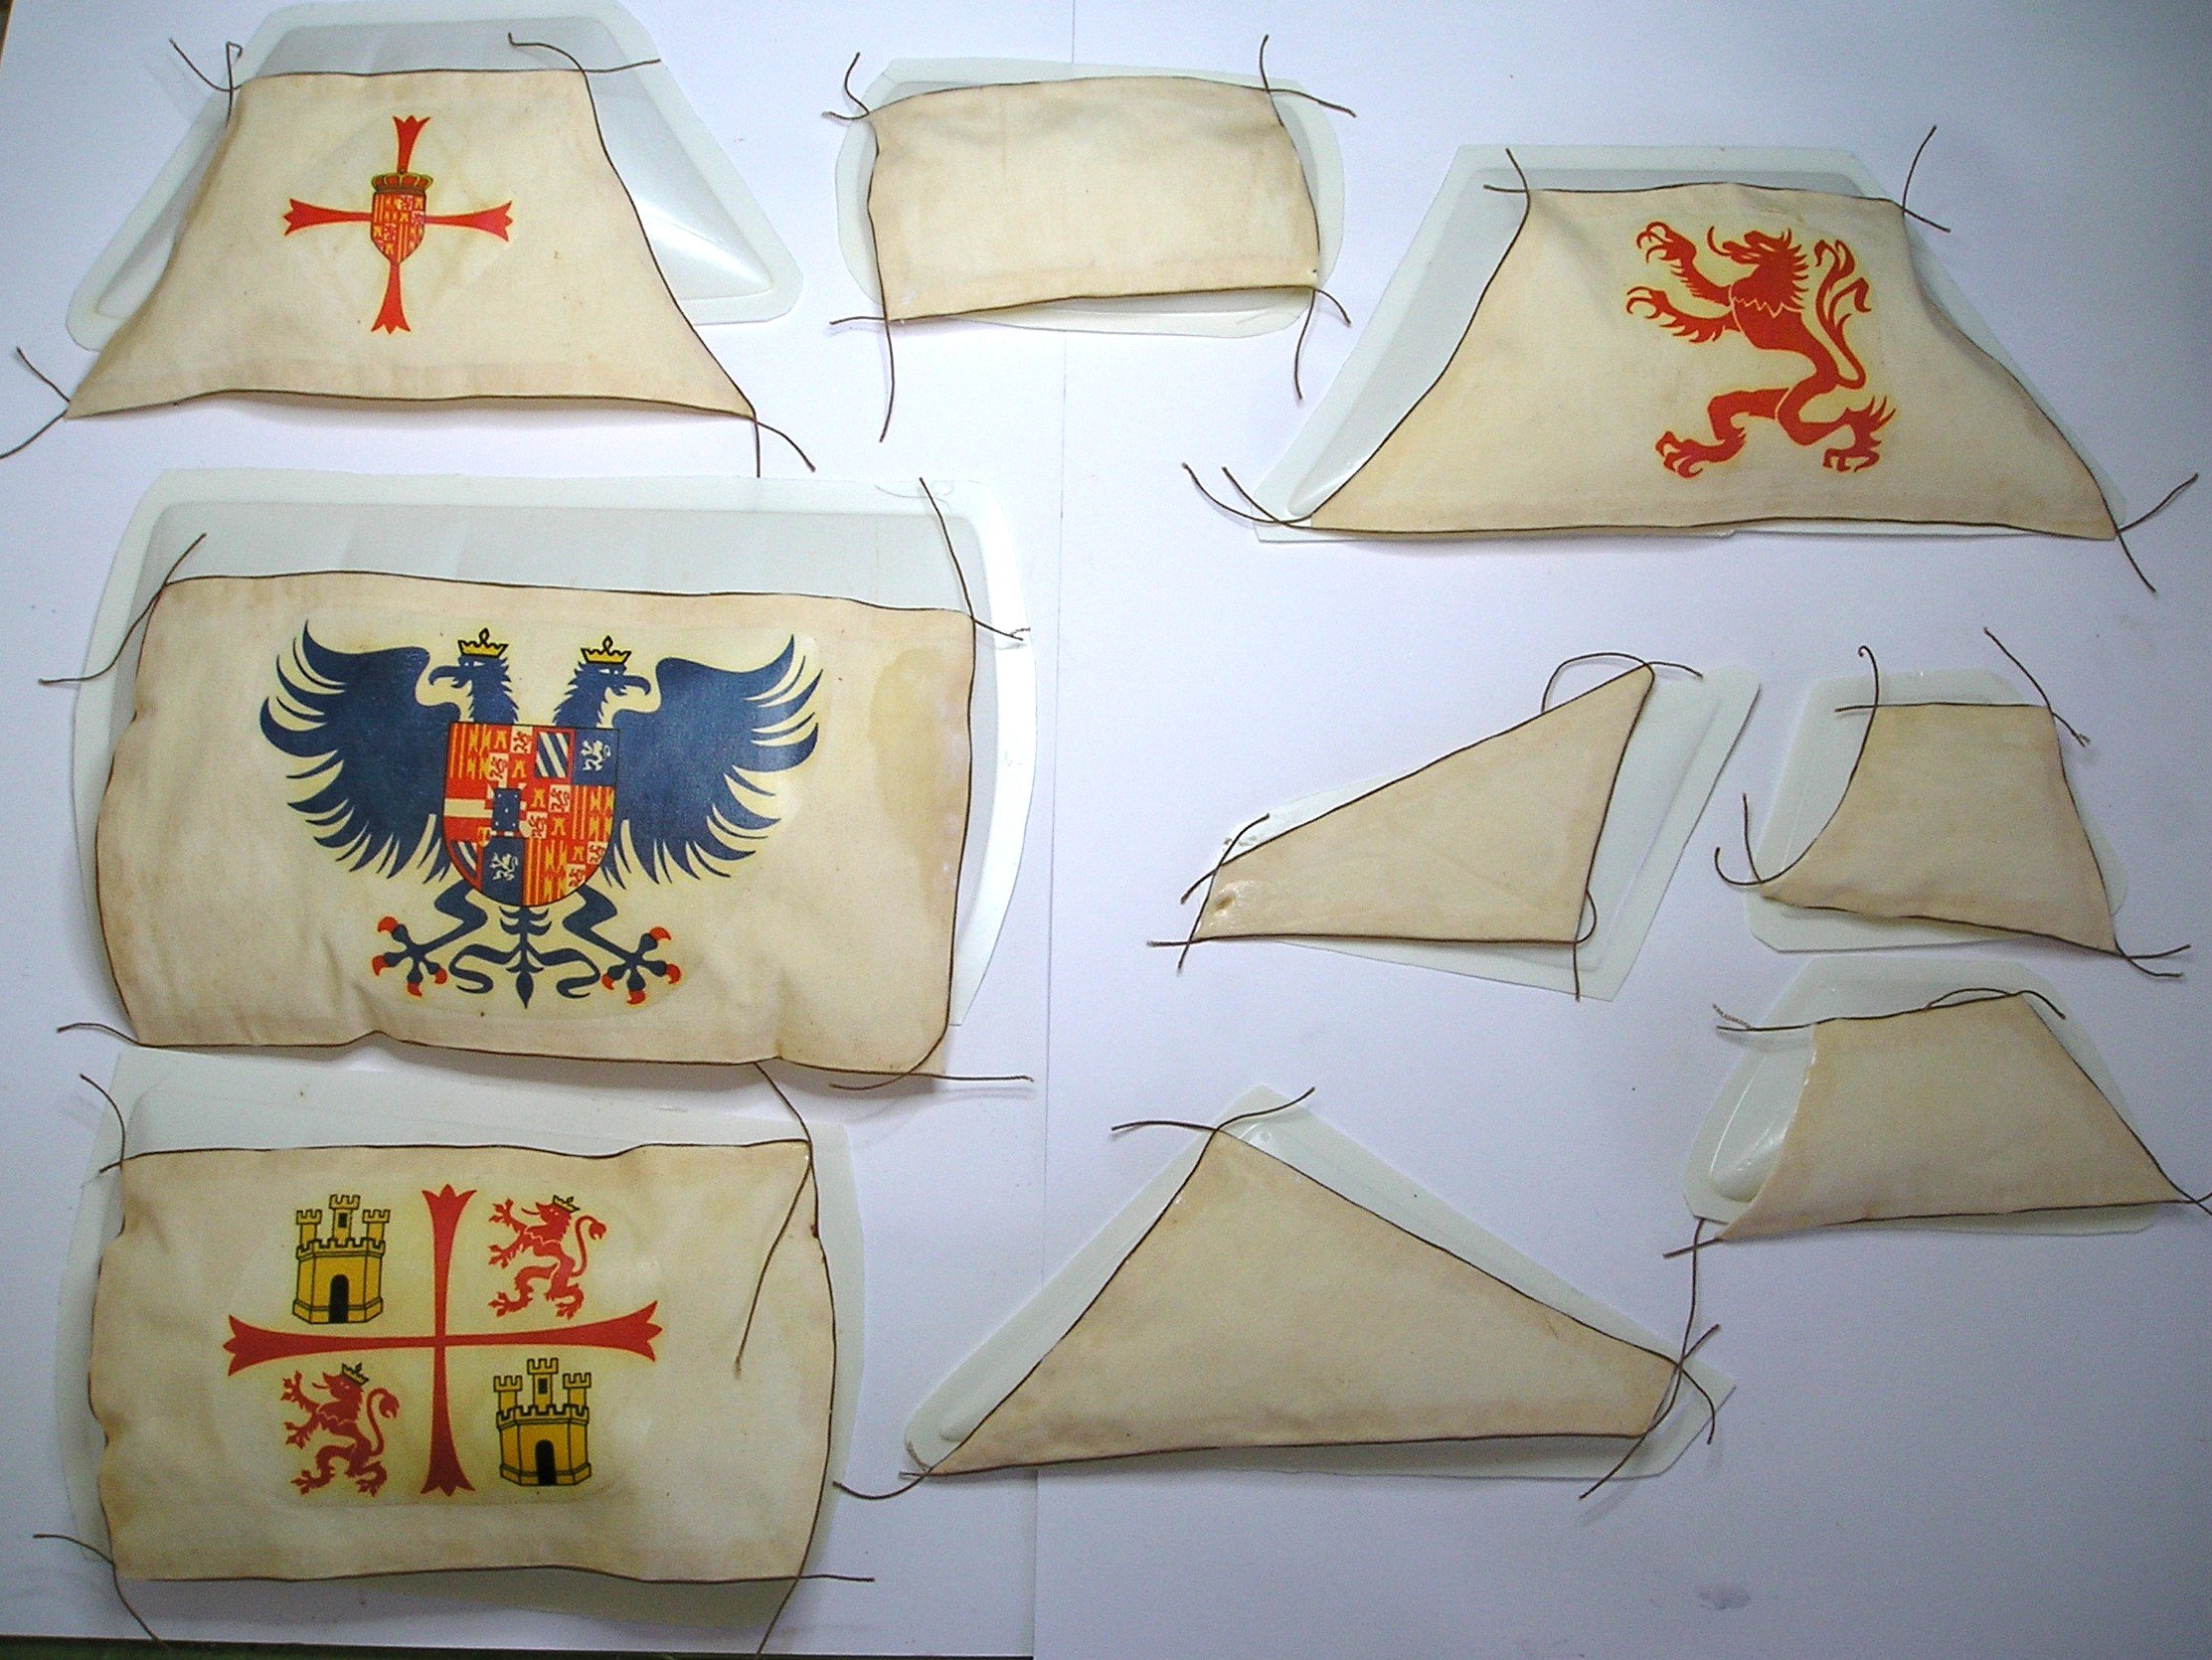
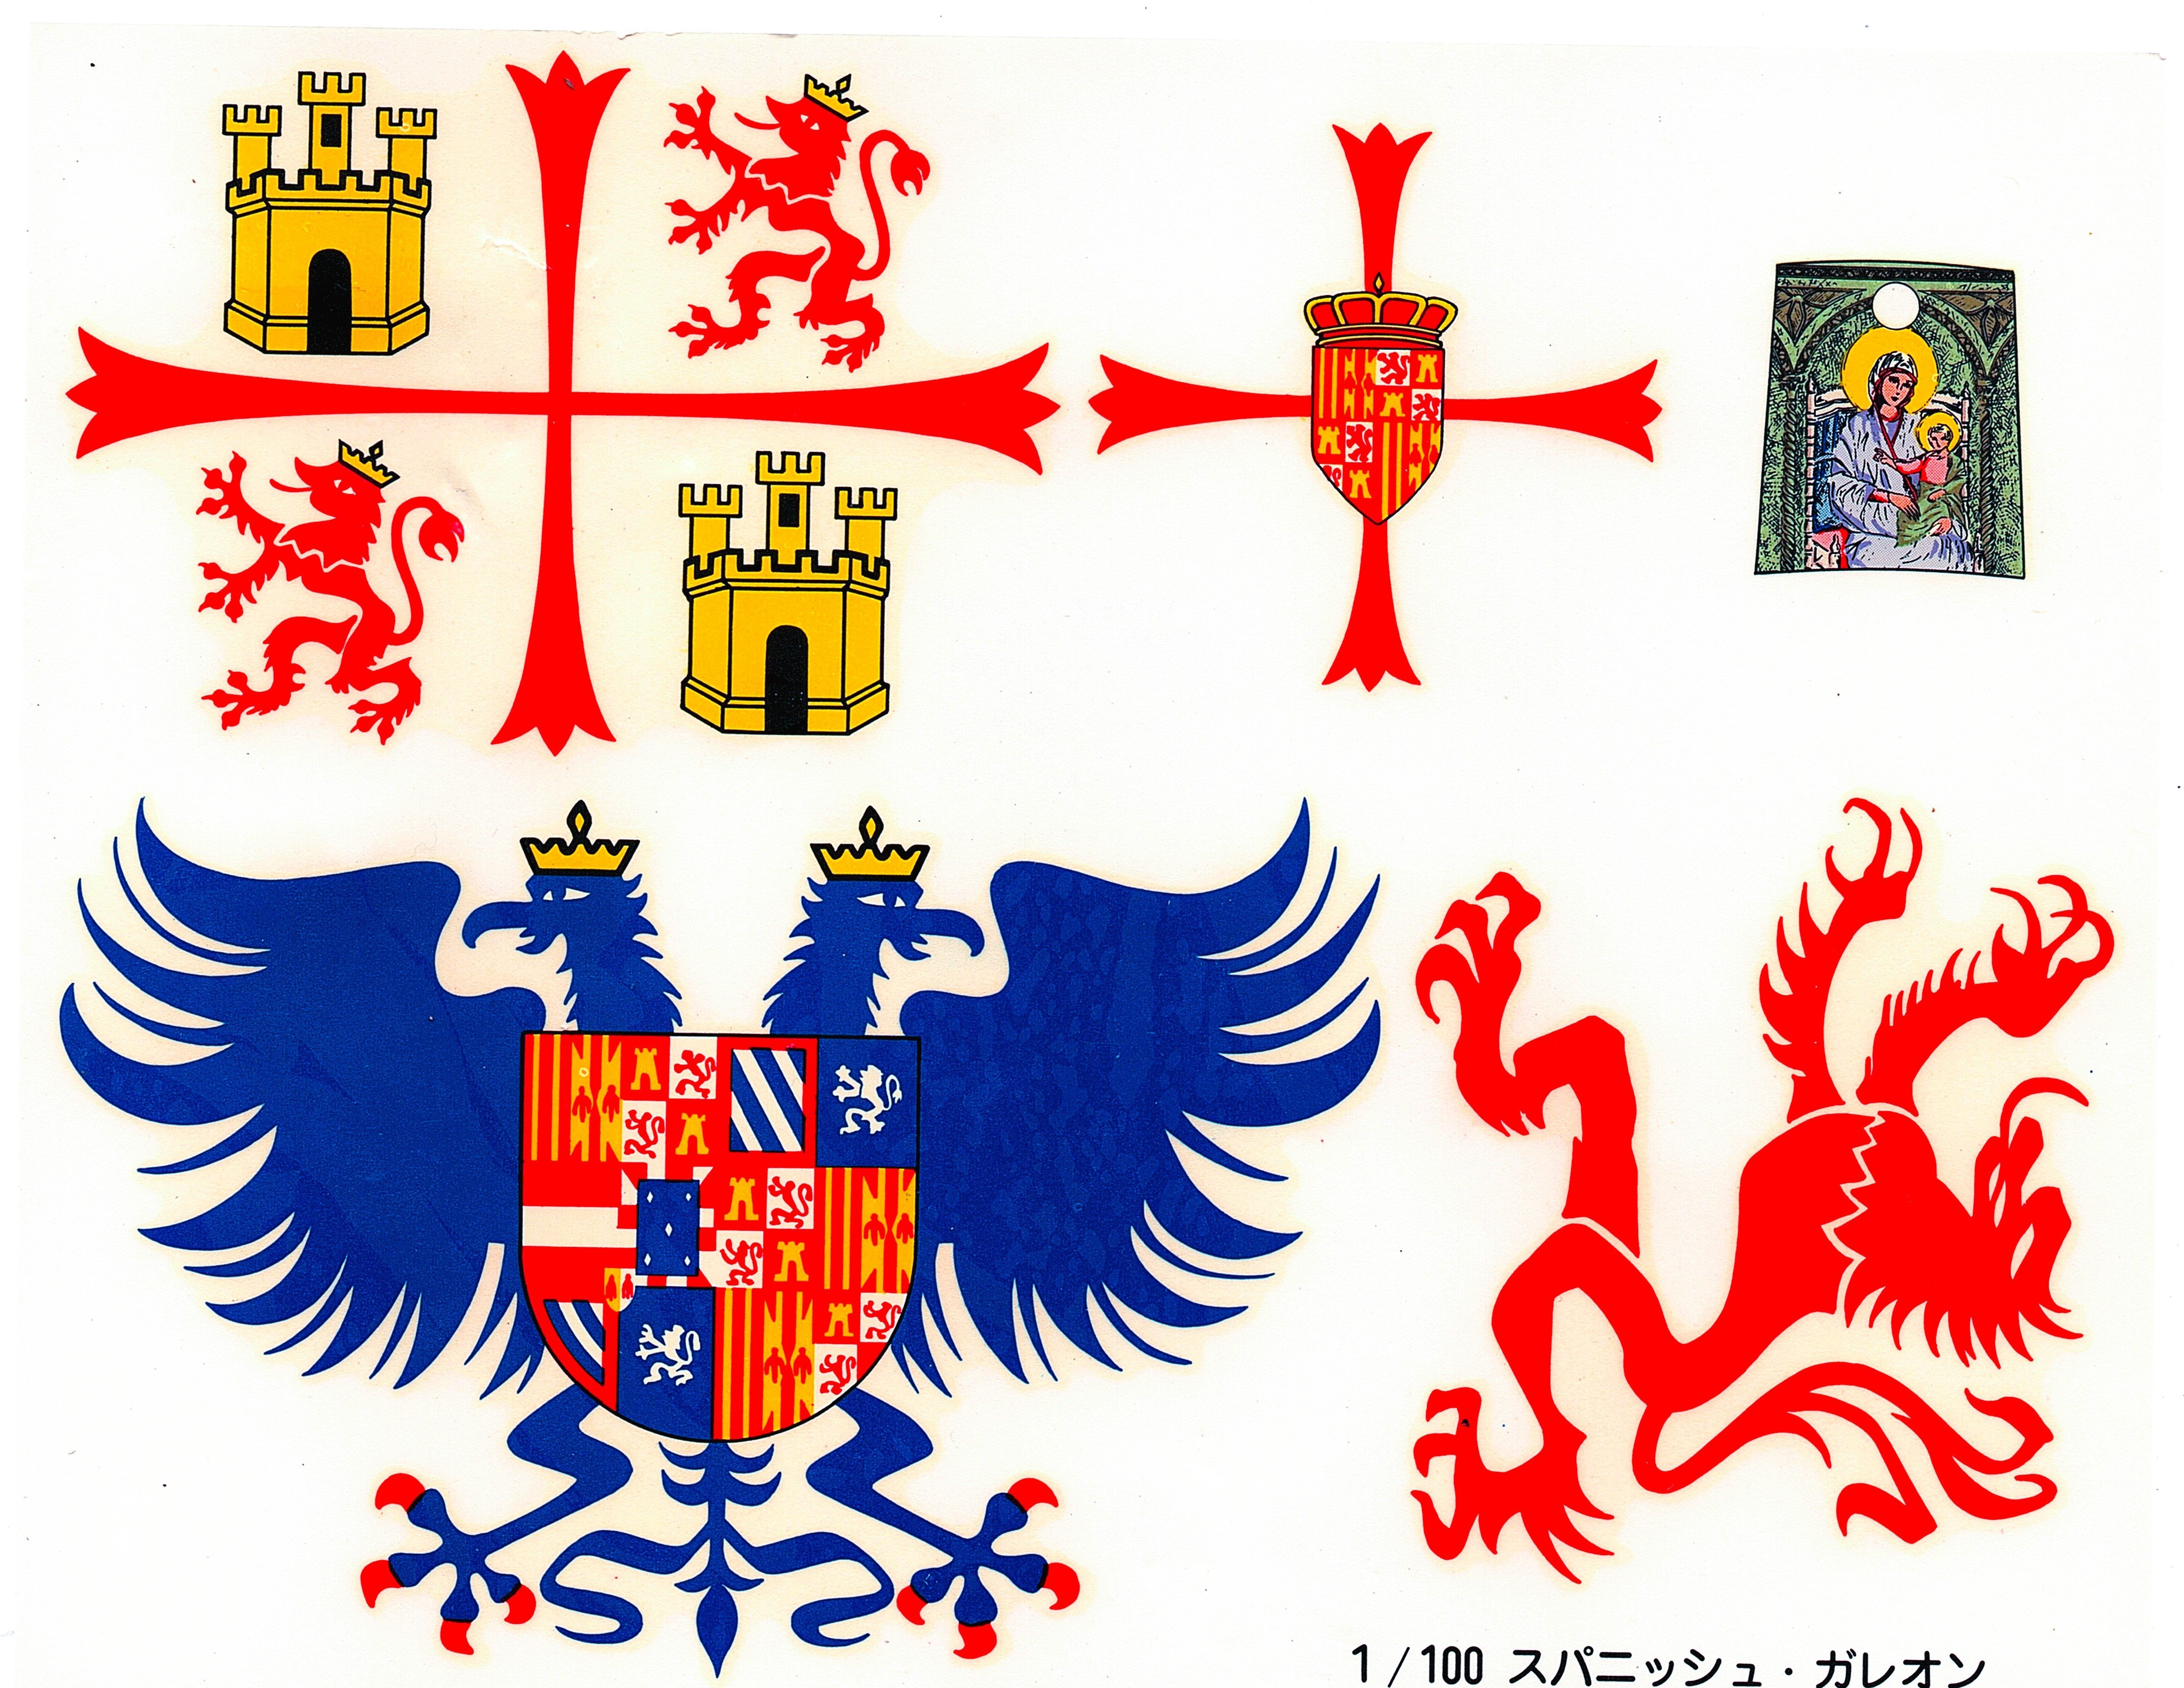
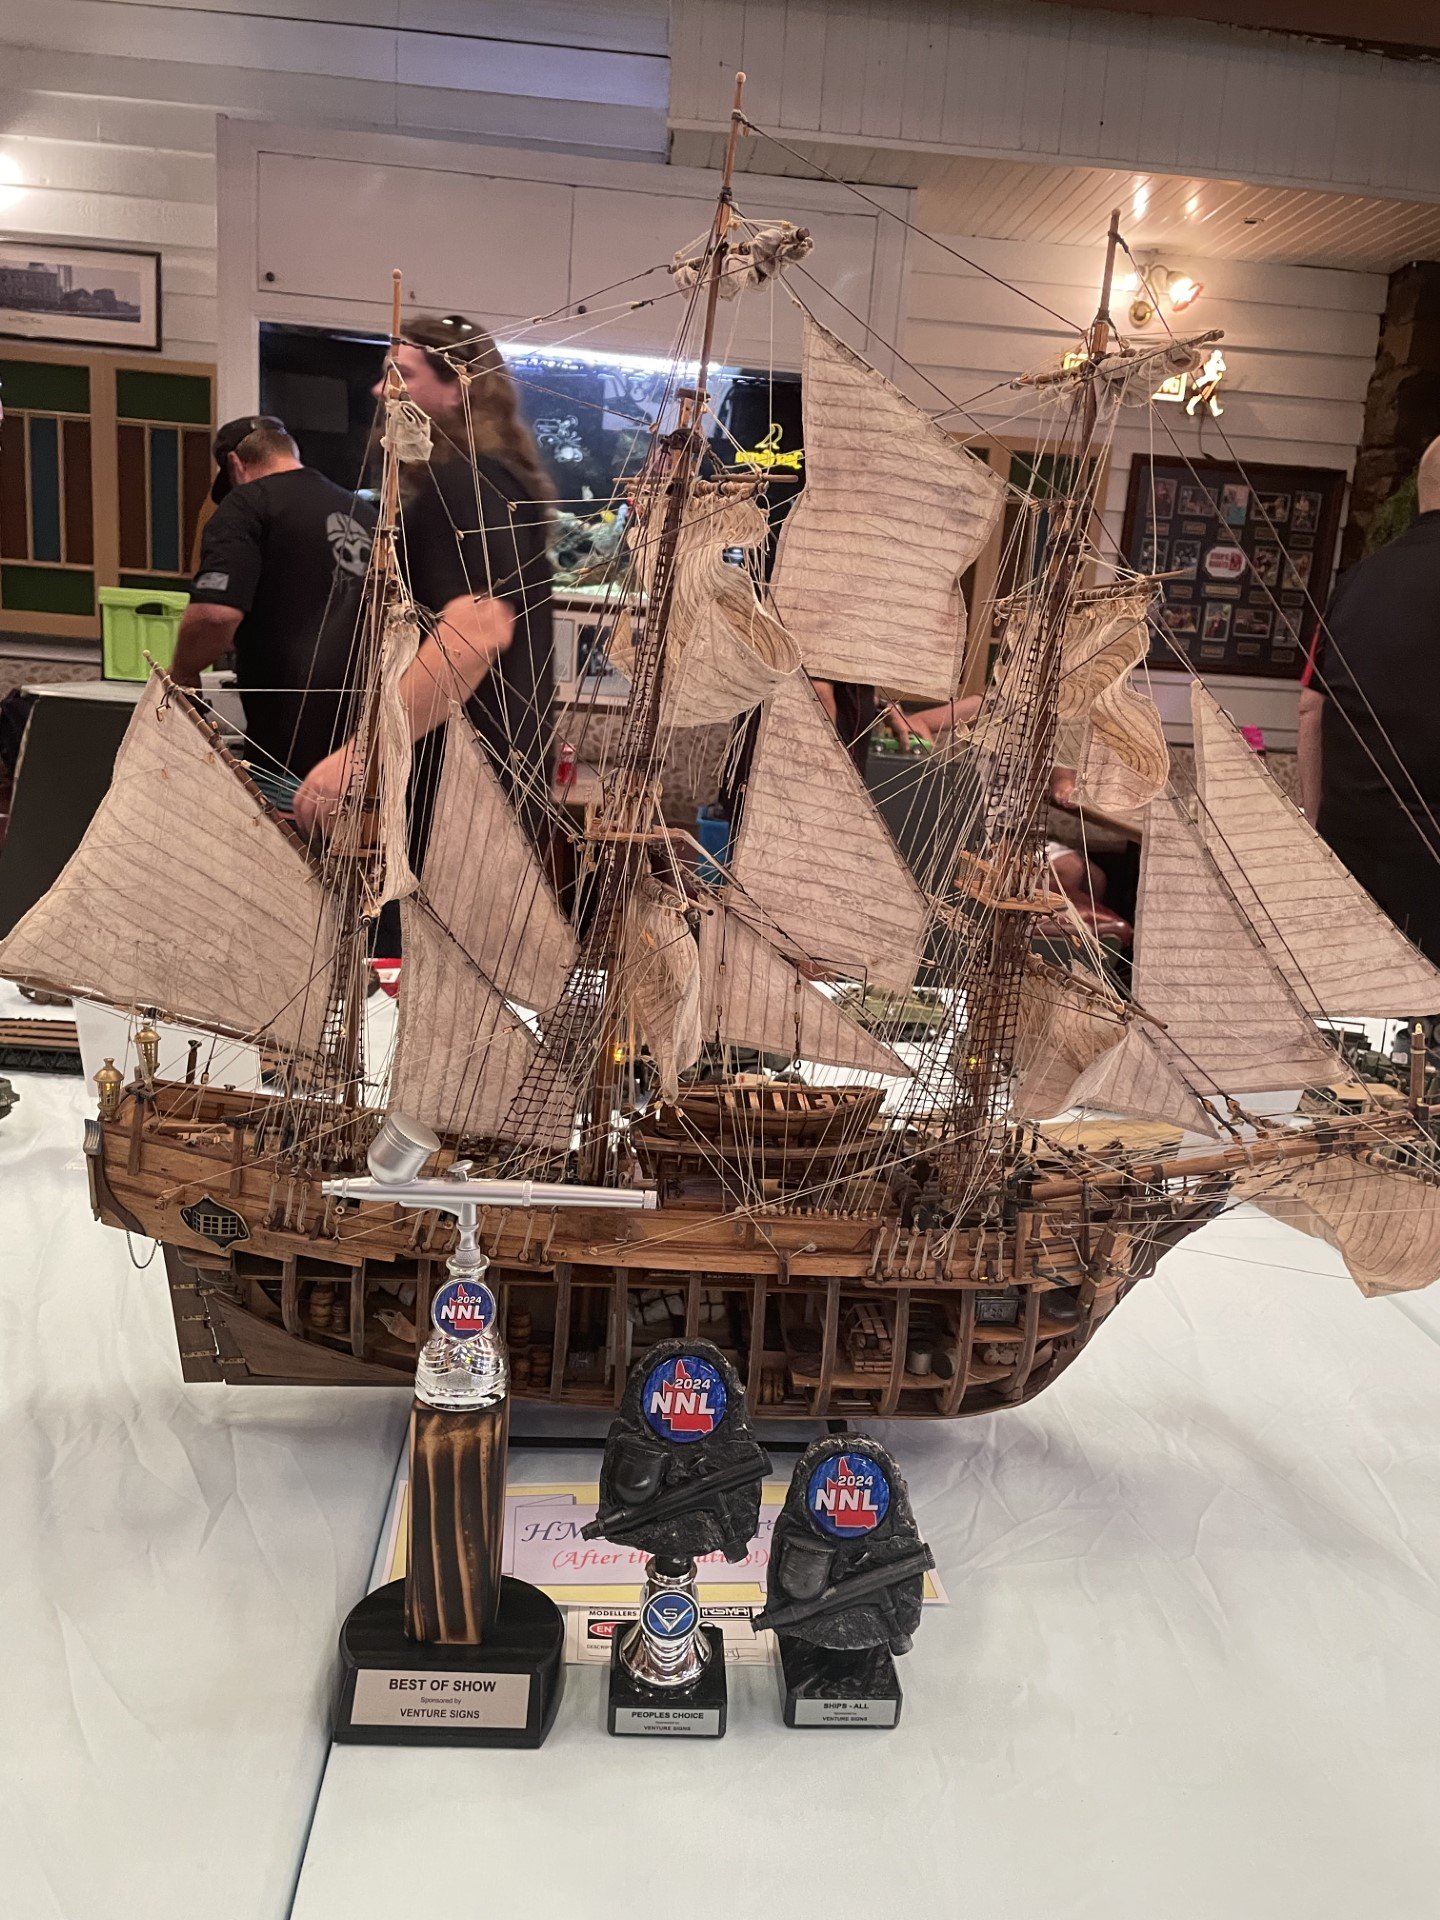
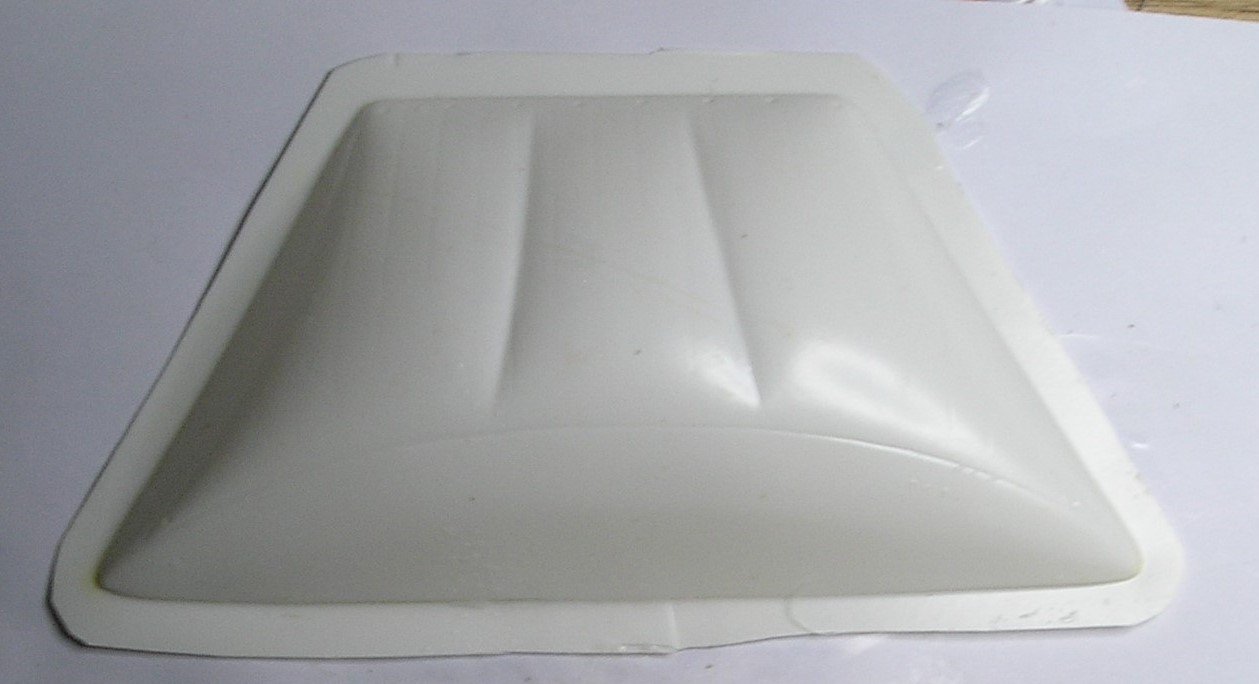
Thanks to all those who support me along the way. 😁 The last two days have been dedicated to SAILS! As I didn't want to use the plastic sails supplied in the kit, I had to make my own. The plastic ones were however a great template. I cut each one out having a 5mm/1/4" margin around the outside. Don't forget to label each one. Cutting nine cloth sails (made from plain 250 thread cotton) was simple. I then weathered them with a solution of watered down Vallejo 70.876 Brown Sand Acrylic paint. Once dry, I had to think about the Decals provided. They however were made for plastic not cloth. 😟 So, I had to use this transfer paper. After scanning, flipping, printing and ironing on the image, I had my images on the sails. But I wanted a hem on each sail, and a ballooning shape. I used PVA glue to make the 5mm/1/4" hem on the back of each sail (obviously), and then soaked each sail with spray starch. Allowing them to dry overnight in their corresponding plastic cut-out, gave each their desired shape. Thanks to @kirill4 's example, today I decided to glue a Gutterman CA02776 thread around the edge of each sail. I'm very pleased with the result as I think it sets off each sail perfectly. You be the judge. 👨⚖️ Just what I wanted. Time to add blocks and attach the sails to the yards. Cheers,


- 69 replies
-
- 3
-

-
- spanish galleon
- Imai
- (and 1 more)
-
A very interesting question Bill. I am currently building a Spanish Galleon (find it here) and can't bring myself to use any gold as it seems too elaborate 'for the day'. I have even followed all the paint guidelines and will be heart broken when I have to weather what I have so carefully created. I always try to be as authentic as possible without the elaborate decoration. Cheers, Peter
-
Another bullseye. The standard rigging is done and has also pulled the previously crocked mast perfectly straight! I'm happy with the result but am too tired to provide any 'terribly exciting' images of lines between posts and horribly tiny bailey pins (4mm, 3/16") 🧐. It's been a big day, and not just for the modelling 😴. Now for the sails! Cheers,
- 69 replies
-
- 2
-
-
- spanish galleon
- Imai
- (and 1 more)
-
G'day @Snug Harbor Johnny, thanks for your appreciative text regarding Australia's size and diversity. It is a great place to live, especially in sunny Queensland where I hale from. I must admit, like Alaska, our history does reflect some "prospectors, wildlife and rugged settlers". Incidentally, I just looked up your profile and can say that the suburb in which we live is adjacent to our own Allenstown! Thanks again, Peter 🐨🦘
- 69 replies
-
- 4
-
-
- spanish galleon
- Imai
- (and 1 more)
-
Ferris and Patrick, I take on board (no pun intended) what you are suggesting, but I have no access to sufficient beads for the parrels and don't see myself having to 'reef' the sails. I am happy to just furl the sails if needed. Cheers, 🦘
- 69 replies
-
- 3
-
-
- spanish galleon
- Imai
- (and 1 more)
-
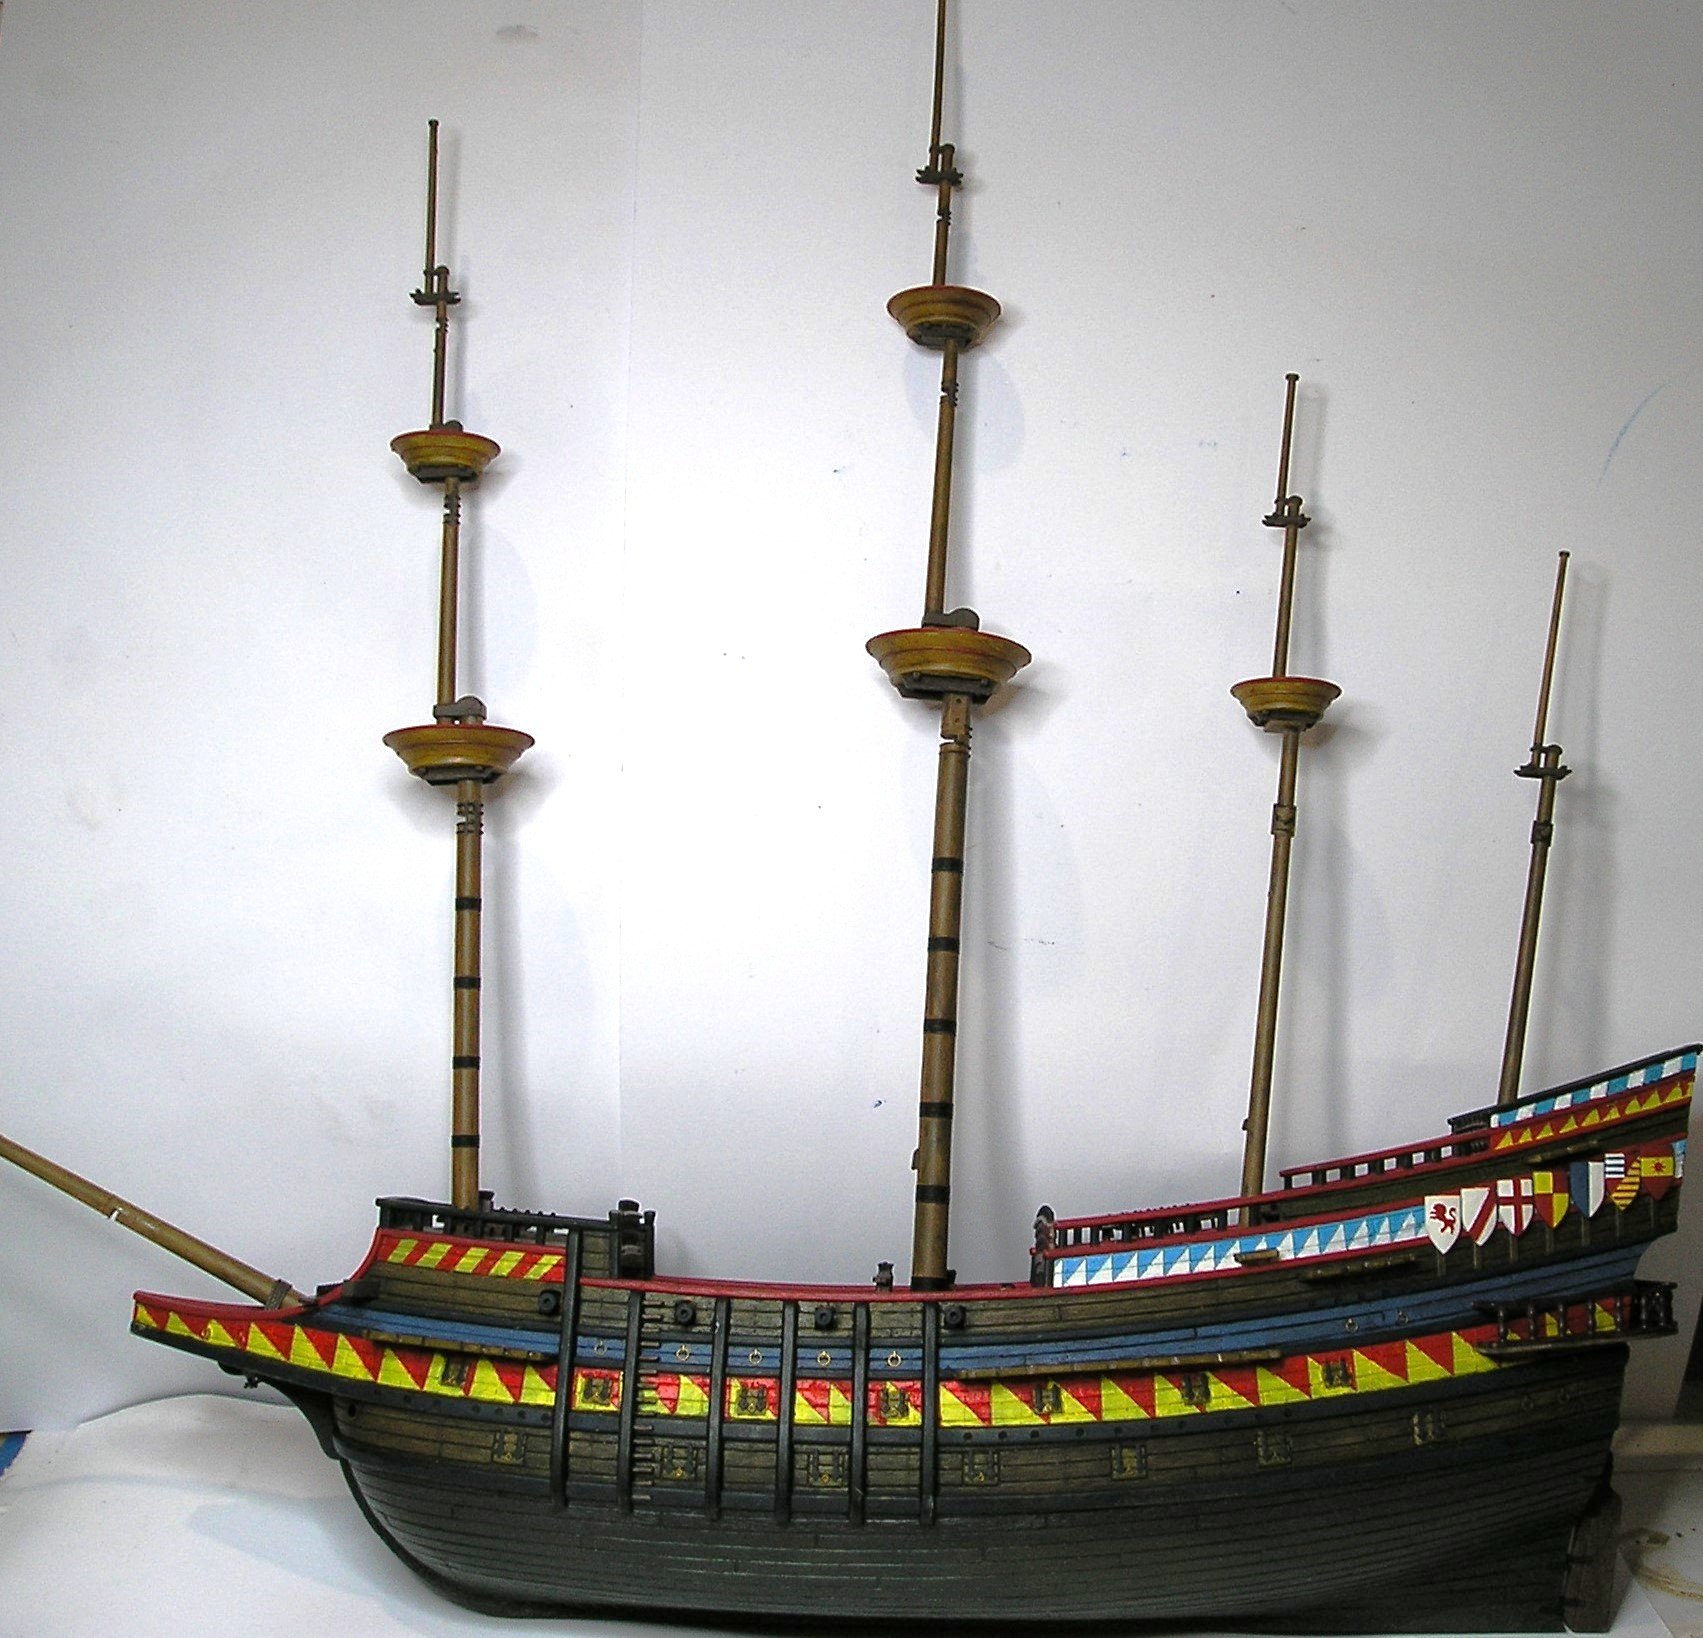
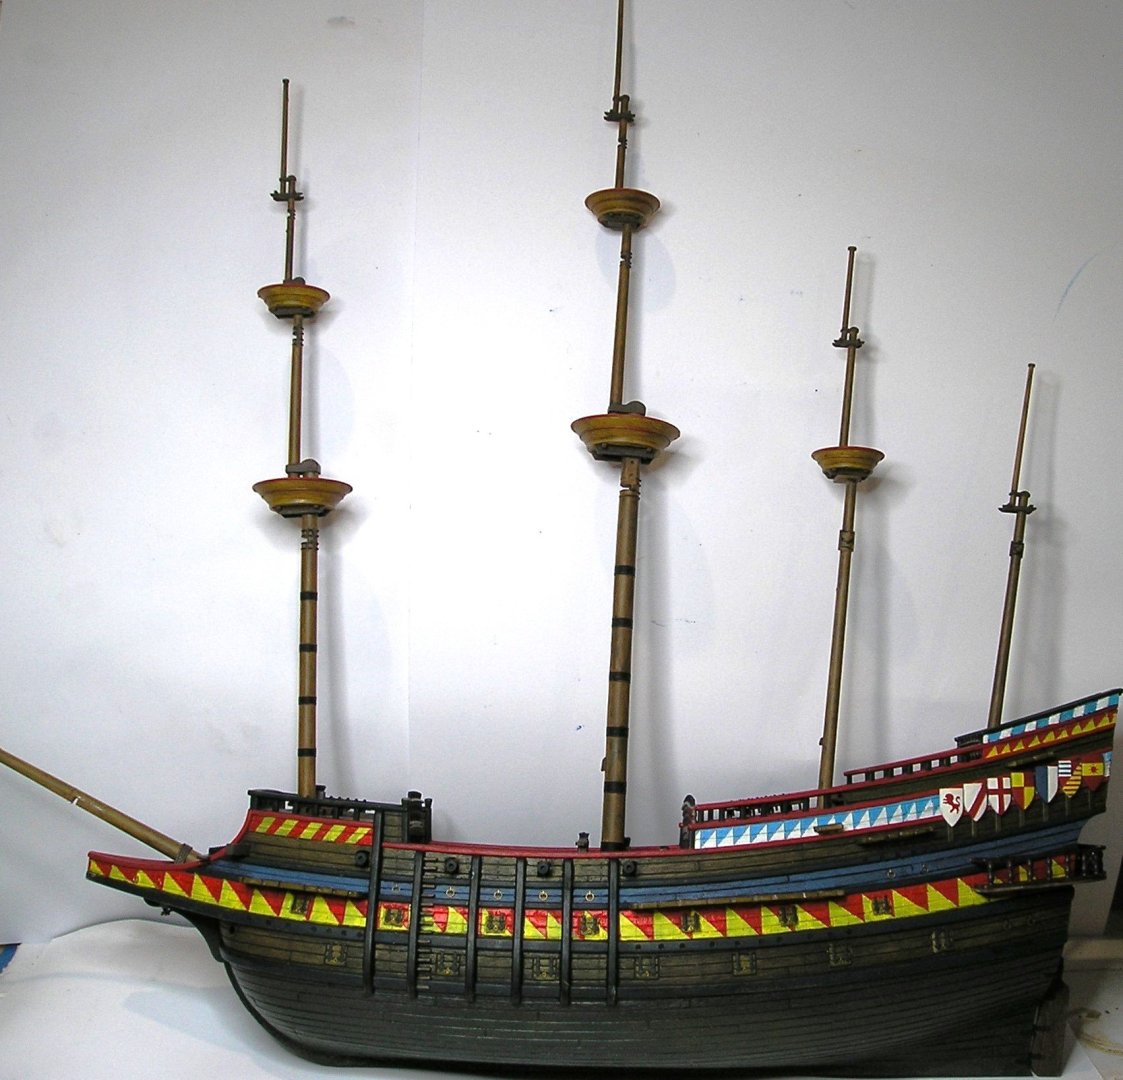
Greeting all, I'm pleased to show the recent addition of the masts. They are painted and weathered, as are the 'tops'. It's strange to see the pronounced angles of the masts as they slope much more than any other ships I have built. Next, I'll be adding the standard rigging and stays. This should pull out the sideways bend in the Foreword mast. Thanks for all the encouragement. Cheers,
- 69 replies
-
- 4
-
-
- spanish galleon
- Imai
- (and 1 more)
-
What is the safest way to straighten a plastic mast when it has a bend after cutting off the sprew? It is already painted so I think hot water isn't an option. Should I perhaps use my wife's hairdryer? Help! 🤔 (No baldy head hairdryer jokes thanks!) ☺️
-
Steven / @Louie da fly, I'll expect you this Wednesday! It's only 2076 kilometers and according to Google Maps, starting at Ballarat, it will only take 22 hours. I'll make sure there is a cold beer ready for your arrival in Rockhampton. Cheers,
- 69 replies
-
- 1
-
-
- spanish galleon
- Imai
- (and 1 more)
-
Steve, You know what to do if you are in this area, another 2.5 hours and you're in Rocky (where we live). Cheers,
-
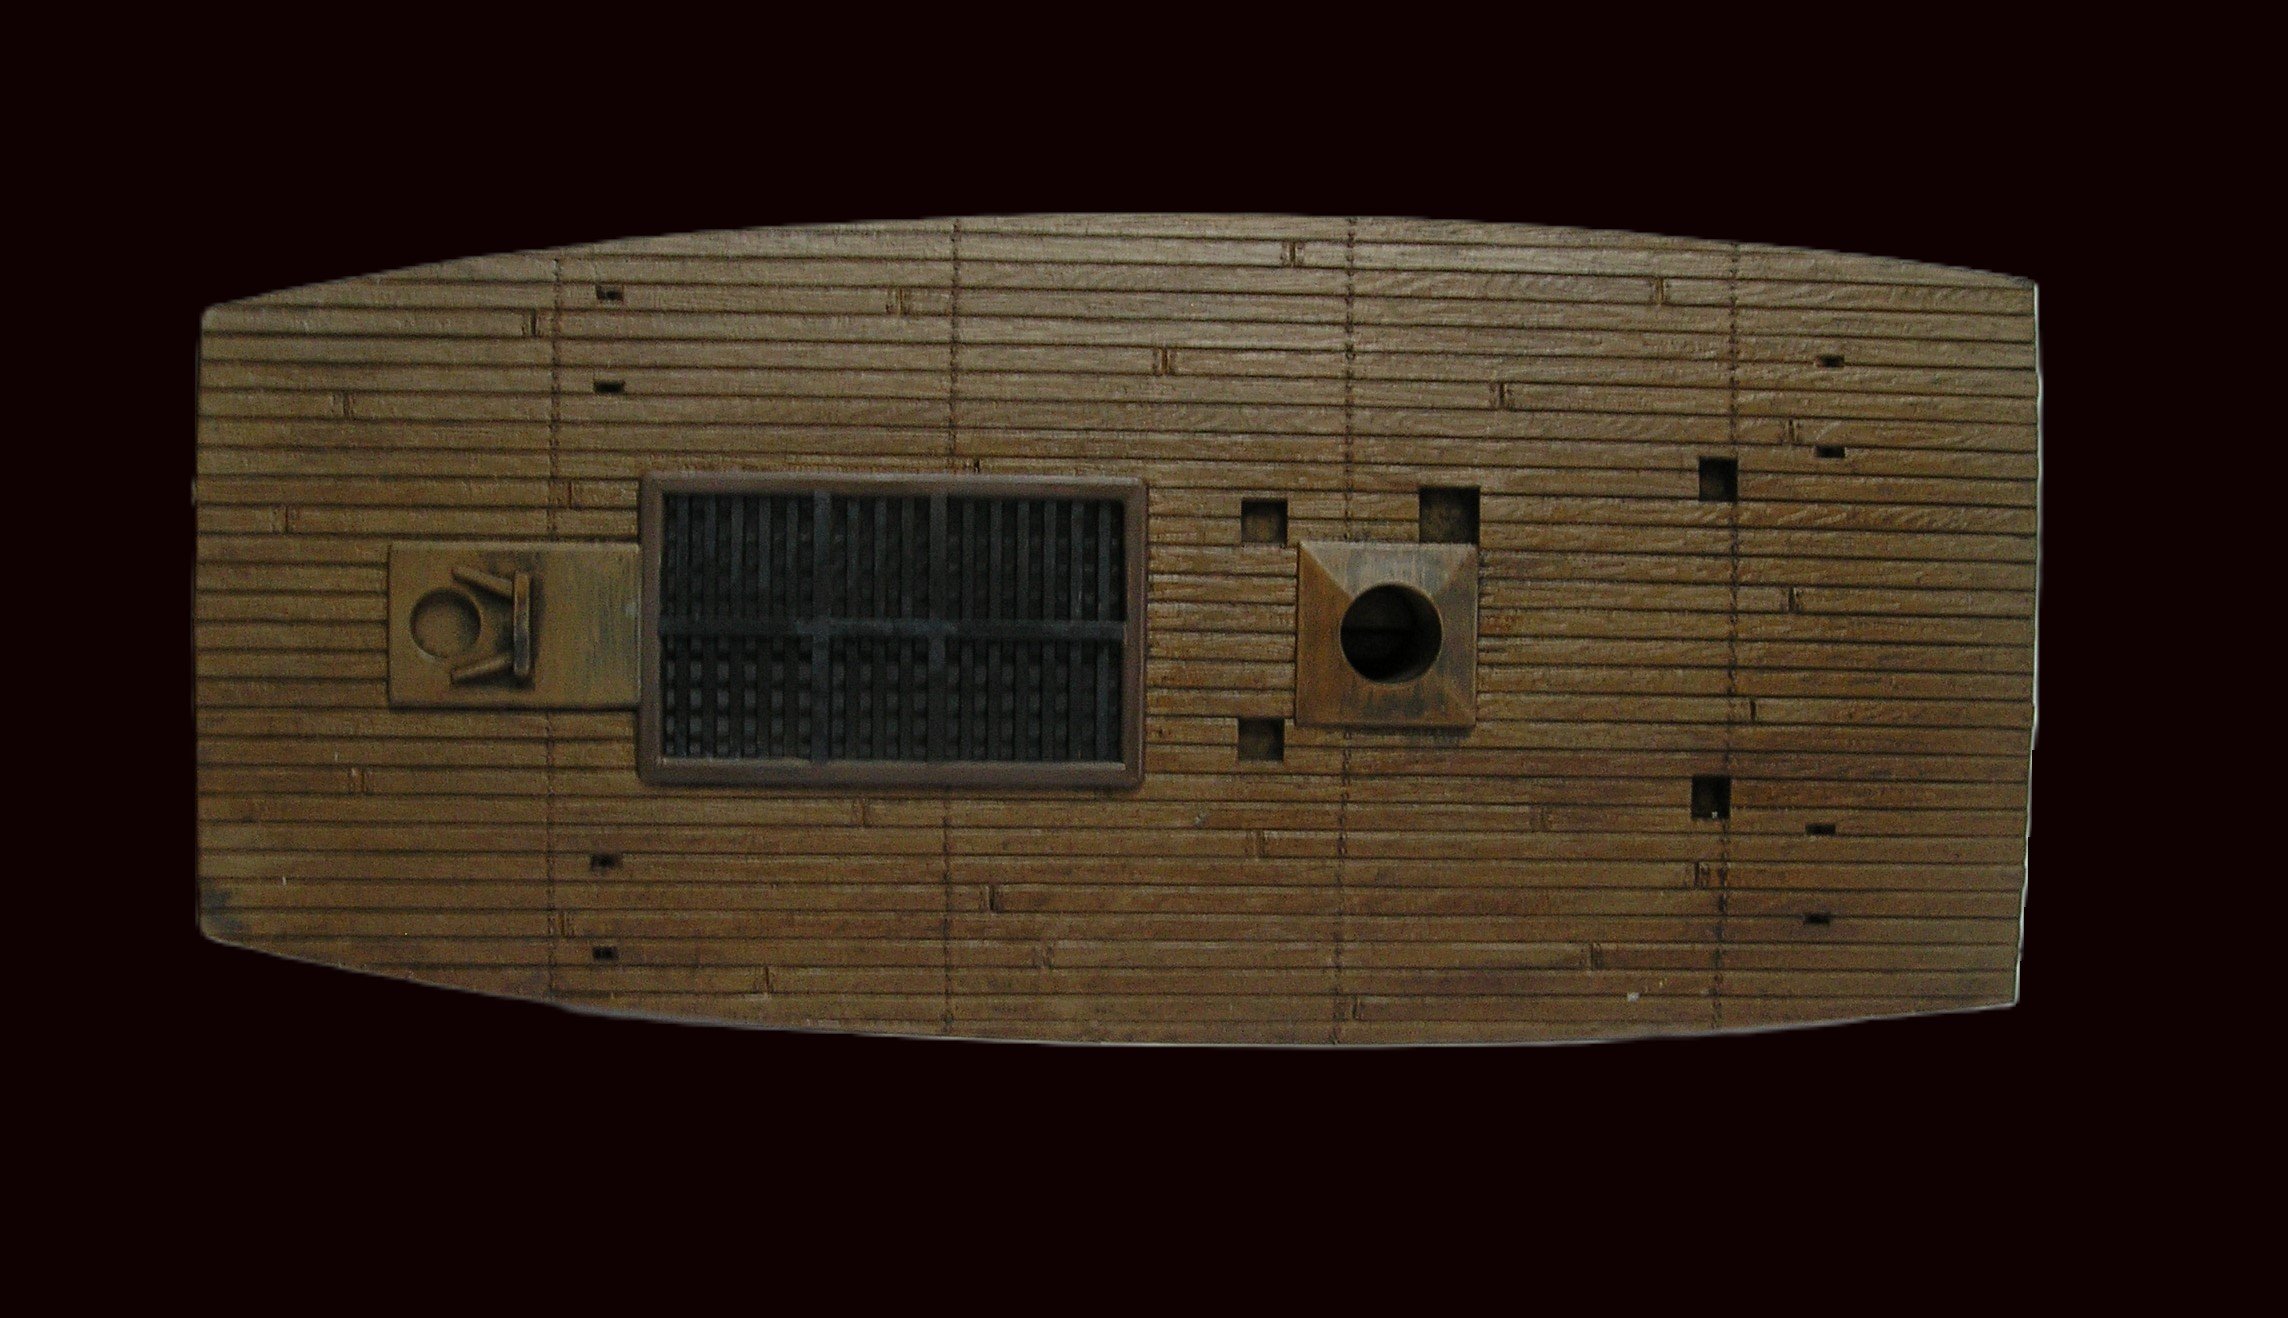
Greetings, We had a great break away for a few days in the Town of 1770 and Agnes Waters. Look them up and you'll see how lucky we are. So much so, that my good wife even allowed me to make shrouds and ratlines on my special jig! Since I've been back, I have done heaps of work on the decks. Most rewarding! From here on, there are a few things to finish 'down below' and on the deck, and then I go UP!!! Thanks for continuing to follow and encourage me on this build. It is always appreciated, especially when I hit the hard bits. 😁 Cheers,
- 69 replies
-
- 6
-
-
- spanish galleon
- Imai
- (and 1 more)
-
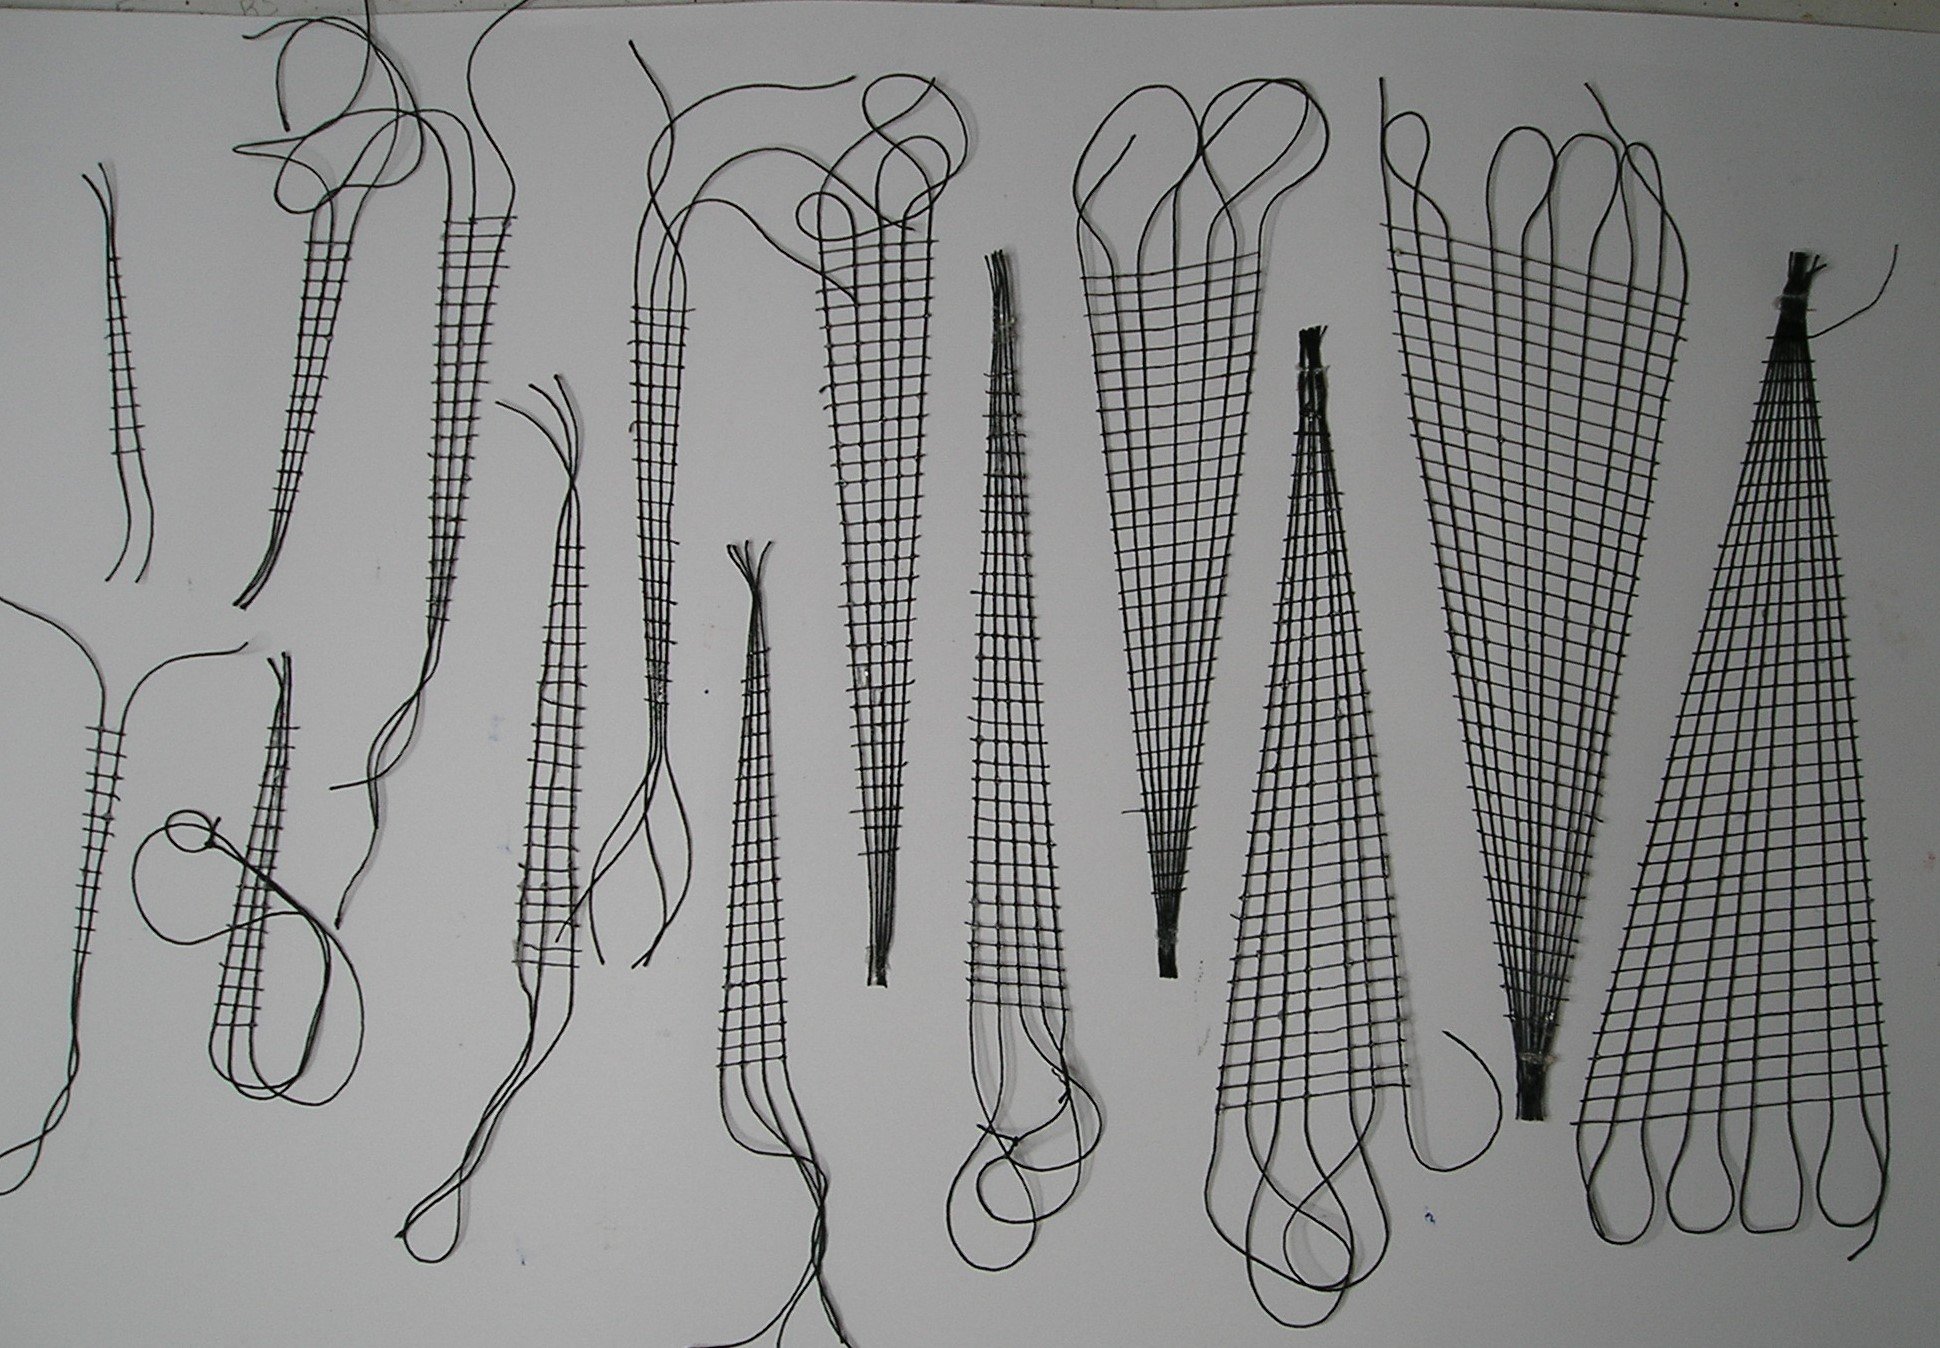
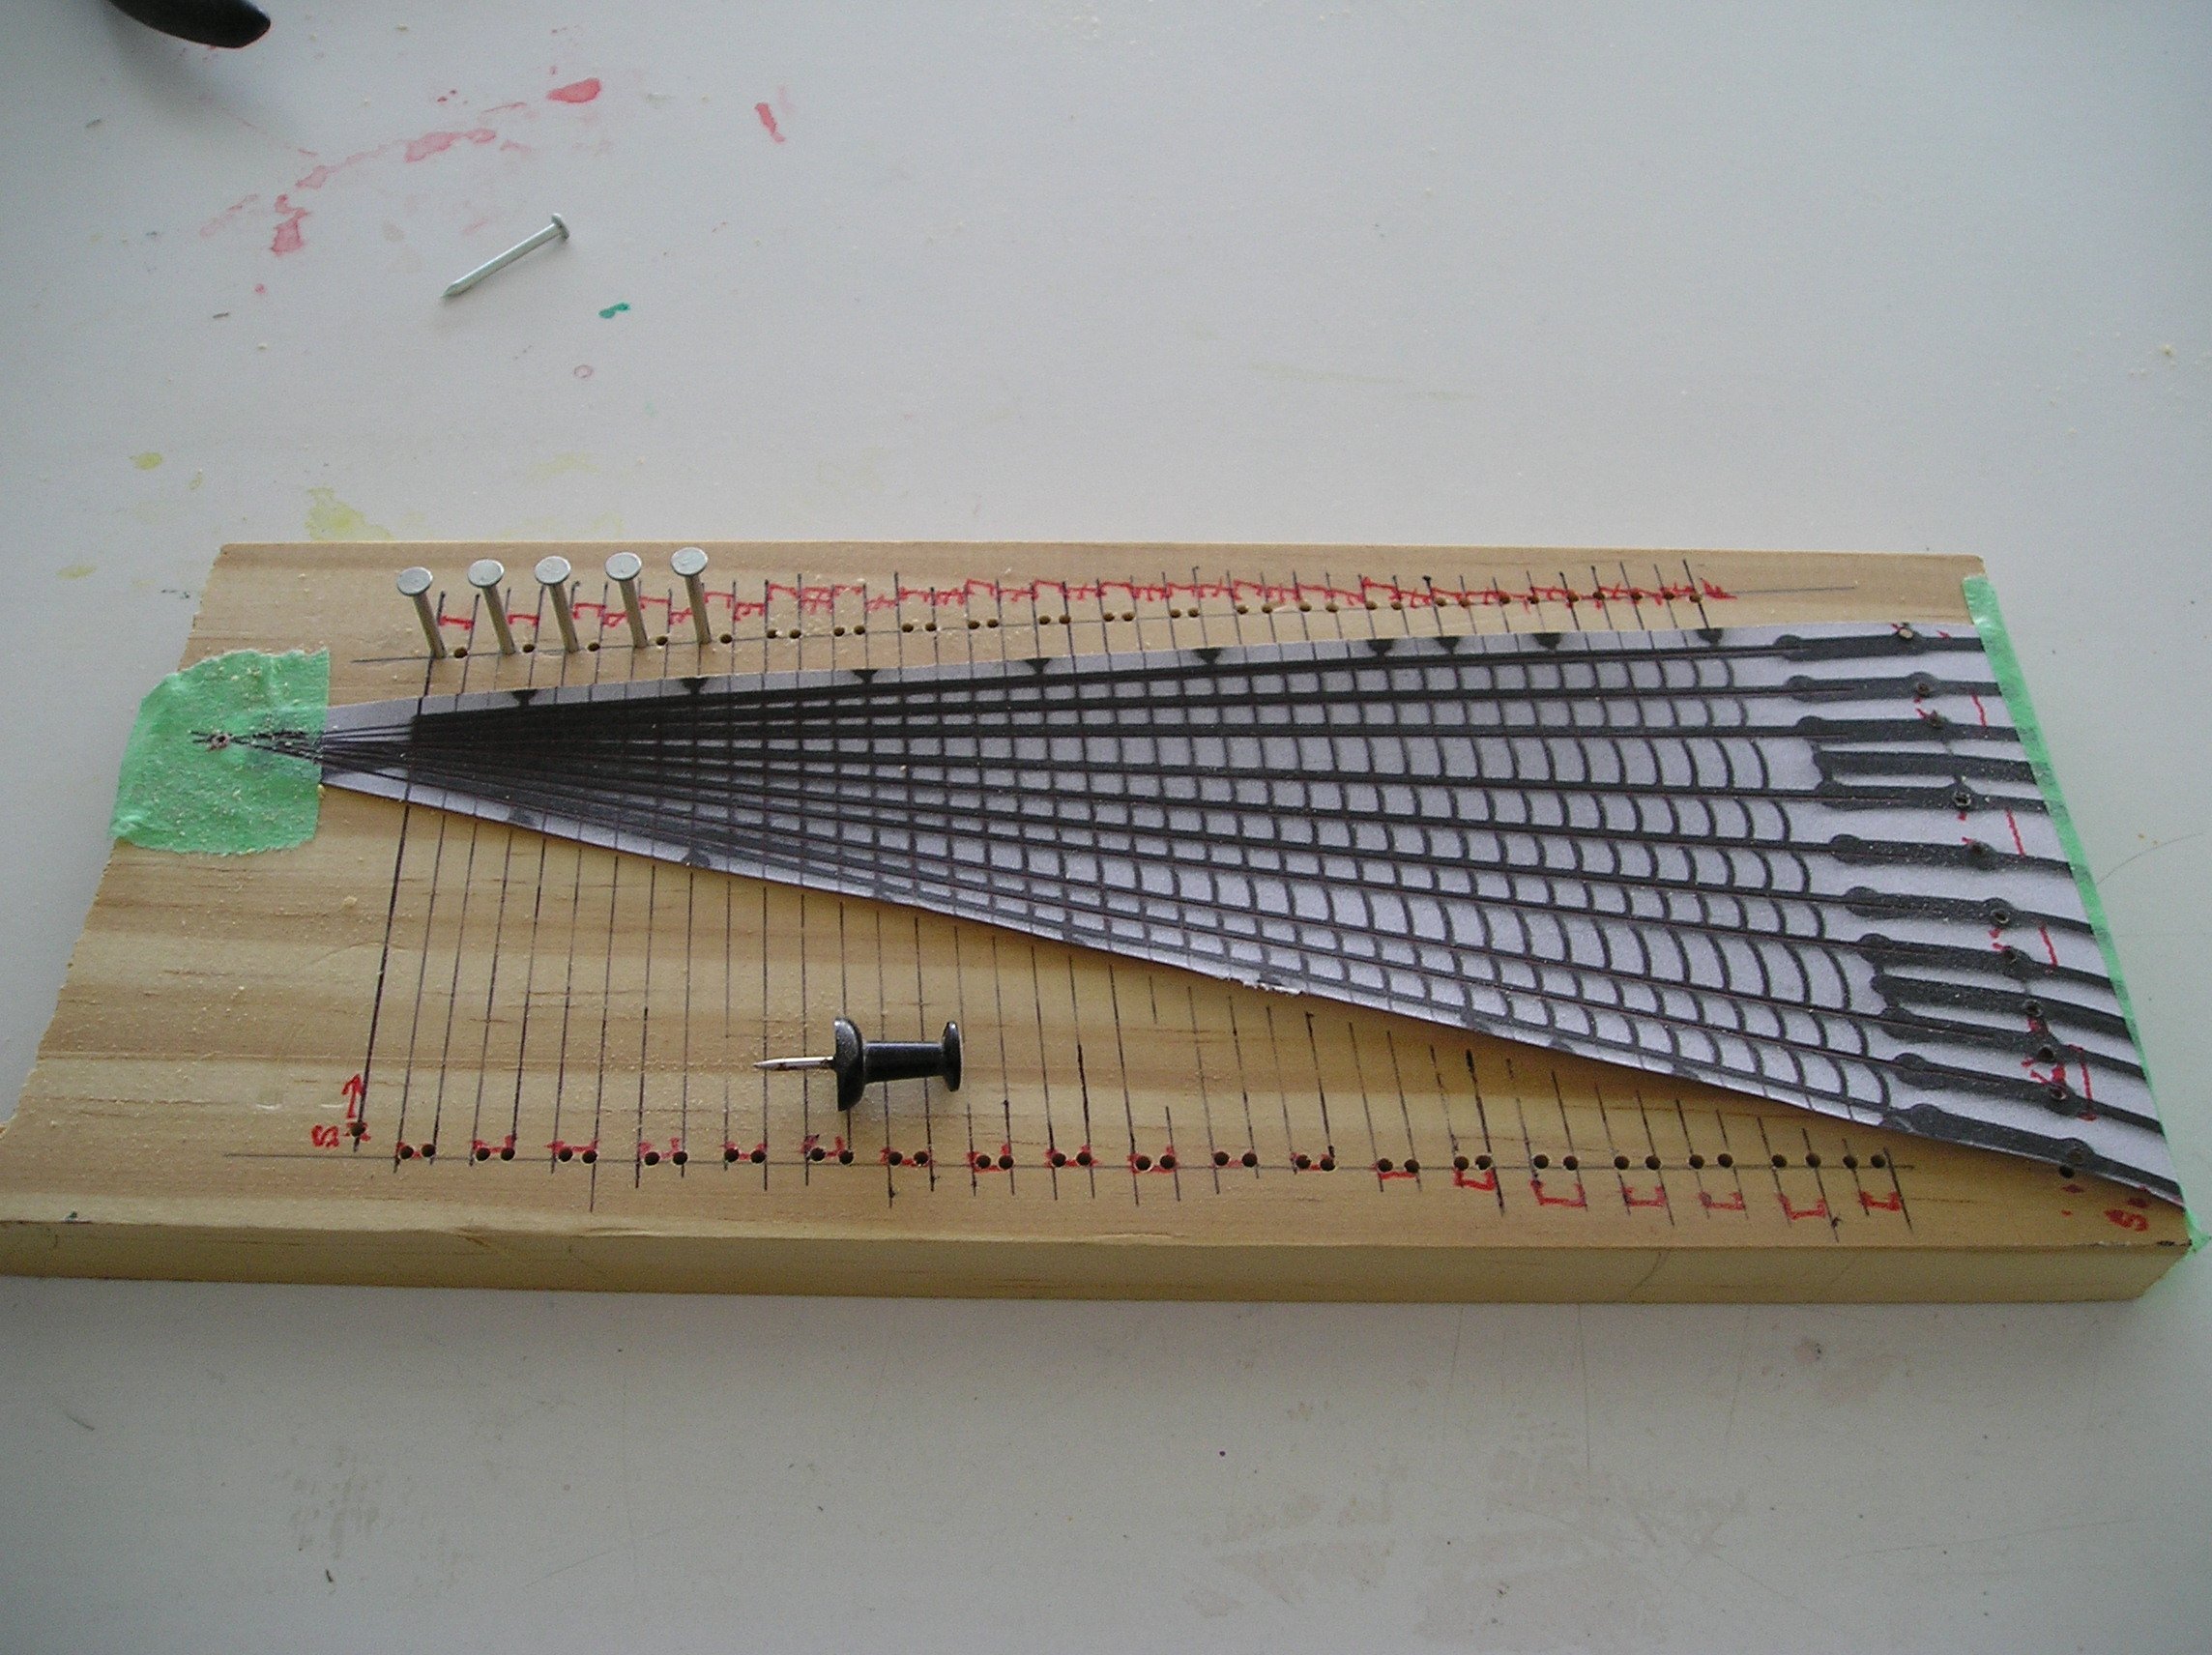
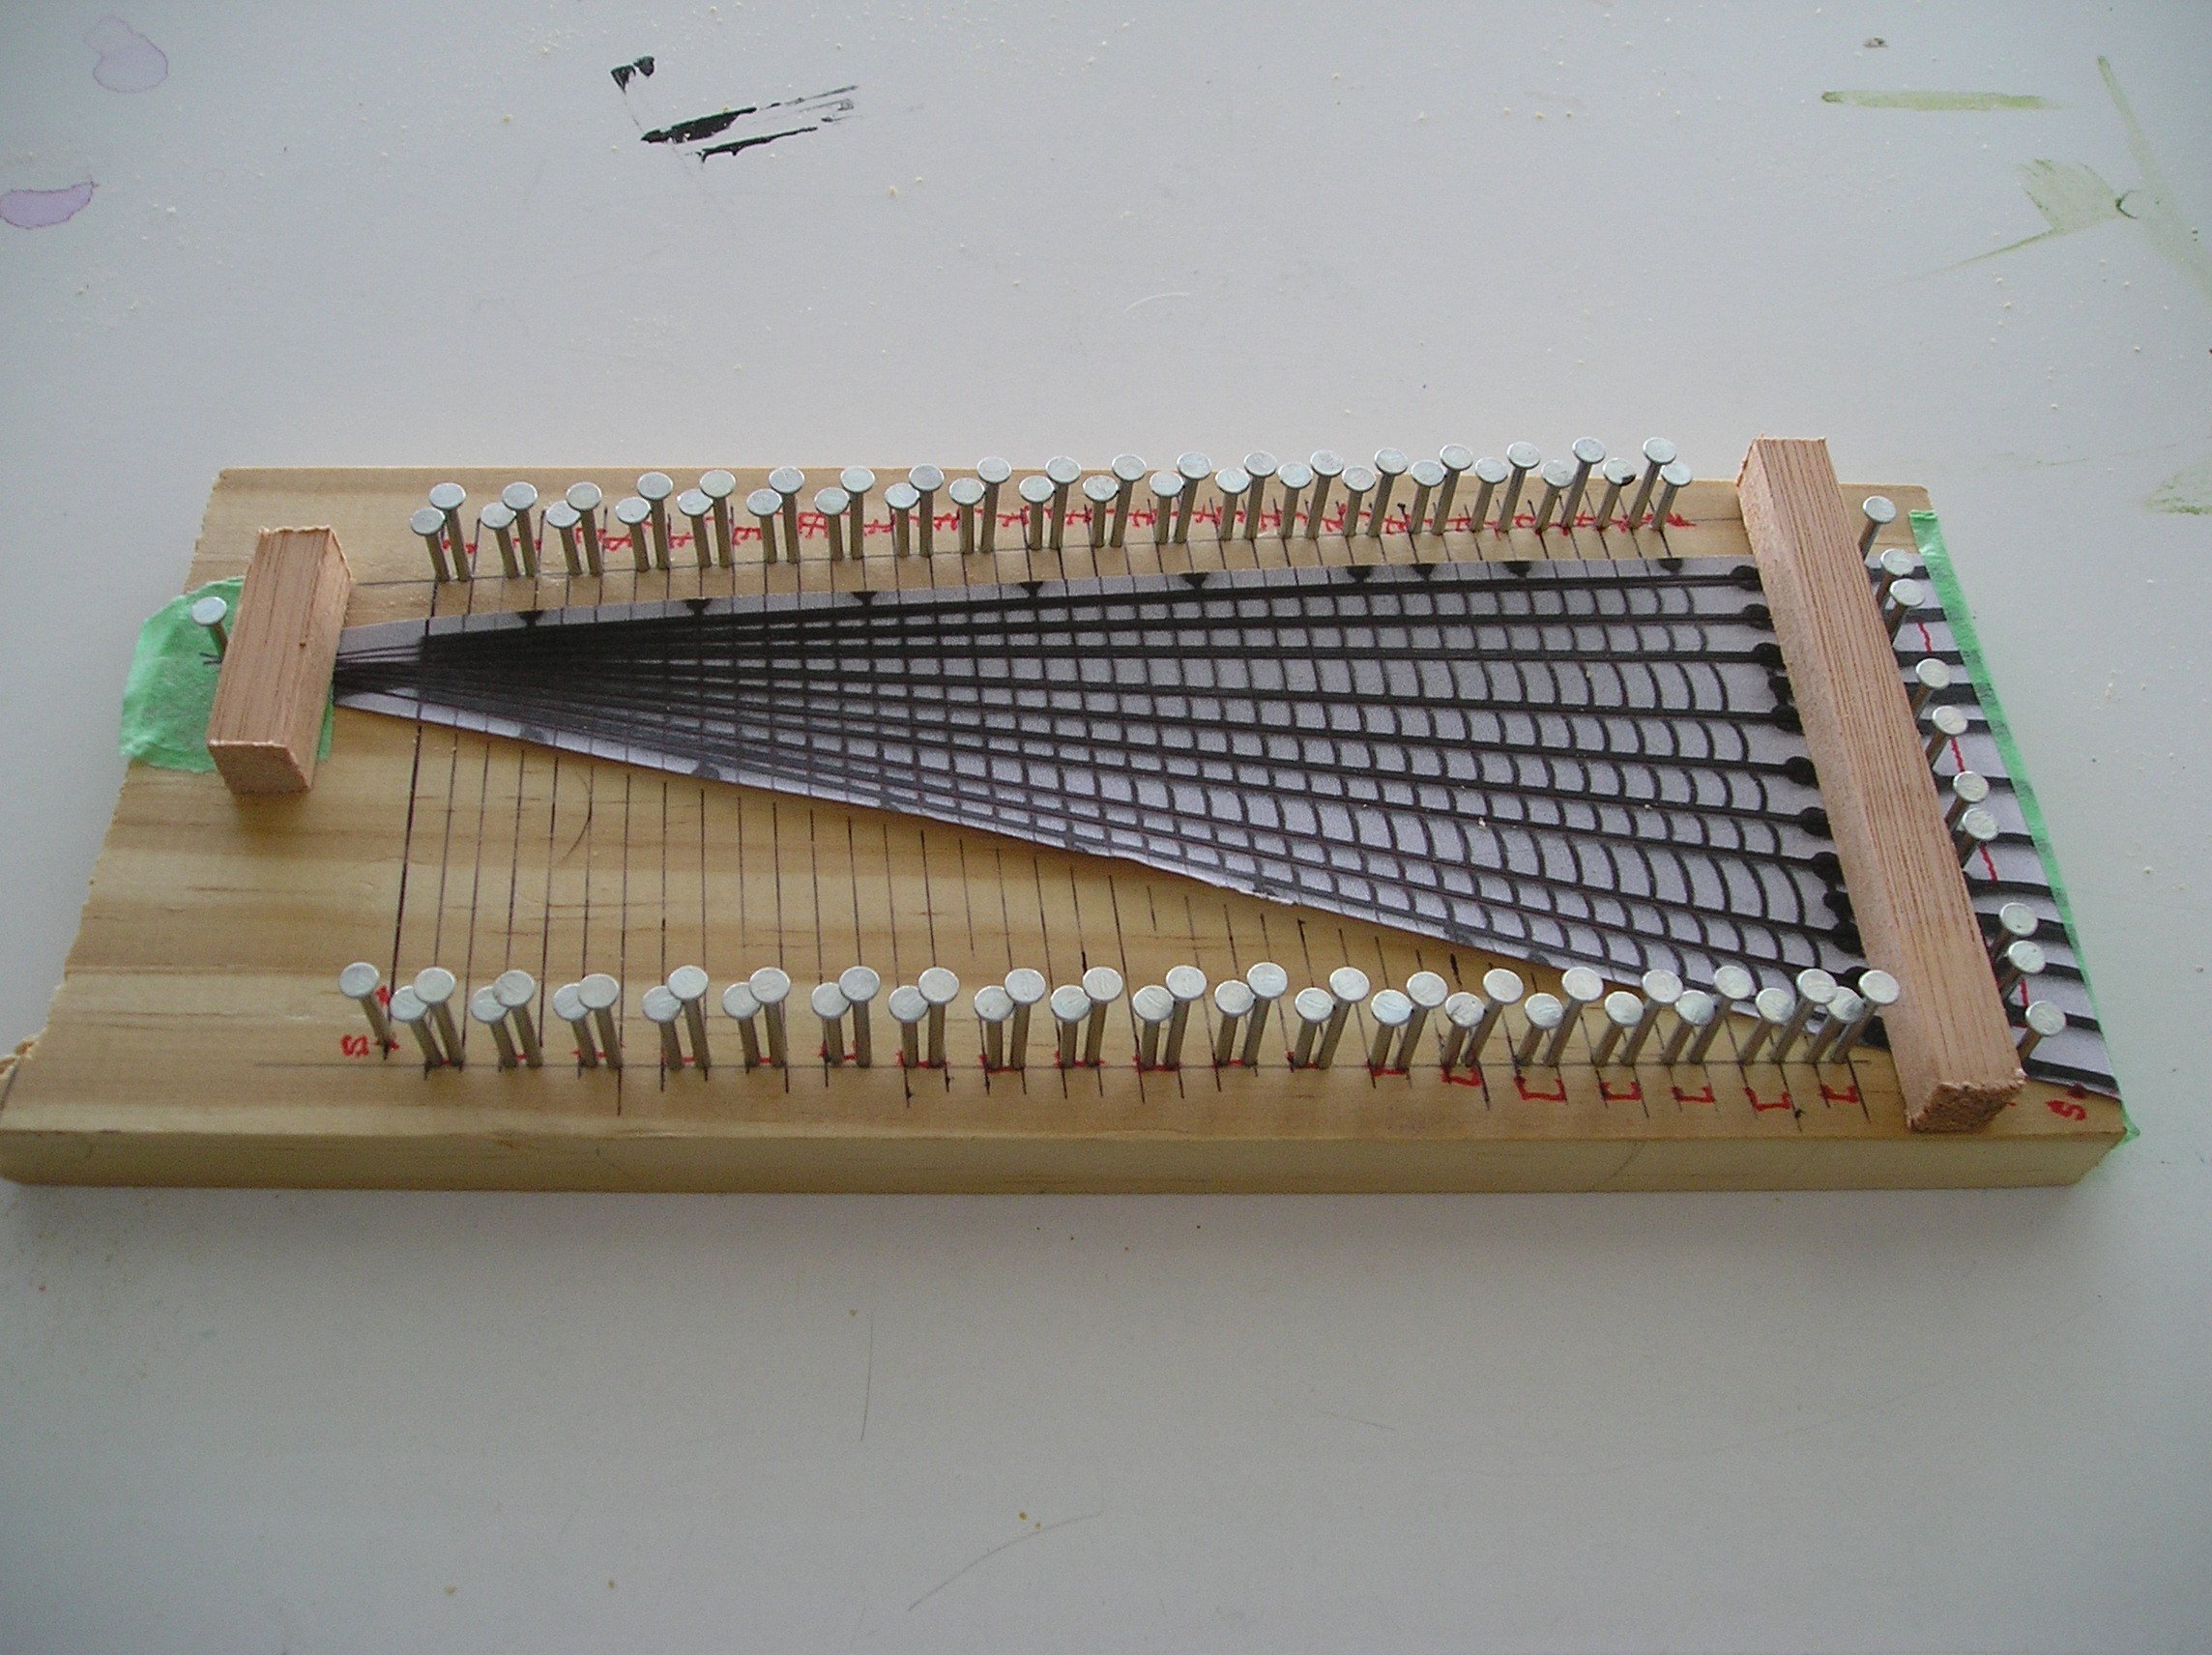
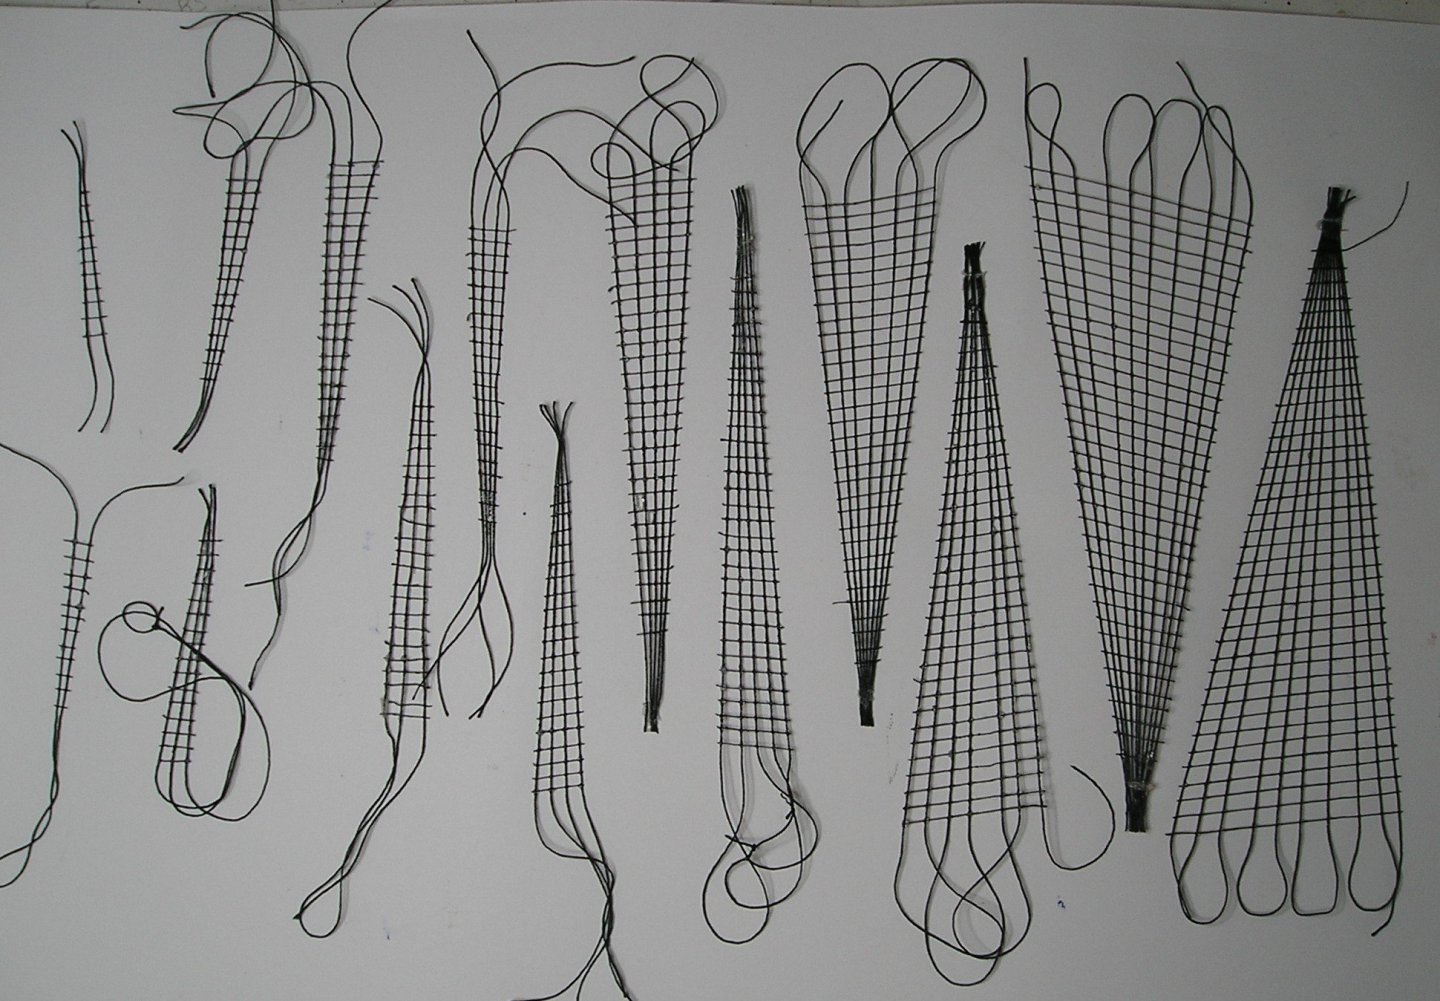
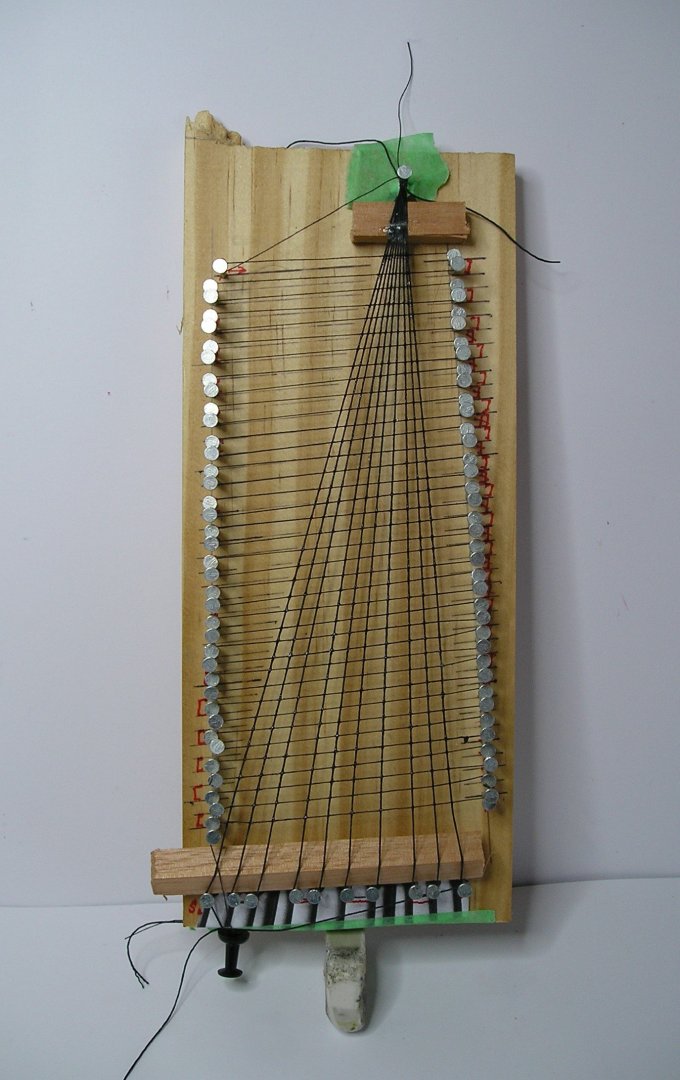
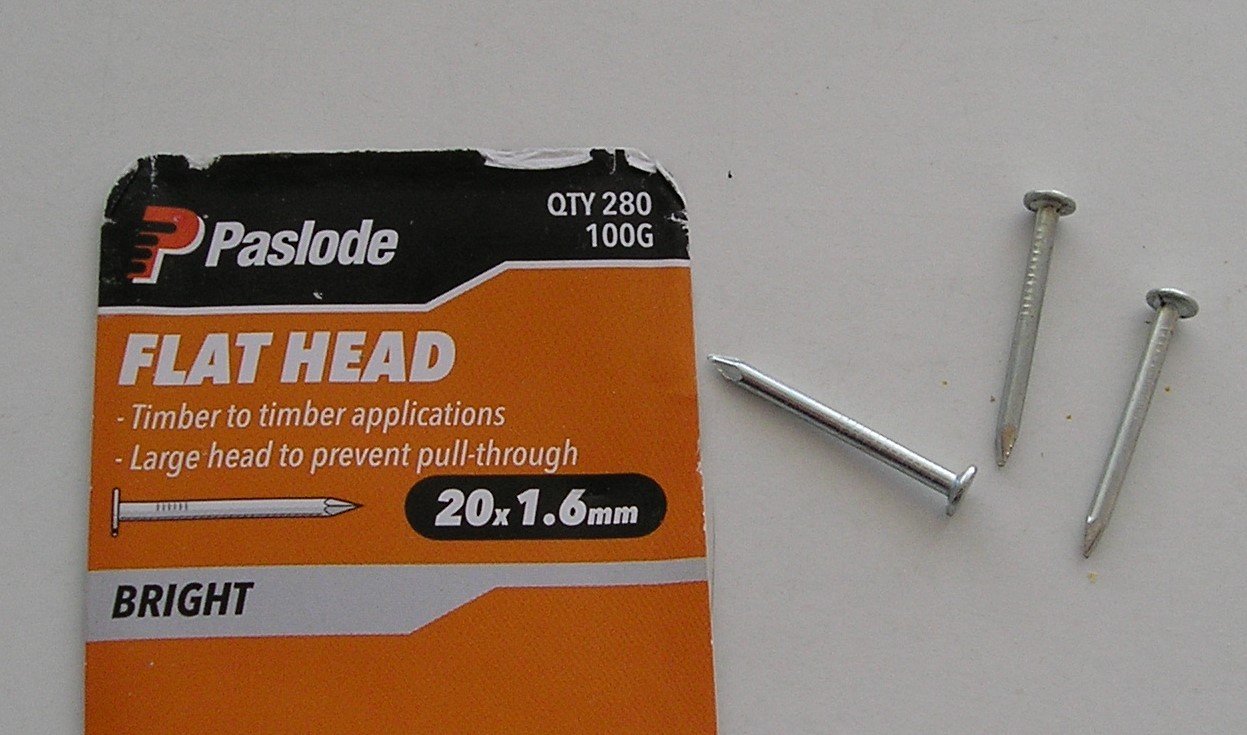
Thanks again for the those who follow my progress. I have been stressing out about the shrouds and ratlines. 😩 Do I, or don't I make my own. As the shrouds in the model measure 1mm in diameter, and the ratlines are 0.8mm, they will look like train lines on the ship! The chances of doing hundreds of clove hitches when the vertical gap is only 4mm, is very unlikely. So, I have decided to make my own! I'll use the kit chains and lanyards and have made up a jig for the shrouds and ratlines. After photocopying the relevant sprew, I cut out the biggest 'ladder' and placed it on a piece of wood, holding it in place with tape. I then traced and extended the shrouds and ratlines. I simply worked out where a single thread would go and drilled holes and placed nails as guides. Two pieces of wood (in this case 0.9mm x 0.9mm) were used to set the nail height and lift the threaded lines together at a height above the base board. The threading was easy even though I removed the photocopy from below. A final adjustment of some nails and I was ready to glue (CA) the joins. For the shrouds I used Gutterman Polyester 0.15mm and for the ratlines, 0.07mm (unknown brand). These threads are much more suitable for the 1:100 scale of the ship. You be the judge. The good part is that I can reuse the gig again for all the other ladders as they all have the 4mm rise. We're having a three day holiday and then I'll be back to do some more! Cheers,


- 69 replies
-
- 6
-
-
- spanish galleon
- Imai
- (and 1 more)
-
An amasing achievement. Excellent work!
-
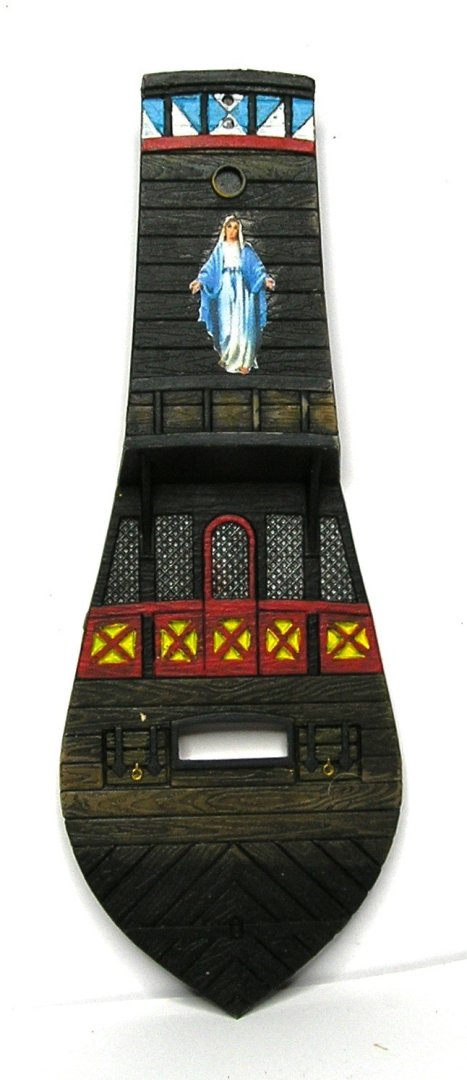
Thanks to those who follow me and 'like' my work. The more I do, the greater the challenge, and the more the enjoyment! I installed the channels, shields and painted the stern (the good lady still needs to be weathered a little). Until next time, Cheers,
- 69 replies
-
- 5
-
-
- spanish galleon
- Imai
- (and 1 more)
-
Glen, this build is truly awesome to watch. It lives up to my expectations of a 'master at work'. Good luck with the fitting! 😟
- 235 replies
-
- 5
-

-
-
- Banshee II
- Bottle
- (and 1 more)
-
Patrick, my Dutch parents lived in Eeklo for five years and returned to Nederland when I was 10 days old. At 3 years of age, we moved to Australia. The world is not so big after all. Cheers, Peter
- 69 replies
-
- 3
-
-
- spanish galleon
- Imai
- (and 1 more)
-
Patrick, thank you for your positive comment and 'like'. Incidentally, is where you live in Oost Vlaanderen, anywhere near where I was born in Eeklo? Peter
- 69 replies
-
- 2
-
-
- spanish galleon
- Imai
- (and 1 more)
-
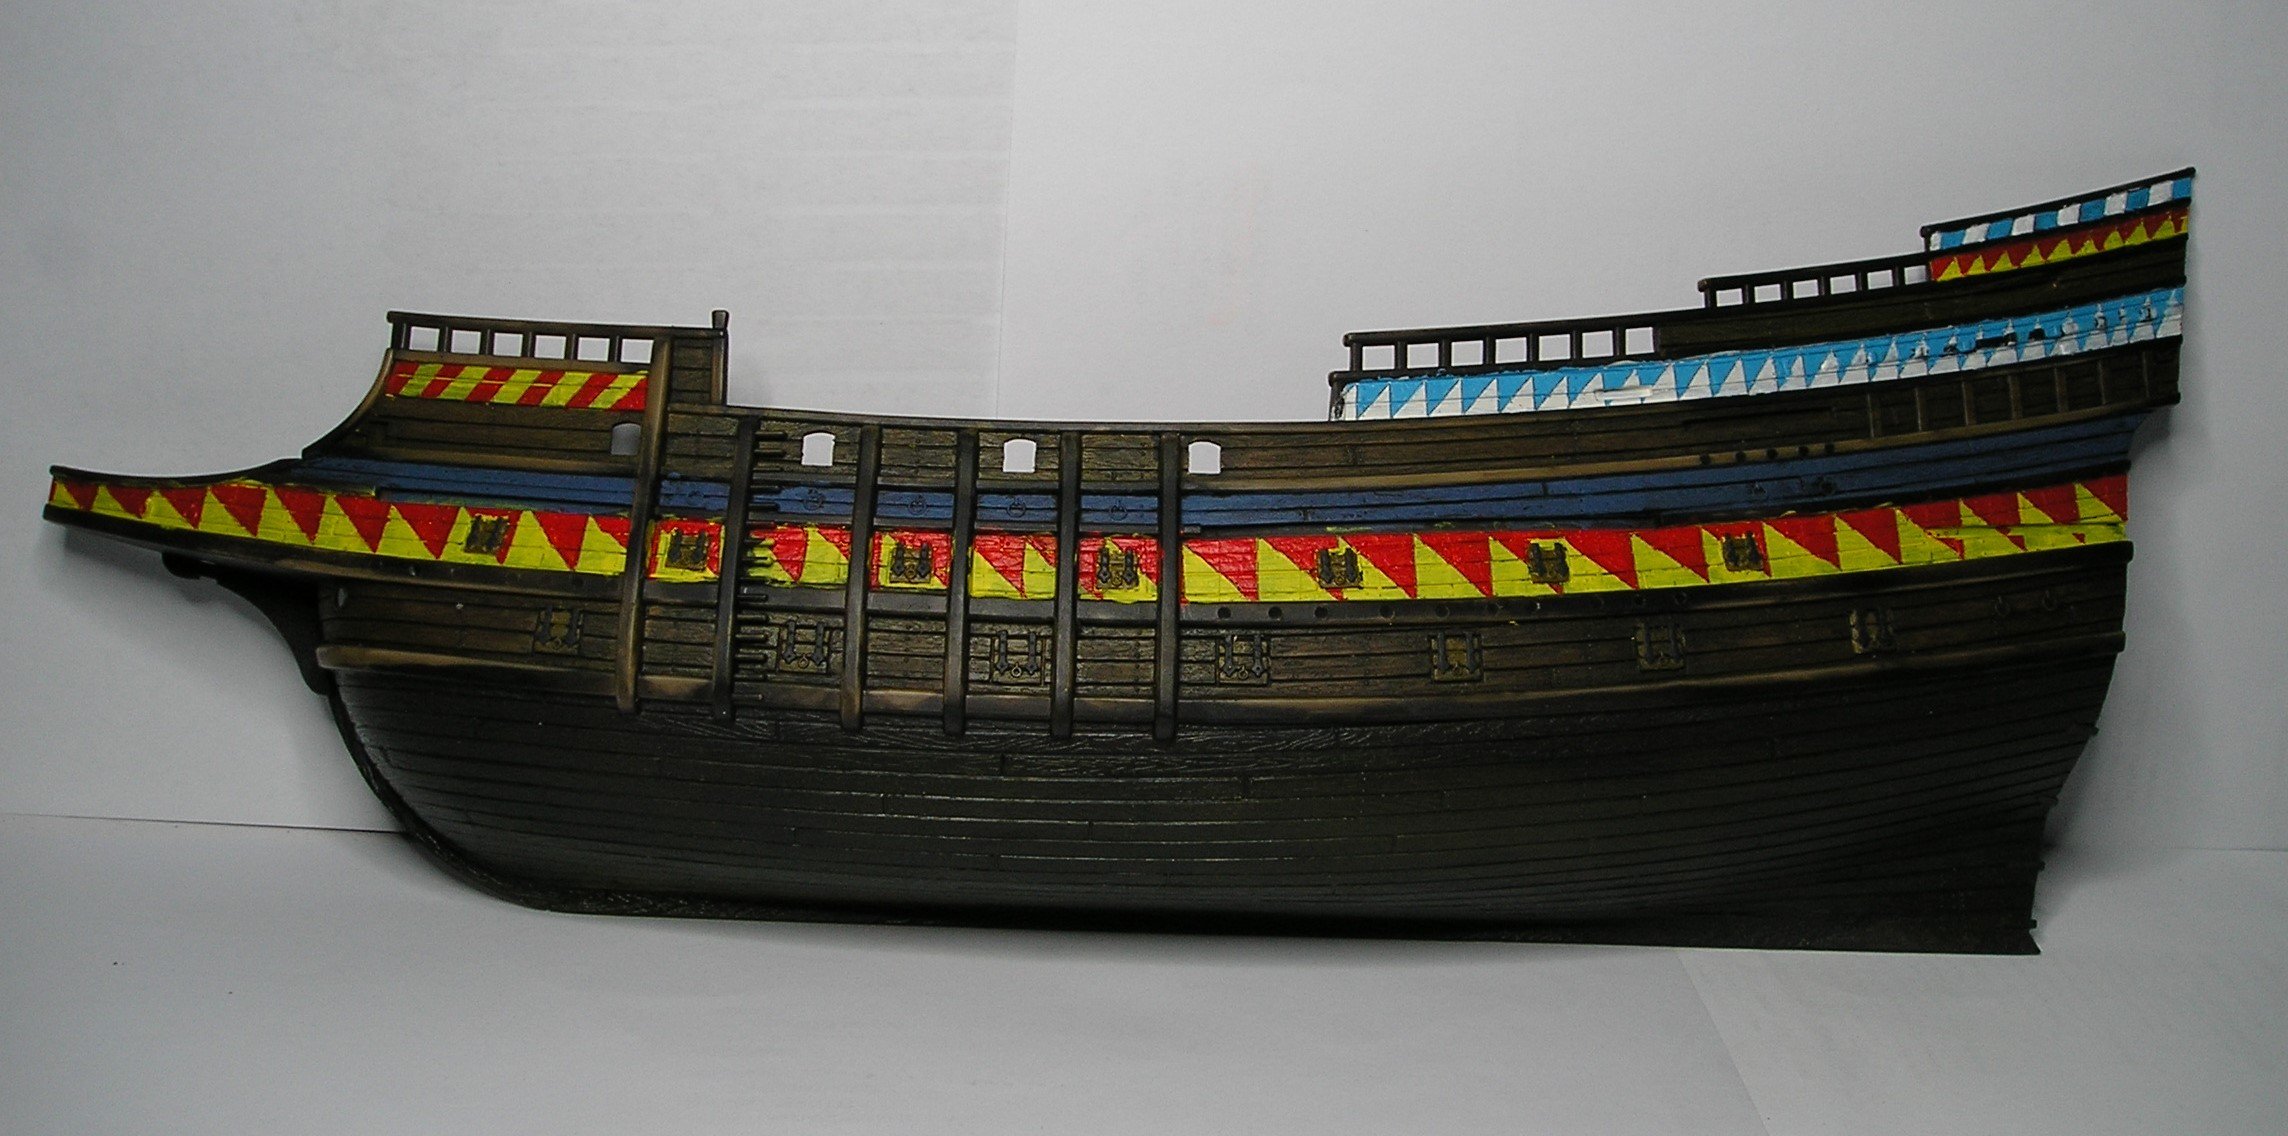
Greetings, It doesn't seem like much progress, but when you consider having to paint and then touch-up one colour after another, it's a lot of fun! Don't forget it's a 1:100 scale model. 🧐 The messy board above the red/yellow is a space for the channel. Tomorrow's work will include installing the channels, and possibly putting the two sides, stern and decks together ... at least for a dry fit. Thanks for the continued interest. ☺️ Cheers,


- 69 replies
-
- 6
-
-
- spanish galleon
- Imai
- (and 1 more)
-
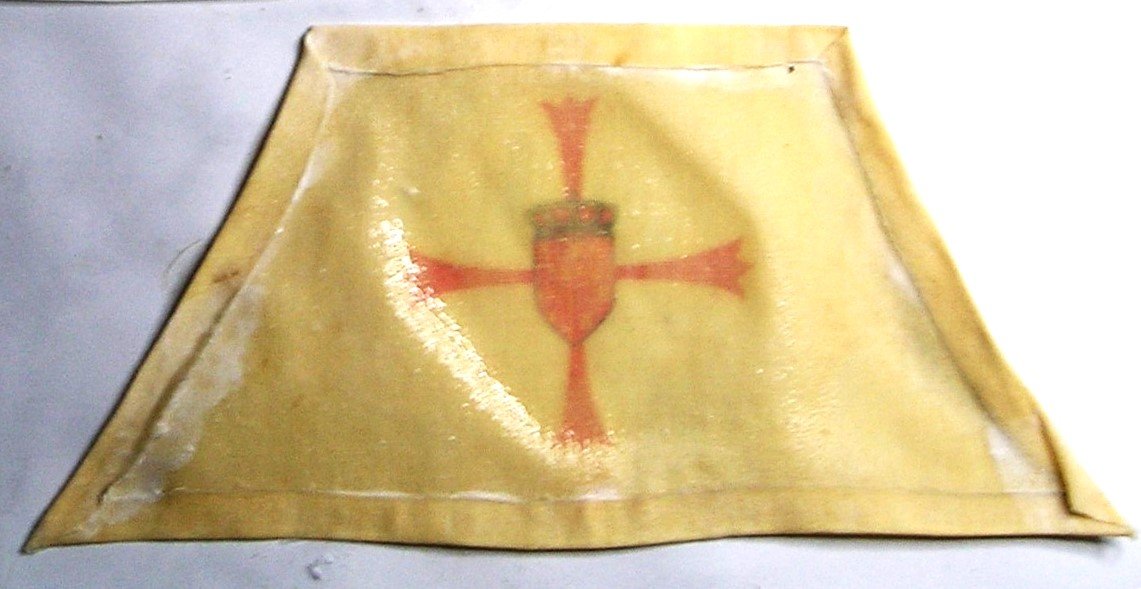
Steven, our crest was vertical without any 'bend'. Thanks for the interest. (I've sent a message with the requested name.) Cheers,
- 69 replies
-
- 4
-
-
- spanish galleon
- Imai
- (and 1 more)
-
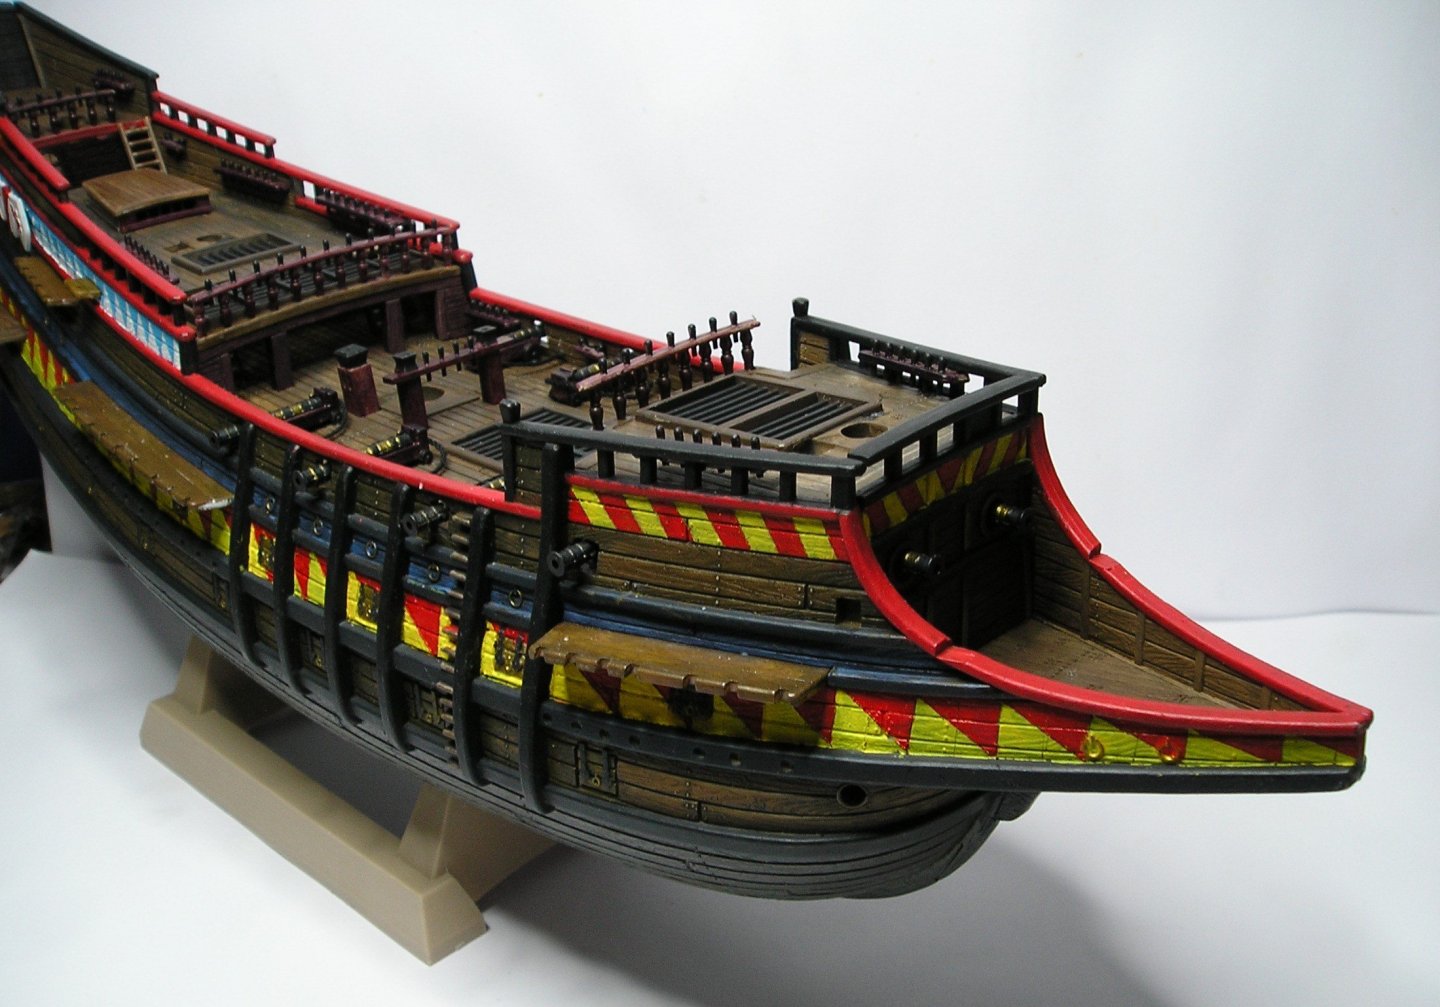
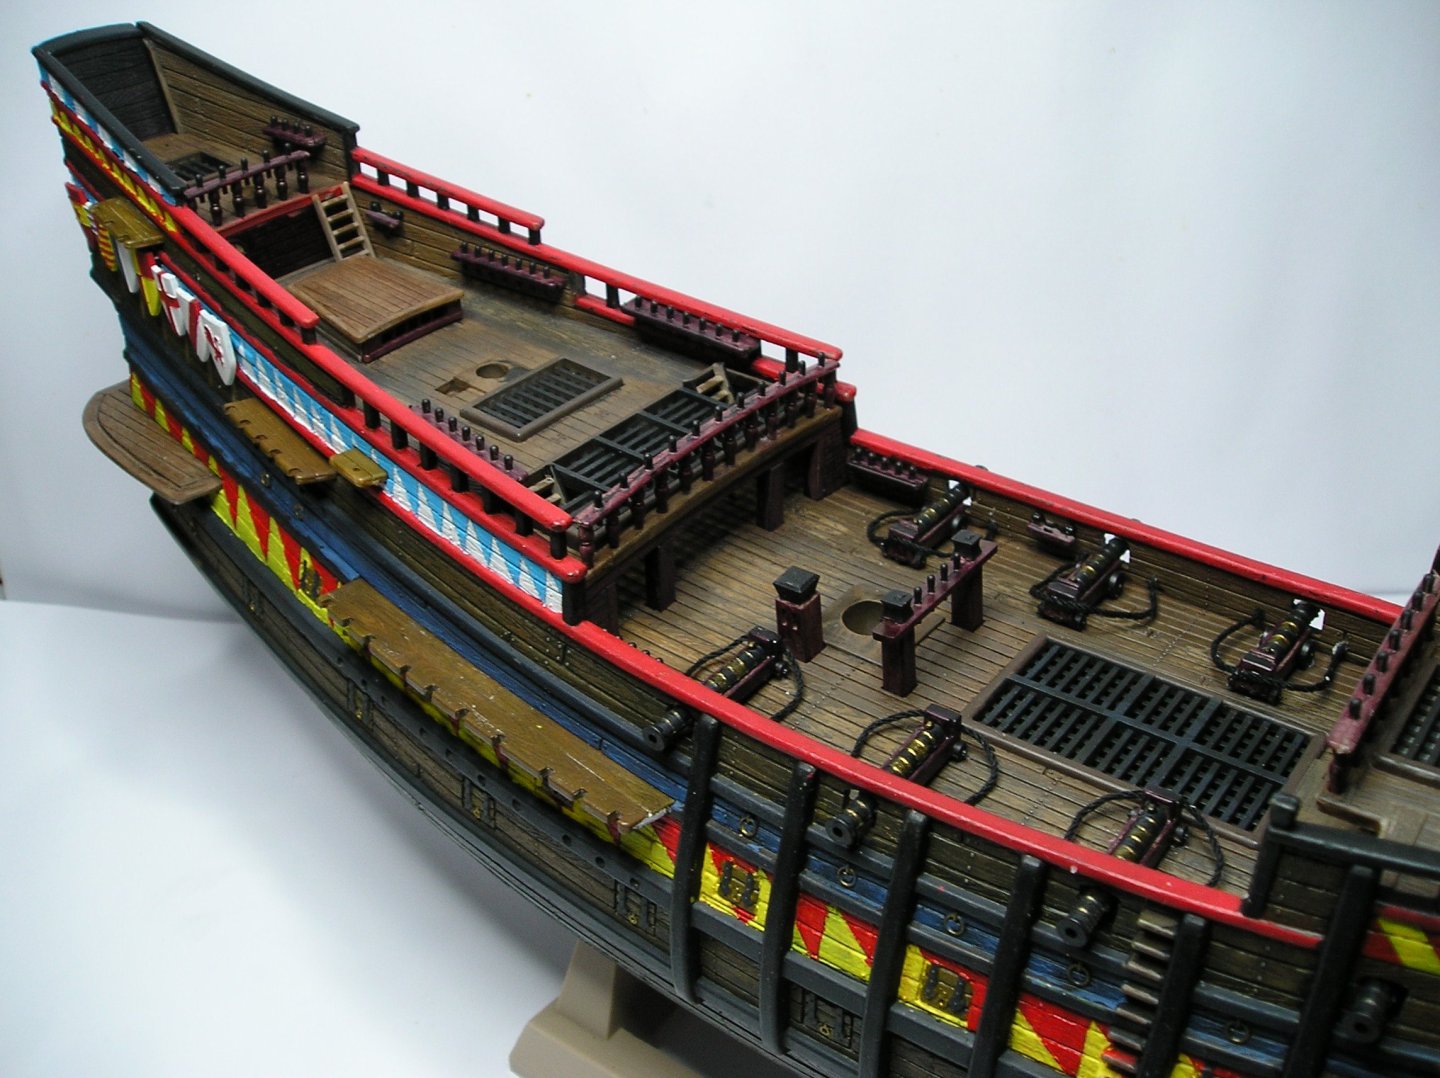
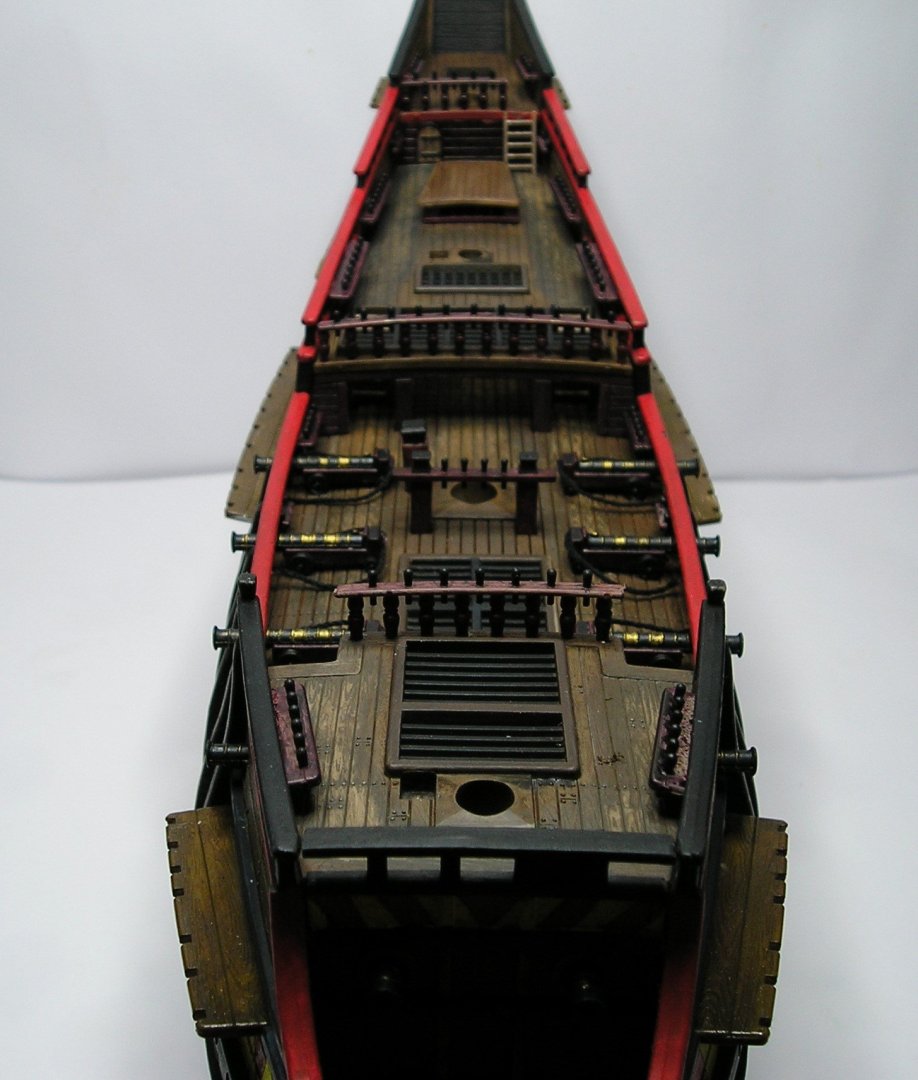
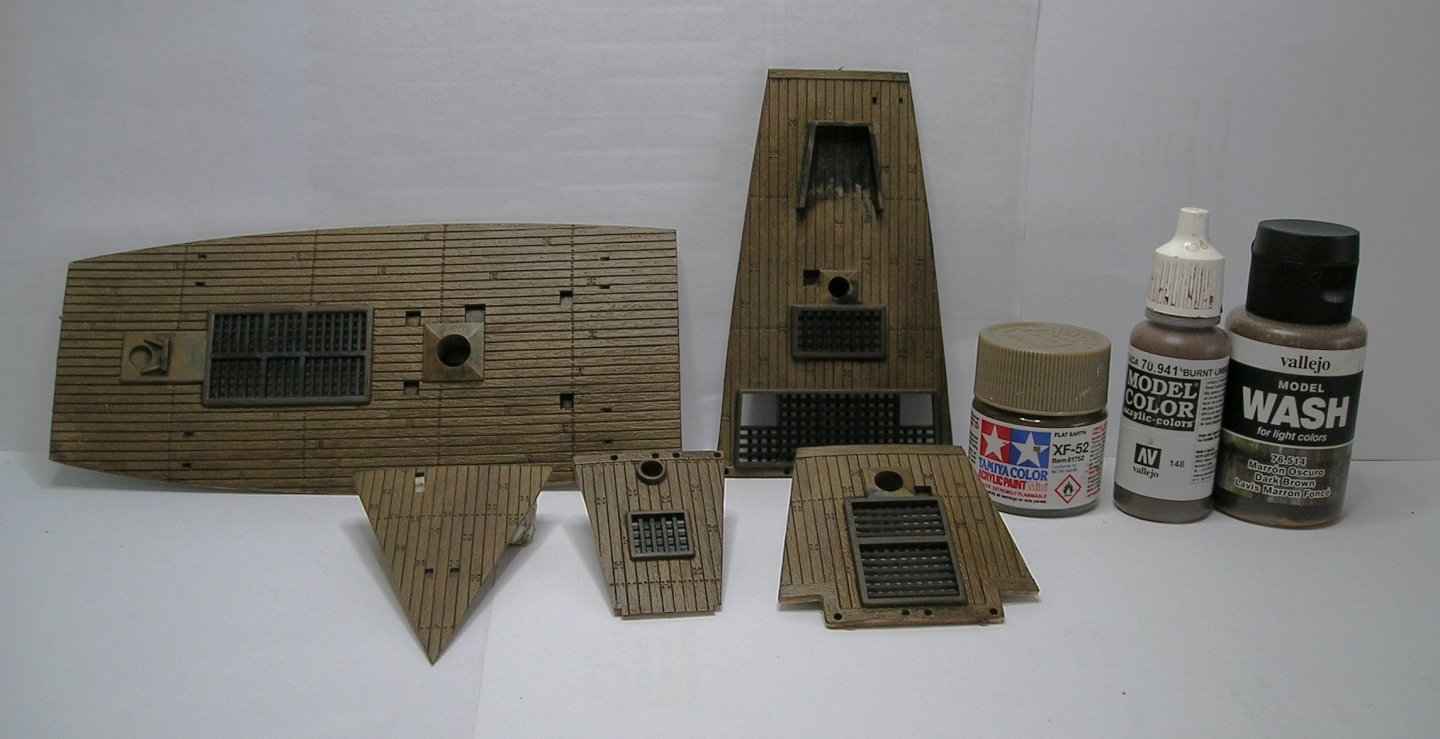
I started painting the 'wales' but wasn't happy with the red colour I was using as it seemed a little gaudy. So, I decided to work on the decks. This proved to be much more rewarding and heaps of fun painting and weathering. The result is very pleasing. 😊 Cheers,

- 69 replies
-
- 6
-
-
- spanish galleon
- Imai
- (and 1 more)
-
The red and yellow striped one. It goes back to an ancient duchy from 1190 onward. P
- 69 replies
-
- 4
-
-
- spanish galleon
- Imai
- (and 1 more)
-
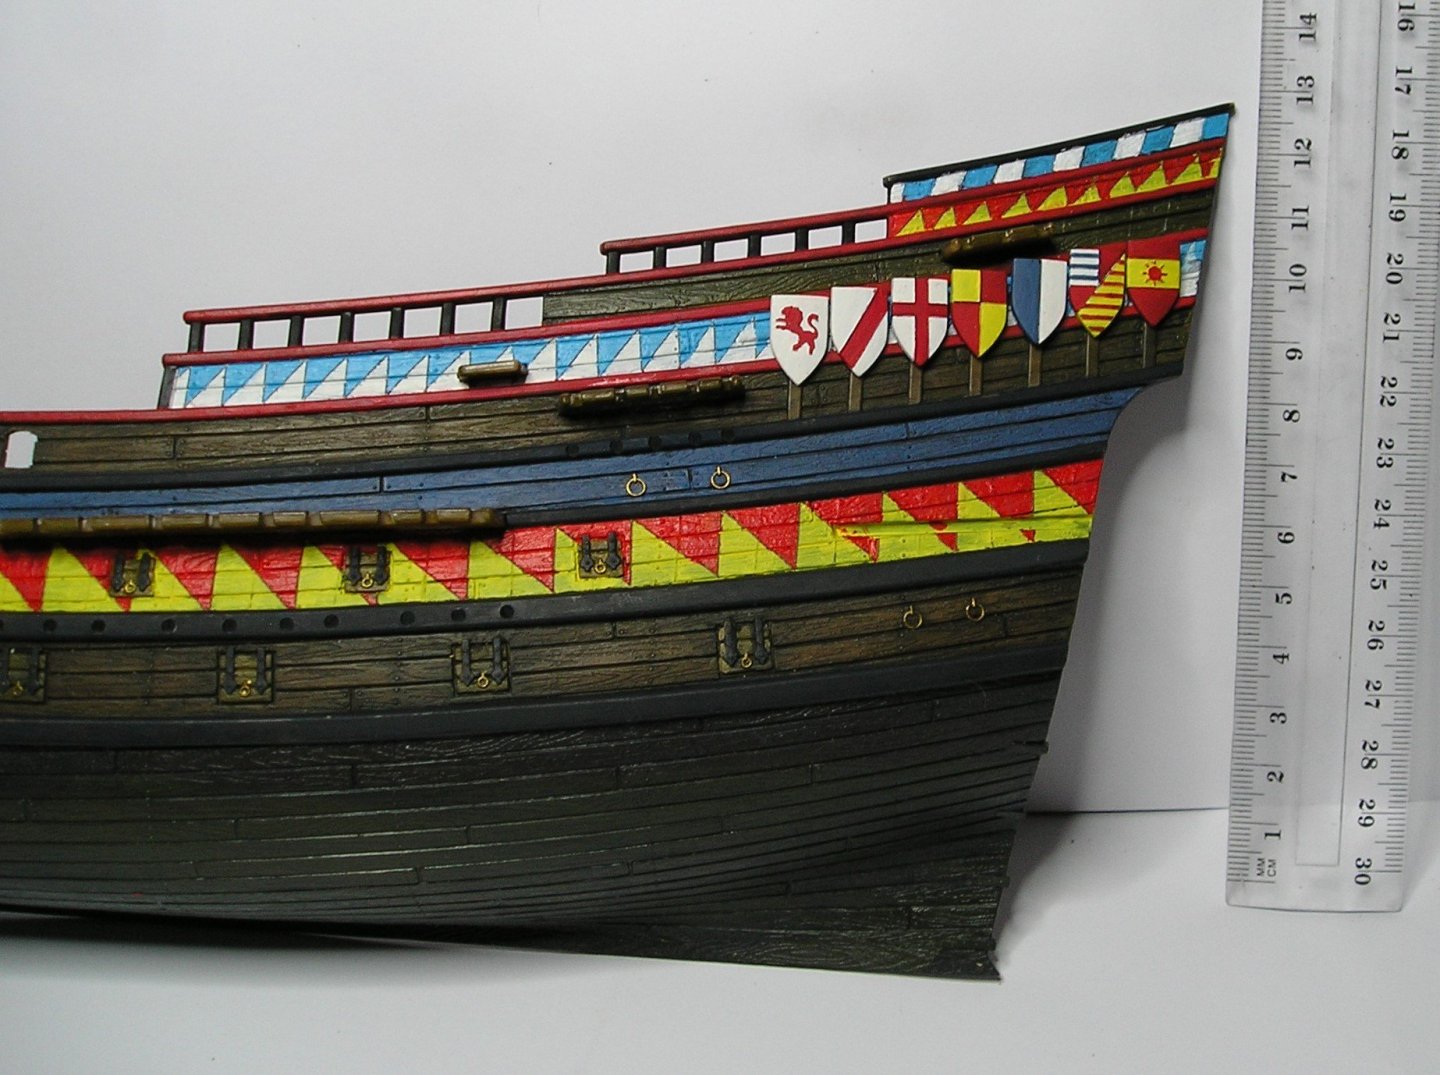
Ferris, regarding the paint patterns and Vroom's reference, I am happy to go with the 1979 version as it was depicted on the kit display. Surely, they must have had some idea, even though it was made so long ago. Incidentally, one of the shields on the model is my family crest! Cheers,
- 69 replies
-
- 3
-
-
- spanish galleon
- Imai
- (and 1 more)
-
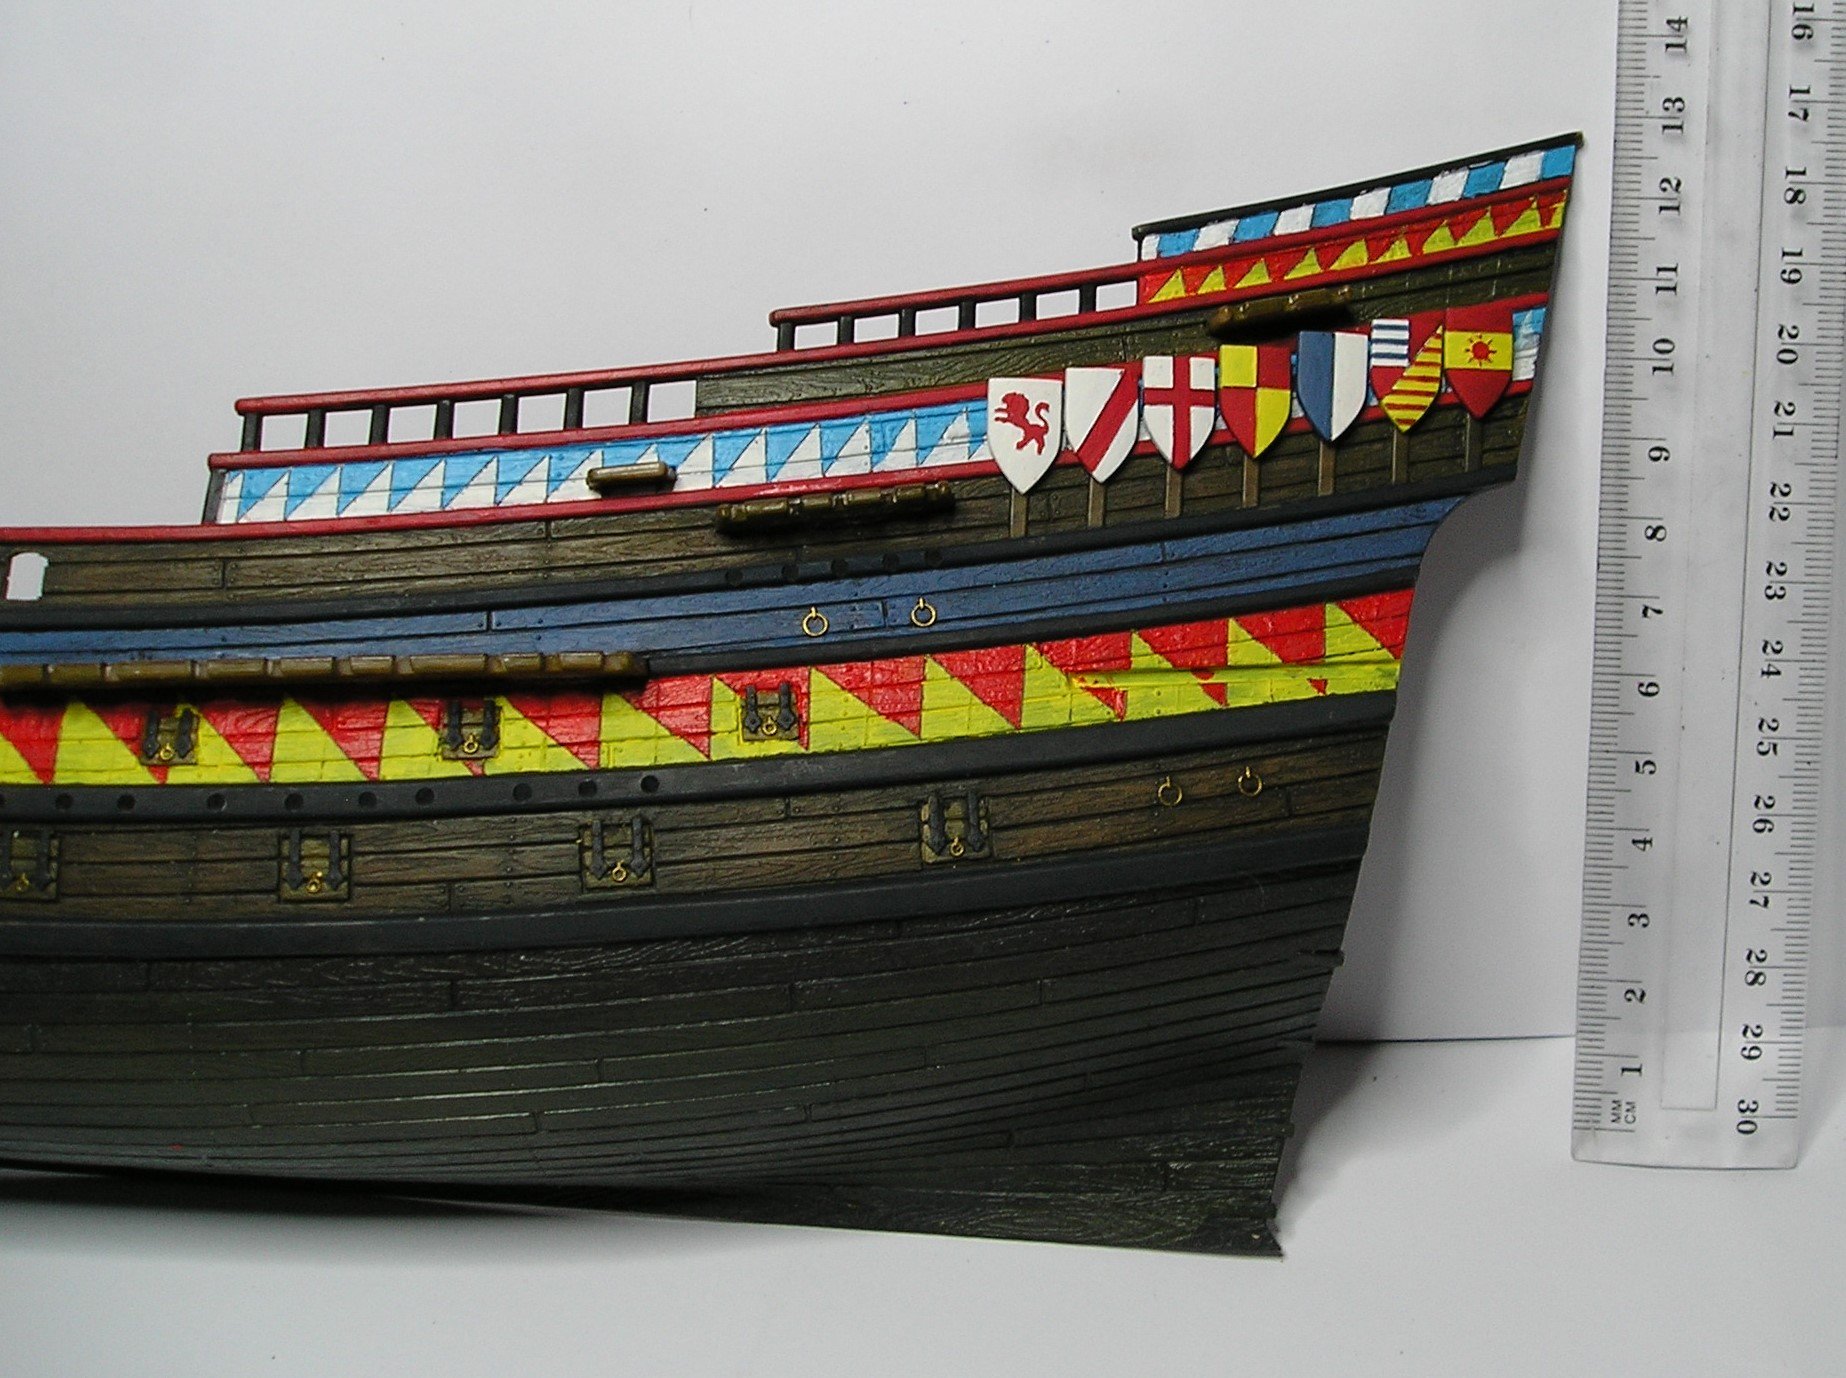
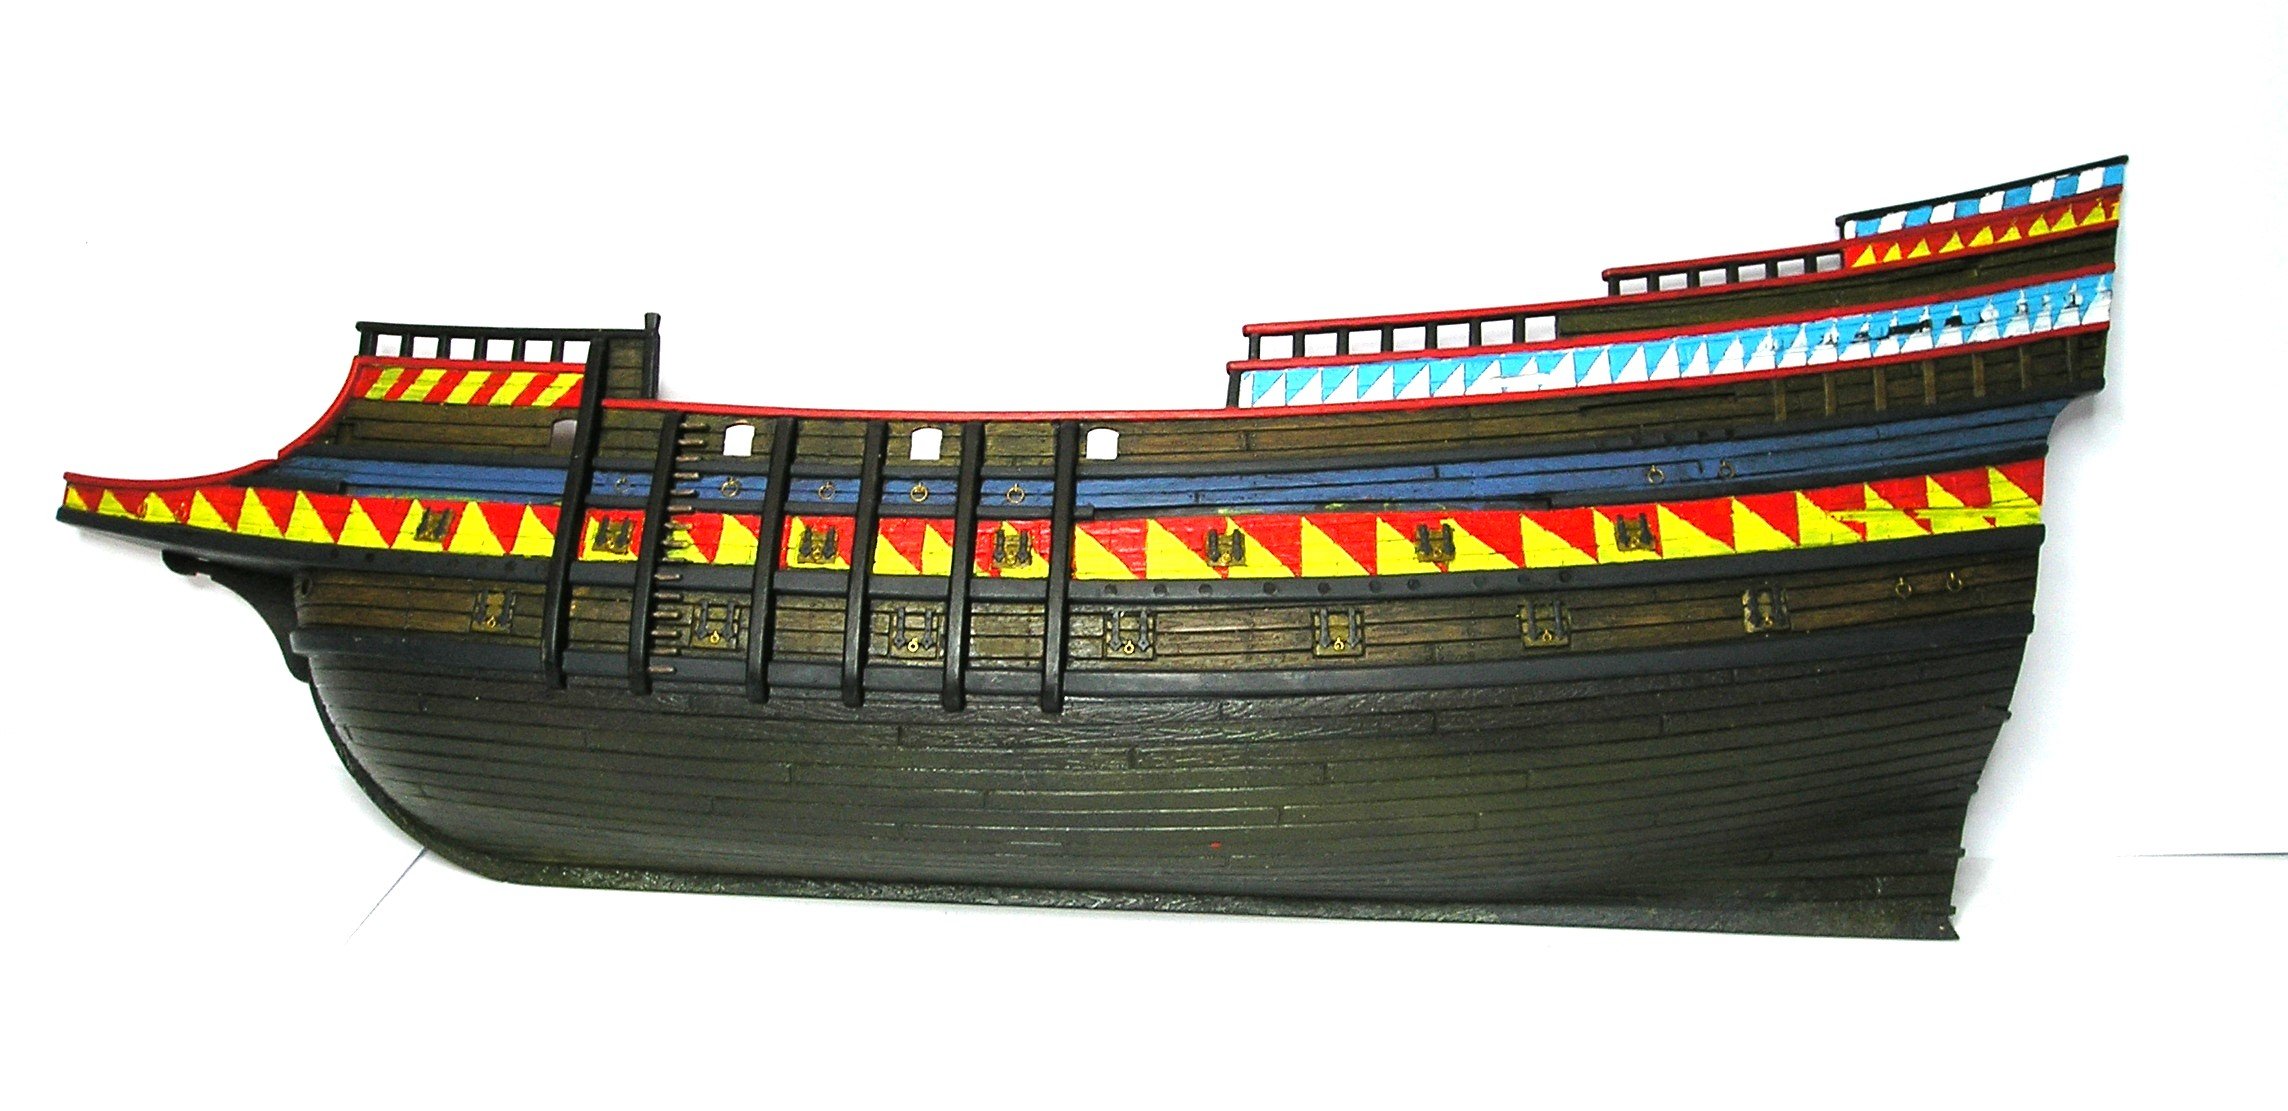
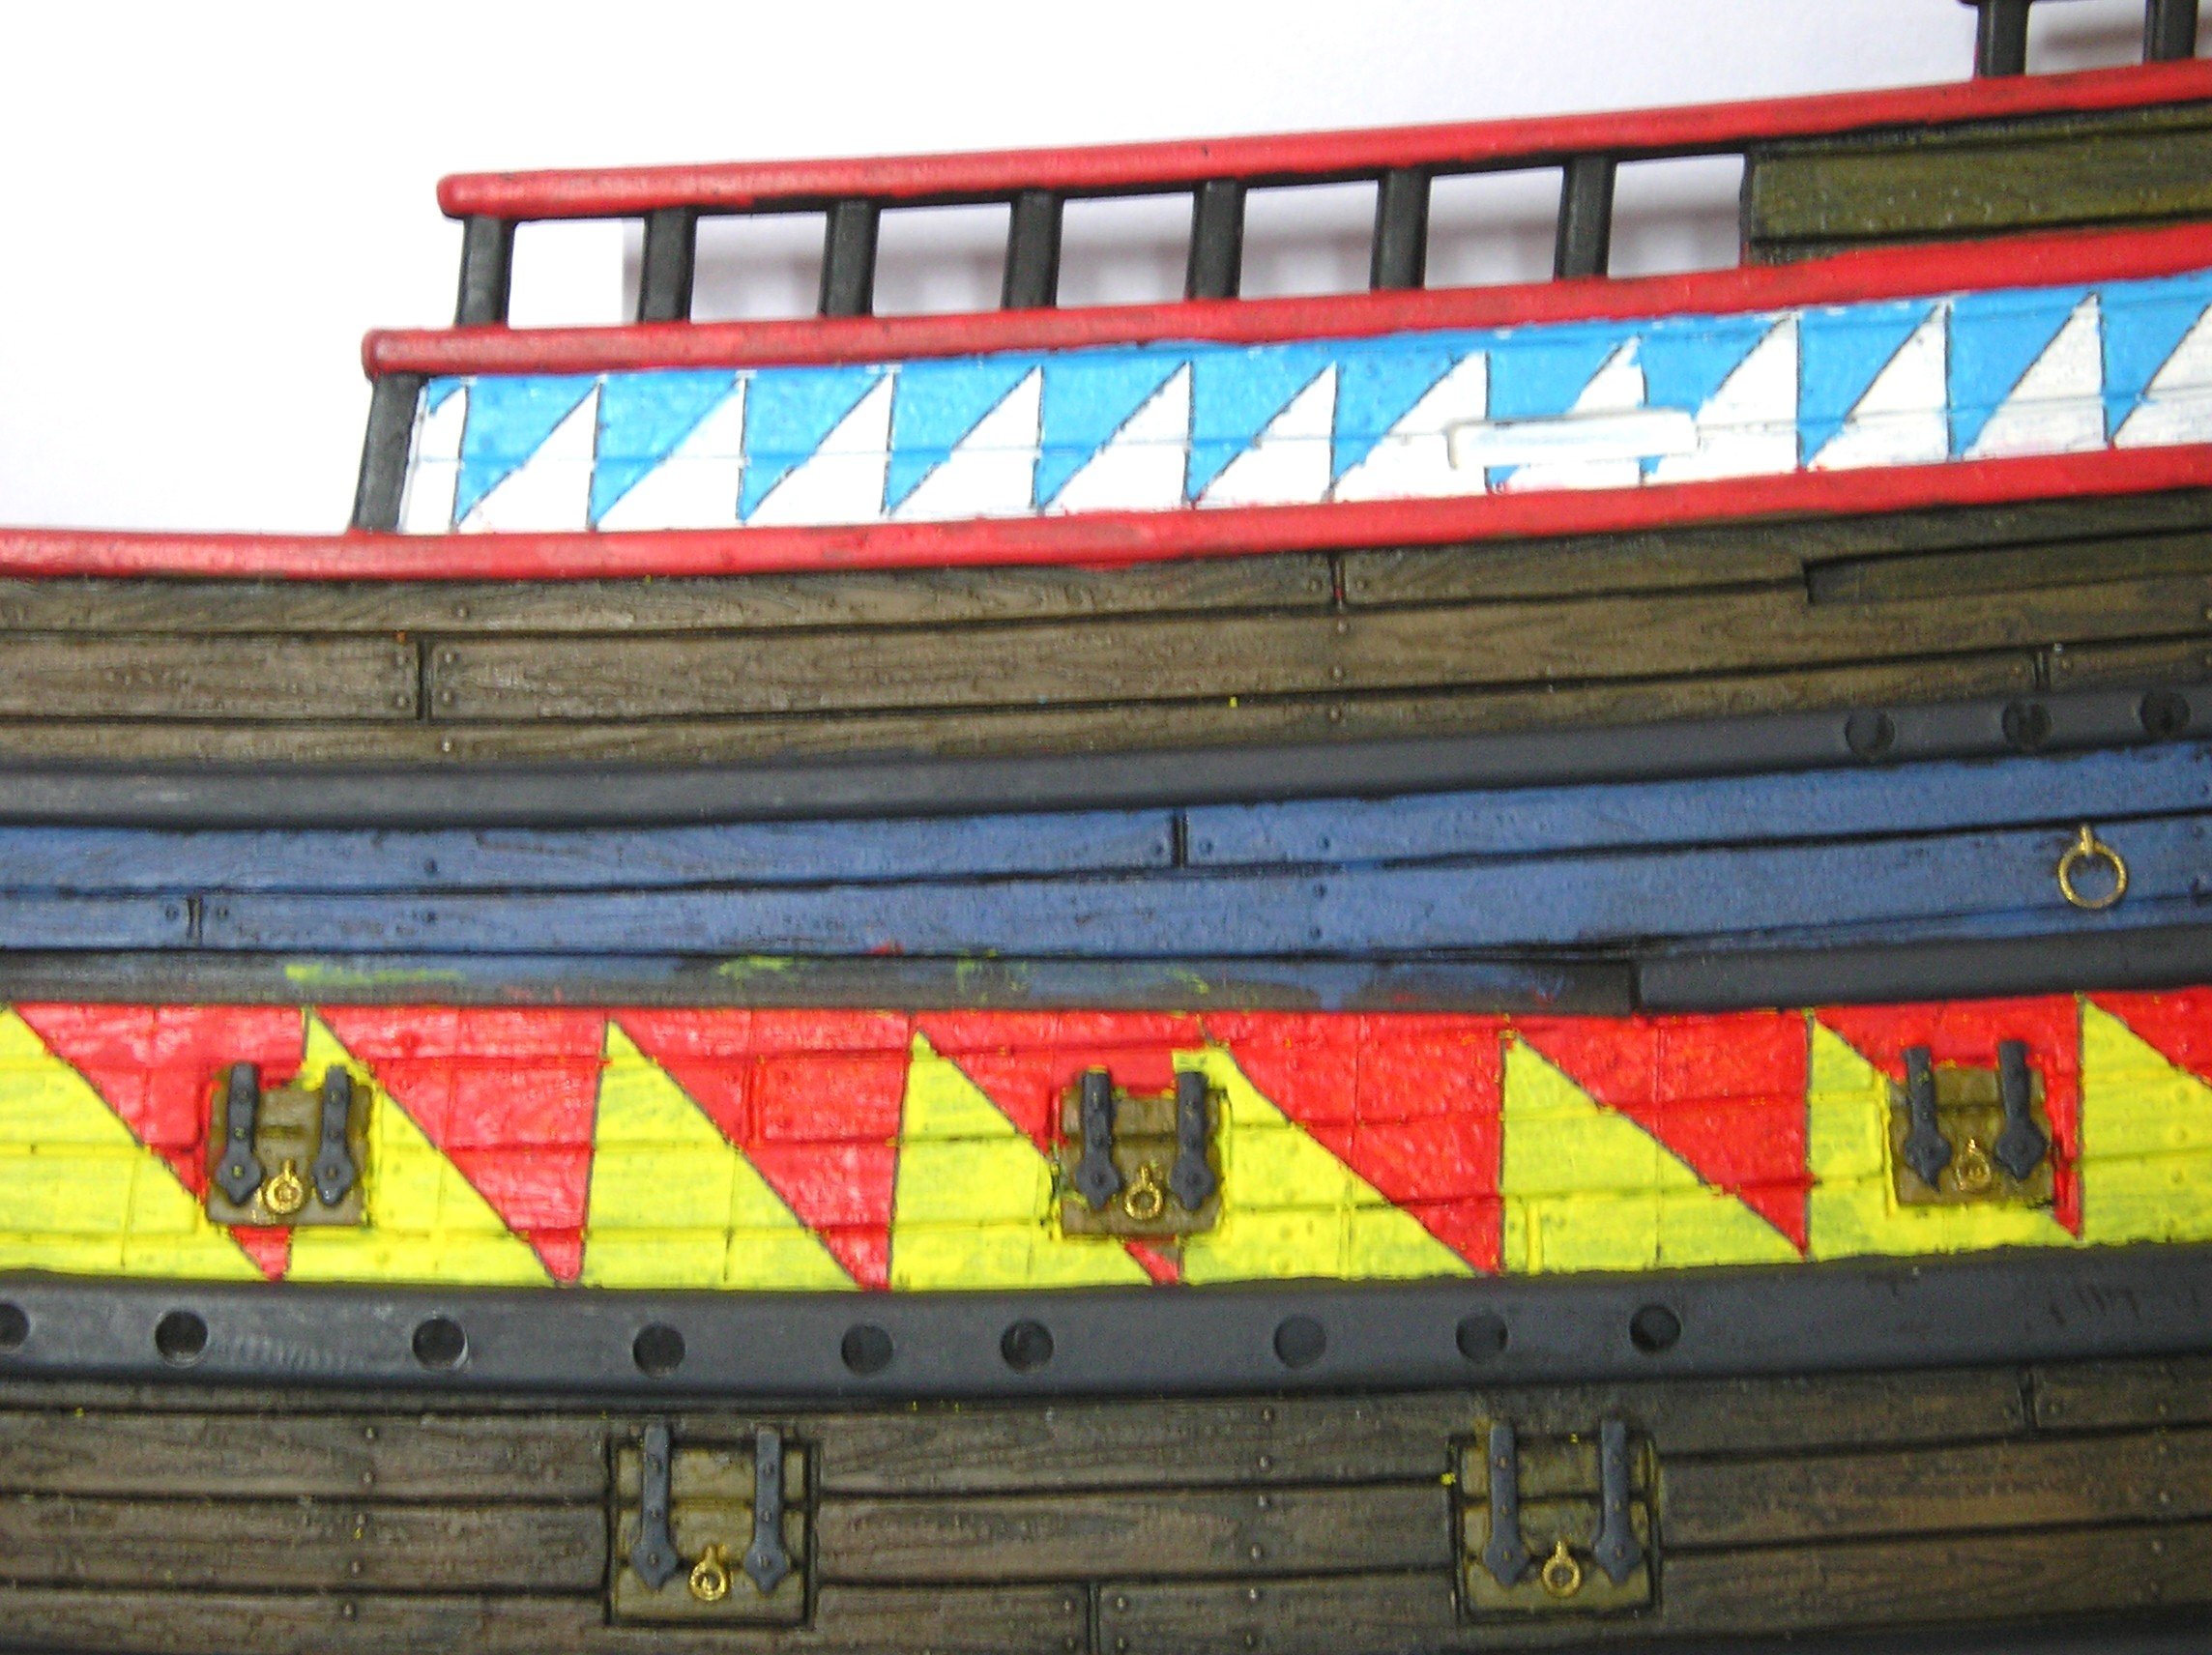
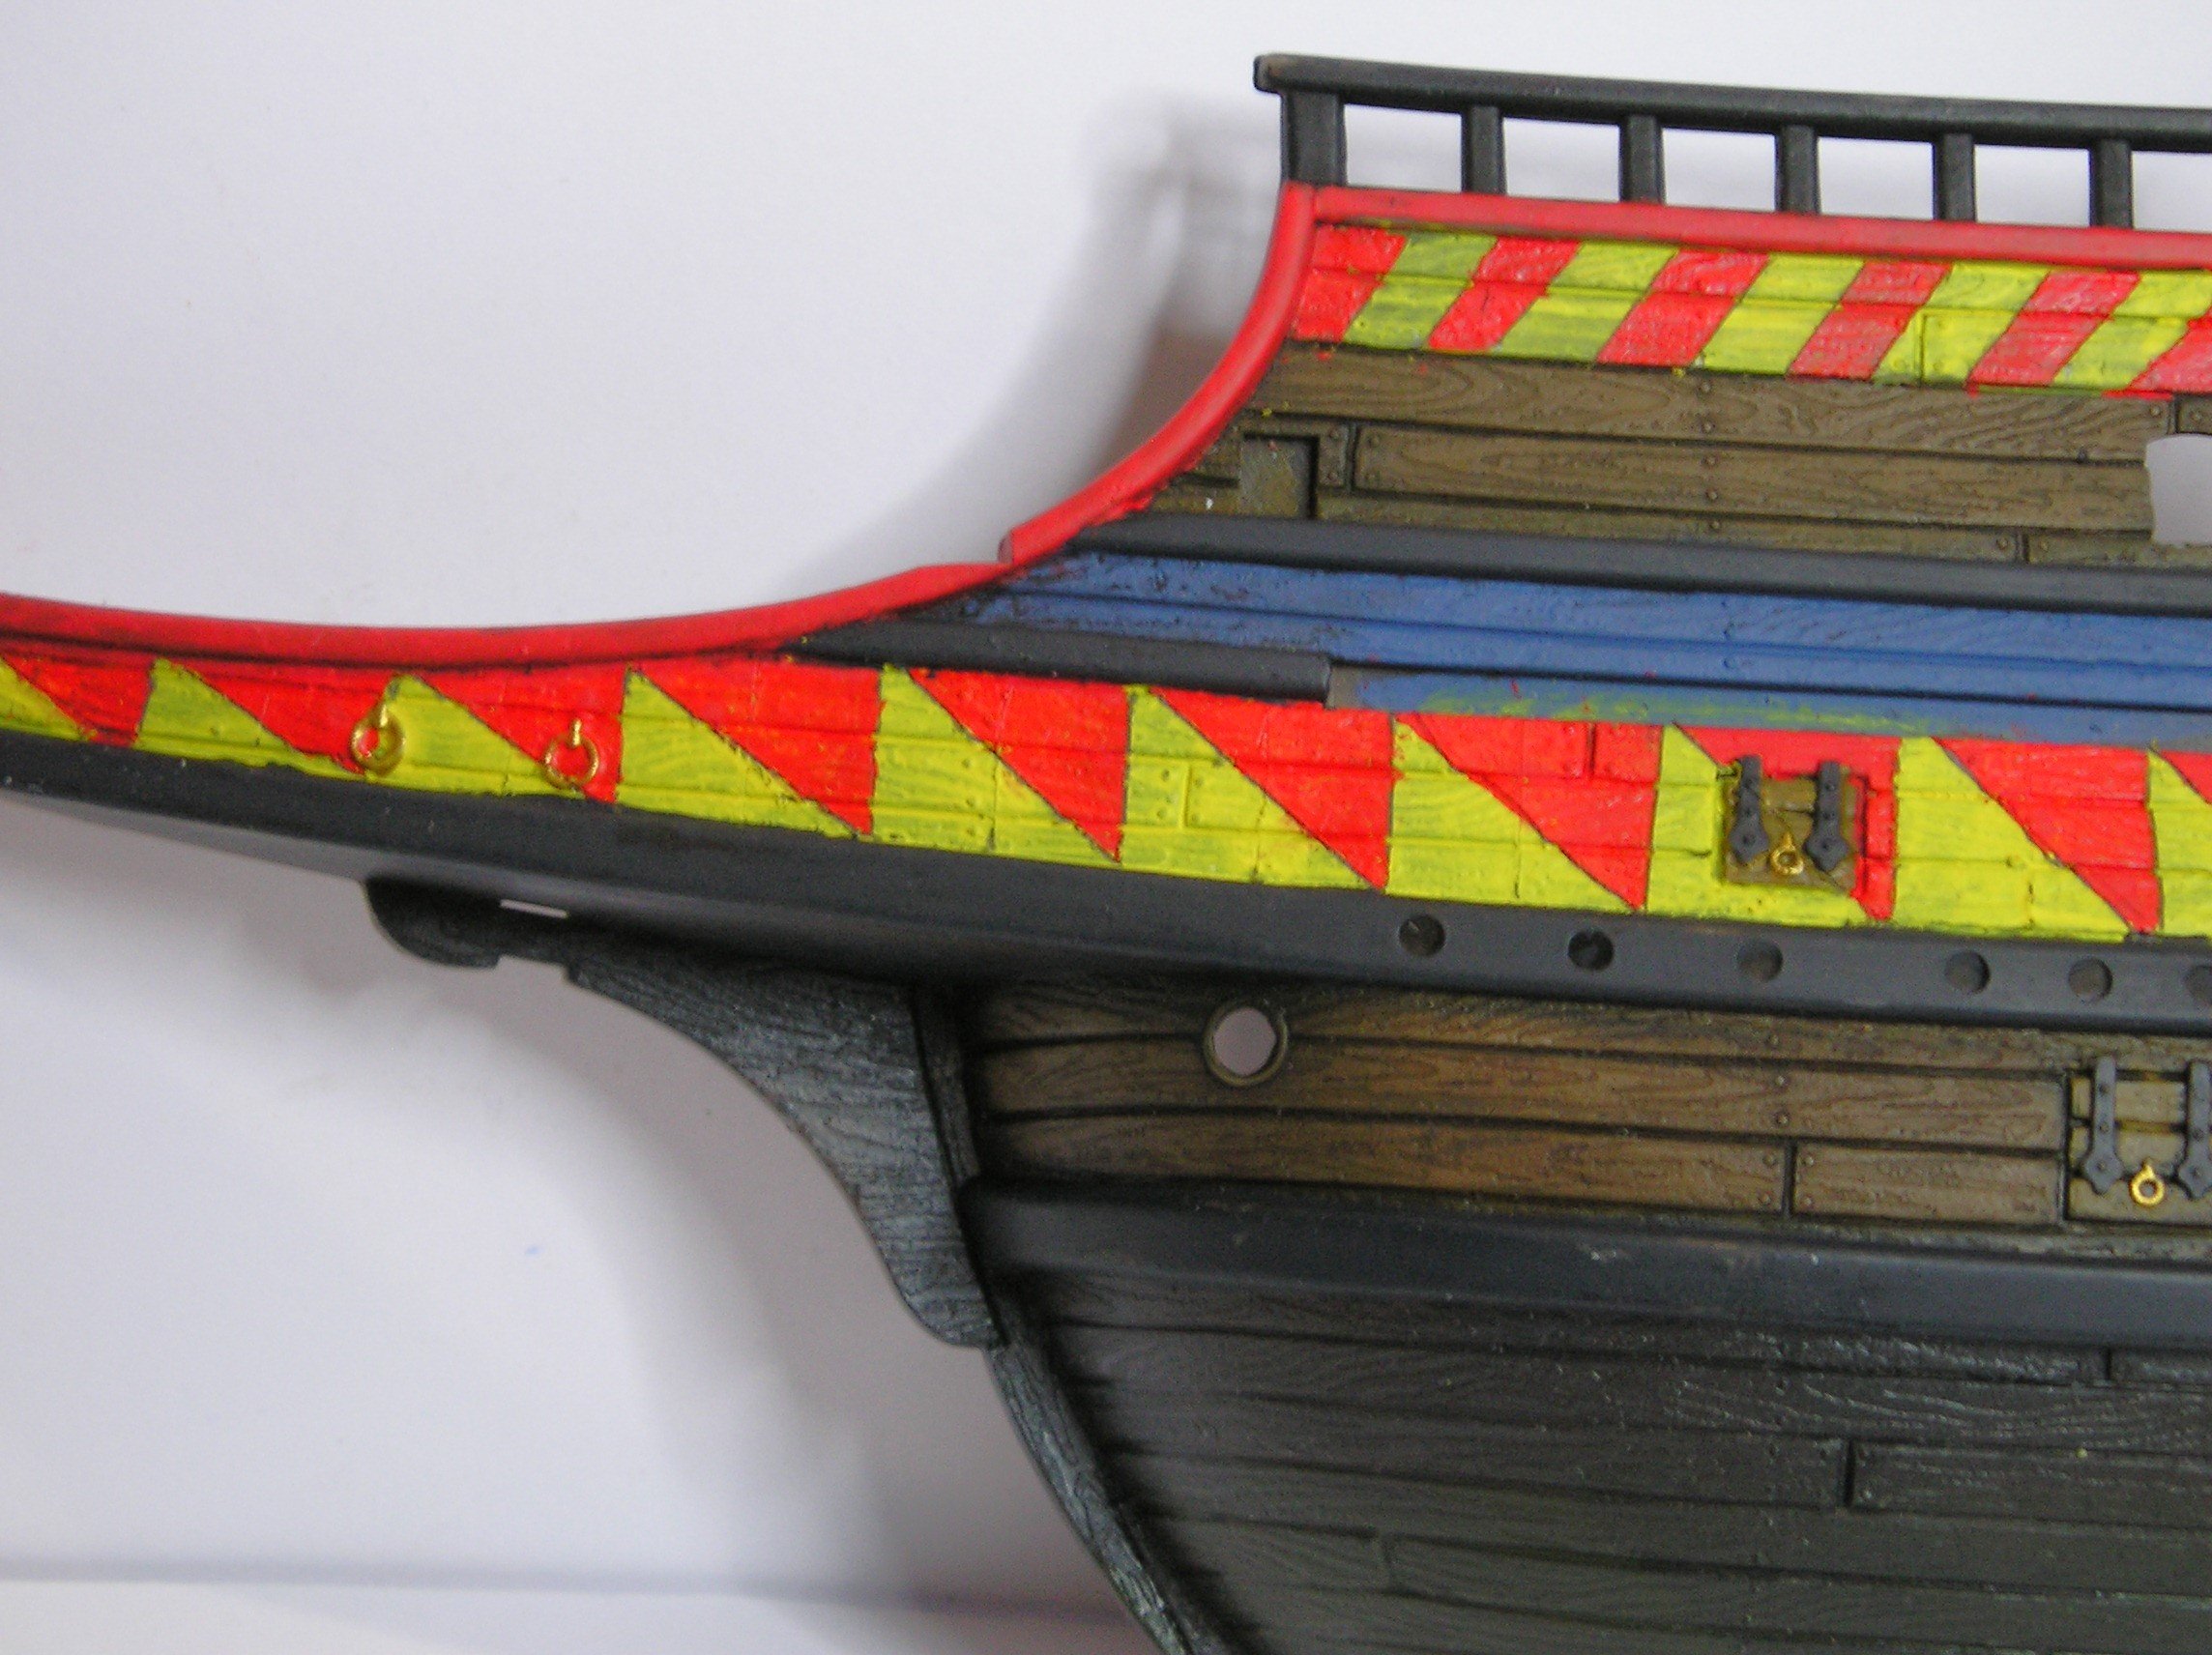
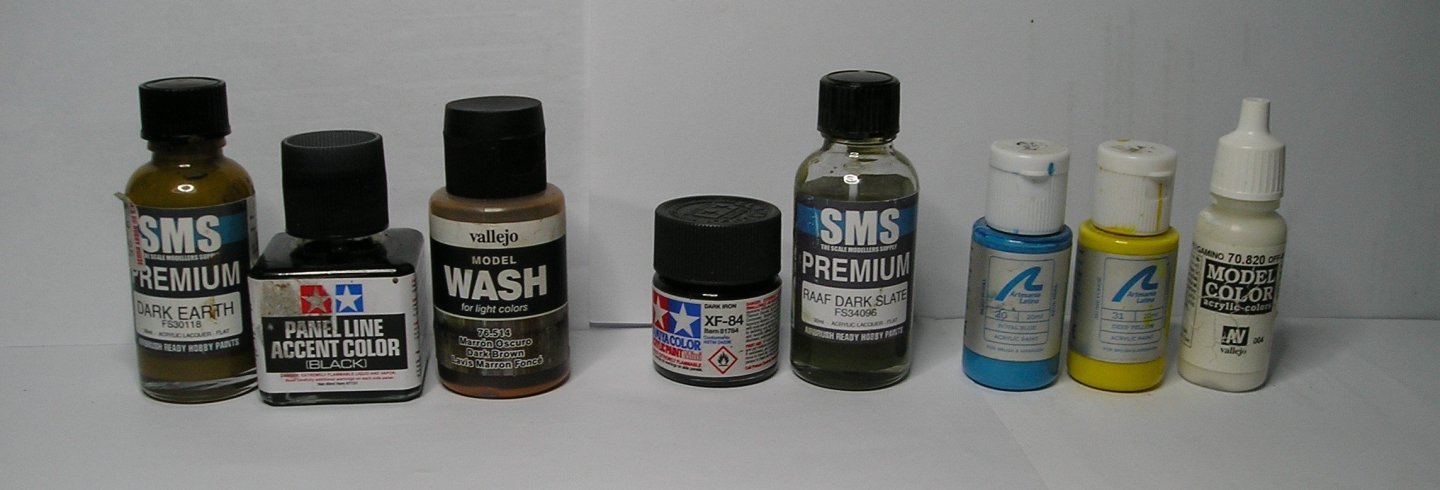
Greetings all, It has been a few days since my last post, and I am pleased to have made some real progress. After priming just about everything with SMS Surfacer Black, I started on the two sides of the hull. I am happy with the result. Above the water level I applied SMS Premium Dark Earth and wiped it with thinner in order to increase contrast and the appearance of texture. The Red, yellow, blues and whites, were as you expected, applied with patience and great care. Below the watermark, I applied Tamiya XF-8 Dark Iron and then weathered it with SMS RAAF Dark Slate, which gave it a dirty, algae look. (Research suggested that these hulls were covered with tar and pitch for protection.) I still need to add some panel lining to the port holes, and also colour to the 'side boards' that sit either side of the coloured sections. (Sorry but my shipping terminology is not so crash hot!) These are the paints and washes I used. According to the instructions, the next step is to consider adding the decks and stern section. That won't be happening until I have them painted and weathered! See you then, Cheers,

- 69 replies
-
- 8
-
-
- spanish galleon
- Imai
- (and 1 more)
-
Thank you Kirill for your suggestions. I'll make a note of this and reconsider when I get to that part of my build. Cheers, Peter 🙂
- 69 replies
-
- 3
-
-
- spanish galleon
- Imai
- (and 1 more)