
PvG Aussie
-
Posts
402 -
Joined
-
Last visited
Content Type
Profiles
Forums
Gallery
Events
Everything posted by PvG Aussie
-
 Welcome on board Mike. I'm sure it is going to take quite some time but should be interesting as I have also ordered the Pontos set. Cheers, Peter 👍
- 97 replies
-
- 3
-

-
- Enterprise
- Tamiya
- (and 2 more)
-
Thanks @Jman8763 and @ddp for your help. I'm finding so much information on the internet about the CV6 that I'm having to focus on one period (mid 1942) in order to set a standard. 🤔 It really is an amazing ship! Cheers, Peter
- 97 replies
-
- 2
-
-
- Enterprise
- Tamiya
- (and 2 more)
-
I have changed to the WWII USS (CV-6) Enterprise focusing on the time of the Battle of Midway in June 1942. The USS Enterprise (CV-6) was a Yorktown-class carrier built for the United States Navy during the 1930s. She was the seventh U.S. Navy vessel of that name. Colloquially she was called "The Big E" served with unparalleled distinction in WW II and was the most decorated ship of that war. (Wikipedia)
- 97 replies
-
- 7
-
-
- Enterprise
- Tamiya
- (and 2 more)
-
Hi Mike @Landlubber Mike, Have a look at my simple solution in Post #13 here. Simple and worked well. Thanks for your great comments regarding my build. Peter
-
The USS Enterprise (CVN-65), previously designated as CVA(N)-65, is a retired aircraft carrier of the United States Navy. Launched in 1958, it was the first nuclear-powered aircraft carrier and the eighth naval vessel of the United States to carry the name Enterprise. She is nicknamed "Big E". At 1,123 feet (342 m), she is the longest naval vessel ever built. (Wikipedia)
- 97 replies
-
- 4
-
-
- Enterprise
- Tamiya
- (and 2 more)
-
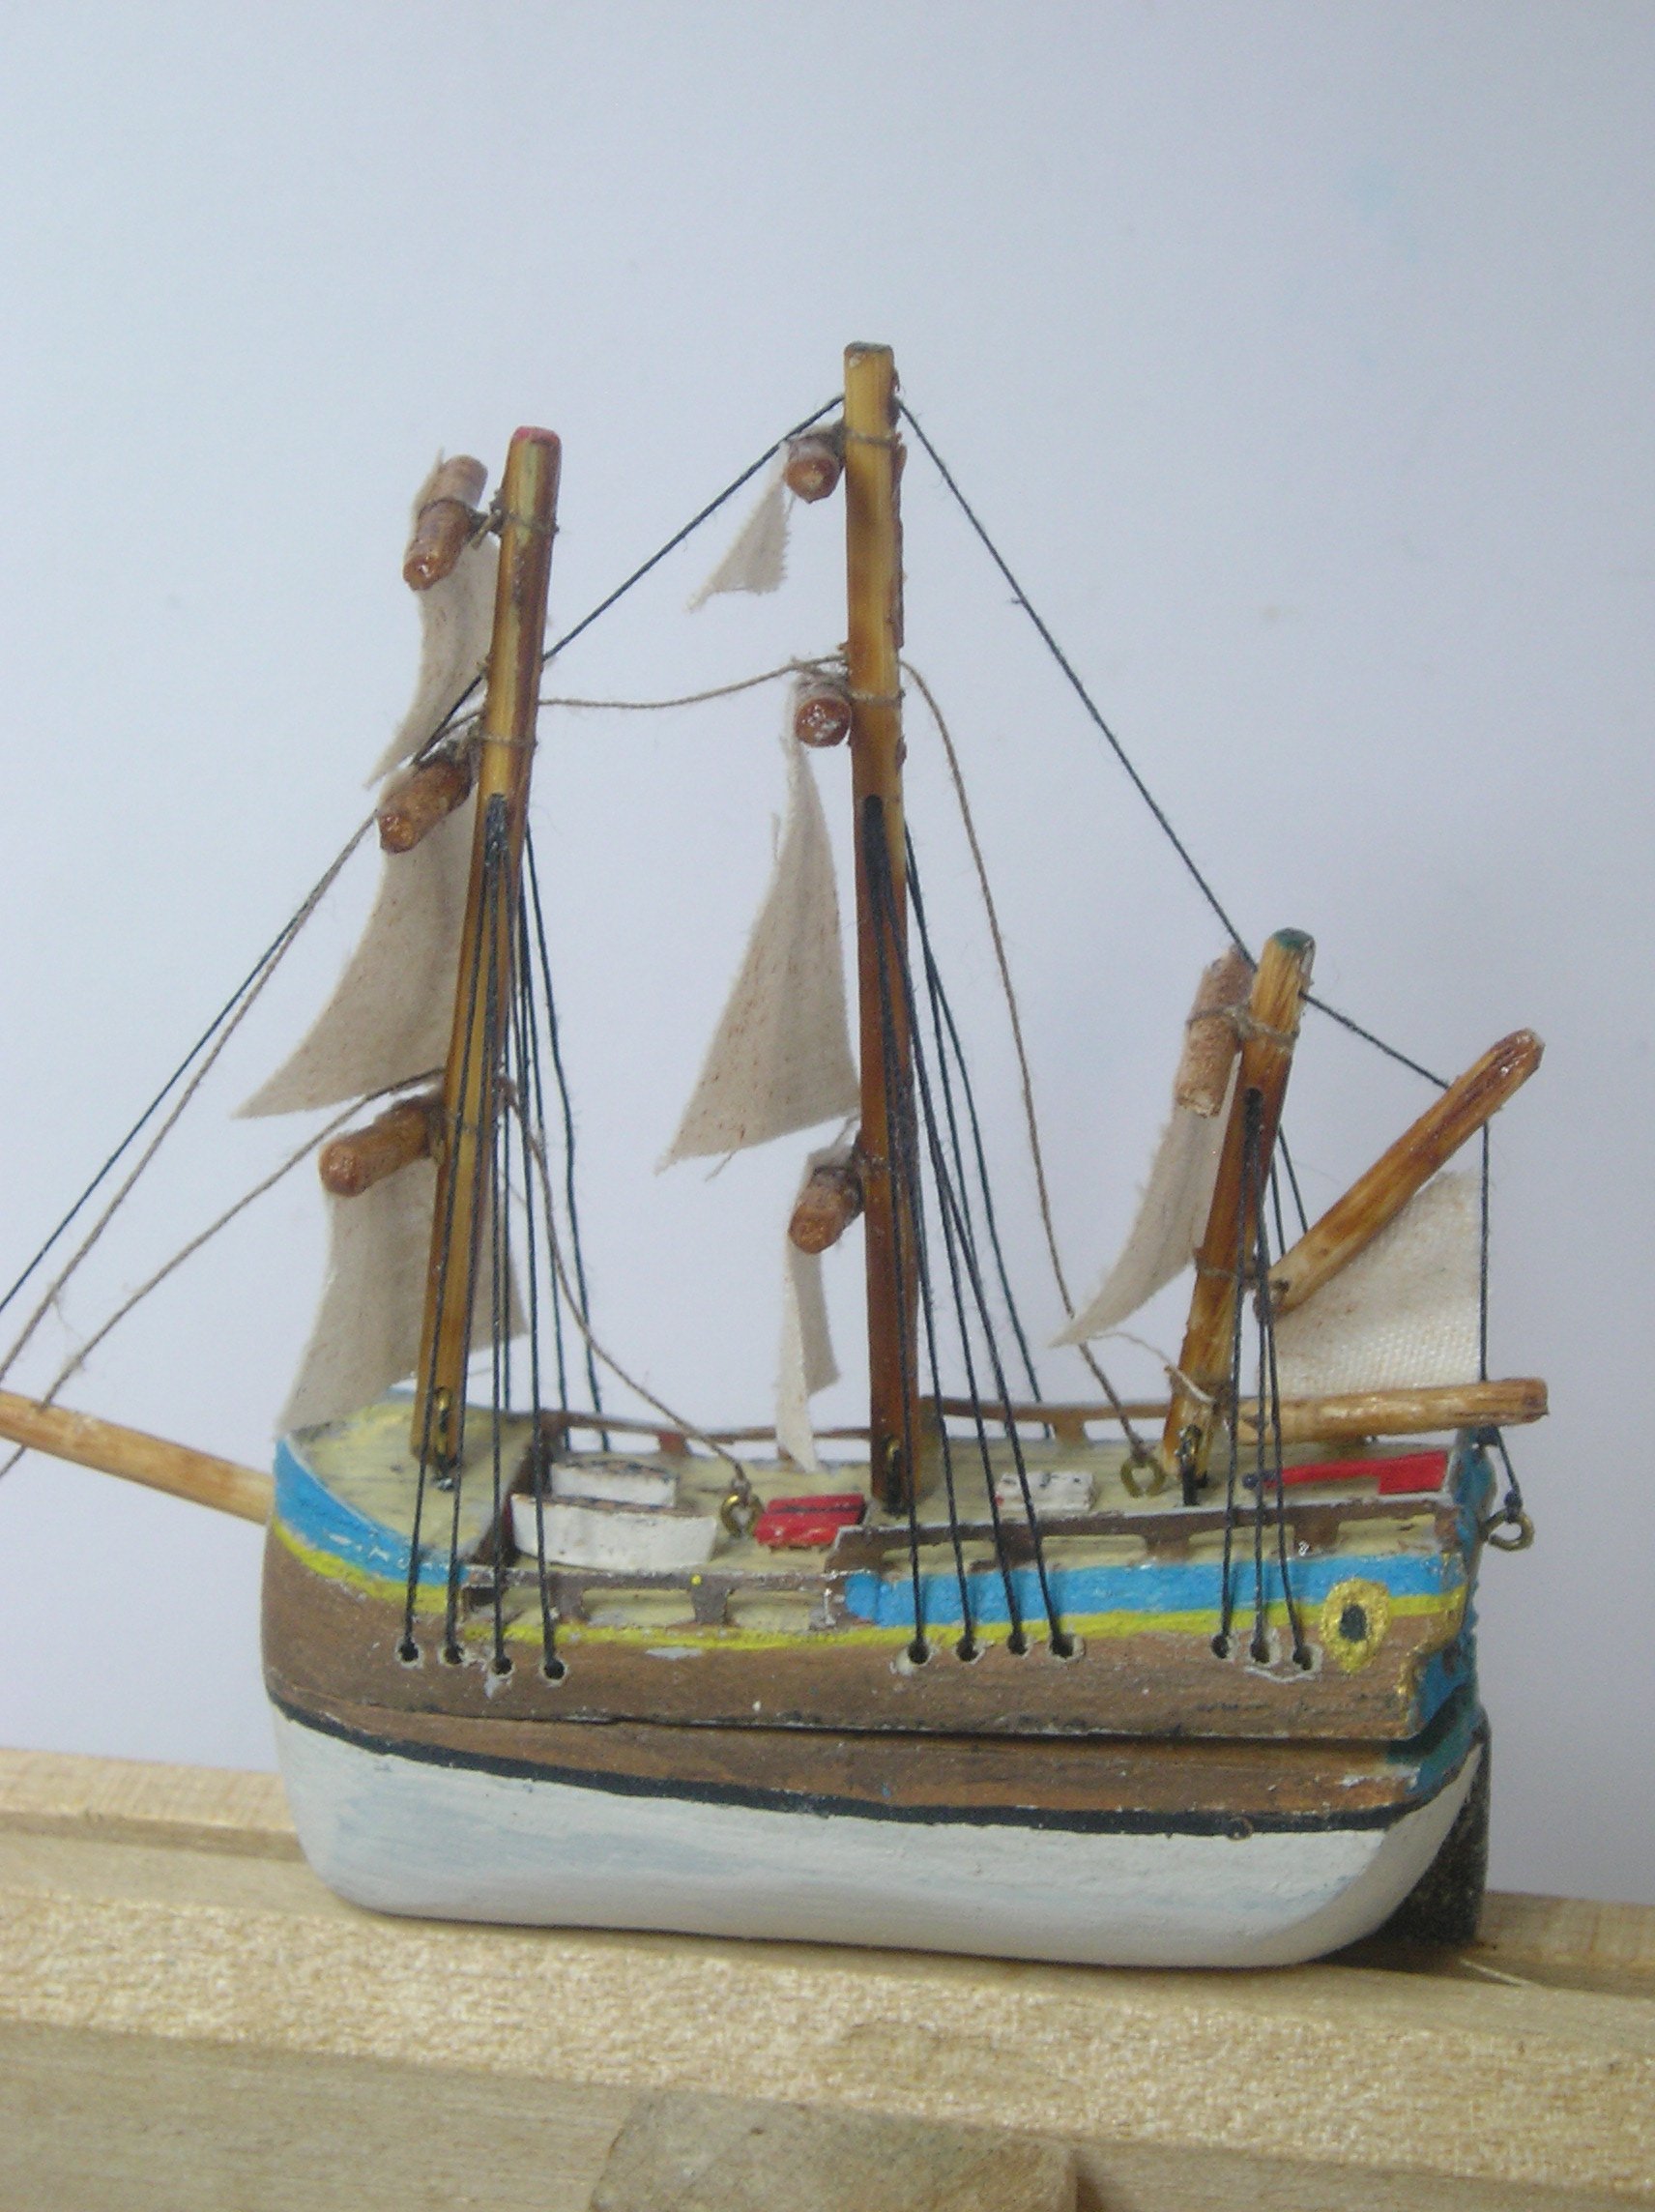
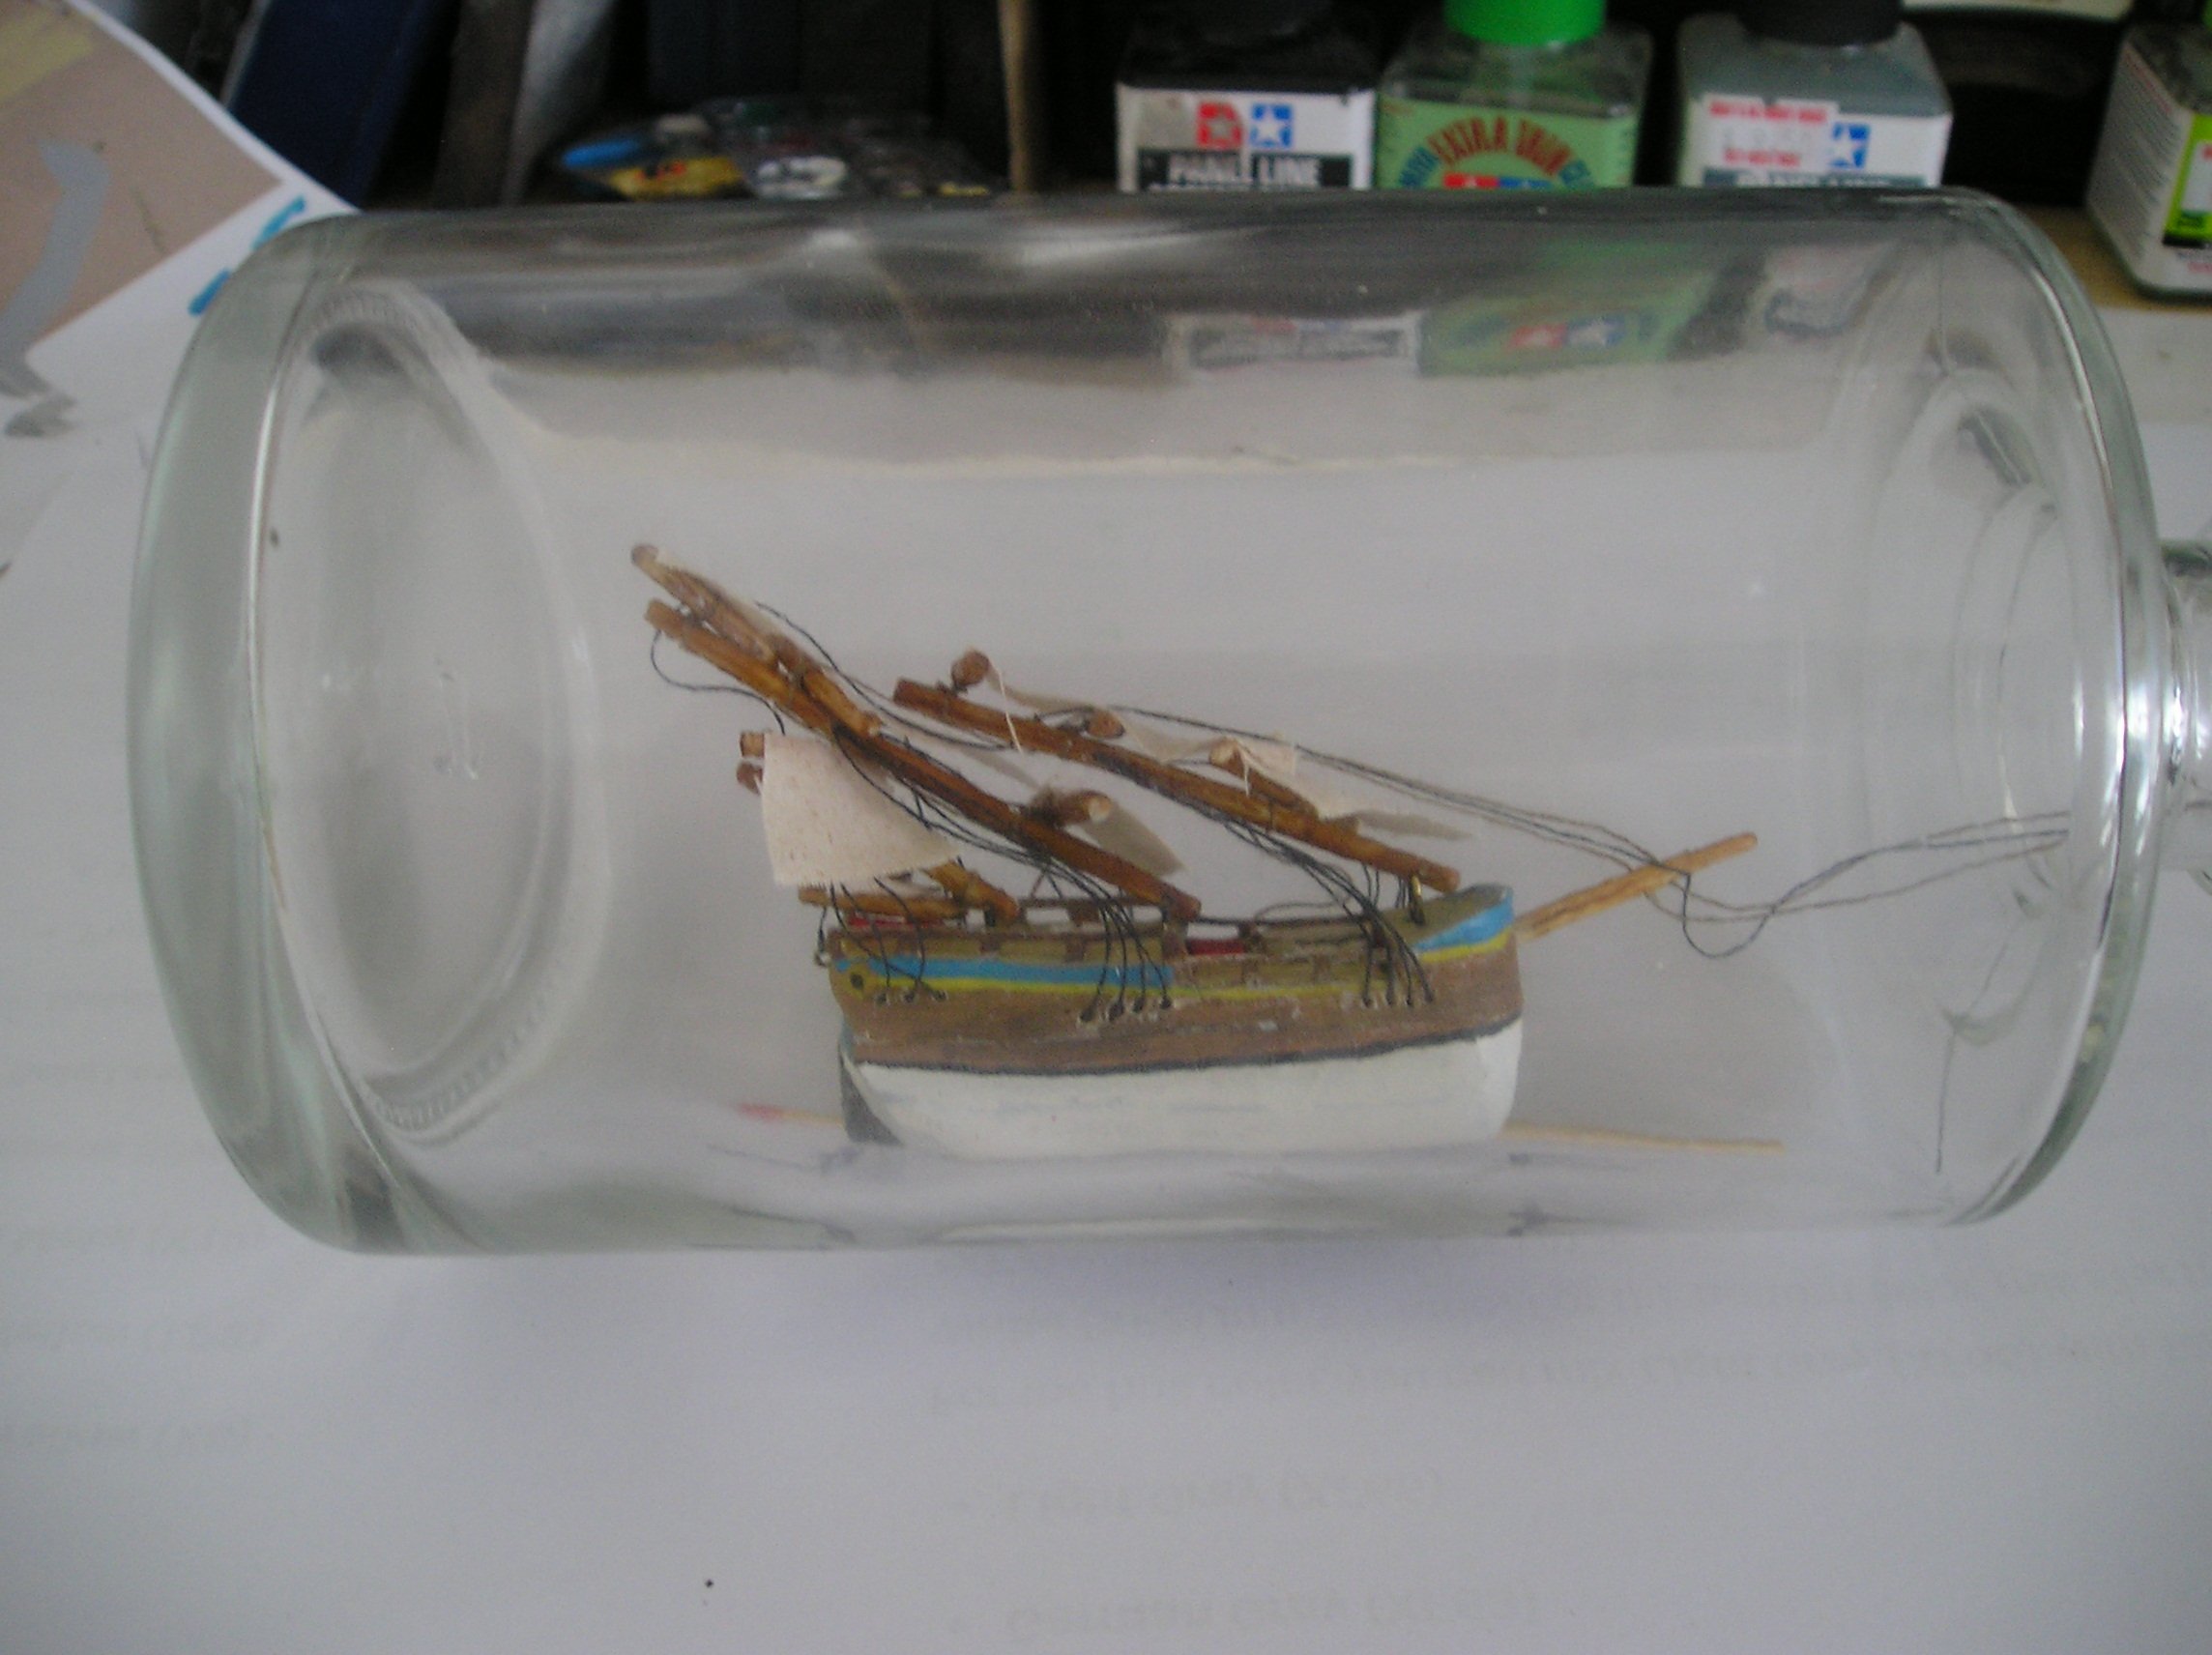
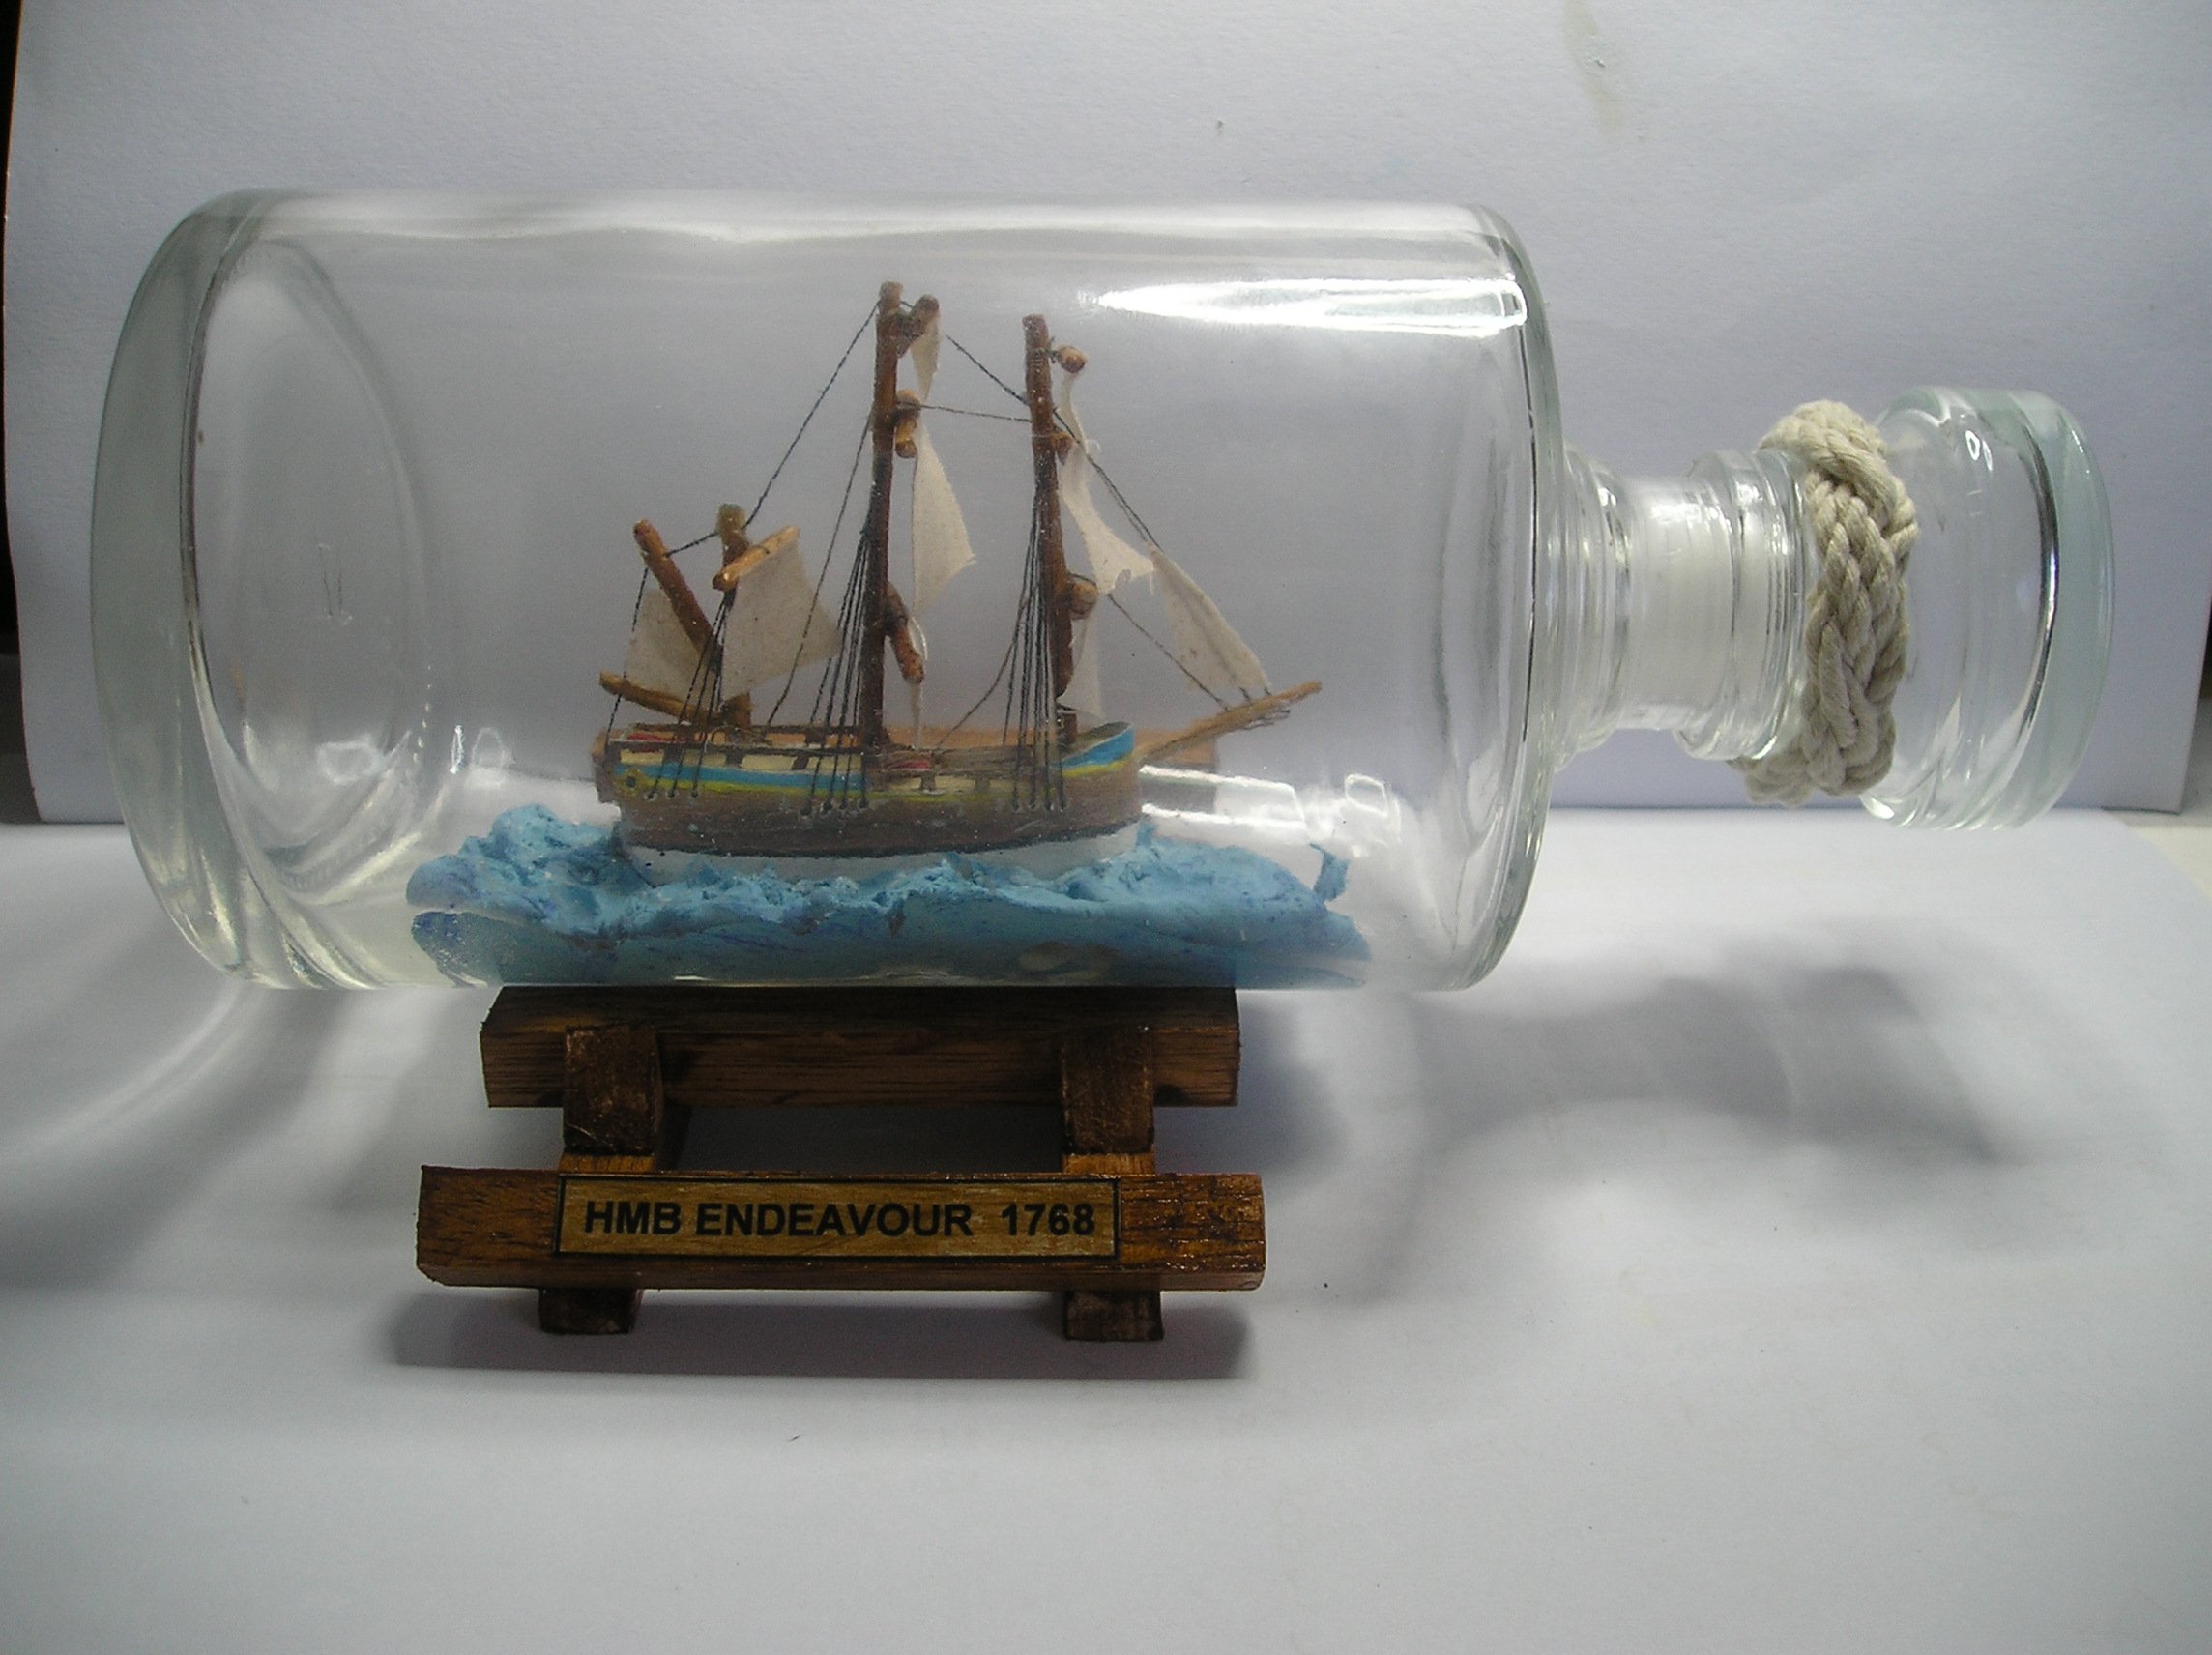
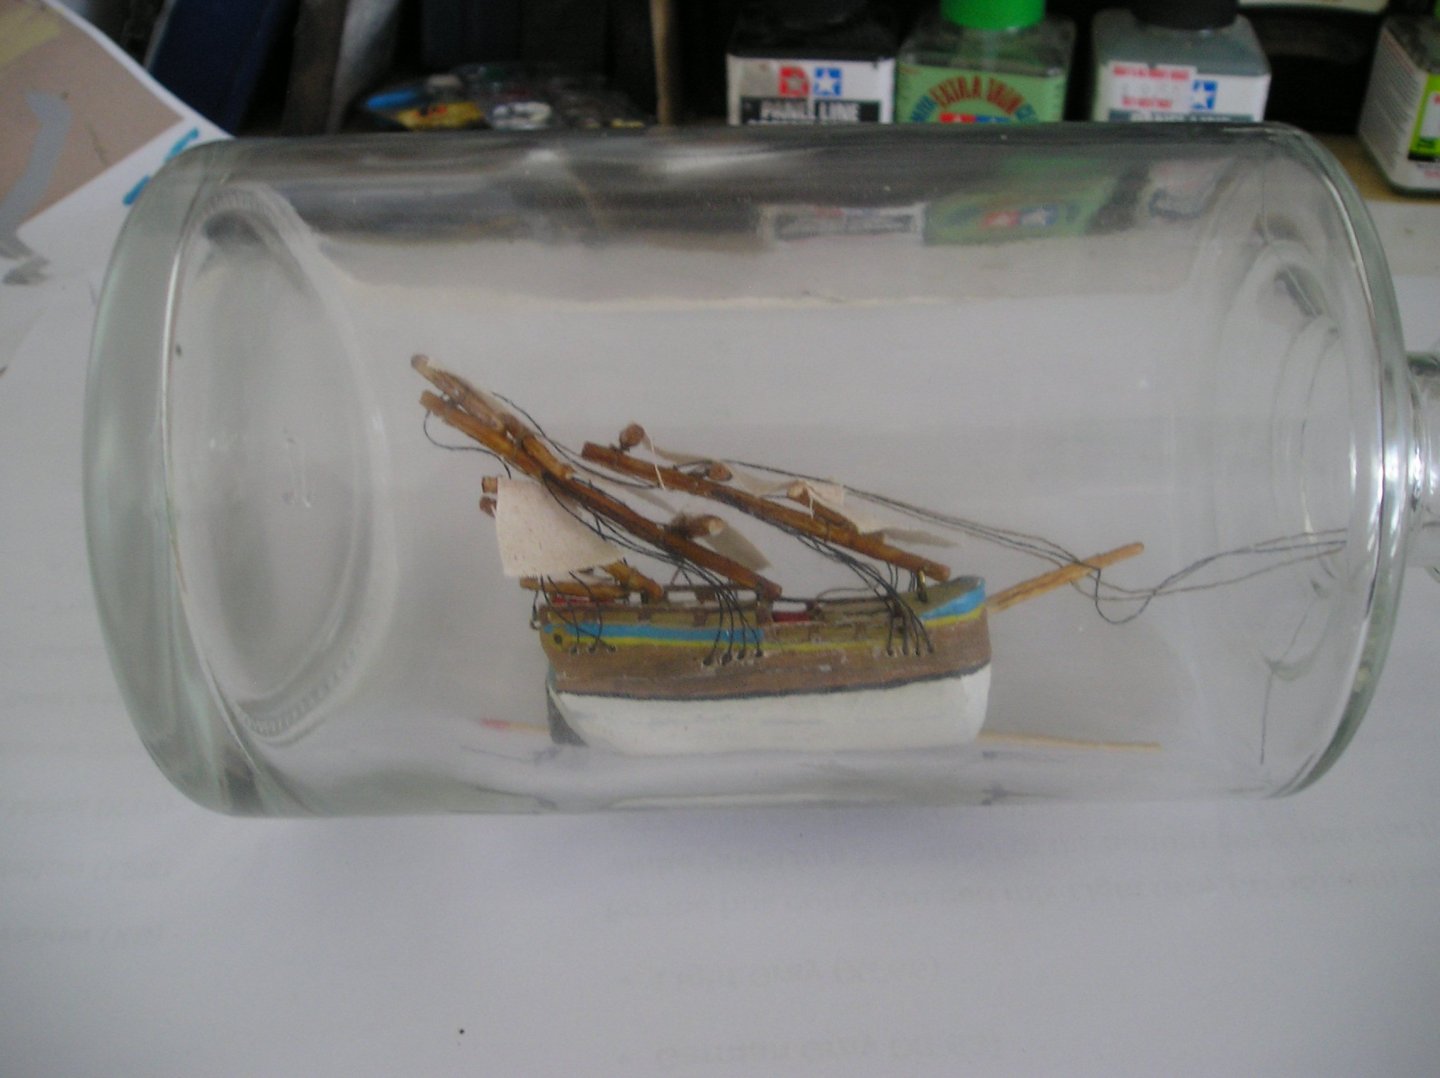
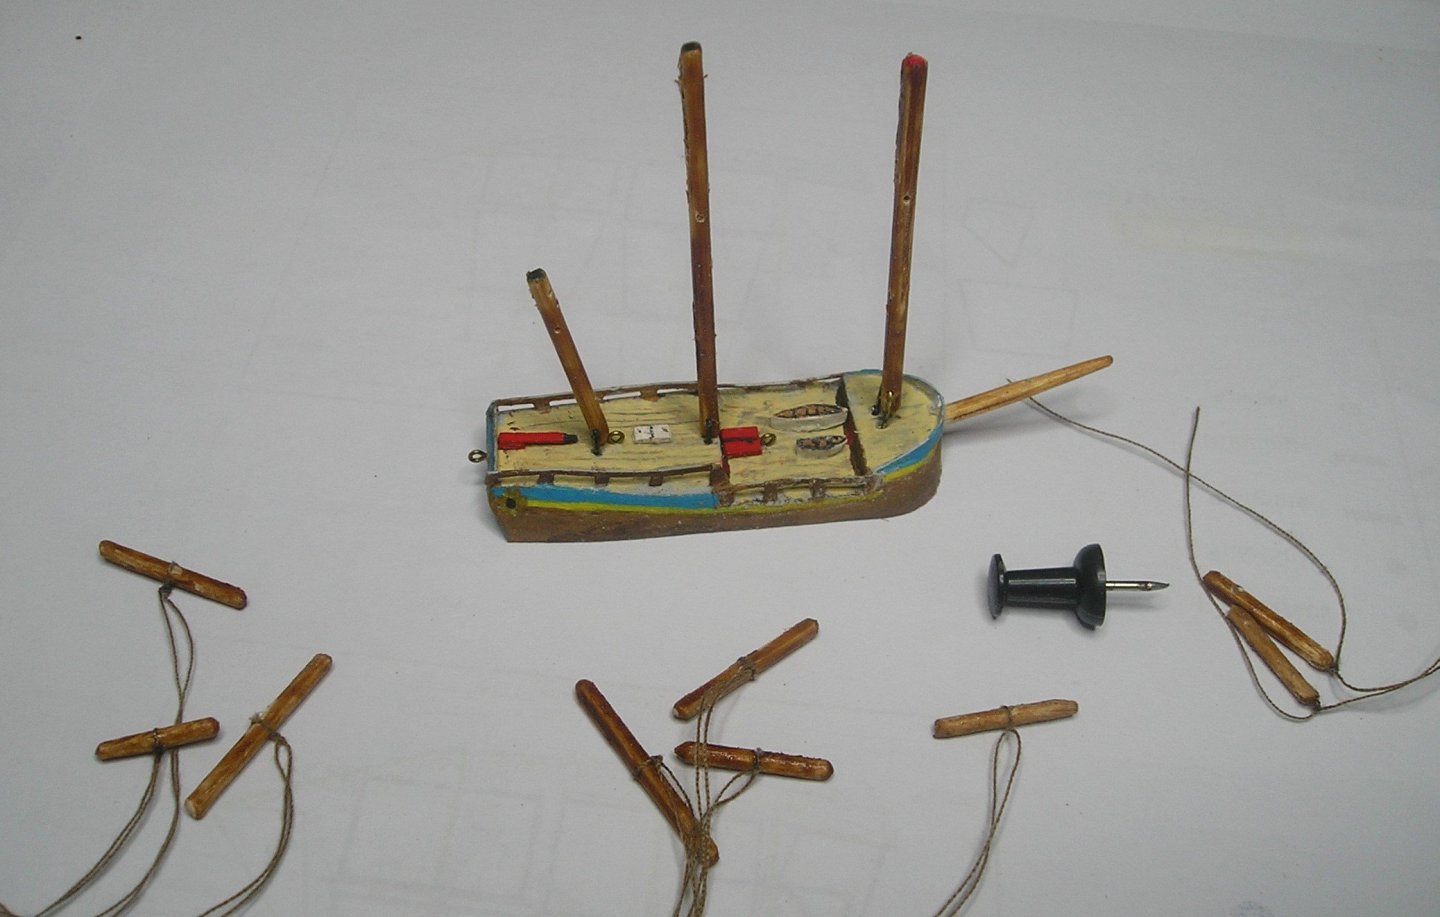
Not much interest in this one, but thanks to @CiscoH and @ccoyle for your support. Last time I left you with masts up and not much else. So here goes. She was then ready for the sails, using white glue, and shrouds. (Holes in hull, needling lines and glue in place underneath.) Time to put her into a clean dry bottle. Bottom half first. Let it dry overnight. Then, 'the cruncher', the top half. 😬 Let it dry overnight and then pull her up! Add the finishing touches and she is FINISHED! Thanks again guys for your support. Cheers, Peter.


-
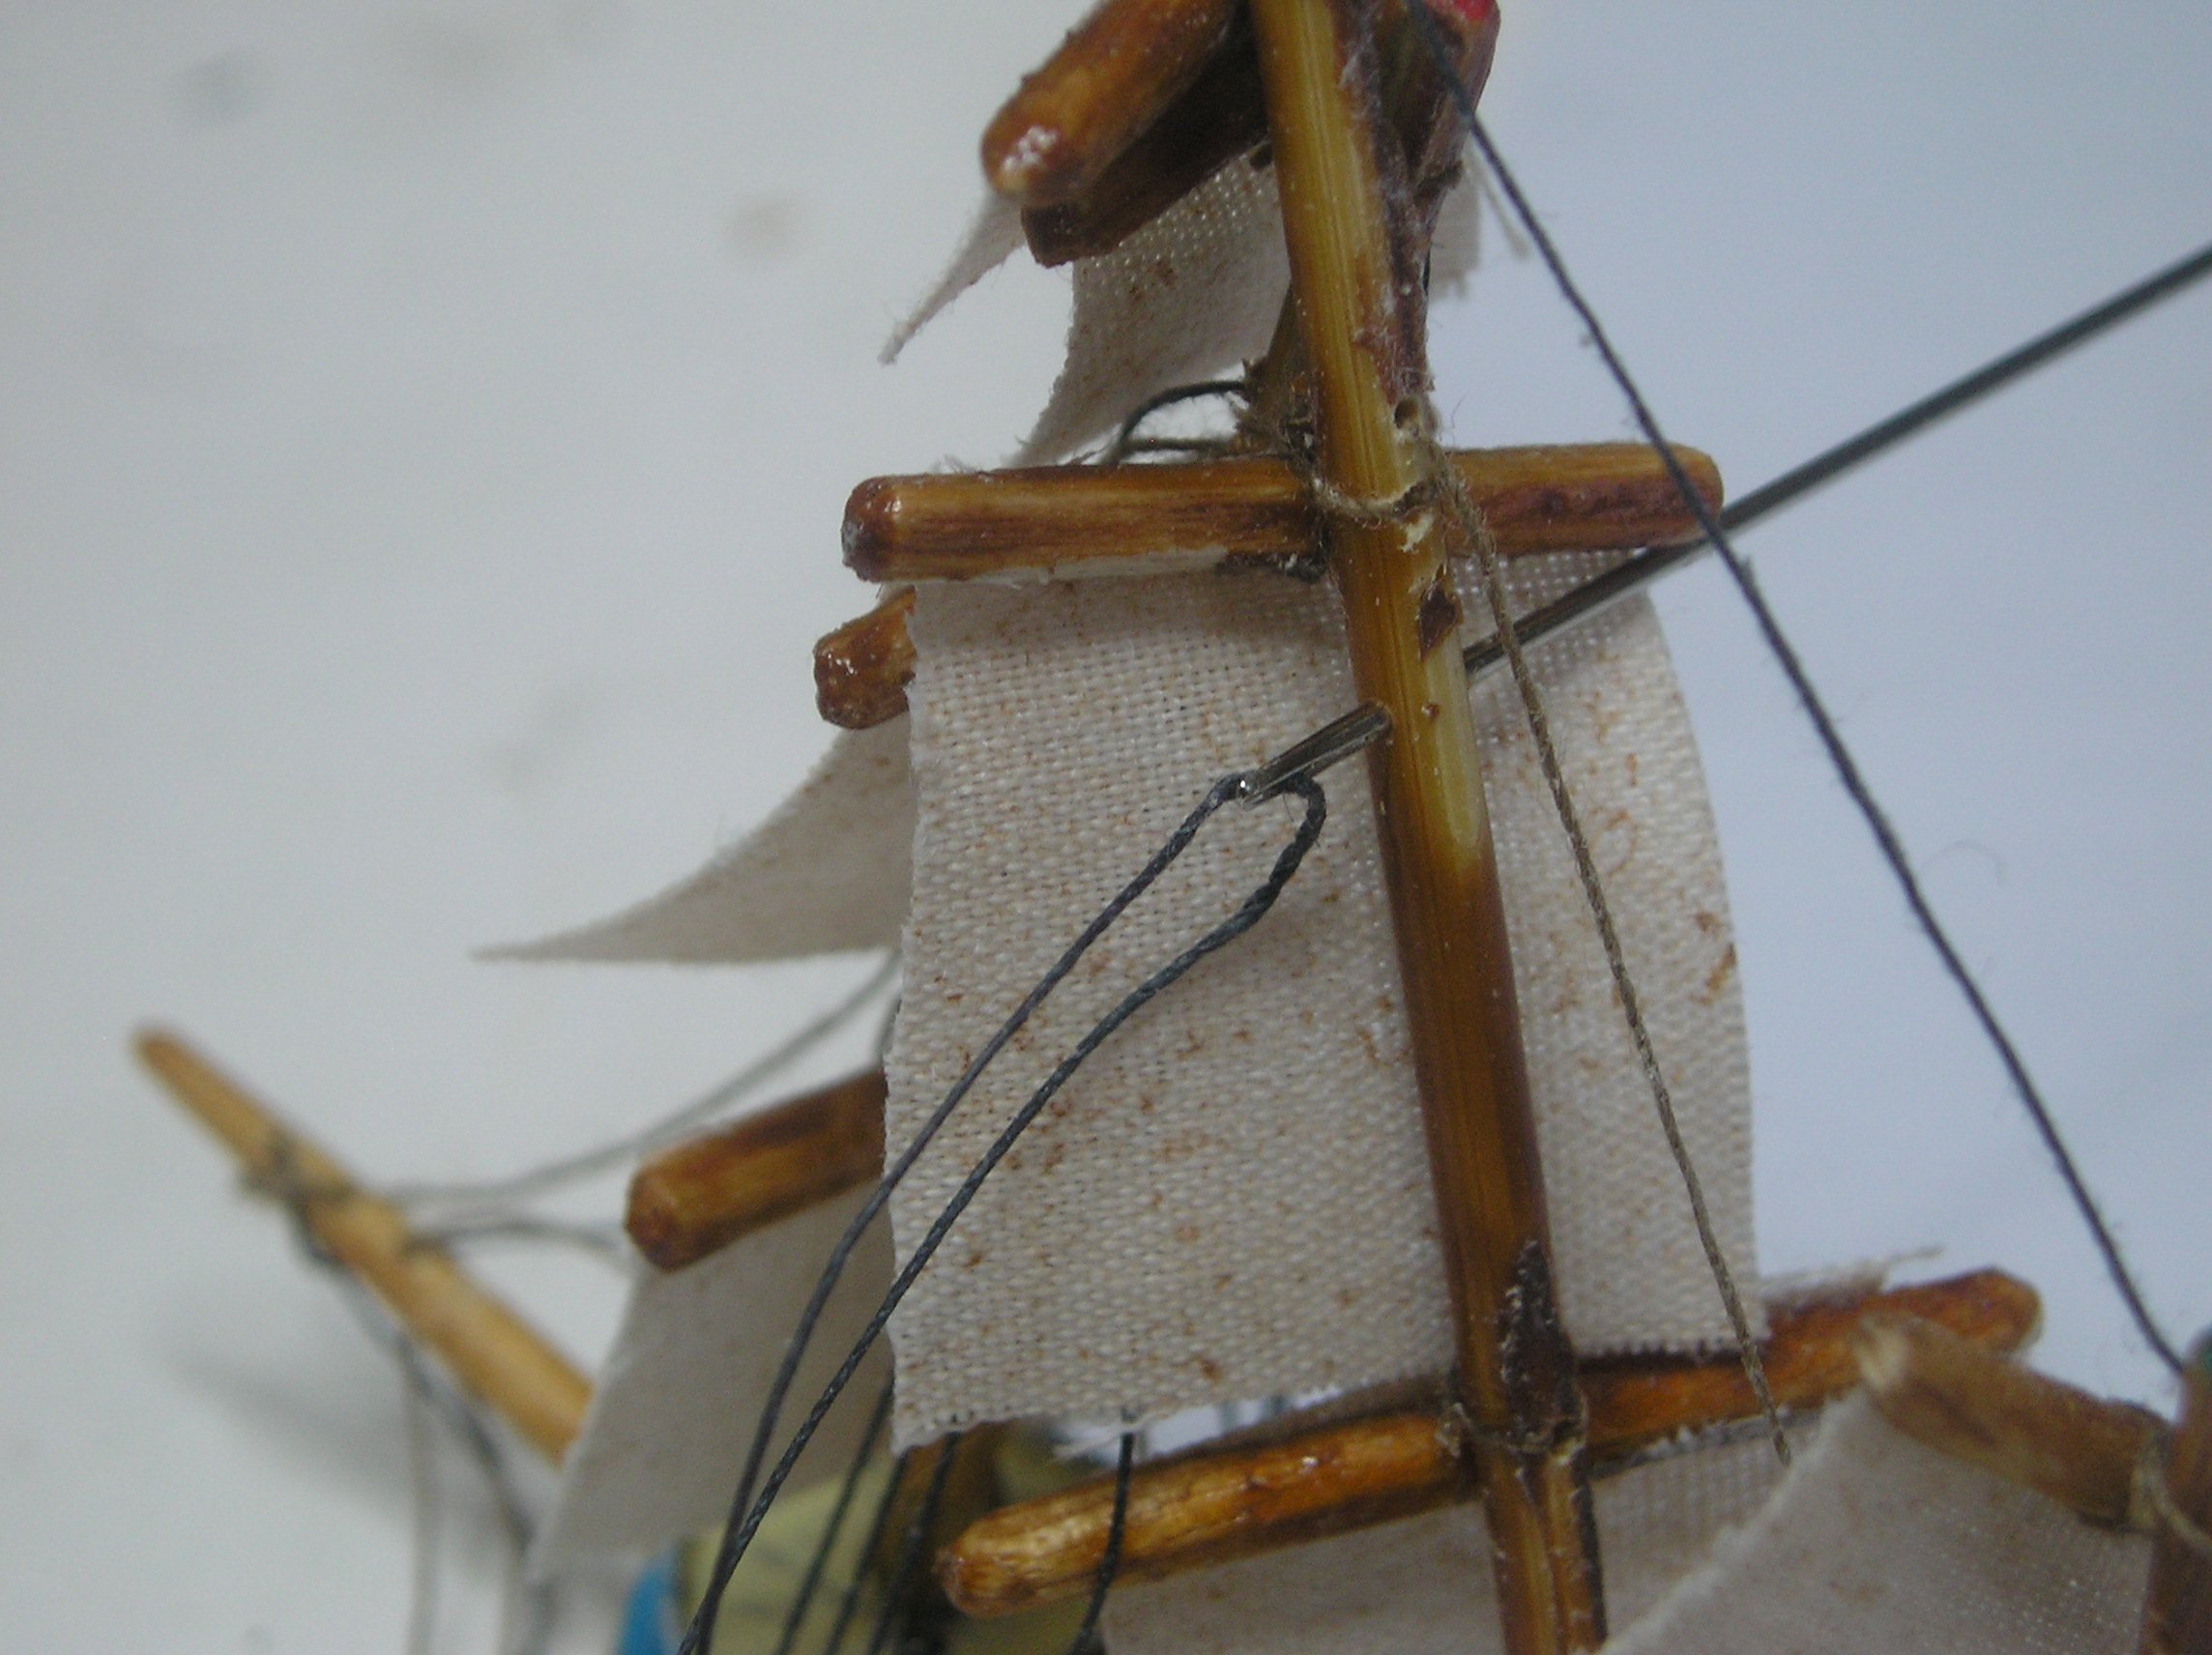
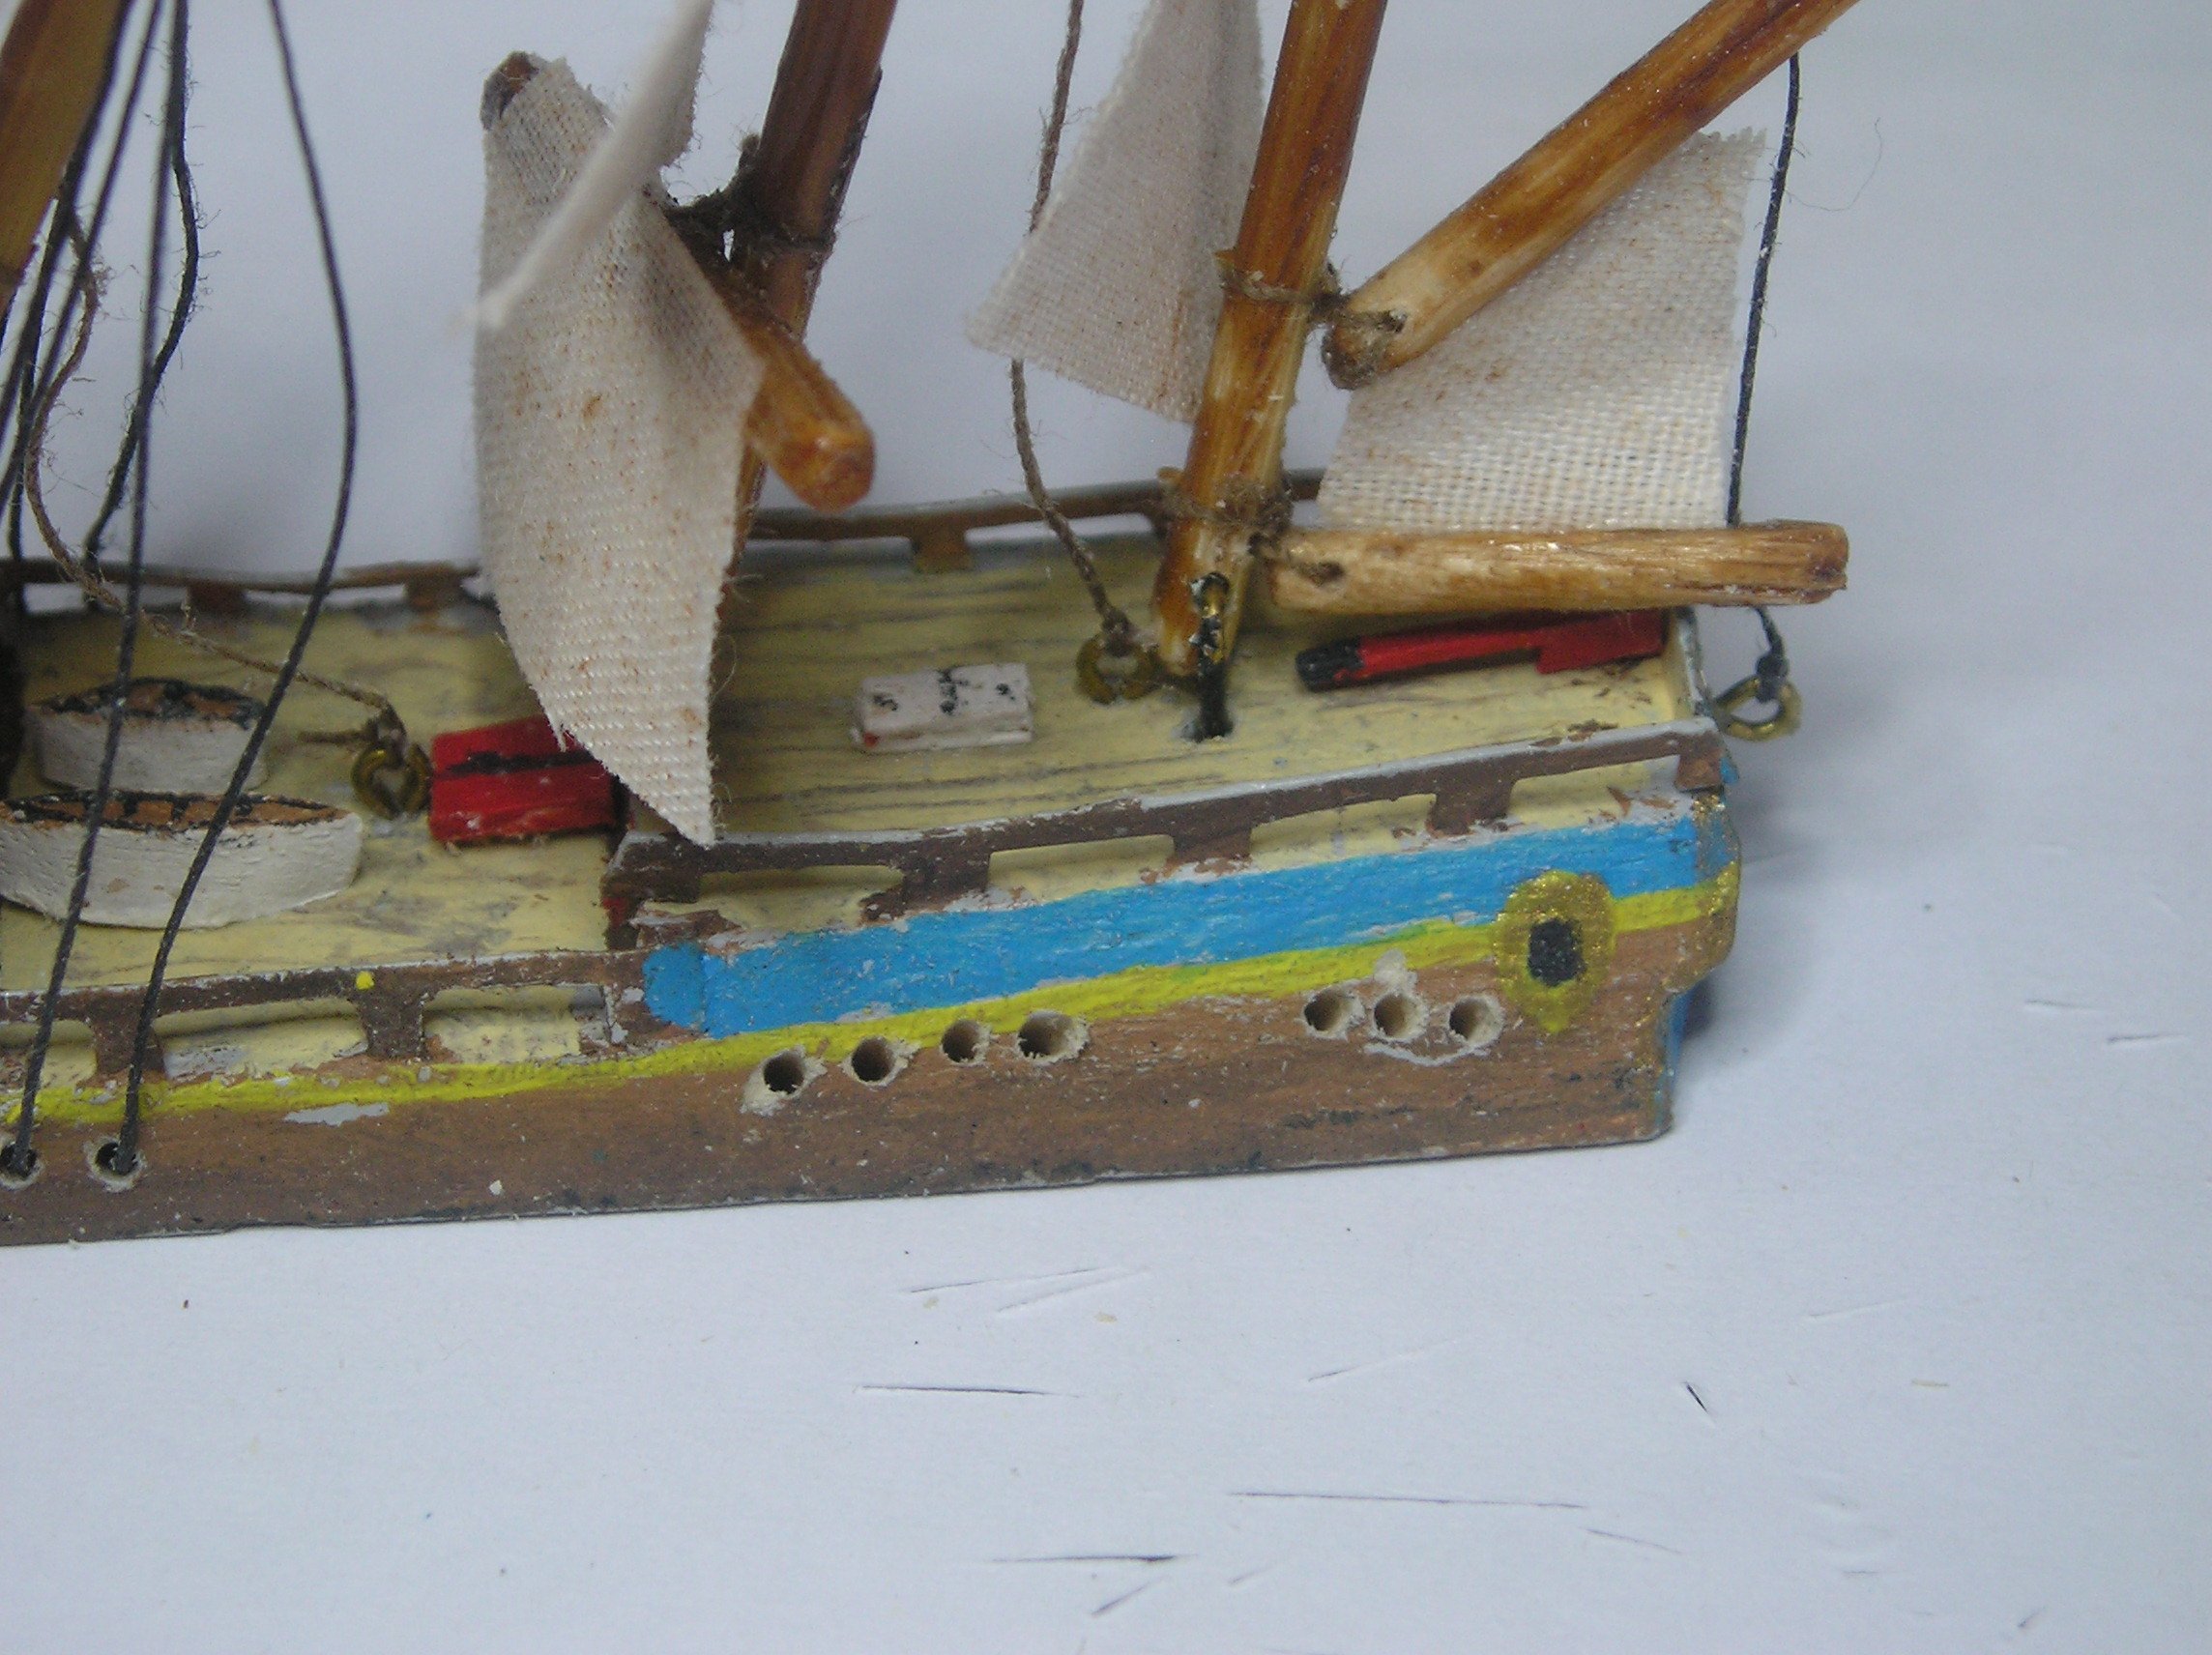
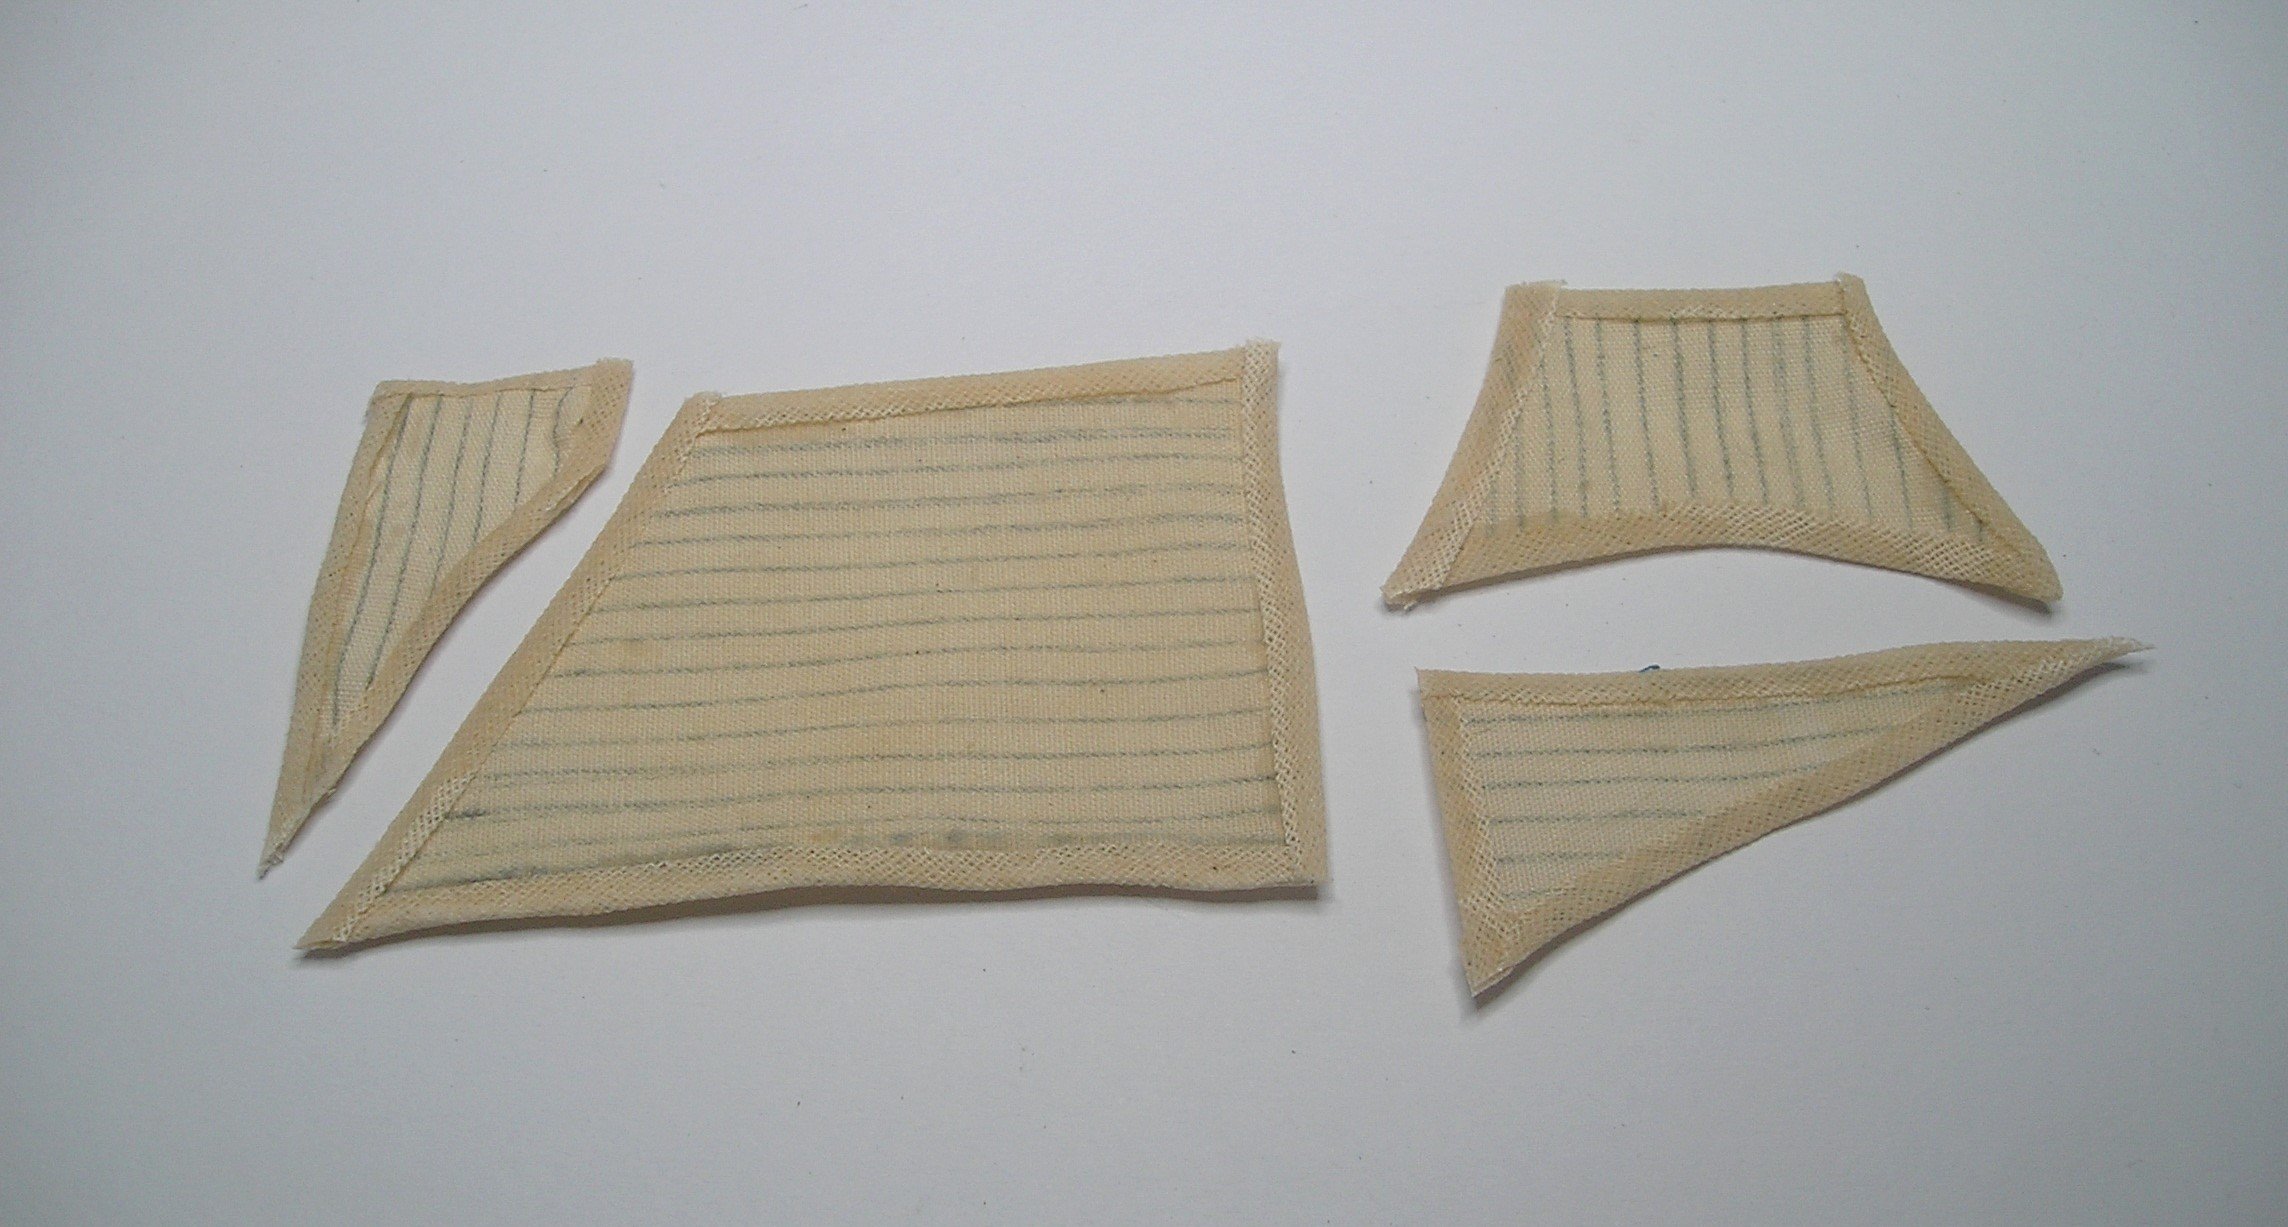
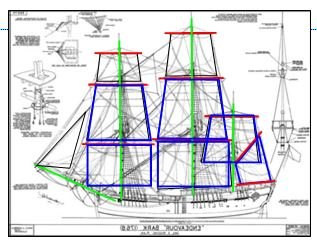
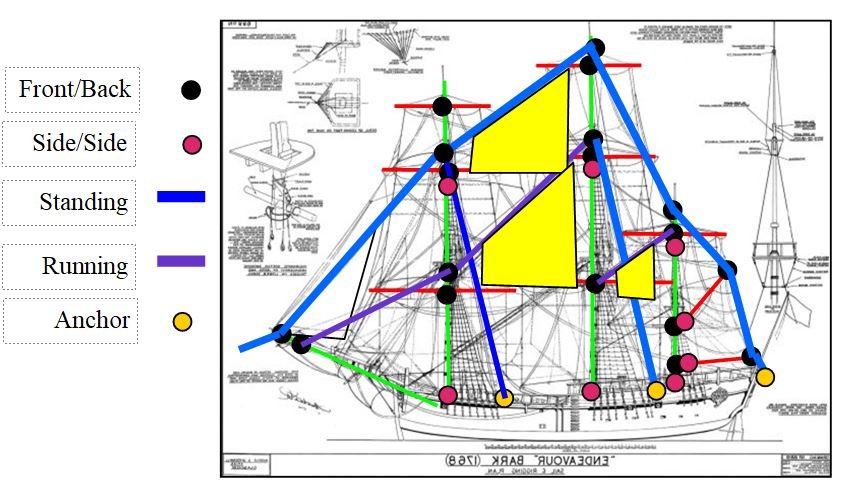
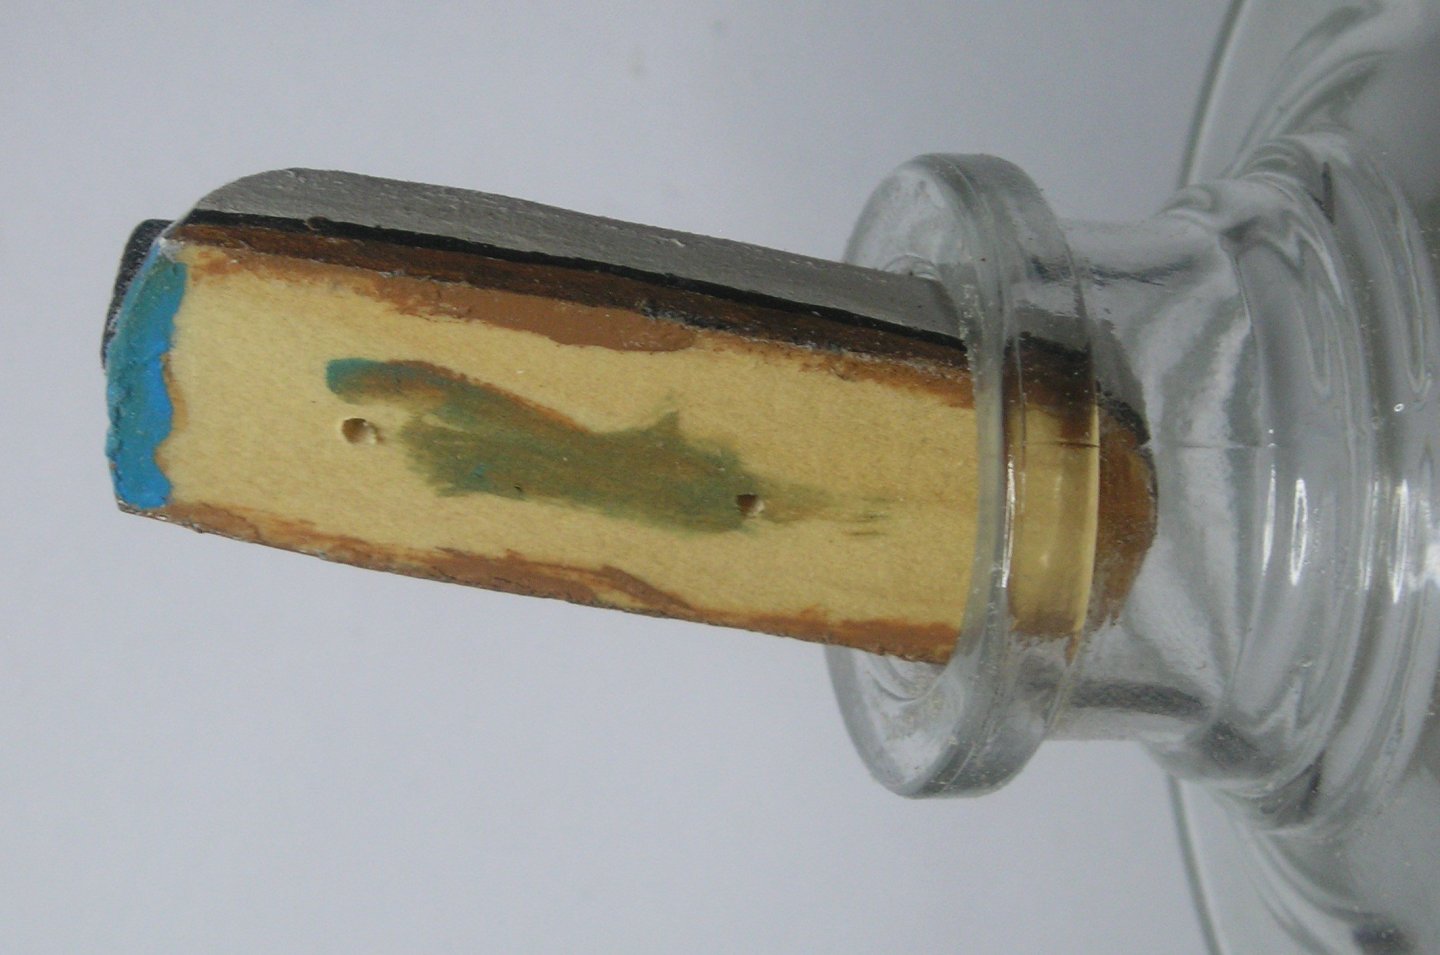
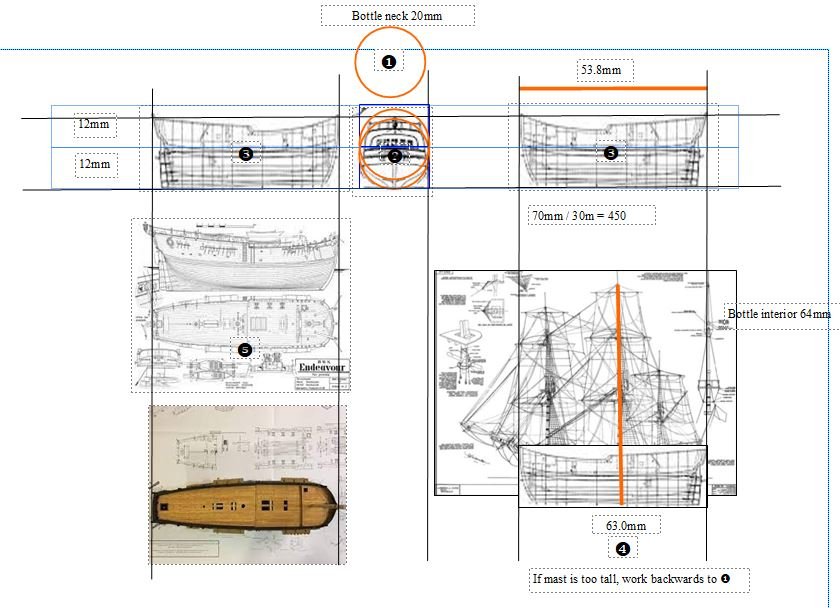
Greeting All, Making the details for the deck was very easy. Progress has been made thanks to my scaled diagrams. This one is used to measure and make masts, yards and sails. To decide on the rigging, I just keep using the same diagram. The little ship is coming together well, and it fits into the neck of the bottle quite easily. The sail material has been stained with Vallejo Brown Sand paint and is ready for cutting and attaching to the yards, tomorrow. Till next time, Cheers,
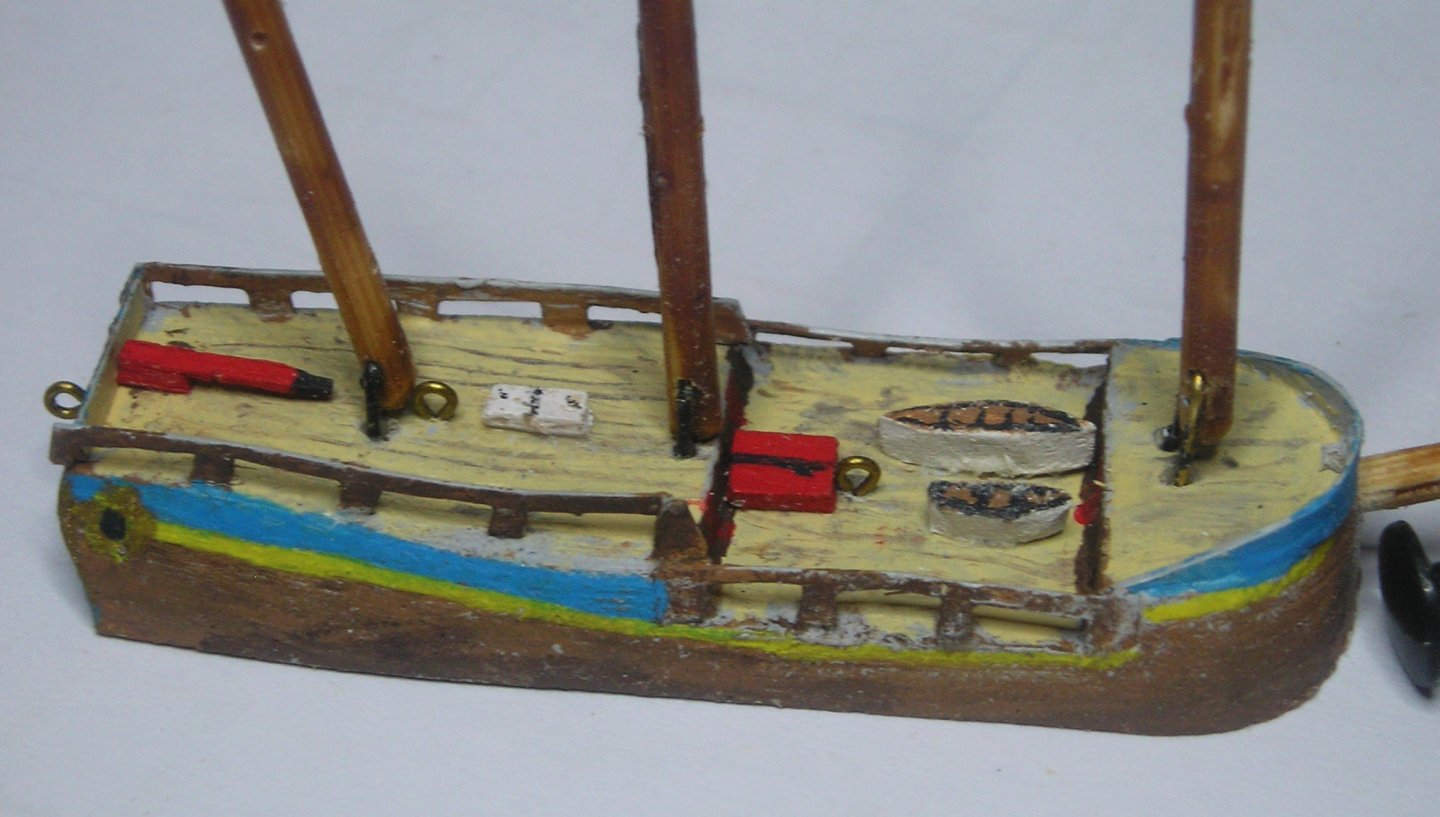

-
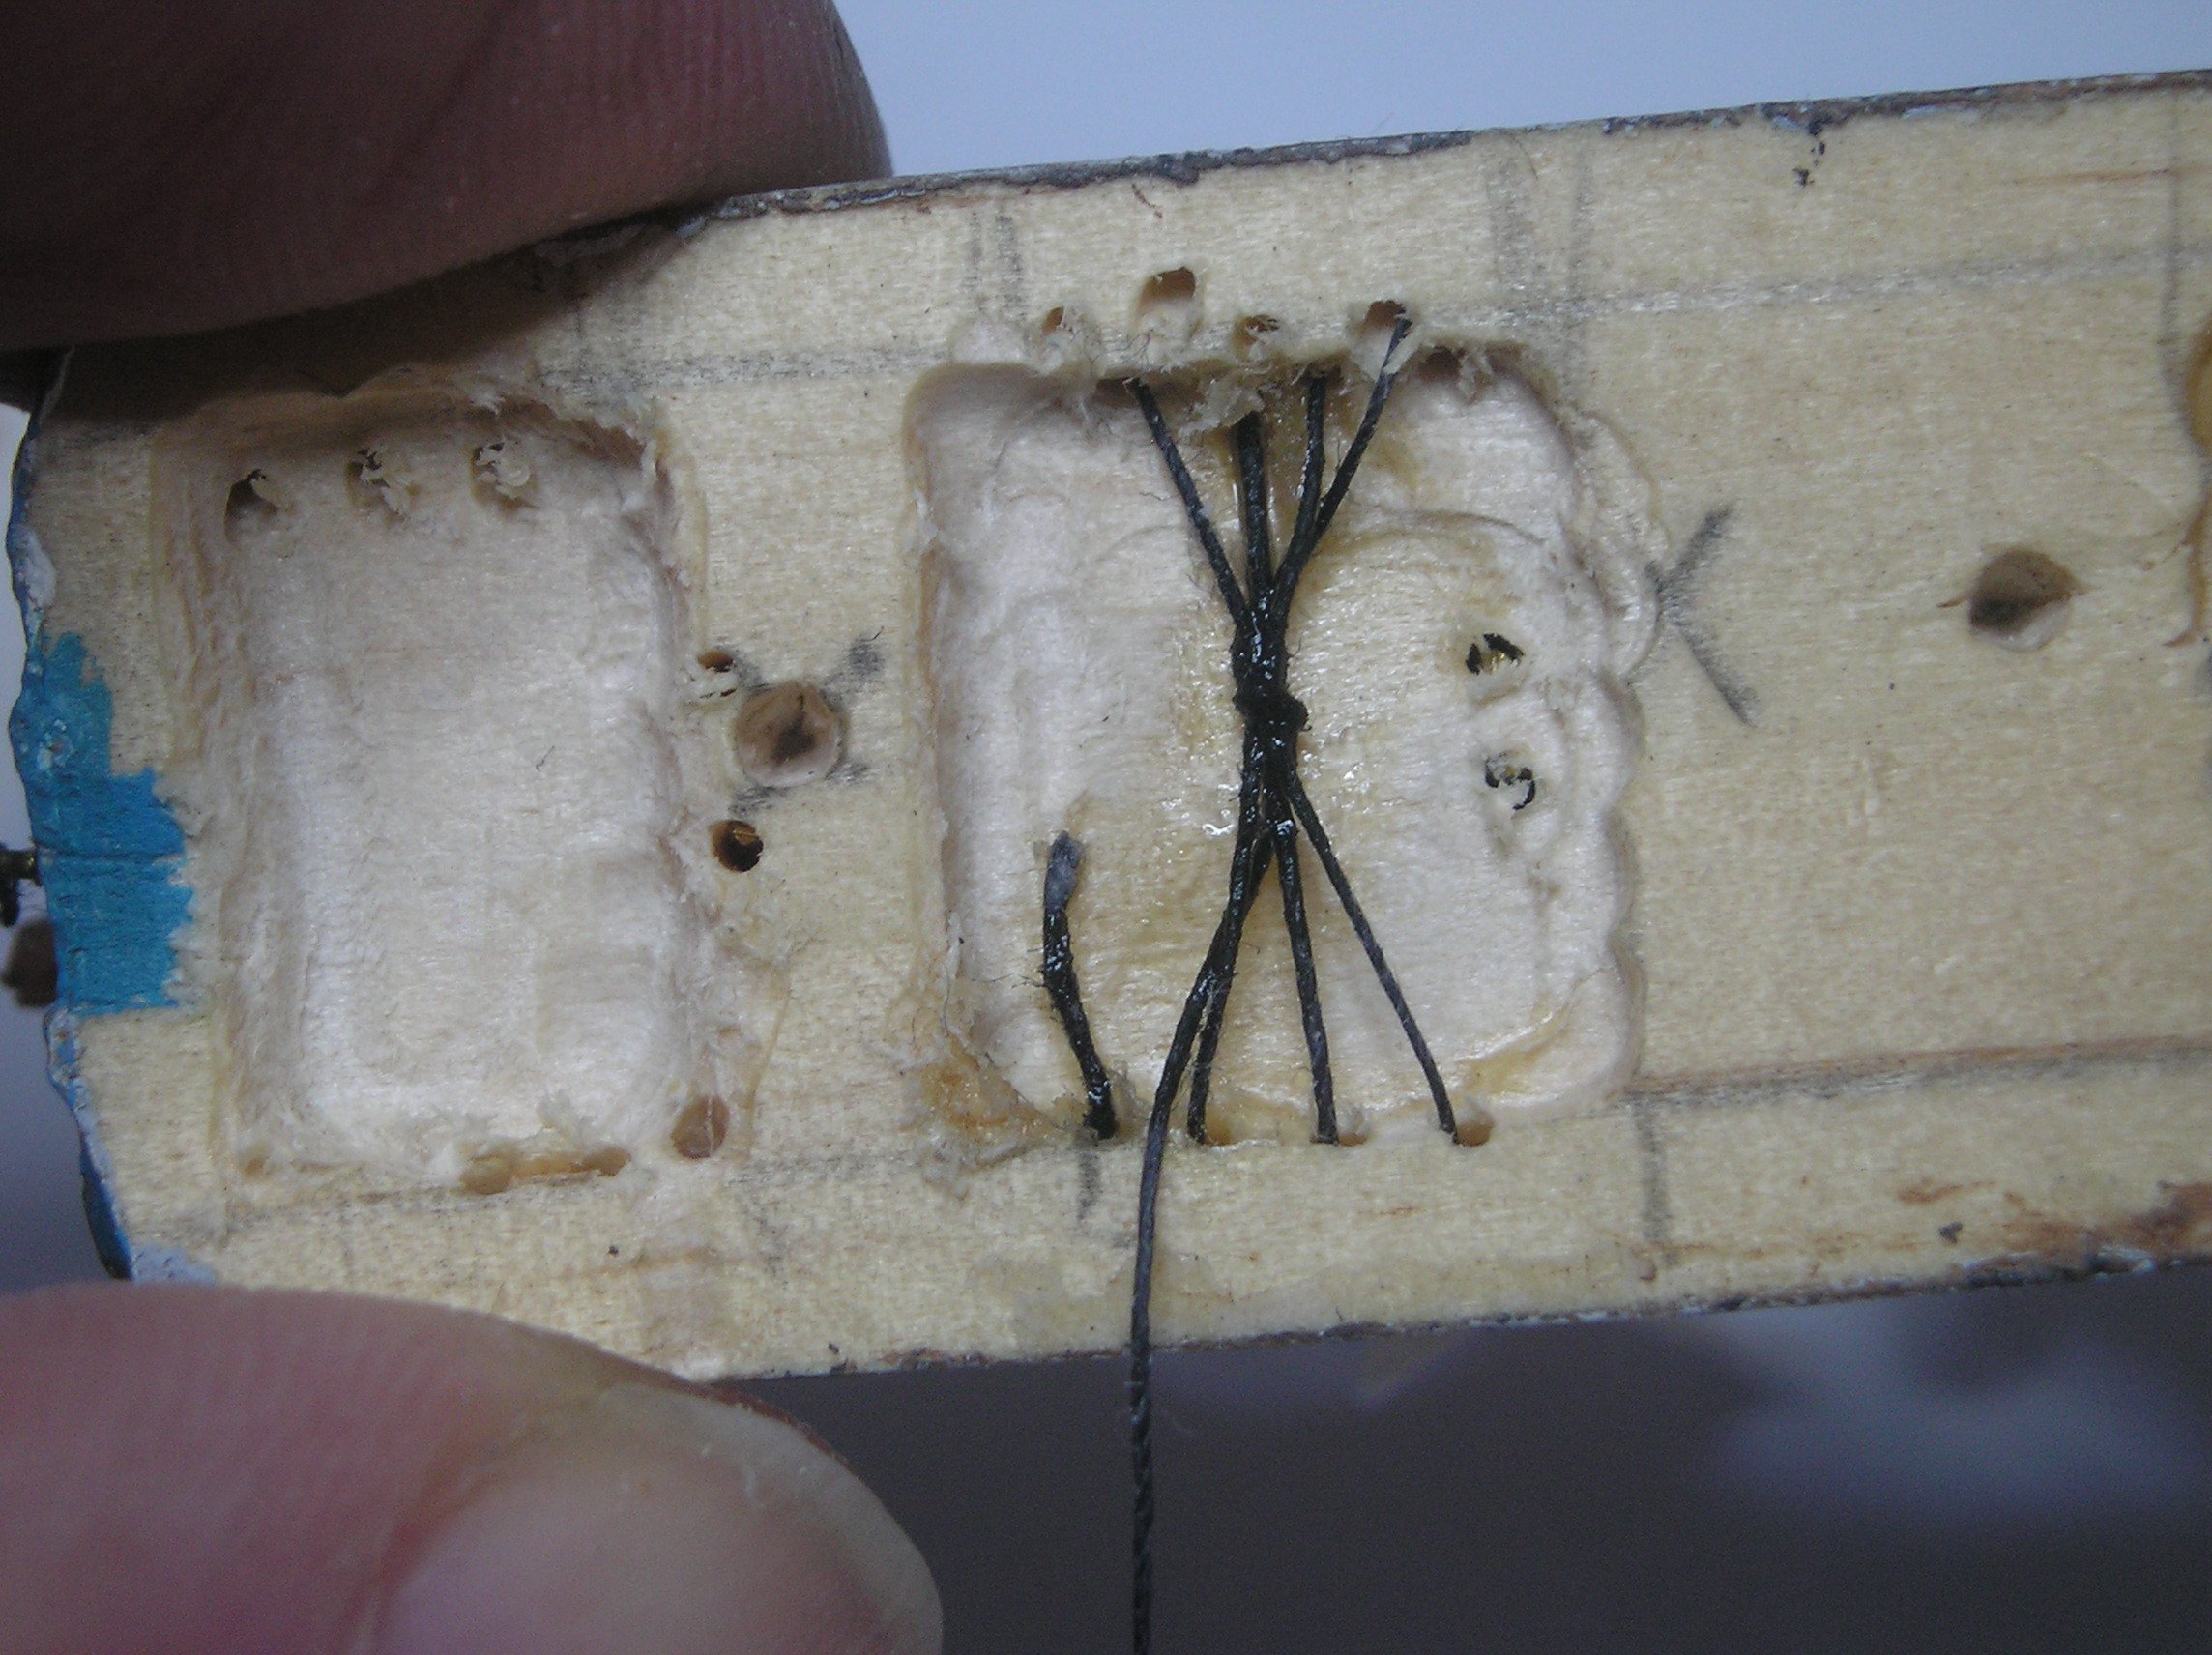
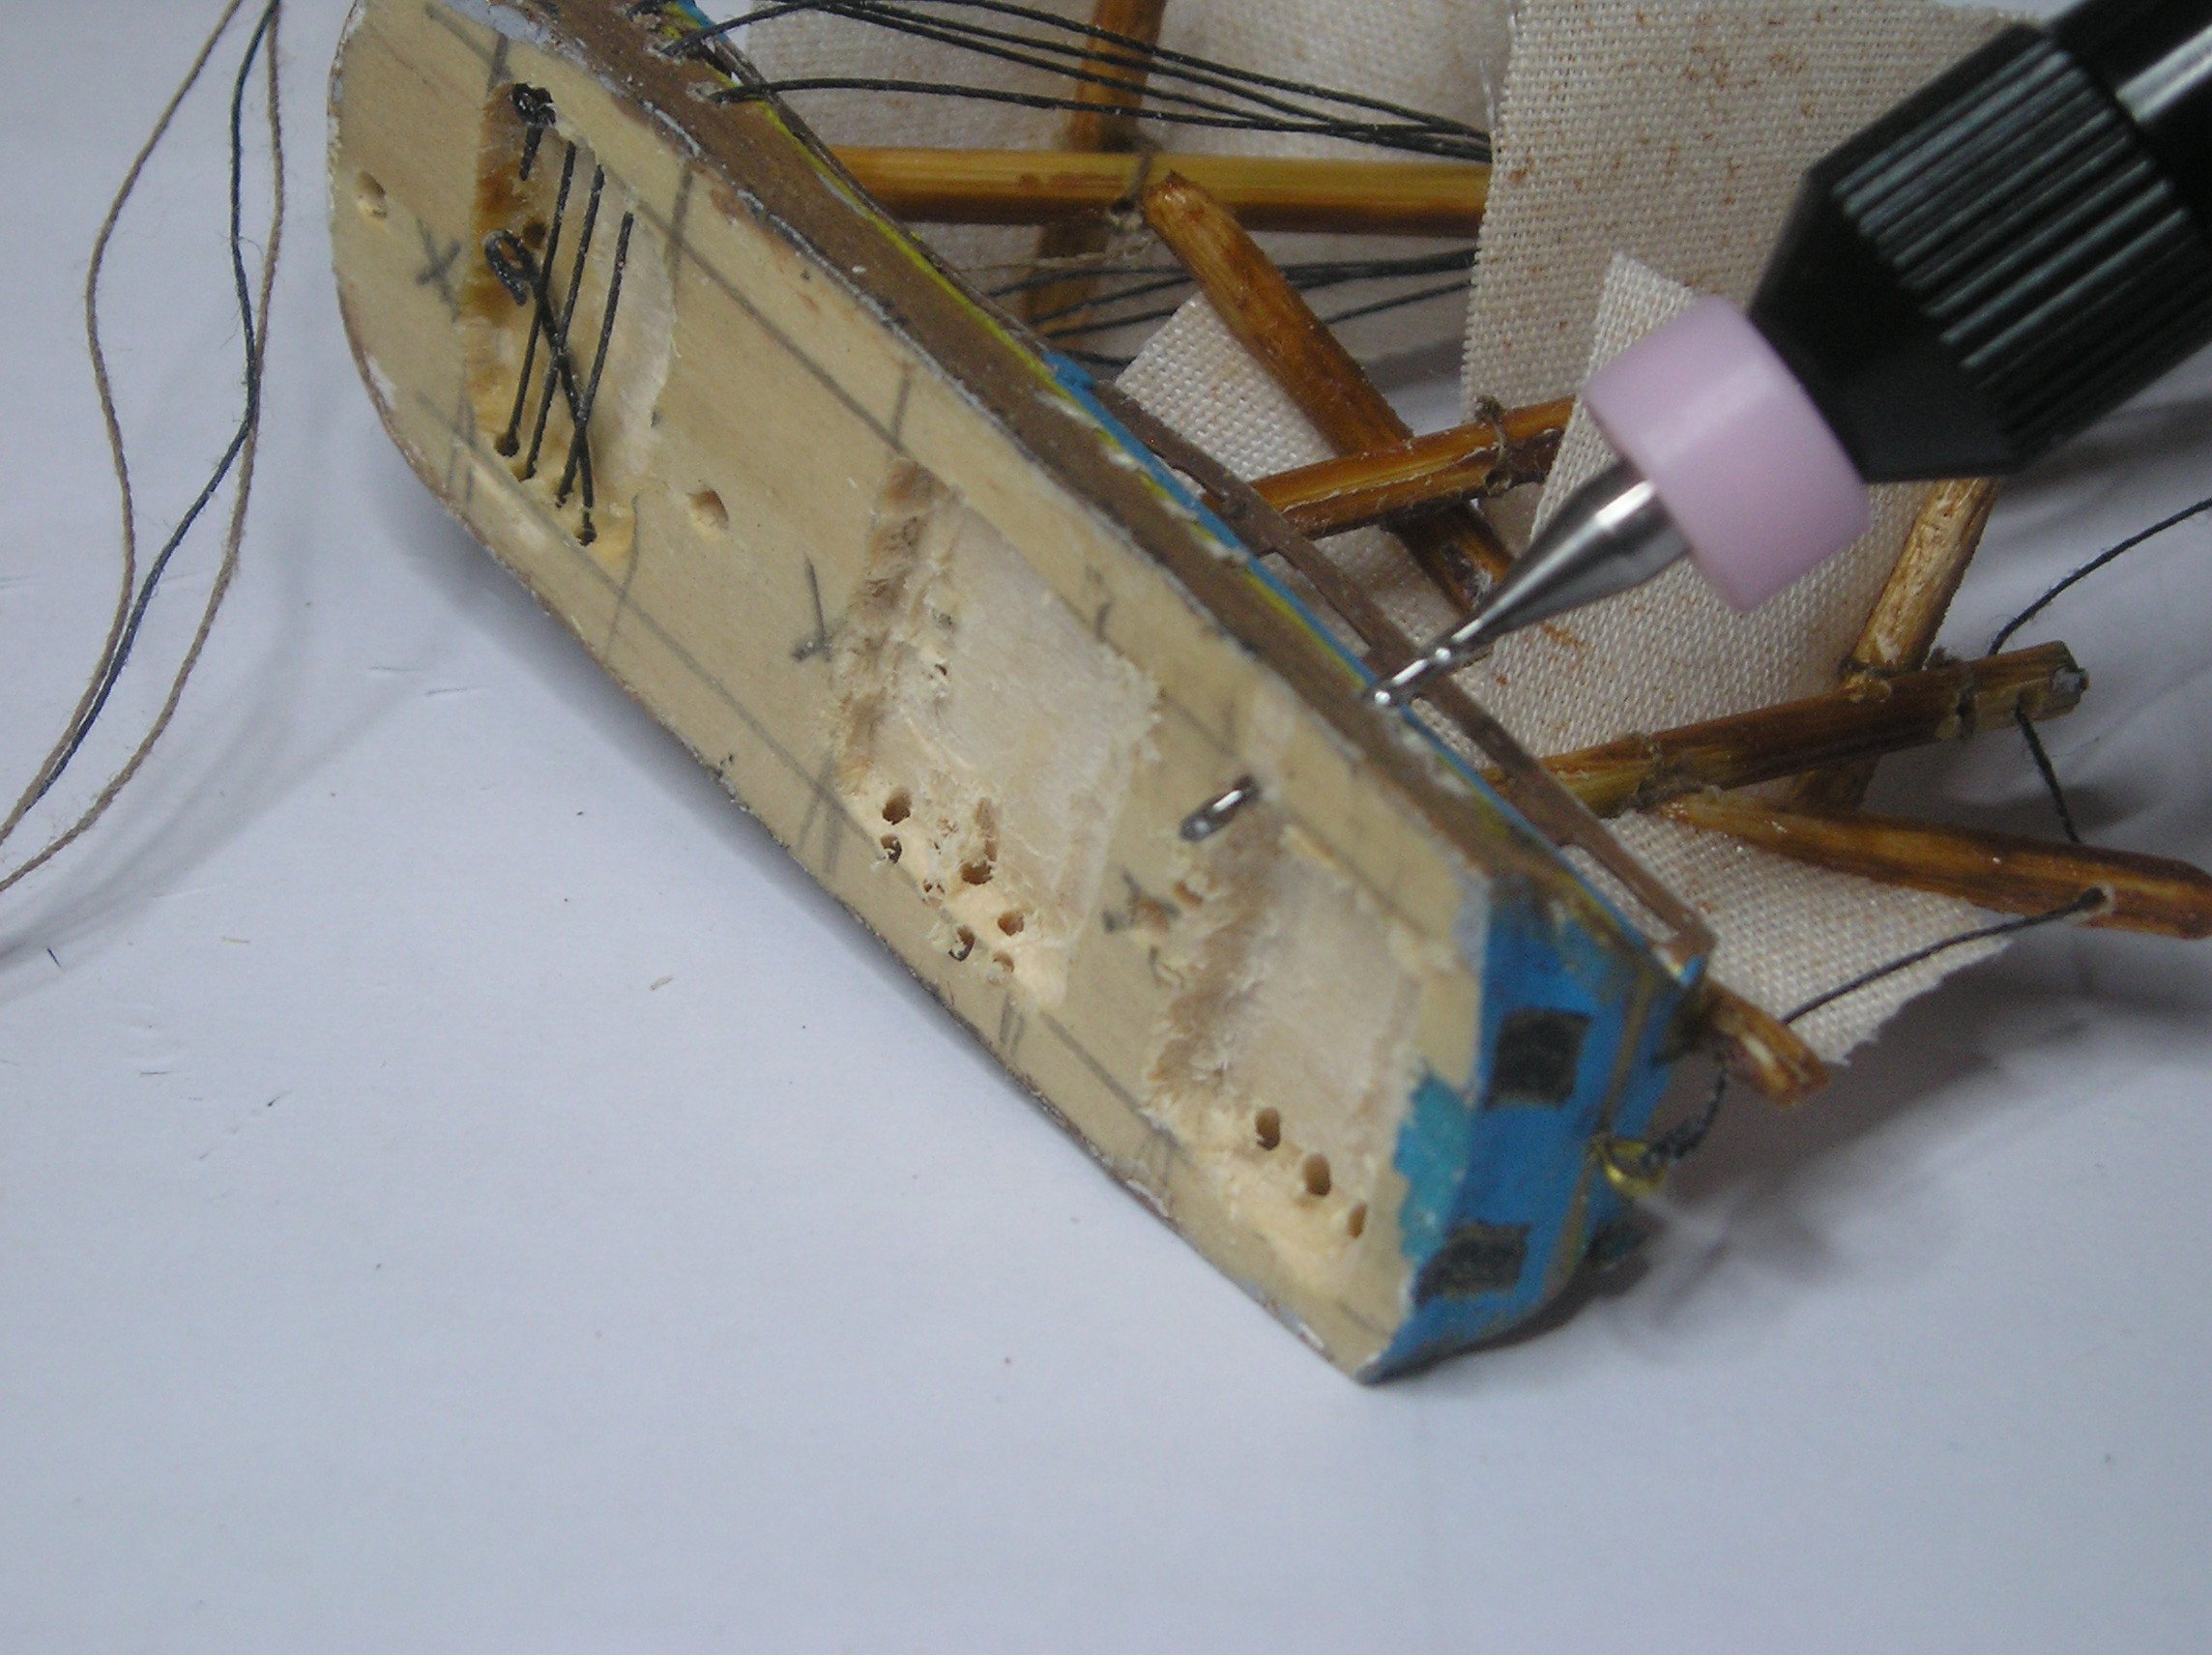
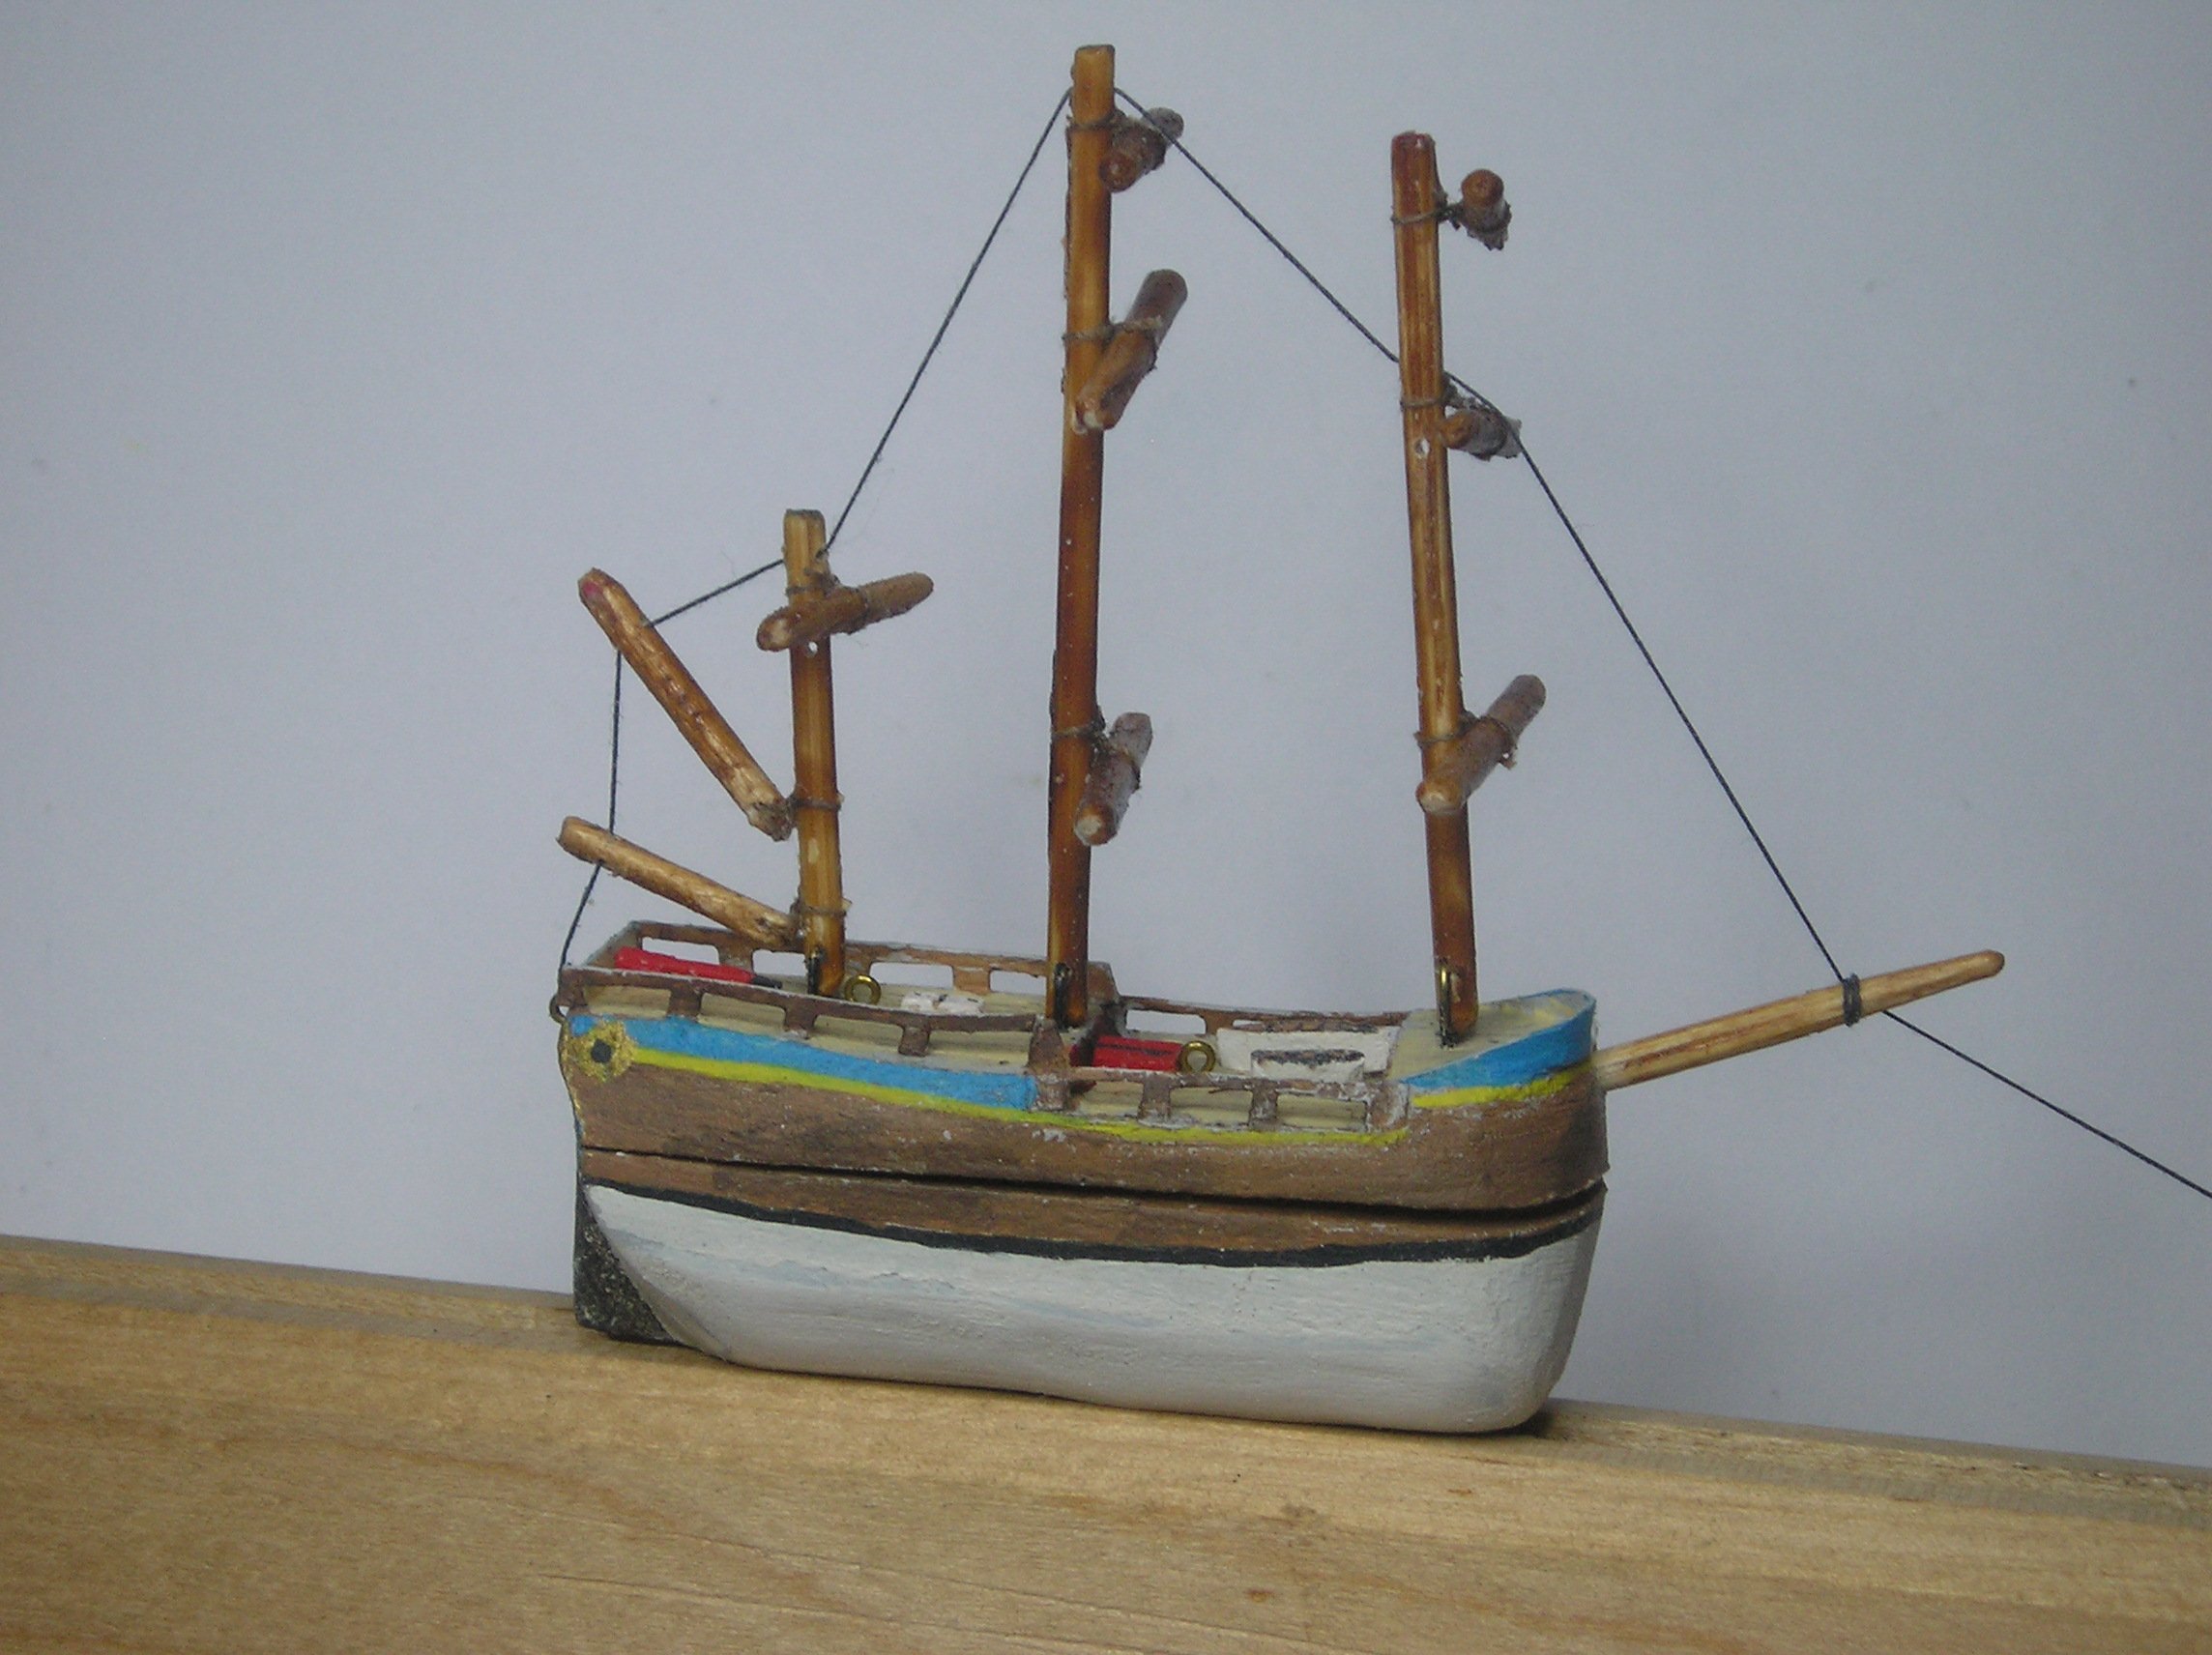
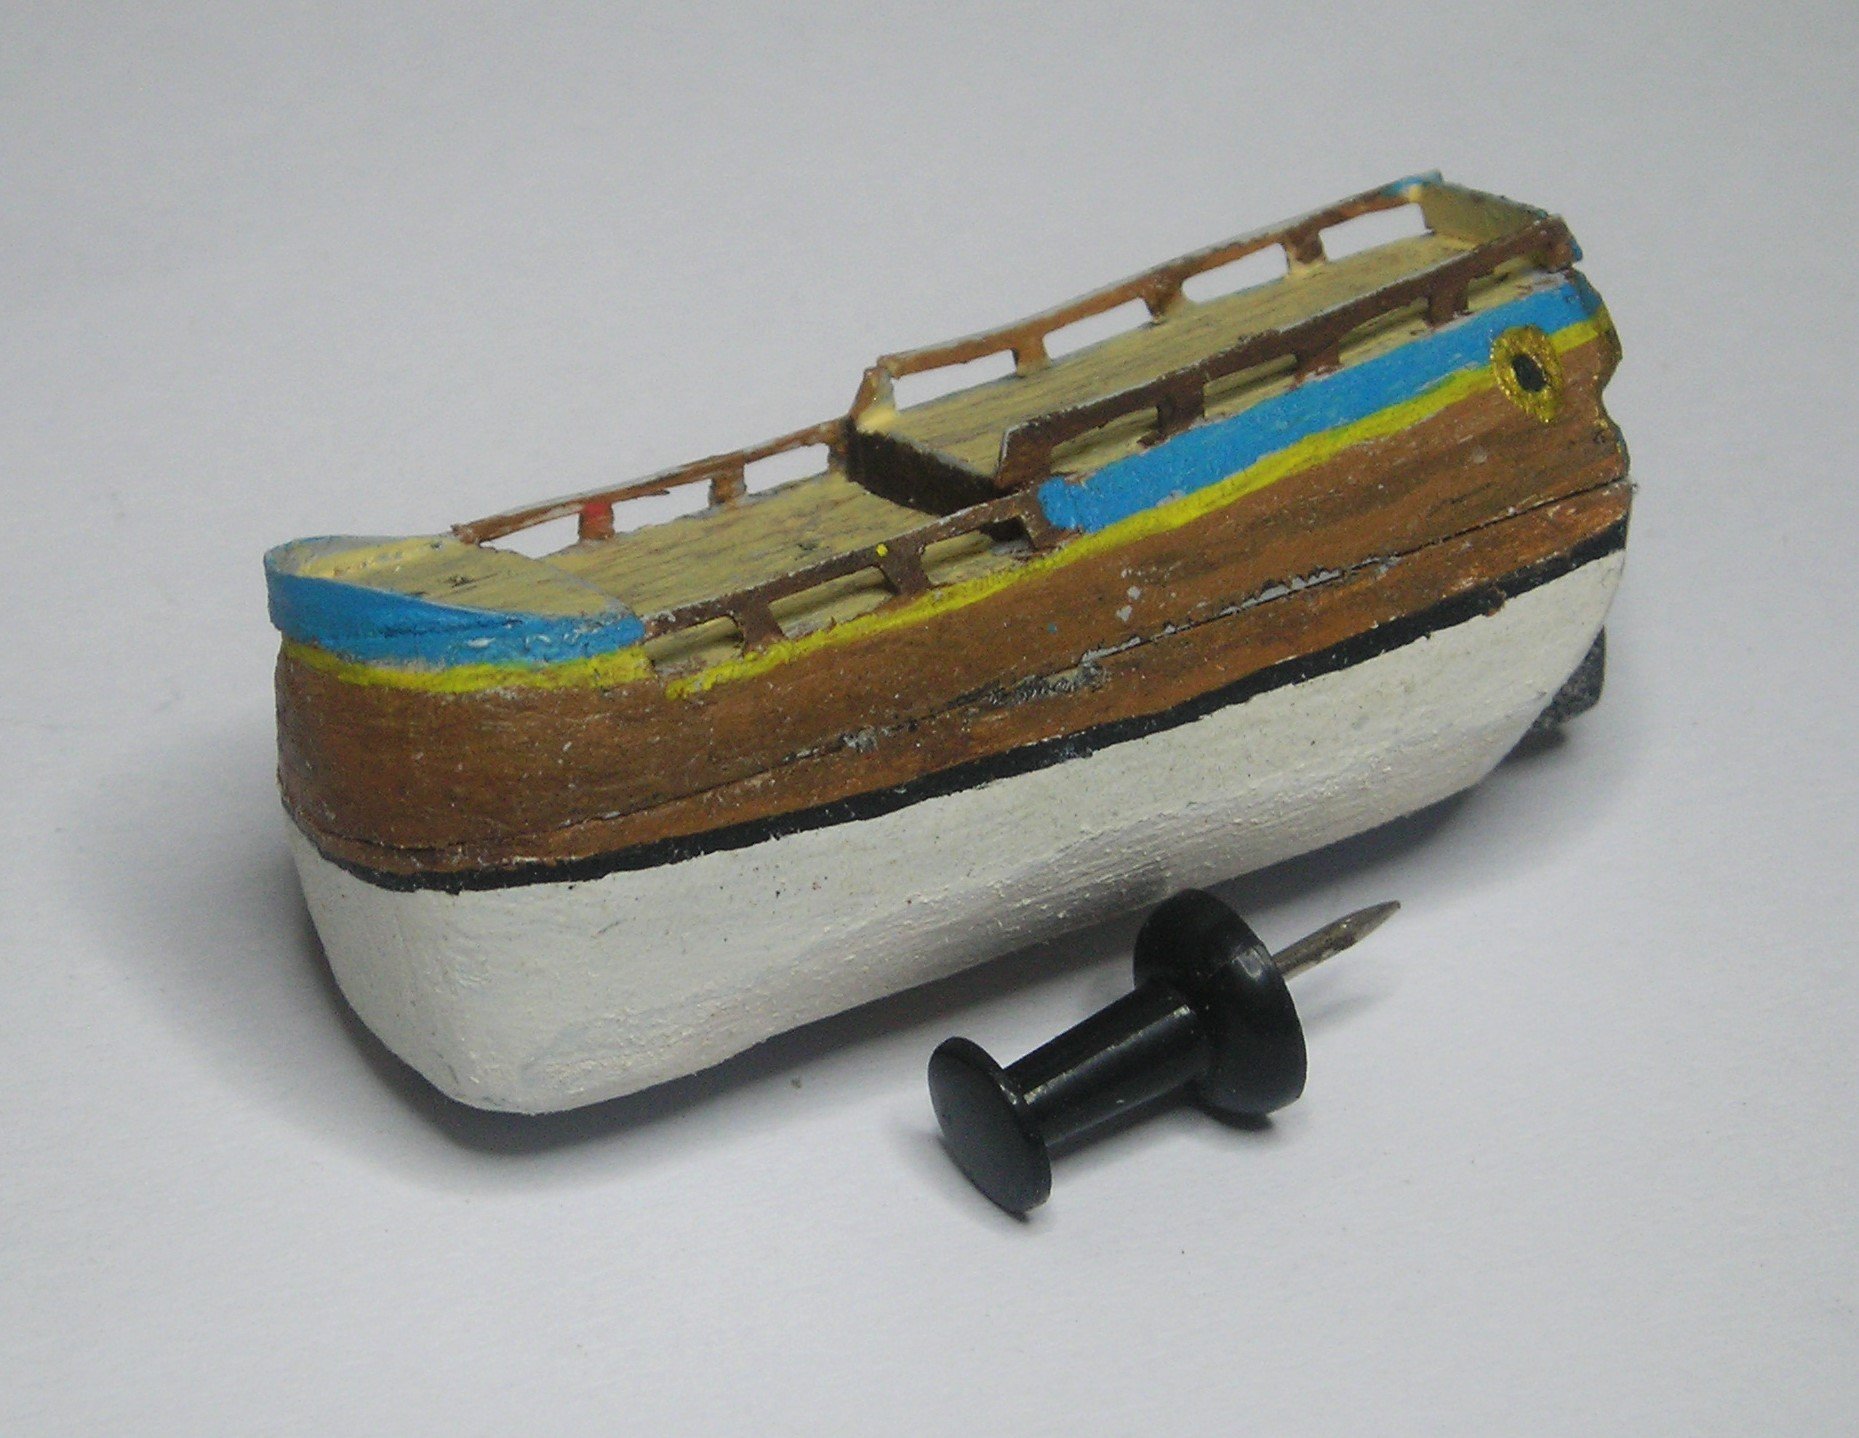
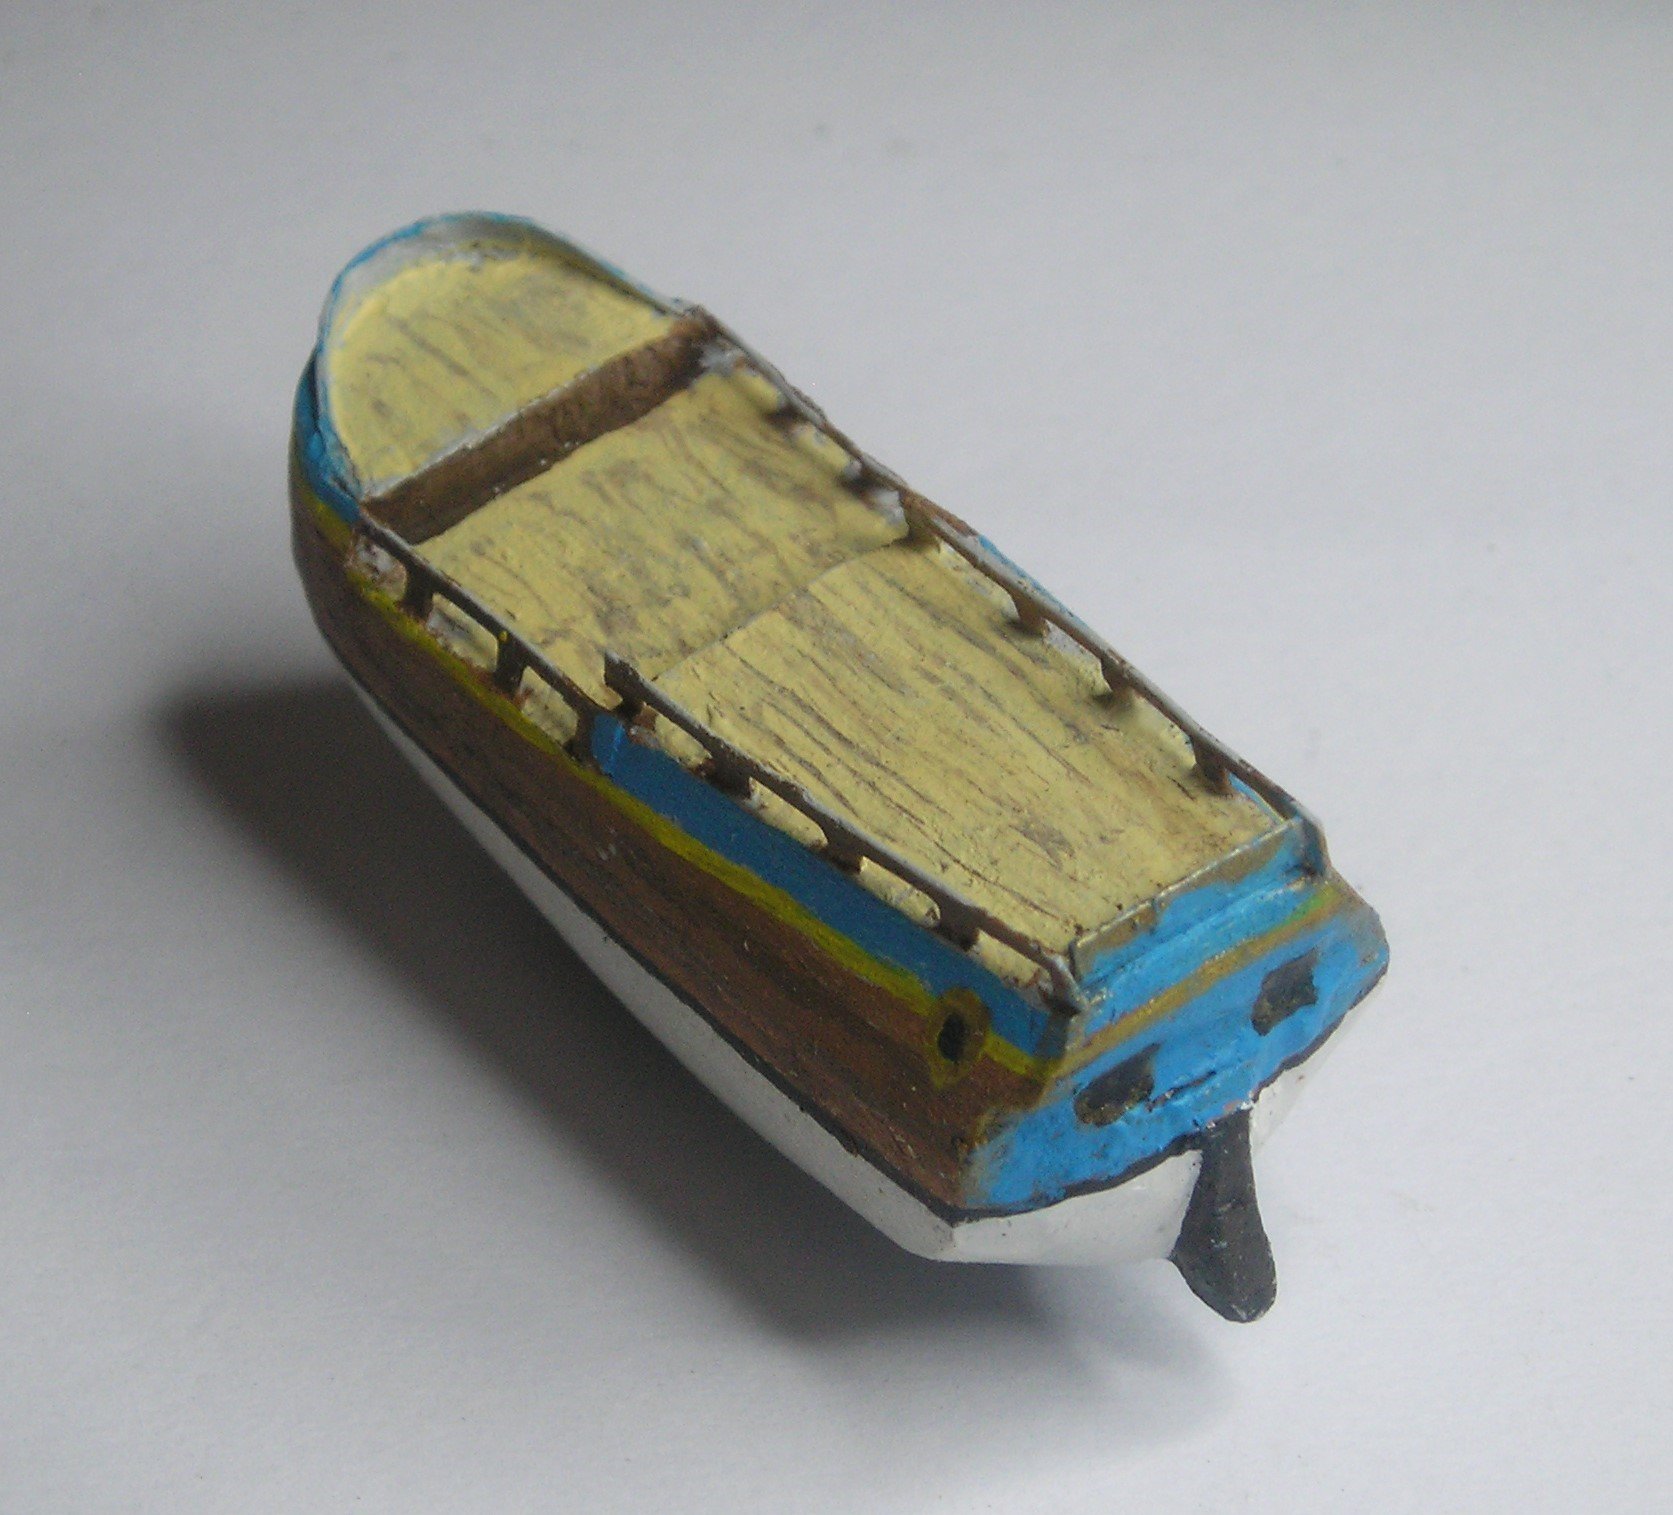
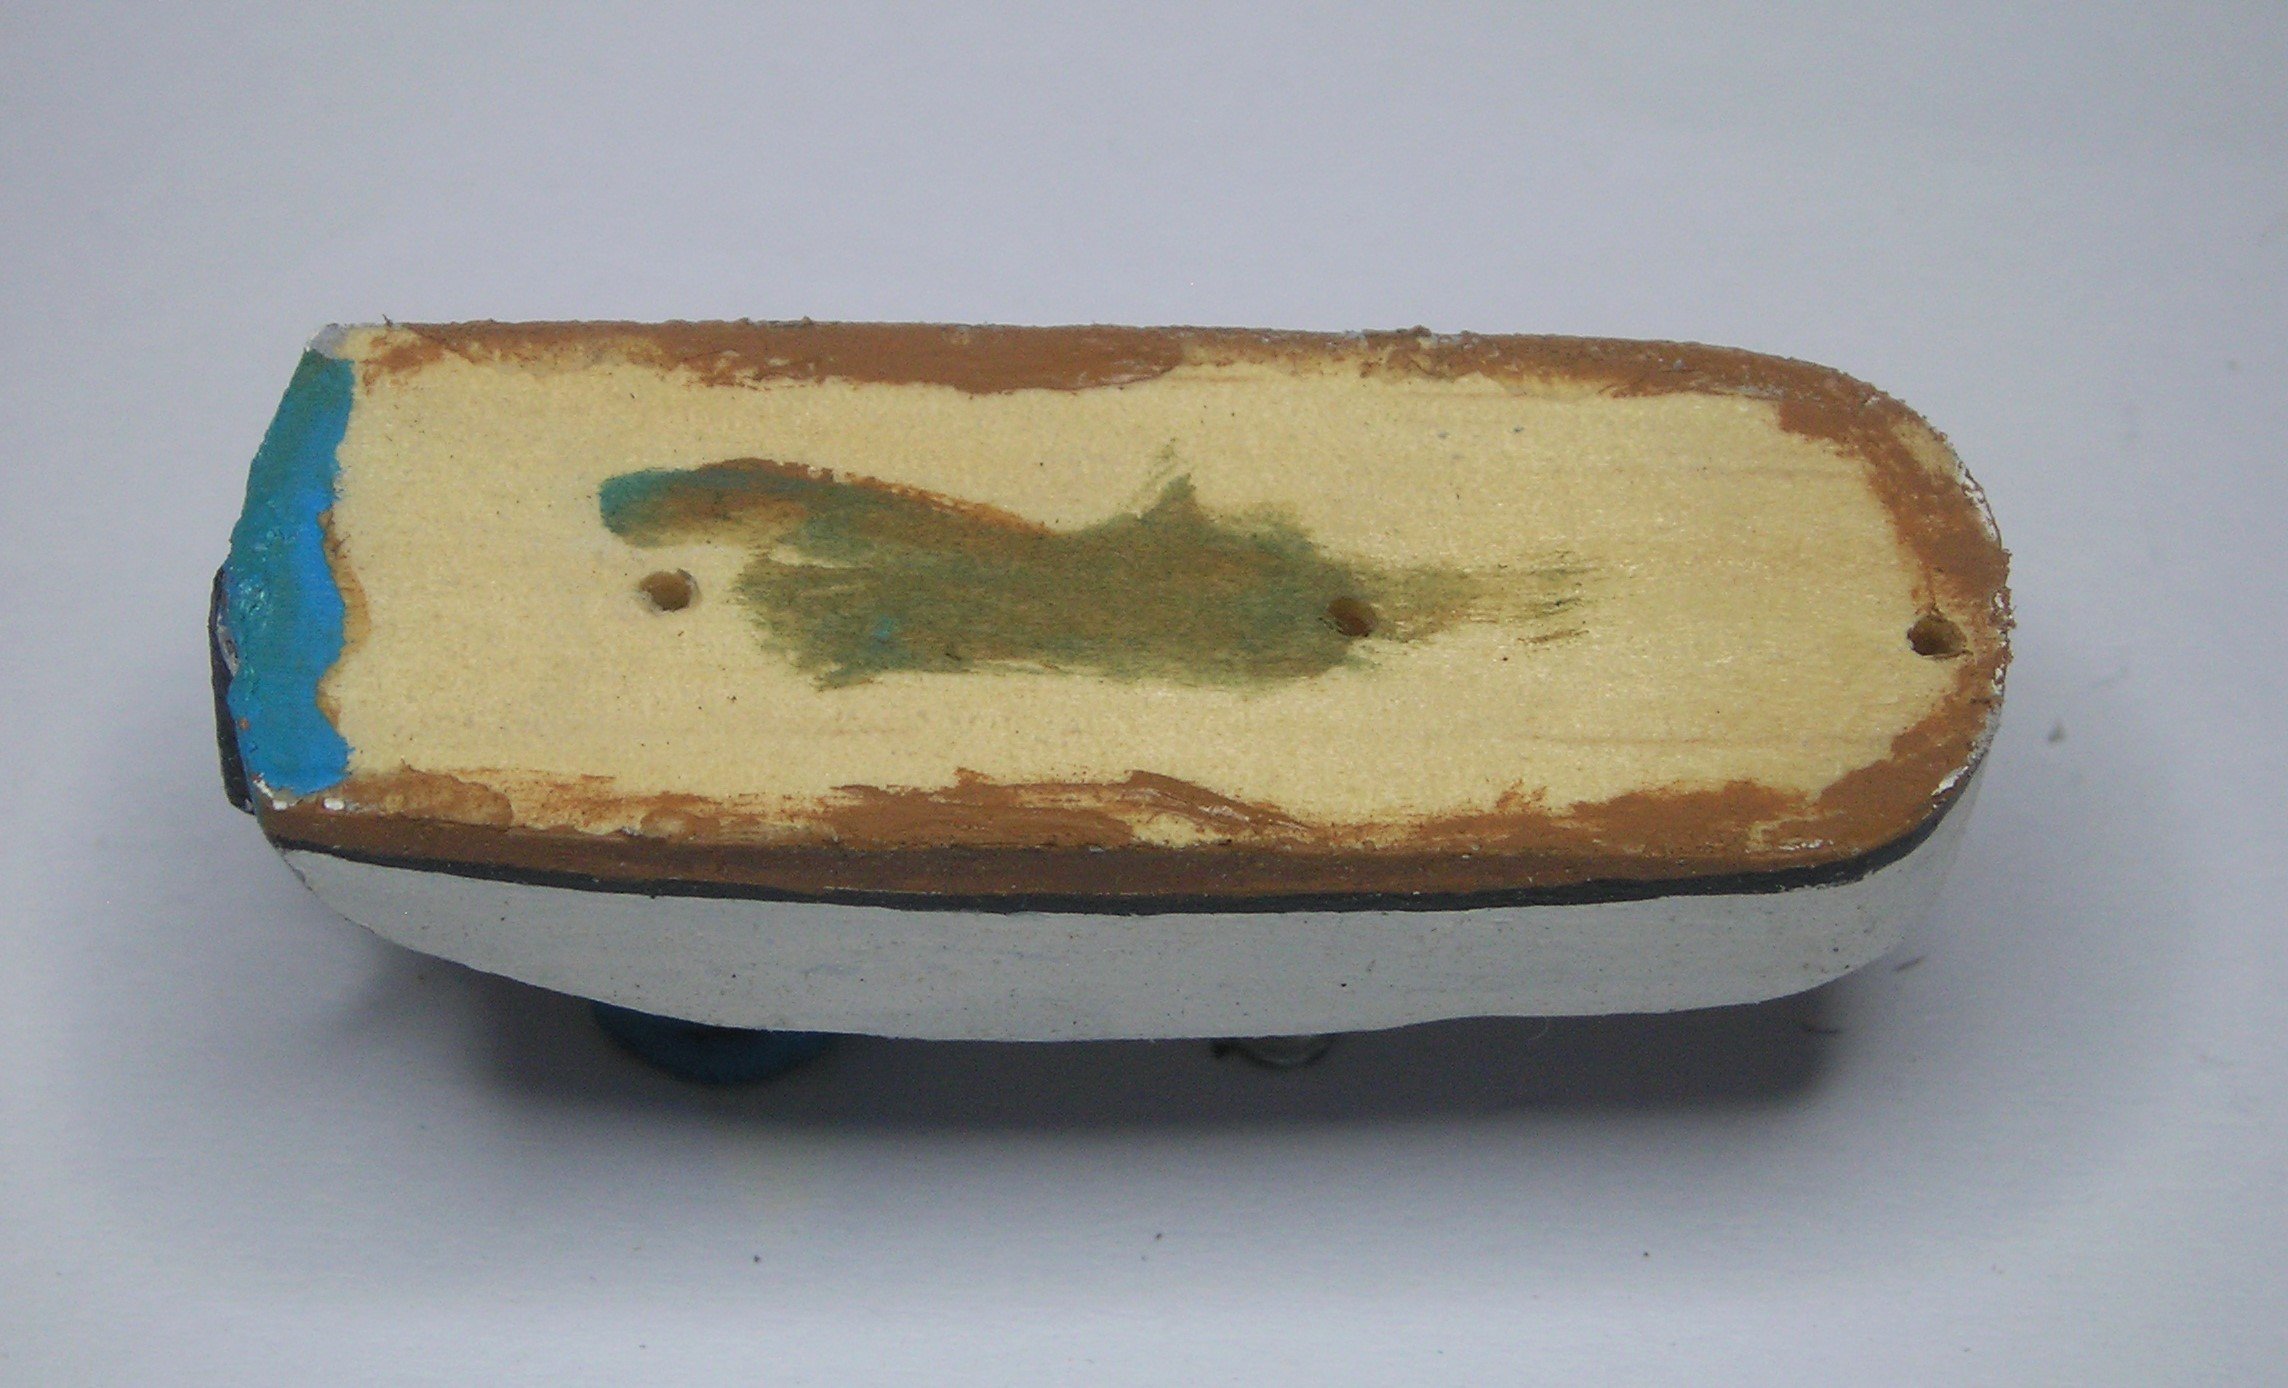
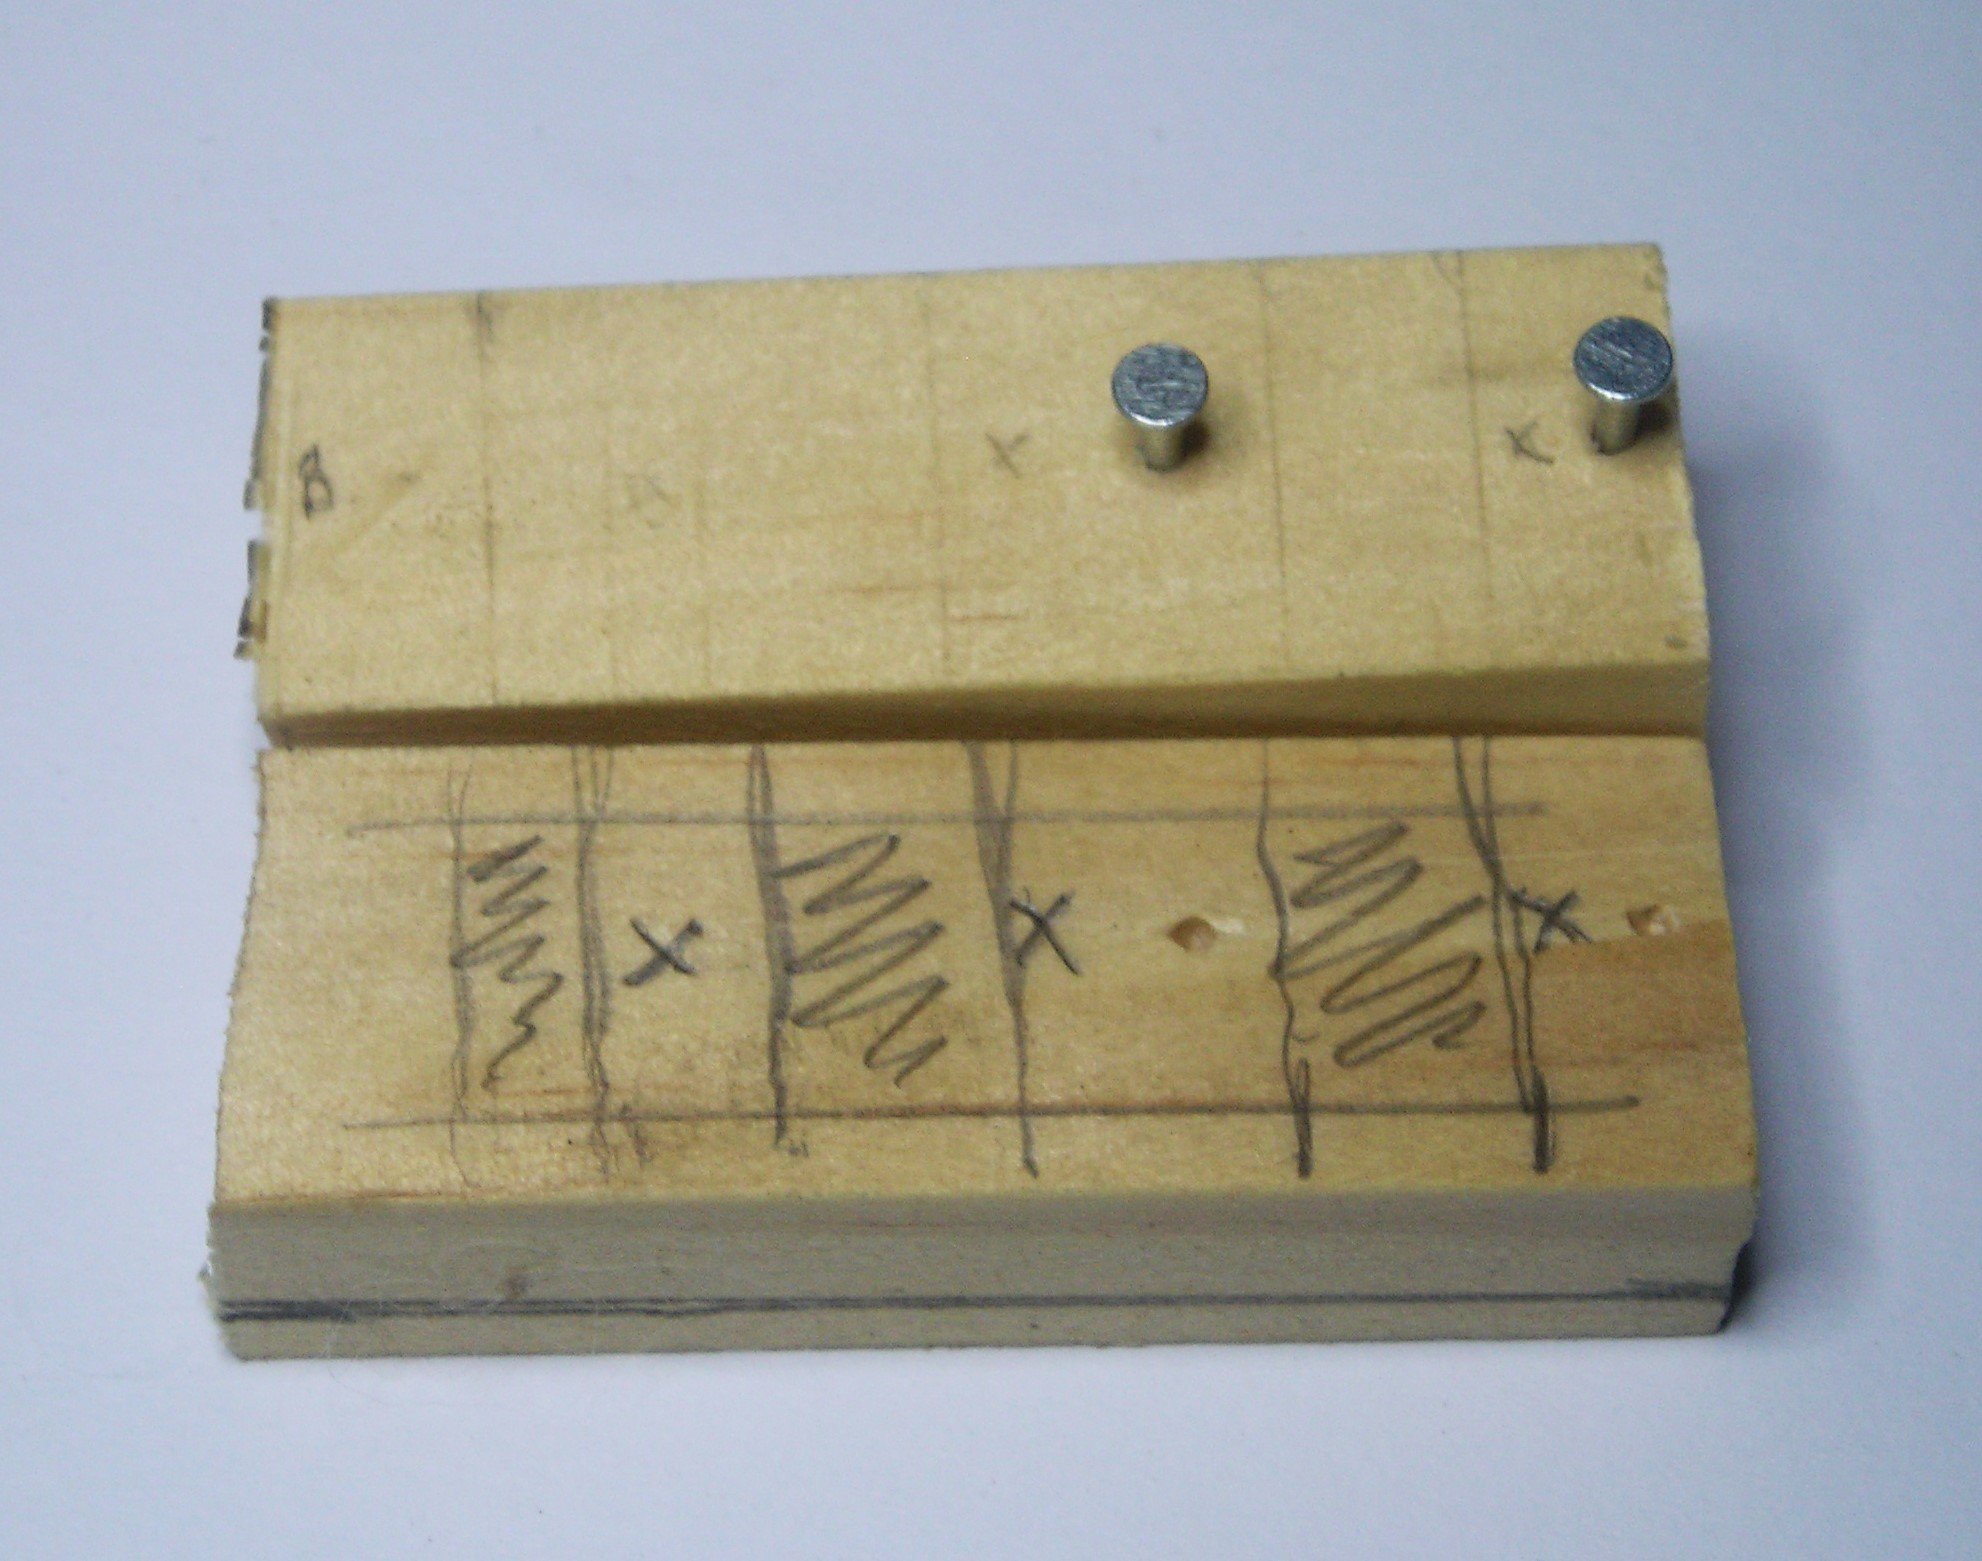
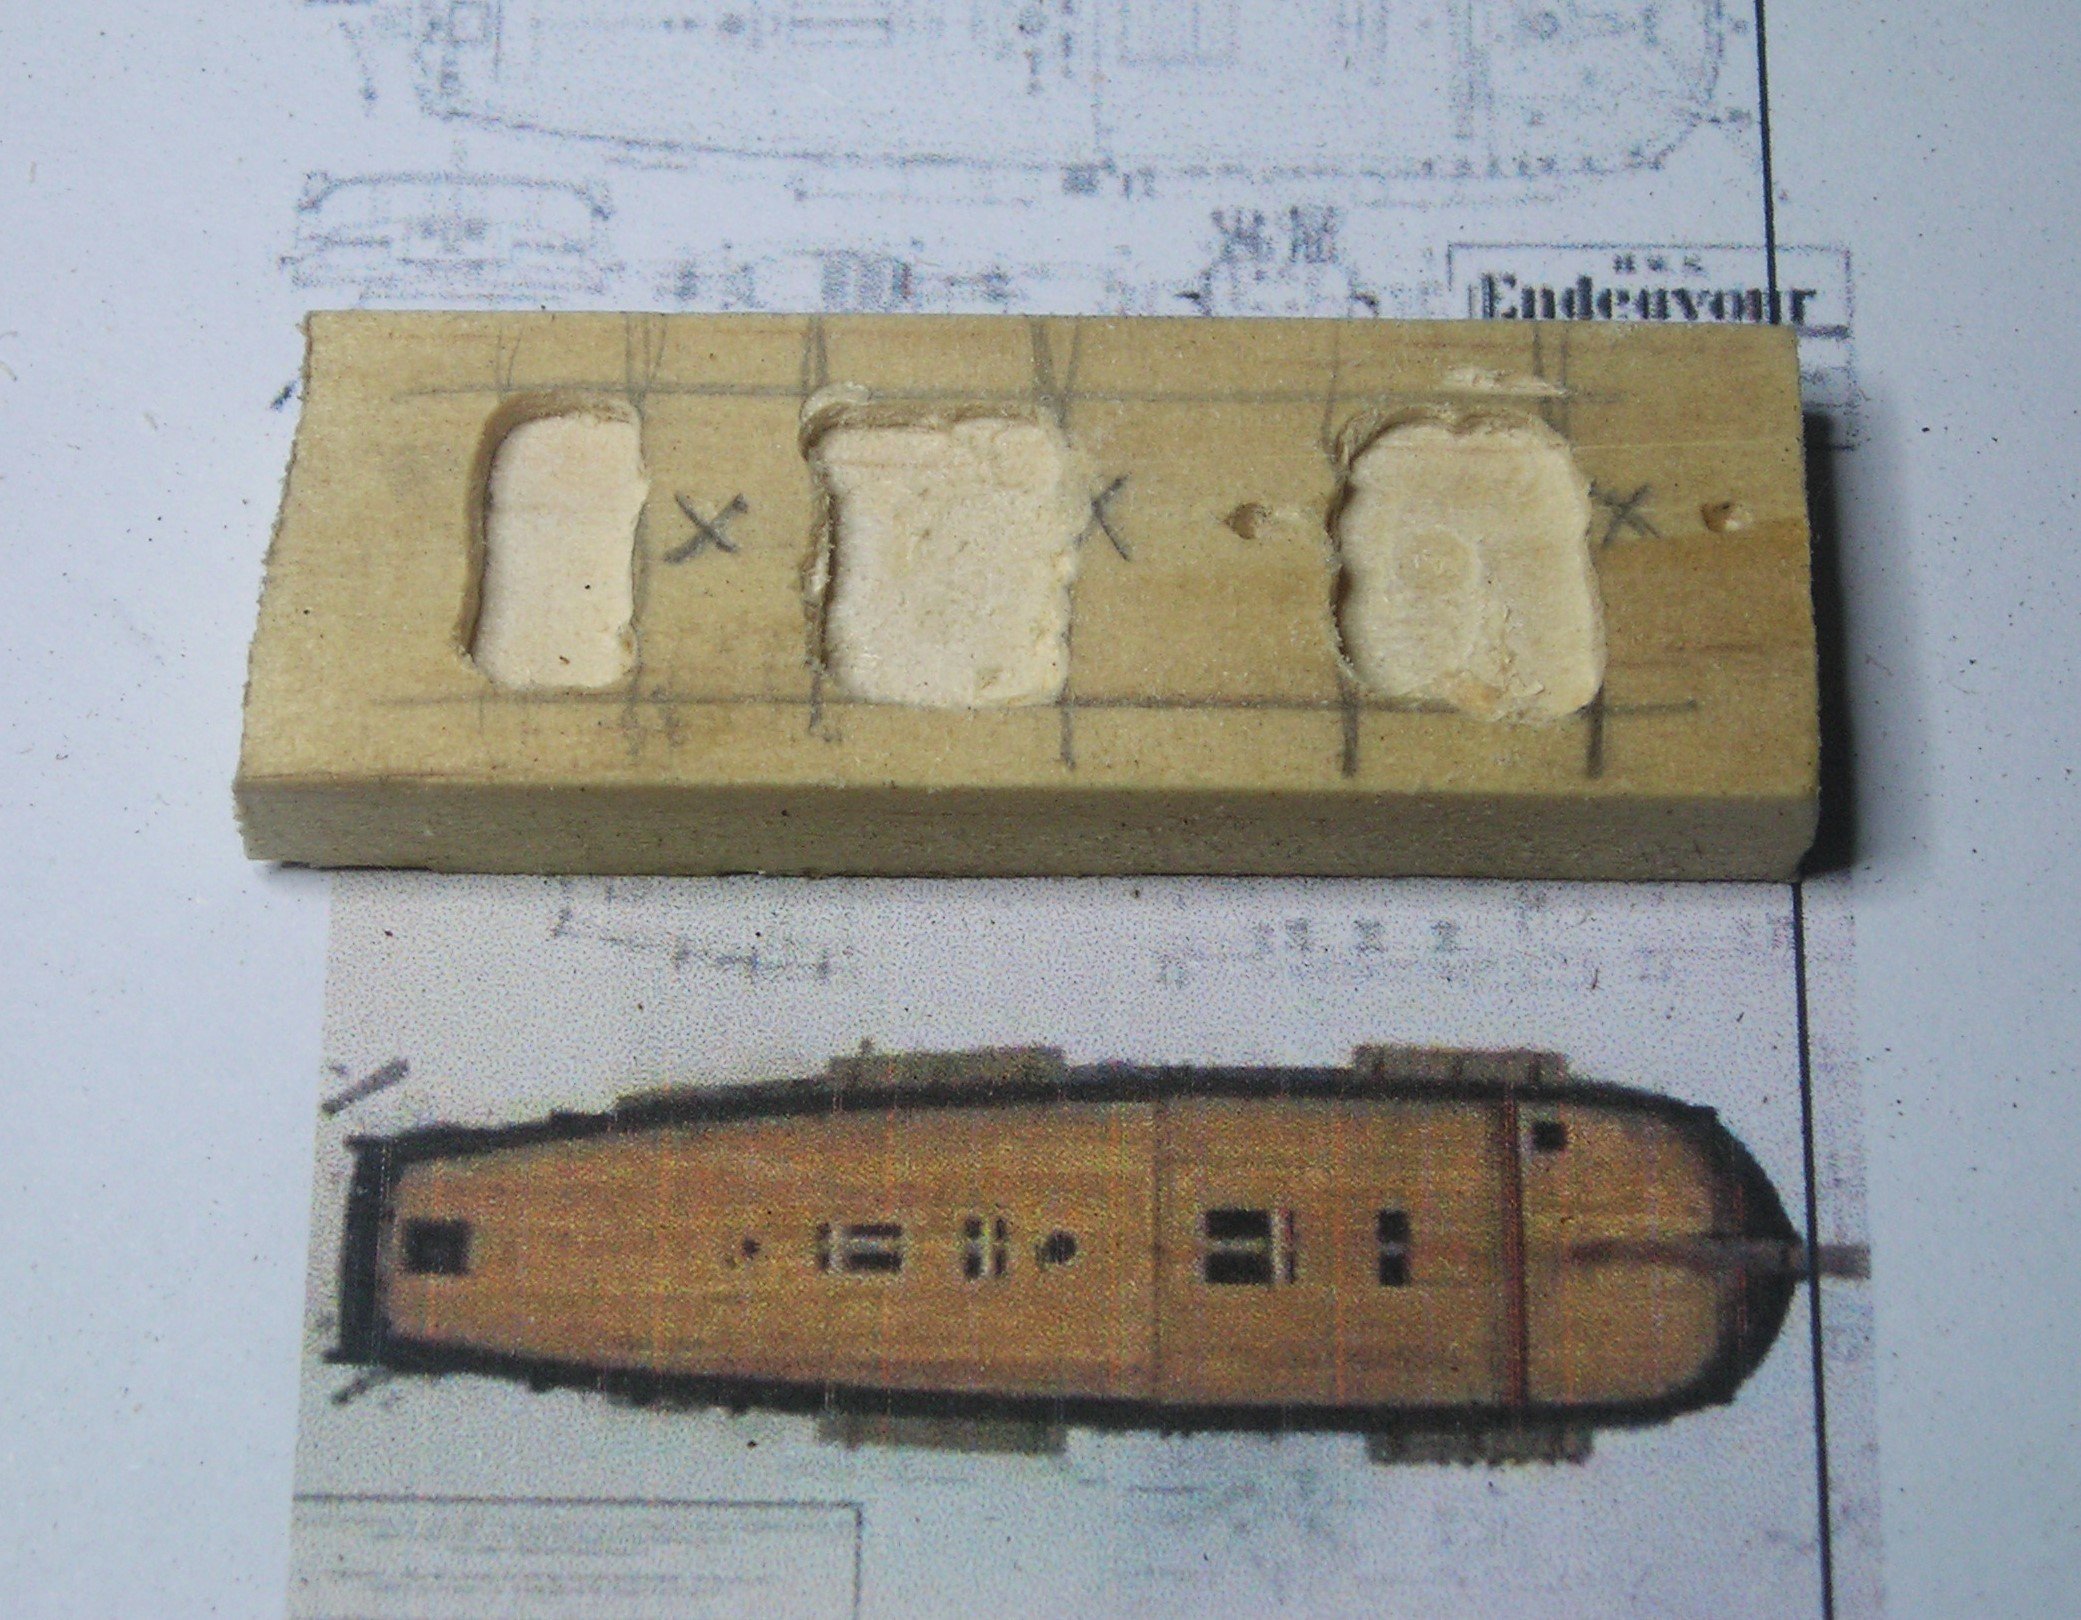
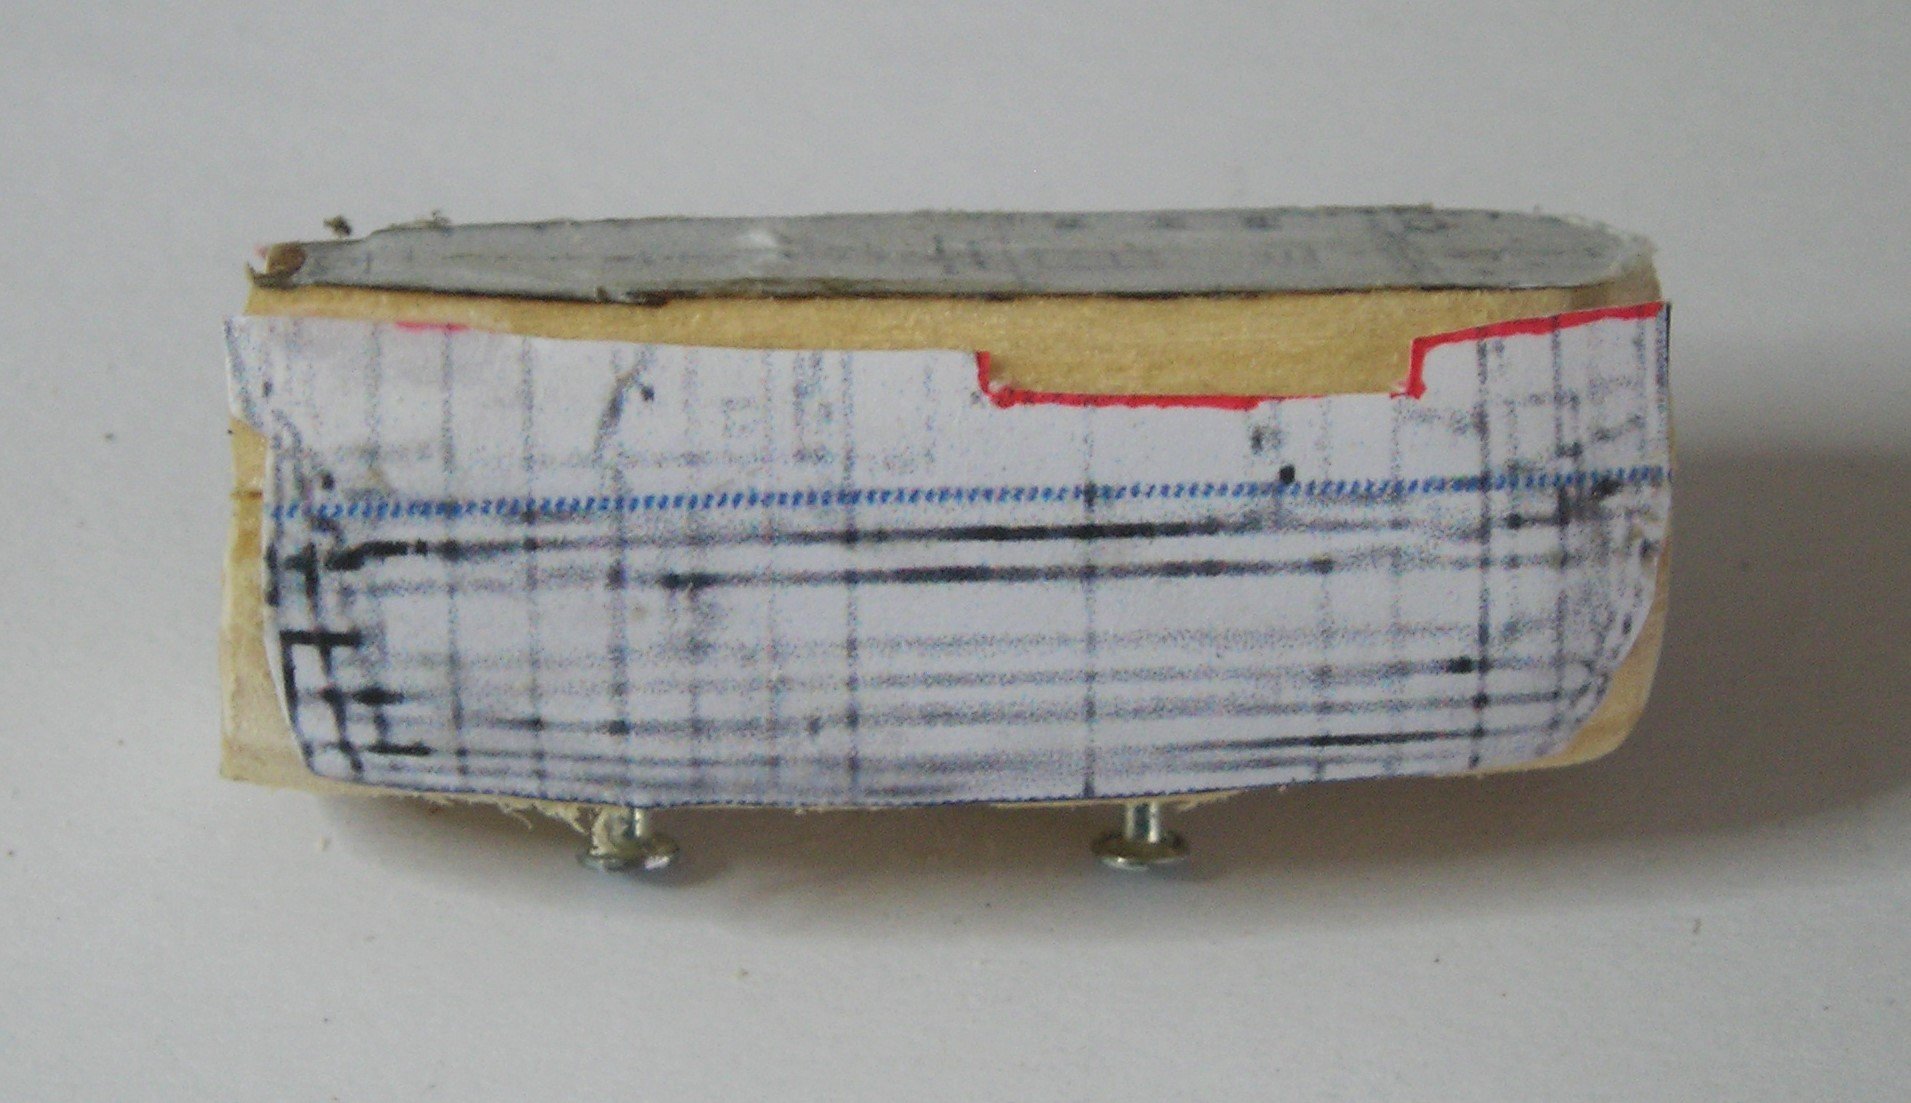
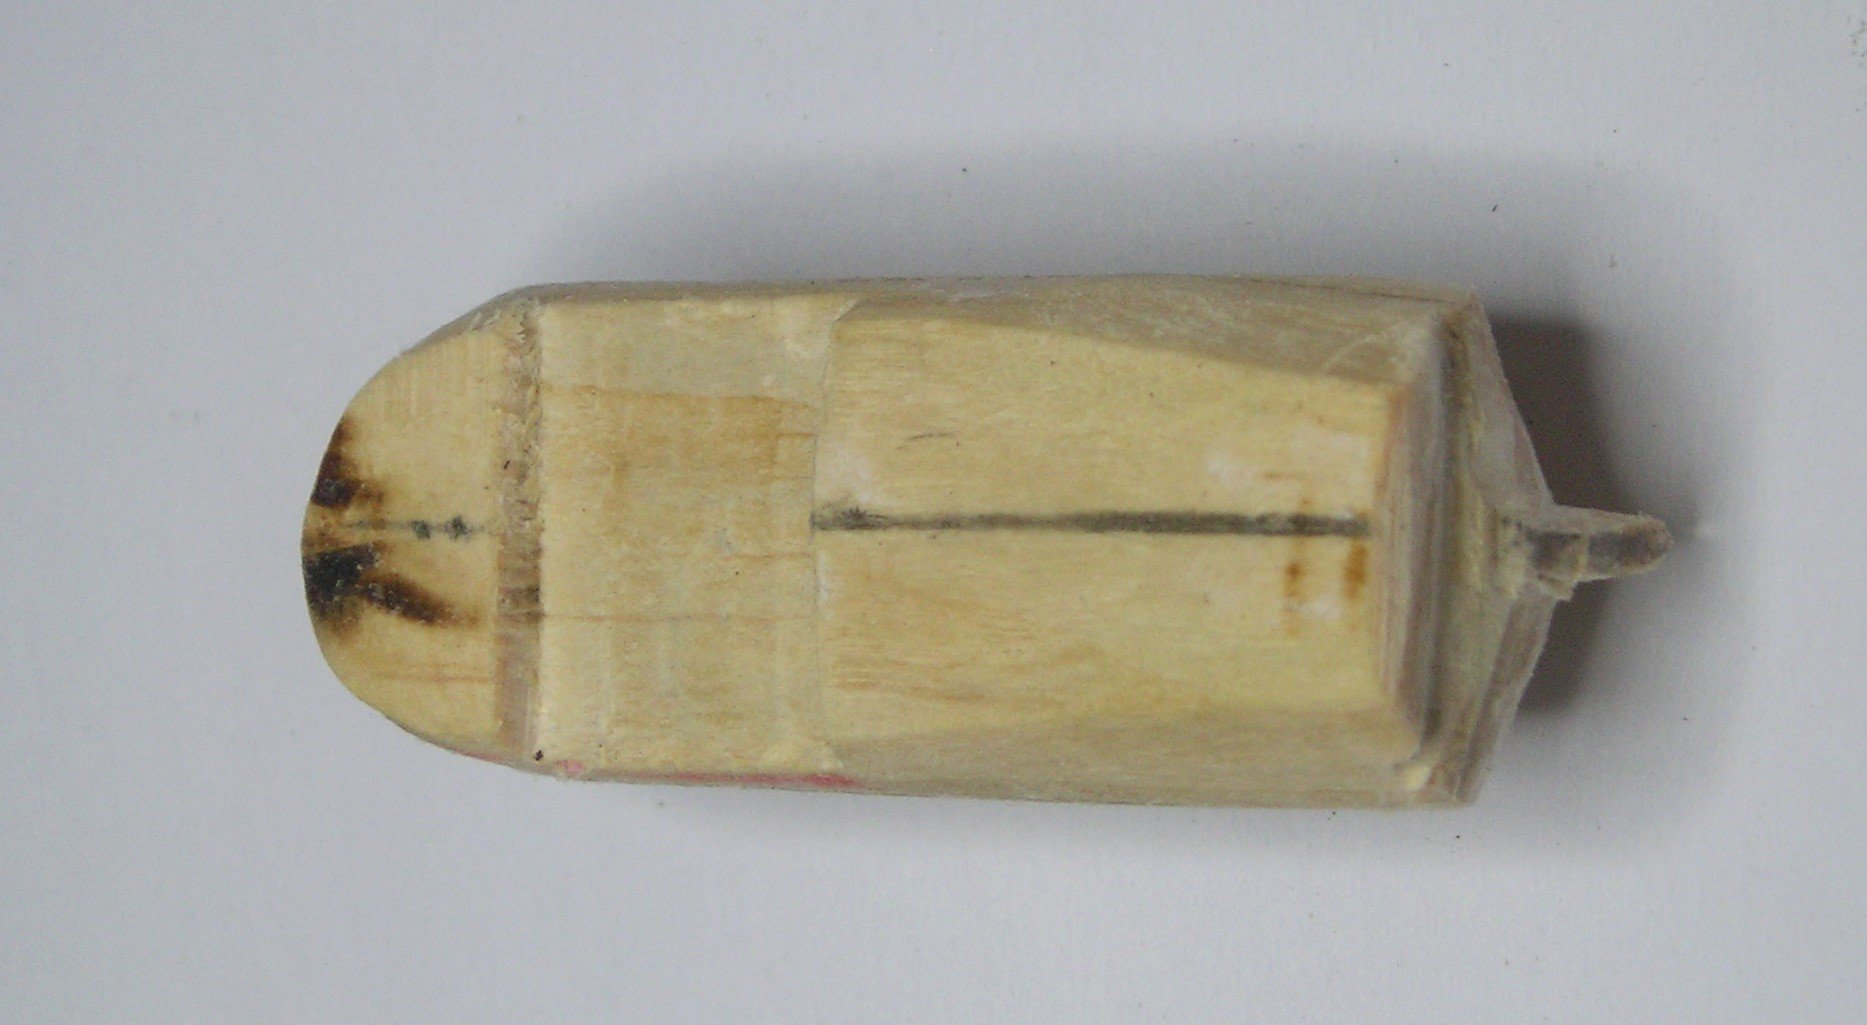
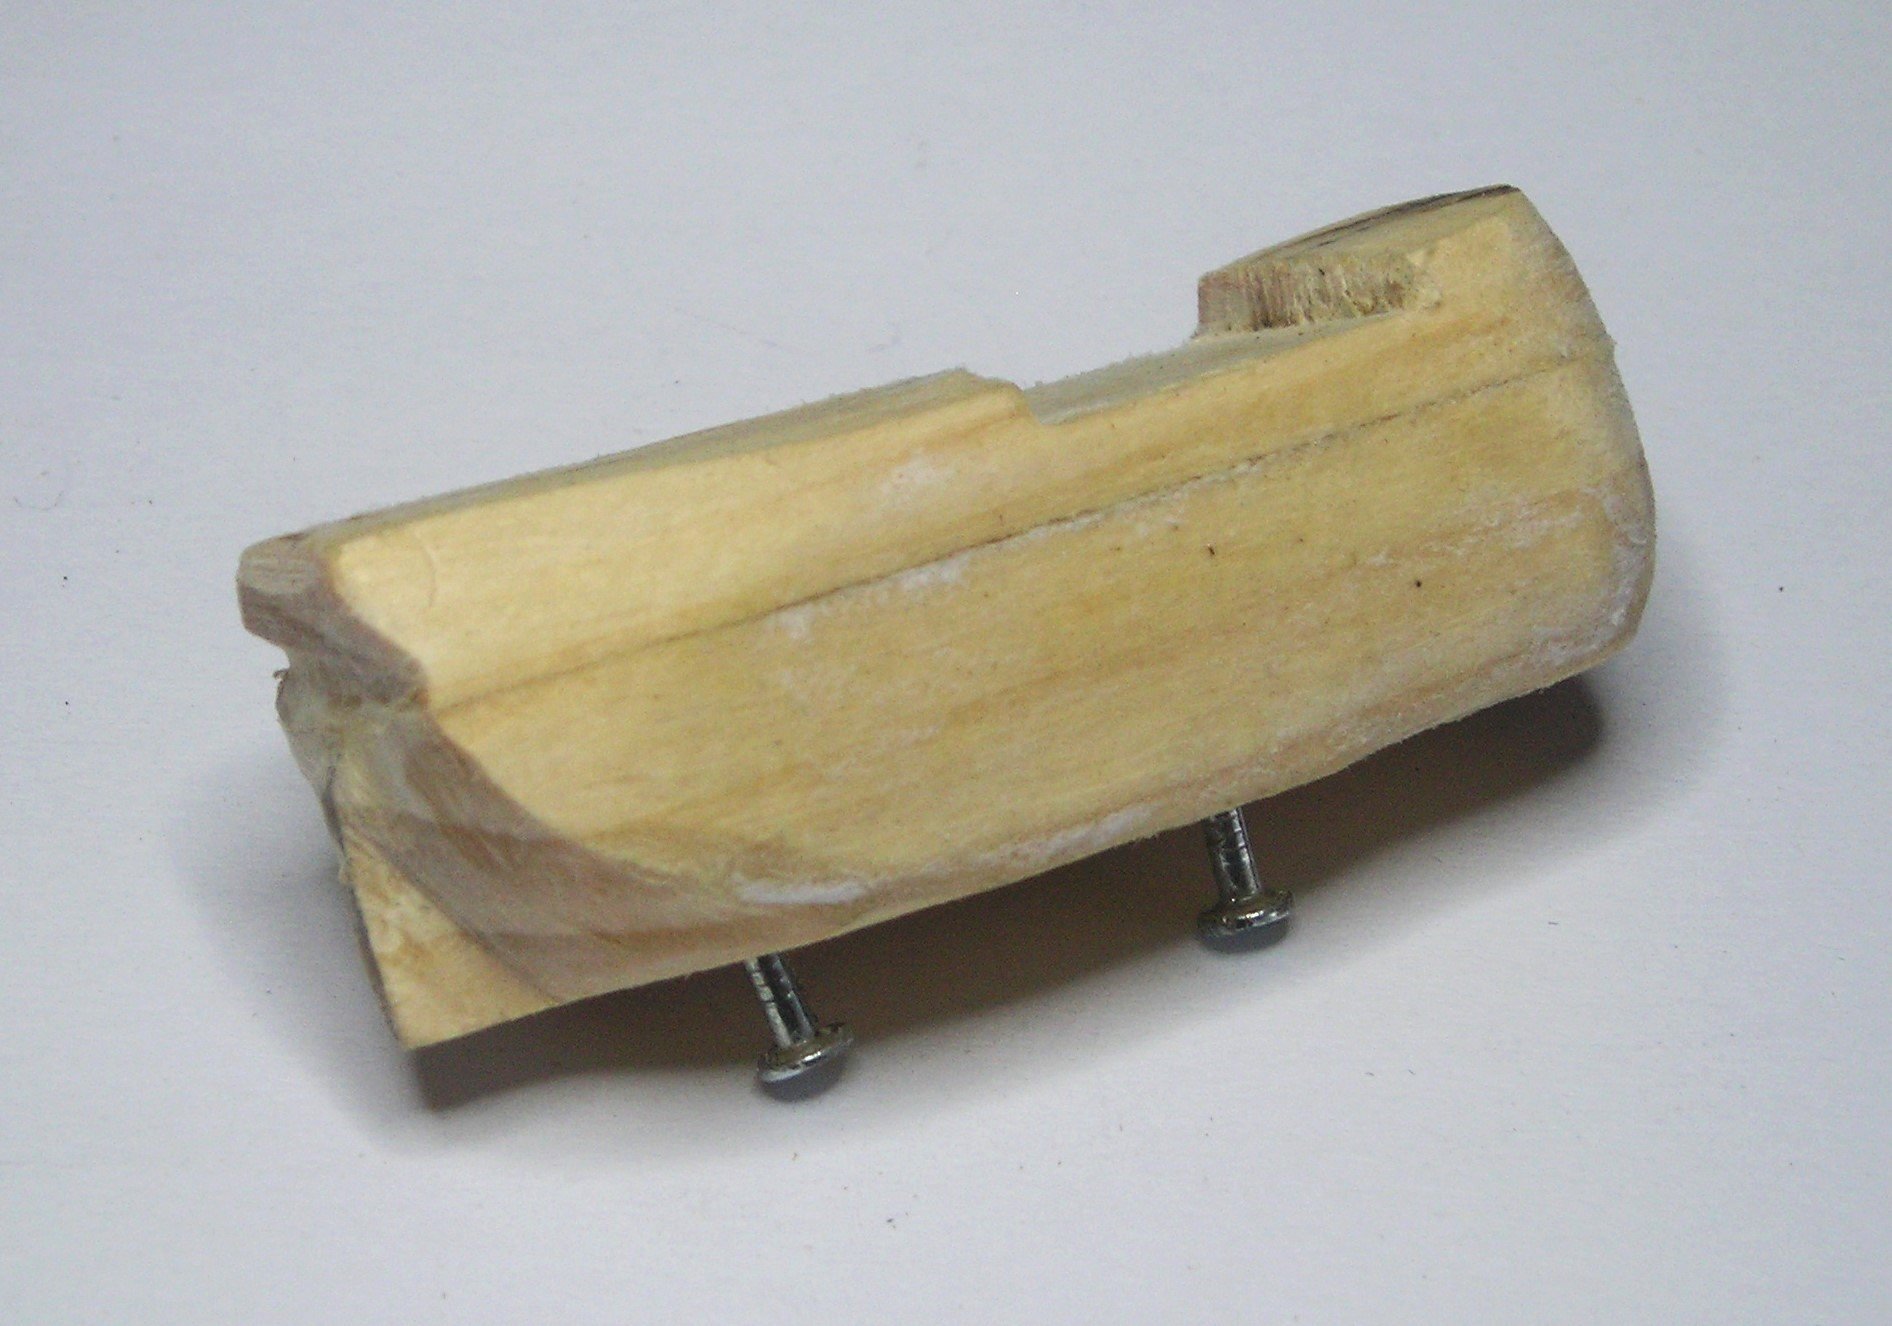
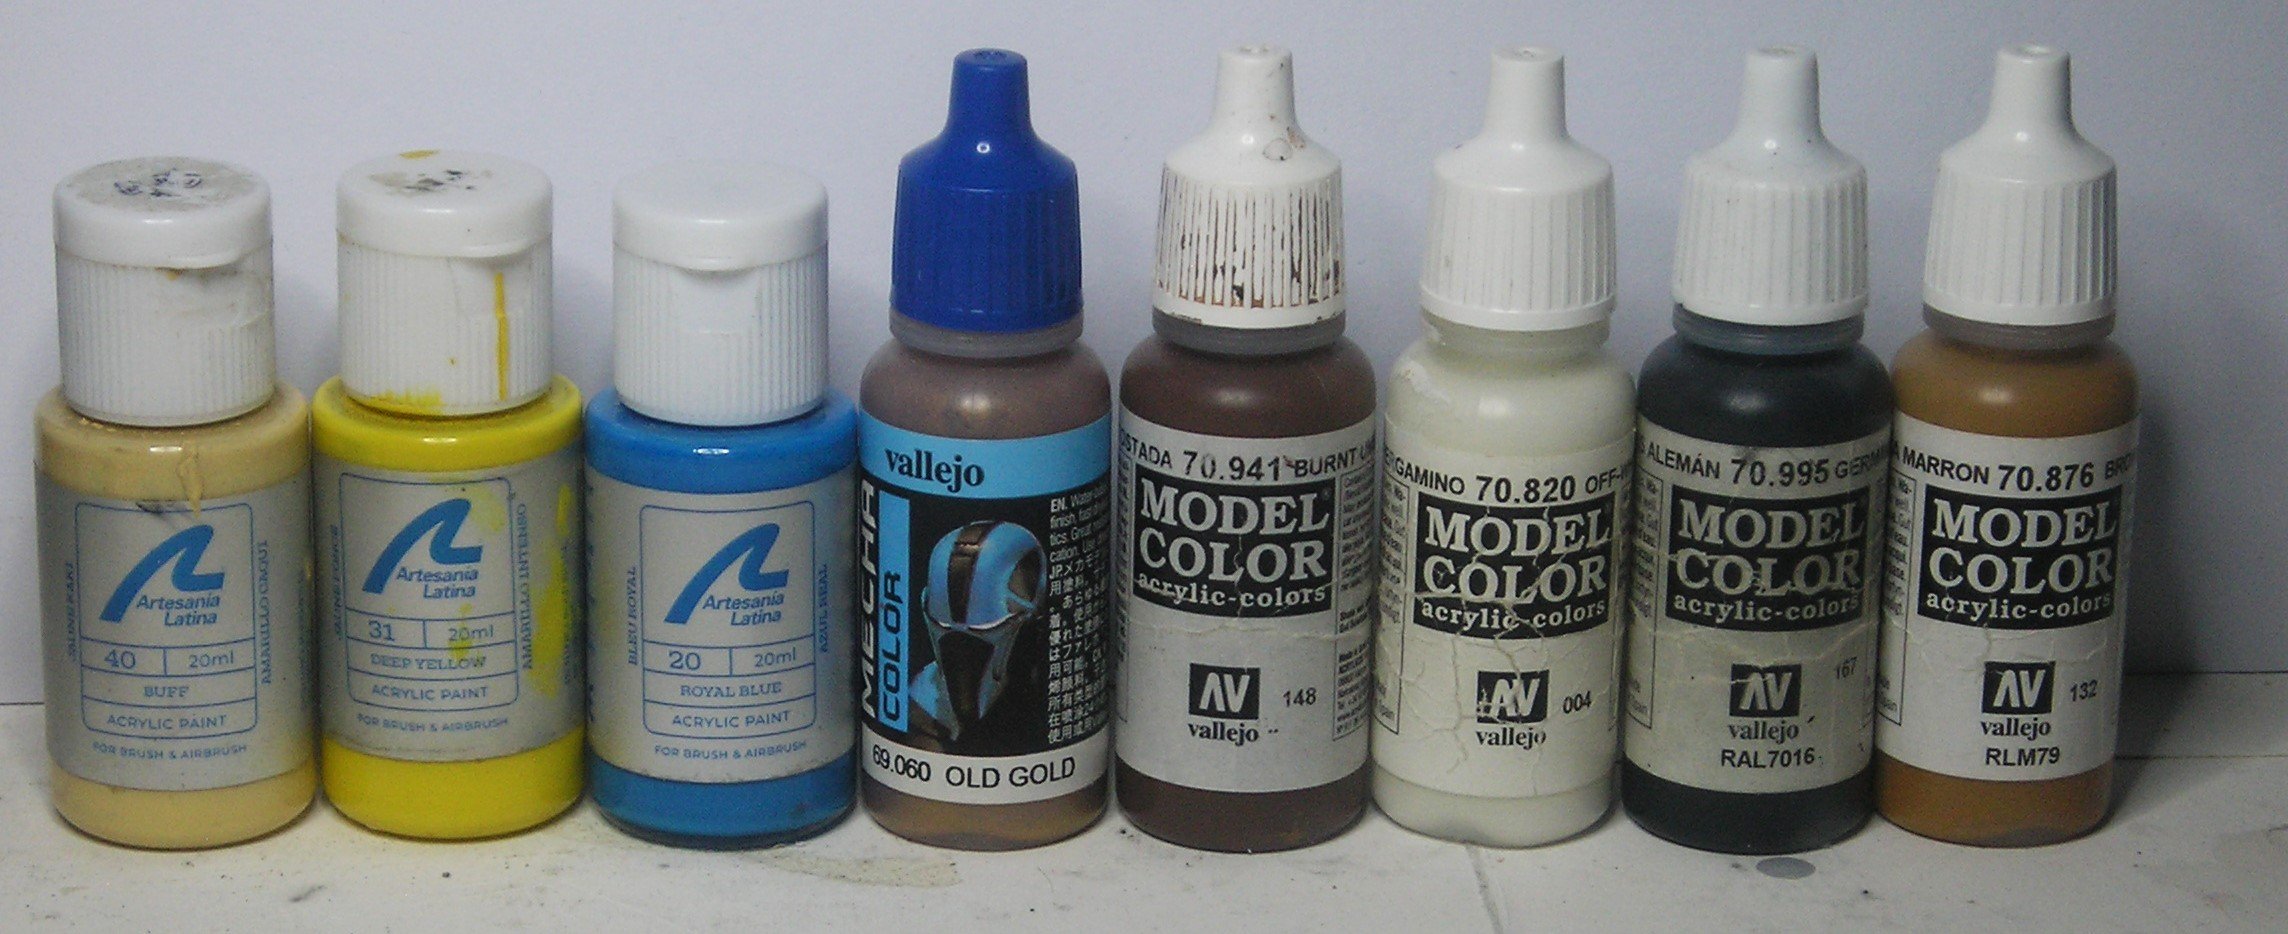
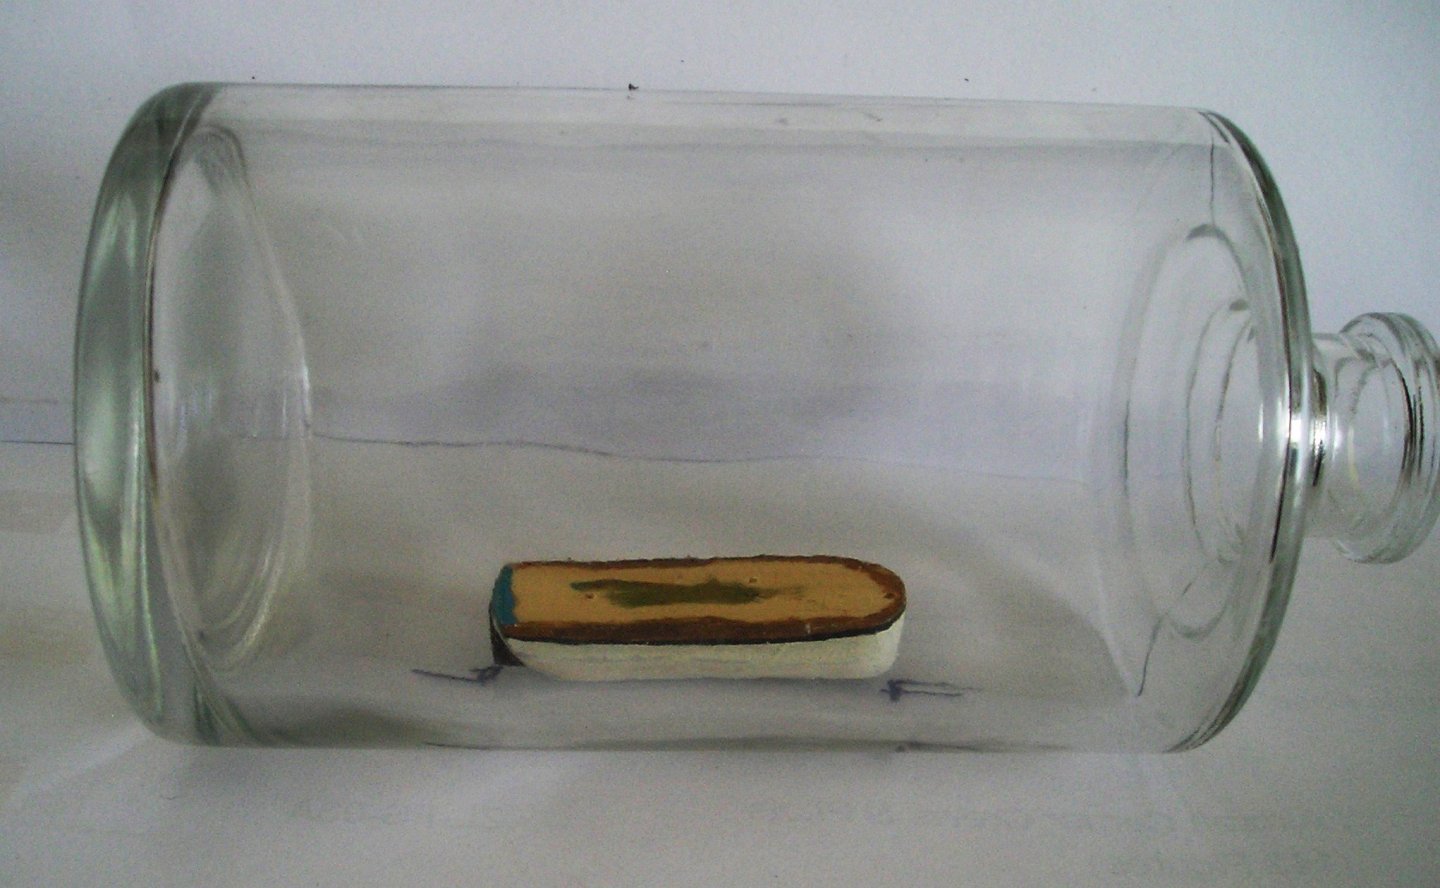
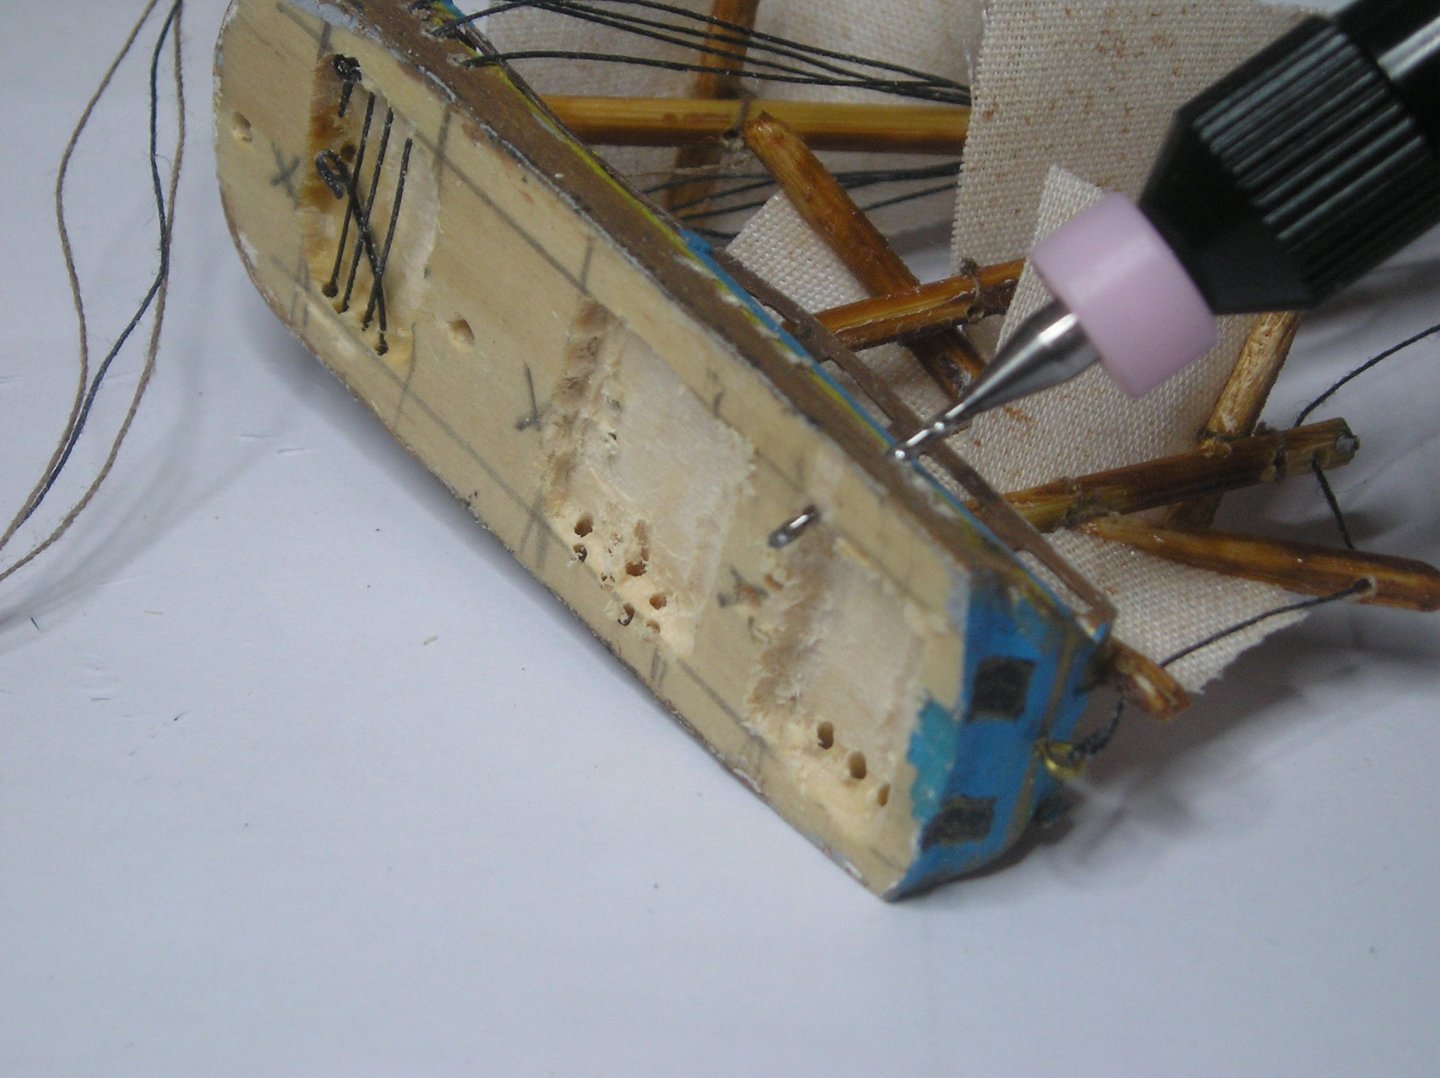
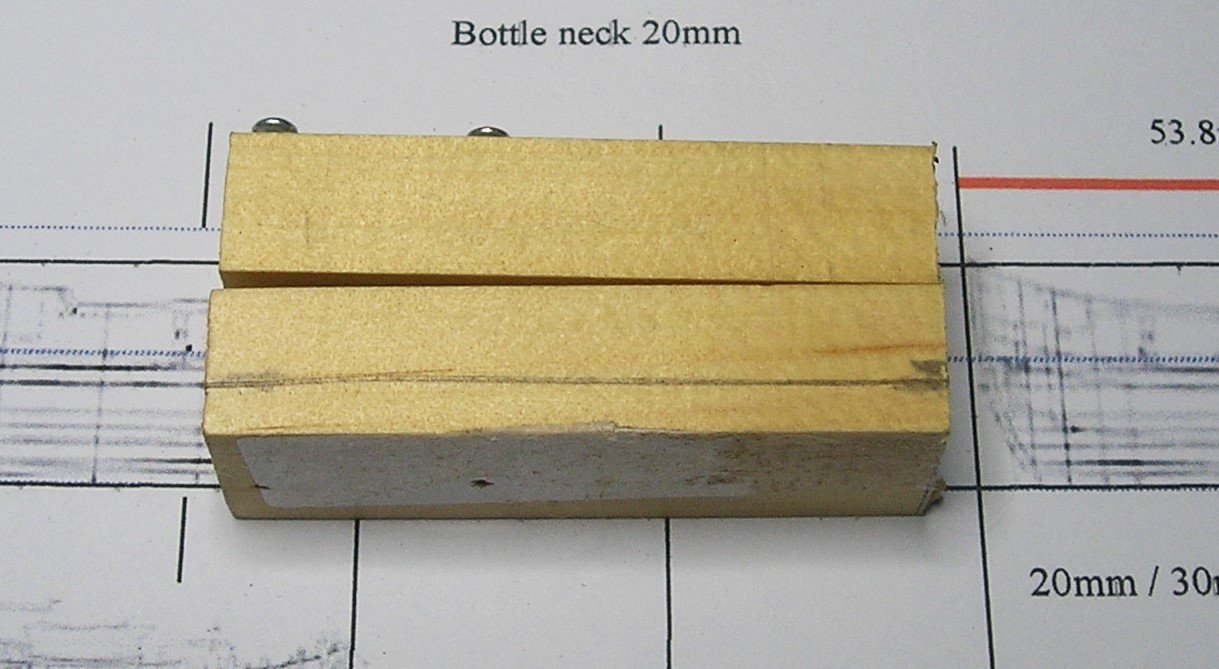
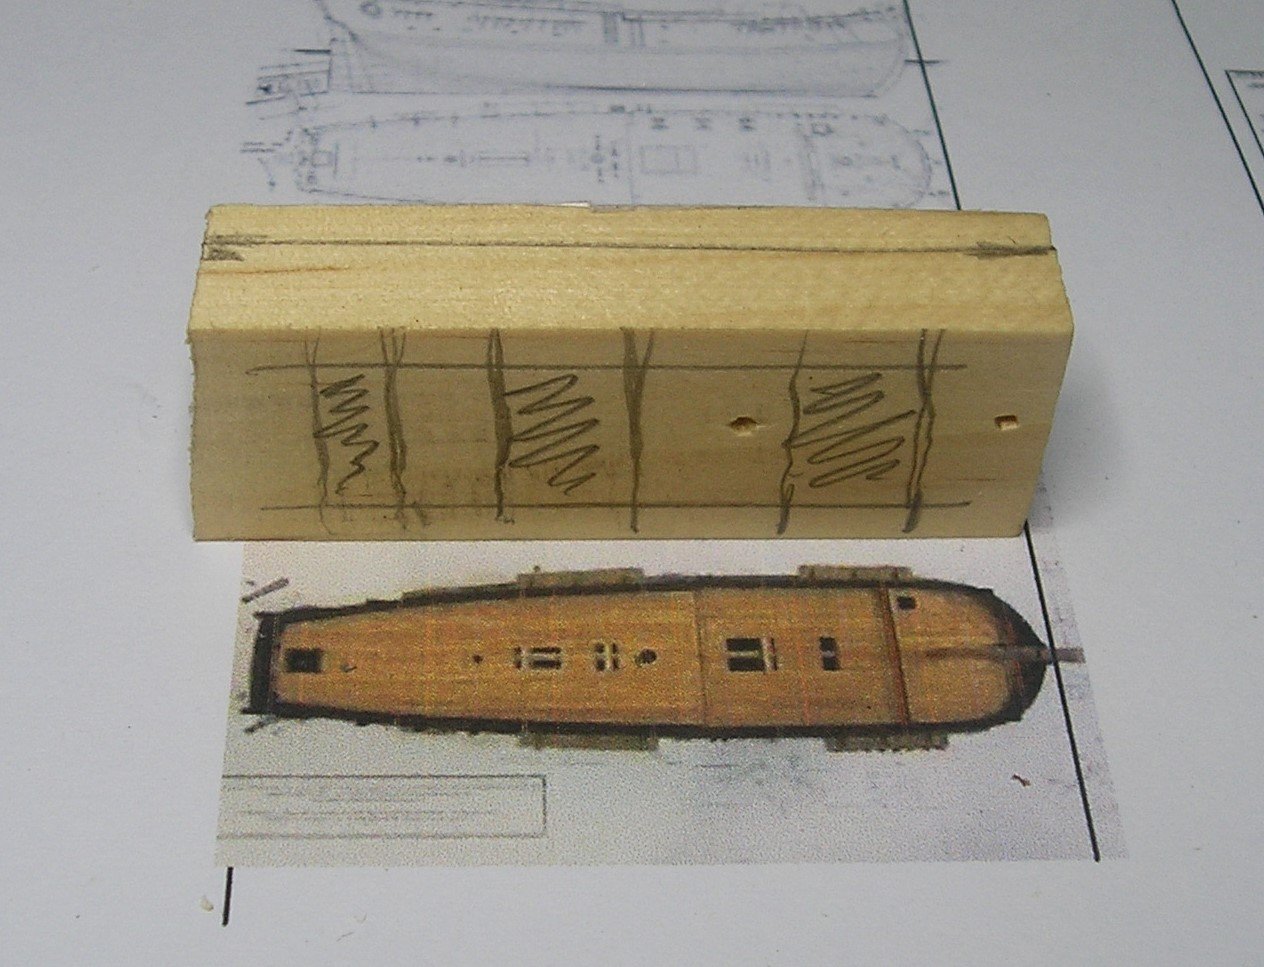
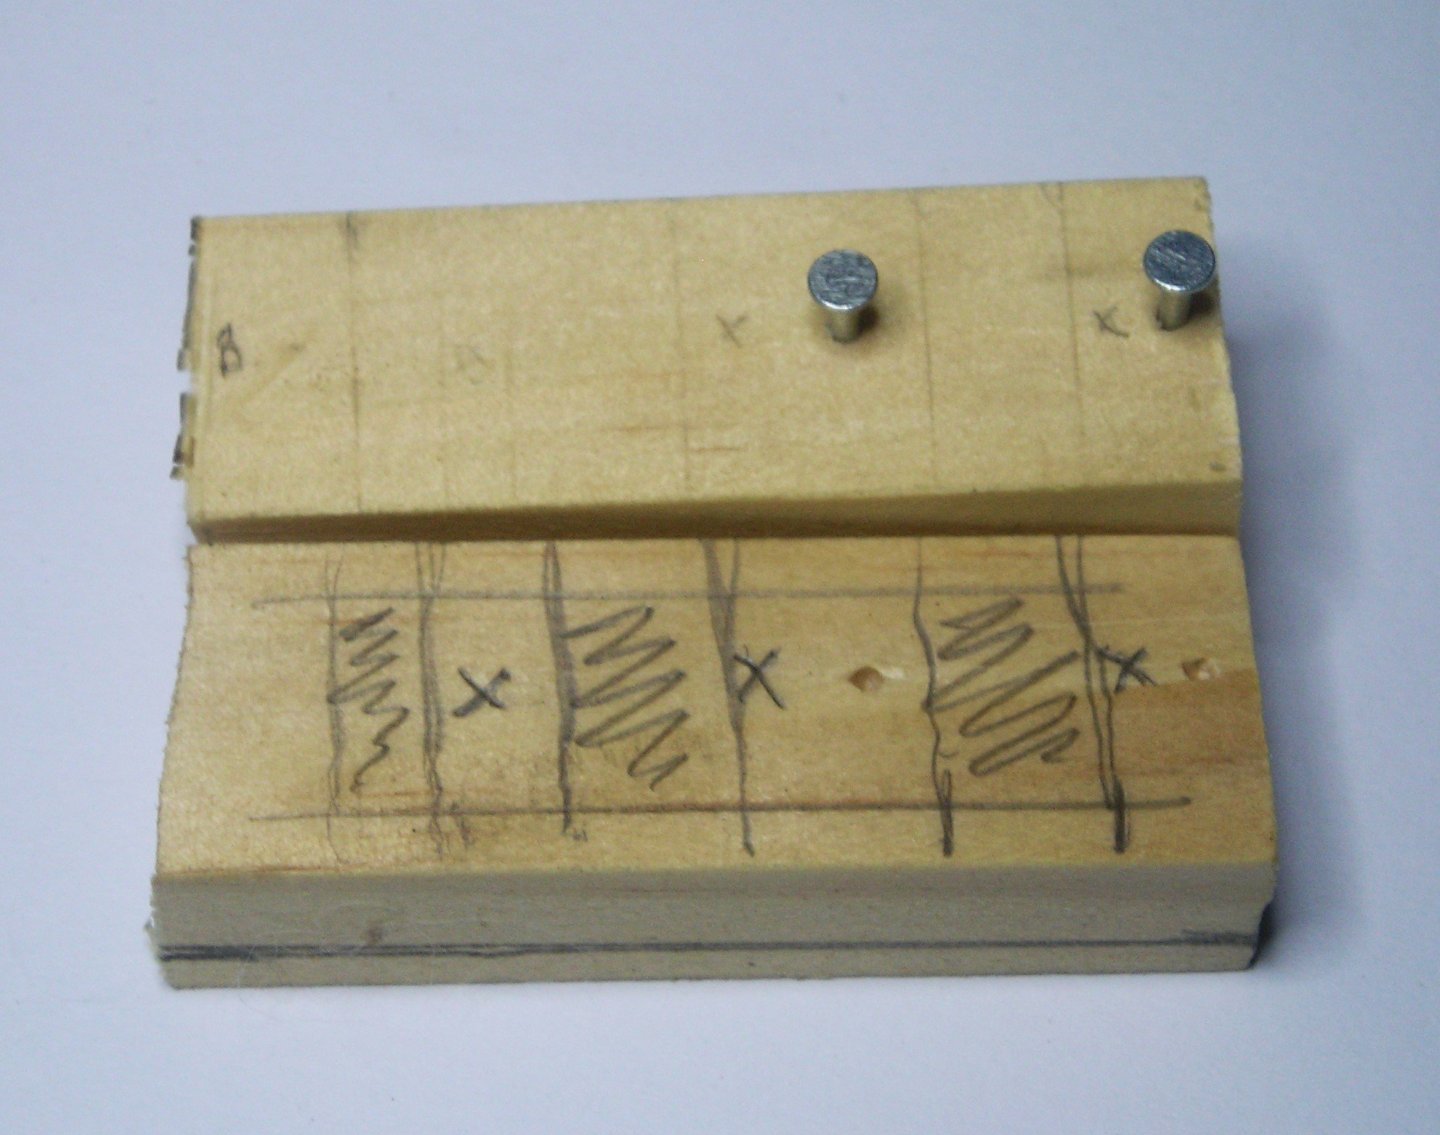
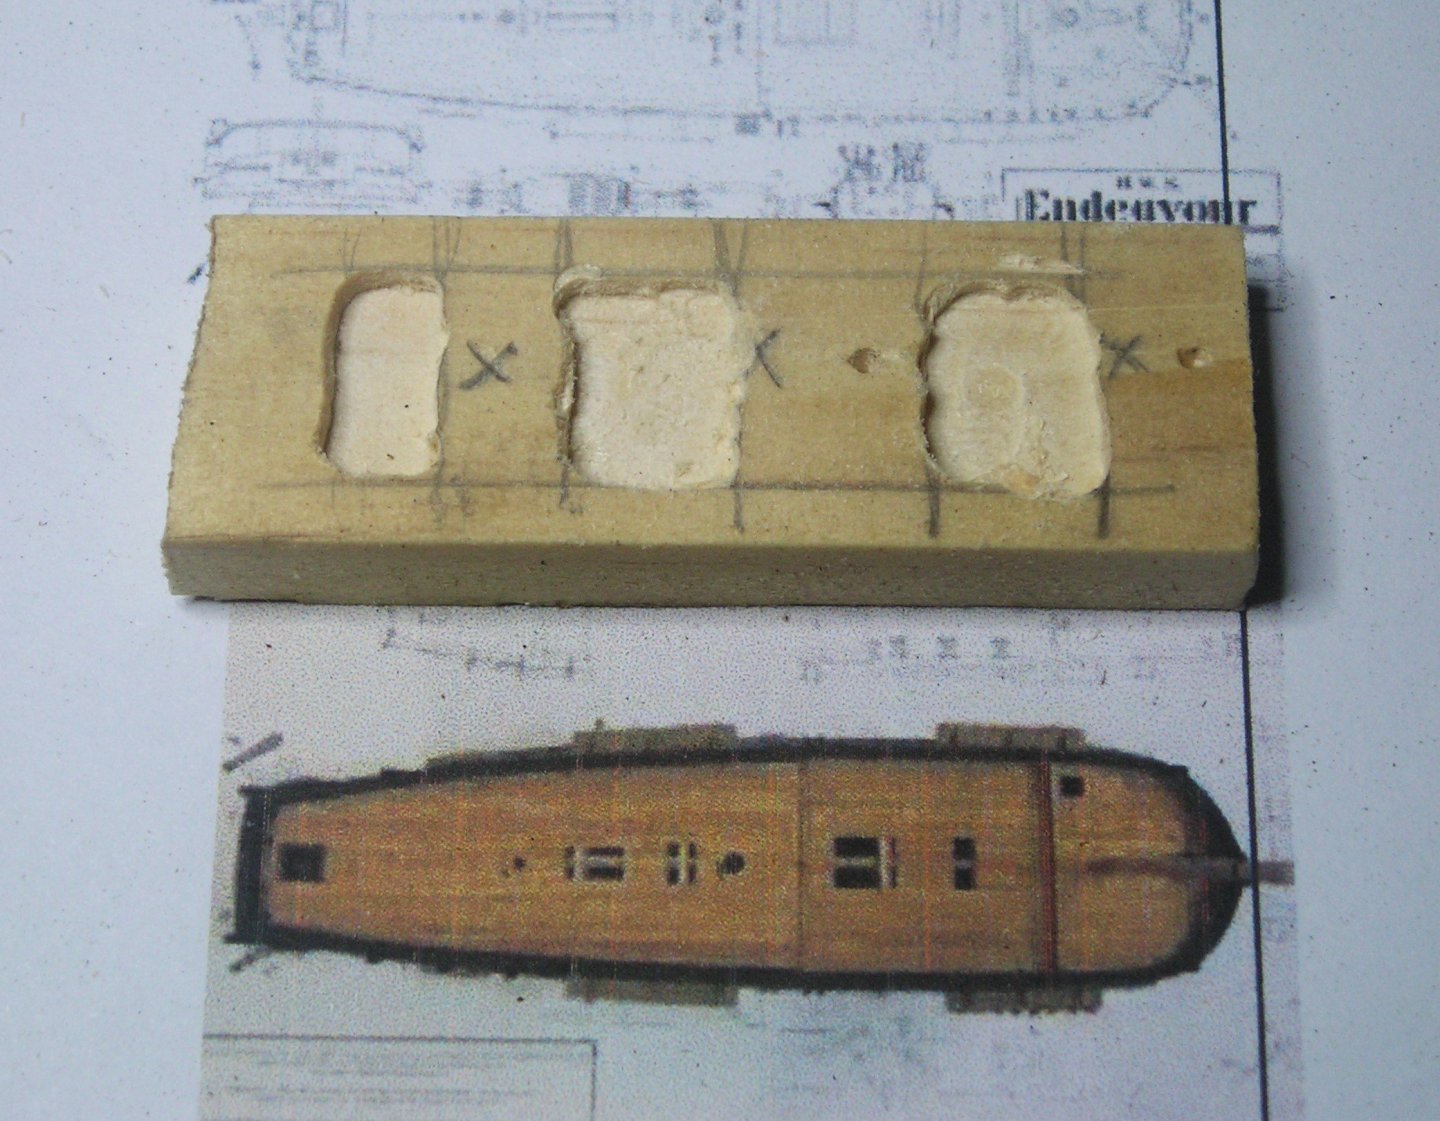
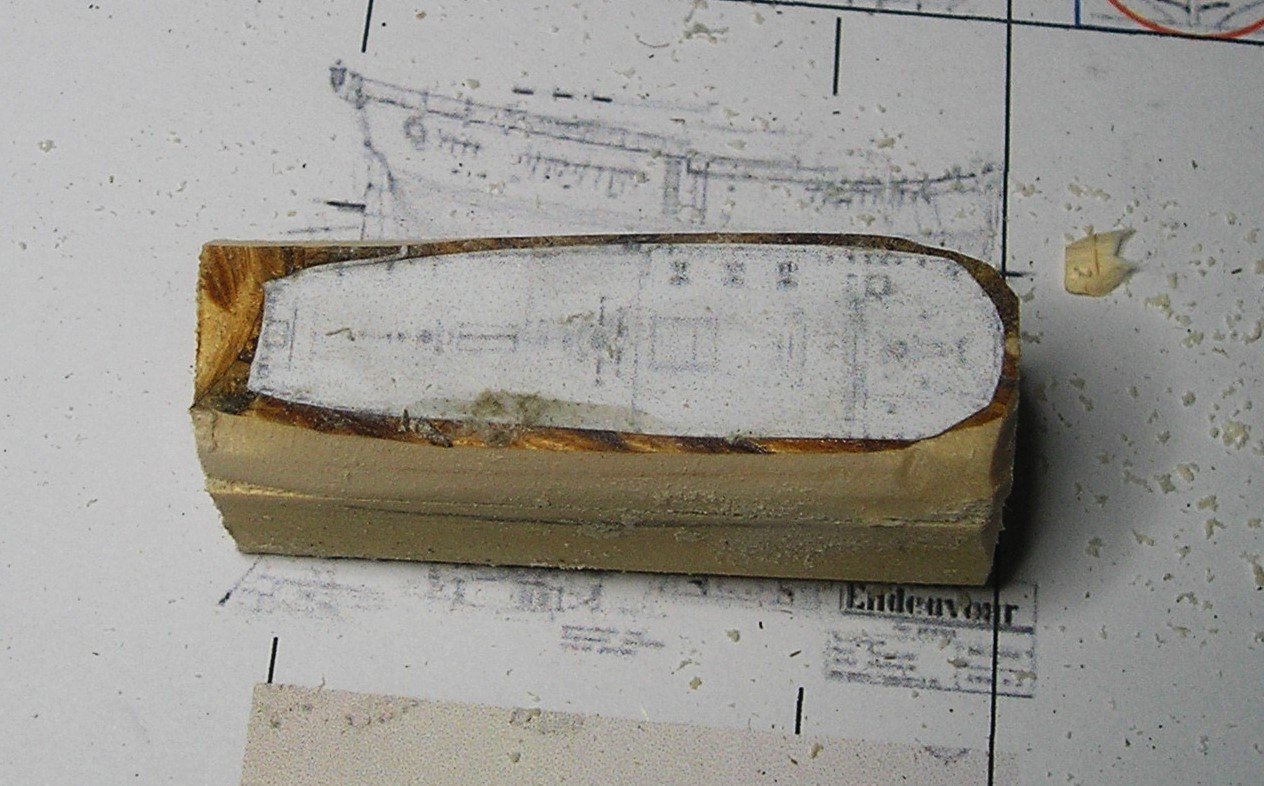
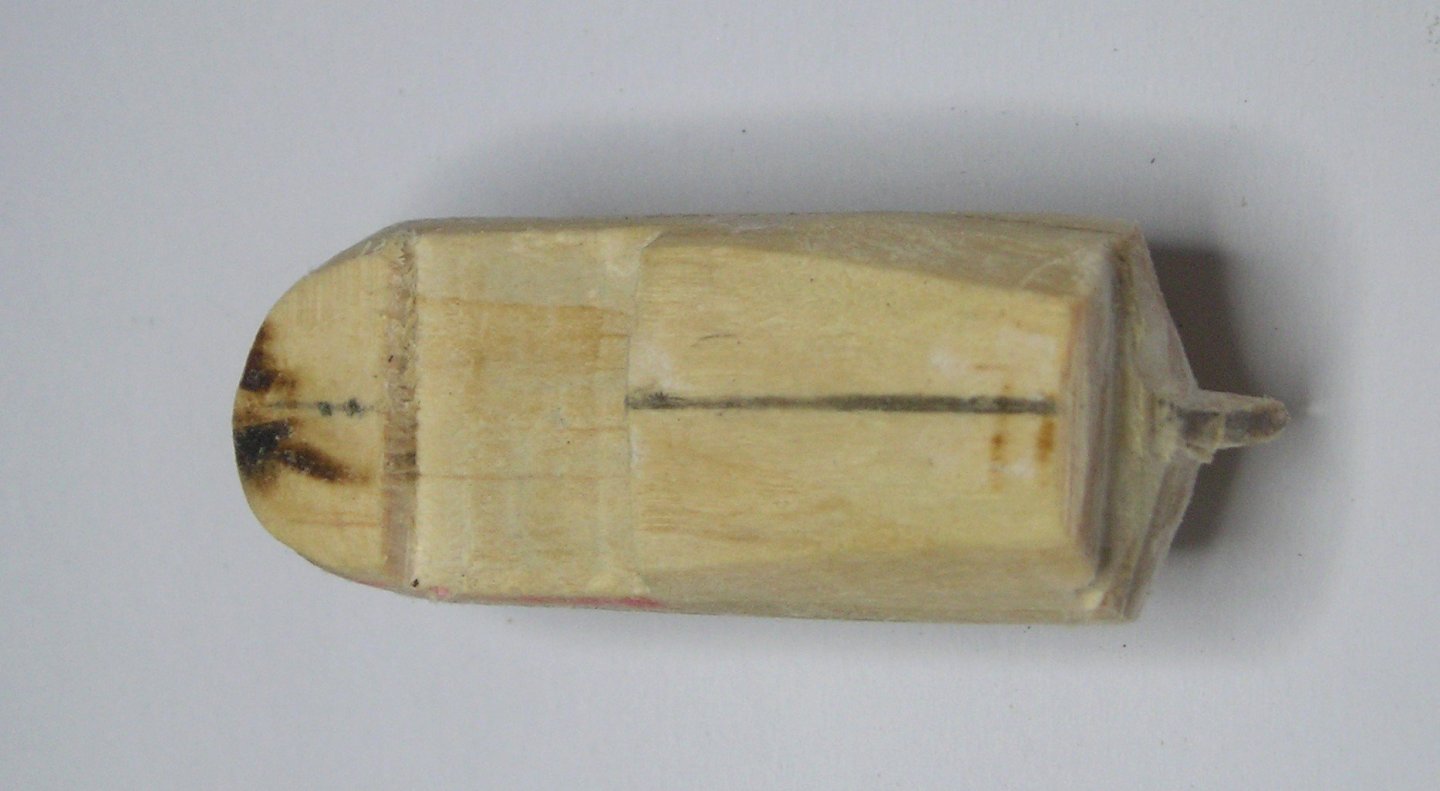
I started a new build yesterday! 😜 If you can't follow any of the content below, go to a more detailed build I did earlier, here. As always, I started with a bottle and a set of carefully scaled plans. Two pieces of wood (12mmx20mm). Decided on how much of the top piece is needed and also where the shrouds would be going on the top piece, so I drew under the top piece (All will be made clear later.) Decided where the two 20mm Flat Head nails were going. Up from the underside of the bottom piece of wood. (These are used to hold the two pieces together.) Generally, away from the marked areas. Don't forget to leave them protruding a few mm. Used my Dremel to cut out 2-3mm depressions under the top piece. 🙃 Cut a top plan of the ship and glued it to the top of the joined (NOT GLUED) blocks. Start shaping! Do the same with the side profiles. Once done check symmetry. Stop and admire your wonderful tiny achievement. TODAY I added some rails (using Polystyrene 0.25 x 2.0mm strips) and started painting! Using these paints. Don't forget the top edge of the bottom piece. (It helps hide the join.) and during the whole process, remember to do a fit test of both pieces. Tomorrow is Father's Day so I think nothing will be happening. Congrats to all Dads. Cheers,


-
This famous ship was under the command of Captain James Cook when he sailed the South Pacific and discovered New Holland (Australia).
-
FINISHED! Thanks everyone for your support and encouragement. 👏👏👏 The final gallery images can be found here. As always, cheers, Peter
- 55 replies
-
- 3
-
-
- miniature
- Brandenburg State Yacht
- (and 1 more)
-
Thanks Bill @Bill Morrison for all your positive feedback. Much appreciated. 😃 I'm sure modesty prevents you from hiding your true abilities. 🤭 Cheers Peter
-
Your build is coming along very nicely but I know working with greys is a real pain. I learnt a great deal from my PBY Catalina build. Go here for a quick look at my experience. Cheers, Peter 😊
-
Keith, I think the flywheel looks perfectly good. Given the scale, I can't see any problems. 👍👏 Cheers, Peter
-
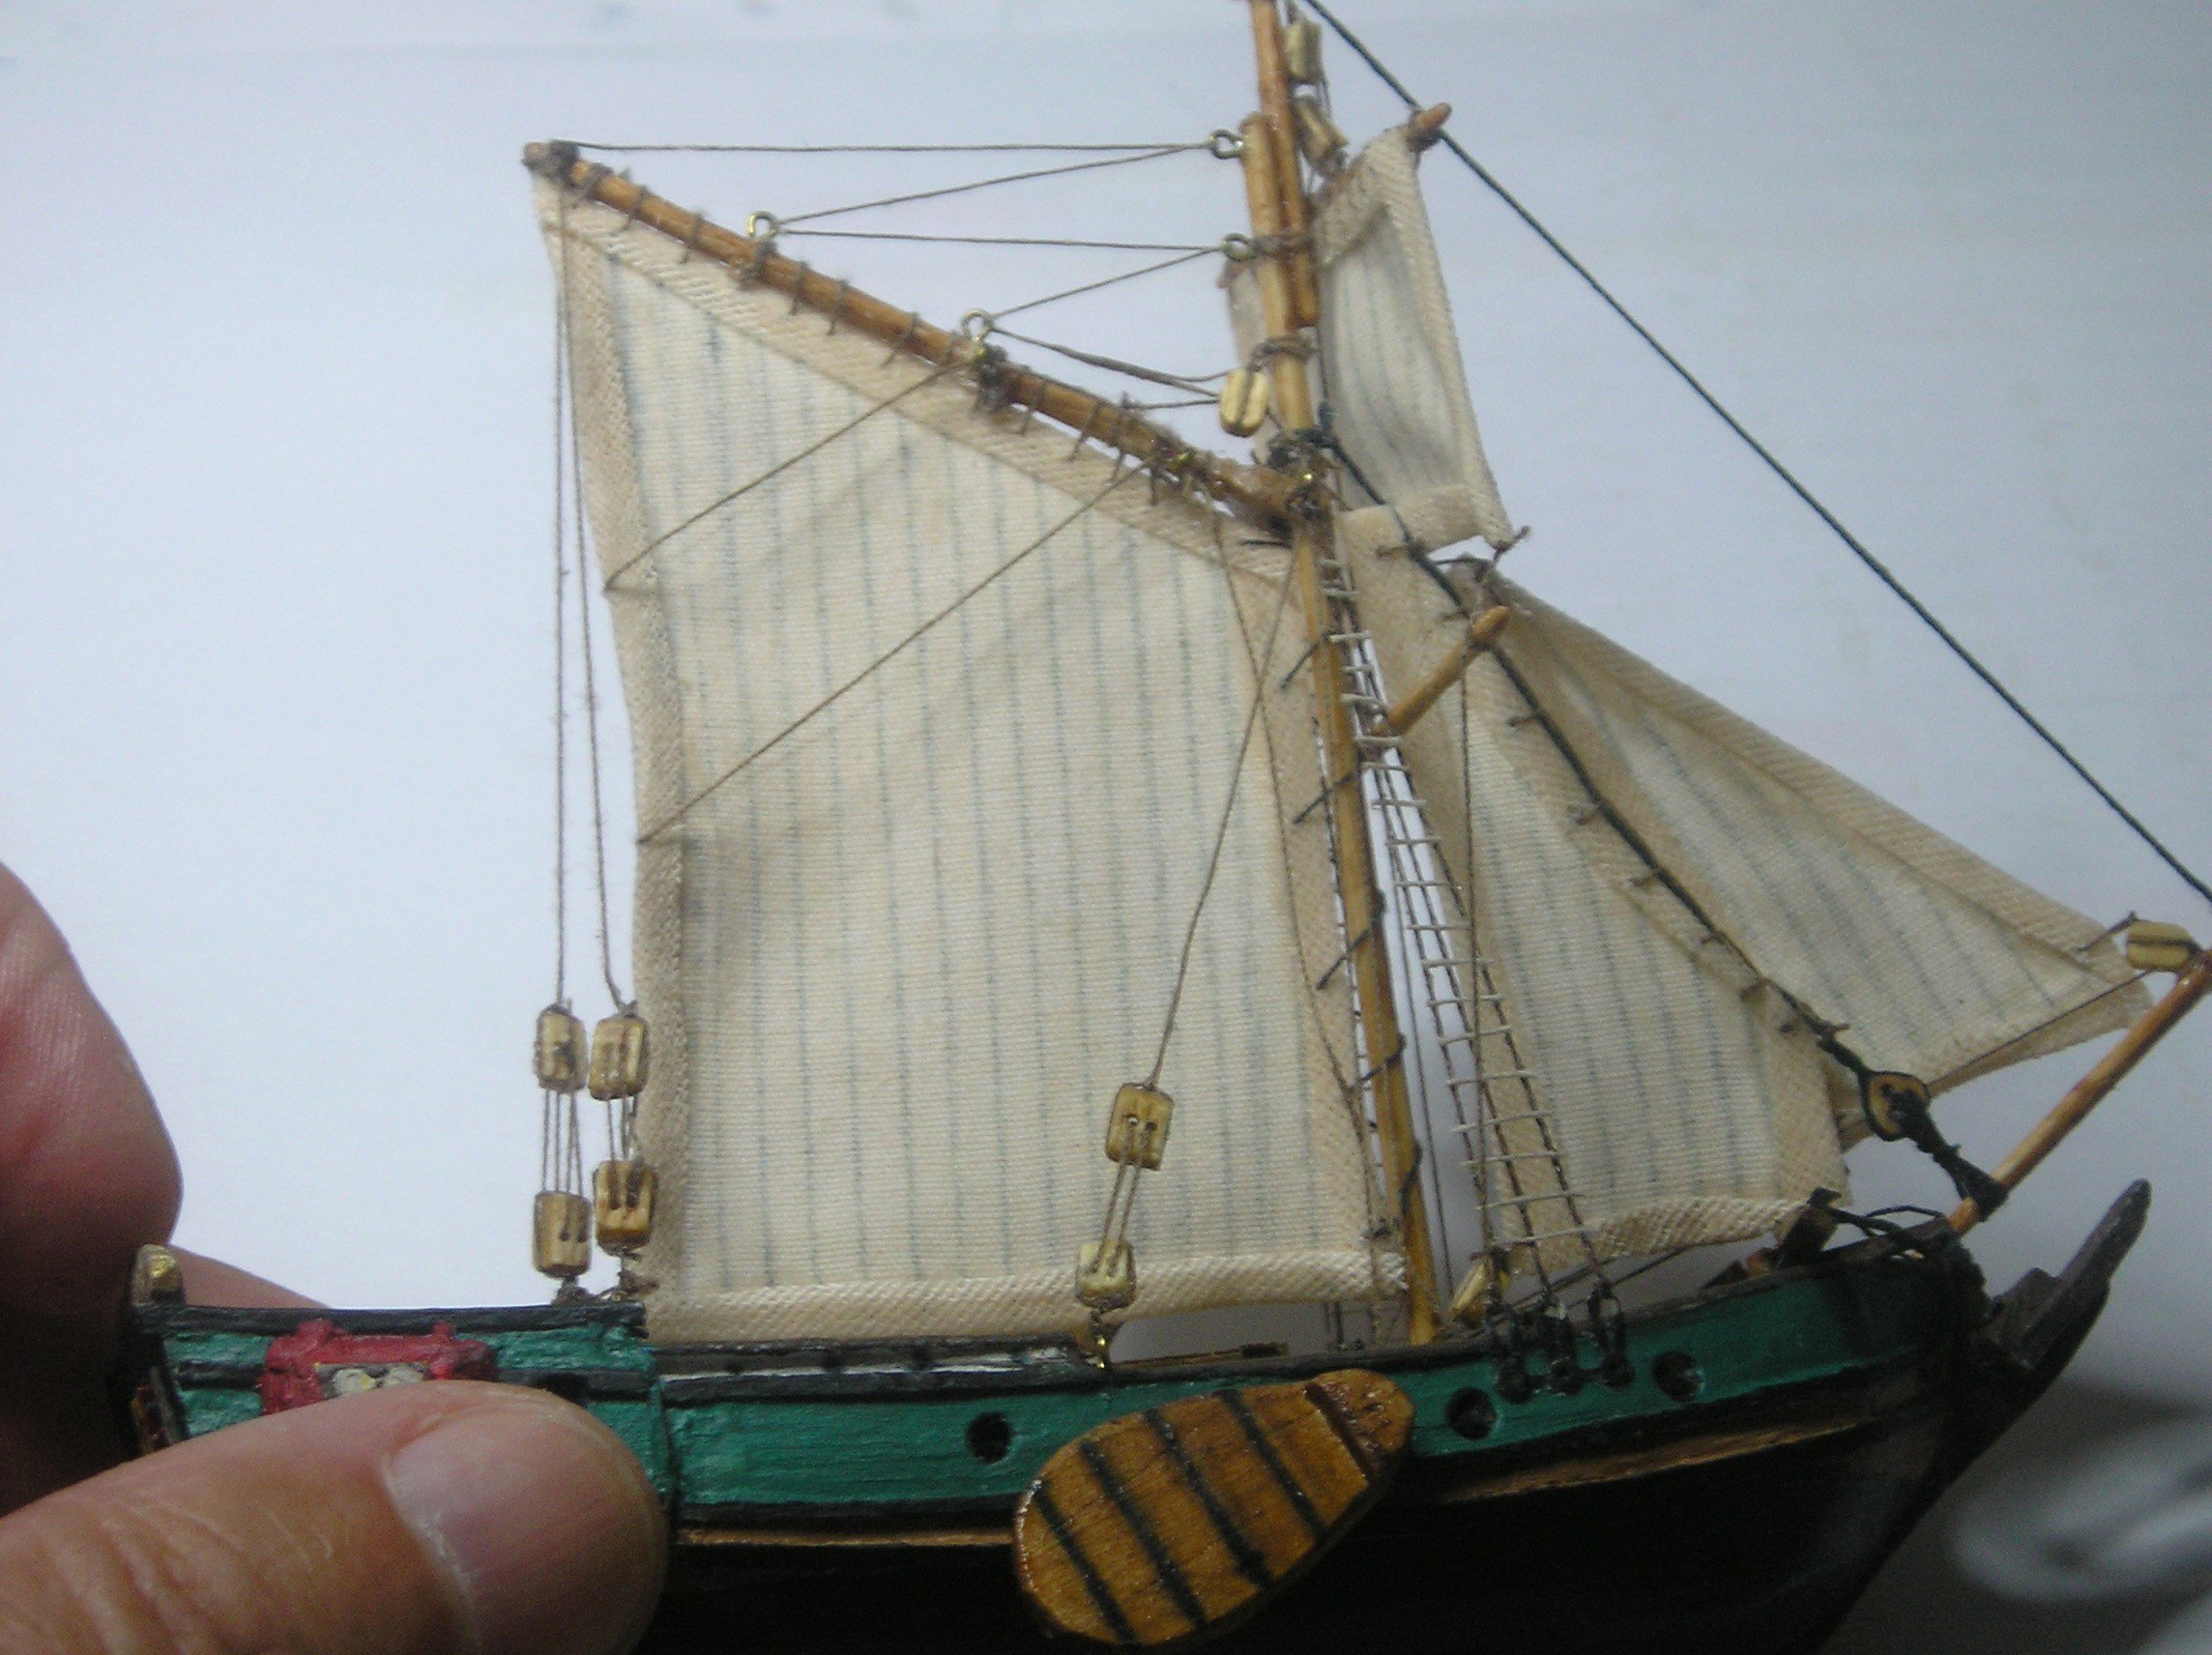
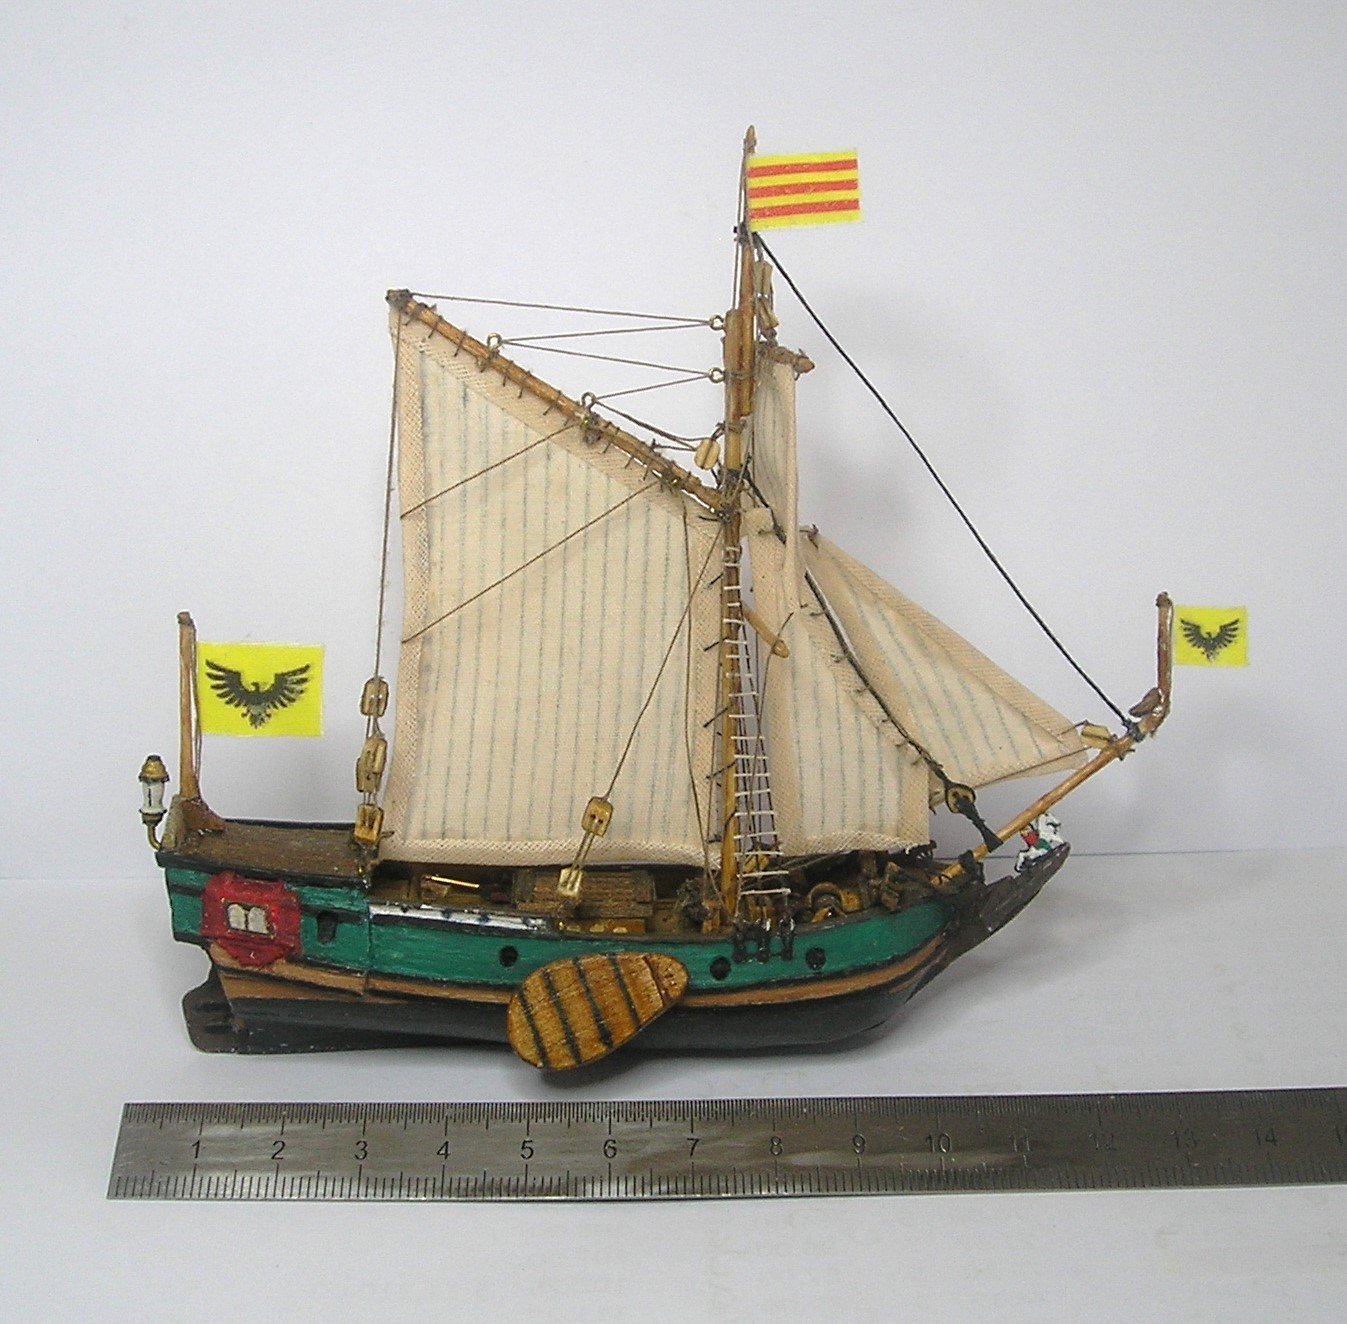
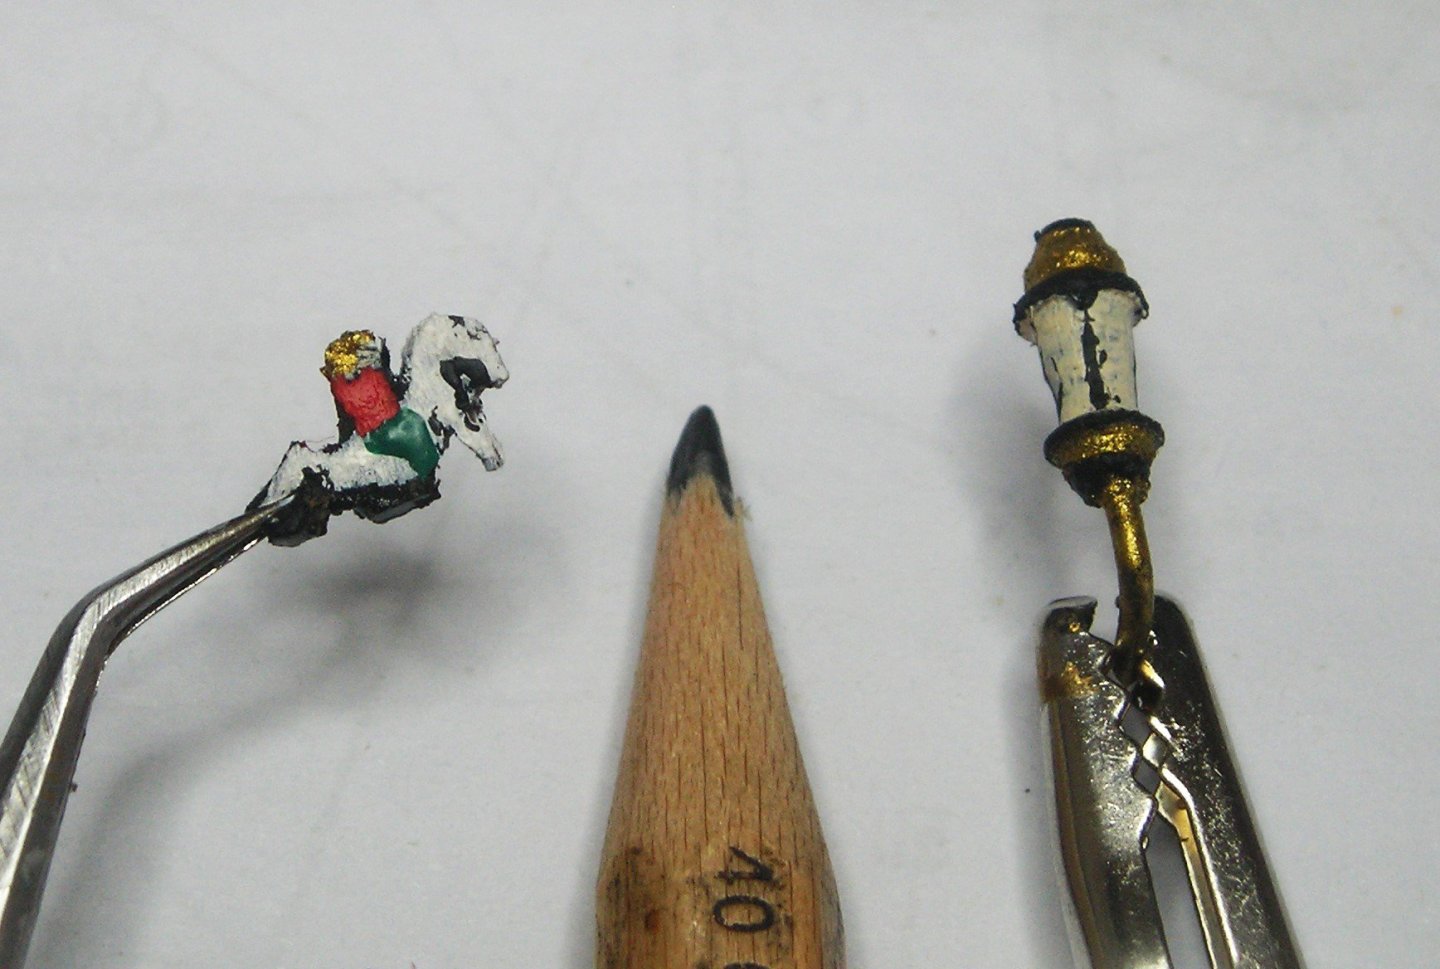
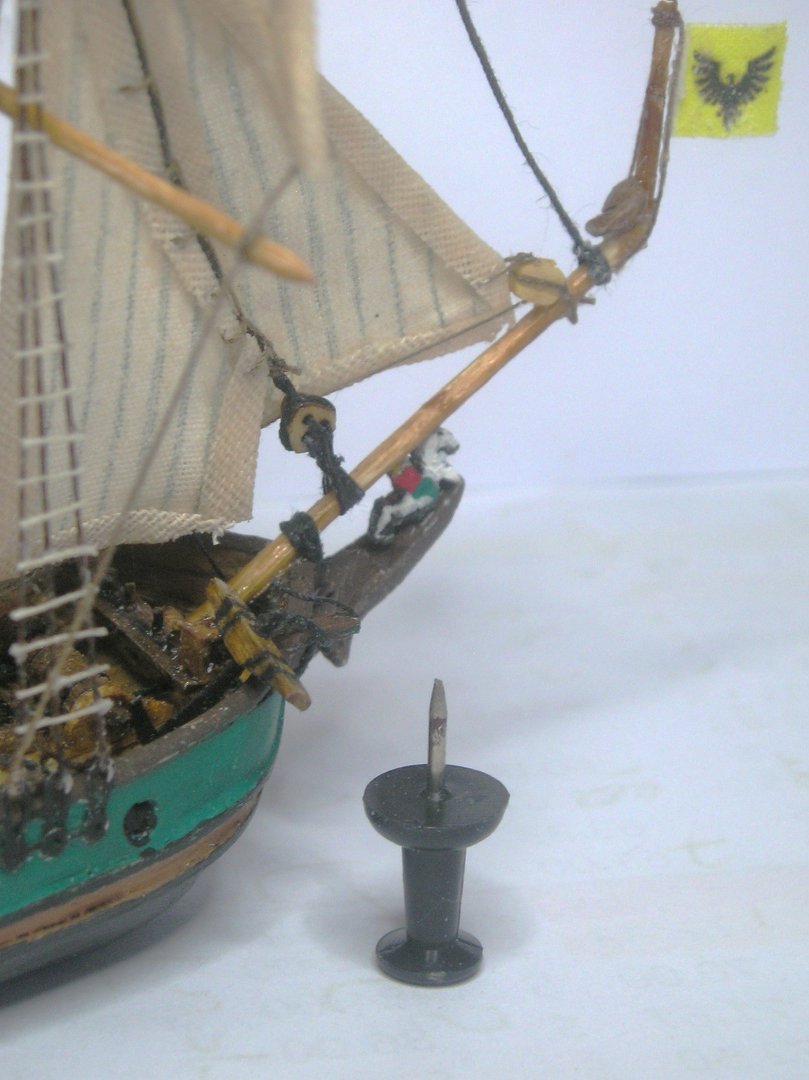
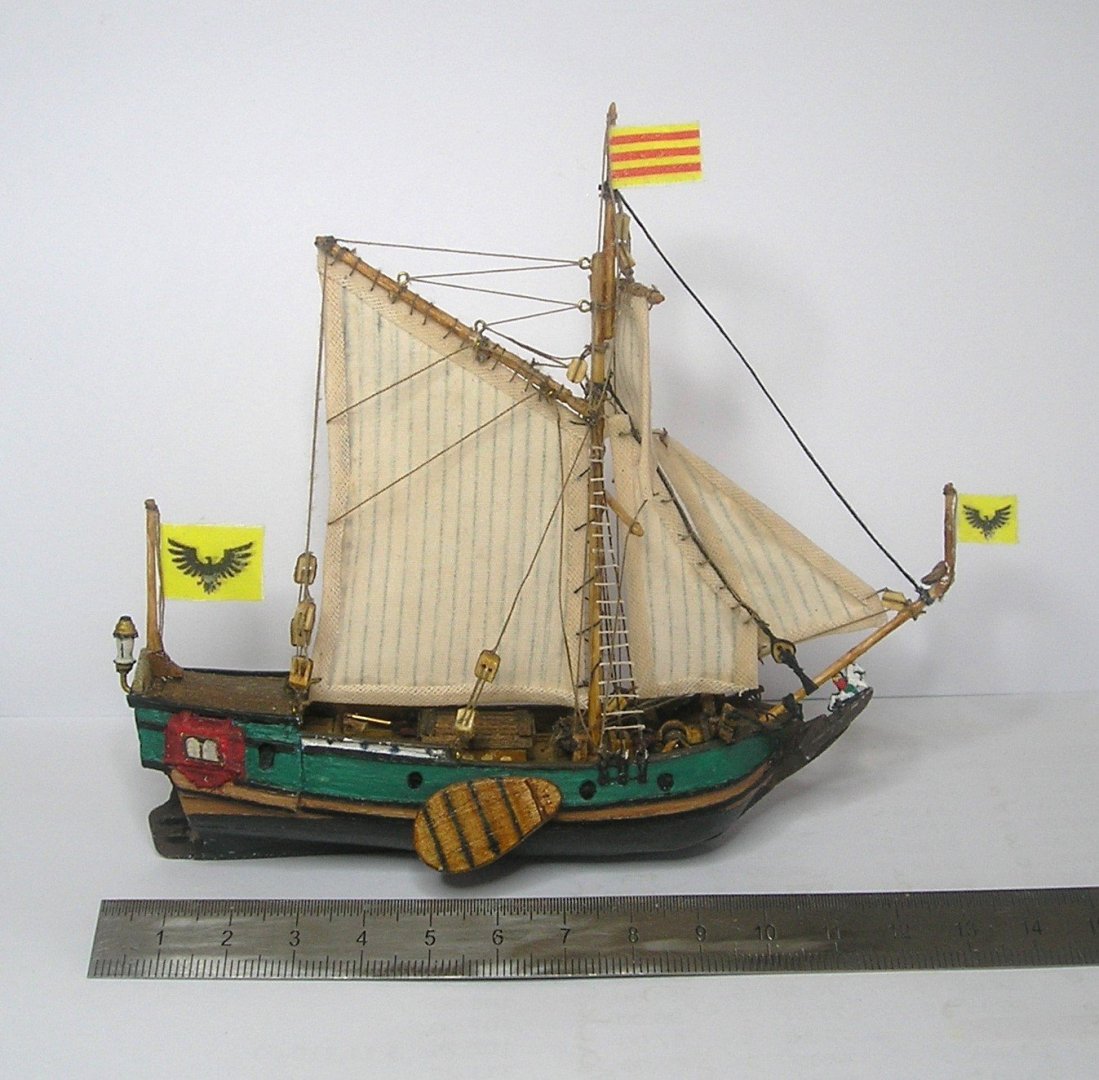
G'day all! Had an early start as I couldn't sleep thinking about the size of the blocks I used. The top ones are just too big! 😝 So, I removed those that were out in the open. The other blocks are reasonable in scale and are somewhat believable. That's better! 😊 Then I made the lantern and figurehead. Bloody small, but they came out well. The flags are also finished. I used the iron on t-shirt transfer sheets from Officeworks. Now I'm as good as finished except for the stand which should be a simple task to make. Thanks for your support and encouragement throughout this build. Cheers, Peter


- 55 replies
-
- 8
-

-
-
- miniature
- Brandenburg State Yacht
- (and 1 more)
-
OcCre Bounty Launch parts ID - help needed
PvG Aussie replied to Highlander's topic in Wood ship model kits
Highlander, I'm a 'kind person' all right. Like you, I'm the kind that gets befuddled with the timber bits! 🤔 You have done all you can. After scrolling up and down between your a-g list, a-g timber picture, and your parts list, I think your conclusion is correct. In regard to timber 'c', have a close look at the instructions and see if your ship dimensions require eleven lengths or eight. If the extra pieces are needed, contact OcCre. Good luck with your build. Incidentally, my favourite ship build was the Bounty (by Artesania Latina). See the link below. Cheers, Peter 🍻 -
Steven, everything looks so great and there are so many positive things to comment on, e.g. the rigging, the protective barrier, the coils and the anchors. I particularly like the golden peg on the quarterdeck. Do you use this one for your special builds? 😜 Cheers, Peter
-
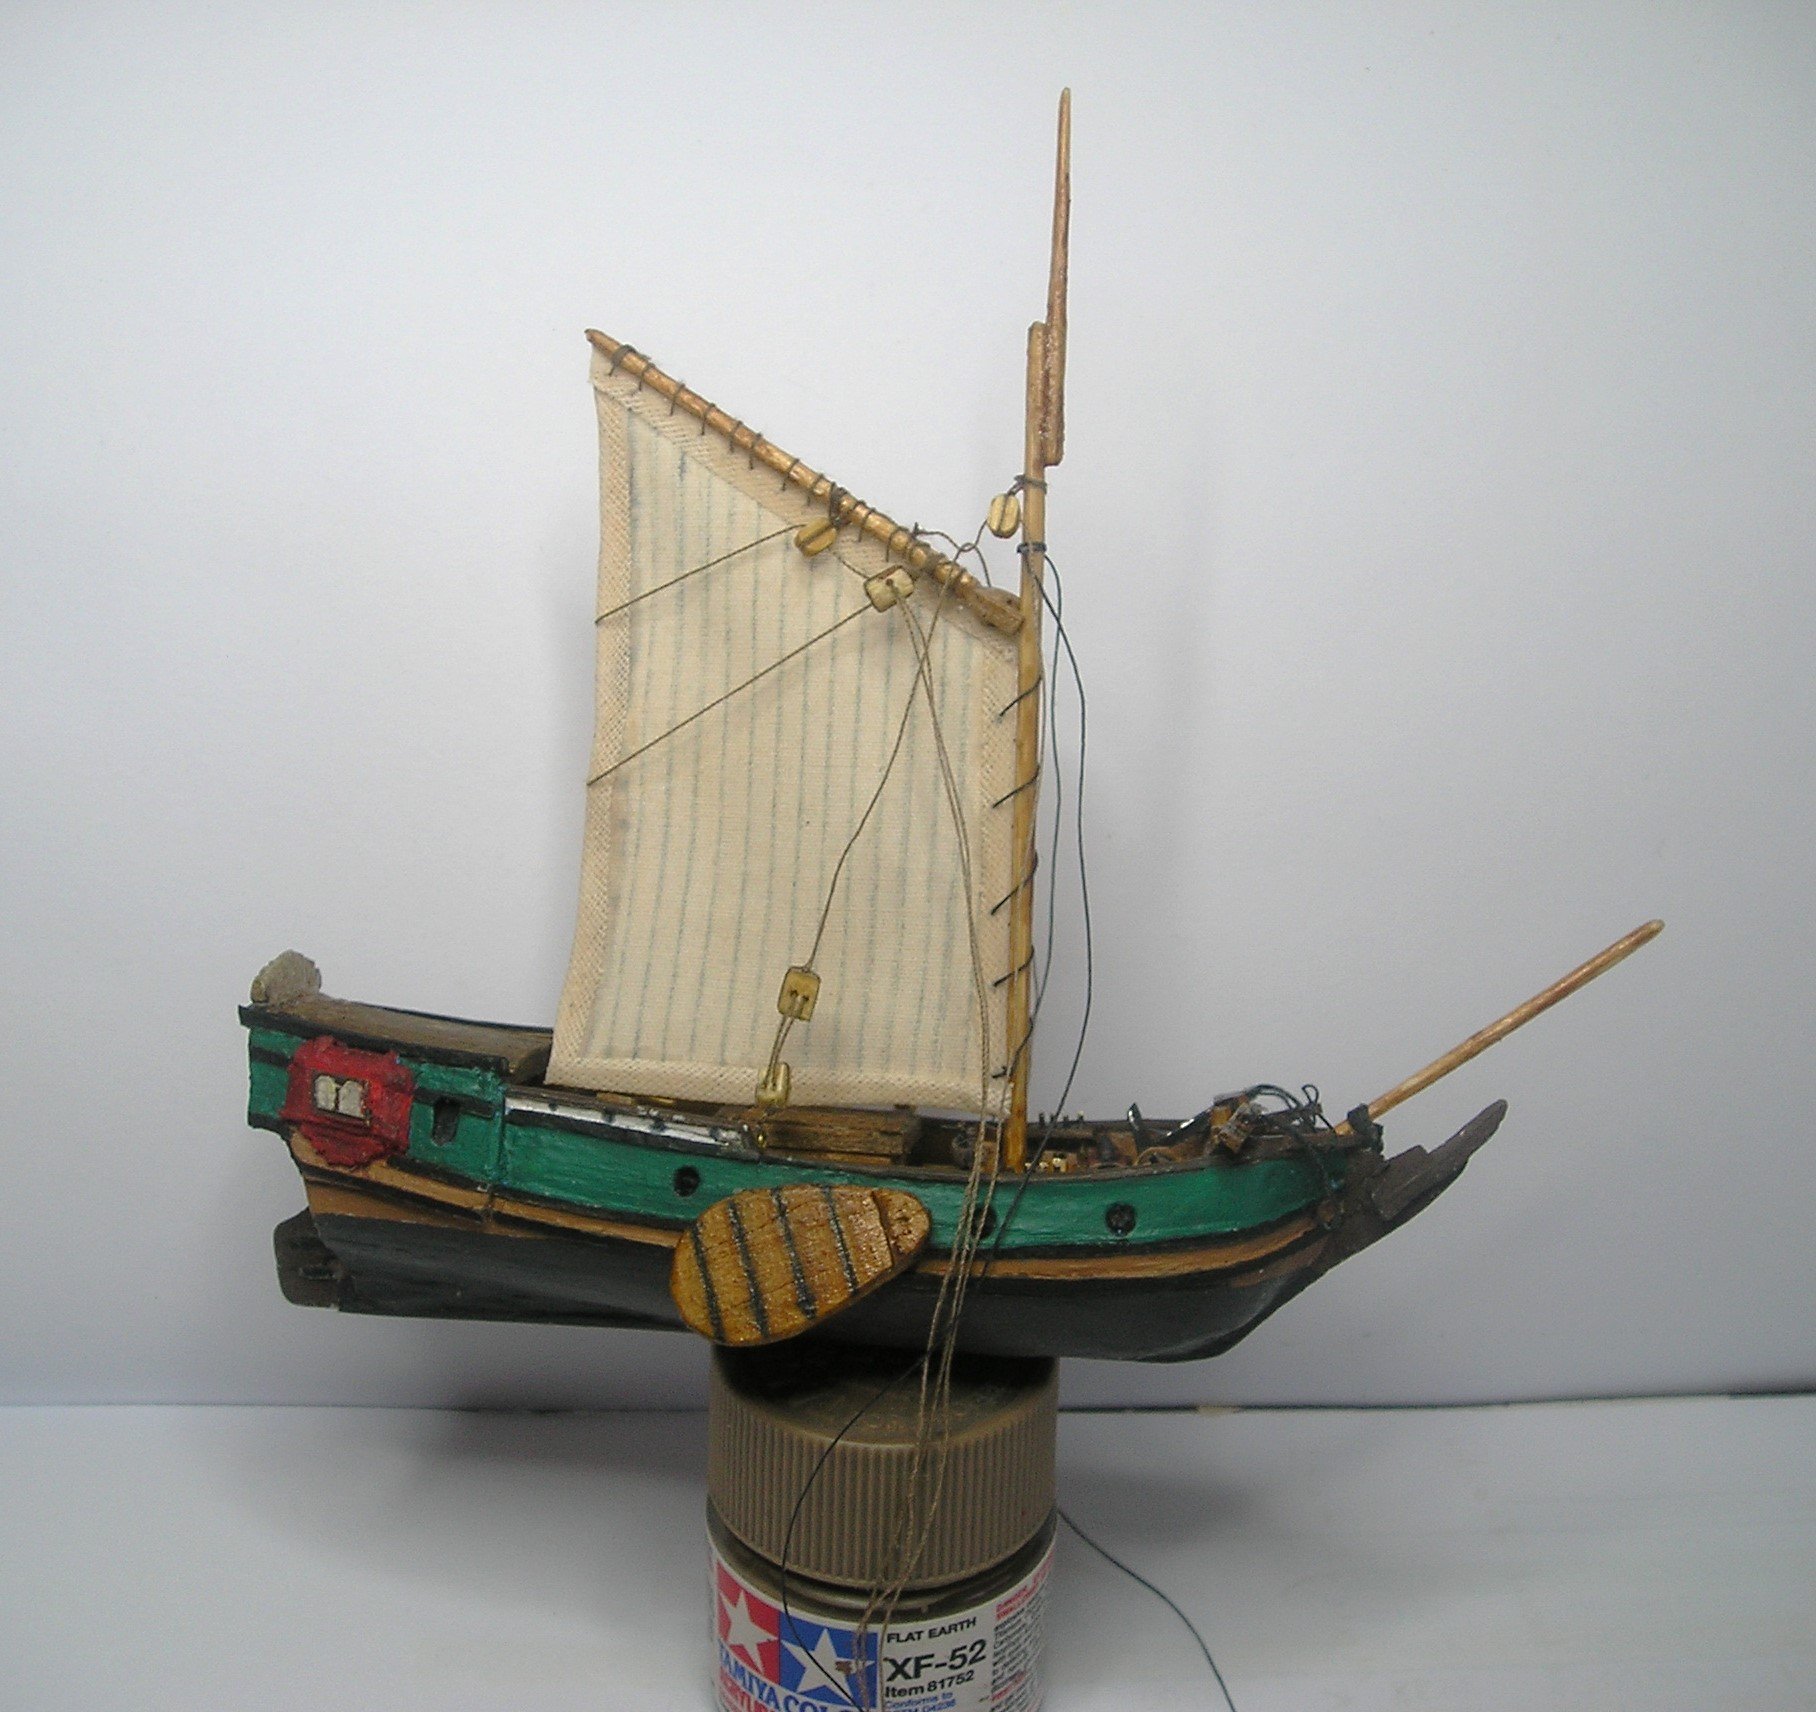
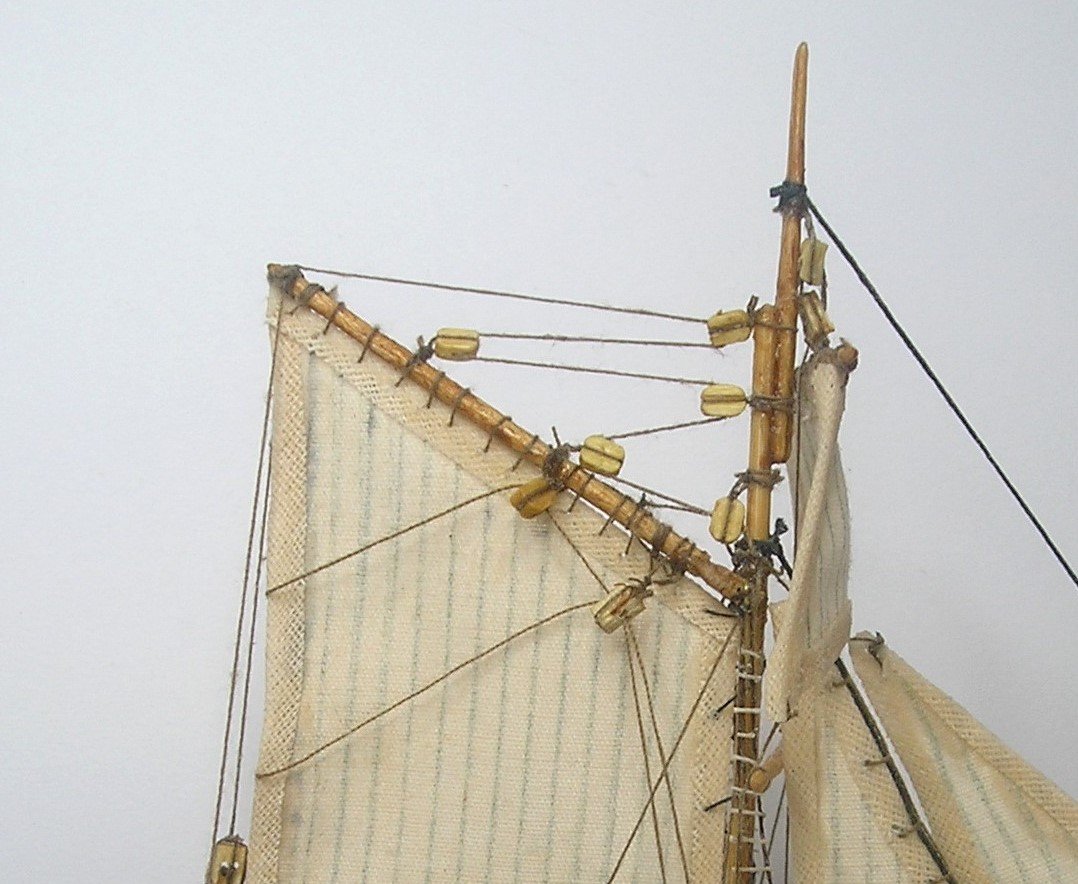
Greetings all, I assume you had a great weekend. I know I had a busy one with my 1:200 model. (Measurements are in millimeters not inches.) Did you notice that I added and rigged all the sails? I also am very happy with the shrouds and ratlines. 😊 Next, I want to make and add a lantern, figurehead and flags. That will probably be fiddly but fun. Thanks for all your support and encouragement. Cheers,


- 55 replies
-
- 7
-
-
-
- miniature
- Brandenburg State Yacht
- (and 1 more)
-
Truly inspirational work Patrick!
-
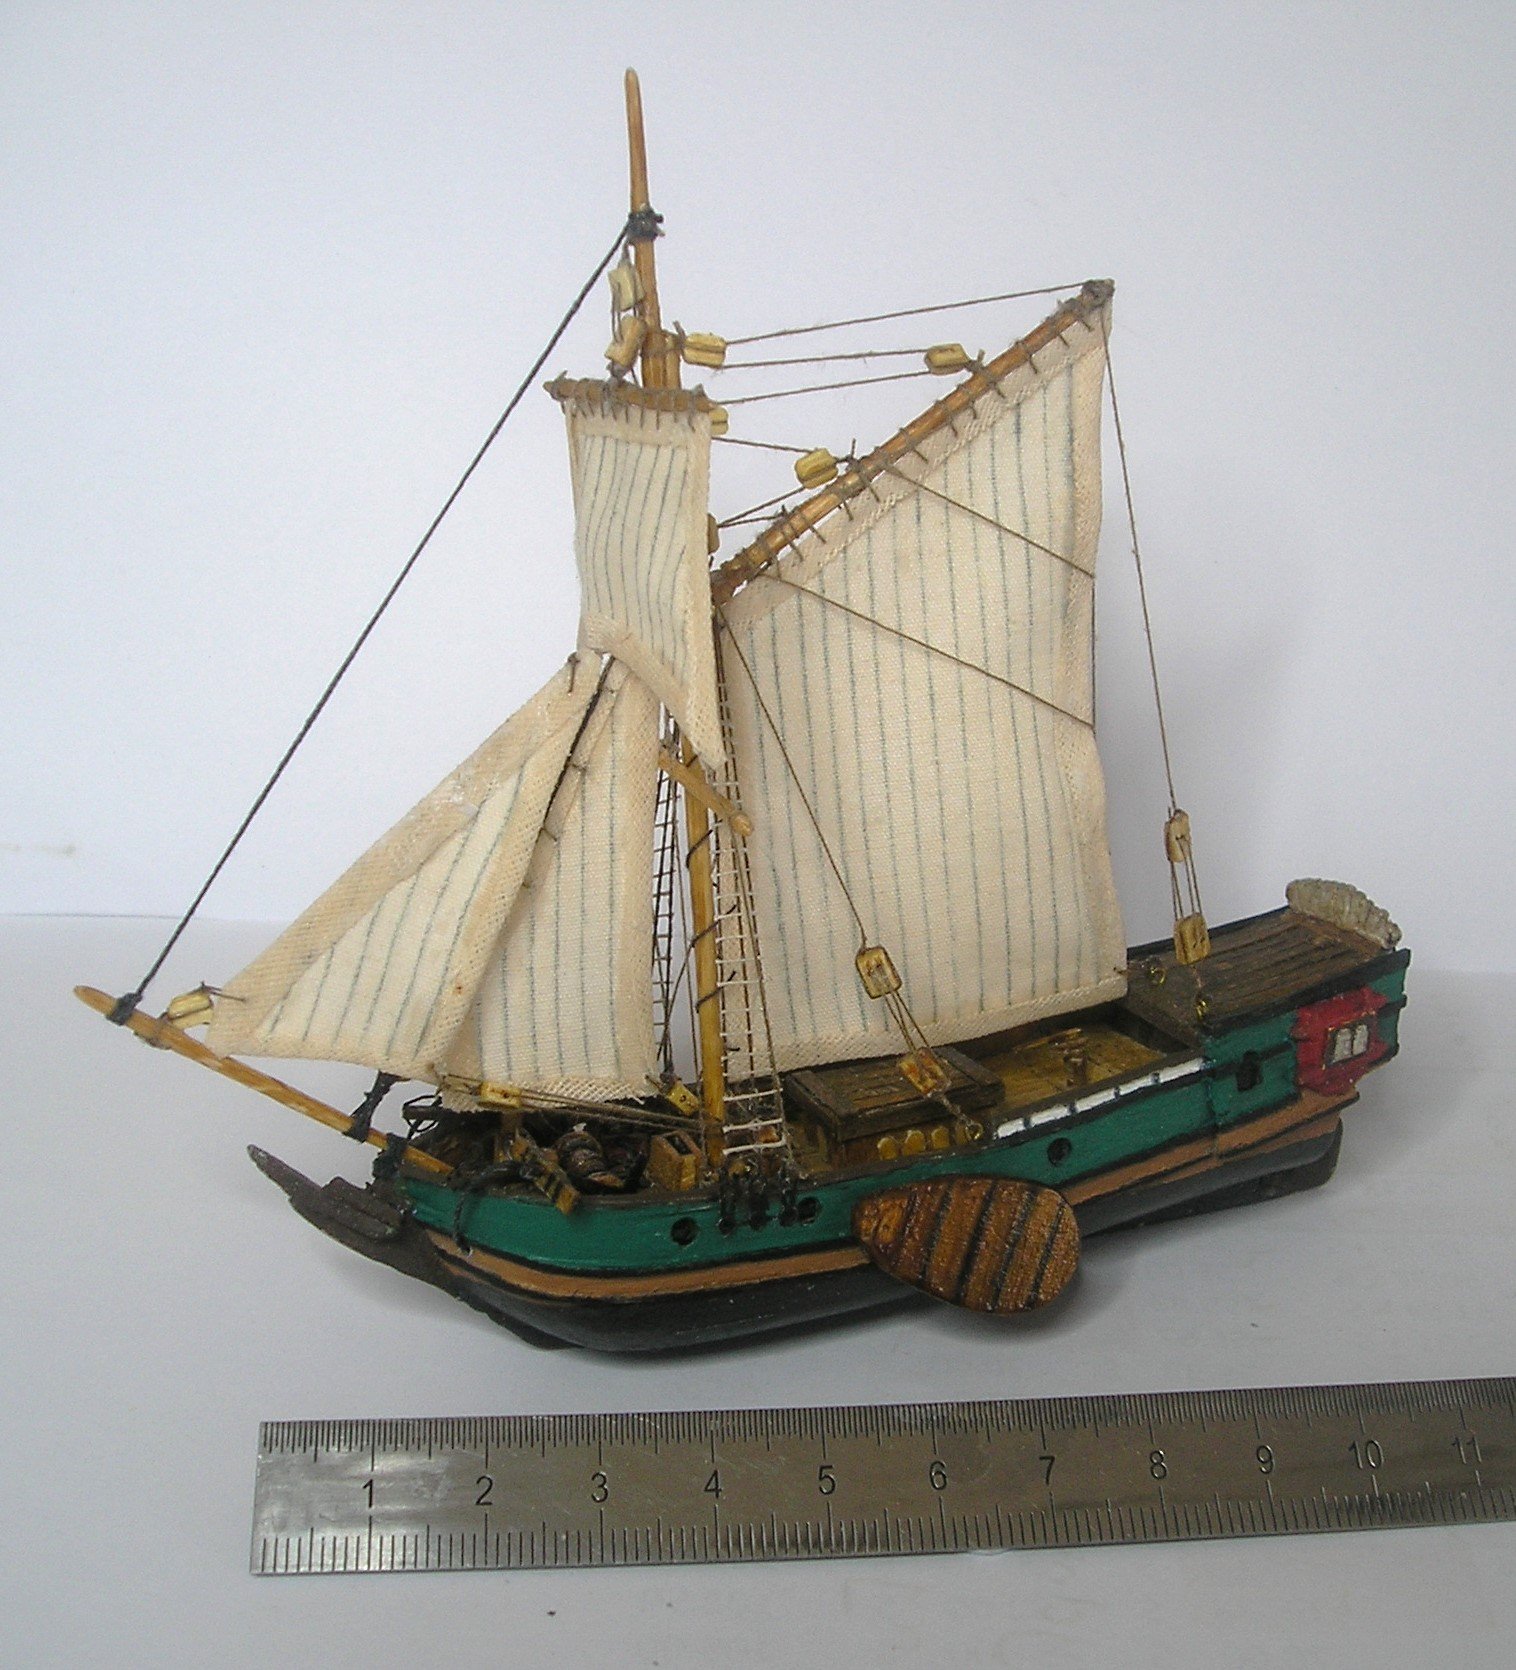
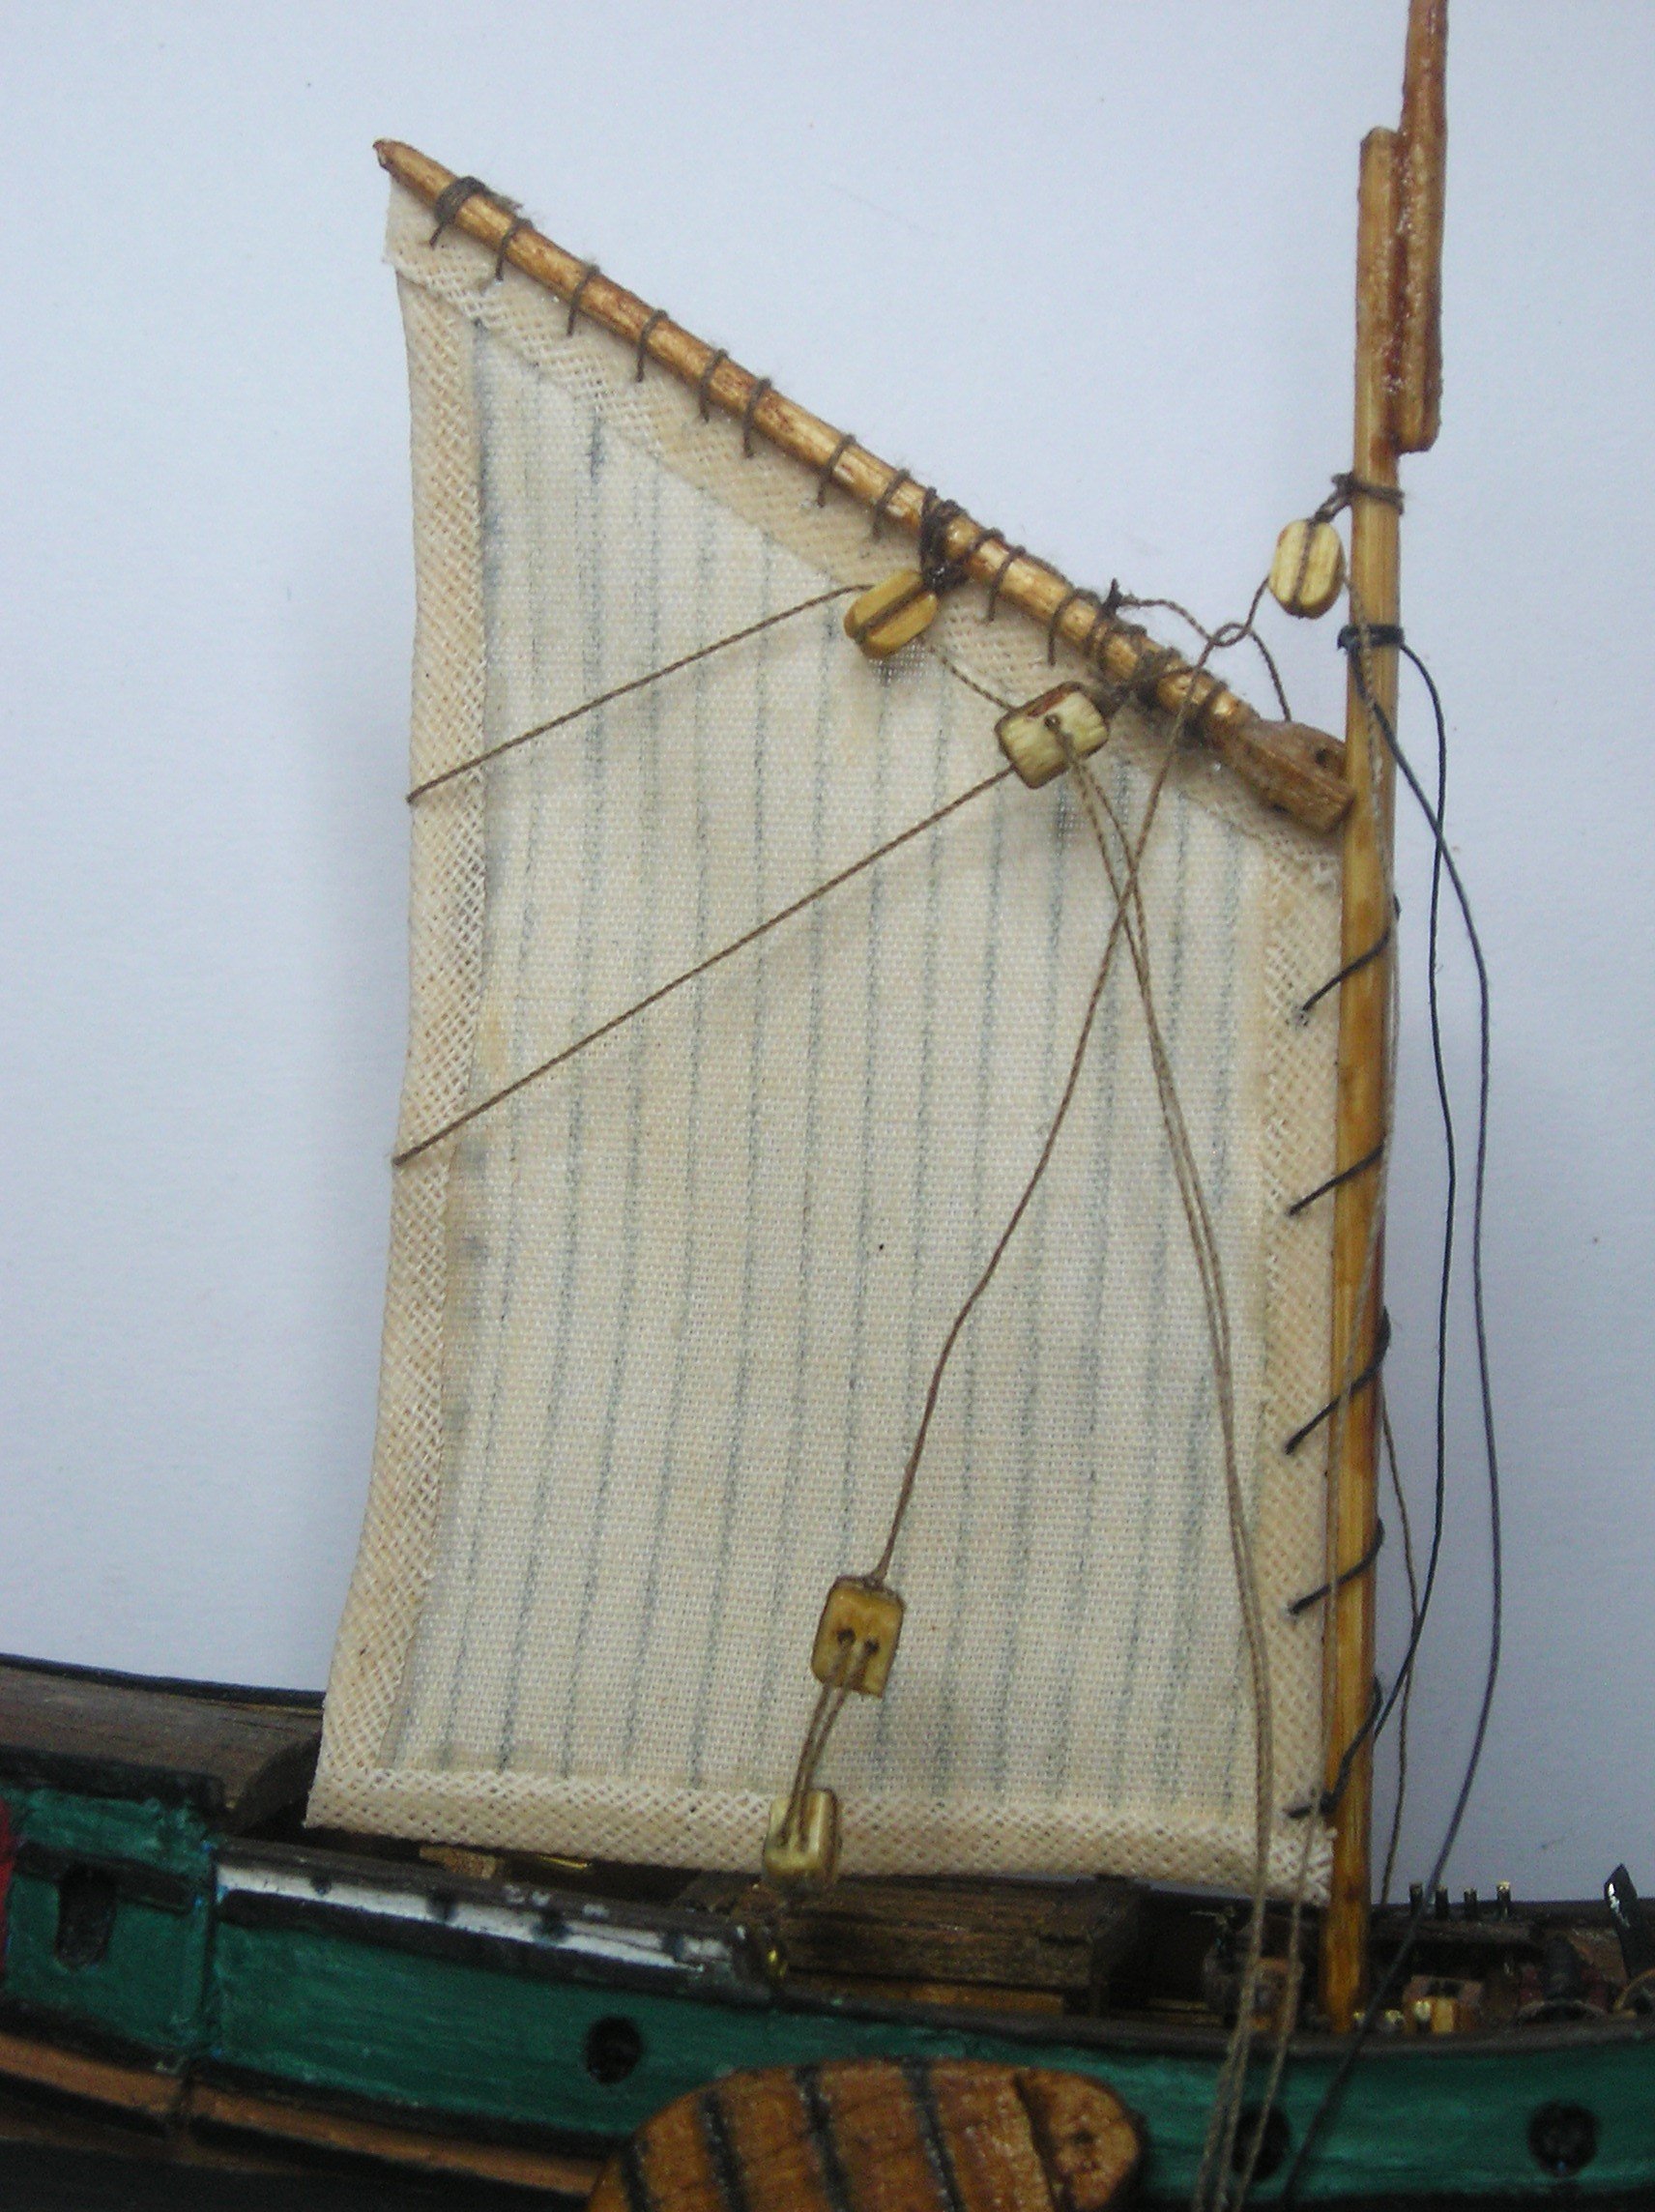
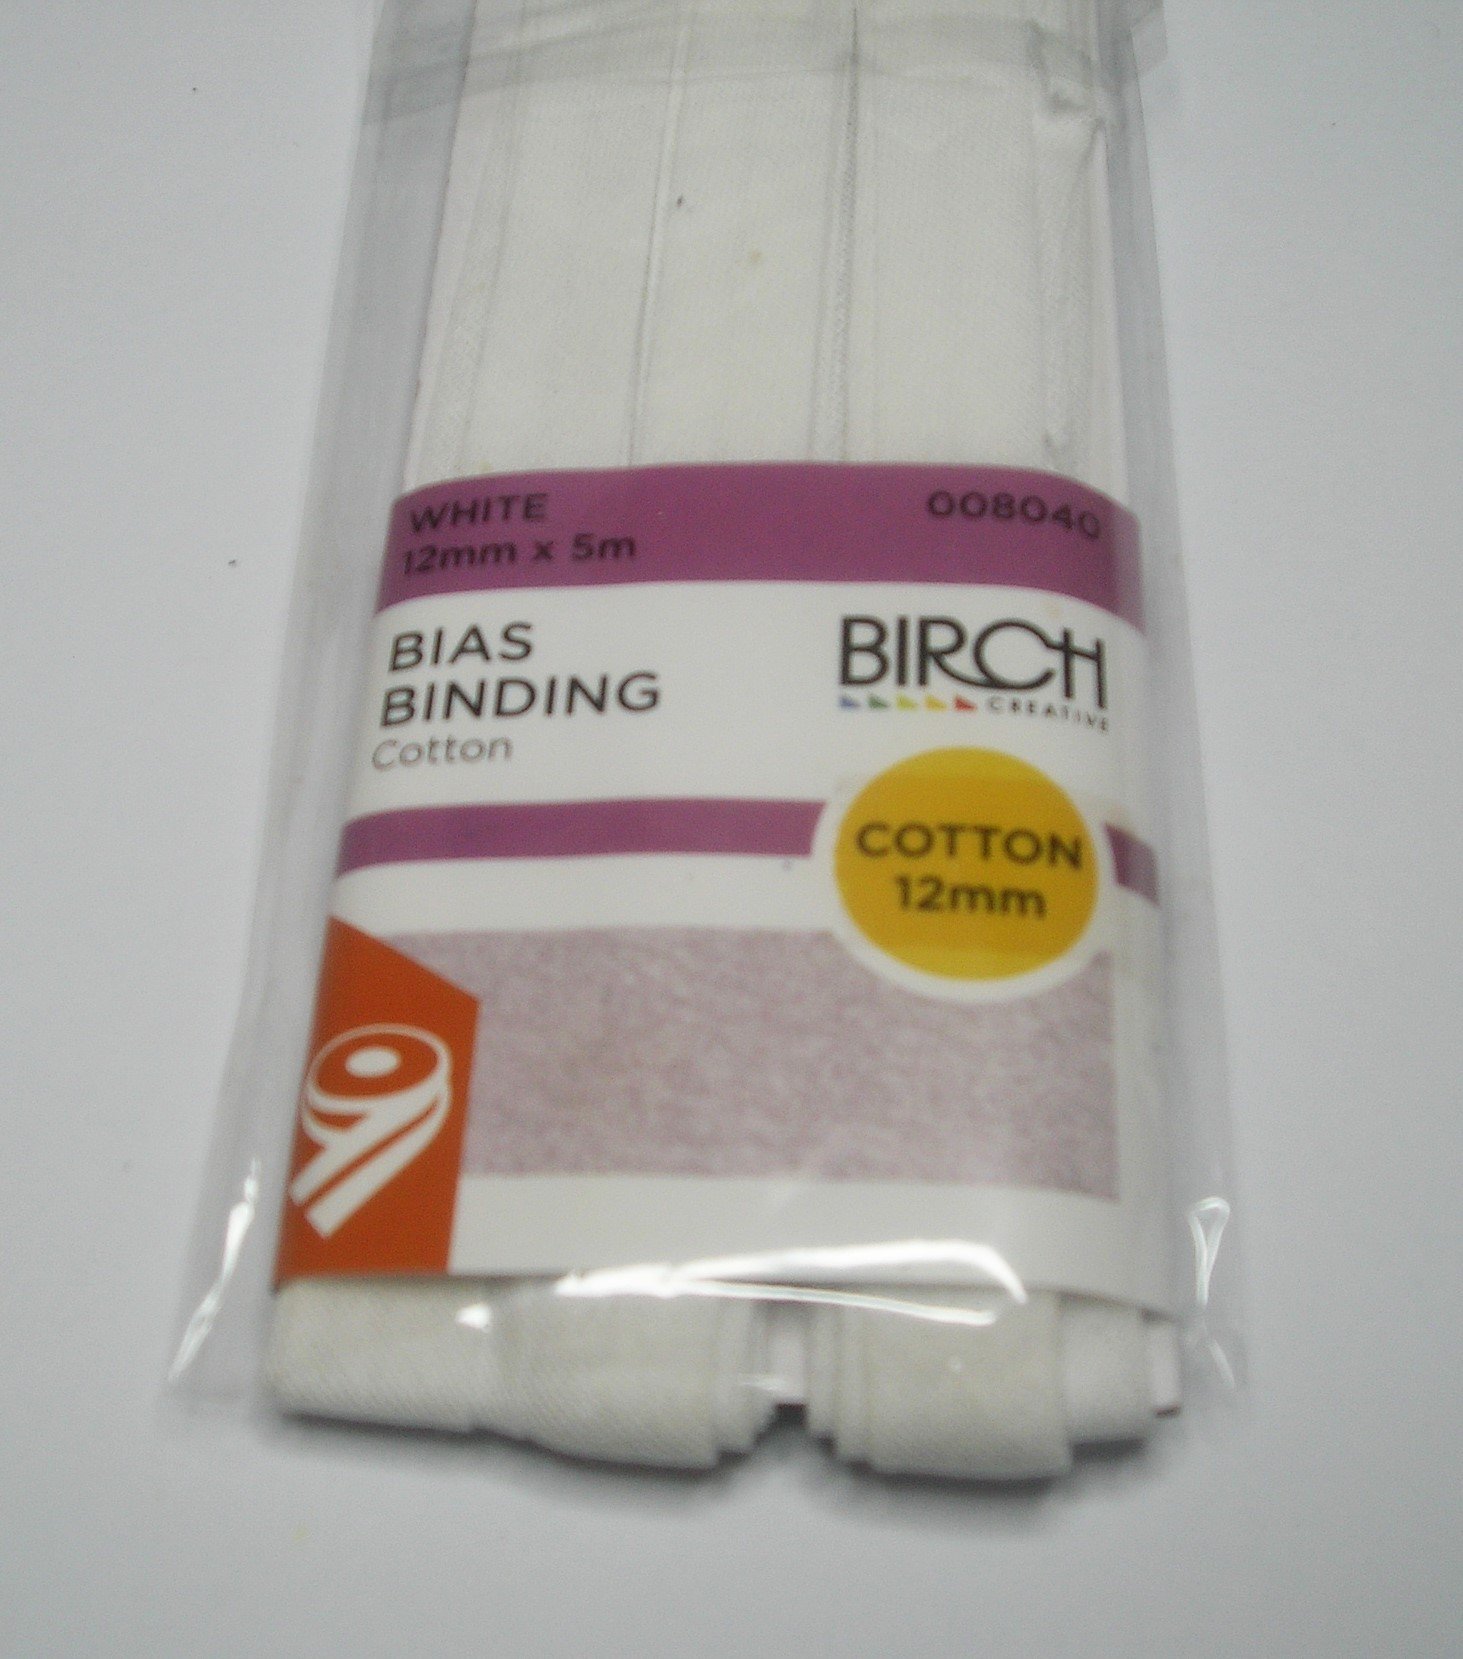
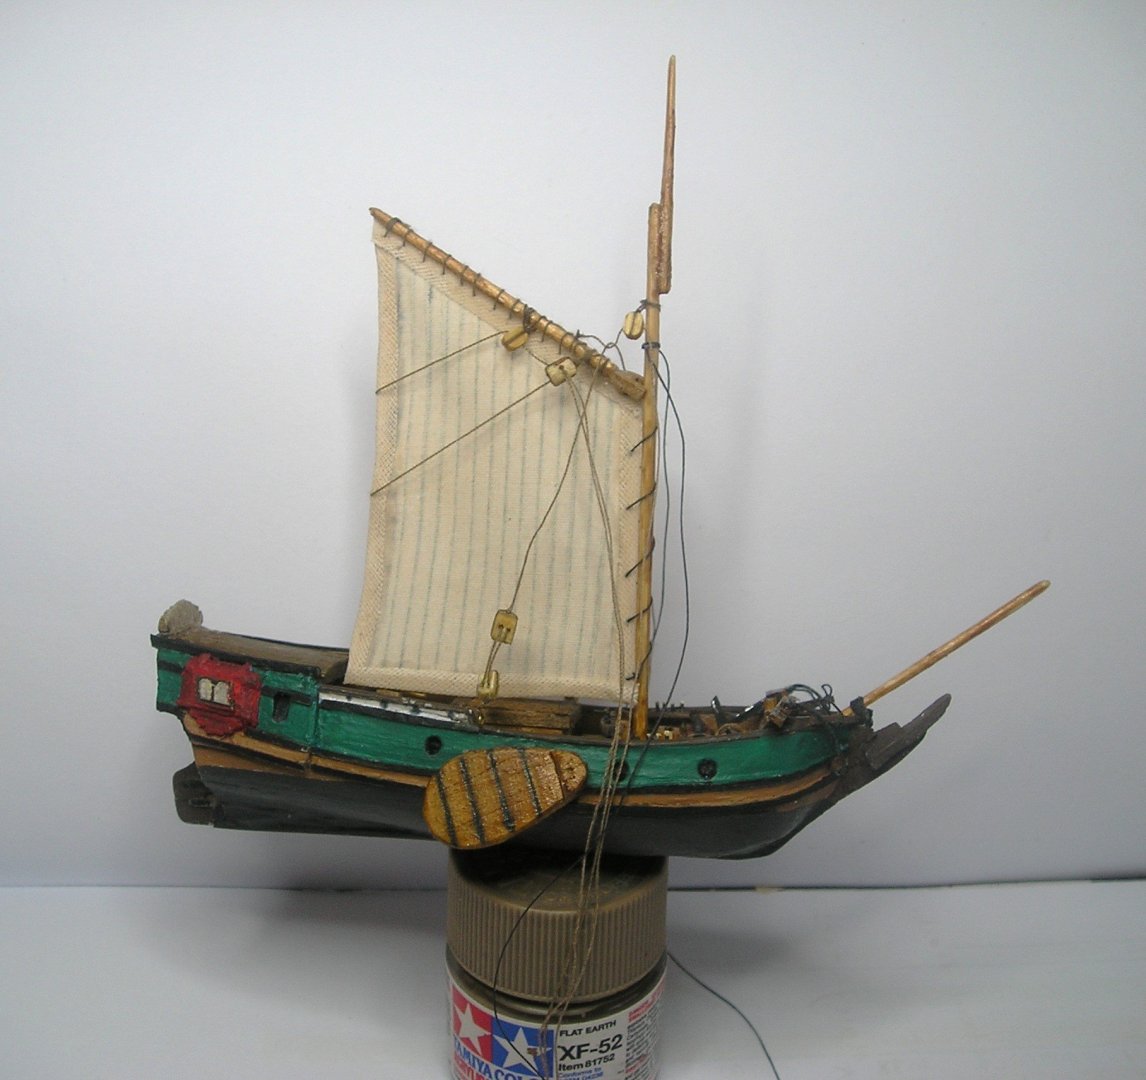
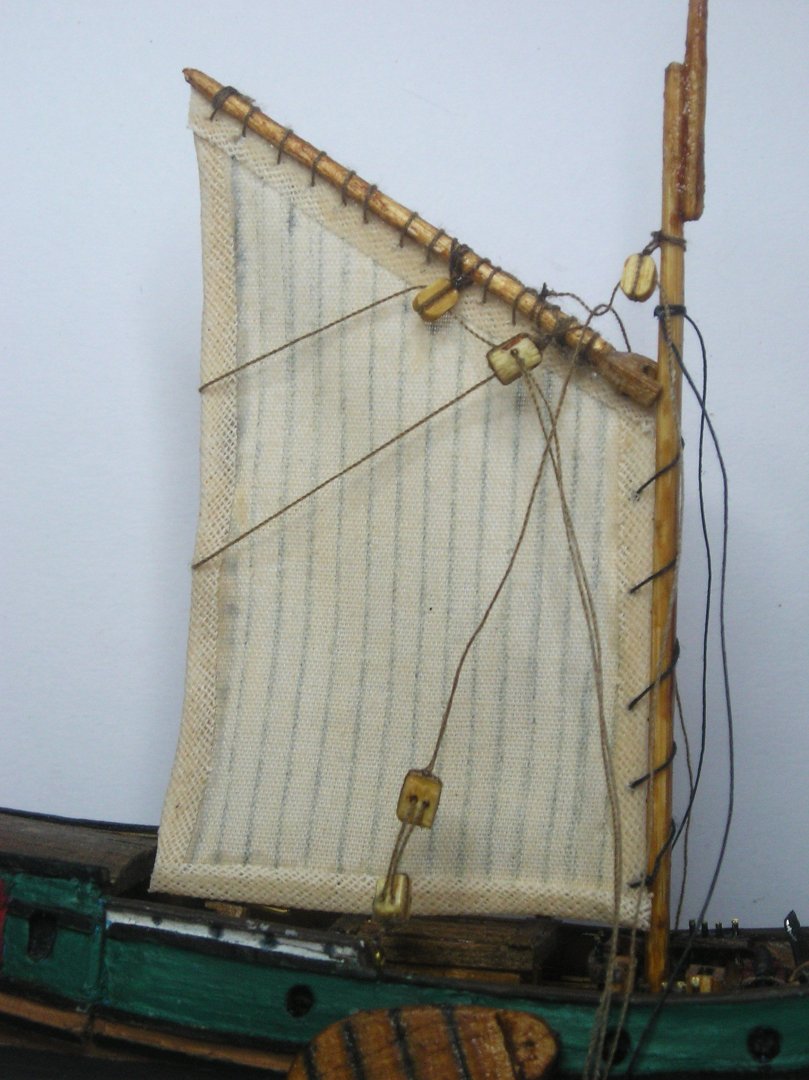
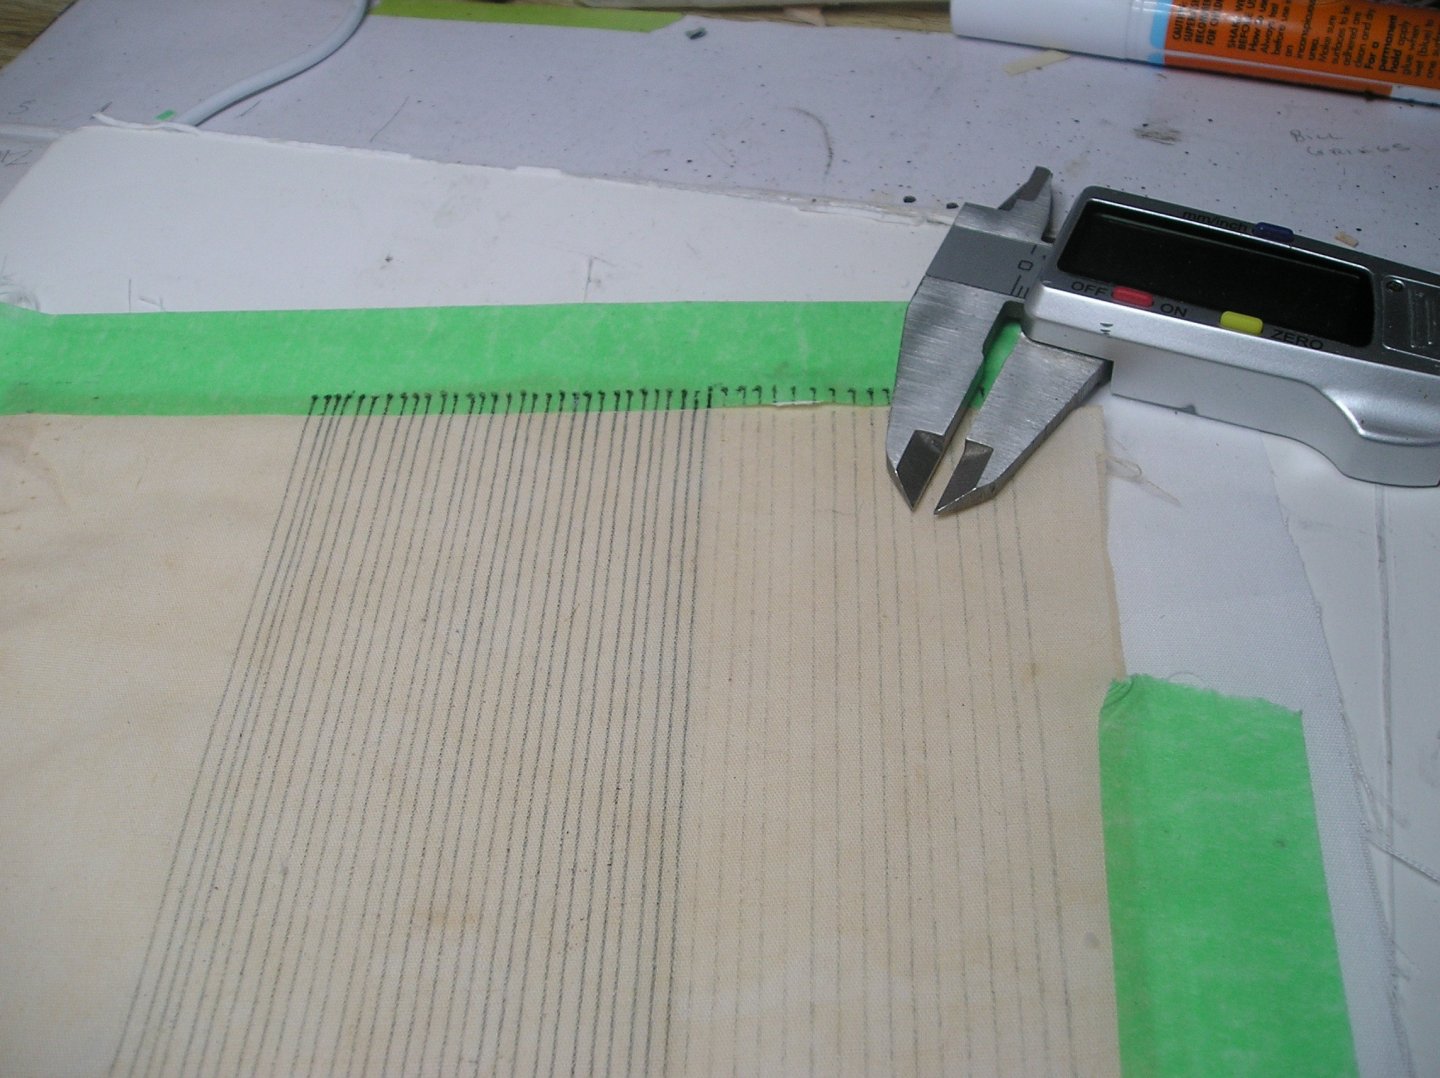
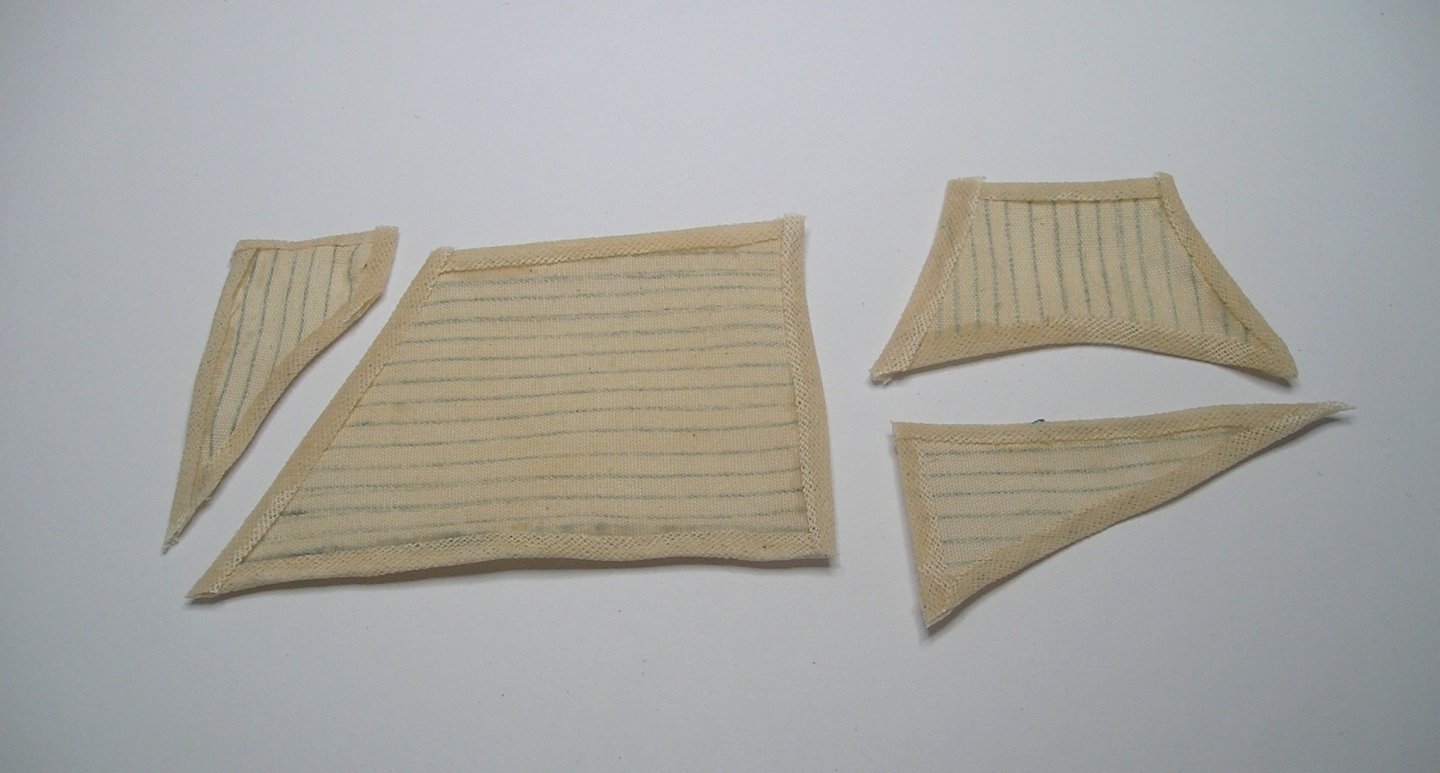
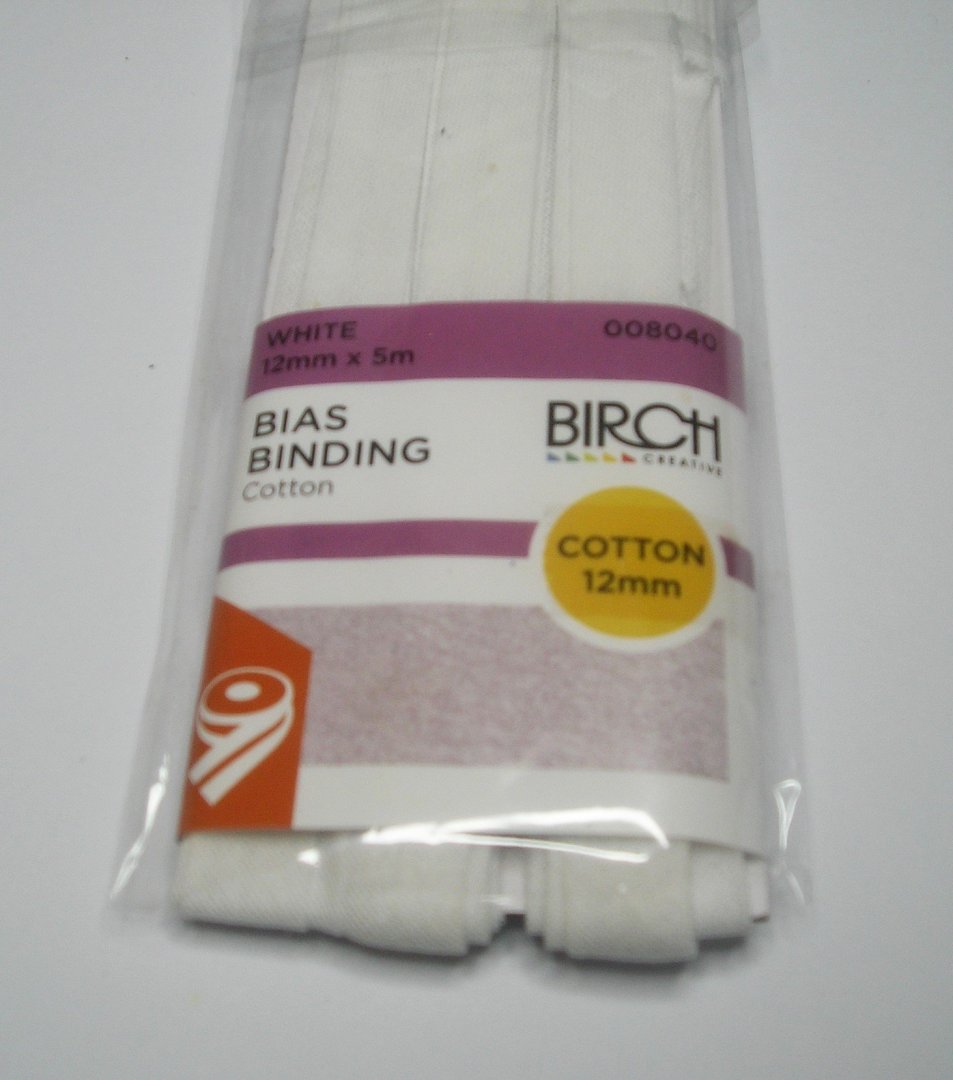
The holidays are over so now I have to 'force myself' and get back to my modelling. 😃 Had a challenging day today working on my sails and starting the rigging. I made the lines on the material using a grey Staedtler triplus fineliner. The first attempt on the centre of the stained material was too heavy. I cut and applied a 'bias binding' to trim the edges (using super glue). Then the fun 'fiddly bit' started - RIGGING! Nothing yet attached to any anchor points, but great progress was made. 😬 Who needs a holiday anyway, when you're a modeller! Cheers,

- 55 replies
-
- 4
-
-
- miniature
- Brandenburg State Yacht
- (and 1 more)
-
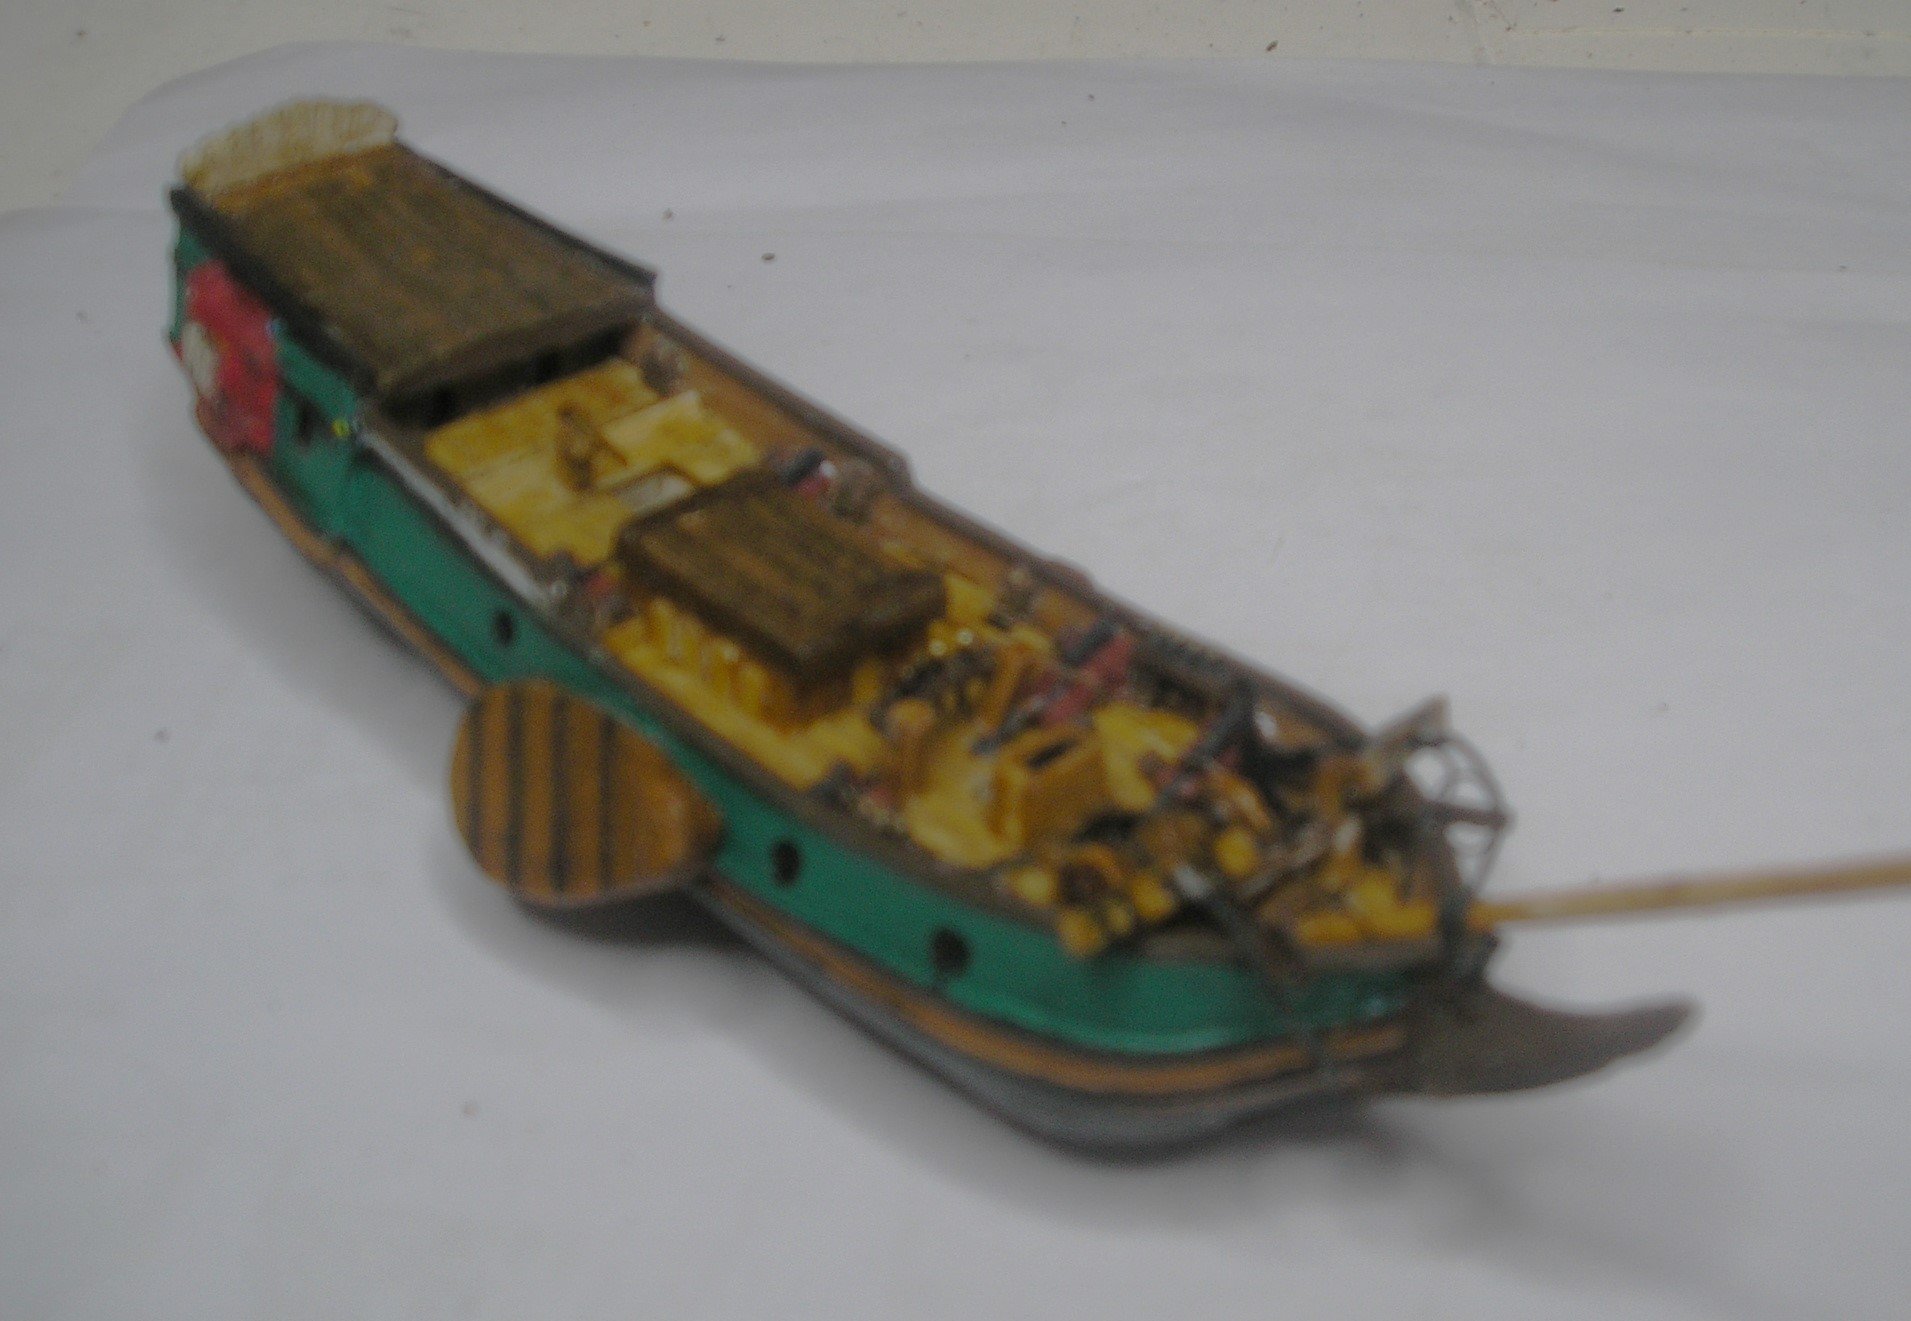
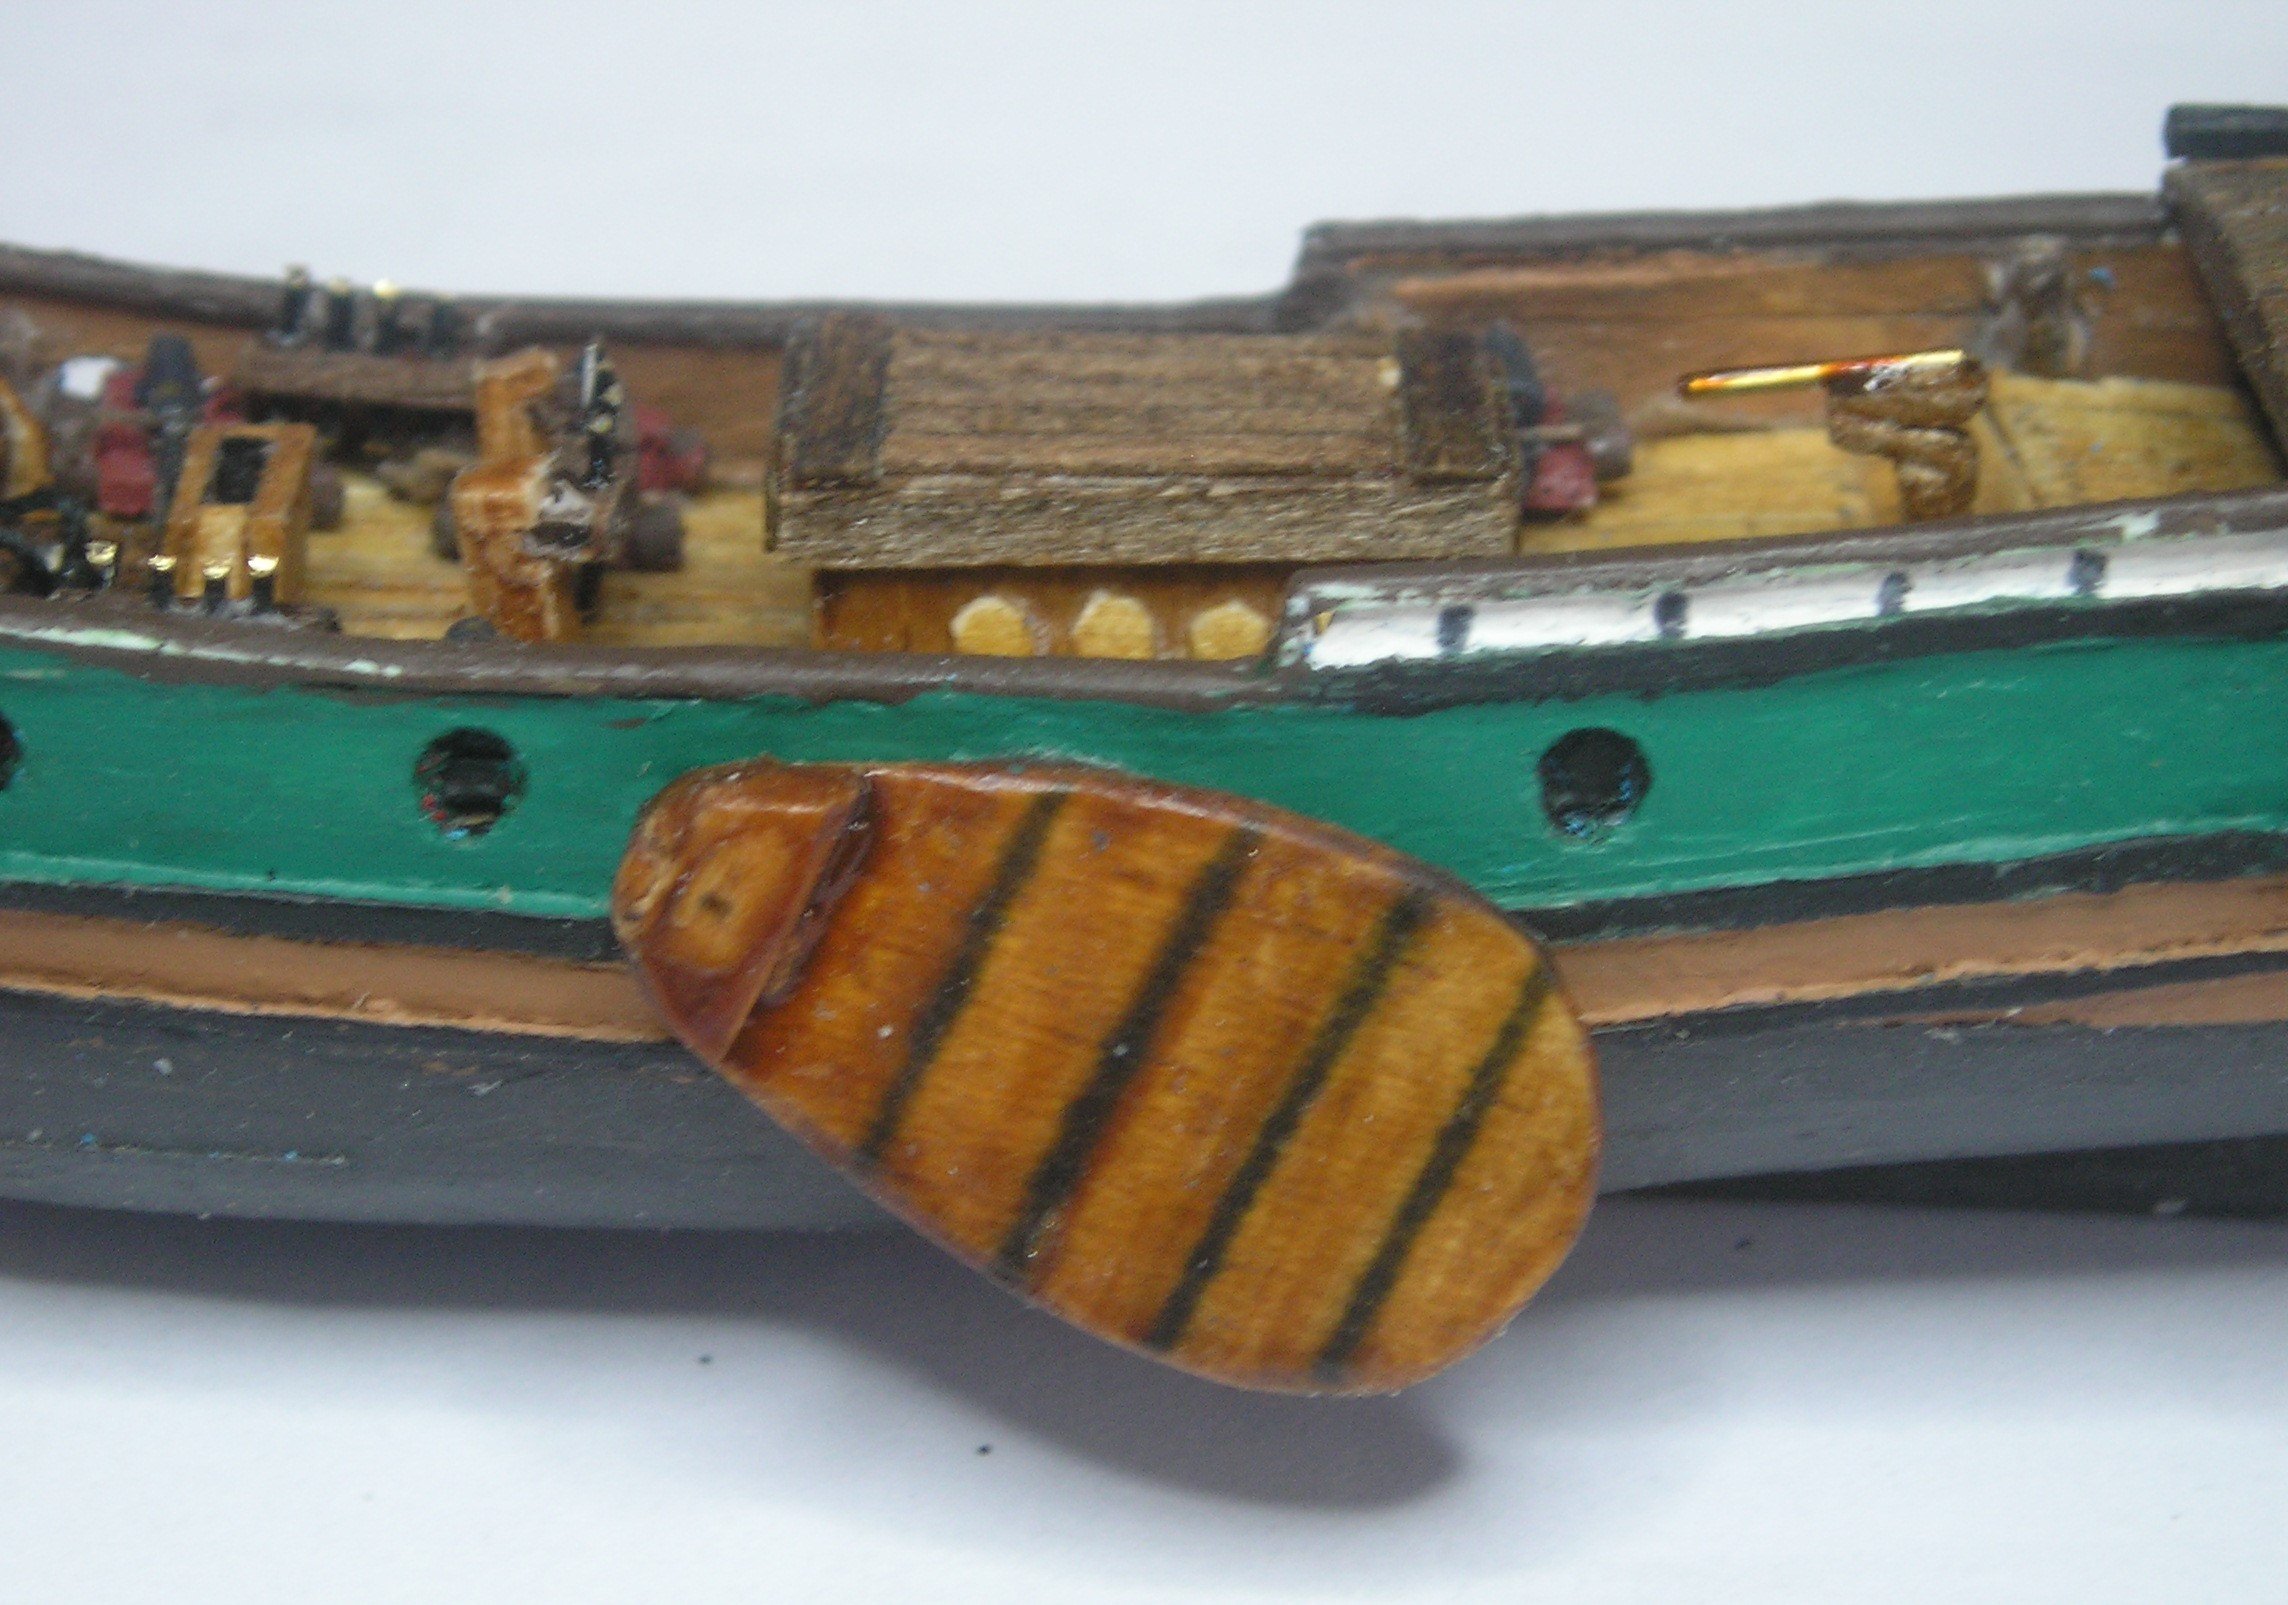
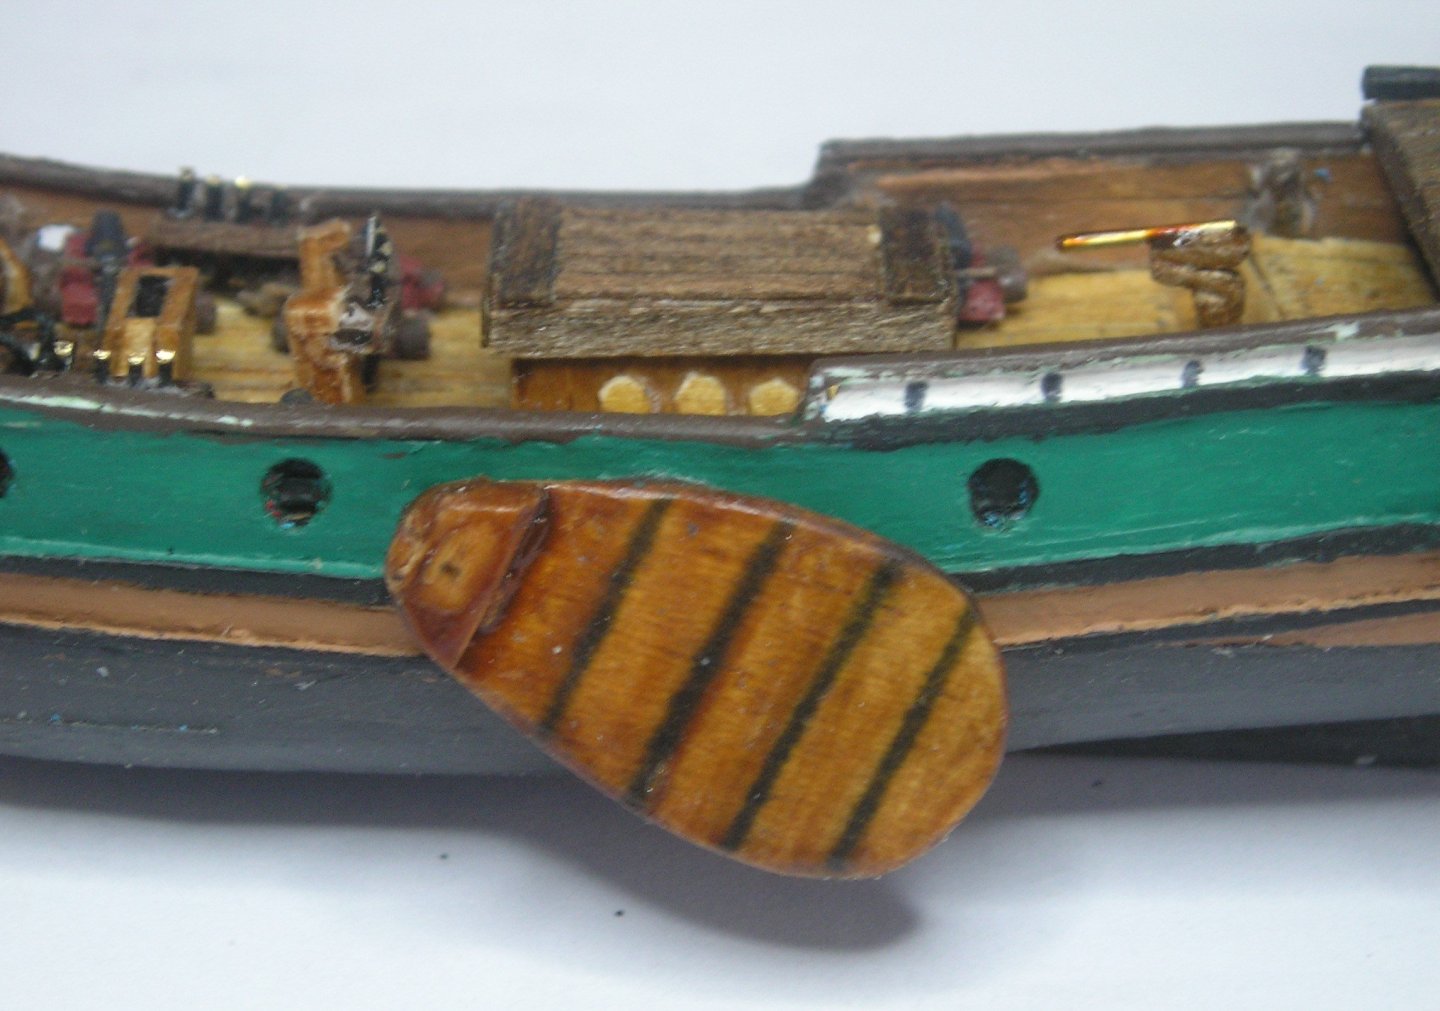
Thanks Steven @Louie da fly for setting me straight regarding the leeboards. As always, I take my hat off in appreciation of your shipping knowledge. Well done. Knowledge is wonderful. Now I know the Dutch and English names for "the boards on the outside" of my boat. 👏
- 55 replies
-
- 2
-
-
- miniature
- Brandenburg State Yacht
- (and 1 more)
-
Thanks Patrick @Baker. It figures that they would have a Dutch name as you only see them on Dutch ships/boats. ⚔️
- 55 replies
-
- 1
-

-
- miniature
- Brandenburg State Yacht
- (and 1 more)
-
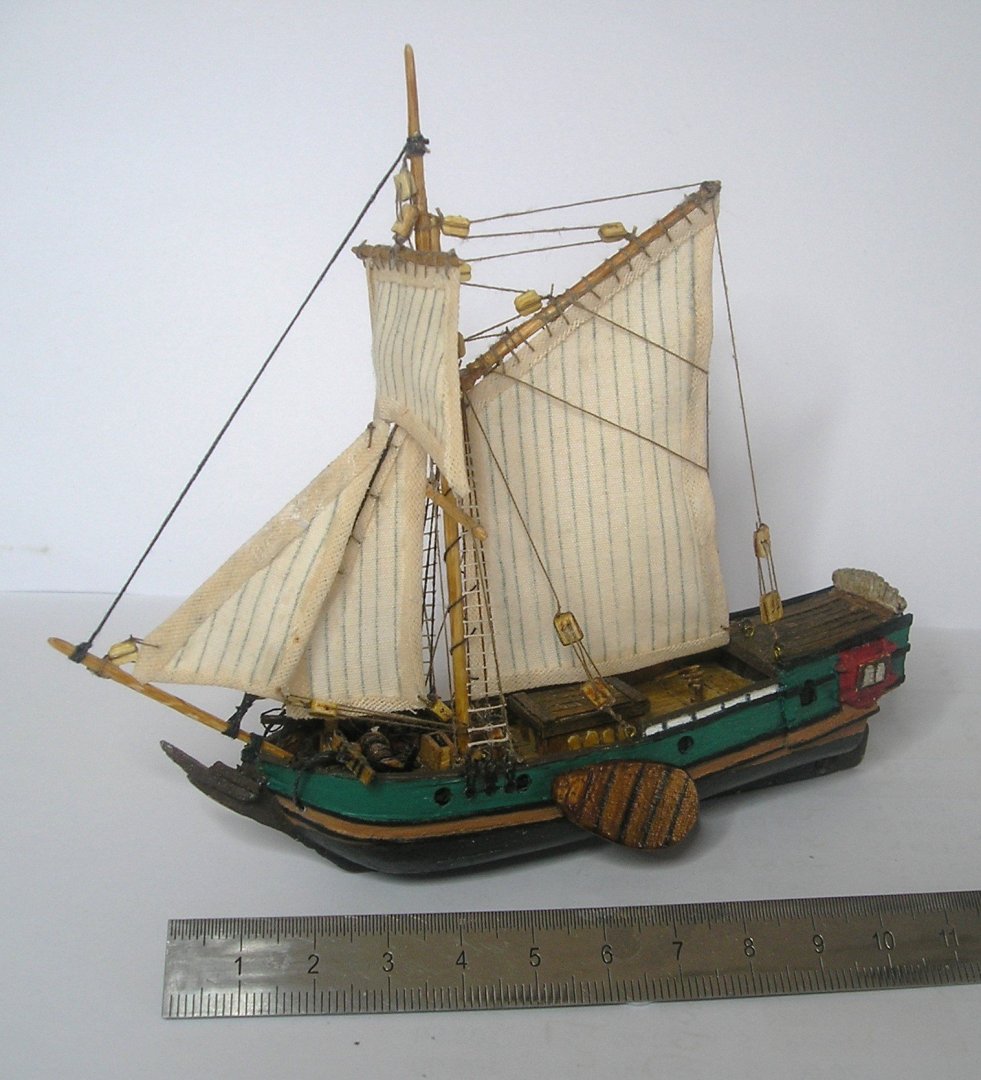
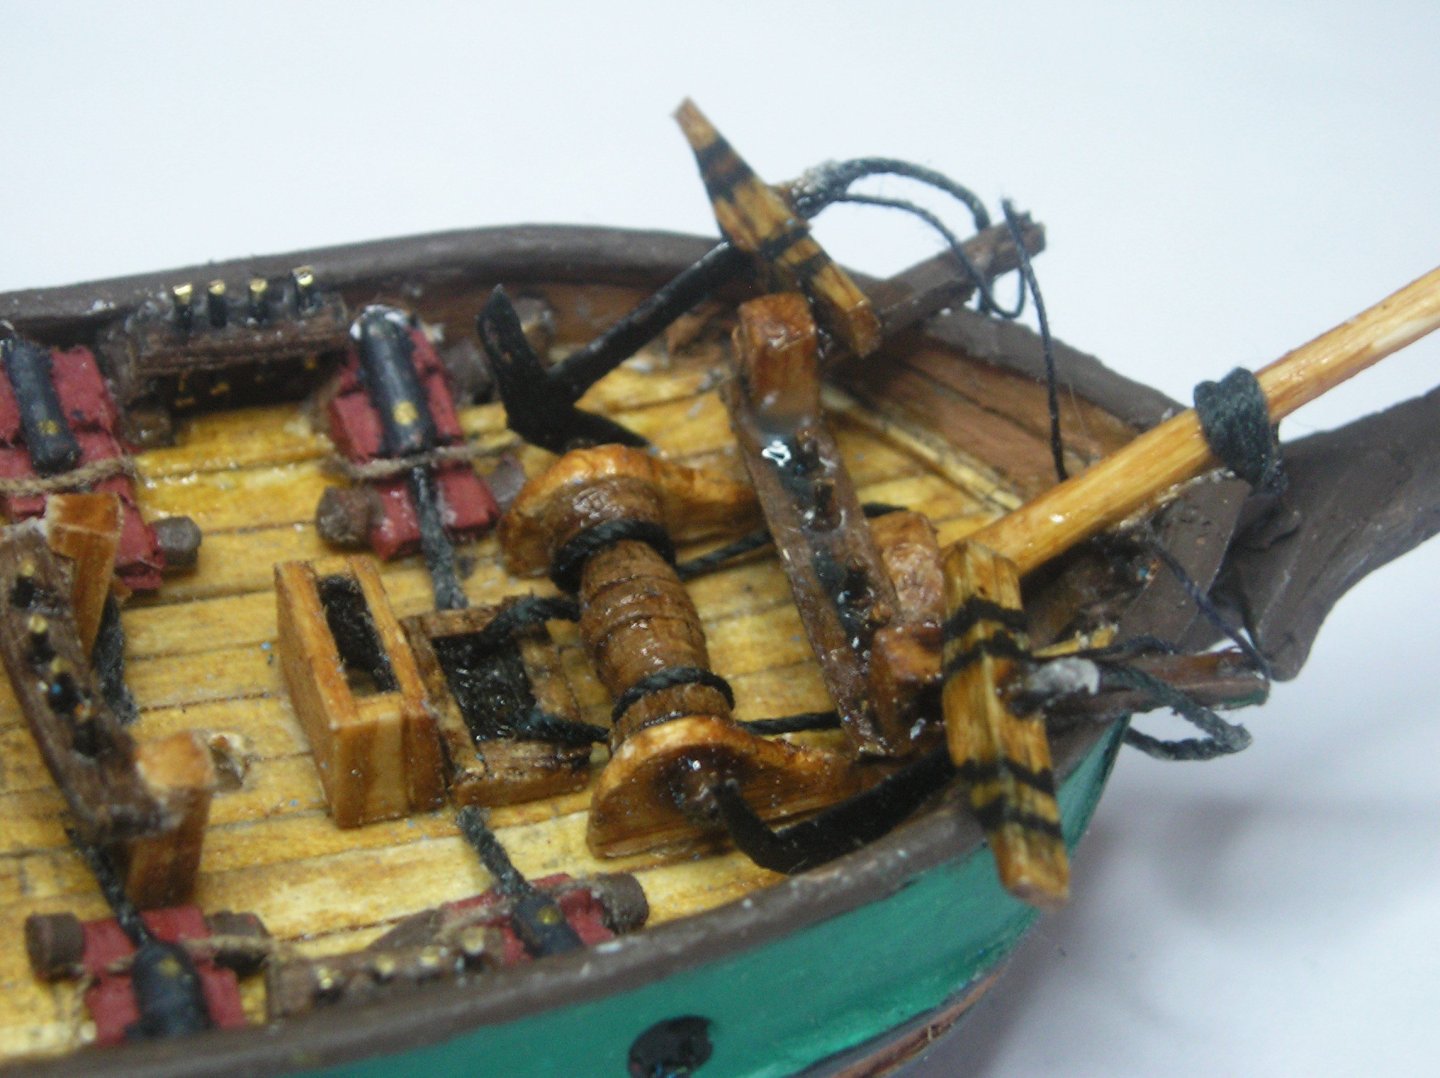
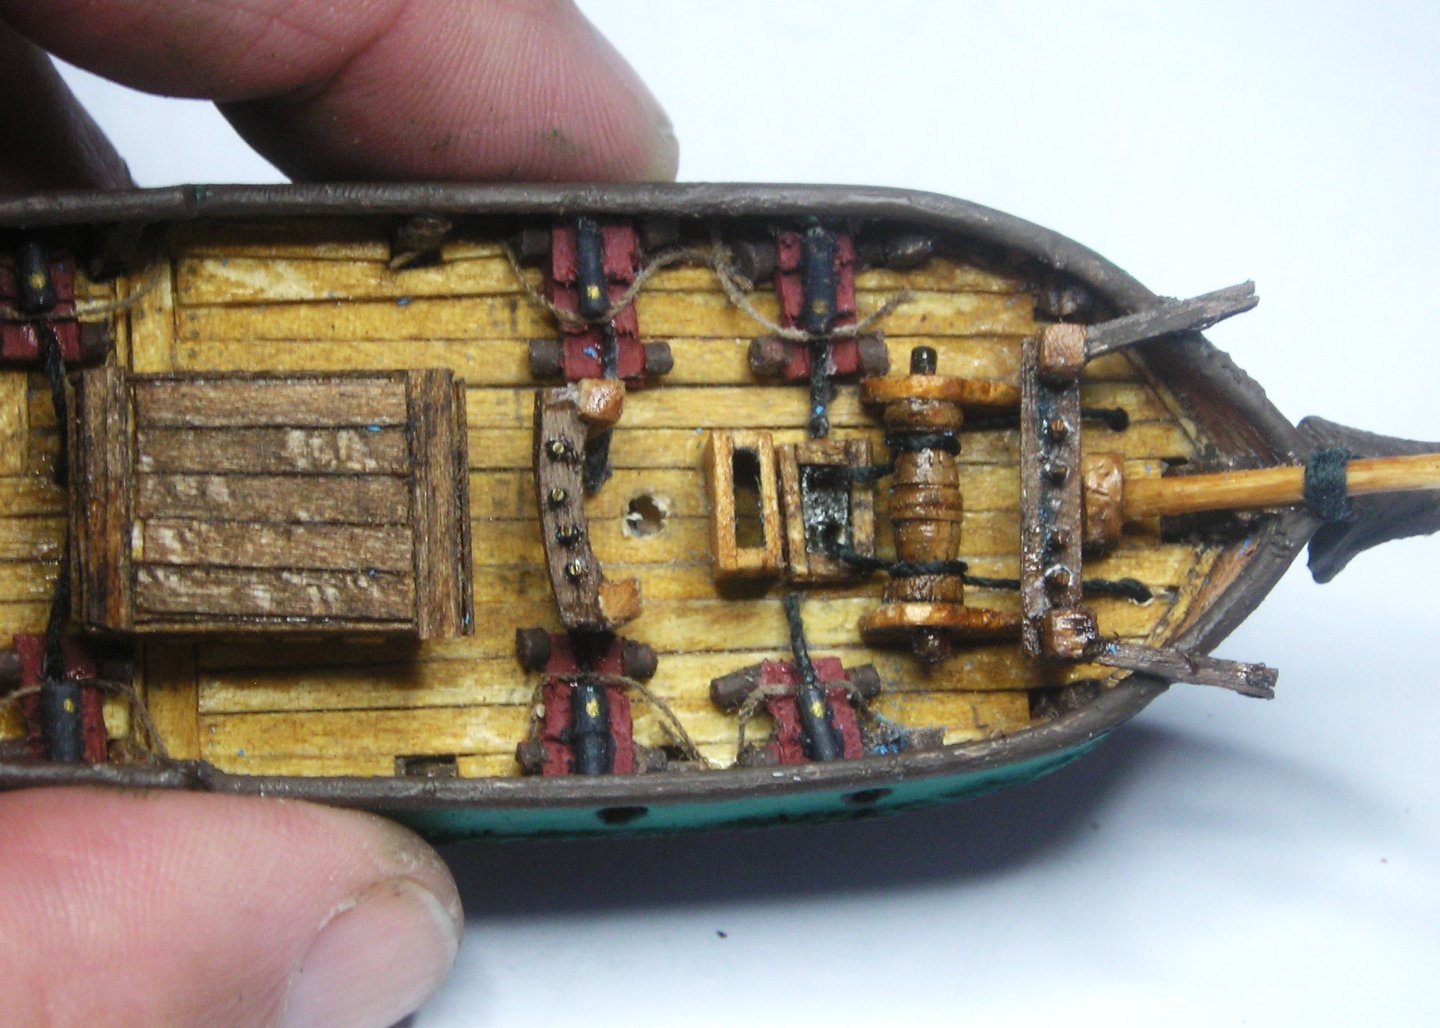
Another great day thanks to all those who spur me on. I added the 'boards' on the outside. and just when you thought nothing else could fit in the bow, I made and added the anchors. 🧐 And I know you are all waiting to see my mast and yards! Excited? (not likely) Nothing is happening tomorrow as the Admiral and I are having a short holiday at the beach. Cheers 🏖️

- 55 replies
-
- 9
-
-
- miniature
- Brandenburg State Yacht
- (and 1 more)
-
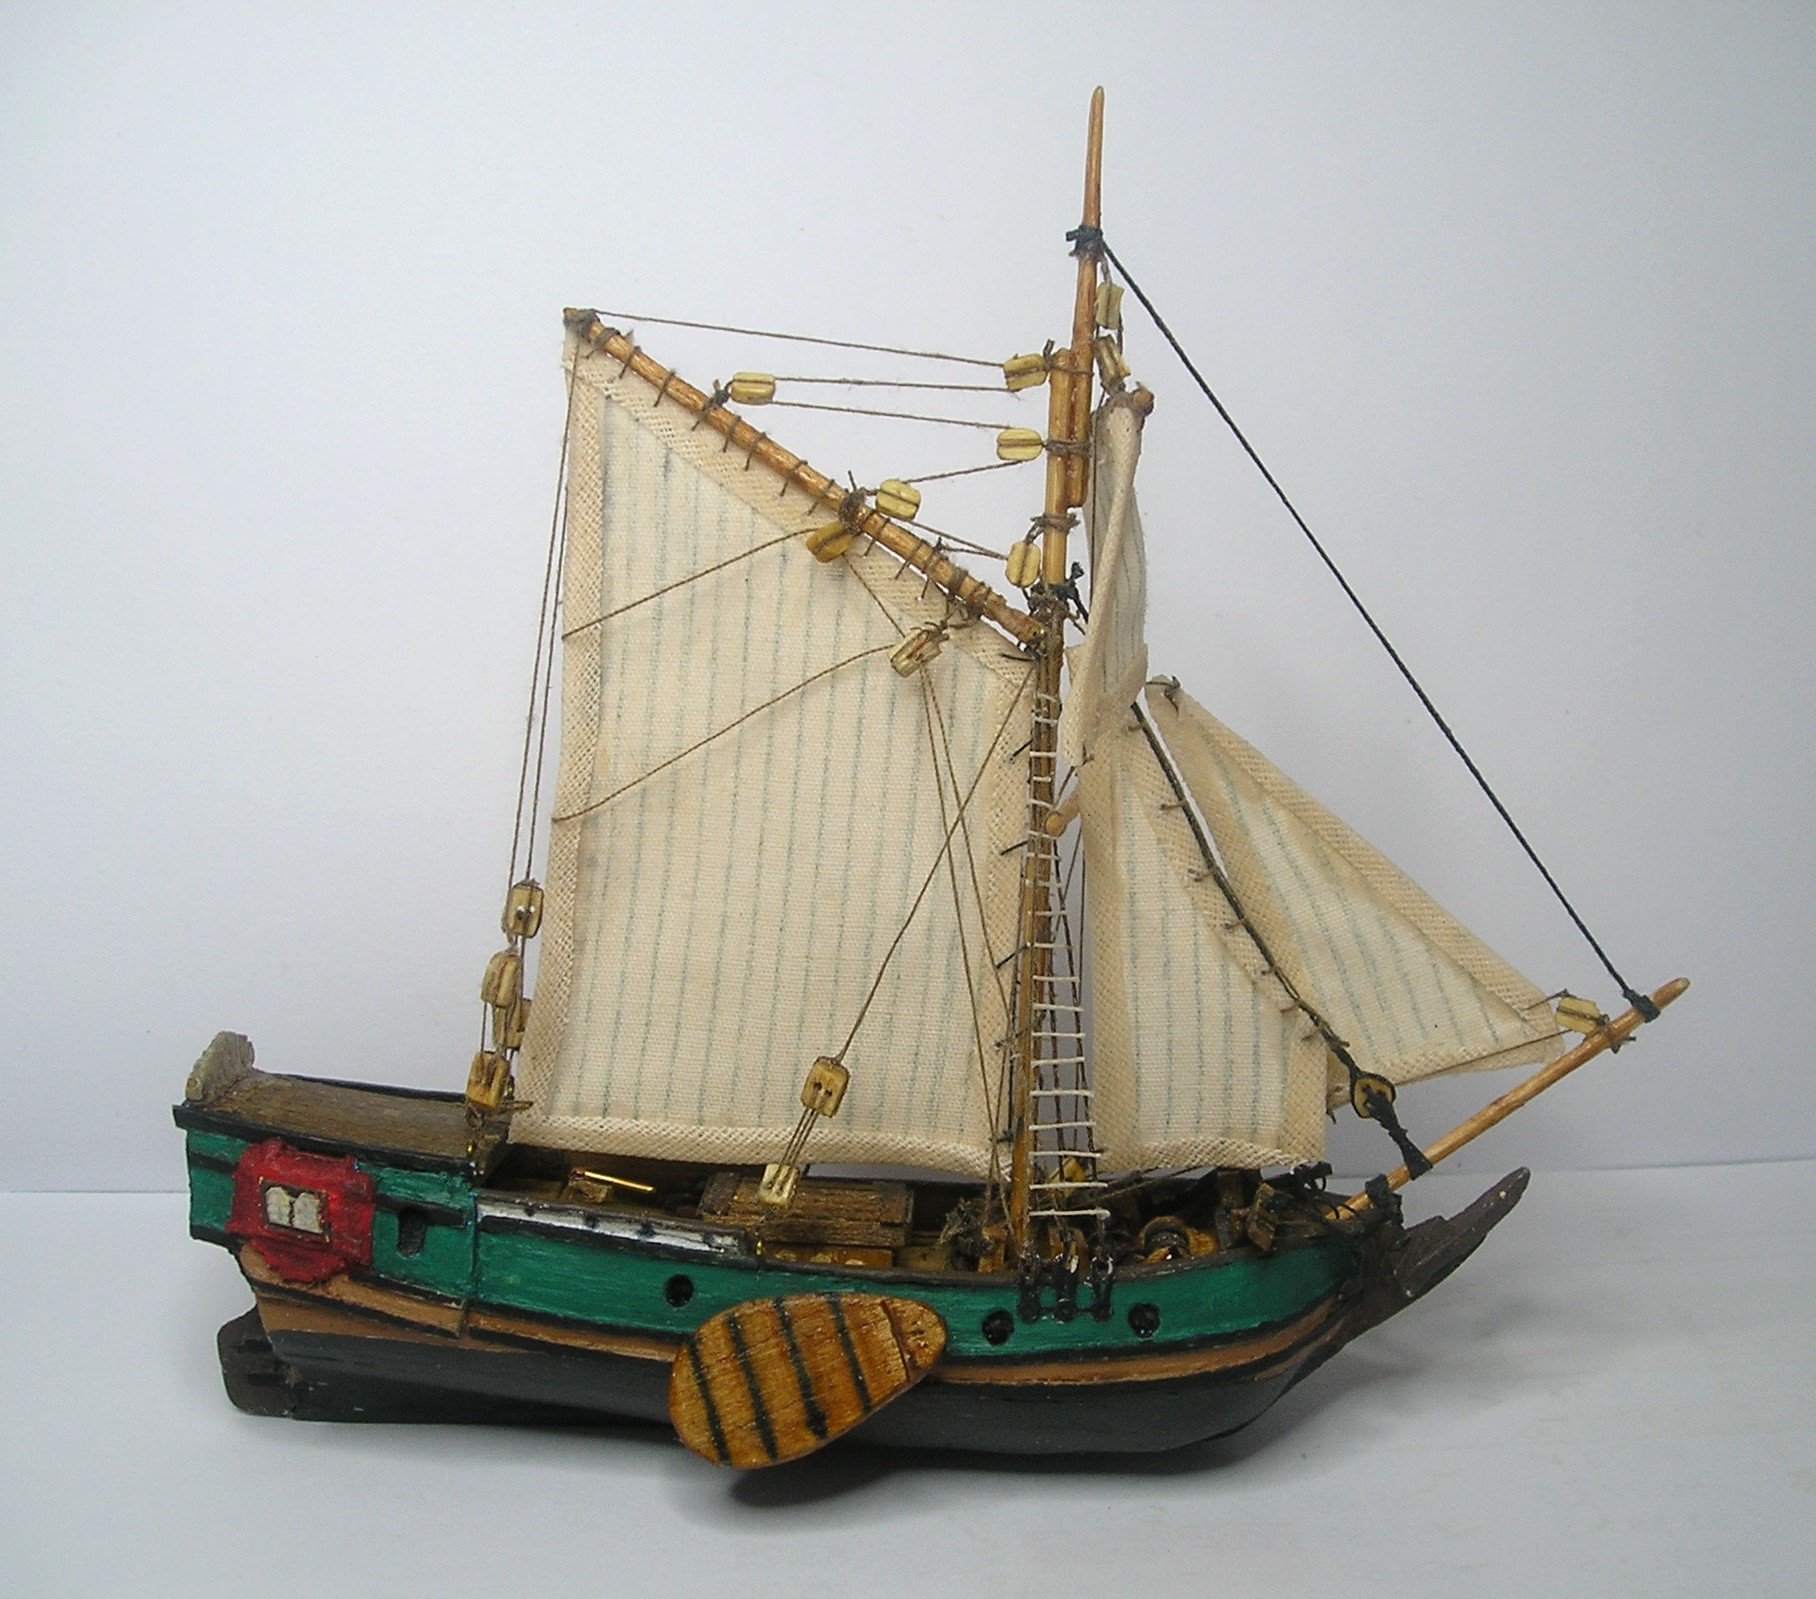
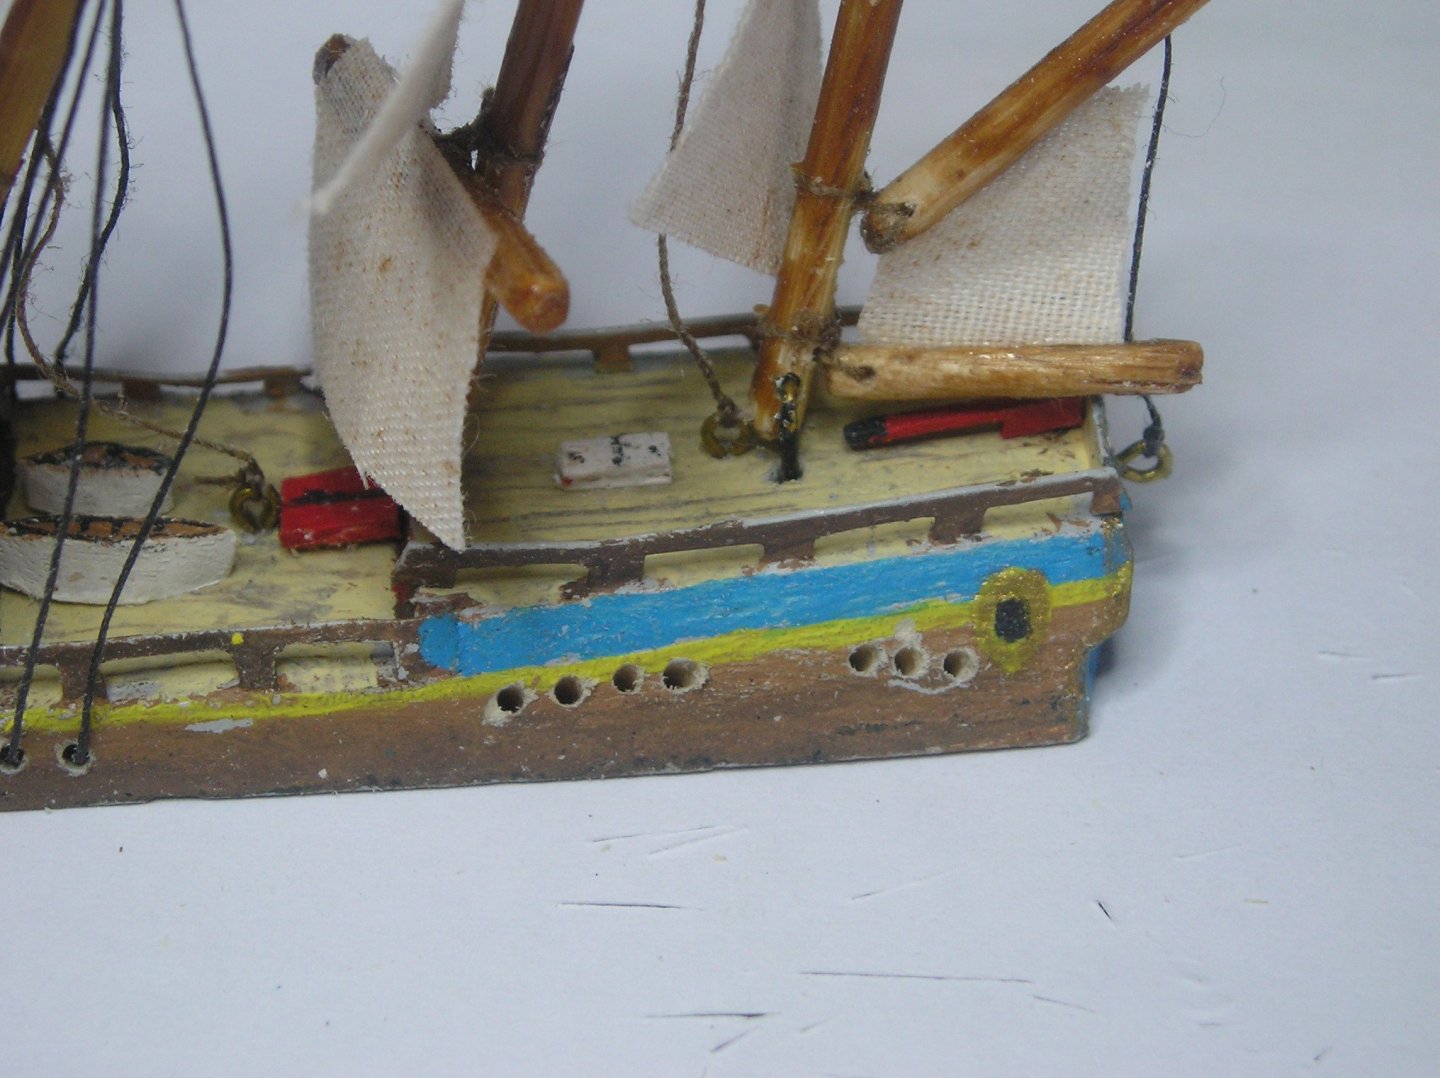
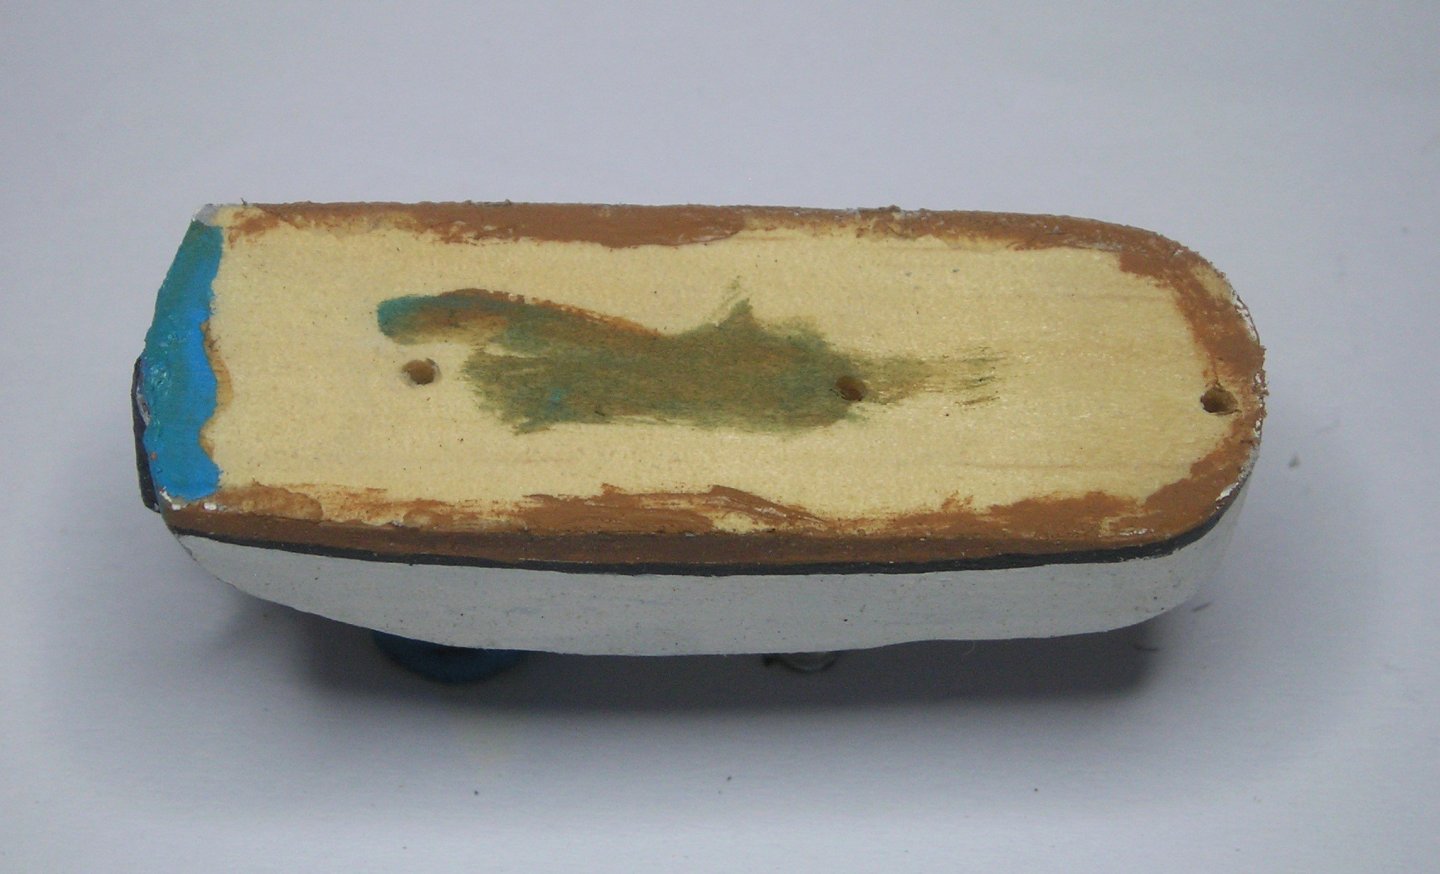
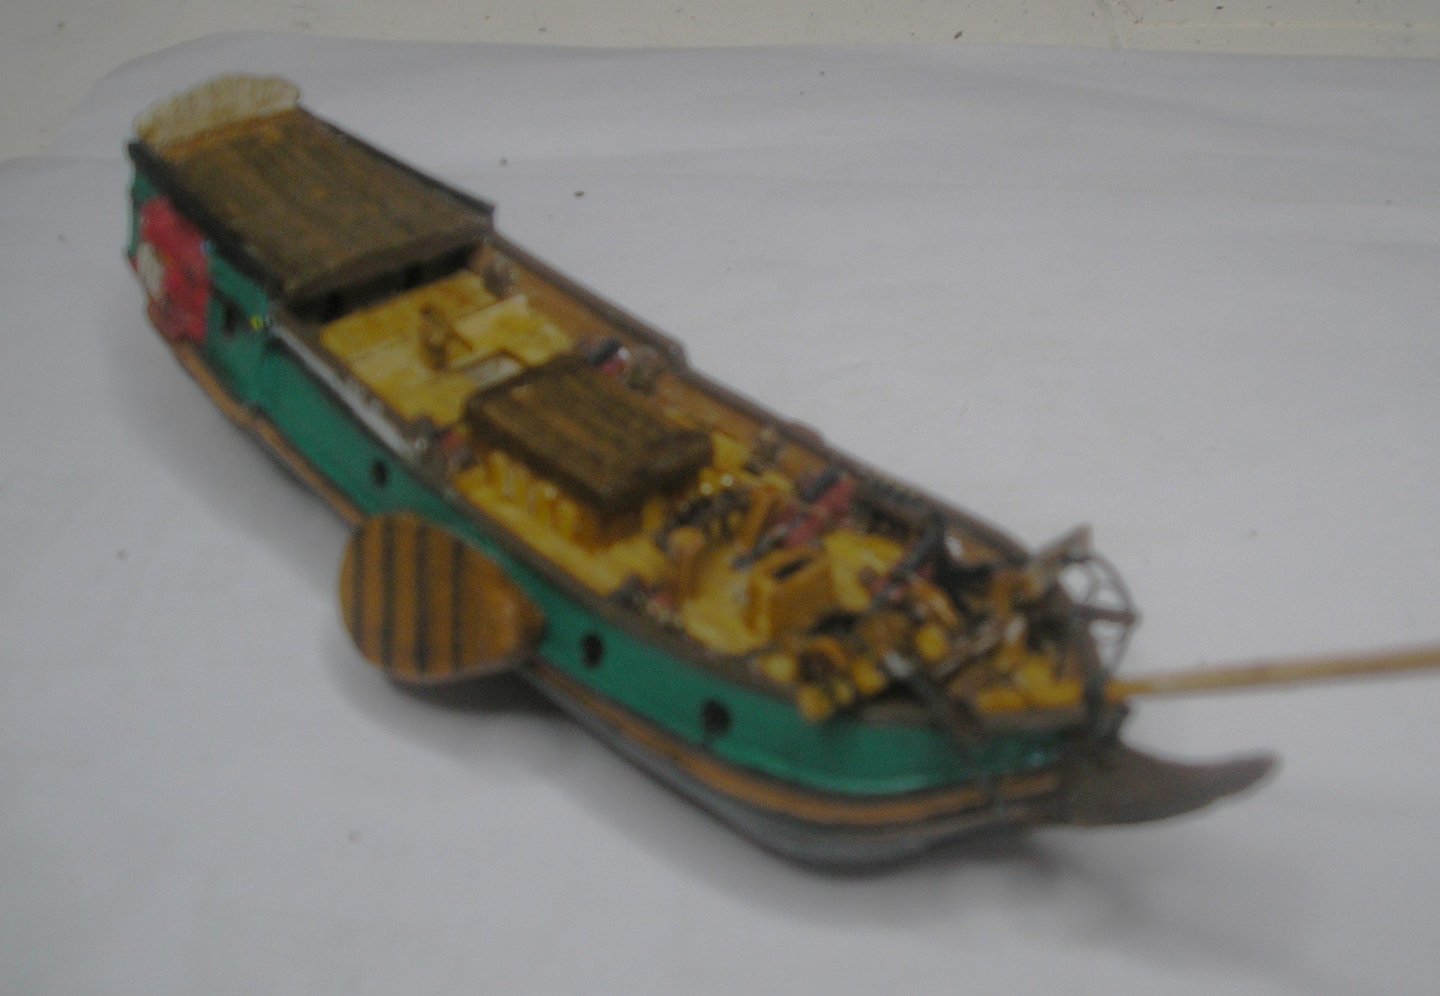
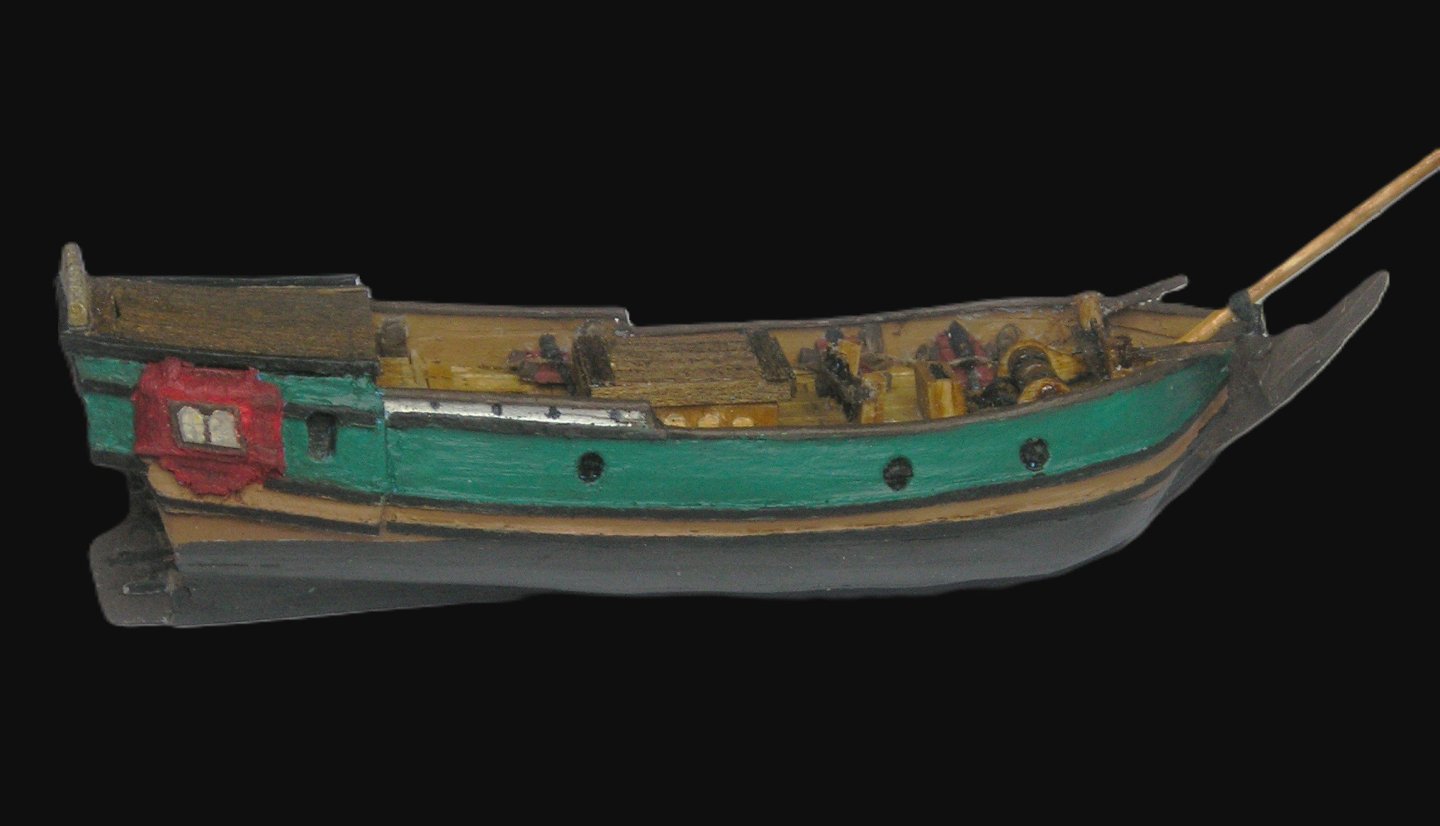
What a day! The deck is nearly finished. After further research, I changed the blue to a deep green on the hull. I like it as it's 'verisimiltude' is better and it doesn't require an elaborate pattern. 😃 Ask @Louie da fly what it means! That leaves tomorrow to finish the deck and start going UP! (all 90mm/3.5") Cheers,
- 55 replies
-
- 8
-
-
-
- miniature
- Brandenburg State Yacht
- (and 1 more)
-
Don't tell anybody @Strelok, but the forward guns are dummies! I had to remove them in order to leave enough space for the capstan and other parts. Now I don't feel so bad about it. 🤭 Thanks!
- 55 replies
-
- 2
-
-
- miniature
- Brandenburg State Yacht
- (and 1 more)
-
There's that wonderful word again. Most appropriate for modellers. I'm very impressed with your technical terminology when describing what you are doing or plan to do. Looking good Steven. Peter