Yon
-
Posts
143 -
Joined
-
Last visited
Content Type
Profiles
Forums
Gallery
Events
Everything posted by Yon
-

HMS Victory by Yon - Caldercraft 1:72
Yon replied to Yon's topic in - Kit build logs for subjects built from 1751 - 1800
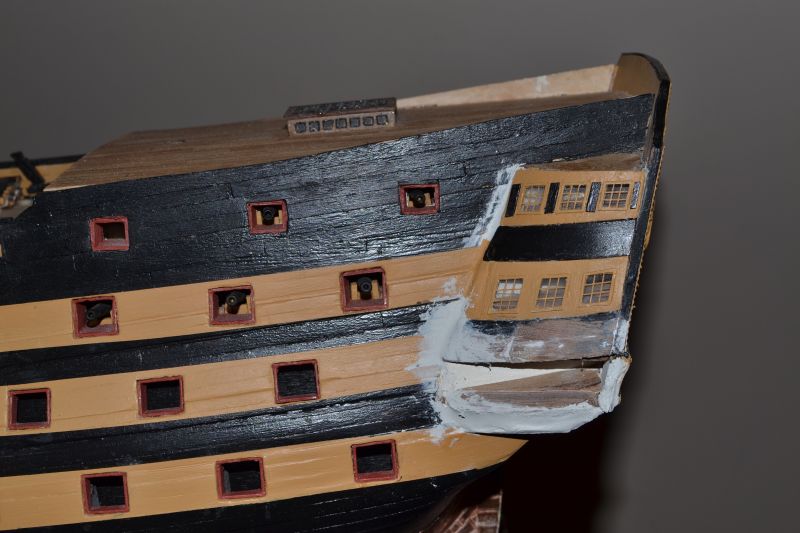
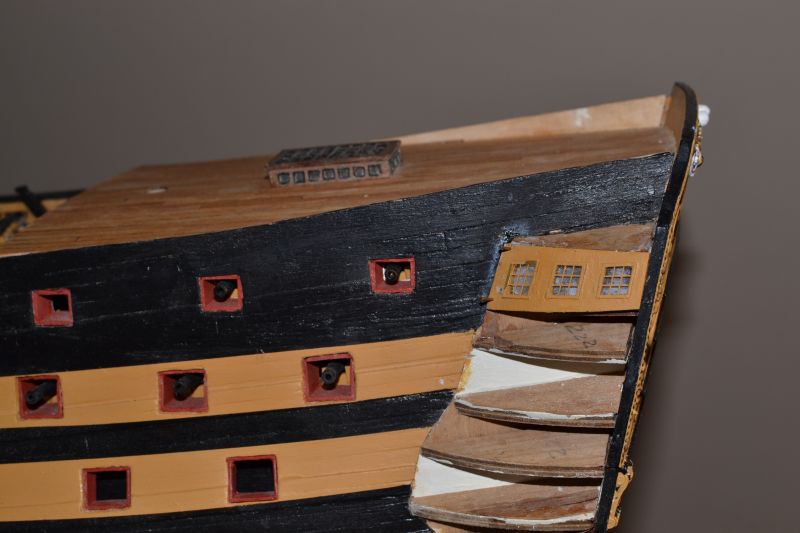
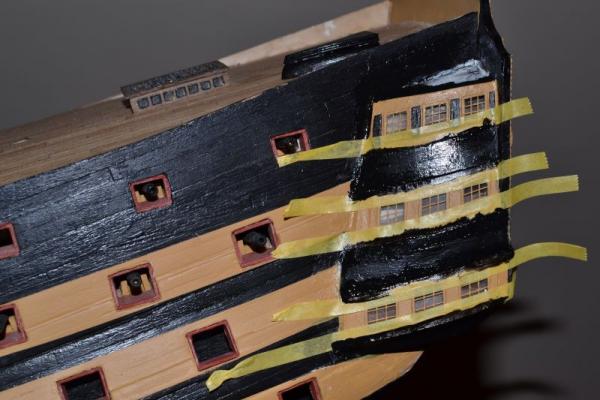
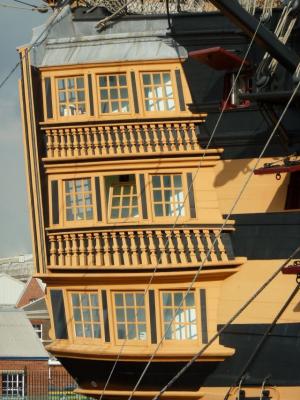
Hi Guys Good to see you back Derek, I think I'm now OK with the windows I just have to watch the CA. Kevin, I agree about the sill (see the bottom picture below) although on my model it will have to be a very specific angle to get it at right angles to the hull as my stern is sloping inwards at that point. I might experiment with wood strip instead of styrene as its easier to work with. Overall I'm still having a very hard time with the galleries. Mainly because I messed up the profiles right at the beginning. My errors are compounding as I work downwards and I haven't even bothered with the bottom skin, I just filled the gap with filler. Still I think I will get there in the end and then start all over again on starboard. Here's some pics - not very pleaseant viewing I'm afraid.... and this is what it should look like


-
HMS Victory by Yon - Caldercraft 1:72
Yon replied to Yon's topic in - Kit build logs for subjects built from 1751 - 1800
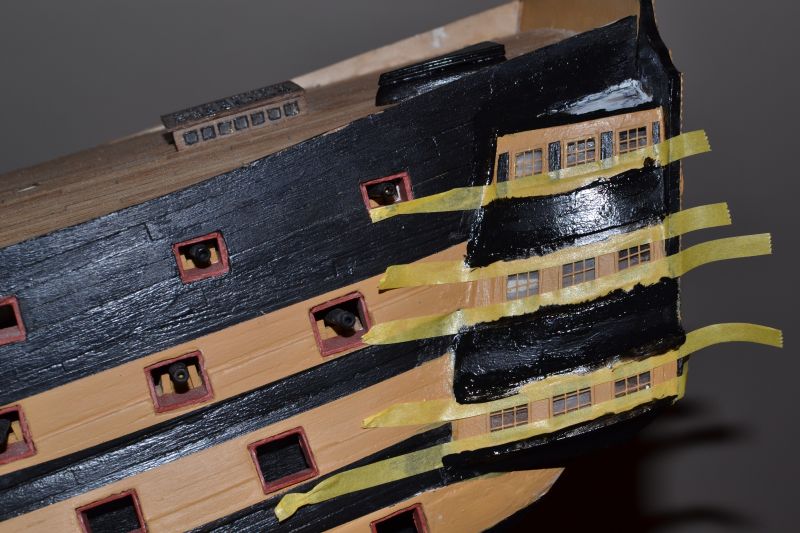
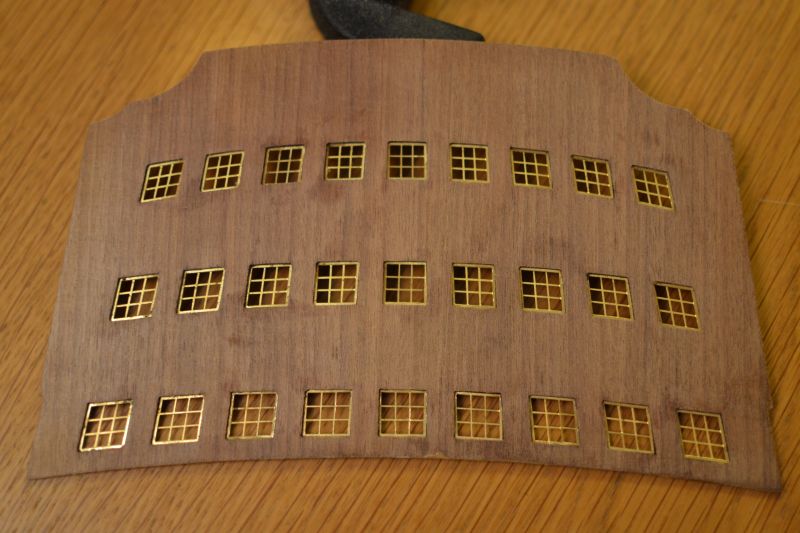
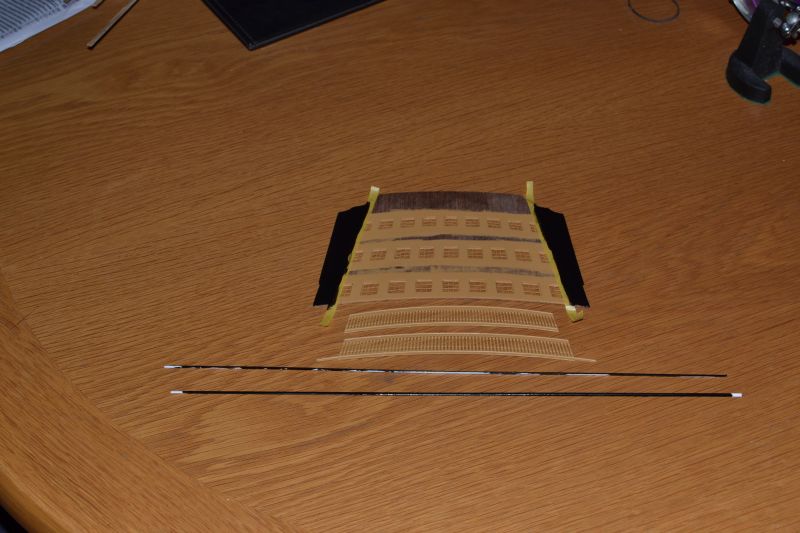
Thanks David My nightmare contimues. I made a big rookie mistake with the gallery glazing as it has clouded over due to the CA fumes to I've had to take the gallery off and start again. I know whart you mean about matching the brass profile - I think I'm going to have the same issue.... Cheers yon -
HMS Victory by Yon - Caldercraft 1:72
Yon replied to Yon's topic in - Kit build logs for subjects built from 1751 - 1800
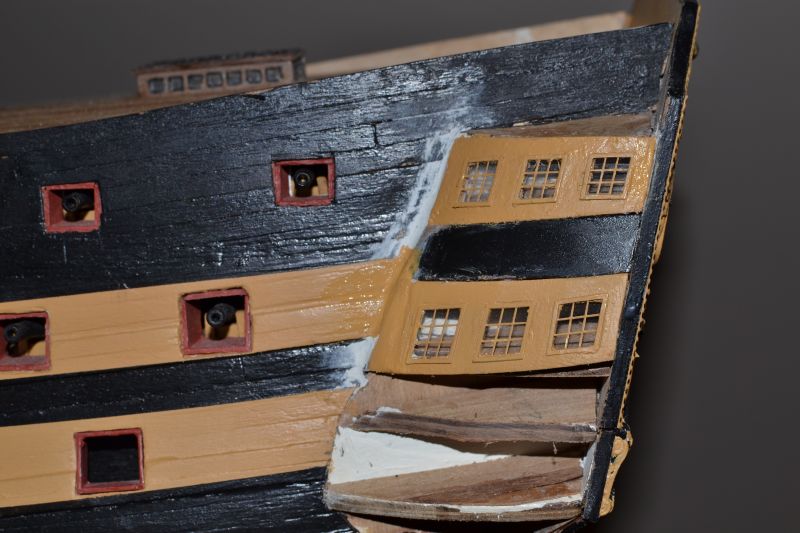
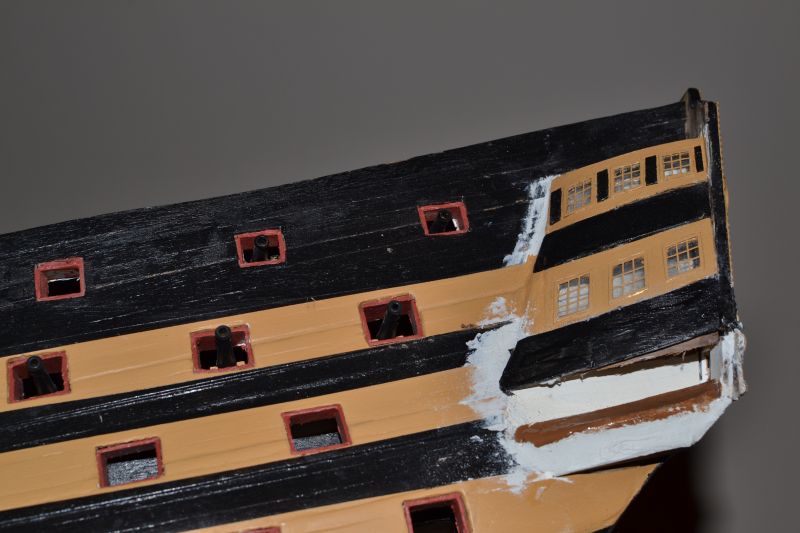
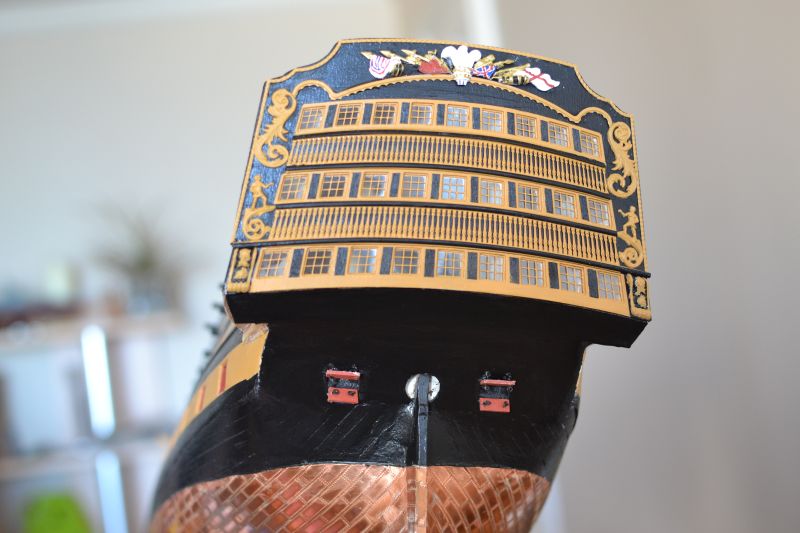
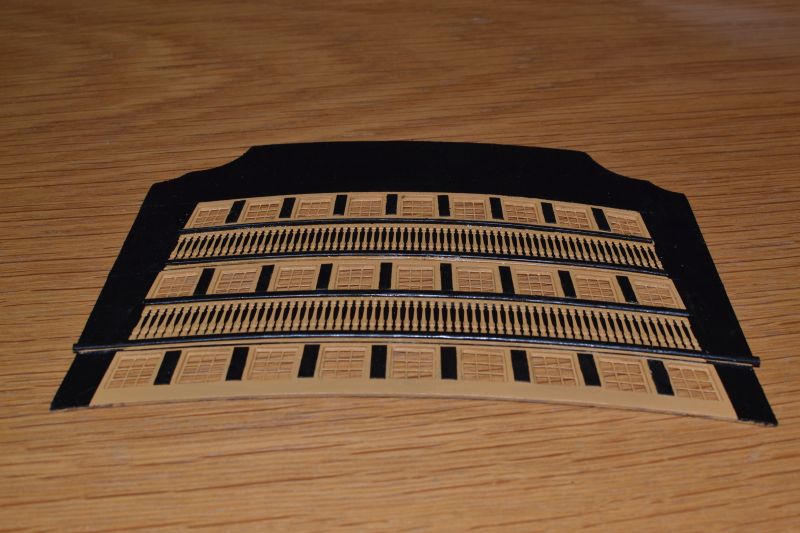
Hi David Sorry I didn't see your post. The stern facia has gone well thanks. Just needs a little touching up and finishing off. The quarter galleries are a nightmare. I don't think I did a very good job of the inside pattern. Then I got confused and cut too much off the middle gallery thinking it was the top gallery. Then I could not get the gallery to fit even with thick CA so I've pinned it in position. I realise now that I should of pre-bent it into shape first. So I have my hands full and will need a great deal of filler to make this presentable ! Here are a couple of pictures. Cheers Yon

-
HMS Victory by Yon - Caldercraft 1:72
Yon replied to Yon's topic in - Kit build logs for subjects built from 1751 - 1800
Hi David Understood - thanks very much. I just hope I can do mine half as good as yours ! Cheers Yon -
HMS Victory by Yon - Caldercraft 1:72
Yon replied to Yon's topic in - Kit build logs for subjects built from 1751 - 1800
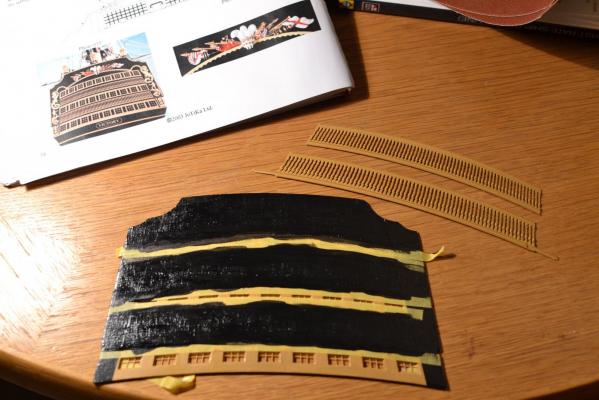
A quick update on the stern whilst the glue is drying. As David says above its not as difficult as it looks and with Kevin's advice I think its going pretty well. Here are some pictures Thanks guys Yon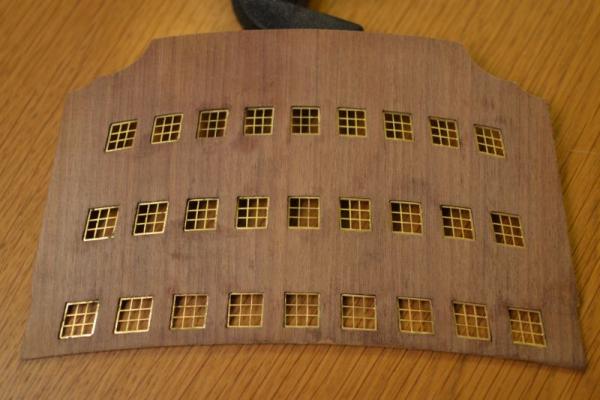

-
Sounds like your strategy committee arrived at the right conclusion ! I think we are at about the same stage as far as the stern is concerned - as for the rest, I think you've tackled some of the more challenging bits - I'll aim to post some of my stern progress tomorrow.
-
Hi Kevin We are almost neck and neck although I haven't yet attached the facia. I can't decide on mine whether the white is too much or not. From your photo above yours looks fine. It isn't clear but it looks like Gil may have repainted his inner facia yellow.... Good luck with your deliberations ! Cheers Yon
-
Great set of photos, David, a clear illustration of your technique and smartly executed. Cheers Yon
-
HMS Victory by Yon - Caldercraft 1:72
Yon replied to Yon's topic in - Kit build logs for subjects built from 1751 - 1800
Hi David Thought I'd lost you there !! Thanks for the advice - I've just fitted the first window - seems OK so far ! Cheers Yon -
HMS Victory by Yon - Caldercraft 1:72
Yon replied to Yon's topic in - Kit build logs for subjects built from 1751 - 1800
Great stuff Kevin - many thanks for the advice. Cheers Yon -
HMS Victory by Yon - Caldercraft 1:72
Yon replied to Yon's topic in - Kit build logs for subjects built from 1751 - 1800
Thanks Kevin. The stern looks a bit daunting - I think I'll take my time Cheers yon -
HMS Victory by Yon - Caldercraft 1:72
Yon replied to Yon's topic in - Kit build logs for subjects built from 1751 - 1800
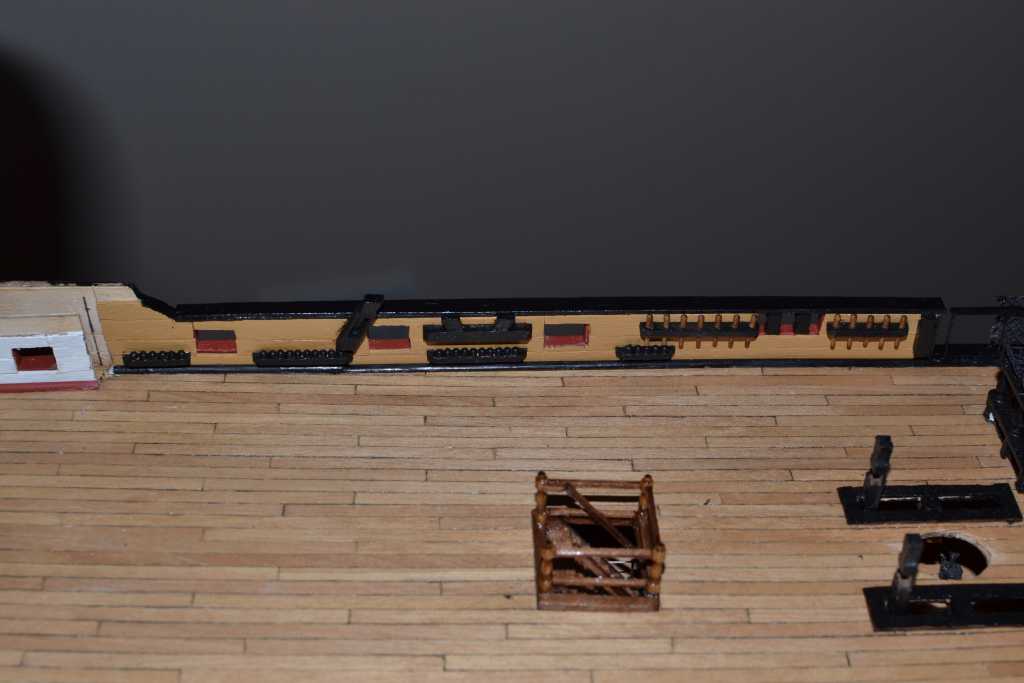
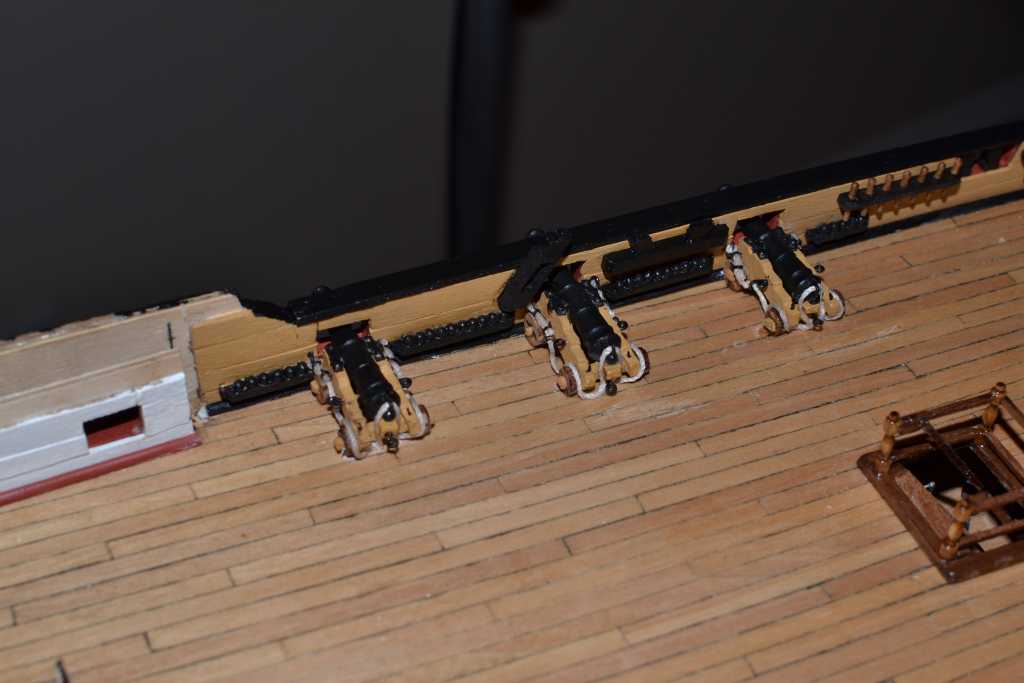
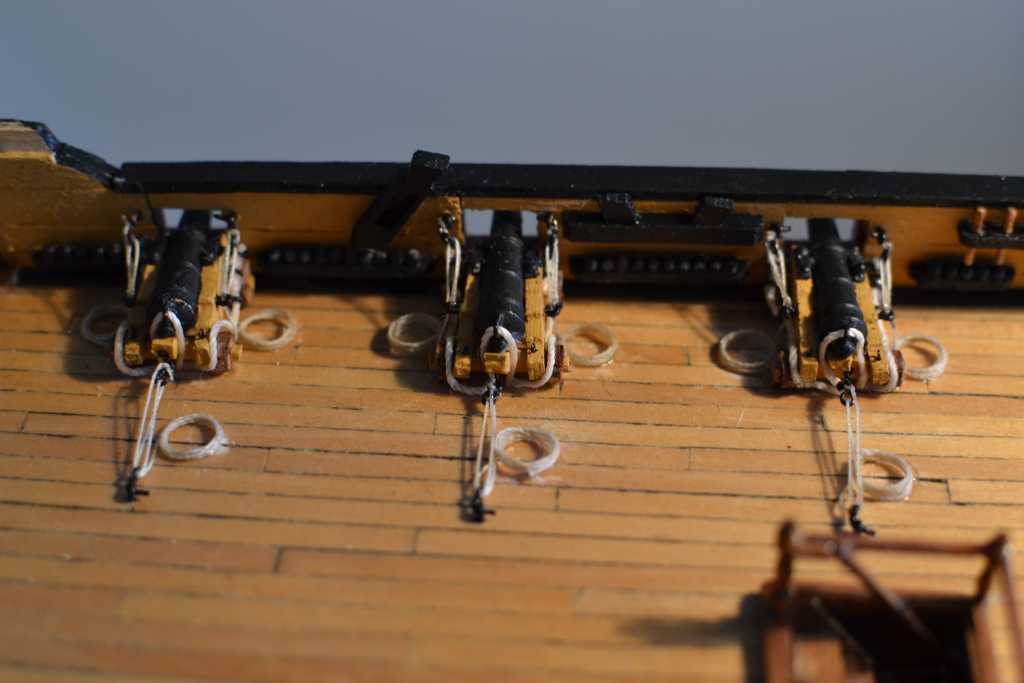
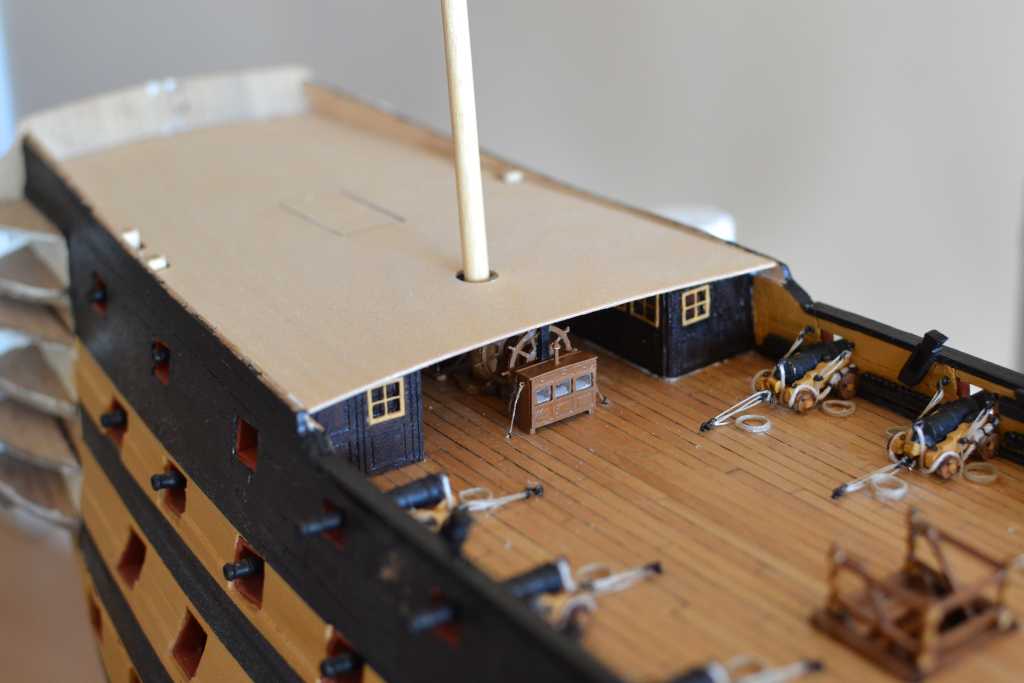
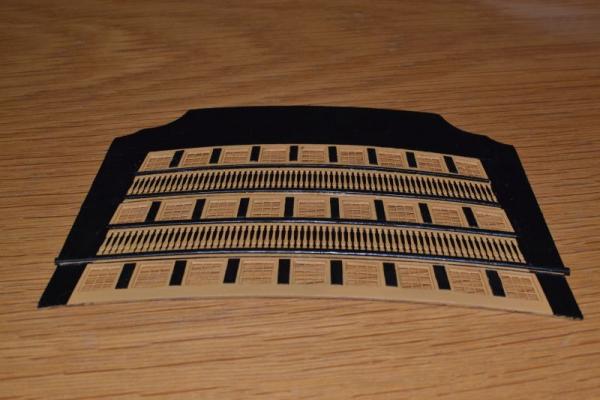
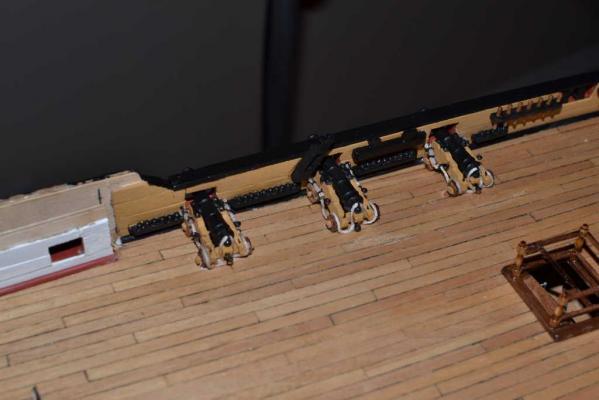
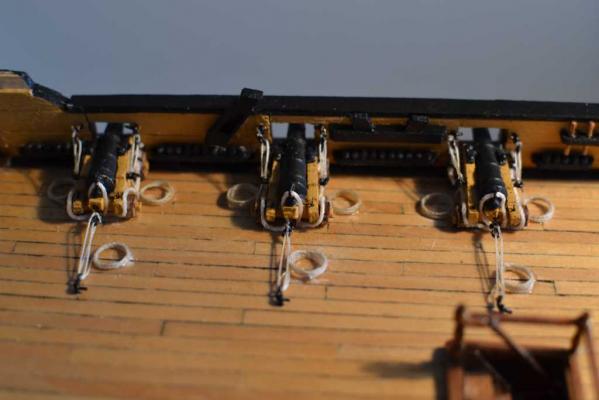
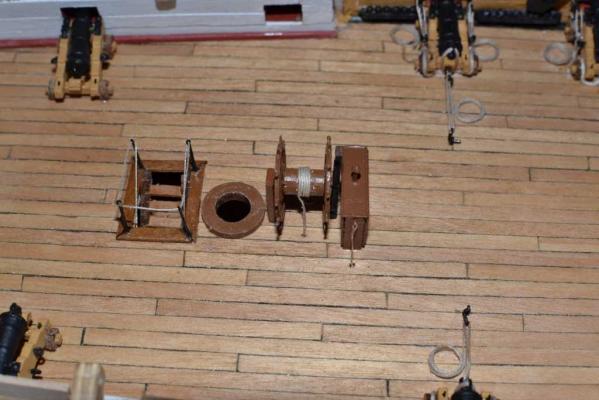
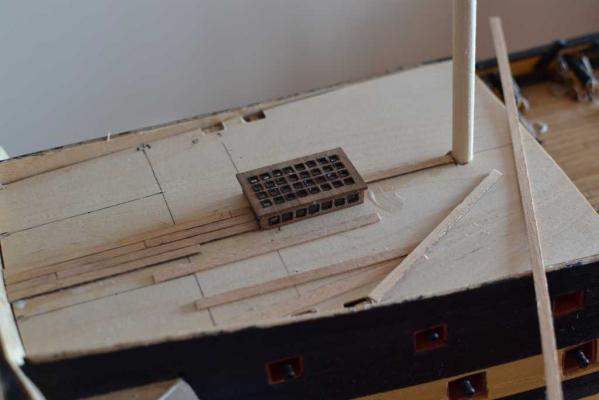
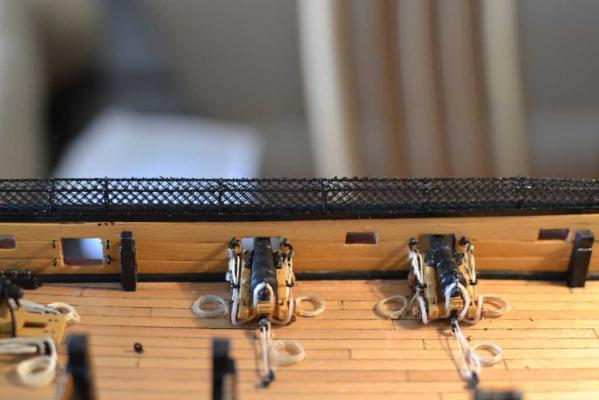
Over the last couple of weeks I've been working on the remaining cannon and quarterdeck fittings. Then I fitted and planked the poop deck. No real drama and I'm very happy that I don't have anymore cannon to rig. Now I'll be finishing the poop fittings (flag lockers etc) and then to the quarter galleries and the stern which I imagine will be quite a challenge. Here are the pictures: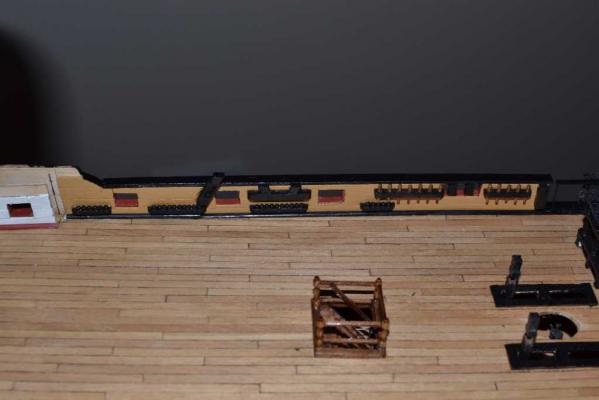


-
Nice Kevin - you've done a great job Cheers Yon
-
Can't have too many photos, David. Looks very impressive with all the lids in place. Good luck with the next stage whichever you decide. Cheers Yon
- 439 replies
-
- 1
-

-
- victory
- caldercraft
- (and 1 more)
-
Looks like a major undertaking - not suprised that you need to take frequent breaks but it looks like you're doing a great job !
-
HMS Victory by Yon - Caldercraft 1:72
Yon replied to Yon's topic in - Kit build logs for subjects built from 1751 - 1800
Hi David That's good progress with the gunport lids - well done. It will be interesting to see if the garlic netting works for the hammock nets. It will be some time before I get to the stern - I think Ill do the admirals companionway, 1/4 deck cannon and fittings, wheel & binnacle and then the poop deck and all those fittings first. Cheers Yon -
HMS Victory by Yon - Caldercraft 1:72
Yon replied to Yon's topic in - Kit build logs for subjects built from 1751 - 1800
I don't think I made my wales as per the instructions so I didn't have the same issue with my bow - good luck with it ! It will be a long time before I'm on to those chain plates - it looks tough although I'll now have the benefit of your notes ! Cheers Yon -
HMS Victory by Yon - Caldercraft 1:72
Yon replied to Yon's topic in - Kit build logs for subjects built from 1751 - 1800
Thanks Kevin -
HMS Victory by Yon - Caldercraft 1:72
Yon replied to Yon's topic in - Kit build logs for subjects built from 1751 - 1800
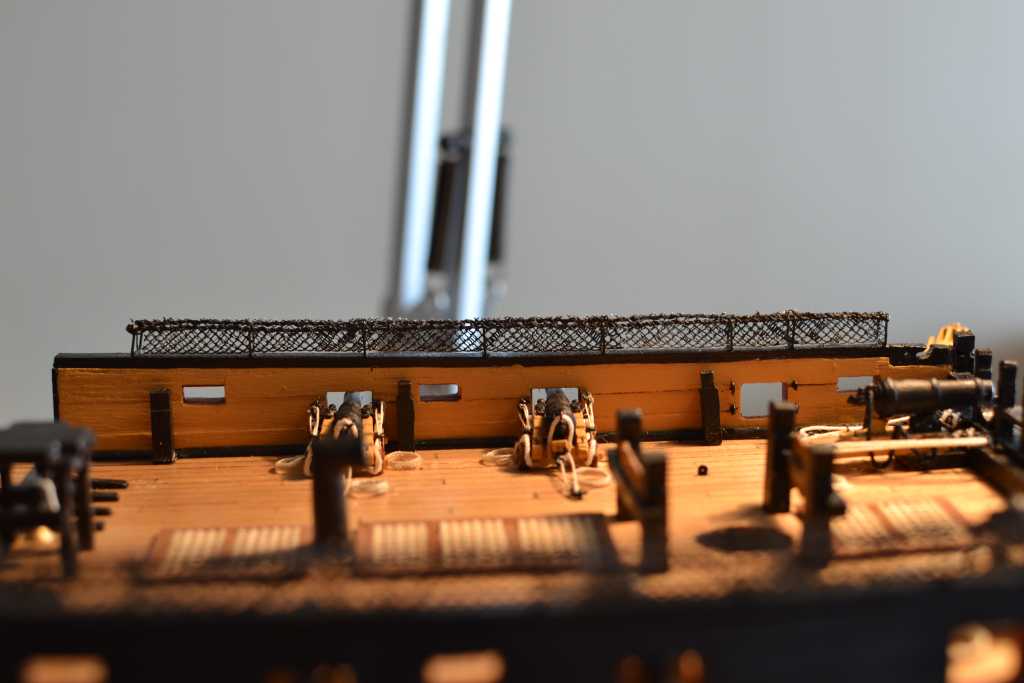
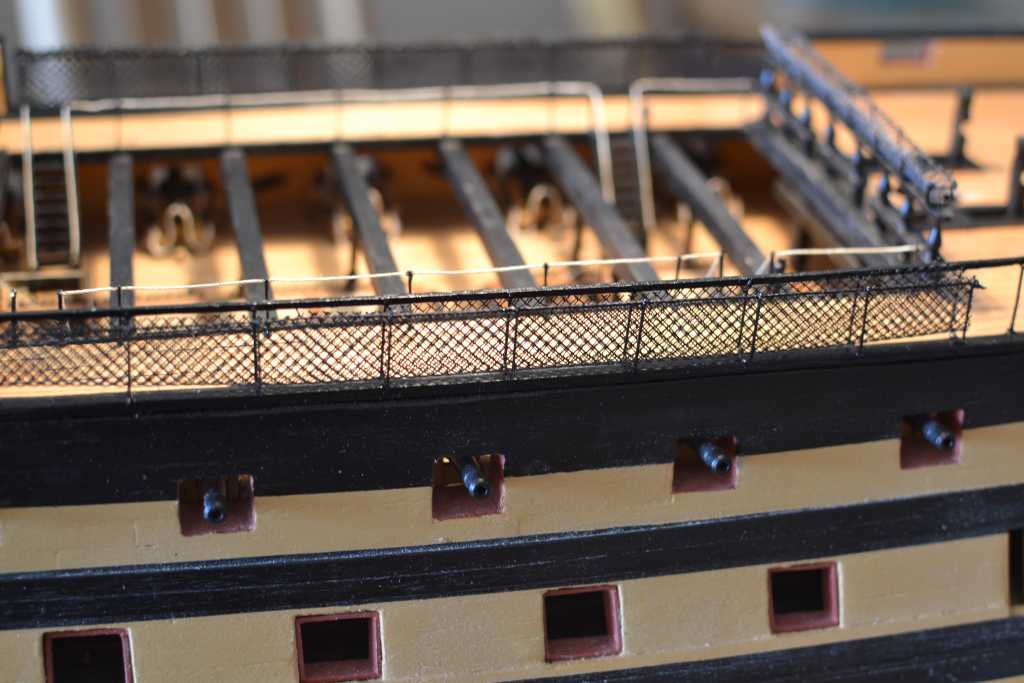
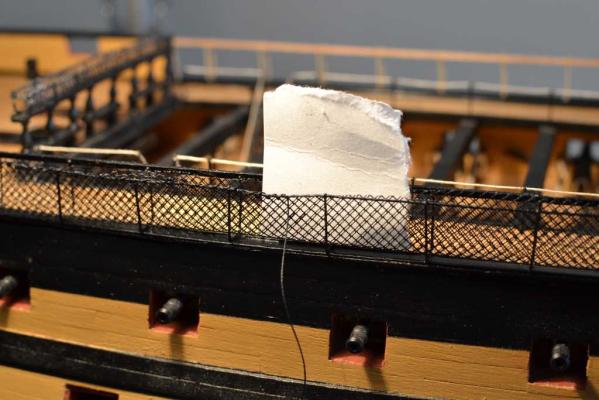
Over the last four days or so I've accomplished what should have taken no more than a couple of hours but I kept going back, redoing work I wasn't happy with. I changed the material I was using for the hammock nets and then realised that it looked much better to attach the netting with CA rather than sewing - which had taken me forever. At least I now know better for the remaining netting. Finally I attached the marines walk which I think completes the bow for the time being. Some photos Before After Marines Walk Cheers all Yon


-
Hi Kevin I used styrene strip - 1.5mm x 2.0mm - it worked quite well. The copper profile was impossible. Unfortutely I went too far and tried to add the blue strip by sticking a smaller strip of styrene, painted blue, on top and that messed it all up ! Cheers Yon
- 1,319 replies
-
- 1
-
-
- caldercraft
- Victory
- (and 1 more)
-
HMS Victory by Yon - Caldercraft 1:72
Yon replied to Yon's topic in - Kit build logs for subjects built from 1751 - 1800
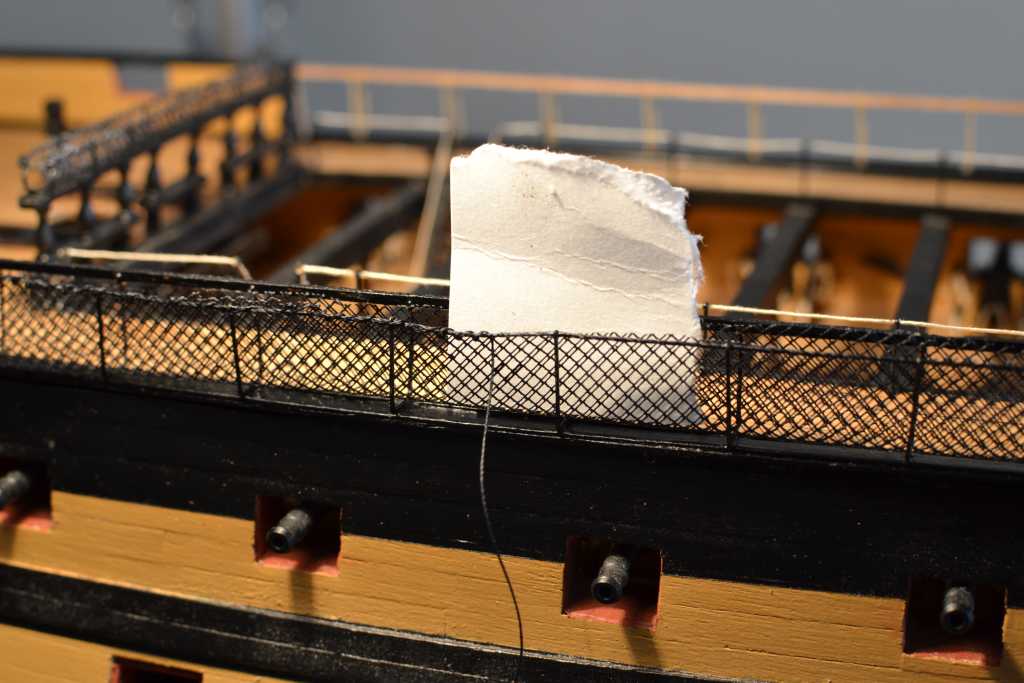
Hi David That's a clever idea - thanks (please keep the post - it will be useful) I'm busy doing the hammock nets and then the marine's walk to finish off the foreastle area. I've slowed down a bit as I'm trying to avoid using Cyano and the white glue is taking a lot longer to dry. I hope to have some updated photo's early next week All the best Yon -
Great work on the lids, David - they all consistent - good luck with the rest ! Cheers Yon
-
HMS Victory by Yon - Caldercraft 1:72
Yon replied to Yon's topic in - Kit build logs for subjects built from 1751 - 1800
Hi Mort Thanks very much Cheers Yon -
HMS Victory by Yon - Caldercraft 1:72
Yon replied to Yon's topic in - Kit build logs for subjects built from 1751 - 1800
Derek - I'll look into that - only got the camera recently so still trying to work it out without reading the instructions ! -
HMS Victory by Yon - Caldercraft 1:72
Yon replied to Yon's topic in - Kit build logs for subjects built from 1751 - 1800
Hi David I too noticed that some people had not bothered with the forward ports - quite honestly I'm beginning to wish I was one of them as it would have saved me a great deal of time and effort ! I had a similar concern with the cat head part getting in the way which was why my port ended up being too narrow. When I looked into the handrail I thought that it started as per my above picture "fwd gunports" and then runs parallel with the horizontal part of the bow. It then naturally terminates where it meets the bow at the forward end. However as it terminates forward it also turns downward for a couple of millimeters. I did not realise this so mine is not correct. Hope that makes sense ! Cheers Yon