FifeModels
-
Posts
528 -
Joined
-
Last visited
Content Type
Profiles
Forums
Gallery
Events
Everything posted by FifeModels
-
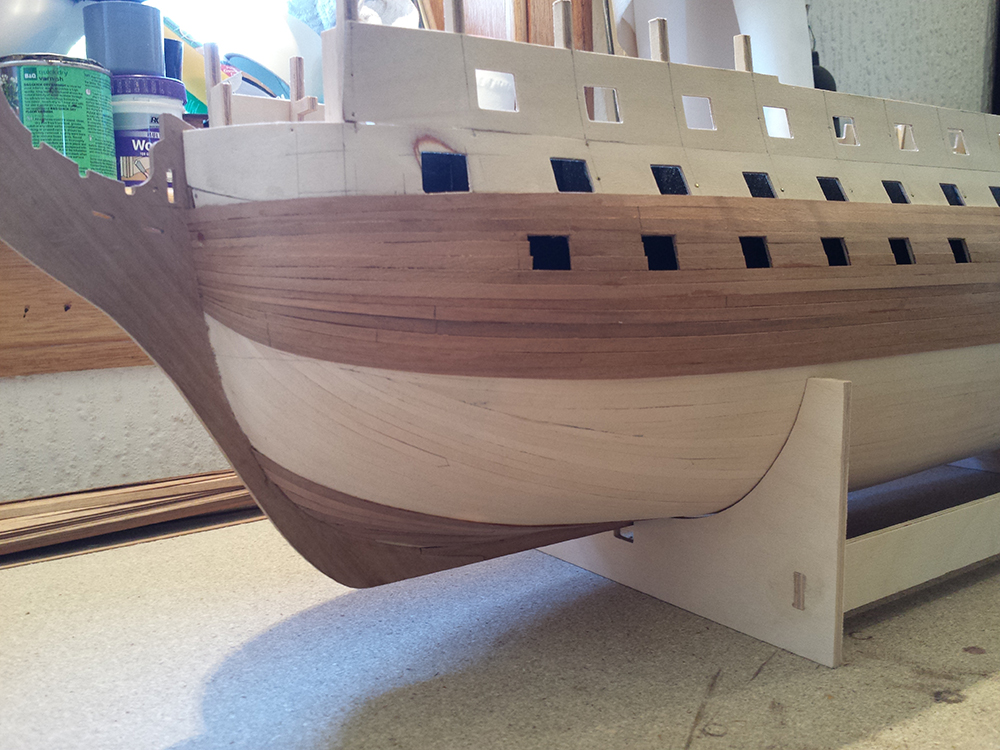
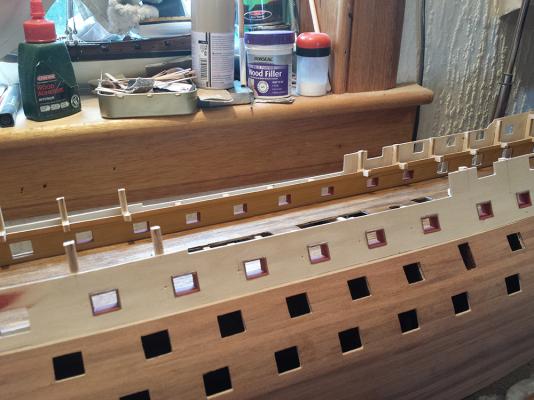
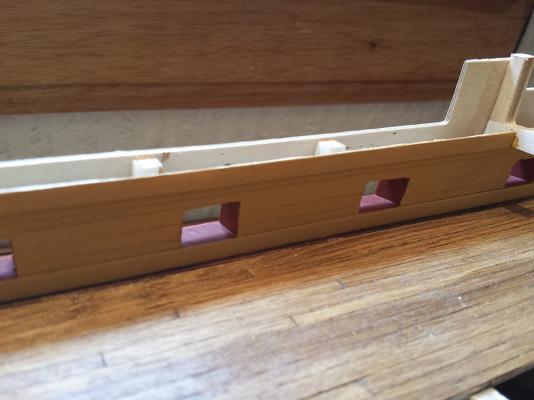
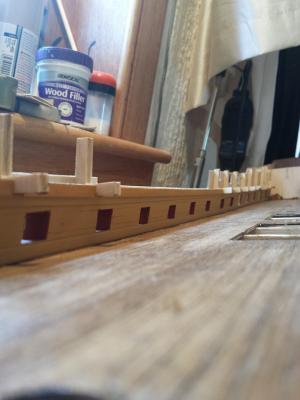
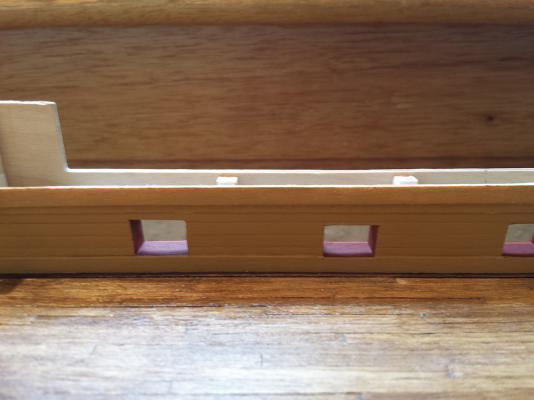
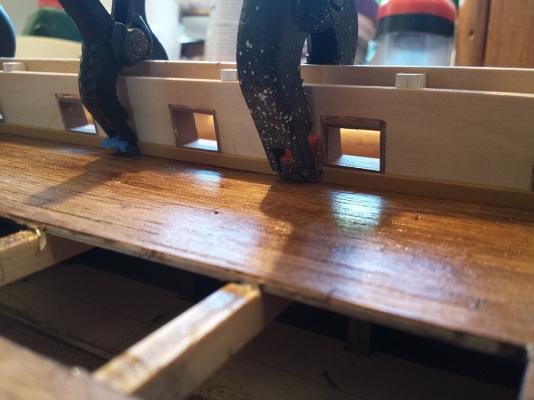
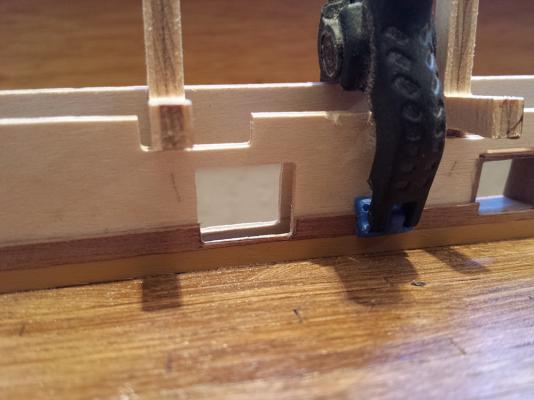
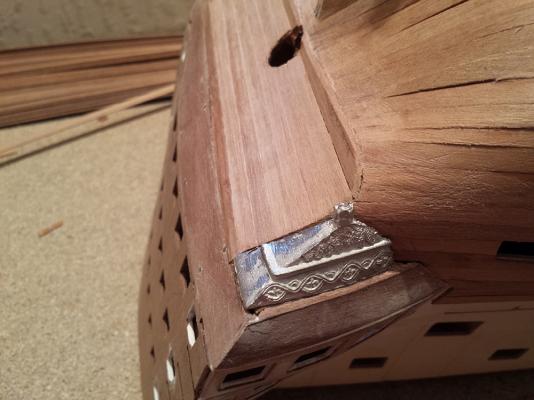
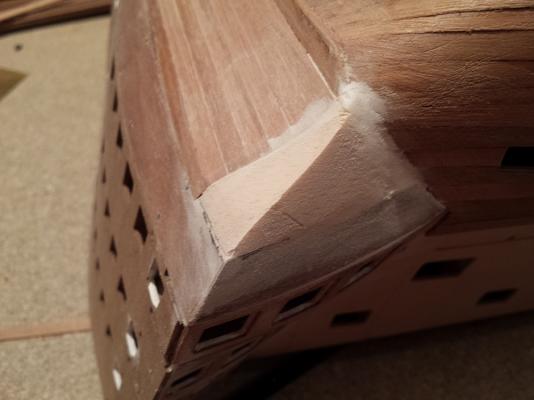
 Greetings all. I've been busy the last few, though not very much of it on ship. And I've managed to make a glaring mistake on an area which has always plagued me. Will bring you upto date first, no pics sorry. I've added the eyelets for the cannon tackle on the upper gun deck, only the 8 that were lined as the rest won't be visible so I have no plans on rigging them. Continued the outer planking upto the lower edge of the upper ports. Now it came to the lower whale. I spent so much time focussing on getting the run smooth and not to dip at the bow or go up and down as I have had on previous builds, that somehow I managed to completely mis-measure its position. The pictures below show where they are currently, and the pencil marks show where it was meant to be. You can see I had already corrected their run a little at the bow, and I still didn't notice they were out of position. It was only when I began planing the middle whale that I noticed they were wrong. My plan to correct them is simple: Trim the lower edge to where it is meant to be, and sand back smooth. The upper egde is a little more tricky. First, I have to add another layer over the upper strip to bring it out to the same thickness as the rest of the whale, then I will add the thinner strip in it's correct position. This will leave me a gap between the two, which I plan on using filler to bridge. (Thank goodness this ship is painted!) And so ends the theory...
-
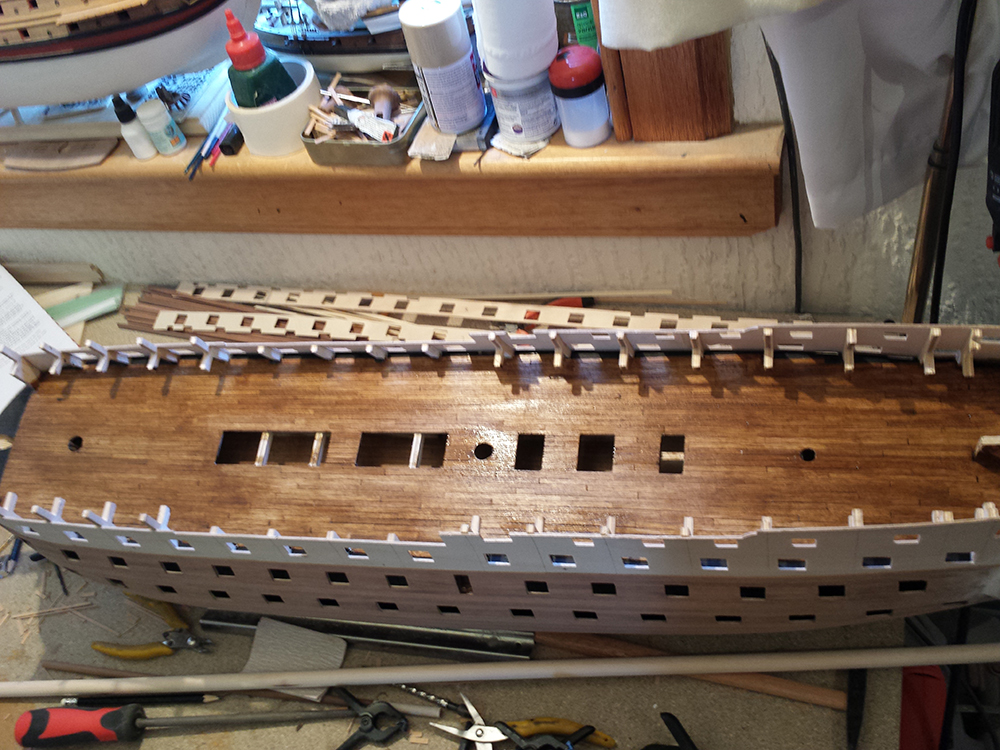
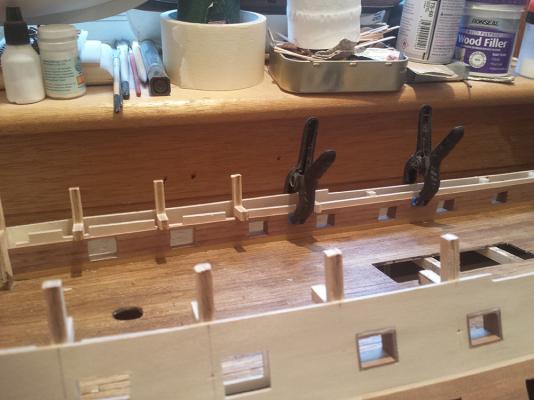
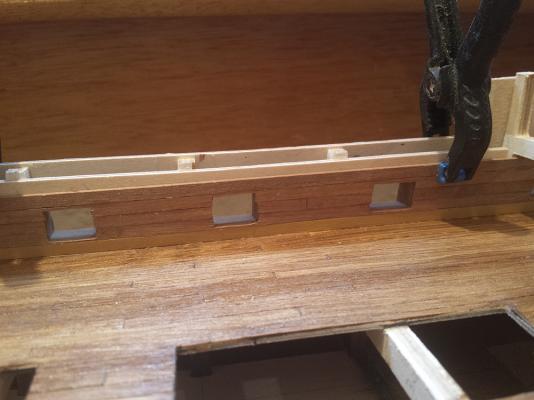
Good morning. Over the last few days I have been working on the inner bulwarks still. Basic planking, followed by lining the lidless ports. Painting. Then adding a few extra details, the waterways and ceilings. Finally followed by filling a few cracks that had crept in and repainting.

-
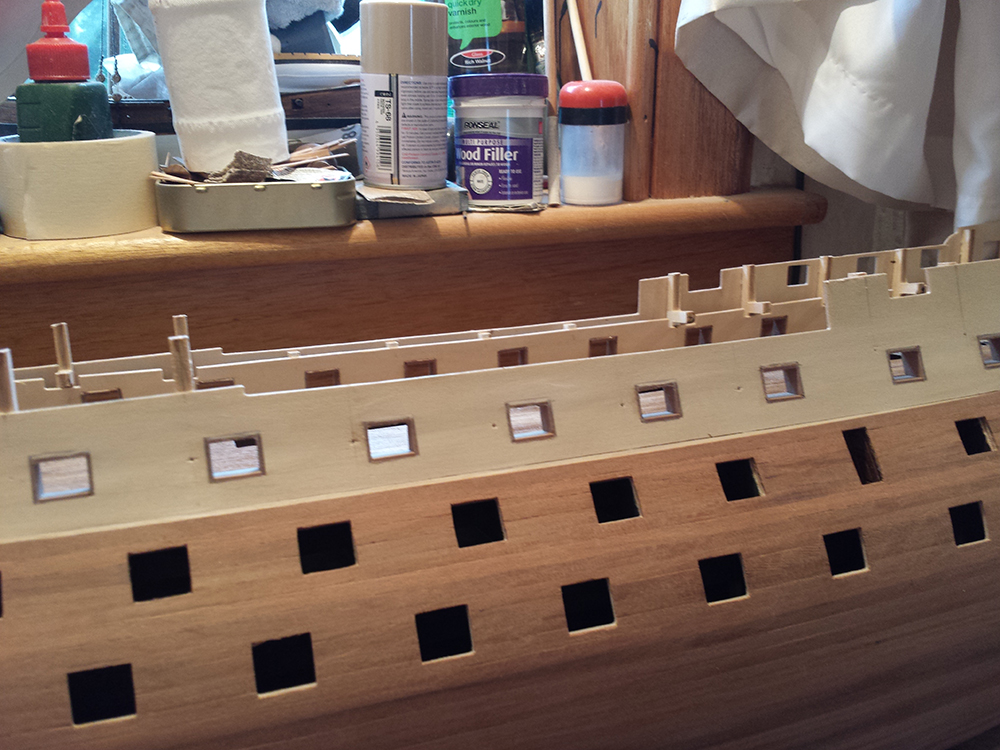
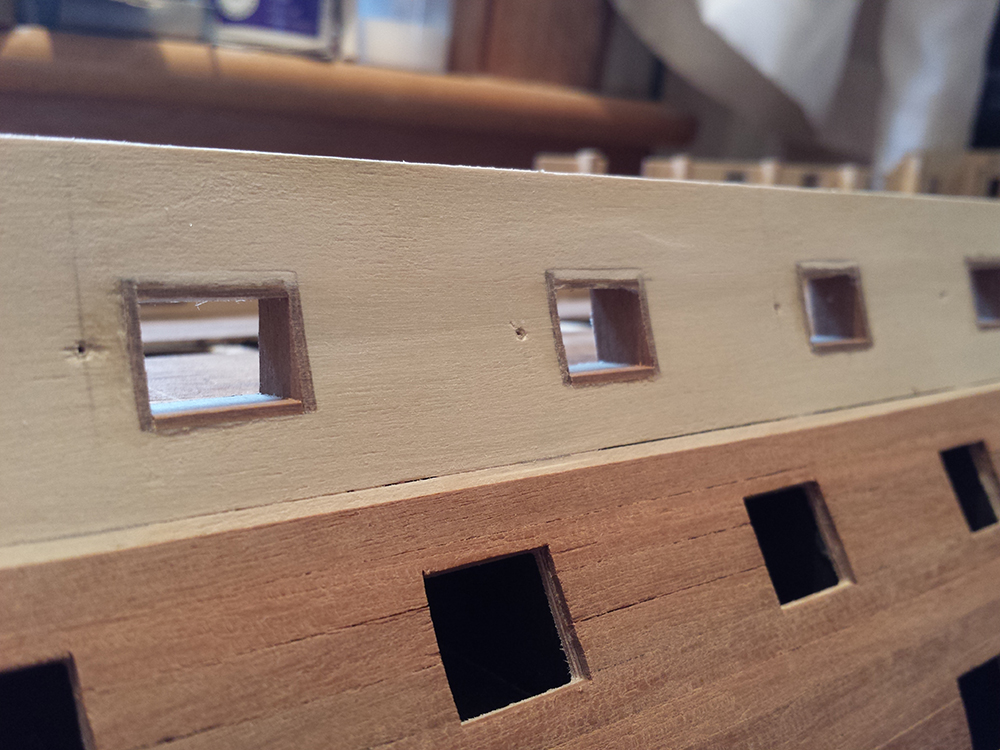
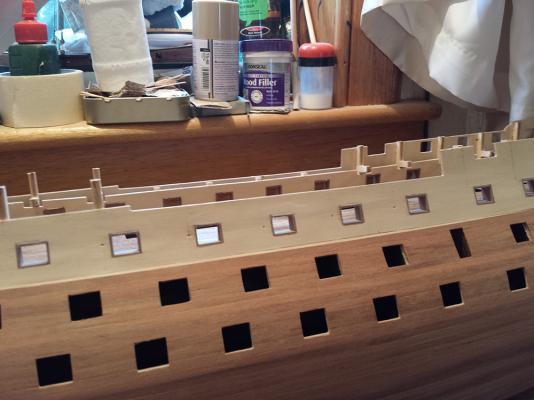
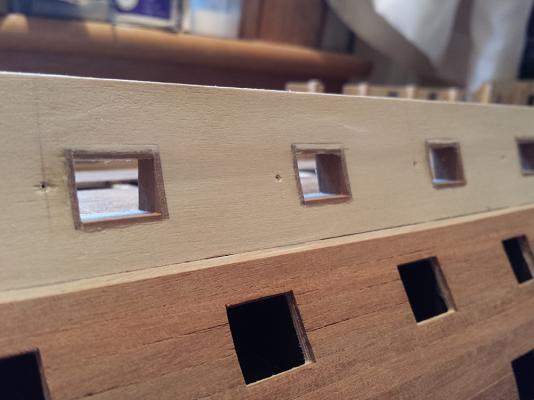
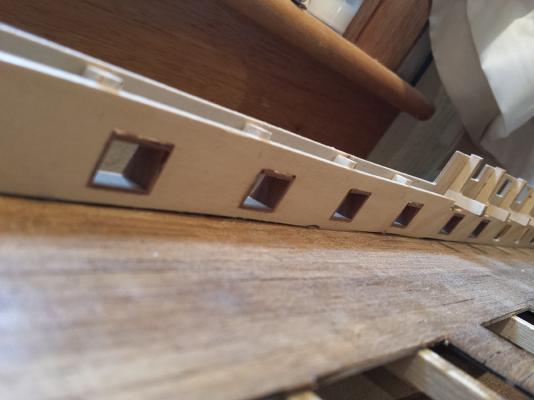
With the gun ports lined I have started planking the inner bulwarks. I pre-painted the lowest one before fitting to make keeping the crisp line between deck and bulwark easier, as masking would be difficult due to the upper supports just getting in the way. The remaining planks will be painted after fitting.

-
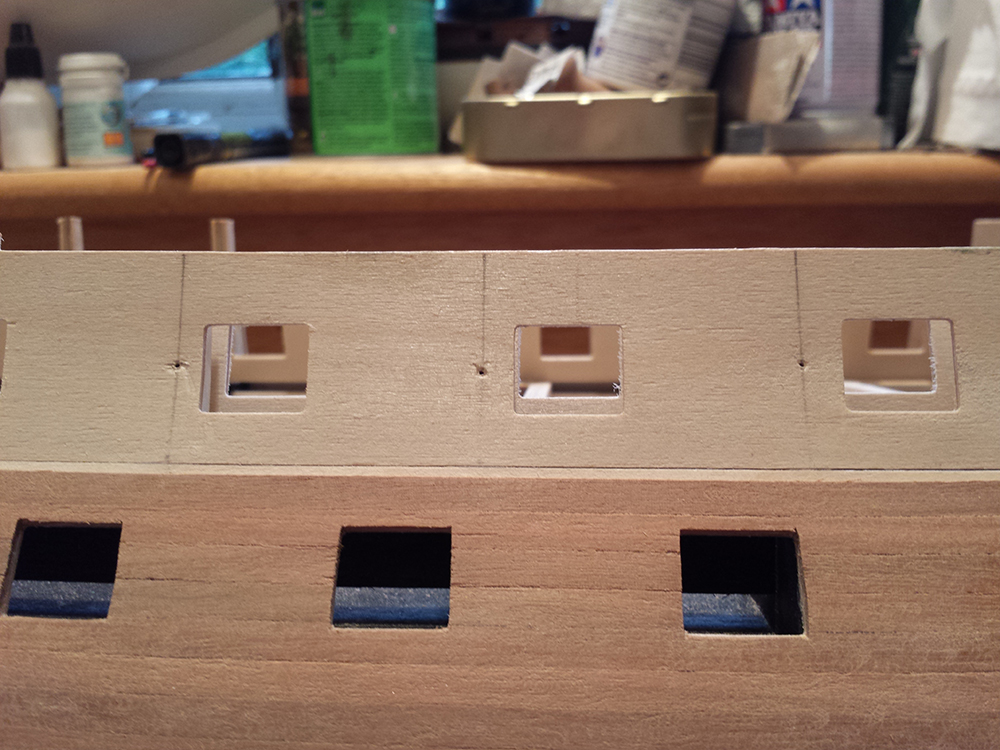
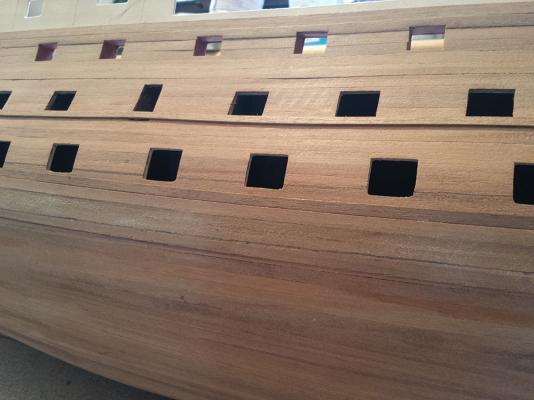
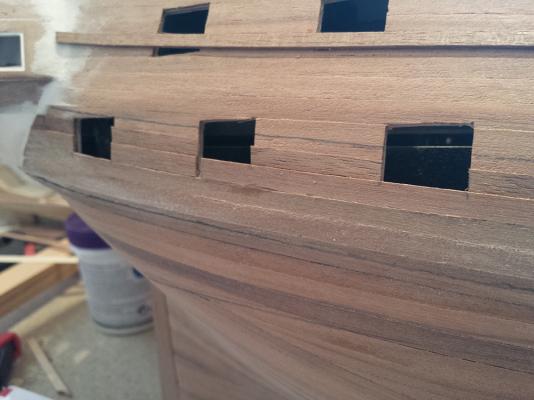
With the inner patterns fitted I started lining the gunports. Apart from the strip being quite brittle was a fairly straight forward task. Was a bit of filling needed here and there although on these ones the planking covers them so not really required.


-
lol it's perfectly fine bud. I just thought you were comparing progress
-
That all looks fine to me. And hey, you managed to get your port patterns down without bubbles at the bow like I did lol If it's any comfort...I hate planking. I find it the most dull repetitive slowest part of a build and seems to go on and on...especially as you sit back and think "yeh finished" ... then realise you have it all to do again lol
-
David yep it did exactly that! The book suggests the ca trick as well and it works very well. I applied thin ca to the anterior of the linings, thus helping secure the lining against the hull at the same time
-
Thanks Ian. To be fair I have 2 weeks on you...but there are times I was at a crawl...or it certainly felt like it anyway, especially during the planking.
-
Hi Ian. Just to echo what David said, and to expand...depending on how anal you are, I wouldn't worry too much about the 1st planking. As long as you have a good smooth surface it doesn't really matter what it looks like...and to a certain extent, in the Vic's case the same applies to the 2nd planking. Everything below the waterline wont be seen once the coppering is done, so again as long as you get a nice smooth surface, you only really need to worry about the 2nd planking above the waterline. Keep going
- 191 replies
-
- 1
-

-
- victory
- caldercraft
- (and 1 more)
-
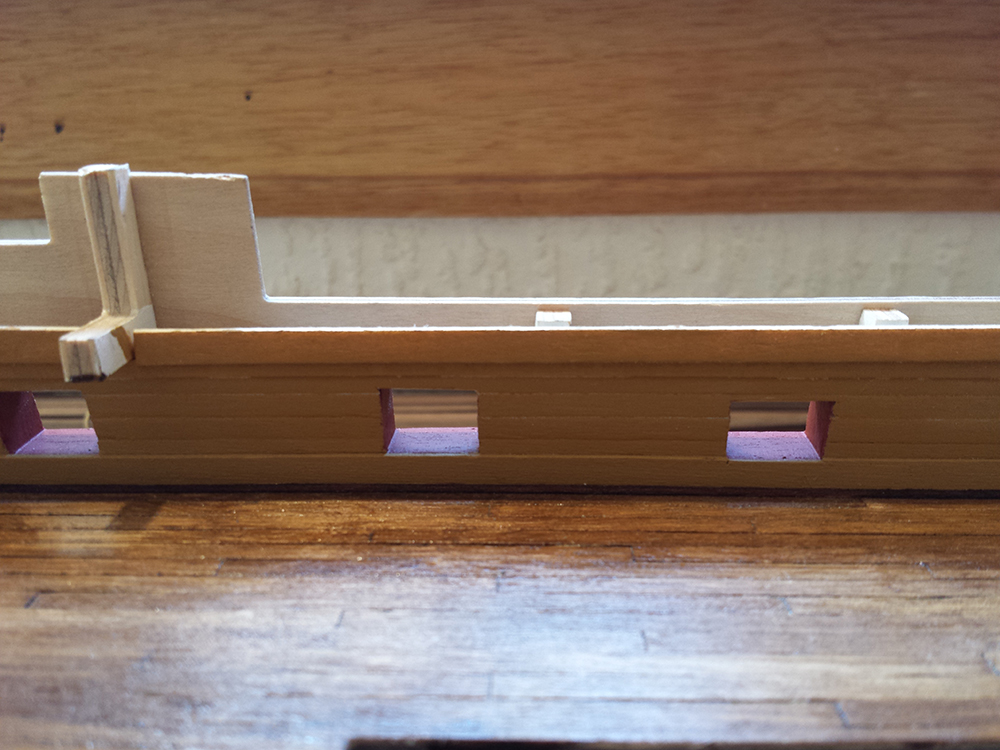
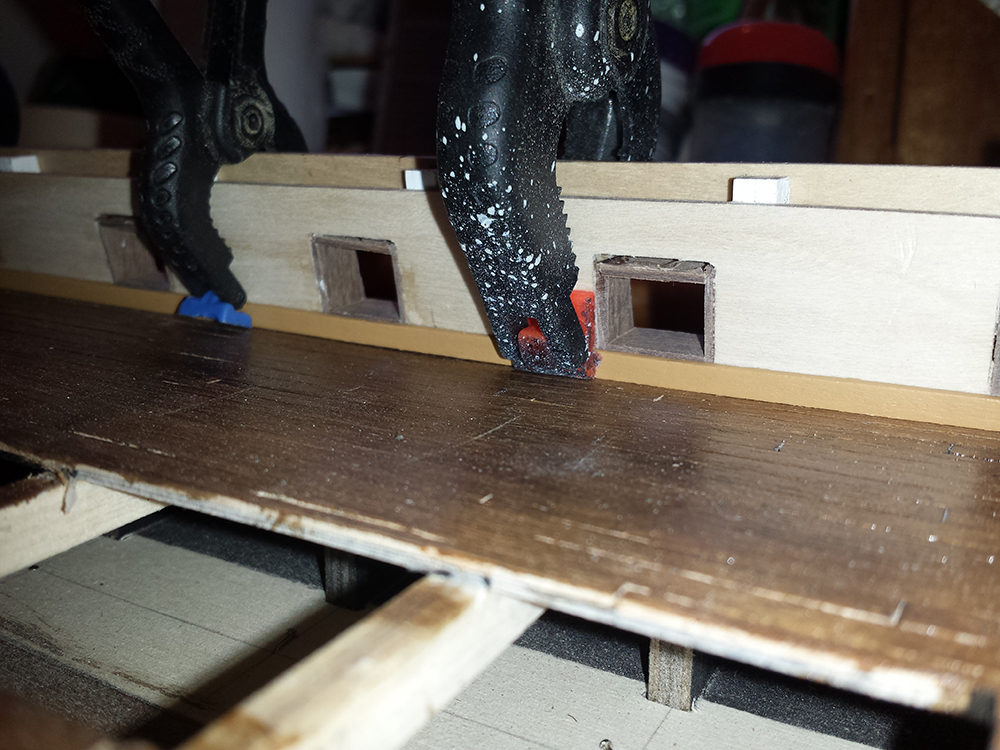
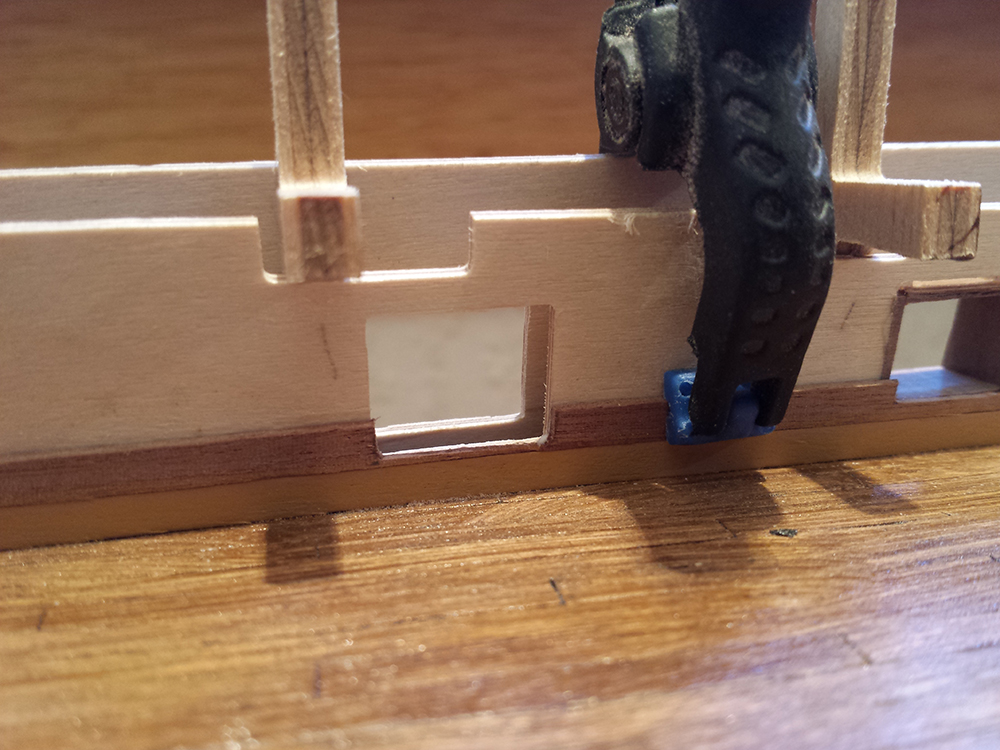
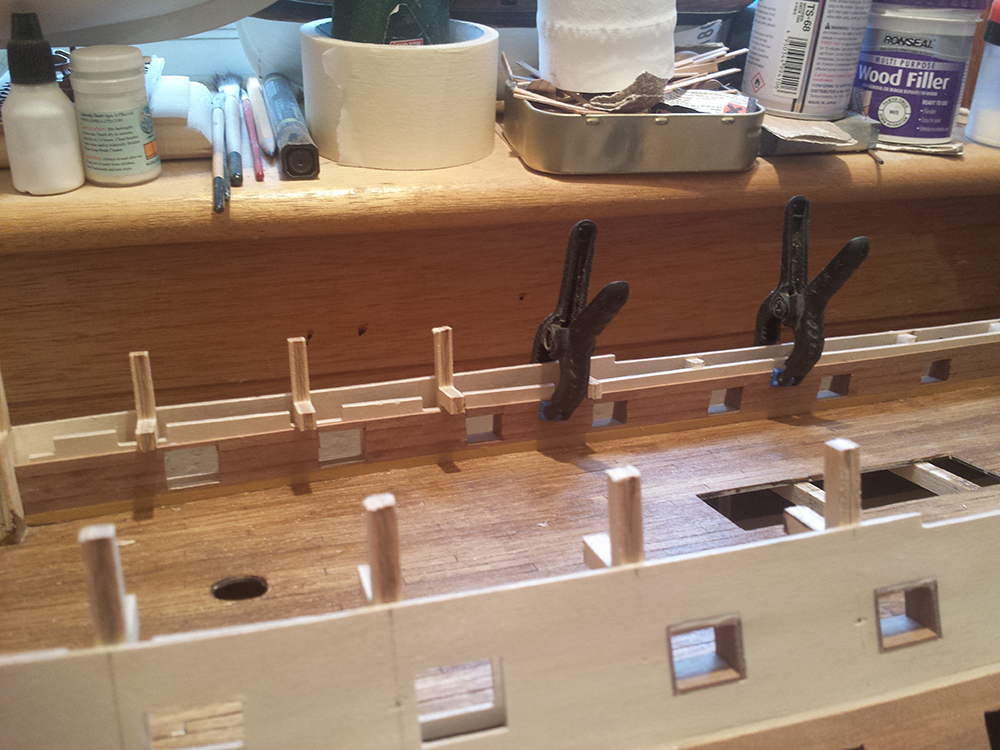
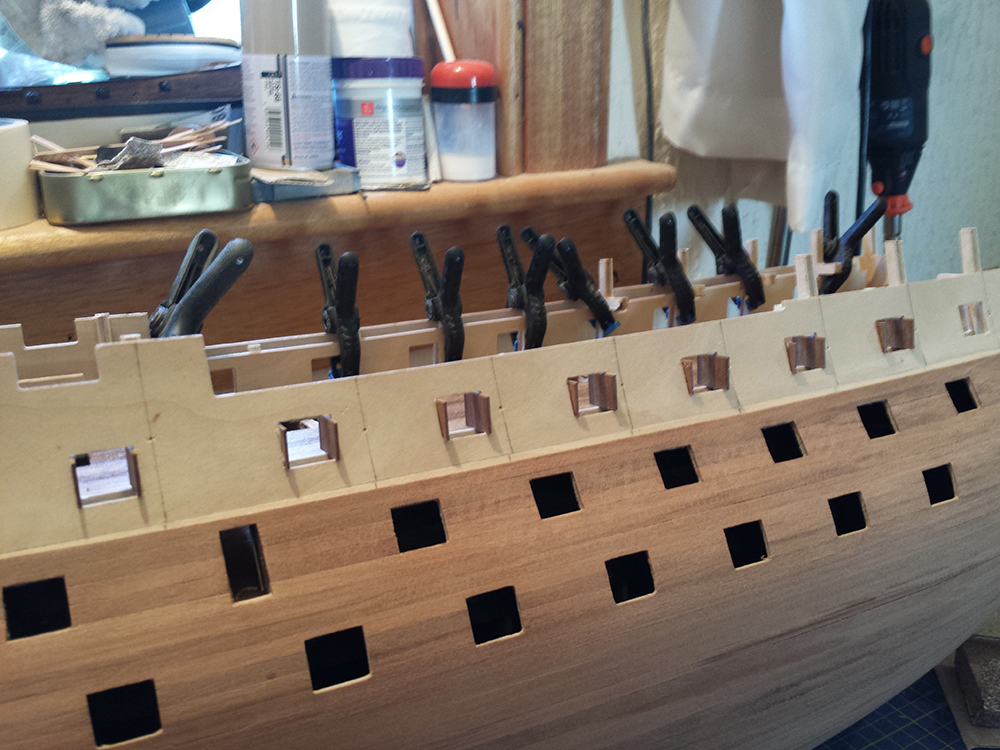
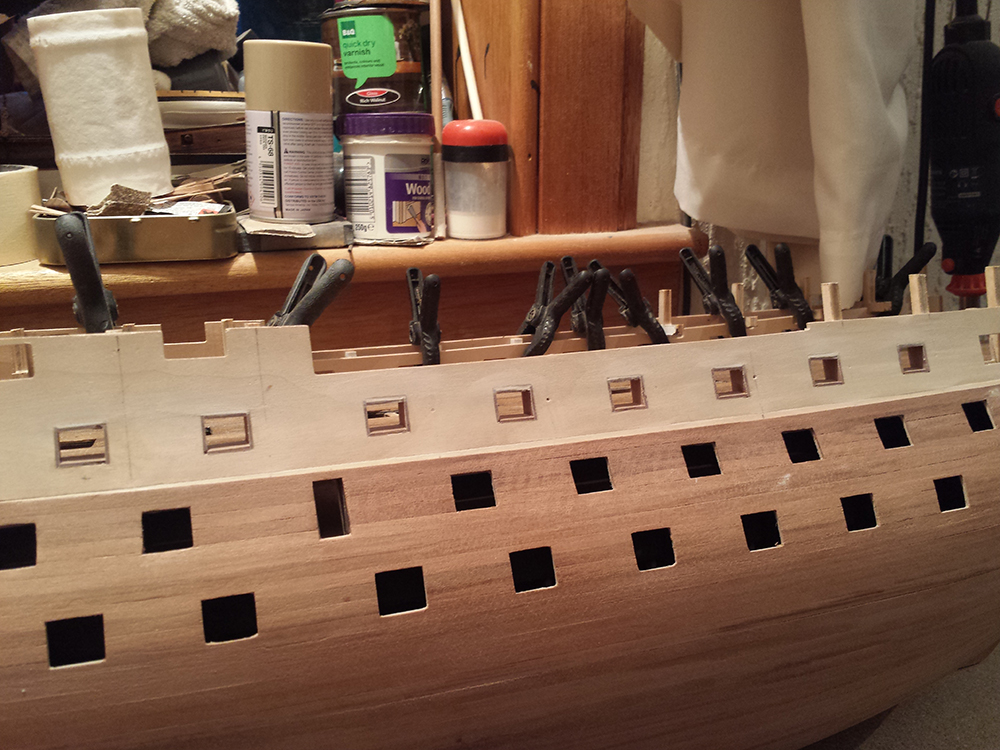
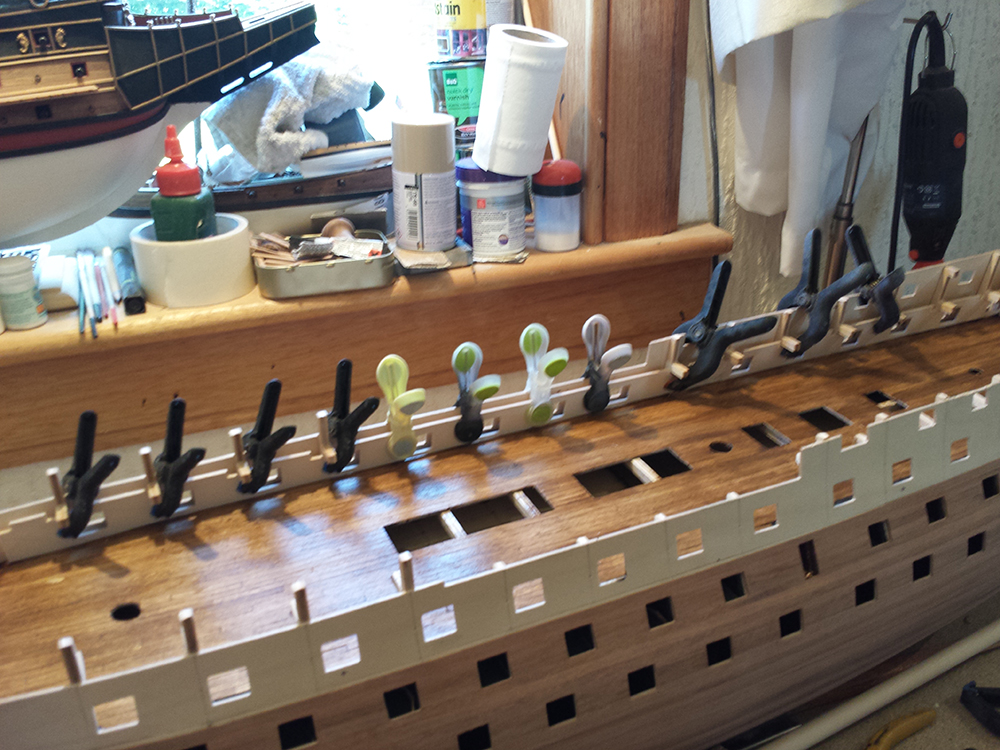
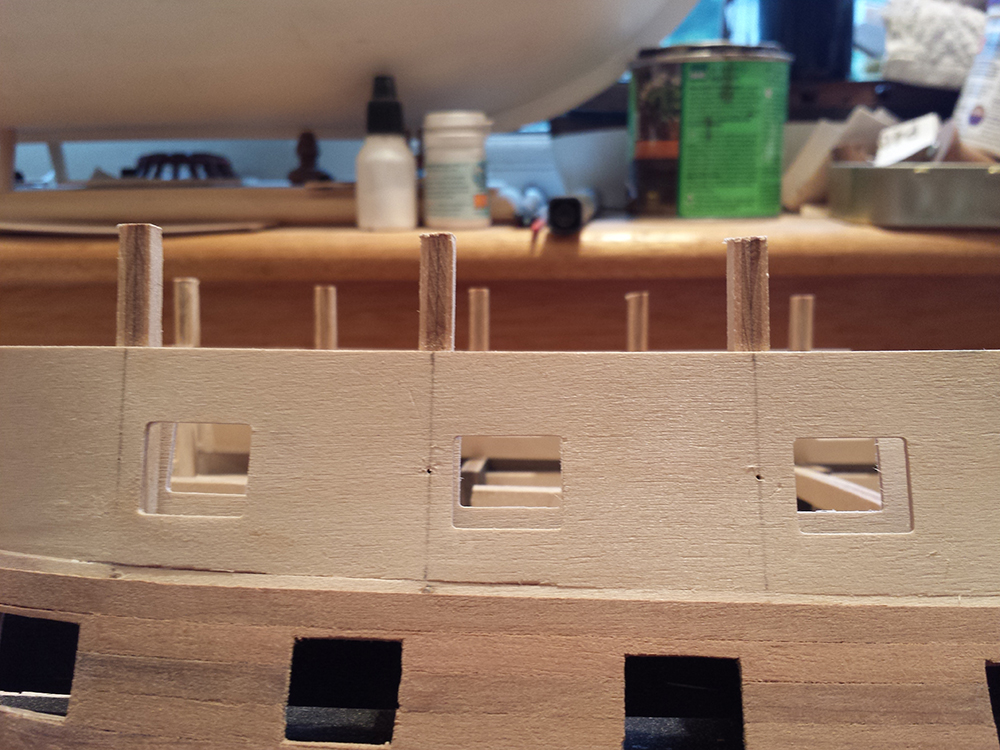
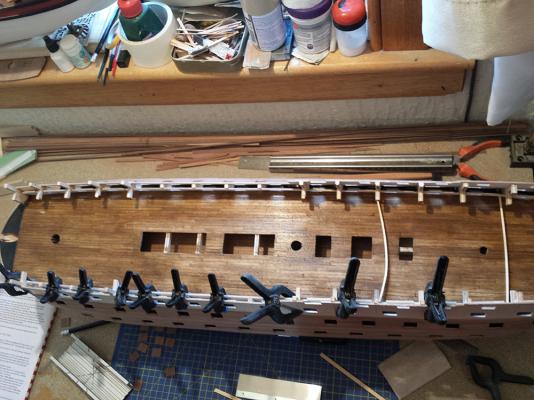
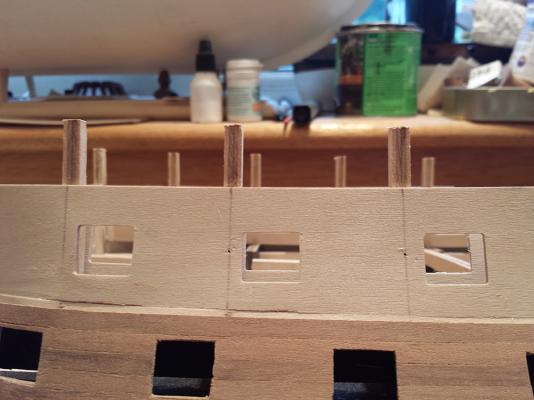
Fitting the inner bulwarks. Already fitted these once but removed them as they slipped during clamping and shifted horizontally. In hindsight probably just as well as they were a little too easy to remove, so clearly I was too conservative with glue. Refitted and allowing to dry. I'd have liked to plank planked the inner bulwarks off ship, but the nature of the lidless gun port lining made that impossible. Oh, anyone else having built this, did you happen to notice the 1x16mm wood for the lidless linings was very brittle/weak ?

-
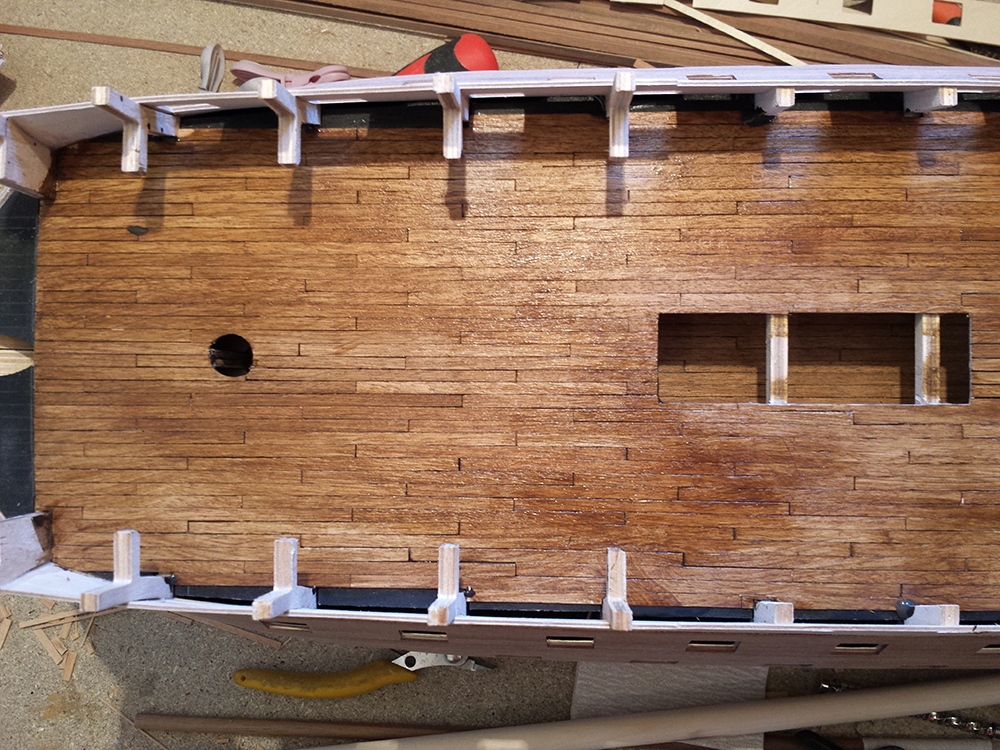
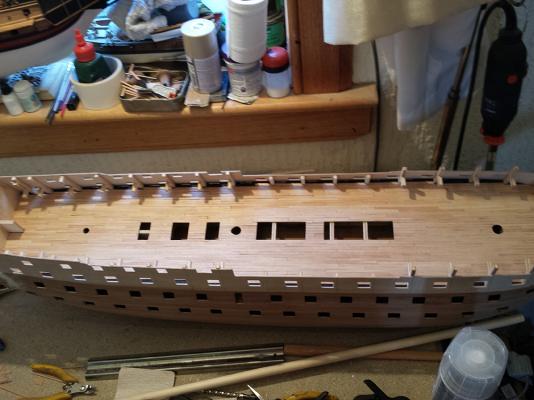
Planking on this deck is complete. There were a few moments I wasn't sure how it was going to turn out, and being self critical it didn't turn out quite as well as I was hoping. Although I showed these pictures to my partner and the first thing she said was "it looks old" That makes it all worth while, as that was the look I was after, so I'll take it


-
David I'd be able to do that after this year. Currently I have no space for any power tools like that. Once I get my workshop built top of the garden I plan in investing in worktop tools like this. In the mean time...
-
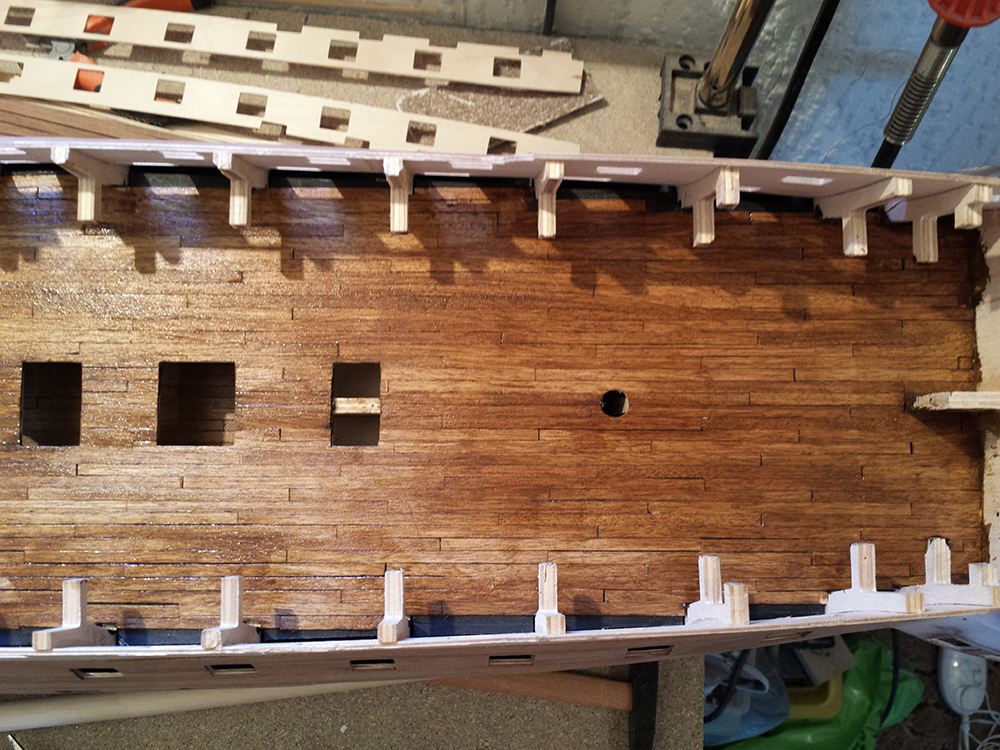
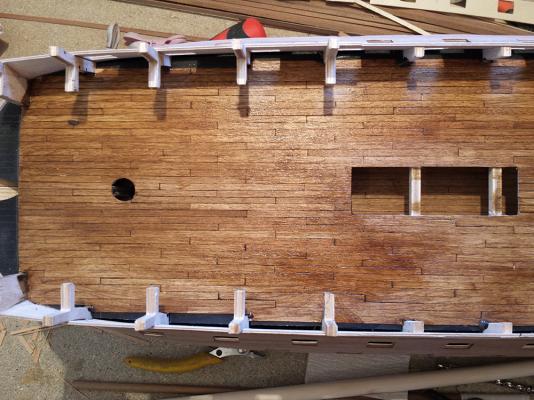
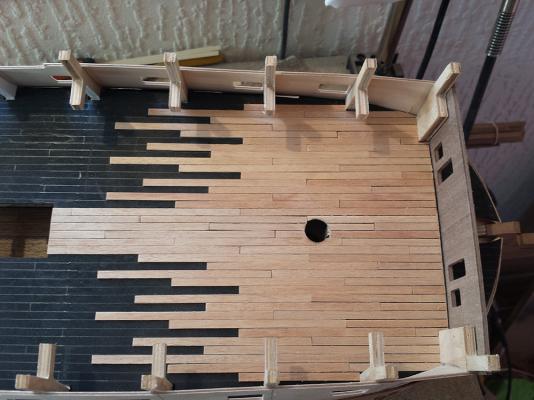
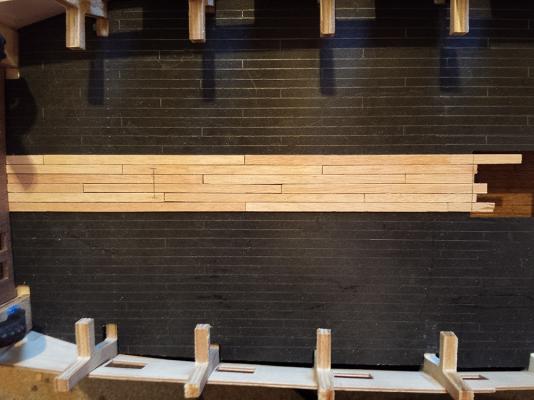
Very quick update, not much to report. Decking progressing nicely. I think after this being the 5th deck I've planked using this method for simulating the caulking I am happy with it. It has the desired effect without being too obvious or too perfect. It's not perfect as above...but then neither are the real things. I'm still looking into a method of drilling the treenail holes in batches so they are mostly uniform. Something I may look into for the q/waist and poop deck(s)
-
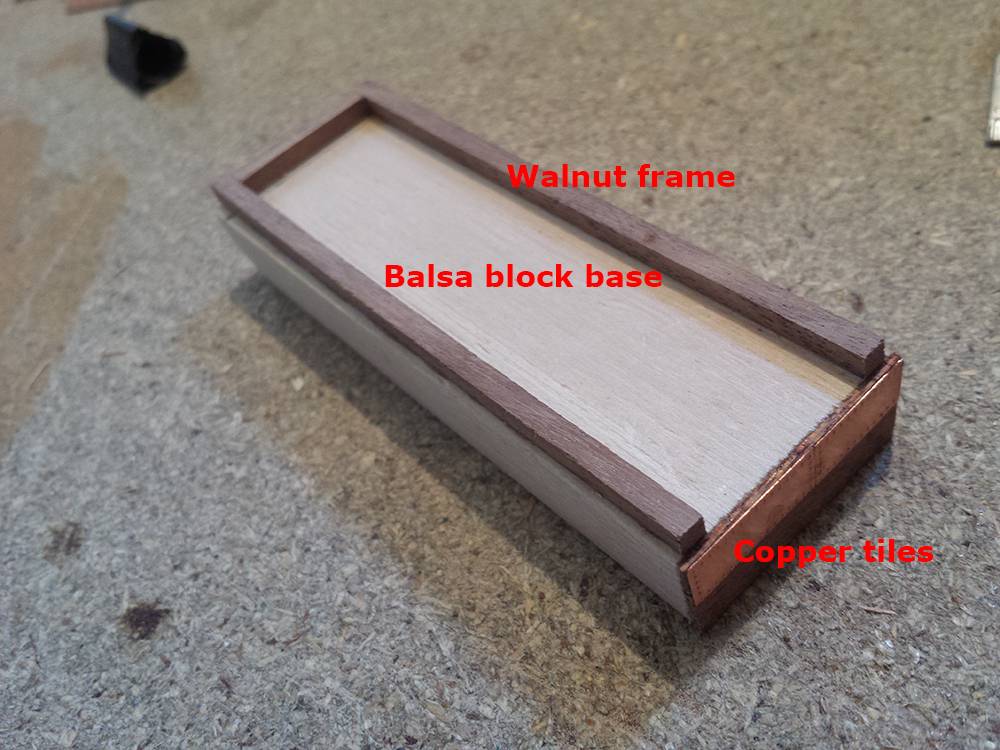
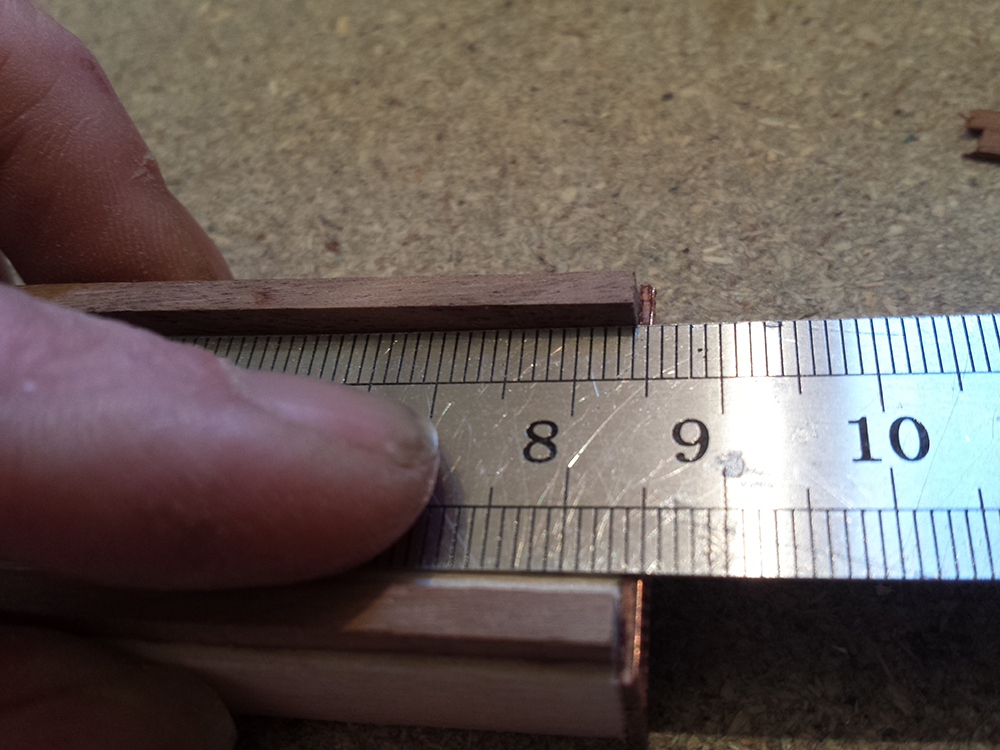
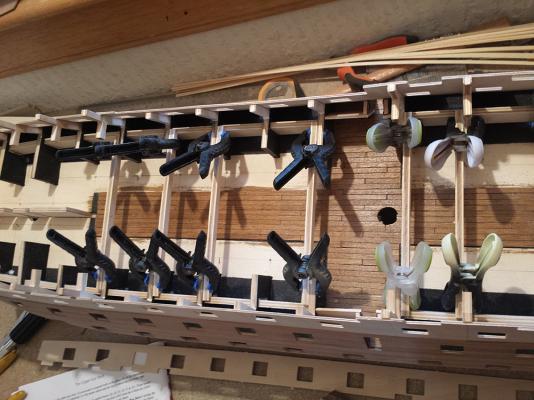
I decided to rethink my jig for preparing the deck planks. I wanted something that would allow me to get the correct length uniformly as well as smooth all the edges of the deck planks in bulk, or batches. I came up with a small block with a walnut frame open on one end. The frame is 1mm lower than the width of the planks. I placed copper tiles on the block beneath the open end. The length of the slot for the planks included the copper tiles is exactly 85mm: This means I can place groups of roughly-cut-to-length planks edgeways into the slot, sand the edges of them all uniformly, as well as sand the ends so that they are all the same length. Then remove, flip, insert reversed and repeat. The copper tiles prevent the length being inadvertently shortened over time due to sanding. I can fit 22 planks in this each time, which fit snugly and require slight pressure to slide them all in. This helps to ensure they stay in place during sanding. I was able to over the space of about 2 or 3 hours quickly and accurately prepare about 300 planks. And the result on ship:


-
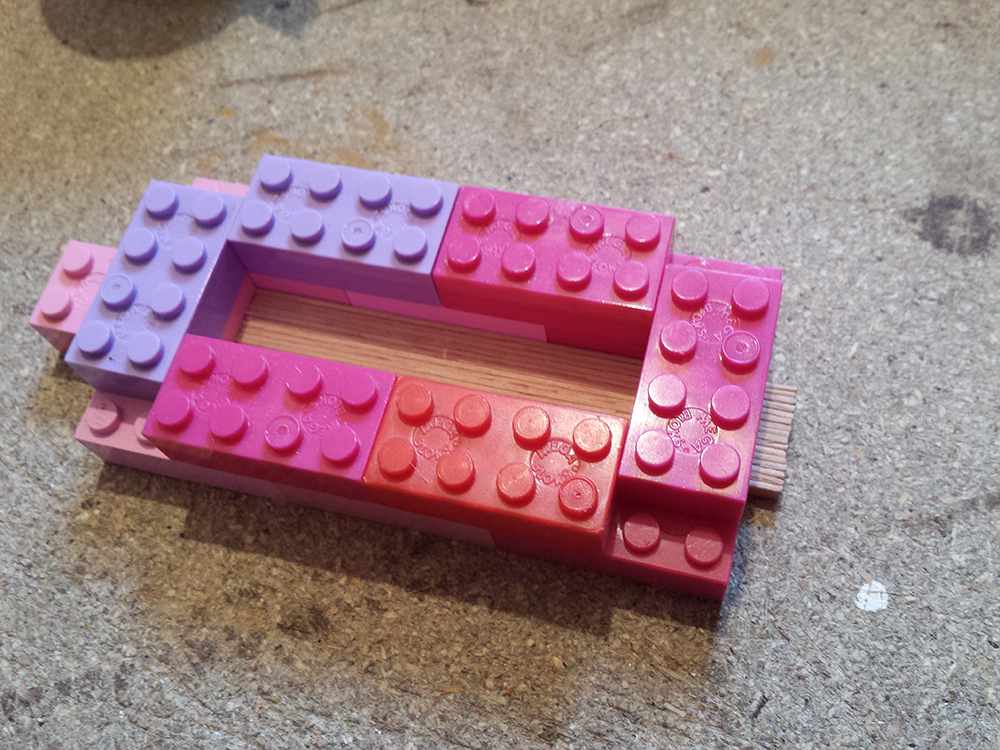
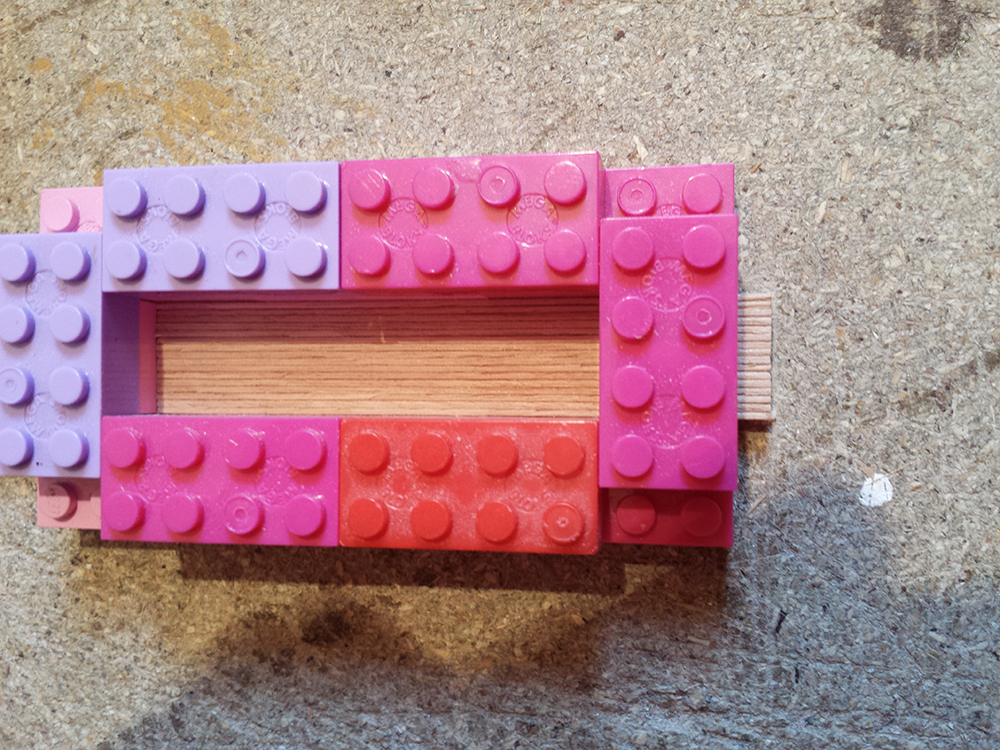
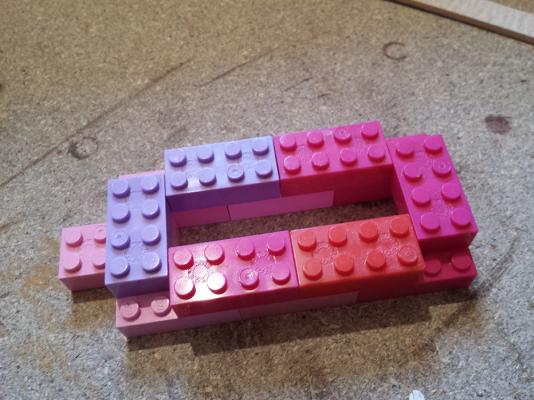
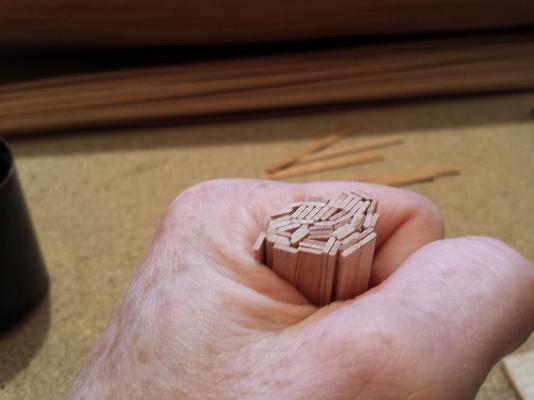
Thanks Jerry. I'm glad it's not just me then. Currently I am marking the position of the decking on the false deck and pre-cutting the planks. I've roughly worked out I will need around 360-ish. I made myself a wee jog to aid me keeping all the planks the same length, in the absence of a more precise cutting tool. Made of lego. (Has so many uses that stuff does).


-
Thanks Kevin. I see Rich had to do the same as well. It's always more comforting knowing other people had the same issue. That upper gun deck though! Really have to give it some bend to get it in place I've not been able to properly dry fit it as I don't think I'd get it back out again if I did. Bang goes me planking it off ship
-
David yes the inner ones are too high. That's fine I just wanted someone else to confirm that's the best solution. Thanks.
-
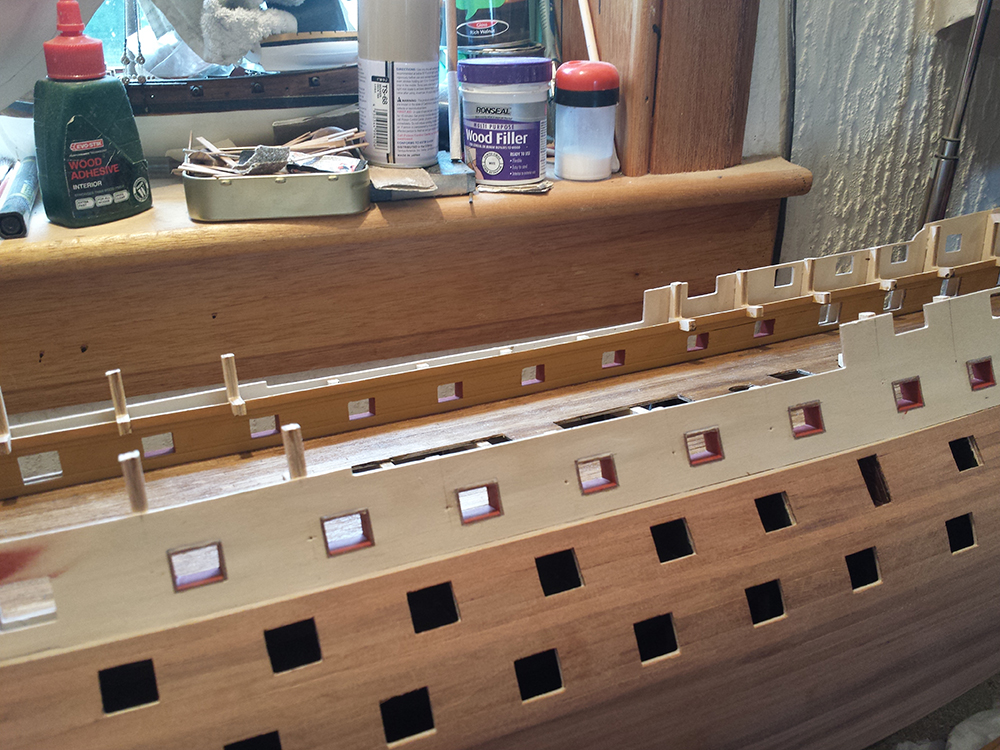
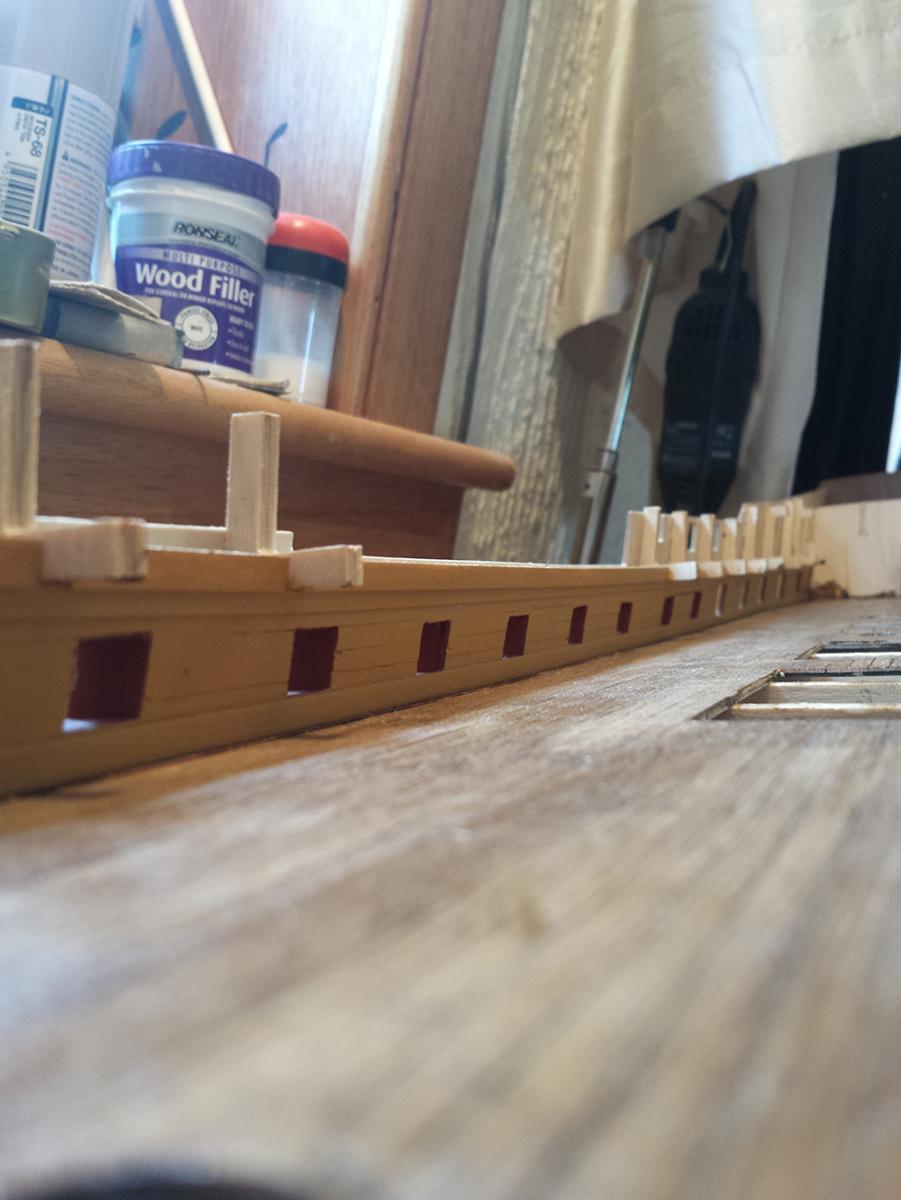
Good evening folks First part of the second planking is finished, sanded, gunports trimmed etc etc, but I've encountered an...issue. First, pics of the planking progress: I've fitted the deck camber beams, that was ok: When dry fitting the deck and the inner bulwark patterns, they fit perfectly on the horizontal, but are several mm too high. I've gone back through my steps and the outer patterns were fitted correctly...ok maybe not perfectly but they were in the right place. So unless I've missed something, or the inner templates have been cut incorrectly, or am completely missing the point...there is a problem. Both sides are the same: Any ideas?


-
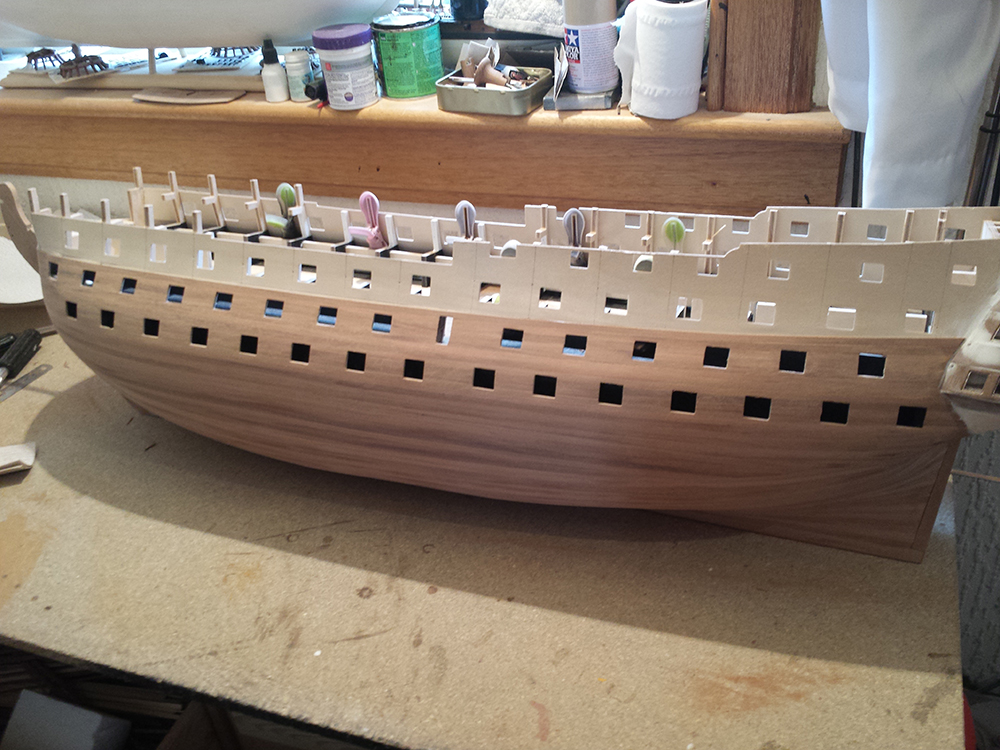
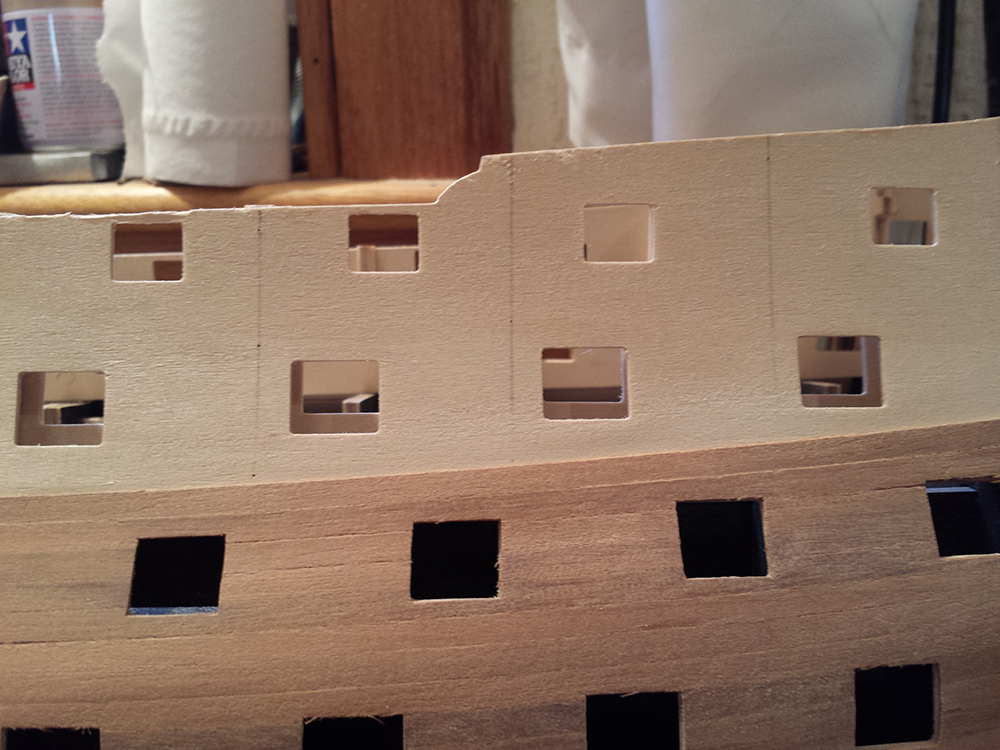
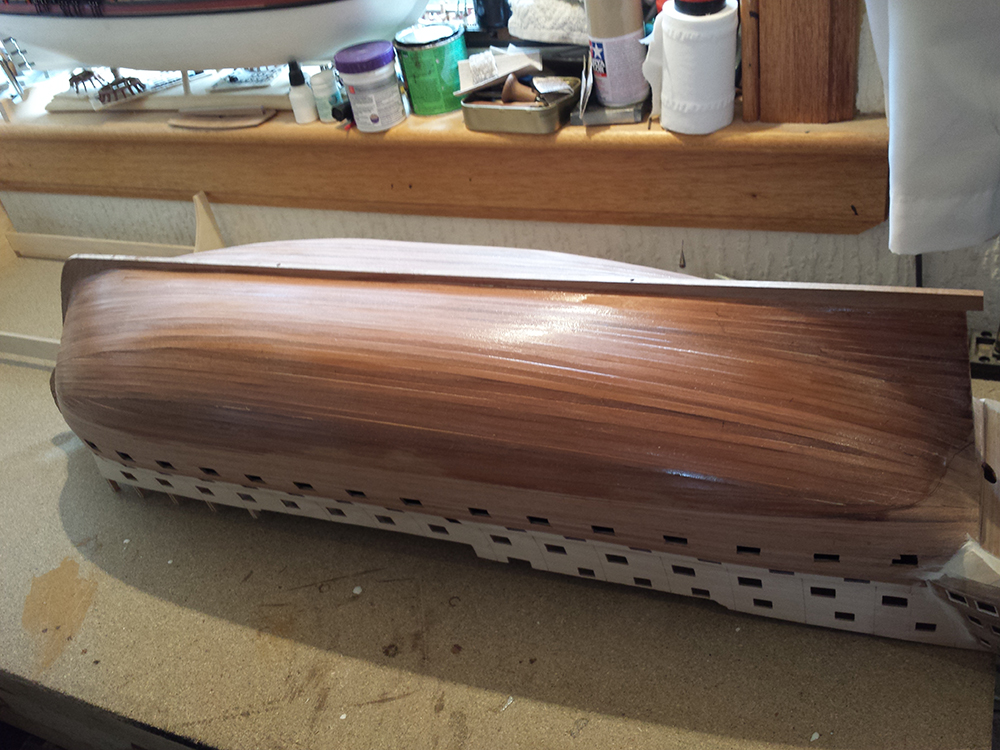
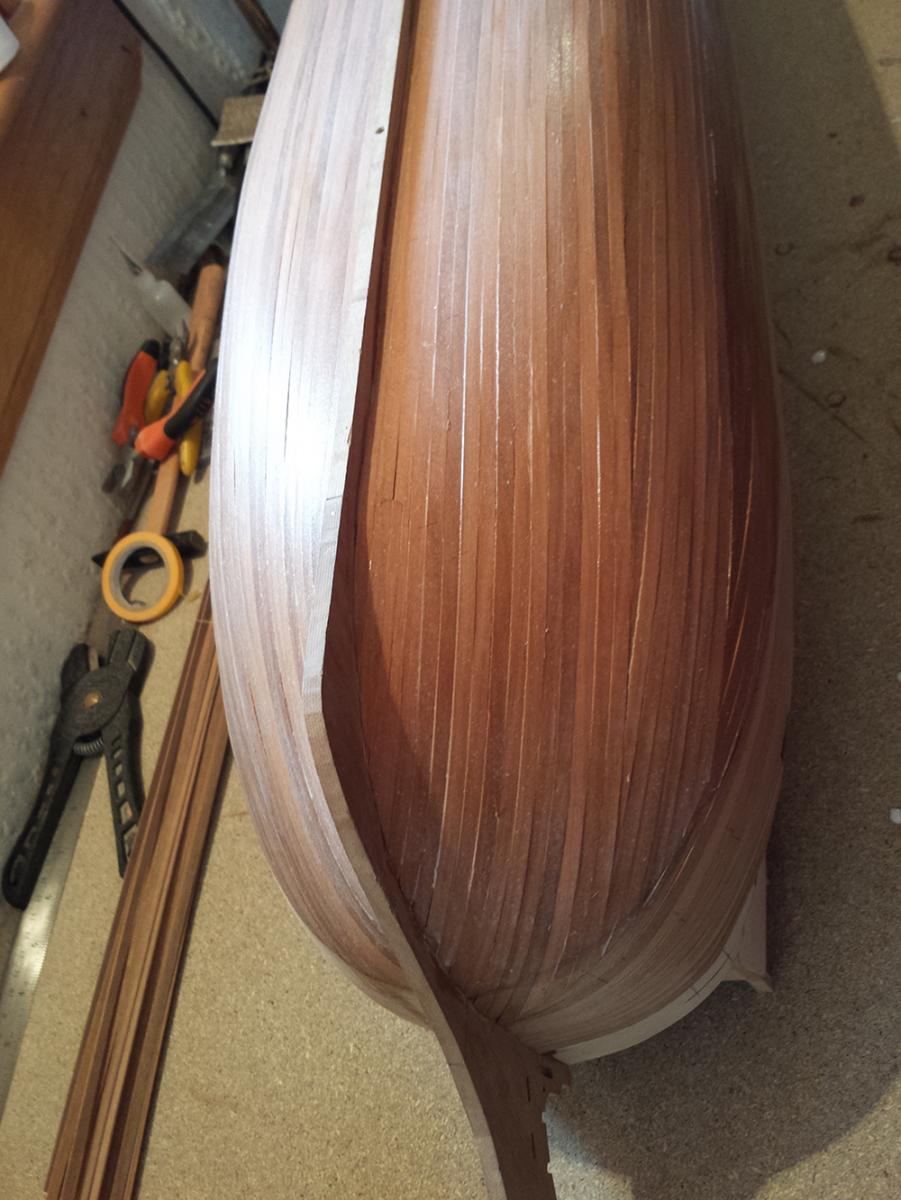
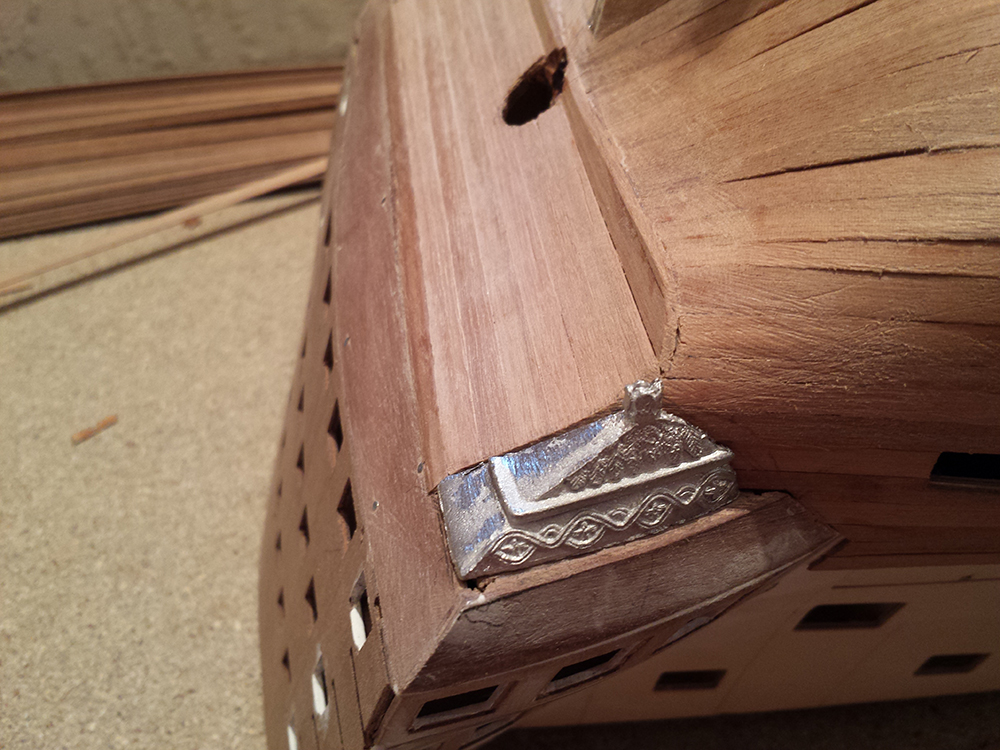
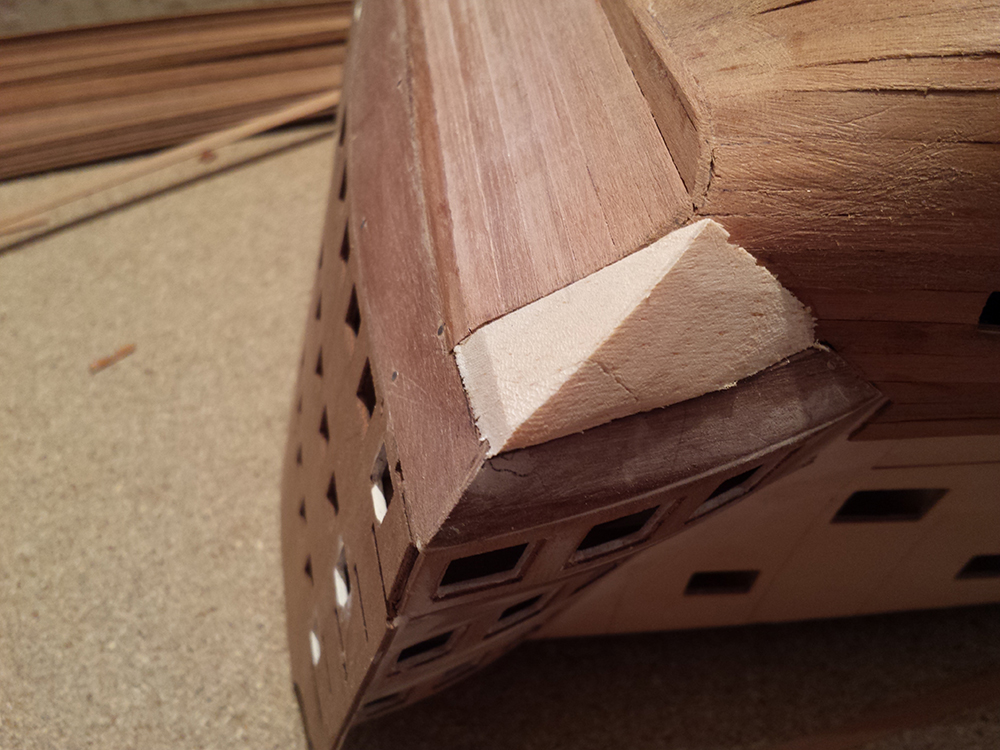
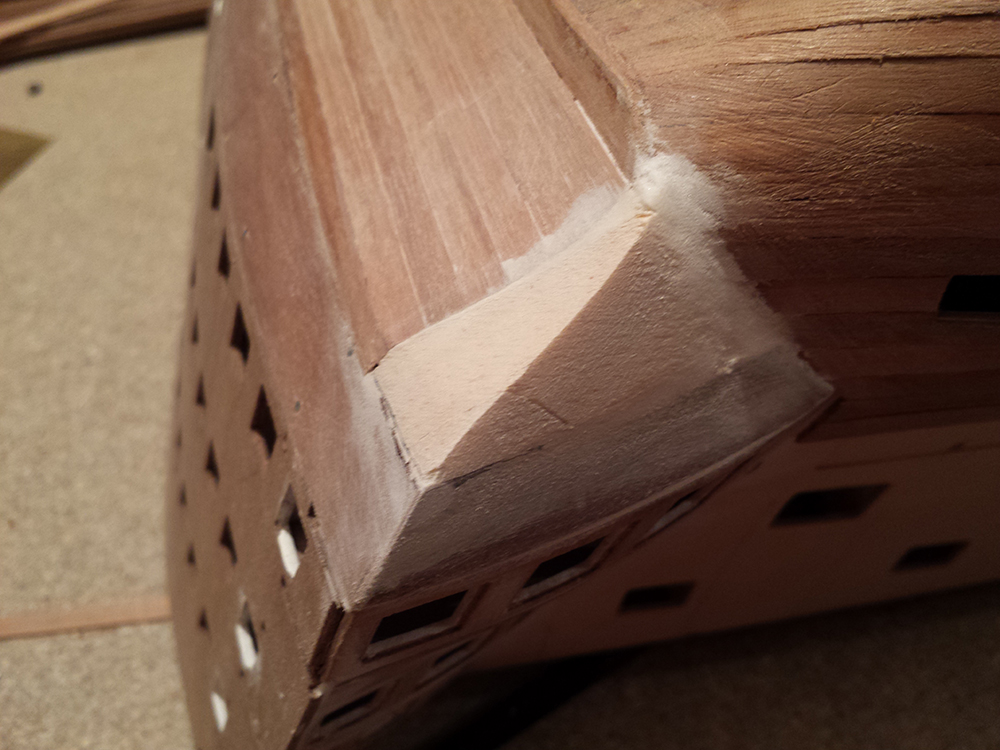
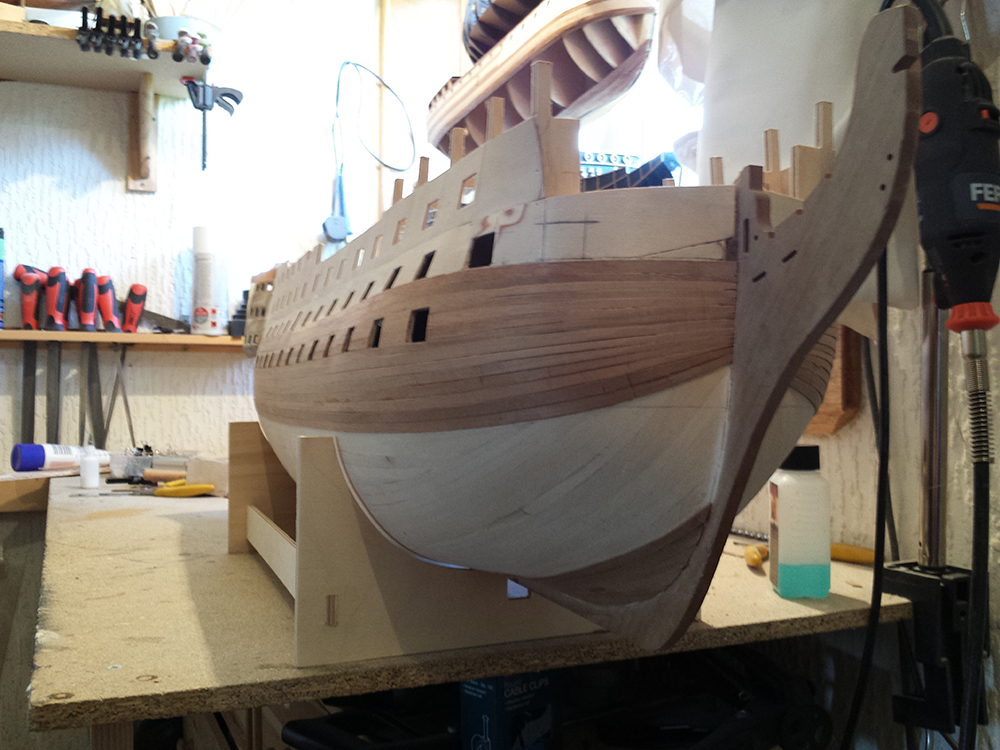
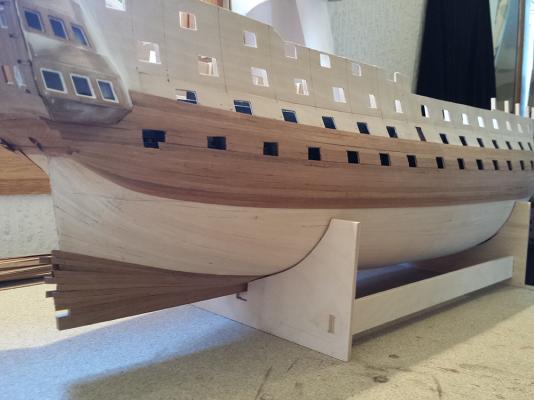
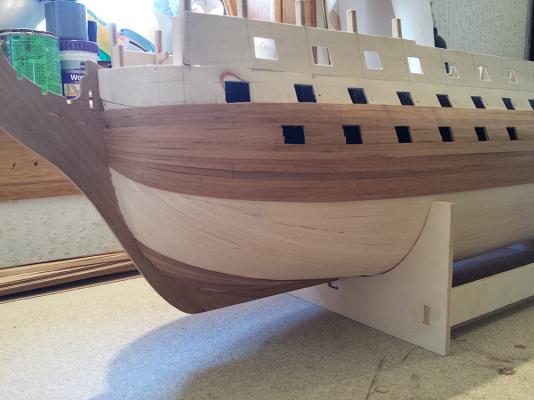
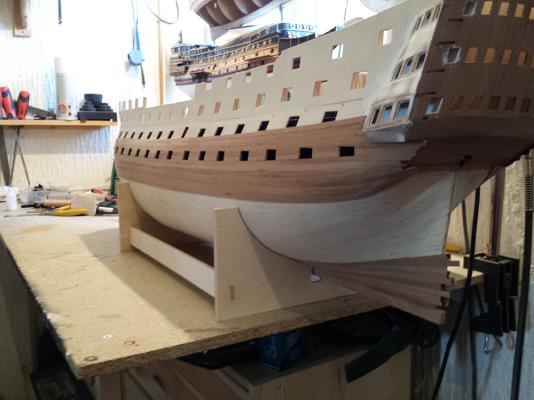
Good day folks. I've finally finished the lower planking. Glad it's done with as it was starting to grate on me. For some reason it didn't go as well as the first planking, especially the second half of it. Thankfully none of this will be seen once the coppering has been done. The hull looks glossy as it's wet. I brushed over 50/50 watered down PVA to help seal any planks that worked loose, which were a few. Reason being it makes sanding smooth impossible if you have sections of plank that have popped up, as they just spring beneath sanding. All the PVA that has settled on the surface will get sanded off, but the planks will be sealed underneath. I took a small break from the planking to start tackling another problem. A bug bear of mine with kits. Those pre-fab parts that fit under the q-galls never, well, fit! Not for me at least. They are either always too big or too small. In this case, too small. And to be honest the detailing wasn't that great on them anyway. So I added some balsa blocks and sanded to shape and size. I will finish shaping and add the details later on in the build.


-
Hi all. Sorry for the delay between posts. I didn't want to post until there was something significant to show. Progress thus far on the 2nd planking is going....slowly. Hopefull after Weds should speed up a little as the deck rats will be back at school.


-
Thanks Kevin. A lathe will have to wait for now...I simply have no where to put it. Dont know how yet I am going to complete this Vic...she is longer than my current workbench I've been looking at Gil's methods. The 1 on page 3 is interesting...not sure if I read it wrong, (and haven't read/checked the plans yet), but it seems the taper he made on the lower foremast is only on the side, so are they actually not round then?
-
Jerry not at the moment. I have a 4 by 6 corner of our bedroom at the moment. Early into next year though I am having a large section at the top of my garden decked and a purpose built workshop built on it so I can start to invest in a few larger power tools. My method for tapering is I simply fit the mast into a low powered drill and use sandpaper and taper that way...but it leads to rather warm hands
- 1,319 replies
-
- 2
-
-
- caldercraft
- Victory
- (and 1 more)
-
I keep looking at your last photo and the way the masts are reminds me so much of how she looked back in 2011 in Portsmouth... Can I ask, how you tapered the masts? I am asking because I have no lathe or other tools to be able to taper easily. All I have is a david plane that I rarely use as when I do I end up taking far too much off
- 1,319 replies
-
- 1
-
-
- caldercraft
- Victory
- (and 1 more)
-
oh I had forgotten about the coppering Yes I've got that coming soon haven't I
-
awww Kevin don't worry I will slow right down once I hit the gun port lining and then again the ratlines. Two of my hates about this hobby, sooooooo repetitive In all seriousness I doubt I will complete this in one go. I have several projects on the go at once and I swap among them to keep everything fresh. Currently I have the Soveriegn to finish (as soon as I get the remaining issues), a smaller Vic thats actually behind this one now, and Hermioné. I think you're safe. I must drop in on your log though haven't had a look for a few days.