FifeModels
-
Posts
528 -
Joined
-
Last visited
Content Type
Profiles
Forums
Gallery
Events
Everything posted by FifeModels
-
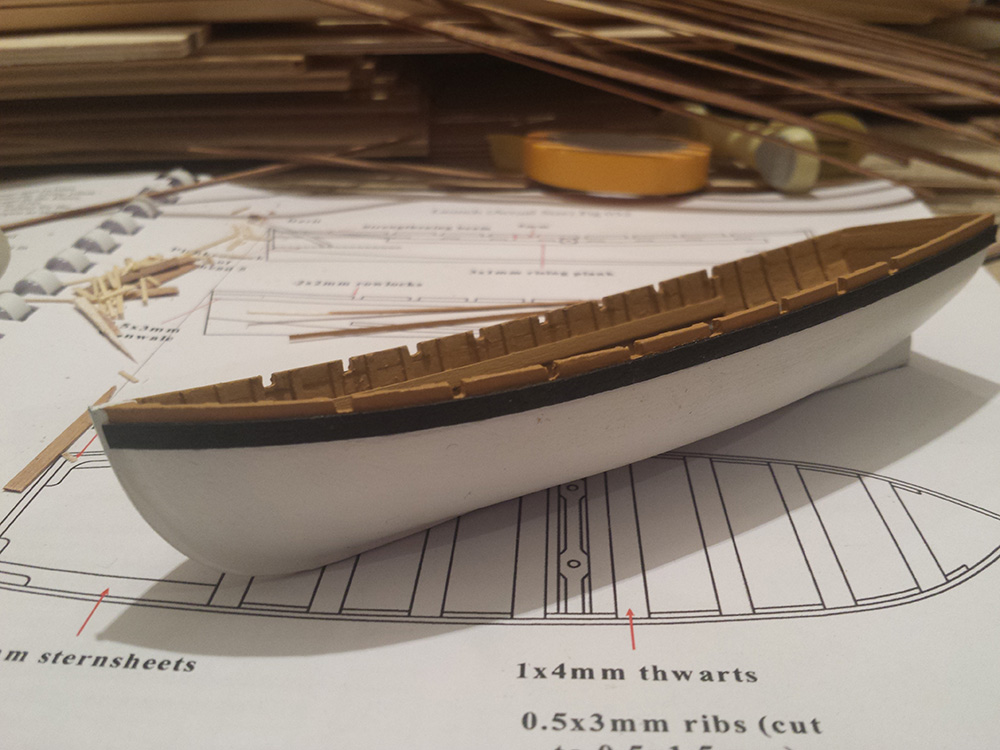
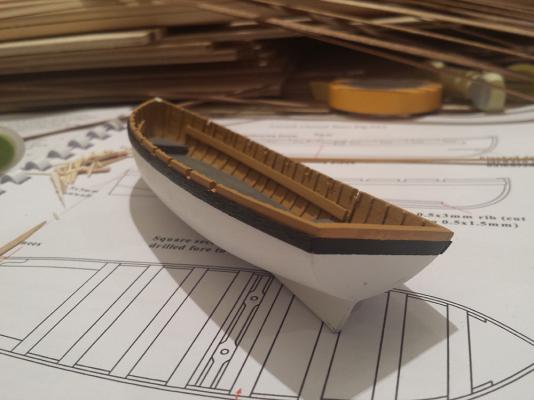
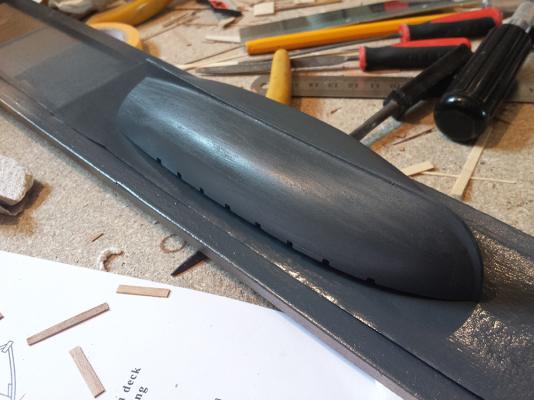
 Thanks Kevin. Small update. I've finished spraying the hull white, and shaped/painted and fitted the gunwales.
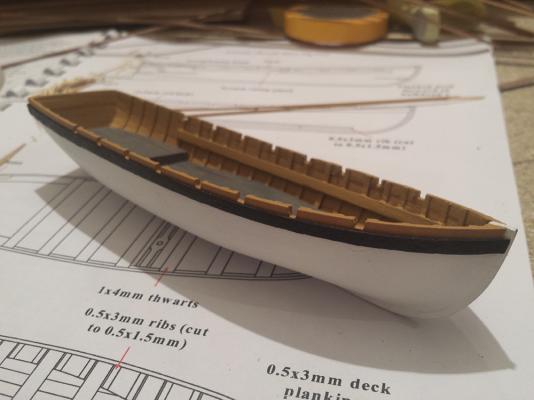


-
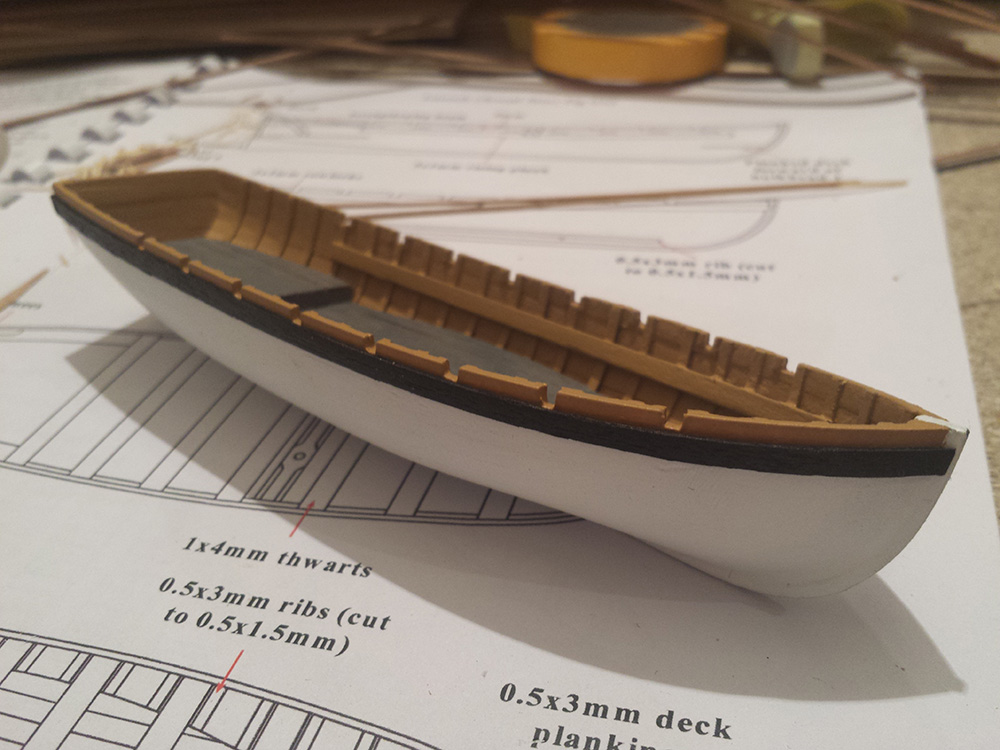
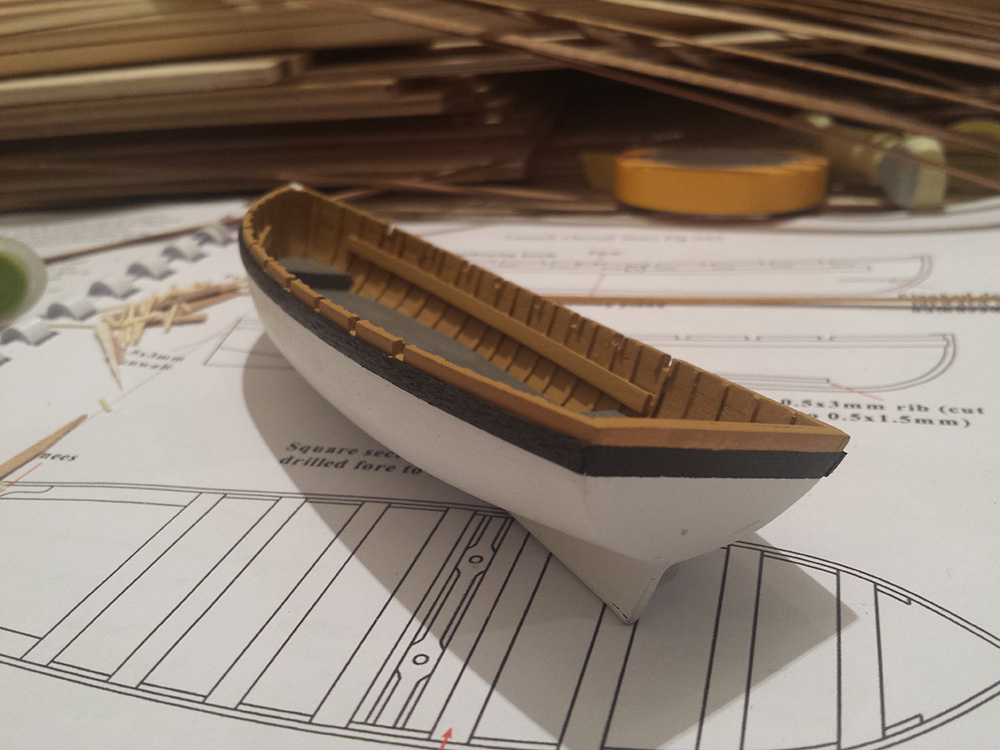
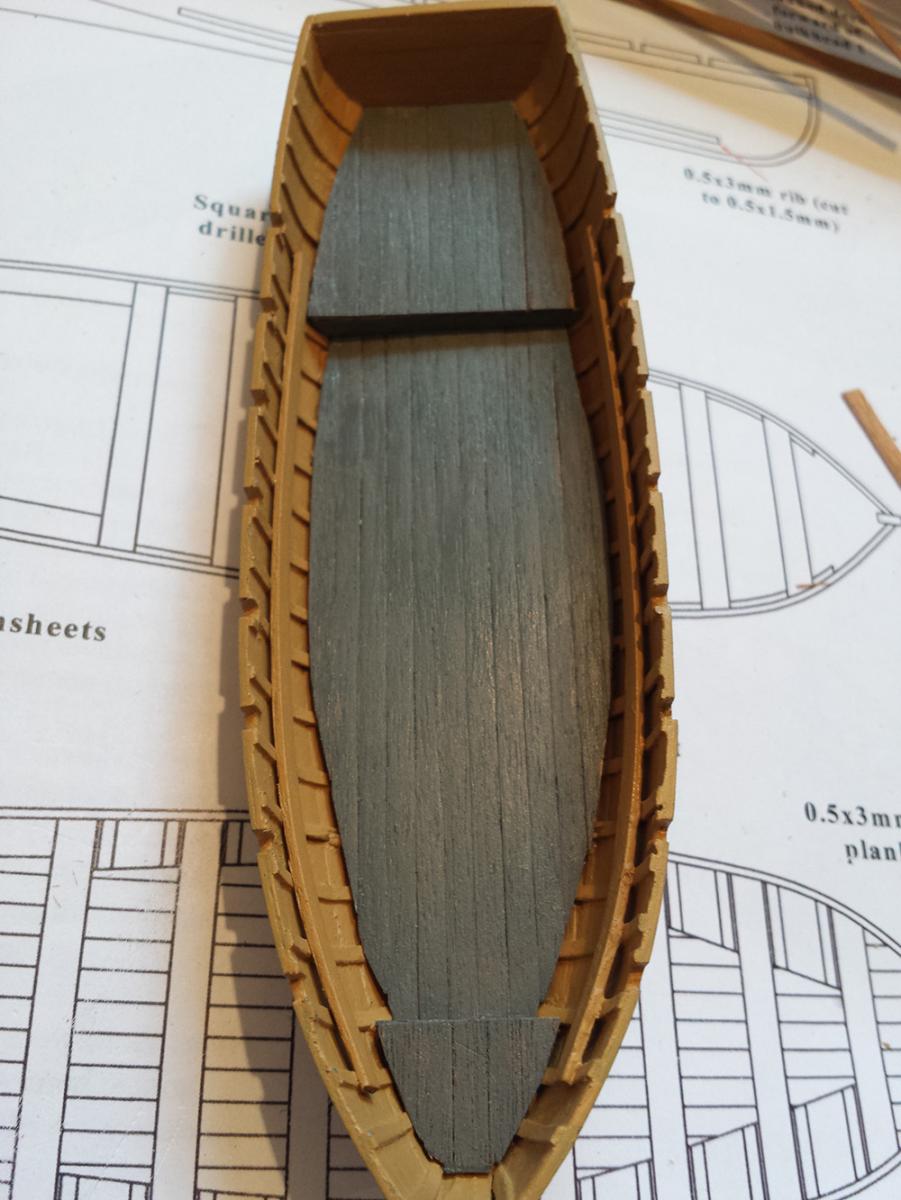
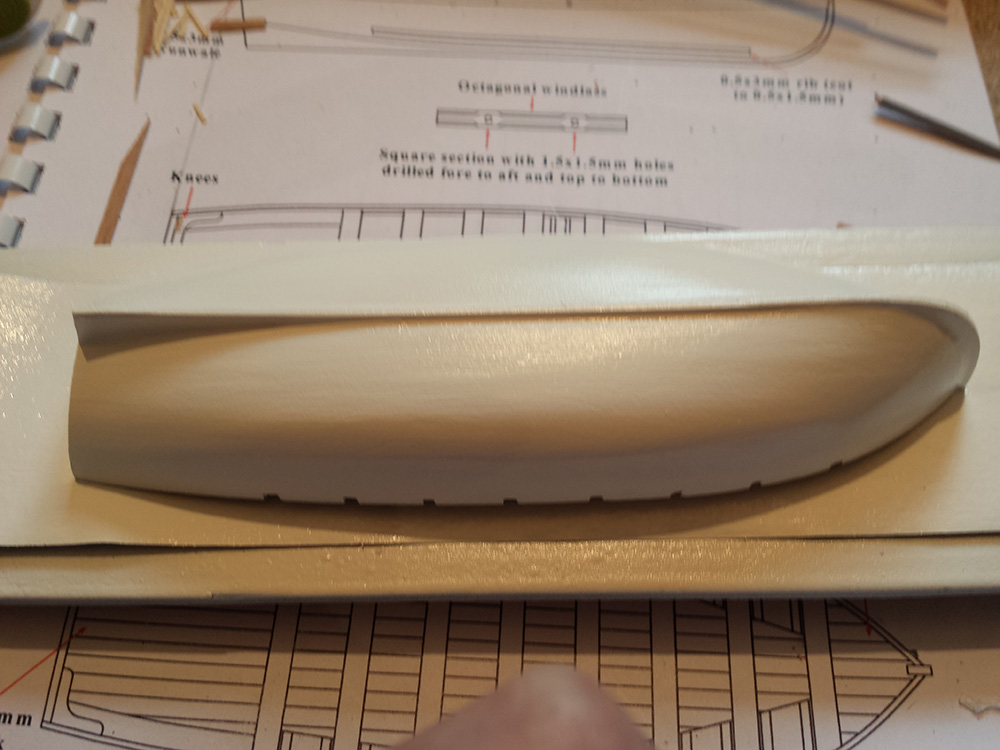
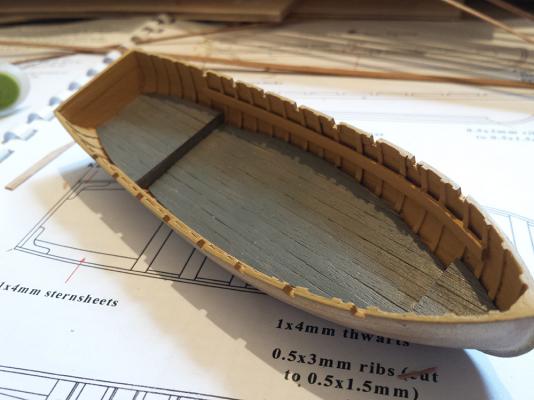
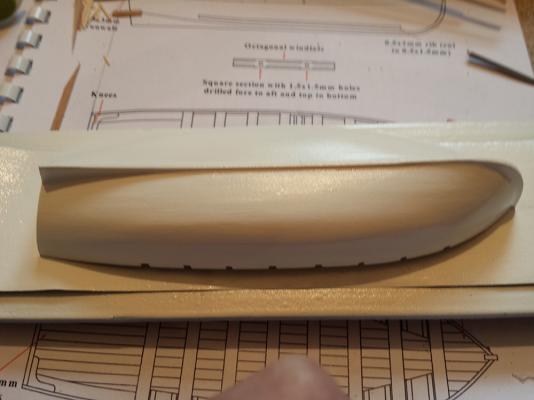
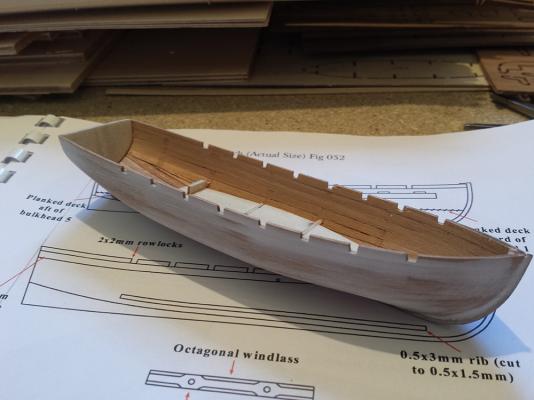
Thanks David. I've finished fitting out the interior for the moment, with the addition of the fore and aft duckboards. I've given the hull a coat of primer, refilled and sanded, and finally several coats of matt white, the last of which is drying as we speak.

-
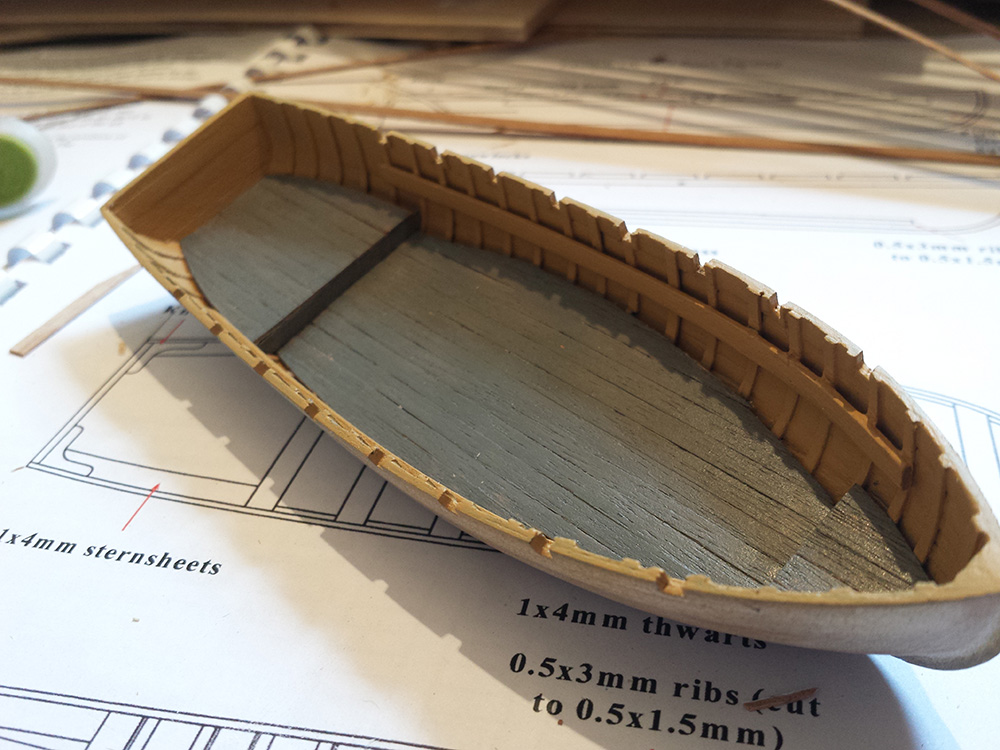
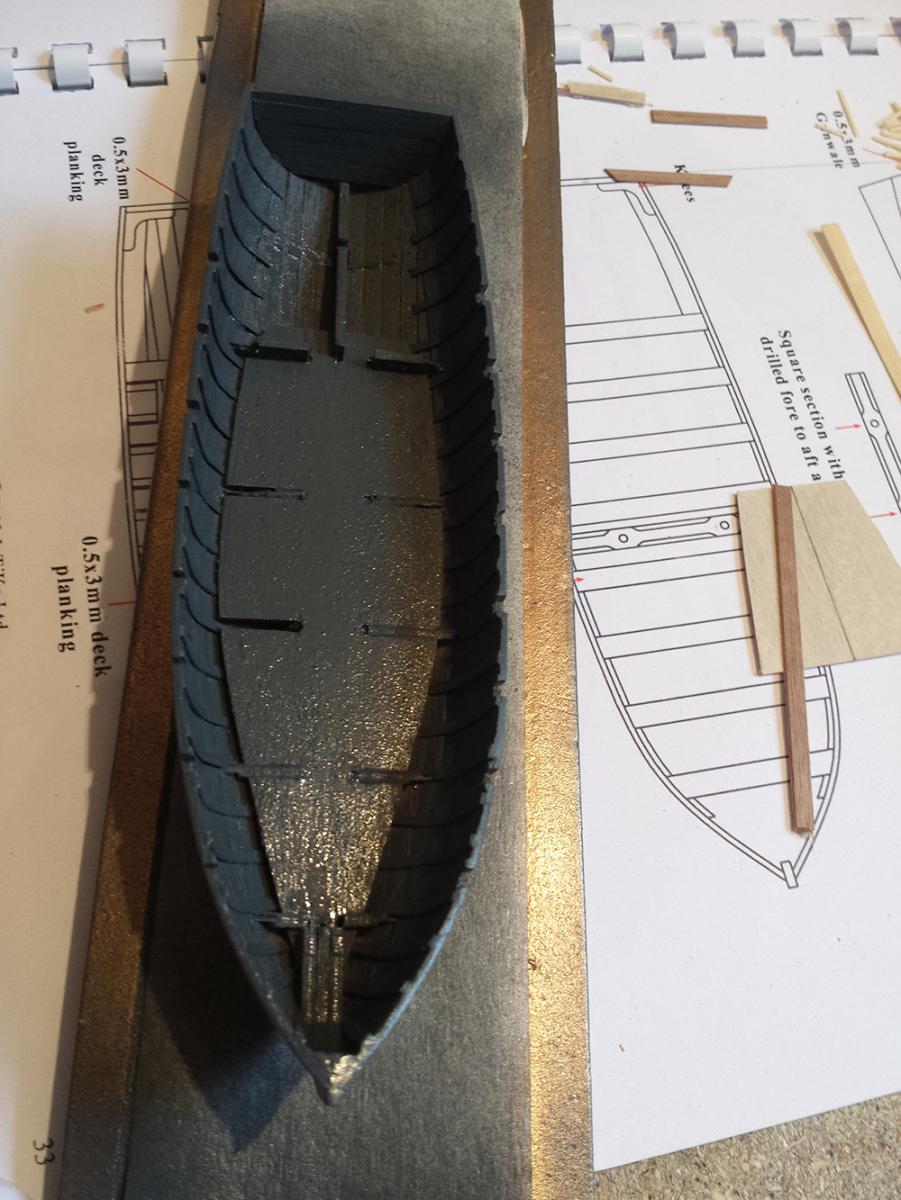
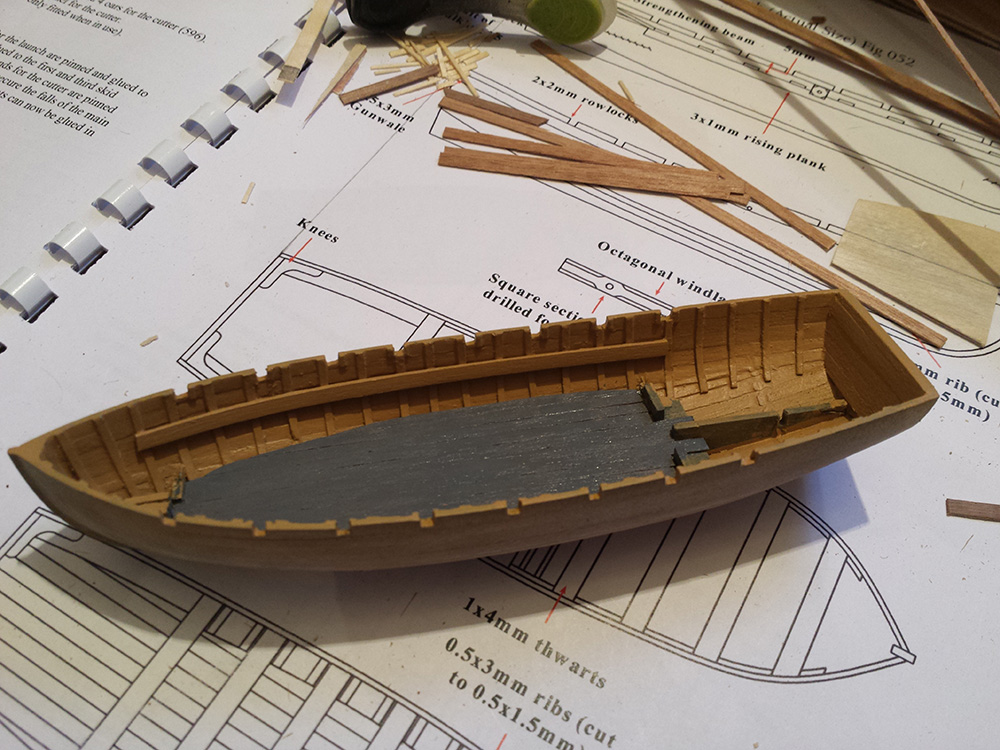
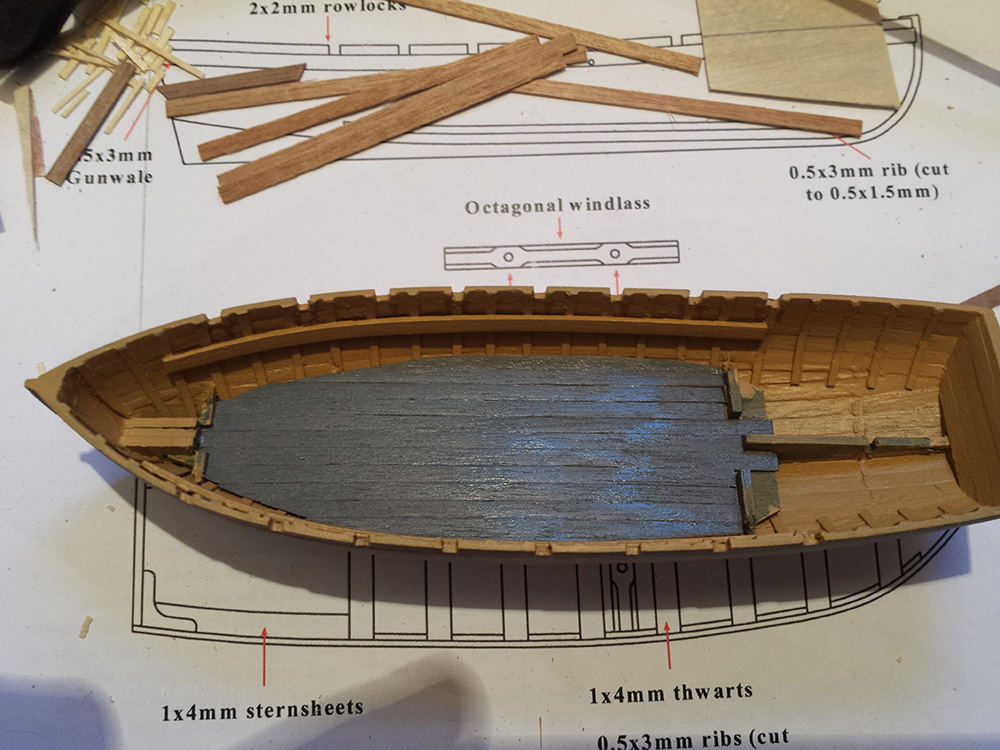
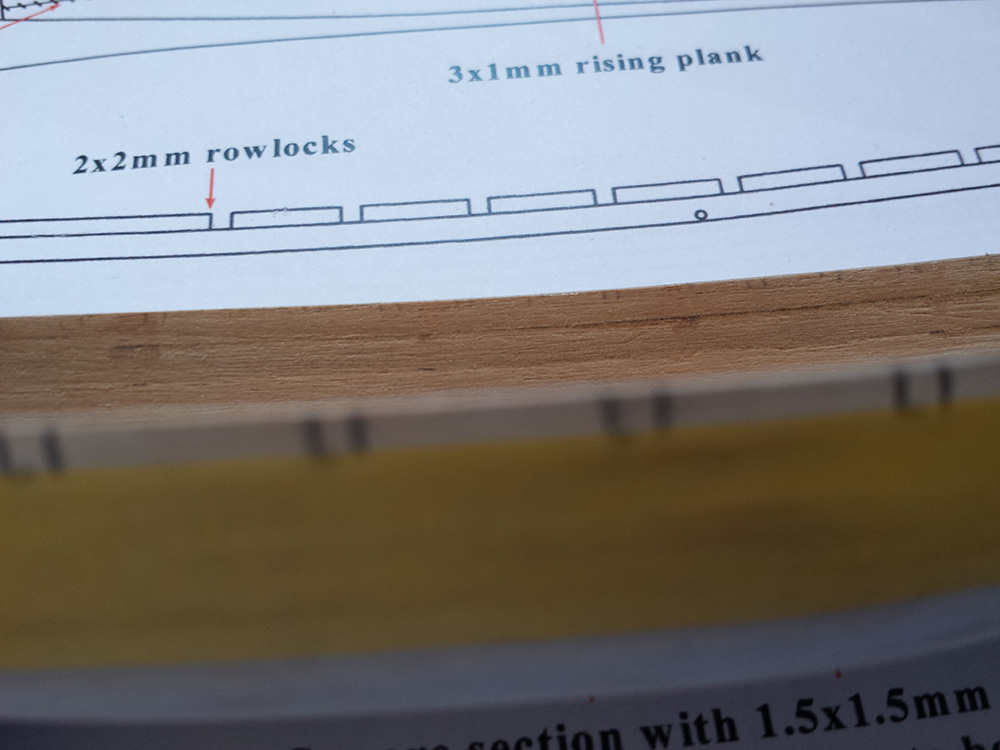
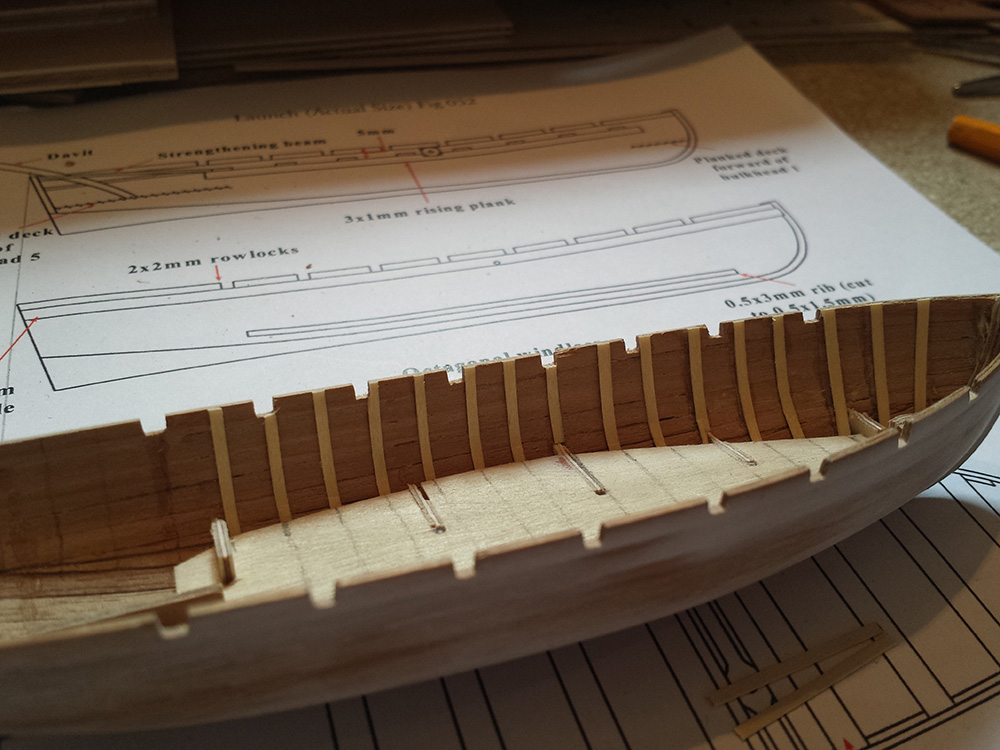
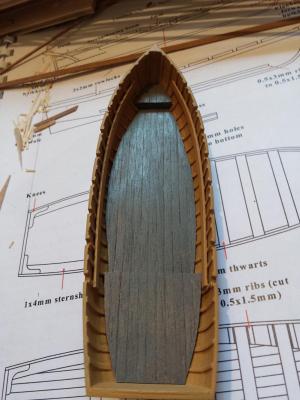
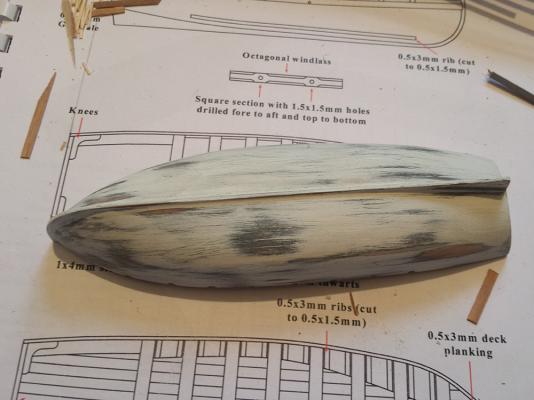
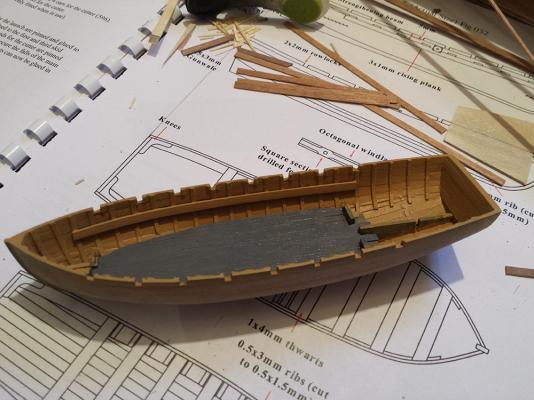
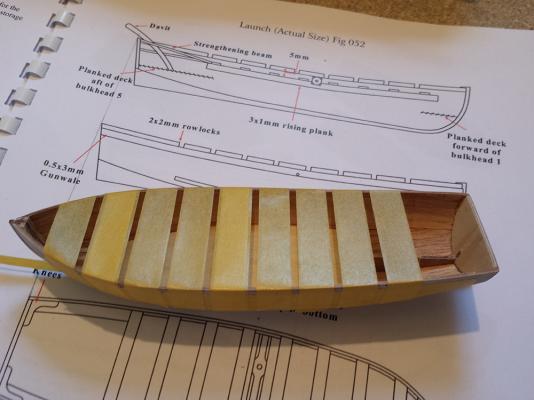
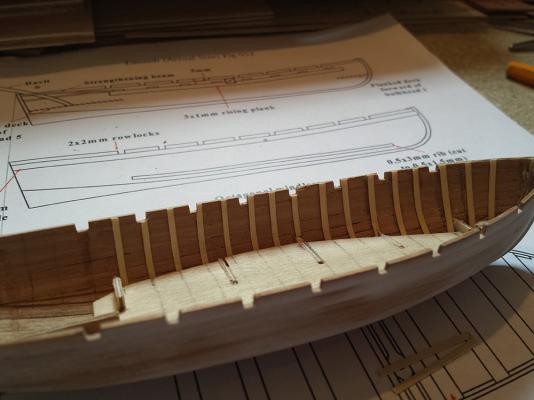
I completed adding the simulated ribs, along with starting on some small extra detailing I am adding in. Not sure if they have a correct term, but the small strips of wood that seem to bolster the row locks. Then after a coat of grey primer, and a disasterous attempt at airbrushing yellow ochre, I hand painted the interior. (I must have really screwed up on the mix). I also planked the deck (duck boards) and used admiralty metal primer to simulate the sub-bleached-washed-out effect based on the reference photograph of the actual launch.


-
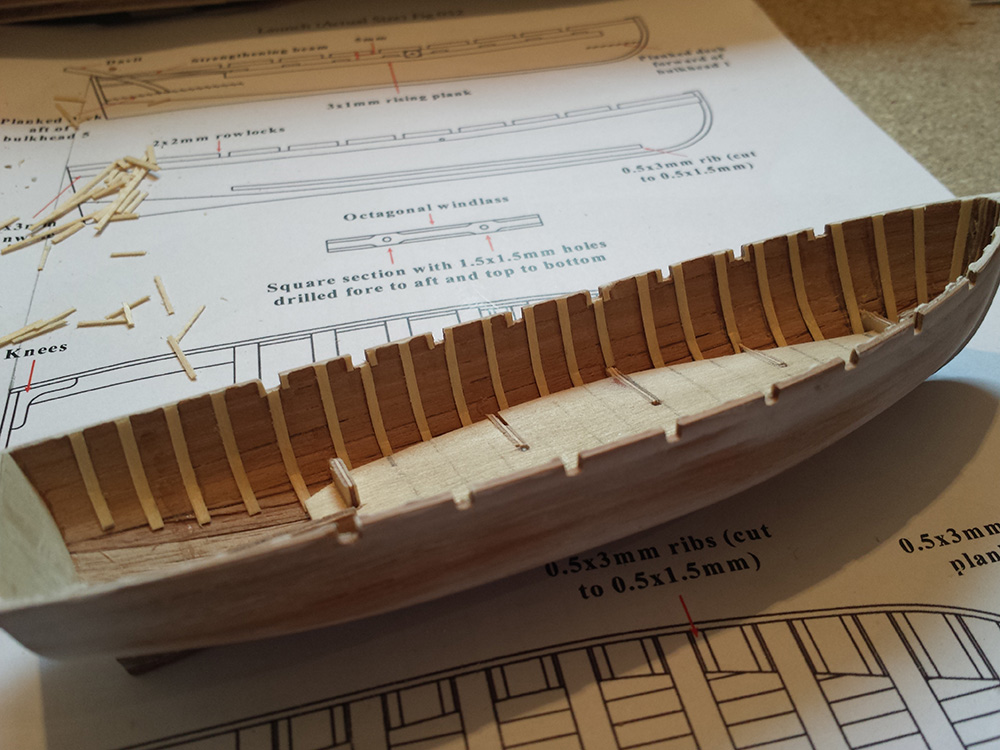
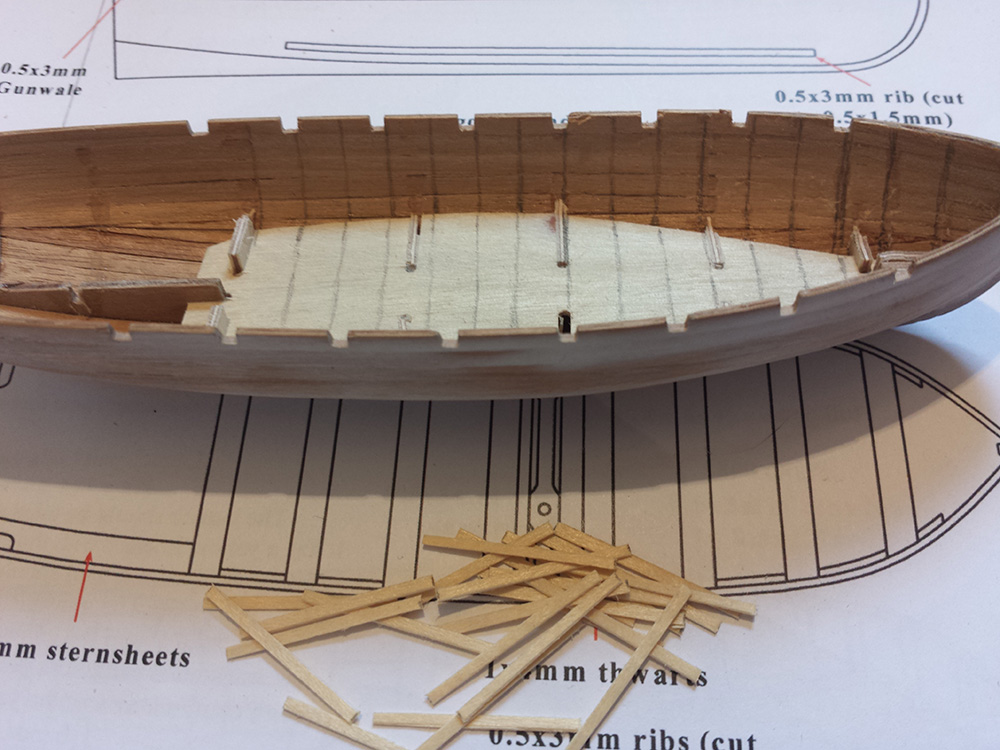
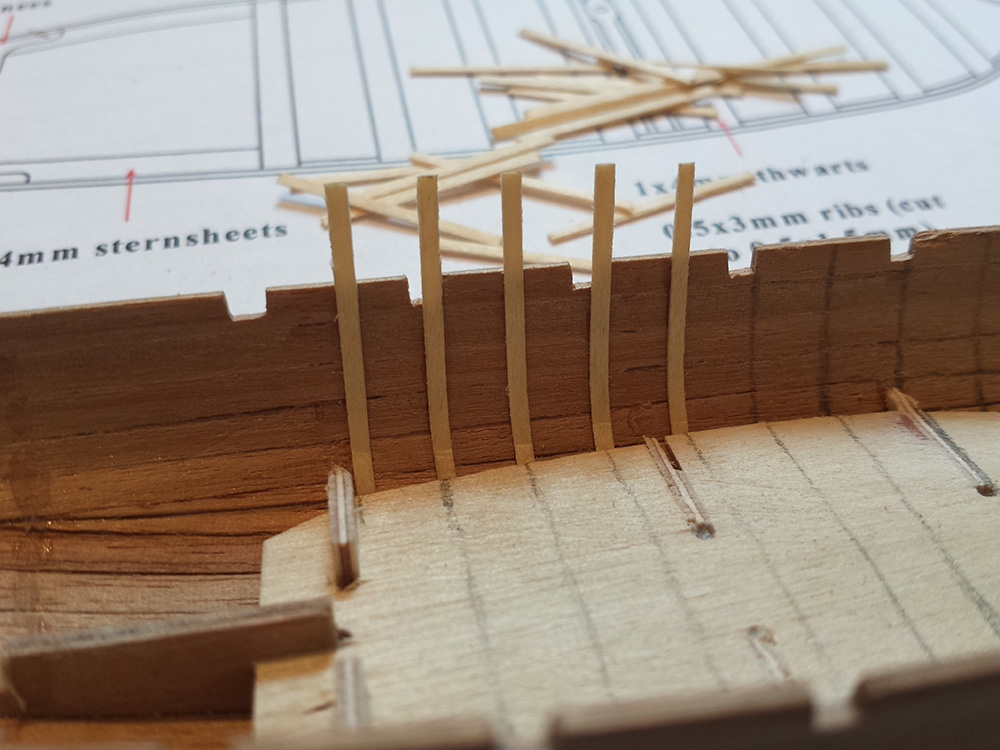
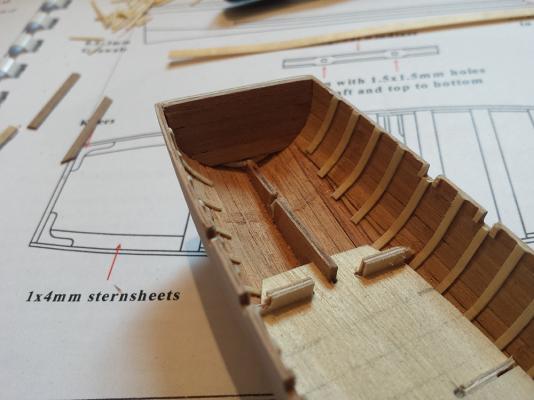
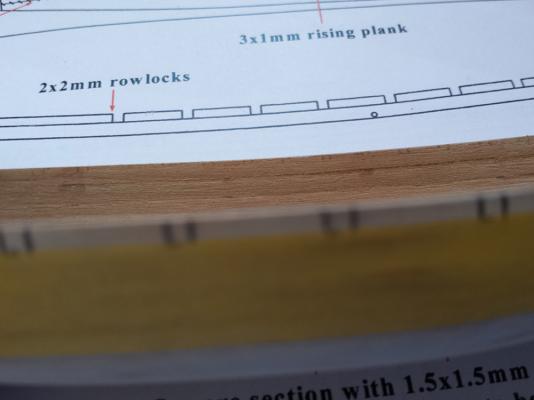
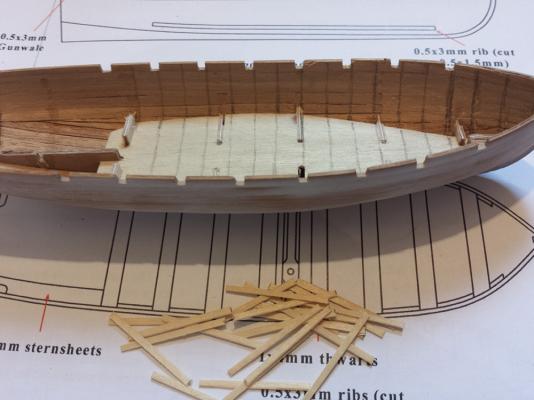
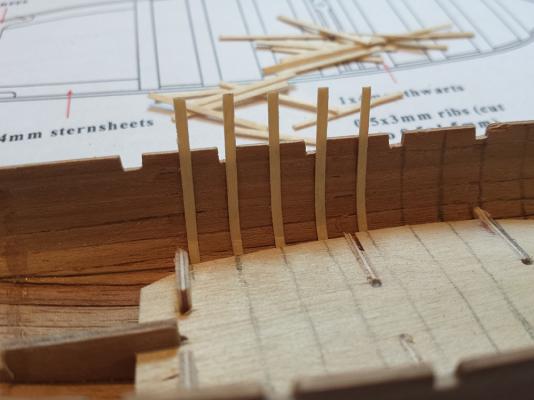
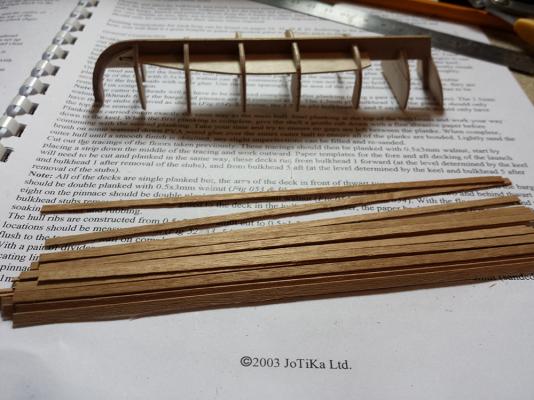
Continuing with the launch, I've marked and cut out the row locks, and made a start on the internal ribs. I used some stock 0.5 x 5 wood cut to 1.5 strips instead of the supplied wood.

-
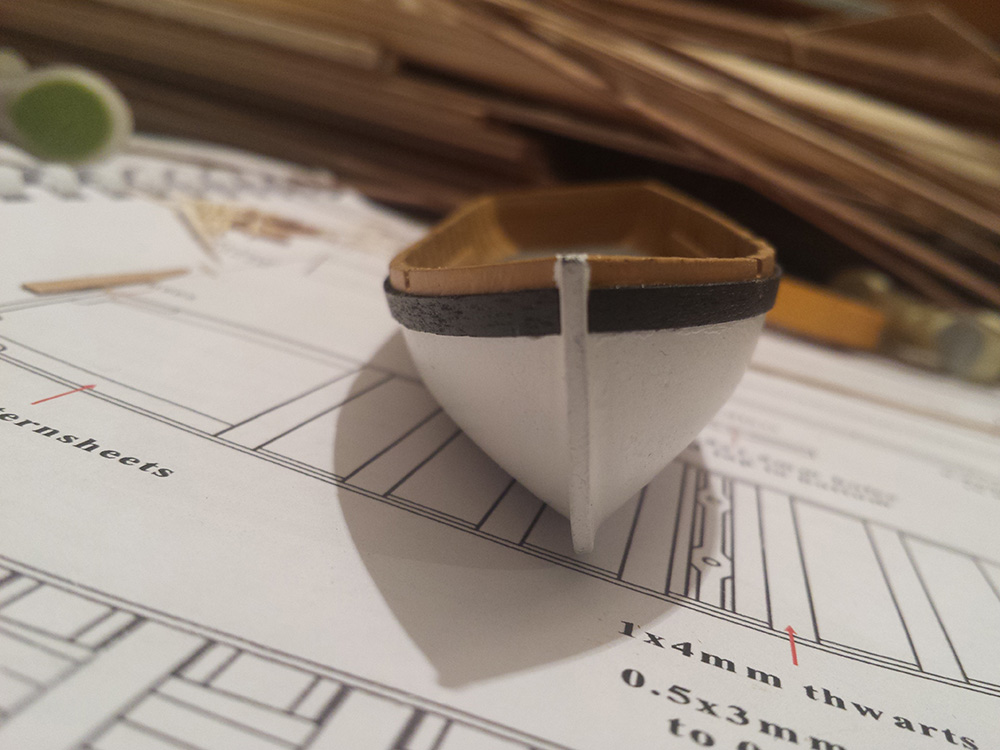
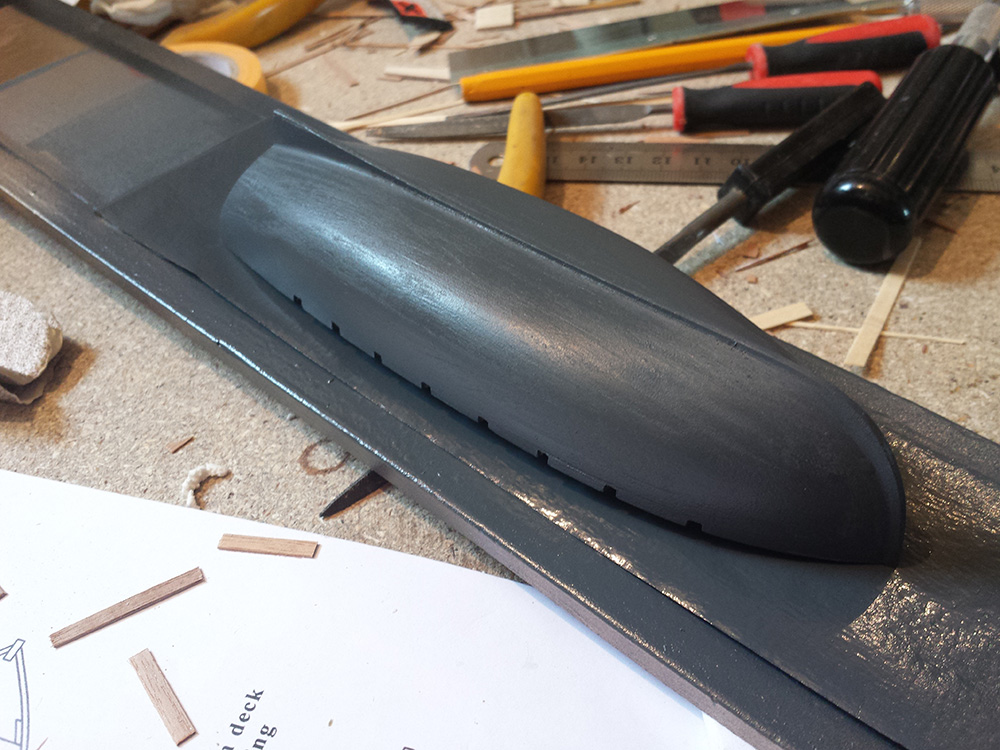
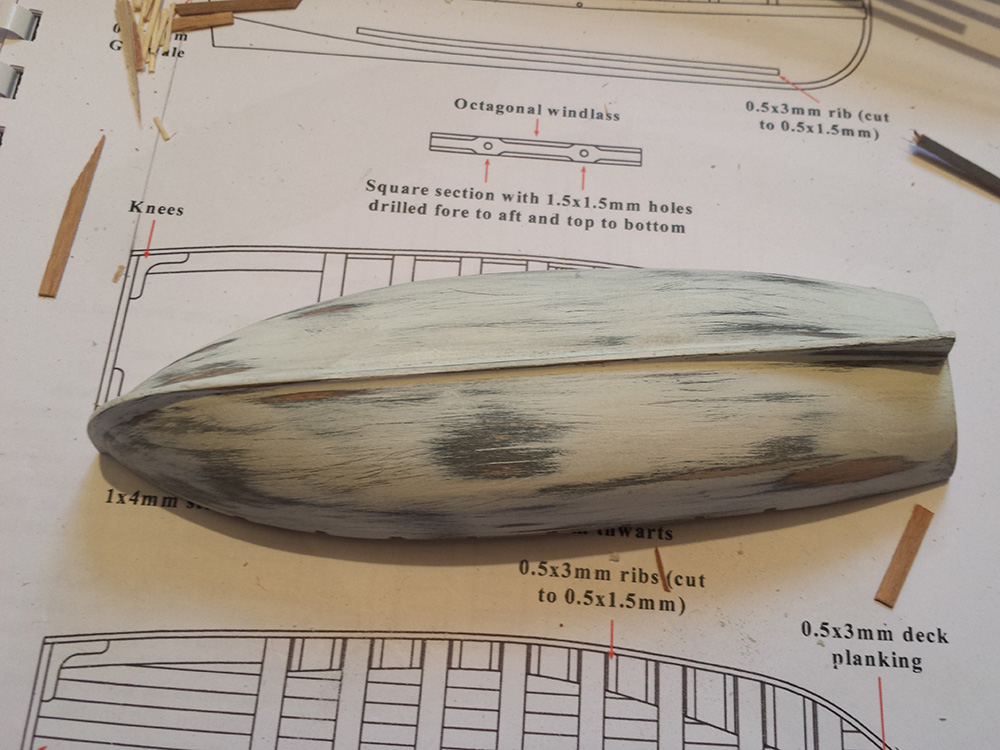
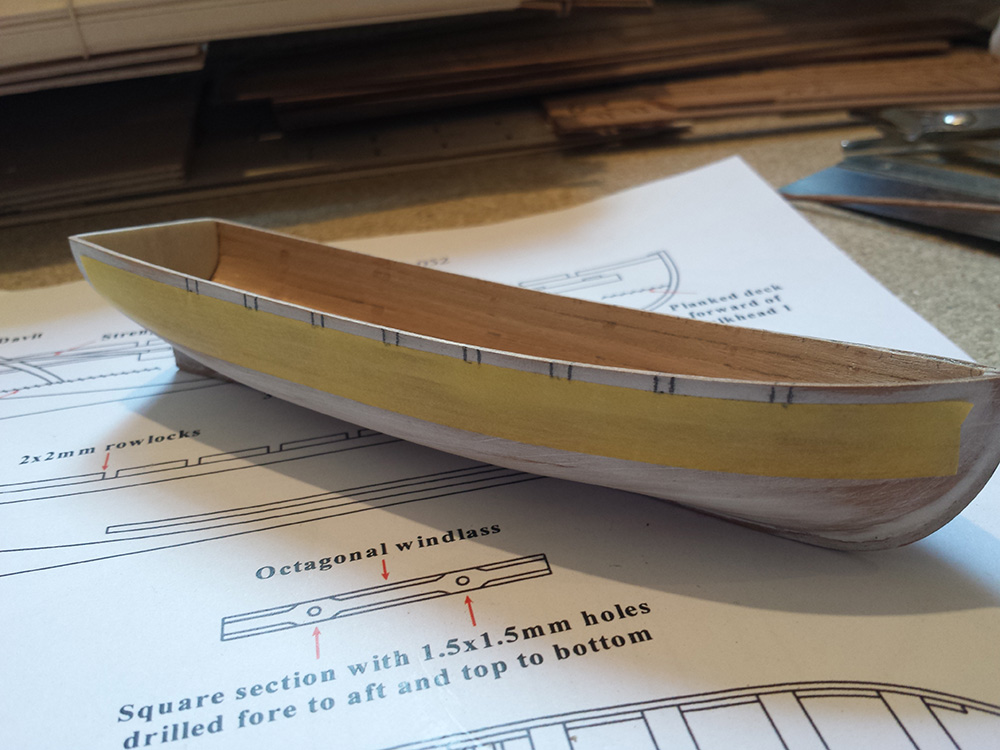
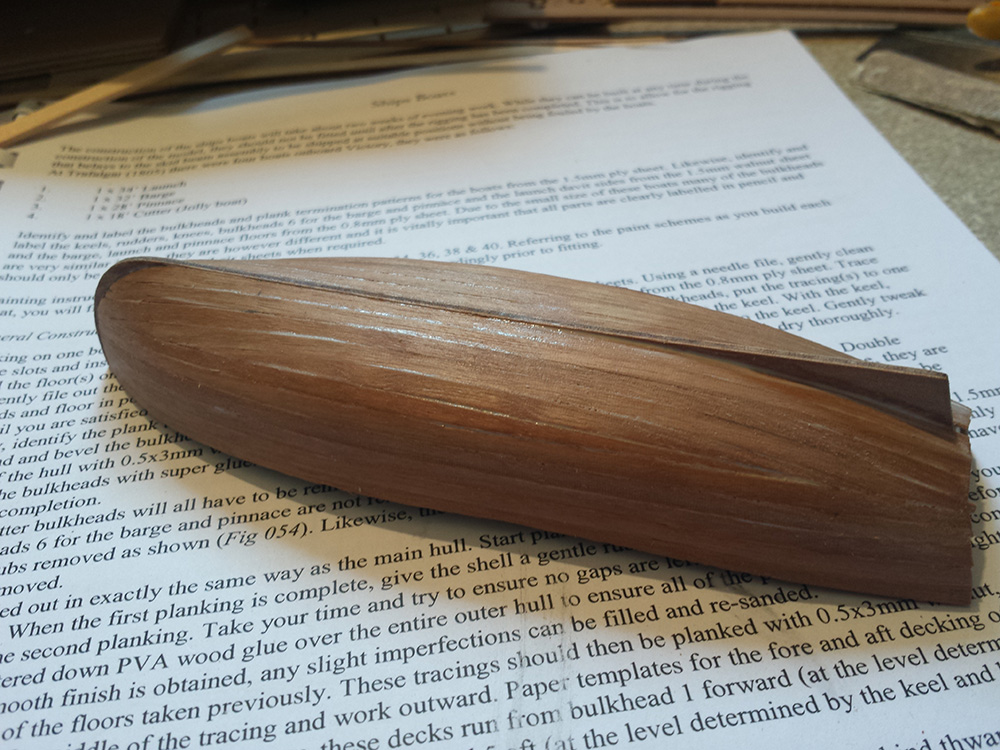
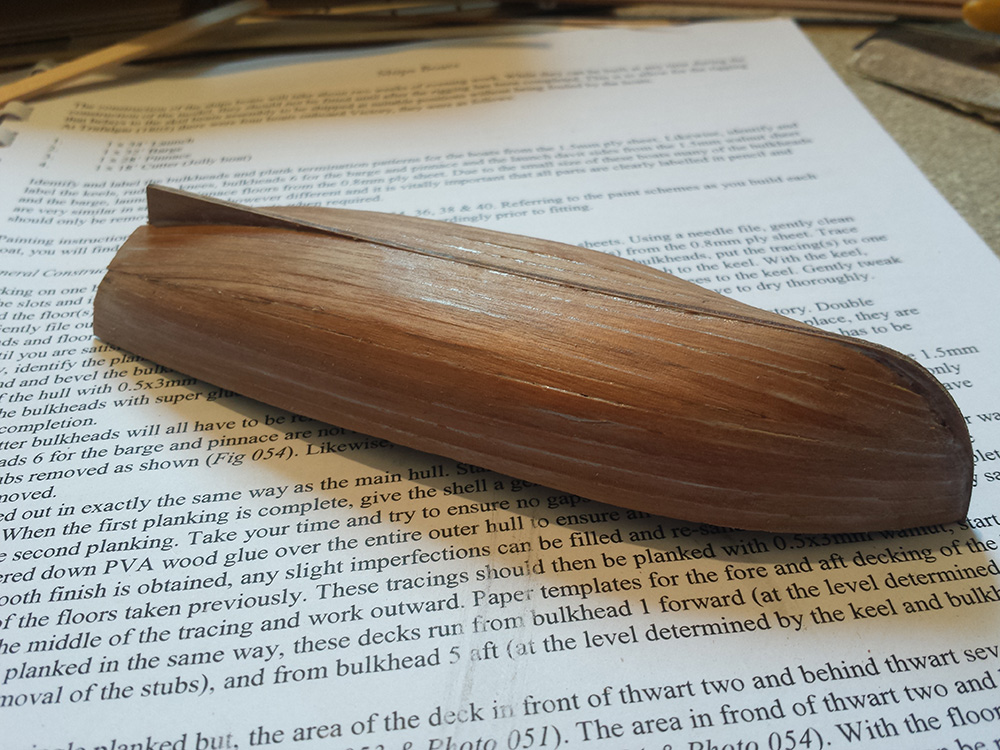
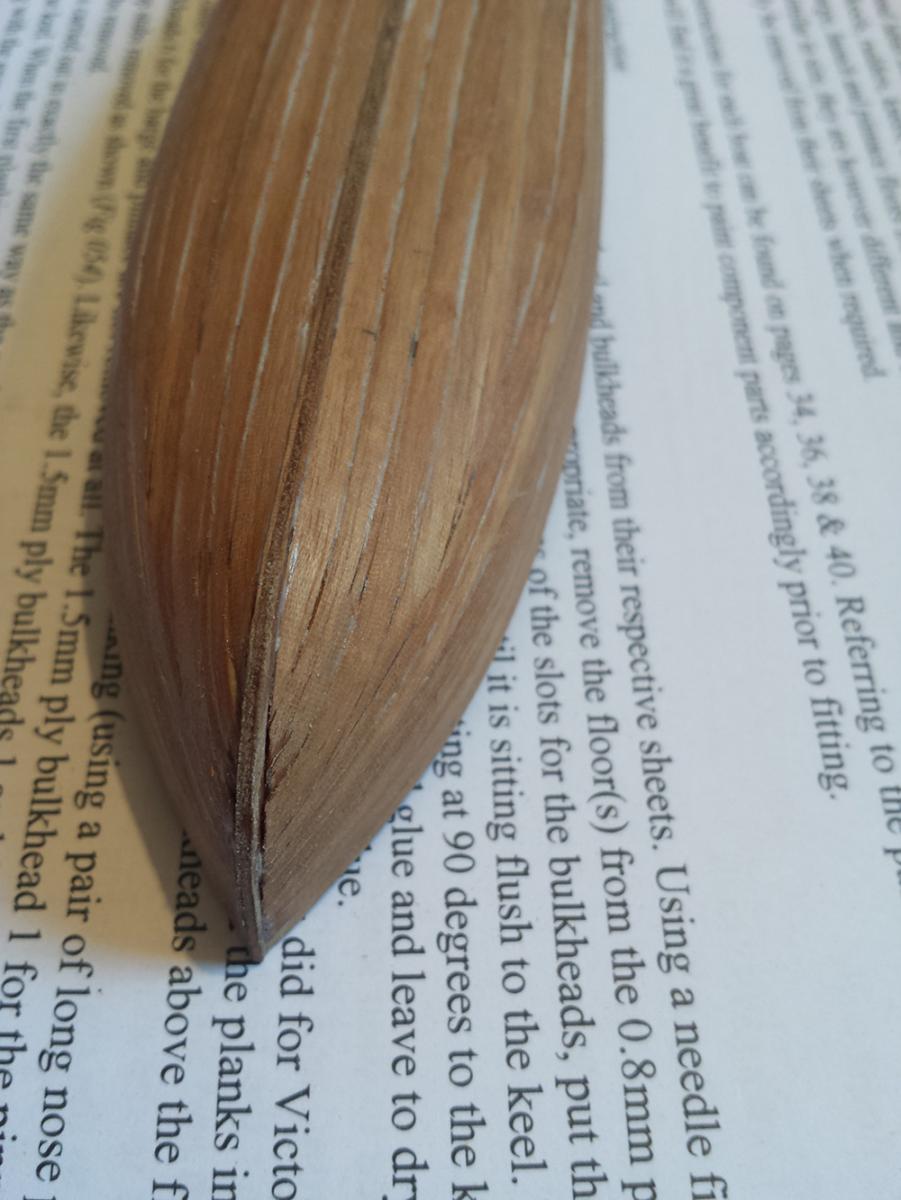
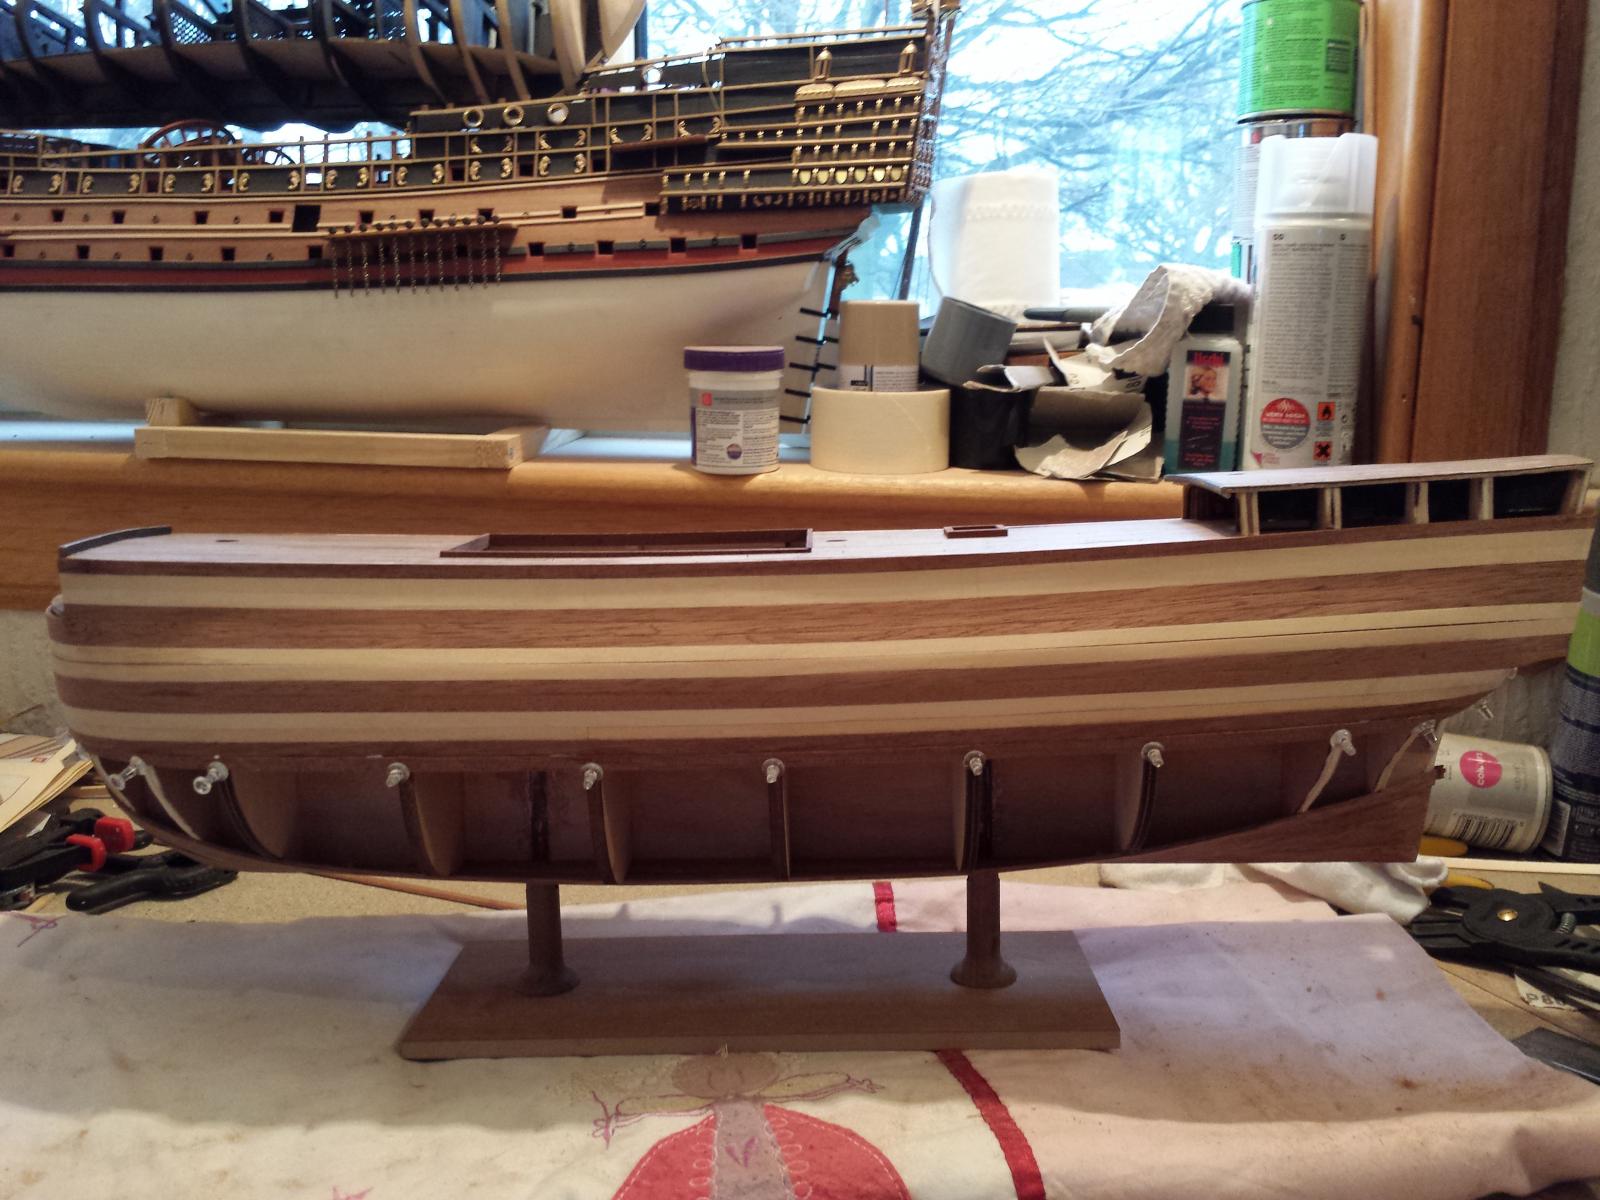
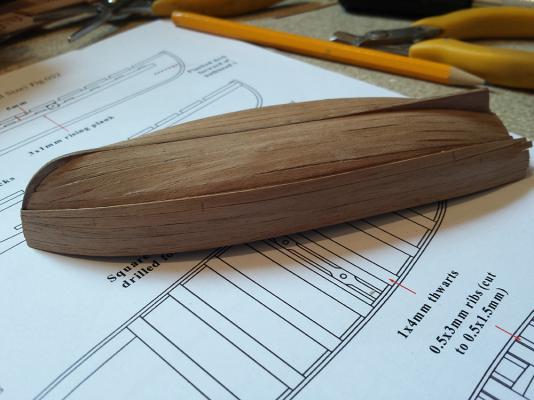
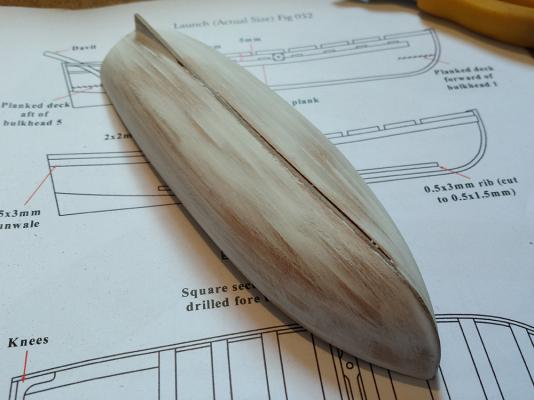
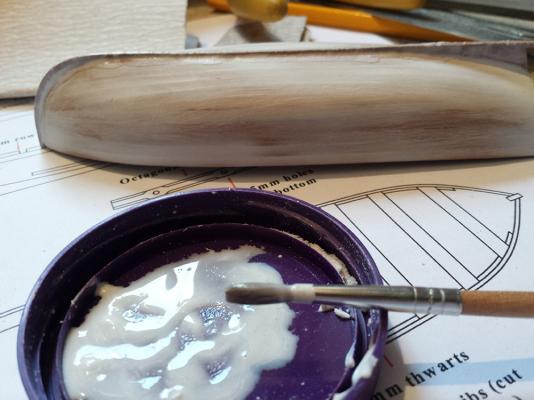
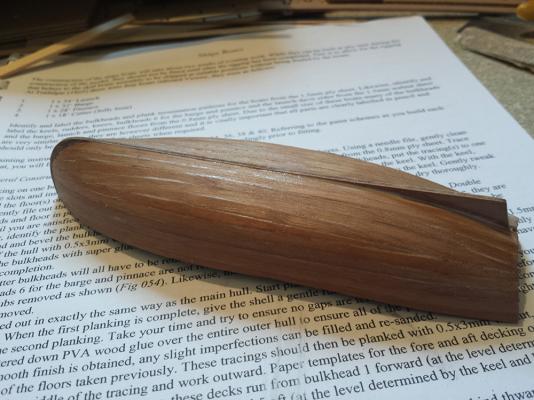
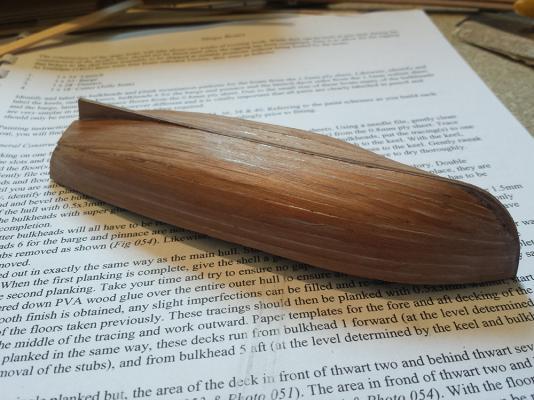
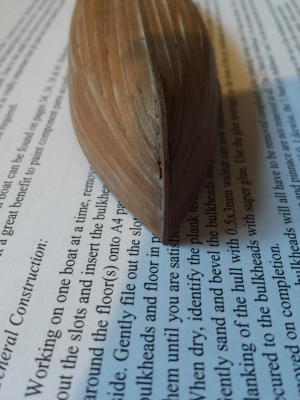
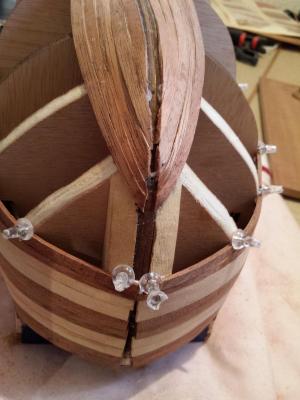
Afternoon. I've put the second planking on the launch which went on much easier than the first. After a rough sand I filled and re-sanded. I also rebuilt the keel as once both layers of planking was on it almost covered the entire keel, so I am guessing either the dimensions are out or I needed to take a lot more off the frames than I did, so the launch is going to be slightly deeper/longer at the keel, but it's not something that is going to be vastly noticeable....annoying though. After shaping/fitting a new keel I used some watered down filler and a paintbrush to fill any gaps, and sort out the area ar the bow where the frames meet the new keel.


-
Thanks Rich. I looked at that one but I think the difference in scale will be too great. The Vic is 1:72
- 1,319 replies
-
- 1
-

-
- caldercraft
- Victory
- (and 1 more)
-
ahh ok Kevin...mine will remain sailess then...I couldn't stitch sails from scratch even if I wanted to lol
- 1,319 replies
-
- 1
-
-
- caldercraft
- Victory
- (and 1 more)
-
Kevin I am wondering, did you ever look into a sail set for this? I've had a look but can't find any at the correct scale so thought perhaps as you've been working on yours for longer you may have looked into it already? Is it worth me looking or is there no options at this scale ?
- 1,319 replies
-
- 1
-
-
- caldercraft
- Victory
- (and 1 more)
-
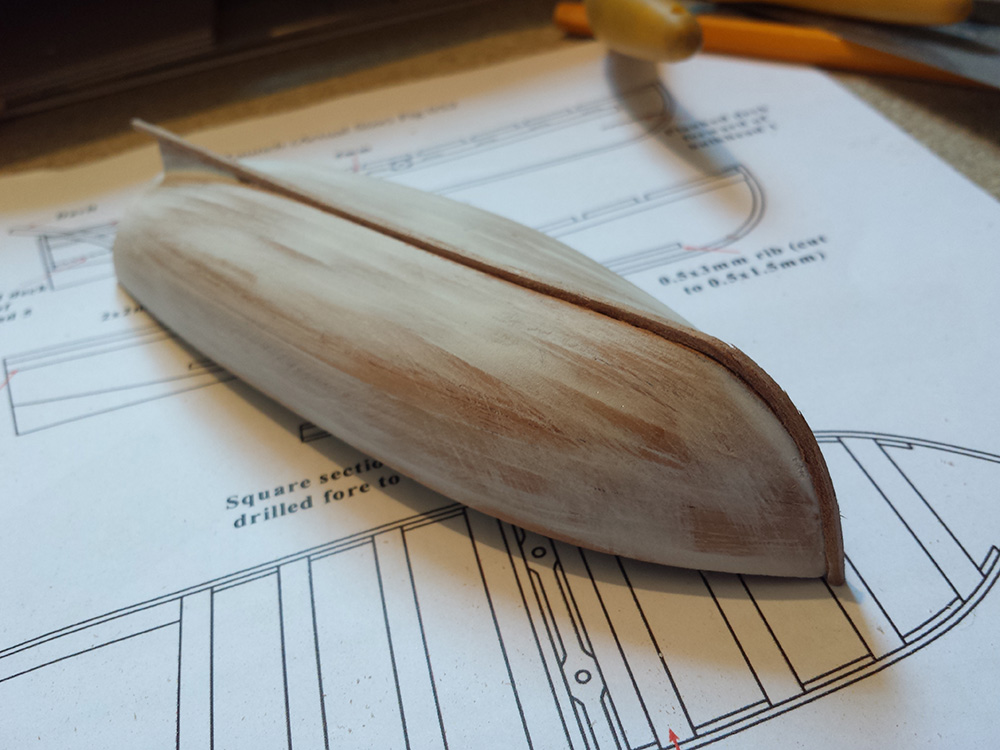
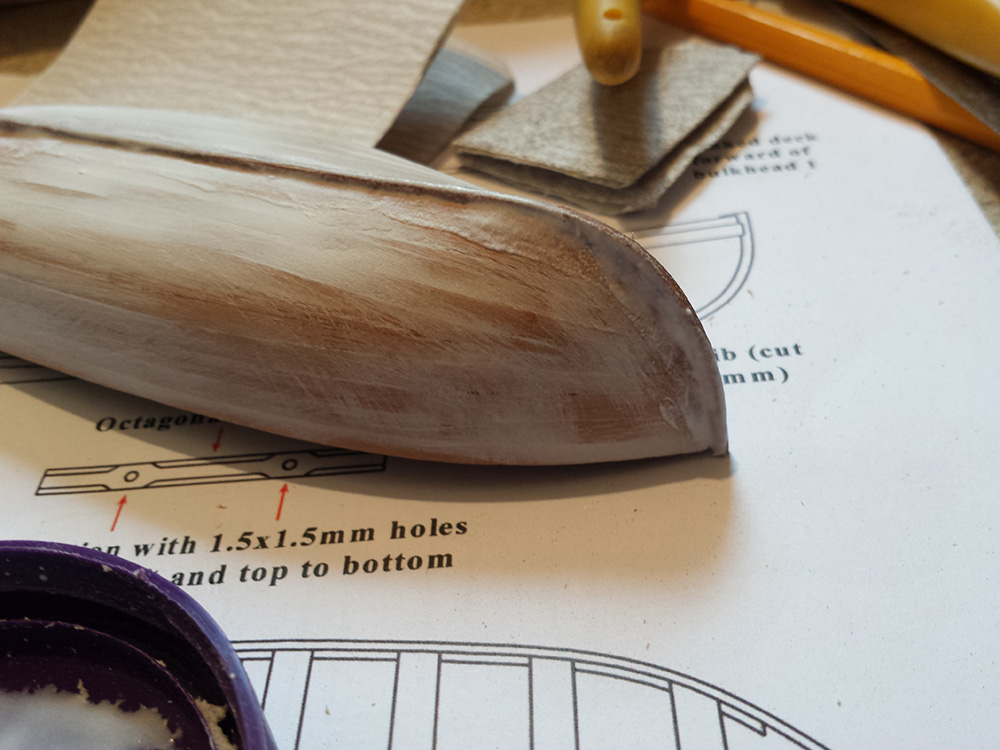
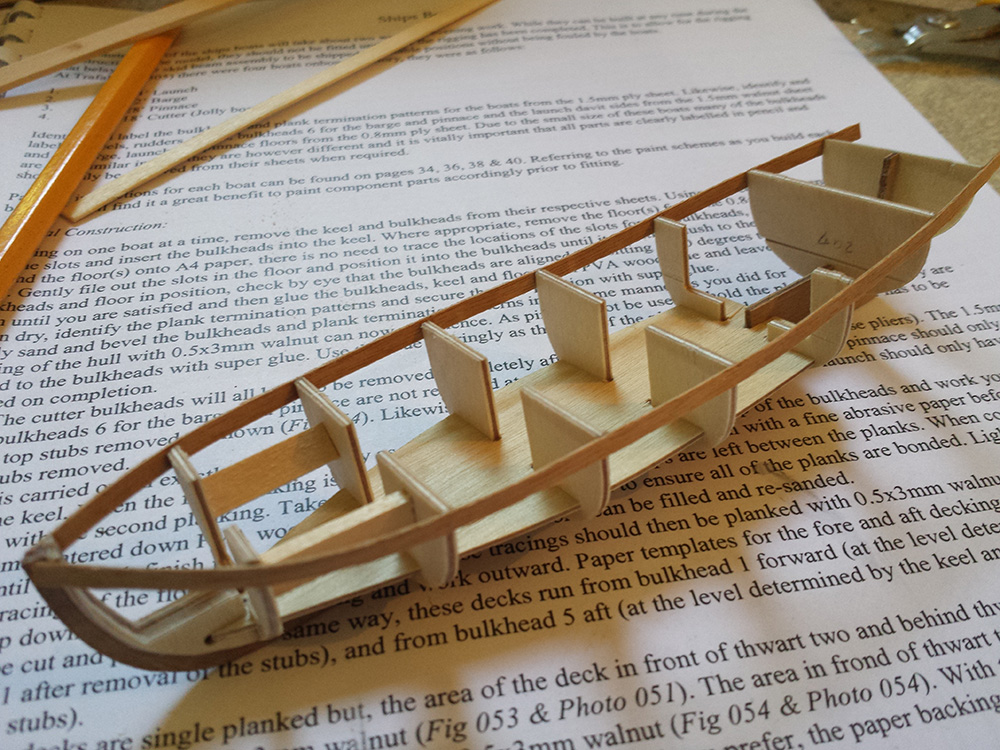
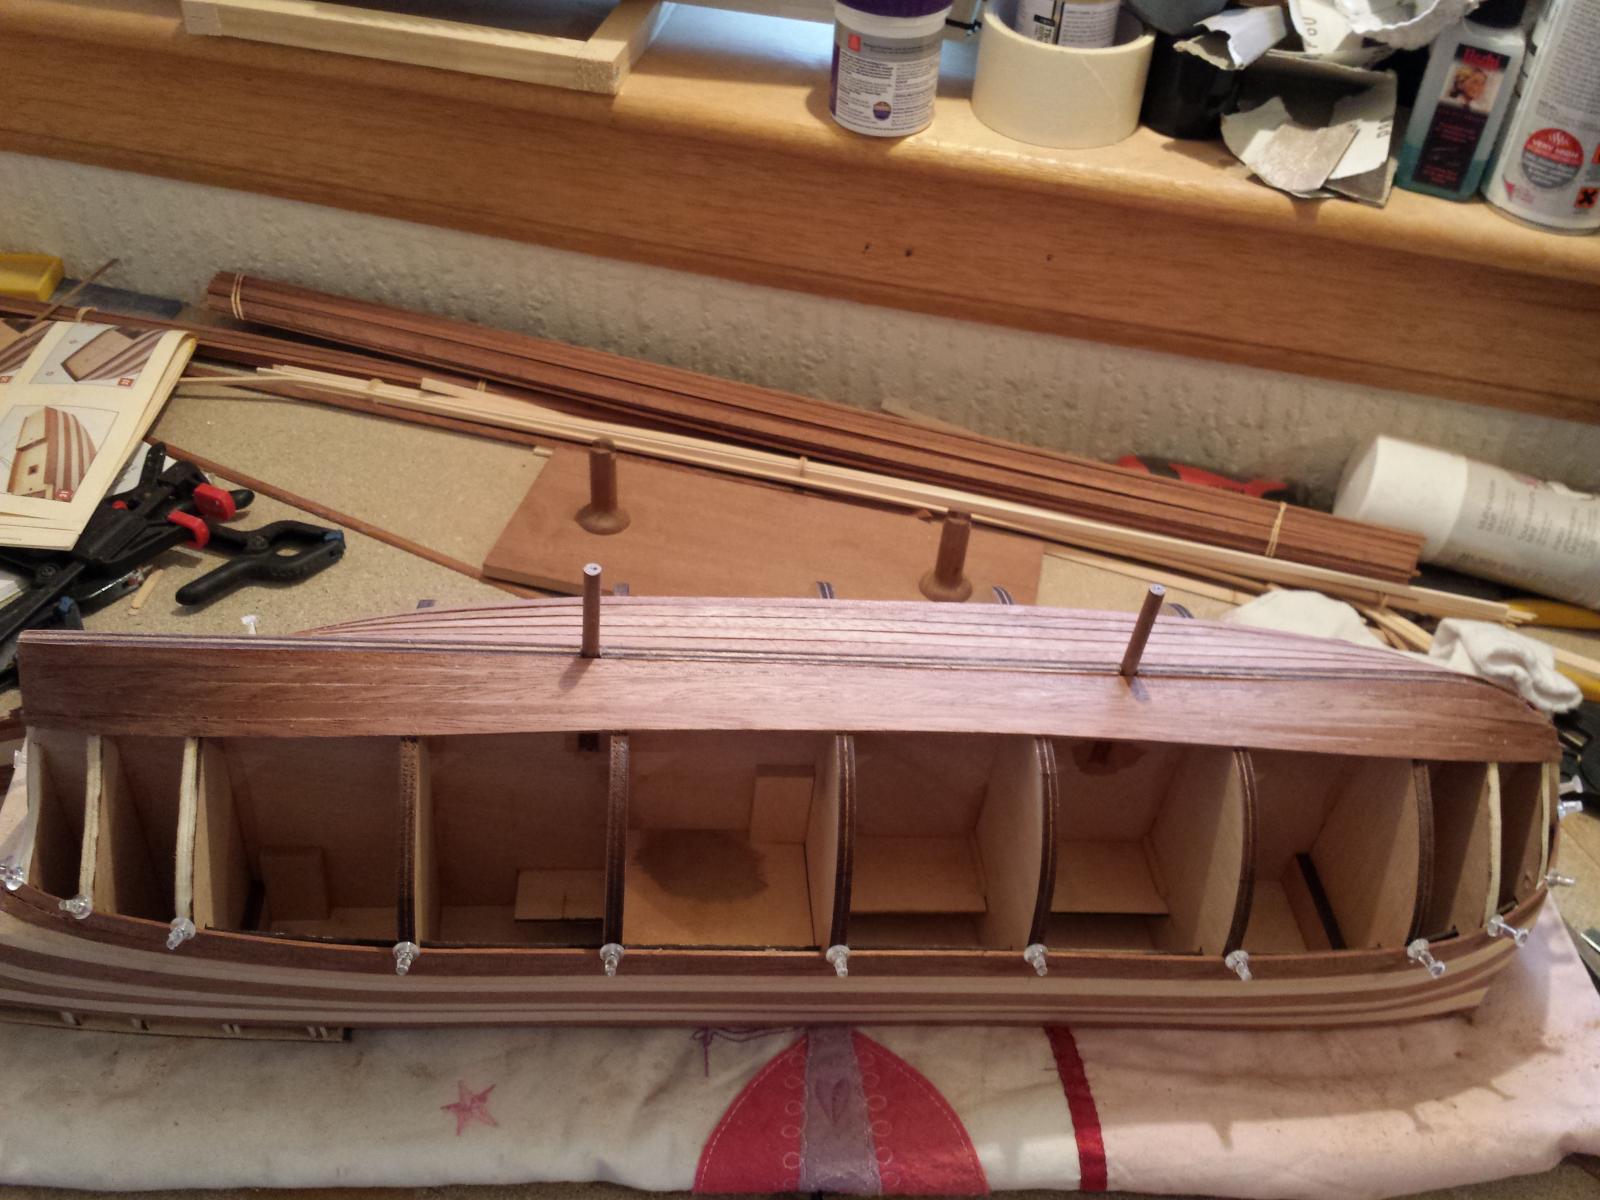
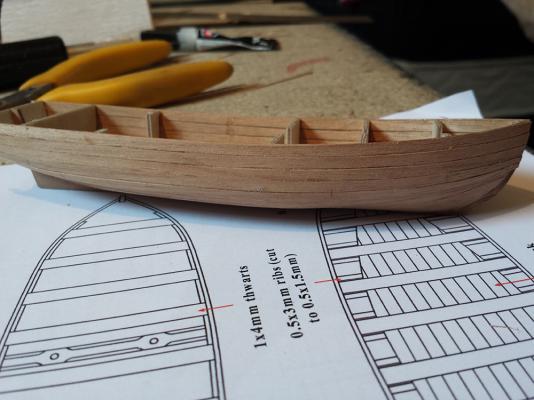
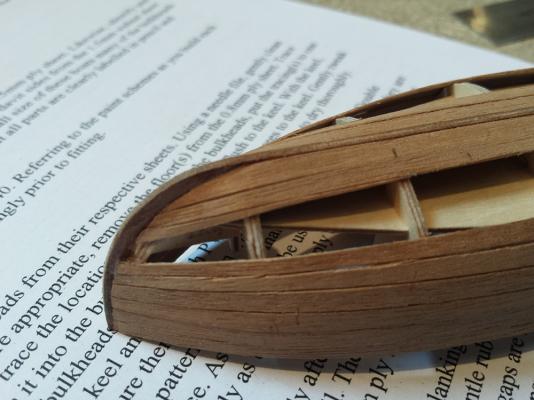
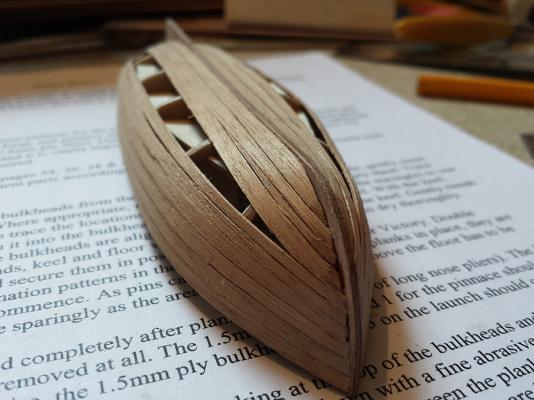
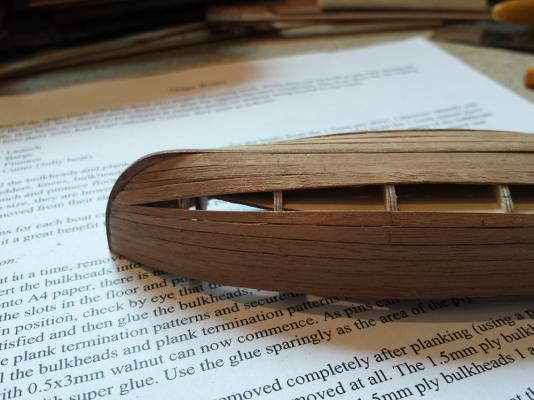
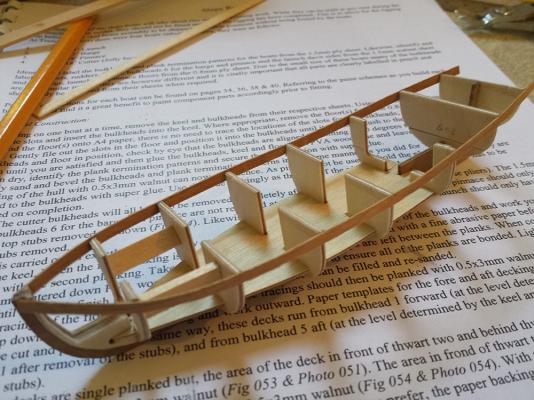
So far I've been able to get the first planking done on the launch. Was a few annoying gaps that I couldn't seem to close, but I can deal with those later. I did end up having to use one stealer at the bow, which I detest having to do, although again, first planking so can get away with it and it's barely visible on the inner surface. Gave a light sande and coated with watered down PVA to seal the planks 2nd layer to do now, and then an attempt at removing the frames...


-
Thanks Sid, that will most likely be the route I follow. Paul I will check it out thanks. Cheers Boyd. I don't know if I will be able to bring anything new to the CC Vic builds, or even come close to matching qaulity of some, but will certainly give it a crack
-
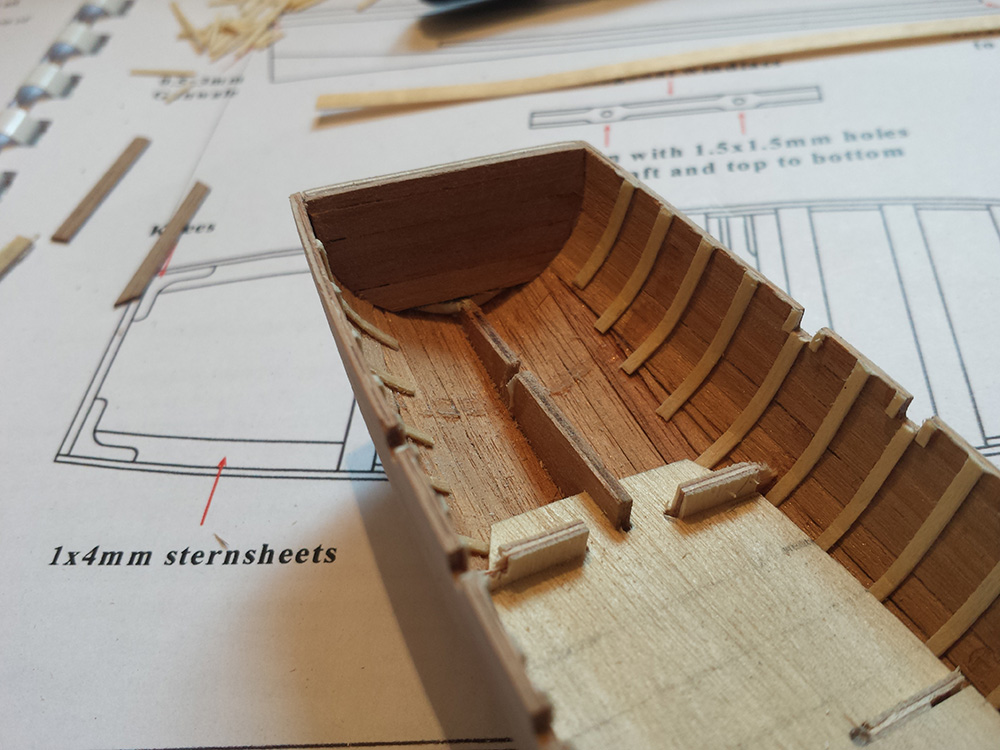
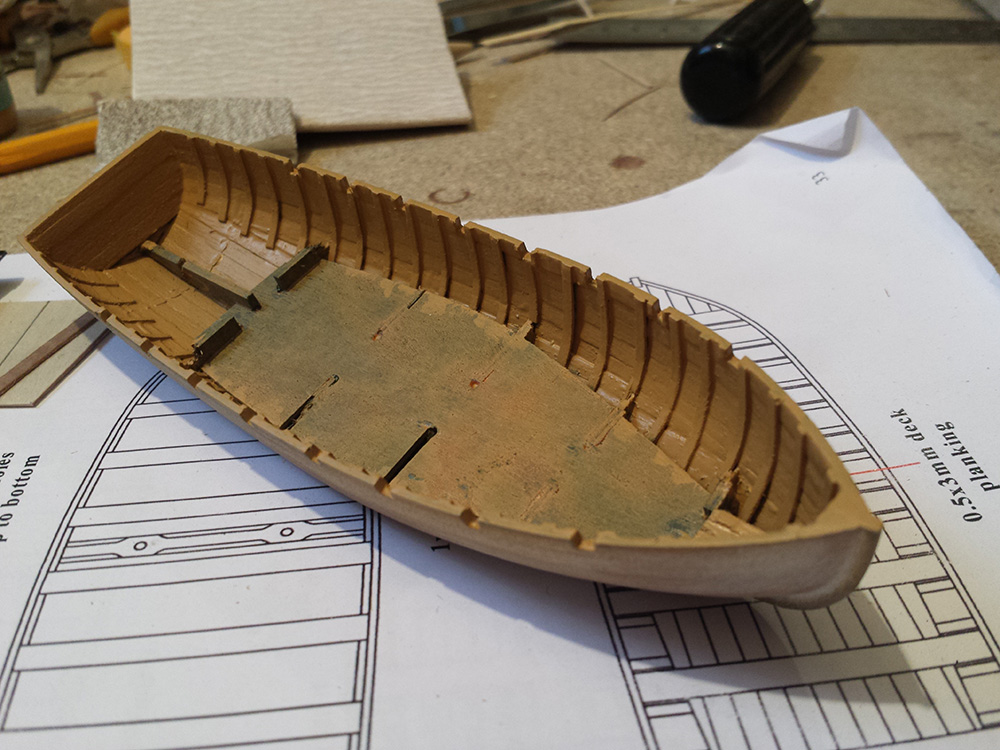
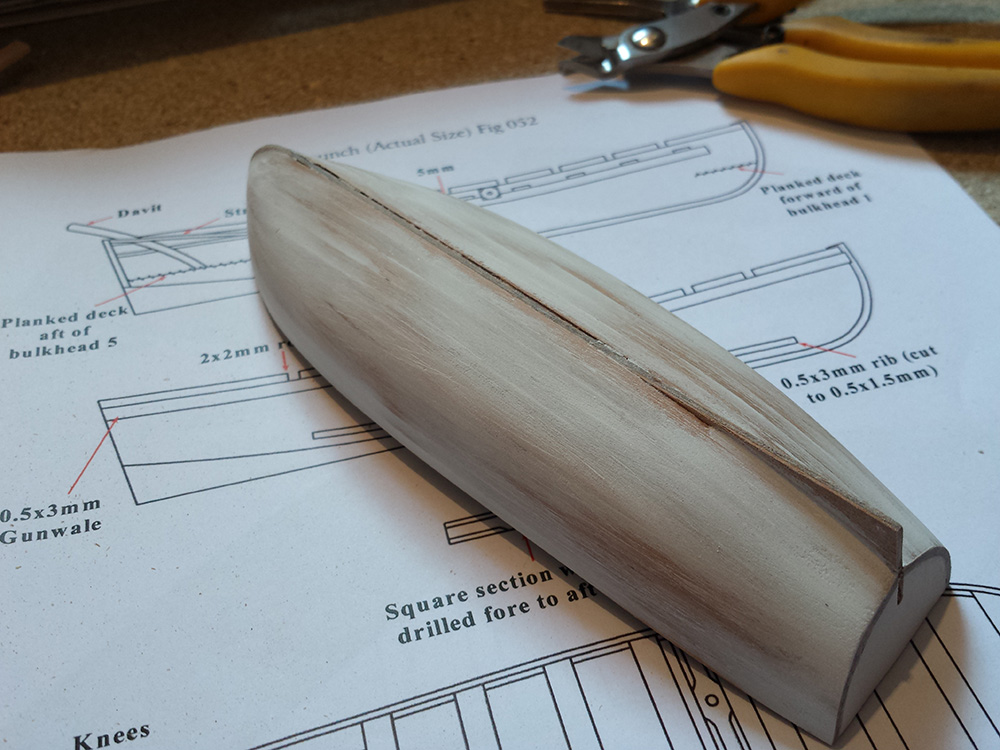
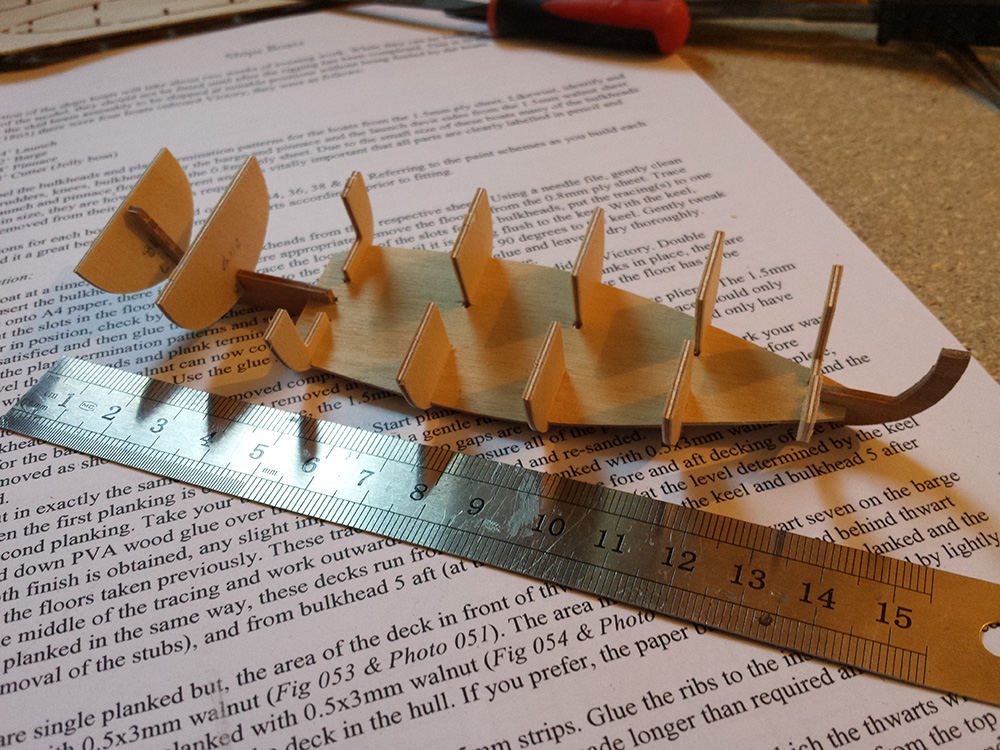
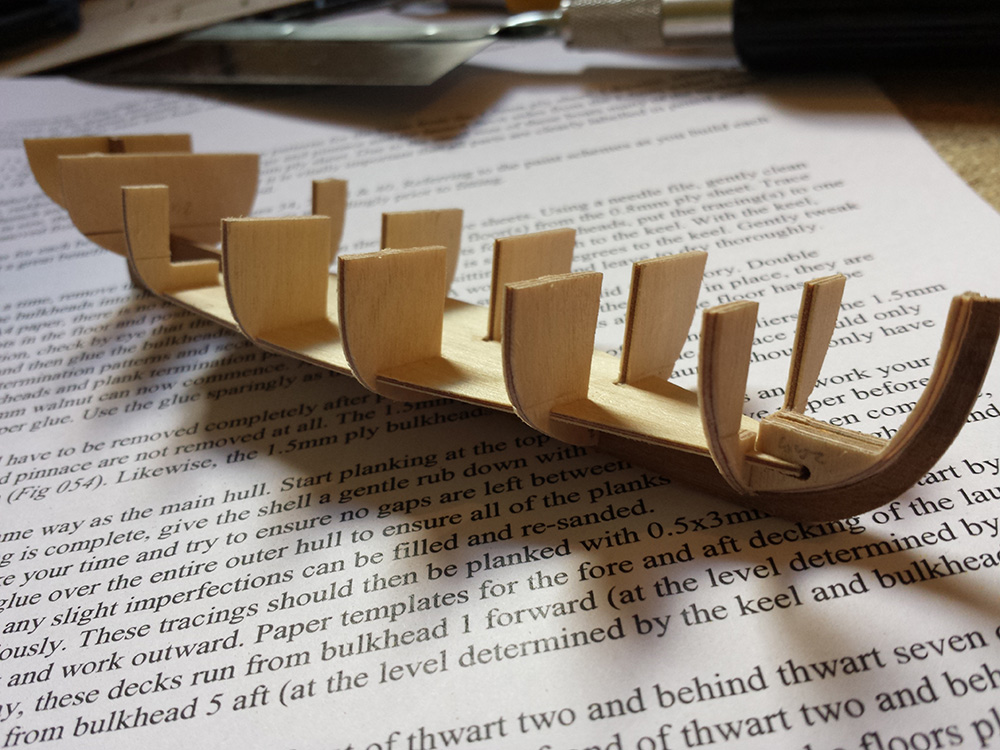
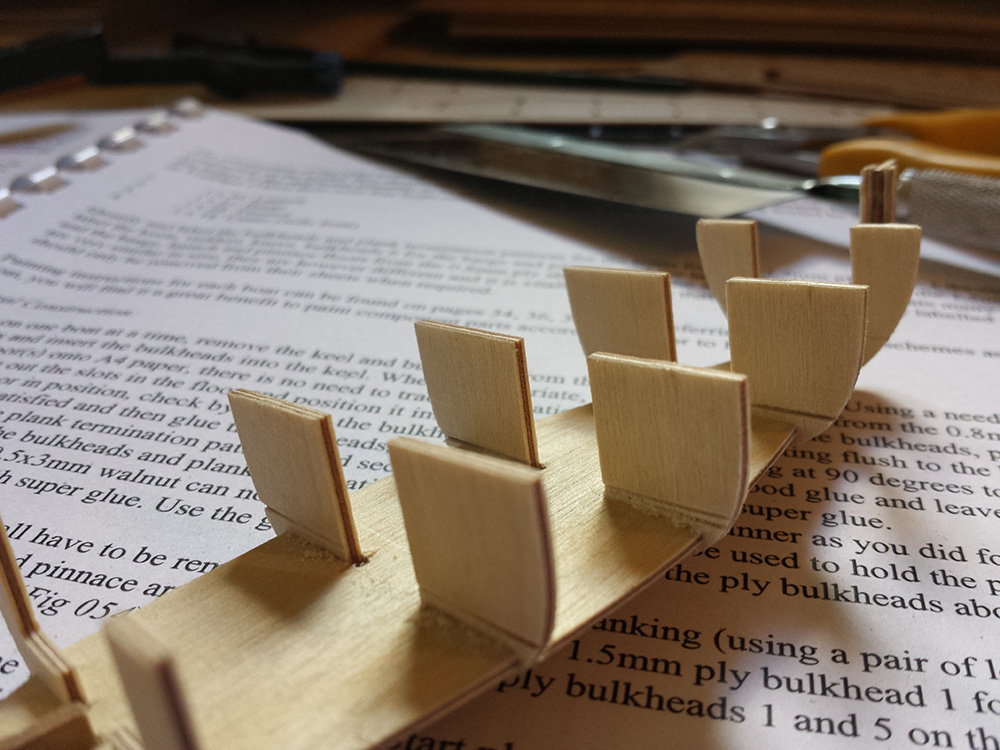
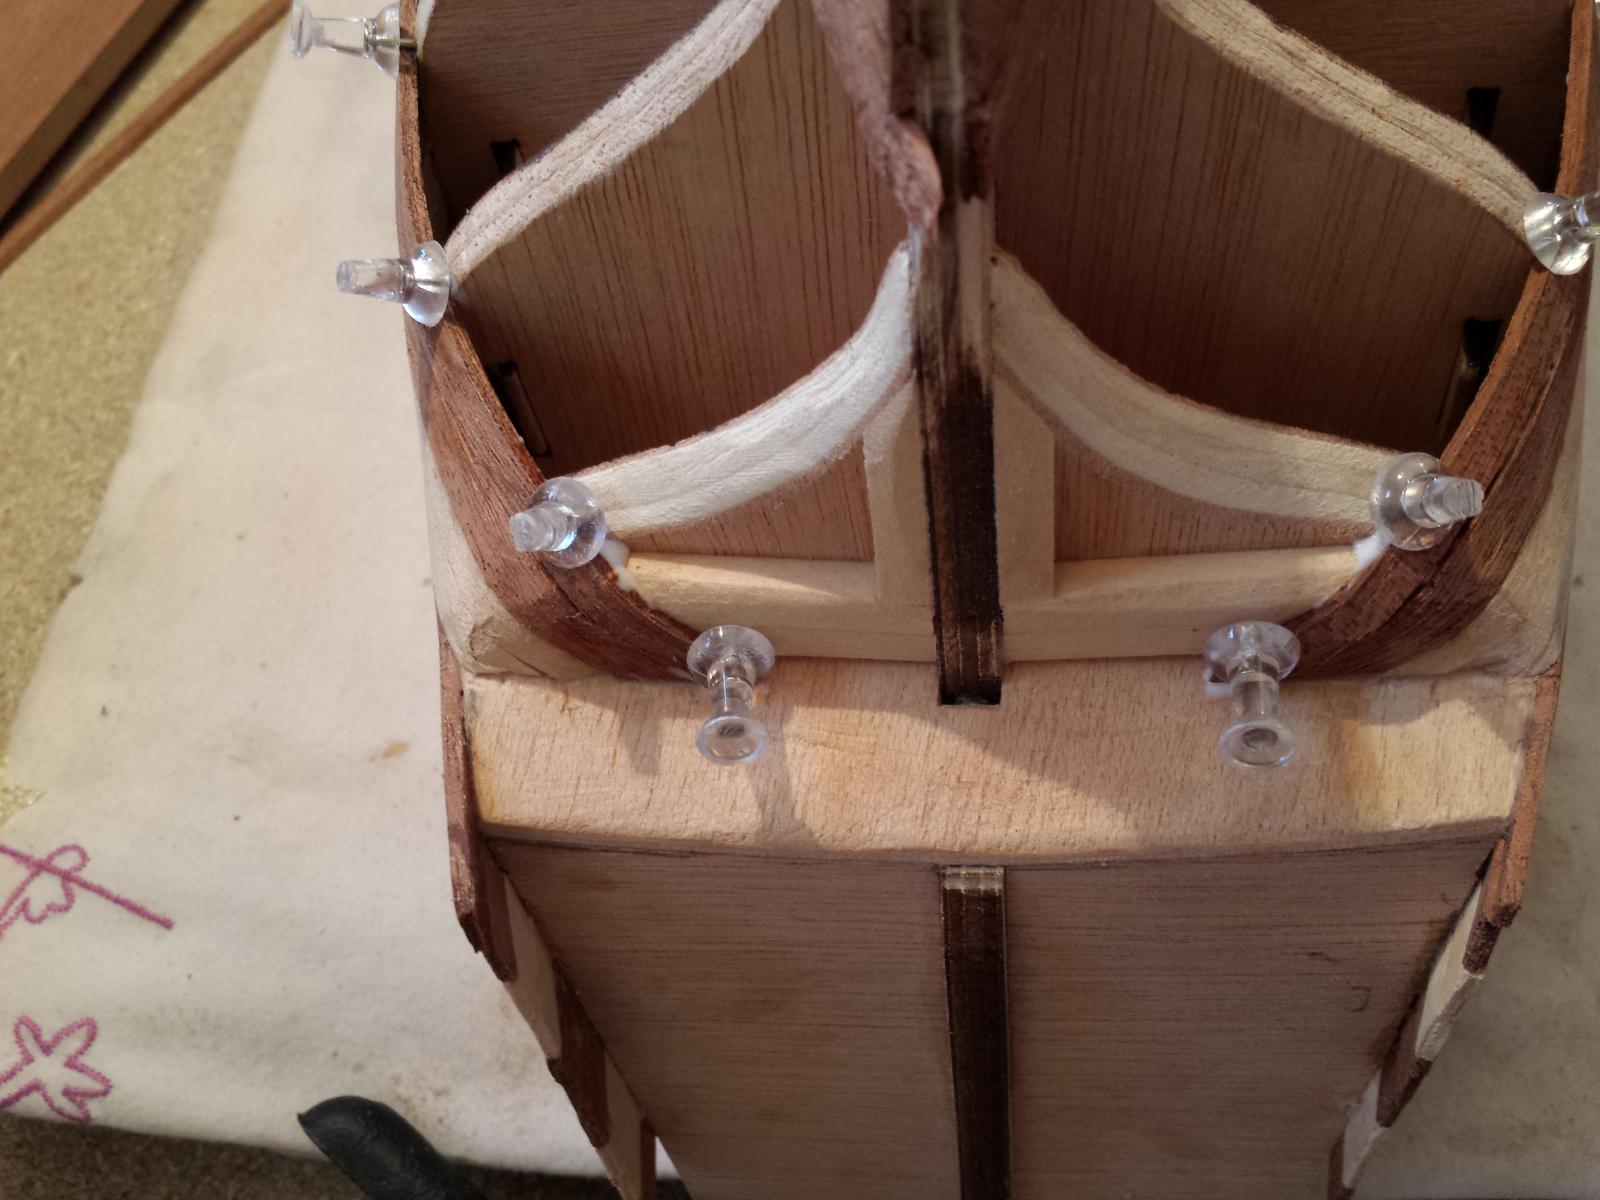
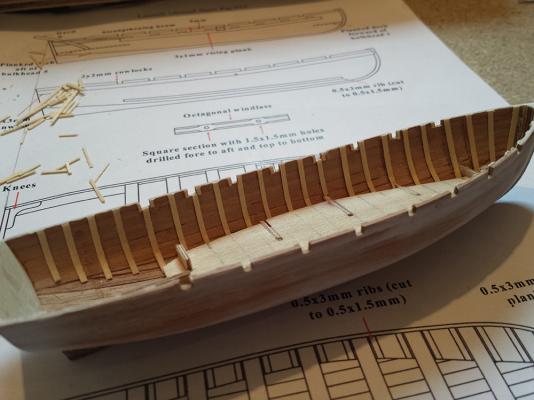
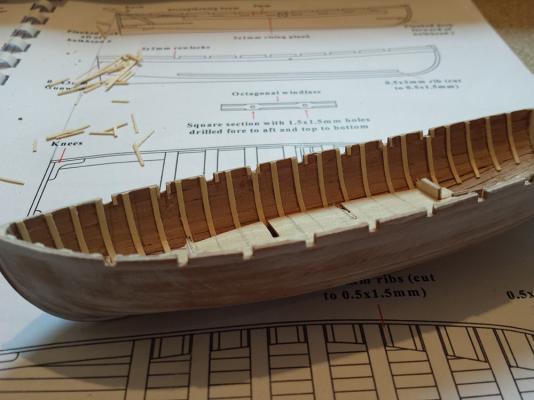
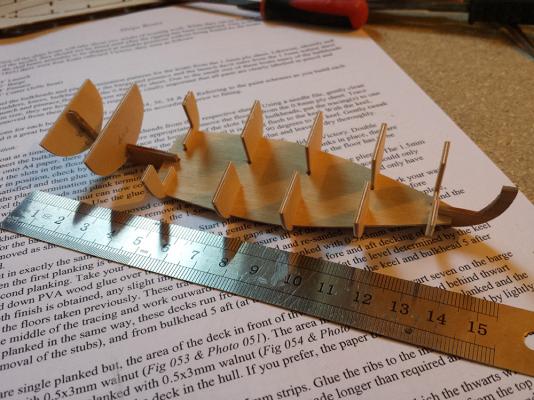
Well...time to get cracking. I did make a start on the launch. After a slightly confusing session with the parts id manual and the aux craft ribs, I identified and removed the ribs I needed, along with the false deck peice and keel, and the plank term patterns. I dry fitted everything in place, snapping one by mistake, everything was such a snug and tight fit I just left them in place and used watered down PVA to secure everything, with the exception of using cyano gel for the term patterns. I also light cut the tabs of the frames to aid in their removal later. After that had dried for a few hours I prepped 24 pieces of 0.5x3mm walnut for the first planking. I worked out it would be about 11 planks either side, per planking layer. After fairing the frames where needed, which wasn't as much of a challenge as I thought it was going to be given the weakness of the frames, I fixed the first planks in place either side. I spot glued them to make the frames easier to remove later.


-
Must admit, I'm puzzled as to what you mean? I don't notice any difference between this kit and any other, in the way it's put together etc...
-
Hi Keith. I did look at the Billings kit a while back, but to be honest the plastic content put me off greatly. Which would mean buying after market addons. Didn't see the point really when the CC kit has it all included. Although I was dissapointed at the inclusion of PE helms. Although the relief etiching is pretty good I may end up replacing those ones. Anatomy of Nelson's Ships is the book that I have too Edit: Sorry ignore that bit about plastic, got confused between kits)
-
Thanks for the advice guys. Paul, do you have a link for that book, it sounds intreiging. I have a Victory book that I was sent by a friend from Austrailia but it's quite an old one now. Kevin I was looking at the stand last night and to be fair it wouldn't take much to make it into quite an attractive stand. I have enough spare stock to be able to plank it nicely and add a few embellishments... Jonny yes living in Fife does make that tricky, however prior to 2012 I lived in Portsmouth, and I have had the pleasure to set foot upon her decks, along with HMS Warrior. (Which is also on my hitlist, the Billings kit looks quite nice). She is a colossal ship up close, it's hard to appreciate just from photographs. I already have a spraycraft airbrush kit, not aquired a compressor yet I am still making use of canned air, but I've not given it much use so far. (Currently I use it with no bottle attached as a great way of blowing dust off rigging).
-
Thanks Kevin haha yeh it looks like a great model until you actually start building it! Yeh all seems complete. Though I wouldn't call it a stand, and to be honest I probably wont end up making use of it as I will be looking at pintle-mounting at an early stage and the bulk of the build will be done on it's final stand. (Once the hull is complete of course). I too will be making use of sprays, and adm paints for the details etc.
-
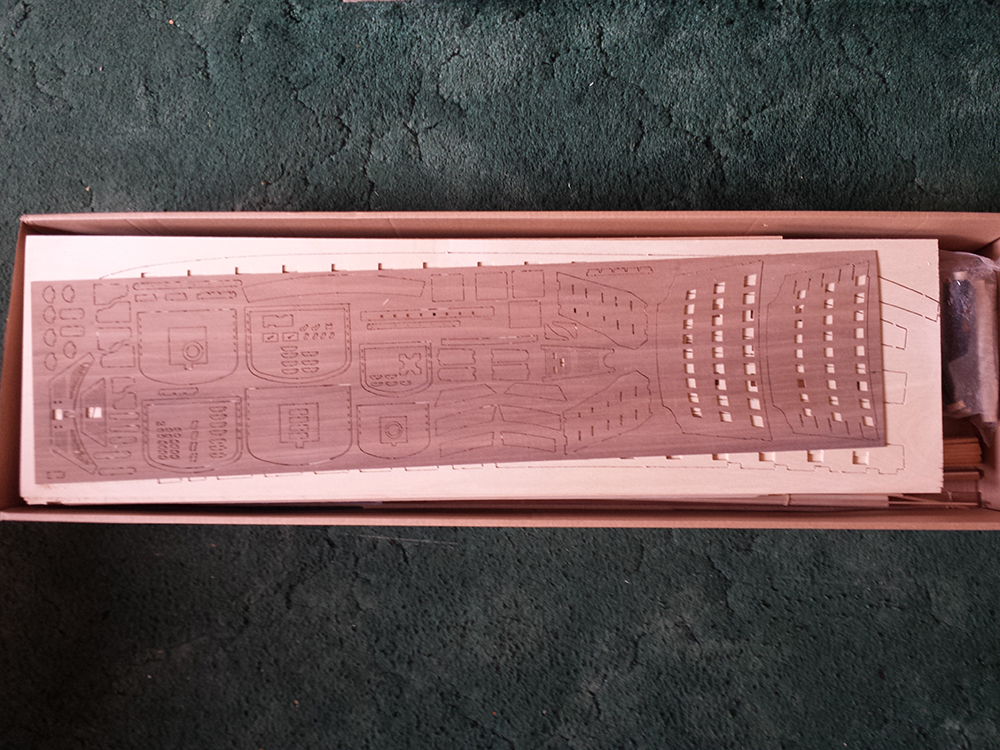
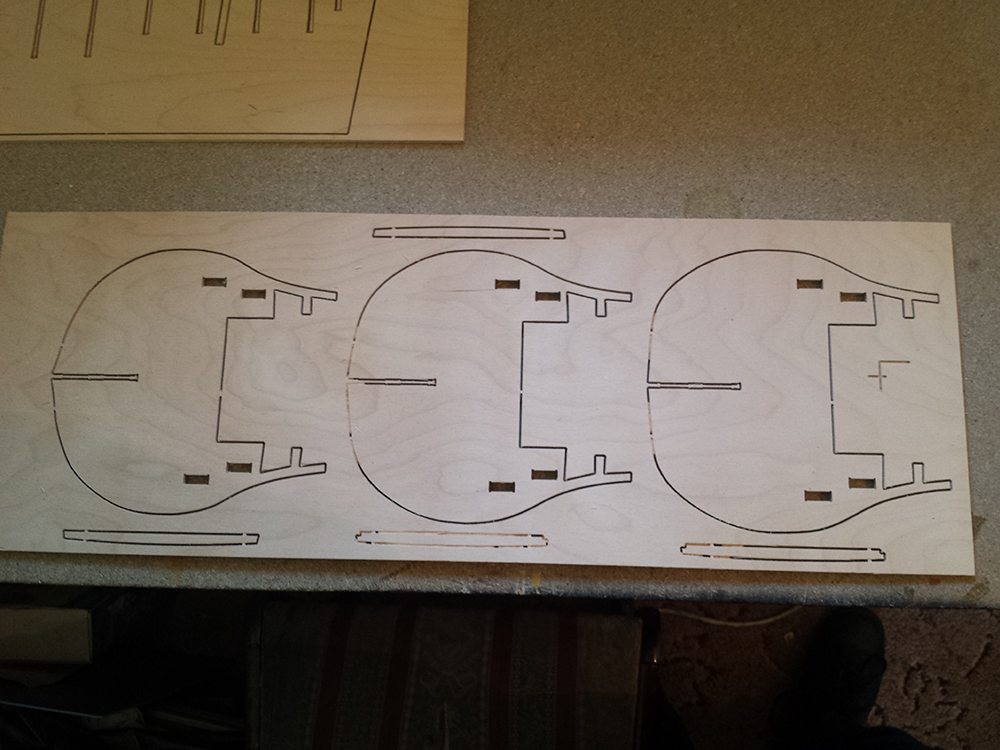
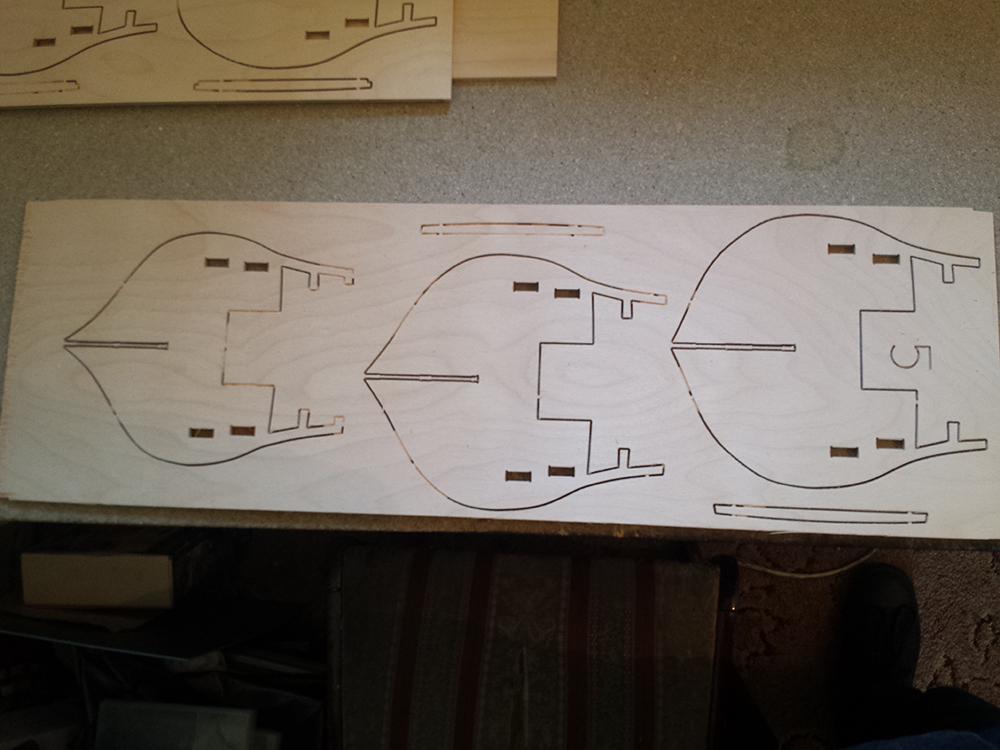
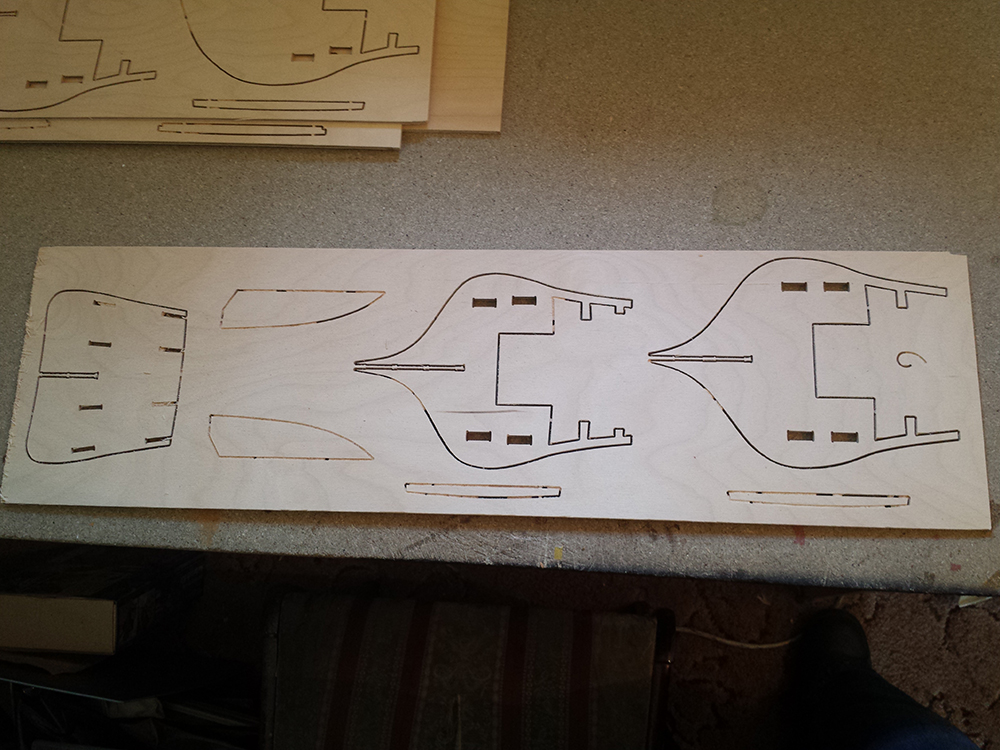
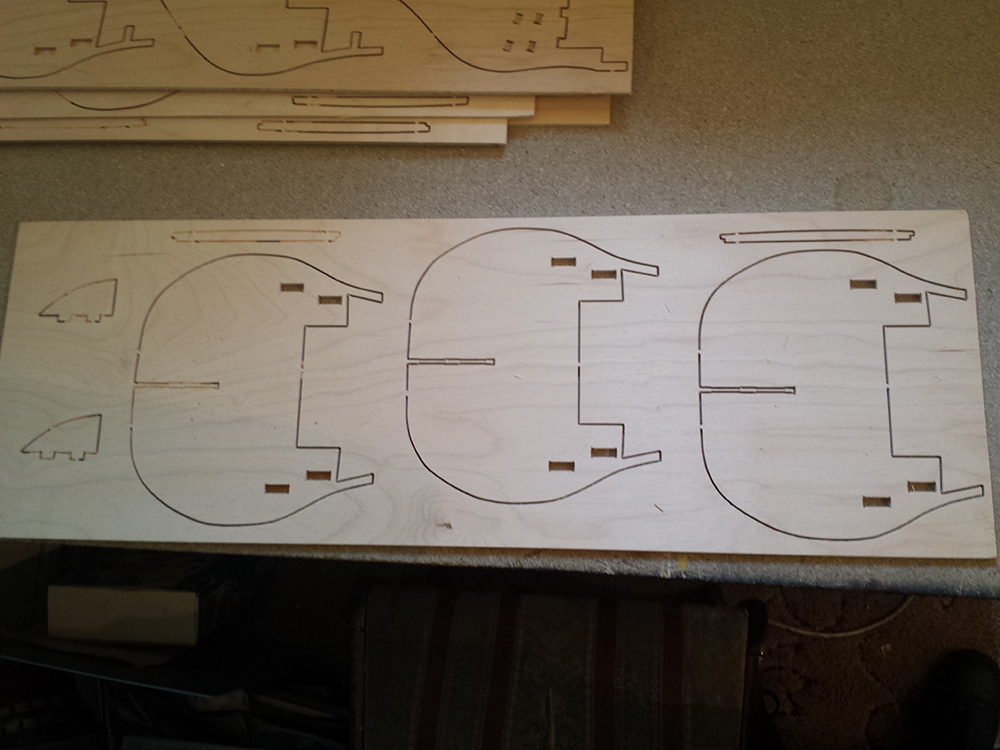
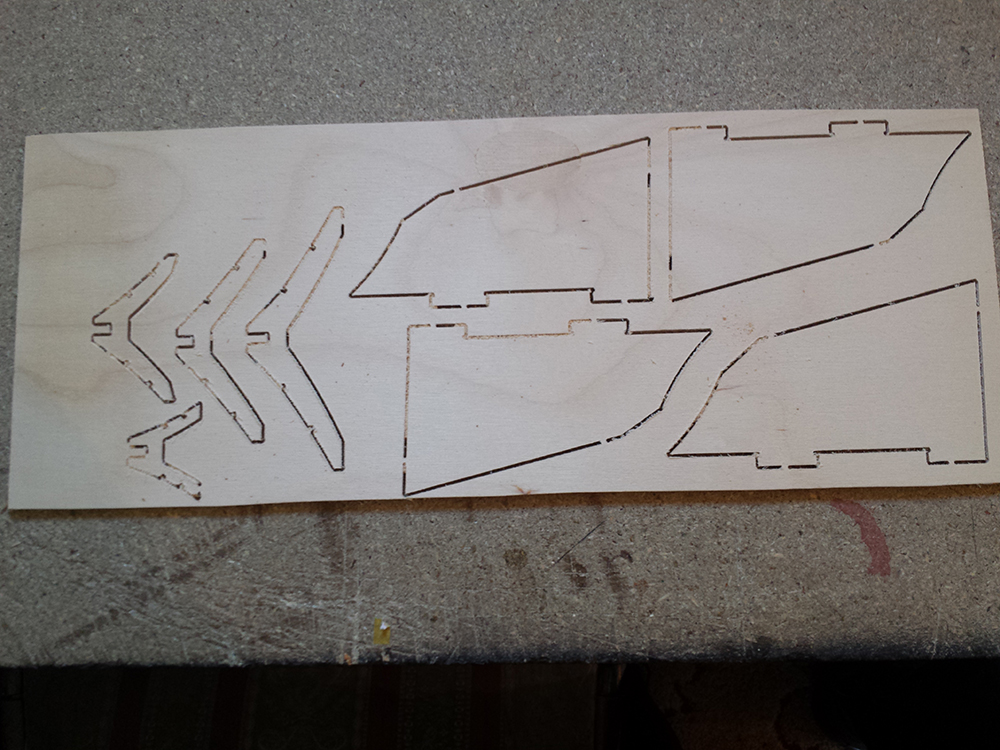
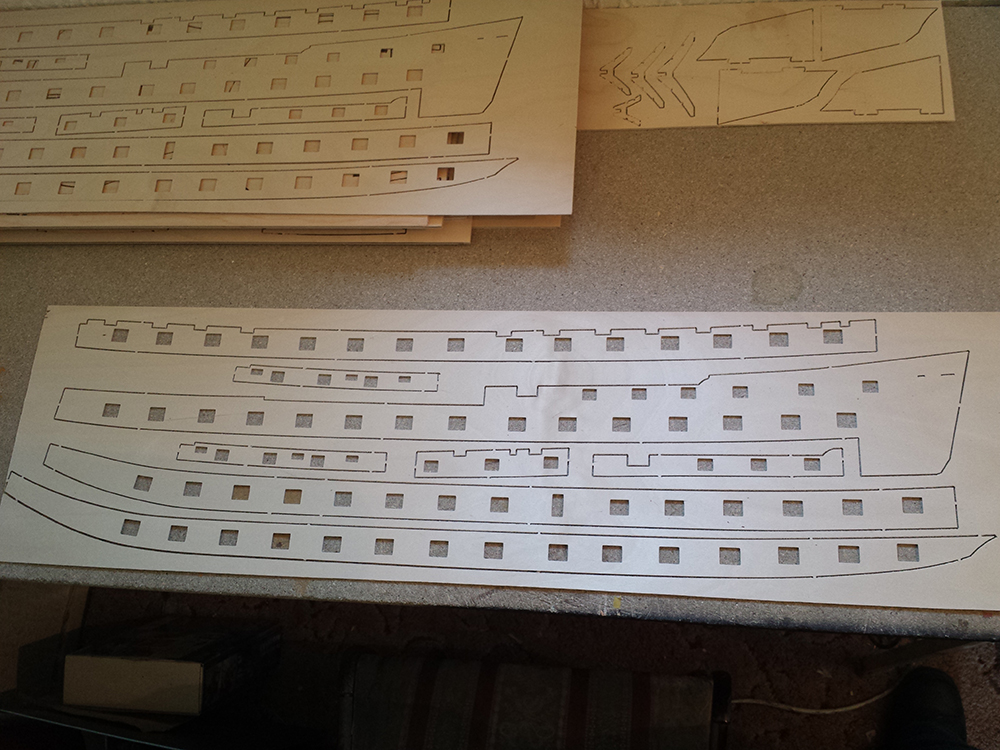
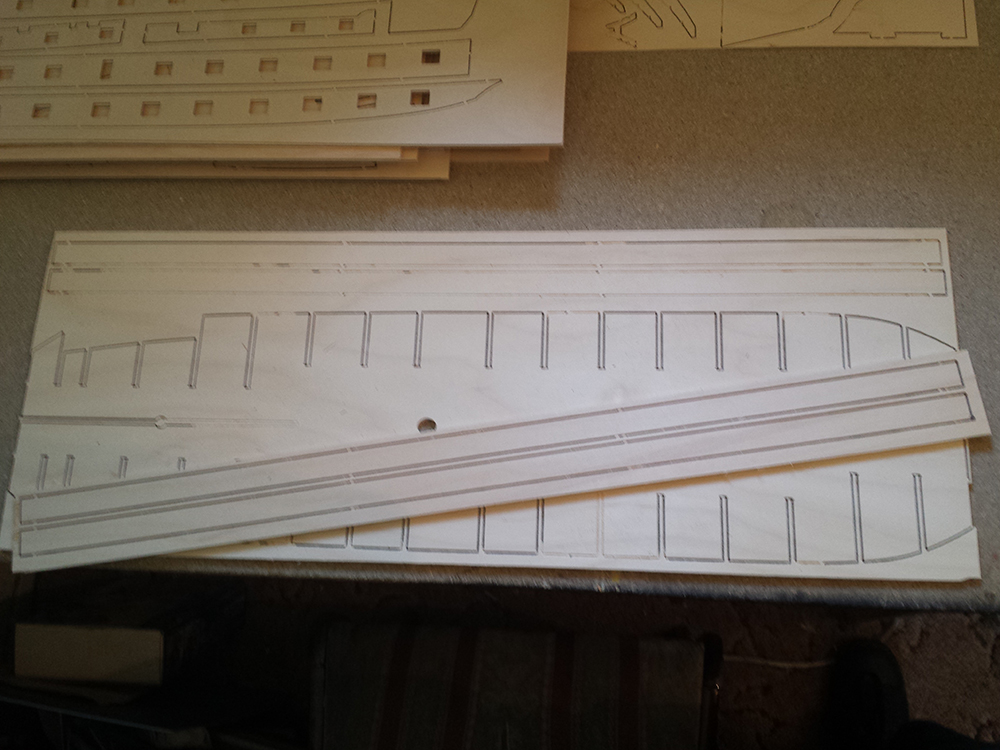
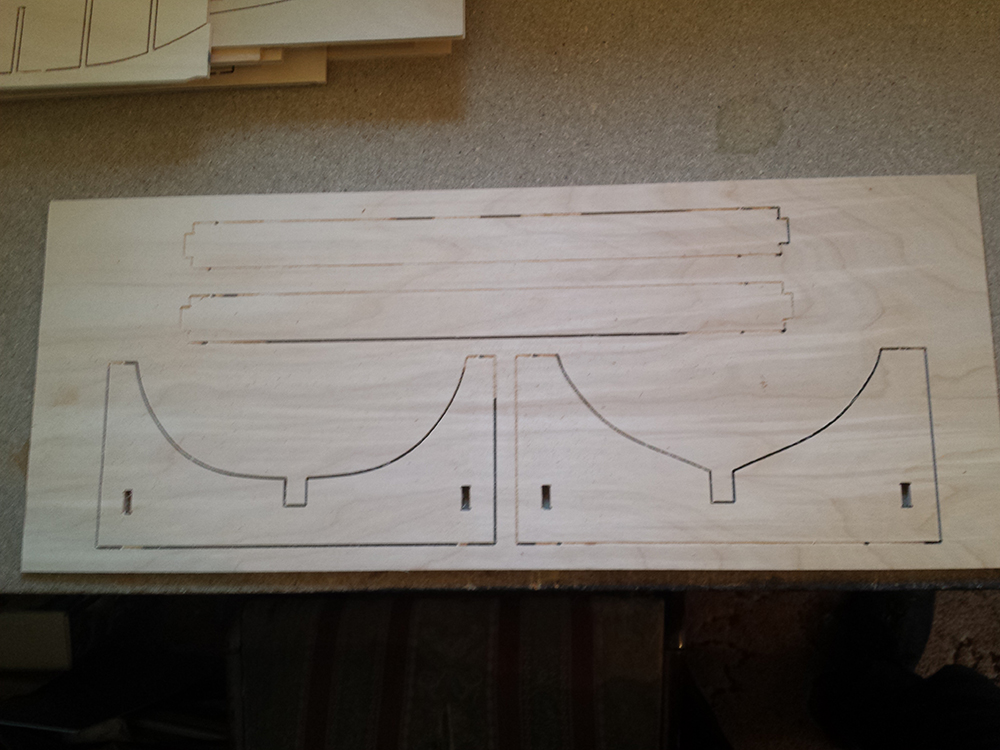
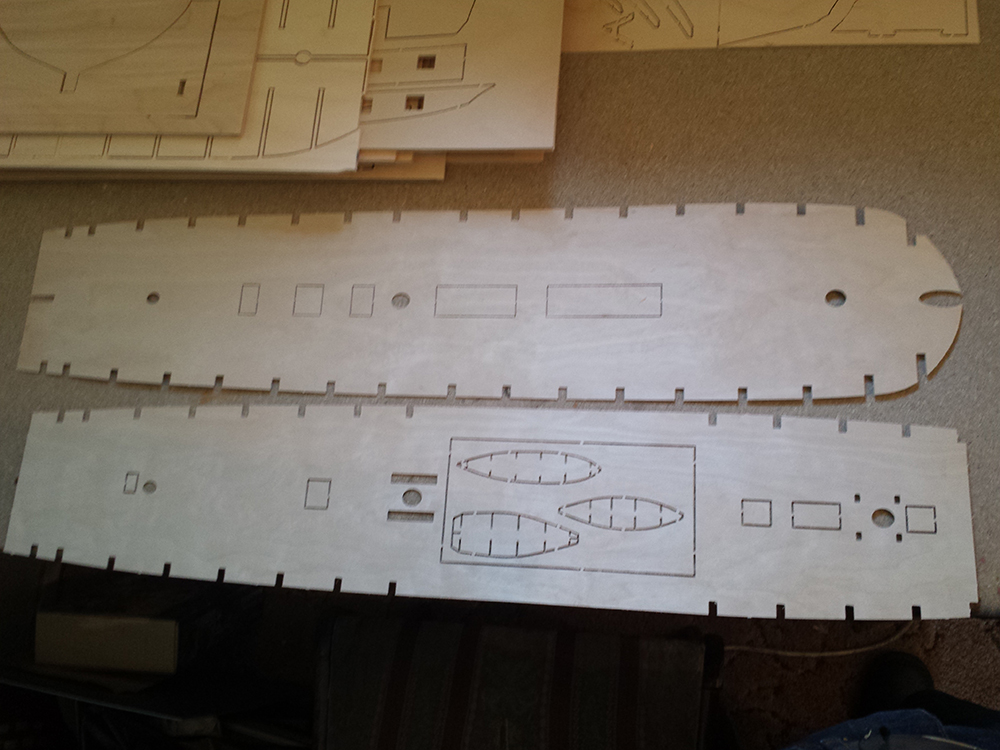
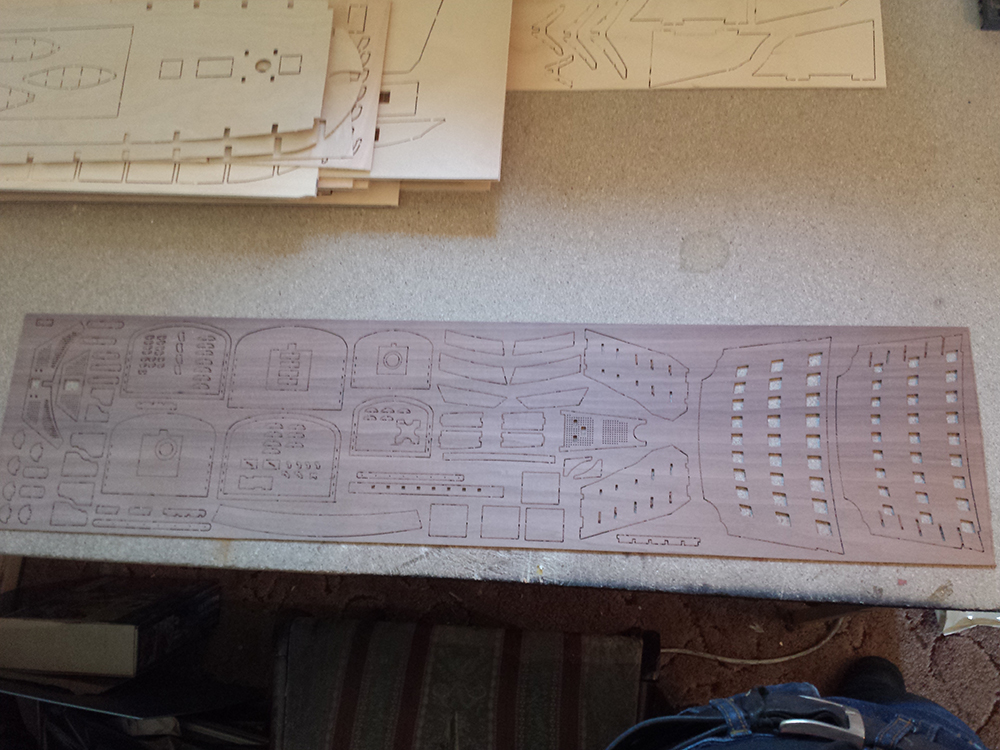
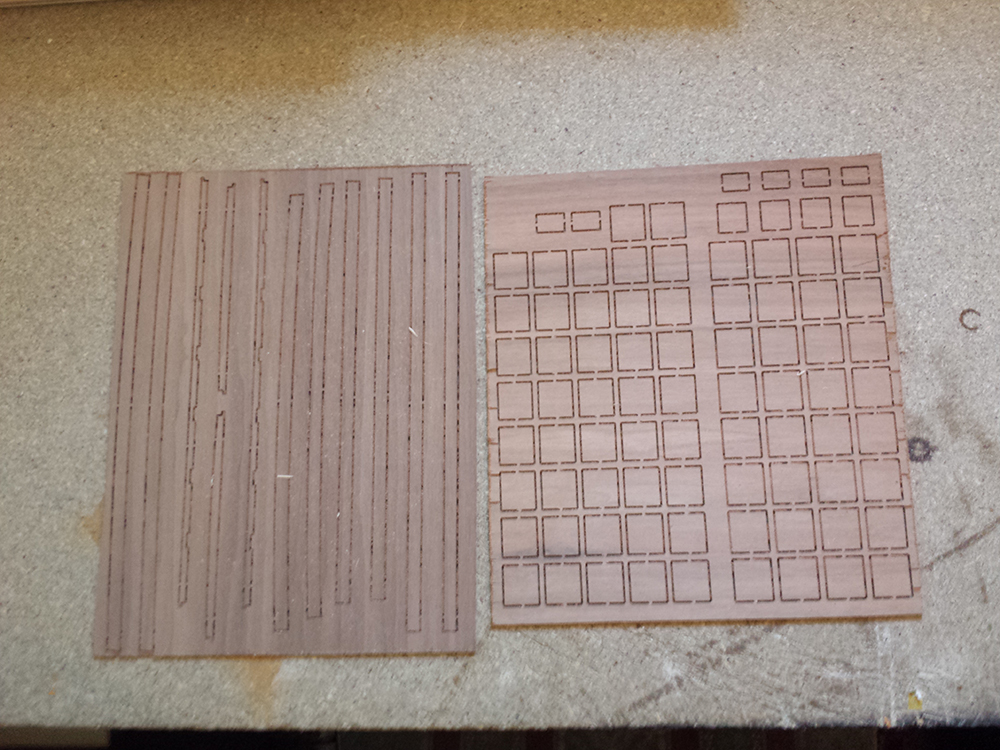
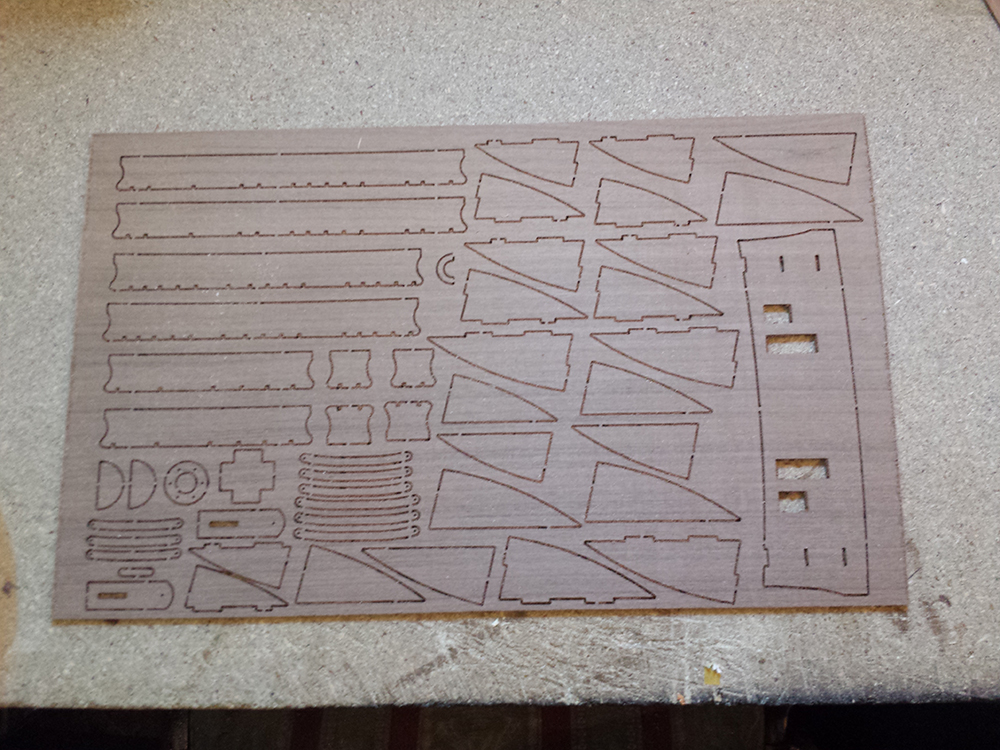
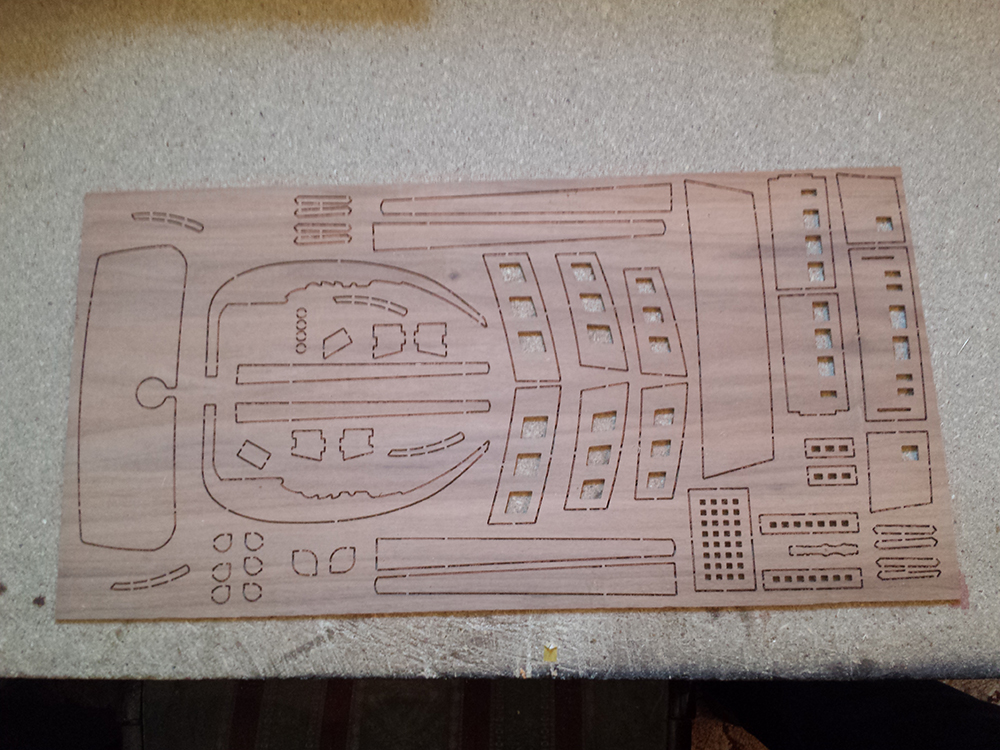
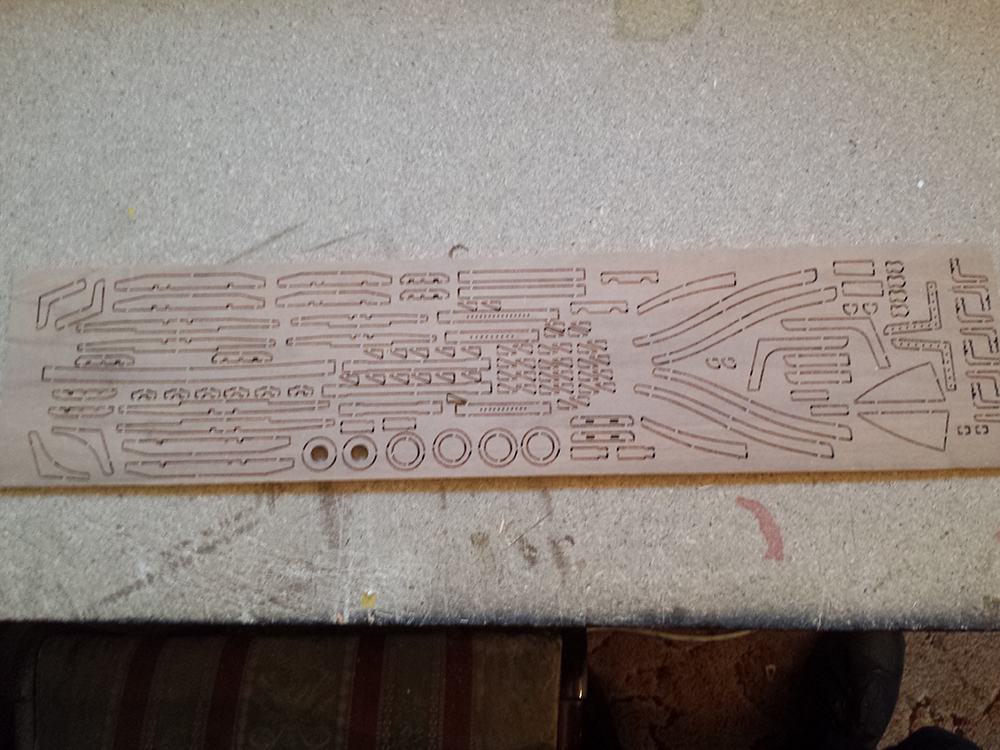
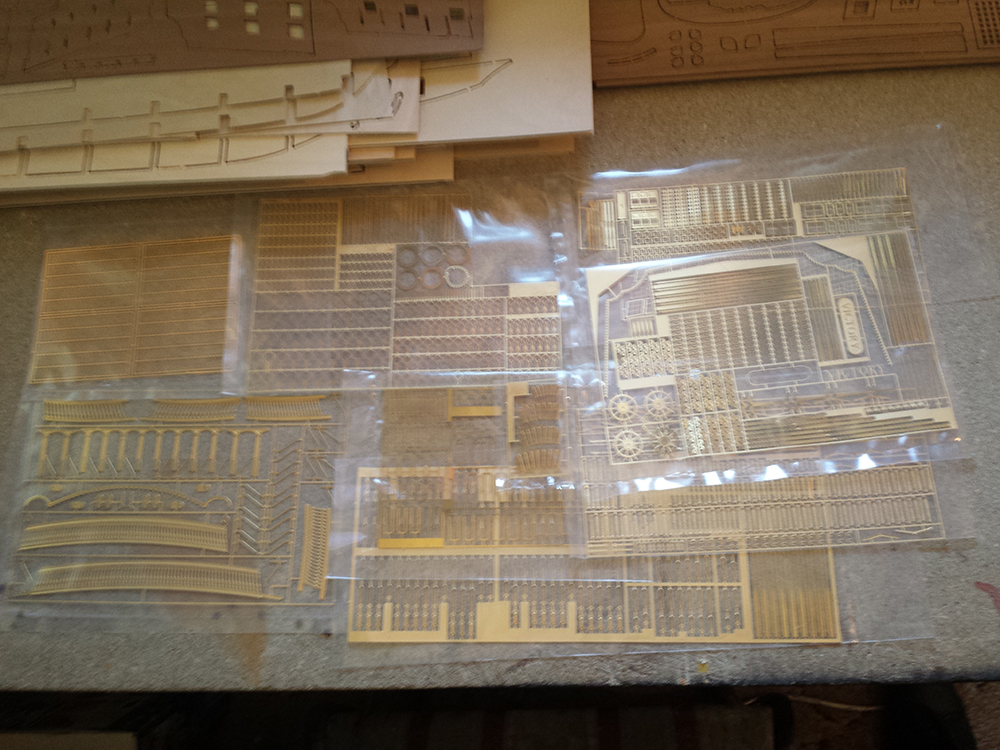
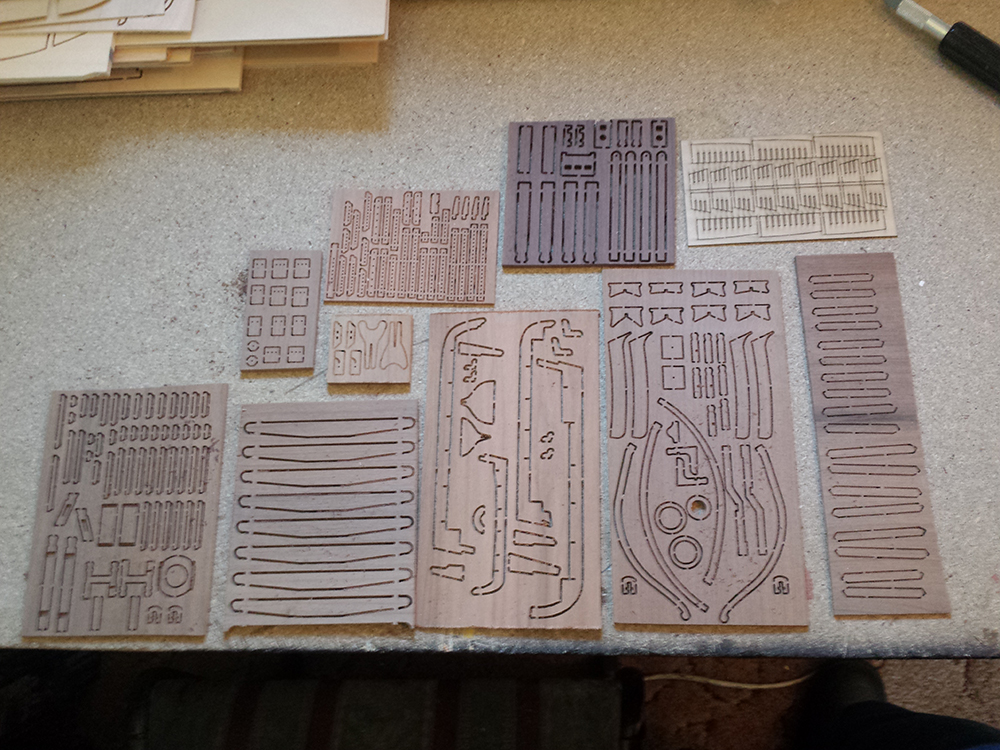
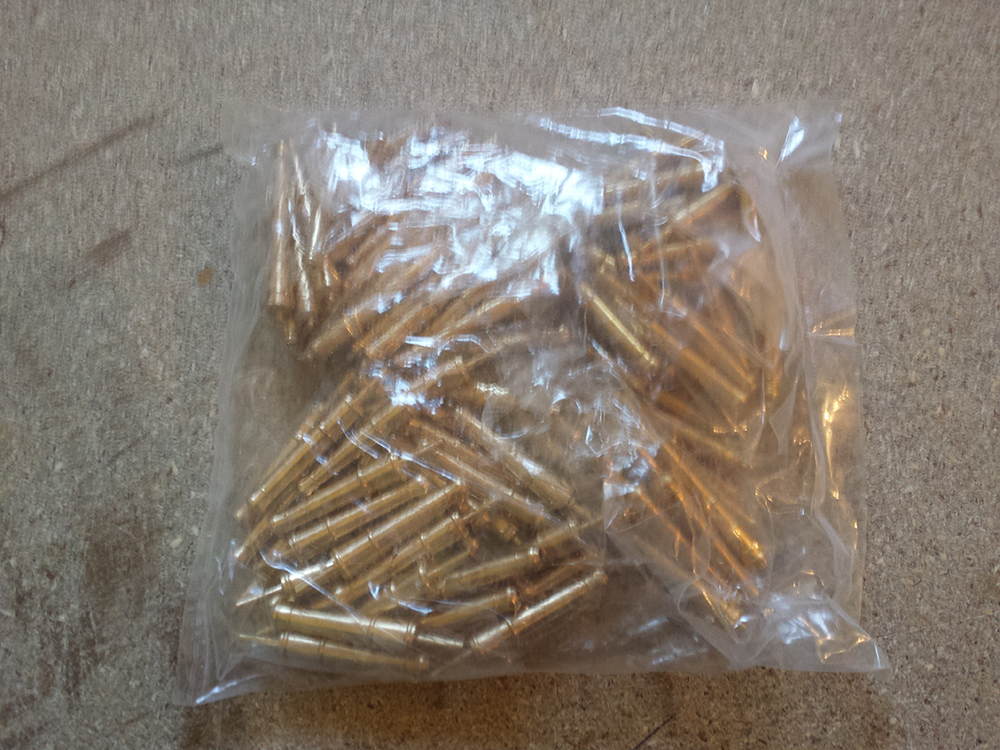
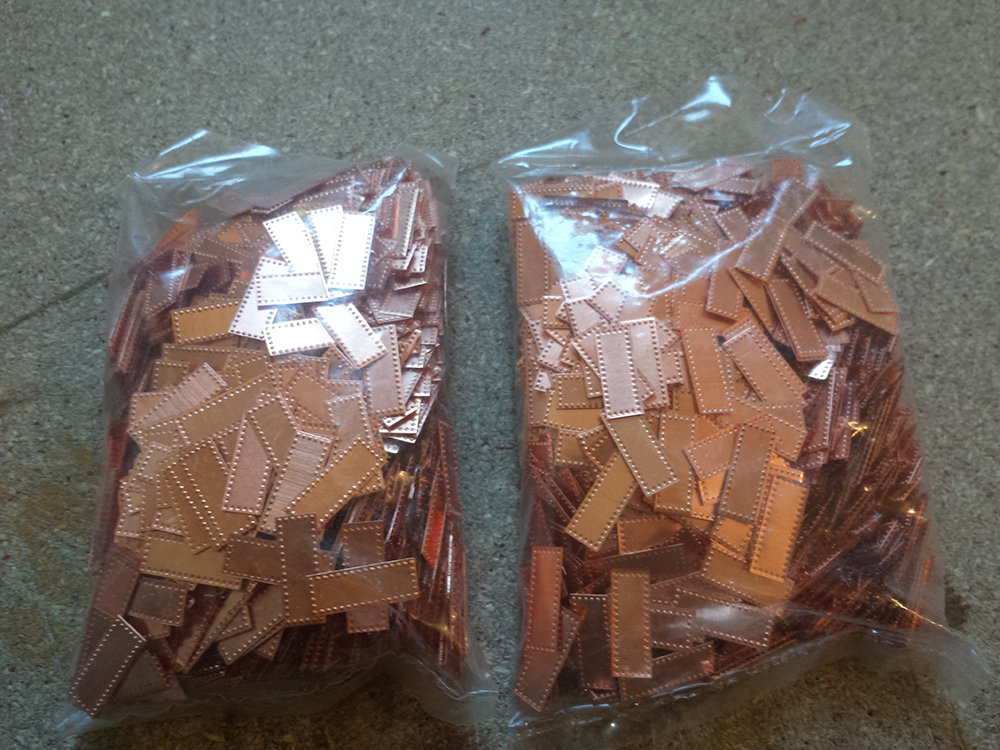
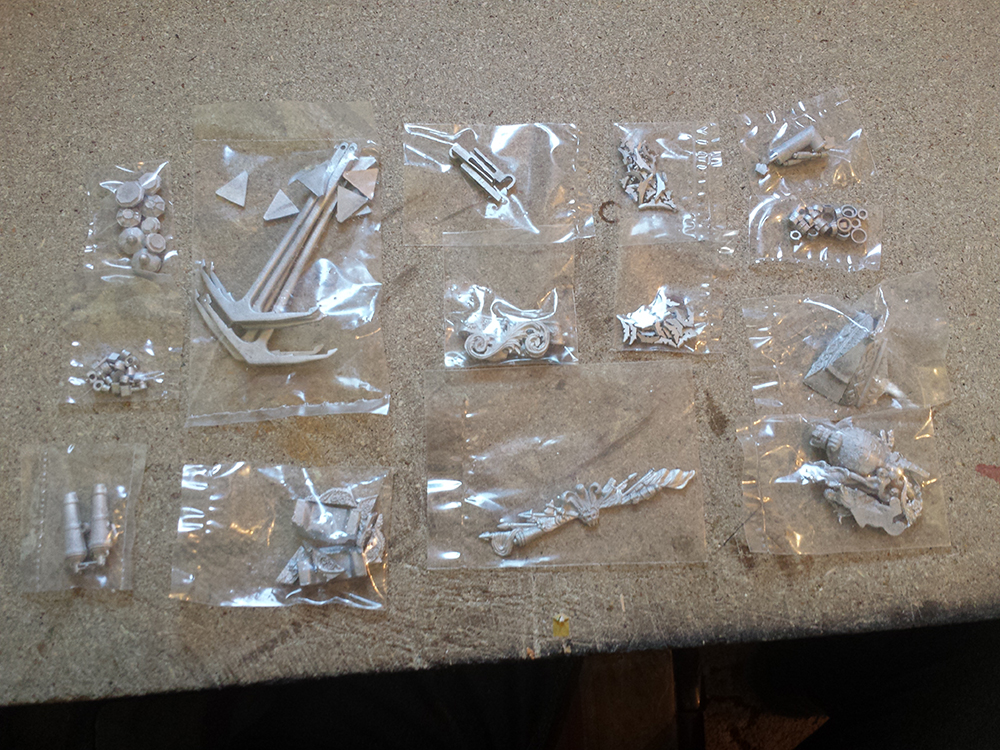
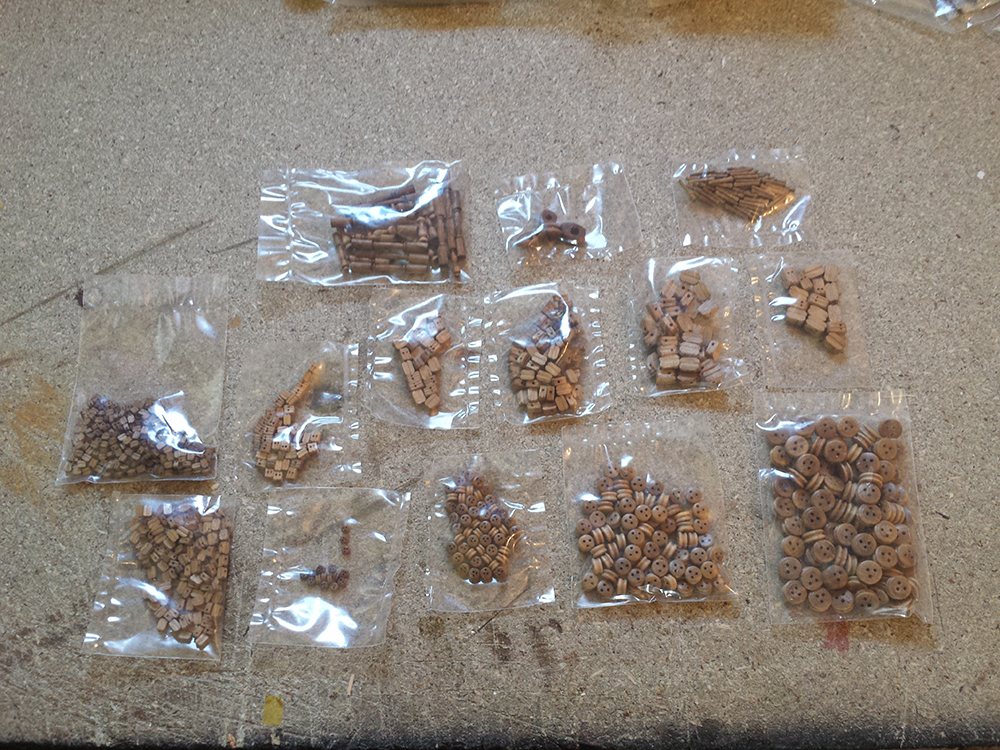
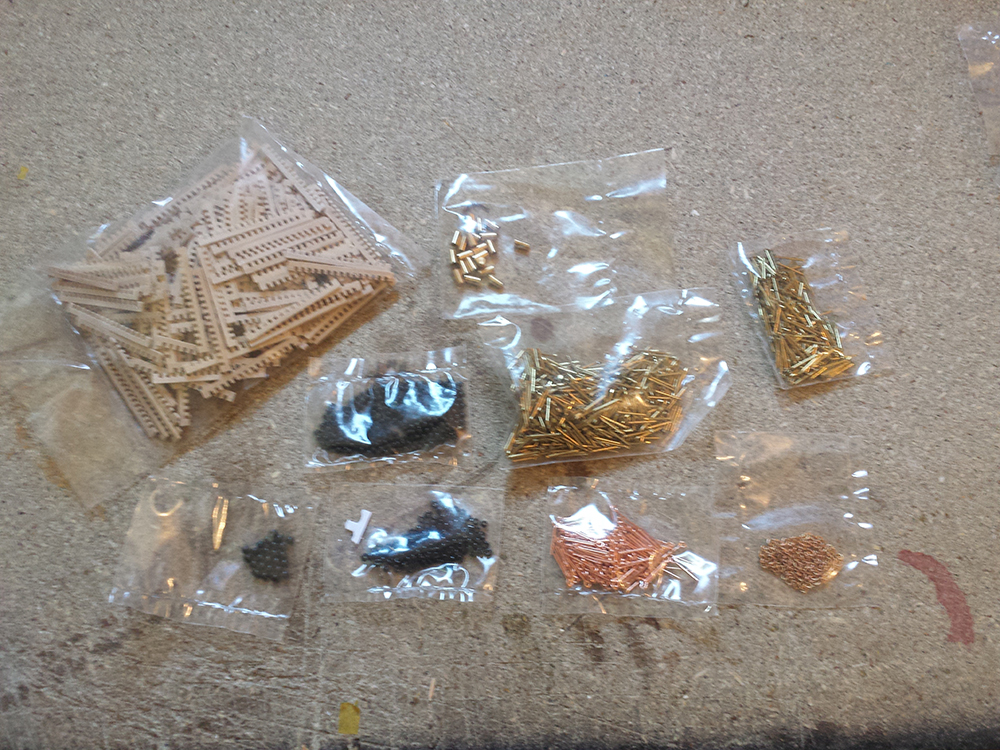
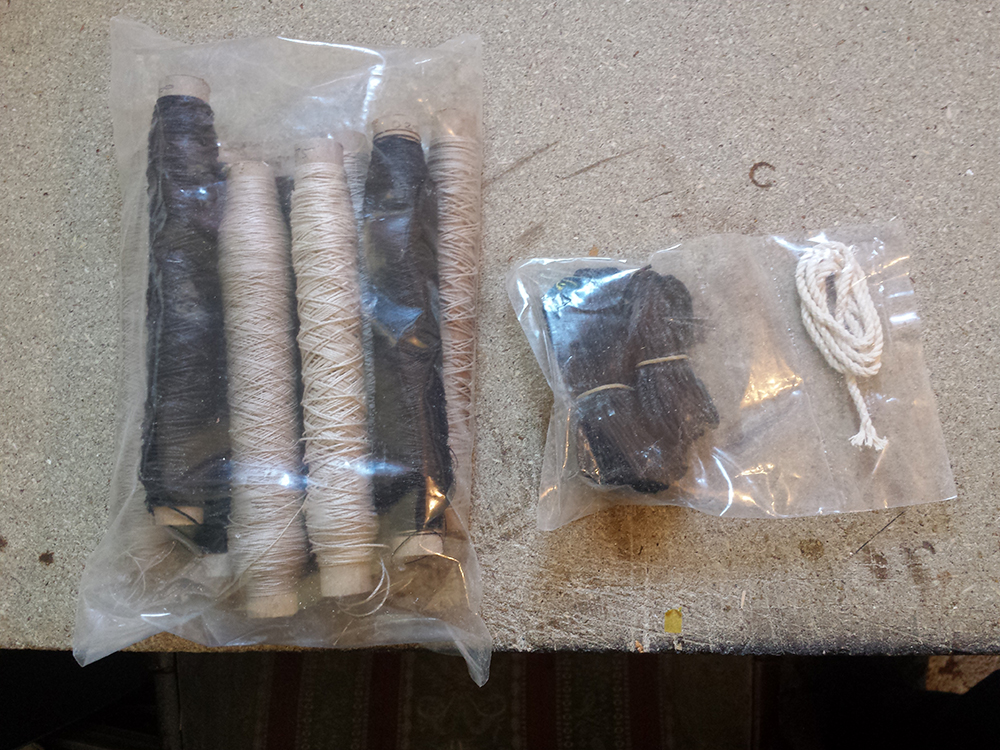
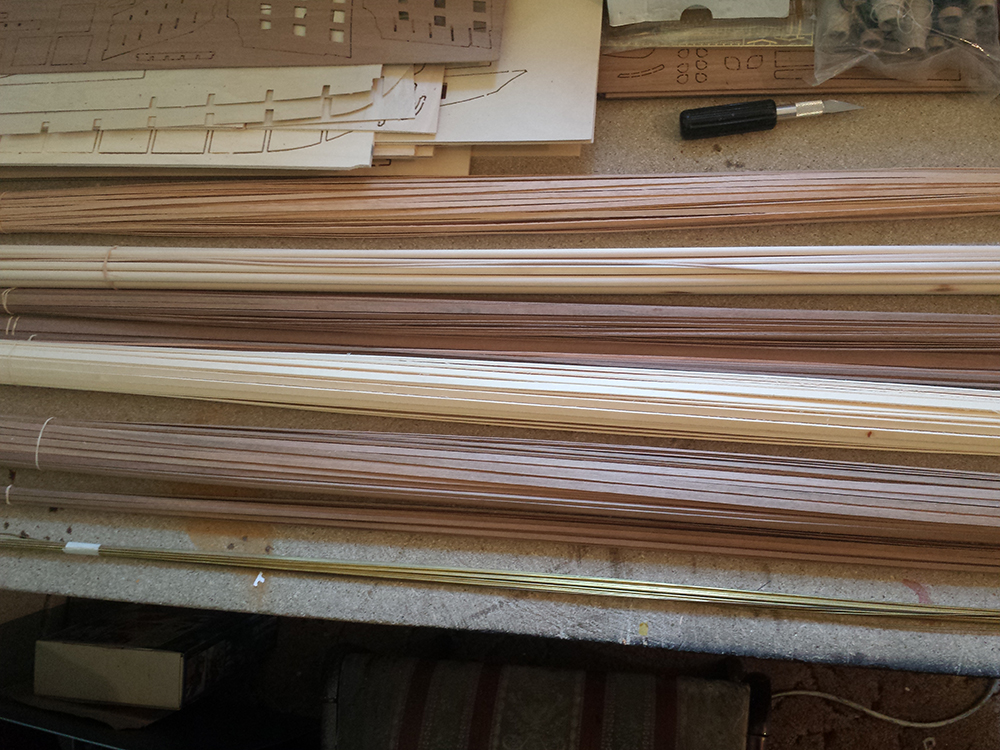
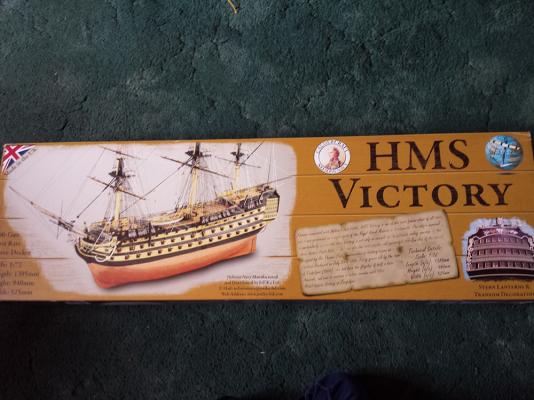
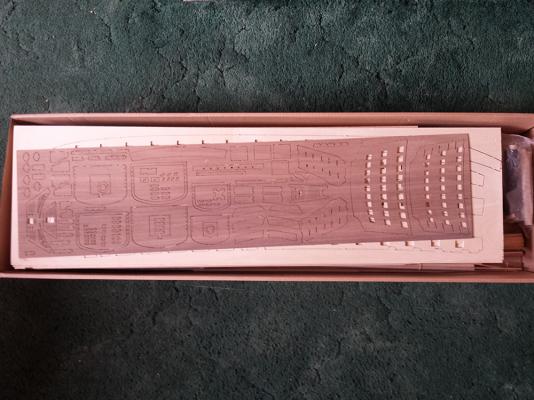
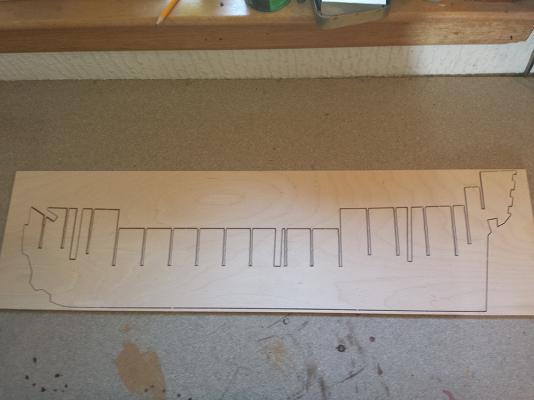
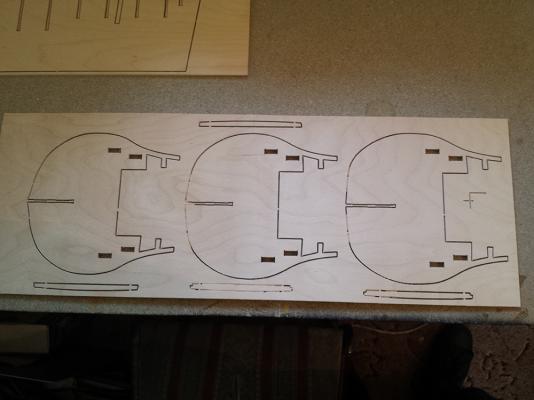
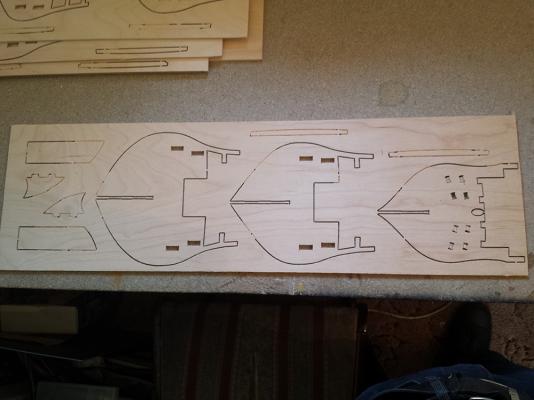
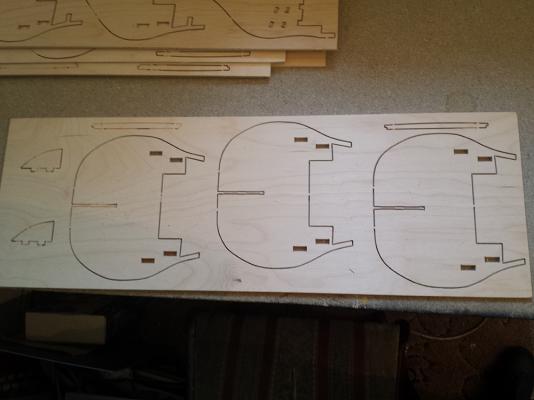
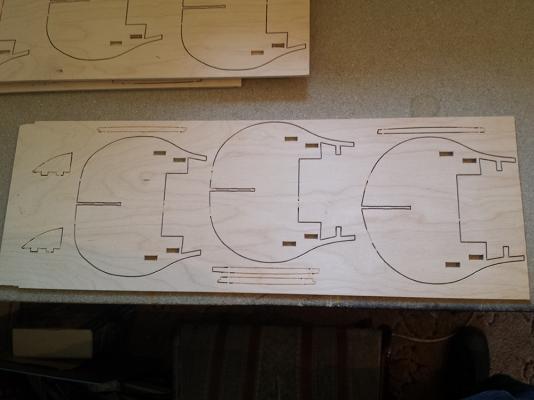
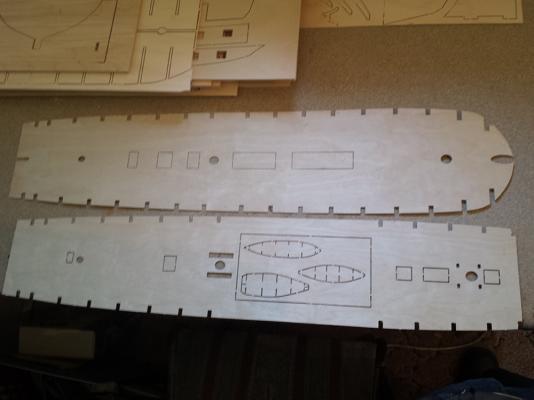
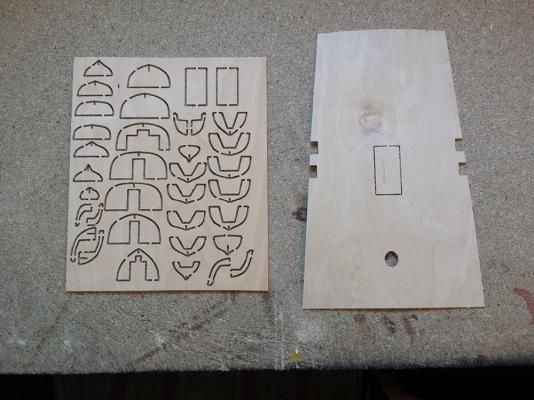
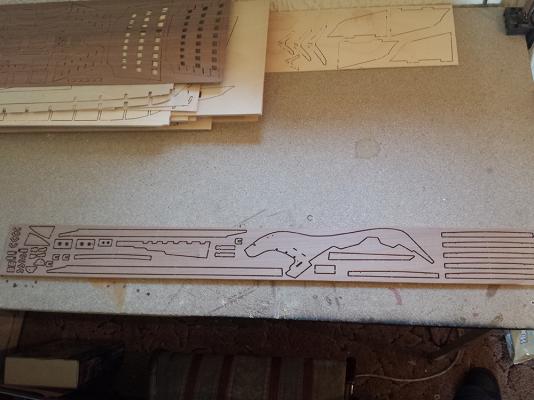
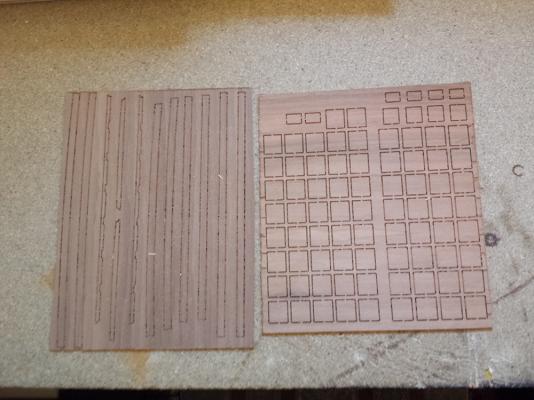
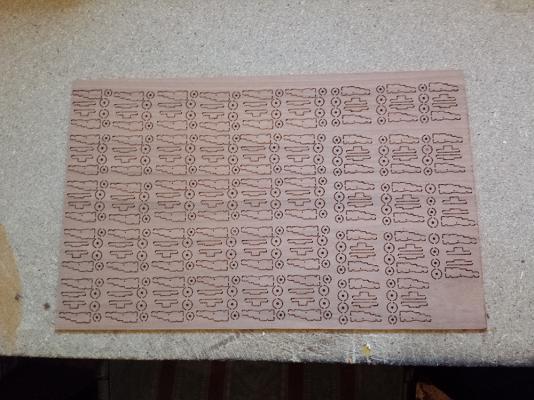
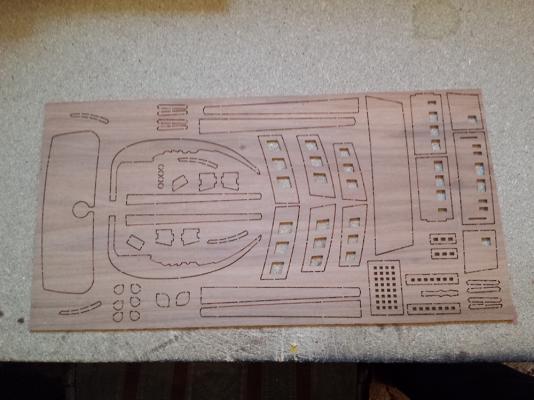
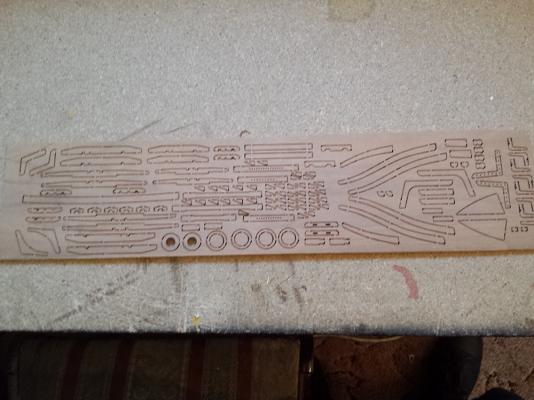
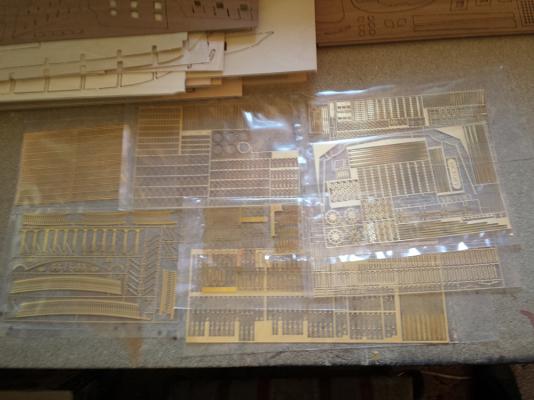
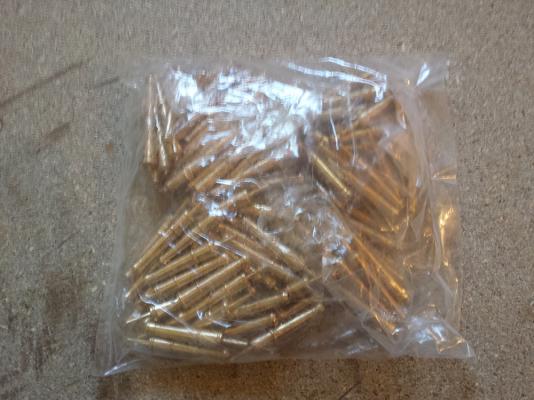
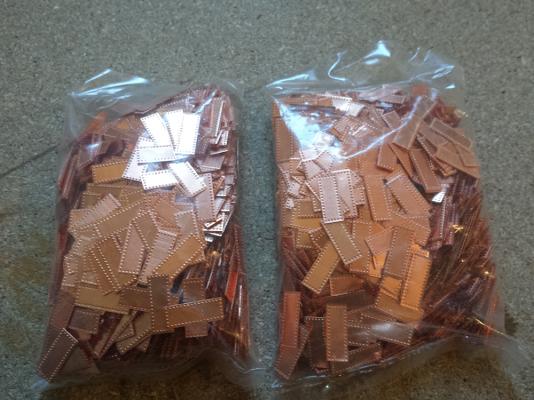
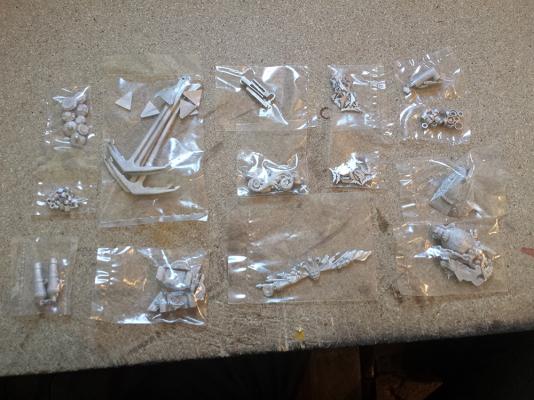
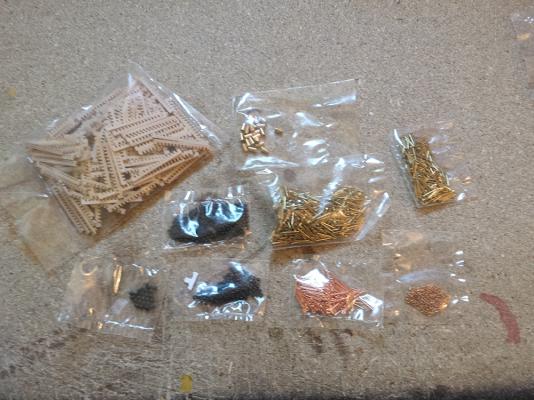
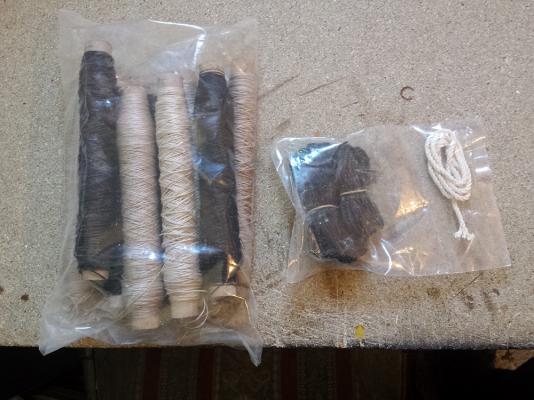
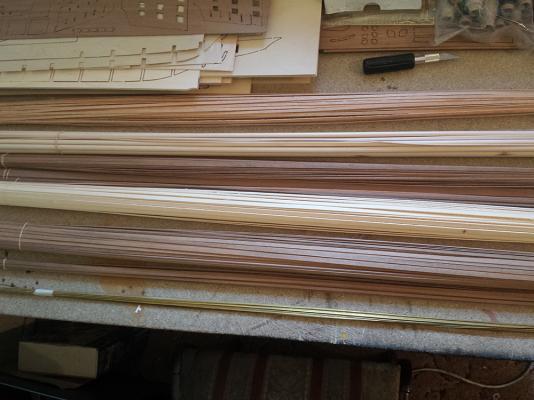
Greetings. I took delivery of this beast earlier today, and it didn't tale me long to crack the seal. I have to admit, I knew this was a large model but maybe underestimated the size of the finished thing...no idea yet where I am going to put it. Anyway, over the years as I shop for kits and try and decide which ones to buy, I make use of other's logs to try and gauge the quality of the kit etc, and although there are a few exceptions I always end up dissapointed that I cannot find any good detailed photo's of the contents OOB, so my first post I will aim to do just that, so that maybe I can help others in the future who find themselves with similar frustrations. Unfortunately this means a lot of photos at first, 32 in fact So here goes: (I've not added photos of the 18, yes 18, plan sheets that are included as I believe that technically that would be classed as reproduction without permission and would infringe on copyright) I've yet to decide where to begin on this one...I kind of get bored of keel and ribs at the start. I've b een thinking about building the launch's and cutters first...although technically that is still keel and ribs


-
Been reading through this, great work thus far Kevin. Just ordered this kit myself hoping it will arrive tomorrow...will be using your log for reference
-
Thanks. In the end fortune and luck went my way for once and I just ordered the CC kit...and for £100 less than everywhere else
-
Hiya, nice build. Am trying to decide on this kit (cost) vs the Caldercraft kit (quality). It's double the price though What's this kit like if build oob ?
-
Hiya Dolly. Sorry not replied before now. Yes, I soak the planks fully, bend as needed using Amati's plier-type bender, pin and allow to dry, then remove, glue, repin and allow to dry. Yes the masts will have a slight backward tilt on most ships, known as the "rake". As Paul said it helps counter the force placed upon the masts by the sails in the wind. Hipexec, I've had no problem with the Sapele, I let soak for at least a few hours first before attempting to shape. I've had no issues so far with it. I hope to be resuming work on this soon, thanks to Paul with his advice on the gunports. I shouldn't really be cutting them out at this stage as I have only planked down to just below the waterline, however knowing the issues with the ribs on this I want to get it done now while I can still access the inner hull.
-
Hiya Keith. No she is an ongoing partwork. I have about 12 or so issues stocked up so will be resuming work on her soon...getting to the nitty gritty time consuming stuff on her...when I left her I was in the process of blackening and making some chains.
-
I am the same Paul I don't often comment on others...usually it's all been said the time I get there. I'd be interested in how you ended up measuring the gunports...I can't even begin properly as there is very little in the way of a clear point of reference on the plans. The entire thing is on hiatus at the moment lest I get annoyed and it incurs my wrath lol
-
I believe they are 2mm yes. They were from an old AL vic kit. Stern decs...None. Zero. Zip. I may have to put up with the flat PE ones or try to scratch make some, not a task I relish. This, along with my others is on hold at the moment anyway while I pursue some other projects. Taking a well needed break as I've come across a major issue which I believe Paul came across as well, with marking the gunports. The plans are amazingly vague with nothing I can accurately use as a starting ref point, just going by the plans as is causes the majority of the ports to hit ribs, and we're not talking half a mm either some are smack in the middle...
-
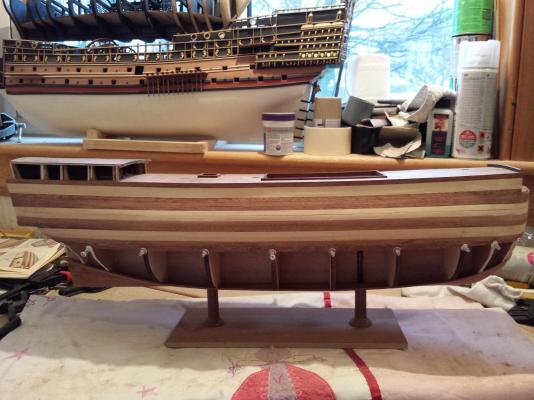
Hiya, just a quick photo update on the progress of the planking. Need to do some filling between the planks on the second row of lighter coloured ones...made the silly mistake of glueing whilst wet


-
Hiya Dolly. I am not 100% certain of the measurements off hand now, but to work it out I measured the internal width, (inside the frame), deducted the "total" width of the two stair side peices then took 2mm away from that. (The notches are only about 1mm into the sides, though check this as on mine they weren't all even. I've had a busy week or so, so not been able to post an update for a while, however I am quite a way through the planking of the hull so far