


BruceWayne426
-
Posts
23 -
Joined
-
Last visited
Content Type
Profiles
Forums
Gallery
Events
Posts posted by BruceWayne426
-
-
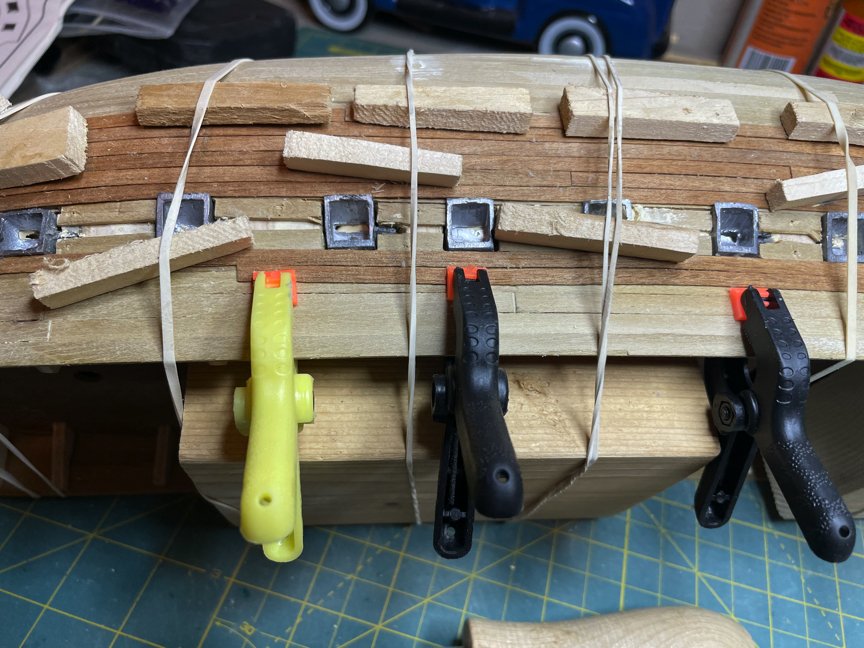
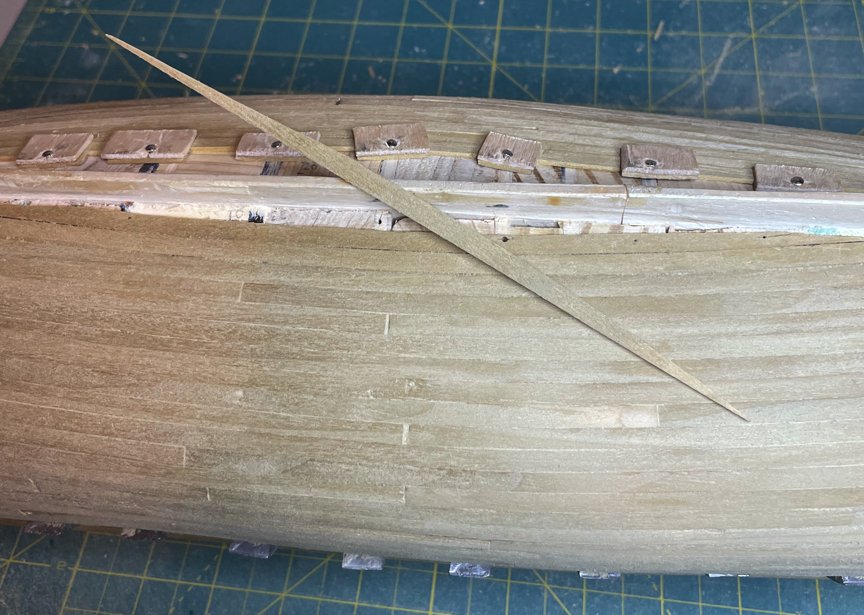
I have been making slow but steady progress. The planking on the deck is now complete. All the planking is still in its raw state - sealing will come later.
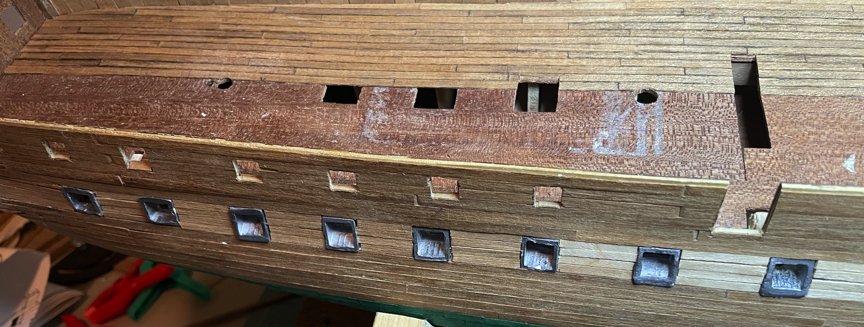
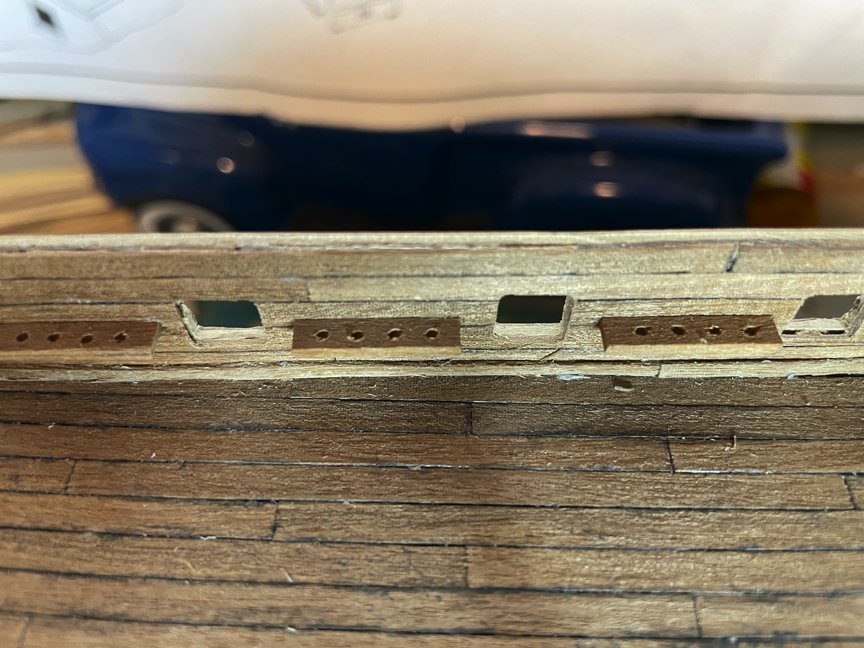
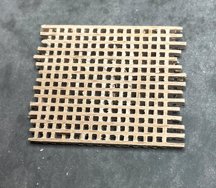
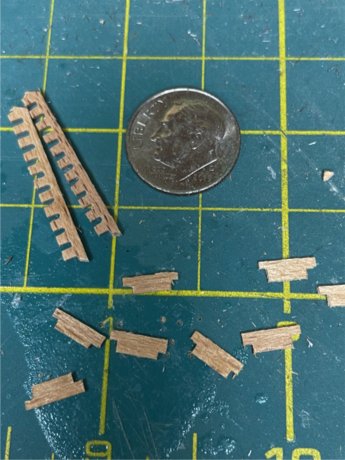
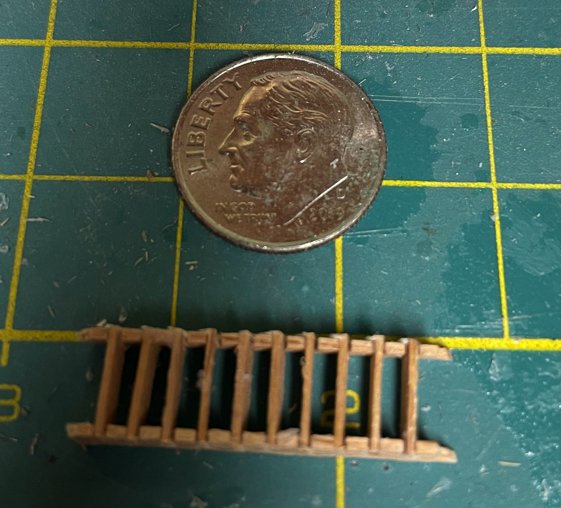
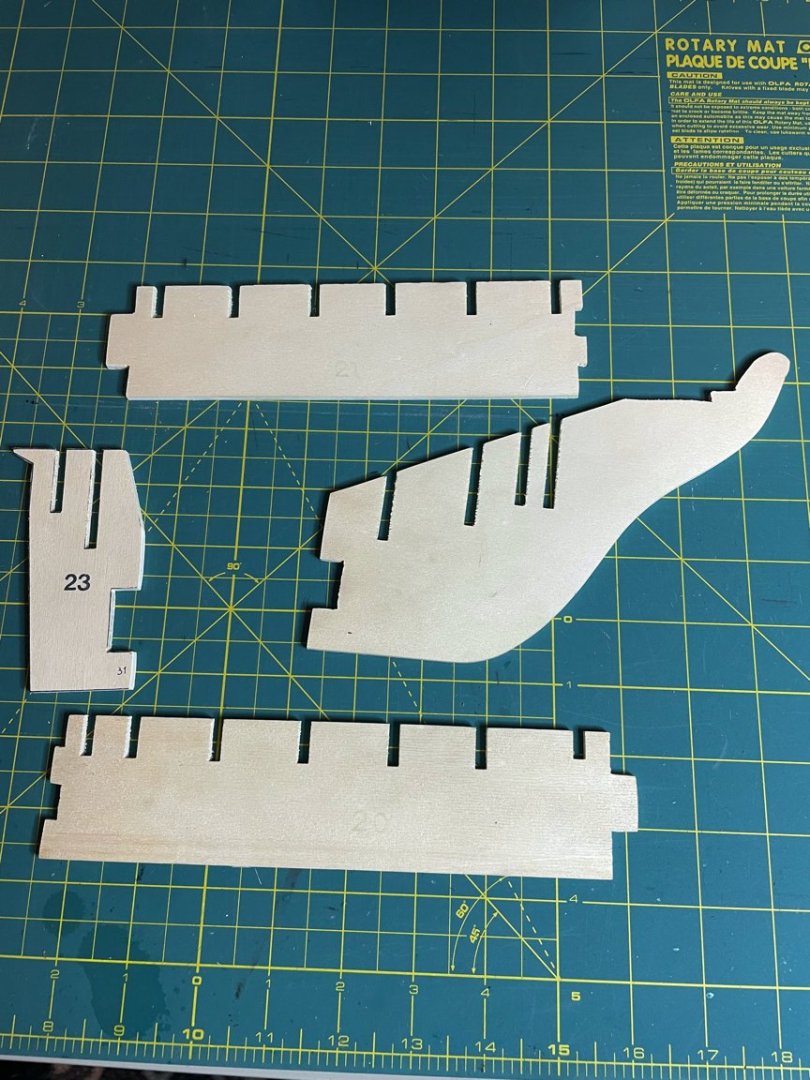
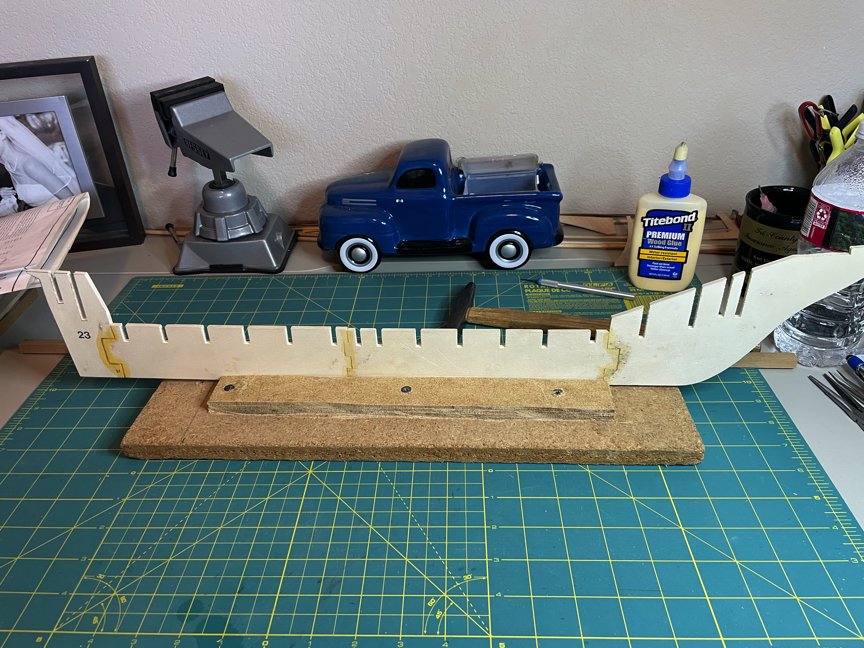
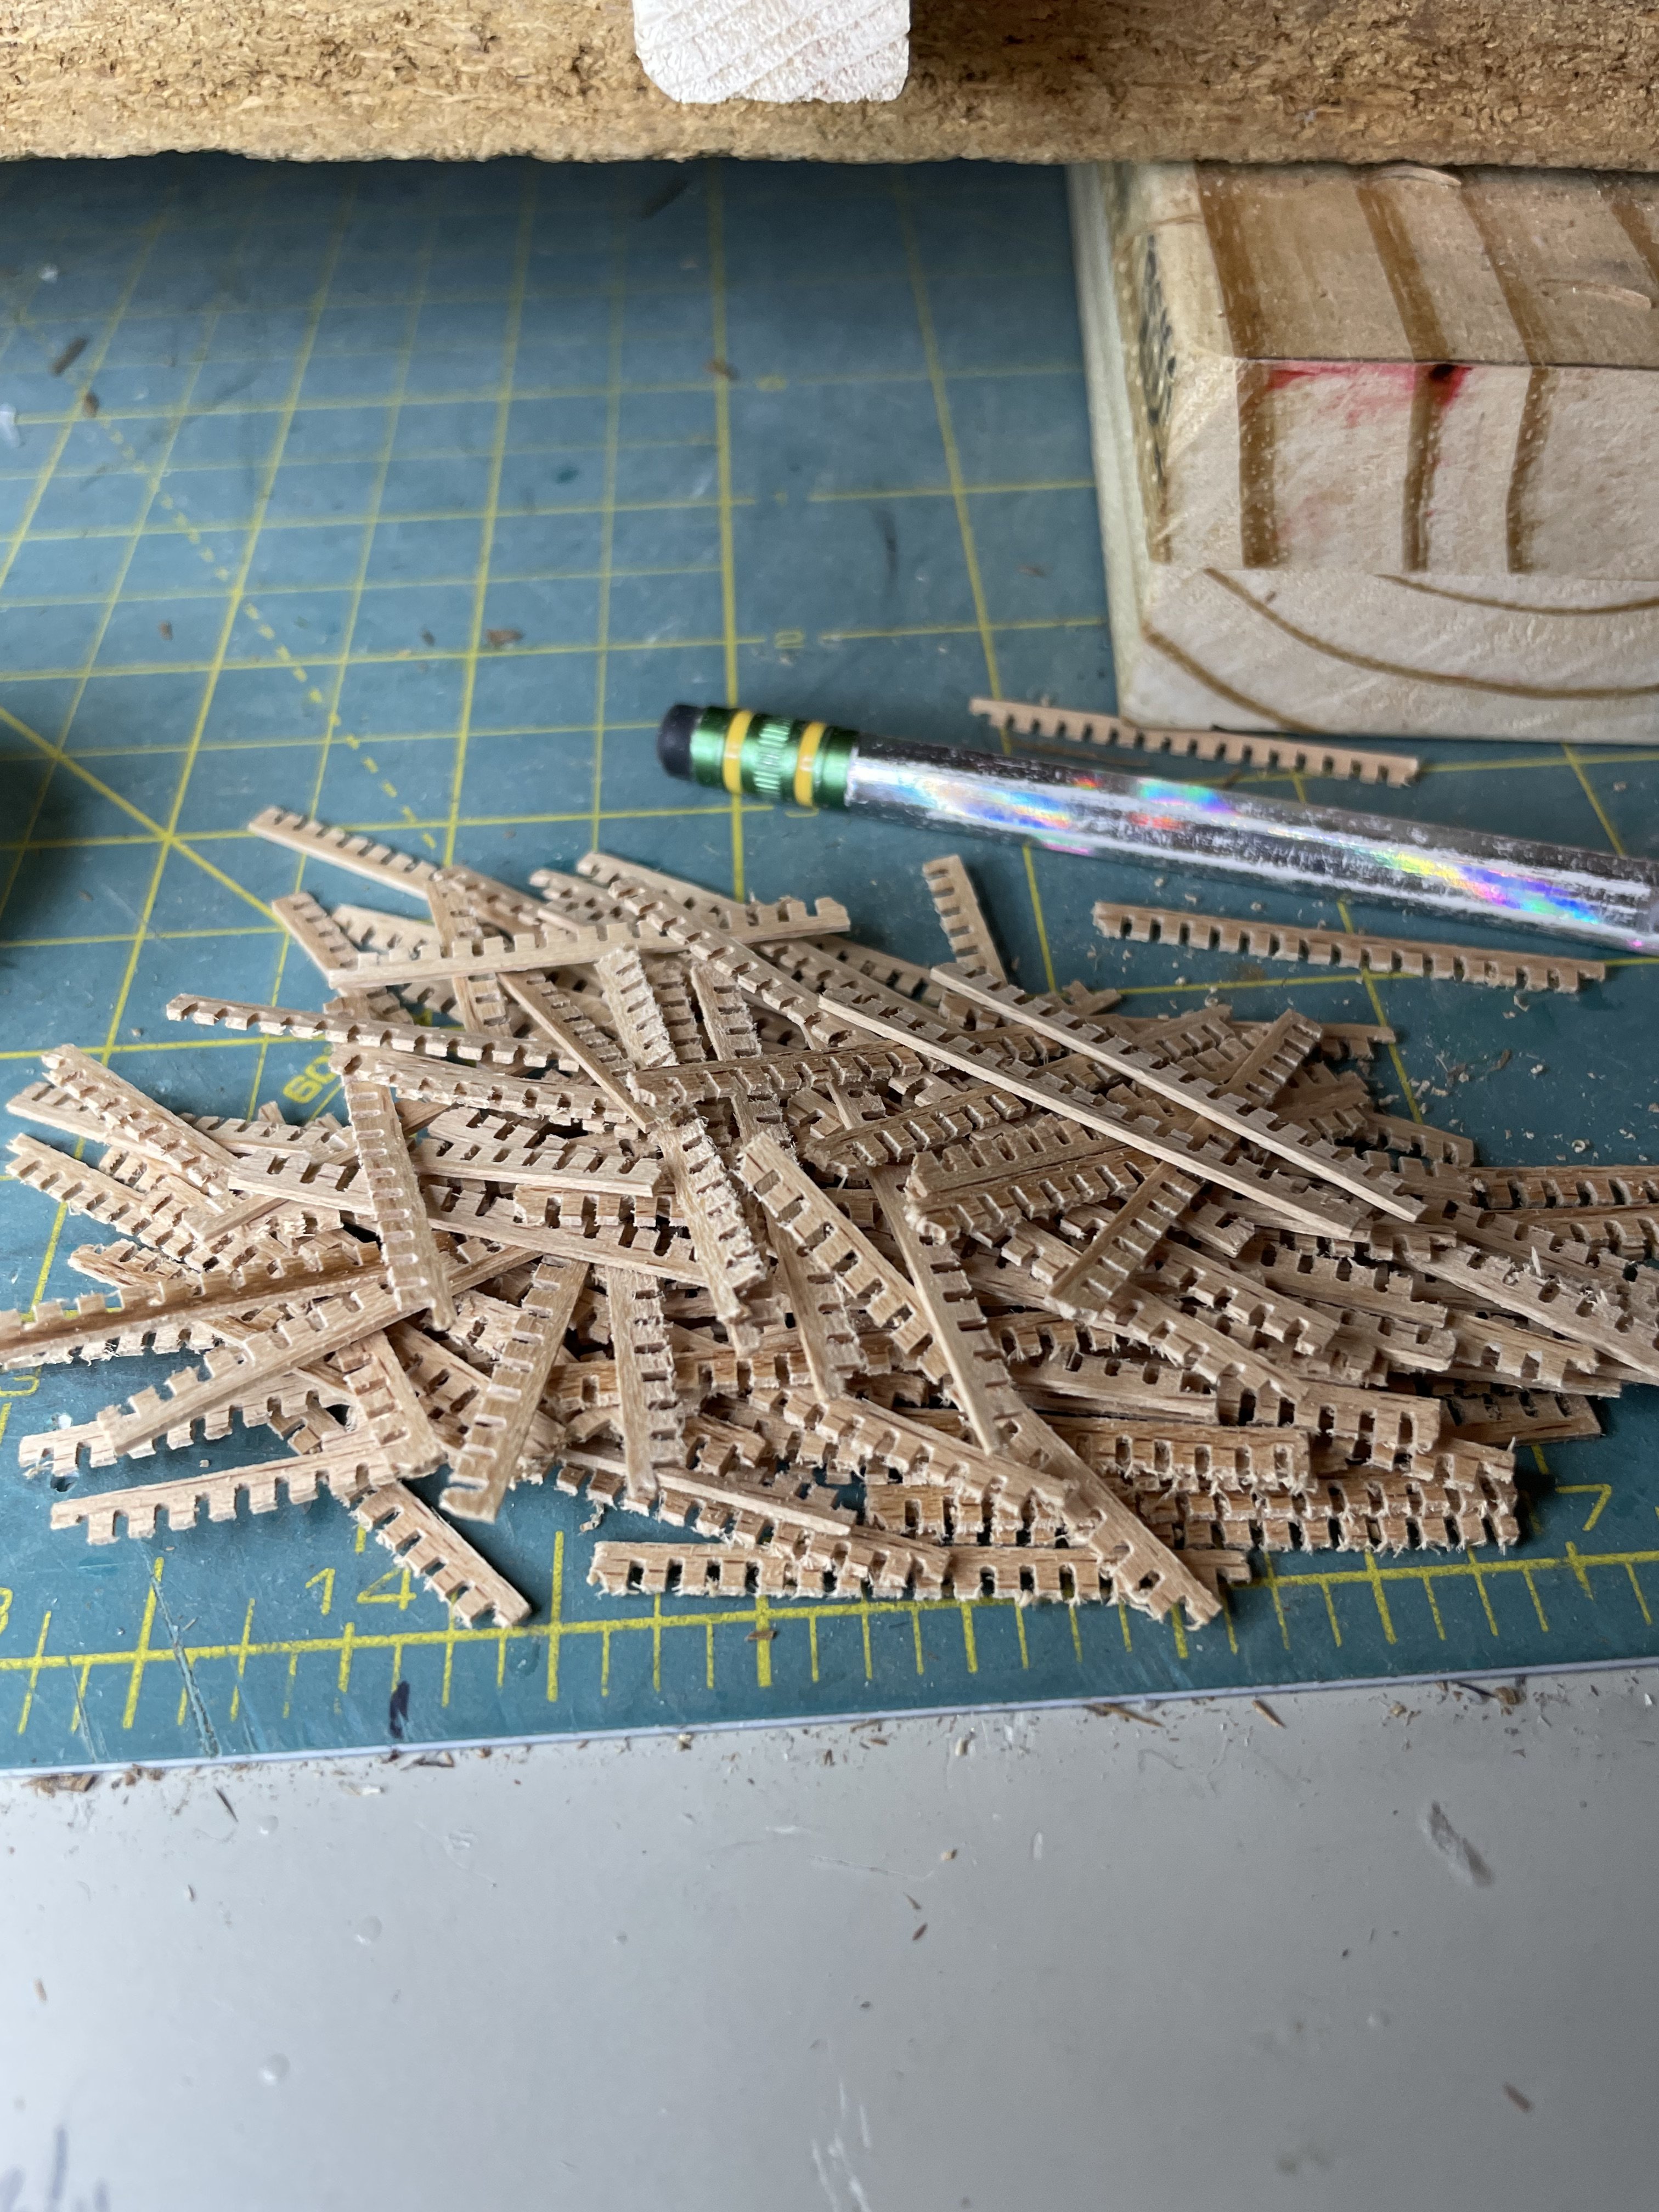
The Mamoli kit came with parts for making the grating and ladders in the same bag. The grating for the poop deck was a challenge to cut precisely. I messed up a few pieces and am now short for the grating under the life boats. I will need to search for a source of grating in this scale at some point.


The same long pieces were made to create the ladders that go from the upper deck to the gun deck.
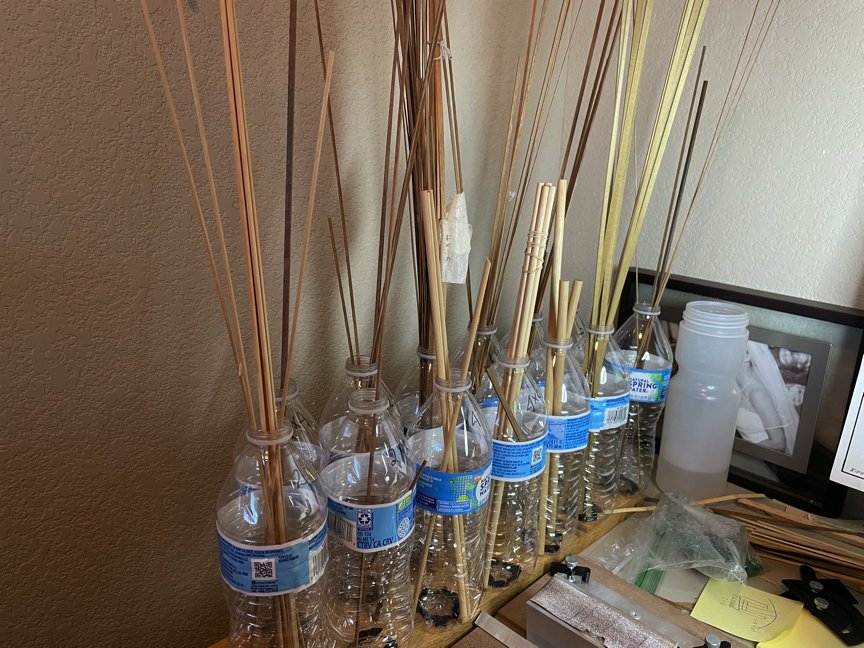
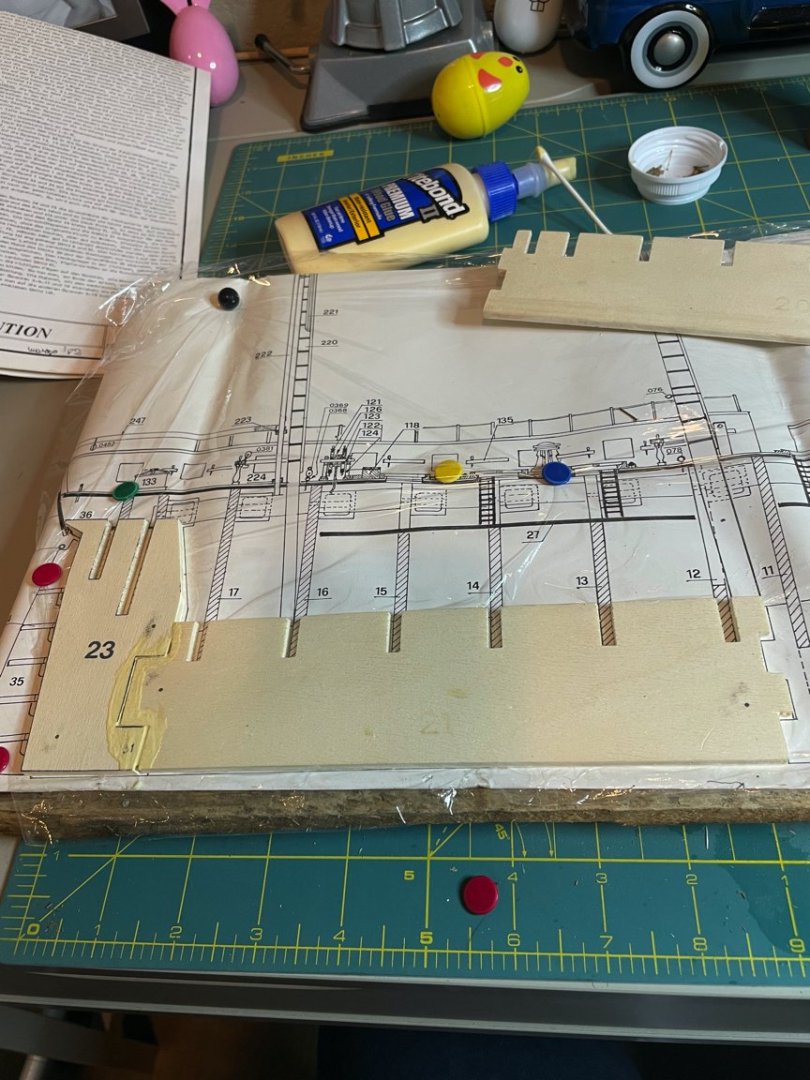
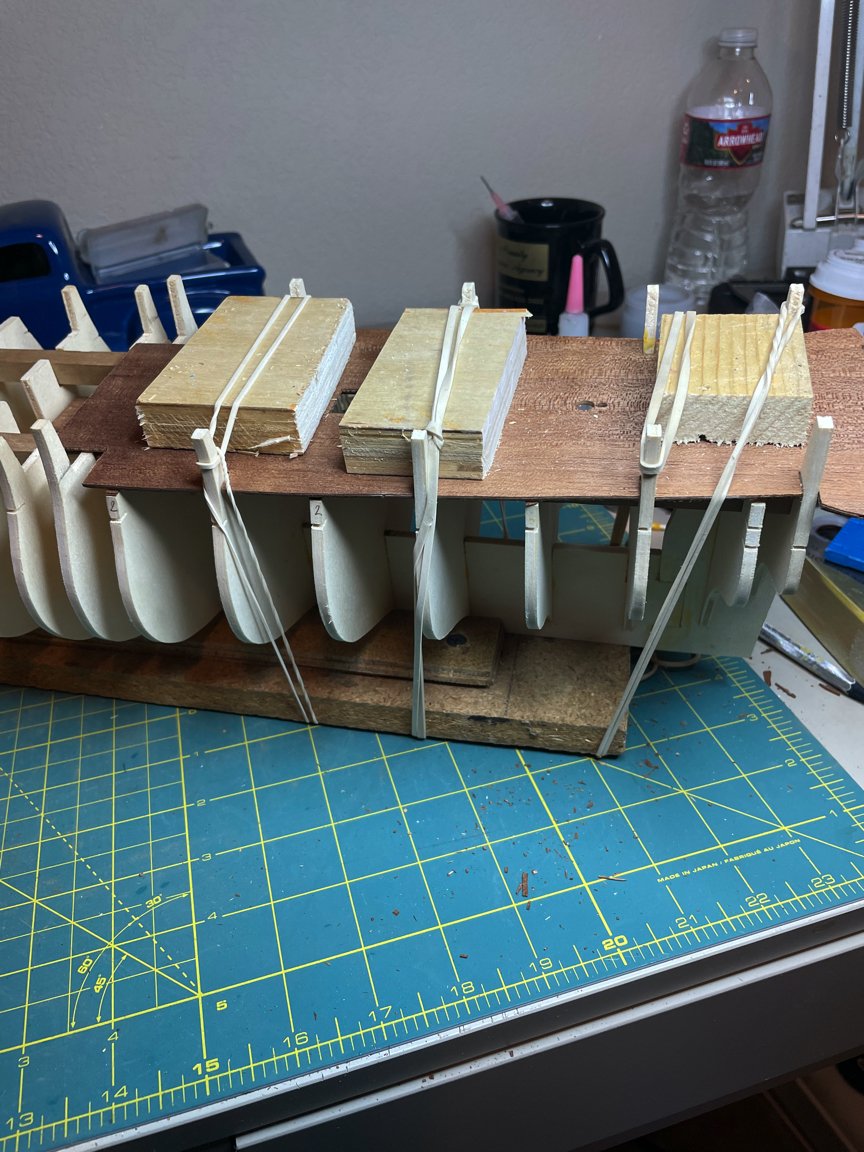
I am now working on all the pieces for the deck. The last pic for this post is my solution for sorting and storing the lumber. I hot-glued 10 empty water bottles to a scrap piece of wood. I labeled each bottle with the size of the wood with a marker on the outside of the bottle (hard to see). When I have a piece that is too short to stick out the top of the bottle, I cut a slit in the side of the bottle and insert the shorter piece into the slit. So far the system is working well, it helps in tracking what stock is on hand and doesn't take up a lot of precious desk space.
-
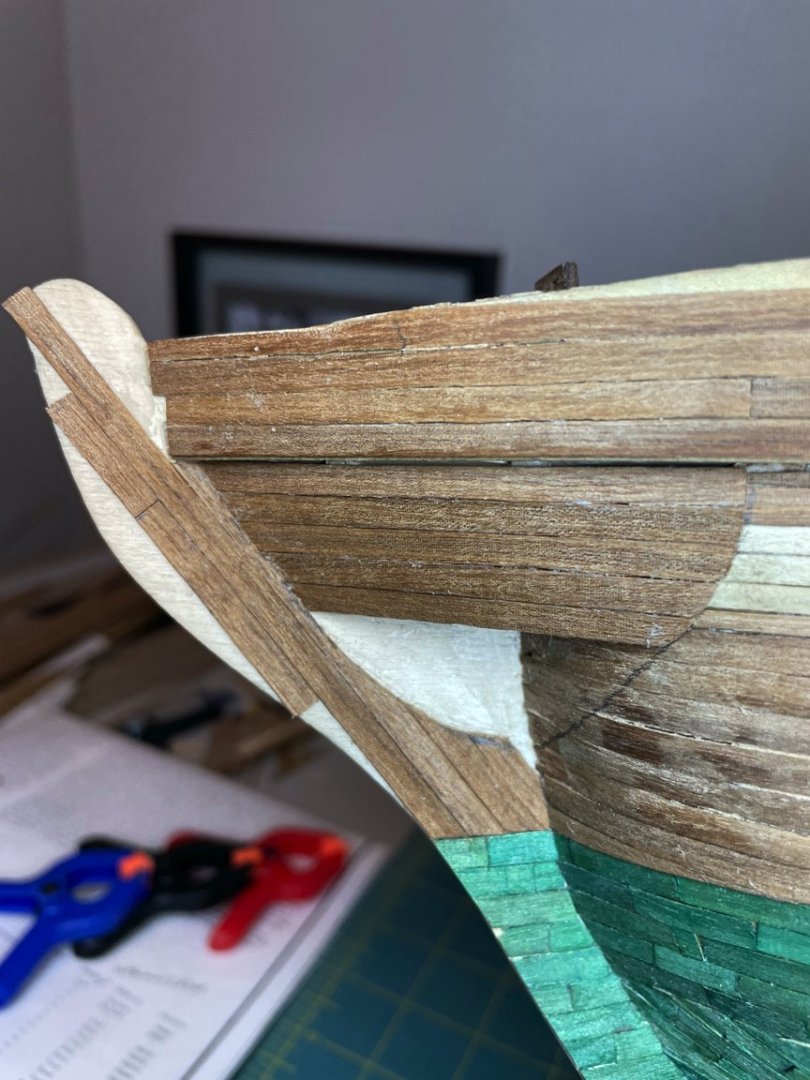
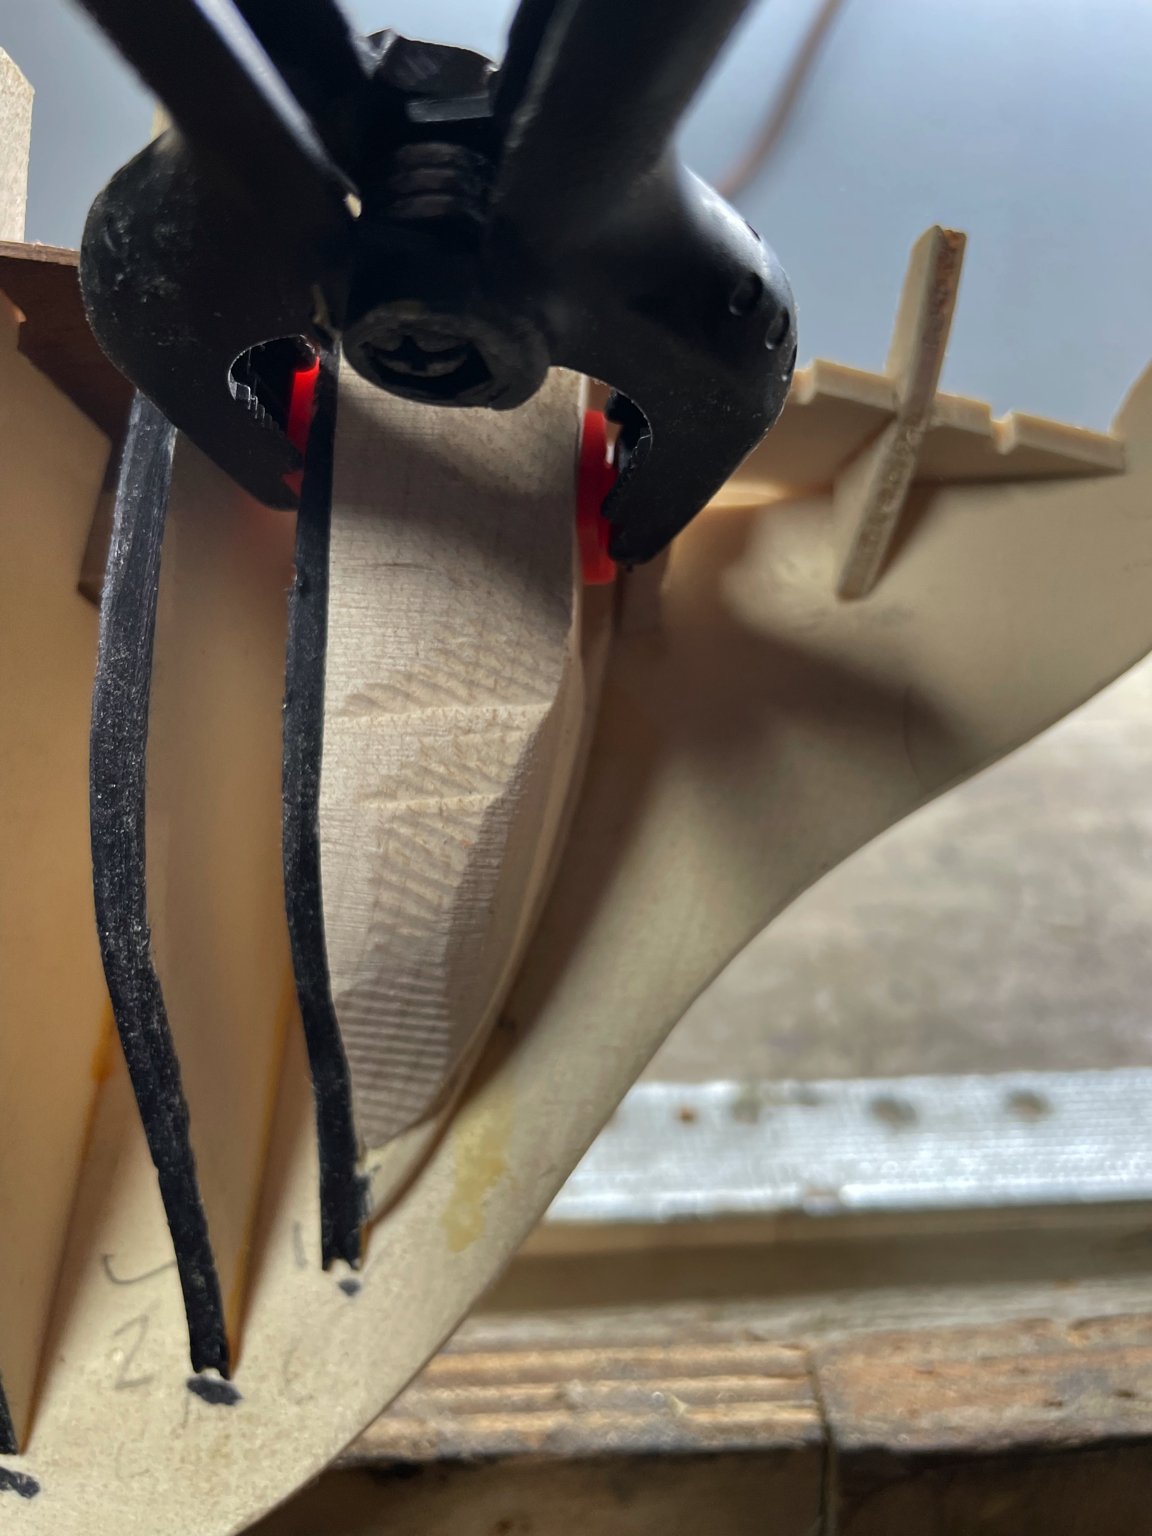
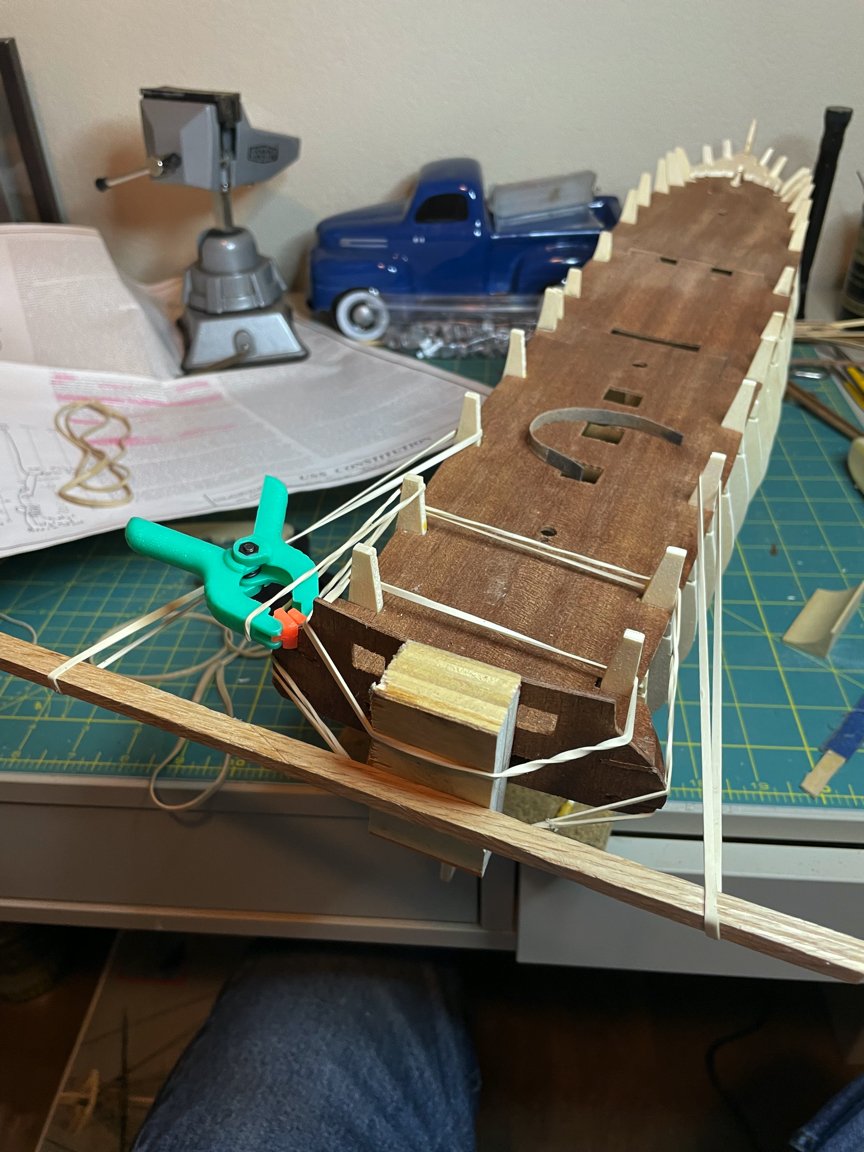
Work is progressing on the hull of the ship. Initially, a piece of 1/16" plywood is applied to the stern as can be seen in past posts. This is then overlaid with walnut planking. The first photo shows the left side completed and the right side ready for shaping. The second photo shows planking completed.
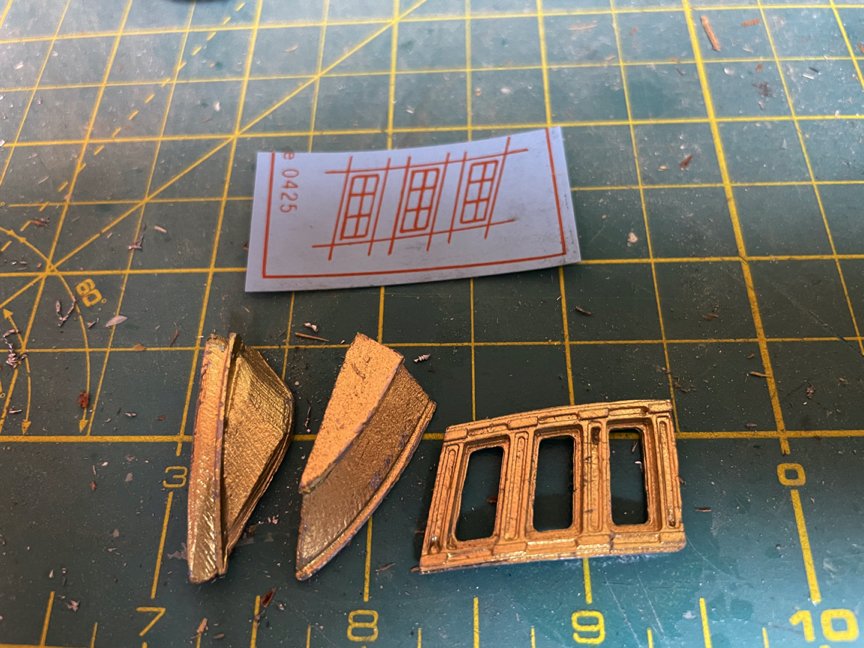
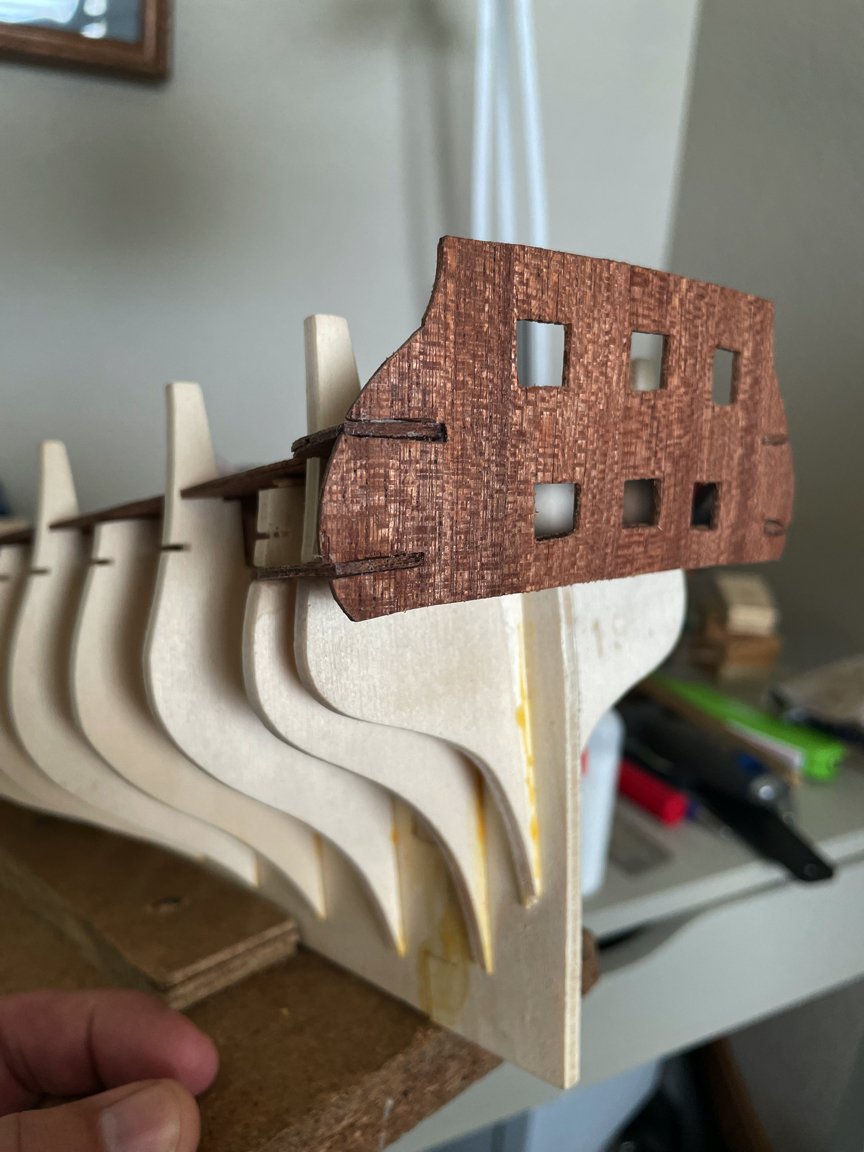
Next came the officer's quarter' windows.. In the kit, these are made in three pieces of a cast metal material and painted gold. Since they are cast metal, a great deal of grinding and filing had to be done to make them fit together and then to the contour of the ship. These will be detailed after the ship is painted. For the photo, I just set one of the windows in place.
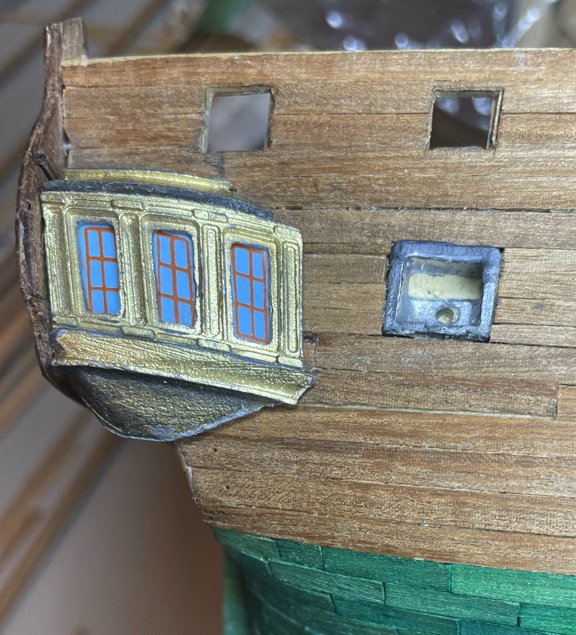
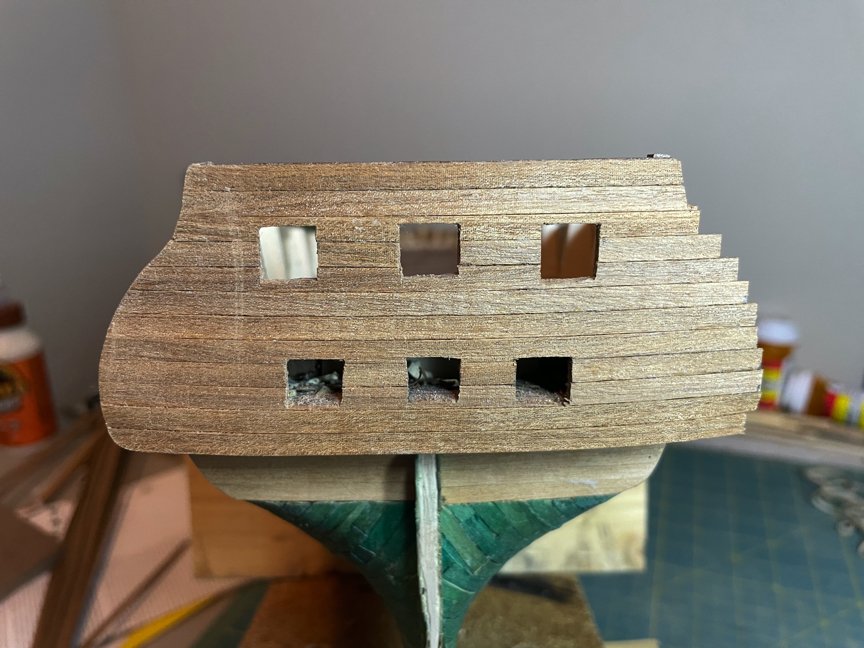
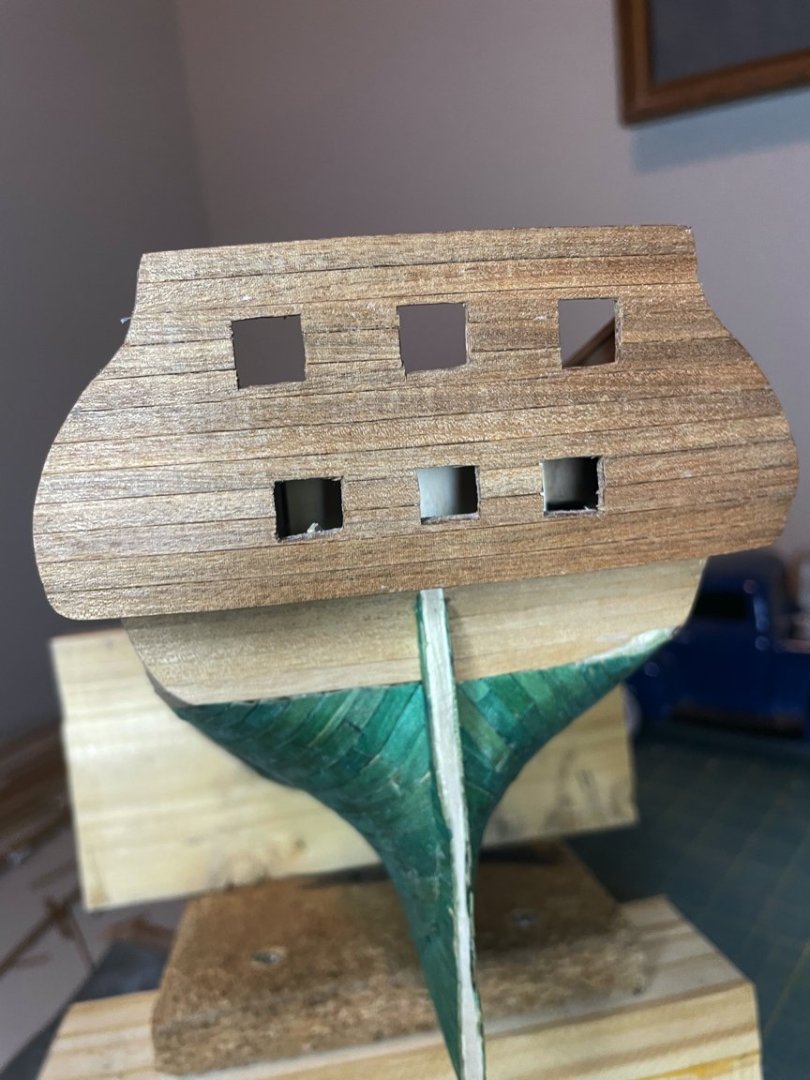
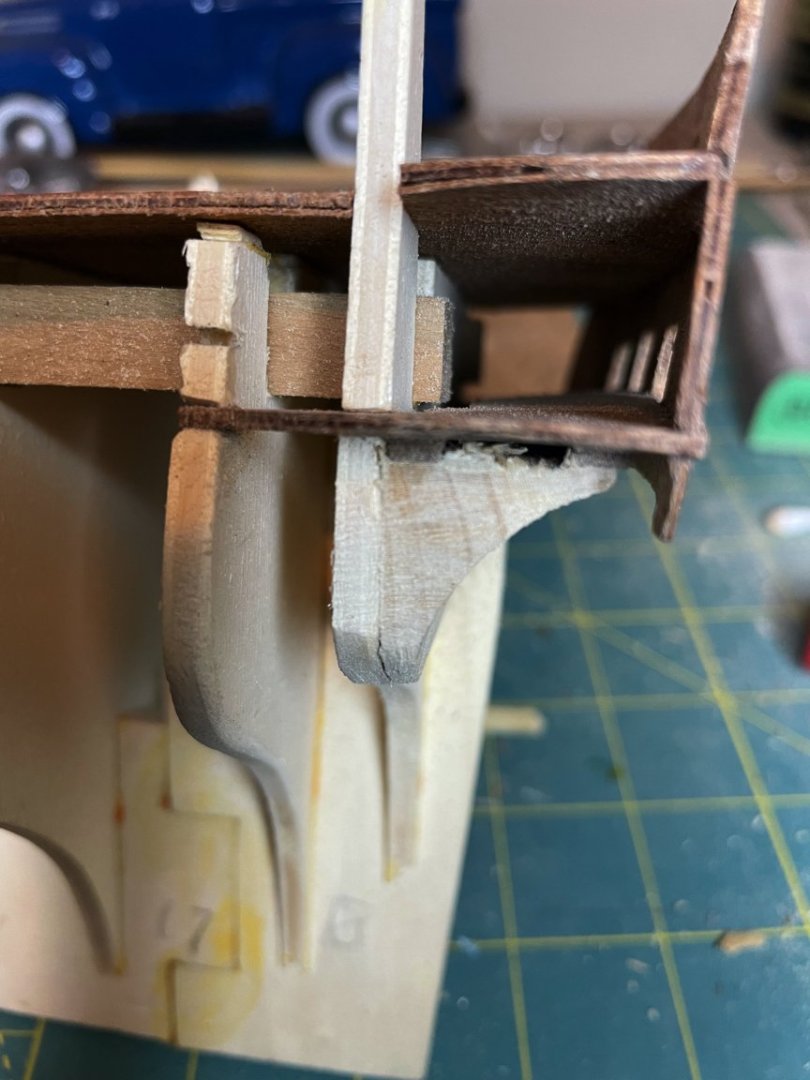
Finally, the area below the poop deck had to be completed. After reading many posts, watching several videos, I learned this is an area that has been altered through the years. The instructions for this area in the Mamoli kit leave more questions than answers. I finally decided on a course of action just to get this area filled in. What I settled on follows the directions in this kit as much as I could determine so I am happy with how it turned out.

Now for some deck work.......
-
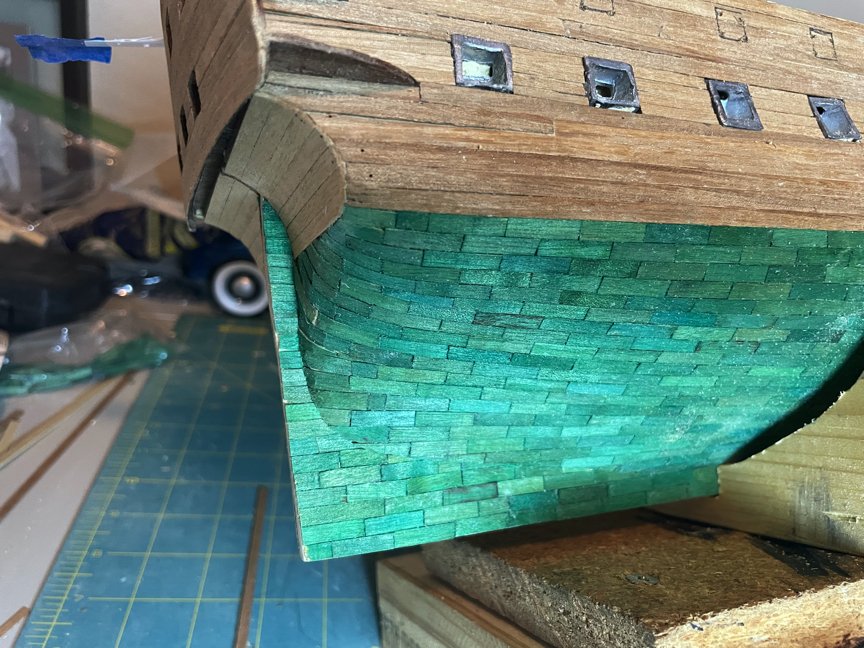
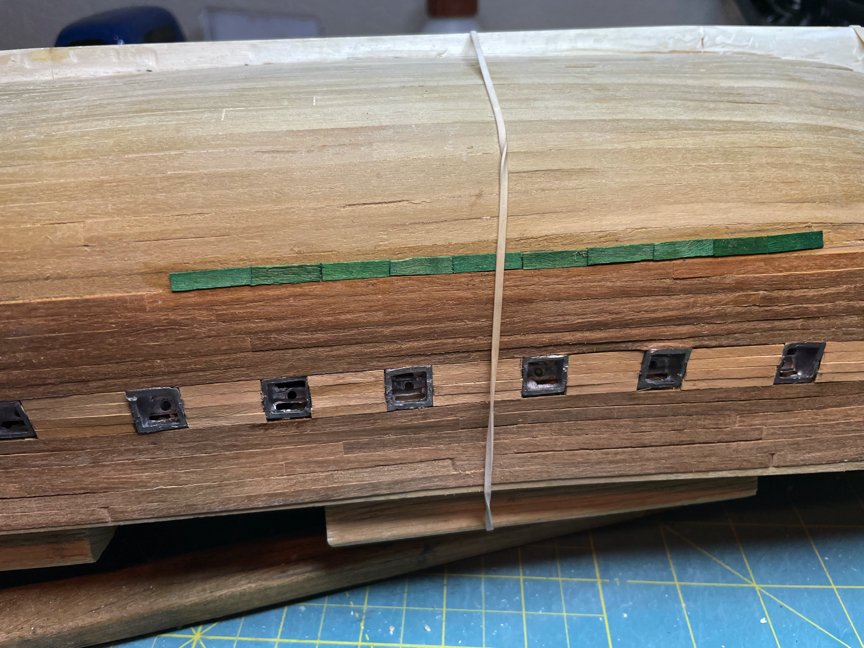
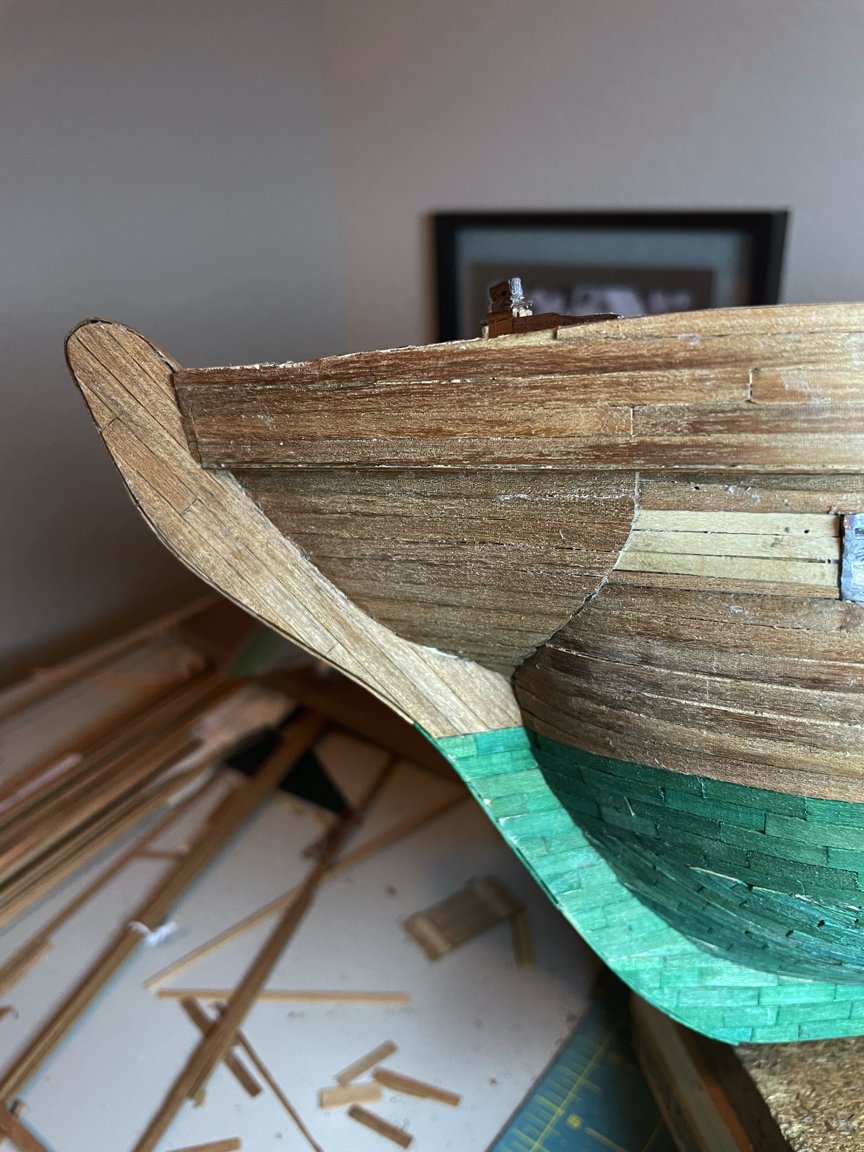
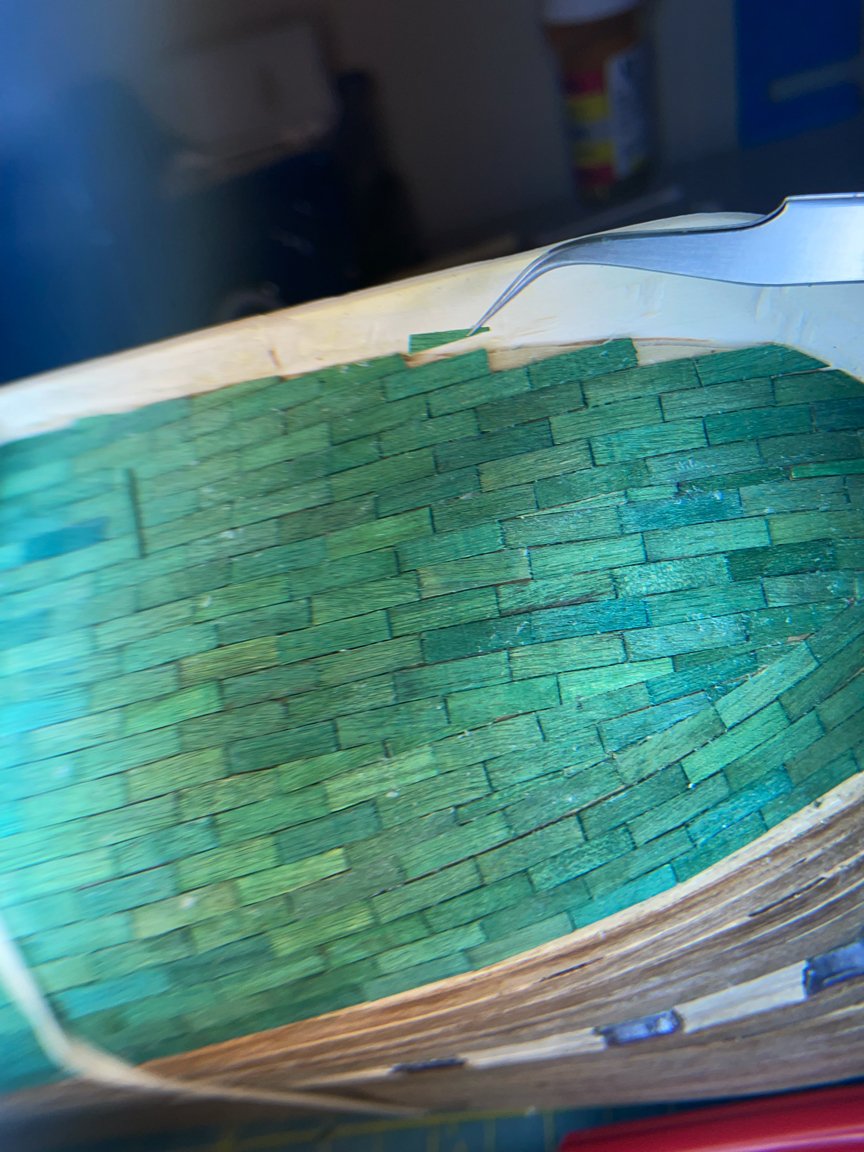
Putting the "copper" plates on was a process. There are 24 rows with a max of 39 full plates in each row.
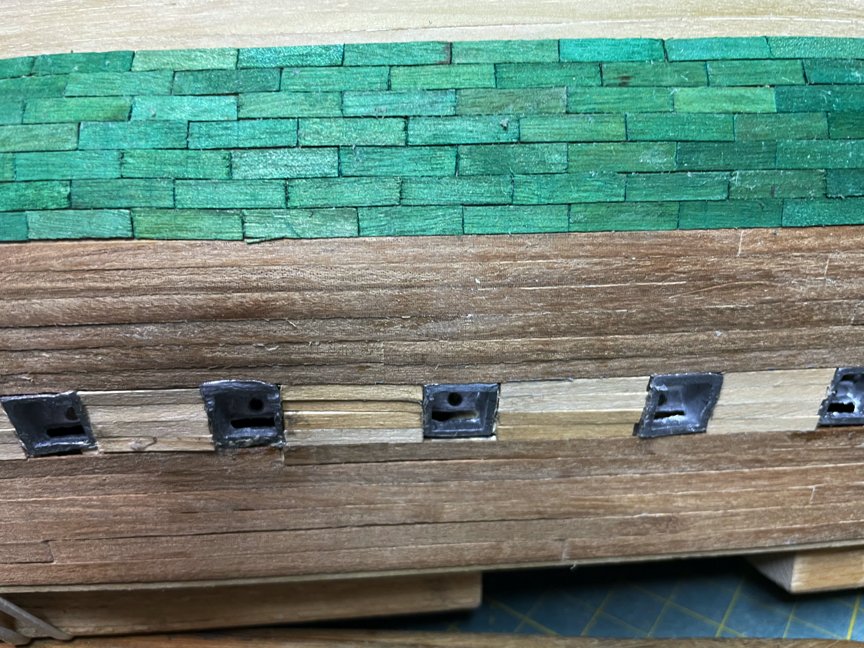
With all the triangular plates that had to be made to accommodate the curvature of the hull, there were probably over 1000 pieces on each side.

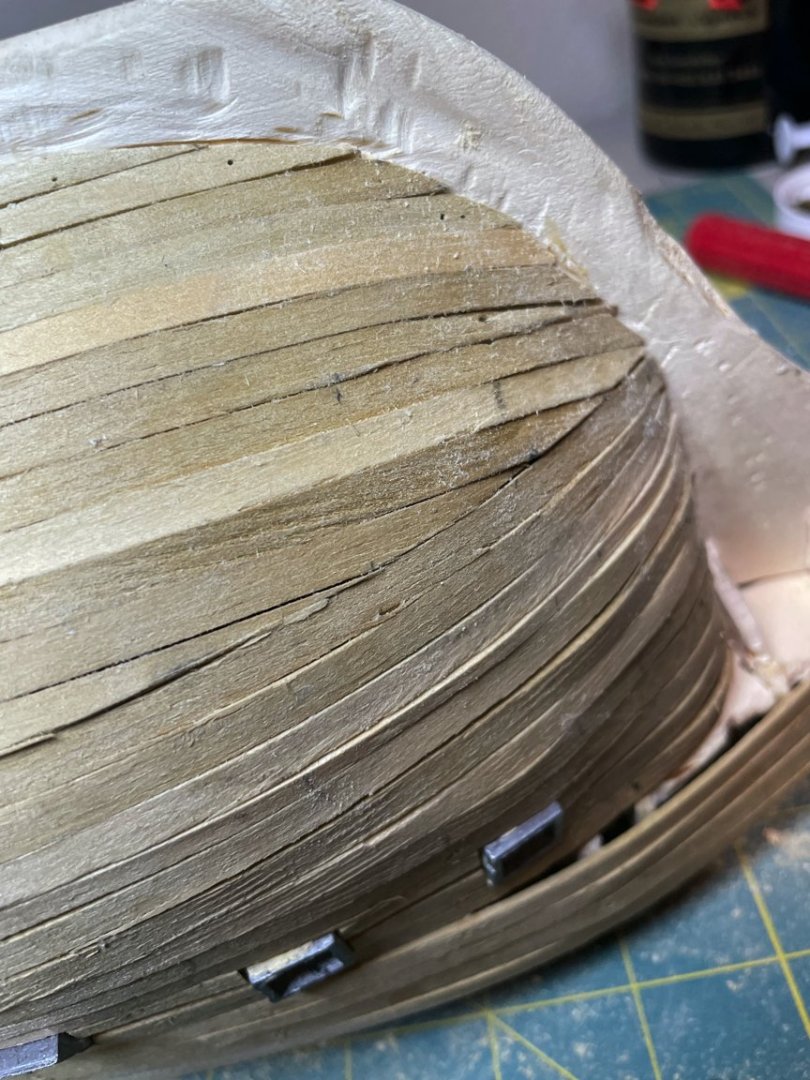
Then, of course, the soaking of the pieces to be bent for the bow and stern,
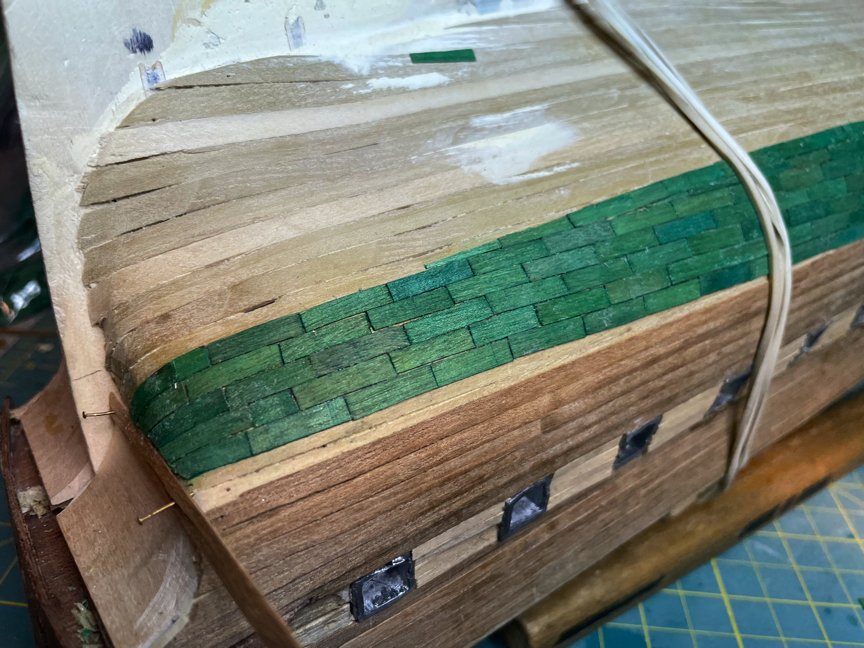
Overall, the plating came out good. There will be some touch up later to bring out the copper color a bit more.
- woodartist, Gregory, mtbediz and 1 other
-
 4
4
-
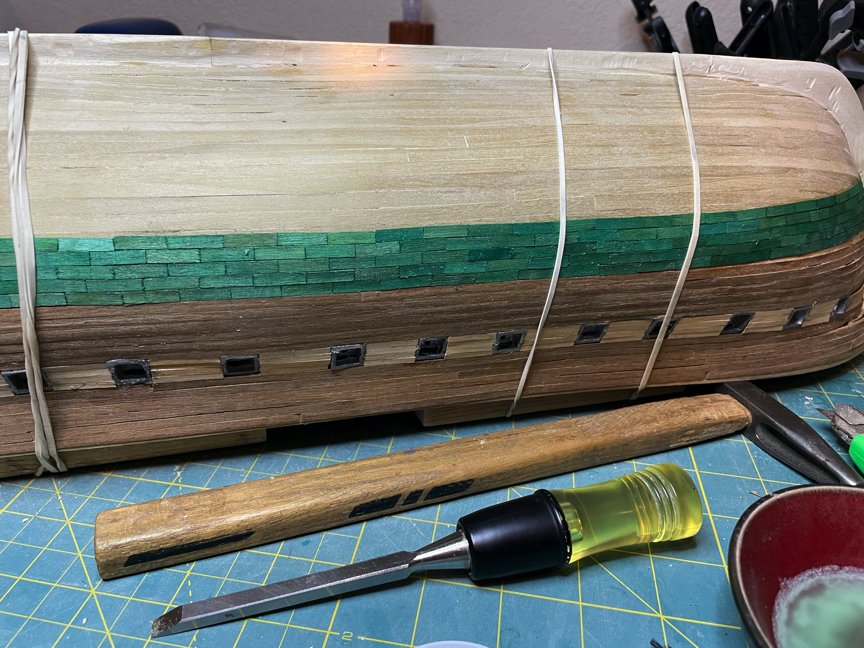
The second planking has begun. This includes two different types of layers.

The first picture shows the pencil water line. The copper plating was used below the water line.
Above the water line, the planking will be painted black. The planking between the gun ports is slightly narrower and will be painted white. The gun ports are cast and not very consistent in size and shape. I will probably do some more filing before painting. All the planking will get another sanding before painting as well.
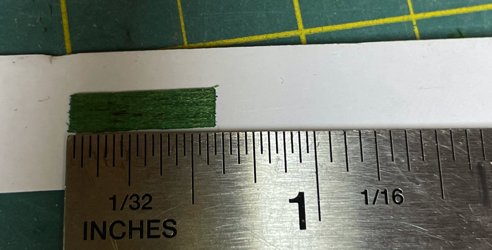
In the Mamoli kit, the copper plates are pieces of wood 5/8" x 3/8" and are painted shades of green to simulate weathered copper. A light coat of copper paint will bring out the copper color a little more after all the plates are on the ship.
Next post will highlight that process - one plate at a time. Anyone care to take a guess of how many copper plates there are?
-
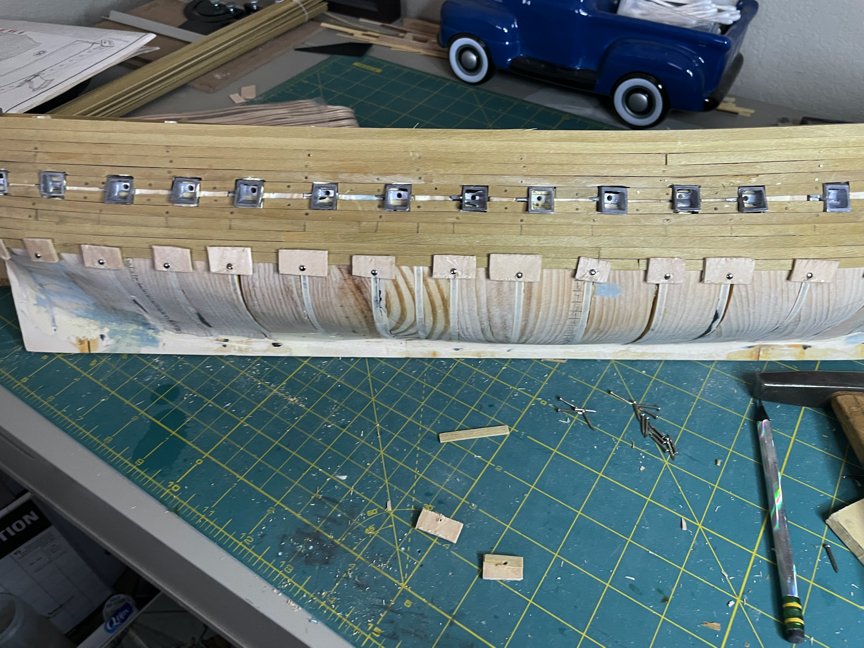
The first layer of planking is progressing. I decided to use small nails to attach the rows around the cannon portals first. After the glue dried, I removed the nails.
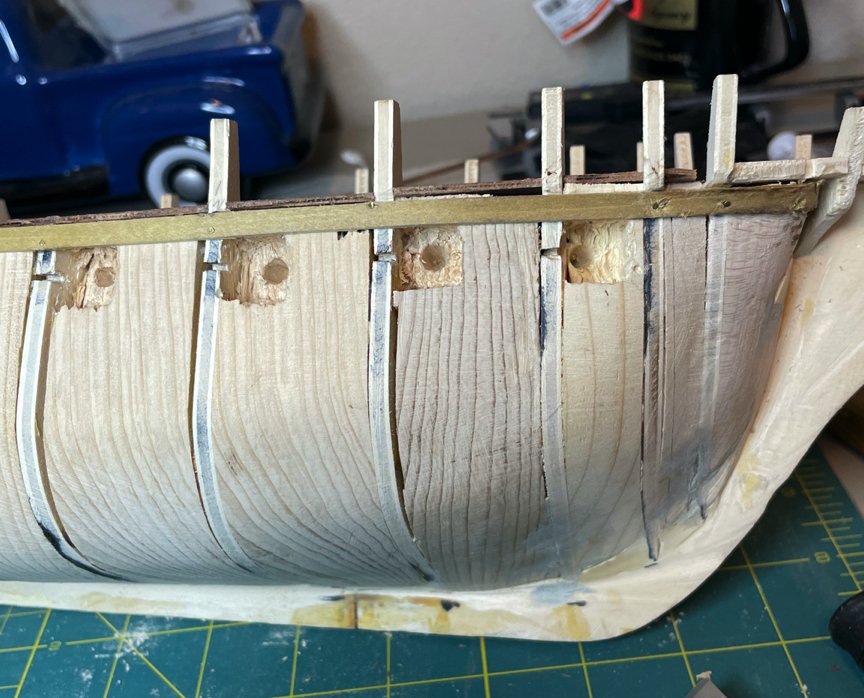
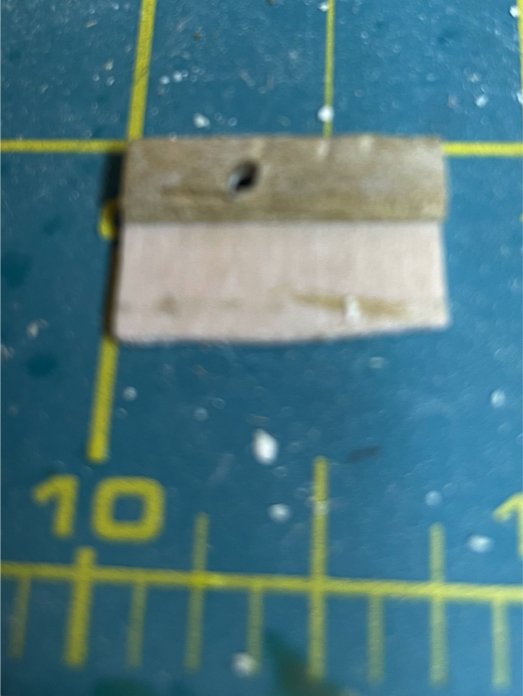
I then made about 40 tabs from popsicle sticks and pieces of planking. I varied the size from about 1/2" to 3/4". The longer tabs were used on the flat surfaces and allowed more "hold down" area. The smaller tabs were used on the curved surfaces. I drilled holes in each tab. I used a thicker 1/2" nail with a bigger head that made it easier to remove when the glue dried. The piece of planking meant that the popsicle stick side of the tab would snug the plank close to the frame. Apologies for the blurry picture of the tab.
Planking goes slow, but I enjoyed it. You can see the pencil marks on the frames that helped keep the planks straight. I measured the total distance from the widest section in the center and transferred those measurements to the bow and stern.

I used the heat bending tool to bend the planks. My first bends/planks were not as good as the last ones I put the bend into, but they will sand out ok.

I worked on both sides at the same time. As the glue dried on the starboard side, I was getting the port side ready. A couple of planks per side per night is about all I could handle.
The last piece.
Now the sanding begins.The thickness of the planks in this kit varied quite a bit, but they sand easily.
-
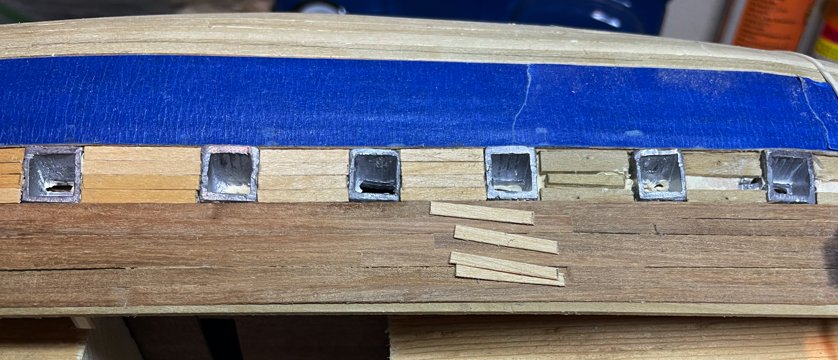
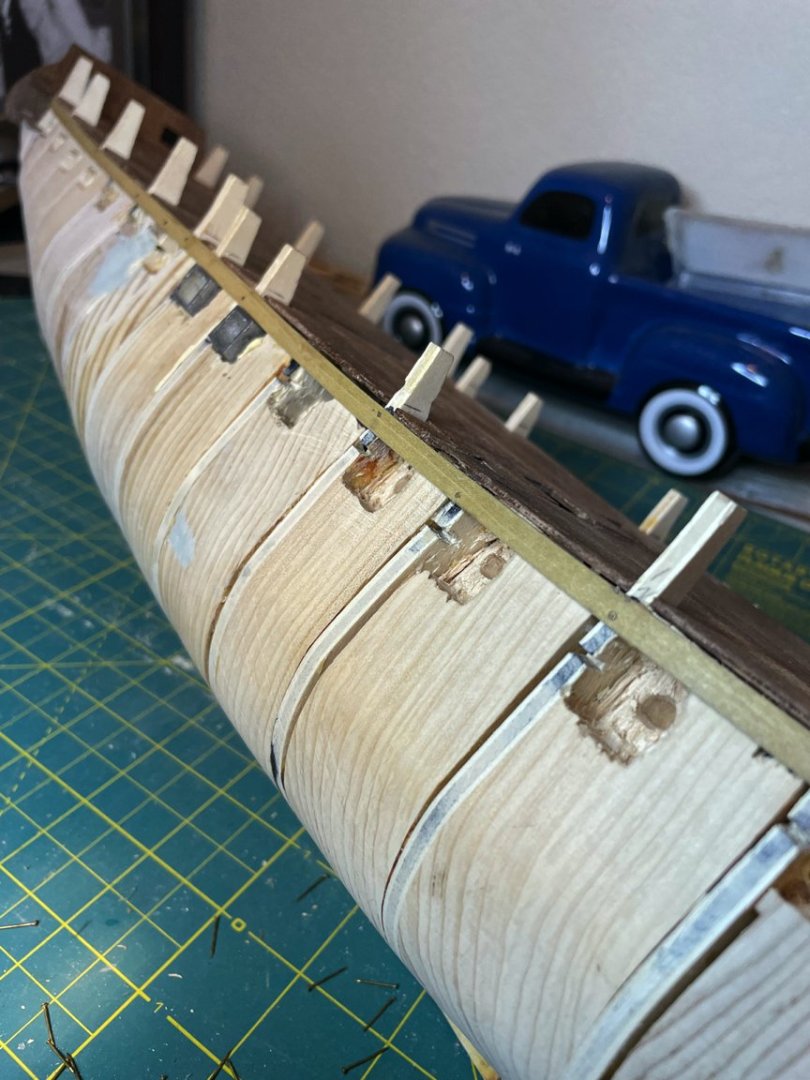
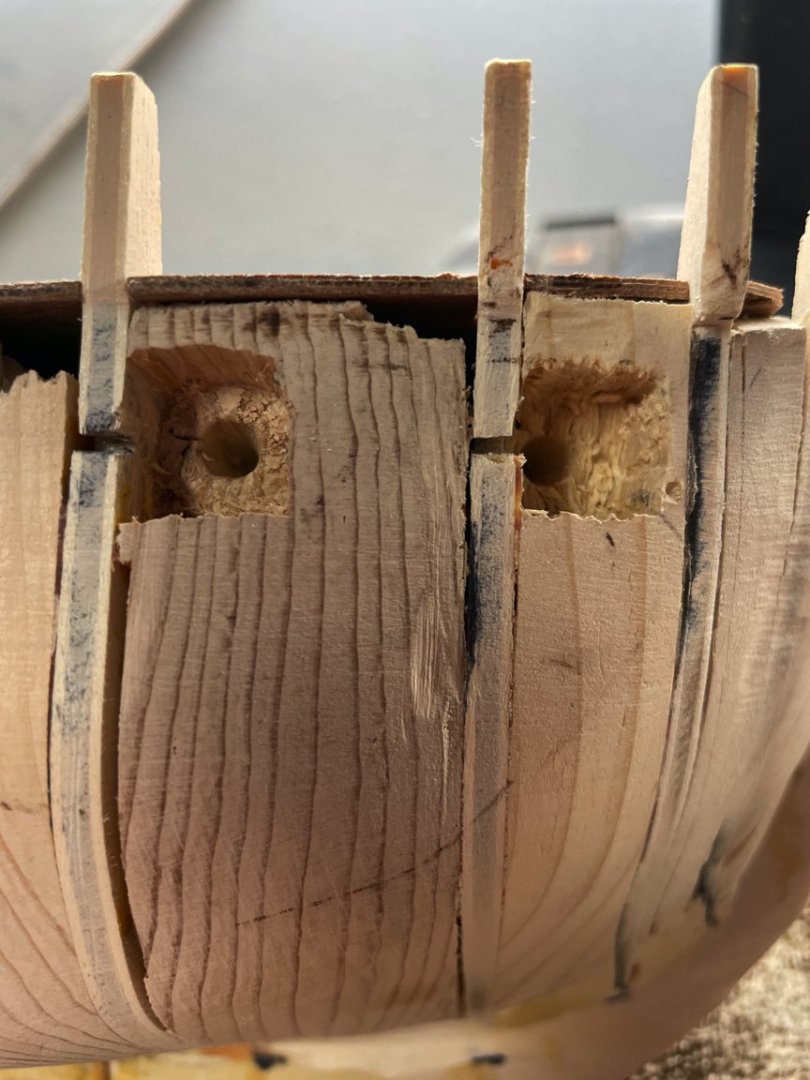
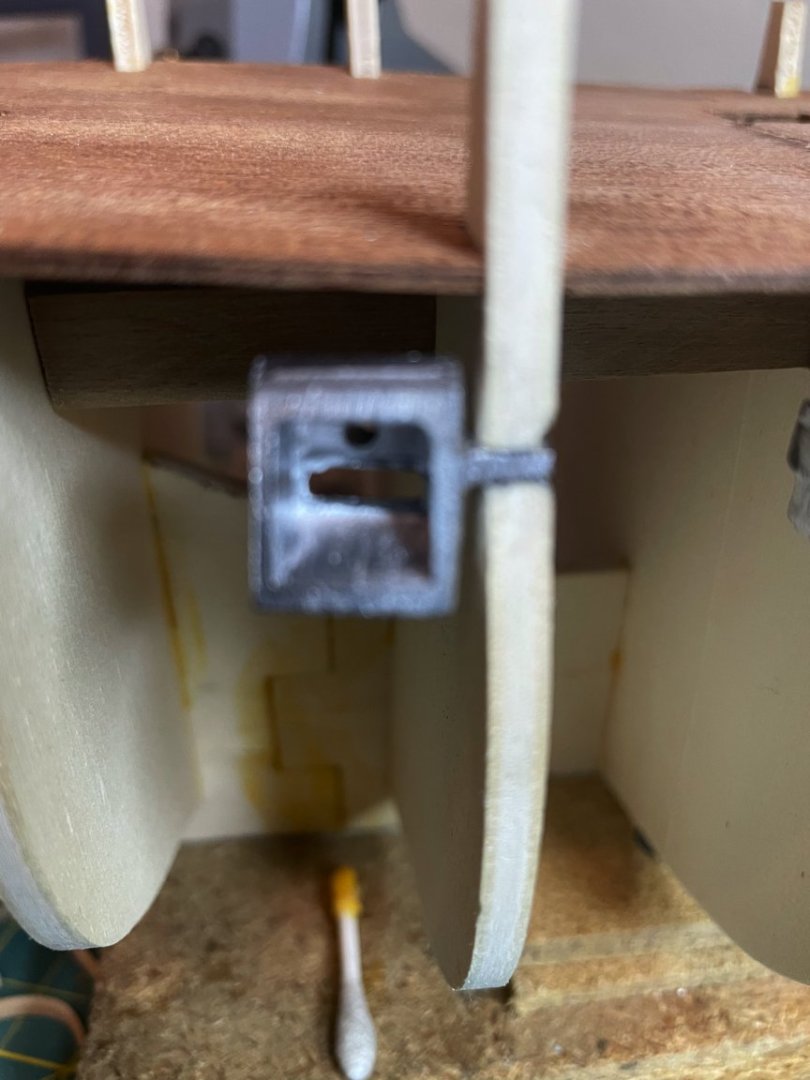
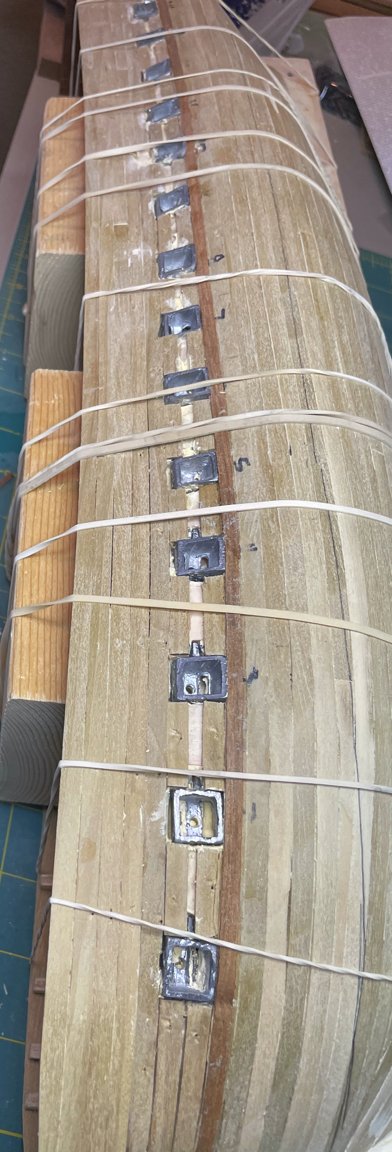
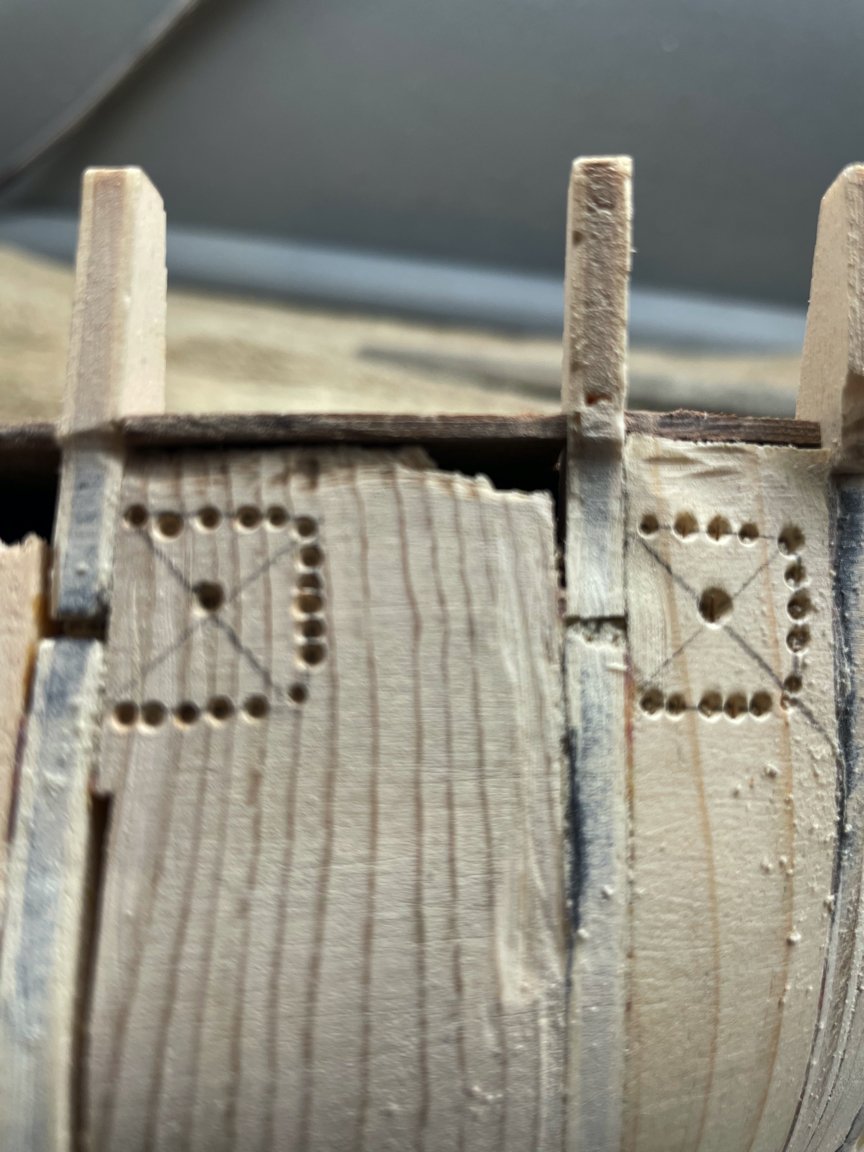
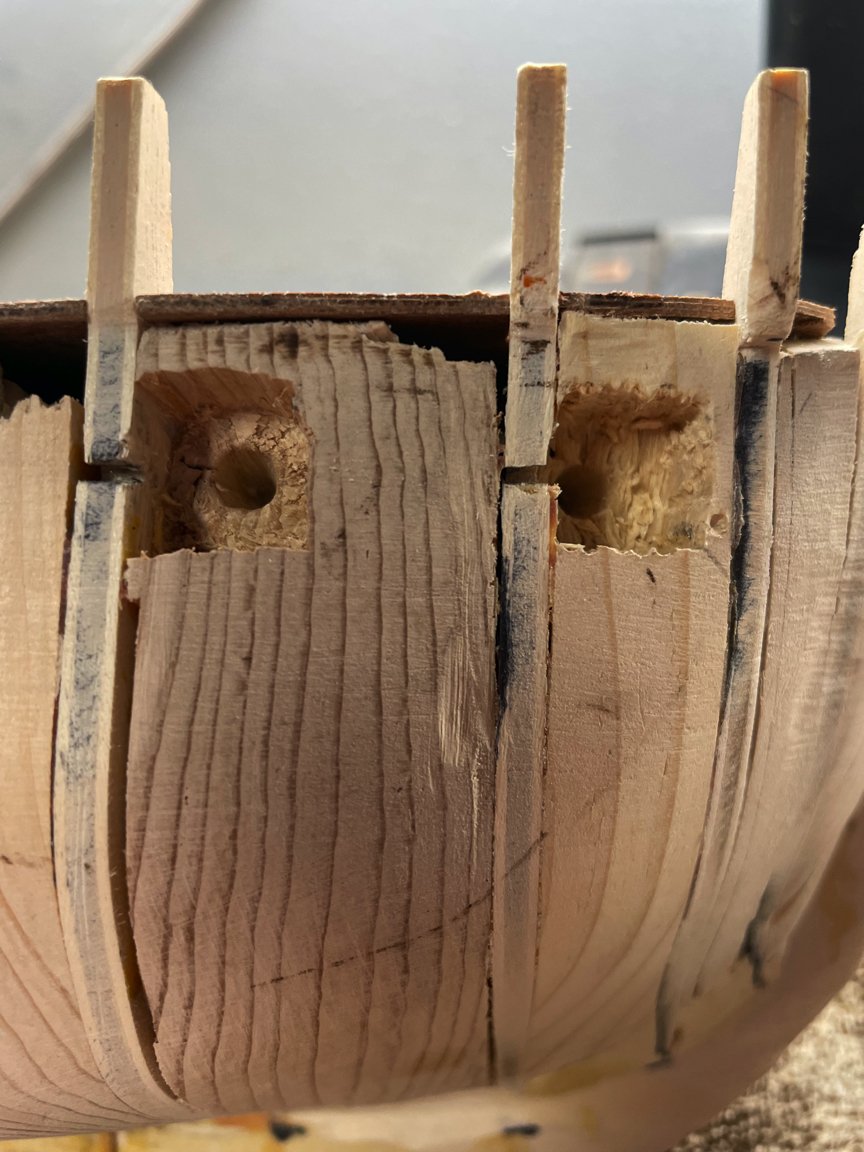
After filling in the spaces between the frames, I needed to cut the spaces for the cannon ports.
The cannon ports with this kit are pot metal with "ears" on both sides that are to be inserted into notches on the frames. In the original plans, the ports are held in place by the ear attached to the nearest frame. The thickness of the ears varied as did the notches in the frames. I also discovered (after the fact) that the notches were not lined up well - a problem I will need to deal with later. The ports were square with the exception of the last two on either end which were angled to match the curvature of the bow and stern.
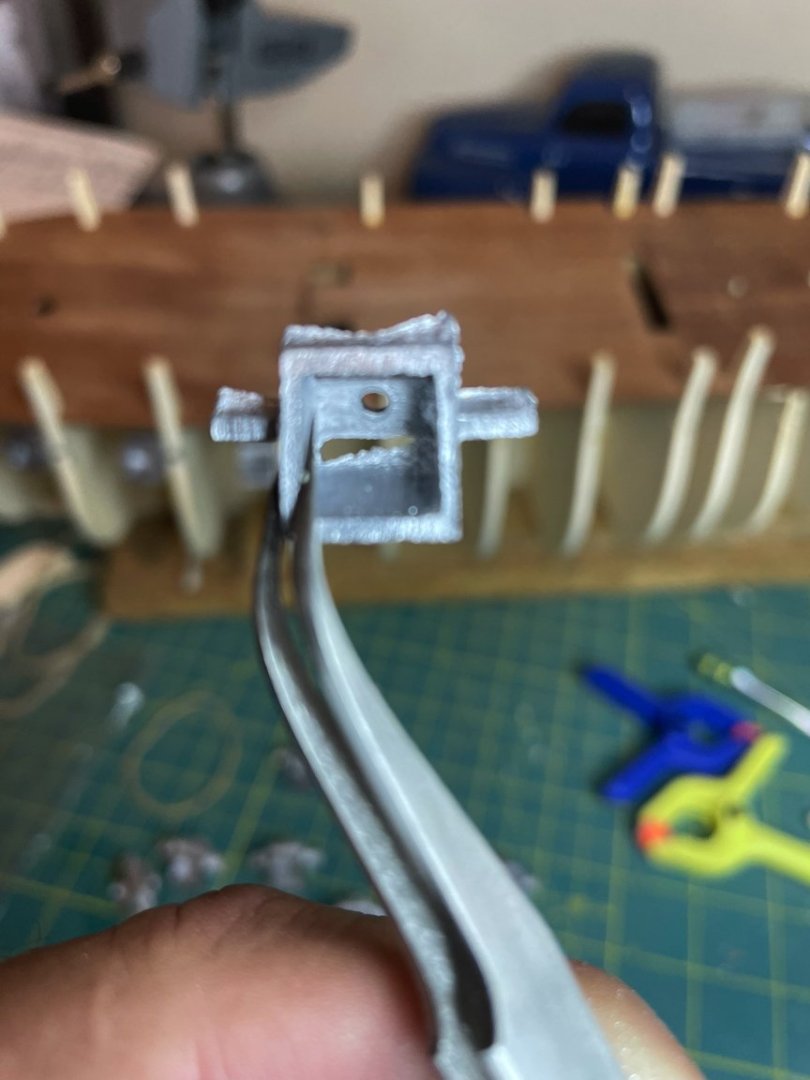
I then marked the spot of each port, drilled holes around the perimeter and drilled the center out with a spade bit. This was followed by using a wood chisel to make the opening a square. Since there will be two layers of planking surrounding each port, the opening did not need to be an exact fit. In the original plans, the only thing holding the the ports in place was this ear in the notch. I used a dab of wood fill on the inside of the port to hold it in place.
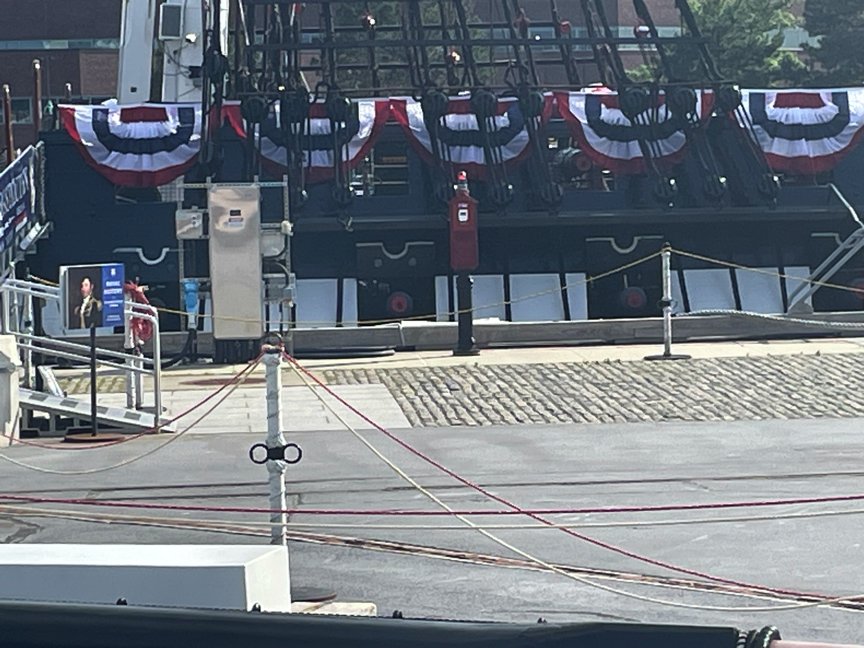
We were in Boston last month. We had an evening flight home so allotted a few hours at Boston Harbor. Unfortunately, we got caught in a massive traffic jam and sat on the interstate in one place for 1 1/2 hours. When we finally arrived at the Constitution site, it was closed for day so the only pictures I was able to take were from outside the fence. Here are a few of the cannon ports. I took many pictures of the ship and some from the museum models, as the museum closes later than the ship.

-
Oz:
Thanks for your comments and pictures. It is so good to see someone working on the same kit as I am attempting. You are several steps ahead of me and I plan on studying what you have done to this point on your website. I, too, have discovered that things don't quite line up but it looks like you have compensated very well and no one will ever know the difference.
I was in Boston last month. We had planned on spending a few hours at the ship before our flight home but got caught in a huge traffic jam and sat on the interstate in one spot for over 1 1/2 hours. When we finally arrived at Boston Harbor, the ship was closed for the day so the only photos I have are from outside the fence. We spent some time getting the best shots possible and a few from inside the museum and gift shop. I will be glad to share if you are interested.
Bruce
-
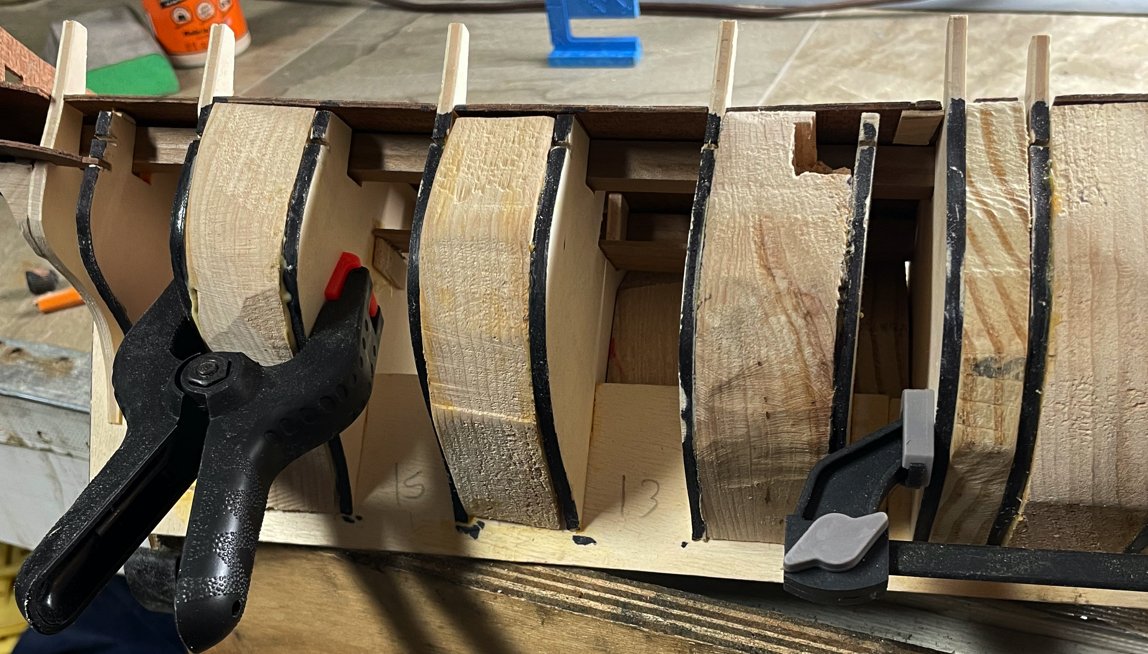
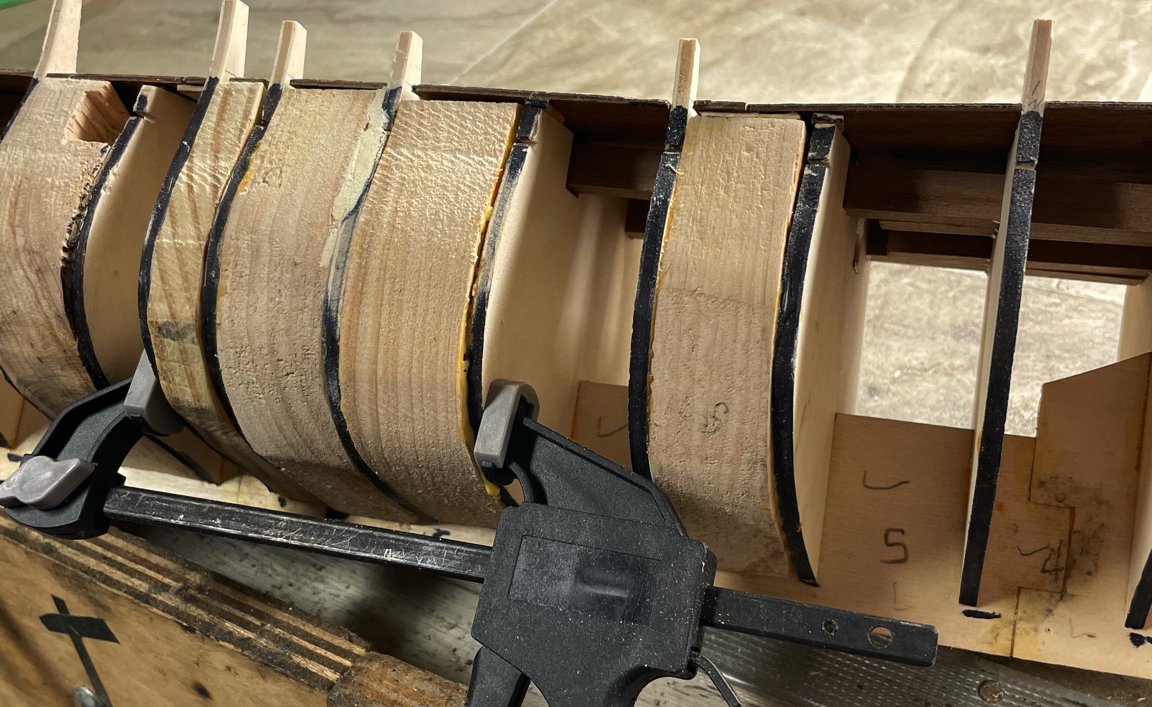
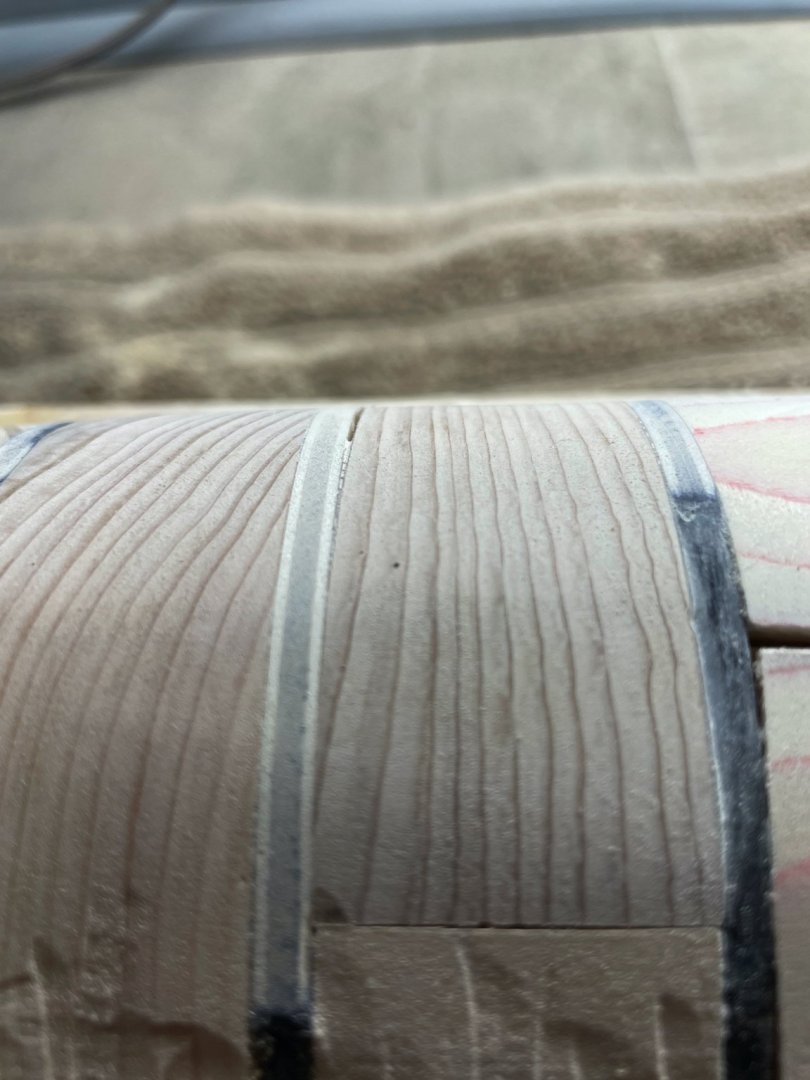
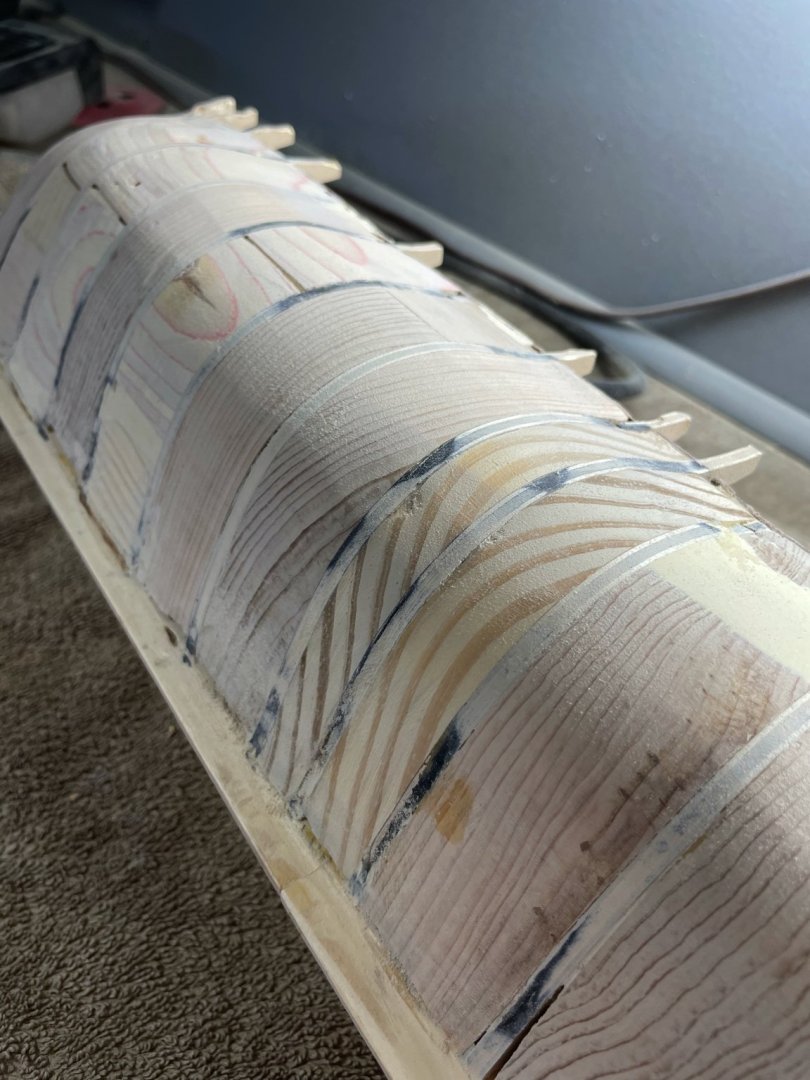
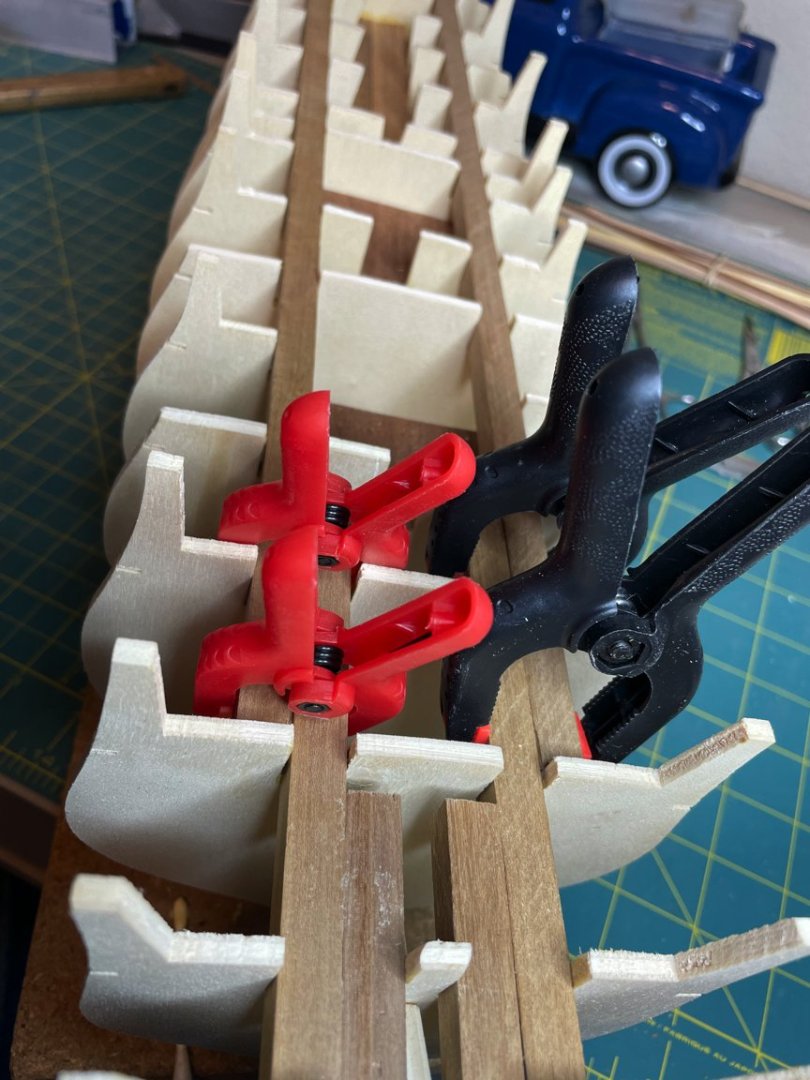
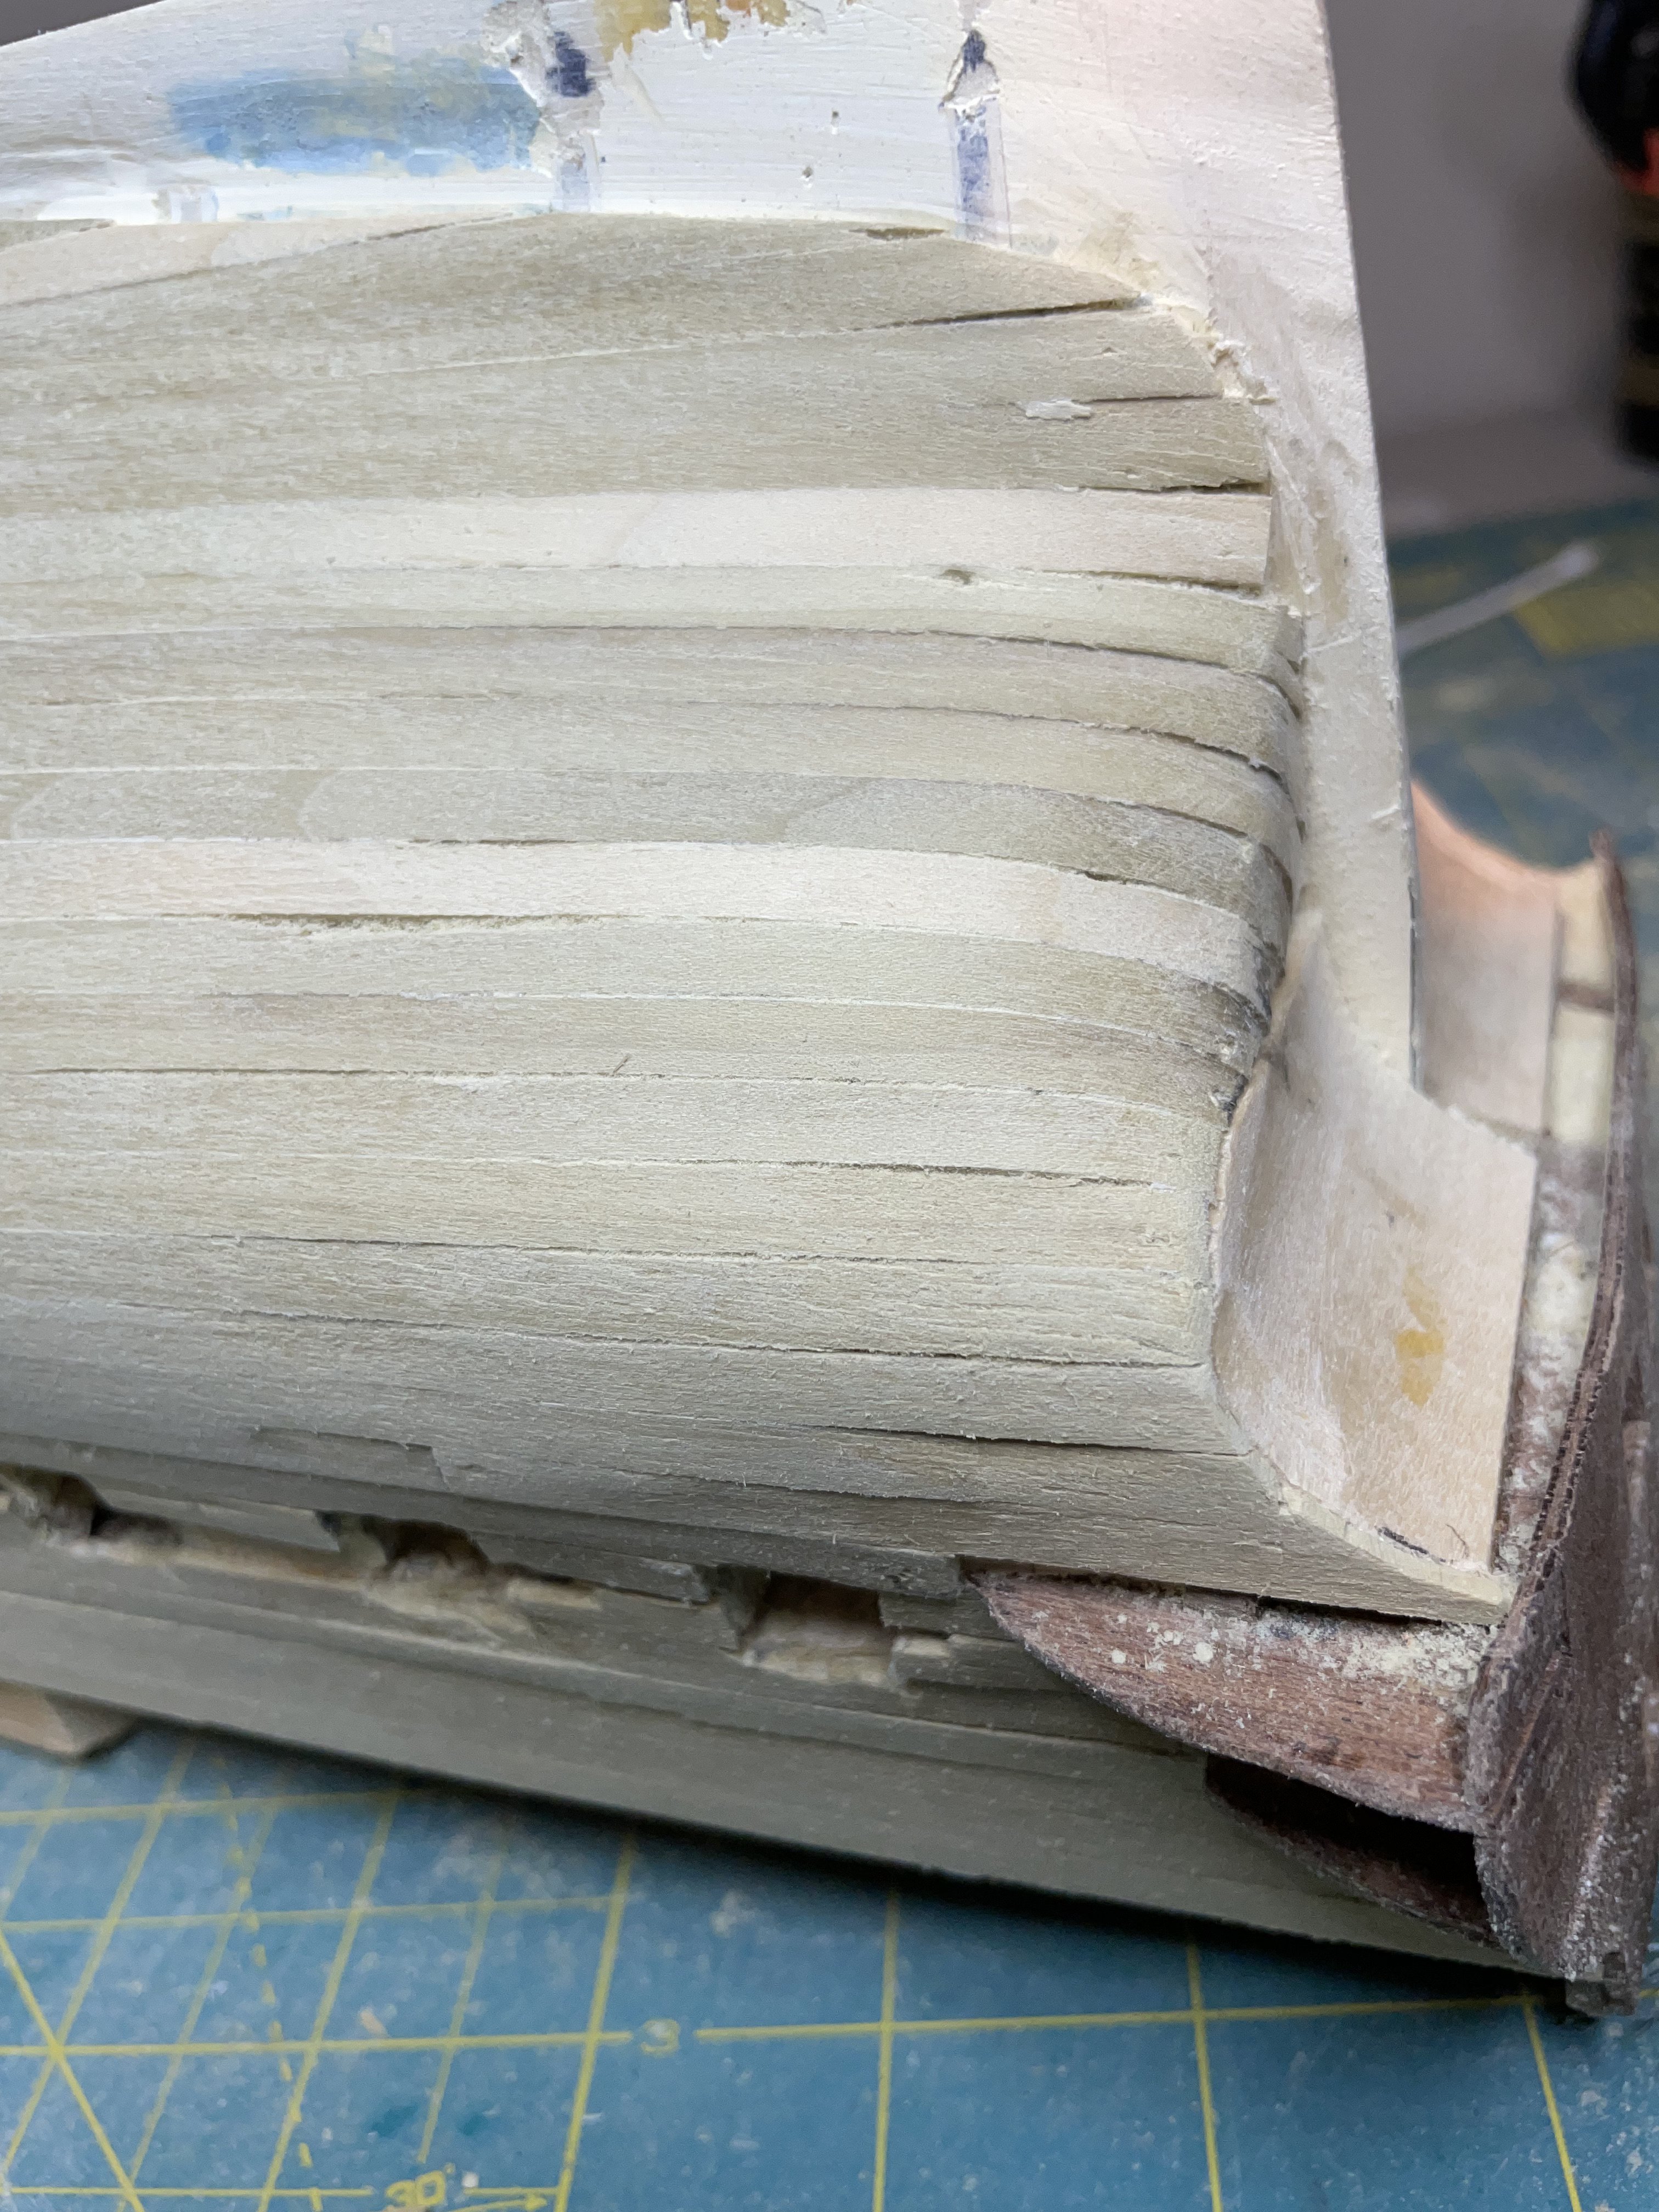
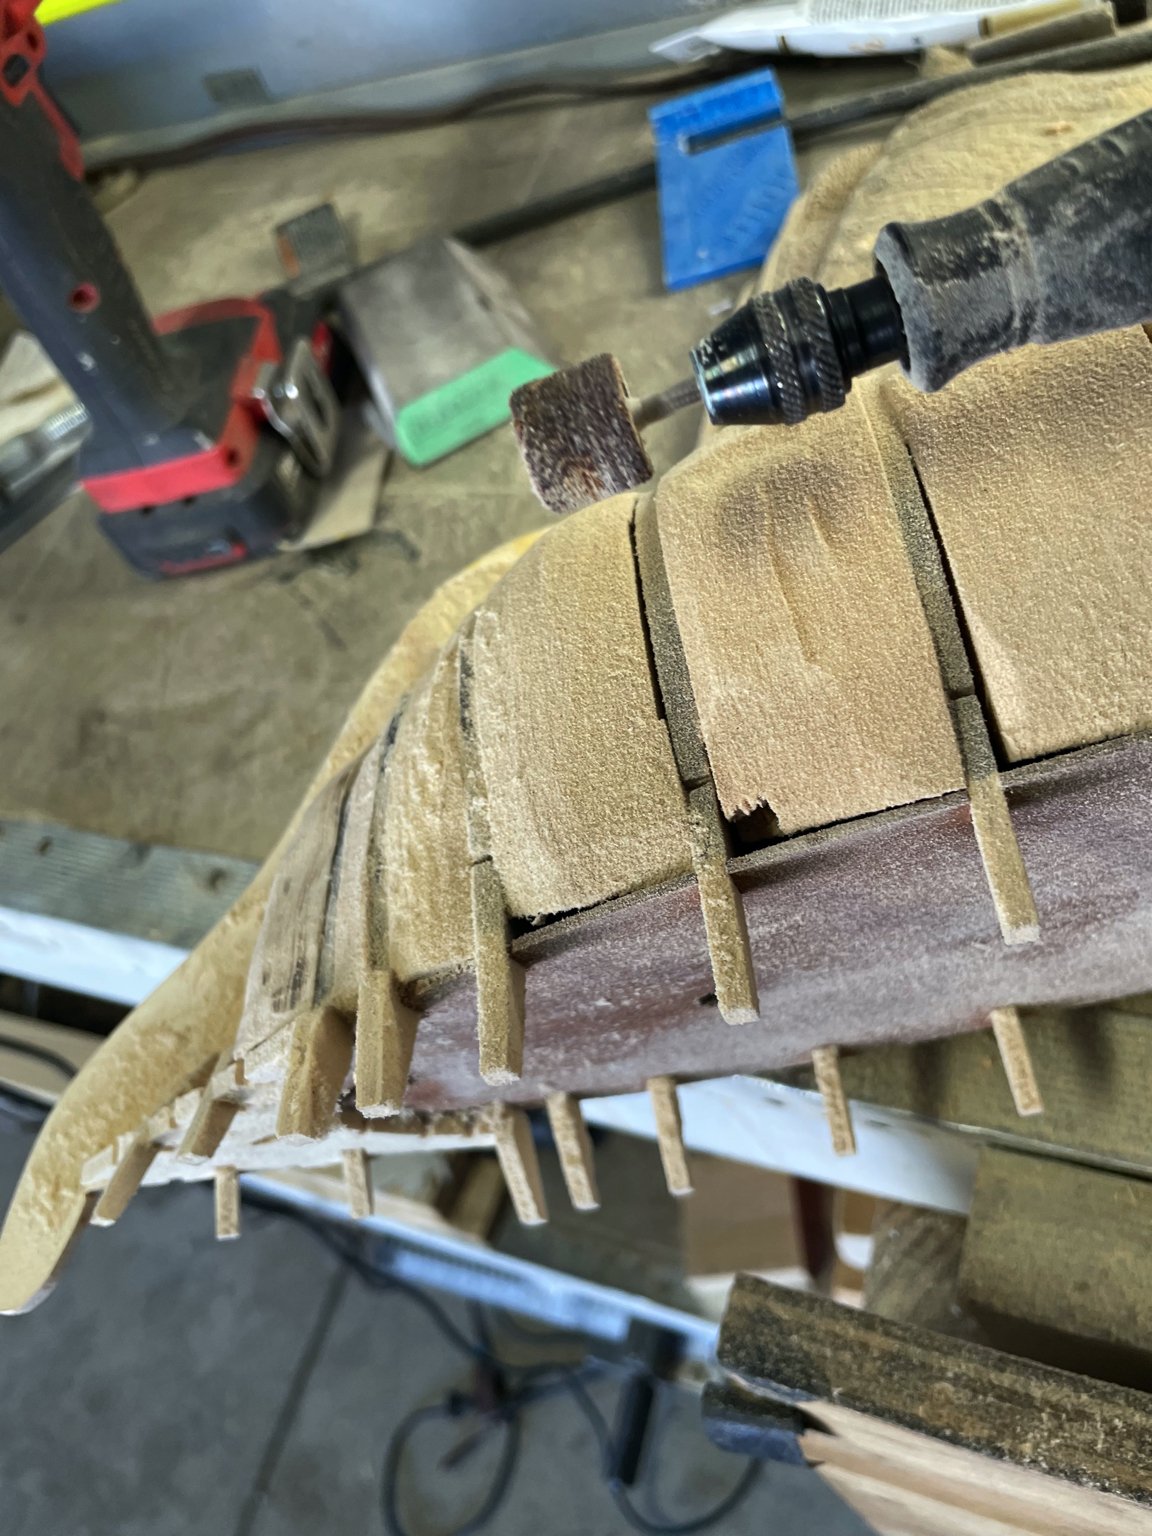
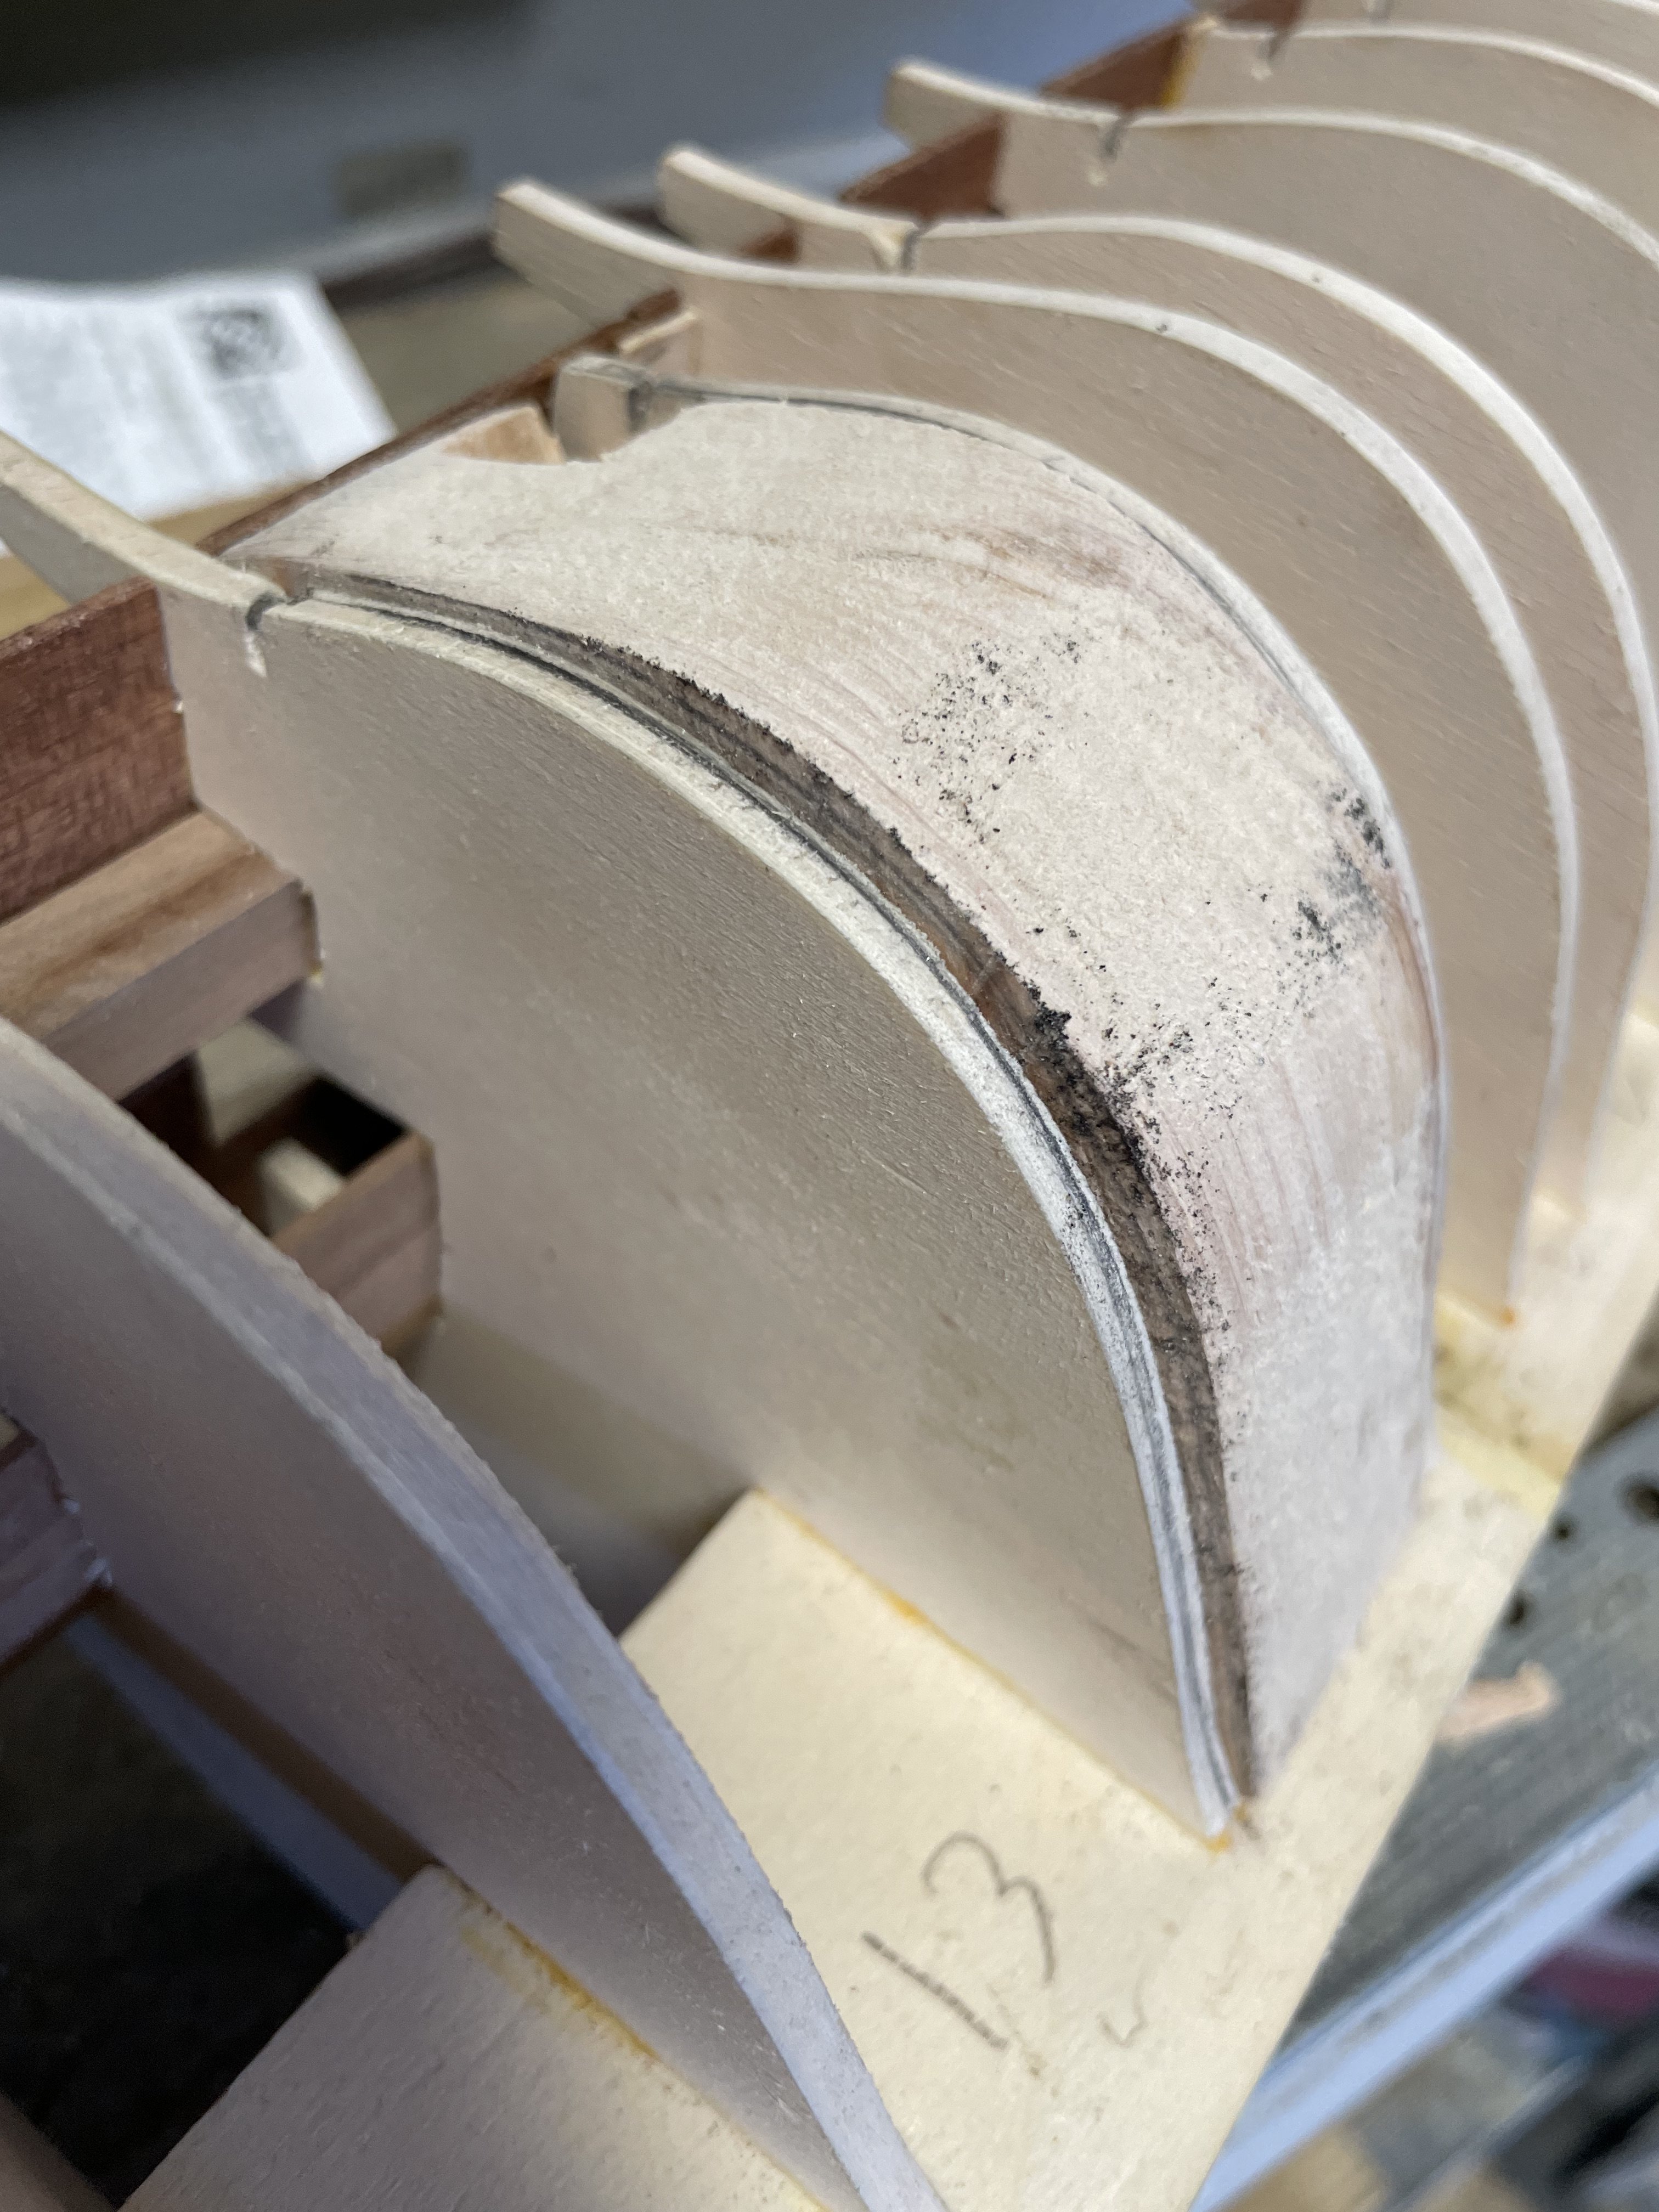
Filling in between the frames was a slow process. It didn't help that I somehow managed to have a run-in with the table saw and lost a little piece of my thumb. I still can't figure out how that happened. Anyway, it has healed well and other than it is slightly shorter and I have no feeling on the end of my thumb, things are back to normal.
I used mostly scrap pine for filling in the spaces. I painted the outside edge of the frames so I would know when to stop sanding. I used a little wood filler here and there to fill some voids. As you all know, the crazy part about this step is that virtually everything you see will be covered with two layers of planking. Oh well, I am happy how this turned out.


-
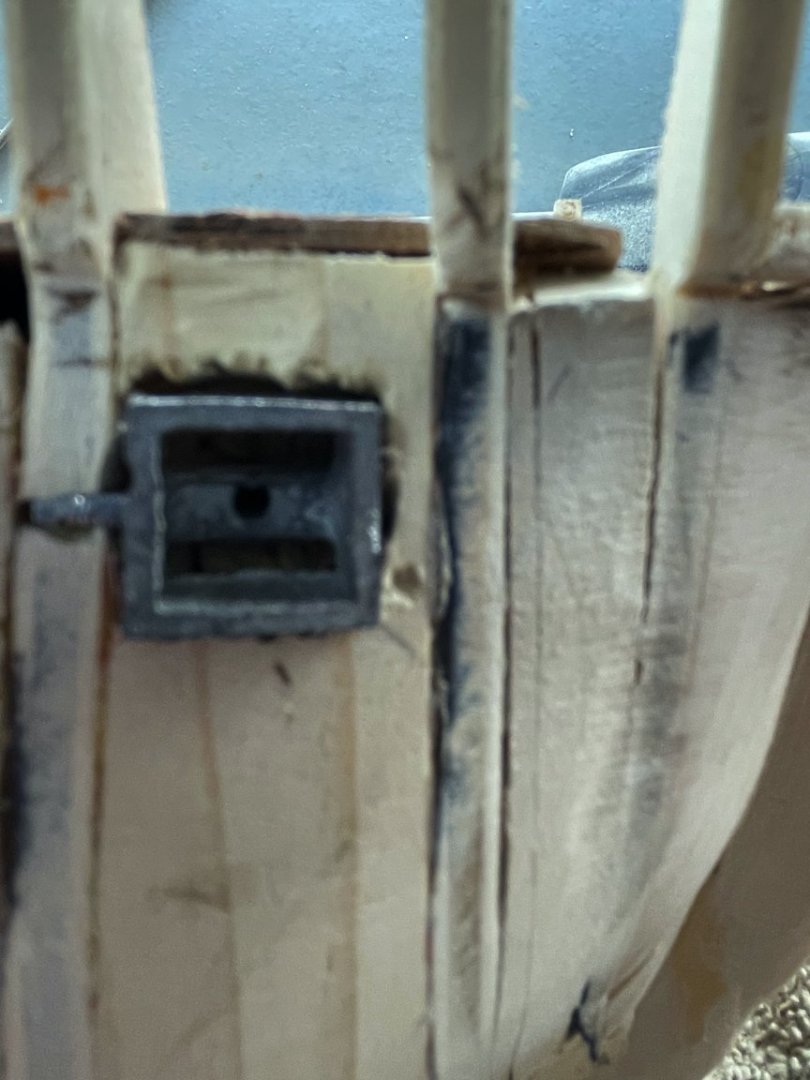
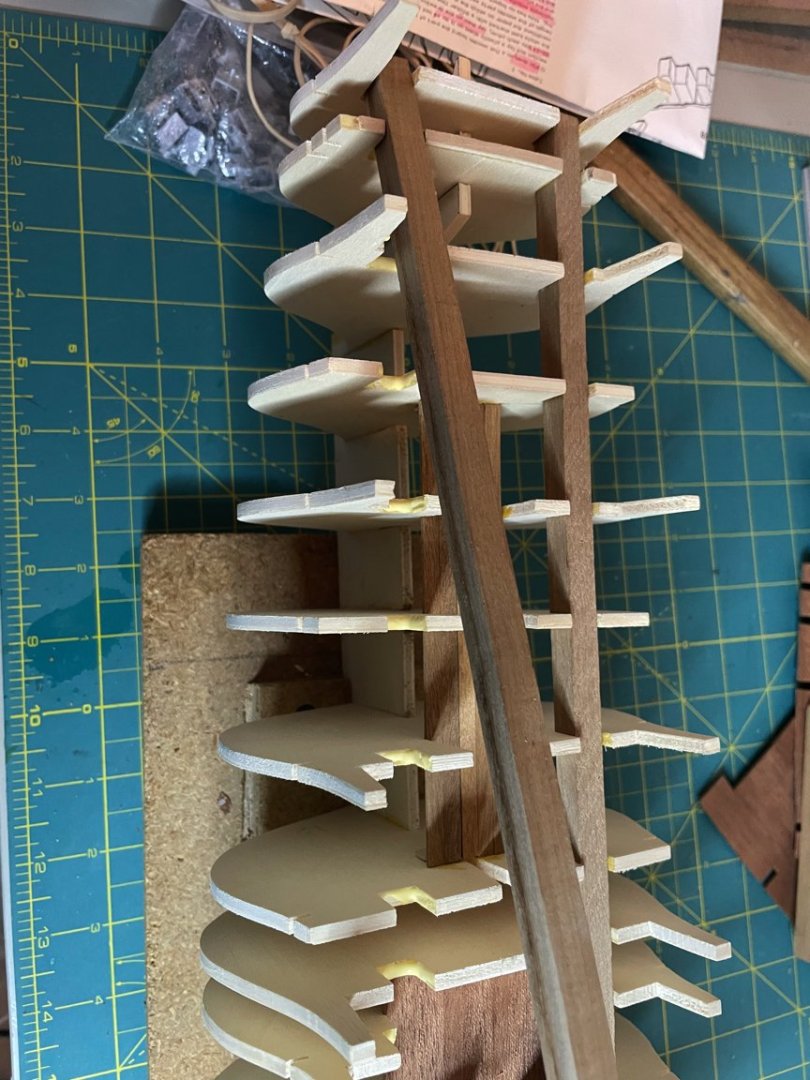
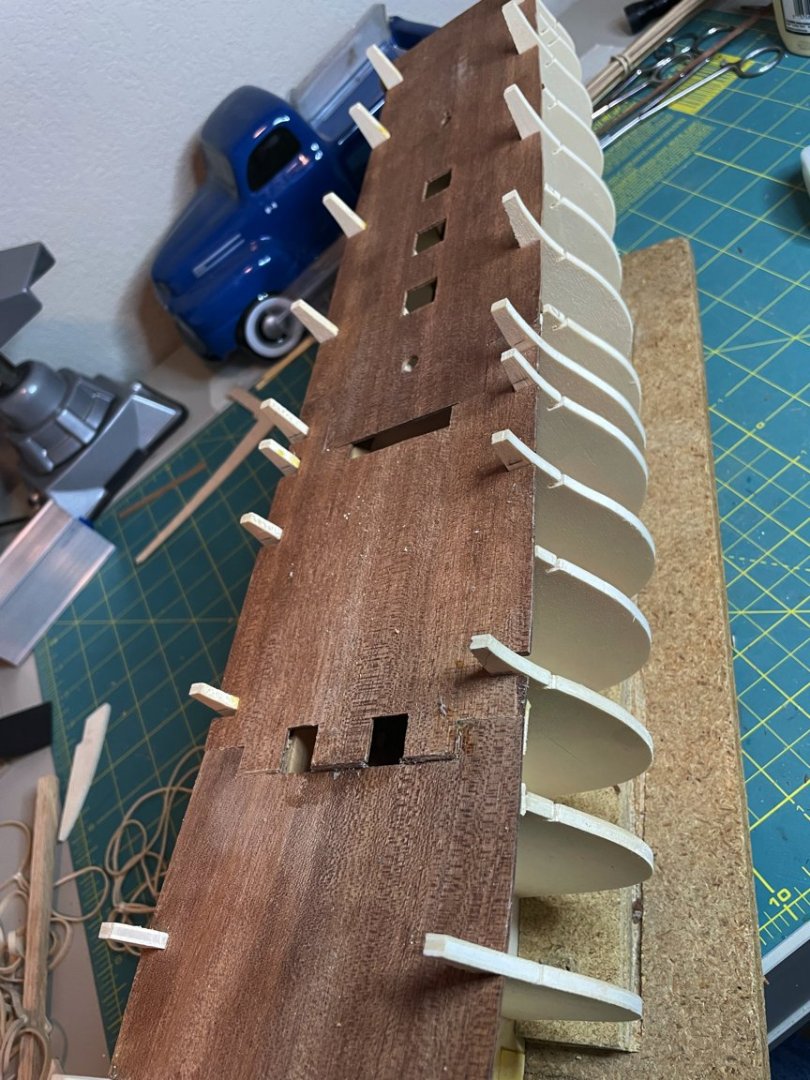
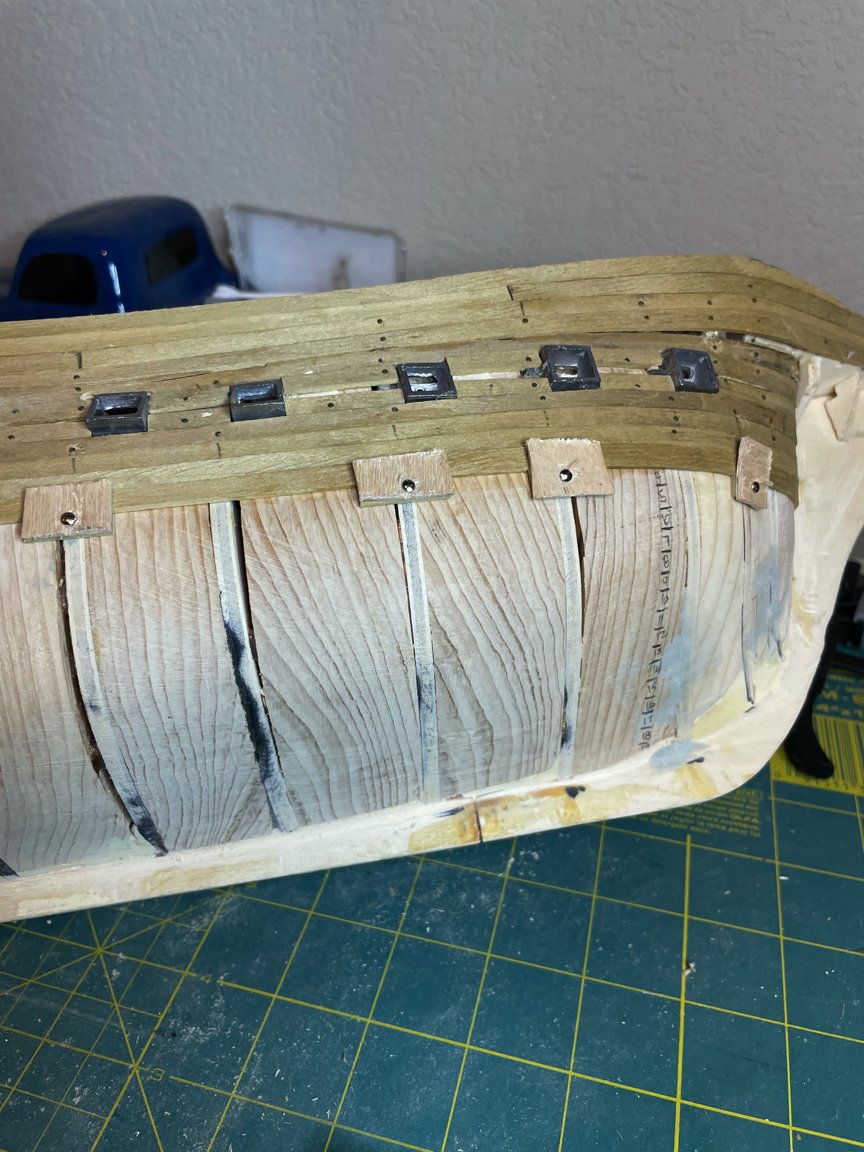
As mentioned earlier, the Mamoli kit does not have a detailed gun deck, just a few openings for some ladders and stairs to the lower level. The gun portals are made out of cast.

There is a tab on each portal that fits into a notch on each frame.

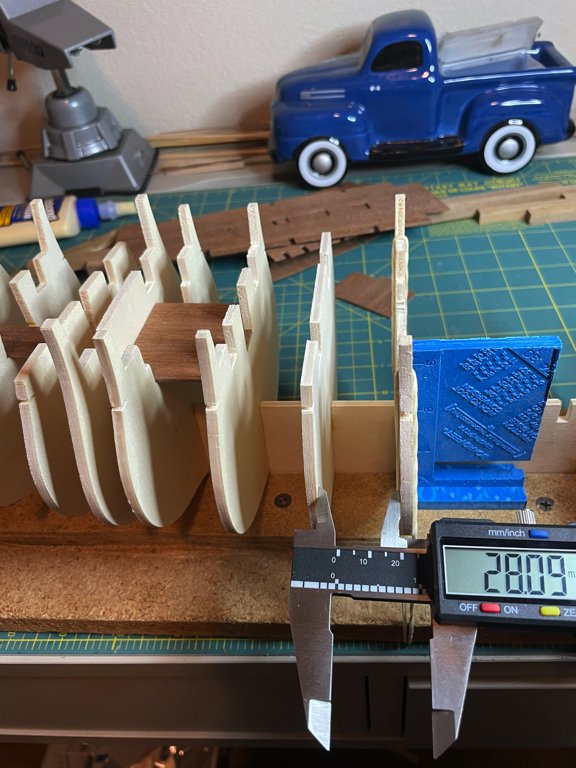
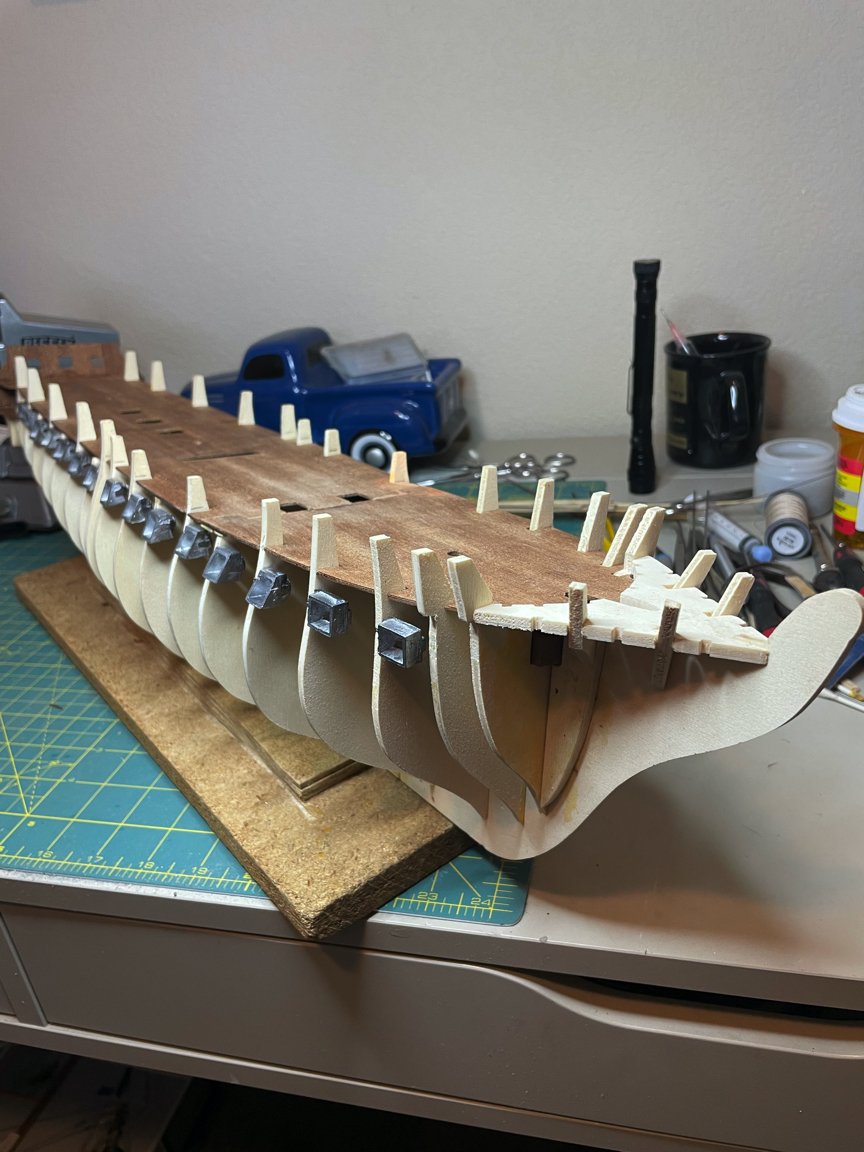
I don't like the plan here as it seems very difficult for the portals to be square and even with only the planking to hold them in place. The size of the tabs varied with slag and all had to be sanded. The Mamoli kit does not suggest filling in any of the spaces between the frames. I have noticed that with the Model shipways build the final bow and stern frame spaces are filled in. After watching several videos of other builds, I have decided to fill in all the frames. I know this will be a lot of work, but I feel it will give me a more solid model, a better base for the planking (even though I know there are two layers of planking) especially in the bow and sterns parts of the ship, and a better support for the gun portals.
I am sure most of you are shaking you head thinking I am nuts, but I am committed to do this.
So I have made my templates and started cutting the pine. I am cutting each a little oversize to leave room for sanding.
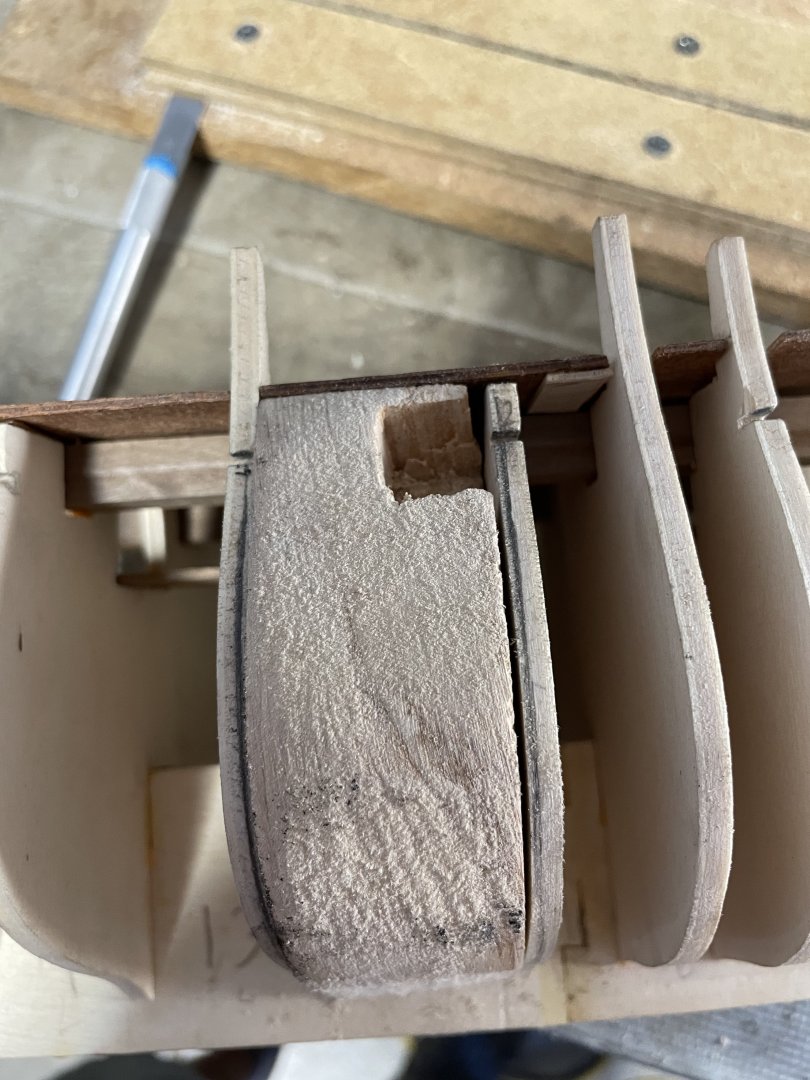

One down and only 37 to go!
-
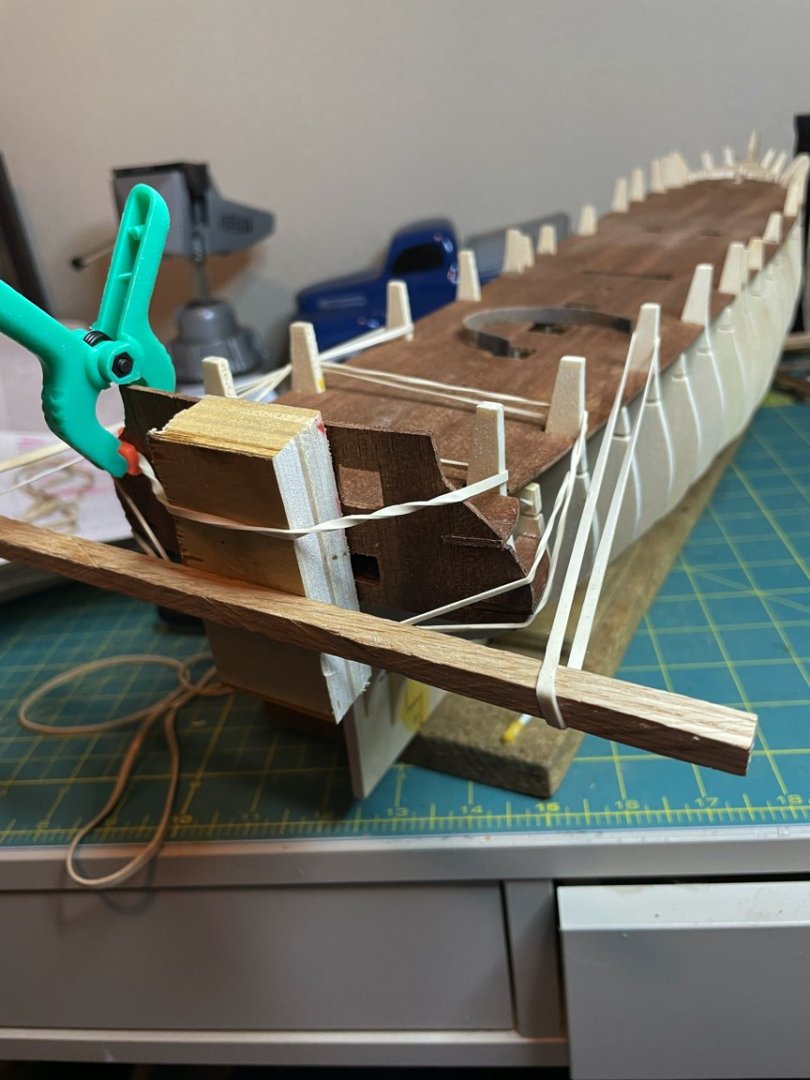
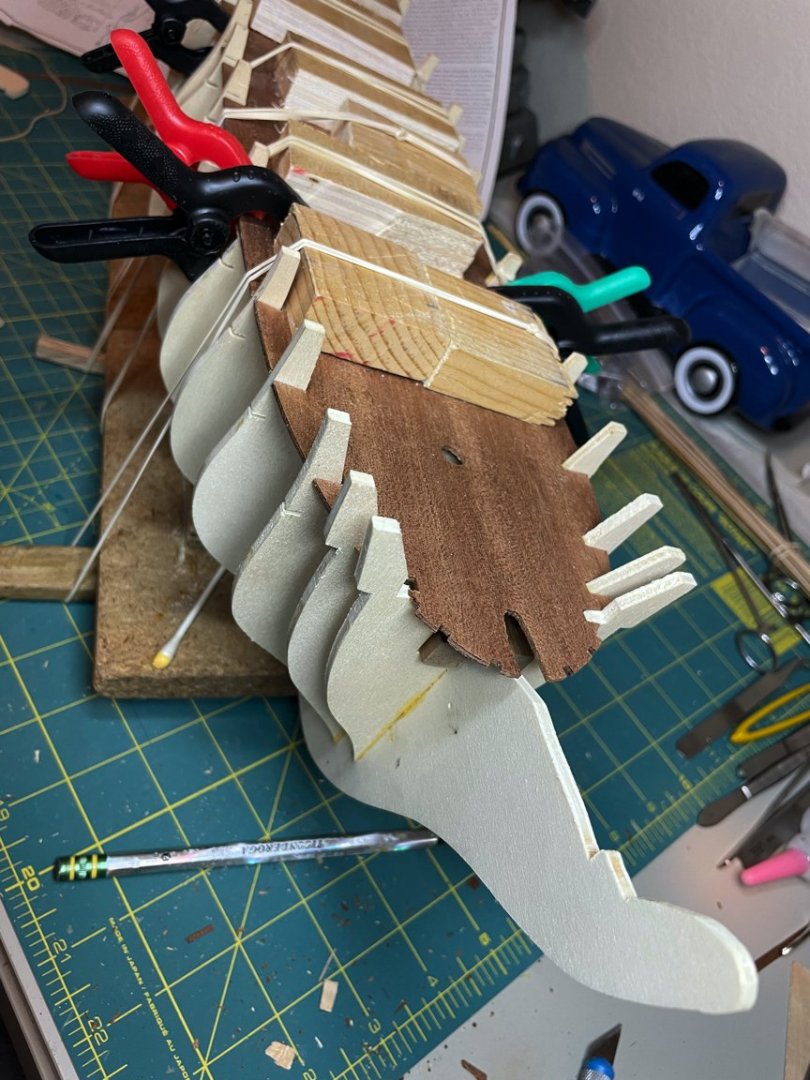
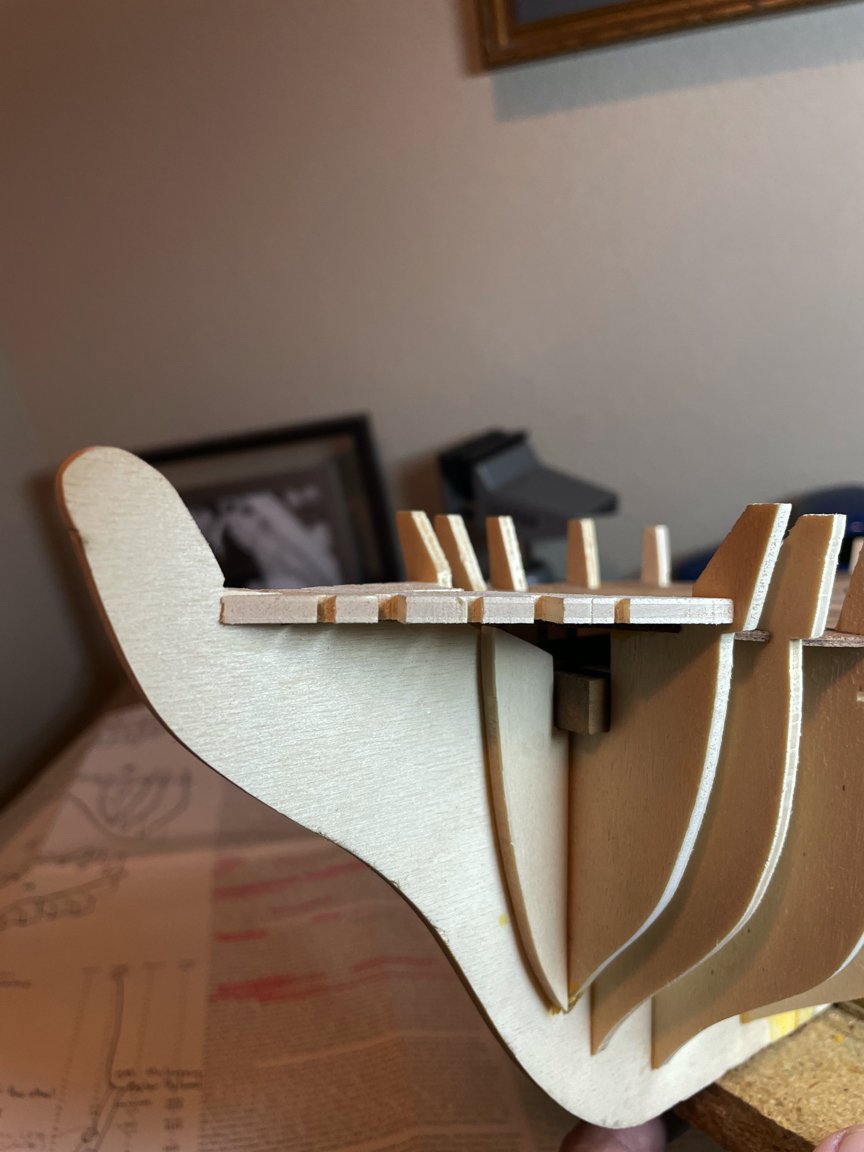
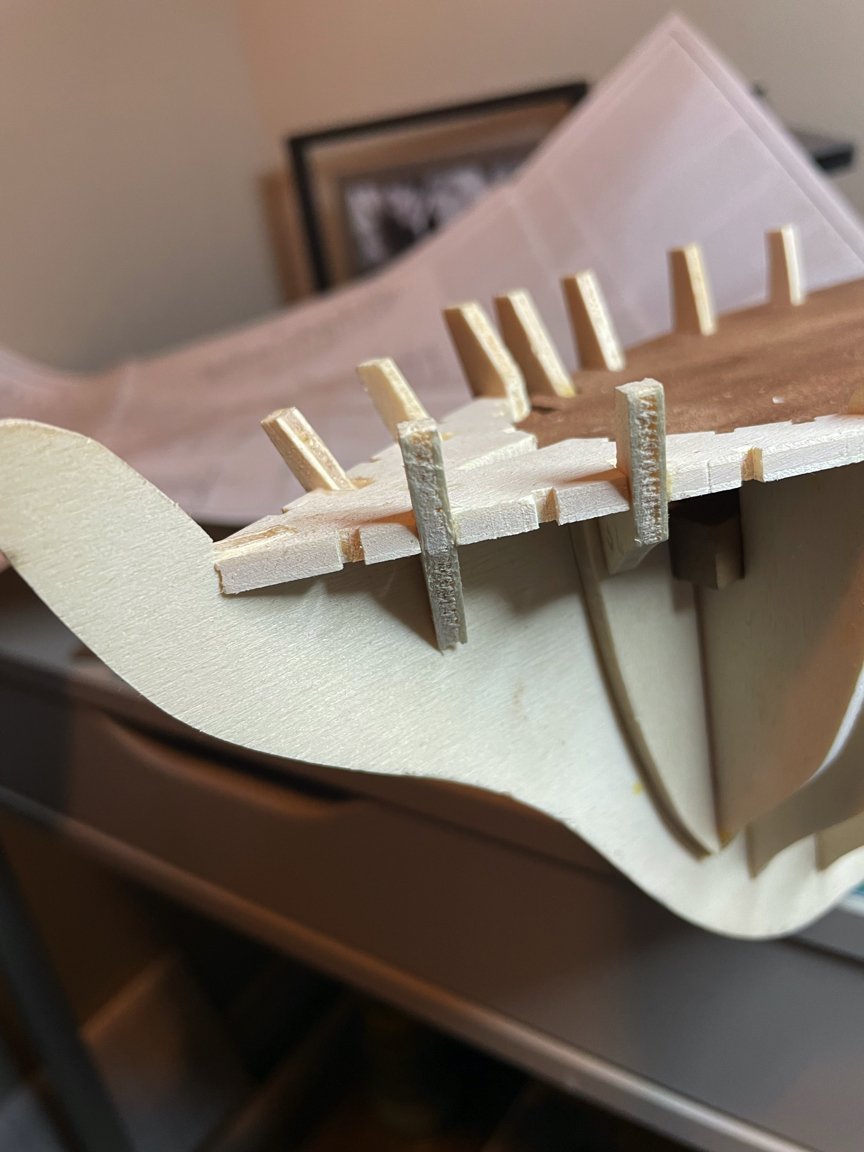
The next step in the Mamoli plans is the construction of the False Fore Deck (their terminology) and the Stern Galley. The fore deck only involved placing a precut piece over the main deck along with four false futtocks, two on each side.


The stern galley pieces were precut, (remember this kit was made before lasers) and needed a little adjustment for fitting.
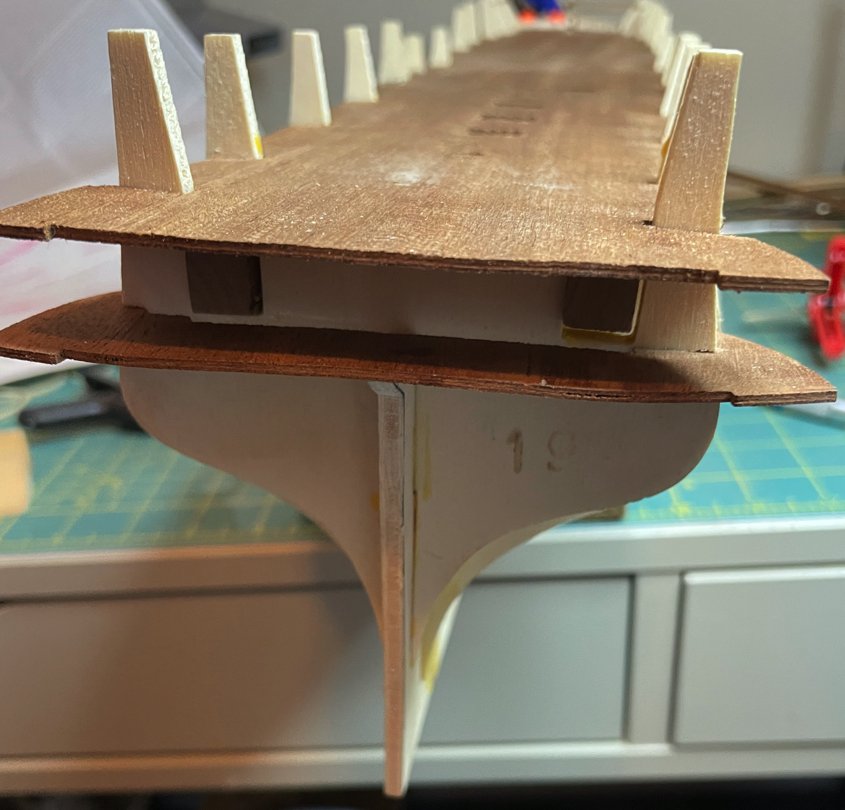


I have studied many builds to determine the shape under the stern galley. This kit supplied a piece of inverted quarter round that was placed below the galley, so that is the route I will go.
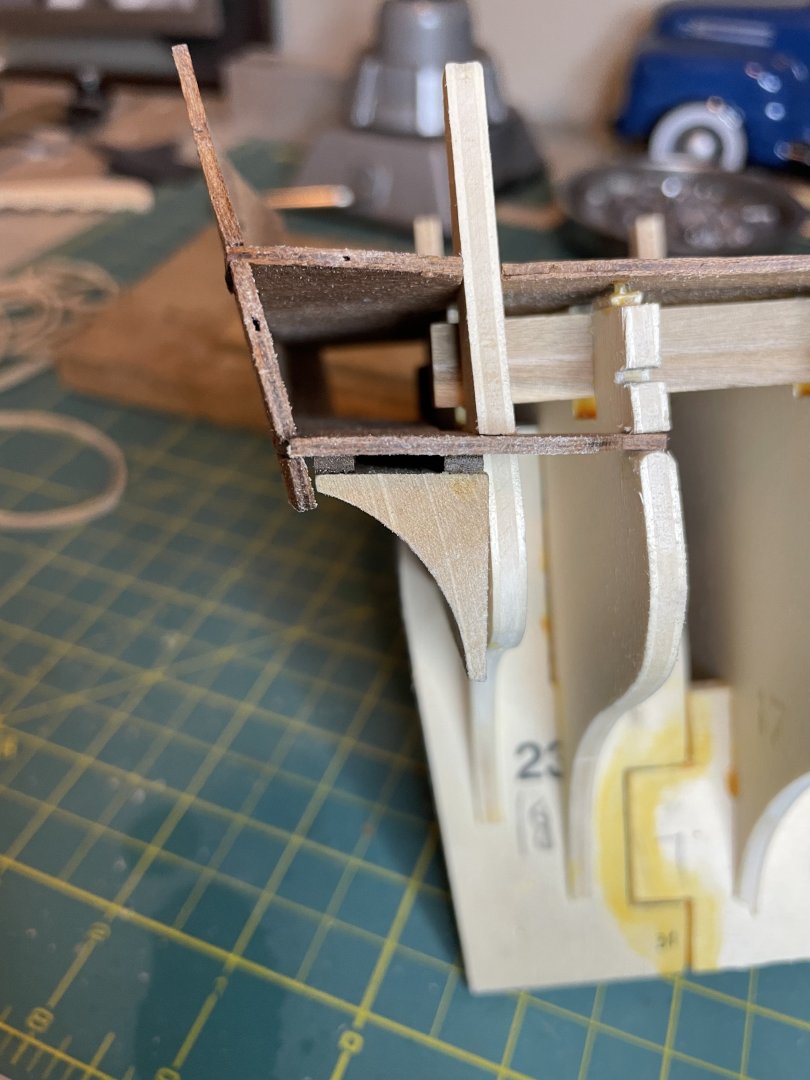
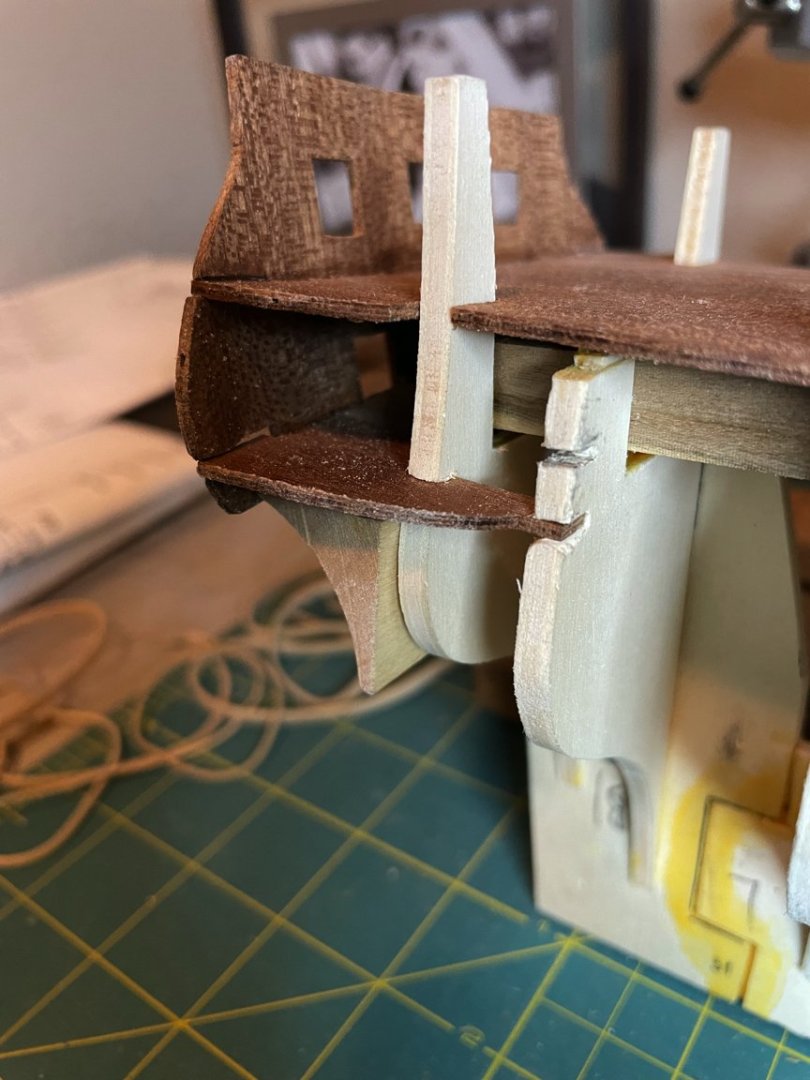
After the glue was set, I shaped to match the last frame.

Next up - working with then ports.
- mtbediz, Bill Morrison and Gregory
-
3
-
Dave:
Thanks for your note. I am sure you have noticed there are no other ongoing Mamoli Constitution builds and only a few in the past. It would be fun and encouraging to have someone more experienced to bounce around kit ideas and questions. I am currently working on some alterations to my work bench so the ship is in dry dock for a few weeks. I will post again when I have made the changes.
Bruce
-
I have enjoyed reading many of the Constitution build logs and studying the pictures. The next few steps for me and my Mamoli kit are quite different than the Model Shipways kits.
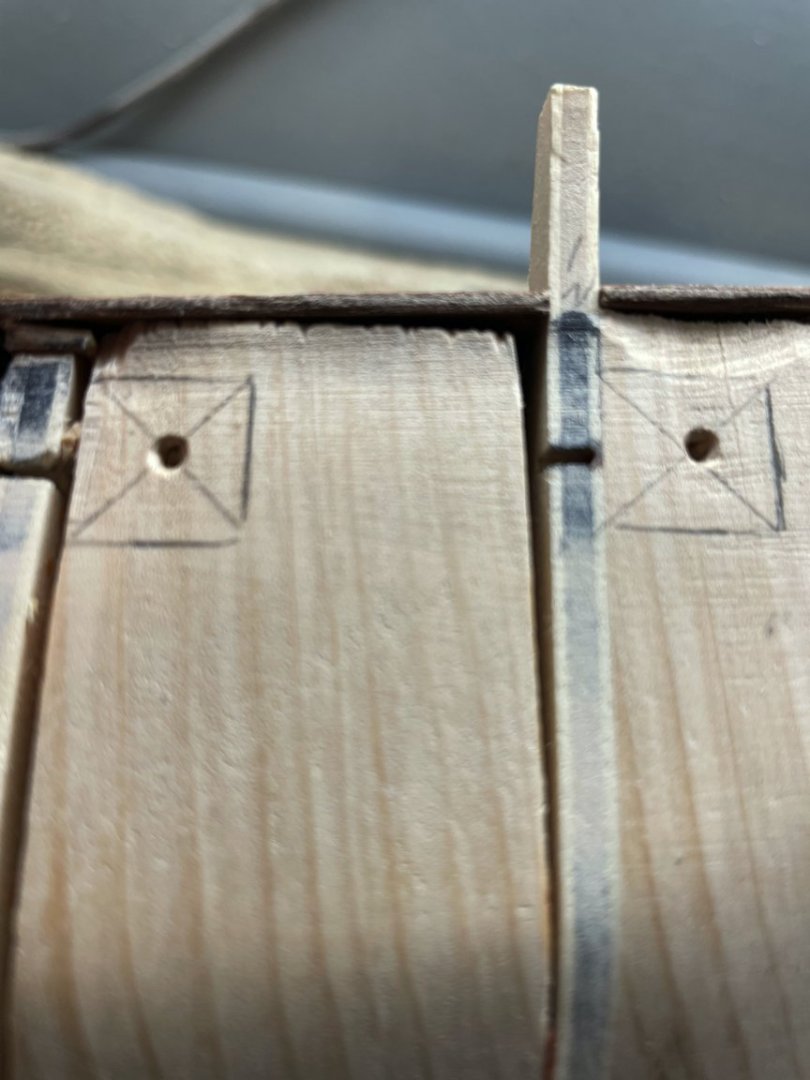
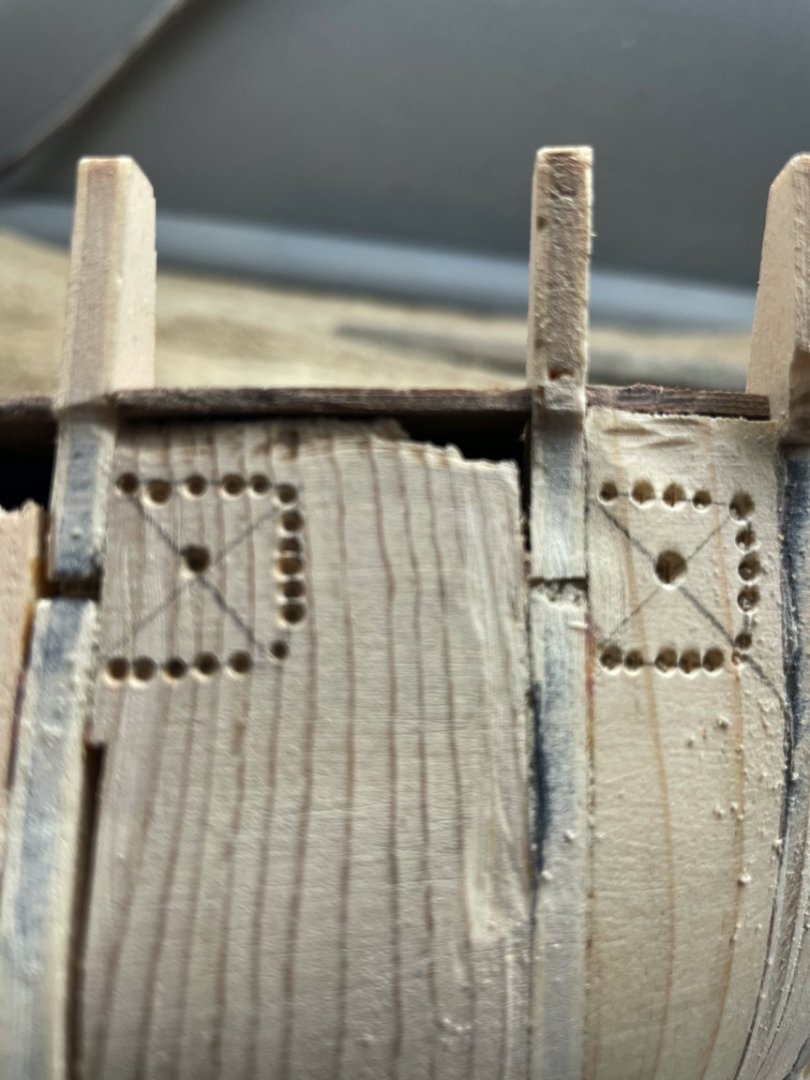
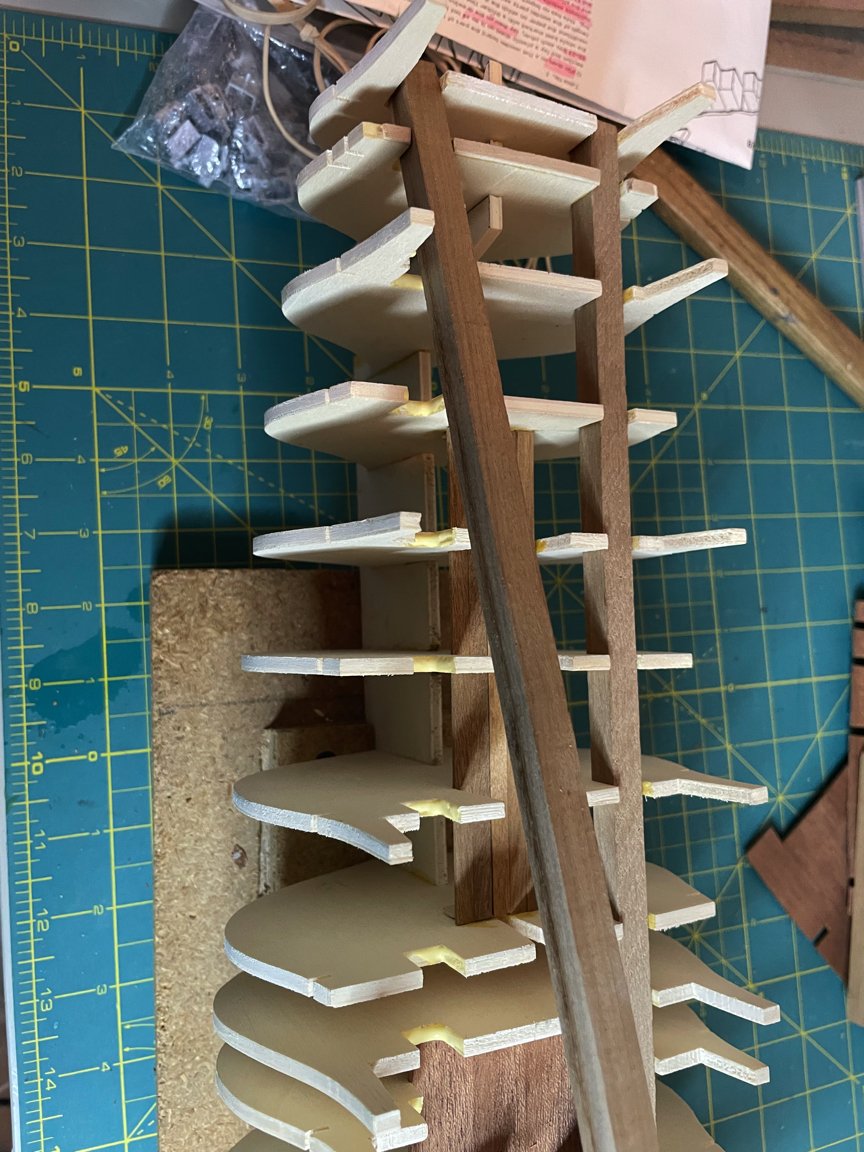
There are two 10mm (1/2" square) walnut beams that run almost the entire length of the ship. The frames are notched for these. At the bow, there are two sets of beams that are placed side by side with the inner set protruding just outside the front frame. My kit does not have complete gun deck detail, but there are three openings down into the gun deck where steps and some minor detail will be visible. This was my only issue with the kit so far, There were precut pieces for the two forward gun deck hollows (as the instructions called them), but none for the poop deck. I finally decided to use some planking from my other build to create this deck. The gun deck is visible in the second picture.
After the beams set and dried, the next step is to dry fit the precut pieces for the deck. The deck was in three pieces. As you can see, some adjustment to the pieces was required to get them to fit. A ways down the road, the deck will get another layer of planking.
There were a few places where I needed to add a few shims to the point where the deck met the frames in order to keep the deck even. After I was ok with the fit, everything was glued into place.


I am not convinced that the points where the masts will be placed into the frames is all that great. It seems there should be more of a receiver socket (for lack of a better term) for each. I am going to study the other builds to see how that issue was addressed.
Thanks for all the comments and encouragement.
- Bill Morrison, JohnOz, mtbediz and 1 other
-
4
-
Mufasa:
I read the section of your build when you were working with the copper foil tape with great interest. The Mamoli solution of wood chips that are stained a greenish copper color just doesn't look right to me. That part of my build is a ways down the road so I have time to think about the options.
Thanks for your response. I am really enjoying your craftsmanship.
Bruce
-
Jon:
Thanks for the welcome. It is much appreciated. I have been reading through all the Constitution logs. Even though they are different kits than what I have, I still glean a lot from their pictures. Even their comments about frustrations and mistakes are encouragement to me. I am still studying Bill Edgin's log since it is a Mamoli kit. He did several modifications. His experience and skill really comes through in his builds.
I am not far enough along in ship building to undertake changes, I am working hard at just making out what the plans are trying to get me to accomplish.
Thanks again for your welcome. It means a lot to a newbie like me.
-
Andre:
I am new to this site and fairly new to the hobby. Like you, I completed one build (an AL Victory) before starting on the Constitution. Both ships were gifts from a friend. I am working on the Mamoli Constitution kit from 1980's and have recently started a build log. I have read your log (and others) with great interest. I am particularly interested in the differences in kits. I am not as far along as you are, but have already noticed differences parts and build sequence. As I understand from what others have told me, the Mamoli kit was an early Constellation Kit and created before laser cutting. Anyway, I am learning from you and others who are commenting on your progress. Thanks for sharing
-
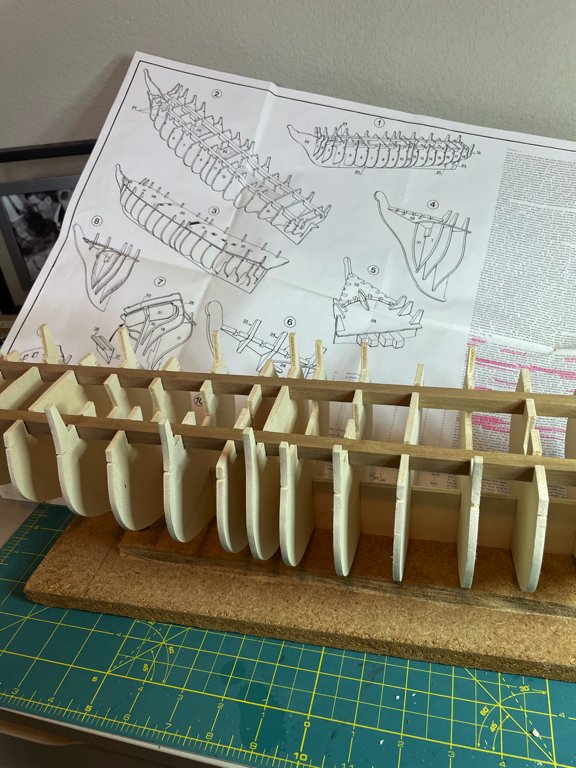
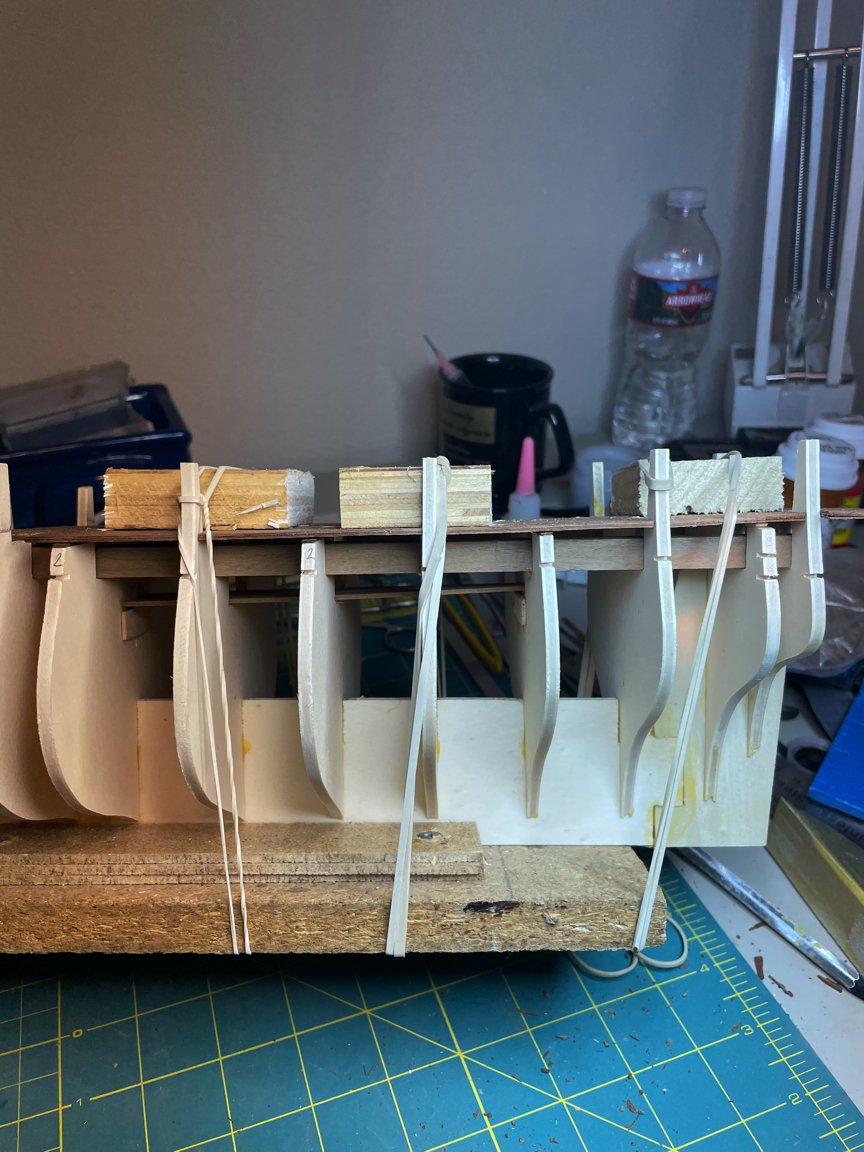
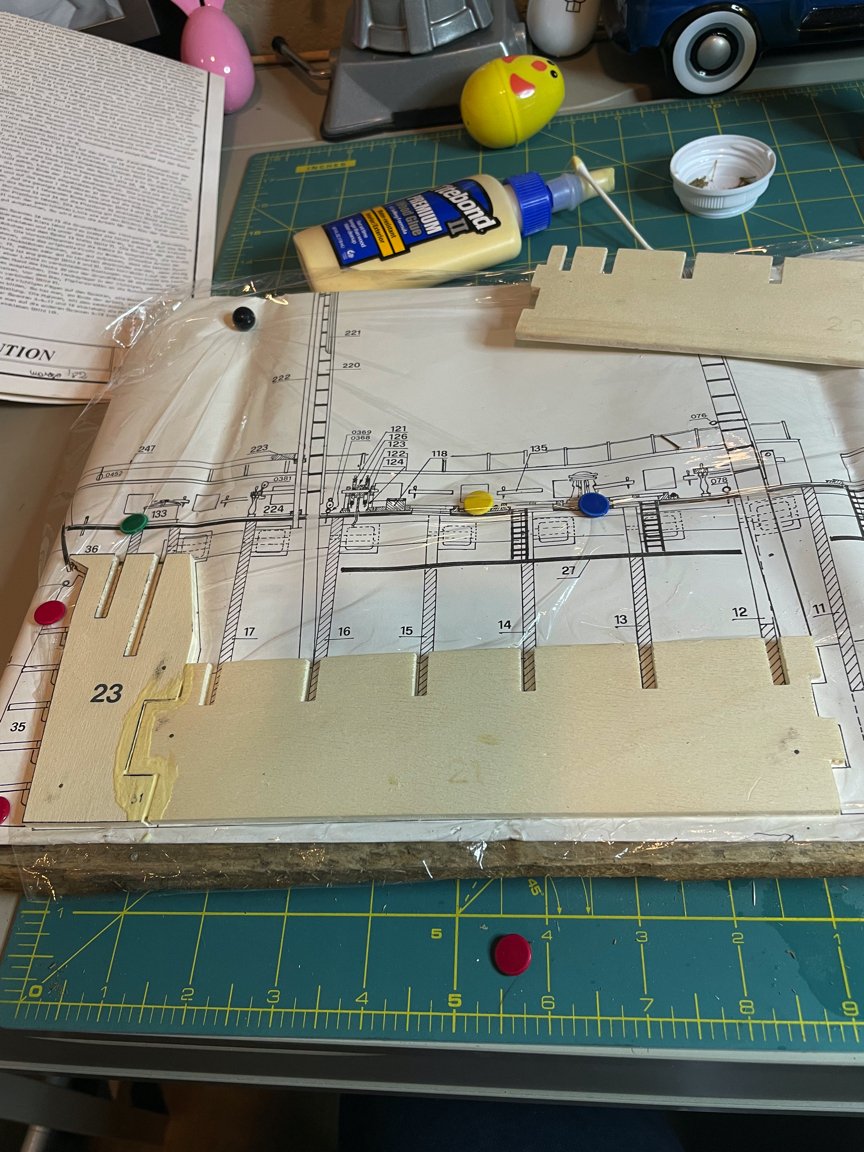
Next step is attaching the frames, or as my wife calls them, the "ribs". Since I do not have a small hobby square, I purchased a plastic miter square at the local HD and cut it down to 2" wide by 3" tall. I used this to square the frames to the keel, both vertically and horizontally. Since this kit was produced prior to laser cutting, all the frames came in a single package and did not need to be cut from a larger piece of stock. The fit to the keel was good and snug. I also measured the distance between each frame on both port and starboard sides to make sure it was the same. I installed three or four frames per day and let them set up and dry before going on. In the background, you can see the plans, which at this point have been pretty good, but then this part of the build is pretty simple and straight forward.

- SUBaron, Bill Morrison, mtbediz and 1 other
-
4
-
I am new to this forum. I am currently building a Mamoli Constitution kit and have recently started a build log. I am enjoying your excellent construction and photography work immensely. As I progress, I will have questions to ask, but for now, I just want you to know you have an admirer in Colorado, USA.
-
-
Andre: I have been watching several Constitution builds and enjoy seeing the differences in kit composition and parts offered. As near as I can tell, the kit I have was copyrighted in 1982, anyway that is the date on the printing which may or may not have anything to do with the actual production. The price tag on the box was $129.95 which is a little clue as to how old the kit is. Thanks for your reply.
-
Greg: Replacing the 1700 (the number given in the instructions) little green chips is one of the things I will change. I have been following mufasa's build. Wow! What a craftsman. When I get to that stage, I plan on asking him about the source for his copper strips. I really like how they look.
-
If you read the new members section, you will read a little about how I came about this kit and into ship building. This will be my second ship, the first being an A-L Victory. I was given both kits by a neighbor who found them among the belongings of his sister's home after she was admitted to a memory care facility. Neither kit had been opened.
I have been reading posts on this site and learned a little about Mamoli kits. I recall one post saying Mamoli kits were no longer produced because of a factory fire. I know nothing about this brand, but it is what I have been given, so that is what I will work with. I have noticed there are very few full Mamoli Constitution builds on the site, mostly were cross-section builds, so that must have been a more popular kit. I only found one Mamoli Constitution full build that was completed and have studied it thoroughly. I have also viewed many other Constellation builds for tips and ideas have have started following some builds.
I am hoping to show what the Mamoli kit has it in and how the ship goes together. The kit contains one 4' X 4' sheet with full size drawings on both sides. There are eighteen 2' X 2' panels (9 sheets, printed on both sides) of instructions in four languages. I am hoping this build will be of interest to those who are building the Constitution from another maker, if nothing else but to show the difference in kits. I am new enough to the hobby that I probably will not be going off-course too much, rather focusing my efforts on understanding the enclosed plans and following the assembly instructions. I will seek advise where plans are lacking and will always appreciate comments.
Today's photos are assembling the keel. The keel came in four sections. It was suggested to lay out a board and tack the full-size instructions to the board, which I did. I then laid down some clear wrap over the instructions so I could not get glue on the paper. The board was to nail the keel to while the glue dried so it would dry perfectly flat. I used yellow glue at this point because I knew it would not show after other parts were added.
- Gregory, Dave B, Bill Morrison and 2 others
-
5
-
I am in my first year of ship building. I came about it as a challenge from my 85 year-old neighbor, Tom. His sister is unmarried and a hoarder. A few years ago she was diagnosed with Alzheimer's and had to be placed in a memory care facility. While cleaning out her five storage units of stuff, Tom came across two ship kits. Knowing I always had a jigsaw puzzle on the table, he thought I might like to try a different sort of "puzzle". I have always been a modeler of sorts. In the sixties, I was into plastic car kits. After college, I started a model railroad that I worked on 30+ years in various locations and sizes. I also have a 1949 Willys Jeep that I have owned for almost 35 years and did a frame-off restoration that took two and a half years. After retiring to Colorado seven years ago, we downsized house-wise so there was no room for trains. I still have my Jeep but was looking for something I could do in the winter months. The gift of the ship kits was perfect.
I have always enjoyed working under the big magnifying glass while assembling and painting model scenes. I had no clue about ship building so started watching a ton of YouTube videos before I started. Tom gave me two unopened kits, Artesania Latina's Victory and Mamoli's Constitution. I have no way of knowing how old the kits are. The Victory had a. price of $89.95 and the Constitution was $129.95. There are copyright dates in the instructions from the 1980's.
Judging by the photo's on the boxes, it was evident which was the easier of the two. I set out to build the Victory. Compared to the Constitution, it had a solid hull and a fraction of the rigging. The AL instructions were not as complete as I expected and took awhile to get used to their translations (practice a 1 mm hole = drill a 1 mm hole), but I figured it all out and completed the kit in about six months. Like everyone, I made errors and it did not turn out as good as I would have liked, but when I presented it to Tom, he was so excited to have it.
Before I started on the Constellation, I again watched dozens of videos to see if I could do better with some of the things I felt I didn't do as well on with the Victory. After watching. videos, I always read the comments and that is how I wound up on this site. I have read through and studied all the photos from other's Constitution builds on this site am going to start a build log soon. To keep me motivated, I started an Instagram thread on this build for my family to view my progress. Posting here is a little different as the viewers here are different than family and friends (who are easily wowed). But I know I will need help. Where better to come for advice and encouragement than a site like this? Thanks in advance to all who will assist.
- Scottish Guy, GrandpaPhil, mtaylor and 1 other
-
4


USS Constitution by BruceWayne426 - Mamoli - 1/93
in - Kit build logs for subjects built from 1751 - 1800
Posted
The deck pieces are finished and in place. I enjoy this type of "close" work.
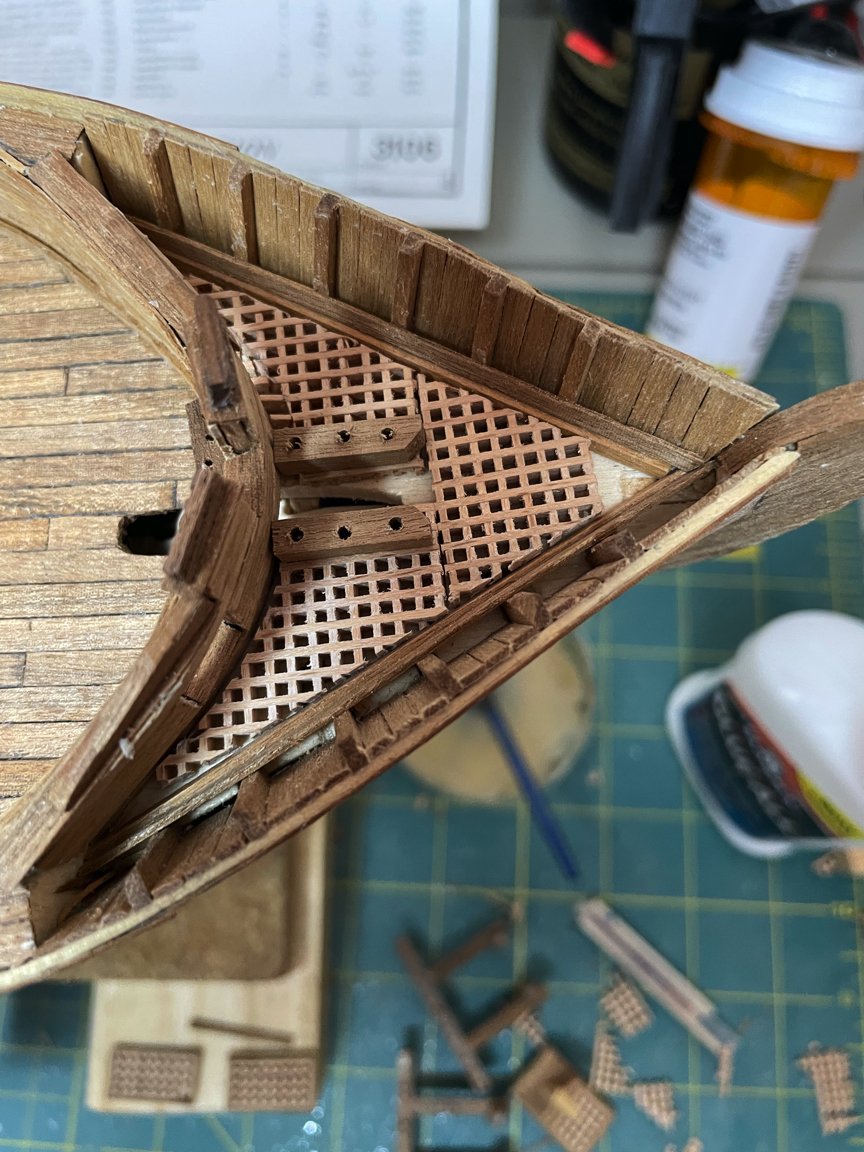
The kit instructions make attempts at noting the sections that are painted white and painted black. There is only one color picture in the kit and that is on the box lid (see the first post) and I refer to that often. As a side note, like any build, mistakes are made. Either there were too few pieces in the kit or I made too many cutting mistakes, but I am short of grate pieces as you can see by the missing grates below the life boat area. I have four sections that need grating. I have not yet starting searching for additional grating, but I am sure I will find pieces when I go looking.
The initial wood build is almost completed. The deck has been sanded and sealed.
Next up is work on the rudder and then onto painting.