
UrkVisser
-
Posts
43 -
Joined
-
Last visited
Recent Profile Visitors
487 profile views


-
 etubino reacted to a post in a topic:
Bluenose 1921 by UrkVisser - Scientific Kit No. 164
etubino reacted to a post in a topic:
Bluenose 1921 by UrkVisser - Scientific Kit No. 164
-
etubino reacted to a post in a topic:
Bluenose 1921 by UrkVisser - Scientific Kit No. 164
-
Scott Crouse reacted to a post in a topic:
Bluenose 1921 by UrkVisser - Scientific Kit No. 164
-
Knocklouder reacted to a post in a topic:
Bluenose 1921 by UrkVisser - Scientific Kit No. 164
-
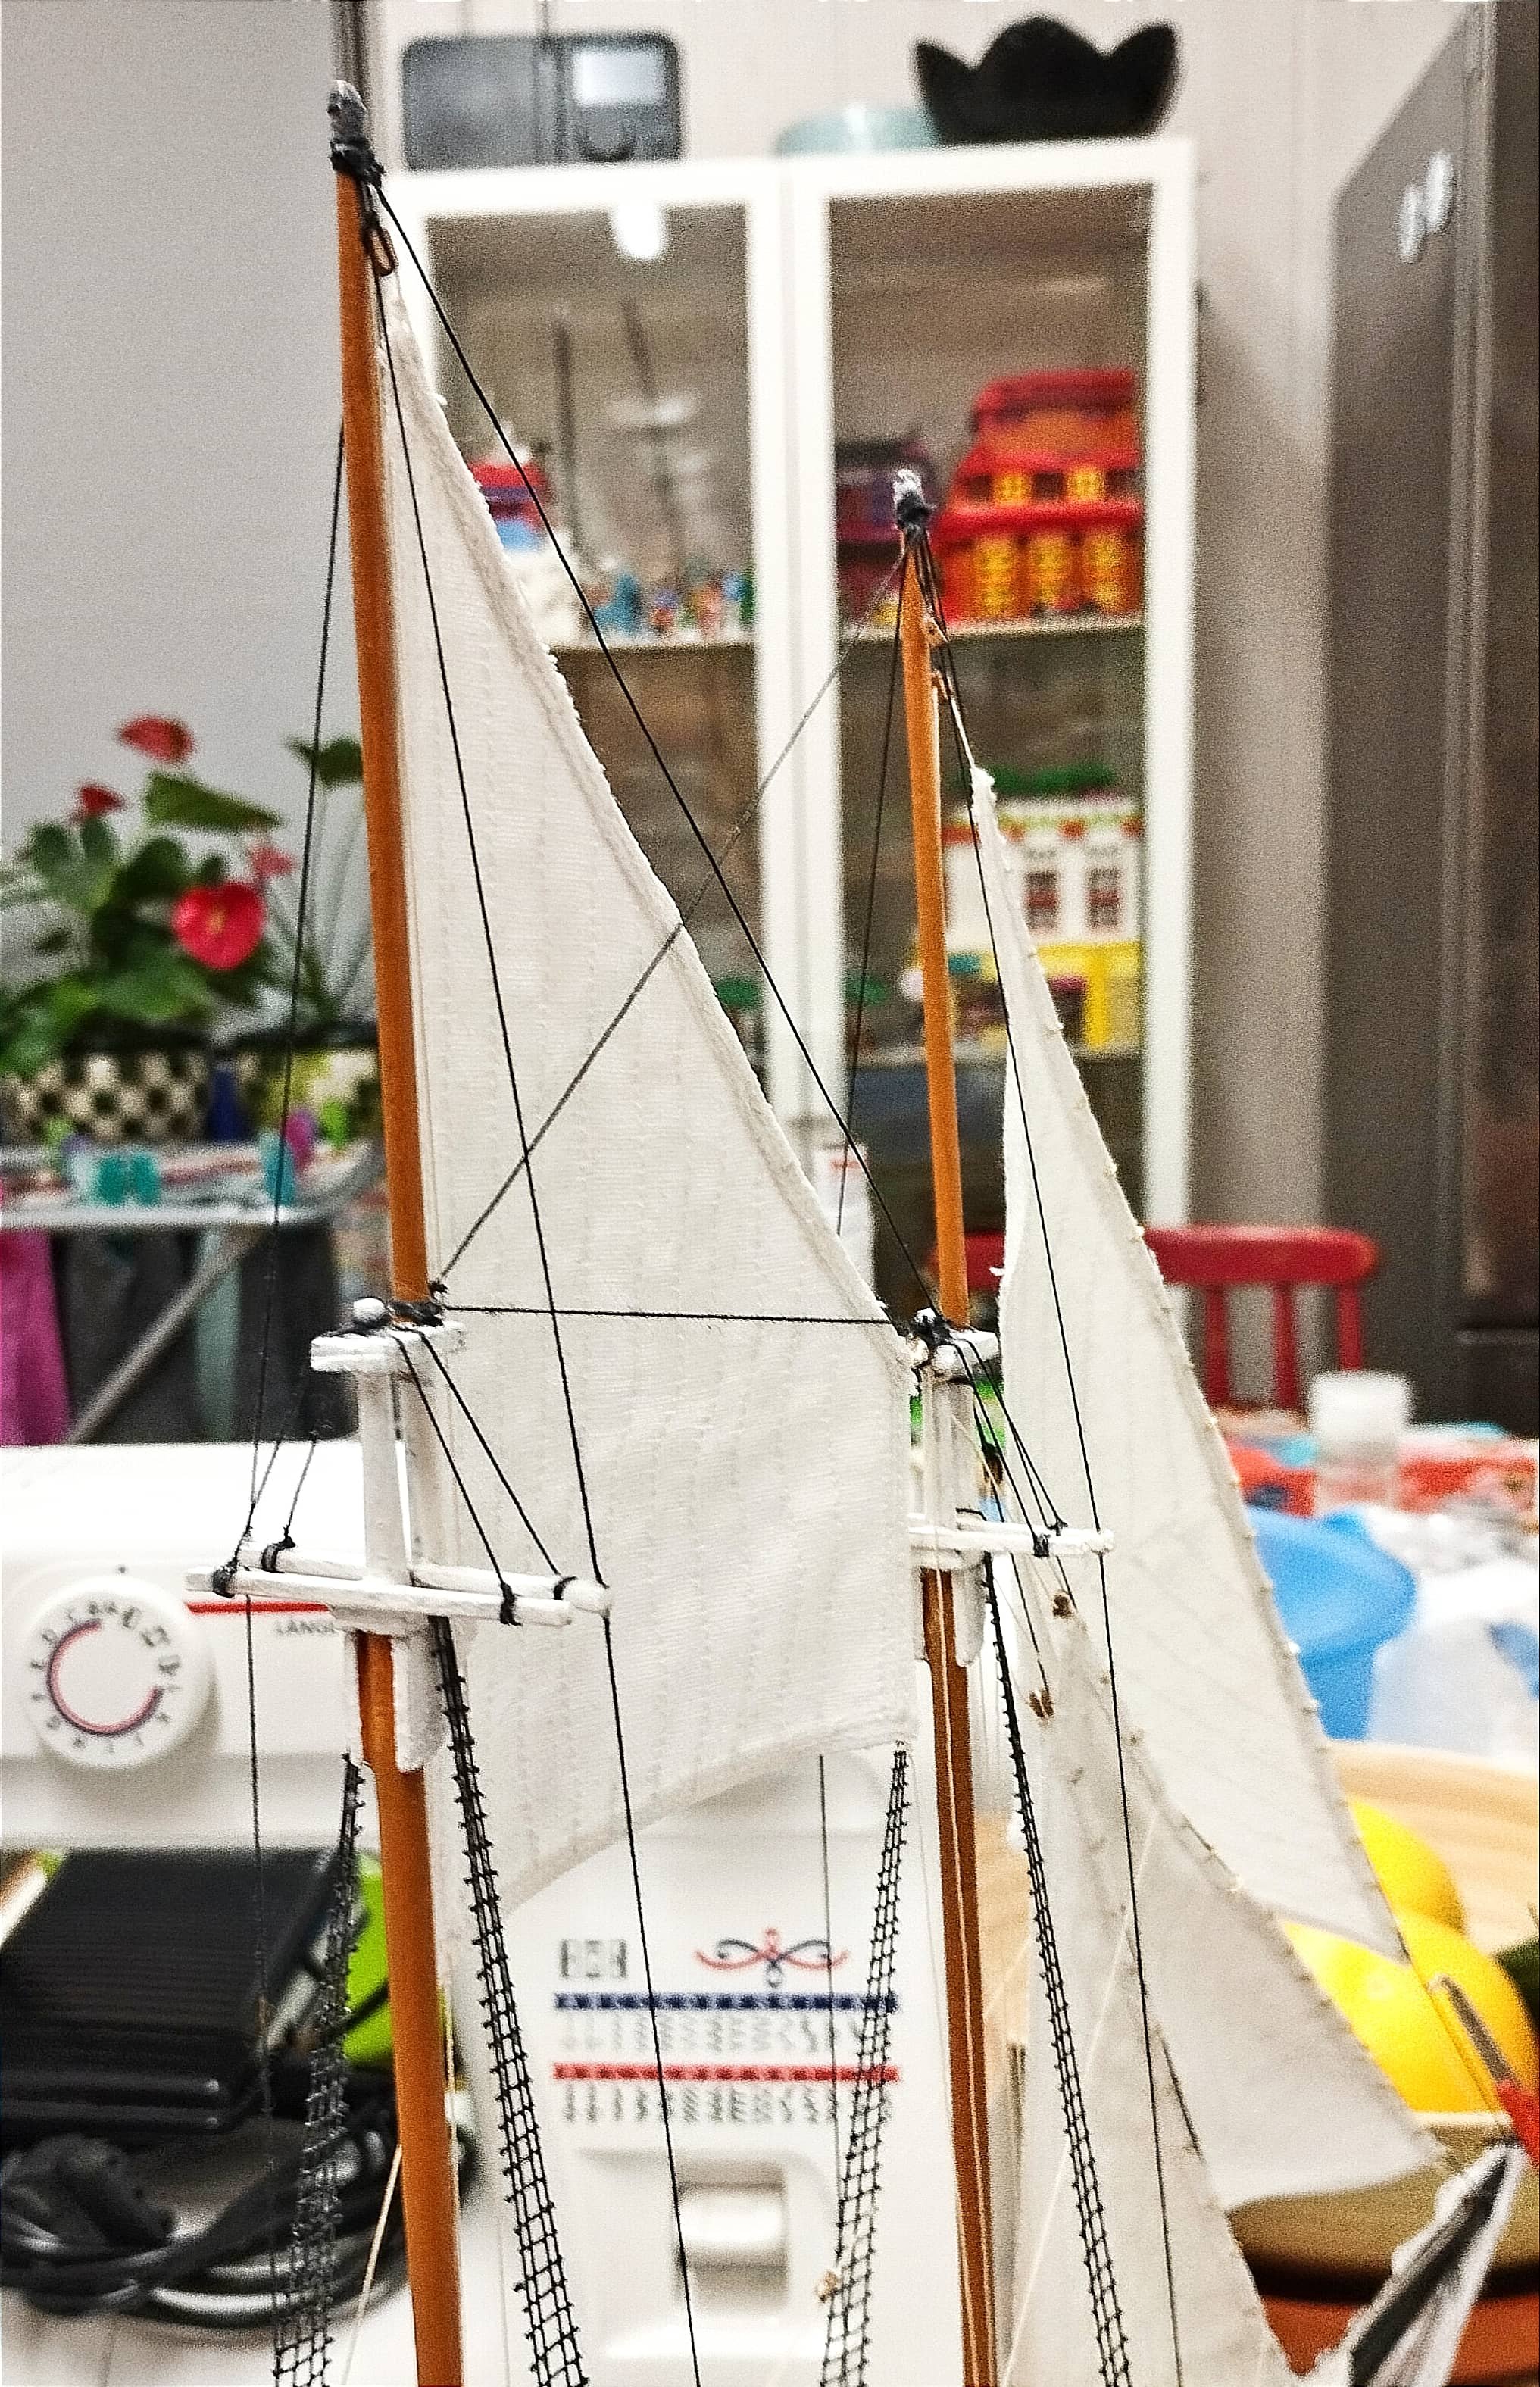
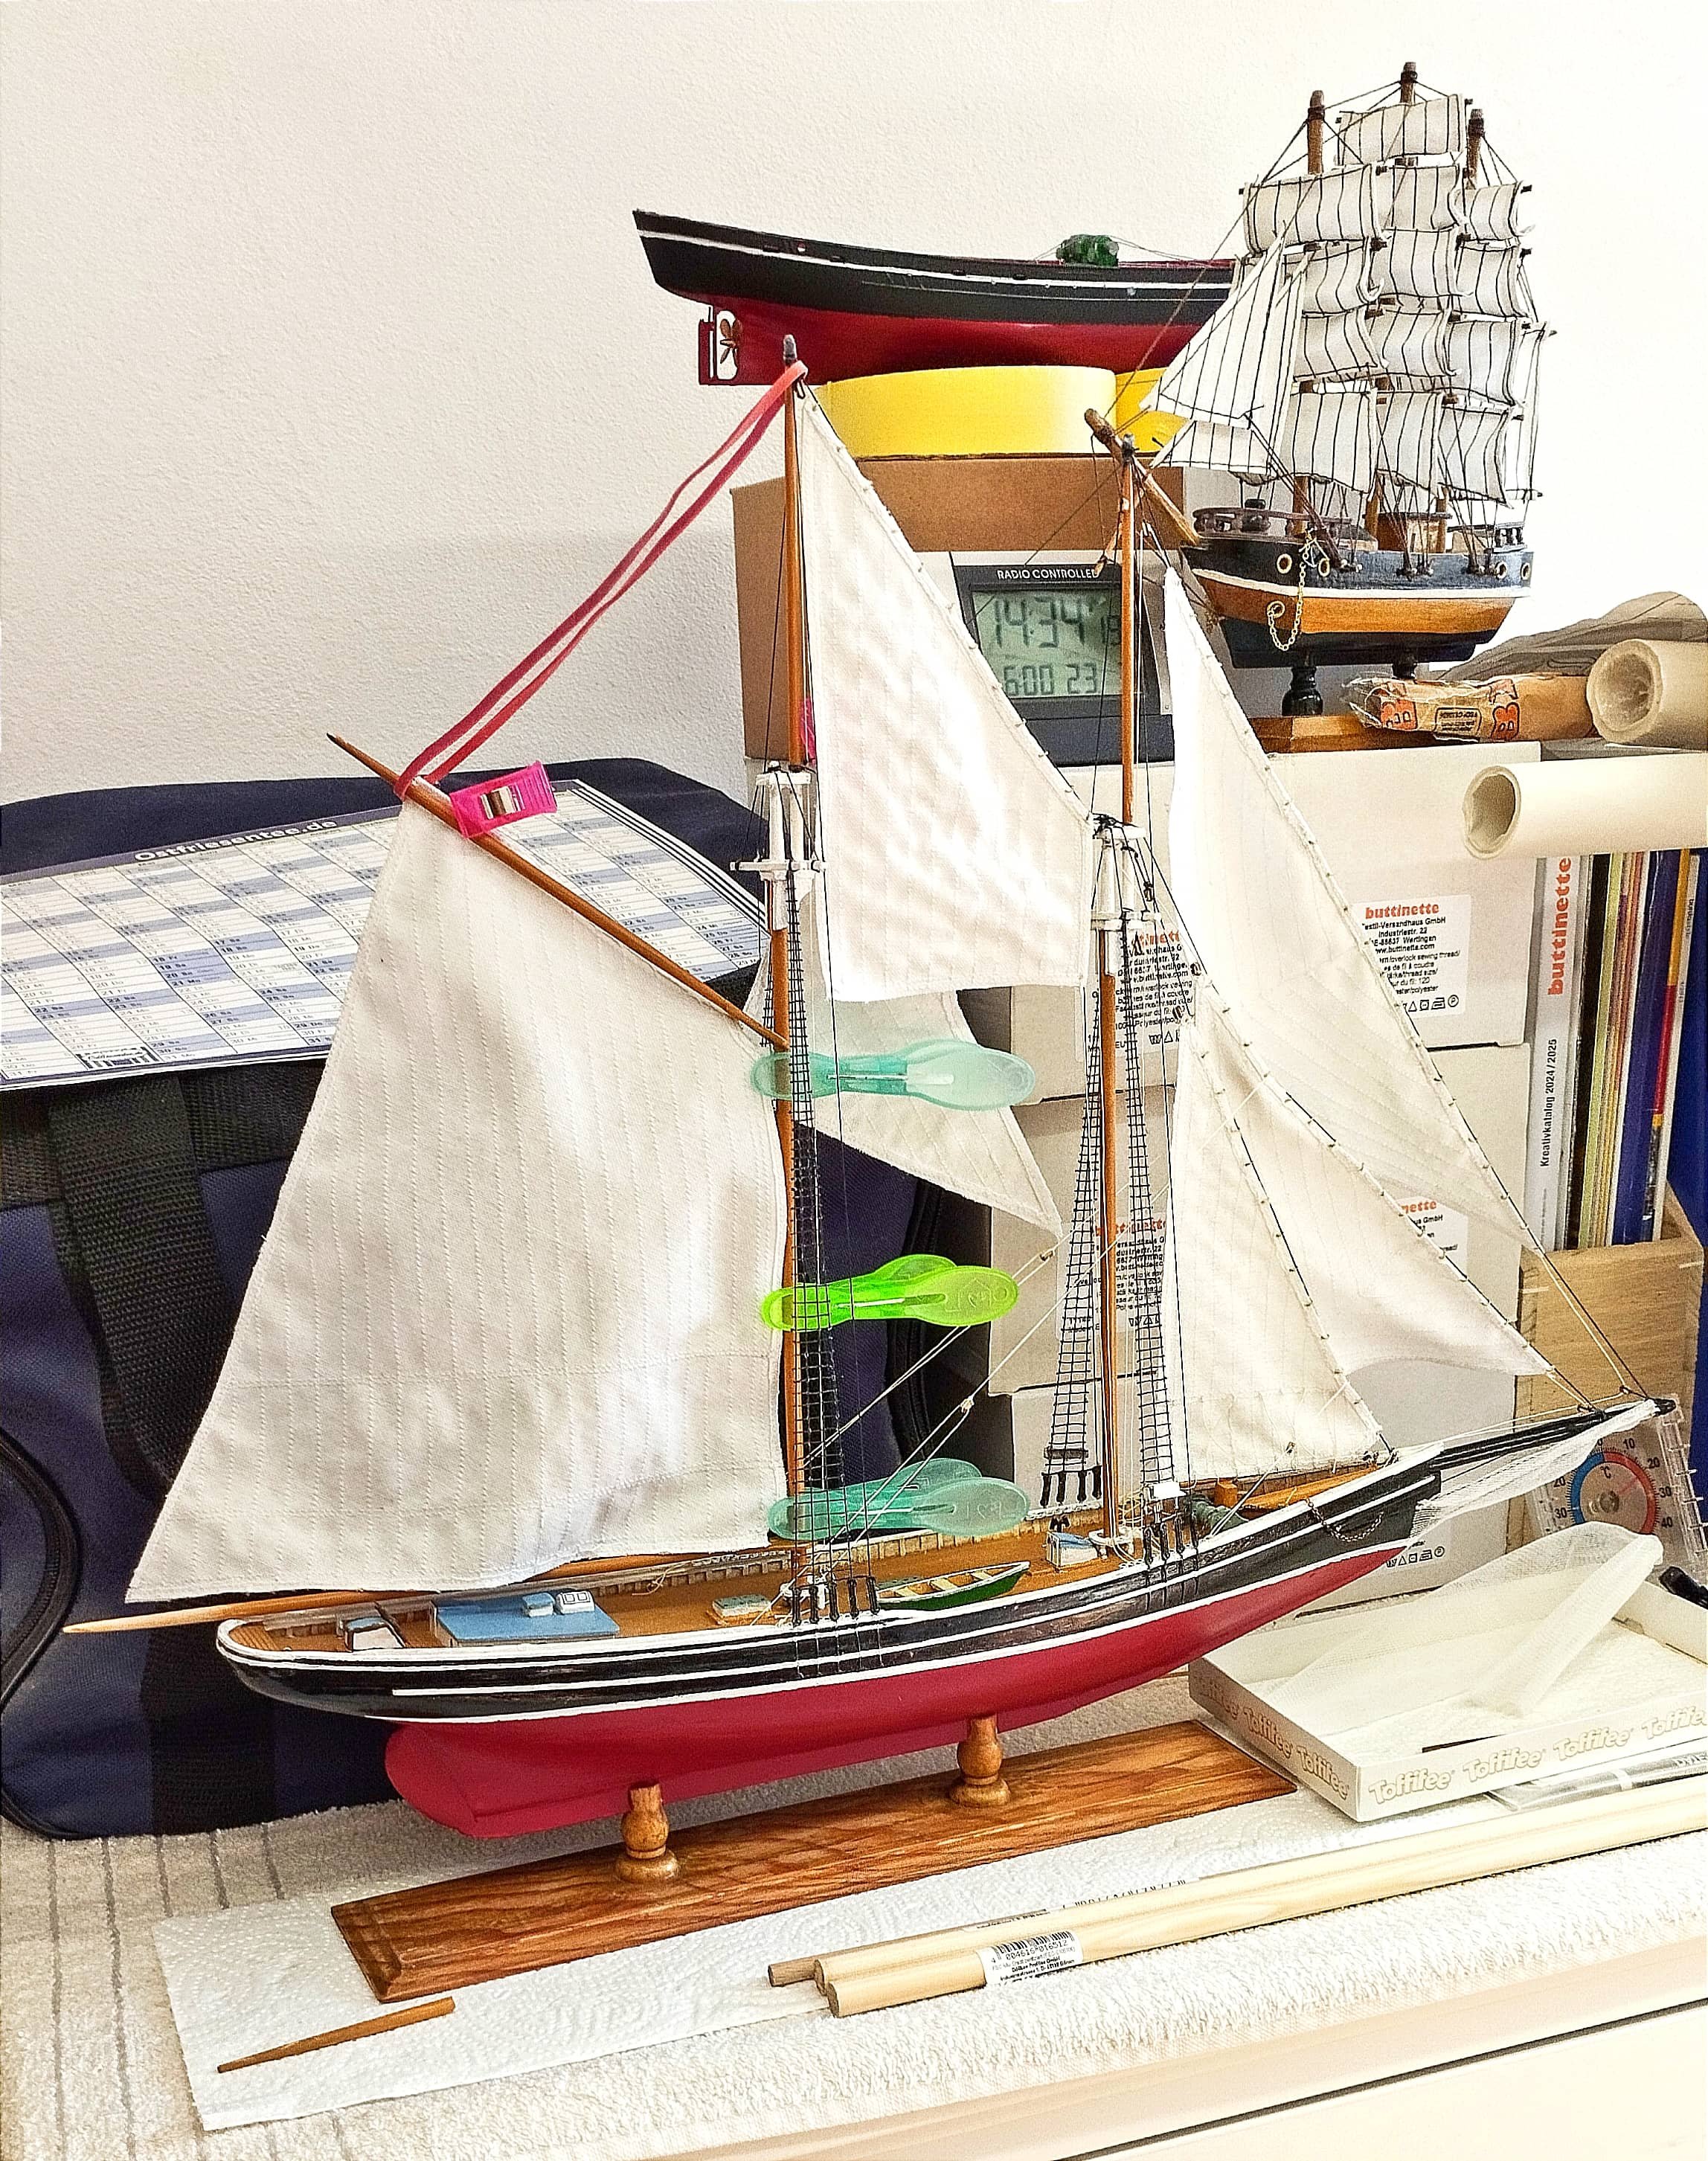
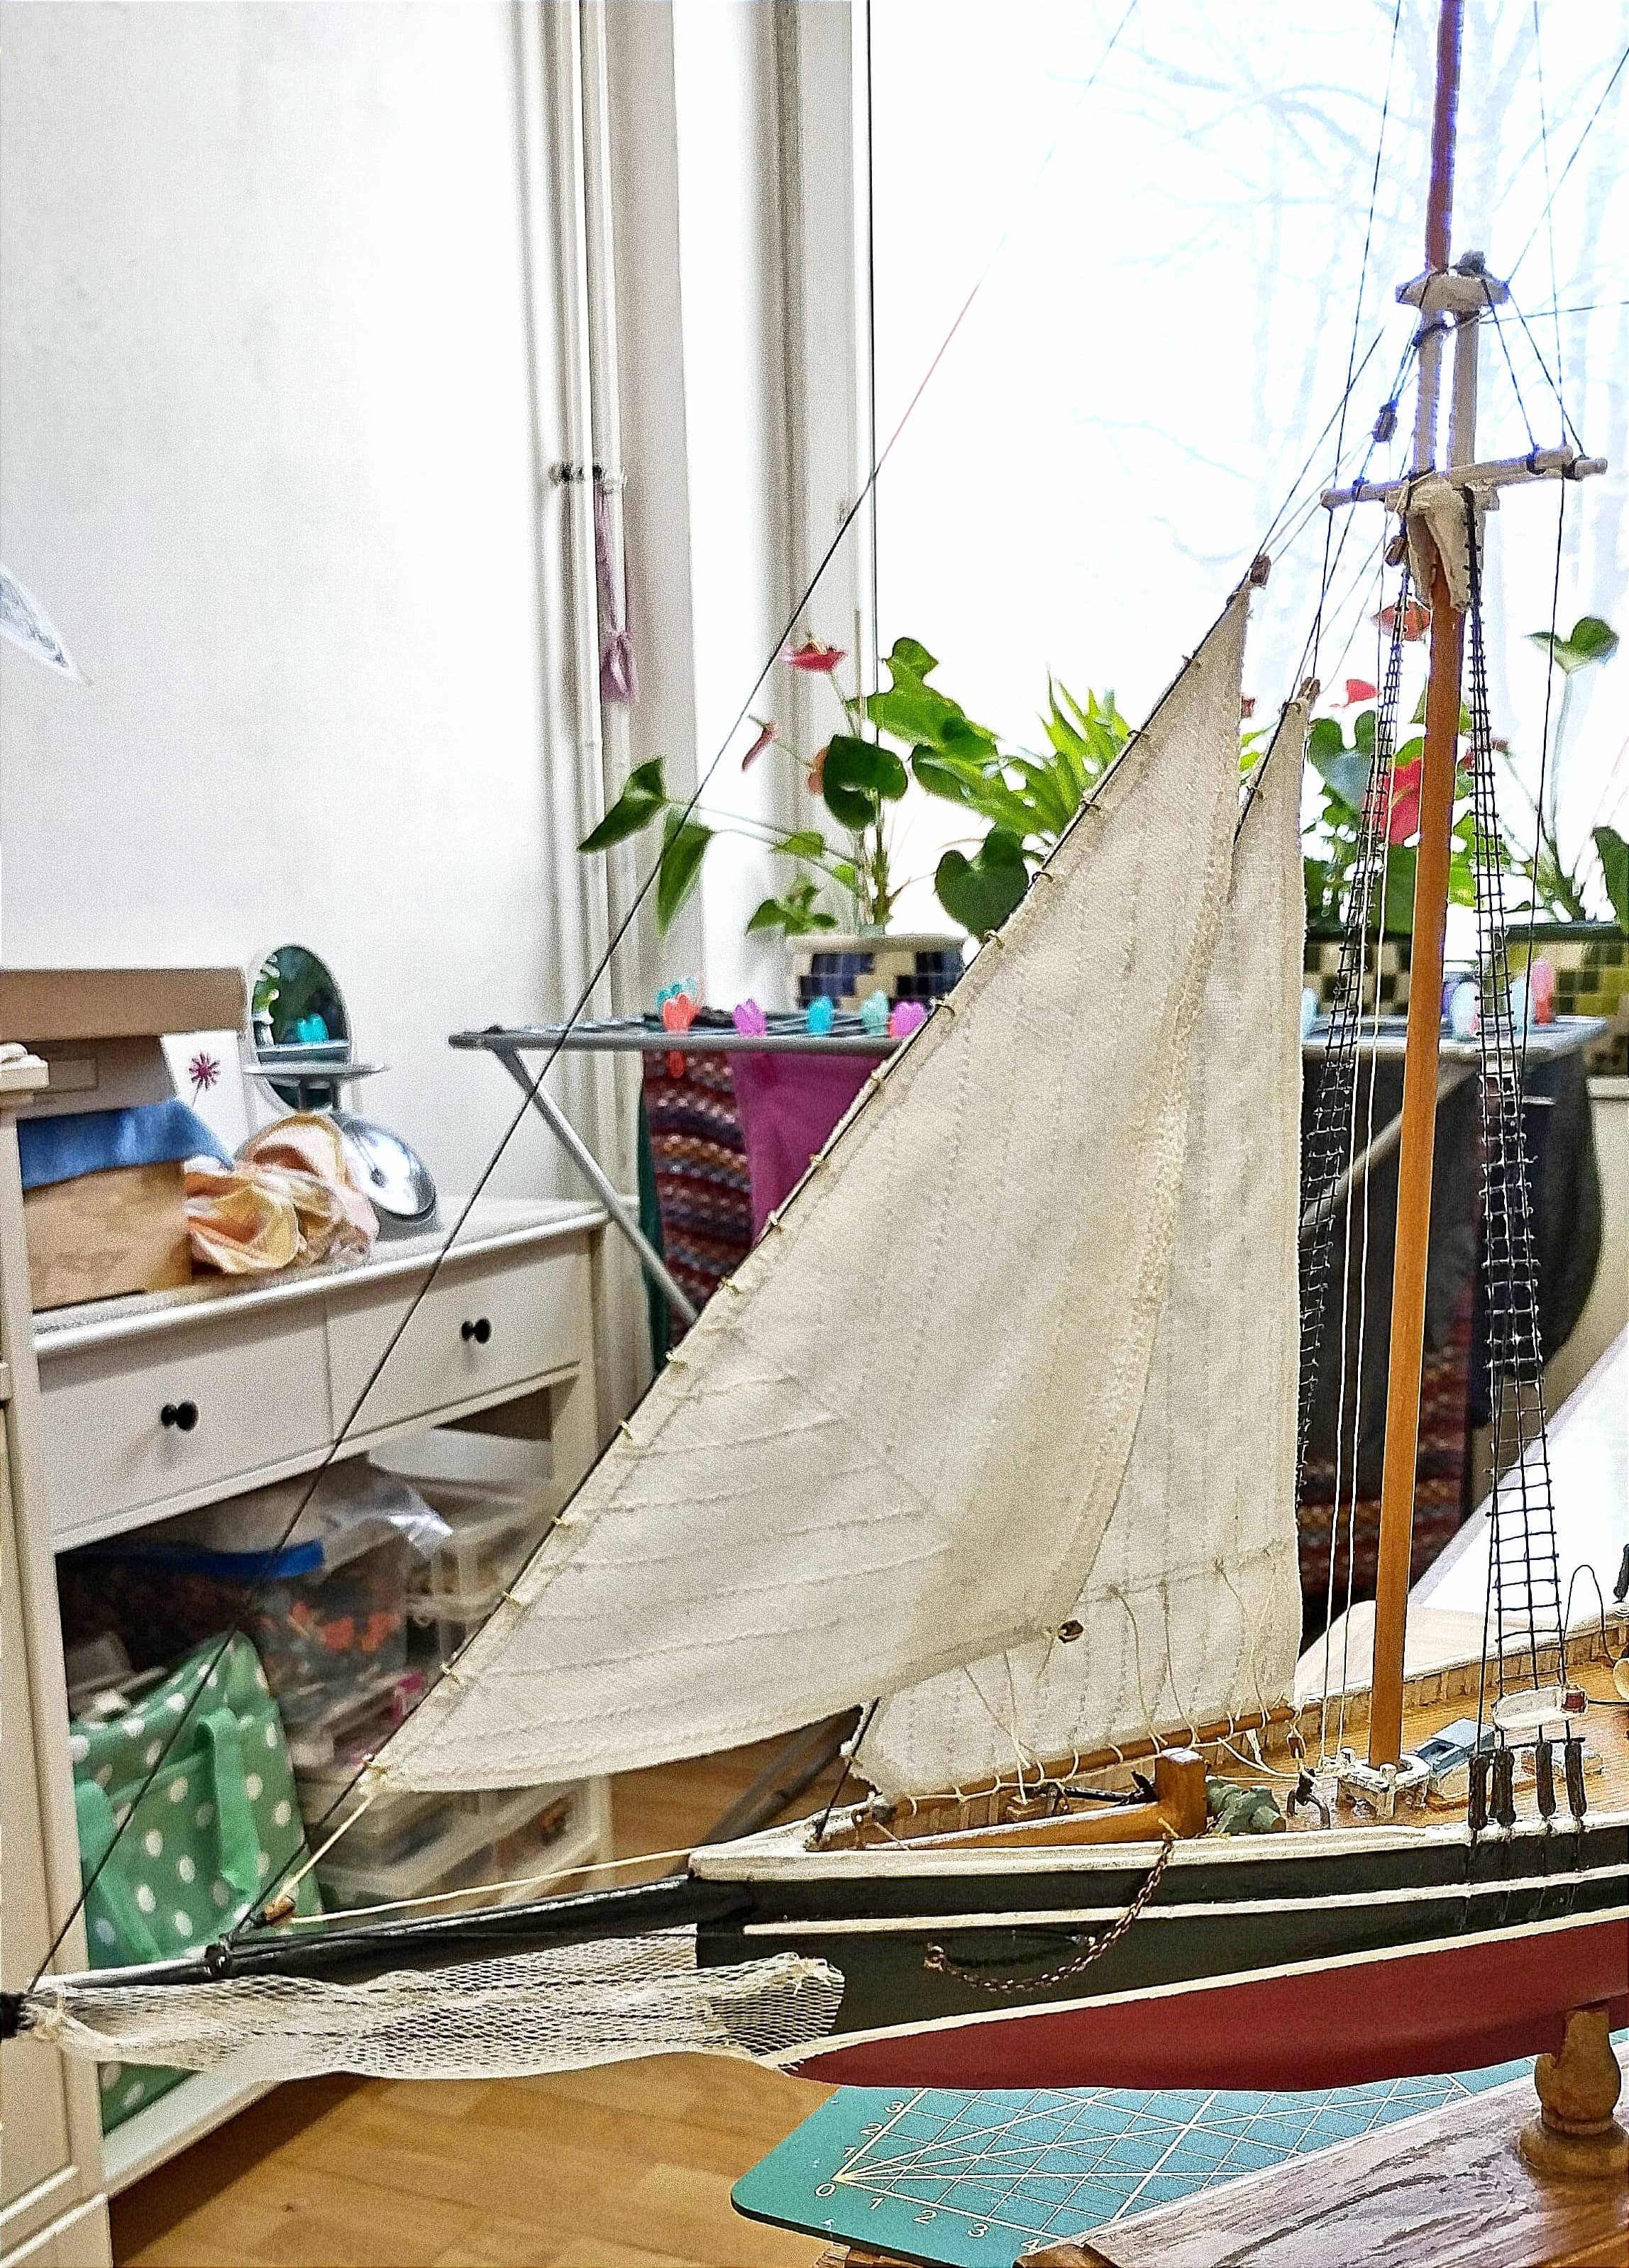
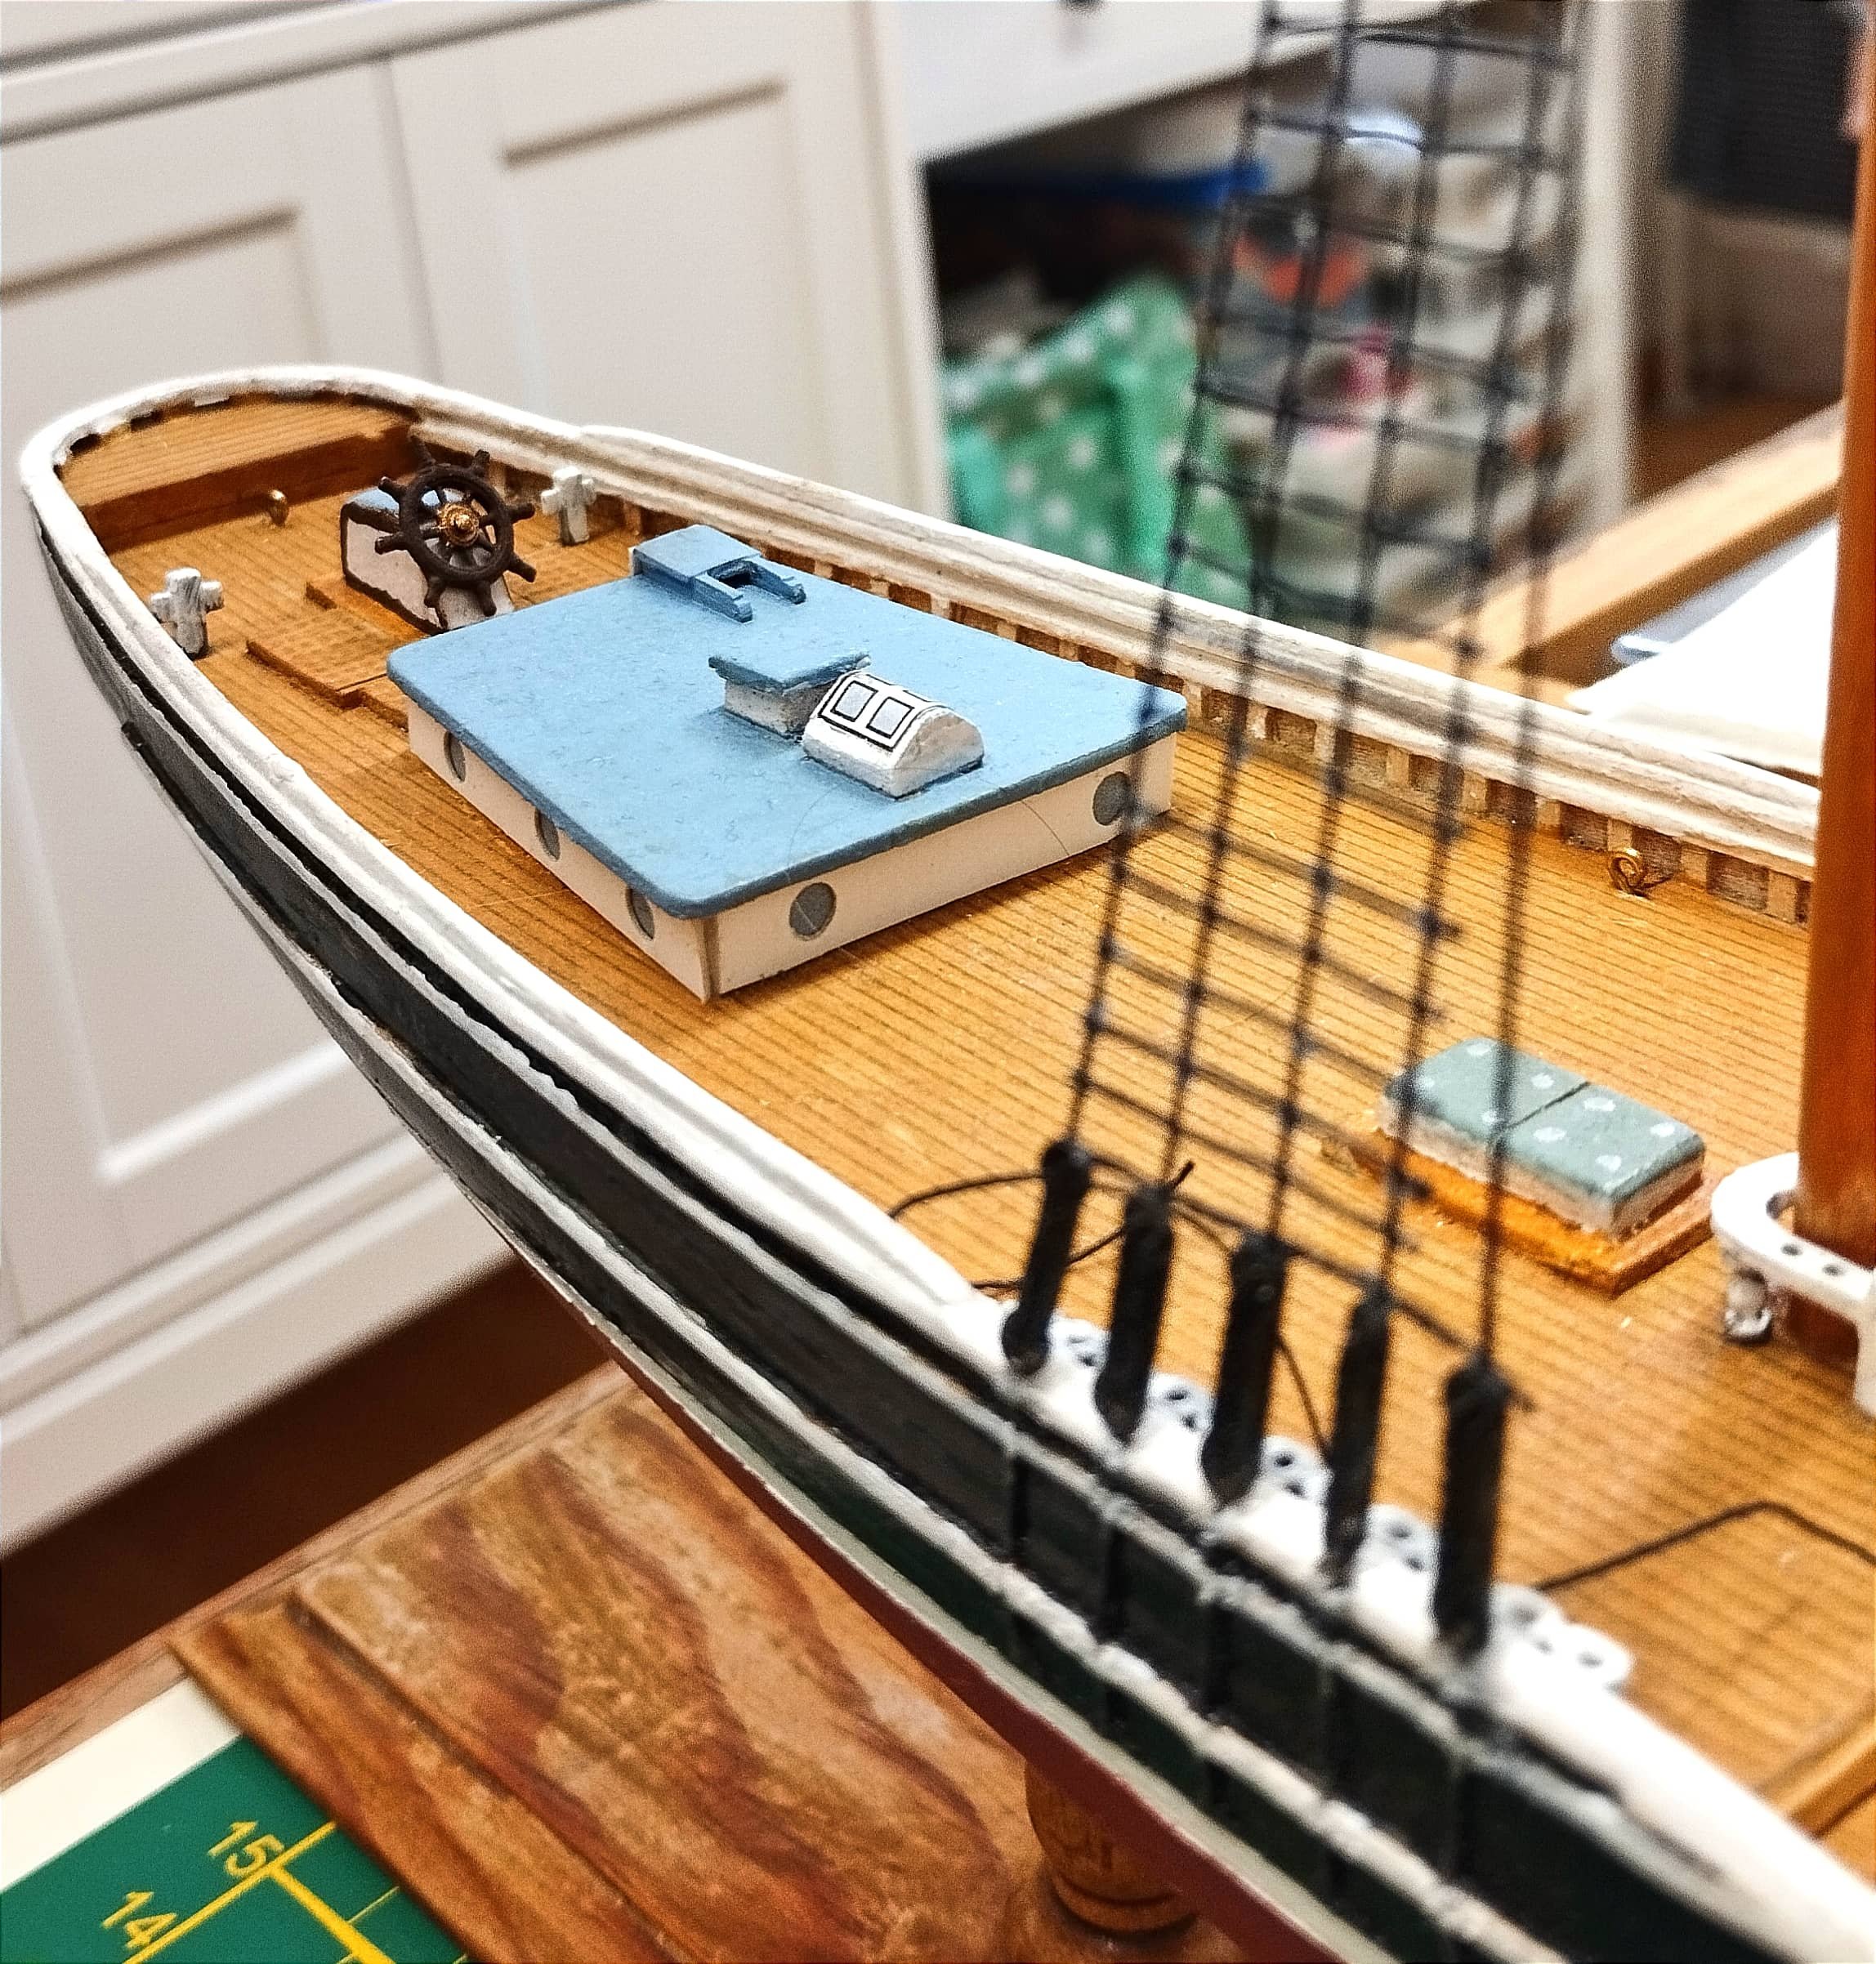
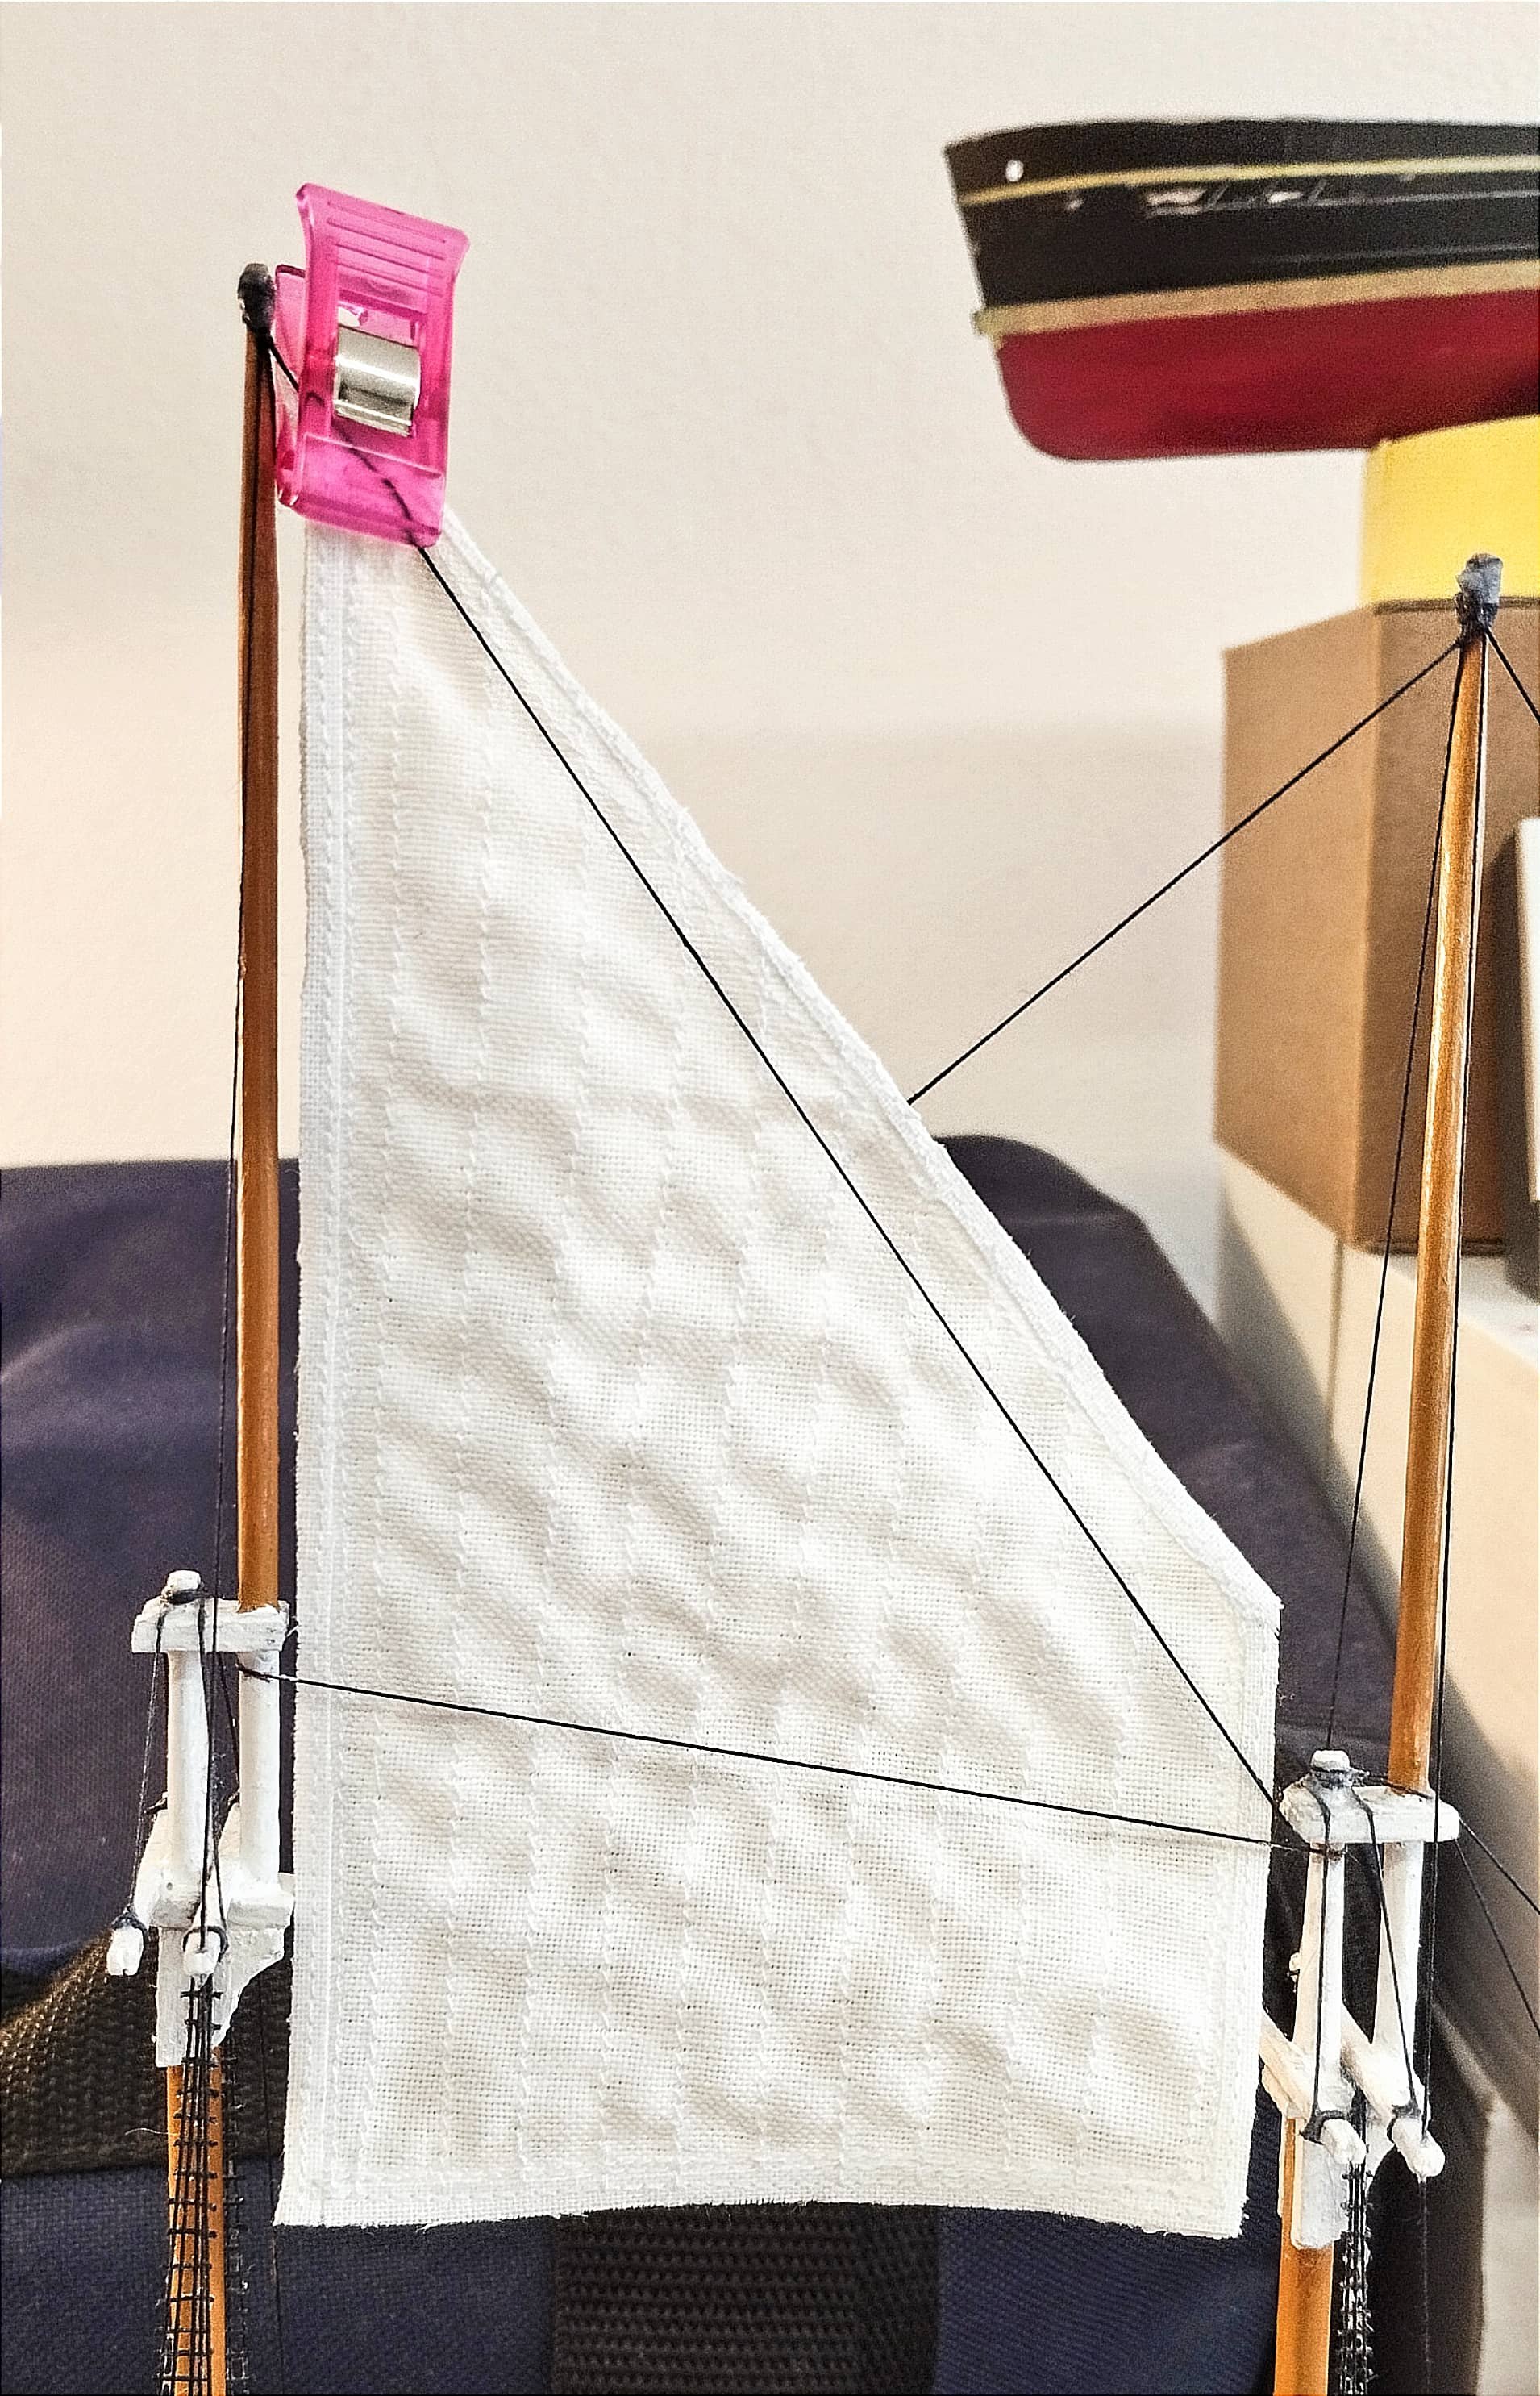
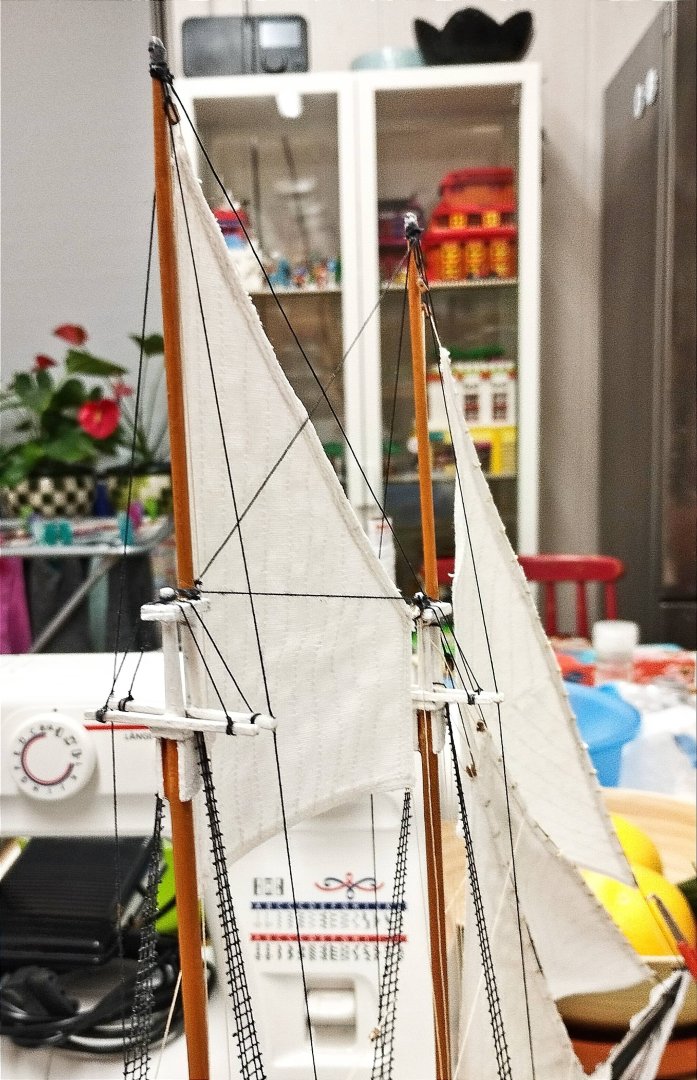
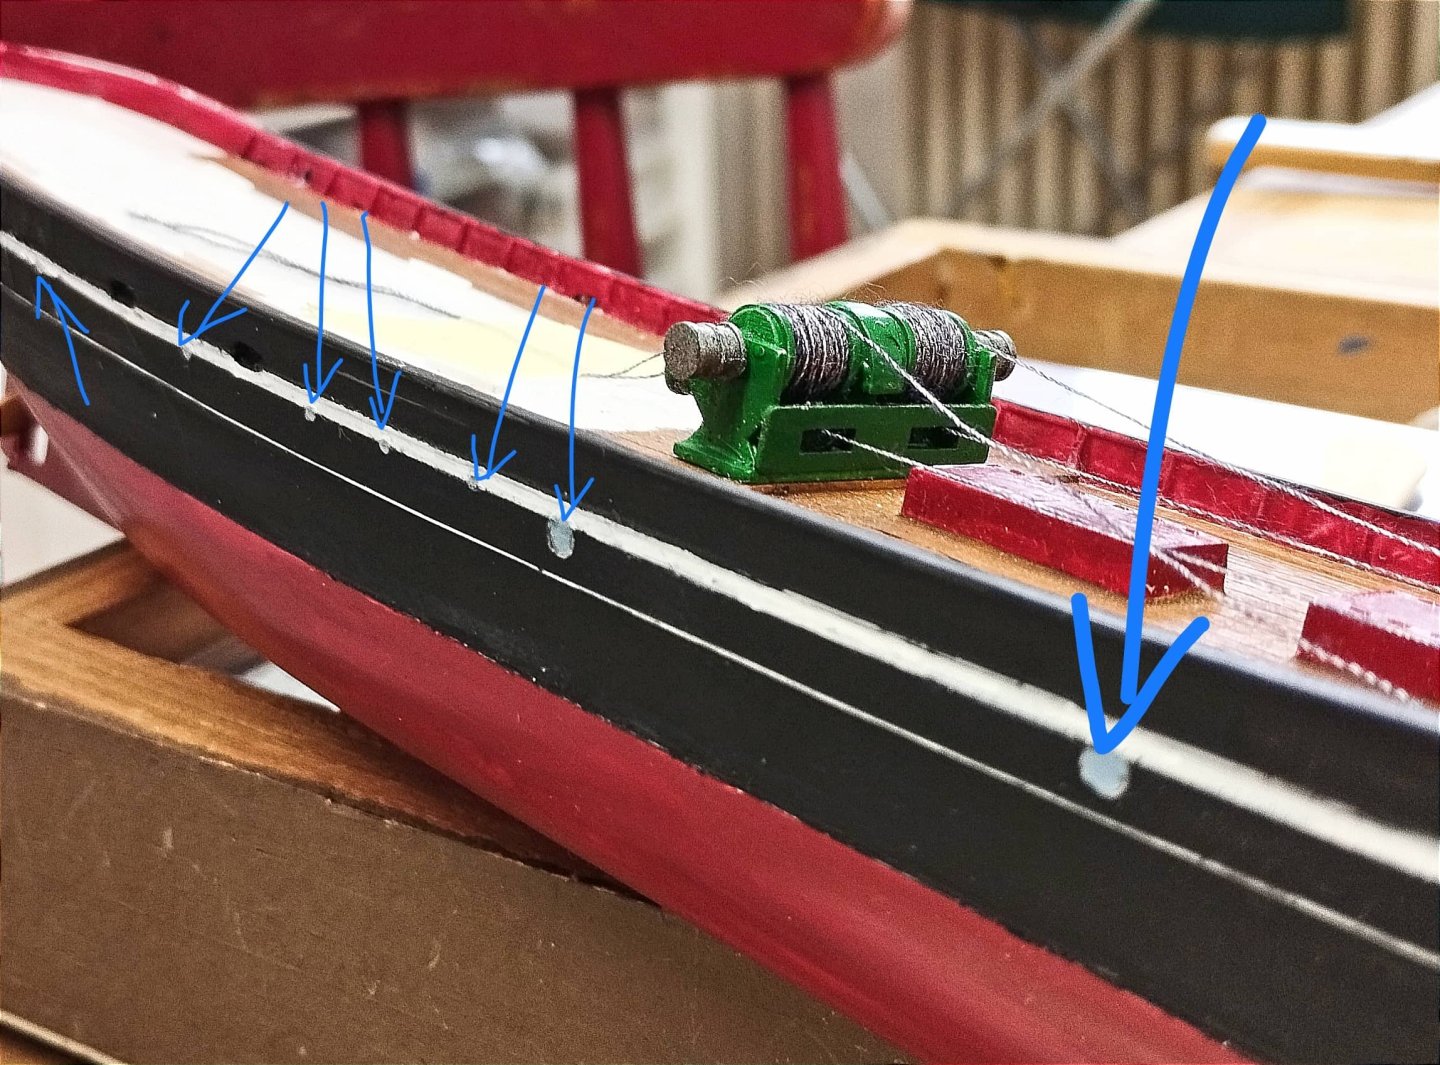
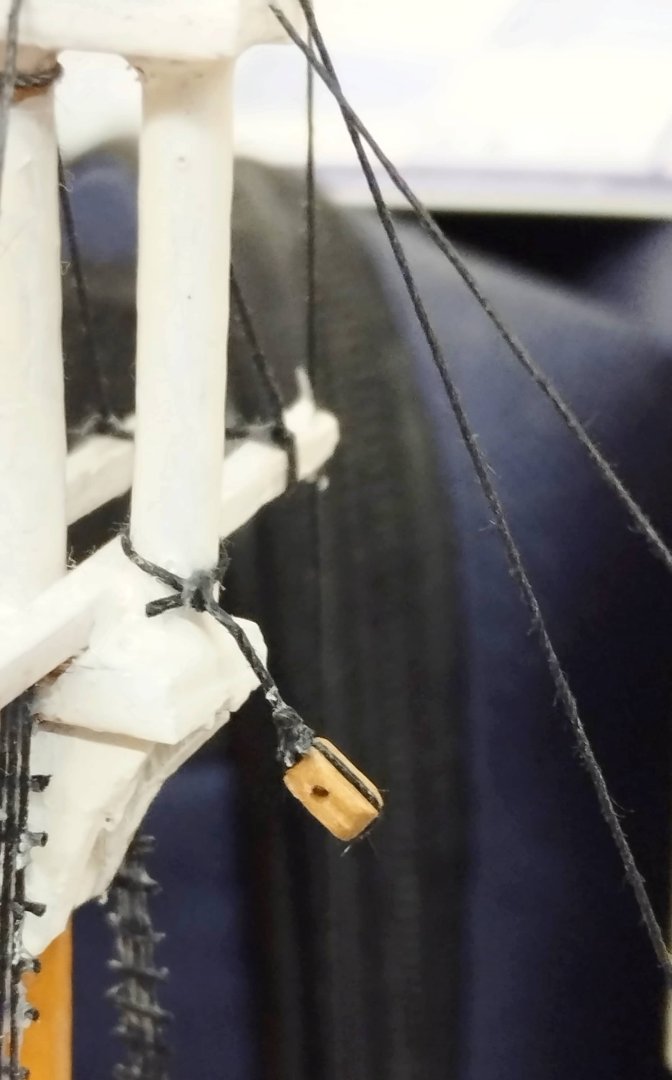
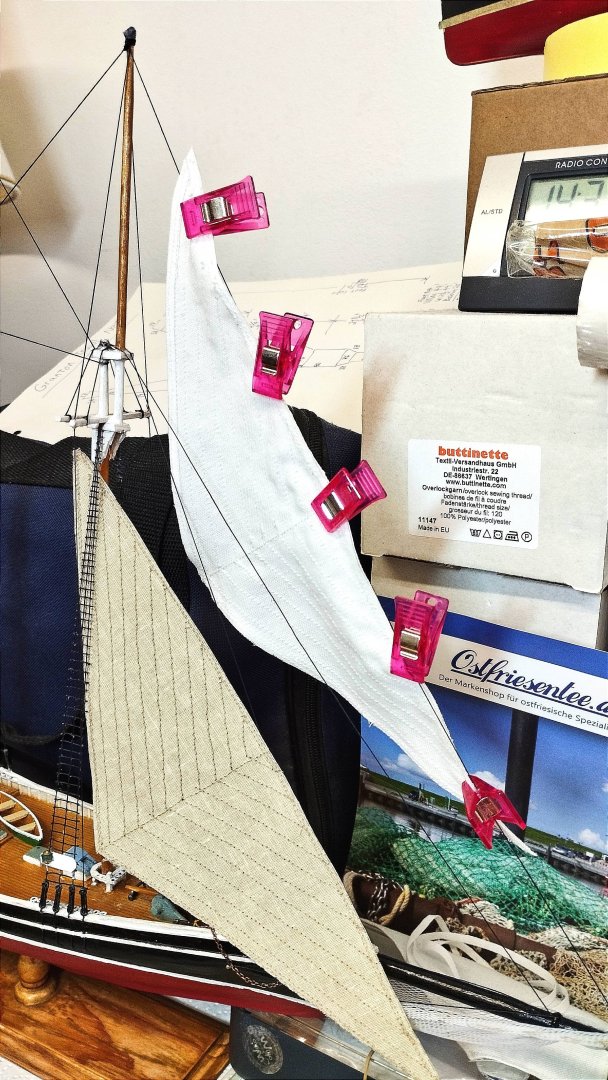
 Another modification: Now her Fisherman's Topsail can swing nicely to port and fill up with wind if the two sheets are loose enough. My shipyard is the dining room table. I moved these sheets to the eye-pins just aft if her main mast shrouds. Otherwise her main sail and boom would have had restricted side play. The plans with the kit were wrong and had them placed aft of her cabin. Peter Voogt from the Netherlands brought these things to my attention. Dankje Peter! 🇳🇱 Best Regards, UrkVisser
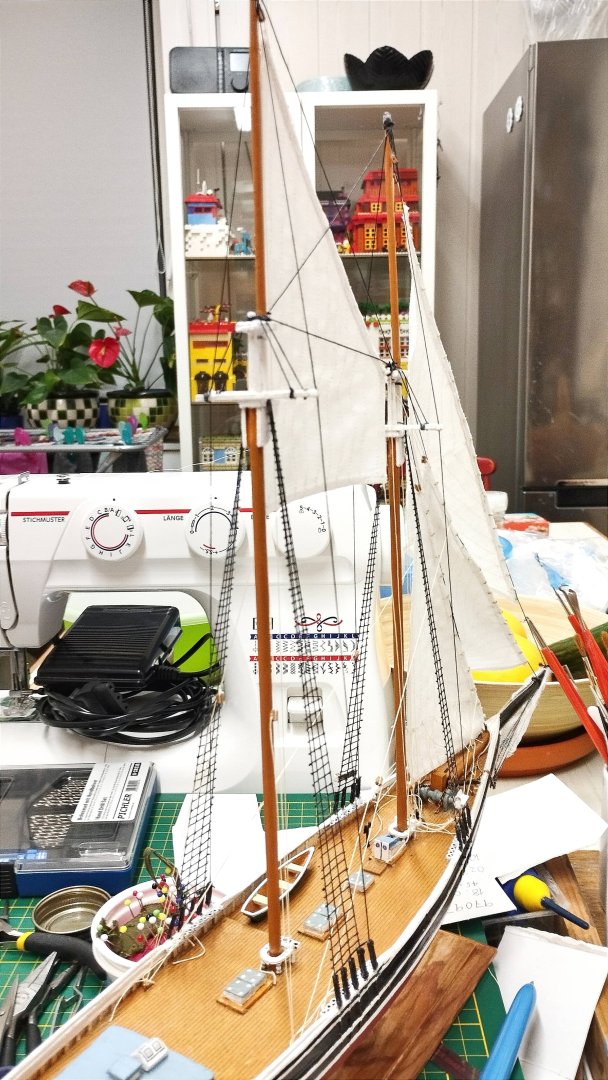
-
eatcrow2 reacted to a post in a topic:
Bluenose 1921 by UrkVisser - Scientific Kit No. 164
-
Snug Harbor Johnny reacted to a post in a topic:
Bluenose 1921 by UrkVisser - Scientific Kit No. 164
-
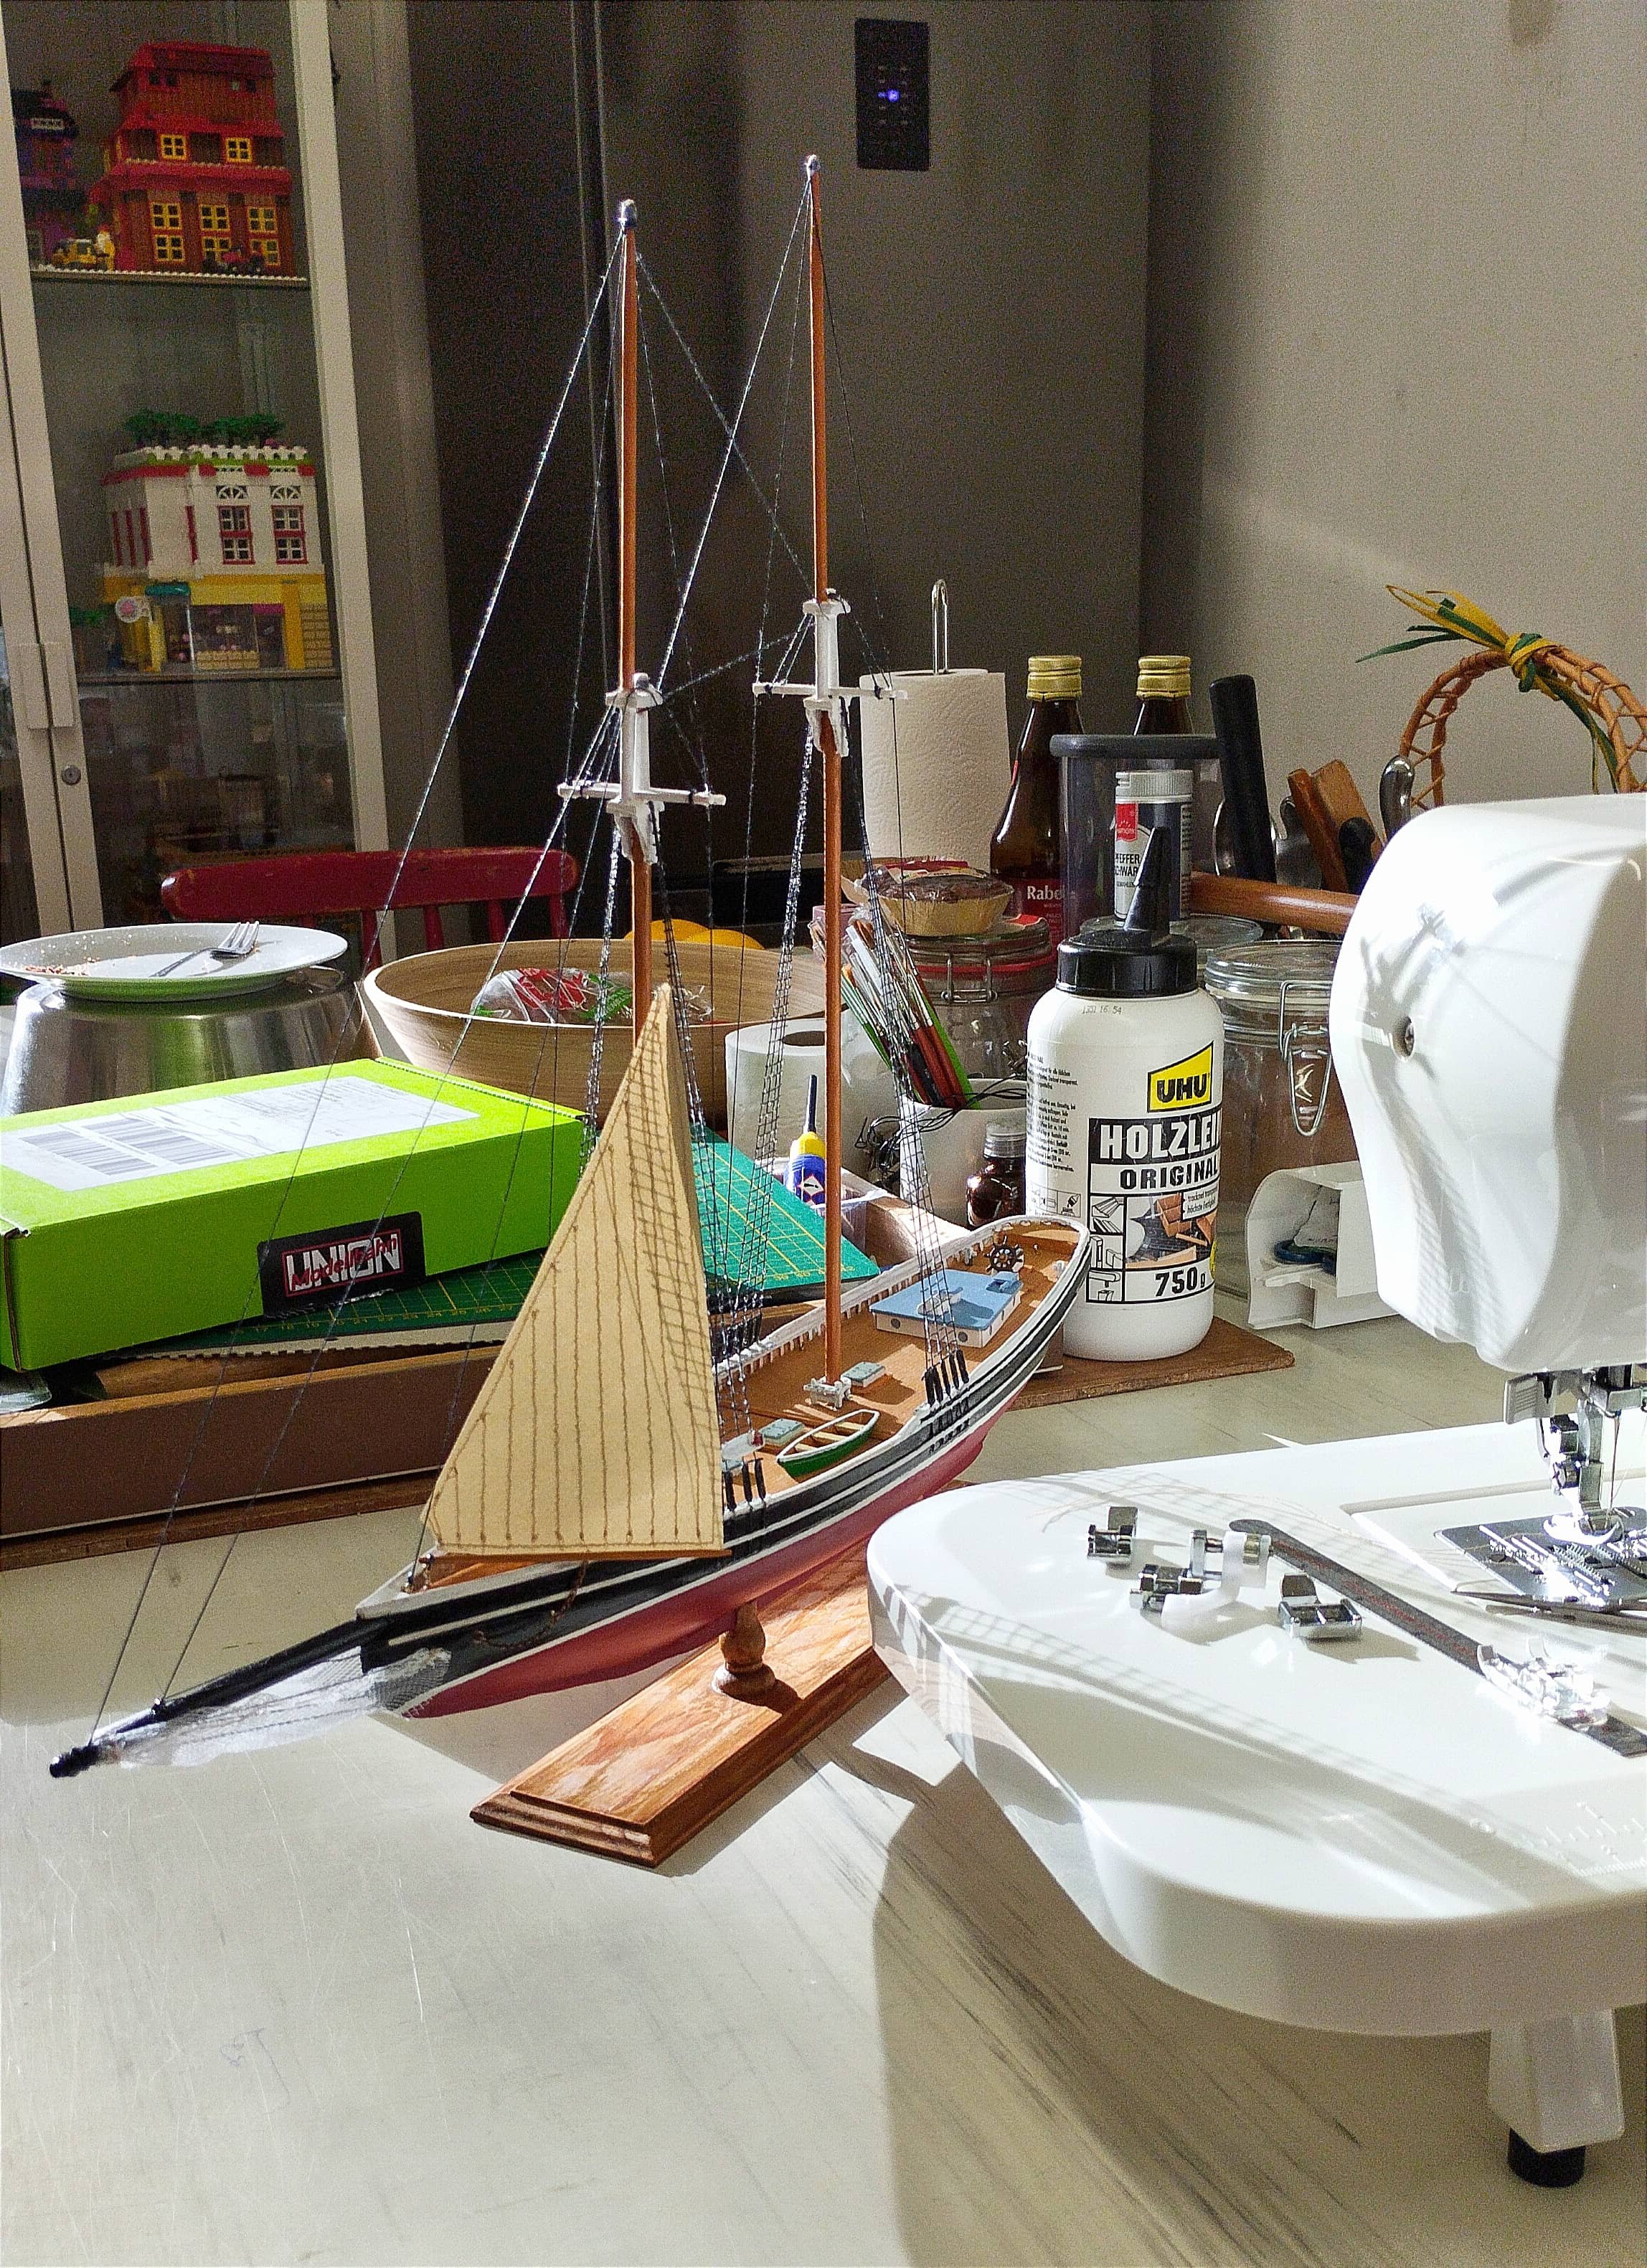
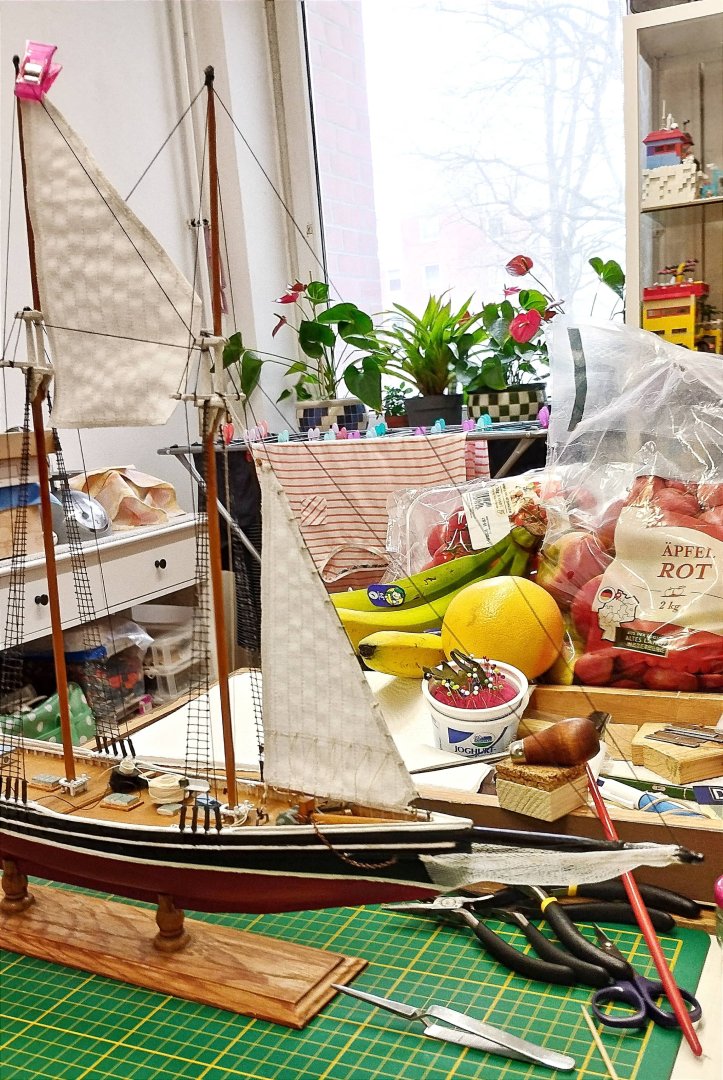
I remounted my Fisherman's Topsail because the 2 mm brass rings were an error. Alas, I only have four 3 mm blocks left so my other sails will have to wait until my next order. PS: Alas the 'Vallejo" paint for my trawler (in the photo above my schooner) is on back order. Bye for now! UrkVisser


-
Snug Harbor Johnny reacted to a post in a topic:
Bluenose 1921 by UrkVisser - Scientific Kit No. 164
-
Knocklouder reacted to a post in a topic:
Bluenose 1921 by UrkVisser - Scientific Kit No. 164
-
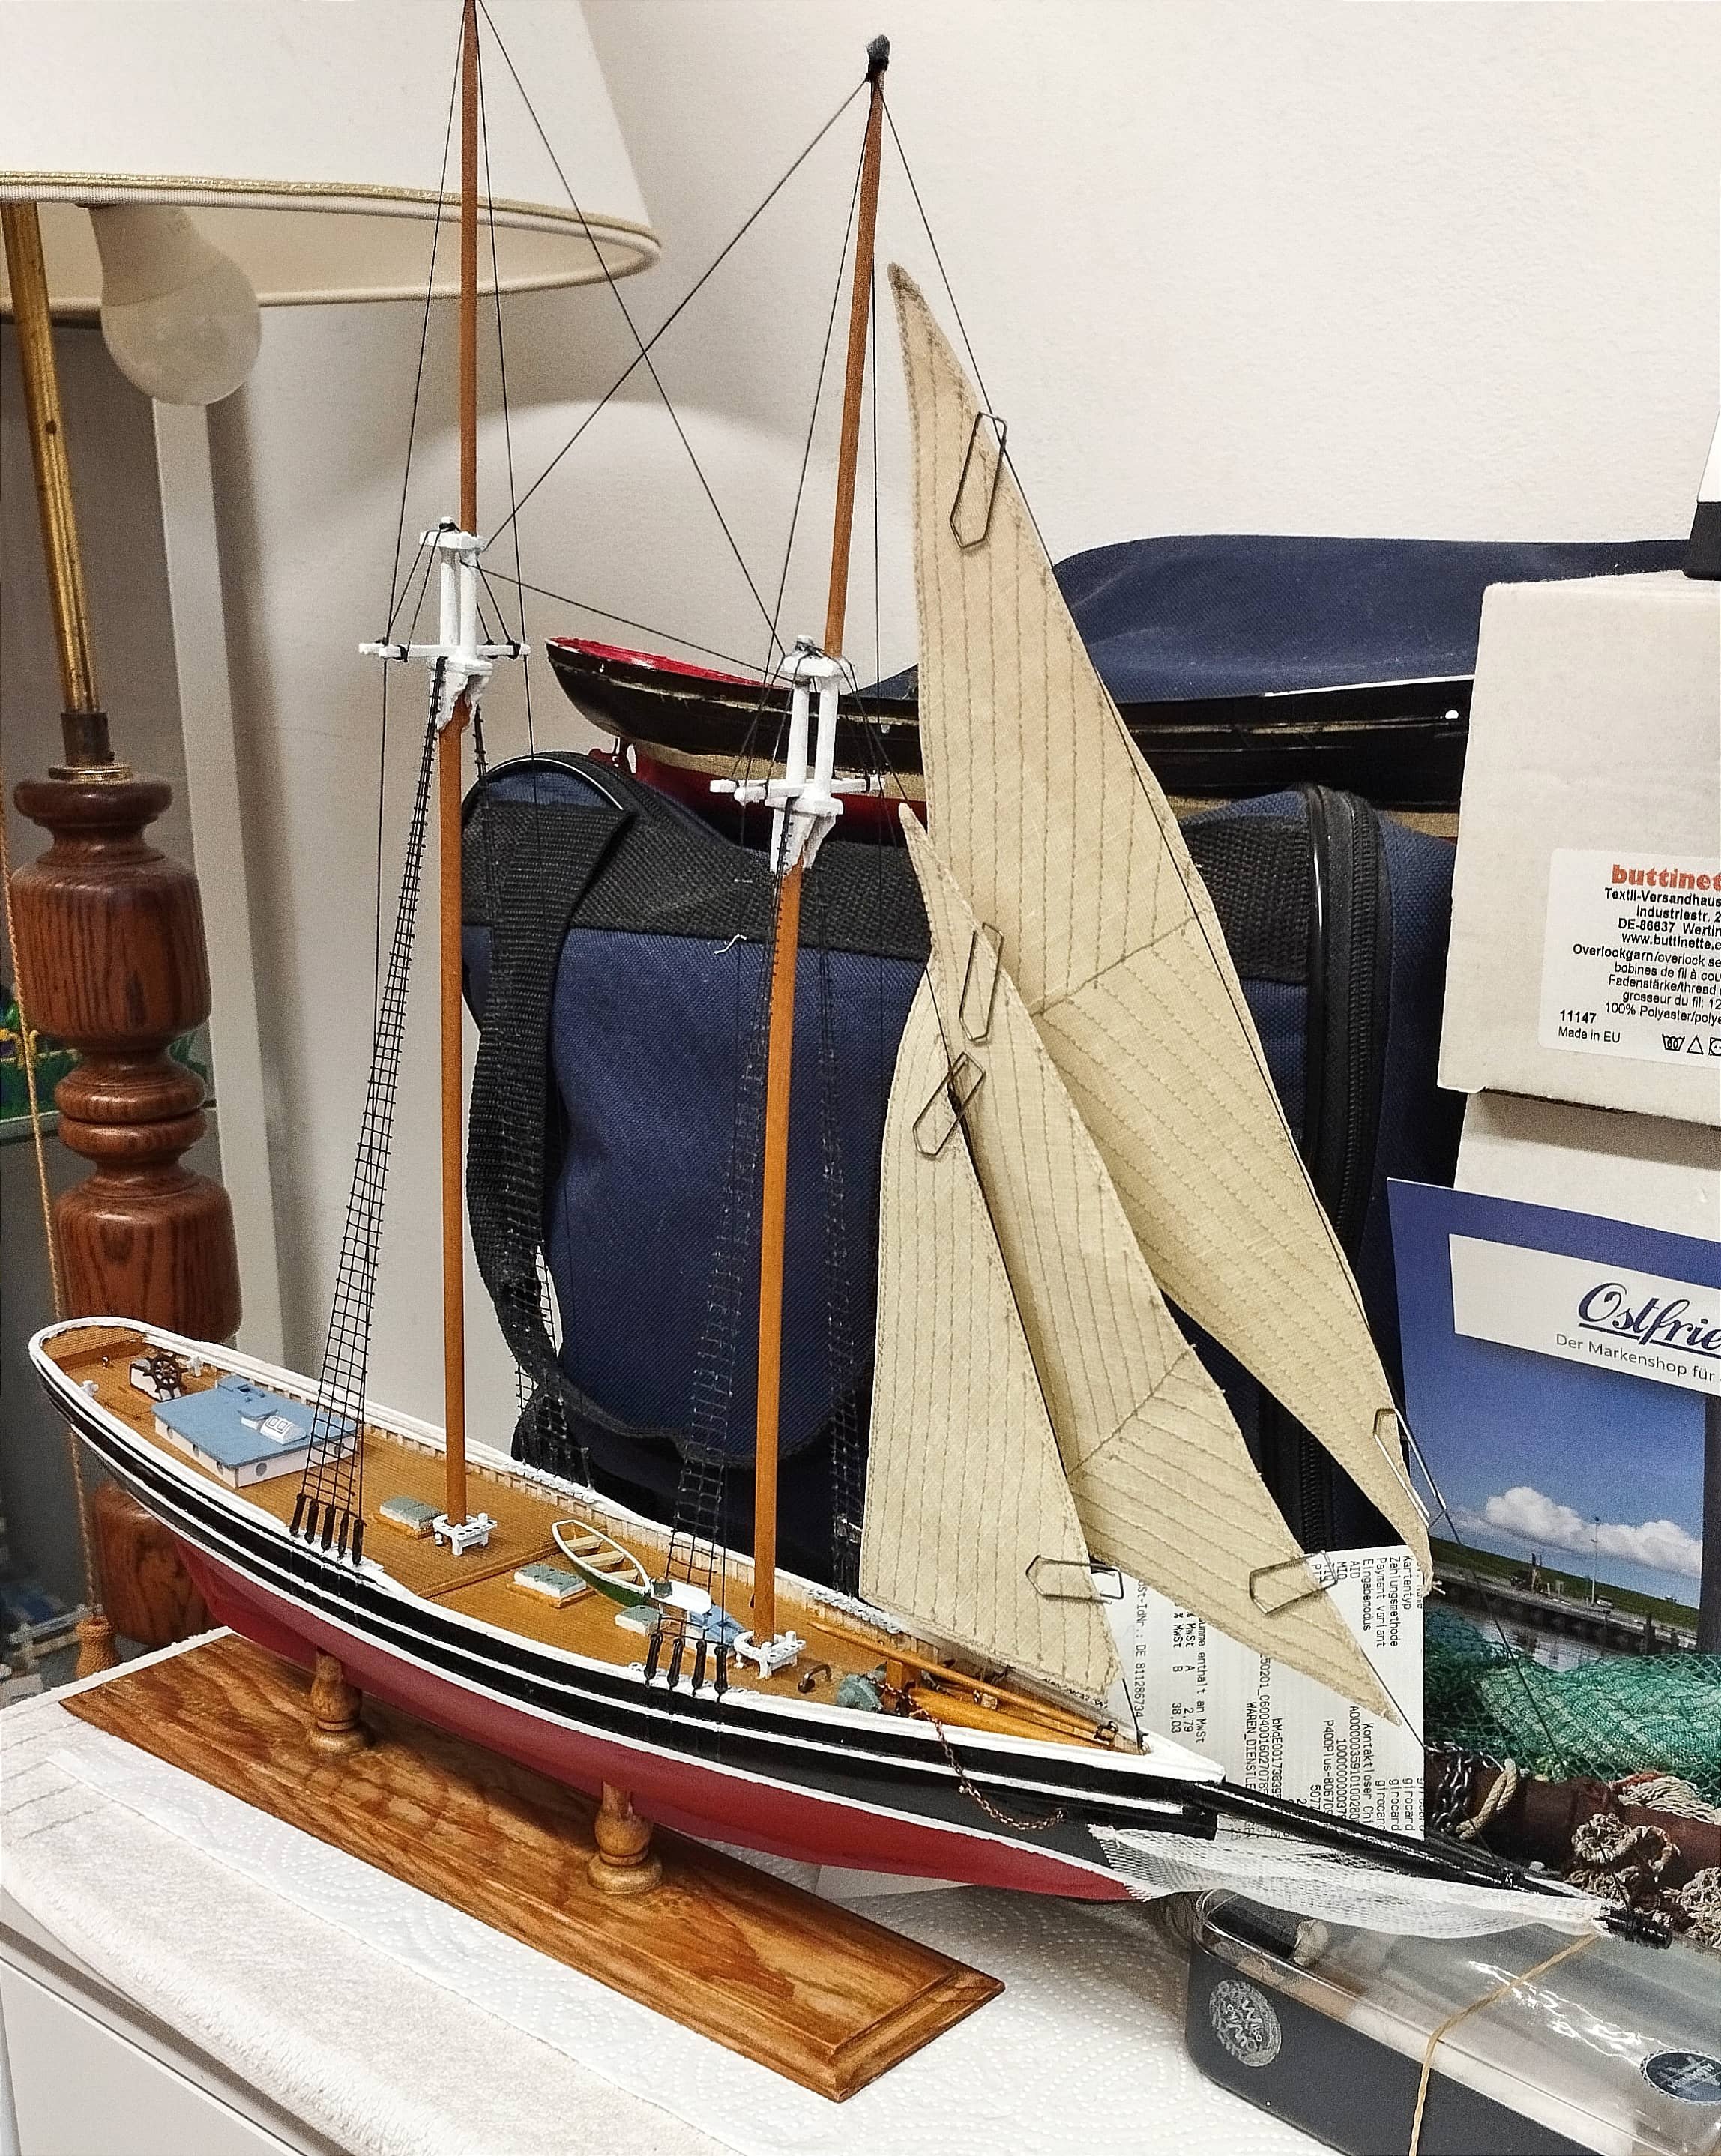
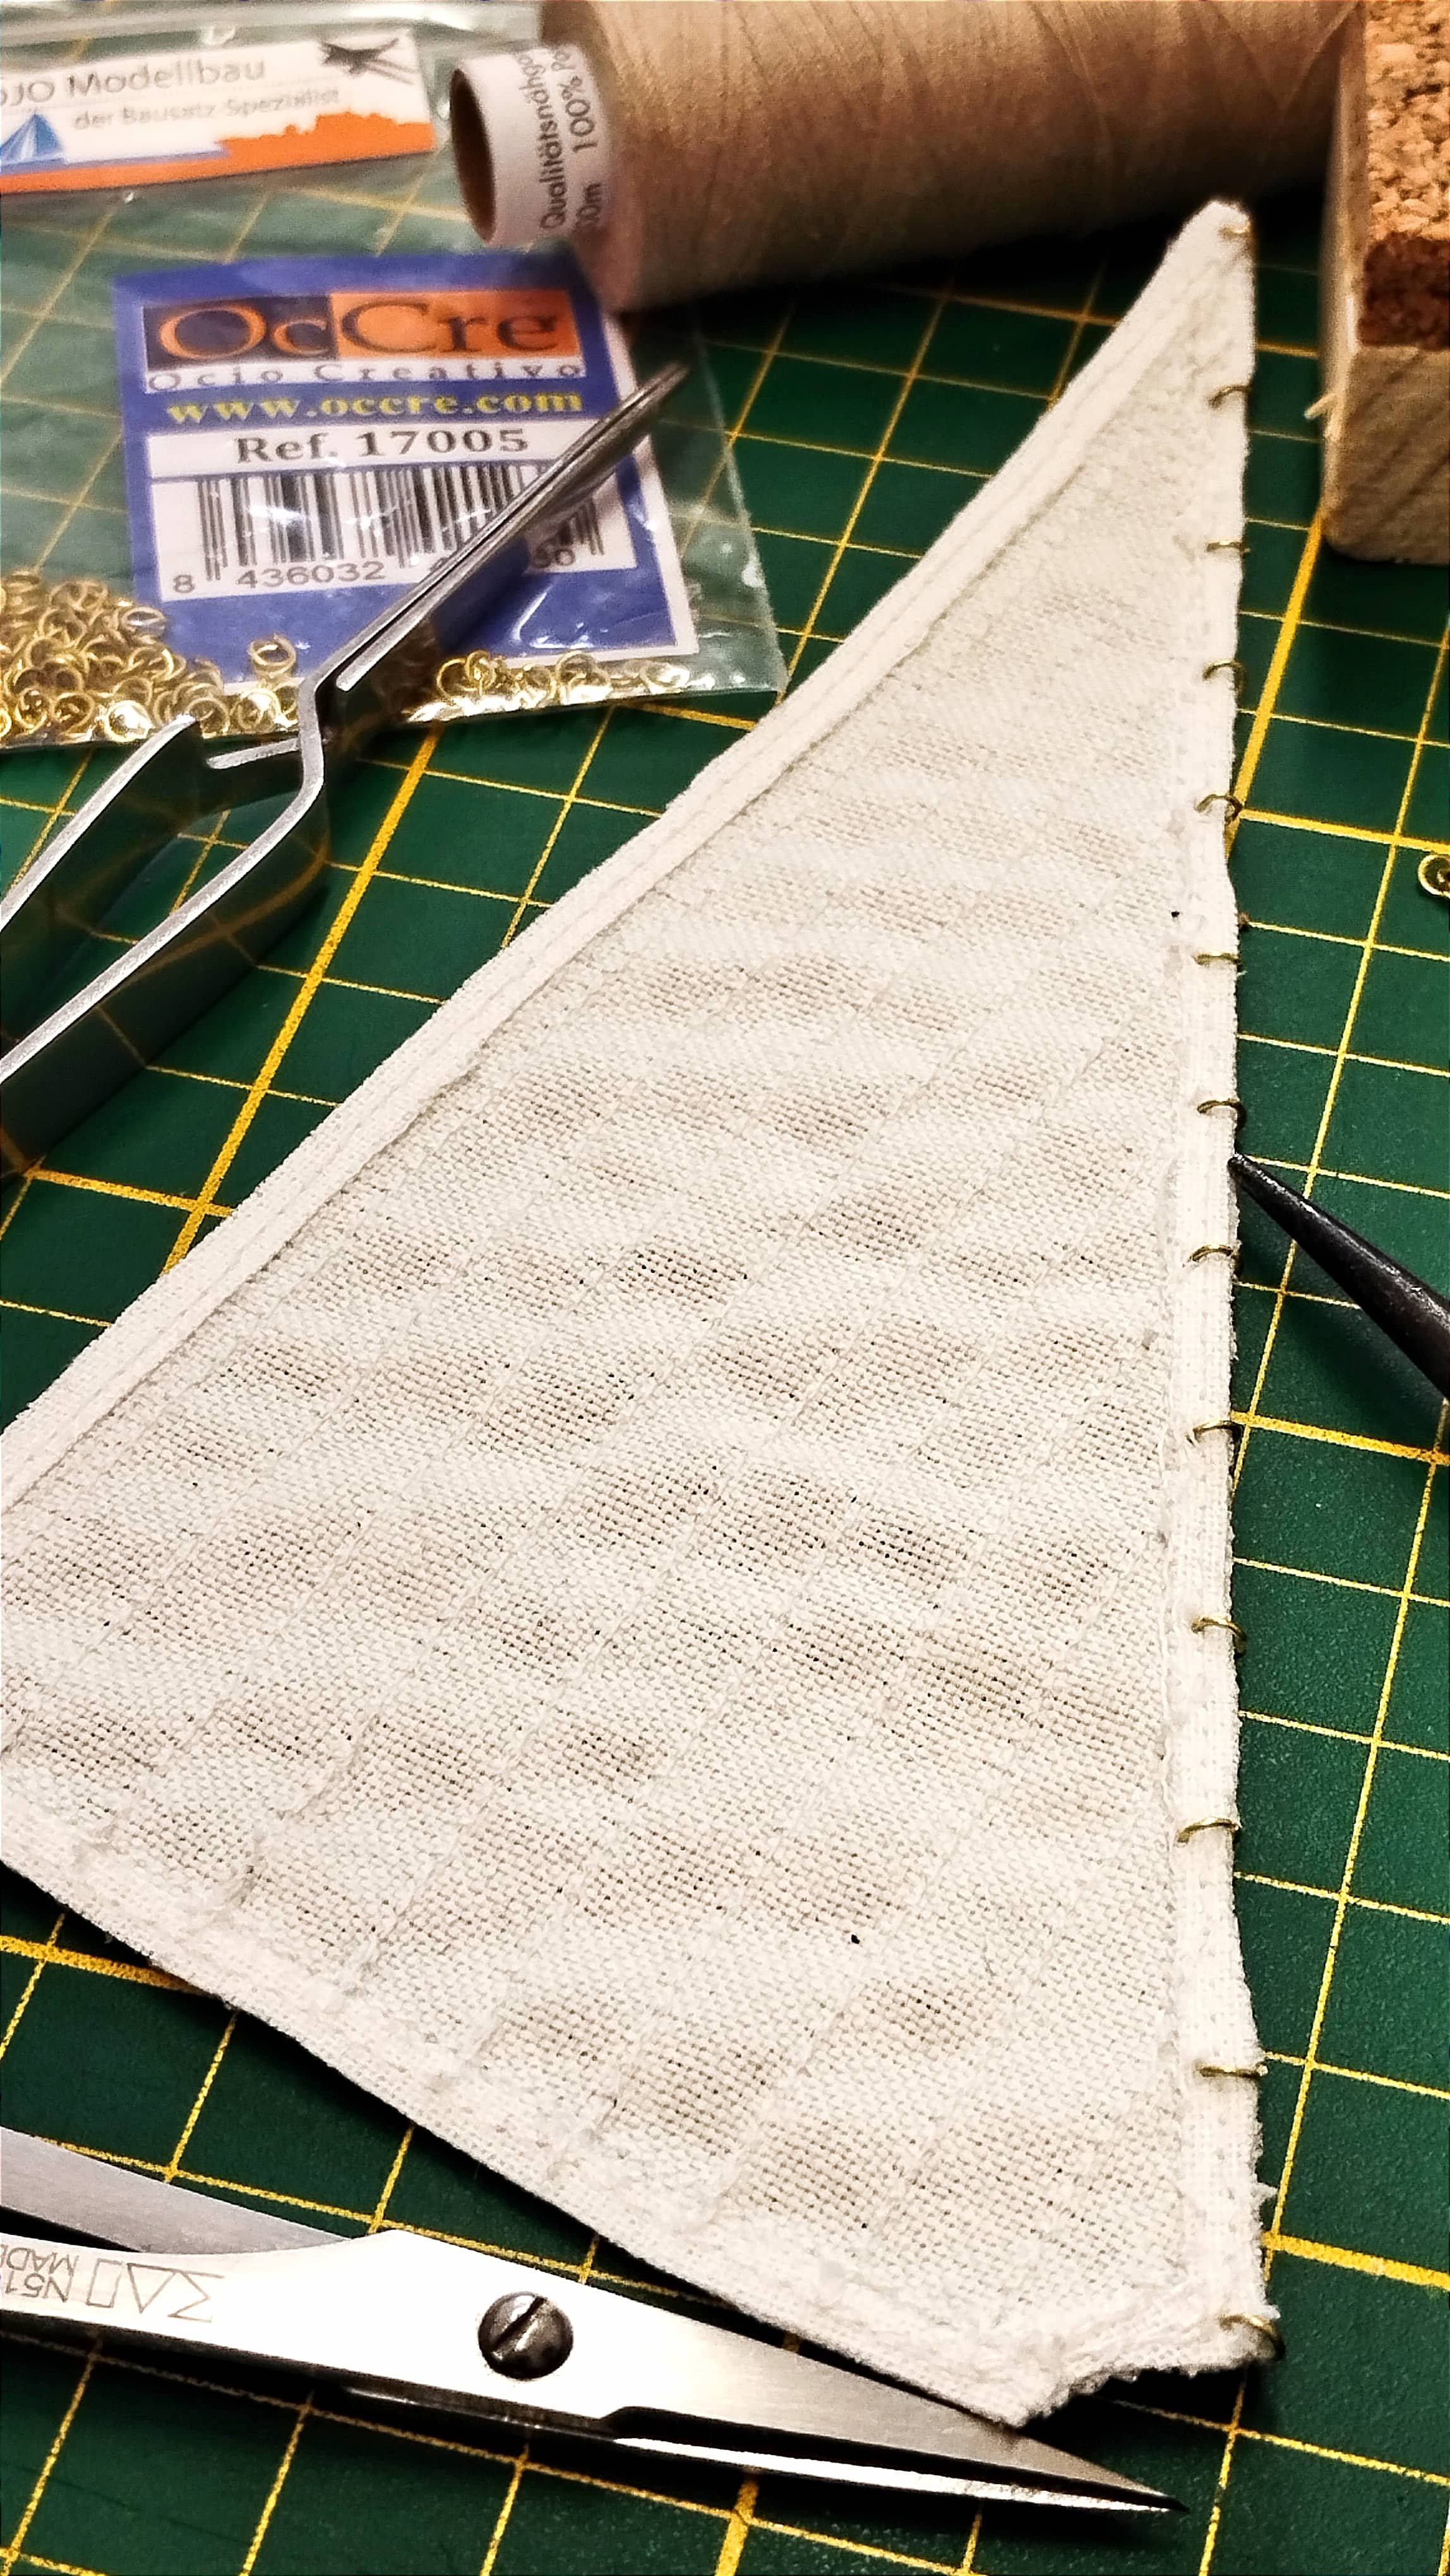
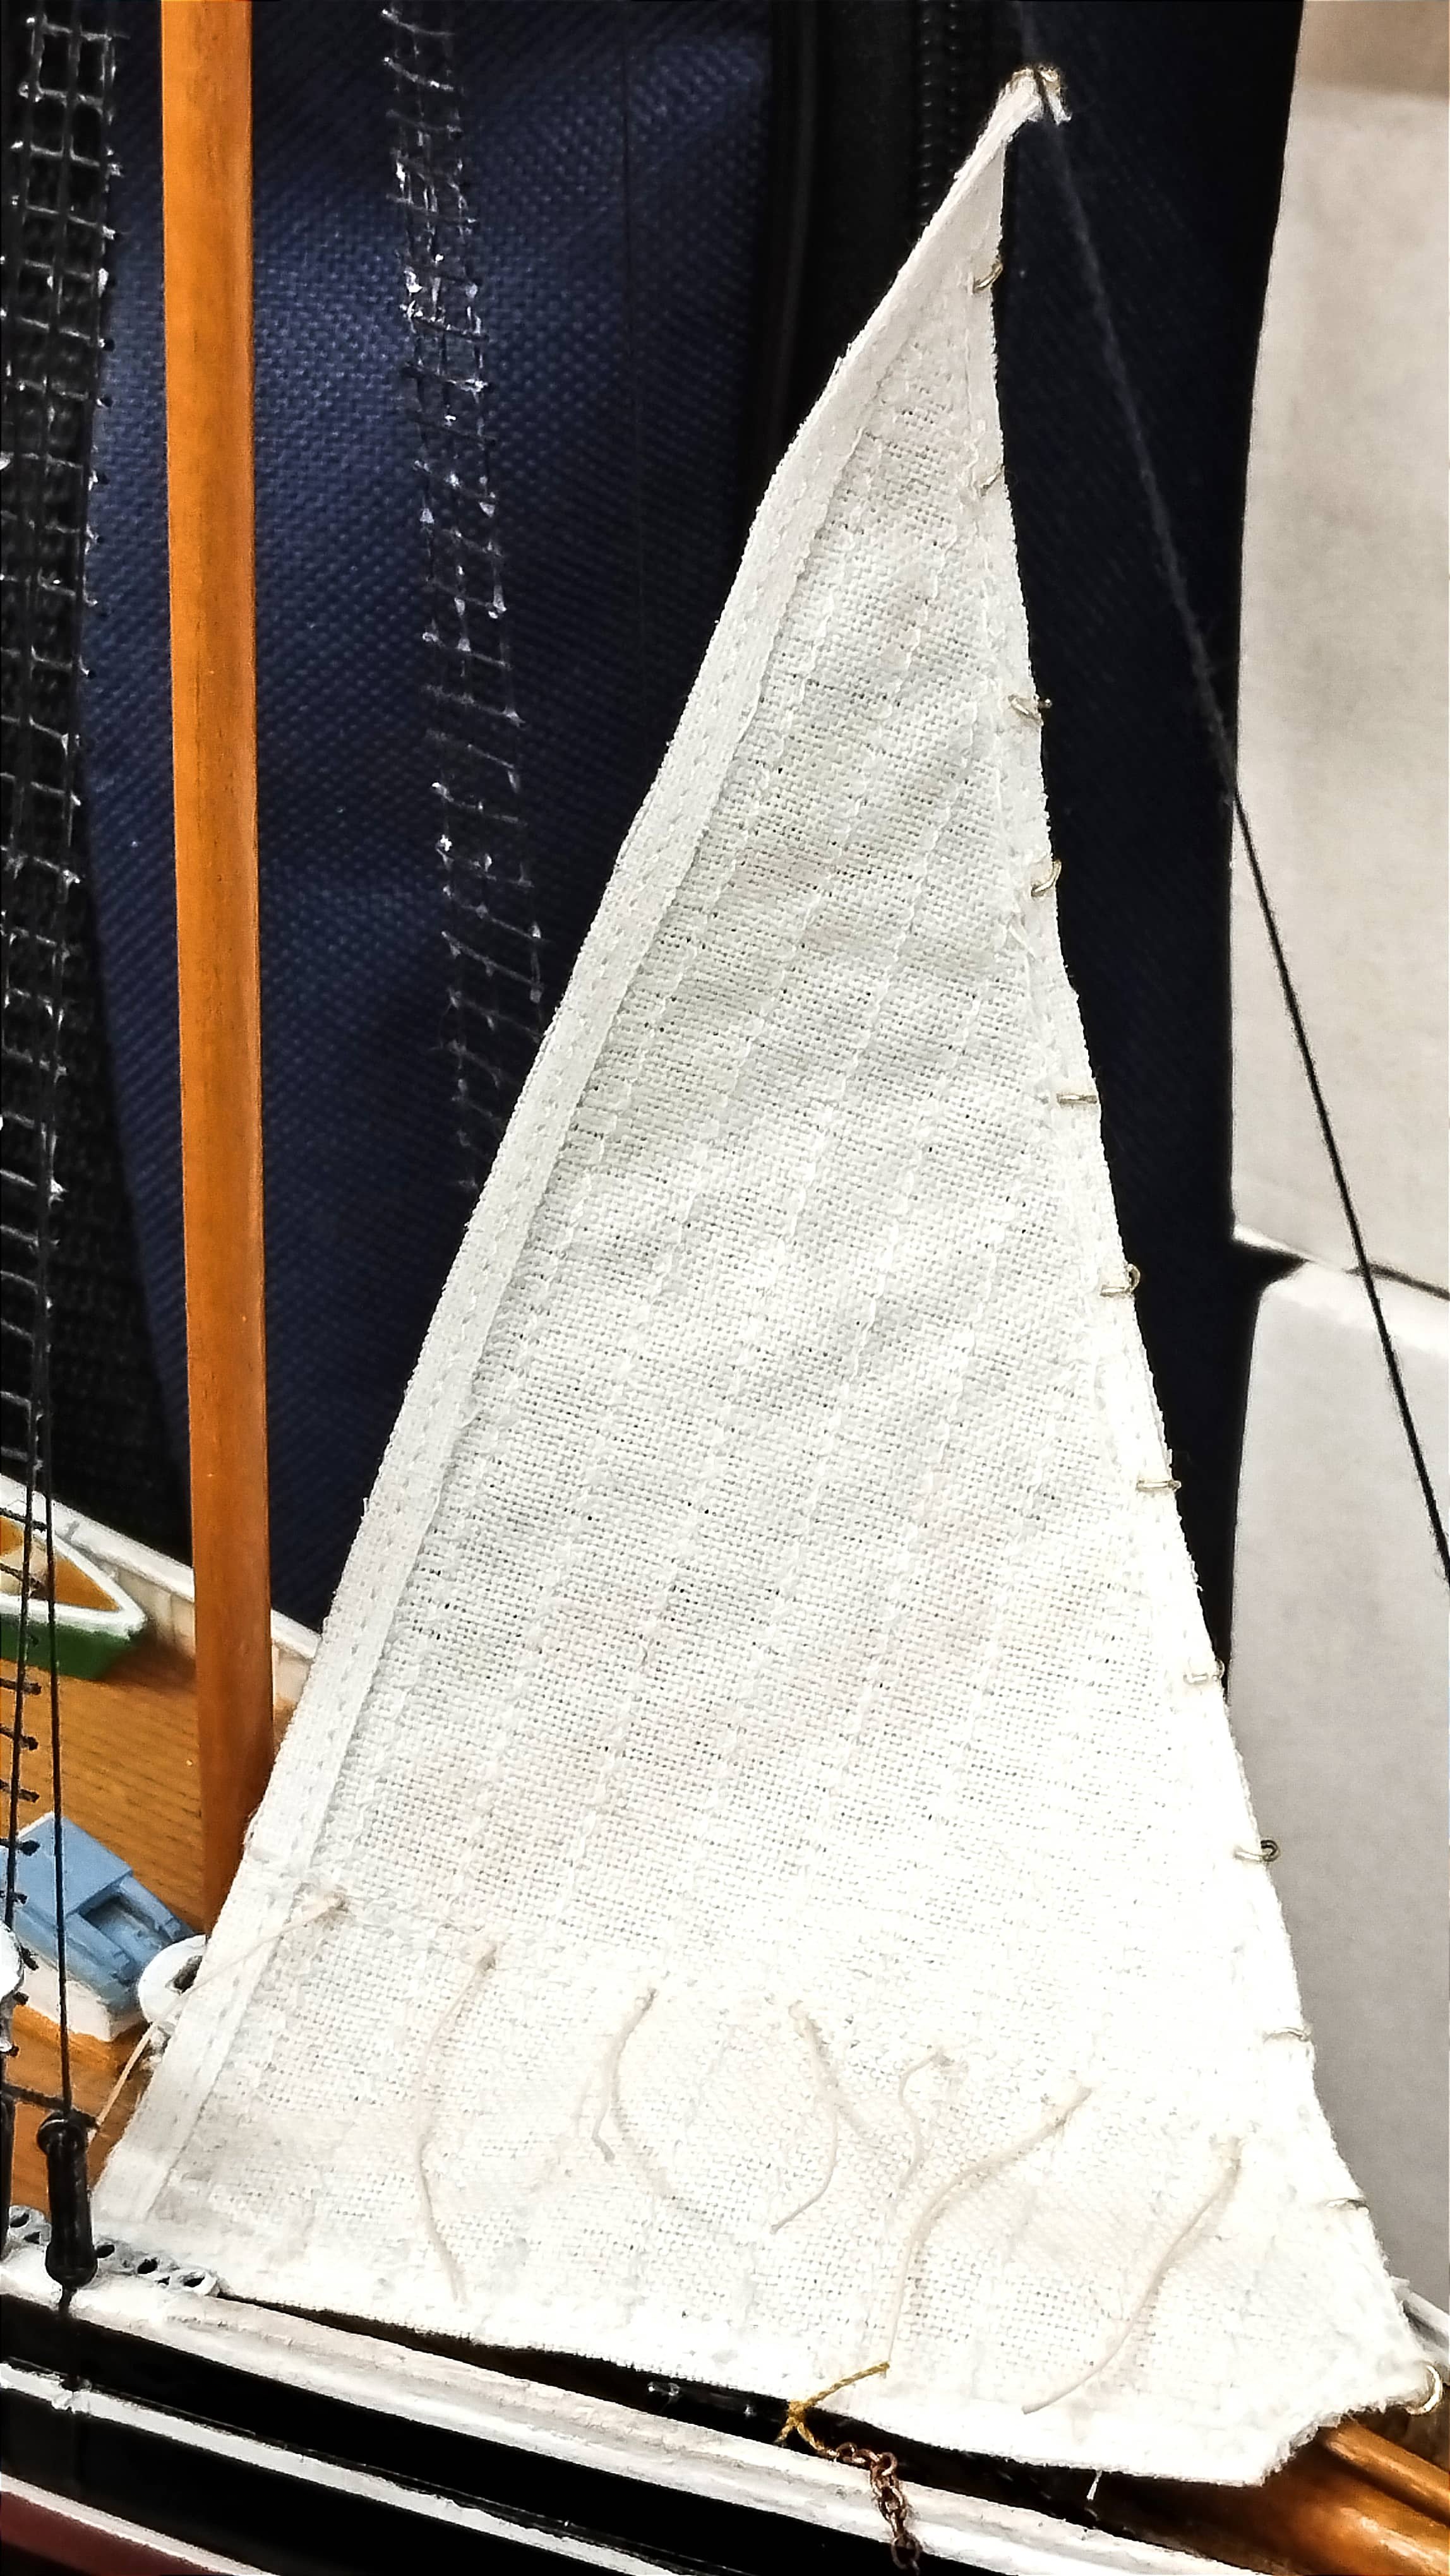
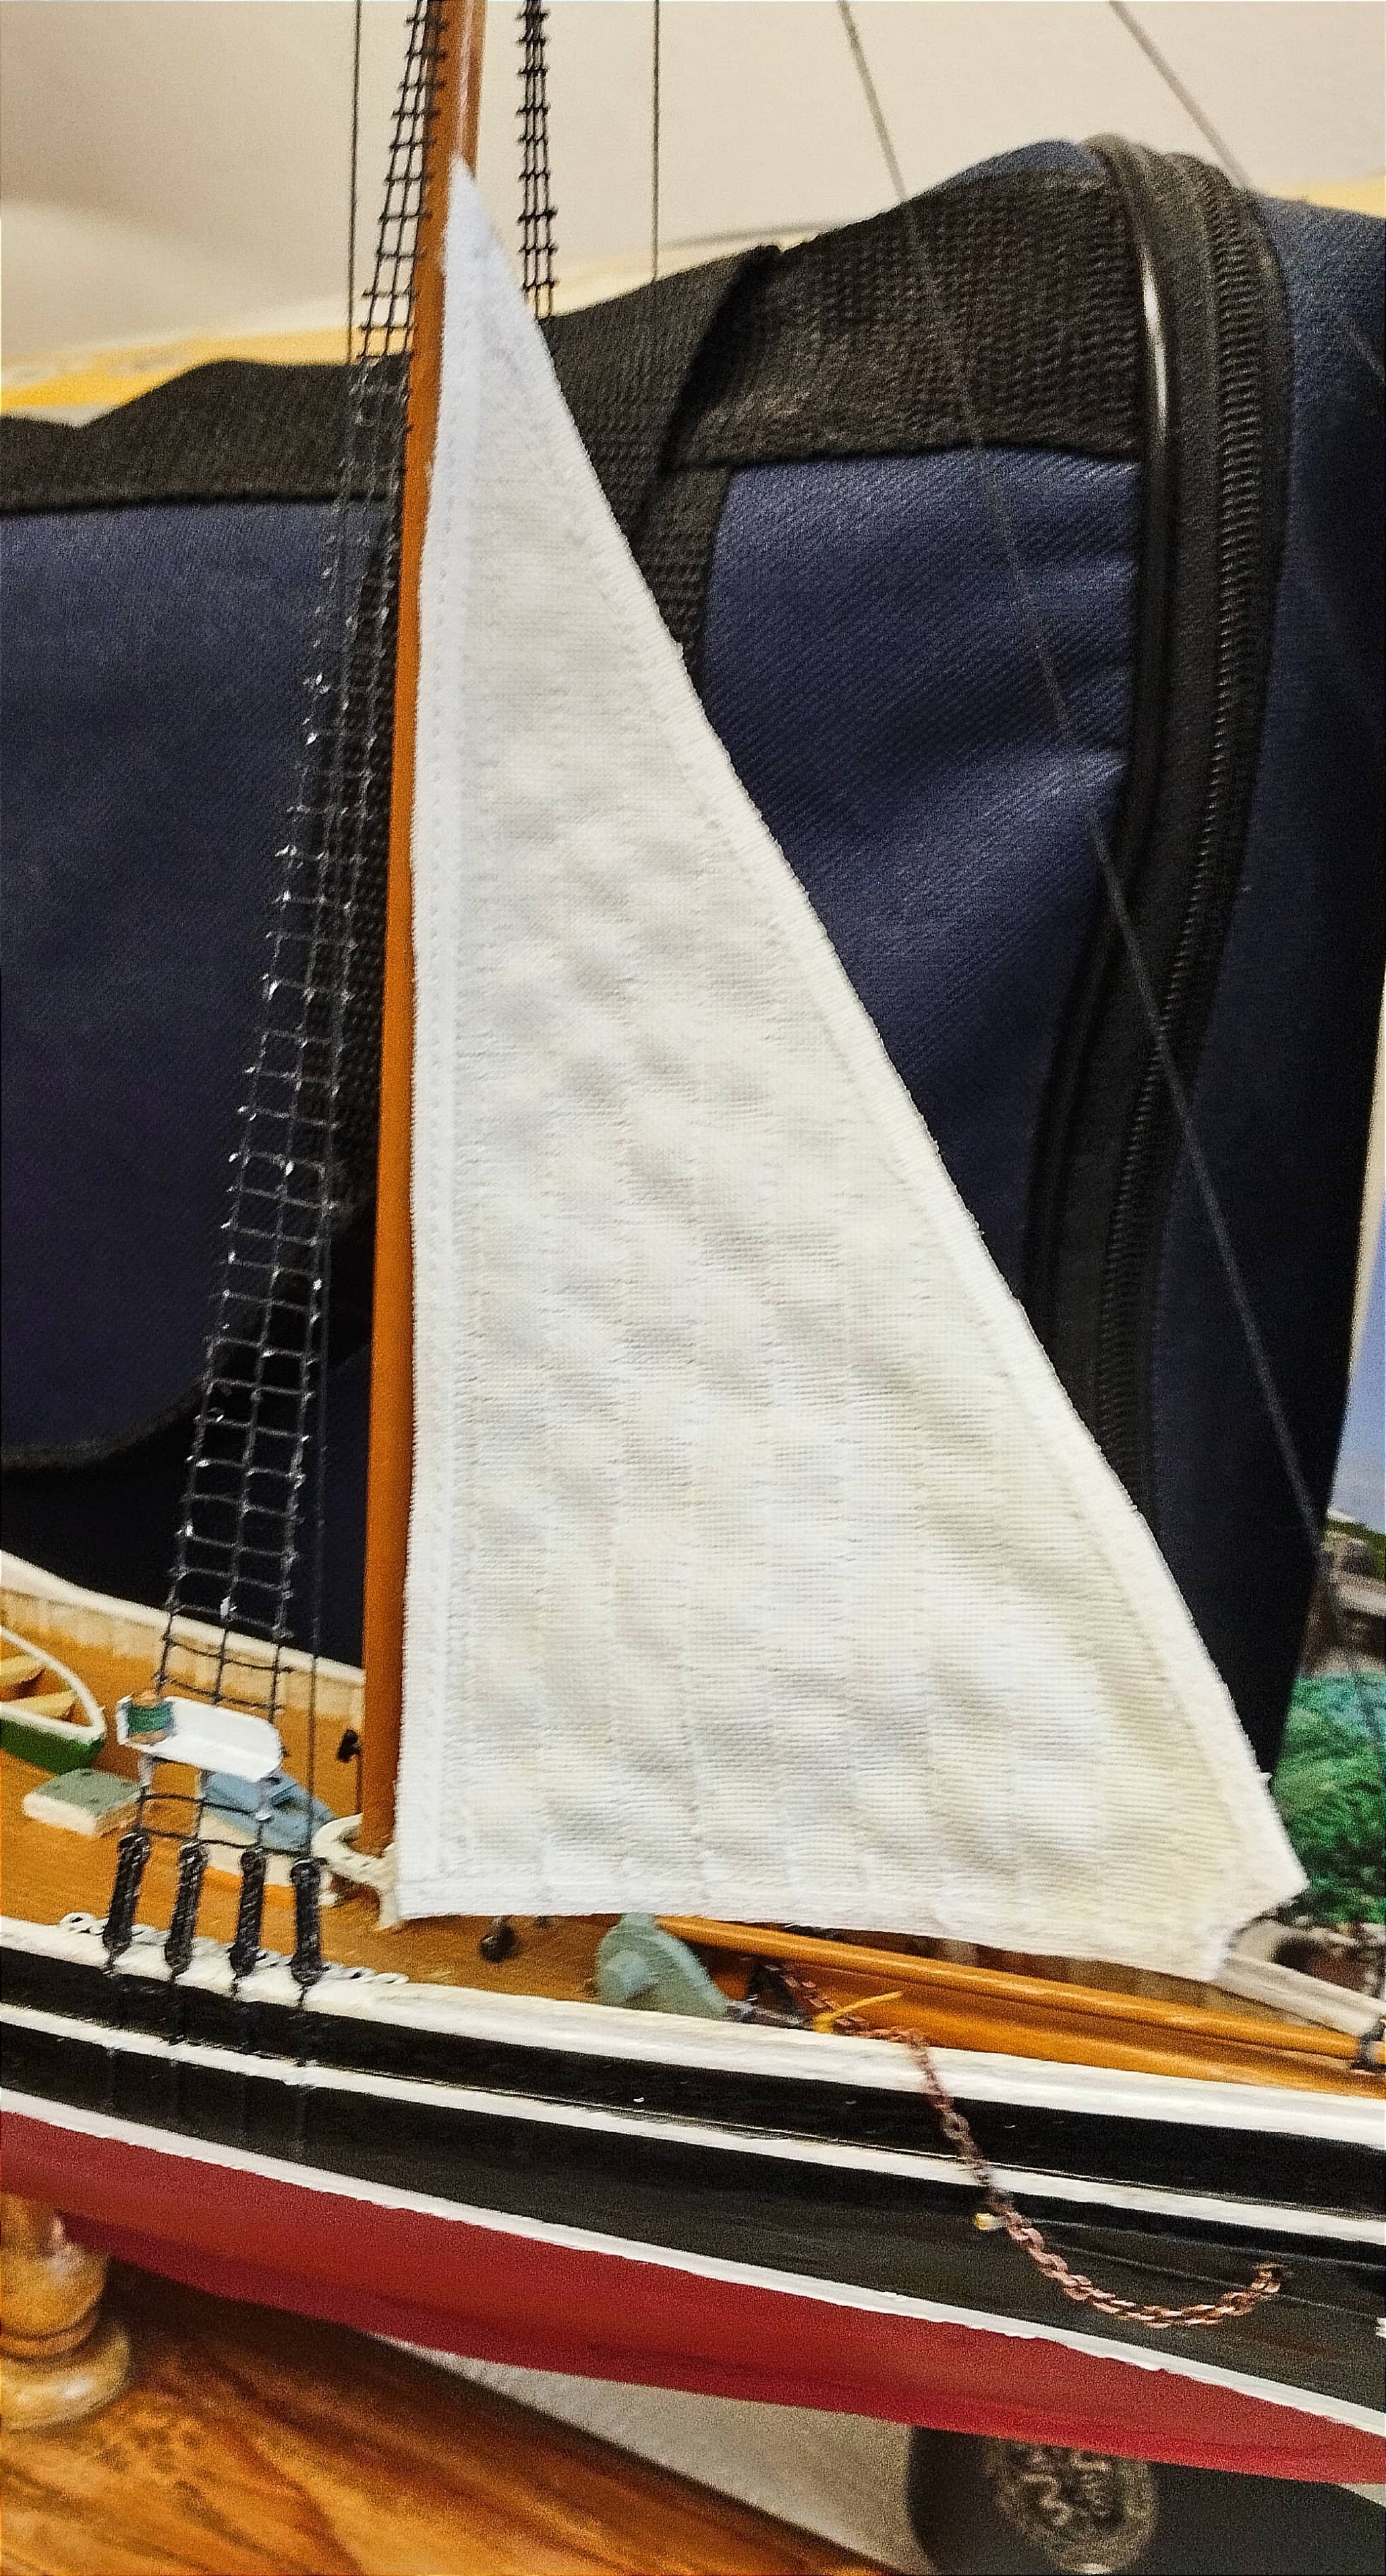
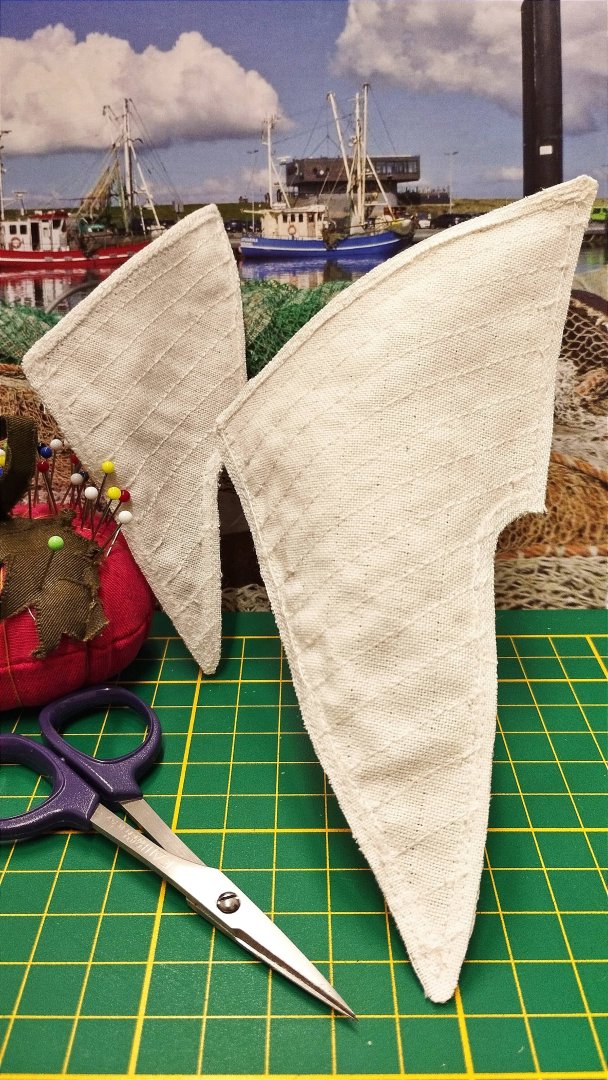
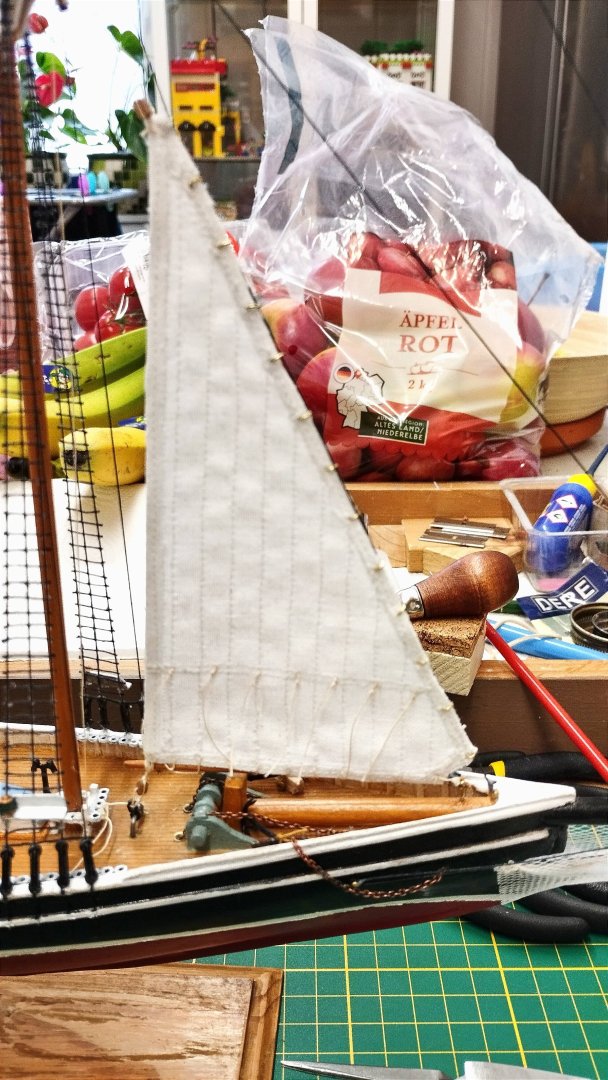
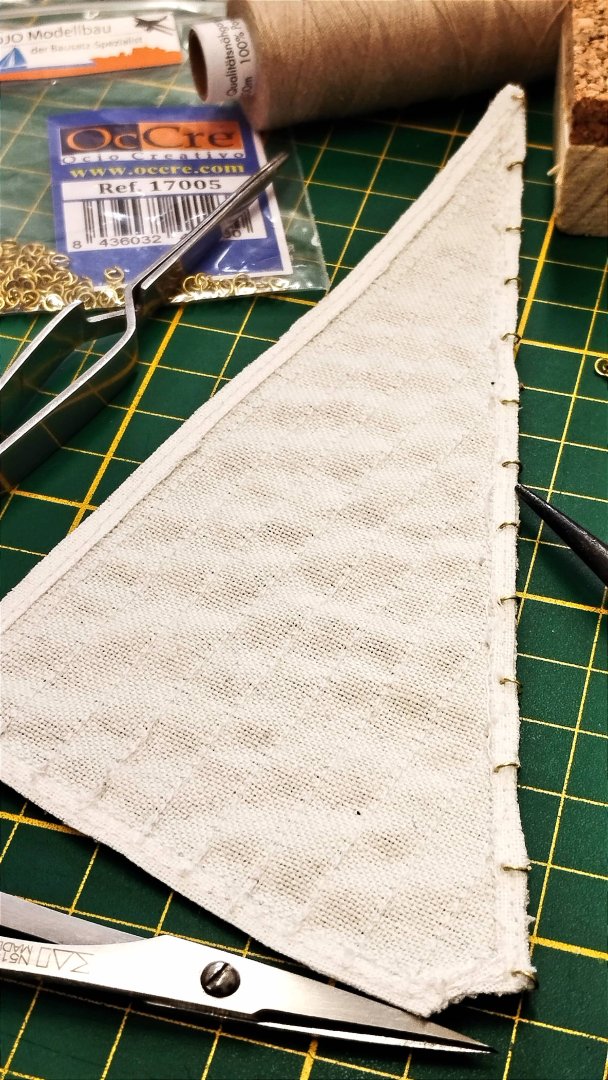
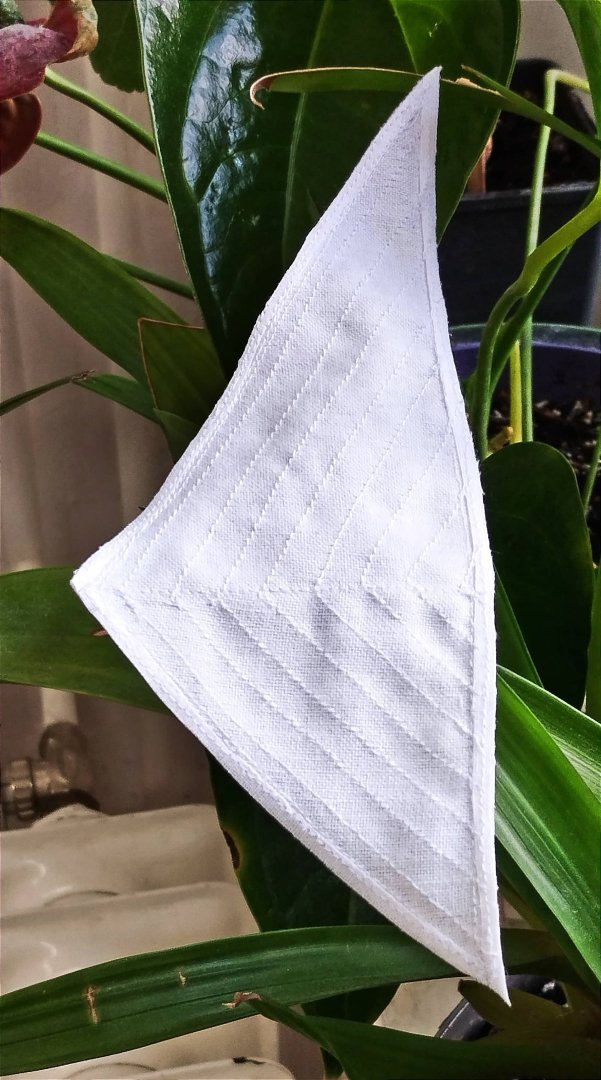
Ahoy! It's just after 22:10 here and I finally got through reworking my 'Main Topsail' and 'Fore Topsail'. They took two hours each! Alas I had sewn the gores into them vertical (Ooöops!) with a stitch length of 1 mm. It was indeed a miserable chore removing them all and as not to damage the Oxford fabric. Also my stitching around their boarders wasn't that great so I removed them all and resewed everything. Now they have their correct diagonal gore stitching and the interfacing on their boarders looks great! Tomorrow I will install them on my schooner as time permits. Good Night! 😴💤🌛✨☁️ UrkVisser ⛵
-
UrkVisser reacted to a post in a topic:
Bluenose 1921 by UrkVisser - Scientific Kit No. 164
-
petervisser reacted to a post in a topic:
Bluenose 1921 by UrkVisser - Scientific Kit No. 164
-
vossiewulf reacted to a post in a topic:
Bluenose 1921 by UrkVisser - Scientific Kit No. 164
-
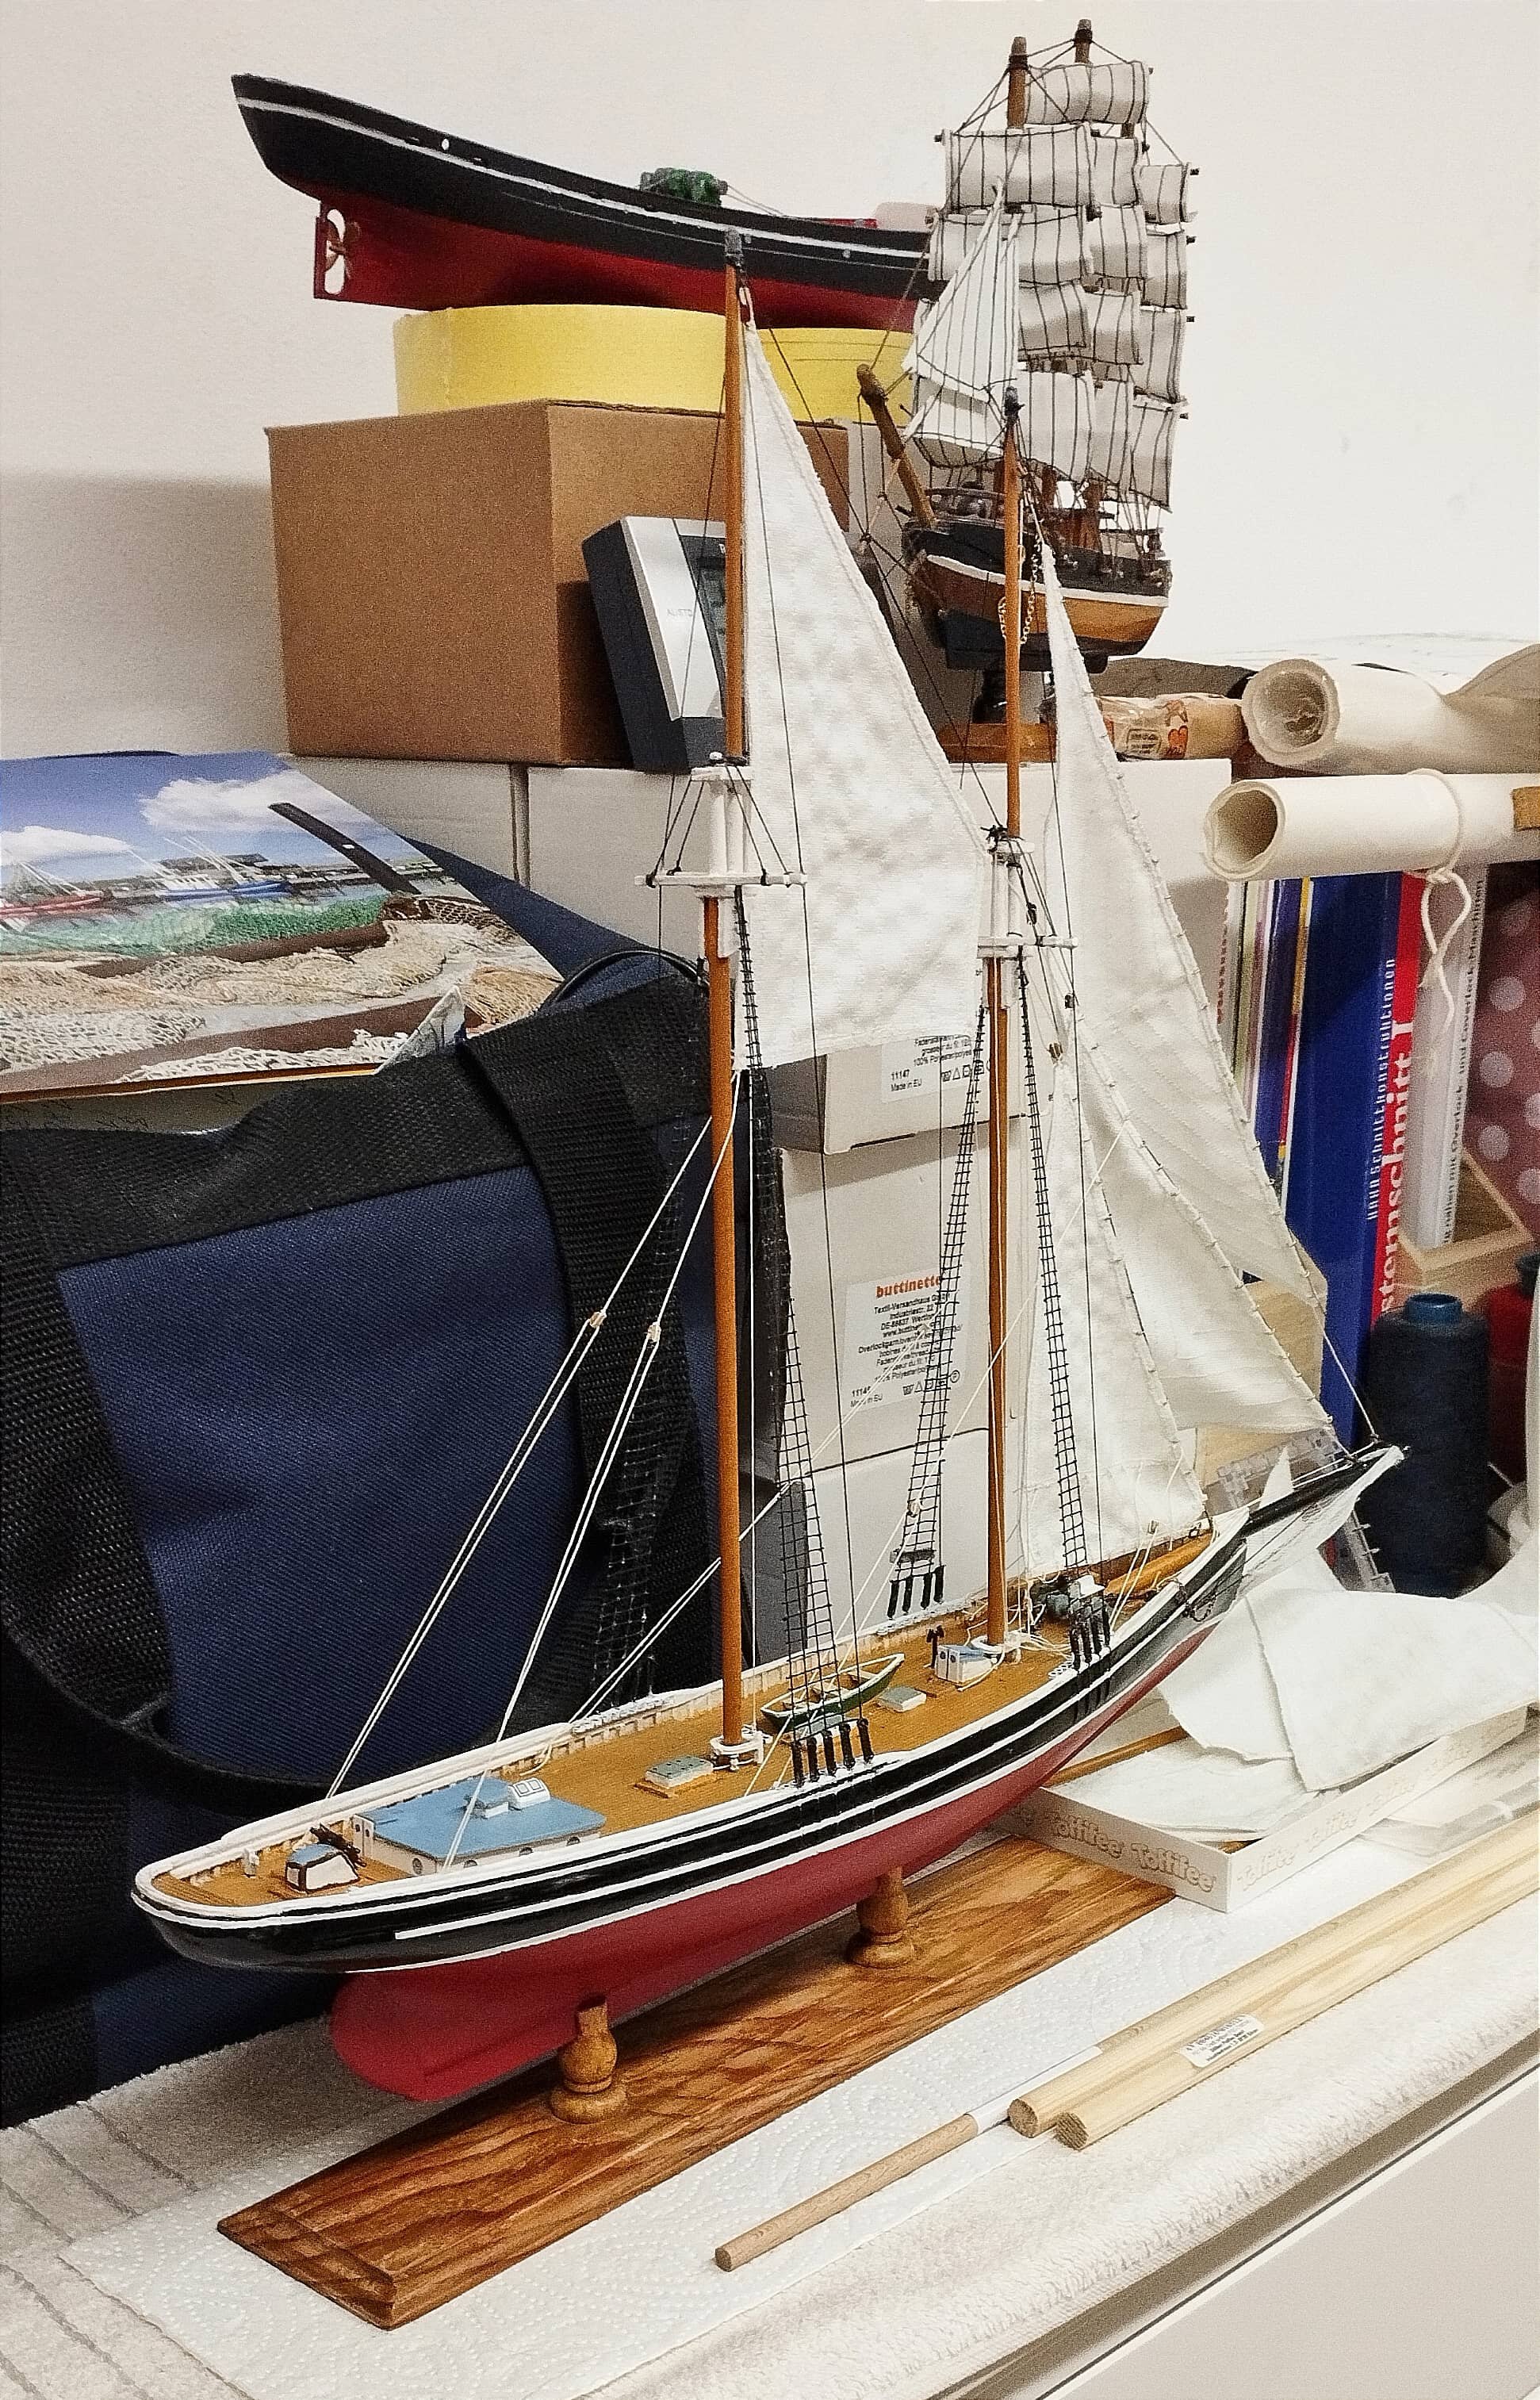
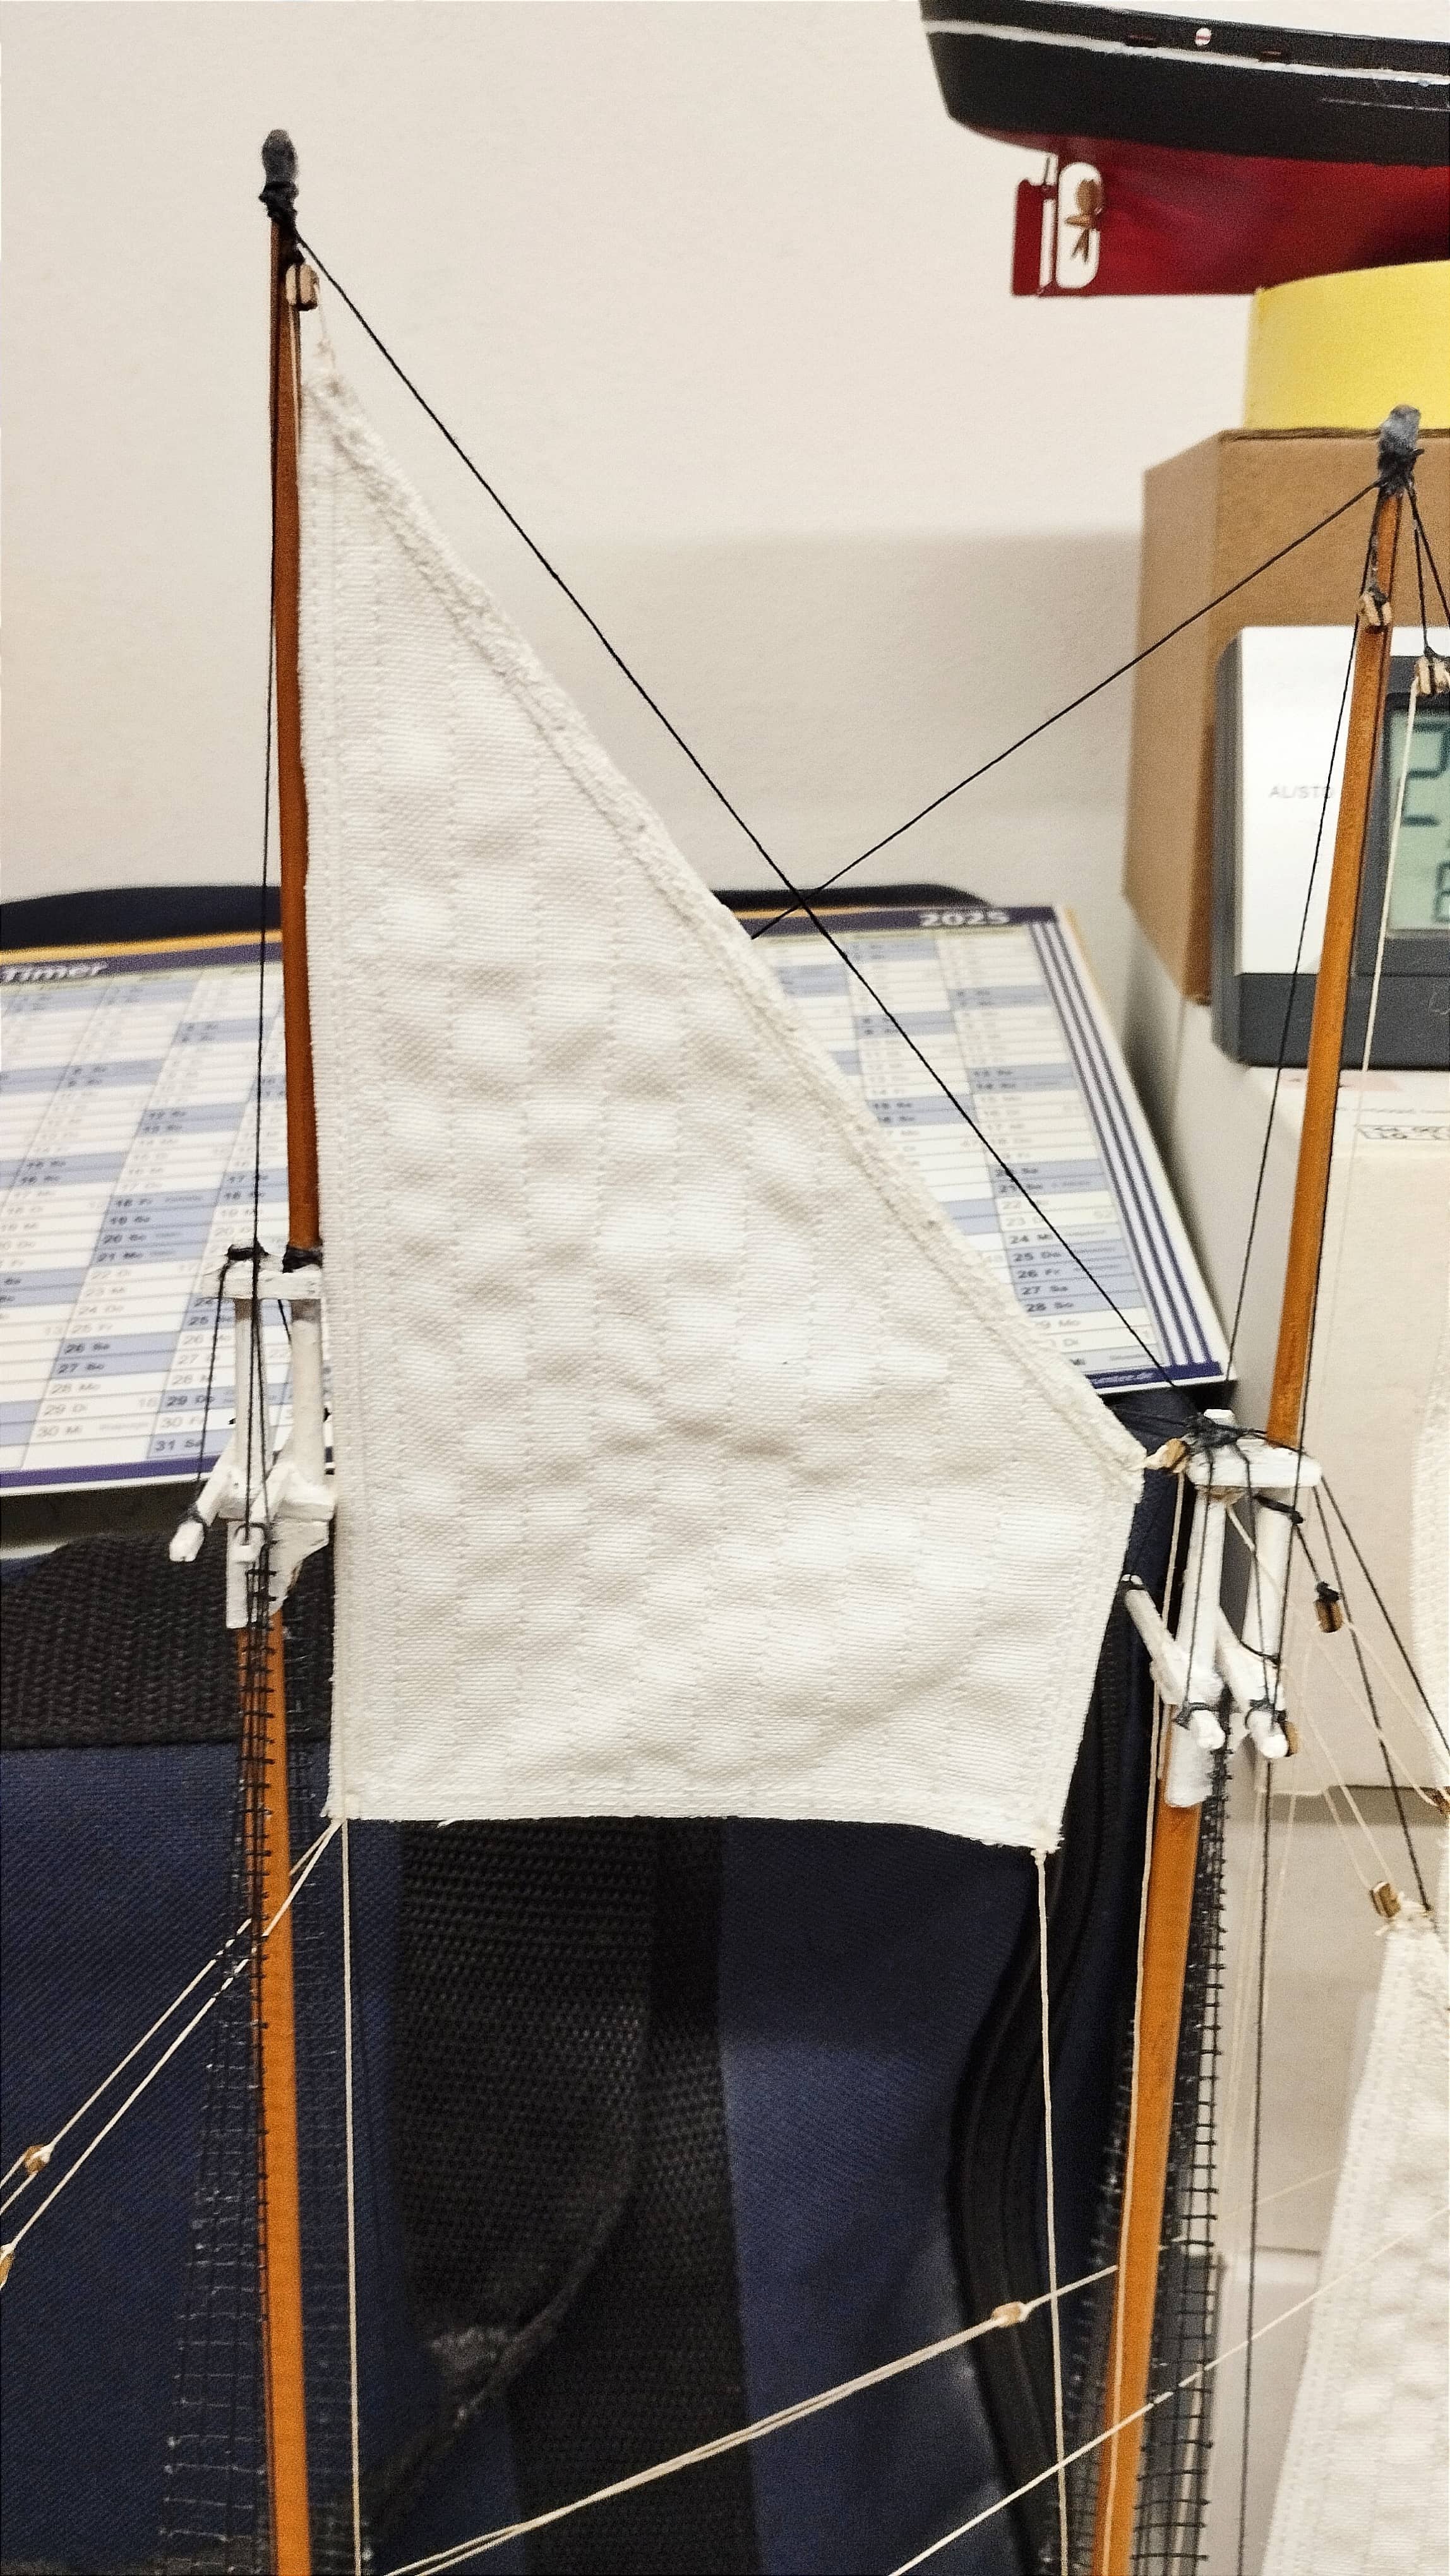
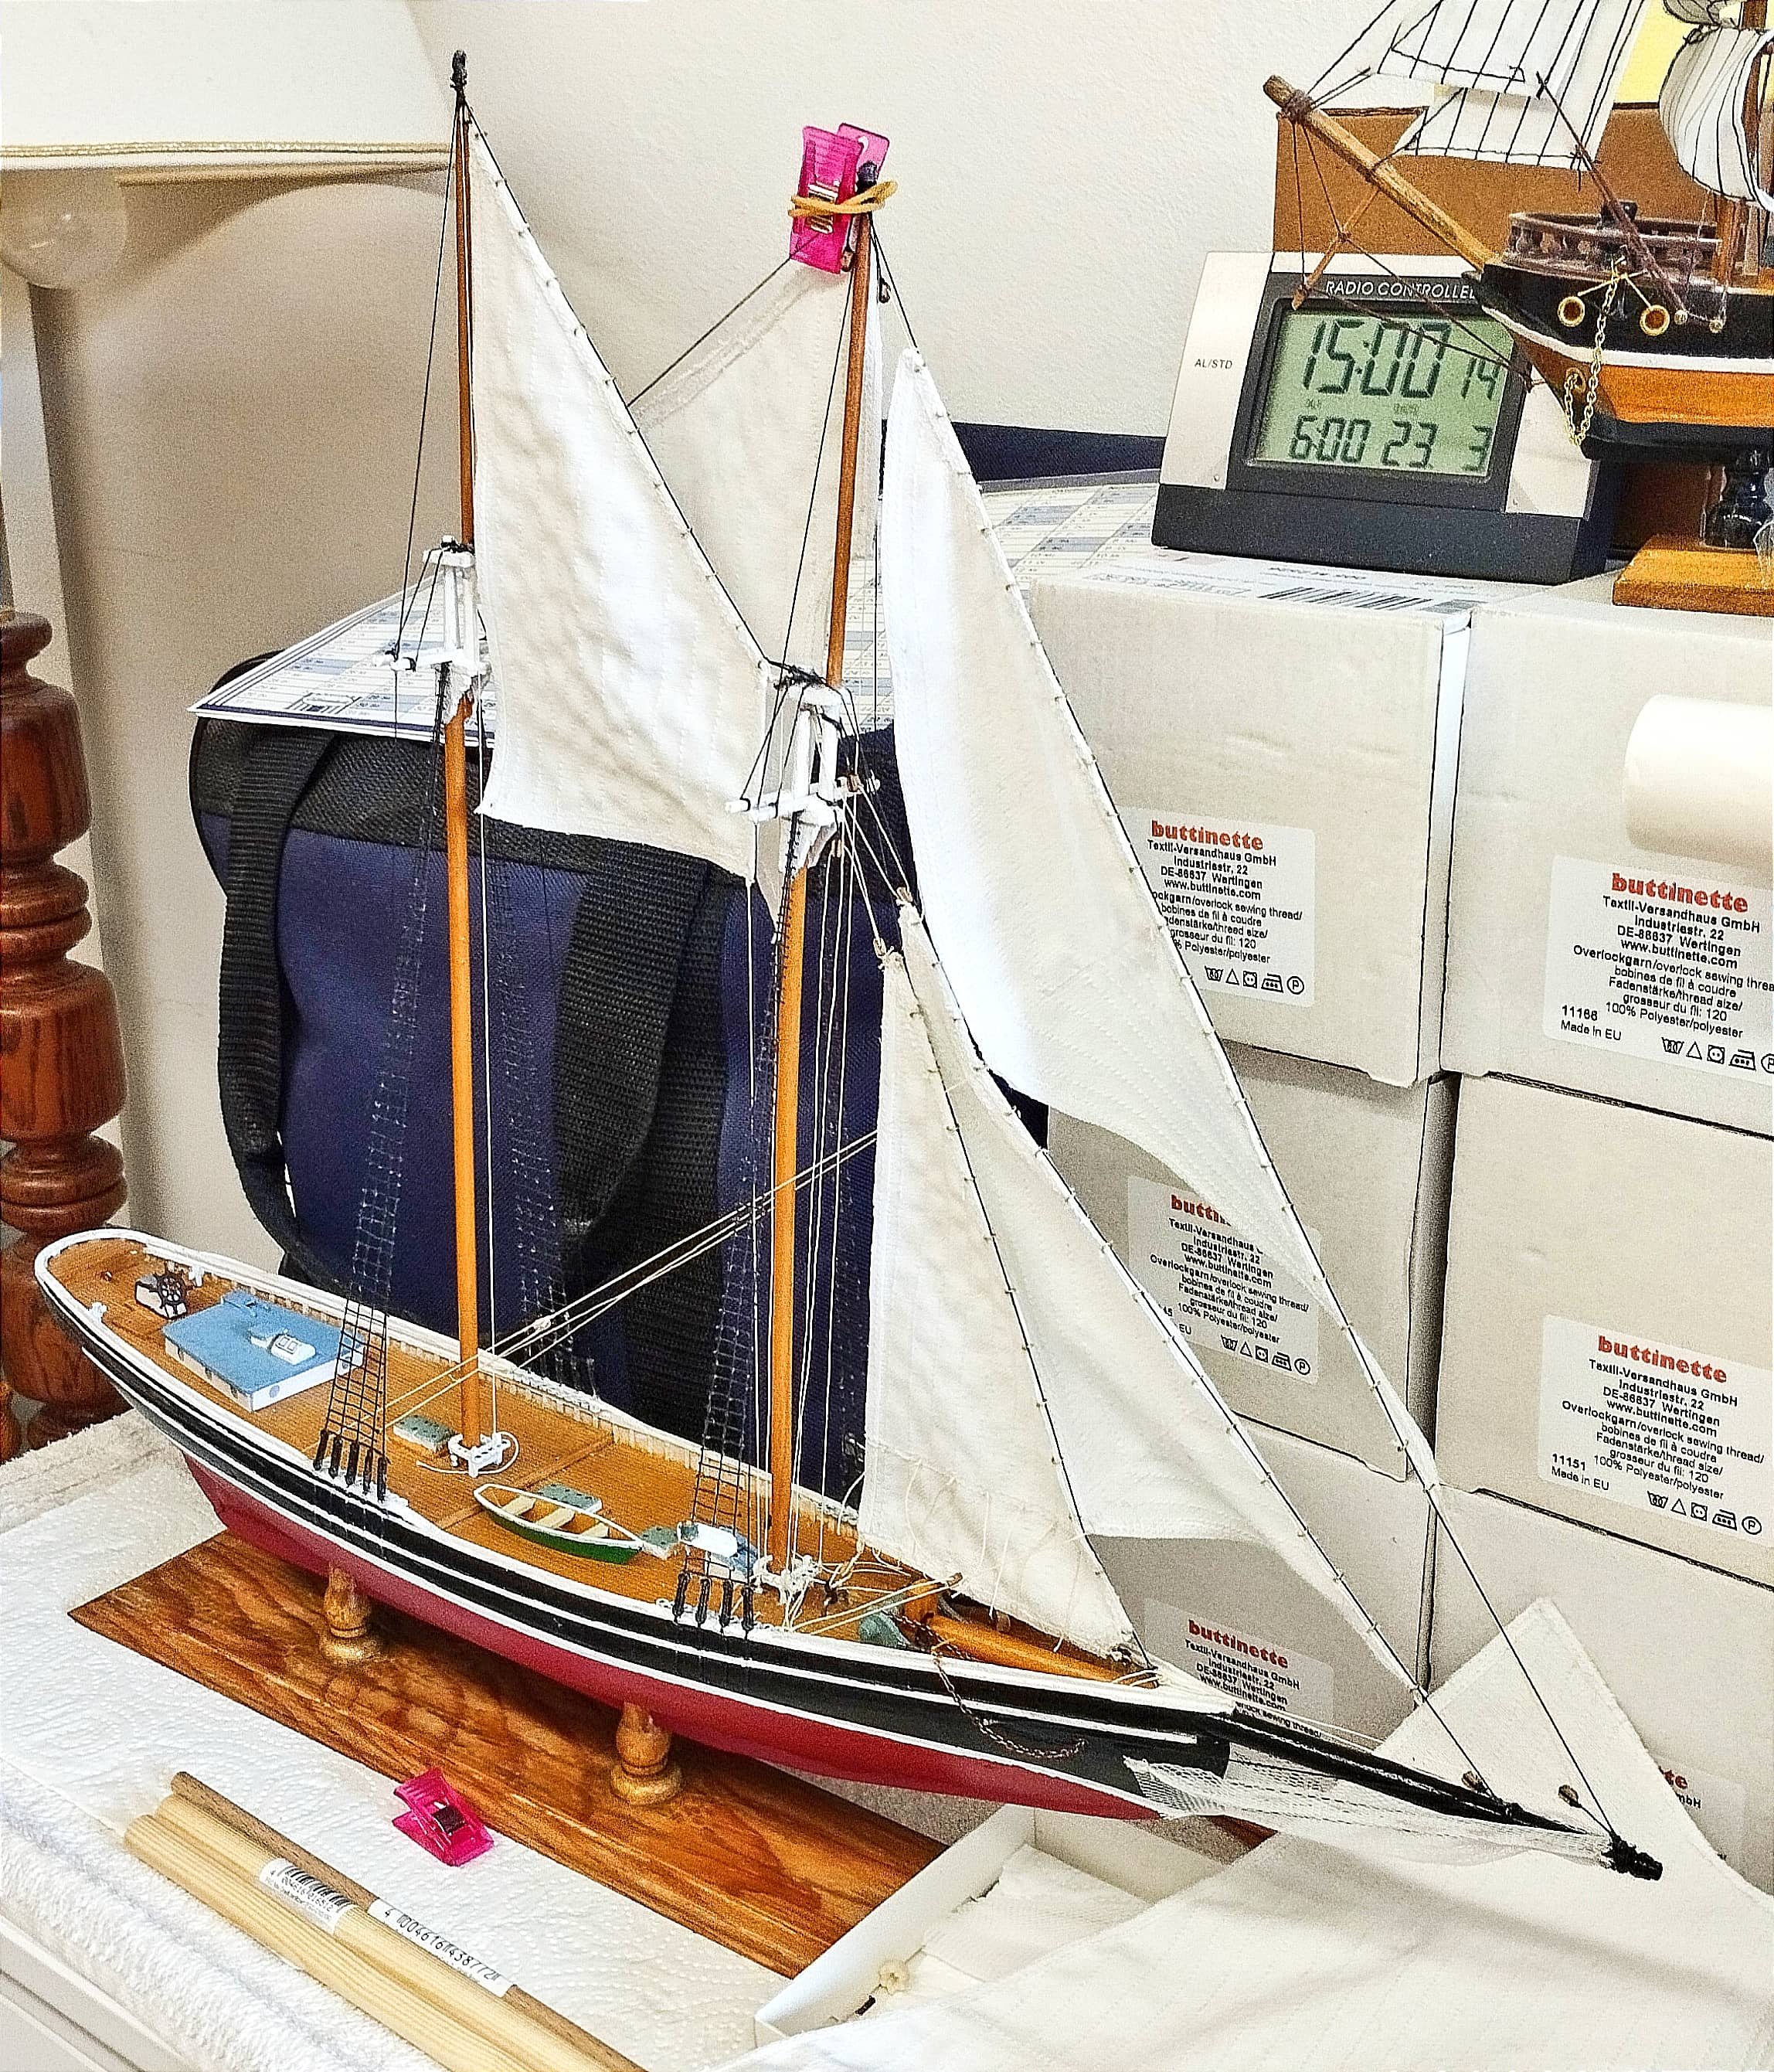
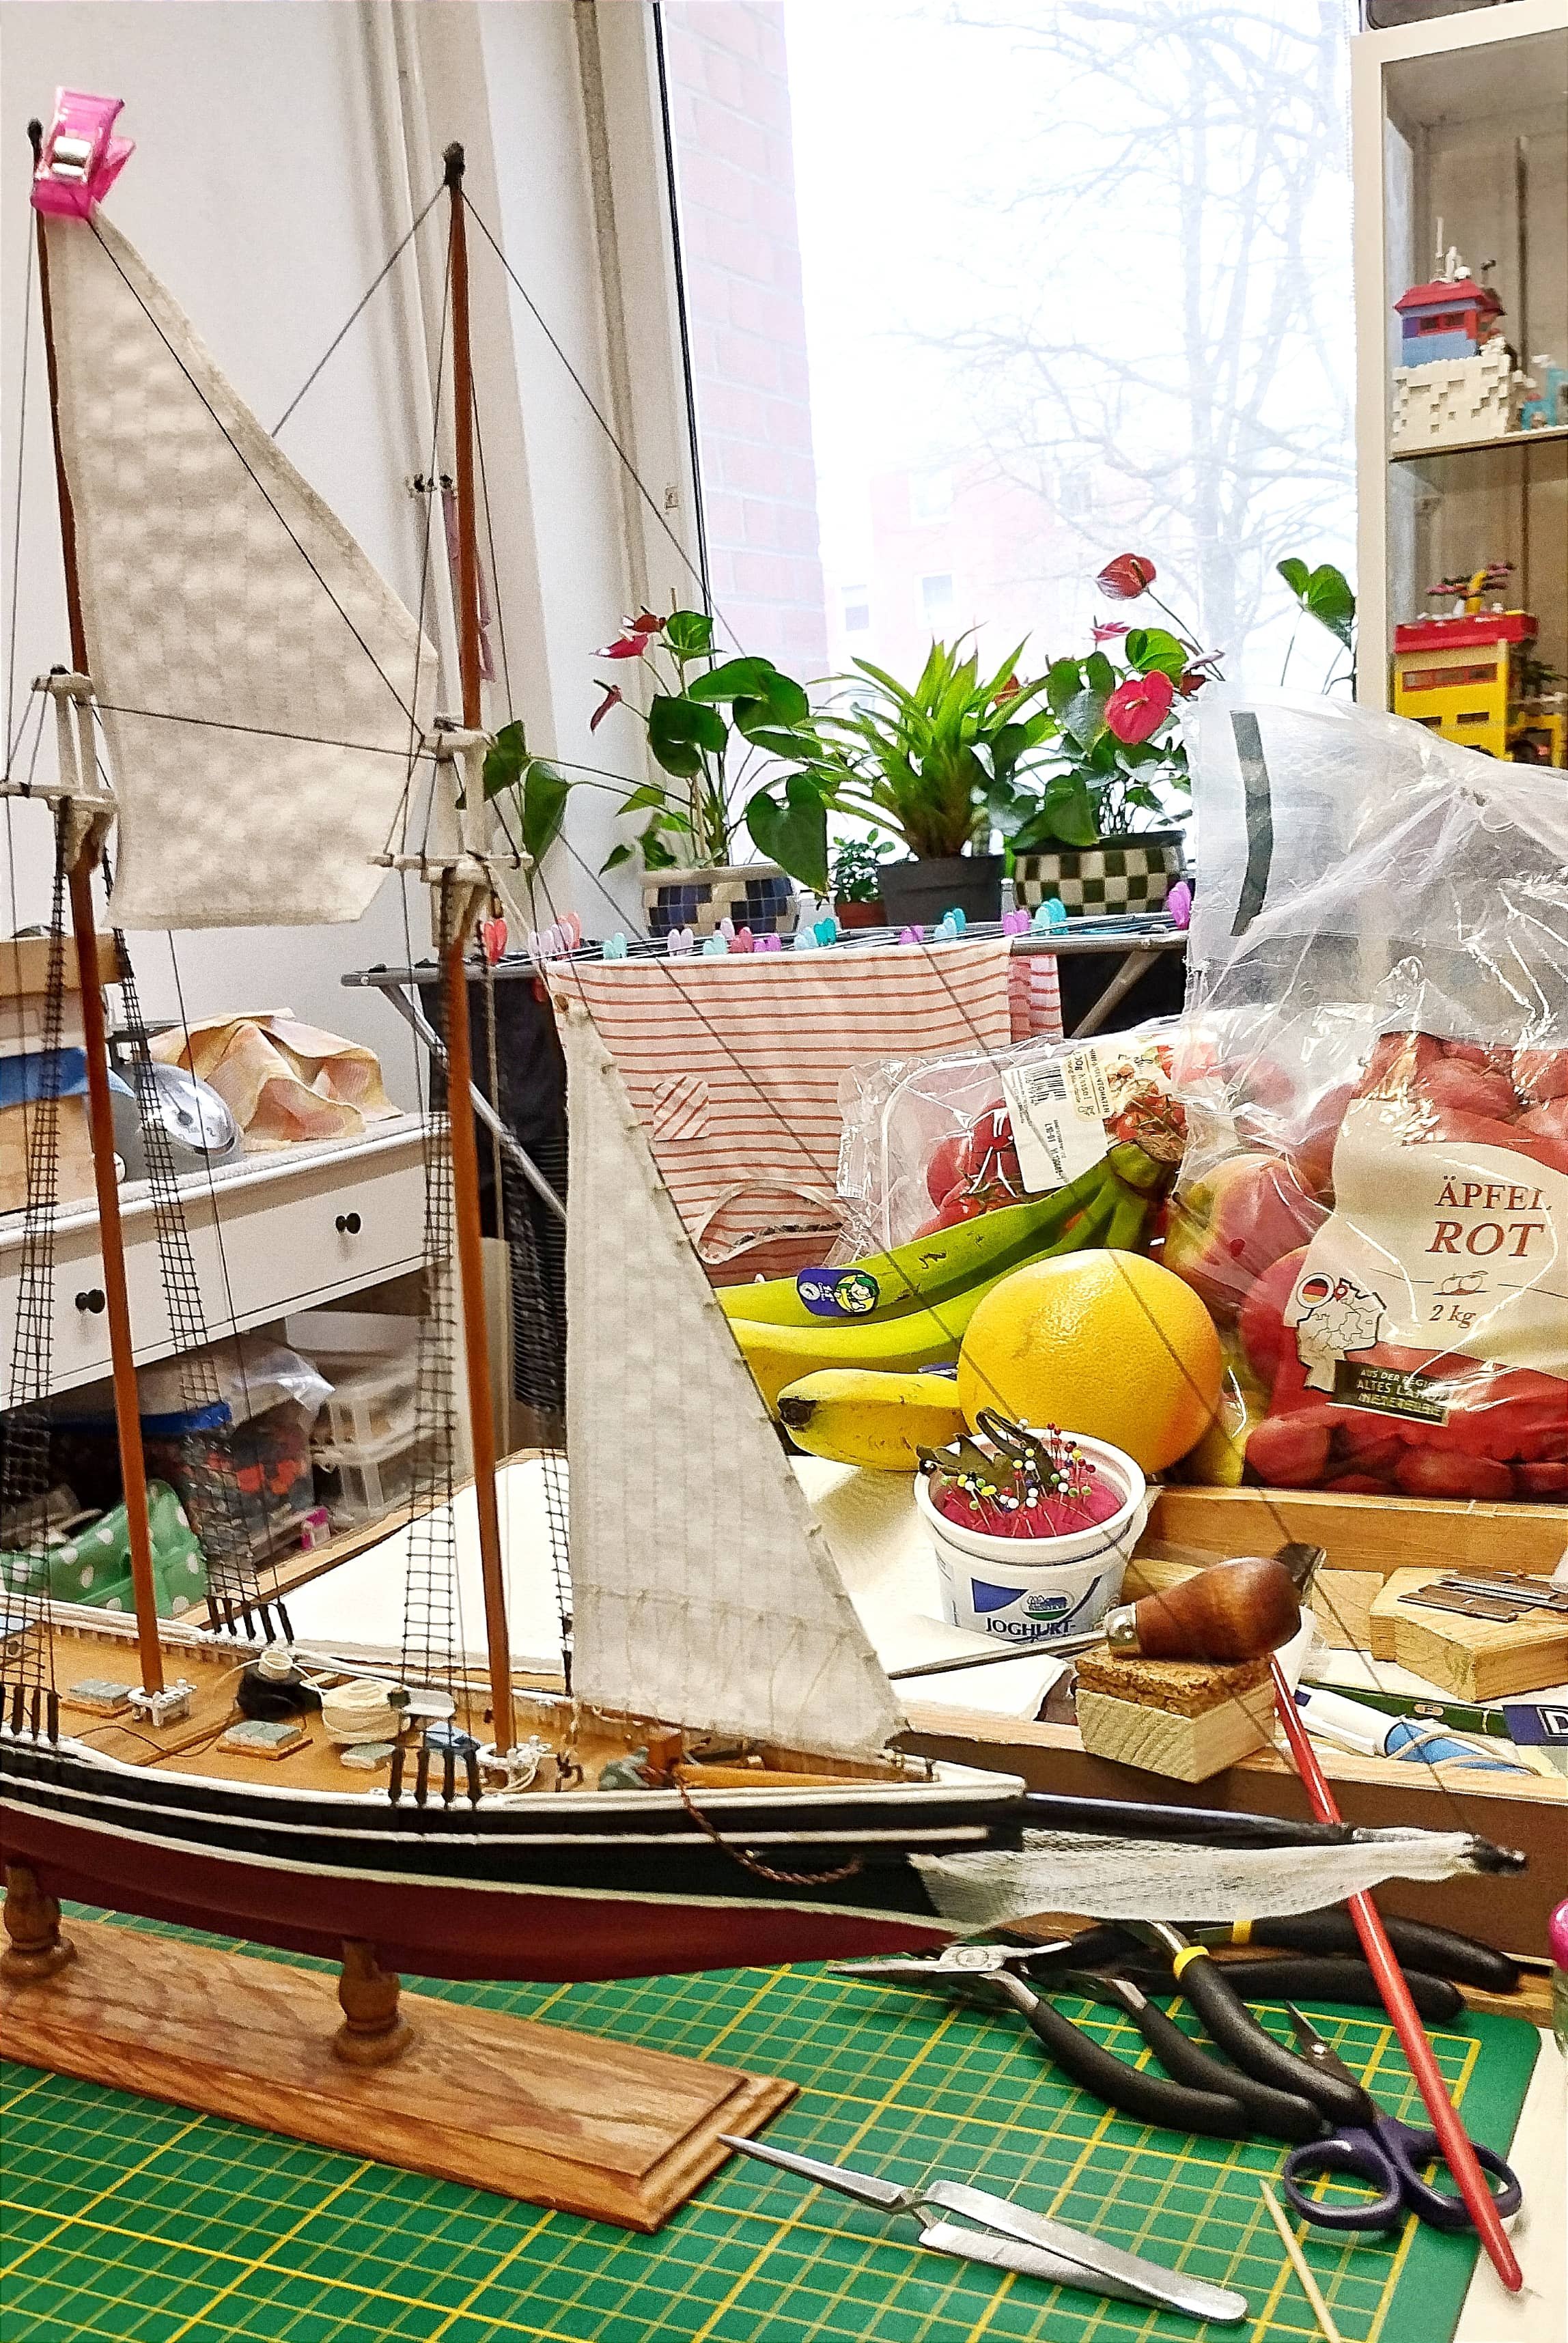
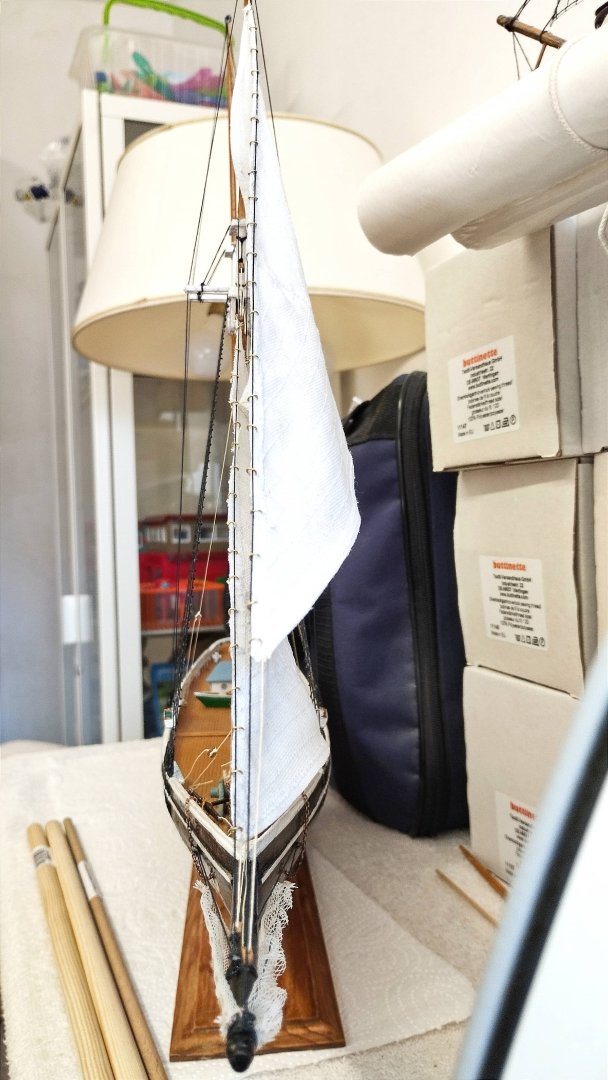
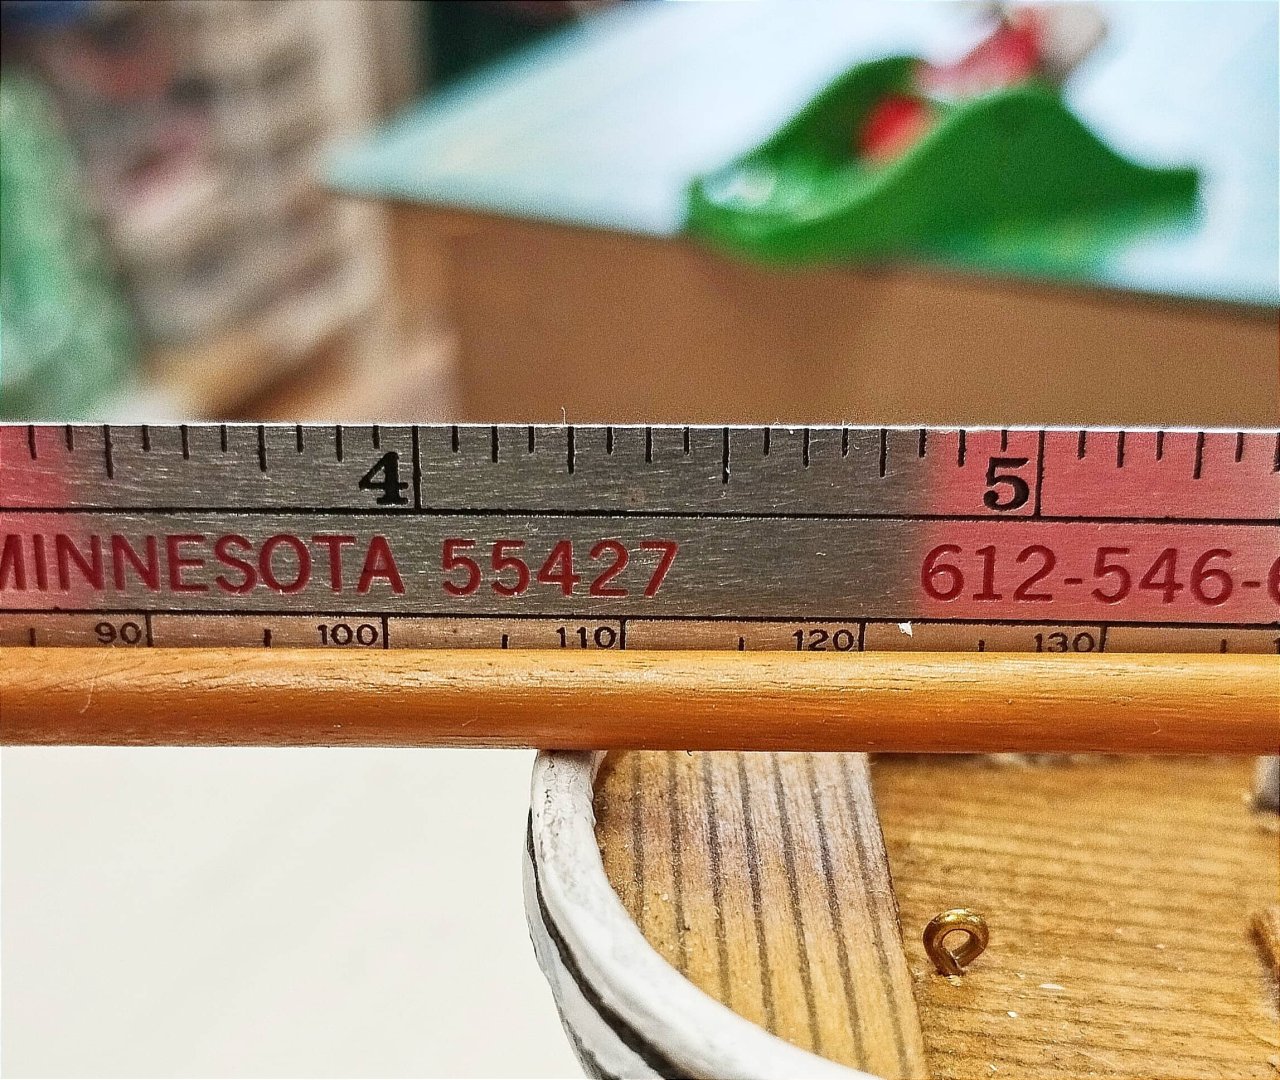
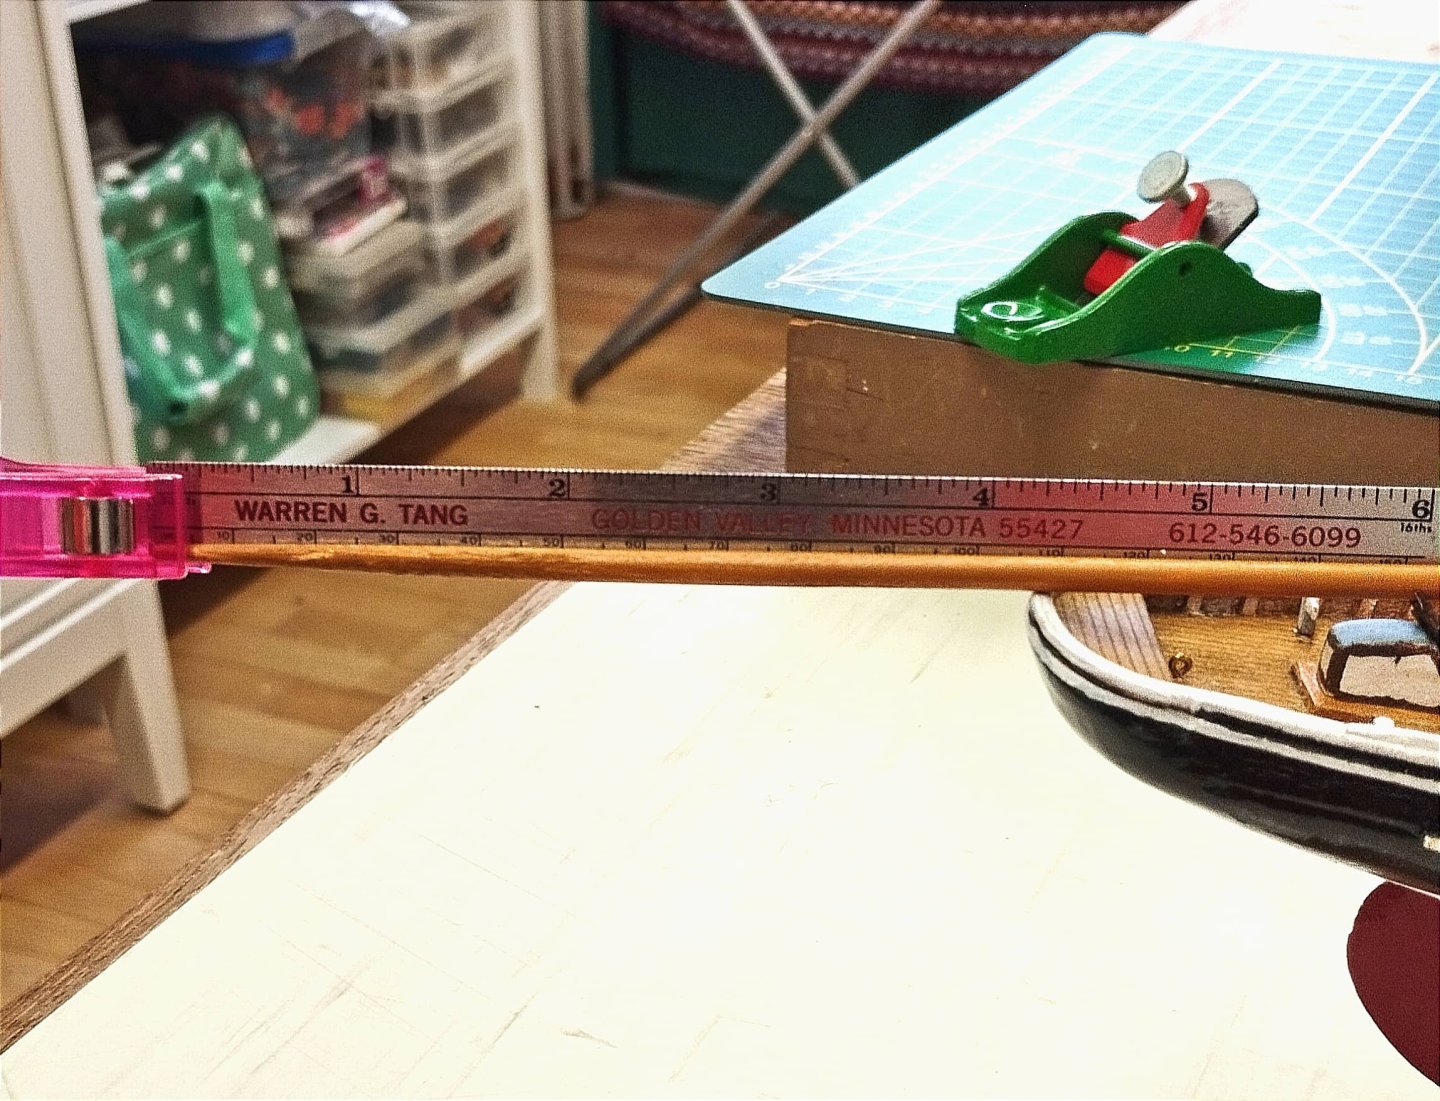
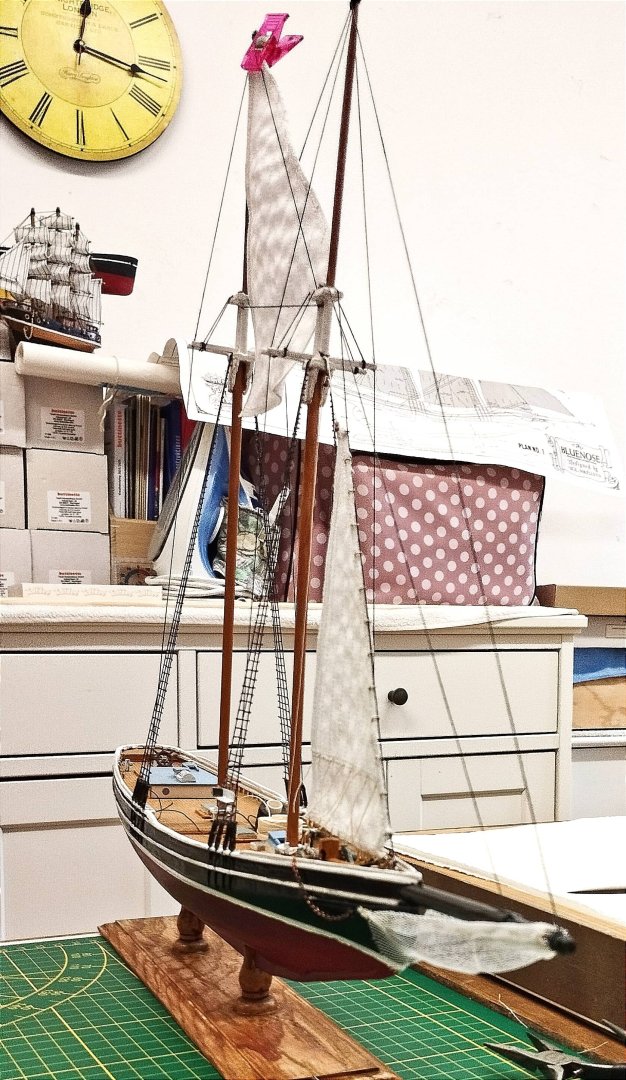
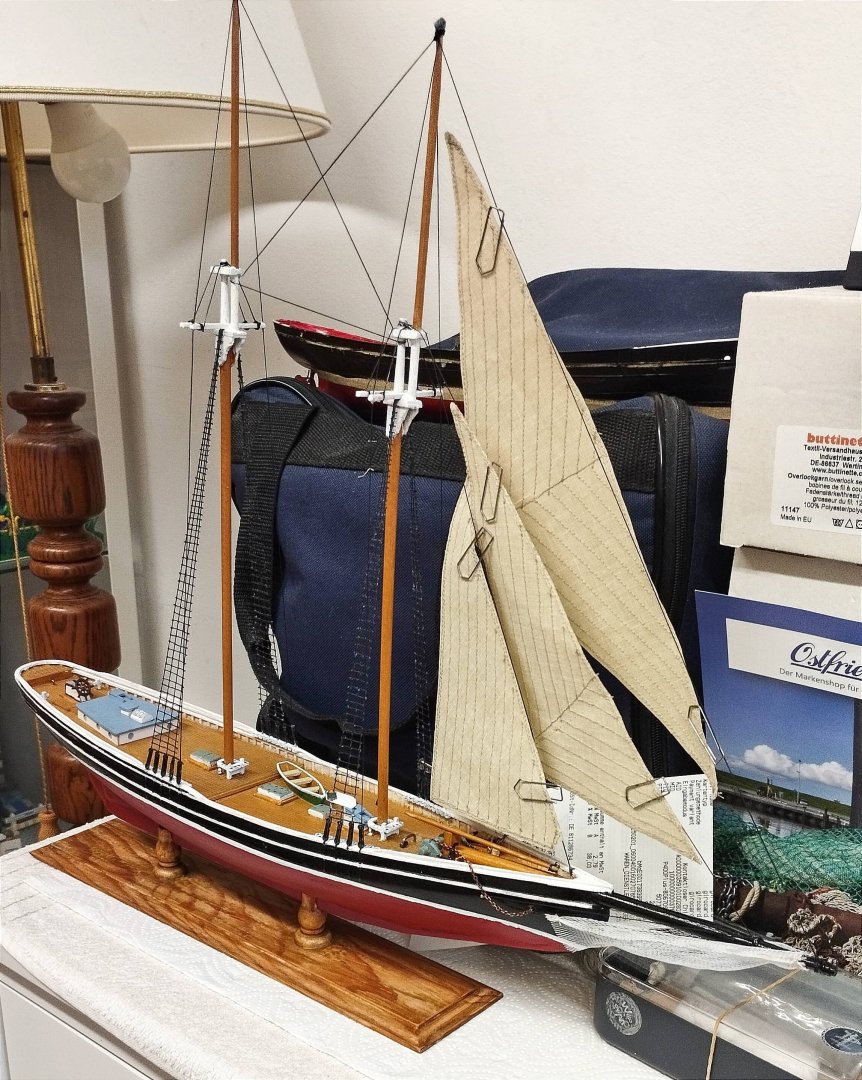
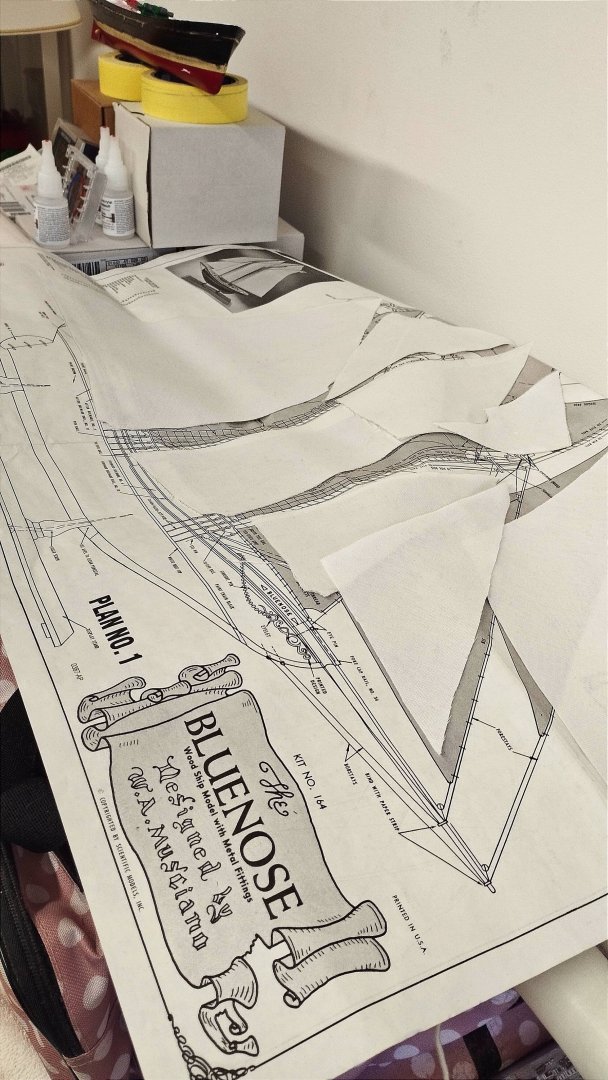
Sunday, 23. March 2025: Hi everybody! It's an enjoyable Sunday and I just installed the 'Fisherman's Topsail' on my schooner and did it's rigging while listing to my usual church service in Dutch. I also altered the schooner's 'Main Sail' and shortened it's boom which were both way out of proportion in both width and length. Old photos of 'Bluenose' (1921) confirm my schooner finally looks correct. Now everything above deck is in the scale of 1:76 whereas this sail and boom were stretched out to 1:72; check out the blueprint in the kit and you'll see what I mean! I still have to take maybe an inch off the 'Main Sail's' gaff in addition but only after I mount the sail to the mast and boom. The hull of course is 1:100 to fit using a 2 foot long 4" x 4" but this was the factory's decision (not mine). Maybe the size of the kit's carton was also an issue; who knows? About half way between 1:76 and 1:00 H0 (1:87) figures may look suitable; or maybe not? Best Regards, UrkVisser


-
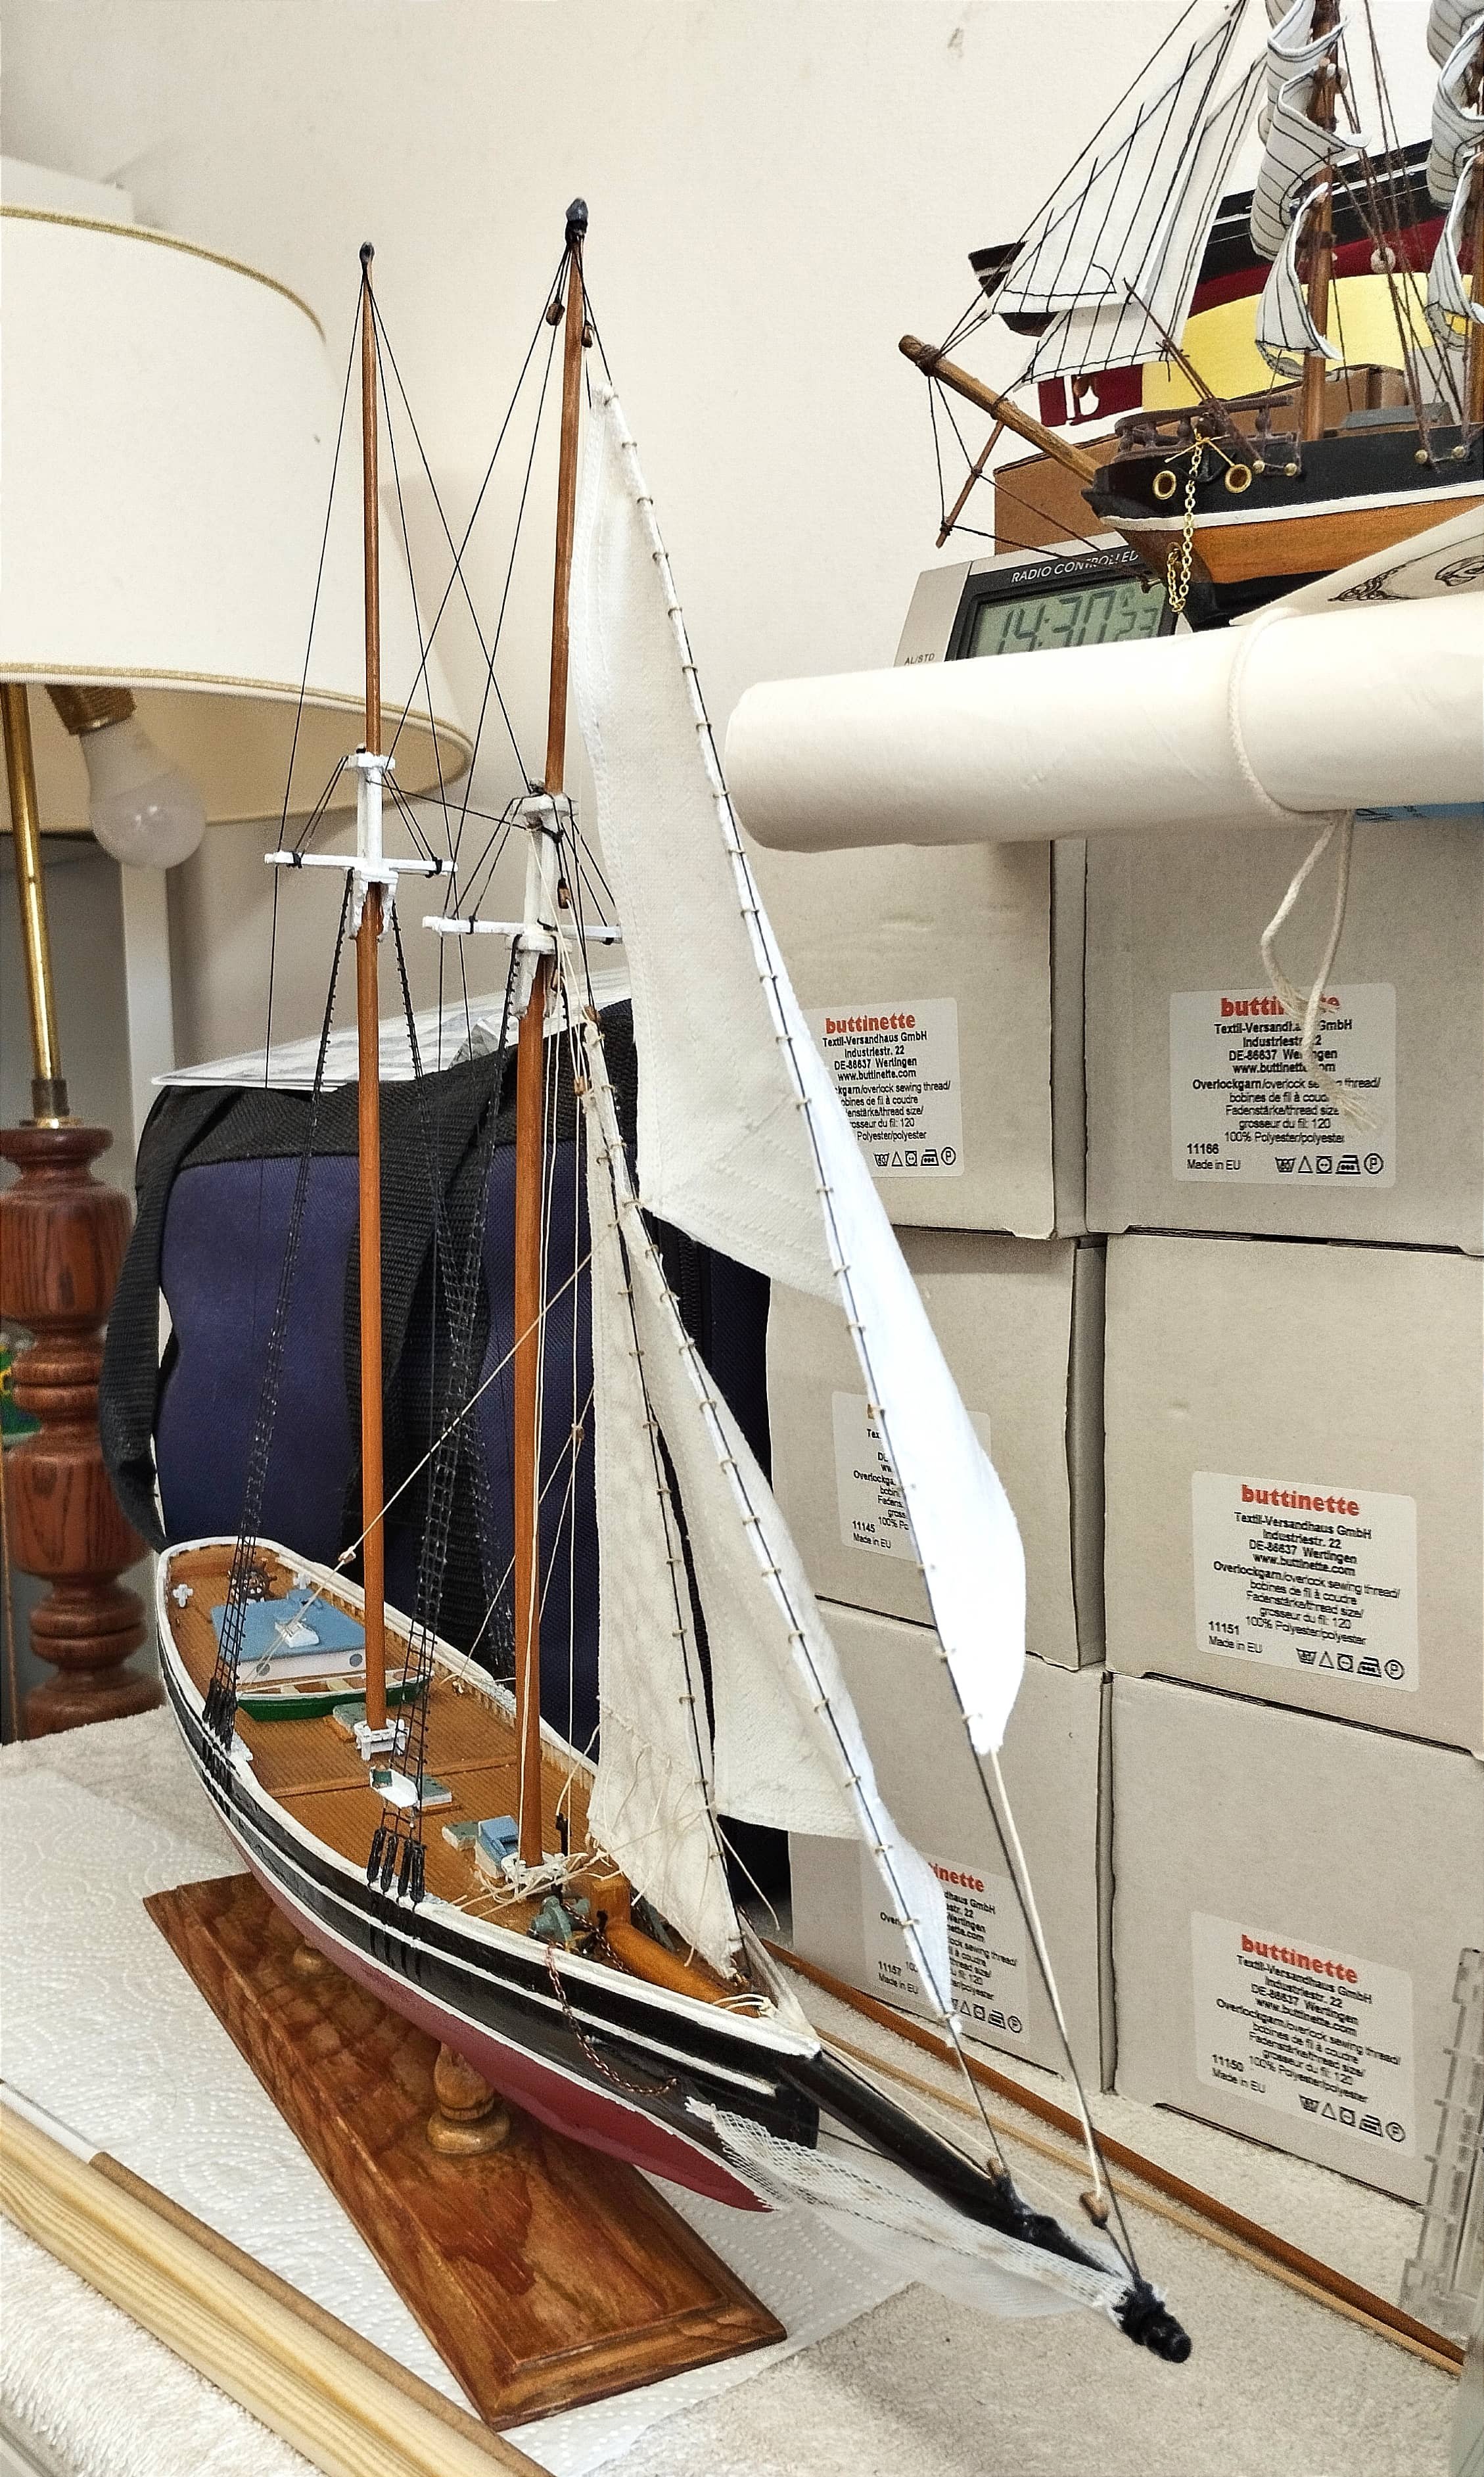
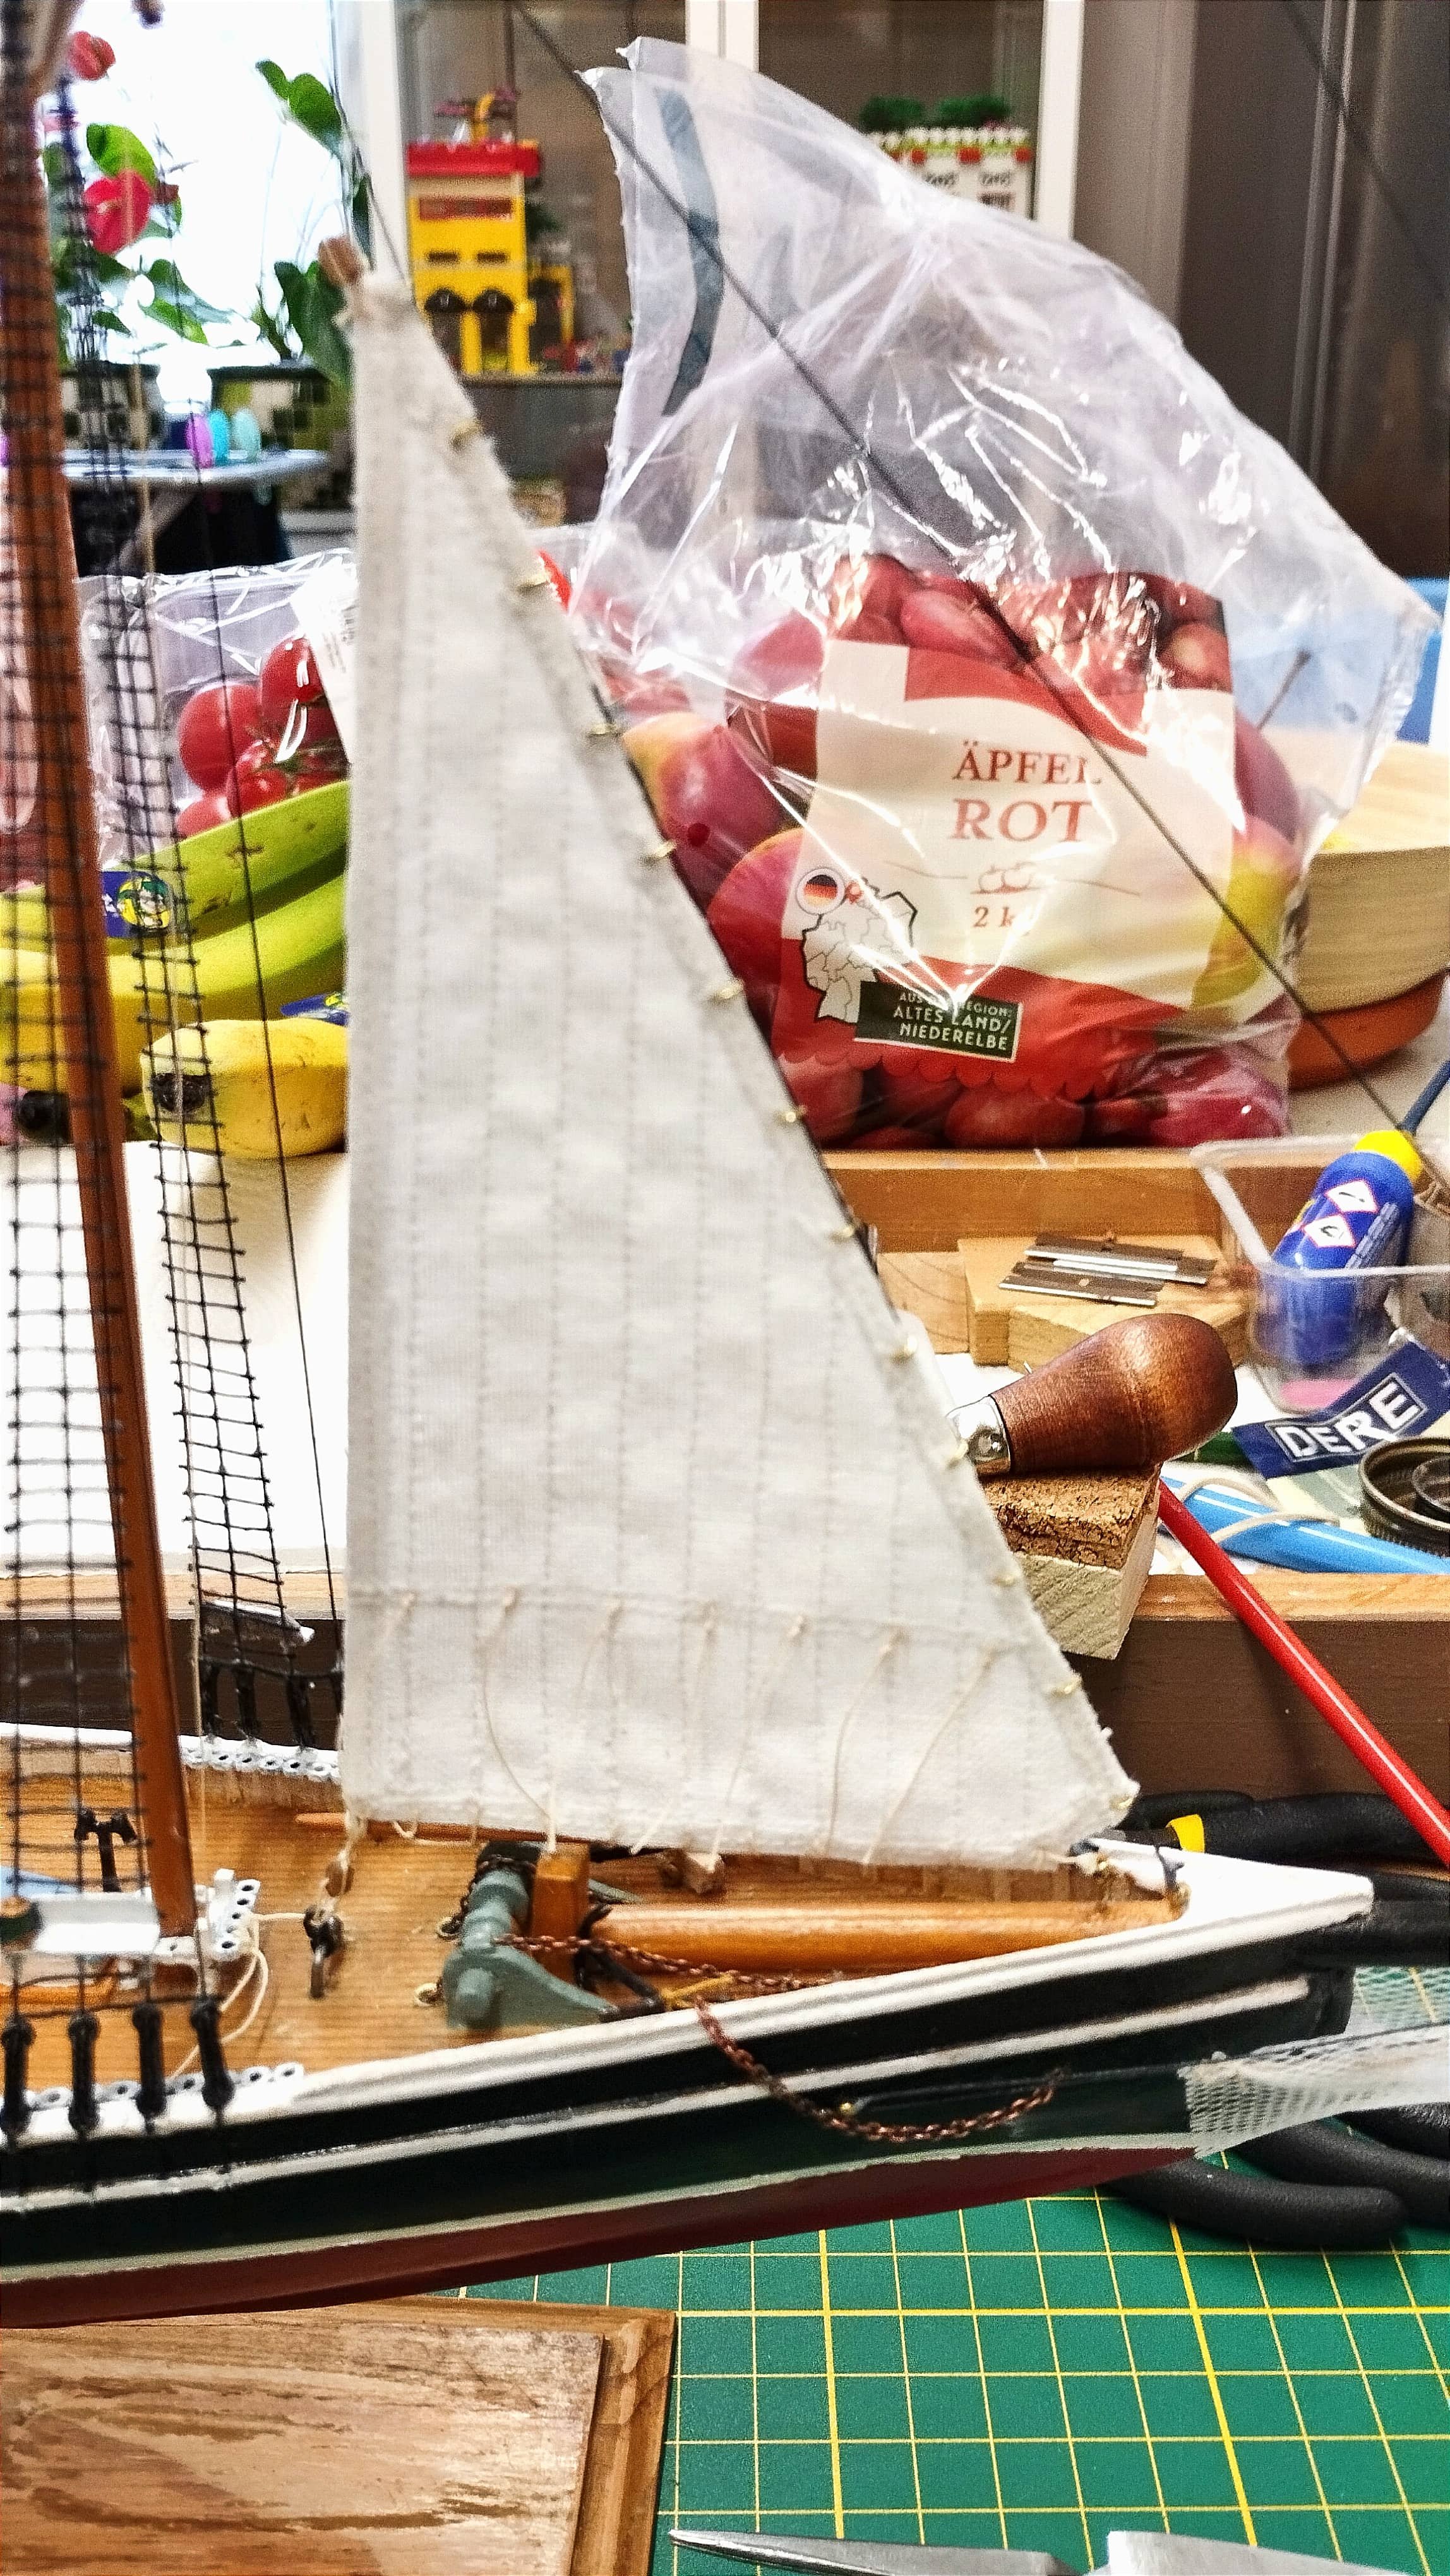
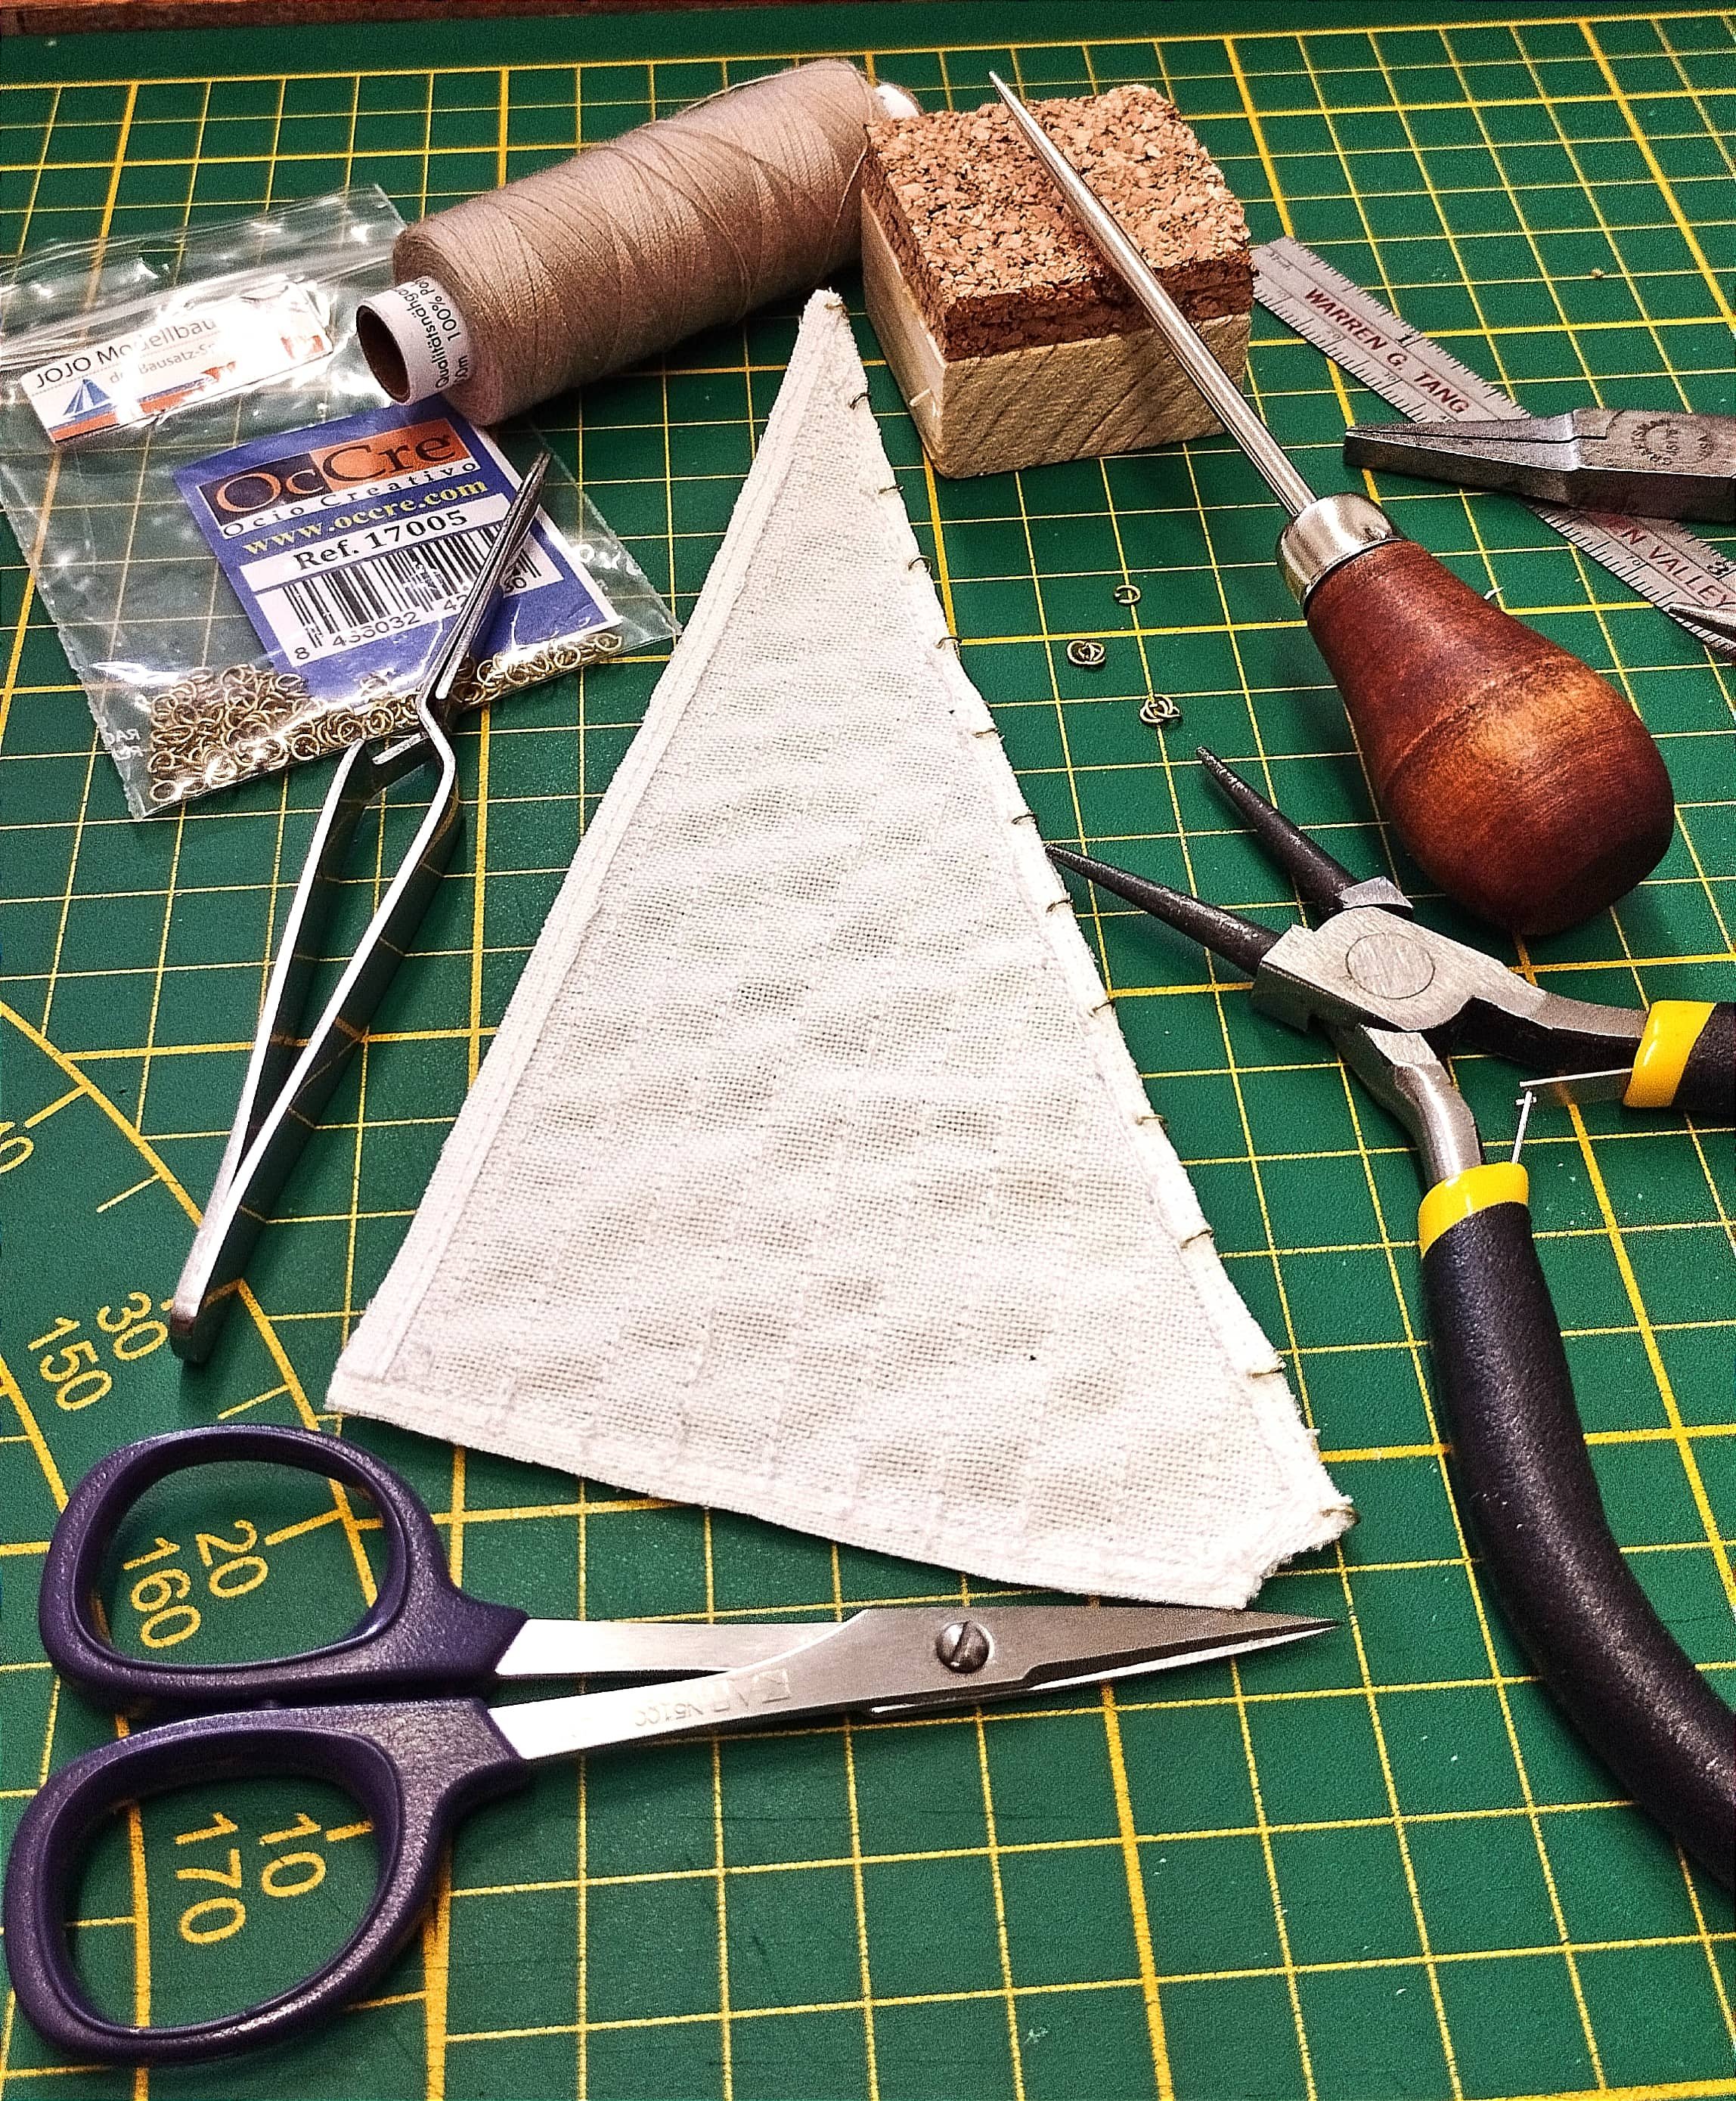
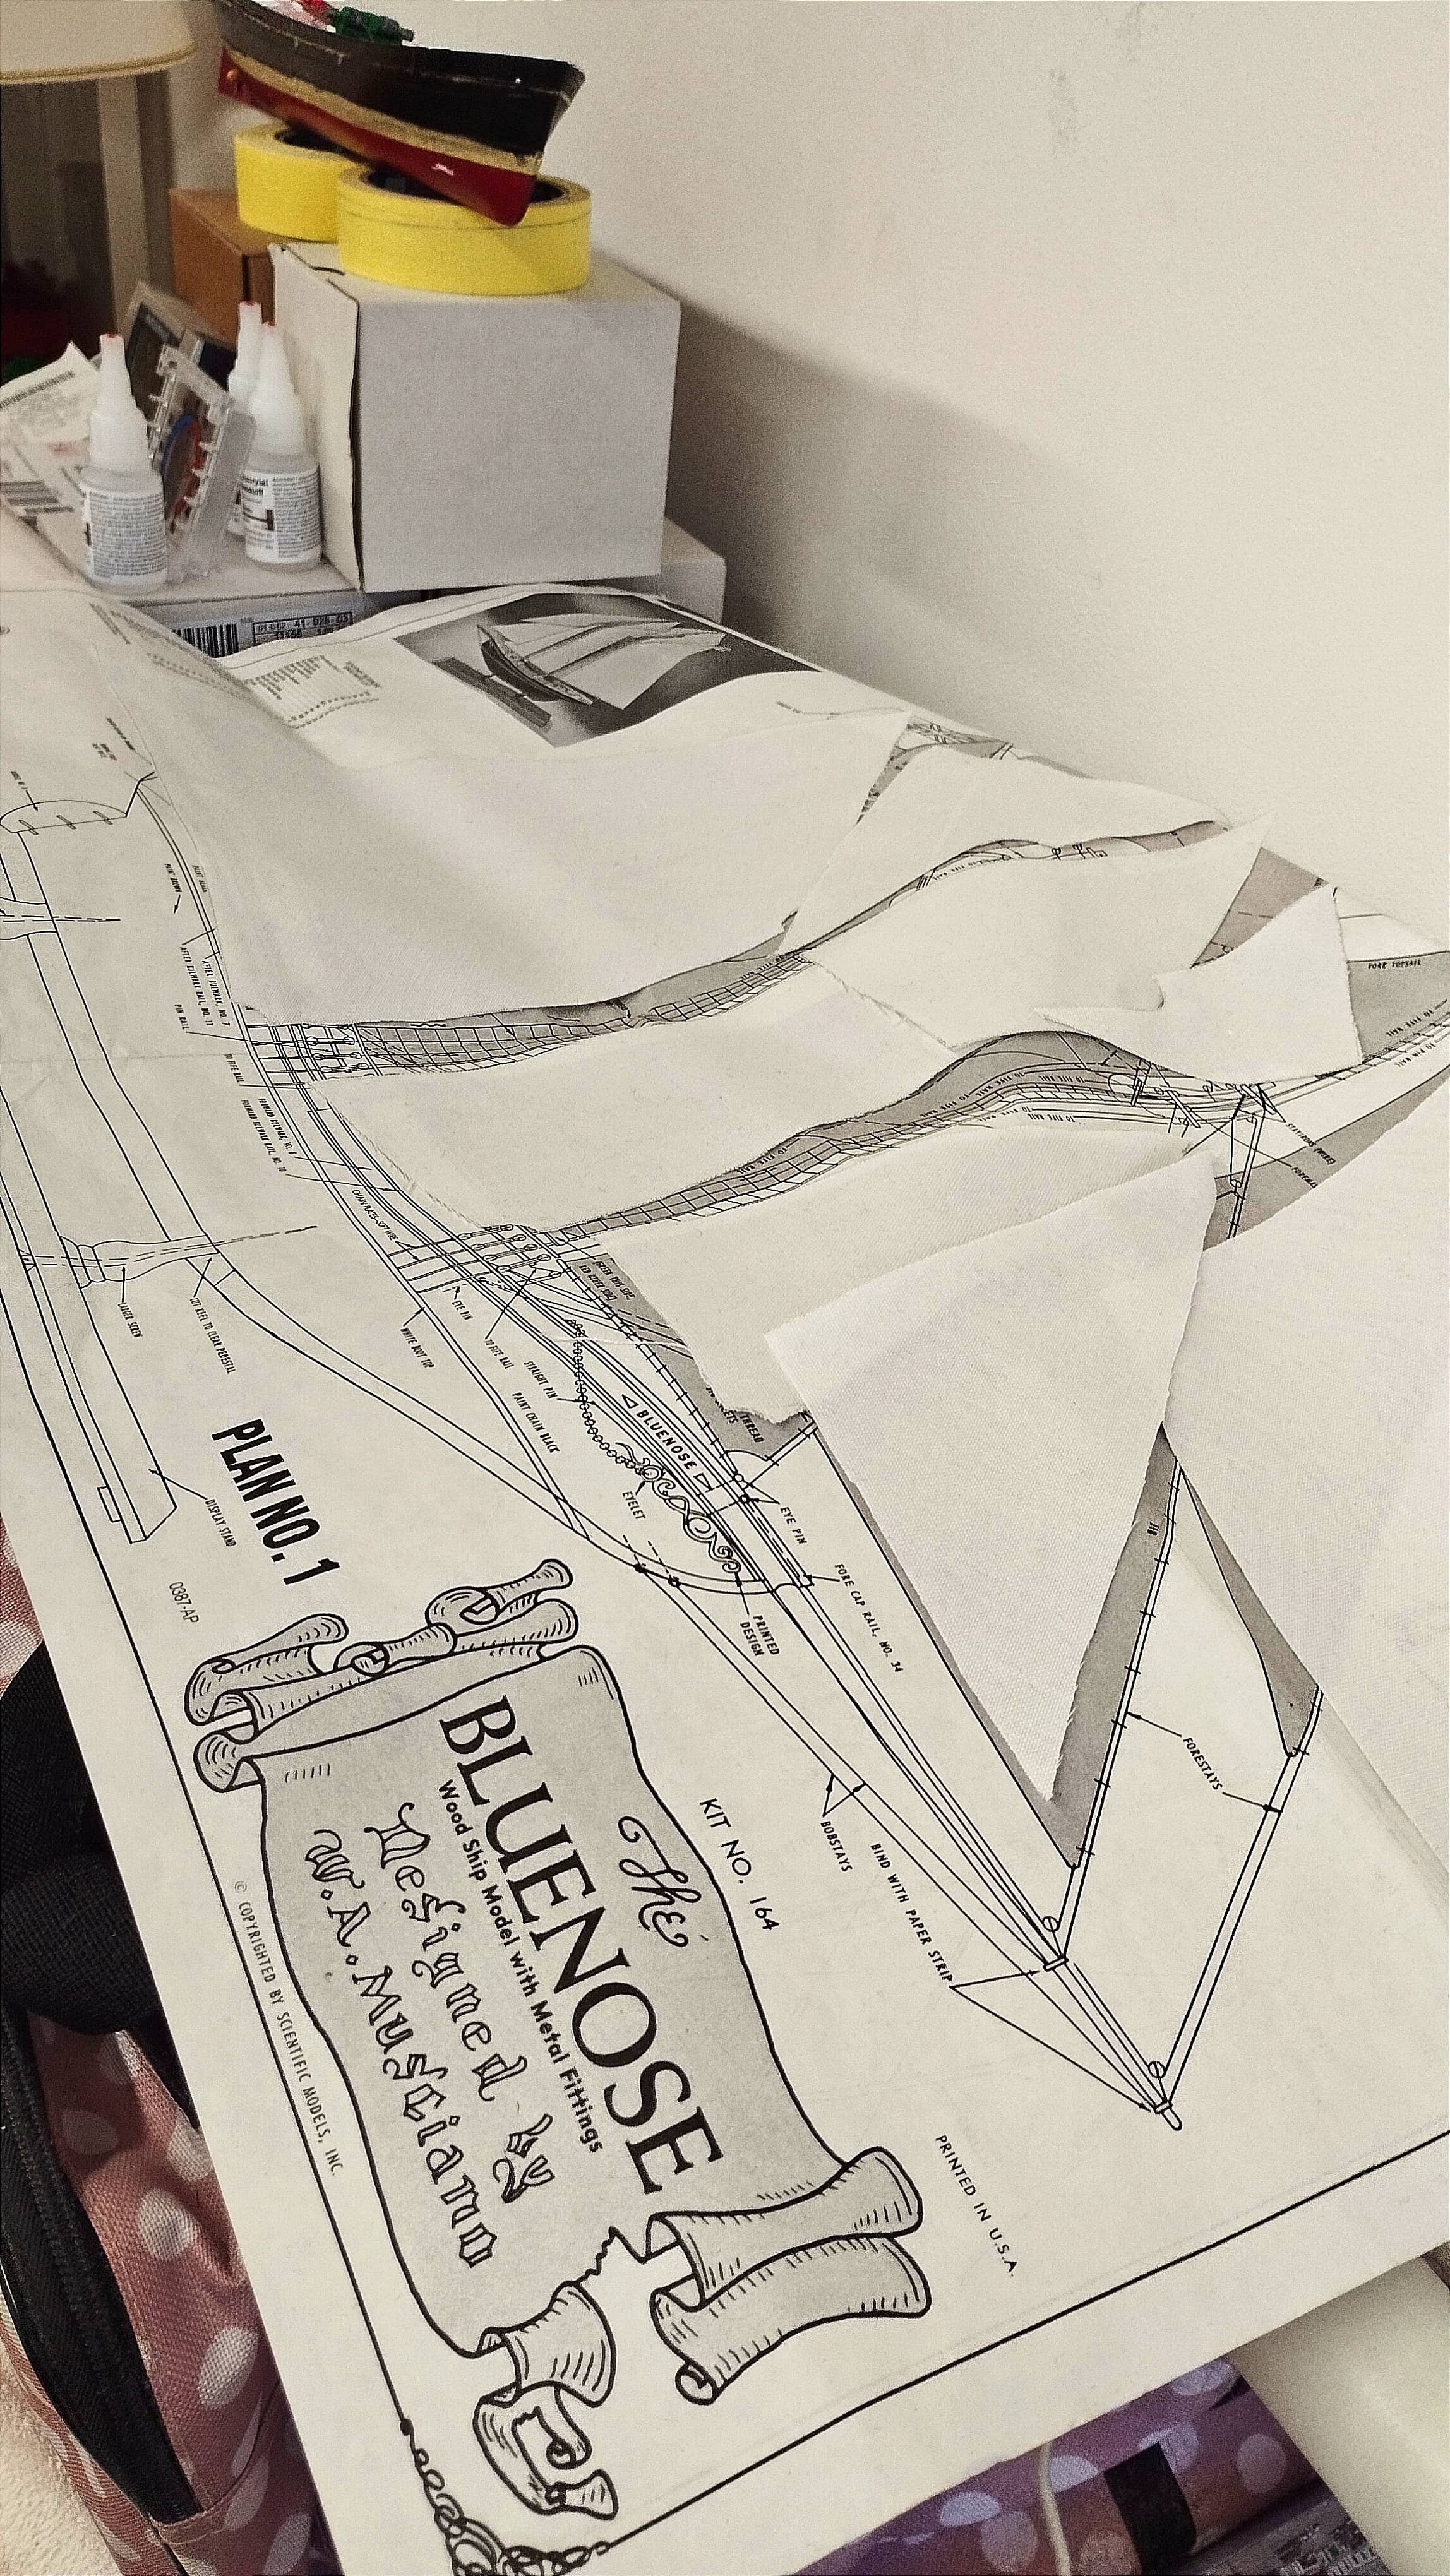
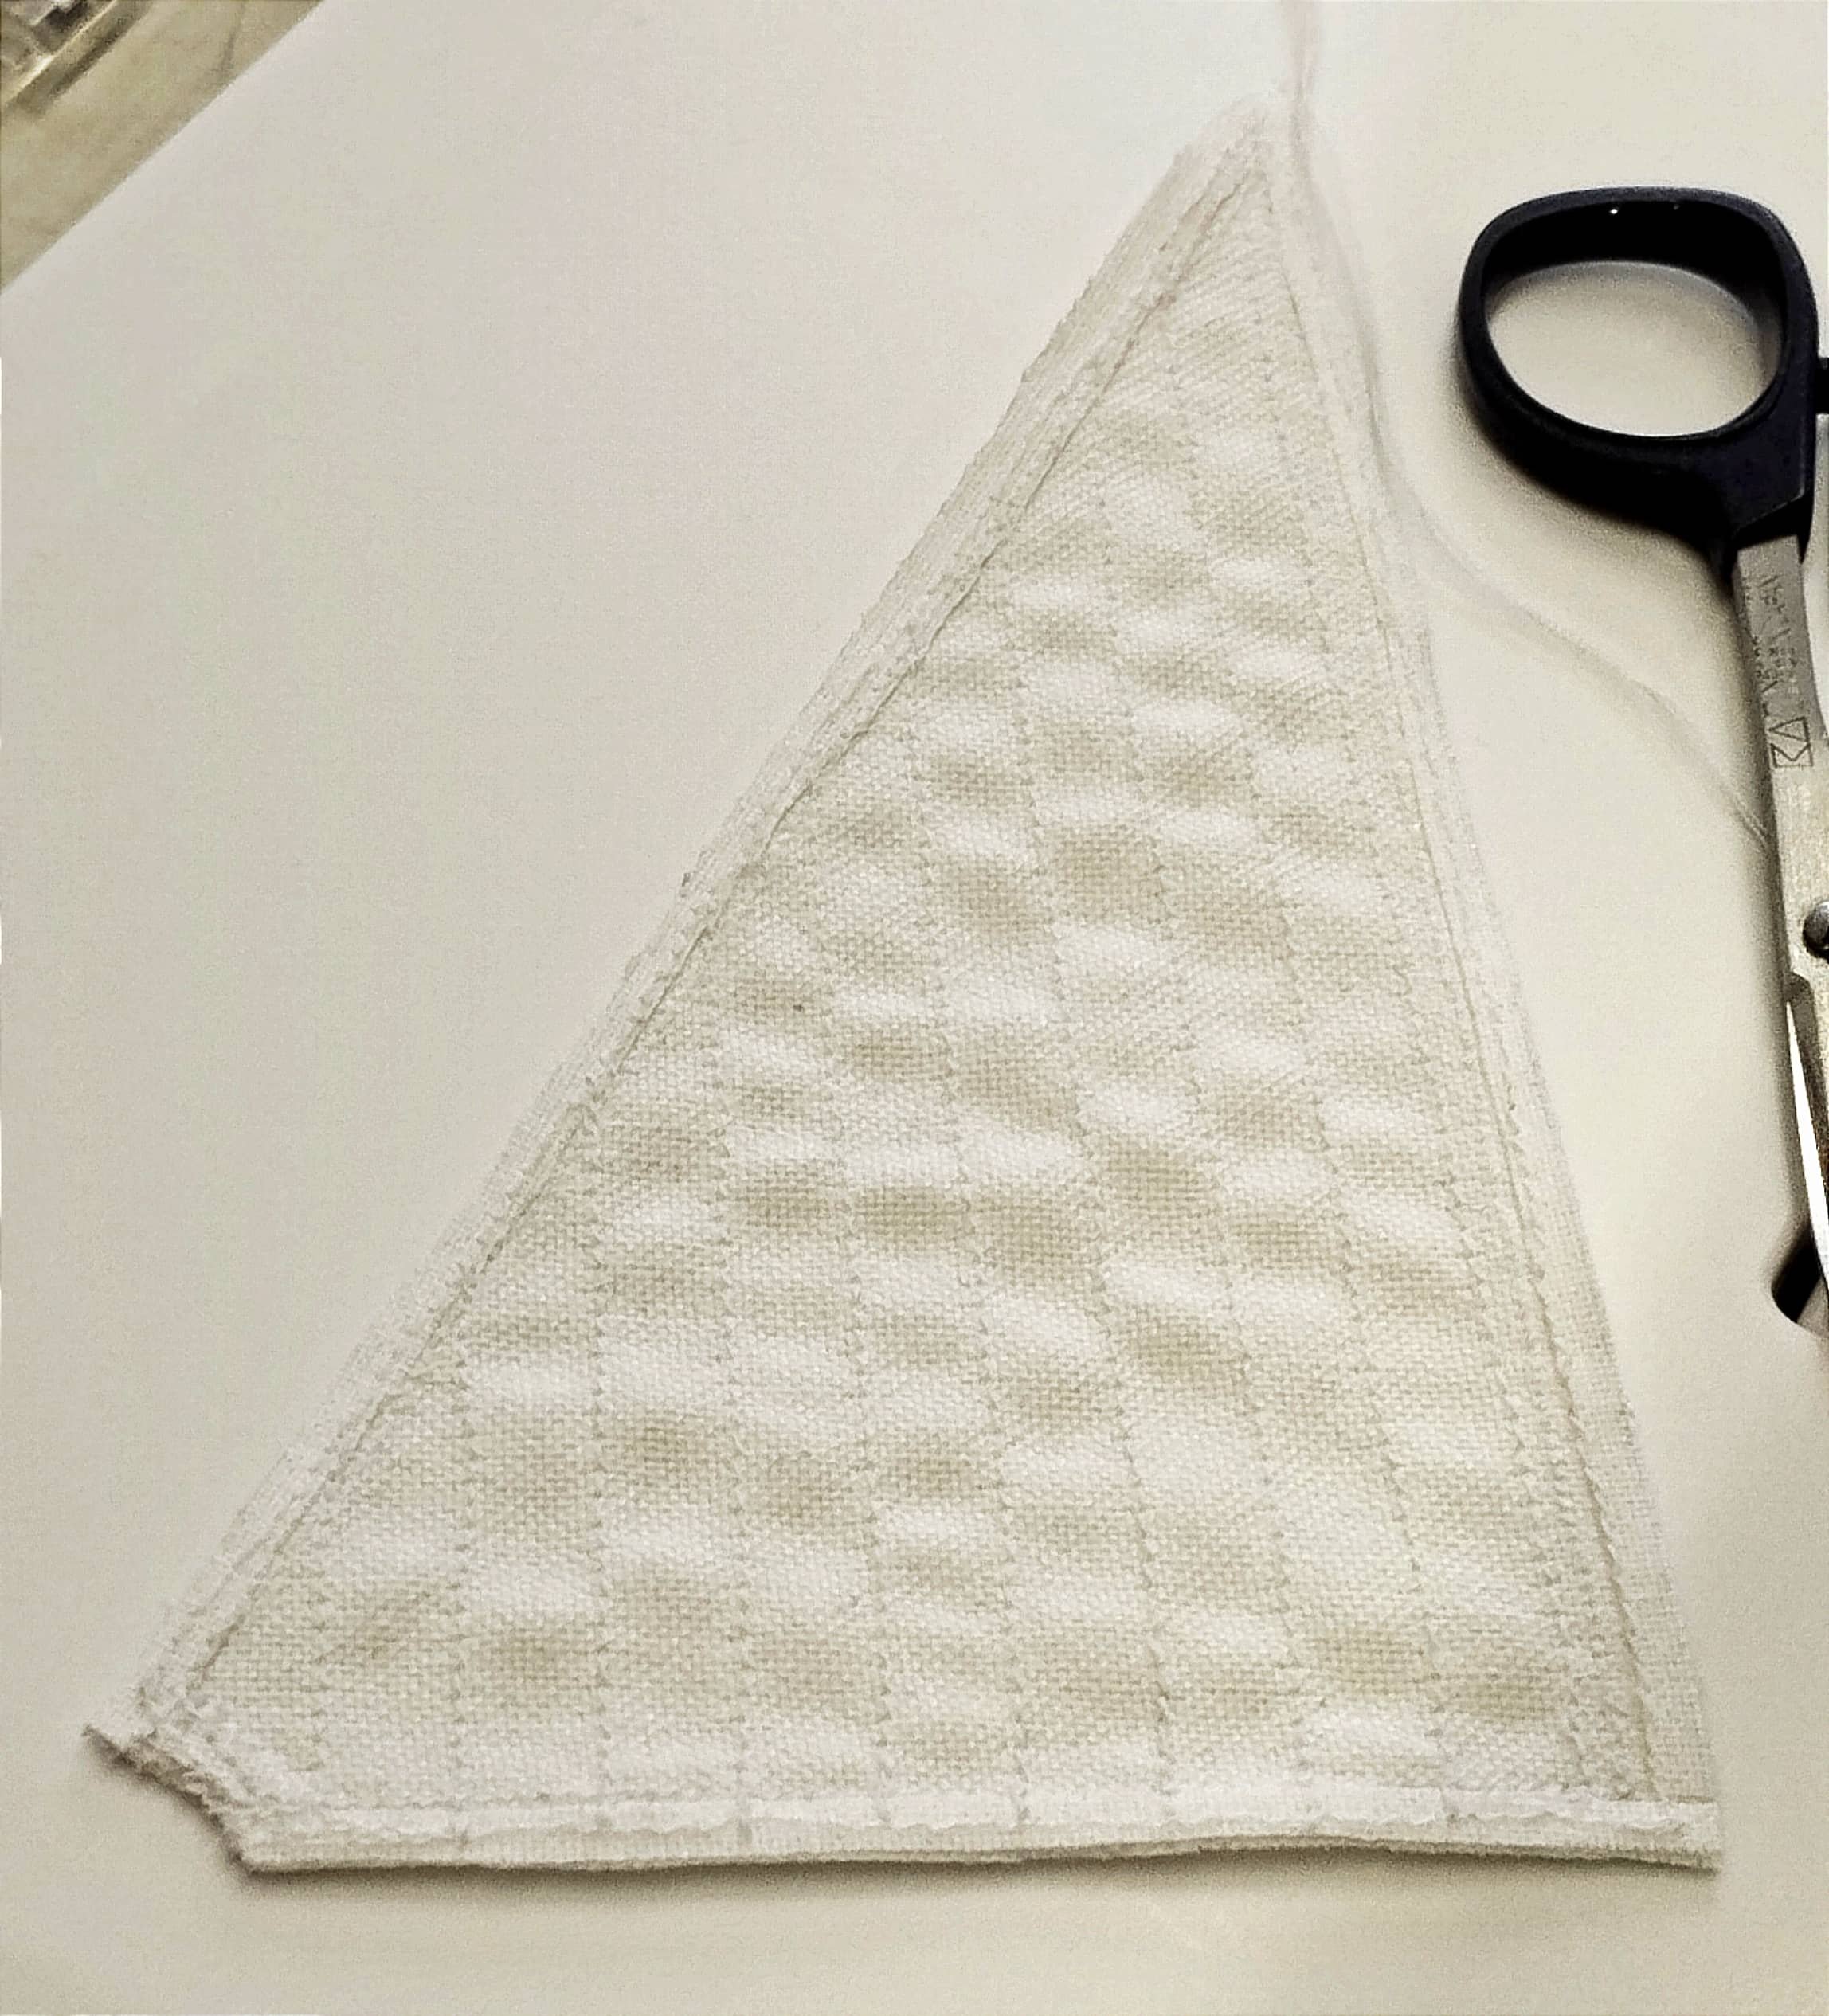
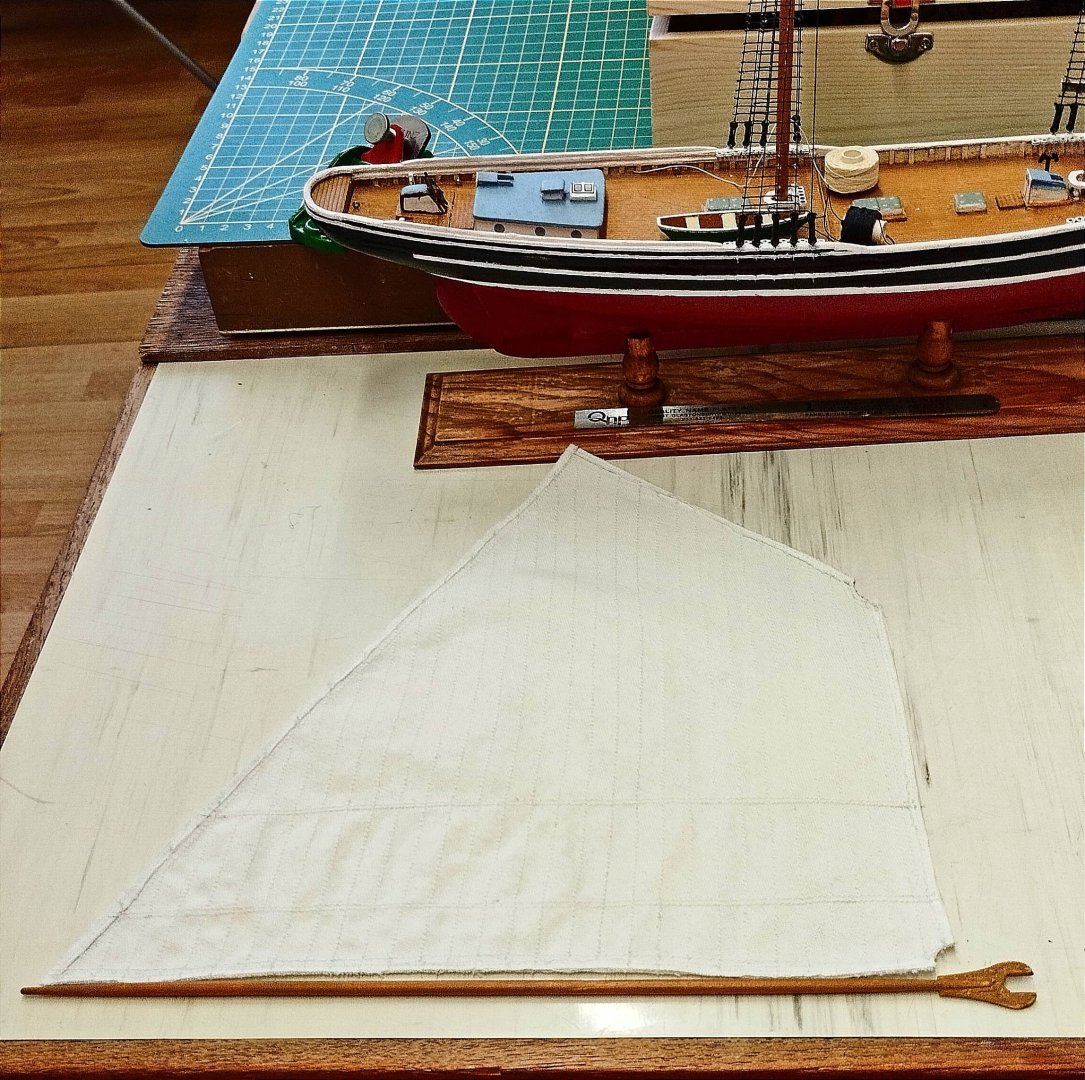
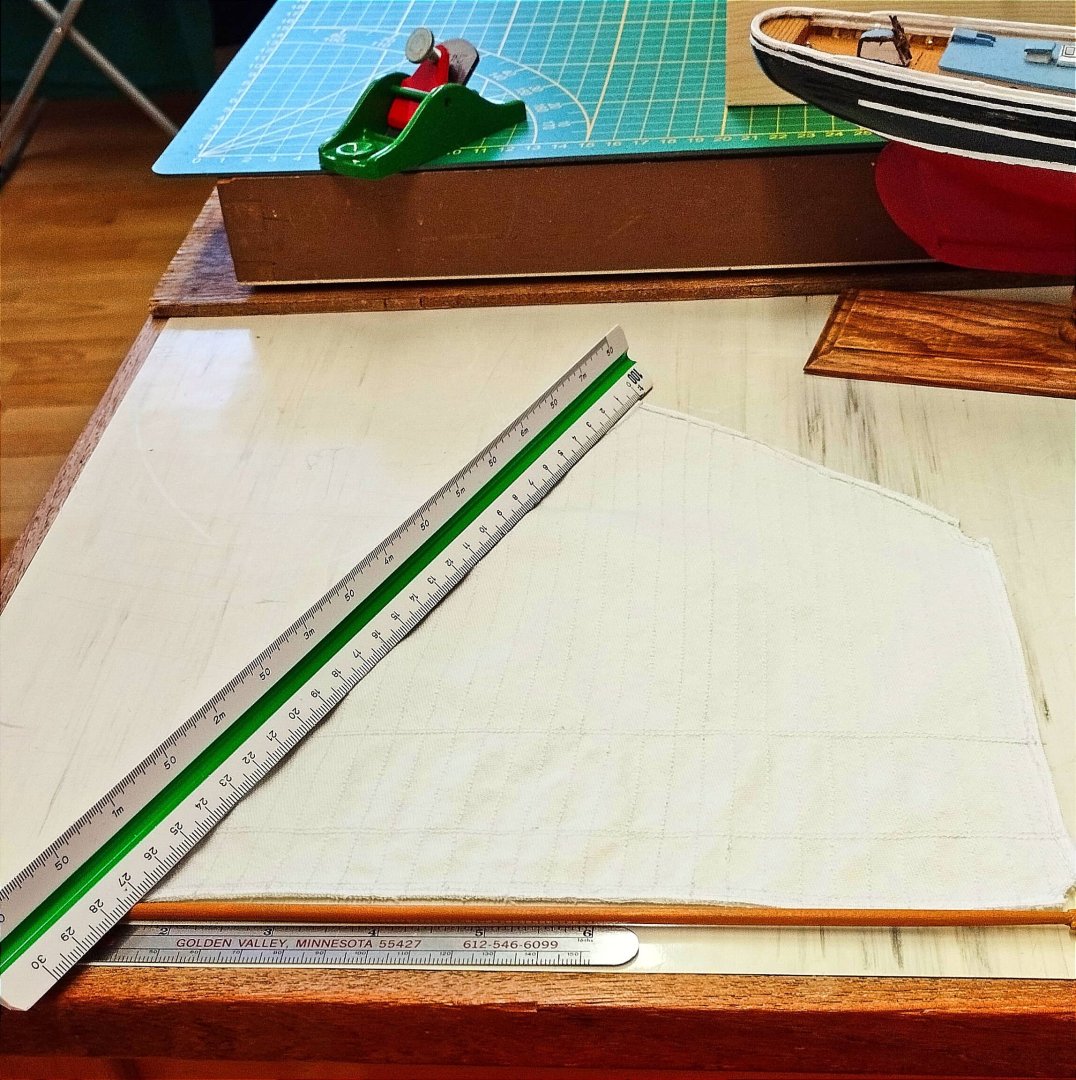
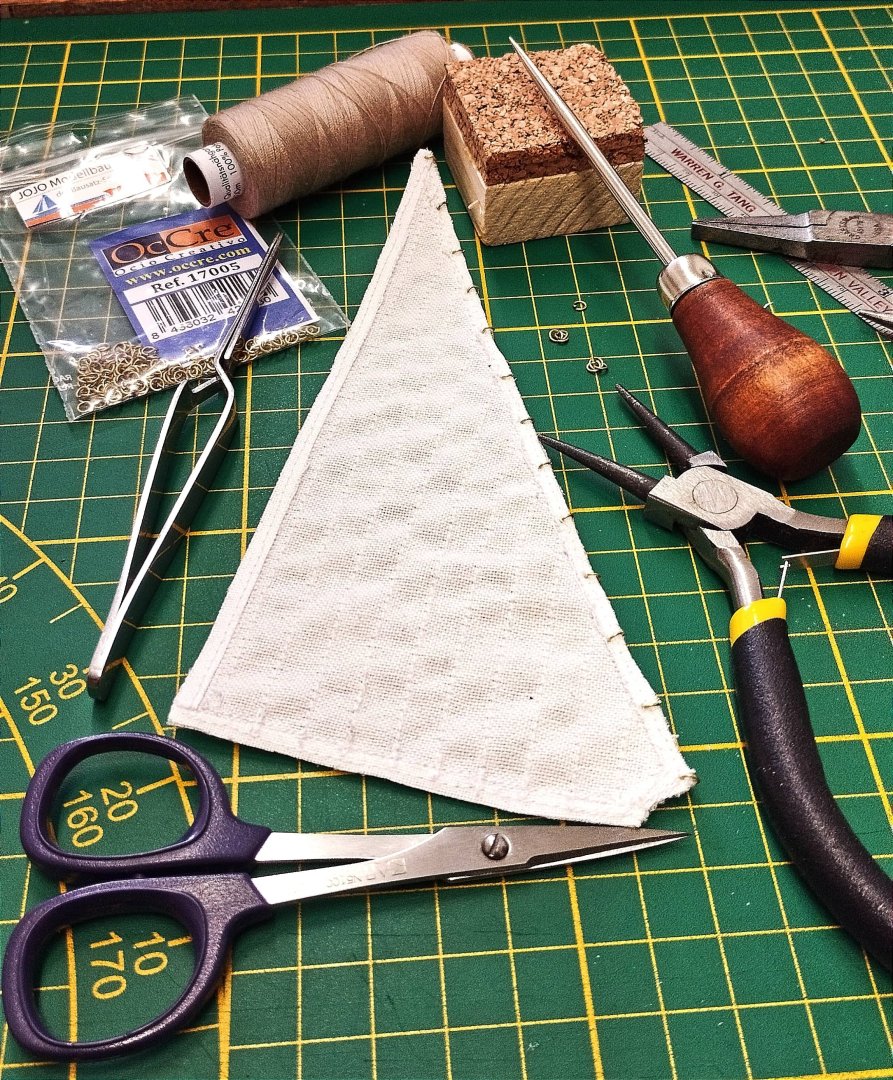
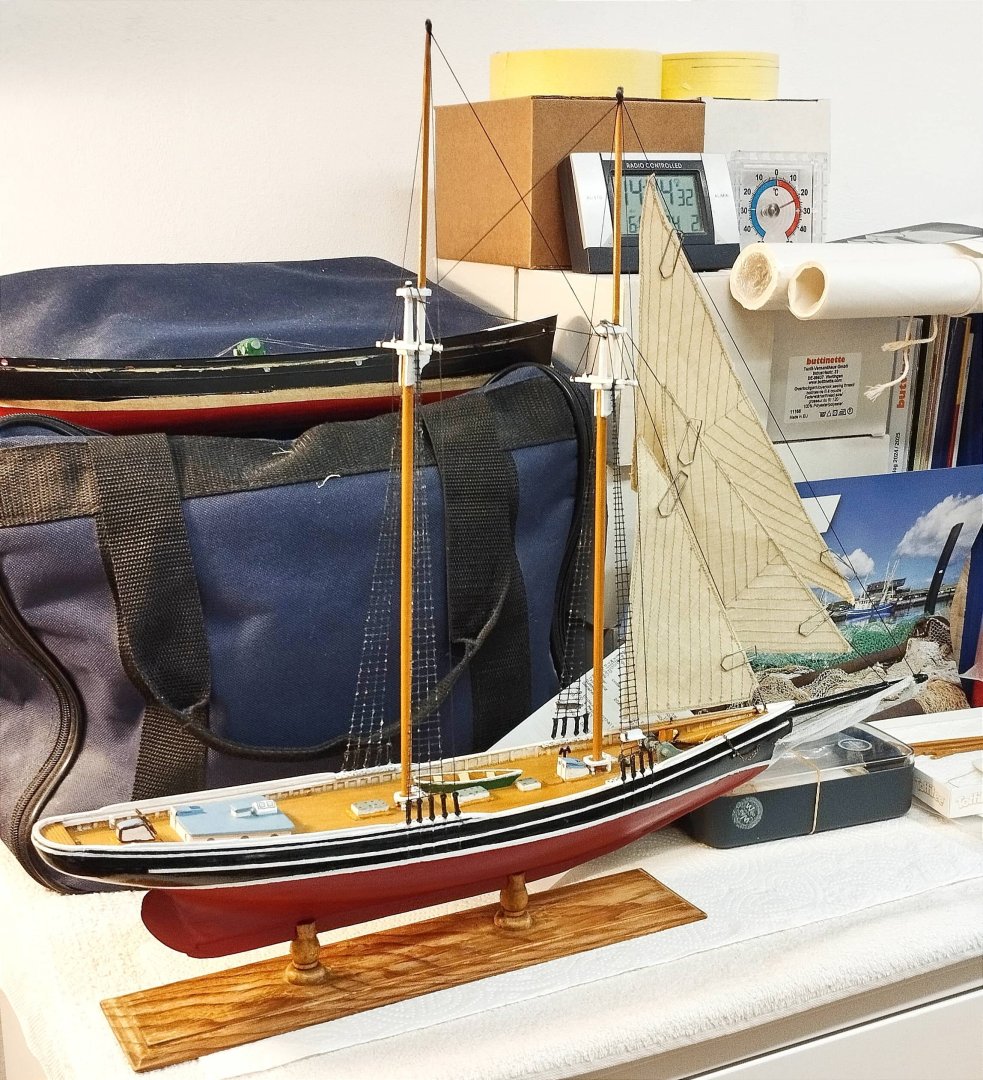
Friday, 21. March, 2025: Moin! ☀️16° C. (Northern German greetings) I finally finished up installing the stay sail and both the jibs complete with the jib sheet rigging. I pulled this rigging tighter to her starboard side to let the jibs fill up with wind nicely. I'm really glad I decided to take the time to make this set of sails out of my old, white Oxford Broadcloth shirt! The impregnated sail material which came with the kit was as 'stiff as a plank' even after sewing all the gores into them. I saved all eight of them anyway to serve as sewing patterns incase I need to make spares. More on this later! Tschüss! ⛵ Best Regards, UrkVisser


-
Ahoy! I've been busy working on my trawler lately and fighting off the Flu. So now back to my schooner. I've now rigged my second sail the smaller jib. I poked the edge of the jib (which is very stable) with an awl and then hung it with seventeen 2 mm brass rings which was difficult. Then I installed four blocks and then rigged it in place. But there's still some rigging to do where 'Scientific's' blueprint is vague: It's the 'jib sheets' coming off the black stand rigging 'forestays' going back to either eye pins on the deck or to the fife rail. I don't know if this is to be on one side of the sail or on both sides of it. ...Hmmm?? ...Well maybe somebody can clear me up on this issue. I just got doing some alteration tailoring on my main jib and the fisherman's topsail so I'll be installing them next. I'm starting off the all the smaller sails. The Main Sail abaft is a puzzle in itself although my sail is very nice: 'Scientific' mixed three scales together when making this kit. (I actually wanted to avoid this topic entirely.) The hull itself is pretty close to 1:100 scale. Set some H0 'Preiser' figures on her deck and alas they look quite large. Then take into the consideration her two masts which calculate out to be 1:76 scale. But then calculate her LOA and the scale is 1:72. Baäah!!! And looking at 'Scientific's' blueprint and the mainsail boom one will notice that the boom and sail are much too long for the ship! If this is indeed really to be the 'Bluenose' (1921) then the end of the main boom shall only extend 6 cm beyond the taffrail. But it extends 10.5 cm with it's matching sail! If I decide to shorten the main boom and re-tailor her main sail then the LOA will drop to 1:76 and be in harmony with both masts. Then everything above deck will be 1:76 and from the deck down 1:100. This is definitely not the kit to buy if you like accuracy! One must also remember the fact 'Scientific' built mostly control line model airplane kits where scale was often manipulated so the model could actually fly. But back to ships! Maybe I will letter this model as some other fictive schooner and let things so be. Maybe she'll be called the 'Anna K.' or the 'Maria Louise' or something else. Best Regards, UrkVisser


-
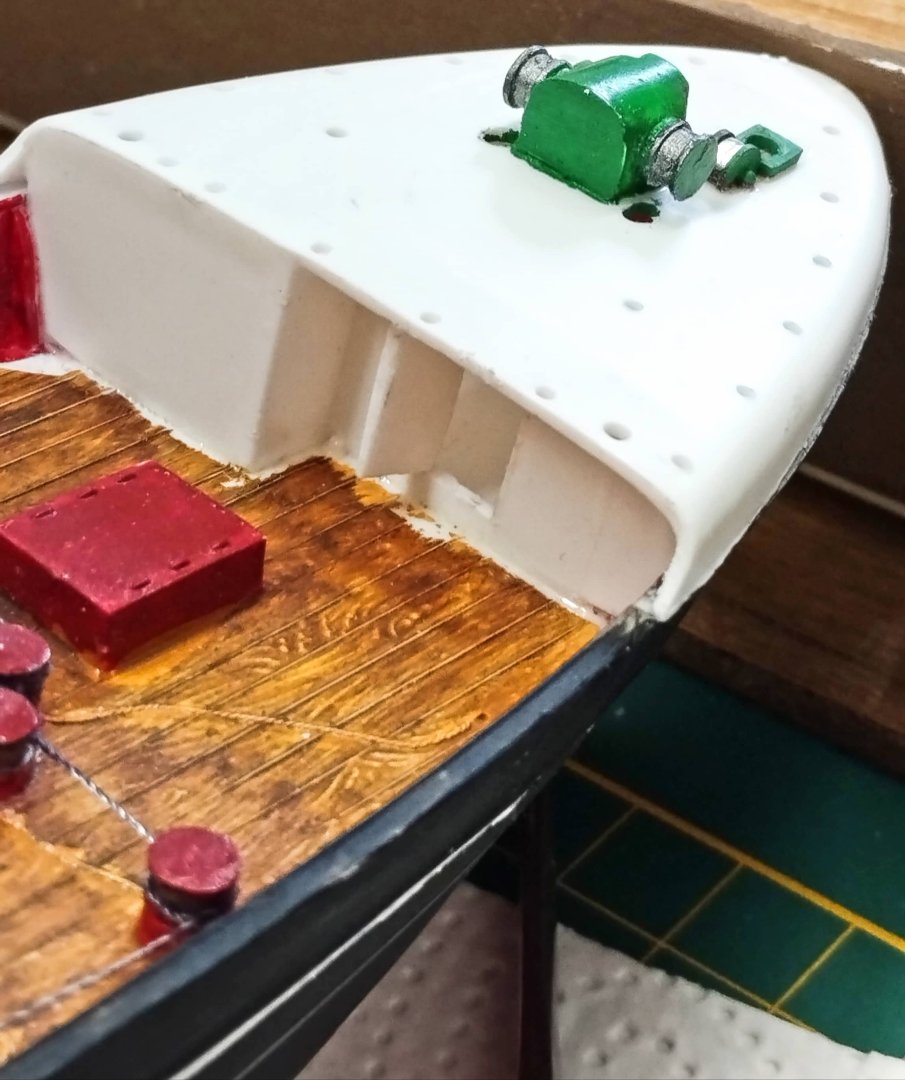
Thanks John! Thanks so much for the photos! Regrettably this model doesn't have any scuppers ahead of the superstructure at all and very few behind or along side of it either. Therefore I need to drill them out and cut them to shape with a hobby knife without damaging her deck. The kit also has the quirk that the how the deck lays into the hull blocks the abaft scuppers somewhat. I wish 'Revell' would have re-tooled this kit; and I would have gladly paid double for it too! The 7 port holes on both sides may have also only been found on the 'Arctic Corsair' or another trawler. Best Wishes, UrkVisser
-
UrkVisser reacted to a post in a topic:
North Sea Fishing Trawler by UrkVisser - Revell - 1:142 scale - PLASTIC
-
Hi! Anyway, I wanted to have this doorway but still wanted the piece I cut out to remain perfect later for use as the door itself. This was very tedious and ticky work as I stuck the edge of an old single edged razor blade into this thick plastic bulkhead and then tapped it with a clock maker's hammer again and again, several times around, along it's rectangle cut out line until the piece finally fell out. But holding this plastic bulkhead with it shape and curve firmly against a block of wood clamped to the dining room table was the hardest part. There was no possible way to clamp this piece other than having the 'Admiralty' hold it for me really good. But it cut out nicely and only needed light filing or sanding. And I still have all 10 fingers and my wife too! 😁 Another very good reason for this door is also to give me access to thread my anchor chain on her starboard side and the mooring line on her port side. (The trawlers on Hessle Road in Hull and also in Grimsby always docked very closely moored together in a 'clump'.) And if my chain breaks (due to grandchildren or whatever) then it allows easy repair. So it's always good to think through every situation first! Best Regards, UrkVisser
-
UrkVisser reacted to a post in a topic:
"Trinidad" 1881 wreck located in Lake Michigan
-
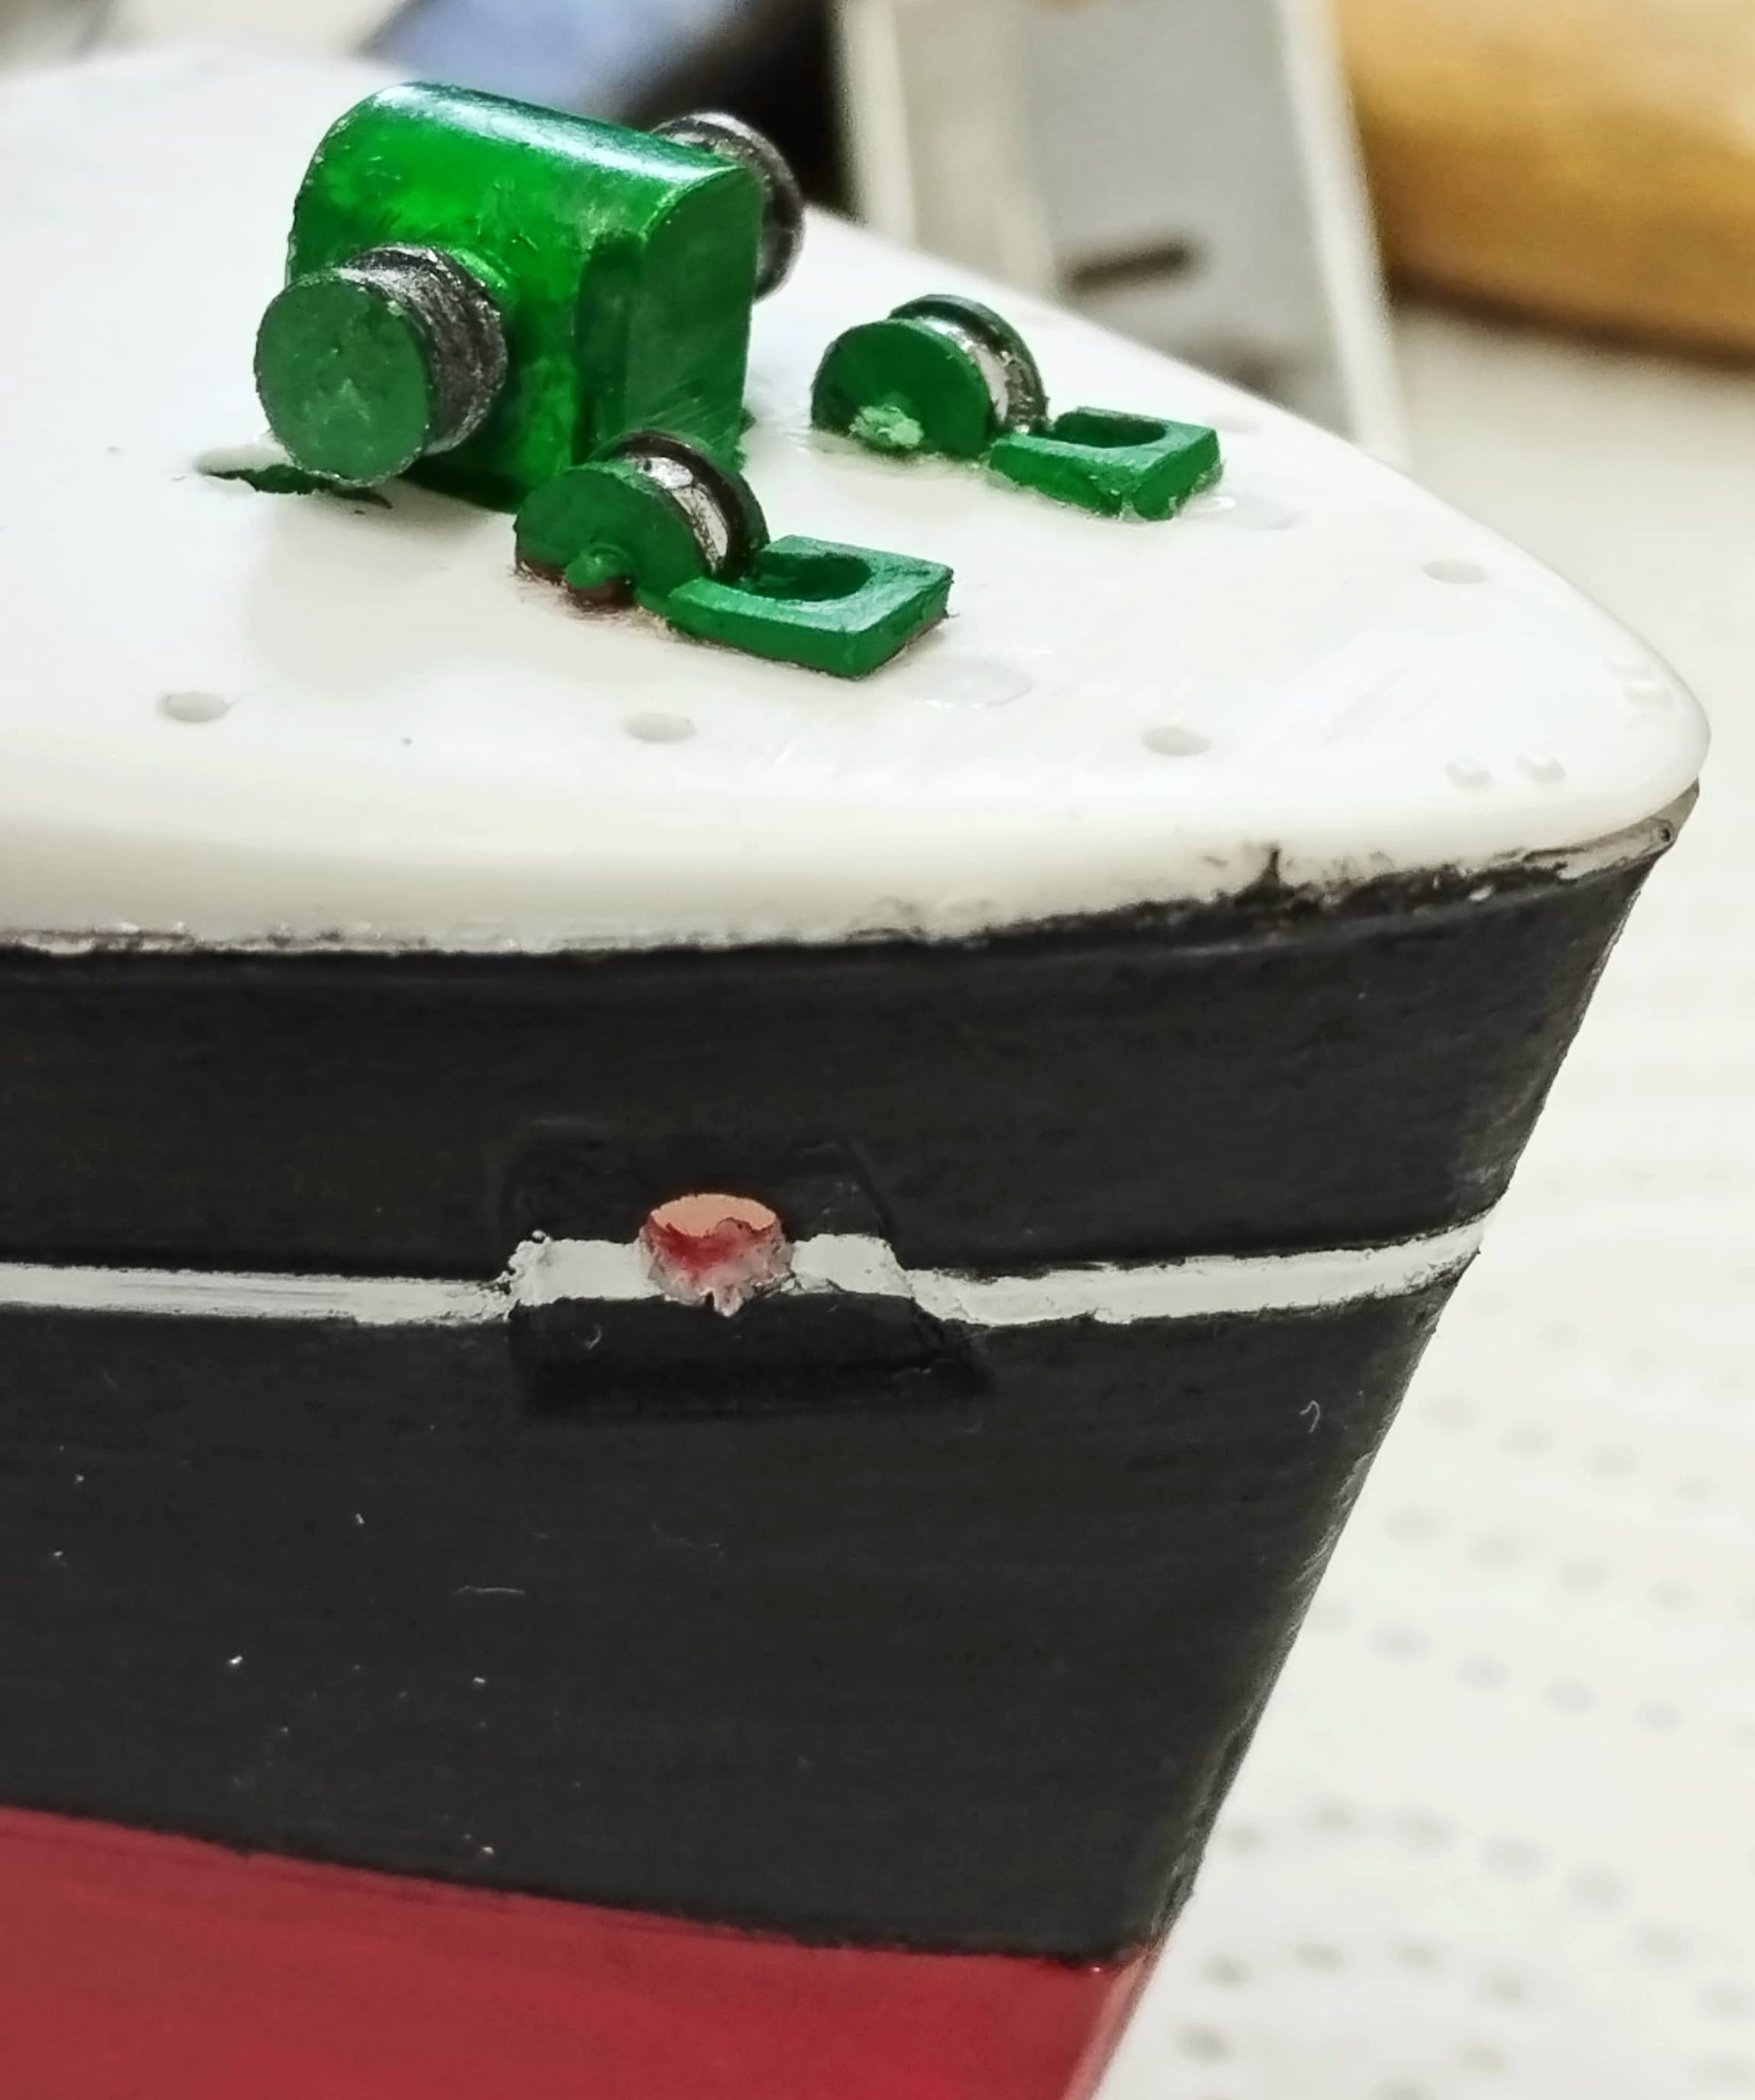
Sunday, 16. March, 2025 So after a lot of fine sanding and a couple coats of 'Vallejo Model Color' black paint plus various touch up work along the white line and painting the 7 portholes on each side grey blue to imitate the reflection of the sea or sky I may soon be ready to coat the upper half of the hull with 'Kreul Hobby Line' water based, clear acrylic satin varnish. Or maybe I will oder more 'Vallejo Model Color' this week and then repaint my white stripe matt white. I'm 65 years old and was definitely more 'sure handed' with fine detail painting last year. Another chore today was cutting the door into the ship's forecastle bulkhead. I painted the inside of the forecastle red one meter up from the deck and then white above like on the 'Ross Tiger'. I also need to buy or build a stairway with handrails for the port side leading up onto the forecastle deck. Next to it is also where the 'Tiger's' anchor is stowed. This ship only has an anchor chain hawse on her starboard side. On her port side is a fairlead for a mooring line. I have 1 mm anchor chain but need to make a suitable anchor as the one in the kit isn't useable. Her port side will get a looped mooring line out of heavy, green carpet thread. There is still various touch up work to do here next week. Best Regards, UrkVisser


-
Today the weather was sunny and pleasant also when only 5° Celcius my 300 meter hike each way to my local home and garden center did me some good. They also have an art department where I bought a 60 ml jar of 'Kreul - Hobby Color' water based, clear acrylic satin varnish. It's made in Germany and can also be thinned. So I tested it out on a piece of discarded plastic sprue from the kit I'm building. I painted it with various patches of 'Vallejo - Model Color' black. After it dried, I experimented with my new acrylic varnish painting over the black with full strength varnish, half diluted with water and as only a thin wash. The one with full strength shines nicely but actually too much and was quite thick leading to brush marks even with my soft red wissel hair brush. The next test I did was with 50% varnish and 50% water was between satin and matt with no brush marks. But my test with only a thin wash was useless. Now I'll test 25% water / 75% varnish which should be perfect! I actually wanted to buy 'Vallejo 726519 acrylic varnish but only a certain model train dealer has it. Alas I just spent 53 € here and 53 € there for two orders of model ship stuff plus tools. So being retired I needed to avoid another big order this month. Best Regards, UrkVisser
-
UrkVisser reacted to a post in a topic:
Vallejo Model Color: I need a satin finish
-
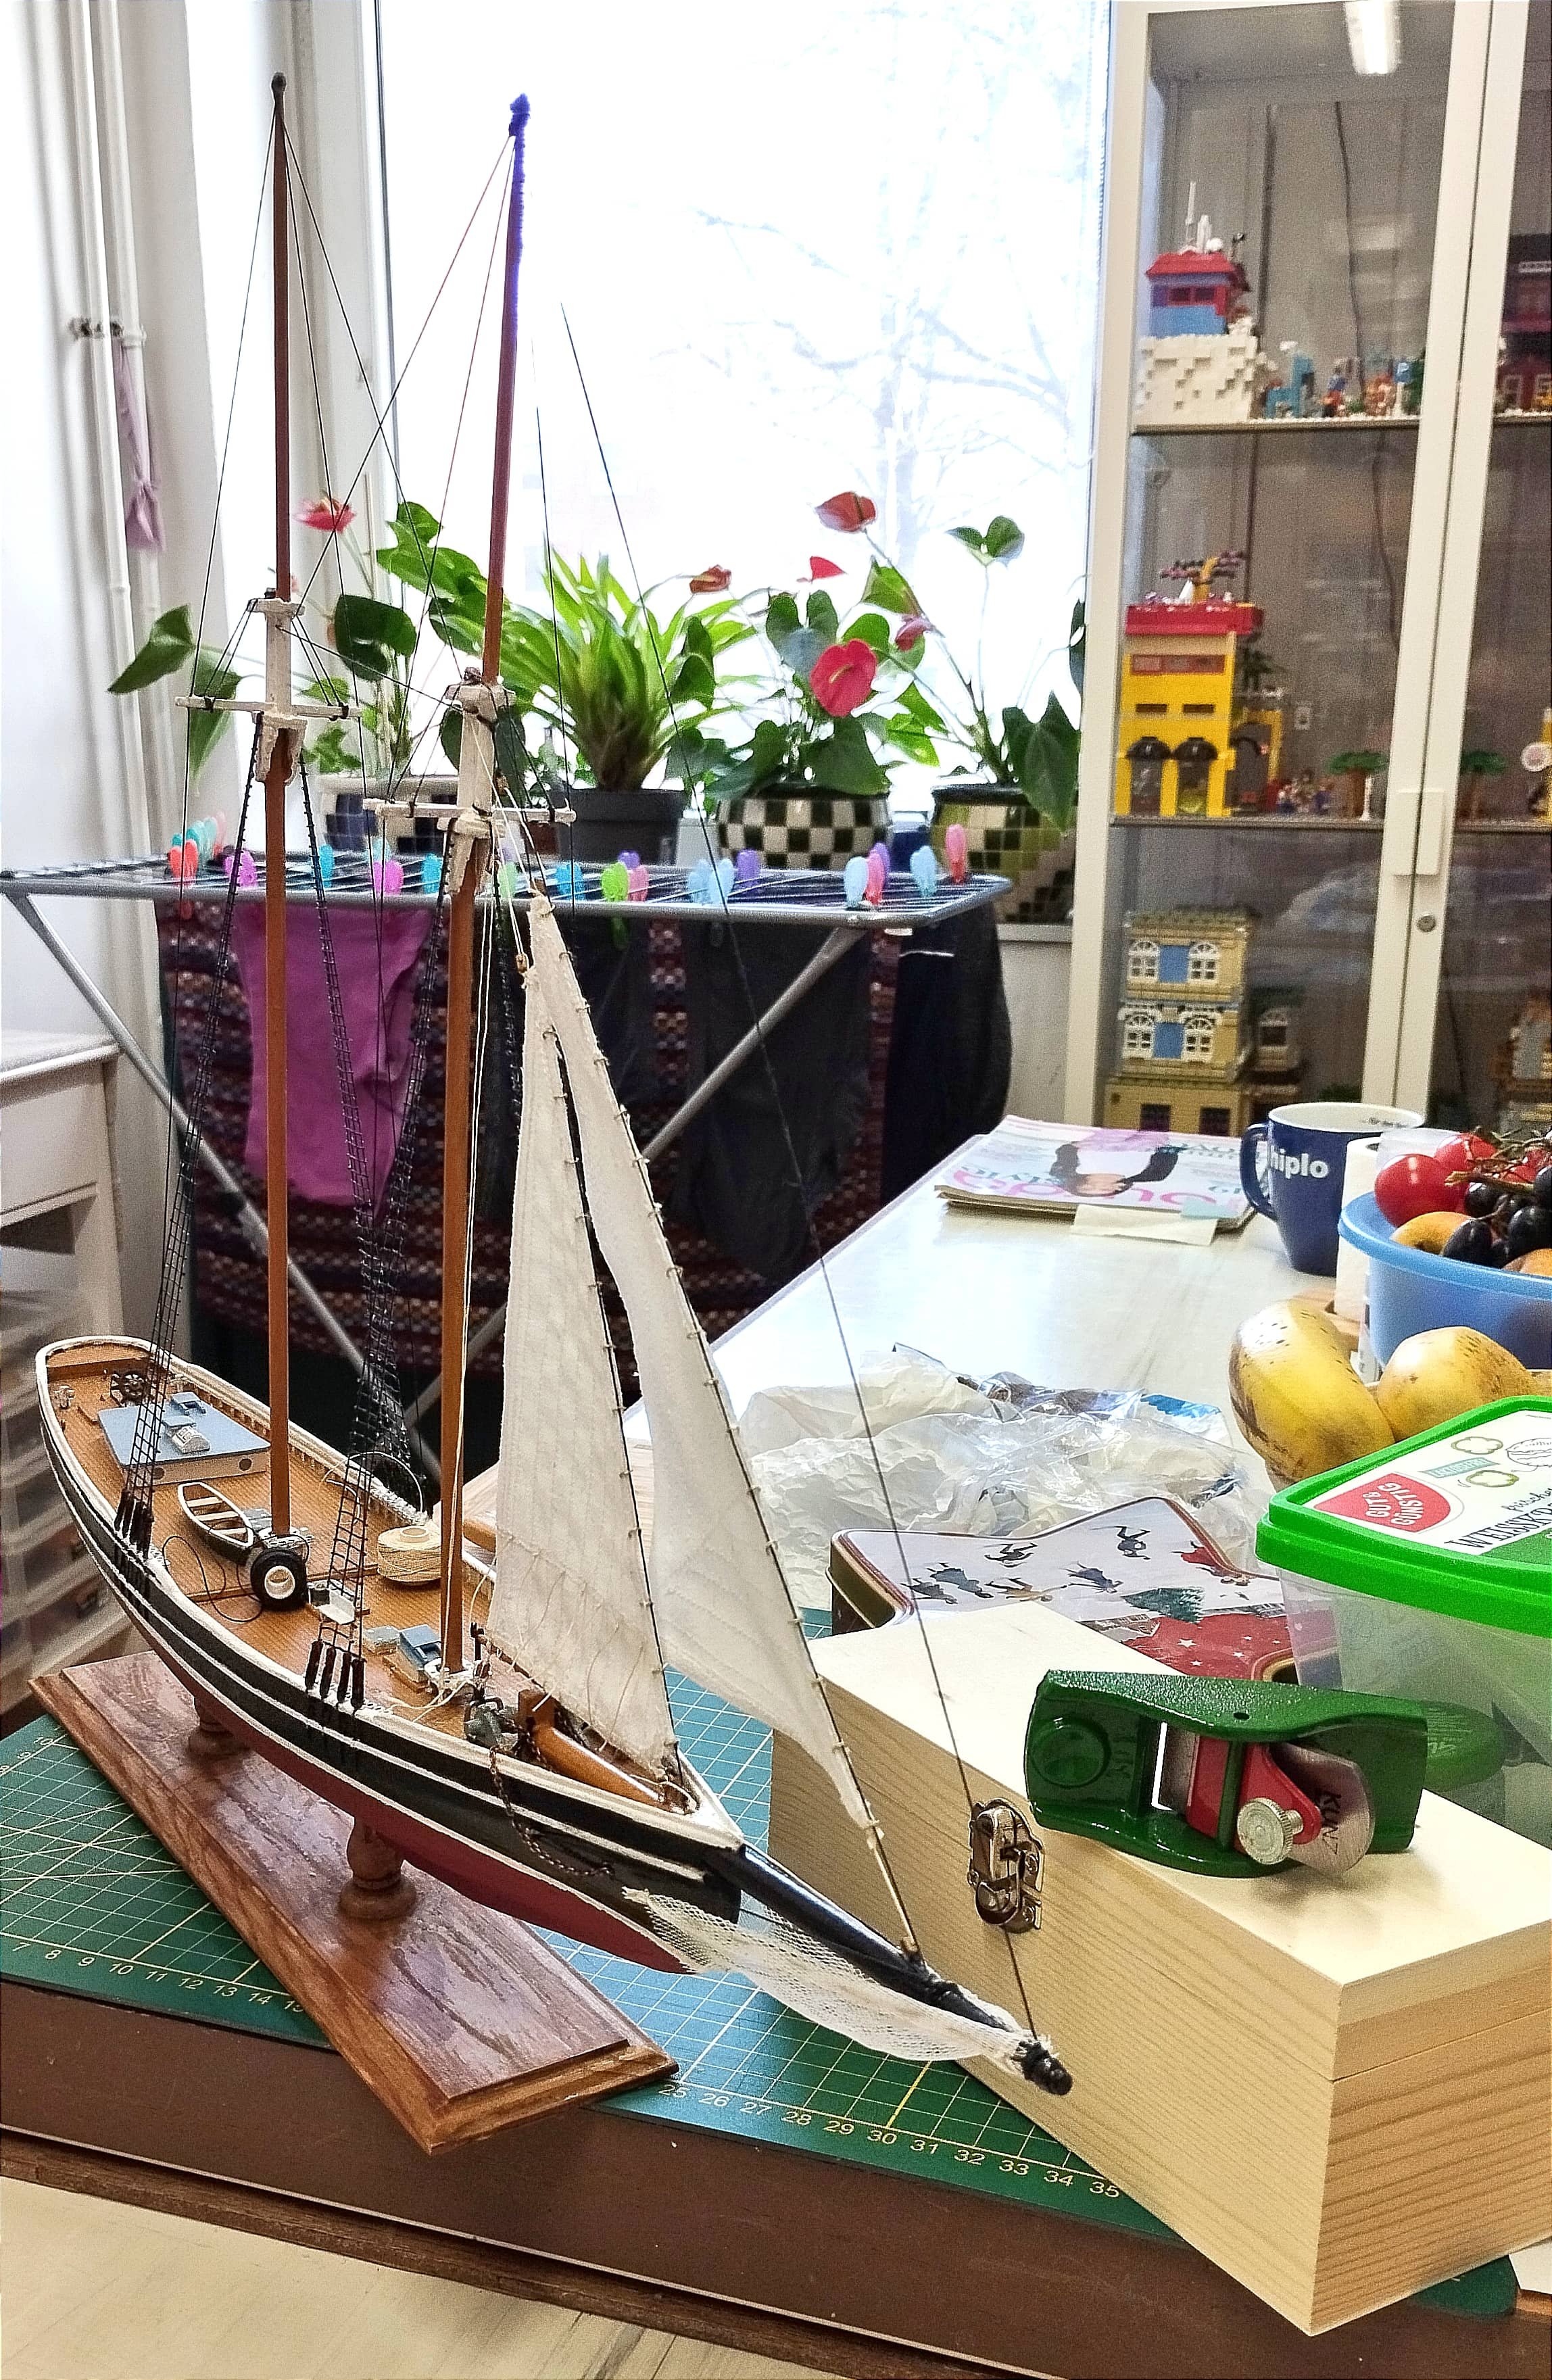
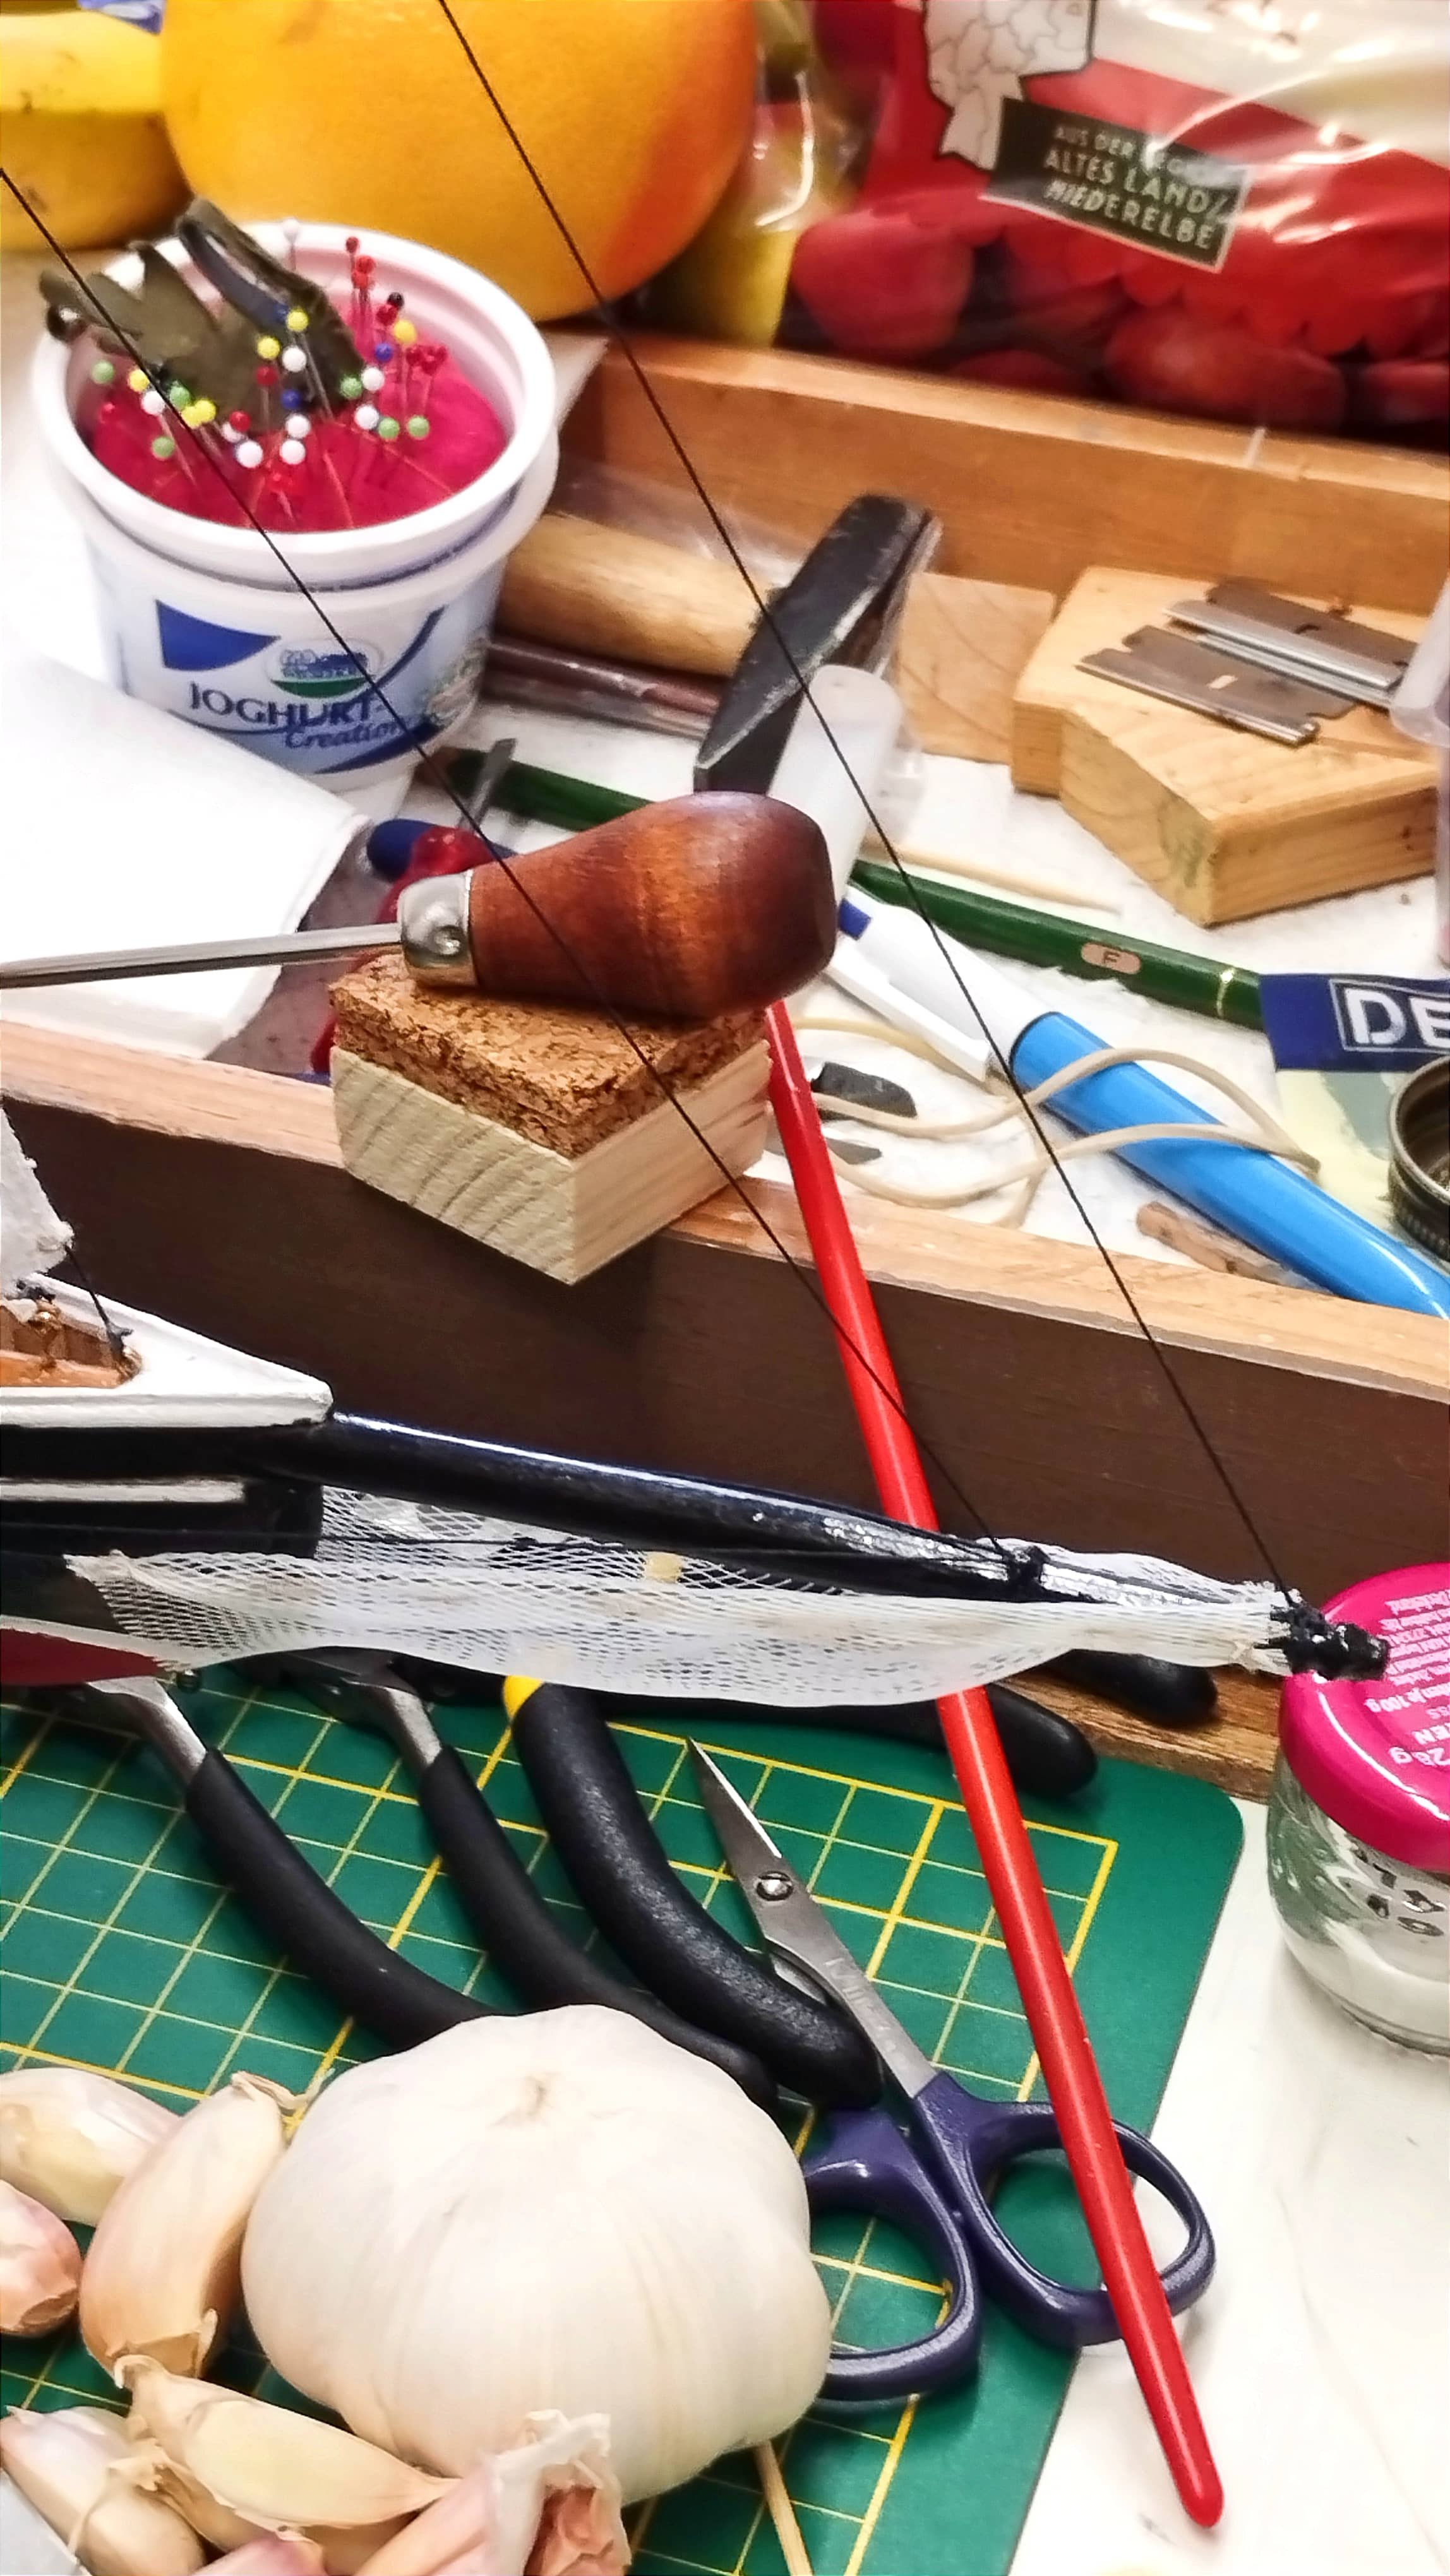
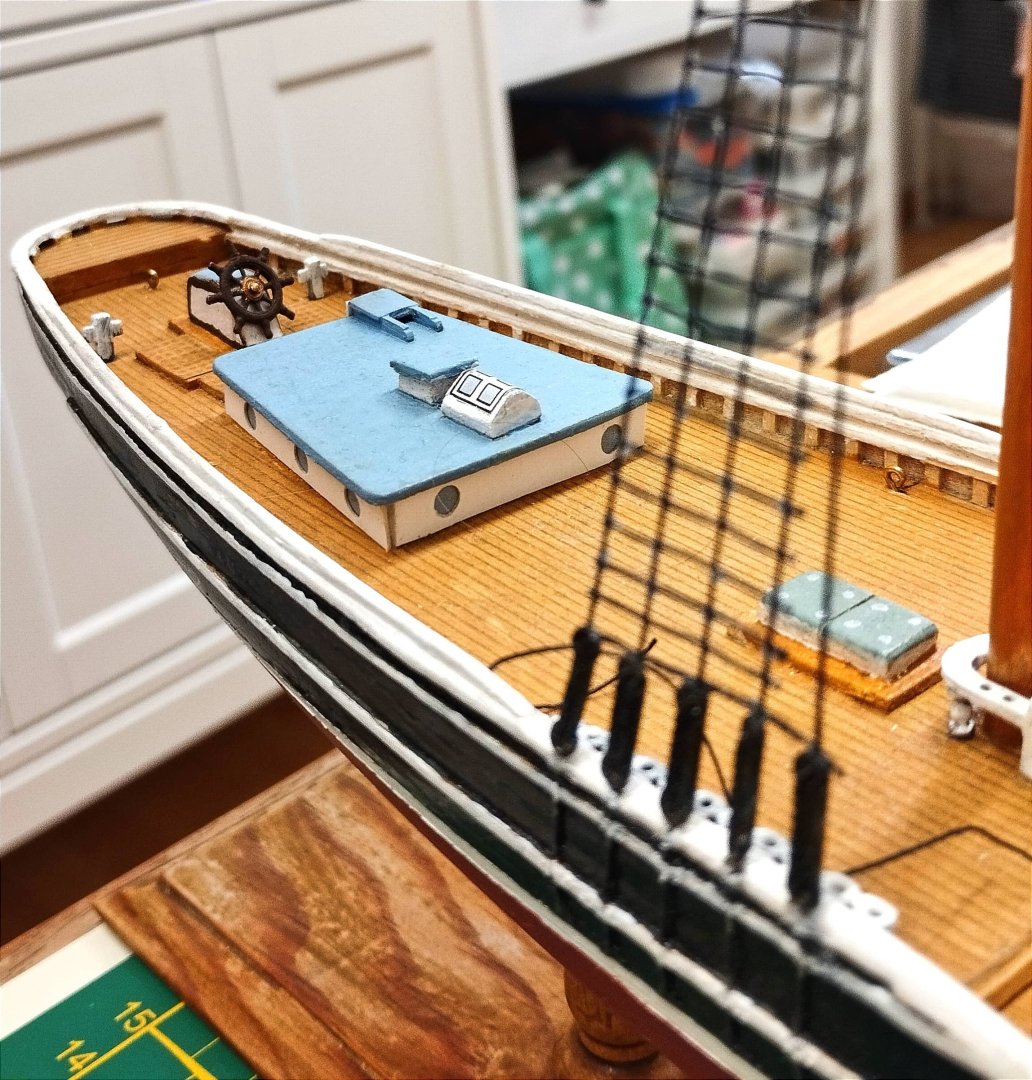
Wednesday, 12. March 2025 Rigging My Ship: Hi everybody! I finally raised my first sail today which is the smaller Stay Sail. I'm using 'Krick No. 60860 3 mm blocks plus the rigging thread which came with the kit. I had problems getting this thick thread though one of my blocks but it was due to flat spots in rigging thread from the early 1980's. I solved the problem by running a needle back and forth through the block and enlarging it slightly by also pulling the eye of the needle through the hole in the block. Cutting the bad spot off the thread also helped. So it's on and looks good! Here's also a photo of the ship's cabin which was originally only a stack of slivery balsa wood. I cut white carton off of a medication box and then made port holes in it with a rotary fabric punch pliers. The greyish sky blue reflection in the windows happened to be a piece of a cash register slip which was the right color as a signal the roll was coming to it's end. One spoke on her ship's wheel broke off so I replaced it with the tip of a toothpick after a lot of 'micro-sanding'. H0 scale maritime figures should look good on this ship. But finding a either a suitable trawler or freighter crew will be a task. And the bow sprit net on her bow was made from the net which garlic was sold in. You sure wouldn't get me oit there without one! Best Regards, UrkVisser

-
UrkVisser reacted to a post in a topic:
"Ironton" wreck 1894 located in Lake Huron STILL WITH MASTS
-
Hi everybody! Today I finally installed my first 3 mm block for rigging my ship! Putting 2 mm brass rings on my Stay Sail was a chore (15 in all); alas two flew away 'into Cosmos' or where ever. These really fit tight and 3 mm rings would have been better but I have a lot of these 2 mm rings to use up. I finally got the sail hung on my ship and then glanced over at the blueprints: "Gosh! Noöoo!" I forgot this sail also needs to get sail tie downs and thus 2 horizontal rows of stitches: one row above the tie downs and one below (like what I also did om my Fore and Main Sails). So I had to clear away my end of the dining room table from all my ship building stuff, get out the sewing machine again and only for a 5 minute job. Baäaäah! I also had to getting cooking straight away as my wife wanted a nice chicken dinner and she comes home from work as hungry as a bear! That limited further progress for today. The Stay Sail is not yet attached. Tomorrow I'll hang and rig the Stay Sail. Good Night! 😴🌛✨☁️ UrkVisser


-
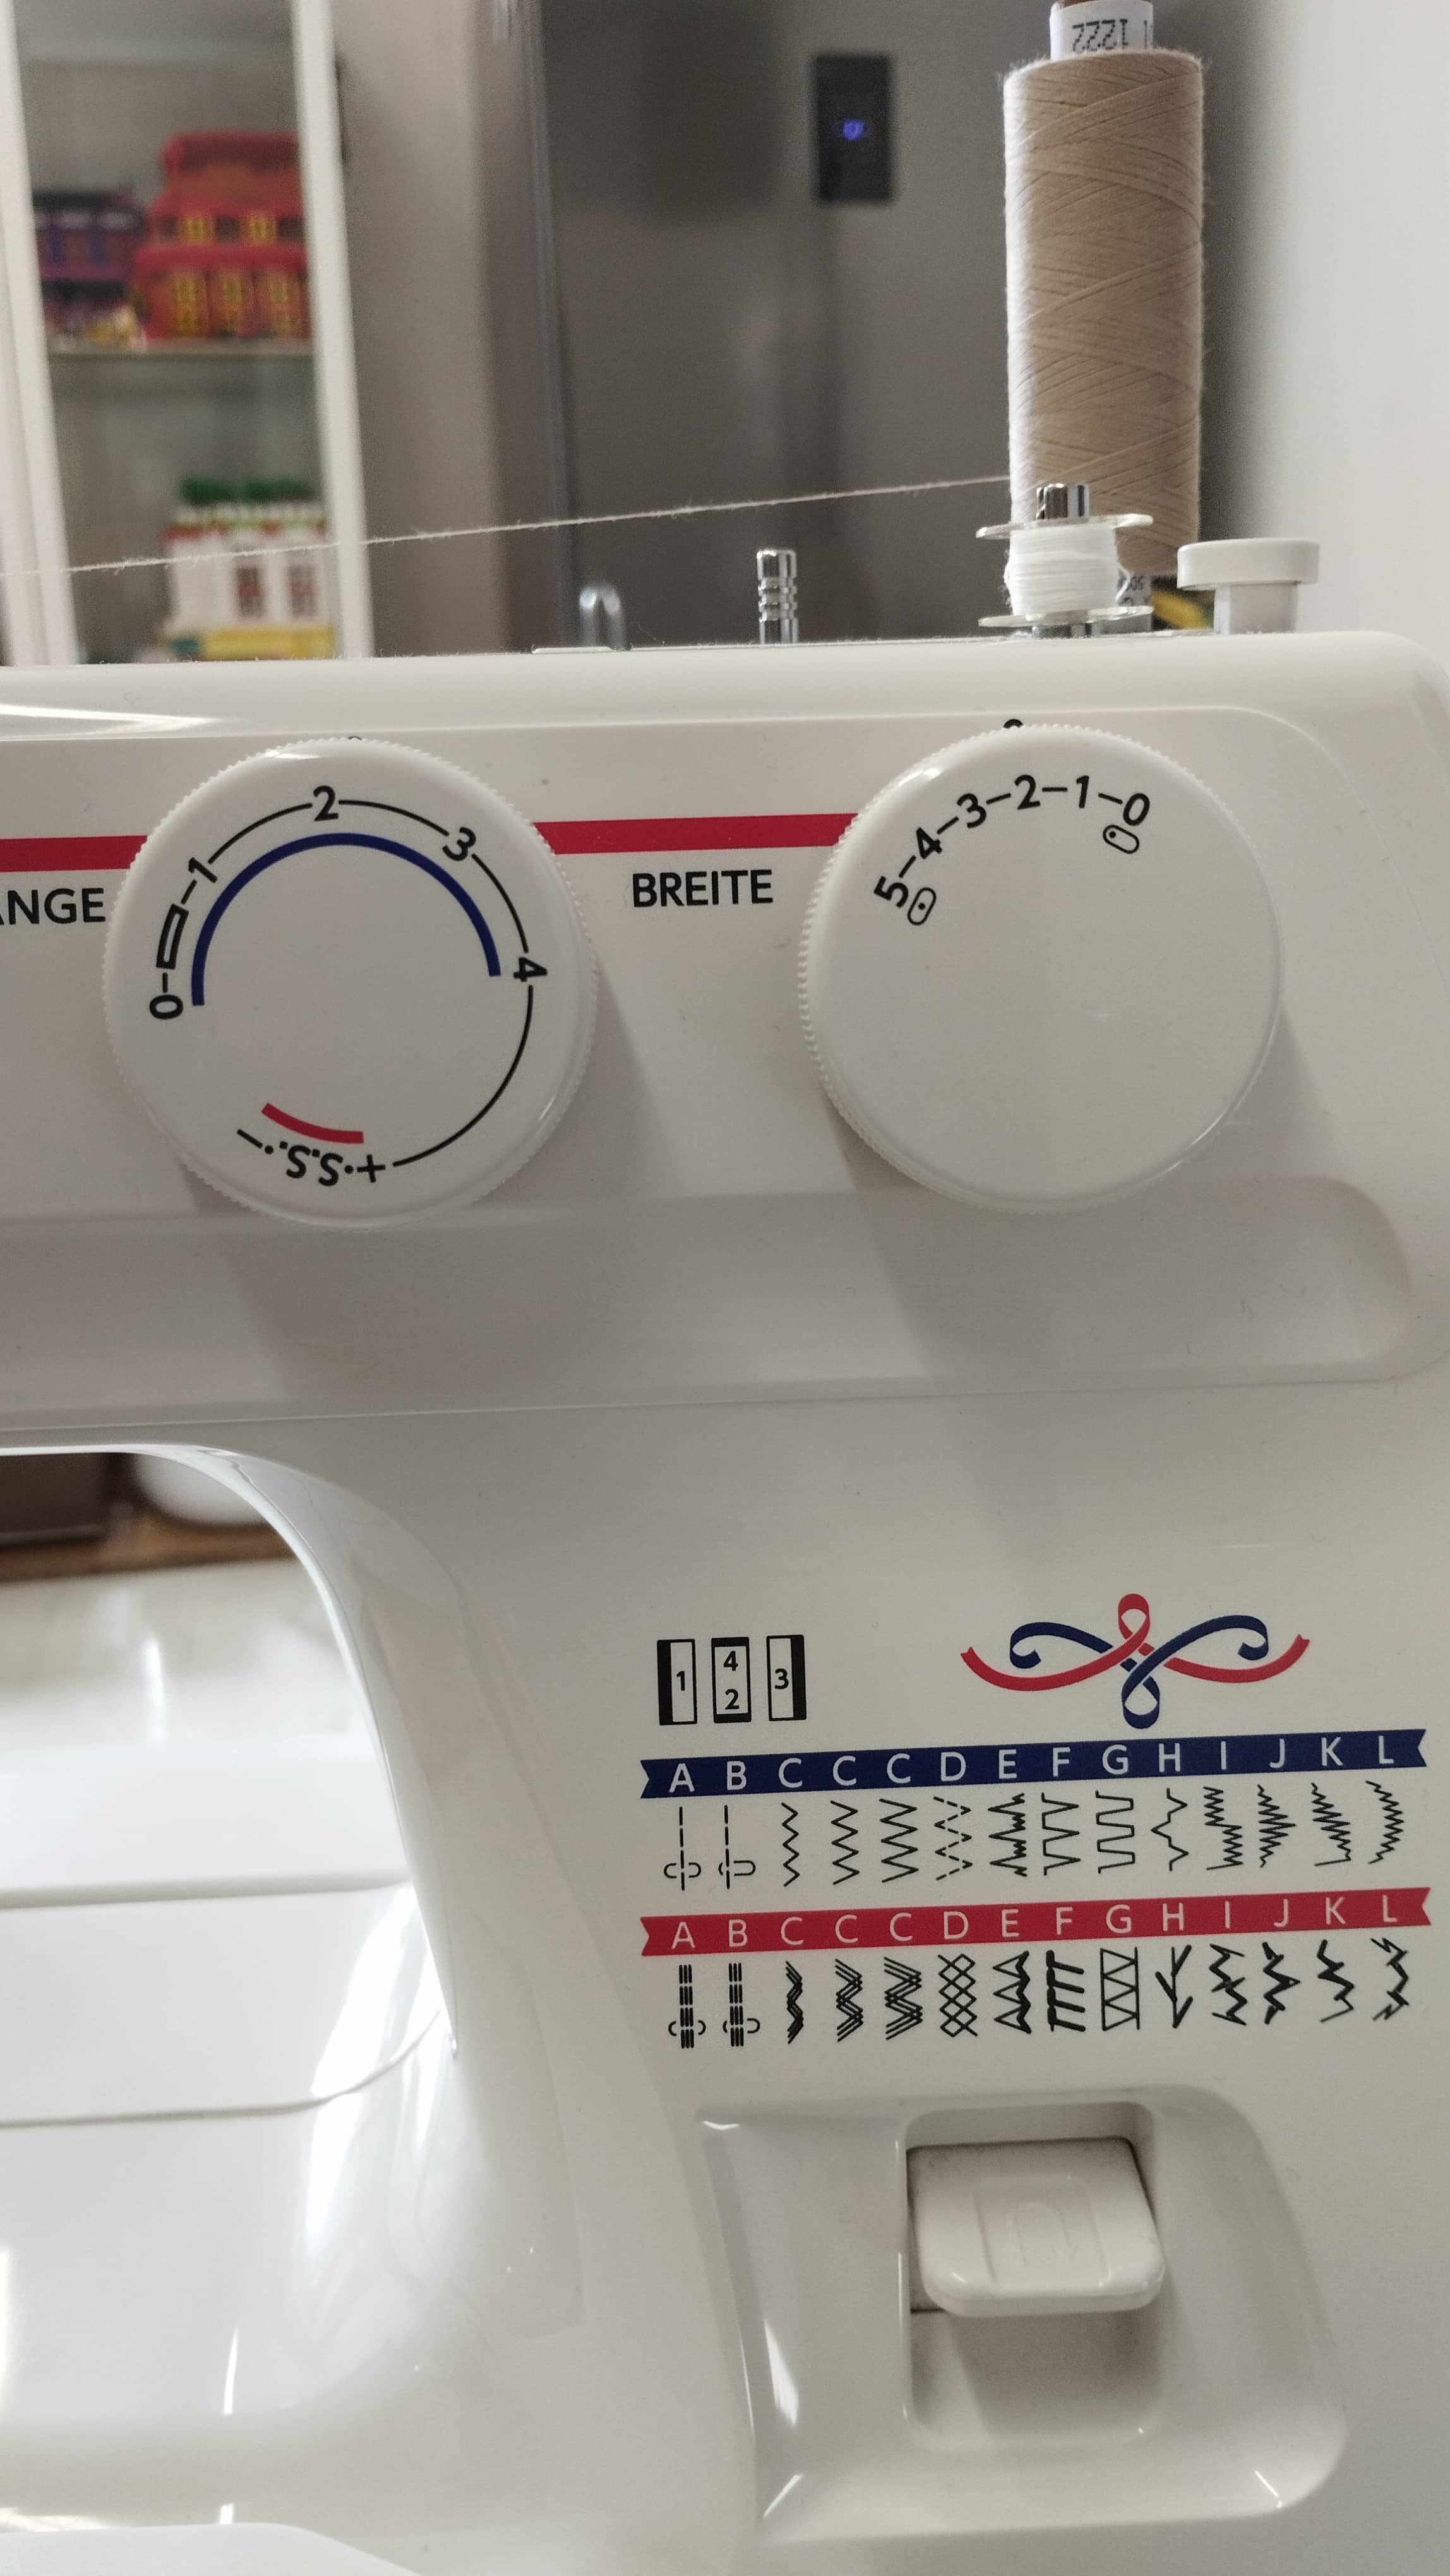
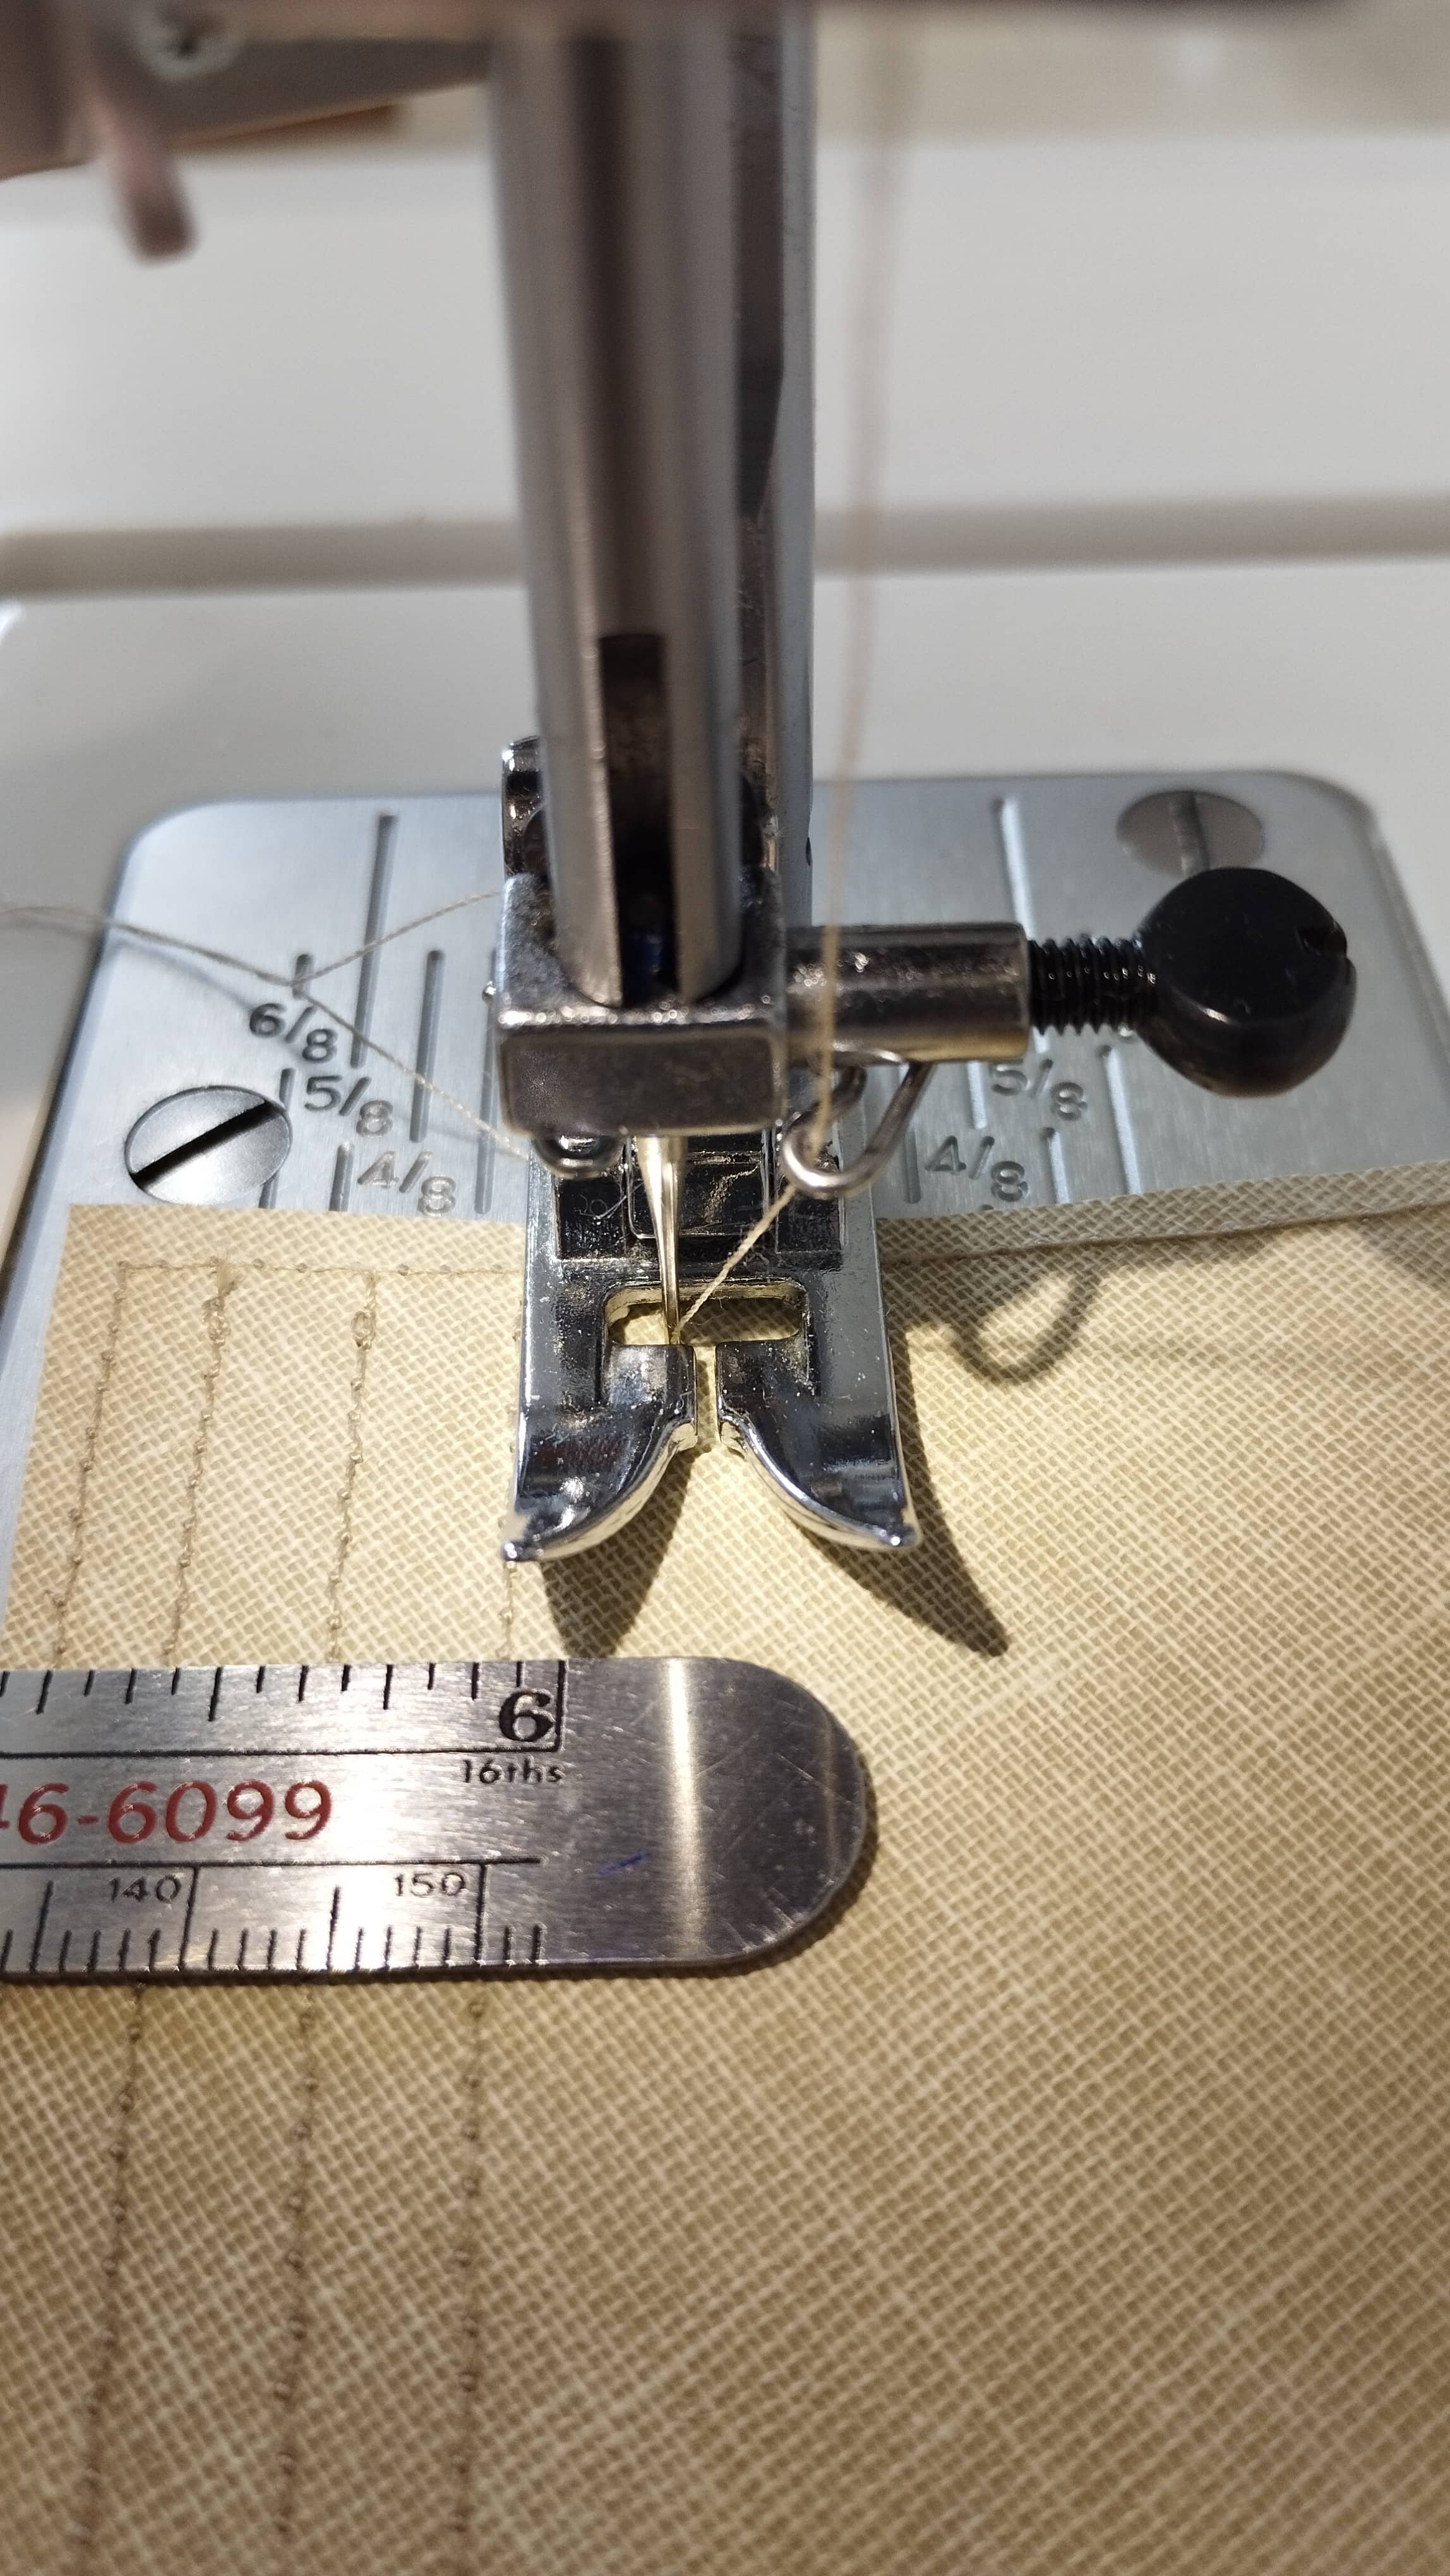
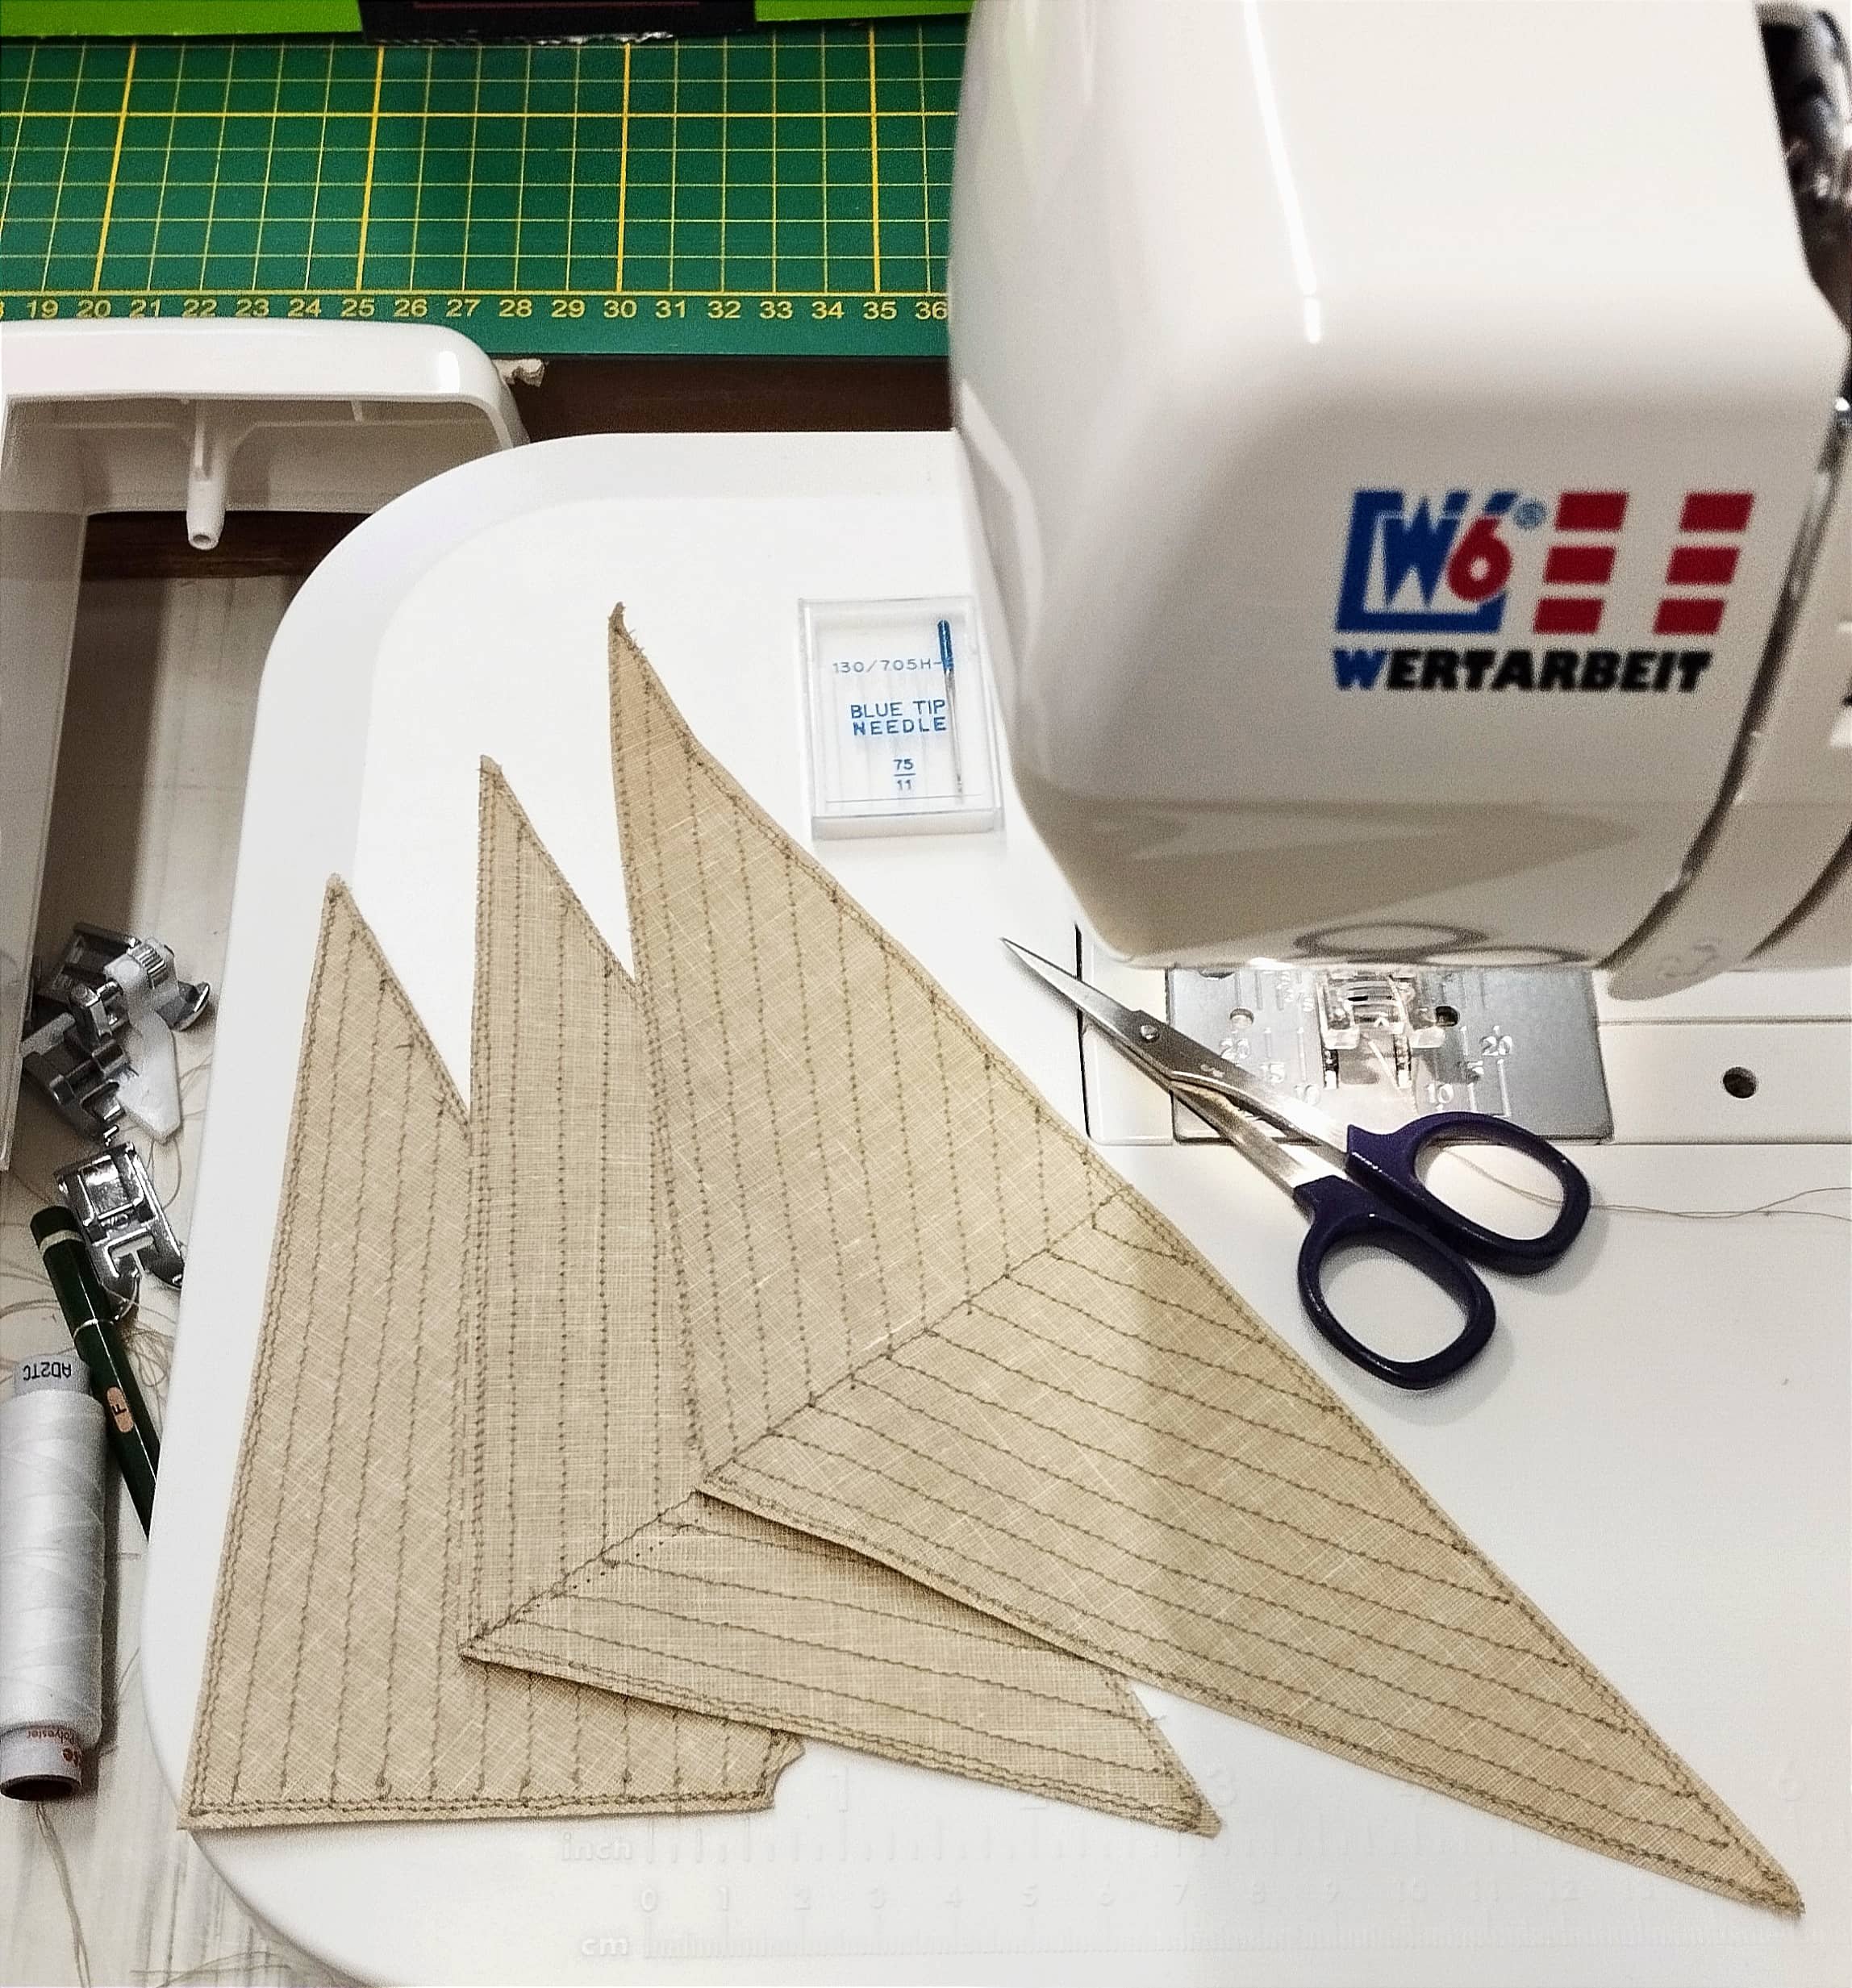
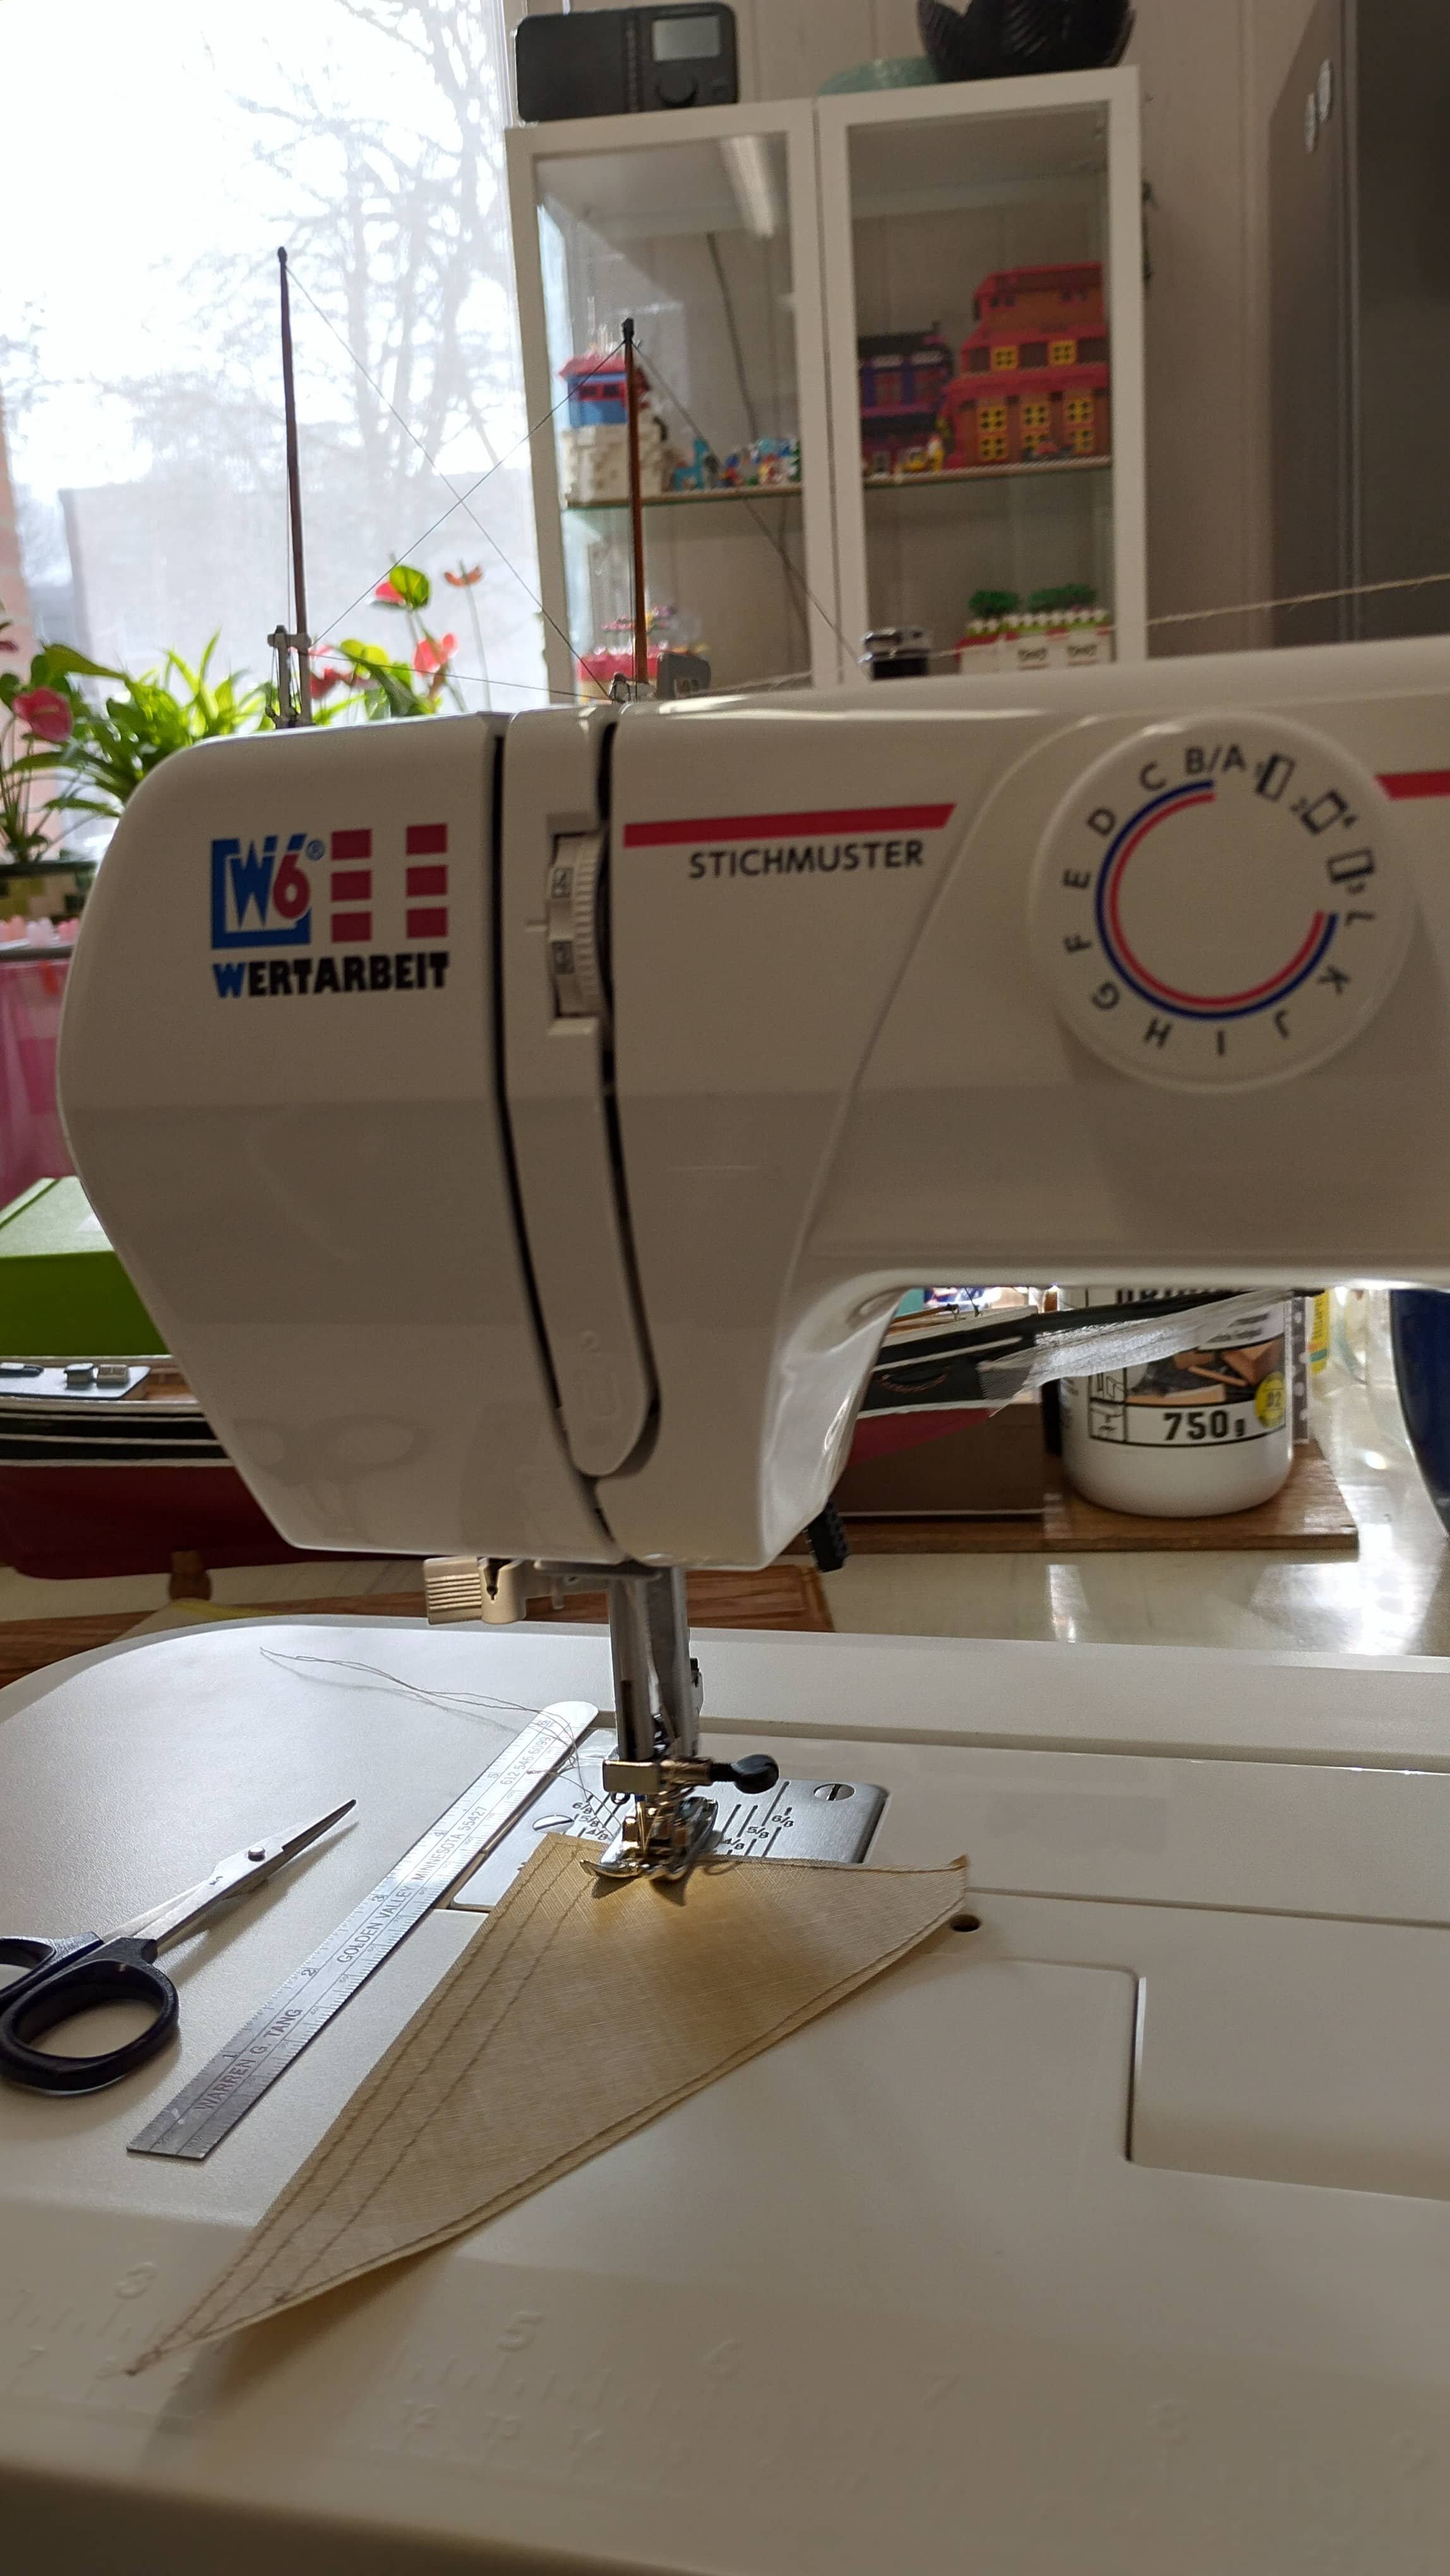
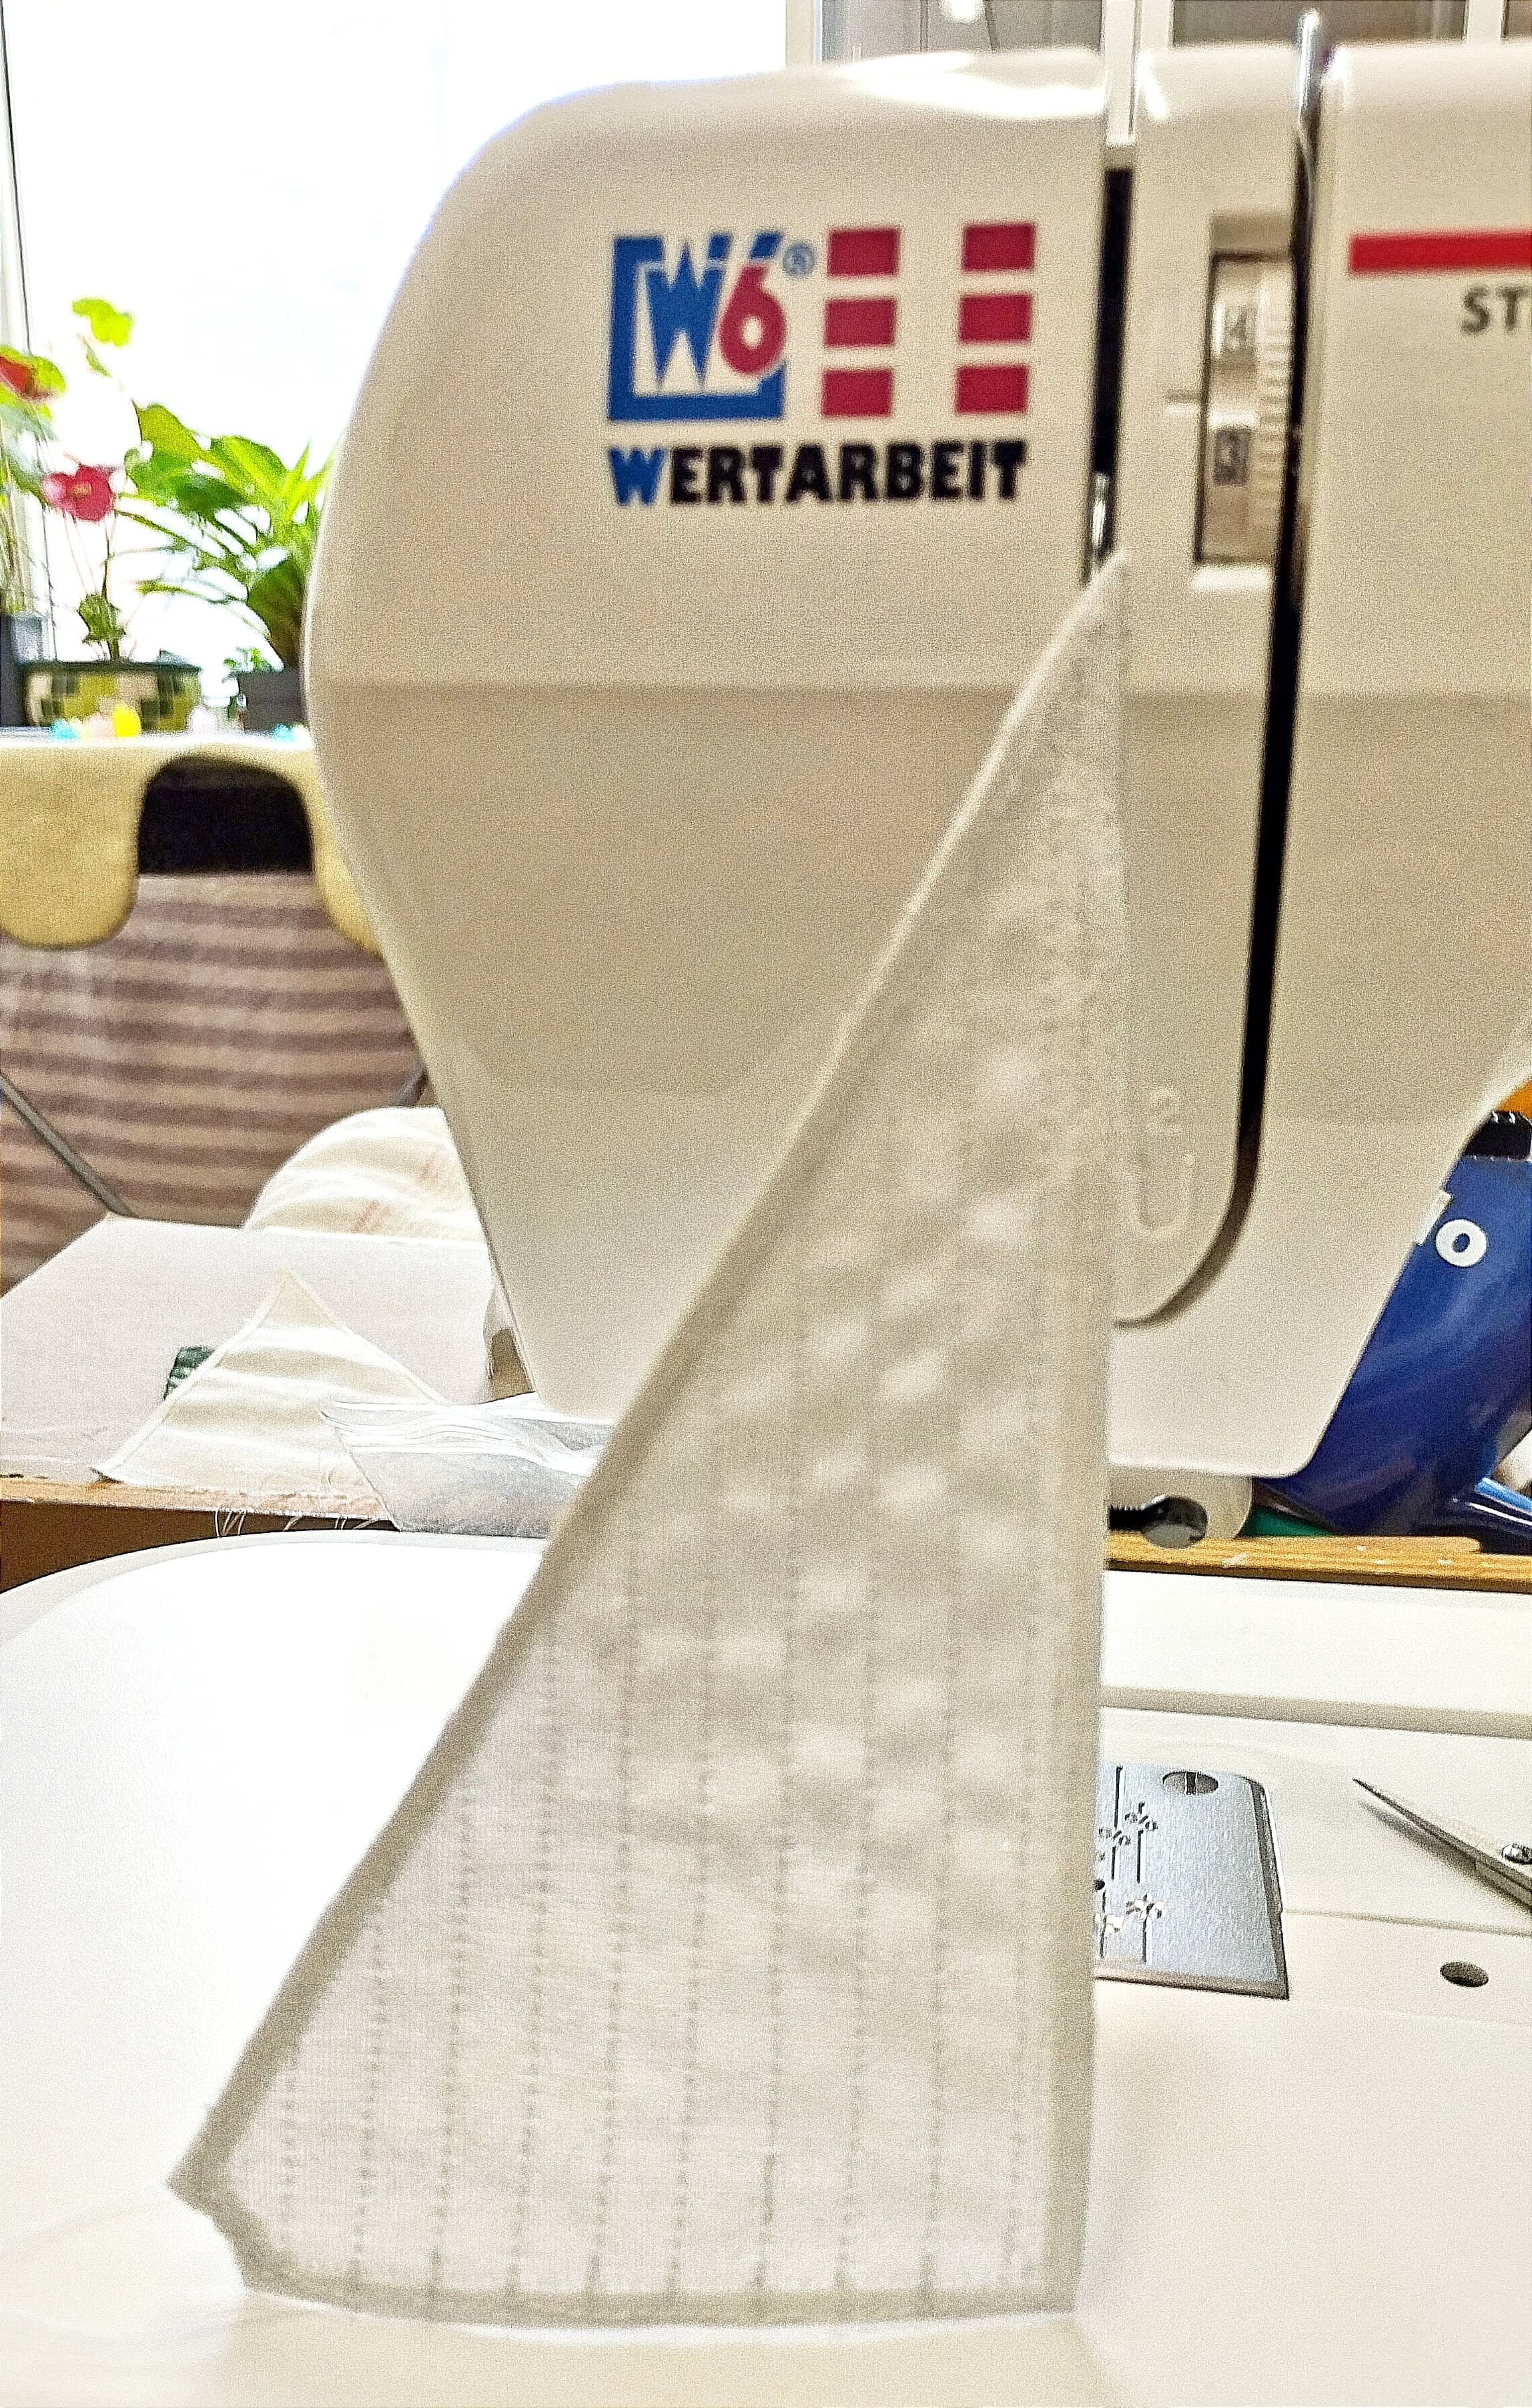
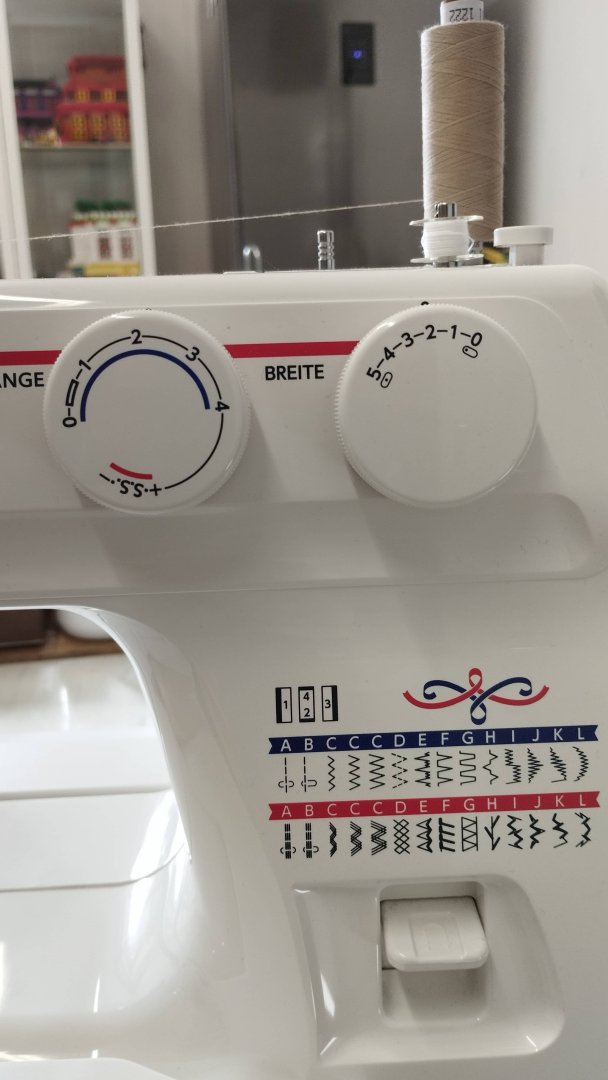
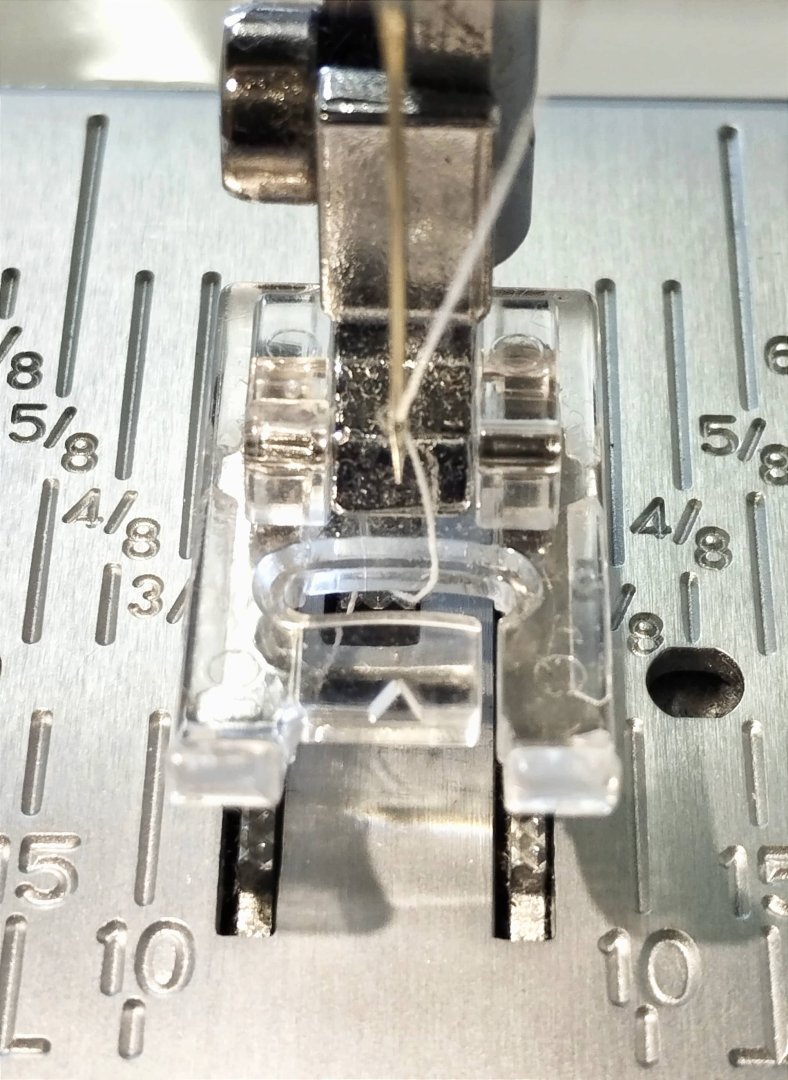
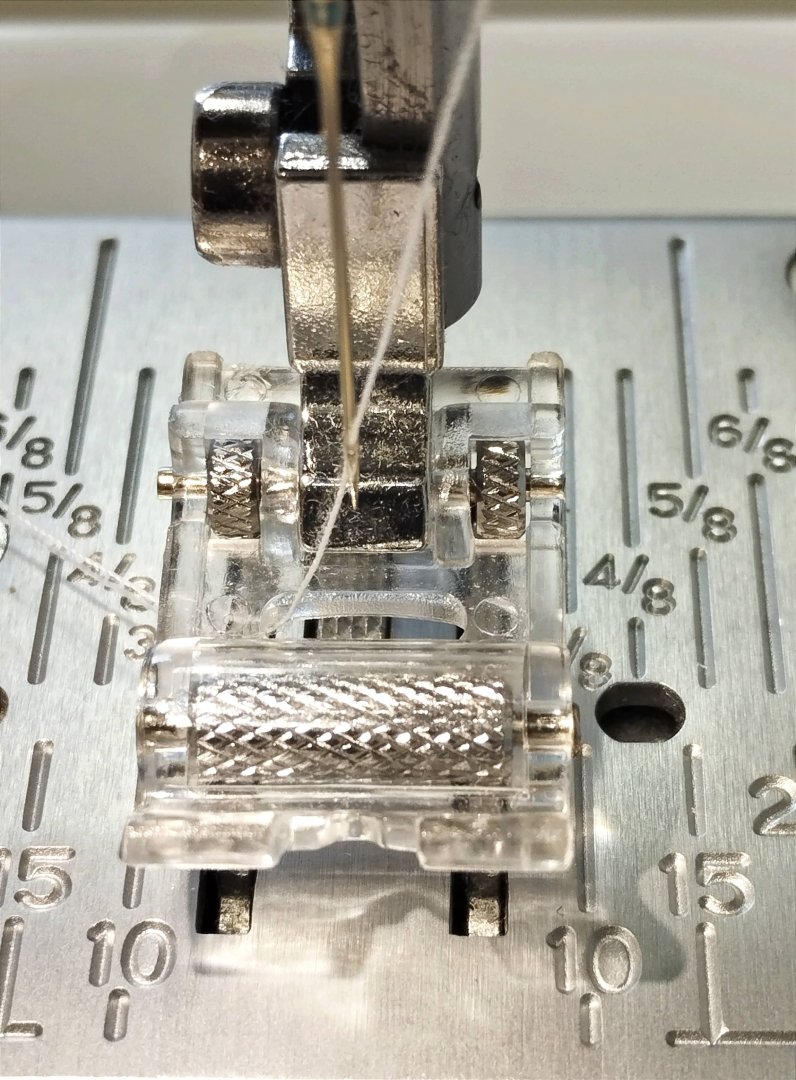
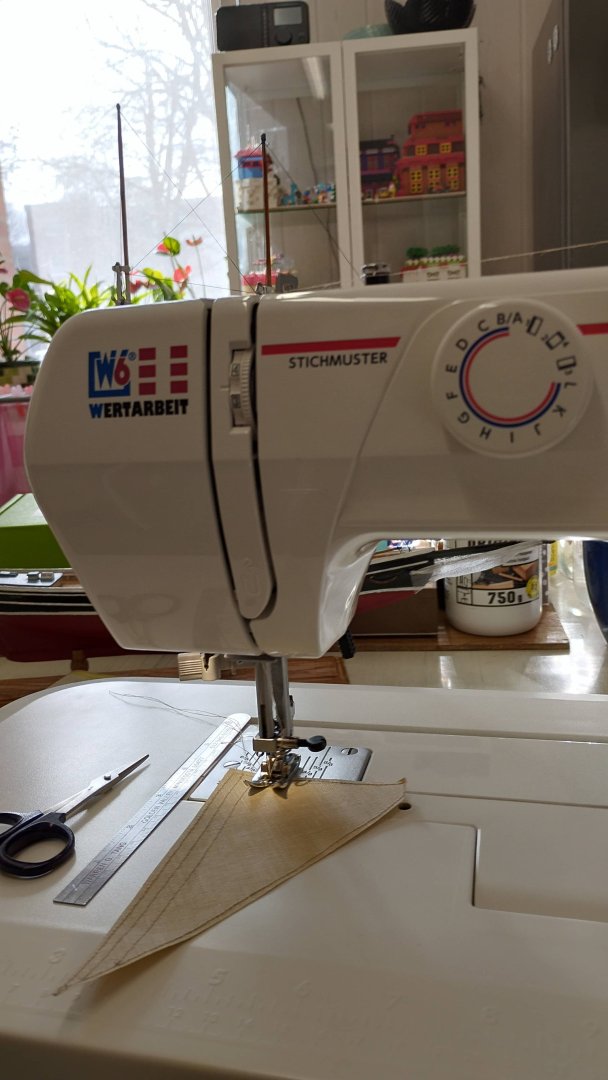
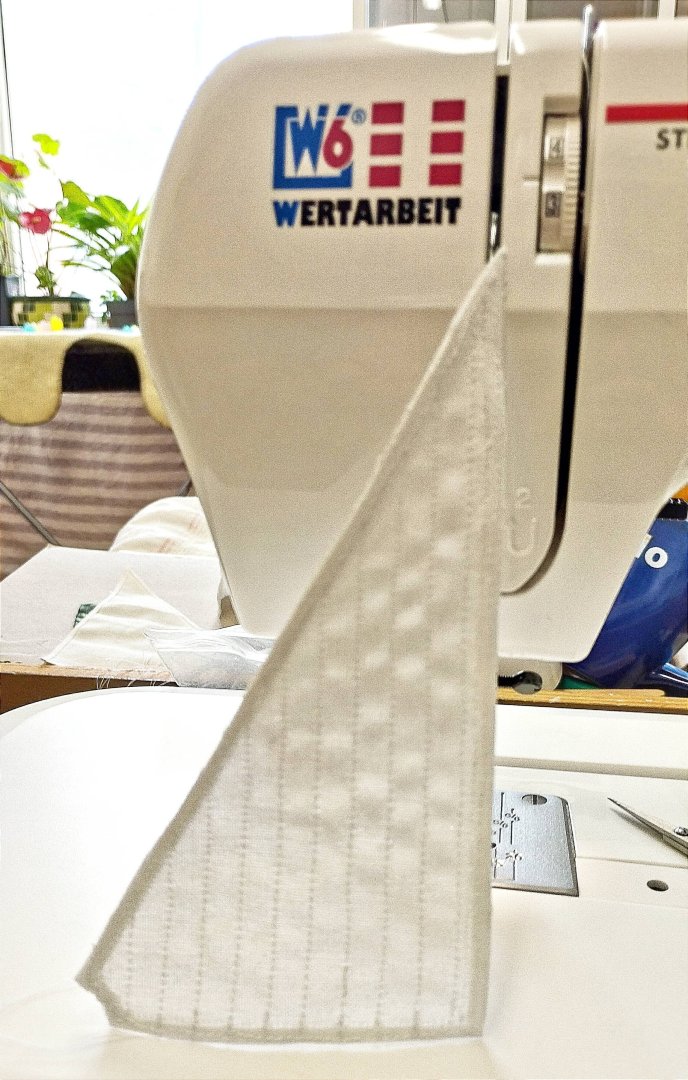
Sail Making Power Tools: The Sewing Machine! A good sewing machine doesn't have to be expensive. My machine only costed me 100 € new and was made in Taiwan by the same factory who also produces machines from 80 € to 8000 € (and more) for various other companies. Something important to look for is a machine with various interchangable feet as you also wouldn't use a Philips screw driver on a slotted screw would you? I like fully mechanical machines the best and really you only need one with 'straight stitch' and 'zig zag'; but an important feature is a 'stitch width' control! Left = Length / Right = Width Of course you won't be zig zagging your sails but in the 'straight stitch' mode the 'stitch width' controls shifts the position of the needle to the left or to the right as need be. I set my needle to a desired position from the left side of my foot using a small ruler. Then I only watch the leading edge of the foot and not the needle. This is a big help in sewing the gores on a sail! Set the needle say 1/4" away from the left edge and you will sew perfectly straight every time by only watching the left, leading edge of the foot running a long the edge of the cloth or the last gore you sewed. The next gore will then be perfectly straight and 1/4" away from the last one. No pencil marks or marks of any kind! Here is my favorite foot which is clear plastic with smooth stainless steel feet underneath. In the normally centered needle position you only have to keep your eyes on the little arrow up front instead of watching the needle. This one has metal rollers for problematic fabrics. It also works nice but limits one's view a bit. But there in a little indentation up front to keep your eyes centered on . And last but not least when your sewing comes to and end and you lift the foot up always pull your cloth towards the back of the machine before cutting the thread. If you pull your cloth towards you the needle will get bent straight away! Bye for now! UrkVisser


-
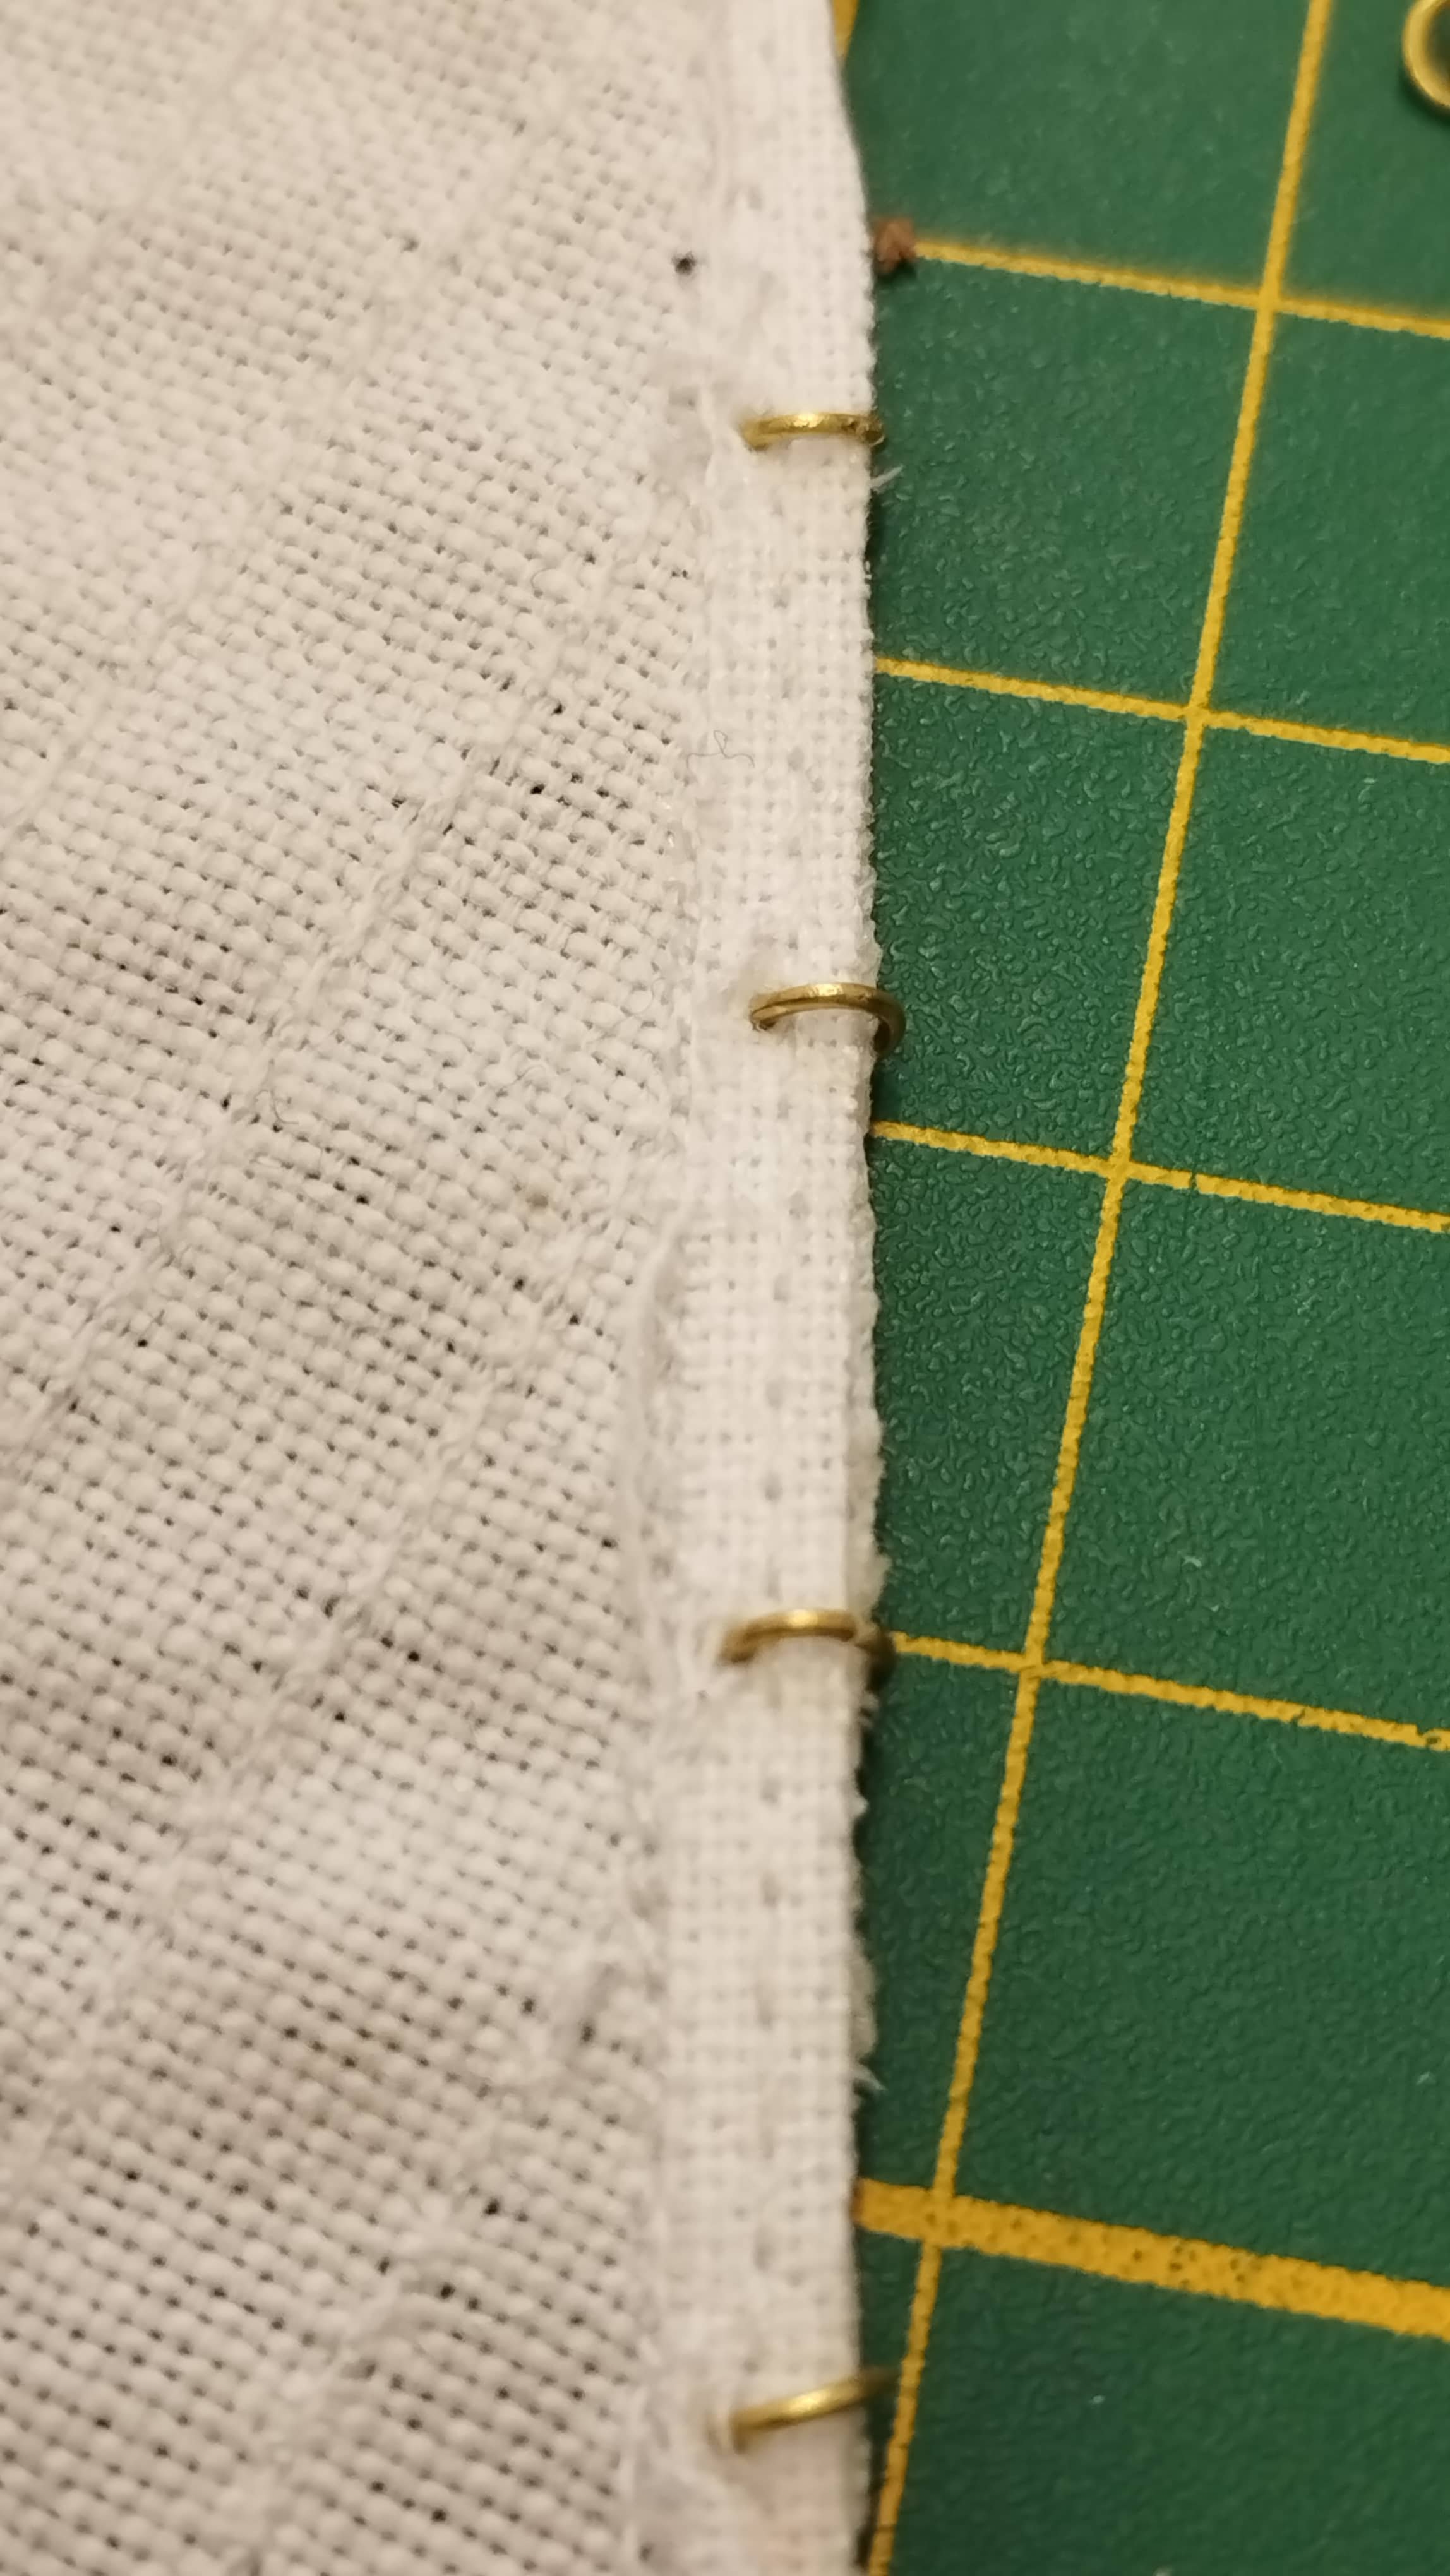
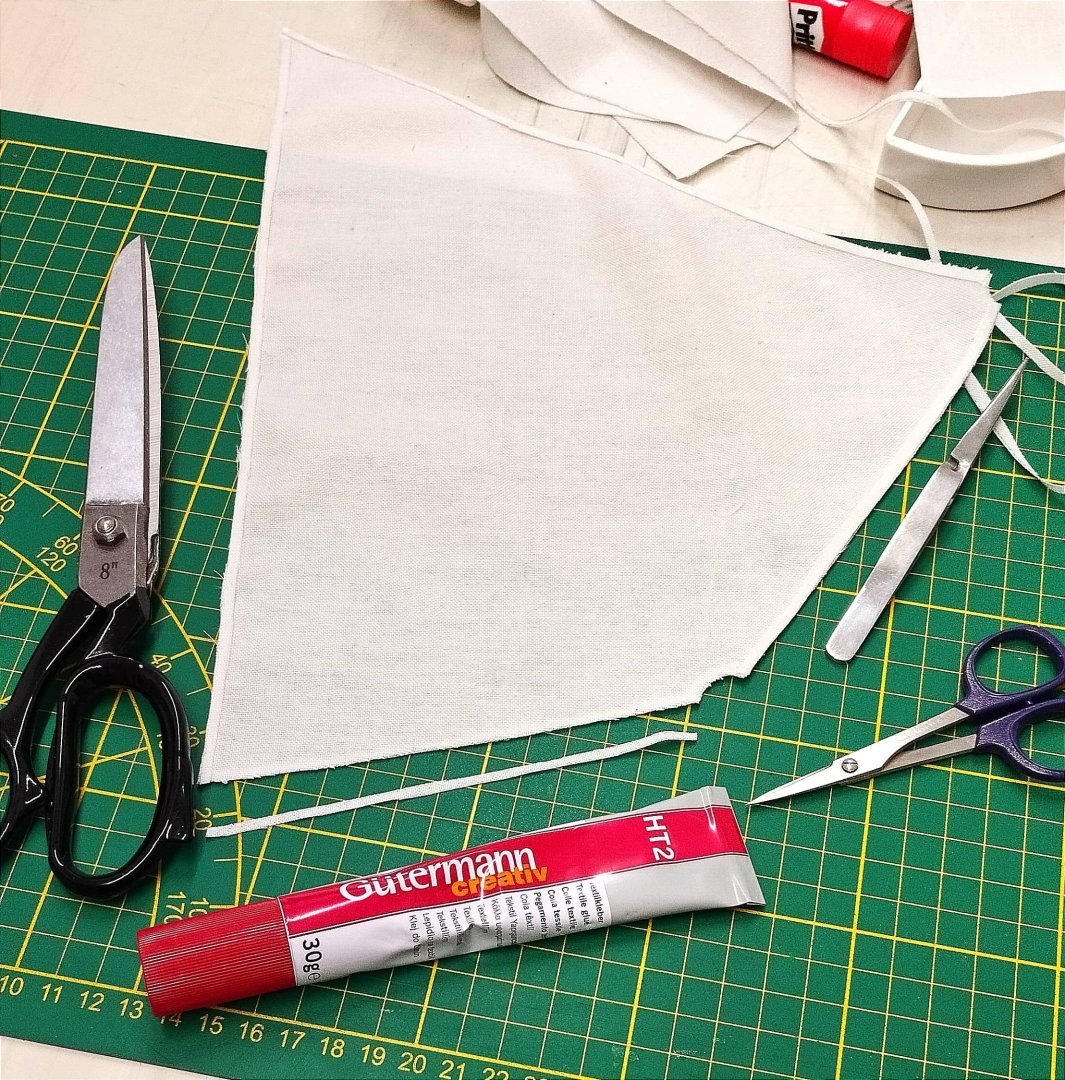
This kit came with some sort of thin, dark beige 'oil cloth' material of sorts as sail cloth. I cut it out, hemmed it's edges and sewed the gores nicely on three sails but it was too stiff, 'lifeless' and too dark. The only advantage was that it's impregnated so the edges won't ravel. So I saved this set of 8 sails as patterns and cut new ones out of the back of an old, white 'Oxford Broadcloth' office shirt. (Maybe the one I got married in? Haha!) Oxford Broadcloth is robust but still light and as shirts you generally don't even need to iron them if you give them a couple of good shakes out of the washer and then hang them on a hanger damp to dry. Perfect! Alas when cut the edges want to ravel straight away and it's 'basket weave' won't hold a needle hole or thread right to it's edge. So I took out a roll of ' No. 320 Interfacing (like what's used in a nice collar) and cut strips of it 1/8" wide and then glued them to both side of the edges with 'Gütermann - Creativ HT2 Fabric Glue' which is a type of crystal clear, thin, fast drying rubber cement. Then the next day I sewed the edges of these strips close to their edges with 1.5 mm long straight stitches using a very fine Number 60/8 needle. This 'sandwiched' the Oxford's edges in between the two interfacing stips solving the problem. I also developed a trick for sewing the gores without pencil markings or markings at all! I'll write about it next time. But more on this later! Bye! UrkVisser


-
'Scientific' Kit. No. 164 - 'Bluenose'
UrkVisser replied to UrkVisser's topic in Wood ship model kits
Hi! I'm ending this thread because I just started a build log with the name: 'Scientific Kit No. 164 - Bluenose (1921) - UrkVisser' See you all there!