HOLIDAY DONATION DRIVE - SUPPORT MSW - DO YOUR PART TO KEEP THIS GREAT FORUM GOING! (Only 27 donations so far out of 49,000 members - C'mon guys!)
×


Jerry
-
Posts
1,753 -
Joined
-
Last visited
Content Type
Profiles
Forums
Gallery
Events
Everything posted by Jerry
-
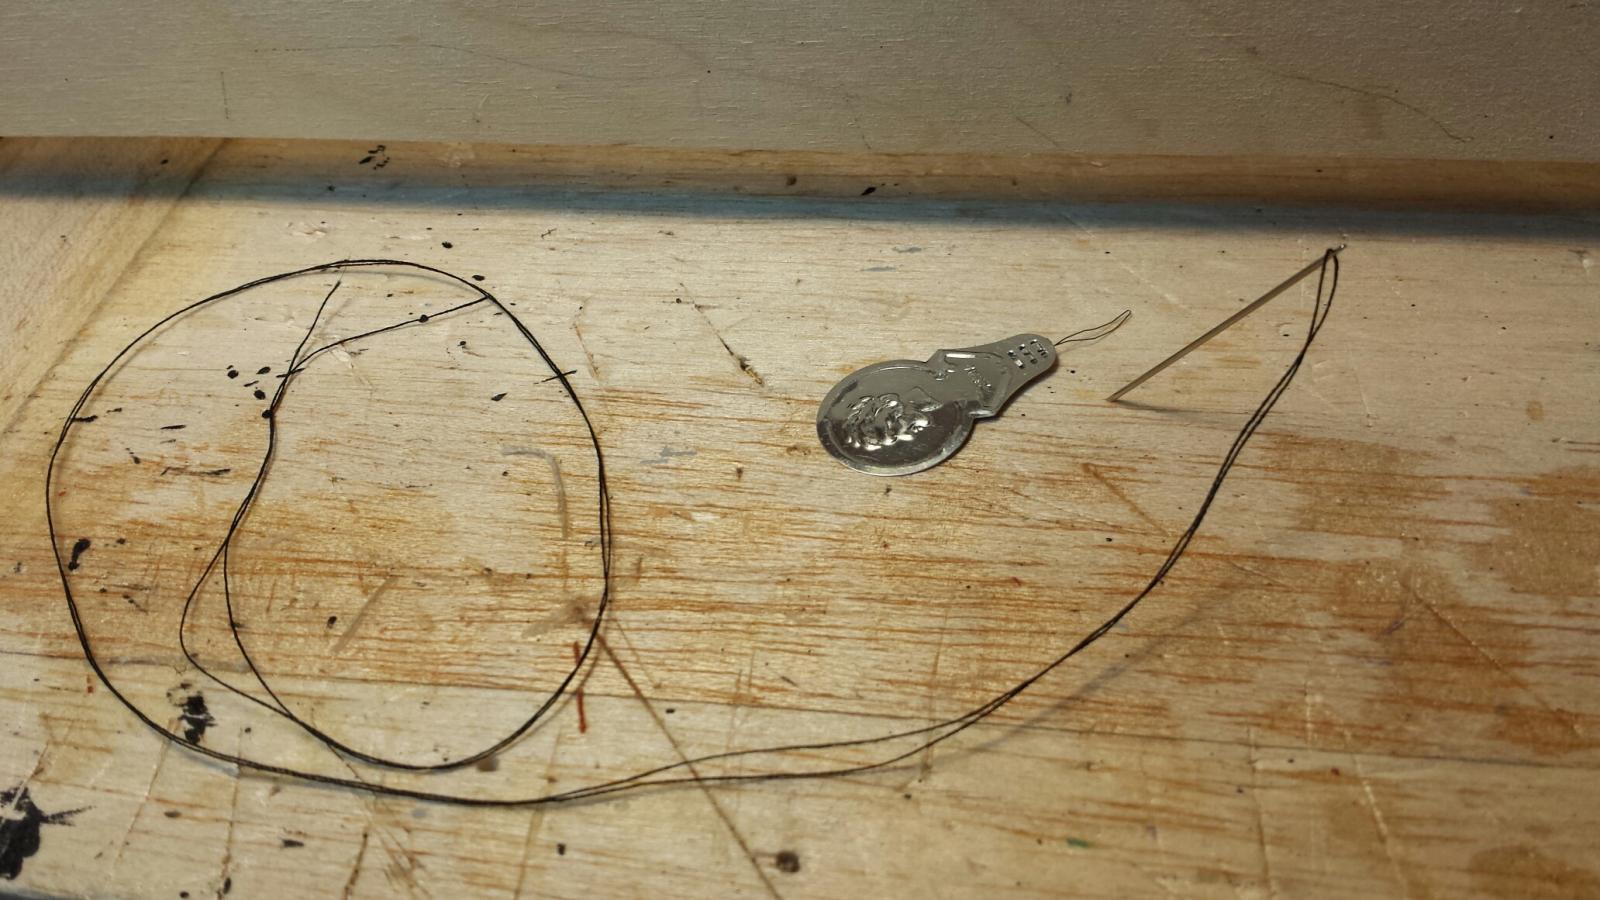
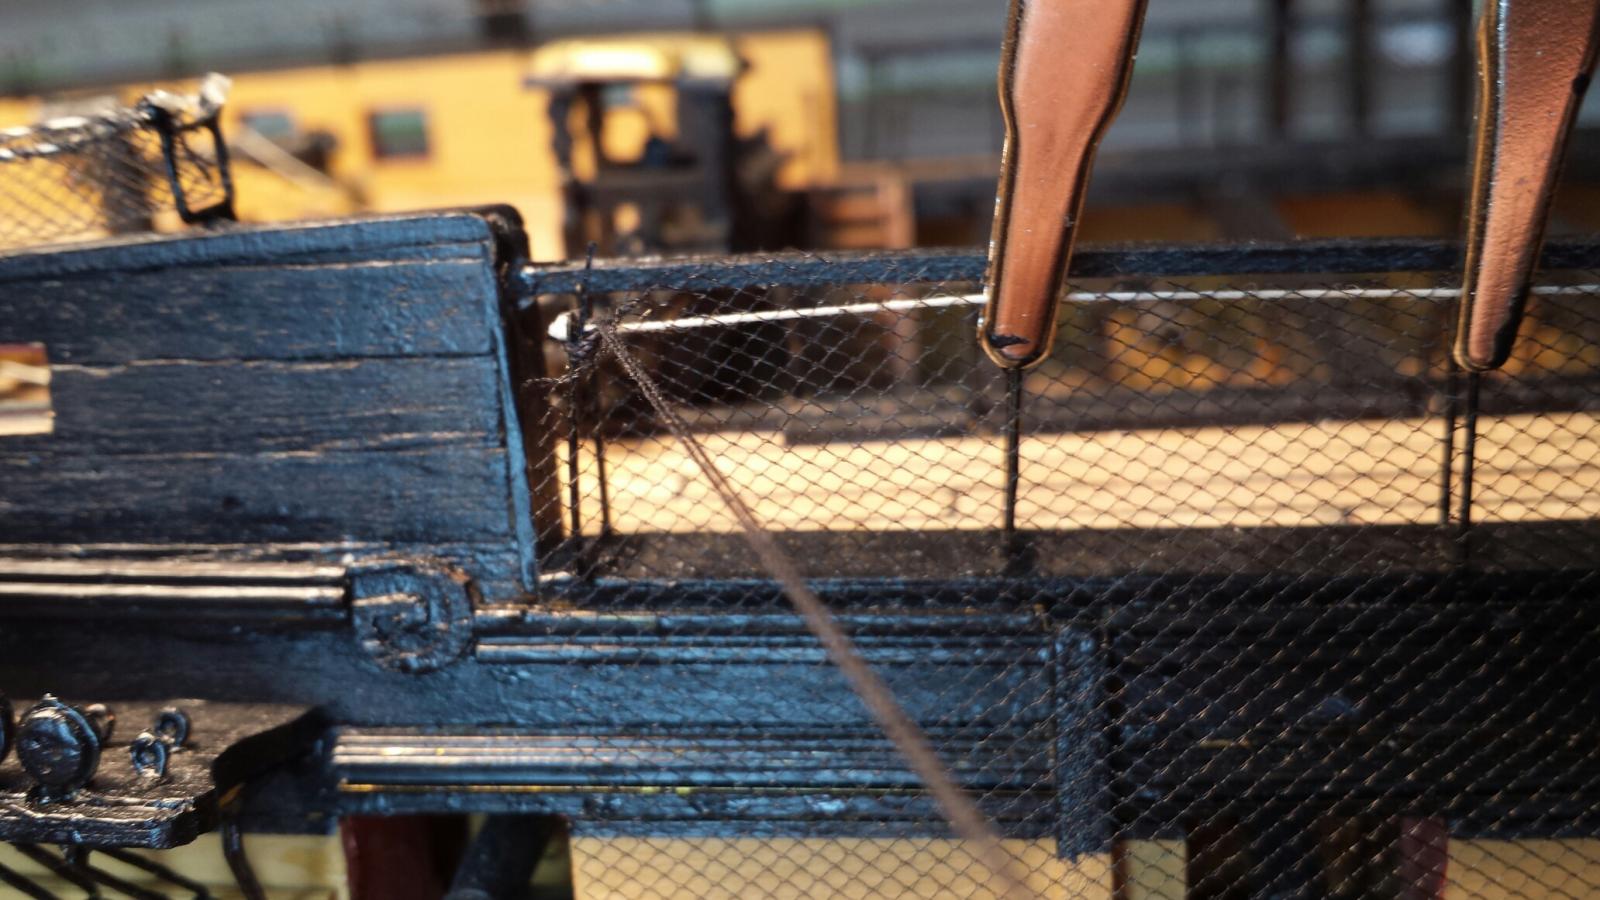
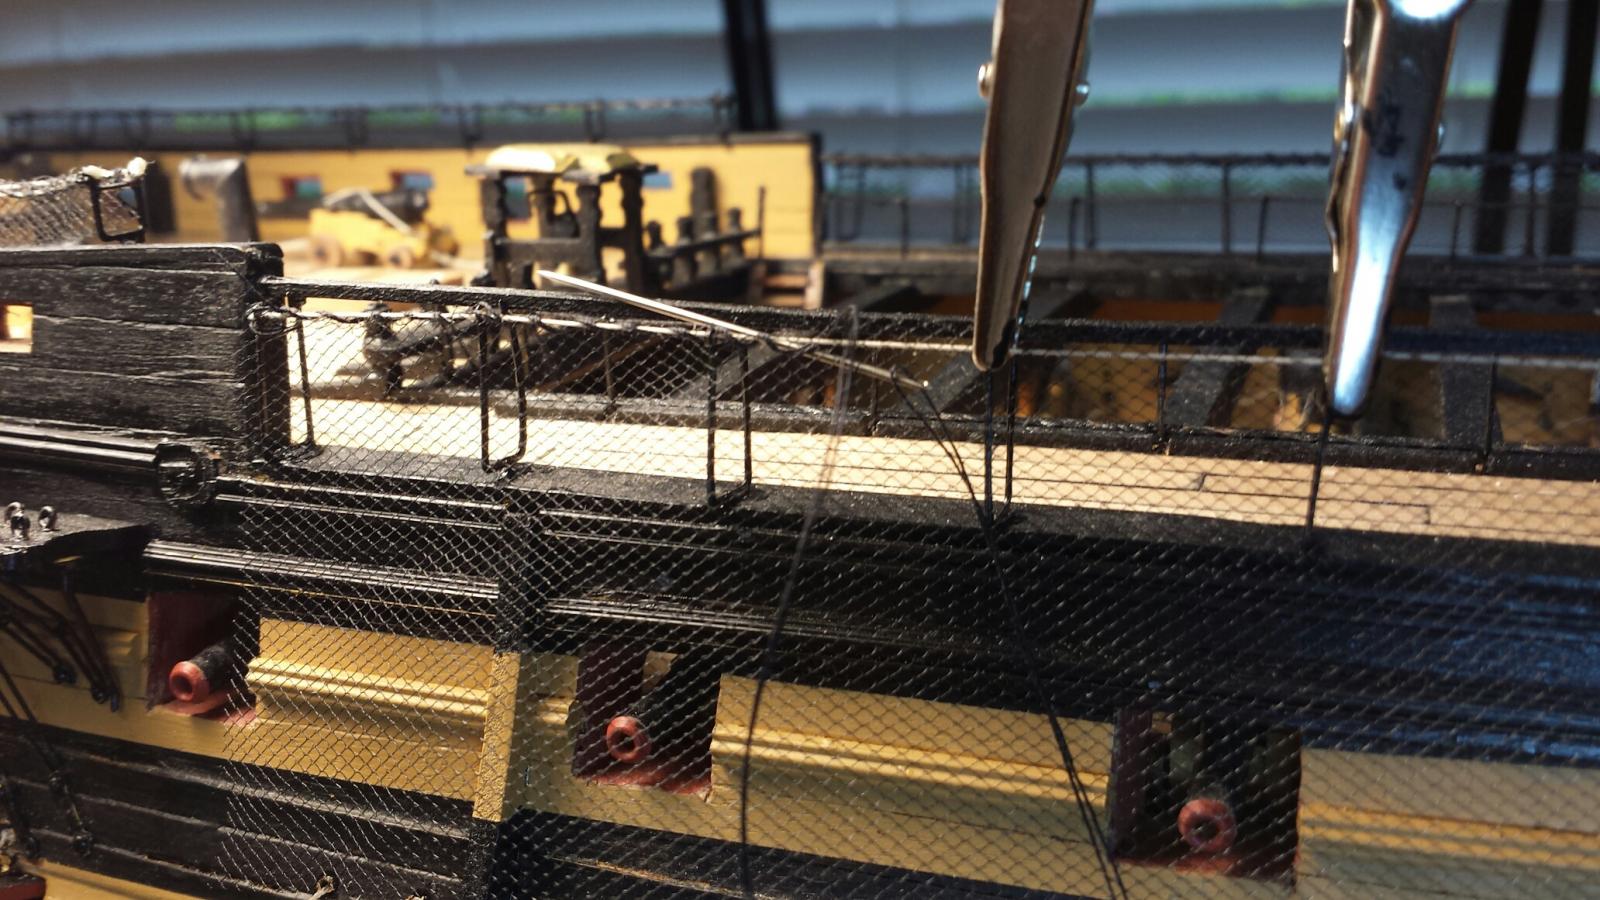
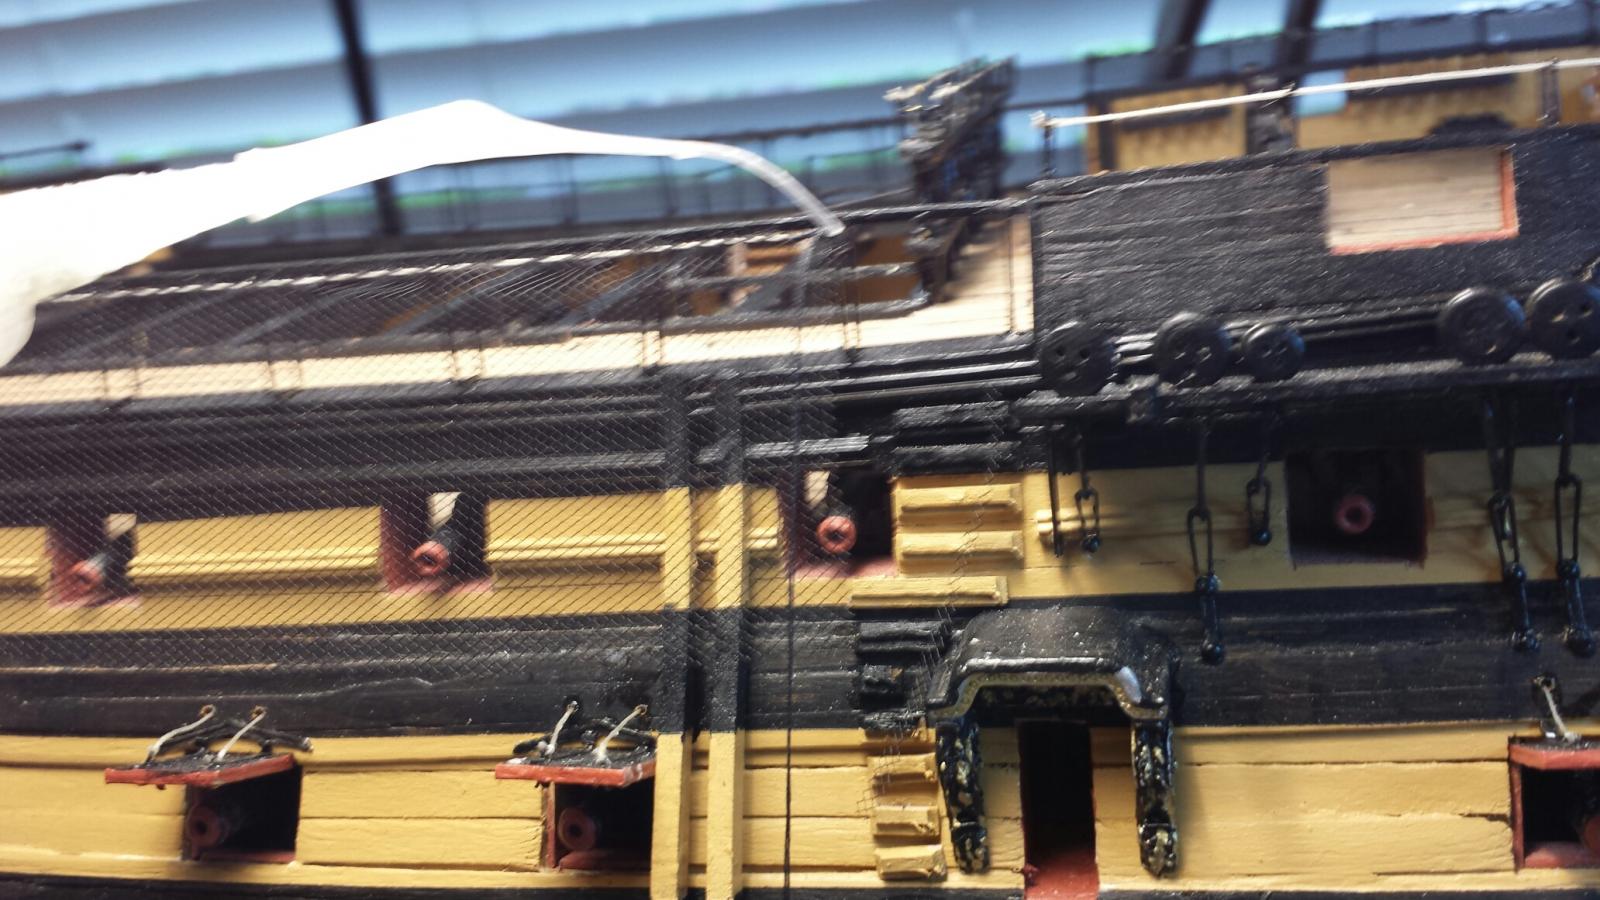
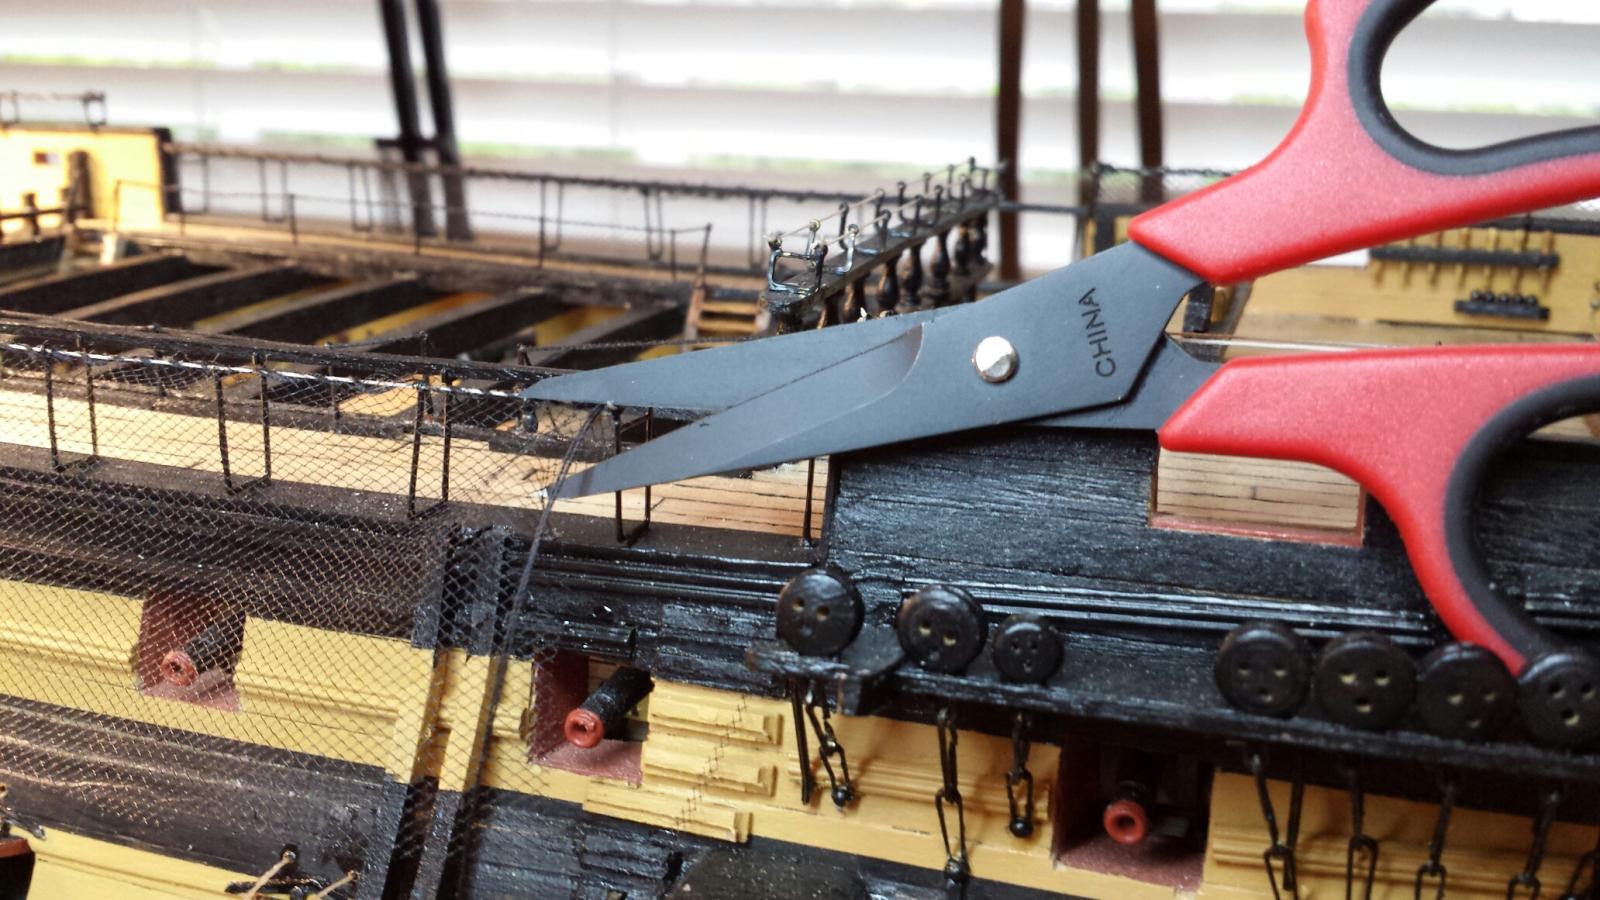
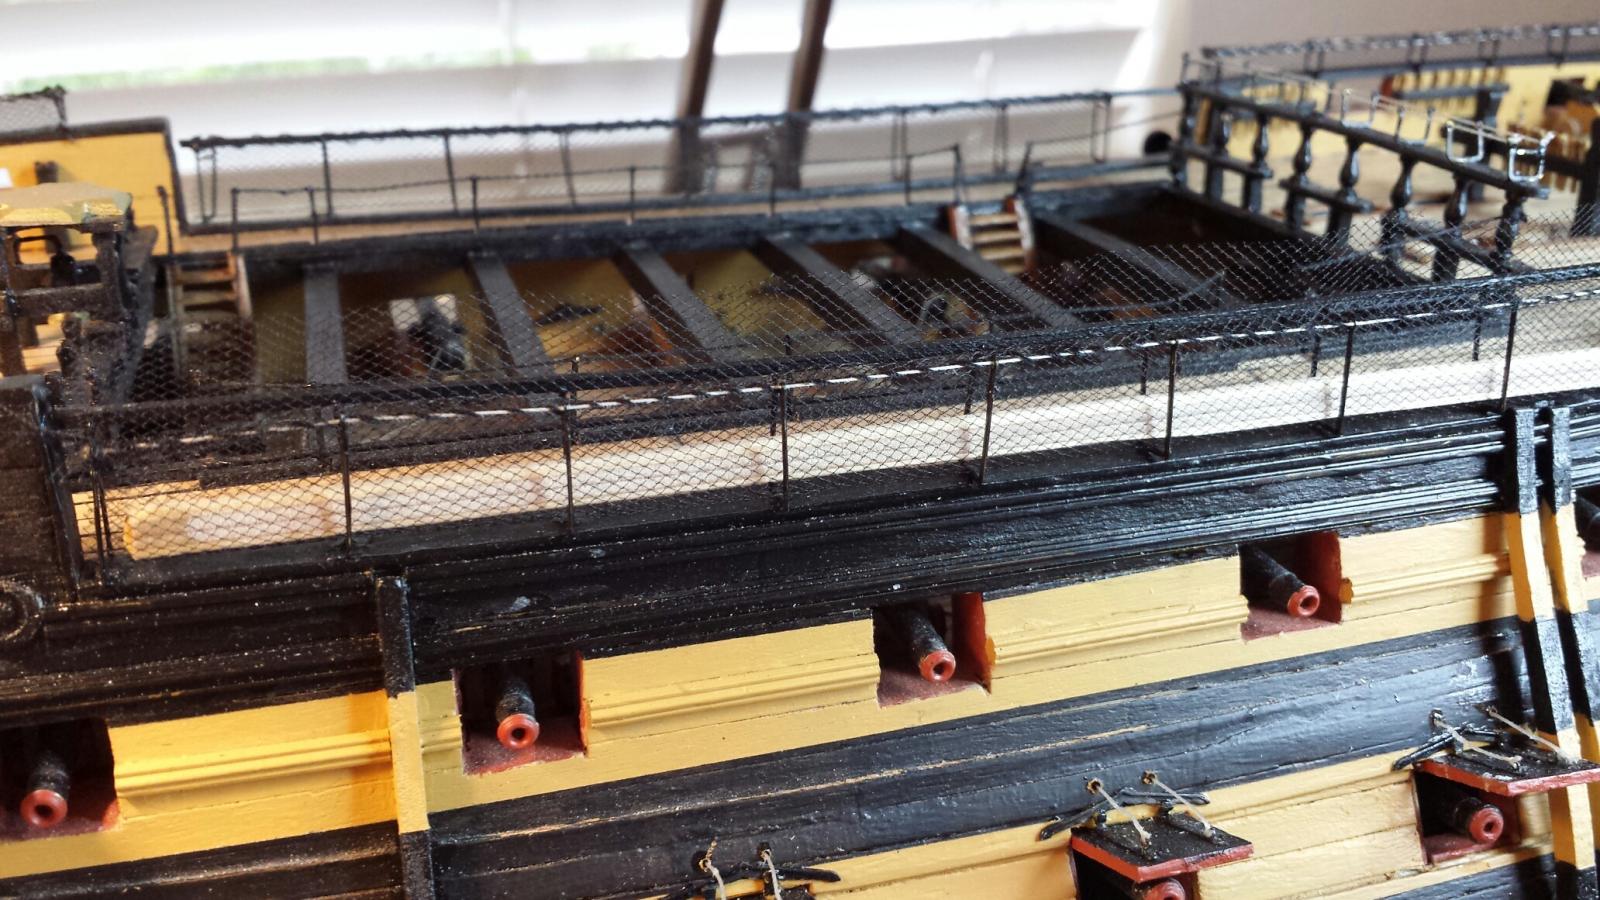
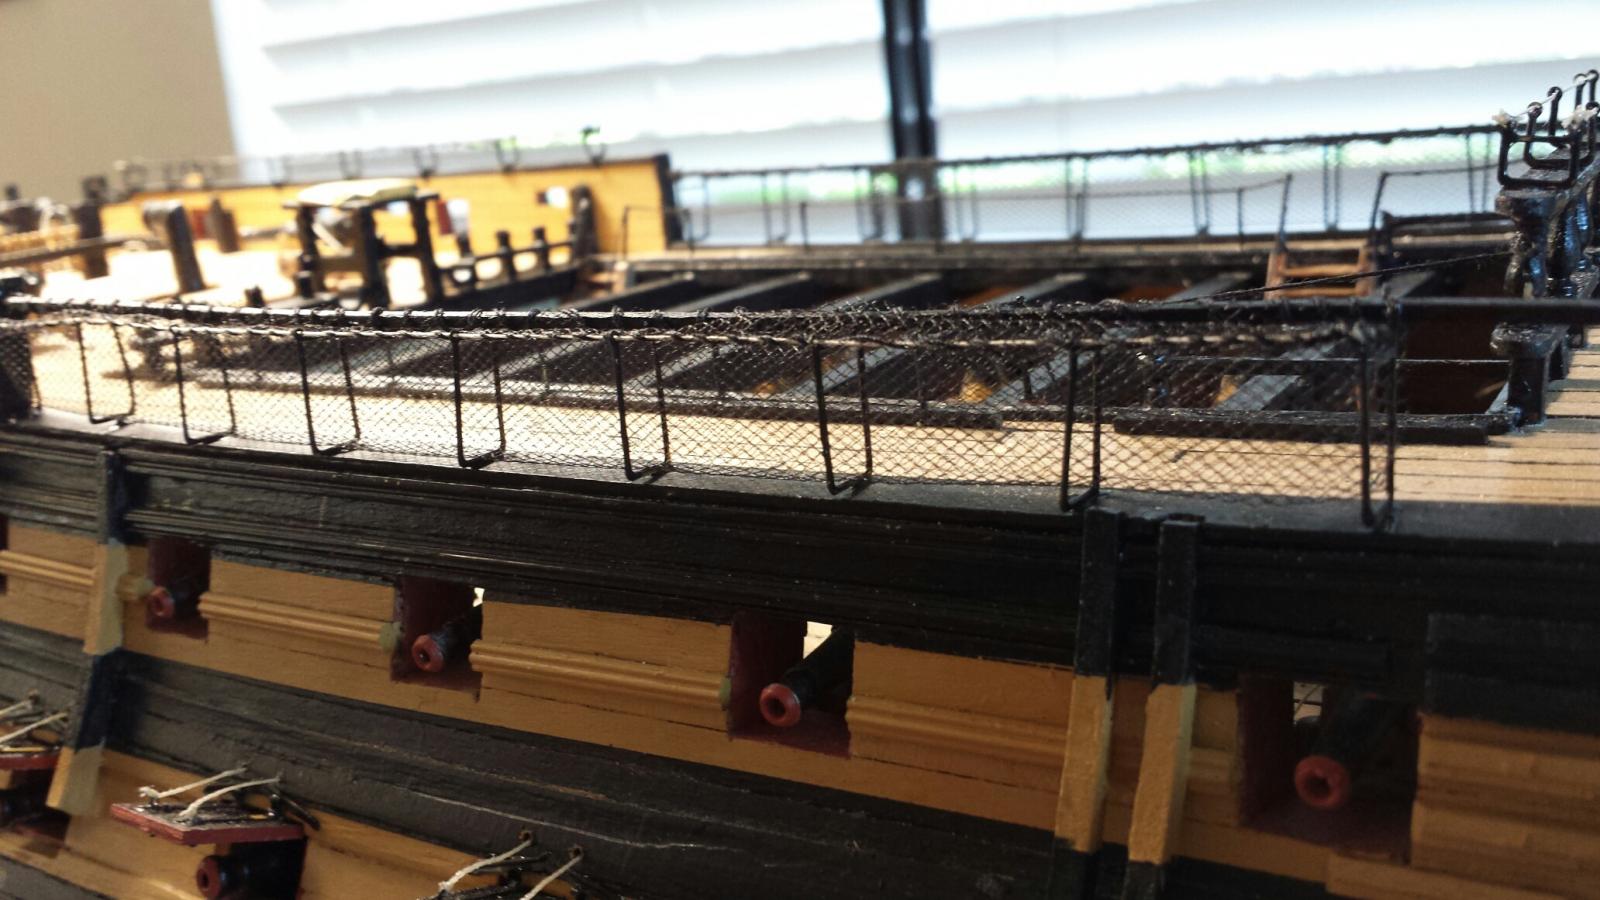
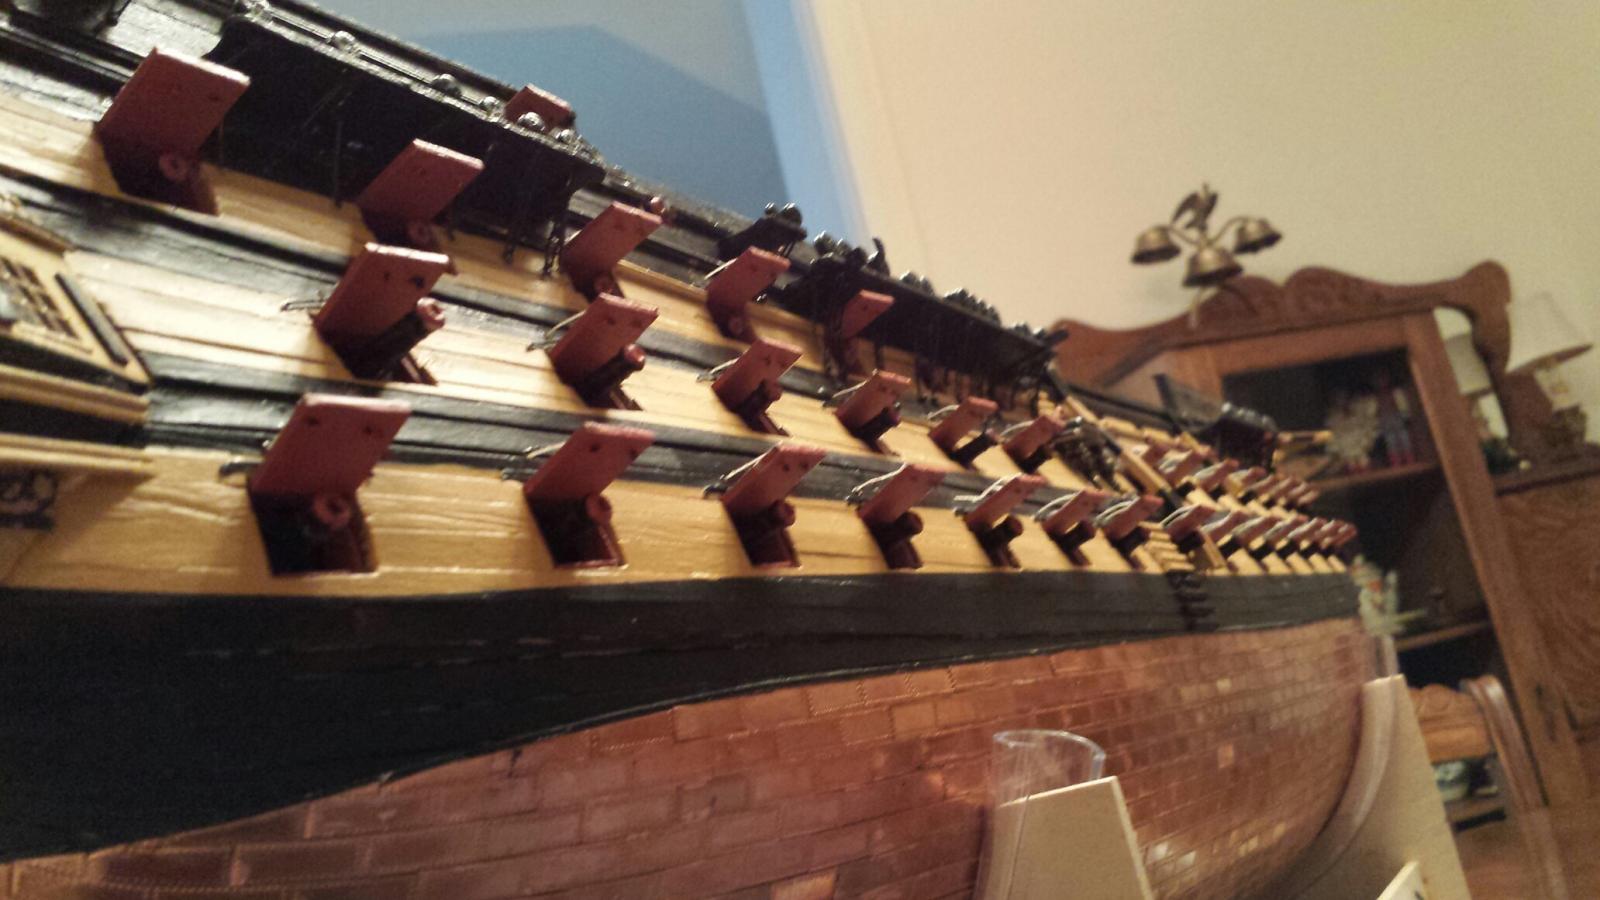
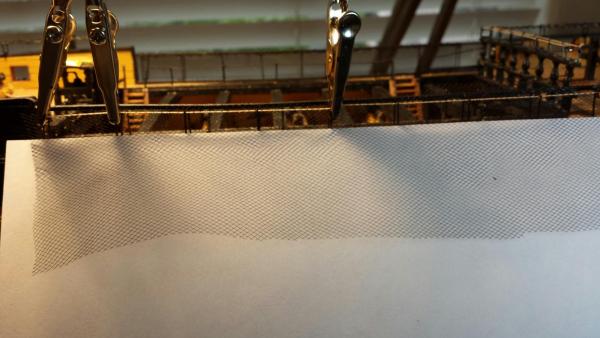
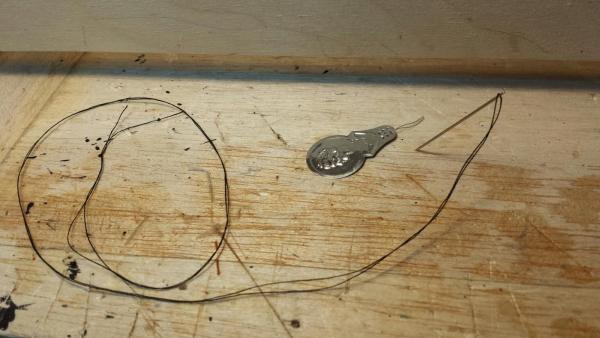
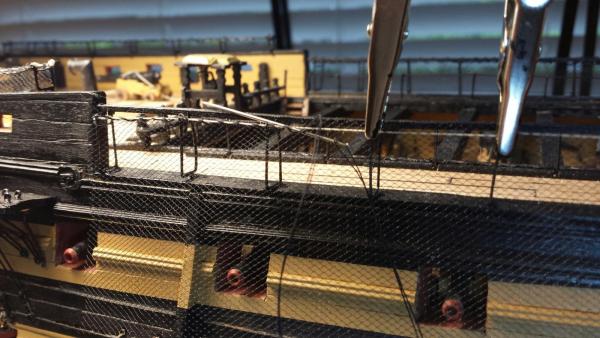
Hello Everyone.. I have had a couple requests as to how I attached the hammock netting to the railings and cranes. I hope the following will be of help and if not, please let me know if you need additional information. I started by cutting a piece of netting (toule..found in most fabric stores) to approximate size which i trimmed to actual size once it was clipped in place. I use double black sewing thread and needle to lash the material to the thread or wooden railings. I begin working (sewing..lashing...) from the left. and continue working along the railing When lashing is completed, A drop of CV cement is used to secure the lashing in place The excess thread is cut off Next the netting is stuffed in between the hammock cranes and formed with a stick placed between the crane uprights. Repeat lashing the material to the inboard rail and paint the outboard rail black I painted all the railings that were made with natural thread black. This should do it. Happy New Yera everyone.. Best to all... Jerry


- 900 replies
-
- 4
-

-
- victory
- caldercraft
- (and 1 more)
-
Hi Lawwrence.. I'm working on the boat now, doing some more hammock netting. I've taken a few more pictures of the process which I'll post later today. I'll be around all day except to run an errand later so if you want to skype me that would be fine. Nice to hear that you are making some additional progress. Say hi to the Admiral.. Jerry
-
Good evening, David... Thank you so much for your thoughts regarding the hammocks. I was wondering when you were going to do yours. I'll be careful but I figured the cranes were already in place and putting in the netting wouldn't make it too much more hazardous. Today is a break day for me and then back to work tomorrow. Take care and again, Happy New Year, Jerry
-
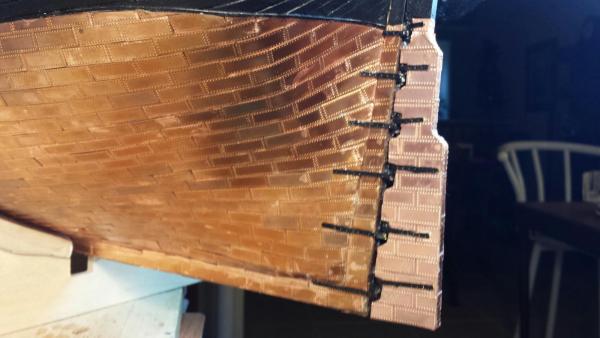
Hey Lawrence. Thanks so much for your note this morning and your much appreciated comments about the hammock netting. I'm very sorry to hear that Burnadette has come down with a cold. I hope she gets better quickly. I'm still coughing quite a bit but not confined to bed. I was able to get some more work done on the hammocks and hopefully will complete that phase in a couple of days. I won't be finished with the hull at that time as there are still some stair railings to complete and of course, the anchor to do. Now to your question: I used regular black toule for the hammock netting. I lashed it to the natural thread railings with doubled black strong sewing thread. The toule was purchased in a fabric store and is very inexpensive. I bought the minimum one can buy, an eigth of a linear yard for the total price of 38 cents. I will have fabric left over when I finish this stage. And when finished with attaching the toule (netting) I painted the thread railiiing black.... . As to how I do it: There is no need to dampen or wet the toule, just use it as it comes. Cut a piece to the proper length and that is approximately wide enough to form the two sides and the bottom of the hammock . Use alligator clips to hold the toule to the outside uprights of the hammock cranes and then lash (stich) the fabric to the rail.. Then gently push the toule into the cranes to form the hammock. I use a stick the length of the hammock to hold the material down and in form once it's in place and then repeat the process for the remaining rail. Trim any excess material when you are through. If you like I can skype you as I begin the next hammock which will be tomorrow morning. I can explain this process to you as you are able to see it. Let me know. I hope this has been helpful and hasn't confused you. Best, Jerry
-
Hello Lawrence... Thank you so much for your complimentary words and your holiday greetings. I wish the same to you and to your family. My wife's family comes to our home every Christmas Eve and tonight is no exception. Except, I'm under the weather with a cold and cough so I'll have to stay away from the others. Even as I write this to you I feel miserable and can't wait to lie down again. Looks like there'll be no ship building for a few days as I need to concentrate fighting this cold. I believe I got it on the cruise; the ship was unusally cold and I couldn't warm up enough. So I hope to be better in a few days and then back to hammocks, railings and anchors. Take good care.. Jerry
- 900 replies
-
- 1
-
-
- victory
- caldercraft
- (and 1 more)
-
Hello everyone.. Not much to report as we just returned from our short cruise to the Grand Turks. The weather was wonderful especially if you like an air conditioned ship. We left Ft. Lauderdale Wednesday and spent one hour on the island on Friday. We returned last night (Sunday) so we had a very long boat ride with good eating. Now to my victory....I started to attach the hammock netting and found it to be no easy task. The best way for me, I discovered, was to lash one side of the toule (the netting) to one rail, seat the fabric into the hammock with a stick and then attach the other side. Since I used black thread for the lashing I decided to paint the natural colored railings of the hammock black also. Although I'm not tickled fancy with this job, I am happy that I only have seven more hammocks to go. I wish all my good friends on this site a very Merry Christmas and a healthy Happy New Year, Jerry


- 900 replies
-
- 3
-
-
- victory
- caldercraft
- (and 1 more)
-
One of the happuest days of my life was when I completed cataract surgery on my second eye. I couldn't believe how bright the colors were and how lovely flowers were. i forgot as I got older without realizing my sight was growing duller. And the best part of all...........NO MORE GLASSES. I had this surgery about 5 or 6 years ago and my sight is now 20/15 with no glasses. Have a great evening. Jerry
-
Glennard.. You are very welcome...Don't forget to darken the end of the plank as well as the edge. And remember to darken only one edge and one end of each strip. I love this site and whenever you have a question don't hesitate to ask. I have had more help form builders here than i can magine, have a good night. Jerry
- 900 replies
-
- 1
-
-
- victory
- caldercraft
- (and 1 more)
-
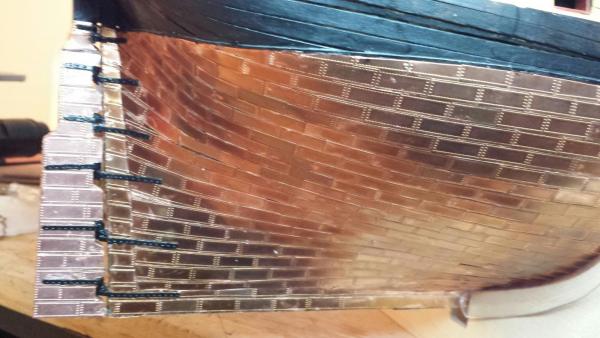
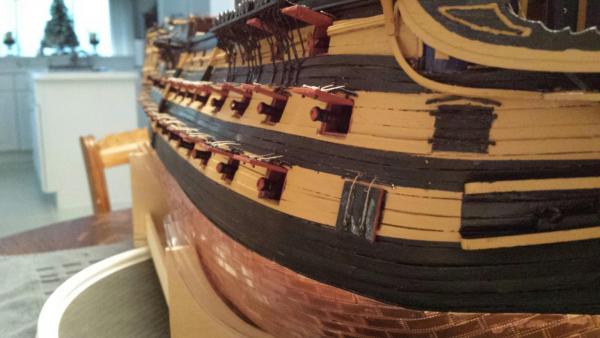
Hi Glennard.. Thank you very much for visiting my log; it's nice to see you again. As David mentioned above, I used the four butt shift system also; however, I arbitrarily cut my planks to 80mm lengths. 85mm is more accurate as it equates to 20 foot long planks on a 1:72 scale. I used a black marker pen along one edge and one end to simulate caulking. I also weathered the deck merely by wiping a rag over the deck which slightly smudged the freshly applied black caulking enough to get the desired effect which I locked in with several coats of matte varnish. I hope this helps. Best regards, Jerry
- 900 replies
-
- 1
-
-
- victory
- caldercraft
- (and 1 more)
-
Good afternoon, David.. Nice to hear from you. I know what you mean about the fragility of the model. I have already broken off a couple of gun port lids and the hammock cranes look like grapnel hooks waiting to snag a sleeve or something else. I have decided to change my work table to a lower one ( a folding card table) where I can work from a higher perspective and watch out for snagging something. I plan to keep the model on my turntable hoping it'll make life easier. I love your Victory..it looks so darn good. Keep up the good work..By the way, I have no intentions to catch up with you. I need you to stay in front so I can keep copying you. Jerry
-
Thanks for the look-see, Wacko...I meant to tell you that i enjoyed reading about your milling machine and it looks like it would be a useful tool to own. I need to find something to help me turn the masts and yards as I am getting very close to that phase of the build. Have a great weekend, Jerry
- 900 replies
-
- 1
-
-
- victory
- caldercraft
- (and 1 more)
-
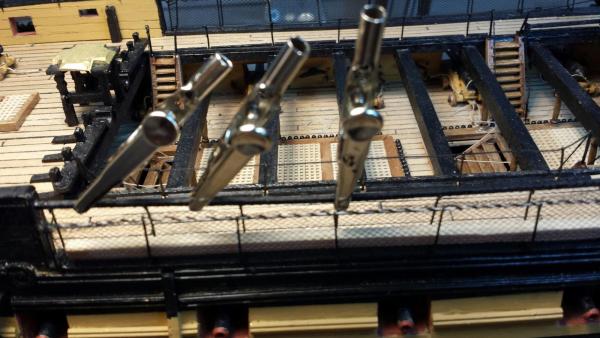
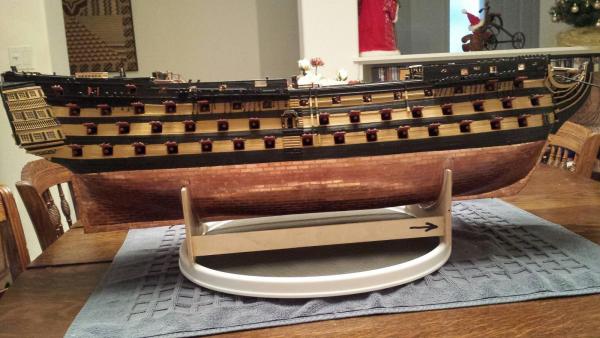
Good morning everyone. I have some pictures showing where I am at this morning. I have installed the hammock cranes and am getting ready to rig them and to attach the netting. I will be leaving the shipyard for several days next week so my progress will be taking a temporary braking. I believe with the way things are going I'll be able to begin masting soon after the first of the year. I hope evryone haas a wonderful weekend, Best, Jerry


- 900 replies
-
- 3
-
-
- victory
- caldercraft
- (and 1 more)
-
Hello David, What you have accomplished is surely very impressive. It's easy to see why so many hours are necessary to build this beautiful model. I'm very happy for you and that you are working your way through this complicated stage of your build so nicely. I look forward to seeing more of your work as you continue with the rigging. Take good care.. Jerry
-
Hello Gil, I painted my rudder hardware black as you did for the same reason you mentioned above. Zinc was available at that time but I suppose they didn't know the technology we use today. It would have been very simple to attach slabs to the rudder hinges which would deteriorate first and slowly to eventually be replaced. I wouldn't doubt that your big boat has a few zinc modules attached to the hull; my 60 footer did. The metal rudder hardware then, I think, could have been other than copper, brass, etc. Just a thought. Jerry
-
Hello David... You sure look like you know what to do. In fact, as I watch you progress in the rigging phase, I'm getting more frightened with each visit to your log. I'm really not sure if I can handle what you have already accomplished. I'm sure not knowledgeable enough to answer your question regarding the jeer blocks. All I know everything looks very professional so please be ready to answer a lot of questions as I am getting closer and closer to the masting. Hope you have a great night my friend. Jerry
-
Good afternoon Gil... I noticed the correspondence that you have been having regarding the color of the hinges and rudder straps. I completed mounting the rudder just a couple of days ago so the instructions are still fresh in my mind. In the Hull construction manual, page 43, line 3 and 8, the instructions say to paint the hinges and straps or gudeons and pintles, if you prefer, copper. I don't mean to seem like I know it all for I'm a far cry from good in this ship model building business but as I said, this bit of babble was still floating in my mind. I hope you are having a wonderful day in your area. It's 83 and sunny here. Best, Jerry
-
Good morning, Jim... I appreciate your visit to my log and thank you very much for your very kind words. As much as I'd like to take credit for the jigs, I really can't since I saw them being used by others on this site. At my age my memory isn't too good anymore but I can remember the latest jig's originator. To position the hinges and get them onto the gunport lids, I copied Shipyard Sid's (David) idea. I can assure you that before I get through I will have pirated all other ideas available. I hope you have a nice day and enjoy the lovely wetaher we are having here in Florida. Jerry
- 900 replies
-
- 2
-
-
- victory
- caldercraft
- (and 1 more)
-
Hey Lawrence...I thought about your suggestion regarding raising the chain when I was building it. I noticed that Gil and david tied their's up to a two loop look but I decided not to do that. As you say, I figured that I could always add an eyelet in between and do it at another time but if my memory is correct, the real ship has the chain the way i did it. Check your personal messages.. Jerry
-
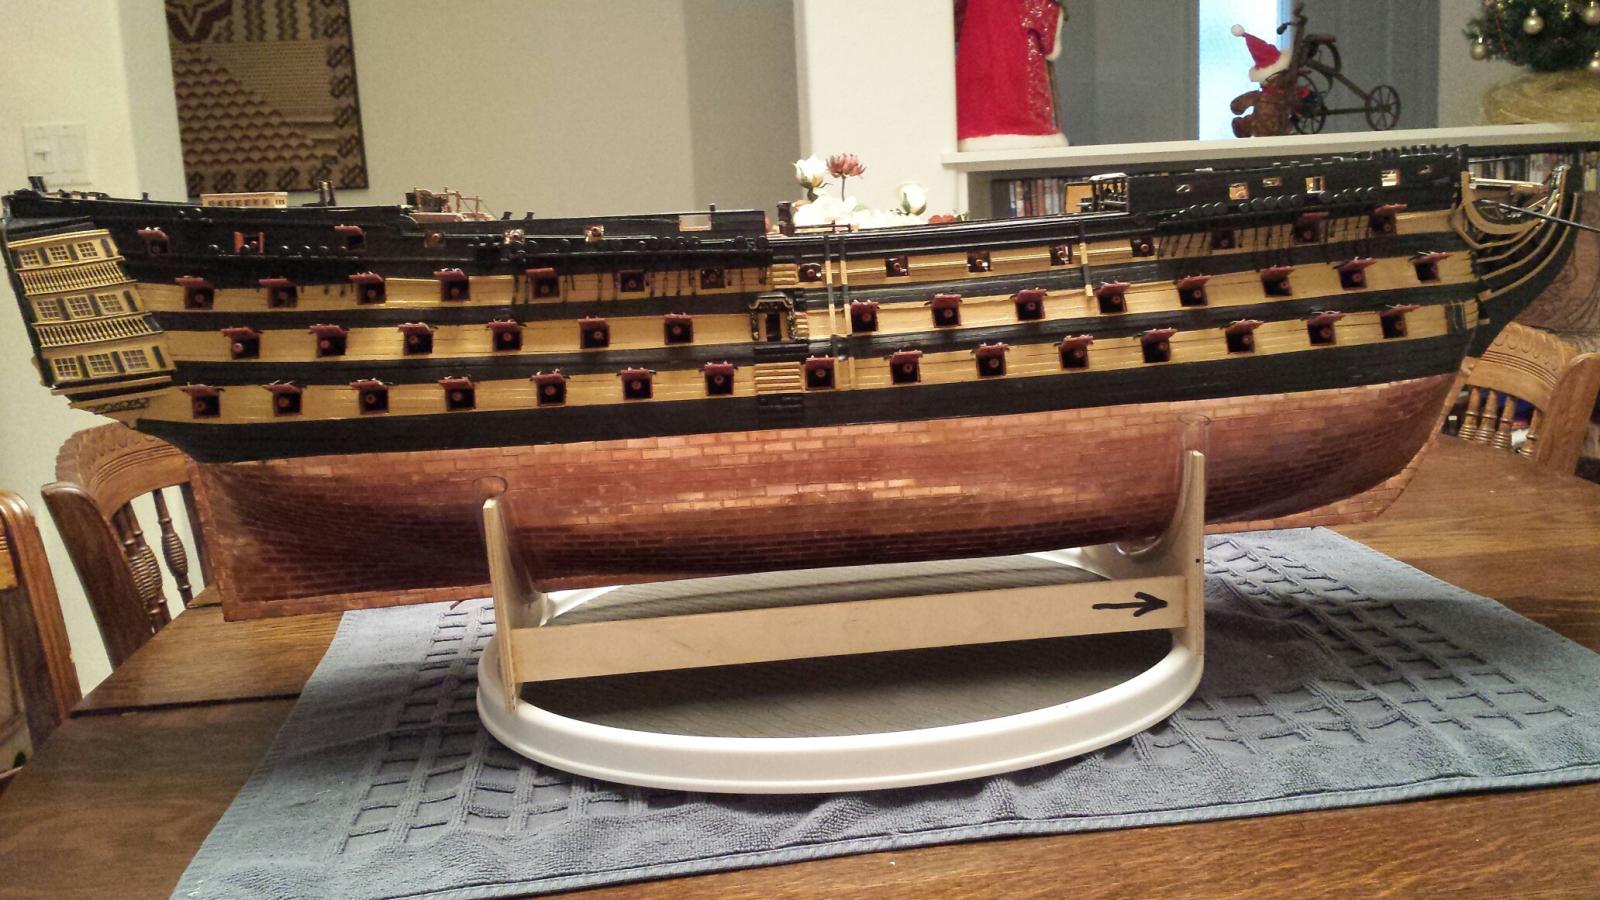
Lawrence.. I'm happy to see you finally coming out of the cold. I was watching football games over the weekend and I couldn't believe the conditions some of the games were played in. In Philadelphia I could hardly see the playing field with the snow coming down as hard as it was. So it'll be back to the shipyard for you to get some addional work done on your beautiful model. I'm sure you are very anxious to get going again and that's great. I have finally finished the rudder and have mounted it to the ship. I also have attached the chains as instructed in the manual. I did the one loop method eventhough some have preferred two loops in the chain. David suggested that I atteach a fish hook and some bait to the chain so that one could troll as the ship moves through the water since the chain hangs below the water line. Have a terrific day and in the meantime here are some of my latest photos. Jerry


- 900 replies
-
- 3
-
-
- victory
- caldercraft
- (and 1 more)
-
Good morning, David. Wow! What a beautiful job. Nothing much more to say except that the time you have put into this project is showing how good you have done. I'm so happy that you are ahead of me so I can copy all the good things you have done. Best to you, David.. Jerry
-
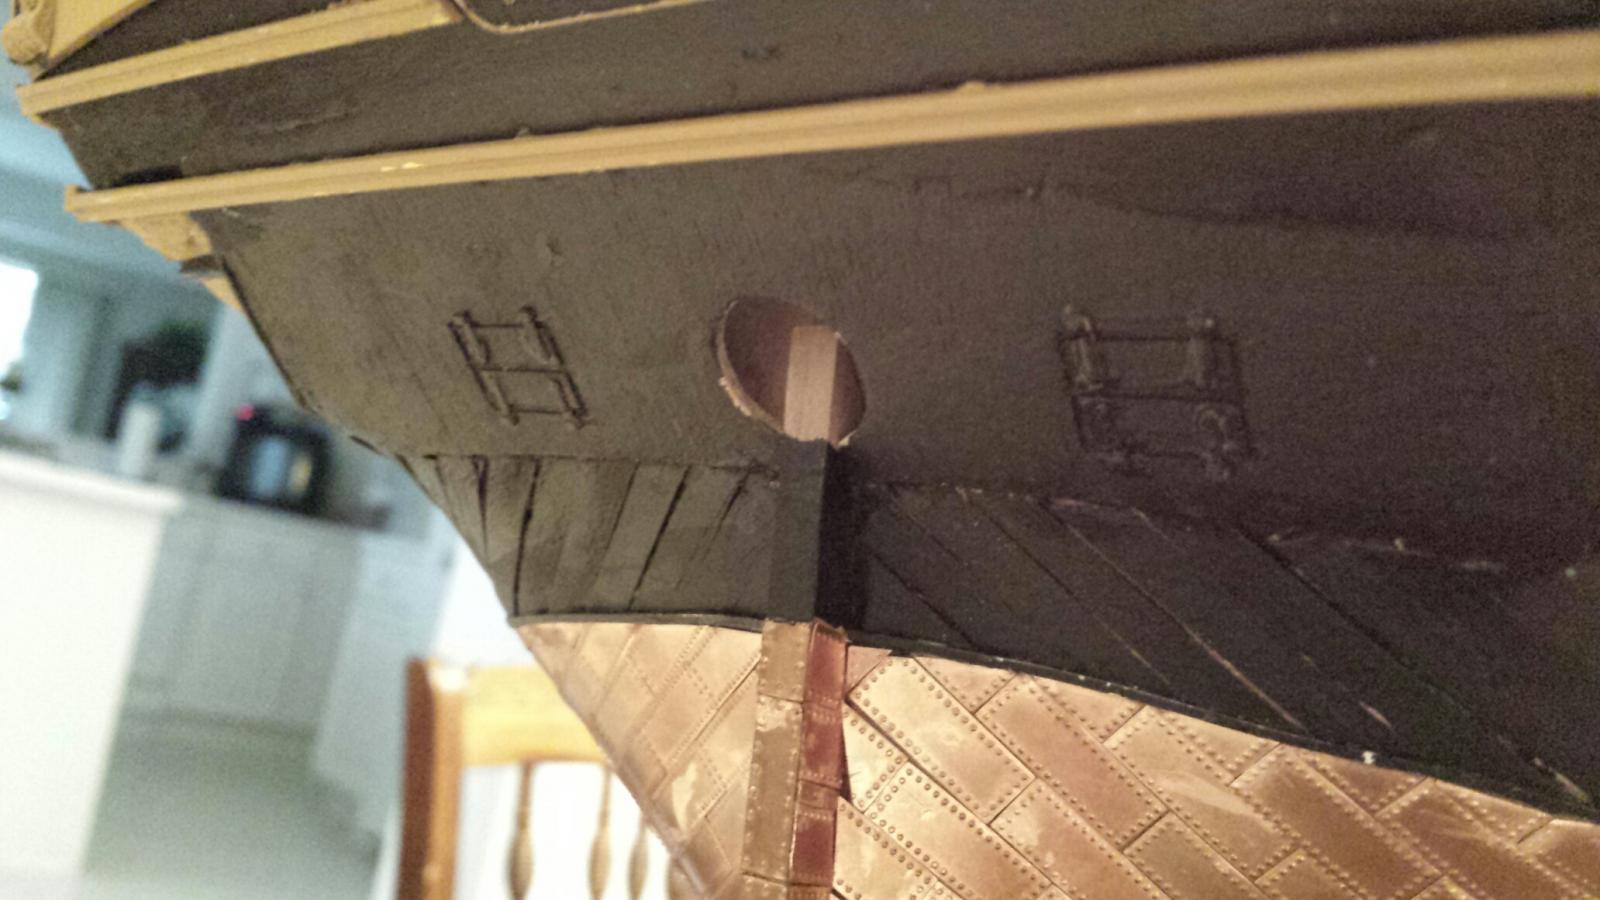
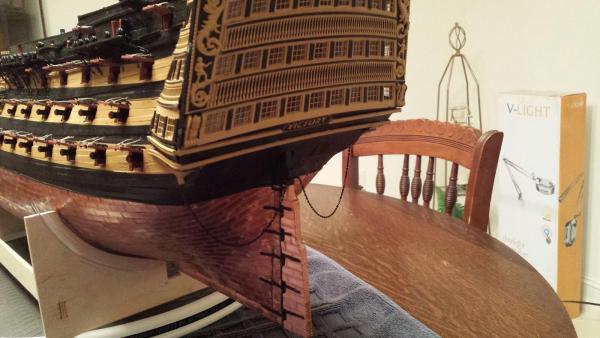
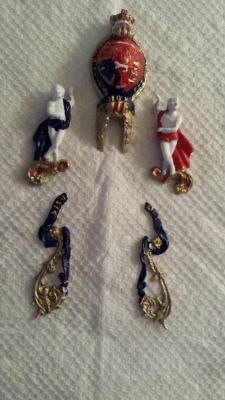
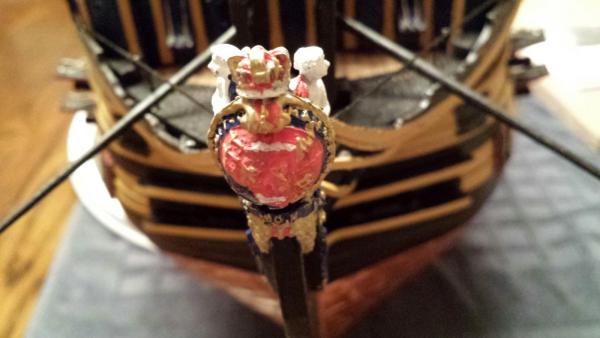
It's bedtime here but I couldn't help getting this into my log before I went to sleep. There's nothing exciting here or worse, nothing drastic. Today was a day to begin catching up on details that I skipped before plodding along further (the rudder.) So I painted the bow figureheads and fitted them into position. It wasn't as easy as I had hoped because the two cherubs had to be mounted partially on some of the bow trim since they didn't fit between the trim. It may not be authentic but it looks okay to me. Good night, sweet dreams, Jerry

- 900 replies
-
- 2
-
-
- victory
- caldercraft
- (and 1 more)
-
Good evening, Lawrence... You are too nice. Your complimentary words made me feel very pumped up and I sincerely thank you for telling them to me. I am excited to have gotten this far but everytime I visit David's log I get very nervous, especially about making the masts and yards. I still don't know how I'm going to turn them but I am looking around for a suitable mini lathe. I'm glad that you are finally winding down your yard work and can get back into your shop. Let's hope the snow gods take it easy on you guys up there. From reading your post in David's log about the piece of black walnut you found, I couldn't help to pass this story on to you. When I first moved to Arkansas (where I lived before living here in Florida) I bought a piece of land to buld our house on. It was very nice and had several acres of woods. One day exploring these woods I came across two fallen black walnut trees. They must have come down the previous spring. Evenyually I was able to salvage two very mice pieces. One was about 16 feet long with a 15 inch diameter and the other, also very straight, was 12 feet long and had a 18 inch diameter. I managed to trail them over to one of the local saw mills and for only $15 they sliced up the trunks into beautiful 5/4 planks. I built a drying/storage rack in my shop and two years later built a dining room table. Unfortunately this marriage didn't last and all that beautiful walnut was auctioned along with most of my other belongings. But all isn't terrible...I have been very happily remarried now for 17 years to a beautiful woman who convinced me to buy the Victory kit. Have a terrific night, Lawrence. Your friend, Jerry
- 900 replies
-
- 1
-
-
- victory
- caldercraft
- (and 1 more)
-
David... Thanks so much for your compliment. I can't send PM or receive them because I'm over the limit until I delete some. So, if possible, and you know how, please advise on this log how to delete the buggers. Thanks, Jerry
-
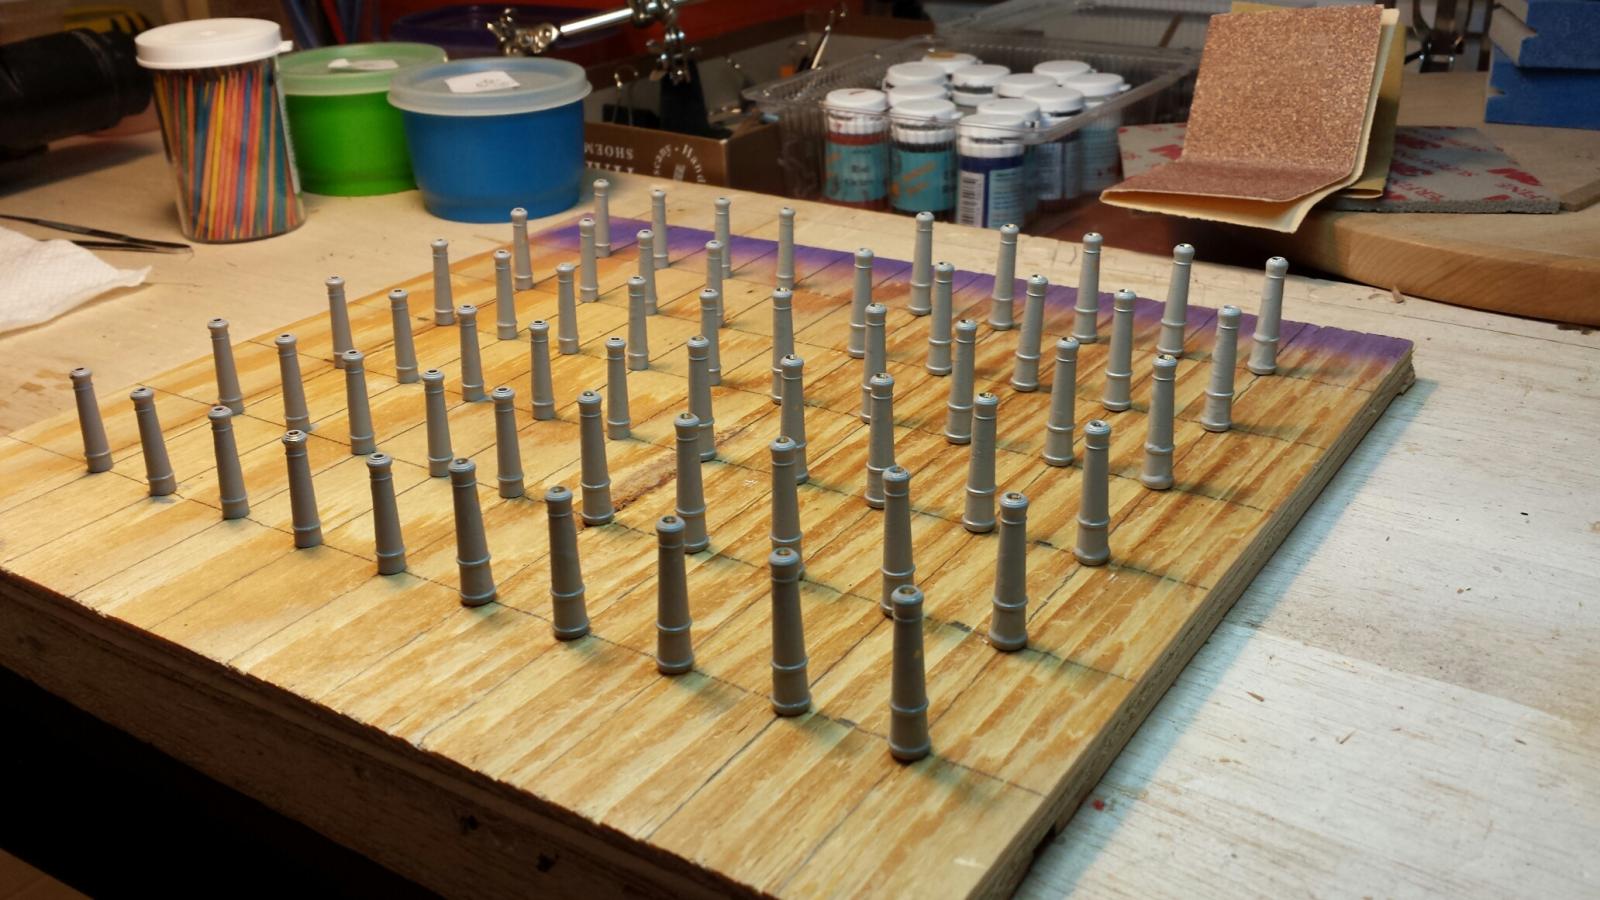
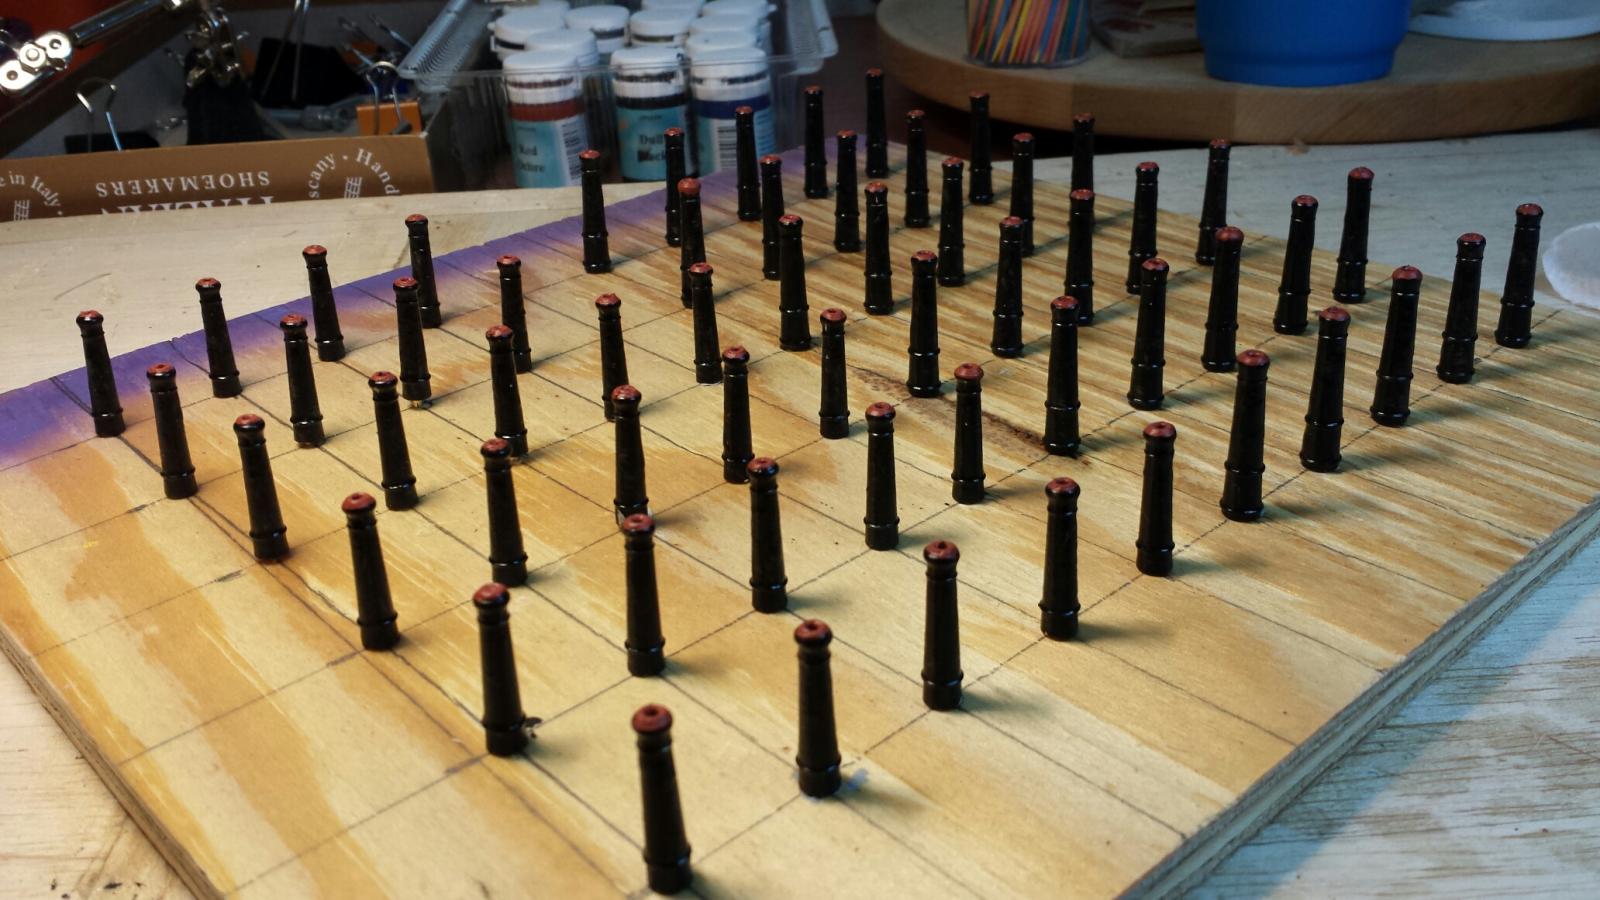
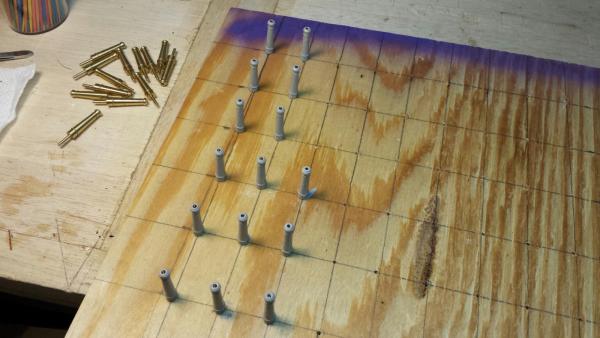
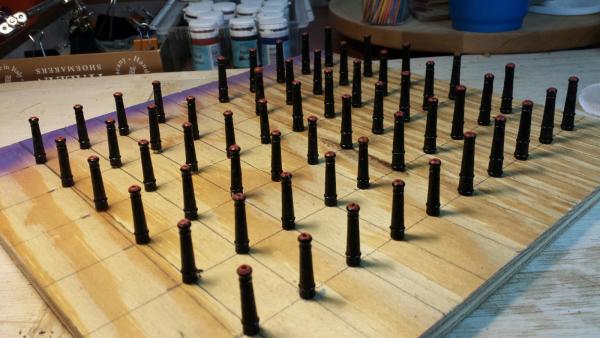
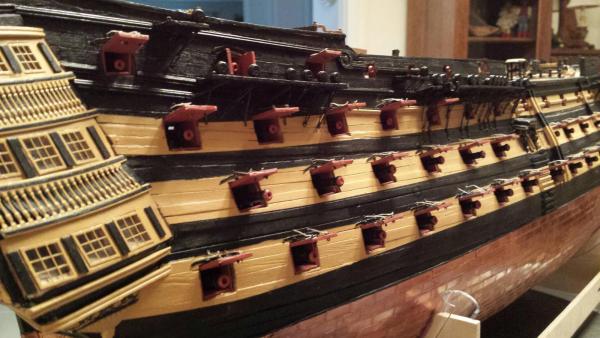
Hello everyone.. I'm very happy to say that one of the longest phases for me, the gunport lids, the dummy barrels and extraneous hinges is finished. Usually I would take on the rudder next but I haven't painted and mounted the bow medallions yet. So all that gray lead will be colored soon and squeezed into position, as best it will, on the bow before I tackle the rudder. The barrels went fine and surprisingly popped into their holes very nicely. I did have to remove one (after it set of course) since it was the wrong size for its position. No problem...after a little paint touch-up all is well again. I made a peg board from some scrap plywood drilling 2mm holes to hold the dummies. As you can see this worked out very nicely So thank you for all your patience reading this garble and most importantly, have a great evening...Best, Jerry


- 900 replies
-
- 2
-
-
- victory
- caldercraft
- (and 1 more)
-
Good morning, David.. Your Victory is looking mighty regal these days. Love to watch your progress so please keep leading the way. Have a great day, Jerry
- 439 replies
-
- 1
-
-
- victory
- caldercraft
- (and 1 more)