HOLIDAY DONATION DRIVE - SUPPORT MSW - DO YOUR PART TO KEEP THIS GREAT FORUM GOING! (Only 24 donations so far out of 49,000 members - C'mon guys!)
×


Jerry
-
Posts
1,753 -
Joined
-
Last visited
Content Type
Profiles
Forums
Gallery
Events
Everything posted by Jerry
-
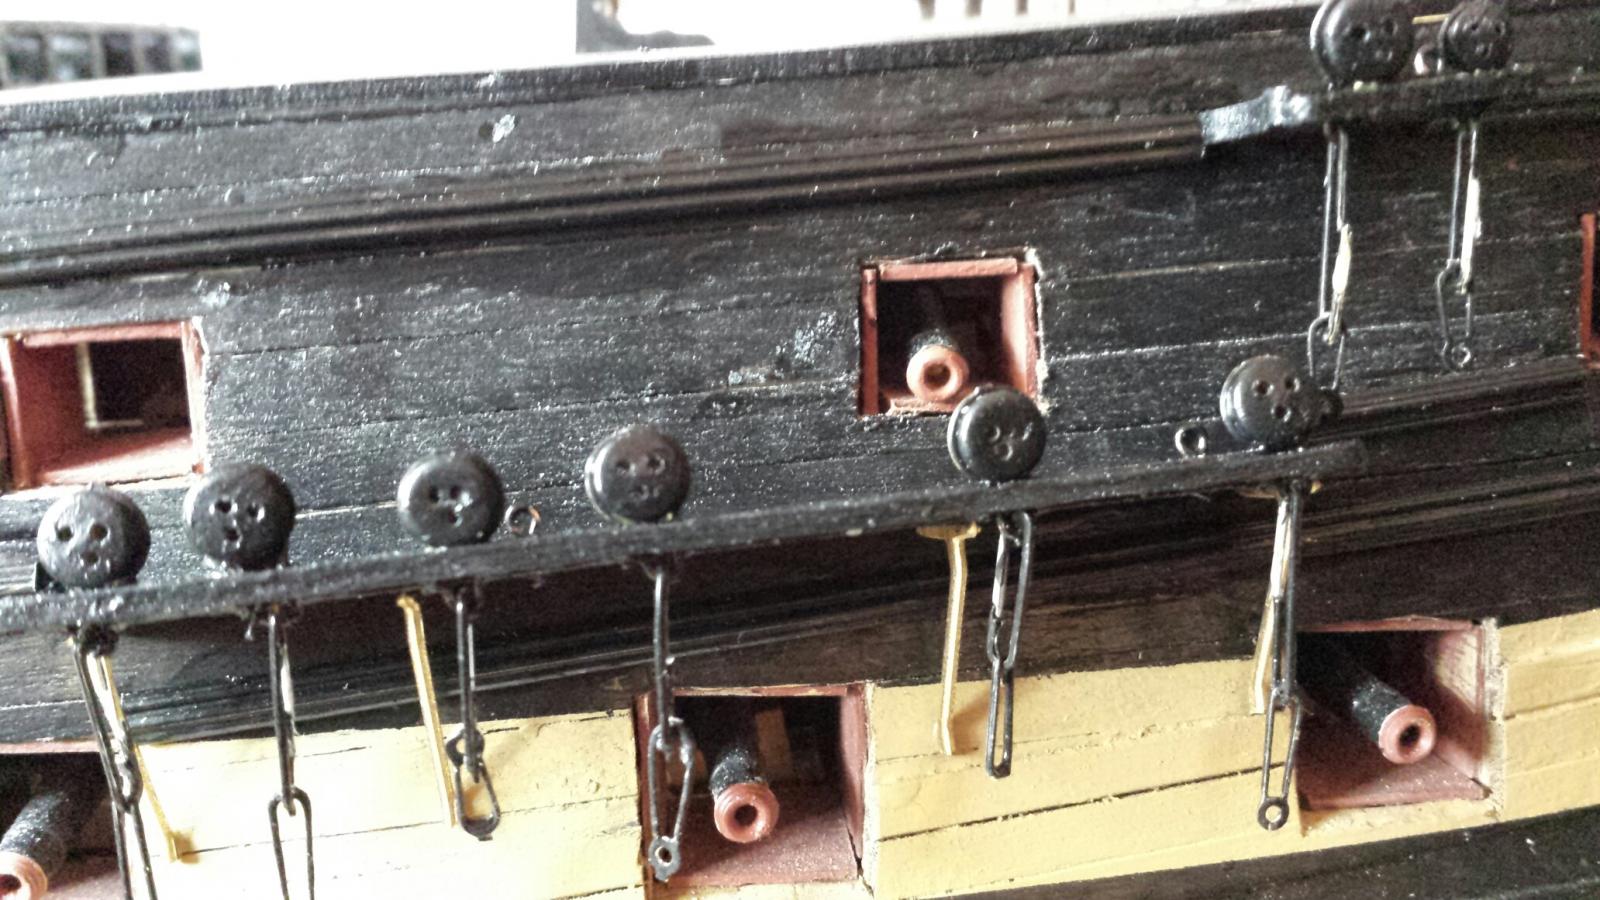
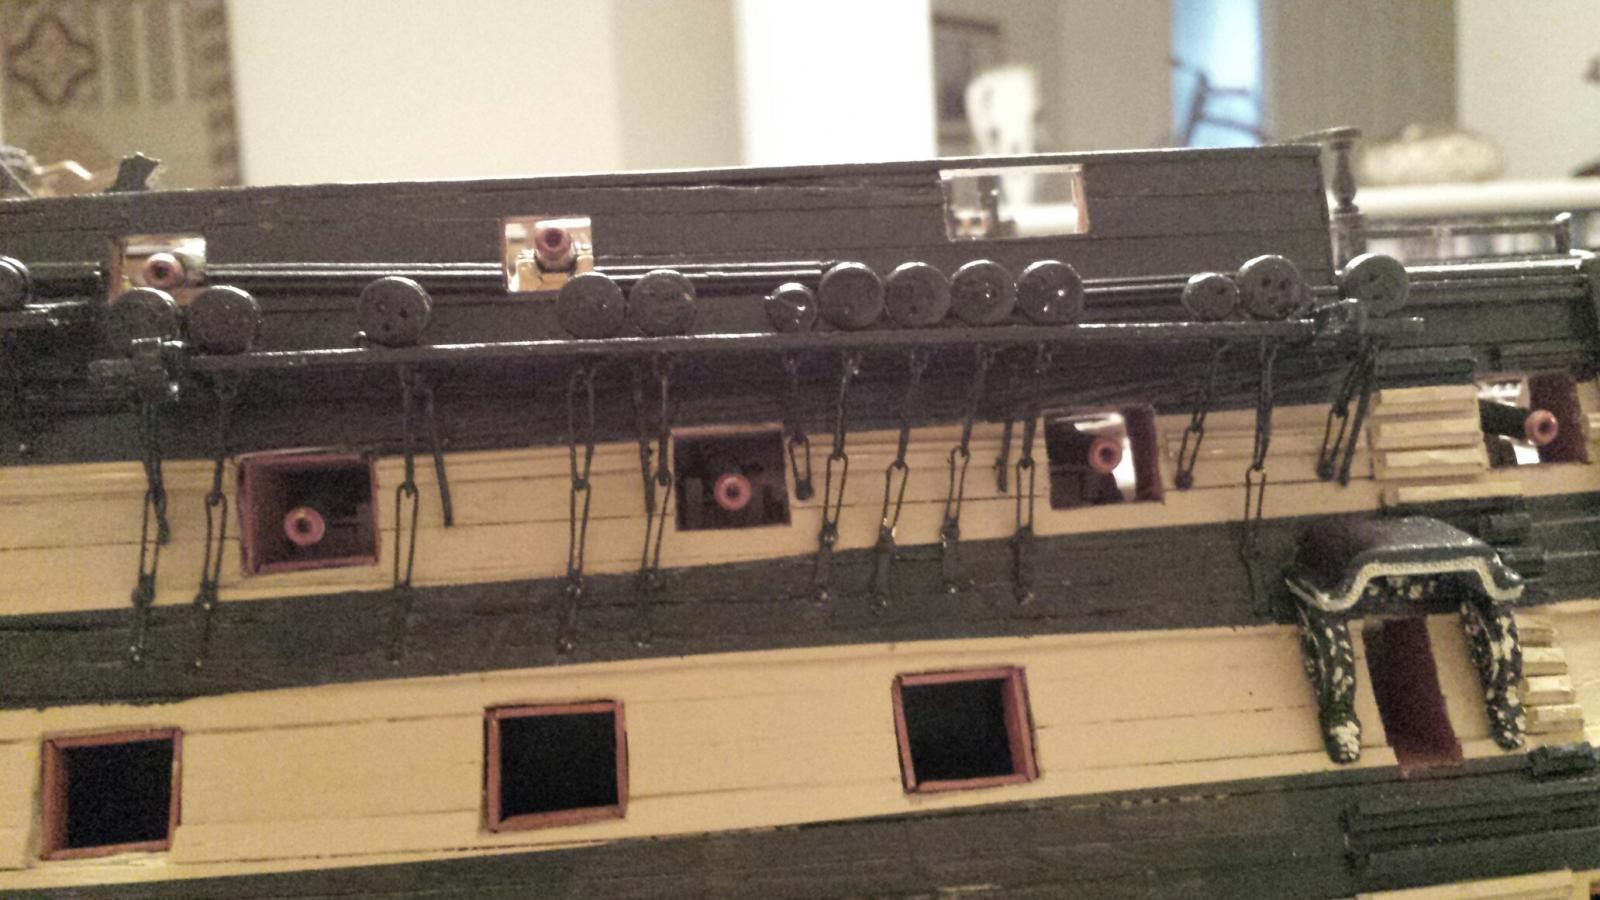
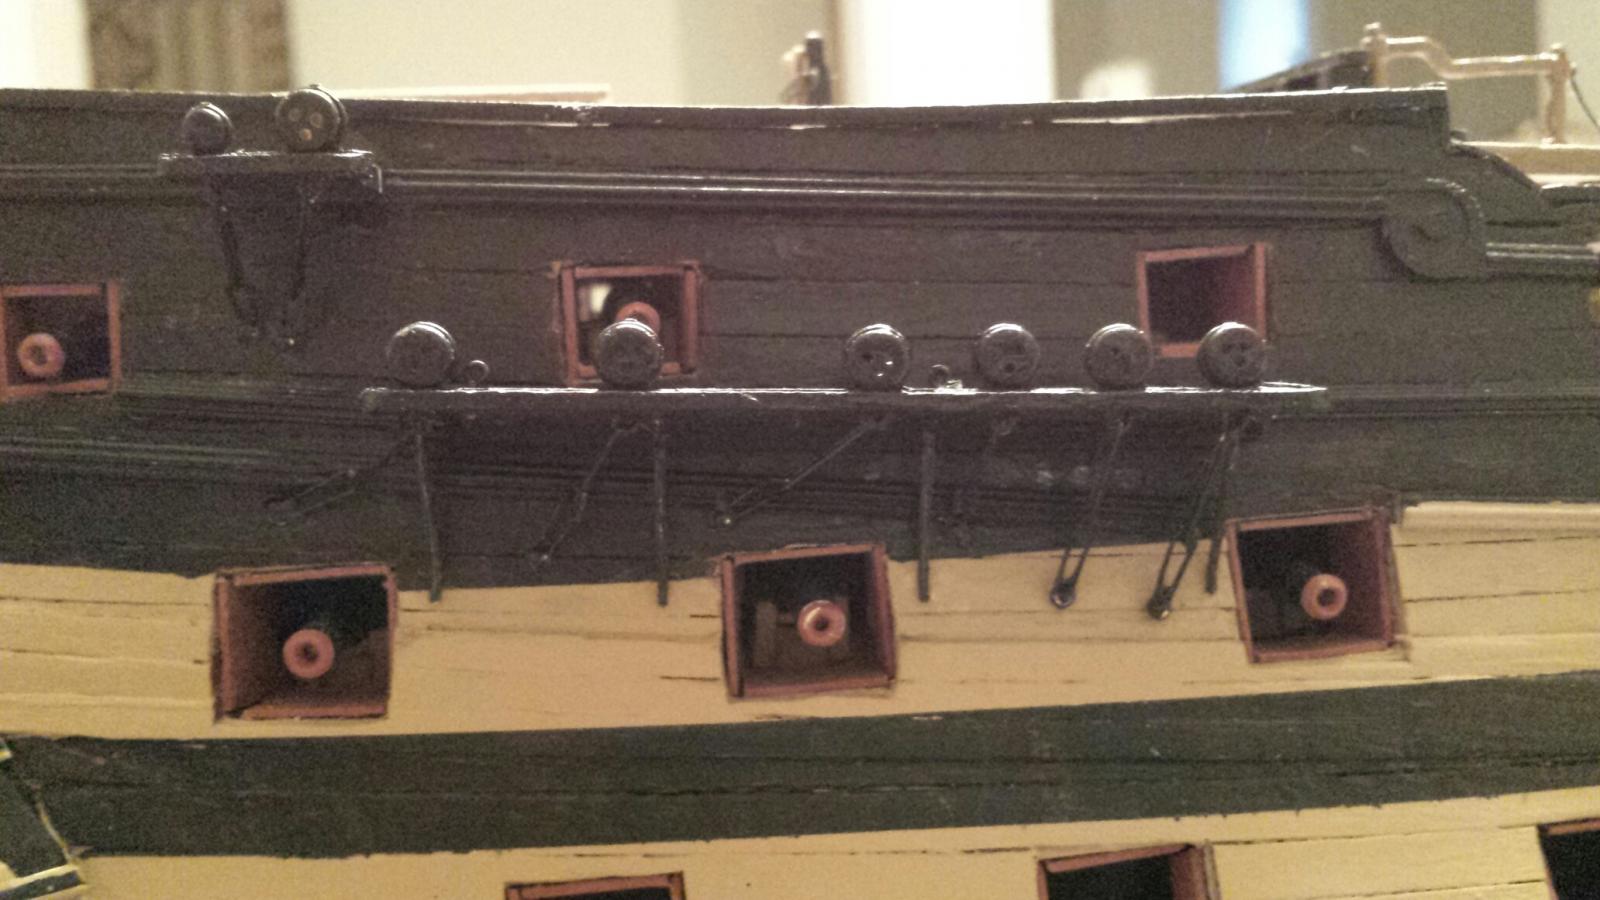
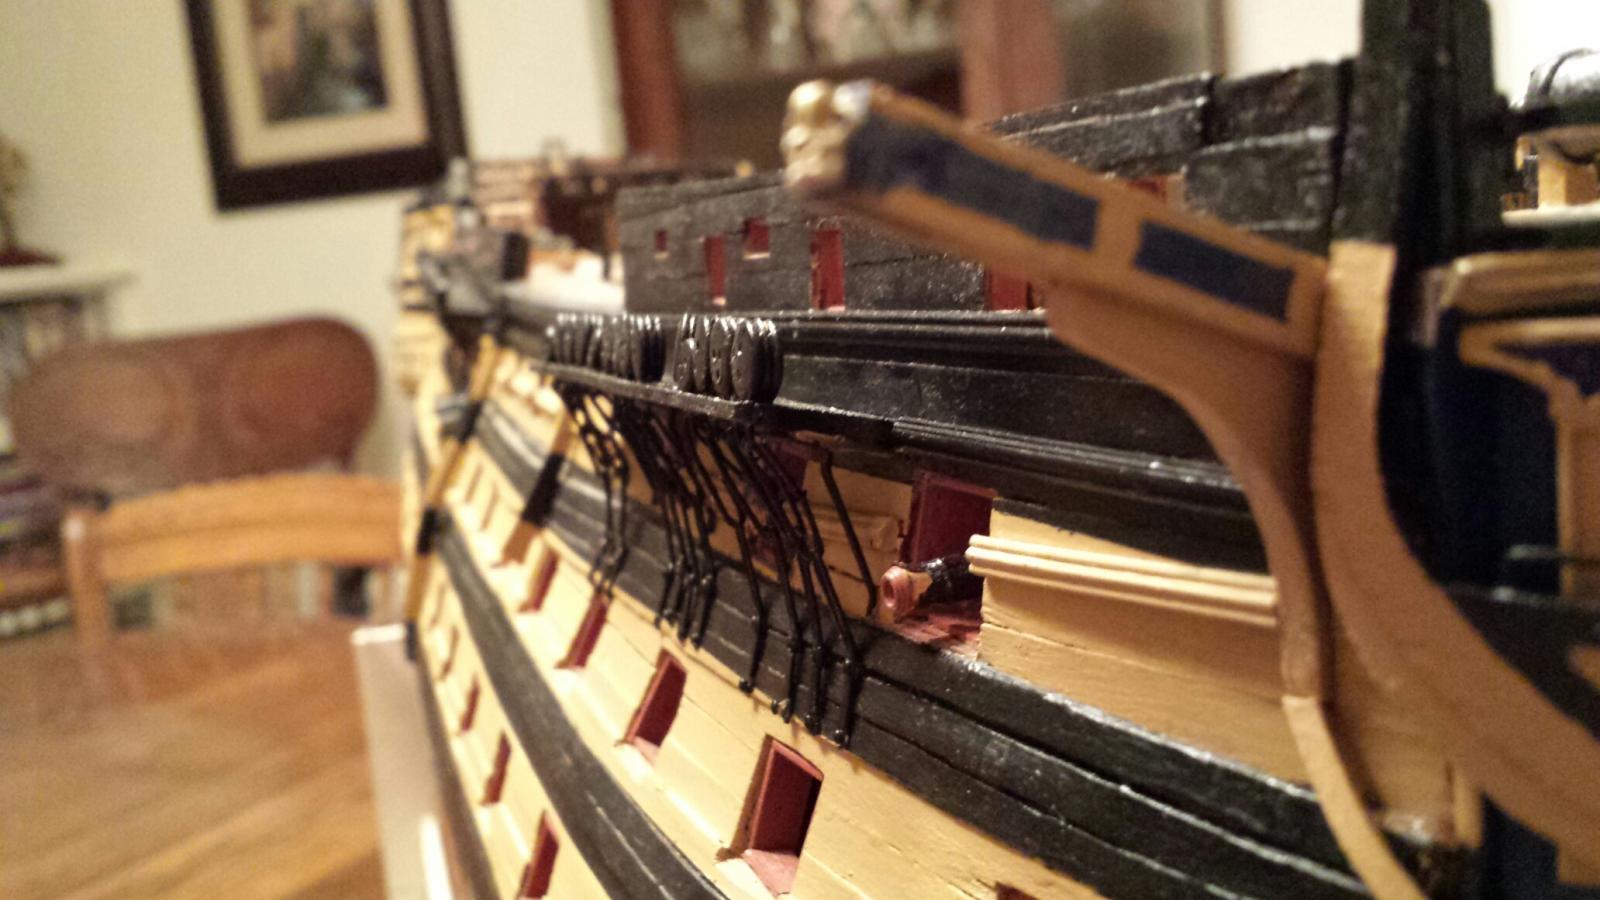
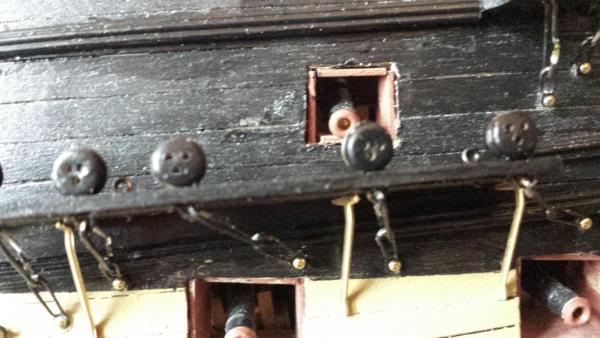
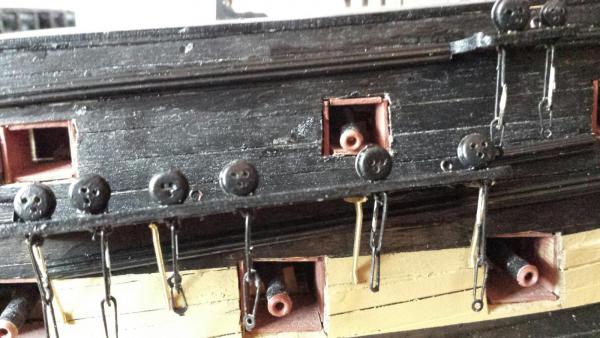
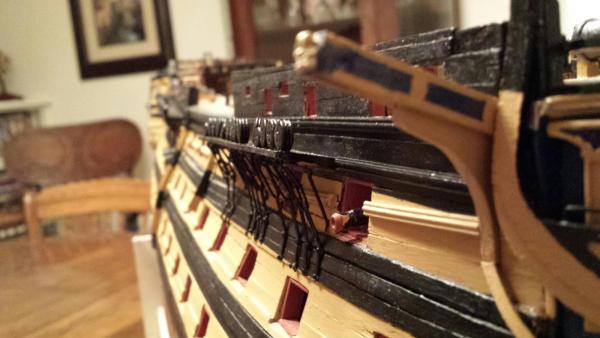
Hi Wayne, Thanks so much for your visit and for the great suggestion. I will move the stropped deadeye about 8mm to the rear on both sides of the ship so everything will remain symmetrical. The photo doesn't show it well but there's decent room to do this. Thanks again for your idea; I definitely believe it'll work. I'm attaching another photo which shows a more accurate location of the deadeye with respect to the cannon. Have a great afternoon. Jerry
-
David... Yep the poor thing looks very pathetic. But Wayne( trippwj) made a suggestion which will work..See below and many thanks again. Jerry
-
Hello David, I was wondering where you were, I thought that maybe you were so entangled in the rigging that you couldn't escape to do anything else. But i'm very glad to hear from you and hope all is well. Thank you for your encouraging words. I'm sure you now that I appreciate them a lot. I do have one problem however which I wish I'd noticed before the channels went on. Looks like Admiral Nelson is going to put the kibosh on the nex to last cannon on the port side quarter deck. For some reason this gun is pointed directly at a deadeye so I will try and raise it so as not to blow the smithereens out of some of the rigging if it's ever fired. I was very careful with my measurements so apparently I wasn't careful enough. Here's a looksee. Jerry
- 900 replies
-
- 3
-

-
- victory
- caldercraft
- (and 1 more)
-
Thanks, Lawrence but today has medical interruptions. Doctor appointments, etc. I'm sure I'll be lucky to find a couple of hours later in the day. Take care, Jerry
-
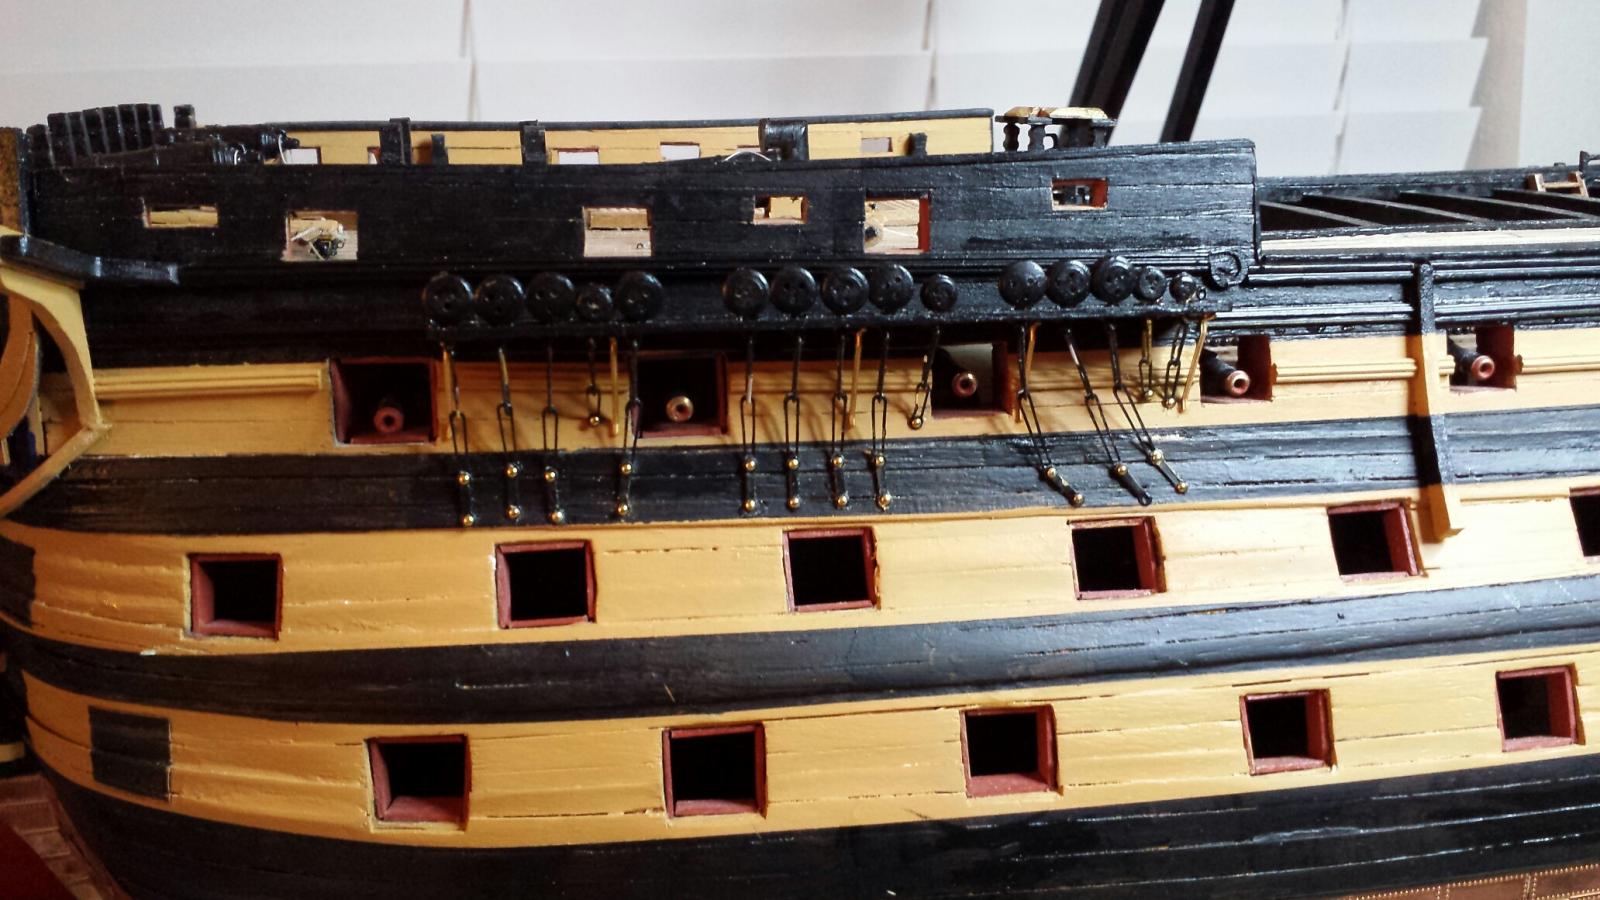
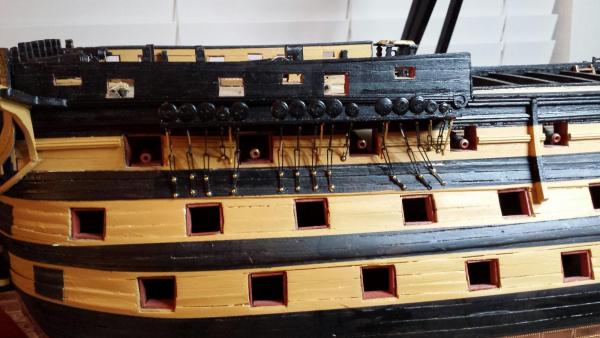
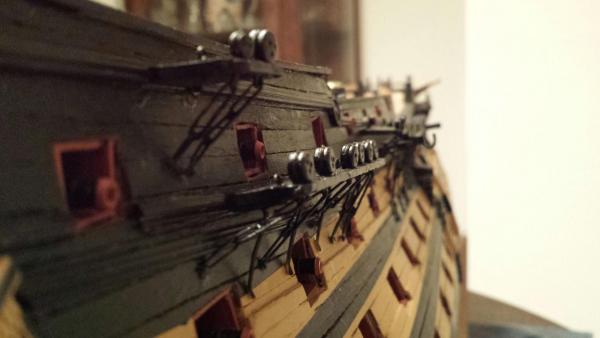
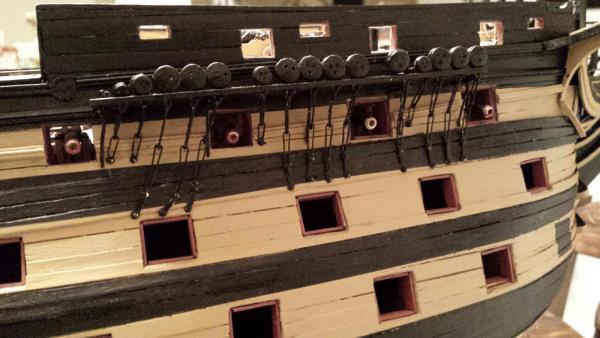
Good morning, Lawrence. Thank you so much for your words of encouragement. I must have been in a puzzled mood when I wrote what I did in David's log. Actually most of it was tongue in cheek and I'm really excited about progressing toward the rigging aspect of this build. At this time all of he channels are fitted and I'm attaching the chain plates to the port side of the hull. I hope to have this completed in a day or two and then it's on to the gun port lids. I have followed the manual step by step although I have noticed that most others jump around either to avoid damage or for other reasons. I wish you a very happy day and congratulate you on the progress you are making. Jerry

- 900 replies
-
- 4
-
-
- victory
- caldercraft
- (and 1 more)
-
Hello David. I started to write this post and after about four lines I hit some key and lost everything so here I go again. I wonder if anyone will be interested in buying my Victory hull whhen it'll be finished. J/K...When I see all the detail involved in the rigging I really wonder if I'm capable. Your Victory is so beautiful and awesome. I'm so thankful for this site because if it weren't for you, Gil and others too numerous to mention, I have no idea what I would do. I love the rigging you have done so far and am extrenely impressed. keep it up; you are creating a real gem. Best regards, Jerry
-
Hello david, Your Victory looks so good, It looks like you're getting into the home stretch soon. These last photos really are great. You must be so excited at this stage..Nothing more to say except I'm very happy for you and hope you enjoy the womderful work you are doing. Best to you. Jerry
-
Hi Jeff, Thanks for checking my log. I'm not sure if I unerstand your question but if I think it is what i think it is....I used Elmers White glue to glue the gun port patterns to the bulkheads as it gave me plenty of time to pin the entire length of the pattern before it set. In fact, I used Elmers glue for building most of the hull. I used CA cement, however on some of the strip planking whenever I wanted to hold down a strip while I bent it around a curve in the hull. But, as I said, for the most part I used Elmers Glue on the basic structure. I used CA to cement the copper tiles. I hope this answers your question. If not try me again. Best regards, Jerry
-
Hi Lawrence, Thanks for the shout out...I saw your log so I knew about the gun port problem. Nice thing to do by making the jigs. I have to think about doing the same thing because the channels and chain plates will be finished in a day or two and the next things are the gun ports. You sure jump around a lot when building.That would drive me nuts because surely I would forget to go back and do what i skipped. Have a great Sunday and keep up the great work. Jerry
-
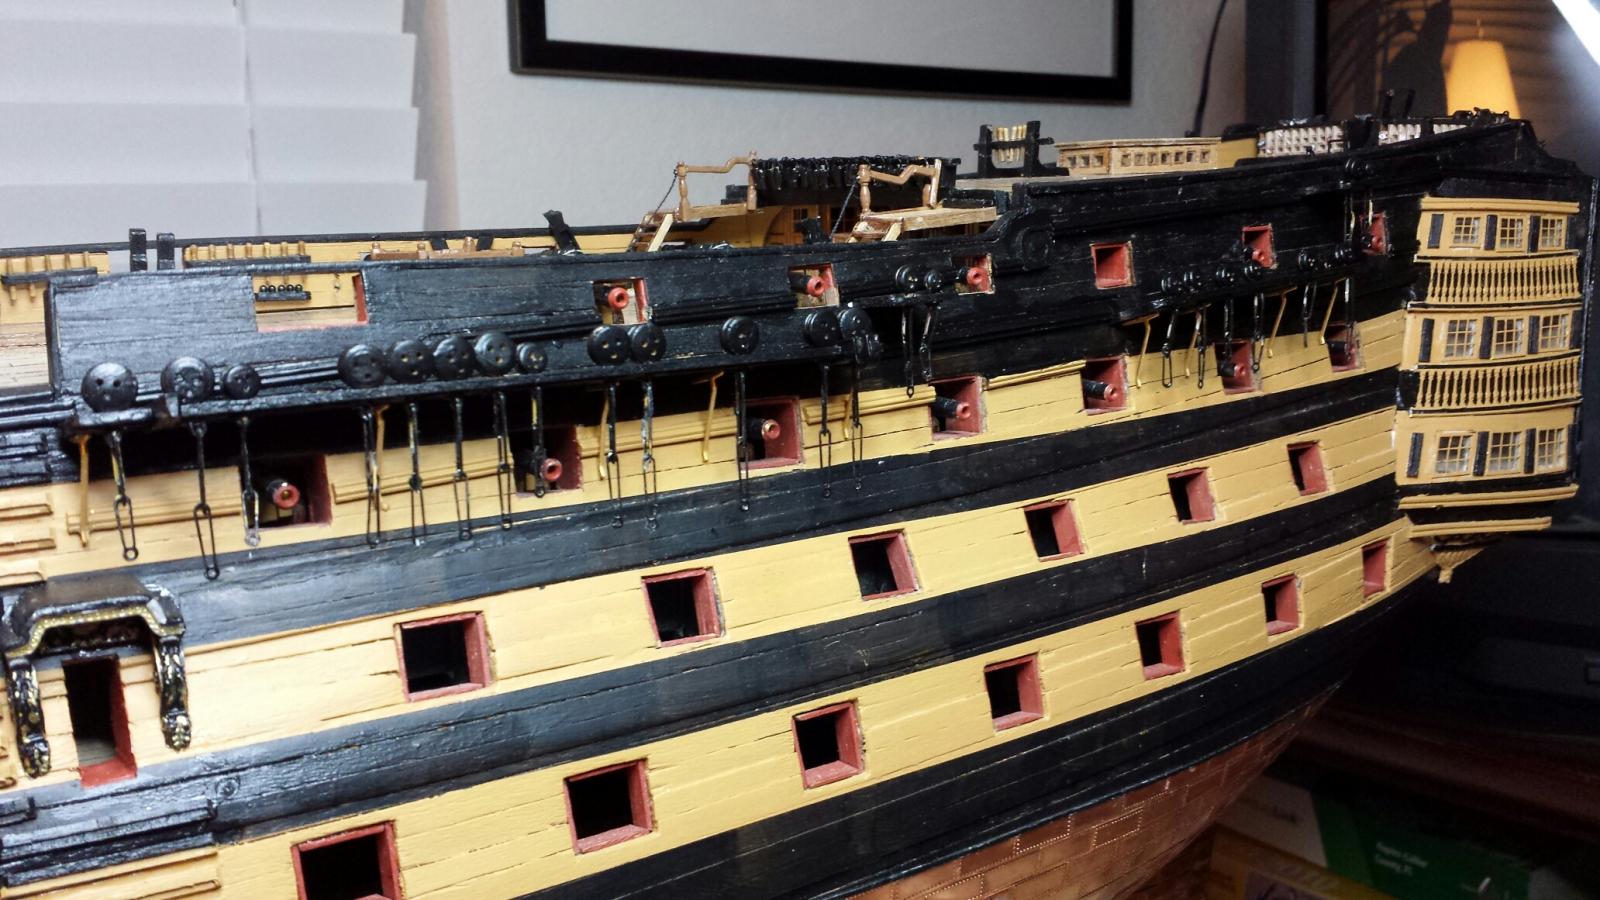
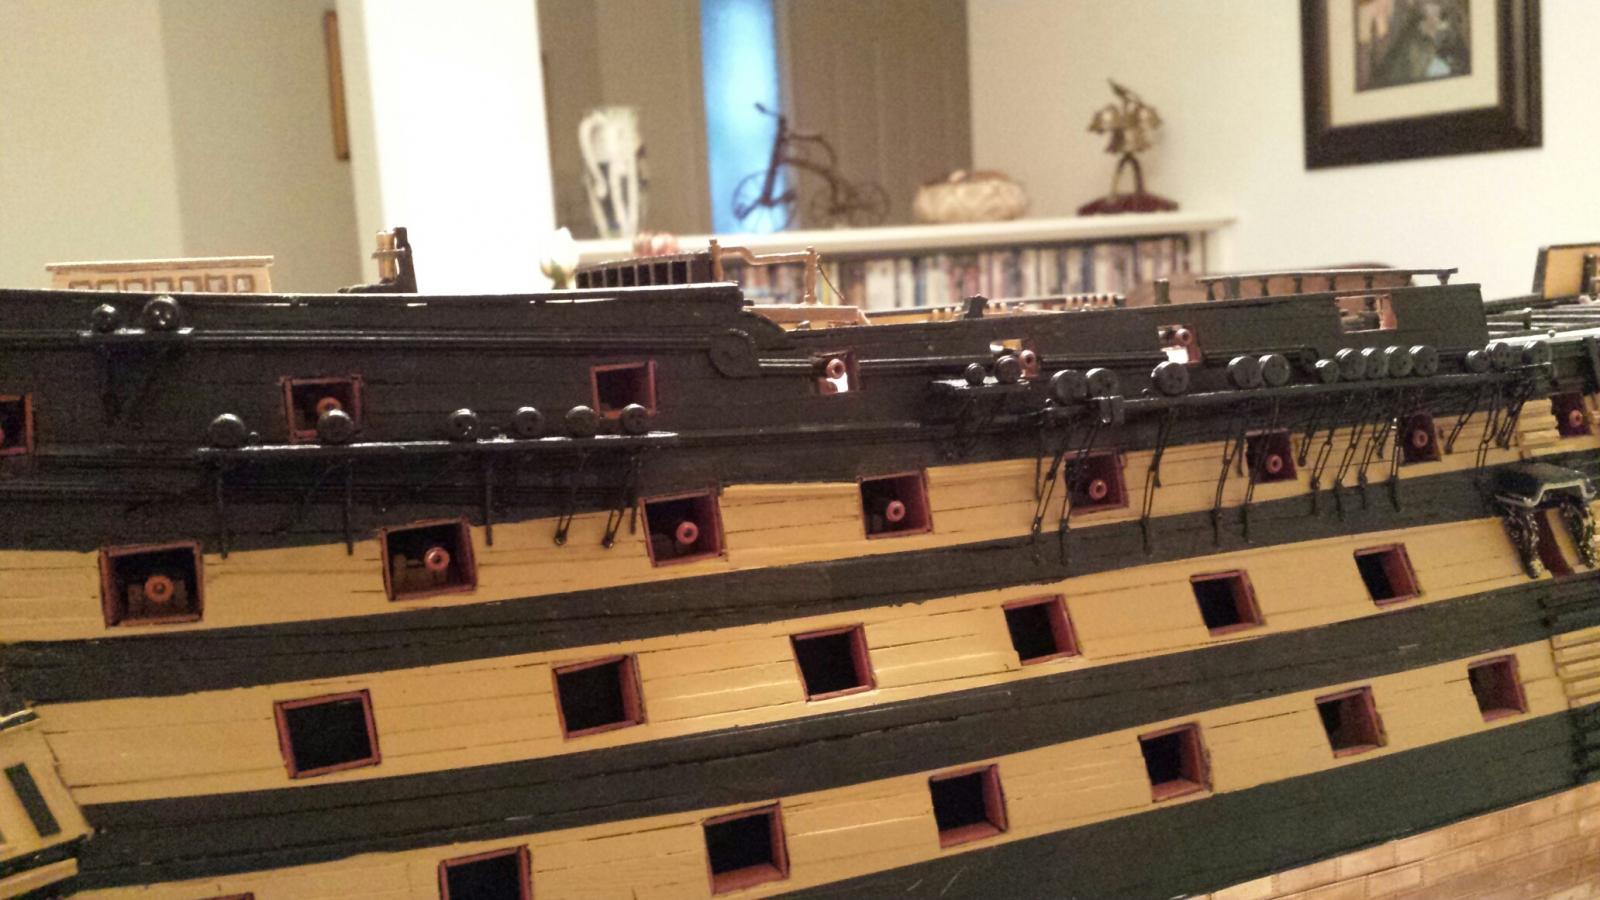
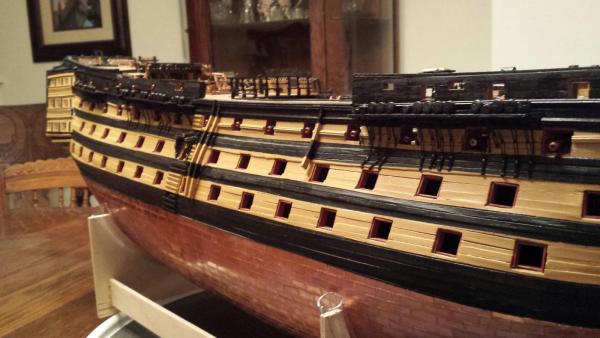
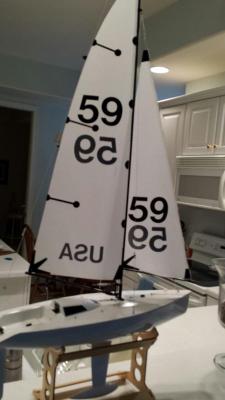
Good evening everyone. Looks like as good a time as any to post my progress with Victory. The last couple of days have incurred several interruptions to my building so the way I see it, I'm lucky to to get done what I have at a nice slow pace. I'm delighted that the mounting of the channels and chain plates has gone well so far. I have completed the starboard side of the hull and will look forward to working on the port side at the next work session. Oh yeah, I'm including a picture of my only sailing rig. My other hobby is racing radio control sailboats. The one pictured is called a Micro Magic, one of the smallest boats sailed in competition. With building Victory, it's hard to keep my committed schedule of racing but so far so good. The only problem is I have to learn to sail better so I can finish better than next to last and last. I need a good tutor. Have a great weekend everyone and thanks for putting up with my rantings. Jerry


- 900 replies
-
- 5
-
-
- victory
- caldercraft
- (and 1 more)
-
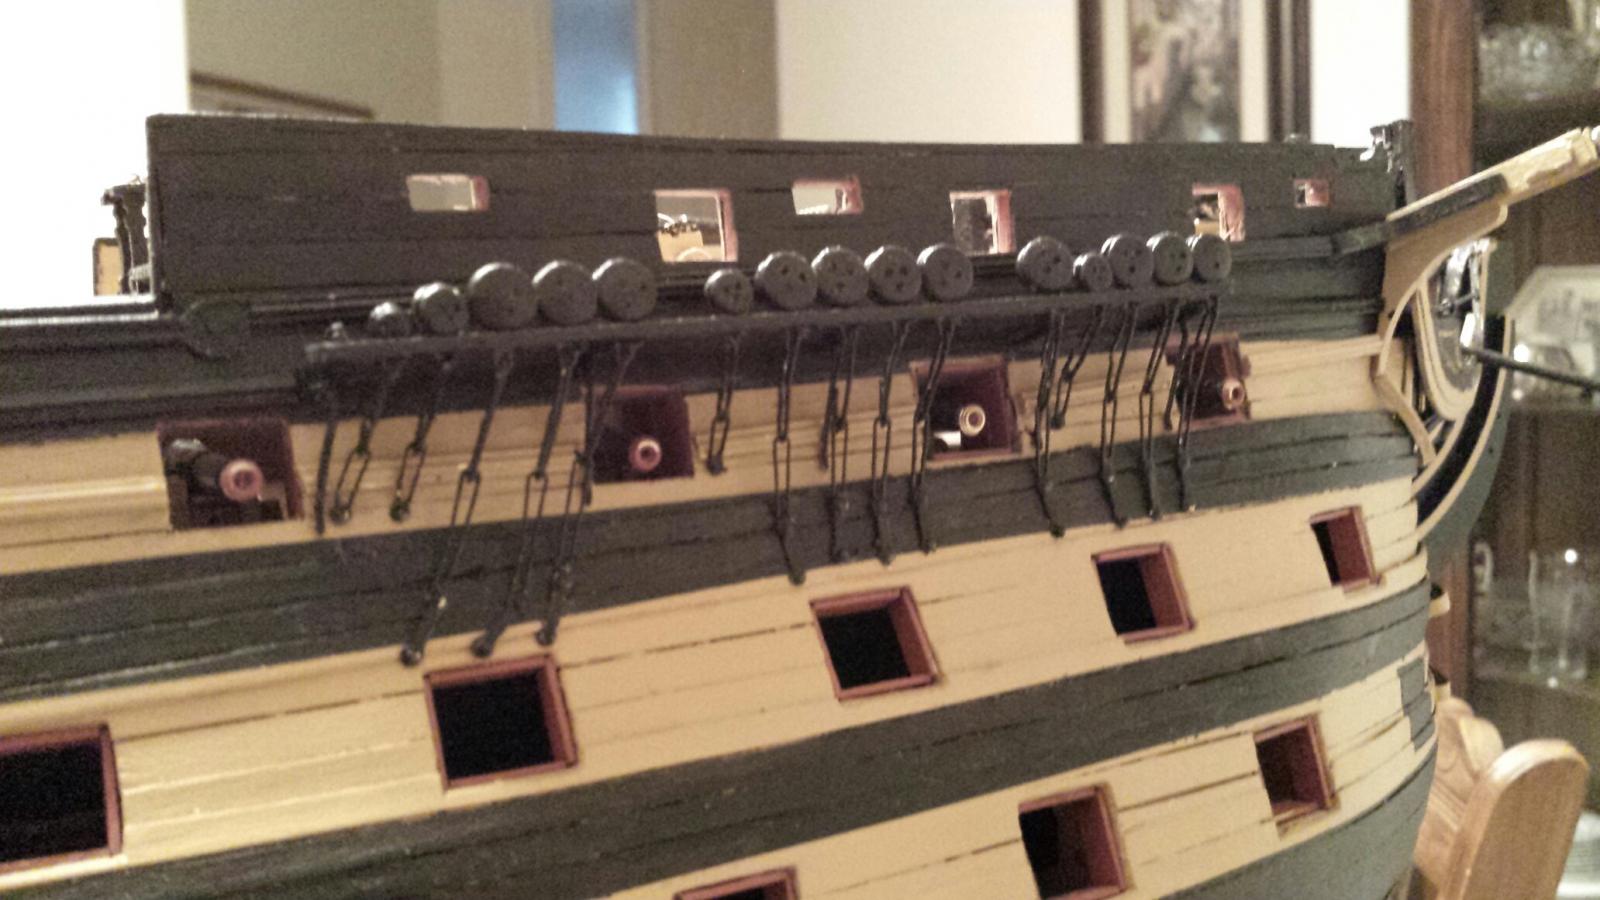
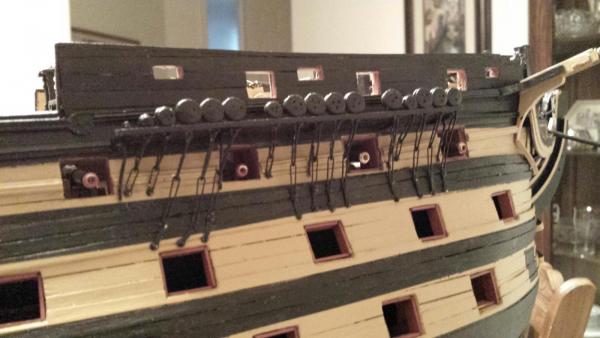
Good morning, Lawrence.. My, you're up early. I appreciate your thoughts on the chain plates or chainwale clips as you have written. I have taken every precaution i could, considering that I only have one strop lug in the channel slot. One channel with all the chainplates is now attached to the starboard side of the hull I have tried to simulate decent tension on the deadeyes and all seems OK. Hopefully, down the road, when I get to the shrouds, all will stay well. Have a great day and get some sleep. Jerry
-
Good morning, Nick.. Thank you so much for taking the time to write to me with your valid thought on the channel, slot, deadeye, etc. I appreciate your advise and using the epoxy seems like an excellent idea. I agree that any pulling out of these deadeye would be a horrible experience so since that I didn't build the assembly that way, I have taken extra caution by double gluing the strops, etc. I can only hope that everything goes OK from hereon in as I'm about to attach the channels with the chain plates to the hull. This is David's method, (Shipyard Sid) and I'll be keeping my fingers crossed. Have a great day and again many thanks for your valued opinion. Jerry
-
Hello David. You sound very excited and you should be. Wow! What a nice job and such nice progress. Until you mentioned it I never noticed that no yards have been installed yet. The rat lines look excellent and their spacing looks perfect. Like i said before, I envy your progress but I know you have worked hard and the results look like it. Thanks for showing us where you're at...Gives me, for one, a real incentive. The best to you. Jerry
-
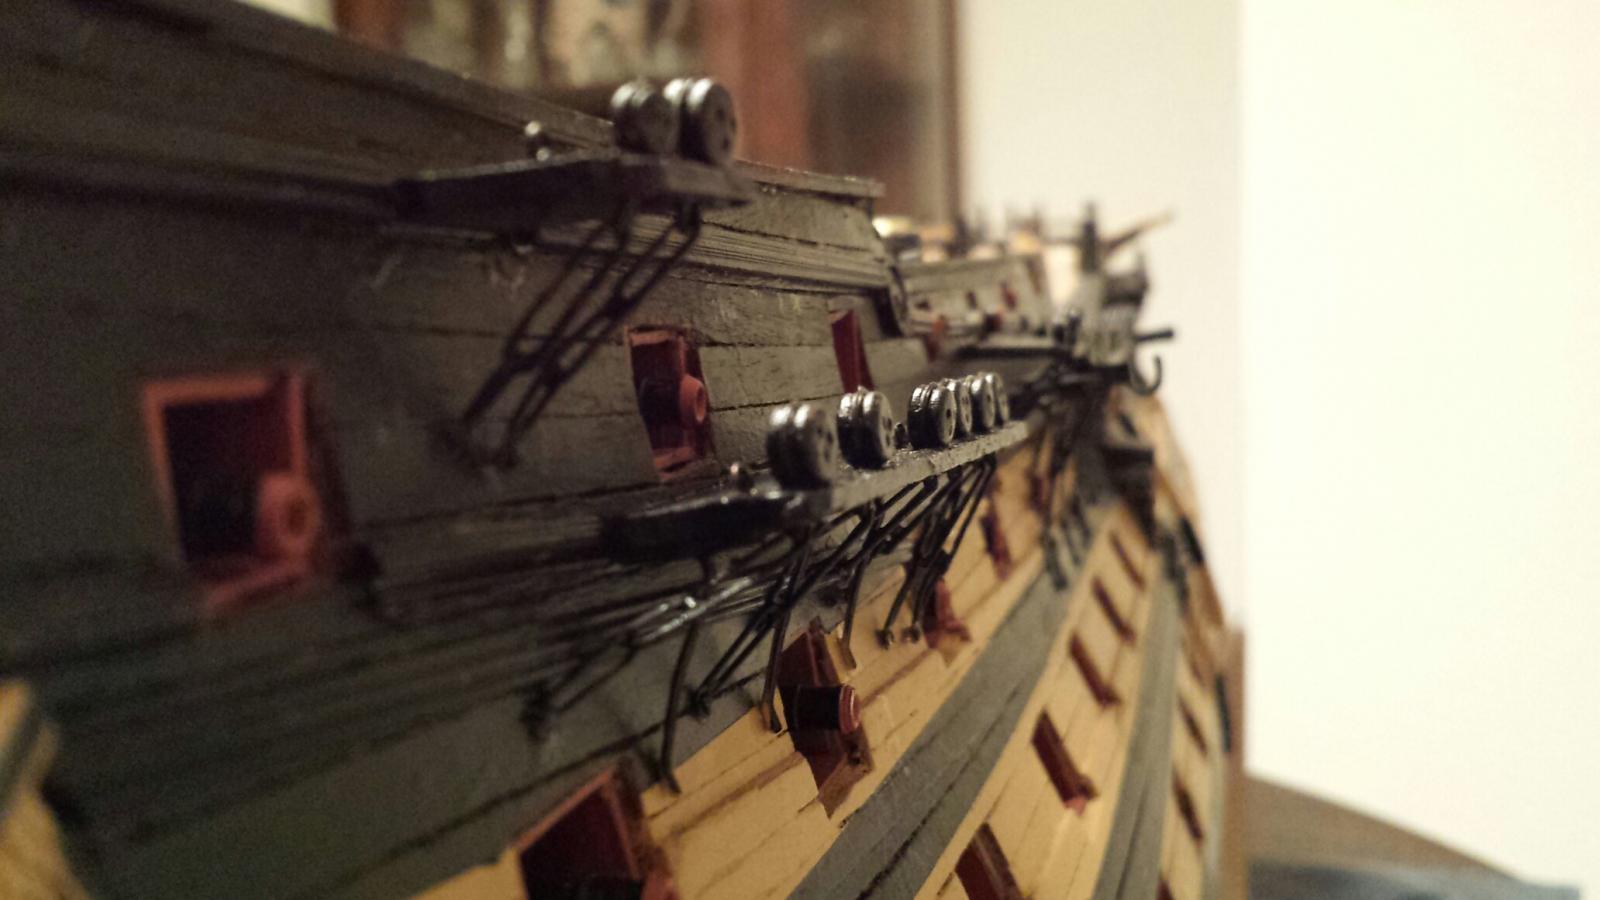
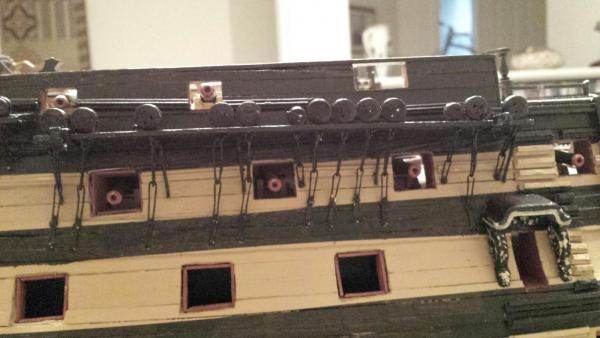
Good evening, Lawrence. You are so nice to think about my situation (problem) with Victory. Actually, as far as I'm concerned, it should be no problem at all. But later about this. So you are spending lots of time I see erecting Christmas lights around your house and property. It's so beautiful to be able to drive around the area and see how some people have decorated their homes. It's actually mind boggling what some habitants do to their property. You are proof about the care some people take when decorating their property. I have always thought that a lot of time is spent putting up these decoations and from what you say, that's the proof I'm talking about. I hope i don't seem like Scrooge but it must also cost a pretty penny to accomplish this feat. No more of that for us...My age makes it difficult to climb ladders, porch railings, etc. We celebrate very simply these days, a small decorated tree perchjed on our piano with a few gifts underneath. By the way, don't forget pictures when the decorations are completed. Now, back to my Victory. Dave gave me a good hint before I started to glue in the strops. He mentioned how to handle the strop lugs and unfortunately, I misread him and the picture he sent me. In the first photos of his work I saw, it looked like the lower strop lug was beneath the channel so I purposely set all my strops this way. I figured the lug, hooked around the bottom of the channel would keep it from coming out from any pressure caused by the rigging. Well,, then.... you know what hit the fan. It was like my log was bombed from all directions...that I should have kept both lugs in the channel slot...TOO LATE...Everything is glued to the channels and I will live with it. I have painted all the channels and strops and deadeyes black and just finished putting a metal prime coat of paint on all of the chainplates. They have not been removed from the brass sheet and won't be until I paint them black. Then I plan to attach all the chain plates to the strops and then attach the channels to the hul by drilling small holes and pinning theml. Somebody, stop me pease, if I'm all wrong. I was very happy to hear from you this evening as I needed some friendly words and that all is well. Thank you for your repeated kindness. Jerry
-
Hello again Gil, Thanks for your quick reply. I did find a photo of the parts in question on the Jotika construction site. here's a link in case you may be interested. http://www.jotika-ltd.com/KitPics/LRG/Victory_Const104_lrg.jpg Many thanks again for your help, Jerry
-
Kevin.. Check out the item with the hook in the picture of the main channel http://www.jotika-ltd.com/KitPics/LRG/Victory_Const103_lrg.jpg Jerry
-
Hello Gil.. I hope all is well and that you can help me out with this question. There are two parts that the manual calls to be attached to the middle channel, the main channel. These two parts are the "studding sail boom, part #684 and "support" part #685. From all the pics I find in your log I don't see these parts placed. Is there a reason you left them off the channel? I notice also that Dave (Shipyard Sid and Kevin don't have them in place either. Can you please help me with this? These parts are called out on page 40 near the end of the Channels paragraph. Thanks so much. Jerry
-
Hello Lawrence.. You are real nice to be worried for me about the strops, etc. As mentioned before I have decided to proceed with my build with the channel assembly as I made it. I made sure that all the strop/deadeye pieces are very secure and will be very careful when I finally get to the shroud job (a long way off) to be extra careful in handling everyting and that nothing is pulled out of position. Right now I'm trying to decide if I should add the sail boom bracket and support pieces to the channel assembly before I go further. Even though the manual calls for them to be added to the channels before painting the channels I don't see them in any of the other's log photos. I need to ask David about this. Have a terrific evening and know that I am much obliged to your feelings in my regard. Take care my friend.. Jerry
-
Hello David... You are so nice to be concerned with my lousy job as far as the strops go. When I first saw your pictures of the channels a couple of days ago it's apparent that I misread them. These new photos you just sent are so clear and show perfectly the position of the lugs of the strops inside the slot of the channel. I remember you telling me that you cut a diagonal in order to fit these strop lugs. When I saw the photos of this a couple of days ago, the bottom lug looked to me to be outside the channel slot and that's the way I did mine. The closeup picture today shows clearly that both lugs are inside the slot. Unfortunately I'm going to have to live with the channels the way I did them and hope that nothing goes wrong. In fact, I hope that the bottom lug, being outside the channel, will help keep the strop in the channel when pressured by the shrouds. The facing strip has been glued on and I'm about to paint the channel/strop/deadeye assembly black. I hope you understand that I don't mean to be obstinate but my misreading of the situation has caused the current state of being. I hope you will continue to help me when I need it and that your communication is always greatly appreciated. Best, Jerry
-
Thanks, Kevin... I believe I got it now. I'm going ahead with the face covering strip and then I'll paint the lot. Thanks so much for taking the time to write to me and have a wonderful evening. Jerry
-
Hi Kevin.. I am very appreciative of your reply but I must admit I don't understand what you mean. To be specific, I don't know what you mean by "drilling a hole into the side of the recess." Do you mean drilling a hole into the hull for the pin holding down the chain plate? And I don't understand the part of " twisting 90 degrees." May i trouble you to explain that to me? Much obliged. Jerry
-
Hello David. Thanks for taking the time to give me your opinion on the strops. Yes, I remember looking at sheet 12 to seee the layout of the chain plates. It is here where the correct rotation of the dead eyes is shown. I may be wrong but I believe that since one of the strop lugs is glued to the bottom of the channel it will act as resistance to the force of the shroud and therefore have less of a chance of pulling out. I also believe that the facing strip on the channel will help keep everything in place. As you know the instructions for this stage, provided by Jotika, are shabby at best. Thank goodness for all the help from you and the other logs. I hope everything will work out. And thanks again for your valued opinion which I always look forward to. Jerry
- 900 replies
-
- 2
-
-
- victory
- caldercraft
- (and 1 more)
-
Good morning Lawrence... I believe I understand what you are saying regarding the strops, deadeyes, etc. So now we know another difference in the two kits. Kevin wrote to me about the lugs that are on the strops and that both lugs should be inside the slot in the channel. Unfortunately all of the strops are glued in place and I don't intend to remove them. I'll be very careful when attacking the chain plates and when rigging as to not pull any of the strops out of their position. Today it's painting the channels (and all the strops and deadeyes) and the chainplates and then attaching the chainplates. Hope you have a terrific day, Jerry
-
Good morning, Kevin... Thanks so much for taking the time to write to me. I also sincerely appreciate the drawing you attached. I wish the manual would have shown the detail that your dfrawing does but I found nothing to guide me in this stage. Unfortunately, it looks like I'll have to be very careful when working around, and with the deadeyes because all of the strops are installed and the deadeyes are all mounted in the channels and the entire assembly is ready for painting. I can't envision removing all the deadeye/strops and starting over. I notice that others installed the strops as I have and that their later stages involving the strops went ok. I hope it will go fine for me too. Again, I want you to know that I am grateful for your advise. Have a great day, Jerry
-
Hello David, it's so good to see your beautiful progress. I wonder where you find the time to get the work done. After all, I for one, take a lot of your time asking you to answer all my questions which thankfully you kindly do. Your Victory is certainly getting there and it scares me to see what's ahead for me. Please keep the photos coming; it really shows your great work. Take care, Jerry