pirozzi
-
Posts
843 -
Joined
-
Last visited
Content Type
Profiles
Forums
Gallery
Events
Everything posted by pirozzi
-
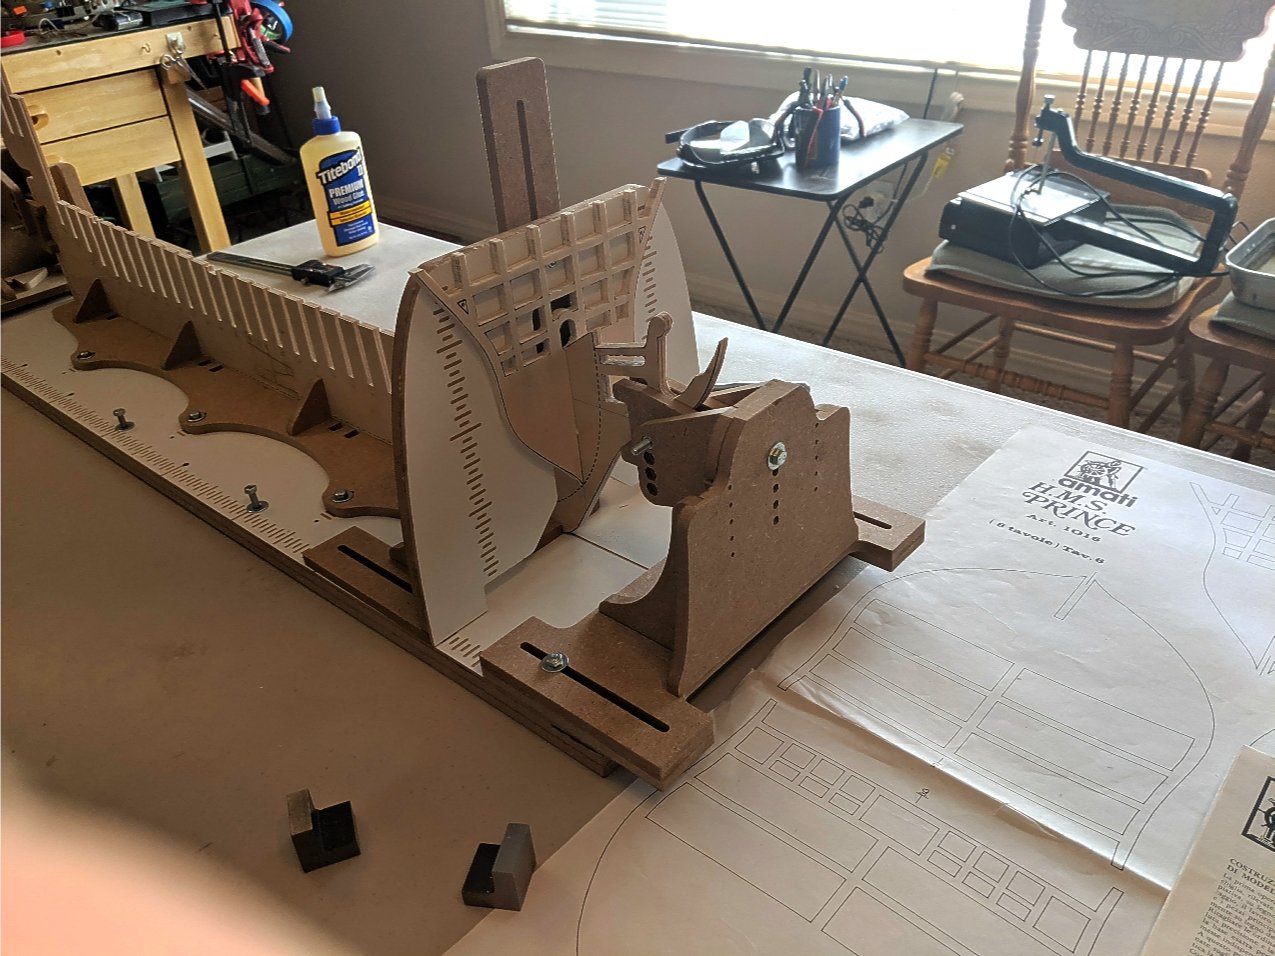
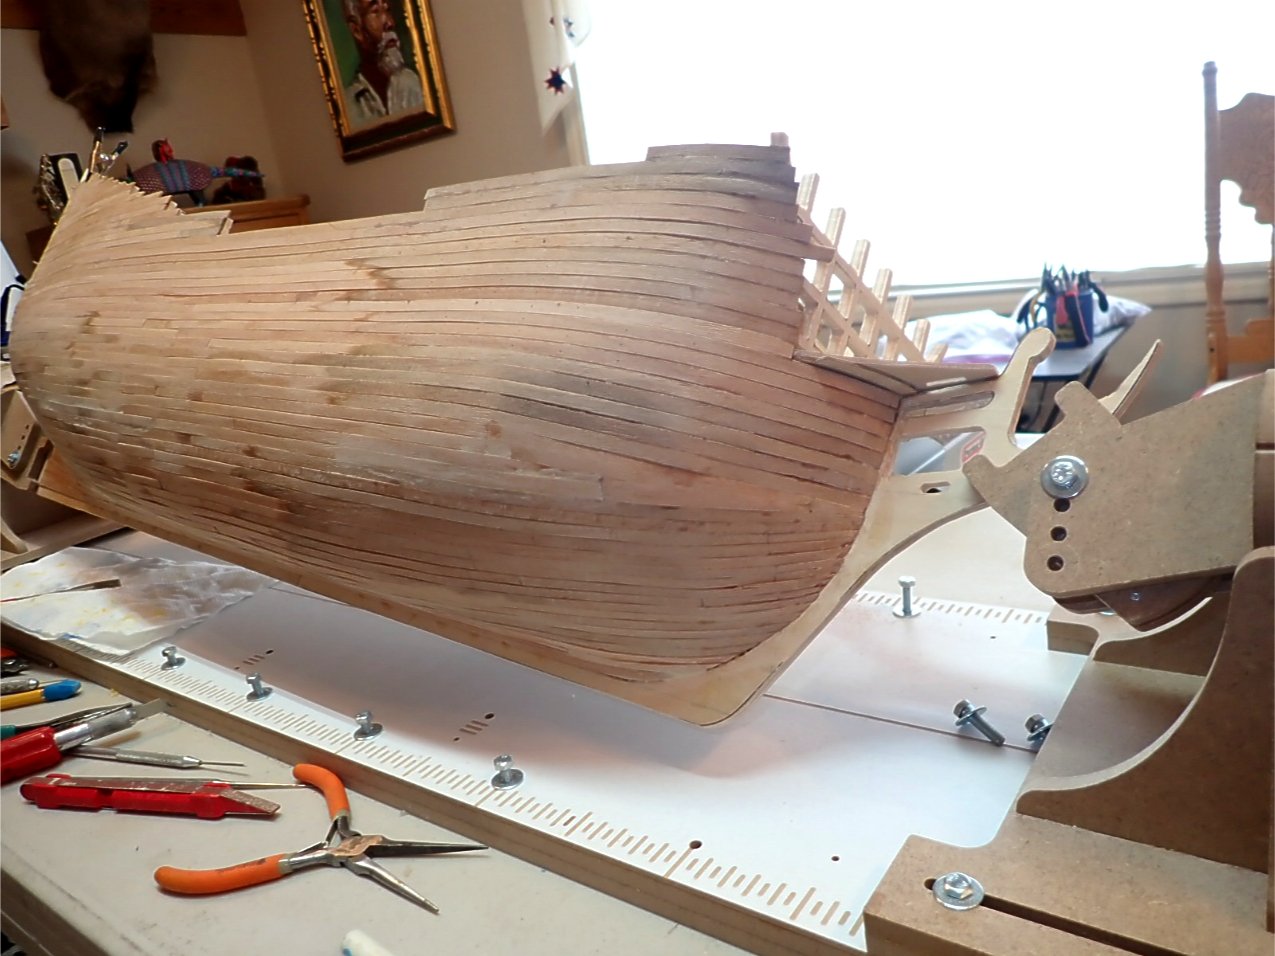
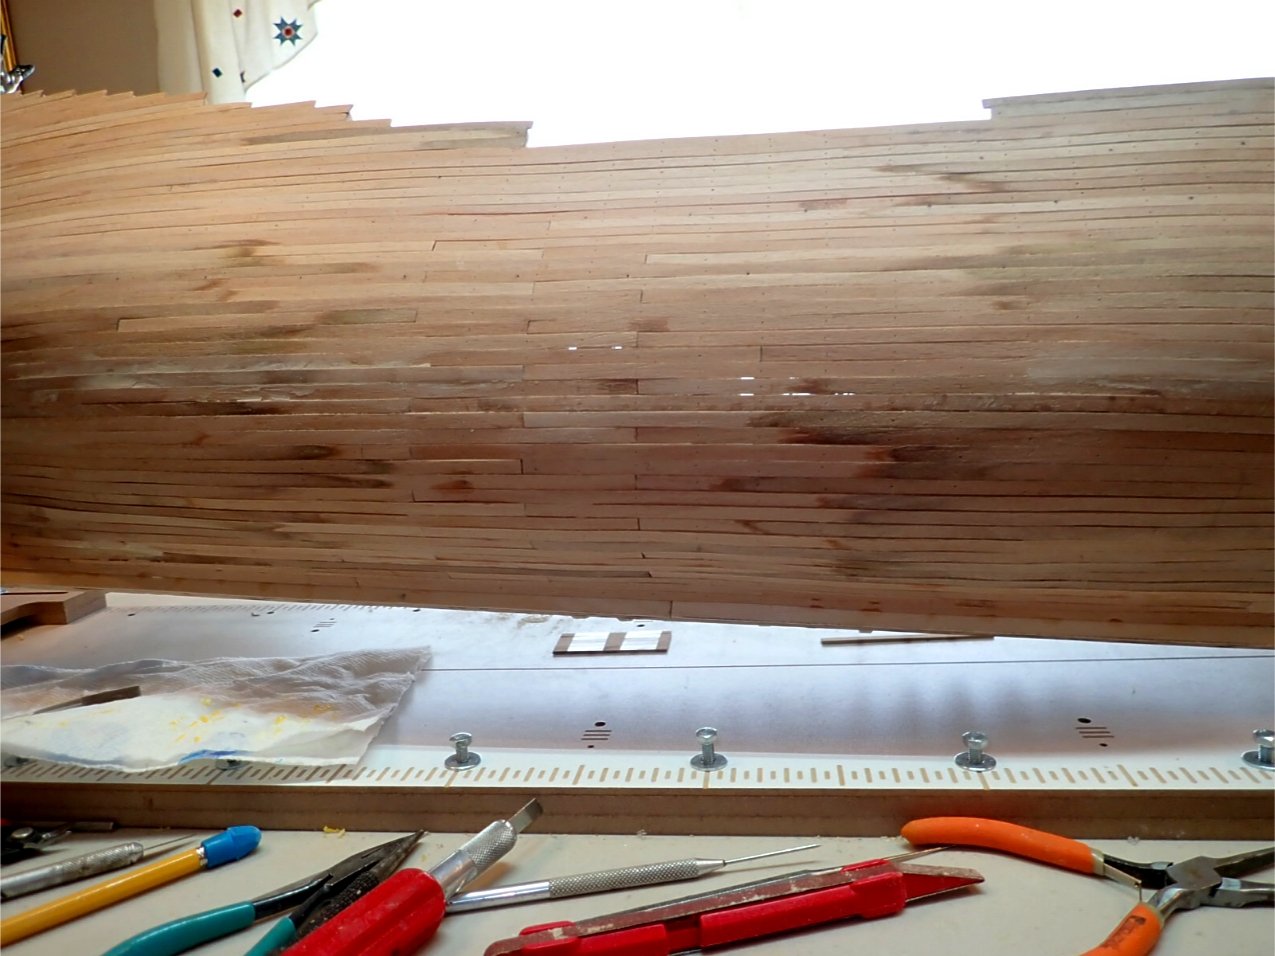
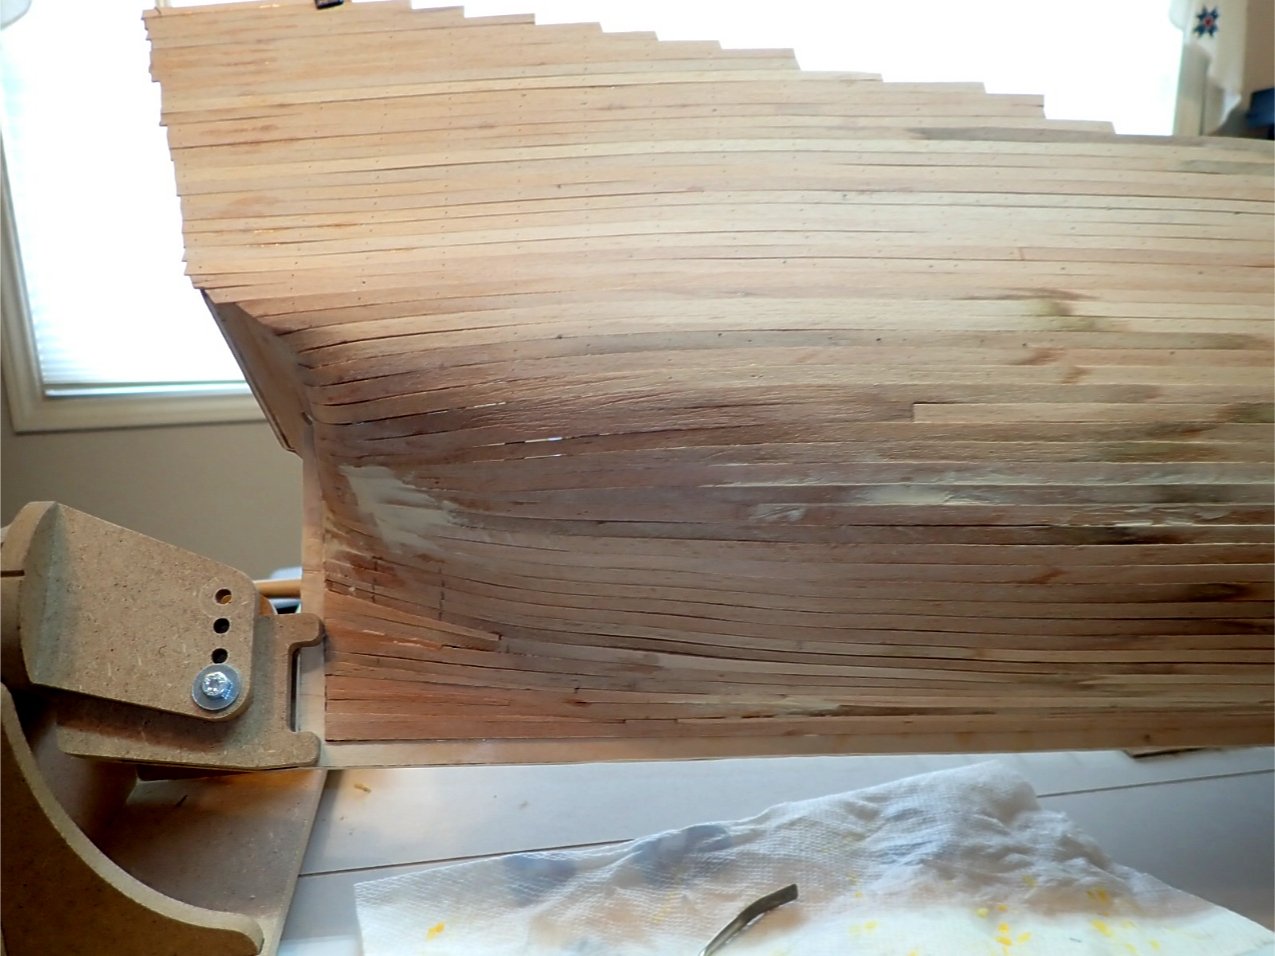
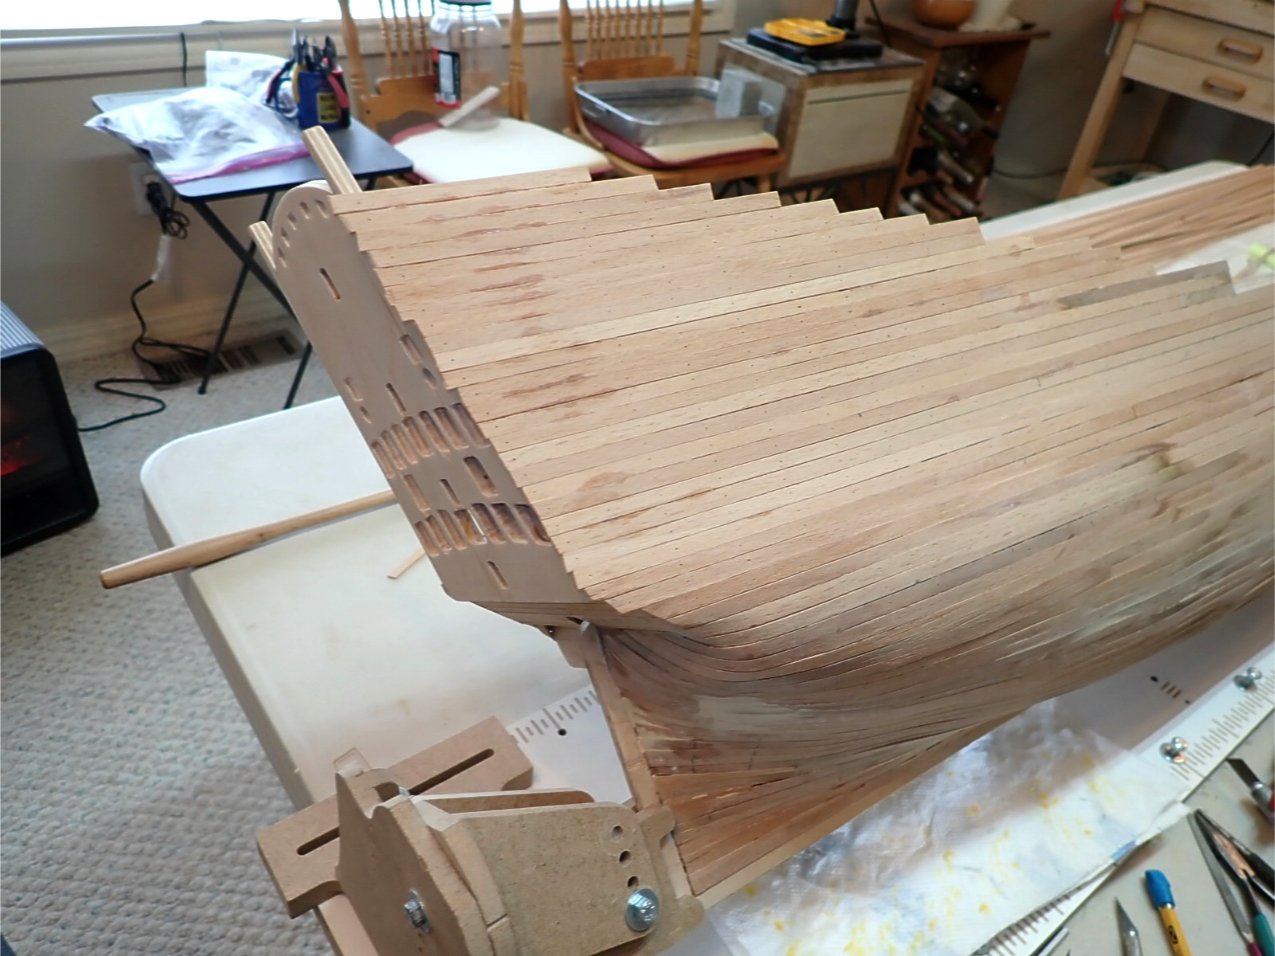
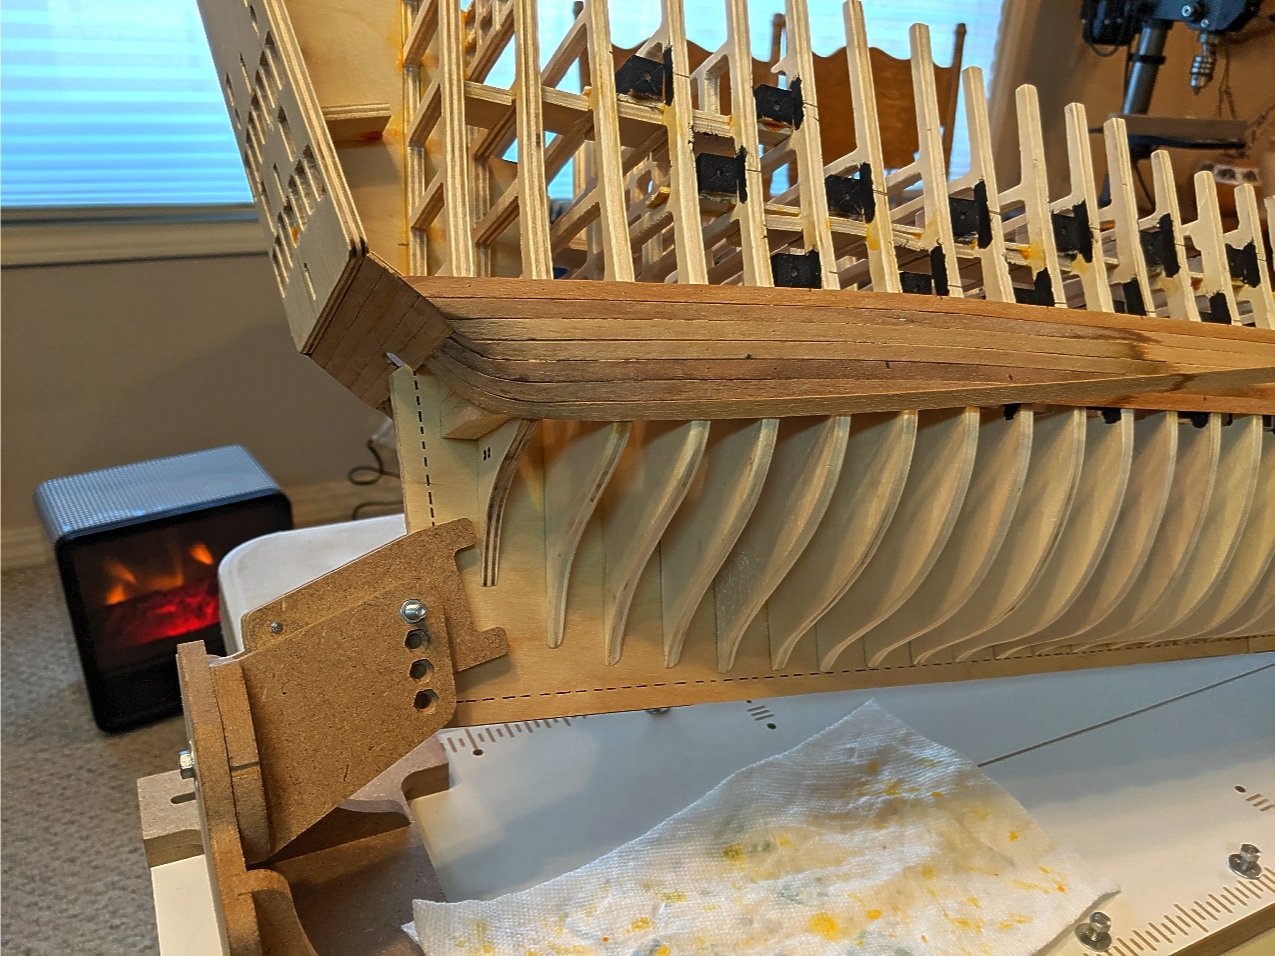
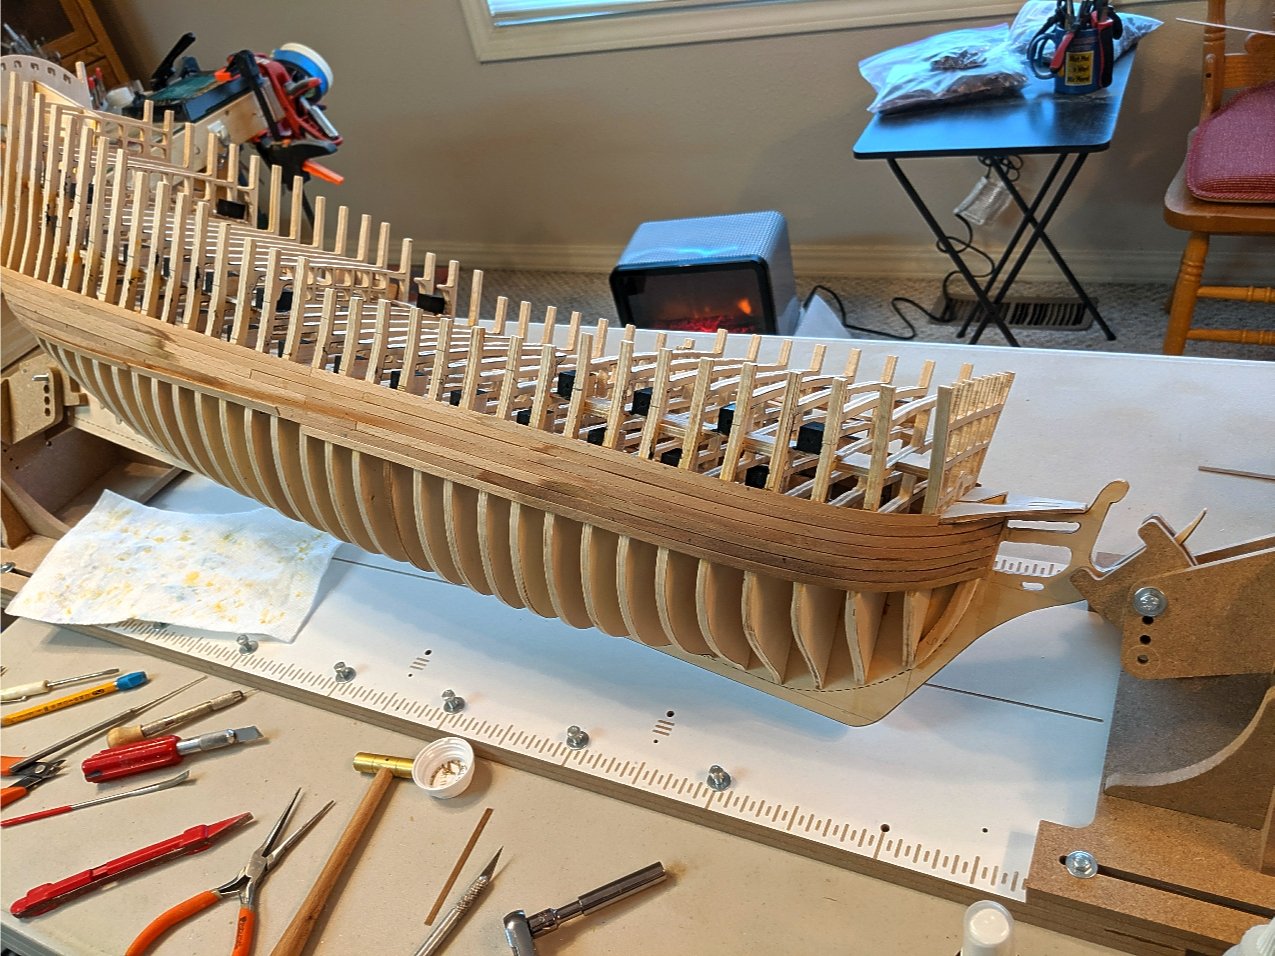
 Hi Mates, Long time no see. Now that I am pretty much confined to the house because of this Corona virus epidemic, I have been putting more time into my build. I have finally finished the starboard side of the first planking layer. It was a monstrous job. Besides being a very large hull, the enormous amount of bulkheads requires constant adjustments of just about every bulkhead to get a fairly even and smooth run of the strakes. Even so, there are a few rough spots that will have to be smoothed out when placing the second finish layer of planking. I used little nails throughout to hold the planks until the glue dried and then pulled them out. For the second layer I will not have to use them because there will be a solid layer underneath to glue them to. I used PVA glue for most of the planking, except where the curves in the hull required holding. In those places I used medium thick CA glue and fast drying spray. I did not cut off the ends of the planks that hang over because I might need some extra when placing the decorations and strips to the bow and stern. Although you can't them, I did mark the locations of the gunports with little holes for cutting them out later. Hopefully I will post more quickly now. Vince P.
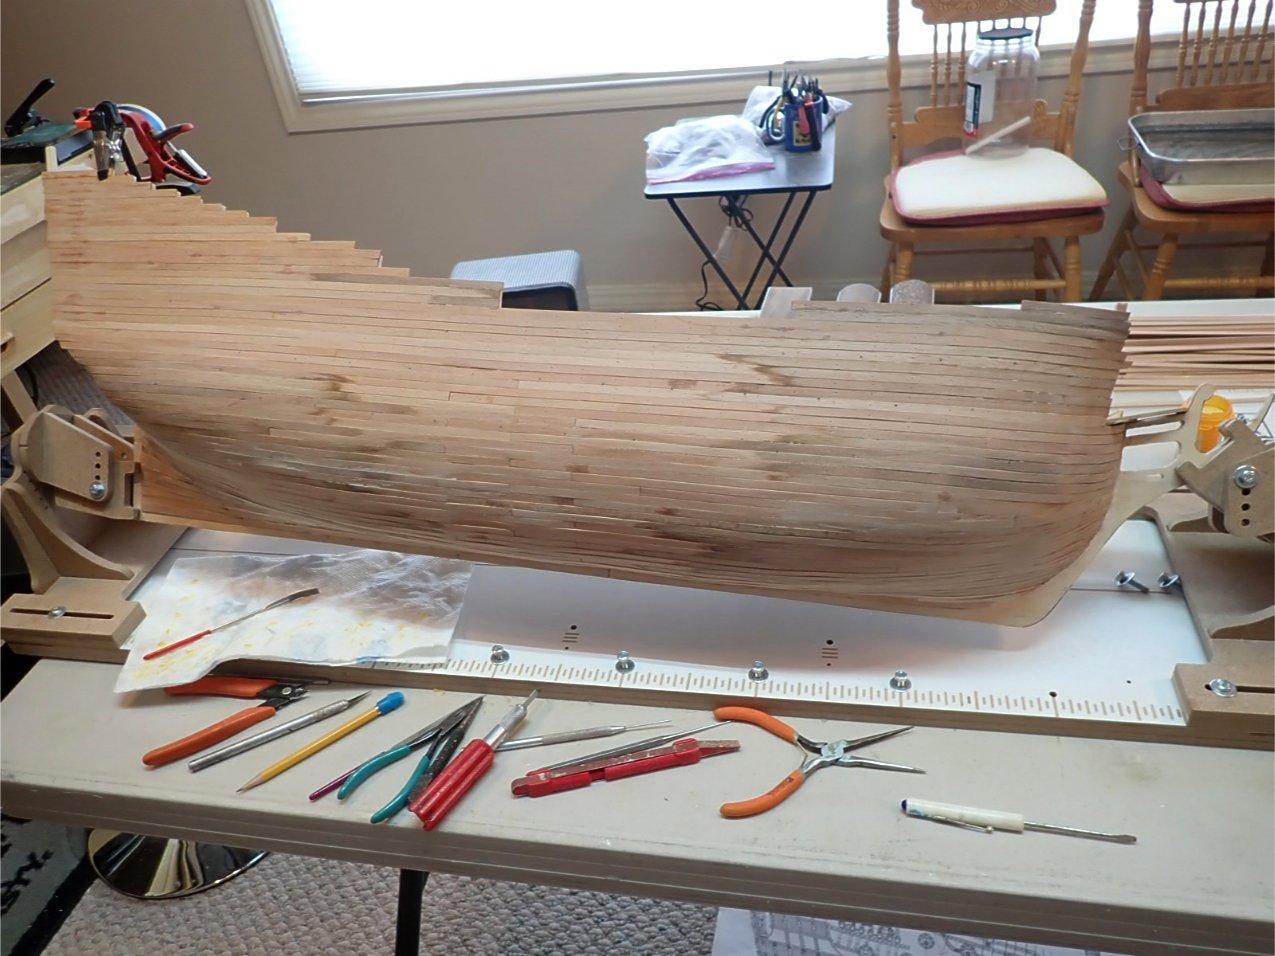
-
Captain, A kit is only a platform. You can take it as far as you want. I have seen that Constructo kit completed by a builder who bashed it considerably. It was outstanding. Vince
-
I have to ask! What is your ship resting on in these photos? Vince
-
You have a valid point. The Royal William I built has a straighter prow. I will look into this. Thanks, Vince
-
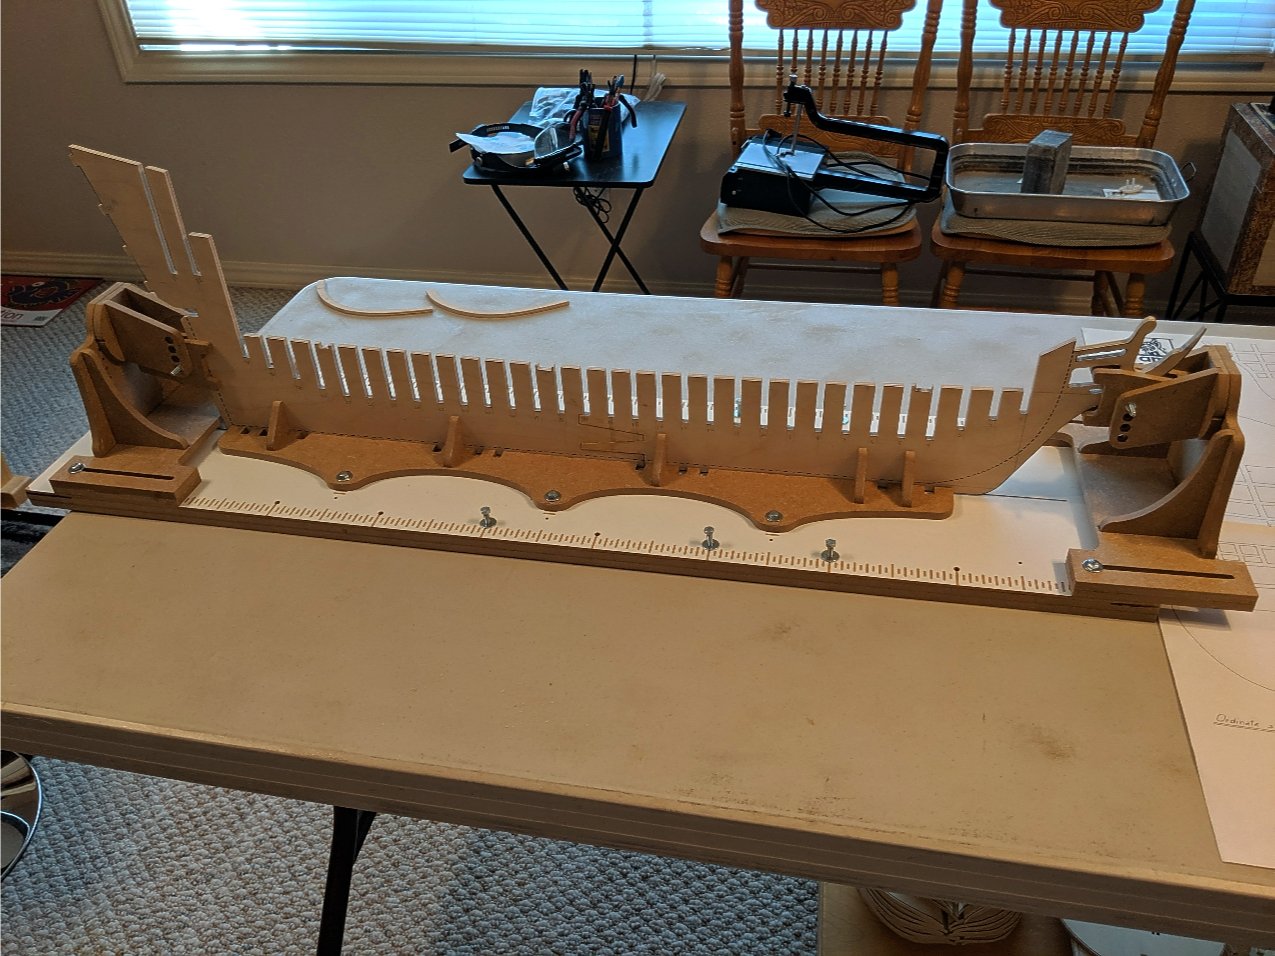
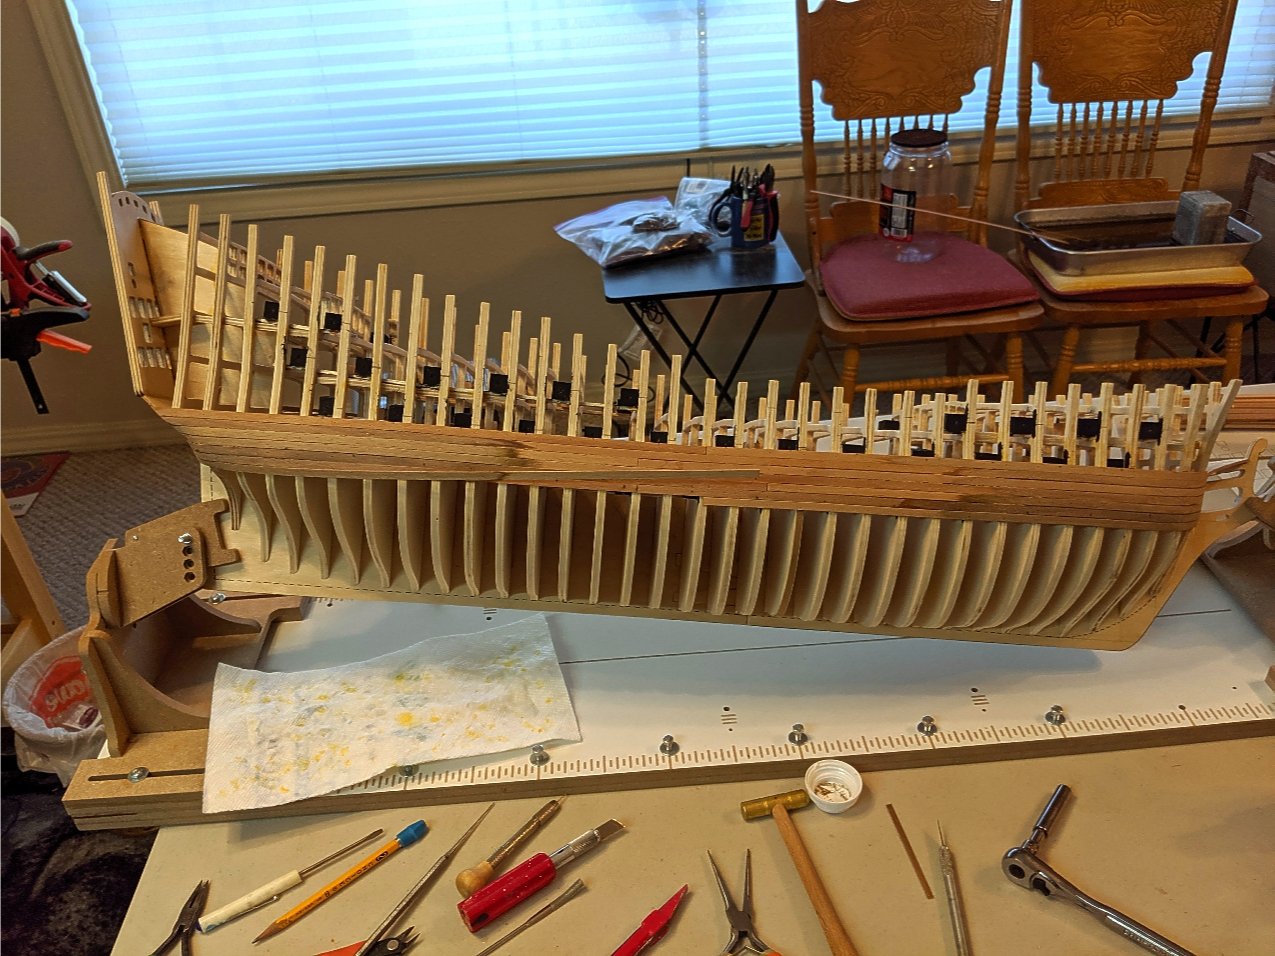
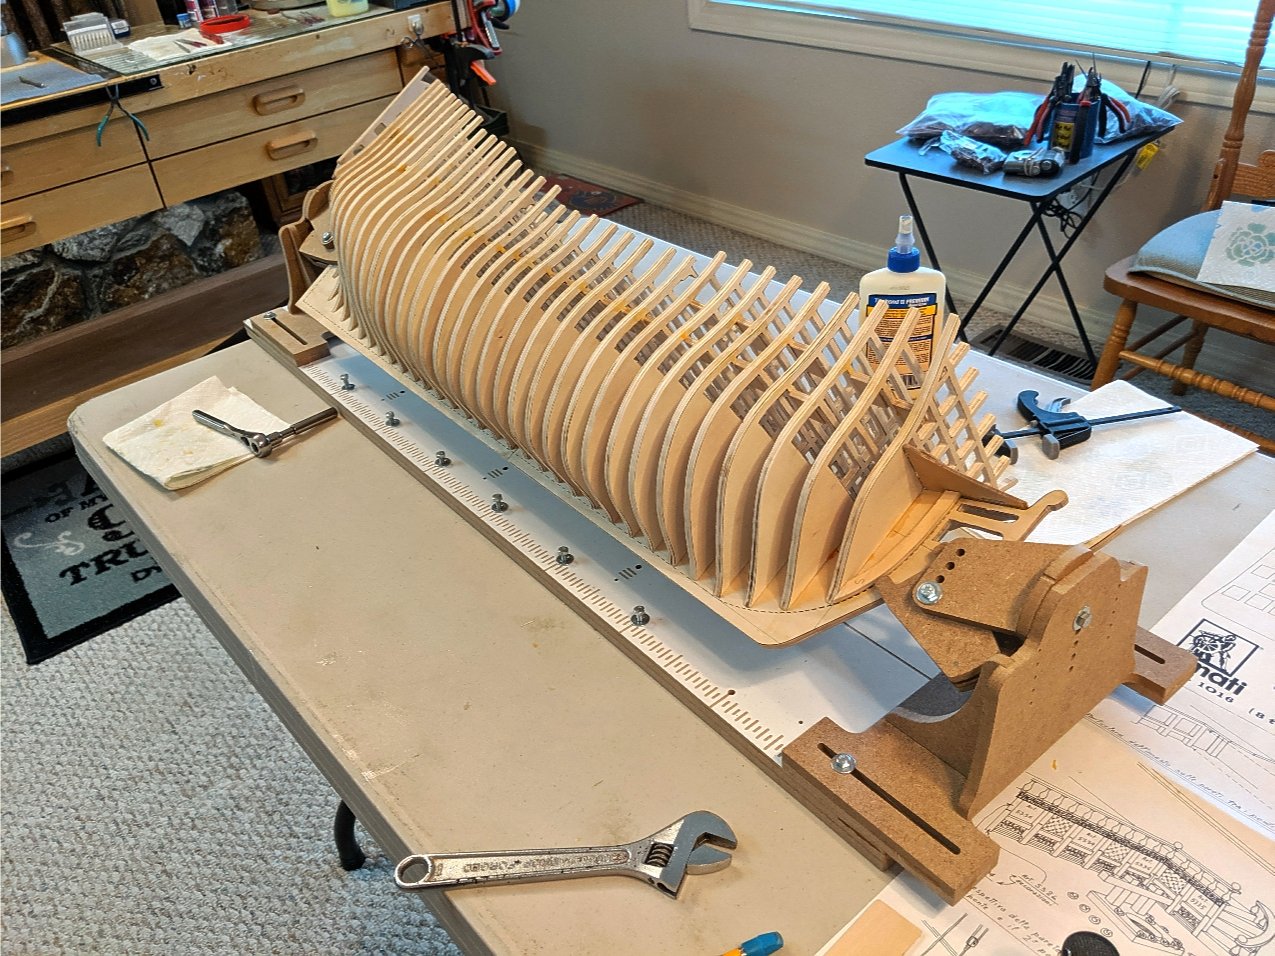
Started the first layer of planking. It is very slow going. Because of the large number of bulkheads, many have to be adjusted along the way to keep the flow of the planking as smooth as possible. There are still ripples that show and those will have to be corrected after the entire hull is planked and before the second layer is applied. Vince P.
-
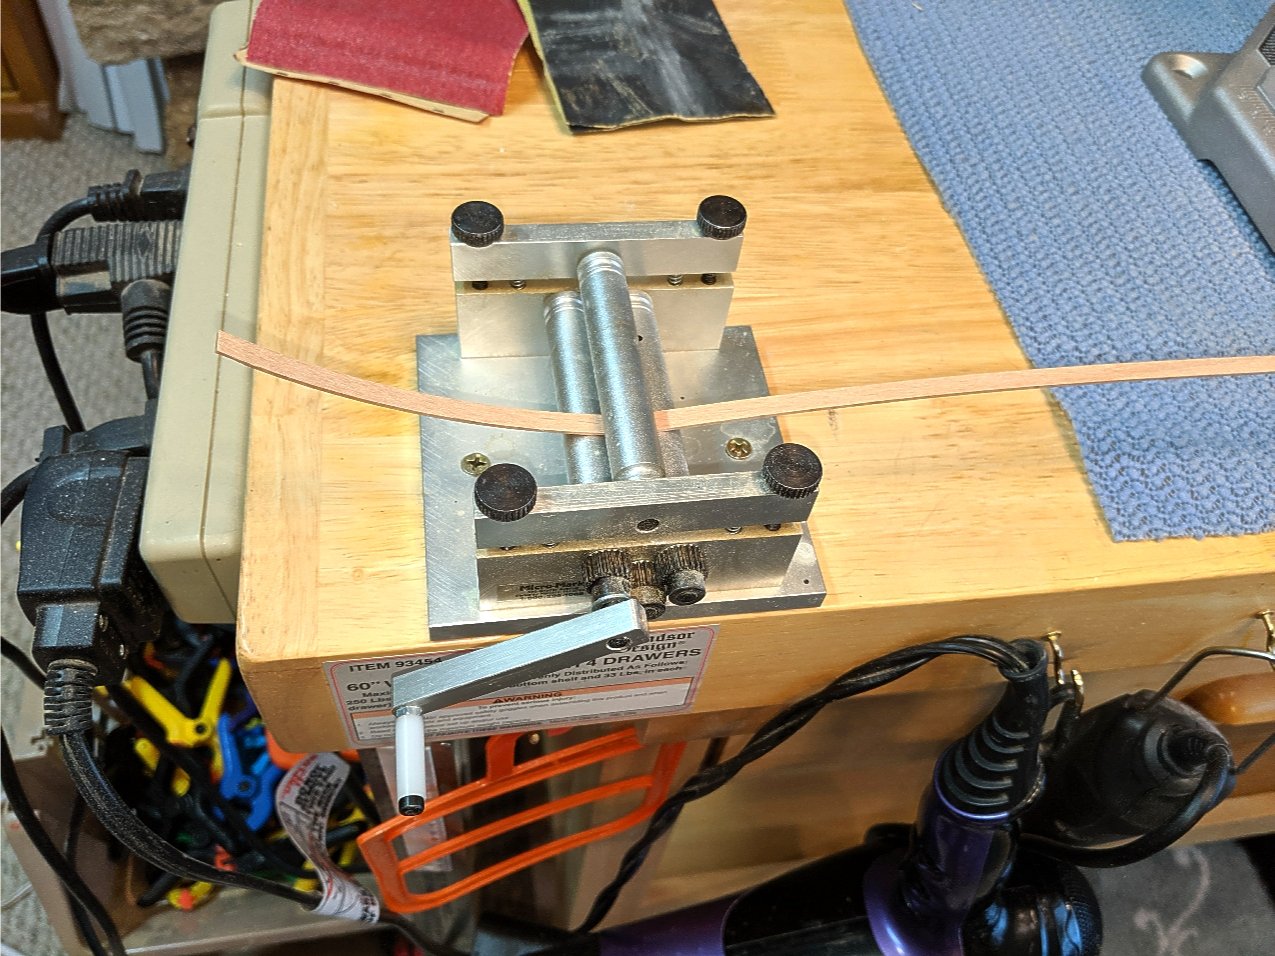
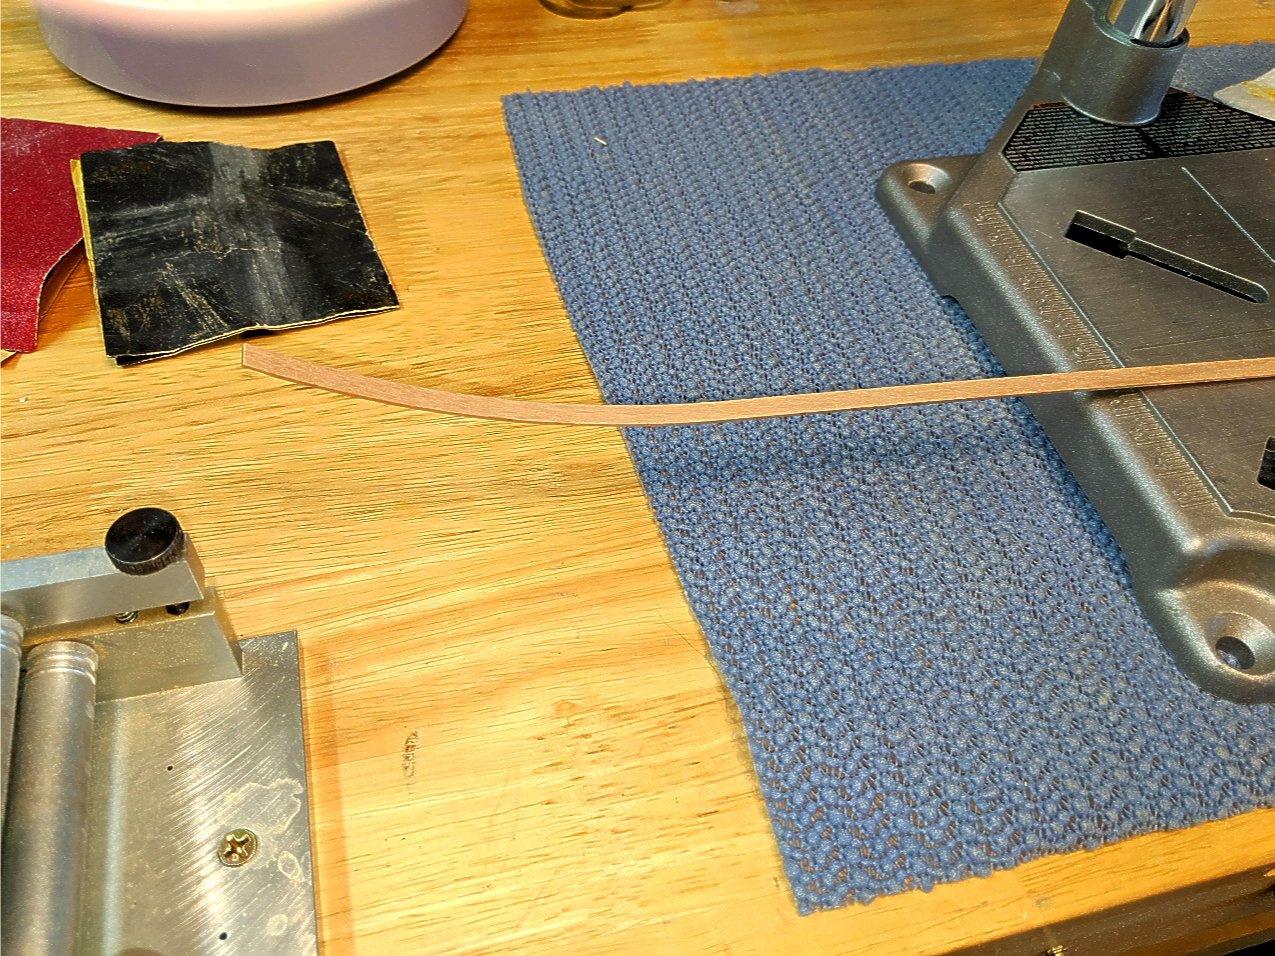
This little plank bender I bought years ago from MicroMark is one of the best tools ever. You can bend wood up to 3mm thick. The wood can be dry and cold. You just adjust the rollers to accommodate the thickness and the amount of arc you need. Just crank the handle. I have planked an entire ship with this. Vince P.
-
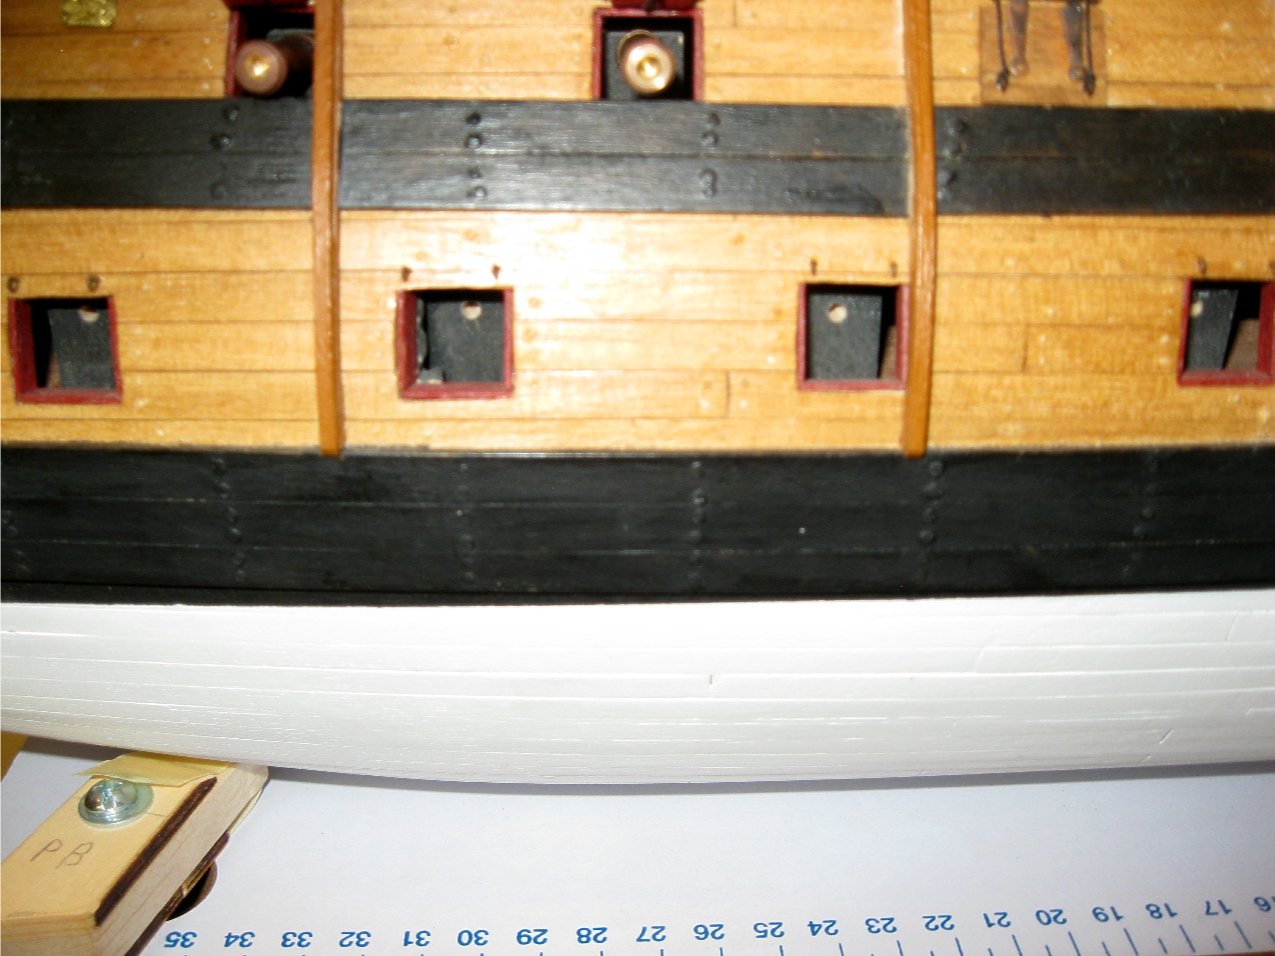
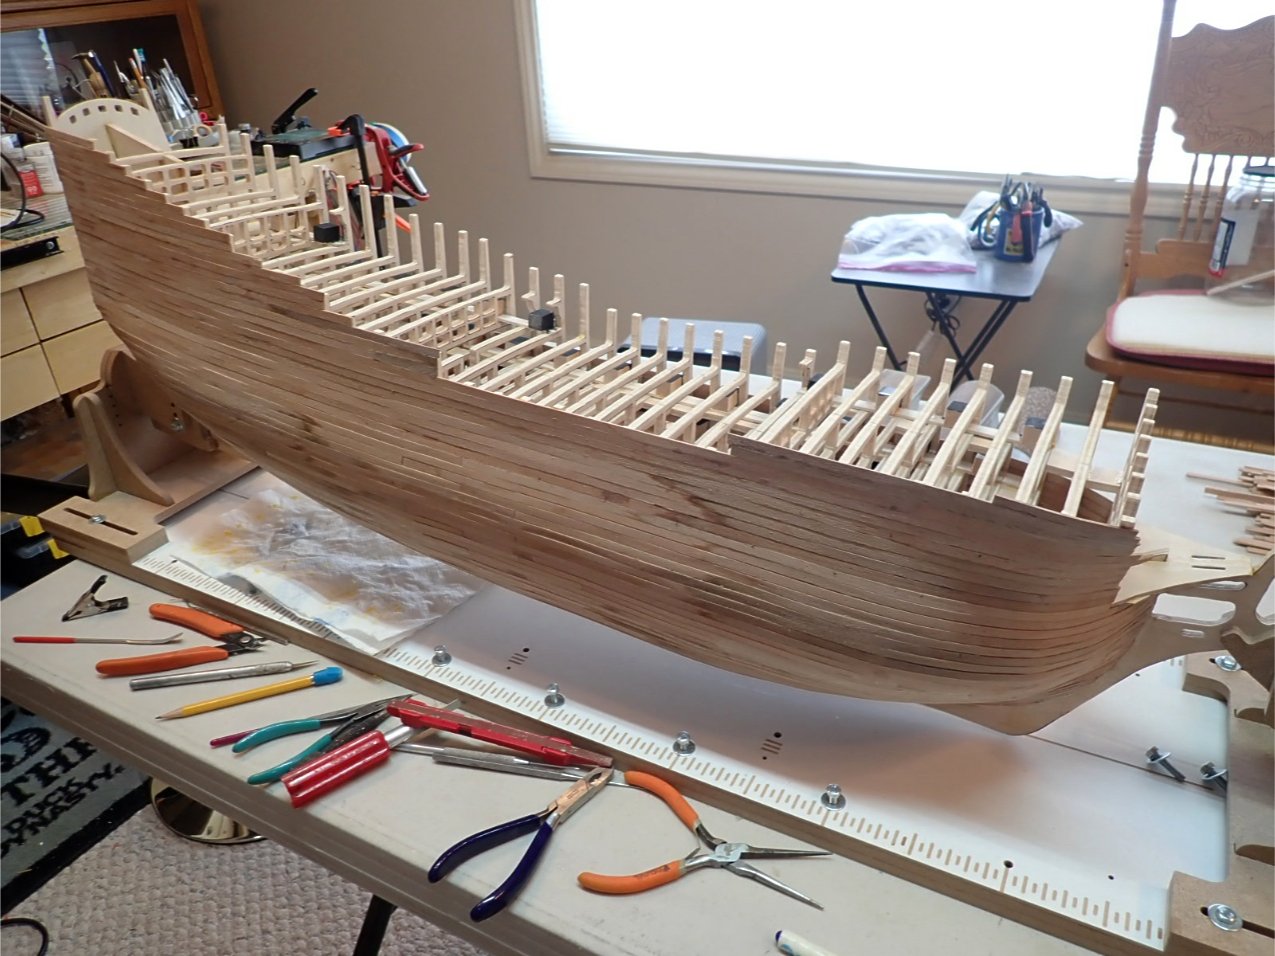
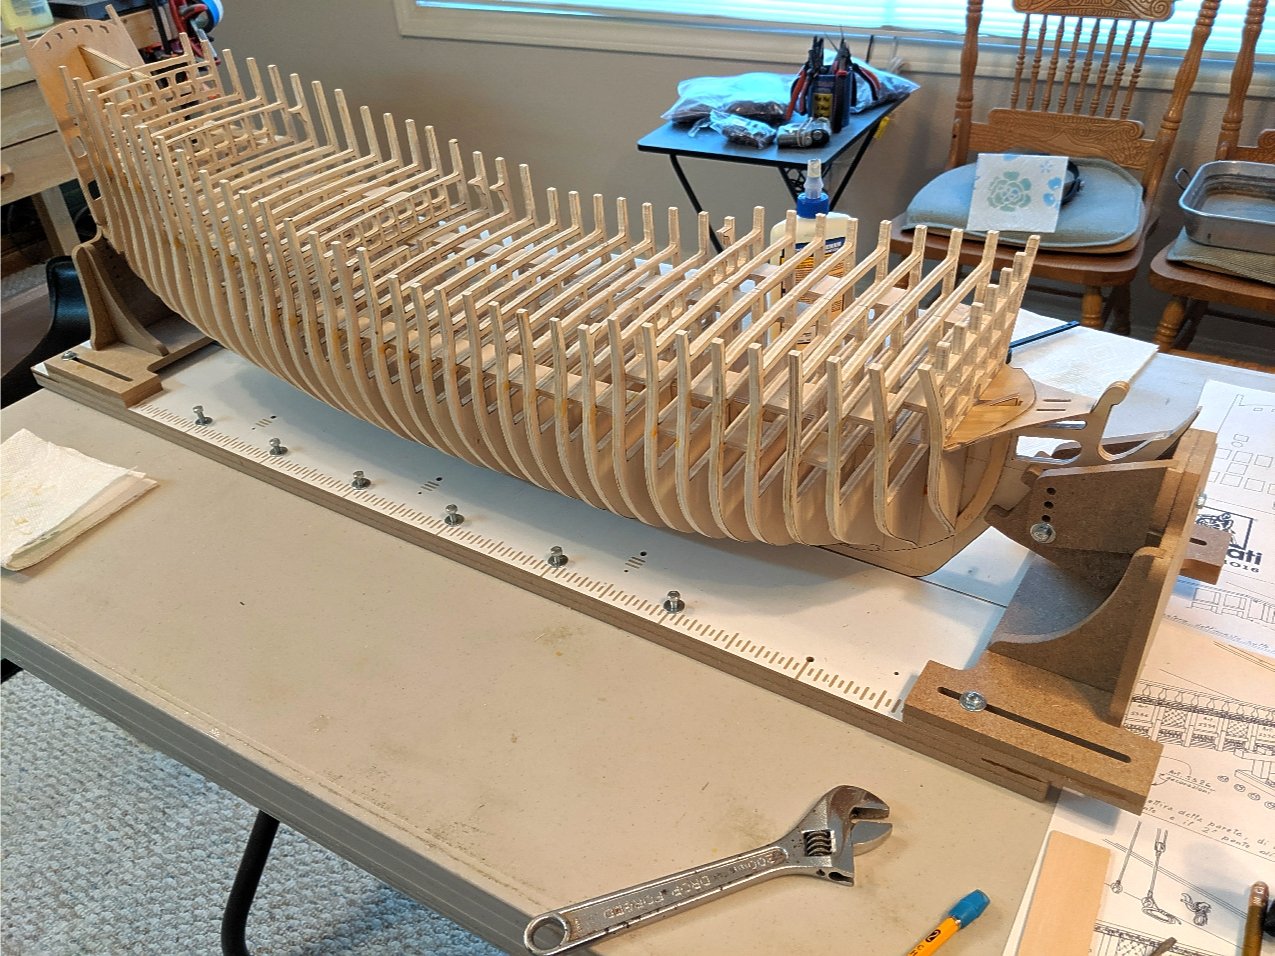
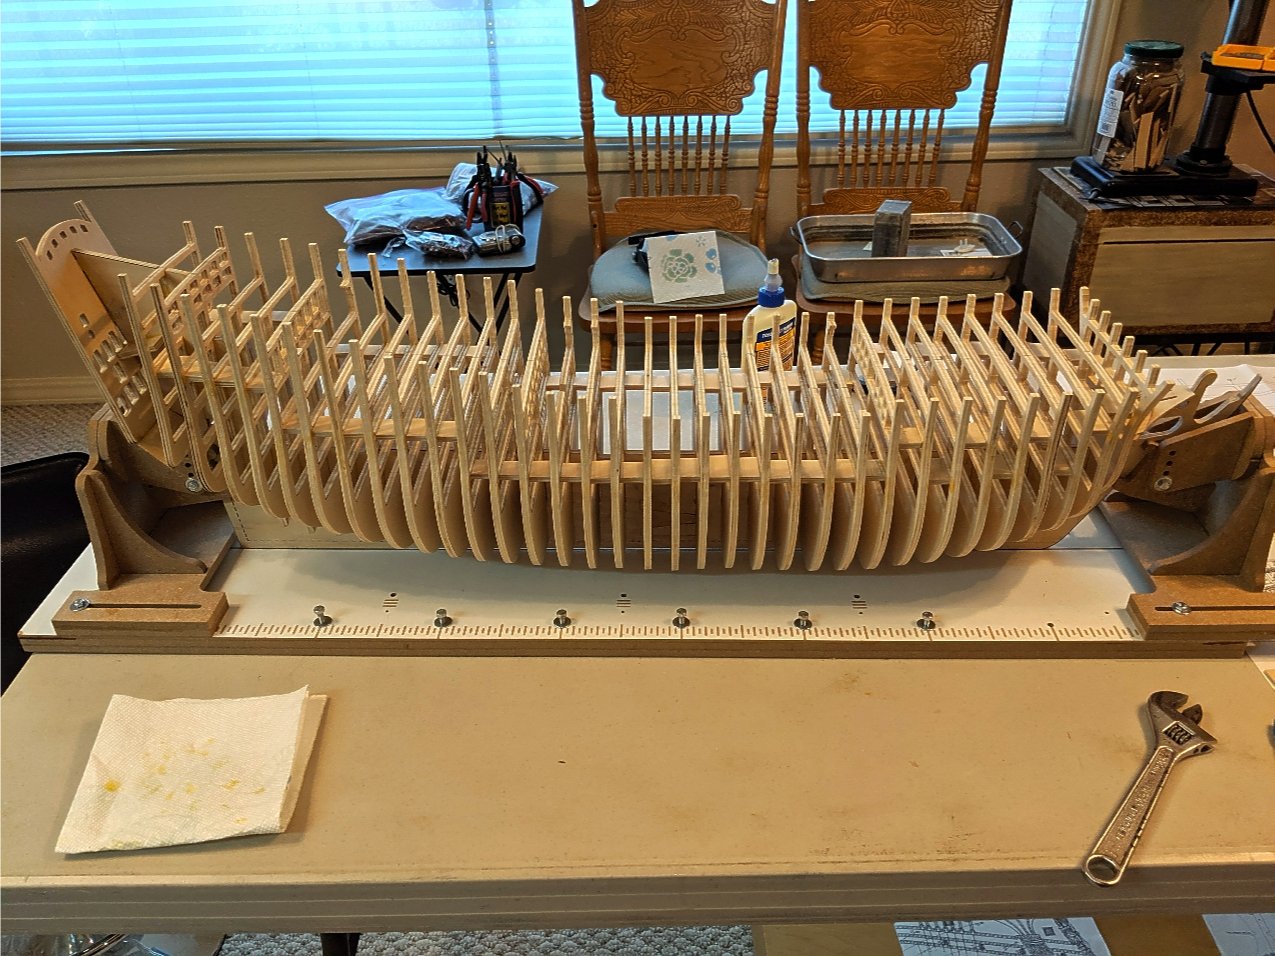
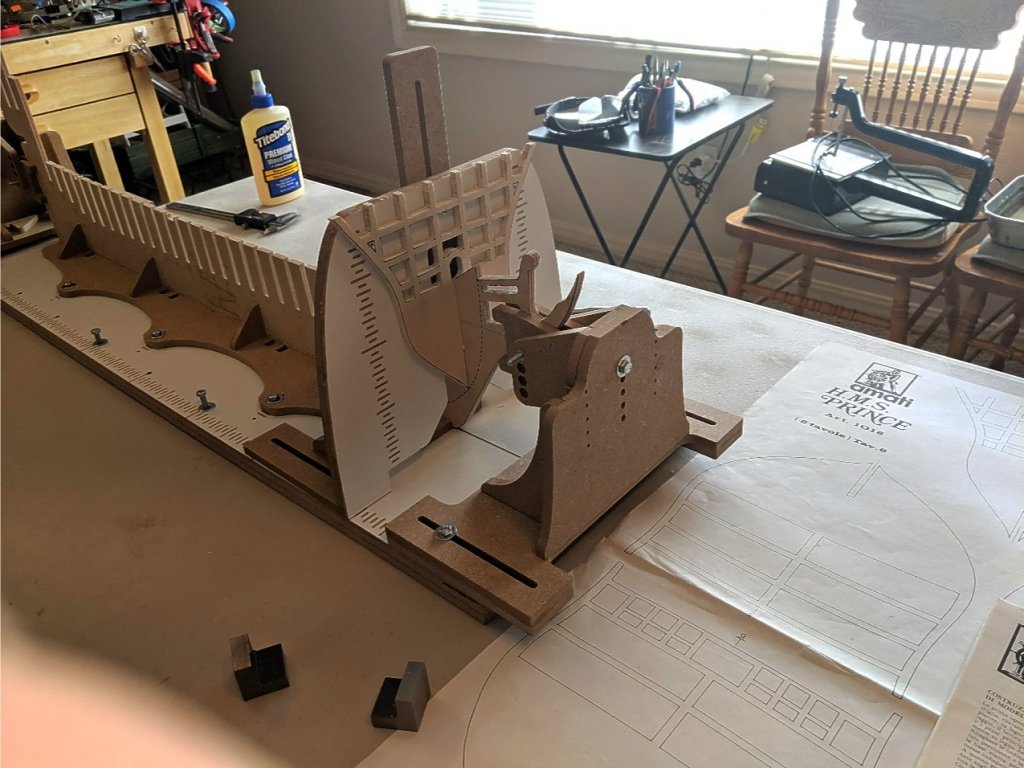
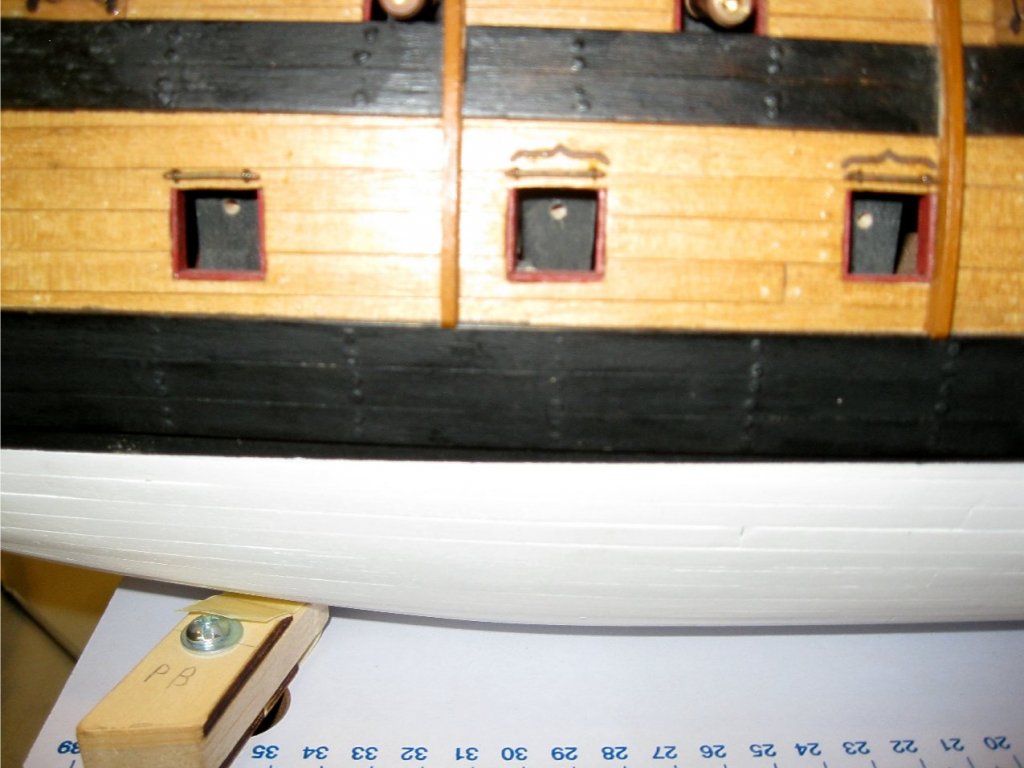
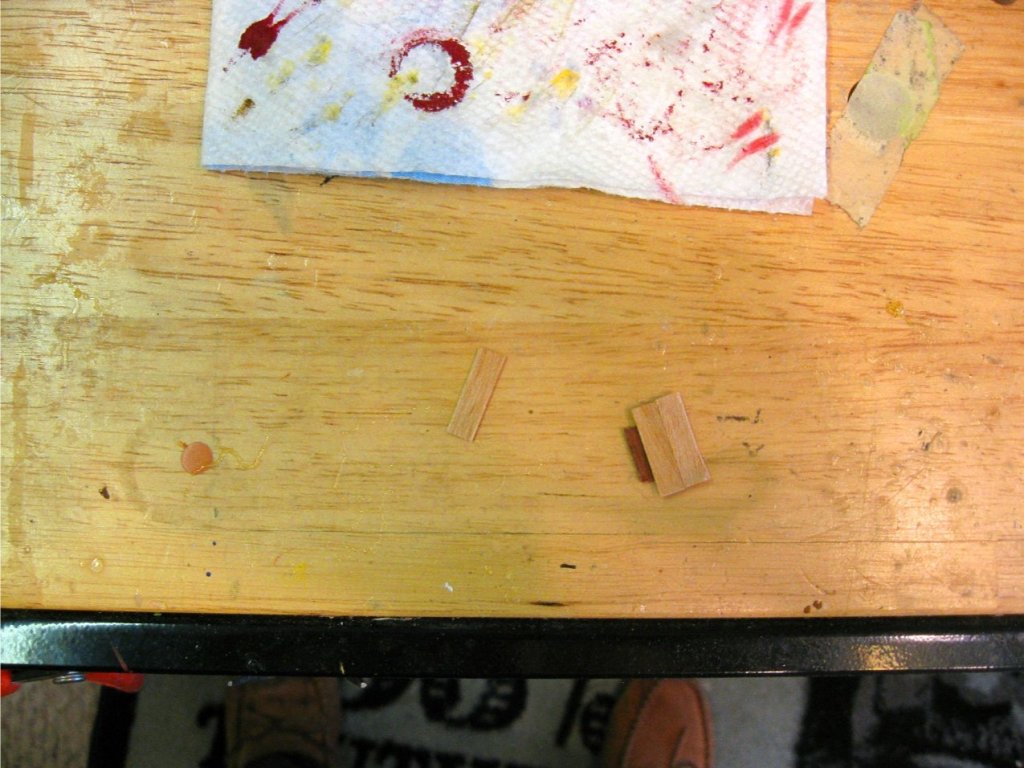
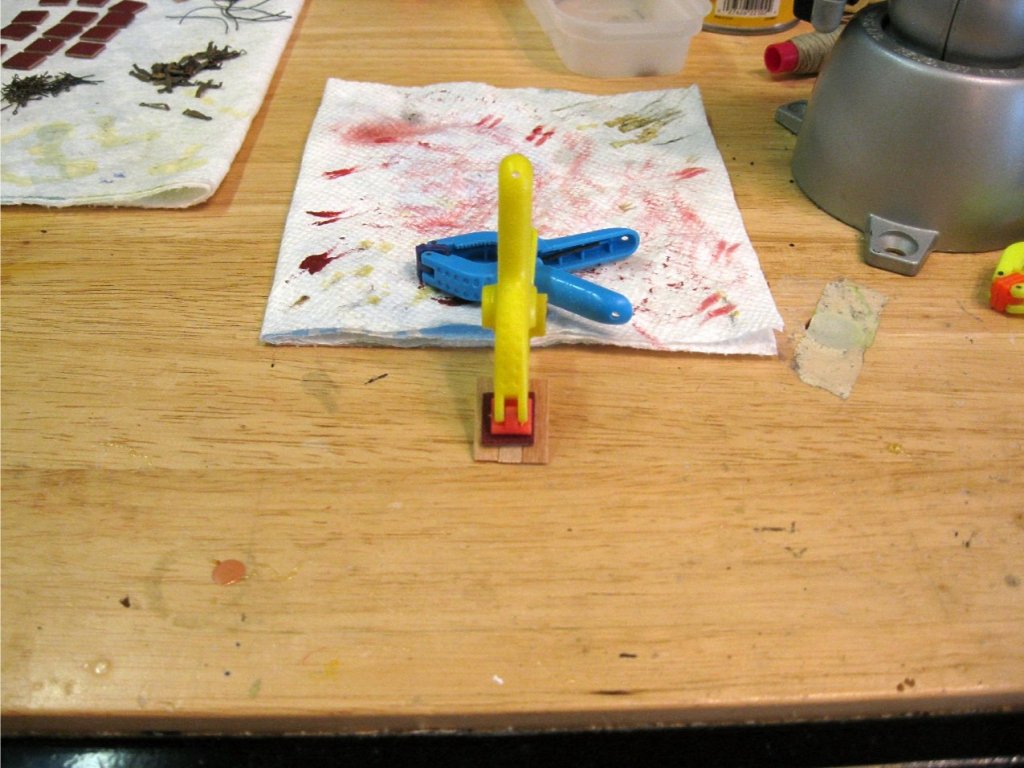
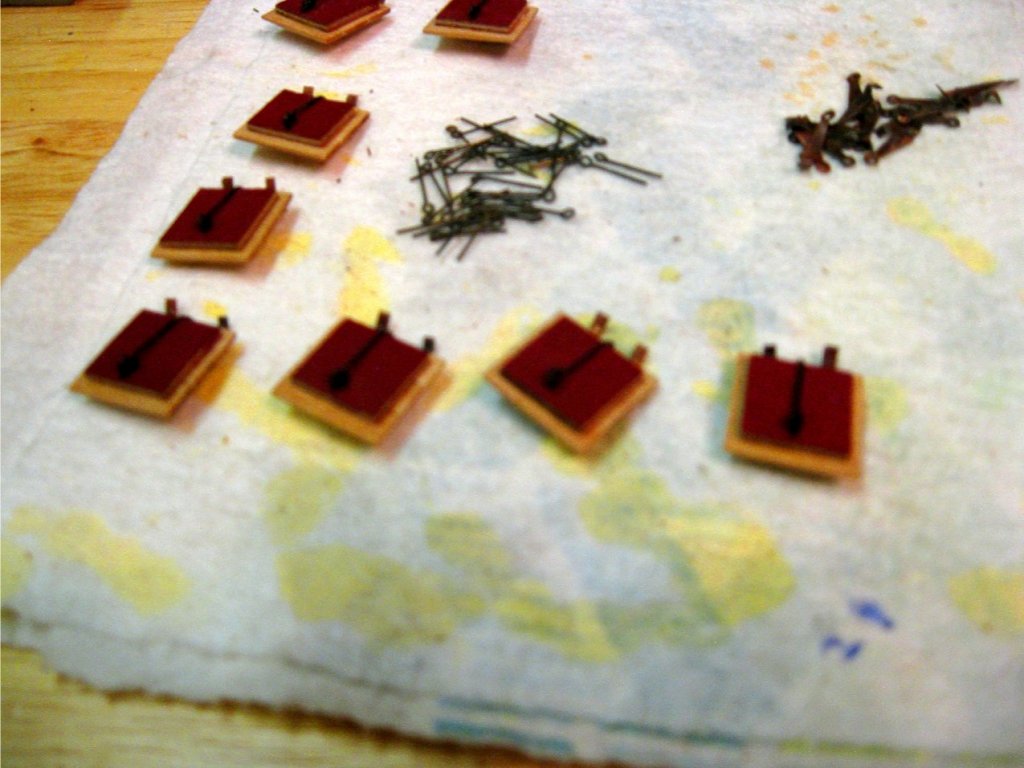
All of the gunports are located and the dummy gun blocks are placed. Locating the ports was fairly easy since they all butt up against a bulkhead. I added planks that follow the deck lines to mount the blocks to. I also noticed that if I want to keep most of the ports open with protruding gun barrels, there are not enough guns supplied. They figure on only having about half of them open. I do have a good supply of gun barrels that are similar in my stash. I will use those. Next up is to bevel the fore and aft bulkhead ends and begin the first layer of hull planking. A hull this size that also has a complex curved stern and a bluff bow will take a considerable time to plank. Vince P.

-
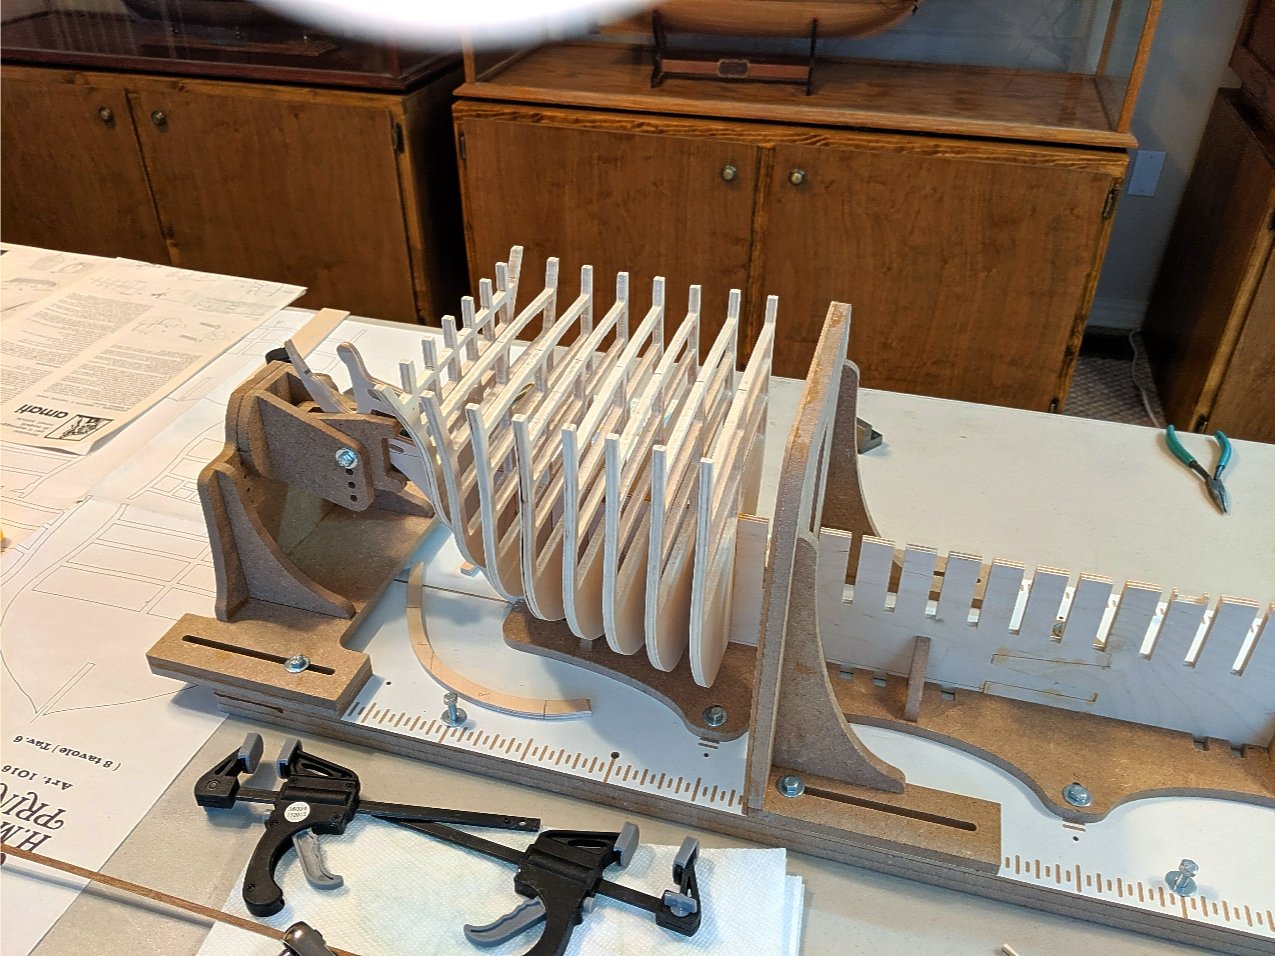
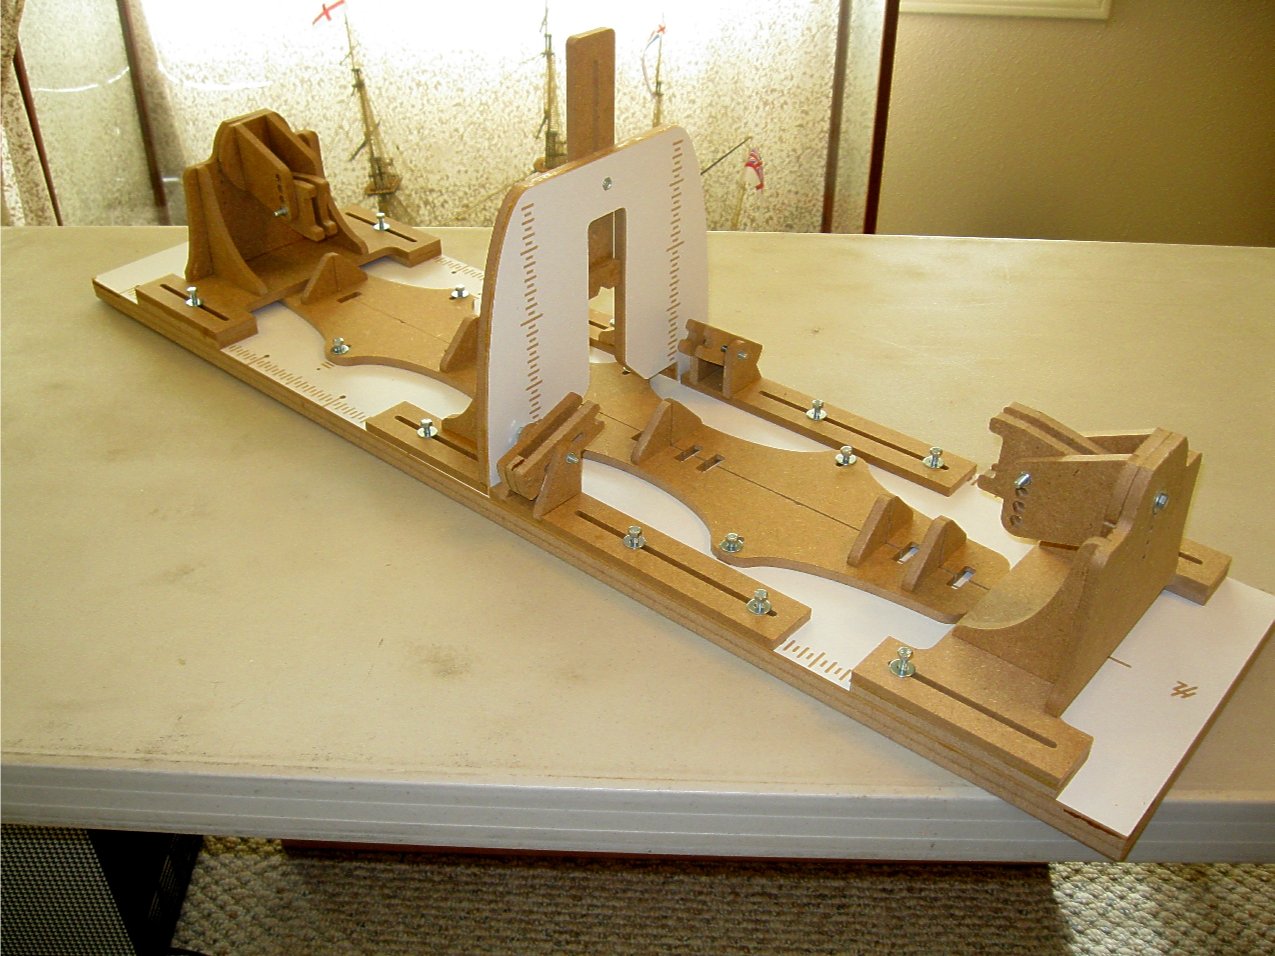
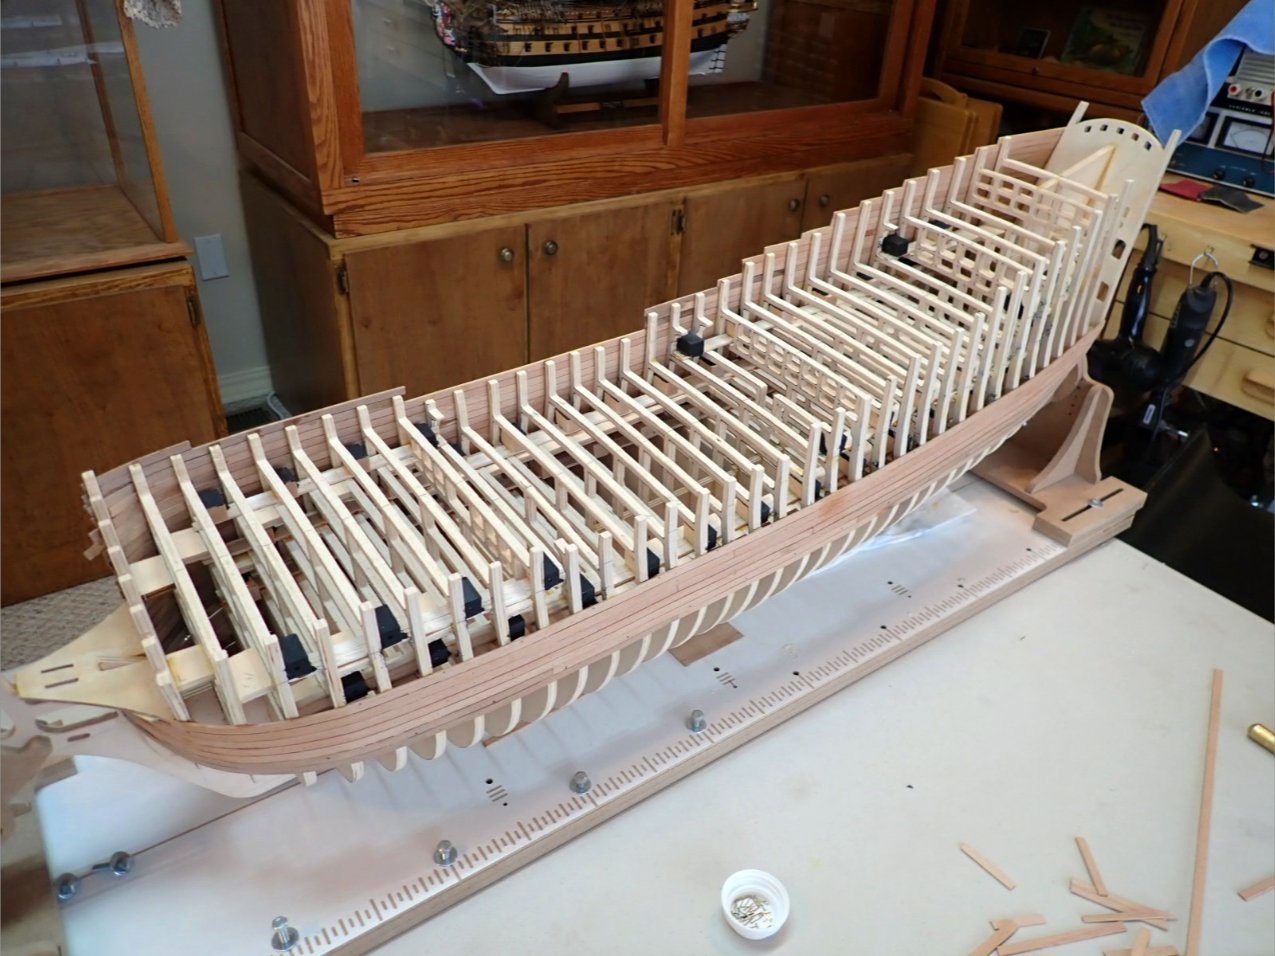
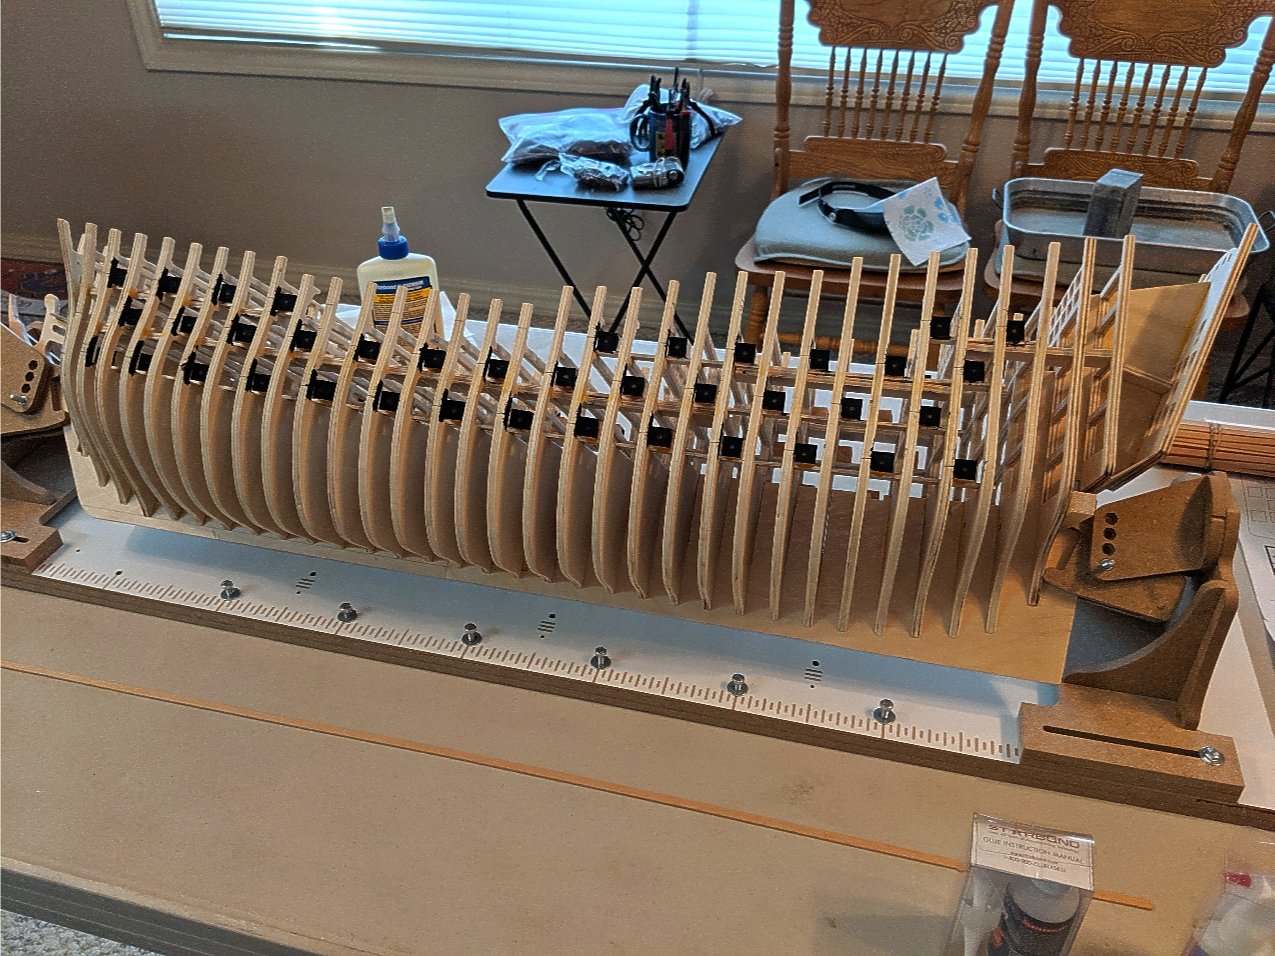
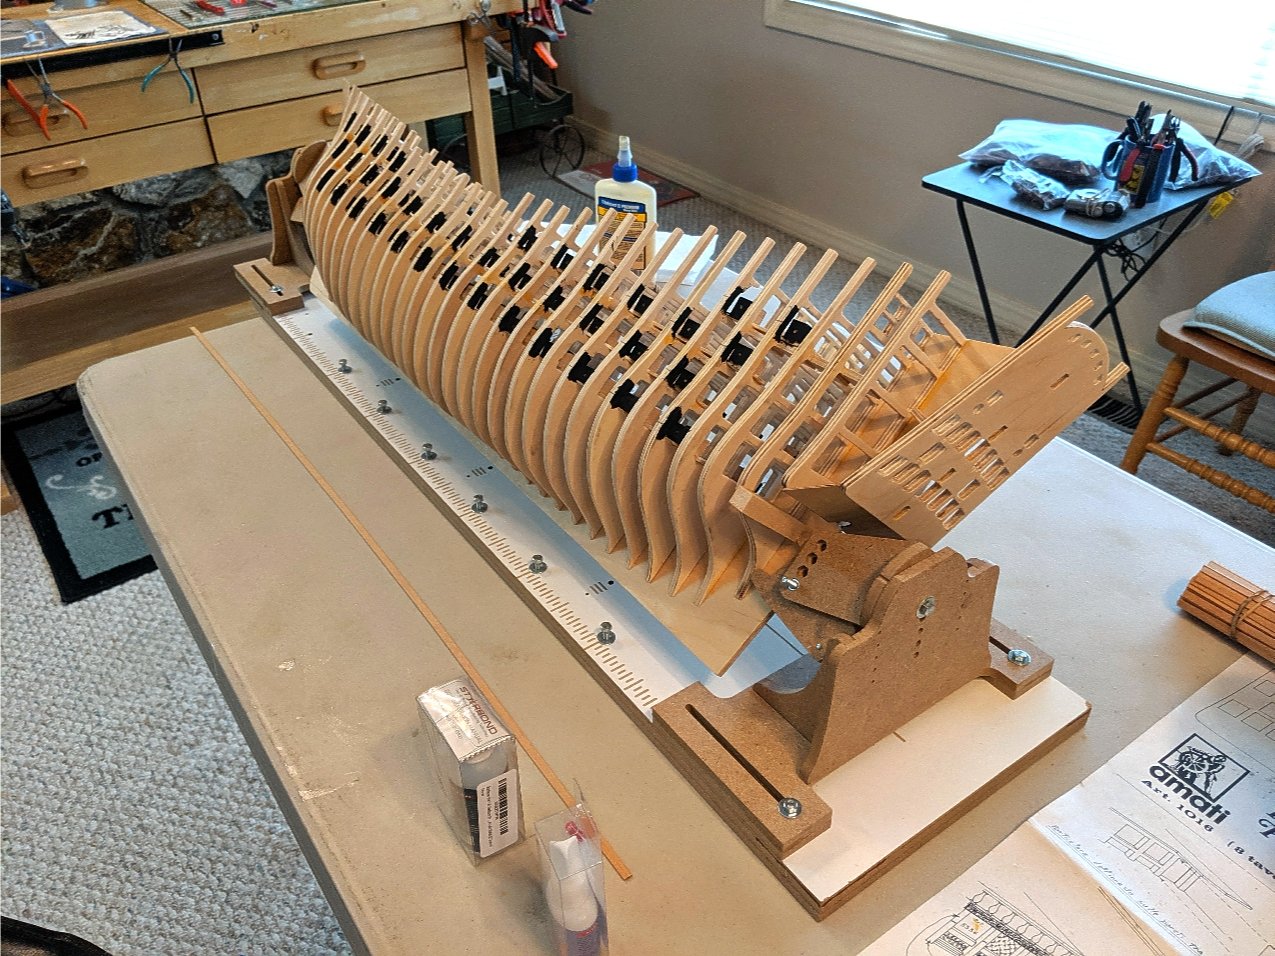
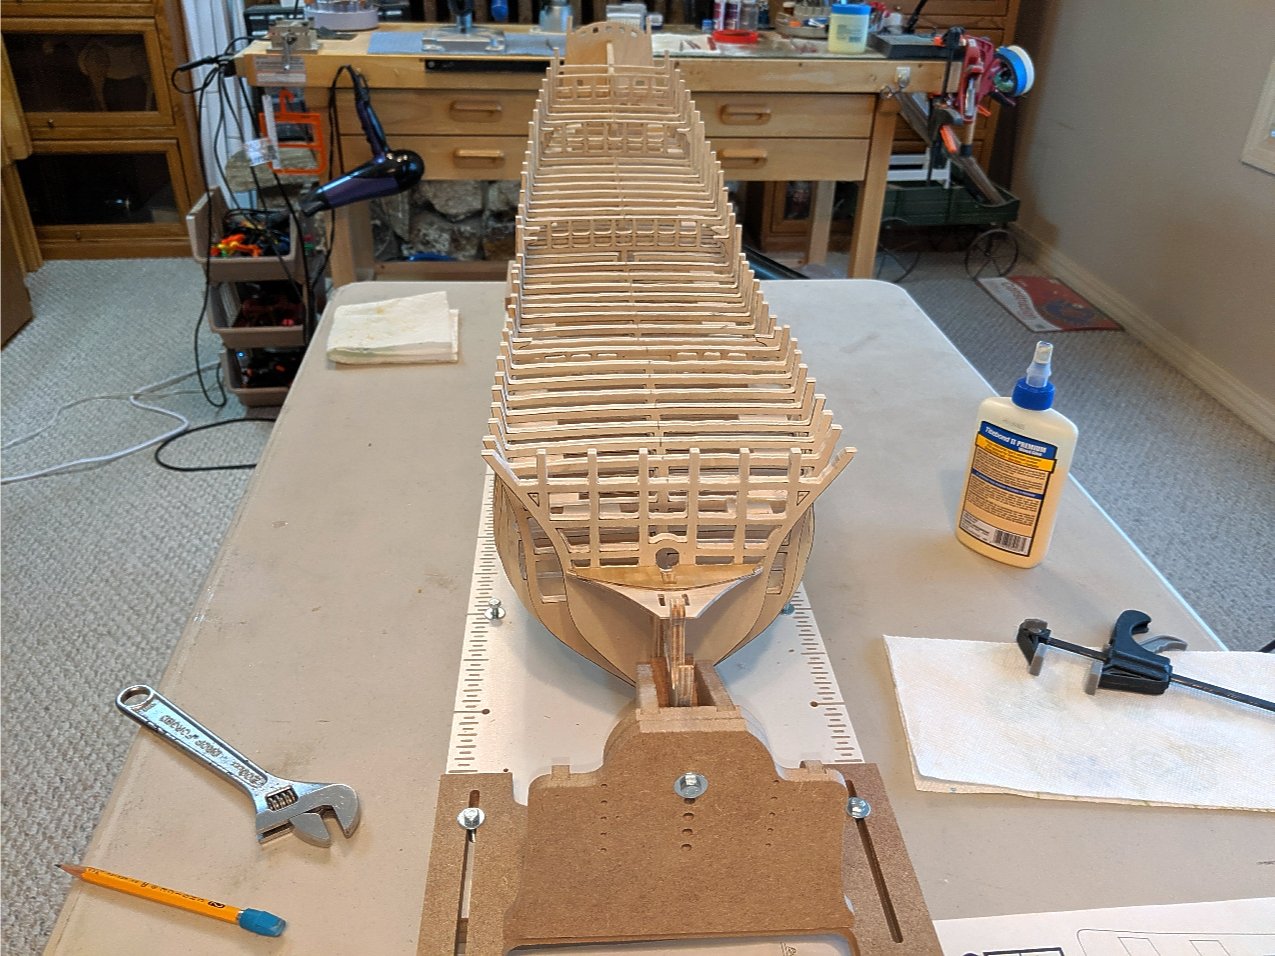
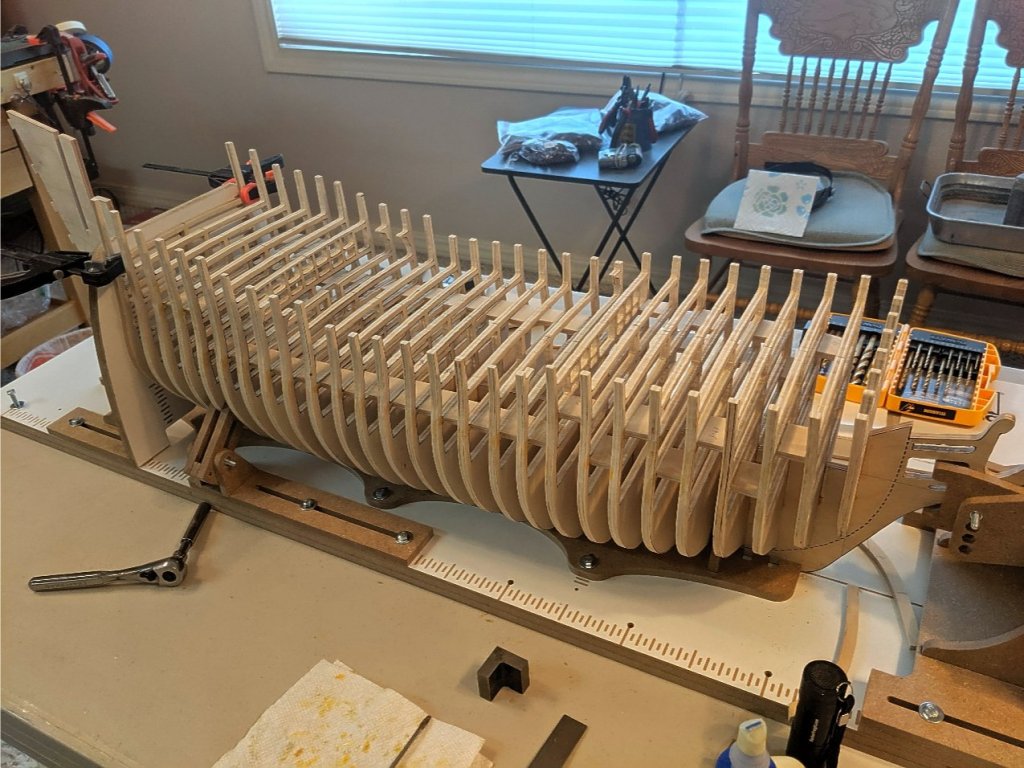
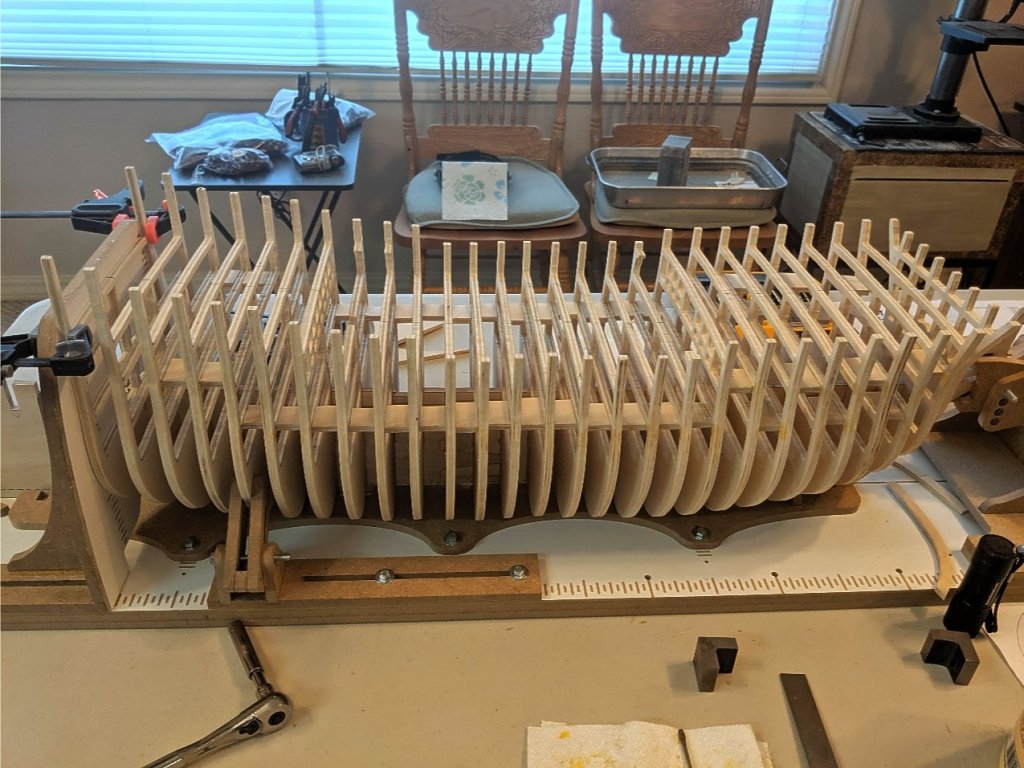
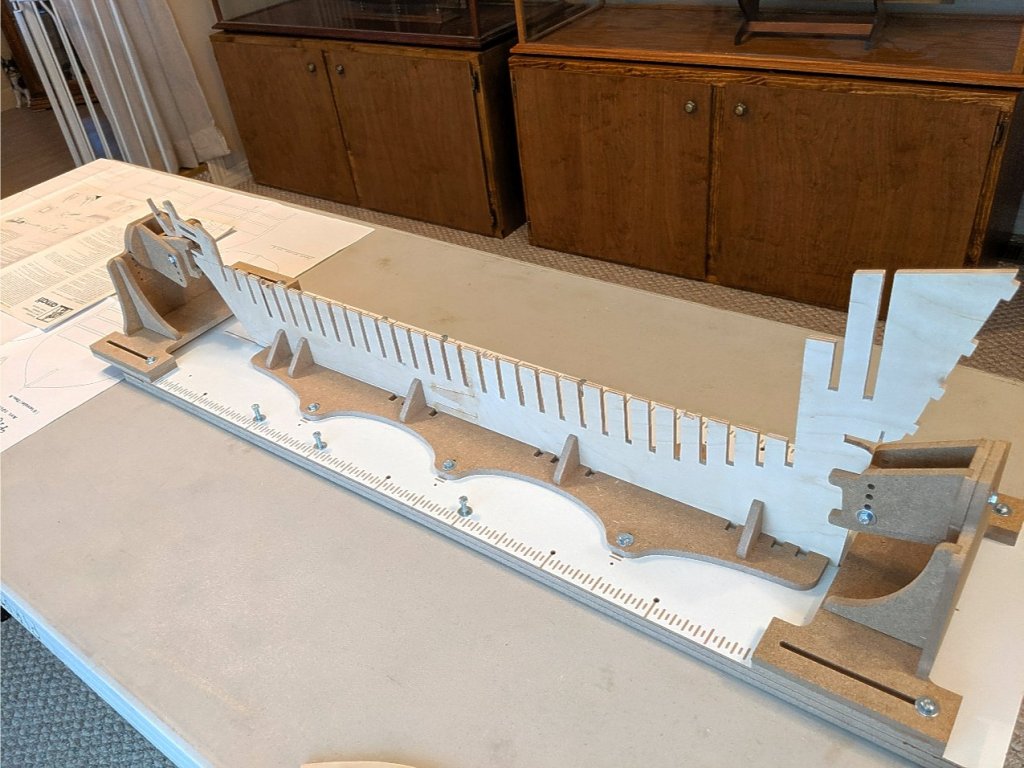
The framing is completed. The Birch plywood is pretty tough stuff. In making all of those cutouts I dulled 6 router blades and wore out a couple of collets. This building slip I am using is fantastic. The last photo shows that the whole hull can be rotated to facilitate planking and all of the hull construction without removing it from the slip. It appears that the entire model can be constructed while in the slip. I am contemplating on what is next. I think that the lower deck gun blocks must be created and inserted after marking the location of the gun ports. Since this model does not have actual lower decks, it would be impossible to place these blocks once the hull was planked. I am only guessing here, but I think this is the way to go. Vince P.


-
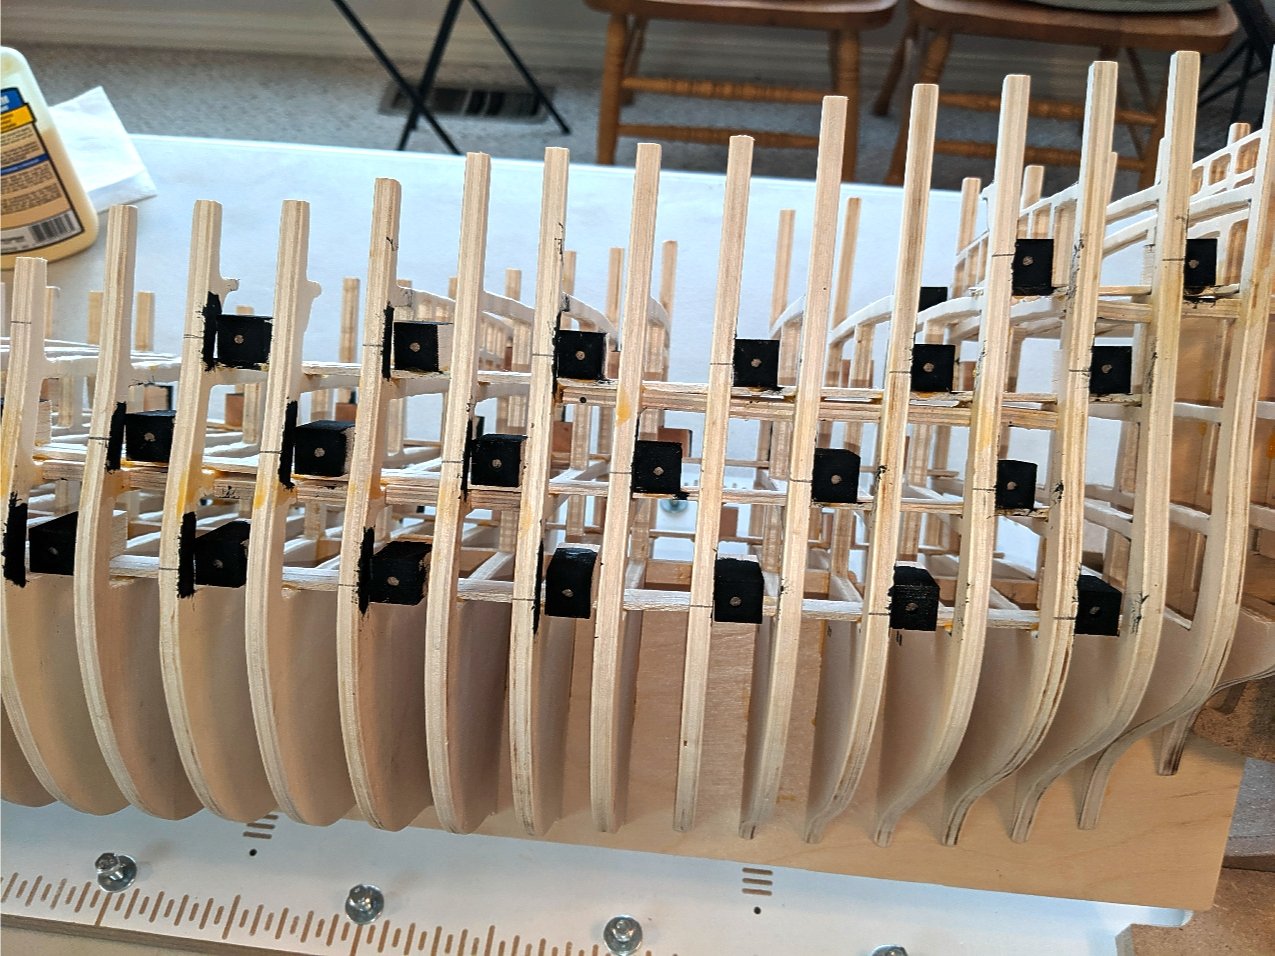
I am still working on the bulkheads. I have about 6 more to go. I found out the reason this kit has so many bulkheads which is about double of most kits. Since this kit will not have the lower decks installed even as false decks. The lower deck gun ports are located to butt up against each pair of bulkheads. This make locating them much easier and you don't have the problem of gunports locating right in the middle of a bulkhead. This problem was frequent in building the Royal William and resulted in closing those ports in order to not have to cut away some bulkheads. I am also placing some stabilizing boards between each pair of bulkheads both port and starboard to make the frame more rigid. It is so long and heavy that it flexes way too much. Once the upper decks are placed and the planking is done, that will also help. Vince P.
-
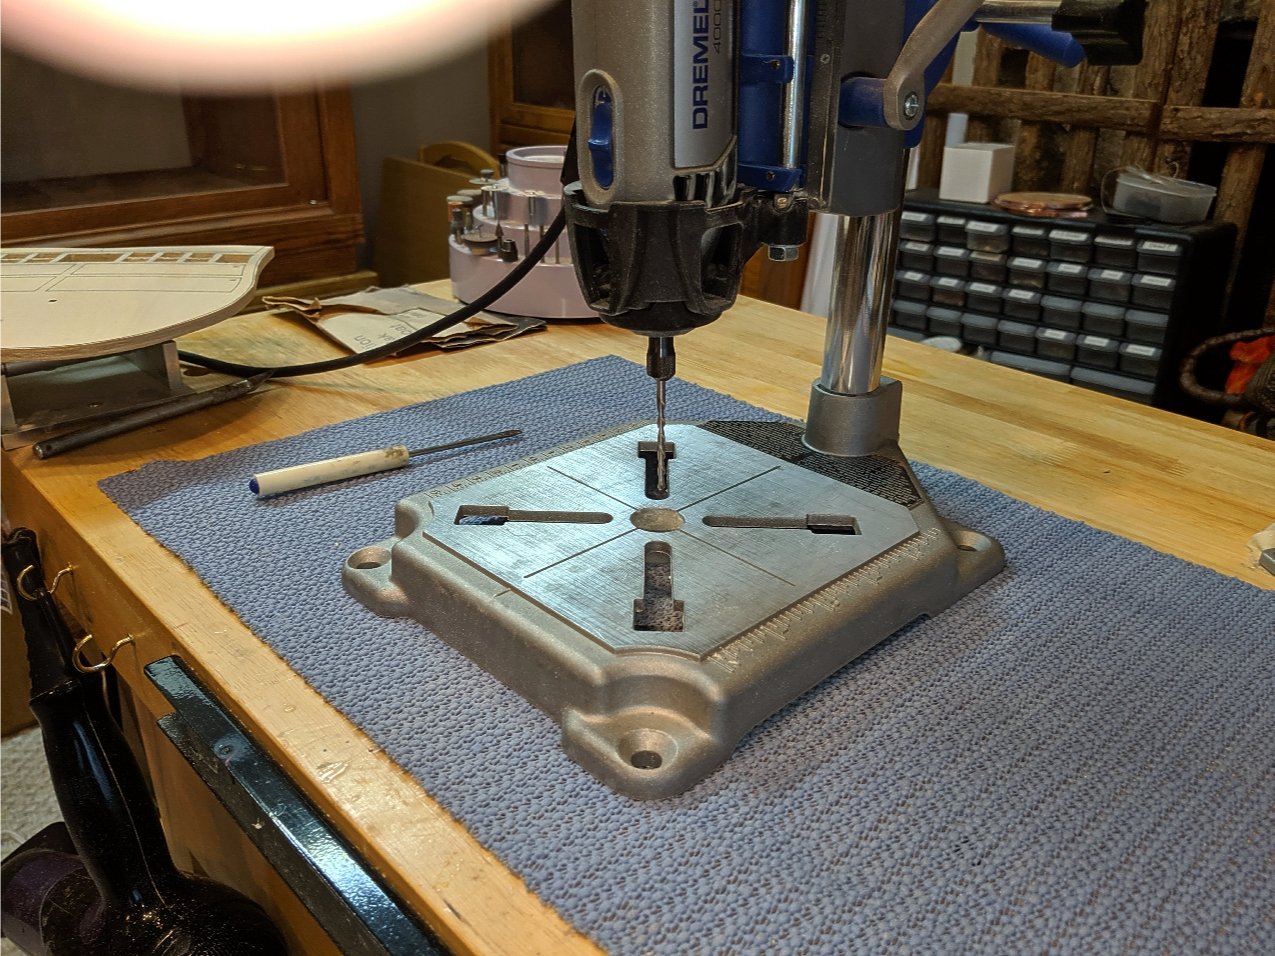
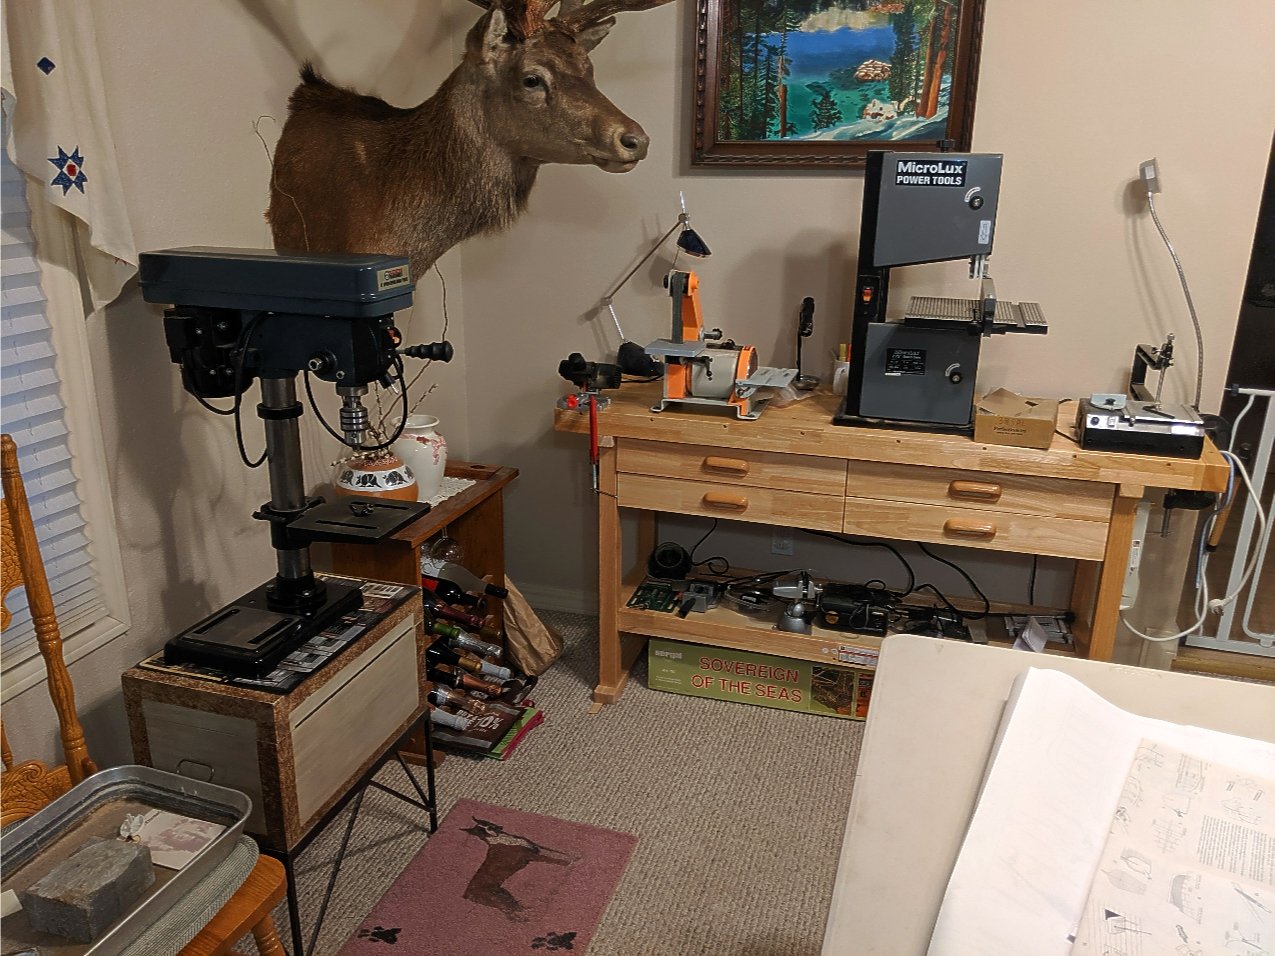
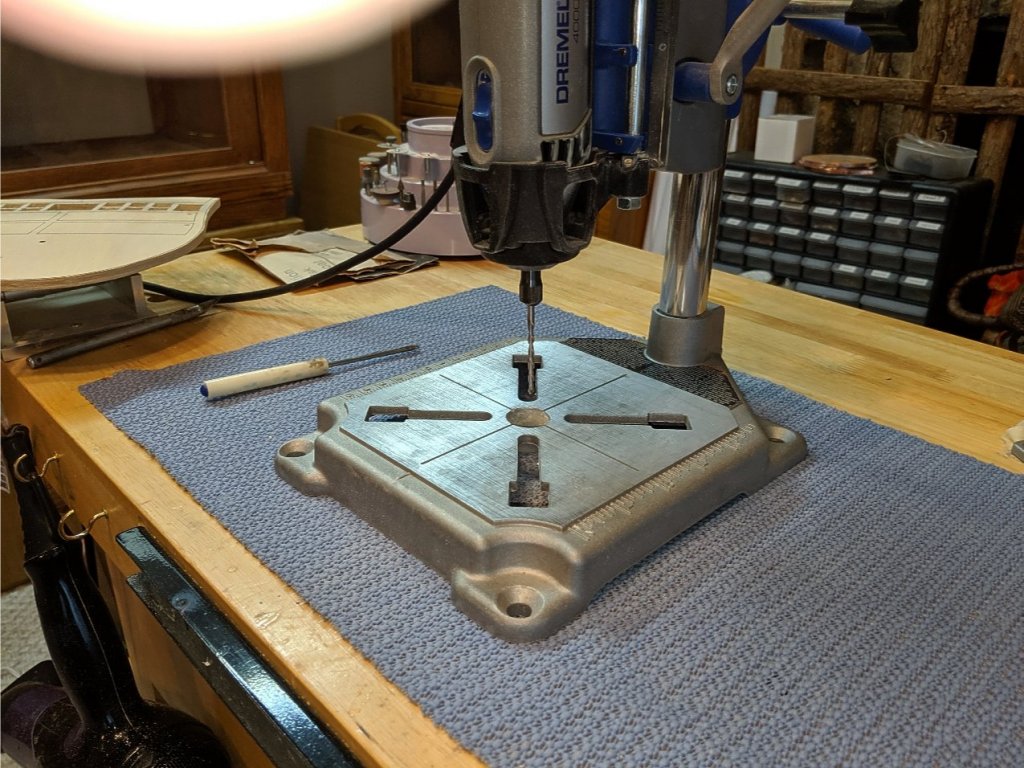
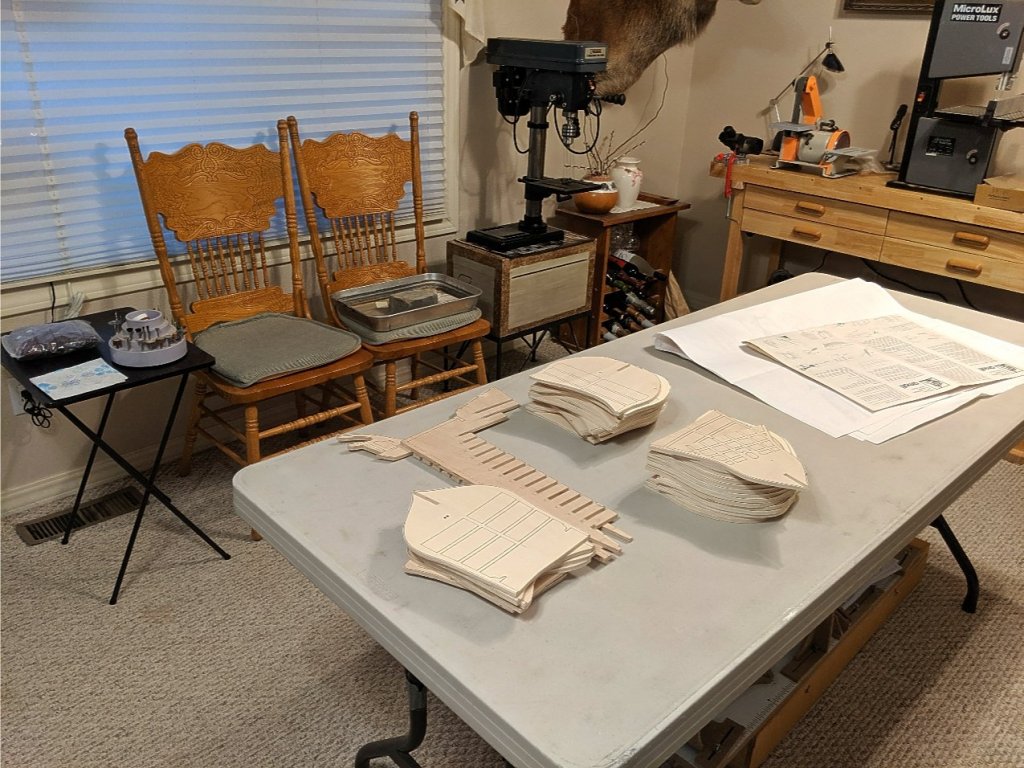
Working on the framing. I decided to make all of the little cutouts in each of the bulkheads even though they are not really needed for the build. It will reduce the weight of the finished model. With all of the metal decorations, this model will be quite heavy. Making all of these cutouts will take considerable time. I made a little milling machine for making the cutouts. I mounted my Dremel Tool in the stand and am using a milling bit. It makes the cuts clean and accurate. My Dremel Tool died after the first 8 bulkheads though. I have had it for about 8 years and used it heavily while working on my models. I just bought the same model as I like the feel of it and it does a good job. Vince P.

-
Pretty impressive for a first build. I will follow your log, as I am also building the Prince. Mine is the original kit from Amati from 1978. I have started a build log here as well. Vince P.
-
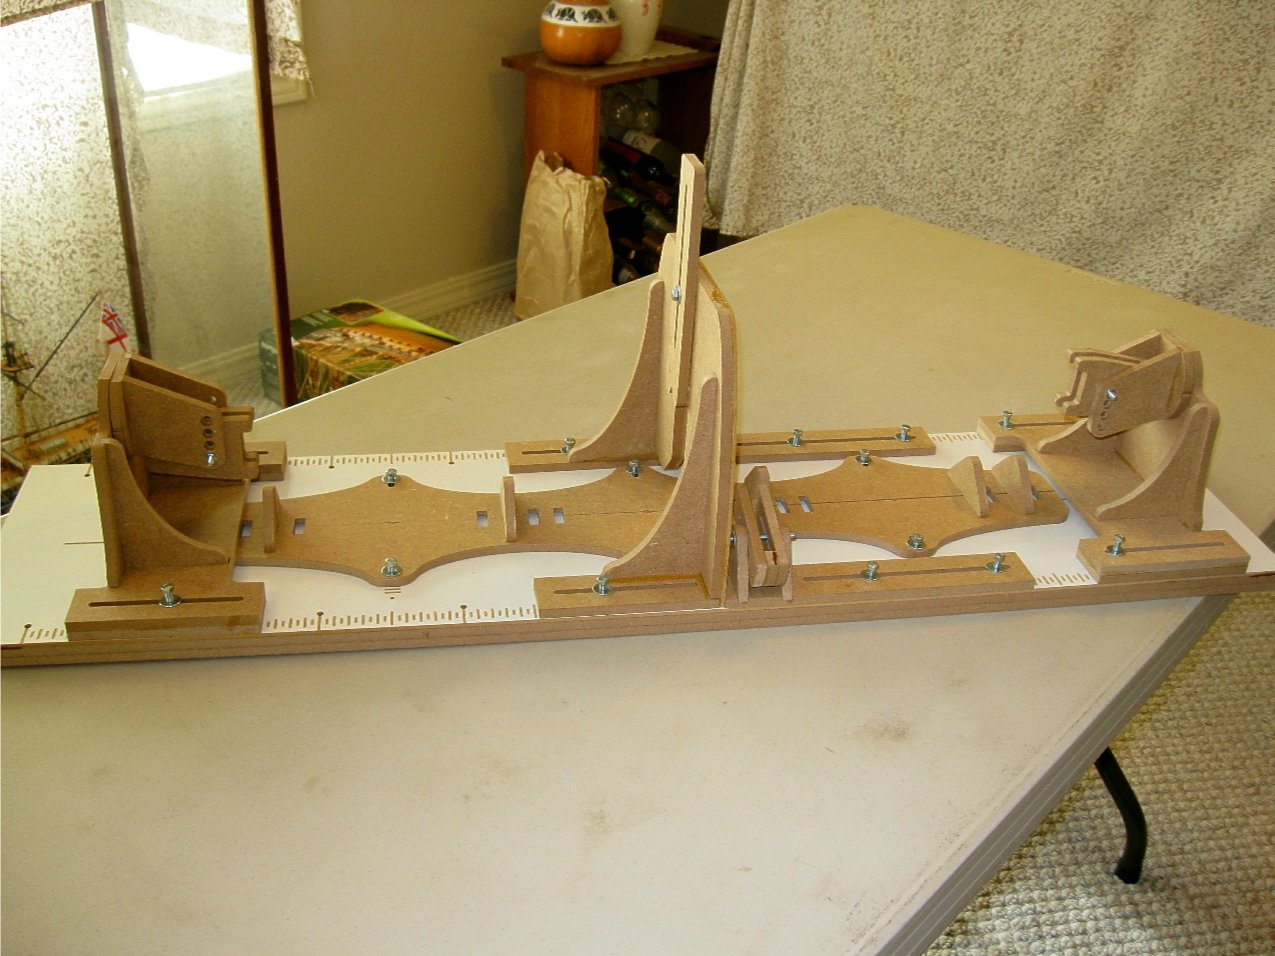
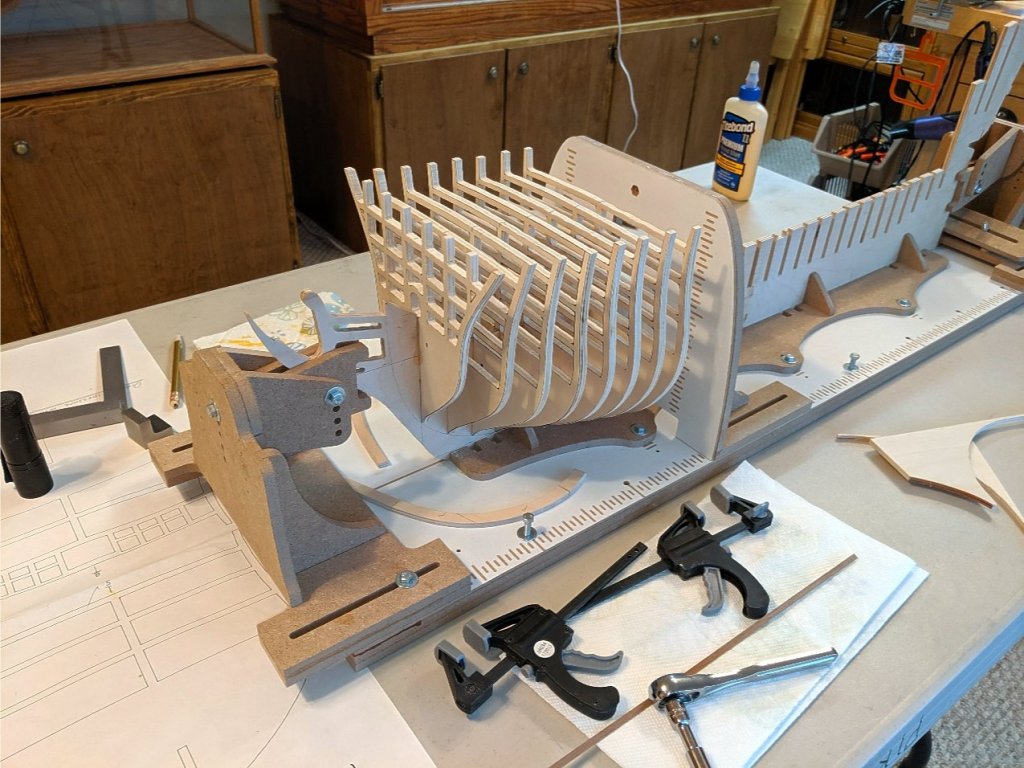
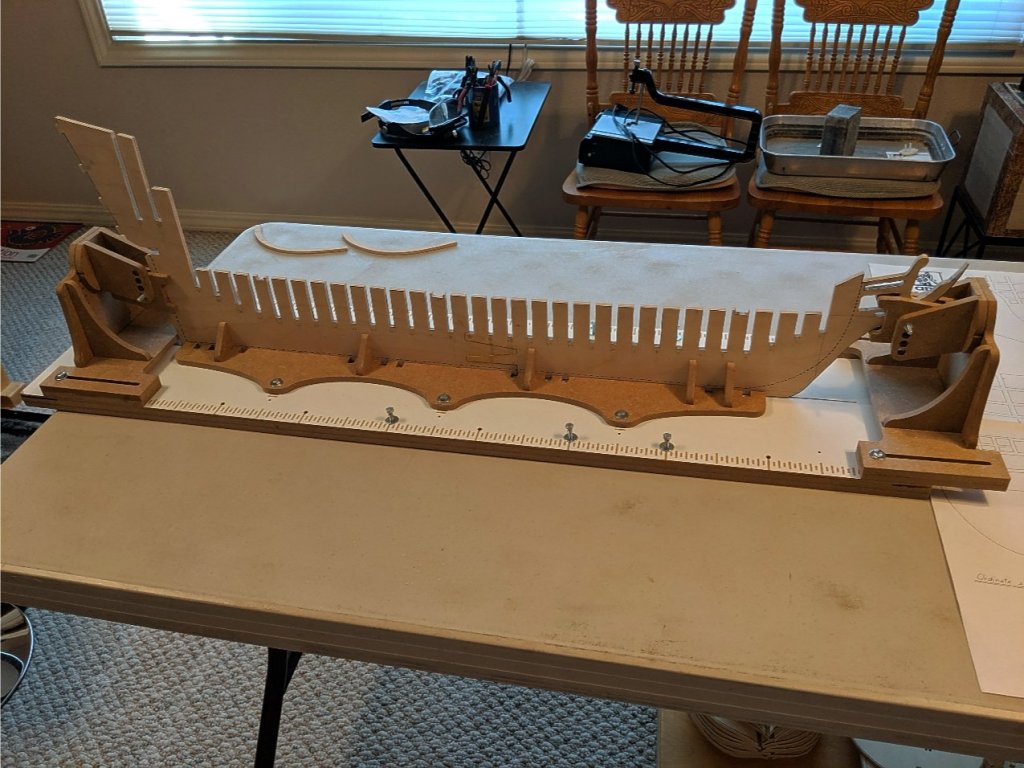
Started construction. False keel is placed on the slip and first of 34 bulkheads in place. On the first bulkhead I cut out all of the marked spaces because some of the decorative panels might need to be placed there. Since there are no actual decks below the main deck, it is really not necessary to cut out all of the spaces. I may decide not to do that which will save a large amount of cutting and routing. Vince P.
-
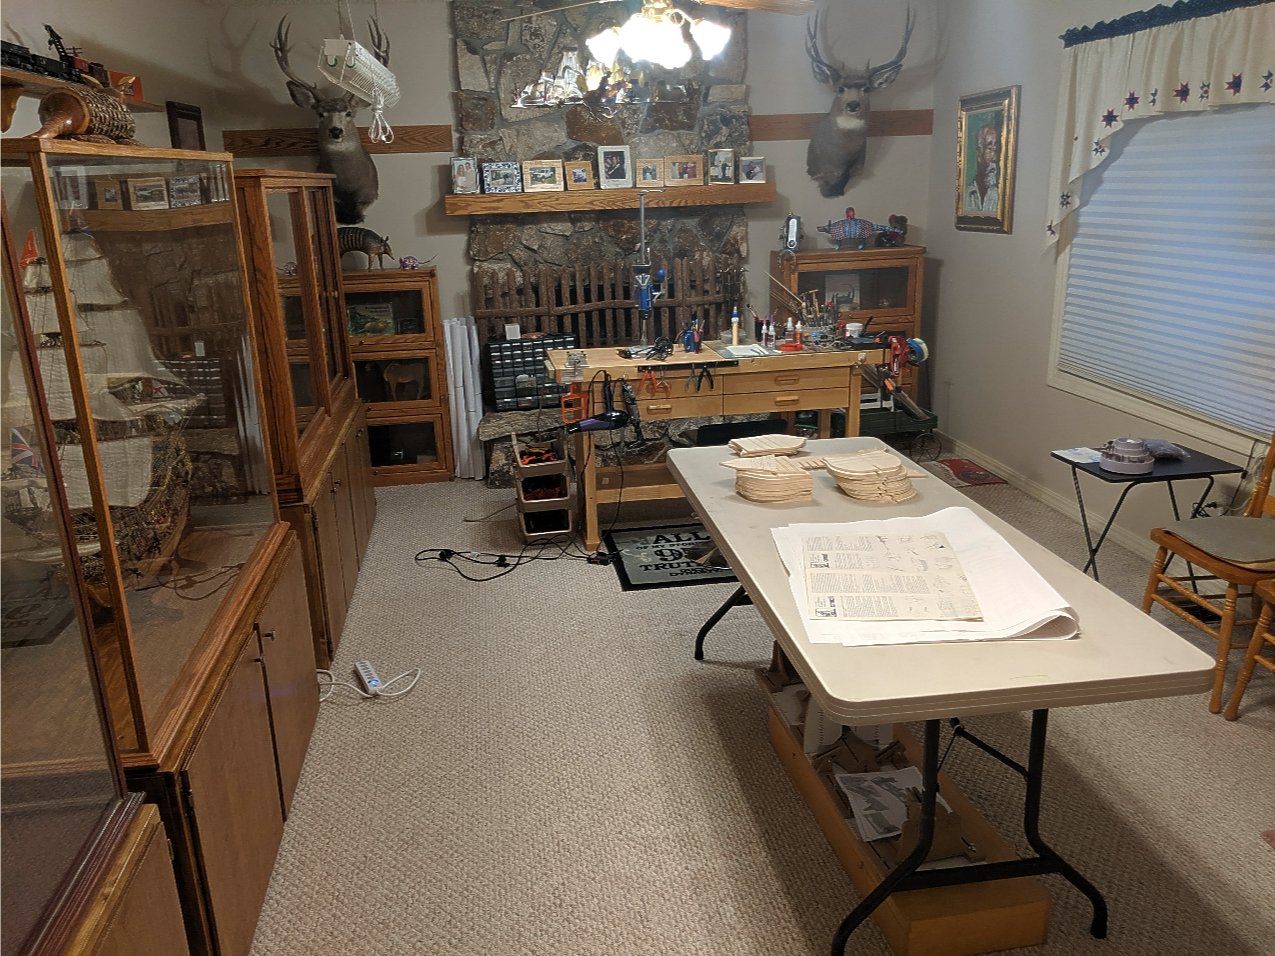
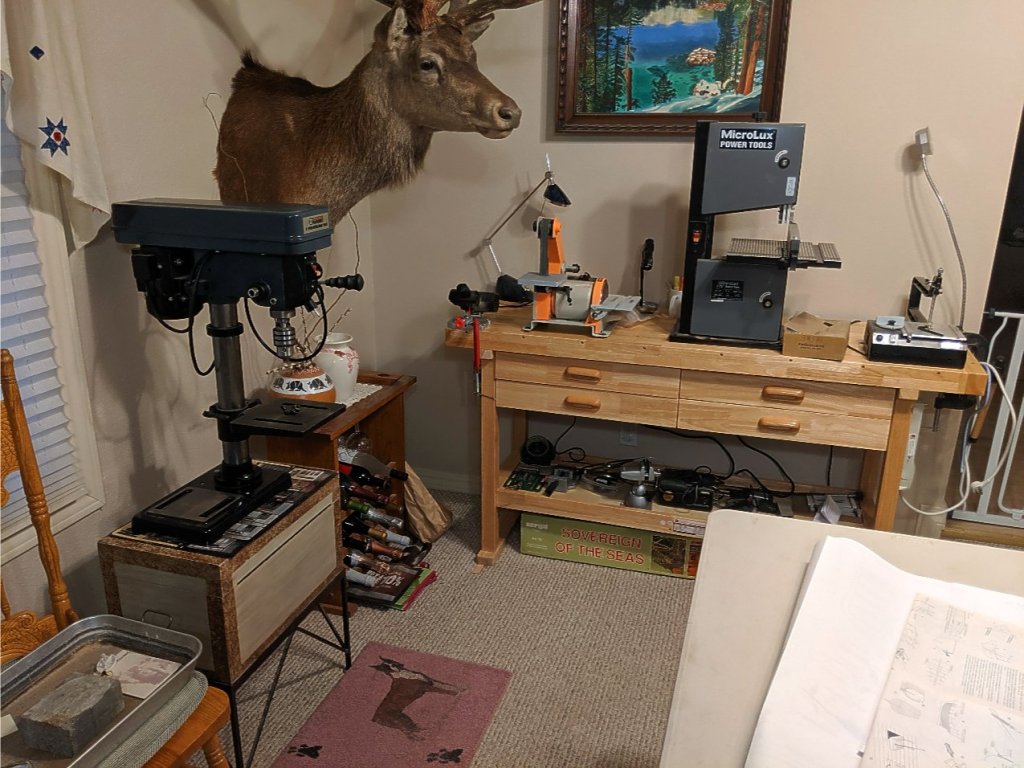
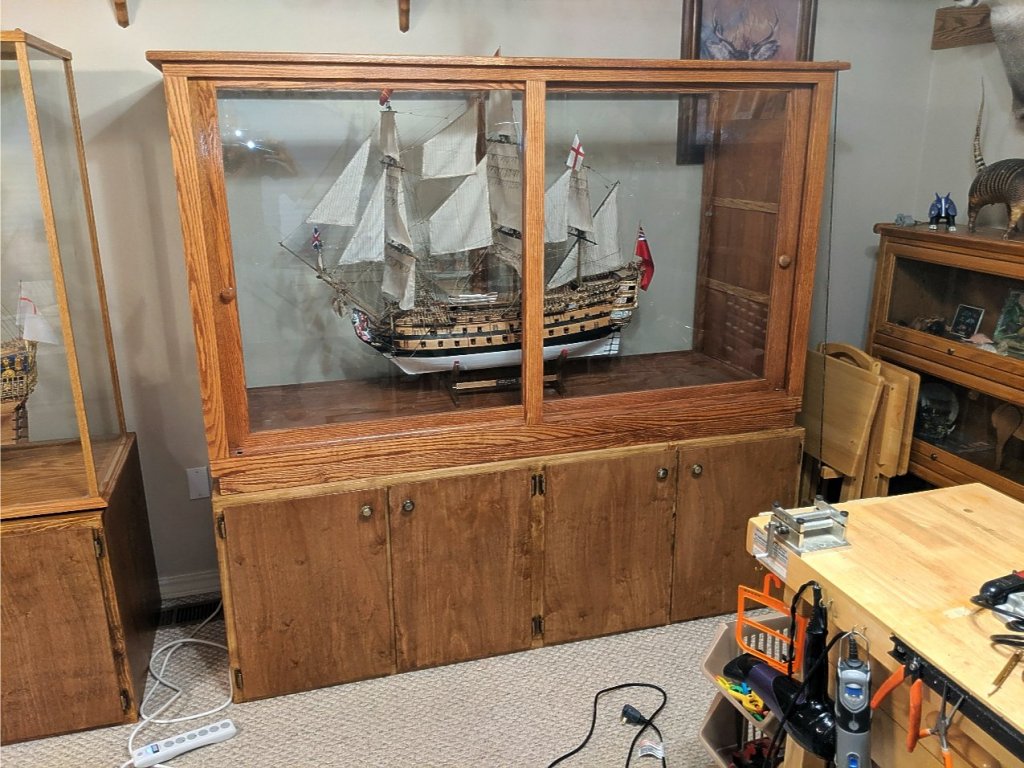
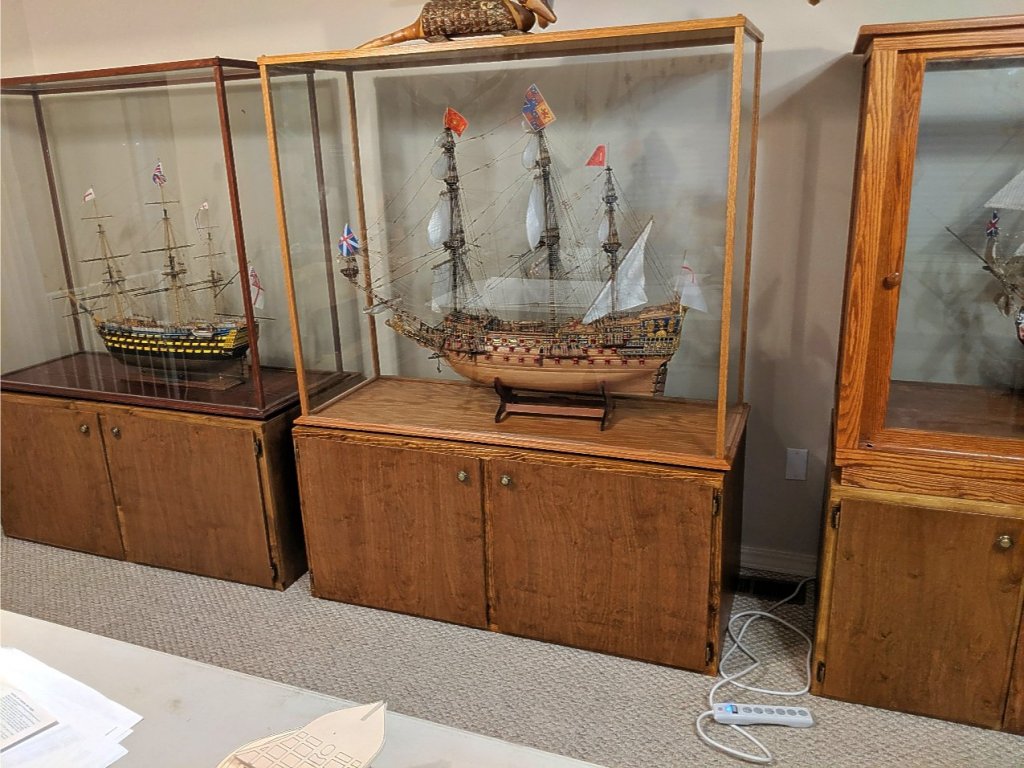
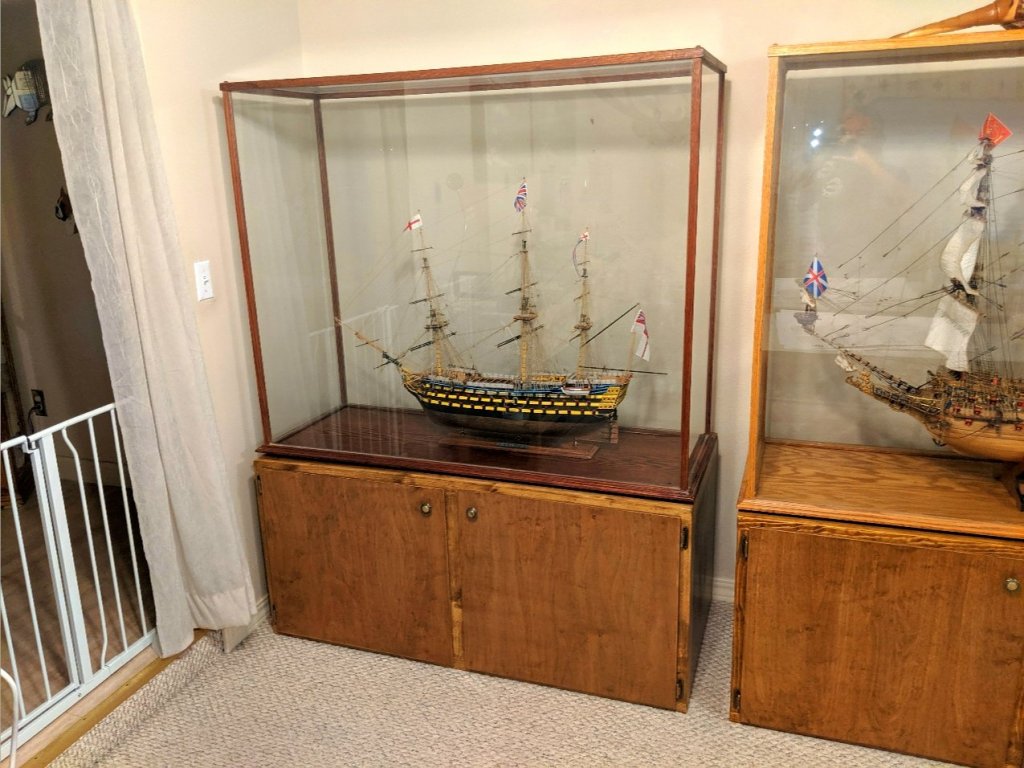
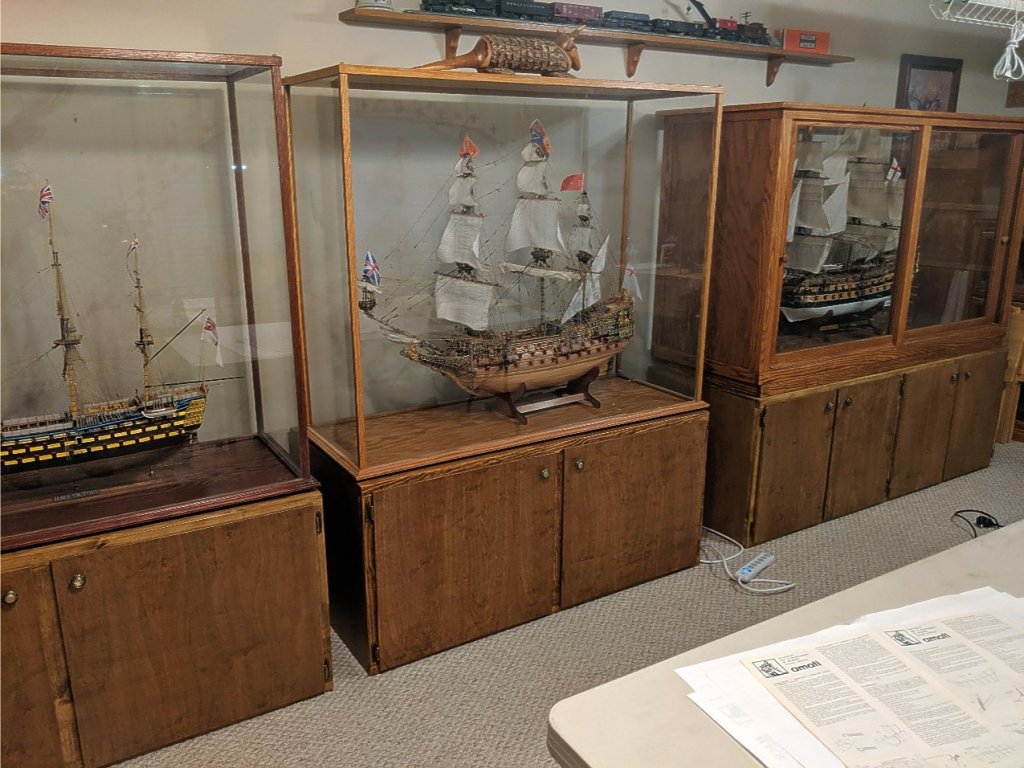
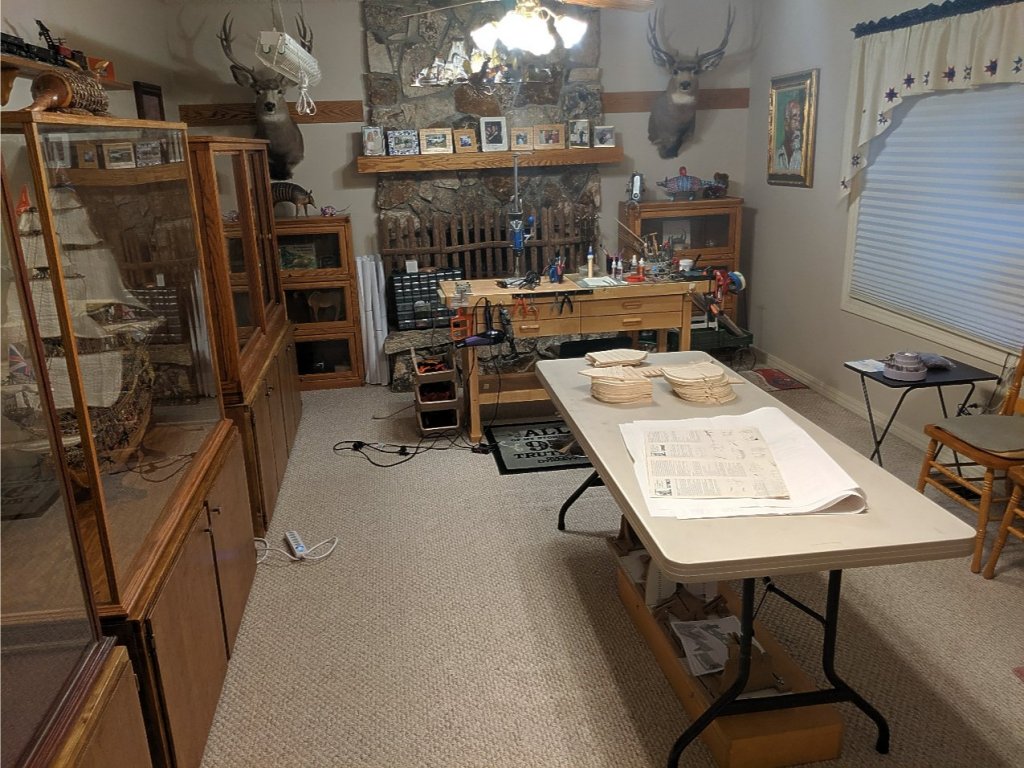
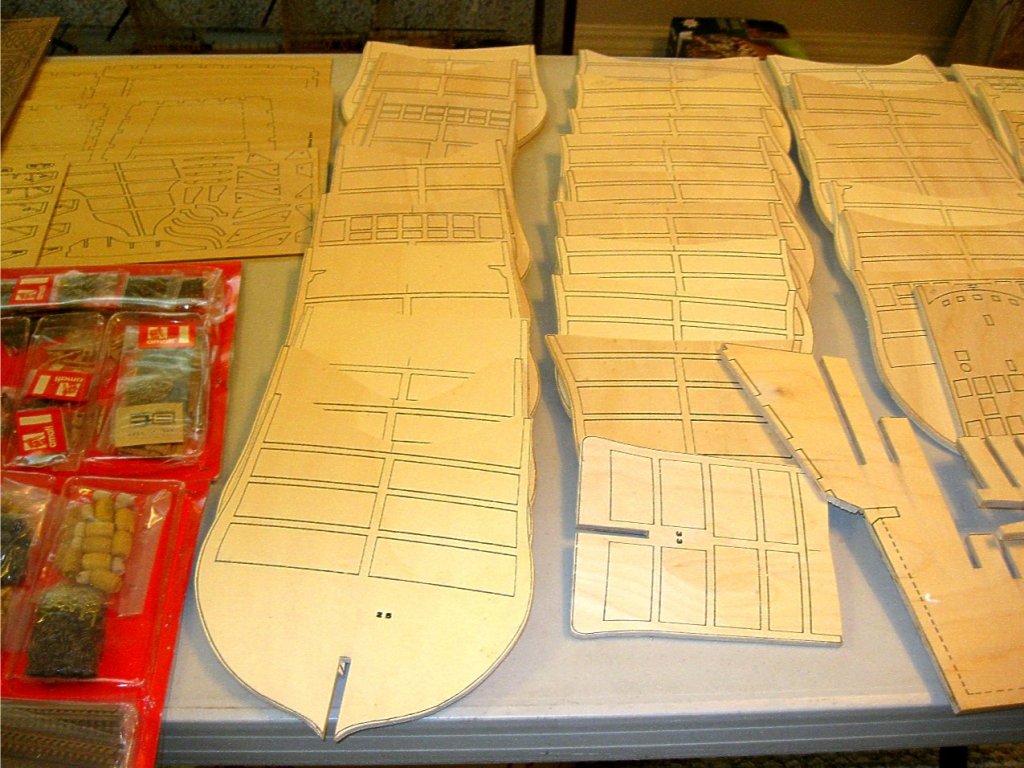
So, I completely re-arranged my workshop to prepare for building the Prince. I had my friend who is a carpenter, build cabinets to place my ship cases on and get them off the floor. Everything came out perfect and looks great. Now on to building the Prince. First up will be to cut out the false keel and all of the 34 bulkheads. Vince P.

-
I looks like birch plywood. Can't say for sure but it is strong stuff.
-
Hi Mark, They don't list a length but the false keel alone is 37 inches, so I would imagine with the bowsprit added and such it will go over 40 inches. Vince
-
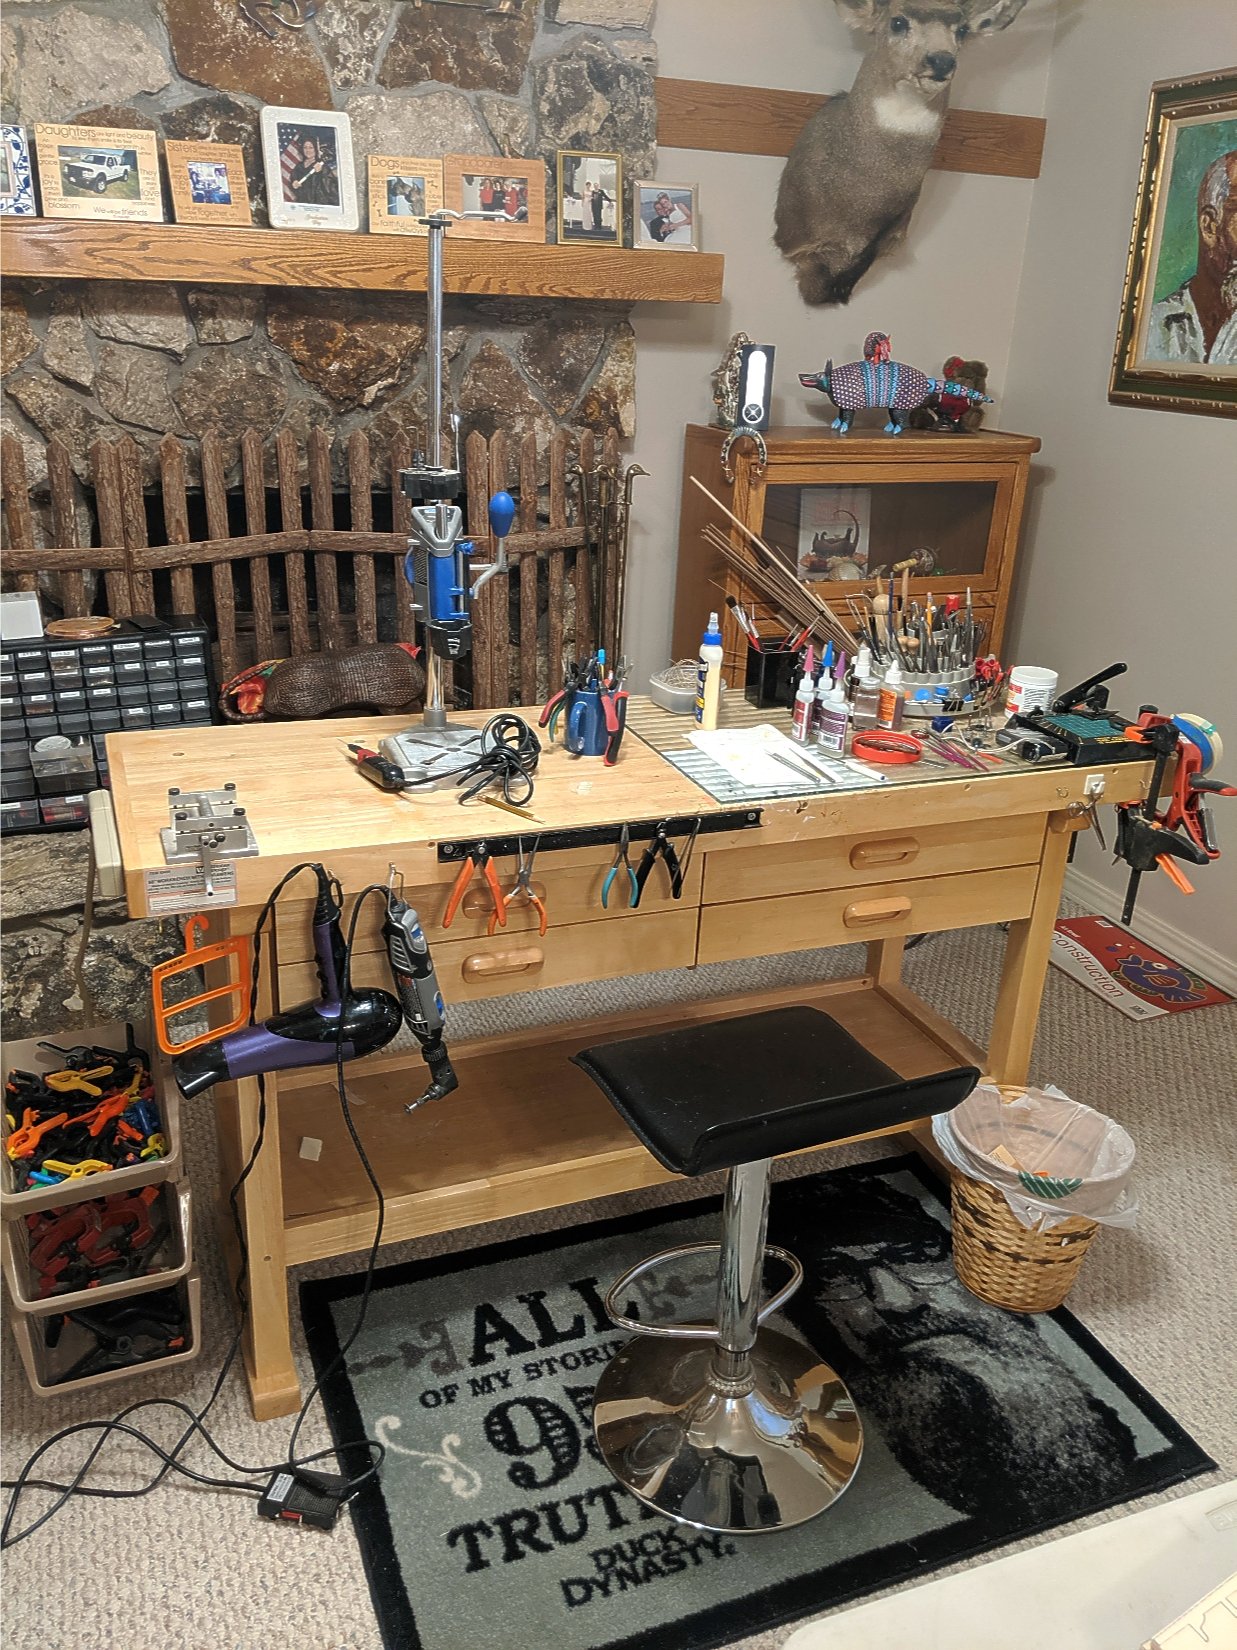
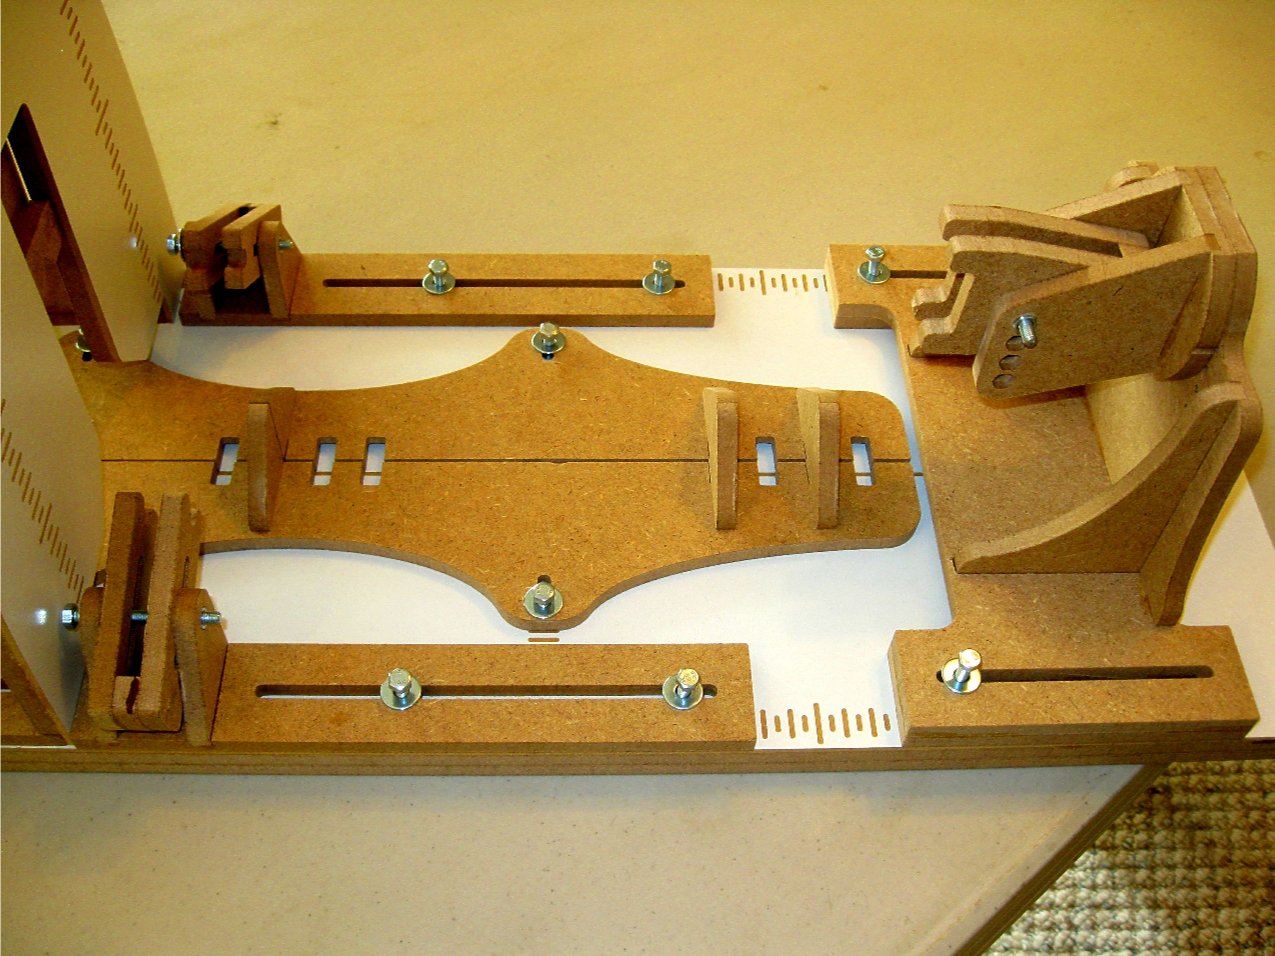
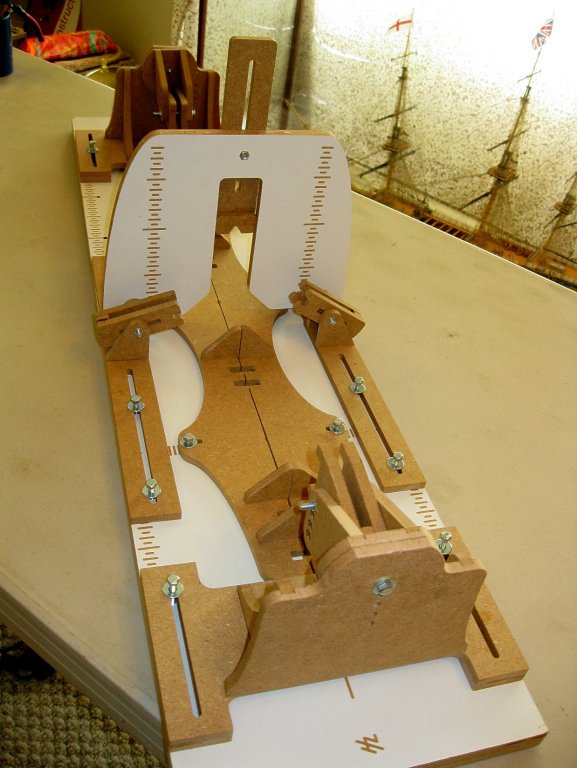
Since there are so many bulkheads that have to be squared and each cut out by hand, I will need all the help I can get. I saw this Professional Building Slip advertised by a foreign company names Hobbyzone. I ordered one and built it. It is very sturdy and complex but is designed to facilitate constructing the framework of the hull and squaring it properly. The hull can be left in the slip once the framework is complete and the hull can be rotated in place for planking. I am going to give it a try. All of the parts were laser cut and the construction consisted of sub-assemblies that had to be glued together. The instructions consisted of just photos in sequence. The photos are pretty small and I had to use a magnifier because it is possible to glue some of the parts in incorrect positions. Carefully examining the photos made it easy to construct without mistakes. Vince P.


-
I noticed a slight warp at the bow upright on the false keel. Not enough to worry about. It can be corrected during construction of the hull. Everything else looks good. I am surprised. Vince
-
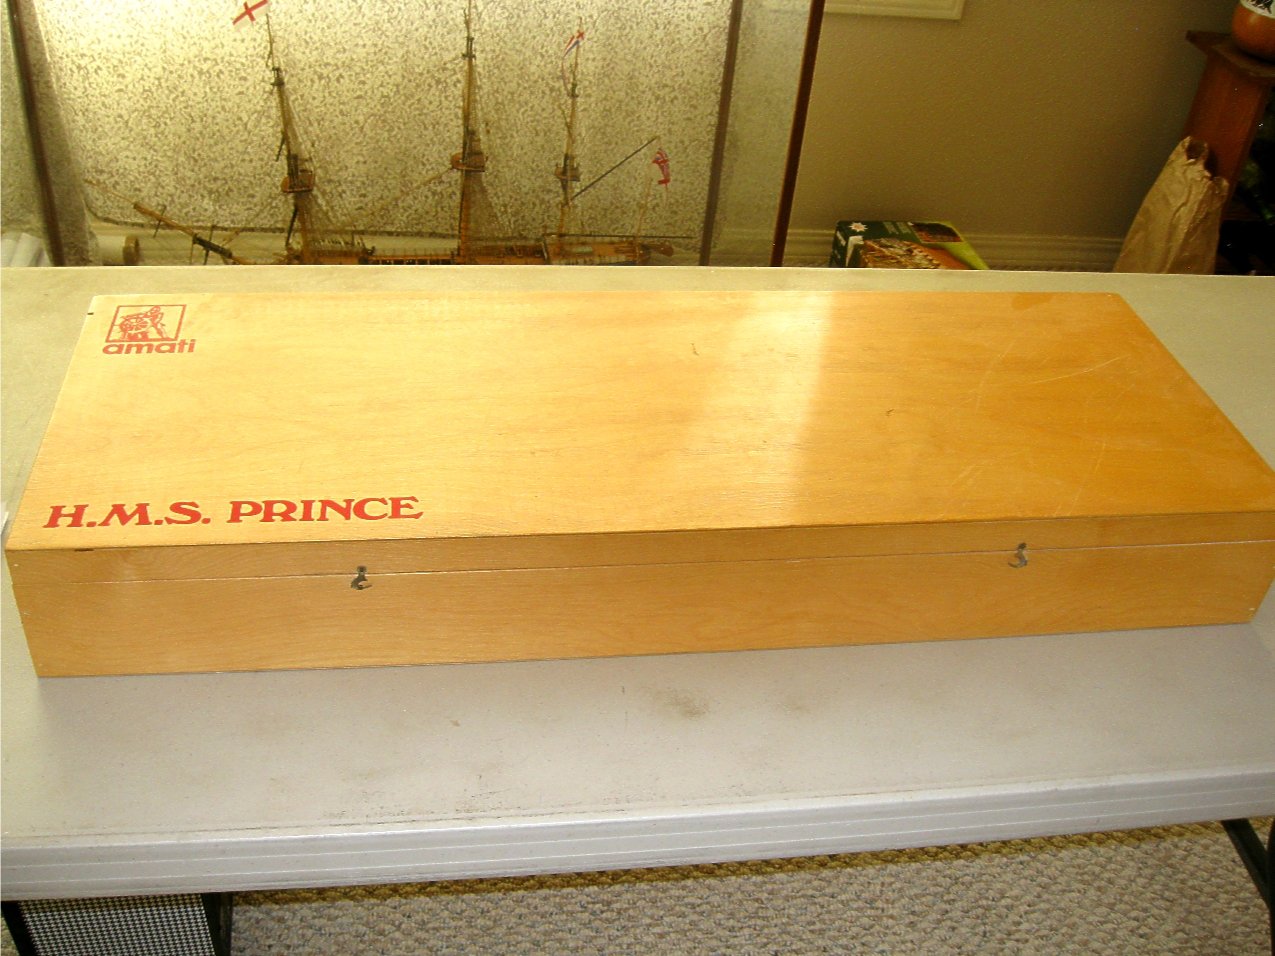
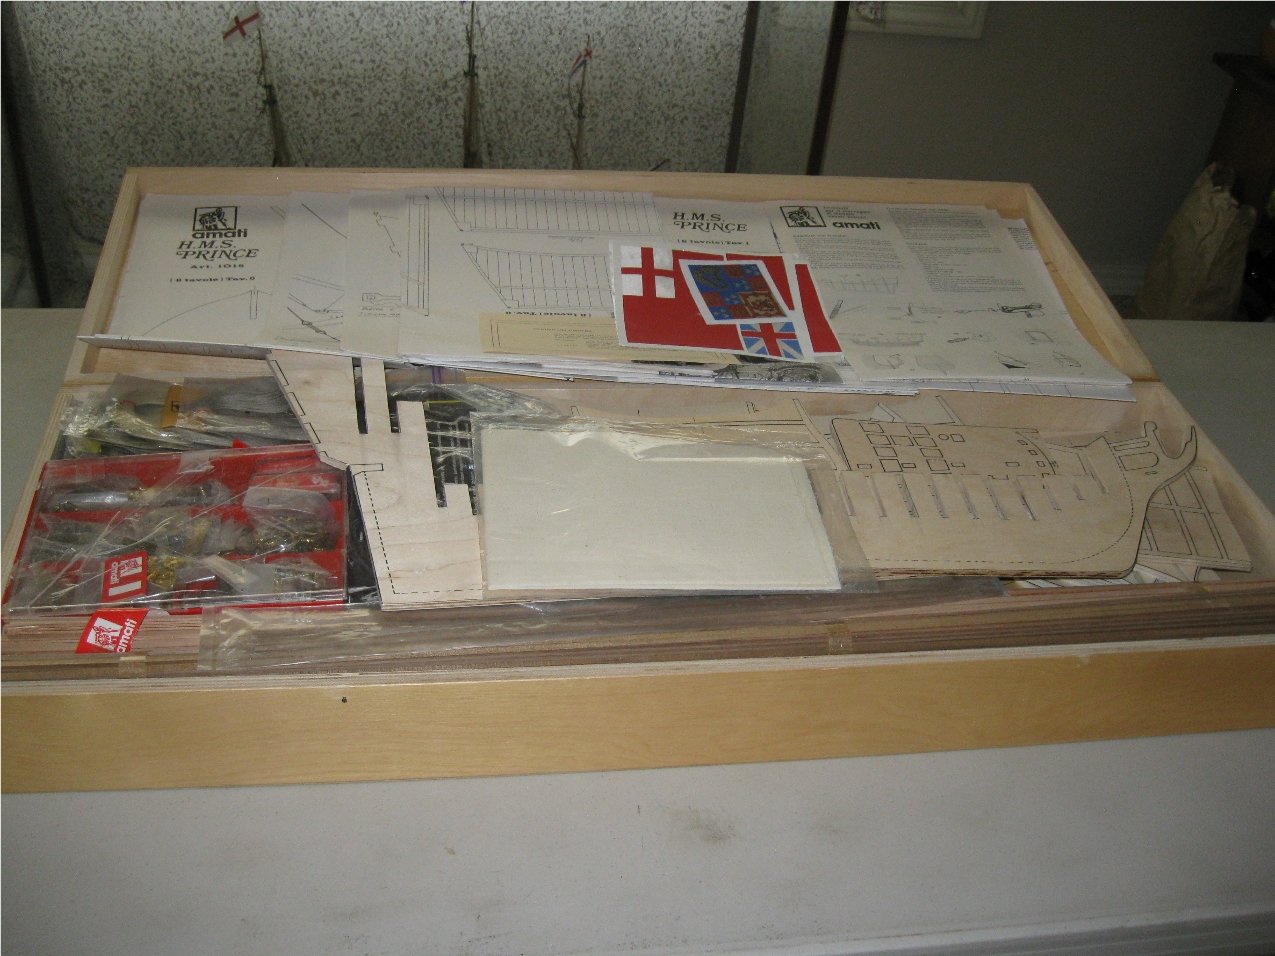
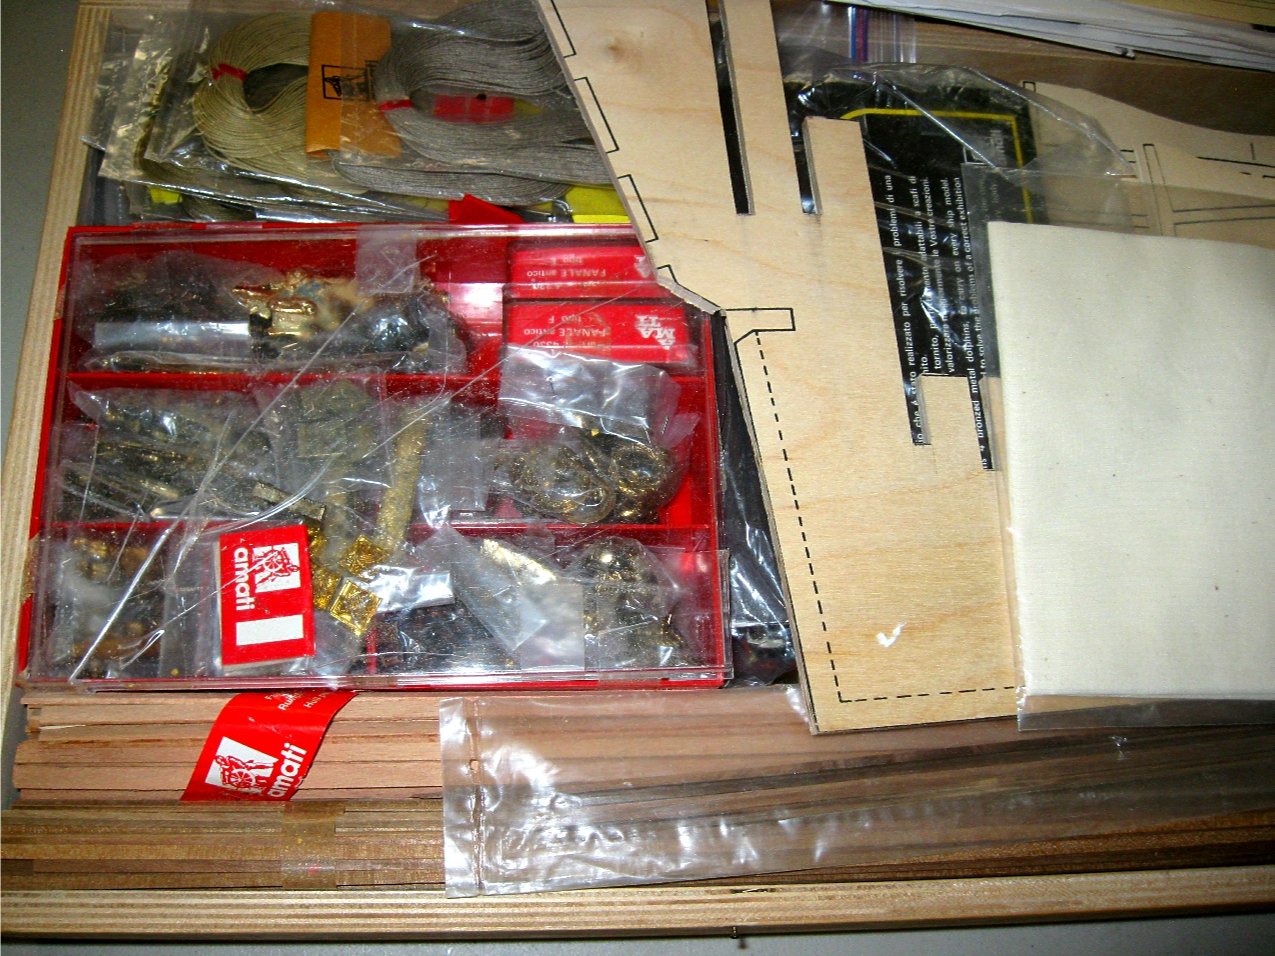
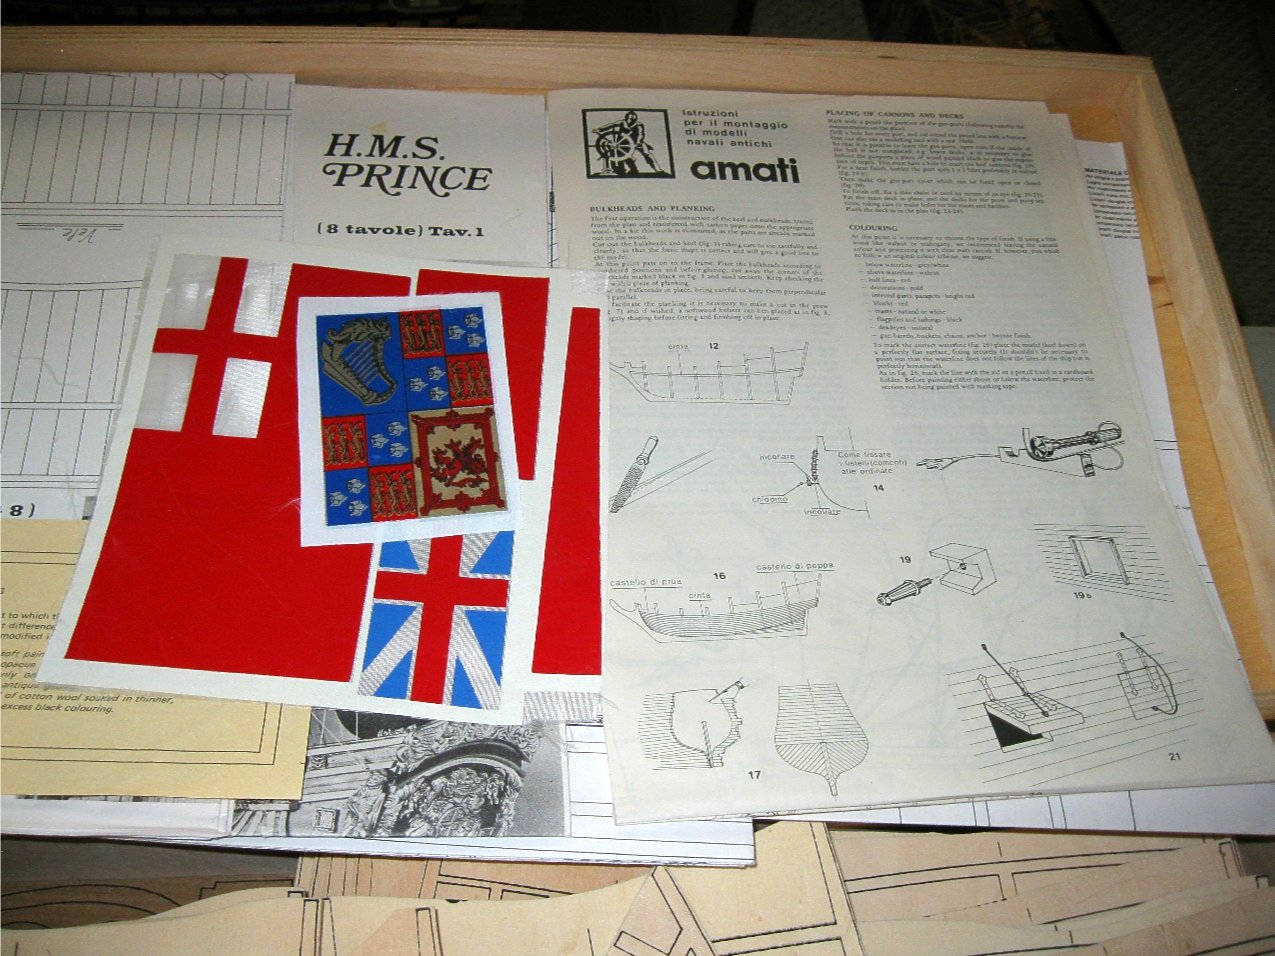
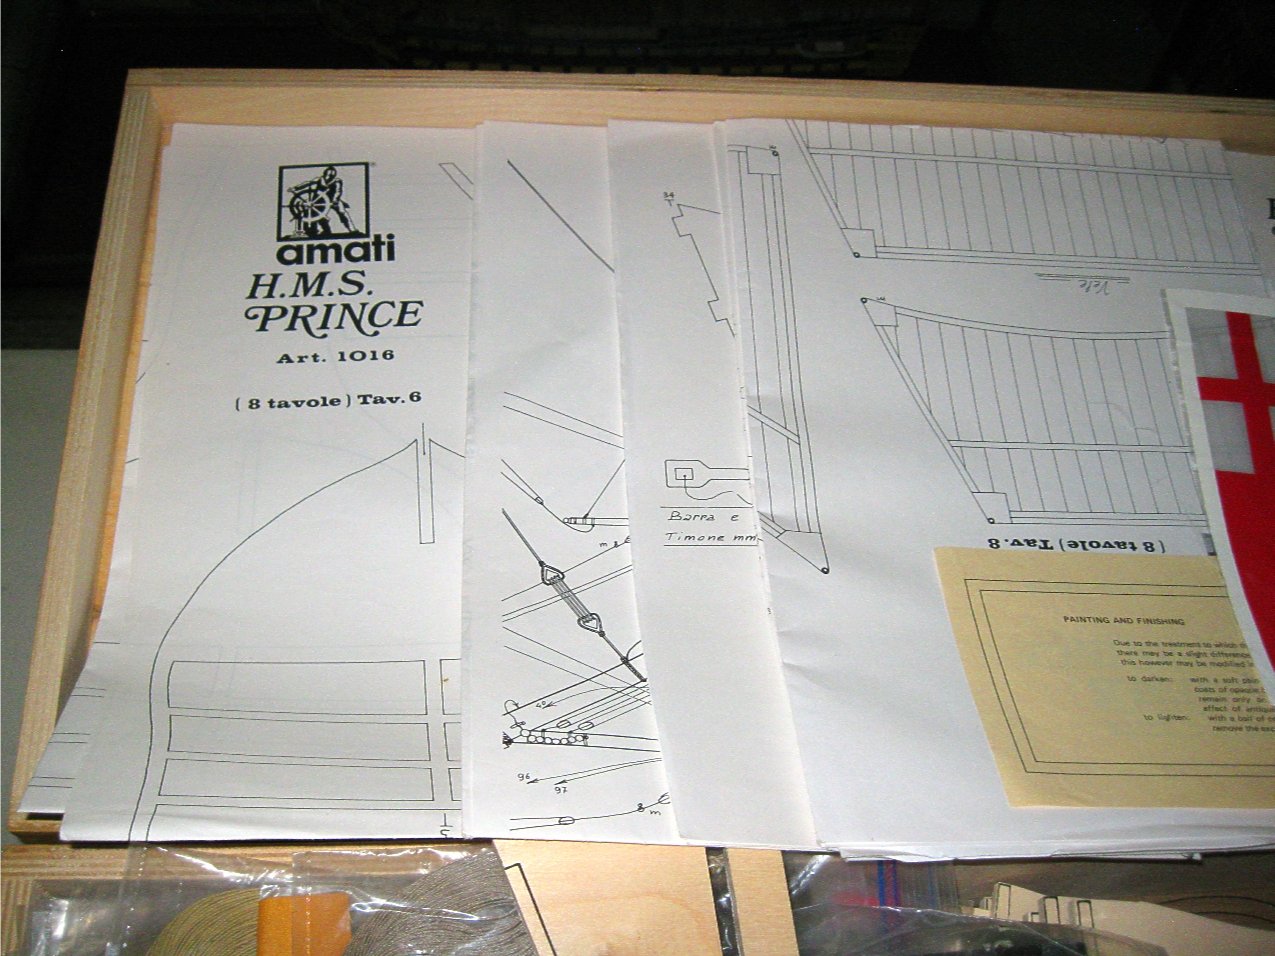
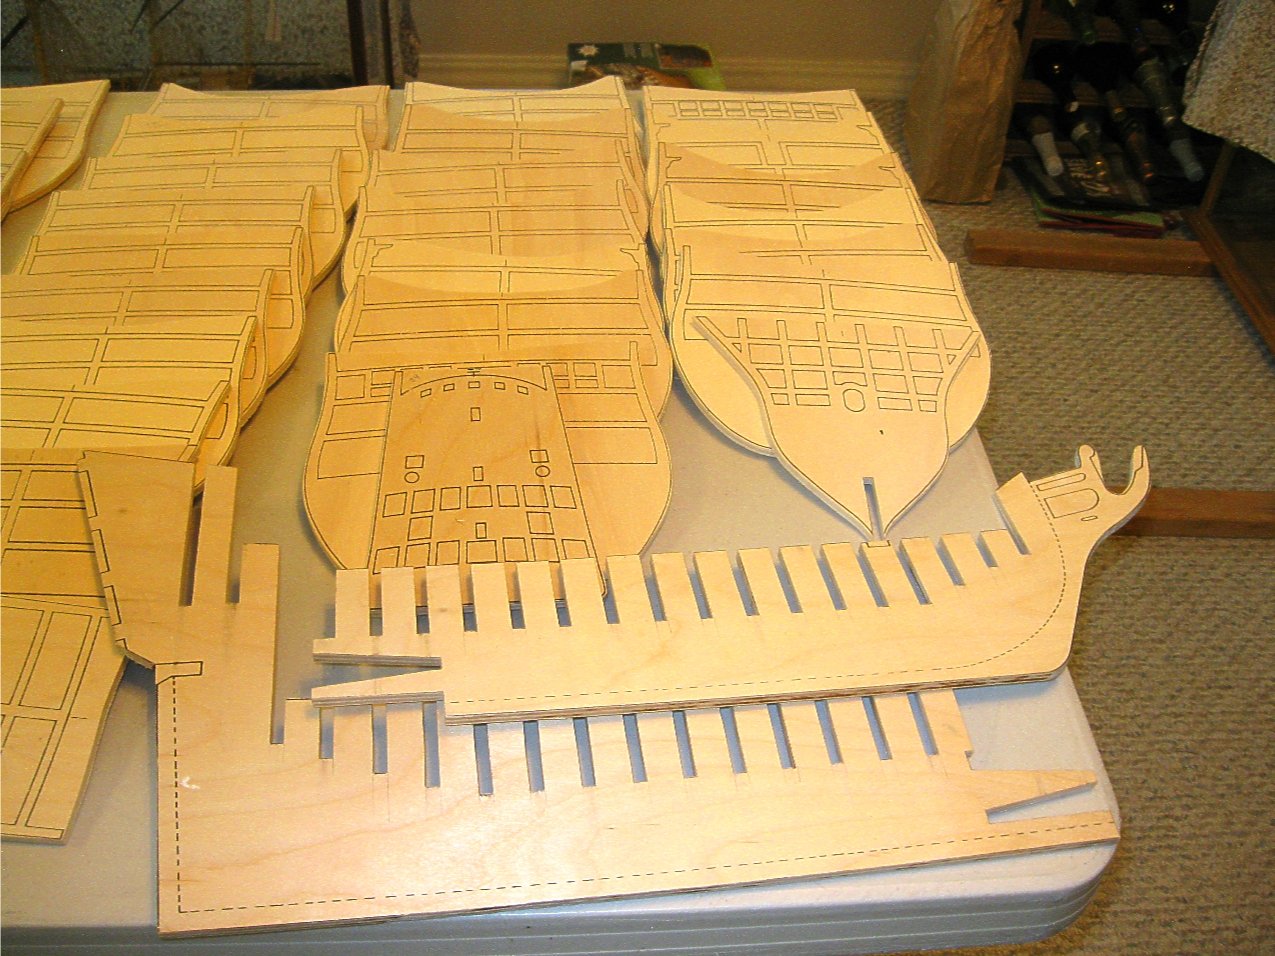
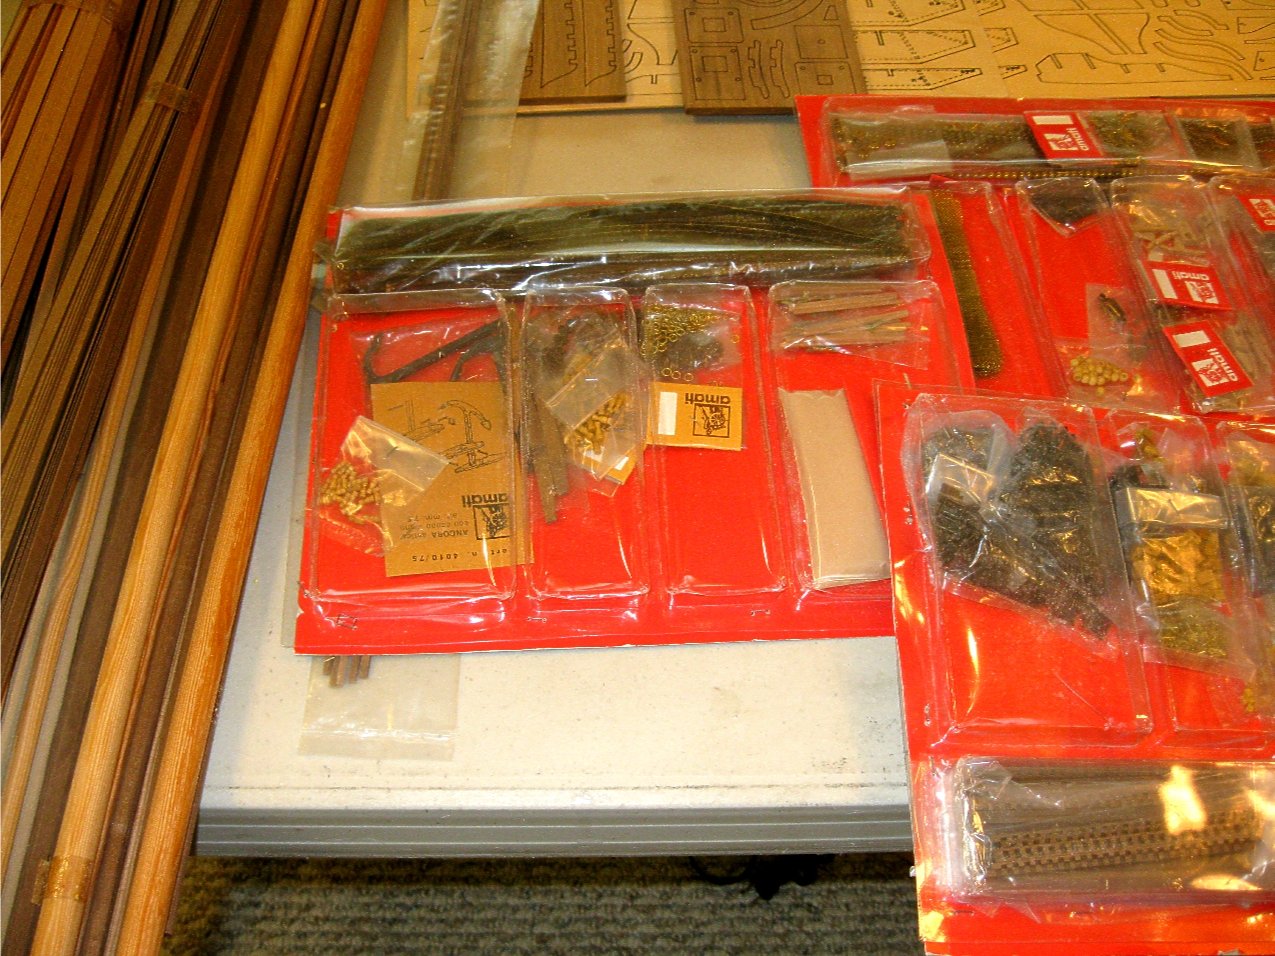
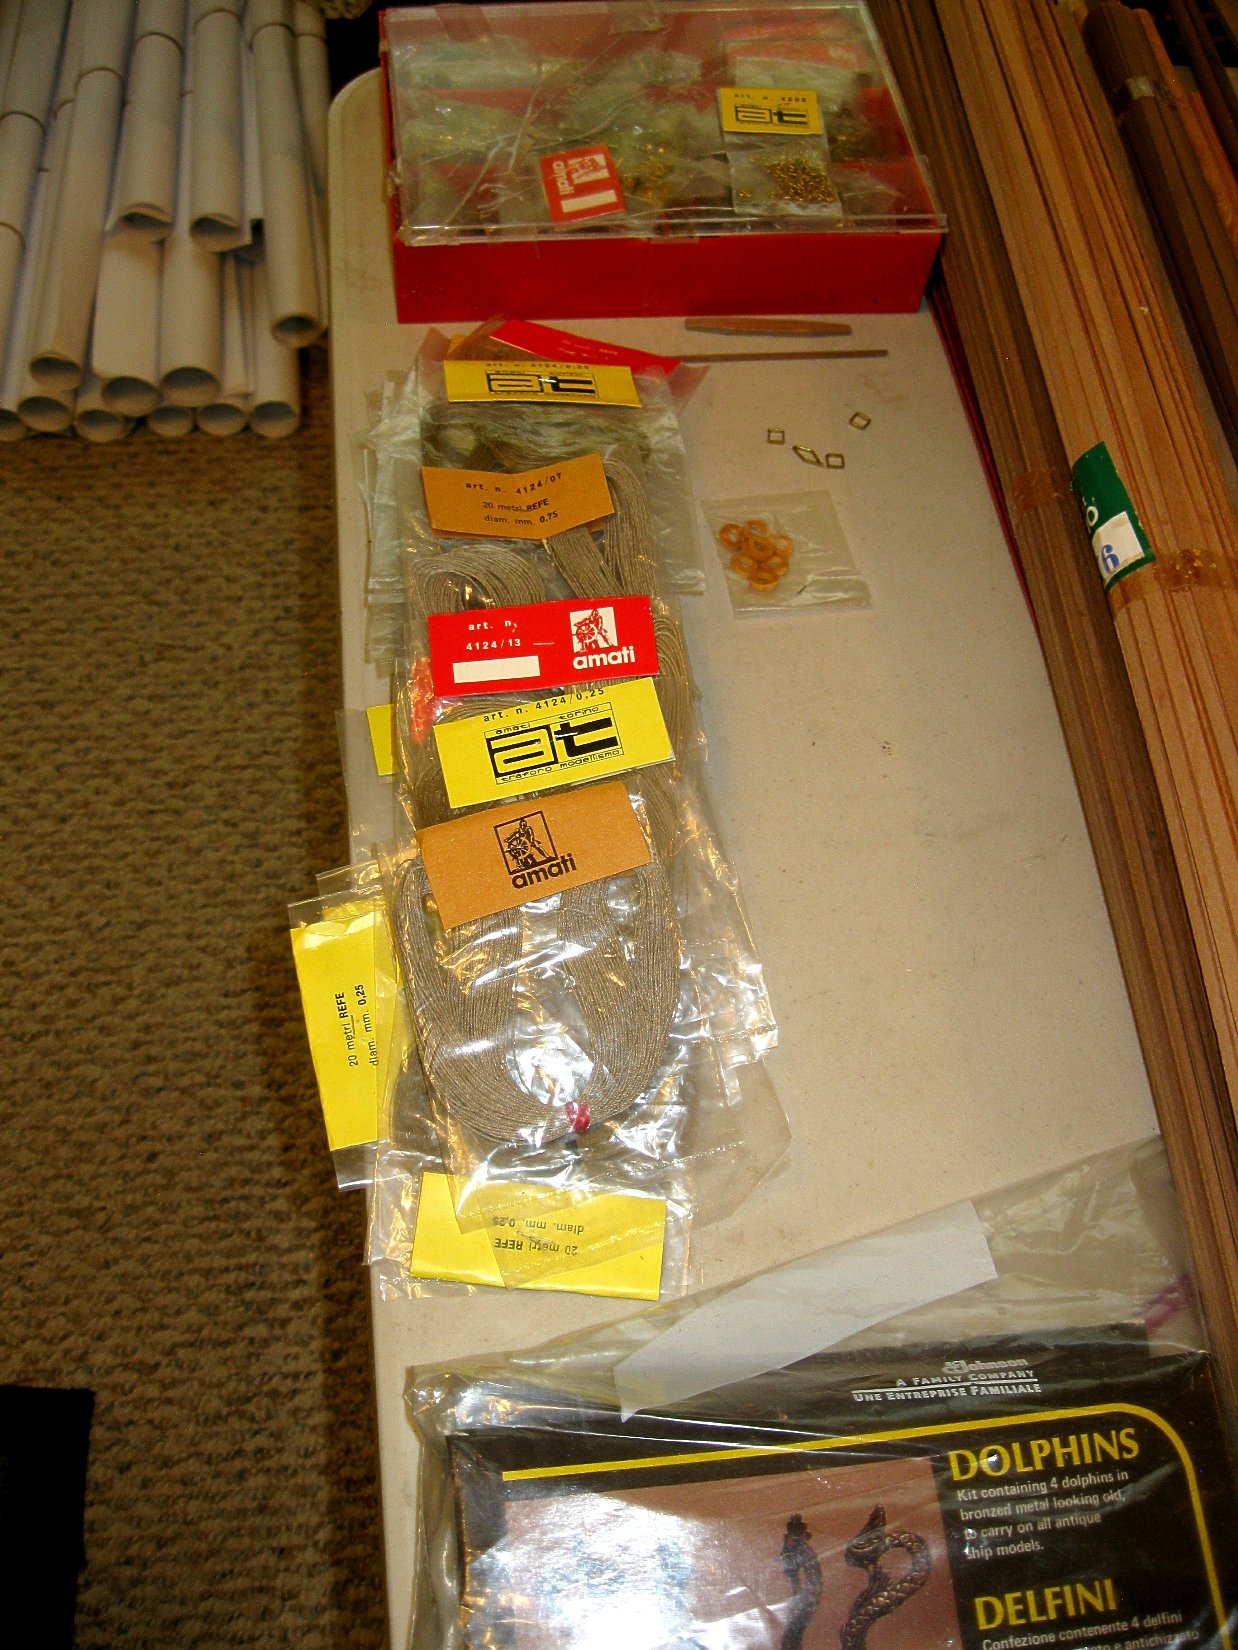
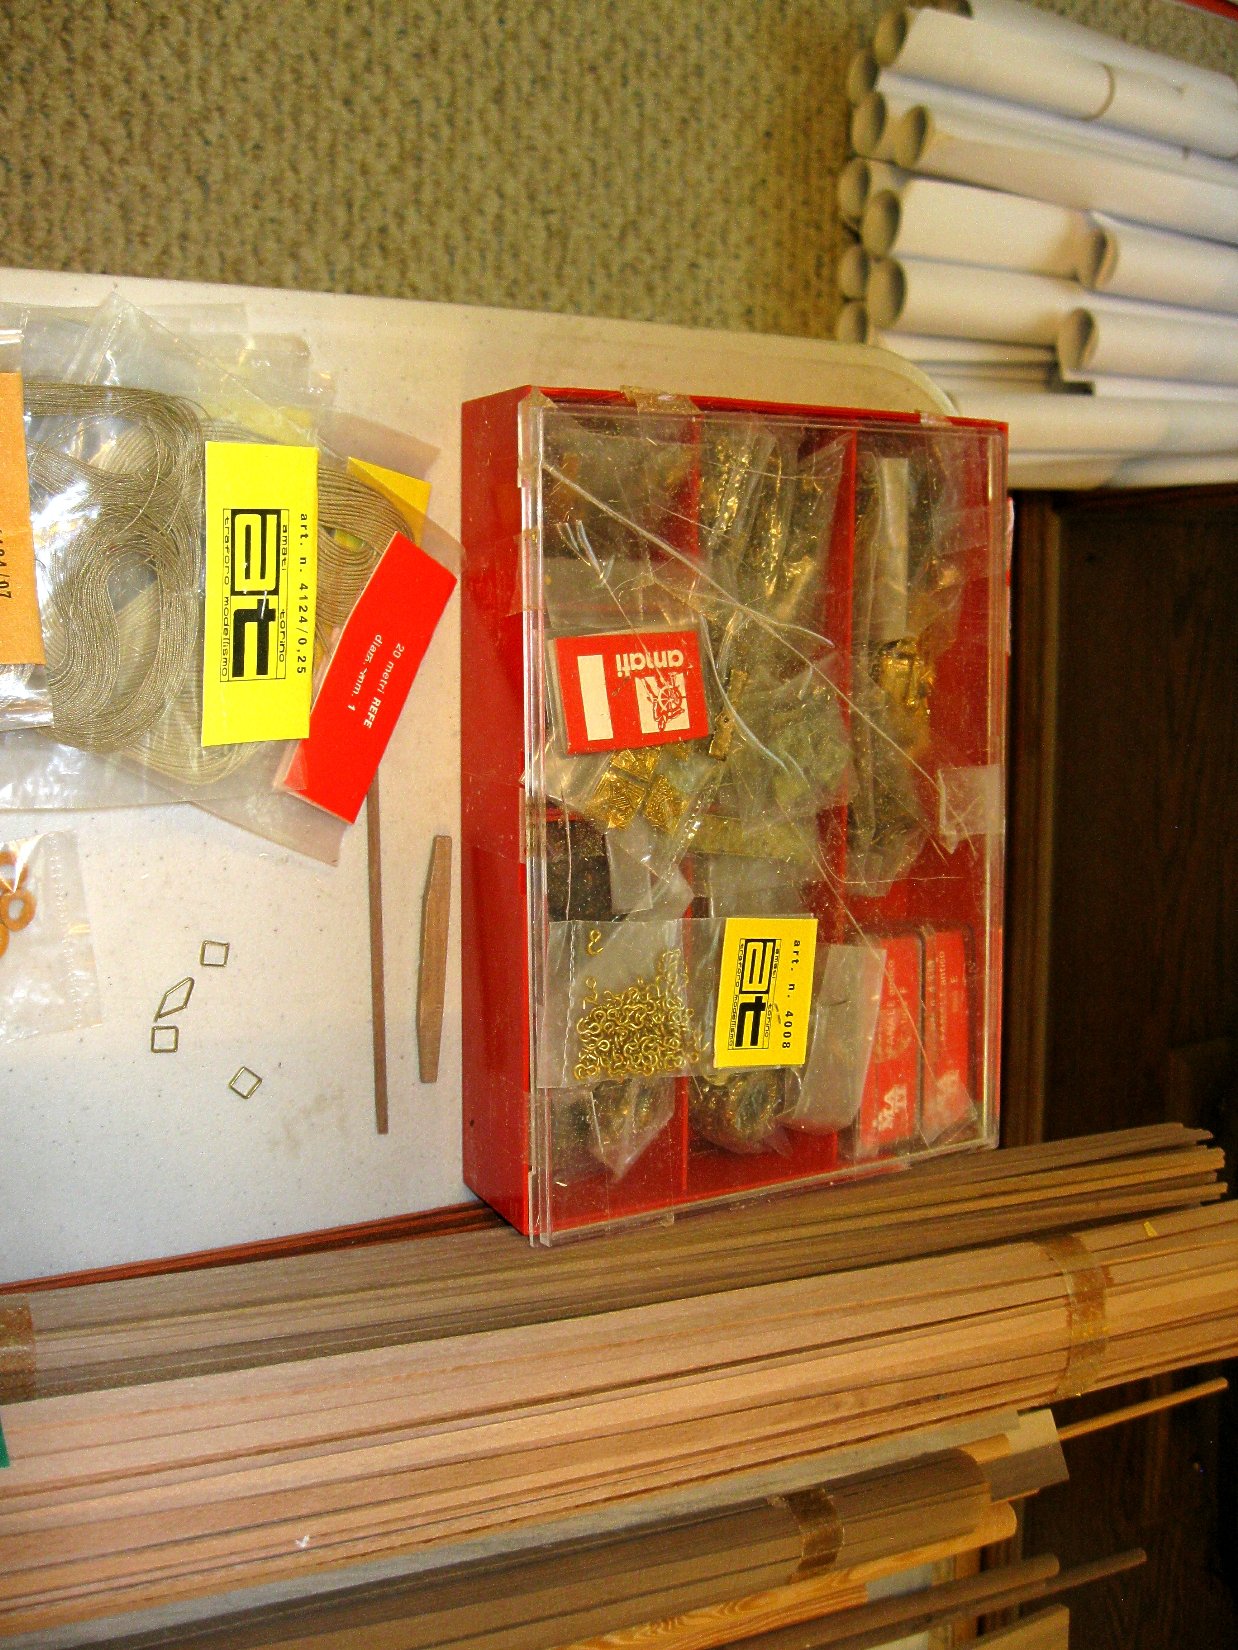
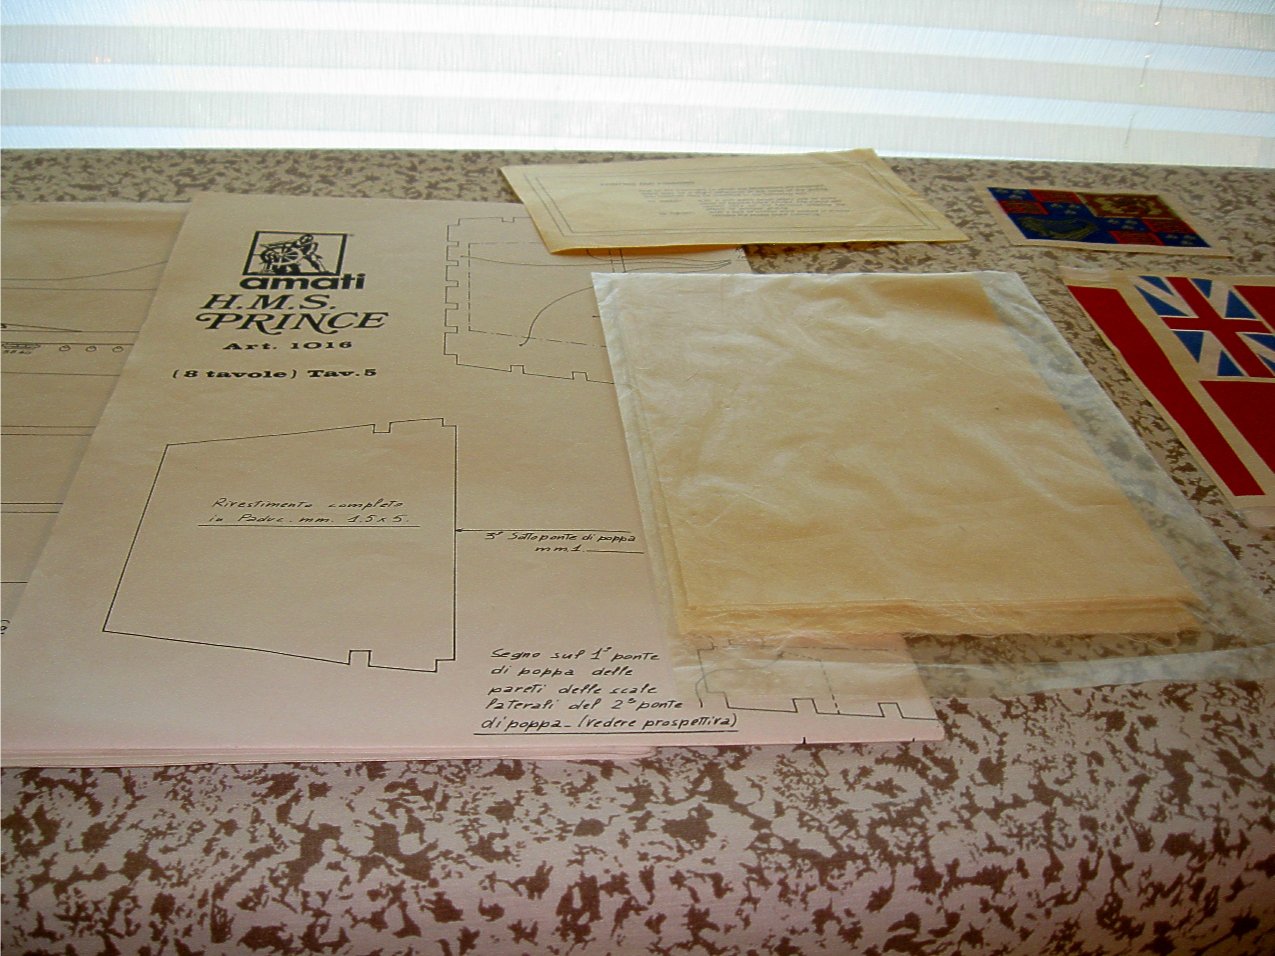
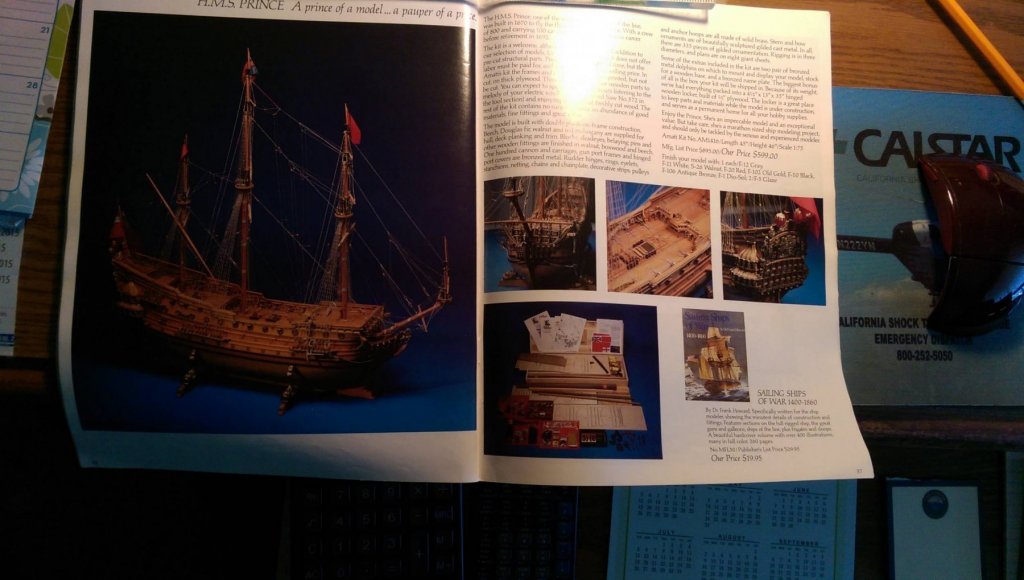
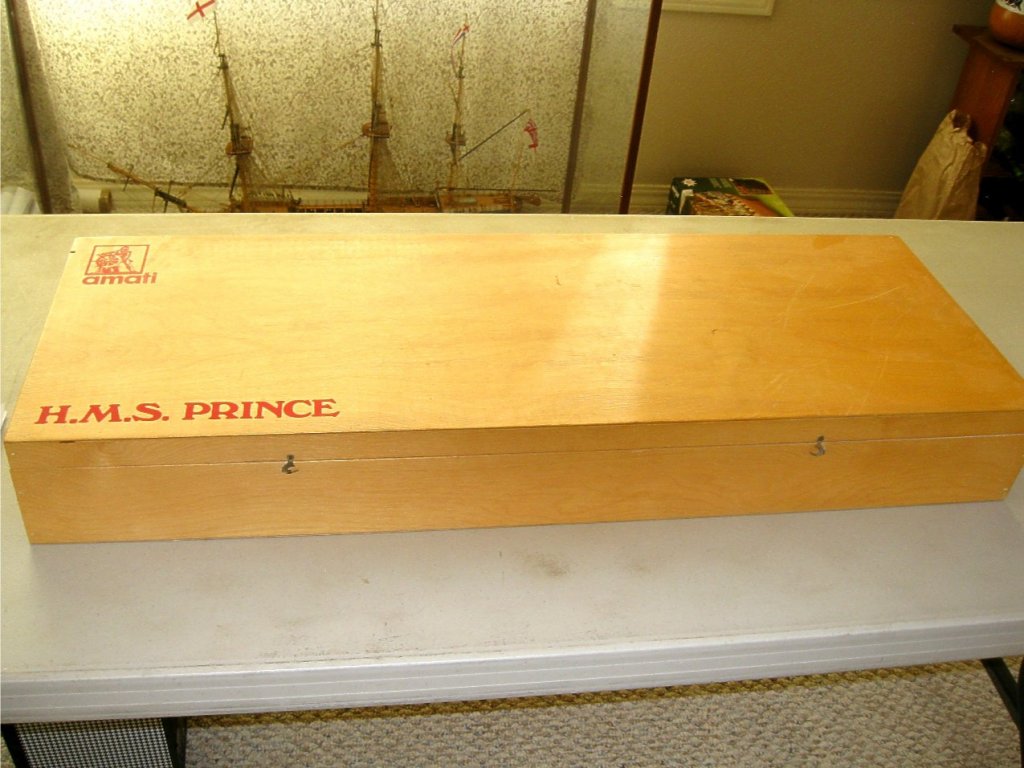
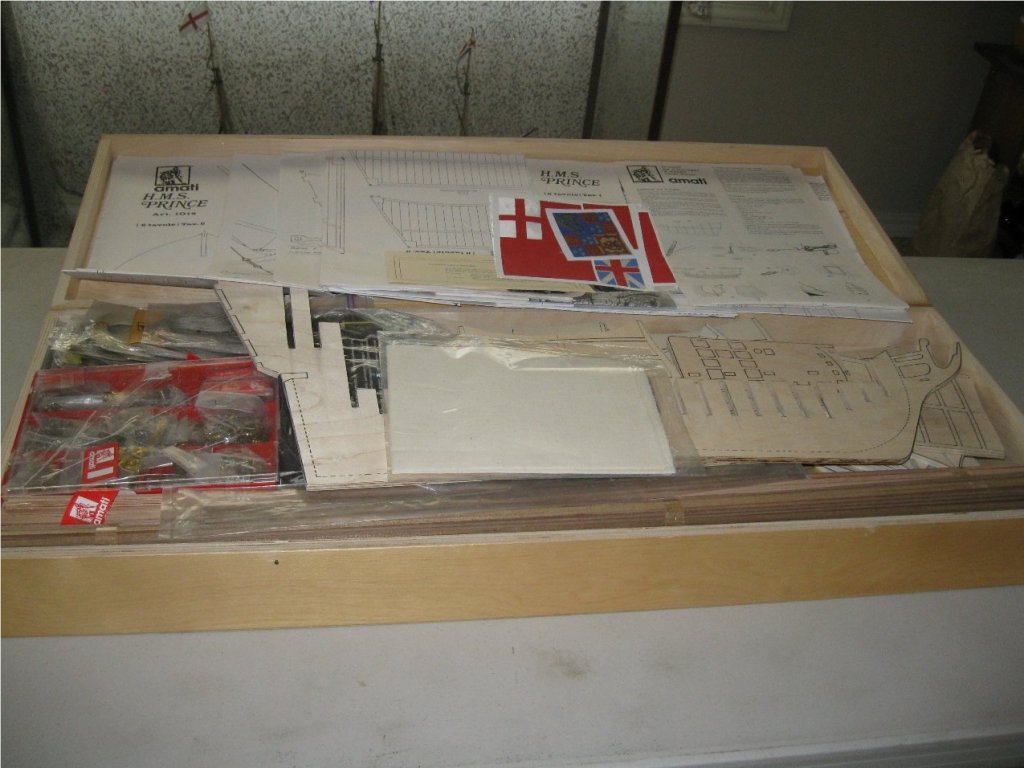
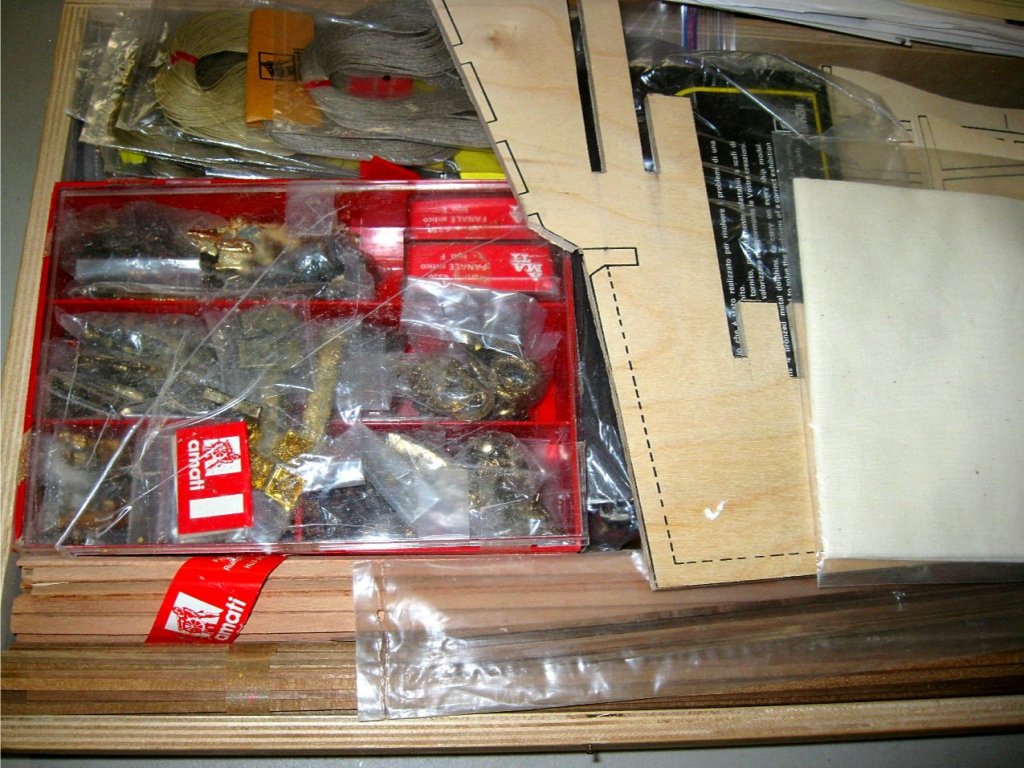
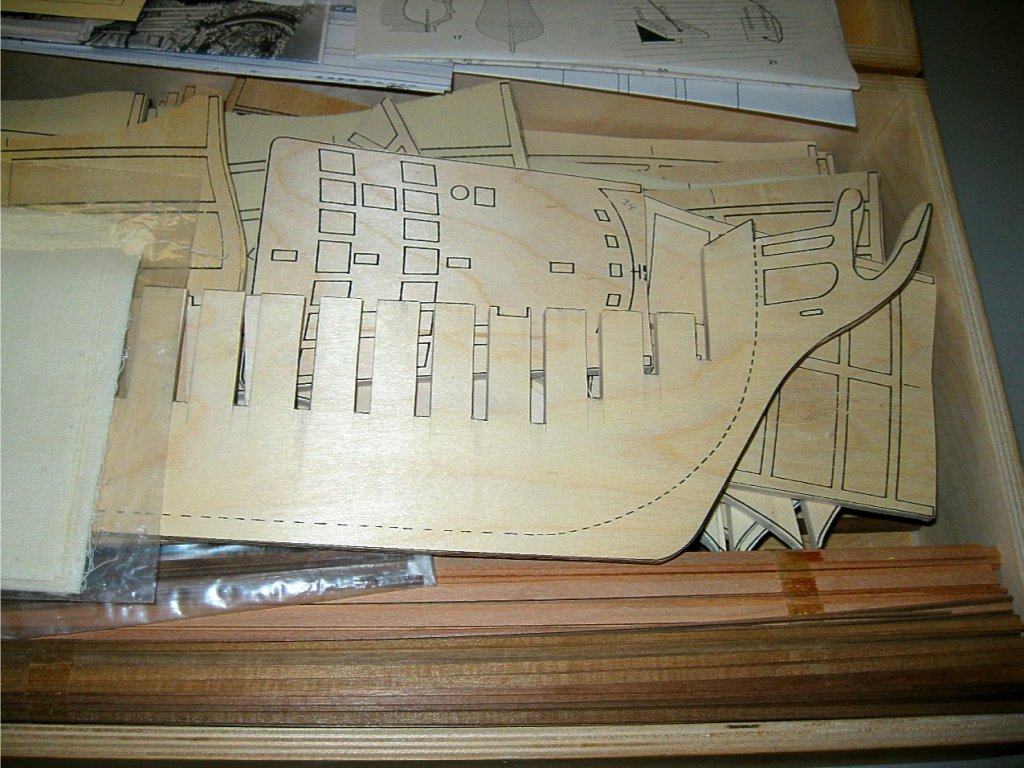
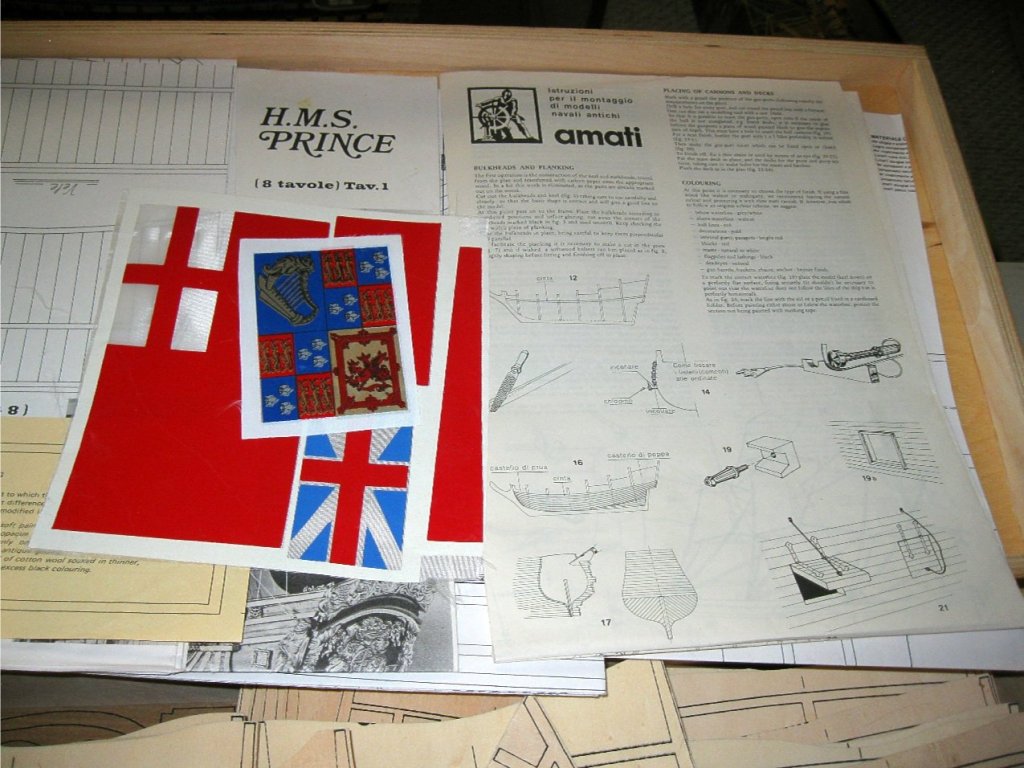
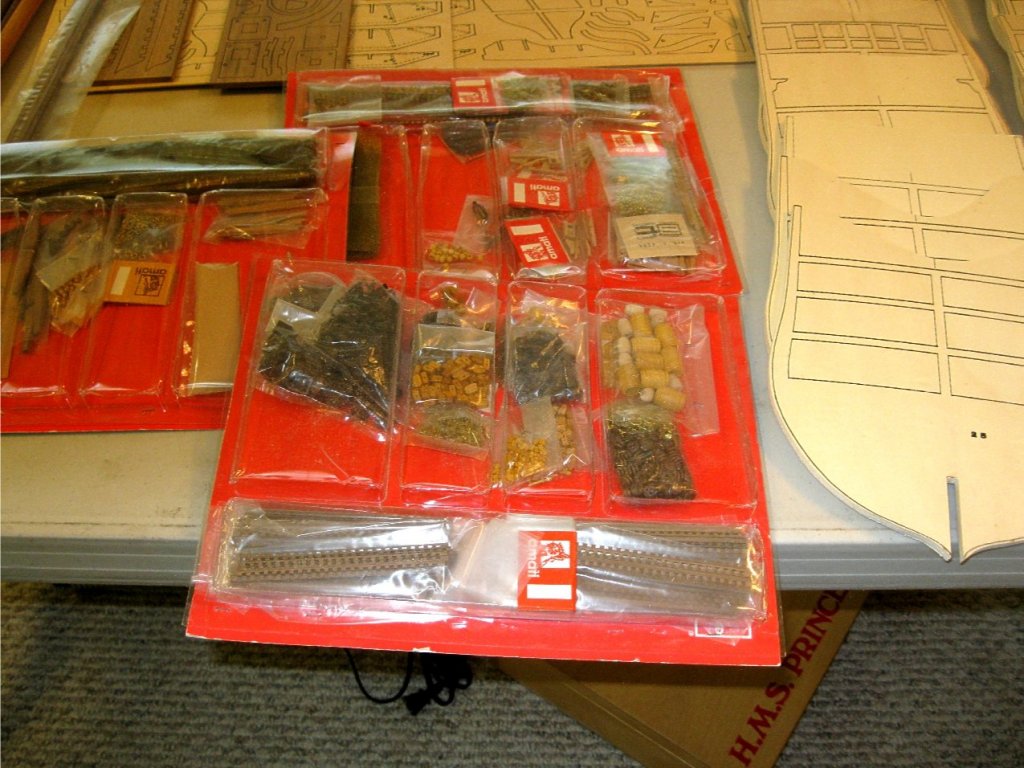
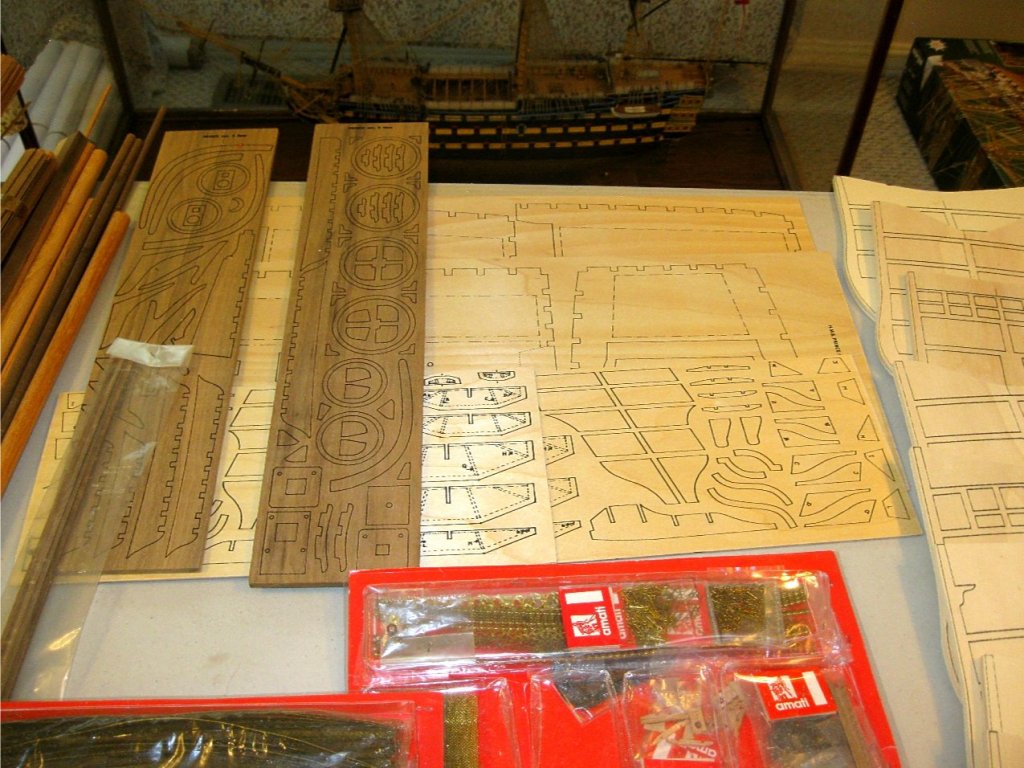
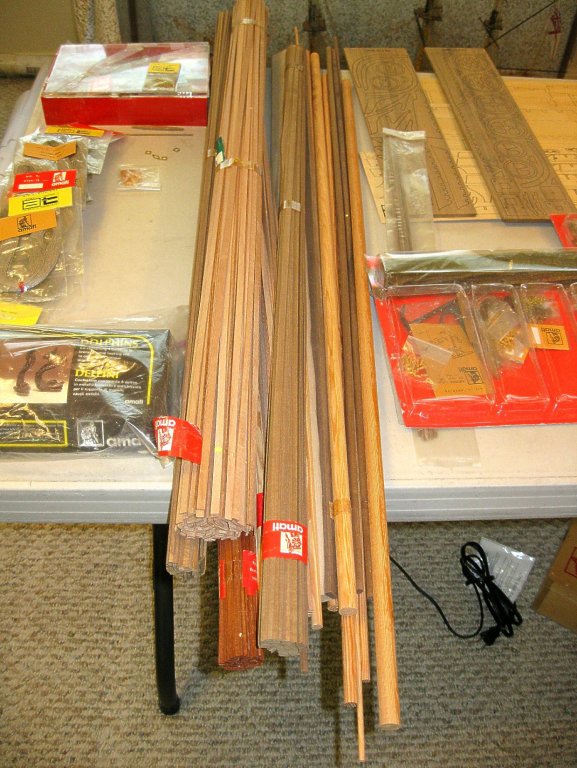
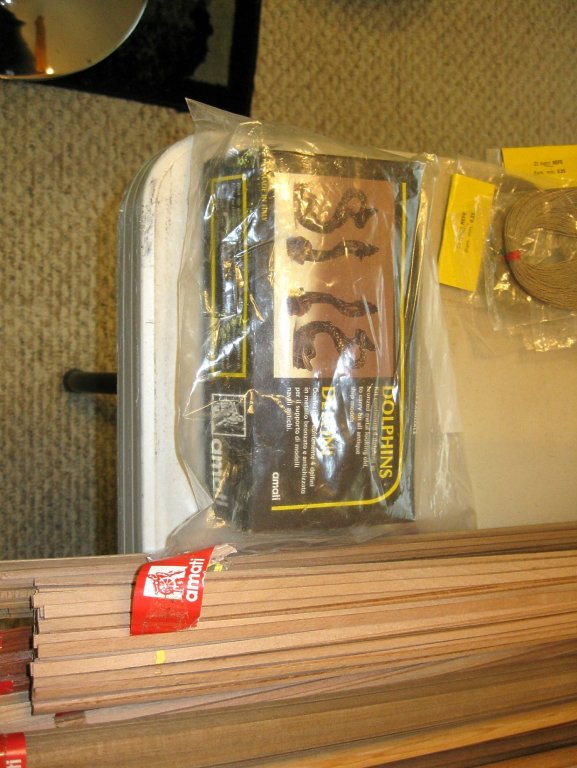
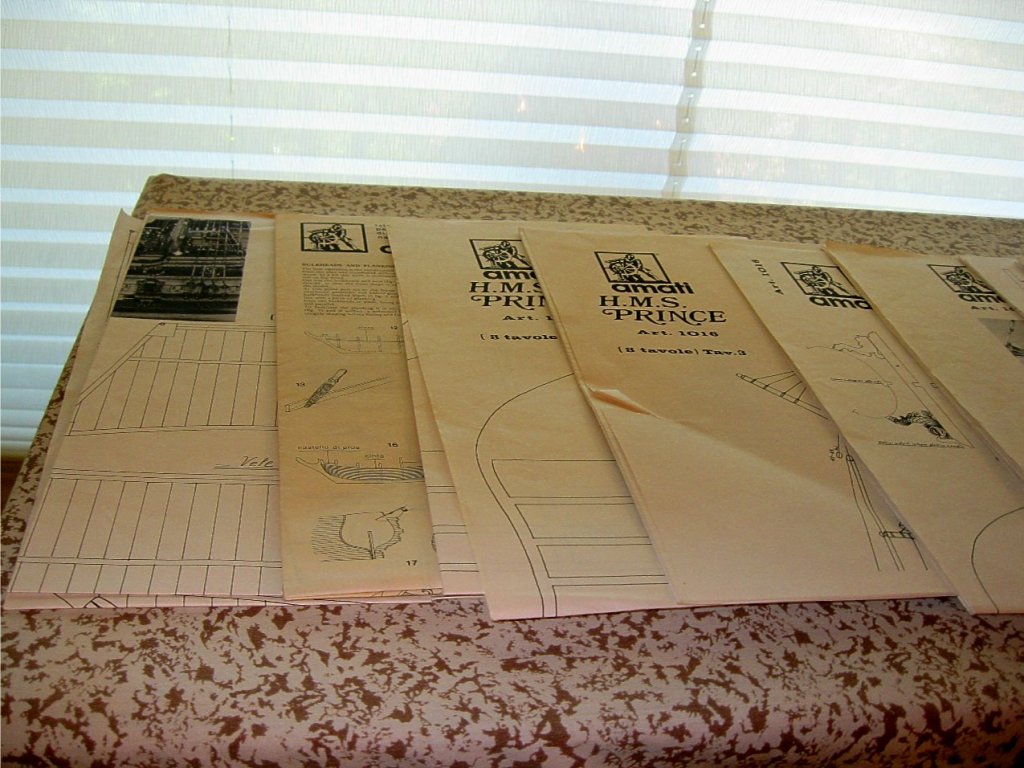
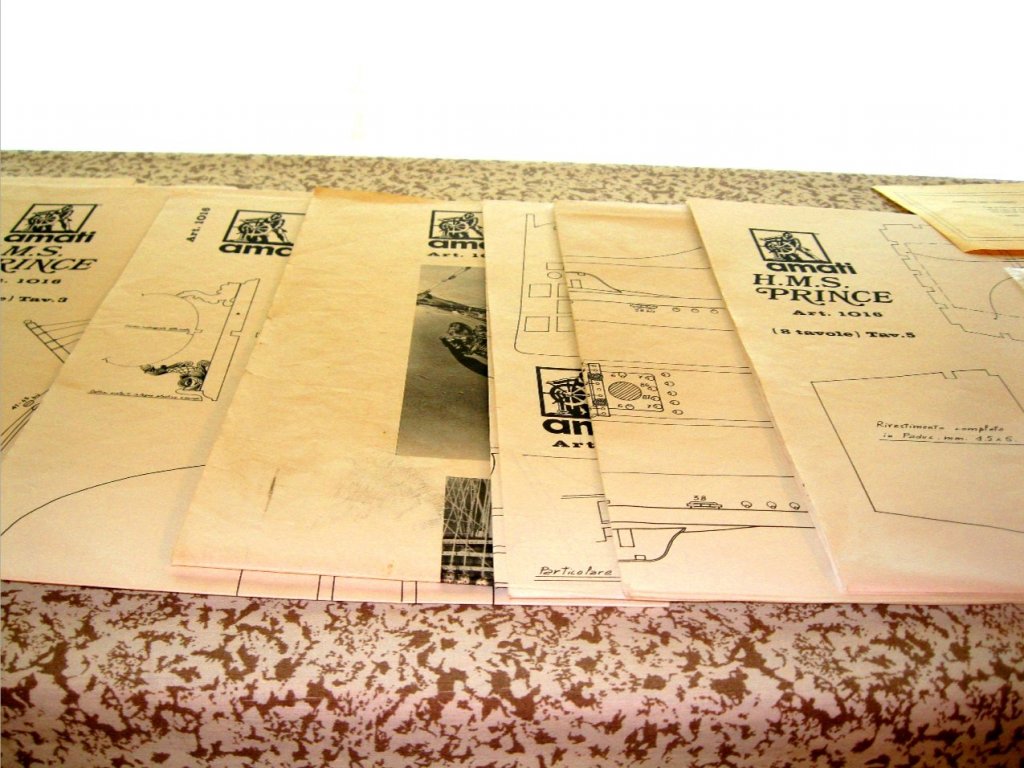
As you know, I just completed the Royal William. The Prince was a ship that was remodeled into the Royal William in the very early 1700's. Amati had a nice kit about 40 years ago of the Prince, but discontinued it long ago. I searched for a source for many years and finally found a fellow through this forum, who had the kit but never started it. I bought it from him a few years ago. Since the Royal William was a remodel of the Prince, to do a "Before and After Display" will be cool. The kit cost $600 back almost 40 years ago, so it is definitely a high end kit. As with the Royal William, I intend to greatly enhance the detail and rig her with full sails. There are a few modern kits available of the Prince, but none of them compare to this old kit, and the scale is big enough to go along side the Euromodel Royal William. The kit came in a nice wood case instead of a cardboard box. Back then there was no such thing a laser cut parts, so looking at the kit, everything must be hand cut by saw and file. There are 34 bulkheads which is about double of modern kits and each and every one will have to be hand cut. I will definitely get my money's worth out of the my band and scroll saws. 😛 Virtually nothing is pre-cut. The amount of decorations appears to be quite extensive as well. I am really going to enjoy this project. The first photo is from a 1980 catalog showing this kit listed. Vince P.


-
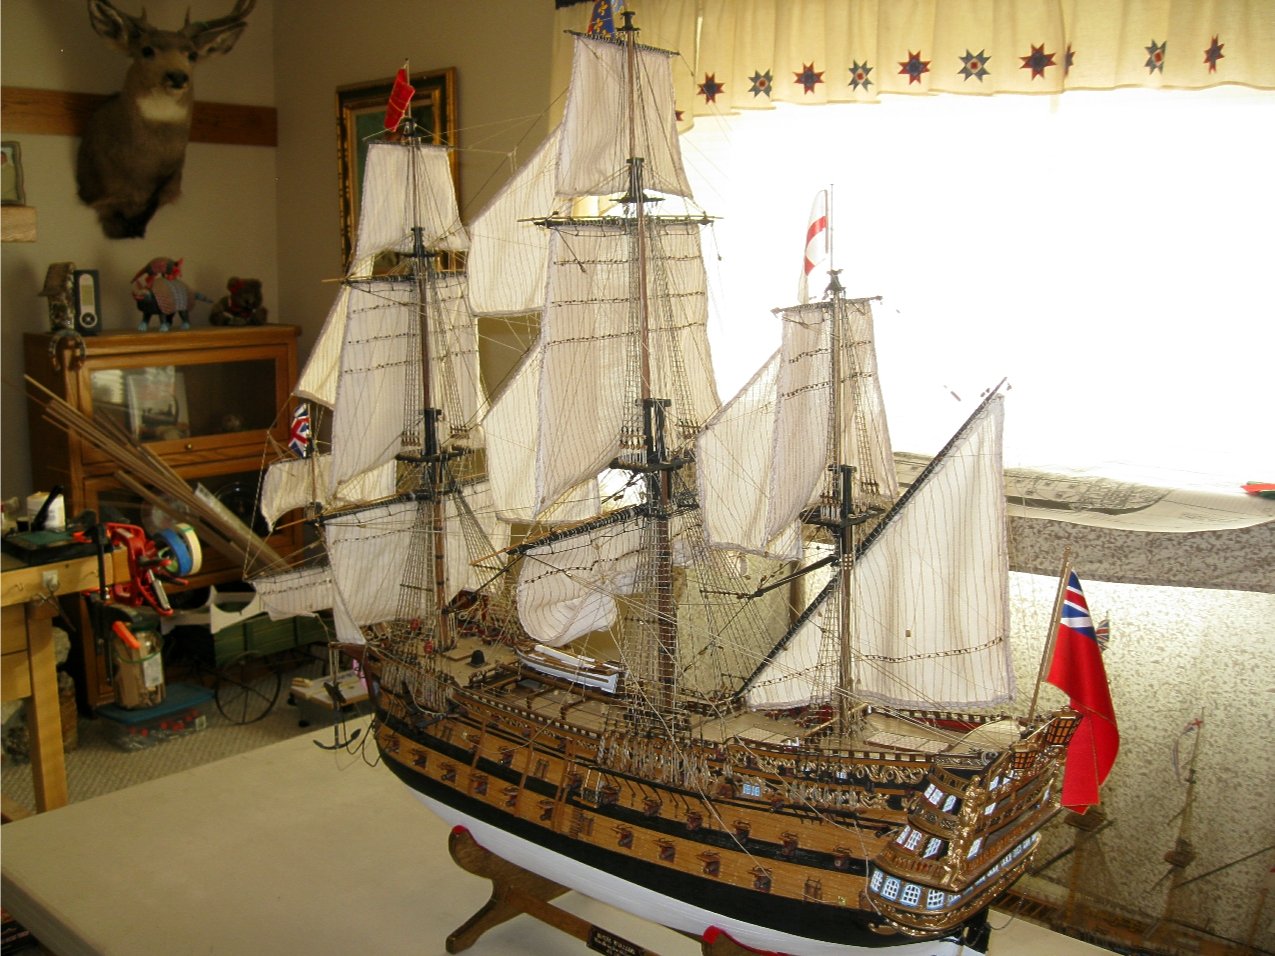
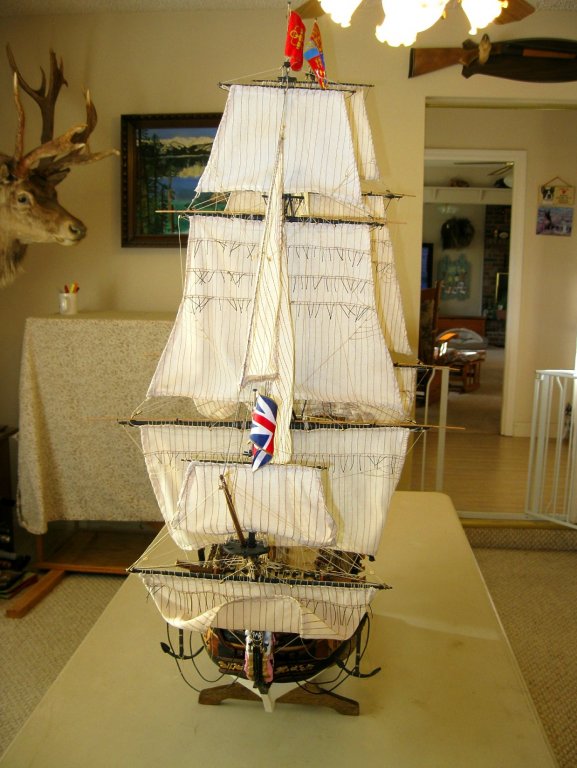
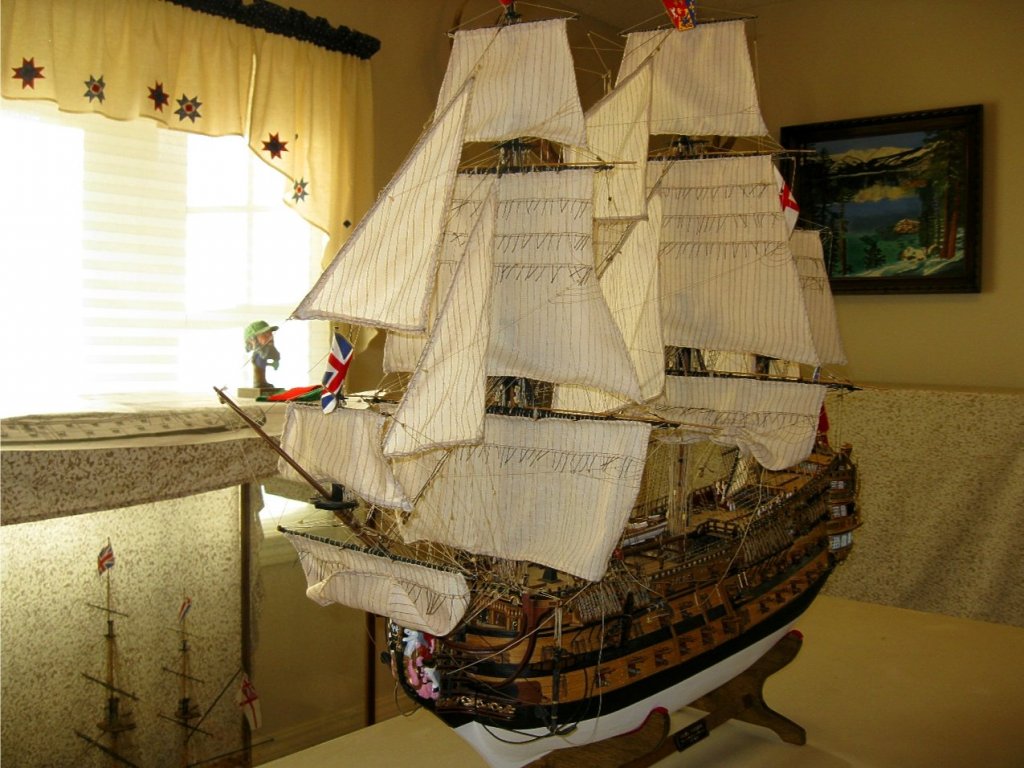
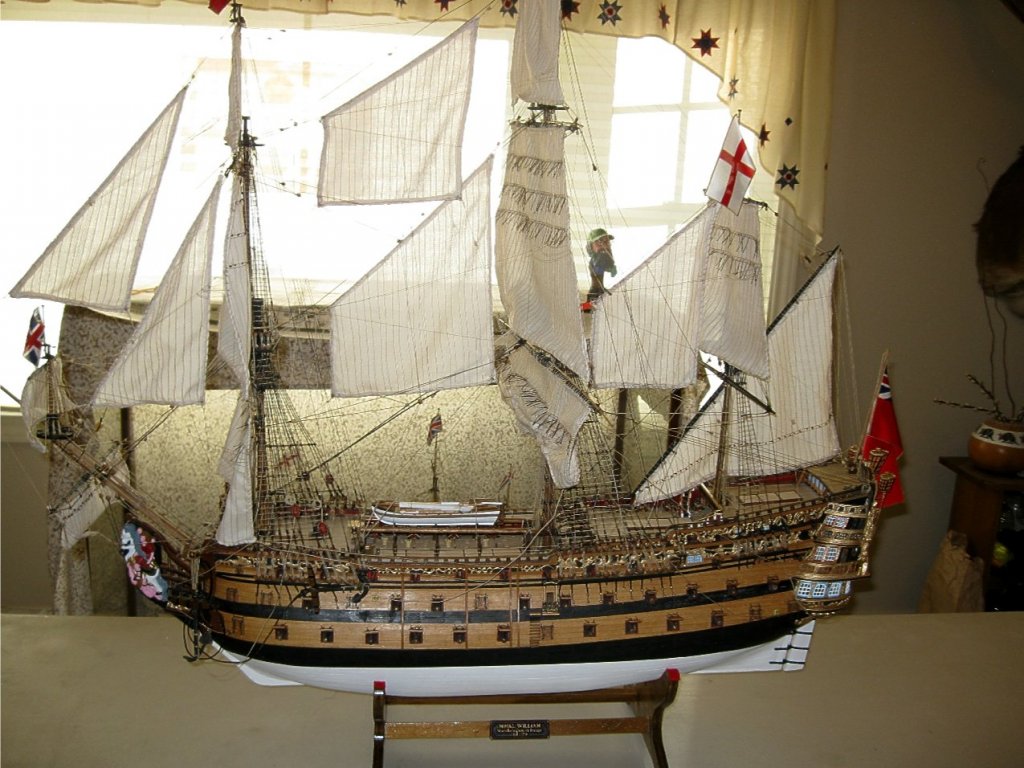
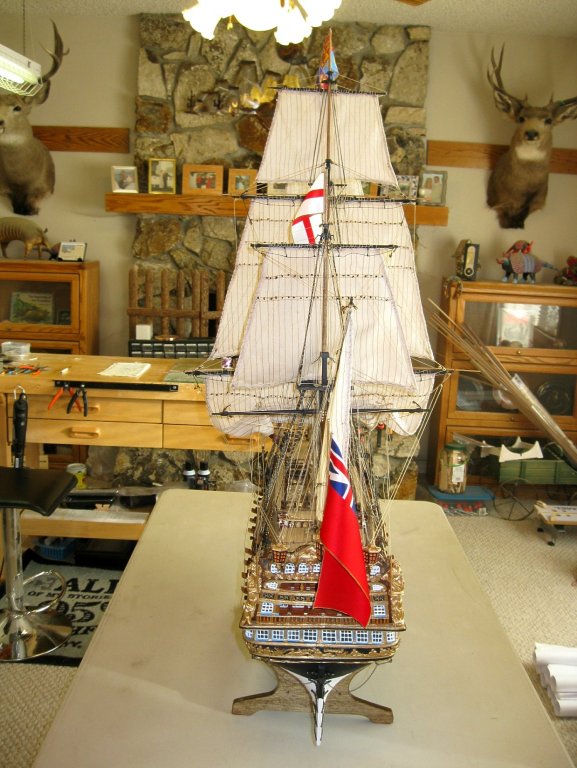
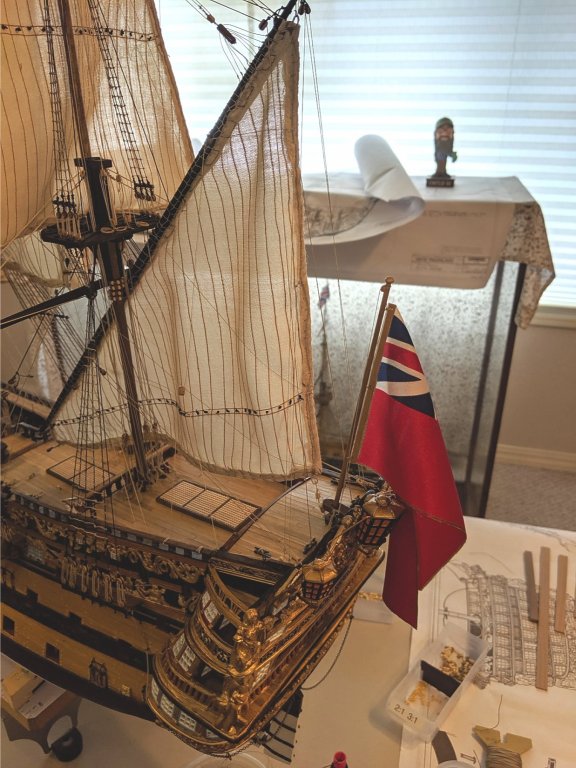
She is finally finished! 😅 The most difficult and challenging project I have ever attempted. I think she turned out great, even with the many mistakes I made along the way. Some I corrected and others I couldn't. If you look really close you may see some. Almost 5 years in the making and so much fun. I know I improved my skills level immensely because of the difficulty involved. Euromodel definitely produces a quality kit. With the way they set it up, the builder can take the level of detail as far as they like. I believe I could attempt a scratch build now if I desired to do so. The cost to complete this model including the price of the kit was well over $4000, and that does not include any labor. I have to give credit to Peter Coward, Keith Julier, Mark T. and the many authors of the numerous text books I used for references along the way. I will take many detailed photos and post them in the gallery soon. As soon as I clean up and update my workshop I will start on my next project . It will be the Prince which was the original ship that was rebuilt into the Royal William. It also looks to be a big challenge as well. Vince P.


- 593 replies
-
- 9
-

-

-
- royal william
- euromodels
- (and 1 more)
-
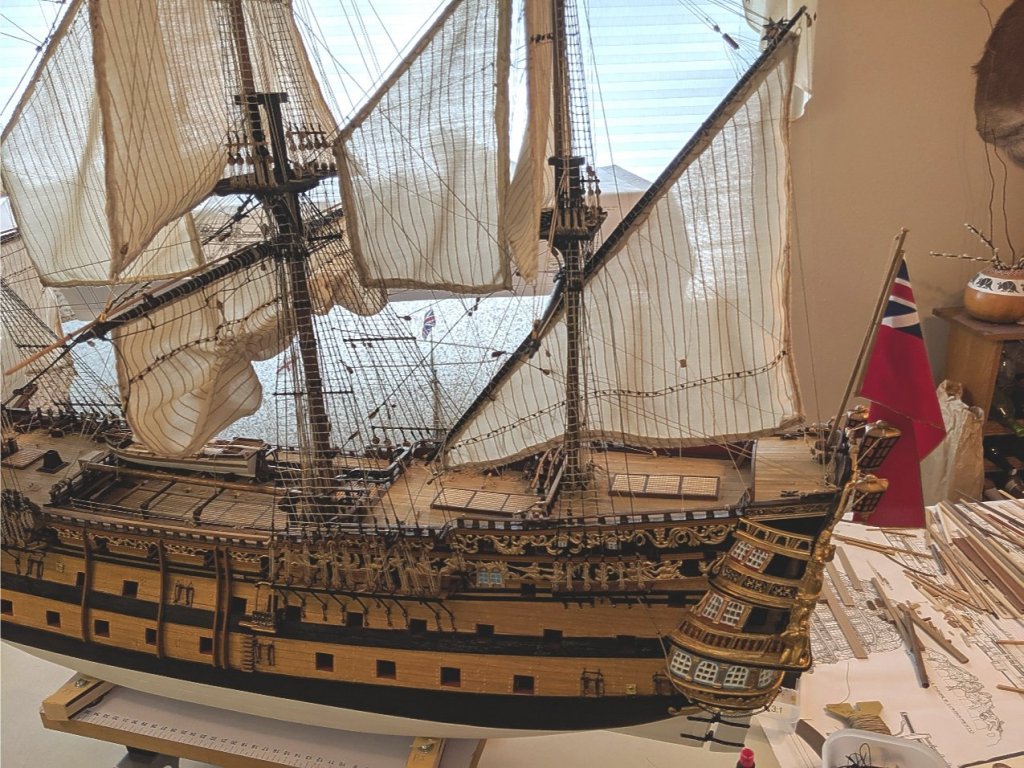
The work on the anchors is done. The only things left are the sheet and tack lines for the fore and main courses and the mounting cradle. She will then be completed. Maybe another week at most. 😁 Vince P.

- 593 replies
-
- 3
-
-
- royal william
- euromodels
- (and 1 more)
-
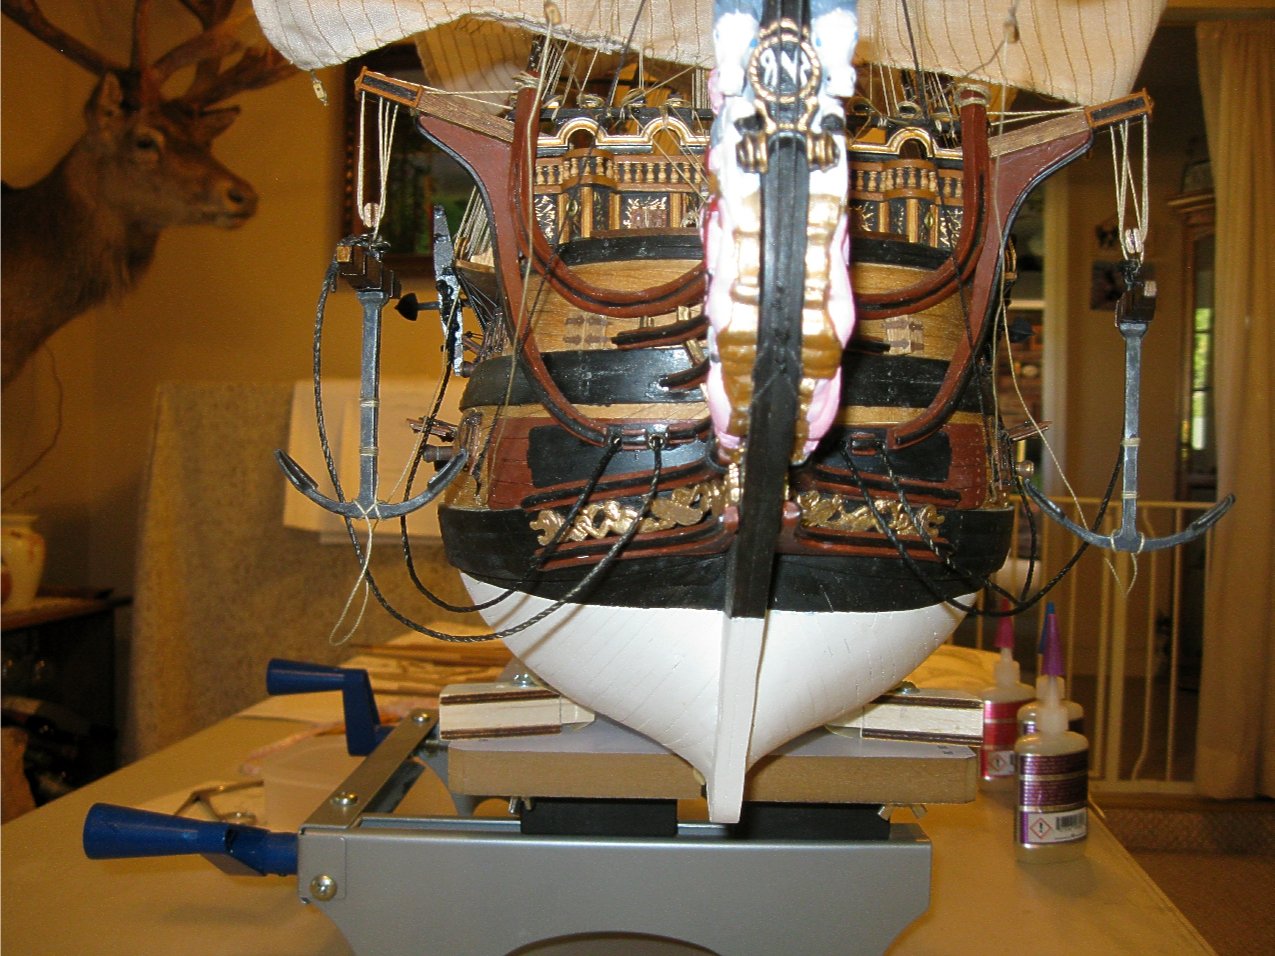
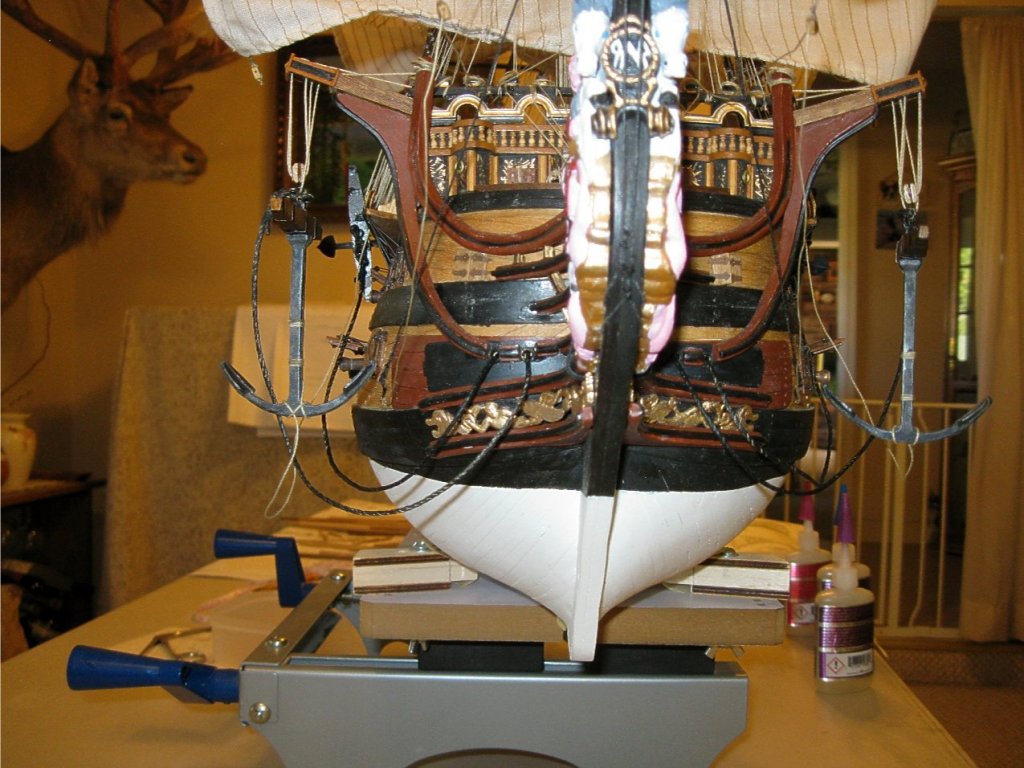
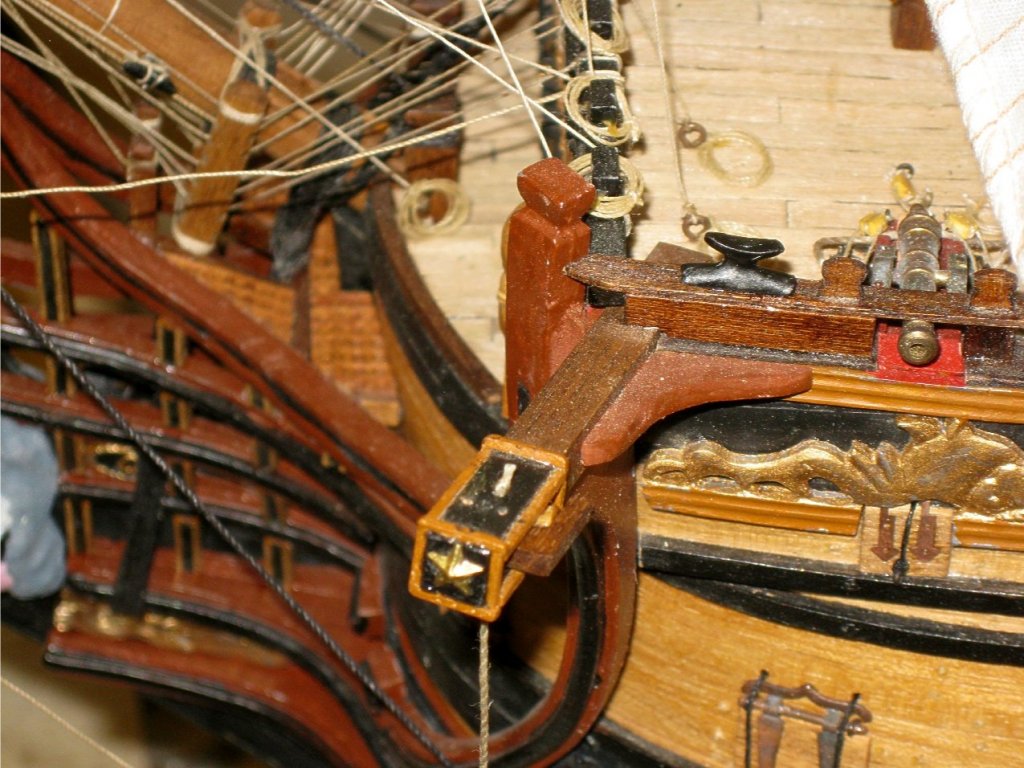
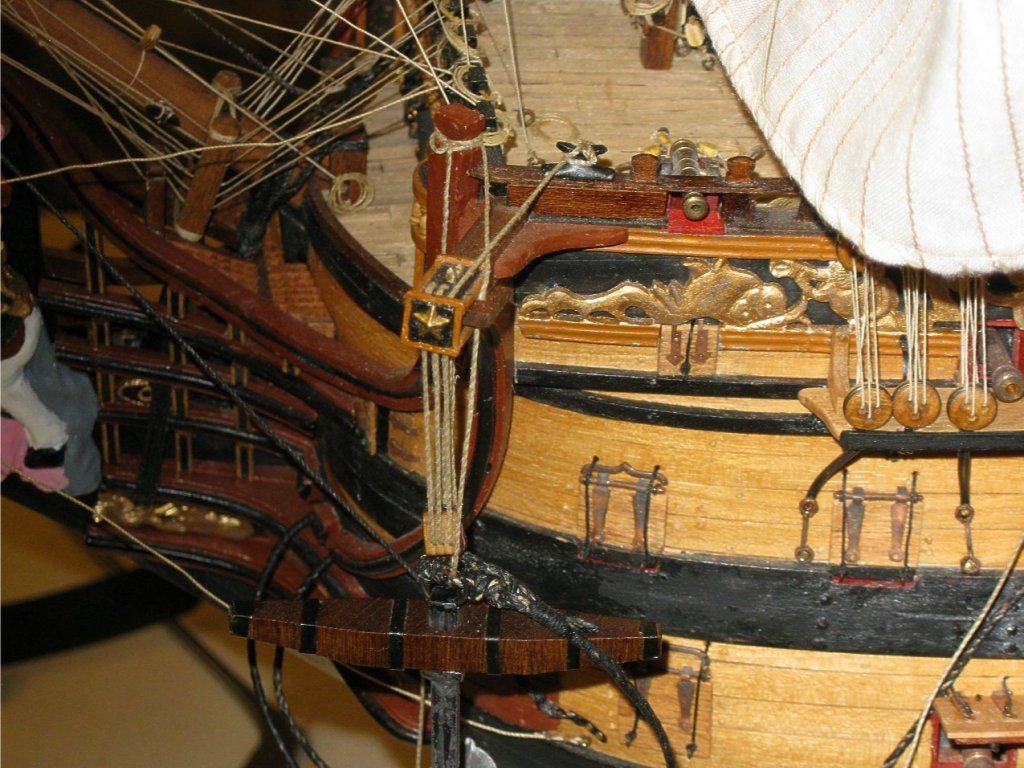
I am working on the anchor rigging. I added a feature that is often missing and is not included on the plans. When an anchor is suspended on the block and hook from the cathead, there would be nothing to prevent it from slipping off the hook and dropping into the water. A safety feature was used called a "Cathead Blocker". It consisted of a half cleat and sheave assembly mounted on the aft side of the cathead. I made the half cleat from 2x3mm walnut and the sheave from a 3mm deadeye. A heavy rope was passed through the cathead and secured with a knot and then fished through the anchor ring and back up through the sheave and tied off to a cleat on the rail. If the anchor became dislodged, this rope would hold it up. Vince P.
- 593 replies
-
- 3
-
-
- royal william
- euromodels
- (and 1 more)
-
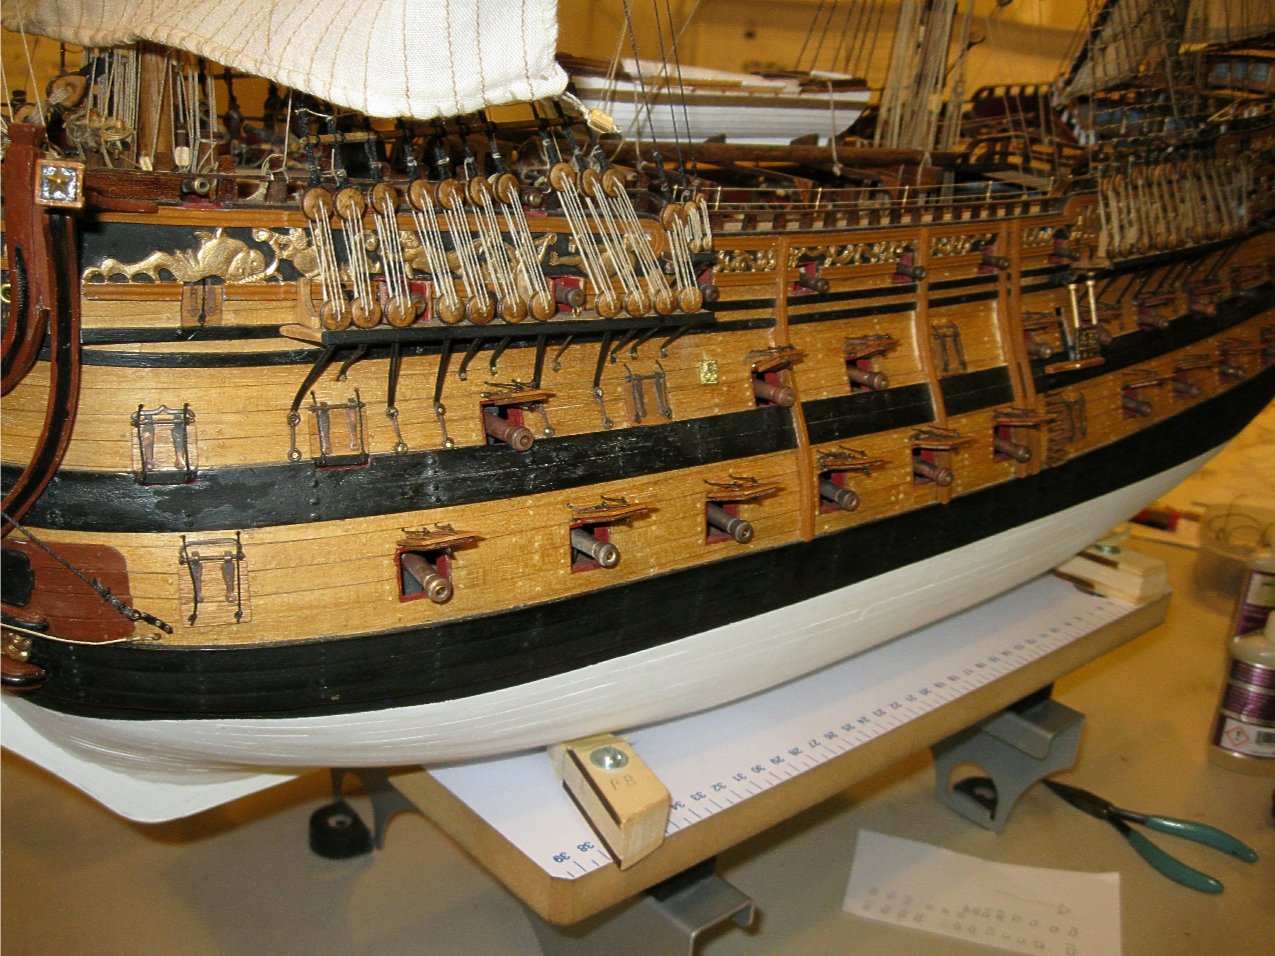
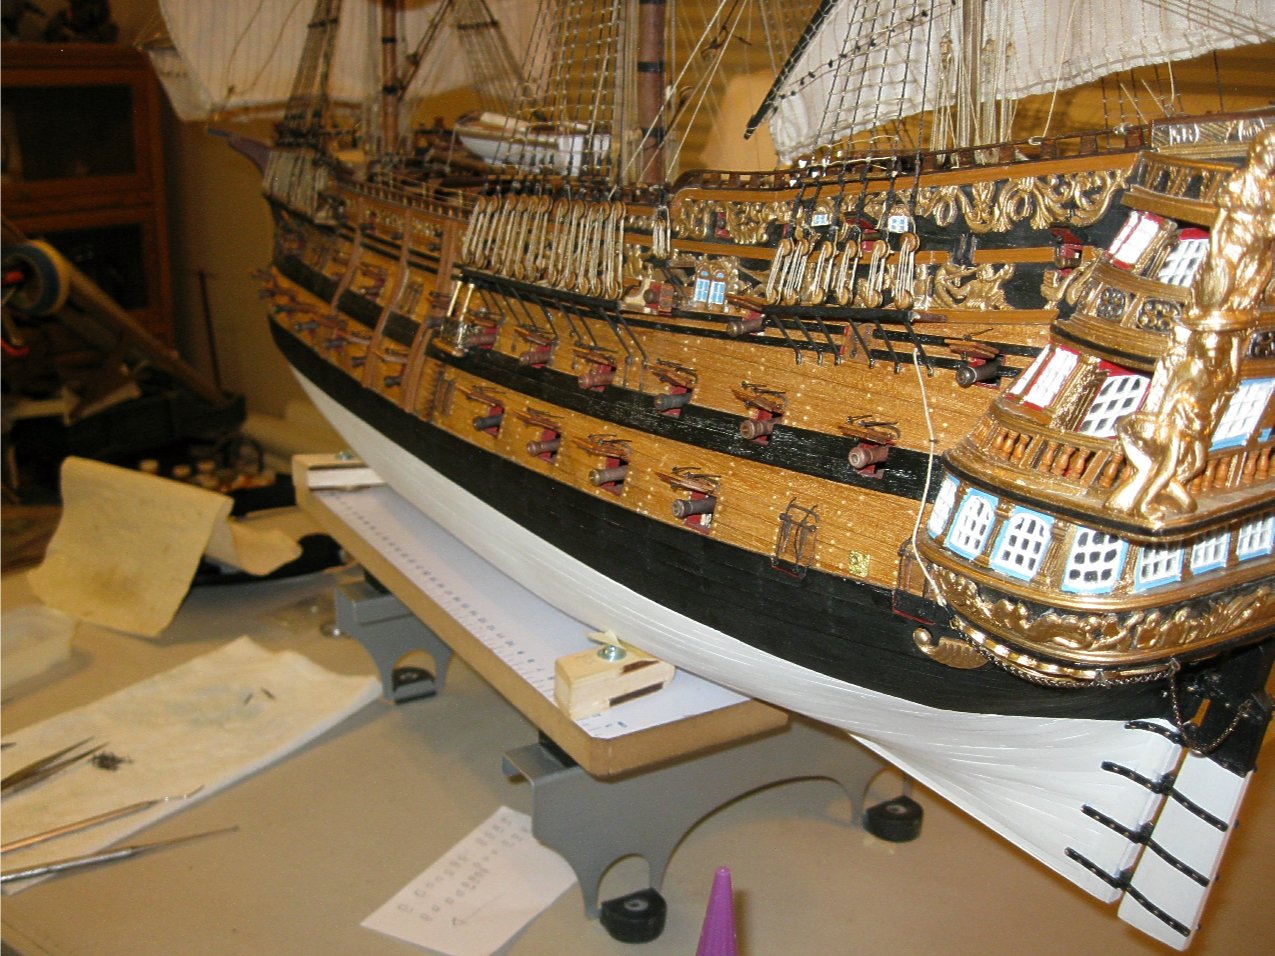
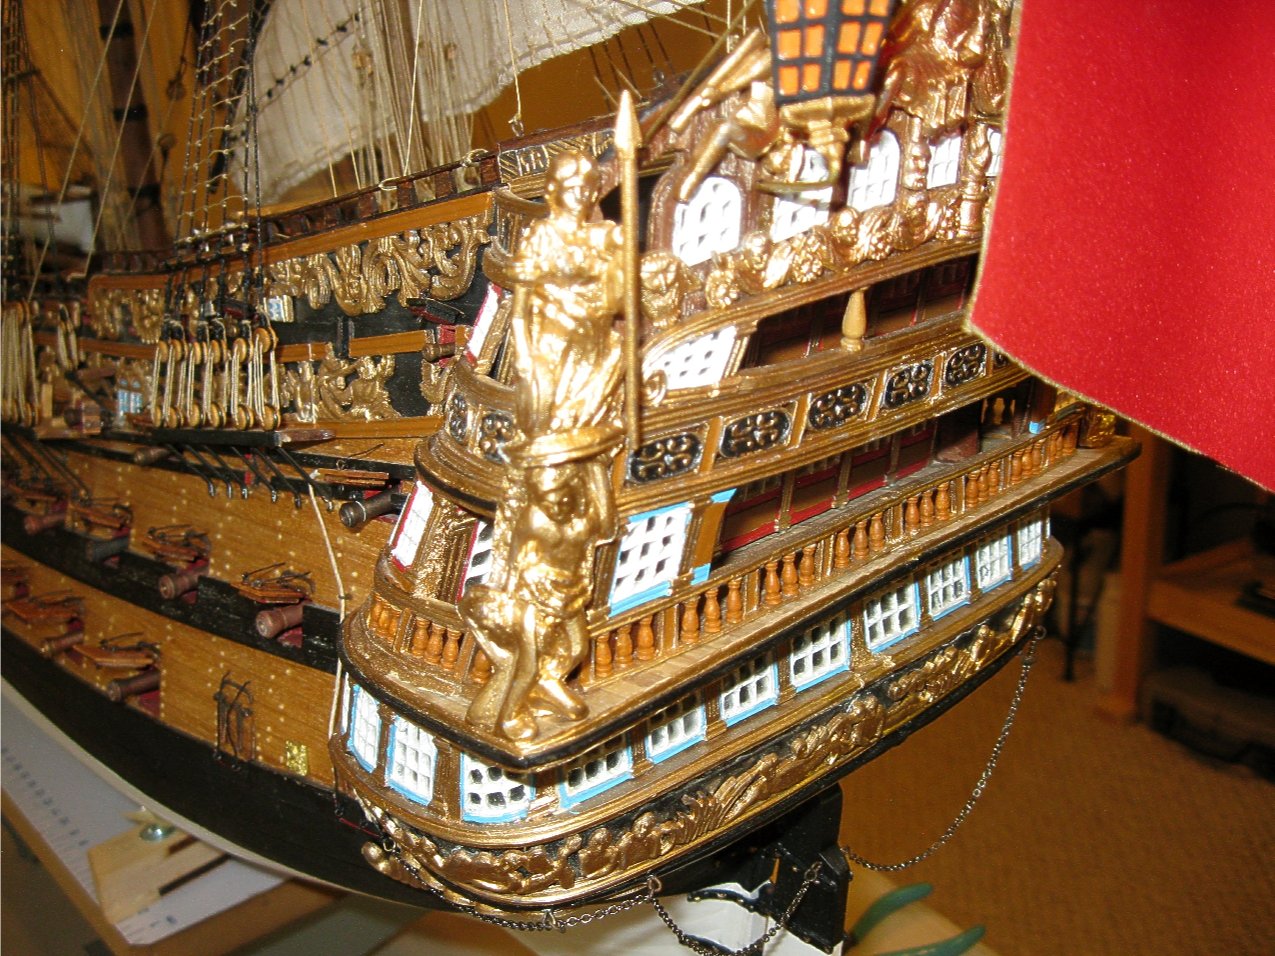
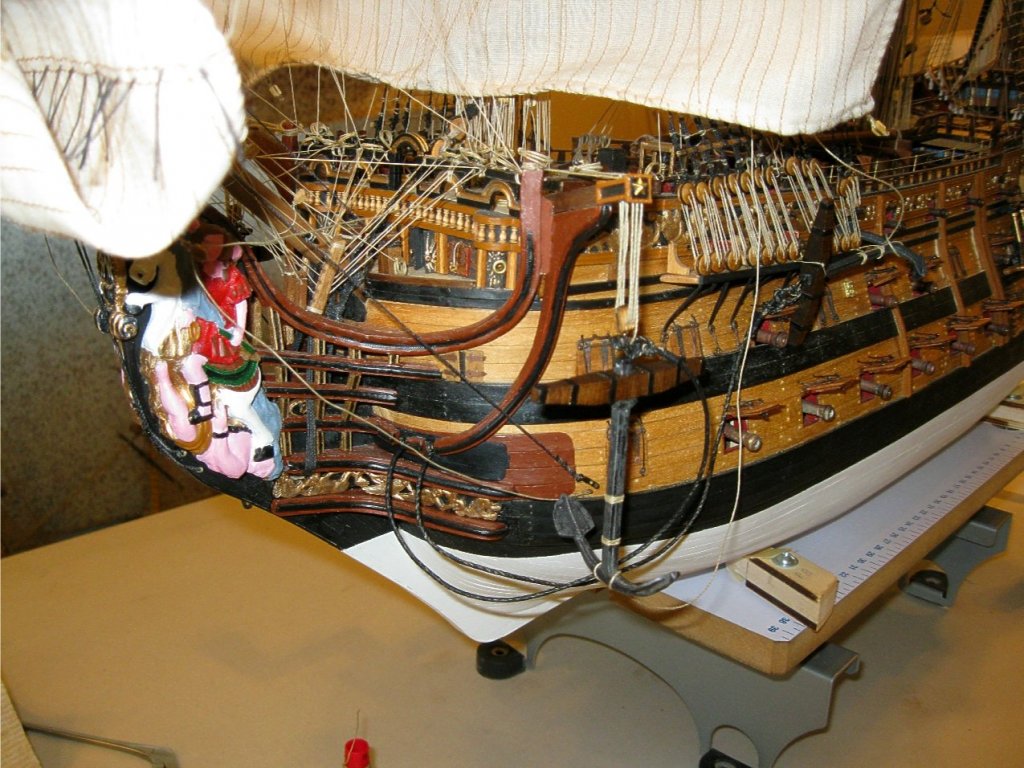
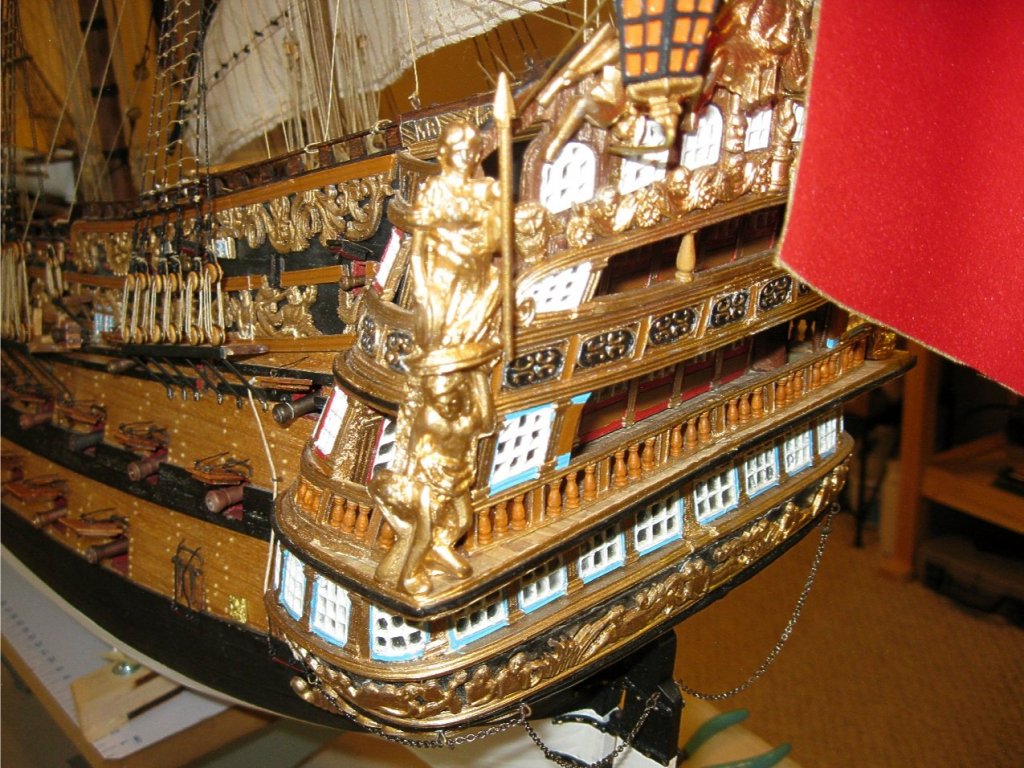
All of the gunports and guns are finished. I also added the spears to the transom figures. Next up is to construct and fish the anchors, complete the course rigging lines and touch her up. She will then be completed! Maybe 2 more weeks at most. I will have 5-1/2 years into her. 😁 Vince P.


- 593 replies
-
- 8
-
-
- royal william
- euromodels
- (and 1 more)
-
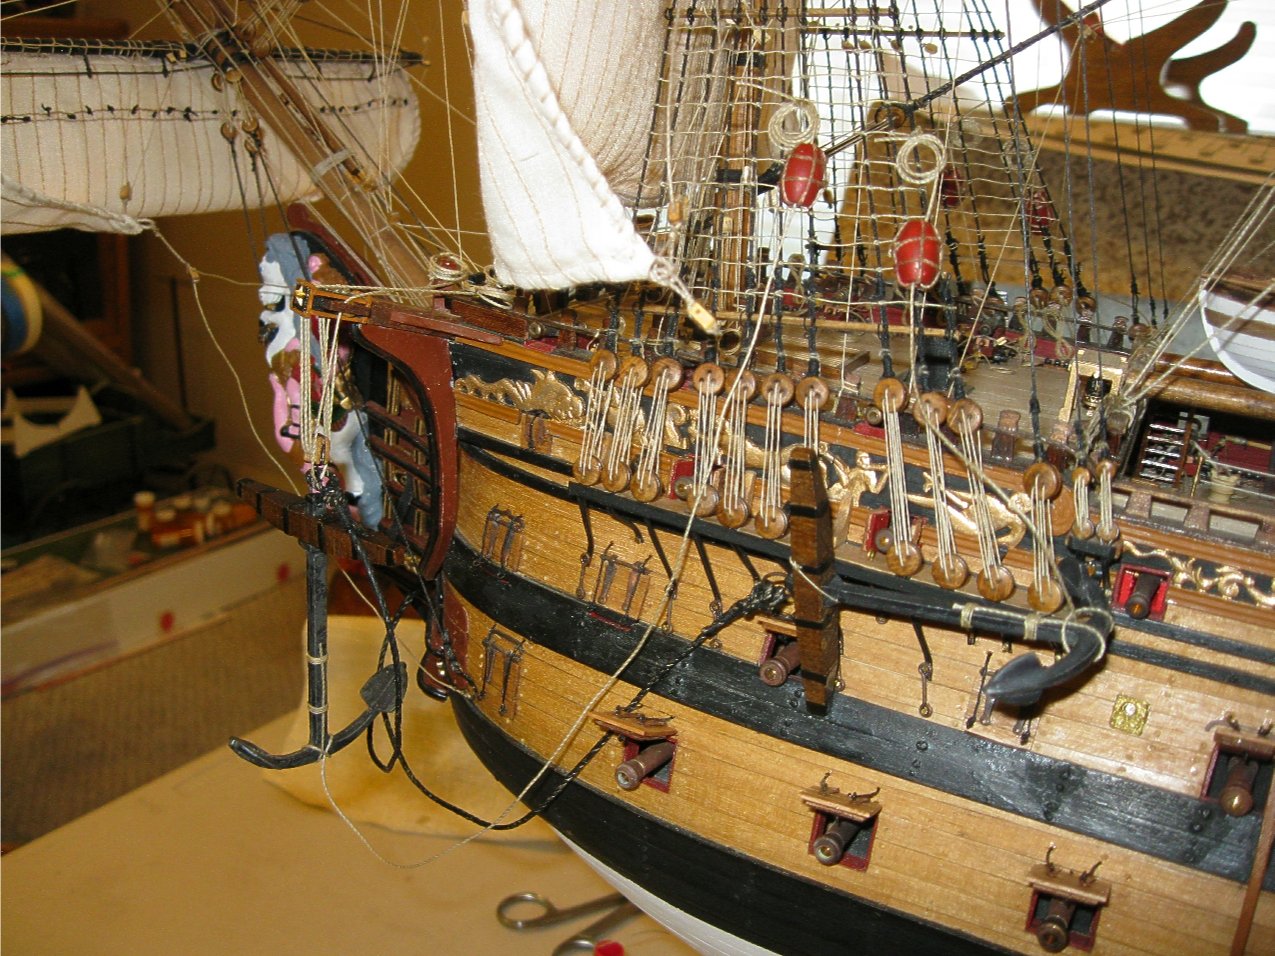
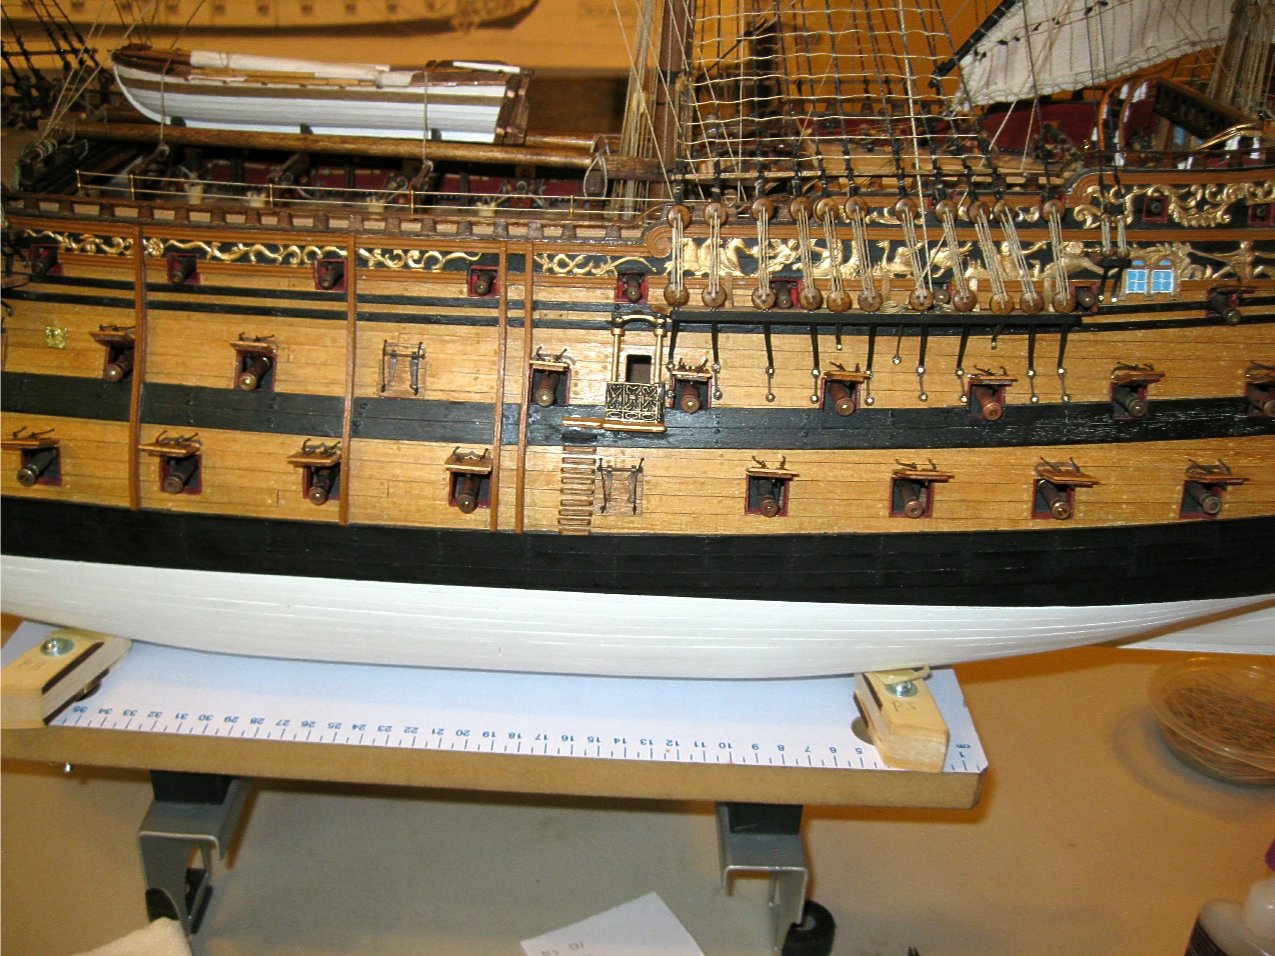
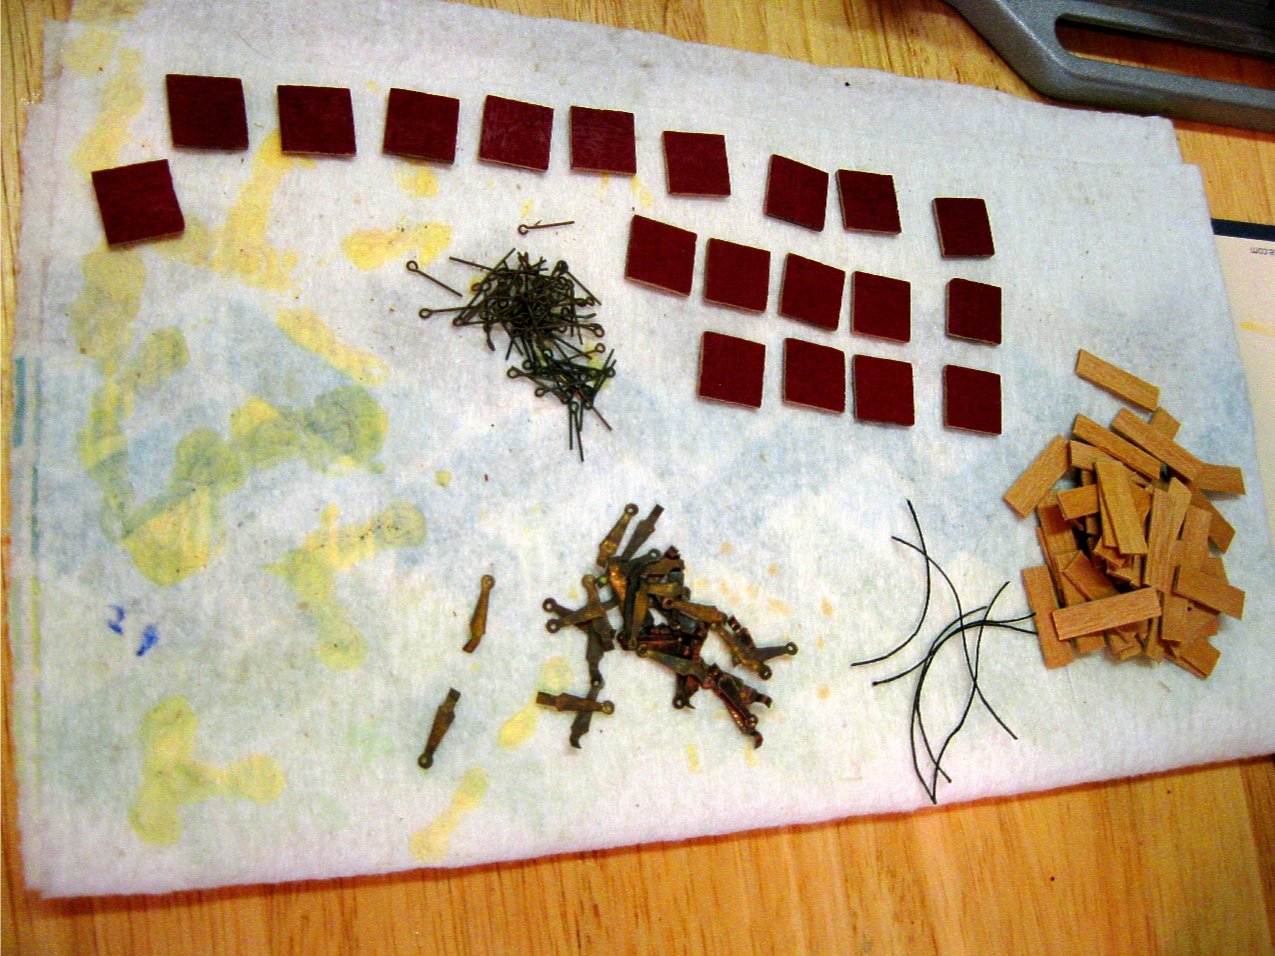
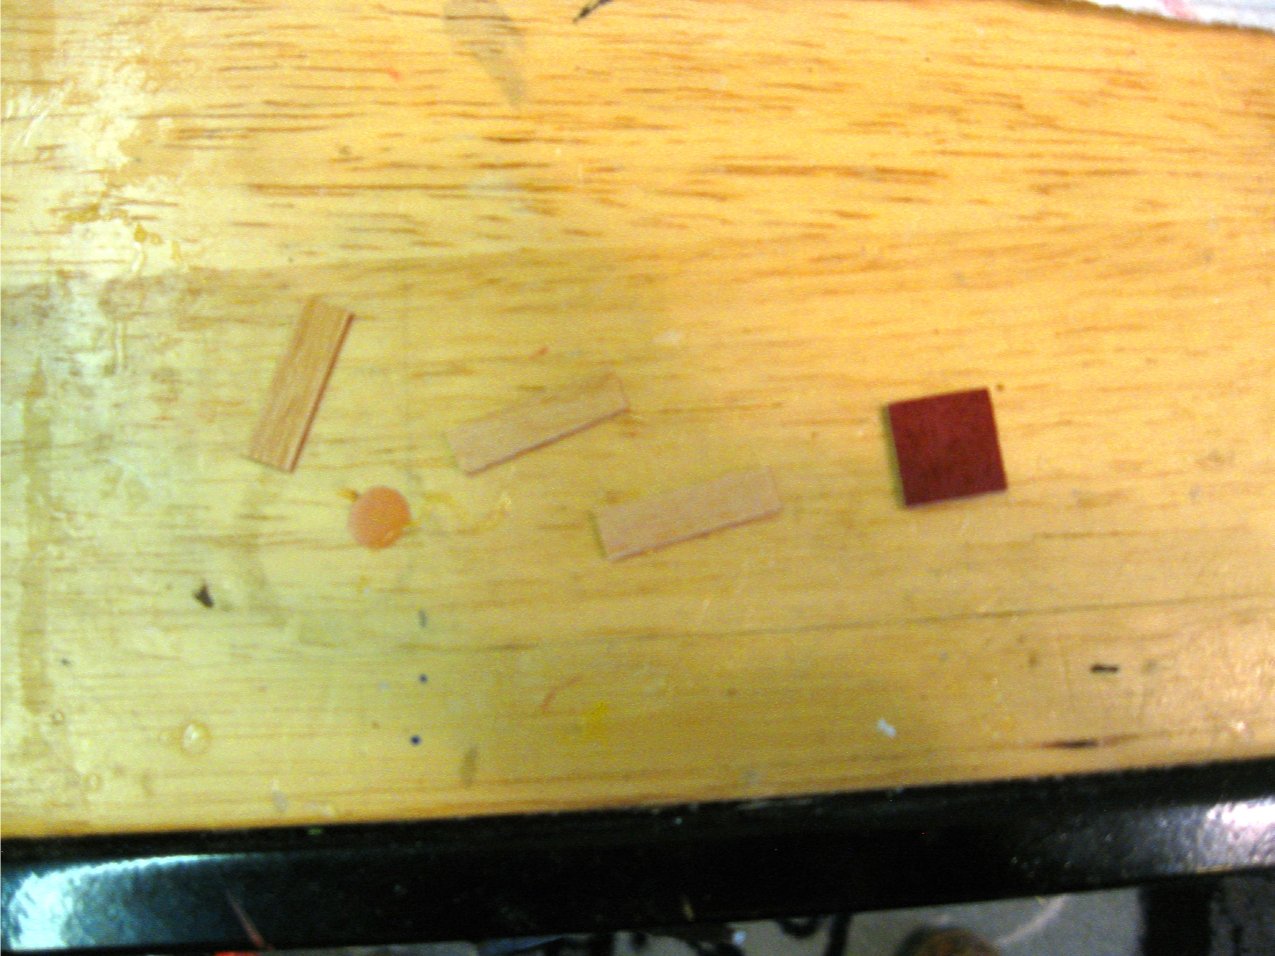
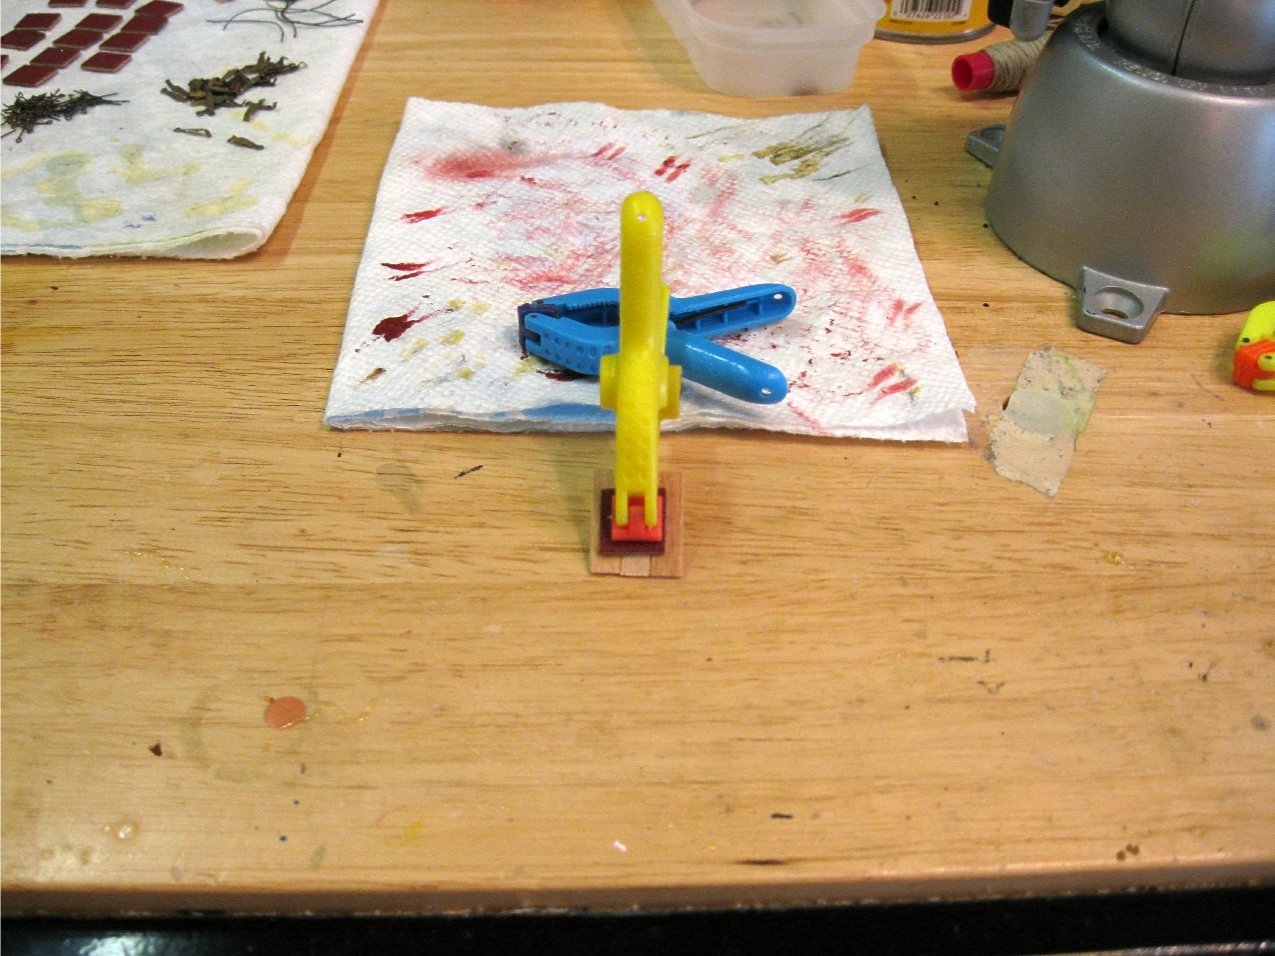
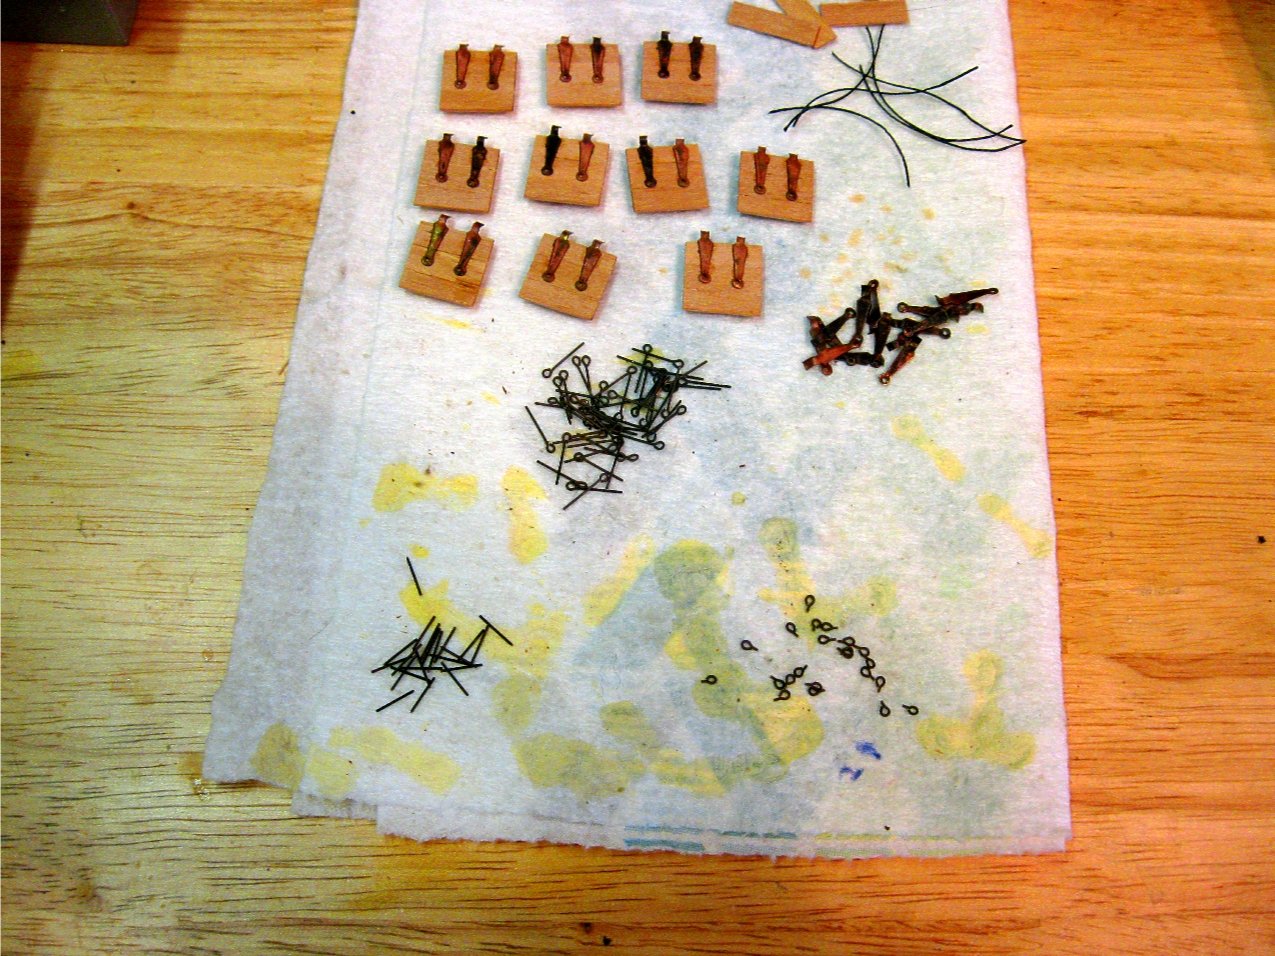
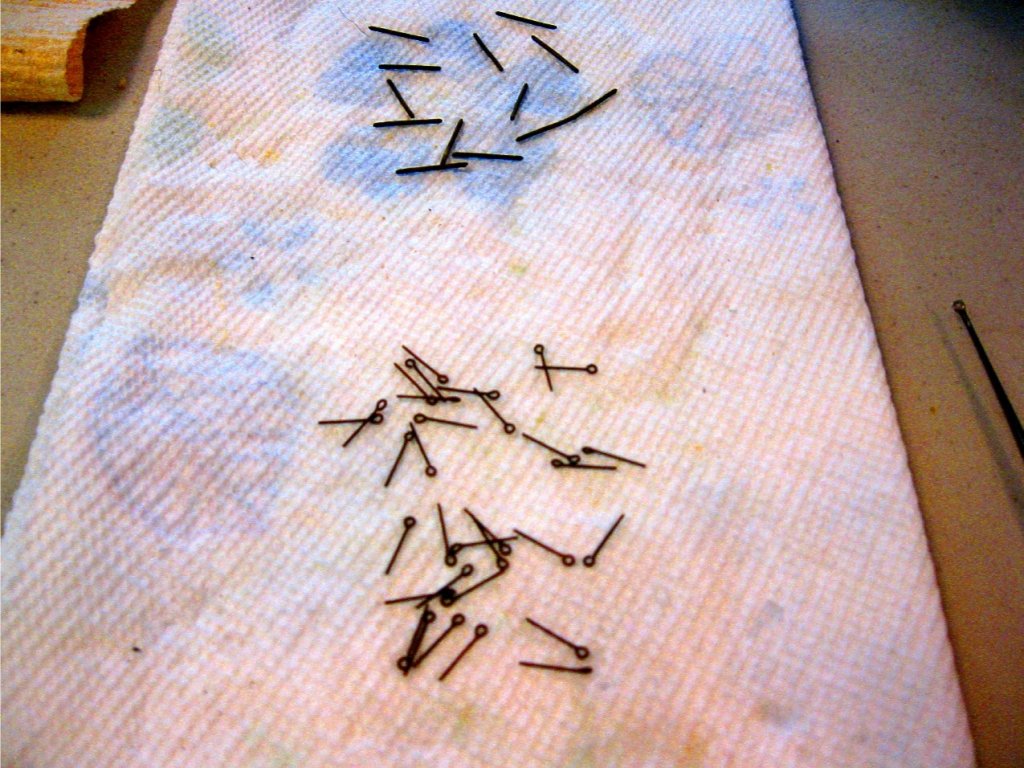
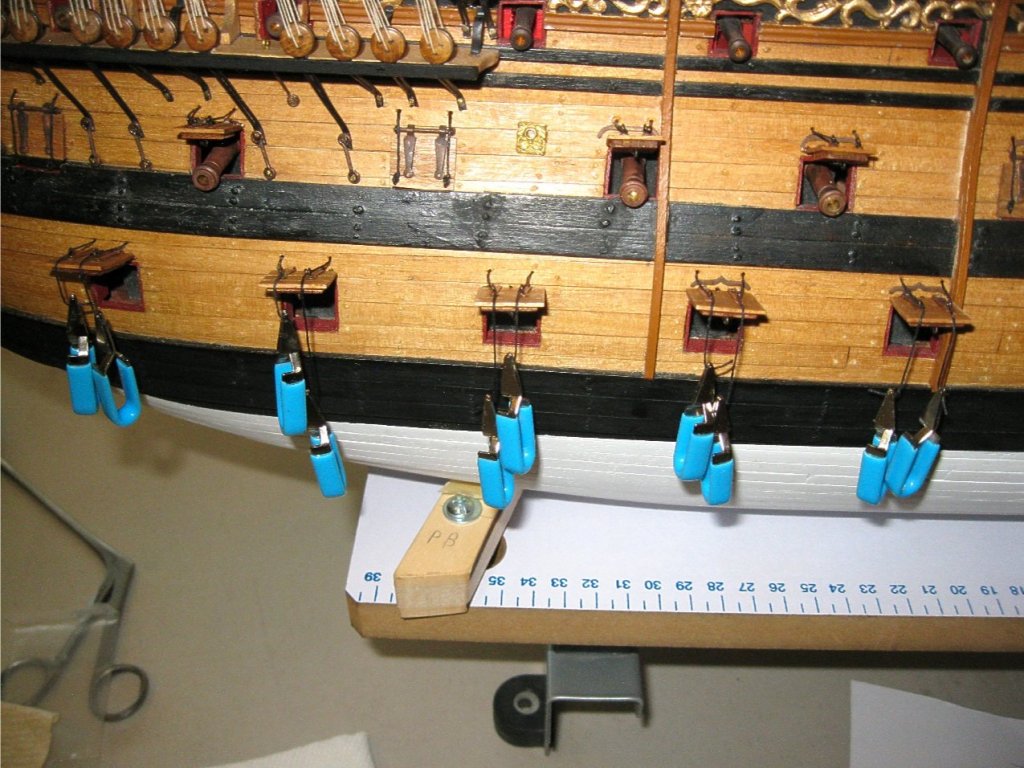
Working on constructing the gunport doors. Made from scratch of course. There are 4 gun decks and each deck has different sized gunports. I did not use the door hinges supplied in the kit because they are chunky and only one size is provided. Different sizes are needed for the various sizes of gunports on the 4 decks. Hull preparation 1. I used small eyebolts and pieces of 1mm brass wire which were blackened, to make the hinges on the hull above each gunport. 2. The rain gutters are placed on those ports that require them. I bought these and blackened them as well. Door construction I start out on each deck with measuring the opening of the gunport in the hull. 1. A piece of 2mm thick walnut plywood is cut to size and painted dark red to match the inside of the bulwarks. 2. Planking strips are placed over the plywood to match the outside of the hull and trimmed to the correct size for the ports. 3. Hinge plates are glued to the outside of the doors and cut down eye bolts are placed for the pull open ropes. Smaller ports have 1 and larger ones have 2. 4. Pull closed ropes are attached to an eyebolt on the underside of each door. ( This is a feature that is left out of most models because of either scale size or the fact that they can't be seen easily.) Door placement 1. The pull open ropes are attached to the hull above each port. 2. The doors are hung in the open position and the pull open ropes are secured to the eyebolts on the doors. 3. Once all of the doors are placed on each deck starting from the top, the false guns and blackened and mounted in each port. Vince P.


- 593 replies
-
- 3
-
-
- royal william
- euromodels
- (and 1 more)
-
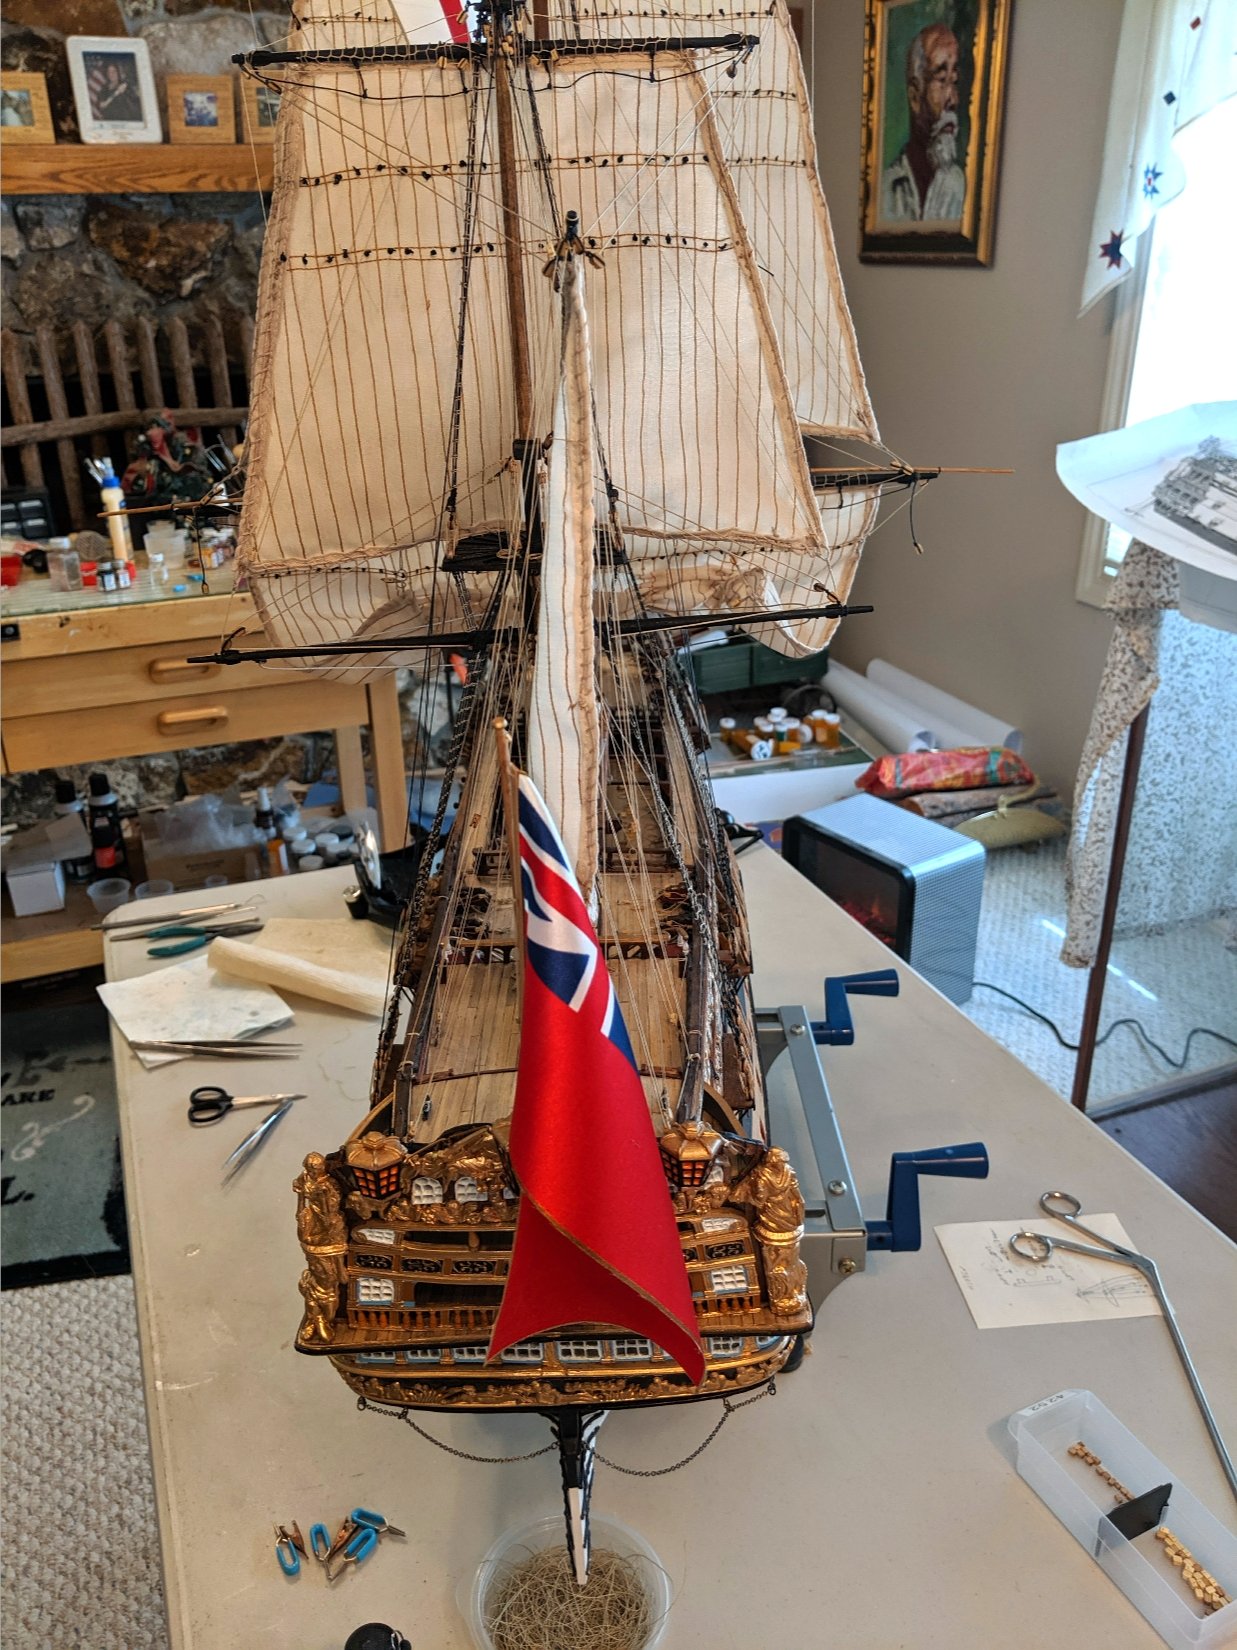
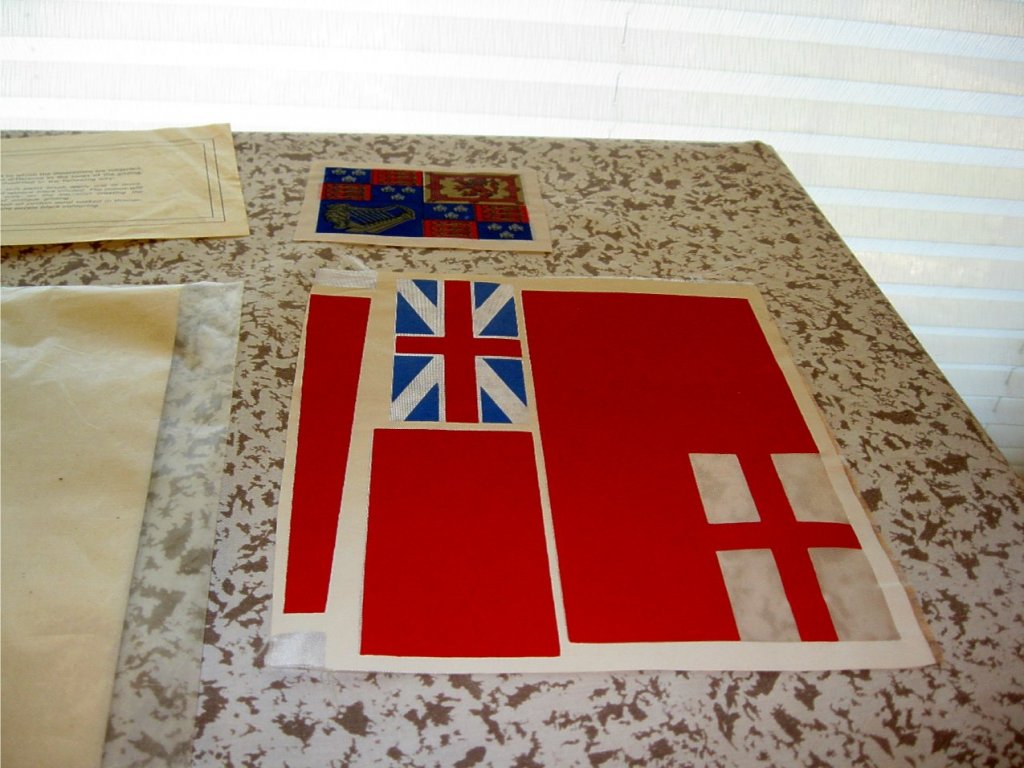
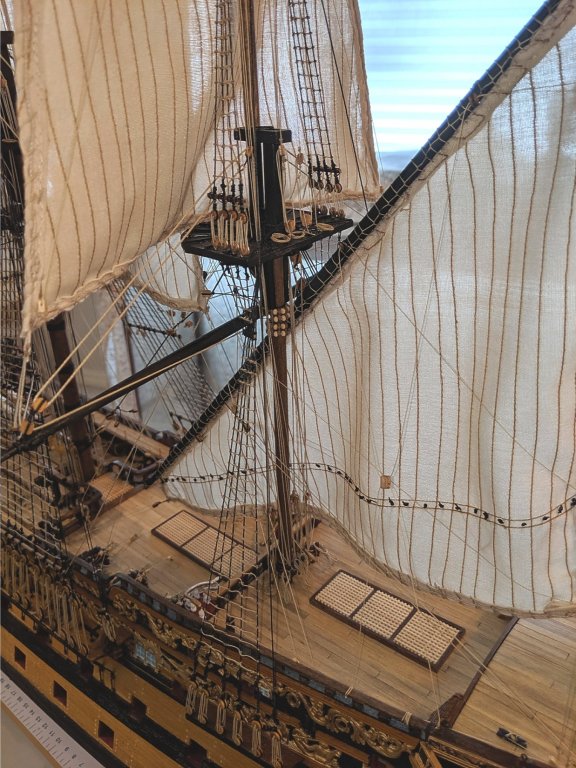
Finally finished the mizzen rigging and the poop deck flag. I have tied my last clove hitch on this baby. Other that the lower corner lines on the fore and main course, the rigging is essentially completed. That was a major project. The amount of rigging thread used, even though I am not wasteful, was at least 4 times what was supplied. It seems most kits short you on the rigging thread. Next up is to construct and place the open gunport lids and the guns. I can see the light at the end of the tunnel. A couple of months and she will be completed. Vince P.


- 593 replies
-
- 11
-
-
- royal william
- euromodels
- (and 1 more)