pirozzi
-
Posts
843 -
Joined
-
Last visited
Content Type
Profiles
Forums
Gallery
Events
Everything posted by pirozzi
-
 Hi Mark, yes I will do all of the sails except for the stunsails.
- 593 replies
-
- 1
-

-
- royal william
- euromodels
- (and 1 more)
-
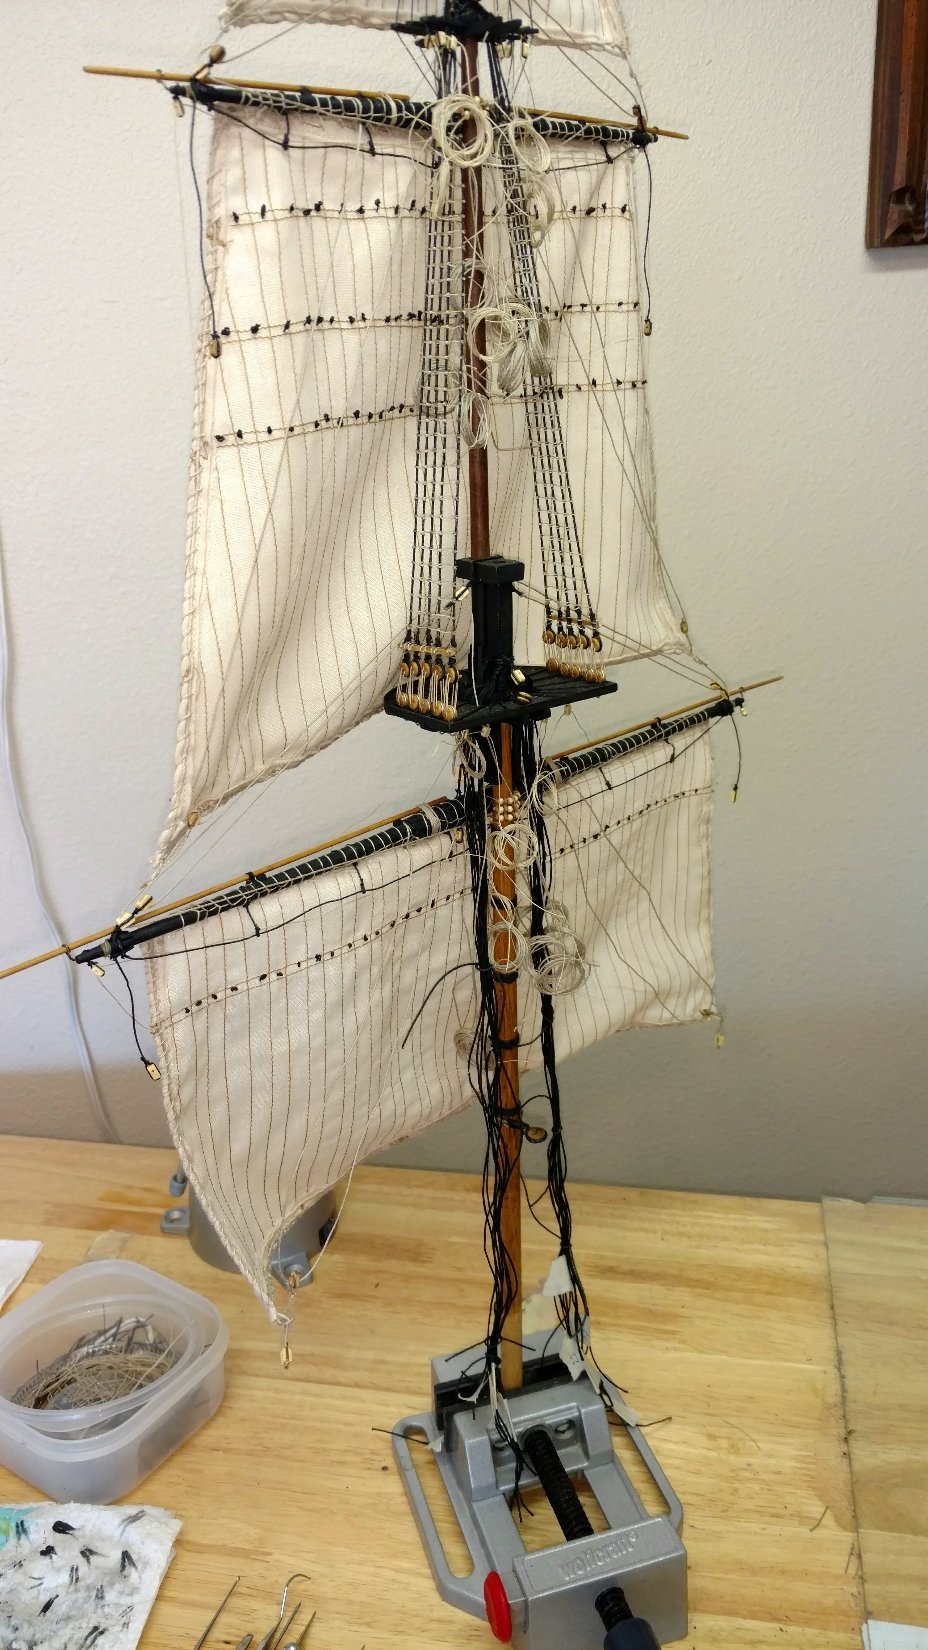
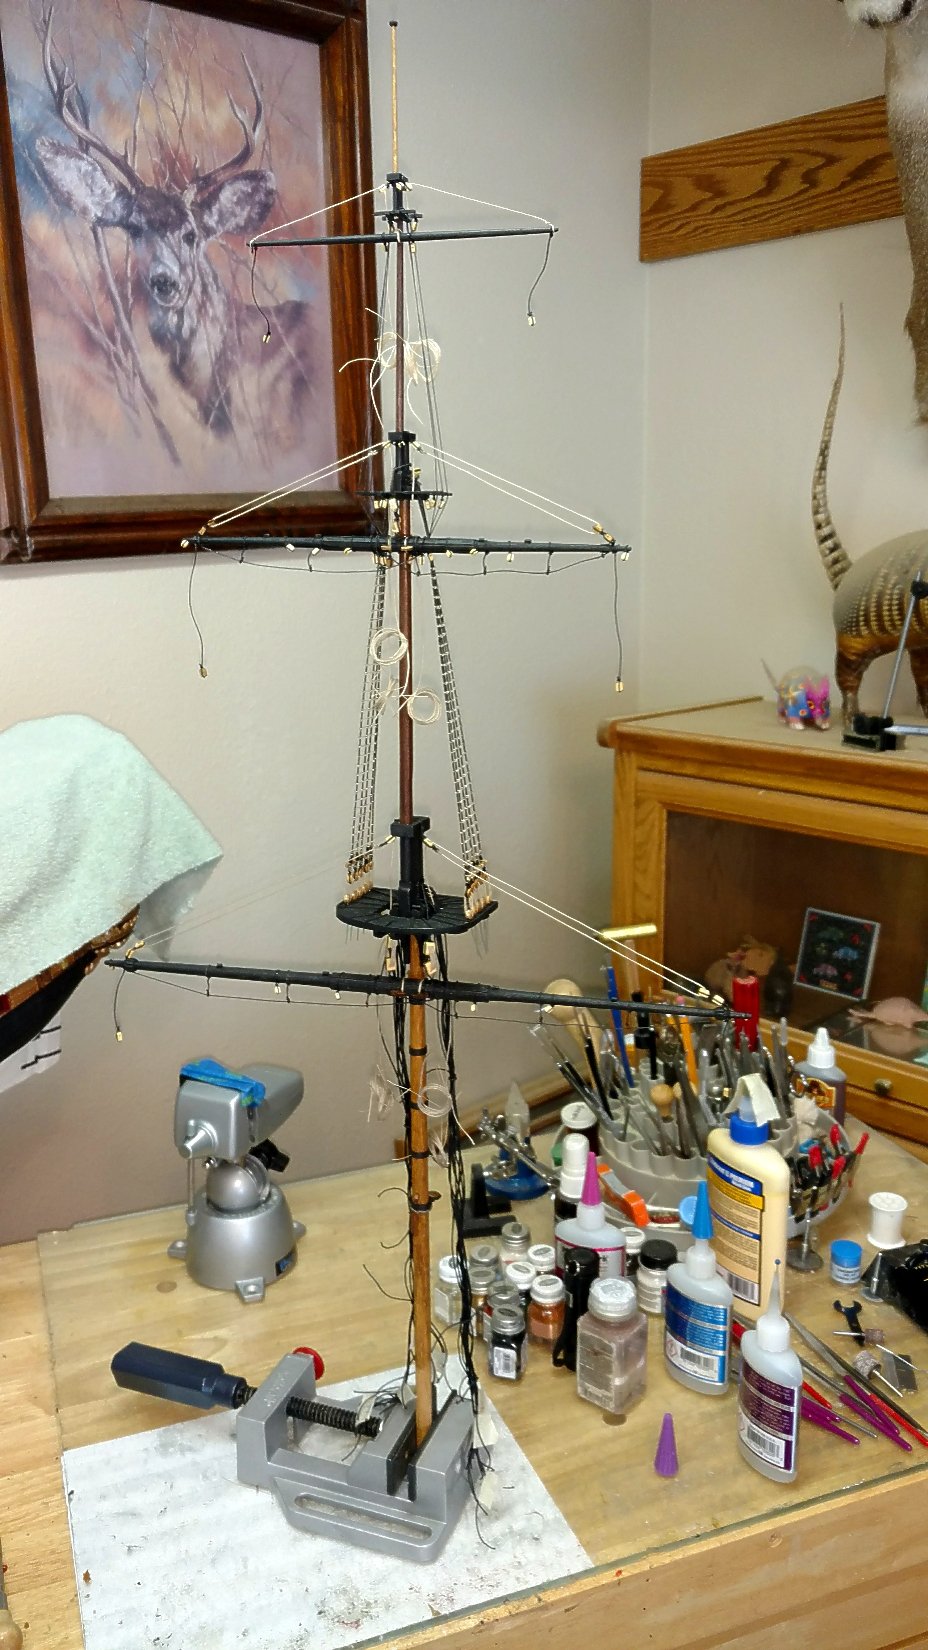
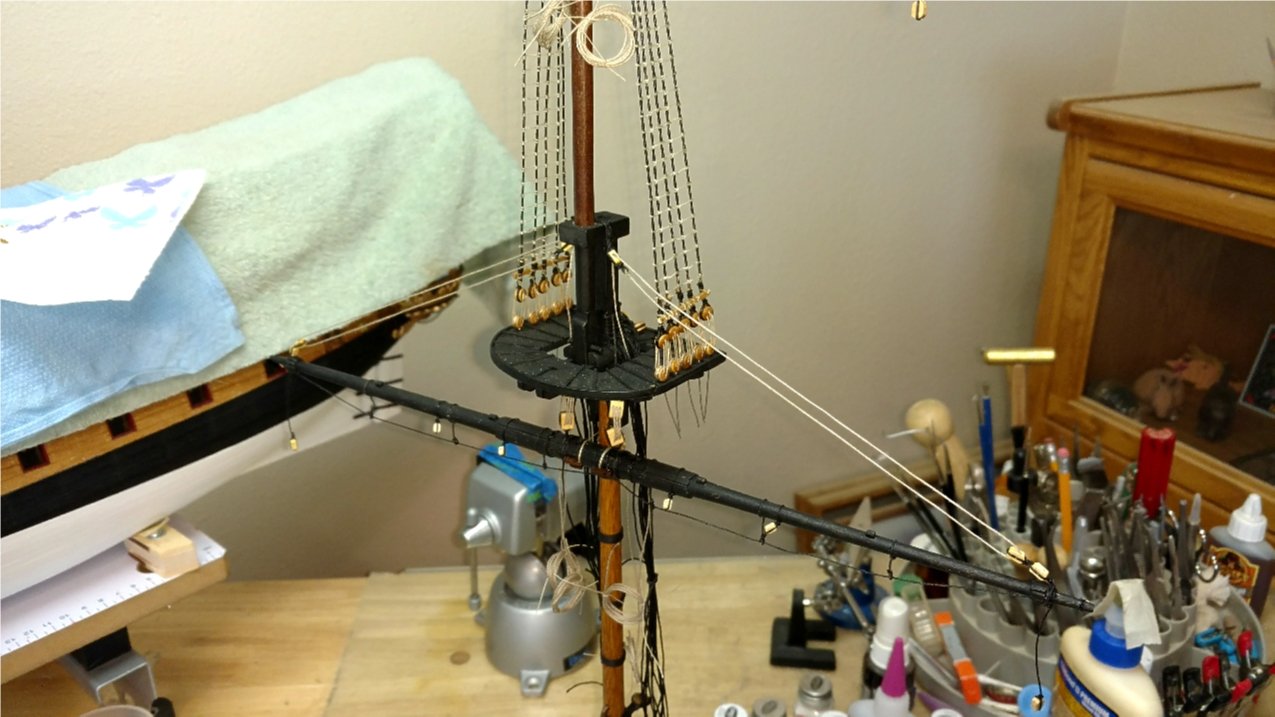
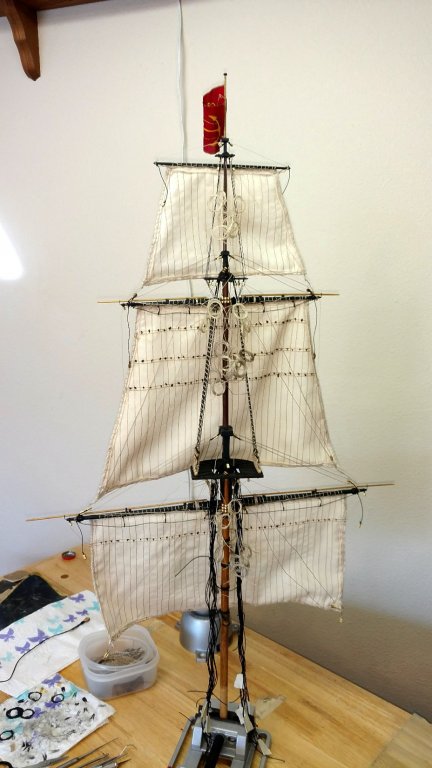
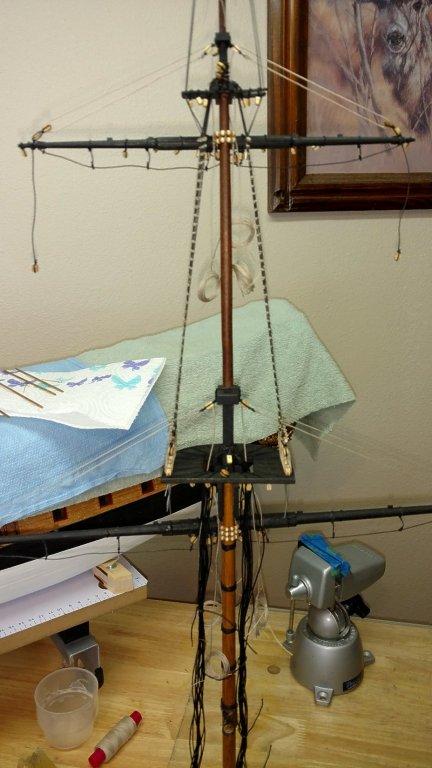
I have completed the construction of the foremast off ship. This includes the spars, sails, and almost all of the running rigging. It will now be stepped into the ship and the standing rigging completed as well as the lower shrouds and attaching all of the running rigging to the deck. With addition of the sails, the amount of running rigging increases substantially. Like I mentioned before, I prefer to complete the masts off ship so I don't have to rotate the ship continuously to attach the rigging and sew the sails. This method works well for me. Vince P.


- 593 replies
-
- 6
-
-
- royal william
- euromodels
- (and 1 more)
-
Hi Cristikc, I remember the problems I had with all of the metal fittings when I built her. I had to cut many of them down and even had to move some of the hull trimmings in order to get them to fit. It all worked out in the end but required a lot of patience along the way. Looking good. Vince P.
-
Welcome aboard mate! Vince P.
-
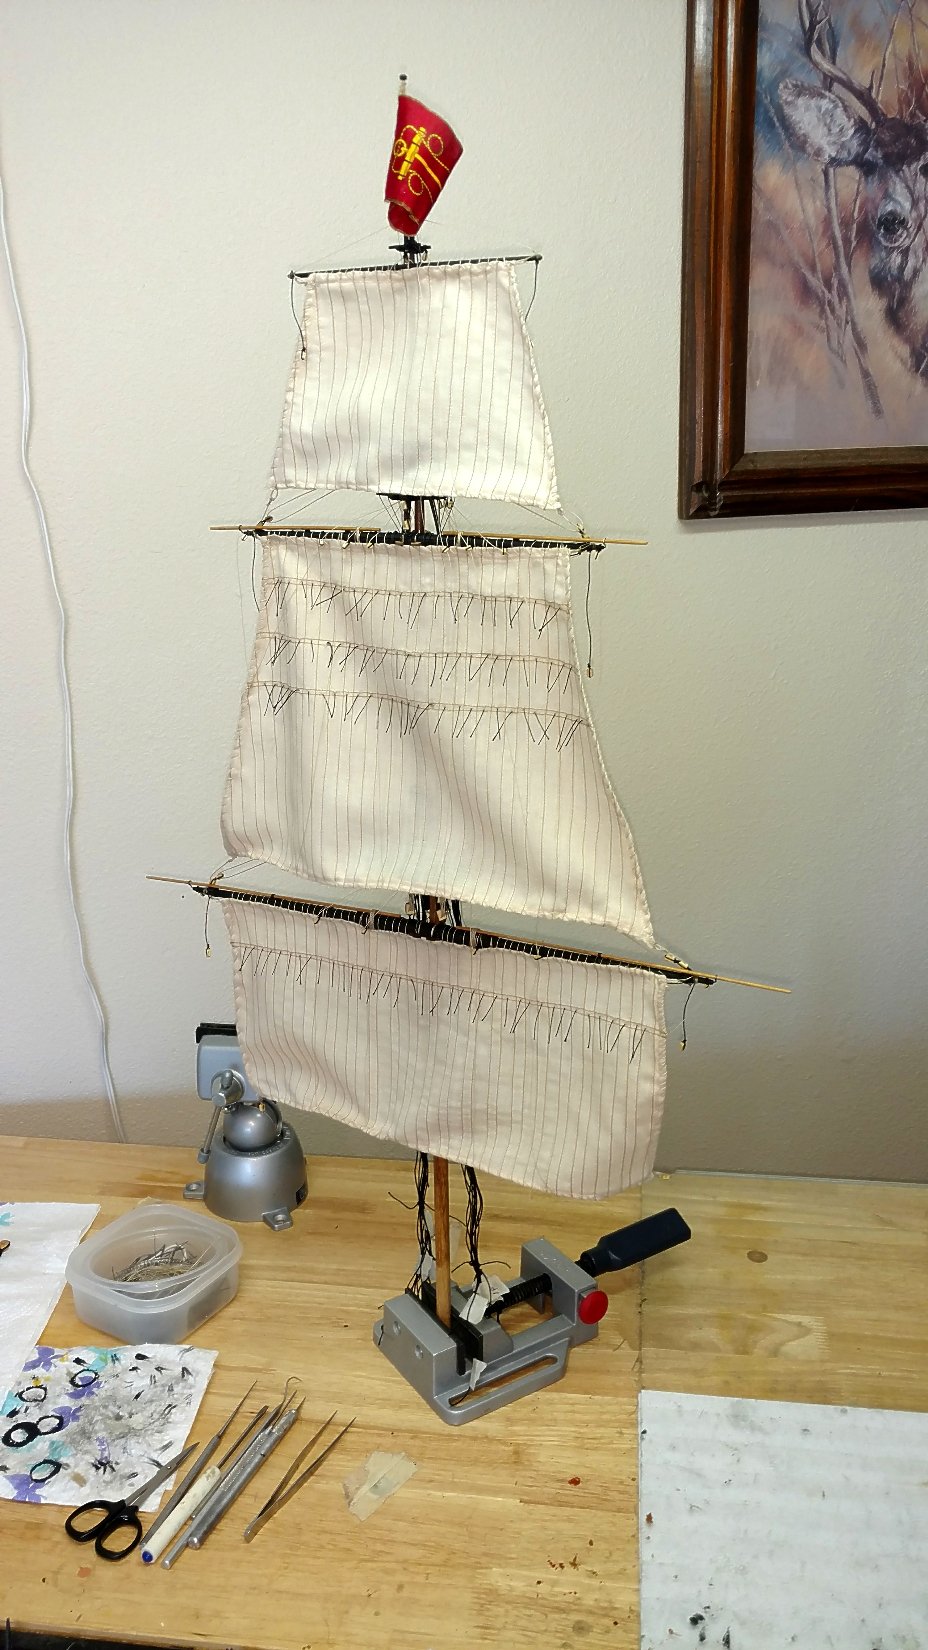
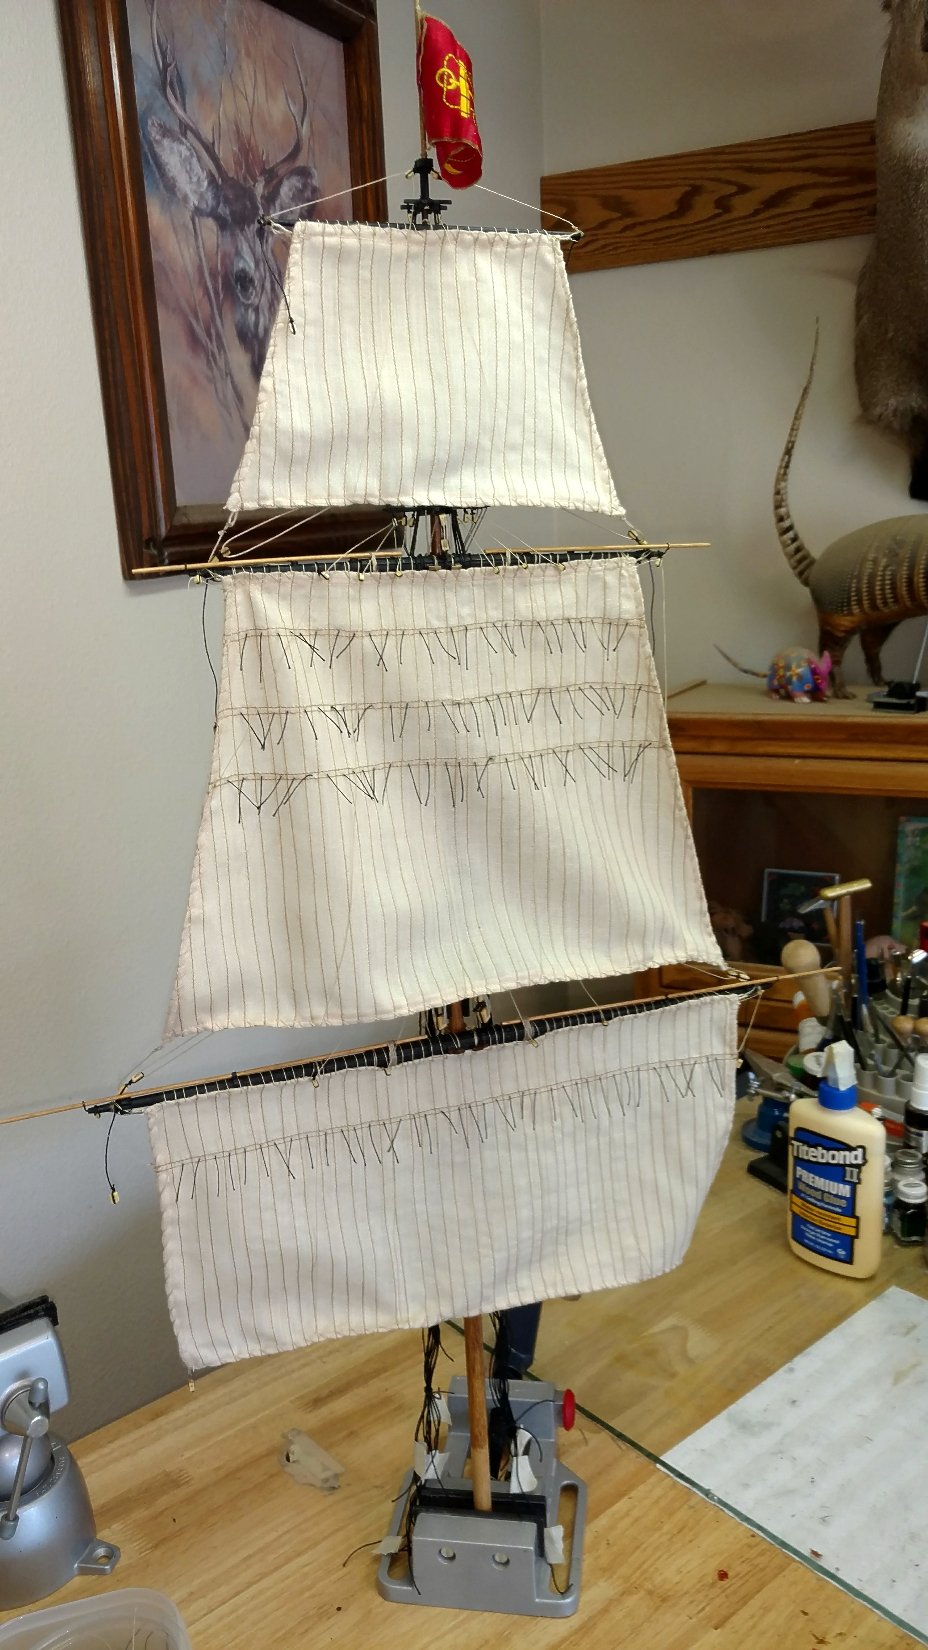
Hi all, Just an update. Even though I have not posted in a while, I have been making progress. The seamstress finished most of the sails. She sewed the basic sails and the wife and I added the framing ropes and the cringle loops to the corners. All of the reefing tie ropes had to be added as well. I am now in the process stitching the sails to the foremast and adding all of the running rigging. Once all of this is completed, I will post some photos before stepping the mast into the ship. I have also completed the construction of the mainmast, but have not added the spars yet. Vince P.
- 593 replies
-
- 1
-
-
- royal william
- euromodels
- (and 1 more)
-
A very impressed new member who wants to push boundaries.
pirozzi replied to Vitanaut's topic in New member Introductions
Welcome aboard mate ! Vince P.- 4 replies
-
- 1
-
-
- architecture
- vlfs
- (and 2 more)
-
Welcome aboard mate! Vince P.
-
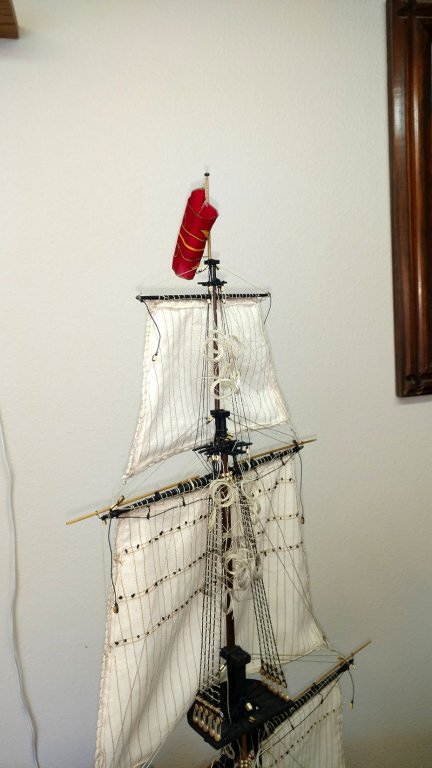
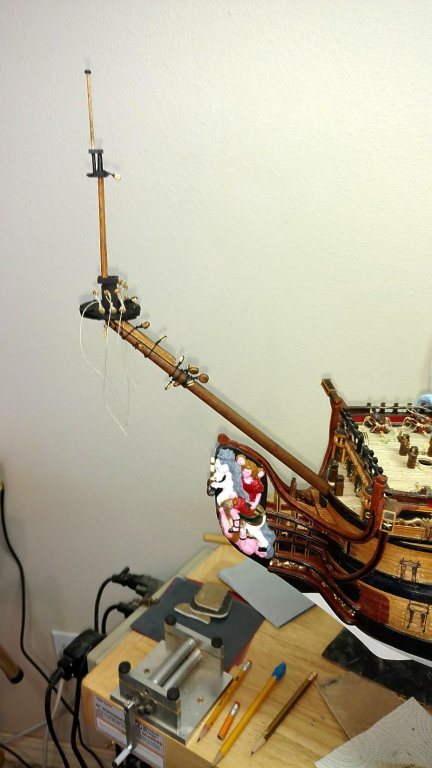
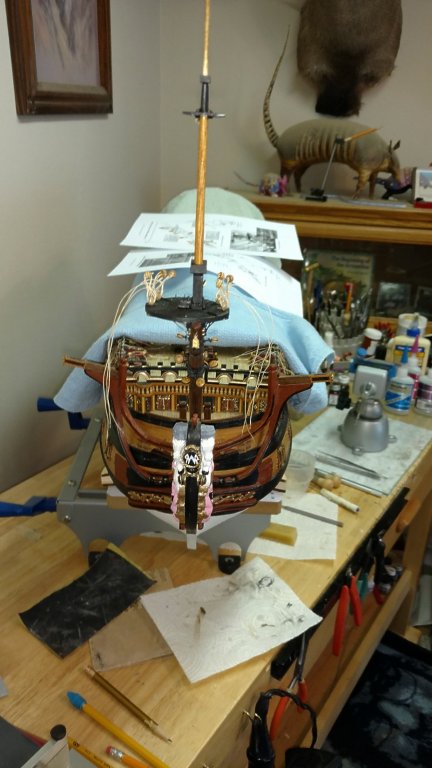
I am almost embarrassed to show my meager progress with Ken and Mark so far ahead of me on this build, but here is where I am. The foremast is fully constructed. My methods are different from most other builders in that I fully construct the masts off ship. This includes the spars, running rigging, and sails . I find it much easier to move around the mast for the rigging without having to rotate the whole ship. I still have to stitch the sails on, but my seamstress has not completed all of the sails yet. Once the sails are on and all of the running rigging attached I will place the stunsail booms. When sewing on the sails the booms will get in the way. Once the mast has all of the sails and rigging, it will be stepped into the ship. All of the stays and running rigging will be finished and lastly the lower shrouds. By adding sails, the amount of running rigging increases considerably. Vince P.


- 593 replies
-
- 5
-
-
- royal william
- euromodels
- (and 1 more)
-
Welcome aboard mate! Vince P.
-
Hi Ken, Outstanding build! All along you were telling us that you had limited skills and were only going to make a simple plain build. You had me fooled. Your build is as good as anything I have seen here. I am amazed at how fast you completed her. I was one of the first to start this build and you blew past me and others like a shot. What is your secret for speed. I can only put in a few hours here and there because of my busy schedule. I probably have another year before completing mine. What is going to be your next project? Vince P.
-
Welcome aboard mate! Vince P.
-
Welcome aboard mate. Vince P.
-
Now that is impressive! Would like to see the model itself. Vince Pirozzi.
- 652 replies
-
- 1
-
-
- royal william
- euromodel
- (and 1 more)
-
Hi my friend. Good to hear from you. Hope to see you building again soon. Vince Pirozzi.
-
Welcome aboard mate! I too was a medic for 38 years before I retired. Vince P.
-
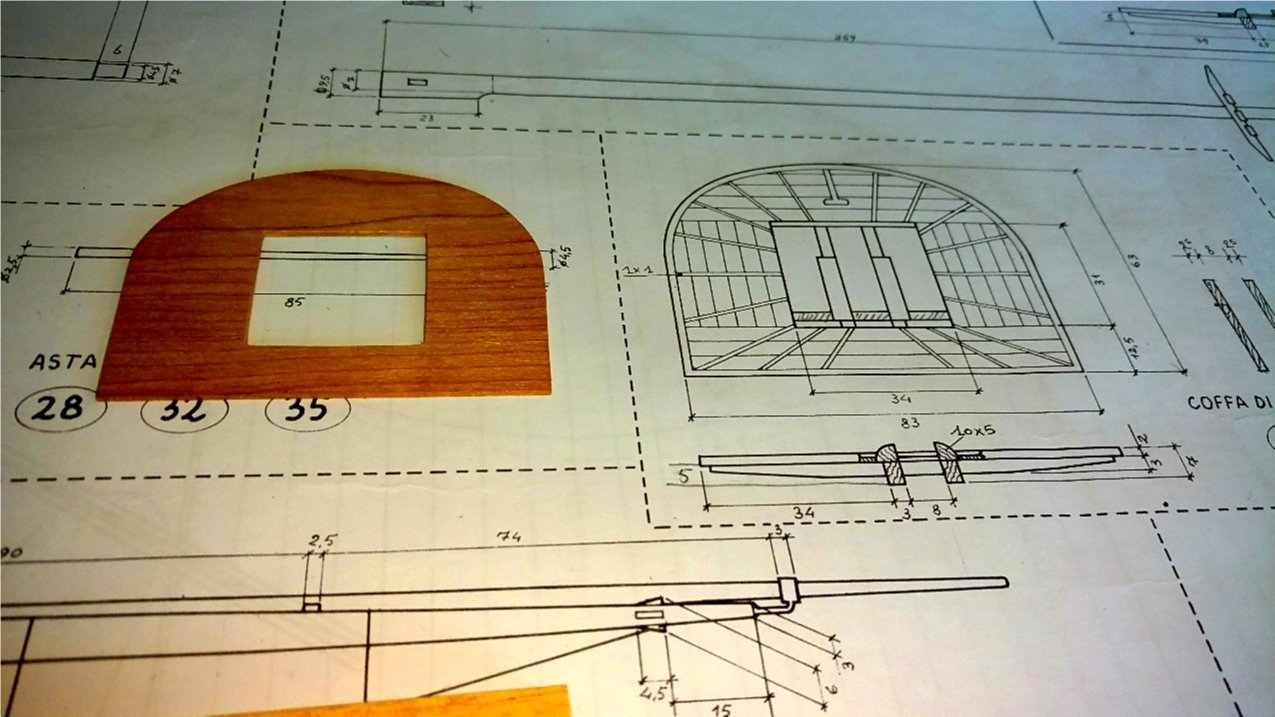
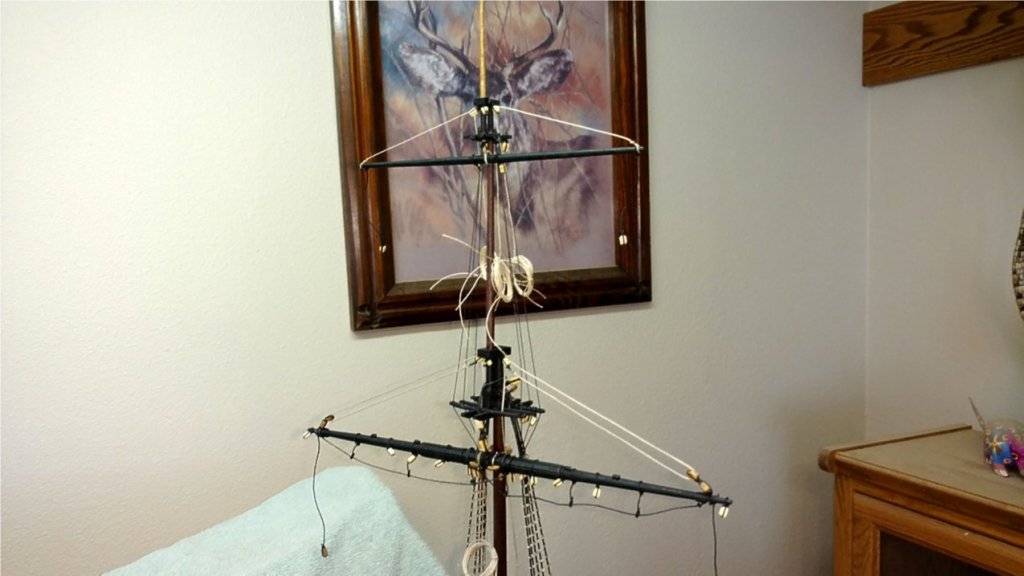
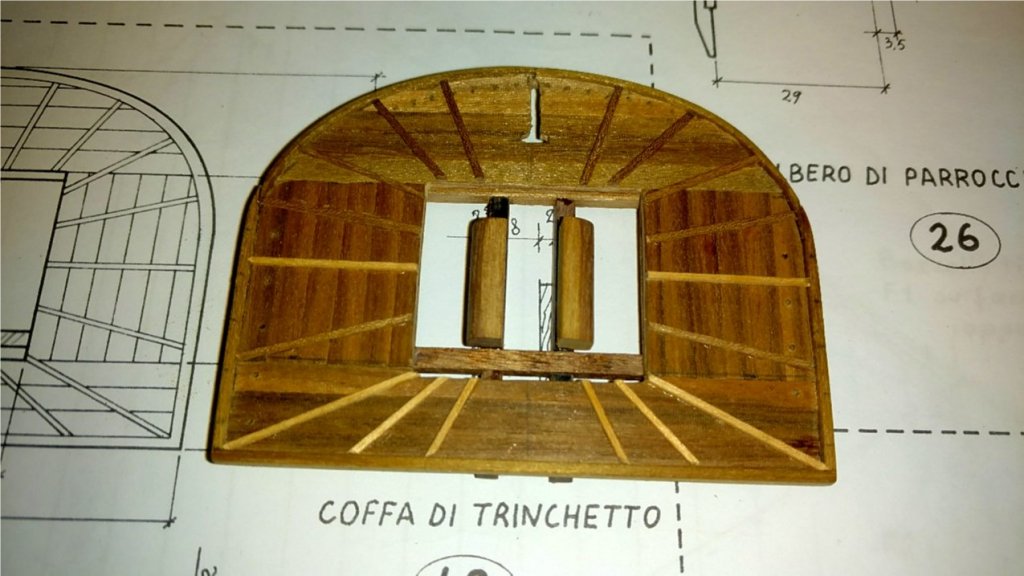
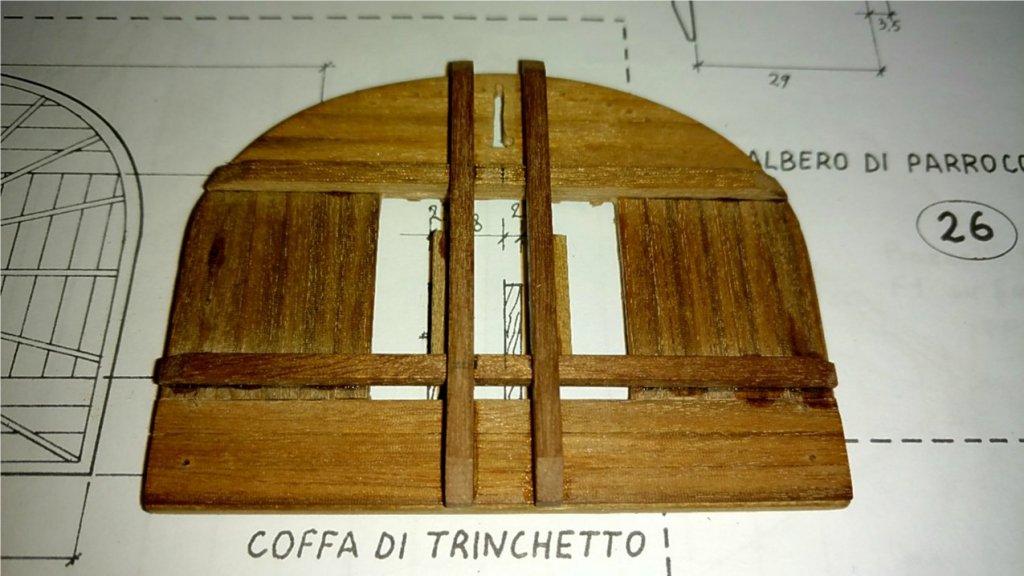
Completed the foremast top. The plywood supplied in the kit for the base of the top was badly warped, so I used some 2mm quality walnut sheet instead. Both sides were planked with finish planking strips from the kit. The crosstrees and trestletrees were assembled on the top so the spacing could be accurately obtained for the thickness of the doubling for the top mast. There is also an error in the plans. It shows the dimensions for the bolsters at 10mm tall and 5mm wide, and 10x5mm lumber is supplied. The height of the bolsters should be 5mm and the width 5mm, so some 5x5mm lumber was used. The bolsters are mounted directly on top of the trestletrees which have a height of 5mm, so the combination of the trestletrees and the bolsters make 10mm in height. Next up is to paint the top black and assemble the topmast, top, and lower mast. While on the subject of errors, the plans show the square base of the top mast at 9.5x9.5mm. It should read 9.5x7.0mm. The thickness has to be the same as the top of the lower mast, which is 7.0mm Vince P.

- 593 replies
-
- 4
-
-
- royal william
- euromodels
- (and 1 more)
-
Finished the spritsail topmast shrouds and ratlines. Next up is to start on the foremast construction. Vince P.
- 593 replies
-
- 6
-
-
- royal william
- euromodels
- (and 1 more)
-
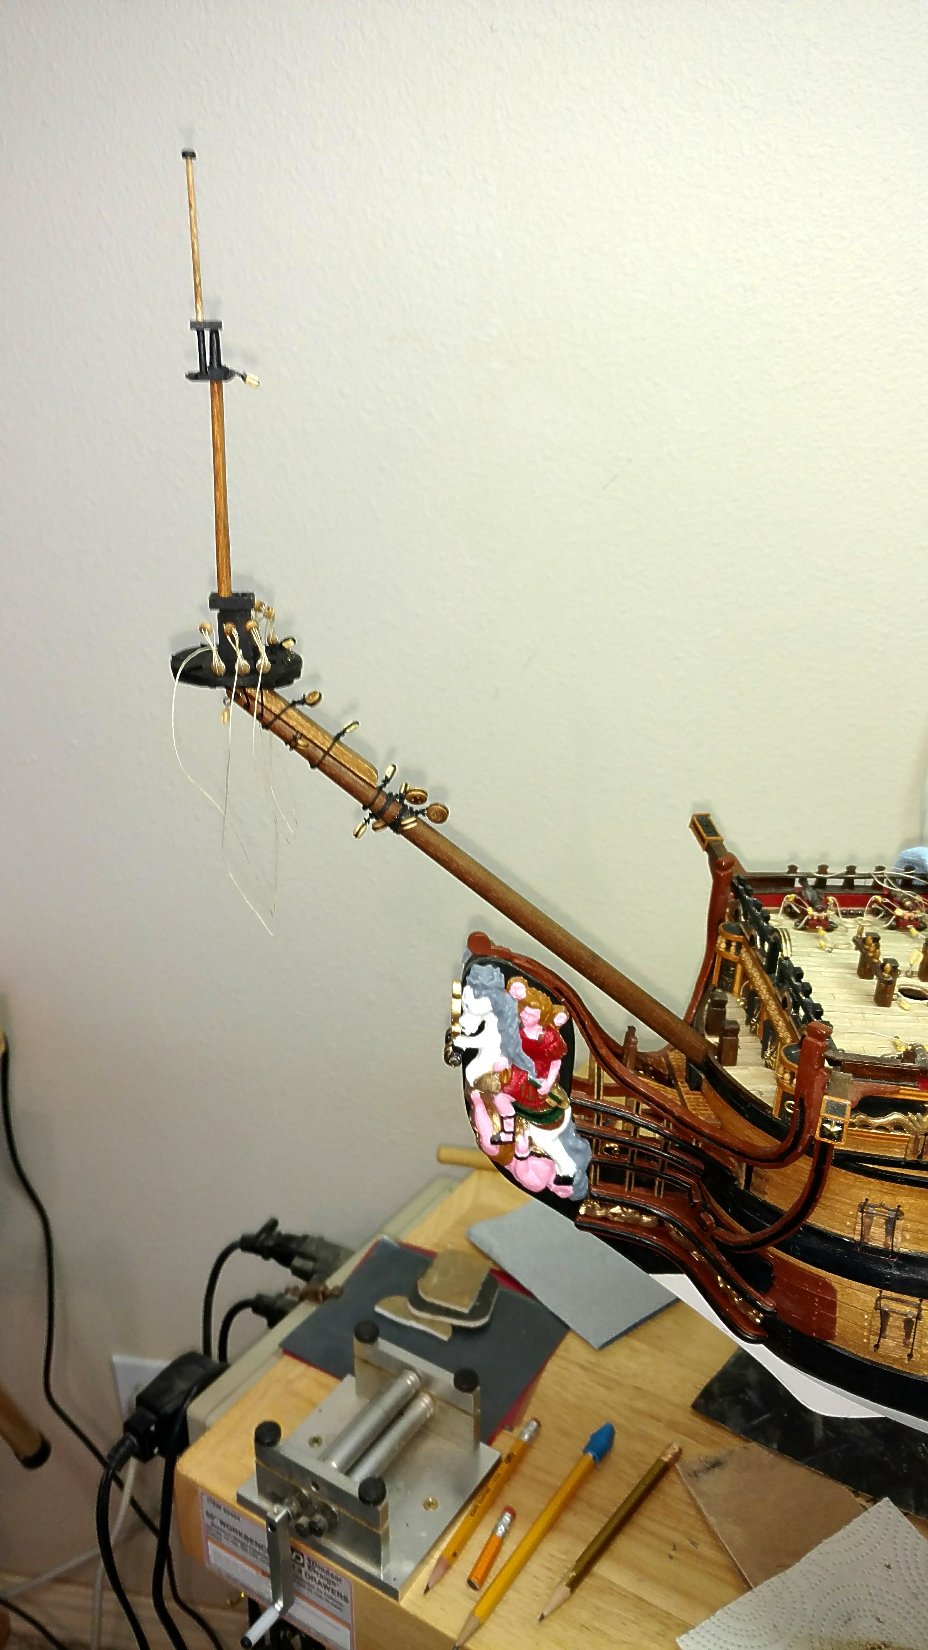
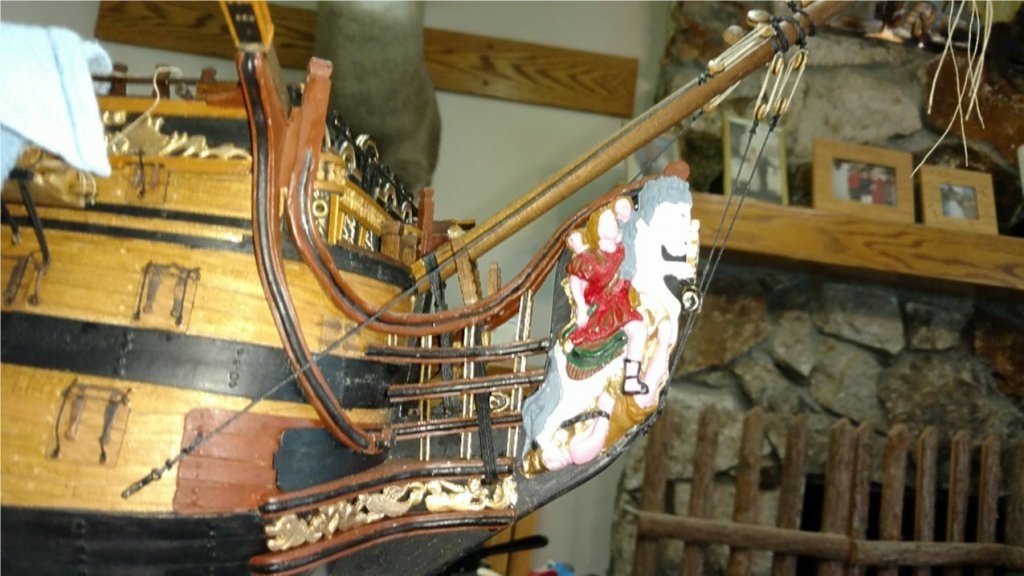
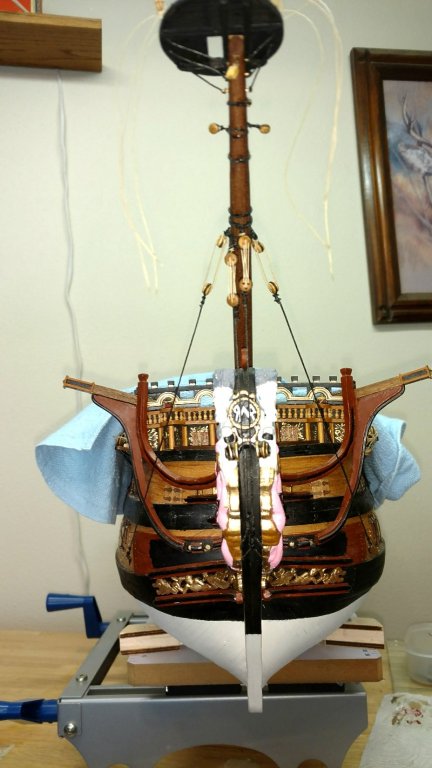
I have completed the bowsprit bobstays and shrouds. Also the gammonings and the fare lead rigging blocks mounted on the forward gammoning for rigging routing from the bowsprit. Pretty straightforward. Next up is the spritsail topmast shrouds and then on to the masts. Vince P.
- 593 replies
-
- 6
-
-
- royal william
- euromodels
- (and 1 more)
-
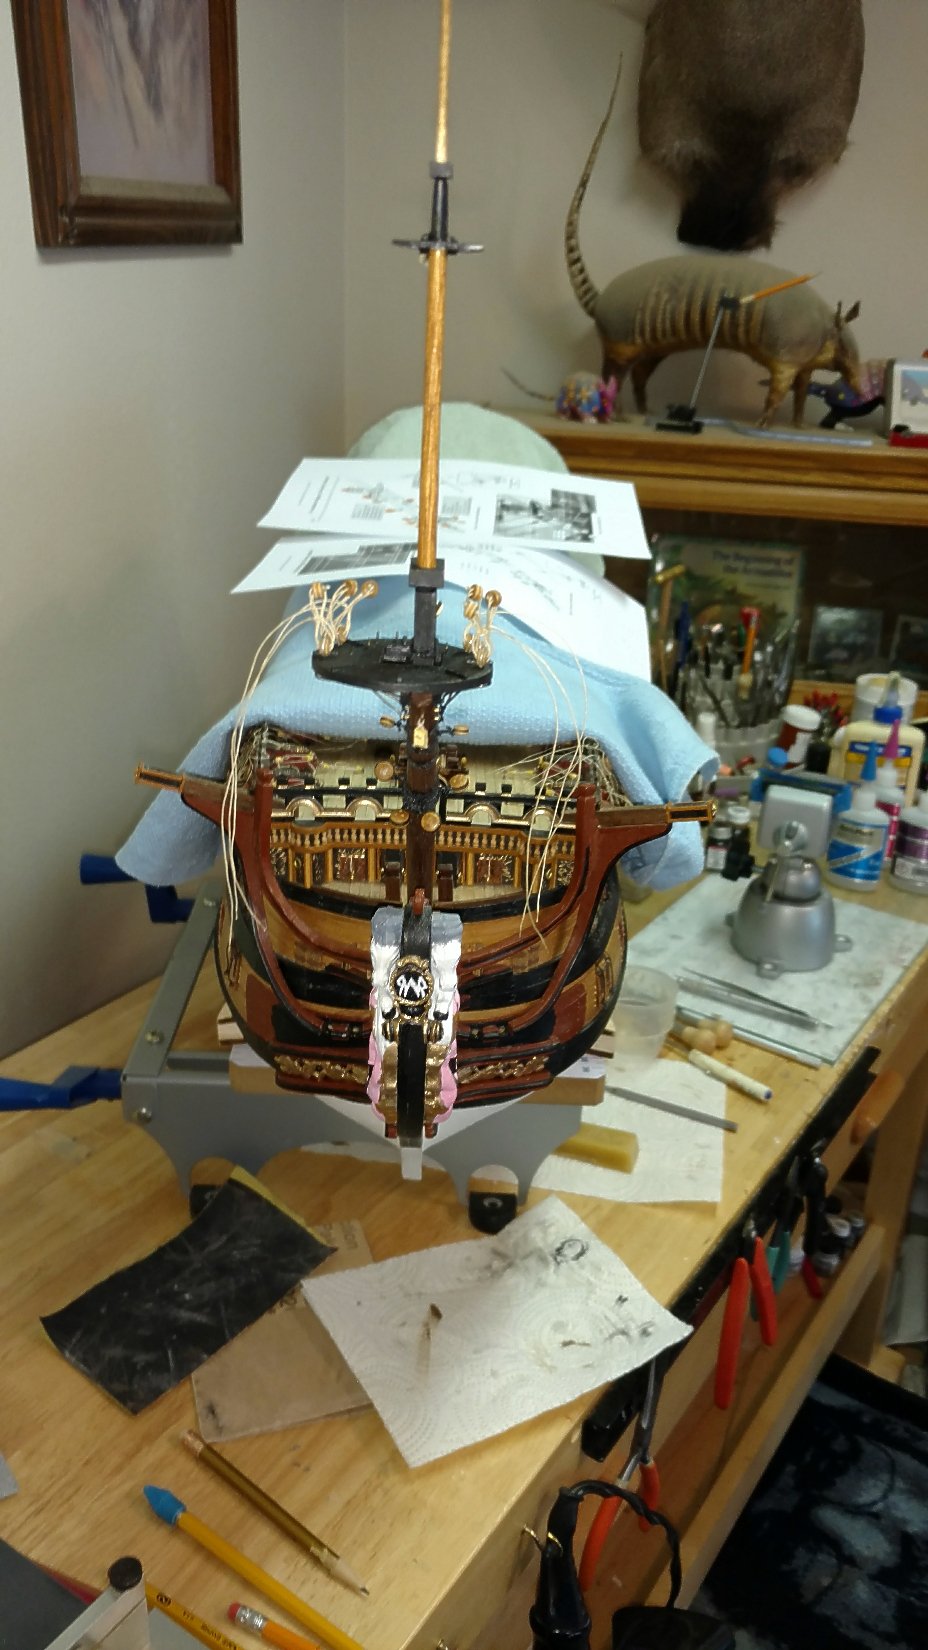
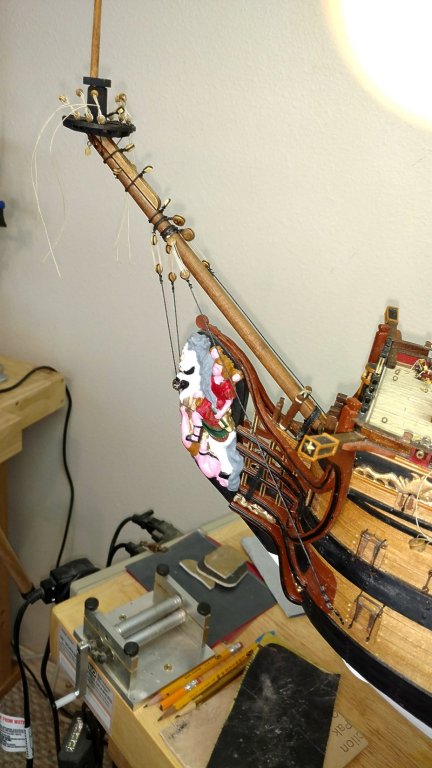
I have constructed most of the bowsprit and mounted it on the ship. The jib boom will not be placed until the foremast is completed and stepped. This way I can move the ship around without snapping the long bowsprit. I still have to install the bobstays and gammonings. Vince P.

- 593 replies
-
- 5
-
-
- royal william
- euromodels
- (and 1 more)
-
Welcome aboard mate! I hail from the northwest and just a little south of you in Carson City, Nevada. Vince P.
-
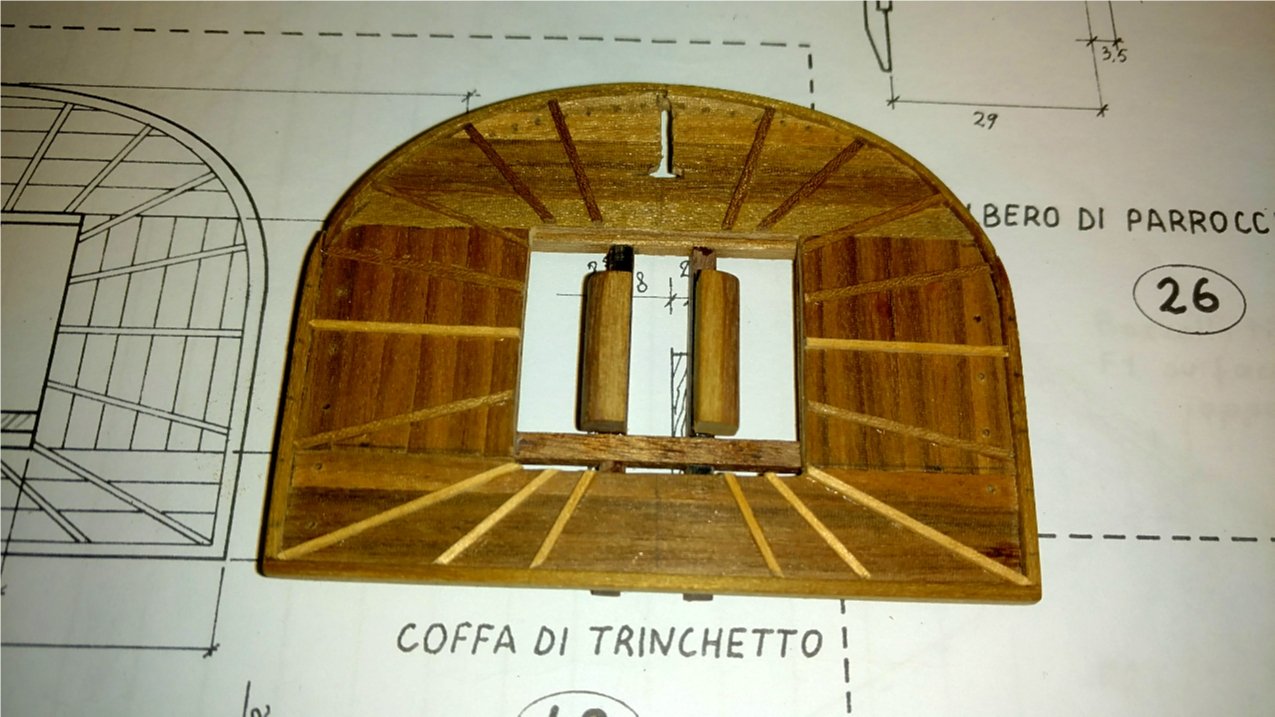
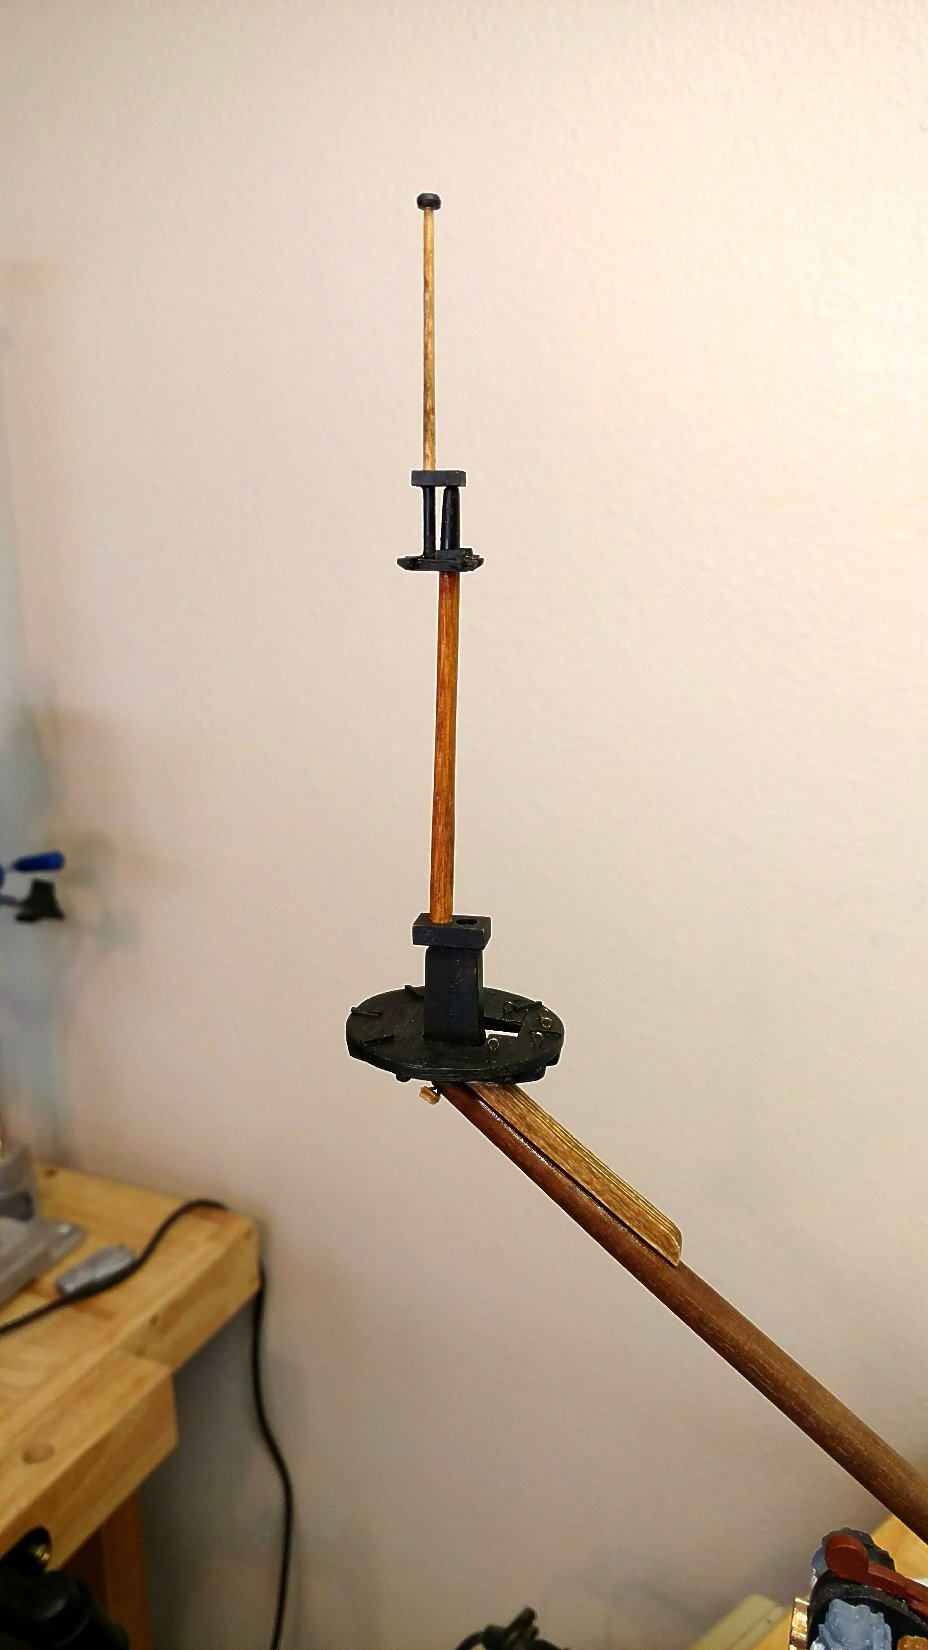
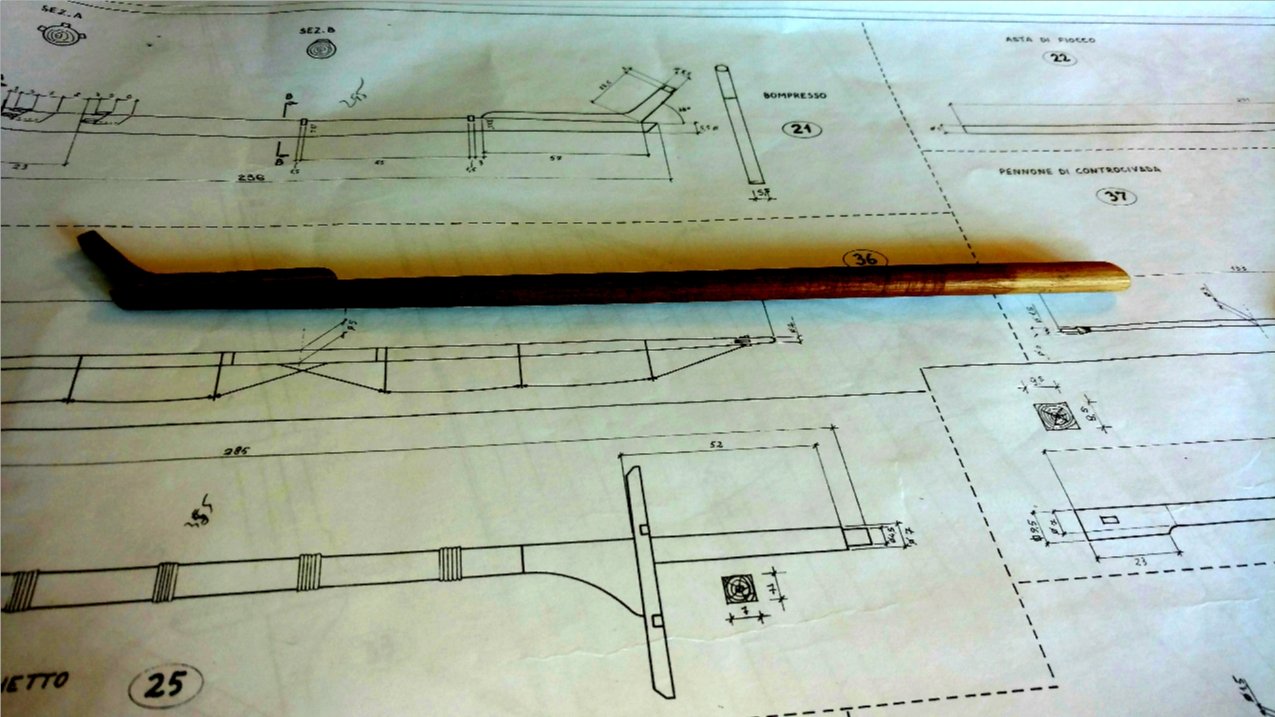
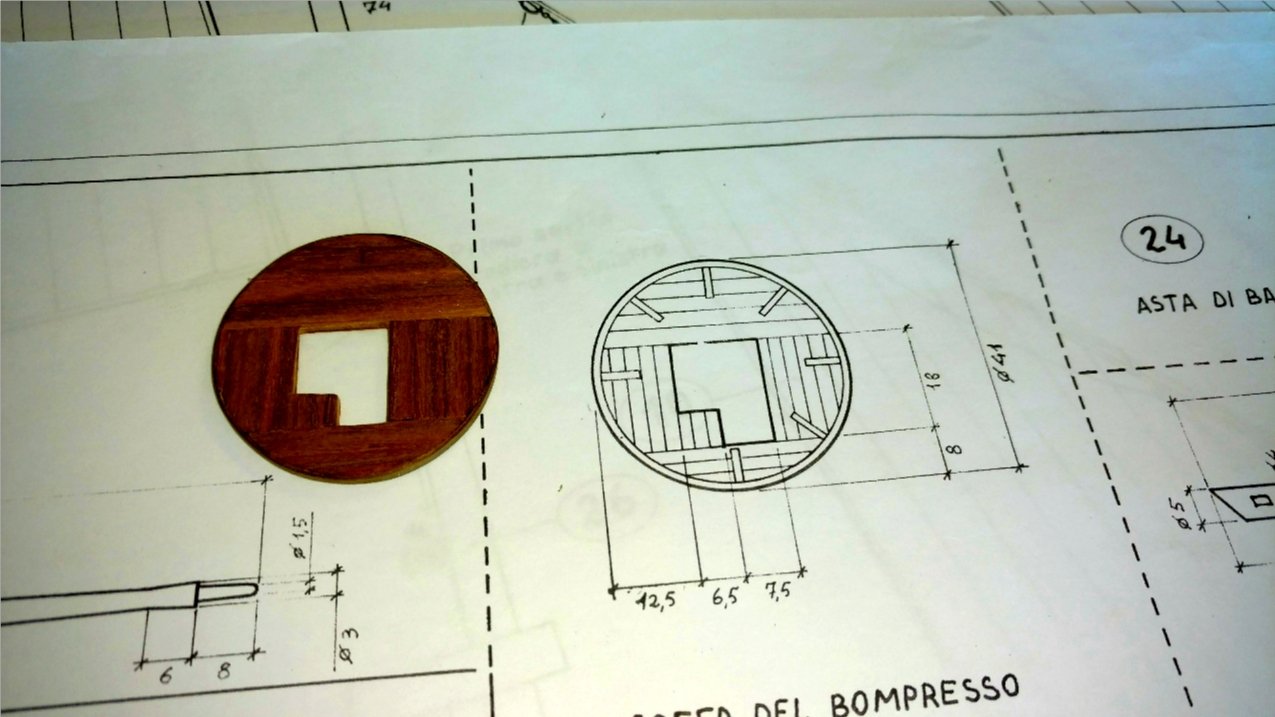
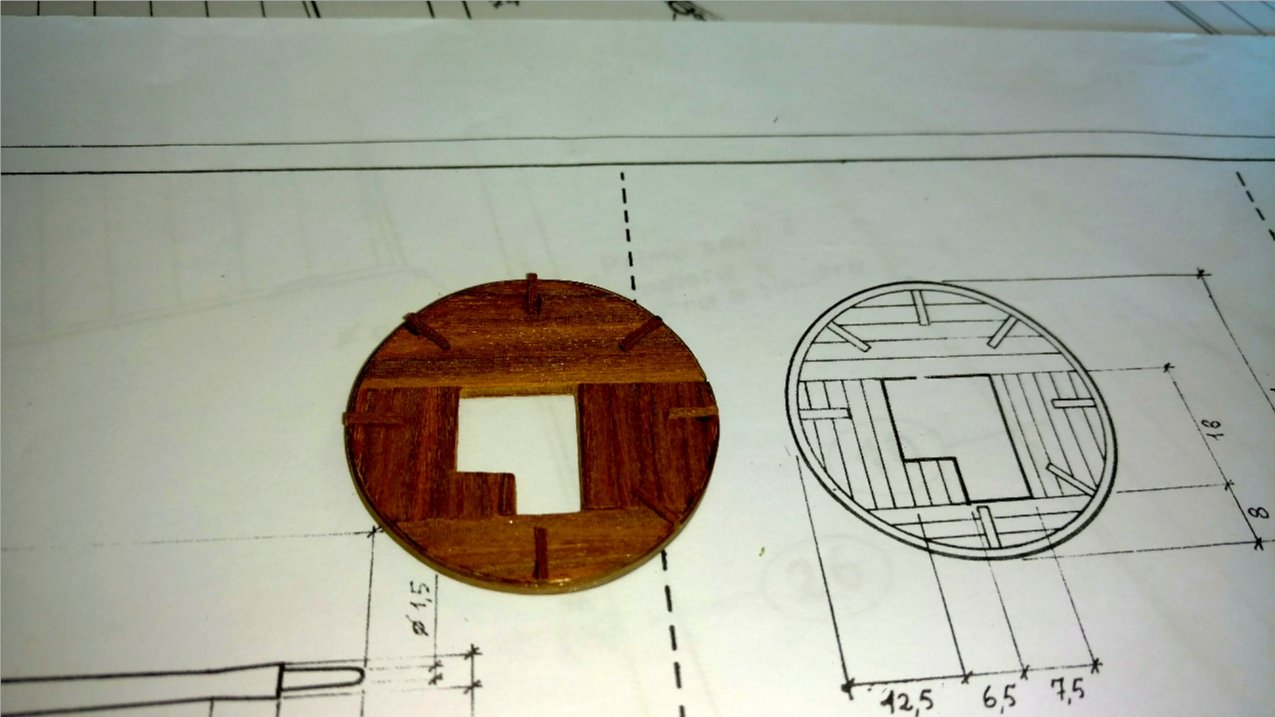
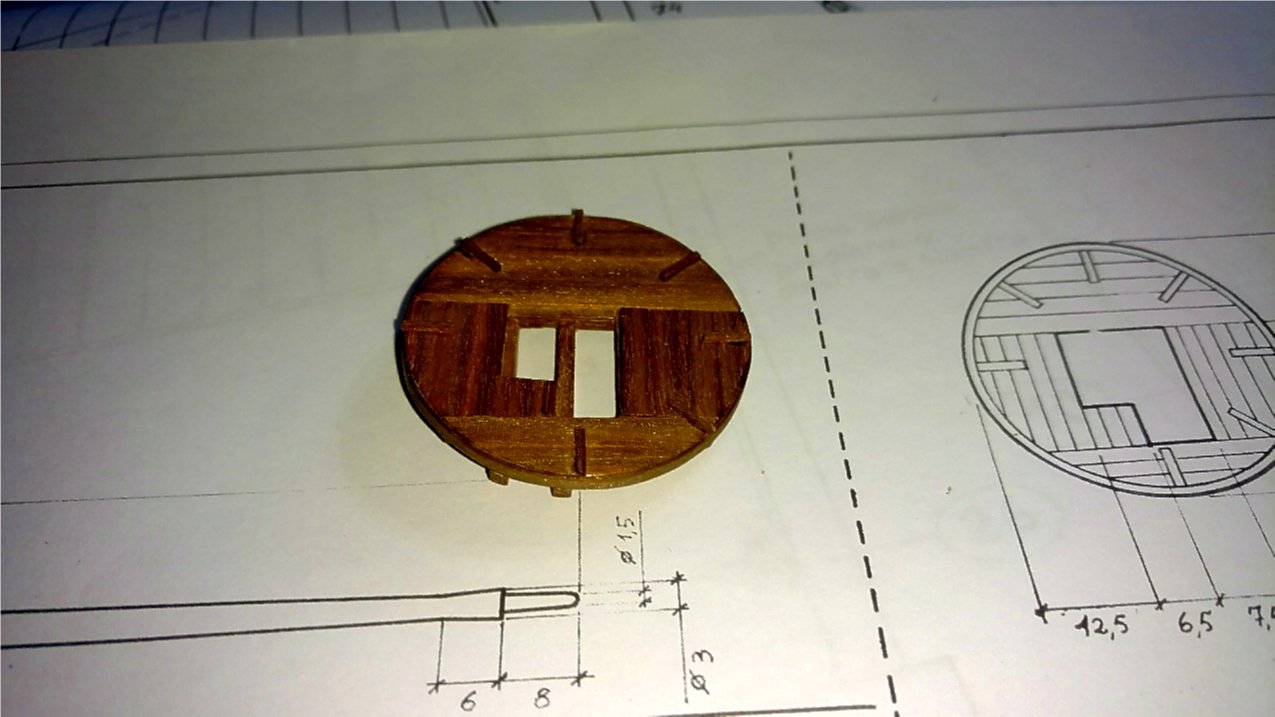
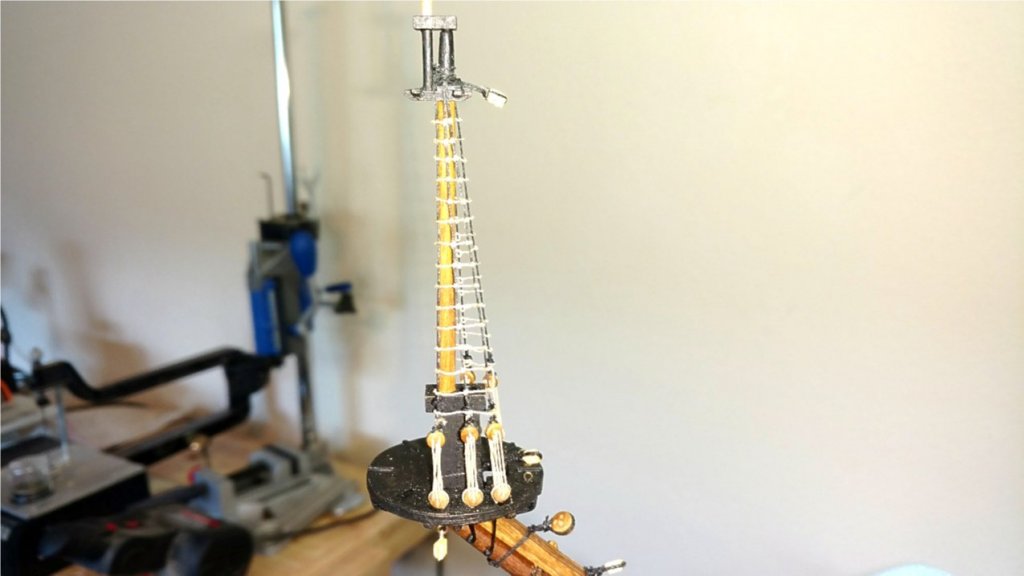
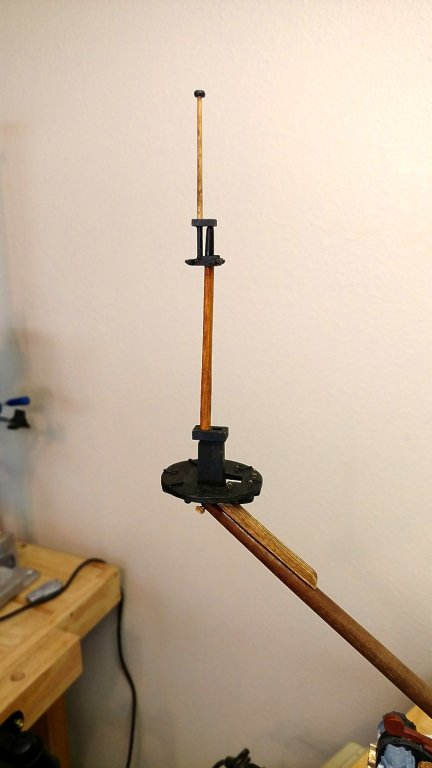
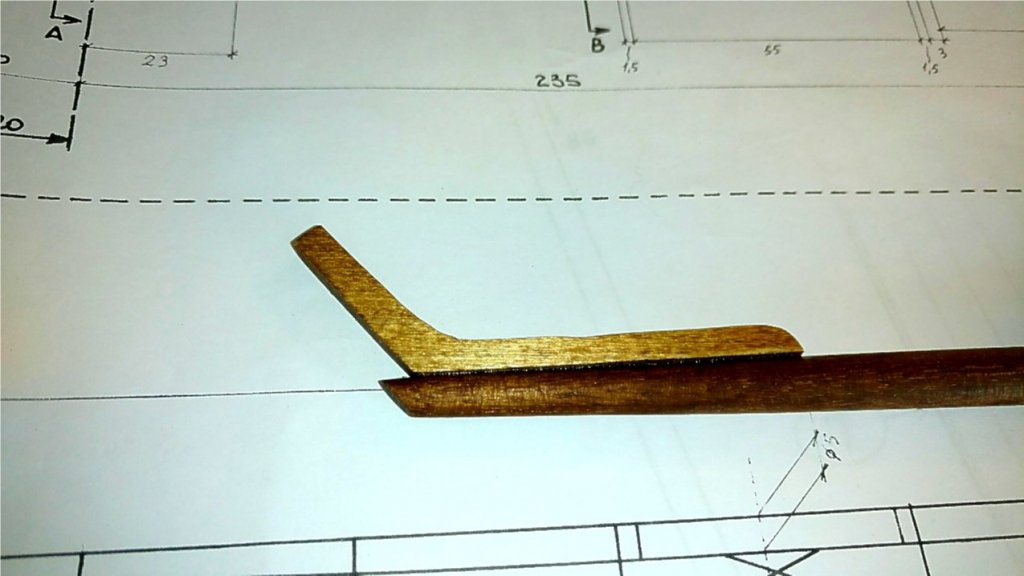
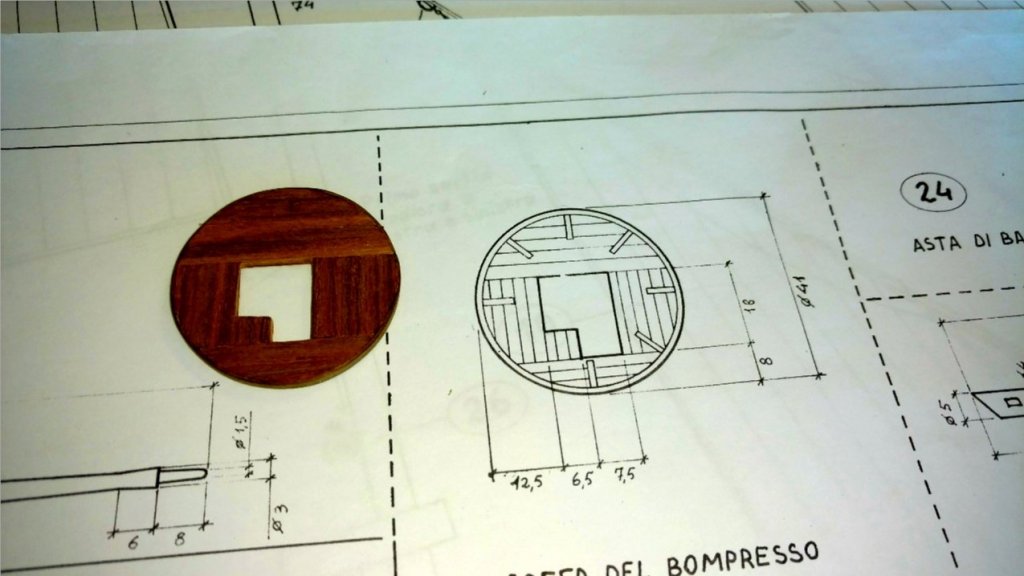
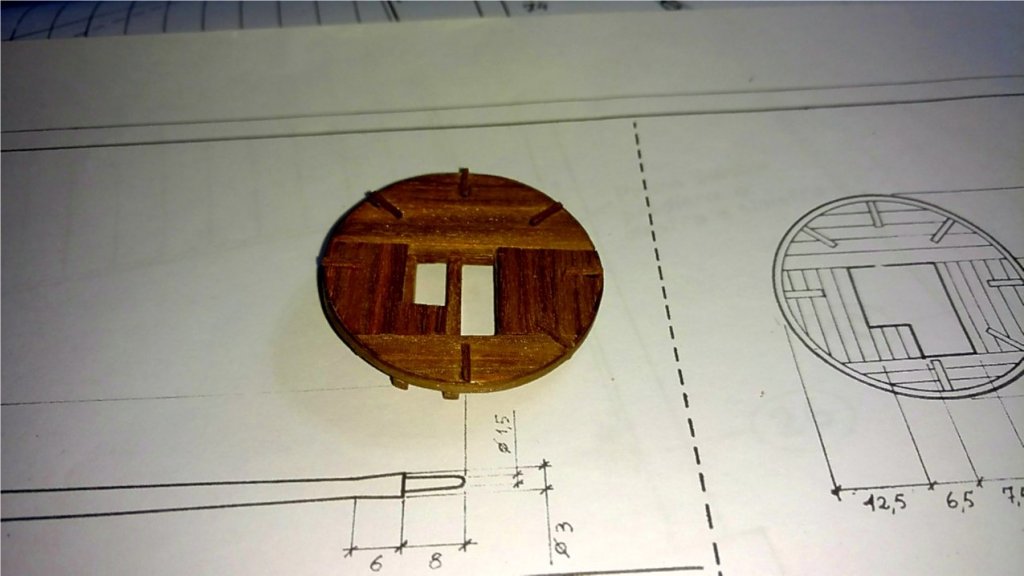
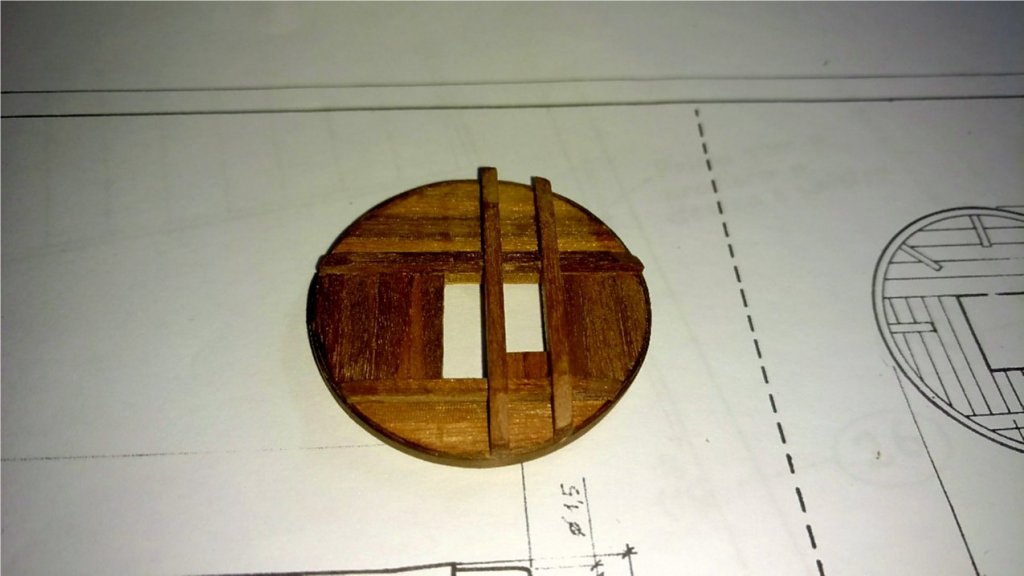
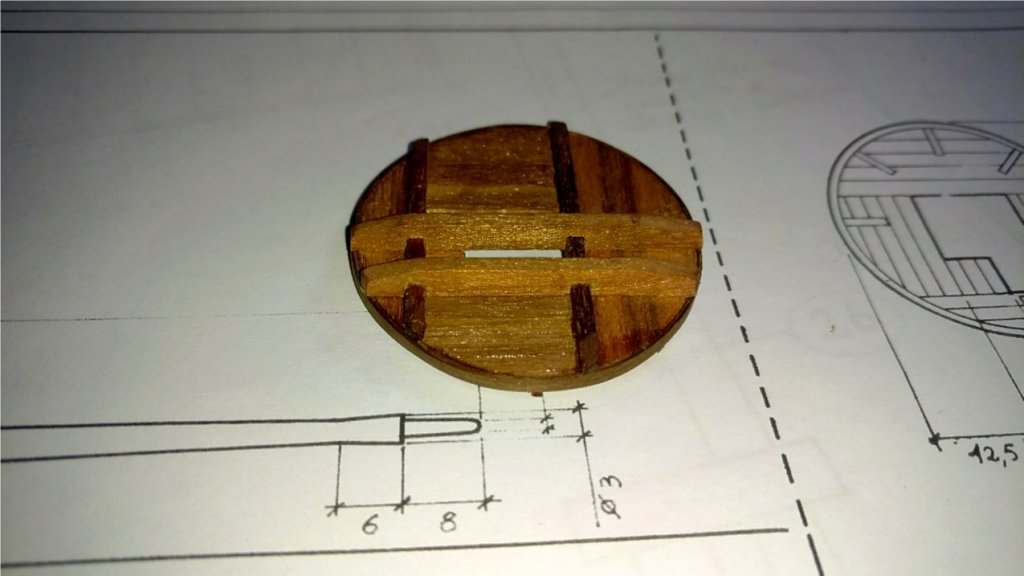
I have constructed the base of the bowsprit and the top for the spritsail topmast. While the plans in this kit are very good, this is one area where they are poor. The plans show dimensions for the round mast top, but totally ignore the necessary cross tree that has to support it from the bottom. I used my experience from building other ships with this type of mast top, and the photo gallery on the Euro website. The gallery does have a closeup photo of the underside of the top, which shows the cross tree. (Thanks Pete!) I estimated the lumber size at 2x2mm for the small legs and 4x2mm for the main beams. The 2 small legs are attached at both ends of the square opening in the top, and the main beams are spaced at exactly 5mm apart on the inside and located across the opening where the doubling will be placed for the vertical top mast. The bracket attached to the bowsprit end is made of 2 pieces of 3mm plywood laminated together and shaved to a total width of 5mm, then cut to the proper shape using tracing paper over the plans drawing. I am going to paint the entire round top black before placing it on the end of the bowsprit base. Next up is to place the mast top on the bowsprit and build the rest of the mast. Vince P.


- 593 replies
-
- 3
-
-
- royal william
- euromodels
- (and 1 more)
-
Hi Mike, I have used the kit supplied wood throughout the build. I have not found the need to substitute anything. I had to bleach the deck planks to make them lighter, but the wood was good. The only wood added was for extra detailing as I went along. I have not found any supplied materials that were not of acceptable quality. Vince P.
- 593 replies
-
- 2
-
-
- royal william
- euromodels
- (and 1 more)
-
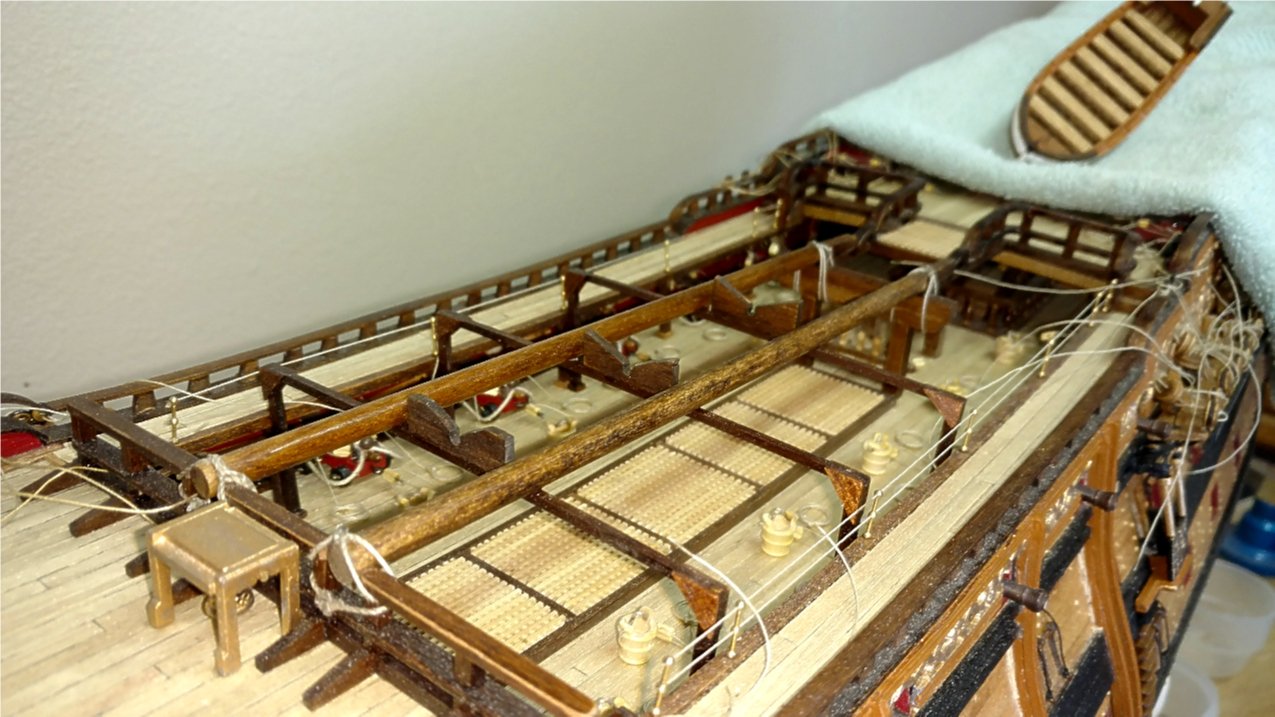
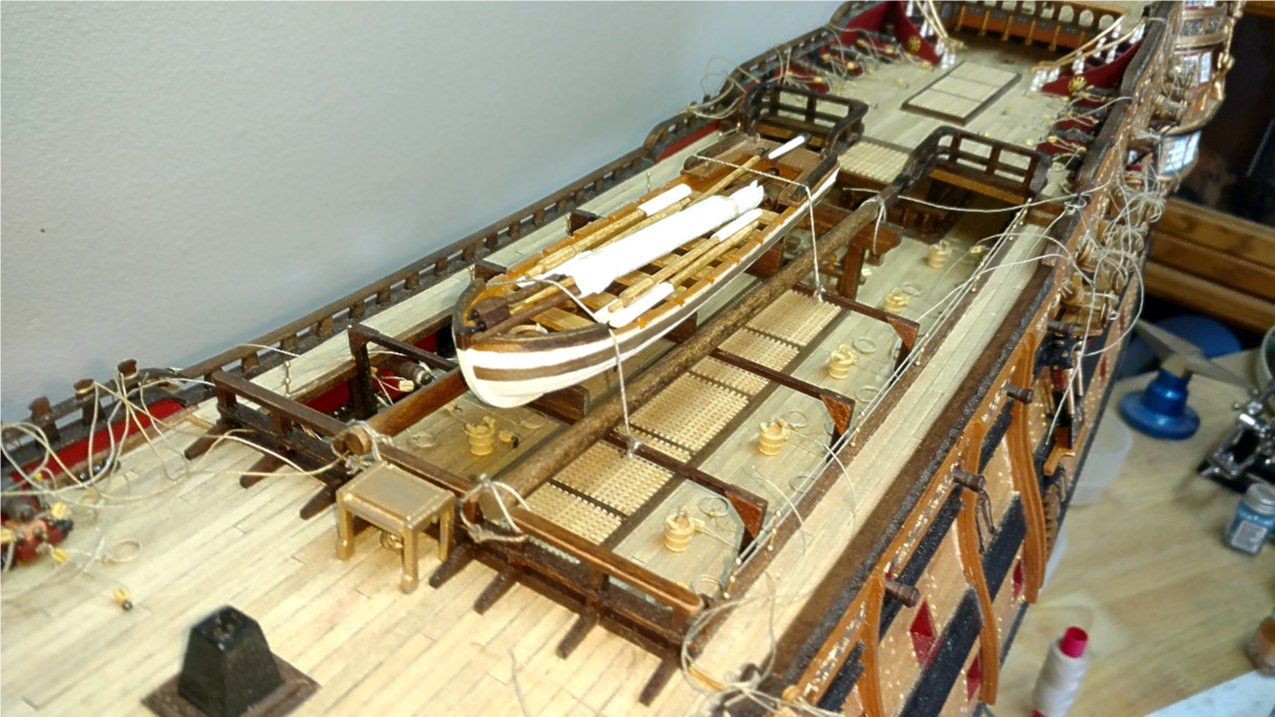
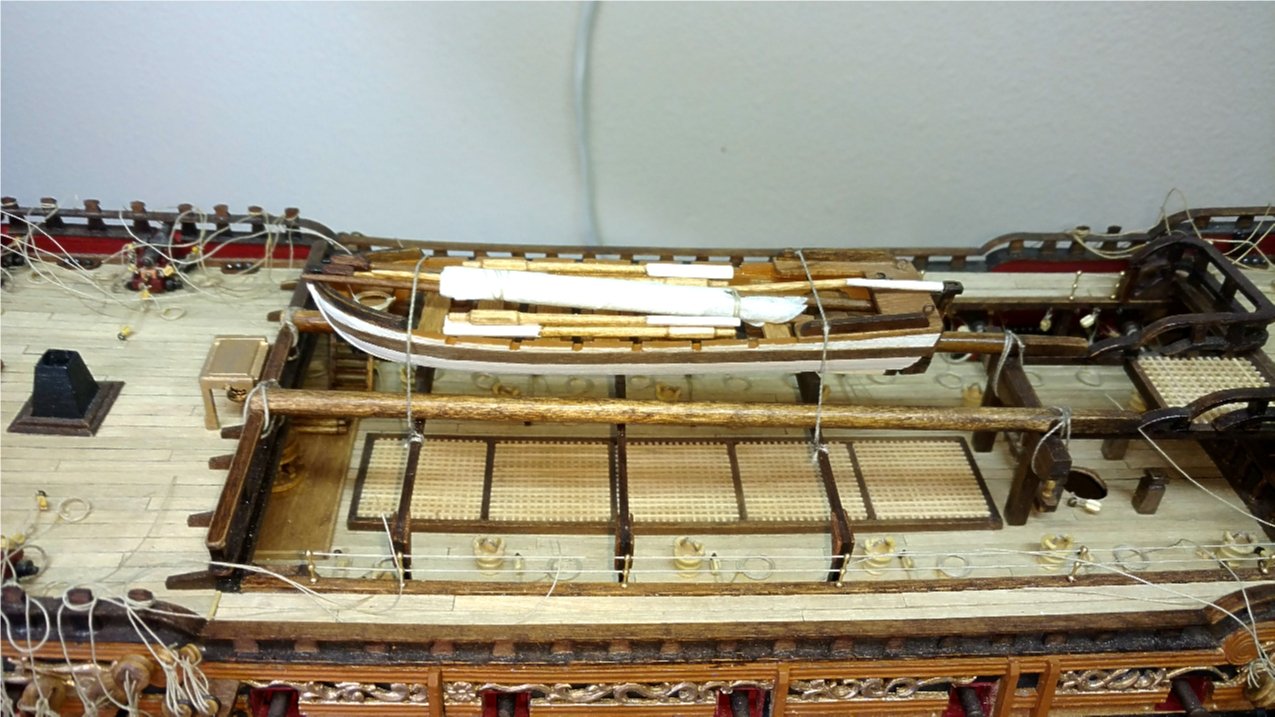
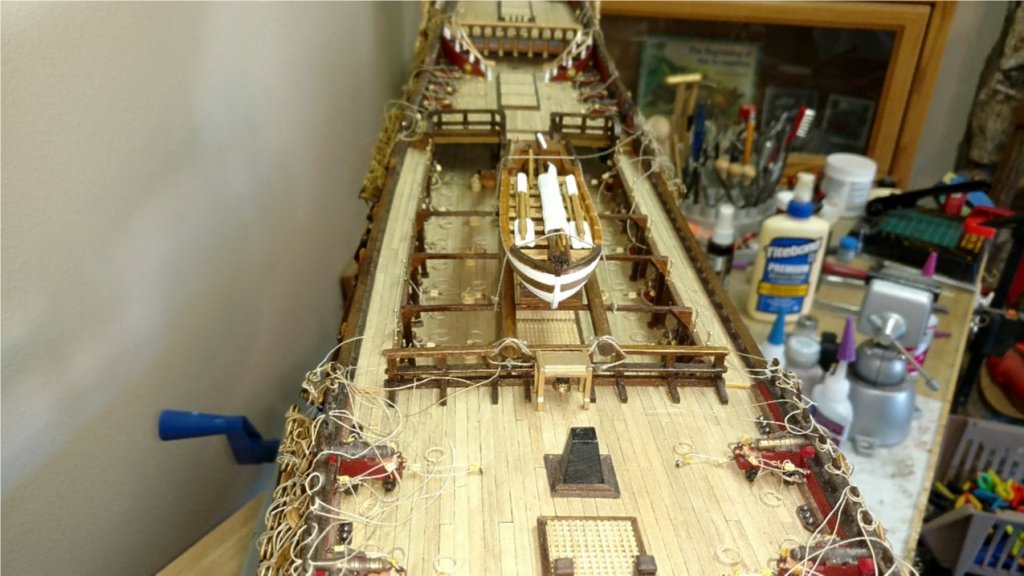
I have completed the boat cradles and placed the boat on the deck along with all of the accessories stored top side. I cut a small piece of white tissue paper and wrapped it around the mast and booms to simulate the sails being stowed as well. I don't have any idea what comes next but I will think about it. Vince P.


- 593 replies
-
- 8
-
-
- royal william
- euromodels
- (and 1 more)
-
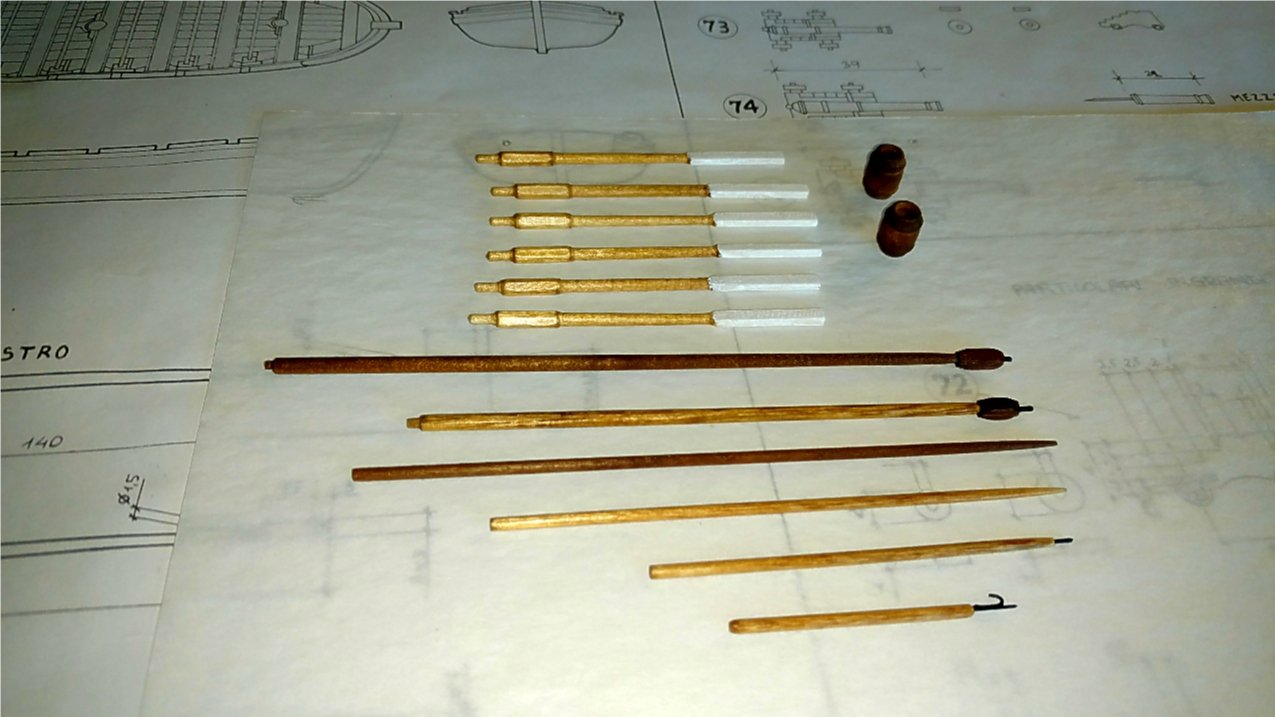
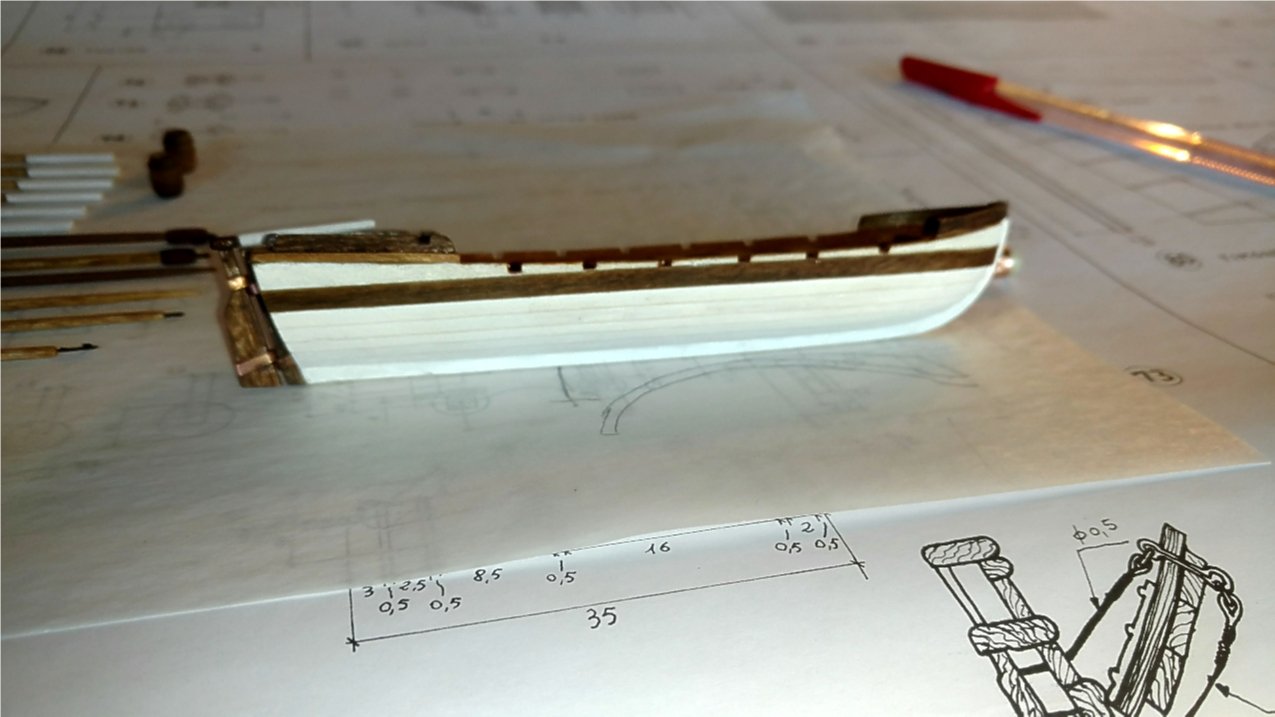
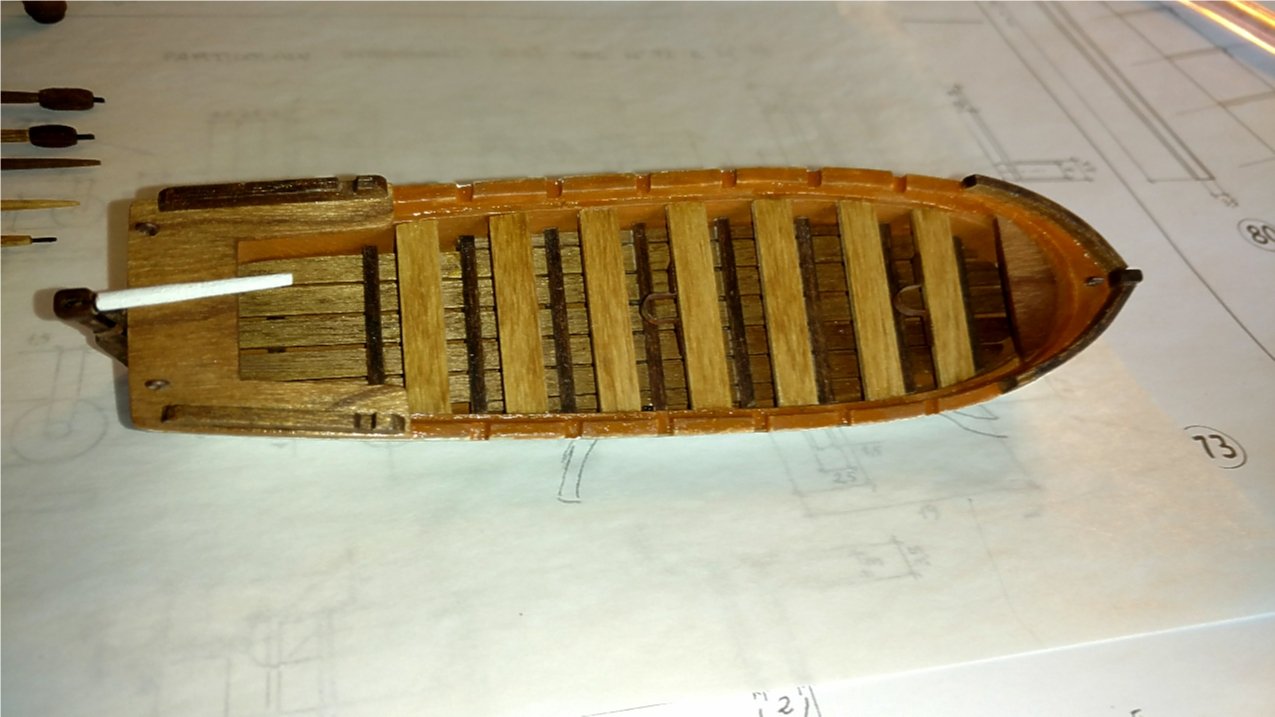
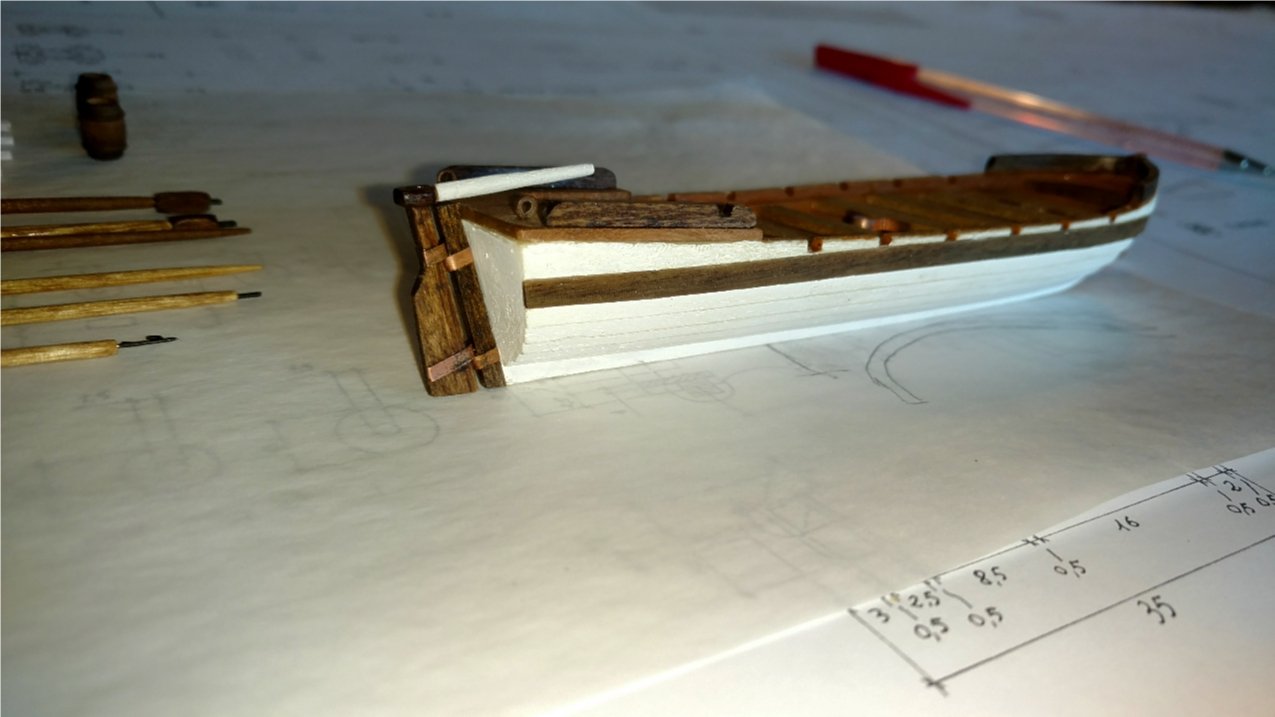
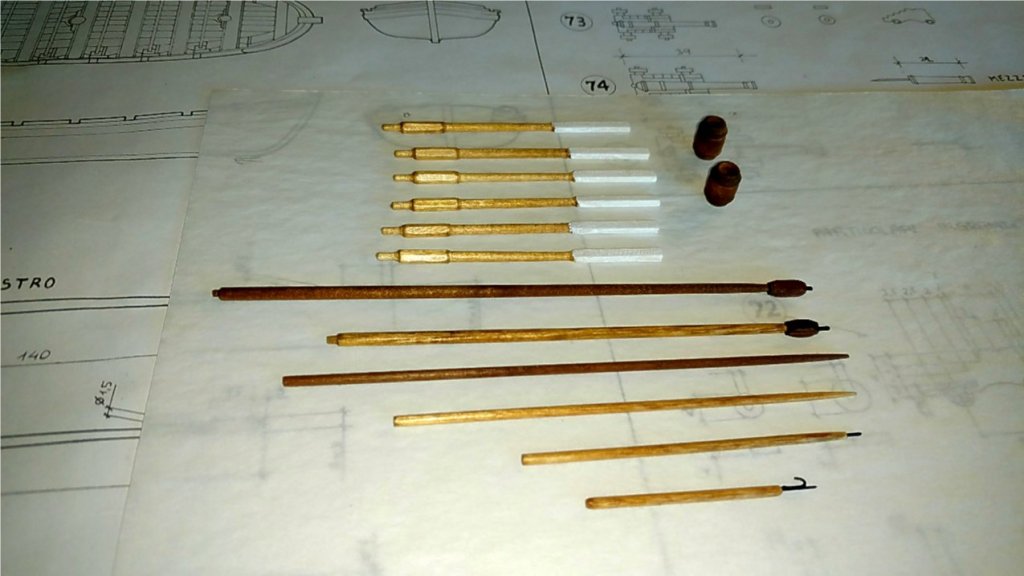
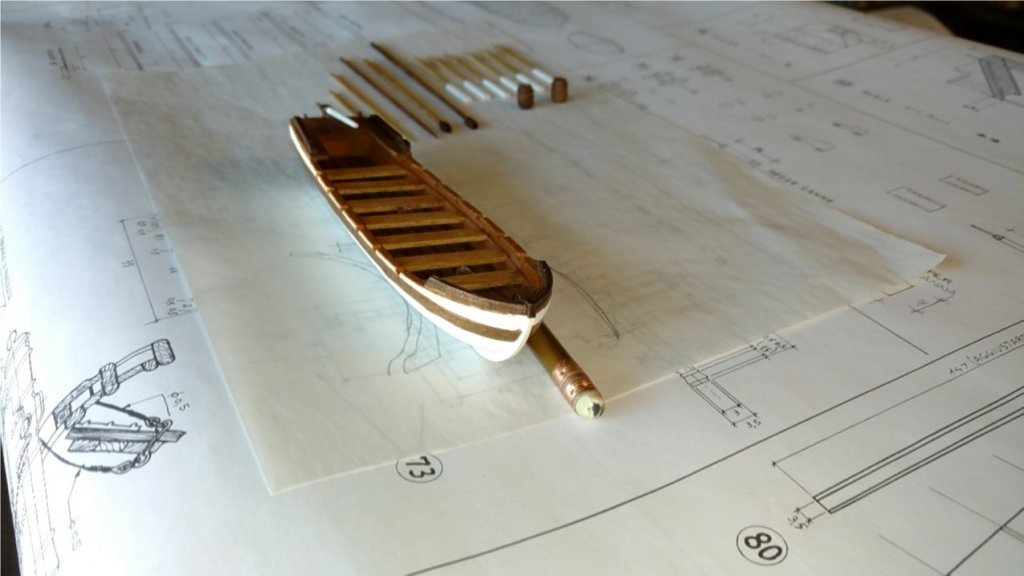
I finally finished the ship's boat. The kit supplies a resin hull shell which is a good starting piece. You can go as far as you like with details. The plans go into fairly good detail with hull construction and accessories. If you decide to go with considerable detailing as I did, you can create a nice 2 masted skiff type boat. I think it came out pretty well. Of course, all of the pieces have to be made from scratch with your own materials. I will show the boat placed on the deck with all of the accessories on the next post. I still have to make the cradles and place all of the accessories in the boat. I put about 20 hours into making this little boat. Vince P.


- 593 replies
-
- 4
-
-
- royal william
- euromodels
- (and 1 more)
-
The port side chain wales, lanyards, and stools are completed. I prefer to rig the lanyards as they are placed on the wales. I find it easier this way to later on attach and rig the shrouds and back stays. Now off to the starboard side. Vince P.
- 593 replies
-
- 1
-
-
- royal william
- euromodels
- (and 1 more)