pirozzi
-
Posts
843 -
Joined
-
Last visited
Content Type
Profiles
Forums
Gallery
Events
Everything posted by pirozzi
-

Hello from therealangrysailor
pirozzi replied to Therealangrysailor's topic in New member Introductions
Welcome aboard mate and thank you for your service. Vince P. -
Thanks Pete. It is fun to include as much detail as possible. The plans are very precise, but you really have to read them over and over to pick out every little detail.
- 593 replies
-
- 3
-

-
- royal william
- euromodels
- (and 1 more)
-
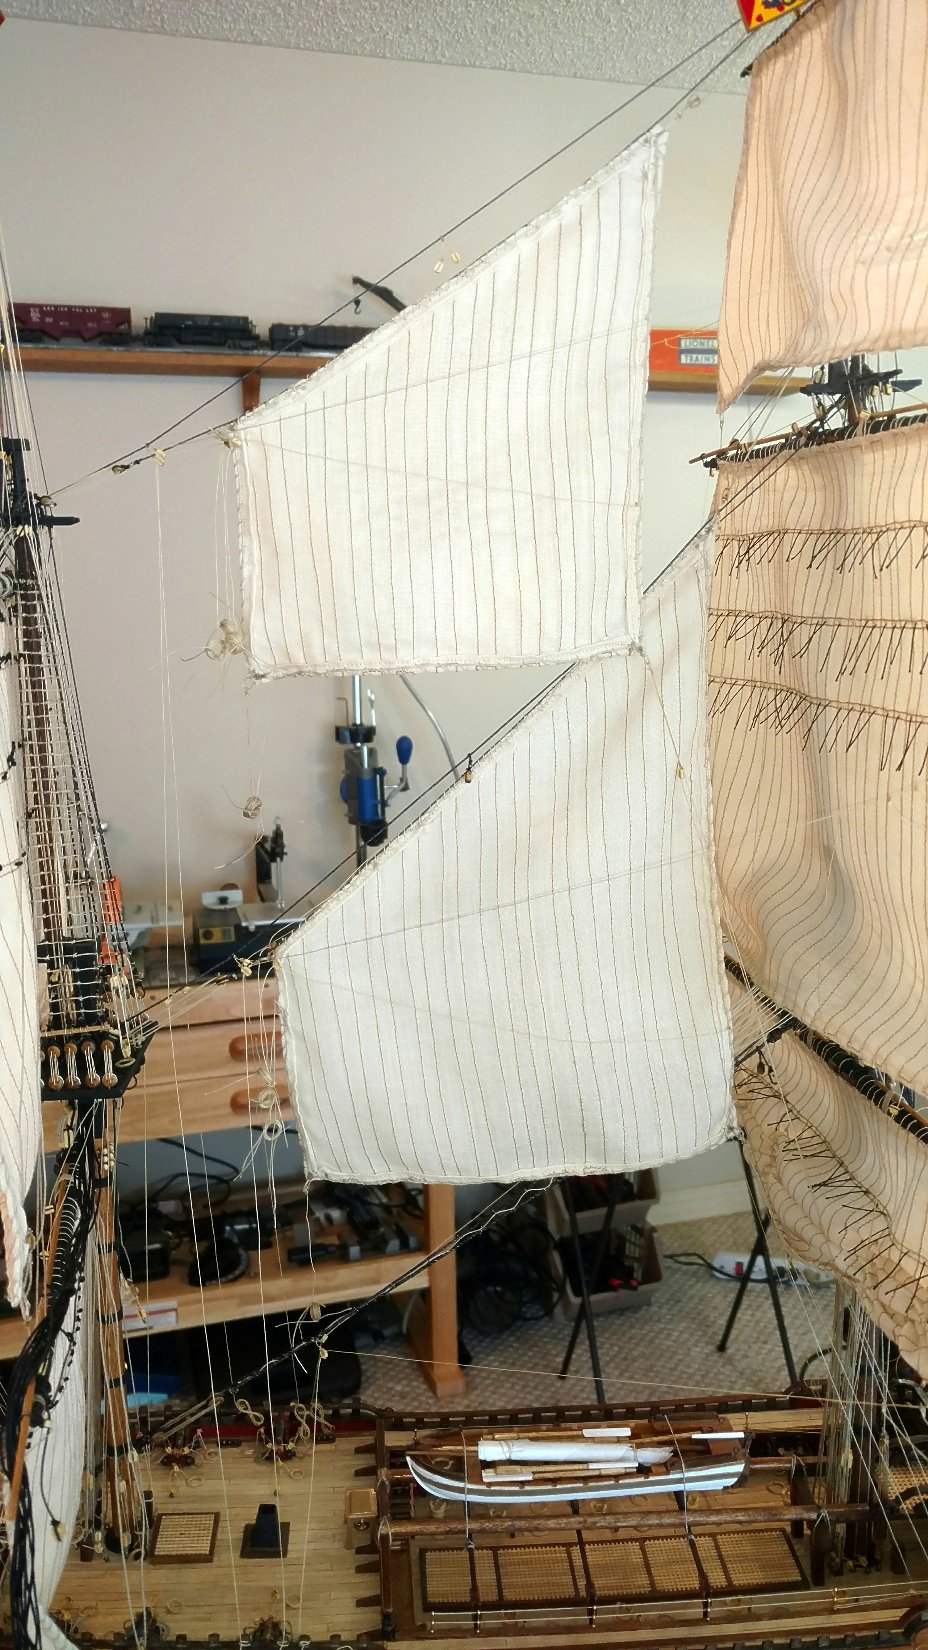
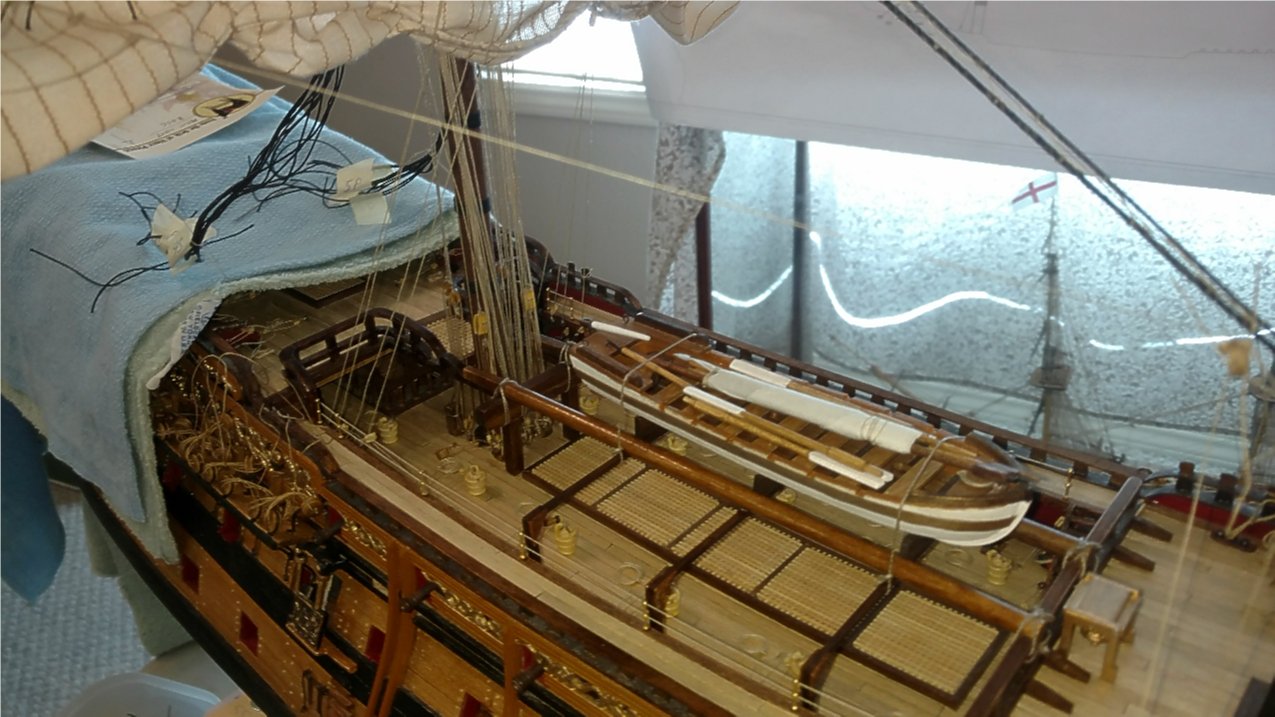
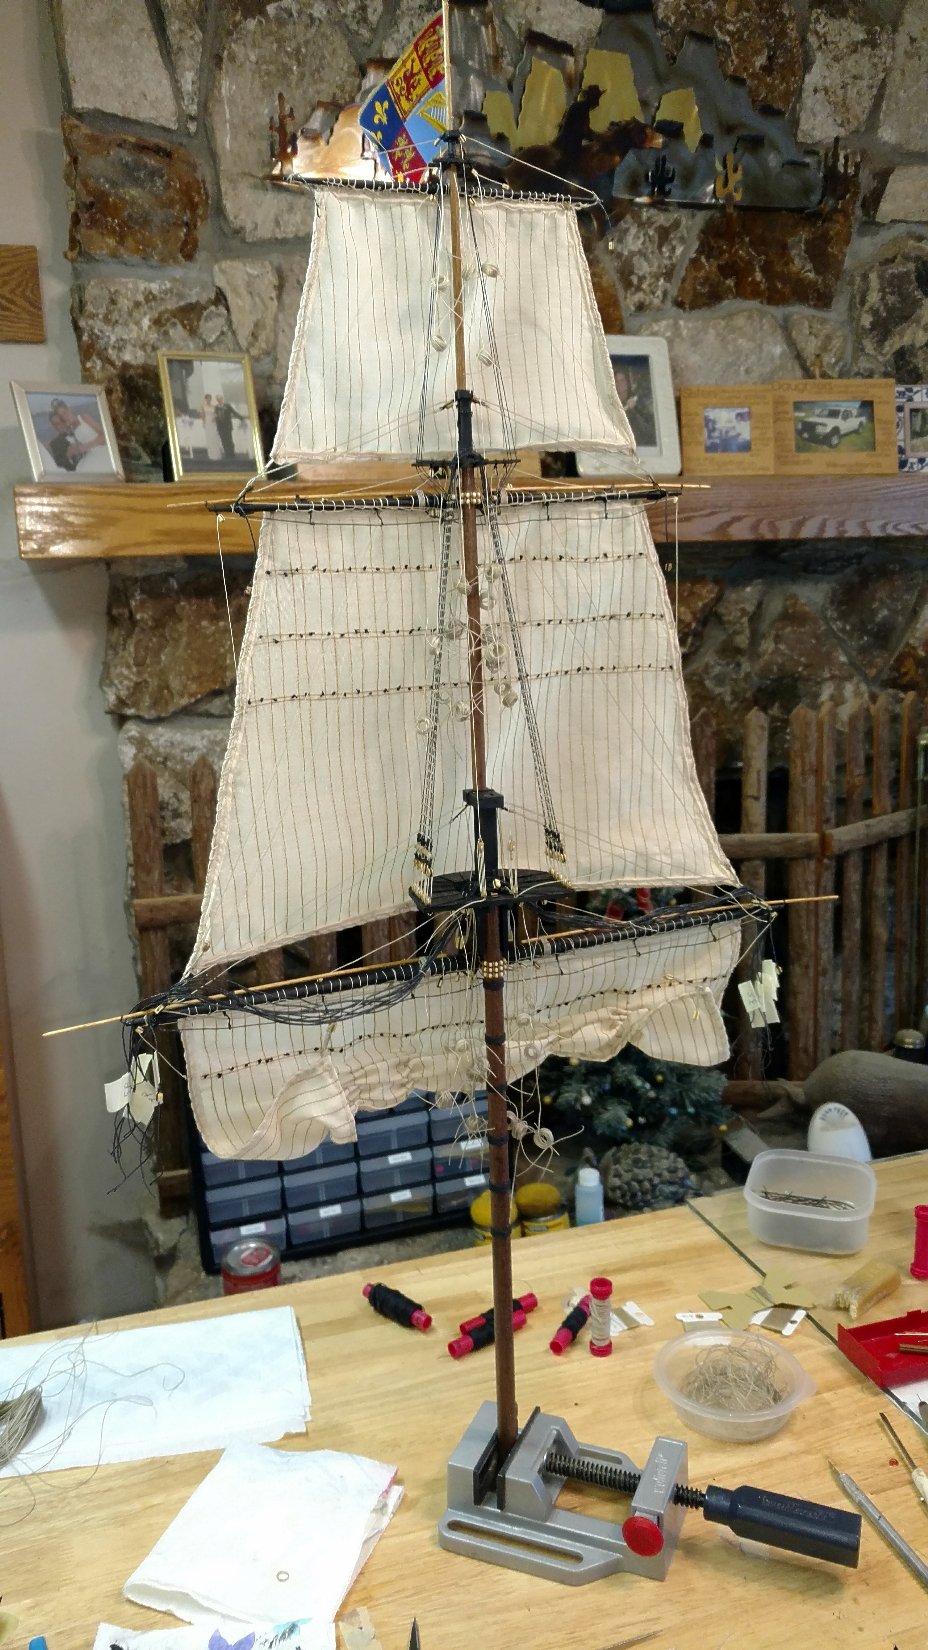
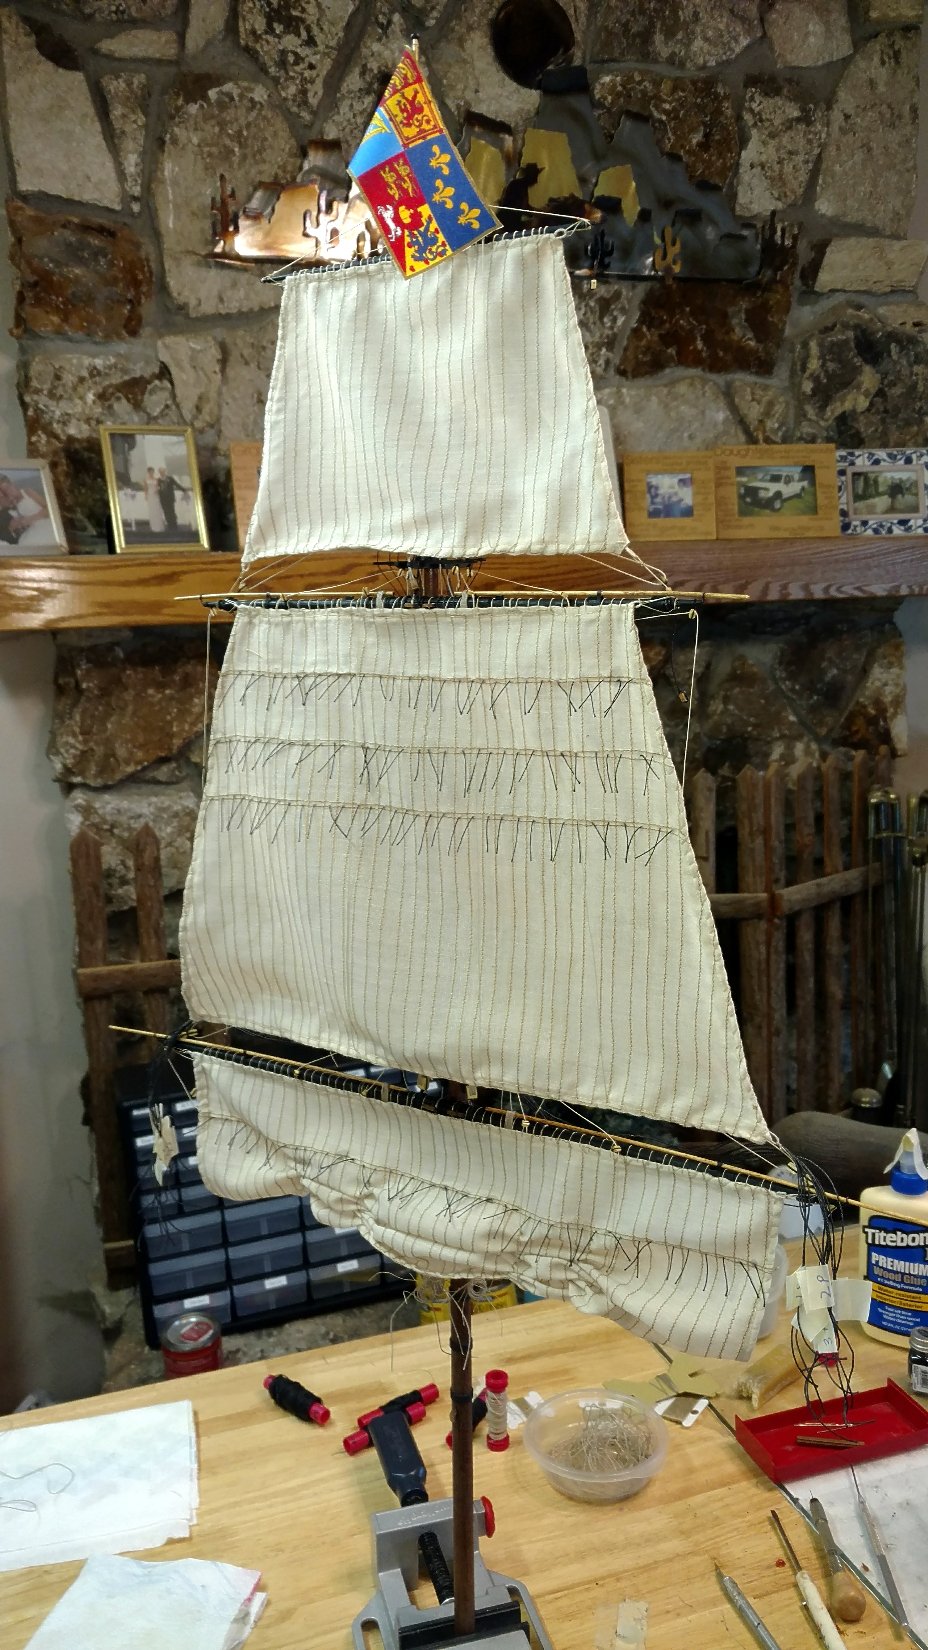
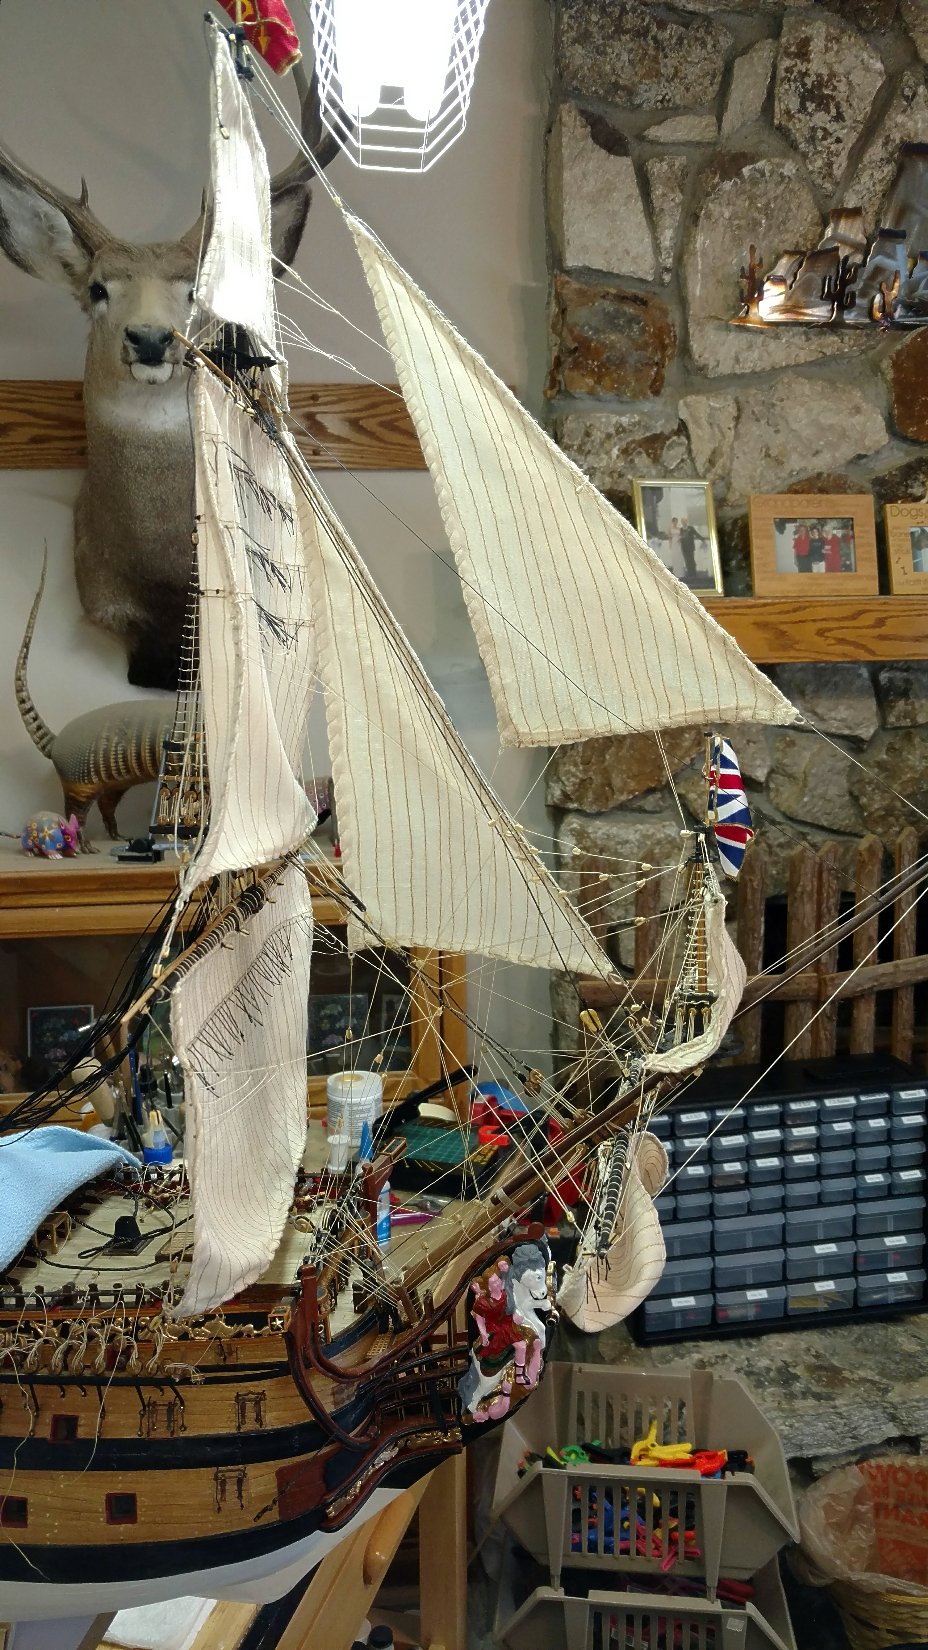
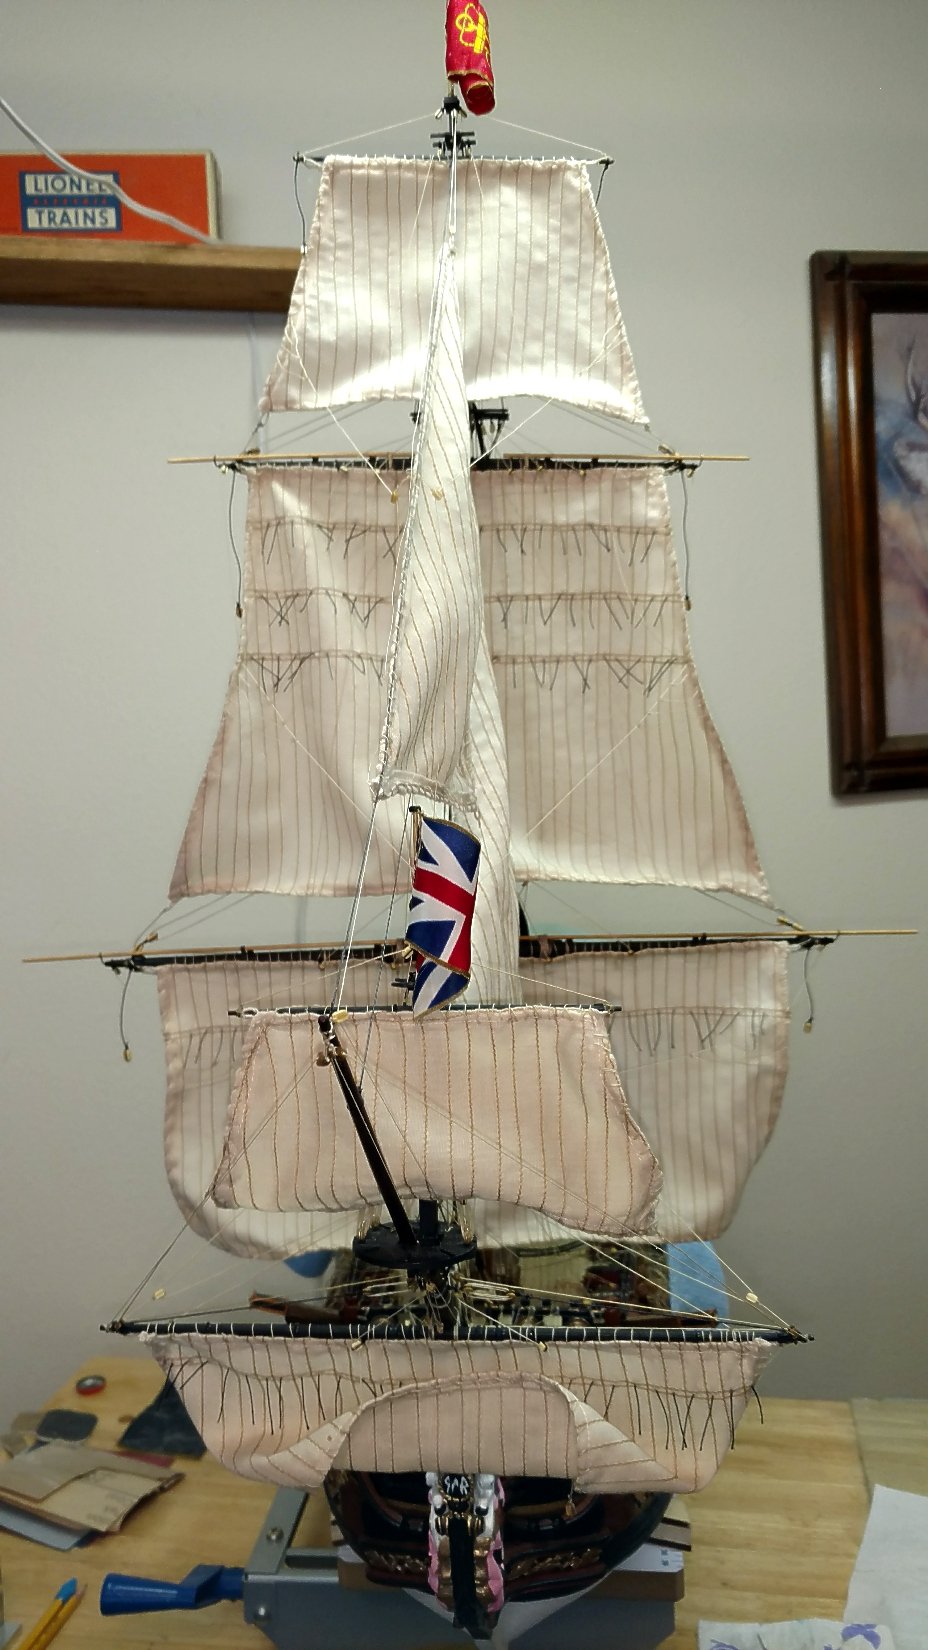
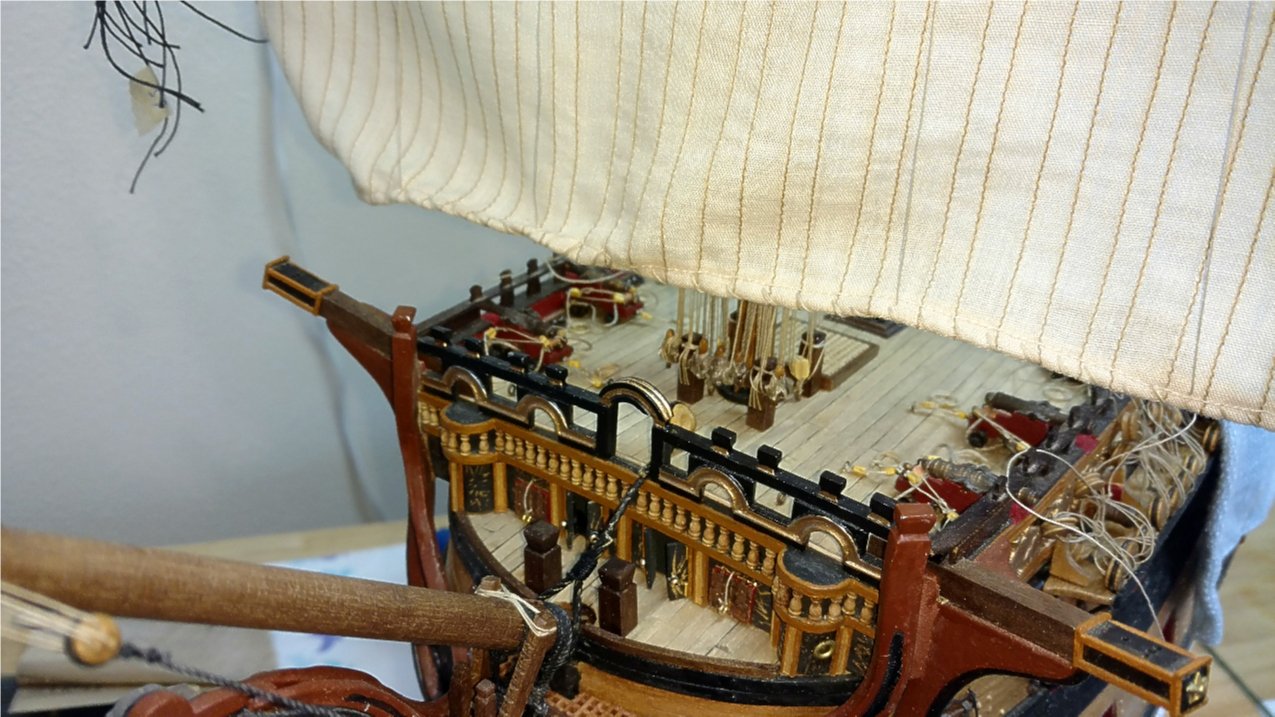
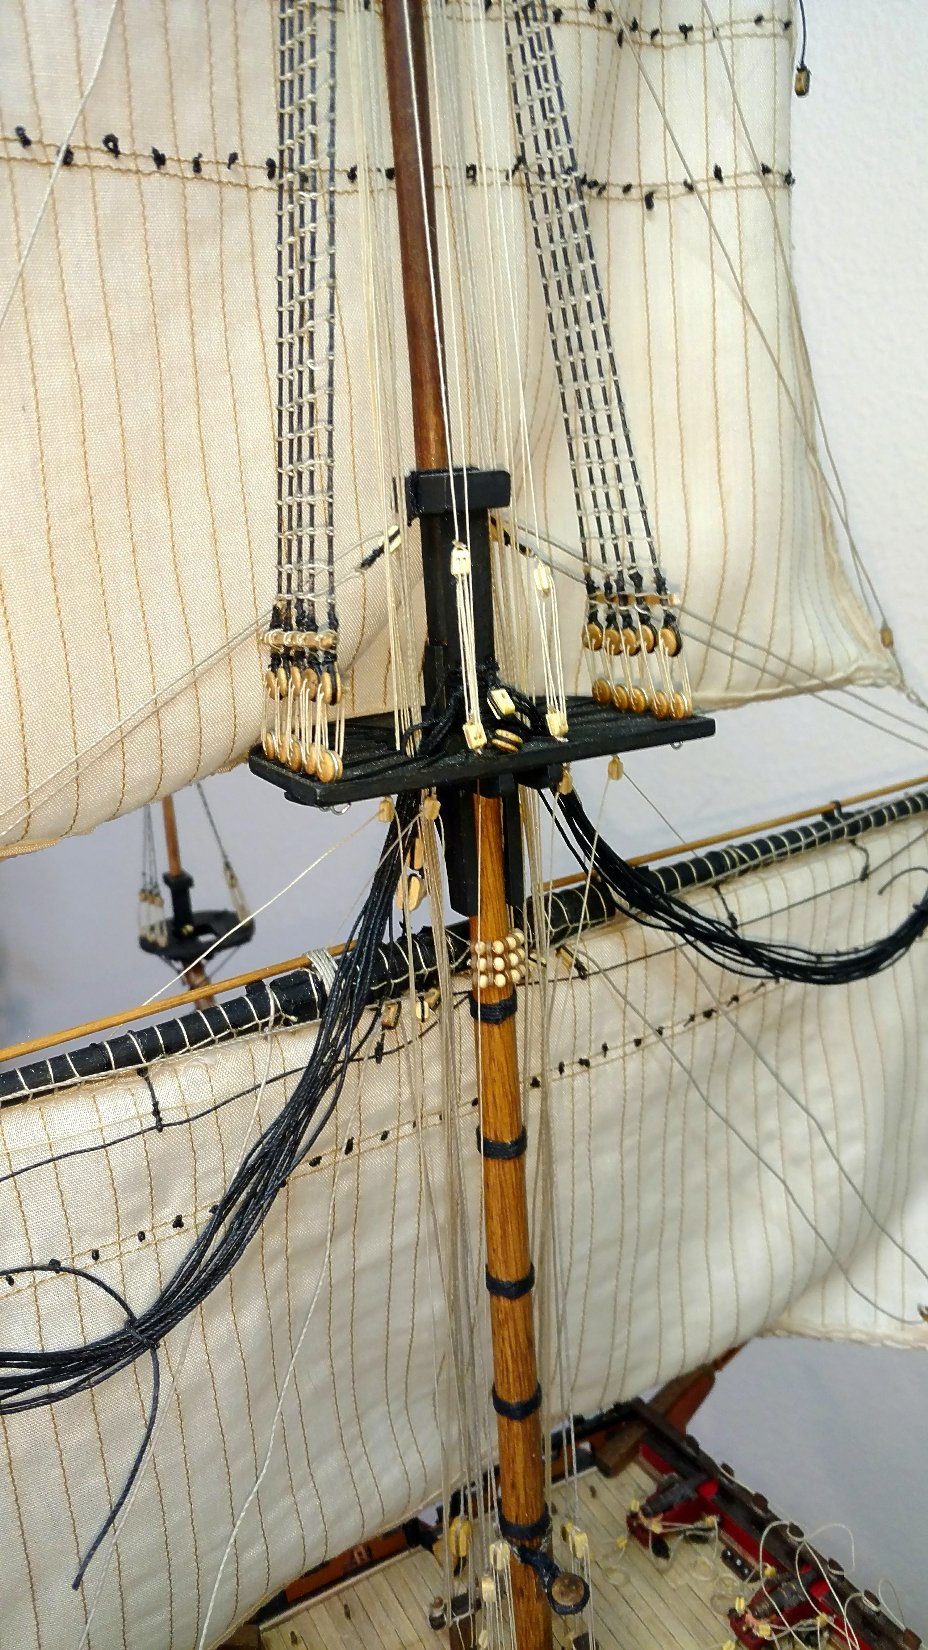
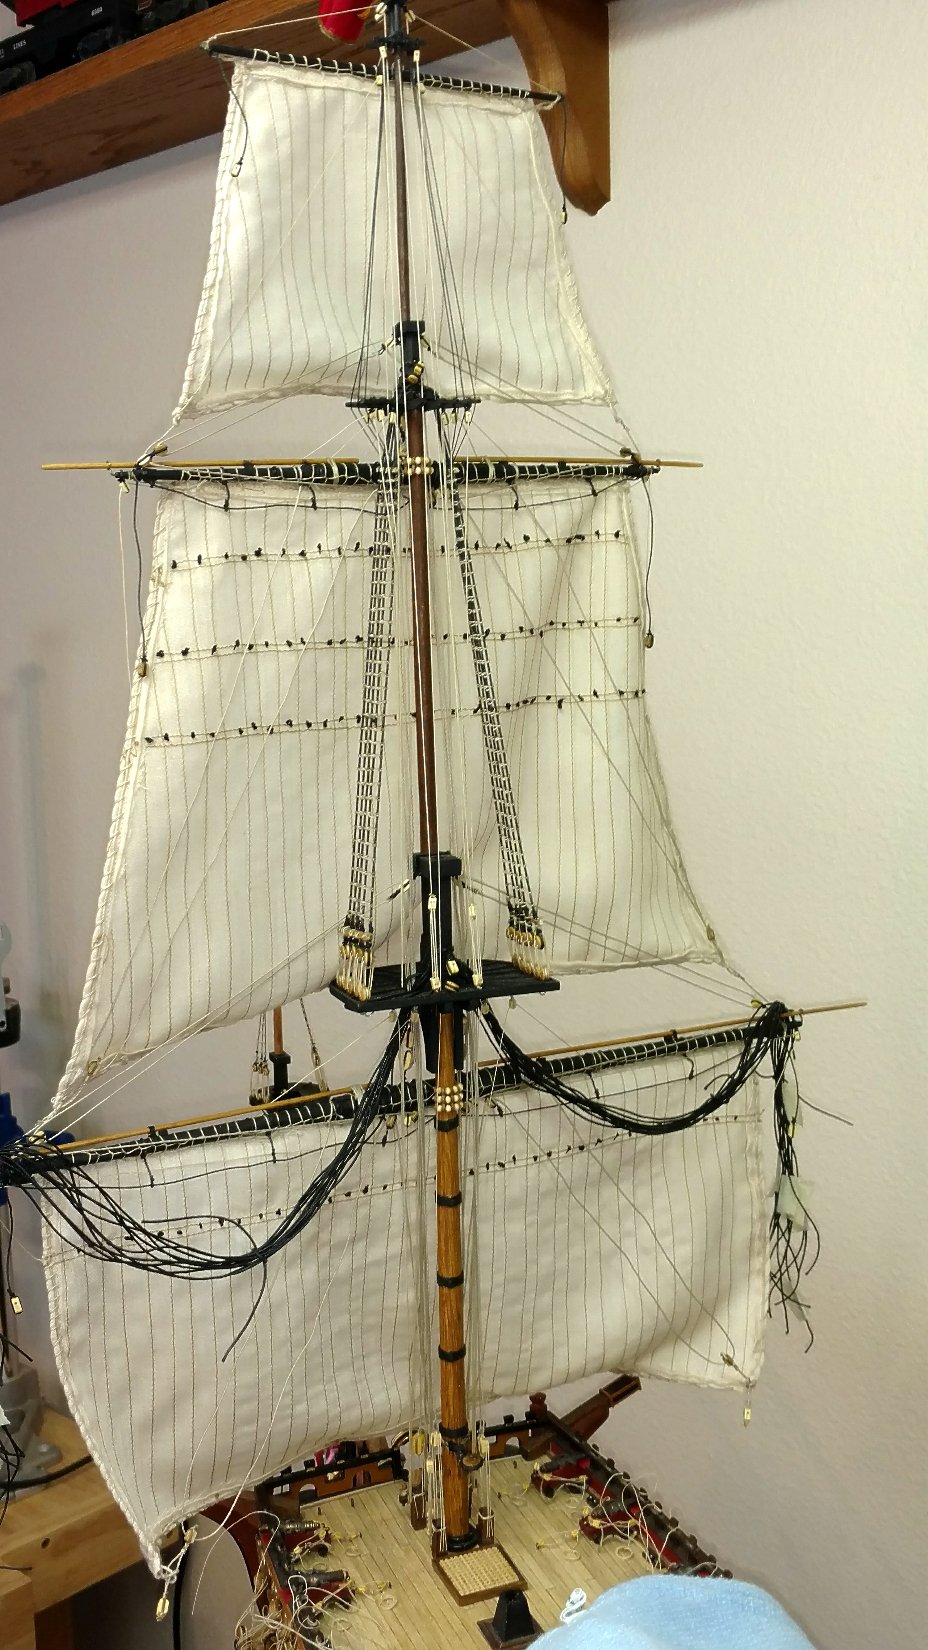
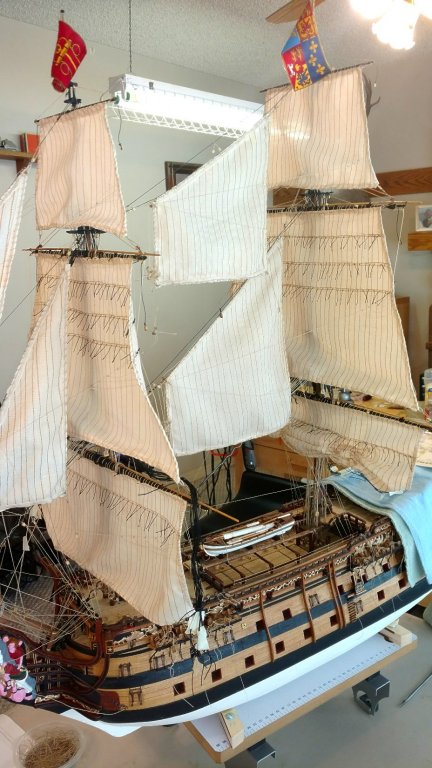
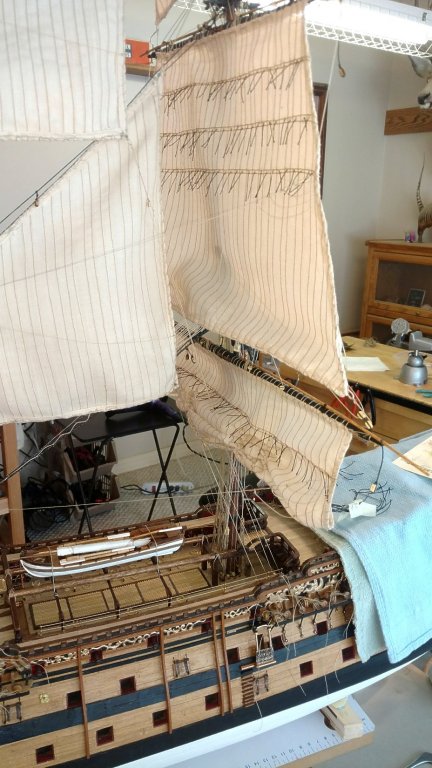
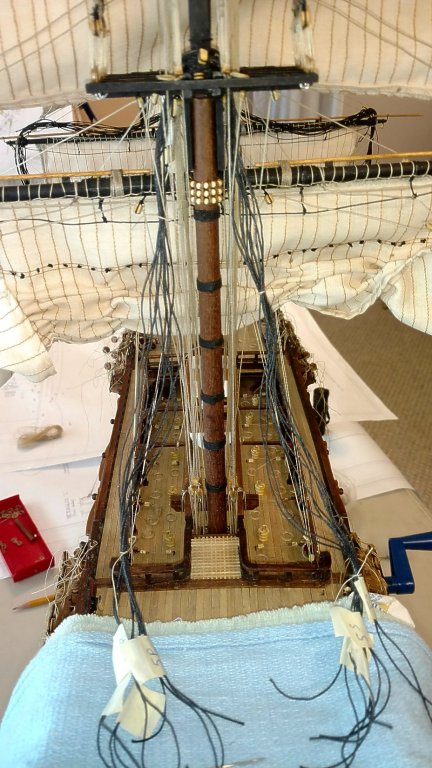
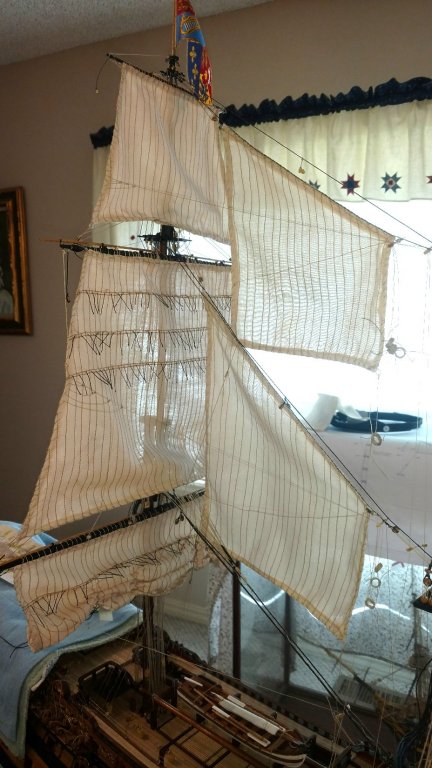
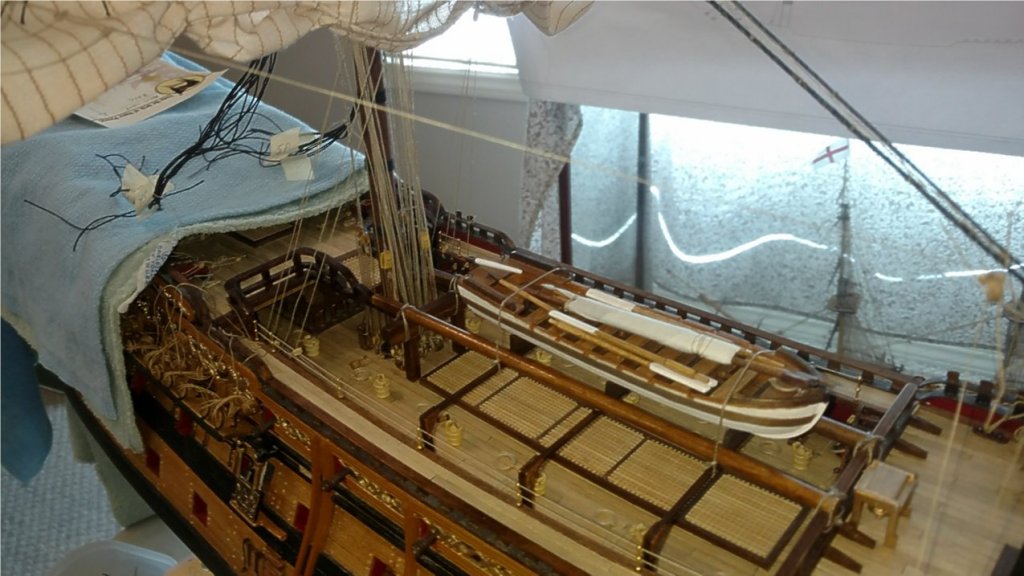
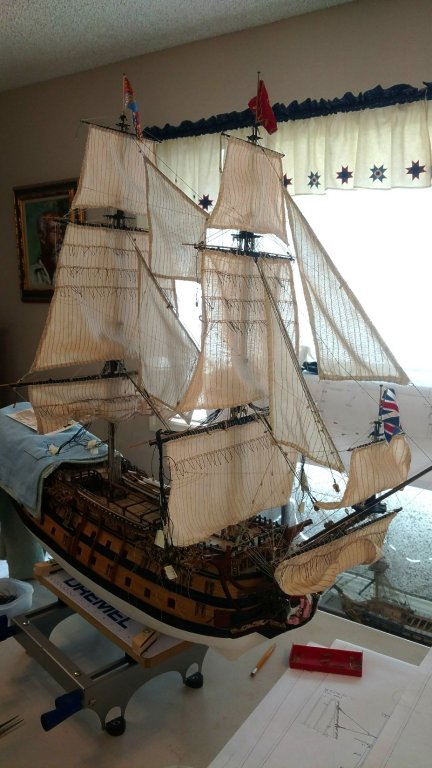
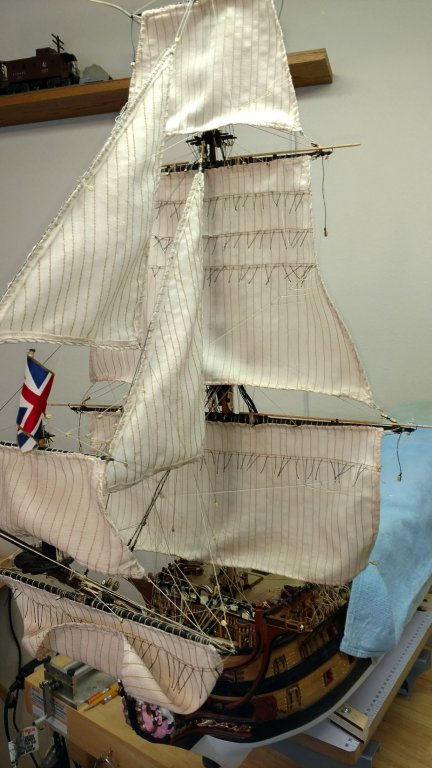
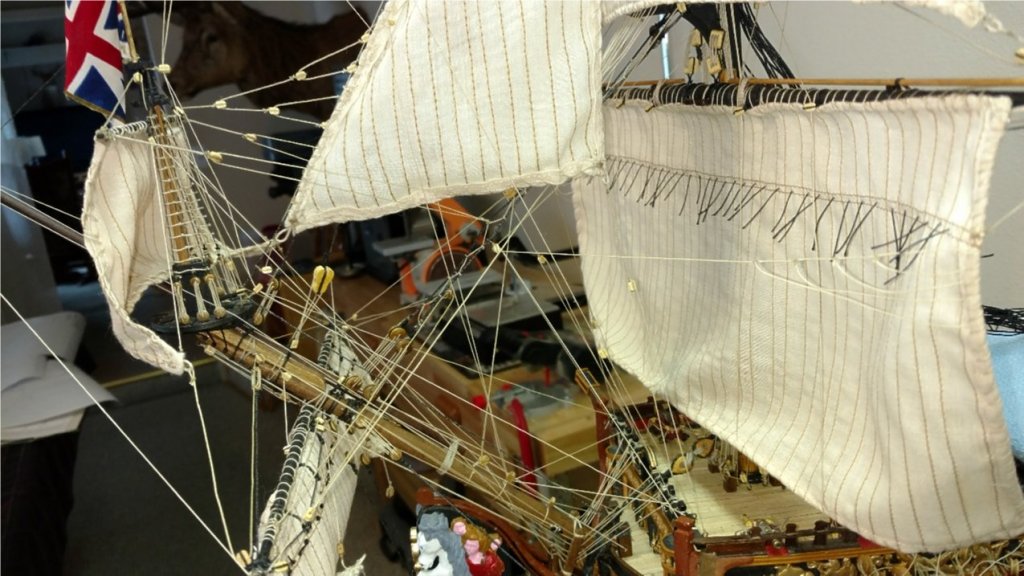
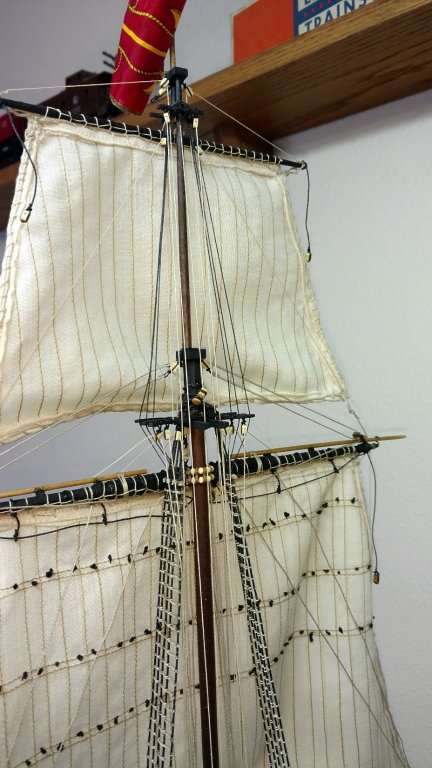
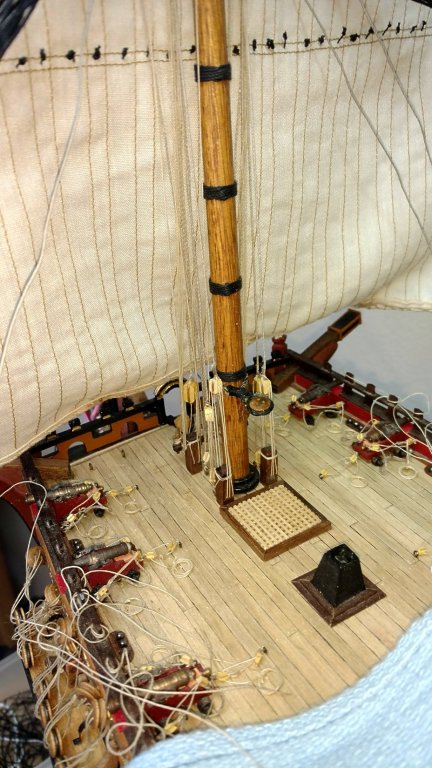
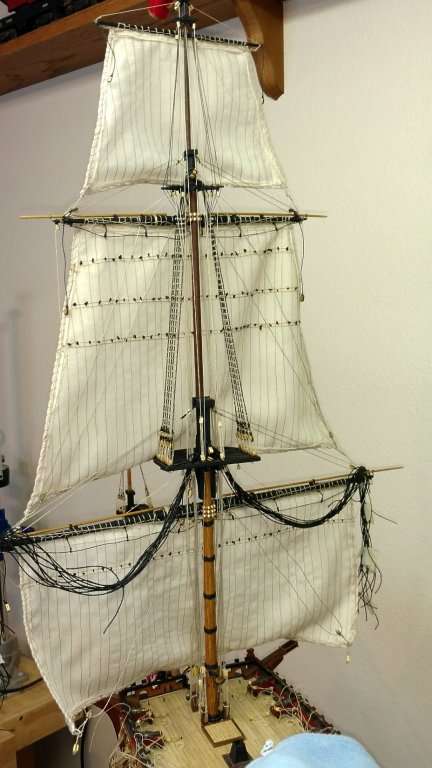
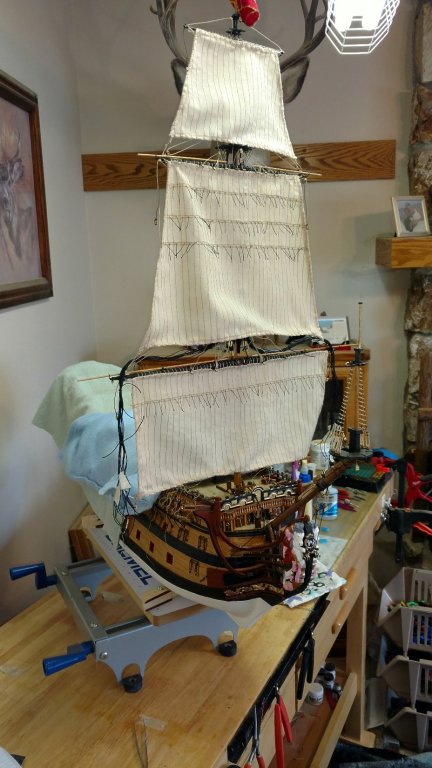
Completed the main mast and stepped it into the ship along with all of the standing and running rigging and the sails. Huge amount of additional rigging for the sails. Still have to complete the lower shrouds and braces. Next up is to complete the lower shrouds and rattlings for the foremast since the majority of the rigging to the decks is now completed. The remainder of the staysail running rigging ties off to the foremast shrouds before tying off to the deck. Vince P.


- 593 replies
-
- 6
-
-
- royal william
- euromodels
- (and 1 more)
-
Welcome aboard mate! Vince P.
-
Welcome aboard mate! Vince P.
-
New member with a question about shipping models
pirozzi replied to CJ2S's topic in New member Introductions
Welcome aboard mate! Very nice work. Your Dad was a skilled builder. I agree with the others. The only way to move them with some degree of safety, is to do it yourself. You could rent a small truck from maybe Uhall and secure them with mover's blankets and ties. Good Luck, Vince P. -
Welcome aboard mate! Thank you for your service. Vince P.
-
Welcome aboard mate! Vince P.
-
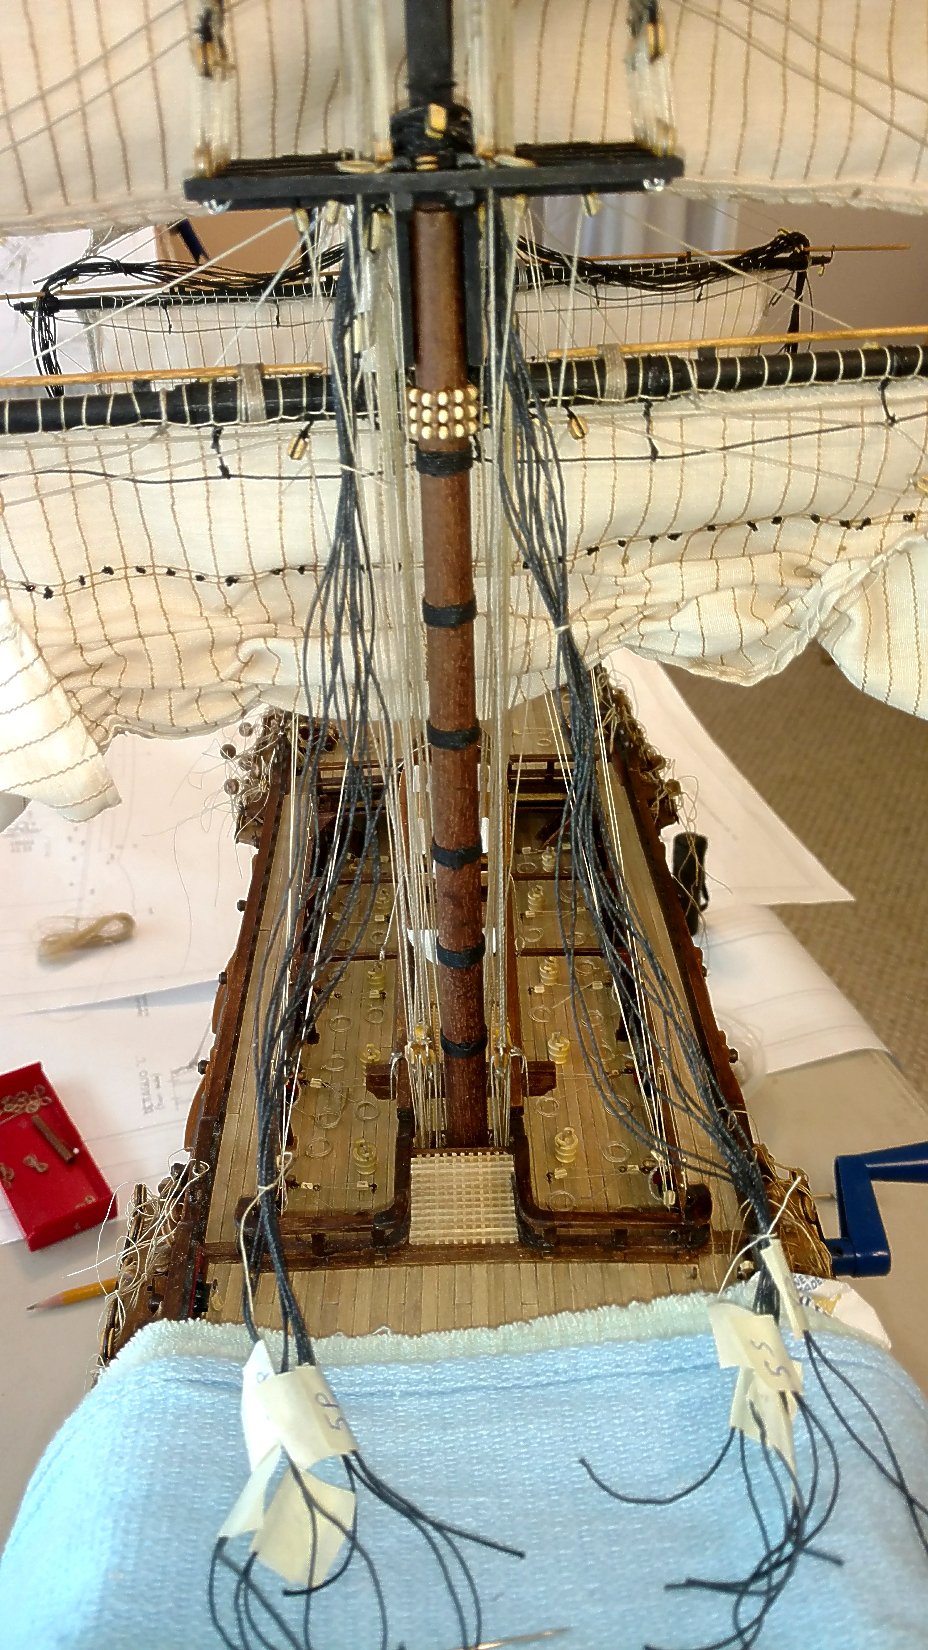
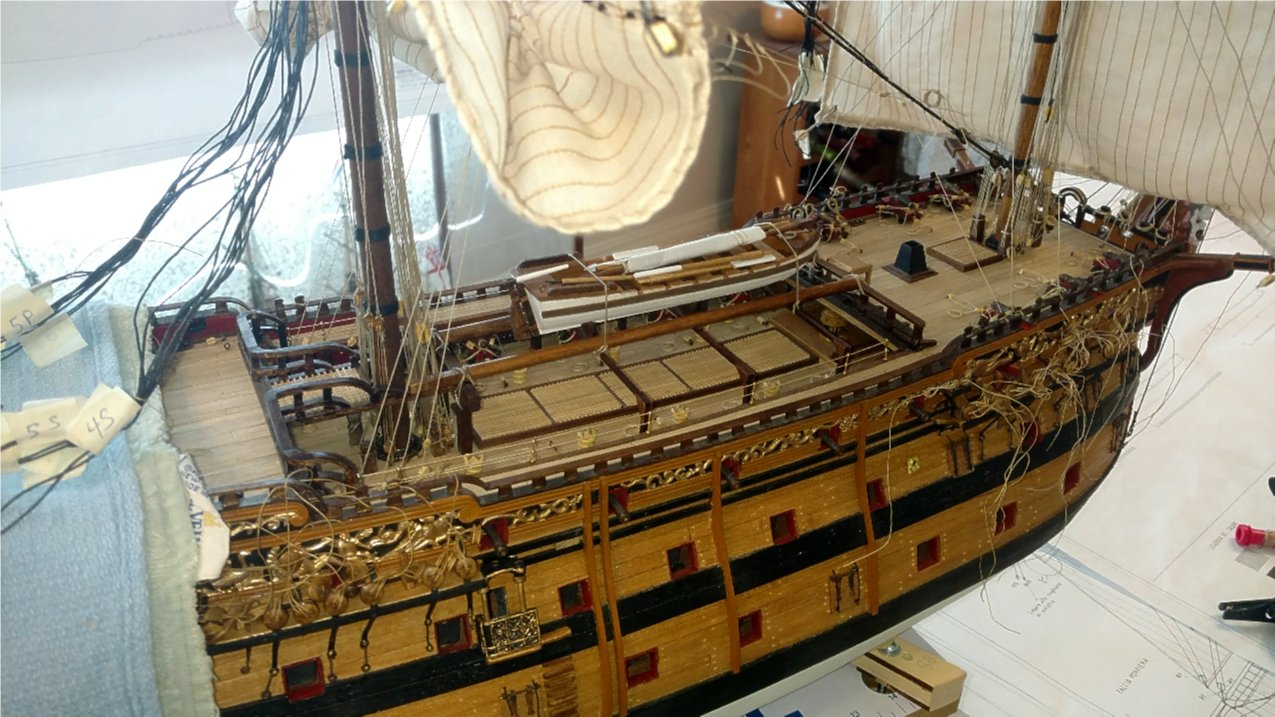
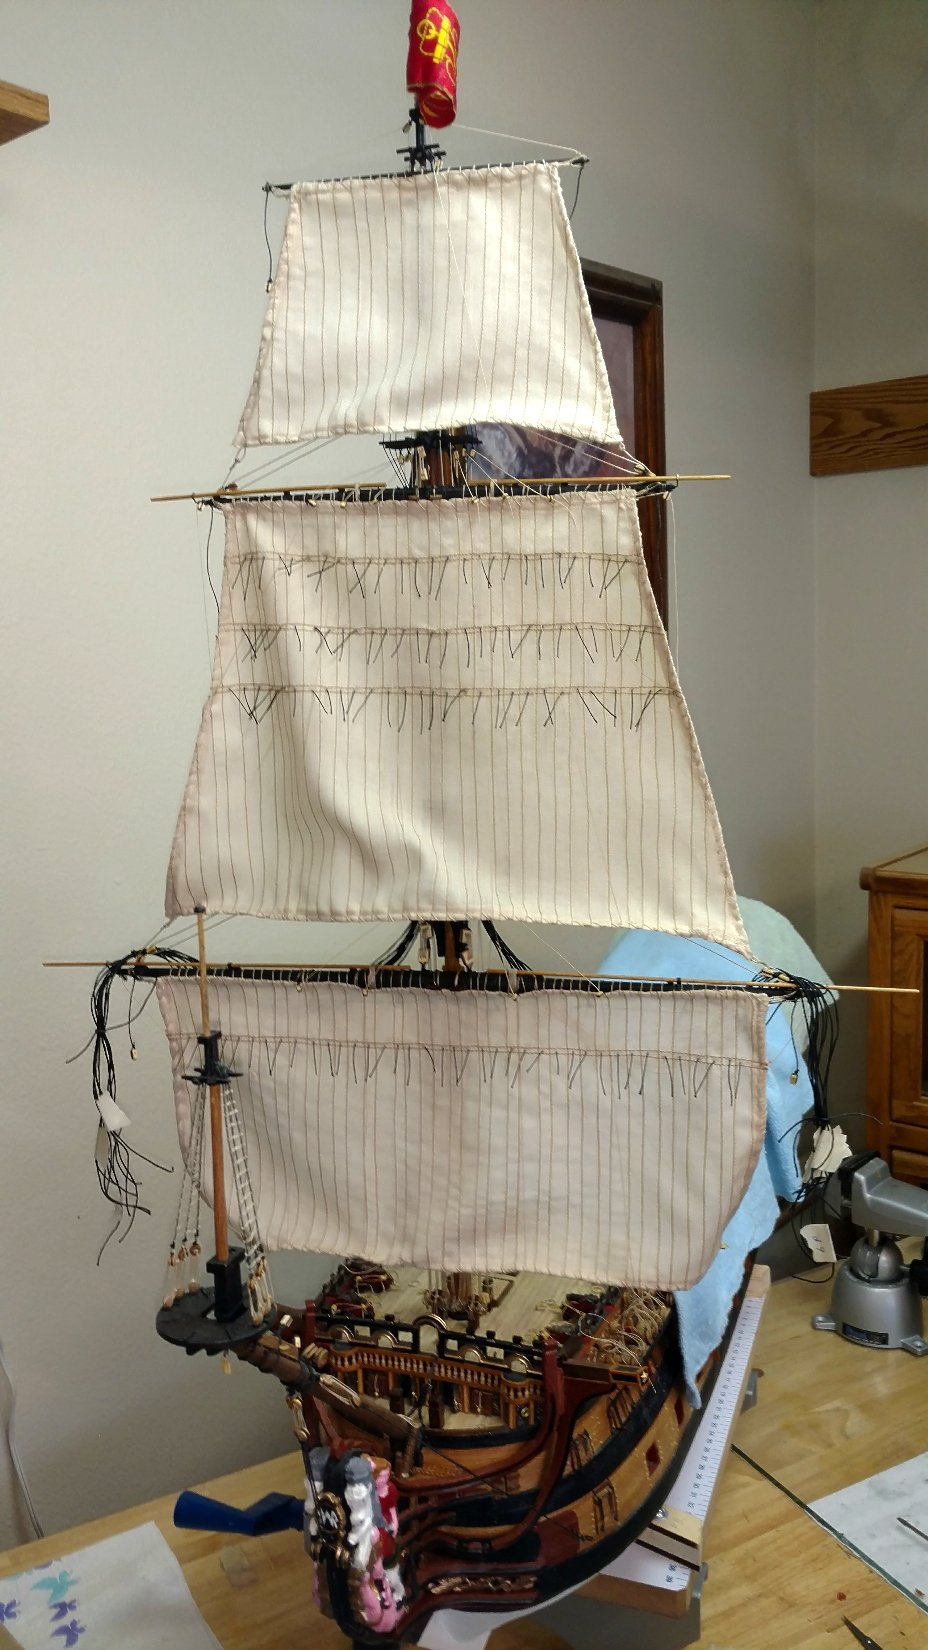
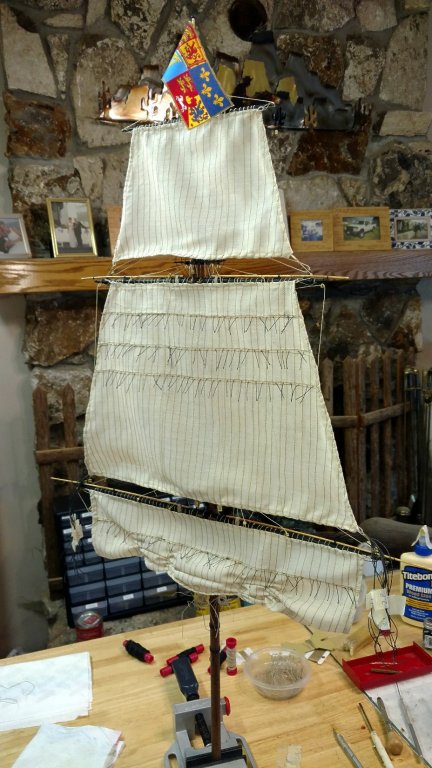
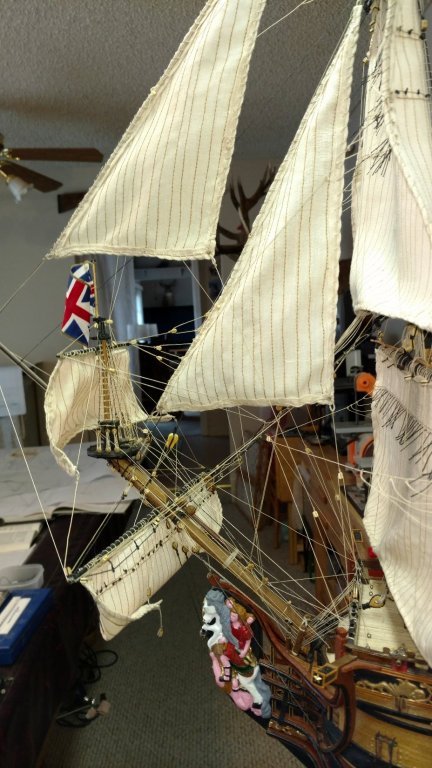
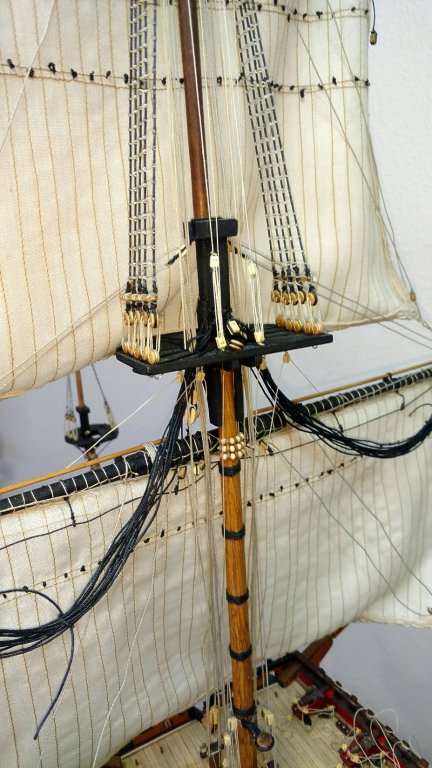
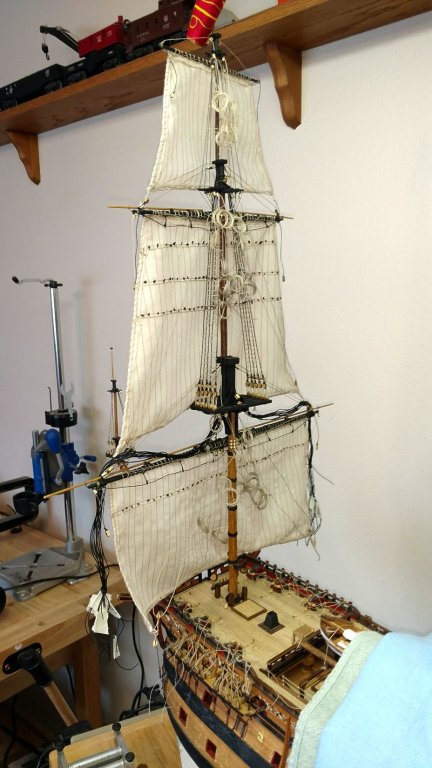
Finally another post. The mainmast is fully constructed and rigged. There was an enormous amount of work to complete this and that is why it took so long. I can only put in an hour or two here and there. I am partially furling the main course so the decks and their details can be seen on the finished model. Next is to step this mast to the ship and complete the standing rigging and belay all of the running rigging to the decks. Vince P.

- 593 replies
-
- 4
-
-
- royal william
- euromodels
- (and 1 more)
-
Welcome aboard mate! Vince P.
-
Welcome aboard mate! Vince P.
-
Welcome aboard mate! Vince P.
- 7 replies
-
- 3
-
-
- li
- lone island
- (and 1 more)
-
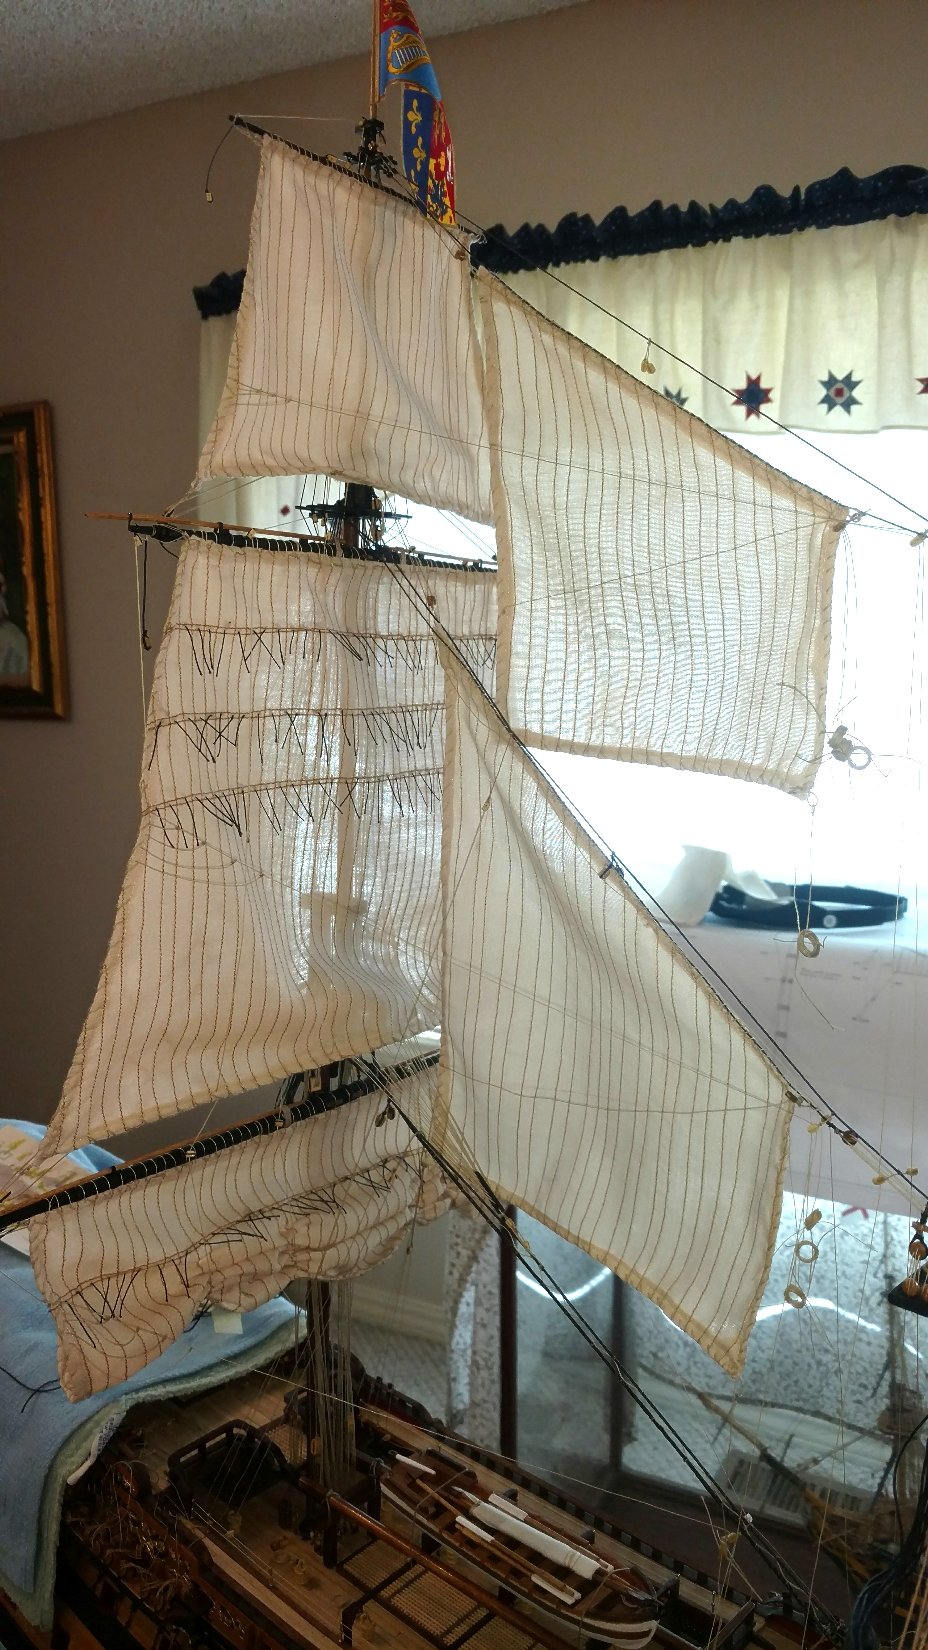
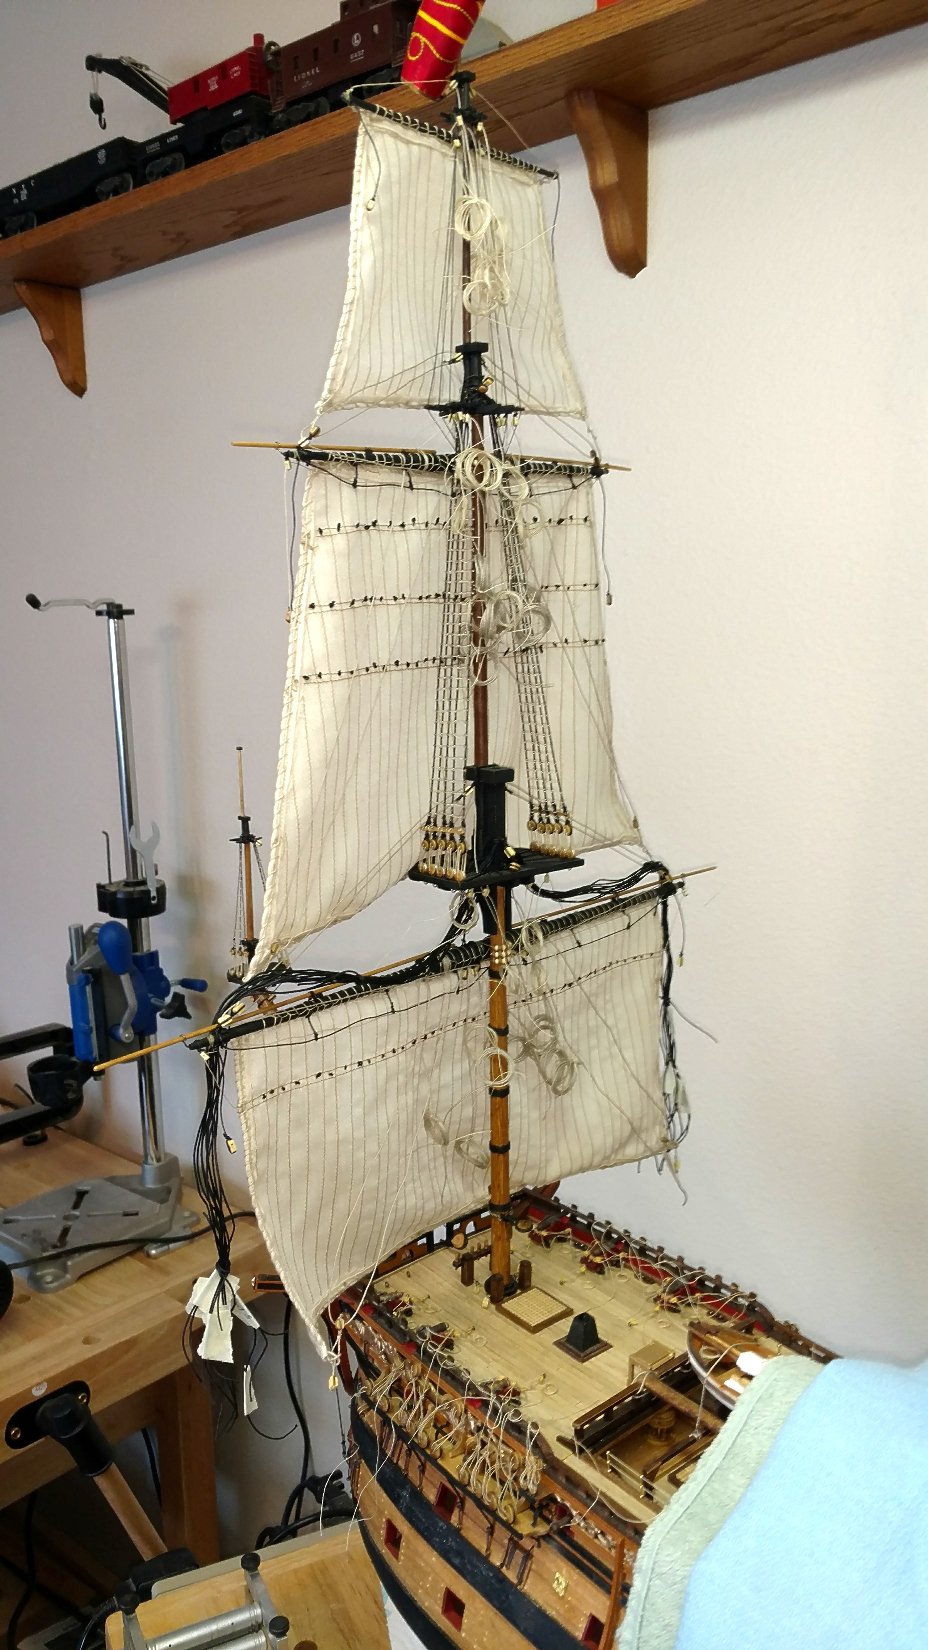
Finally completed the standing and running rigging of the foremast and bowsprit. Only things left are the braces and lower shrouds of the foremast which will be done later in the build to allow access to the inside of the decks. This area of the ship has the most complicated and intense rigging considering you are really rigging 2 masts together, so the hardest part is over with. With the sails, as said before, the amount of rigging is much more complicated. I had to accomplish the rigging in layers from the inside out in order to have access when needed. I made a list of all of the lines and prioritized them by numbers and completed each in pairs. Next up is placing dozens of tiny rope coils to all of the belay points and then moving on to the mainmast. Vince P.


- 593 replies
-
- 6
-
-
- royal william
- euromodels
- (and 1 more)
-
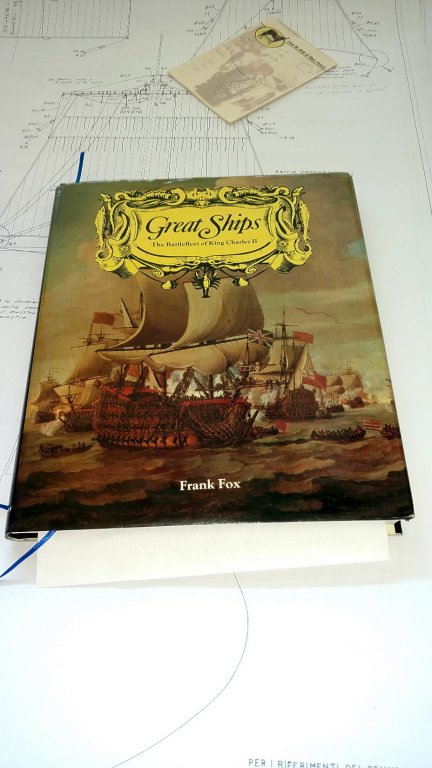
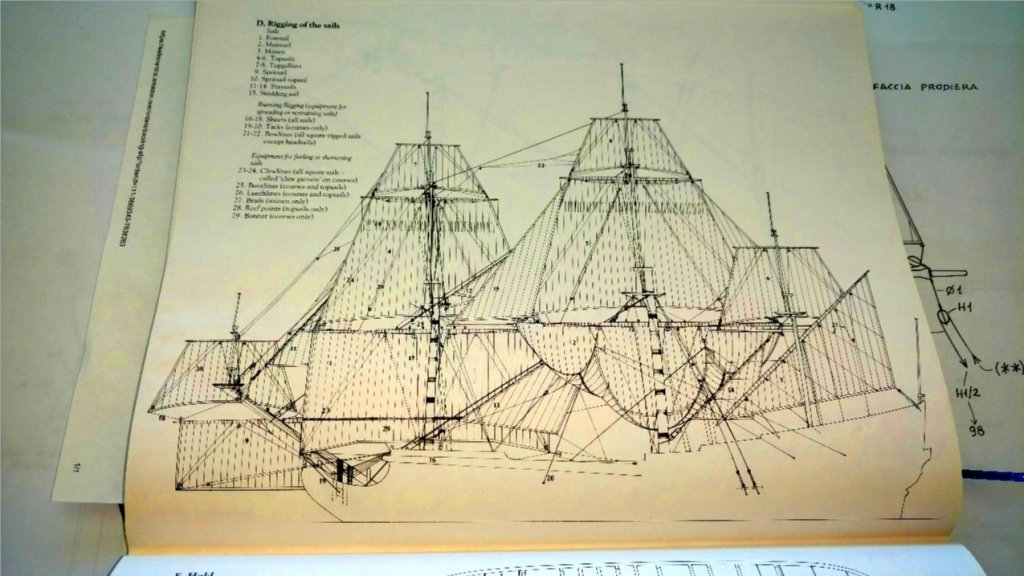
Hi All, I found this great book, thanks to a new member here, Mark from Virginia USA. It is illustrated with actual drawings and paintings from the 1600's by the builders of war ships of the period of the mid to late 17th century. Also photos of various museum models. Since I am building the Royal William and Prince coming next, I thought it would be a good addition to my reference library. Not only is it a great book, but it has diagrams of rigging plans as well. I am building the RW with full rigged sails and the plans leave out some of the tiny details. I have been going back and forth to several sources trying to figure the running rigging out. This book has a complete diagram for rigging sails on a ship like the RW. In ten minutes it answered all the questions I had. It also has fabulous closeup photos of the decorations for the RW and the Prince and many other ships of the period. I got a used copy in almost new condition from Amazon for $149 US. Thanks Mark! Vince P.
- 593 replies
-
- 5
-
-
- royal william
- euromodels
- (and 1 more)
-
Thanks mate, Since I am working on Royal William now and the Prince to follow, this book will be of great value and a nice addition to my library. Vince P.
- 2,699 replies
-
- 6
-
-
- heller
- soleil royal
- (and 9 more)
-
Welcome aboard mate! Vince P.
-
Hi Keith, Welcome aboard mate! Try on line with the big ship model retailers like Model Expo, Ages of Sail, Modellers Central, Natures Coast. They all sell most of the lines of the major model companies. Vince P.
-
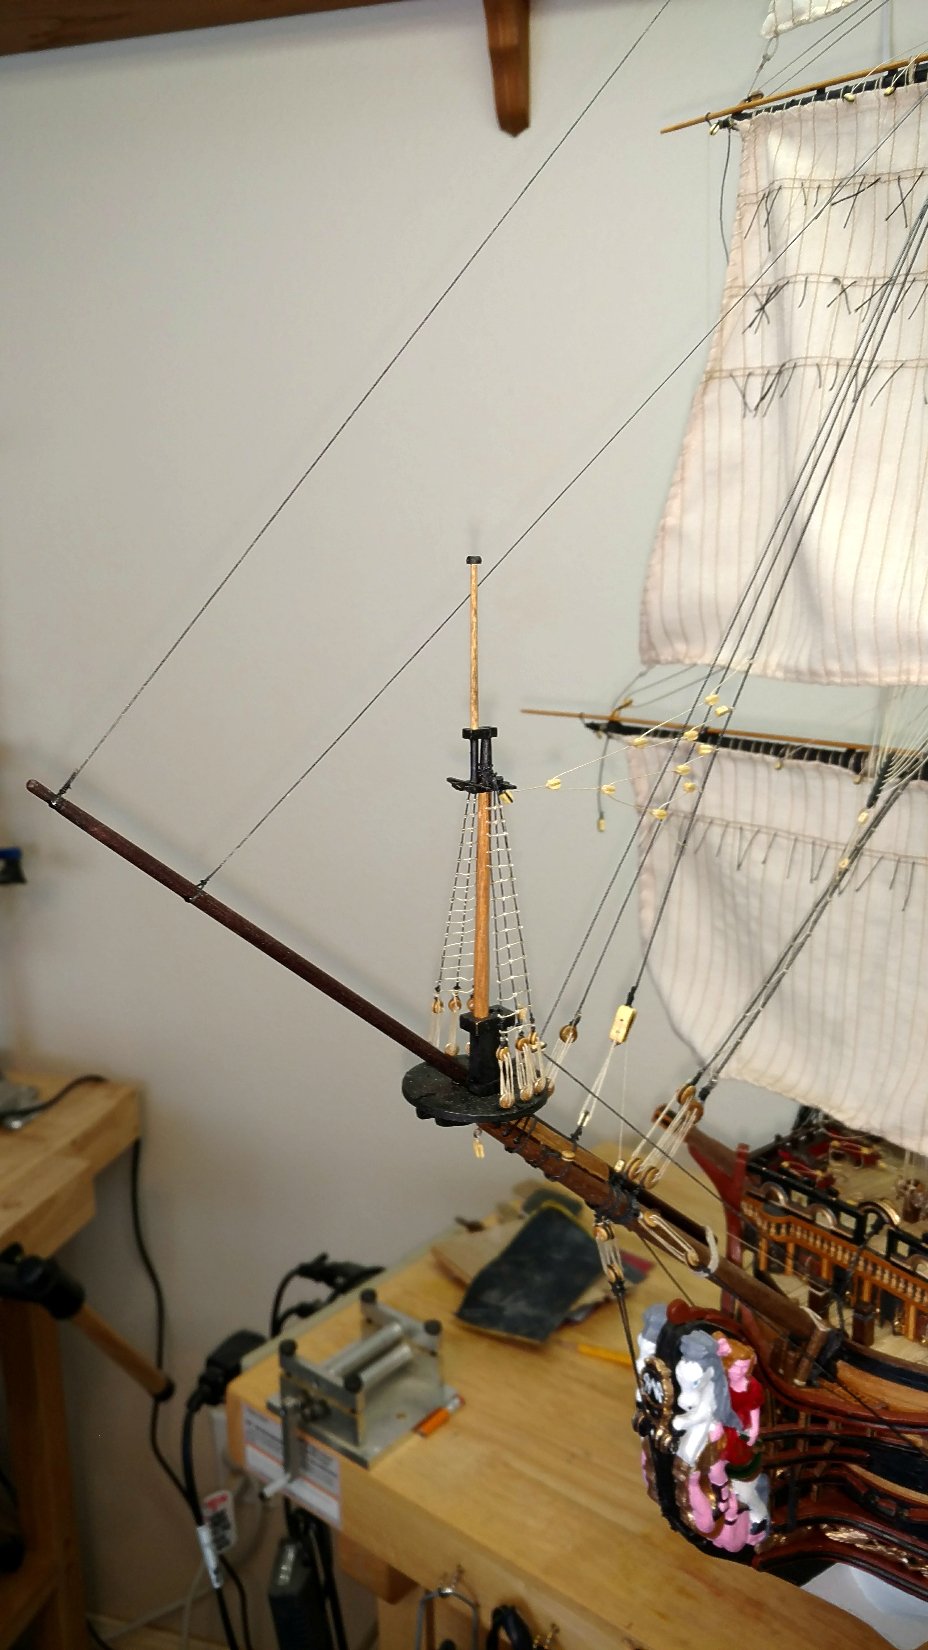
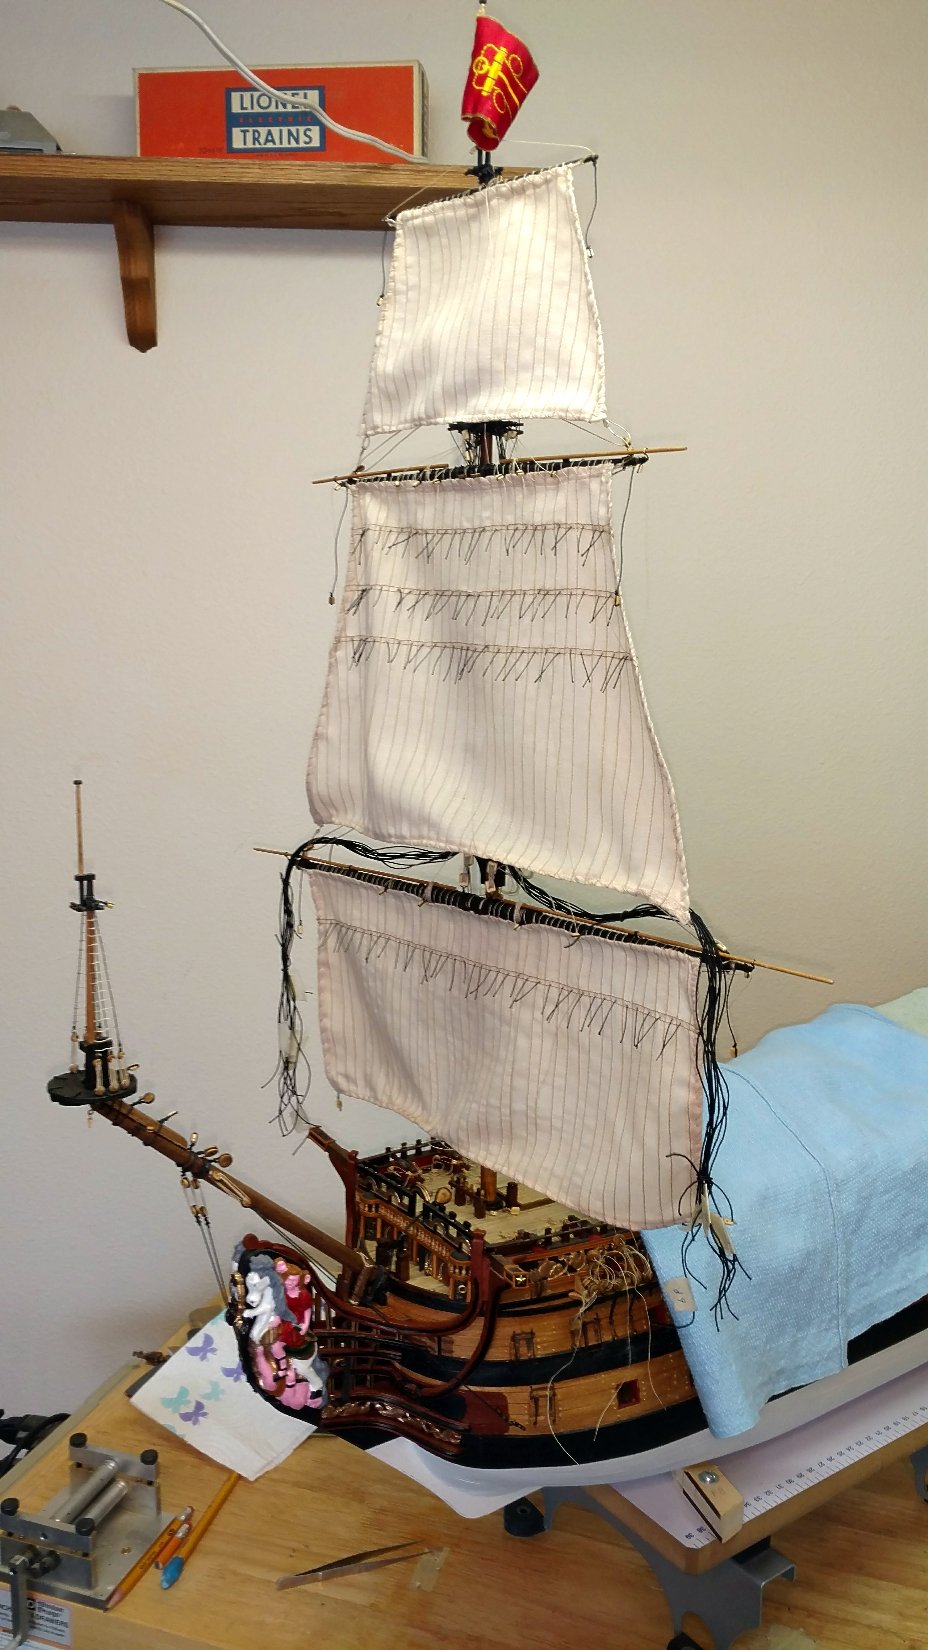
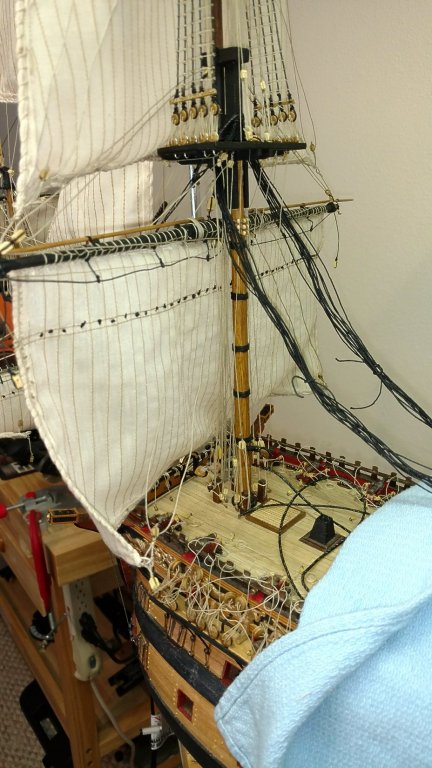
Most of the standing rigging for the foremast and bowsprit is complete. The foremast backstays and shrouds will be done last. Next up is spars, sails, and running rigging for the bowsprit and spritsail topmast. Vince P.

- 593 replies
-
- 4
-
-
- royal william
- euromodels
- (and 1 more)
-
Hi Don, It will not interfere. I used this method on the Sovereign of the seas and it worked out well. I believe the whole issue with rigging is to work from the inside out. Doing the shrouds and ratlines first limits the ability to get inside where most of the rigging is, especially if rigging with sails. Vince P.
-
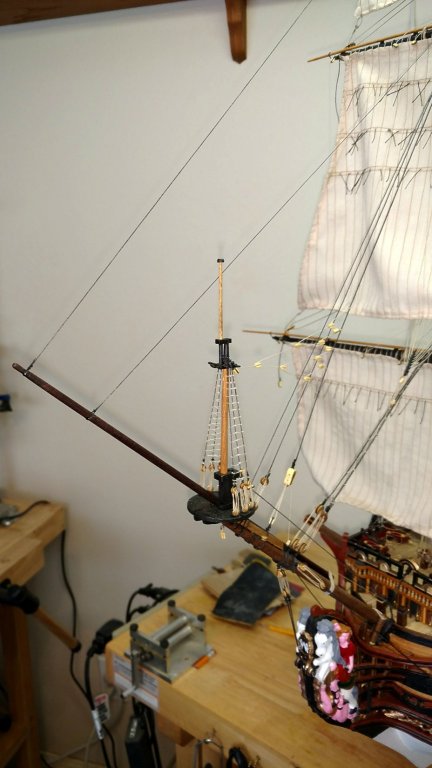
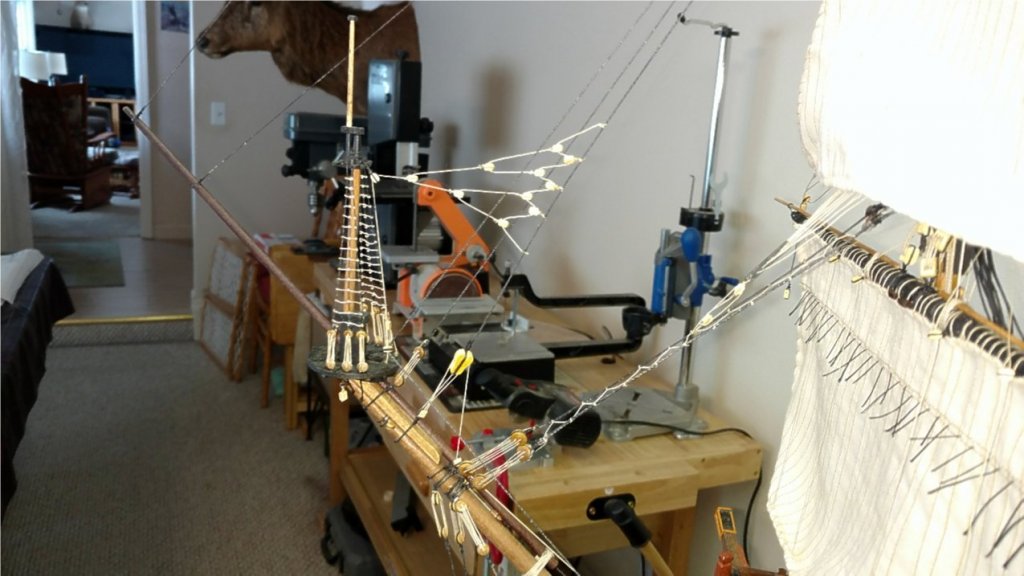
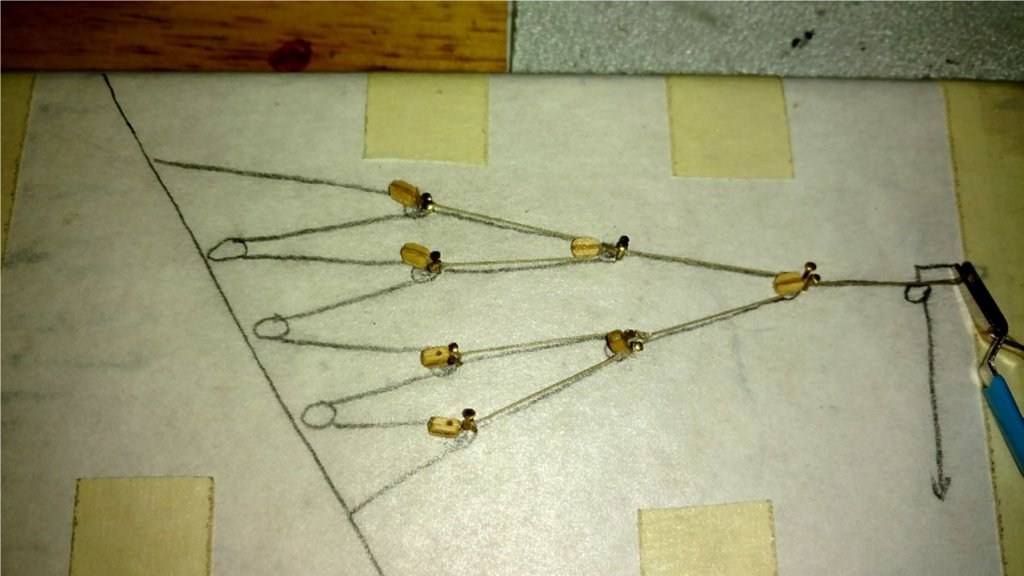
The spritsail topmast backstay is a complicated array of blocks in a spider weblike pattern. In order to get the whole thing to balance and tensioned evenly, I built a jig. I traced the diagram first from the plans and taped it to a board. Then using small nails I built the thing on the board. I will remove it and place it on the ship. More photos to follow. I used this method on the Sovereign of the Seas which had several large and even more complicated arrays for the mizzen mast upper stays and they came out perfect. Vince P.
- 593 replies
-
- 2
-
-
- royal william
- euromodels
- (and 1 more)
-
Hi Don, It does not interfere at all. I used it on building the Sovereign of the Seas. The only shrouds you will be doing is the lower ones. All of the others up above are done off ship. Vince P.
- 593 replies
-
- 1
-
-
- royal william
- euromodels
- (and 1 more)
-
Very nice work. Vince P.
-
Welcome aboard mate. Nice work. Vince P.
-
I finished all of the foremast running rigging that could be done at this point in the build. That was a lot of rigging. The plans are vague in some areas as to the belay points for some of the rigging. I had to rely on books from R.L. Anderson, Keith Julier, and the photo gallery from Euromodels for some information. Having experience in rigging these types of ships with full sails also helped. Having to do all this research makes this project all the more fun. Next up is the standing rigging for the foremast and the bowsprit running rigging. Vince P.


- 593 replies
-
- 4
-
-
- royal william
- euromodels
- (and 1 more)
-
OK, the foremast is stepped into the ship. Now comes the fun part of completing all of the associated rigging. Unlike most builders, I actually enjoy the rigging the most. Vince P.

- 593 replies
-
- 4
-
-
- royal william
- euromodels
- (and 1 more)