pirozzi
-
Posts
843 -
Joined
-
Last visited
Content Type
Profiles
Forums
Gallery
Events
Everything posted by pirozzi
-
Hi and welcome aboard mate! I live just over the hill from you, in Carson City Nevada. Vince P.
-
Hi Hal, I grew up in Queens and then moved to East Meadow, Long Island. My brother still lives in Seaford. I miss the seashore back home, but not the traffic. Welcome aboard mate! Vince P.
-
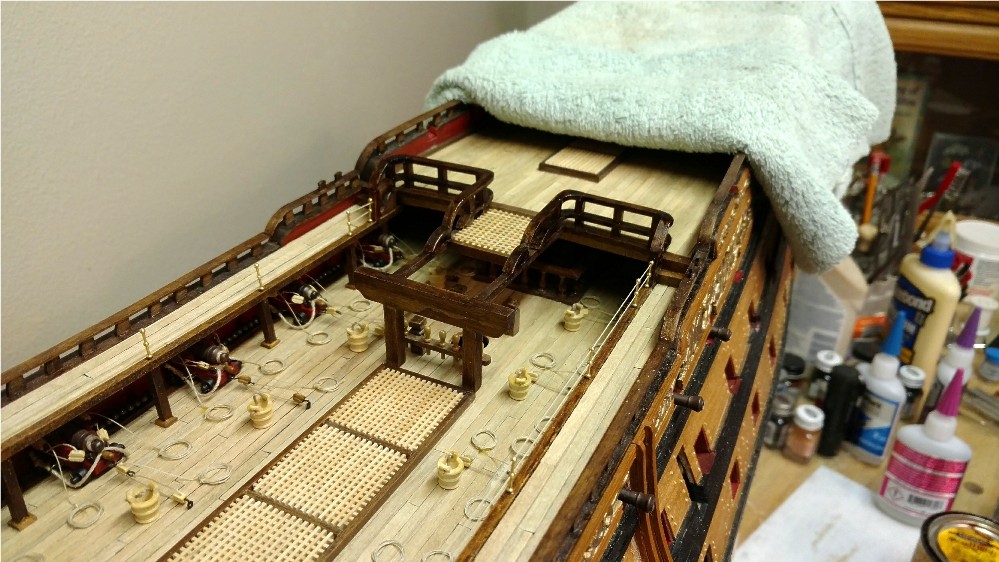
 I think I have completed all of the topside deck fixtures with the exception of the long boat. If you choose to go the long route and add a lot of detail, it takes quite a while to do. Next up is the rudder assembly. Vince P.
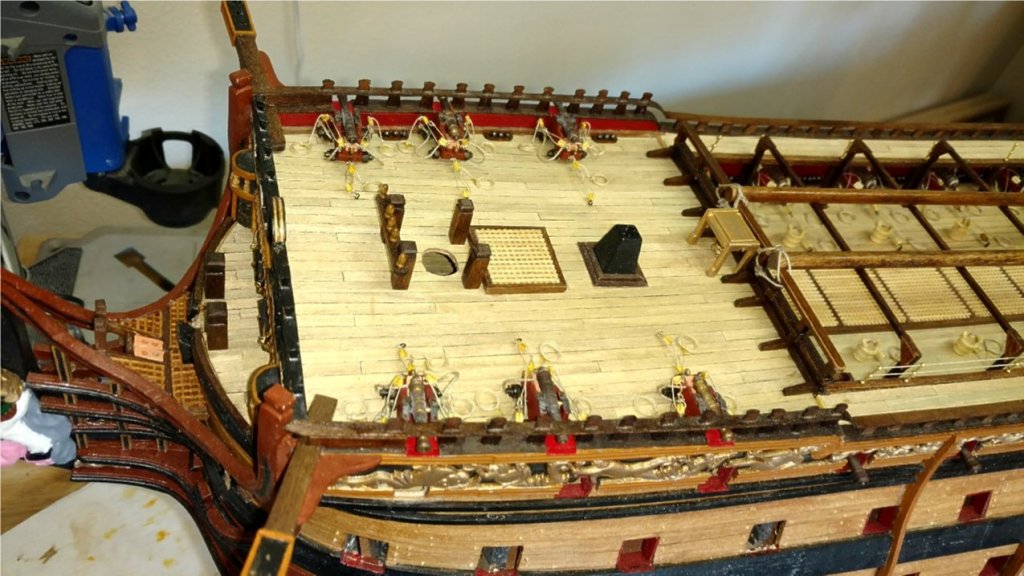


- 593 replies
-
- 6
-

-
- royal william
- euromodels
- (and 1 more)
-
Welcome aboard mate! Vince P.
-
Hi Pete, Since rigging is my favorite part of the build, I try and rig as complete and accurate as possible. If you look at my last build of the SOS, you will see that she is rigged nothing like the kit plans. I did a huge amount of research before the rigging. I will do the same for the RW. I am looking forward to your notes and am sure they will be a great help. Vince
- 593 replies
-
- 2
-
-
- royal william
- euromodels
- (and 1 more)
-
Hi Amfibius, My username is Pirozzi which is my last name. I sign everything Vince P. which is my first name and middle initial. 😁
- 593 replies
-
- 2
-
-
- royal william
- euromodels
- (and 1 more)
-
The service to the members on this site is awesome to say the least! I made a major blunder and accidentally deleted this whole build log. I posted in the contact section to the administrators for help, asking if it could be restored. In less than 2 hours an administrator names James Hatch restored it and sent me a notice. I don't know James, but a big THANK YOU. Vince P.
- 593 replies
-
- 7
-
-
- royal william
- euromodels
- (and 1 more)
-
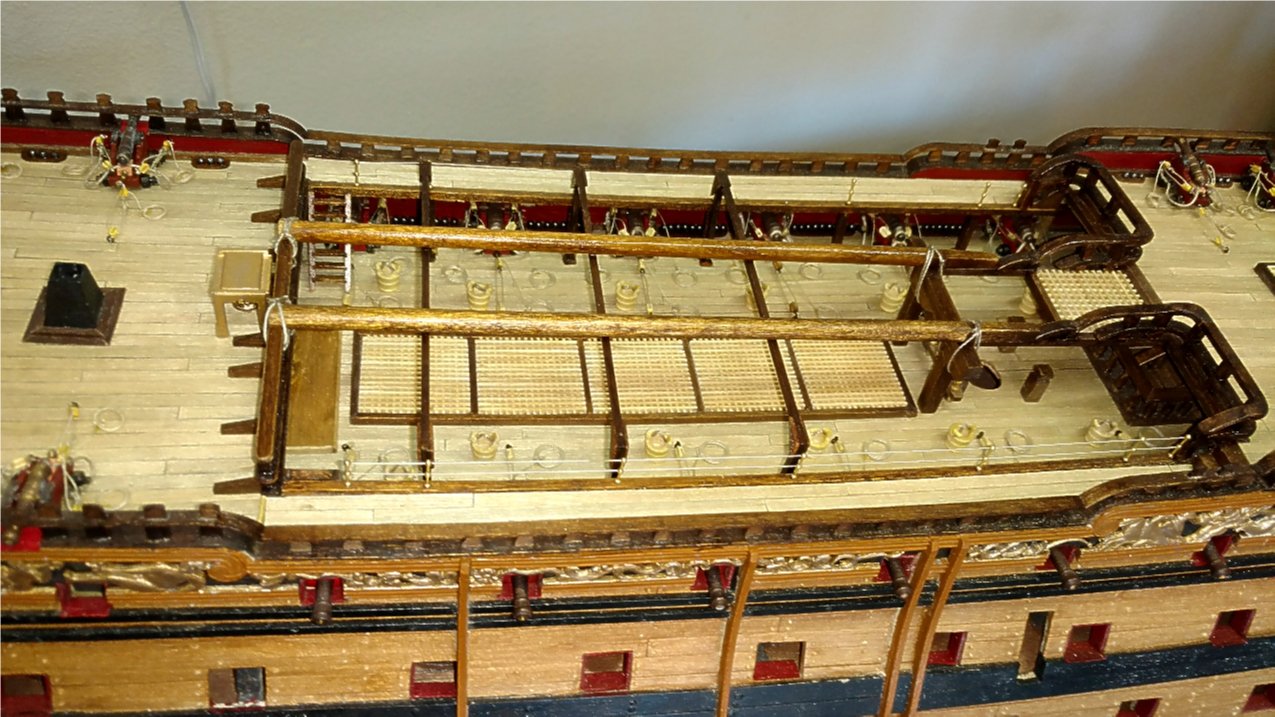
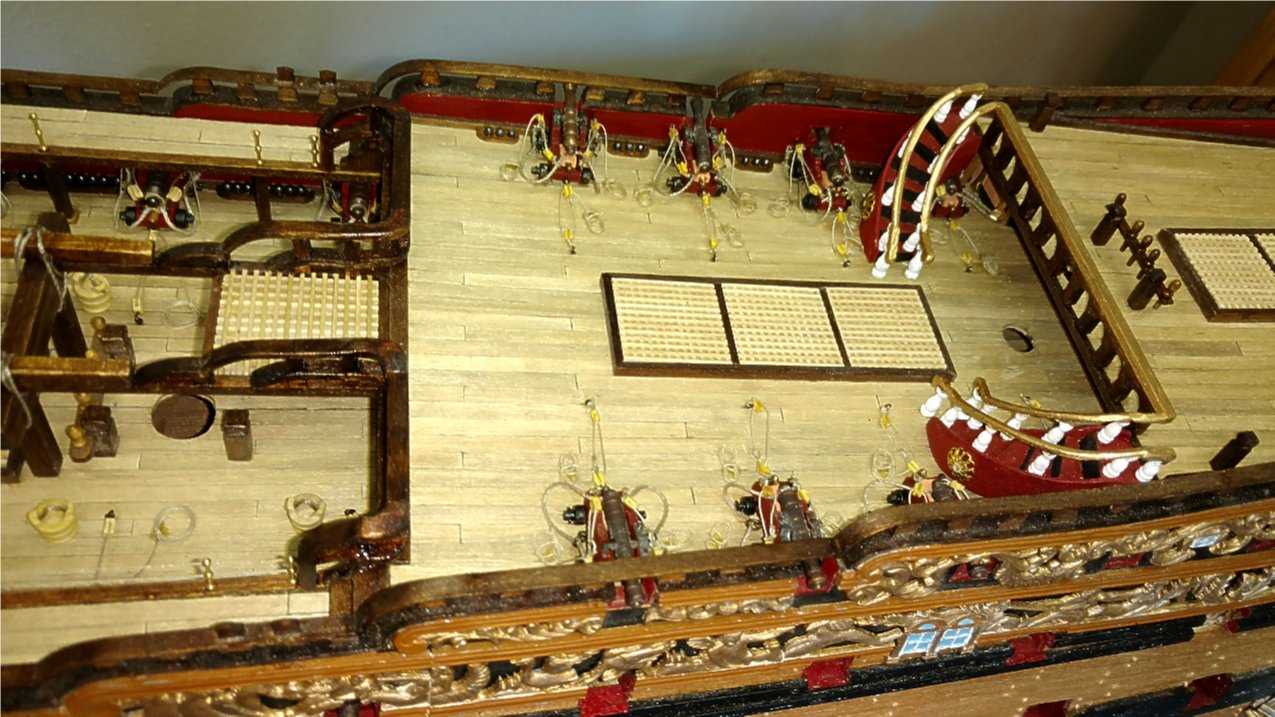
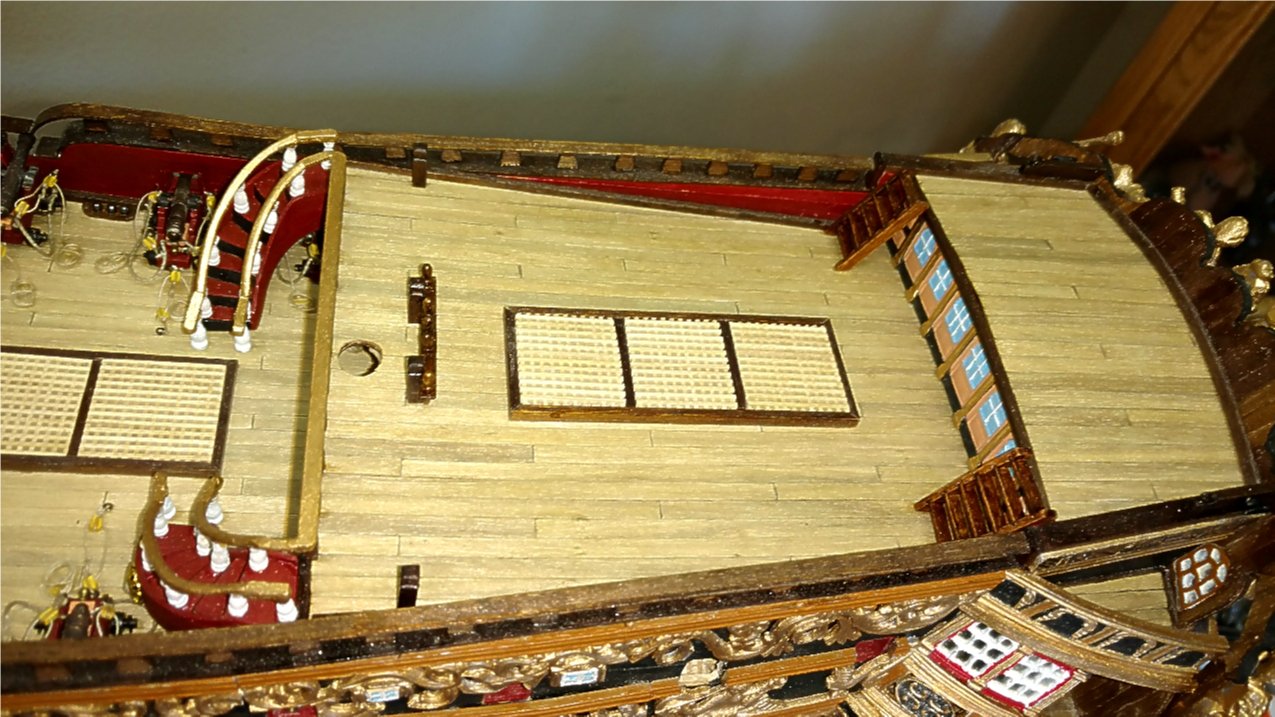
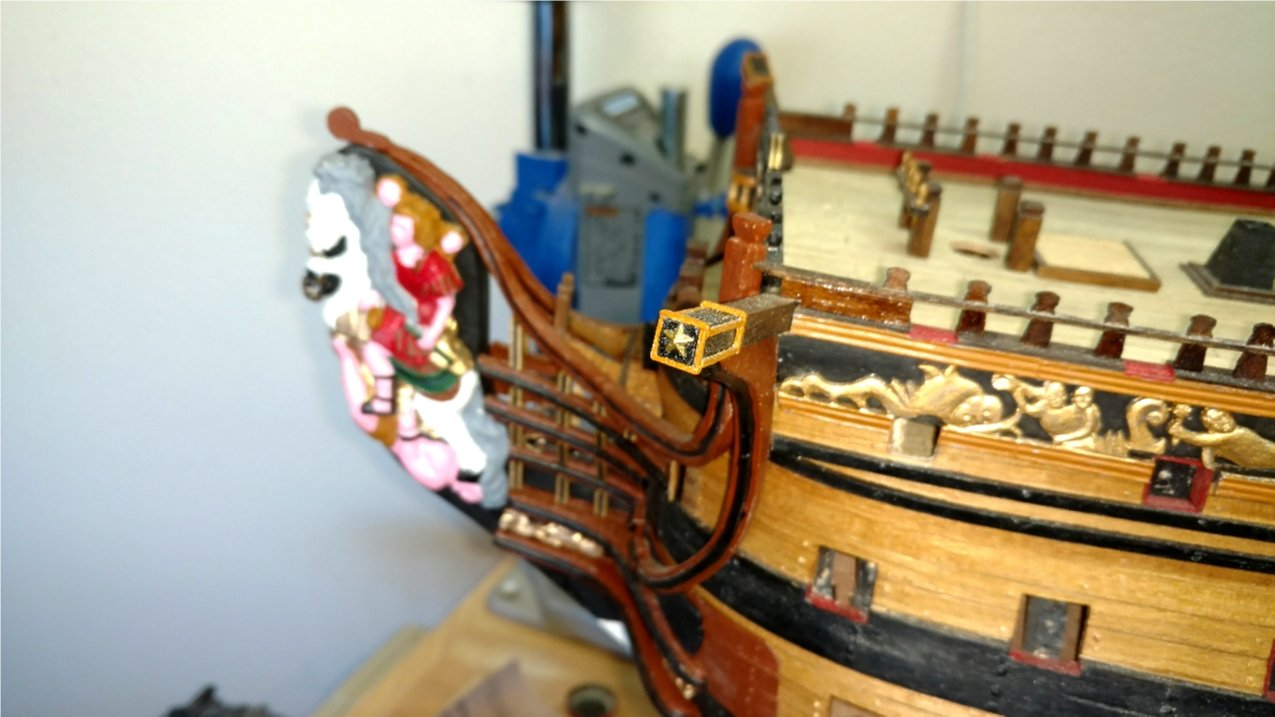
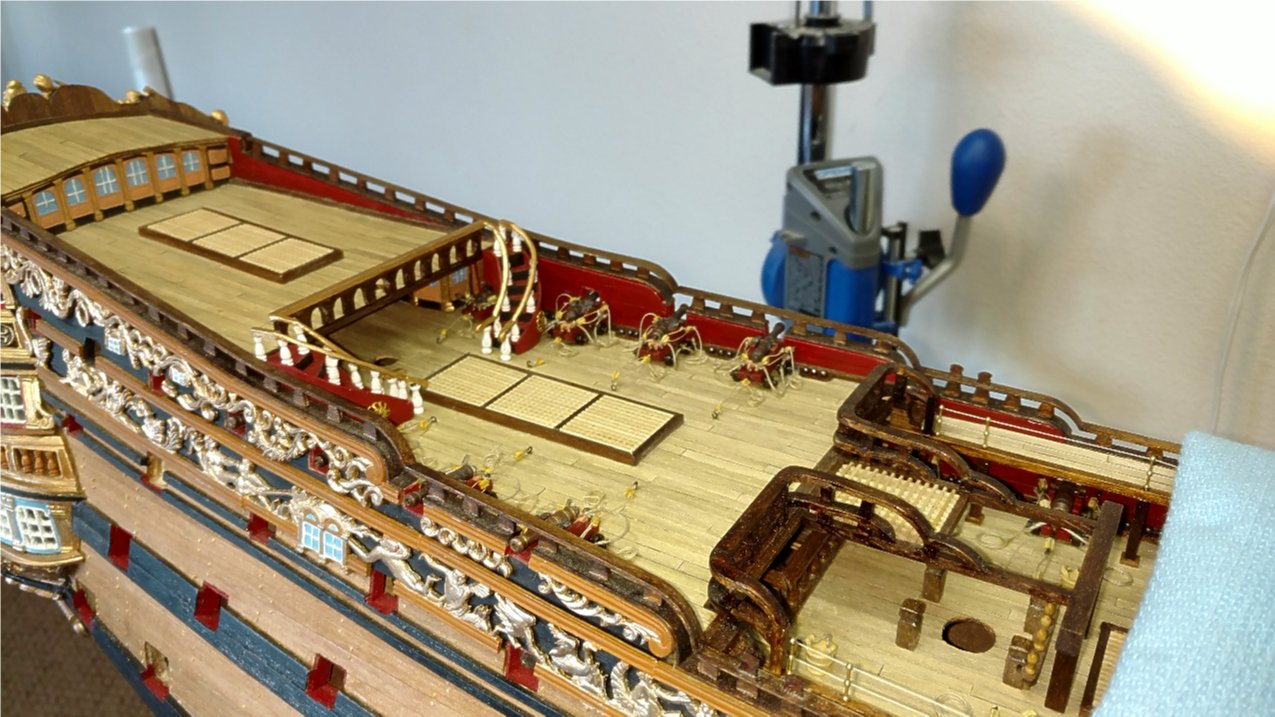
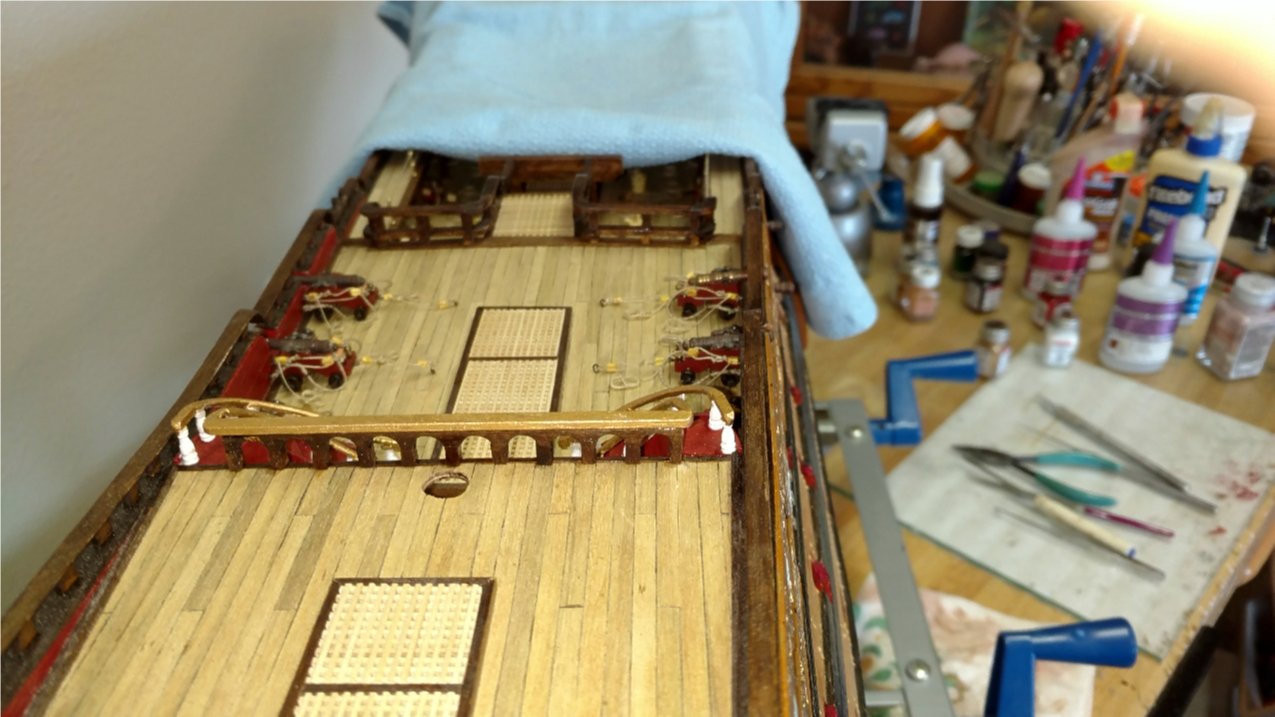
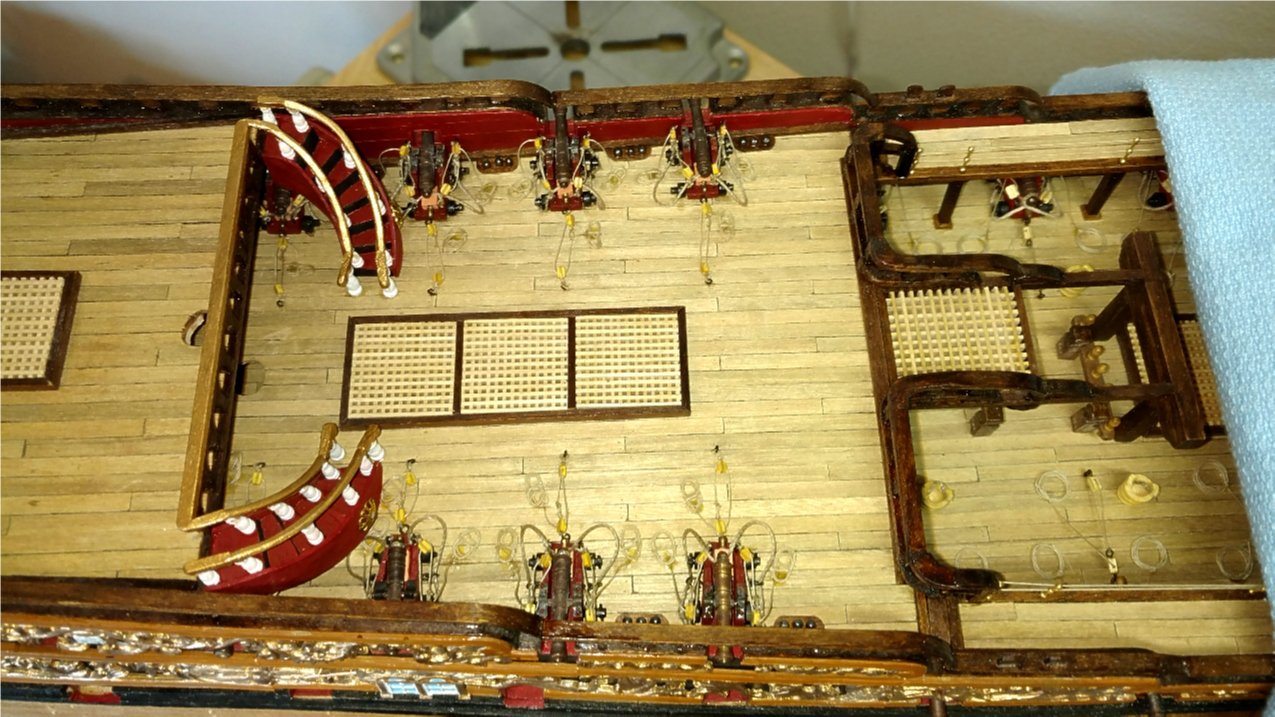
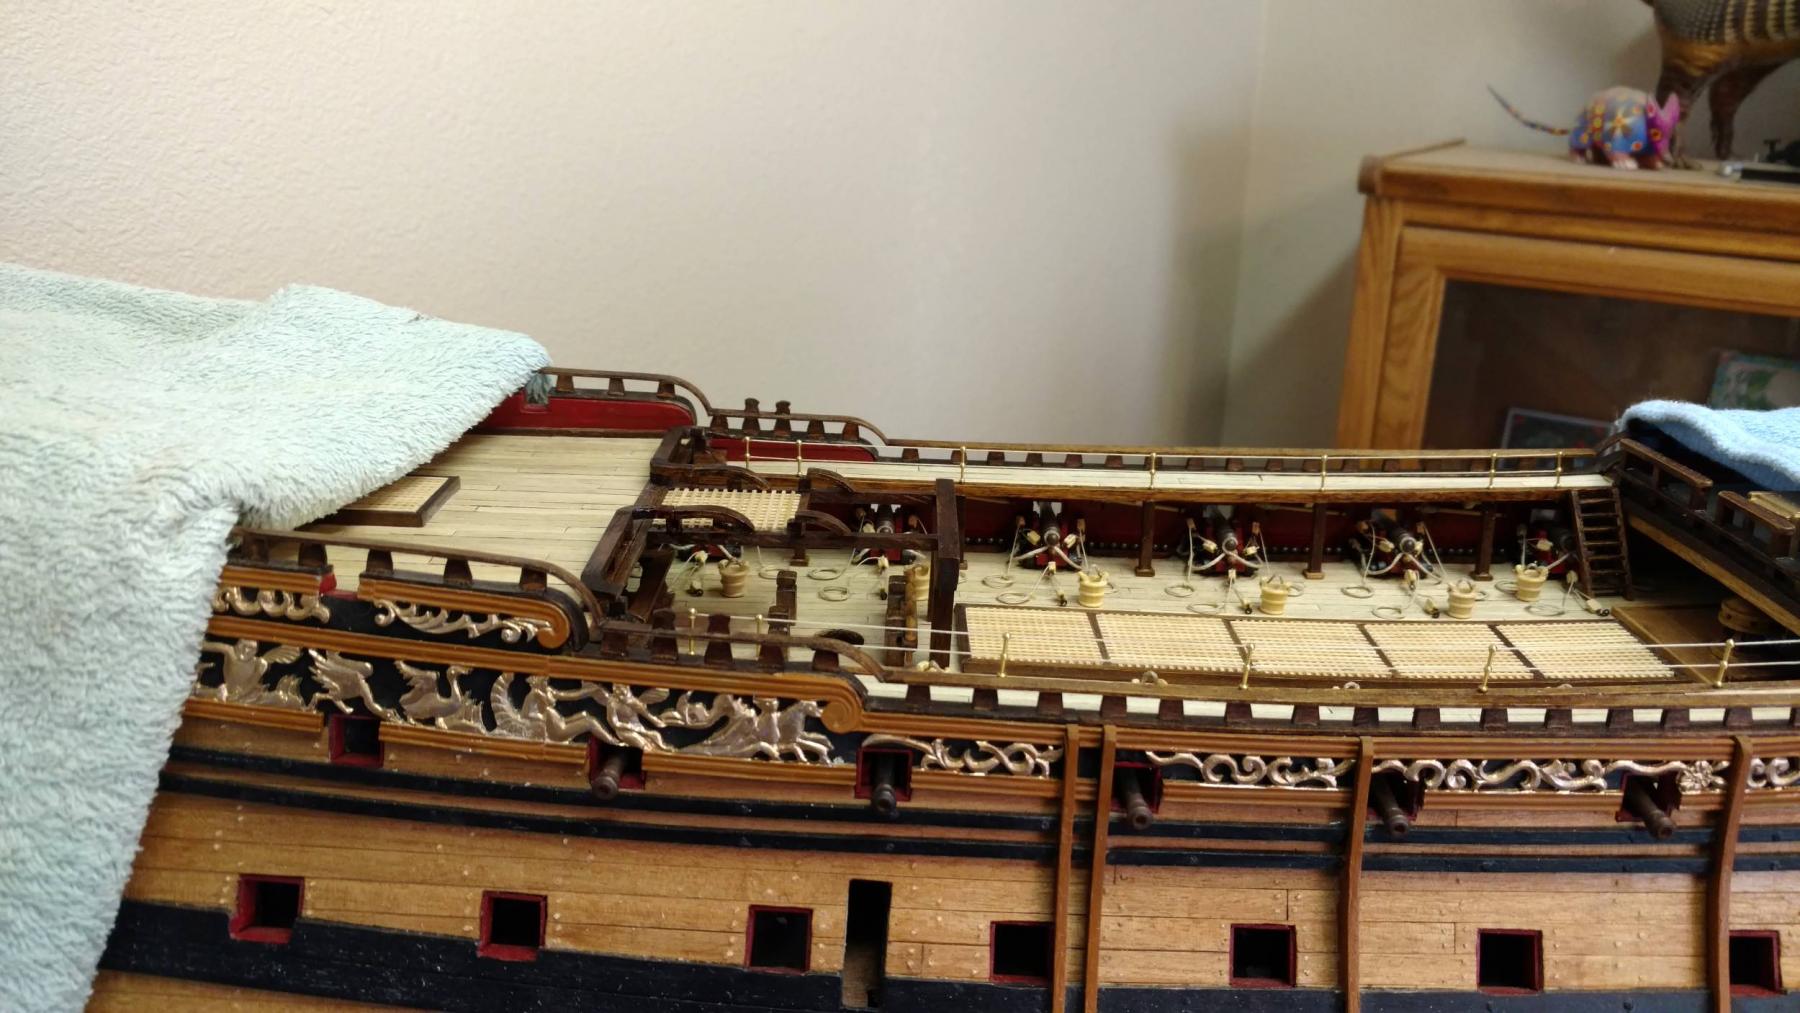
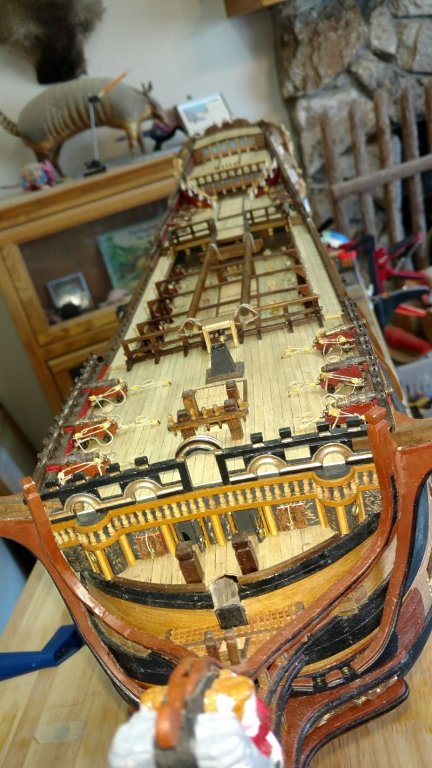
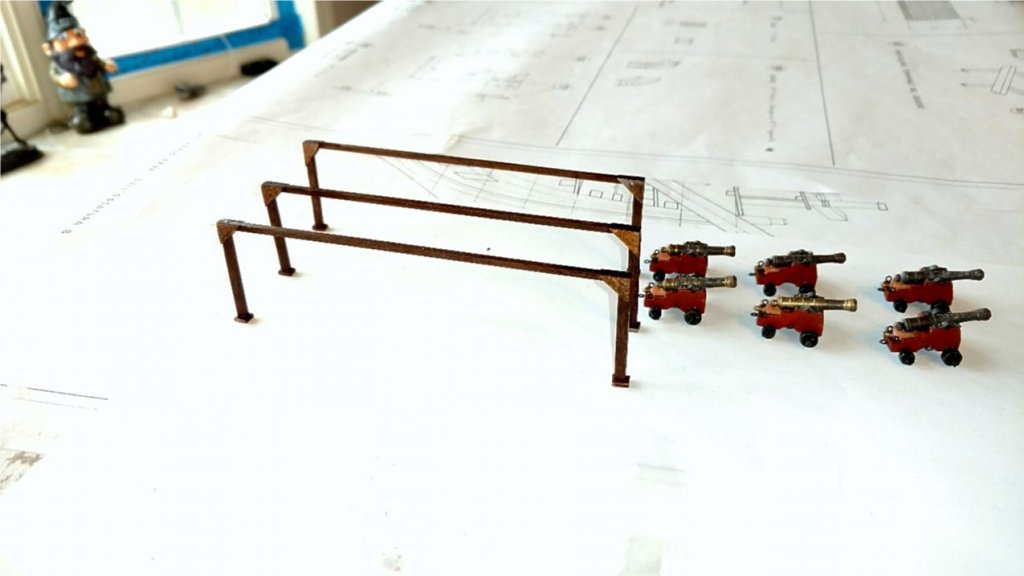
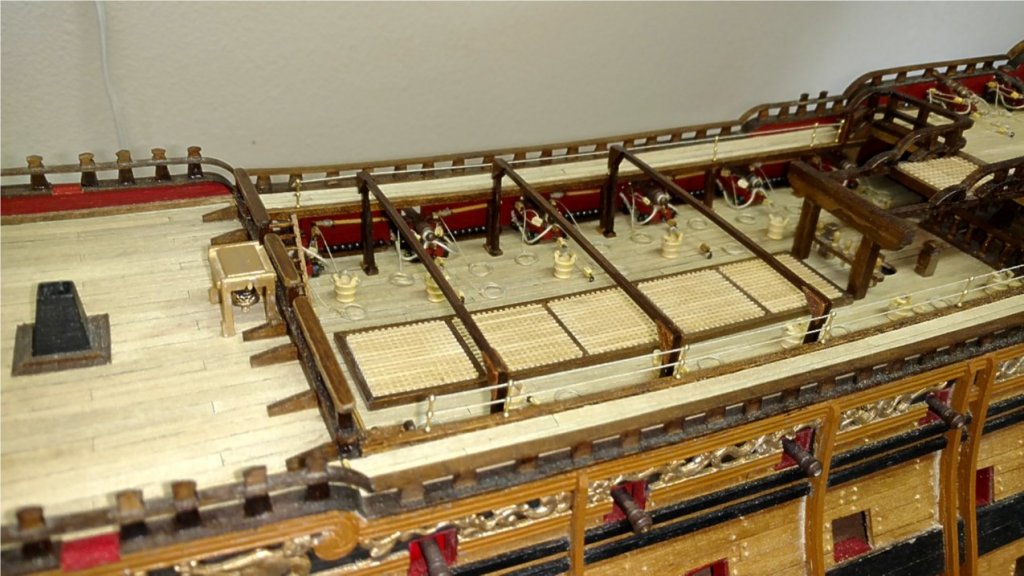
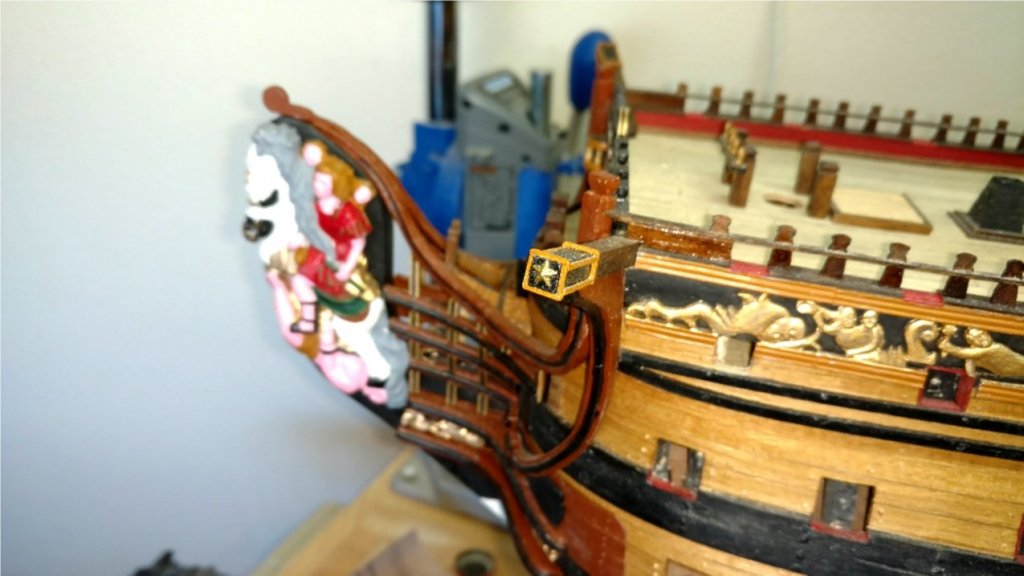
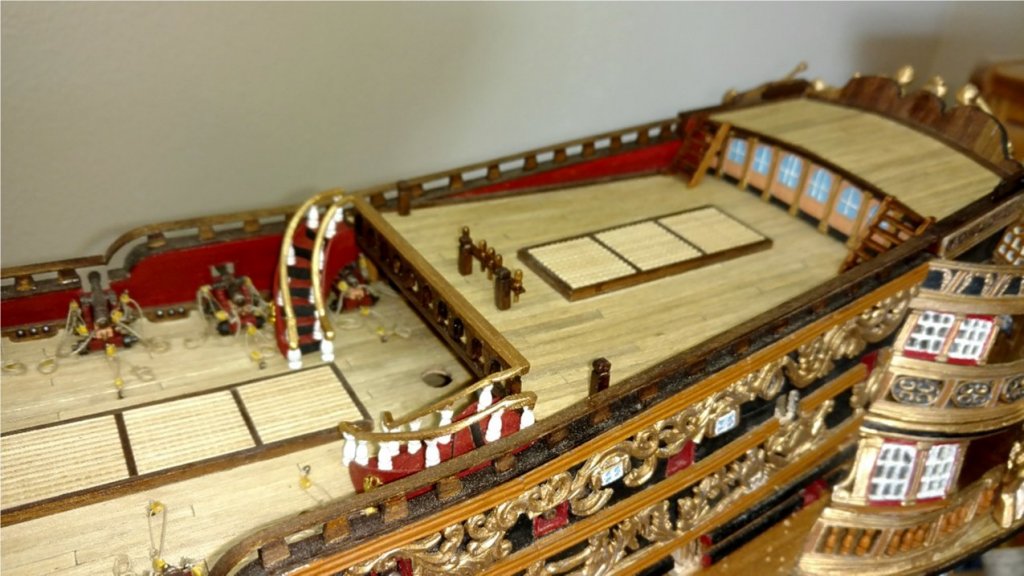
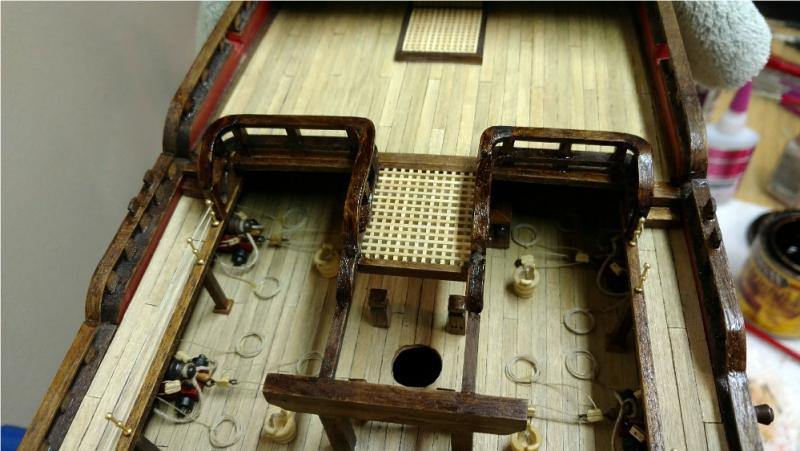
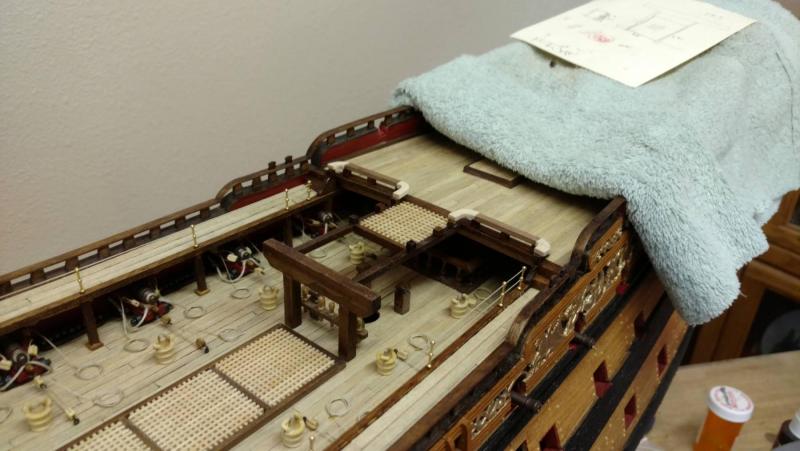
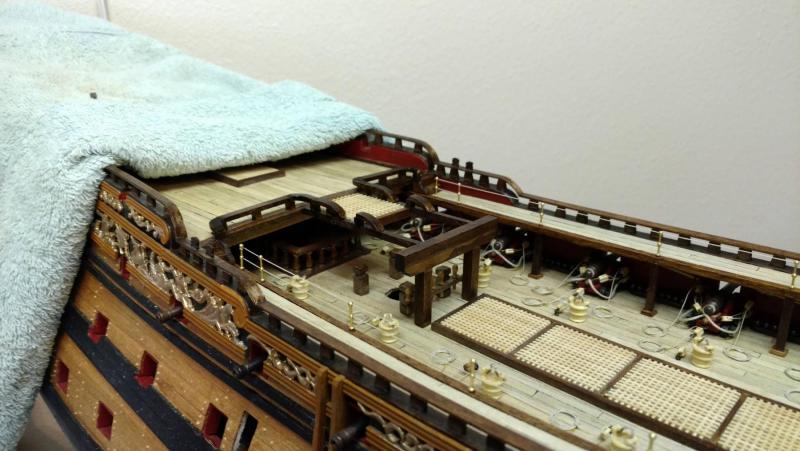
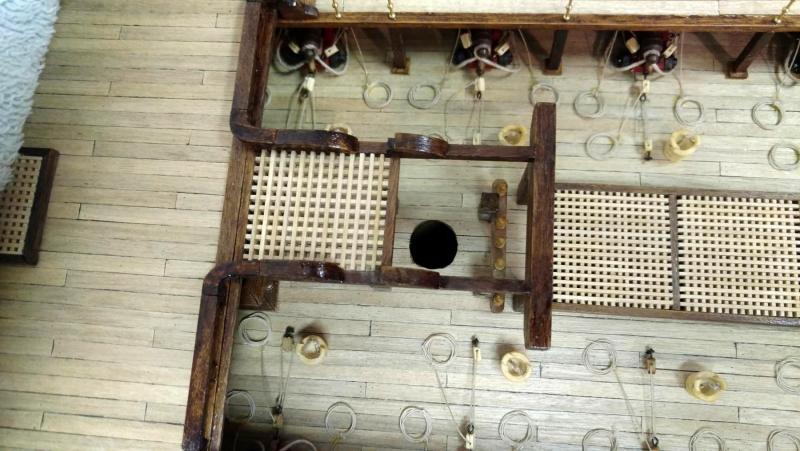
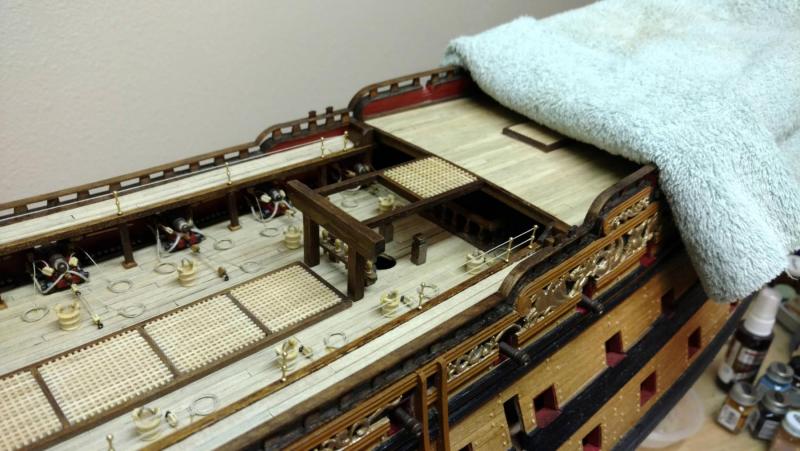
A few more little updates to the deck fixtures. I constructed and placed the boat supports on the main deck. I had some little brass stars and placed on the ends of the catheads for a personal touch. The ladders to the poopdeck. The rigging brackets on the rear of the poopdeck for the main course sails. The bits on the upper quarterdeck. Next up are the forecastle guns. Vince P.
- 593 replies
-
- 8
-
-
- royal william
- euromodels
- (and 1 more)
-
I just noticed a new look to the forum and it is much easier to post and to navigate. Very nice. Thanks to the administrators for a great job. Vince P.
- 593 replies
-
- 3
-
-
- royal william
- euromodels
- (and 1 more)
-
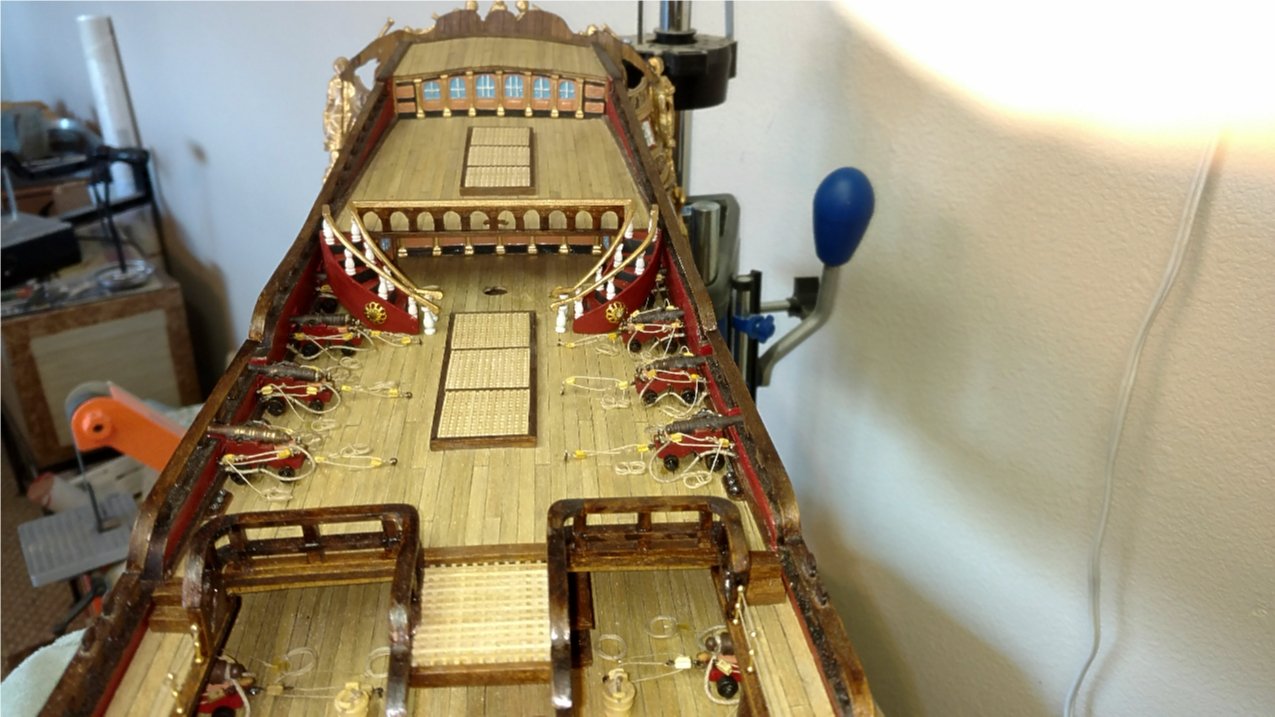
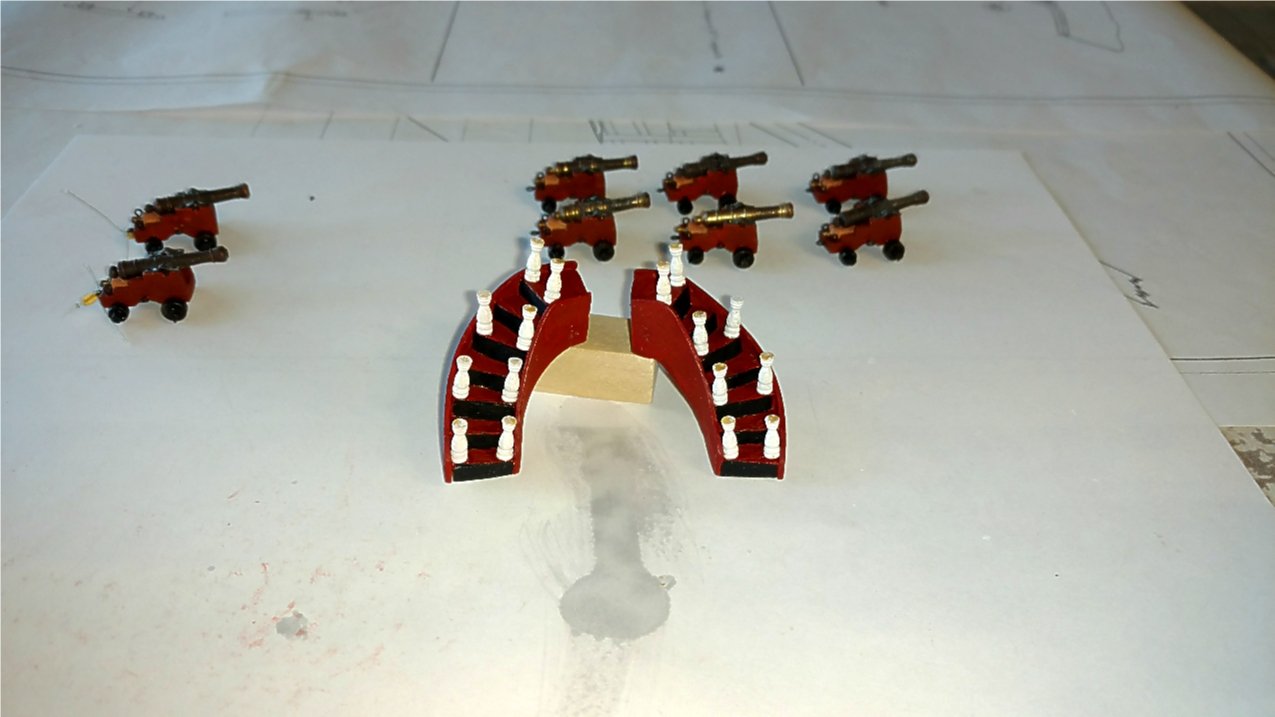
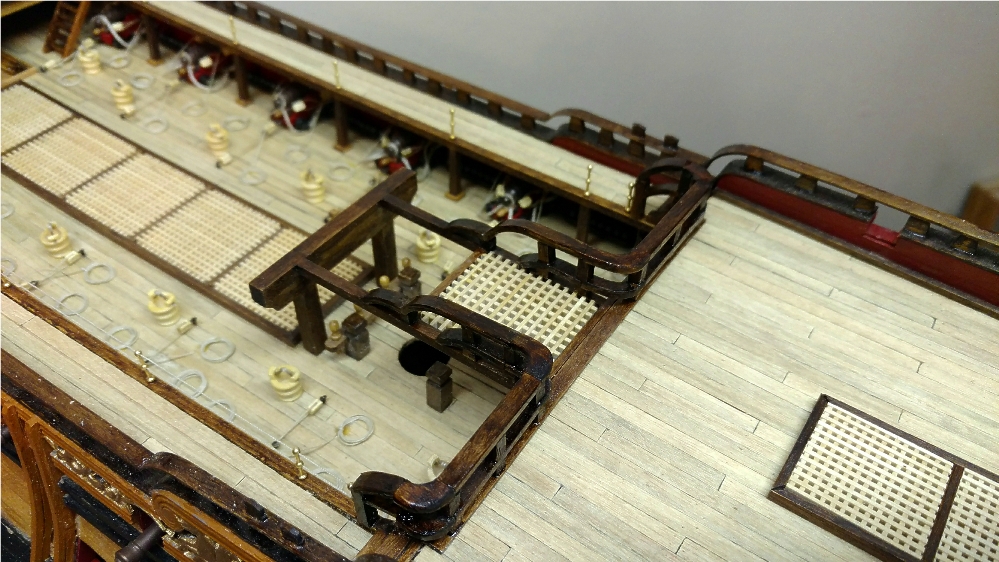
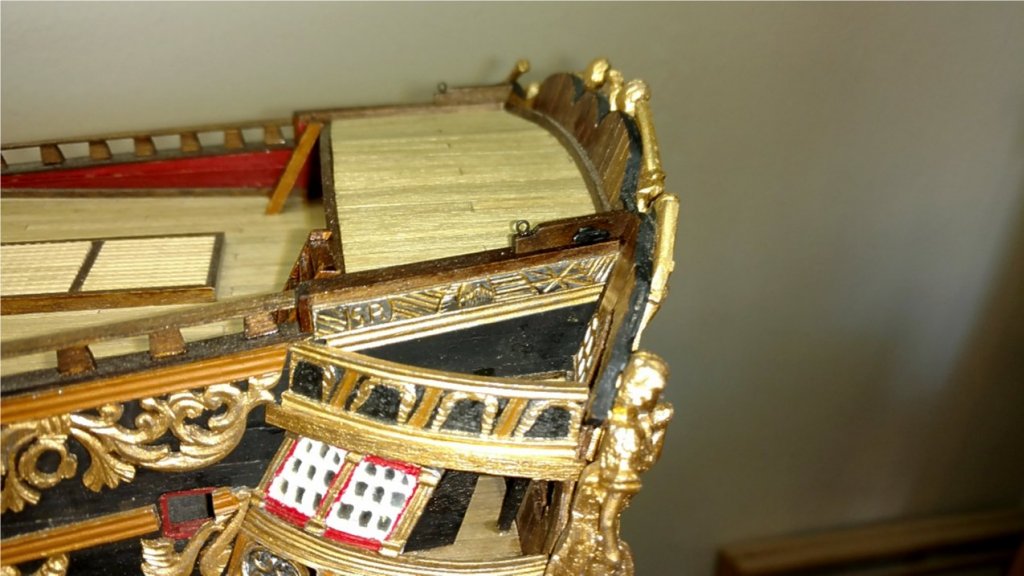
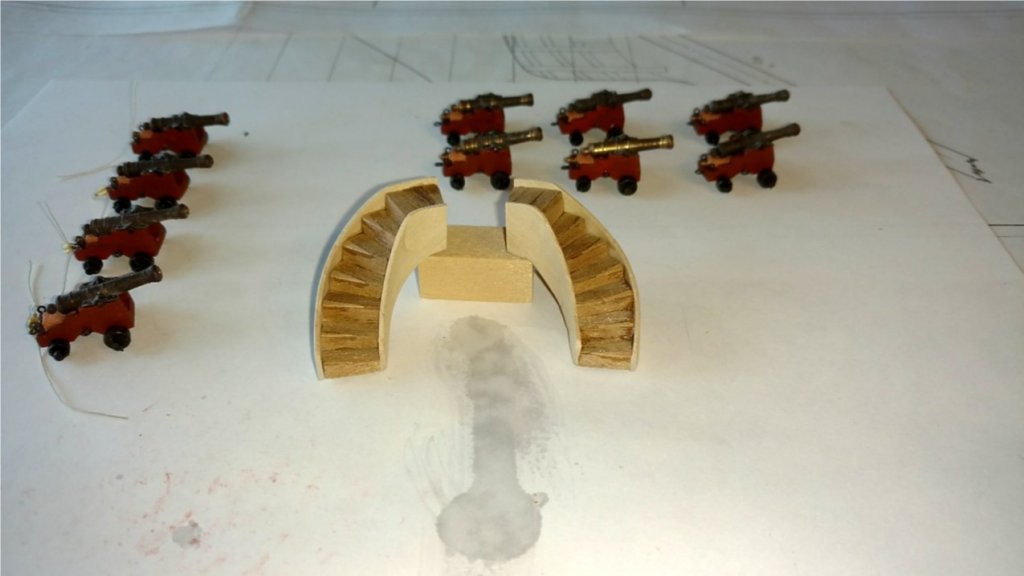
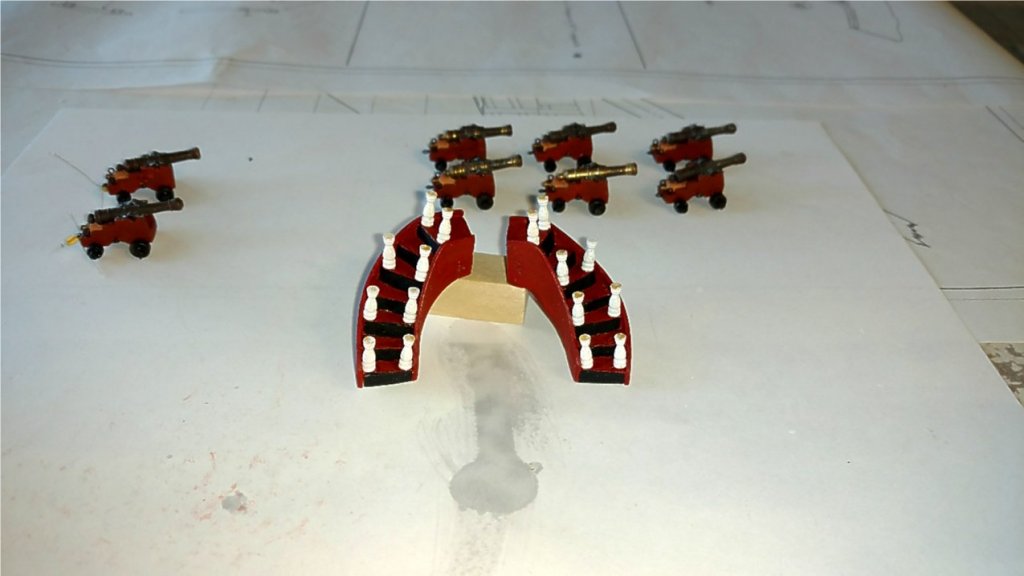
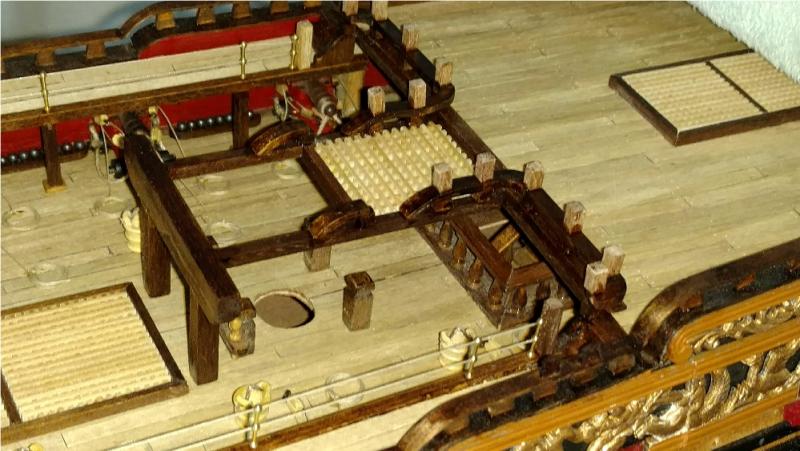
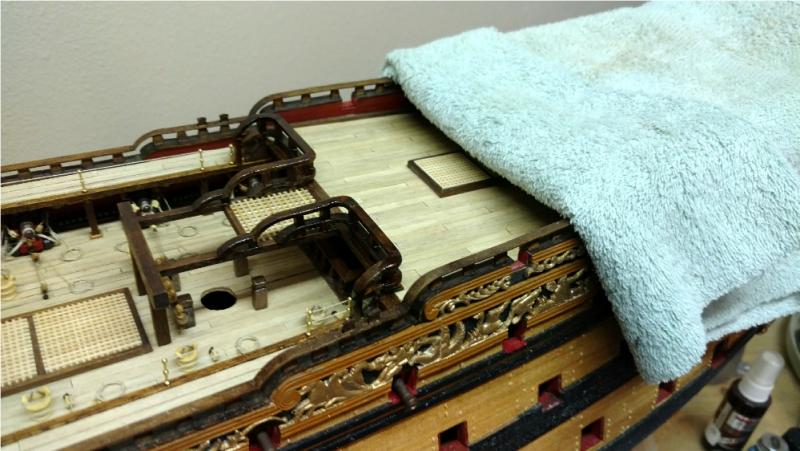
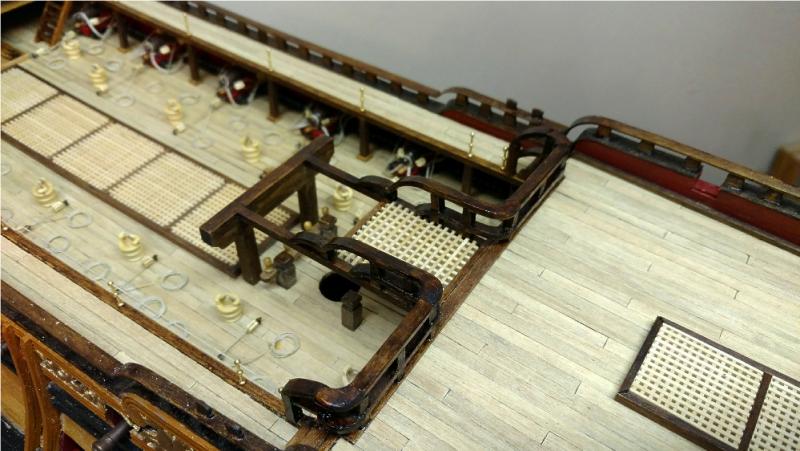
Photos of the staircases in place with the newly constructed quarterdeck breast rail. Next up is finishing up on all of the remaining deck fixtures, boat supports, and remaining forecastle guns. Vince P.


- 593 replies
-
- 10
-
-
- royal william
- euromodels
- (and 1 more)
-
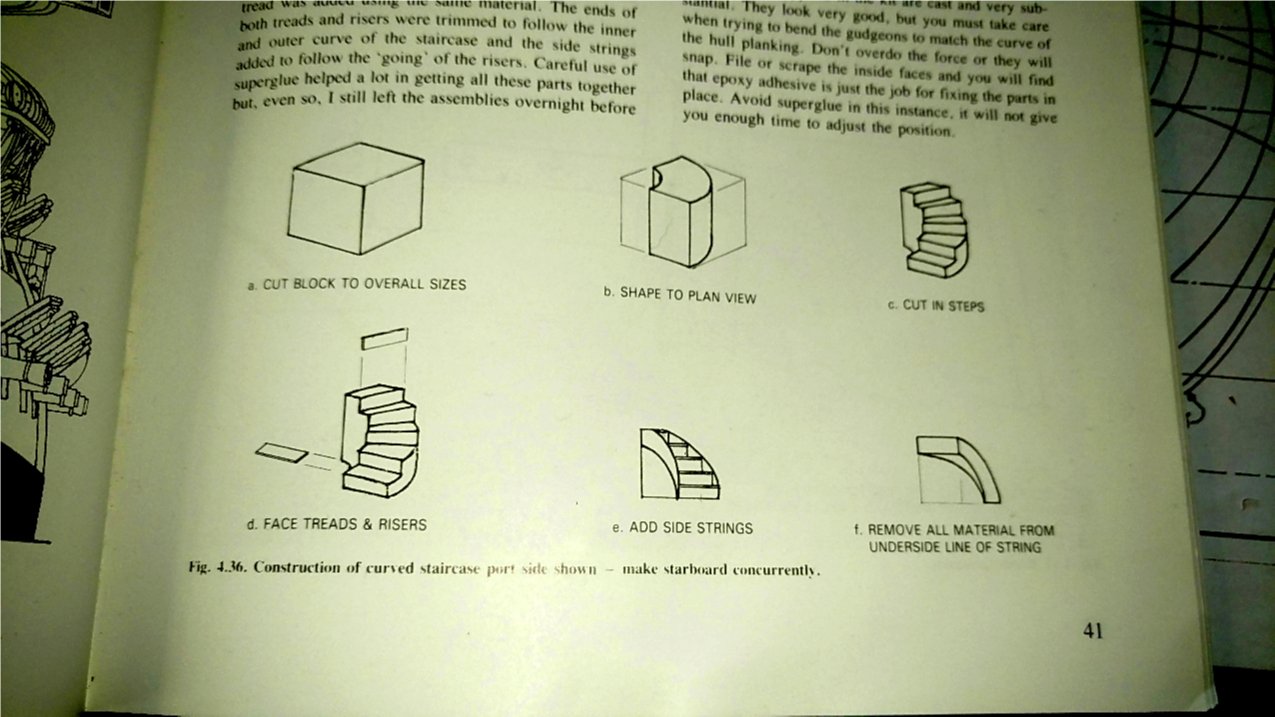
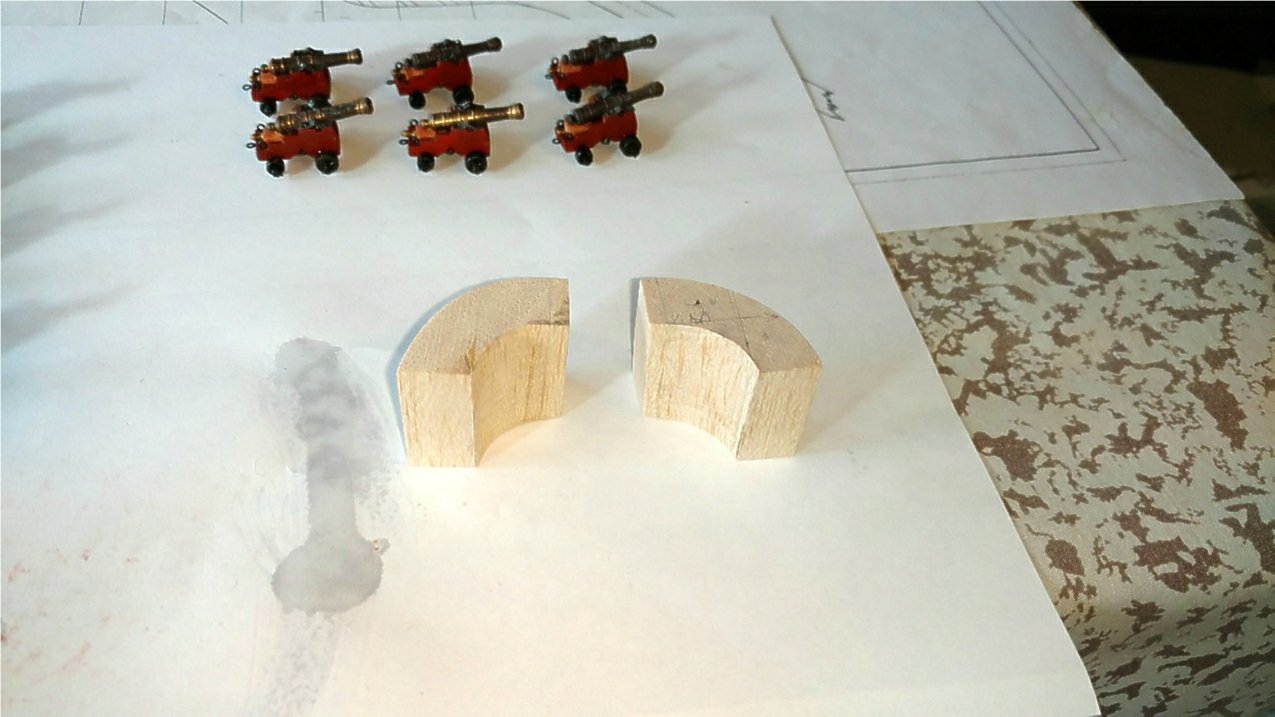
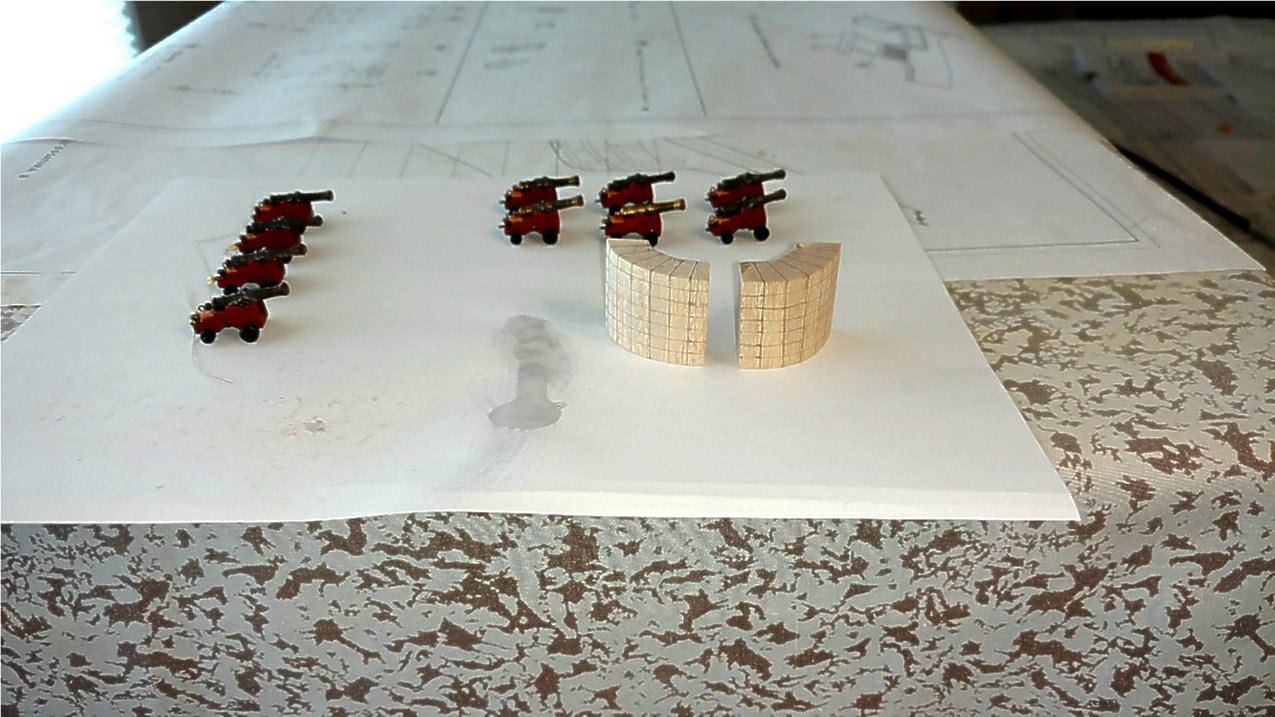
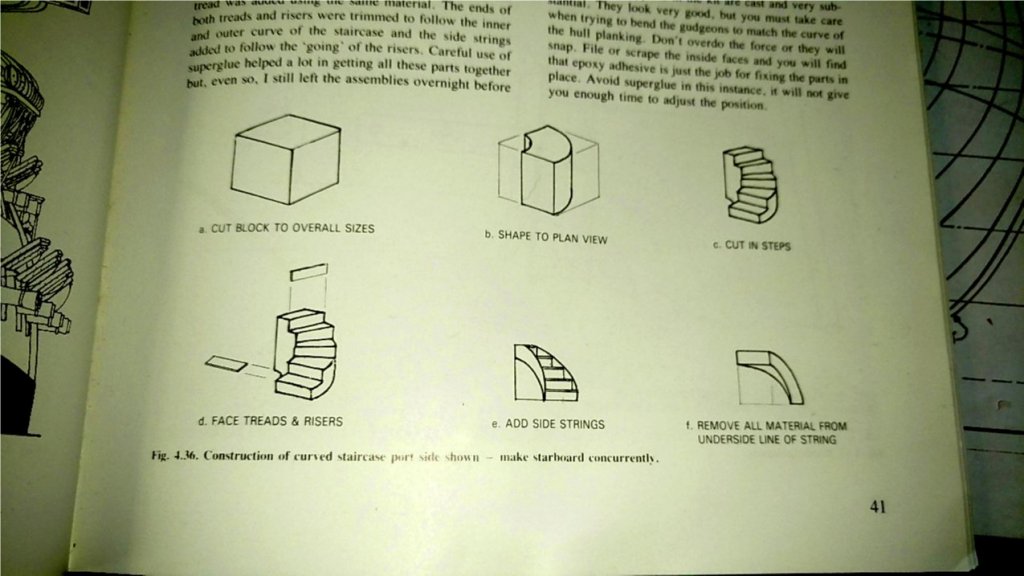
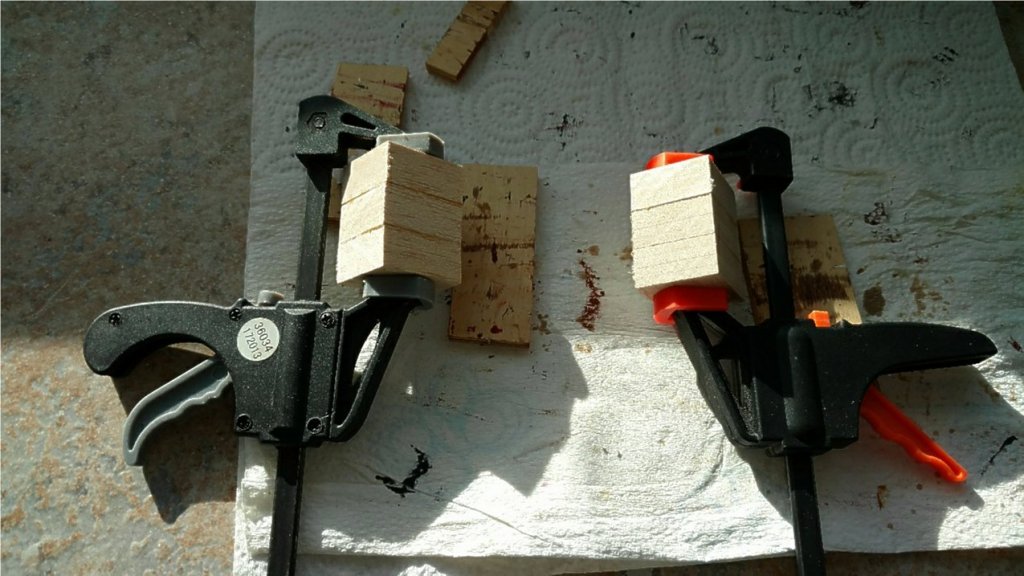
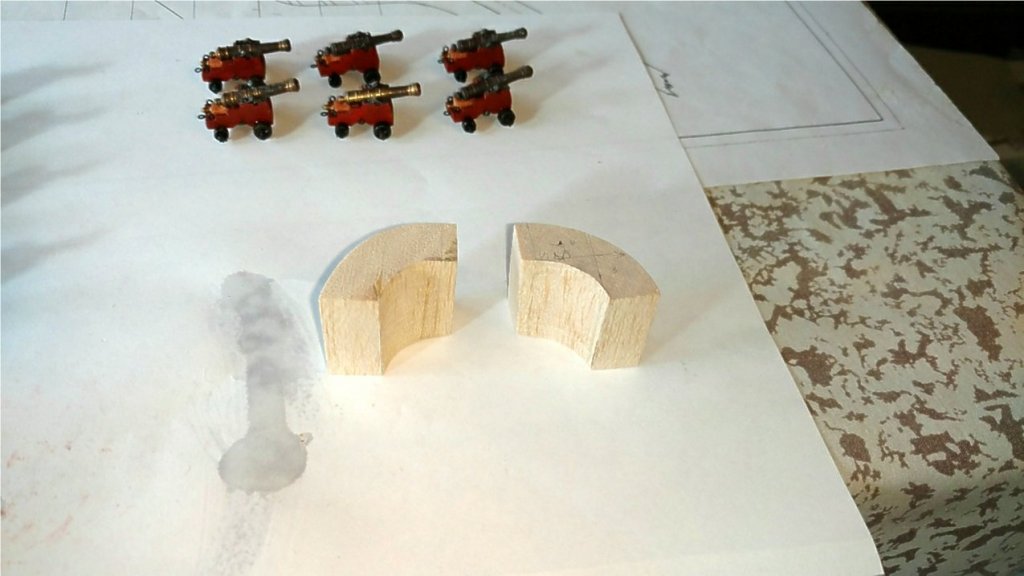
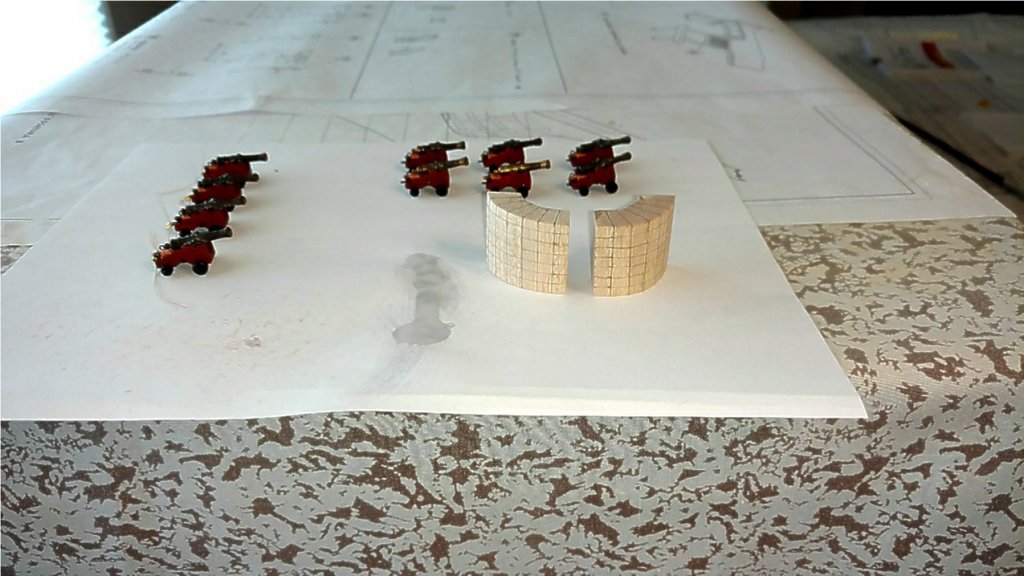
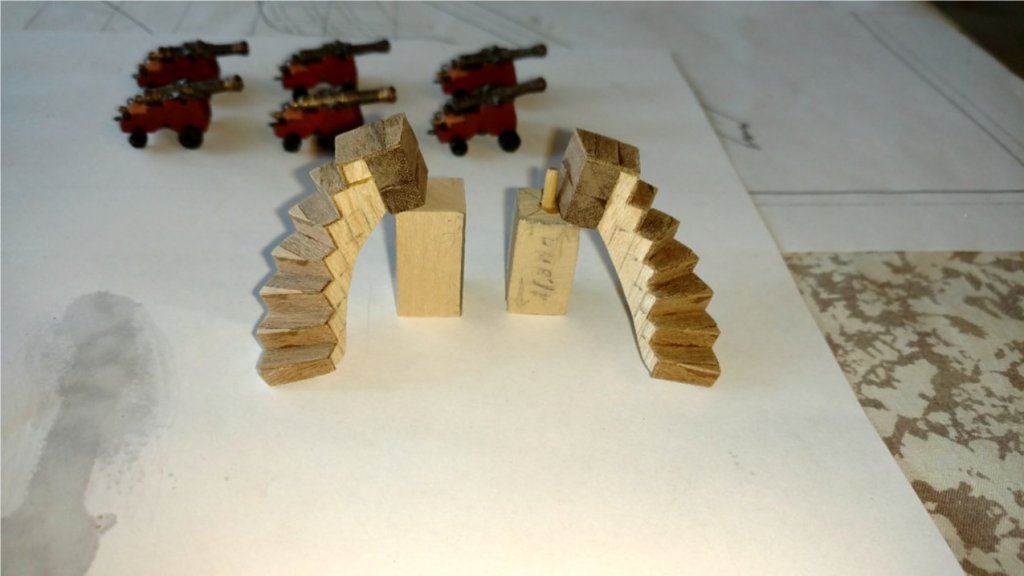
Hi Mates, More on my Royal William. Construction of the curved staircases. There are several ways to accomplish this and no matter, it has to be done from scratch. I chose not to reinvent the wheel and used Keith Julier's method of starting with a solid block of wood. It was quite a chore, but not as bad as I anticipated. The results were not quite a work of art, but as good as my skills would allow. They may have come out a little long, as they encroach on the grates when mounted. Vince P.

- 593 replies
-
- 7
-
-
- royal william
- euromodels
- (and 1 more)
-
Welcome aboard mate. 👍😃
-
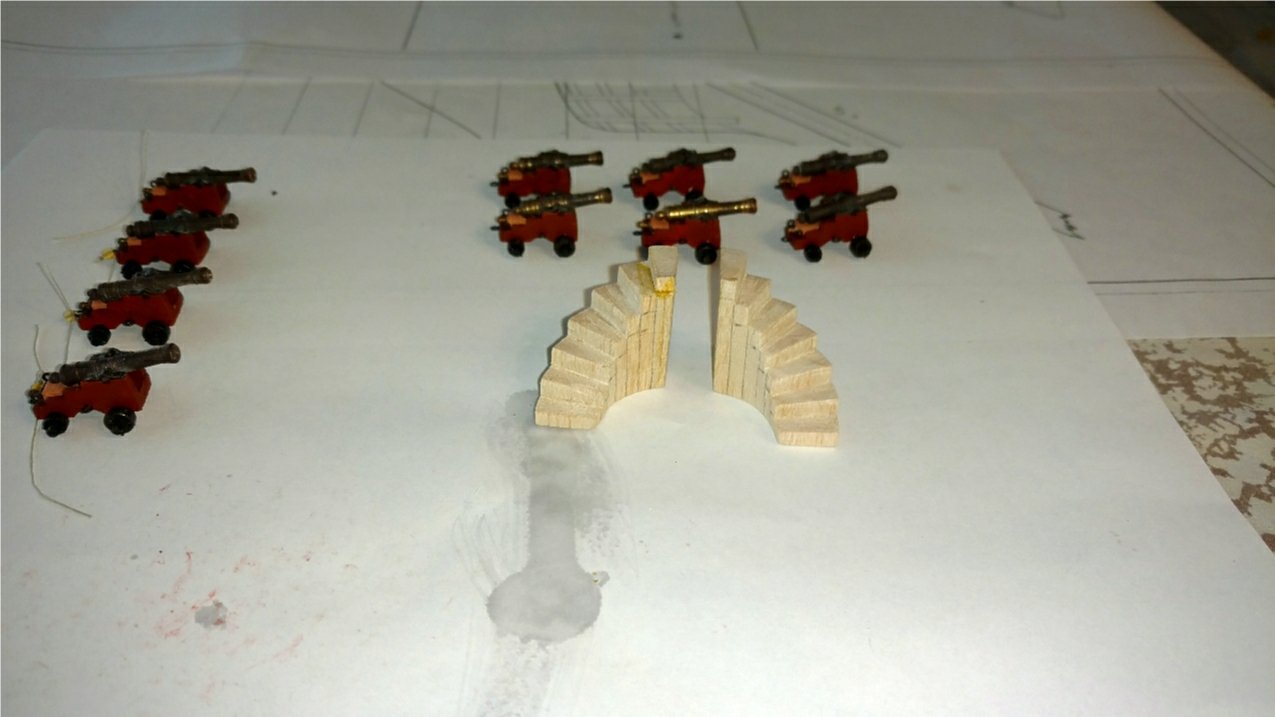
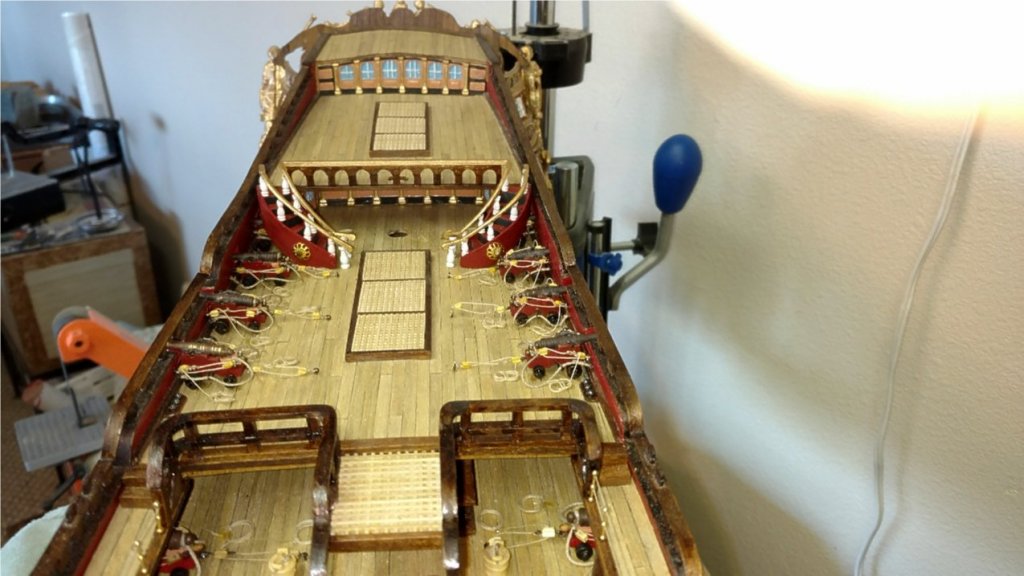
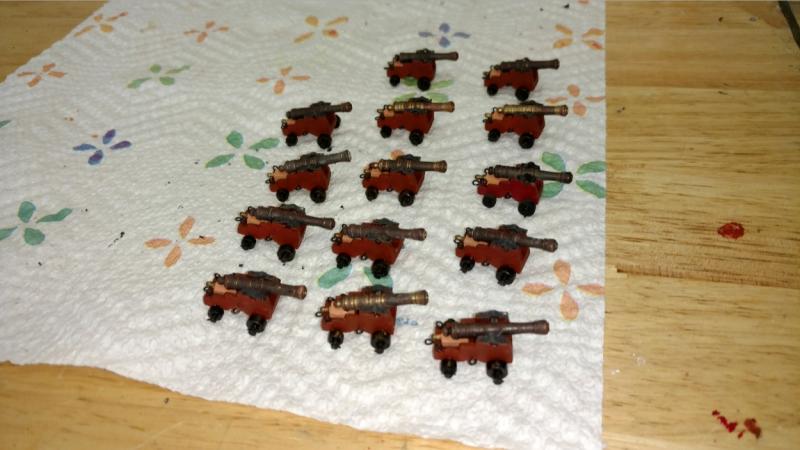
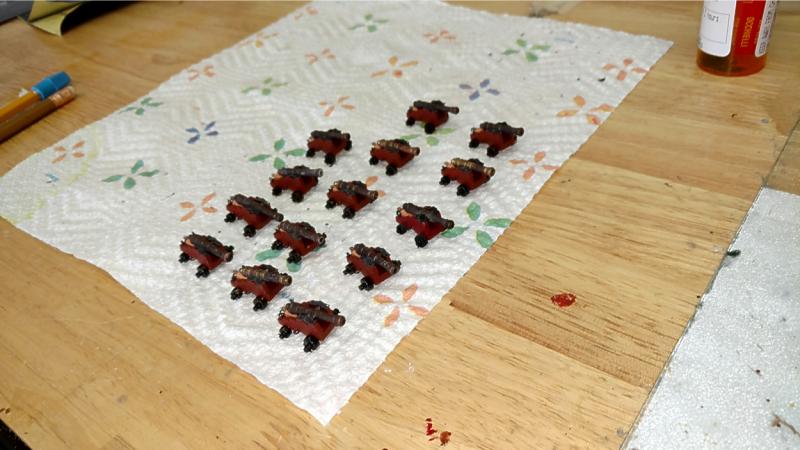
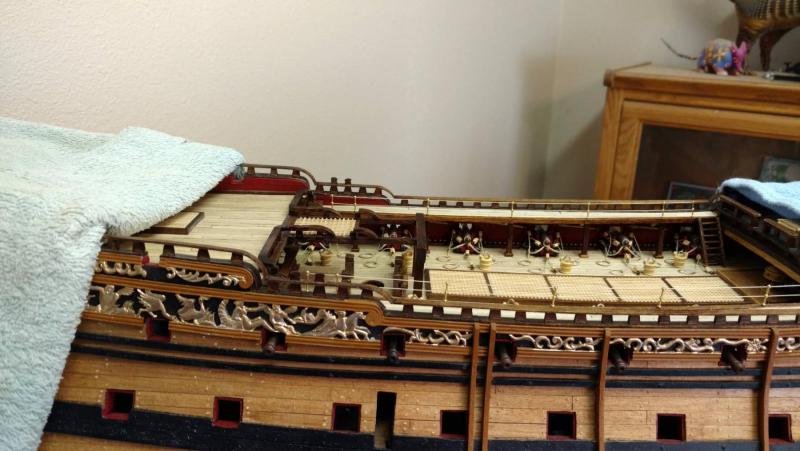
The quarter and forecastle deck guns have been assembled. These guns are smaller than the main deck guns and even more difficult to work on if you want to add all of the detail. Since these guns would sit out in the weather all of the time on a real ship, they would look pretty dirty and tarnished. When I blackened them I tried to get a weathered and worn look on the barrels. I think they came out pretty nice and will look authentic out on the decks. Next up is to place and rig them. Vince P.
- 593 replies
-
- 7
-
-
- royal william
- euromodels
- (and 1 more)
-
Need advice for what to do with Dad's beautiful ship models
pirozzi replied to Sarahbday's topic in New member Introductions
Hi mate! All of the suggestions are great. Connecticut is a big sailing community. I am sure you can find a home for them. Please don't throw them away. Sorry about your dad. Vince P. -
Welcome aboard mate! Thank you for your service. Good luck with your scratch build. That takes guts. Vince P.
-
Hi mate. The lower shrouds for all the masts can be the same diameter. As you go up to the topmasts and topgallants and so forth, you can decrease the diameter as you go up, provided that the scale is big enough to allow it. The diameter of the rattlings should all be the same. That is how I have always rigged my ships. Vince P.
-
Welcome aboard mate! Looking forward to watching you work. Vince P.
-
Royal William Kit by Vince P. - Euromodel - 1:70
pirozzi replied to pirozzi's topic in Wood ship model kits
Thanks Ken. You are so right about posting build logs. I only do it to help others. In the beginning it does take some courage to do so because you are putting your efforts out there for all to see, and expect criticism of your work. In all the years I have been posting on this sight, I have had only one individual make a post that was critical. Although he was correct, it was not comfortable to see it in my log. If I see something that needs correction in a build log to really help the builder along, I will use a private message so that only the builder and myself can see it. I have only done it once, since the poor fellow was heading for big trouble in his build. He was grateful for my help. If you have to be critical, make sure it is constructive. This site is known for this and that is why it is rewarding to post a build log. Vince P. -
Welcome aboard mate! Vince P.
-
I have been building this kit for almost 3 years now, and I believe I have come to know a great deal about it. I am writing this topic to pass on what I have learned, so others can use this information if they choose to do so, when deciding whether to undertake this project. I had no such information, and made the decision based on books and other source information I could gather. Make no mistake, I am delighted with my choice, but there are many things to be concerned with if attempting to complete this kit. Having completed several advanced level kits from other manufactures, the Euromodel philosophy is different from the others. They provide excellent plans to take the build far beyond the basic supplied kit and it is up to the builder to decide how far to take it. The kit itself is probably the most expensive kit in its class out there. I paid over $1300 dollars US about 4 years ago. If the builder desires to just build the basic kit, with little to no enhancements, the finished product would be a fine model, but would not look much like the plans because much of the intricate detail would be left out. The materials provided in the basic kit are of high quality and would not really need much substitution to improve quality. If however you wished to replace some materials such as lumber or fittings with better stuff, you could be putting out hundreds of dollars more. That is strictly a matter of choice, but not absolutely necessary. I did not replace hardly any materials because I thought I needed better quality, but did replace or modify some of the smaller fittings for better detail. I chose to include as much detail enhancements as my skills would allow because I wanted my build to be as close to the plans as possible, and even went beyond in some areas. To this point I have probably invested $400-500 dollars more for materials. This does not include a considerable amount of extra materials taken from my stash, which have accumulated over 35 years of modelling. I don't even count buying new and better tools either. In my opinion, the skills level needed to build the basic kit would be at the very high end of advanced. If you want to add the enhancements like I did, a good supply of scratch building skills is a requirement. While I have not completed a true scratch build yet, a considerable amount of this build so far has been from scratch. I believe my skills have been greately increased because of this. Certainly all of the enhancements, and even some of the basic kit construction requires making parts from scratch, as indicated in the plans themselves. You are pretty much working strictly off the plans, as there are little to no instructions included. I have relied on books from other builders of this ship and the excellent reference notes provided on the Euro website, which are free, to help me along. So in summary let me say that if you are considering taking on this project, be prepared to invest countless hours of intense effort, and a very large amount of cash. You should have a few completed models of the advanced category under your belt and not be afraid to venture into the unknown. This is without a doubt the most fun thing I have ever done, but I have also had some scary moments trying to get things right. Lots of do overs also. So far, so very good. Good luck to you if you decide to do this. You are going to need it. The end result should be far better than you imagined. While I am about half finished, most of the hardest parts have been accomplished. I do have a build log going and up to date. Just go to the Ship Kits section of the forum and query Royal William. Vince P.
-
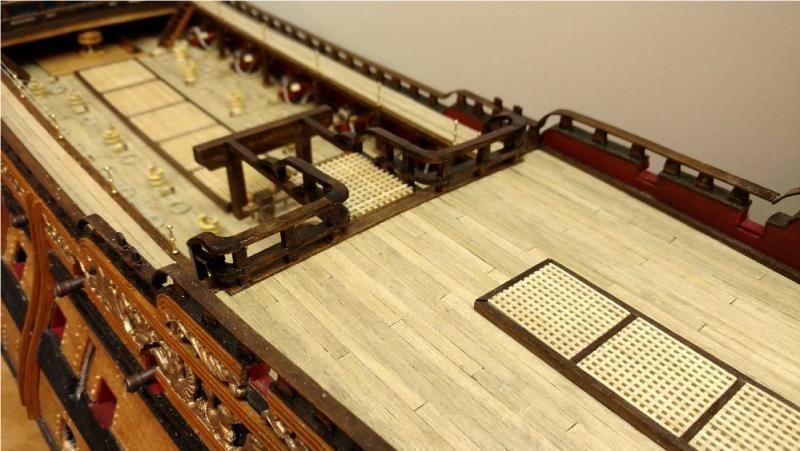
More photos of the quarterdeck breast rail. Vince P.

- 593 replies
-
- 8
-
-
- royal william
- euromodels
- (and 1 more)
-
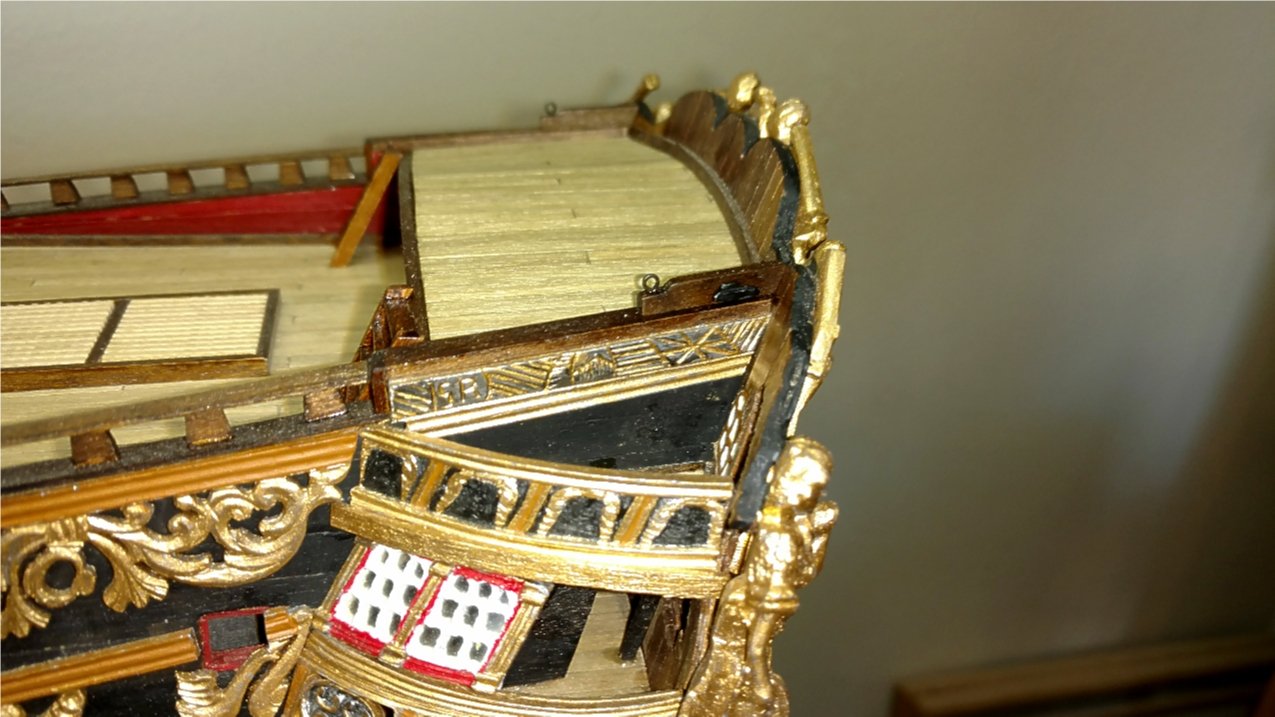
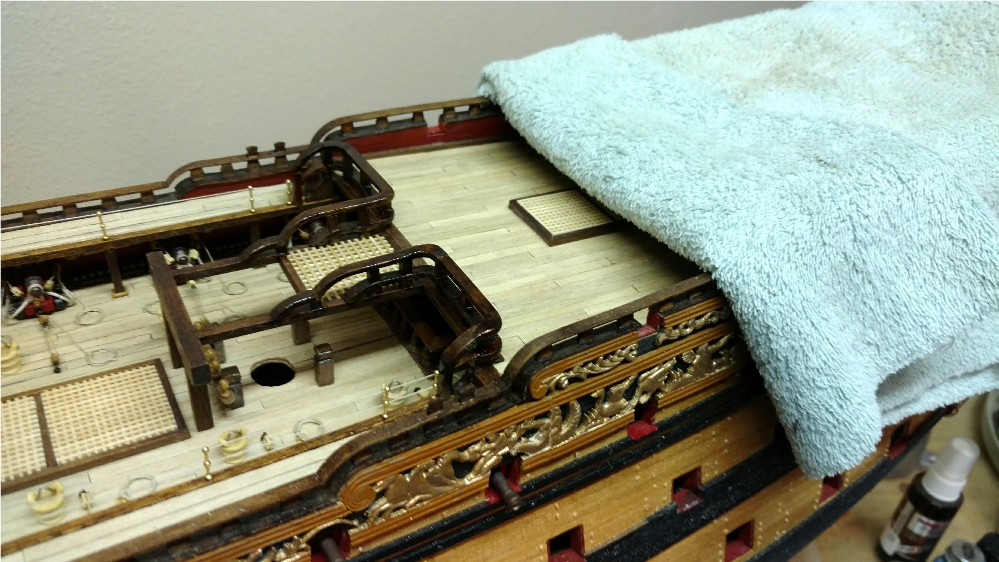
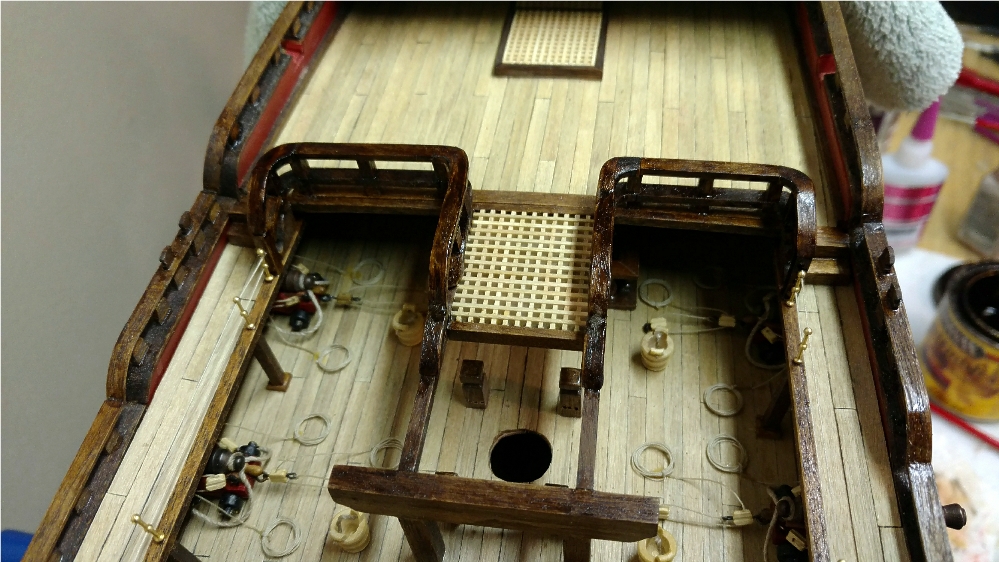
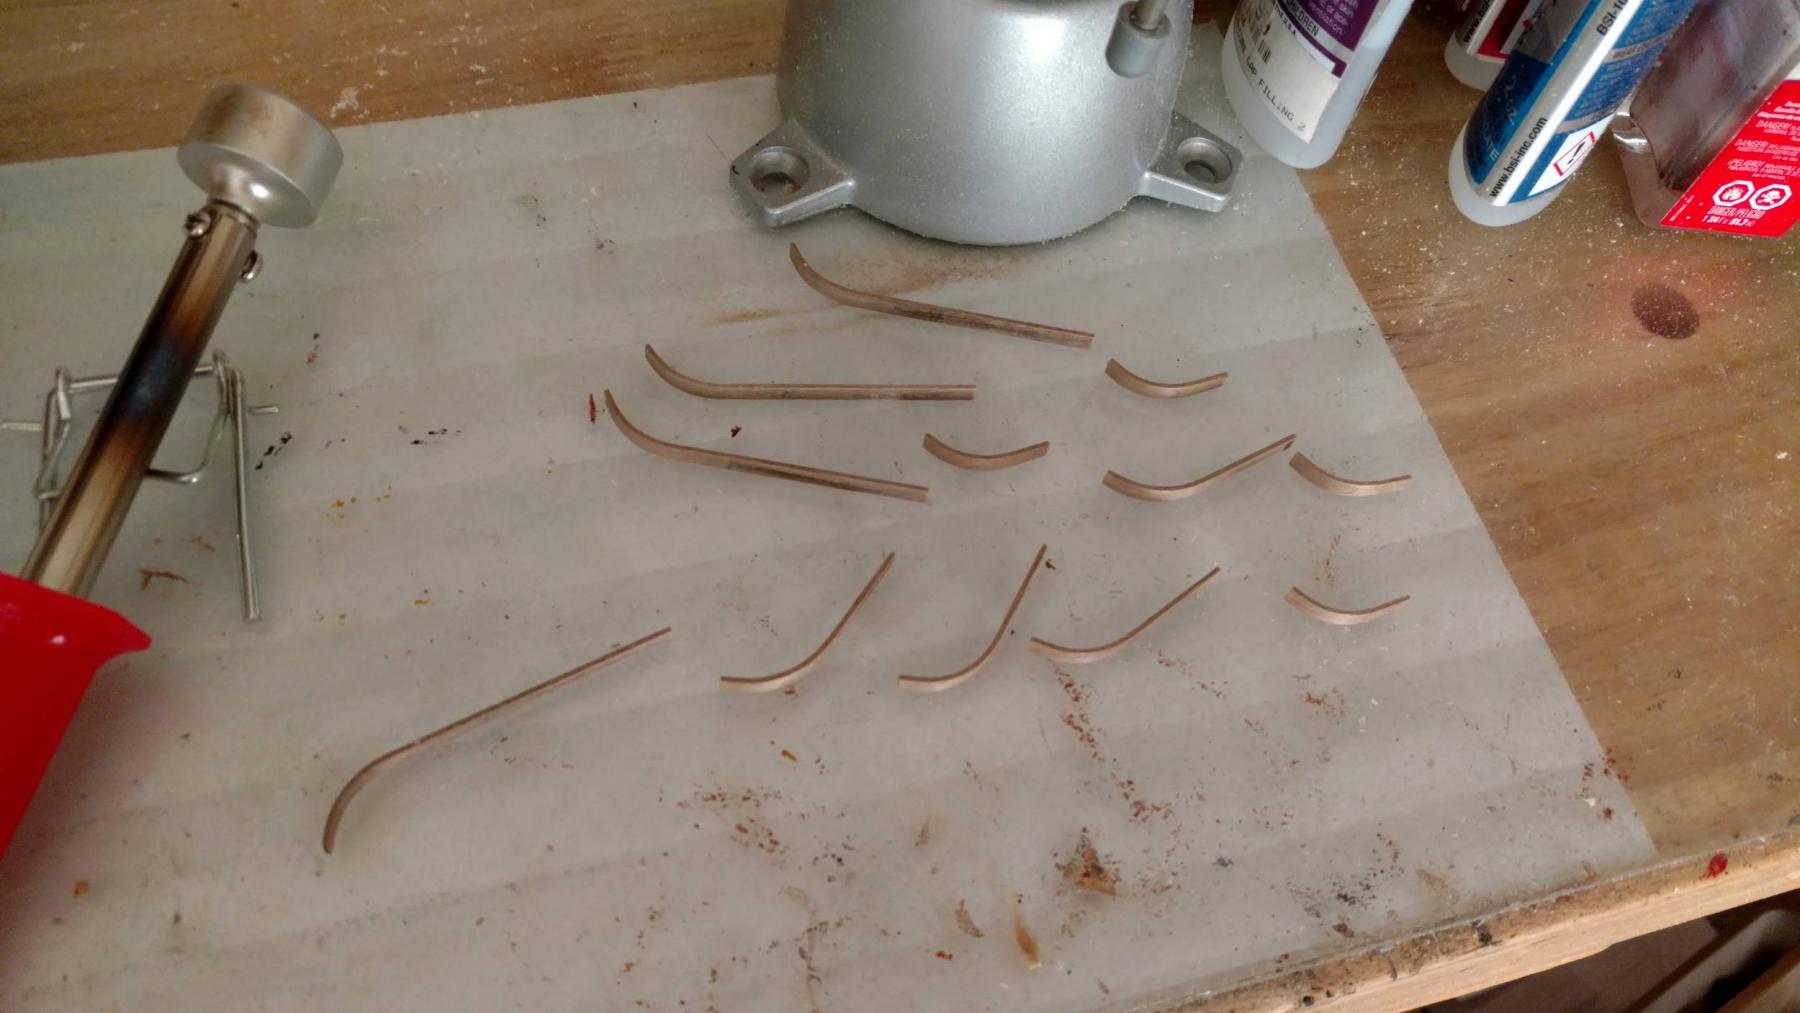
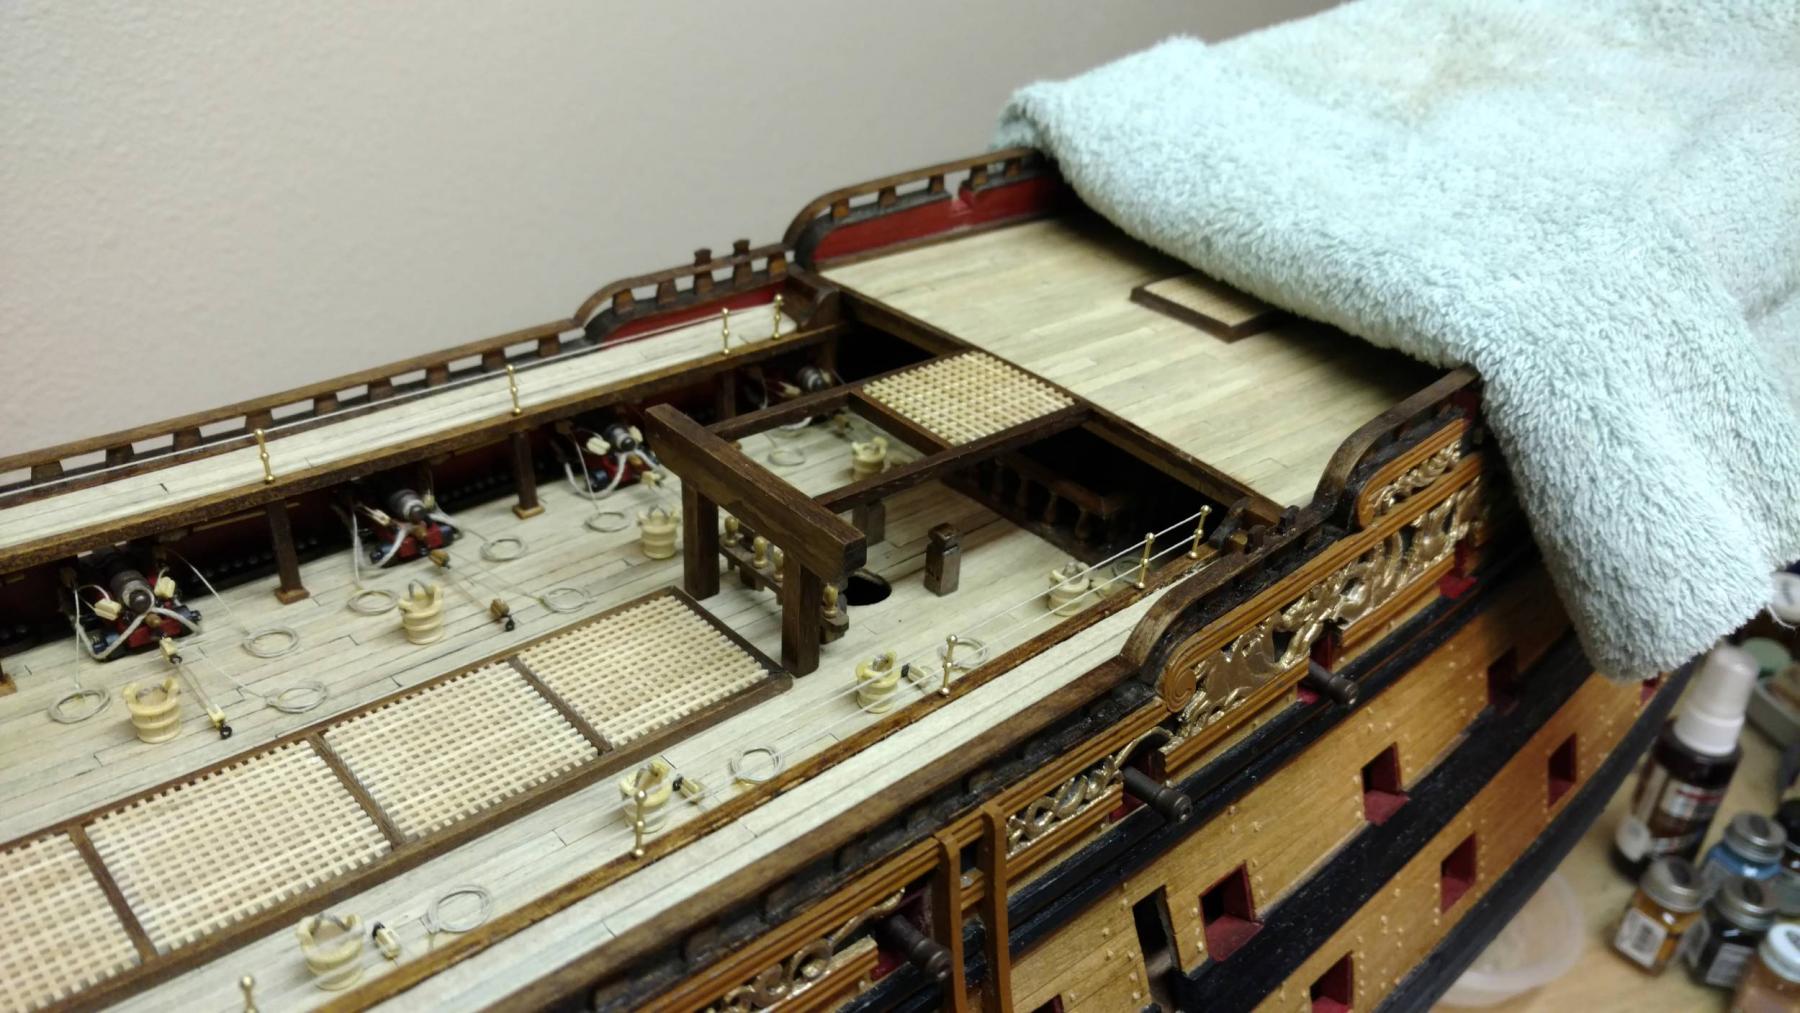
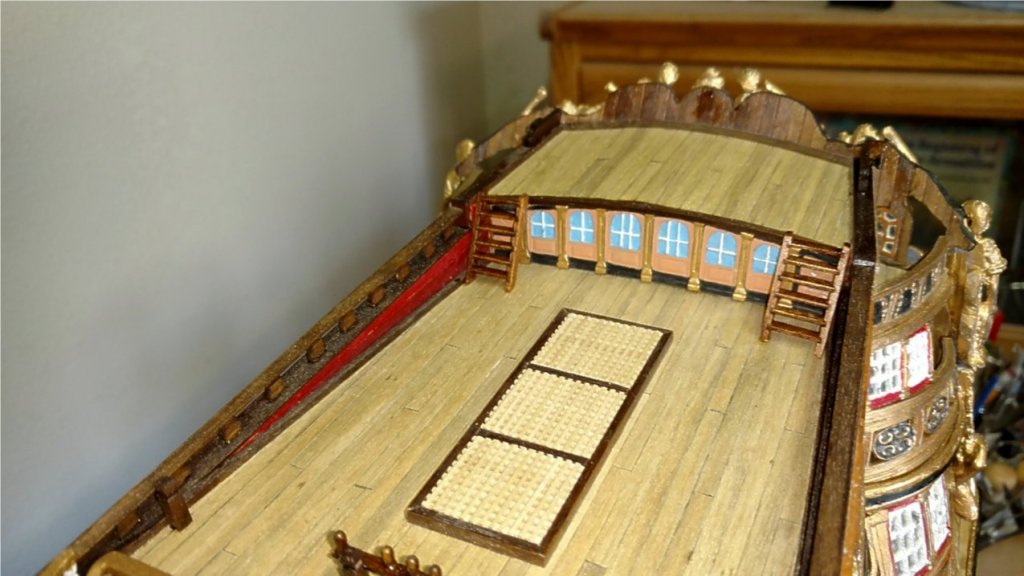
Finished the quarterdeck breast rail. Not as bad as I thought it would be, but considerable amount of work if you want to put the decorative curves and bends like I chose to do. I think it came out nice. I tried to take photos at each stage of the construction. The overall railing had to be constructed in layers. For the rounded corners of the top rails, I used some plywood and cut the round corners by hand. For the bends at the ends I used 4mm x 1mm walnut and laminated 2 strips for a thickness of 2mm. It made bending easier. The straight sections were 4mm x 2mm strips, and the little posts were 3 x 3mm. I am not sure what comes next, but it will be on the quarterdeck somewhere. Vince P.


- 593 replies
-
- 2
-
-
- royal william
- euromodels
- (and 1 more)
-
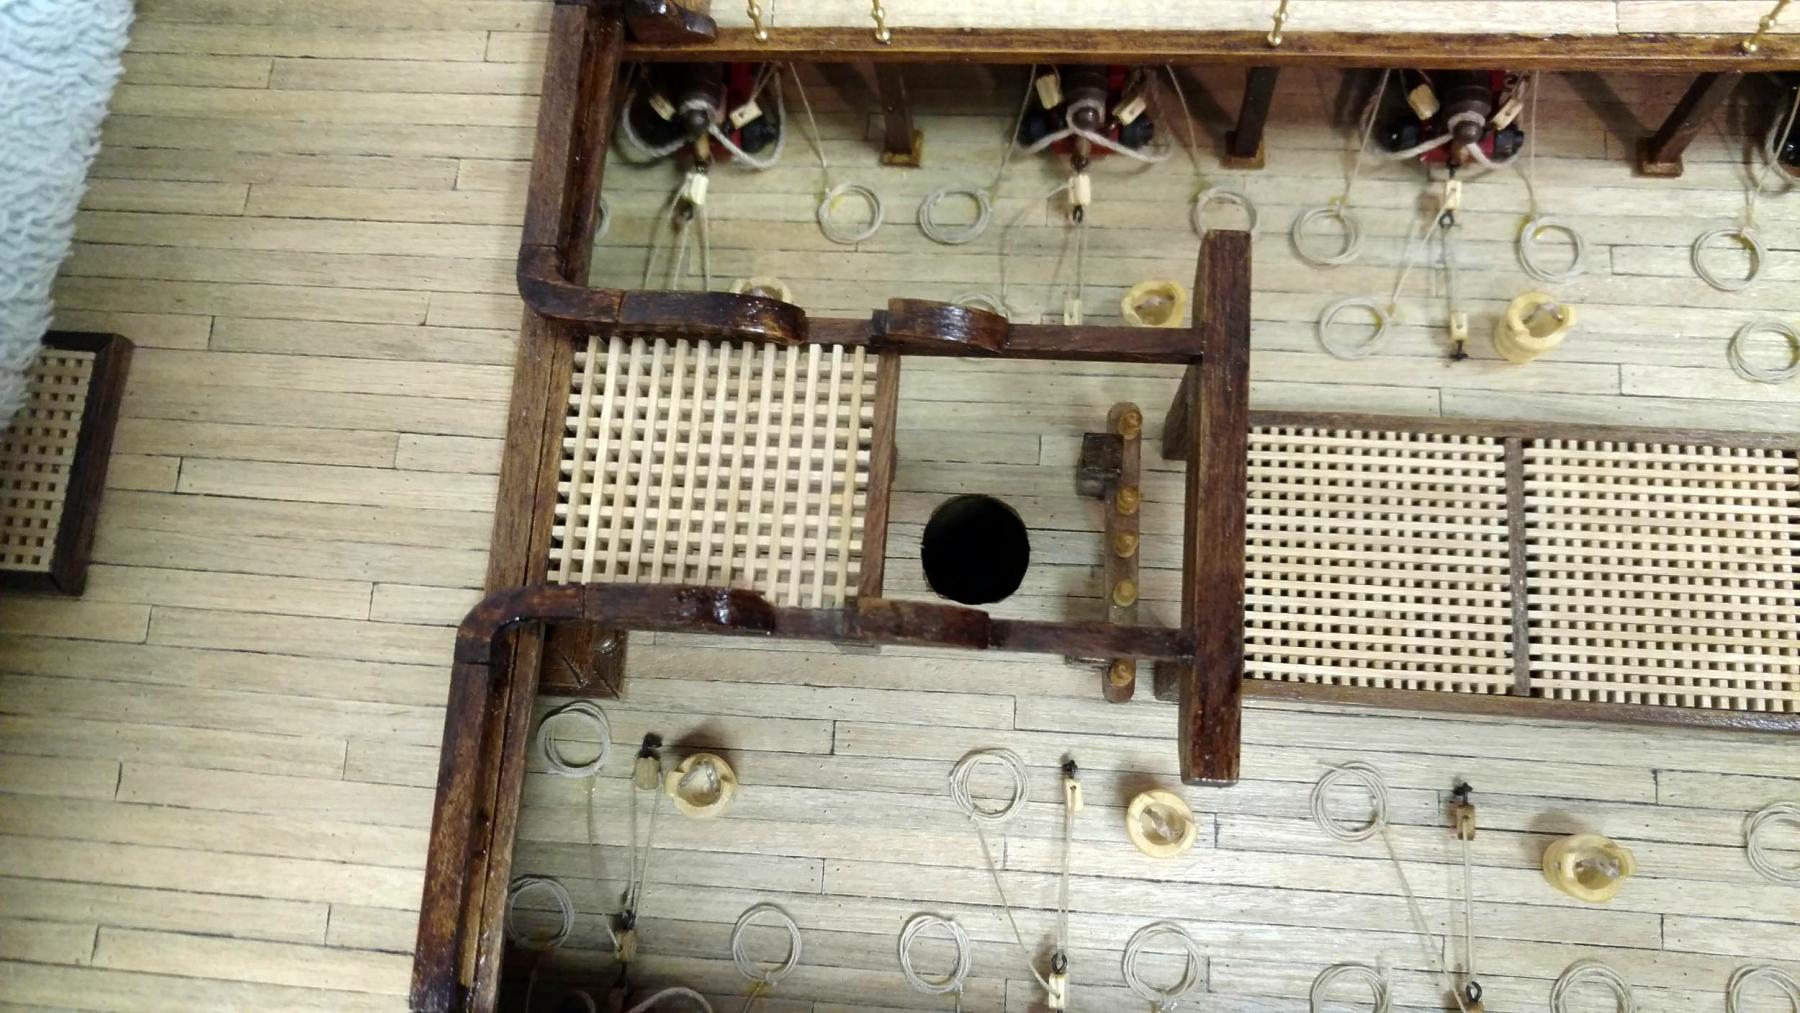
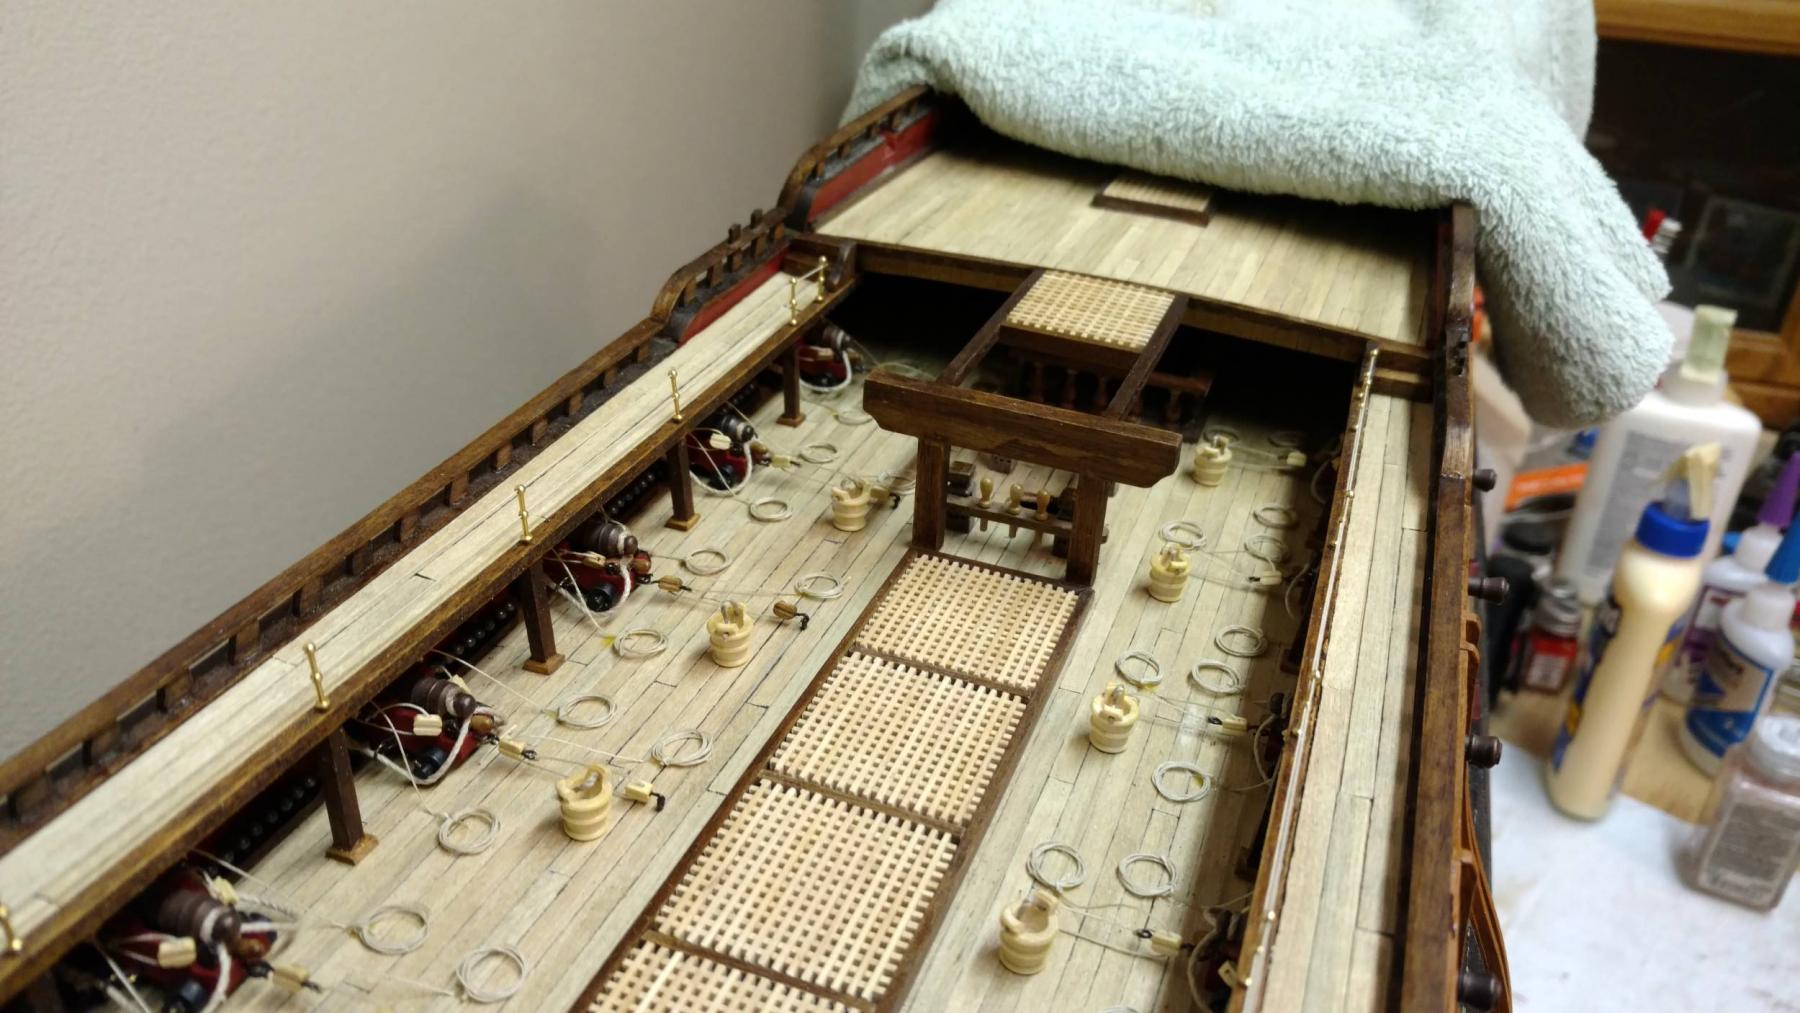
The anchor bits are completed and in place. Now the hard part is to construct and install the quarterdeck breast rail. Vince P.

- 593 replies
-
- 8
-
-
- royal william
- euromodels
- (and 1 more)
-
Humidity is the main enemy to models made of wood. Keeping the surrounding atmosphere at a relatively low humidity using a dehumidifier if necessary, and having vent holes in the case to allow fresh air to circulate is the best way to preserve your models. This is how museums do it. Vince P.
-
Thanks Greg for the compliments. Marry Christmas and happy holidays to you and yours. Vince