pirozzi
-
Posts
843 -
Joined
-
Last visited
Content Type
Profiles
Forums
Gallery
Events
Everything posted by pirozzi
-
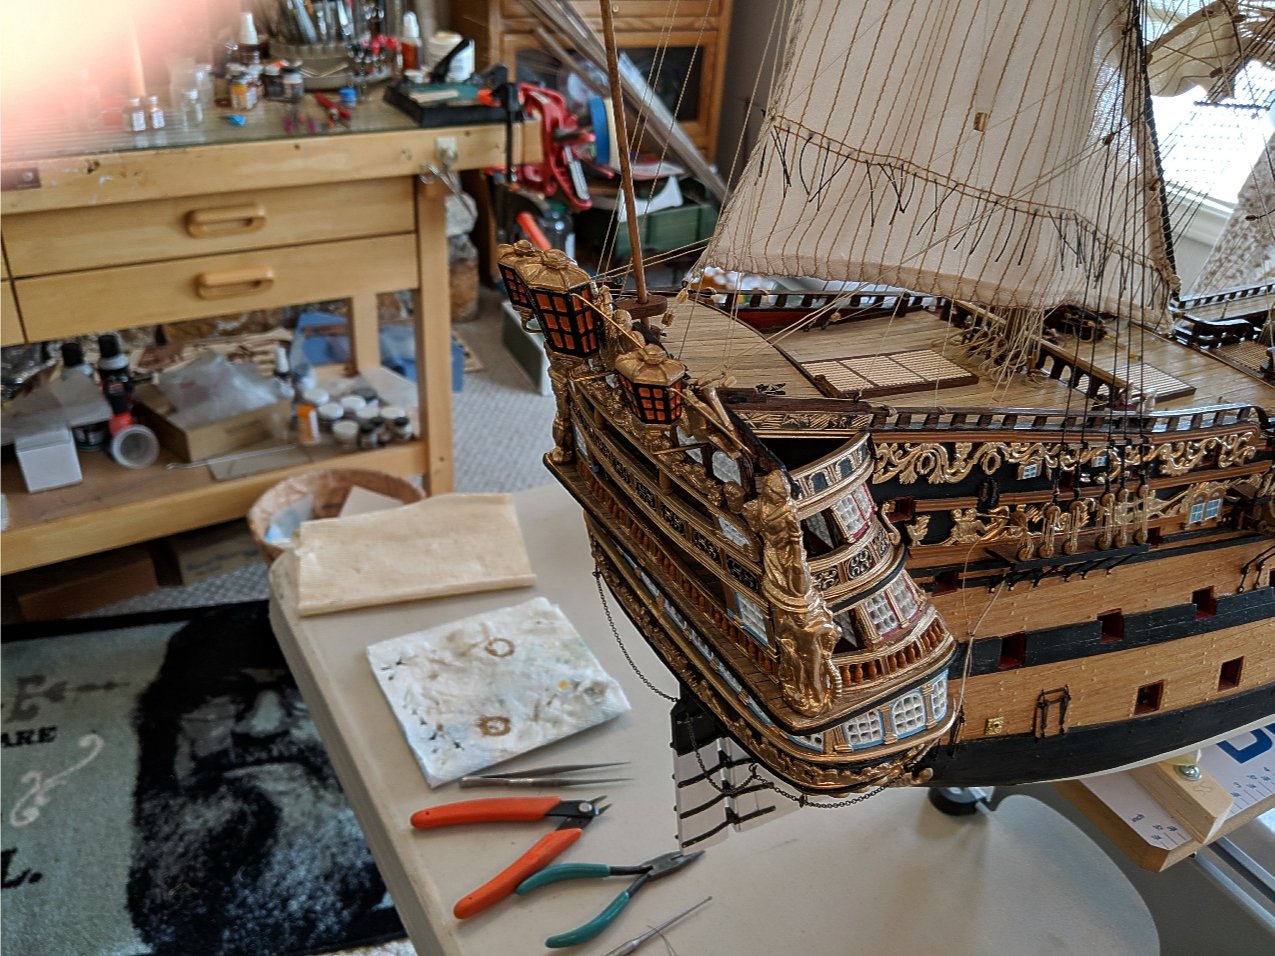
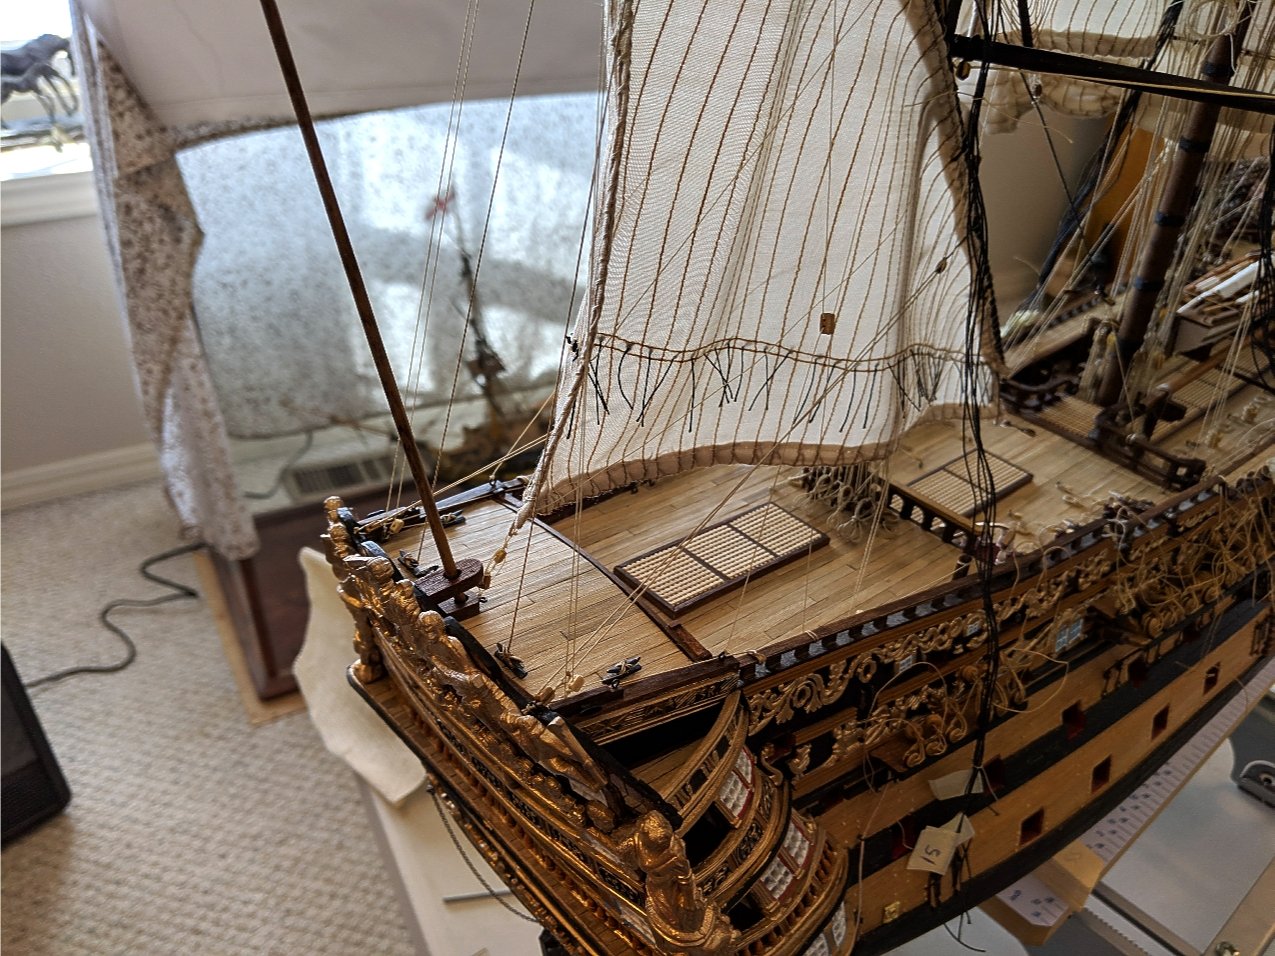
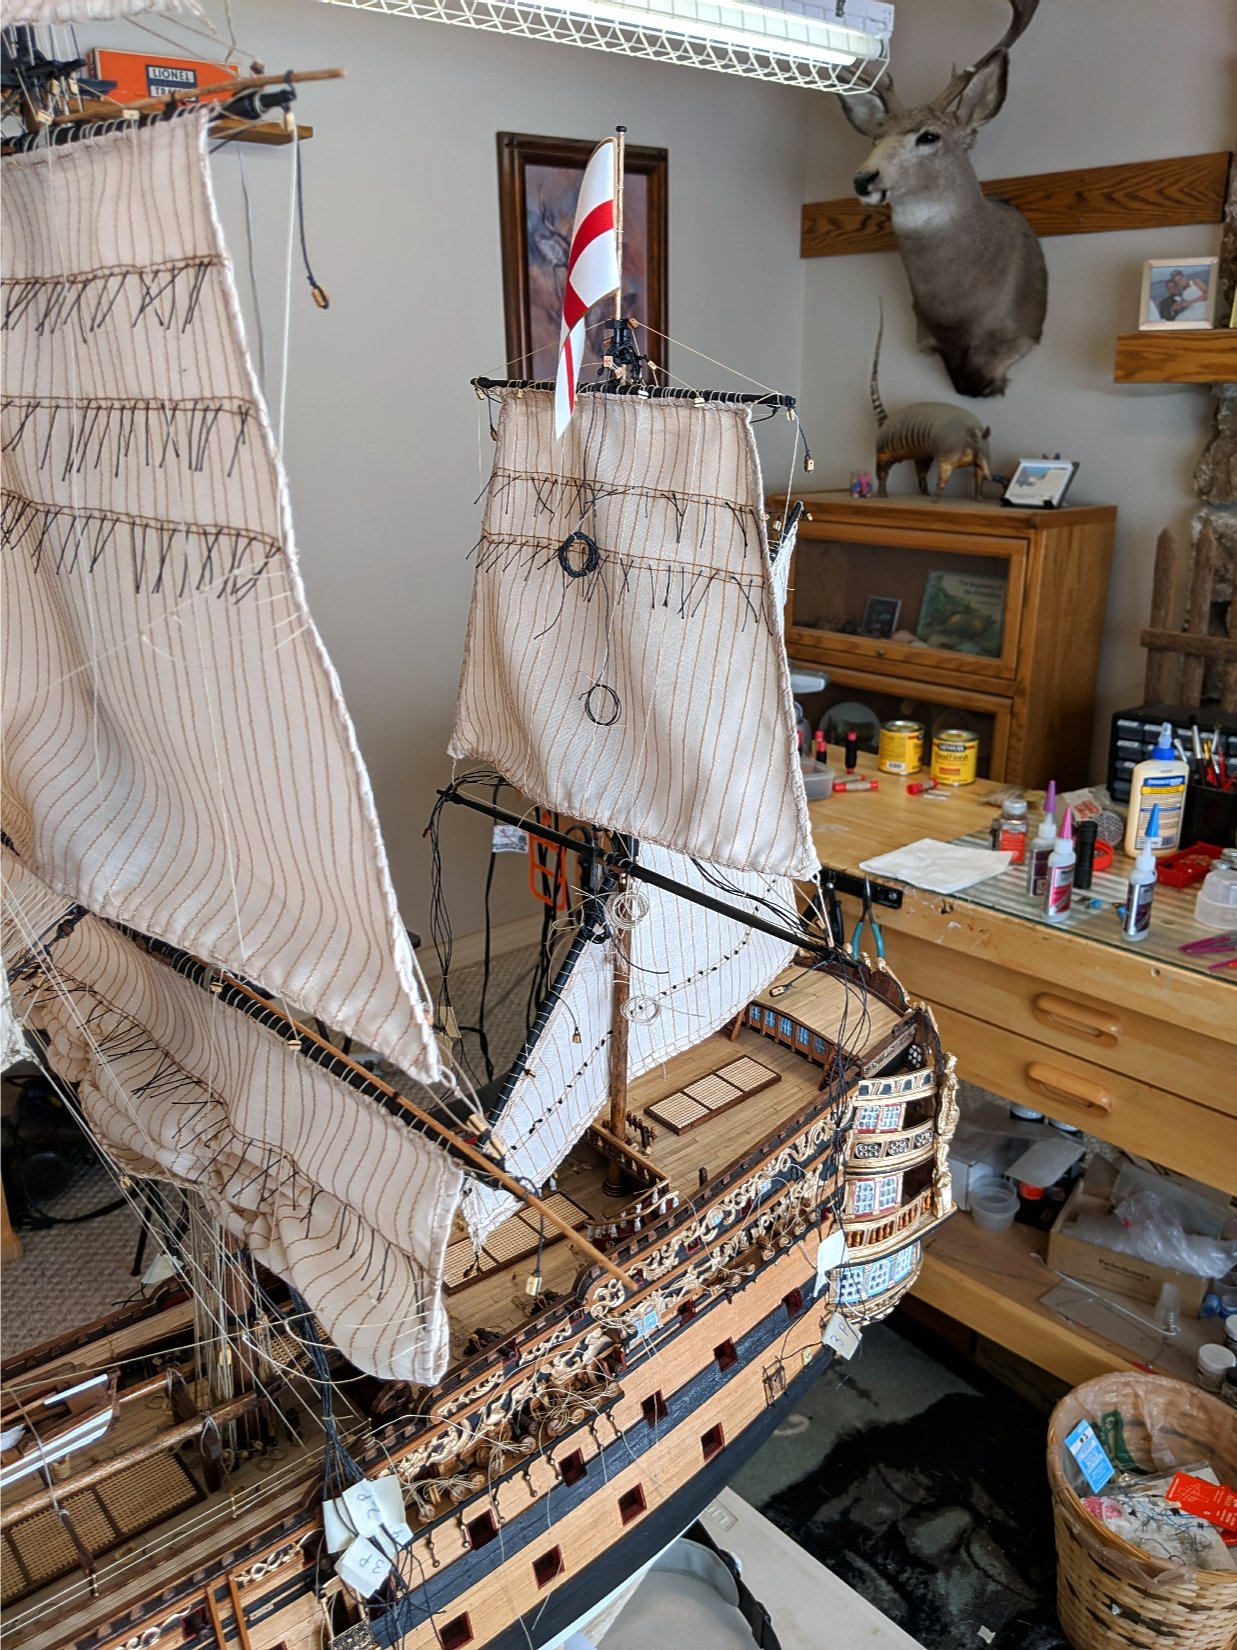
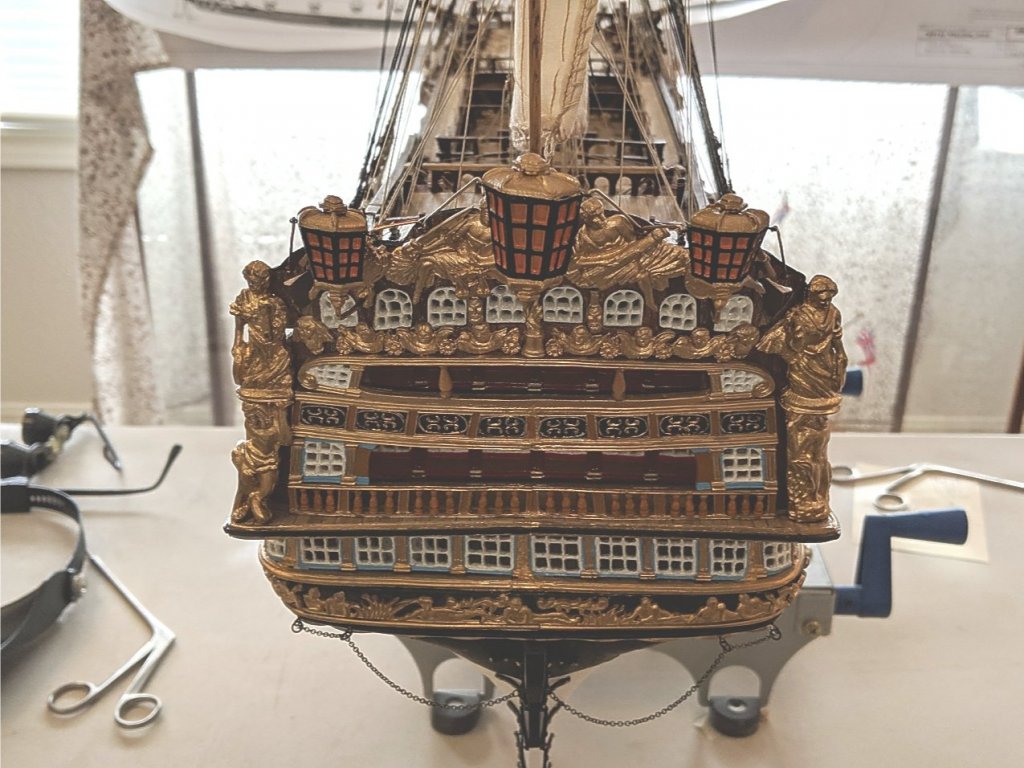
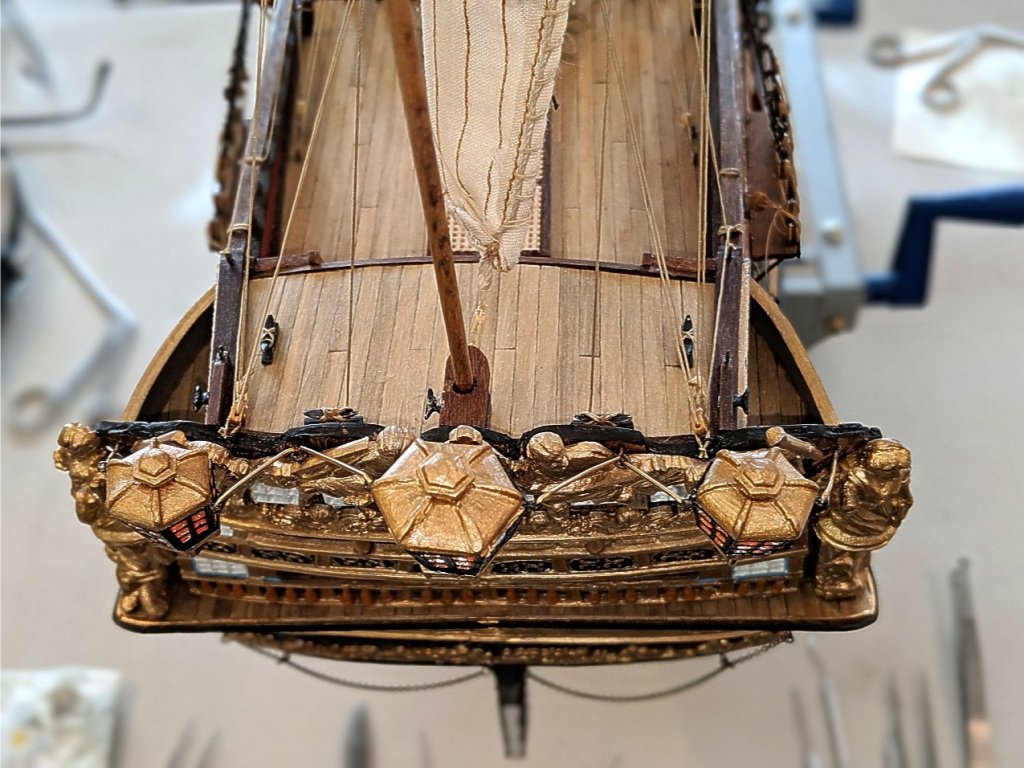
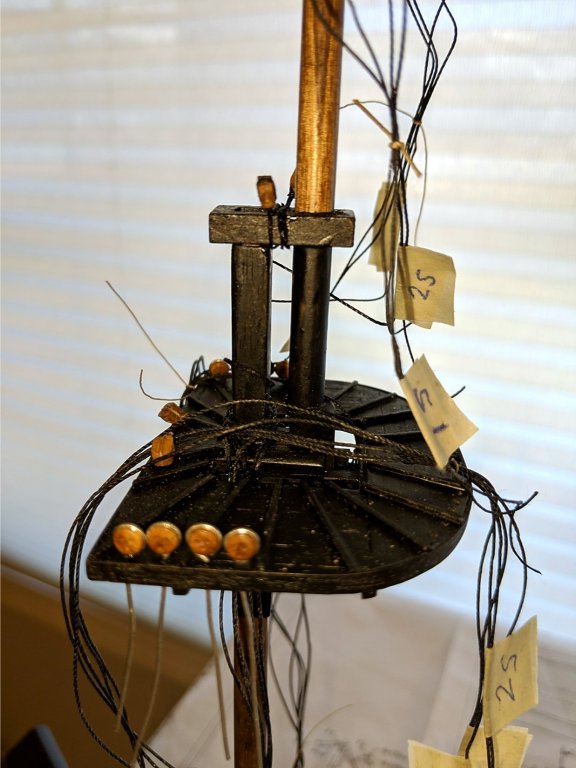
 The stern lanterns are constructed and mounted. I used some 0.8mm brass wire for the side brackets. The main supports came with the kit. I painted the lanterns so it looks like candle light in the windows. Next up is to finish the mizzen shrouds and backstays. Vince P.
- 593 replies
-
- 5
-

-
- royal william
- euromodels
- (and 1 more)
-
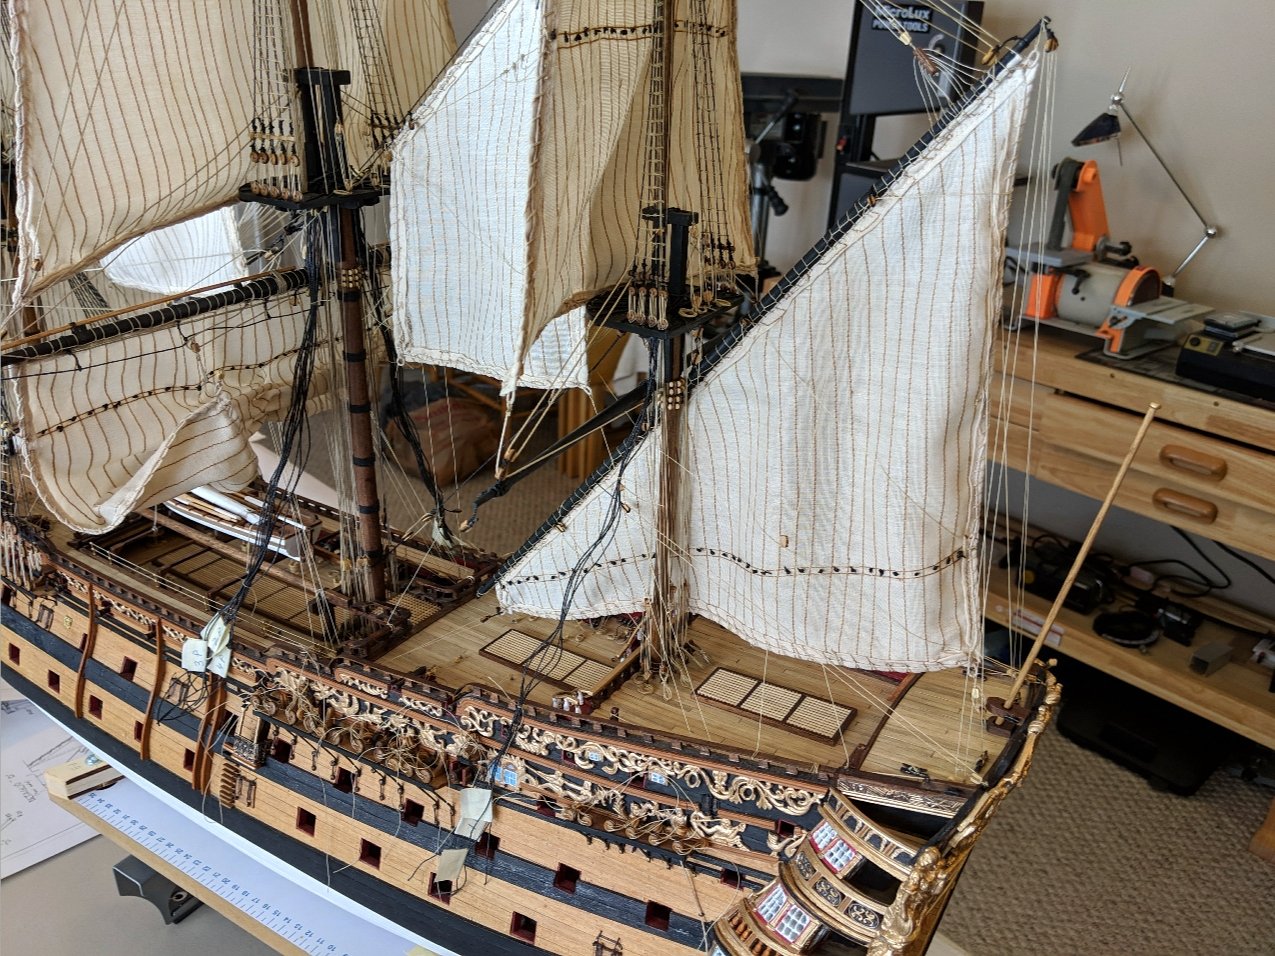
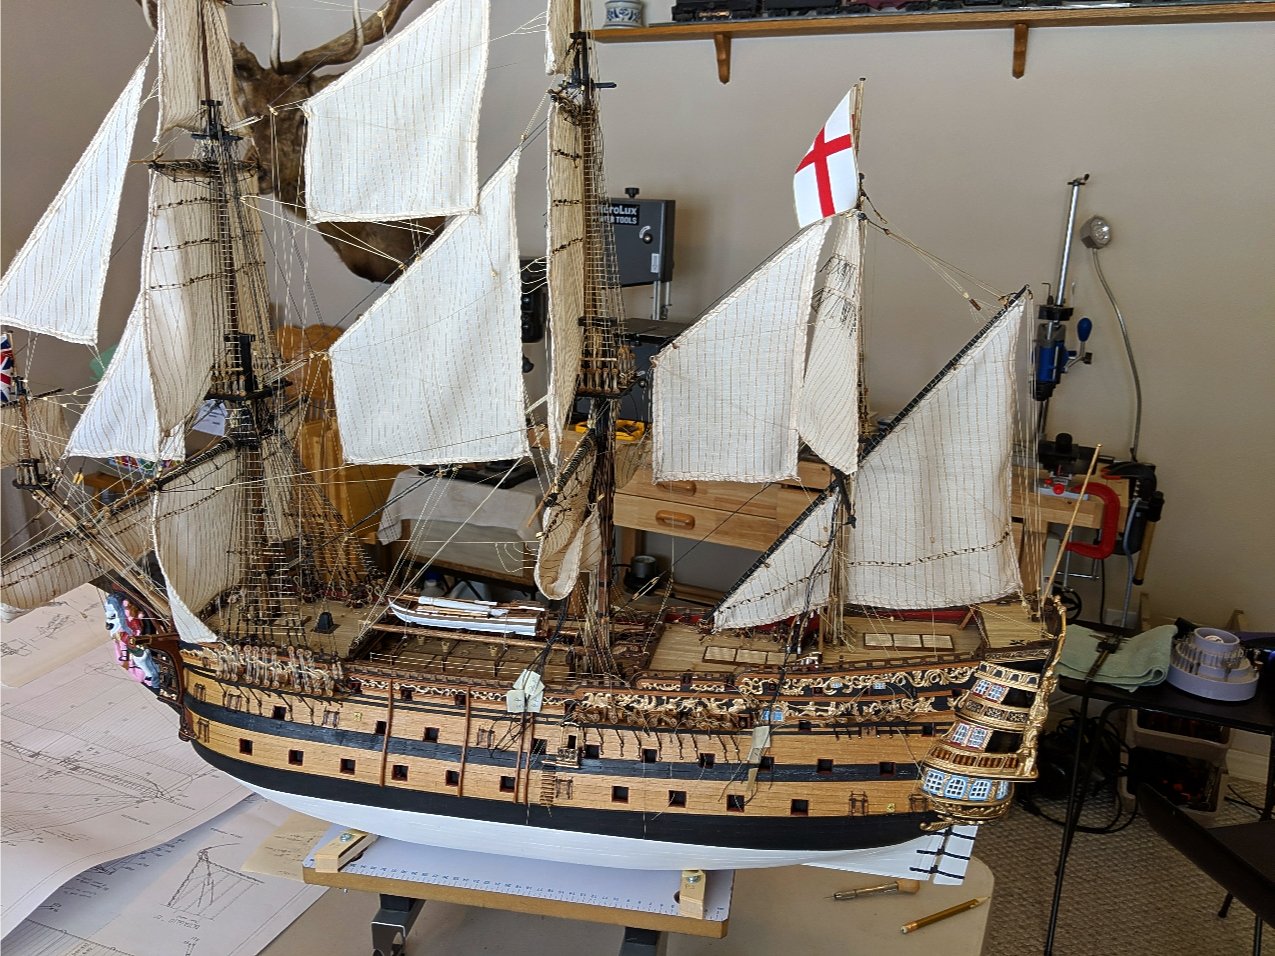
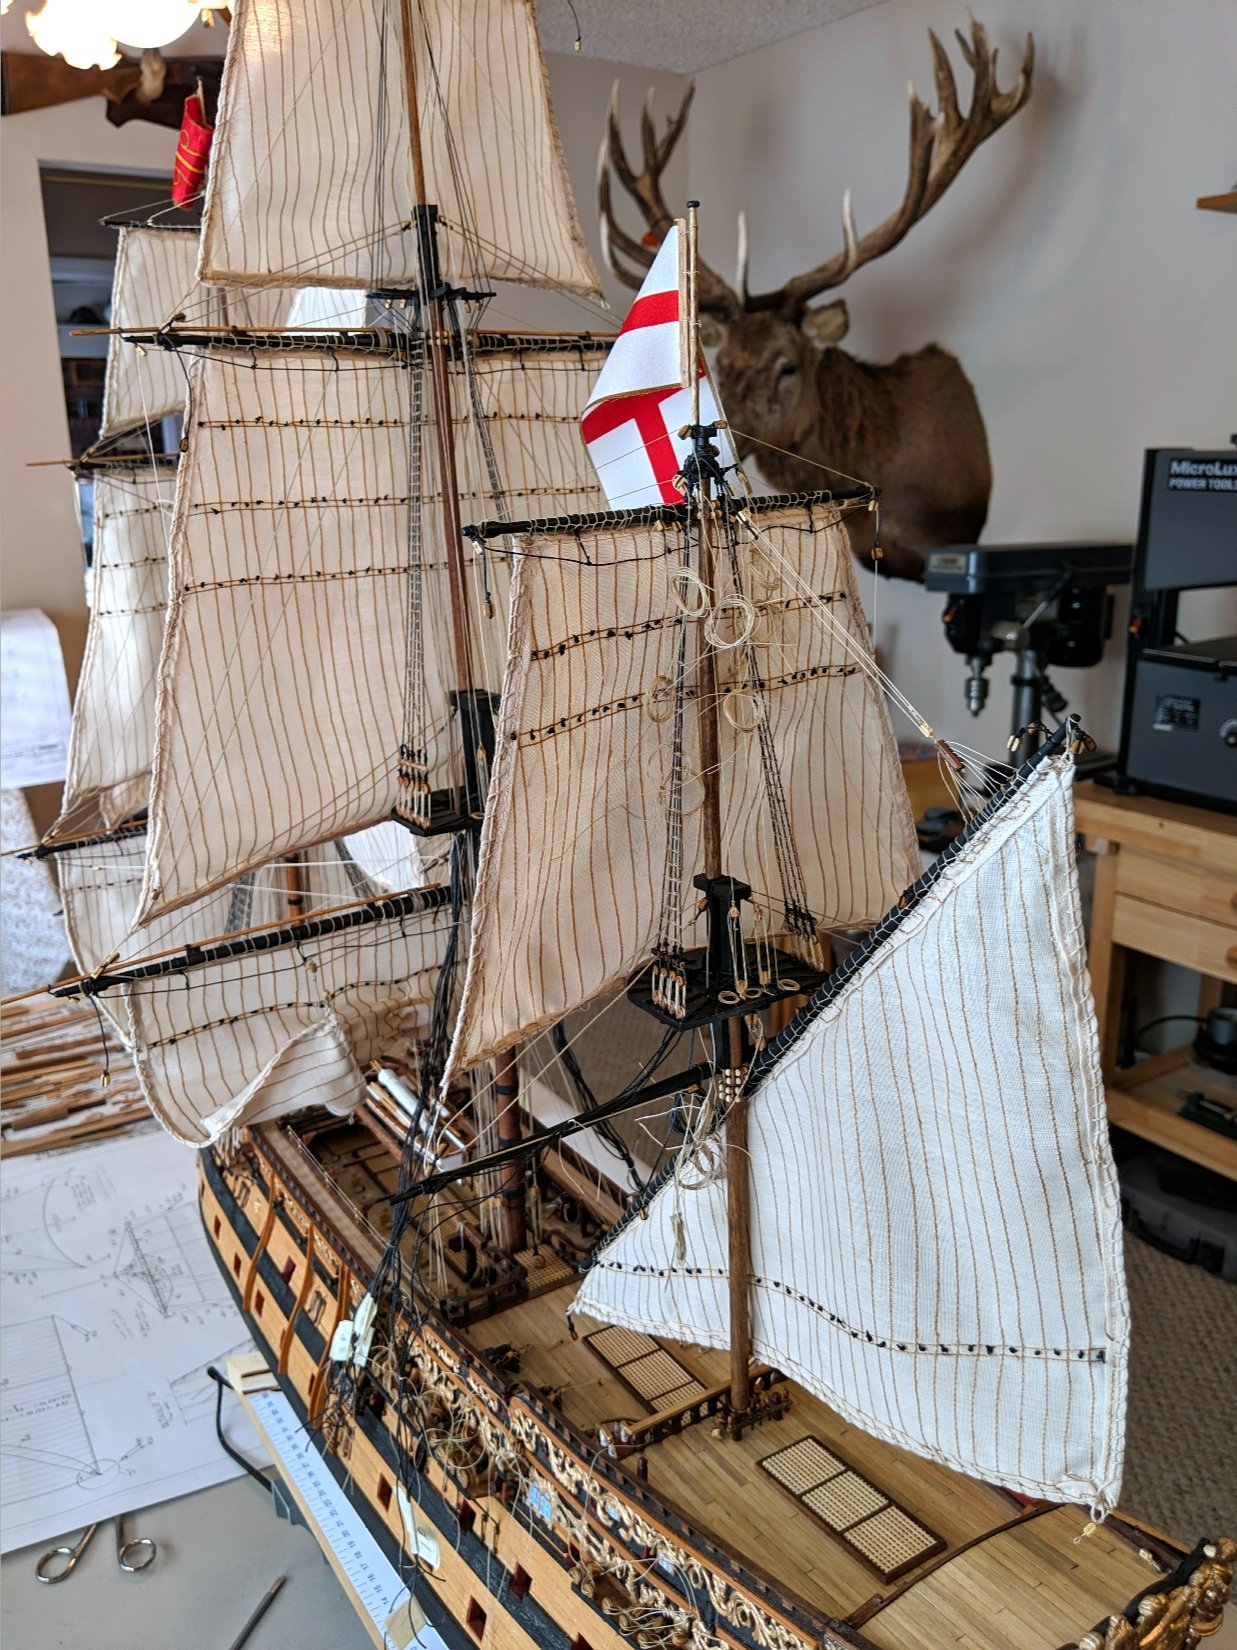
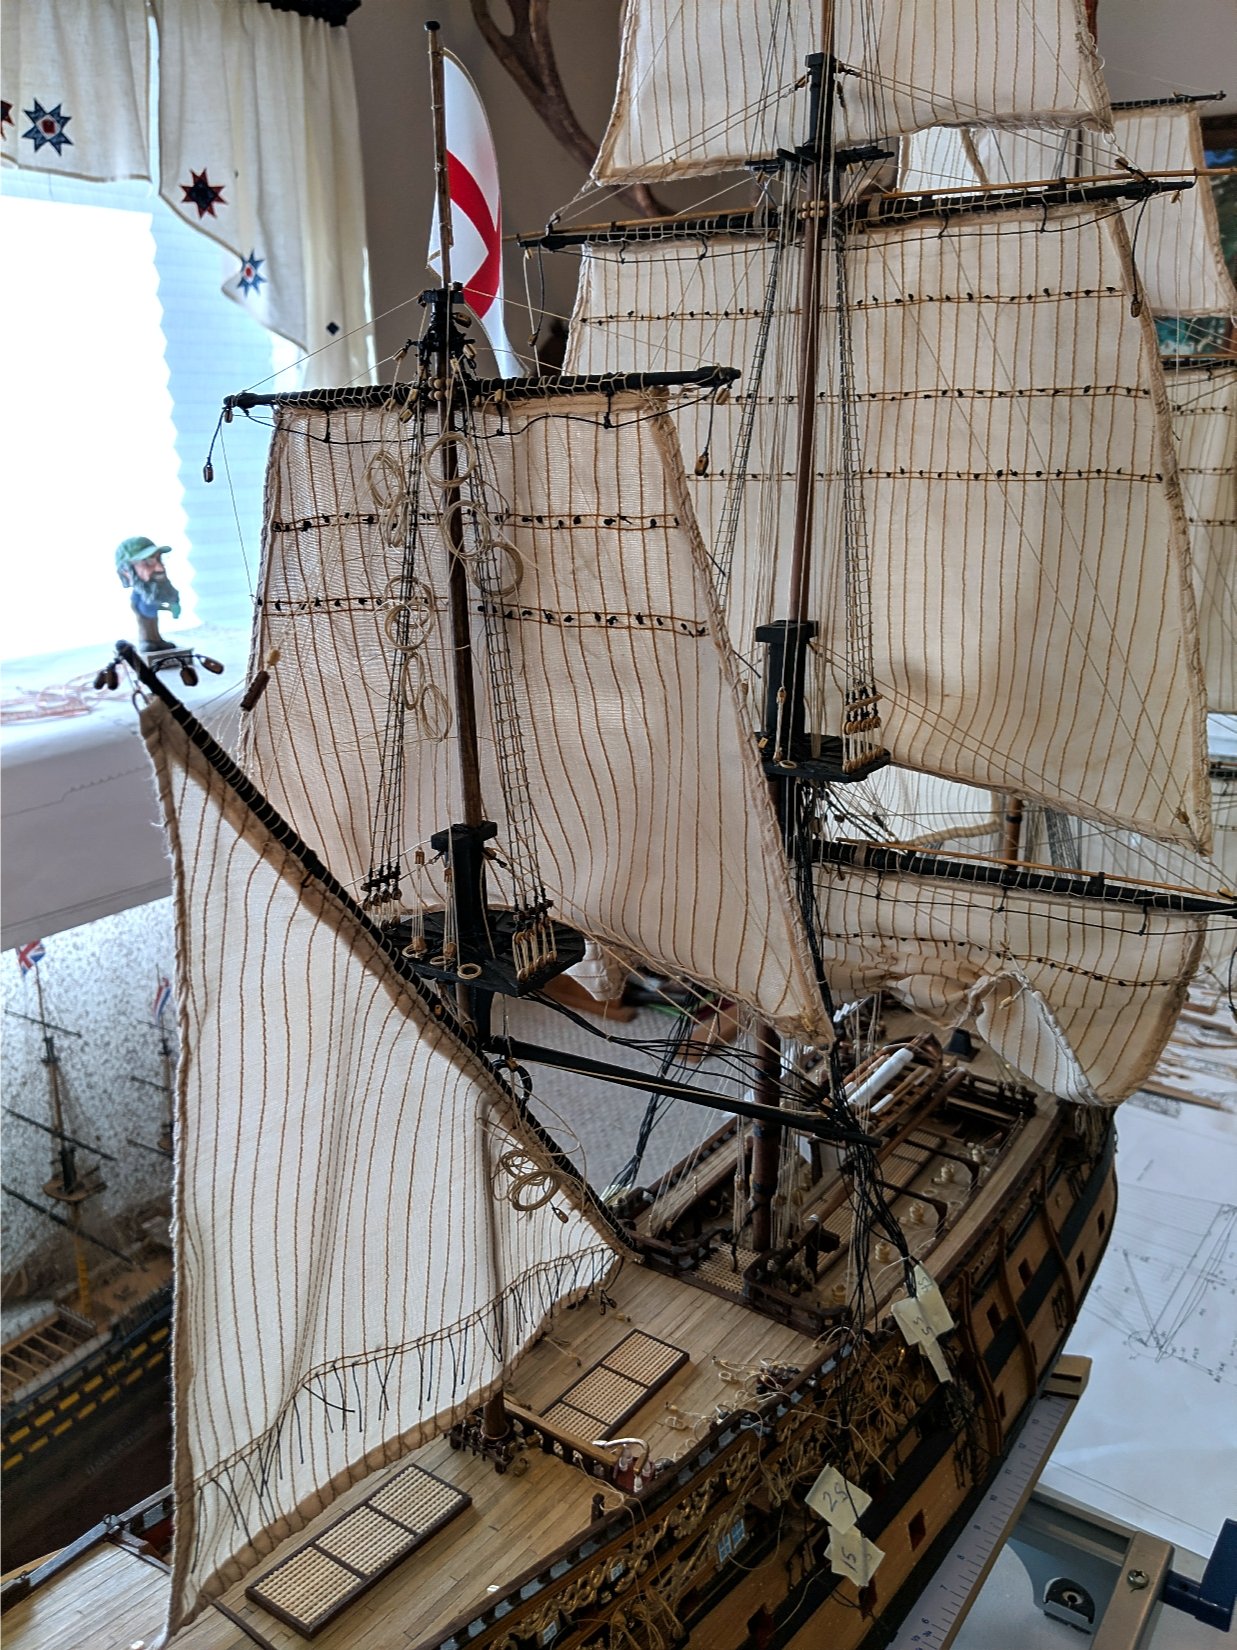
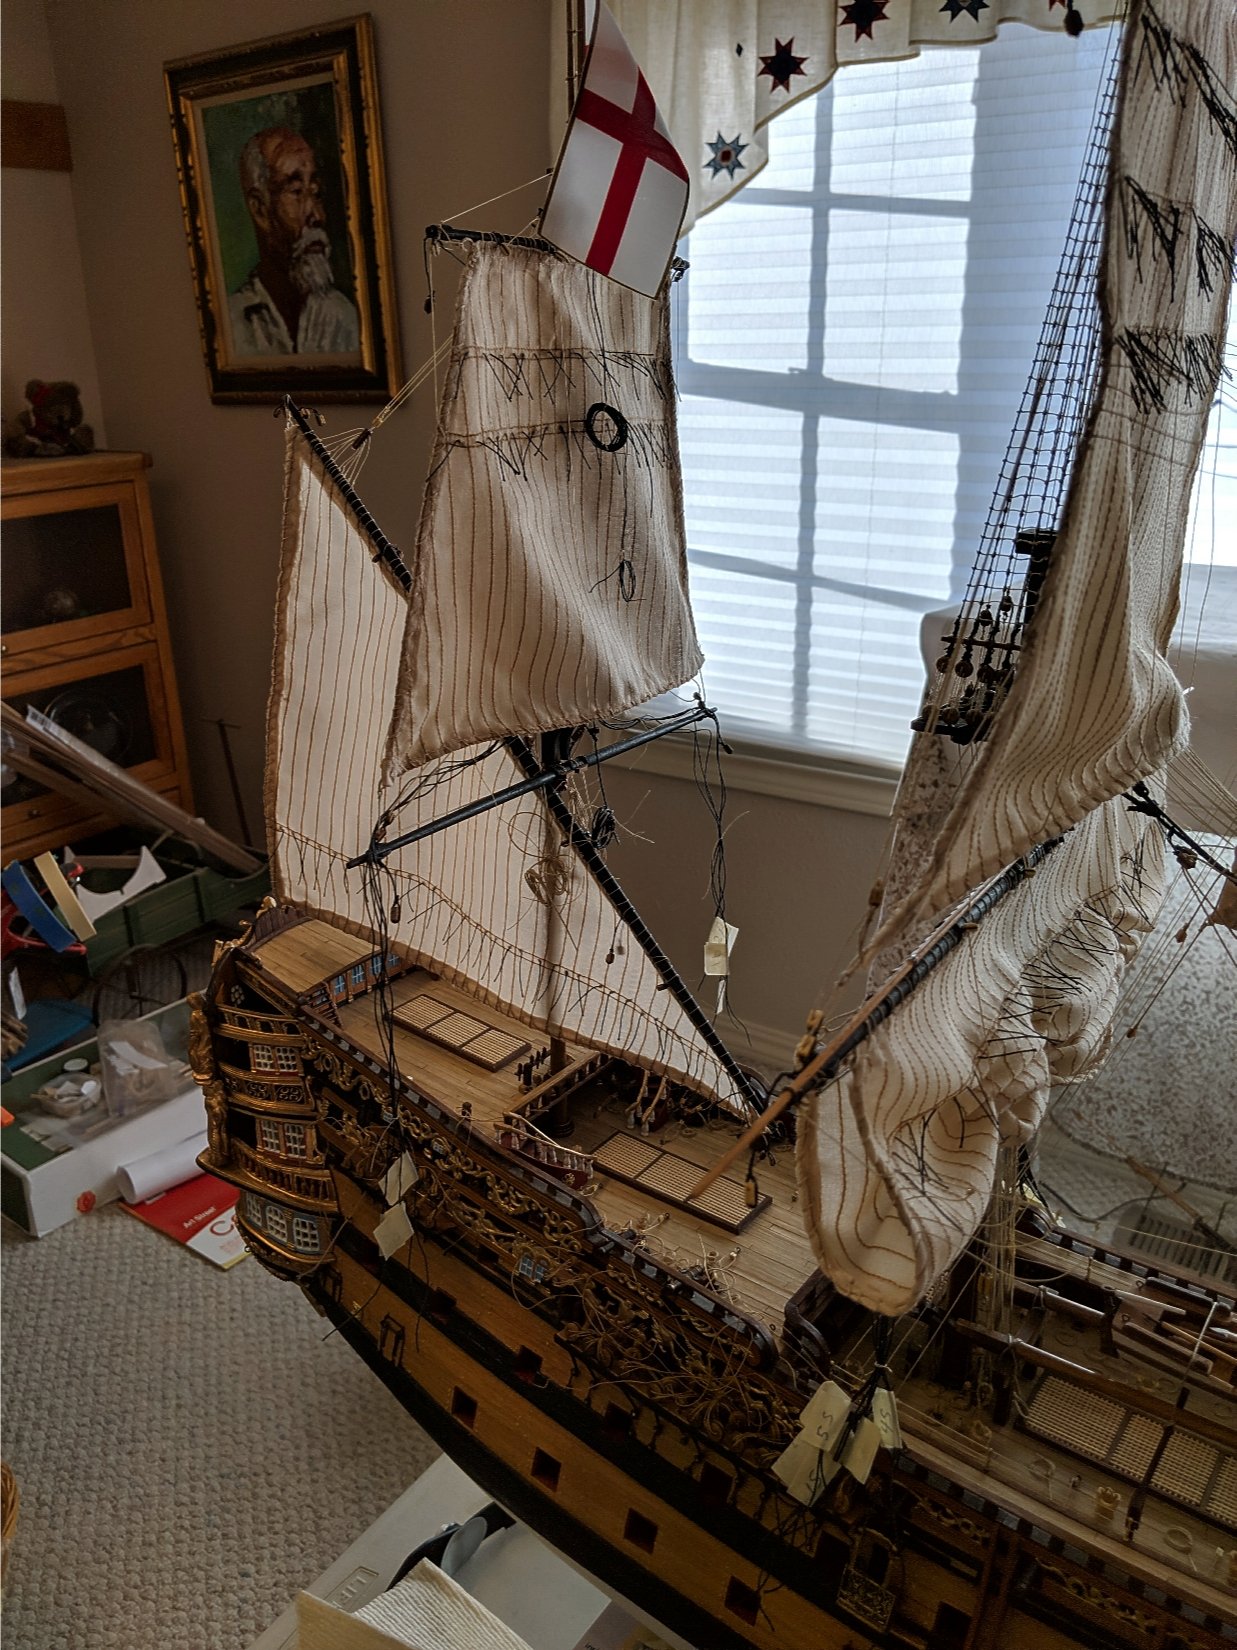
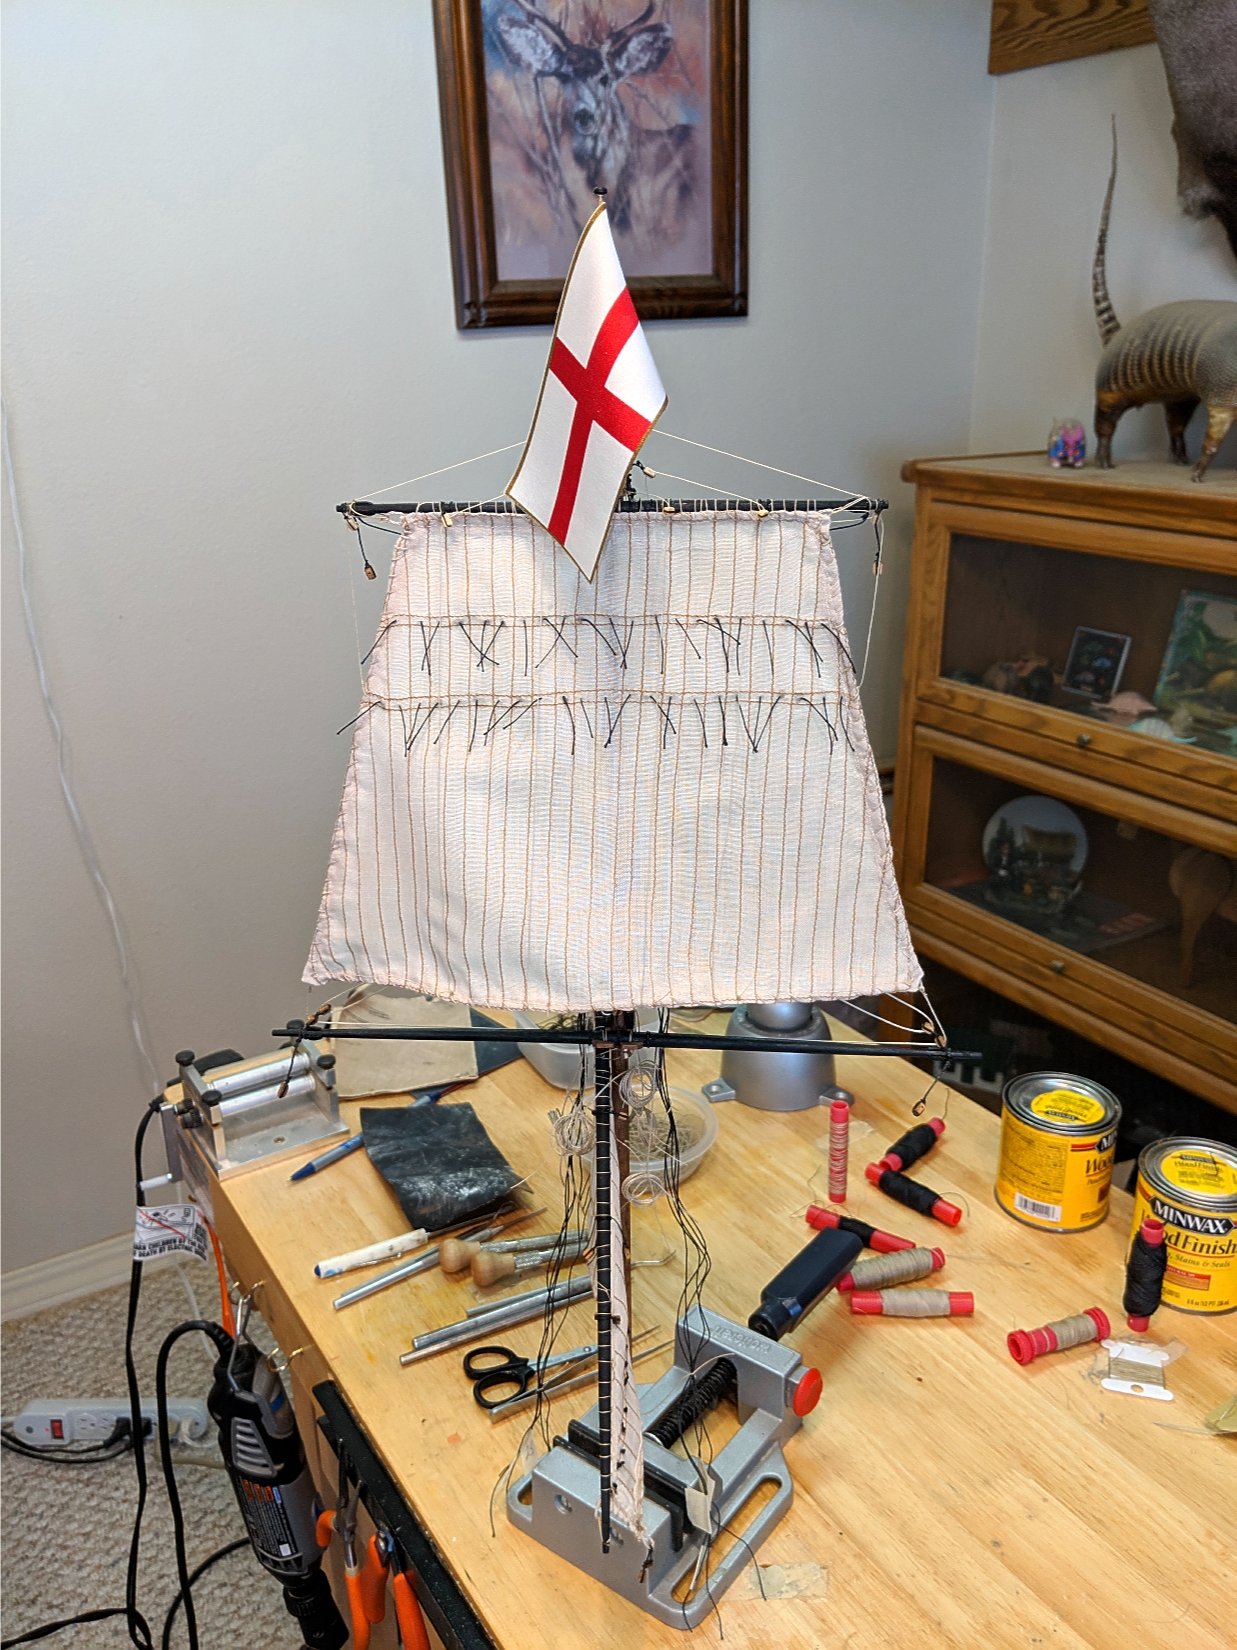
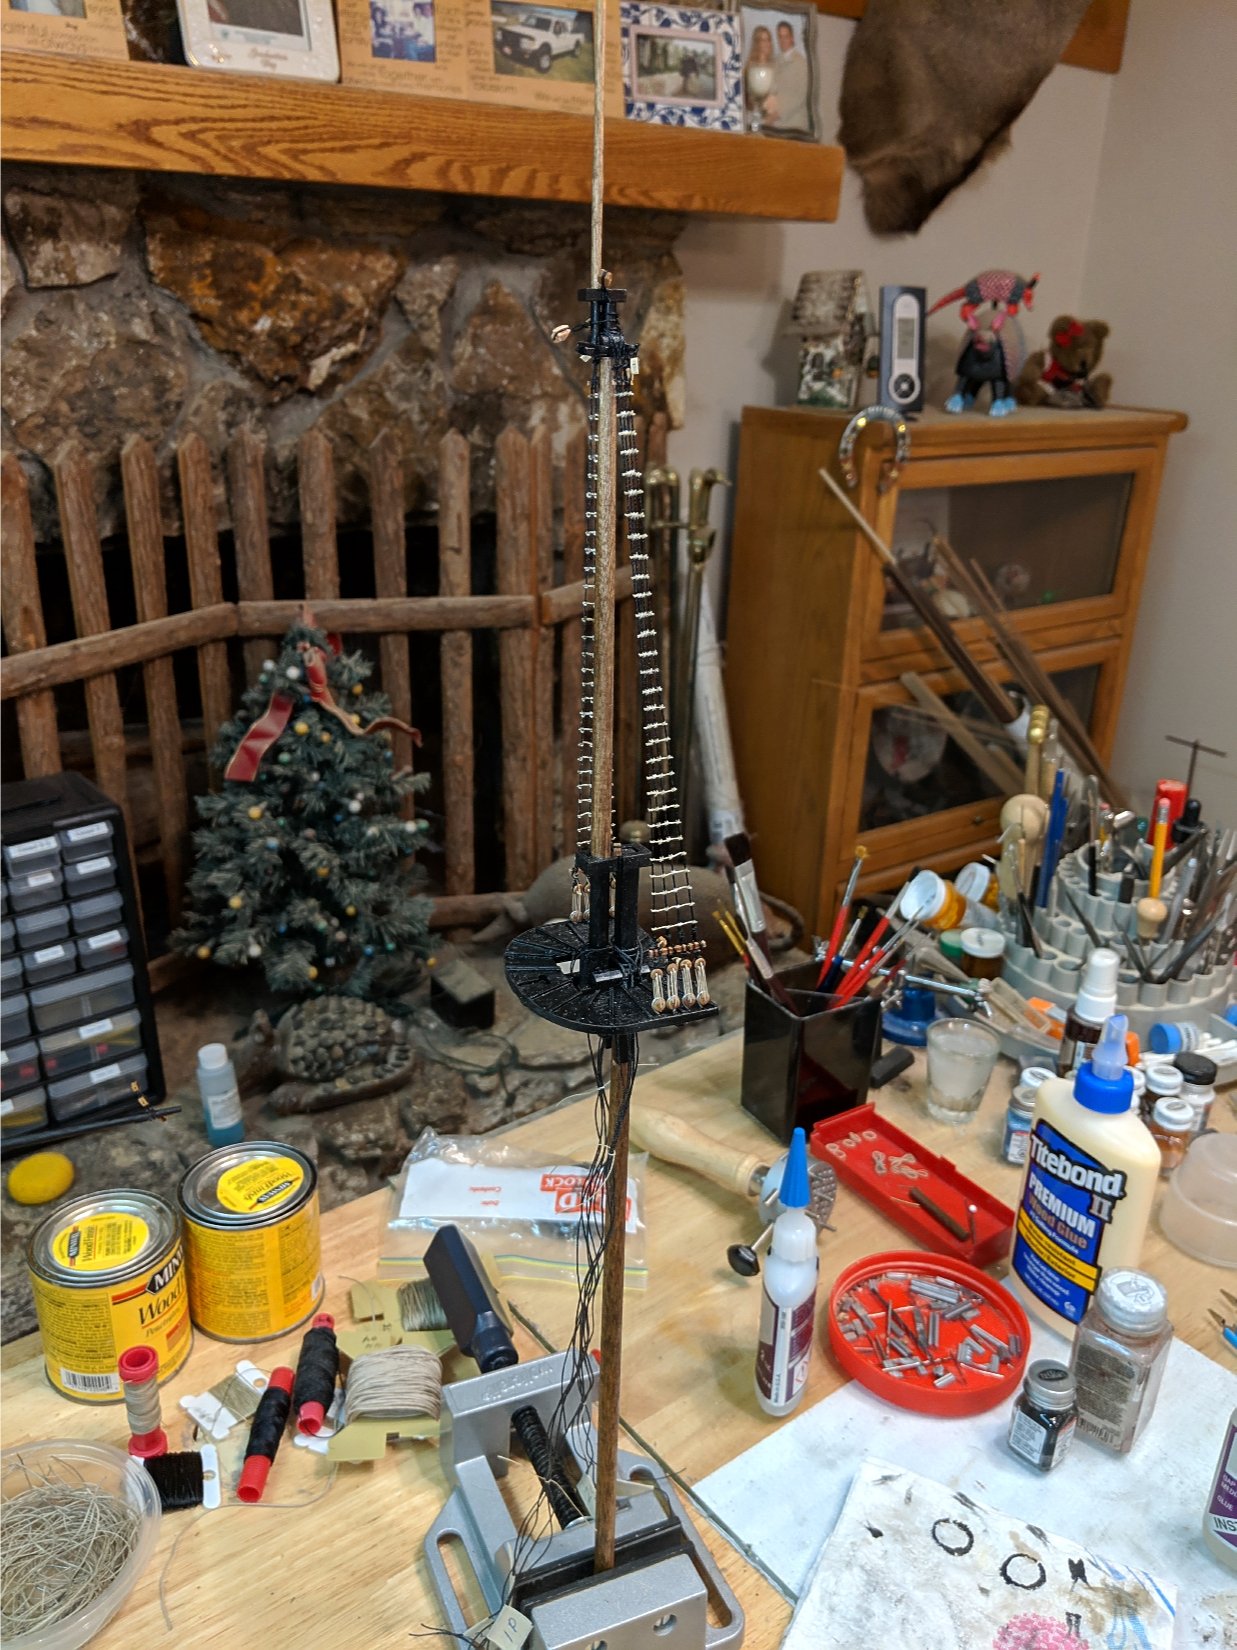
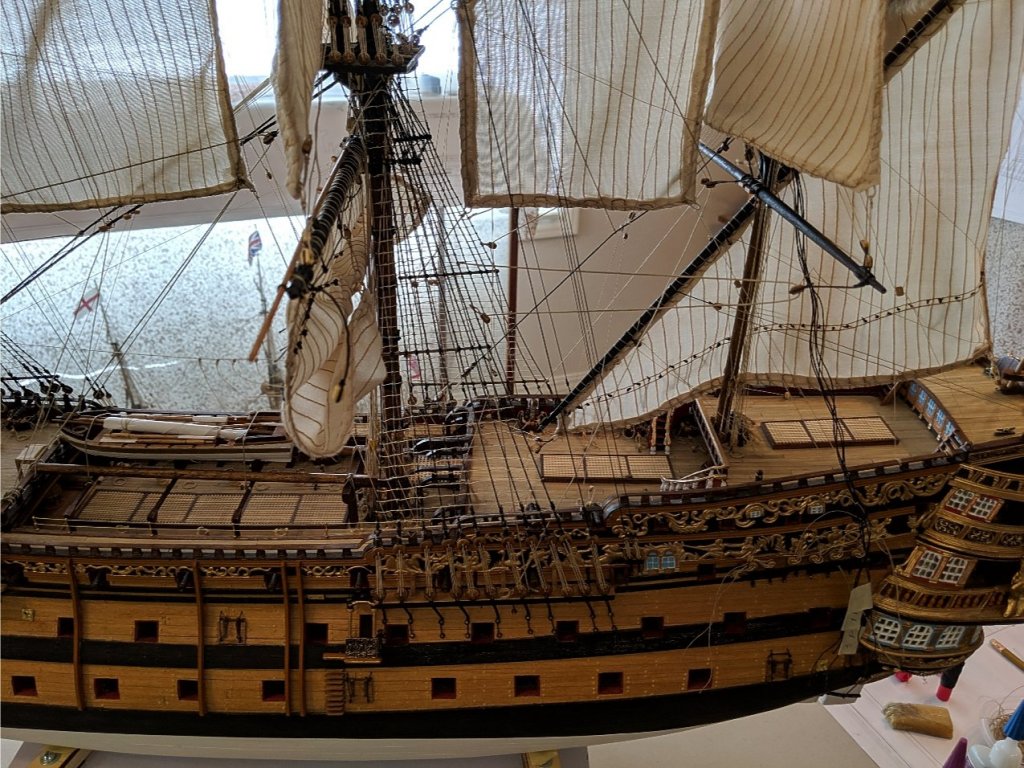
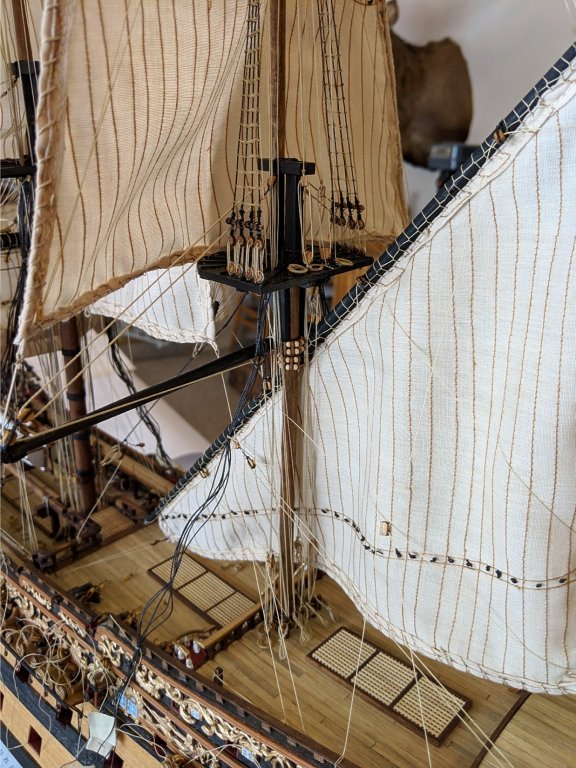
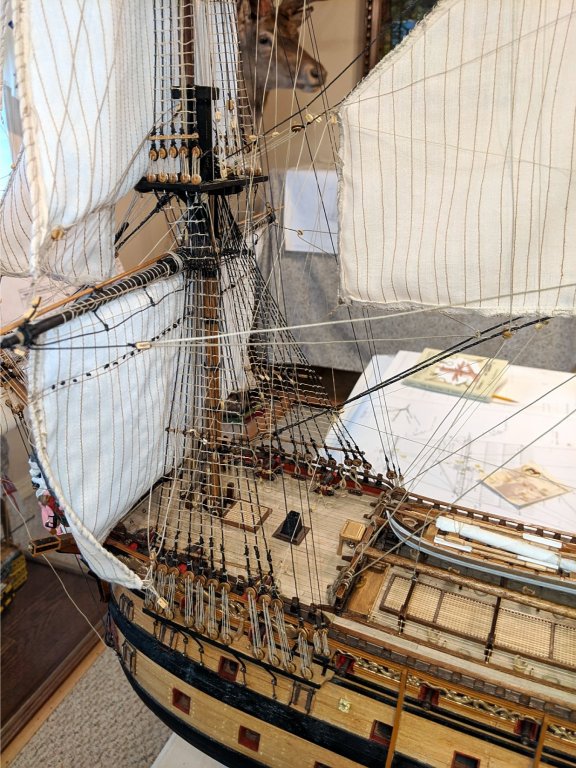
Finally finished the standing rigging for the mainmast. All that is left are the corner lines for the main course sail. They will be added at the very end of the build. Currently working on the stern lanterns and the lower shrouds and backstays for the mizzen mast. Vince P.


- 593 replies
-
- 6
-
-
- royal william
- euromodels
- (and 1 more)
-
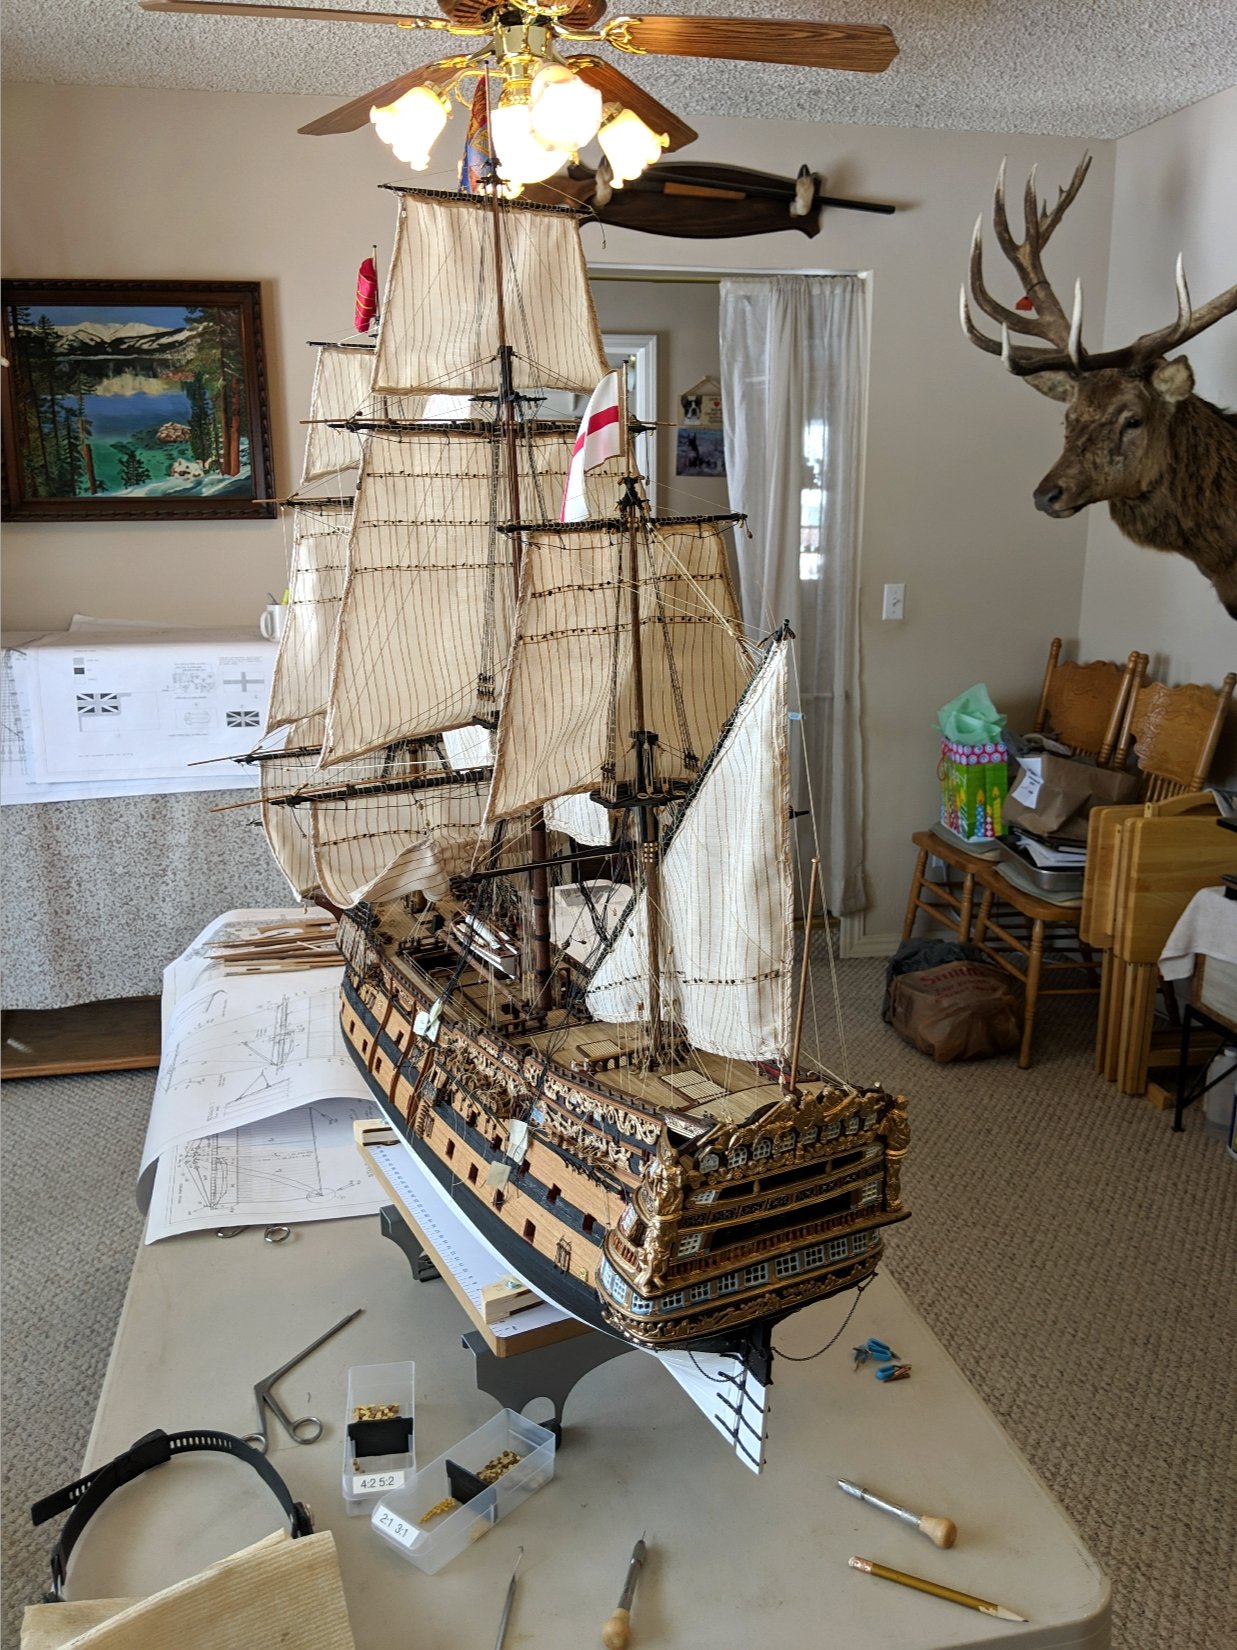
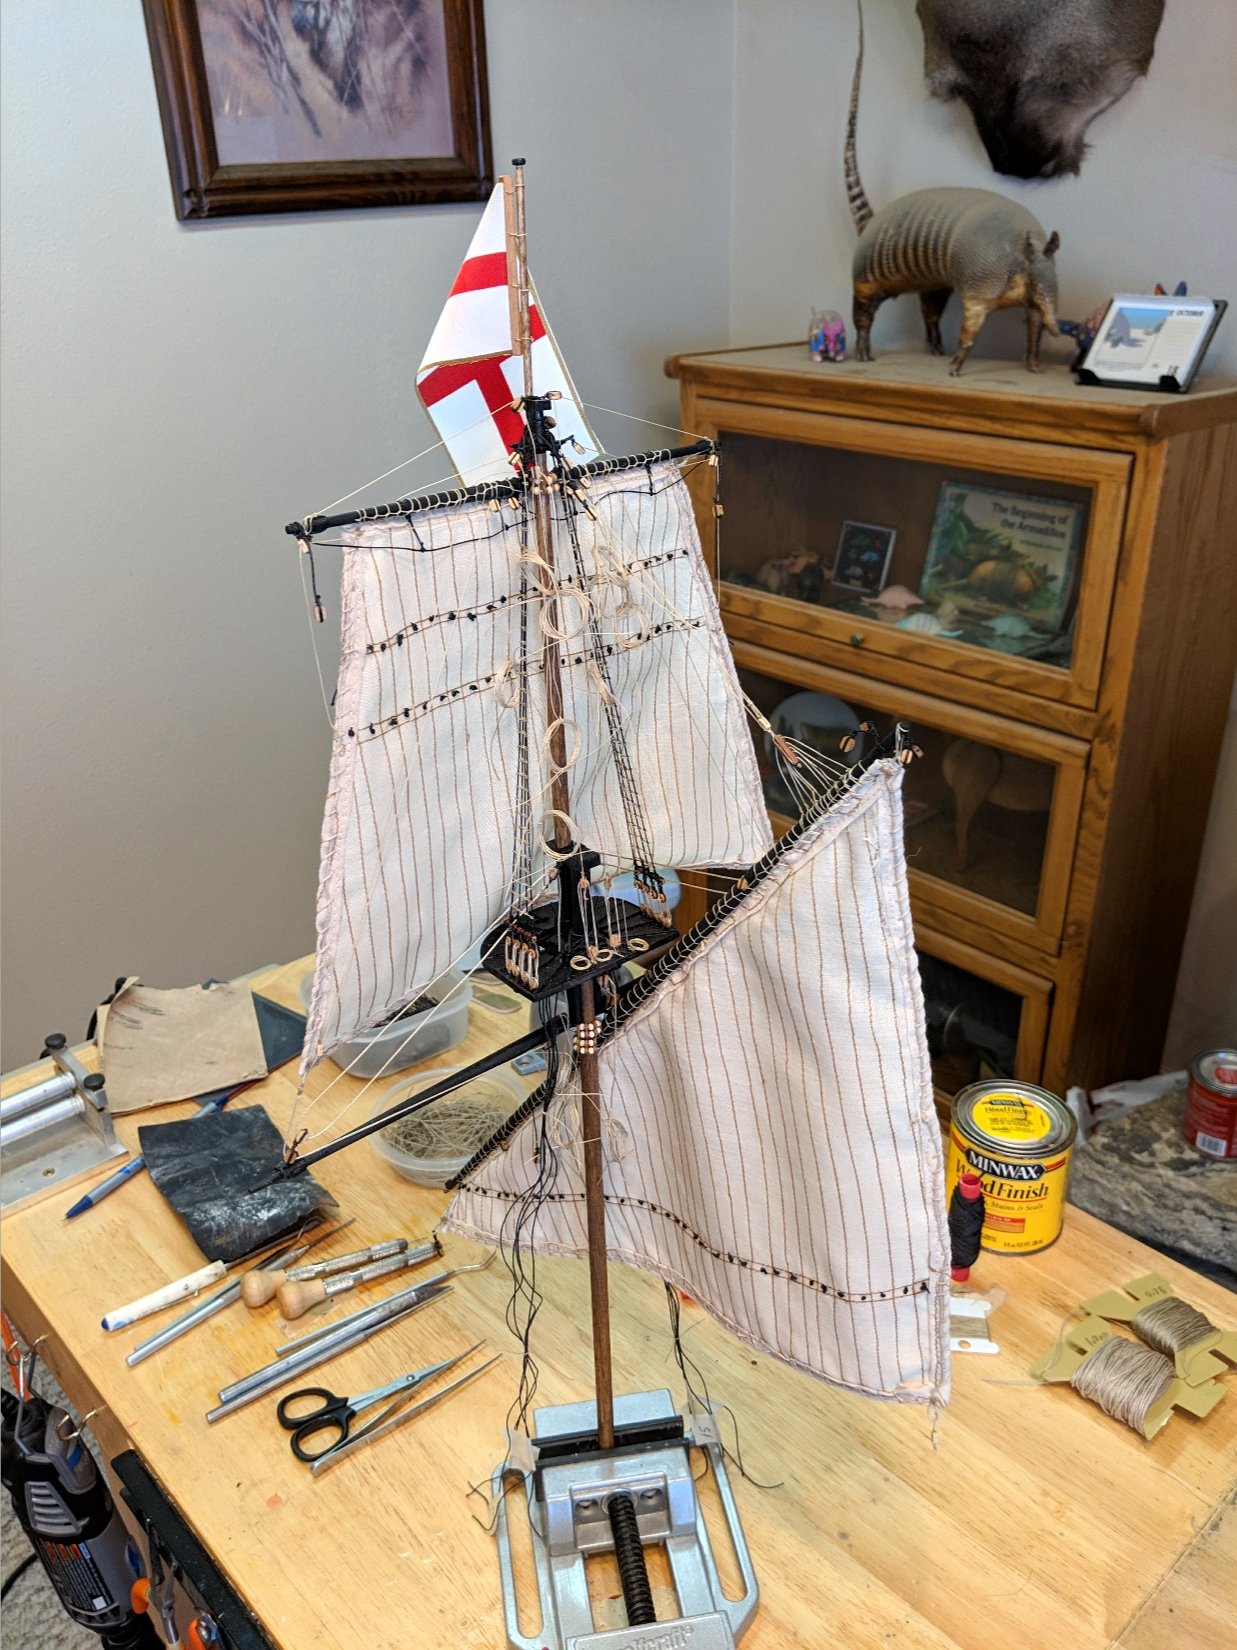
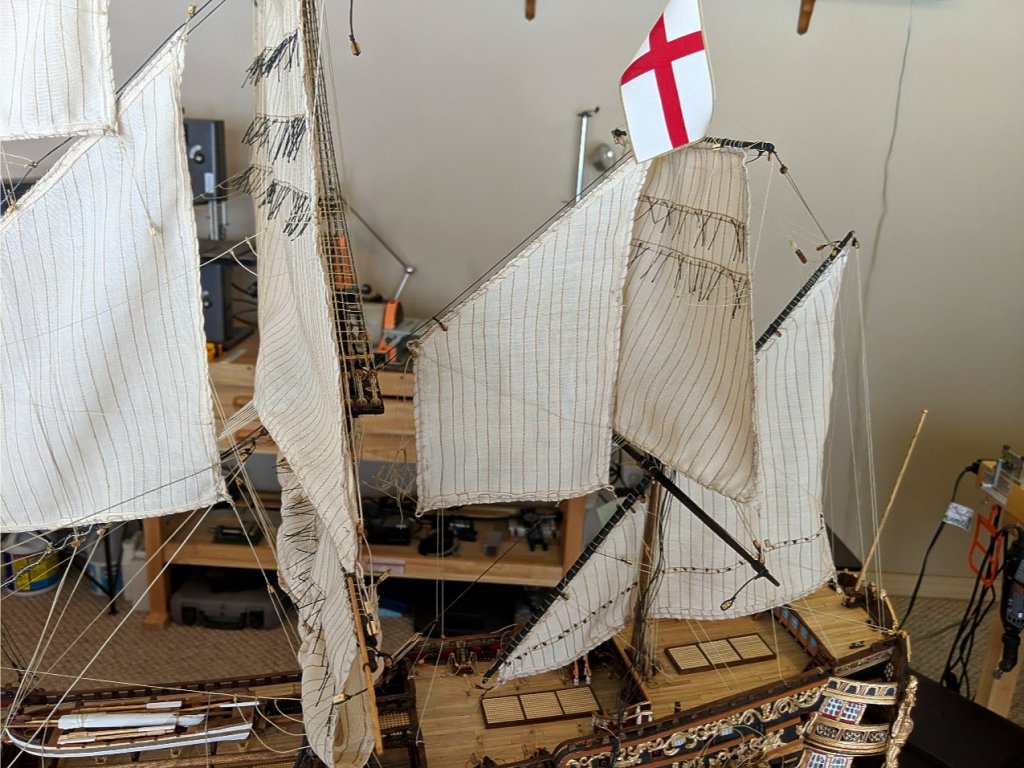
The mizzen mast is completed with all of the running rigging and the poop deck flag pole is installed. The lower shrouds and backstays will be completed later. Next up is to complete the main mast lower shrouds and back stays. Vince P.


- 593 replies
-
- 8
-
-
- royal william
- euromodels
- (and 1 more)
-
Nice build. What's next? Vince P.
-
The mizzen mast is stepped into the ship and now awaits the standing rigging and the belay of the running rigging. Vince P.


- 593 replies
-
- 5
-
-
- royal william
- euromodels
- (and 1 more)
-
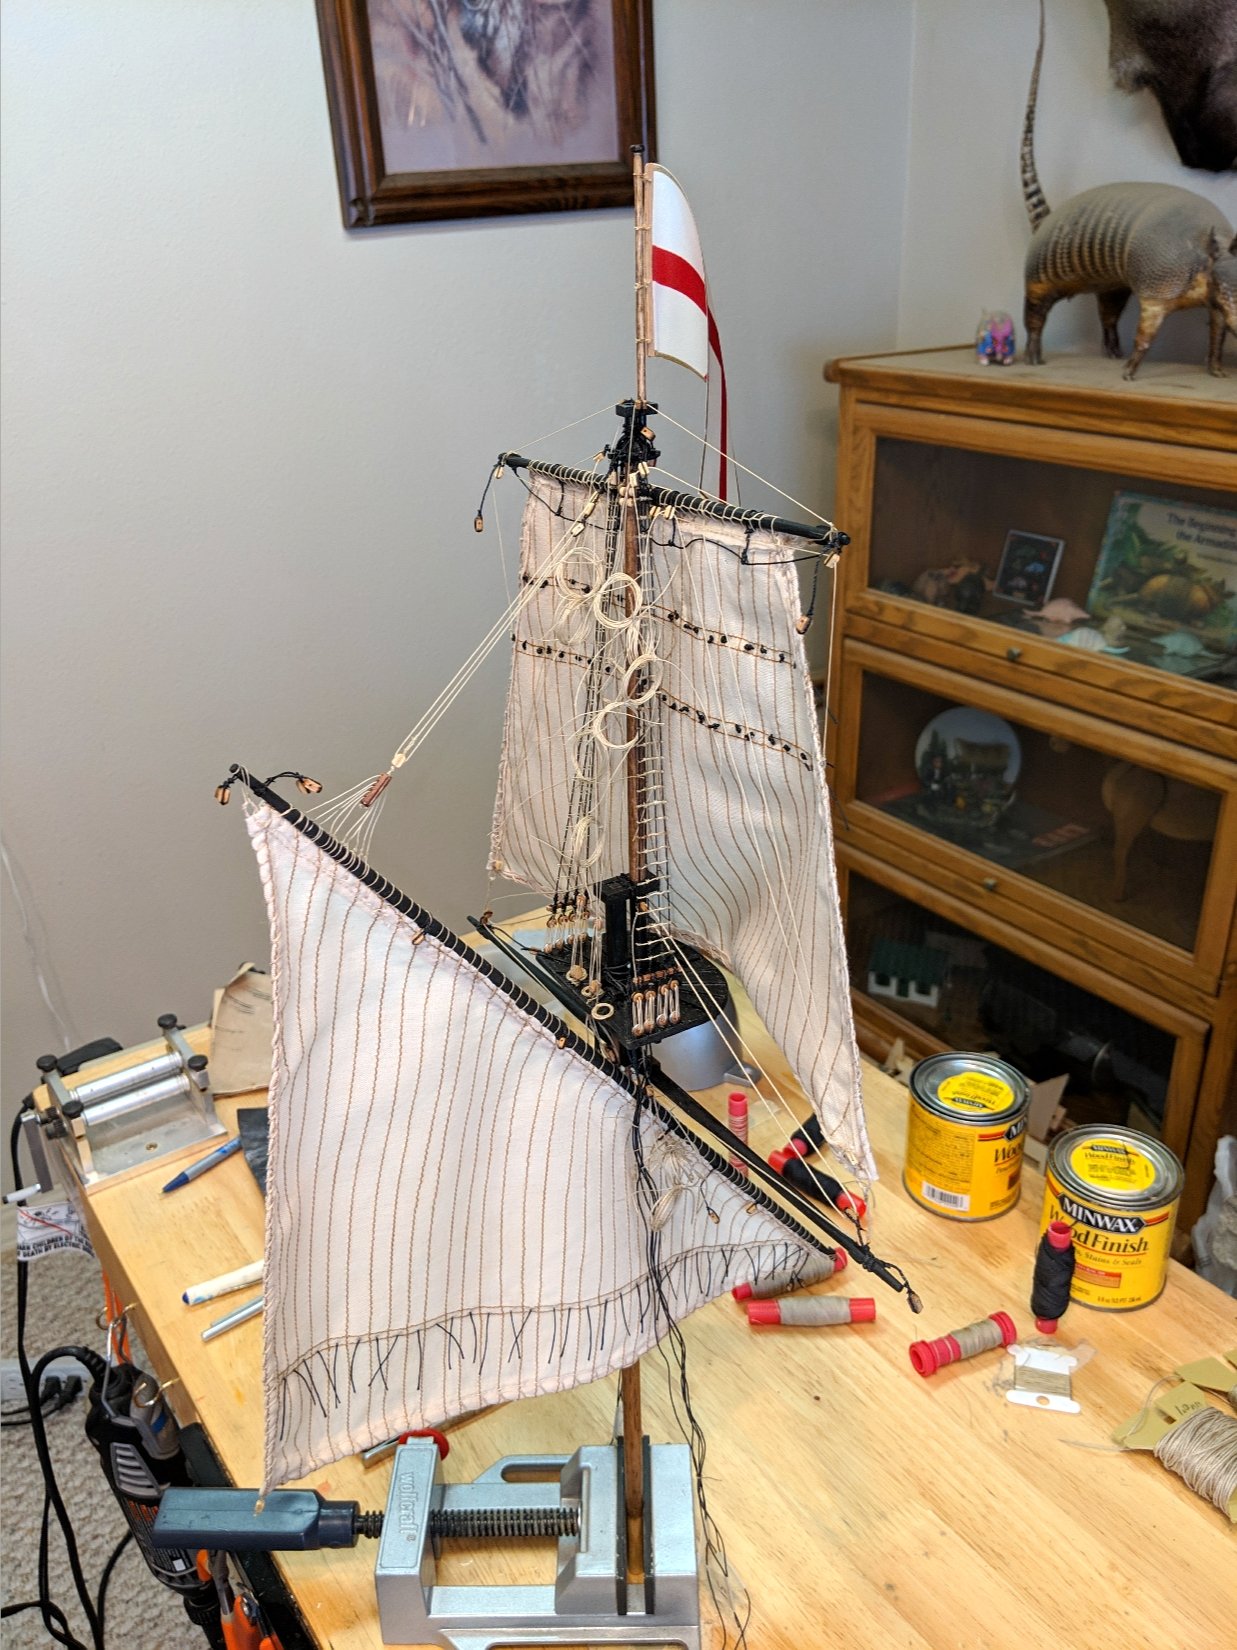
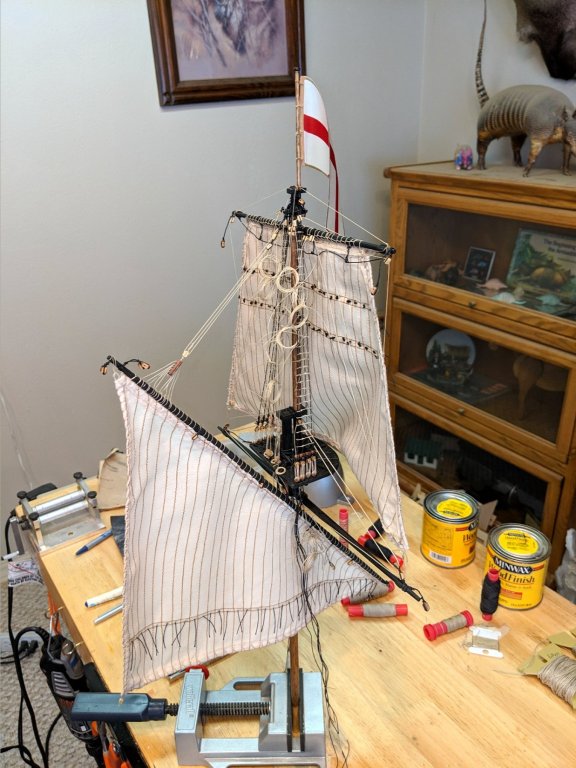
The mizzen mast is completed and is ready to step into the ship. Vince P.


- 593 replies
-
- 2
-
-
- royal william
- euromodels
- (and 1 more)
-
Me too! Mark and I are builders of Euromodel ships. Mark did a fabulous job on his Royal William, and I am still in the process of finishing mine. You are quite correct about Peter Coward (Pirate Pete). He is the man to count on with any and all questions about Euromodel ships. Good luck, Vince P.
-
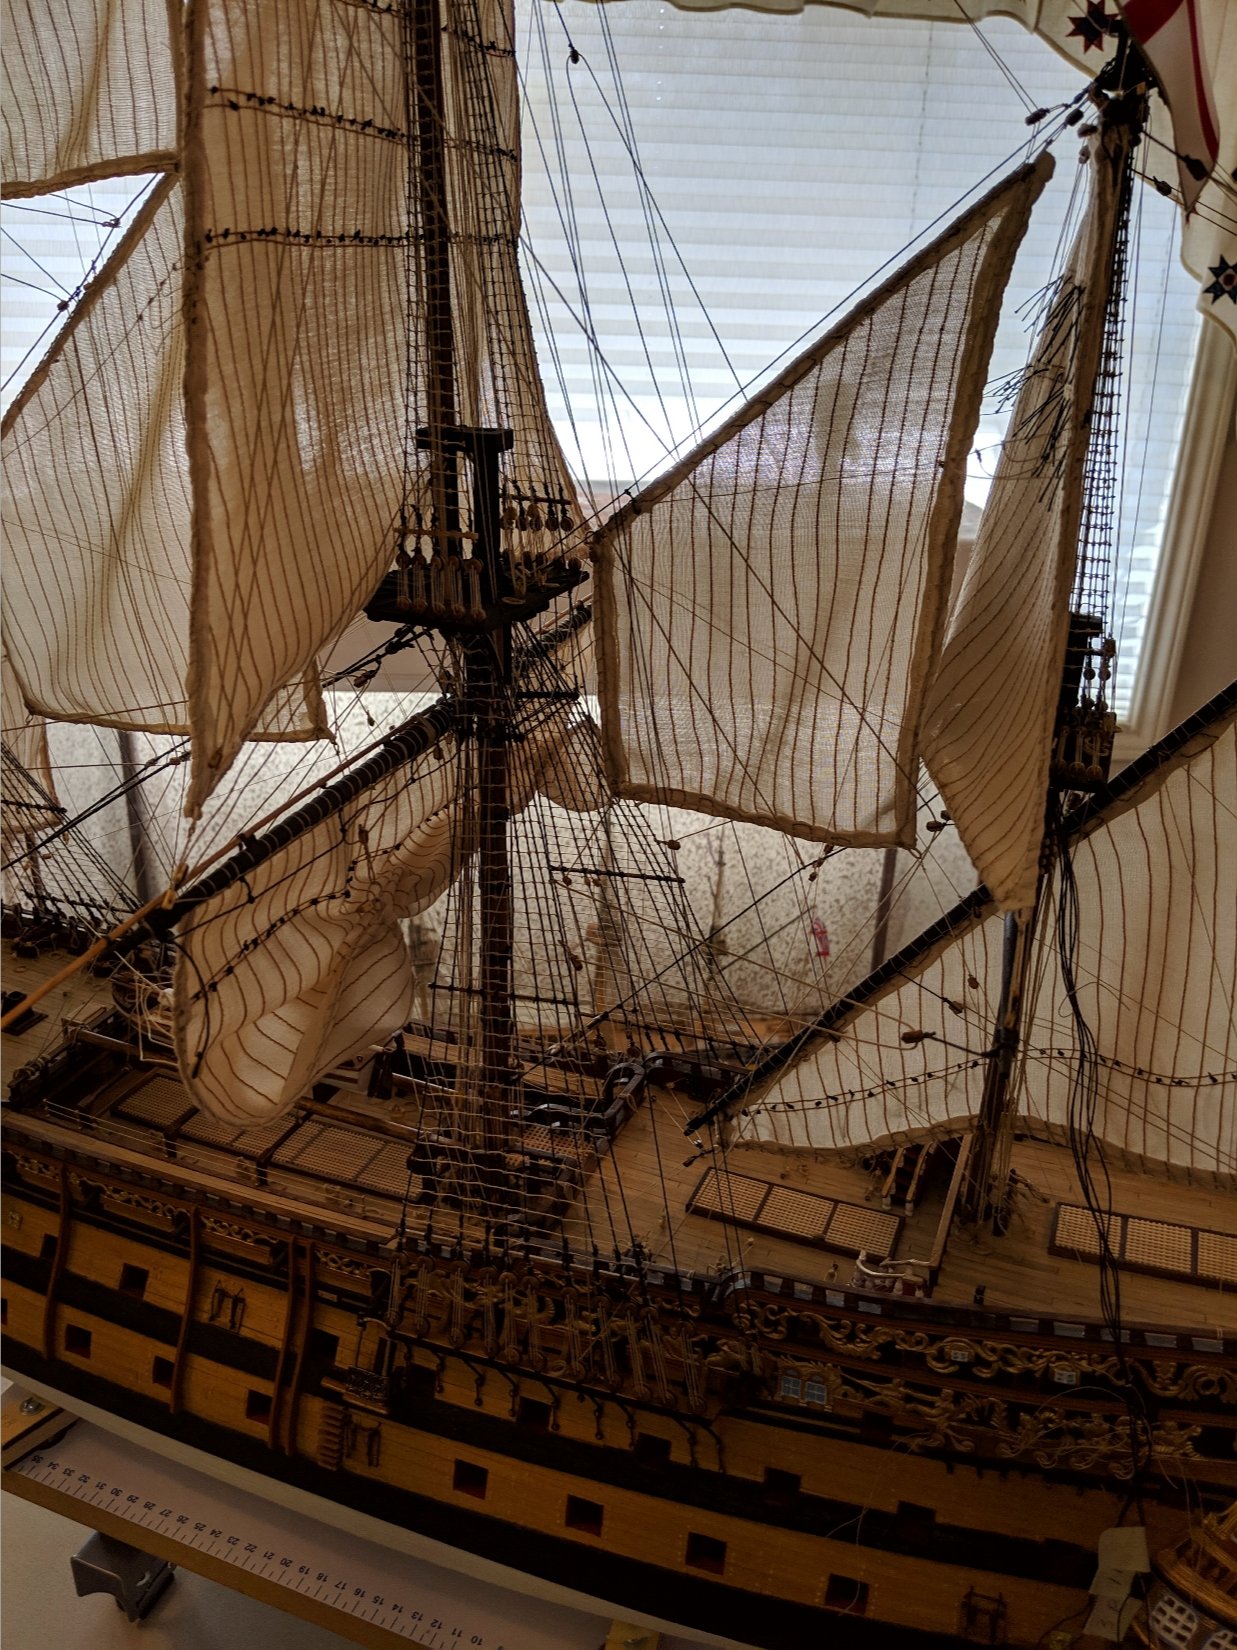
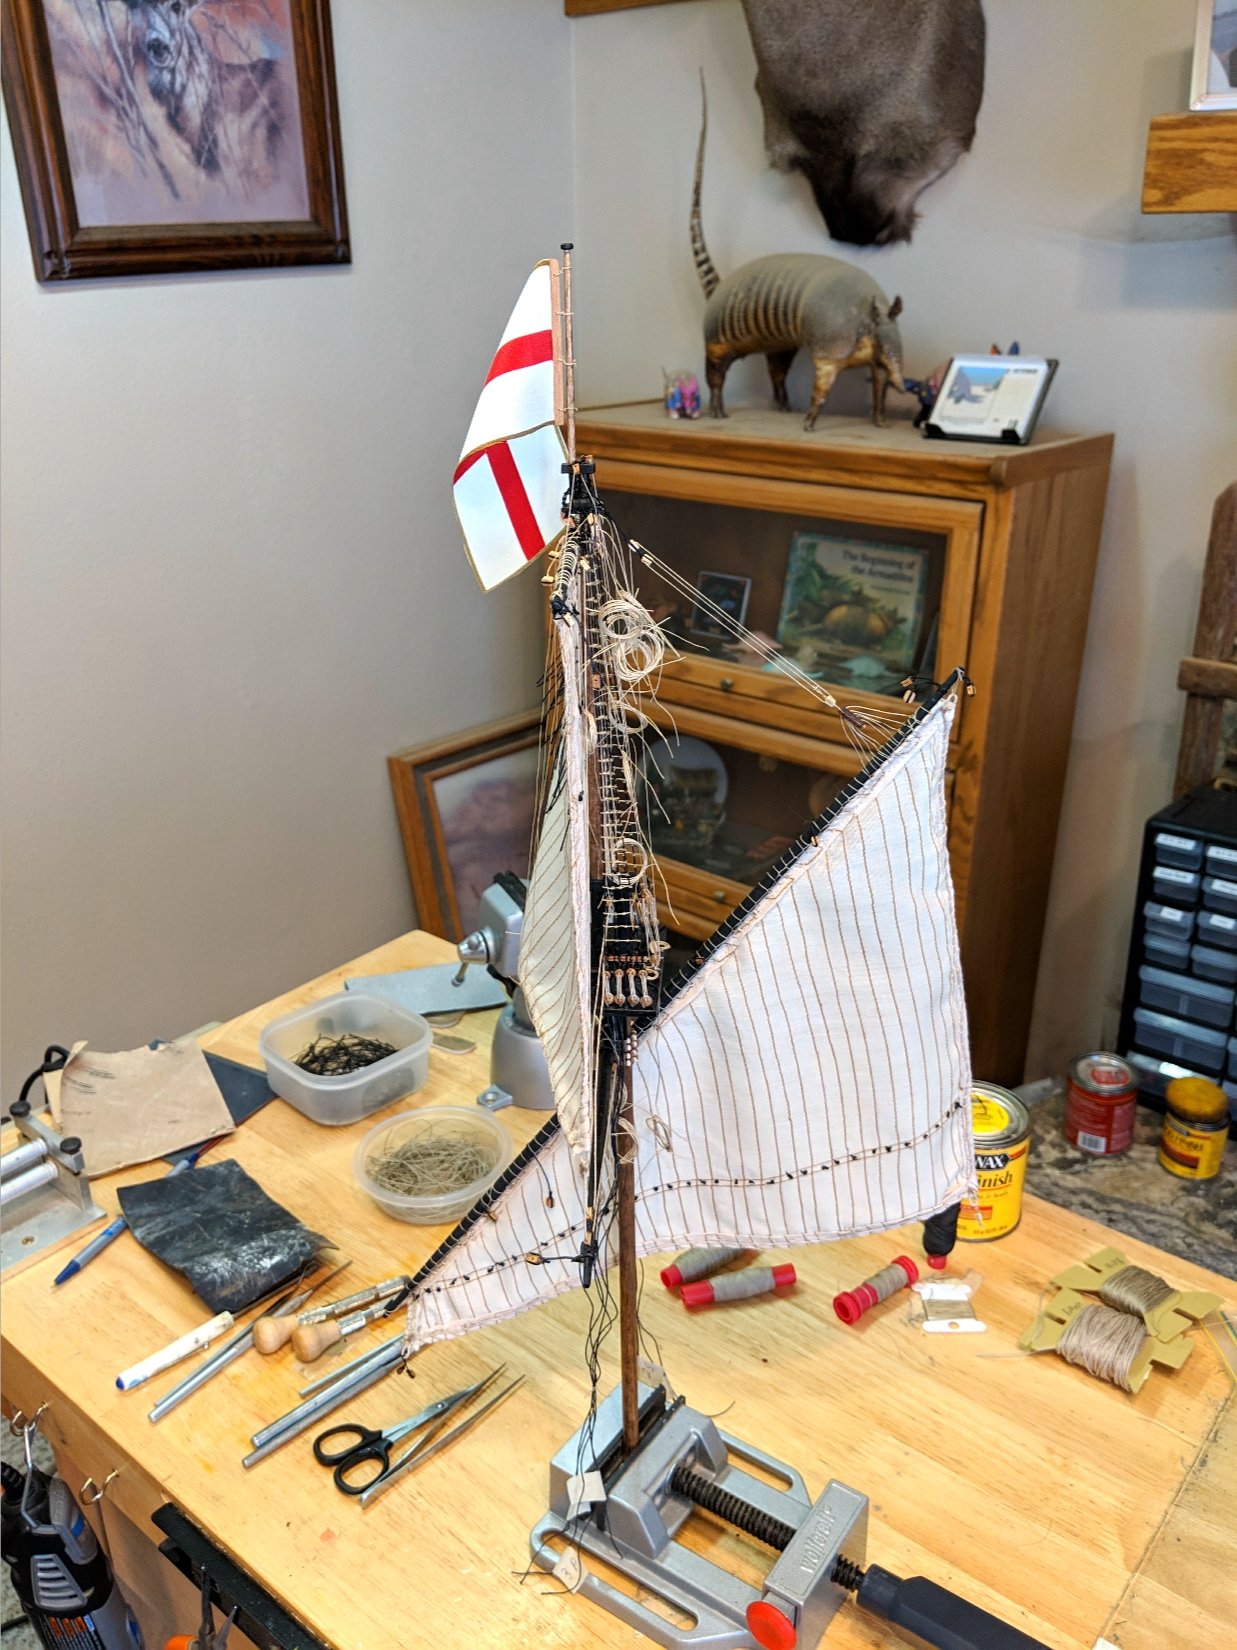
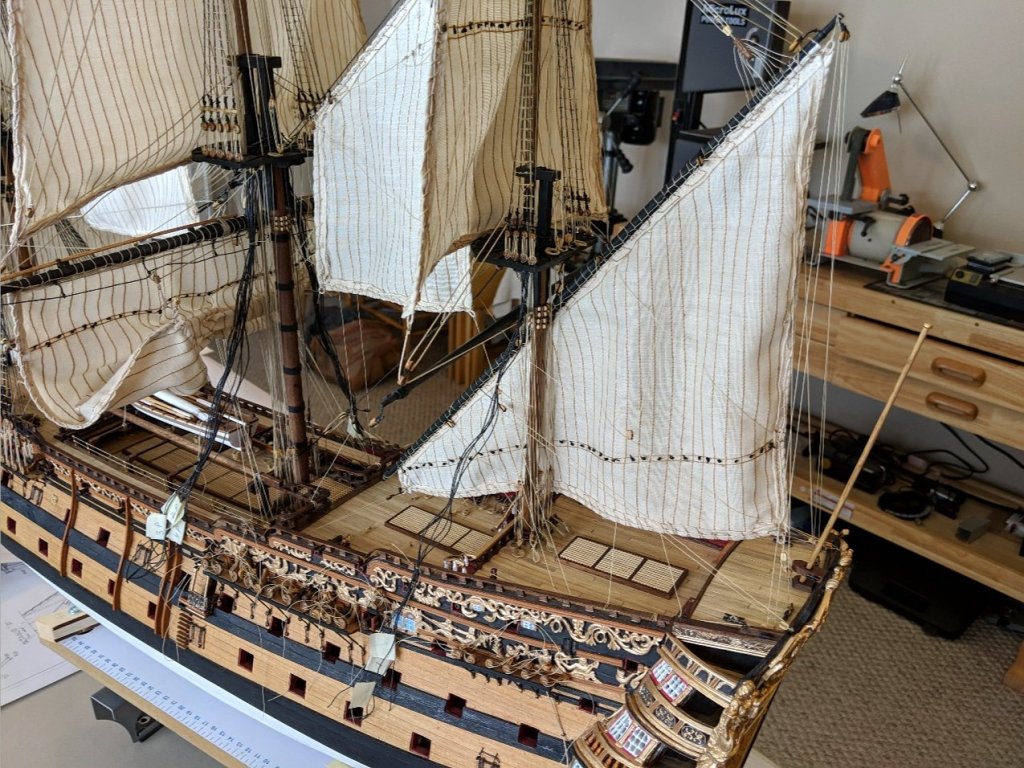
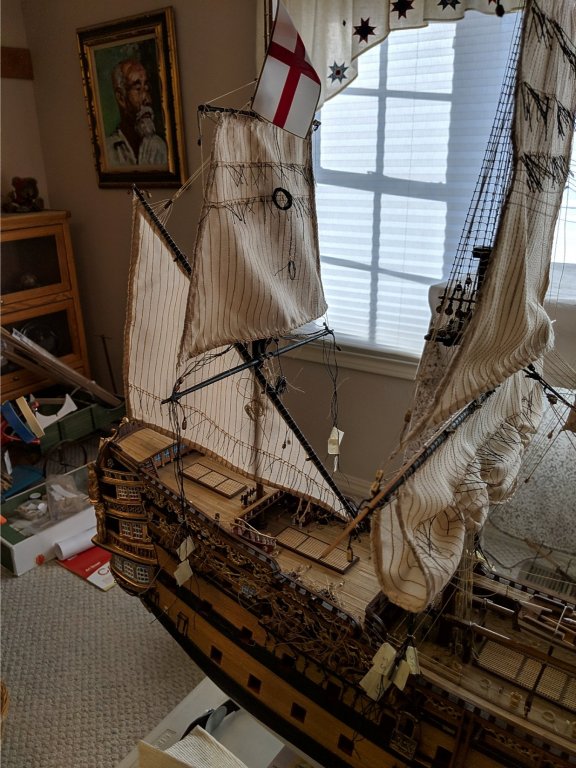
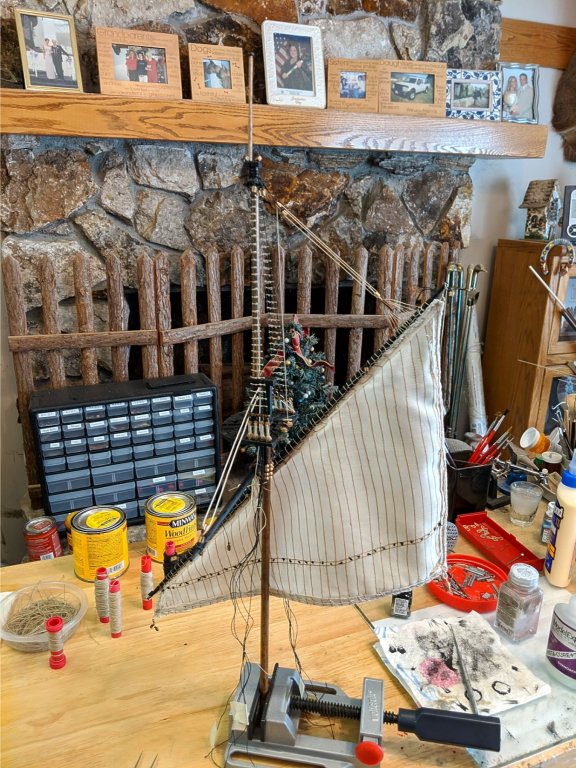
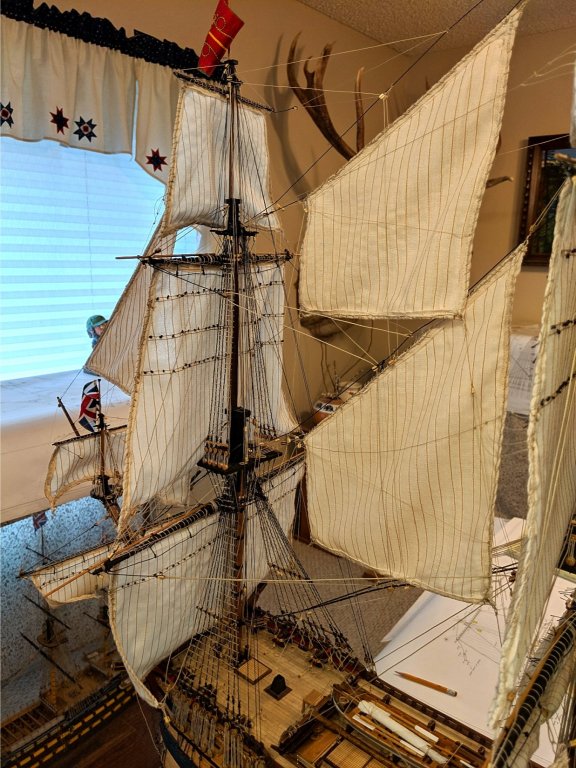
The mizzen mast with the crossjack and the lateen yard and sail. Vince P.


- 593 replies
-
- 6
-
-
- royal william
- euromodels
- (and 1 more)
-
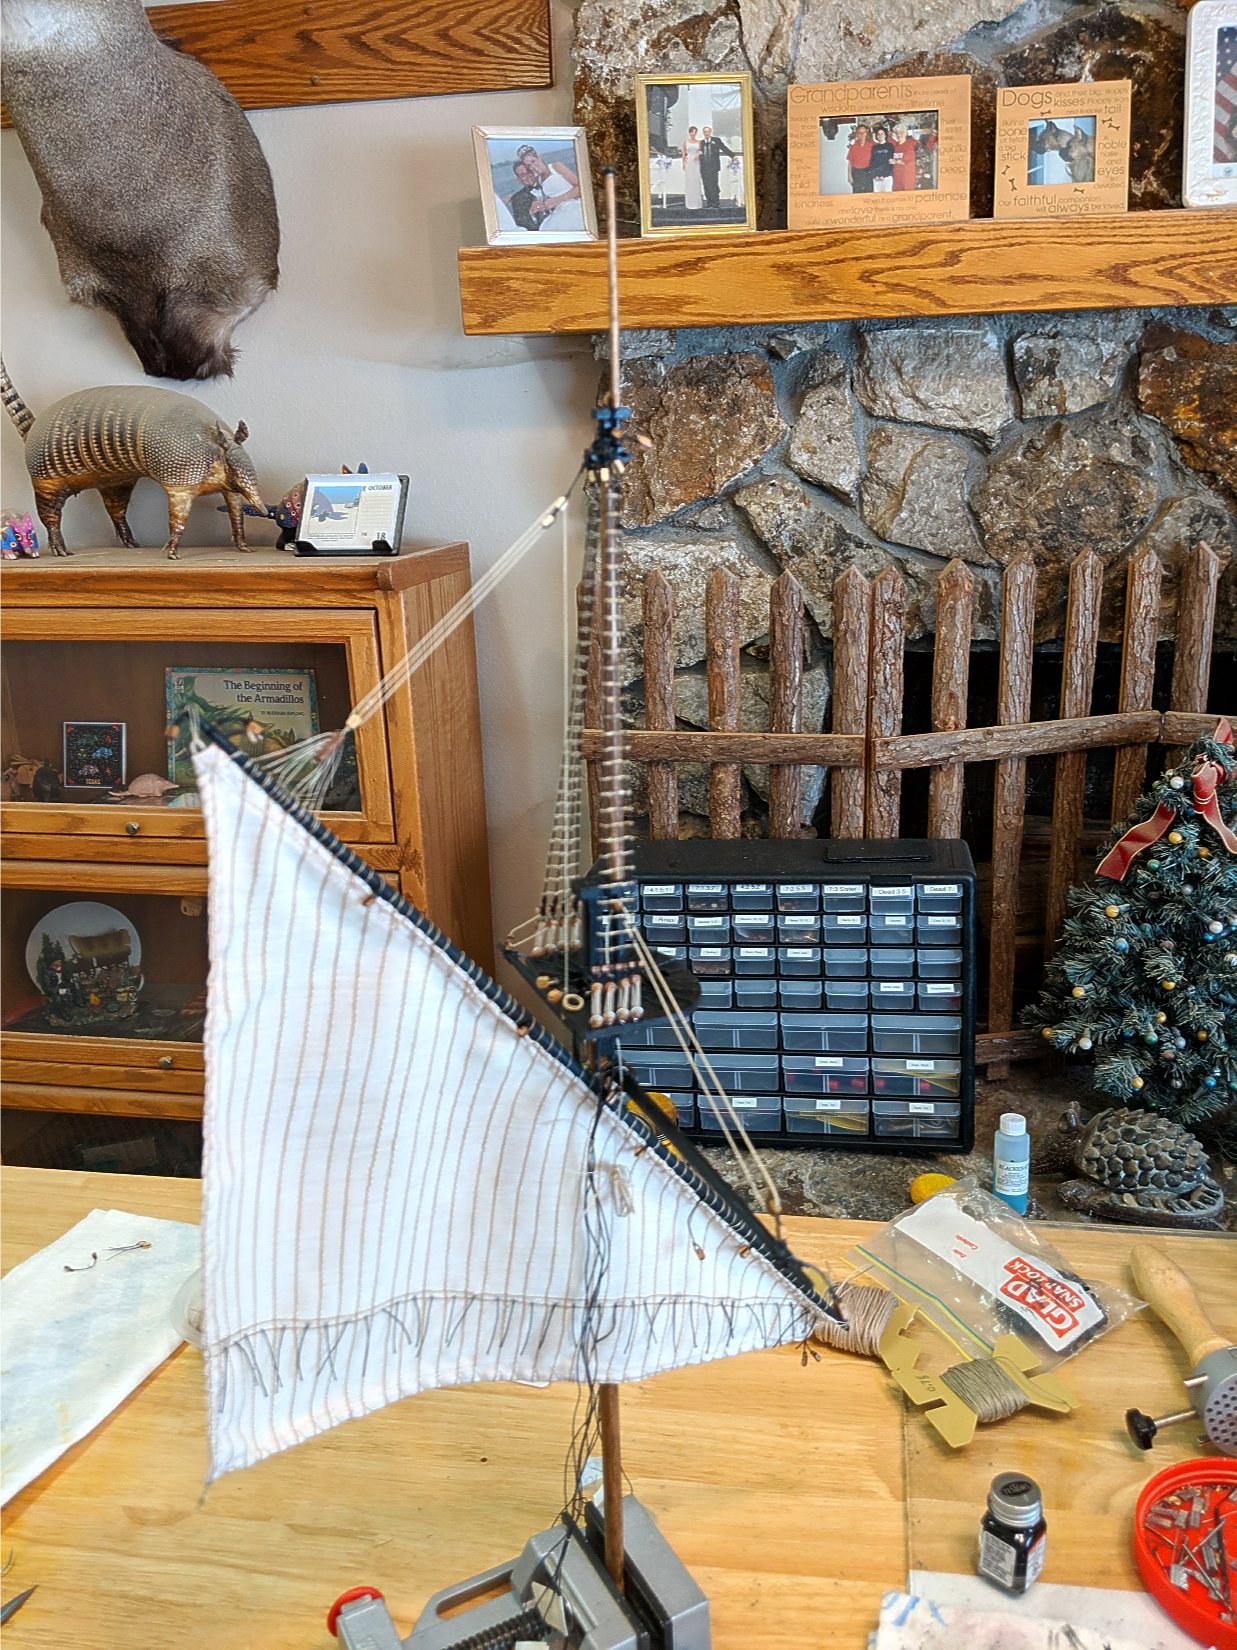
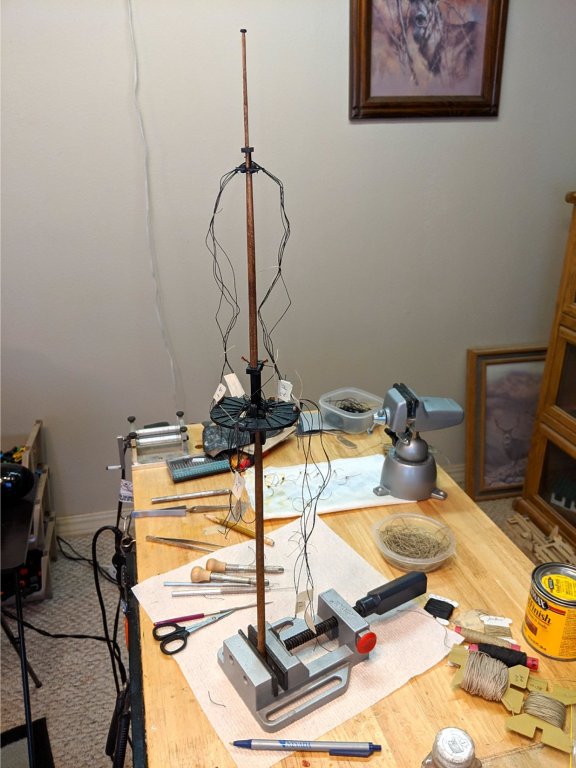
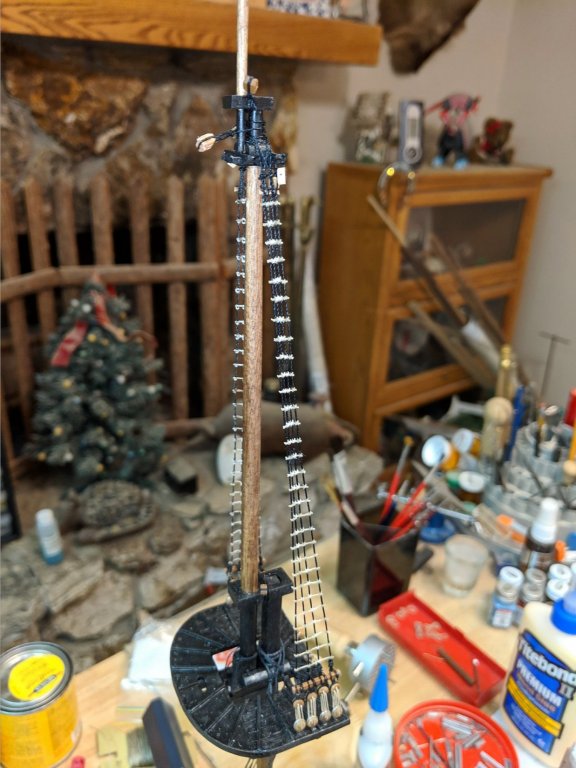
I am constructing the mizzen mast, the last one to go. As usual, I will complete it off ship first. Vince P.


- 593 replies
-
- 4
-
-
- royal william
- euromodels
- (and 1 more)
-
Good luck, Vince P.
-
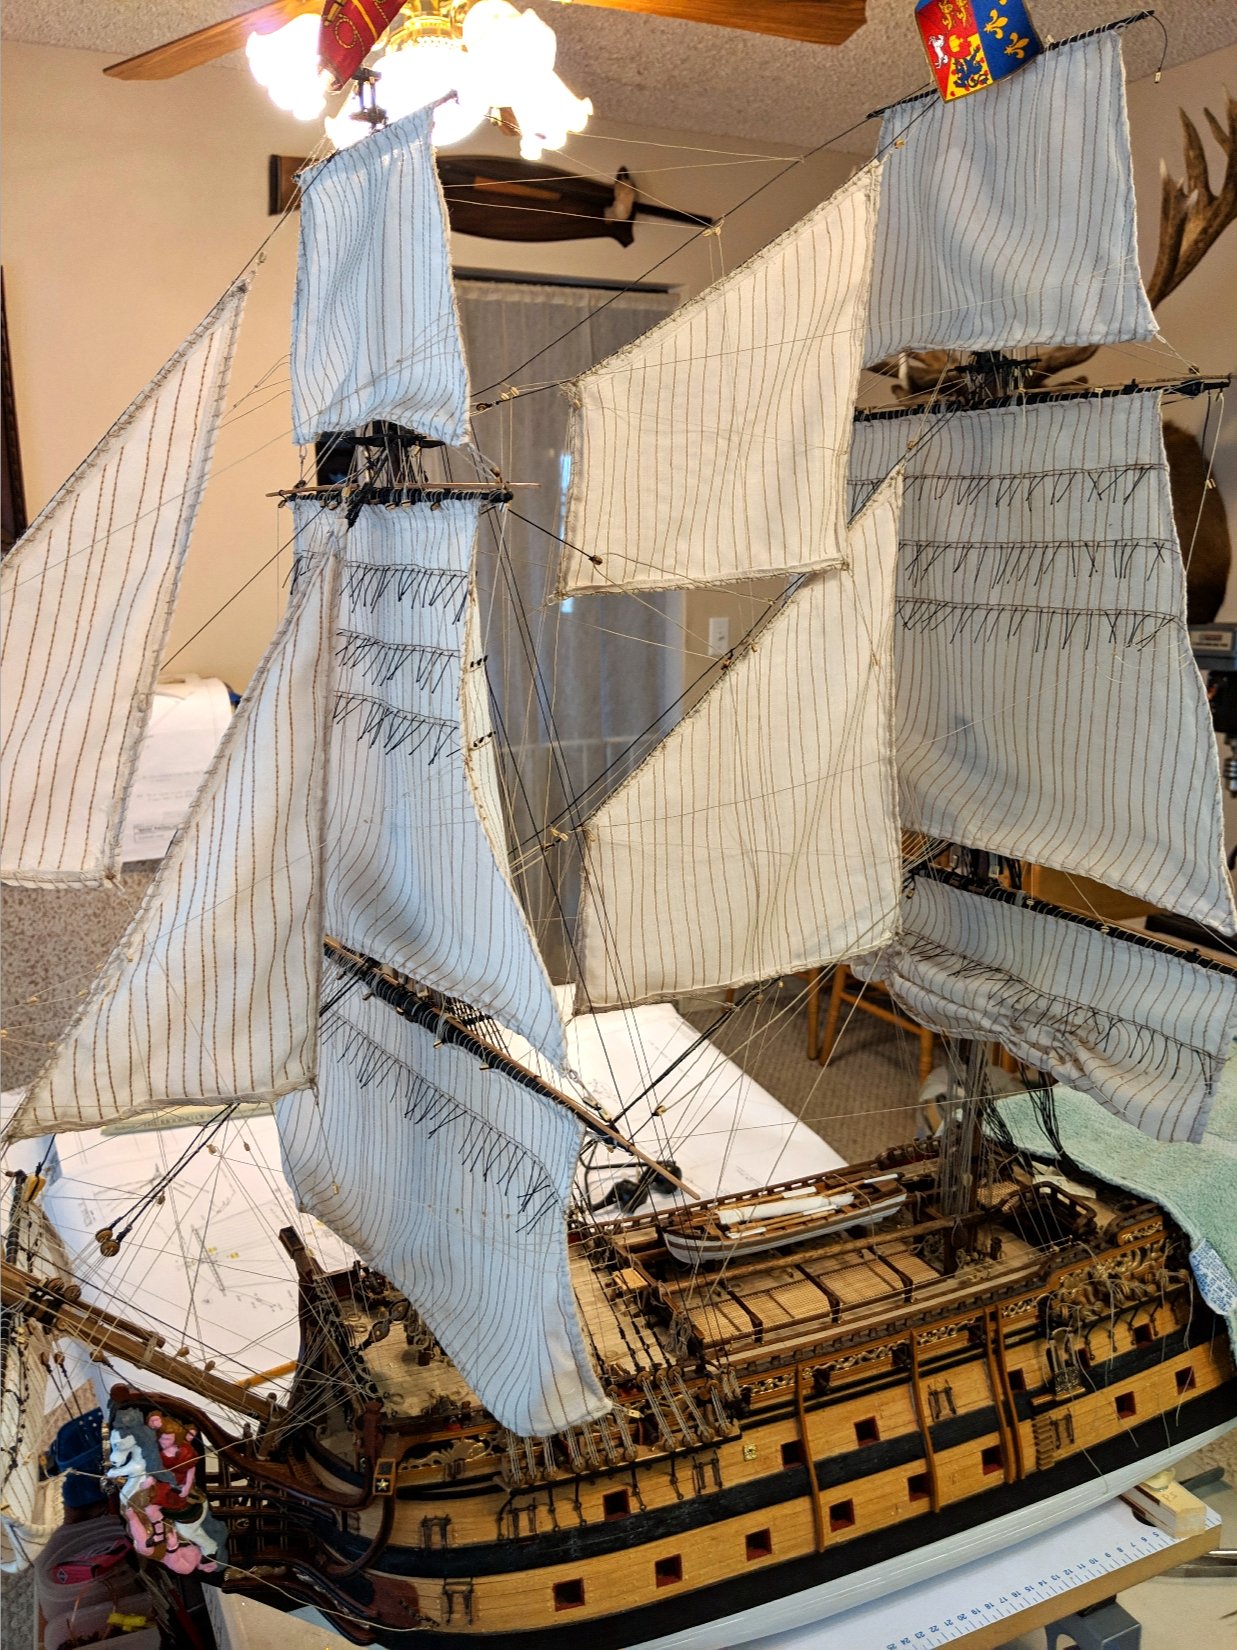
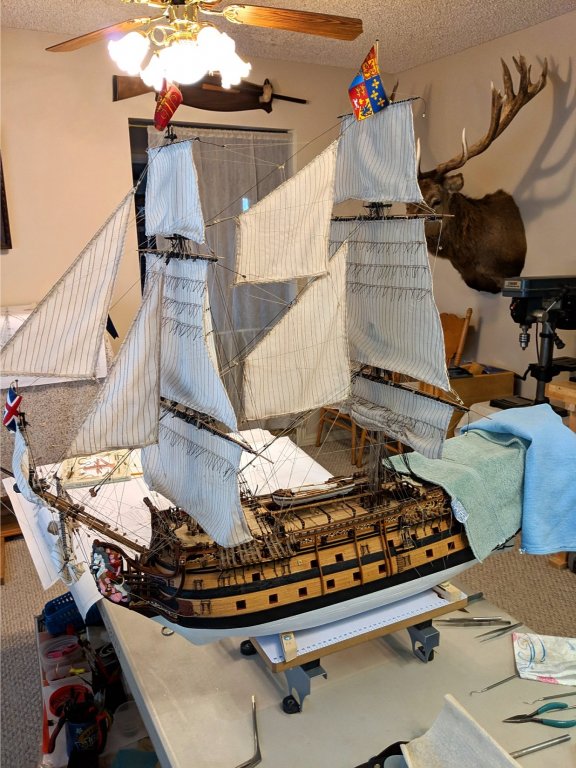
Finally finished the foremast. All of the standing and running rigging is complete except for the Course sheet, clew, and tack lines. These will be done at the very end of the build to allow easy access to the sides of the hull for what is left. Next up is to construct the mizzen mast and step it. Then I can finish the main mast rigging. I can see the light at the end of the tunnel. A few more months and she will be completed. 🤩 Vince P.

- 593 replies
-
- 6
-
-
- royal william
- euromodels
- (and 1 more)
-
Welcome aboard mate! By your introduction it sounds like you are going to jump in with a scratch build of the Victory. That is some project. You must be a very experienced builder, or very brave. Vince P.
-
Hello all and already looking for help
pirozzi replied to Signode388's topic in New member Introductions
Welcome aboard mate! Vince P. -
Welcome aboard mate! Vince P.
-
Welcome aboard mate! Vince P.
-
The website says that you have to get special information on shipping to the USA. They give an email address to ask. I have sent 2 messages with no response. What to do? Did you have the same issue? Vince P.
-
Welcome aboard mate! Vince P.
-
If is that bad, why don't you just double plank it. Use a thin layer of about 0.5mm x 5.0mm walnut over the first layer. Many kits are double planked for just this reason. The first layer is course to cover frames. Then second layer is easy to apply and will look good. Vince P. 😁
- 87 replies
-
- 4
-
-
- scottish maid
- artesania latina
- (and 1 more)
-
Thanks for the info mate. It sure looks efficient and neat. Also glad you decided to stick it out here. We are a great group and do help each other out immensely. I for one have been building models for decades, and I learn something new every time I log on. Vince P.
- 87 replies
-
- 1
-
-
- scottish maid
- artesania latina
- (and 1 more)
-
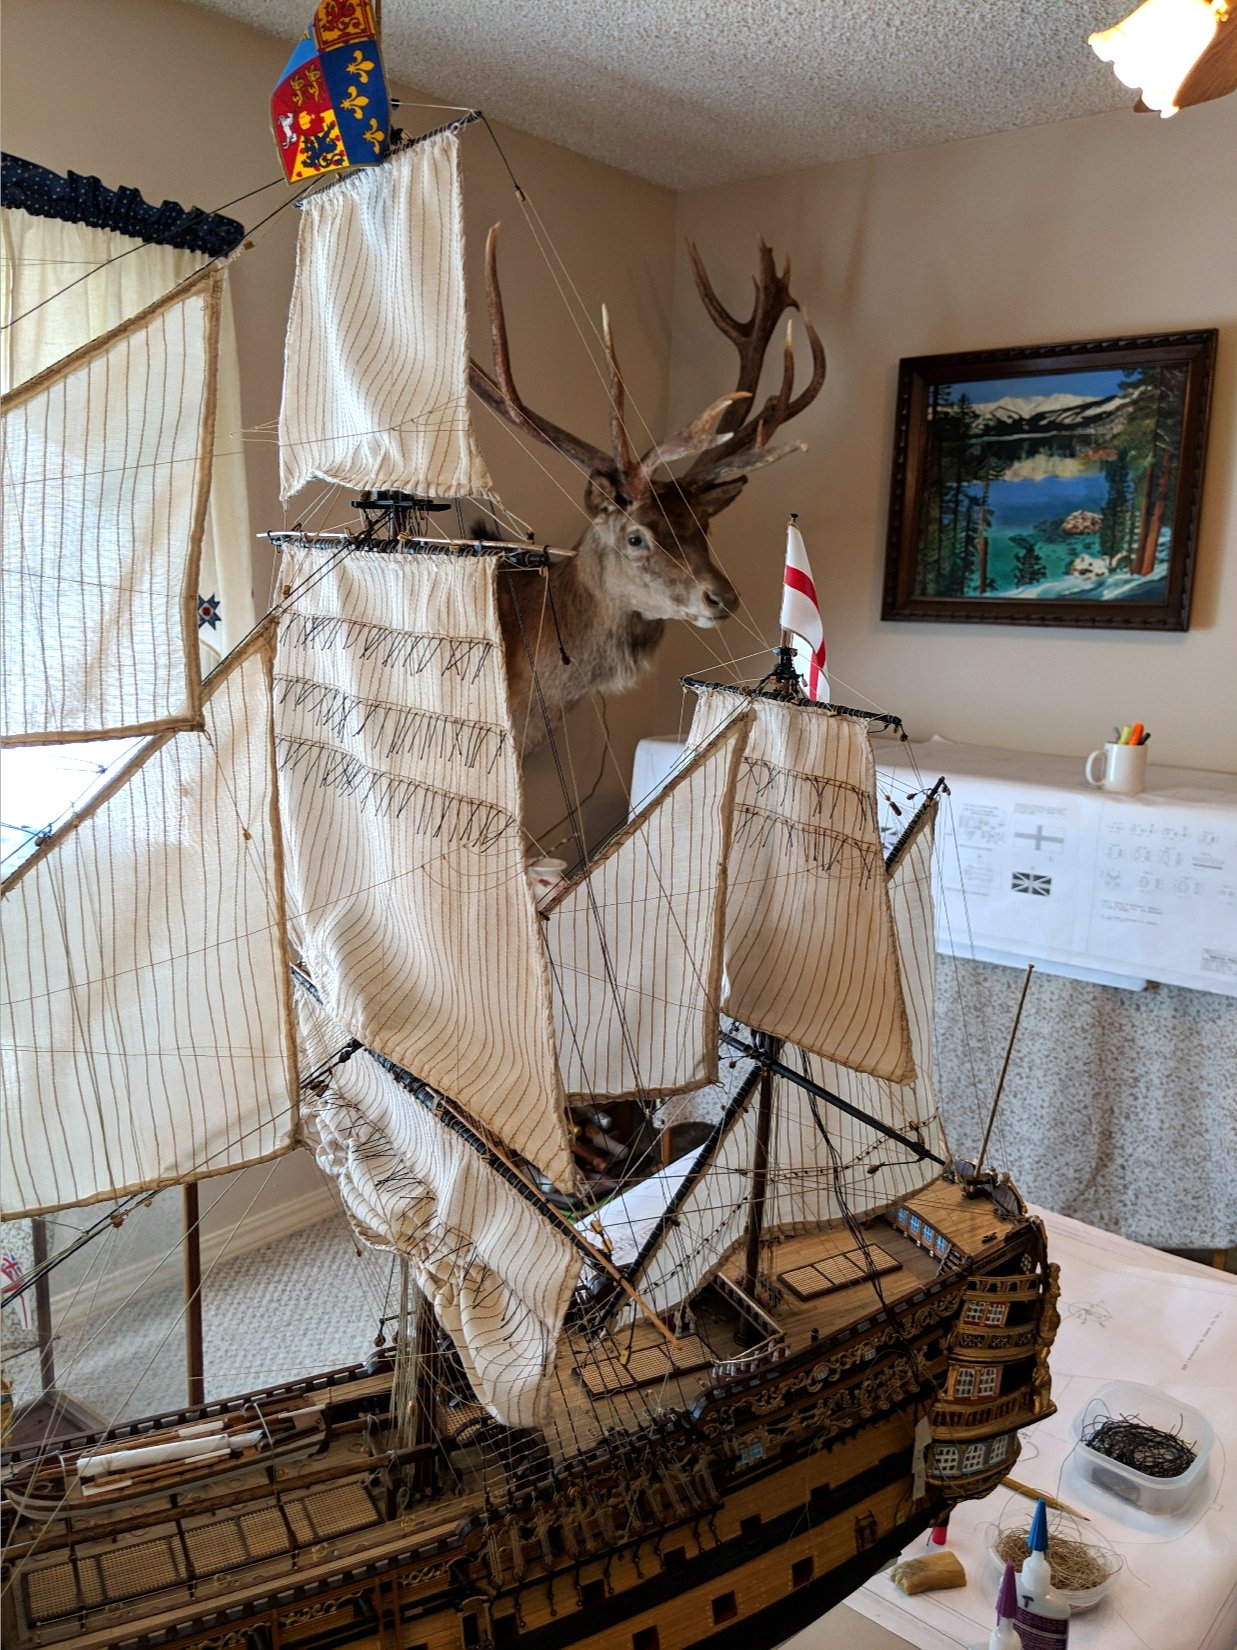
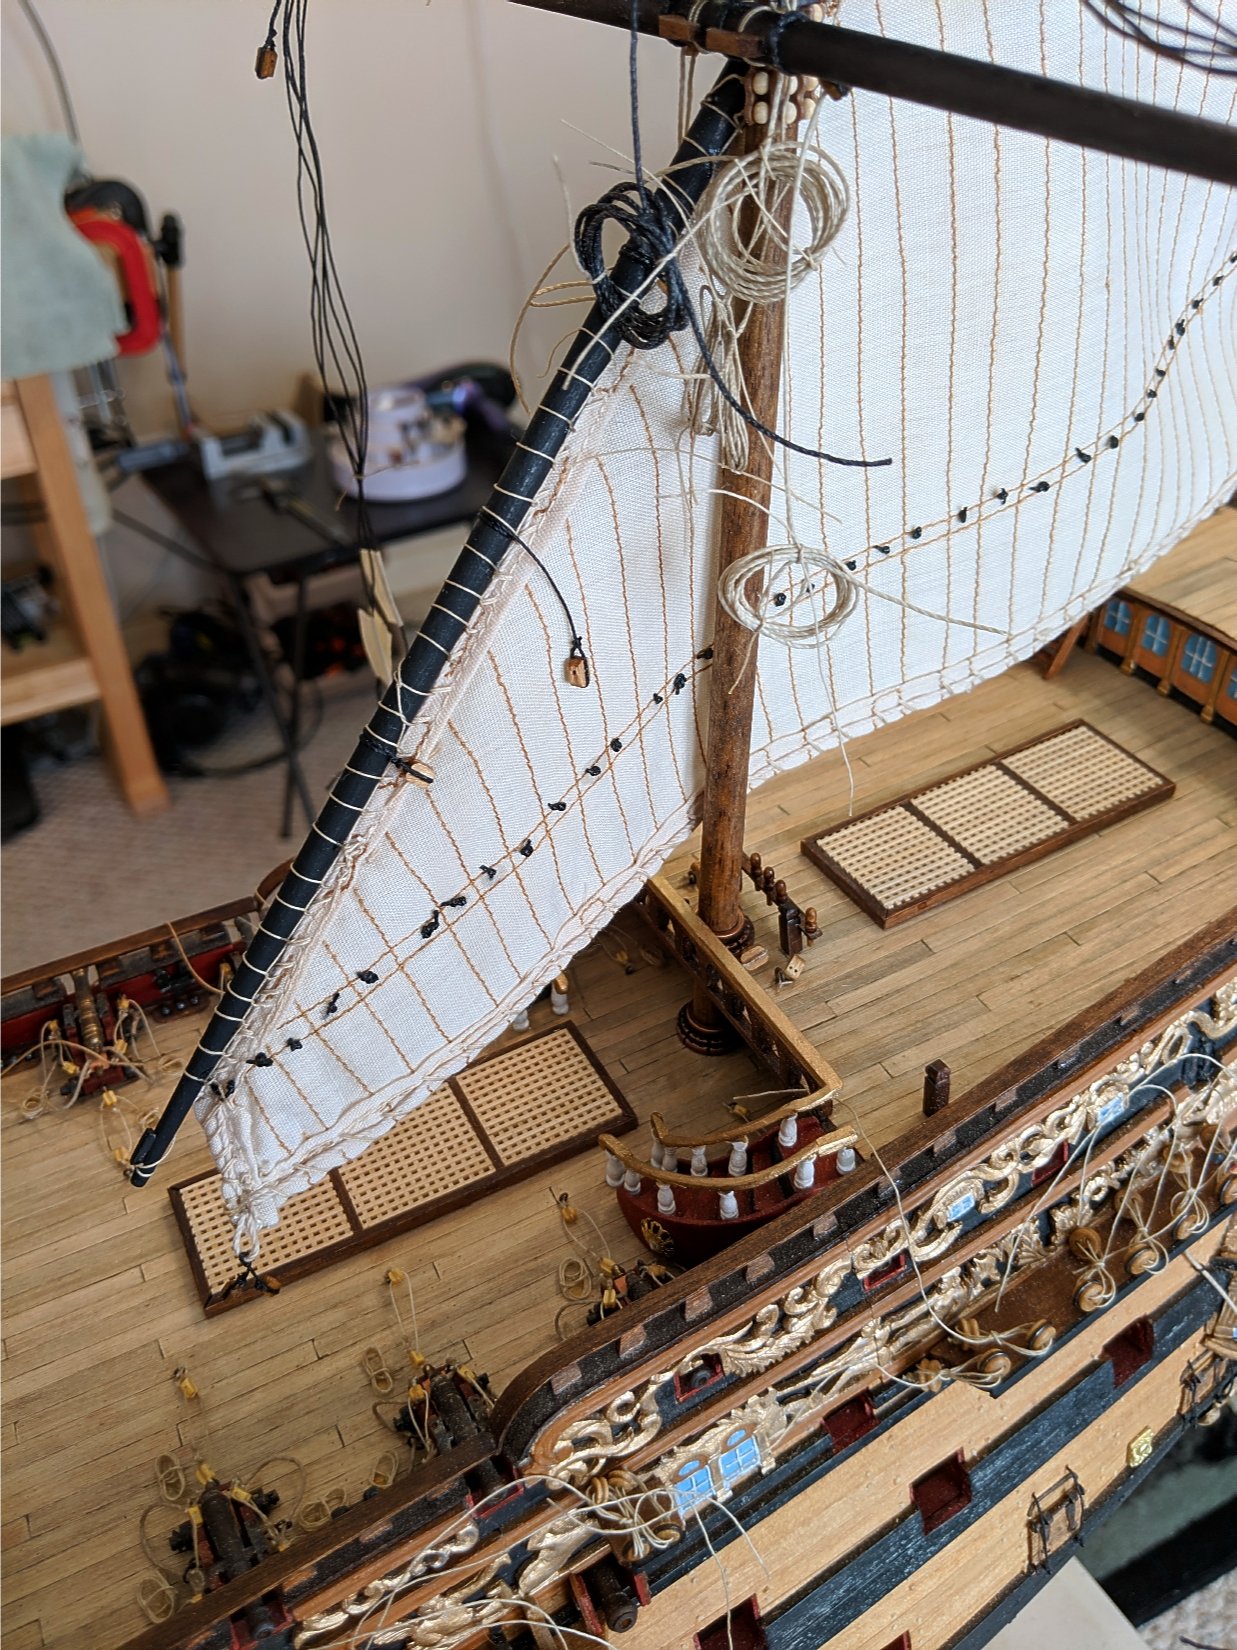
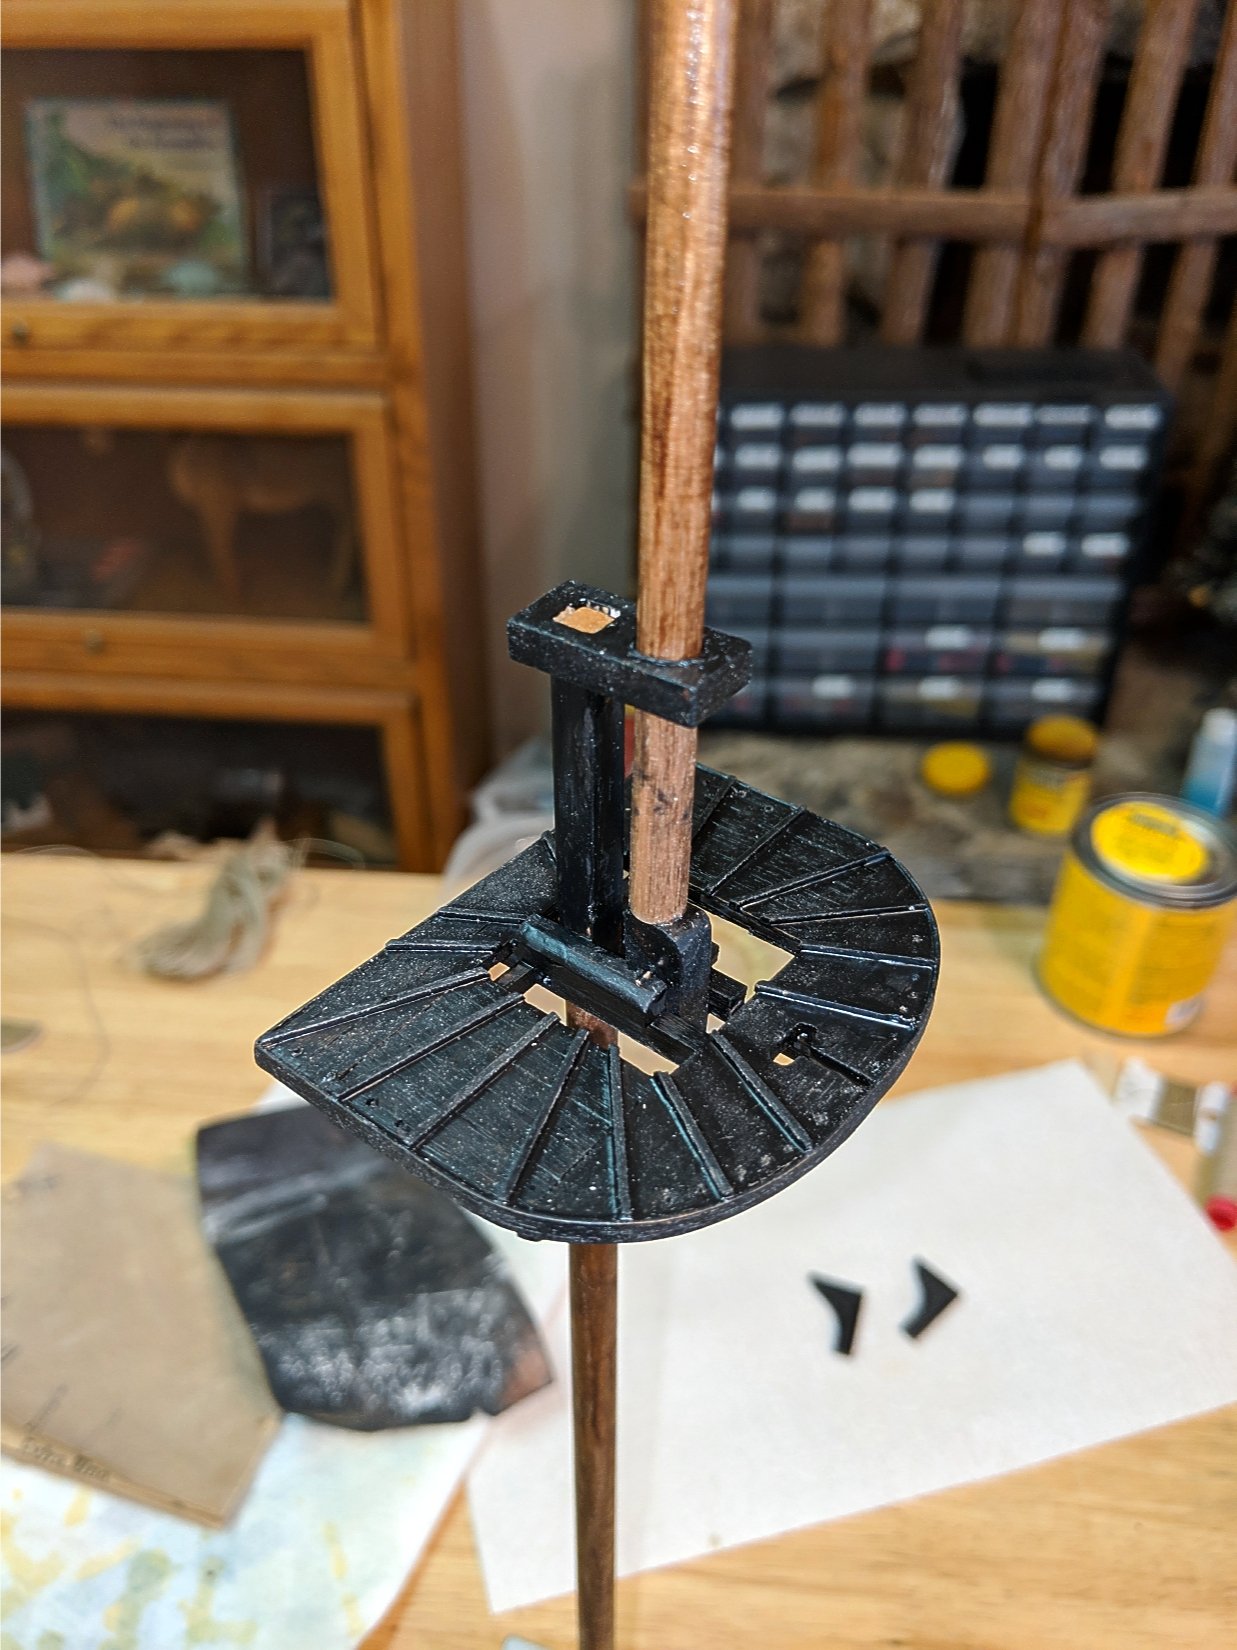
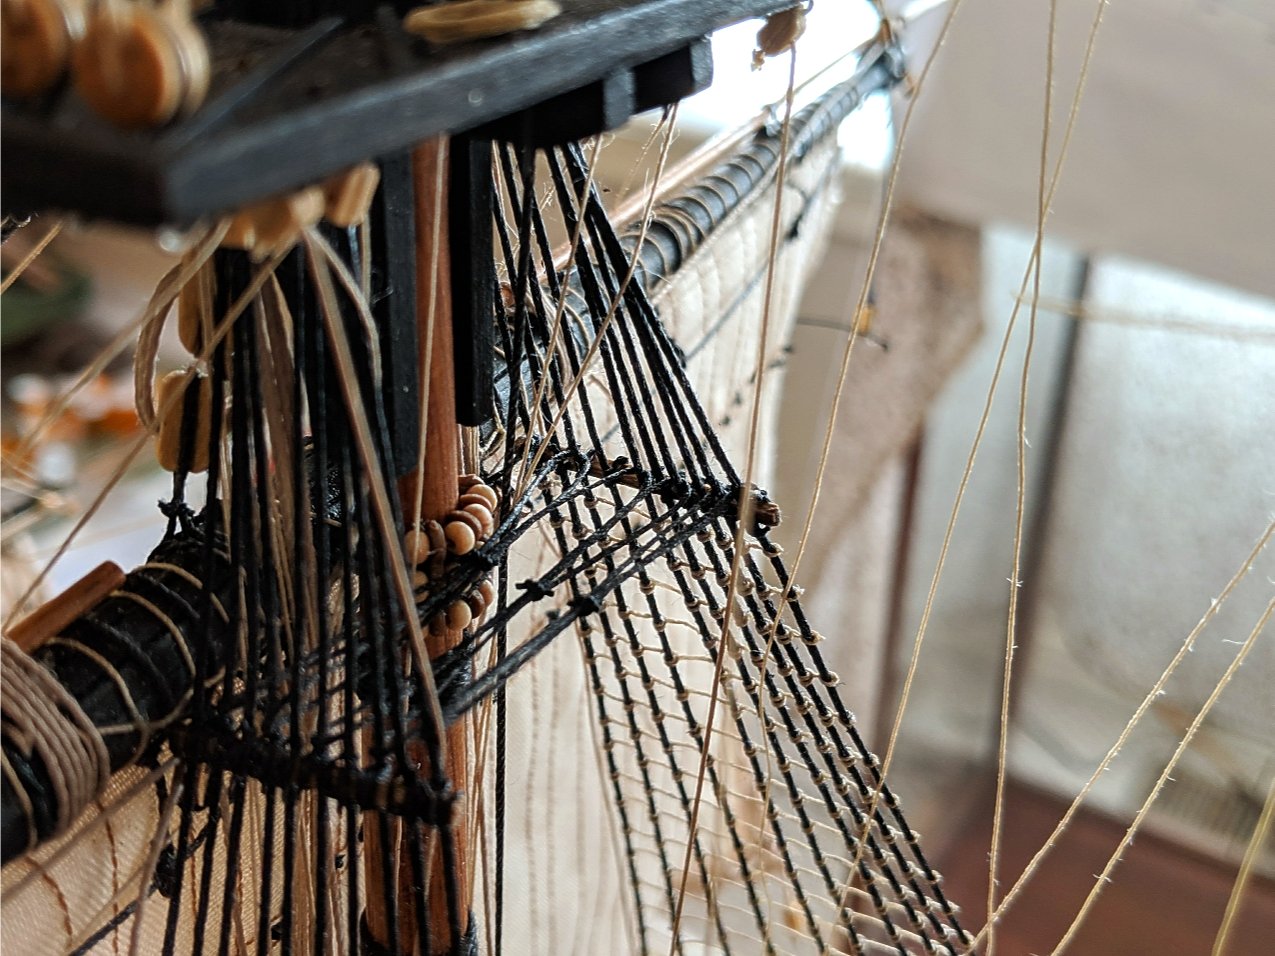
I am still plugging along slowly. I decided to add Catharpins to the lower shrouds. They probably will be hard to notice, but this is just another bit of detail I am putting into this model. Vince P.

- 593 replies
-
- 3
-
-
- royal william
- euromodels
- (and 1 more)
-
Thanks EJ.
-
Hi There, I would like to order that Building Slip you have. It is just what I need. Did you have trouble getting it shipped to the US? There is some rule about a 10kg minimum weight limit and this is just 7.4kg. Thanks, Vince P.
-
Welcome aboard mate! Vince P. 😁
-
I like your workbench. Is that custom made or maybe a fancy computer desk. Vince P. 😁
- 87 replies
-
- 3
-
-
- scottish maid
- artesania latina
- (and 1 more)
-
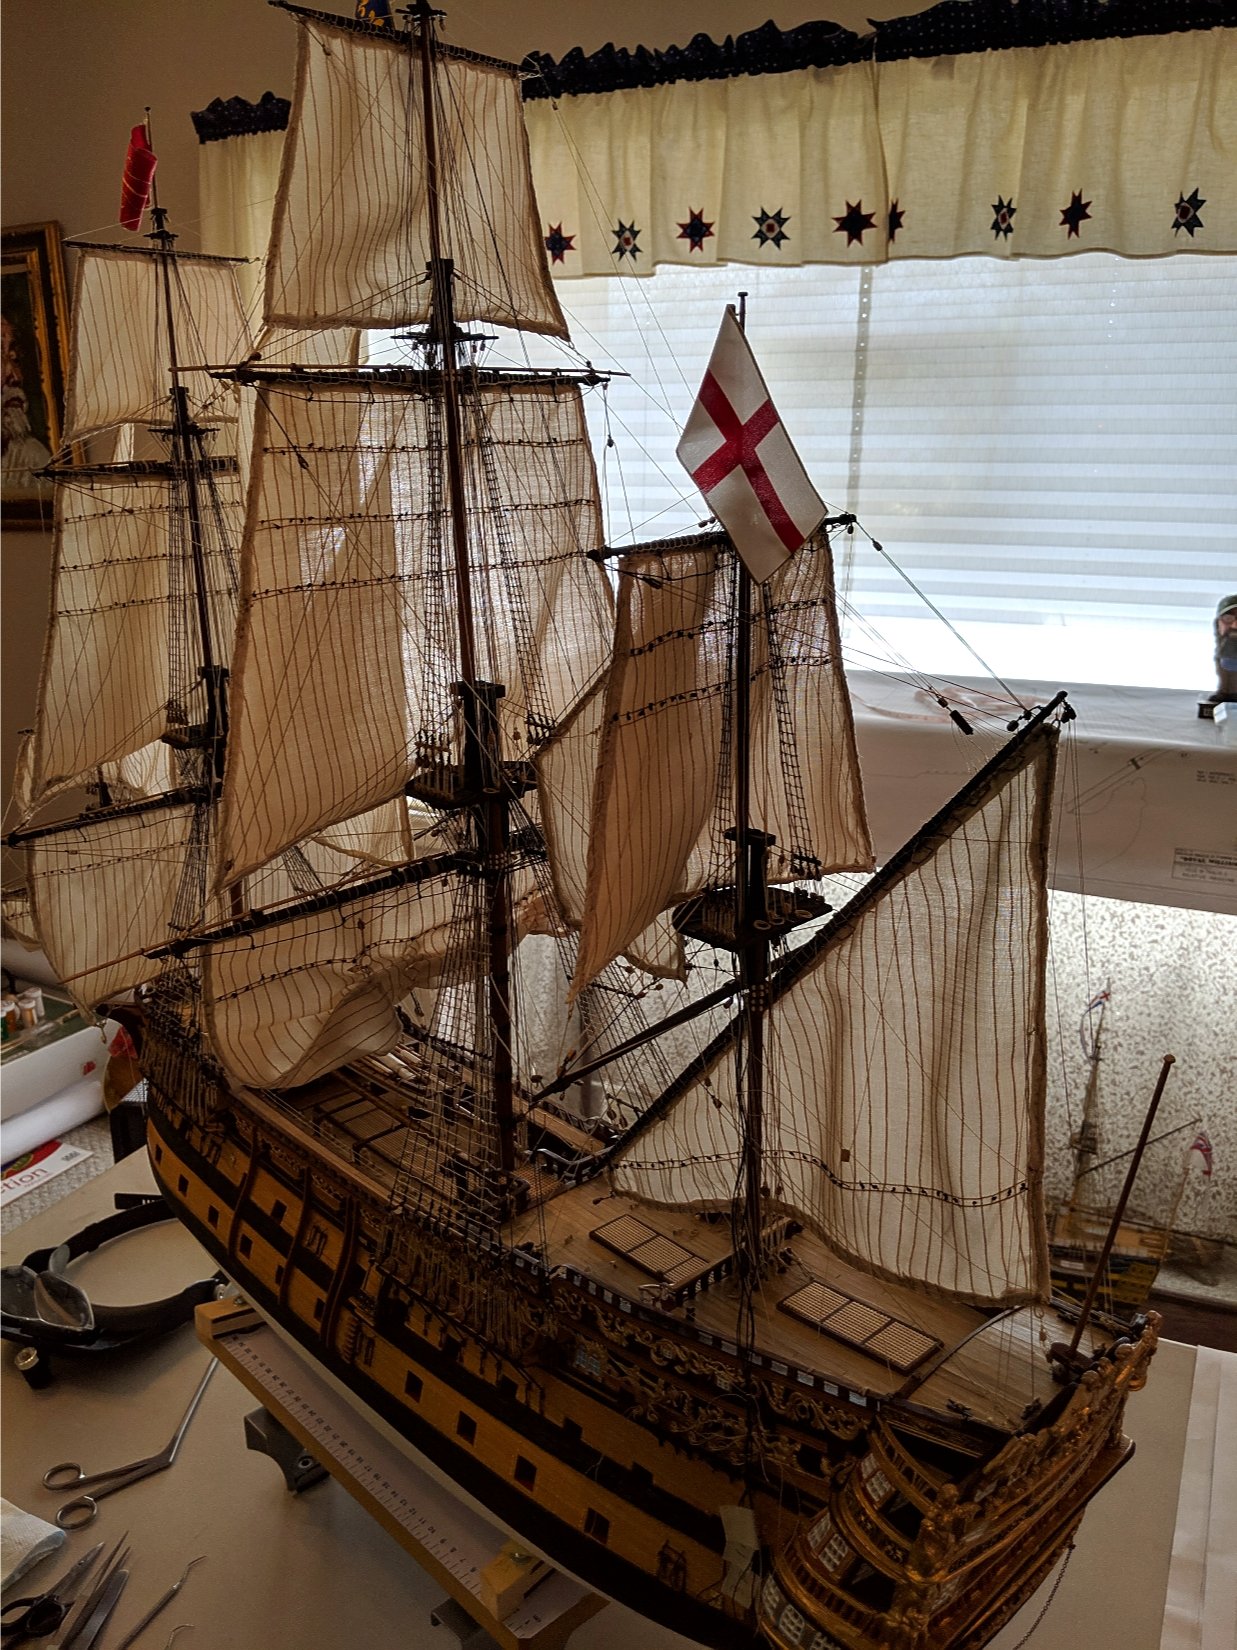
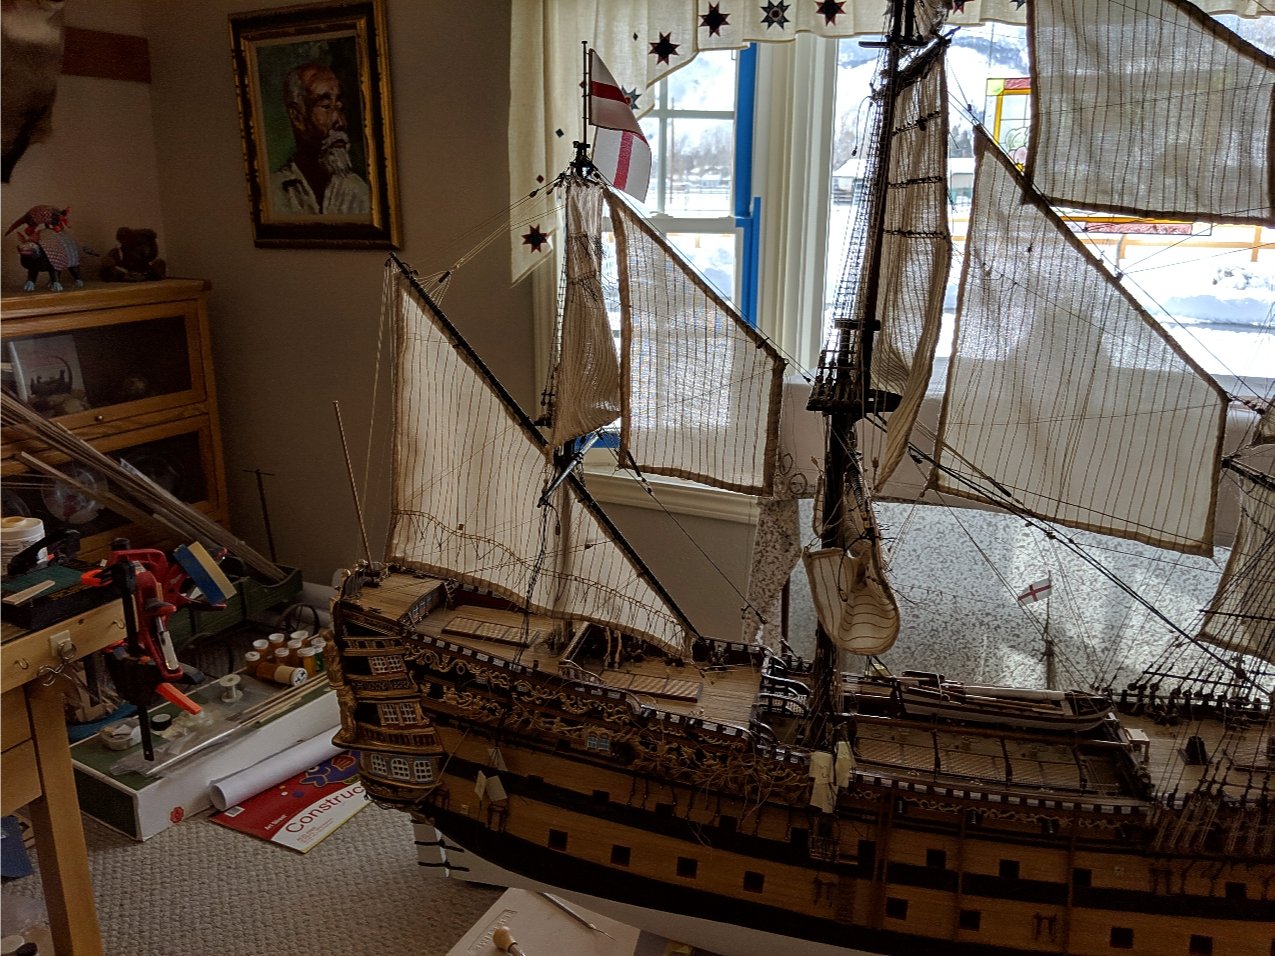
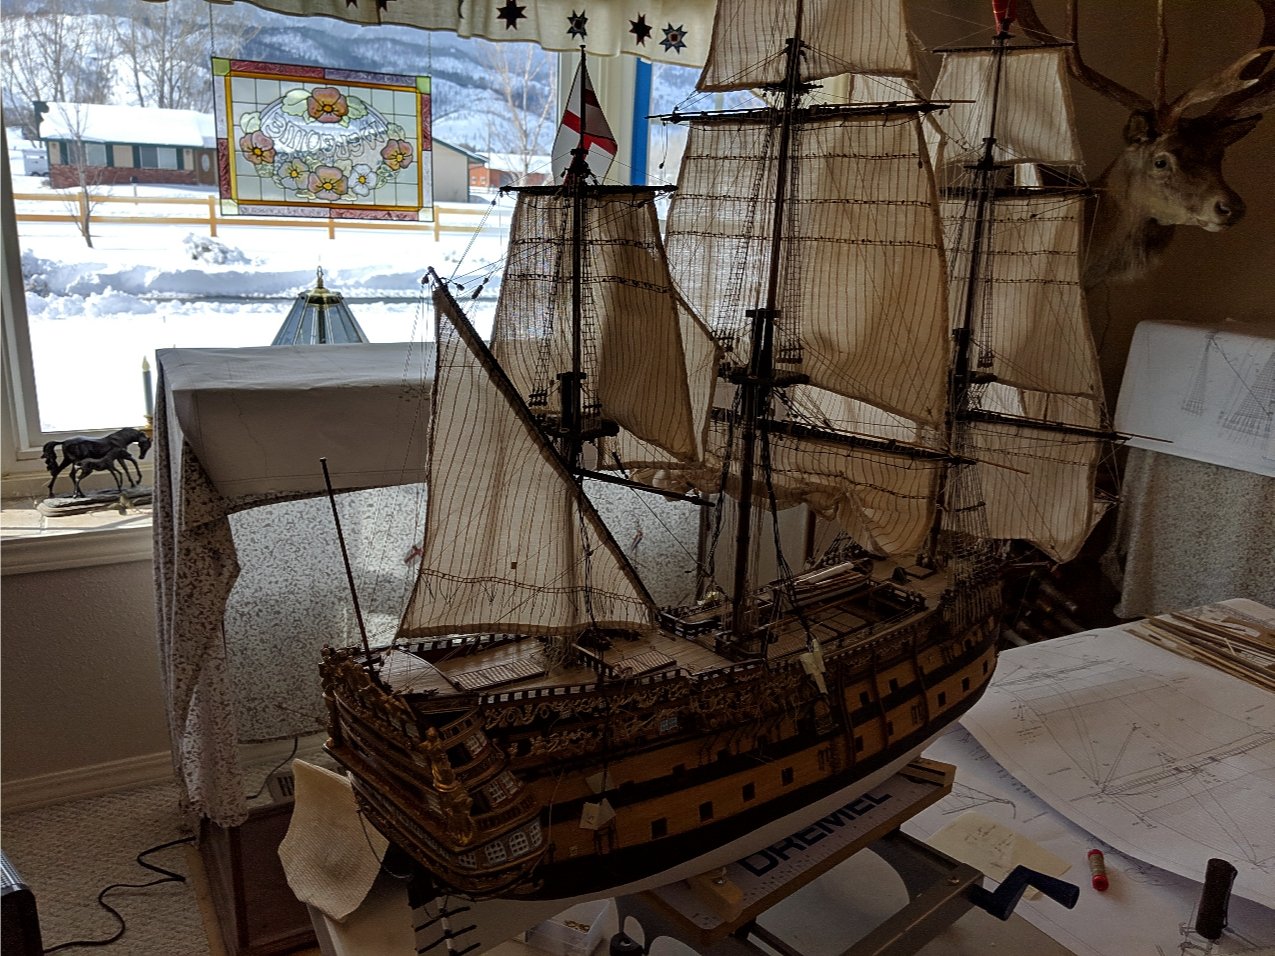
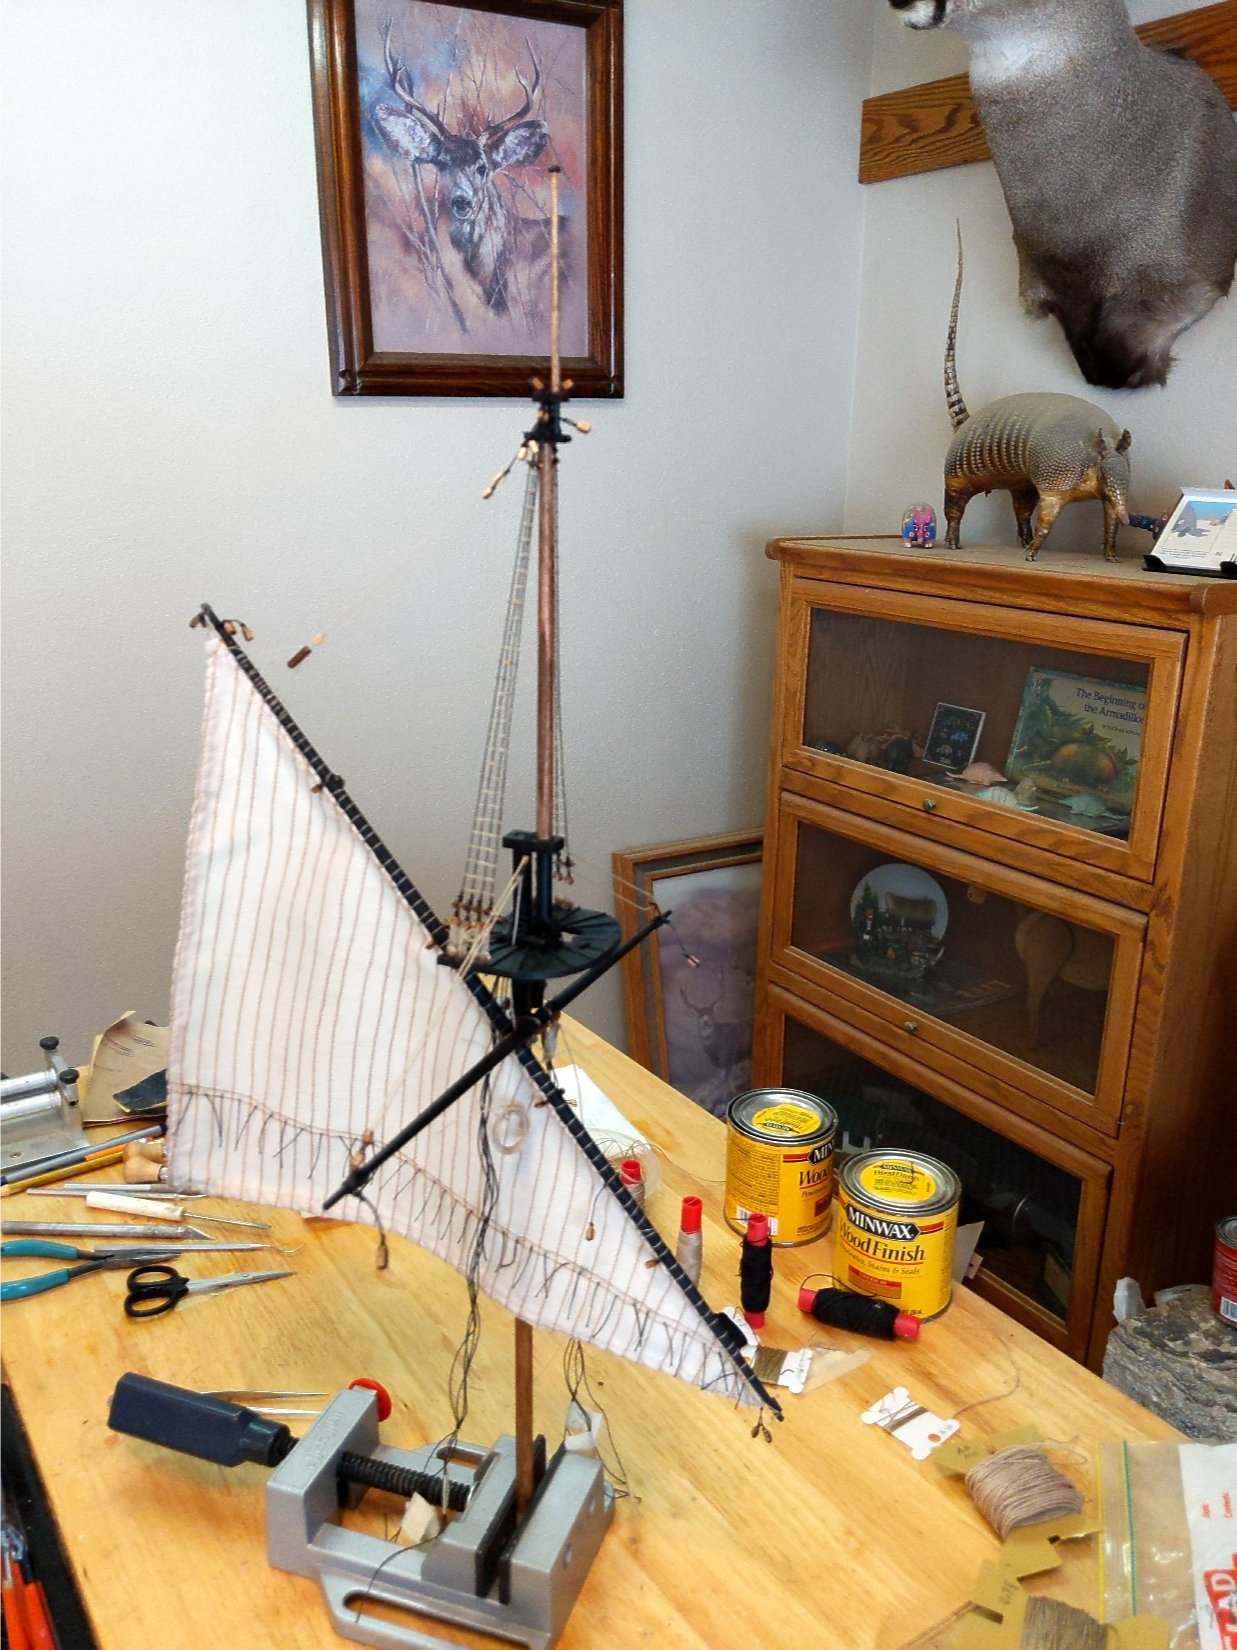
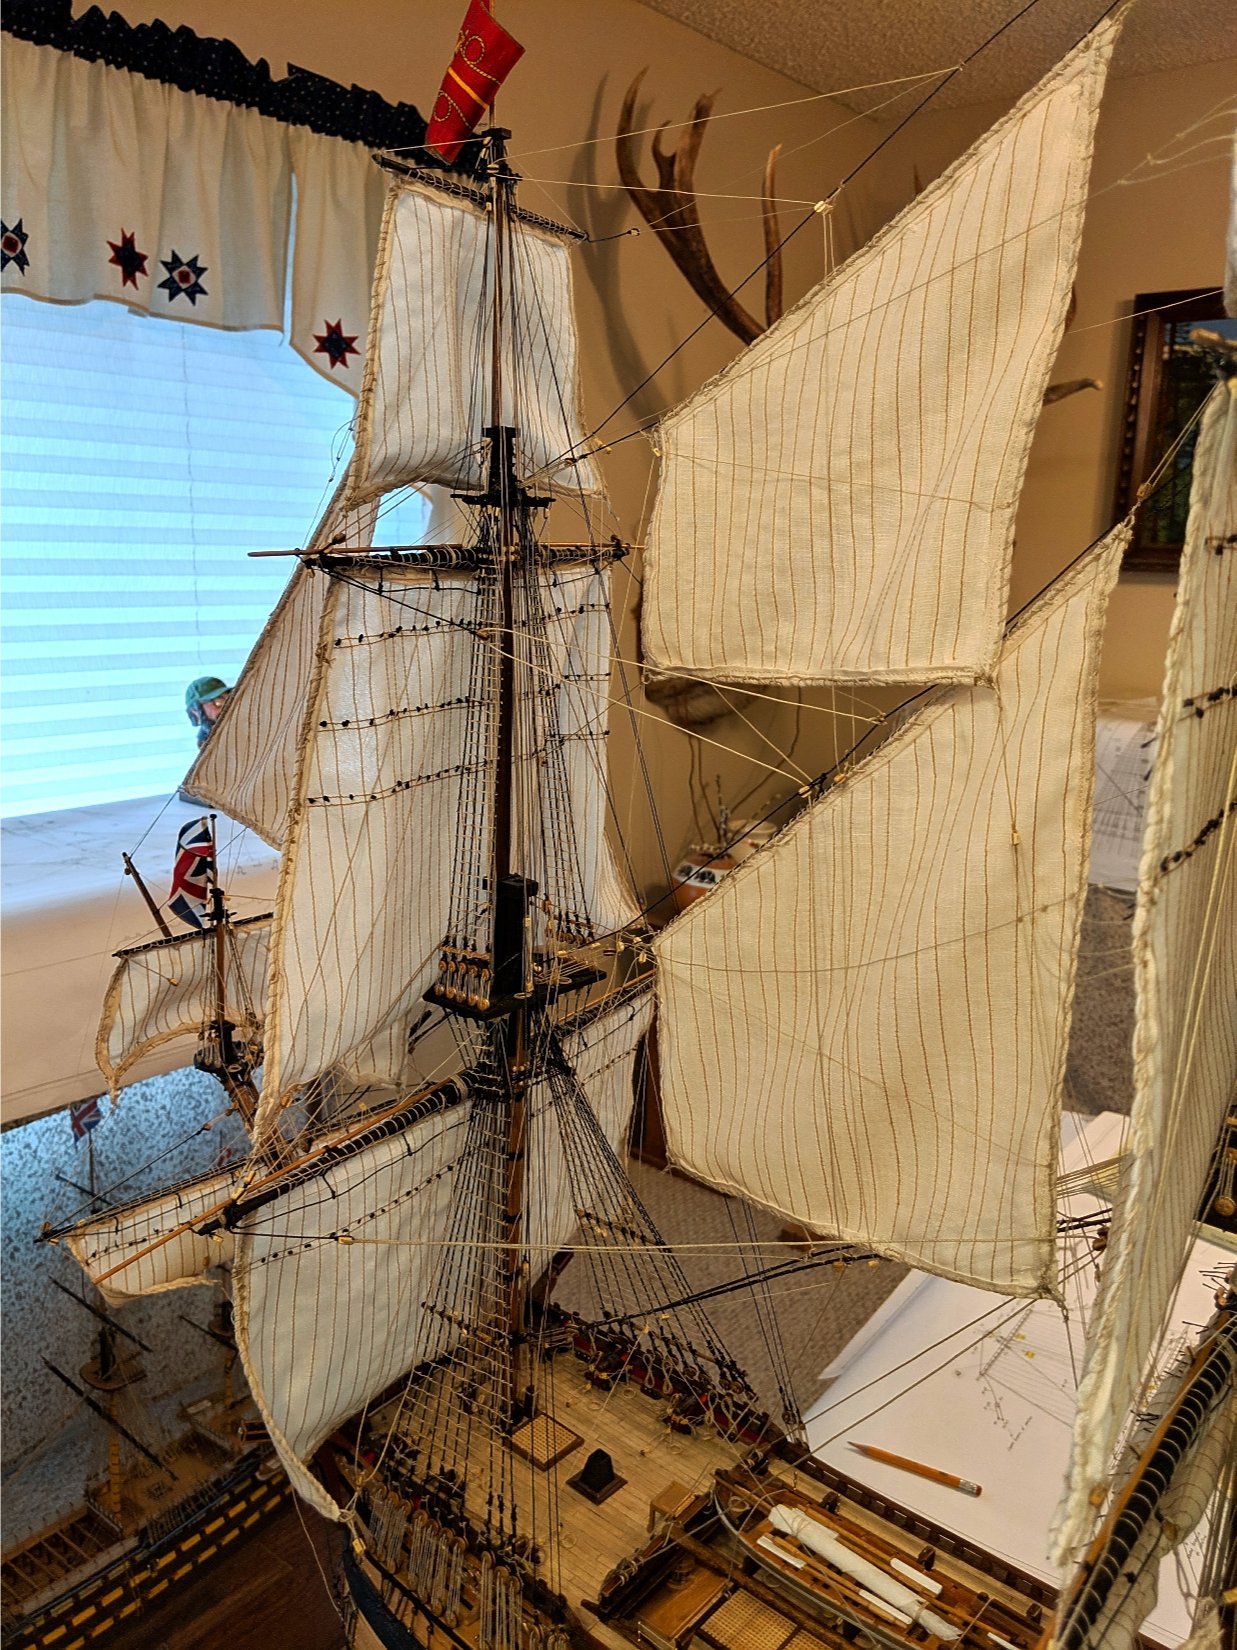
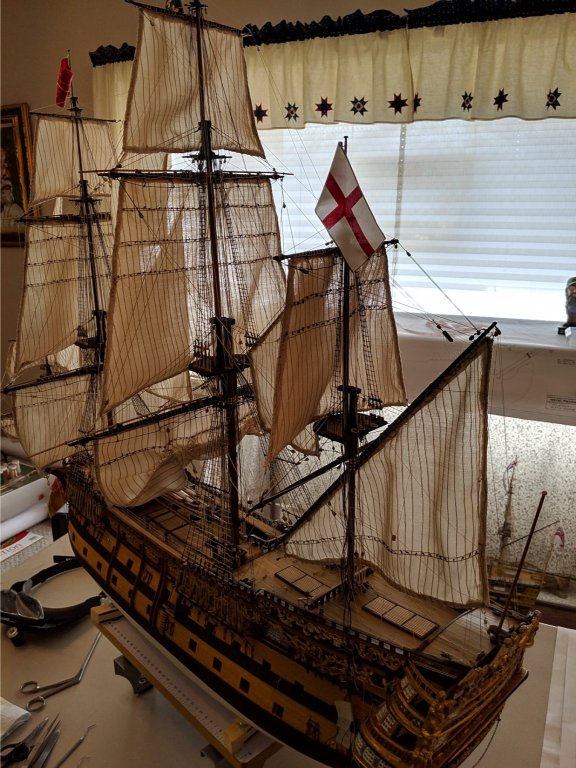
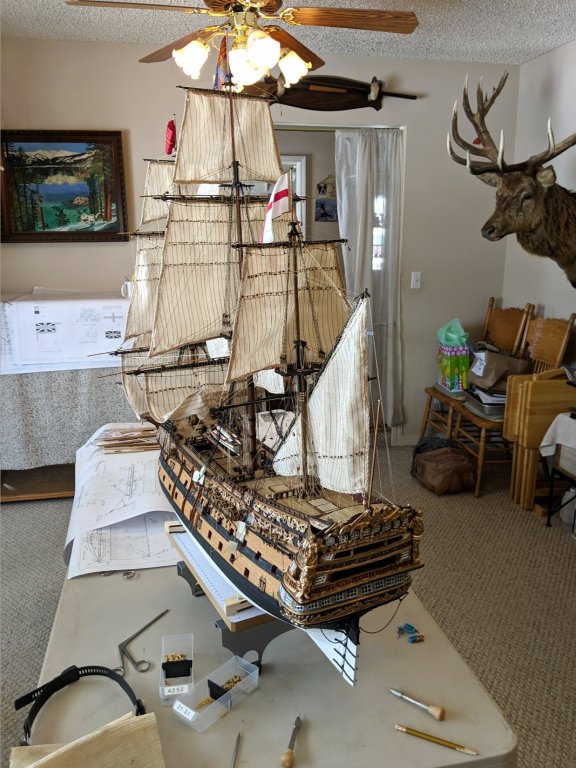
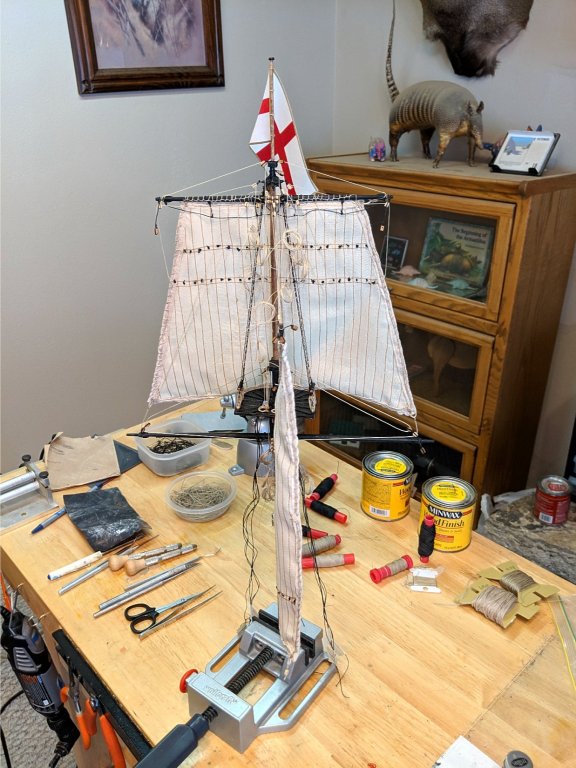
Hi Mike, I did use the cloth from the kit but there was not enough. Since sewing is out of my league, I had a friend of mine who happens to be a seamstress, make the basic sails. She found more cloth that closely matched the kit. I had her stain the cloth with tea because it was very white. Real sails had a stained and weathered look. The tea did the job. When she delivered the sails, I added the corner cringles, the edge ropes, and the reefing ties. I think adding the sails makes for a more authentic model. It does however add a considerable amount of labor and supplies. Vince
- 593 replies
-
- 3
-
-
- royal william
- euromodels
- (and 1 more)