Farbror Fartyg
-
Posts
178 -
Joined
-
Last visited
Content Type
Profiles
Forums
Gallery
Events
Everything posted by Farbror Fartyg
-
 "If tape was a woman, she'd be a-a-all over me-e"
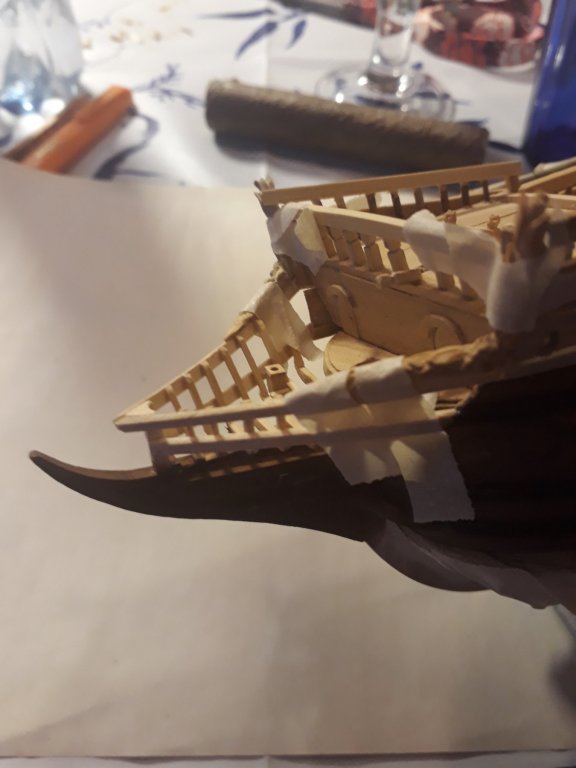
-
Thank you! Understandable. This is my first completed build log ... We worked on the project continuously, but somehow I just never found the peace to sit down and tell the tale. What's next? I'll most likely sneak in some more projects with a nautical twist - the crew likes boats. This is one of the good things about kindergarten work: what you're supposed to do is pretty clearly defined but how you do it isn't. So say for example that we're to work with furthering the kids understanding of, and interest in, physics and math. What better way to do that than to build ships! Why do ships float? Test buoyancy. How many centimetres of stick do we need for that mast? Etc.
-
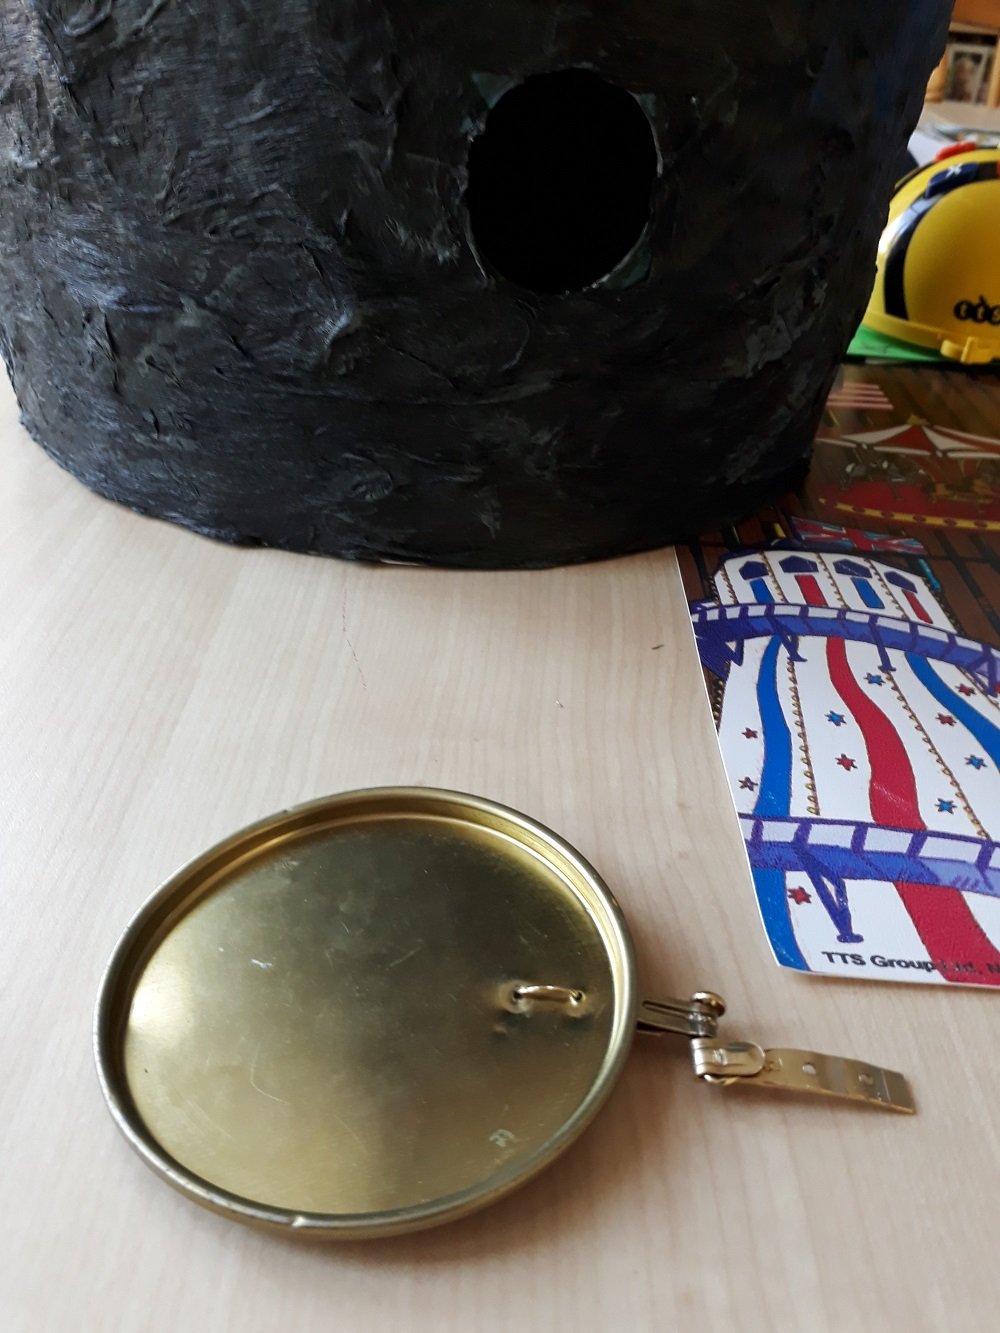
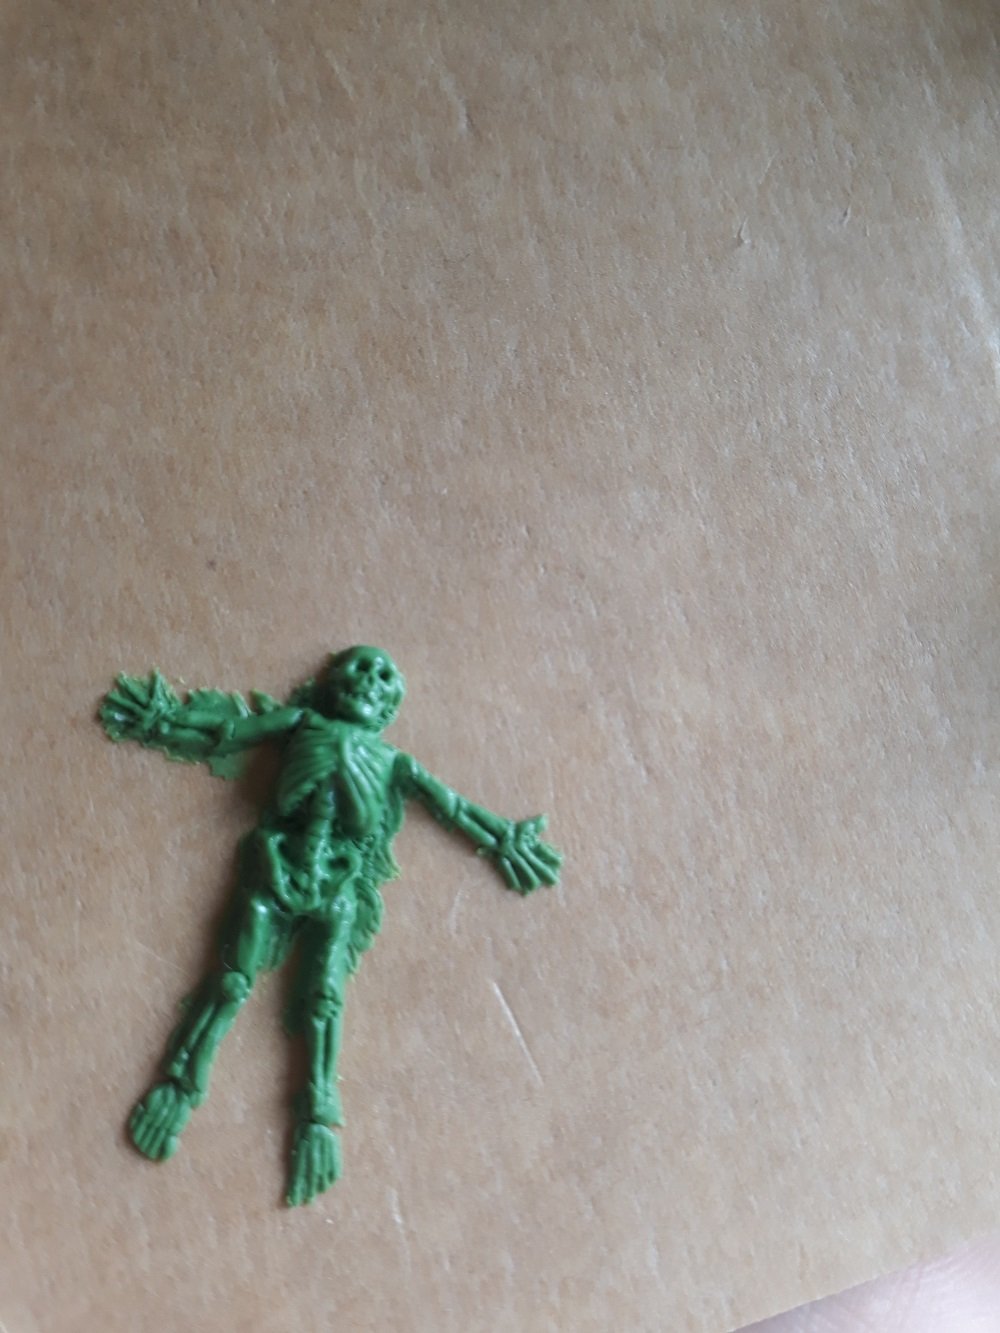
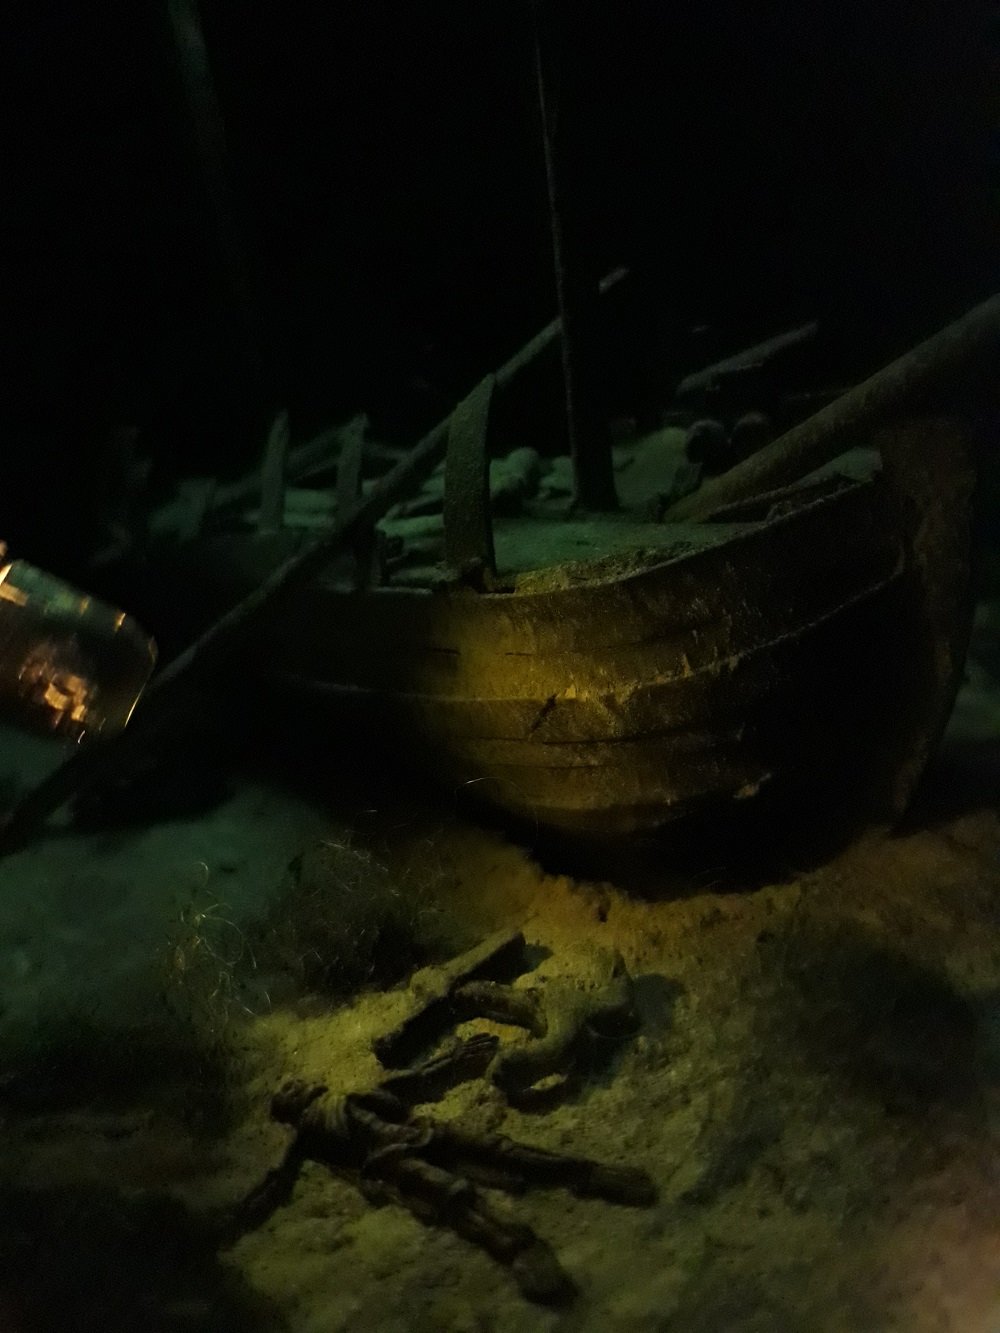
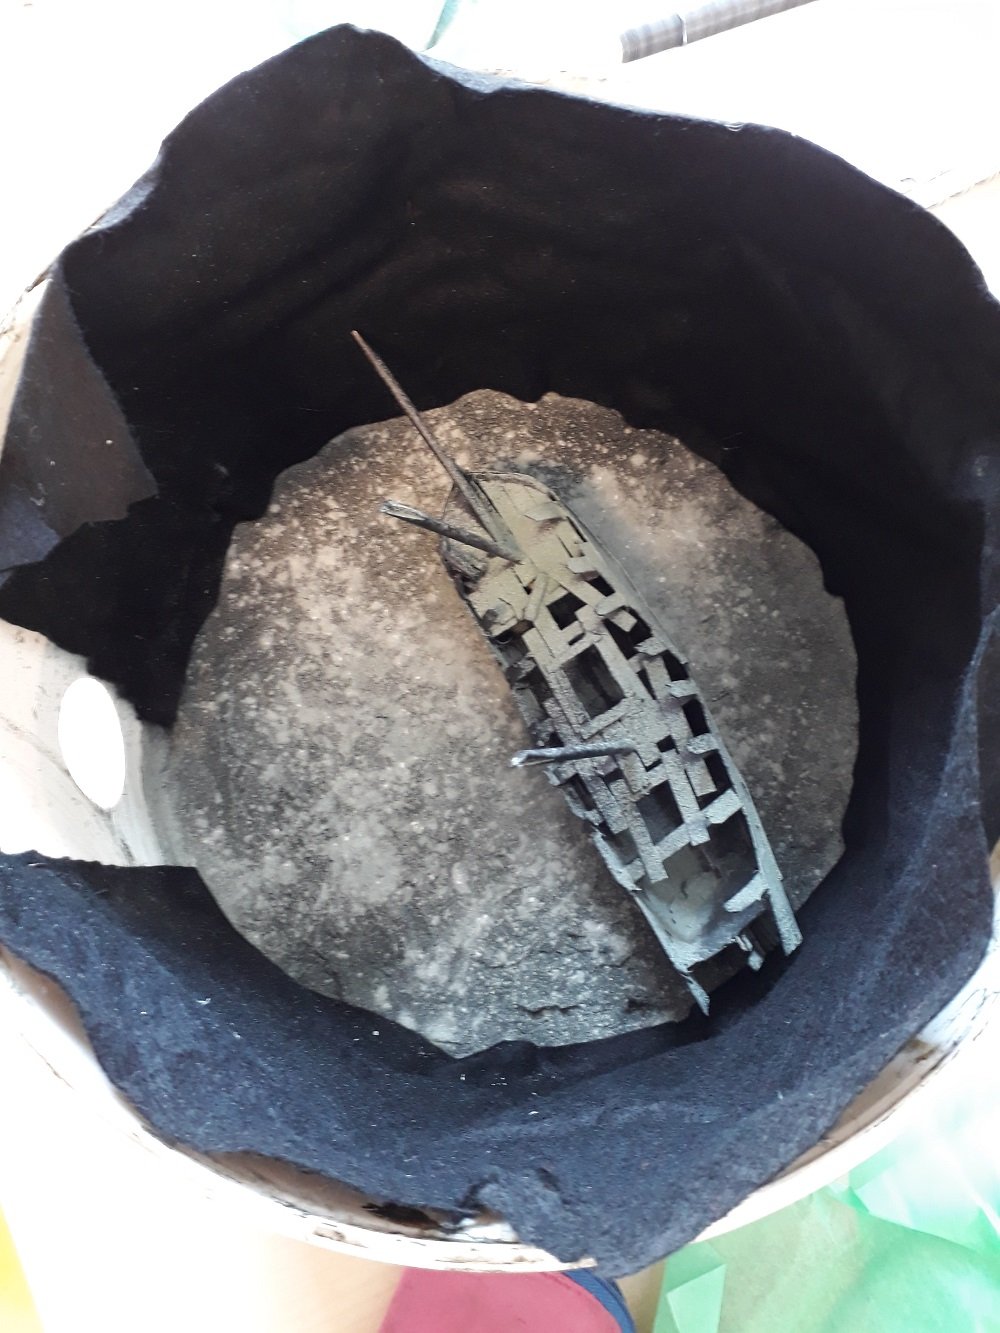
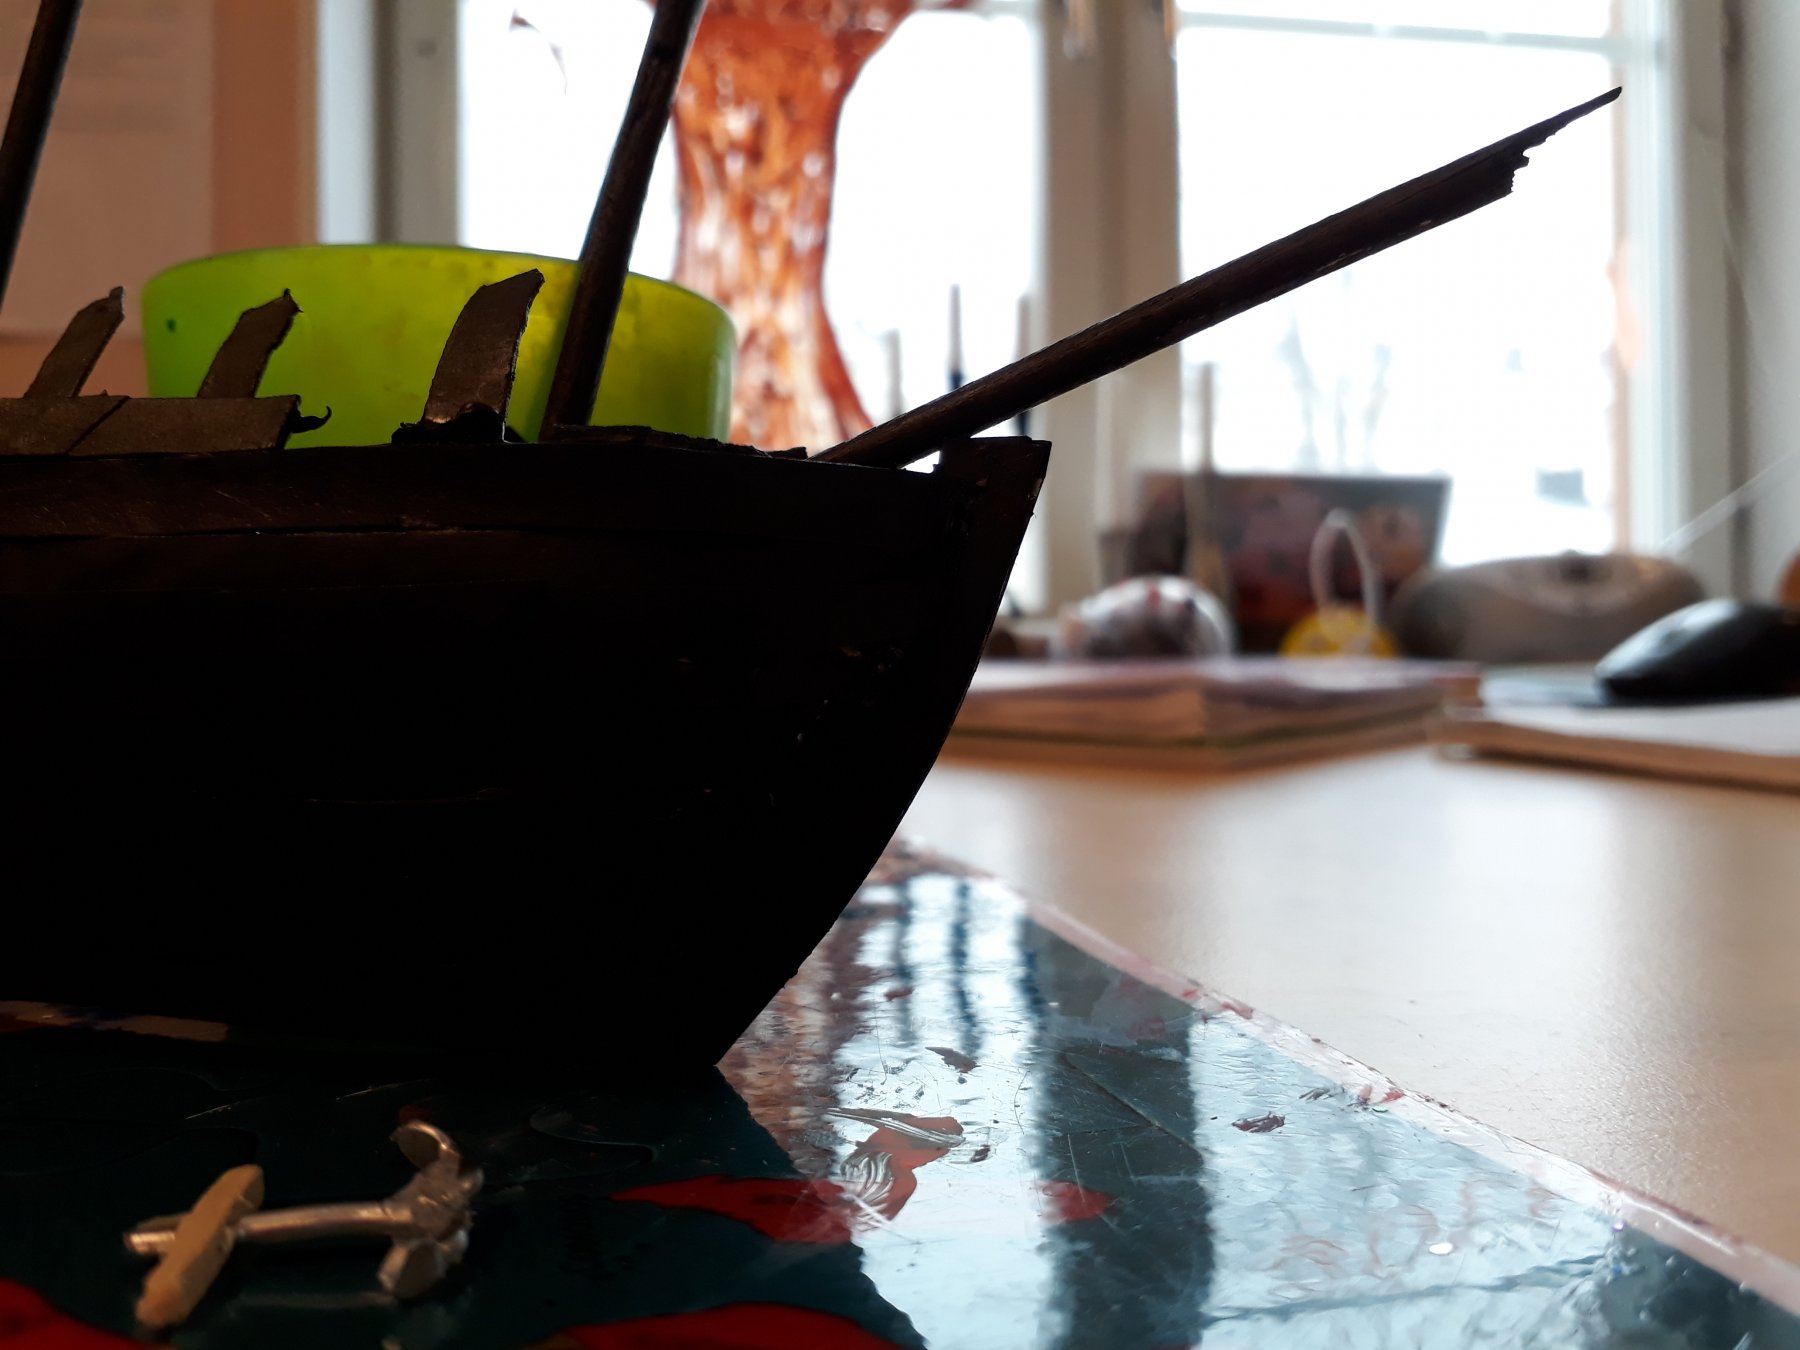
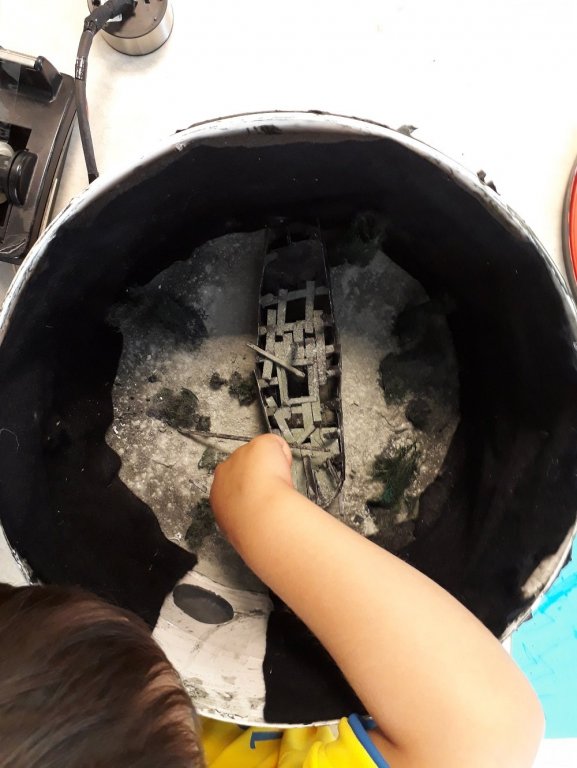
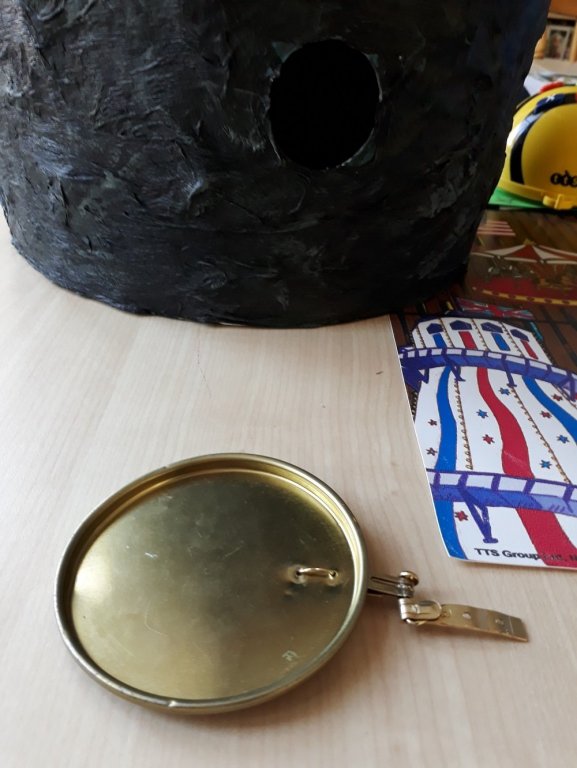
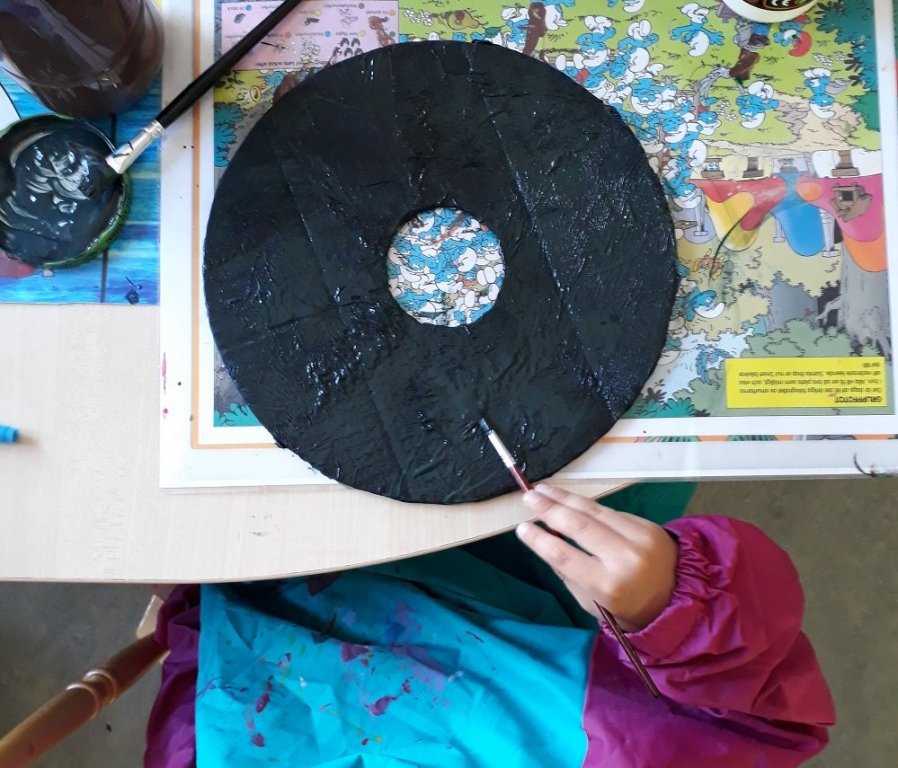
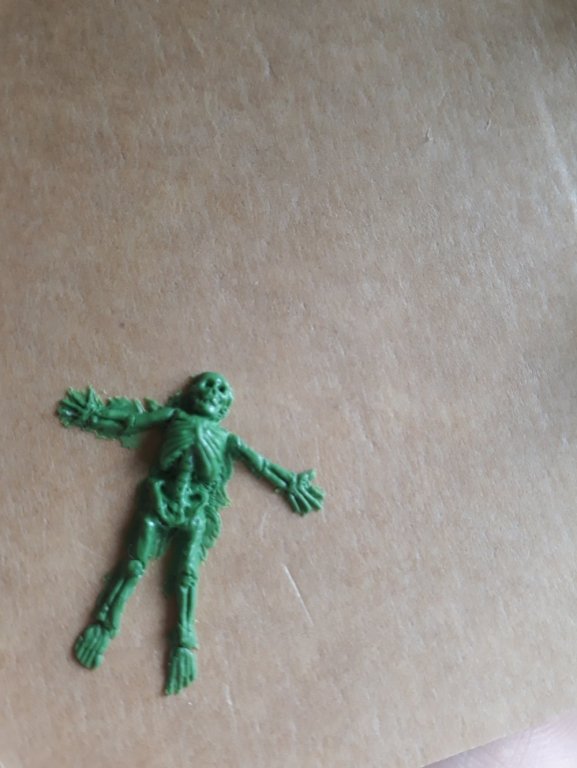
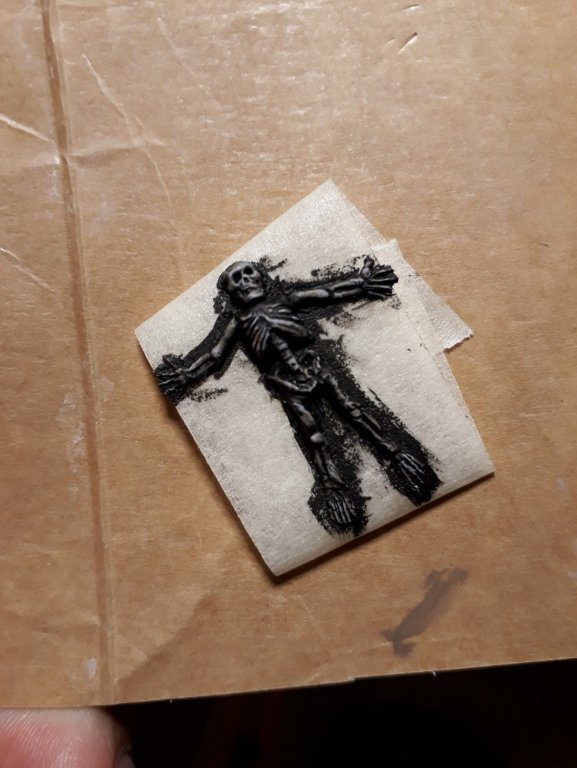
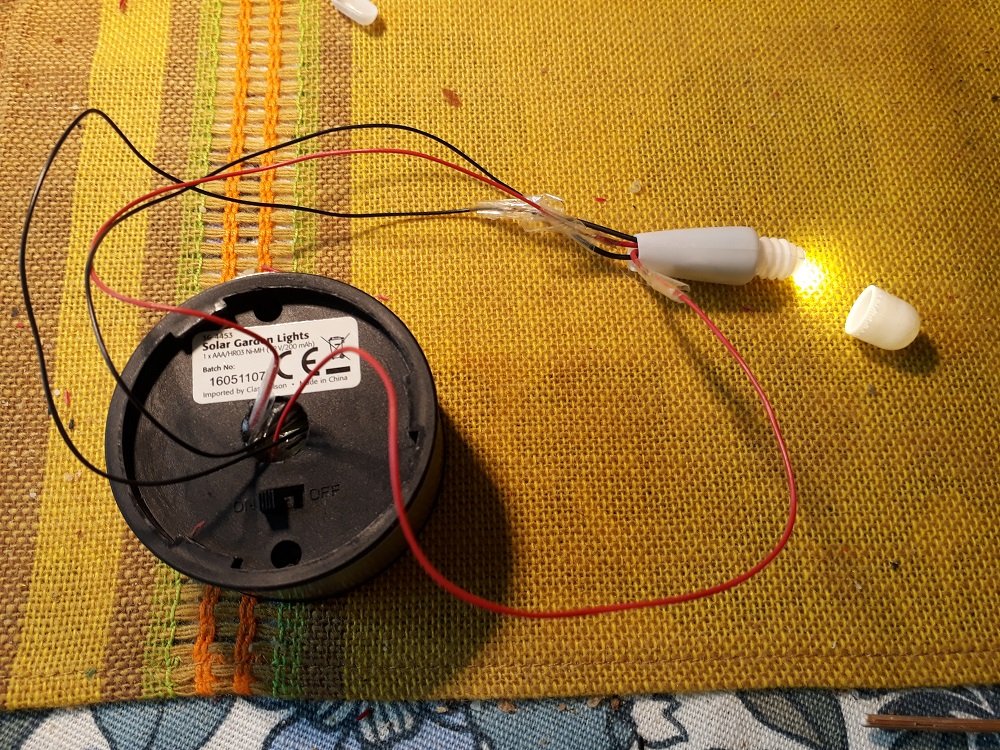
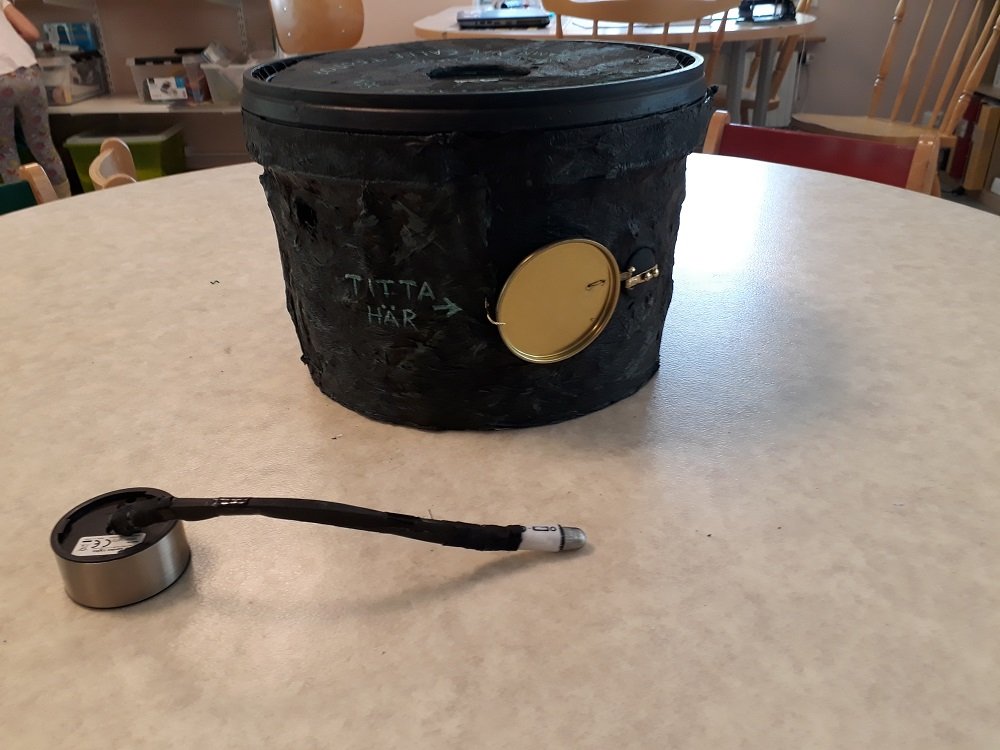
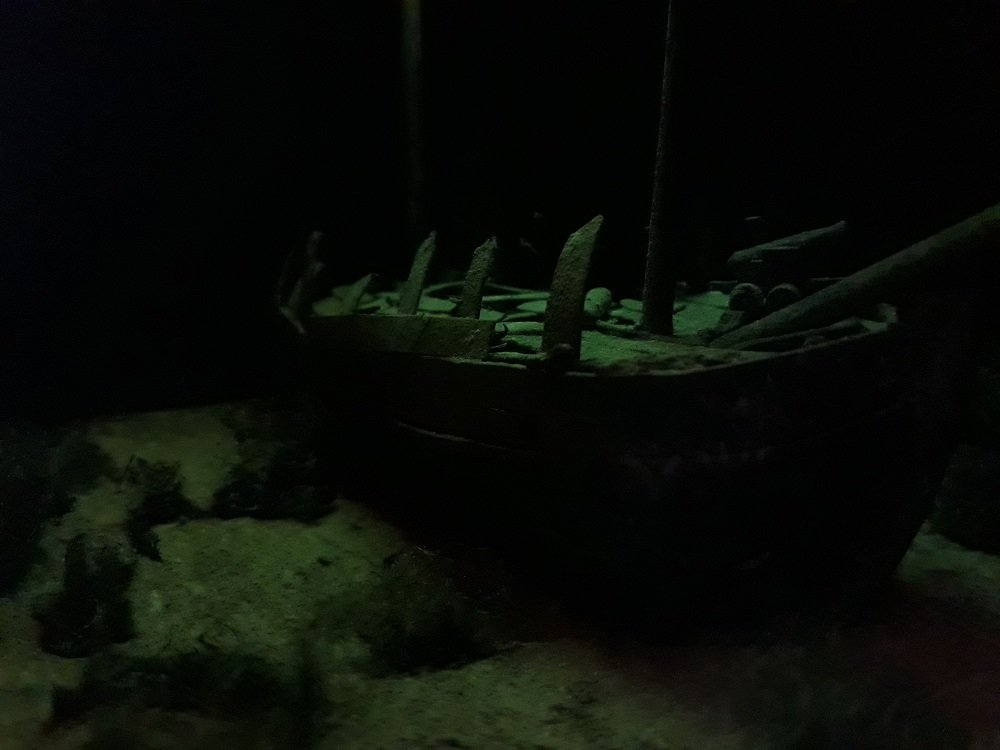
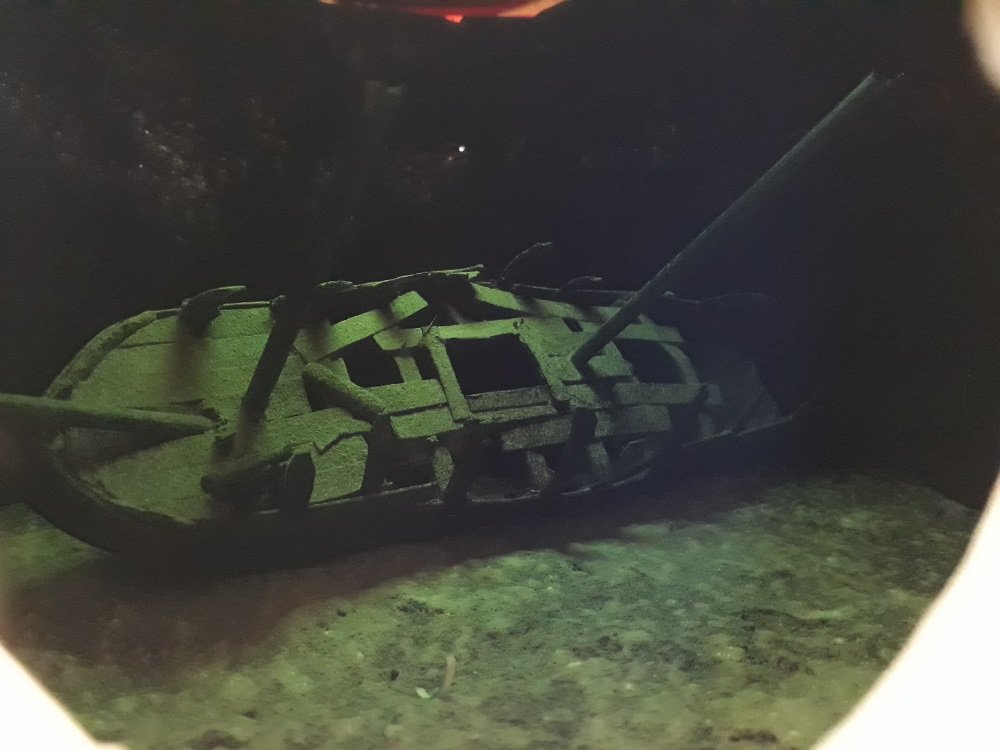
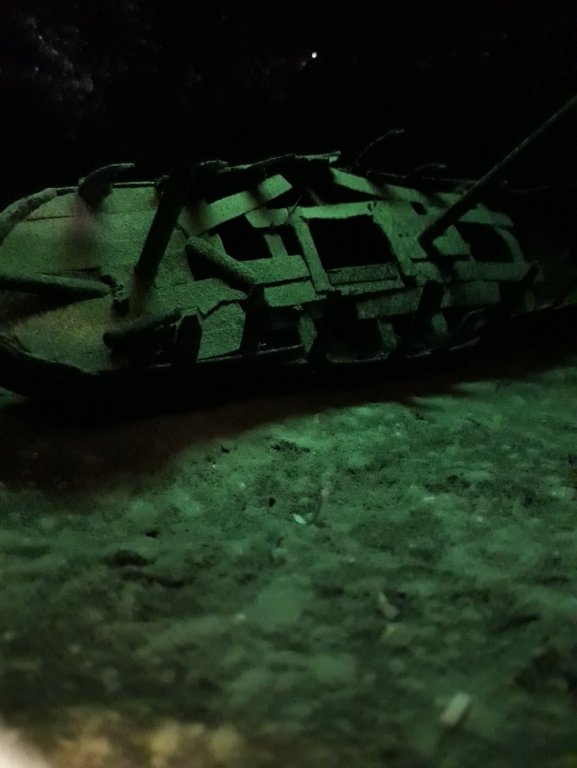
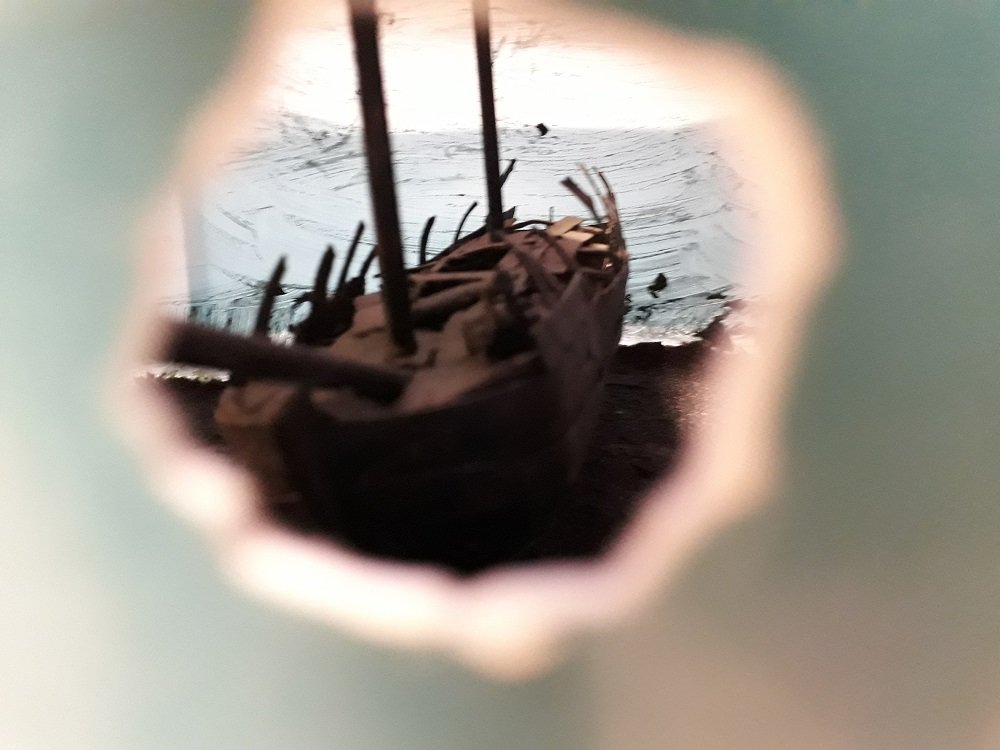
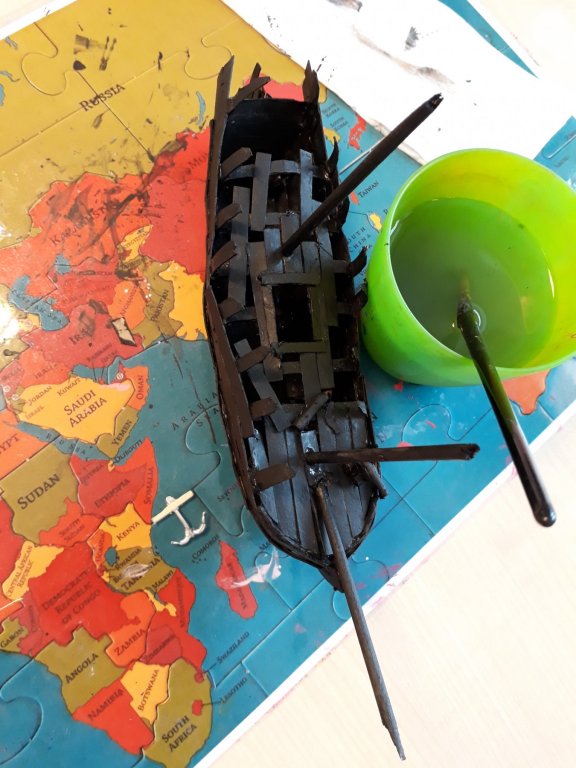
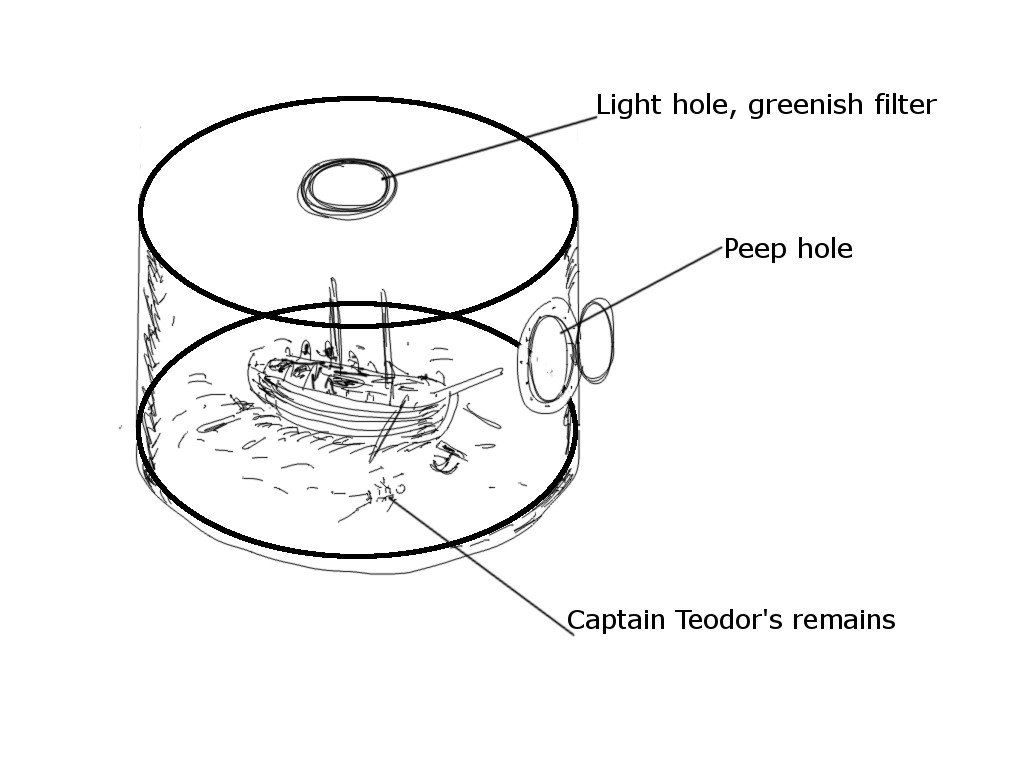
Spring and early summer were pretty busy for me and the crew, but we got there in the end. We attached a bit here, painted a lid there, and now Captain Teodor is well and truly in Davy Jones' locker. It's been fun, for everyone involved. The crew really adopted the idea and made something, that could have been a teacher-driven slog, into their project. We ended up compromising with the much debated seaweed - I got to place some long bits and the crew got their little tufts. We all agreed that a cover for the peep hole was nessecary, so I built one out of the metal lid from a cardboard tube, some wire and picture hangers. The lid of the jam bucket let a bit too much light through, so we made a cover and painted it a nice, solid greenish black. With that, and some more paint here and there, the diorama box was done. The diorama obviously needed a Capatin Teodor. While looking at pictures of skeletons, the crew each made their own fleshless crewman. So now we had about twenty skellies ... in all shapes and sizes ... we couldn't even fit all of them in the box. It was decided that we would have only one Captain Teodor, and that I should make him. So here he is: Looking at the diorama through the peep hole with just the natural light filtering in is all well and good, but I wanted to add an element of exploration to the experience. We needed an ROV. I canibalised an old solar powered garden light - extended the wires, added a bendy pole and stuck a toothpaste tube on the end with the LED. The ROV is inserted through a little hole in the side of the bucket. You can move it around and explore different areas of the wreck. So there it is. I suspect our Captain isn't going to get much R.I.P. - lots of curious eyes will pass by the peep hole for sure. Even the principal made a surprise appearance during snack time, to "see the amazing ship". Thanks for following, liking and commenting! See you soon! Sam


- 31 replies
-
- 12
-

-
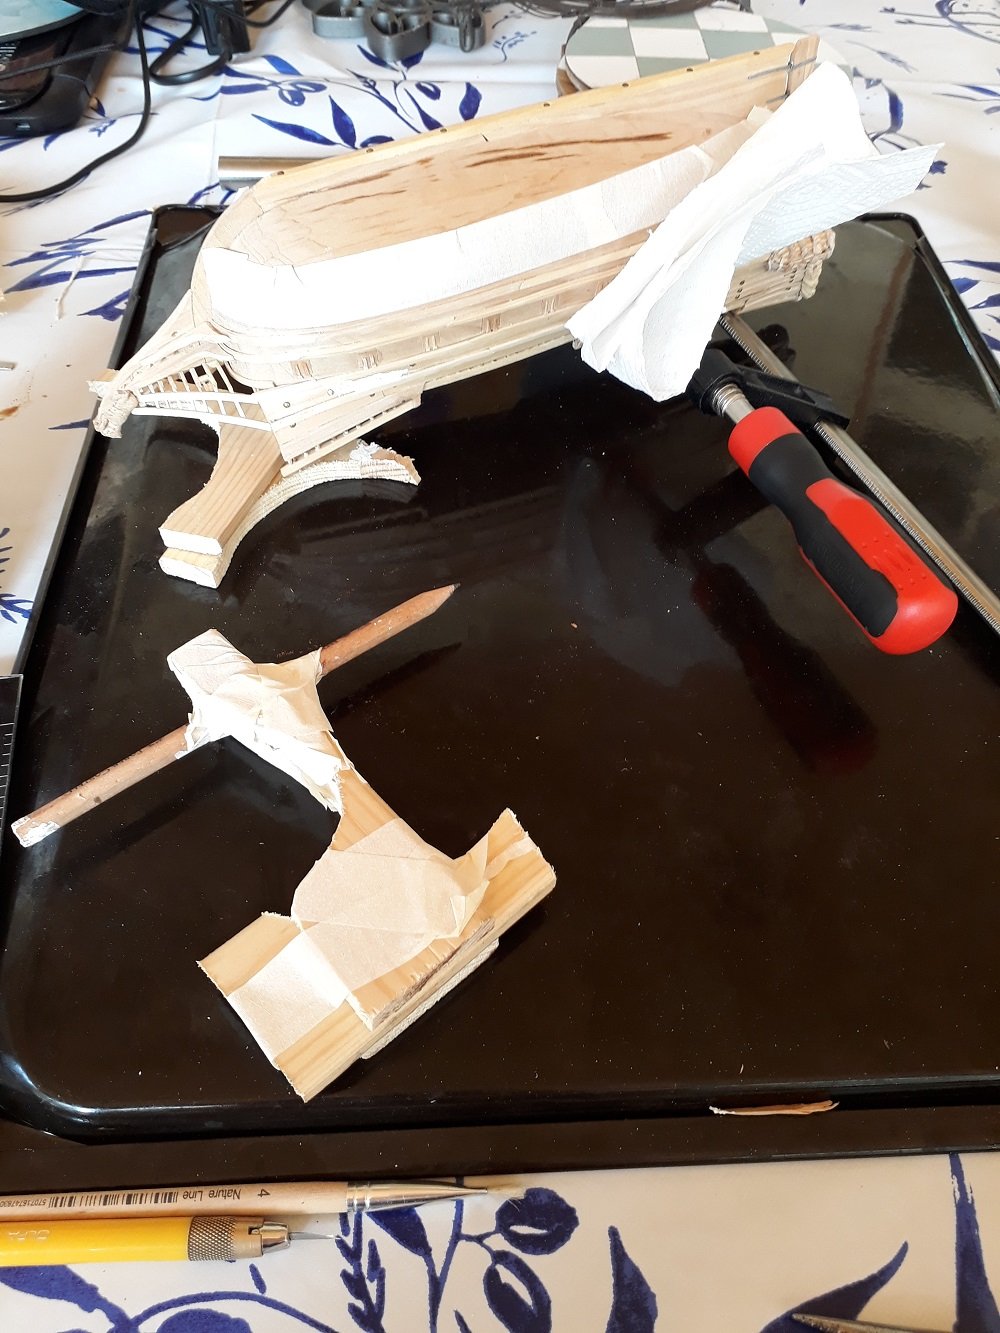
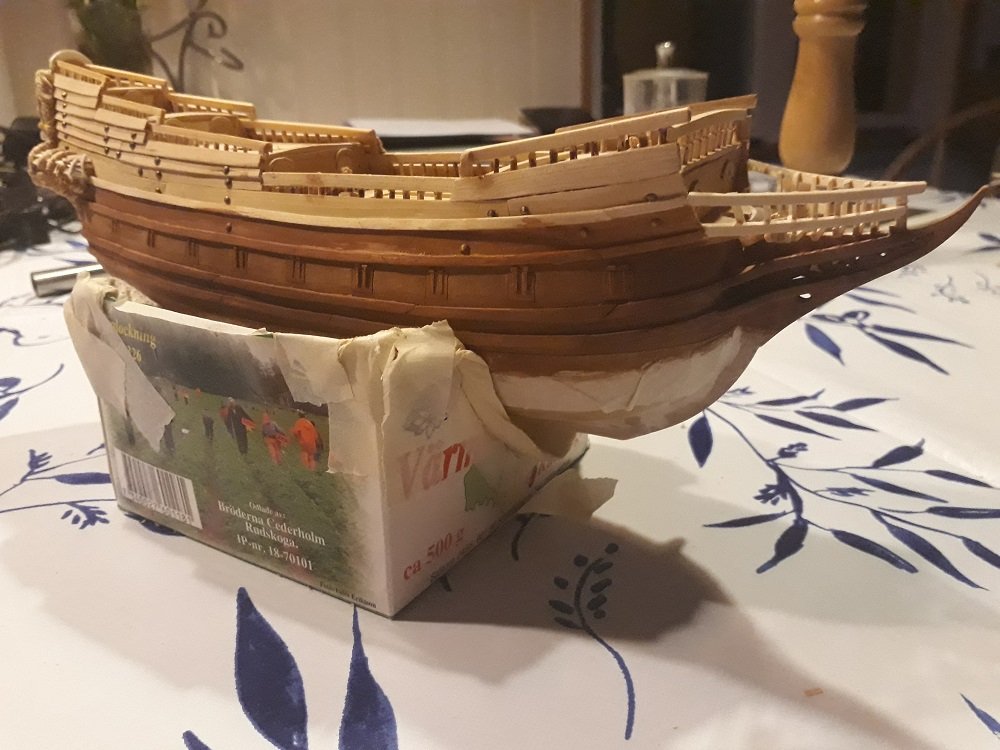
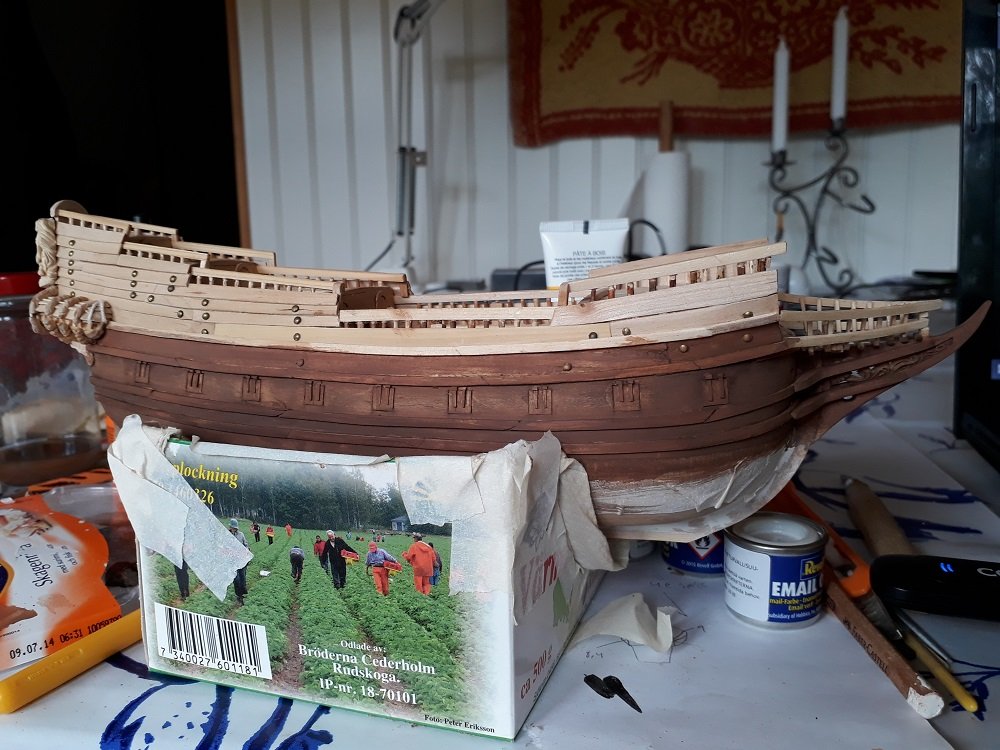
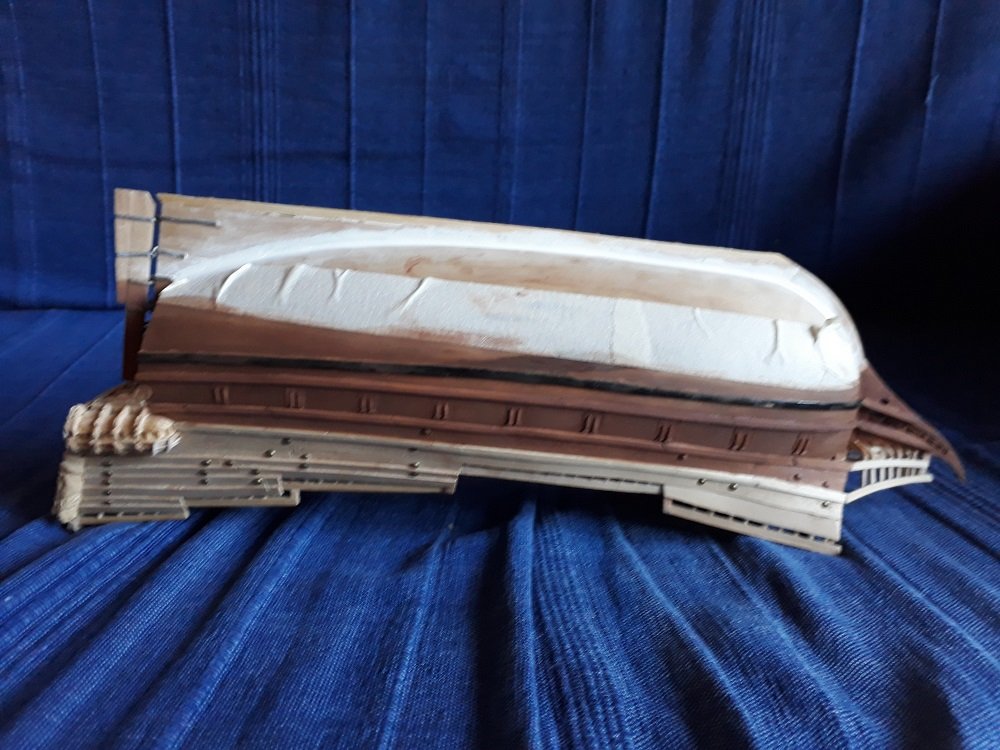
It feels like this build has entered a new phase. The oh-so-familiar little sticks and fiddly bits on the table are now in the company of paints, filler and string. When Tulpijn was turned upside down for water line marking, I noticed a rather unsightly gap between the keel and the hull, so out came the wood filler. I've also used filler on some uneven bits on the rest of the hull. With paint on you'll hardly notice it. Paint: I'm building up the colour with very thin washes of Humbrol enamels. When everything looks right, I'll varnish. The look I'm going for is something like this but with darker hull colour. (The model, "Amaranth", in the Museum of Nautical History in Stockholm, is quite possibly my favourite man-made object ever ... man, she's beautiful...) Two coats on so far. The under water hull will get white-stuffed. And, no, Sweden's definitely still in the World Cup! Cheerio Sam

-
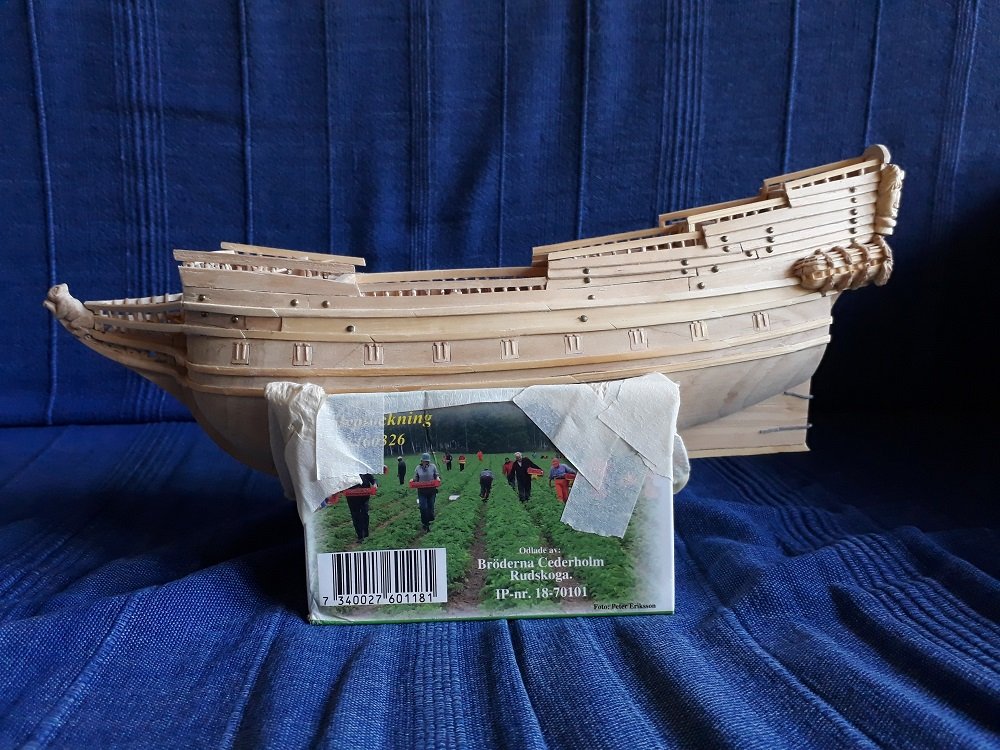
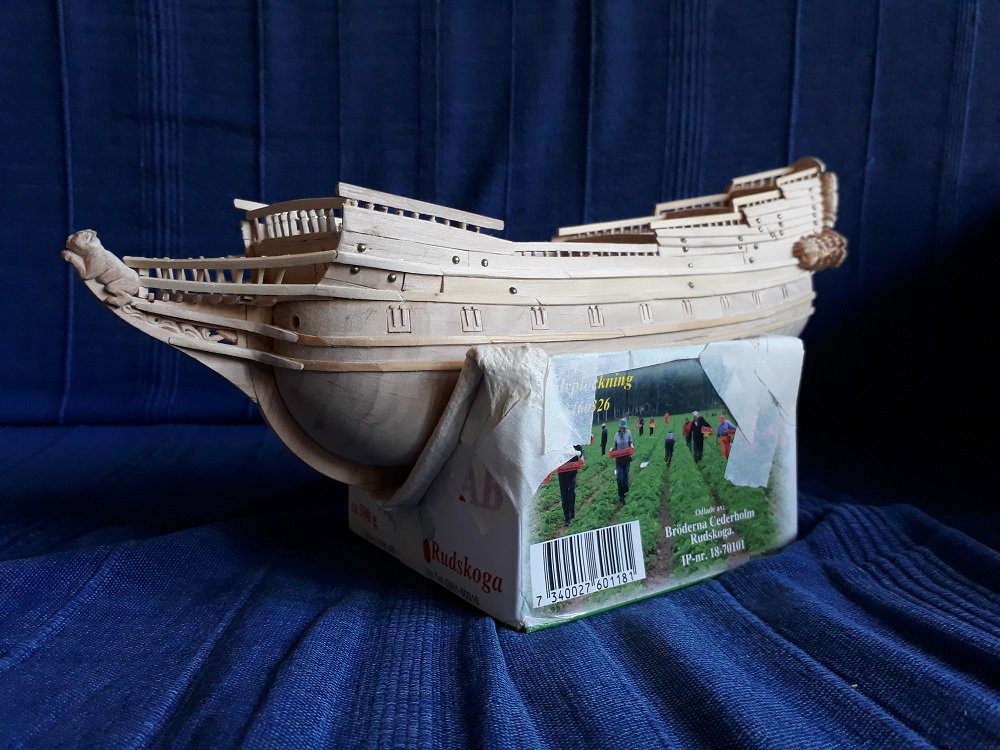
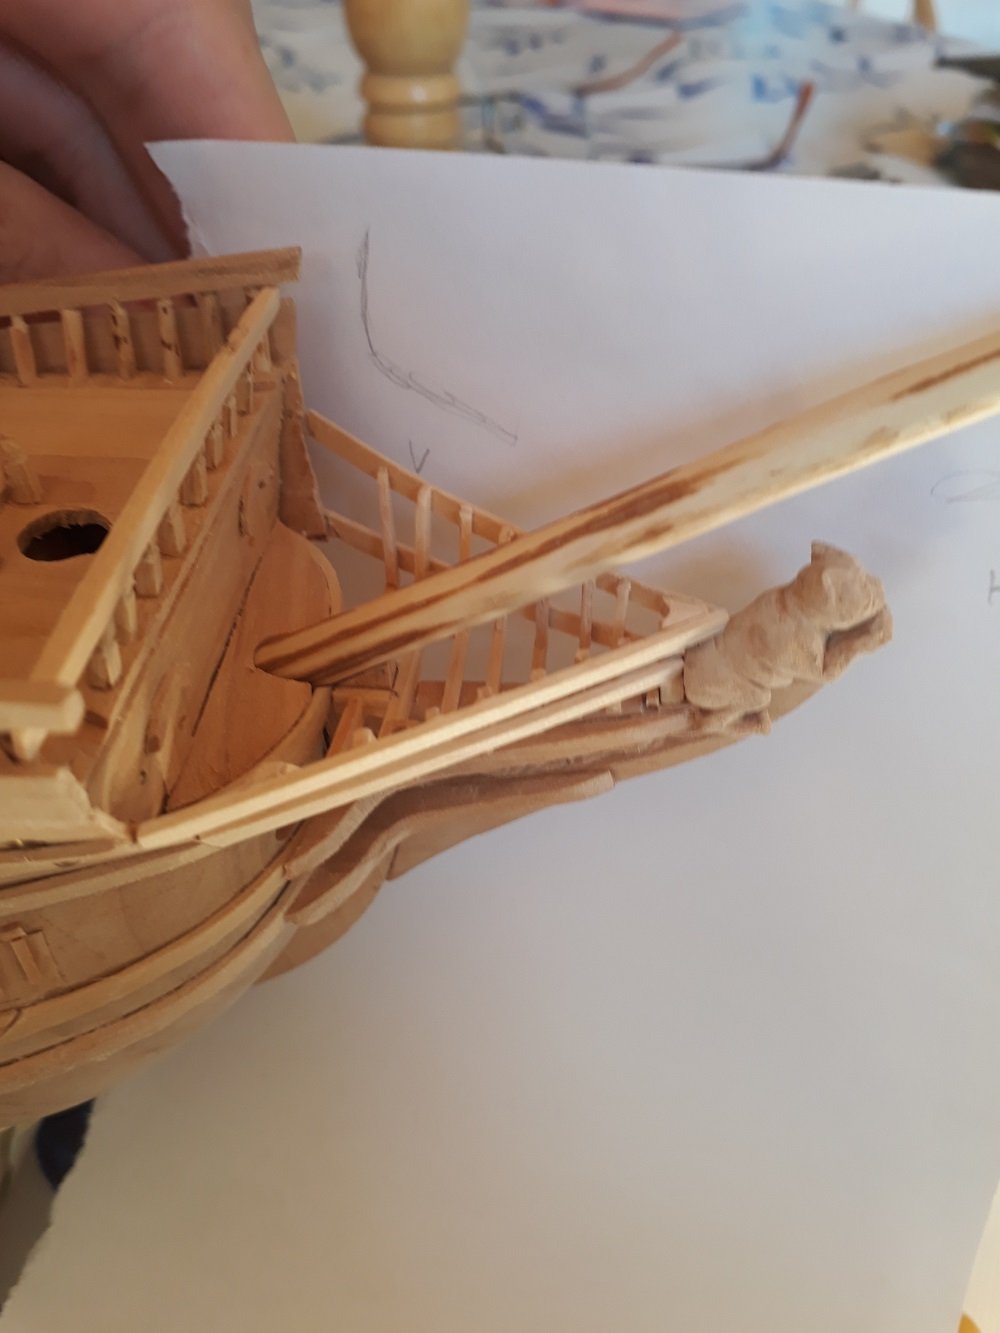
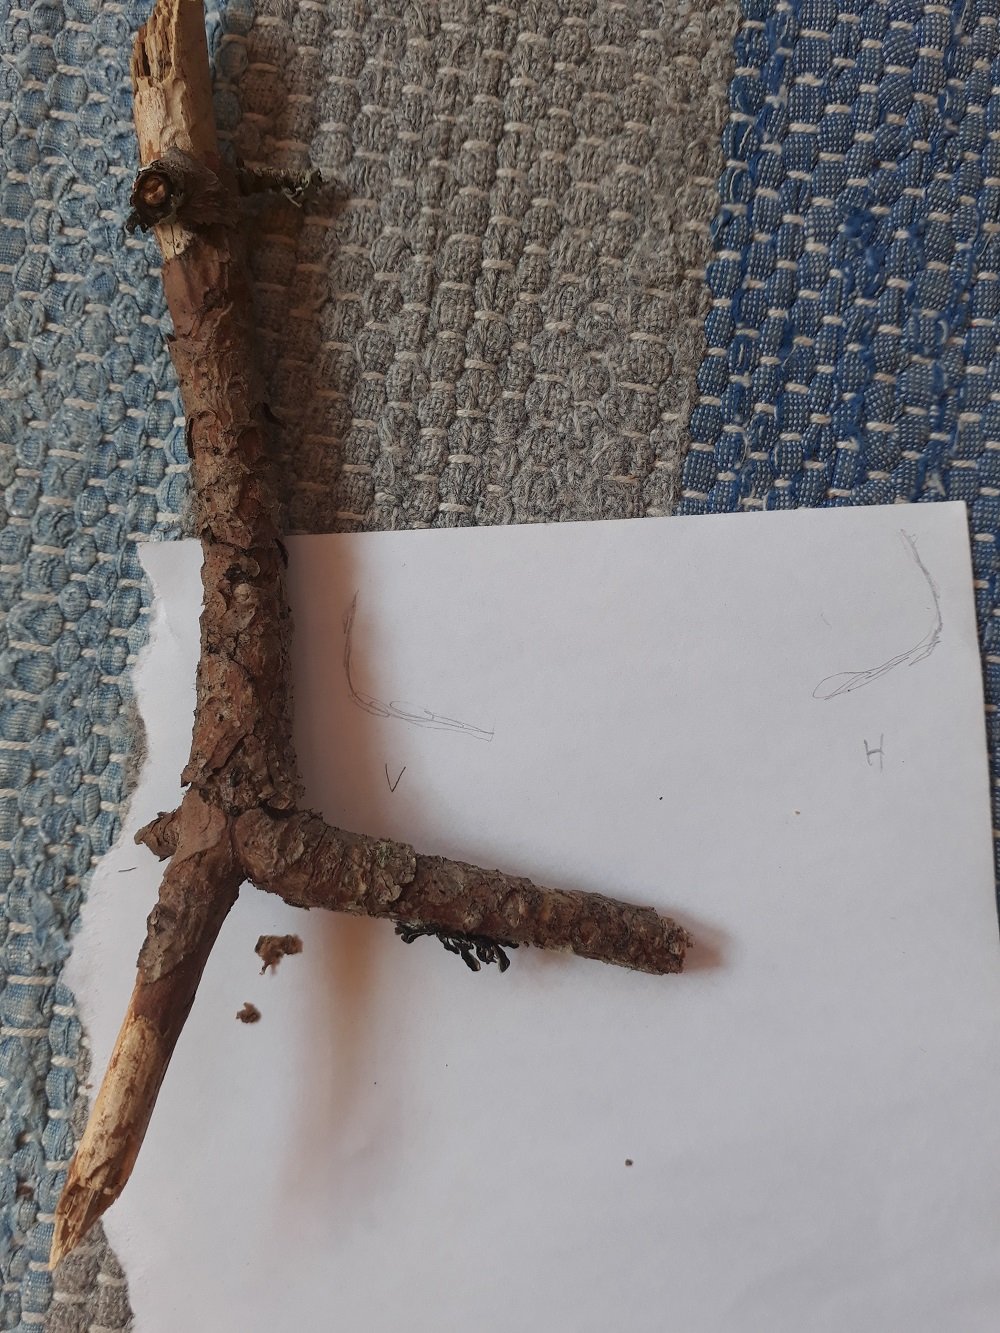
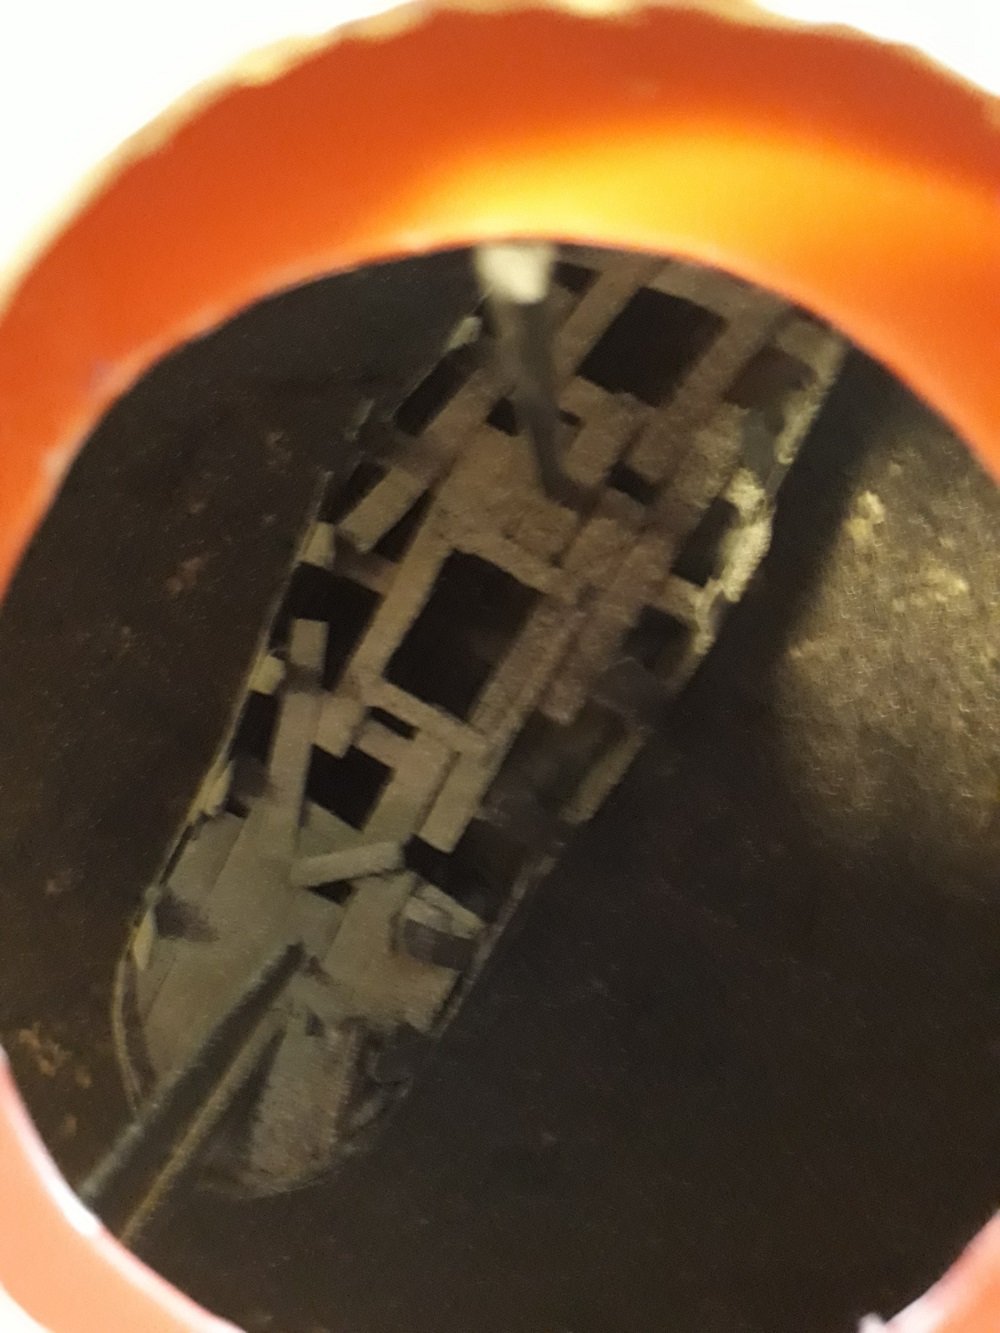
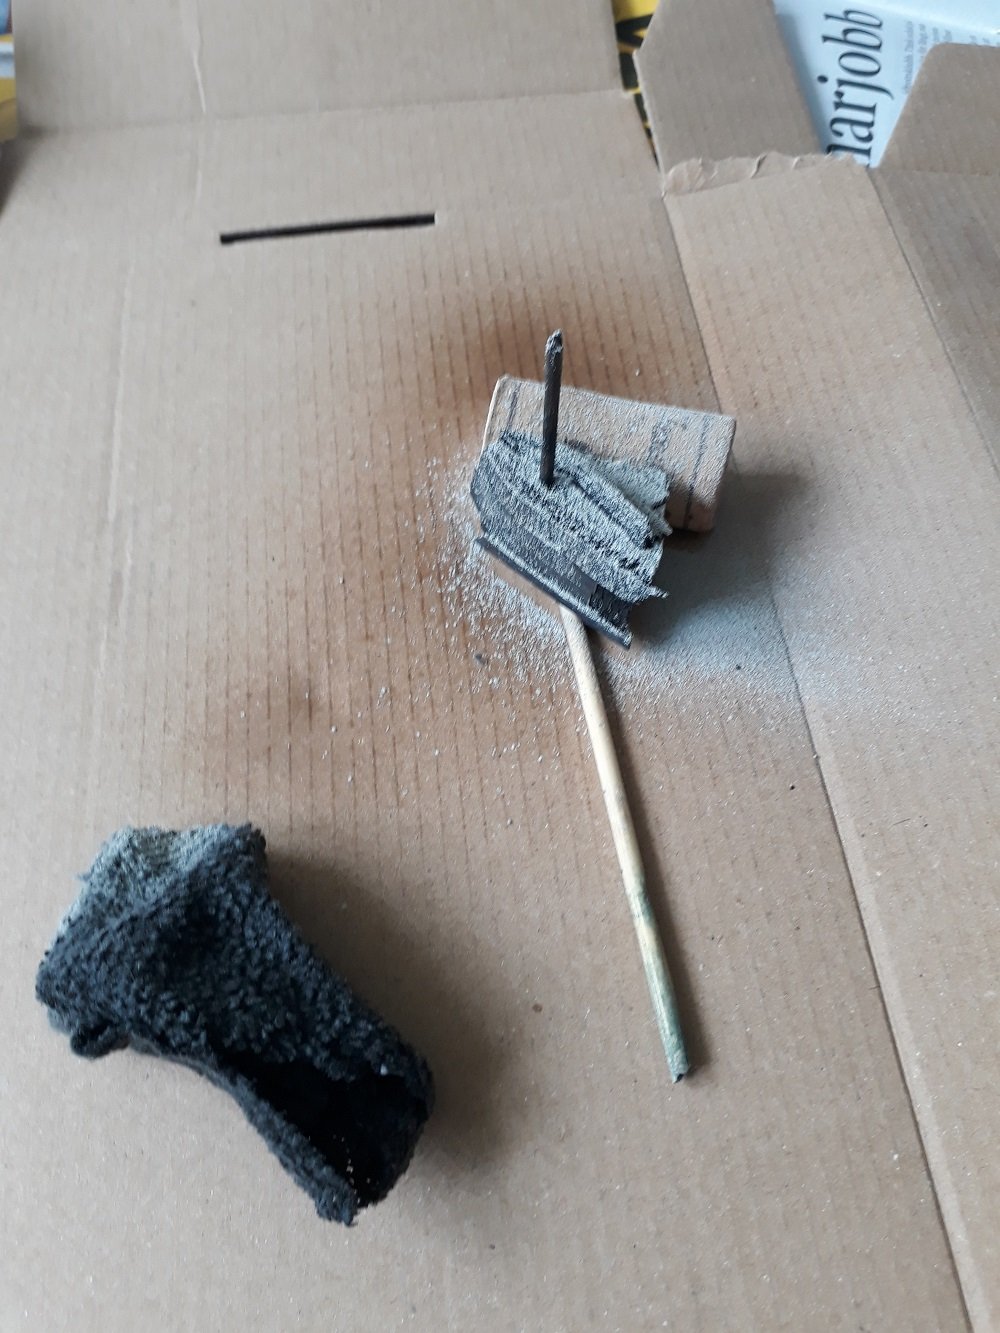
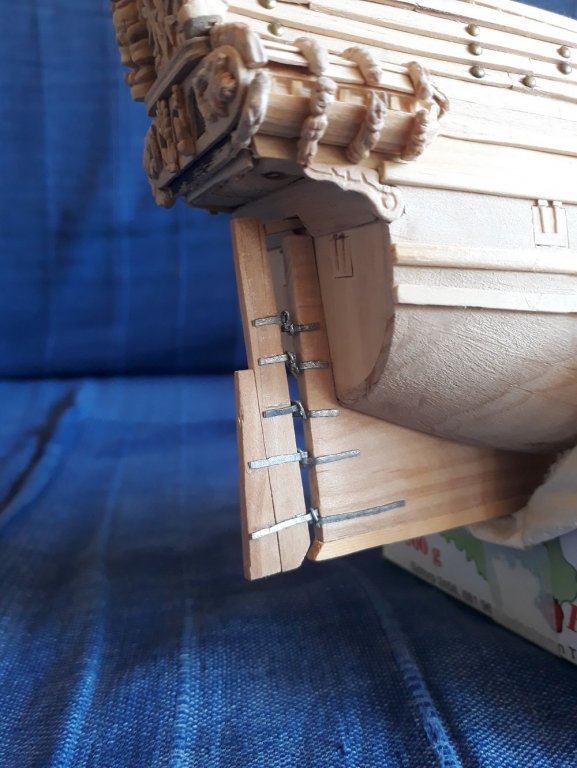
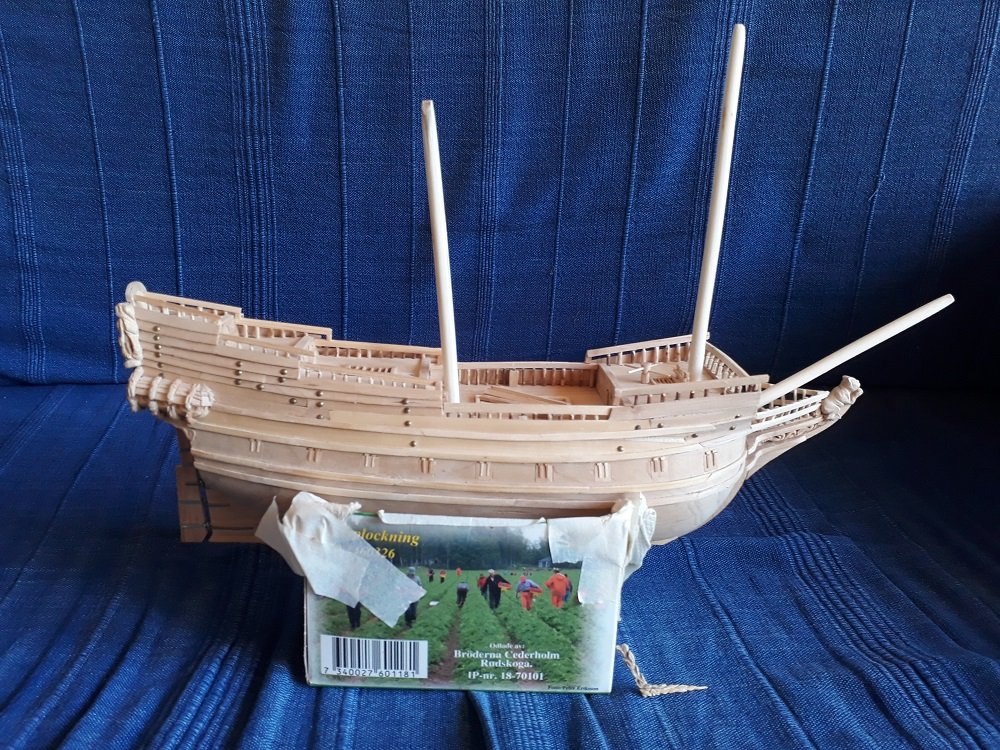
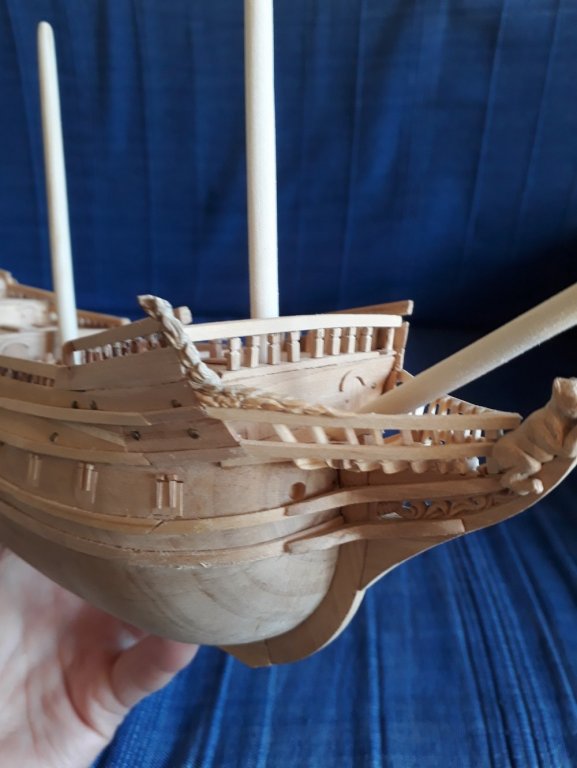
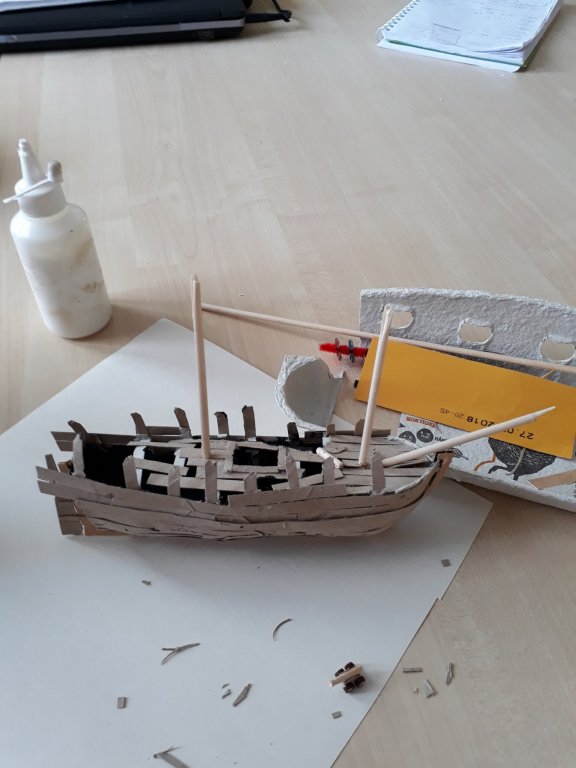
Sweden has effectively been booted out of the world cup, but hey, the sun's still shining and coffee still tastes like smoke. Chin up. Sitting here leafing through R.C. Anderson's The Rigging of Ships ... - we're getting closer ... I've been here for two days now and I've managed to get quite alot done in that time. 1. The rudder has been attached: 2. The starboard quarter gallery and gun ports are finished. 3. I've begun working on a hatch cover for the main hatch. (I might re-do the gratings - never was very pleased with how they turned out.) 4. I've started working on the masts - diameter, taper, lenght. Not done yet, and no - the fore mast isn't going to be that high. 5. You know how "them old shipwrights" used to look for tree branches the right shape for making knees and whatnot? I kinda did the same thing, but on a smaller scale: Man, it's good to be back. Now that the rudder's on, all we need before we can start painting the lower part of the hull are holes for the gammoning. Talk to ya soon! Sam


-
Superb Bounty! The colours are great! Sam
-
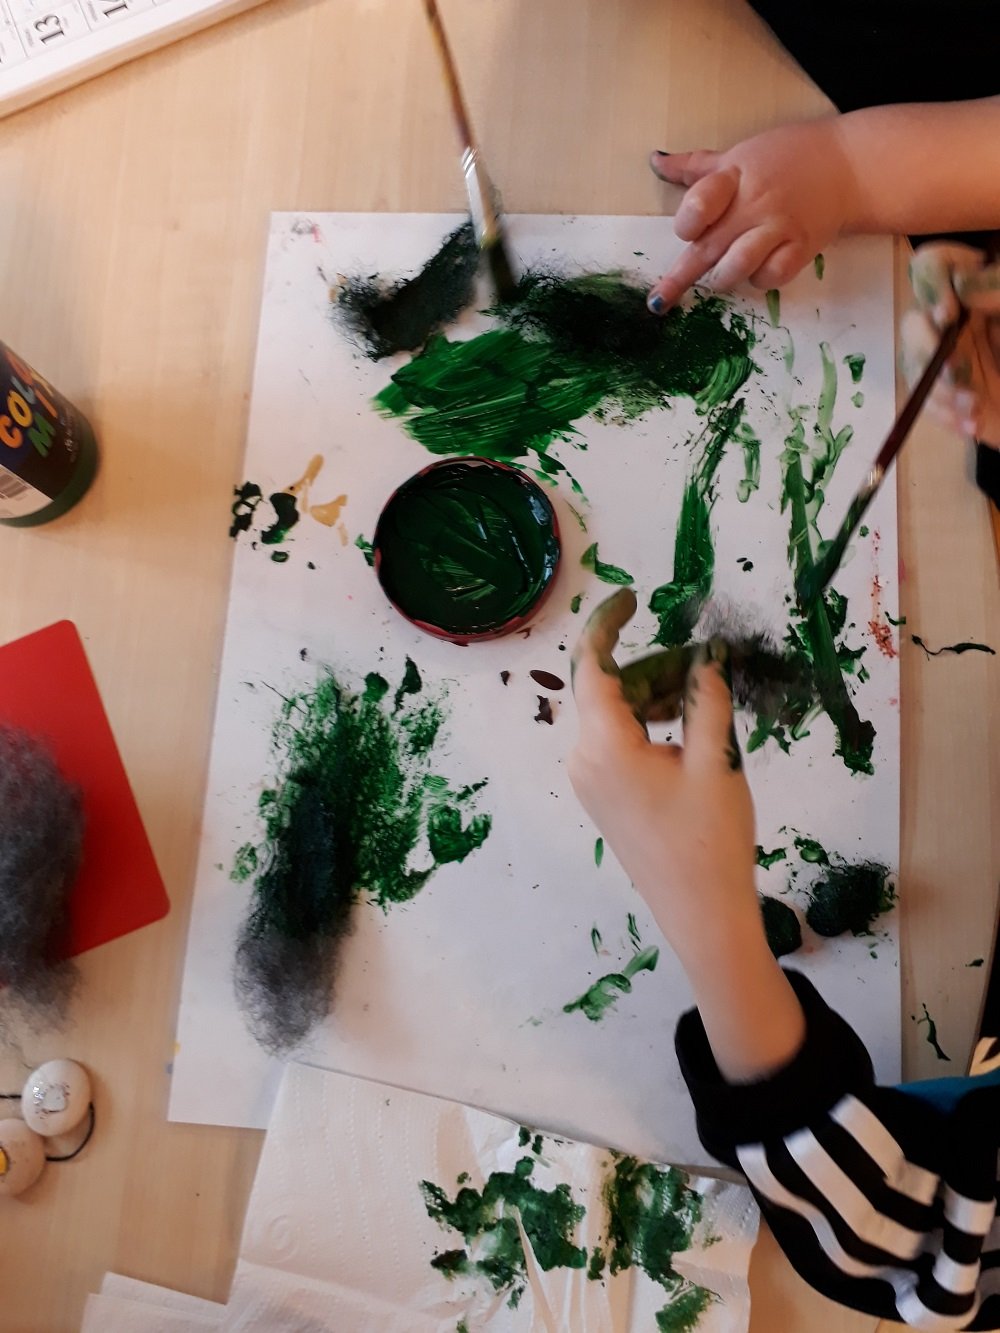
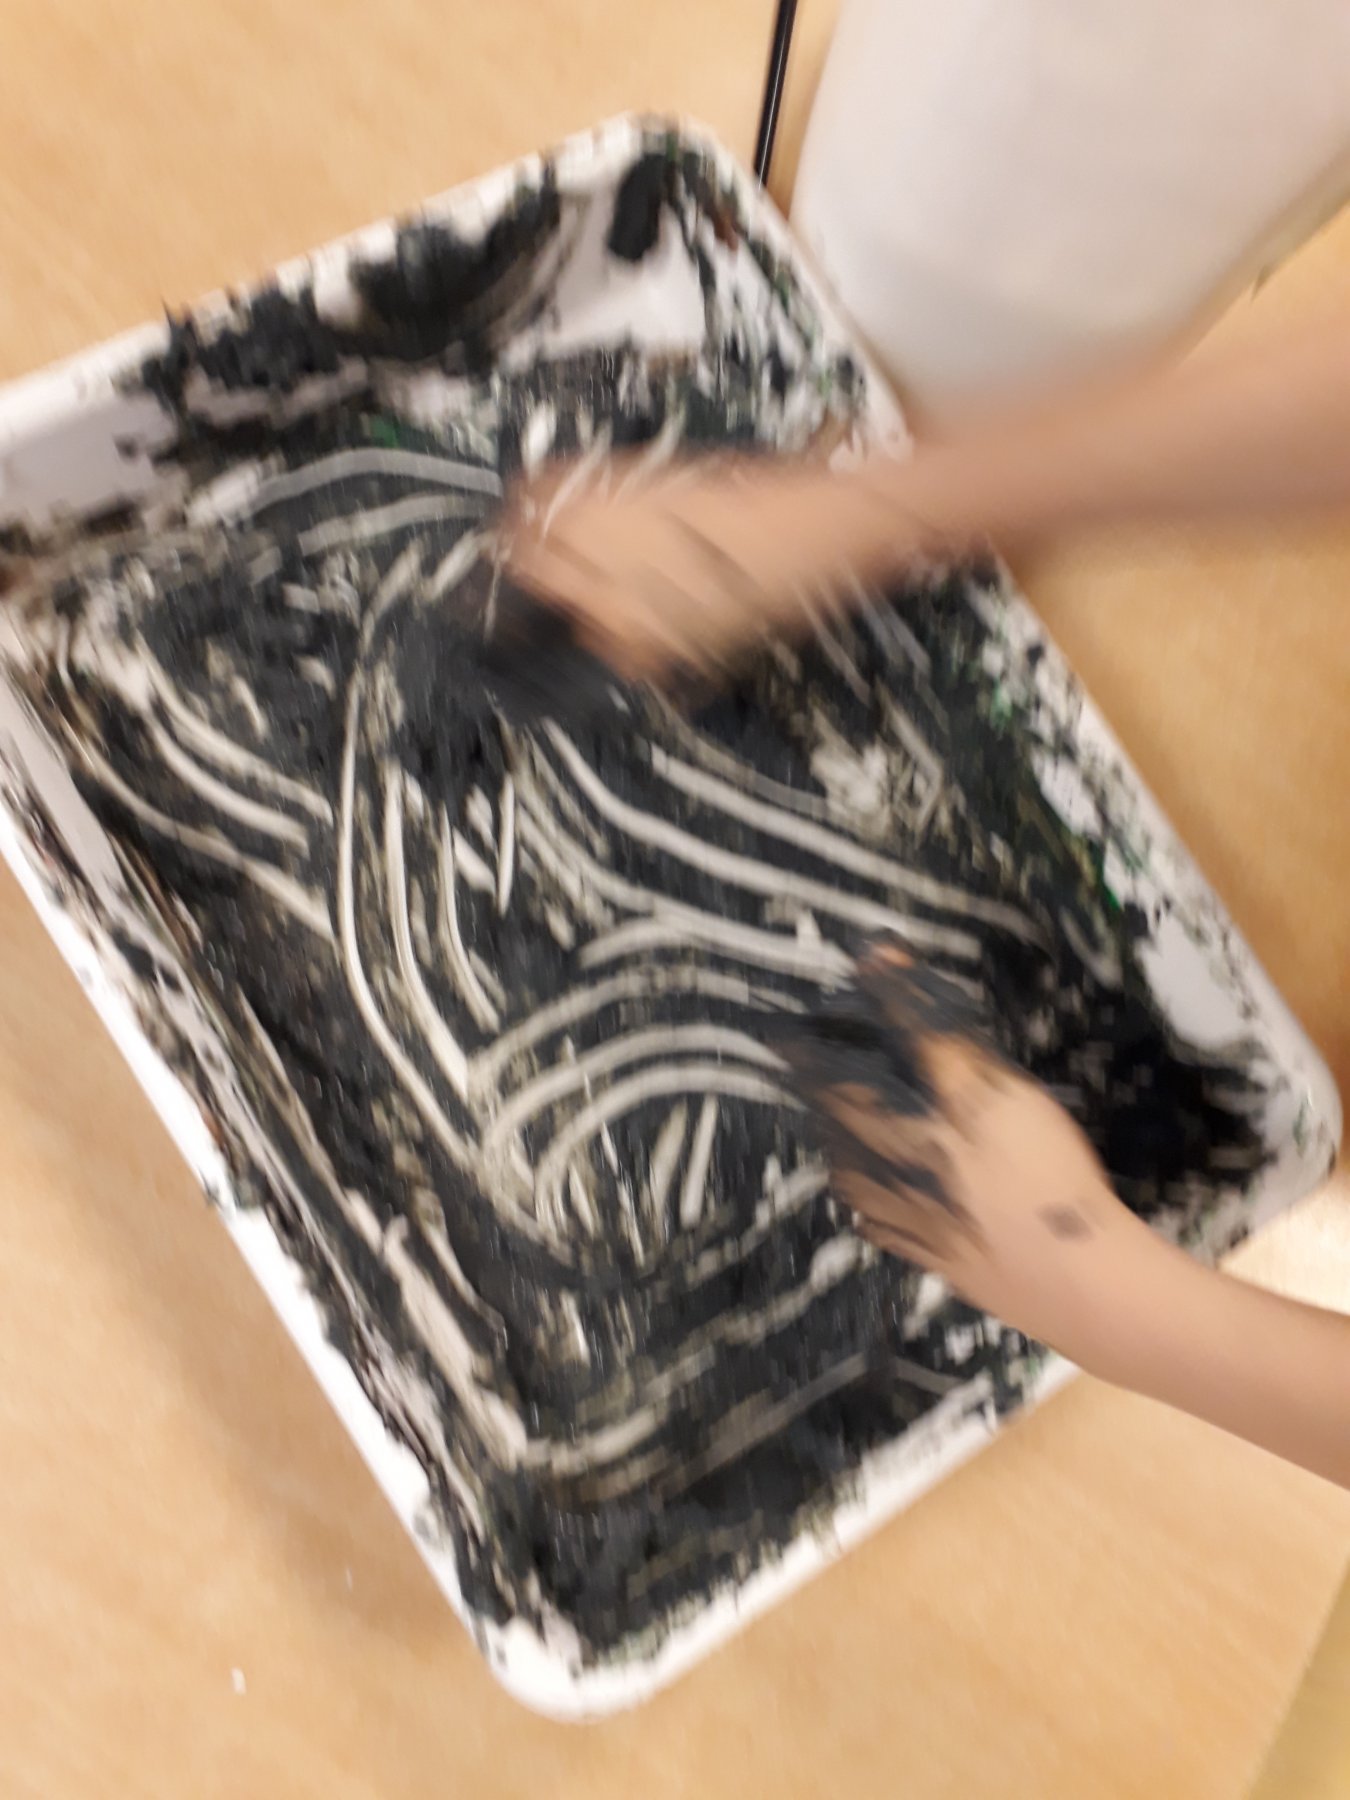
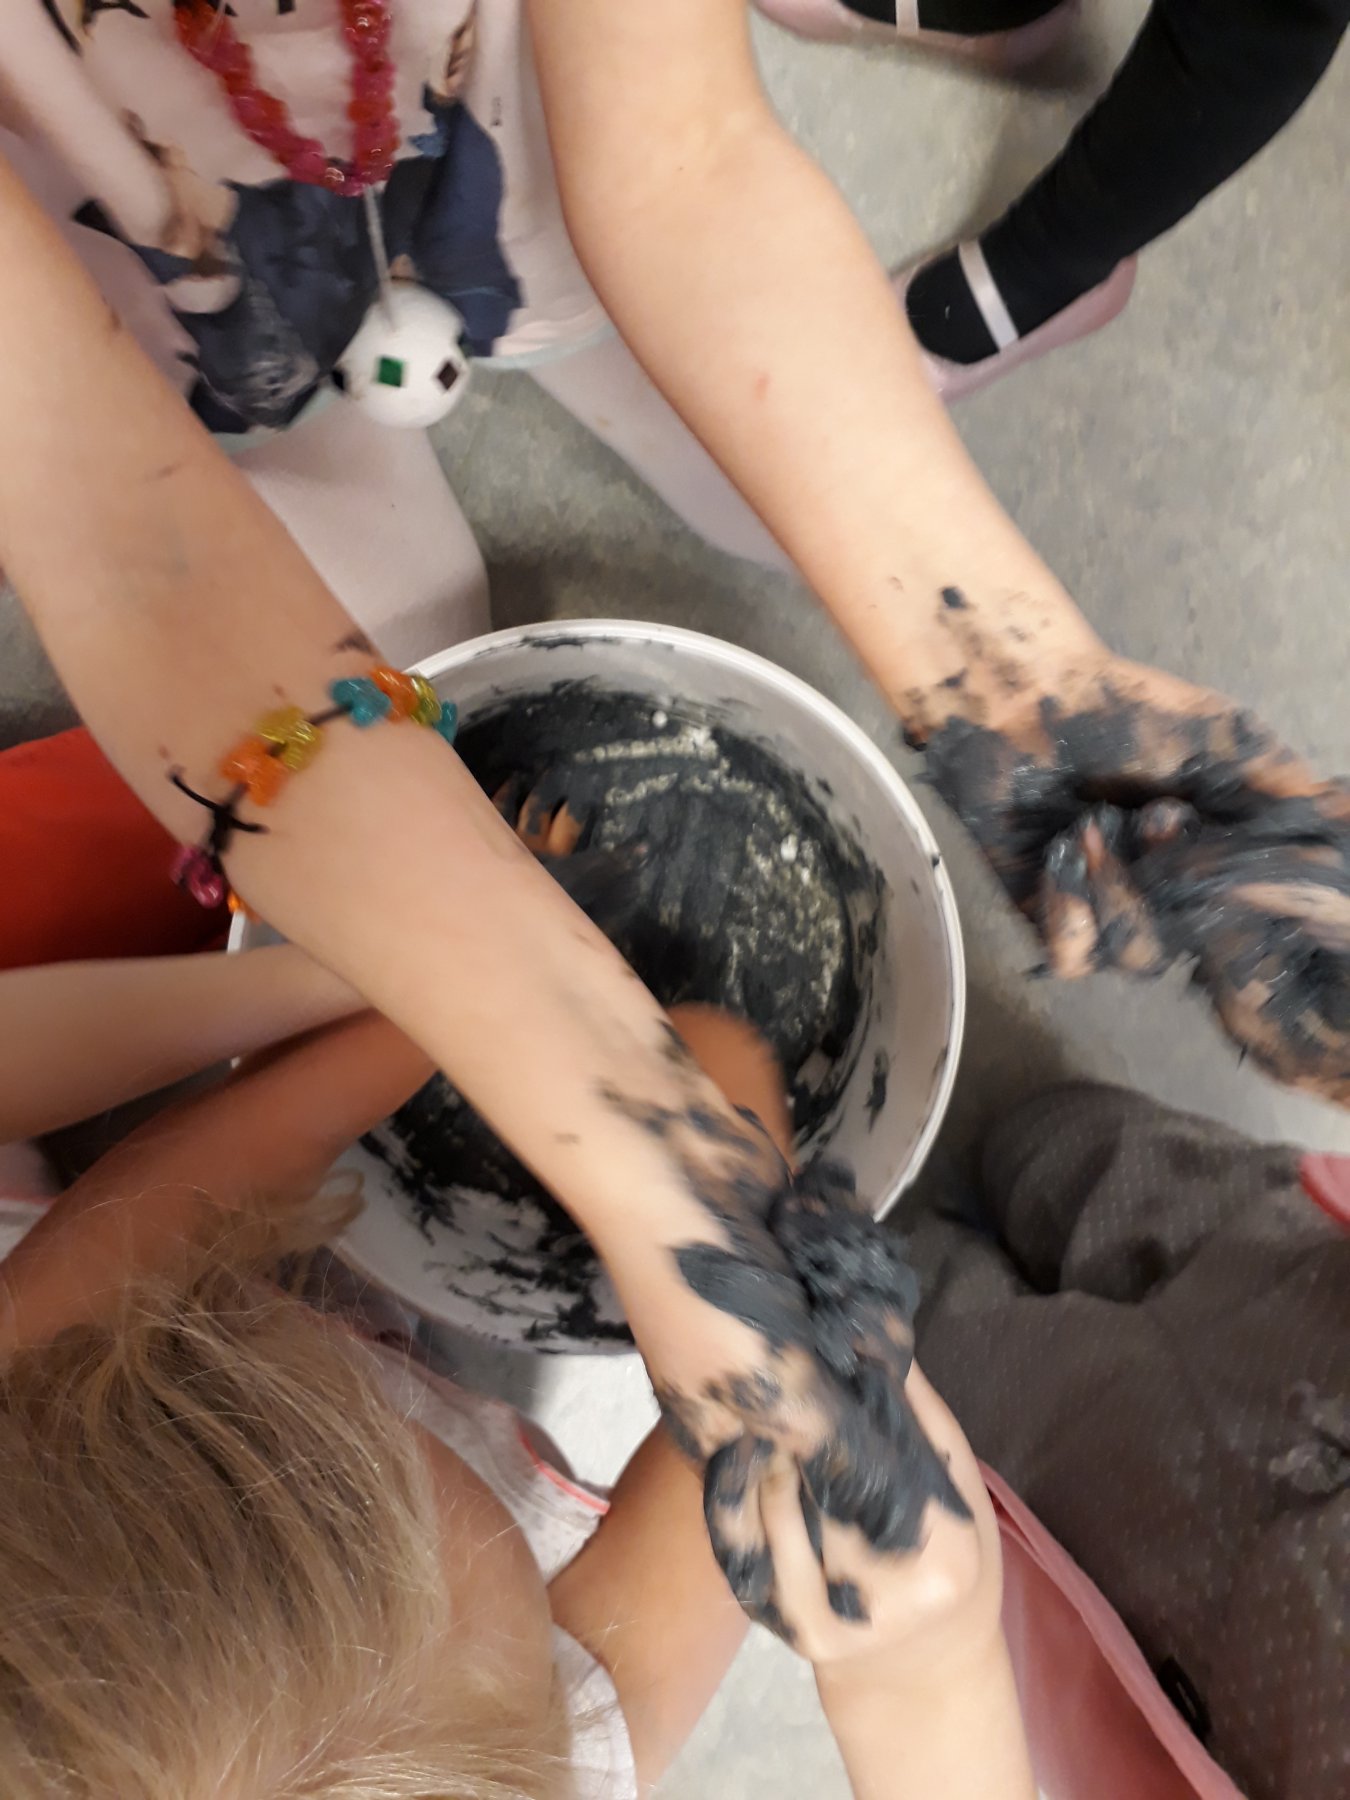
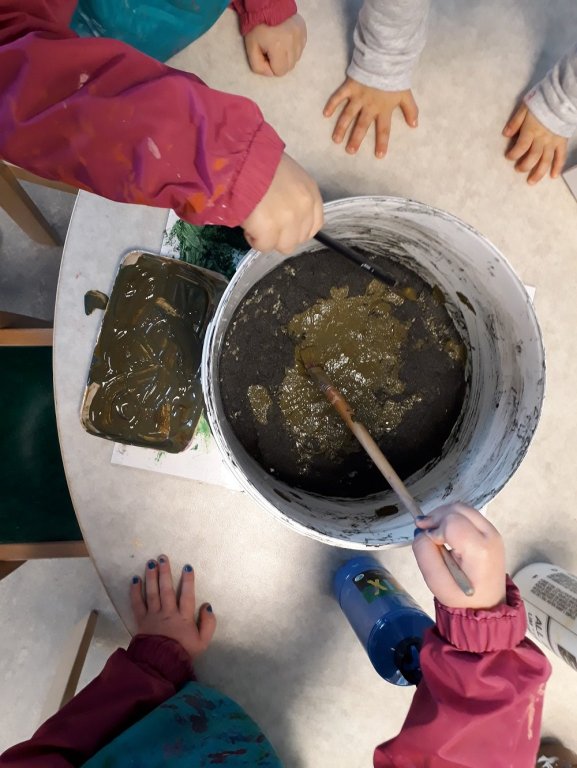
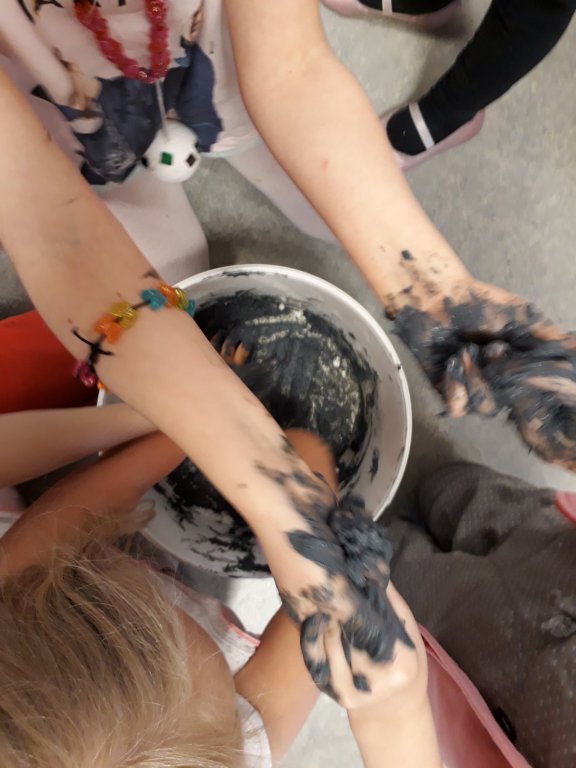
Yeah they're pretty great. When they're not cranky. As far as pictures go, you'll have to settle for hands and feet I'm afraid. Rules and regulations ... Sam
-
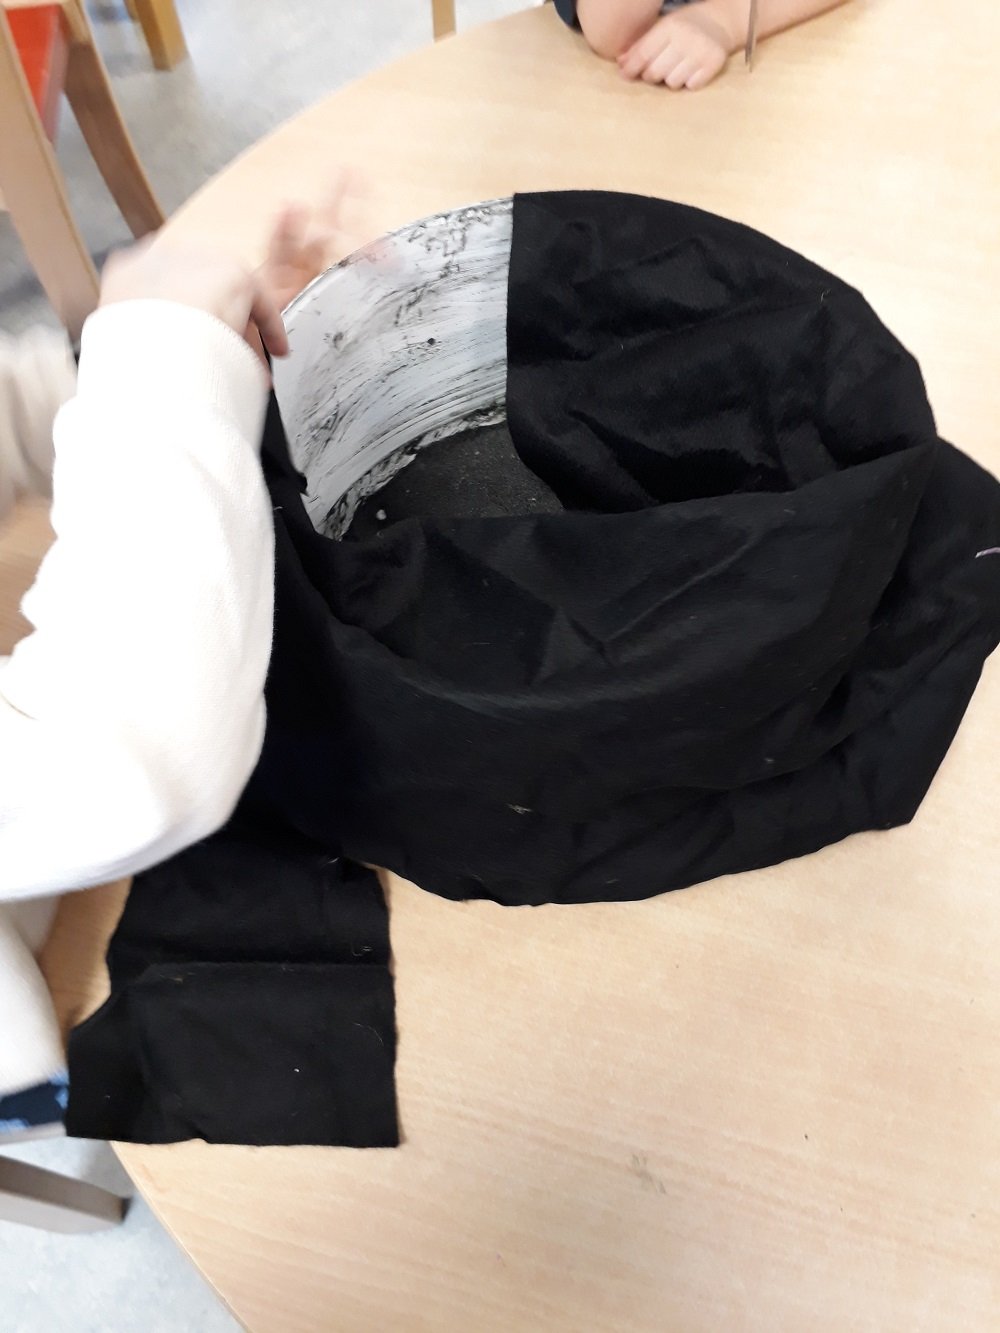
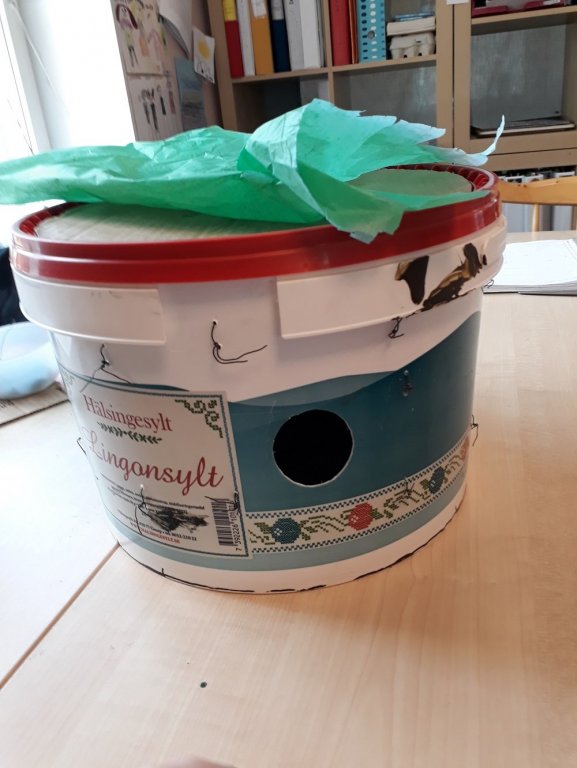
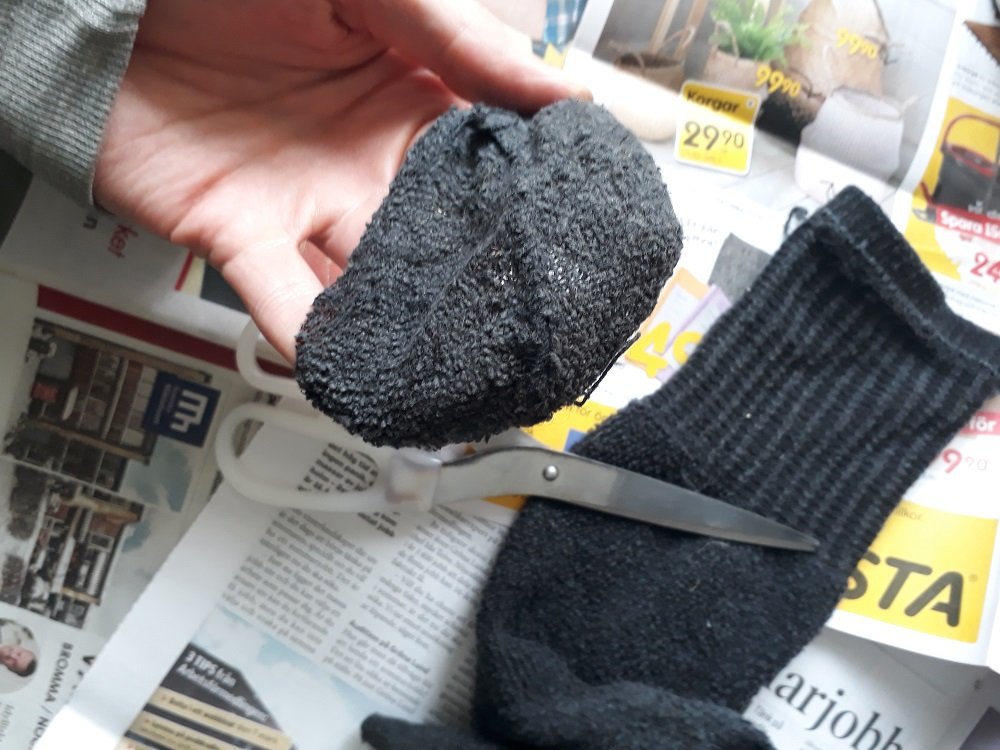
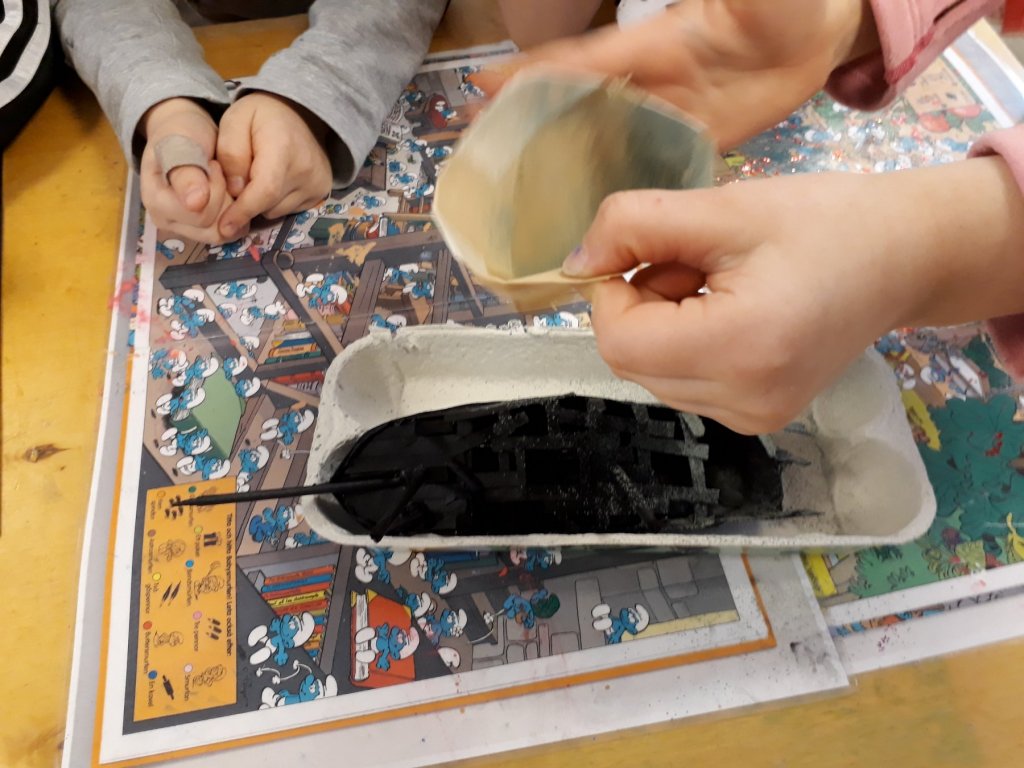
Today our little aperture in the side of Mr. X.L. Jambucket saw more eyes than an ... optometrist ... convention ... ... It also got enlarged. Things are beginning to look pretty sweet, if I do say so myself. The felt has been attached, and we found of a piece of green wrapping tissue to serve as our sea green filter. We gave the sea floor a wash of a darker shade of mud green, and sprinkled it with some silt powder. I think it works well with the green light in the bucket. Today I also learned that when it comes to sea weed, I really have no say whatsoever. Since we apparently absolutely have to have sea weed in the diorama, I figured we'd go all out and REALLY put some frikkin' sea weed with a big S in there. A kelp forest! Swaying ... gently caressing the ship and the good captain ... mmm ... I even googled up some very atmospheric images to try to sell the idea. But no. Brick wall. Out came the scissors. Sea weed is short, and it grows in little tufts on the bottom. We even had a little toddler of three, who had shown almost no interest in the project up to this point, brandishing a pair of scissors going: "We're cutting!" That'll teach me to have big ideas, eh ... I'll just go and sit in that corner, shall I ... Big day! Cheers Sam

- 31 replies
-
- 14
-
-
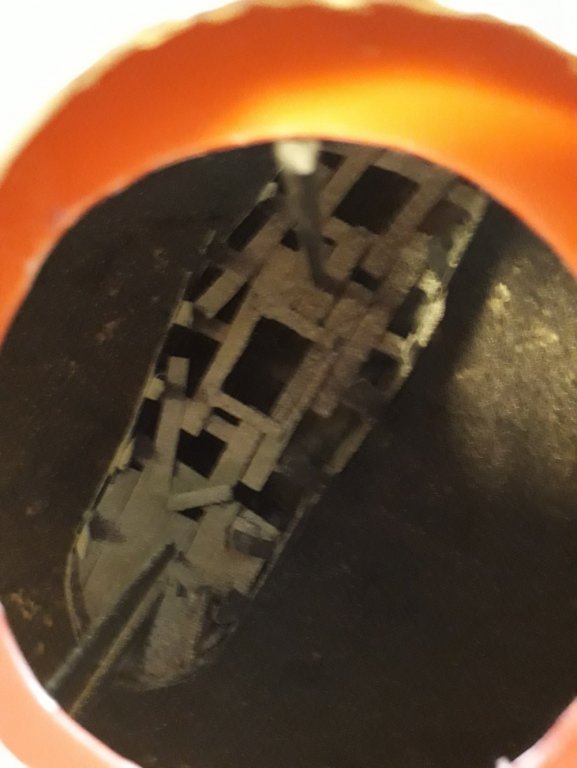
No worries there. I only gouged out a little test hole to see what the lighting was like, and because the crew was anxious to see how things look. I reckon the peep hole will have a diameter of about 5 cm.
-
Take it one step at the time and work in small groups - that's the recipe for success here. That 3-D model of the wreck of the Bodekull was, in a way, the thing that got the project started. We were having a little chat about the song about Captain Teodor and someone wondered what his ship looked like. Since I'm a massive marine archaeology anorak, I immediately consulted my in-brain database for a suitable ship. The Bodekull had the big advantage of being available as a 3-D model for the kids to mess around with on the pad. When I started fiddling with the wreck model, that generated lots of interest, but I don't think they felt that it was "their" project then. Now that has changed completely - ideas ar pouring in and they're chomping at the bits to get started every day. News: I had no problem finding volunteers for sea floor painting duty. I think I may have someone else give it a second, darker coat tomorrow. Turned out a tad light. I (I don't trust the crew around knives ...) have cut the light hole in the bucket lid, and a small test peep hole in the side of the bucket. We put the wreck into the box and peeped at it. Great stuff. With the felt lining attached, and a greenish filter for the light hole in place, I think it will look pretty nice. cheerio Sam
- 31 replies
-
- 11
-
-
Thanks! Always good to be here! I hope this isn't seen as shamelessly trying to promote my own build logs, but if you're interested, you can sort of meet "The Crew" here. They're an ... interesting ... bunch. They don't need much in the way of booty, spoils and loot, but you WILL have a mutiny on your hands if they get even a little bit bored. That could be it! Some unscrupulous pearl divers could have dynamited her to get to the pearl oysters within. Shouldn't blame EVERYTHING on the carpet monster. Sam
-
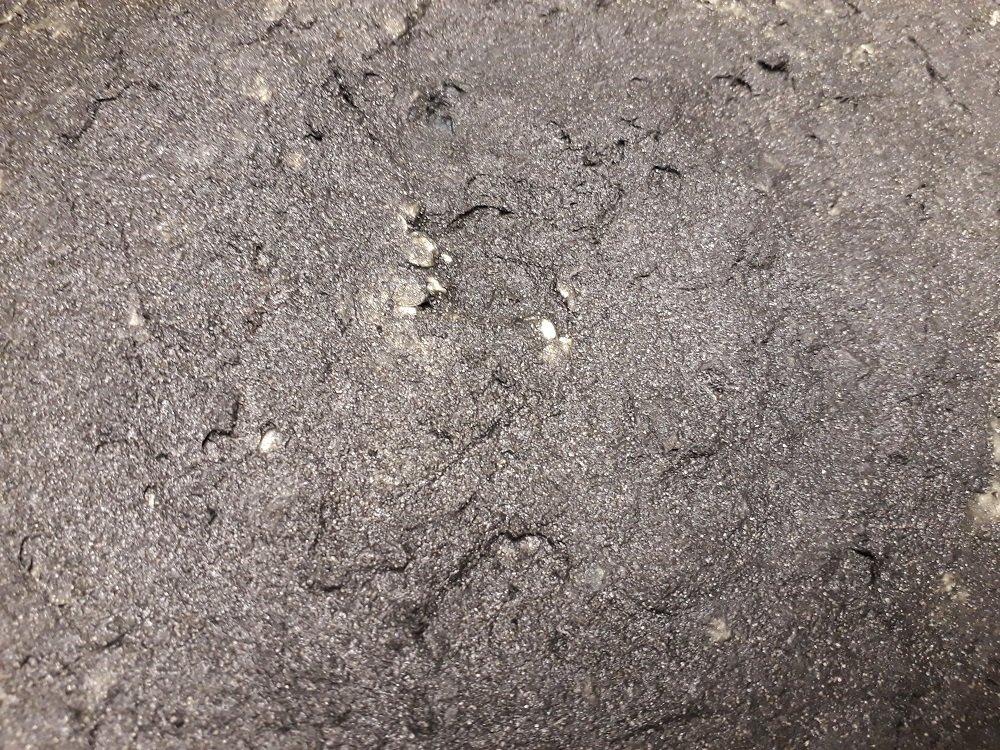
Our sea floor had hardened nicely over the weekend. A coat of paint, maybe some dry brushing and sprinkle of silt, and it will look fantastic. We'll want to make sure that the only light admitted into our very own Davy Jones' Locker comes from the light hole above the wreck. Lining the inside of the bucket with thick, black felt should do the trick. In the song, Captain Teodor is "cradled by sea weed", and as we all know, the lyrics of a song are to be regarded as a legally binding contract, to be followed to the letter. Yup. "But the wreck is pretty deep down, you know. I'm not so sure much of anything's growing down there ..." I meekly protested. But The Crew would have none of it; if it's sea weed in the song then we'd bloody well better have sea weed in the diorama too. Guess we're painting sea weed this week then. All the best Sam


- 31 replies
-
- 13
-
-
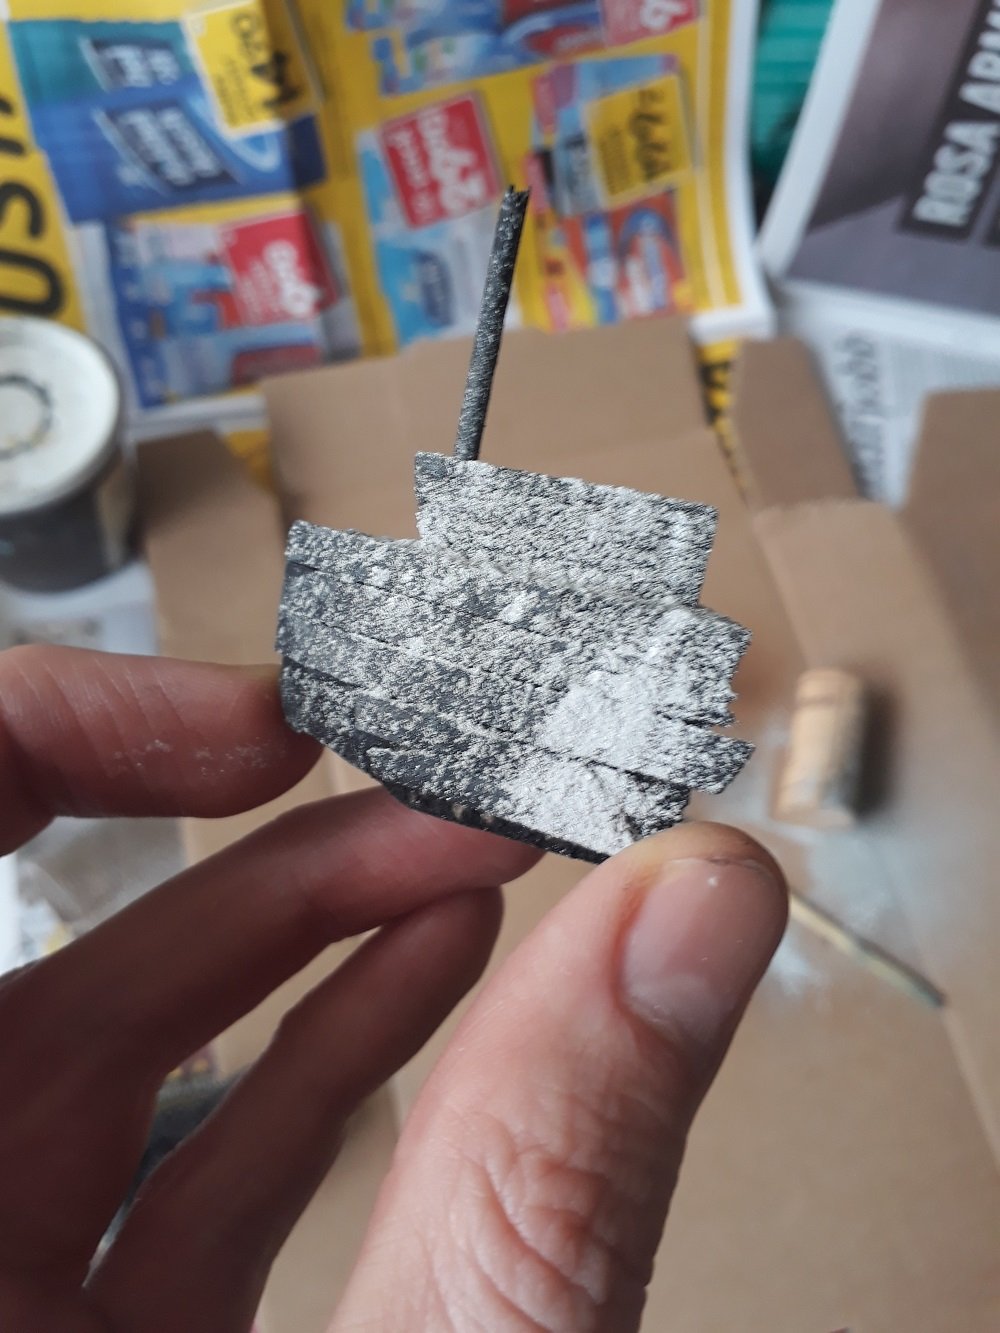
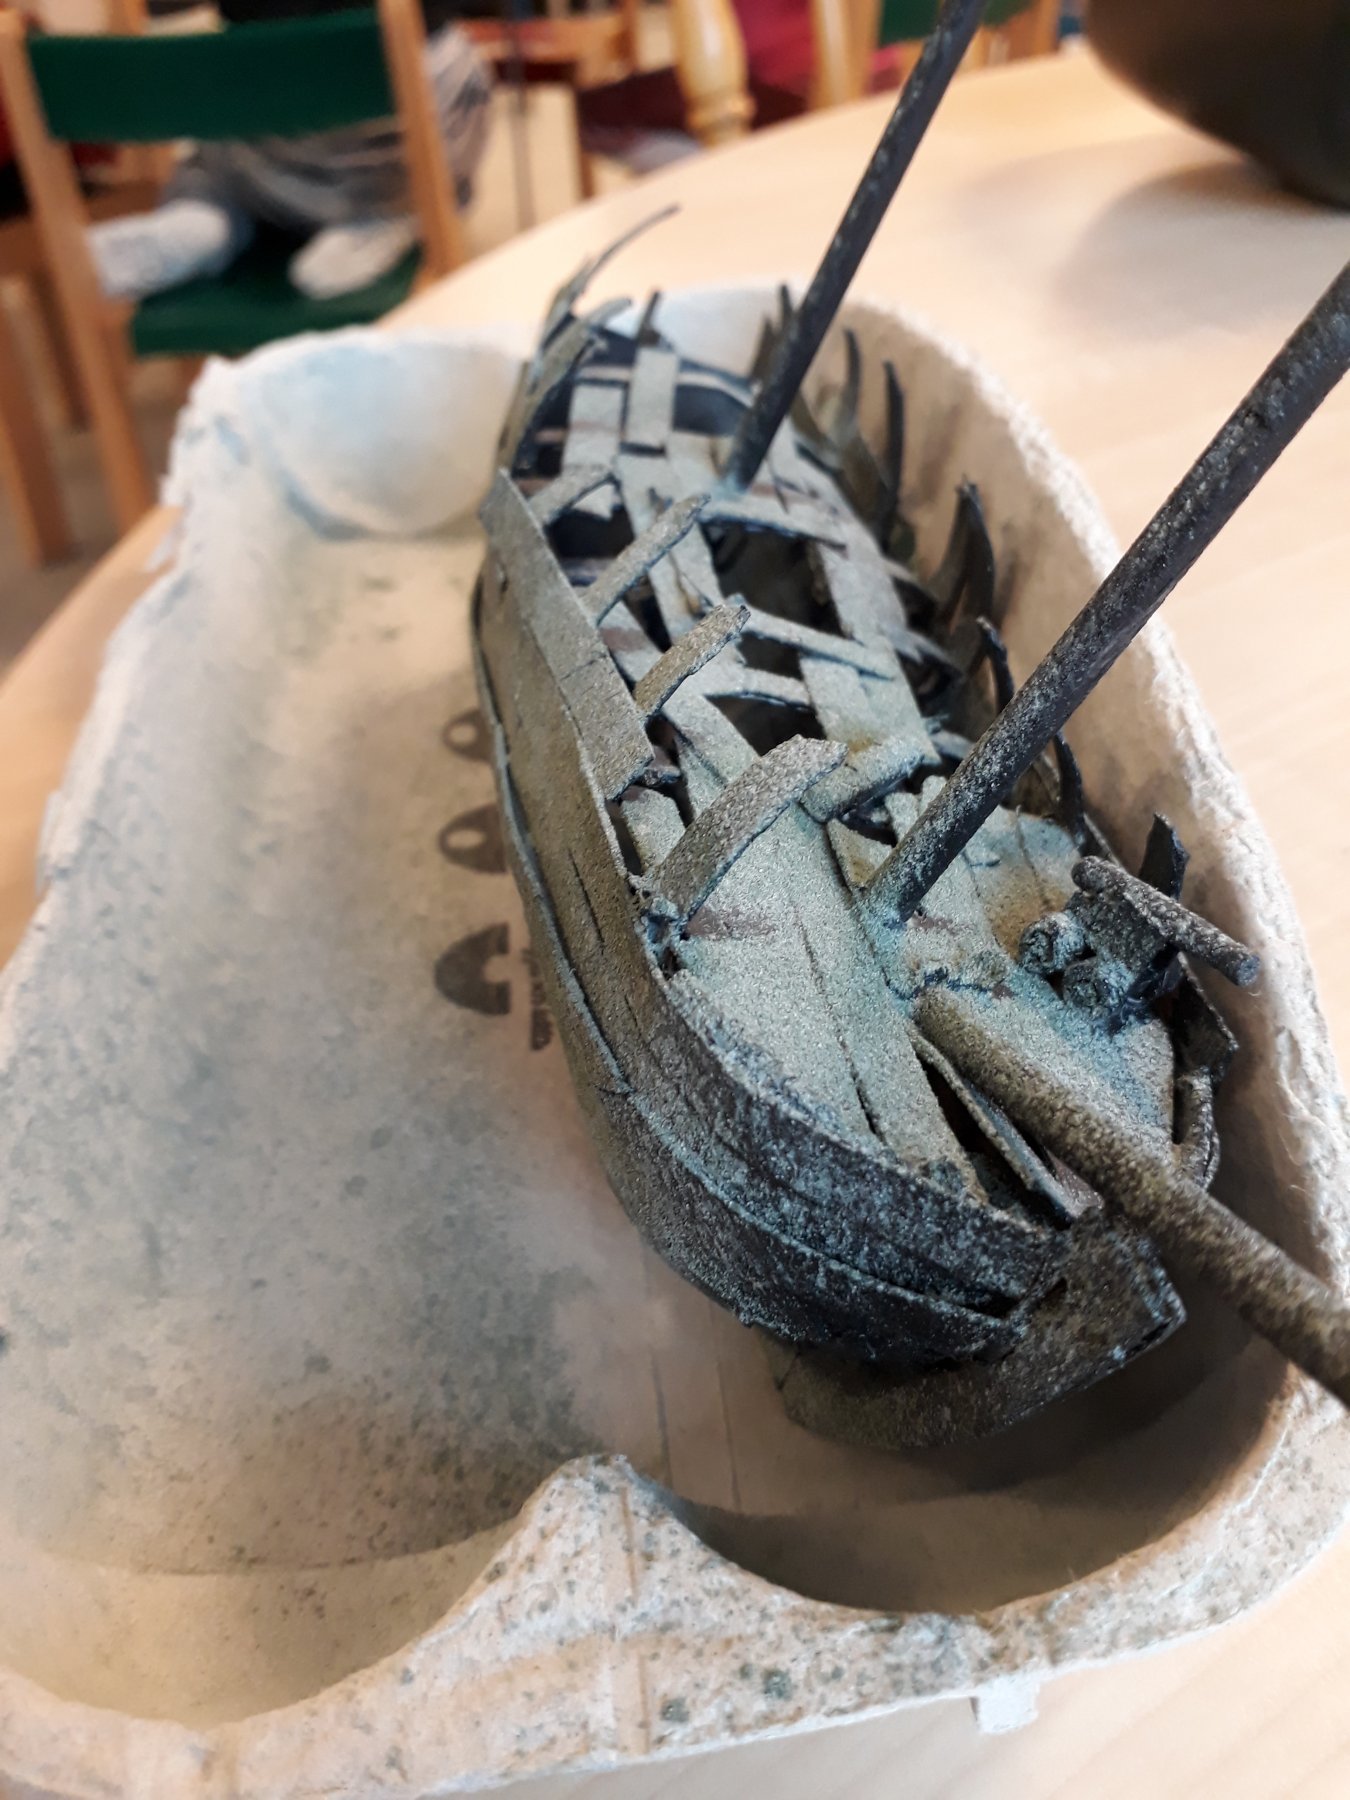
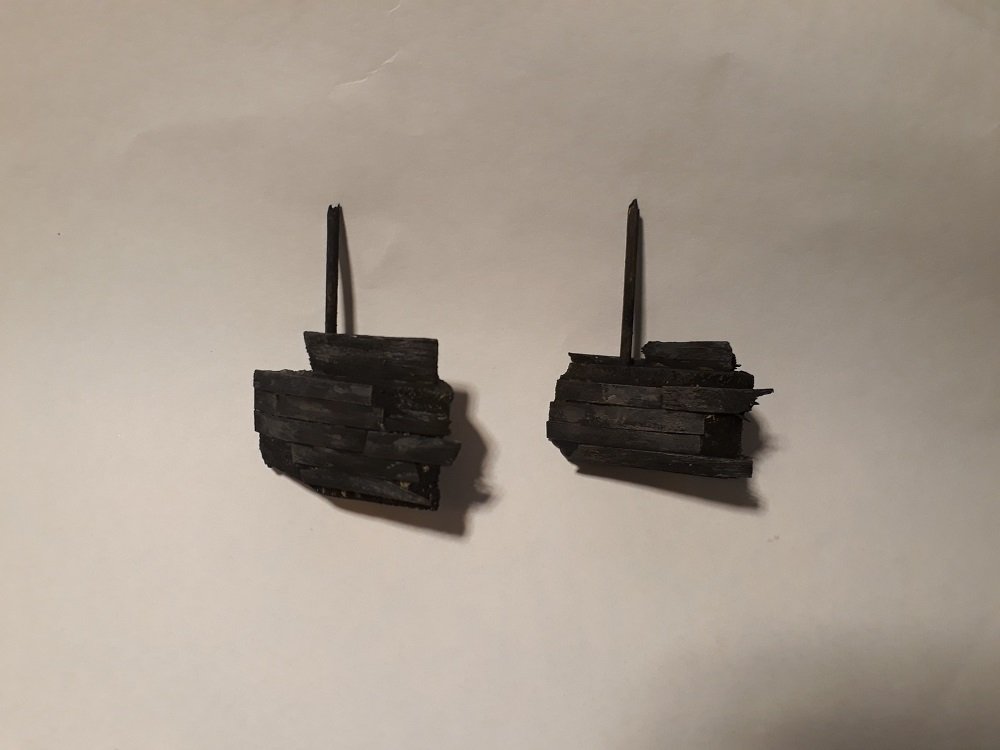
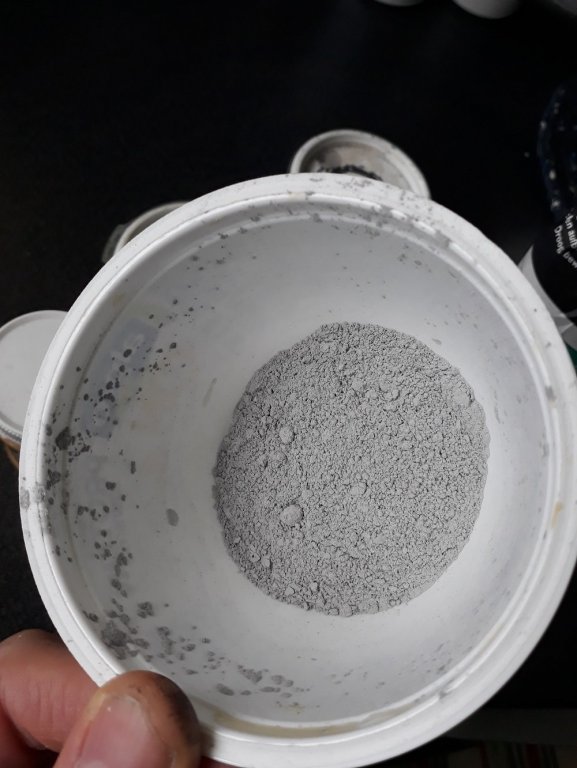
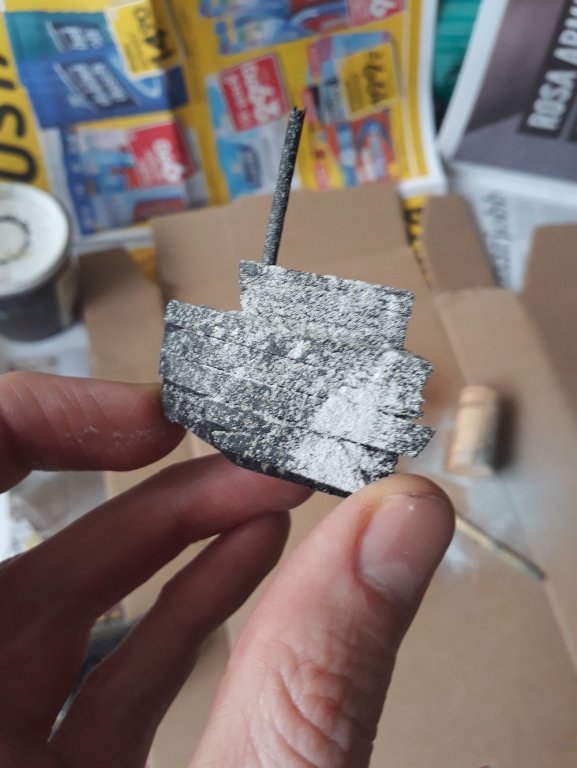
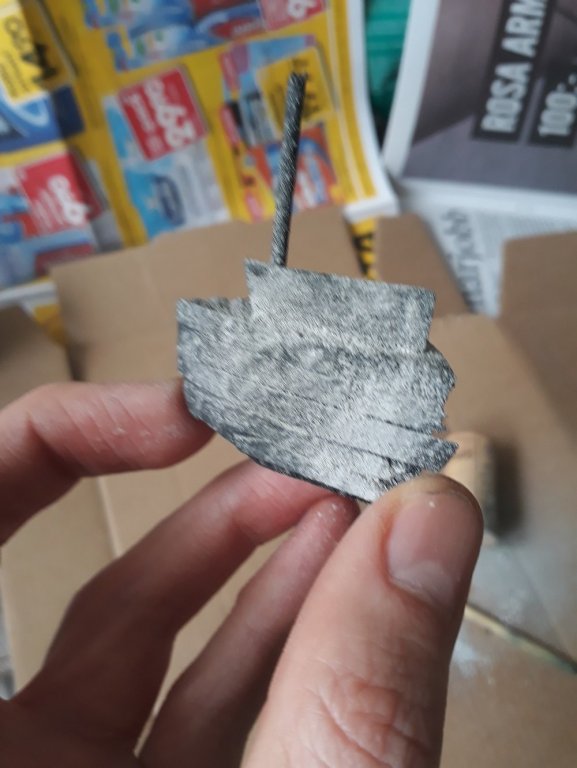
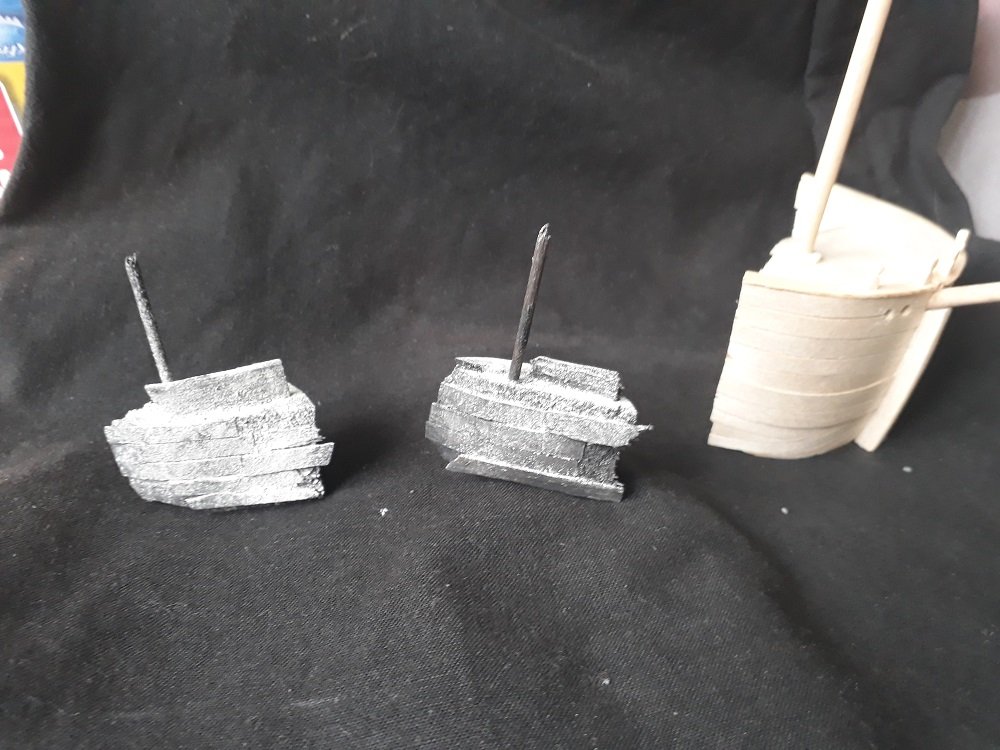
Hello again! This site really does wonders for your creativity. I hadn't planned on doing any work on this project any time soon, but a ping from the inbox, a comment and a like or two in the thread, and there I was - wreck box in hand - thinking about silt again. The project that me and "The Crew" at work have going also gave me a push in the right direction, it has to be said. News: I've given USS Truncheon and HMHS Keith Richards a coat of black/brown/grey - soggy old wood style. HMS Oyster Trap has apparently been lost to the carpet monster. Or perhaps a particularly nasty spring storm broke her up completely. We'll never know ... Since the silt me and The Crew mixed up worked out so well, I decided to do something similar with this project. Here at home we are properly supplied with pigment powders, so no water colour pucks had to be sacrificed this time. The silt is a mixture of plaster, green, brown and black pigments. I think the colour came out nice. To get the silt onto the test wrecks, I first sprayed them liberally with matt varnish, then I dusted them with silt powder from a little pouch I made from an old, very, very worn, sock. To make the silt look less grainy, I lightly brushed the wrecks with a very soft, dry paintbrush. Look at the before and after pics: HMHS Keith R. before: and after: Well pleased with the result. I think we're on to something here. One thing I'll probably do is to mix up some different coloured silt to get a less uniform feel. You could, for example, have a slightly more browninsh colour that you could use to show where Iron fittings have rusted away. Once again, it really feels good that you're taking an interest in this project! Love it! Sam

-
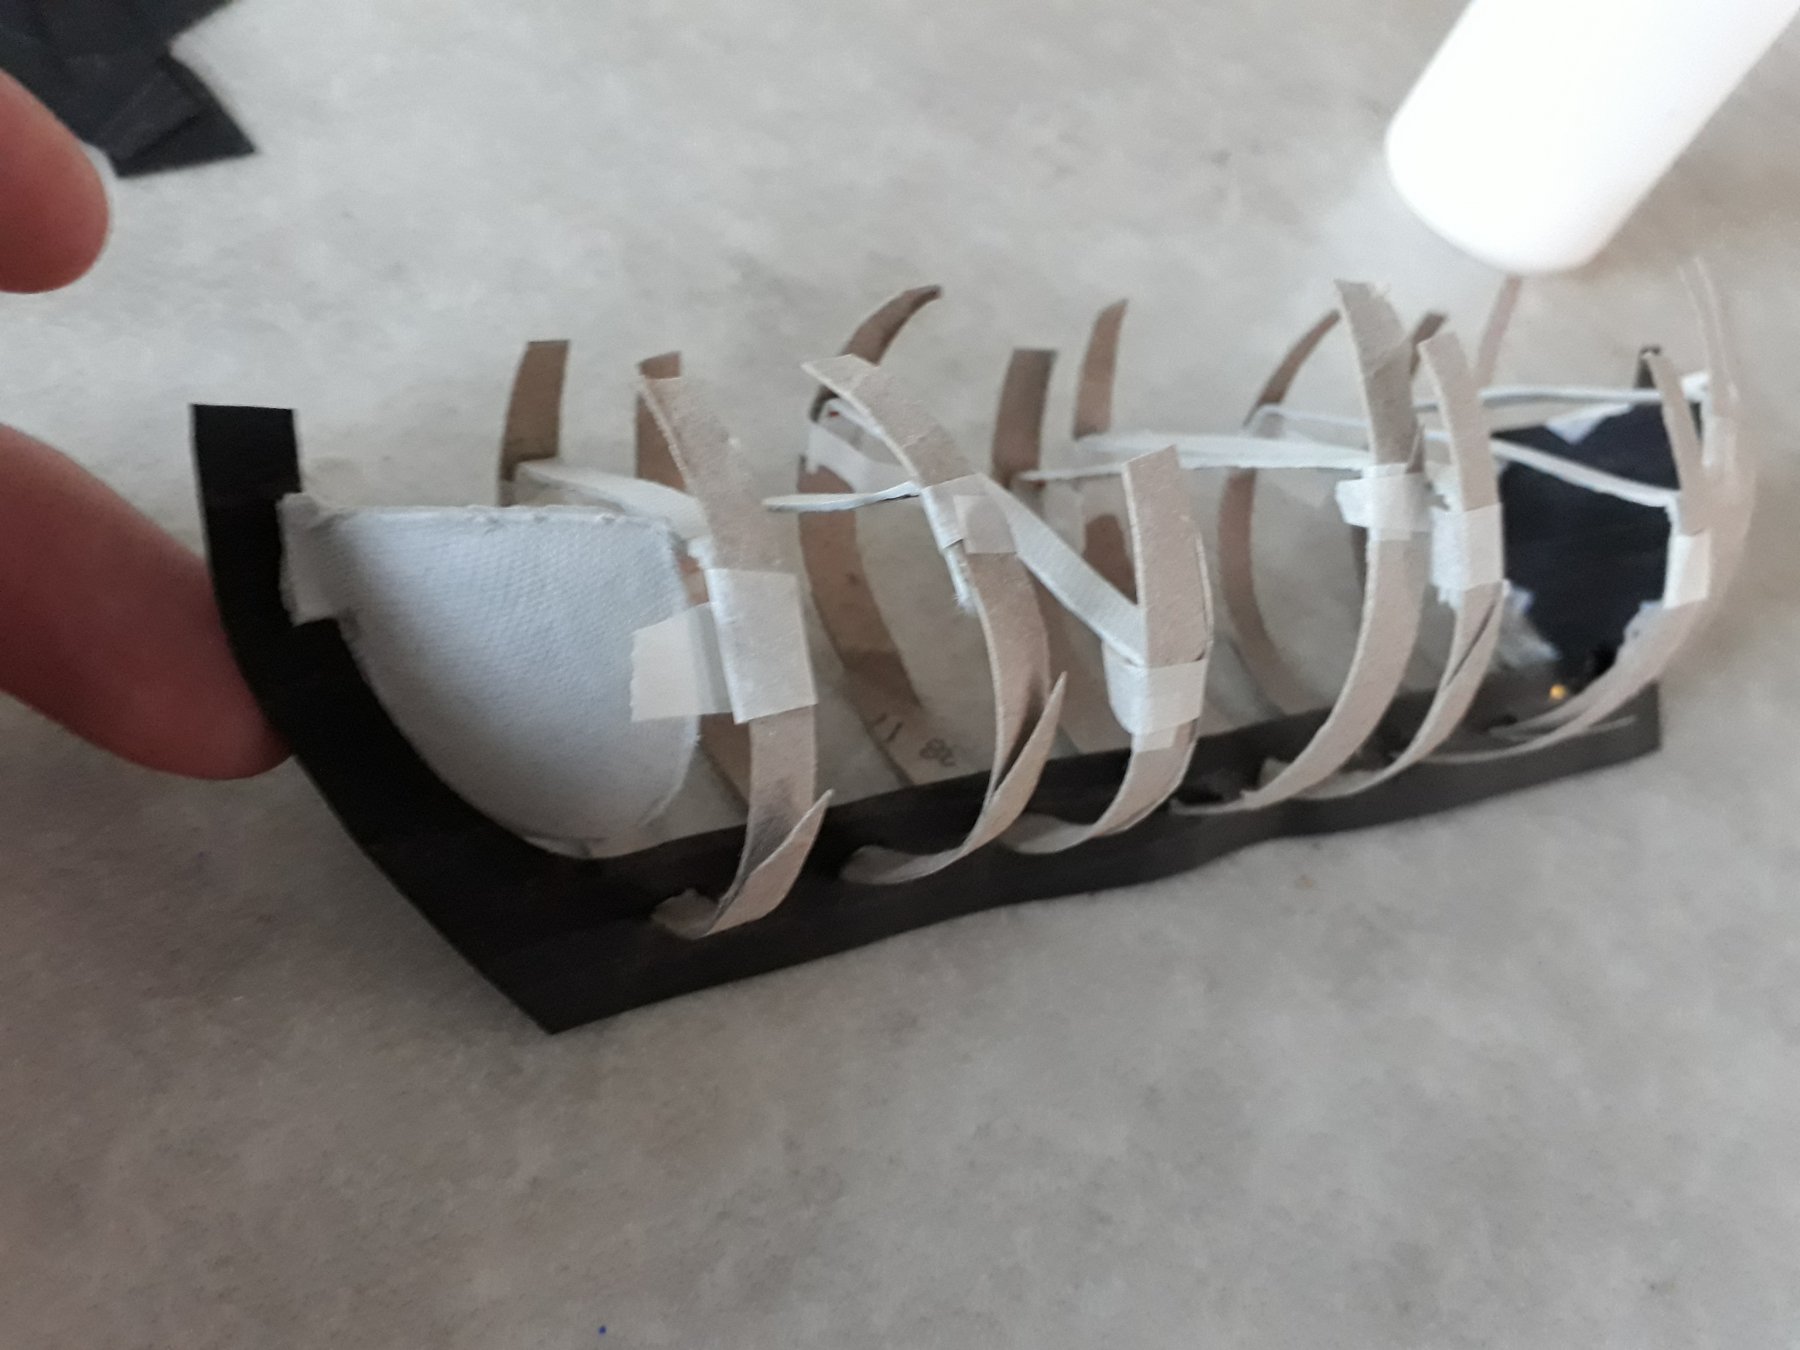
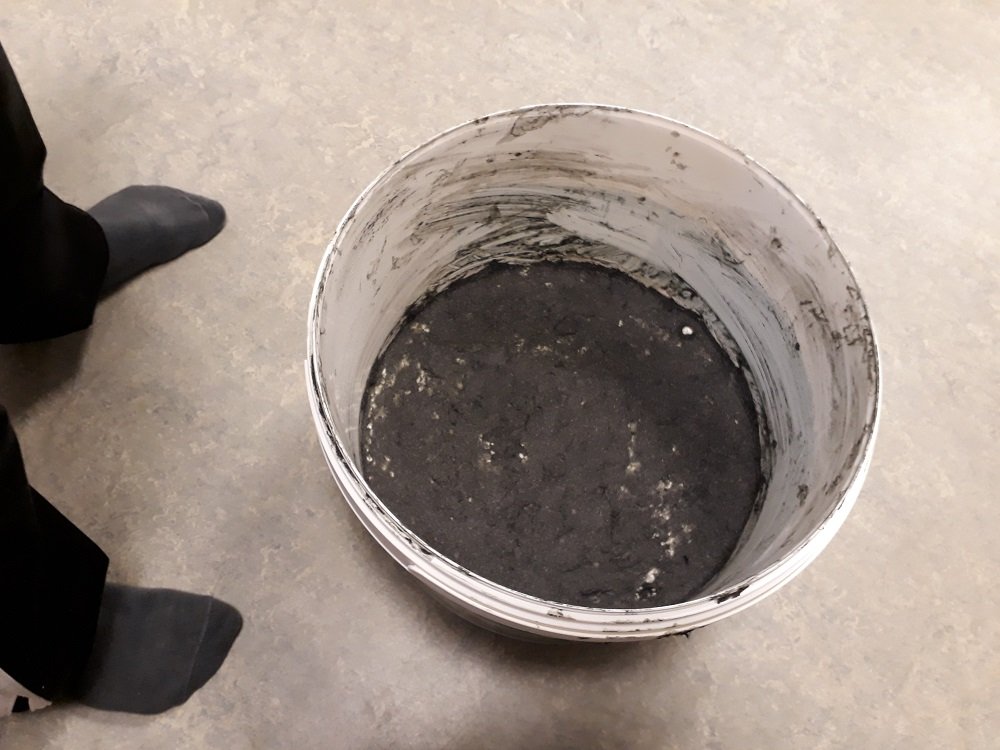
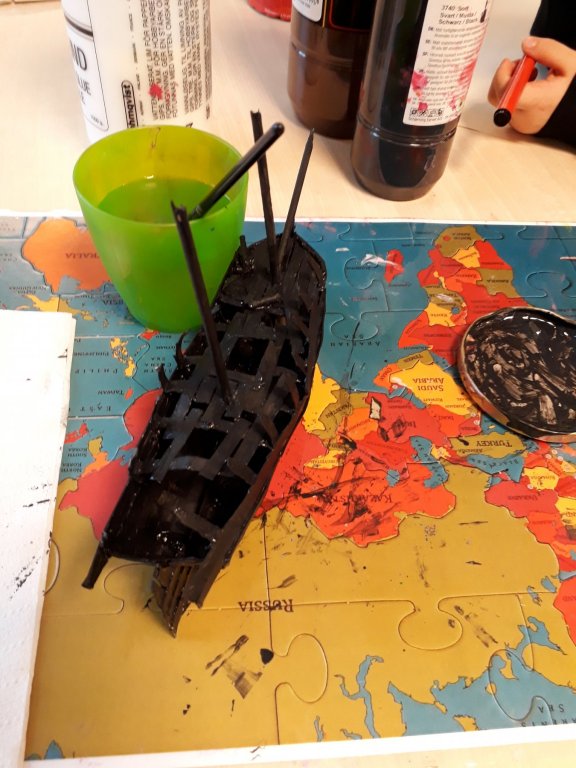
Initially, I thought we'd build a wooden box for Captain Teodor's ship to sit in, but one of the crew found a stonking great jam tub that was just the right size. Why not? Good job! No wreck without a sea floor for it to settle into. The bottom of the jam bucket was a bit flimsy so we cut a circle out of Styrofoam and glued it in. To give a little more structure to the sea floor, some goop was required. Luckily I know a good recipe: 1). Rip toilet paper into little itty-bitty shreads. 2). Pour on glue and paint. 3). Chuck in a handful of fine sand 4). Mix until you get the desired consistency. Now just smear it on and job's a good'un ... and then we all washed our hands ... for ages ...

- 31 replies
-
- 11
-
-
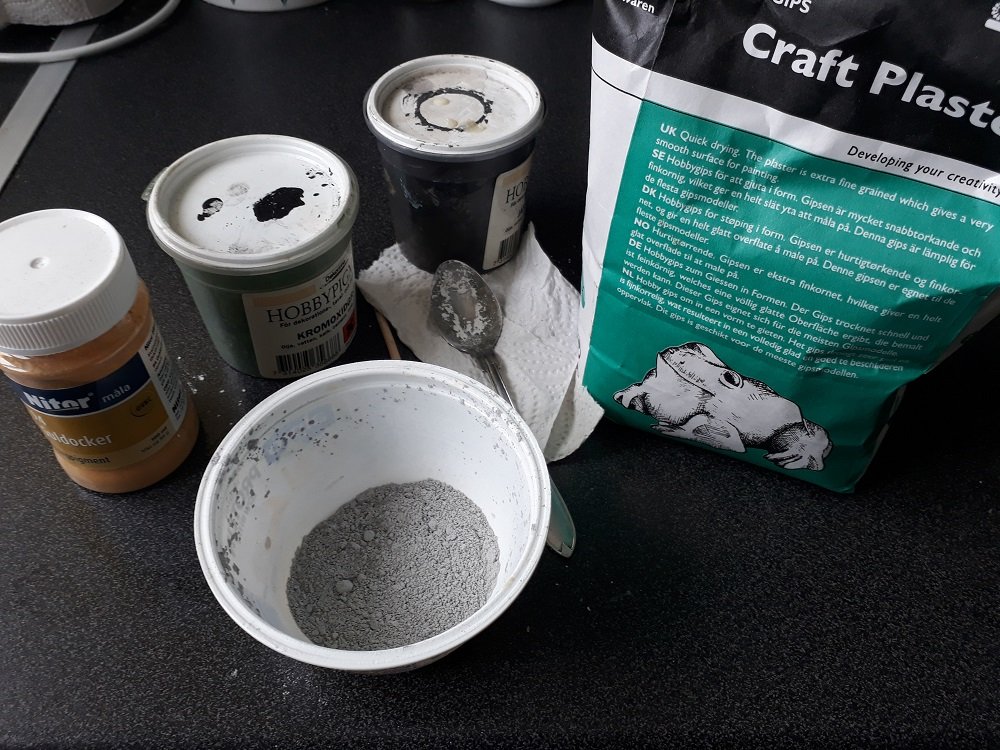
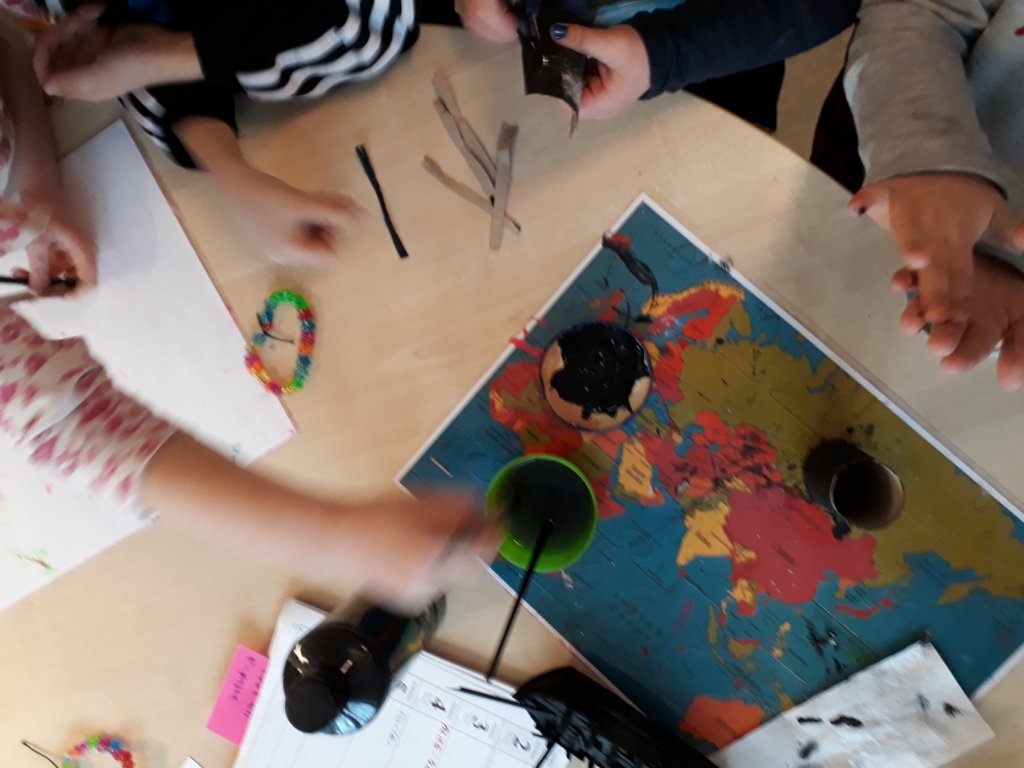
Me sitting there, beavering away at my boat had the desired effect. Before I knew it, the whole thing was more popular than macaroni; "What's that?", "That doesn't look like a boat", "That looks like my dad's boat!", "What's a mast?", "Where's the loo?" ... and so on and so forth. And of course: "When do we get to do stuff?" "You may paint planks." I said, in my best benevolent ruler voice, "We're going to do an experiment." Wrecks aren't just broken, they're often dirty too. Modelling silt is a problem that has kept my brain cells running in circles for quite some time. They deserved a breather. So I decided to pick the brains of my "crew" for ideas instead: "We could use slime", "Glue on strips of paper", "plasticene!" Well ... all really great ideas but ... Actually I had already decided on a dusting of plaster of paris and pigment powders. But now we hit a snag - there were no pigment powders to be had. We had plenty of water colour pucks though. So we sanded a few of them down to a fine powder and mixed that with the plaster. I call the shade of green "Rancid Bilge Goo". The crew really enjoyed getting the silt onto the wreck. We started out by making a lot of little holes in a coffee filter with a sewing pin. Then we fashioned a little bag from the filter and filled it with our powder. Finally I sprayed the wreck with spray adhesive, and the crew then dusted it with the powder. We were all plenty pleased with the result. More will follow soon Sam


- 31 replies
-
- 11
-
-
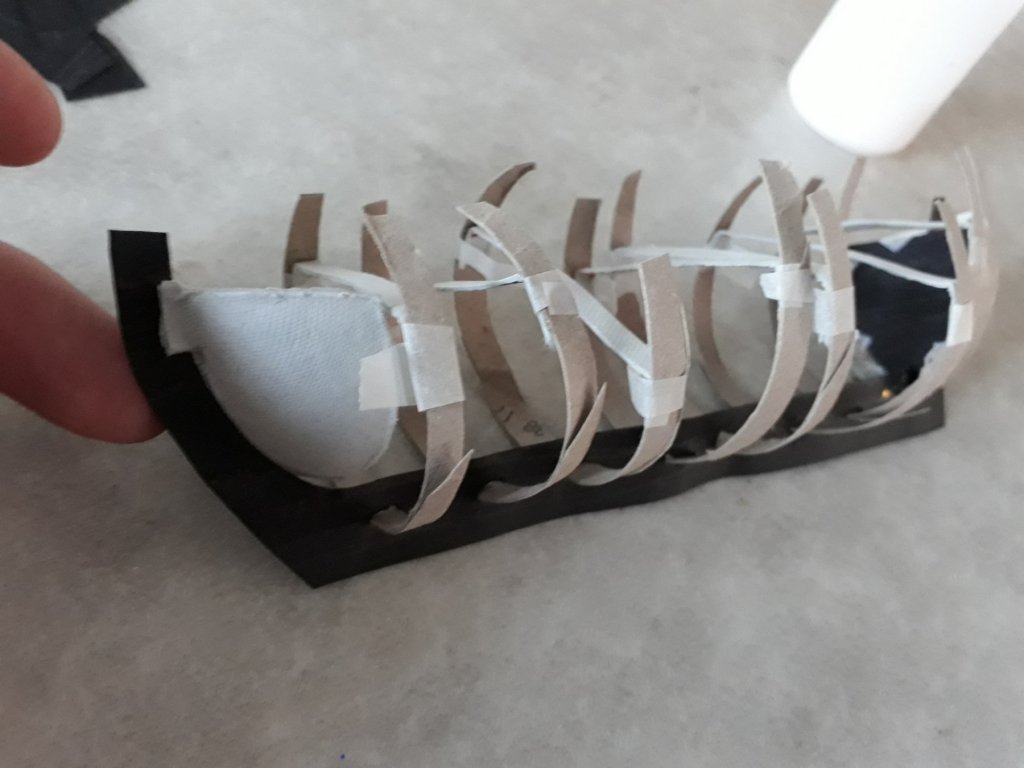
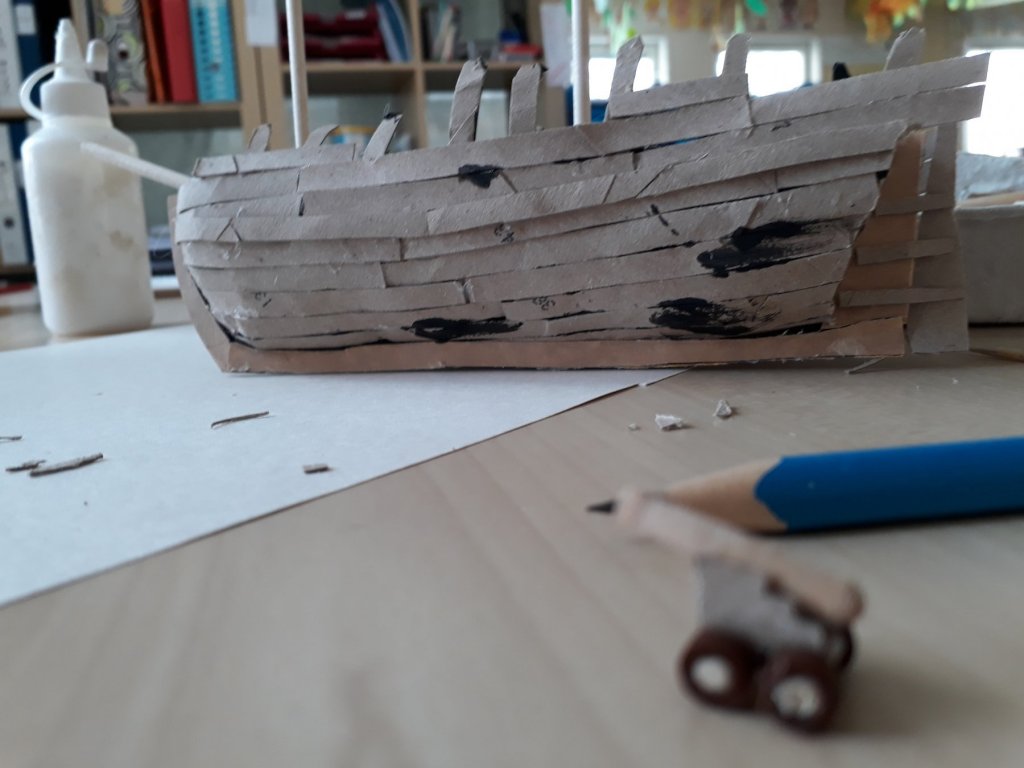
When I mentioned this project here, I said I probably wasn't going to do a build log ('cause Dionysus knows I've got a few of those going already) but you know what? - I've had a change of heart and I'm gonna go for it. BECAUSE: a). It's fun and different. b). This time it's actual, paying work and my slacker genes are kept in check by a schedule and a bunch of eager kids, who will badger me endlessly unless I get off my bum and "let them do stuff with the boat". So don't you worry, dear reader - this one's not going to be an endless, hopeless slog through the salt marshes (at worst, your shoes will get a little muddy) so come along, why don't you? Also, if you have an idle gaggle of five-year-olds knocking about somewhere, this might be something worth trying out. Good fun. The model is heavily inspired by the wreck of the Bodekull (previously know as "Dalarövraket" - 'The Dalarö Wreck'). AHEM! Right. Onwards. There's a children's song, I think it's from one of the Pippi Longstocking movies, and the first two verses go like this: "Minns du en sjöman för länge, länge sen? Minns du hans namn var Kalle-Teodor? Aldrig så ser du den sjömannen igen han vilar i havet Kalle-Teodor. Men en stormnatt kan du höra nån som ropar 'hej-hå!' Ifrån havets djup det kommer och det låter så: 'Hej-Hå!' I storm på Biscaya gick skeppet i kvav skeppet han segla Kalle-Teodor Därför så vilar han nu i sin grav vaggad av sjögräs, Kalle-Teodor Men en stormnatt kan du höra nån som ropar 'hej-hå!' Ifrån havets djup det kommer och det låter så: Hej-Hå!'" Here's an English version from this video: "Can you remember a sailor from before Can you remember Captain Teodor You will never see this sailor again He's resting in the ocean, Captain Teodor. But on a stormy night it echoes - someone calling 'Hey-Ho!' from the ocean deep it cometh and it sounds like so: 'Hey-ho!' In a storm on the Biscay the ship hit a wave the ship he was sailing Captain Teodor so now he is resting below in his grave cradled by sea weed Captain Teodor. But on a stormy night it echoes - someone calling 'Hey-Ho!' from the ocean deep it cometh and it sounds like so: 'Hey-ho!'" This song is ever a favourite among kids (in my experience, at least). Loss at sea isn't something Swedish, urban kids of today typically have to deal with, but it has that ... vibe ... you know ... it's macabre enough to get the thoughts rolling. And it's mighty catchy too. Being quite unable to keep my perverse nautical interests out of anything, I ... um, "We" ... decided that Captain Teodor's ship would be a great theme for a creative project. So I picked up a toilet roll, scissors, a hot glue gun and off I went. Here's the general idea: That's Part one, then. Cheers Sam
-
Hello! Wow ... long time no see, eh ... Mr. Wreck-Diorama-Thread ... The model hasn't been completed. That, however, isn't saying that it won't be completed. Followers of my Akagi build will no doubt know by now that even an asthmatic tortoise can beat me when it comes to speedy progress ... The wreck is still sitting on me desk in plain view, glaring at me, making me feel slightly guilty. This project is still fresh in my mind - I'm still thinking about it a lot. And I'm actually doing a very similar thing (probably won't do a build log, but stay tuned!) with some kids at work, and that has given me some ideas for this diorama too. So to sum up - will finish this one, eventually. Thank you, kisses and hugs all around, for remembering and showing an interest in this project! Cheers! Sam
-
Thanks! Yeah, Hasegawa very kindly included a nice, shiny metal bar in the kit. It'd be rude not to use it. I found it before I had a glance at the instructions; "Nice ... but what do I need a whetstone for ...?" I thought.
-
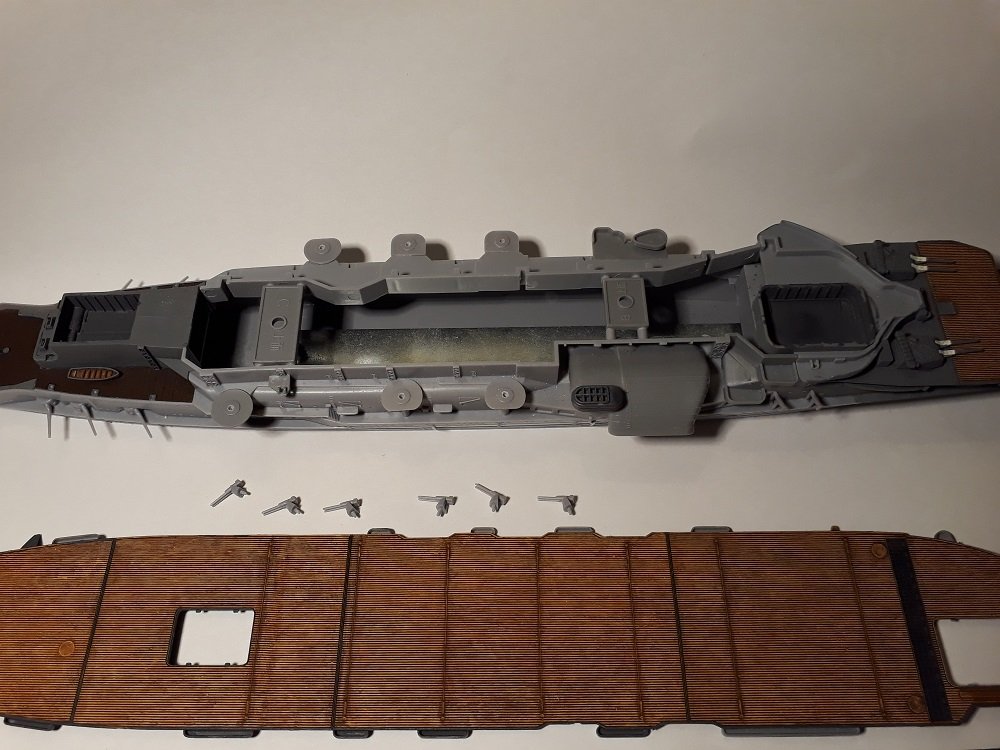
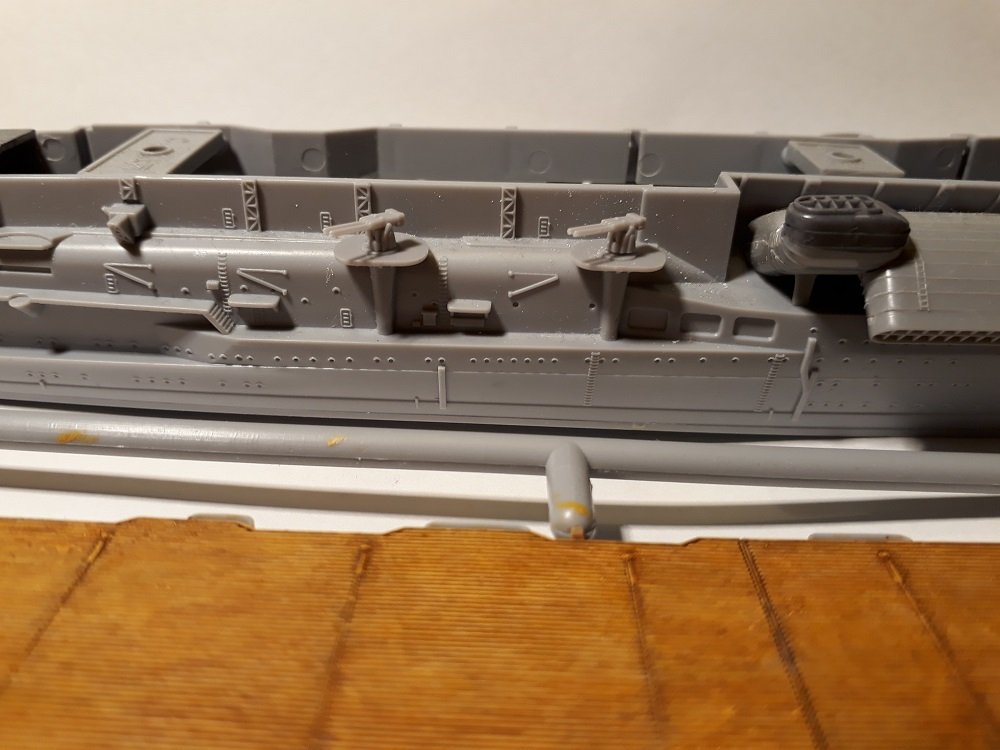
Nope. Completely innocent, as far as any porthole drilling is concerned! That's a shame ... Still, an unopened kit can be left to "mature" to a nice, round and well-balanced vintage status. More Akagi: A few more bits and bobs to glue on - davits, boats, and such - but apart from those what remains is attaching the top flight deck, painting and decals. ... oh and the scores of teeny-weeny planes. The flight deck isn't quite "there" yet, but the lookout has spotted land, so to speak. I'll finish the details, drybrush the wood a bit more, perhaps a bit of weathering and the odd oil stain too. You know those black holes that we all have in our flats and houses? I think some refer to them as Carpet Monsters? Anyway, mine has claimed its first victim from this build: one of the aft turrets (terminology?). So I'll have to scratch build me a new one. And, yeah, they rotate too. Thanks for dropping by! Sam
-
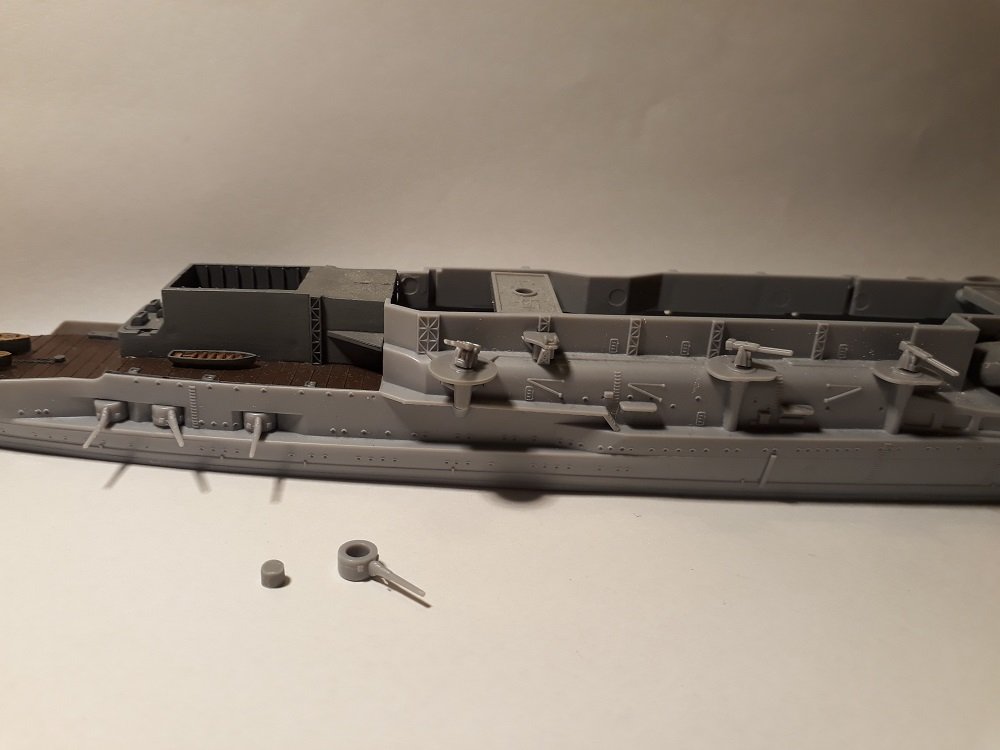
I've been steaming ahead, at my two knot top speed, all week. I reckon the flight deck will look about right after one more session or so. A lot of drybrushing. So much in fact that I decided to take a break and build some aa turrets. Movable, naturally. (... but you can't change the elevation ... I wonder if I could ... NO! Stop it! It's 1/700, you fool!) I'll show you the flight deck when I've gotten it looking a little sexier. See you soon, hopefully! Sam
-
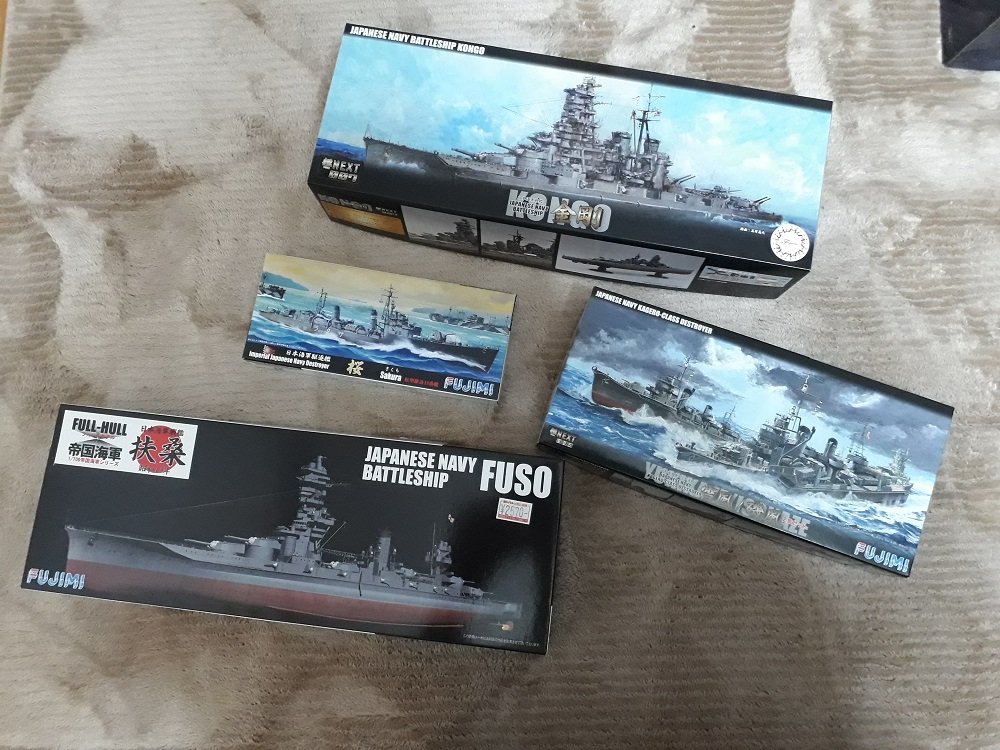
Yeah, I'm a snail ... but I'll make it across the road. Eventually. But I took my own slowness into consideration when I selected the ships. Fosô and Kongô will be serious mouthfuls to chew but Sakura, Yukikaze and Isokaze are pretty small and uncomplicated. Burning rubber: I'll have a good 'ol wallow in pics of aircraft carrier decks - see if some ideas crop up. Thanks.
-
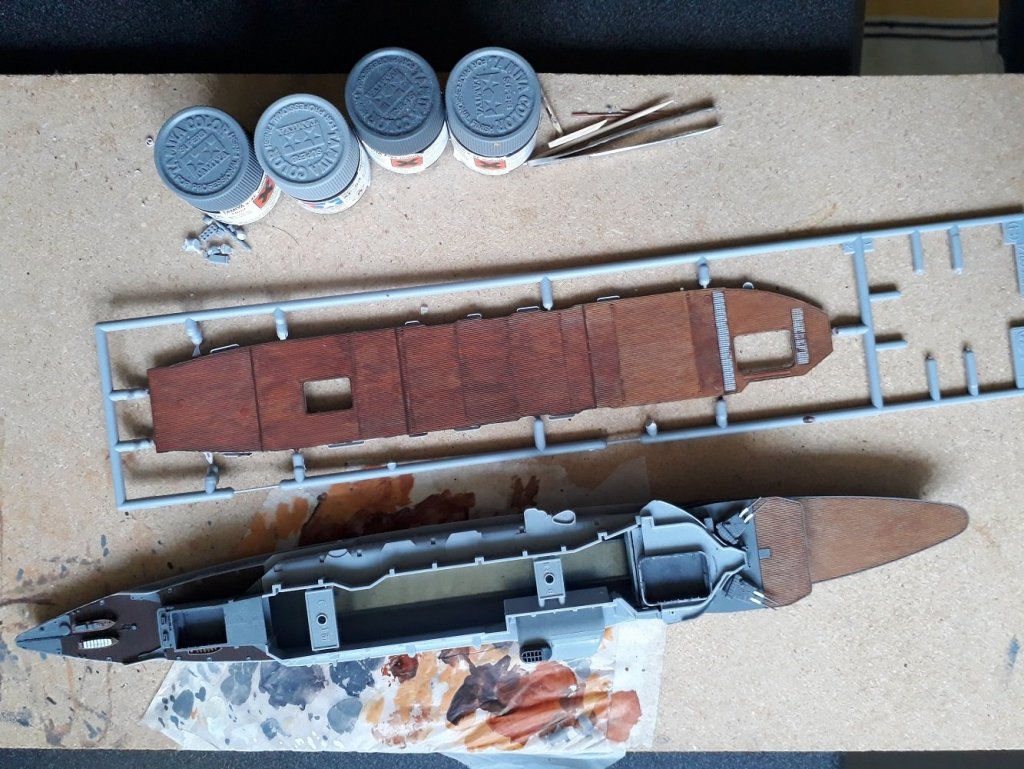
Hello again My threads never die; they're like those rare orchids that only flower once every eon or so. Those who read the inaugural post here might remember my grand IJN fleet plans. The next step has been taken. Akihabara isn't just a place where nerds, like me, go to visit Maid Cafes, buy laptops and drool over over-priced Akira figures, it also serves as a perfectly good ship yard and naval base. So I naturally took the chans to go there and procure me a warship, or five, during my recent trip "home" to Japan. Before these badboys get built, I'll of course finish Akagi. I've started painting her upper flight deck. Same procedure as the other wooden decks: light brown base coat->several darker brown washes->a combination of drybrushing with various lighter browns/yellows and more washes. Cheers! Sam
-
Thank you, thank you! Yeah ... I'll enjoy being twenty-something again ... To be honest though, well, if statistics are to be believed, I'll most likely find myself hankering for a bike and some botox. NO ladies of half my age will be safe. Anyhooo My sweet, sweet gents (haven't seen any ladies in this thread yet)! You know what I forgot to do? I forgot to post the bye-bye pics I took before leaving paradise. The chock of the head on collision with city life left my senseless and distraught ... Rectifying in 3, 2, 1: Thank you all for showing an interest in this little project! Cheers Sam