HOLIDAY DONATION DRIVE - SUPPORT MSW - DO YOUR PART TO KEEP THIS GREAT FORUM GOING! (89 donations so far out of 49,000 members - C'mon guys!)
×


Farbror Fartyg
-
Posts
178 -
Joined
-
Last visited
Content Type
Profiles
Forums
Gallery
Events
Everything posted by Farbror Fartyg
-
 Hey! @Popeye I'll take that ... should I drink it before or after the red? Thanks everyone! I really appreciate it. I'll get the build log moving again in a bit. For some strange reason clients want me to actually finish sites I'm building for them ... [insert your best superlative] Regards Sam
 -
Hahaha! Sandbags - I have another one for you! Here there's a breakfast cereal called "Havrefras" (something like "Oat Crispies" in English). They're cushion shaped and if you soak them ever so slightly in diluted PVA, you can shape them with your fingers. Soak, knead, stack ... and once dry, hey presto! Instant sand bagged position for your troops! Aaahh ... off topic ... Sam
-
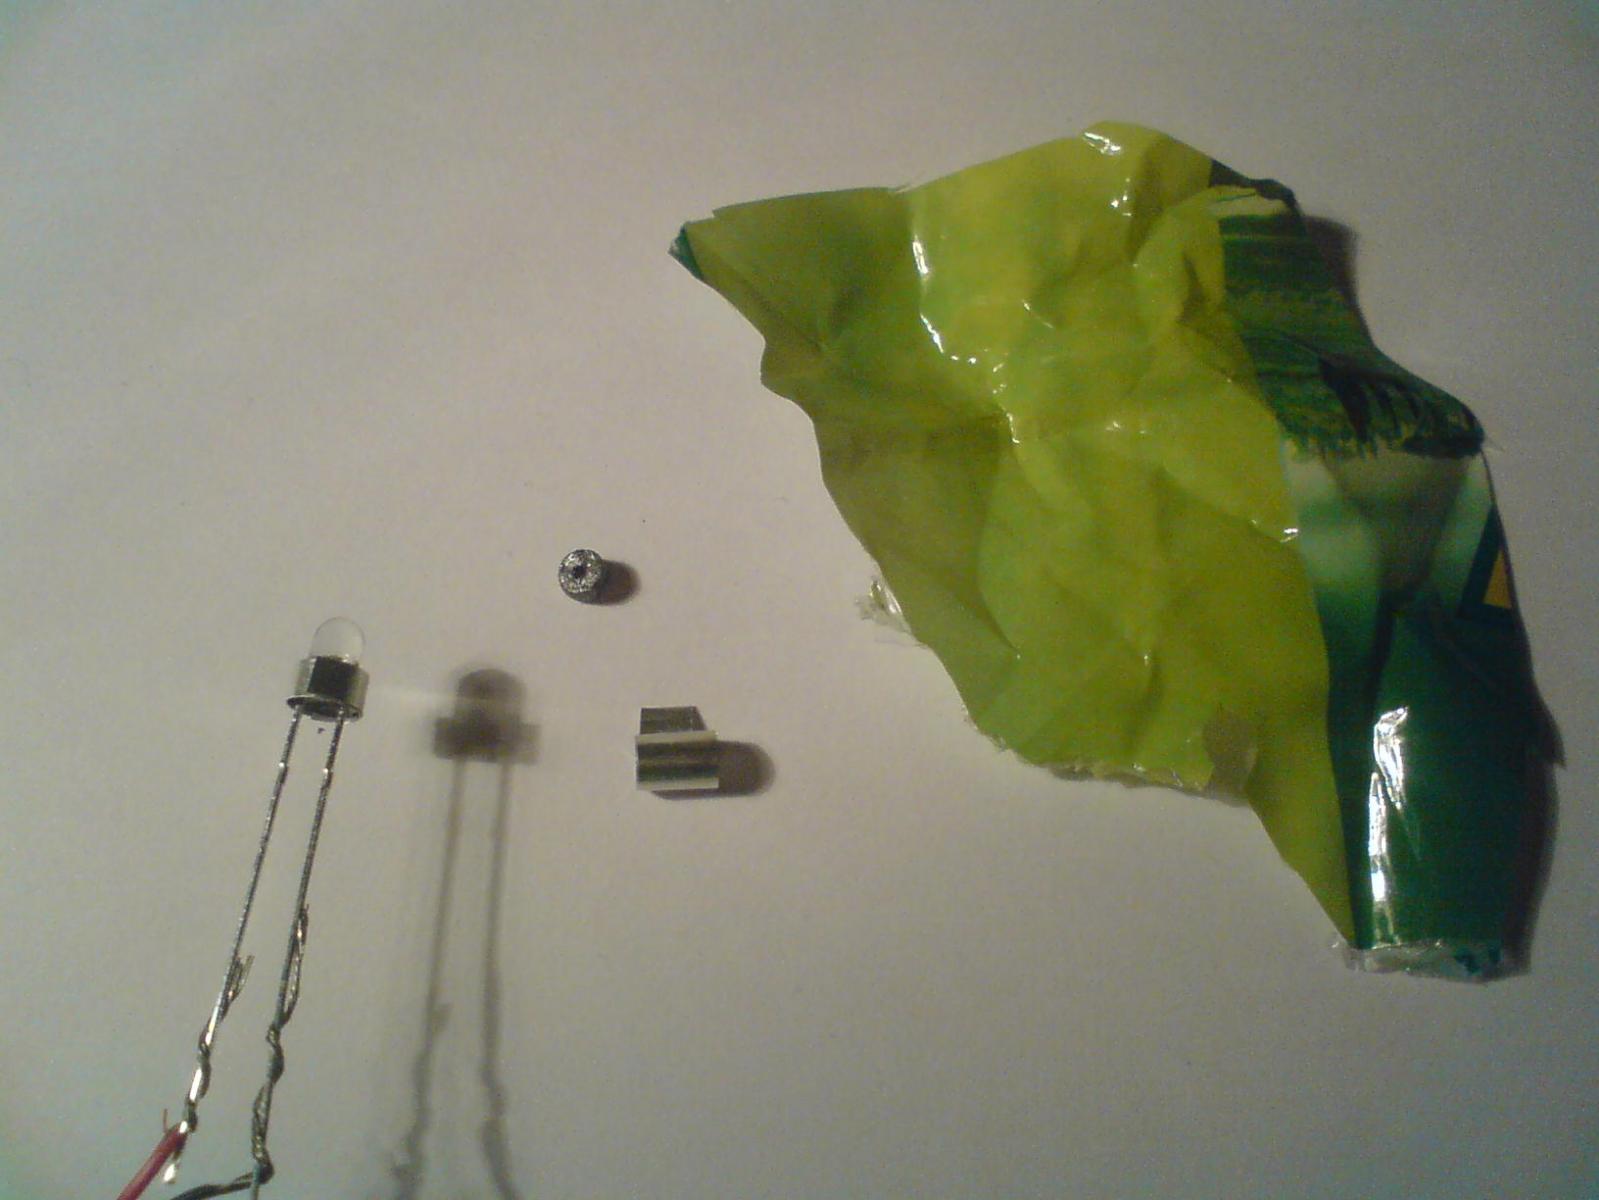
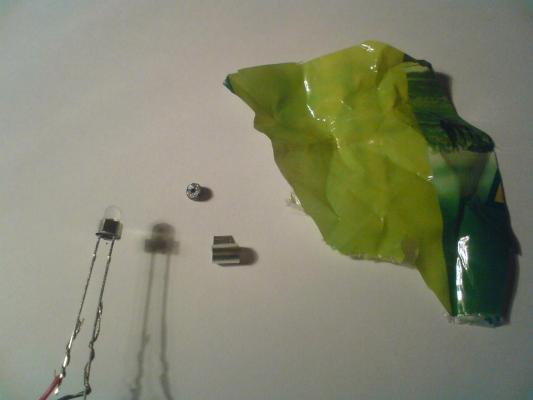
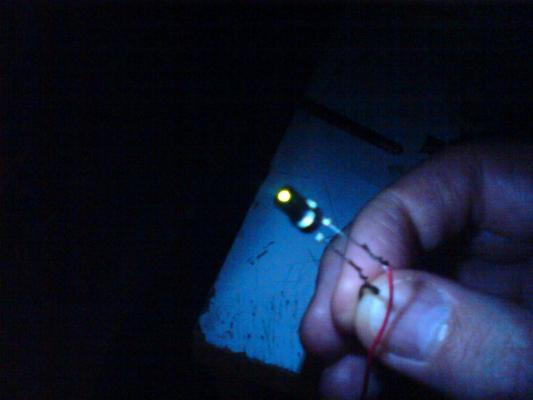
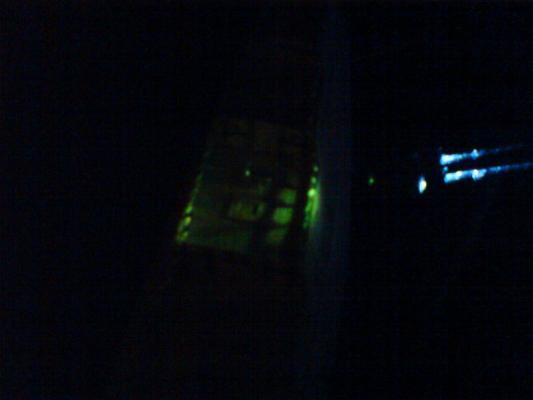
Welcome back to Making Possible Things Seem Impossible, with your host - Farbror Fartyg. I've done some work on the ROV. As I'm sure you can deduce from the picture, the parts are too big and heavy to lift. I'm using the very latest in ship building technology - pasta packaging. My poor, unfinished Sovereign made a cameo as wreck in this pic. The metallic bits are, as previously mentioned, aluminium foil. If I ever need to change the LED, it comes right off. The tubes are glued, but they aren't glued to the LED iteself. To fit the filter, and to make the "spotlight" smaller, I made a wooden plug, drilled a tiny hole in it, painted it, and inserted it in the LED tube. The filter is made from the pasta packaging seen in the pic above. The light looks very green in photos taken by my mobile camera ... looks a bit better in reality. I'm pretty pleased with the effect, though. It looks sort of underwater-ish.
-
Happy birthday! I feel like you have given me a present - this build log. It has given me tons of inspiration. Sam
-
I'll follow this one. Interesting. "Fune" is simply "ship", or "boat" in japanese. As for the "bune" bit: I've forgotten the linguistic term for it, but has to do with a first word of a compound word affecting the pronounciation of the first consonant in the word following it. In some cases, "fune" becomes "bune" when in compound words. EX. "tsuribune" - a fishing boat. Give me a holler if you need any help with anything Japanese related. Sam EDIT: Sorry catopower! I didn't notice you had already explained what fune means ...
-
Now this is REALLY something! I LOVE the colours! Sam
- 883 replies
-
- 1
-

-
- royal caroline
- ship of the line
- (and 1 more)
-
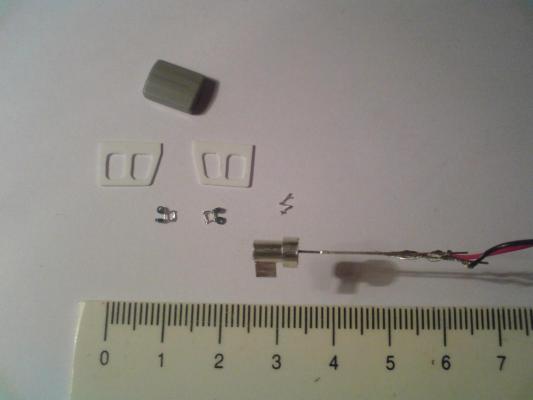
I think something has to be done about the brightness of the LED, but I'm thinking about a more low-tech solution - a filter. The viewer is meant to peer into the diorama box through a rather small opening. The opening has let enough light through for the whole thing to actually function as a night light, so it can't be too small. It can't be too big either, as that would be too revealing. You want draw the viewer in close. I have to make sure the light is just right. Filtering the LED's light will, if done right, do two things. Firstly it can help sell the illusion that you're looking at an underwater scene. And secondly it will soften the light so that the viewer isn't blinded. I decided on using a white LED because none of the other available colours felt right. It's fairly easy to change the colour and intensity of white light with a filter. Thanks! Dilluted PVA is a very good idea! Why didn't I think of that ... I've actually used it before, as a fixative for drawings. ROV update: I made an ROV, with kitbashed parts on a wooden box (housing the LED) but I didn't like the result, so I scrapped it. Instead I decided to make the LED housing, and some other parts, out of thick aluminium foil. The advantage is that the foil is already opaque and metallic, so I won't have to paint it to prevent light leaks and to get a metal finish. The flotation tank on top, and the side "grilles" are made from styrene. I've also been going over the www with a fine-toothed comb for wreck pictures. Frightening stuff ... Sam
-
Oh oh oh ... How do you tell someone they're INSANELY good at model making ... do you just tell them? Like that? Crikey ... Sam
-
@Errol Good idea! Thinking about various ways of silting up the wreck, it's easy to wander into Borges territory: You gradually make your attempt at replicating reality more and more complex, and finally it's so complex that it IS the reality you were trying to replicate.
-
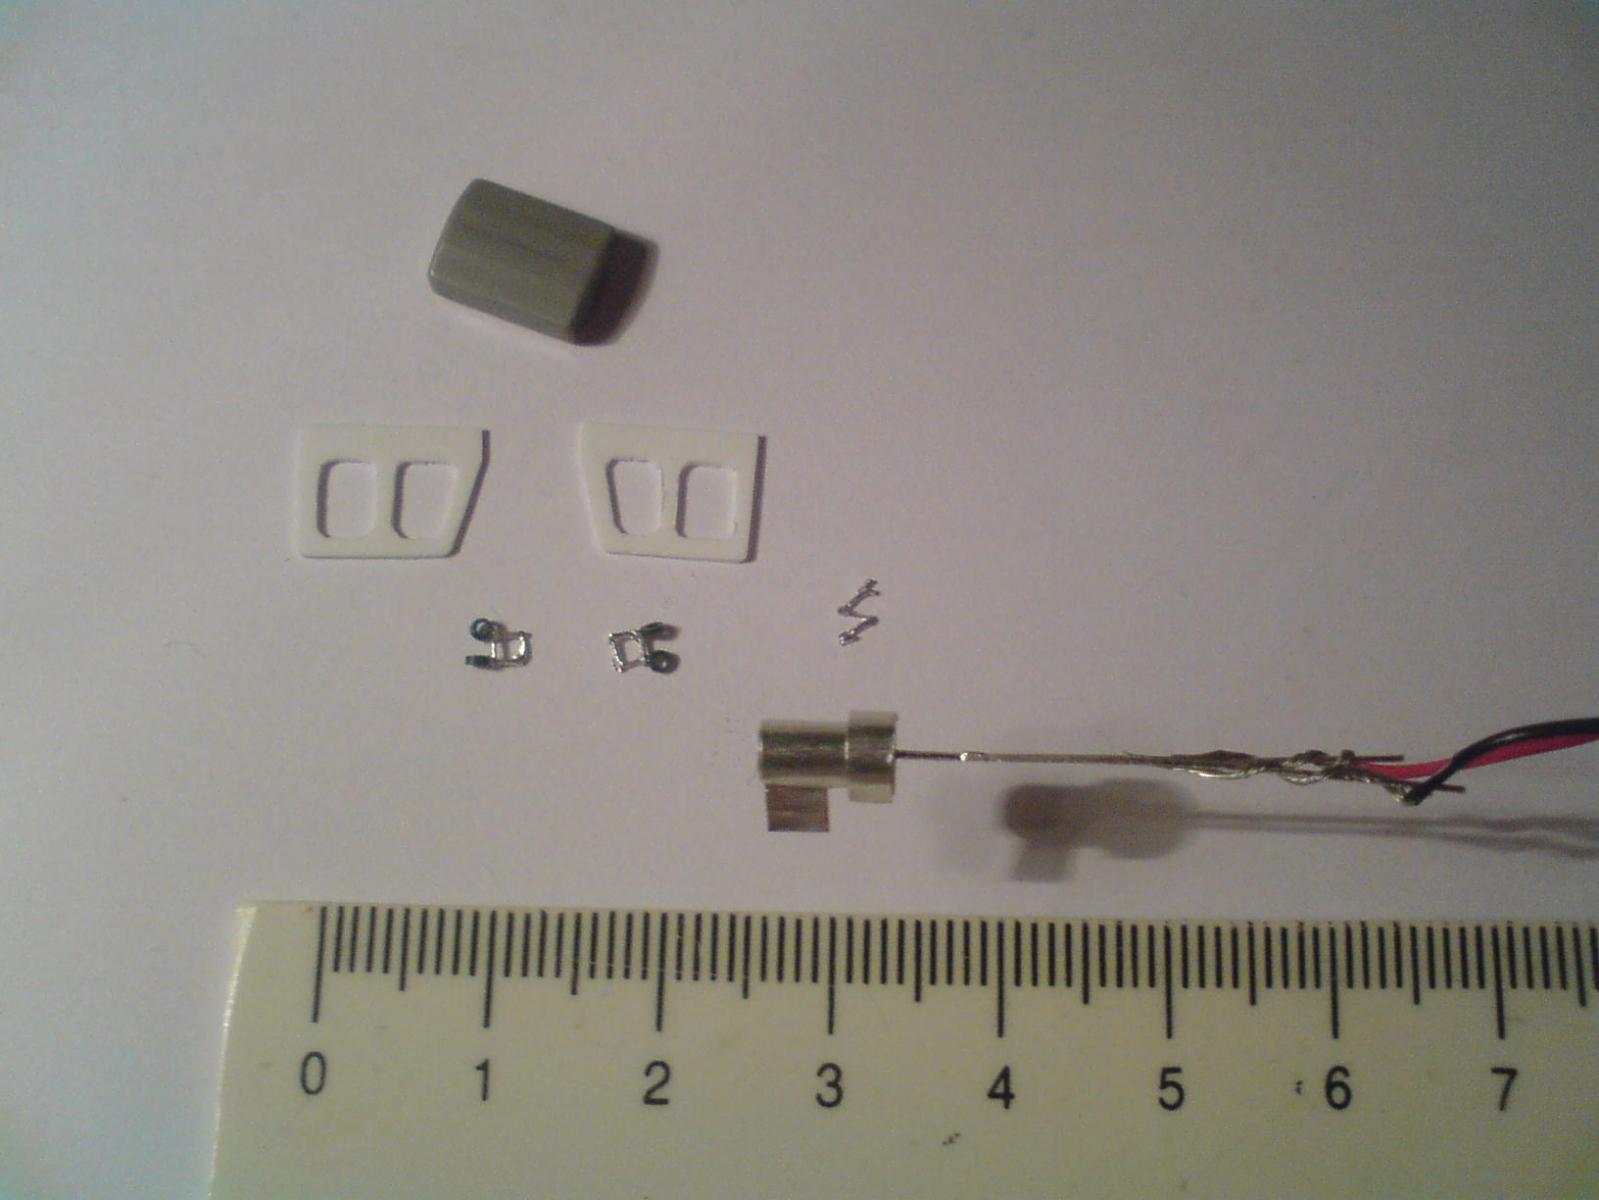
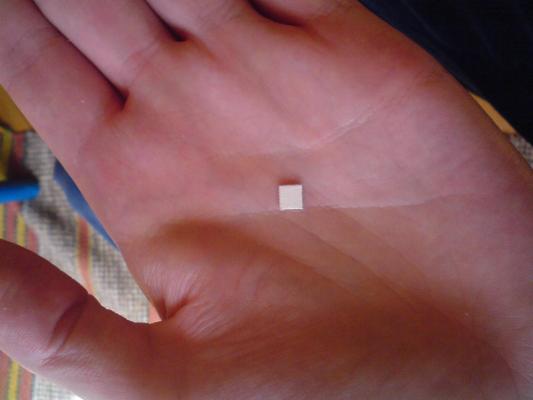
I made a qucik ROV mock-up, to test things out a bit. At one cm it's very tiny indeed ... See-through wood - a Nobel prize in the bag? Metallic paint is the best chioce for making things opaque. Dang! The looters got here before us ... When working with LEDs and batteres, always remember your mantra: Ooohhhmmm, Ooohhhmmm ...


-
Some thoughts. The LEDs, I've bought a pack of 3 mm diameter ones, will determine the size of the ROV. The ROV will determine the scale of the rest of the diorama, so it will have to be constructed first. I've found one that I like[1]. To best convey the gaping, dark hollowness of an old wooden hulk, I think it would be best to use some sort of plank on frames solution for the wreck. I'm pondering how to best represent silt accumulation[2] on the wreck, and on object strewn about the sea floor. One way of doing it would be to "mist" the finished model with spray paint. If you hold the can above, and quite far away from, the model, you can mimic "Neptune's gentle snow". Some problems with that approach is that it will be hard to find paint of the right colour - I guess "Mud Grey - matt" isn't exactly the most popular colour. Another problem is that spary paint can form blobs. We dont want that. You could also perhaps use some sort of spray adhesive to mist the model, and then sprinkle mud coloured powder pigment over it. Or I could just paint it, the good old way. [1]https://www.google.se/search?q=panther+rov&safe=off&rlz=1C1DVCJ_enSE462SE462&tbm=isch&tbo=u&source=univ&sa=X&ei=J-f2UeaqBoOKtAbS5ICICA&ved=0CE0QsAQ&biw=1600&bih=799#facrc=_&imgdii=_&imgrc=HRAExA0RH_8KOM%3A%3BxlamroPReCGaCM%3Bhttp%253A%252F%252Fwww.sub-find.com%252Fimages%252FpantherROV.jpg%3Bhttp%253A%252F%252Fwww.sub-find.com%252Fpanther.htm%3B271%3B280 [2]http://www.google.se/imgres?imgurl=http://sverigesradio.se/diverse/appdata/isidor/images/news_images/86/2002076_520_292.jpg&imgrefurl=http://sverigesradio.se/sida/artikel.aspx?programid%3D86%26artikel%3D4803198&h=292&w=520&sz=29&tbnid=RHk0hYayoK1X4M:&tbnh=70&tbnw=124&zoom=1&usg=__EoveqzJwHKNSq_bFFVJRupawXg0=&docid=LKHLQKWVV-gUnM&sa=X&ei=EH_3UbCLB86w4QSs74HACg&ved=0CEIQ9QEwAg&dur=437
-
@Greg That's pretty close to what I'm aming for. Thanks!
-
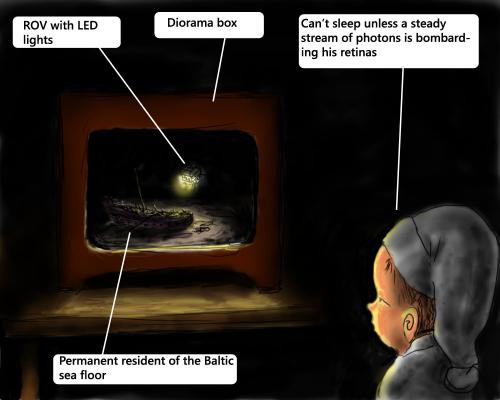
Hello With my first build log[1] on hold for a year, it's time to sail into new and uncharted waters (and then sink there). First of all I'd like to say thanks to all the people who popped in with a thumbs up when I presented[2] my idea What I'm giong to build is this: A lit diorama, in a box, of an ROV investigationg an old wooden wreck in the blackness of the deep sea. The inspiration for the project comes from two places. Firstly, from the abundance of remarkable wreck discoveries in the Baltic sea in recent years. And secondly from an "art" project I abandoned some years ago - diorama night lights. I thought it would be cool if you could lie and gaze at some scene, say, your favourite street corner, while you drift off into sleep. Now the night lights are back, but they're Wreck Lights now. Yes, Wreck Lights, That's what I'm going to build. The scale will be fairly small - it would be weird to have a night light the size of grandma's telly ... What I'm aiming for as far as the wreck itself is concerned is something like this: http://www.hydro-international.com/issues/articles/id1236-The_Ghost_Ship_Expedition.html It might be cool to do a fluyt. I really like fluyts, wrecked or not. Any tips, sharing of thoughts, reference material etc. is of course much appreciated. Lastly, I've done a silly illustration to show you what I have in mind (I won't build the kid ...) [1]http://modelshipworld.com/index.php?/topic/3046-toy-ship-by-farbror-fartyg-inspired-by-large-17th-century-ships/ [2]http://modelshipworld.com/index.php?/topic/3063-wreck-site-diorama/
-
Thank you, Ian. I've been sculpting miniatures since ... I can't remember when. Practice, practice and practice. A sharp scalpel, good lighting and dumb stubbornness help.
-
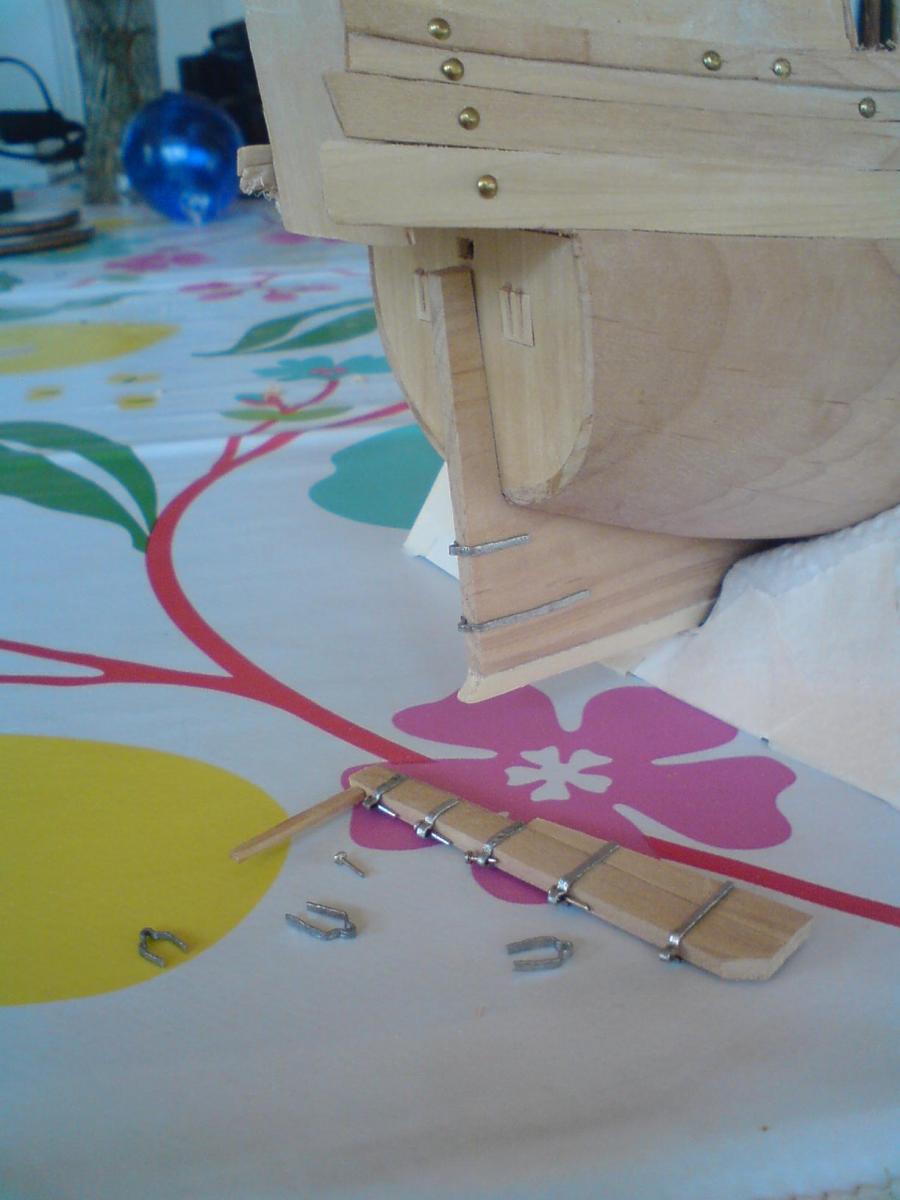
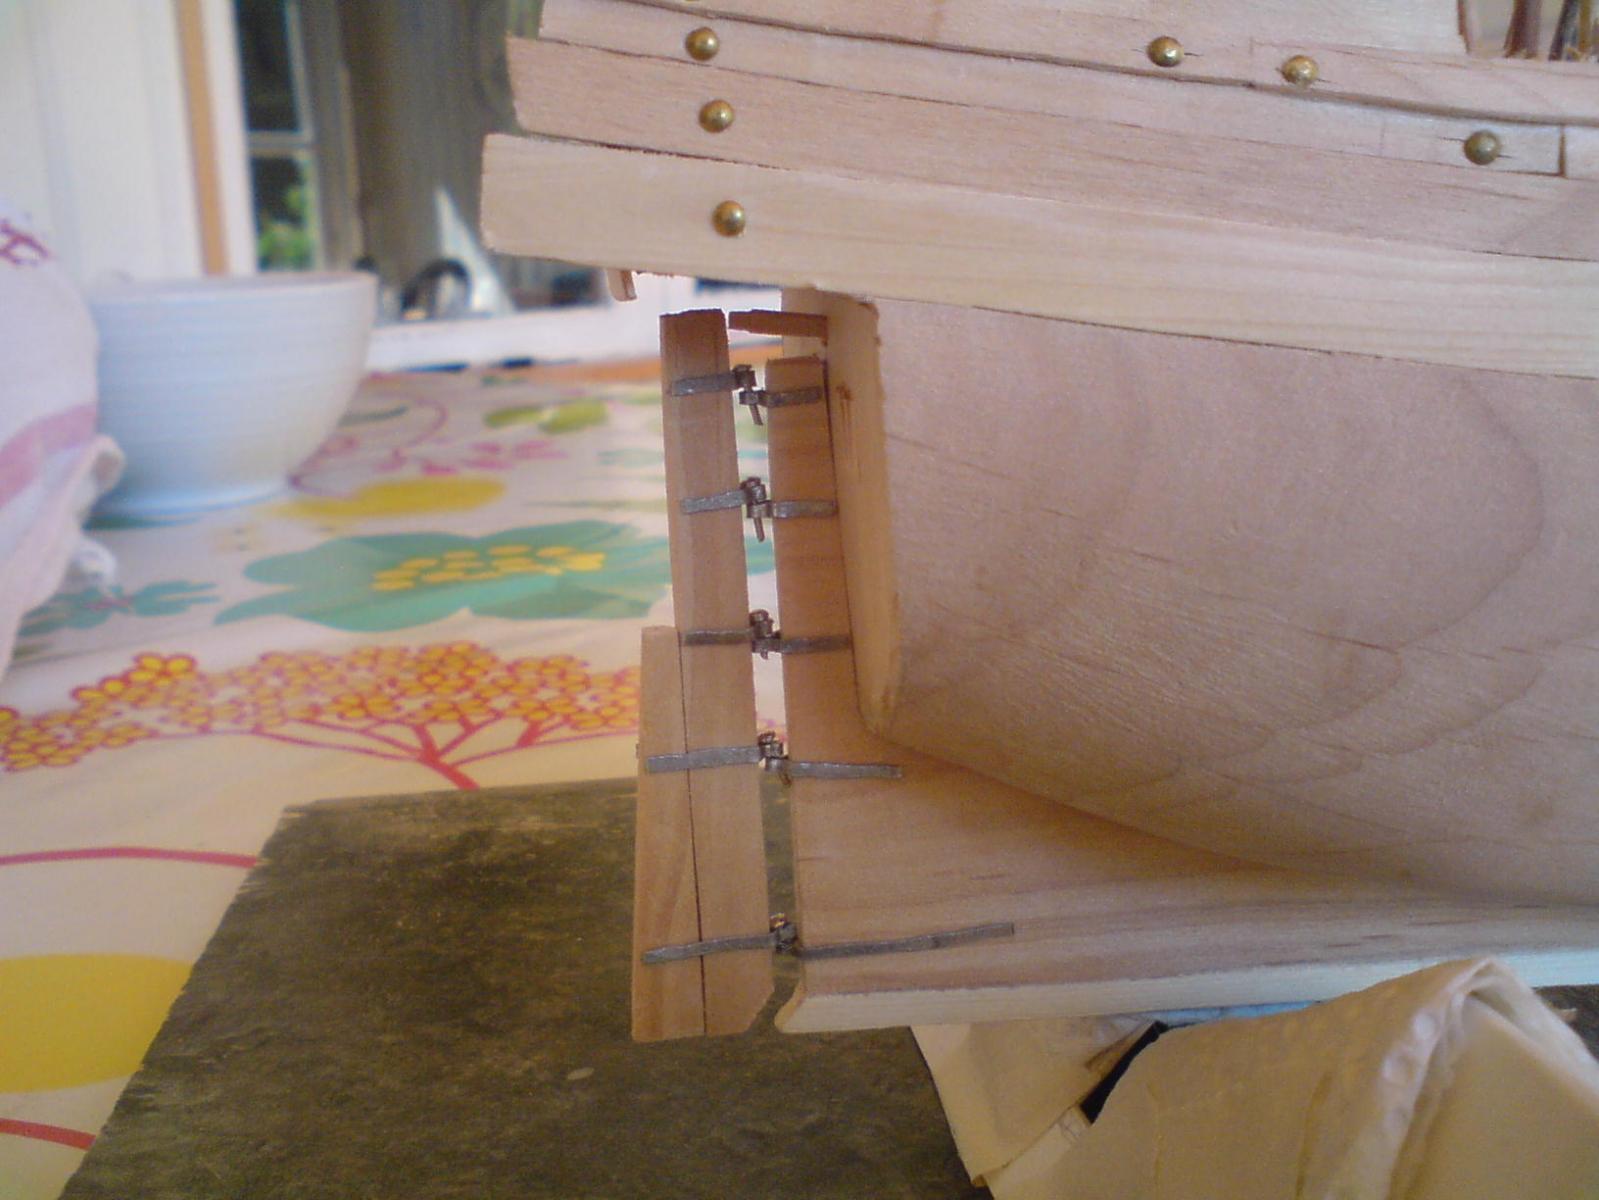
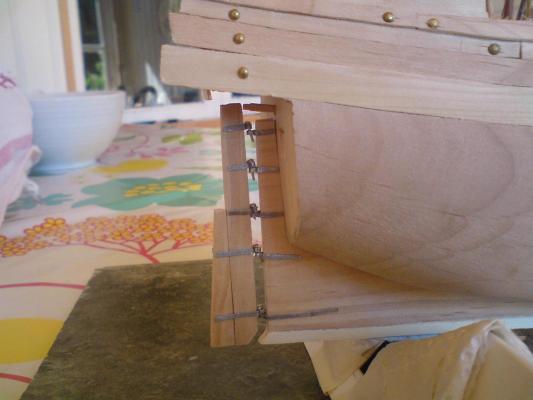
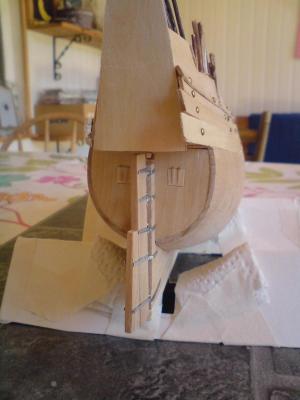
Rudder: I wanted a movable rudder - my ship's GI Joe Kung-Fu grip, if you will. Had to do a spot of blacksmithing for this one. To make the hinges, I took two hammers, put one on my lap to act as the "anvil", I placed som iron wire on it, and then pounded the wire flat with the other hammer. Some fiddly bending and twisting later I had hinges for my rudder. The pins are just that - sewing pins cut off just below the head. Before I introduce the whole contraption to Mr. Glue, I'm going to tighten the hinges and make things look a bit neater. But that's something for next summer.

-
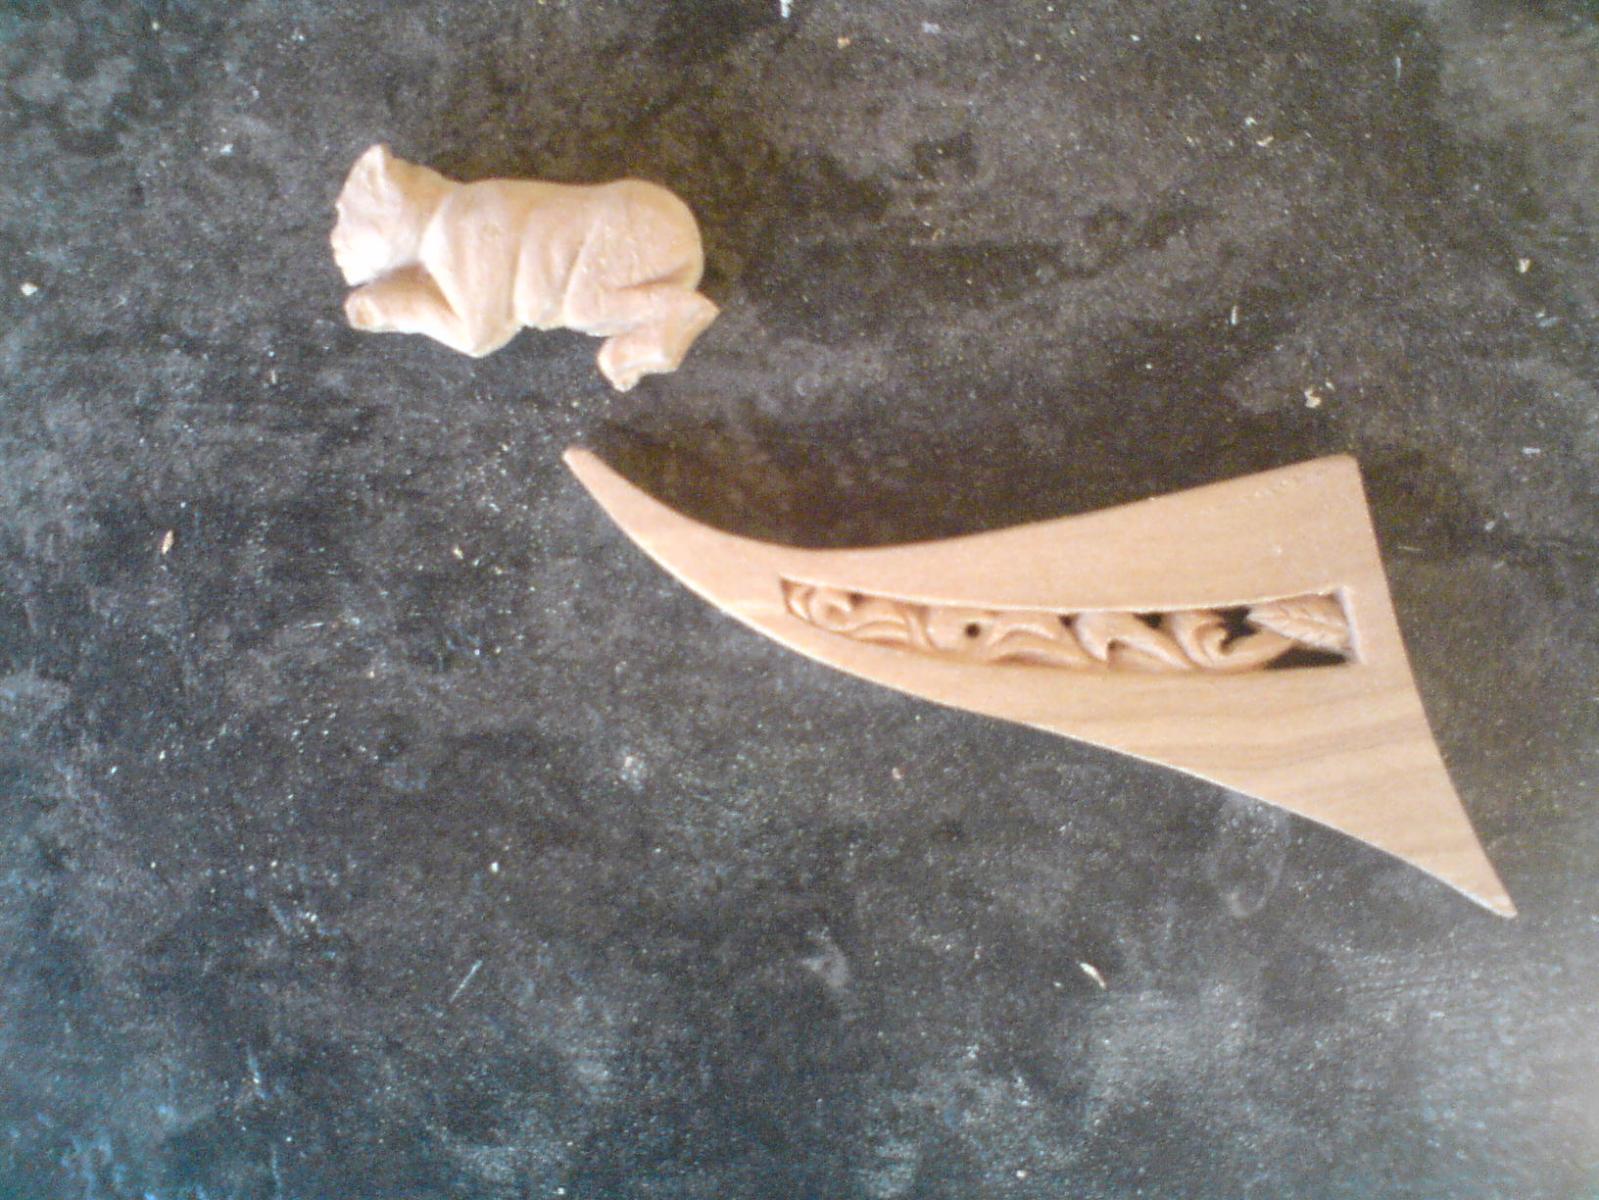
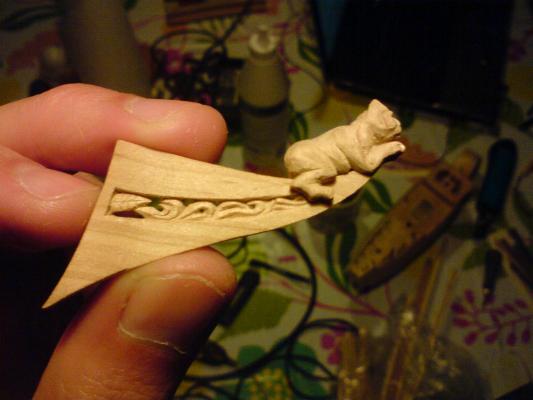
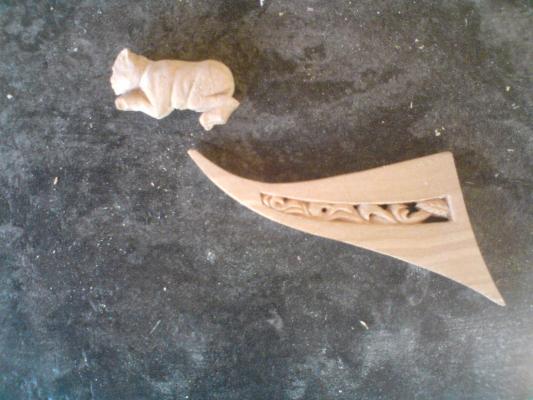
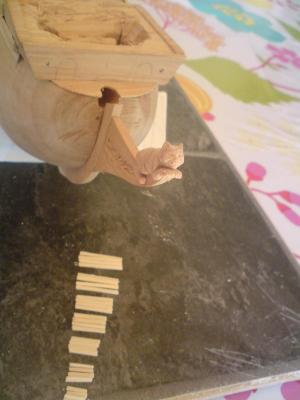
Beakhead: The really fun bit! This stuff was pretty straight forward - just shape a shapely piece of wood and then carve away. If the lion sculptures adorning the beakheads of the 17th century war ships symbolized might, I'm not really sure what my fat cat symbolizes ... hmm ... comfiness, perhaps.

-
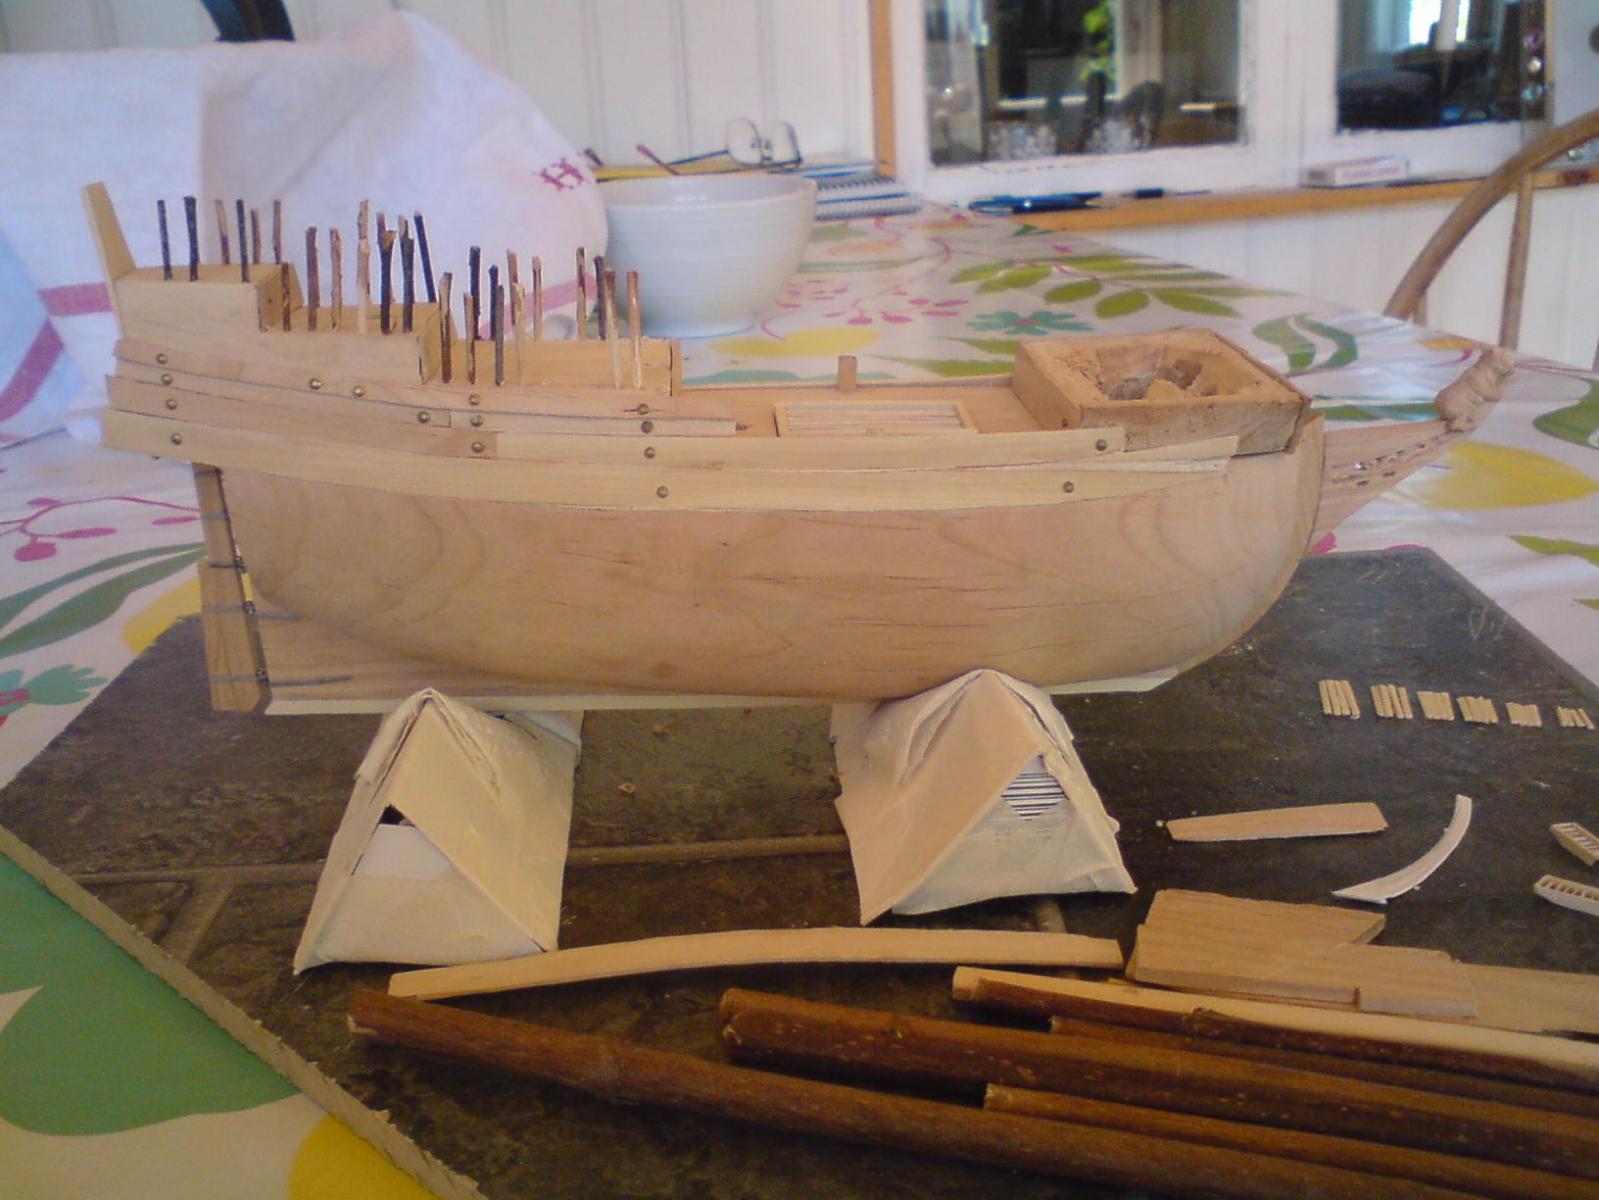
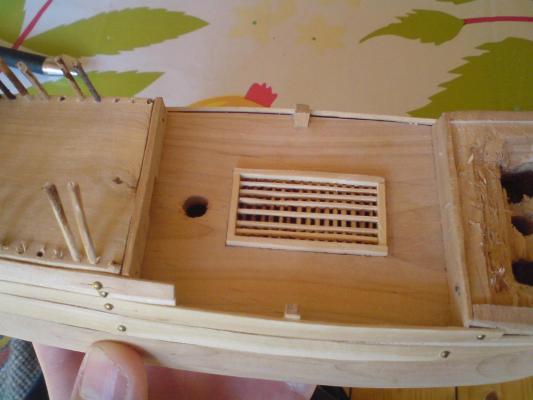
Cargo hatch: If you have a hollow hull, you simply can't deny anyone admiring the model the thrill of peering down into it. On a more practical note, I also needed a way to add ballast. Enter removable cargo hatch (pun sort of intended). I made a frame out of four strips of wood. Into the underside of the frame I cut slots, and into those slots went tiny, tiny sticks from the garden. I then cut six very thin strips of wood and cut slots matching the spacing of the tiny, tiny sticks into them. Some trimming and glueing later I had me a nice grid hatch.
-
Thanks Daniel! Keel and cutwater: On the bottom of the hull, from stem to stern, I cut a groove into which the parts making up the keel could be slotted. The keel consists of two pieces and a "false keel" to give the whole thing a bit more structural integrity. I used nails, as well as glue, to fasten the false keel as the metal will add a bit of extra weight where it's actually needed - in the bottom of the ship - as a bit of extra "ballast". Might not make a whole lot of difference, but the theory behind it is sound, I guess. The cutwater was attached the same way the keel was - groove and glue.
-
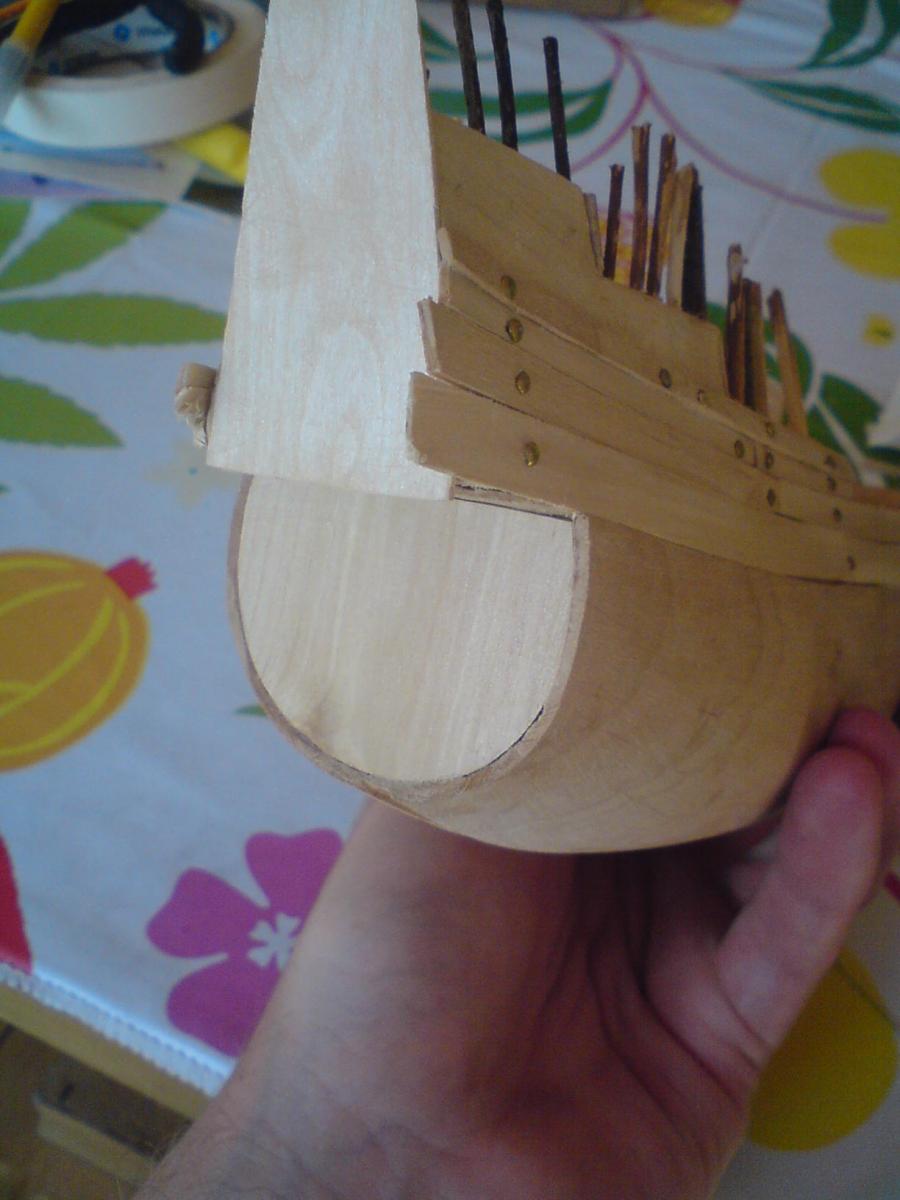
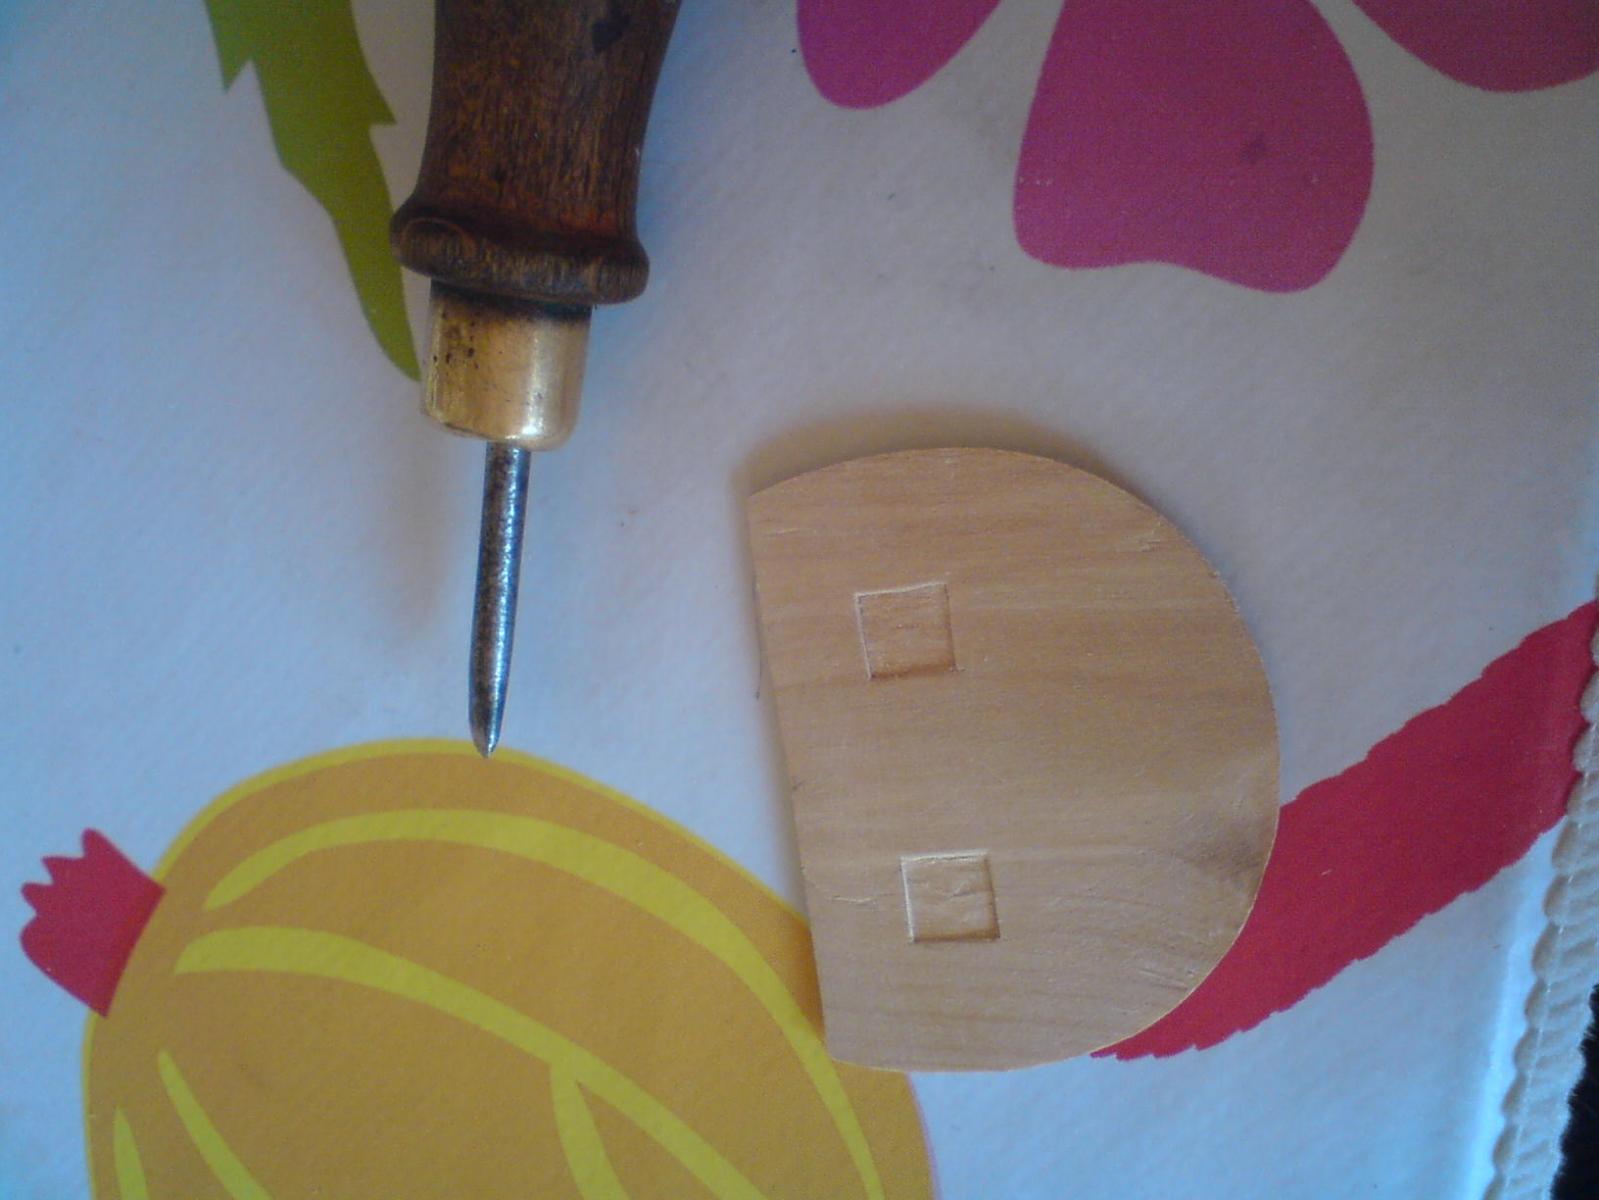
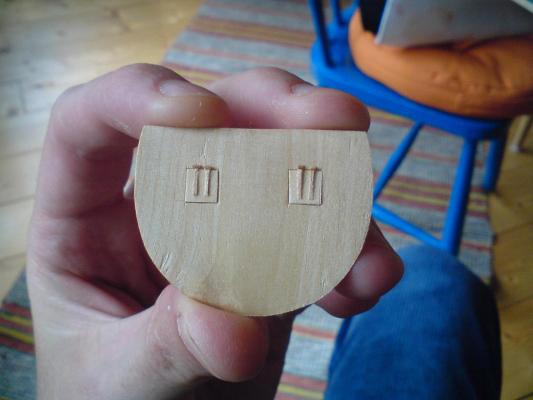
Thank you, S.Coleman. We'll see ... about the floating bit! We might end up with the whole Vasa thing all over again. Having hollowed out the hull from the back, I was left with a big, gaping hole in the stern. I cut a groove following the curve of the stern and made a flat "lid" to fit the hole. I have always imagined the stern as being the "face" of a ship - with the gunports as eyes, and the rudder as the nose. Since my little shipster will go bathing, having gonports that are actual holes in the hull would complicate things. But she needed eyes, I felt. I therefore decided to do the gunports as little square depressions, not going all the way through the hull, into which I could glue a fake lid. I made a gunport template to ensure that all of 'em will be the same size. Another challenge for the stern is the fact that it has to be watertight. I used a paste made from saw dust and water resistant wood glue to glue the lower stern "lid" into place. I'm hoping that the paste, varnish and paint will keep the water out. Fingers crossed.


-
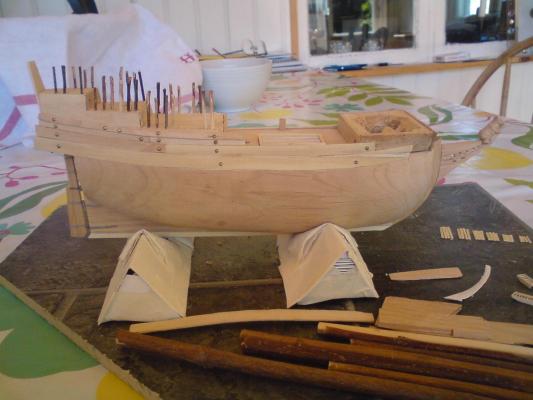
Planking: the planks are all made from sticks (various wood - pine, fir, birch ...) that were split and whittled/sanded into thin, curving strips. The hull is just a flat plane on a rounded bottom, so the sheer of the ship will have to be represented by separate curving planks. I won't plank the whole hull. Since the model will come into contact with water, I decided to use brass nails. The nails are the only thing I've bought for the project so far. The challenge of this project is to use tools and materials availabe at the summer house, to the greatest extent possible. (Yes, the nails completely out of scale, I know. The heads would be the size of footballs to a miniature sailor on my ship ...) Since weight reduction is important, I clipped the nails in half, and used pre-drilled holes to attach the planks.
-
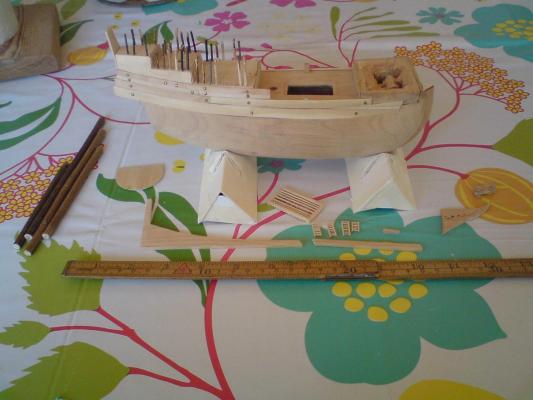
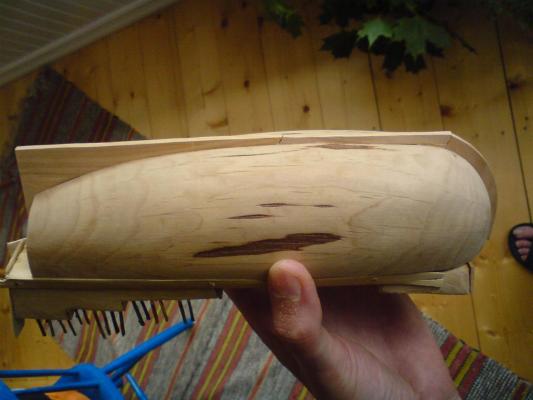
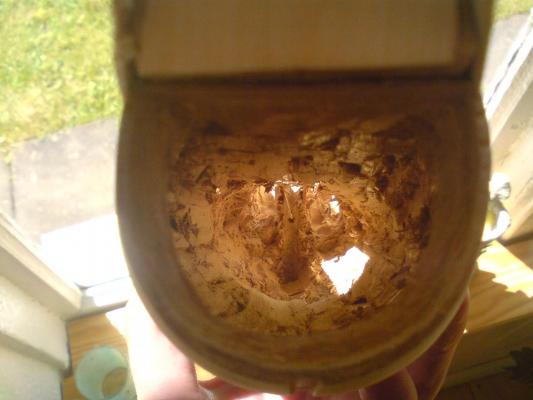
She started her life as a solid Birch log that I split in half and whittled down to the basic hull shape. Then I sanded it with progressively finer sandpaper. I then cut a piece of wood, birch again, into stern castle shape and attached it. Then I tested her bouyancy, with disatrous results. Mistake number one - the wood was too dense. She floated allright, but freeboard was virtually non existent. At this point I thought about giving the whole toy ship idea up, and just make her into a display piece. I didn't, however. Instead I took hammer and chisel in hand, said hello to my two new friends Mr. Boring and Mr. Time-Consuming, and started to hollow out the hull.
-
*** EDIT *** Shouts of joy as I reveal that I've found the pics from this build. Reconstruction is now possible. *** /EDIT *** Hello and welcome to my first build log. It will be a somewhat unusual one. I started this project during the rainy summer of last year, to have something to do while the rain was turning the lawn into something resembling a WW1 trench system. It's a toy ship with a 17th century-ish feel to it. I'm calling it a toy ship due to the fact that it's meant to actually set sail - it will patrol a nearby pond. I like my ships being able to float. Somehow it just feels a bit perverse to build a ship that can't actually survive contact with water ... What lucky kid will get to sail her, I hear you ask? Why, me, of course. The main thing that will make this log a bit unusual is the fact that I'm buliding her at our summer place, and I'm only there for a few weeks during the summer. Therefore, anyone following this will have a long wait ahead for the next update. Aplogies for that. Well, here goes.