HOLIDAY DONATION DRIVE - SUPPORT MSW - DO YOUR PART TO KEEP THIS GREAT FORUM GOING! (Only 13 donations so far - C'mon guys!)
×


Farbror Fartyg
-
Posts
178 -
Joined
-
Last visited
Content Type
Profiles
Forums
Gallery
Events
Everything posted by Farbror Fartyg
-
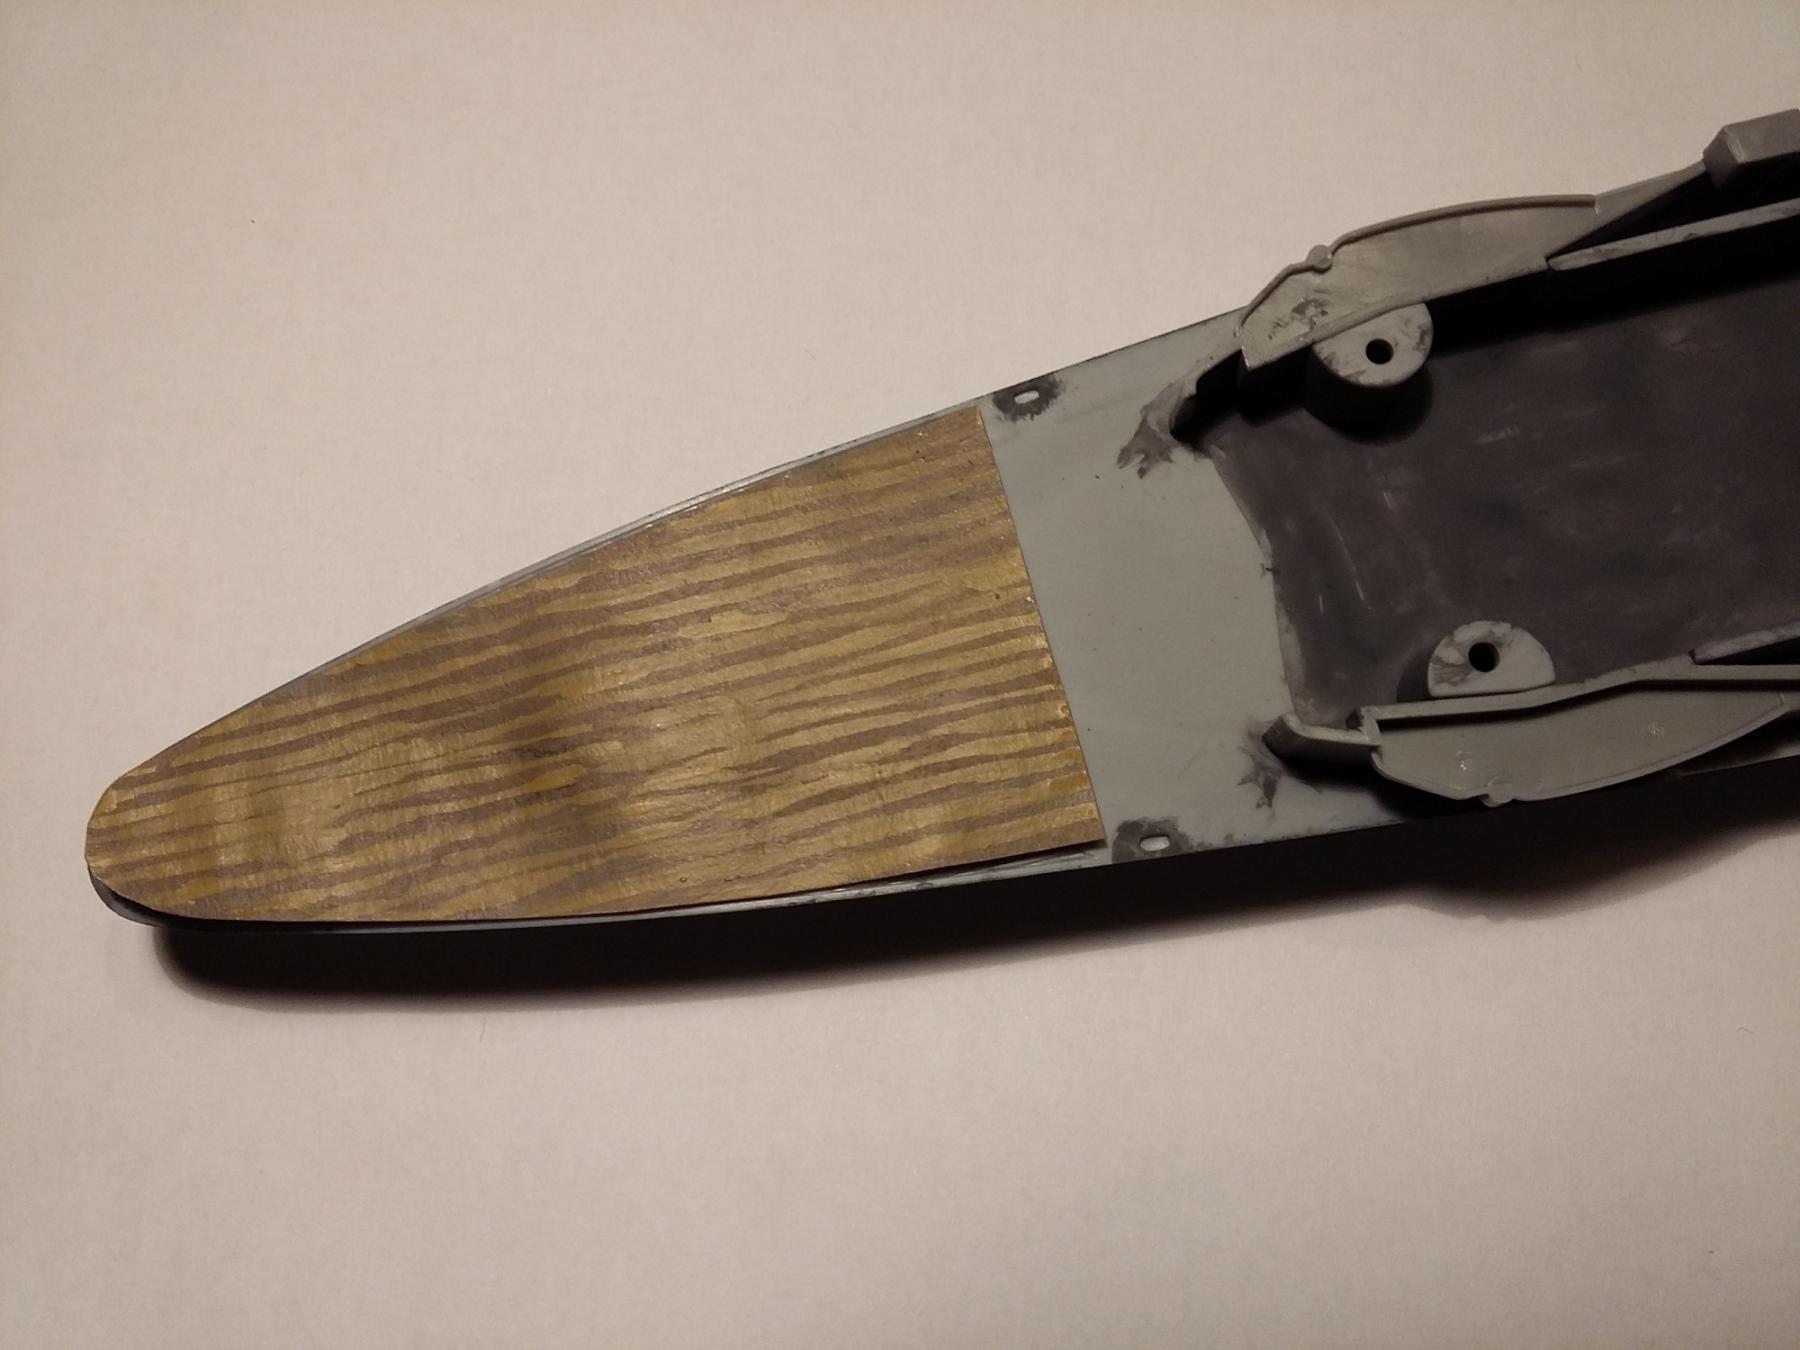
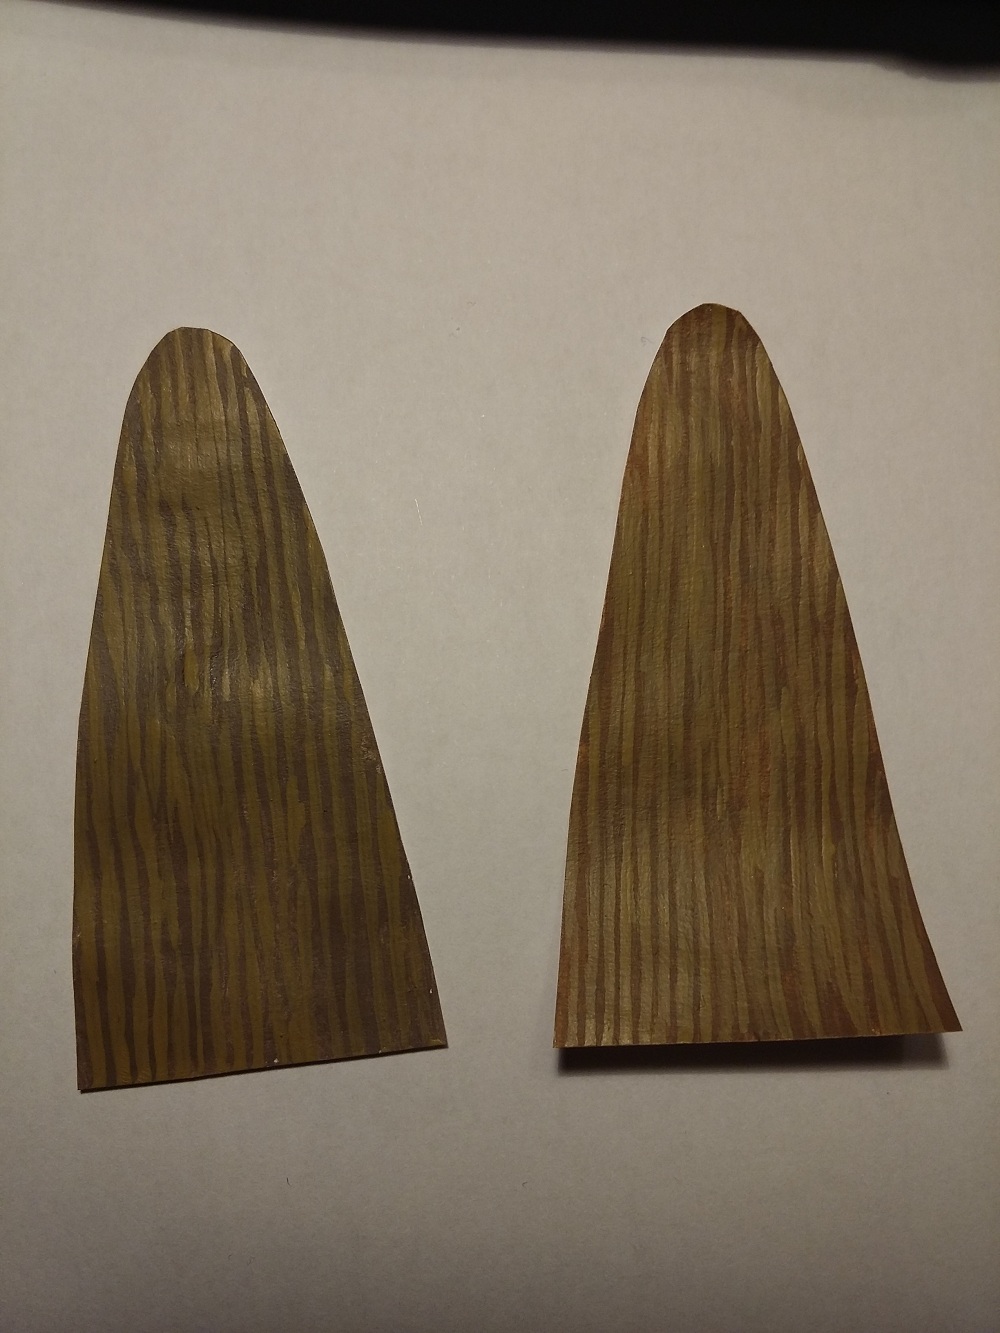
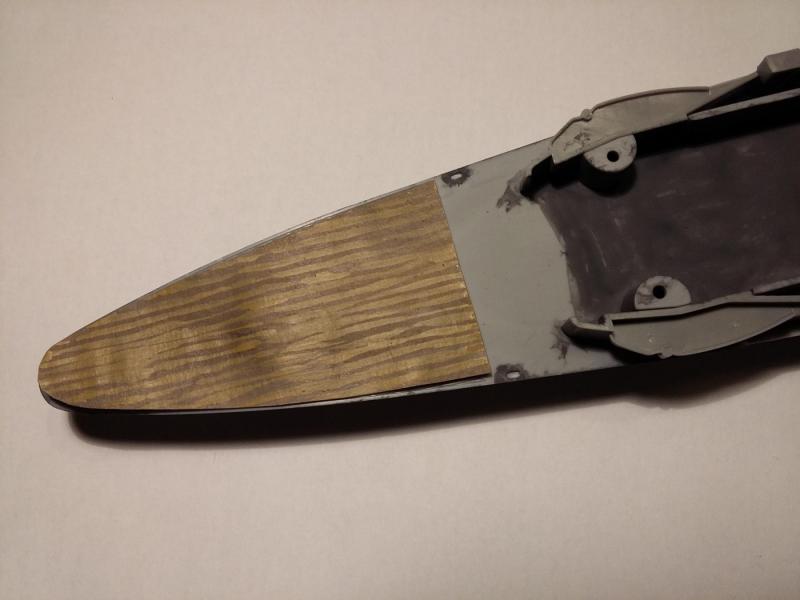
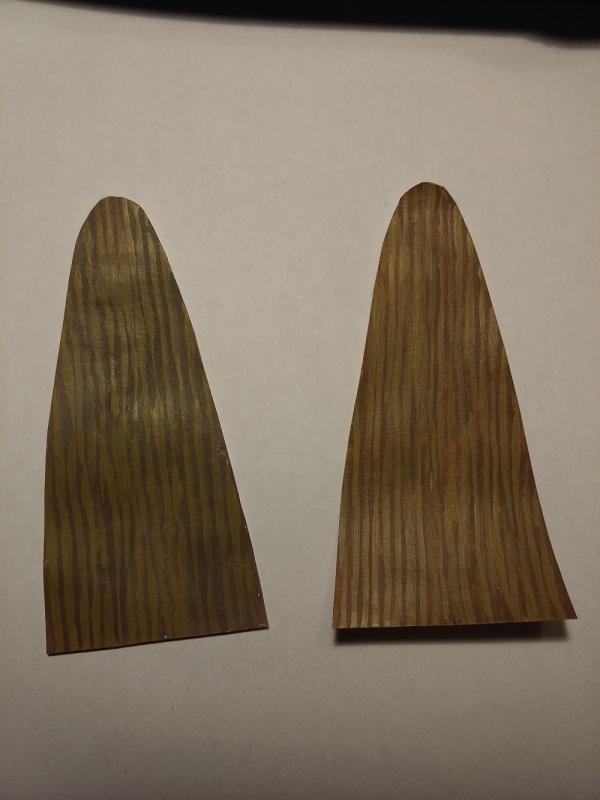
 I'm trying to decide on a colour for the wooden decks. Painted me up some colour test. 1. (Base - Citadel "Graveyard Earth" highlight Citadel "Desert Yellow") 2. (Base - Citadel "Khemri Brown" highlight Citadel "Desert Yellow") What do YOU think, ladies and gents? Sam
-
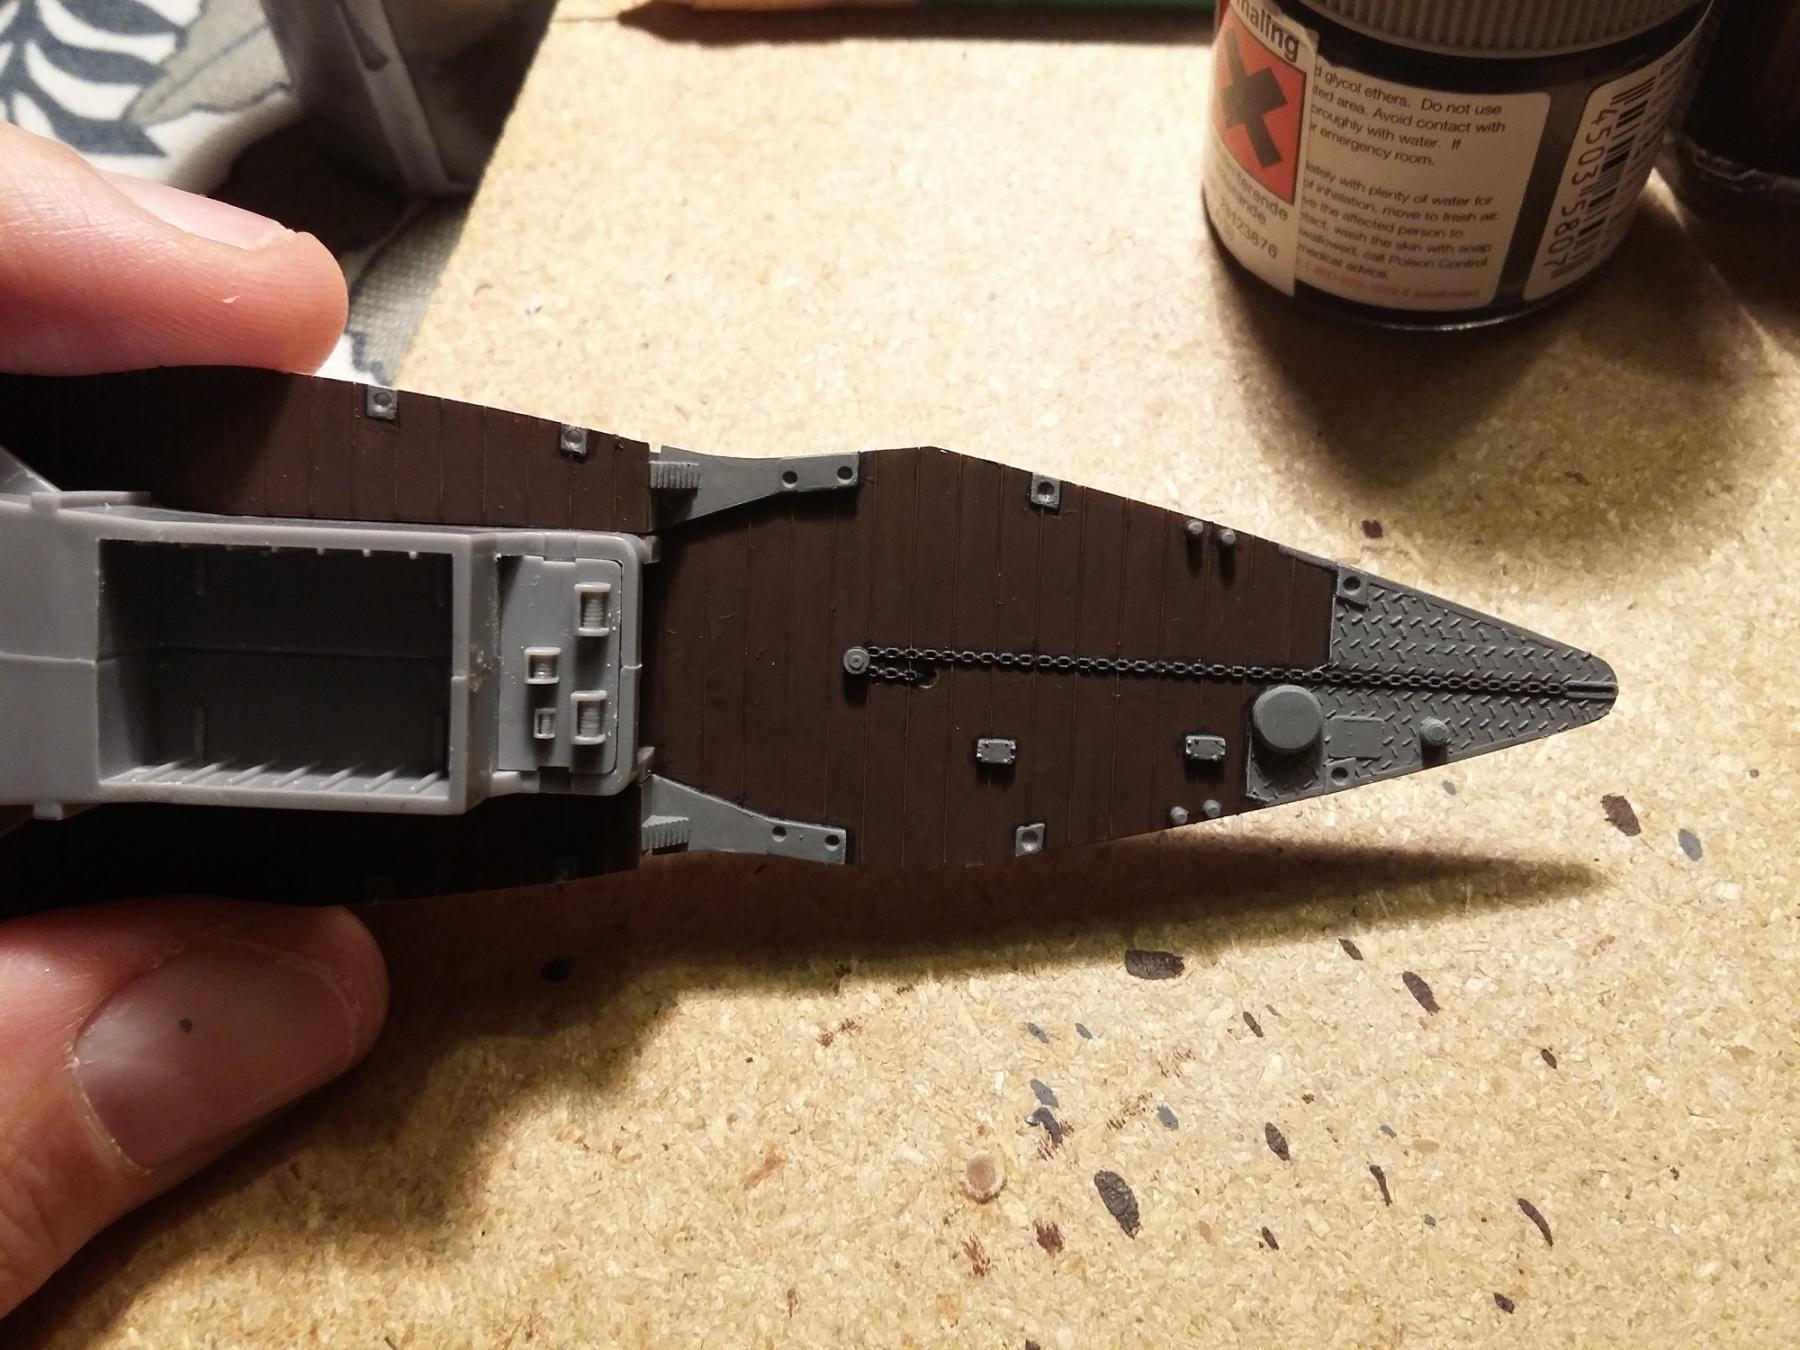
You like updates. I like updates. Win Win. I decided to paint the deck below the lowest flight deck up nicely even though it will be practically invisible once said flight deck comes on. Which it has. "If a job's worth doing, it's worth dy(e)ing for." Sam

-
I'm half tempted to drop the Akagi and go out to get me some ratlins to tie. Sweet Victory. She looks ... right.
- 1,319 replies
-
- 4
-

-
- caldercraft
- Victory
- (and 1 more)
-
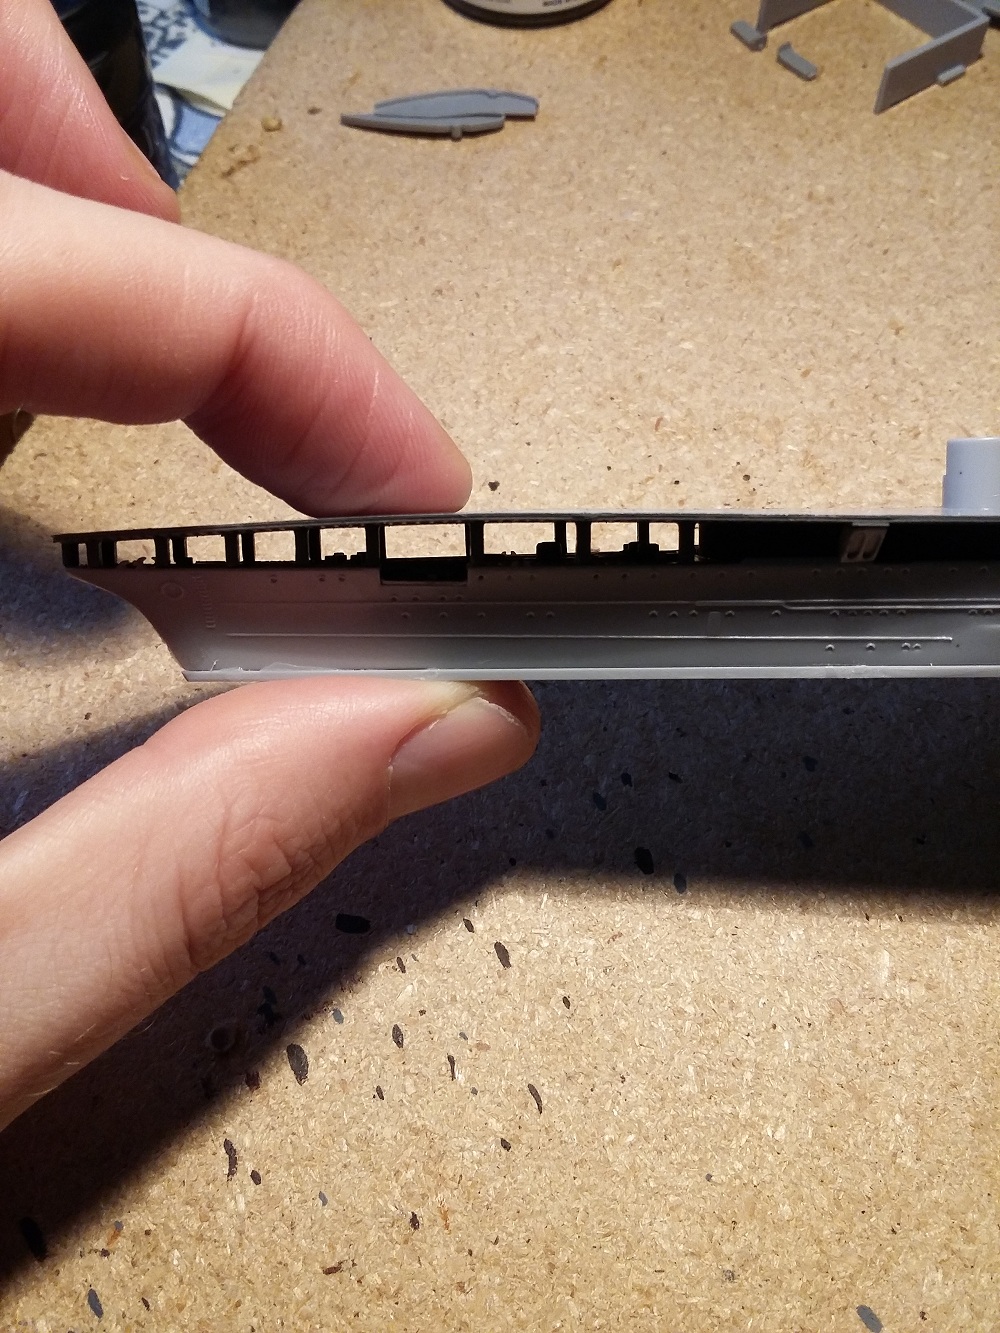
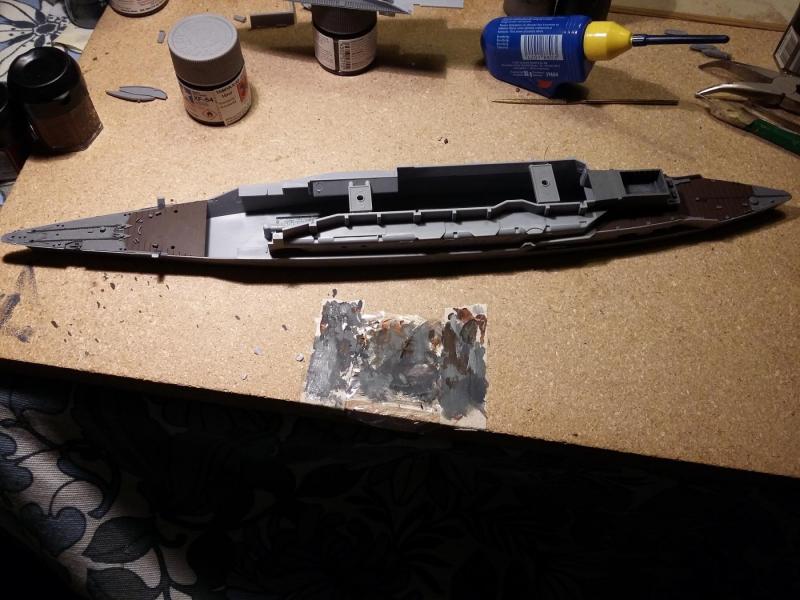
Well oh well. I reckon something like that is going to work. The grey (Tamiya Dark Sea Grey XF-54) is a bit ... off ... but I guess it'll look OK. I decided to add som subtle shading and highlights - at this tiny scale the eye needs some cues or the detail of the kit might get overlooked.

-
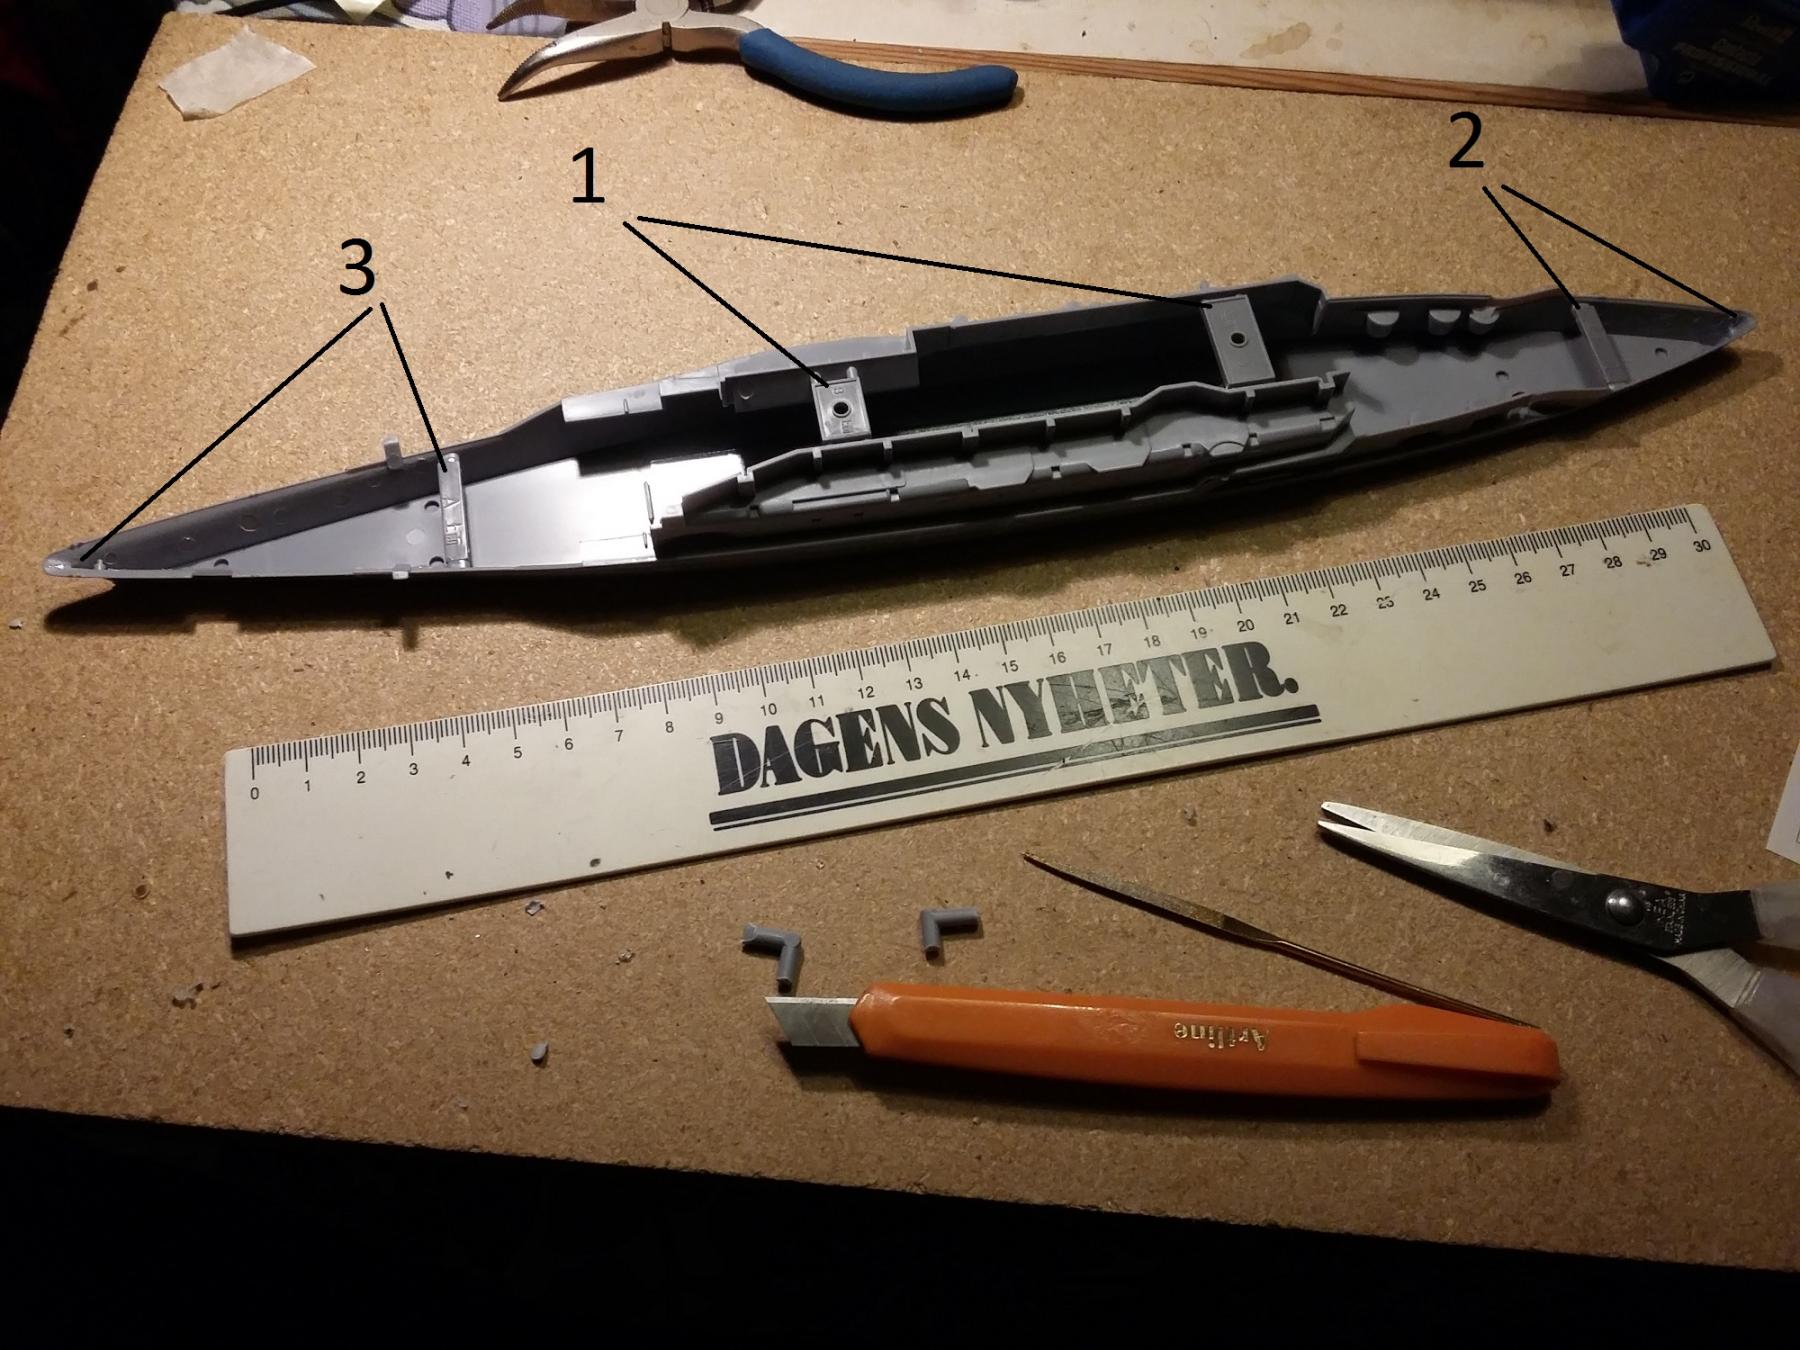
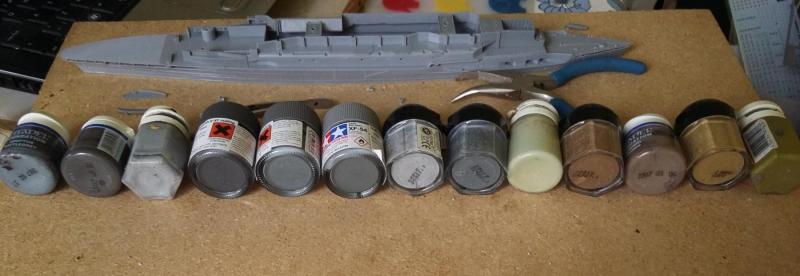
The lower part of the ship is supplied as a bottom plate and two side pieces. The sides are really long and springy, and bit awkward to work with. To someone building this kit, I would suggest assembling the bottom bit in the following way: Look at the numbers in the photo: 1. Take the sides and stand them on up on a flat surface and make sure they line up properly. Glue them together in that position using just the middle two joining pieces. Hold until the glue hardens. Ignore the bottom plate for now. 2. When the glue has hardened, insert the joining piece in the stern (or bow - I don't think it matters) and glue the stern/bow together. 3. Repeat the above, nr 2, procedure for the bow/stern. When the sides are securely glued toghether, check to see if the bottom plate fits (I had no problems with it) apply some glue stick it all together. Painting I've reached a stage where there are bits that will have to be painted before Mr. Glue is introduced. We had a roll-call this morning to see who's still with us and who isn't in paint box. Managed to assemble a decent collection militay-ish greys, browns and greens. I'm not going to go into chemical analysis to get the shade of grey just right, but I would like to at least stay in the ball park as far as colour is concerned. Any advice here is mucho appreciated. cheers! Sam

- 83 replies
-
- 10
-
-
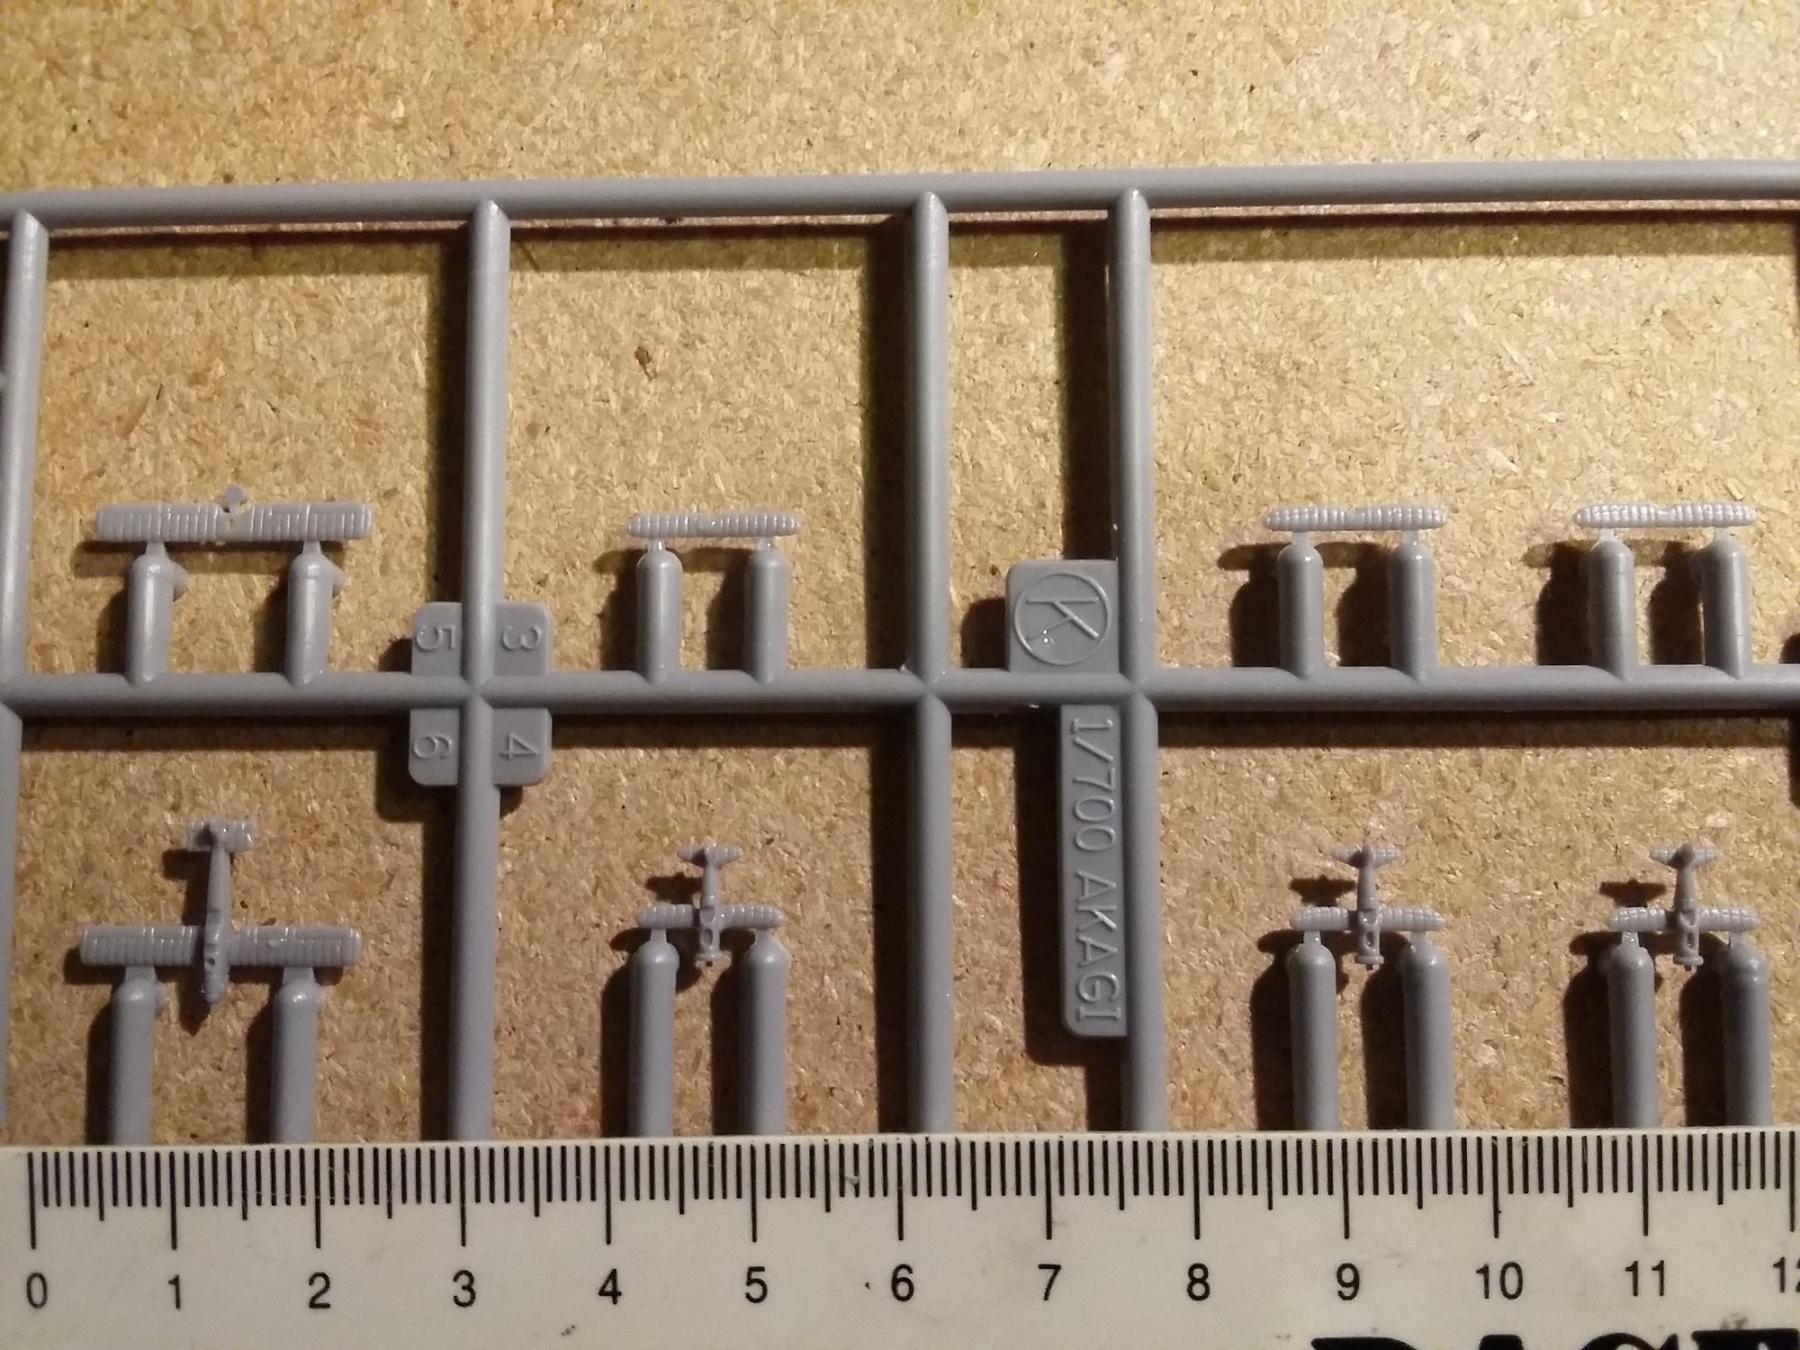
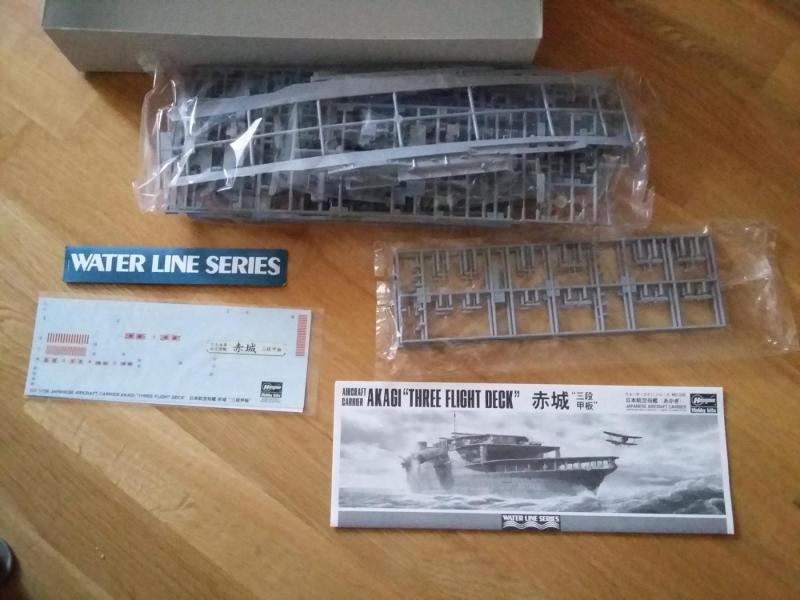
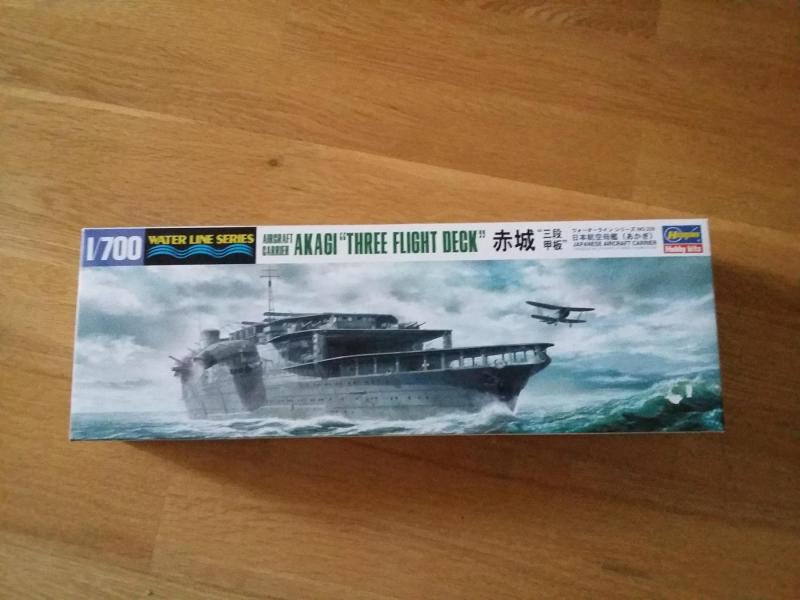
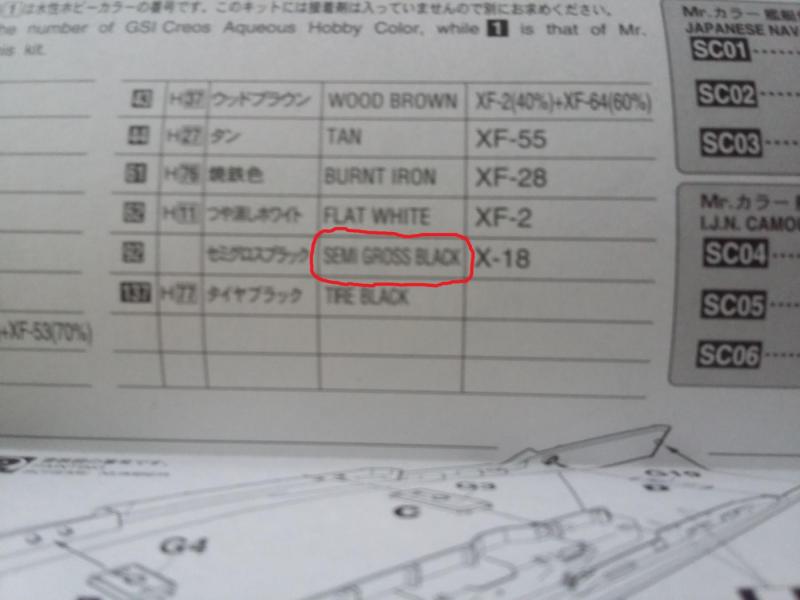
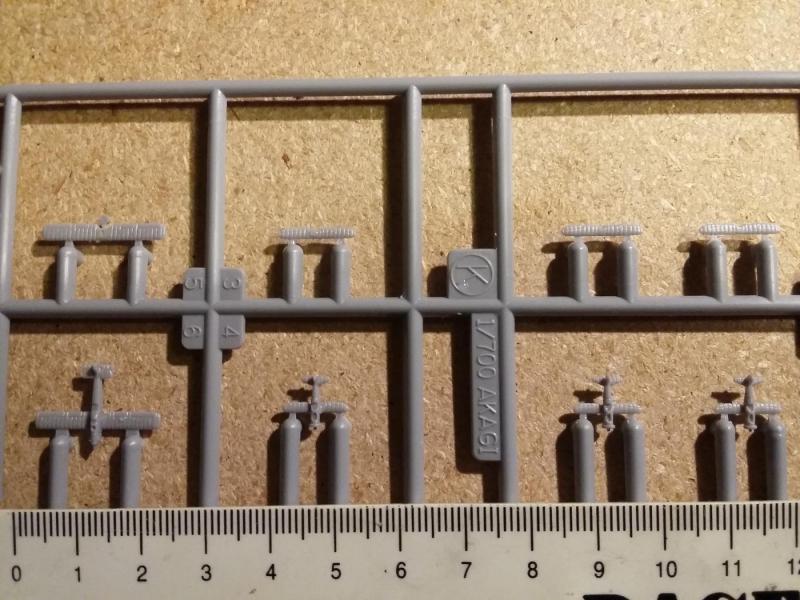
AKAGI 1927 So here I am, sat at the kitchen table, a bottle of Asahi Super Dry in front of me. My katana is hanging on the wall - I can't see it from where I'm sitting, but I know it's hanging there ... approvingly. The only thing missing is a stirring marching tune, blaring from cracked speakers, and the picture would be perfect. I'm building the IJN Akagi. I have no intention of stoking the fires of the silly kit vs. scratch debate, but I almost feel a bit ... disoriented here in the kit department. The scratch build section is where I usually hang my hat, and my darlings generally have sails and had their keels laid down before 1700. I don't really know what happened. They found the Musashi, and I sat through every minute of the 2,5 hour Expedition Live Feed. Then it was on to IJN battleships on Wikipedia ... I suppose the fate of all those lovely ships got to me; the wastefulness of it all. The Dai nippon Teikoku Kaigun deserves a bit of resurrecting, albeit in 1/700 scale. The plan is to assemble a little fleet of IJN ships. We'll see how far I get. Anyways, I picked the Akagi as the first ship because she is a bit of an odd one, with her three flight decks. An aircraft carrier is also completely new territory for me - thought it might be fun. WWII is fairly new to me in modelling/painting terms. (I've only built Russian tanks and painted Finnish infantry before this project.) So I'll take any expert advice, cheering on, pointers, source material (English, Japanese, Swedish, Norwegian, Danish are all OK) etc. I can get. For those interested in the subject, here are some links: http://ww2db.com/ship_spec.php?ship_id=10 https://en.wikipedia.org/wiki/Japanese_aircraft_carrier_Akagi https://fiftiethstateofmind.files.wordpress.com/2015/08/akgimg_00071.jpg https://s-media-cache-ak0.pinimg.com/564x/75/d4/97/75d497ac91cd0121abebeac8459d56d4.jpg The Kit The kit looks nice and detailed and the instructions seem OK. Although I did find som (mandatory) japlish. It's good that the black isn't TOTALLY gross, just semi gross. The kit certainly includes the most minuscule aircraft you'll ever see. No kids or pets around so I might leave the planes loose. Weeelll, the sprues have been washed so, here goes. Sam
- 83 replies
-
- 14
-
-
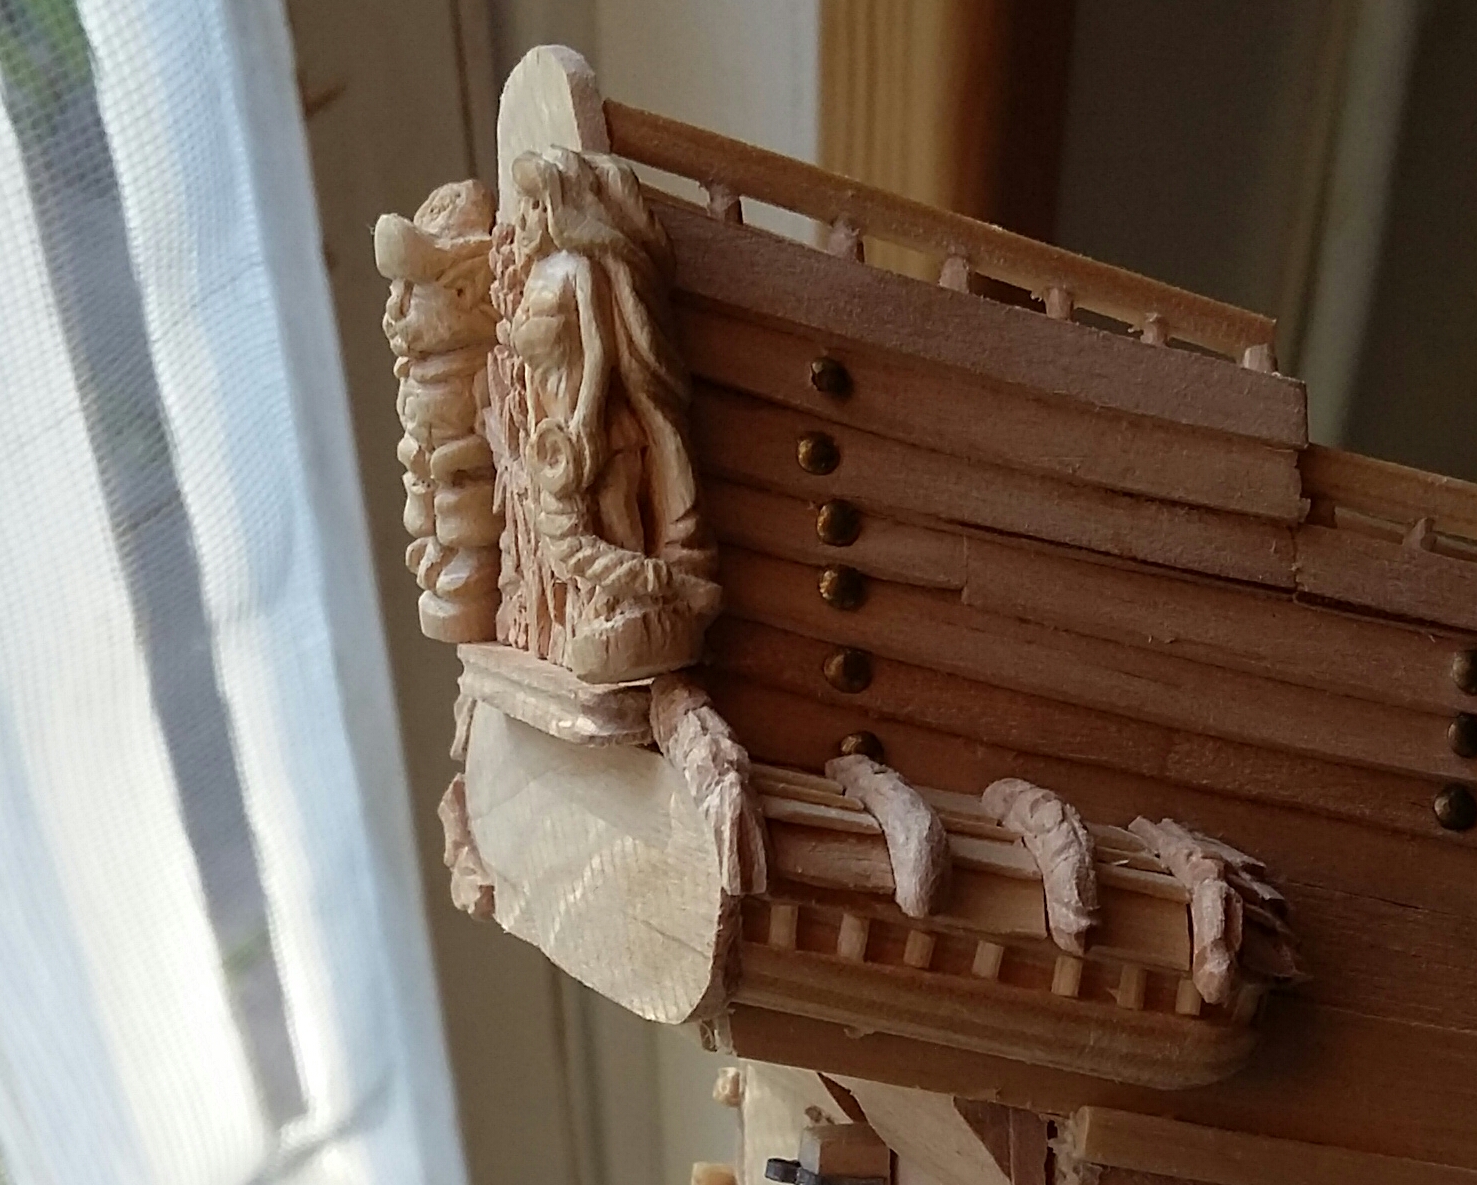
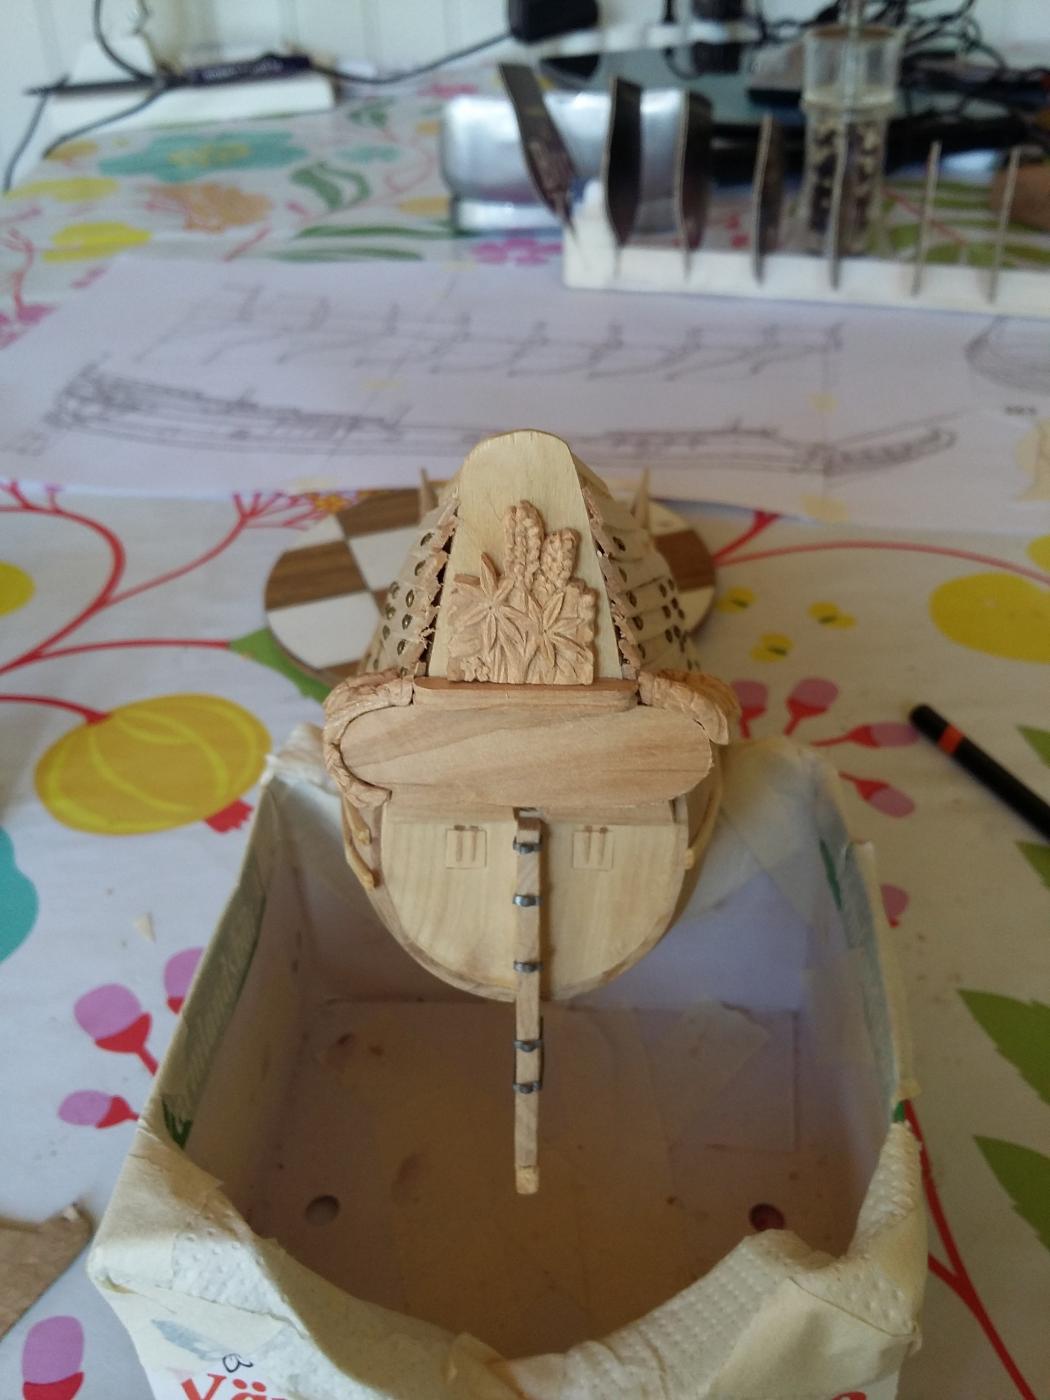
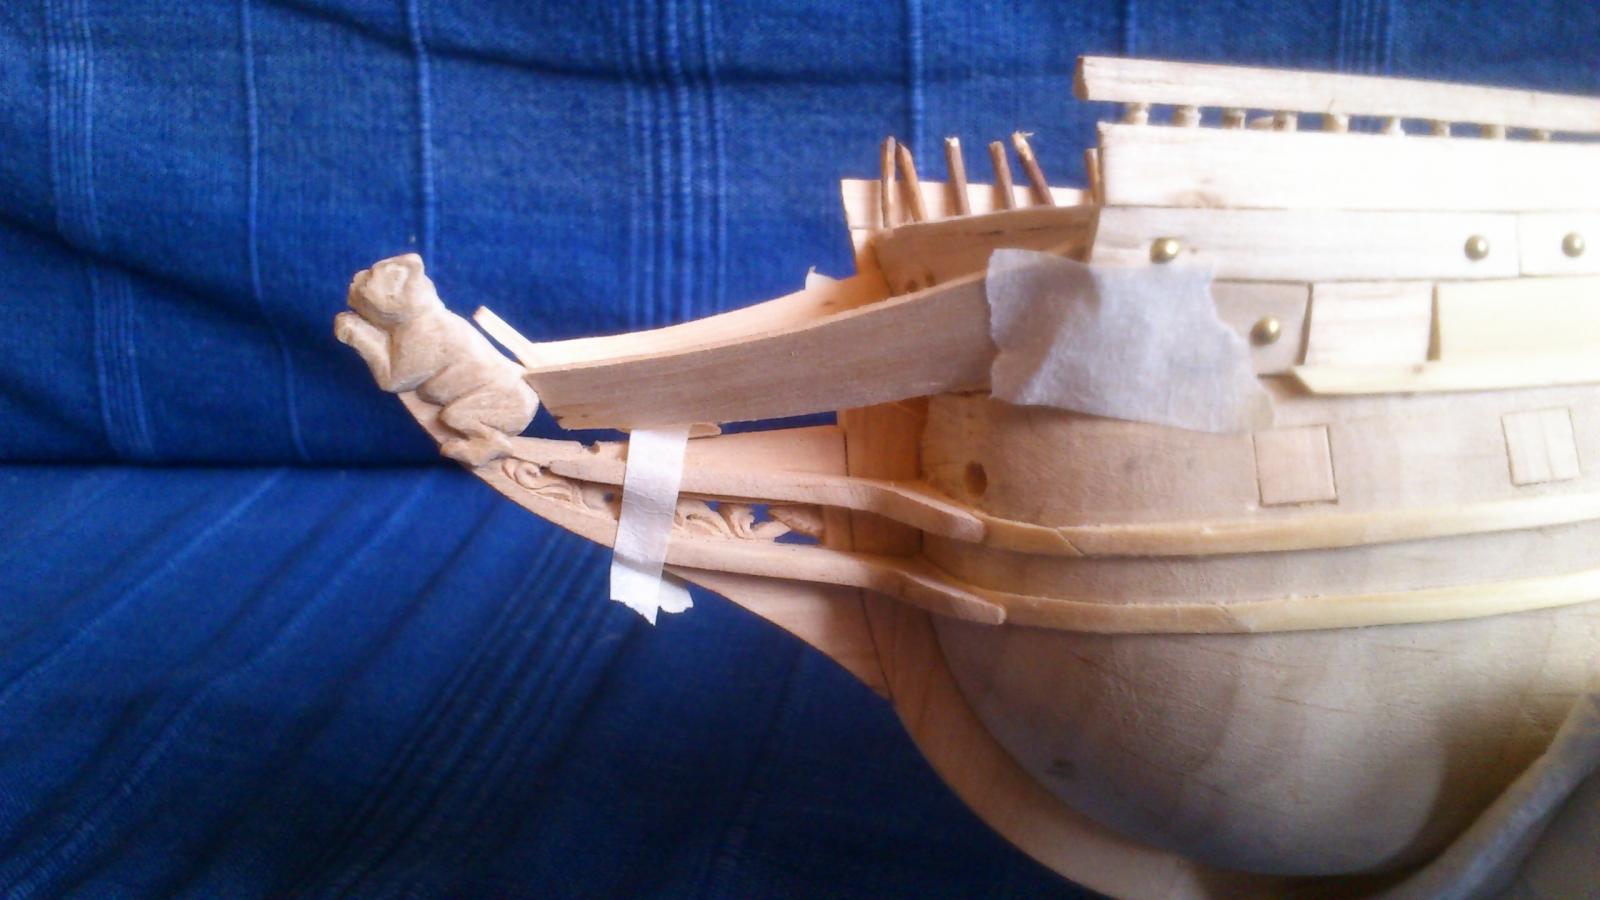
Going back to town and, eventually, work tomorrow. As I sit here contemplating the sad state of affairs, some appropriate dialogue from the opening sequence of the video game Oblivion comes to mind: The Player (you - the followers of this build log): "Where are we going?" Uriel Septim (me): "I go to my grave; a tongue shriller than all the music calls me. You shall follow me yet for a while, then we must part." Well oh well. We've gotten a bit further this year. Between installing kitchen fans and entertaining aunts etc. I've managed to sneak in a few hours of shipyard joy. The transom carvings are well on the way. All the wales are in place and the starboard side now has most of its gun port hinges in place (no pics) I've also made quite a few of the bits that'll make up the beakhead.


-
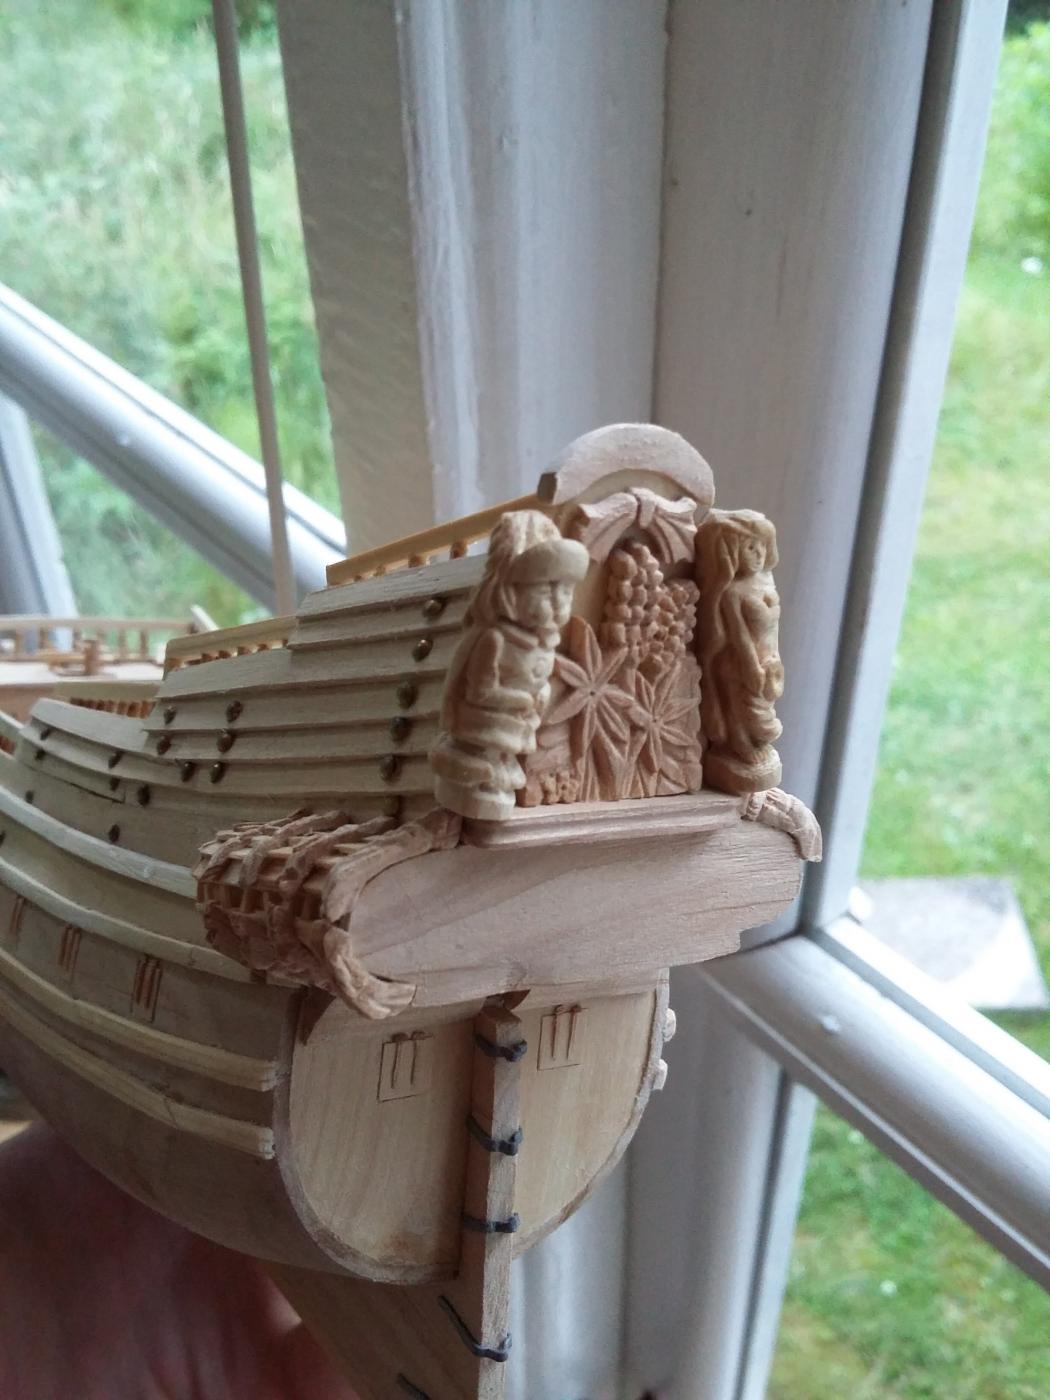
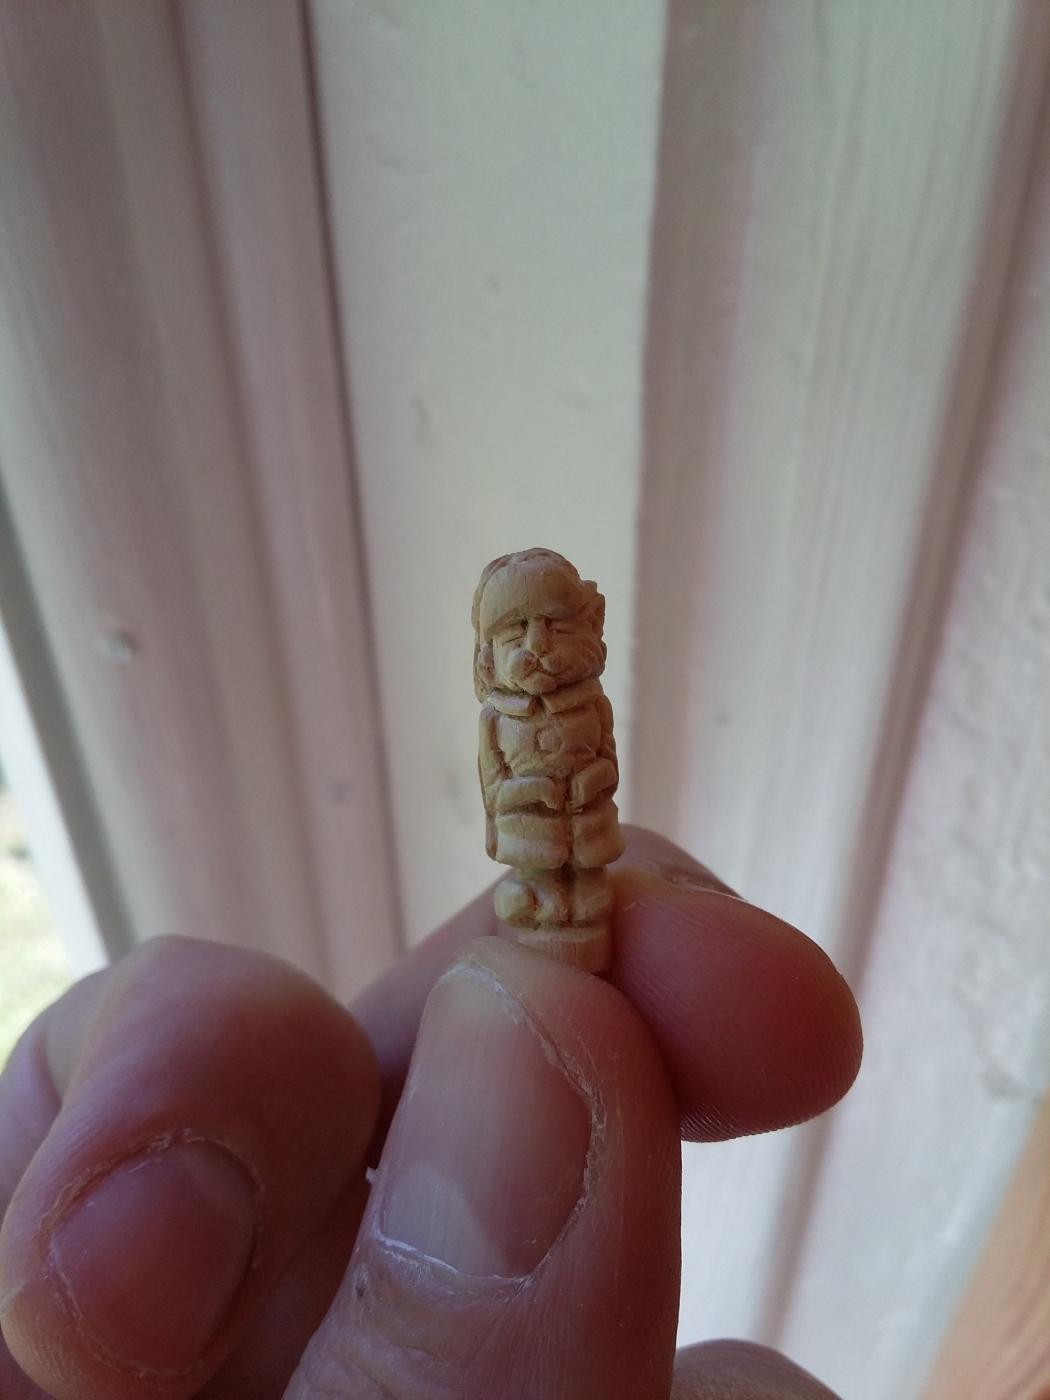
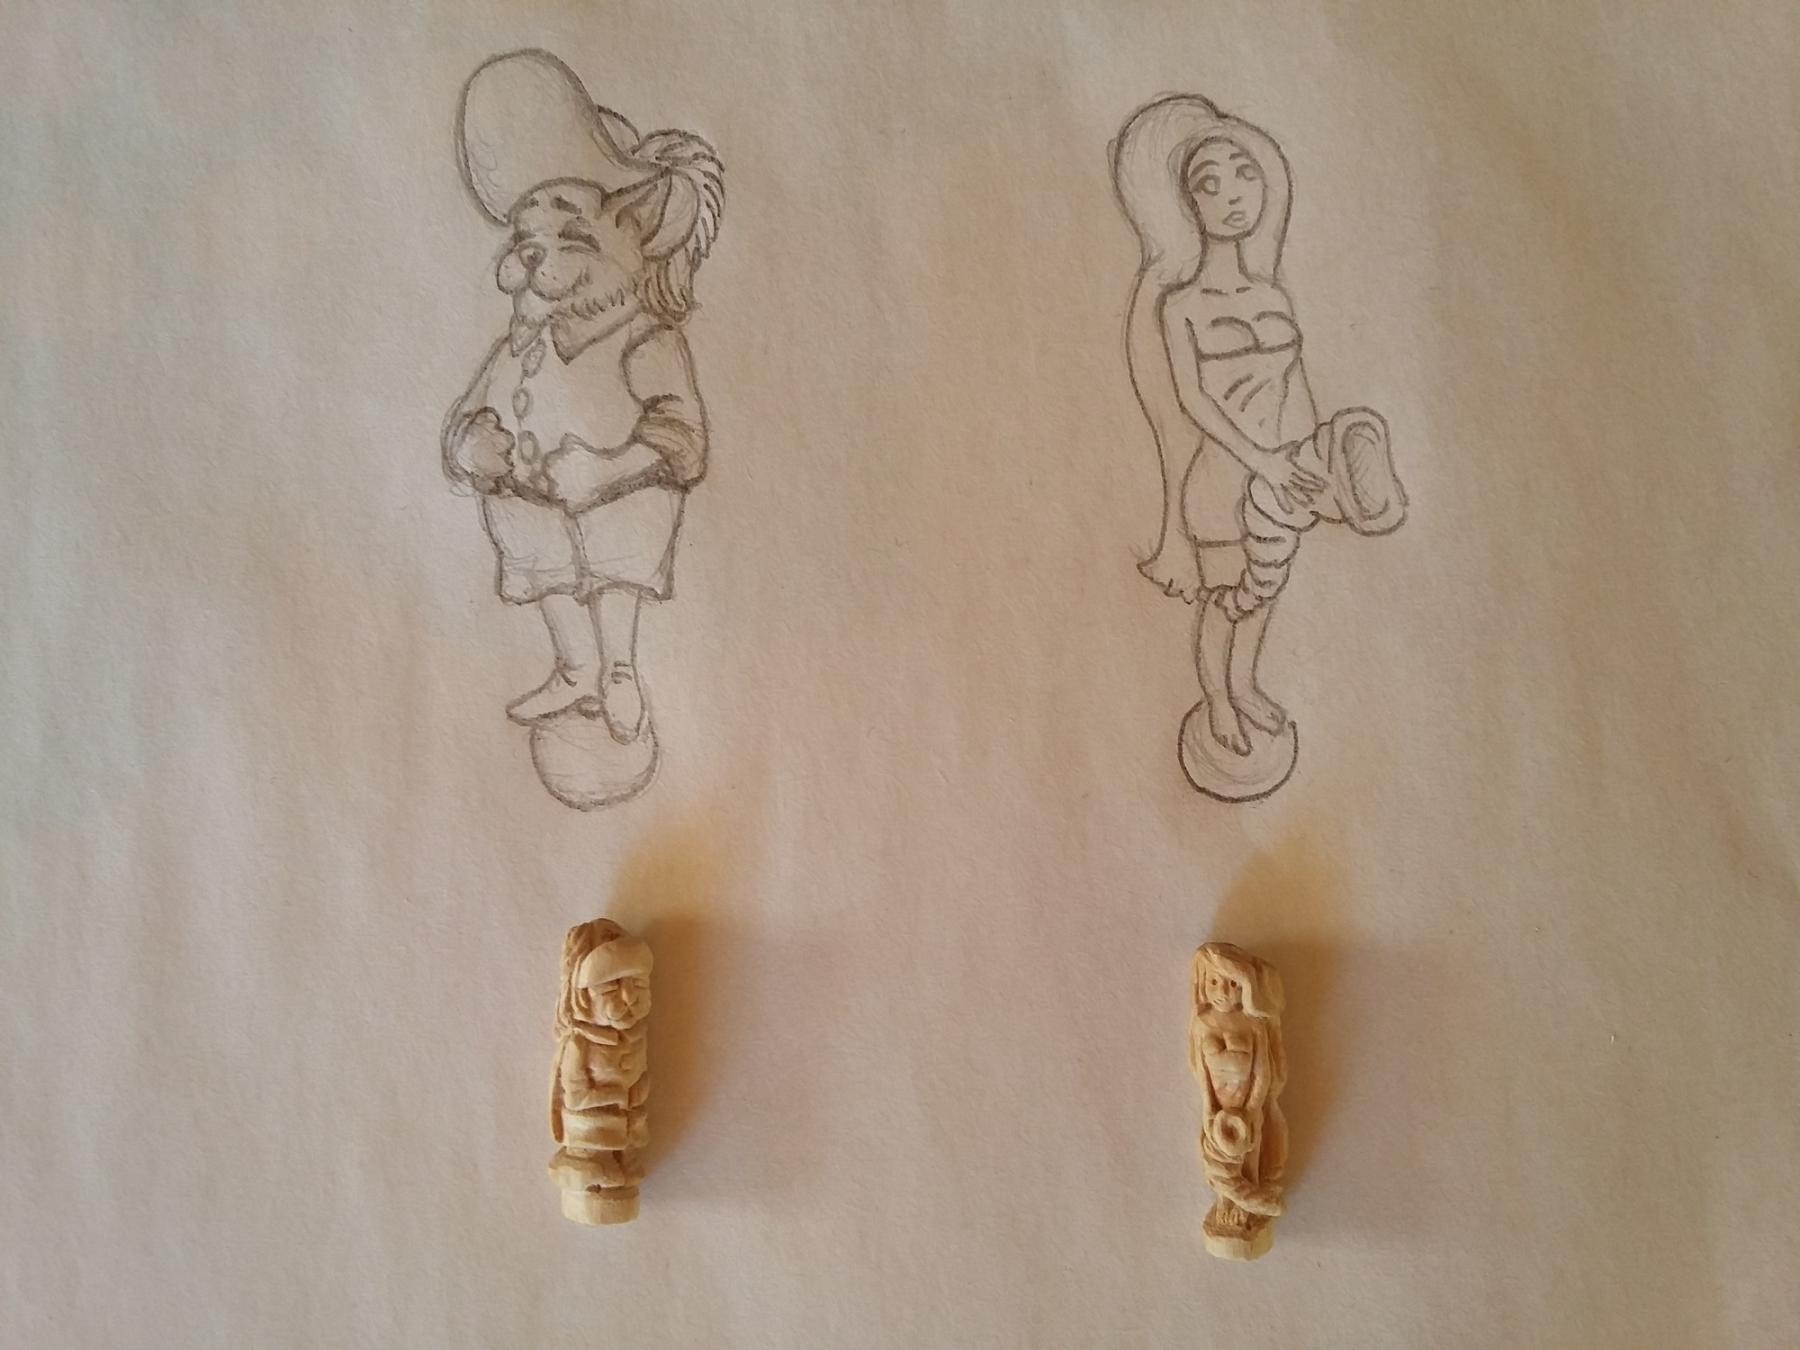
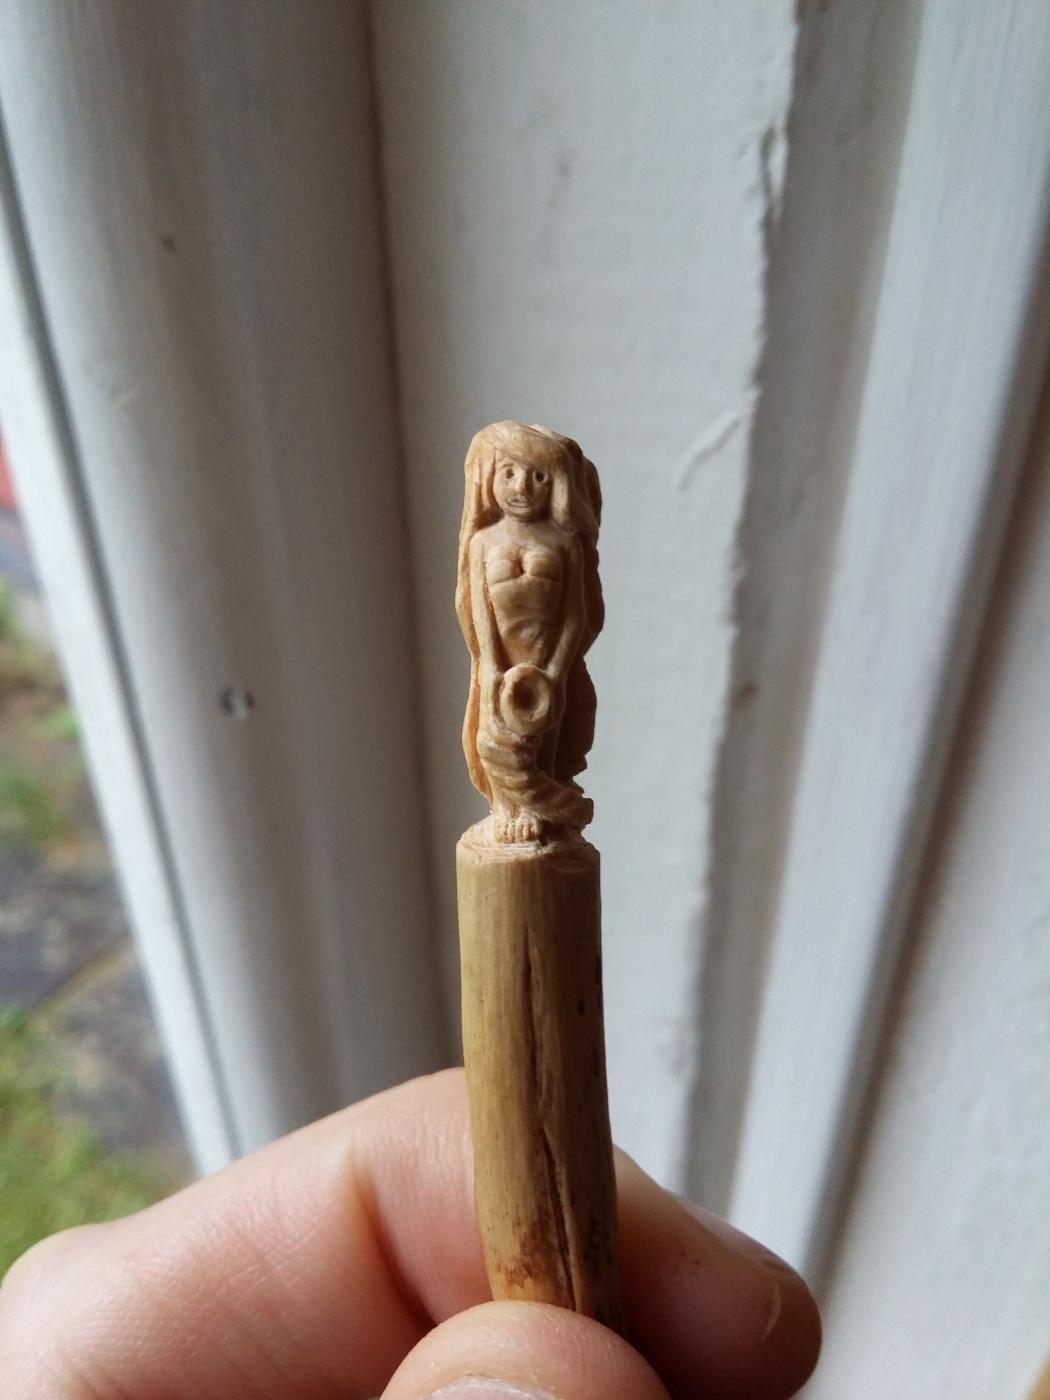
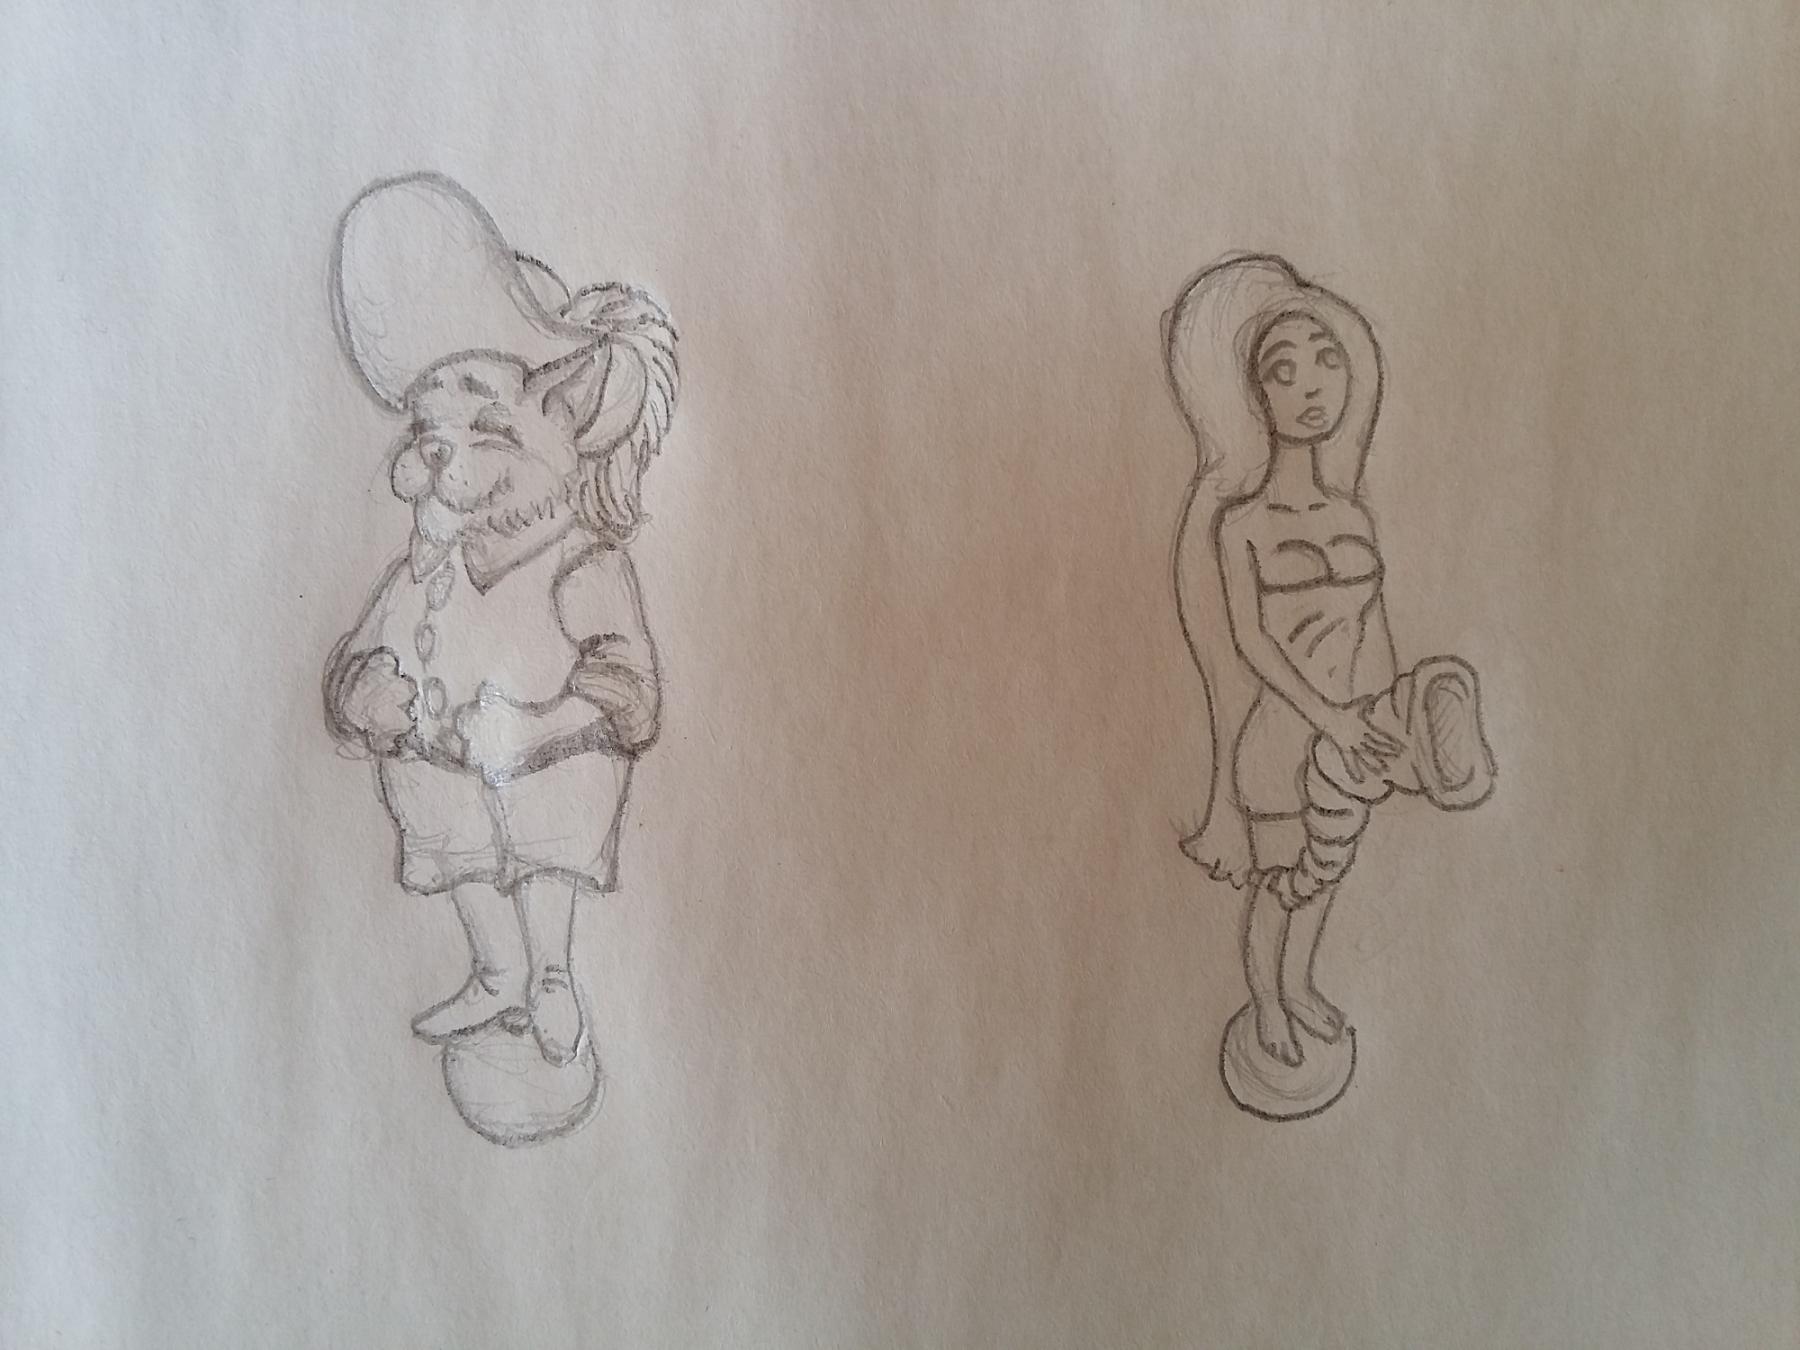
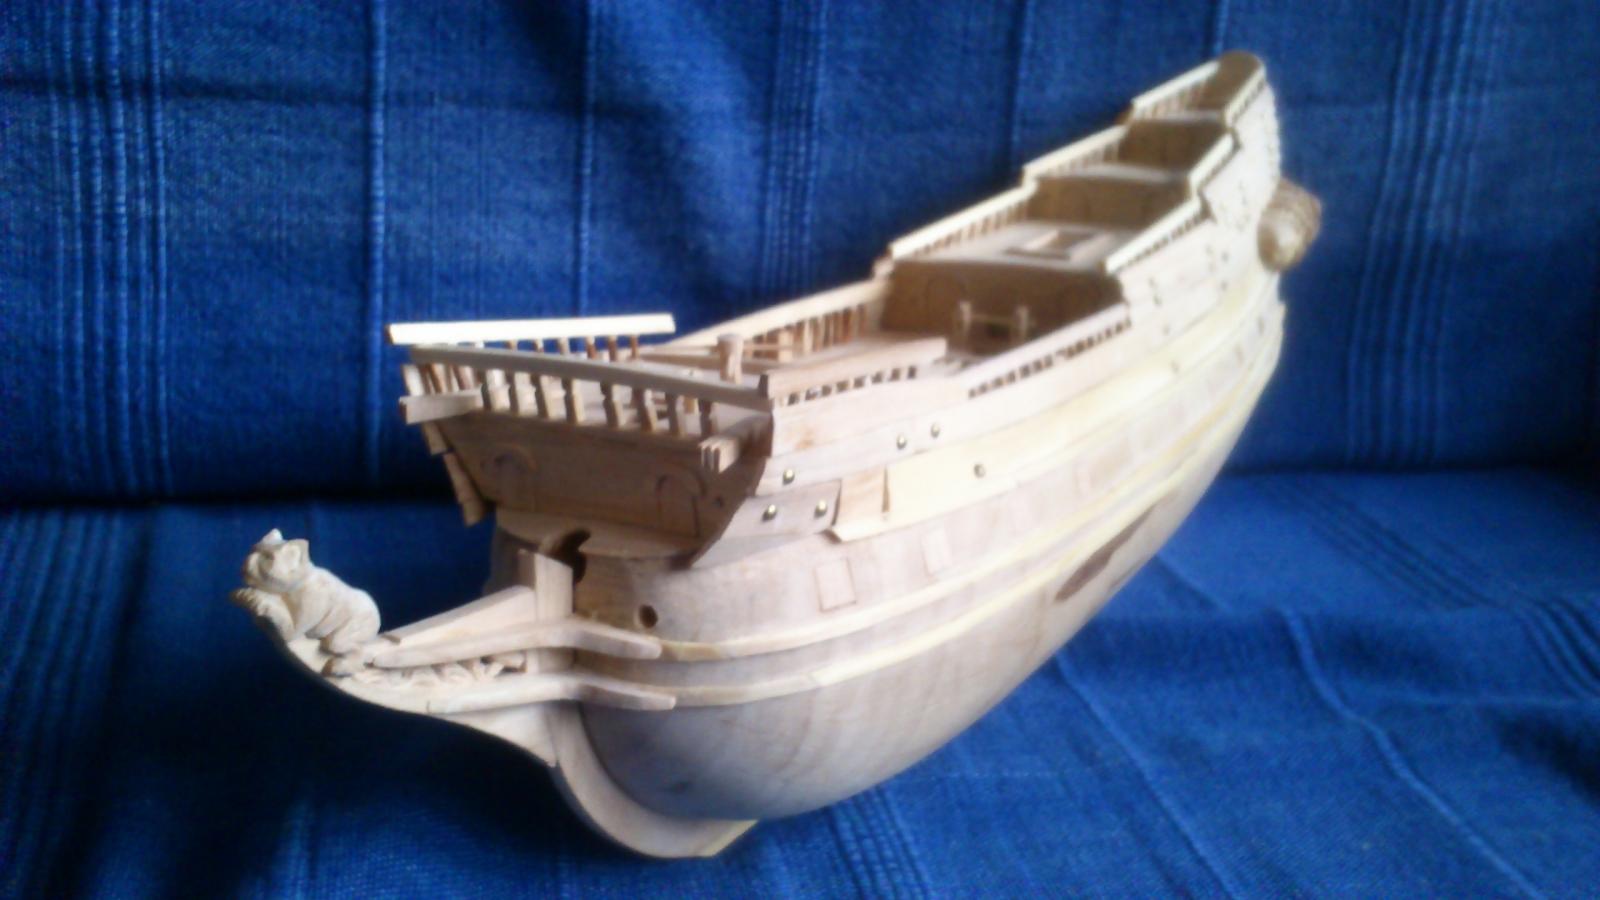
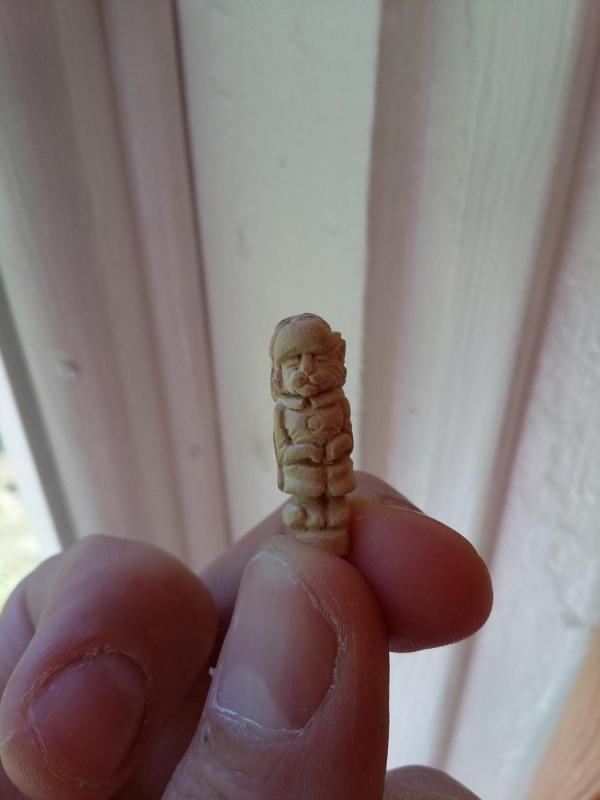
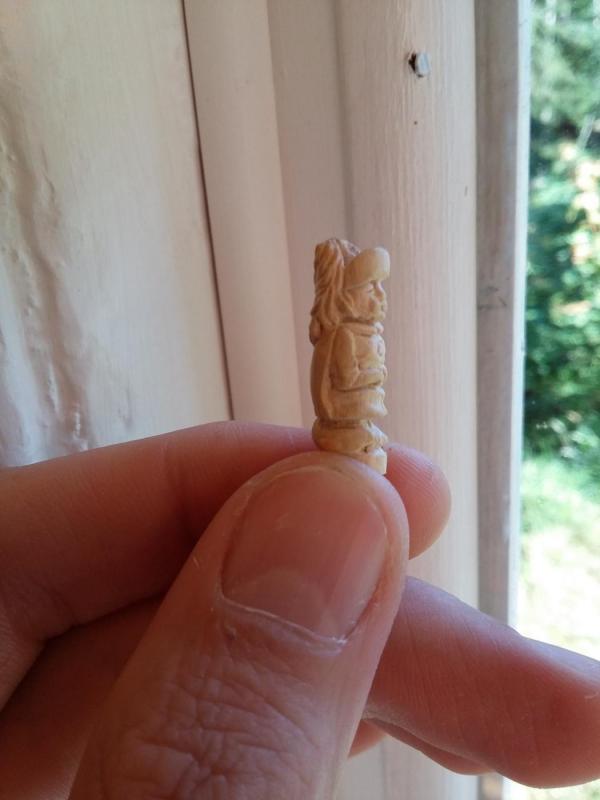
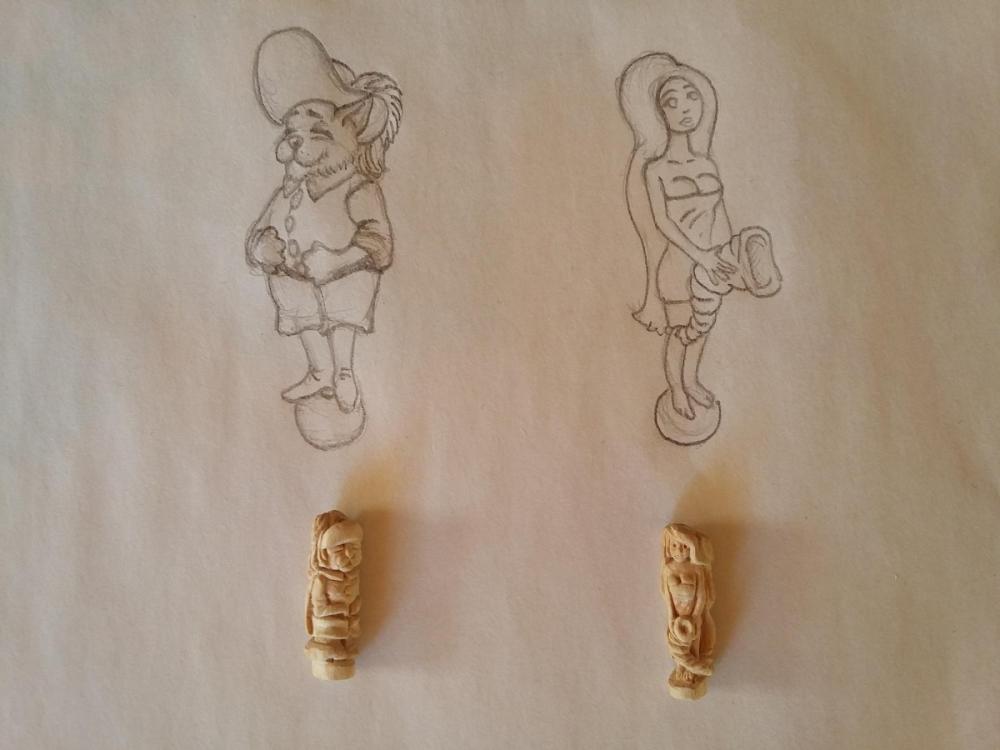
And here he is, finally. I present to you, Meaty the Cat, companion of Chestity the Semi Nude Nereid (my fantasy, my rules). I think they turned out alright.
-
Hello again! I promised you a chesty Nereid. Well, one chesty Nereid delivered, I'd say. She's 2 cm tall. Popeye: ?uoy rof hguone toh


-
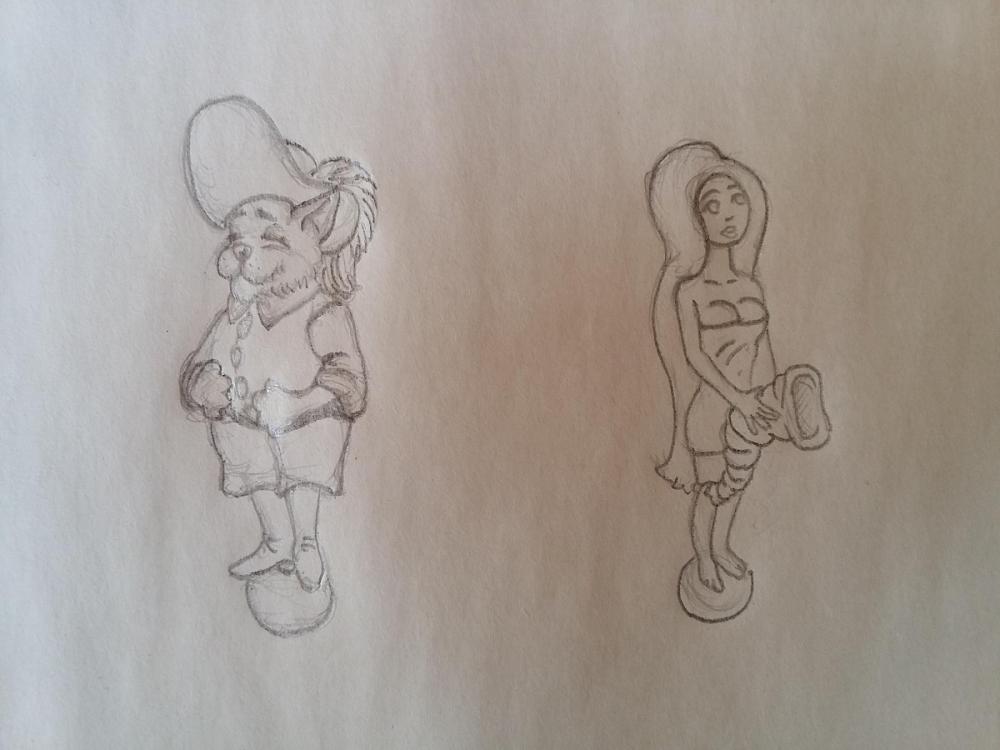
Thank you! Yeah, it's impossible to mention lupins without thinking about Monty Python! "Dennis Mooore, Dennis Mooore ..." Yep, card mock-up, that thing in the background. With the abundance of wood around here, I thought I'd cut me some frames to bring back to town. Back to Tulpijn - tonight I'll start on the hoekman figures. Here's what I have in mind: Thanks to all who post and like! Sam
-
Right. So we come to it at last. It's time to talk names! Earlier in this thread, Popeye the Sailor suggested "Batavasa" (obviously following Swedish Navy naming conventions) which isn't bad at all. However, the name of this ship was decided long ago. Before we break that champagne bottle - a little background. They really do resemble an army, besieging our house from all sides. Their shields of green and waving banners of pink, white and purple are truly an awe-inspiring sight. I am of course talking about lupins. Despite our best efforts the blasted things are slowly but surely taking over the show around here. Lupin in Swedish is lupin (by happy coincidence) When my oldest younger brother was a wee lad, he pronounced it "tulpin". This is what she'll be called. To get that fancy "old Swedish" feel, we'll spell it "Tulpijn". A wine-soaked evening carving later we have ourselves a lupin for the transom: We also have hinges for the port side gun ports: "GASP!" ... but what's that in the background?! Farbror Fartyg, you cheeky, cheeky man ... is that ... a new project!?


-
Baby! I've missed you so much ... I'm back now. Everything's gonna be alright. Come here! You big hunk of ... wood. Give yo daddy a kiss. Good, no cobwebs ...

-
Thanks! But ... that's too close. My shoddy work doesn't stand up to close scrutiny-
-
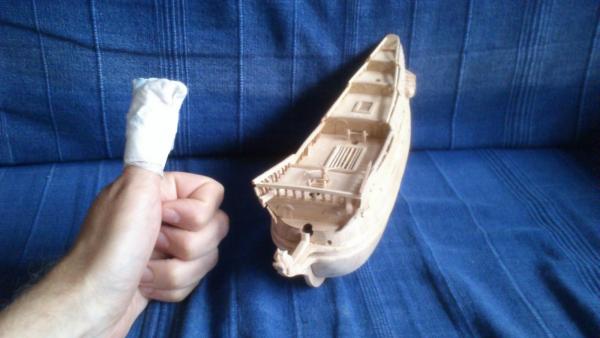
I could not leave her alone. Looking at her every day, walking past her, thinking about her being locked up in this cold, empty house, with no one to work on her for almost a year. Absolutely forlorn ... It turns out I can work quite well with just 9.5 fingers. OK THAT'S all that will be built this year. (Probably)

-
Thank you, Popeye. And likewise! Andrea Gail was a whole barrel of fun. The injury: I hear scars add to one's manly ruggedness. Or does that only apply to facial scars ...? Hmm ... As far as other projects go, never a lack of those. I know my posting here is infrequent at best, but things are happening behind the scenes. One example is the wreck light. More's to follow within a reasonable time frame there. The research for "The Next Project" is also moving forward. I think I have enough to start building soon. Looking forward to that immensely. Thanks to all who like and post in this thread. It means a lot to me. Live long and prosper. May the force be with you. Sam
-
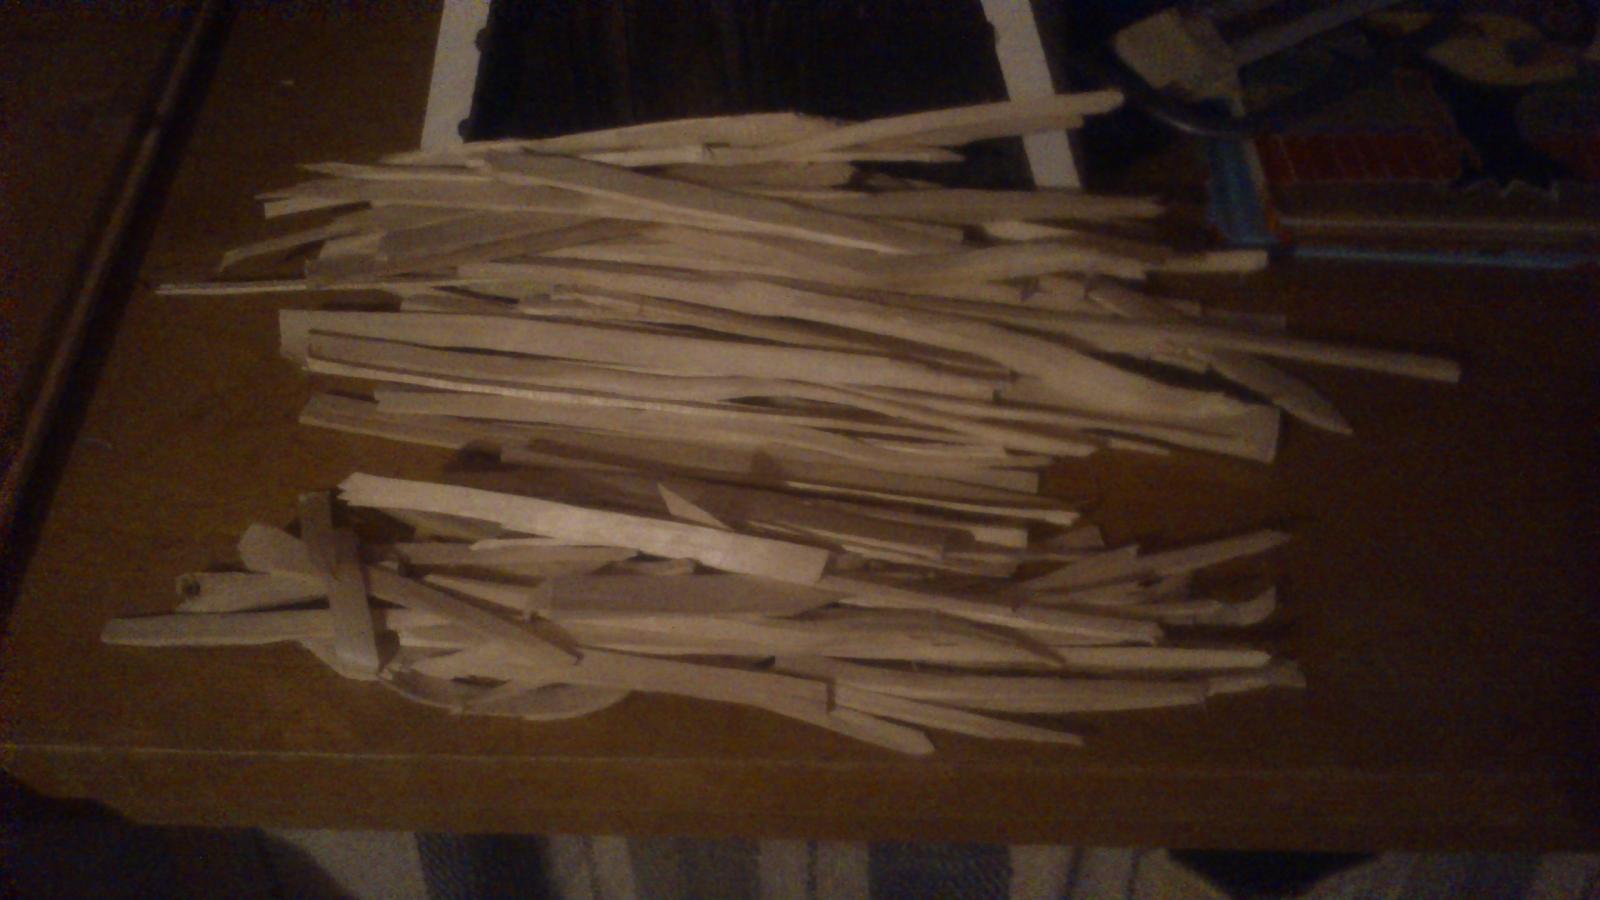
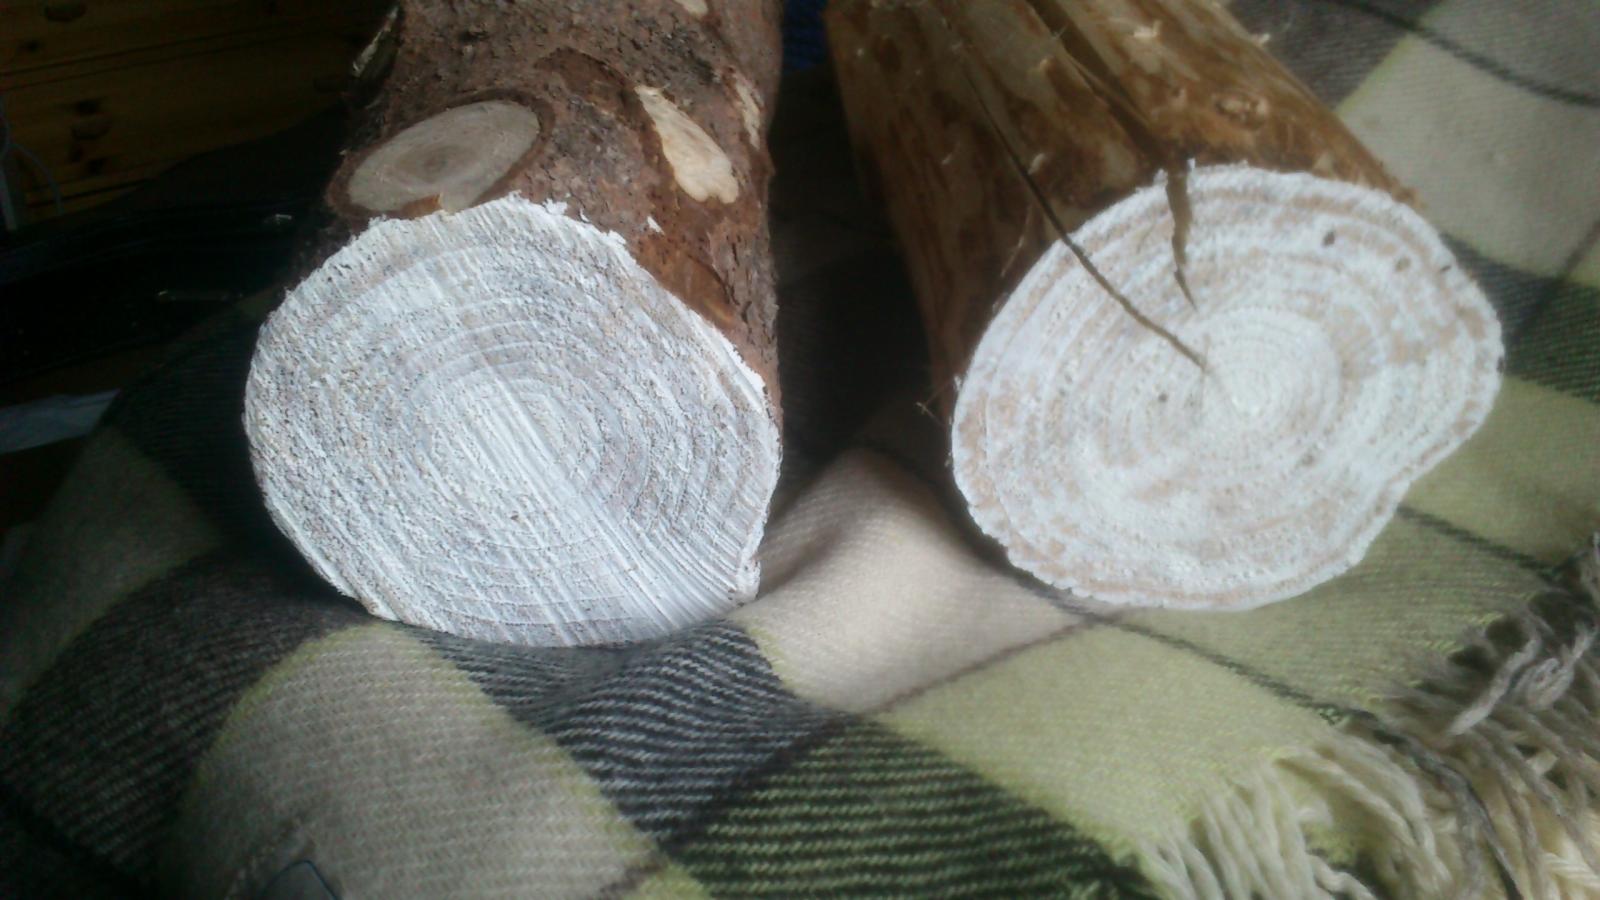
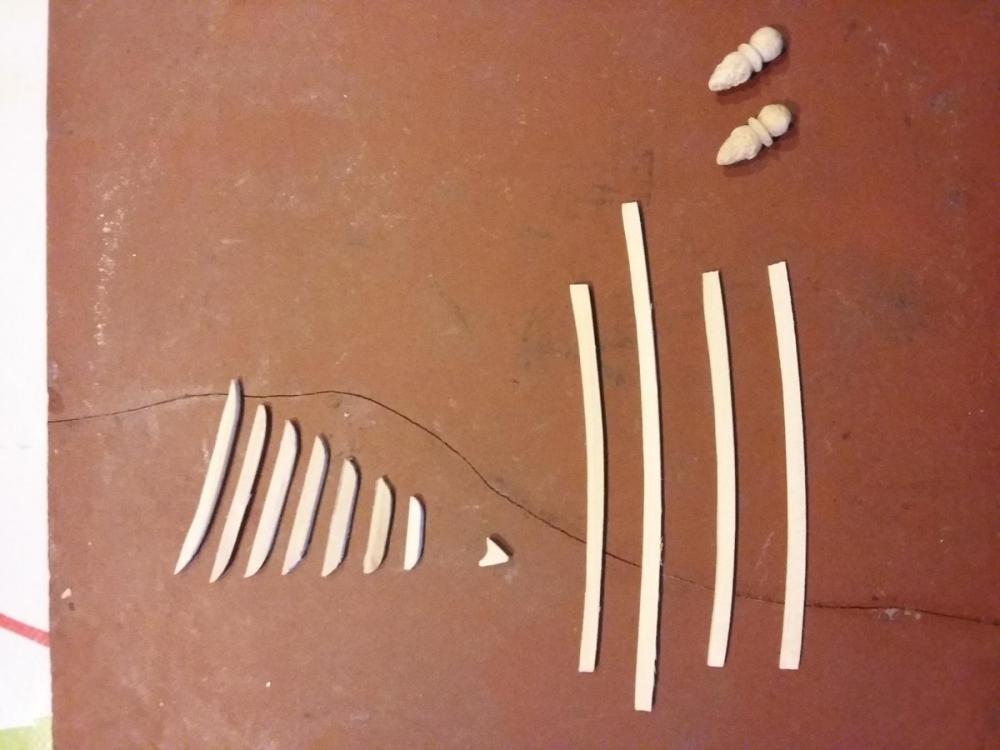
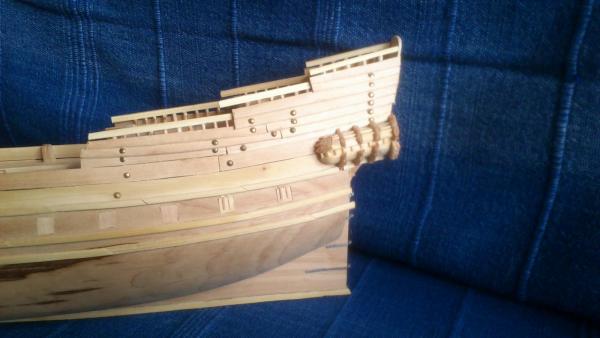
Only a few days left of (somewhat) sunny summer frolicking, and I've managed to give my left thumb a nice, new, centimetre deep gash. Good work ... Not much ship modelling in the forecast for the rest of the stay any more ... or plank making ... or anything that requires two opposable thumbs. But I did get a few things done this year. I'm not bitter. The beak head from another angle!: Bonus pic 2 - Roughly a quarter of the split log has been turned into planks, of various lengths and thicknesses:

-
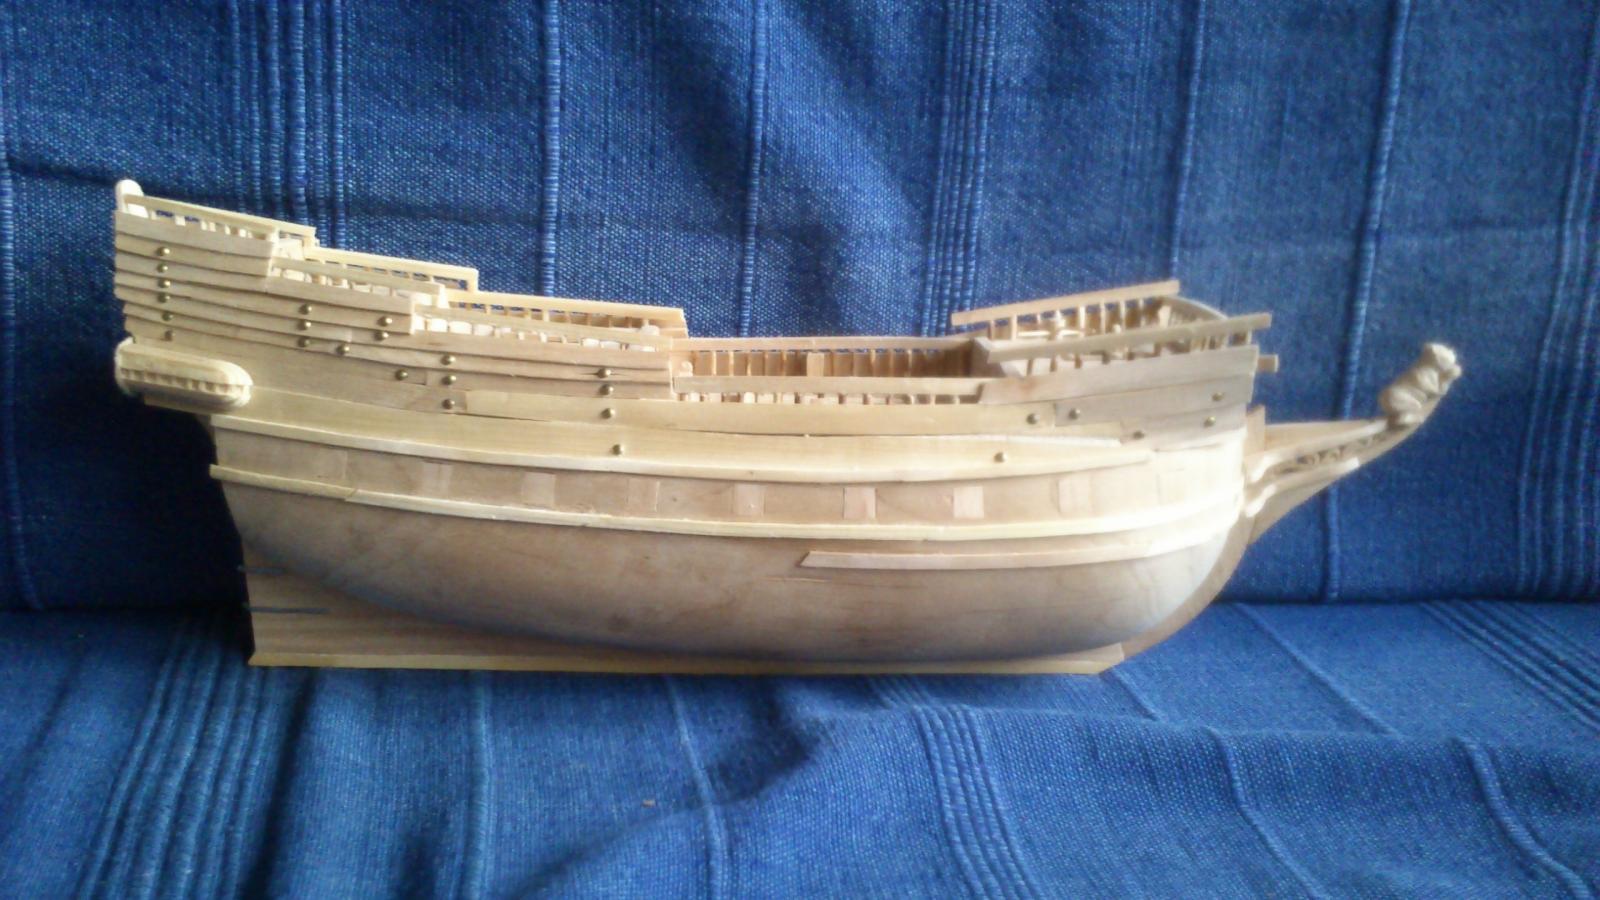
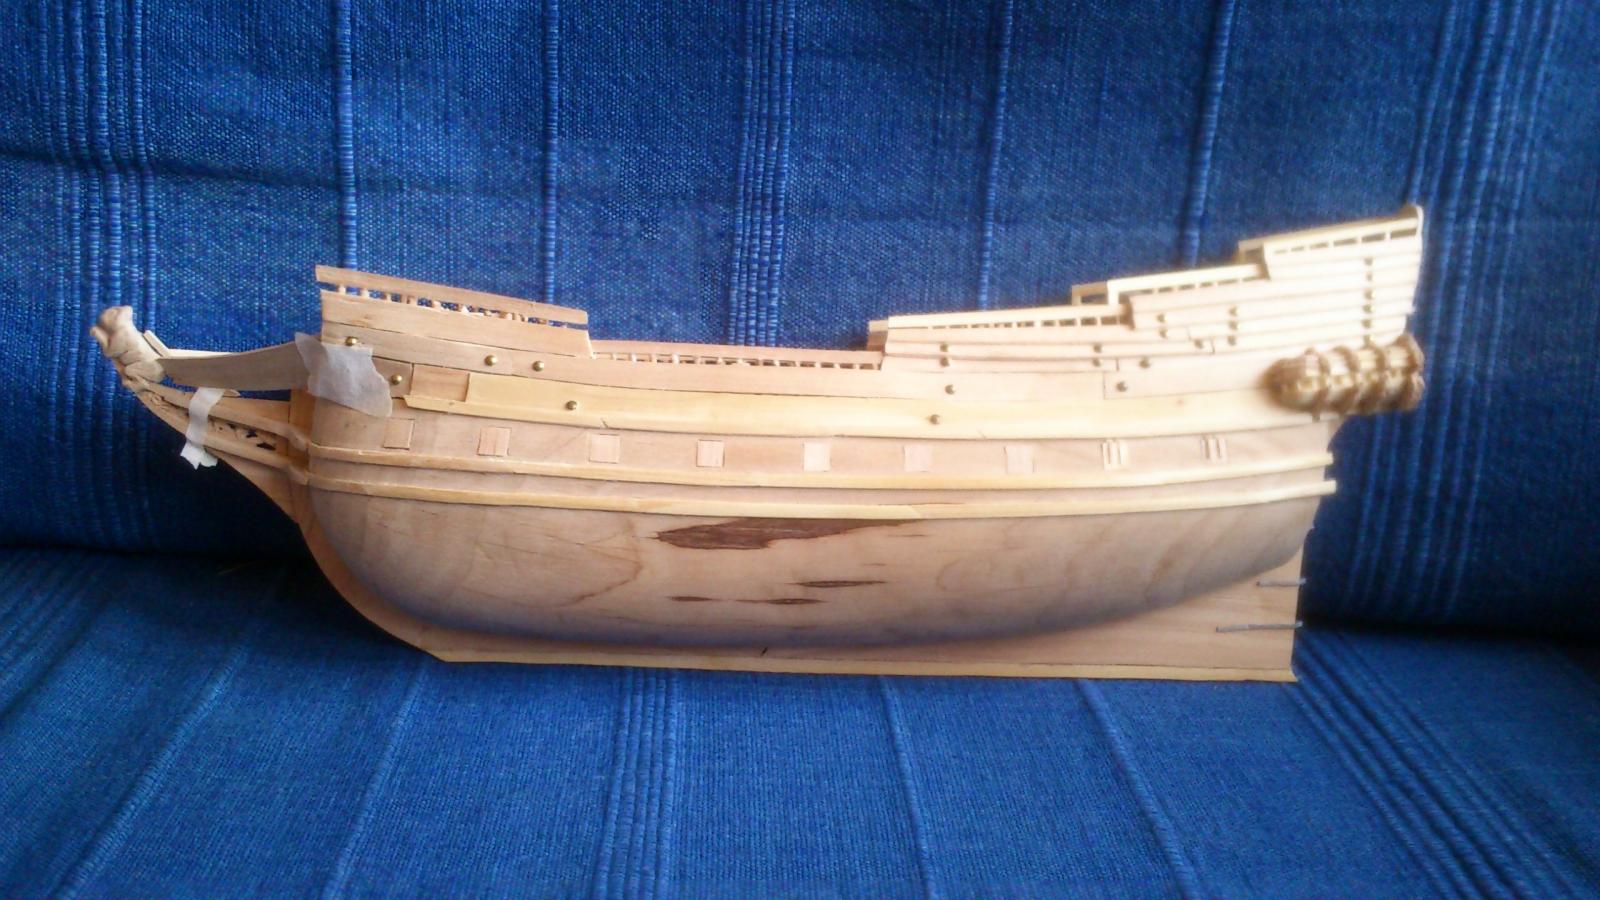
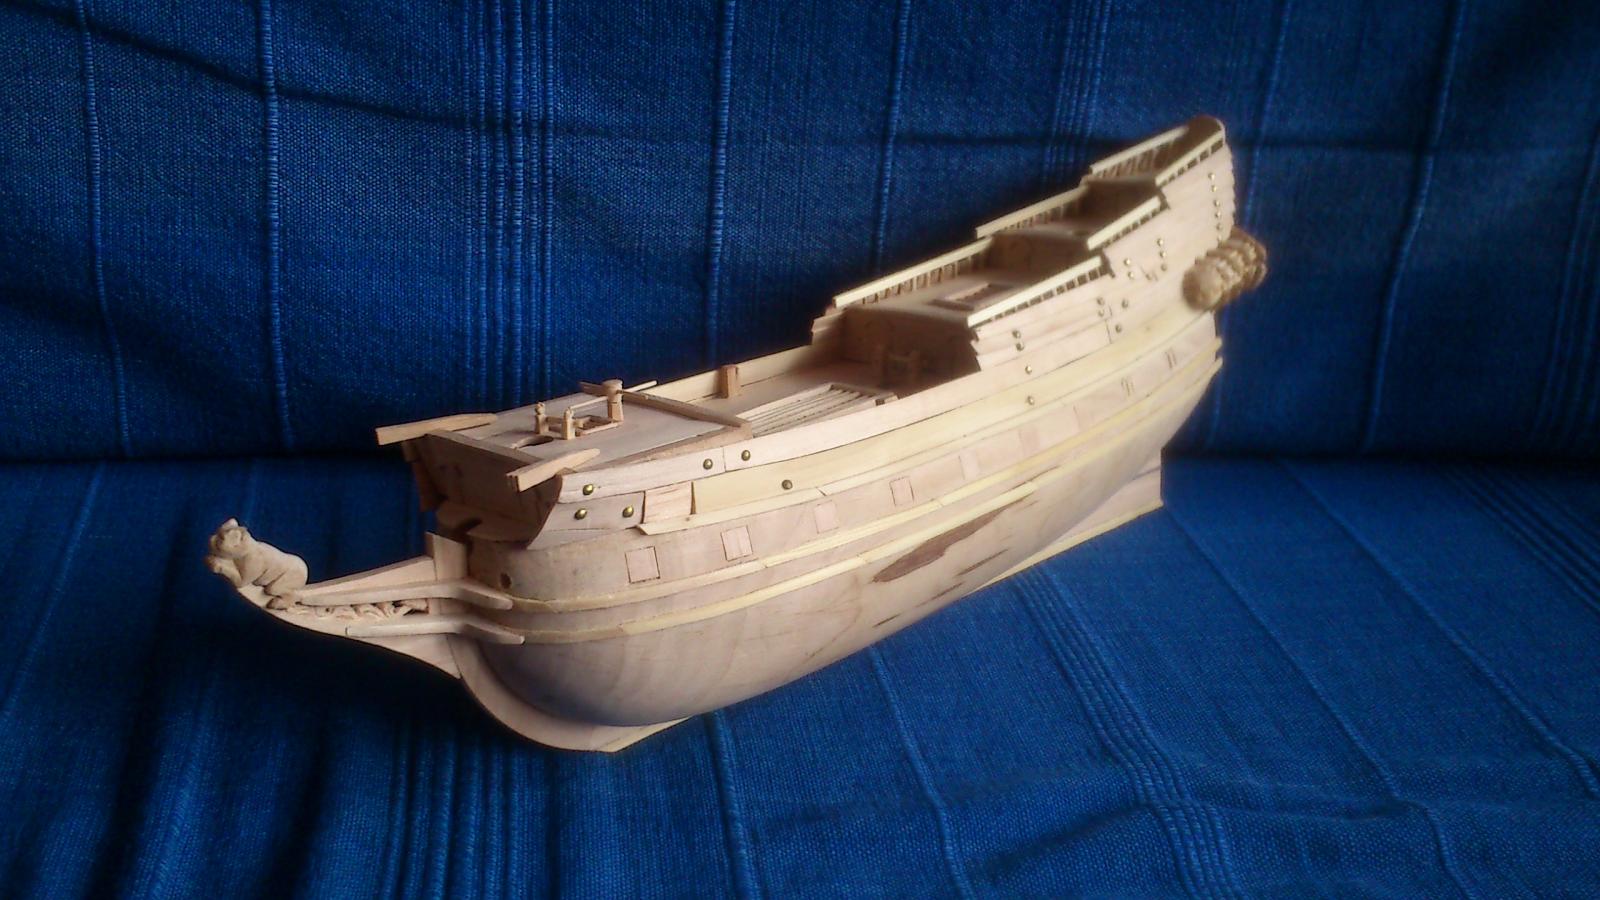
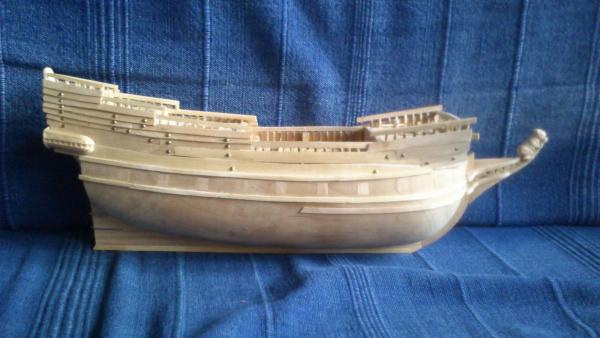
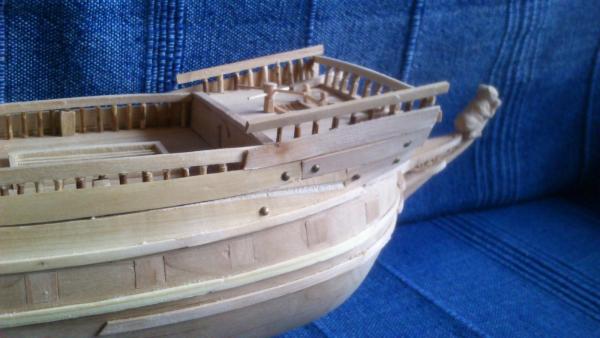
One or two things have been added. I can't make up my mind whether the poor picture quality is making the ship look better or worse ... More railings: Beak head dry run: I've also continued adding wale planks to the starboard side. ... they look like the ones on the port side ...


-
Thanks! Batavasa - not bad, not bad. Unfortunately I already have a name for her. More on that later, when we get to the transom decorations. The split log will be turned into little planks, for when the next project comes a-knocking.
-
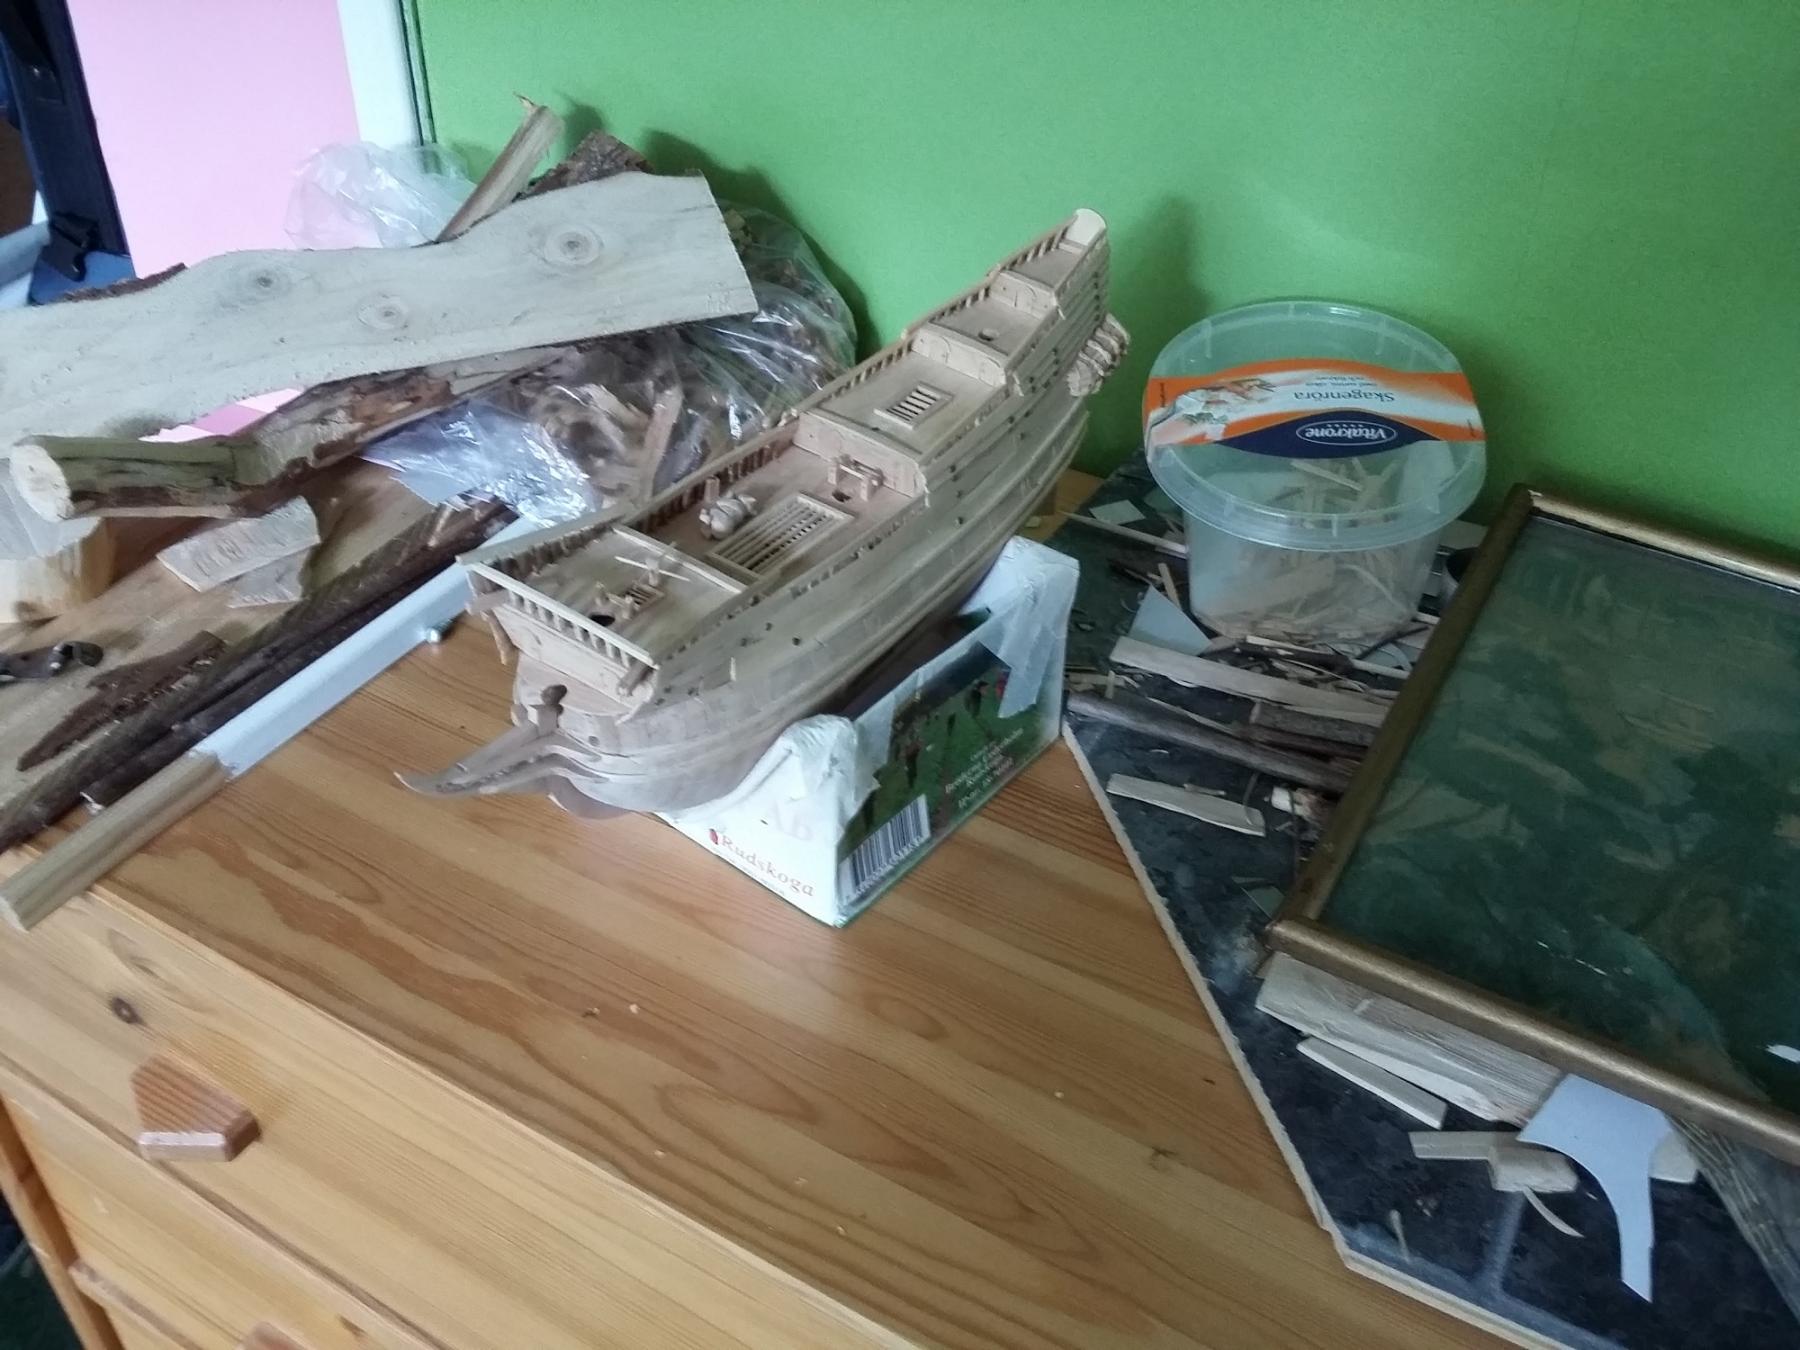
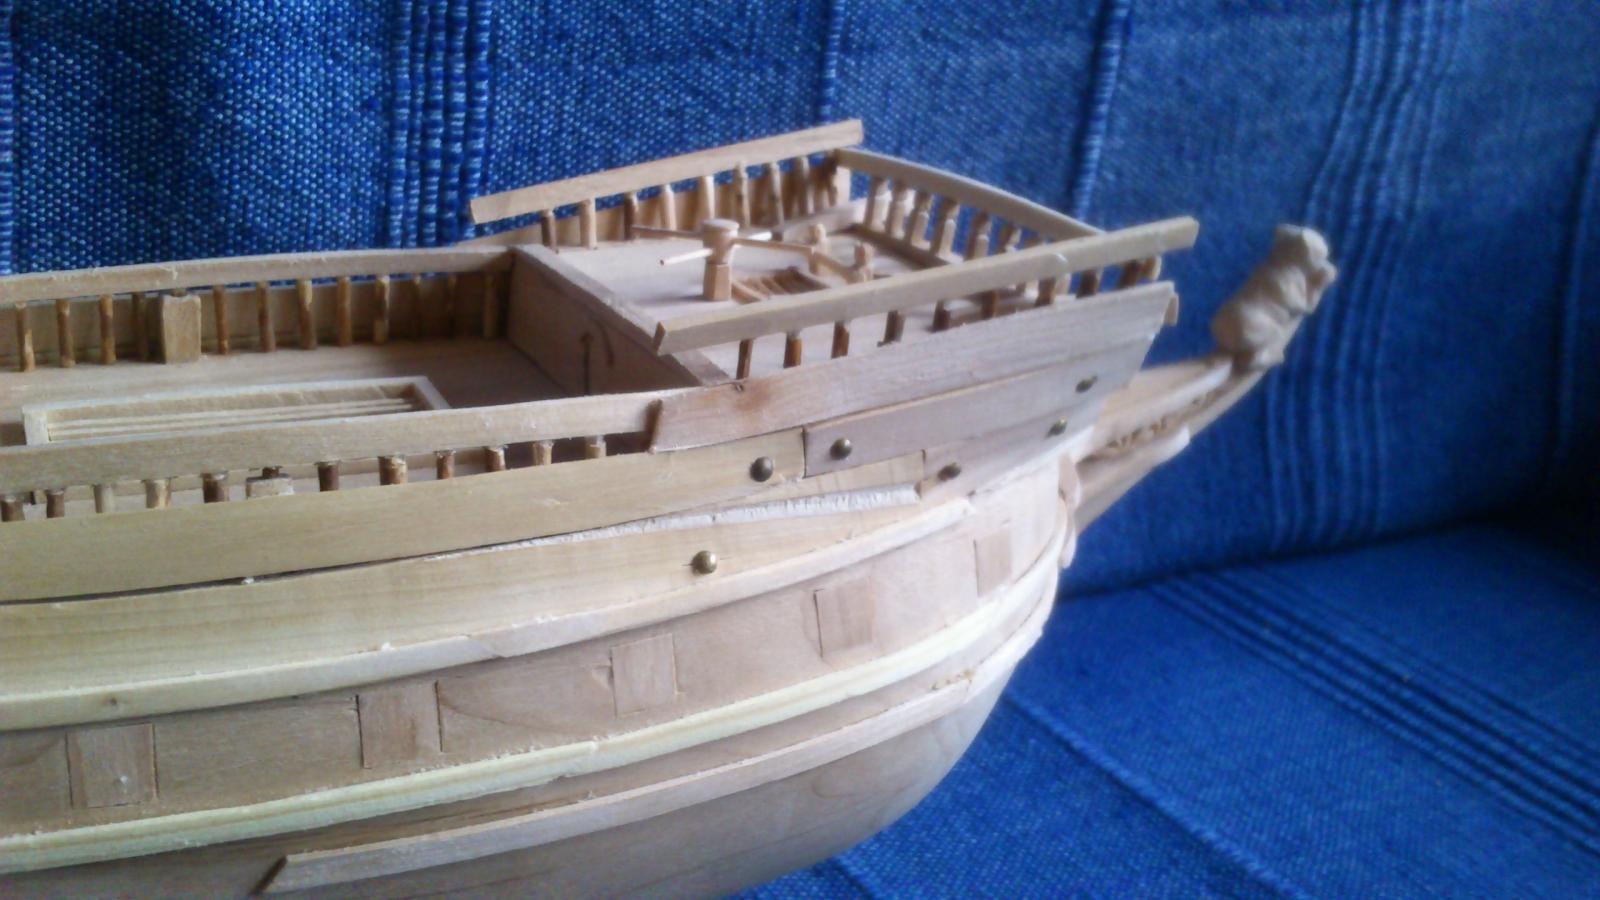
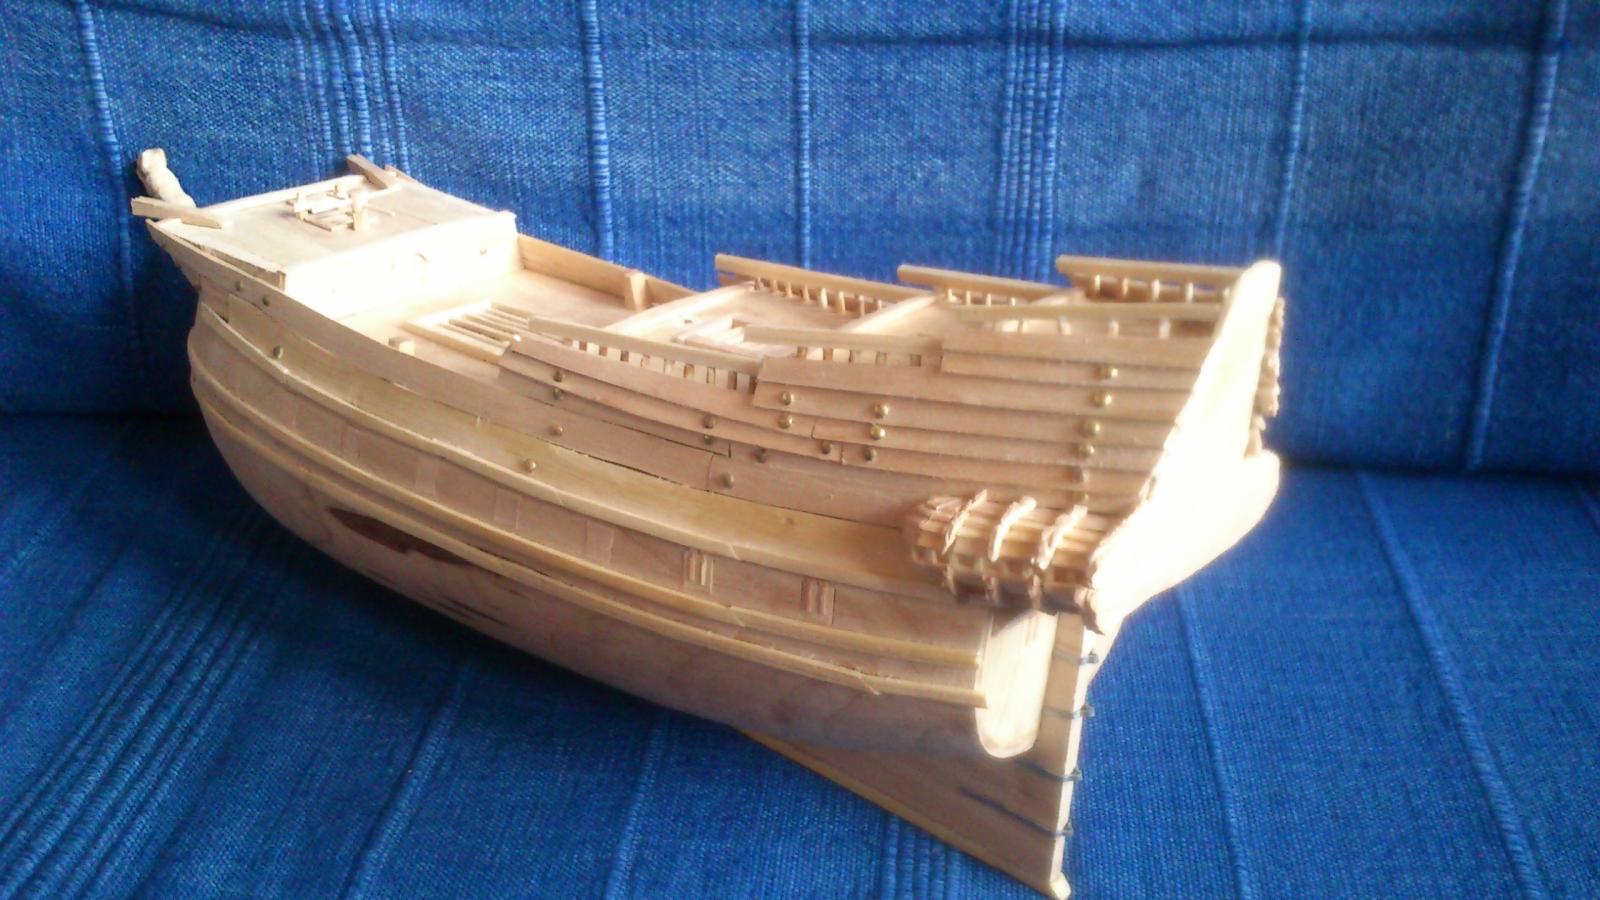
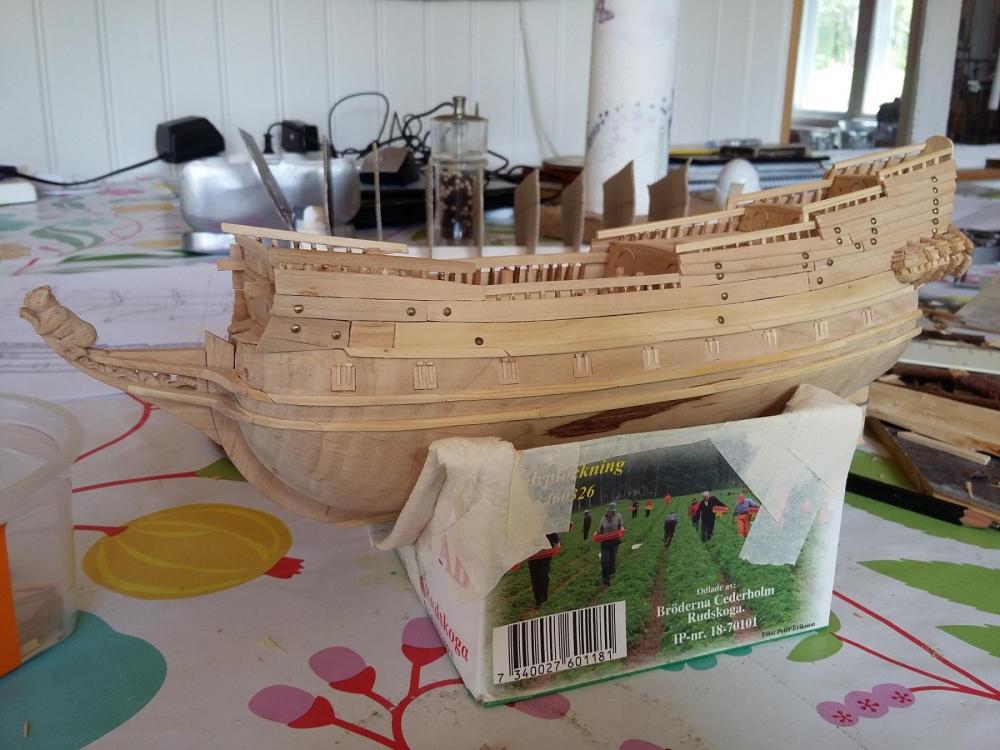
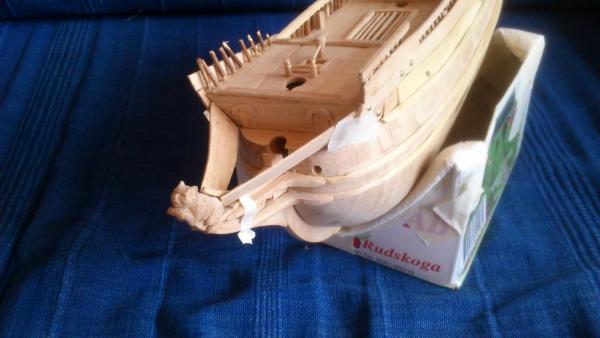
Yes, it's that time of the year again. If you're ready for more "rustic folk art" from the dampest, deepest, most fir infested parts of Sweden, then your friend Farbror Fartyg stands ready to deliver. The stern castle is now planked and has railings. Mmmm ... feels good to be back in business. Bonus pic: This is why you should always dry your wood with the bark on.


-
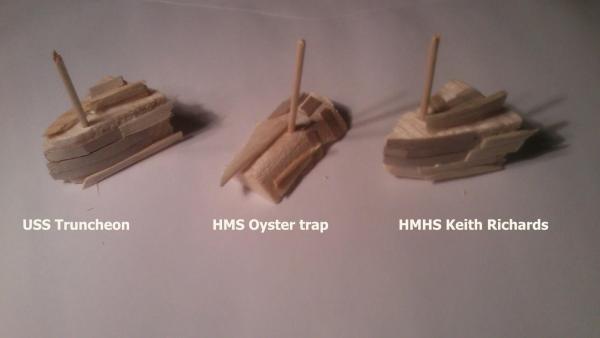
Literally the first thing that came to mind when I started thinking about naming my test wrecks, was Keith Richards ... You know how it goes: Rock->wreck. Wreck->Keith. Keith->old. Old->MIck Jagger ... and so on. I'm going to need everything to work together in this diorama - the hull, the silt on it, the bottom, the light ... Colours, and textures, are going to be very important. So I'm going to need to do a few tests to get it right. That's where the "armada" shown above is going to come in. Good way to get rid of scrap pieces too. Sam
-
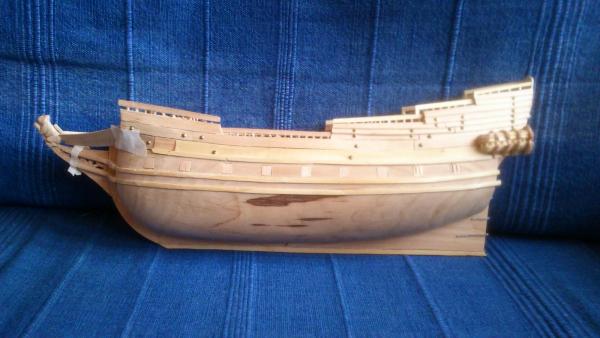
A little update. The planking's mostly done. While waiting for the few strips that are still feeling the loving hug of masking tape, I thought I'd amuse myself by throwing together a few test wrecks (unusual word combination there). They'll be used for colour tests later. Sam
-
I can totally see how that might have happened. I didn't do any work on this diorama for more than a year, so the thread got pushed way back into the obscure and murky parts of the forum. Glad you like it! Sam
-
Happy Birthday! May the scaffolding at the shipyard rise high enough to touch the heavens! Sam