stevenmh
-
Posts
161 -
Joined
-
Last visited
Content Type
Profiles
Forums
Gallery
Events
Everything posted by stevenmh
-
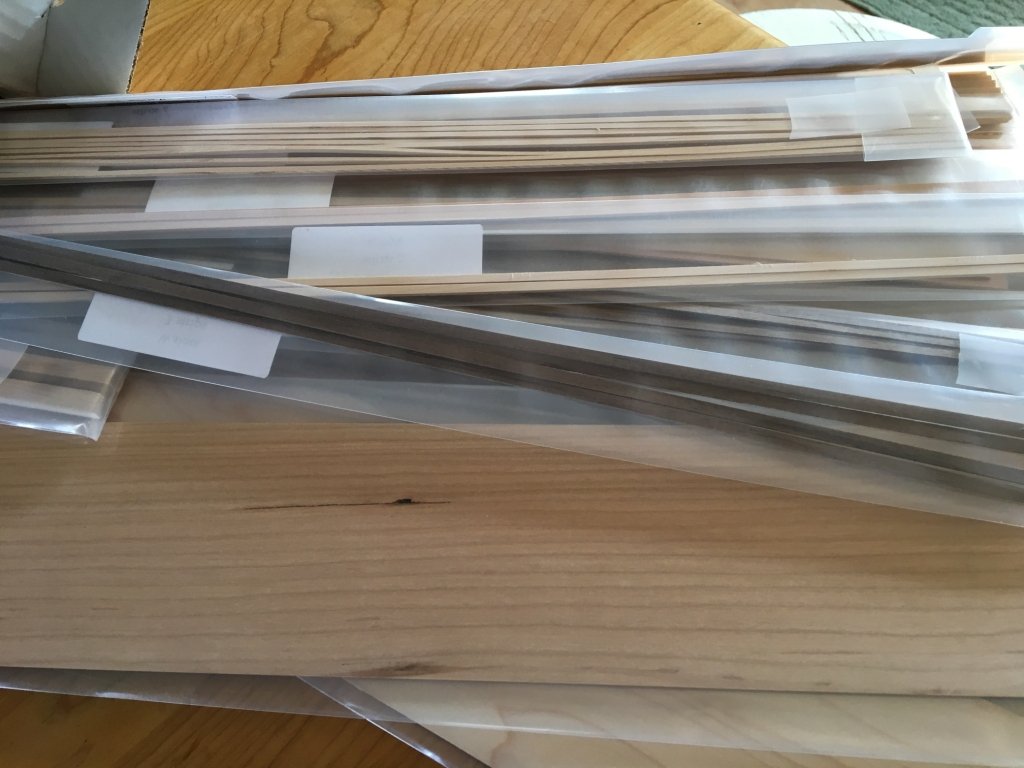
 New wood finally arrived - now I have no excuse not to go full steam ahead! I am thinking I will finish the side I started with the kit wood, then fill, sand and paint it, but the other side I might "paint" with the new wood I bought and depending on how that wood looks, put some satin poly on it. We'll see. Now off to finish the deck frame plans/templates and start cutting lumber.
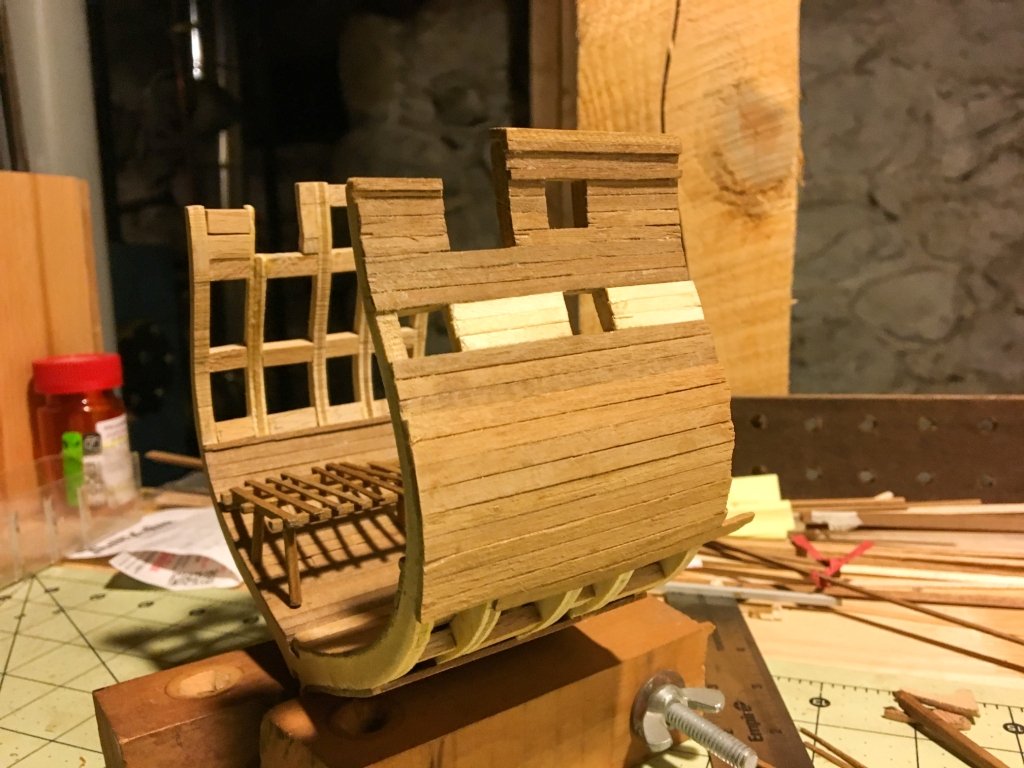
- 108 replies
-
- 5
-

-
- mamoli
- constitution
- (and 2 more)
-
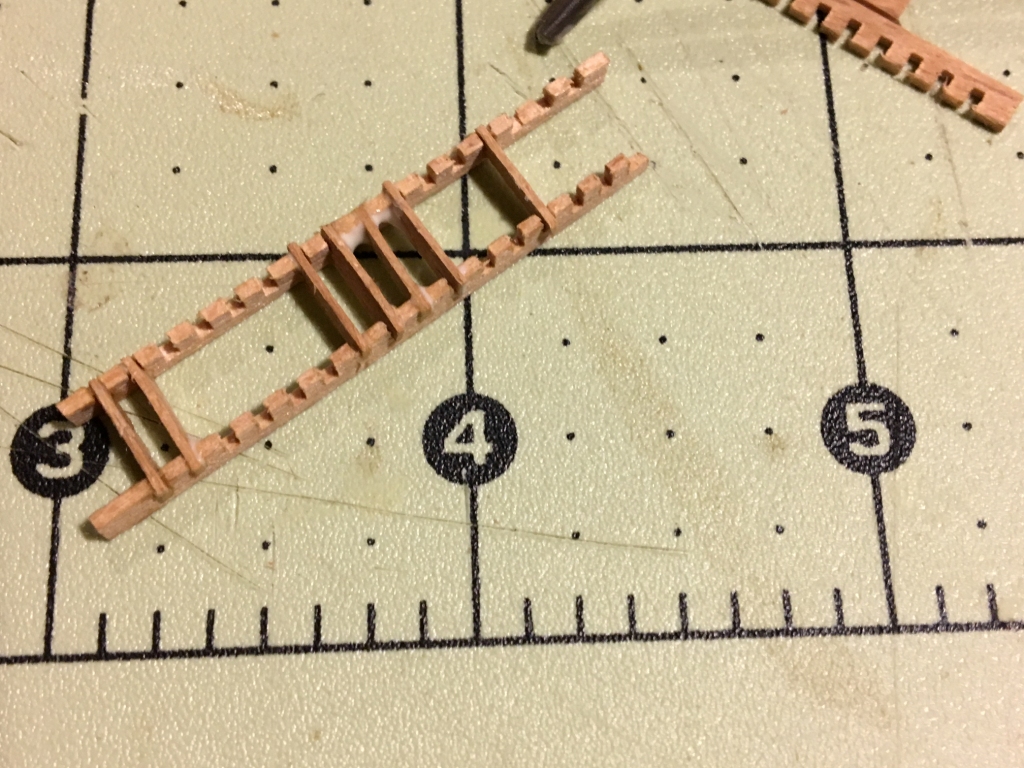
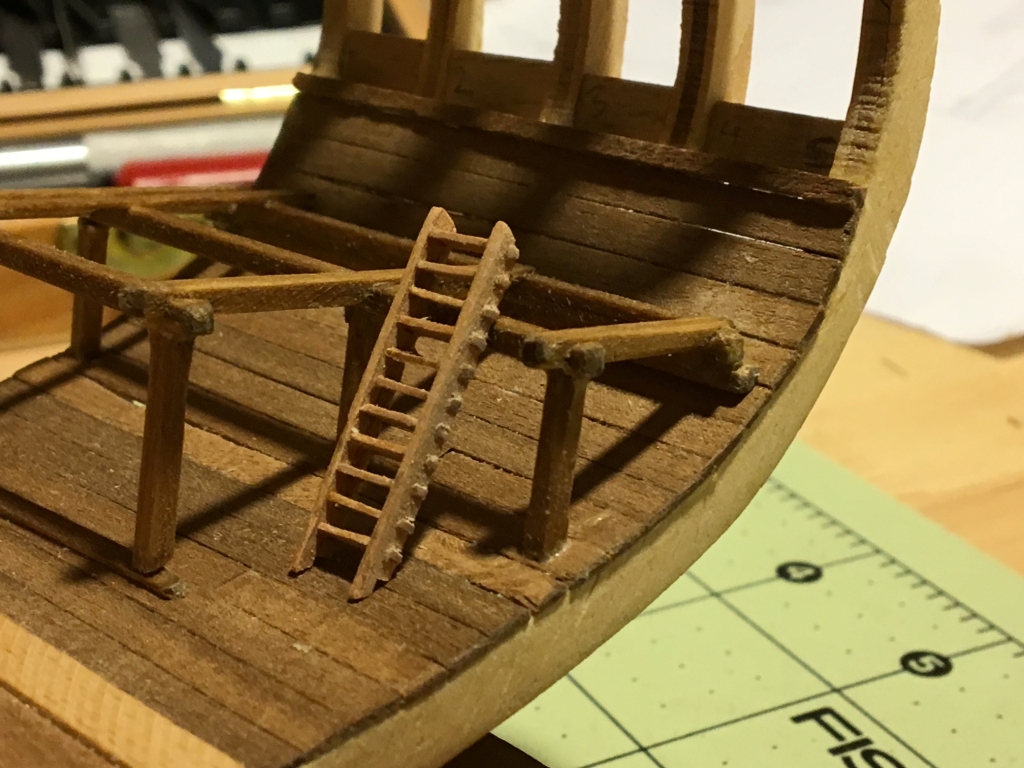
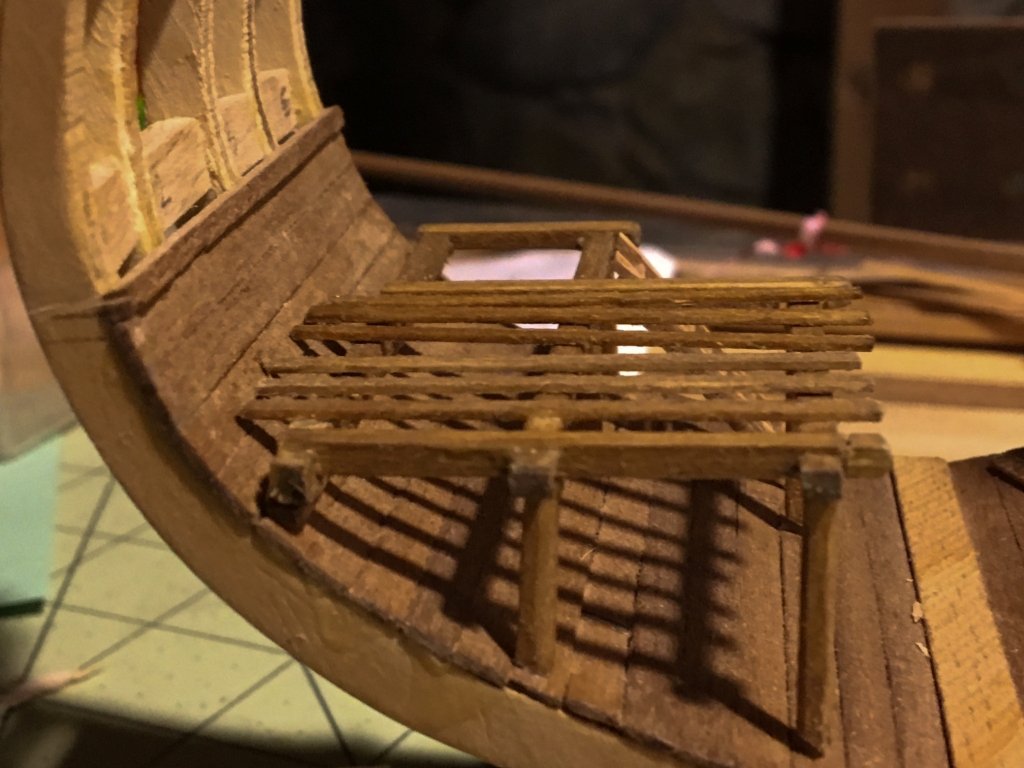
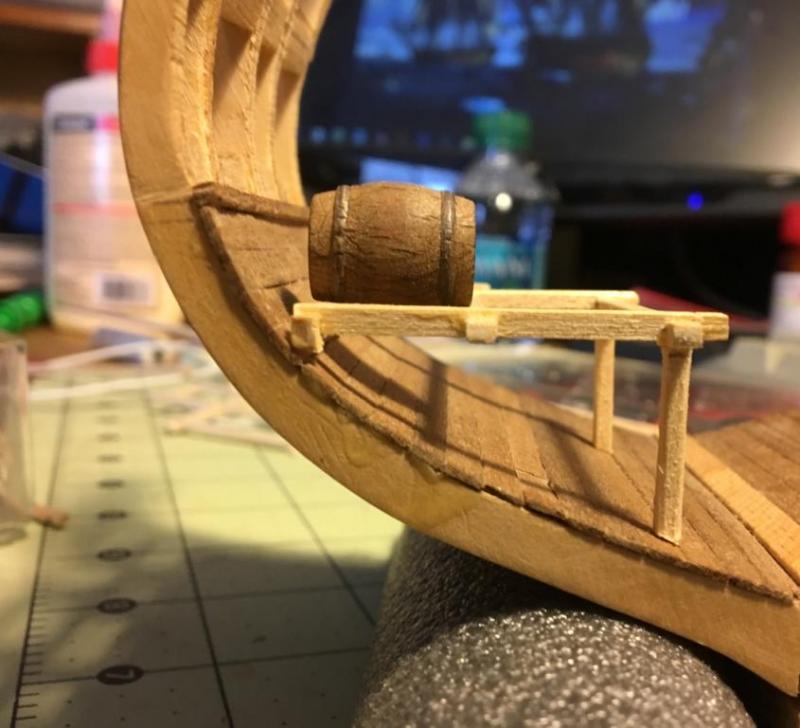
A bit more progress while I figure out better wood and tools. Stained the platform and some home-made planks, but those plank were very uneven, so I am going to make some more. I also took some of the ladder that came with the kit, and is supposed to just sit on a closed hatch and cut it down, started sanding it down so it is thinner (looks out of scale as it) and will attach it to the platform once the new planks are in.


- 108 replies
-
- 5
-
-
- mamoli
- constitution
- (and 2 more)
-
Thanks Russ - I did buy a little 4" table saw, and our black walnuts have dropped a number of branches - maybe I'll play with those, but probably also get a scroll saw and some tougher wood too.
- 108 replies
-
- 2
-
-
- mamoli
- constitution
- (and 2 more)
-
Thanks guys, I appreciate the comments and likes. How does maple stack up vs. boxwood, aside from being cheaper??
- 108 replies
-
- 3
-
-
- mamoli
- constitution
- (and 2 more)
-
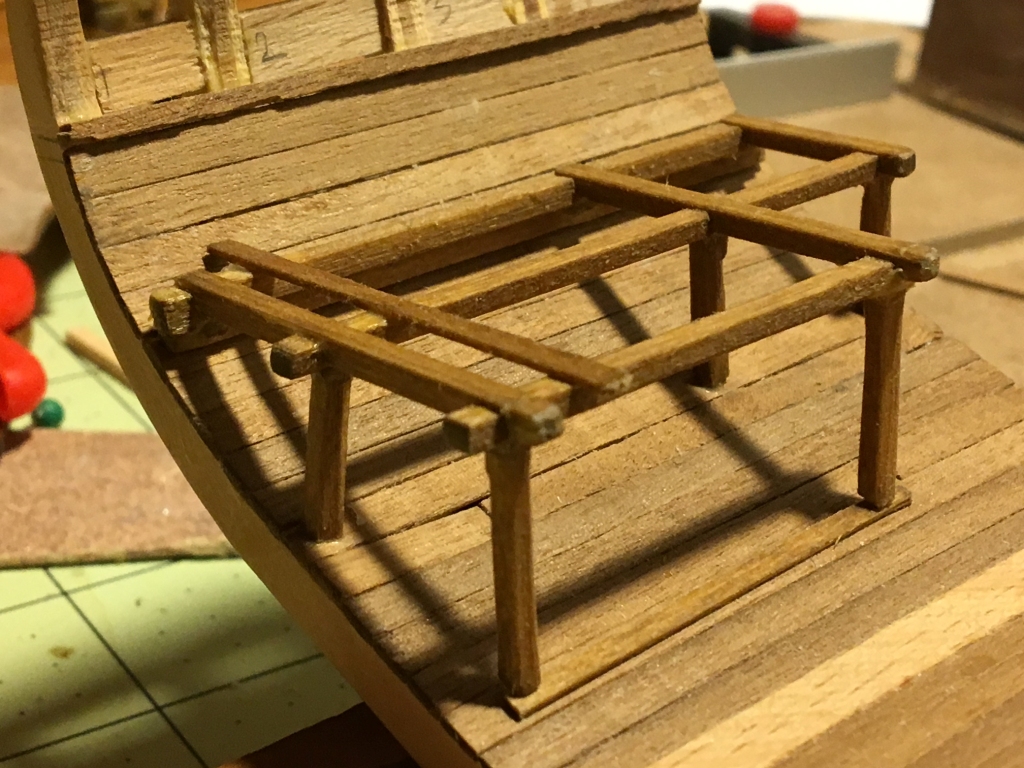
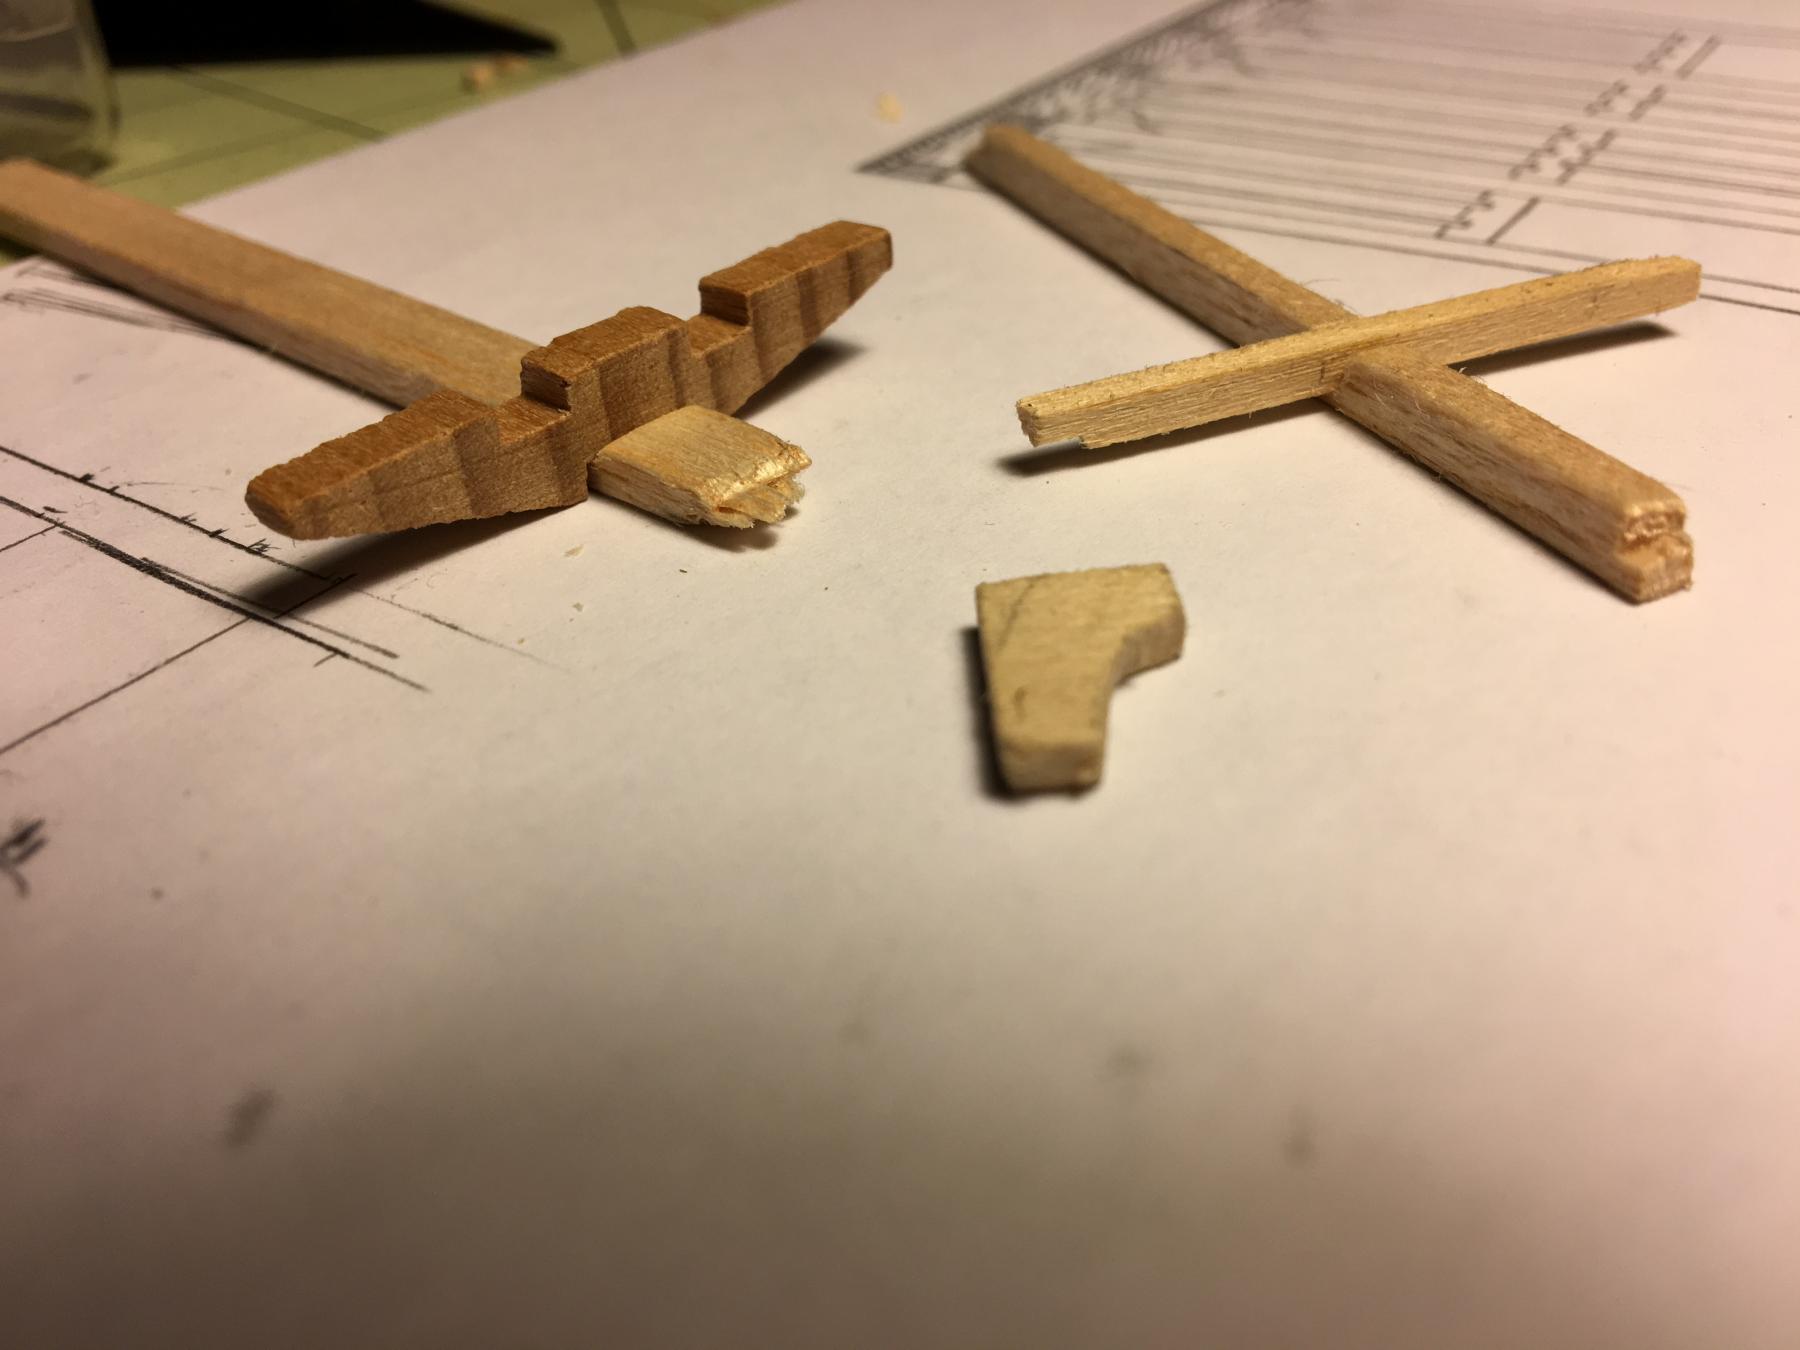
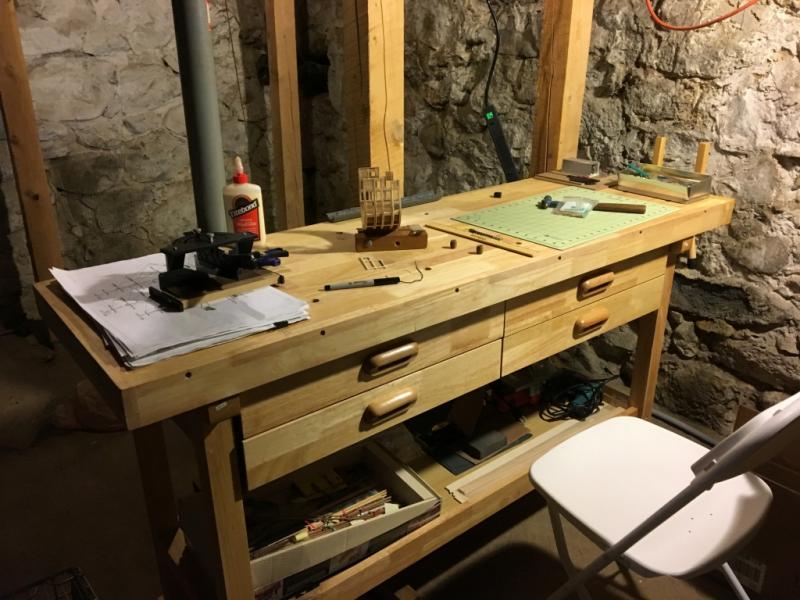
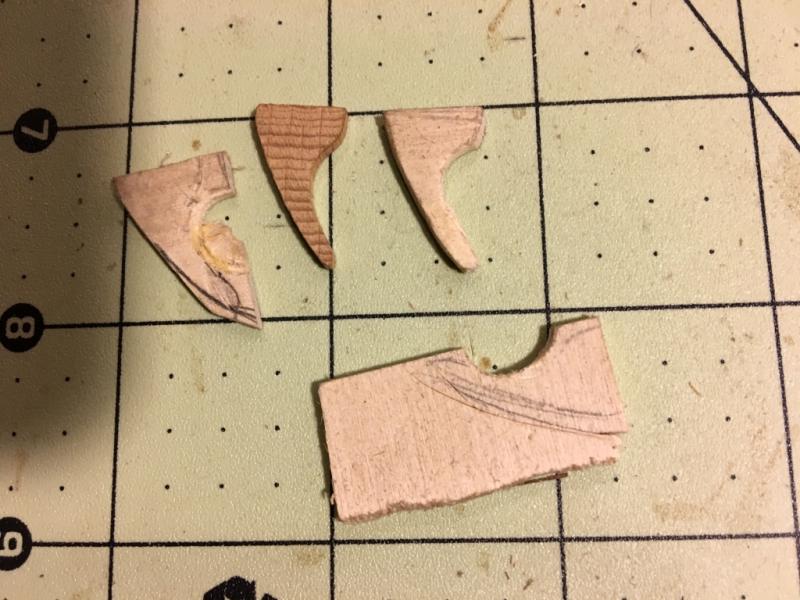
Took a bit of a break for the holidays, and to set up my new winter quarters in the basement - much darker and dingier than the garage, but a heck of a lot warmer. Platform frame is done, all the legs in place (although they still need to be sanded/chamfered - if that is even a word). Note the cleat holding up the back of the platform. I am also starting to make the knees I will need. The brownish one is the original, the lighter ones are the ones I am making in various stages of fabrication. Almost impossible to contemplate doing dozens of these without power tools (I've been cutting these out with exacto knives, tiny chisels and a jeweler's saw), so I am going to mount a jig saw under a board to use as a scroll/band saw of sorts. I am using 3/32" basswood, but have had a problem with it splitting across the "tail" of the knees while sanding. I think I might need to use a different wood - any suggestions?
- 108 replies
-
- 4
-
-
- mamoli
- constitution
- (and 2 more)
-
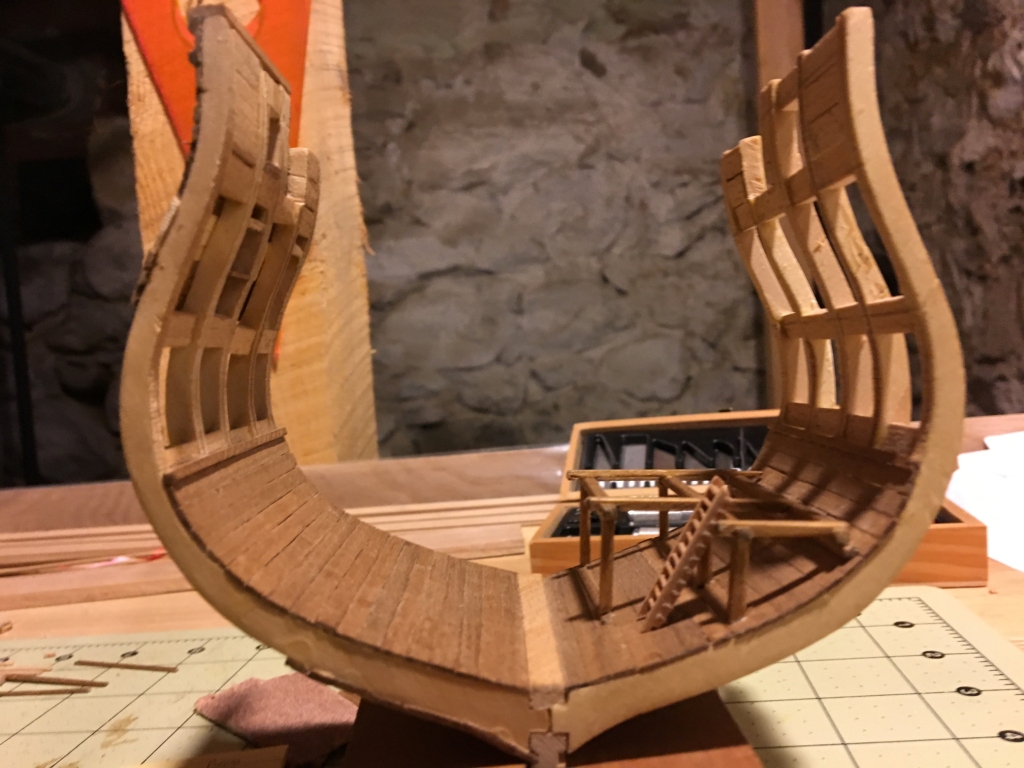
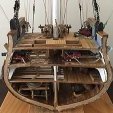
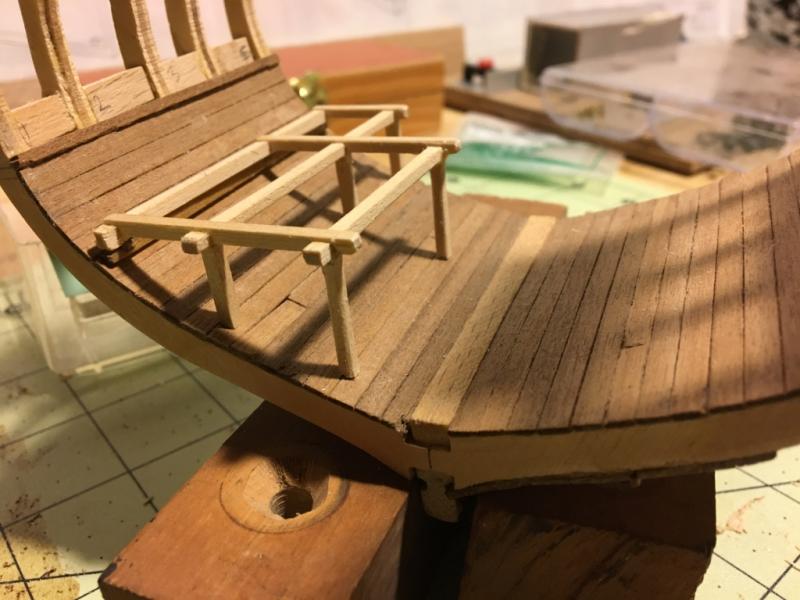
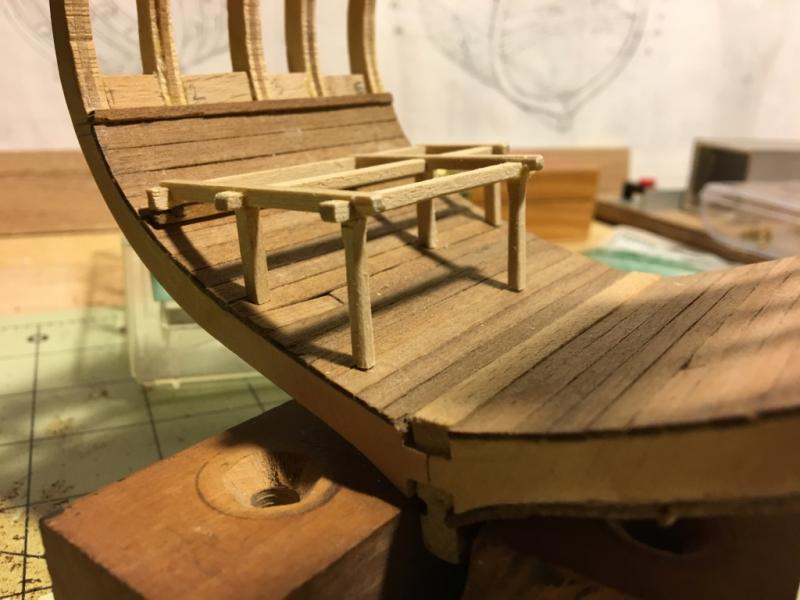
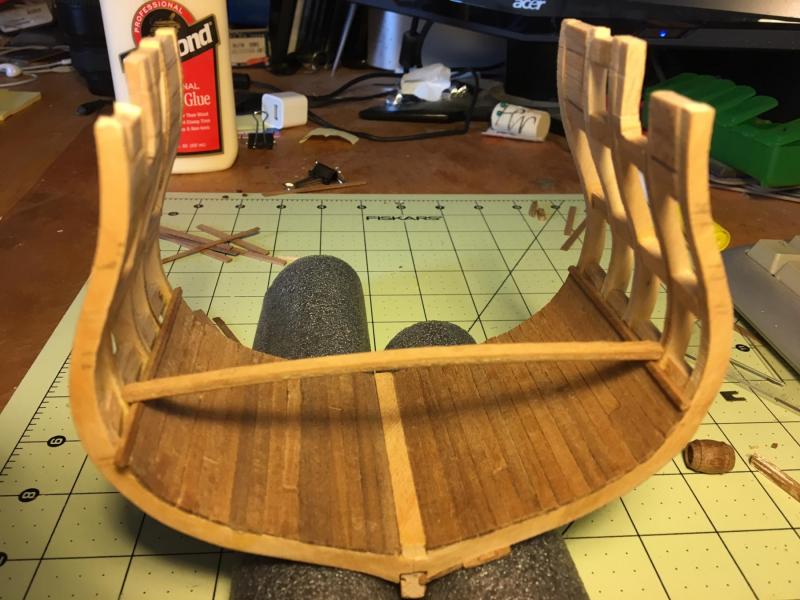
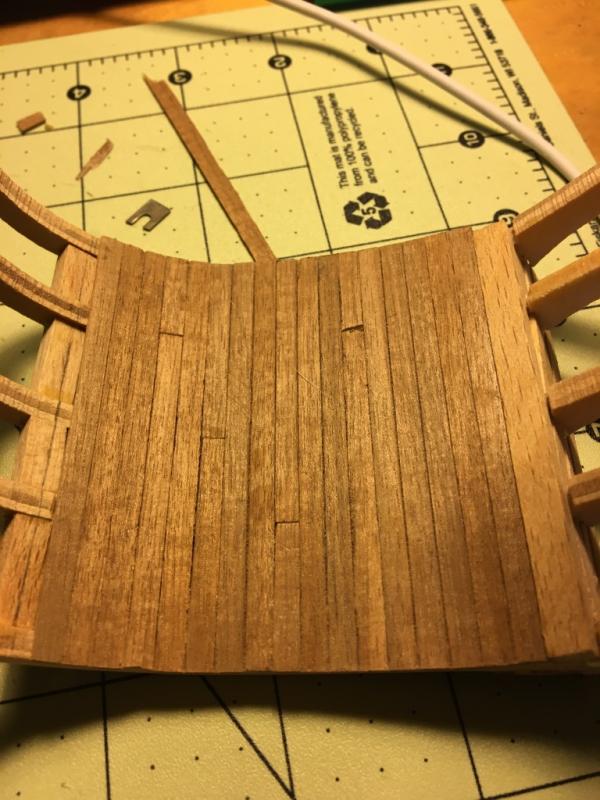
Hope everyone had a wonderful holiday; now back to work. I didn't like the way the platform looked - too big taking up too much of the hold, so I cut it down a bit, leaving more room for ballast, casks and whatever else I can stuff in there. Now on to planking the rest of the exterior and fabricating the knees so I can start putting together the berth deck framing.

- 108 replies
-
- 5
-
-
- mamoli
- constitution
- (and 2 more)
-
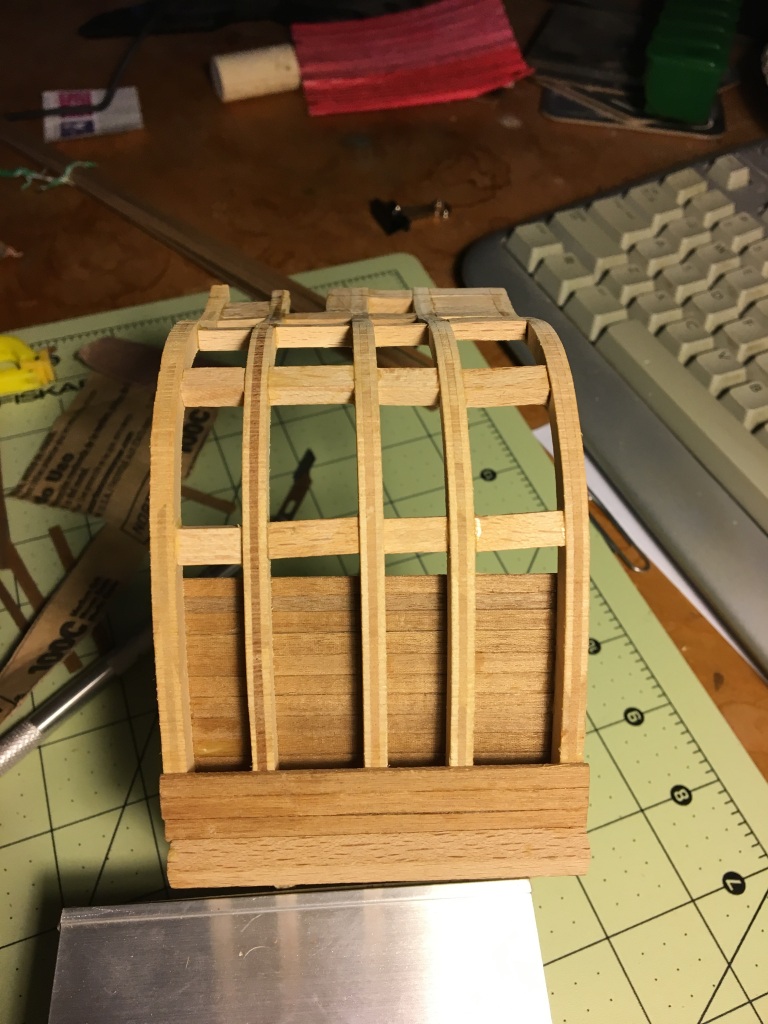
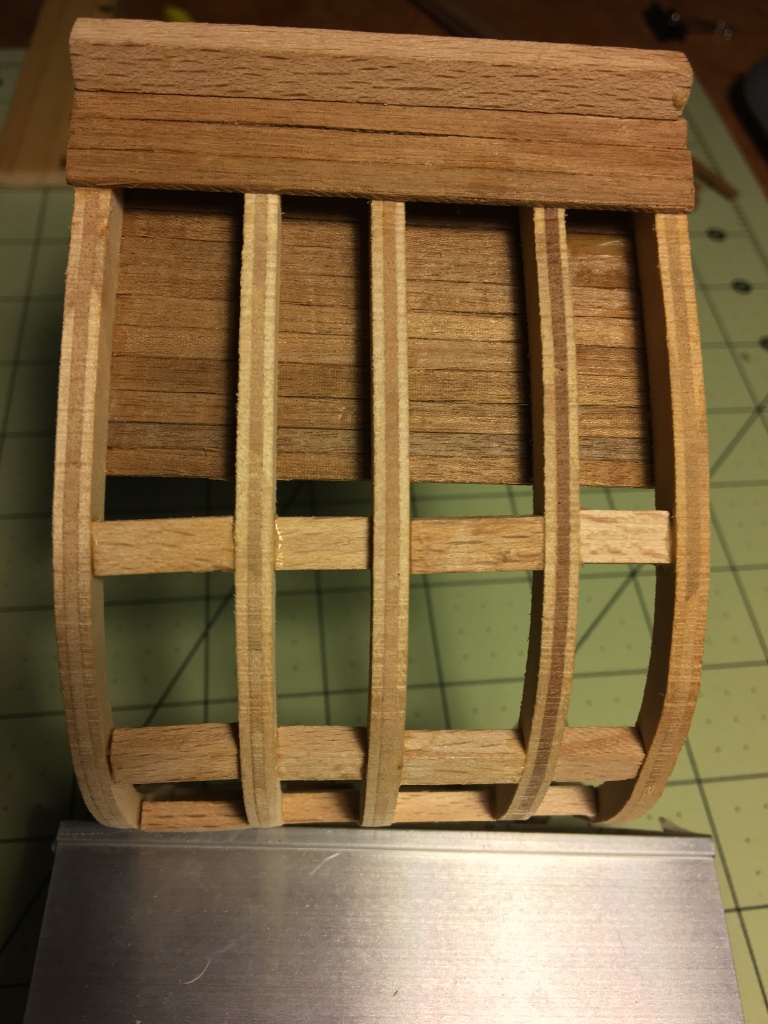
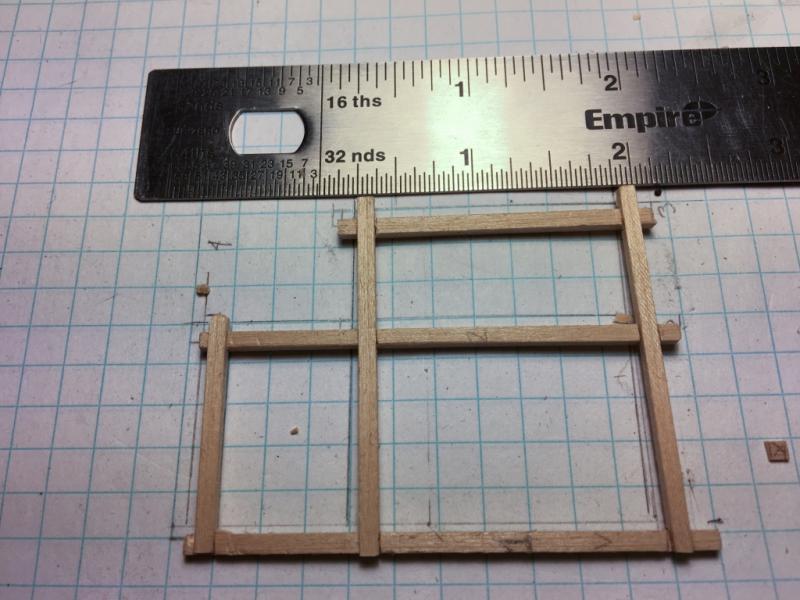
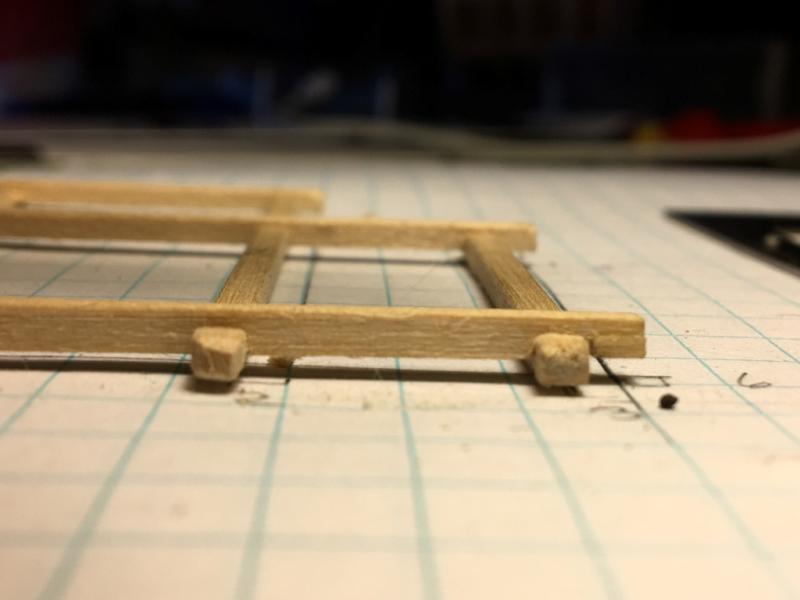
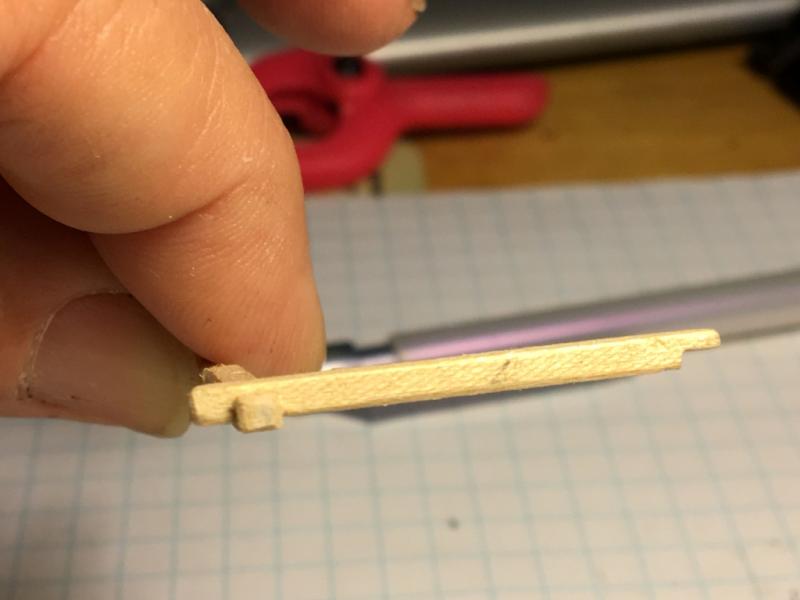
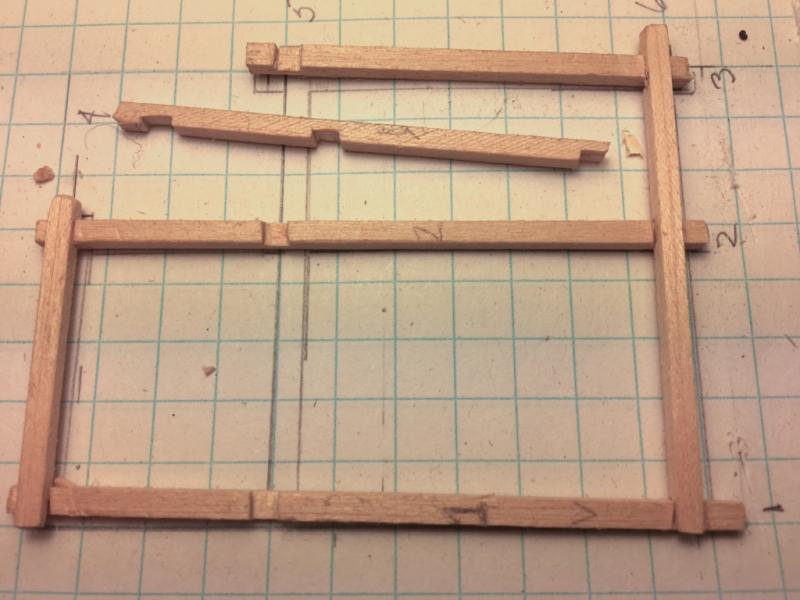
Now I know that in the grand scheme of experienced wood-workmanship a few 3mm sticks with lap joints is no big deal, but as a first attempt to scratch build something I'm quite proud of this. Not perfect, but not bad.

- 108 replies
-
- 7
-
-
- mamoli
- constitution
- (and 2 more)
-
Thanks for the kind words and for the tip Cap' - I've got some 400 & some 600 grit sandpaper that should do the trick.
- 108 replies
-
- 3
-
-
- mamoli
- constitution
- (and 2 more)
-
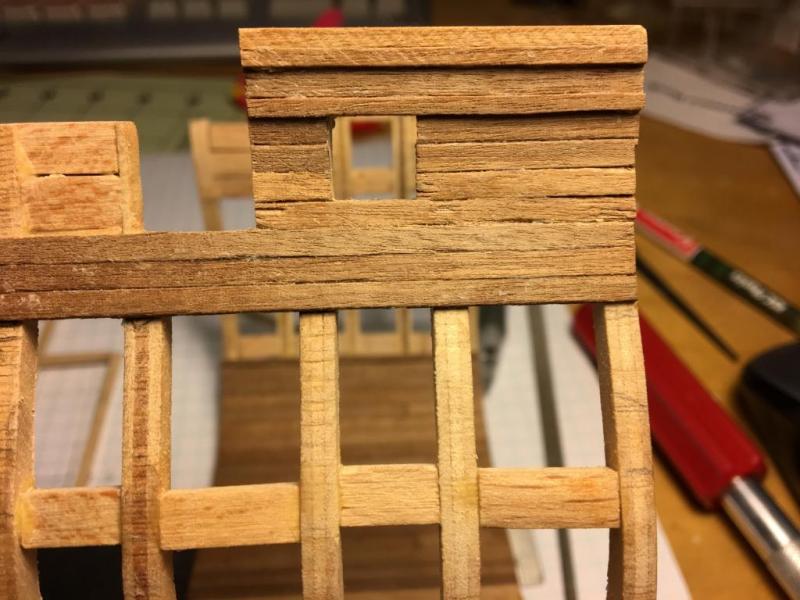
Slow progress still, but progress. I have some concerns that the outer hull planking is, in fact, slanted so I decided to start from the top rail and work my way down and see how bad it is, or is not. Whatever corrections I would have to make would be hidden under the copper plates, so not fatal. But, as you can see, between my beginner's workmanship and the quality of the wood - especially the 3mm strips, the Conny looks like it is already in need of a refit, and lots of wood filler. I have also started on the platform I want to add - this experiment is being done with an exacto knife to cut out the joints, rather than trying to hold my rotary tool steady. Router, what router???
- 108 replies
-
- 7
-
-
- mamoli
- constitution
- (and 2 more)
-
Not much progress in the last week. I noticed, when test fitting some exterior planks, that one frame is a bit wider measuring across the cross section than 3 others and the 5th one (which sits next to the wide one and is an end frame) is significantly narrower - planking as is would leave a gap between the plank and frame right on the forward end of the model. Soooo - when Thanksgiving is over and the guests leave and the guest room reverts to my winter workshop (my summer workshop is in the unheated garage) I will take some weights and/or clamps and try to bend the narrow frame outboard a bit. I also had a design question (and I've also posted this question in the Plans and Project Research forum), since I am doing a cross section I figured I would also try to expose some of the guts, in particular I wanted to leave some of the deck planking off and show the structure of the framing. Most of the plans I have seen, including those in the Anatomy of the Ship volume, show the carlings (joists) perpendicular to the deck beams/parallel to the keel. However, drawings I've seen from 1926 before the refit show them running diagonally. There are also photos in the Boston Public Library's digital photo collection that show the same thing - I'm just not sure if these are before or after refit photos. My question is which is "correct." Are the diagonal or the perpendicular carlings as she should be or is one an artifact of a non-historic refit?
- 108 replies
-
- 5
-
-
- mamoli
- constitution
- (and 2 more)
-
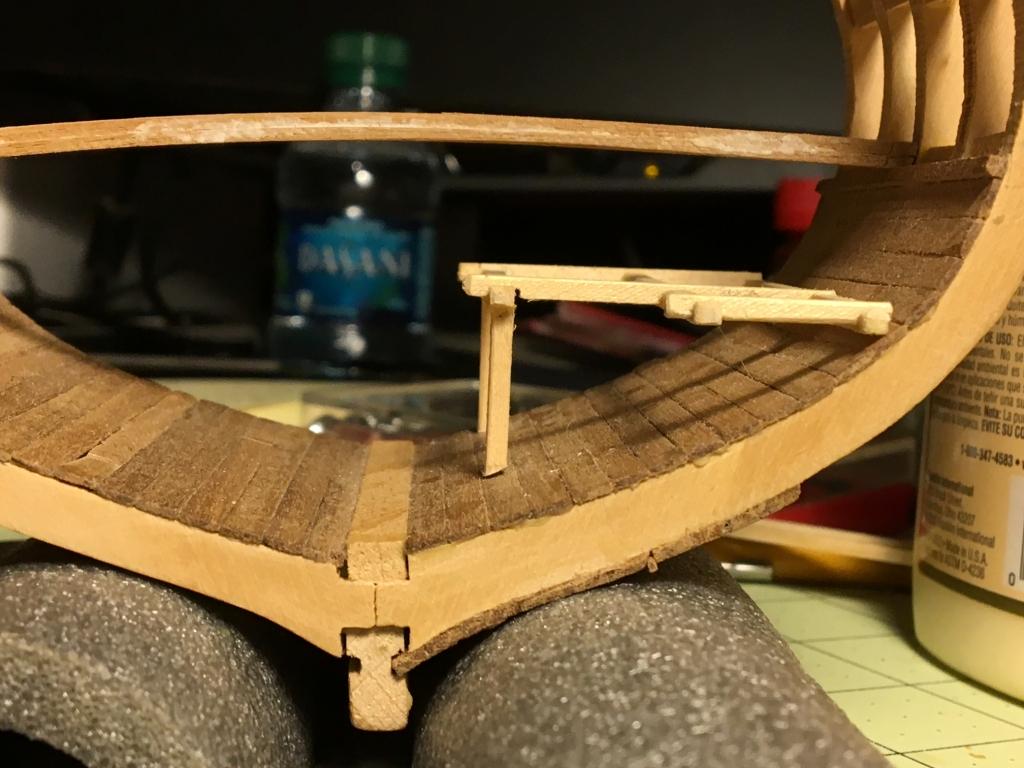
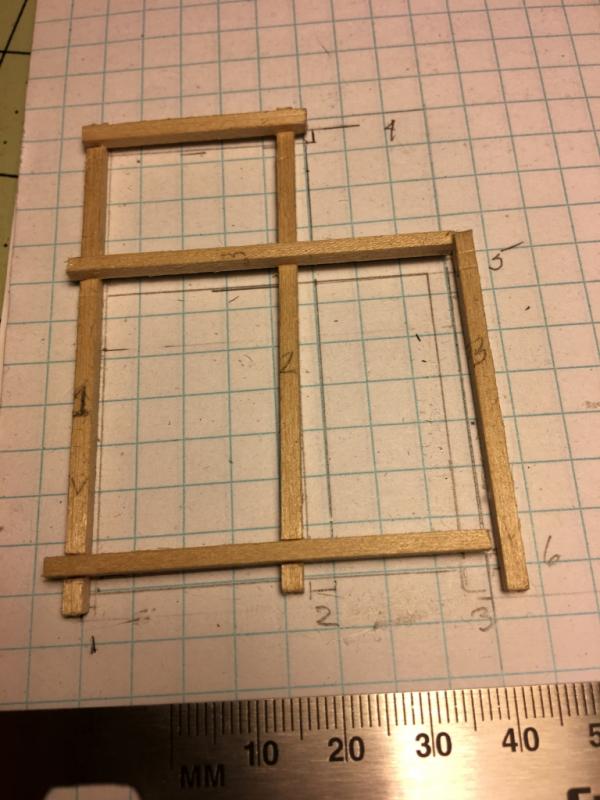
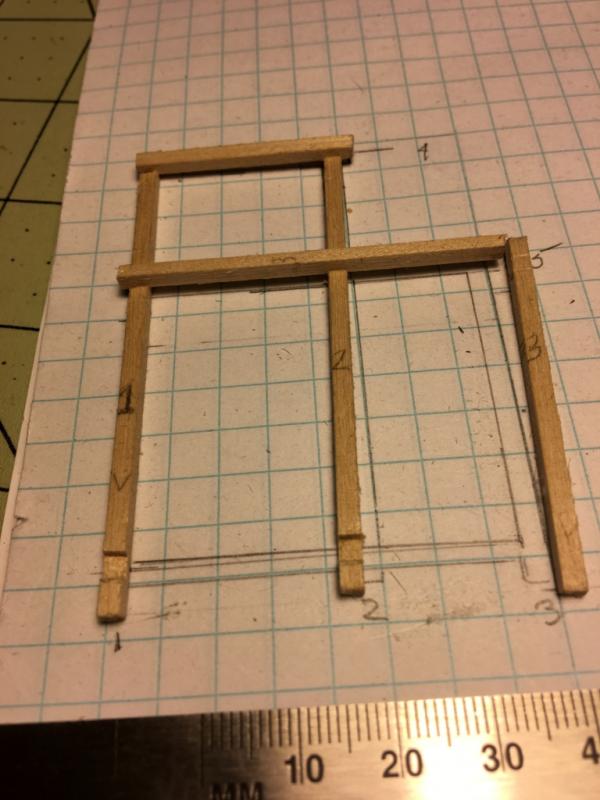
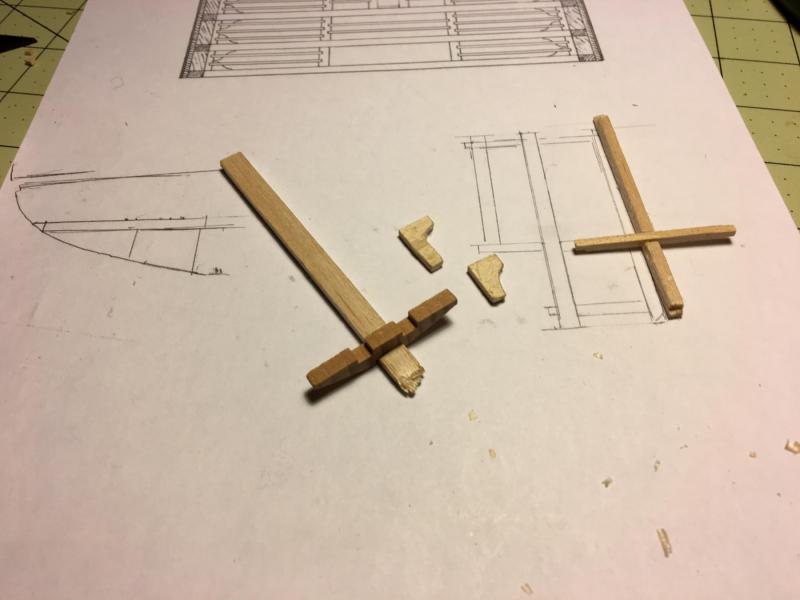
Just some woodworking experiments for the hold storage rack, additional knees and notching the Keelson to accommodate the foot for the mast if I decide to make a bit more prominent keelson, as shown in the PDF (if it actually attaches). The PDF also shows a different arrangement of posts supporting the deck beams from what is in the kit plans - will likely go with those also. p mid-ship sec.pdf

- 108 replies
-
- 4
-
-
- mamoli
- constitution
- (and 2 more)
-
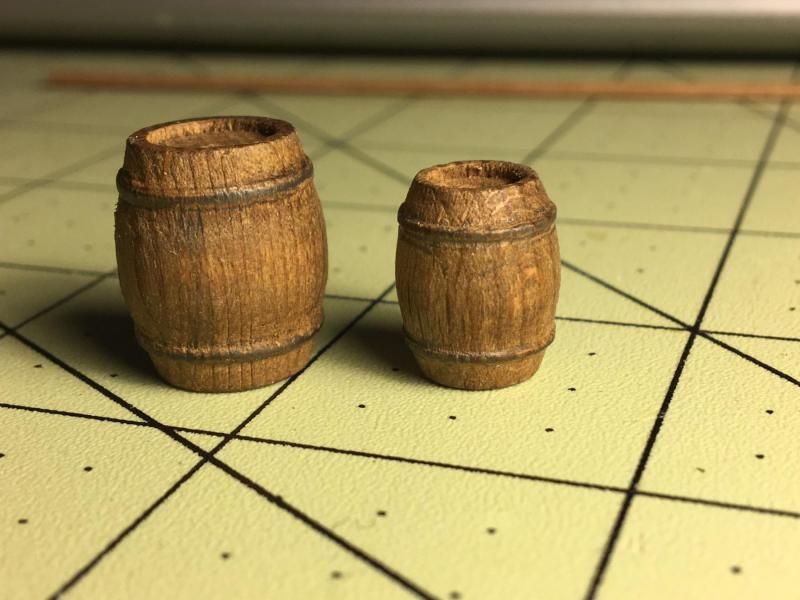
Thanks Captain - I had the Modeler 12 log on my list of ones to go through, but hadn't yet. Now I will - incredible work. Rainbow - as this is my first wooden kit I don't have anything to compare it with from the point of view of materials. My kit is also of somewhat strange provenance; I got it off ebay from someone selling things out of his father's estate so am not sure how old it is or if all the pieces will end up being present (I know there is supposed to be more than the one size of tan rigging line that came in the box). I can tell you that the instructions are a bit skimpy - the parts list is in Italian, the English instructions are poorly translated, so I am really depending on the logs of others, particularly Tuffarts and AndyMech, both of whom have done amazing stuff. Below are today's experiments with coloring barrel hoops - I was having a hard time imagining that I could paint the hoops and not go outside the lines. So I used drawing pencils instead (hardness F & #2 for these) and I think there is some promise in this method - just got to keep from rubbing it off before I get them in place. I may try a matt poly on one.

- 108 replies
-
- 9
-
-
- mamoli
- constitution
- (and 2 more)
-
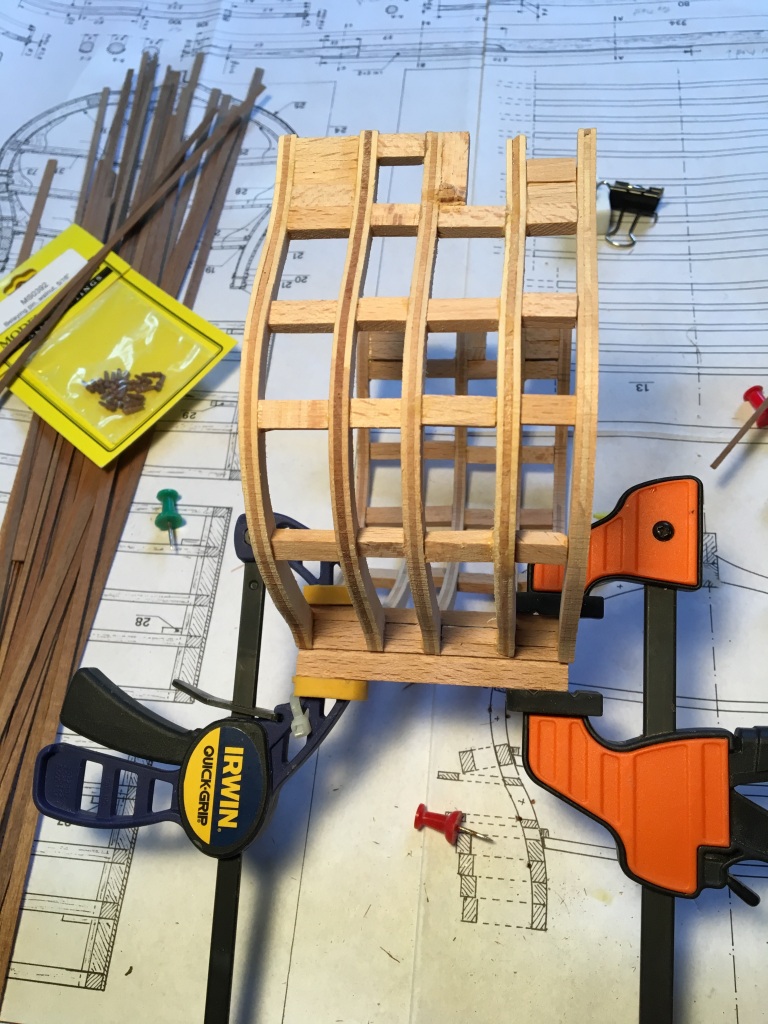
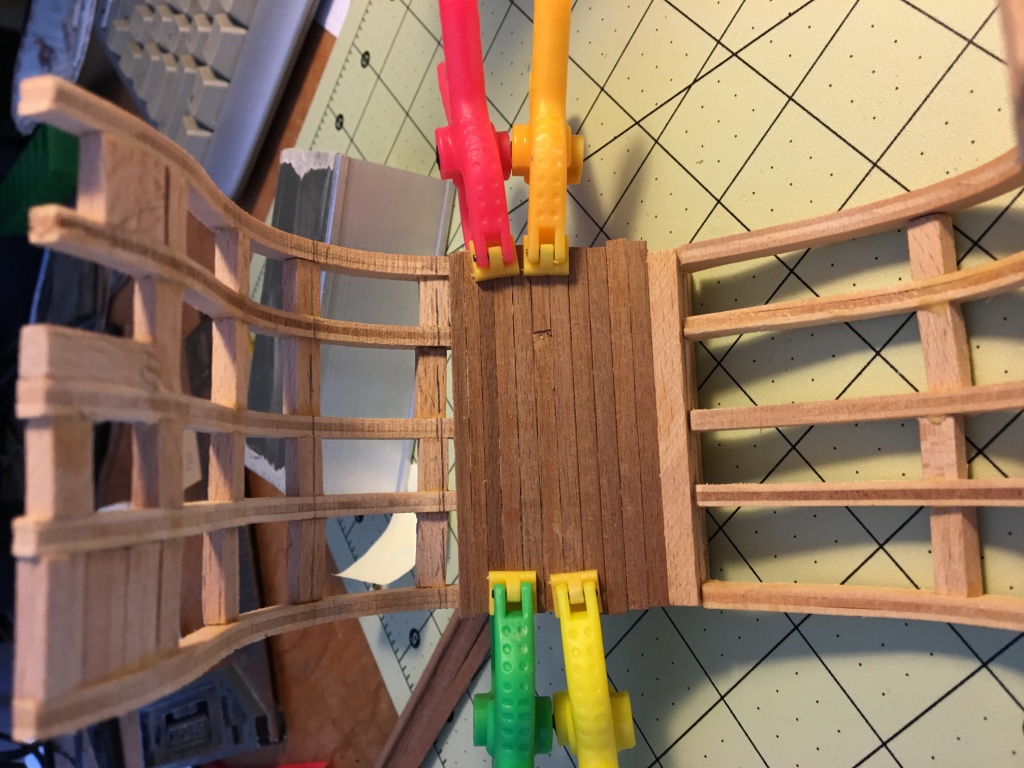
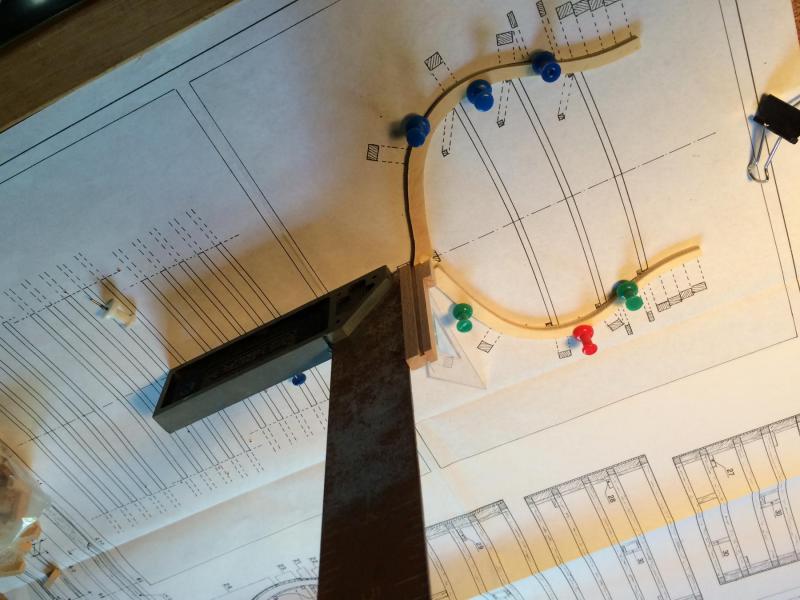
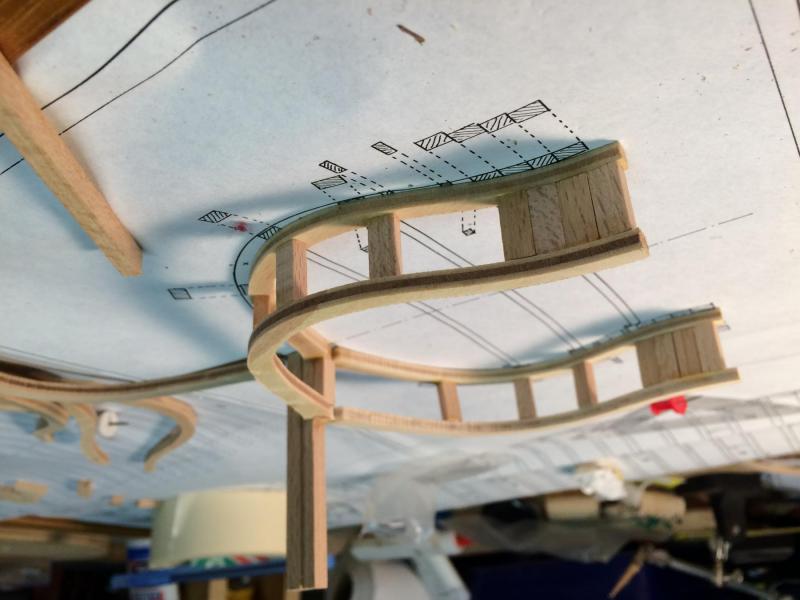
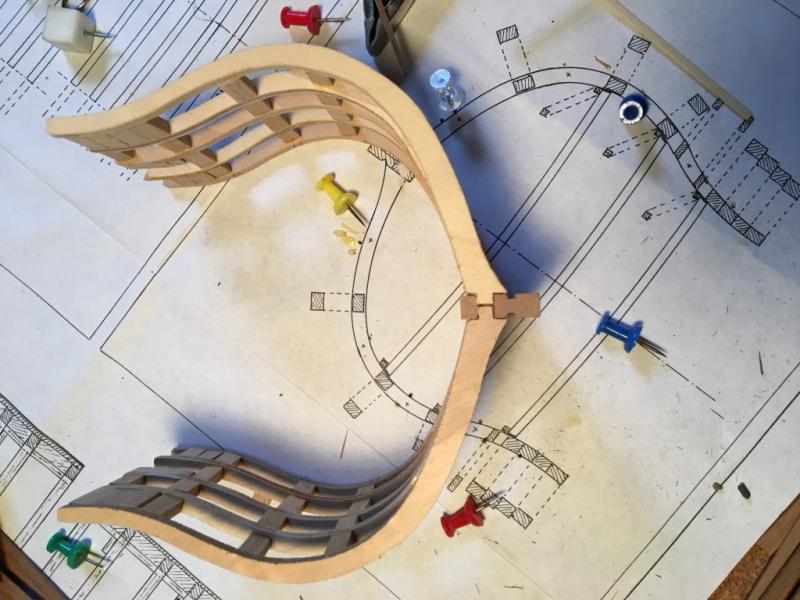
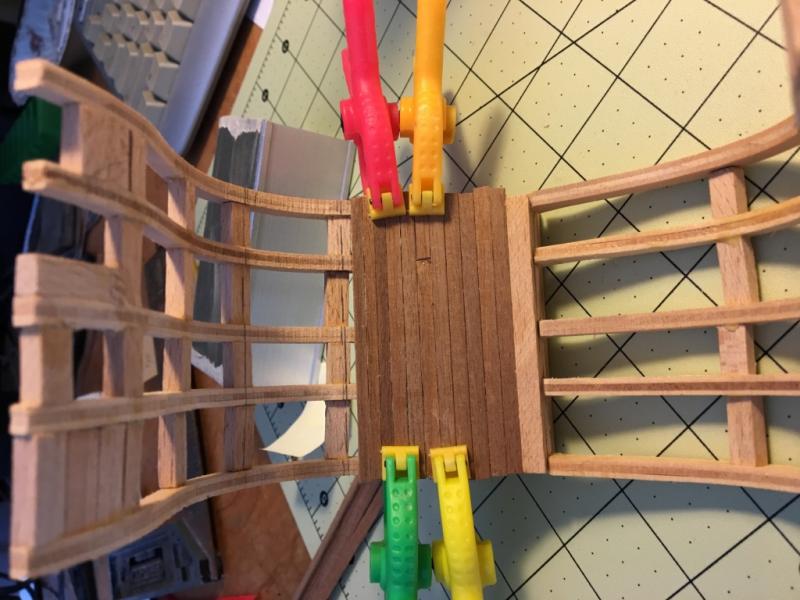
First deck beam dry-fit in place. Seems drowning in glue and putting the beams in a form does not really work, so I soaked the parts, let dry a bit, glued and held the curve in place with pins for several days. Now on to the rest. I was looking at a log by Tuffants (seems to have ended in mid stream quite a while ago, unfortunately) who was doing some interesting things I am going to try to emulate. I may be biting off more than I can chew with my limited woodworking experience, but what the heck. He put in more of the deck framing and left some of it exposed by not planking a portion of the deck. I thought that was part of the point of doing a cross section, so would like to try my hand. He also added some structures to the hold that added interest, and may not actually be that difficult. Hopefully the kit, or a nearby hobby store, has the extra wood I might need.
- 108 replies
-
- 5
-
-
- mamoli
- constitution
- (and 2 more)
-
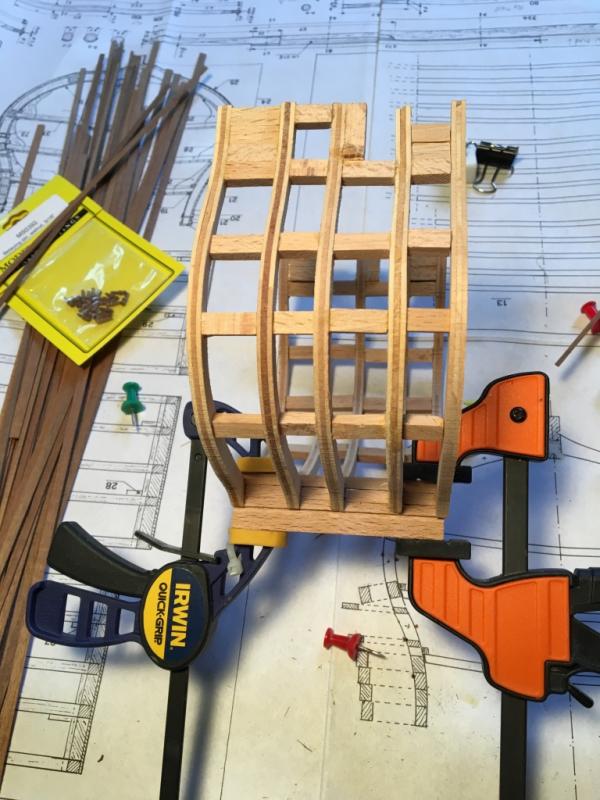
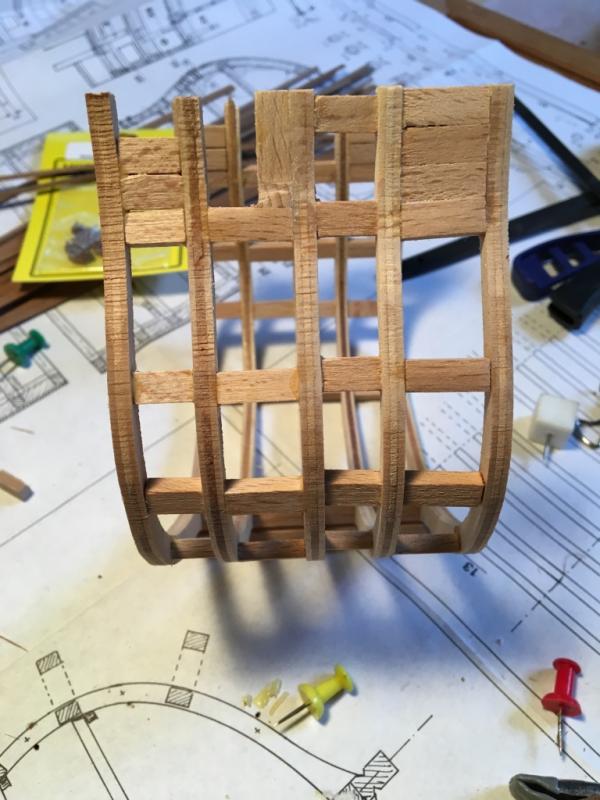
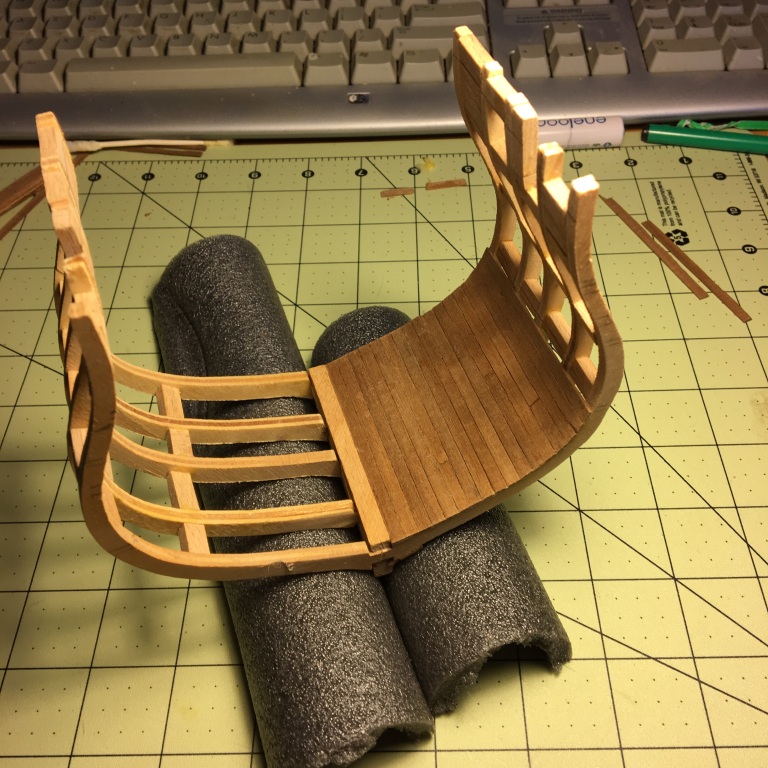
While waiting to see if any of my experiments with bending the wood for the deck beams actually works (smother in wood glue; soak in water for a couple of hours, let dry pinned in the curve overnight and then glue and put back in the pins) I started looking ahead. In one respect the kit seems a bit inaccurate - while there are five beams per deck, the kit comes with only 4 knees (2 per side) per deck, and those knees attach to the side of the beams, not underneath them. The knees provided are hanging knees, there are no lodge knees nor any diagonal knees. I've seen may pictures of this ship with diagonal knees, and I have a page of the plans from 1926 that show all three types of knees. Am I missing something here, or is the kit? If I wanted to make diagonal knees, does anyone know a trick to getting the curve for the side against the hull - I expect it will not be exactly the same as the curve for the hanging knees.
- 108 replies
-
- 5
-
-
- mamoli
- constitution
- (and 2 more)
-
Thanks Tom and E.J. I think the issue with the planks has more to do with the spacers being skewed and an quirk of perspective in the photos, but I will dry-install the rest of the planking to make sure.
- 108 replies
-
- 2
-
-
- mamoli
- constitution
- (and 2 more)
-
I've finally decided to take the plunge and start my first wooden model. I don't have much experience working with wood (although a friend and I did recently complete a wooden truss-tube telescope - his 3rd, my 1st - but that involved mostly square cuts at a much larger scale), so I thought this cross section would be a good way to get my feet wet, so to speak. With this kit I think I can learn some of the basic skills I will need without getting too caught up right away with learning to bend planks, learn how to strop and rig blocks (3mm blocks! How do you work with those?) and enjoy seeing how the rigging comes together. I've already figured out things I would have done differently, but I think for the most part they will not affect the final look. You will see in some of the pictures below that the planking seems to be at an angle, and not perpendicular to the frames - in reality the spacers are not parallel to the keel but the planking is - should have scribed a line on the frames where the spacers go. I've decided to follow one suggestion I came across in one of the really excellent build logs I've come across and plank the hold up to the point where the deck beams attach and use the planking to keep the support level. One question on bending the deck beams - the plans call for gluing 2 strips of lathe together and putting it in a jig to get the right curve - I am assuming I can just smother the wood in glue and bend and place it in the jig (with wax paper to keep it from sticking to anything else) and it would keep its shape when dry (that is what we did to create the one curved piece on the telescope). Is that correct, or do I need to wet the wood, soak it, putting it in vinegar or rubbing alcohol? Thanks for stopping by.


- 108 replies
-
- 10
-
-
- mamoli
- constitution
- (and 2 more)
-
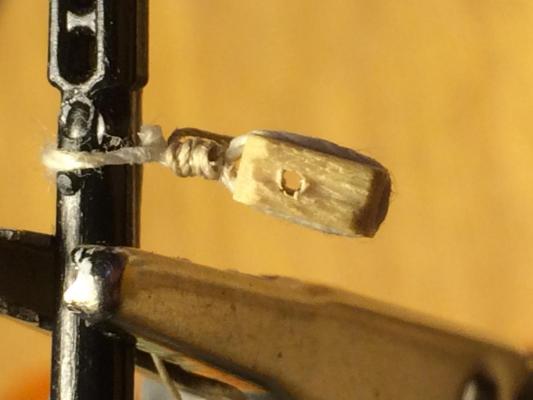
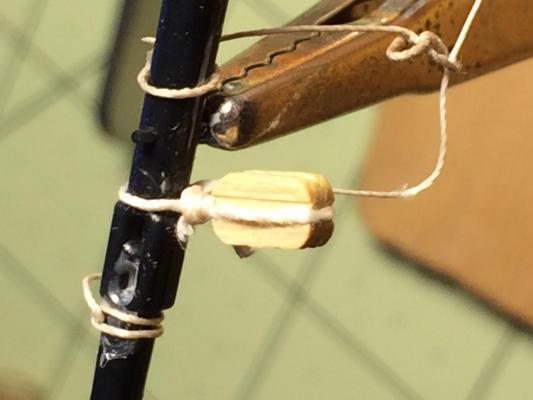
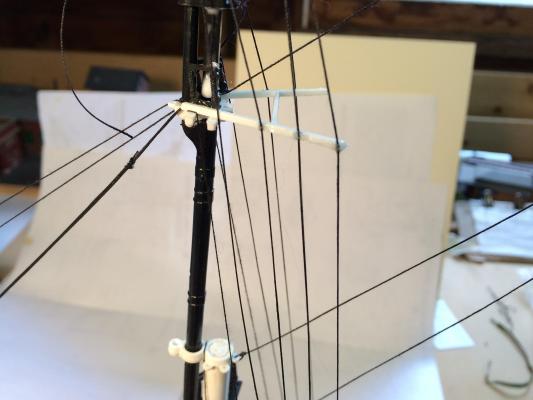
Still working on blocks - the ones in these photos I tried the method outlined in this video - https://www.youtube.com/watch?v=WUrRb66VSSE worked very well - although I still need practice - getting the thread not to slip off the loops as I'm turning was not always easy - and getting the same number of turns was often an issue. Next ship I'll start using Chuck Passaro's blocks Also started on the lifts for the fore course. Hope to be done setting up the fore yards in the next week or so and then start rigging those at least.


- 53 replies
-
- 2
-
-
- cutty sark
- revell
- (and 1 more)
-
Thanks. I seem to be getting into a rhythm with these finally.
-
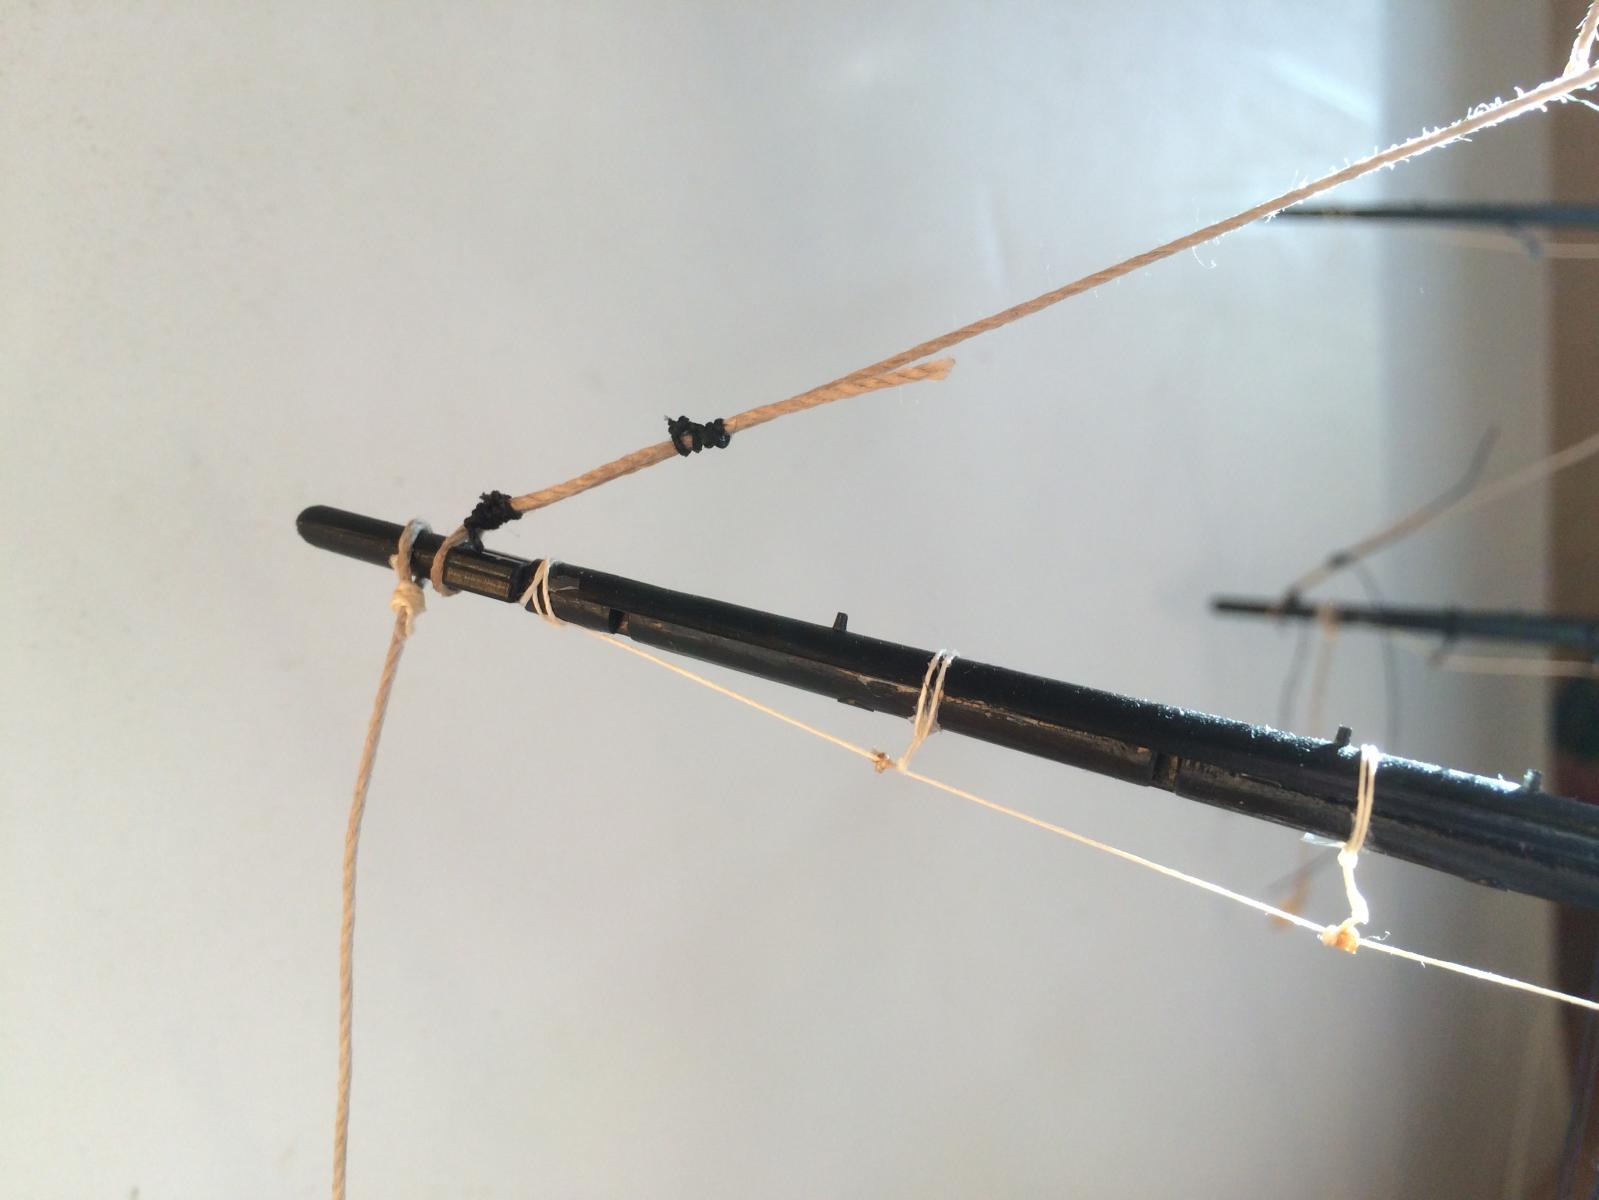
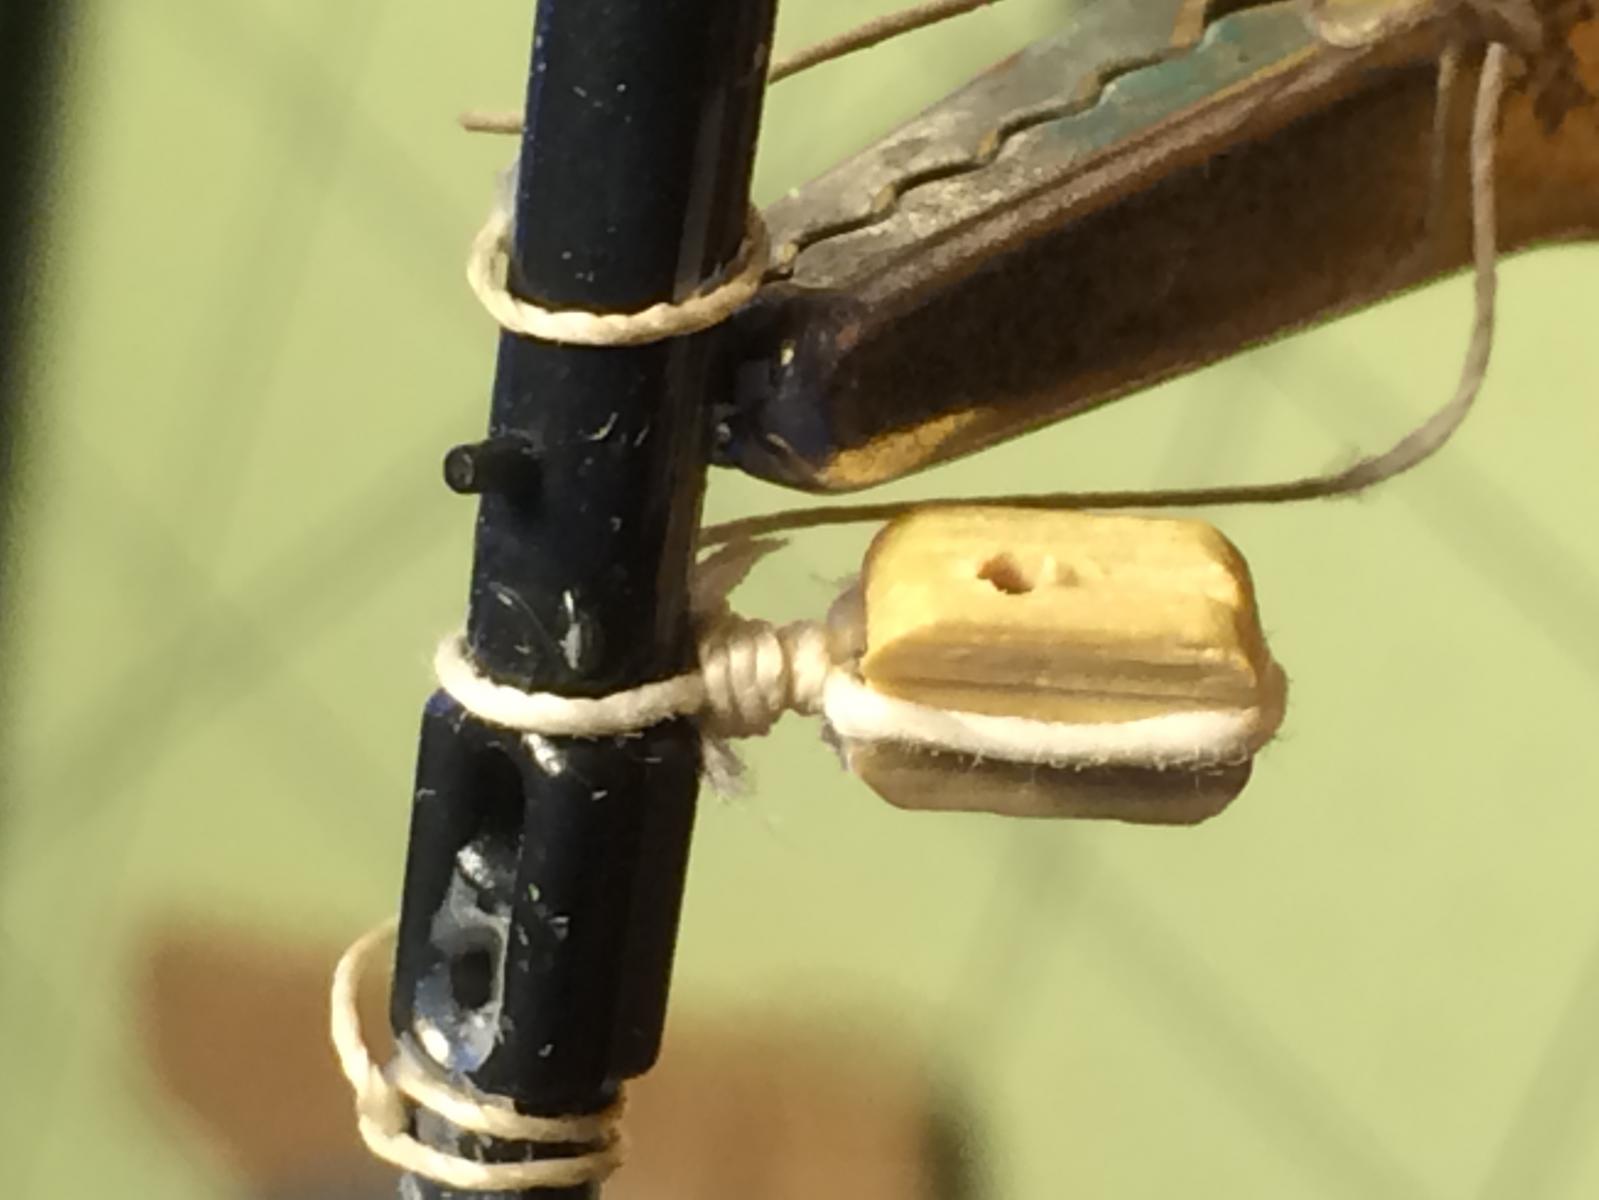
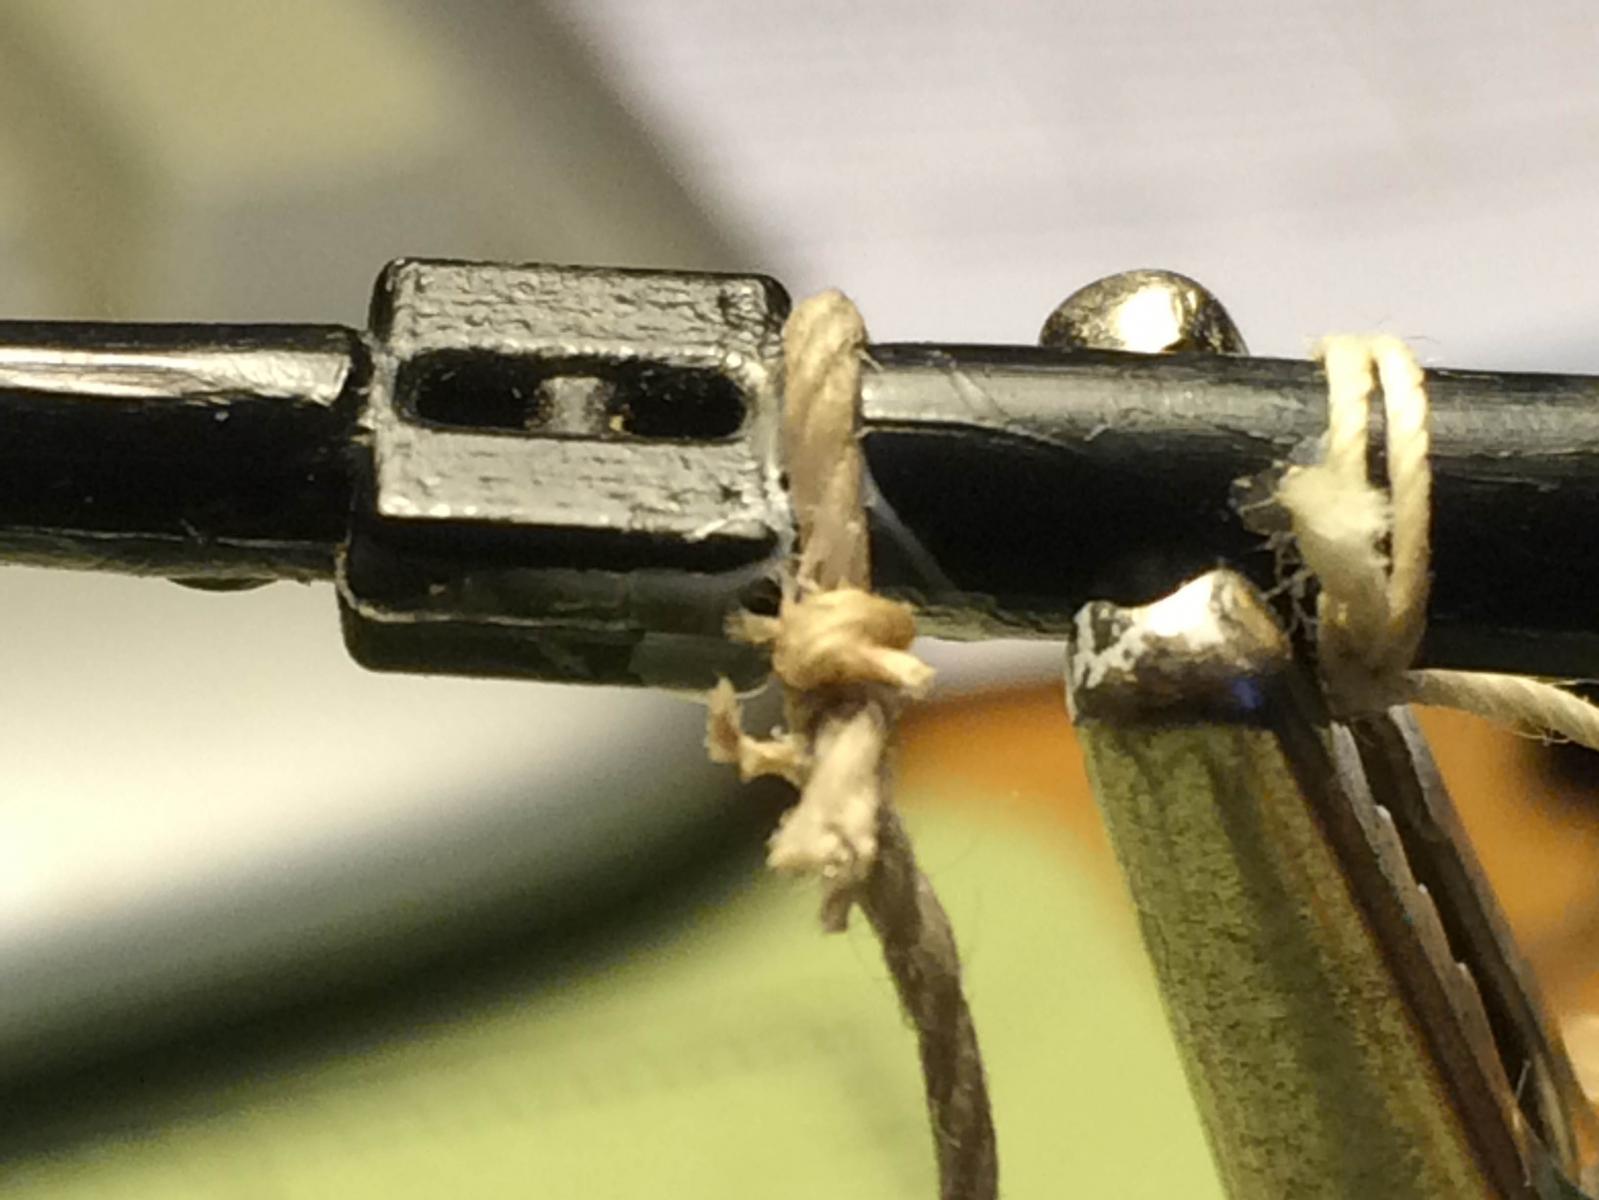
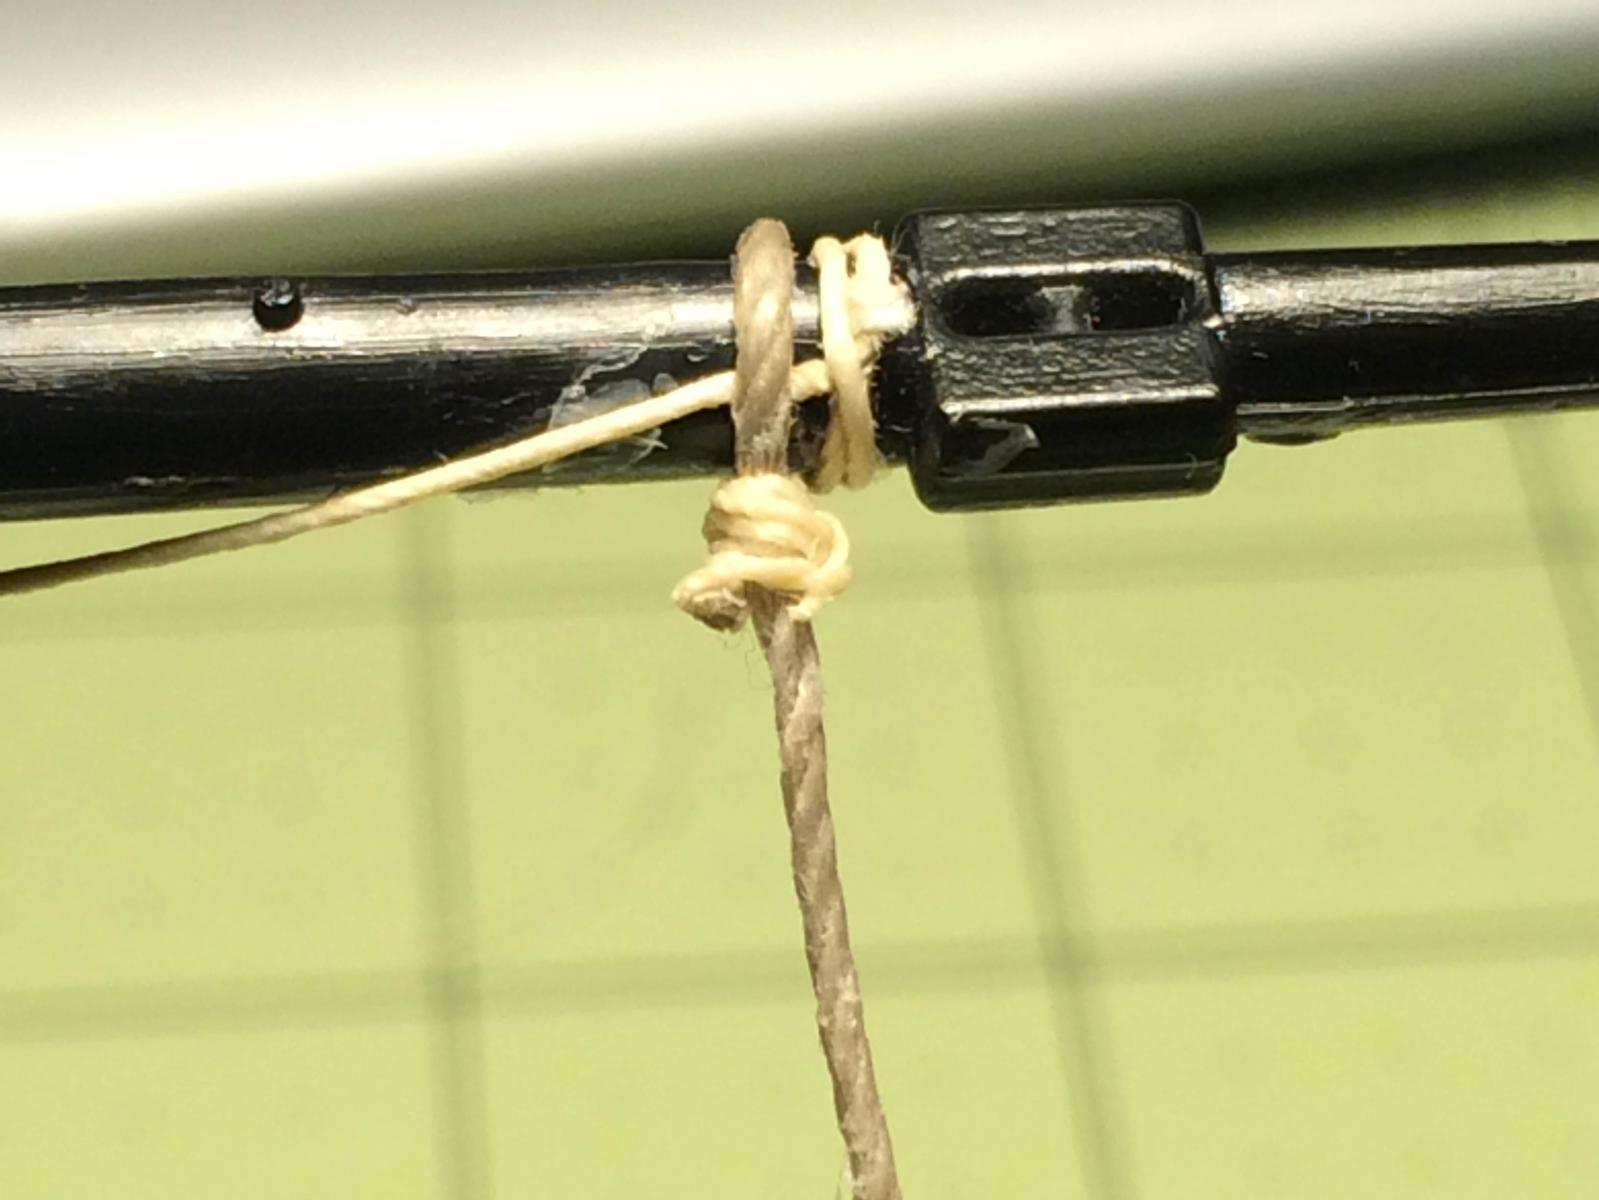
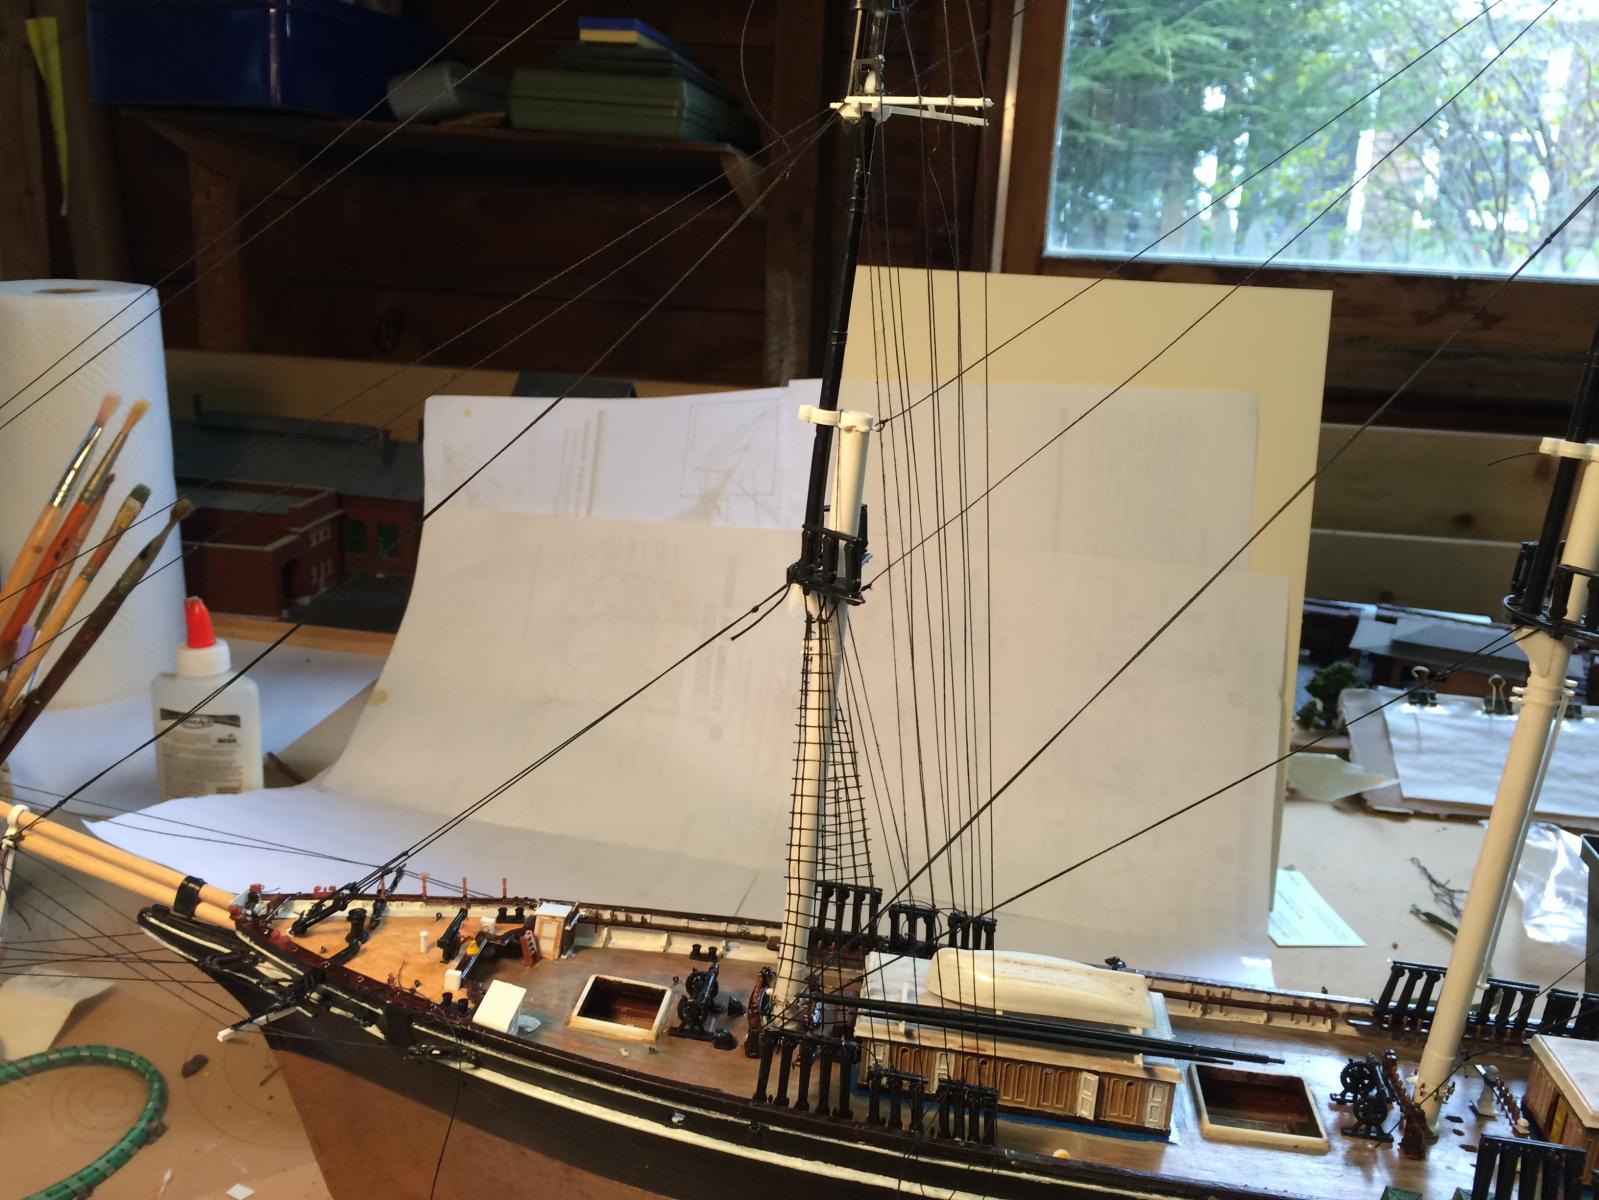
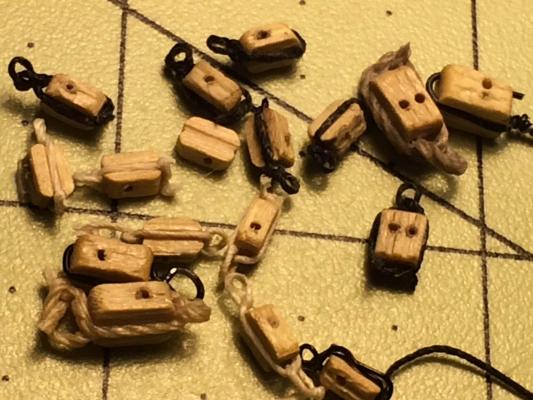
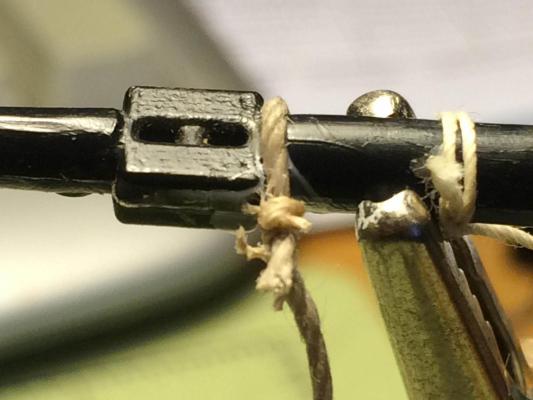
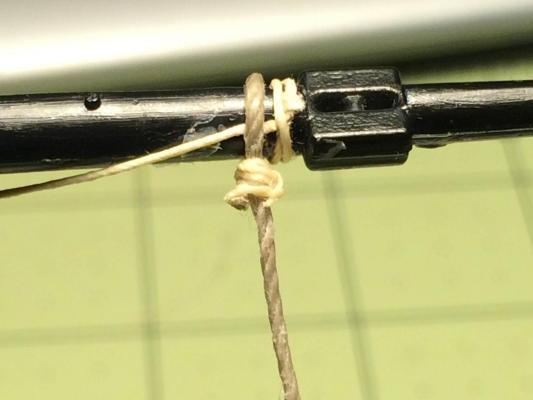
Standing rigging is pretty much done; running rigging has intimidated me, which is why it has been a while since my last post. Stropping and seizing blocks has been hard enough - I've been experimenting with different ways of doing it and using different materials - white thread, black thread, rigging line from kits, even wire (26 gauge for 5mm blocks, 28 gauge for 3mm blocks) - that I am starting to get the hang of, although blocks with 2 beckets are still a problem. Attaching the blocks to spars is another issue - I'm not even sure what knots to use or if I should just try seizing the lines like I did for the brace pendants. Any helpful hints/suggestions/tutorials/read this books would be appreciated.


- 53 replies
-
- 4
-
-
- cutty sark
- revell
- (and 1 more)
-
A bit more progress - need to practice trimming the knots a bit closer without cutting lines. I think next time I may try to make the footropes out of wire, they have really been a struggle to make out of thread.


- 53 replies
-
- 3
-
-
- cutty sark
- revell
- (and 1 more)
-
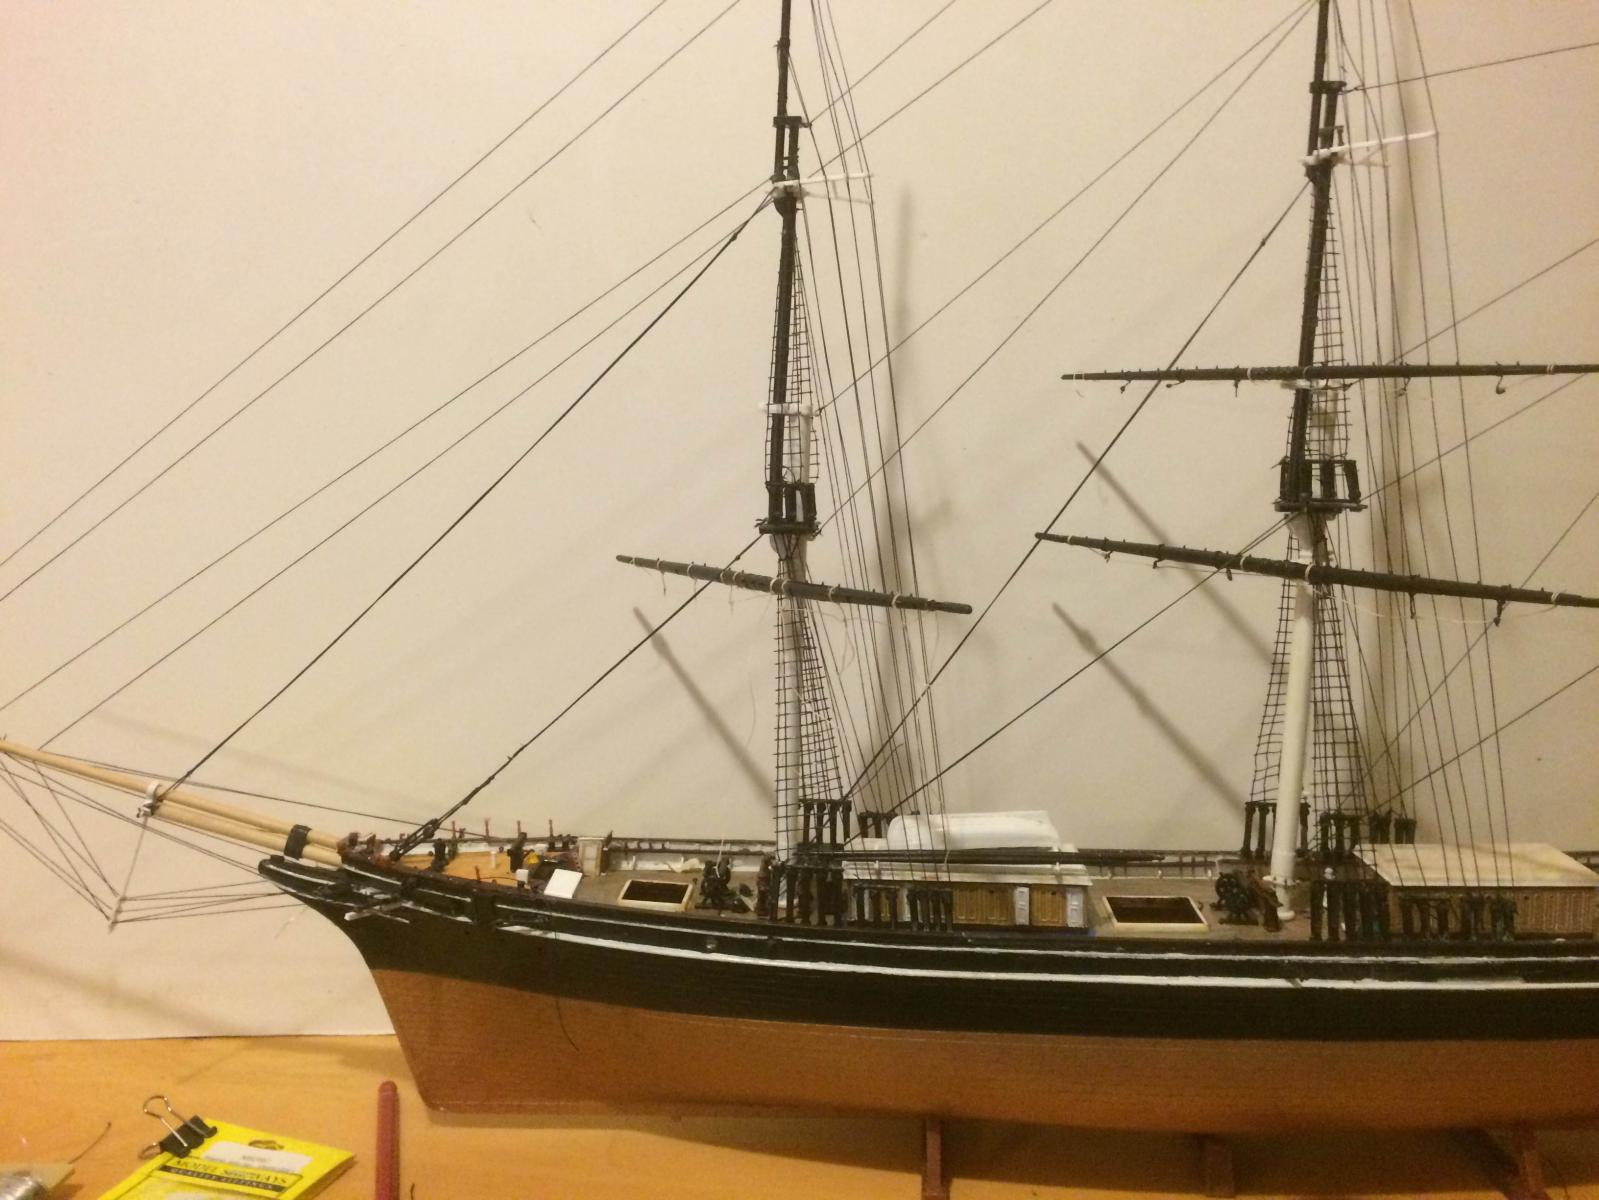
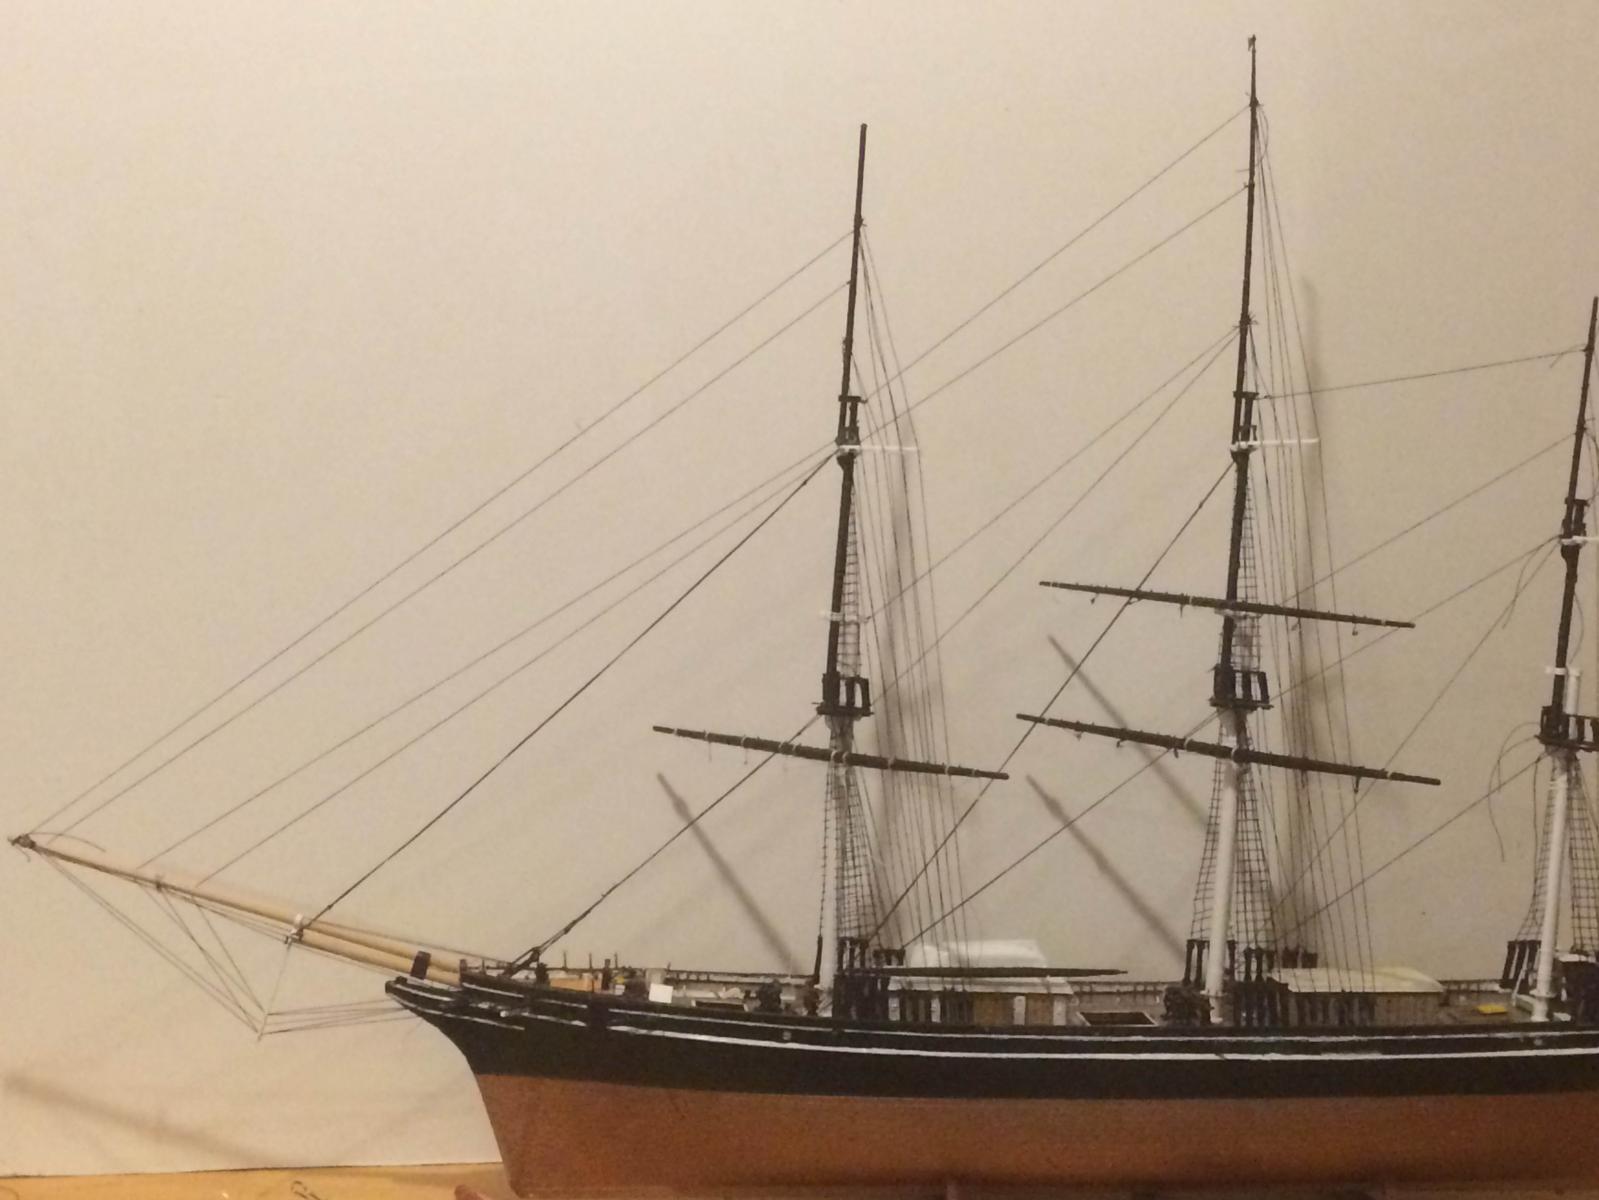
Standing rigging almost done, then I need to cut off the loose ends of the knots without cutting the lines - did that once already. Thankfully the kit came with pre-made ratlines, so I did not have to learn that skill yet. Next up - footropes.

- 53 replies
-
- 3
-
-
- cutty sark
- revell
- (and 1 more)
-
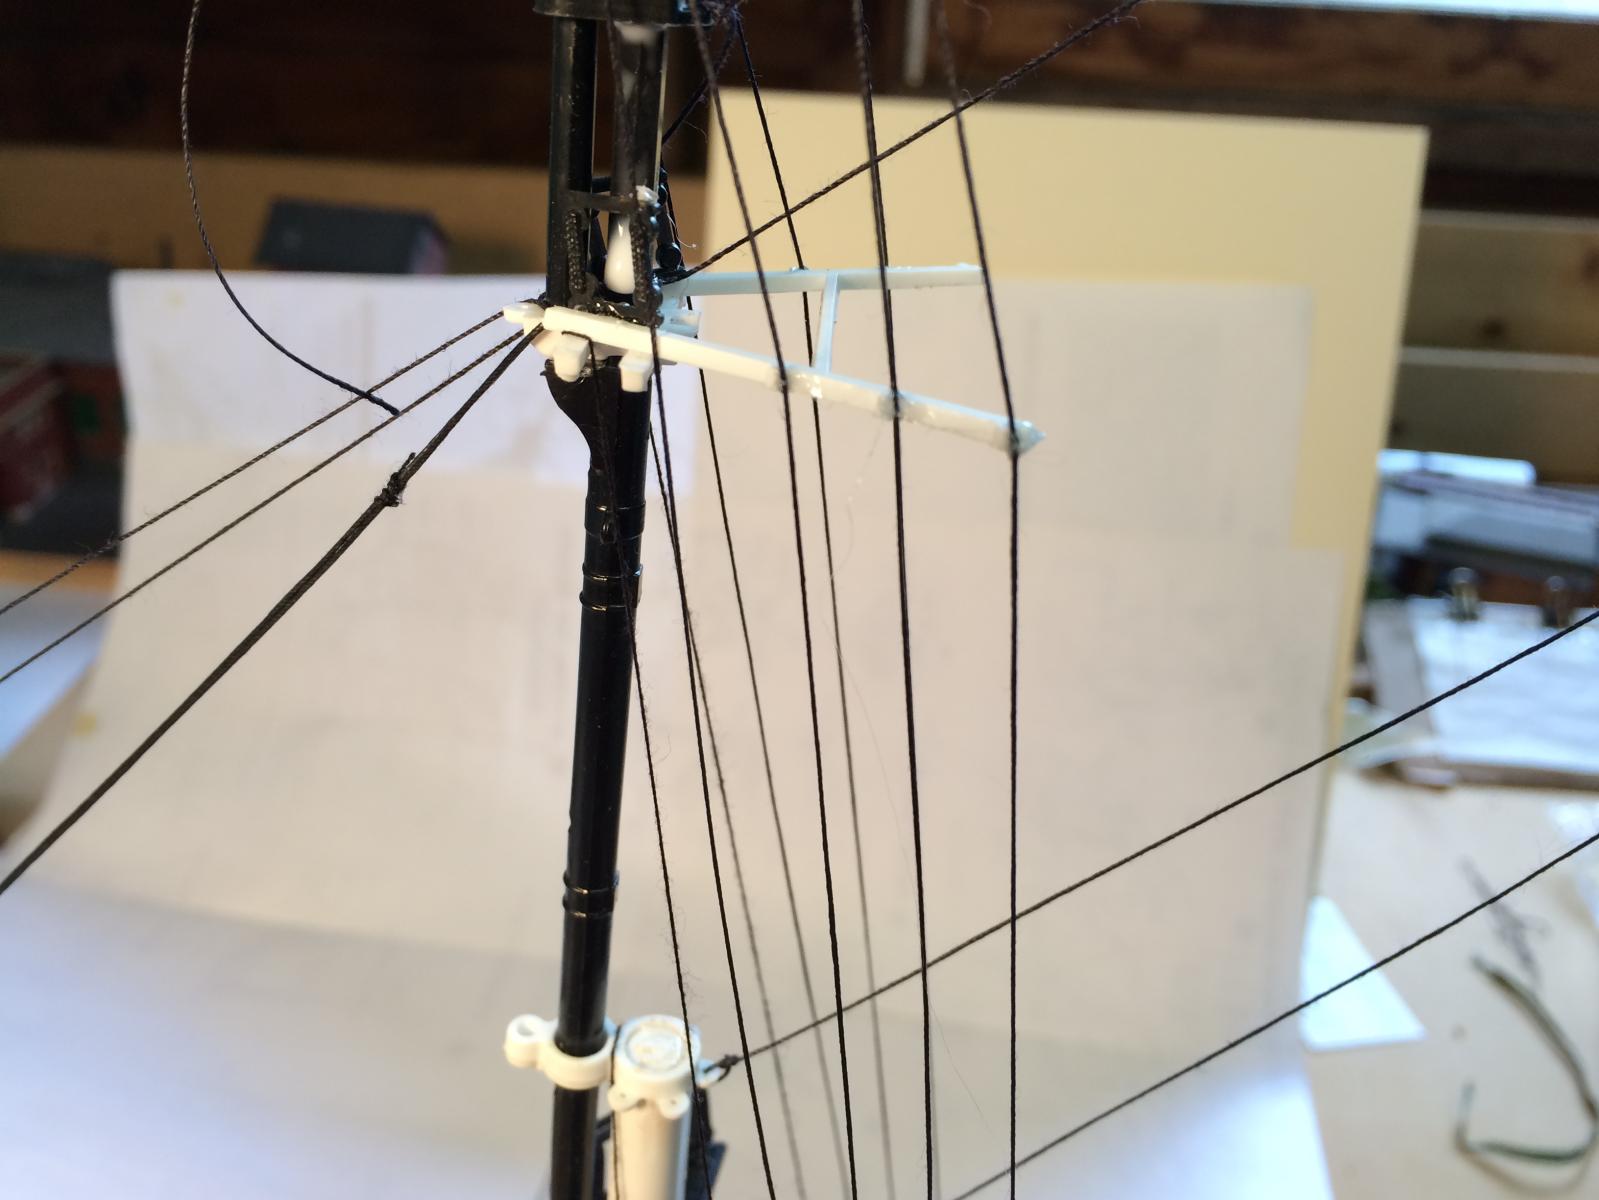
A bit more progress on the rigging. The model is beginning to show her age - some very brittle plastic that keeps breaking. Some of the breaks I can mend - like the plastic eyebolts. Others, like the cathead that just snapped, will be a pretty big challenge.

- 53 replies
-
- 5
-
-
- cutty sark
- revell
- (and 1 more)
-
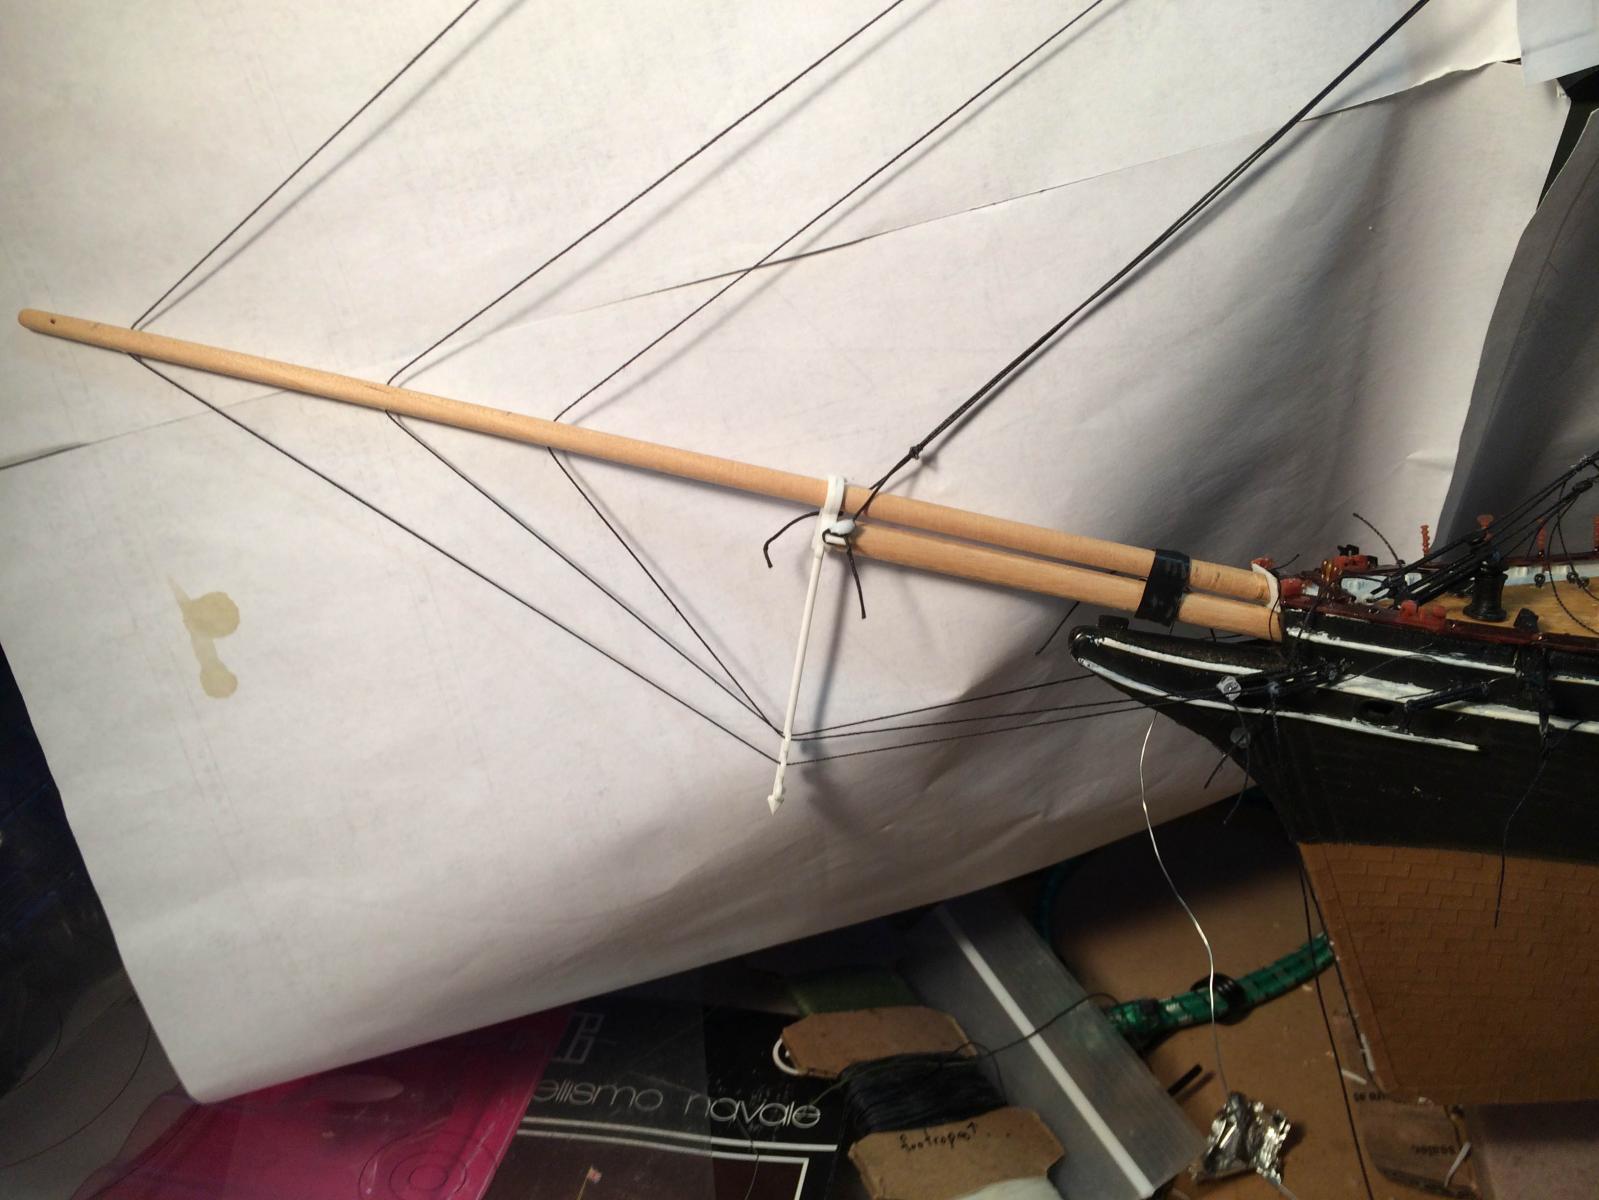
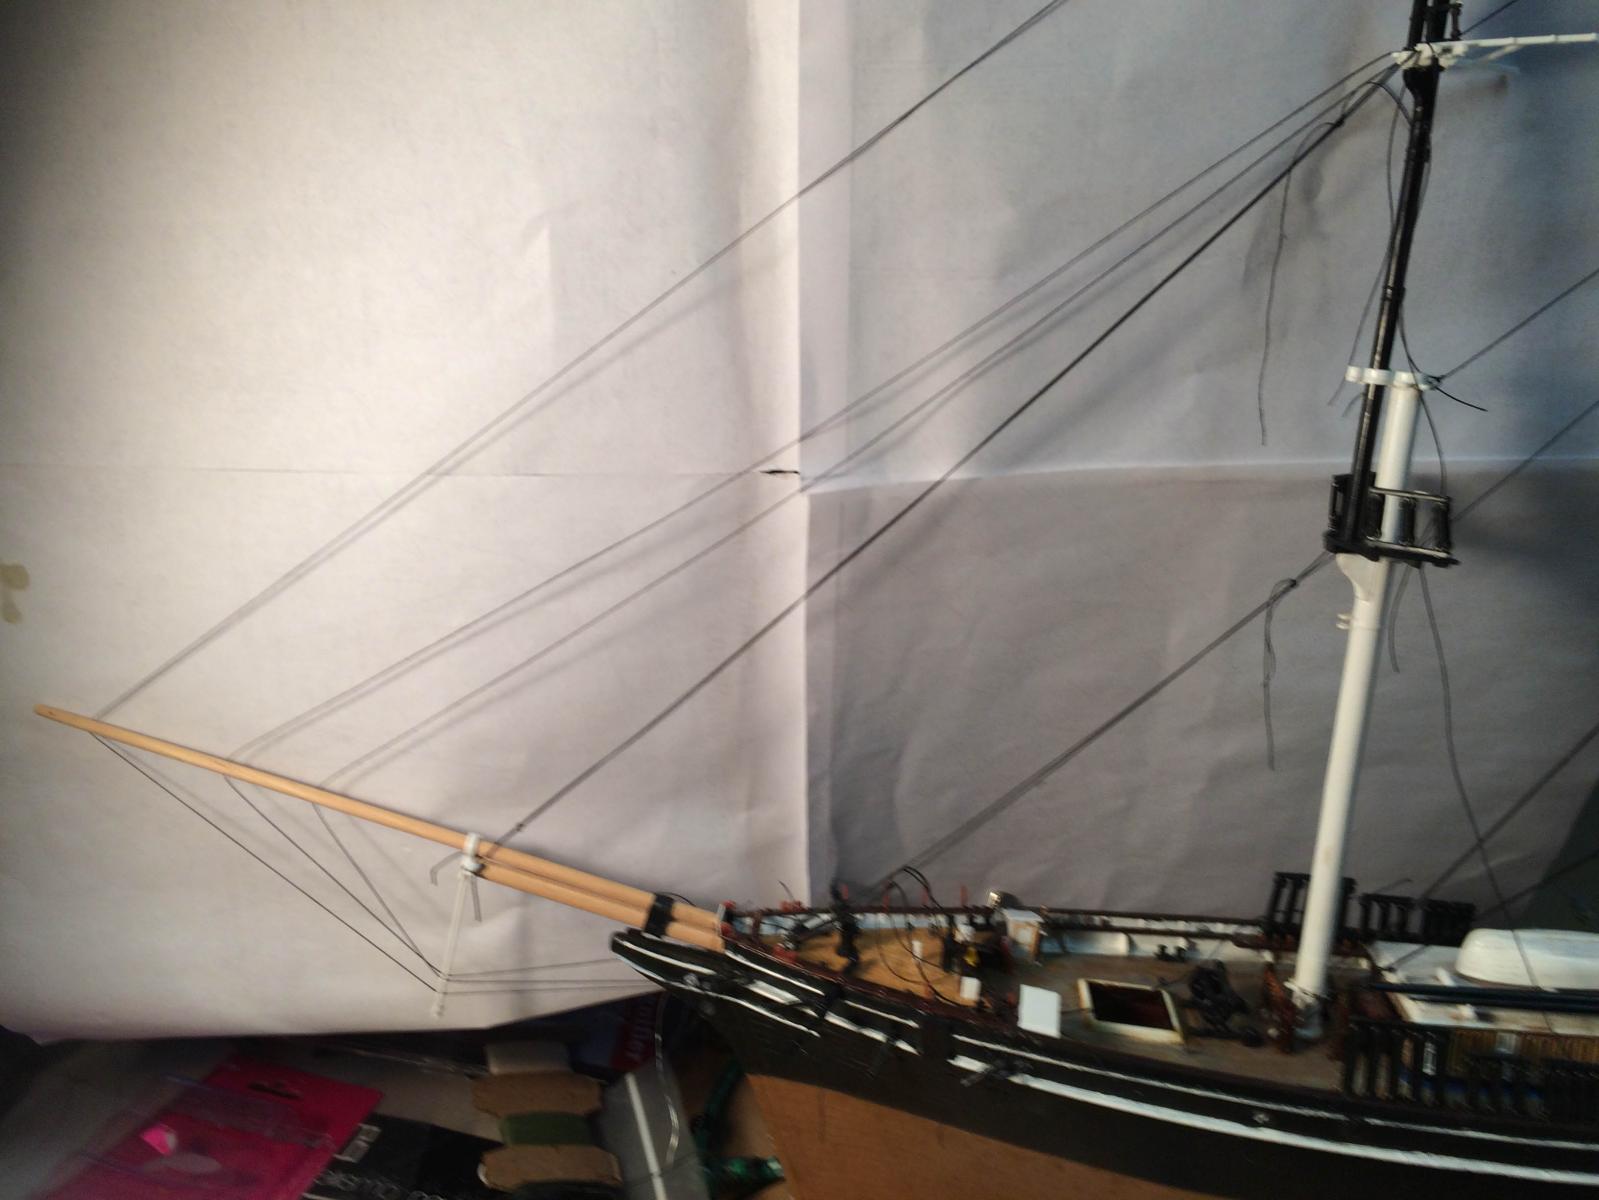
Thanks to you both. Working with the wood was not as hard as I thought it would be - I may become more ambitious.
-
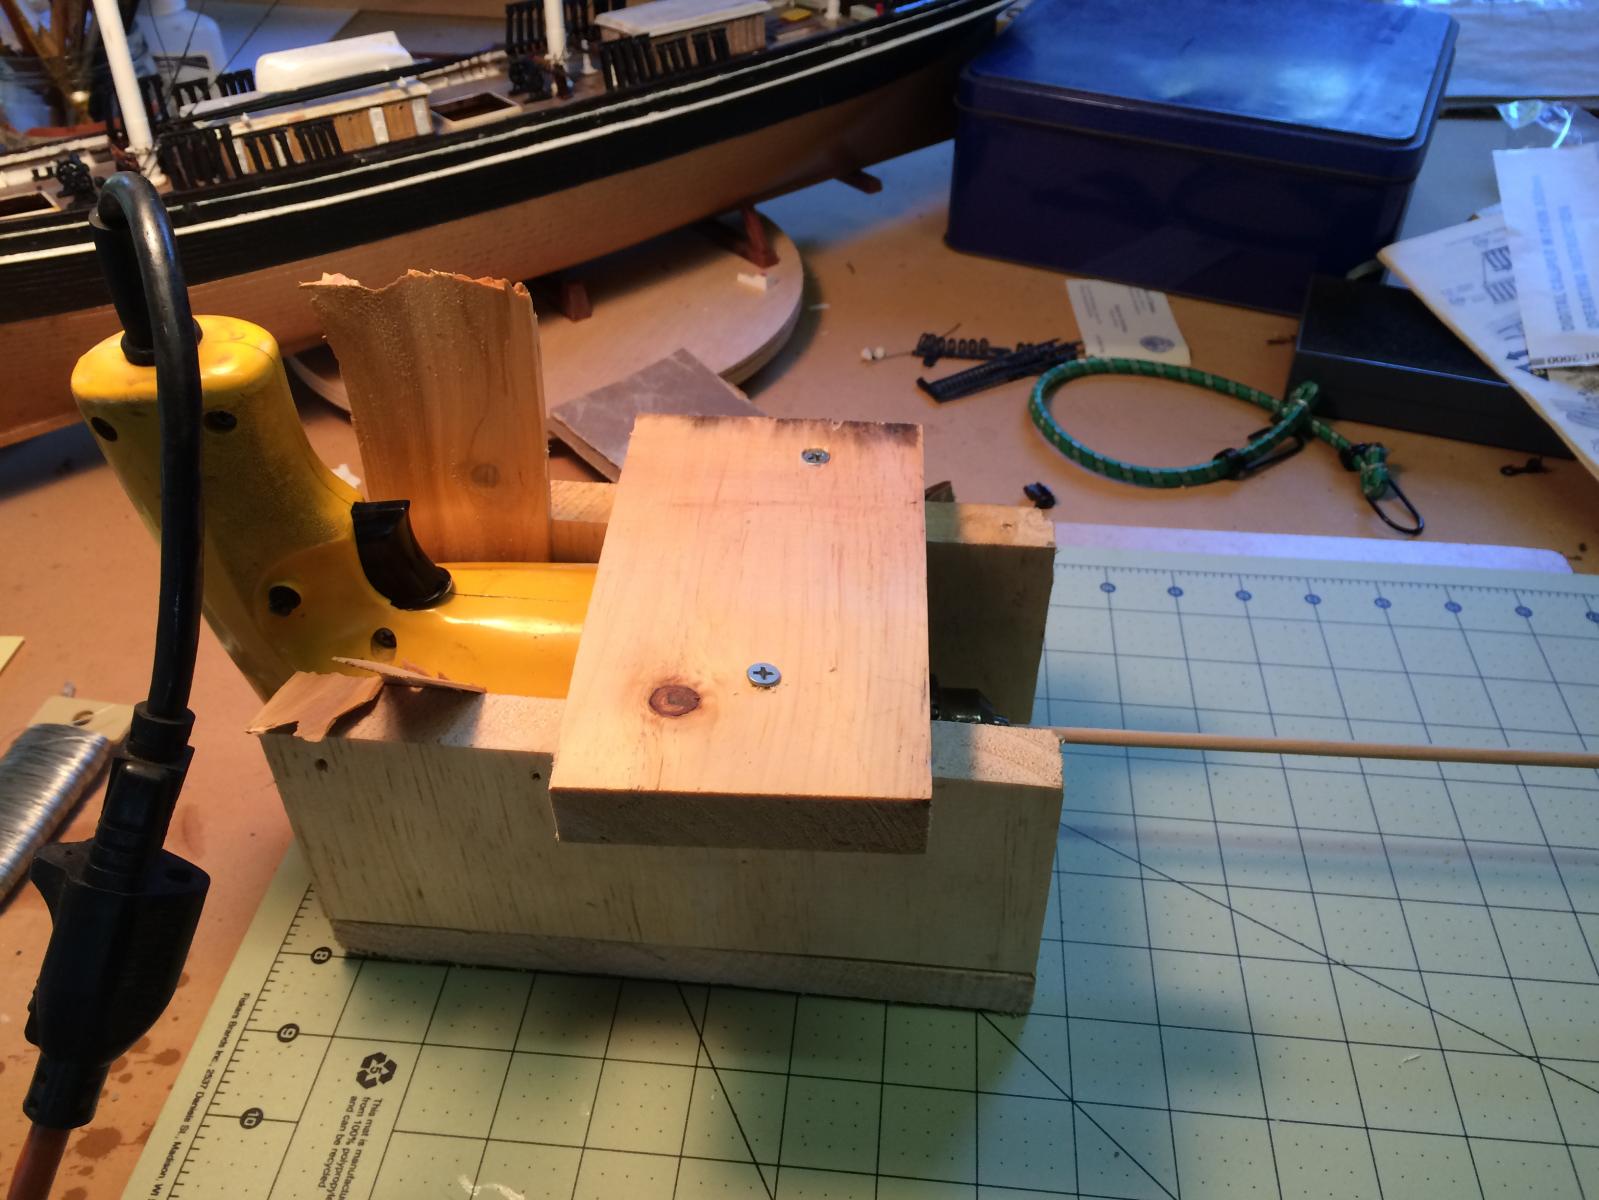
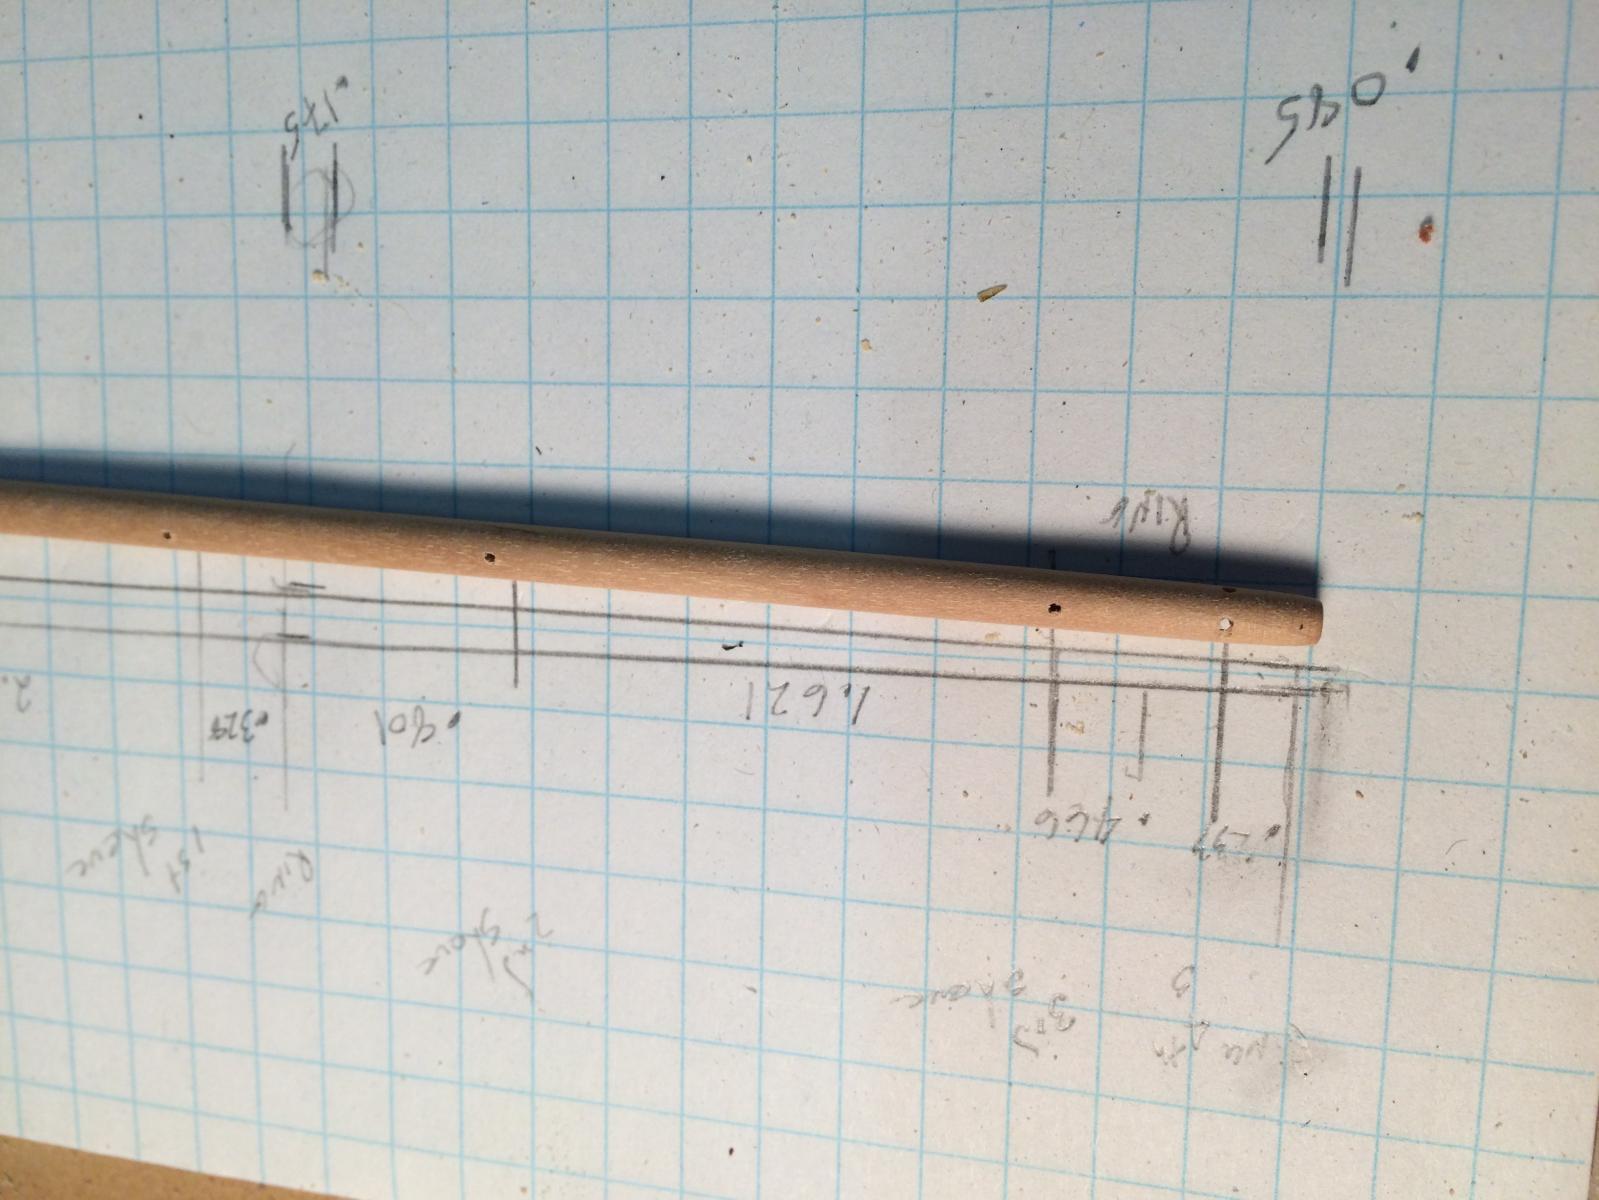
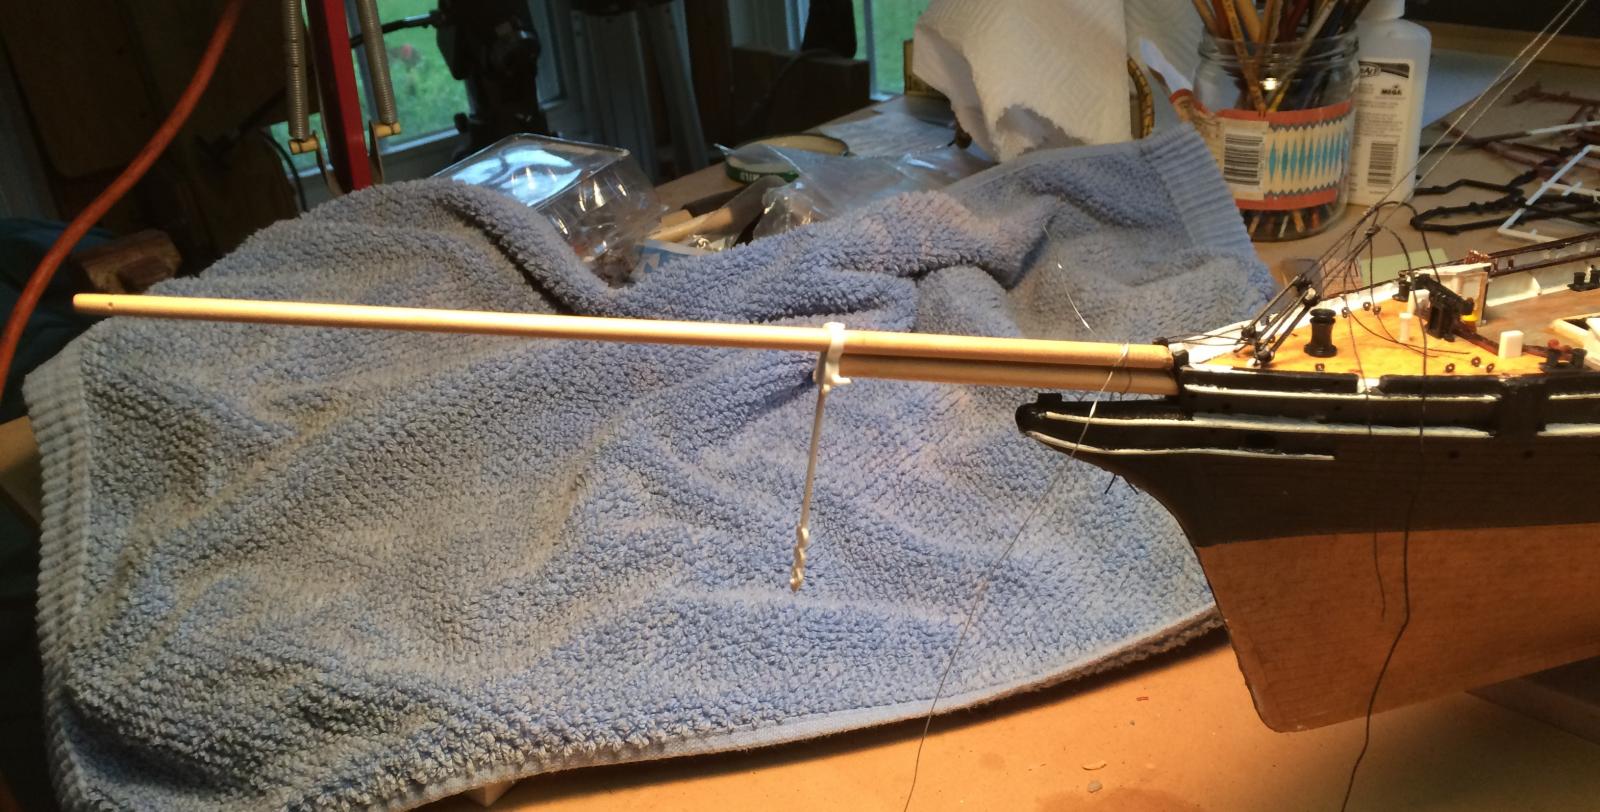
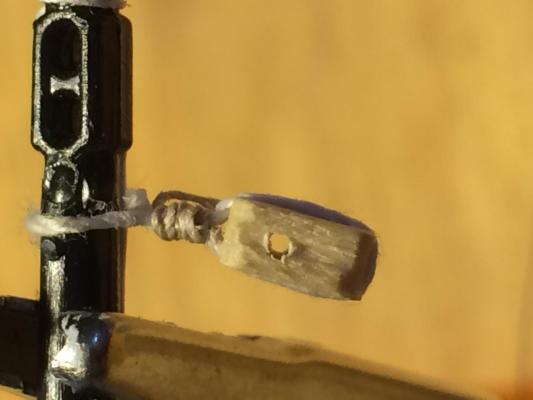
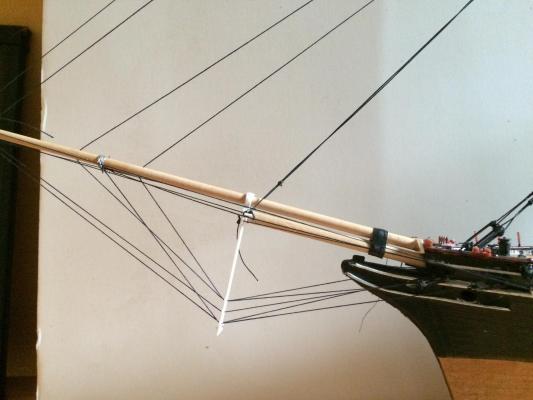
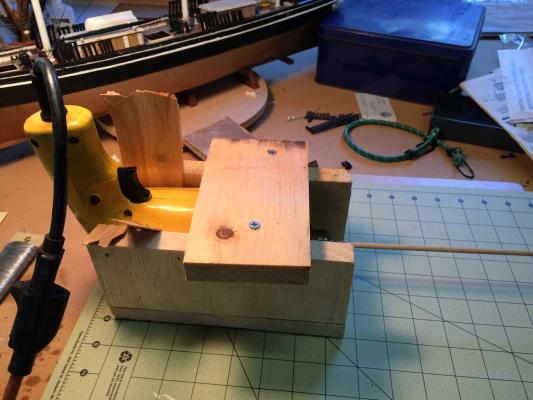
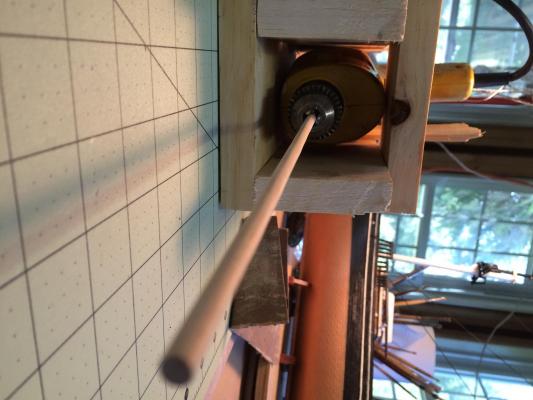
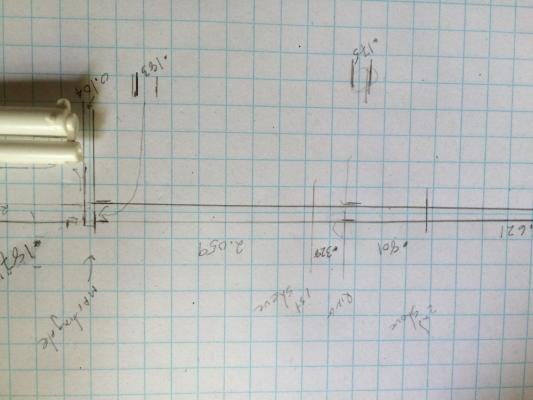
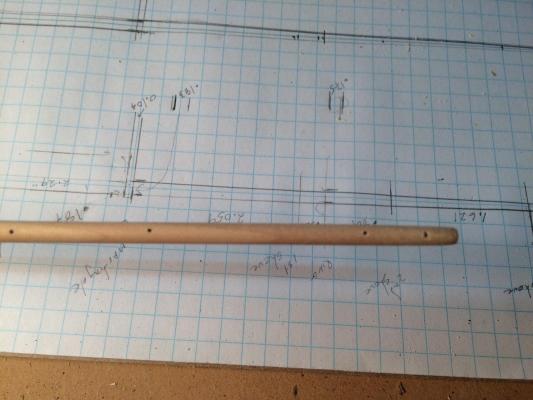
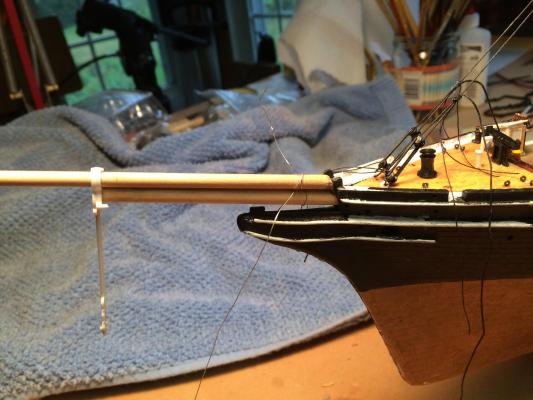
First attempt at the jib boom using my home-made "lathe." First I made a template (3rd time looked good - using digital calipers helped) and drilled the holes for the sheaves, then slowly sanded the taper. Test fit looks ok, although I still haven't quite figured out how to attach it all.


- 53 replies
-
- 5
-
-
- cutty sark
- revell
- (and 1 more)