-
Posts
630 -
Joined
-
Last visited
Content Type
Profiles
Forums
Gallery
Events
Everything posted by kruginmi
-
Nope, the rumor of my demise is greatly exaggerated haha. Dropped in to give a bit of a status. Still loads to go but the basic look is coming together. Currently working bowsprit so I can get the masting into primer. Then will transition to tie down rails / furniture. Cannons are just stuck in (friction fit). Will be blackened. Walkway will be primed white prior to being planked like main deck. Banding on masts done with 1mm Tamiya tape. The prop and lift assembly have been put together but still need prime and paint. Seems to reflect the pics as she currently sits better than what was supplied. That is all for today. Hope to have more in the coming weeks. Mark
-
The waterways needed some pizzazz so at this scale (and that the bulwarks will be painted) grabbed some molded plastic: That went into place pretty straightforward (superglue) and really did the trick: Working towards the application of sanding sealer so I can paint it up. The list is shrinking but still a ways to go. Mark
-
One of the reasons you do these trial setups is to verify. Well, I was pondering the picture I took and suddenly realized something was very 'odd.' The height of the supplied binnacles was way too large. They measured 3/4". In 1-100 scale this equates to over 6 feet tall. Well, I guess I am replacing those after all (the kit strikes again haha). As these were very different in design on the actual ship I had been going this way regardless. I need to make some scale figure stand ins so these type of errors jump out immediately. That will also help with the ladders to be made. Since I am doing an update I also wanted to provide the kit provided deck furniture verse what I came up. Given the age of the kit this did not surprise me. Reminds me of the numerous balsa wood kit airplanes I built in the 70's. Big difference is now I have access to other sources of wood and skills to use them. Now to figure out how best to make skylights for this scale. Mark
-
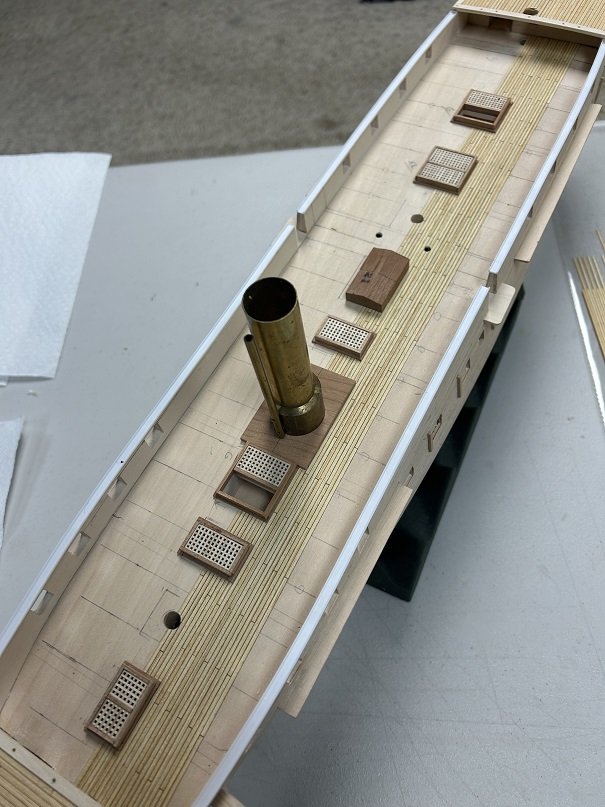
Working through my view of how to do the deck fixtures. I think I am happy with the result. Getting these set will allow me to begin planking the deck. Notes: - The skylights (2) are currently placeholders. They will be replaced with better examples. - The binnacles (plastic) will have their posts replaced. May keep the top part. - All the belaying pin mounts are still TBD. Using cherry wood means I do not have to paint these. The funnel base is the one exception - black. Cheers, Mark
-
The chase holes and such were modeled after this piece of plan that Anders has shown previously. The ship has undergone a lot of modification and somewhere a line in the sand (or hull haha) had to be drawn. I based the chase port off of the leading edge of the forward top deck - not the forward stem. To get this to my Uncle and move forward I am going to leave things as assembled. I also think some camera distortion in the pic is making things look stranger. Mark
-
Thanks Martes, but this is a conundrum of the original kit and not realizing how off the kit was. They were baked into the build before I realized how different the two were (reference the deck fixture observations above). I should re-iterate this kit is from the 60's-70's and not the latest incantation. Pushing forward. Mark
-
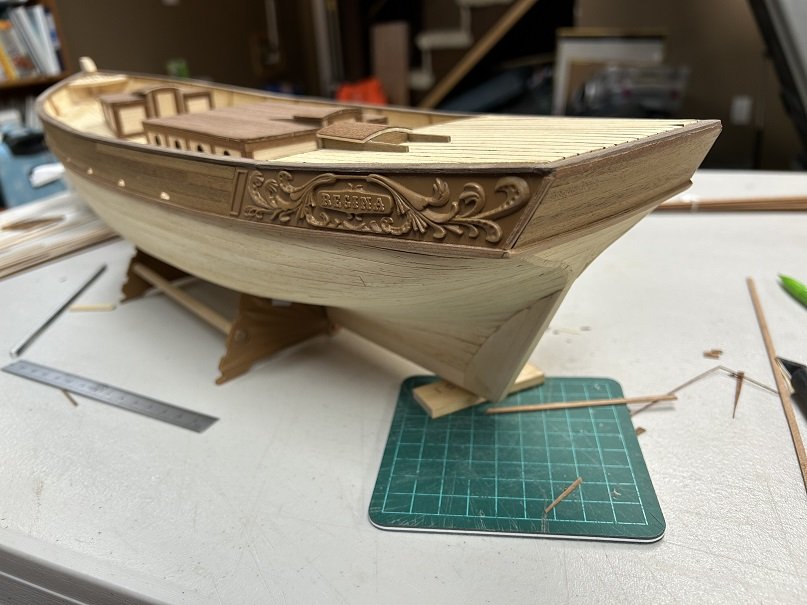
With my new direction, I have continued to Krugify (veer from the plans) on the look of the ship. Decided to veneer the outer bulwarks and since I always like the look of scuppers, added 5 of them each side for a pop of contrast and interest. I have also decided to replace (once again) the inner bulwark supports with cherry, replacing the basswood for a deeper color contrast. This is in progress. You can see one in the pic second from aft. Once I put the finish on it will pop a lot more. I also wrapped this around the stern. There is a plastic decoration that goes in this location, might go with something different. I will probably switch back the the Jylland to complete it's main deck next. Hopefully won't take too too long. Mark
-
Thanks Mark, that was the direction I was headed (deck wise at least). With the hunk of plastic on the side, pretty much forced to do some painting. My initial thought is the external hull will be painted. Water line and below - dark green. Plastic piece strip - dark green. In between - white. My unknown is the bulwark walnut railing / cherry 'wales'. Like to keep them natural but think the cherry will have to be painted white. Color is not my natural skill so suggestions welcomed. I do not feel restricted to the box art of the kit. From my Army background: If it moves - salute it, if it doesn't - paint it white. Mark Update: Wife came by (she originally picked this kit) and asked for the plastic piece to be painted and leave it at that.
-
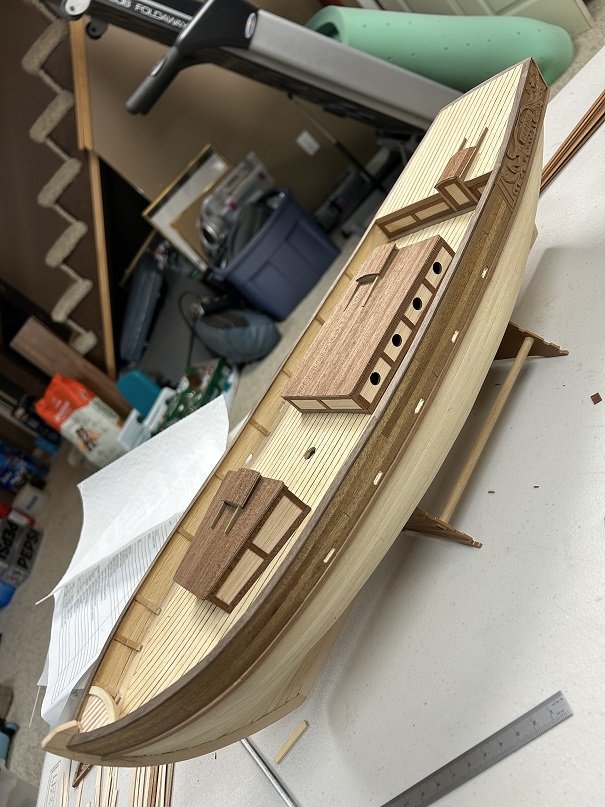
Ever forward. I met my goals for this week by getting the basic hull complete. Still some fine tuning. The forward grating plastic piece did not fit into the space without modification. Thought it was just easier to make the whole thing out of wood. Finished up the laminated cherry 'wales' and the walnut railing. All three deck house entry ways were also finished off as well as the remaining trim. Still need the skylights (3 total), which are half plastic. Next step is figuring out how the forward bowsprit intersects with the stem head and butt joins to the winch. I need to construct the winch and see how this fits together. Then the forward and stern raised railing can be affixed. Mark
-
Snapshot of progress. Not a play by play of everything I have done. Happy to answer any/all questions if any. As I get into the finer details I am not a stickler for the plans in a kit like this, just looking to enjoy myself. For example, the bulwark rail is shown to be a lighter wood (like the hull). Decided I wanted a darker (natural) look so brought in some 1/16" walnut for the job. I have only completed the back half of the rail to allow me to plank the upper stern deck. I like the result. For the trim piece below the side decoration I substituted in some cherry I had on hand. To allow it to fit into the bow area (bending wise) I used 1/32" strips and laminated 2 together. Still need some sanding but all good. On a side note, the deck houses in the kit had the location lines for the trim marked on them. I was concerned some would be visible in the final product so actually build the main boxes for each inside out. I like having a clean palette. I actually liked the idea of putting the access door in the house to starboard, causing the rearmost cabin door to move port. When this is shown next to other Regina's (haha) easy to pick mine out. Next up is finishing the rail and replacing the plastic belay pin rail at the bow. My resultant hull differs from the plastic outline enough that it justifies just making a new one. Mark
-
One feature that pops out is the mid-ship walkway so decided to knock the base structure out. Still need the guard rails but that can come later. Affixed the plastic c-channel on top of the bulwarks to finish the look. This walkway is easily removed. This gives the ship an overall look of: Decided to look closer at the cannon: The bottom row left three are from the kit. That flared out muzzle sure make them look older than the mid to late 1800's. All supplied cannon are the same type. For the main gun deck you get the top row guns which affix to the hull. For comparison I grabbed in my stash a set of 18 pounders which I showed as the three shiny right hand ones. My basic research shows the ship used (1864) 8-18 pounder, 4-12 pounder and 32-30 pounder guns. The top deck has 16 gun ports with 12 guns identified so that is another question on what goes where. I am toying with the idea to use some of my 18 pounders (obviously only on the top deck). Have to ponder that one. The guns on display at the museum definitely look more like the 18 pounder version than that supplied by Billings. To ramble some more I am seriously considering having this ship put back into my list of ships to do once this is complete. I have the next three projects waiting but think I could take what I have learned, research some more and produce a set of plans (and a list of assumptions) that would produce a better ship. I would definitely need to find that book referenced at the start of this project. The old girl is growing on me and I would like to do her justice. Mark Up next is to finish the planking on the starboard side and fabricate the missing deck furniture. Masts/Spars are quickly coming up.
-
Ever forward. Updated the bow based on new information. The highlighted 'brace' I hereby declare as the Steggen Brace. I had no idea it existed until his pic. As it be said, let it be done. Looks much better overall with the added center platform. Finally decked the stern area. That took a minute. Obviously deck furniture to be added. Figured out my missing deck height on the main deck. Looked at the cannon and for this kit they are very bare bones - only the carriage and gun which they want glued to the deck. Well.....I can fancy them up and add wheels which will give me the necessary height addition. Now to sort out the main deck furniture so I can start laying out the deck and where planking is required. Mark
-
First off - Peter: Thanks for the kind words, just (trying) to have some fun. Now to define why all the questions / rabbit holes. This ship has gone through (it seems) so many big changes externally. Add a deck, stretch the deck, change the deck furniture (maybe). I had no idea when I started what a can of worms that would be opened. Every time I look at a specific topic and compare the plans I have, the updated plans from Billings, pictures I can get from the web, plans from the archives and finally the input from this great group I have quite a few different answers. Since I didn't know this from the beginning I have baked in some specifics variables from my re-draw of the hull plans. Again, the bulkhead pieces were seemingly hacked out of the wood with a dull butter knife and the plans as shown did not have a right angle and could not be used fix the pieces (this kit from the 70's, not the replacement one available now). I laughed this evening because I finally gave a close look at the deck fittings. Let's start from the stern looking at the original plans: Pictures clearly show the ship's wheel is sitting on a grating (makes sense). No such thing as defined on this model. Looking at images, the next item up should be a skylight then a grating. These are switched (or are they as defined originally?) Under the ships boats there should be a skylight as exists today. Would the ships boats still fit here? Moving forward: The funnel has a secondary tube. Shown on the plans aft of the funnel. Pics of the current ship show it forward. The stairs down to the gun deck seemingly should be forward of the grate. Even the funnel in the forward grate can be seen pointing forward and aft. Is this all time period dependent? Was Billings this sloppy or did they design off one set of procured source material. I have looked at the 'new' 'improved' deck plans of their updated Jylland kit (real expensive) and they are not much different. I think the answer is to rename the ship the Krylland (get it - Krug and Jylland - I crack myself up) and get'r done (joke). This ultimately is for my Uncle so I will proceed making choices for aesthetics / function / and finally ~accuracy. As always, I welcome any and all input just know I will probably make choices that will cause your eyelid to twitch a little. This ship deserves a well made set of plans (or maybe 2 or 3 based on date). A great ship. Thanks again to all, I will endeavor to persevere Mark
-
Accepting input (did I do this already?) of color choices. Bottom of hull will be patina-ized copper (greenish) that is set. Question is upper hull and masting. As seen today (white hull, light yellow masting with some black upper works) or Fighting black hull, white stripe across gunports, black gunports, green inner bulworks Or other. Give me your thoughts. Mark
-
Okay, I lied. Decided to add the planks to see how they will look and if the self adhesive is still viable. I was half way through and not liking the way the planks were not laying down (coming loose). Decided I had Titebond at hand so started to add my own adhesive. Seemed to work very well. Each plank is laid individually. You do not cut out a section and apply as one unit. Now just need to carry on down the hull and bring to the same state of readiness for sanding sealer (for when it gets warm - feels like 8 degrees Fahrenheit here with snow falling currently. Mark
-
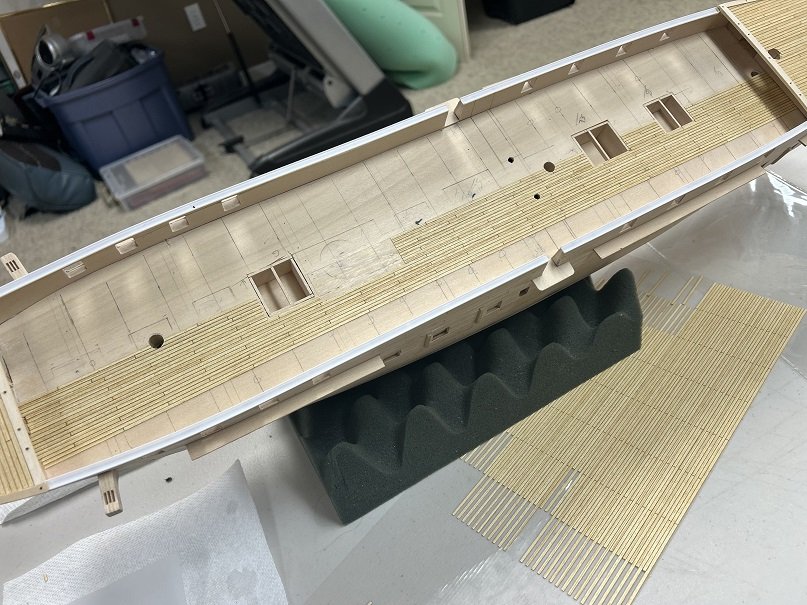
A little more deconstruction for the good of the build. I pulled off the rest of the bow deck section and re-did the slope to bring it in line with a better representation of the ship. I also took this opportunity to add a floor to areas that could be seen. The real ship is very different (kit is way over complicated) but I didn't want to rip everything out. I also designed the grating section. The key here was to go off the actual deck piece and not the plans per se. The result seemed to fit the bill. To complicate matters there are two false decks here. One tucks atop the frames but between the sides (1/32" thick). This is seen below The second sits on top of all so rises above the bulwark cap rail seen amidships (1/16" thick). The side planking will also cover this. On top of this will be the thin deck shown previously. On the outside edge will be a 1/32" trim piece that will slightly hang over the edge. This has not been glued and/or sanded to exact size yet. You can also see the plastic 'C' channel on top of the bulwarks, not glued yet used for sizing. The outside holes are for the grating sections. They will end up flush with the deck. Given the gratings depth I needed to cut out both false decks for insertion. The center section stays open. Next step is to get the gratings sorted and affixed. Then on to finishing up the stern deck. Stay Building My Friends, Mark
-
This was a huge issue for me which ended up being a trifle. The provided rear bulwark decoration (yes, plastic) did not conform to the deck angle. I spent a lot of time (too much) pondering how to compensate. Finally (maybe after the whiskey plank haha) I tore off the false deck and modified the underlying frames to set it right. We are talking less than 20 minutes to a solution. It was a very minimal correction but reset my mood for this project. Onto the decking. The provided plank separators were at a different depth size than the planks themselves but with some careful prep in gluing went down pretty straight forward. Still need to do the stern deck but need to define the caprail / waterway first. Plenty of wood left to accomplish this so that is nice. Caprail is next (along with the remaining flooring). I do need to sanding seal the hull so that will wait for warmer weather. Lots of things to do in the meantime. Mark
-
Things have been popping behind the scenes for both this and other projects I have been pursuing. Letting people know I am still alive and kicking and hope to put this ship in the done column sometime this year. This is the state of the ship as she now sits Planking finished up pretty straight forward. Given it is a single plank hull I was a bit more careful in how I progressed. Still not sure of her final color scheme (paint or other) so anything could show. And finally the long awaited whiskey plank: Yes, I still have some sanding to smooth out a few things but I consider that a win. Cheers, Mark
-
My decking conundrum. I was gifted a deck sheet (with adhesive on back) which actually is in the right proportions. The problem is the deck is less than veneer width in depth. I had allocated a 1/32" deck depth when building. If I use this I need to add a second false deck over the first to allow for that depth. Very doable but the joints will need to be very smooth with this stuff. In the meantime also going to 'improve' the aesthetics of the raised bow area. The kit supplied ink stamped gratings are less than desirable. Picked up some basic gratings of the right size which will be put into this area. I have removed part of the false deck for this and will custom fit/size the gratings to the model shape. A lot of this model is a compromise between accuracy, looks, and the what I have to work with. This is also contingent on the deck decision described above. The 1/32" can really be detected here as it defines how the bulwark caprail merges into this area. Mark Mark
-
Keith - words never so true. Well, time has flown and things done (health and other LOL). Jylland is a priority - especially with the VIC rigging done and delivered. Finally put to bed the tale of the stern windows. No arguments now, they are fitted. Much better than the provided decals. Still a lot of refinement to do but they are in place. As also can be seen the planking of the hull (above the waterline) is in full swing. I wanted a better looking hull (with character) after it is sealed and painted. I am using maple veneer. The starboard side is still in progress but am hopefull by this weekend. My lesson learned (LOL). As you get older your nerve endings seem to become less ..... active. Well, I managed to perforate myself on one of my fingers - which was used to hold the hull when inverted. Finally figured this out when I set the hull back on the stand saw the blood bath. Blood is not the easiest to get out of wood - believe me. However, a decking will go on top so all is good. Bandaids have become an important part of my kit. I can always prove this model is mine with the affixed DNA. Mark
About us
Modelshipworld - Advancing Ship Modeling through Research
SSL Secured
Your security is important for us so this Website is SSL-Secured
NRG Mailing Address
Nautical Research Guild
237 South Lincoln Street
Westmont IL, 60559-1917
Model Ship World ® and the MSW logo are Registered Trademarks, and belong to the Nautical Research Guild (United States Patent and Trademark Office: No. 6,929,264 & No. 6,929,274, registered Dec. 20, 2022)
Helpful Links
About the NRG
If you enjoy building ship models that are historically accurate as well as beautiful, then The Nautical Research Guild (NRG) is just right for you.
The Guild is a non-profit educational organization whose mission is to “Advance Ship Modeling Through Research”. We provide support to our members in their efforts to raise the quality of their model ships.
The Nautical Research Guild has published our world-renowned quarterly magazine, The Nautical Research Journal, since 1955. The pages of the Journal are full of articles by accomplished ship modelers who show you how they create those exquisite details on their models, and by maritime historians who show you the correct details to build. The Journal is available in both print and digital editions. Go to the NRG web site (www.thenrg.org) to download a complimentary digital copy of the Journal. The NRG also publishes plan sets, books and compilations of back issues of the Journal and the former Ships in Scale and Model Ship Builder magazines.


.thumb.jpg.8852195d28b1db94c4331e9cf7be2f74.jpg)


