HOLIDAY DONATION DRIVE - SUPPORT MSW - DO YOUR PART TO KEEP THIS GREAT FORUM GOING! (89 donations so far out of 49,000 members - C'mon guys!)
×


gil middleton
-
Posts
308 -
Joined
-
Last visited
Content Type
Profiles
Forums
Gallery
Events
Everything posted by gil middleton
-
Popeye, I like your style. My Dragon will not look much like the plans. I plan to use the mahogany for insets on the planked deck. Pete48, I think I have found my reference source. I thoroughly enjoyed the beautiful gallery of your work, particularly the building of the Etchells 22. As a professional, your work reminded me of Ken Gardiner's models of the America's Cup contenders. They were done with such detail that if a Schaffer block served the original yacht, it did so on the model. I was set to make a pilgrimage to his Newport Beach, CA shop when I learned he had retired and then passed away in 2013. Cheers, Gil
- 60 replies
-
- 3
-

-
- dragon class
- billing boats
- (and 2 more)
-
John, Thanks again. Popeye, Only just realized that you are the Billing guru; eight Billing models in your portfolio. I'll bring all my questions to you! But it is more fun making your own parts than simply following instructions. Bob, I enjoyed your build log on the Dragon 2. Your wife has good taste. Also enjoy your SS Mariefred. It seems rather similar to our "Mosquito Fleet" that plied the inland waters of Puget Sound over a hundred years ago. Kevin, It's been over a year since I've been on MSW and what beautiful progress you've made on the Victory. Even shed a tear for your broken job boom however your repair would make Jack Aubrey proud. Permission to follow the log? Since there seems to be no other Dragons in progress, I didn't think anyone would even notice. Old friends are always welcome. Spyglass, I envy your experience in Dragons. Feel free to advise or correct my mistakes. I understand the problem with all that beautiful varnish. Our present boat is 71' with LOTS OF VARNISH. And it's hard to varnish in the rain. Cheers, Gil
- 60 replies
-
- 5
-
-
- dragon class
- billing boats
- (and 2 more)
-
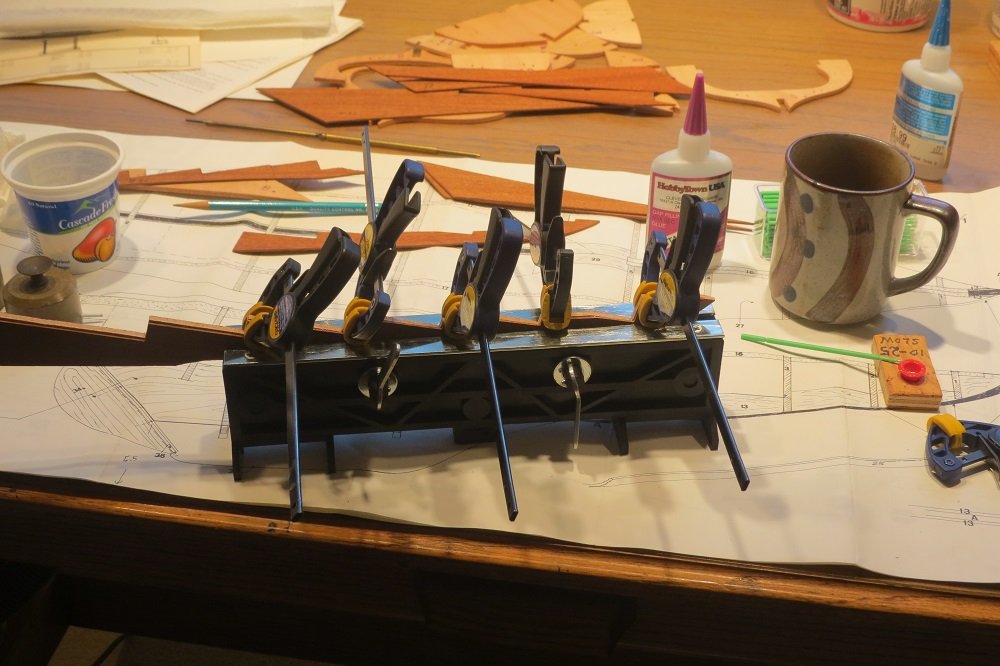
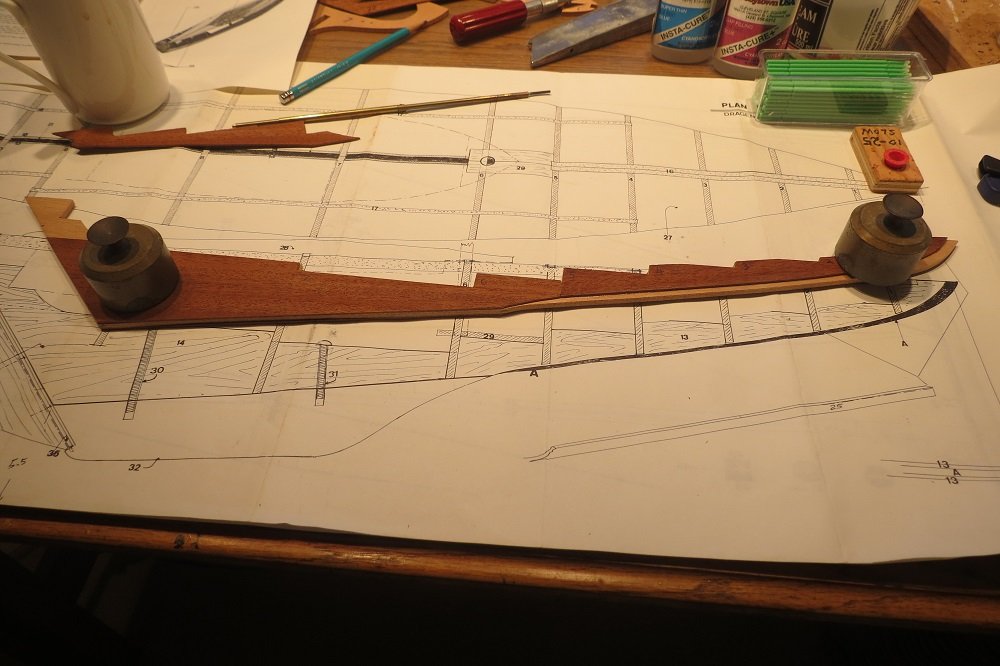
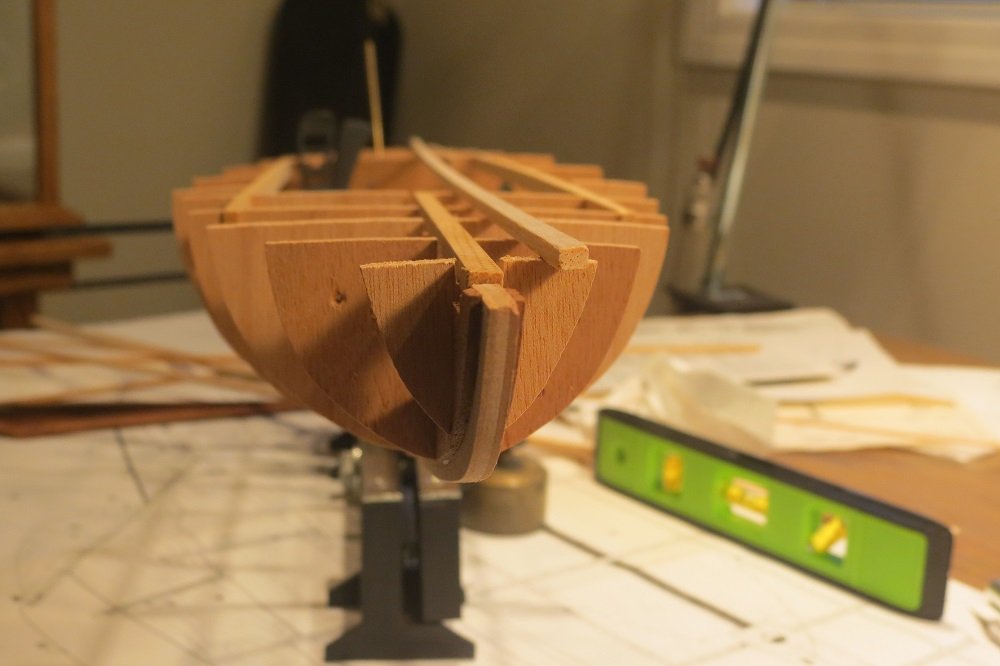
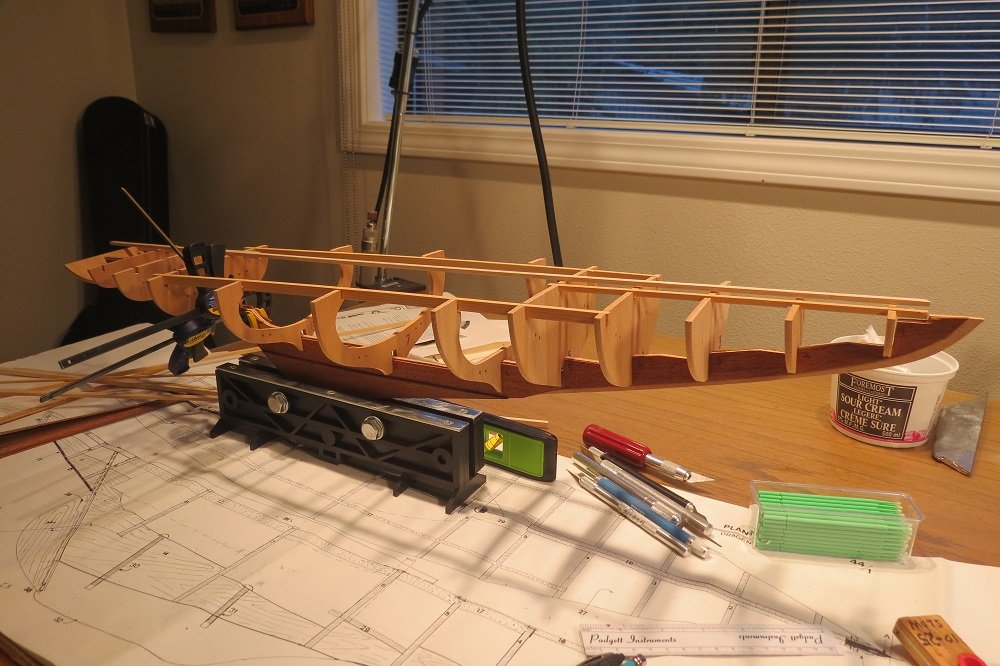
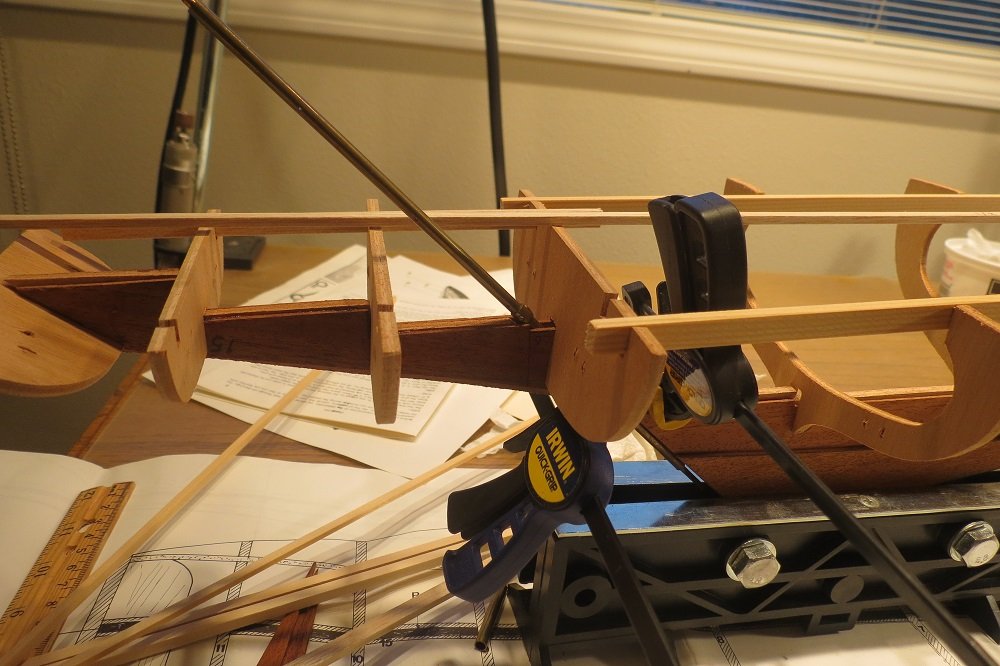
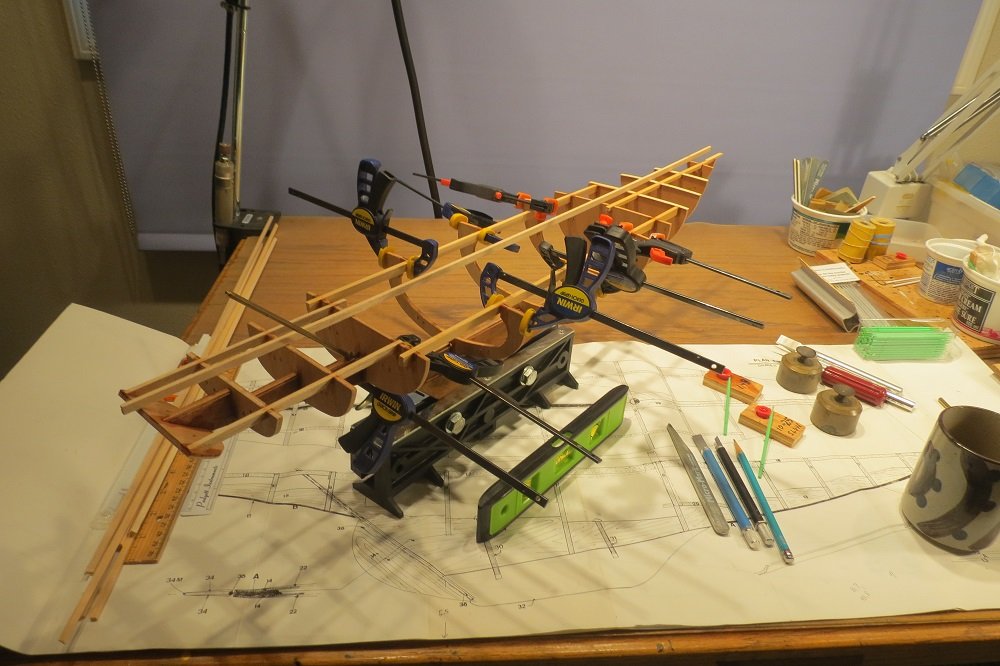
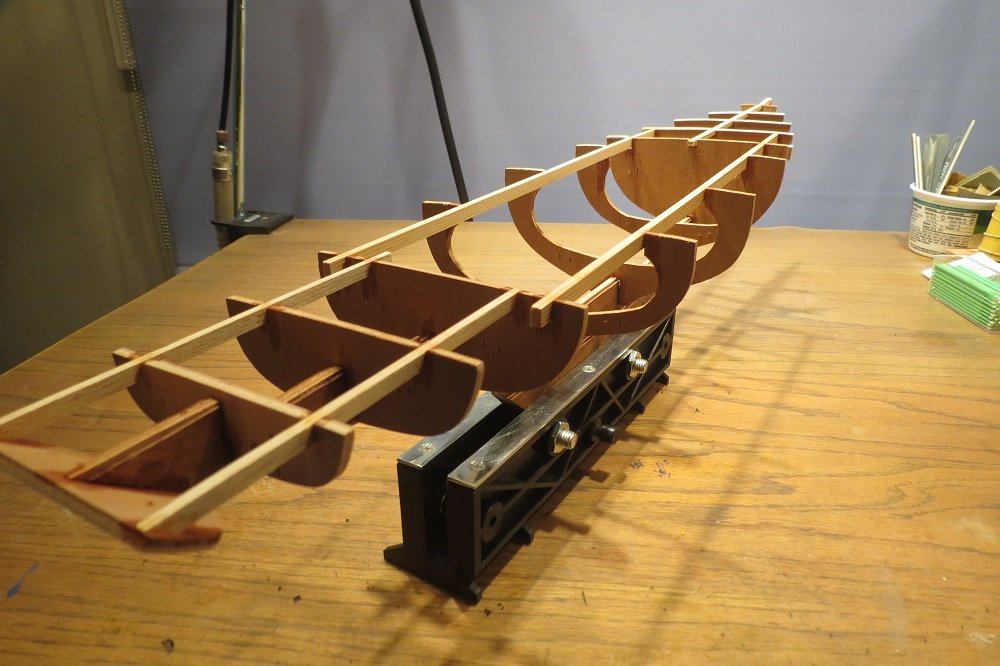
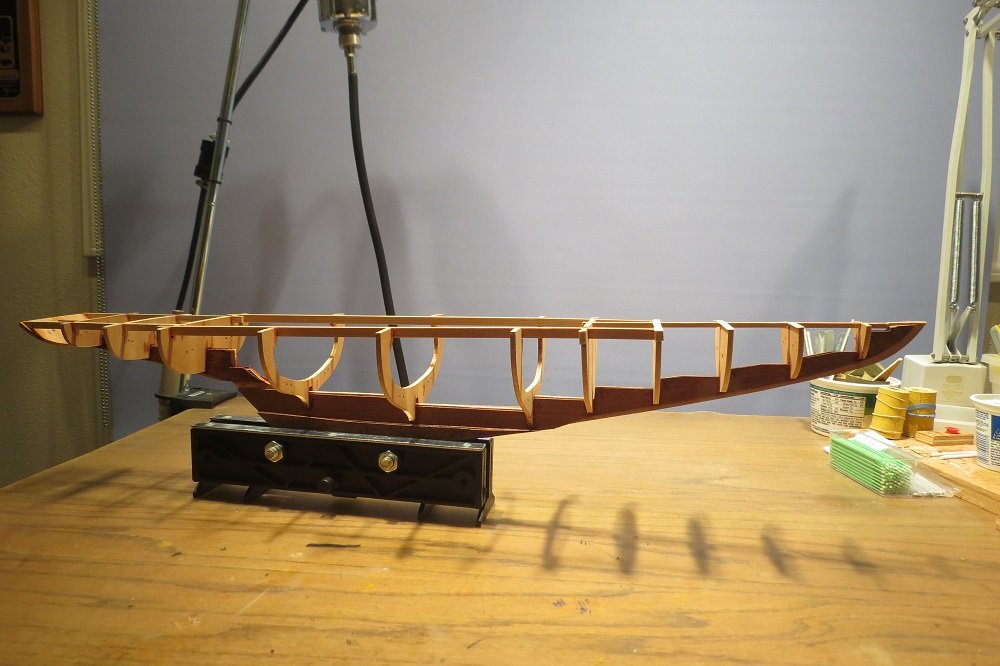
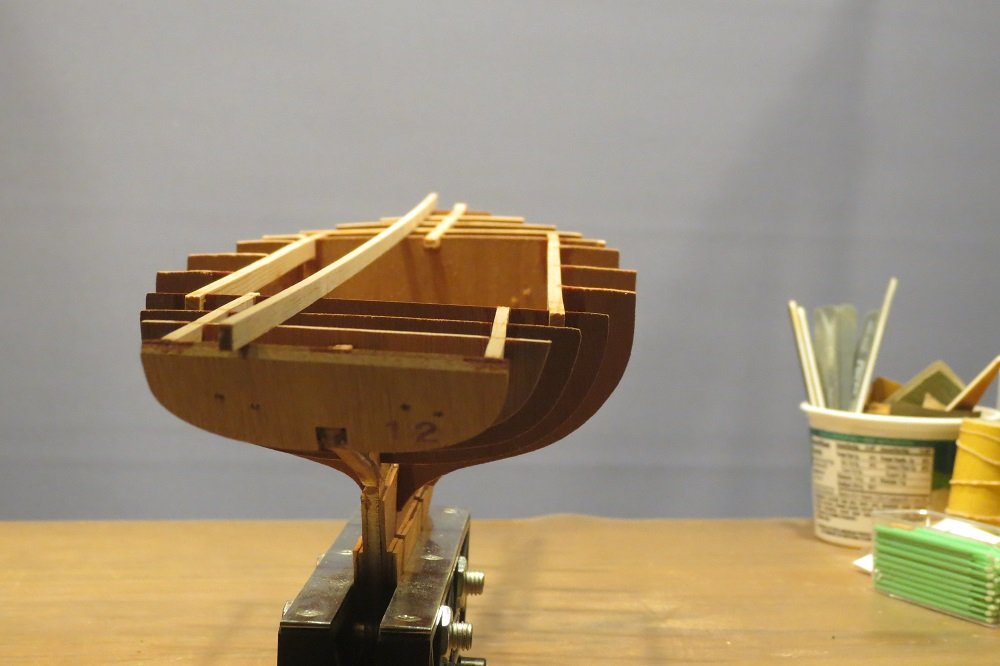
A few comments on the Billing kit. To be fair, It has been on the shelf for 20 to 30 years and may have been improved. However, I would give it 2 stars out of 5. Instructions were minimal and hardware not consistent with building a replica. I've never warmed up to printed decks. It was used as a template and mahogany inserts. Rigging (standing and running), one roll of string, discarded. Planking too thick and too wide. Used left over from previous models. Having said that, I'm probably having more fun than if it were a five star kit. The following photos are a typical start, aligning bulkheads with the keel, setting the sheer and getting the bones right. Aligning the bulkheads. A very tenuous junction of the stern portion, aft of the rudder post, with the forward section. Stability was gained only by the addition of stringers. Adding stringers Slight sheer is apparent. Next up. Planning the deck.
- 60 replies
-
- 14
-
-
- dragon class
- billing boats
- (and 2 more)
-
Many thanks John. You must be getting old to appreciate the classics or perhaps simply well informed. Popeye, Nice to hear from an old friend. I also thought Borge's metal work outstanding. Gil
- 60 replies
-
- 4
-
-
- dragon class
- billing boats
- (and 2 more)
-
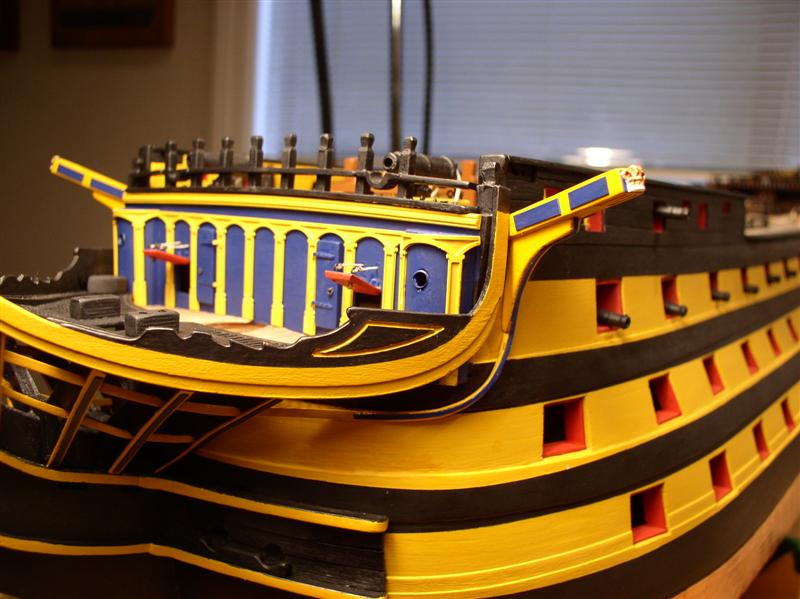
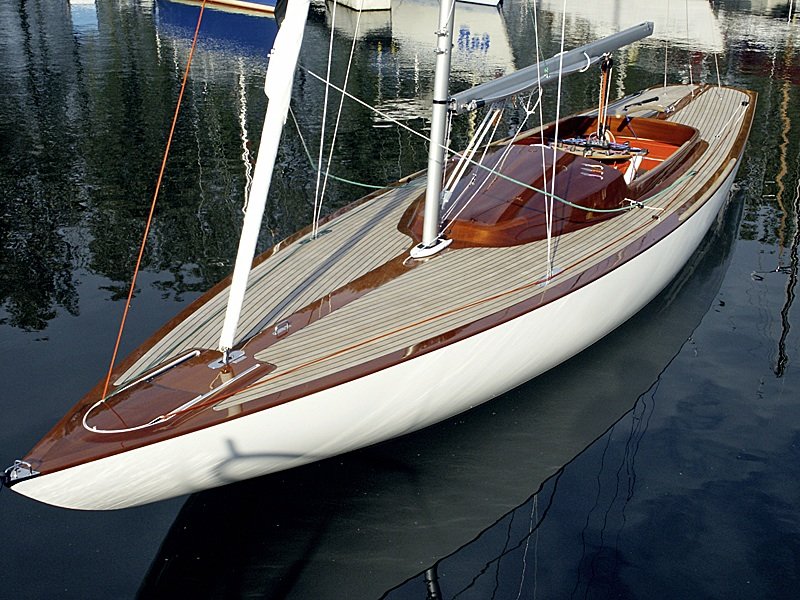
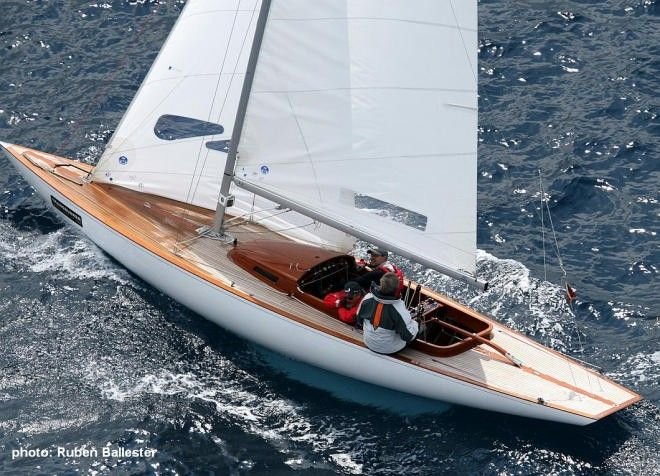
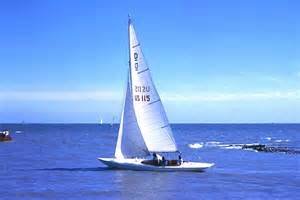
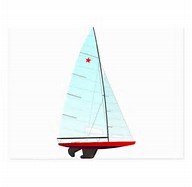
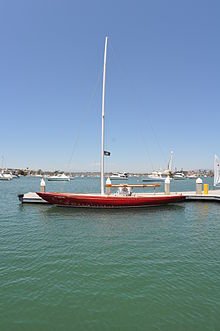
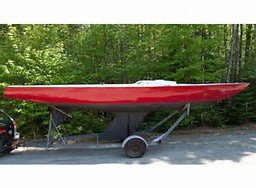
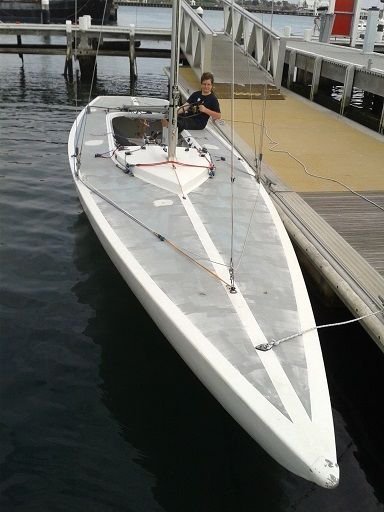
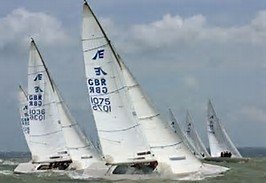
Having accidentally deleted the previous posts, this is a new start. Over 70 years ago, I thought that the Dragon had the most beautiful lines of modern sailboats, and my opinion hasn't changed since. Sure, there were many boats that caught my attention from 8 meters to J boats, but to me, the Dragon had the lines of a classic sailboat before rating rules dictated changes such as plumb bows, reversed transoms, etc. I've sailed and raced a Penguin, Flatty (Geery 18), Coronado 15, Lightning, Soling, 26' sloop (Halliday) and Cal 40 but never a Dragon. Building the model is my vicarious way of gaining that experience. My last model, HMS Victory was a six year adventure, but at 83, another long project doesn't seem to make sense (I'd like to see the end result). There are only a few Dragon models on MSW. Cap'n Bob pleased his wife with a second build, 1:48 scale and Dee-Dee recorded a brief but detailed version of the hull. Borge used the Billing kit to build a cruising version with fine detail and exquisite metal work. I haven't the experience to replicate Borge's metal work, nor are metal lathes, drill presses, etc. considered proper decor in our den/office (condo). I've had a Billing Dragon kit for 20 or more years and it supplied the basics for my build. More on the kit quality later. The Dragon was designed by Johan Anker (Norway) in 1929, gaining world wide appreciation as well as Olympic Games status. Specifications are a fractional sloop rig (Bermuda rig), overall length of 29.17' (8.89m),displacement of 3740 lb. (1696 Kg.), molded finn keel of 2200 lb. (998 Kg.) and an upwind sail area of 286 sq.ft. Other designs with similar sail areas include the Star, Etchells 22 and 5.5 M class. The venerable Star boat carries about the same sail area for it's 22.9' (6.92m) hull and less than half the displacement. Star. The 5.5 M was designed as a developmental class as a slightly smaller and less expensive alternative to the 6 meter, at 31' (9.5m) displacing 3700 - 4400 lb. 5.5 M The Etchells 22 is perhaps the most similar design to the Dragon. Designed in 1966, the Etchells has an overall length of 30'6" (9.3m), displacement of 3324 lb. (about 400 lb. less than a Dragon) along with a finn bulbus keel and a reverse transome. The sail plan is very similar to the Dragon noting the location of the fore stay in the on deck photo. Next, the kit and beginning of the build. Cheers, Gil
- 60 replies
-
- 7
-
-
- dragon class
- billing boats
- (and 2 more)
-
Lawrence, I just had the pleasure of reading through your log on the Annie Parker. Such a beautiful result with so many ideas, metal work, sails and scratch yet. Who's the teacher now? I haven't the great grandfather or great uncle who captained a schooner, but having lived in Vancouver (15 yrs.), Edmonton, Toronto and Halifax (as a midshipman in the Canadian Navy) I may just have to build the Bluenose. I haven't decided yet whether it will be kit or scratch, but you certainly set the bar high. I can't remember where you found your "little" crew. Thanks for the kind comments. Your log will be a new reference for me. Cheers, Gil
- 755 replies
-
- 4
-
-
- finished
- caldercraft
- (and 1 more)
-
Phill, Like you, I felt that copper plates with a slight overlap and a single row of "nails" looked much better and more authentic than the plates supplied by Caldercraft. I used the pounce wheel after completing the coppering on one side of the hull. I purchased the chopper from Model Shipways a number of years ago, but was surprised that it is no longer listed on Model Shipways' web site or at Micro-Mark. Amazon sells a later version, "Northwest Short Line Chopper II" for $38. Also at Model Train Stuff, NWSL 69-4 "The Chopper II" at $34. You obviously found that #3 Coppering in the table of contents of my log opened directly to coppering. Using the chopper, with very light pressure on the cutting blade, one can feel and hear the cutting of the copper while leaving the paper backing intact. This makes handling of the individual plates much easier. Of course the key is pre-drawing the rows and belts for the carefull placement of each plate. Good luck with the process. Cheers, Gil Alde, Great start on your "Glad Tidings" We're just a ferry ride away. When I visit my son in Bremerton, we could get together. Gil
- 755 replies
-
- 4
-
-
- finished
- caldercraft
- (and 1 more)
-
Many thanks to each of you for your visit to the log and for your comments. Since I didn't build the case for the "Victory" no credit is due. However, it's nice to be back in the loop catching up on the many new and better ideas in others logs. I relied heavily on the extraordinary scratch build log by Ed Tosti, a great source for anyone building the "Victory" or ship of that period. I hope that my log will be of some help to newcomers taking on the task of modeling a full rigged ship. Per, You've been here and understand the problem of large models in limited space. Sors seems to have solved that by placing his models in a local high school. Ian, I've reread your Victory build and enjoyed your lovely choice of woods. Mark, Every log I read, I find your helpful hints and encouragement. Thanks for your support over the last few years. Evan (Force 9), Your "Constitution" per 1812 is done with beautiful detail, but I enjoyed even more the historical references. The USS Nimitz is possible if we knock some walls out. Thanks John. I think we are overdue for a cup of coffee or a wee dram. Remco, When I feel the need of a little inspiration, I go to your log for therapy. Kevin, Haven't been to your log for some time, but amazing progress and attention to detail. You admitted to liking the rigging, a brave admission for a submariner. I couldn't agree with you more. The sails and rigging are the engines of the ship and are what separates the classics from today's ships. I think we were both born a couple hundred years too late. Nick (Pompey 2), I wish I had thought of LED lighting, but by the time I saw others doing it, I was past the point of no return. Love your build.
- 755 replies
-
- 8
-
-
- finished
- caldercraft
- (and 1 more)
-
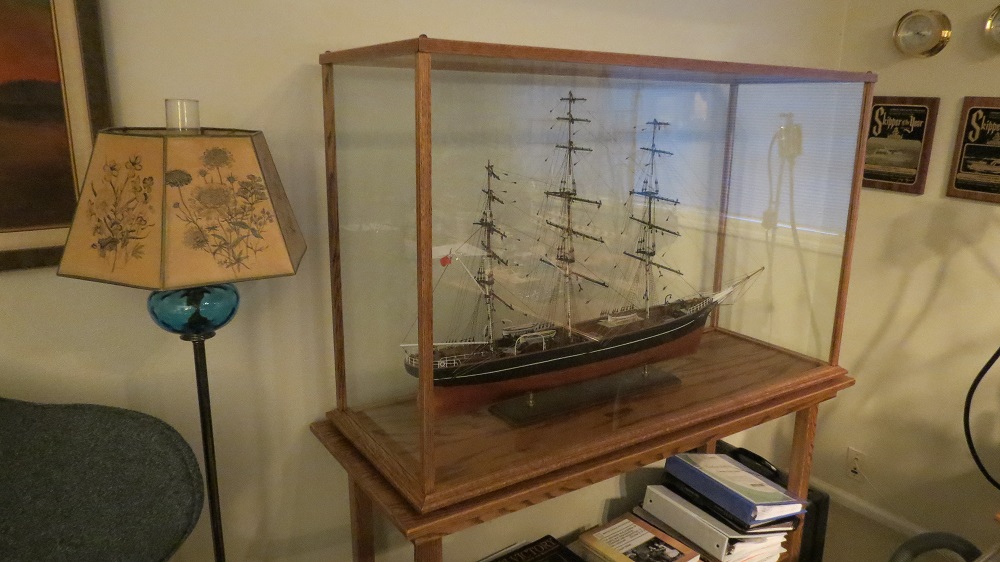
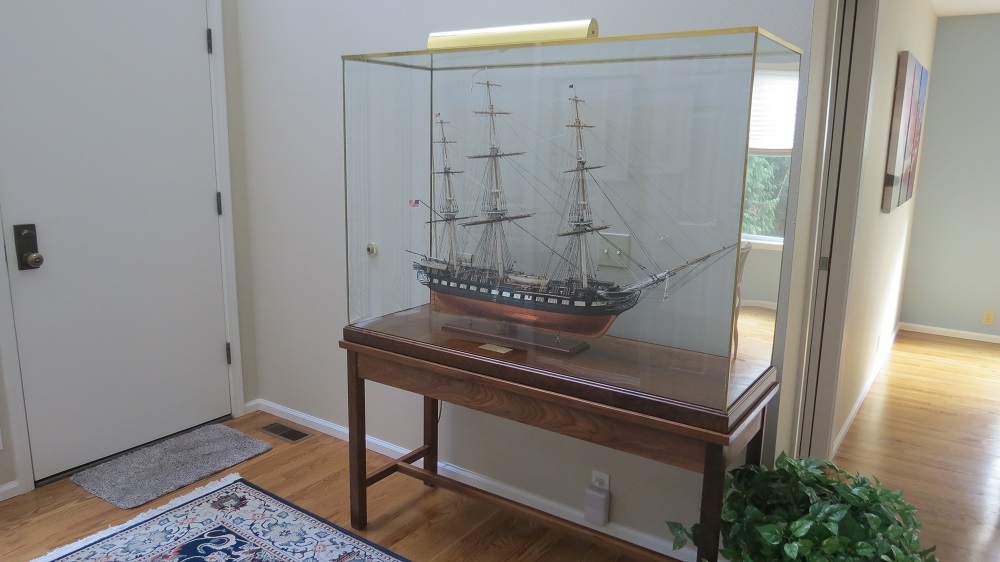
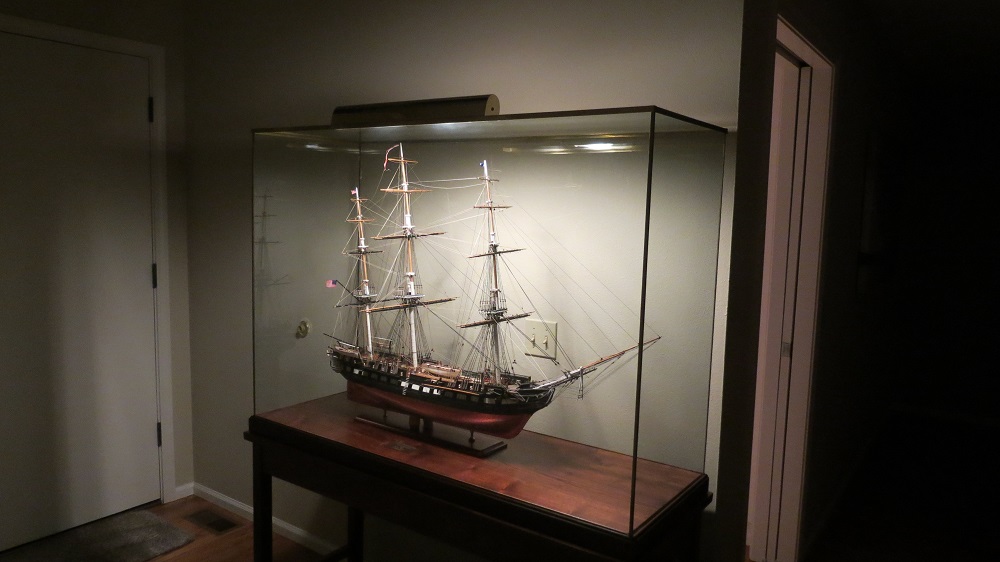
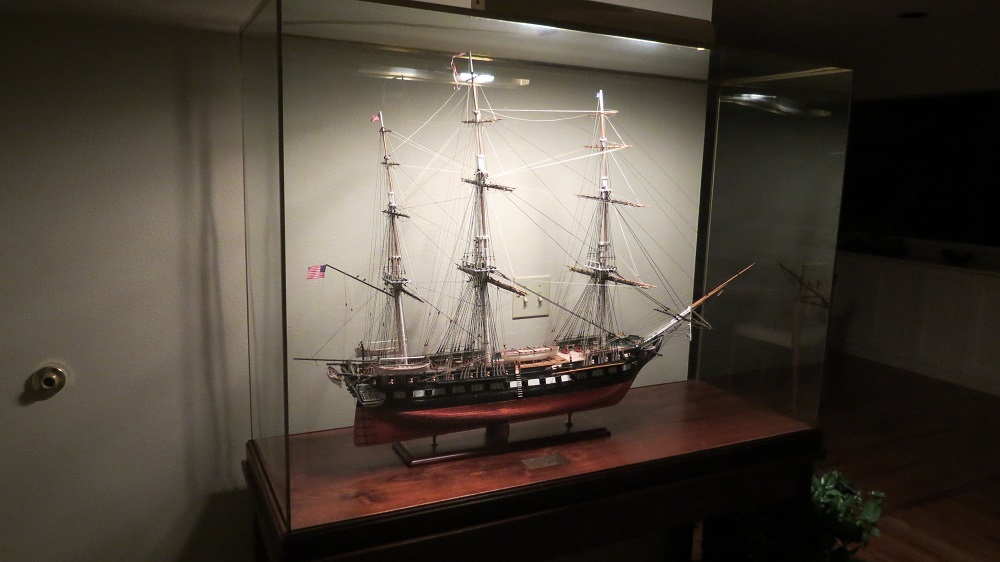
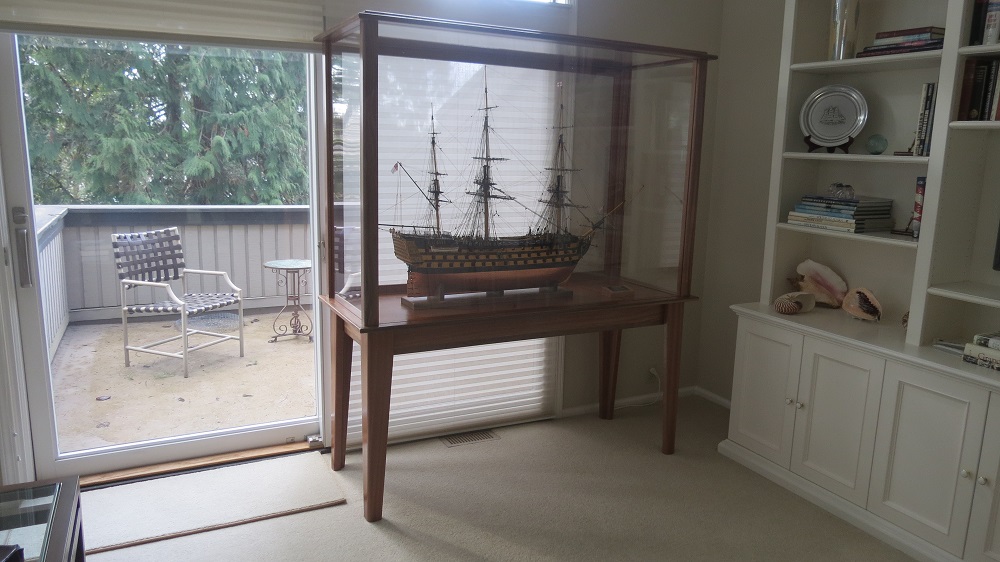
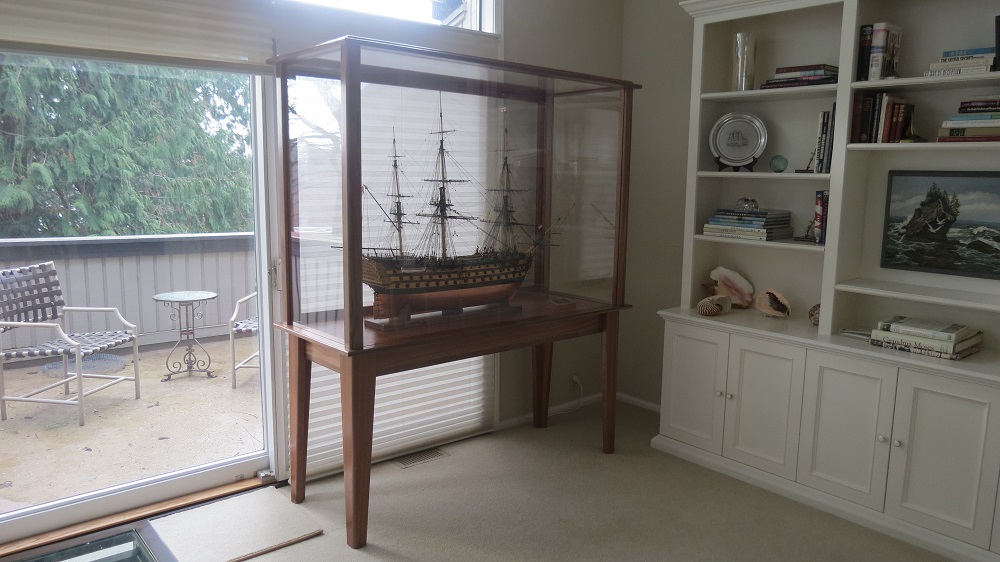
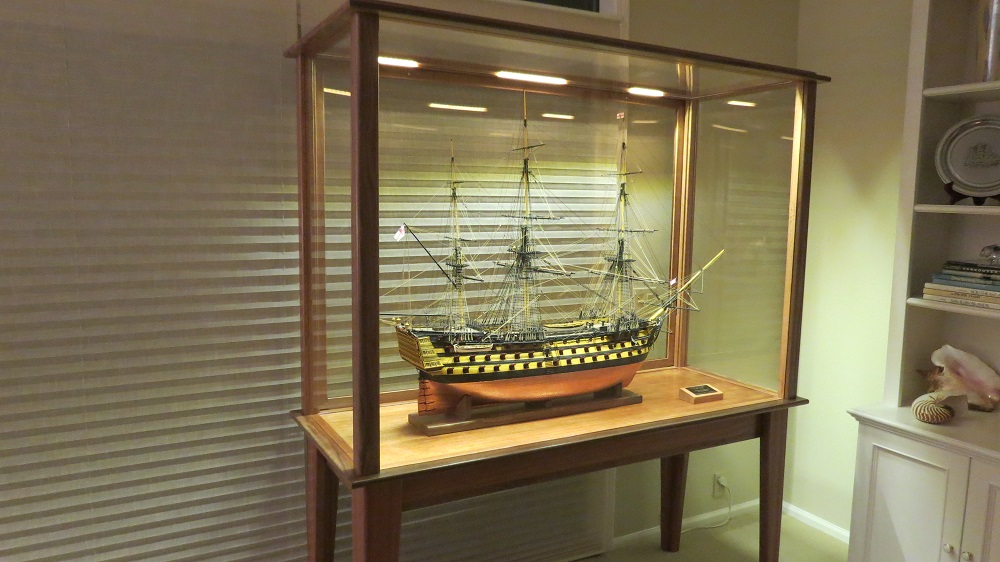
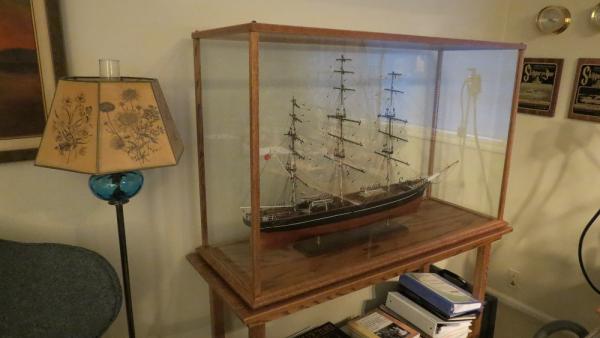
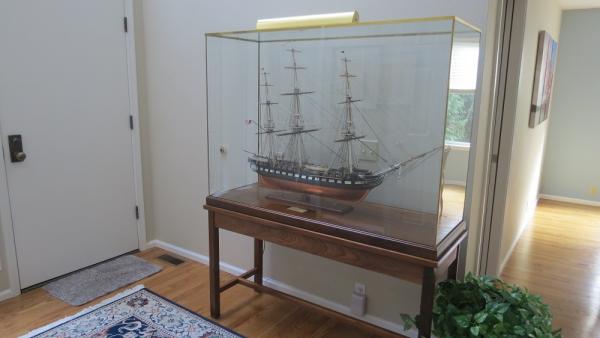
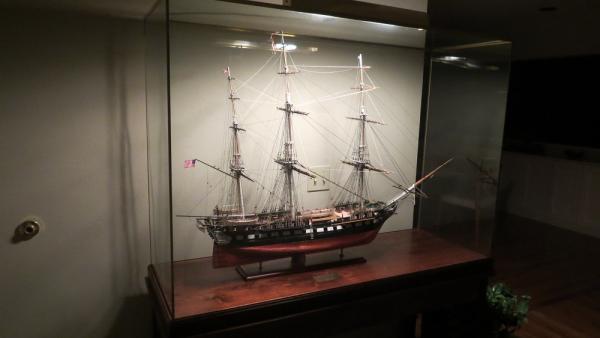
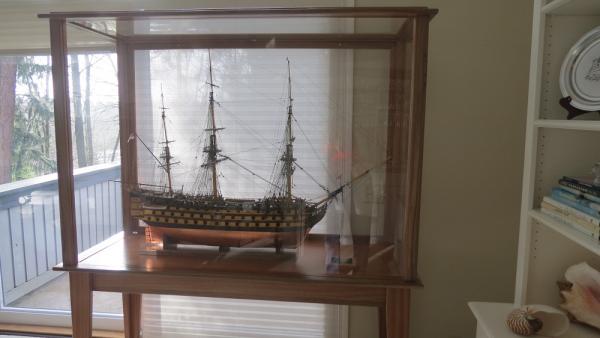
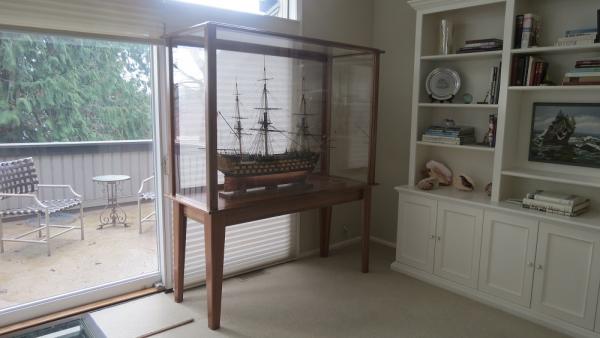
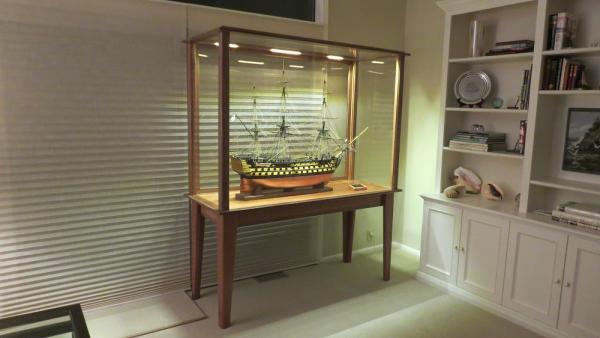
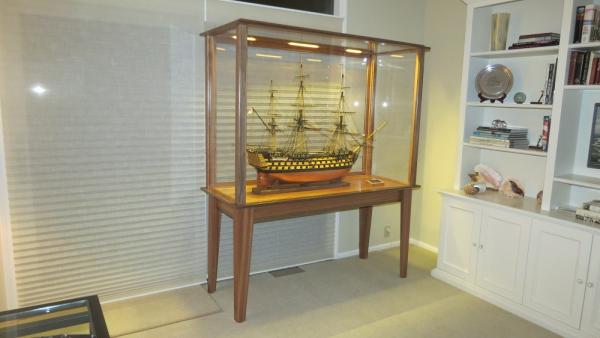
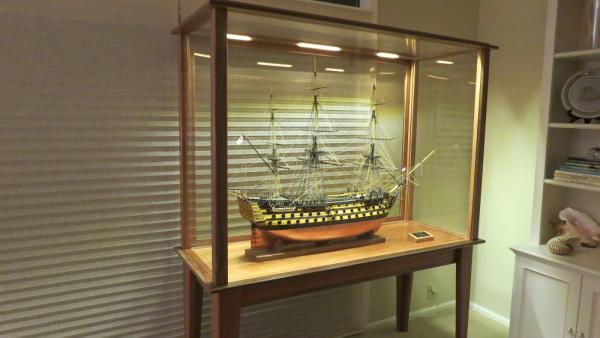
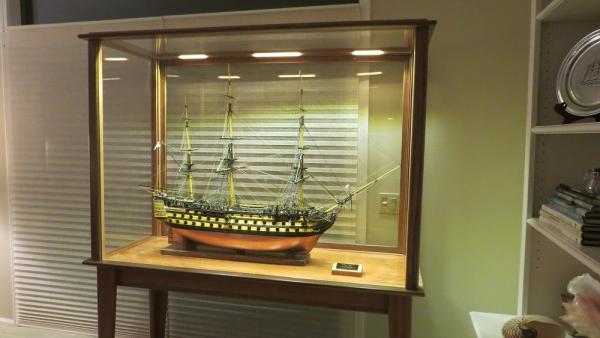
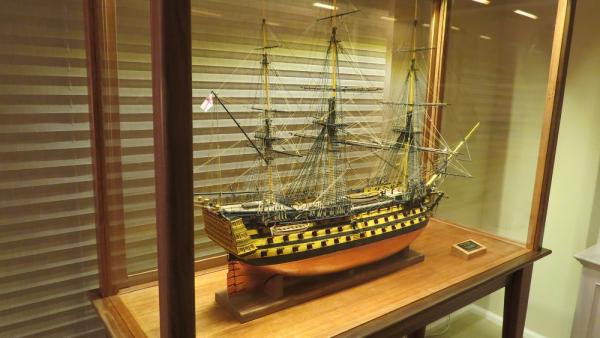
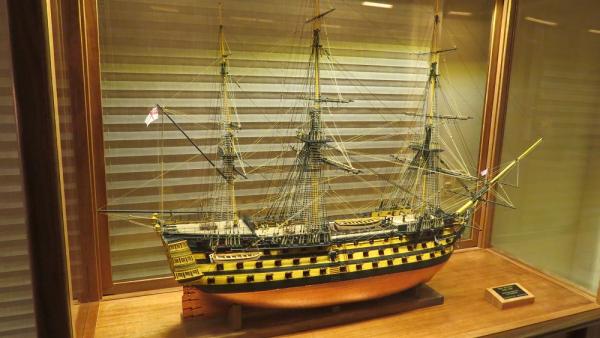
At long last, the "Victory" is settled into her permanent home, which gives back the work space in the den. While the model seemed rather large, the case seems massive. But more on that later. My first case was a proprietary case put together with tempered glass (to avoid shards of glass with active grandkids) on an Oak table I made for support. Tempering glass distorts it slightly so the fit is less than perfect. The "Cutty Sark" found it's home in our office. The second case was put together using brass "L" 3/8" and a black walnut base obtained from American Marine Gallery, Gloucester, MA. This preserves and displays the "USS Constitution" with tempered glass, glued by silicone as in an aquarium, with the glue joints covered by the brass "L". This required cutting down the base and using a router for the glass channel, and again a walnut table to display it. By lifting the top, the front panel is removable. The entry hall got this one. Finally, the "HMS Victory" being even larger required a bigger case. Living in a condo does impose limits on work space and the use of power tools, so I elected to have the case built by Raven Arts in Seabec, Washington. It seems rather massive, but is a work of art with mahogany and black walnut, museum quality acrylic, internal LED lighting and an opening back panel. Being the largest, the "Victory" chose the favored location, the living room. So where, oh where does the next one go? Did I mention that we are thinking of downsizing? Perhaps it is time for miniature models. Cheers, Gil


- 755 replies
-
- 27
-
-
- finished
- caldercraft
- (and 1 more)
-
Per, There are advantages to being old and retired. Gil
- 755 replies
-
- 6
-
-
- finished
- caldercraft
- (and 1 more)
-
Heinz, Thanks for the link. I thoroughly enjoyed reading through your log. Your approach with natural wood is beautiful and much more difficult than painting the model. While my goal was to simulate a miniature of the real ship, painting allows one to cover blemishes. I lack your woodworking skills, and look forward to following your beautiful work. Cheers, Gil
-
Kevin and Heinz, My sincere apologies. We were traveling in July and through August and September cruising up the British Columbia coast in Canada. Finally I'm getting back to catching up on build logs. Kevin, your log brings back memories of challenges, and occasional solutions. What fun. Glad you're back and making great progress on the Victory. Heinz, thank you for your very kind comments. I look forward to following your log, but could not find a log under Heinz746 on MSW. Is there a different reference? Robert, Your Bluenose II is a work of art. A friend of mine was the project manager in the reconstruction of the Bluenose II, which I followed with great interest. While you take on HMS Victory, I may just have fun with the Bluenose, probably the original. Cheers, Gil
- 755 replies
-
- 7
-
-
- finished
- caldercraft
- (and 1 more)
-
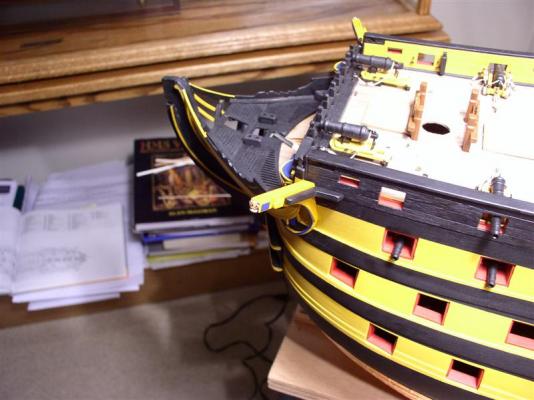
Hi Mike, Sorry to have missed you in Minneapolis. Your message arrived the day after I left Seattle. I thoroughly enjoyed reviewing your log on the Surprise and the great progress you've made, facing the same conundrums I did on the bow works. Earlier, you noted the difficulty painting the blue stripes on the timbers. May I humbly offer a tip (too late), that may come in handy on a later detail. At 82, my hands aren't as steady as they used to be. One solution is to cut out the detail on a very thin strip of styrene, paint it and glue it in place, giving it a clean edge. At normal viewing distance, the eye doesn't distinguish between an elevation or depression. An example on the cathead. Next time I go to Minneapolis, I'll give you an earlier heads up. Cheers, Gil


- 188 replies
-
- 7
-
-
- surprise
- artesania latina
- (and 1 more)
-
Many thanks Mike. As you might surmise, I have been negligent on Model Ship World, redirecting my efforts to the real ship. Repairing a couple areas of dry rot, resurfacing the upper deck, adding non-skid so the old fellow won'y fall overboard, etc. We're planning on spending August and September up the B.C. coast. I'm waiting for the case to be built and will add photos when it's finished. Per, so many thanks for the photos. I realized after the "launching" party, that we hadn't taken any photographs. I was so enamored by Shelley's magnificent performance on his 250 year old violin, and the good company with Champagne, that photos were forgotten. Cheers, Gil
- 755 replies
-
- 9
-
-
- finished
- caldercraft
- (and 1 more)
-
So many friends and so many nice comments. A bit overwhelming. My sincere thanks to each of you. With less to do on the victory, I'm enjoying perusing other's logs. Alan, You've heightened my interest in my CAD program but clearly I've a lot to learn. Fascinating. Jack, the overall dimensions are: LOA 56", width of the Main Yard 19" and height 38". Rather large, but the case will be even larger. Which of course raises the question of where to put it in our condo. " Well honey, we could get rid of the dining room table and............................." Perhaps I shouldn't go there. It will be some time before she is on display in her case, but I'll post the results. Cheers, Gil
- 755 replies
-
- 7
-
-
- finished
- caldercraft
- (and 1 more)
-
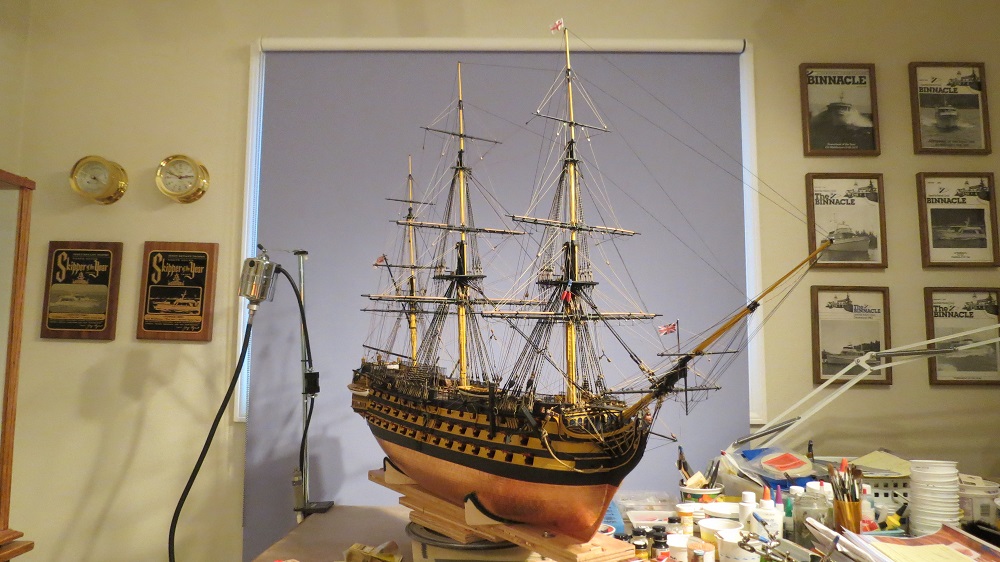
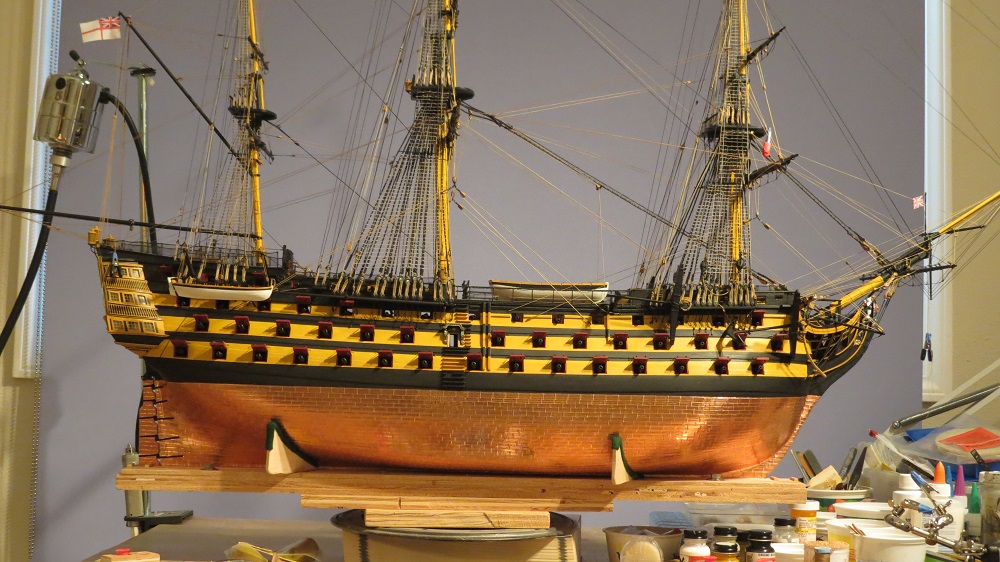
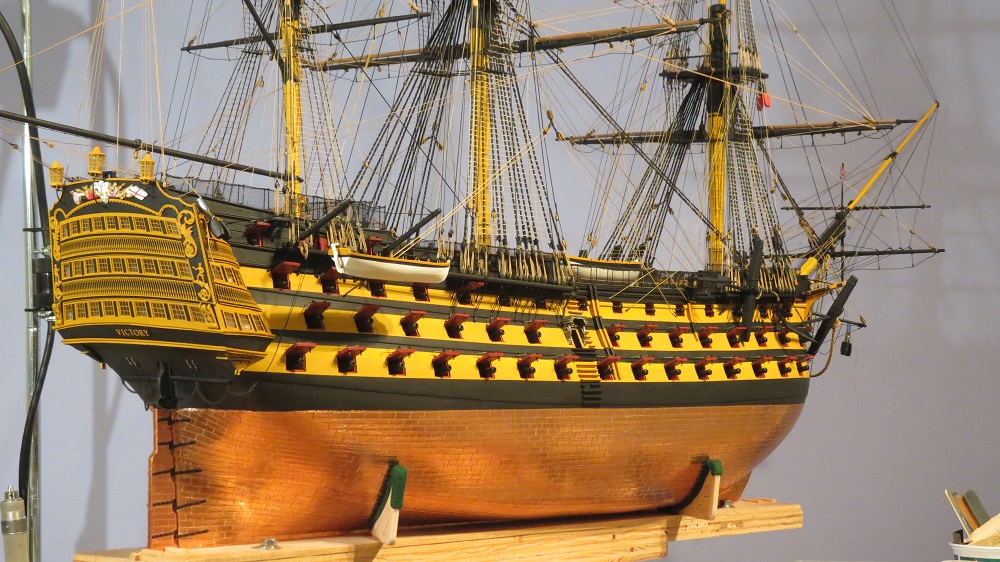
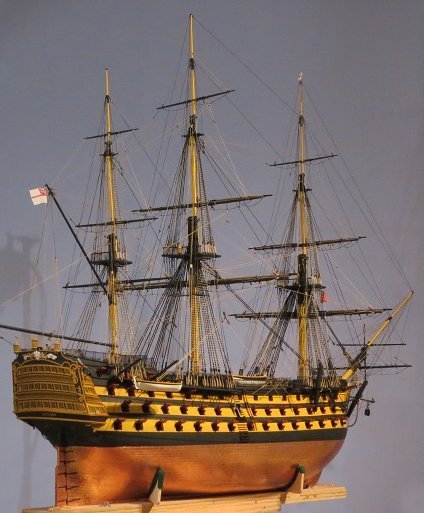
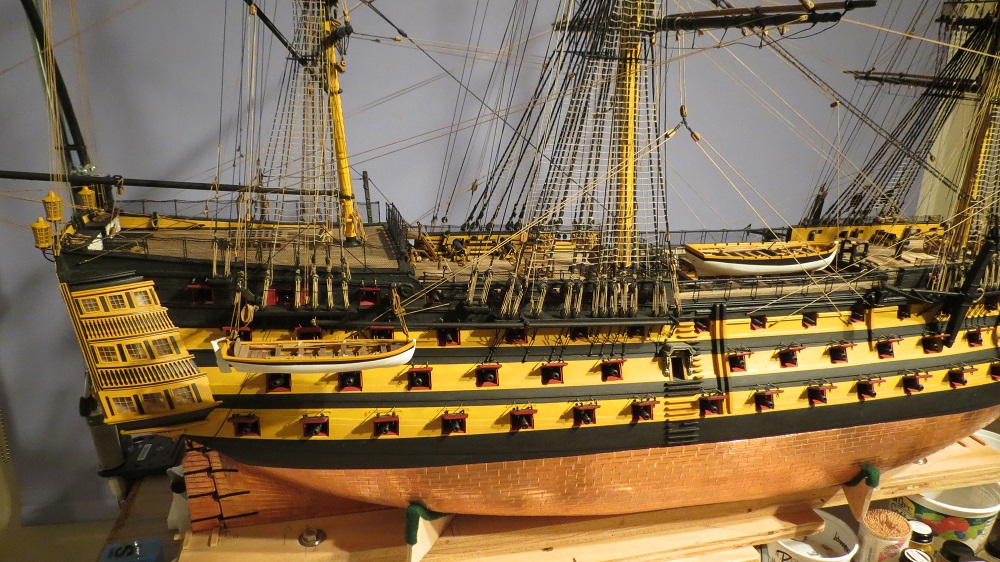
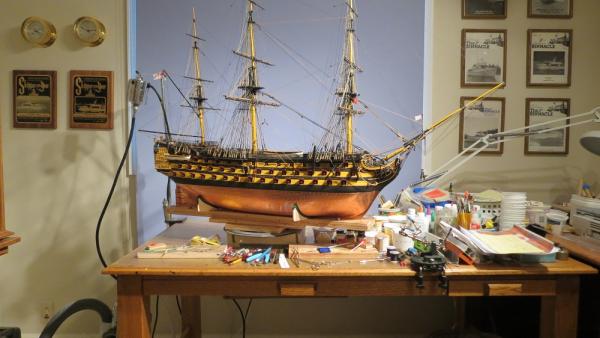
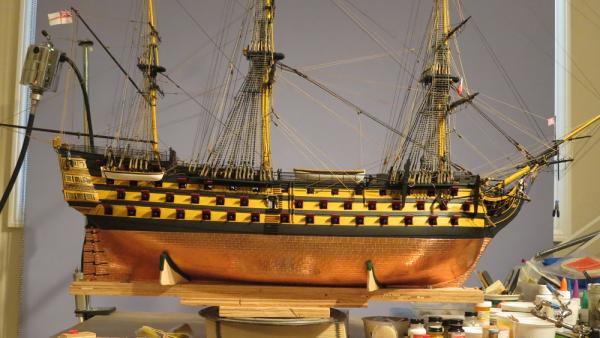
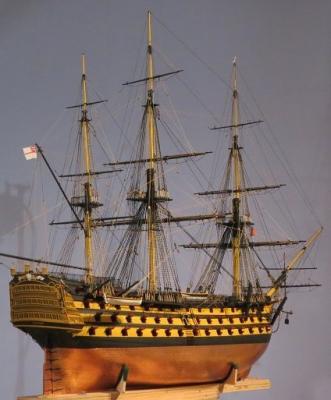
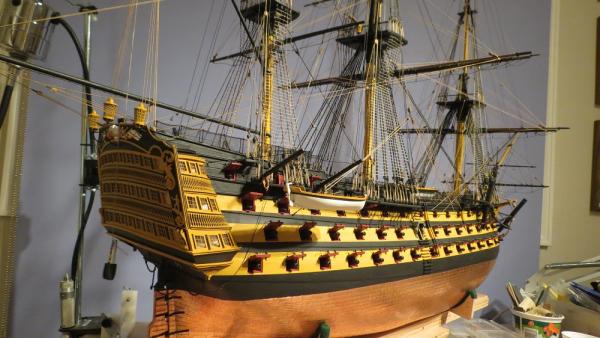
The following are a few photos with an overview of the model. A few clips attached to lines and a flag to be redone. Vern from our Puget Sound Ship Modelers made available a beautiful walnut board with exquisite grain markings for a base. Unfortunately, it is a few inches too short so the search goes on. The ship still on it's lazy Susan.


- 755 replies
-
- 28
-
-
- finished
- caldercraft
- (and 1 more)
-
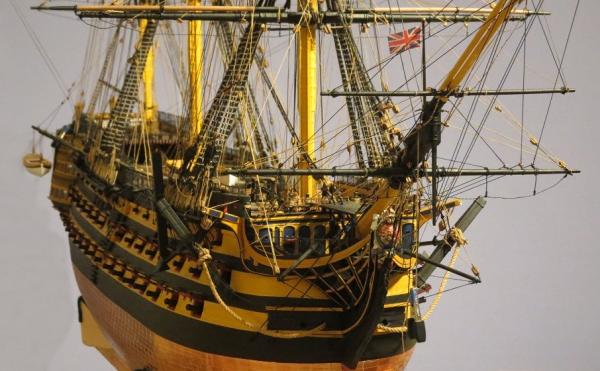
First, a sincere thanks to John (Neptune) and Ian Major (private communication) for pointing out my mistake. I believe the Union Jack is now flying right side up. David (Shipyard Sid), You are extremely kind in your remarks. I keep adding photos which seems like I am squeezing a lot of mileage from the build. However, I've noticed that most of the photos deal with details, with little overview. (To follow). Nick, Many thanks. As for guidance, I've picked up as much or more than I've added on this great website. .Monkeyman, Thank you so much. Don't worry, we all started with little experience. At 81, I've picked up a few techniques and tricks...........Now if I can just remember them. By the way I am enjoying your journey with the Titanic's lifeboat. Dave, The champagne is already chilled. Looking forward to seeing you, but don't forget to bring your Bluenose. Daniel, Haven't dropped it yet, But.............................. Popeye, The news reports on your weather is truly sobering. If I told you Seattle has been sunny with temperatures topping 60 degrees, you'd never believe me. Thanks very much for your kind comments. It's nice to have a friend in every port. A wee dram would be lovely, but I'll call first. Cheers, Gil
- 755 replies
-
- 8
-
-
- finished
- caldercraft
- (and 1 more)
-
Many thanks Jerry. Wouldn't it be fun to host a gathering of the "Victory" models. Daniel, Grant, David, Kevin, Lawrence, Derek, Patrick, Glenn, and Rosemarie to name just a few. However, I think we've all discovered that the only thing more challenging than building a large model is transporting it. I guess we'll have to be satisfied with MSW. Popeye, I've looked back over your many many posts and sincerely thank you for your six years of support. If I ever get to Manchester, NH, you'll certainly get a call. Cheers, Gil
- 755 replies
-
- 4
-
-
- finished
- caldercraft
- (and 1 more)
-
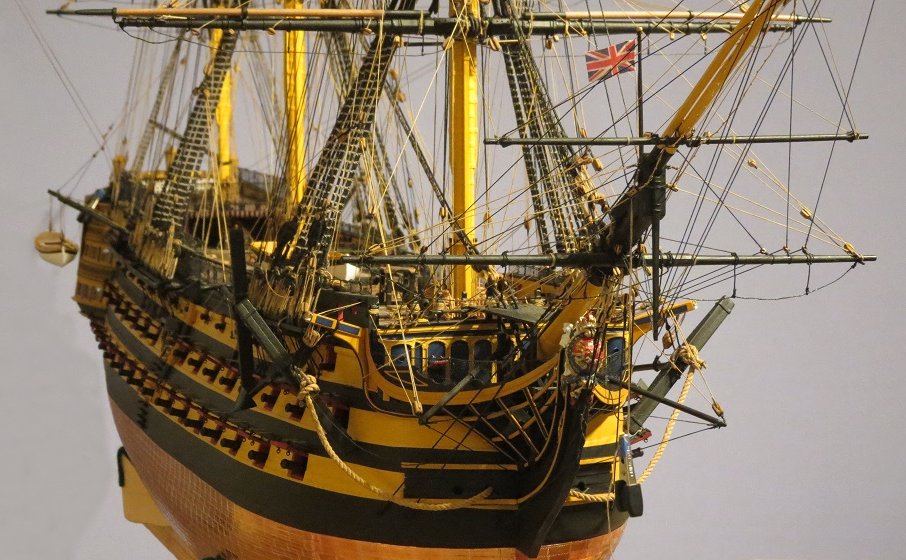
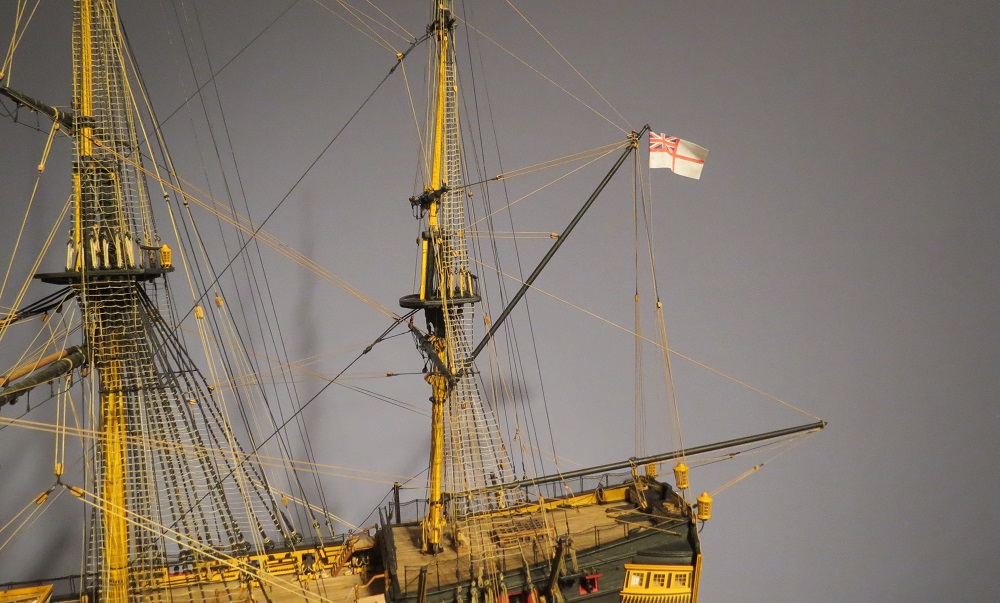
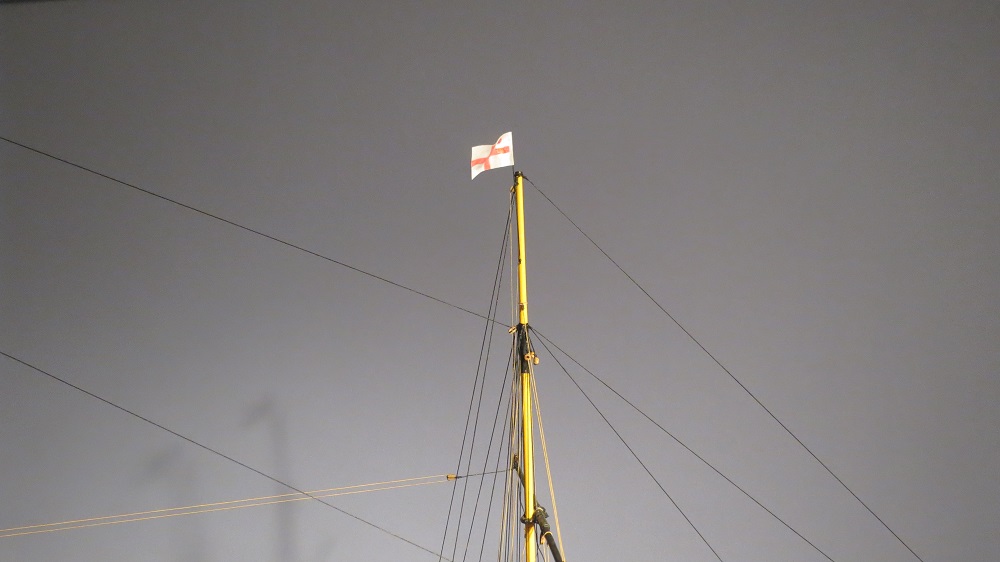
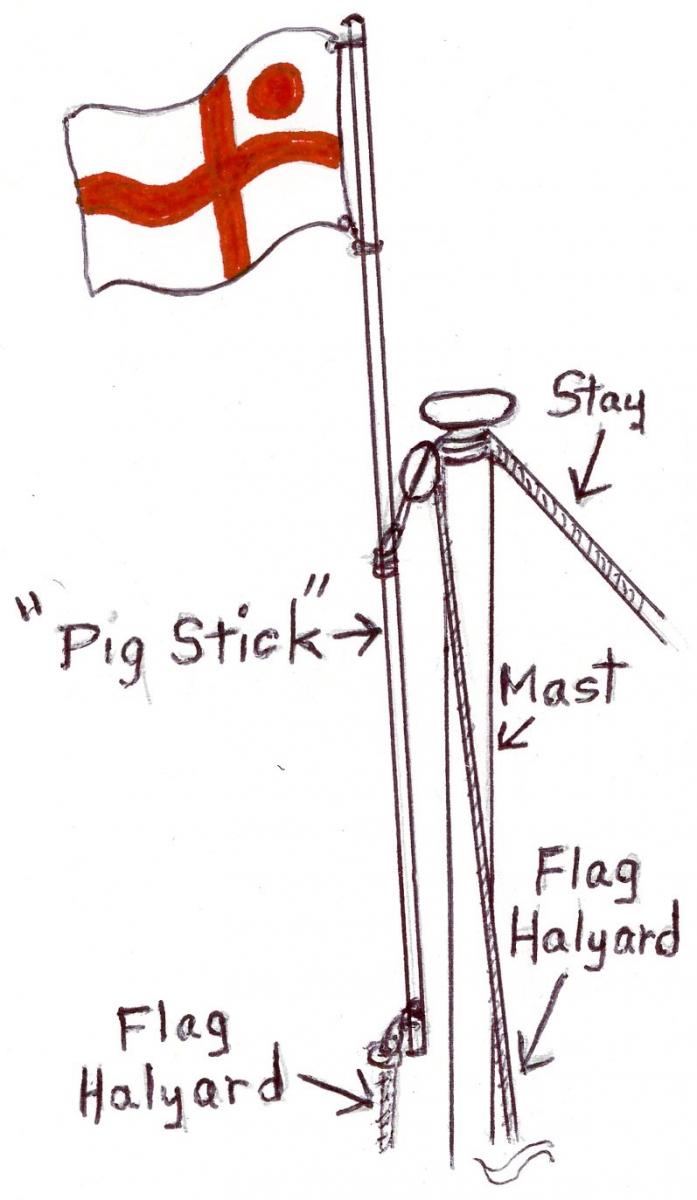
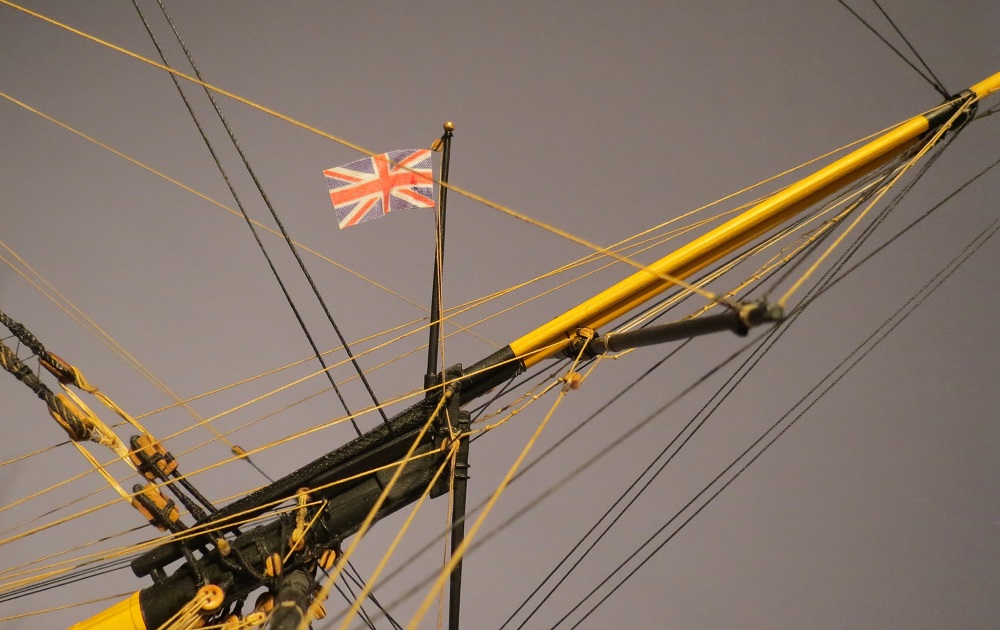
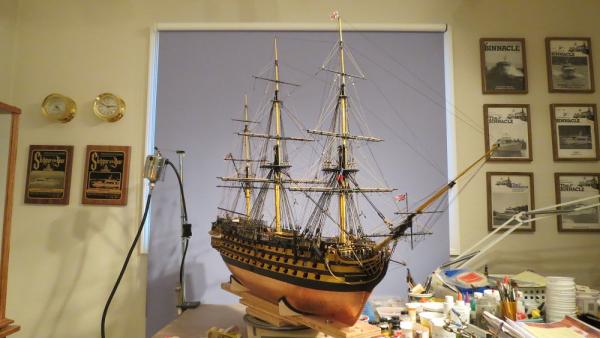
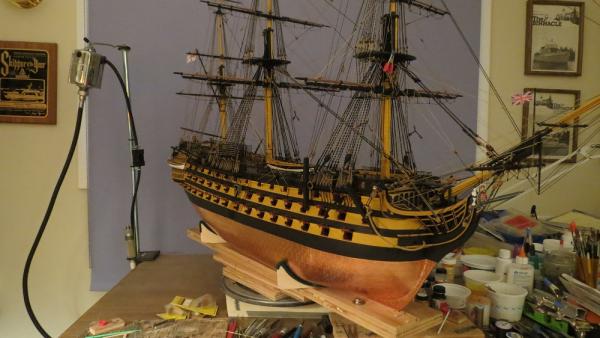
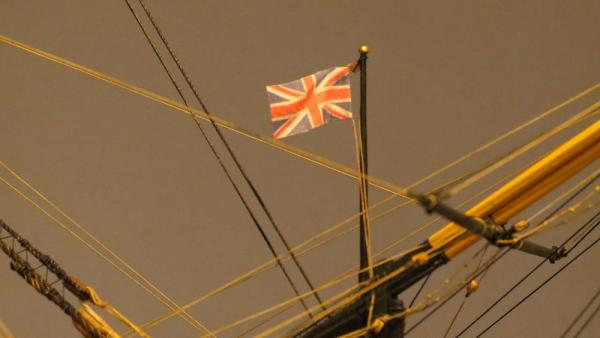
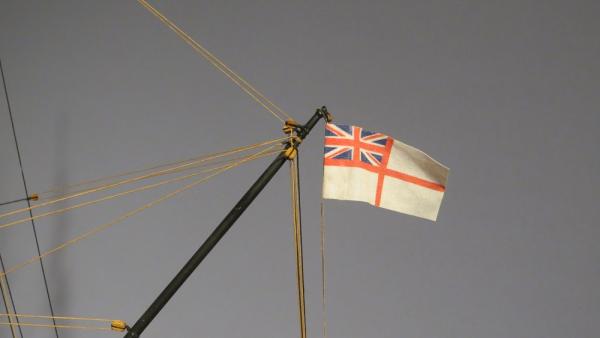
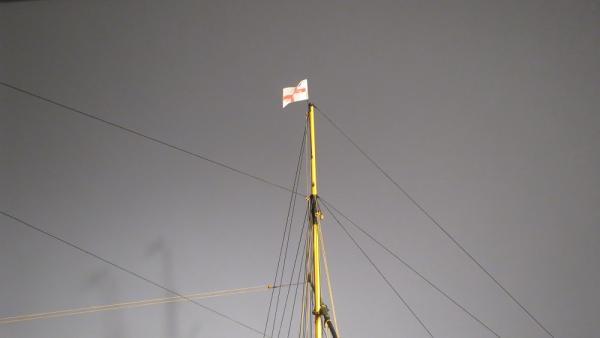
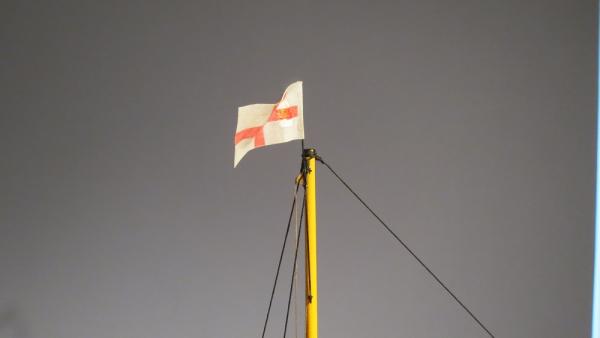
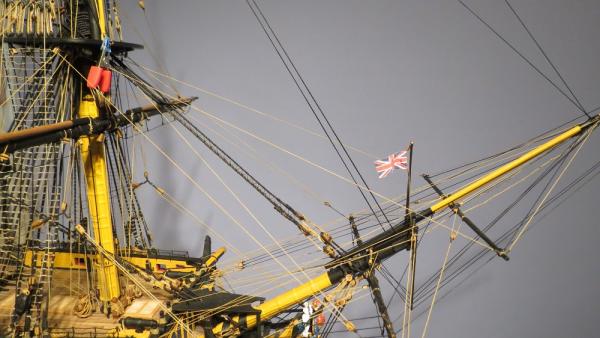
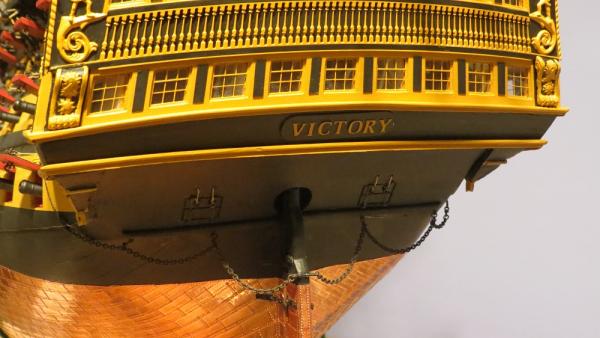
Finally getting around to the flags, attaching the White Ensign, Union Jack and Vice Admiral's flag. The White Ensign on the driver yard flag halyard. Nelson's Vice Admiral flag at the foremast peak. The flag is flown on a "Pig Stick" so that the flag is not fouled by the stay or back stay. A pig stick was and is a common way to fly a flag above the mast head. I'll replace the flag. This one degraded by paint bleed For those unfamiliar with the term pig stick, a simple sketch should clarify it's use. The Union Jack at the jack staff (anchored or moored; at the main mast when underway) Name plate. Now to attaching supports and a base plate. Drilling through the keel and internal reinforcements placed at the beginning of the build. With any luck, I won't drop the ship in the process. Cheers, Gil


- 755 replies
-
- 16
-
-
- finished
- caldercraft
- (and 1 more)
-
Mark, I'm glad to hear you'll have more shop time. However, your 8000+ posts have encouraged a great number of ship modellers. A special thanks from one of them. Jack, If I had only known. I would have checked out your lovely longboat before starting on my own. Thanks Jerry, I'm finally catching up with you. Remco, Your comments are greatly appreciated. A few more small details, clean up, touch up, etc. Cheers, Gil
- 755 replies
-
- 4
-
-
- finished
- caldercraft
- (and 1 more)
-
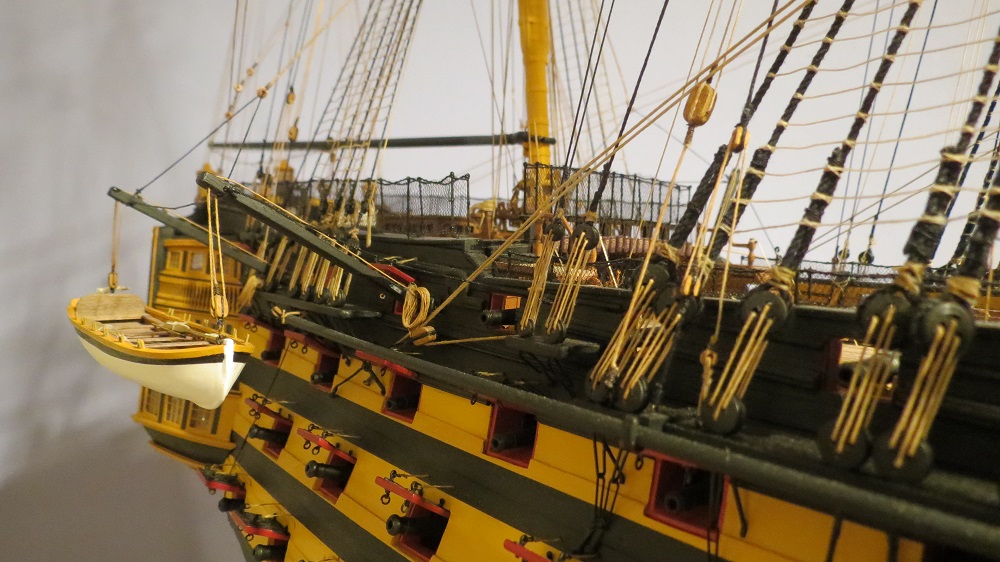
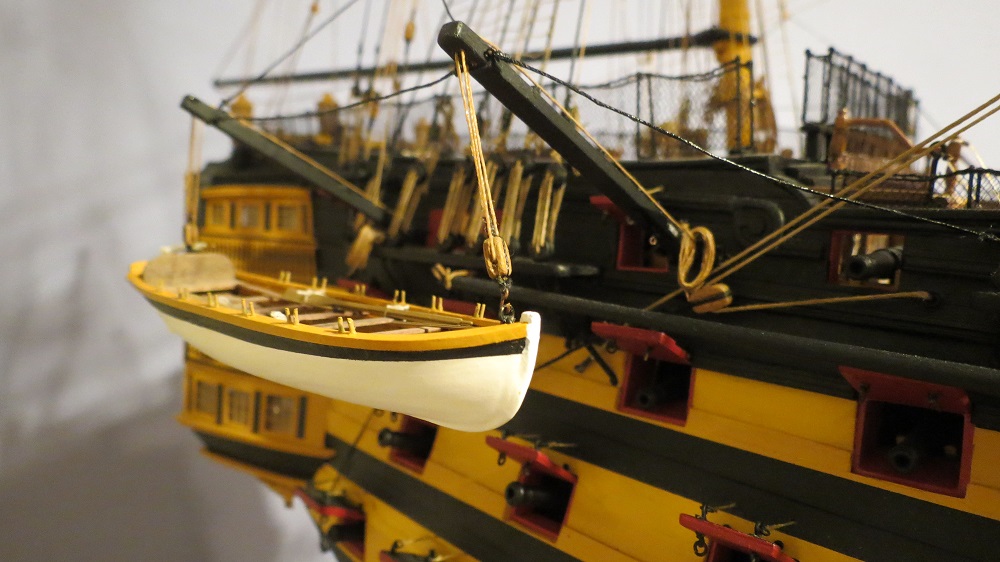
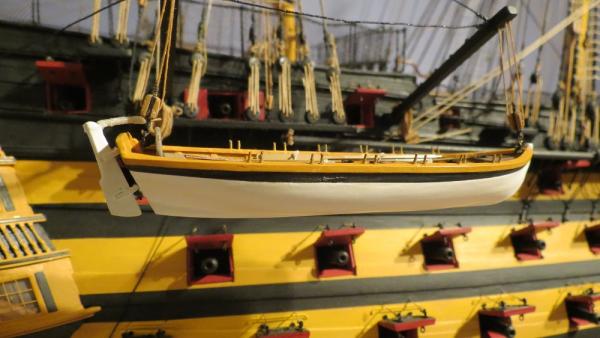
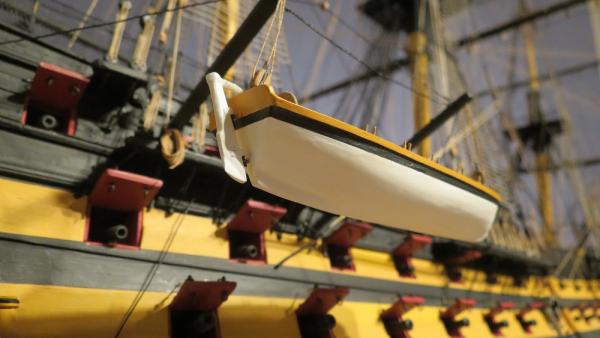
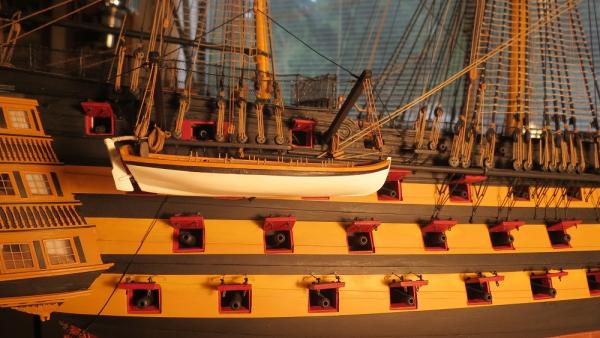
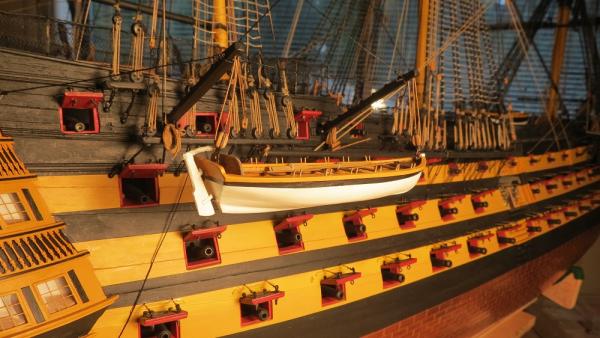
The Cutter, secured to the falls from the davits. Flags, name on transome and a mounting base before fitting a case. Cheers, Gil


- 755 replies
-
- 20
-
-
- finished
- caldercraft
- (and 1 more)
-
Mark, Always a treat to have your comments. But how do you keep track of all of us as an administrator and get any work done on your lovely Licorne? A SPECIAL THANKS TO ALL OUR ADMINISTRATORS FOR MAINTAINING THIS GREAT SITE ! As always Kevin, many thanks. Jack, It's fun to try something different. The next detail could be scrimshaw, if one is adept at engraving the image of a ship on the head of a pin. Perhaps I'll pass. Cheers, Gil
- 755 replies
-
- 3
-
-
- finished
- caldercraft
- (and 1 more)
-
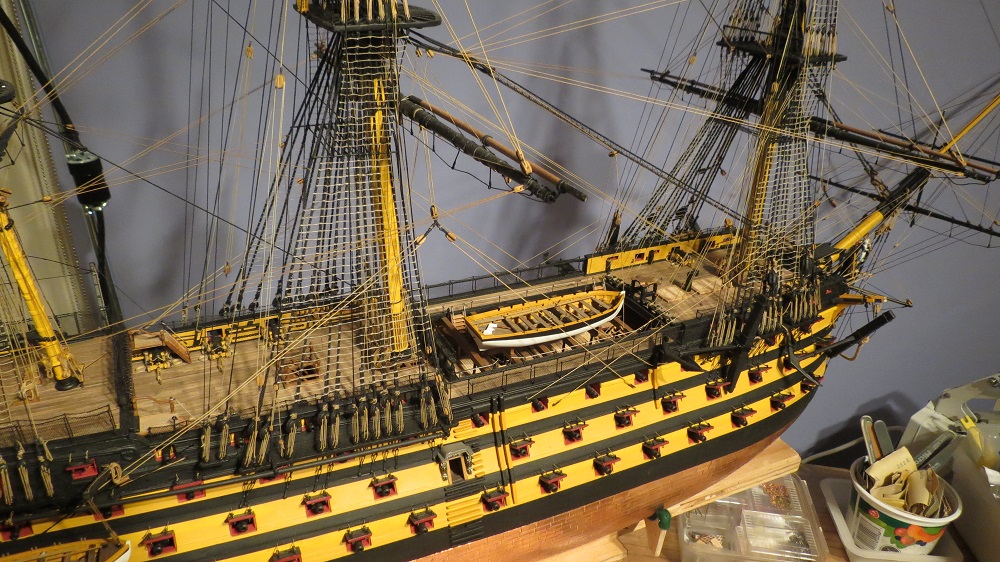
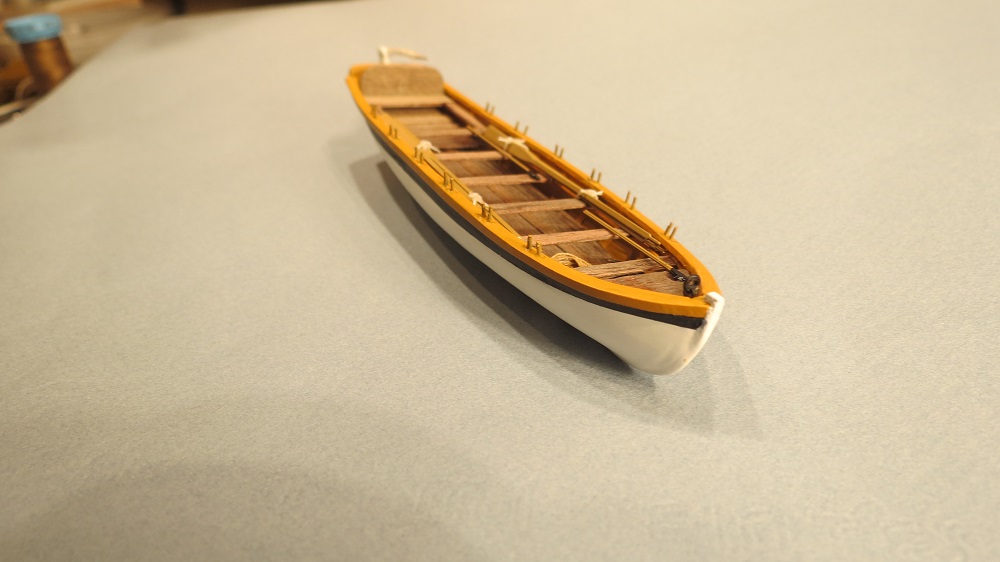
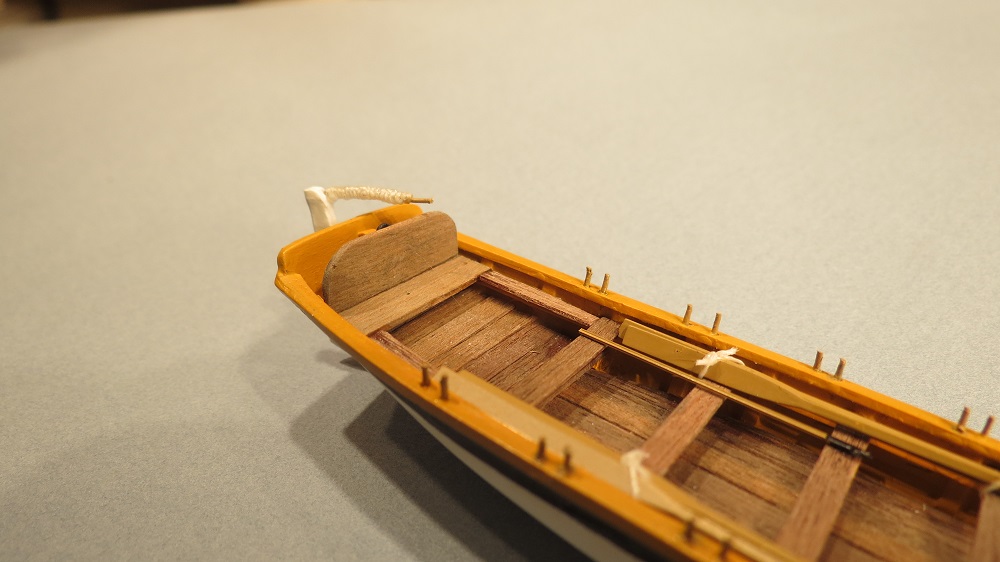
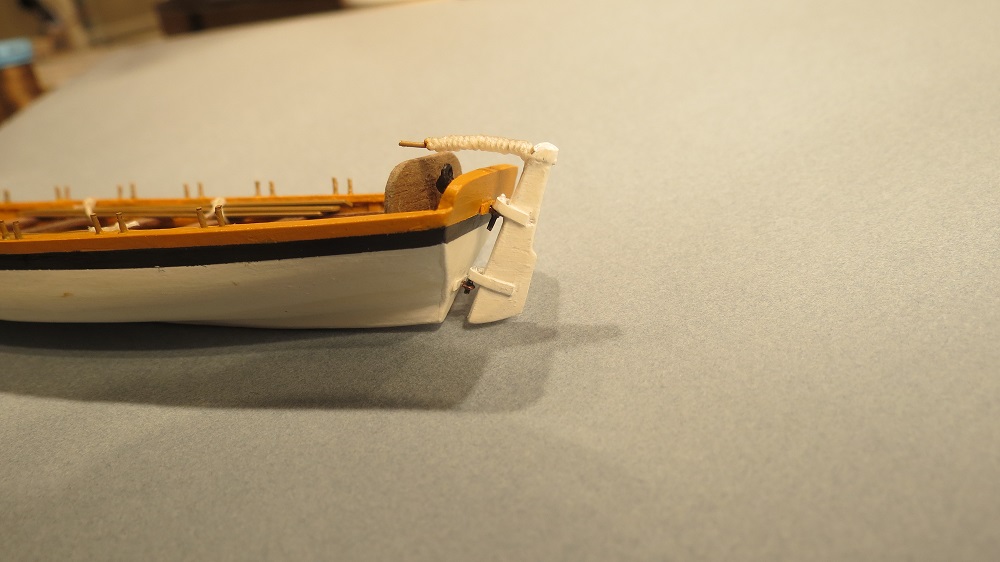
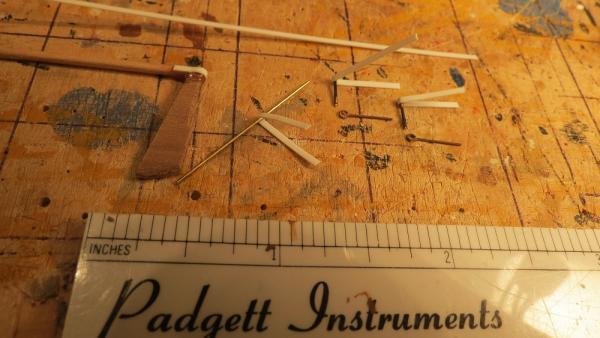
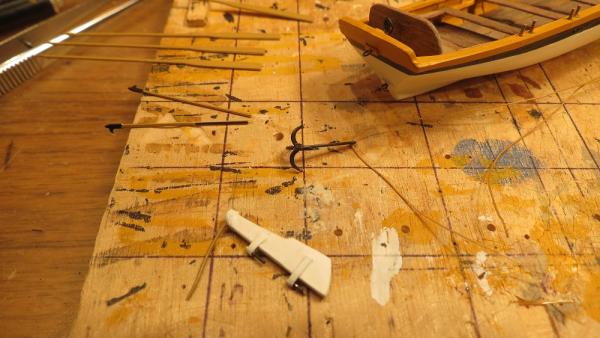
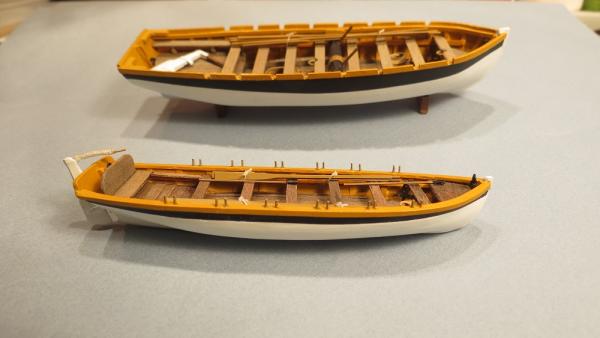
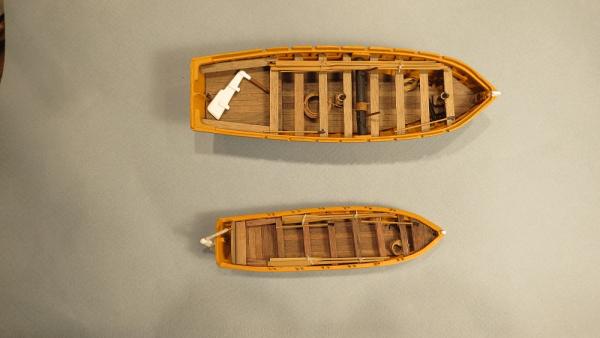
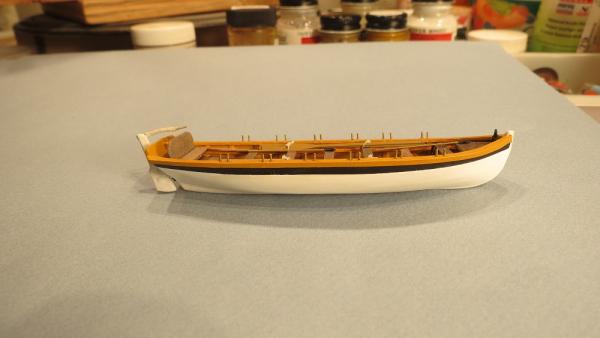
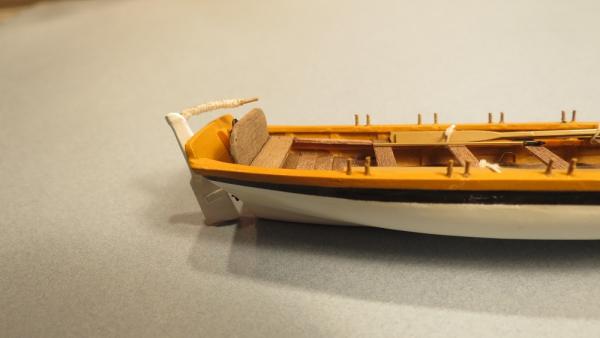
Fashioning pintles and rudder. At small scale, it is easy to lose track of size. The rudder looks fine except that the tiller at 1:72 would be in reality 5" to 6" (12 1/2 to 15 cm.) in diameter, and totally out of scale. The tiller handle was replaced with painted wire, equivalent to approximately 1 1/2" (4 cm.) diameter at full scale. Gudgeons added to the transome and thole pins at the gunwale for rowing. The cutter alongside the launch. Painting scheme for the cutter. Marlinspike seamanship has been practiced for hundreds of years, including knots, hitches, splices and decorative knots. Decorative ropework was typically seen on tiller handles, bell ropes, hand rails and stanchions, etc. although only one "turkshead" was seen in my photos of the "Victory". Here is a crude example to simulate a decorative ropework covering on the tiller. Next: Attaching the cutter to the falls from the davits.


- 755 replies
-
- 15
-
-
- finished
- caldercraft
- (and 1 more)
-
Thanks Popeye, I wasn't sure what I'd end up with, but the further along I got, the better I liked it. Sometimes we just get lucky. Cheers, Gil
- 755 replies
-
- 1
-
-
- finished
- caldercraft
- (and 1 more)