HOLIDAY DONATION DRIVE - SUPPORT MSW - DO YOUR PART TO KEEP THIS GREAT FORUM GOING! (Only 36 donations so far out of 49,000 members - C'mon guys!)
×


rlb
-
Posts
655 -
Joined
-
Last visited
Content Type
Profiles
Forums
Gallery
Events
Everything posted by rlb
-
 Hi all, I'm researching the anchors for my Oneida (1809) model, and it seems to be a transitional period for anchors. Looking at contemporary models, most from this period show angle-arm anchors, but a couple are round-arm. The Hornet (1805) sailor's model, also an American ship, is one of the round-arm ones. Also, around this time the stock seems to have transitioned from wood to iron. In Chapelle's book, in the appendix listing spar dimensions for Argus (1803), it lists the anchors to be with iron stocks. It's probably my choice on both the angled or round arms, and wood or iron stock, but before I decide I wanted to get some opinions or info from anyone who knows more about it. Thanks, Ron
 -
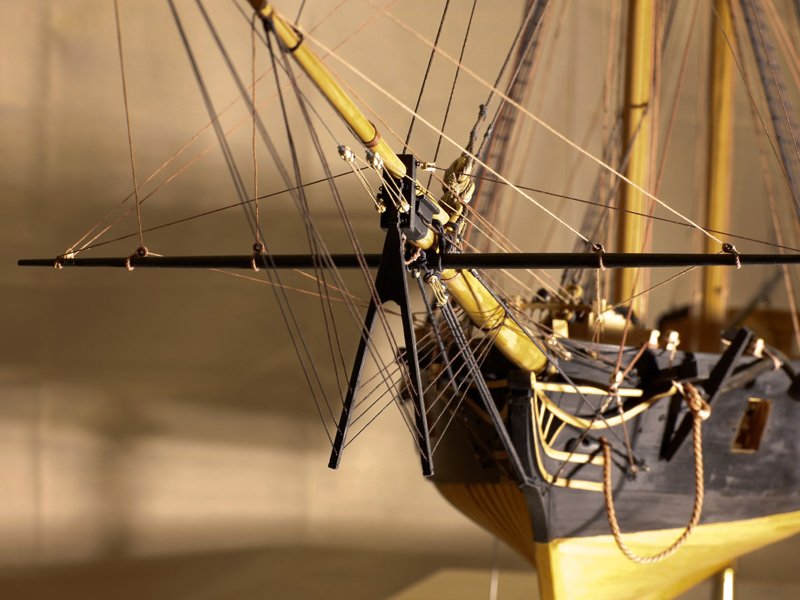
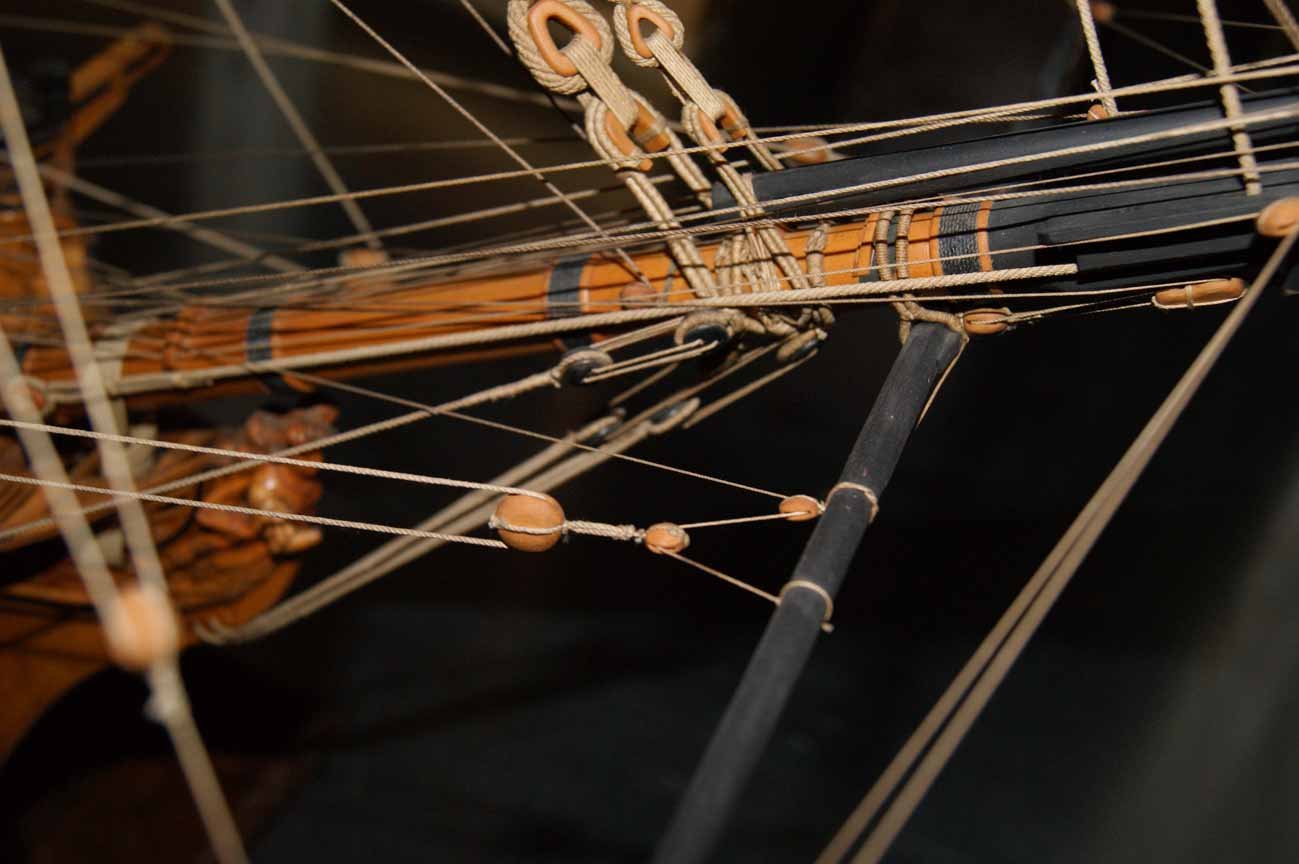
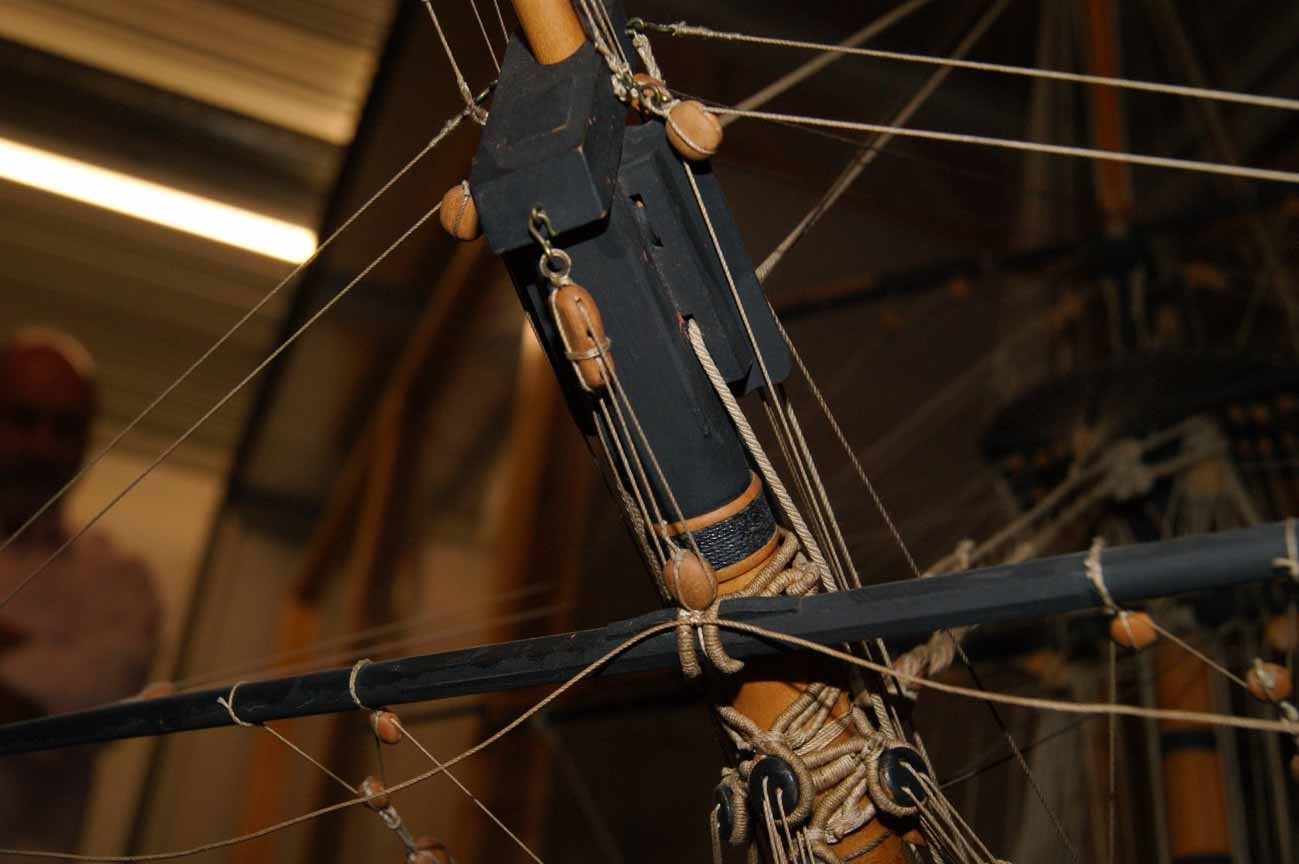
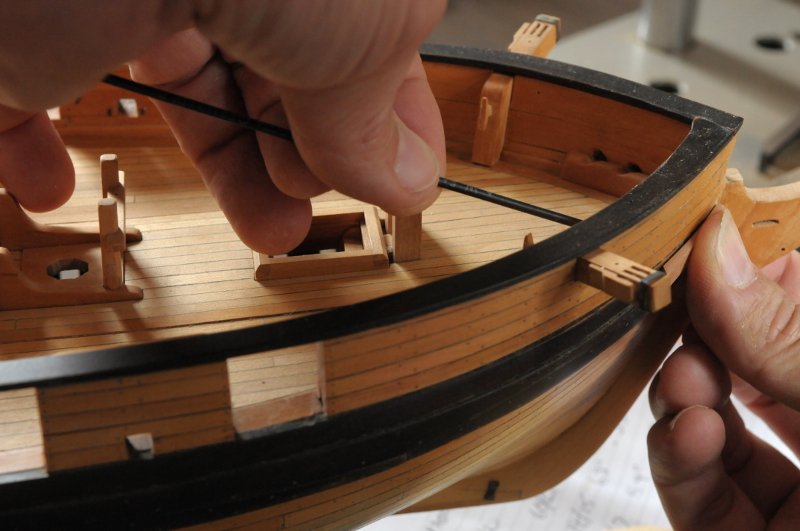
Bees confusion. Last night I was tired and didn't feel like doing much, so I climbed into bed early with a stack of ship modeling books. The first thing I looked at was Lees' drawing of a bowsprit, showing the sheaves in the bees in opposition to what I had modeled! He had the port sheave aft, and the starboard sheave forward. I had followed the FFM, which is the opposite. What to do? I didn't end up sleeping well. In the morning ensued a search of everything I could find. I just wanted to know how I should be modeling this on Oneida. I looked at Lees, Petersson, Underhill, Antscherl FFM, Charles Davis, Chuck Passaro, the MSW galleries of contemporary and member models, Frolich's Cygne and Le Cyclope models (which can be seen online), and and Glenn Greico's model of the Jefferson (also online at the TAMU website). All seemed to show the topmast stay on the starboard side, and the topmast preventer stay on the port side. Okay. Frolich's models showed the stays both in the forward holes (maybe a French thing), but the contemporary model of Thunderer/Hercules in the MSW gallery, and Grieco's Jefferson, a brig built shortly after and in the same general area as Oneida, show the topmast stay starboard forward, and the topmast preventer stay port aft. Hercules/Thunderer-- Jefferson-- So I decided that was the way to go. I removed the bee blocks and sheaves-- And reglued them. Also, this time I centered the sheaves (vertically) in the bee blocks, not offset as I did before-- Hopefully I will sleep better tonight. Ron
-
Thanks Ed! Good question. I have a spar and sail plan for Oneida from Christian Bergh (via Chapelle), which gives me the mast and spar lengths, but not much beyond that. From there I am using many sources to piece together the info. Lees' Masting and Rigging to give me the tapering and other shaping info, (and when I get to it, multiple other rigging details), David Antscherl's FFM for various mast and spar details, Chuck Passaro's Syren drawings and instructions, as that is also a brig, for the rigging details. I expect to use his Syren drawings (especially the belaying plan) as a main guide when I get to the rigging. And, I peruse the MSW gallery of contemporary models, and member completed models, to learn whatever I can. Ron
-
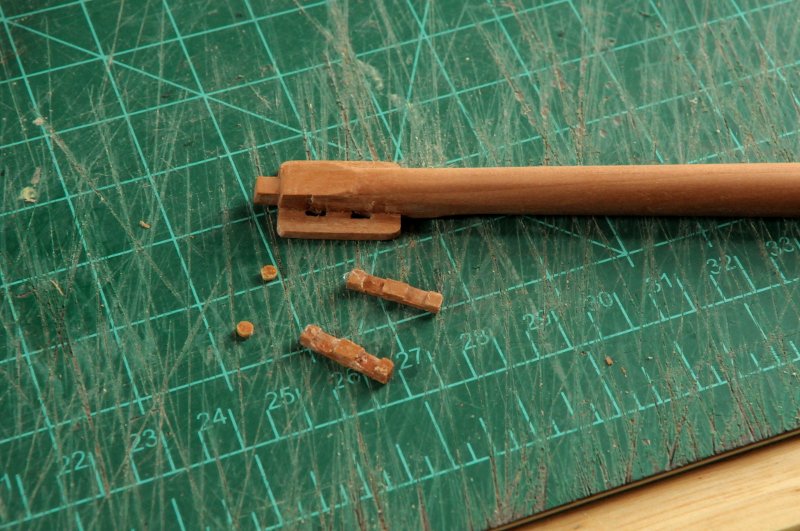
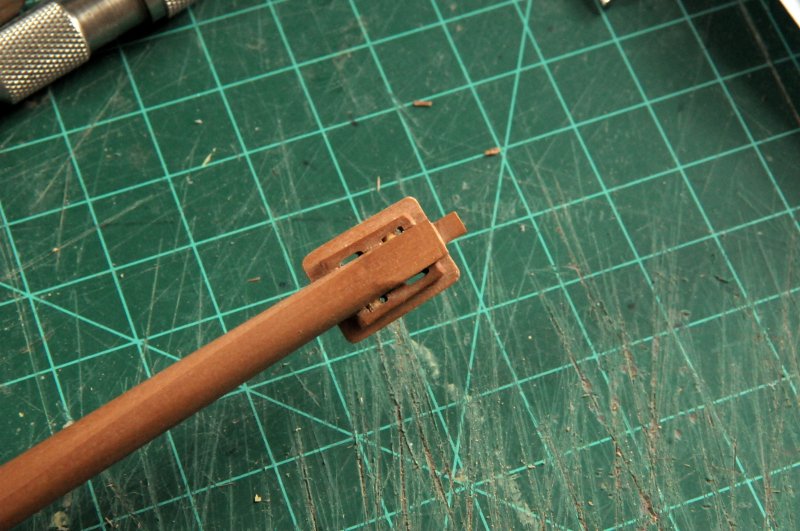
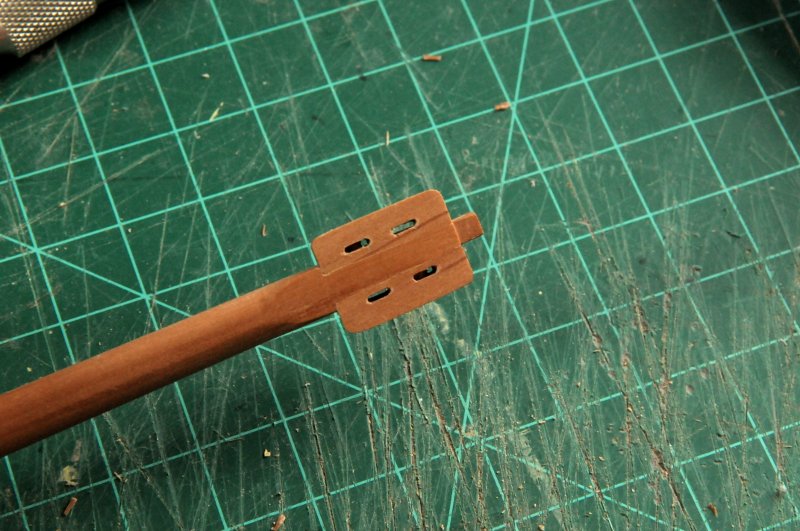
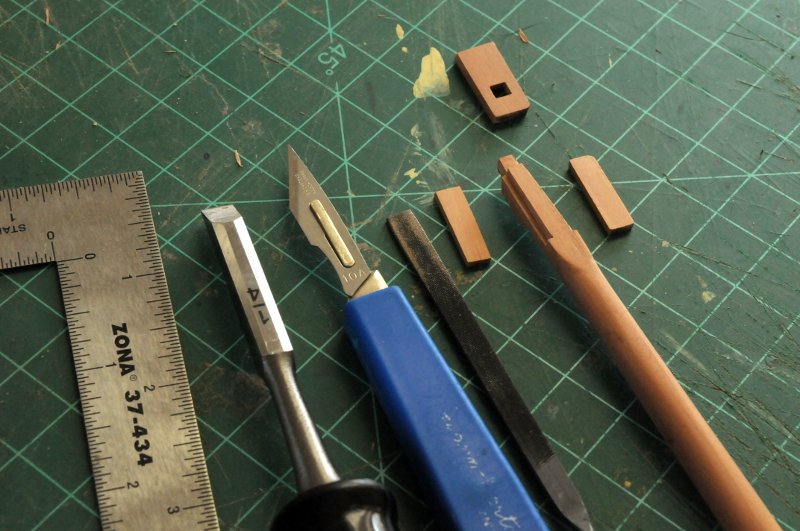
Thanks, Dowmer. Bees update: I cut notches into the bowsprit to receive the bees, which exist at this point as the rectangles laying on both sides of the bowsprit-- Next the bees were glued on. I purposefully made them just a hair too thick, so they sat just proud above the notches. Then, when sanded down level with the bowsprit, it made my joinery talent look better than it really is! The block slots were marked, the ends drilled and then cut out as best I could. I don't have any files that can get inside a slot that narrow, so I used the chisel and knife from both sides. The photo makes them look rougher than they do to the naked eye. There are also some distracting grain streaks in the wood of the bees, but this part of the bowsprit will be stained black, so that's okay-- Next was making the bee blocks. (Just love some of this terminology.) I cut the slots, and glued simulated sheaves in the proper spots, port forward, starboard aft (We're looking from underneath here!). I was careful to angle the front of the bee blocks where they meet the angled bowsprit cap-- Whoops. When I glued one, and test fit the bowsprit cap, I noticed the block was wider than the cap, which looked odd. Sure enough, after re-checking a photo in David Antscherl's FFM book IV (which I recently acquired), the bee blocks clearly don't extend to the cap. The glue hadn't set yet, so I was able to pry the block off, and after altering both of them to be more correct, glued them in place on the bowsprit-- Here is the bowsprit, fit on the ship-- Finishing the cap is next, then the bowsprit seat/bitts (where the weight of the pin vice is holding down the end of the bowsprit at an approximately correct angle), and then a few more bowsprit details before it gets permanently attached. Ron
-
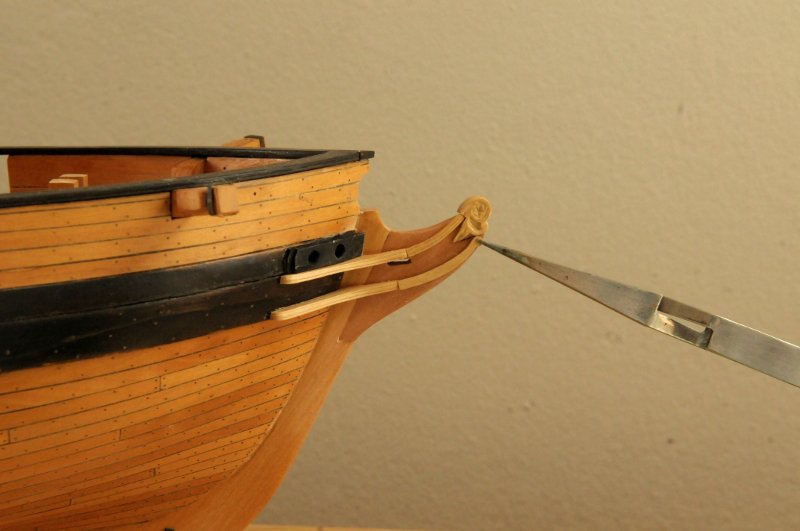
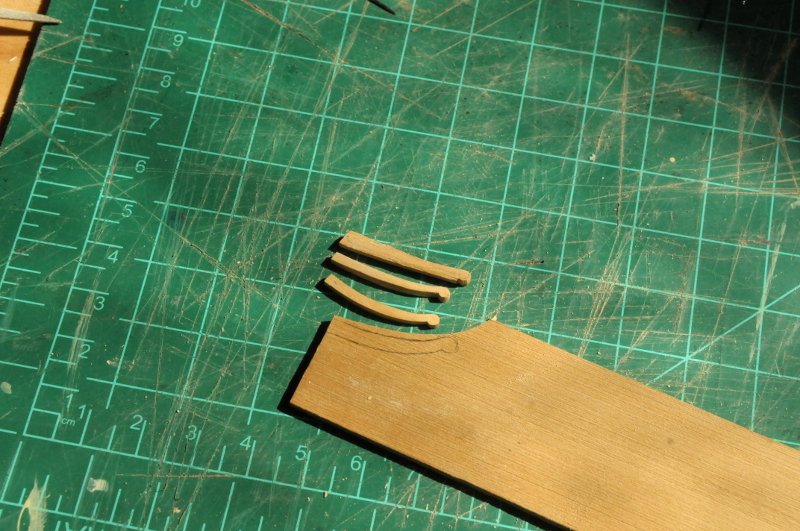
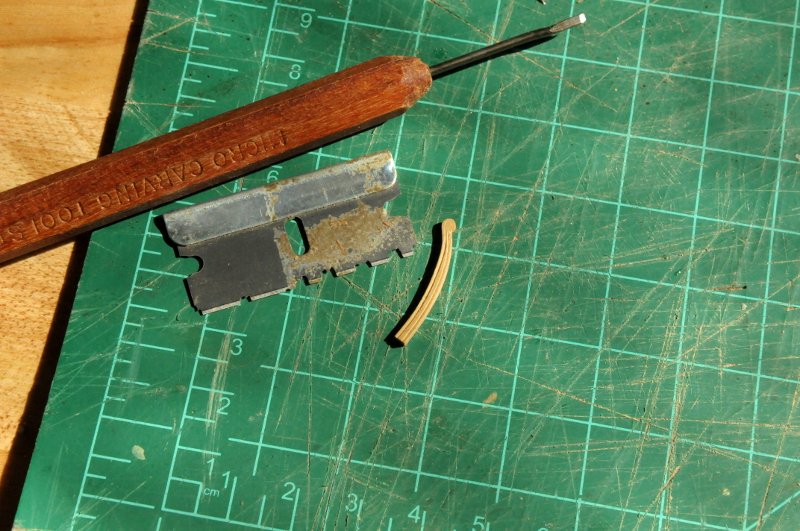
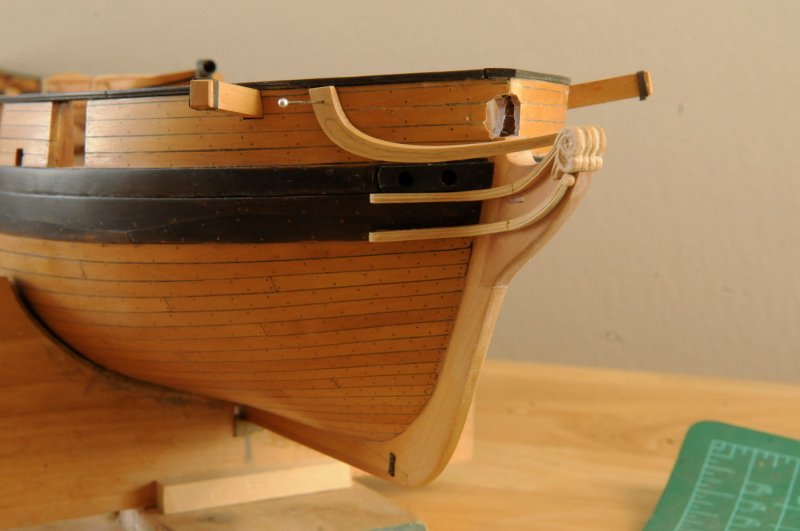
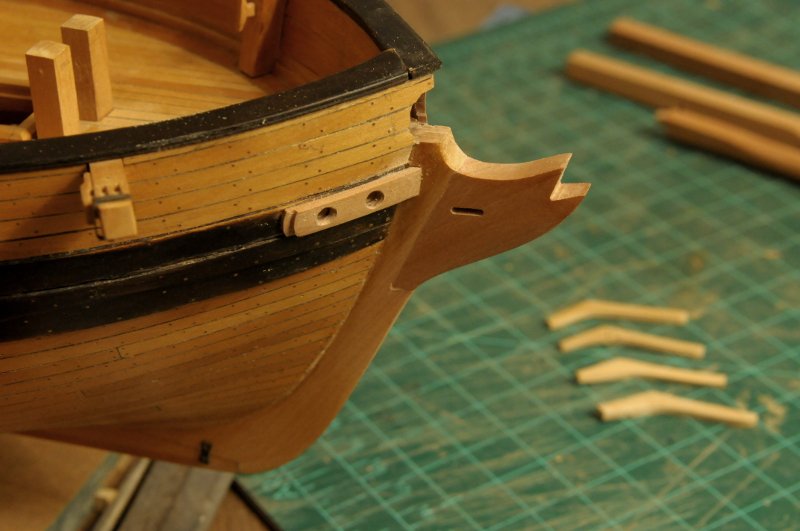
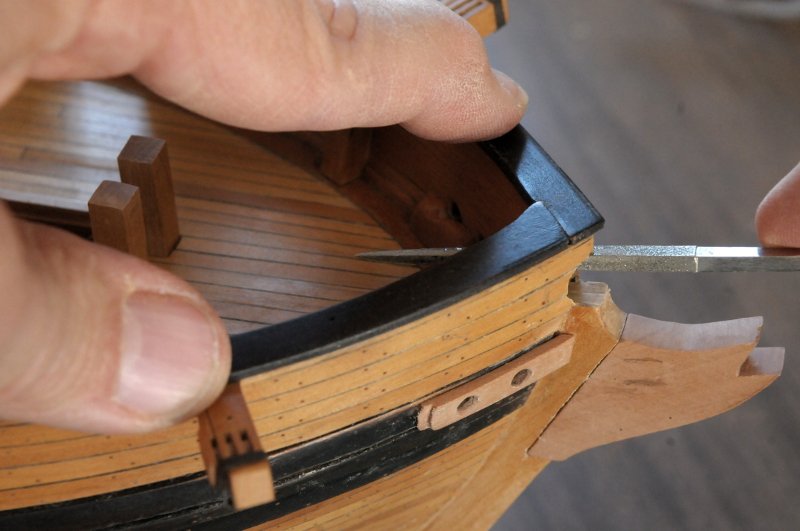
Work on the starboard lower cheek bracket: After my first attempt at the bracket, which I could tell (before getting very far) was not curved enough, I made a rough card template-- Using files, and a sanding block, roughed out the shape-- Test fitting on the model. I am not happy with the curve. It is still too flat, and not a good transition from the lower cheek-- Trying again, this one is better-- The three attempts, and using the third one, traced it for the port side bracket (or a fourth starboard try if needed!)-- Scraped the molding profile into the bracket-- And glued it in place-- I will move on to the port side cheek brackets, and then I need to finish work on the bowsprit and it's step. The bowsprit will need to be installed with it's gammoning, before finishing the headrail work. Ron
-
Hi ben, I thoroughly enjoyed my visit, seeing your workshop, your finished and current builds, and talking ship modeling, wood, books and tools . It was inspiring, and I'm looking forward to doing it again sometime! And you pushed me over the edge--a Byrnes disc sander is on the way to my home! Ron
-
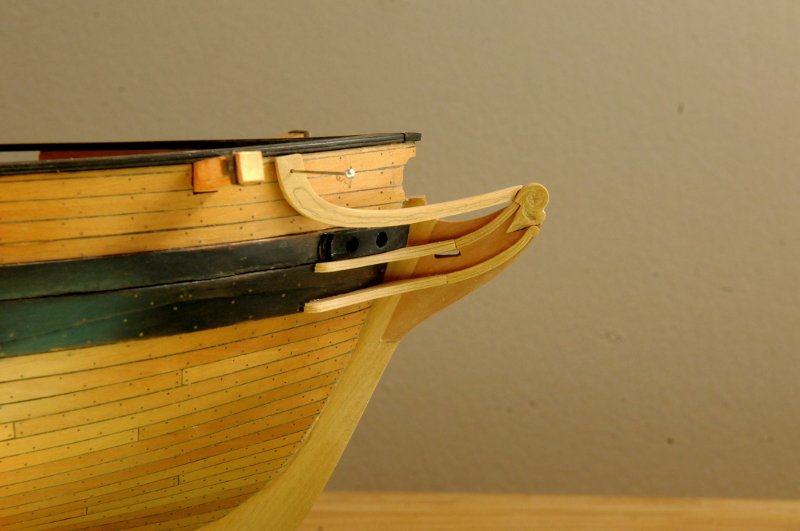
A small update. Work continues on the cheeks and headrail. The primary cheek pieces are glued. The headrail is dry-fit, still some fine tuning to do. And the upper cheek piece as it connects to the scroll is roughed out, and dry-fit. It also needs some further shaping work-- Ron
-
Thanks so much, Martin. Yes, the stars are a challenge! Back on page 2, post #51 about halfway down that long page, I go into more detail about the ebonizing. I'm very happy with the color it makes; a very rich neutral black, not too warm or cold. And since it's not paint, the wood still looks like wood. Thanks Joe, glad you found my log. I grew up in Spencerport, and my parents still live there, so I am back a few times a year. I'd love to drop in on one of your meetings if the timing works out! Ron
-
Thanks Dan. And thanks for the photo! I like your simple volute, and you're most likely right that there wasn't the time or manpower for anything 'extra' under the conditions the ship was built. Ron
-
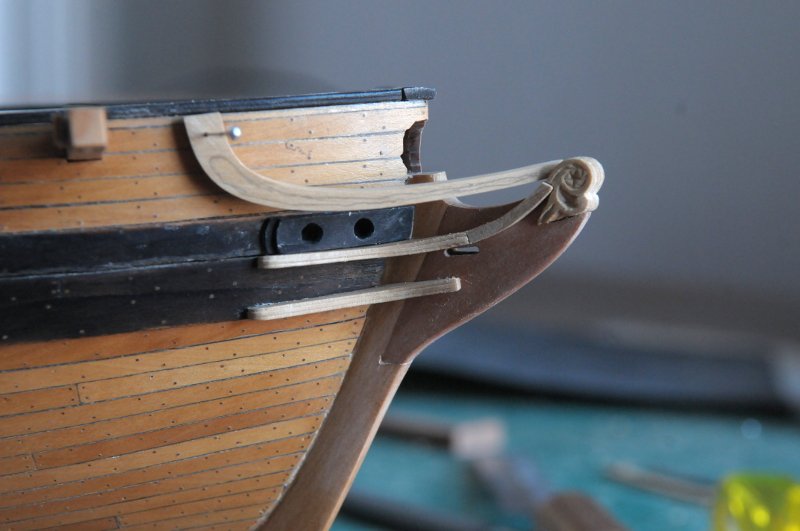
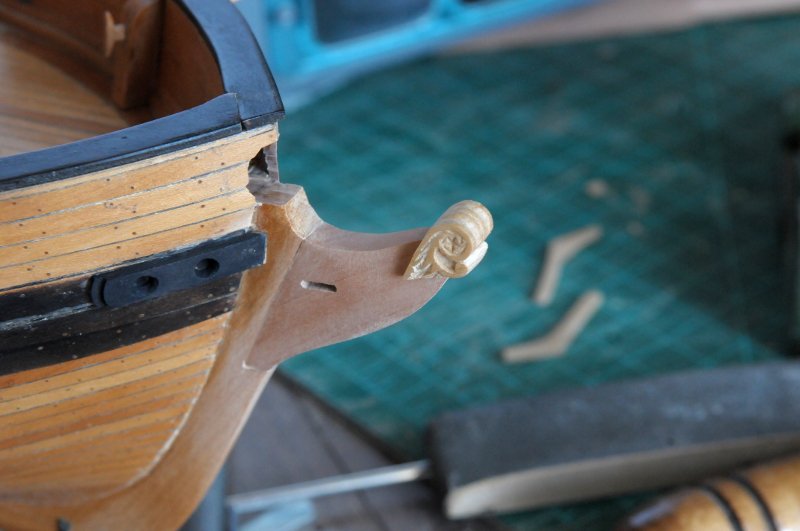
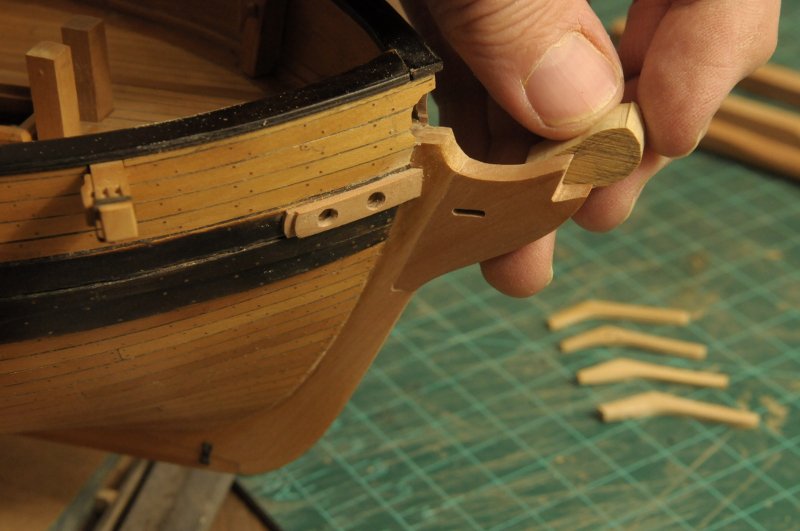
Thanks Dowmer. While I was looking at photos of headrails, I saw one or two versions of a simple scroll figurehead, one of which was kind of similar to Chapelle's. Oh well, I wanted the star! With the sun making an appearance through the window, here's the current billethead. It fits on the stem now just about the way it needs to-- Though it looks like the bowsprit is resting on the billethead, there is a very slight gap, as there should be, between them. Continuing with the starboard headrail now, after taking off material to thin it down, it's held up to the bow to evaluate its shape. (The cheeks have also been glued in place to help in judging the curve of the headrail)-- It's still needs much thinning down, but there is a worse problem. It drops too low over the hawse holes (hidden in shadow). I could possibly cut off some of the upper end where I'm holding it with the tweezers, but then I don't think the curve is going to look right at the aft end. I cut another piece, with a slightly flatter curve, worked on it for a while and here it is-- This also still needs much thinning down, but I'm satisfied with the basic shape. That being the case, I marked the port side headrail on a piece of my diminishing stock of Castello Boxwood-- Ron
-
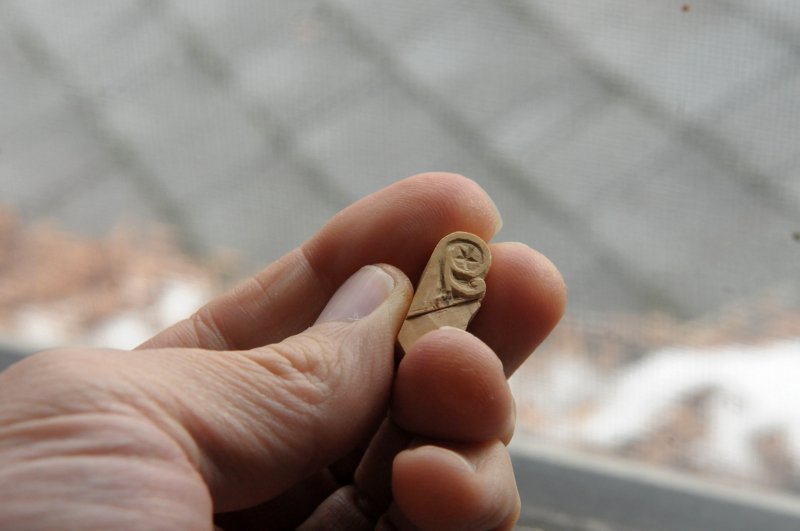
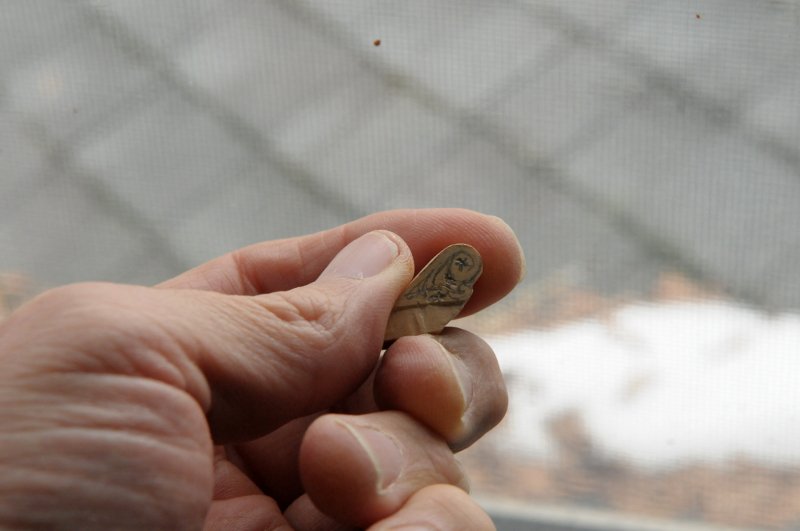
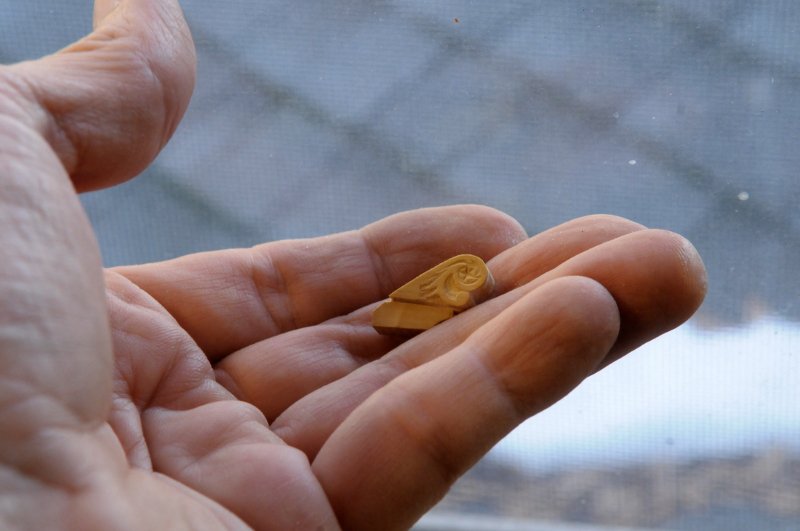
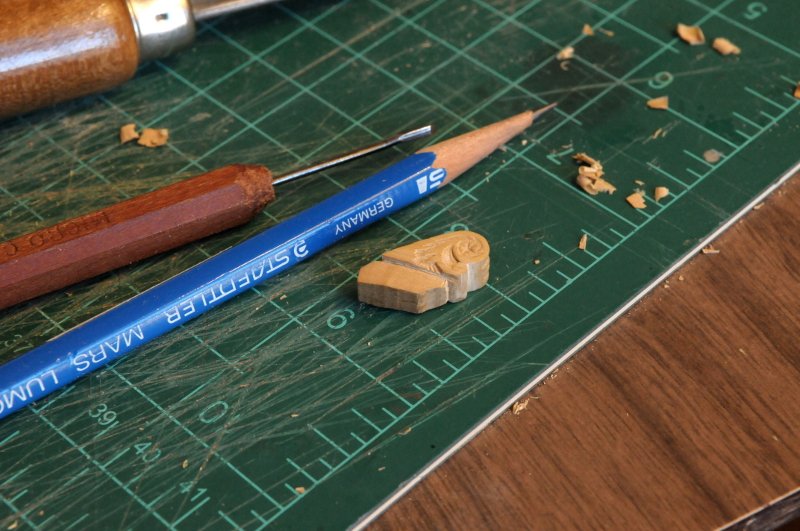
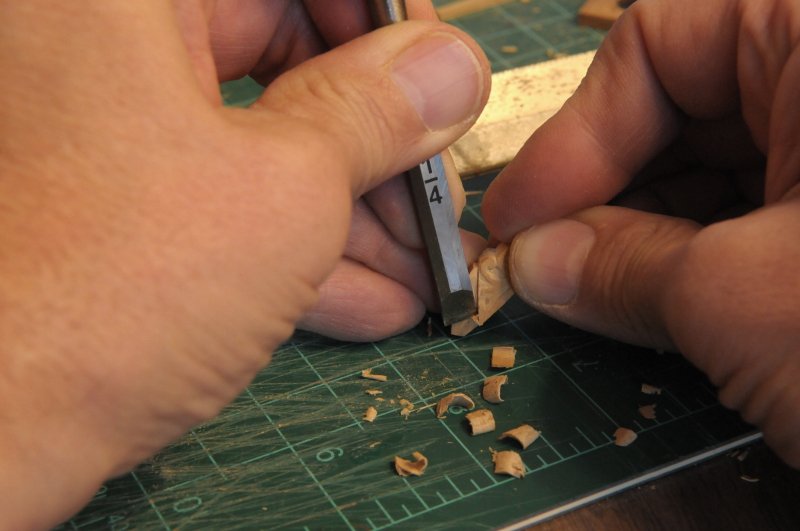
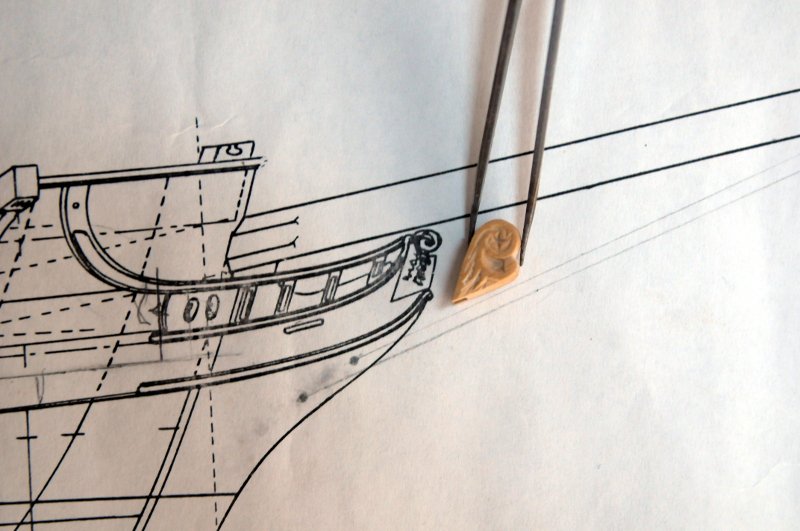
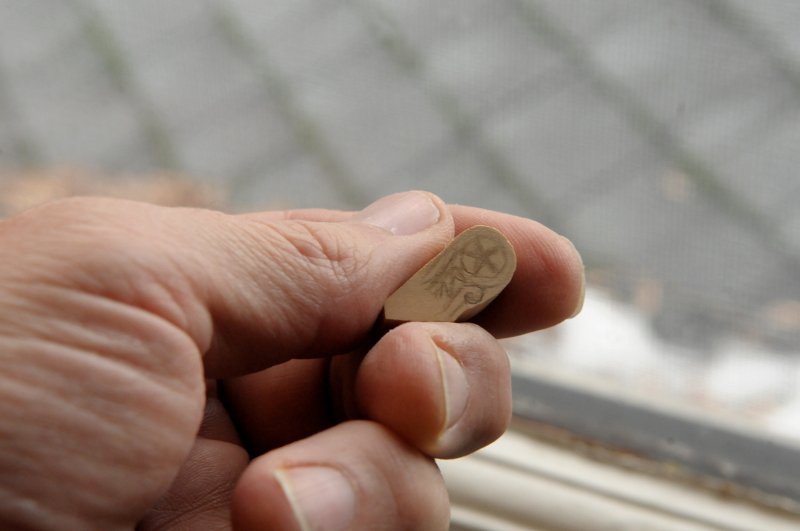
Thanks Lou, and all who have liked. Yes this area of the ship is a real challenge to me and one I can't really totally visualize yet, but it's only wood and I can cut a new piece as many times as I need to! I have been working on the billethead. I redrew it with a smaller star and some other refinements (not sure how refined they are, but they're the best I can manage!), and carved it out-- I was happy with the star, but the lower center part just kind of got mangled. It's also overall too big. I need to trim the whole piece down, which means sanding this carving off and trying again. Fortunately the piece is also too thick at this point, so I have a couple tries at it before I need to start with a new piece. Here it is closer to the right size, with the design drawn on, with an ever smaller star. There are still some gouges from the previous attempt, but I don't think they will be a problem. It's still a tad too big, but I don't think I can do smaller!-- And carved out. I was able work in a couple of the little "barbs" as the scroll winds around the star, though the star itself is not quite as nice as the bigger one from the previous attempt-- The small "tang" at the bottom helped me hold the piece as I was carving-- But that comes off now-- Here is the piece next to the plans. You can see mine is bigger, and a different design. Maybe I should have tried to match it closer, but I'm not really sure what I would carve for those squiggles trailing off the scroll! It also seems a little blank on the forward area. (Sorry Mr. Chapelle!) My top cheek molding will transition into the scroll that wraps around the star, instead of stopping separately behind, as shown on the plans. I think this will resolve my oversize issue, as my height is close, but not the width-- Here is the piece dry fit on the stem-- There is still some carving work to do, and there is a notch in the back (you can just see it the previous photo where I am holding it next to the plan) that needs to be deeper so the piece slides farther back on the stem. The curl at the bottom needs to line up with the front of the stem. Ron
-
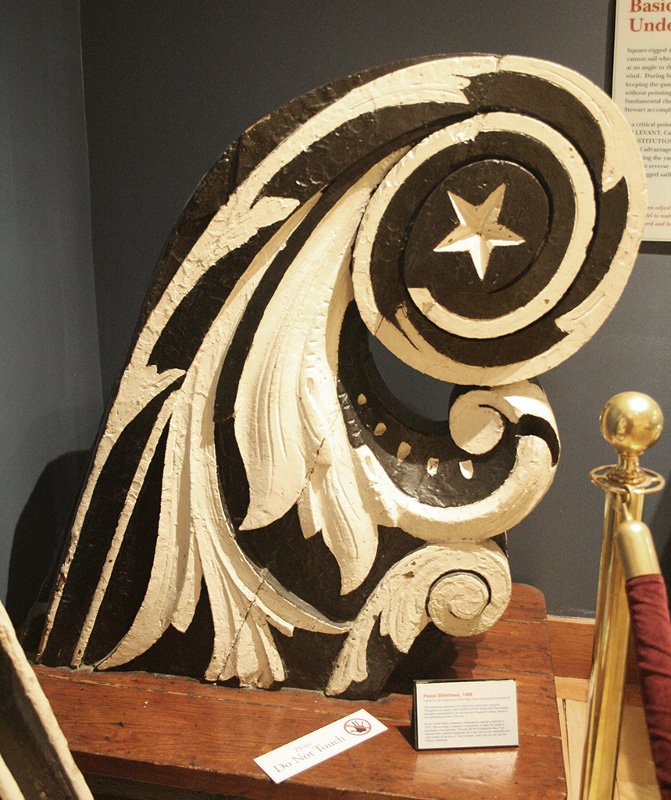
The hawse hole piece is now blackened, using the 'ebonizing' technique. First mask off around the piece-- Then paint it with the Quebracho Bark Extract-- Followed (while it's still wet) by the Iron/Vinegar liquid-- In a few seconds it's quite black-- Masking removed-- It will get some Tung Oil finish which will warm it up a little, and it'll match the wale and bulkhead cap, which were blackened the same way. This is my model for the billet figurehead, from the USS Constitution-- I'll simplify it quite a bit. Here's my rough sketch. I'm not quite happy with it, so I'll sand this off and try again-- Ron


-
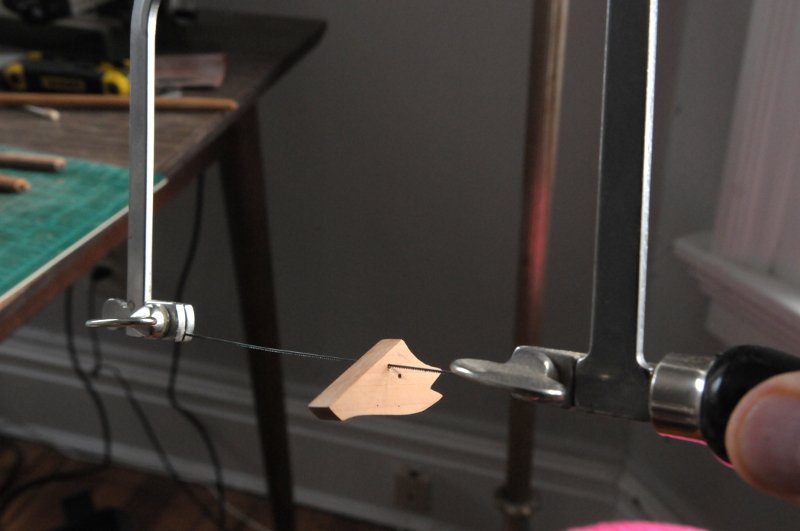
Slow progress on a number of things: I marked the stem piece for the gammoning slot, drilled two holes, and then threaded it onto the jeweler's saw to cut the slot-- After cutting the slot, I gradually cut it out with micro chisels and files, then glued it onto the stem. I'll drill the bowsprit stay holes in place, I'm not sure exactly how they are going to line up yet-- I cut a rough blank for the billet figurehead piece. This will be a new experience, carving it-- And I'm roughing out one of the headrails. Once I have the shape fine tuned a little, I'll cut the other one-- Here's the bowsprit fit in place, with some starting work on the bowsprit cap-- The cheeks are getting there. The two starboard side pieces are done, and the port side pieces still need some thinning down. Ron

-
Ed, I'm not positive yet, but I do think I will fully rig the ship (without sails). As you remembered, my old house would not have had room, but I have one or two places in my new home where I think a fully rigged Oneida would fit. Oh, others have taught that course far better than I ever could, but I'll give you a front seat to my attempt. Ron
-
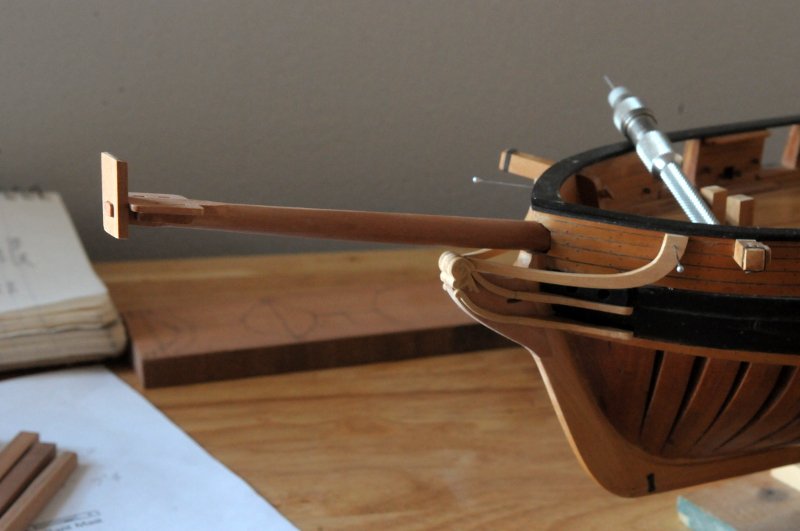
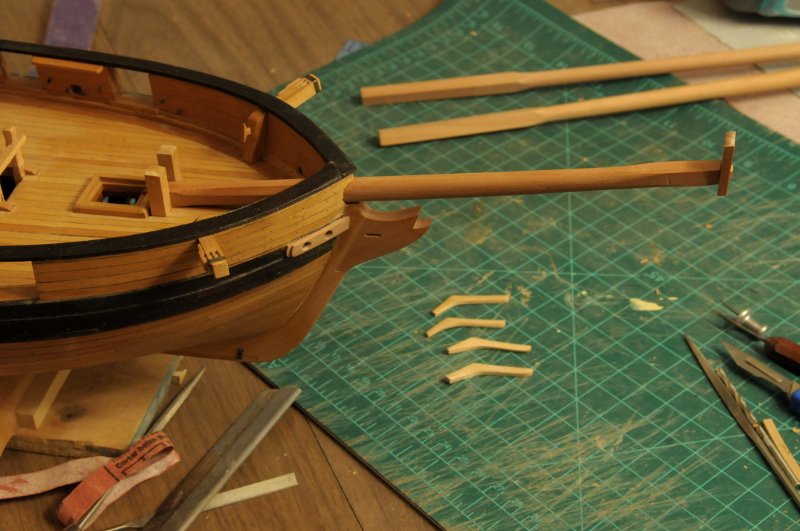
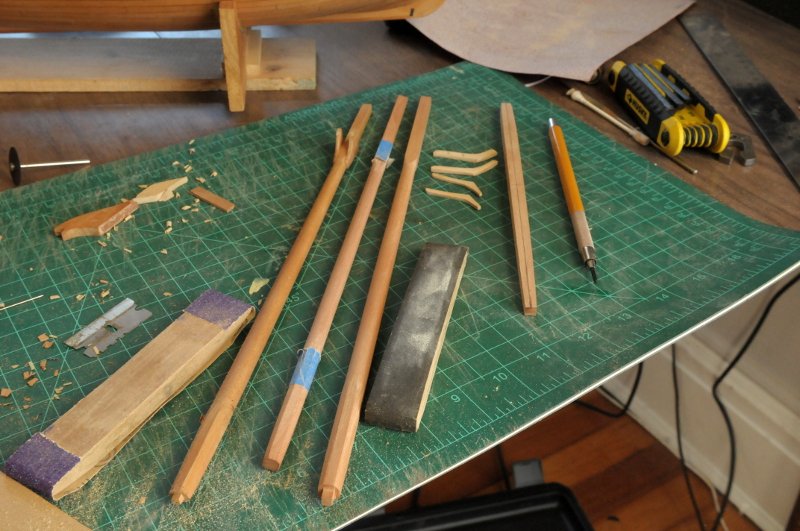
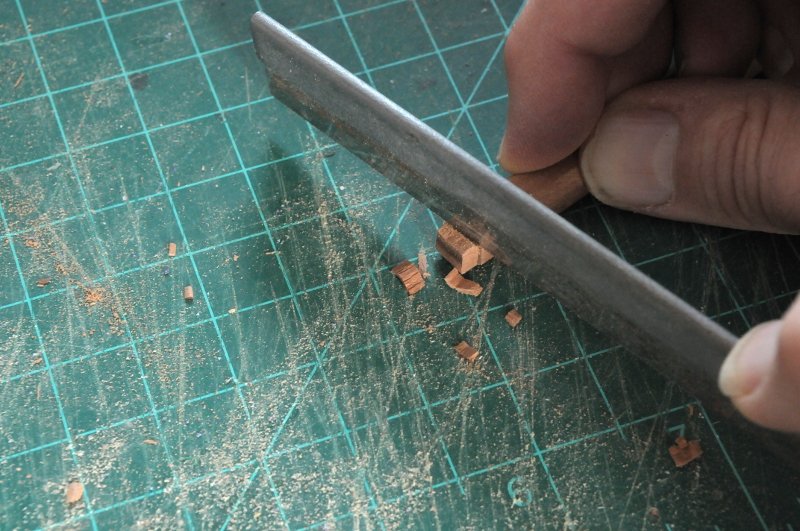
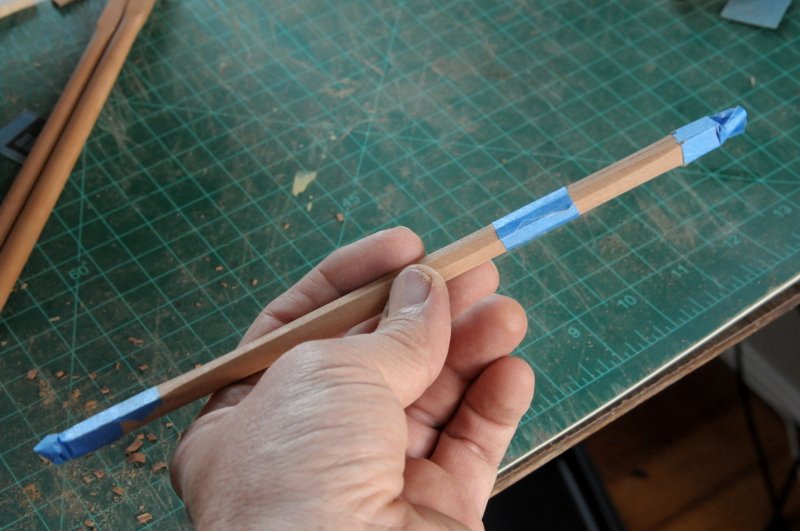
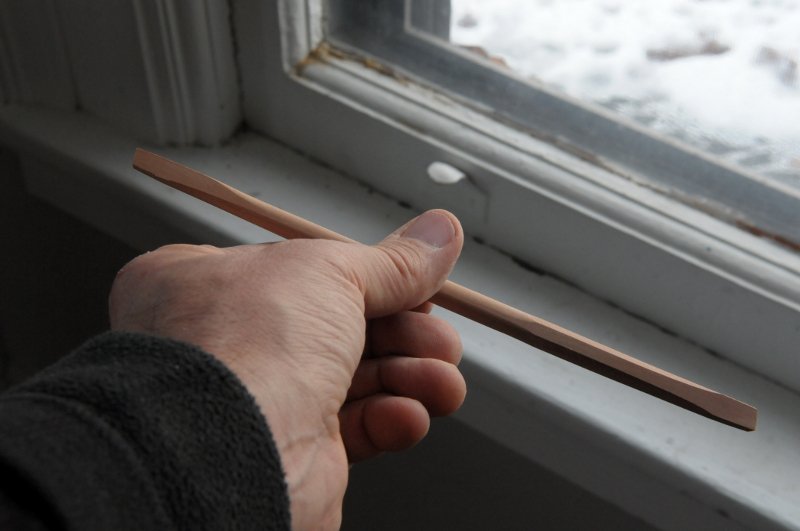
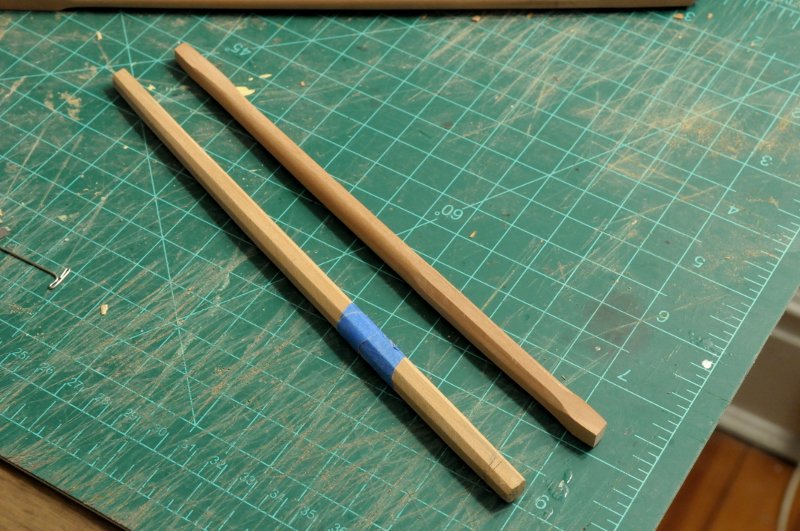
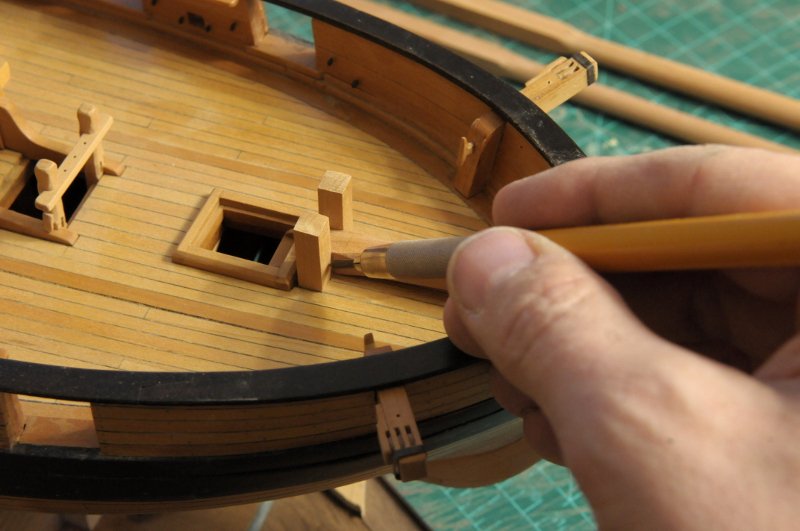
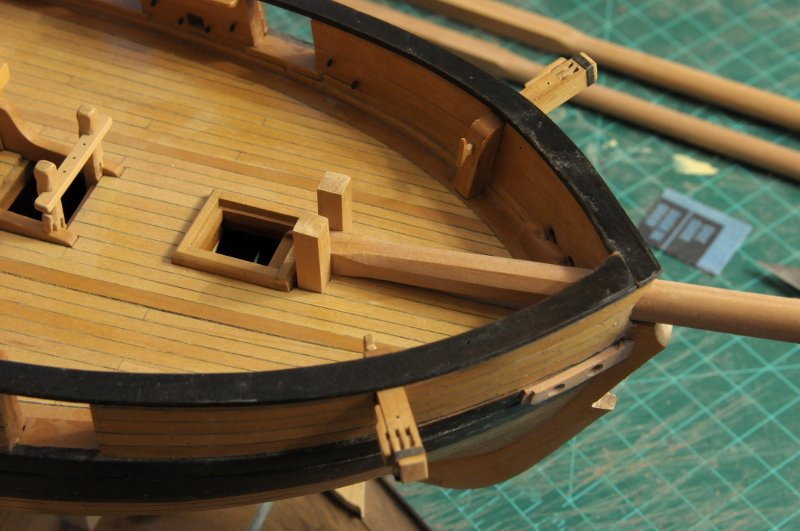
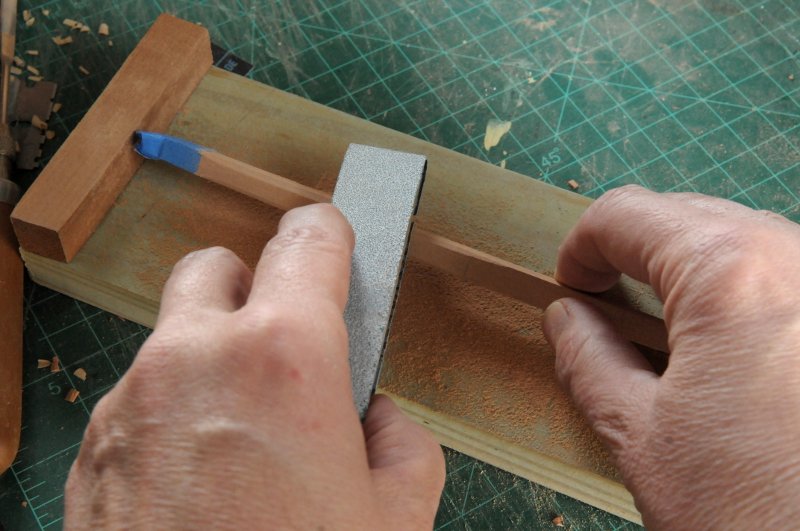
Work continues on the masts and bowsprit Here is the Main Mast sanded, with the heel tenon cut in. I also have the second of the cheek pieces mostly sanded down-- Here is the Fore Mast partly done. The tape marks the areas that are not to be rounded, and there is a little more work done on the remaining cheek pieces. A center line is drawn on the tapered bowsprit before sanding it to an octagon-- The tenon being cut in on the Fore Mast-- While sanding the bowsprit from it's basic tapered square form, I made the mistake of giving it an octagonal section for its whole length. Unfortunately this meant cutting another blank and starting over. Here I am starting to sand the octagonal section into the new one, with tape at the fore and aft ends marking the areas to leave square-- Then, only the center portion of the bowsprit (where I am holding it) needs to be rounded. More tape to mark the rounding limitations. Note that at the fore end (to the left), the rounding is not symmetrical, and the top stops before the bottom-- Here is the bowsprit roughed out, the top is facing the window-- The new one next to the aborted one-- Here are the two masts, the good and bad bowsprits, present state of the cheeks, and the new stem piece (which fell off as I was working)-- The stem piece fell off (you remember I barely tacked it on) as I was filing out the bowsprit opening and test fitting the bowsprit many times-- After much filing, the bowsprit finally fit through, and I marked it for a very shallow tenon to be cut-- With my big hand out of the way here it is test fit in place (tenon not cut yet, nor bowsprit seat finished)-- Ron

-
Thanks Mike! A small update: For some relief during during fashioning the new stem piece and cheeks I worked on tapering the masts and bowsprit (and vice versa from the tedium of sanding the masts). They now have their basic taper done. There is about an extra 100th of an inch everywhere to allow for final sanding. Next will be chamfering the corners to make the octagonal sections, and begin the rounded ones. Note the bowsprit taper is not symmetrical. The top edge (you can just make out my penciled note "top") is straight, and the bottom and sides are tapered-- Ron
-
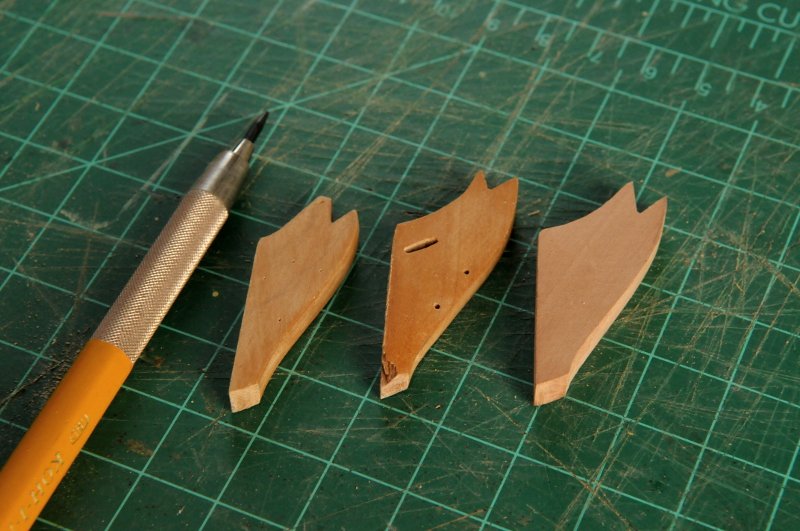
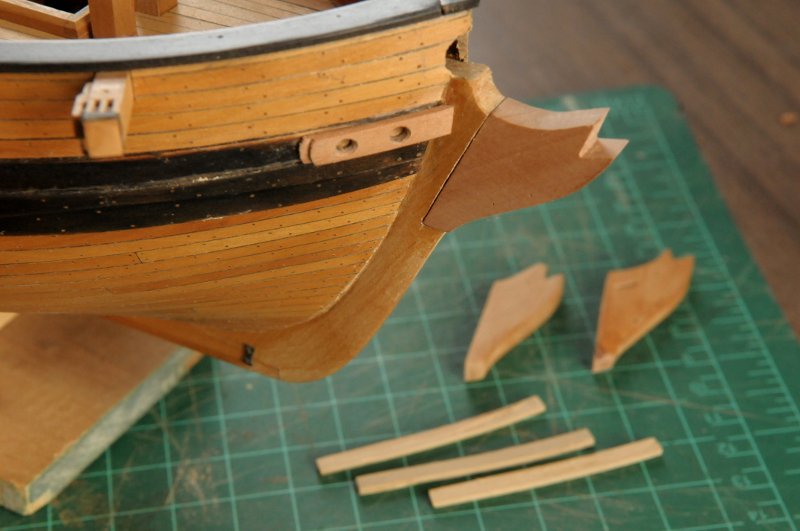
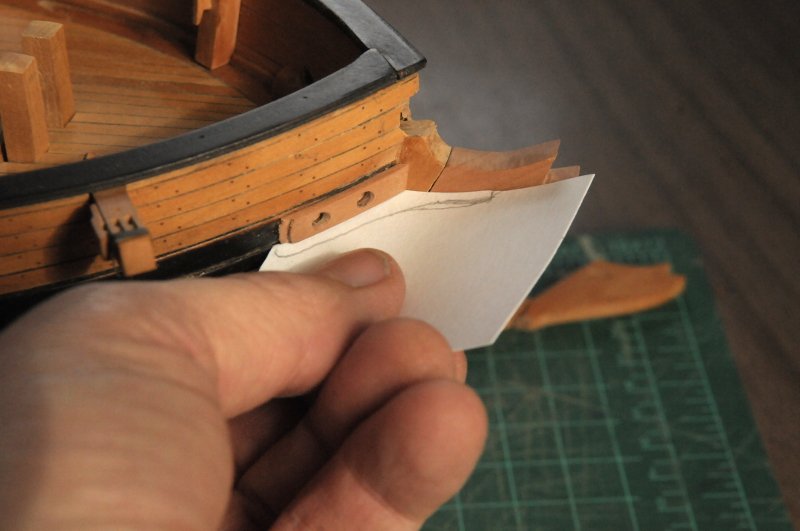
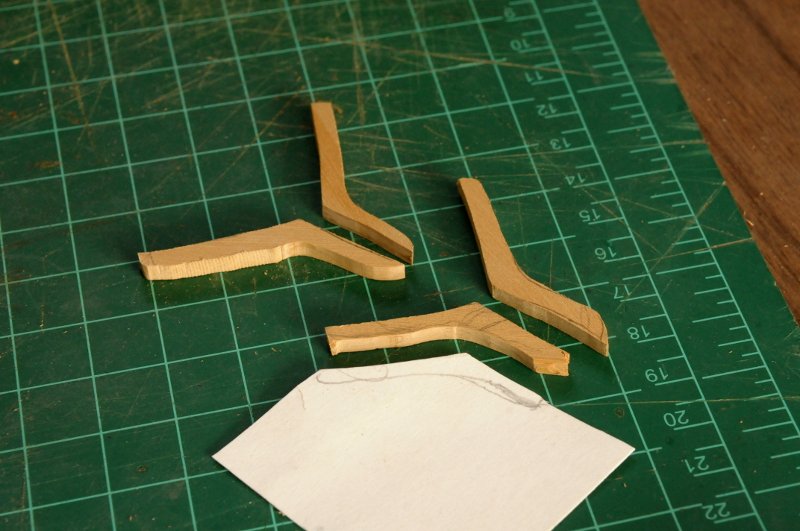
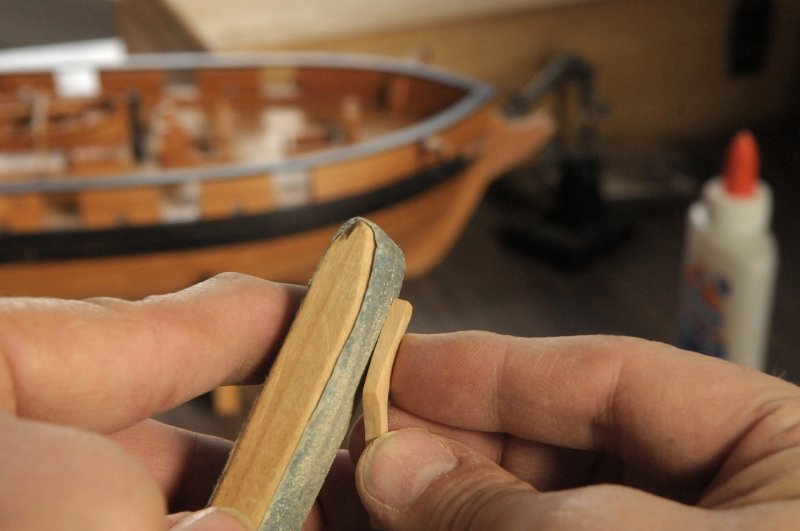
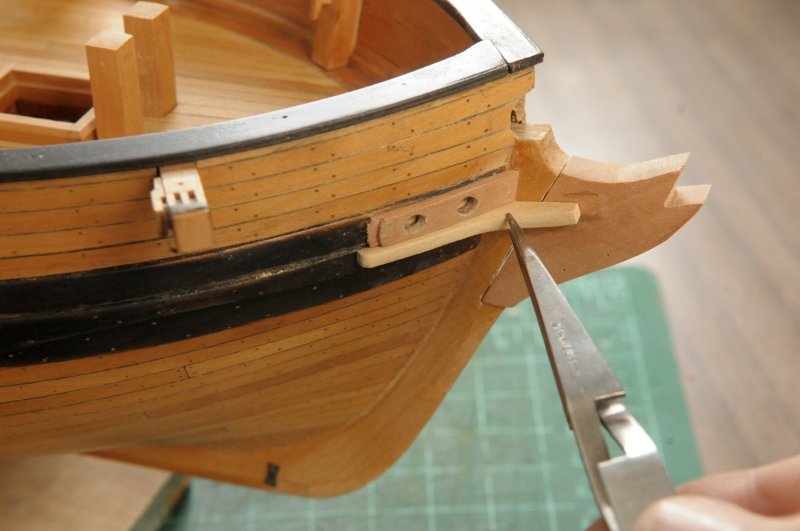
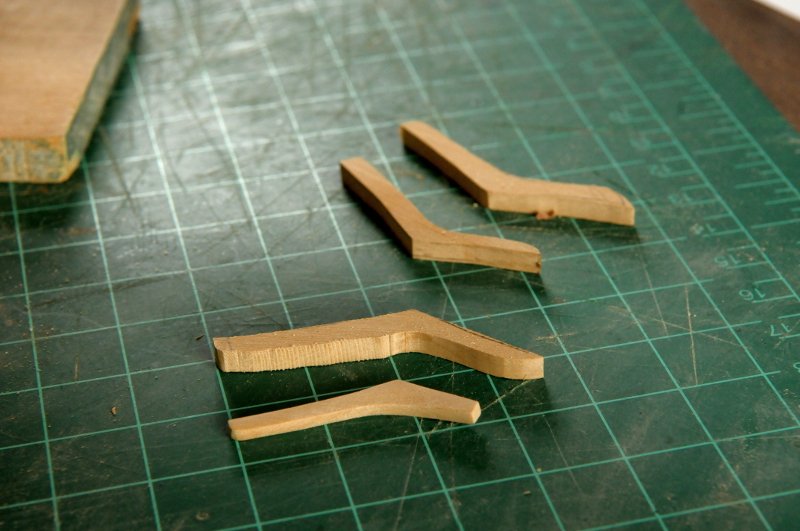
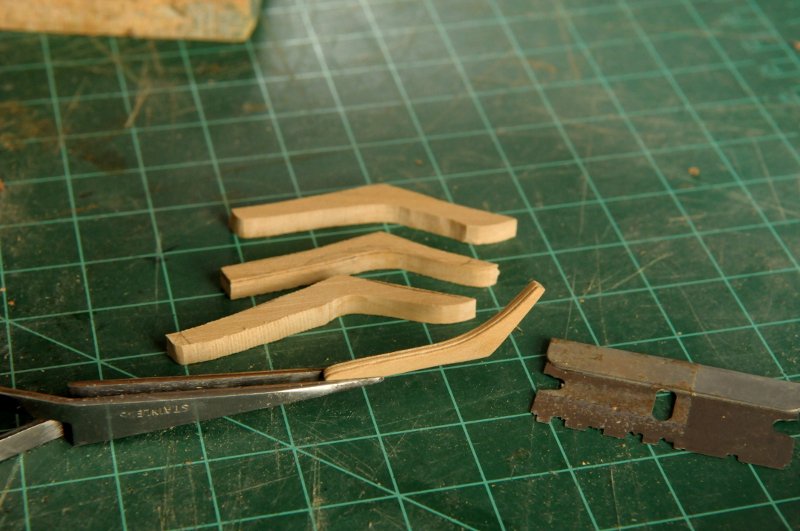
Work continues on the replacement head piece, and the cheeks. On the left is the original lazer cut piece. In the middle is the one I just removed, due to the bad gammoning slot position. On the right is the new one, basically shaped. I refined the cutout for the decorative piece that takes the place of a figurehead. It better matches the original shape, and the shape shown on my plans. I will wait before drilling the bowsprit stay holes and gammoning slot-- I tacked it on with just the barest bit of glue. But it will stay in place while I work the cheeks and headrails out, then I'll cut the gammoning slot, glue it on to the stem, and do some final shaping after it is permanently attached. Below are three of the cheek blanks. They won't do. They need to extend farther up the stem before joining the piece that makes the final decorative curve. The joint will be hidden under the gammoning, not where I was thinking it could be, at the join of the stem and hull-- I drew a card paper template to get the rough shape-- And cut four blanks out. They will need a lot of shaping-- All to be done with sandpaper and files-- One of many test fittings-- Here one just about finished. It's hard to tell, but the short leg has a slight up curve, that's why the blanks need to be cut from thicker stock and sanded down. And the long leg needs to be more of a slight trapezoid in section rather than square. Like many others on the ship, it's quite a complex piece (assuming I have made it somewhat close to how it should be!)-- A molding profile is scraped into the piece with a razor blade. The very left end, on the corner of the blade, is the profile I used, running it on one side of the piece, then the other-- Test fitting. It is done enough to move on to the others. Some adjustments may still need to be made, but I hope I'm on the right track this time-- Ron

-
Phil, Thanks very much for those examples. I don't own any of those books, so I appreciate your taking the time to respond and share the information. I think either the Underhill (as far as the mast shapes), or AOTS left side example (without the woolding) may be appropriate for my masts. The major difference between those two seems to be whether the mast is flattened only on the sides for the cheeks/bibs, or as in the AOTS example, fully squared. Ron
-
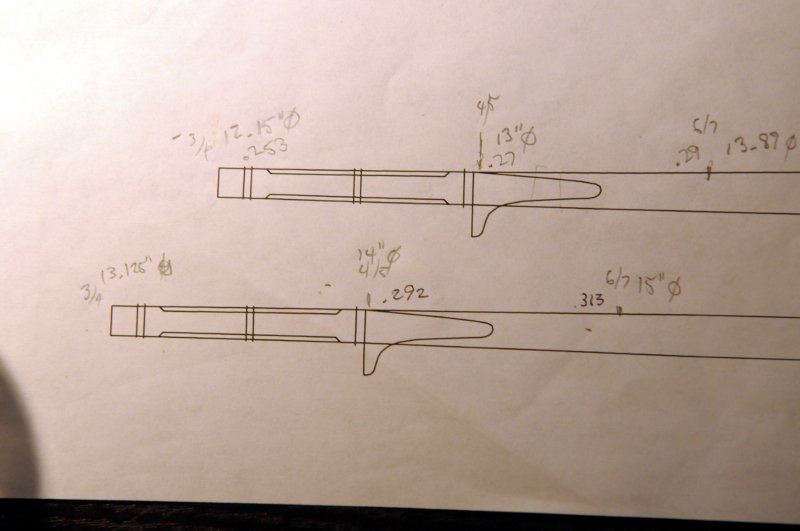
Hi all, I am looking for information on how masts without cheeks were constructed at the area of the hounds/bibs. Here is part of a drawing I have to guide me for my Oneida masts. It's for another ship (and I don't remember where I found it!!), but since Chapelle's re-draft of Christian Burgh's "Oneida Spar and Sail plan" also shows the masts and bibs similarly, without cheeks, I think it is probably accurate to Oneida, and I have chosen to follow it. What I am not sure of (besides where I found this drawing!), is how the bibs were incorporated into the structure and taper of the masts. The bibs don't seem to be made of two pieces, with the sawtooth joint into the cheeks as on the more elaborate masts of larger ships. But I am thinking they must have been fayed (?) into a flattened area of the mast, which somehow made some kind of support at their base, rather than simply bolted onto the side of the mast. Can anybody offer any guidance, or know of a source of info on this point? Many thanks, Ron
-
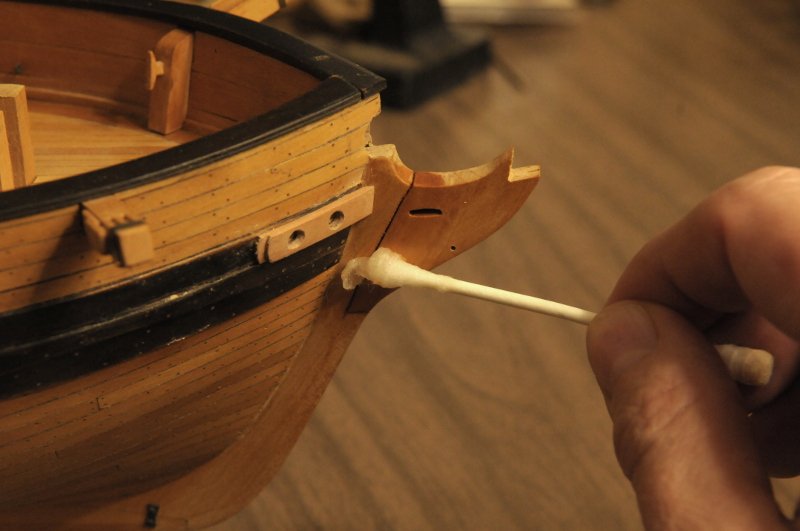
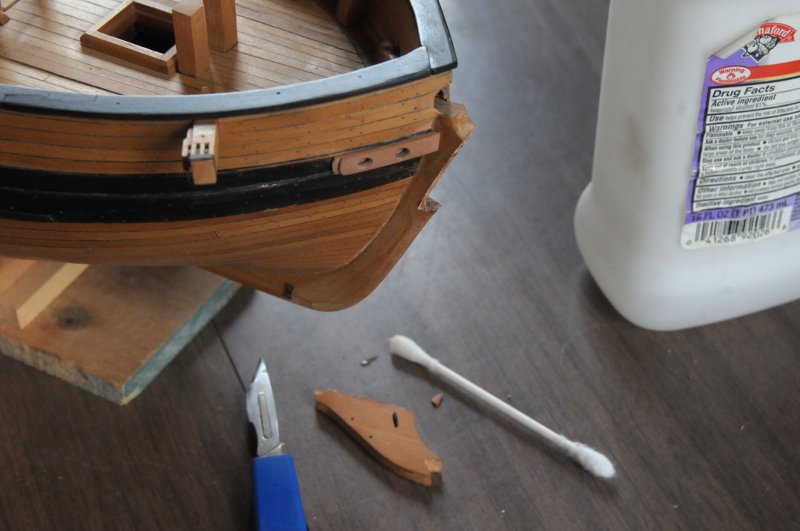
A backward step to report: I discovered that my slot in the stem for the gammoning is too high. The upper cheek (I had been calling them headrails in error, but the cheek pieces are the ones shown in the last couple posts that I was bending, cutting, etc.) will at least partially block the gammoning slot. I might have tried cutting a new slot, and covering or filling the bad one, but I opted remove the stem piece and make a new one. I was never happy with my gammoning slot anyway--it was a little too elliptical, and not tilted quite right. This will be the second time I've had to remove this piece in situ. After a few days of repeatedly scoring the joint with a knife, and soaking with isopropyl alcohol-- The piece finally broke free-- Ron
-
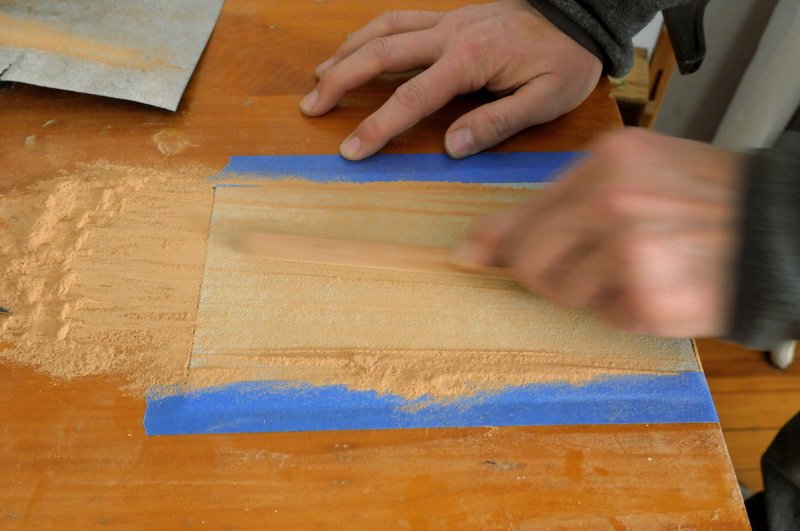
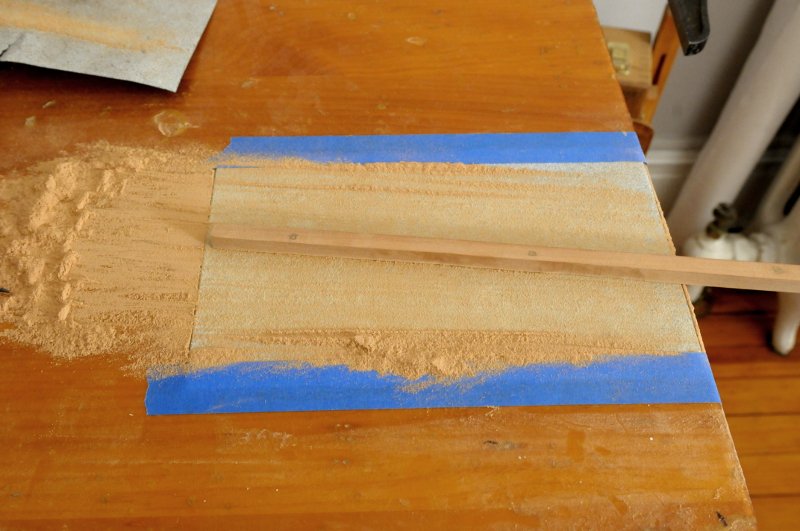
Thanks Ed. I've been meaning for so long to get back to Oneida. I hope I can sustain the motivation this time. My course would be called "How to Build a Model Ship-A Lesson in Perseverance, Patience, and Eyesight Magnification." Martin-I think, if you are not in a hurry, hand tools are all you need. I jones for a Byrnes saw, a lathe, or even a motorized sander, but my hands have gotten me this far, I will probably continue that way, at least for this model. (My Proxxon rotary tool has been extremely useful for many things--so I could never say this model was completely hand done.) If there are others models in the future maybe I will invest in more advanced power techniques. As far as sanding the masts, I have gotten very comfortable with sanding, especially using sandpaper taped flat on the table . Every piece of wood on the model has been sanded in some fashion. A miniature plane would probably work very well for tapering the masts (in fact I have one--though it is not of high quality), but I trust myself most with the sandpaper. Ron
-
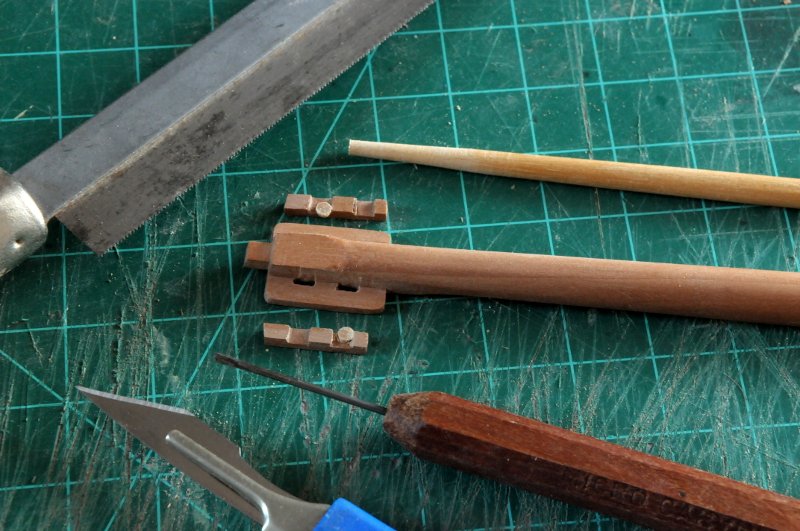
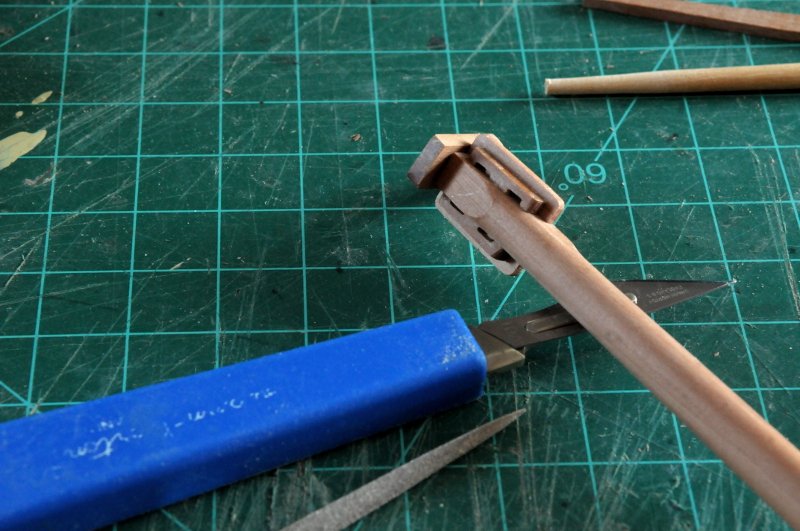
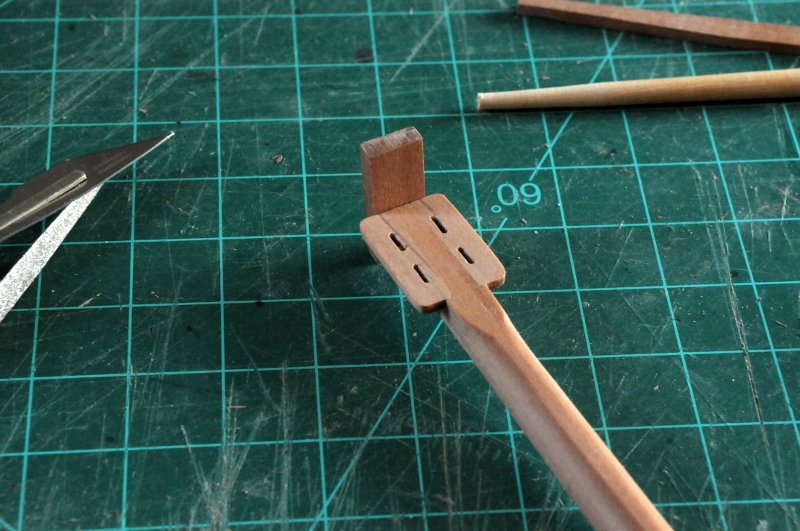
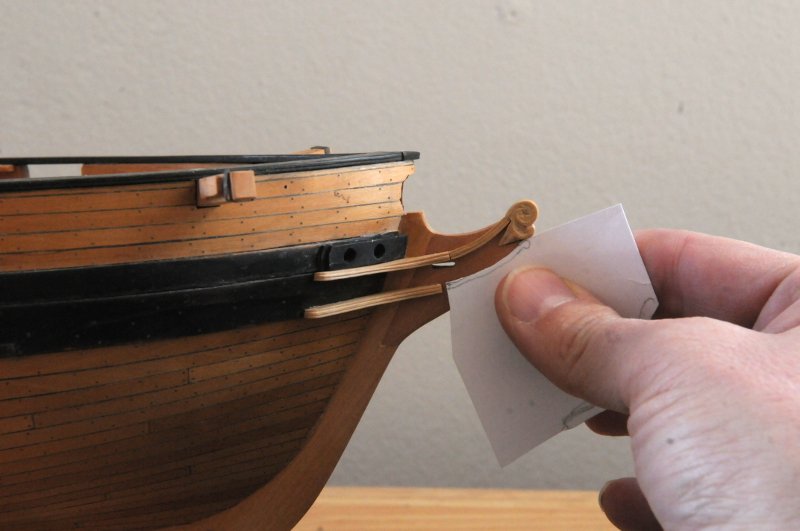
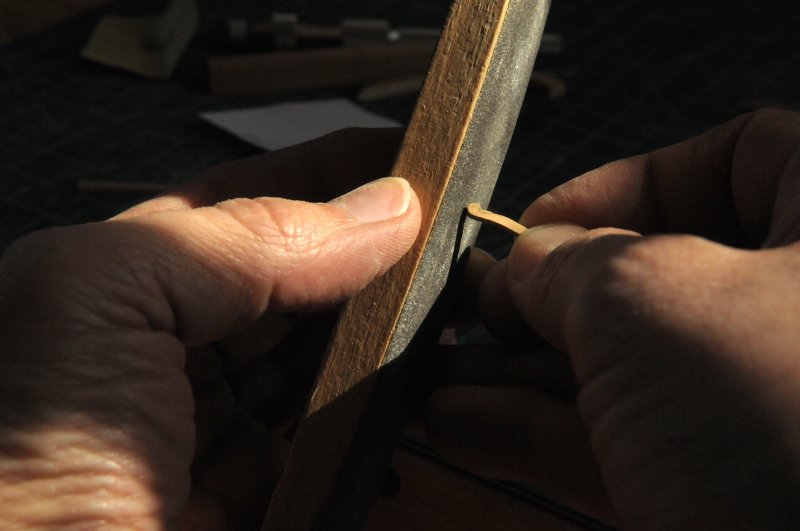
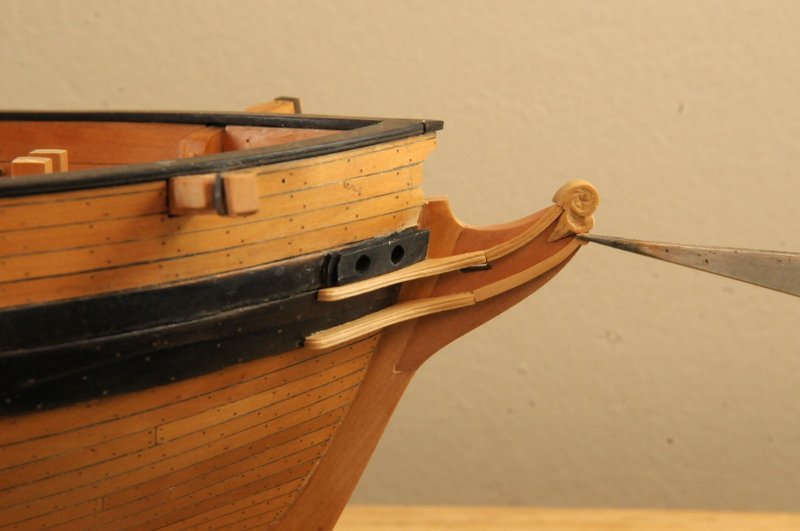
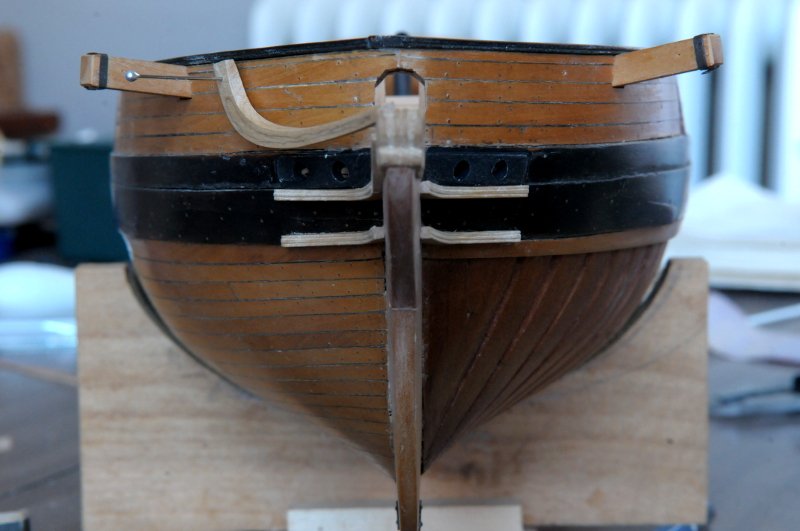
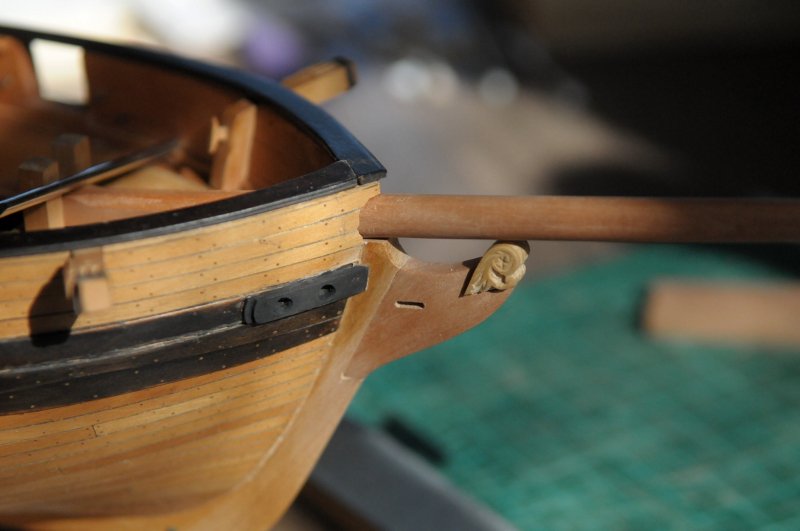
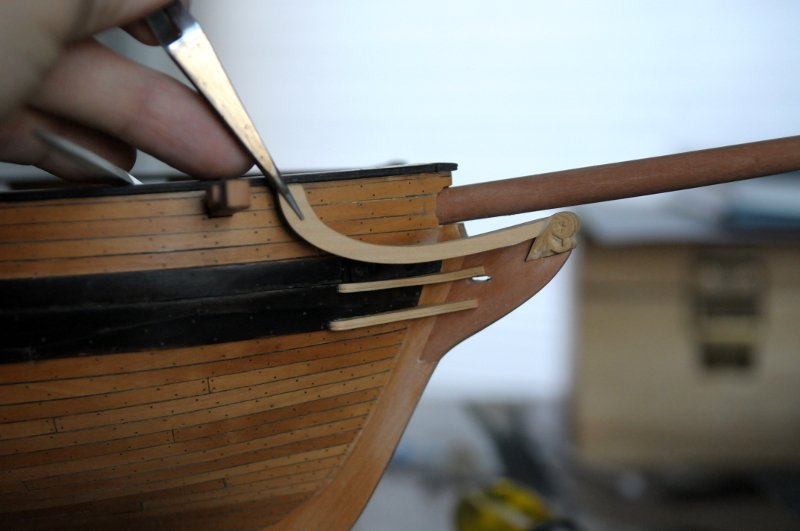
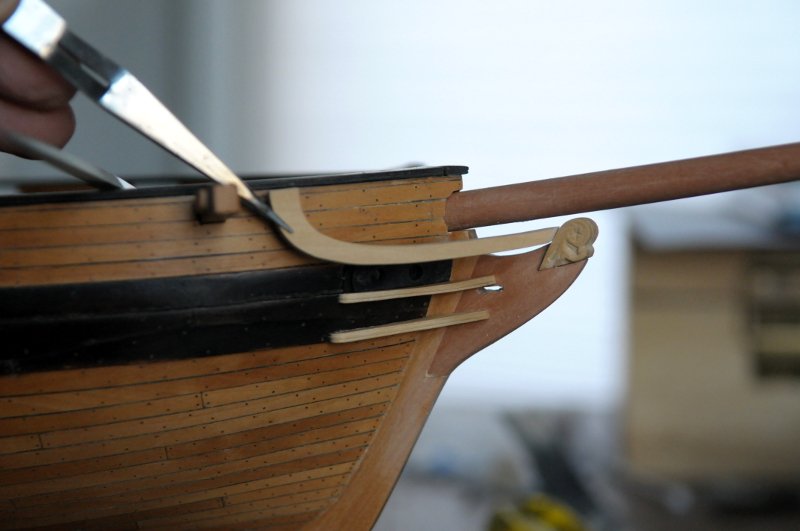
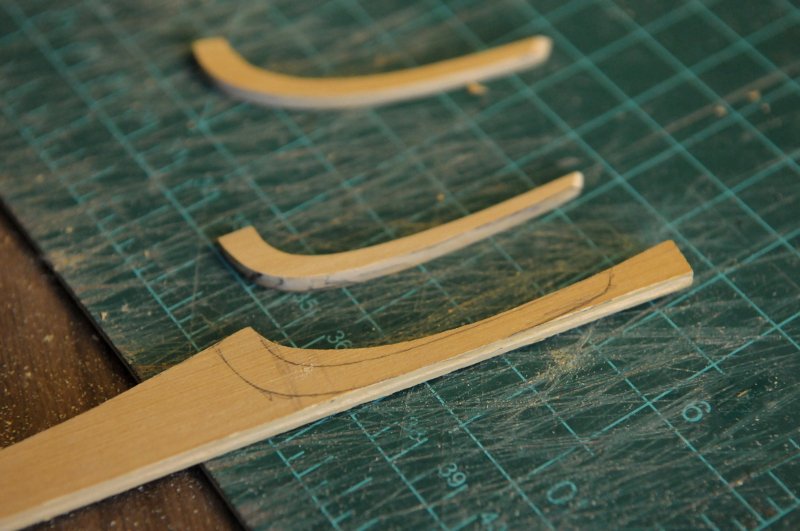
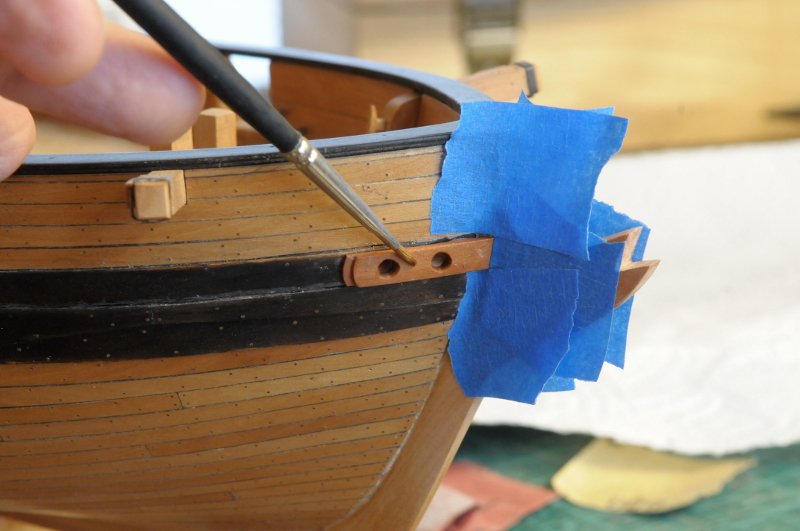
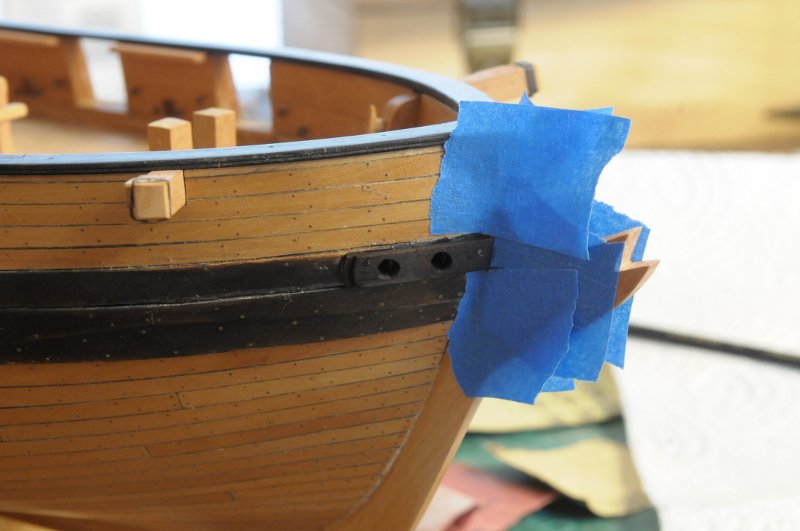
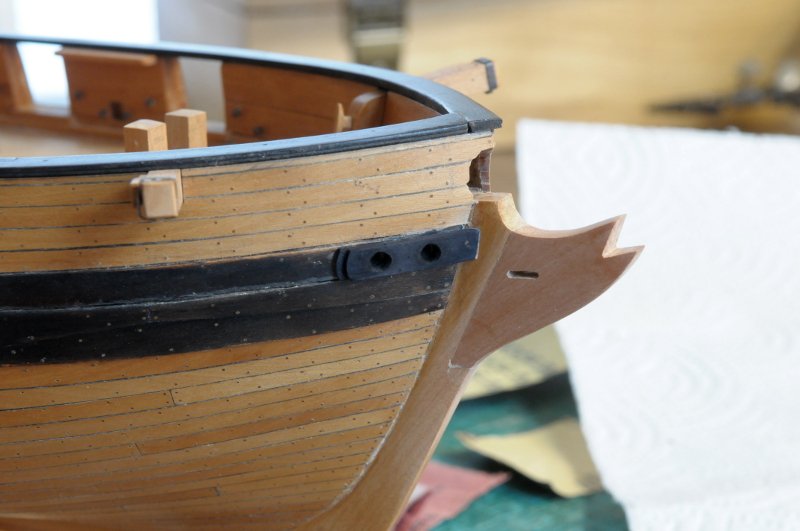
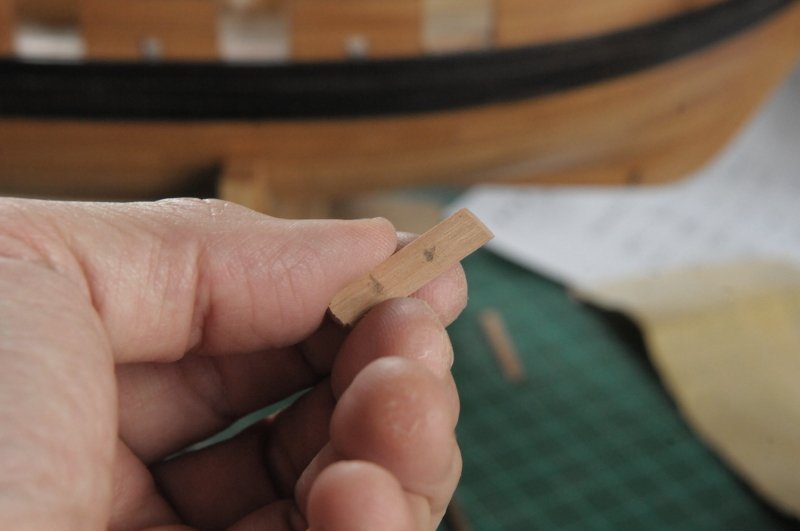
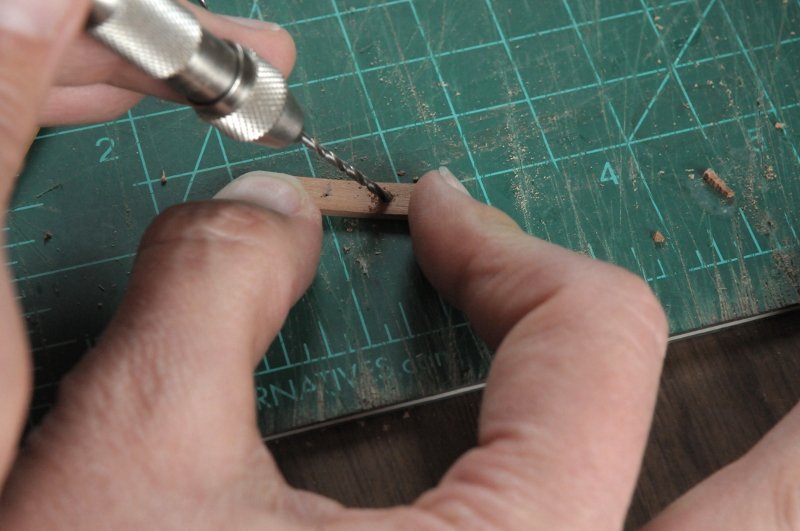
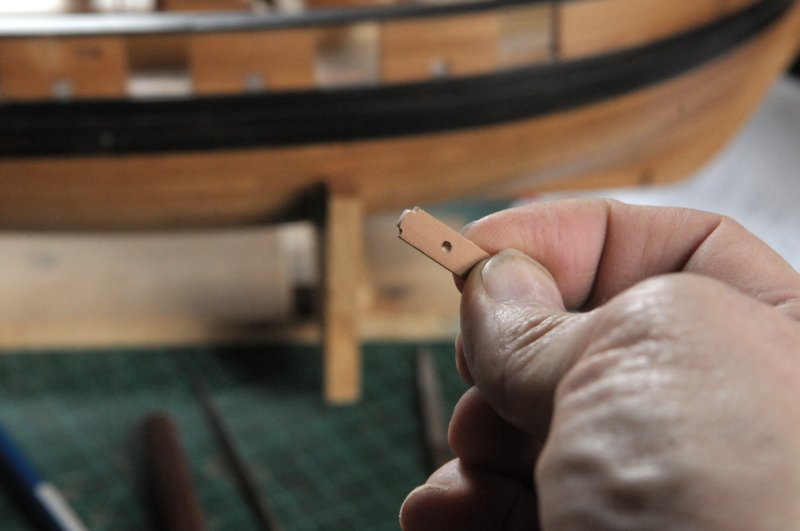
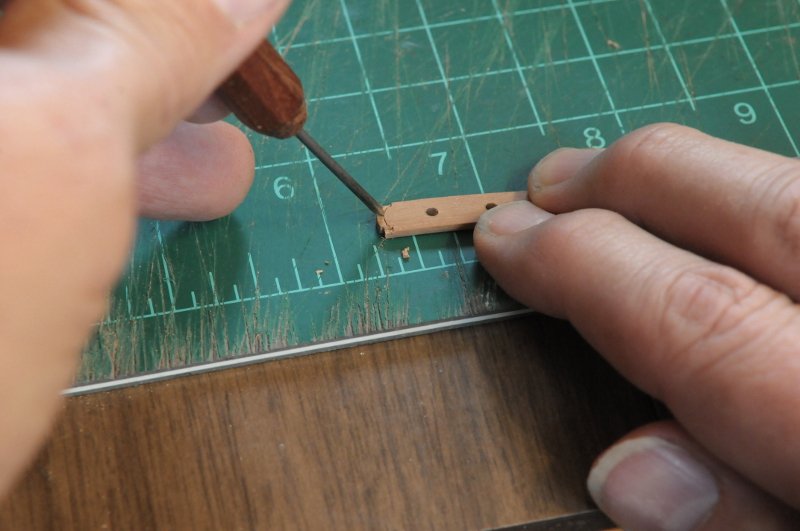
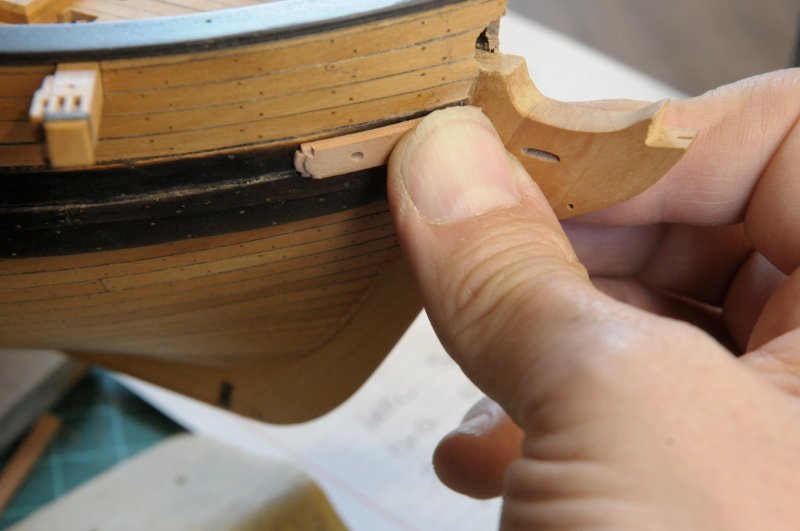
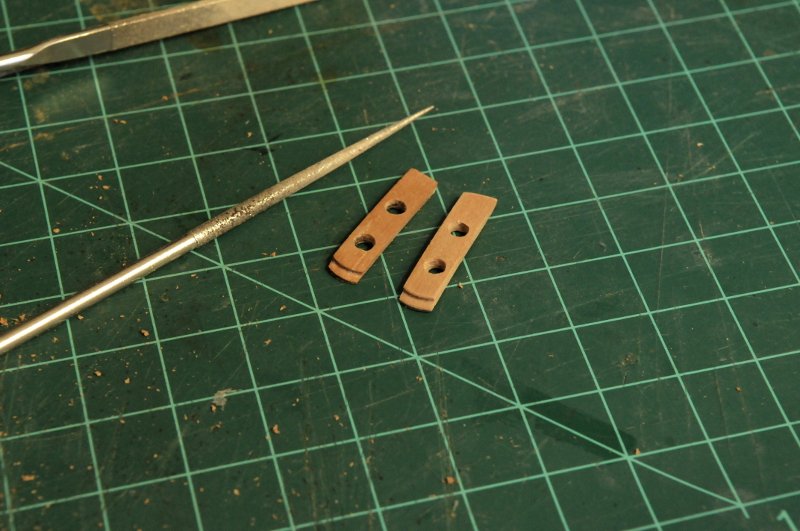
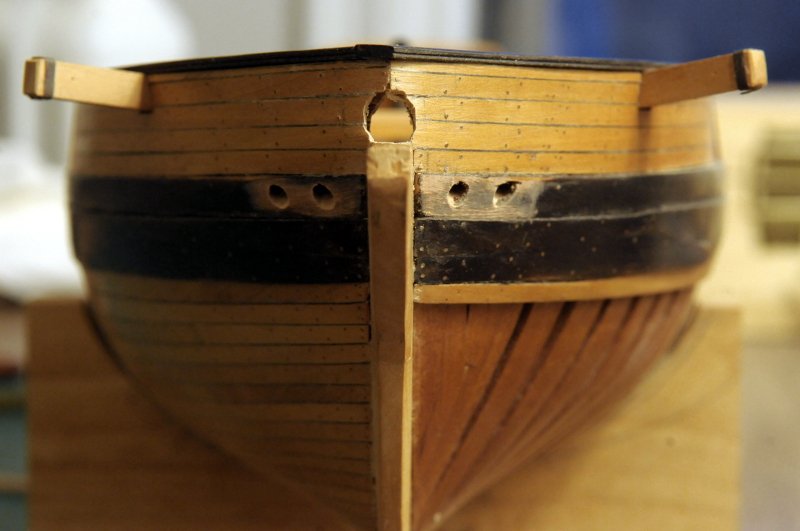
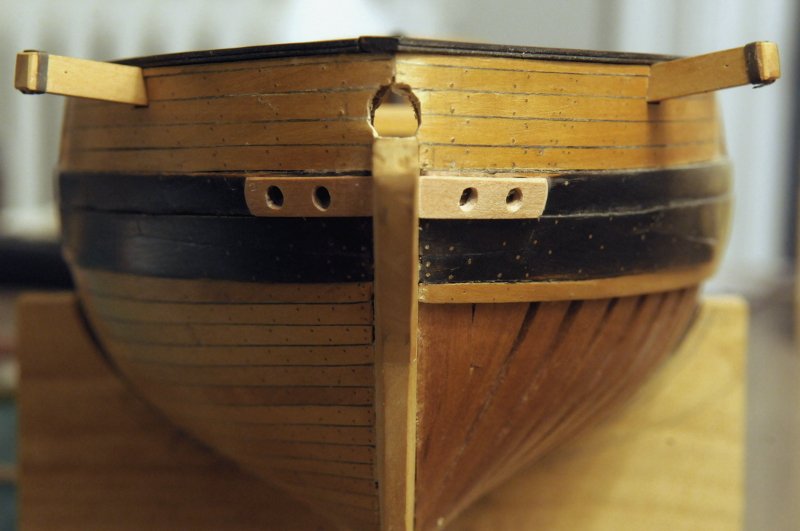
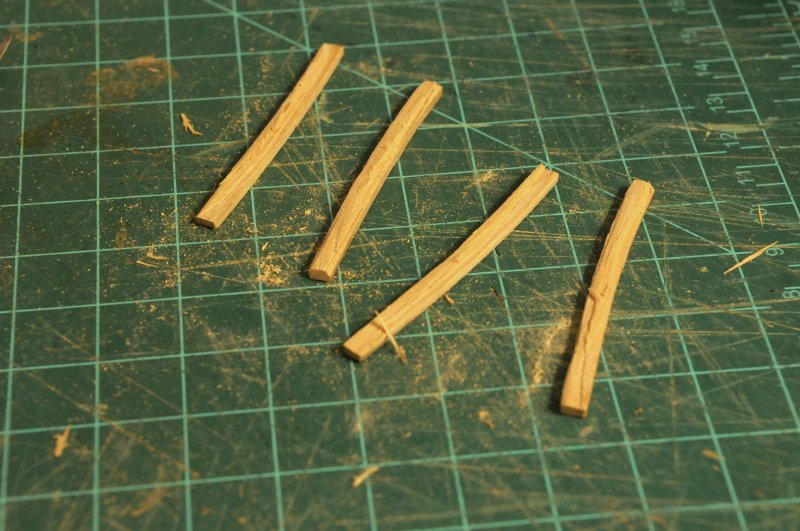
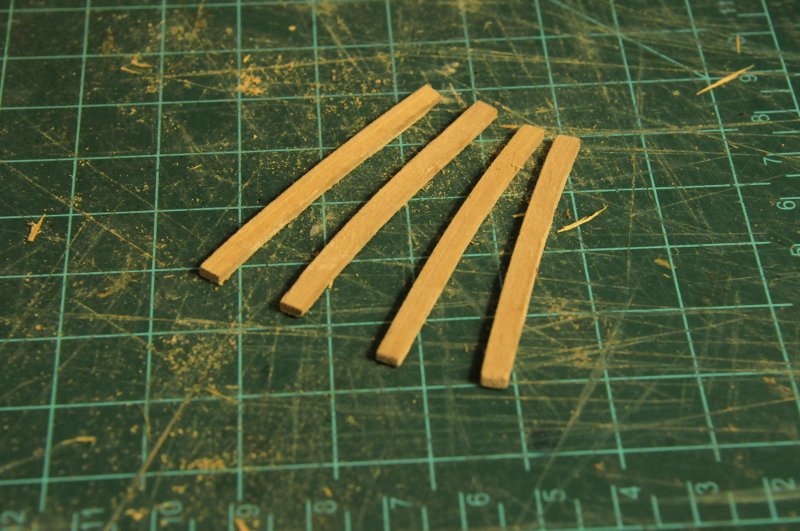
Thanks for all the likes! Here are the masts with centerlines marked. Hopefully that will help with the tapering. There also are my curved bolster and headrail pieces-- I cut the bolster piece down to two pieces of approximate length, and while holding one up to the bow, put a pencil lead through the holes from the inboard side to mark their locations on the bolster-- Then pilot holes were drilled. They need to be at a downward and forward angle relative to the bolster piece. The holes will be filed out larger, while checking that they match up with what's on the model-- The aft end needs to be shaped-- And given a stepped end. I'm not sure if the actual one was made up of two separate layers of wood, or simply carved as I am doing-- Seeing how it looks in place-- Either I didn't capture the right profile, or it just doesn't look good to me. I changed it to a simple curve, and you can see I've enlarged the hawse holes a bit-- The wales needed to be roughened up to make sure glue will bond-- And they are now glued in place. (Optical illusion-the stepped ends disappeared! They are there, but the at this angle they don't show. I actually ran back to the model to make sure after I looked at this photo!) Final shaping of the holes will happen after these have set-- Meanwhile the headrail piece has been cut in half, and those pieces are sawed lengthwise-- I have thinner flat stock I could have used, but it hadn't sunk in how thin these pieces really needed to be, I just grabbed a piece from my odds and ends bin that looked about right. Actually though, it was easier to bend the square shape than it would have a flatter one on it's thin edge anyway. They are a little rough-- But after sanding a little, I think they will work-- Ron
-
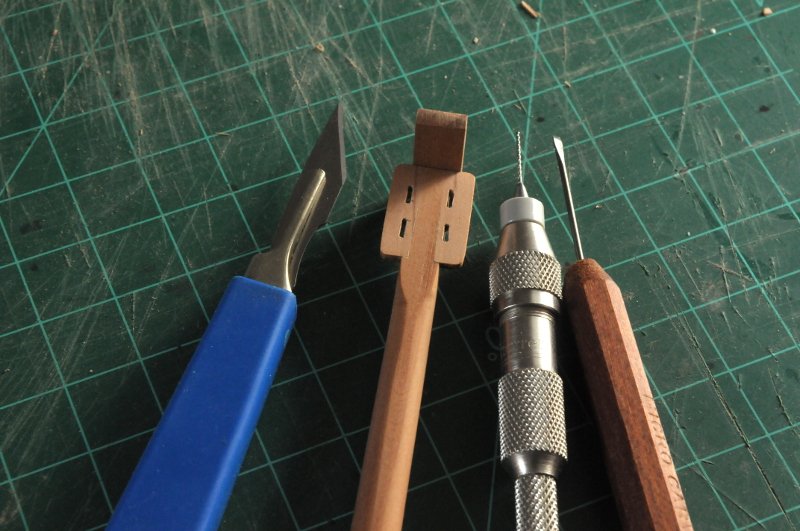
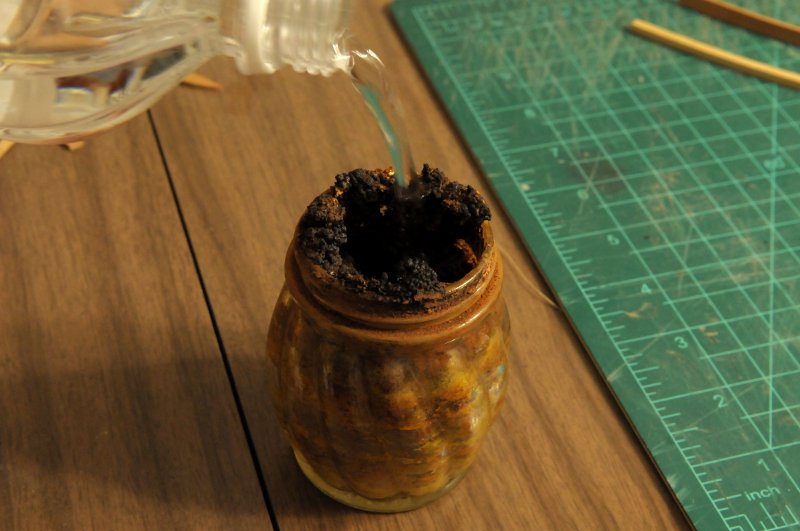
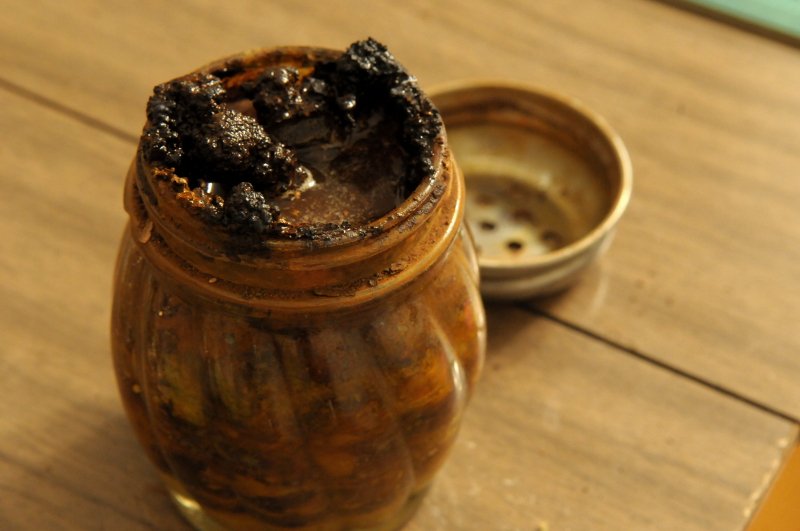
Welcome, Dowmer; and thanks NateB! The masts have been roughed out and marked for the next steps-- The first pieces for the bow work are ready to be subjected to trial and error. The pear piece is for the hawse hole bolsters, and the Castello Boxwood is for part of the headrails-- The hawse hole bolsters will need to be ebonized. It's one of my favorite processes on the model--it reminds me of developing prints in the darkroom in the old days--magical. But my magic solution has dried out and needs to be rejuvenated. Pouring vinegar into a small jar of rusted nails-- These were steeped in vinegar last year (hence the black crustiness), but they've dried out over the past year and need to be re-steeped-- What fun. Ron
-
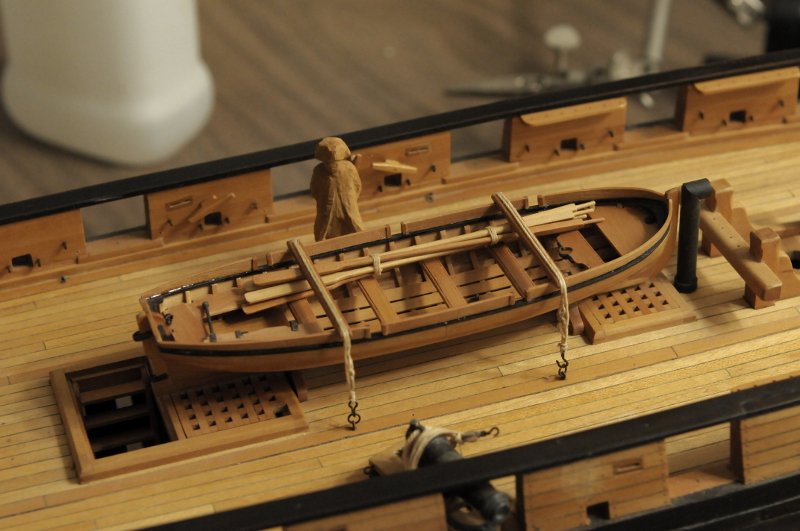
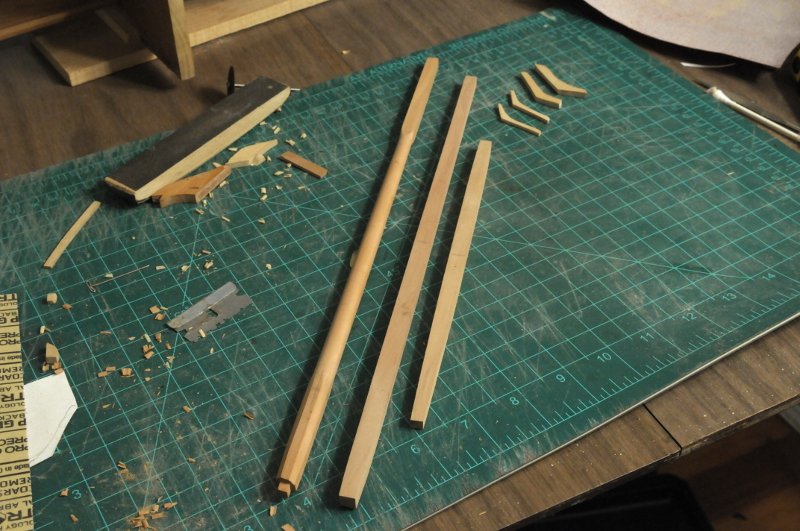
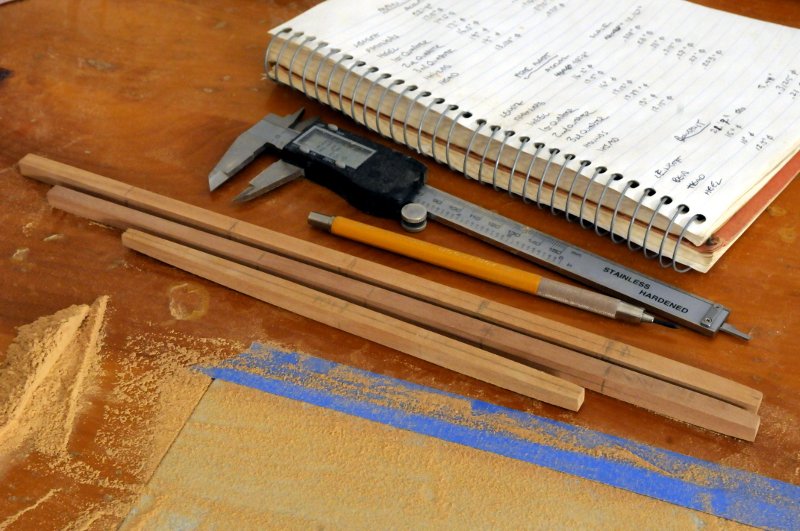
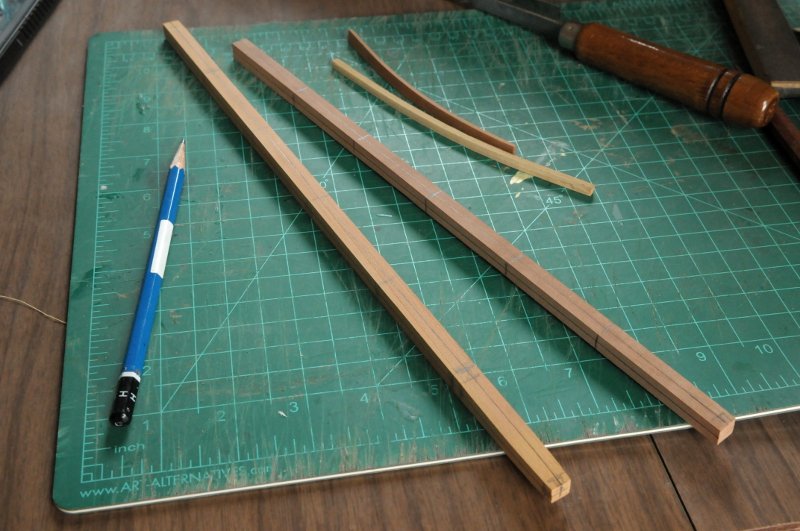
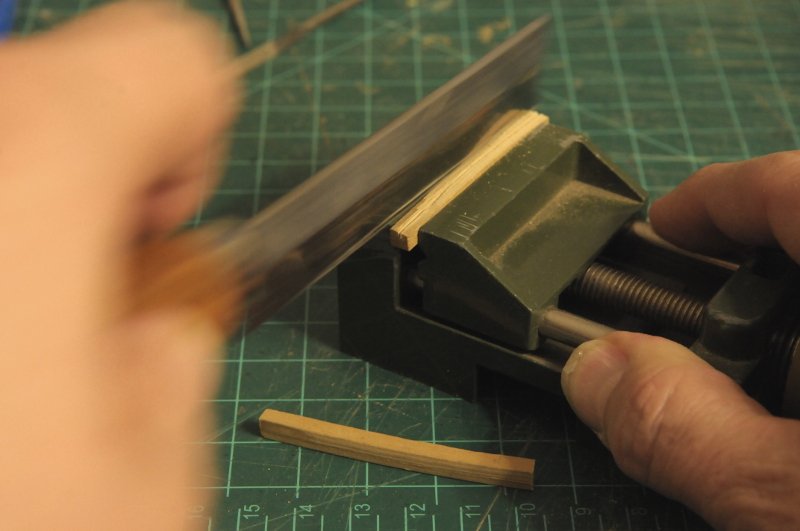
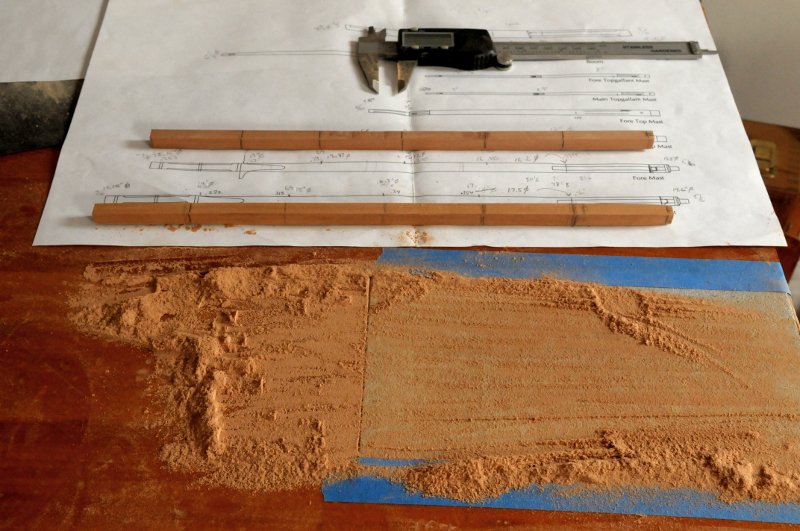
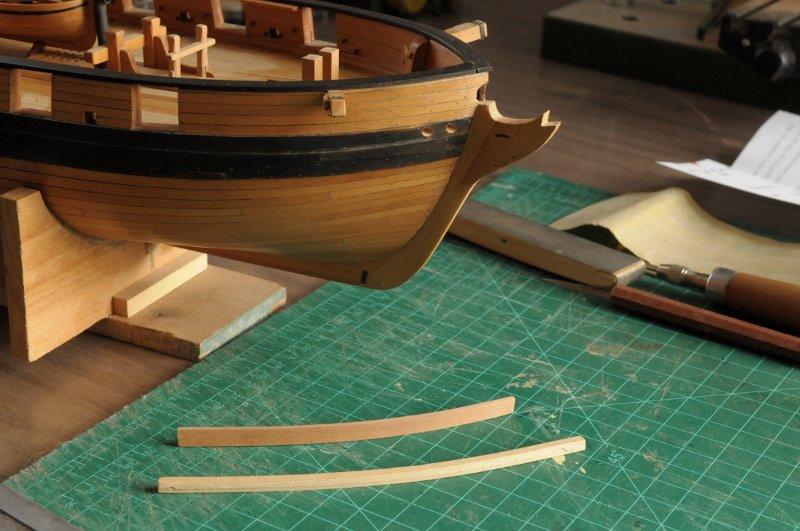
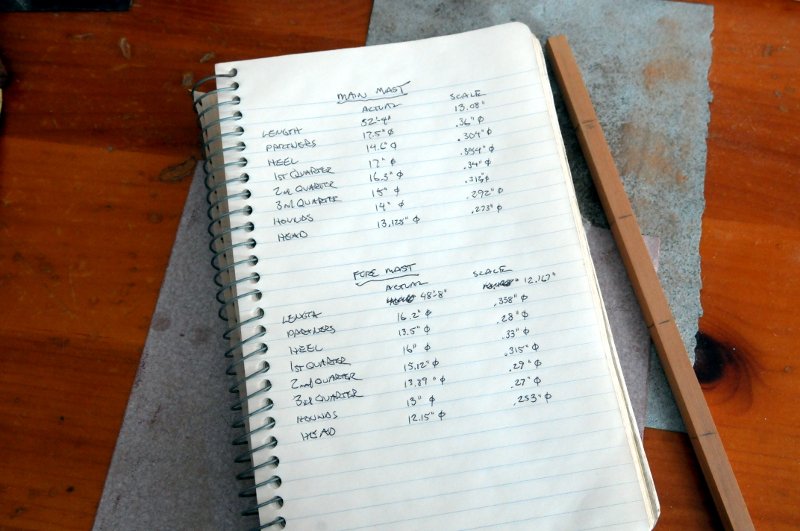
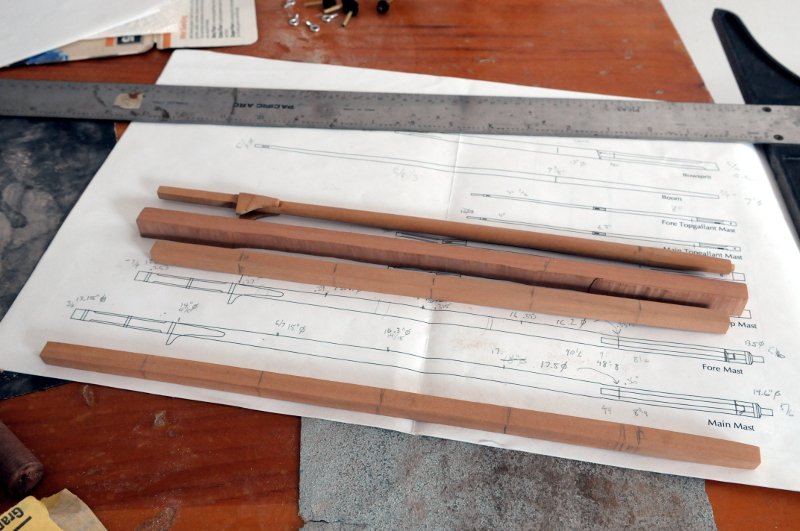
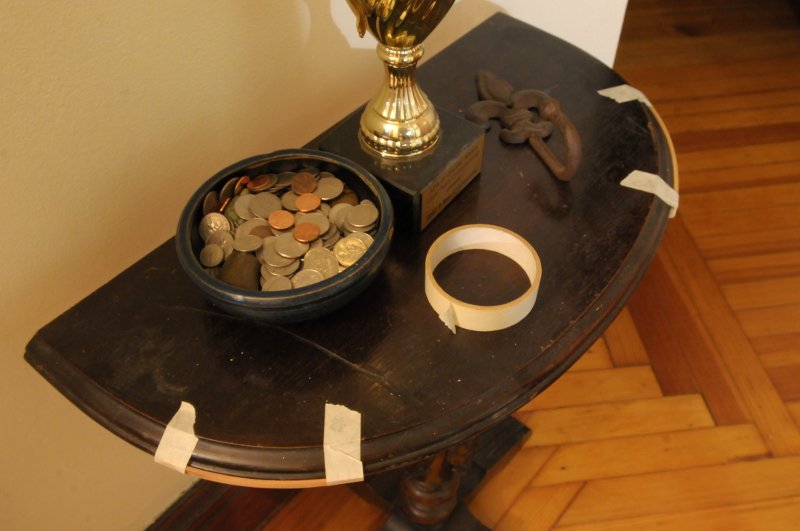
Thanks much hamilton! Now that the boat is done (as much as I am going to do), I'm going to work on the masts. Here are my calculations of the dimensions for the two masts, using Lee's book for guidance-- I had started the masts a while ago (years now!), and was unsuccessful. The top piece was my attempt at the main mast which was too short, too thin, and I didn't like the way the hounds turned out. The third one down was going to be my foremast, but it is too short. That roughly cut piece in the middle of the group of three will be my new foremast. The lowest piece is the second try at the main mast, which is (so far) on track to turn out okay. You can see on the printed drawing where I have adjusted the heel length to account for the shallower draft of my lake vs. ocean brig-- The piece that is to become the fore mast was cut very ragged, from thick stock. It needs a ton of sanding to get it smooth, square and down to size-- It's getting there, the marks indicate that I don't initially sand that side-- While I work on the masts, I am also going to work on the head rails, and in preparation I'm bending some stock. Sometimes you just have to look around the house for the right radius-- Ron
-
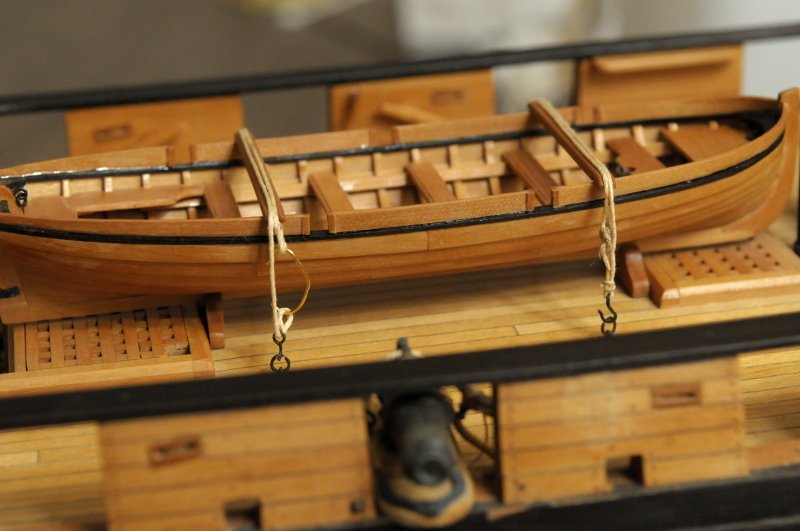
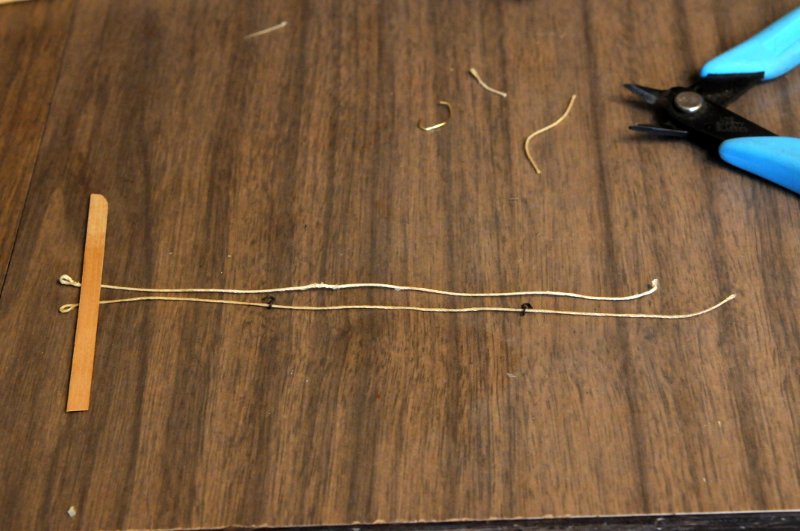
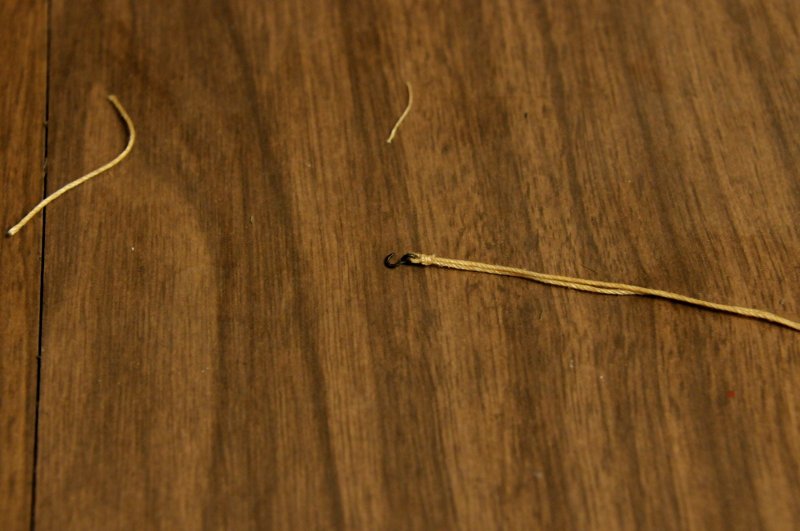
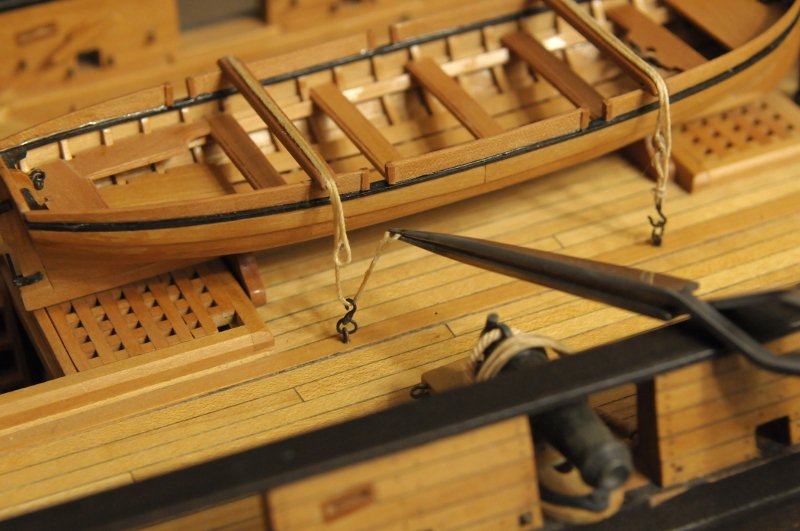
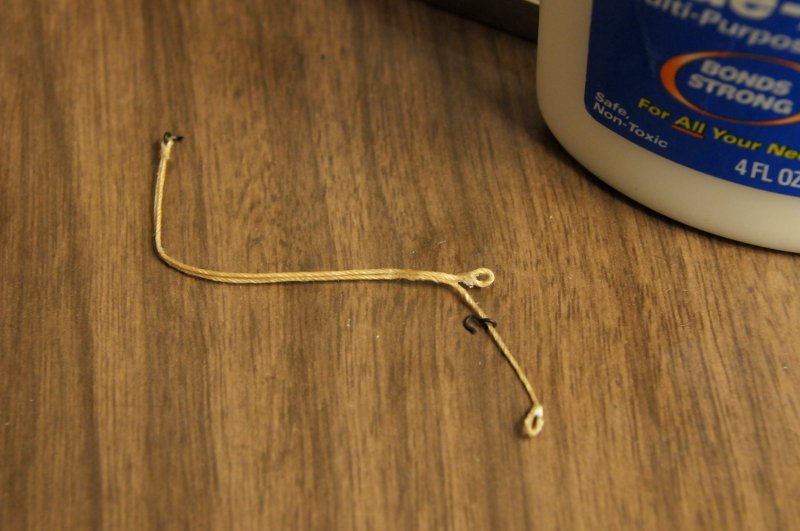
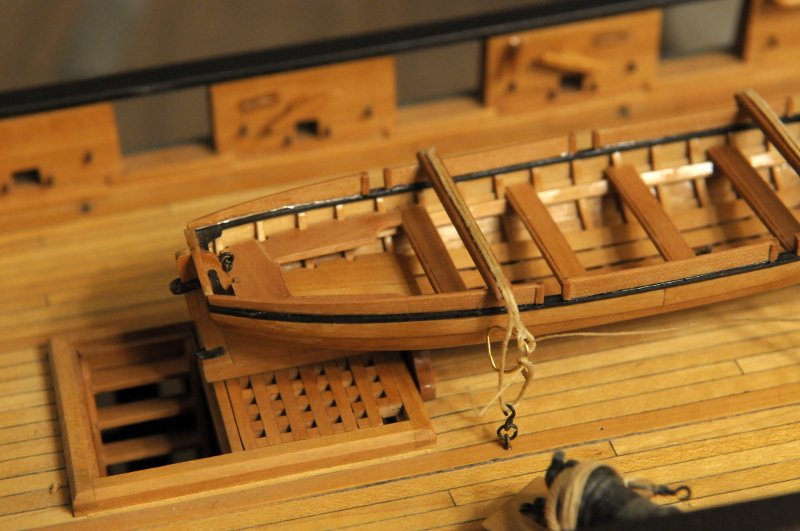
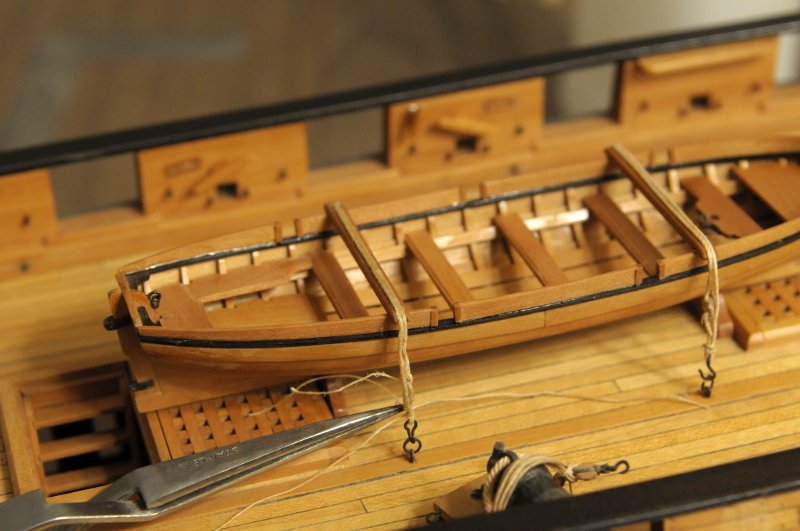
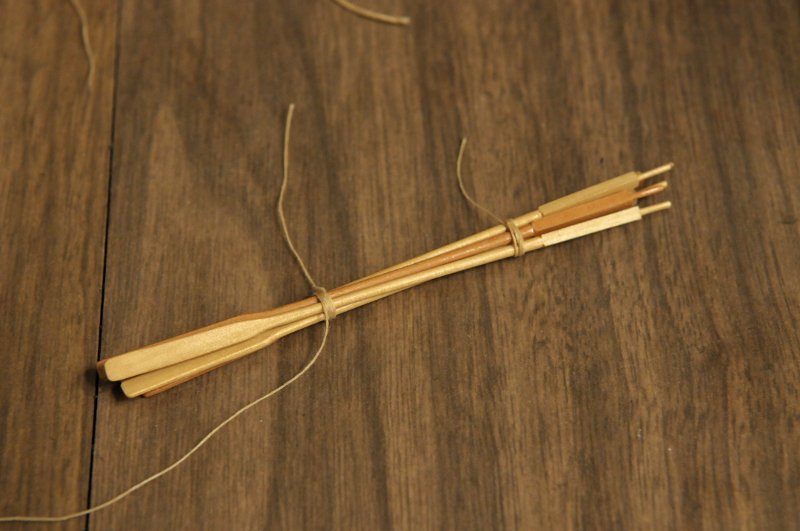
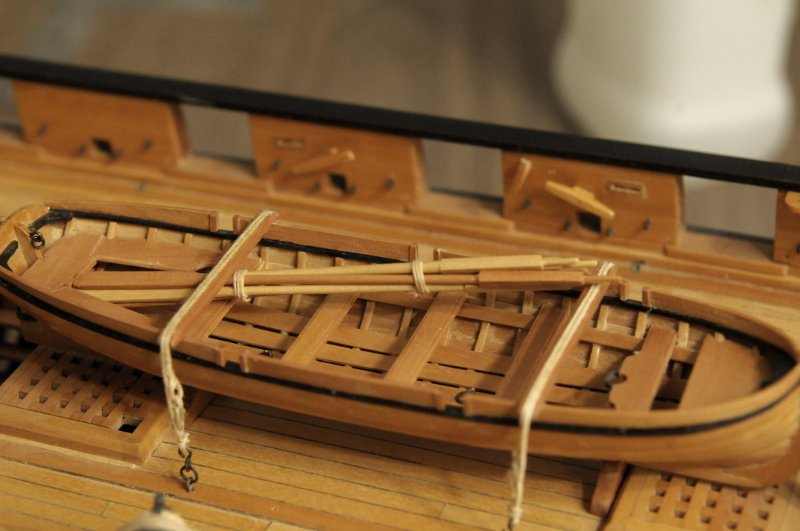
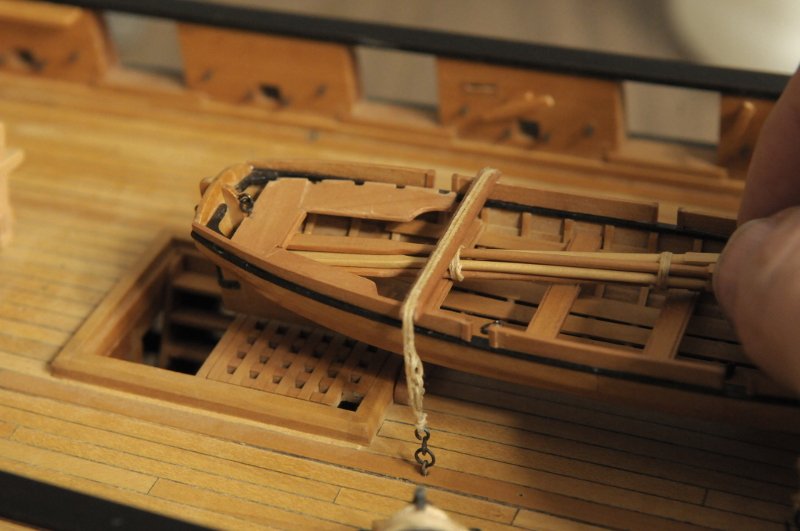
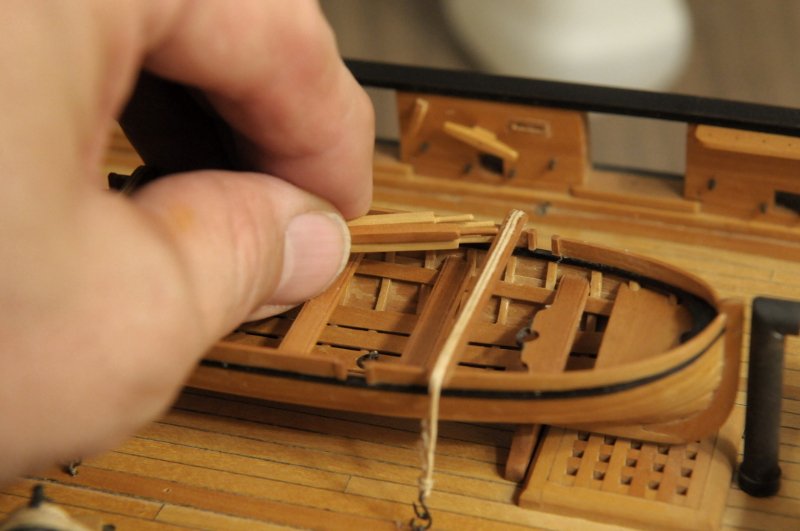
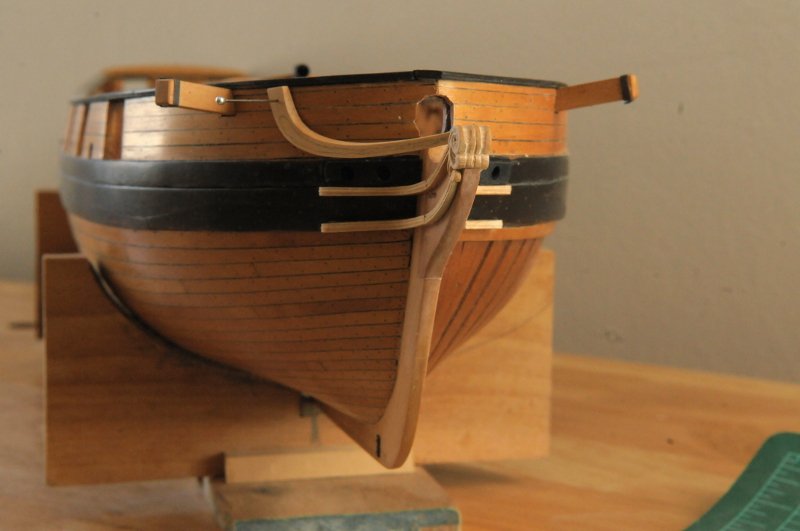
Thanks, Martin. Here's some more progress! I got lucky somehow with the first tie-down. The second one took a few tries. The first test fitting showed it was too short. I considered lashing it anyway, but my conscience wouldn't let me-- So I cut another piece, a little longer, and threaded the hooks onto it-- I seized the port side hook-- And test fit it. Too long now-- I trimmed a few millimeters off each end, and reformed the eye splices. You can see the dab of glue that forms the splice-- That one was also just a smidge too long-- I trimmed again, formed another eye splice, and finally it was just right, so I seized near the hook, and lashed the eye splices together-- By the way I found my missing oar!! Here are the five lashed together-- But to my dismay, I could not slide them under the battens!! The battens and tie downs can't be removed now without messing with the hooks (or cutting the lashings and seizing's), and I don't want to do that-- So close-- I discovered that one side of the seat was not glued tight, and it lifted to let me push the oars under-- And I was able to push the front batten forward (I had put just a touch of glue to secure it, but was able to gently break it free) just enough to slide the delicate oar handles under it-- The work on the tie downs was tedious, and I took shortcuts with the splices and lashings. I need to improve my rope skills, but for a start, there's the boat, fastened nice and snug!! -- Ron