
HOLIDAY DONATION DRIVE - SUPPORT MSW - DO YOUR PART TO KEEP THIS GREAT FORUM GOING! (Only 64 donations so far out of 49,000 members - C'mon guys!)
×


rlb
-
Posts
655 -
Joined
-
Last visited
Content Type
Profiles
Forums
Gallery
Events
Everything posted by rlb
-
 Justin, Your progress is looking great! You might want to try making a paper or card pattern for the garboard plank. Then you could work out the tricky shape and cuts without experimenting on precious wood! Ron
- 66 replies
-
- 3
-

-
- Finished
- Model Shipways
- (and 1 more)
-
Congrats, Andrew. Many models are started, fewer finished. She looks great. Ron
-
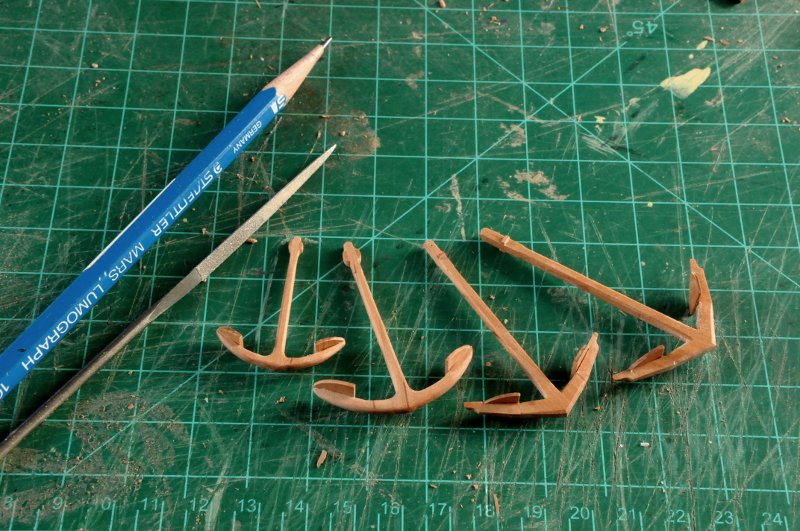
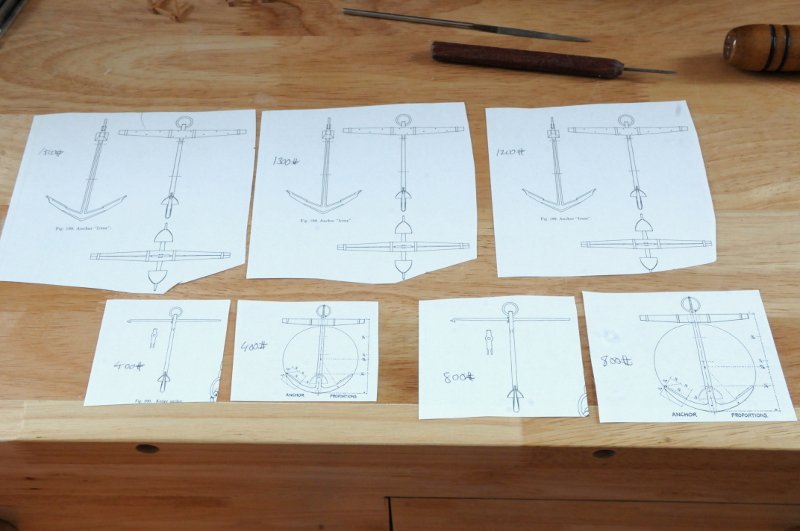
The anchors are roughed out. From left to right: 400 lb round-arm, iron-stock; 800 lb round-arm, iron-stock; 1200 lb angle-arm, wood-stock; 1500 lb angle arm, wood stock-- That 800 pounder still looks heavier than the 1200 pounder. There is some discrepancy between the Davis proportions (or drawings, since I didn't compute every proportional dimension) for the round arm, and the Lavery drawings for the angle arms, that don't jive, or maybe (uh, probably) I haven't delved deeply enough into them. There is still some fine tuning to do--gaps to fill around some of the palms (flutes), thinning down some of the palms, shaping the snapes (the pointy ends on the angle arm anchors)-- I will also give that 800 pounder a general thinning down. I am very curious; I wish I had a scale that could accurately measure these, and then I would know the true relative differences. I had a kitchen scale which might have worked, but I haven't been able to find it since I moved. Ron
-
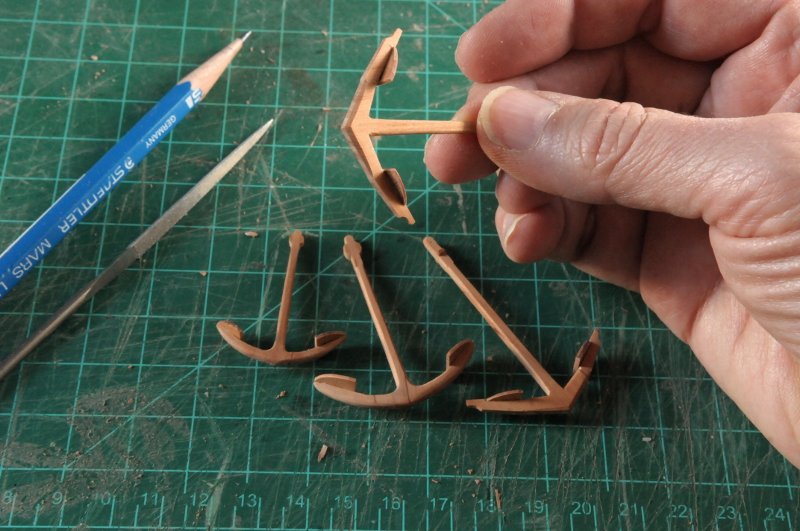
In between conference calls for work, I try to take a few swipes at the anchors. Here was yesterday's state of affairs-- And now today-- The outlines are basically there. There is more tapering to do, and chamfering of the shanks and angle arms, plus small additions on the shanks (as you can see on the smallest) for either the eye of the iron stocks, or the ridge for the wood stocks. Then come the palms, which will complete them, as far as being ready for casting. What is supposed to be the 800 pound anchor , second from the right, looks even heftier than the 1200 pounder to it's left. The shank is appropriately shorter, but it's width is too much I think. There is a discrepancy between the shank width as drawn by Davis and Petrejus. You can see this in the previous post where the drawings are side by side. Here is the 800 pound anchor with the Davis pattern on the wood (in order to shape the arms), and the Petrejus drawing next to it (which unfortunately doesn't draw the profile of the arms). They may look close, but there is a discernable difference-- I will thin down the shanks of the two round arm anchors, and I think they will look more proportionately lighter. Ron
-
Mark, Yes, that is a big reason I love these ships, especially this time period. Everything is curved in different directions, and yet so gracefully resolved. Ron
-
These are quickly grabbed online of Victory, how applicable I don't know, but they look to me like sill and heads are following the deck.

-
Speaking as an architect, not a shipwright, my preference would be for the sills and heads of the lights to be parallel to the deck sheer. You wouldn't have that triangular sliver at the heads that way, and it would look more natural from the inside.
-
Thanks for all your advice, druxey. Phil, your centrifugal casting technique looks good, thanks for the tip. Probably won't try it this time around, but if I see an old centrifuge for cheap, I might go for it. wefalck--yes, mastering a new technology is probably the primary reason for me wanting to cast the anchors. There will be four, each a different size, and I am making the masters out of wood. I could more easily just paint the wood masters, and not cast anything. That is my back-up plan if I'm not able to get a good result casting. I had bought a piece of brass the thickness of the biggest anchor, but thinking about cutting 4 anchors out of brass, and filing them all down by hand seemed even more work than the casting. Making the forms out of wood vs. brass is definitely easier for me. Printing these, and the many other parts that could use that technology kind of defeats the purpose of the hobby for me. I guess casting is kind of analogous to printing, but it still seems more of a by-hand process, which appeals to me. Ron
-
Steve, The molds will be rtv silicone rubber. I was able to find your build log--a sweet model! I definitely can't manage the centrifugal casting arrangement you showed. I'll see how it goes. If I am not able to cast them well, I'll do the anchors another way. Ron
-
Druxey, I will make the filling vent/funnel larger, it's good I can recycle the metal! I think I need to get a larger crucible. I am doubting that the spoon/ladle that came with the casting "kit", will hold enough metal. Steve, I have wondered about this. They will be long, narrow pieces to cast. I was puzzling over whether a lower melting point was better or not, as it's not as big a delta from the mold (maybe won't cool down as fast as a higher temp metal?). I have also read that heating the mold before pouring can help, and I will talcum powder the mold also. I don't think centrifugal force is an option, unless there is a safe way to do this by hand. Is a higher melting point alloy better for this type of casting? Ron
-
Thanks druxey!
-
Thanks much, wefalck.
-
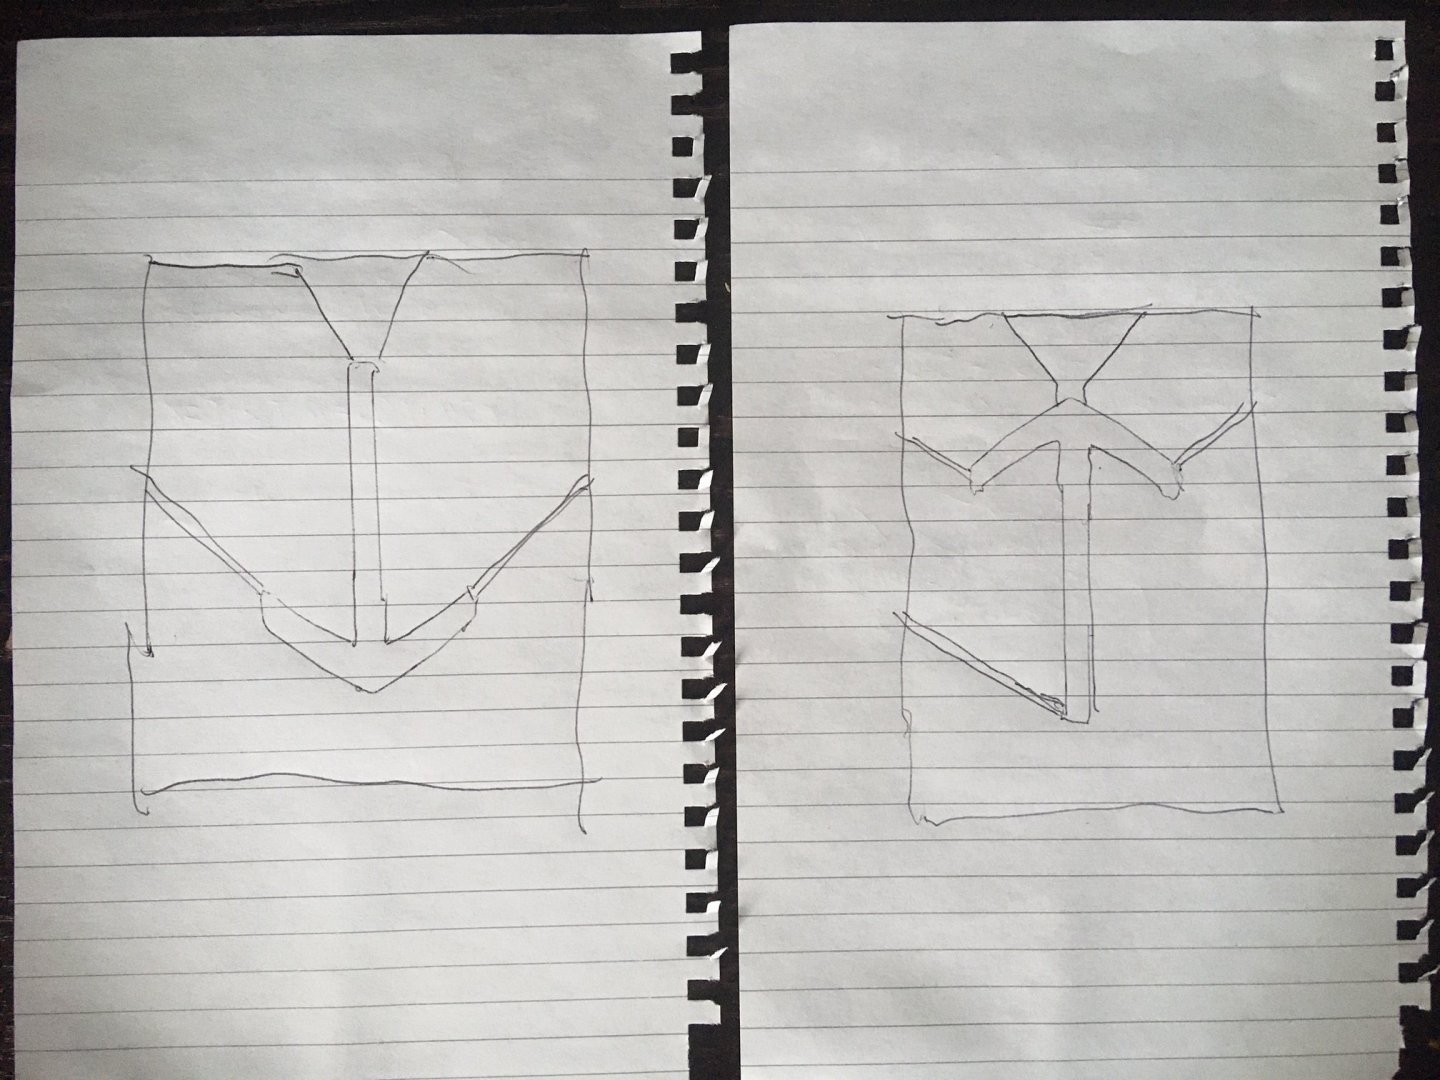
Question for those with experience casting: I am going to try casting my anchors for Oneida. It will be the first time I have tried casting. I'm using the Micro-mark 280 metal (280 degree melting point). How should I orient my anchor patterns in the mold? As on the left, or as on the right? Ron
-
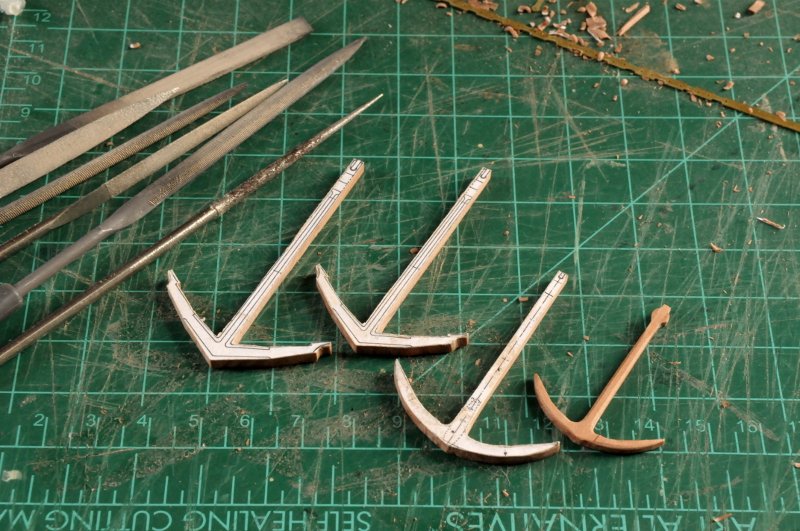
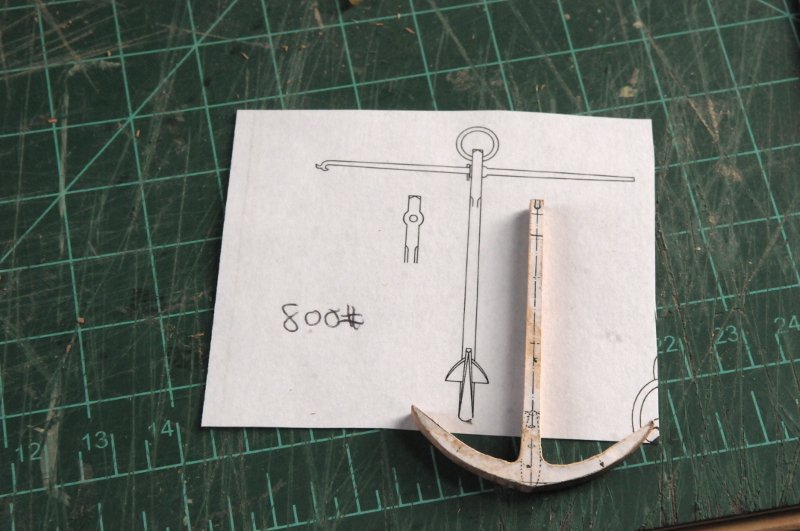
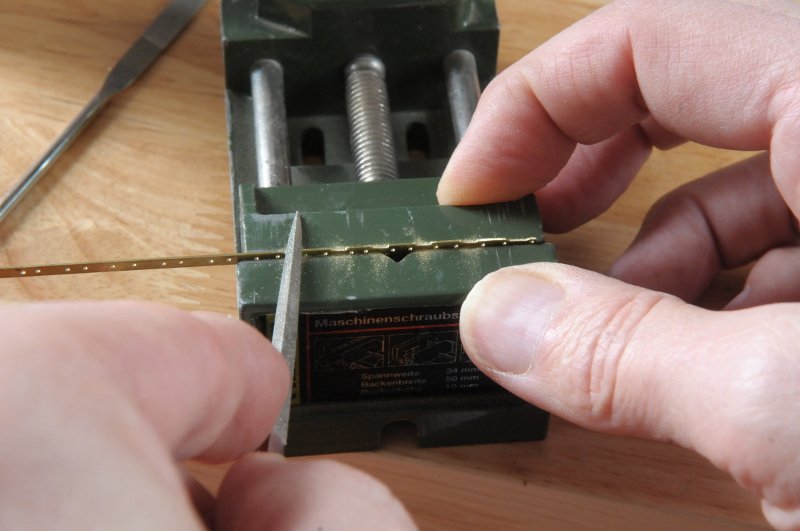
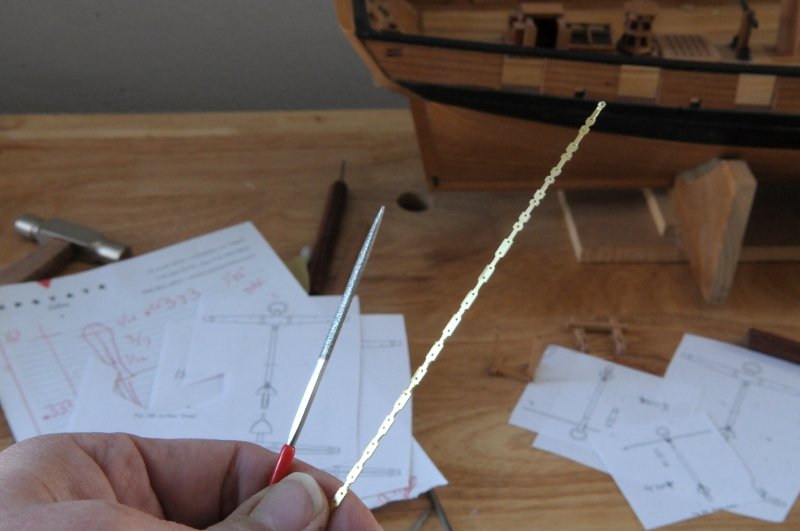
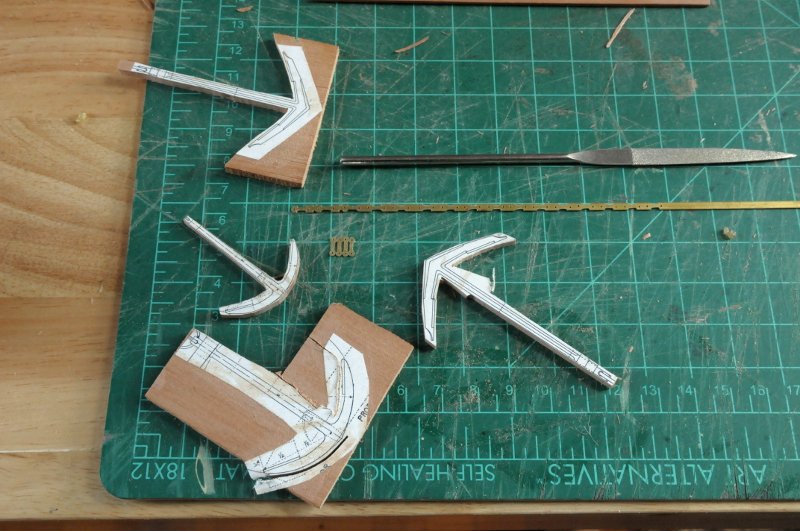
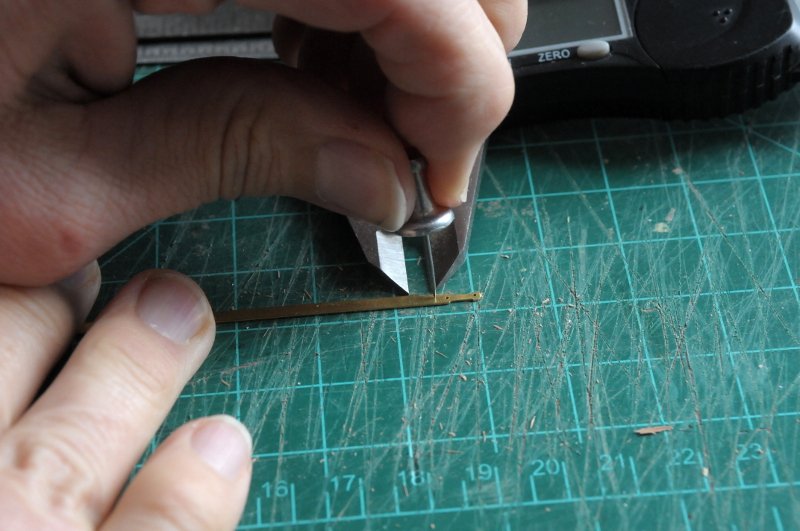
Here are the copies of the anchors. The two round-arm, iron-stock anchors need two patterns--one with the stock, and one with the arms-- I've decided to do the 1500#, 1200#, 800#, and 400# anchors. Here are the patterns glued to some pear stock. Wasting more wood than I would like, but I couldn't really figure out a more efficient way to lay them out without going diagonal. I thought I should keep the grain parallel to the shank, though that does make the arms susceptible to breaking-- The holes have been drilled and I'm filing away at the brass strip of preventer plates-- Varying stages of progress-- Four preventer plates parted off--they look a bit chunky, so more work is needed on them to slim them down a little. And the anchors in various stages of being cut out, sanded and filed-- Ron
-
That makes it sound easy, but I know there is skill involved! Ron
- 221 replies
-
- 2
-
-
- queen anne barge
- Syren Ship Model Company
- (and 1 more)
-
Michael, Photos can be inaccurate, but that color seems to be developing very well, and I applaud your patience in having to be careful with so many coats! Ron
- 221 replies
-
- 1
-
-
- queen anne barge
- Syren Ship Model Company
- (and 1 more)
-
Romulus, Welcome, and it is interesting that you are a professional ballet dancer, and are interested in this hobby. I have three daughters who studied ballet for many years; one of whom still dances professionally. I don't think any of them would start a ship model! As druxey says, any help you may need is available here, and I hope you will continue after the "shut down" is over. Ron
-
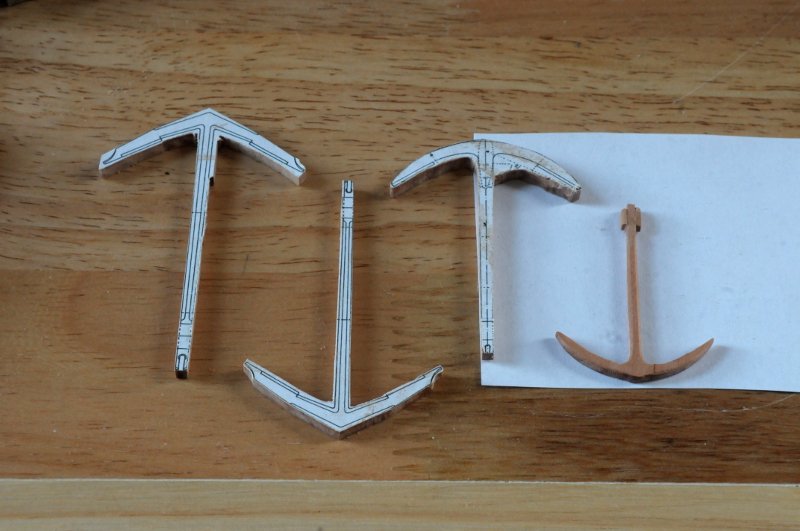
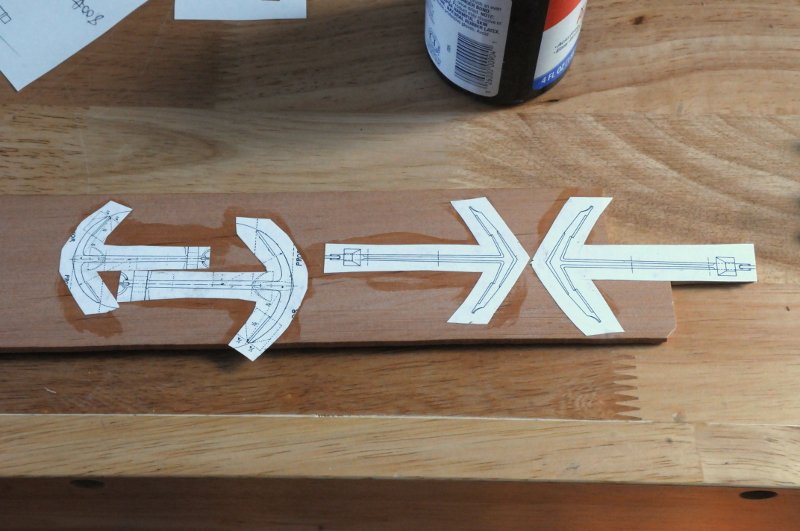
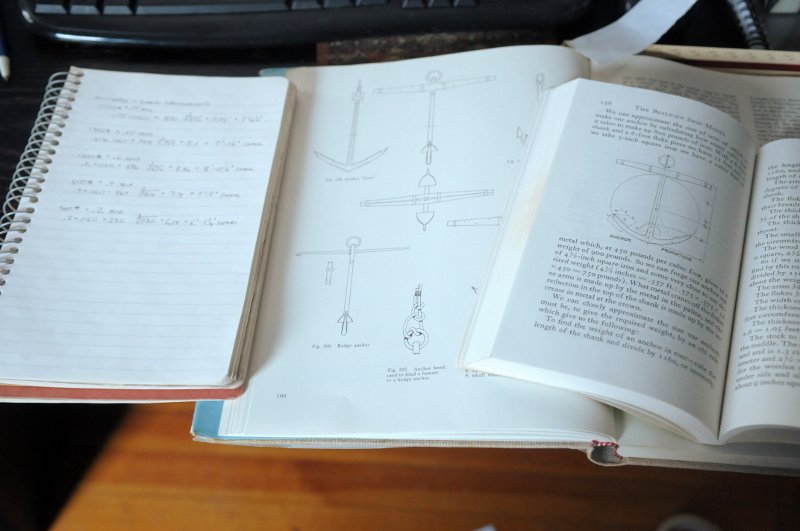
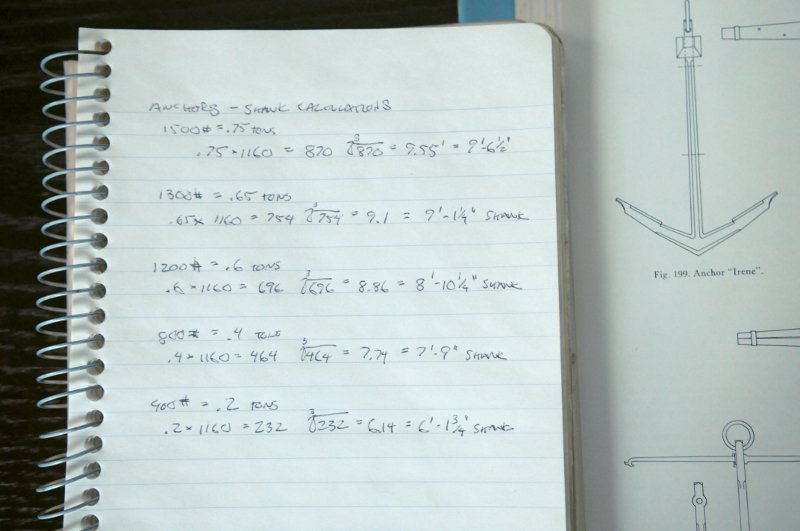
Thank you, Andreas. I have a few things going at once, having finished the bow work. I'm still sanding the Channel pieces into form, and also cutting out 20 Chainplate Preventer Plates from a strip of brass. I did one, to test, and will now mark and drill the holes for all twenty, and try to do them more or less all at once-- I am also beginning preparations for making the anchors. Oneida was to carry five: 1500lbs, 1300lbs, 1200lbs, 800 lbs, and 400 lbs. I think I will be making 4, though not sure which ones yet. As this was a transitional period for wooden stock vs. iron stock, and angled arm vs. round arm, I am thinking of two of the larger ones as traditional angle arm, wooden stock anchors, and the two small ones as round arm, iron stock. It seems there is some evidence that the smaller anchors were more likely to introduce the iron stocks. I'm going to try and cast them, which is something I have never done before, so we'll see how that goes. Since I'll have the wooden forms for the casting, if the casting doesn't pan out I can paint the forms and use those. Here is a page from Petrejus's book Modelling the Brig of War "Irene" showing both traditional and iron stock anchors, and Charles G. Davis' book The Built-Up Ship Model showing a round arm anchor (though with a wood stock), and my notebook with calculations for the sizes. I used the formula Charles G. Davis gives in his book. I calculated just the shank size, and will Xerox copy the illustrations to multiple sizes so that the shanks match my calculations. That will give me scaled paper patterns to cut out the wood forms with-- I also adjusted Davis' formula to check it against a table of anchor sizes in Lavery's The Arming and Fitting of English Ships of War, and got results that corresponded reasonably well to that table, so I am somewhat confident that my anchors will be close to the right size. Ron
-
That will look pretty similar to the photos on Dave's website. Nice! Ron
-
I too, missed your build log until seeing your gallery photos. Superb job, she looks great! Ron
- 231 replies
-
- 1
-
-
- model shipways
- armed virginia sloop
- (and 1 more)
-
Post #80, Photo 1 (though other photos show it also, this one struck me)-- There is indeed a human being in this cold, sterile place, building this beautiful thing. Ron
-
Steve, Yes, you won't need the detail from the Chapelle plans for a while. Hopefully by then we'll all be back to normal! My frames are actually Cherry, as are the deck beams and knees. The keel, stem, sternpost, and hull planking are Pear. The decks are Maple, and there is Castello Boxwood here and there. I think your Maple frames will be nice! What other woods did you get? I love that all the Oneida's are different. Ron
-
Bob, I completely agree with Kurt on the display! Ron
-
Beautiful work, CRI-CRI. From your scale figure, La Niña, is actually larger than I thought her to be! I'm looking forward to watching your model develop. Stay safe, Ron

