HOLIDAY DONATION DRIVE - SUPPORT MSW - DO YOUR PART TO KEEP THIS GREAT FORUM GOING! (83 donations so far out of 49,000 members - C'mon guys!)
×


rlb
-
Posts
655 -
Joined
-
Last visited
Content Type
Profiles
Forums
Gallery
Events
Everything posted by rlb
-
 Nice. A next door neighbor, when I was 4 or 5 years old (about 1965), raced hydroplanes, and some of my earliest memories are of a kind of scary light (welding?) coming through my window at night, as he worked on his boats; and the trailer in his driveway with a stack of those strange shaped craft. I look forward to your model. Ron
 -
Best wishes to you, also, B.E. for a great 2014. You know you must throw yourself into the Pinnace. Your Pegasus is too good for second-best. (Though as I write that, I am trying to imagine the difficulty of building my cutter at an even smaller scale.) Ron
-
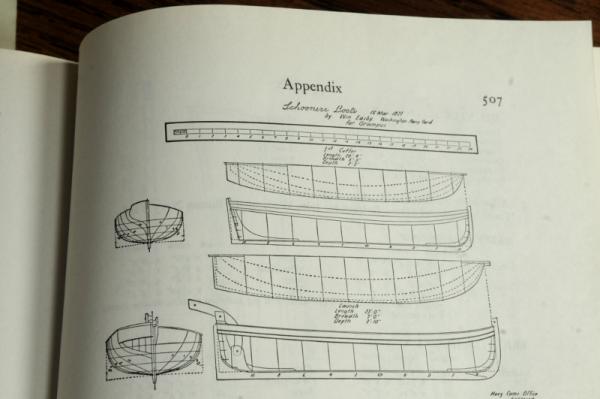
Thanks, all, for the comments, and everyone who popped in with a "like". They are all very much appreciated. Elia, I too, was intimidated by the clinker planking, but as with most of these modeling-things-one-hasn't-done-yet, the bark is worse than the bite. And, the other fact of model building--I think I can do it better next time! I'm looking again at the Chapelle drawing, trying to determine all the details he didn't include in the drawing: footboards, platforms, seats, etc. Even the number of oars to account for is a mystery to me. How many would a 20 foot cutter have, two on each side, three, four? (My compulsive lack of planning ahead is evident, once again.) I think I have planked one strake too many. Chapelle didn't label a washboard on this drawing (I'm building the upper boat), as he did on many of his other cutter plans (nor did he dash them in as the Royal Navy plans do), and I was going to cap my boat with a thin gunwale, and thole pins or wooden oarlocks. But as I re-examine this, studying how he drew the transom on this and other plans, and taking into account the depth of hull measurement, I now think his drawing does show a washboard, which means I'll have to do some back-stepping. I'll also go back through my W.E May book "The Boats of Men-of-War" for some clues. Ron
-
Russ, I like your thinking! I missed a step in failing to locate the frame locations on the interior of the keel, but I think I can interpolate them from the planking butt locations, which I was careful to place accurately. I think I should be able to do as you suggest. Ron
-
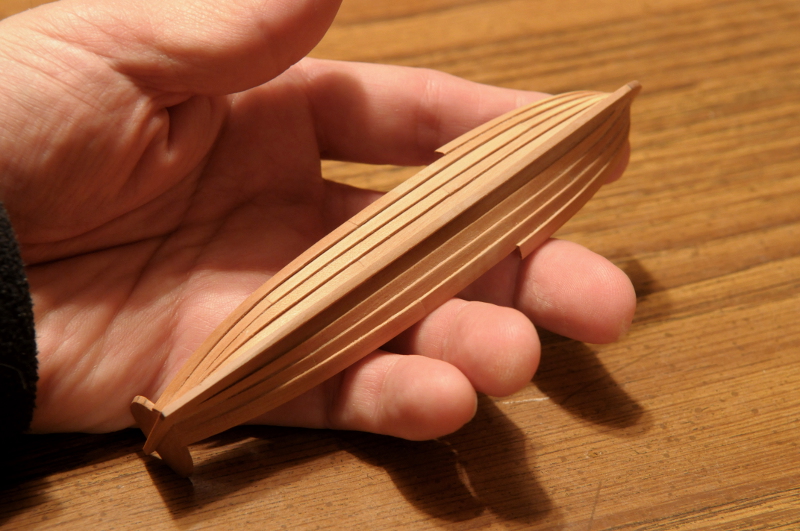
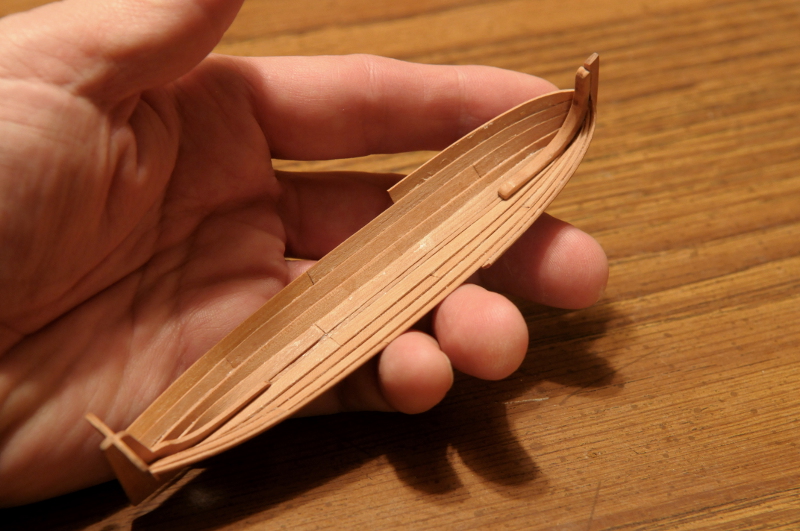
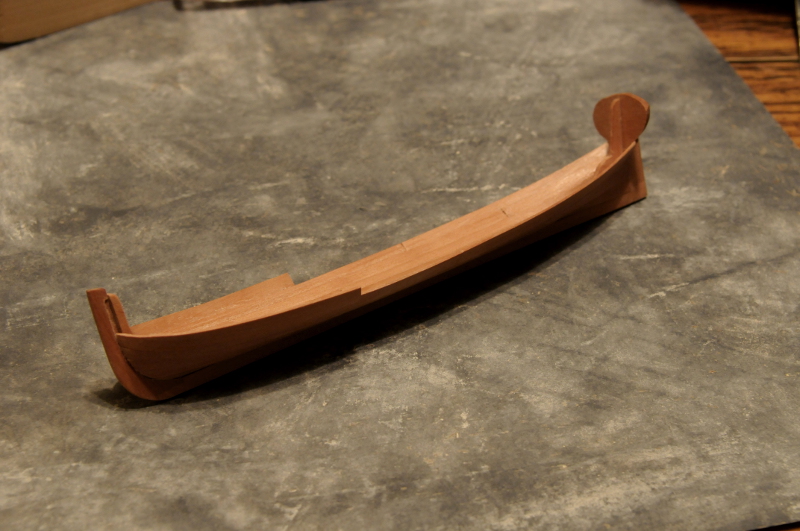
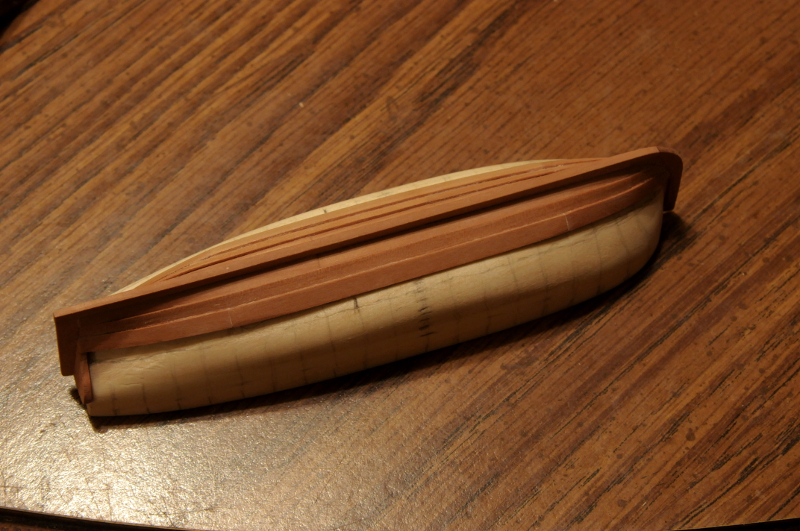
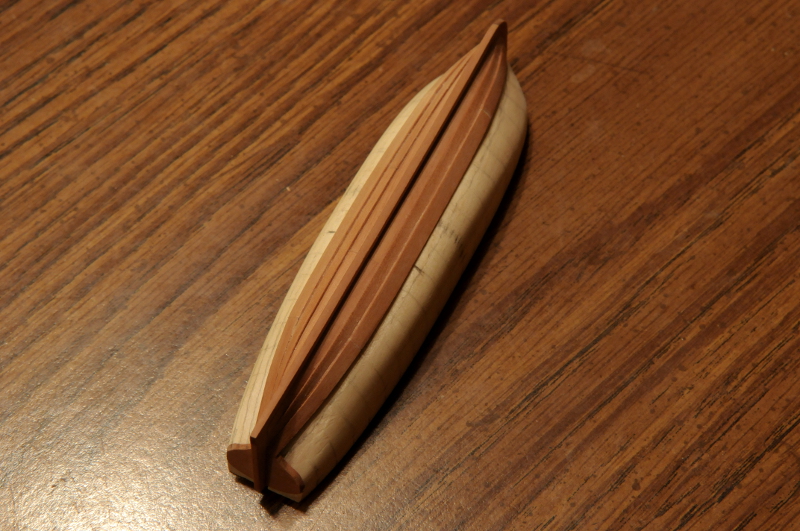
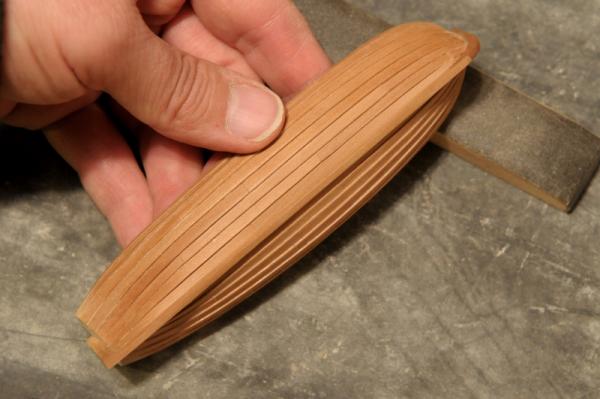
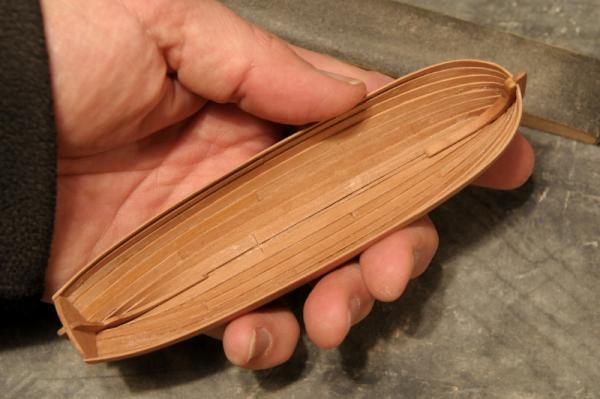
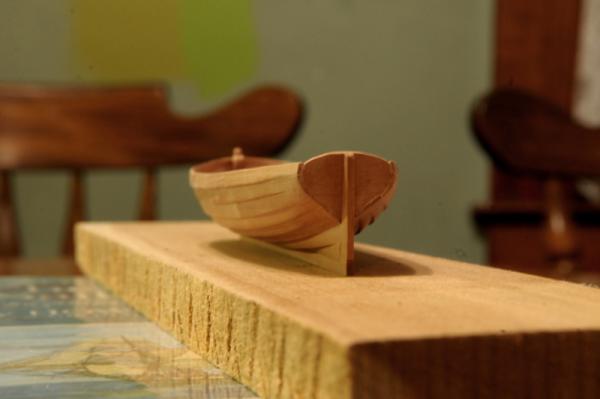
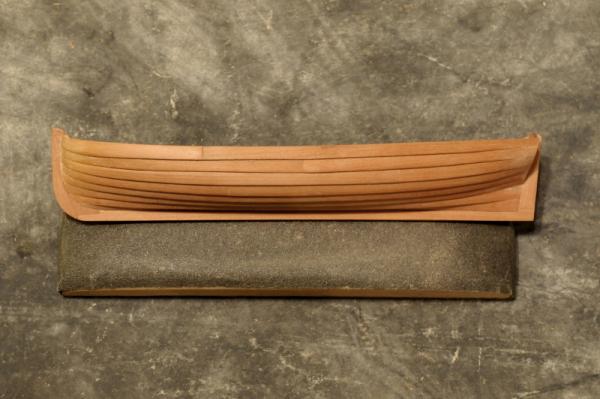
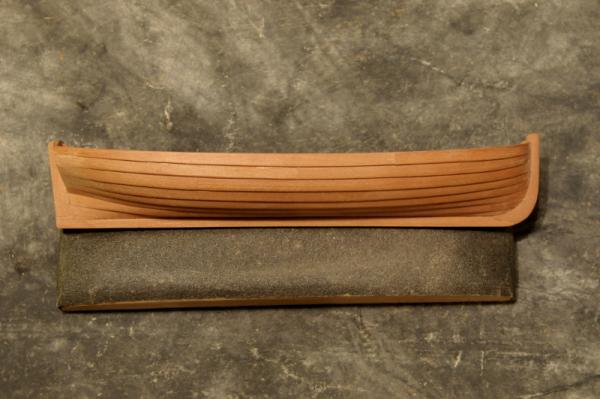
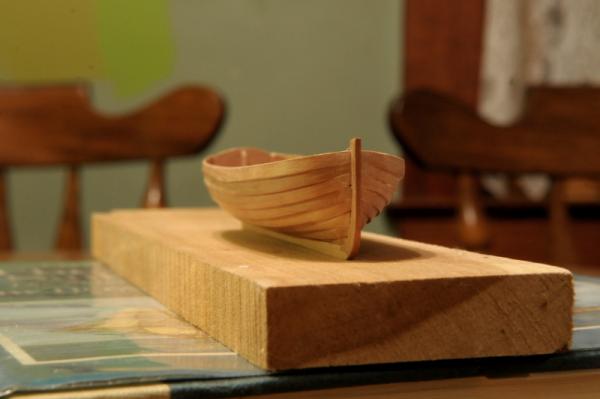
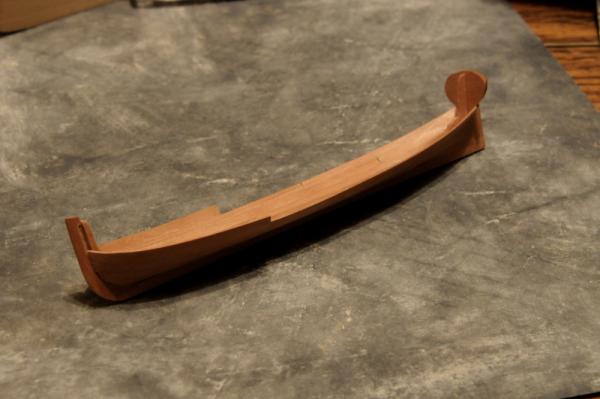
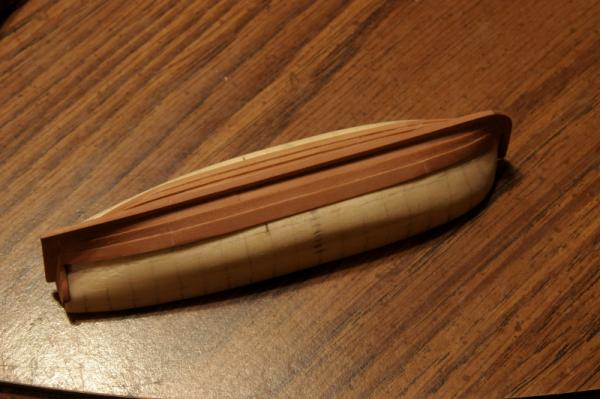
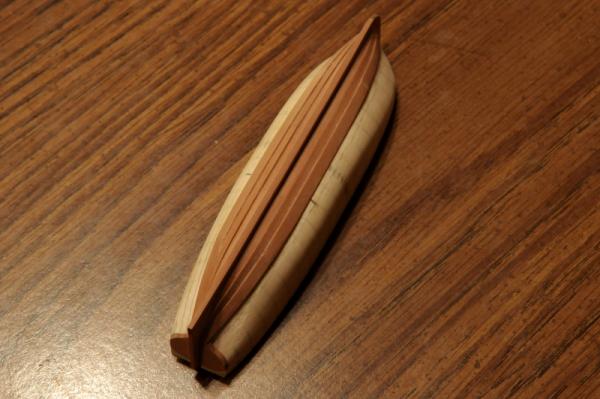
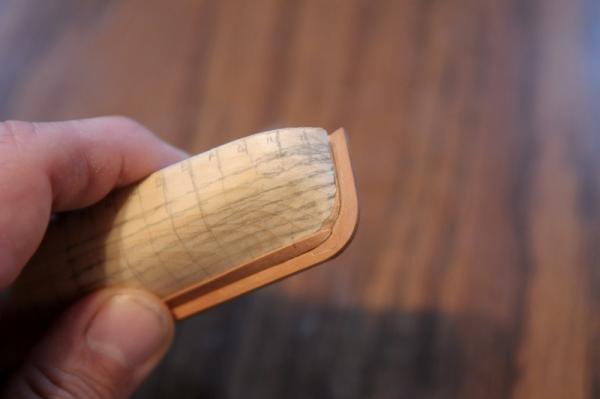
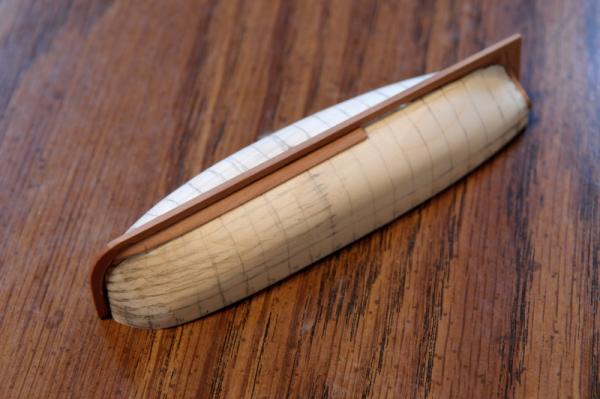
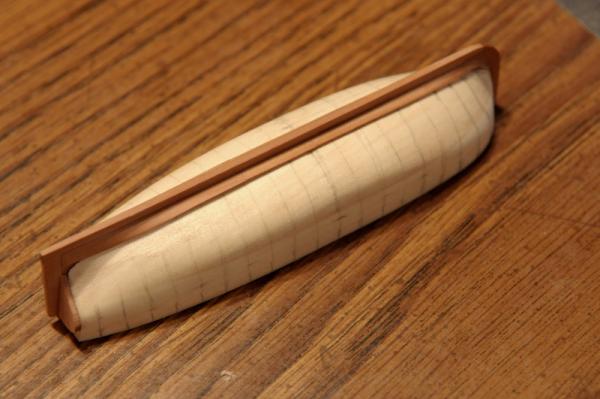
Thanks, Russ, and Dan. Planking finished. Still some minor glue clean up to do on the exterior (and a lot on the interior, but that may wait until the frames are in), and some more sanding is needed, especially at the bow. But maybe the hardest part of the cutter is done (hopefully)? I'm pretty happy with the starboard side, which will be the more visible side in the finished model display. Next will be cutting the frame slots into the hull plug. Ron

-
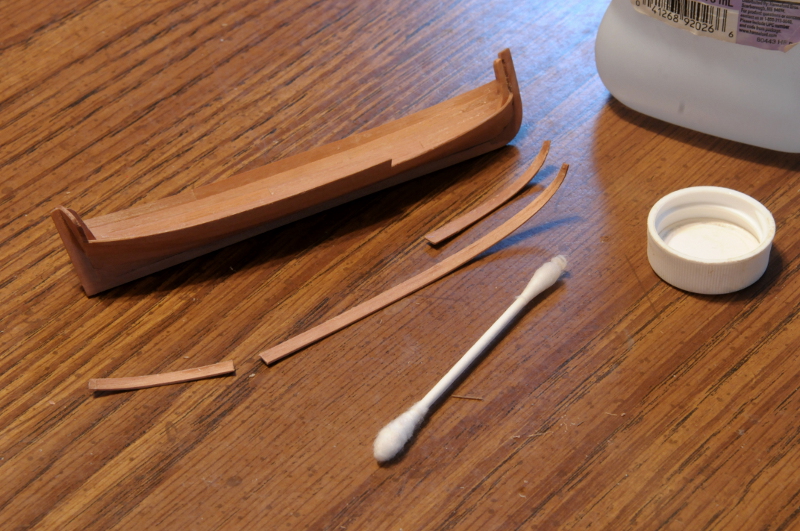
Thanks, Sam. I do like the look of the lap strake planking. Elmer, good luck with your Oneida. Planking the cutter continues. The usual procedure is cut and bend a few planks, wait for them to dry, then sand to shape and glue. A few strakes after that last photo, I decided I wasn't happy with the way the planks were developing at the bow on the starboard side. I had also made a mistake with the planking shift on one starboard strake, so those two issues compelled me to take a backwards step and remove a few planks. There's very little glue holding them. A few wipes with Isopropyl alcohol, and they come off pretty easily-- Here's where I'm at now, waiting for these planks to dry, so I thought I would post a little update-- I have six planks (one and a half strakes on each side) to go, I may be able to finish the planking today. Ron


-
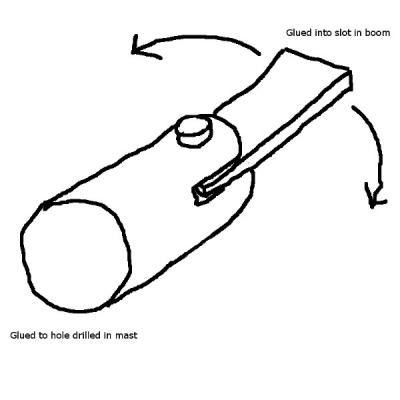
Hi Chief Mac, The Alden kit included a small brass fitting as I've drawn here-- You might be able to make something that looks or works the same. Cheers, Ron
-
Thanks, Elia. Thanks, greatgalleons; glad to help spread some ideas (they're not mine alone!). I'm amazed how fast (and with such quality) you're moving on your Niagara. Keith, Yes, I have the planking stagger all mapped out. Being able to shape a bow plank, separate from the stern plank, helps immensly. I can't imagine trying to get both bow and stern ends to fit well, and also be the perfect length, with a single plank. It's relatively easy to get two separate planks to join and line up well in the middle. Up to this point, the spiling curvature has not been an issue. I've been able to incorporate minor curvature in the limited plank width that I've used so far. It looks like it may work out as well for the rest, but I won't know until I actually get there. The third plank issue does seem to be working itself out! Still a ways to go, and any sort of difficulty may arise, but so far so good. Ron
-
What brand is a good head mounted magnifier,light.
rlb replied to kiwiron's topic in Modeling tools and Workshop Equipment
Elia, it's amazing you have done without one so far. When I got mine last year it was like I could see for the first time. Your detail work will be even better than it was (which was pretty good!). Ron -
Thanks, Elmer! Hope you had a good Christmas. As Keith predicted, it starts to get interesting with a few more planks added-- Ron


-
Sailor1-0, my cutter model is held together with PVA (white) glue. A more realistic way might be possible at a larger scale, but not for me at this scale. Thanks, Michael and B.E., and "Likers". Ron
-
Keith, I can now say from experience, clinker planking is not easier. Dan, Thank you for the advice. So far, the shapes are not too wacky or weird. I do start by laying a piece of card at the next plank location, and they have looked simple enough--not too much curvature--so I've just gone ahead and directly shaped the wood piece. It is slow going. Shaping and fitting the planks takes a while. Keeping the glue mess to a minimum is also much more important here than with carvel planking. I've been striving to keep the exterior free of errant patches of glue. The interior is not as clean, and will need some clean-up work; fortunately most of it will be covered over by various details. Three strakes out of eight done. This third strake is the only one that will contain three planks, and the middle plank here ended up being a problem. It isn't quite "full" enough after gluing (it sits a little too flat on the plug), but I think I can compensate for this on the next planking. Here's the current status-- And that's it until after Christmas. I wish everyone happy holidays, wherever you are. I'll be checking in, but no new modeling for a few days. Ron
-
Thanks, everyone. Yes, Remco. I have yet to find out, but I'm mindful that I may need to switch to some wider stock to cut some of the planks. The few I have done so far have just fit within the pieces that I am able to sand down with my mini "thickness sander". The wider stock (1/2" wide x 5/64" thick) I may have to thin down by hand. This cutter is much narrower than the one shown in David's tutorial, so the amount of sideways curvature in the planks should be less than those on that cutter. We shall see. If I need to cut planks in wider than my 1/2" stock, I'll really be "sunk". Ron
-
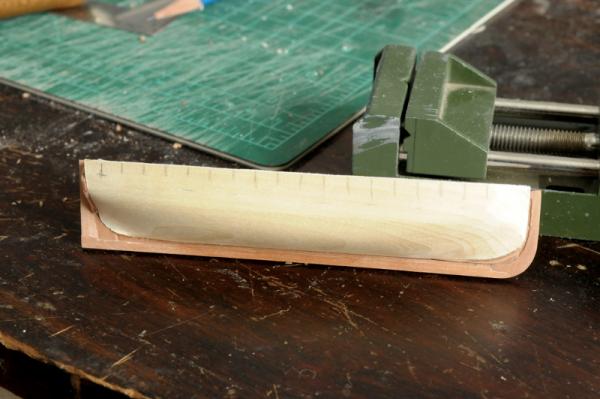
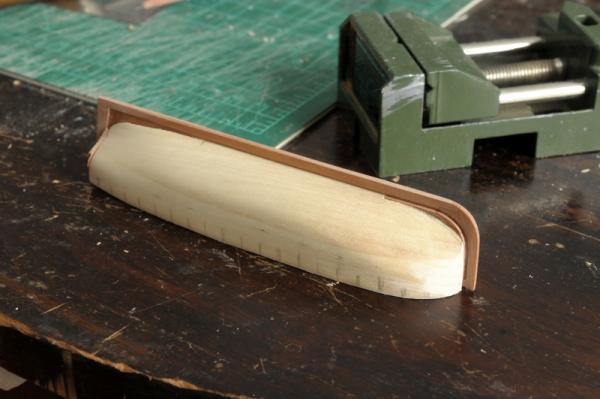
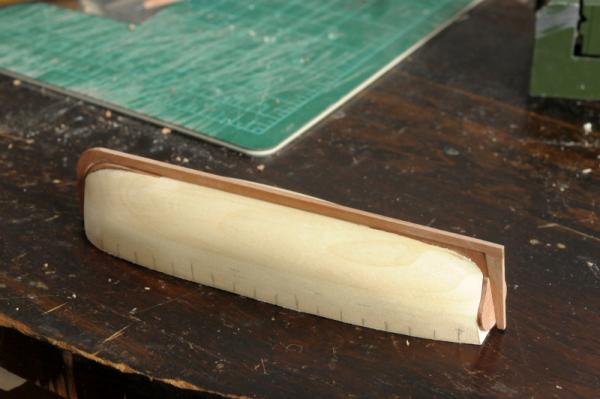
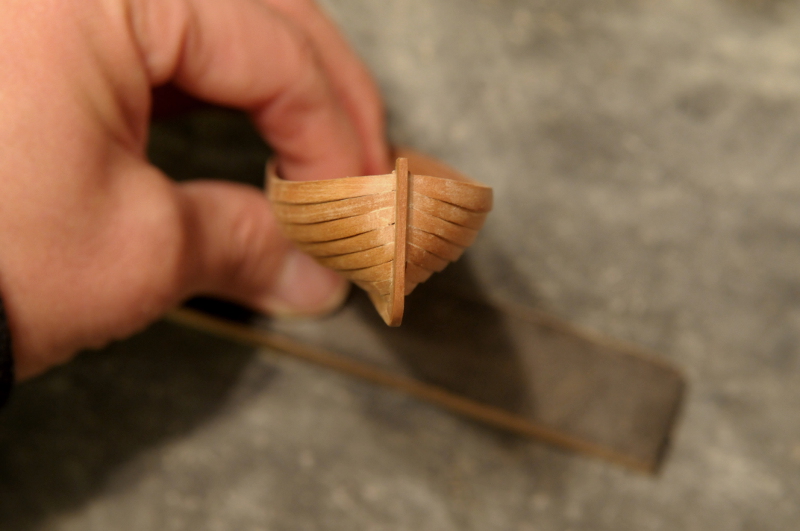
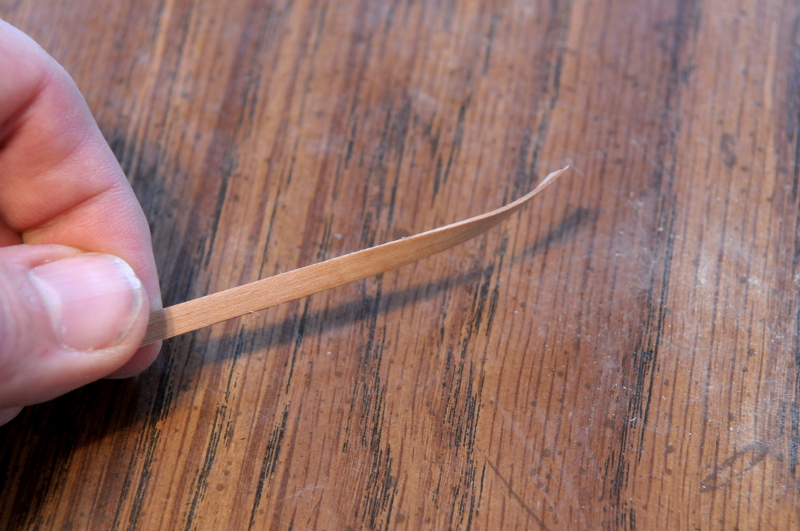
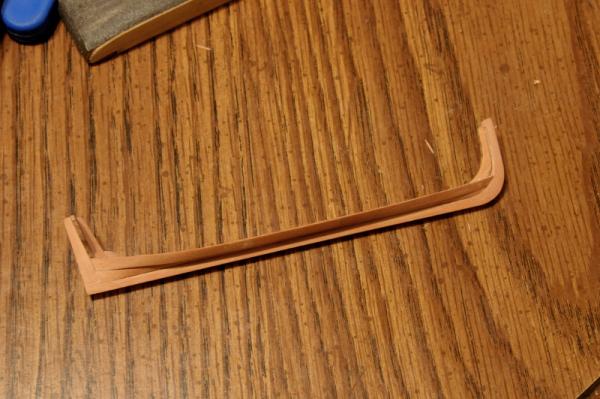
Planking the cutter I finally was able to spend some time working on the cutter, and it is slow progress indeed. With clinker planking, there are more steps in the process, and less room for error, because the whole thing can't be sanded smooth afterwards. First I bend a strip of planking-- Then work with flat sandpaper as well as a sanding block and files to adjust the shape of the plank-- Many dry fit tests. This plank is fitting okay, but still has some fine tuning needed at the stem. I have drawn the approximate lay of each planking strake on one side of the plug-- When the piece gets filed and sanded to acceptable shape (I am incapable of perfection!), it's glued to the keel-- Repeat for three more planks, and the garboard, port and starboard, is complete-- In the fitting of the next strake, the garboard strakes are cut back in places, filed, and adjusted to help the fitting of the next strake- I'm very curious to see how this will turn out! Ron


-
Thanks, Michael. When I see the tooling, cutting and milling setups, that you and others use, I am impressed. Often I don't have the patience to spend the time thinking about, and putting together these kinds of jigs, I often just muddle along by hand with sandpaper and files, and I'm sure, spend more time than I need to that way. But once in a while a better way will occur to me. Ron
-
Looks like a good start, Chief! Good to see your log. Ron
-
AJ, You're a very good modeler. You made that bowsprit look easy, and I don't think it is! Ron
-
Elia, Always great to see your work--so clean and to scale, and the first thing I thought looking at the full profile is that those colors really look good together. I also thank you for the transfer lettering info. Ron
-
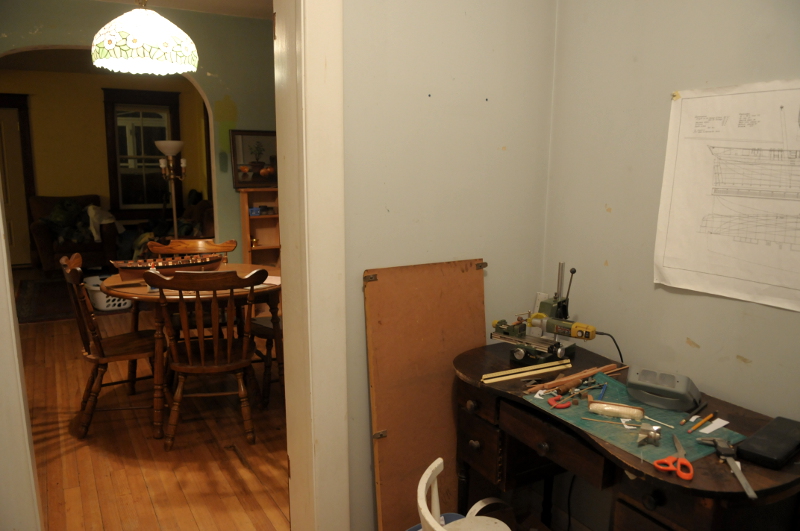
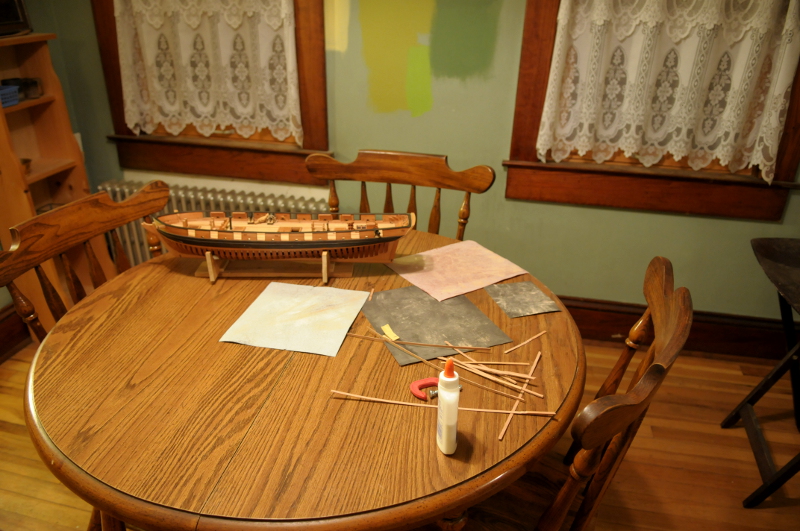
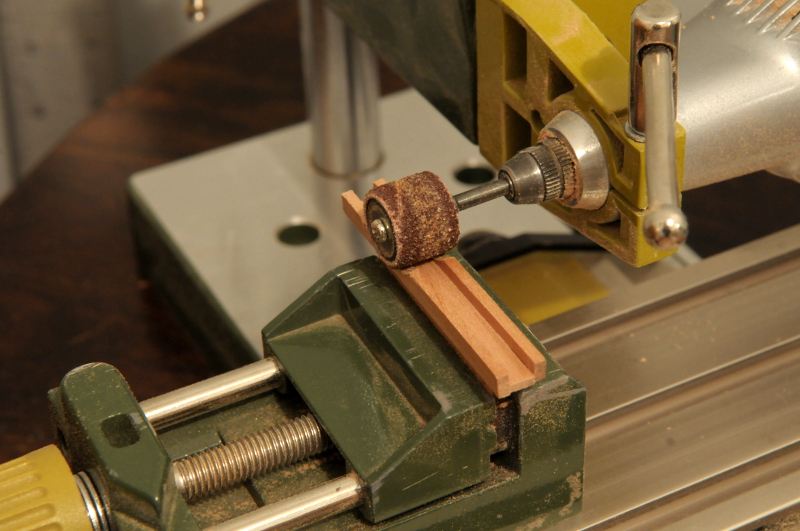
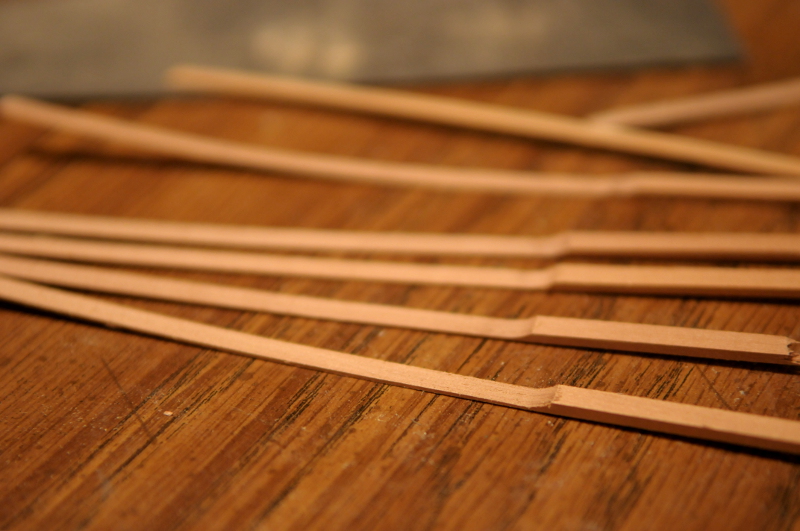
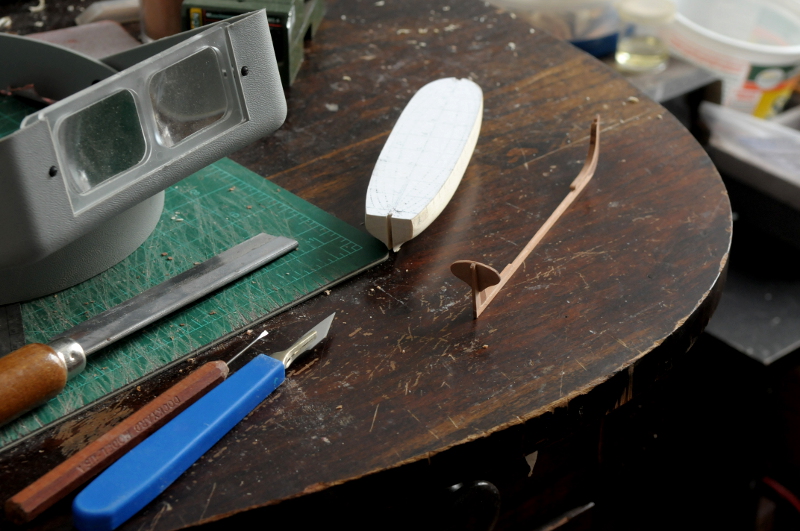
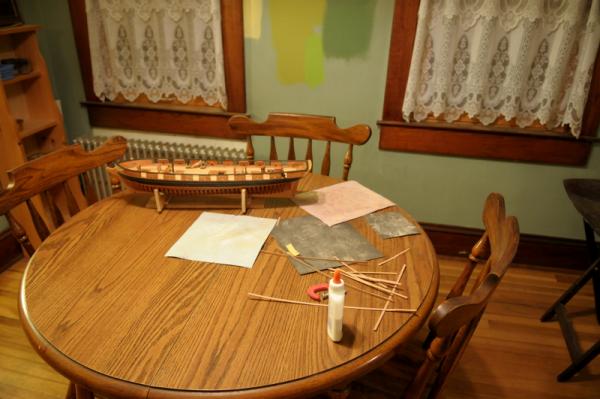
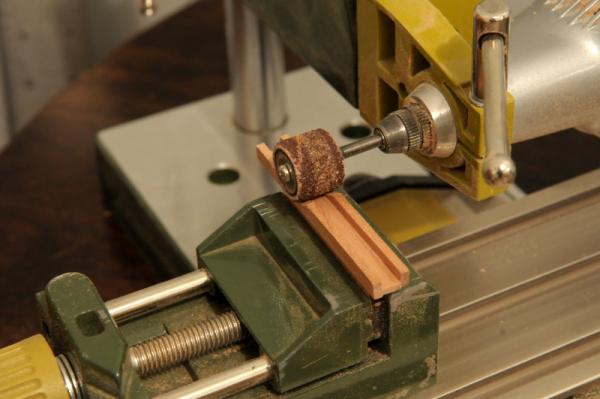
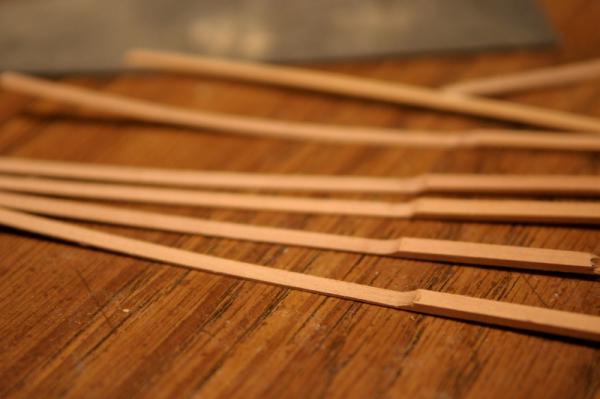
Thanks, Elmer! You should be getting a nice holiday present! I hope you enjoy it and I'll help you if I can. Keith is right, in my dojo you must become one with the sandpaper. Keith, you've got the patience and sanding part right, but you give me too much credit when you say "never seen any builder", etc. I'm still very much an apprentice--not nearly a master--in the hand work department. Think more of Russ, John (Jim Lad), others here as well without a doubt, and Underhill before them. But thank you very much for the kind words! Keith's comment tempted me to post a photo of a completely tricked out workshop (like Gaetan Bordeleau's), and pretend to "fess up" to having actually built my model using fancy power tools. But this really is my "shop"-- Most cutting and power sanding I do in the foreground room; most hand sanding, soldering, and work on the actual hull, or deck, I do on the round table where I have more room and better light-- I do have a good rotary tool, with the stand and x-y table, with which I've done some very basic milling, and a lot of "drum" sanding, including this setup I made yesterday, so that I can thin down some planking strips-- Seems very wasteful to sand away all that precious wood. But I don't need very many planks for the cutter. These are now 1/32", though they still need to be sanded smooth-- Ron

-
Thanks, Martin and Stan! Ron
-
Matti, You do very beautiful and evocative work. I like your philosophy on not making things "perfect", but having an essence of real life. Ron
-
"Great guns", Robert, you're doing a fine job! Ron
-
Gorgeous work, Alexandru! Ron
-
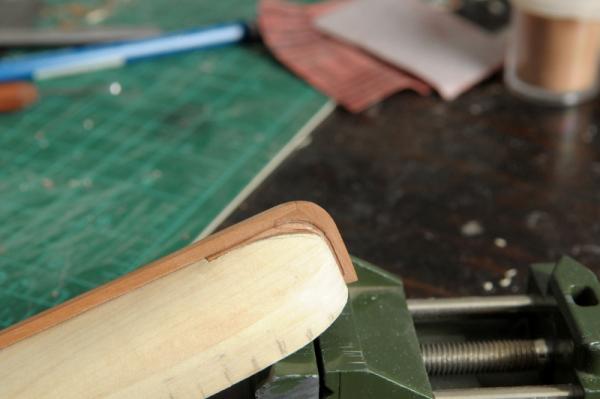
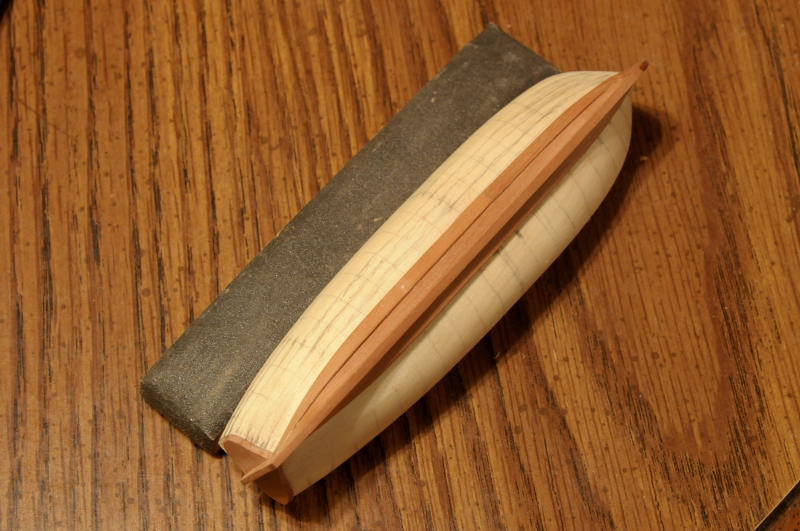
Thanks, Russ. In hindsight I wish I had tried a razor blade scraper for the rabbet, though I have had trouble with those as well, especially across grain or on a sharp curve. MIchael, thanks for your earlier post, and regarding thinning the wood: Good catch, I meant 5/64 rather than 5/16. Even I wouldn't try that by hand! I've done a bunch of thinning from the 5/64" x 1/4" and 5/64" x 1/2" stock I have, just scrubbing it on sandpaper. Time consuming, but it works. Ron
-
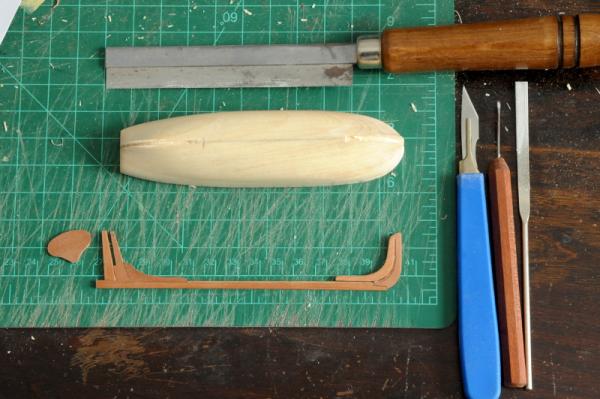
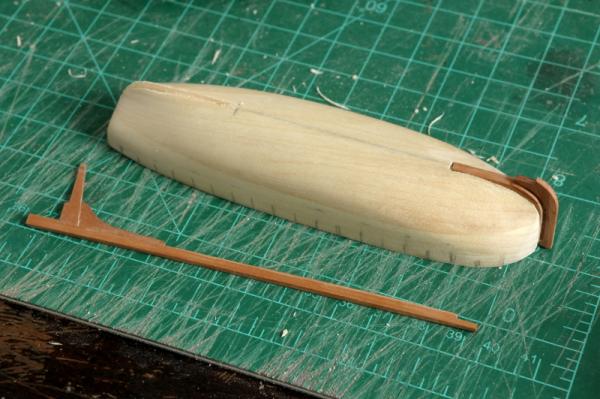
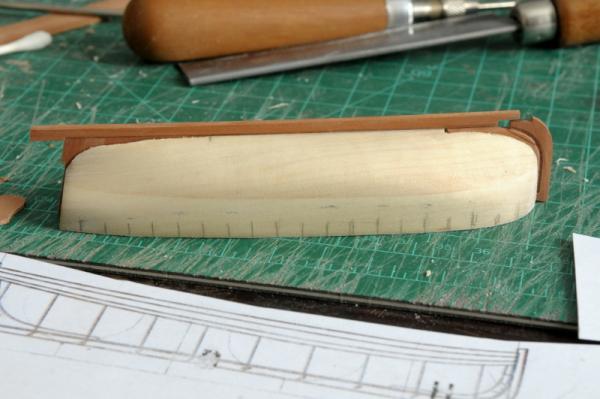
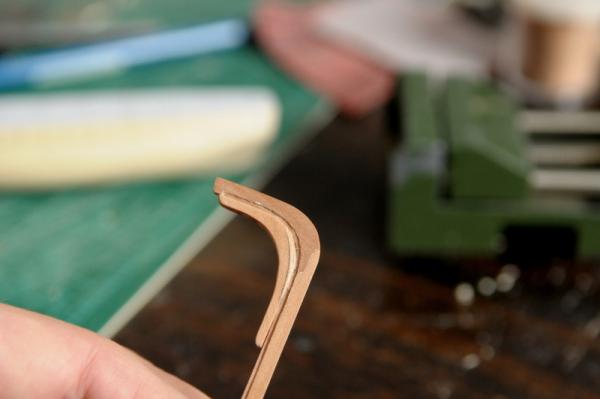
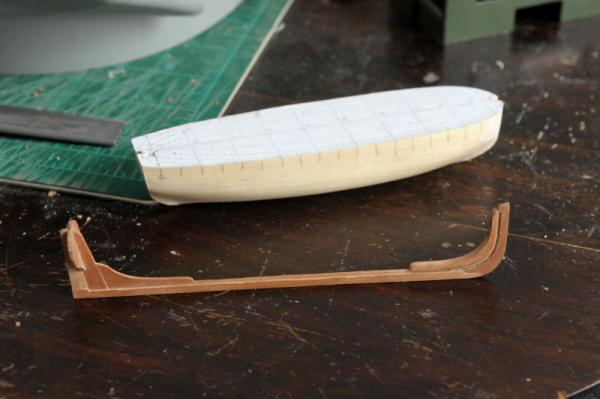
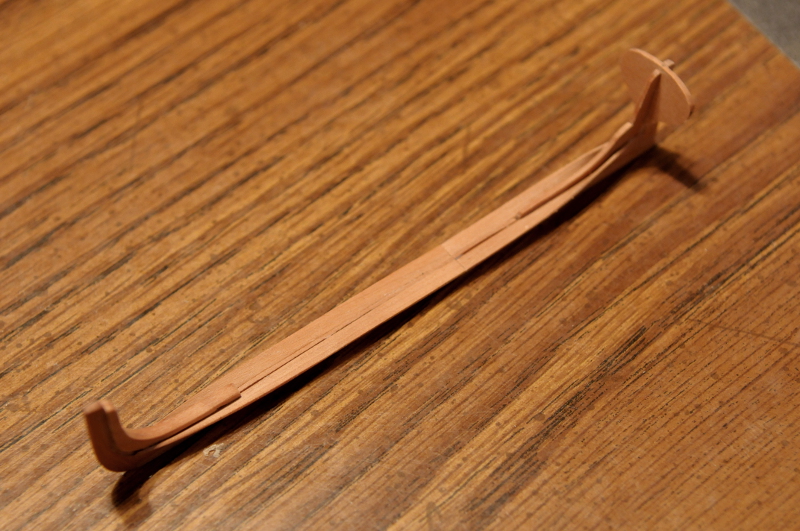
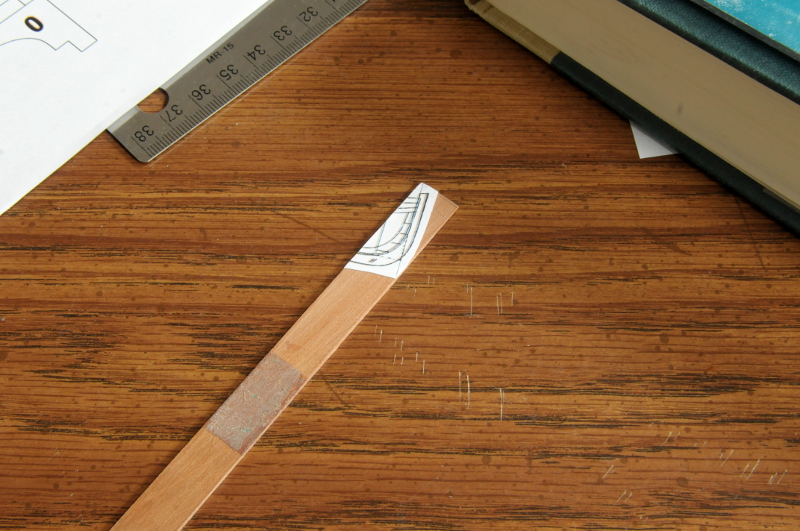
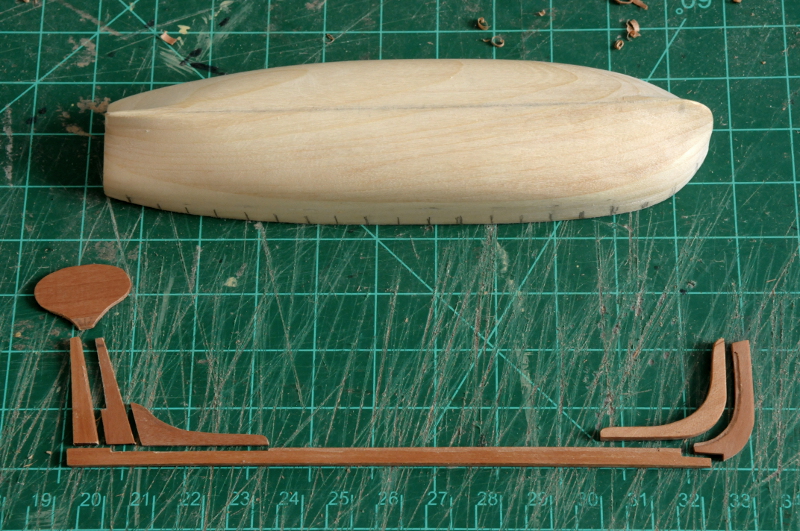
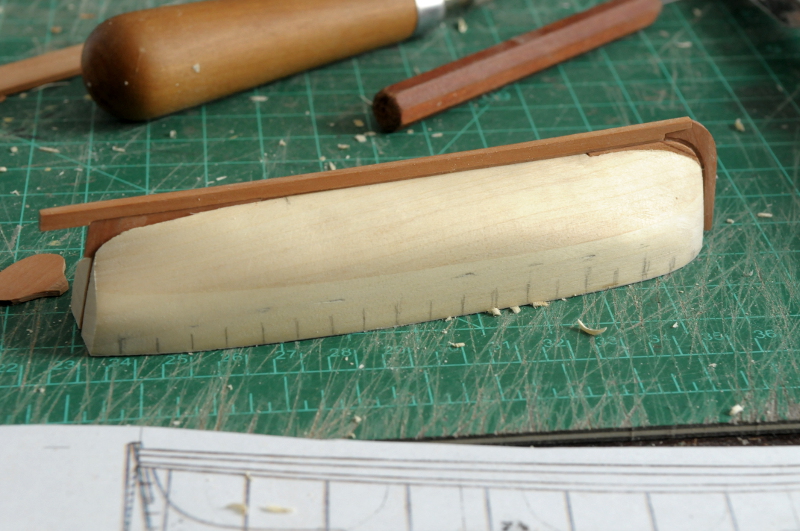
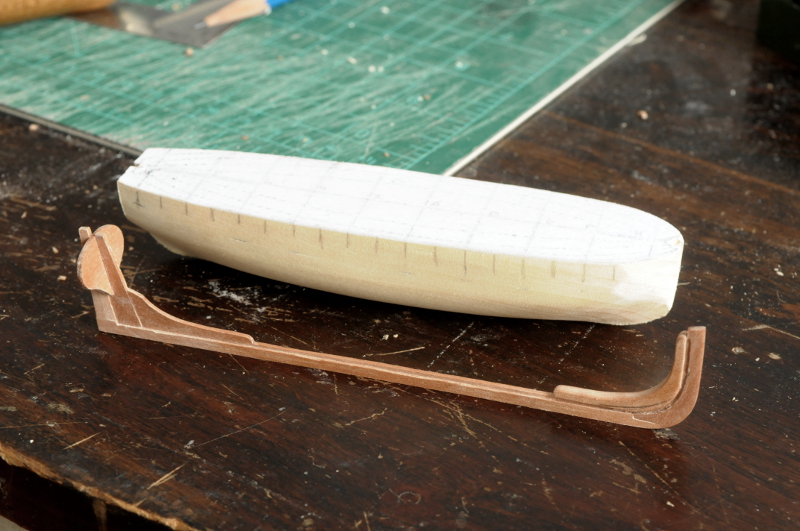
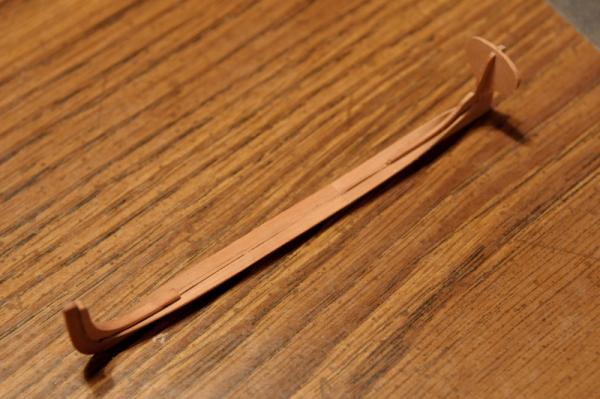
Building the cutter backbone All models begin with one piece-- That stem piece took four tries, and I still had a pretty ragged looking rabbet. The keel piece took three tries before I accepted the less than perfect rabbet. Here are the seven pieces of the cutter backbone-- Once I had those, I could start to cut the notches into the plug for the stem and stern. Here you can see work beginning on the plug, and the backbone dry fit together-- I glued the stem and the apron together, and used it to test the carving out of the plug-- After gluing the sternson knee pieces to the keel, I could test fit the stern notch, and see how well the keel fit. The keel matched my hull drawing, but you can see there was some more work to do on the plug to close the gap between the keel and stem-- I worked on the notches, and fine tuned the plug shape at the bow and stern, until the keel fit together on the plug-- I could now glue the transom and sternpost to the keel-- Fitting the completed backbone into the plug and evaluating the result-- One thing I noticed was that the stem apron needed a bearding line cut into it. The lighter crescent of wood in this shot shows where I chiseled a bevel in the apron-- And the resulting transition from the plug, across the apron into the rabbet-- Look ma no hands!! The backbone balances-- This shot give a little better idea of the scale. The cutter is not tiny, but it's not that big either-- Now I have to decide if I want to plank this in Swiss Pear, which I have on hand (though I have to thin it down from about 5/64ths [i had mistakenly typed 5/16th originally] to 1/32 or less.), or order some boxwood or holly, which I could get in the necessary thickness, but it means a long wait. I'm leaning toward the pear, and make the gunwale and washboard black, for some contrast, along with some nice boxwood oars. Have to think about this. Ron