HOLIDAY DONATION DRIVE - SUPPORT MSW - DO YOUR PART TO KEEP THIS GREAT FORUM GOING! (Only 13 donations so far - C'mon guys!)
×


PAnderson
-
Posts
117 -
Joined
-
Last visited
Content Type
Profiles
Forums
Gallery
Events
Everything posted by PAnderson
-
This is exactly what happens. Speeds and feeds were developed for production and all materials cut differently. Can you run a slower RPM and slower feed rate? Absolutely! Don't get wrapped up in the data that is there because most of it doesn't apply to us hobbyists. If you only have 2500 RPM, use it to your advantage and realize slower is better. It's not like we are talking minutes versus hours for any given cut but maybe only 2 minutes instead of one. Mark is right, more cuts for finishing is the way to go. The important thing is to learn what YOUR machine can do and use it to it's potential. Paul
-
I would like to know what the average diameter of tree nails would be on the average wood ship kit. Would .5MM be an OK size? The reason I ask is that I realized that .5MM mechanical pencil lead might be the perfect solution in some cases if not most. Black may be too dark (or not?) but it is sold in different colors. You could even use the pencil as an insertion tool. Drill a .5MM hole about 3MM deep and insert a piece of lead, then break off. It would probably sand much like wood also. What say the experts? Paul
-
Wood needs RPM to get a good finish. Habit has shown me that using a cutter at low RPM's, the tendency is still to crank the feed handle fast. Impatience is the problem, maybe. And, unless your cutter is razor sharp, wood will just tear and splinter. This is why, in the day of carbide cutters, that high speed steel is a better option. It can be ground to a sharper edge than carbide. It may not last as long though. HSS can also be custom ground easier and to the correct geometry for cutting wood. Carbide, not so much. I use HSS in my lathe because I can hand grind the blanks easier and they can be redressed to a sharp edge with a fine stone. I use carbide exclusively for metal. Inserted cutters with inserts ground for aluminum, which are razor sharp. This seems to work the best in a small lathe where you are probably feeding the tool by hand versus power feed. Paul
-
Feed rates with small cutters do not directly correlate with bigger cutters. They are not as strong. A 3MM cutter with 4 flutes may only run at .001-.002 per flute while a larger cutter may run at .005-,010 per flute. In wood you also have to worry about the flutes packing with chips or dust at higher feed rates. Use all of the RPM's you are comfortable with but be very careful when it comes to feed rates. Also, harder woods and woods with a lot of resin will not cut as nicely. Trying things and seeing with your own eyes what works is the best way to run. If you are cutting metal, the above is even more important. Download a speed and feed app for your phone or computer and pay very close attention to the surface speed each material type is able to run at and start slow and work your way up. Keep in mind this is not production. You want a successful part not broken cutters or parts. Paul
-
Nice job Mike. She looks great. The rigging isn't as hard as it looks. She's going to shape up great. Paul
- 100 replies
-
- 4
-

-
- model shipways
- 18th century longboat
- (and 1 more)
-
Eric, your build looks superb. Beautifully done. The name plate was a good idea. That should look really sweet wherever you put this boat to display. Paul
- 222 replies
-
- 3
-
-
- 18th century longboat
- model shipways
- (and 2 more)
-
Then may your Christmas wishes come true.
-
My lathe has an MT #4 taper in the spindle nose. I have an ER40 collet adapter in it. I have a set of colllets from 1/8" to 1". That is what I am using at the moment. I can also put a ER11 adapter into the ER40 with collets from .010 to 1/4". I don't like a chuck for this kind of work either. But it can take a 3 jaw, 4 jaw and a face plate, which I have. The Emco's got caught between a hobby lathe and a real lathe. Too big for hobby use and laughed at by machinists for being too small. But in reality it is the perfect hobby lathe because there is not much you can't do with it. Emco still makes them as desktop CNC machines, but no more manual machines. Paul
-
I have experience with them but not their ship models. I built the brass Japanese WW2 locomotive. Coming in at almost 25 pounds with stand, it was a great build. But.........I decide I am not into a subscription model building environment. It makes you work at their pace instead of your own. This might not matter for a ship kit since it will probably take a year or more anyway. I have a friend through another forum who works for DeAgostini here in the states as a marketing affiliate and he has built a few of their models including working on one of the ship kits currently. I will say they have outstanding quality in materials, workmanship and customer support. You will NOT find all kits sold here in the states and they have quite a few. My friend has a friend of his in the UK take delivery for him and then forwards all monthly deliveries to my friend in the states. The kits are pricey, at least from my perspective. But maybe not for the model ship kits. At approx. $1400 for the HMS Surprise and $1200 for the Victory. And you can buy these as complete kits instead of a monthly description even though the subscription is an option All in all, they were great to work with and the kits are top notch. Paul
-
Thank you Ryland. Can't wait to see yours done. Paul
- 37 replies
-
- 3
-
-
- model shipways
- 18th century longboat
- (and 1 more)
-
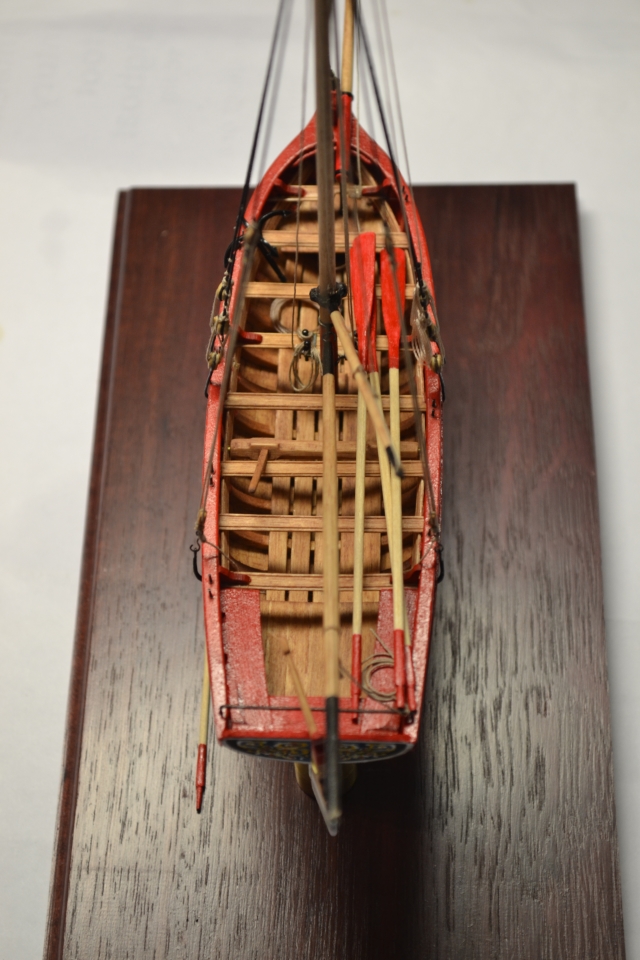
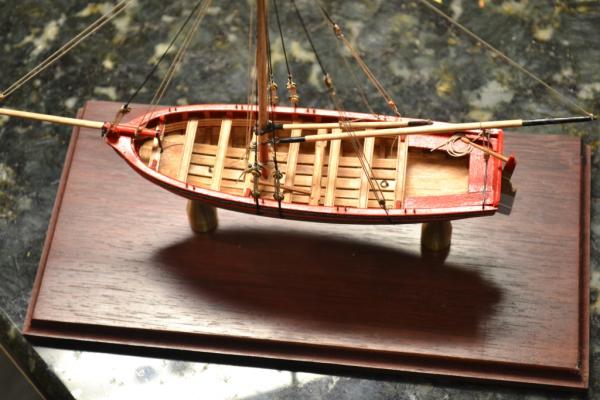
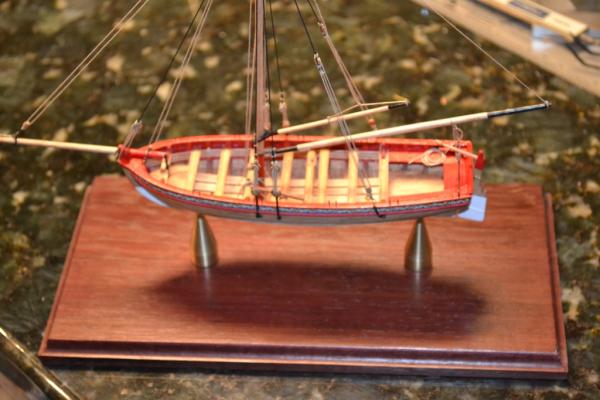
Hello again. I appreciate all the comments and advice. This build has been a great little challenge and she is officially finished. As for my next build, I will decide for sure by the end of the year. I am leaning towards a much more challenging build such as the USF Confederacy and may very well start two at once just to break up some of the challenges involved. Here are the last of the pics involved in this beautiful little boat. Thanks to everyone and especially Chuck for designing this. It was just challenging enough to tell me this is what I want to do for the foreseeable future. I am sure I will build plastic again but I was getting burned out on it after so long. Thanks, Paul
- 37 replies
-
- 8
-
-
- model shipways
- 18th century longboat
- (and 1 more)
-
It was with a heavy heart that I decided to switch the type of models I built. I don't relish selling all of my stash. In most ways I build for the sake of building and working with my brain and my hands. I was always interested in working with wood and that is why I have a small shop in addition or in conjunction with model building. But model building has kind of taken control, LOL. I'm sure most of you know how that feels. But I am a huge WW2 history buff also. I have built the 1/200 USS Arizona and am part way through the 1/200 USS Missouri. And if anyone here has seen any of the Wingnut Wings kits of WW1 aircraft (I have 14), you may know what I am talking about. But I was always fearful of a big rigging job. Years ago I built the AL Swift and gifted it to my brother and his new wife. It is still on his mantle. I realized that wood ship kits come in all sizes and types and I don't really have to build rigged ships. This is why the admiralty models really peak my interest. But it's also not fair to say I will never do a rigging job. You never know until you try. Right? Thanks, Paul
- 37 replies
-
- 3
-
-
- model shipways
- 18th century longboat
- (and 1 more)
-
I didn't. I only did the outside. This being my first time using wipe on poly, I didn't know what would happen if I used a brush. I only did the outside. The interior is just cherry stain. Paul
- 37 replies
-
- 1
-
-
- model shipways
- 18th century longboat
- (and 1 more)
-
Nirvana, please don't give me any ideas, LOL. I was thinking that last night down in my little shop. One super long build does not appeal to me. I am not afraid of a complex build. As a machinist/toolmaker, I have built many things. I work for a machine tool manufacturer at the moment so I use model building to keep my mind sharp and my hands busy. When you like to build things, you must provide yourself an outlet. Besides, I love the smell of wood chips versus metal chips. I have a lot of wood working tools at home but only a few lend themselves to model ship building. But the USF Confederacy really calls to me. I love the idea of an admiralty model. Brian, thanks. I will take the time to look over your build log again. I took a look a while back. What beautiful work that is. Either way, I have a decision to make. I have about 70 great plastic kits in my stash. Now I have a major decision to make. Do I sell some? Thanks to All, Paul
- 37 replies
-
- 3
-
-
- model shipways
- 18th century longboat
- (and 1 more)
-
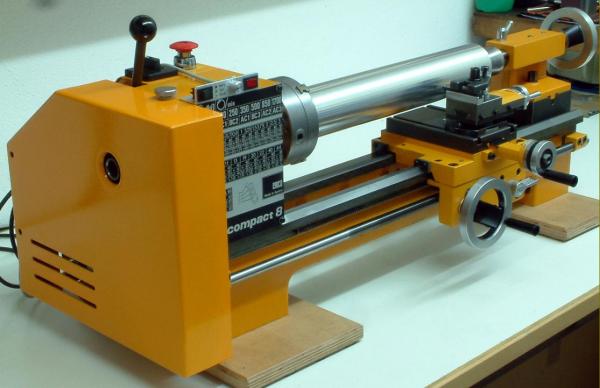
I have an Emco Compact 8. It is a metal cutting lathe with threading built in. I really understand the need for a small lathe but being a machinist for almost 40 years I couldn't bring myself to by a tiny machine. This, to me is a perfect size but not something you can take on and off a table. Emco made some great machines and they made smaller ones too. They were made in the same fashion as the bigger industrial lathes. I would look around for this or the smaller Compact 5, which would be a pretty sweet machine. The pic attached is NOT my exact machine, just a pic of the one I have. I got a bunch of attachments, chucks, cutting tools for $600. Look around, well worth the investment
-
Thanks everyone for the kind words. I do appreciate it. Brian, those lines were under load, LOL, But while working inside they got stressed a little, as did others. Maybe I can adjust them a little. As for my next build? I do now have a stash comprised of: Model Shipways HMS Bounty Launch Model Shipways Armed Virginia Sloop Mamoli USS Constitution Model Shipways Confederacy Can I get suggestions from the group on my next build? Not sure I am ready for the rigging job involved with the Conny yet. But I am really wanting to do the Confederacy. That will be a long project and would definitely need to do a proper build log for her. I think I need one more smaller project completed before I try either the Conny or Confederacy. Paul
- 37 replies
-
- 2
-
-
- model shipways
- 18th century longboat
- (and 1 more)
-
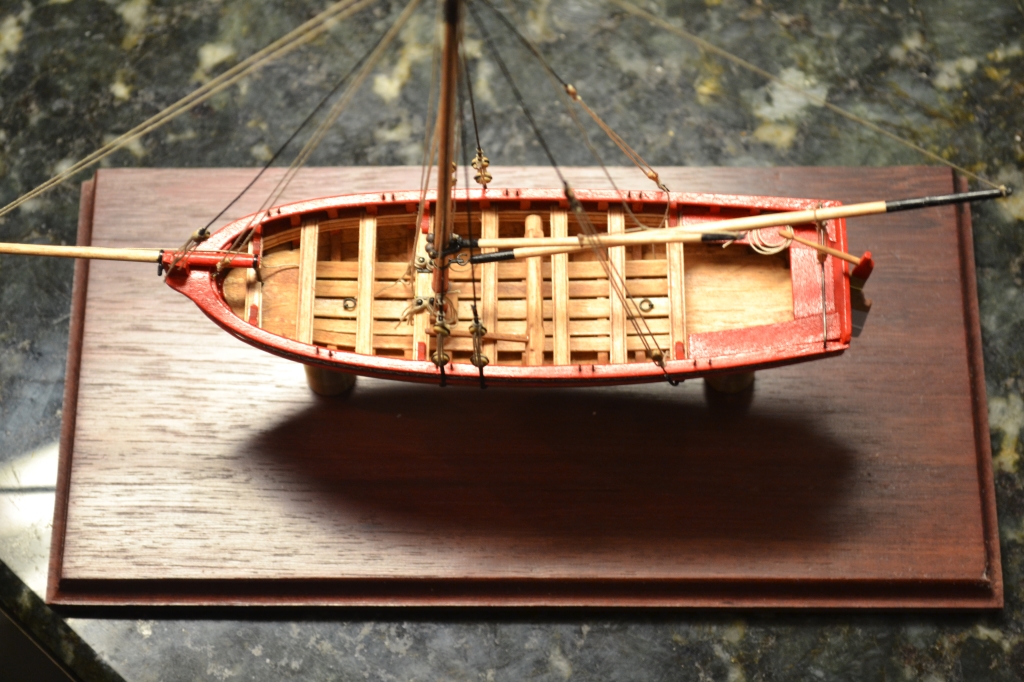
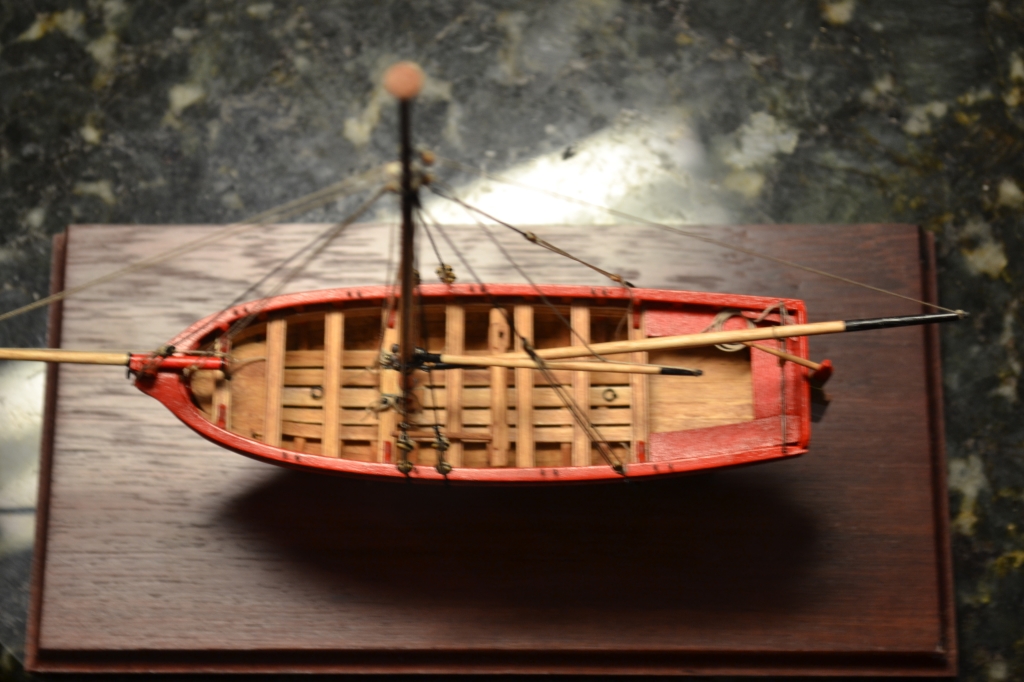
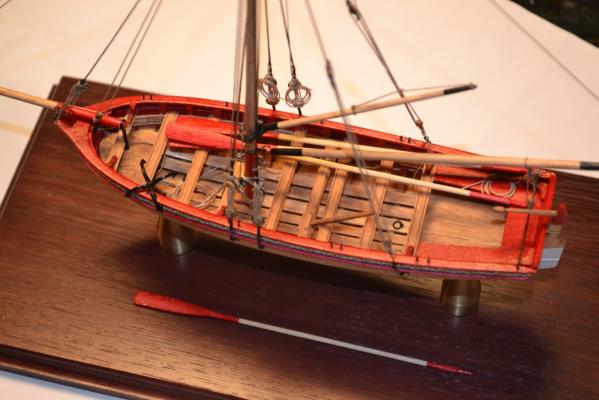
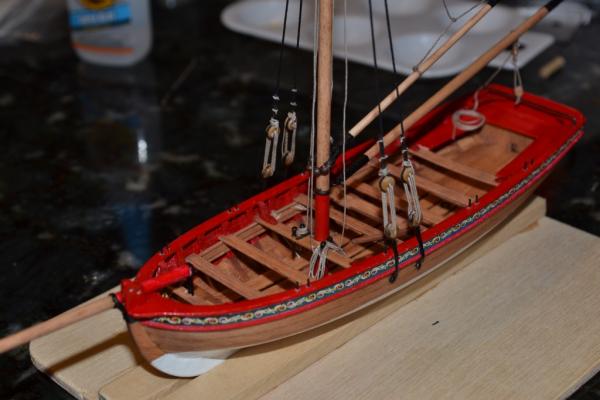
Last but not least, here she is on the base I made. I had a 10" X 10" piece of purple heart that I had left from another project from a few years ago. I decided to use this for my base. I ended up cutting the square base into 2 pieces. This way it fits better on our mantle and I have another piece for a future project.

- 37 replies
-
- 9
-
-
- model shipways
- 18th century longboat
- (and 1 more)
-
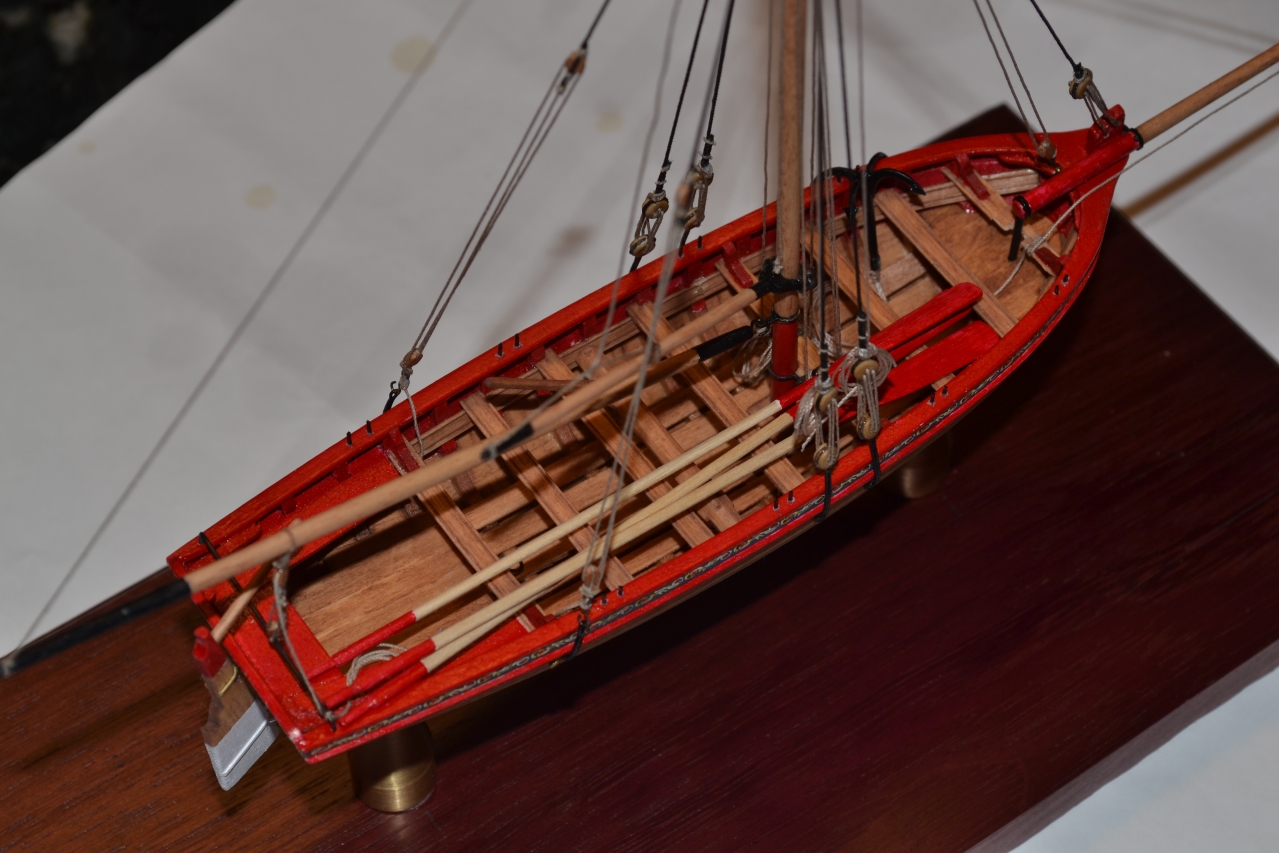
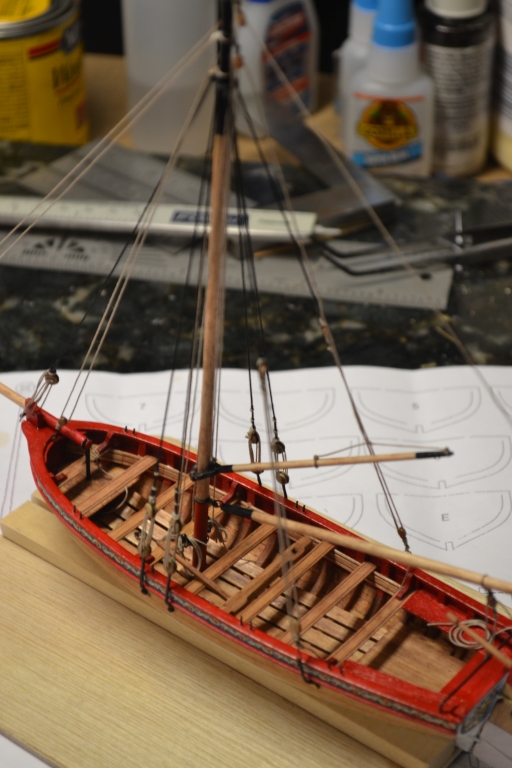
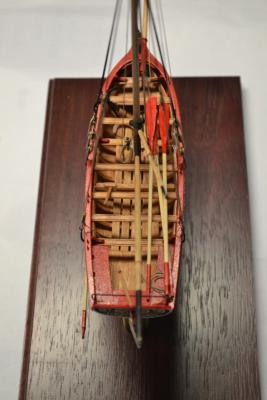
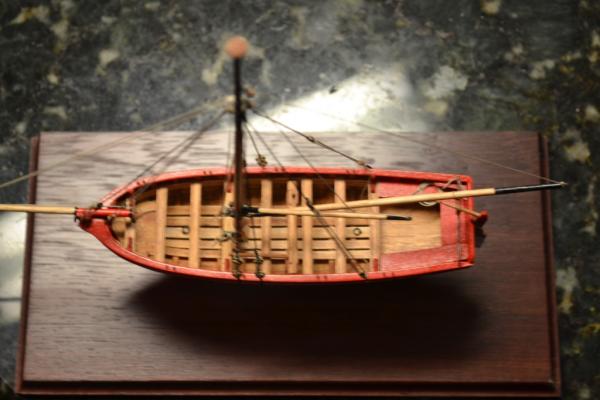
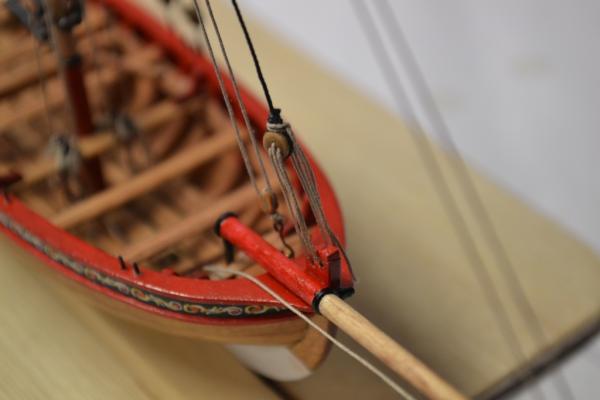
Here are a few more leading up to christening her with a new base.


- 37 replies
-
- 5
-
-
- model shipways
- 18th century longboat
- (and 1 more)
-
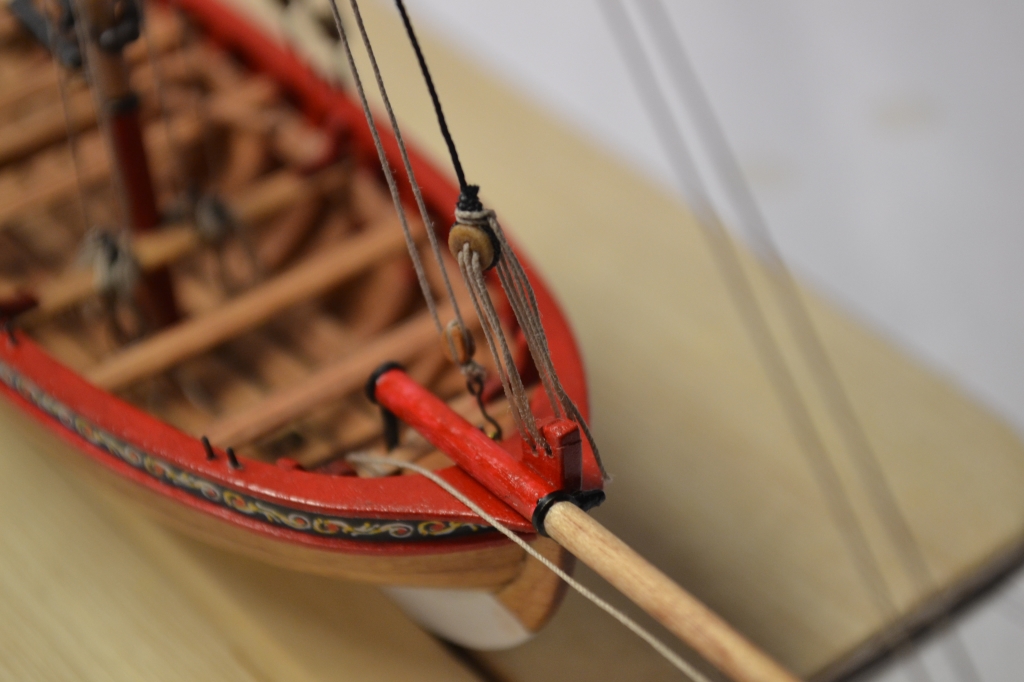
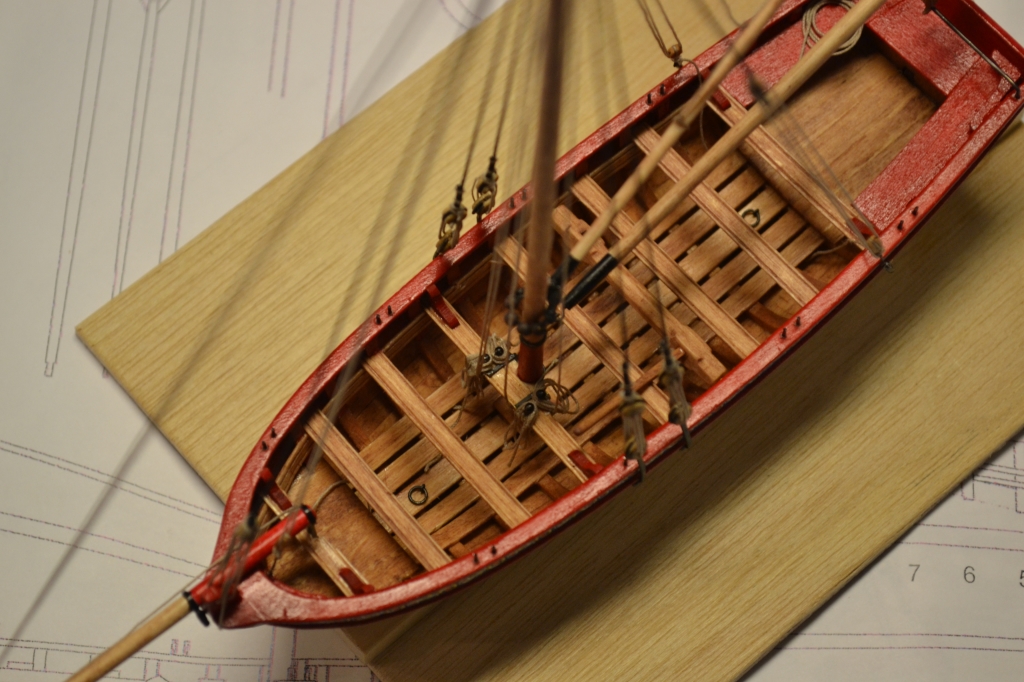
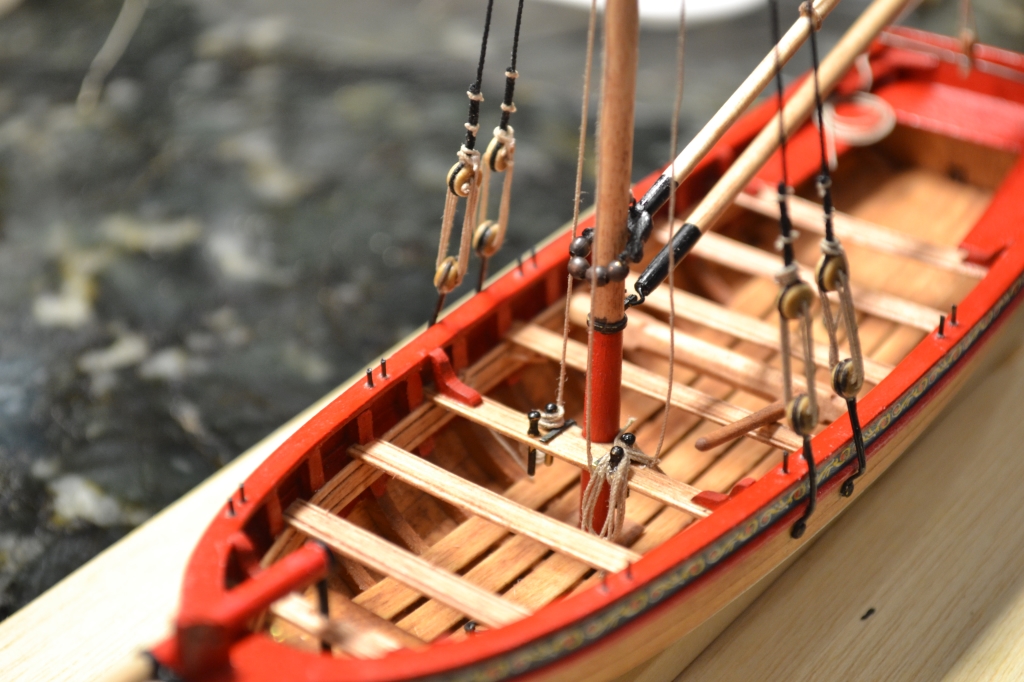
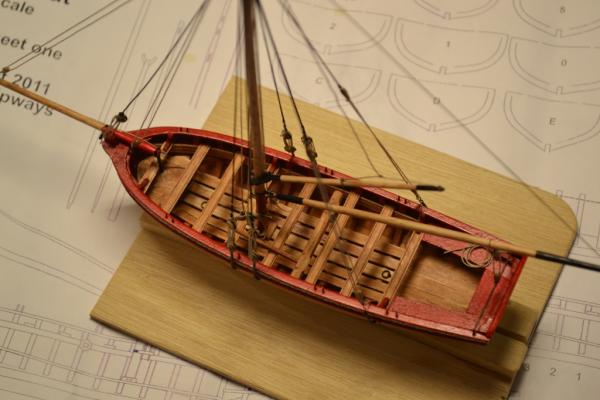
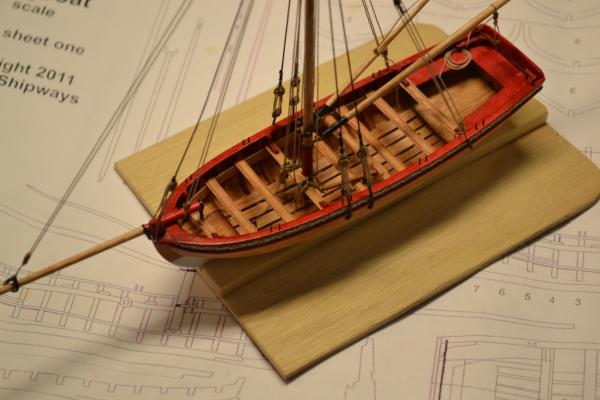
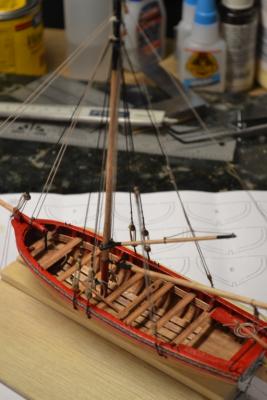
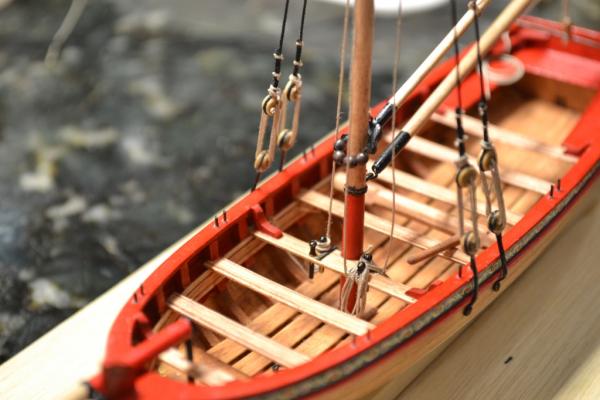
This little boat is almost done. A few things left to do including adding the base.


- 37 replies
-
- 6
-
-
- model shipways
- 18th century longboat
- (and 1 more)
-
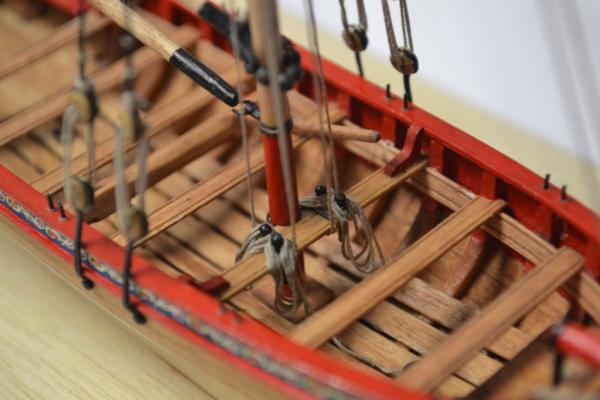
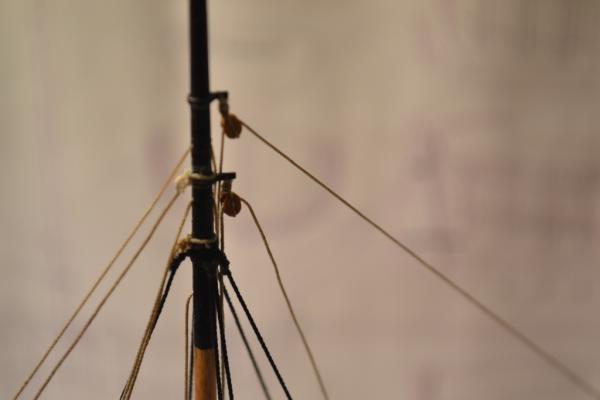
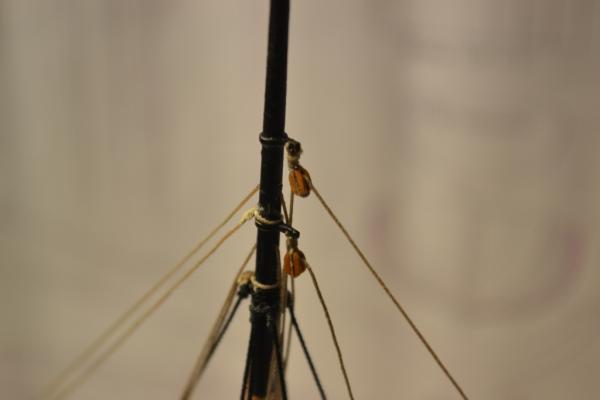
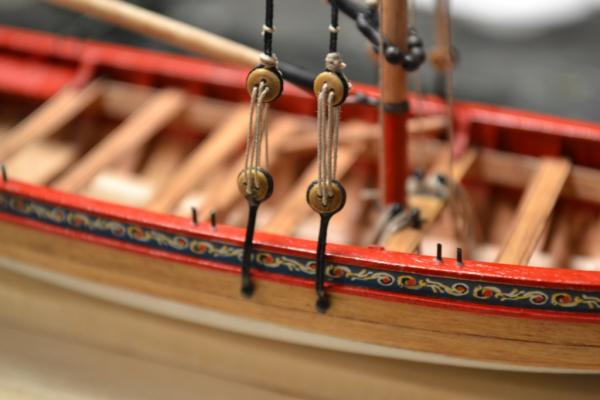
Another trick I used to get the backstays even on the shrouds. I made little hooks to go through shrouds and when both lines were even I taped the bottom ends of the line on the hooks to the build board. I seized the blocks then took the hooks out.


- 37 replies
-
- 5
-
-
- model shipways
- 18th century longboat
- (and 1 more)
-
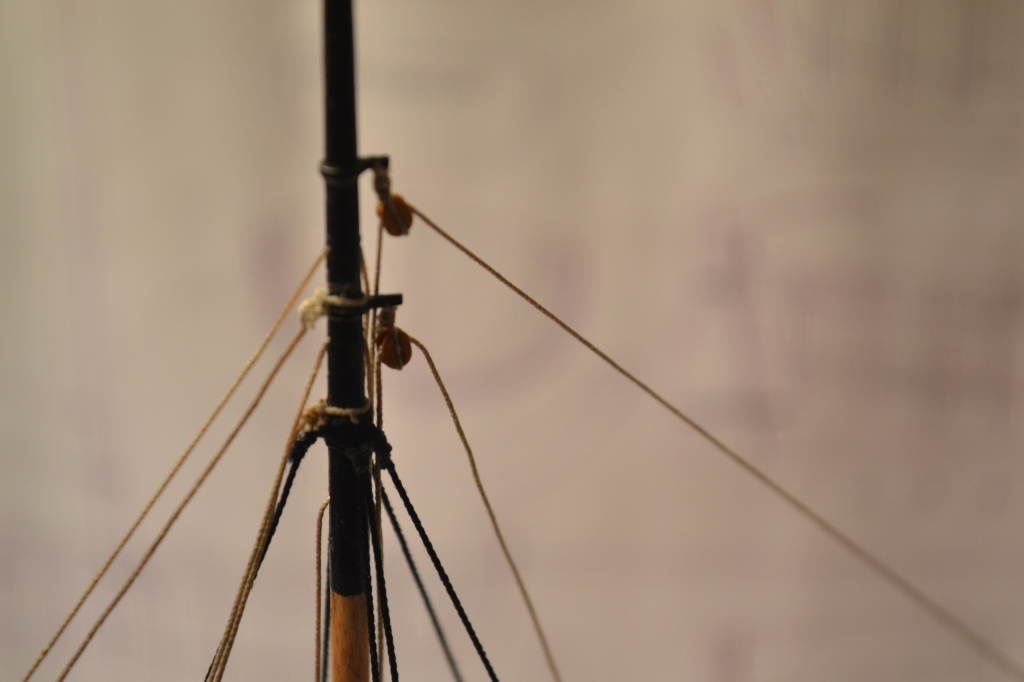
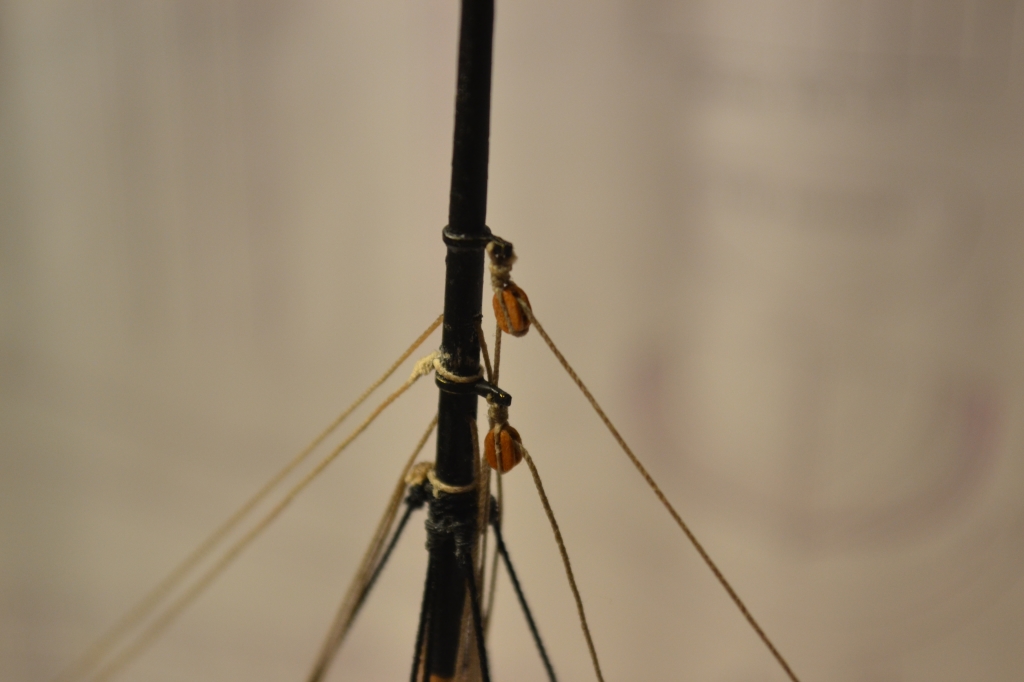
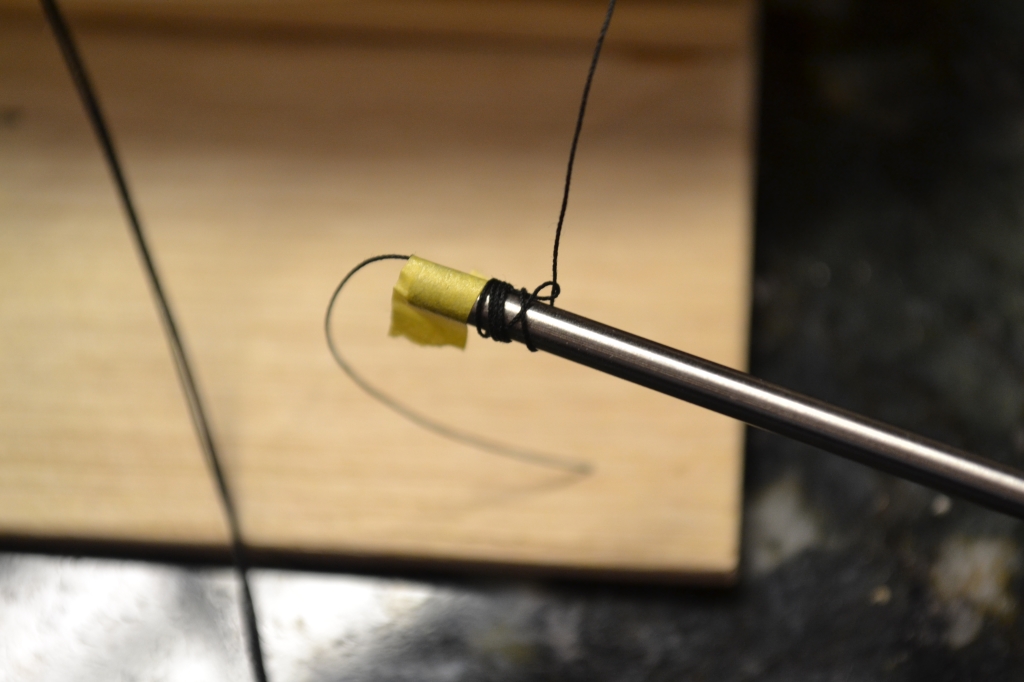
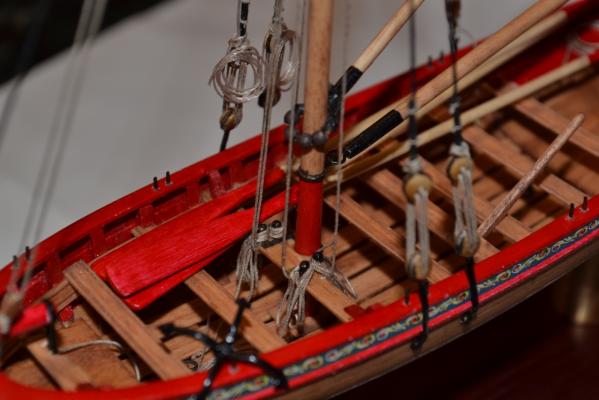
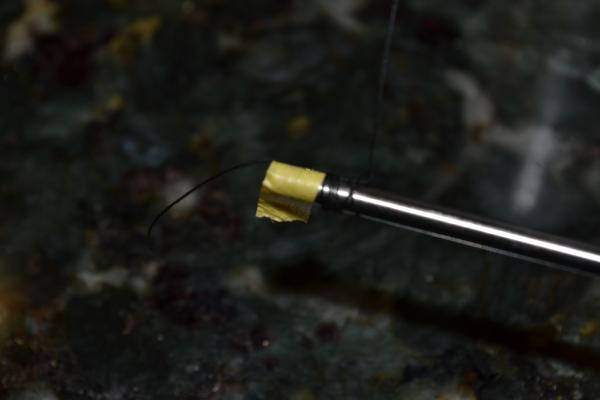
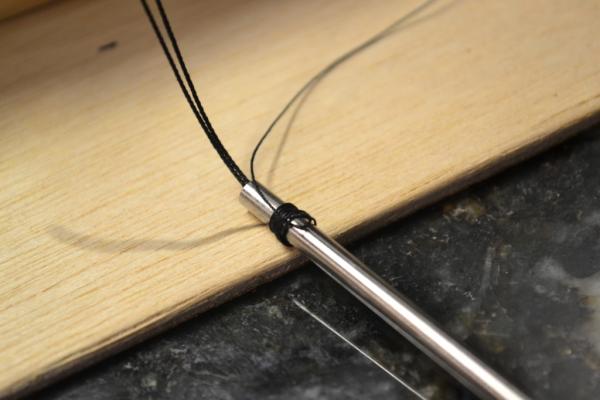
This is how I seized the shrouds. I do realize this method can't be used in all types of seizing but working really close to the mast is not easy, I learned the basic method from a youtube video but I decided to add a twist. I did the loop and wrap thingy around a piece of tubing then threaded the two shroud lines through the tubing. Then I pulled the tubing up to the mast, pulled lines through and then slipped the .008 seizing loop onto the shrouds, pulld the tube off of the lines then went to work pulling the lines of the seizing tight. Worked pretty good for me. I am sure someone else has thought of this.

- 37 replies
-
- 2
-
-
- model shipways
- 18th century longboat
- (and 1 more)
-
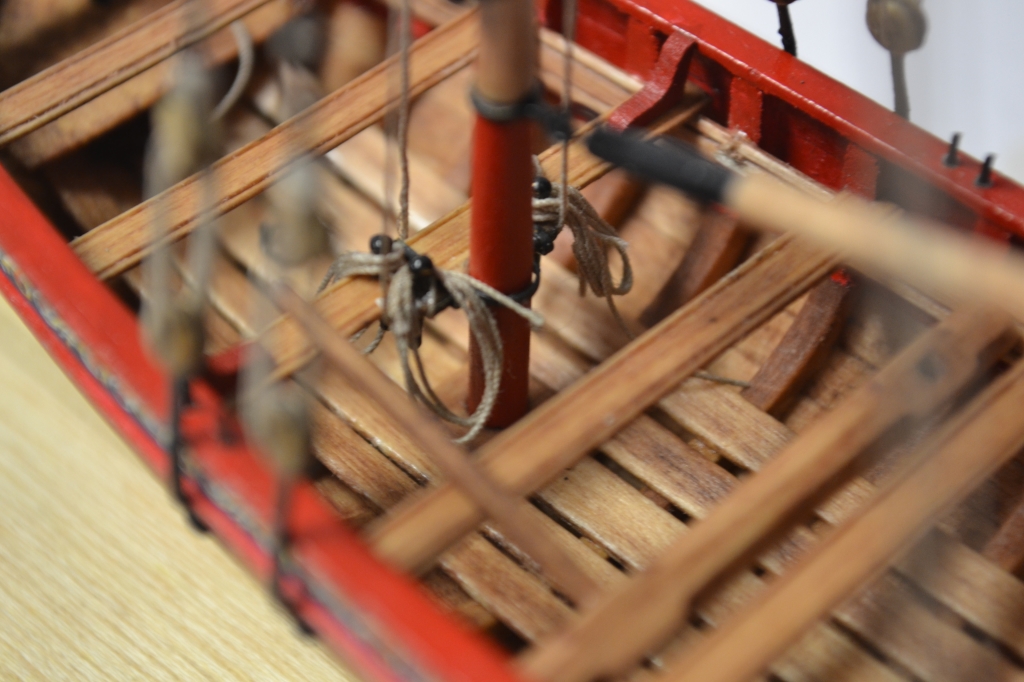
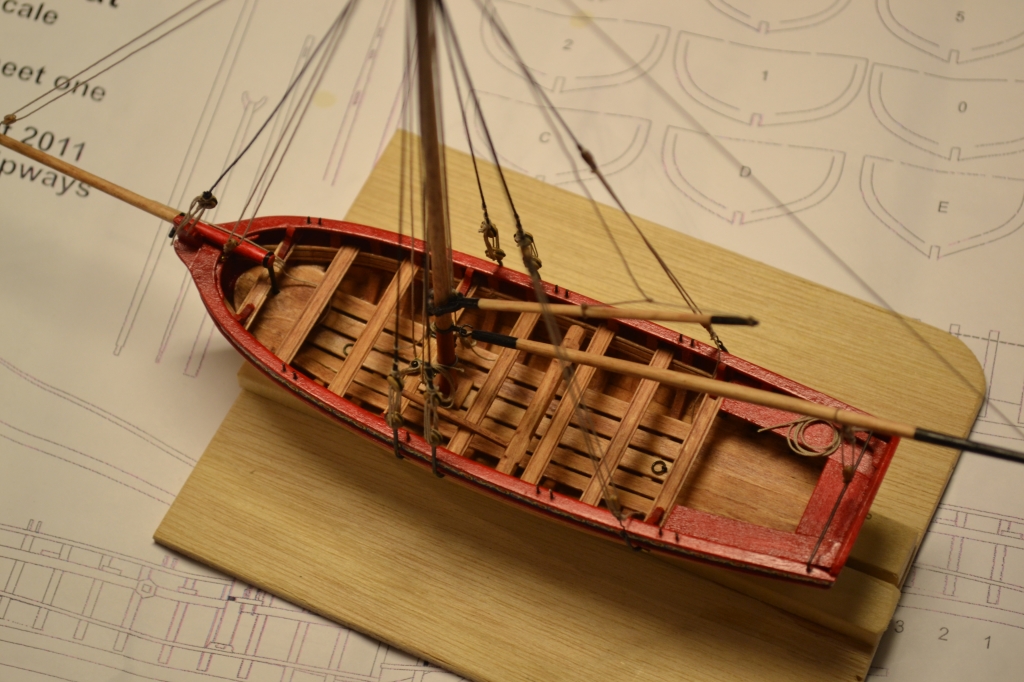
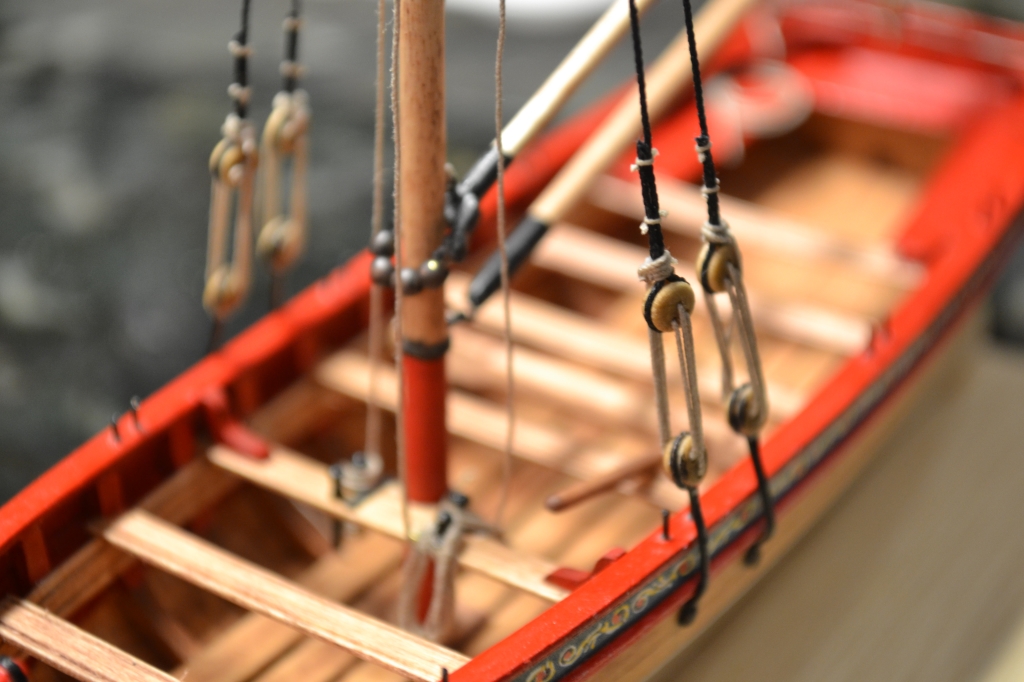
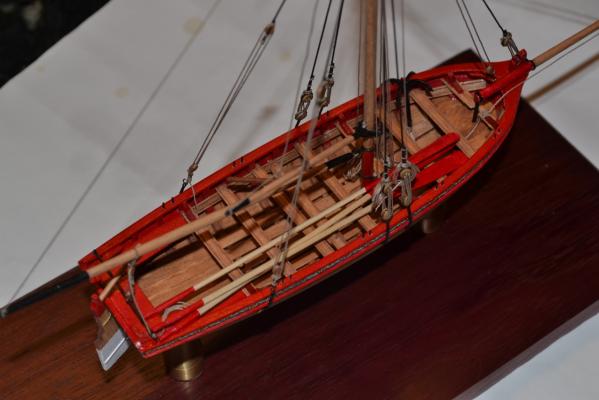
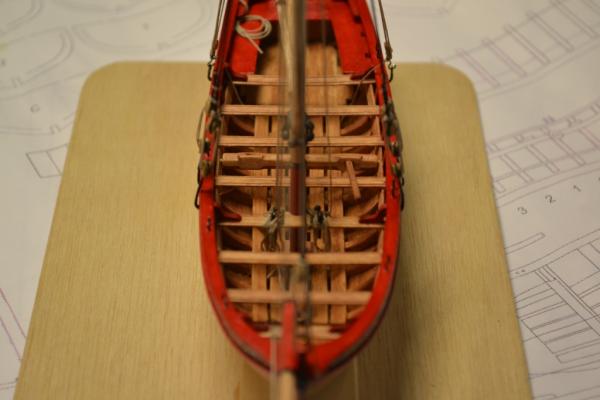
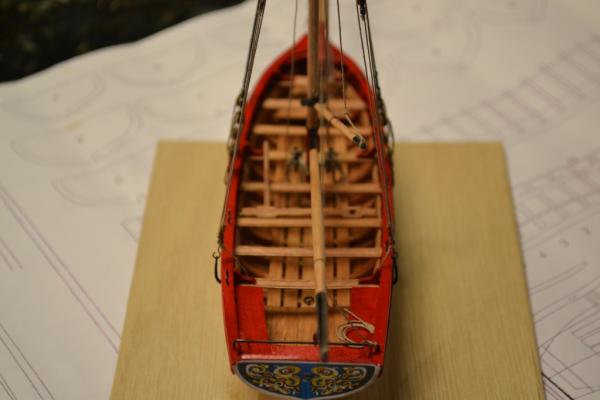
First, I edited the thread title to more conform to guidelines. I am truly amazed at the talent here, not just in the longboat section but in this forum in general. It is somewhat intimidating seeing the great work here. I can only hope to come close to the talent here. Somewhat embarrassed too, since I am a "beginner". I also apologize for the lack of posts on my build of this little boat. I think I felt I had to just jump in and do this with as little help from the great people here. Just to see if I could tackle this alone. I have made quite a bit of progress and here are my latest pics. I hope I did this beautiful kit justice.


- 37 replies
-
- 7
-
-
- model shipways
- 18th century longboat
- (and 1 more)
-
From that era, it still amazes me that a ship that size could accomodate 600 people. I know these were large ships even for that time. But these were not cruise ships. I am just showing amazement at that number. And the weight of the cargo. I would assume all of that does not make this ship a good fighting ship under those circumstances. Paul
-
And 600 people? That's a LOT of servants.
-
That's amazing. Now a long legal battle ensues. How big was this ship that it could have 600 people on board? Was this common? That seems like a lot, packed in like sardines. Slaves? And did the British make any attempt to save any of these souls? Paul