HOLIDAY DONATION DRIVE - SUPPORT MSW - DO YOUR PART TO KEEP THIS GREAT FORUM GOING! (89 donations so far out of 49,000 members - C'mon guys!)
×


PAnderson
-
Posts
117 -
Joined
-
Last visited
Content Type
Profiles
Forums
Gallery
Events
Everything posted by PAnderson
-
Eric, that is some seriously nice work. Those chain plates look nice. She is going to look awesome when done. And your coiled lines look awesome too. Paul
- 222 replies
-
- 4
-

-
- 18th century longboat
- model shipways
- (and 2 more)
-
Very nice work Ryland. I bet it feels good again after a year away from it. Paul
-
Very nice work Mike. She's coming along beautifully. Paul
- 100 replies
-
- 3
-
-
- model shipways
- 18th century longboat
- (and 1 more)
-
Nice work Eric. Coming along beautifully Paul
- 222 replies
-
- 2
-
-
- 18th century longboat
- model shipways
- (and 2 more)
-
If I may make a suggestion about painting the molded trim. I would use some oil paints mixed together to the color you like. Oil paints, when brushed on right can really do a good job of duplicating wood grain.You may even find that burnt sienna will duplicate walnut pretty well.
-
Hey Mike, all I did was coild the rope by wrapping 5 turns around an exacto knife handle, pinch it a the top and add a tiny point of CA. Then draped it over the belaying pin and pushed the bottom of the coil down with a steel rule then added another tiny drop of medium CA and held the steel rule in place for about 10 seconds. It's only glued at the belaying pin, the rest hangs naturally. This with Chuck's rope. Not sure if the kit rope would have hung so nicely. Paul
- 37 replies
-
- 3
-
-
- model shipways
- 18th century longboat
- (and 1 more)
-
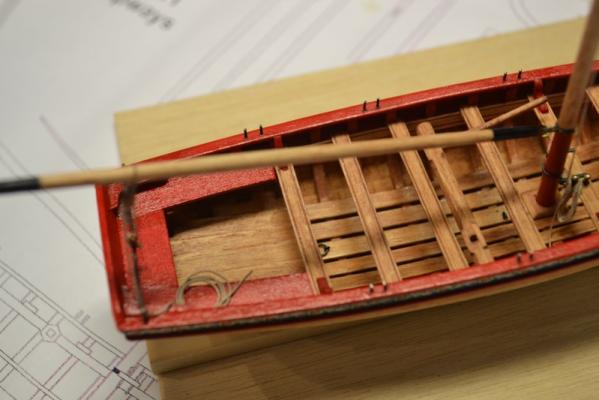
Thanks Brian. Yes, definitely still in progress. A lot to go yet. Gaff will go up today. Then on to the chain plates. Paul
- 37 replies
-
- 3
-
-
- model shipways
- 18th century longboat
- (and 1 more)
-
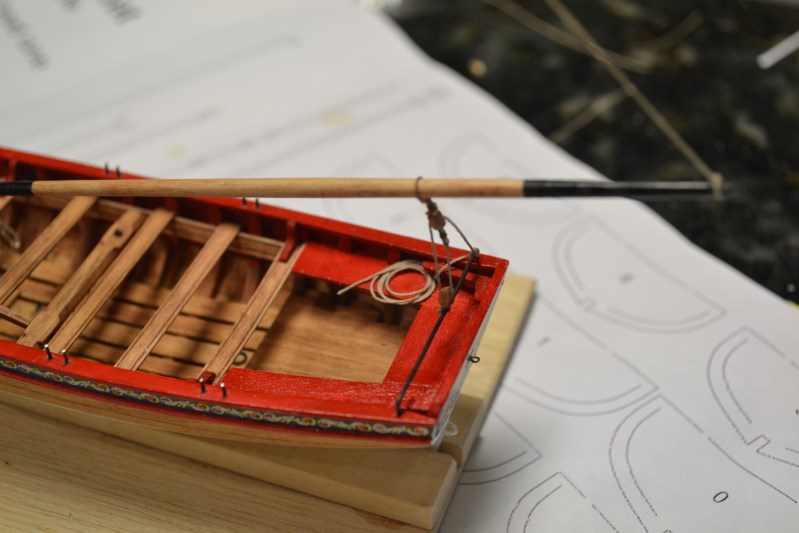
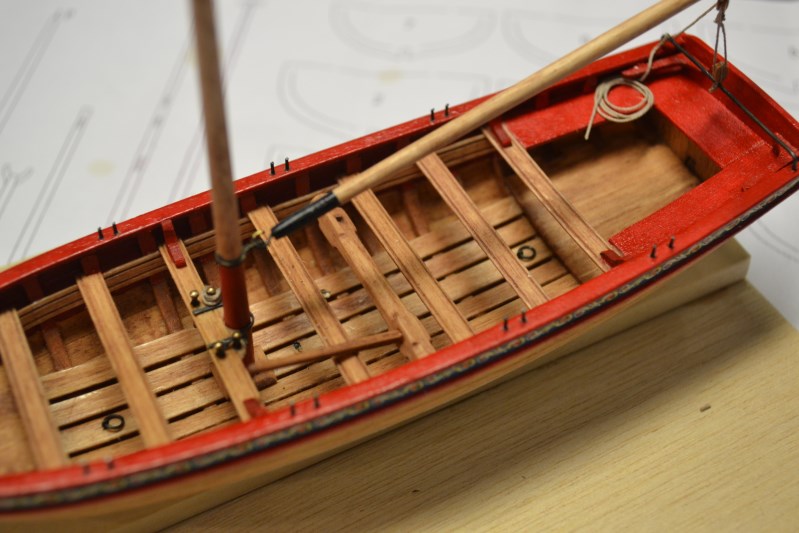
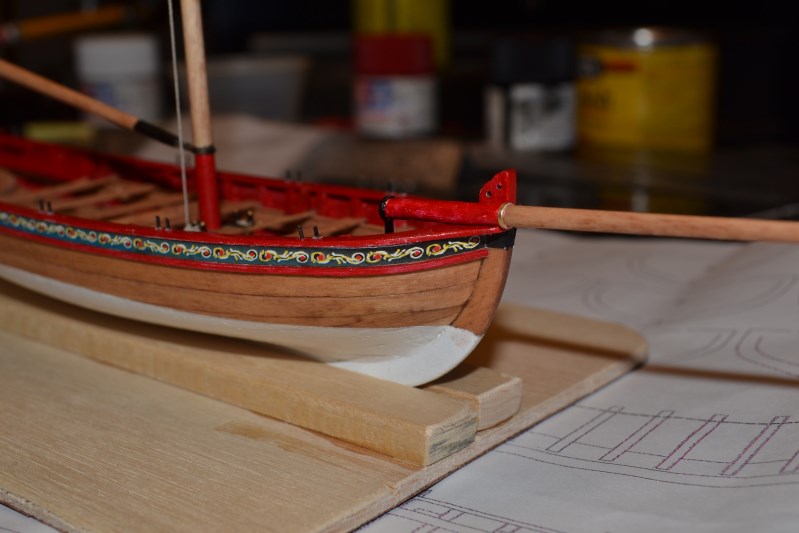
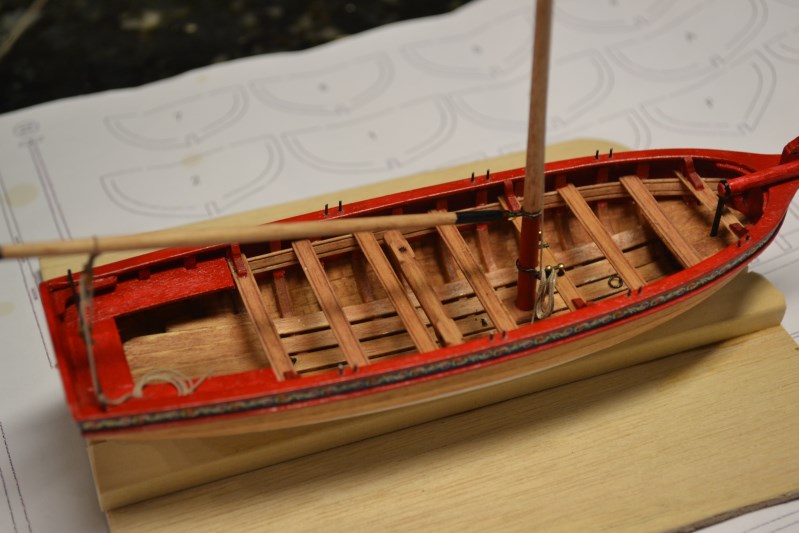
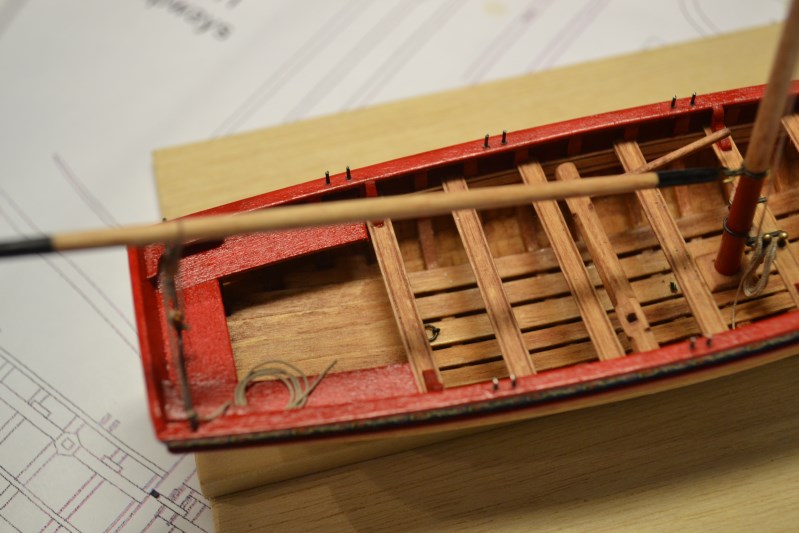
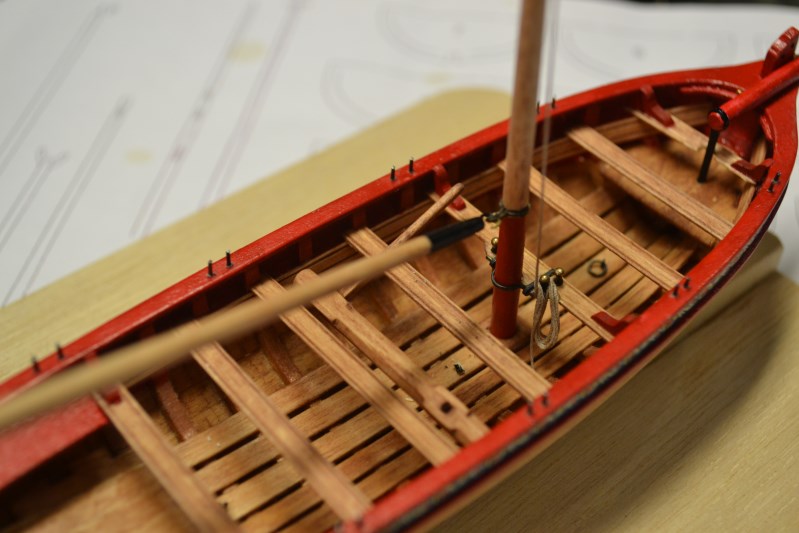
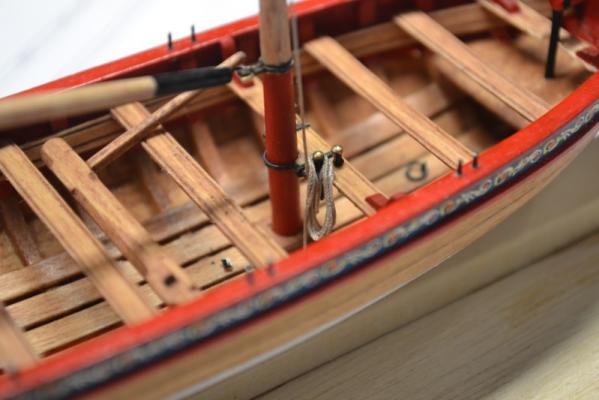
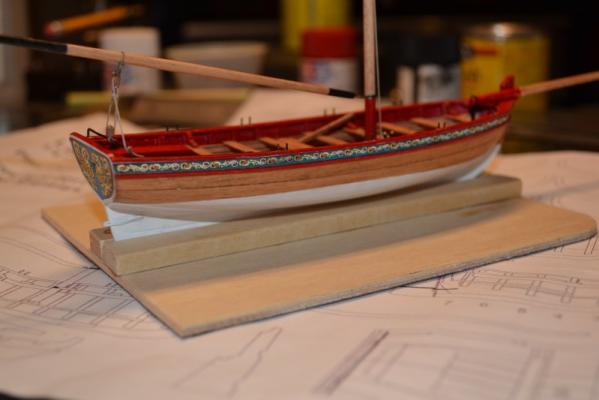
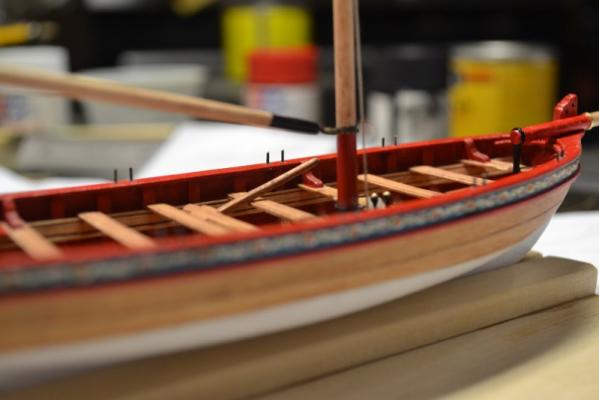
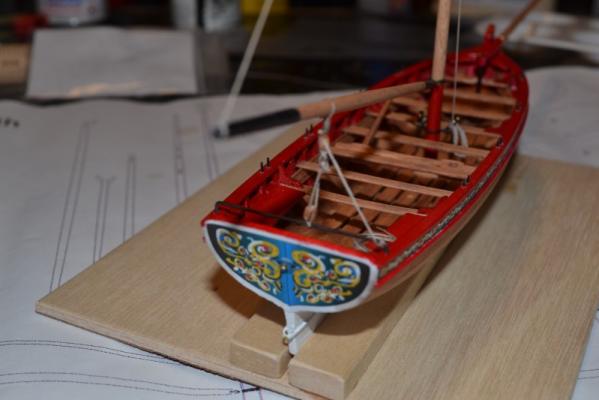
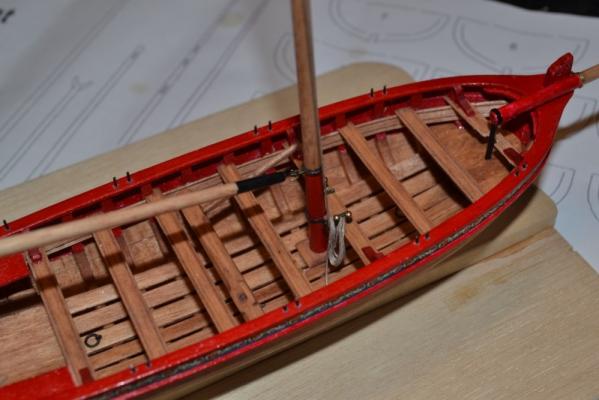
Thanks Mike. Here is the progress on my 18th Century Longboat by Chuck. My apologies for not keeping up on this like I could/should have. I really had to just dive in and see if I could do this. Plus, while I work I really don't think to take pics while in progress. I am loving building this little boat. As I go, I really realize how detailed and awesome this boat is. Mant thanks to Chuck for designing this kit. I have just finished rigging the main mast, boom and boom sheet. Any critiques are kindly welcome. Have I forgotten anything?

- 37 replies
-
- 8
-
-
- model shipways
- 18th century longboat
- (and 1 more)
-
Yeah, I should have checked that sheet. My bad. Thanks Chuck. One thing I noticed too is that my plans are out of scale by a large amount. If I hold my boat against the main plan view, the boat, from transom to the tip of the bow, is about 1/4" longer than the plans. Is this a printing error from Model Expo?
-
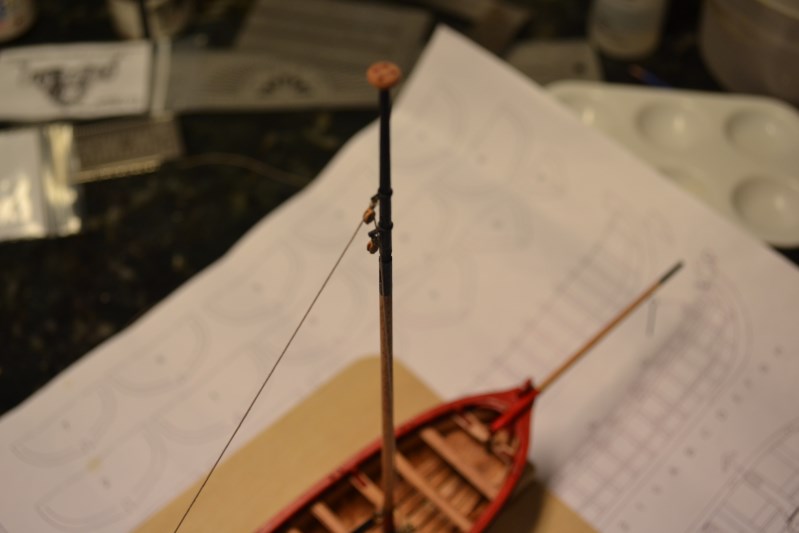
Hello Chuck, I am in the process of building this kit. What a joy so far. But I have run into a small problem. Because the mast is painted black in all of the pictures and the plans don't show it, I need to see the relationship of the upper bands on the mast to the shives I drilled into the mast. Where are the bands located relative to the shives. Can you help please? Paul
-
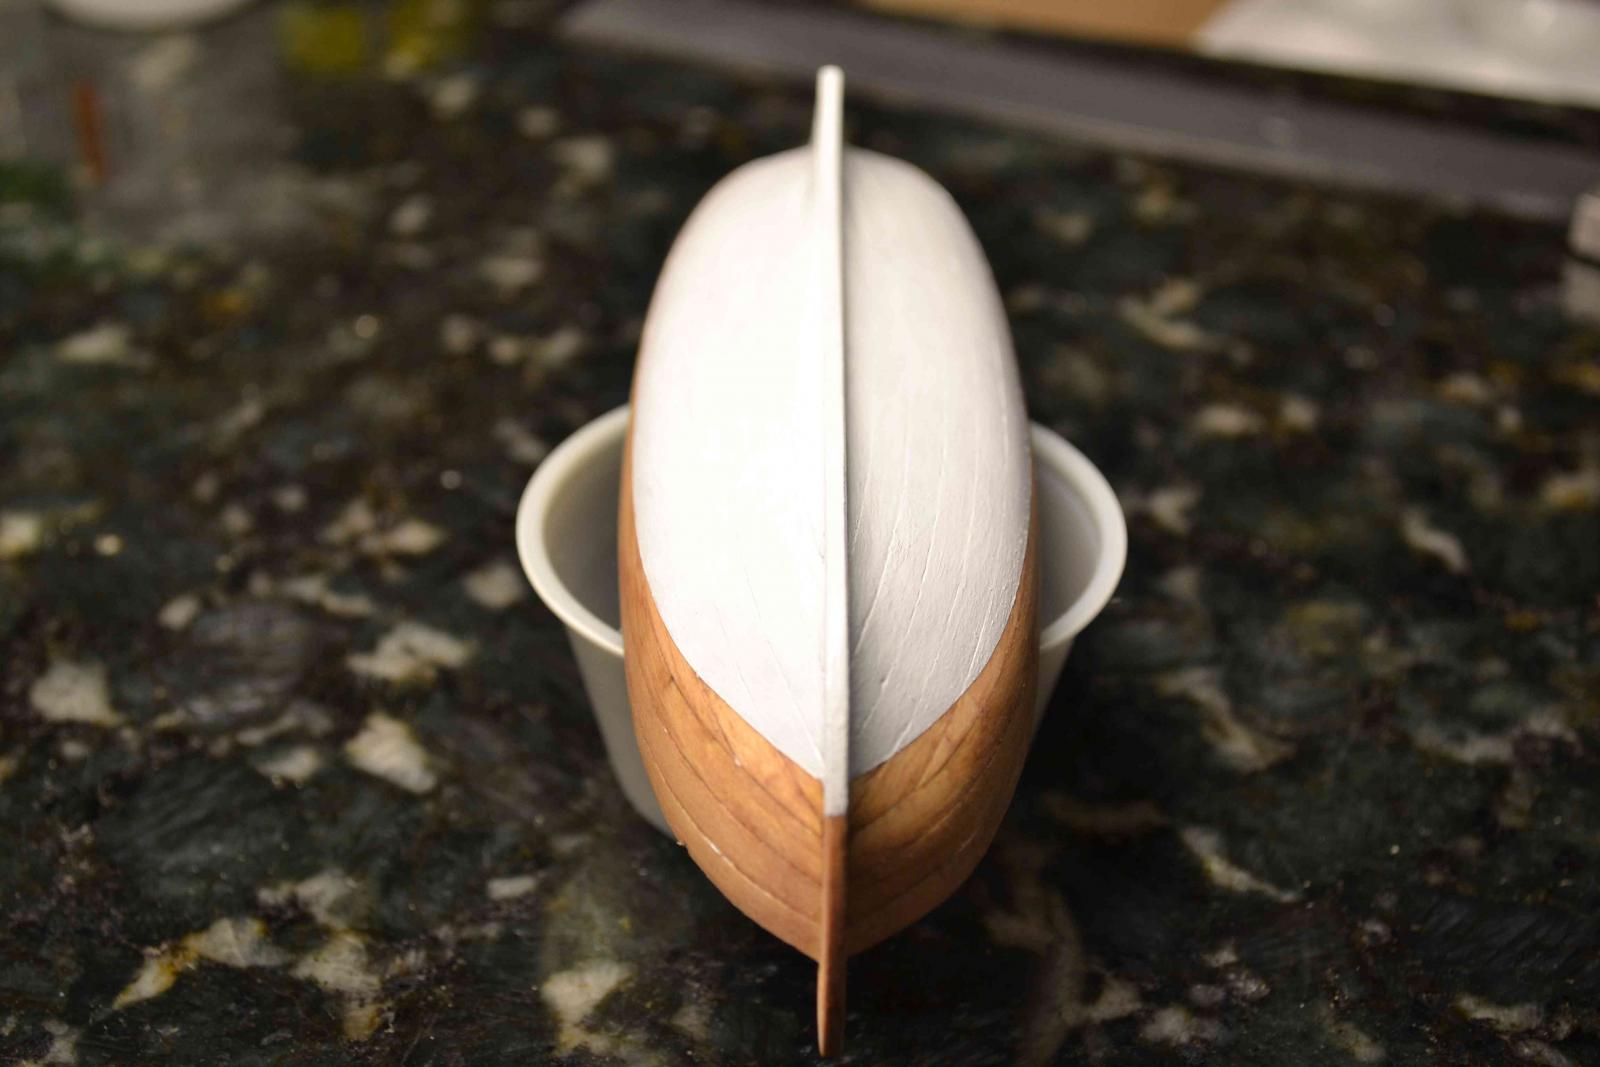
Next, I stained the whole boat with Minwax Cherry stain. I think it added a little age to the wood and I like the look. I then painted the hull from the waterline down with Tamiya white acrylic gloss. When that sets, I will use wipe on poly on the outer hull left bare. There is a lot to learn/relearn since I built the Swift many, many years ago. I have the cap rails rough cut and ready to go on. First, I will paint the red insides, fit the inner rails. Question: How do you guys finish the inside? Wipe on poly doesn't seem to lend itself to "wiping on" with ribs in place. Paul

- 37 replies
-
- 9
-
-
- model shipways
- 18th century longboat
- (and 1 more)
-
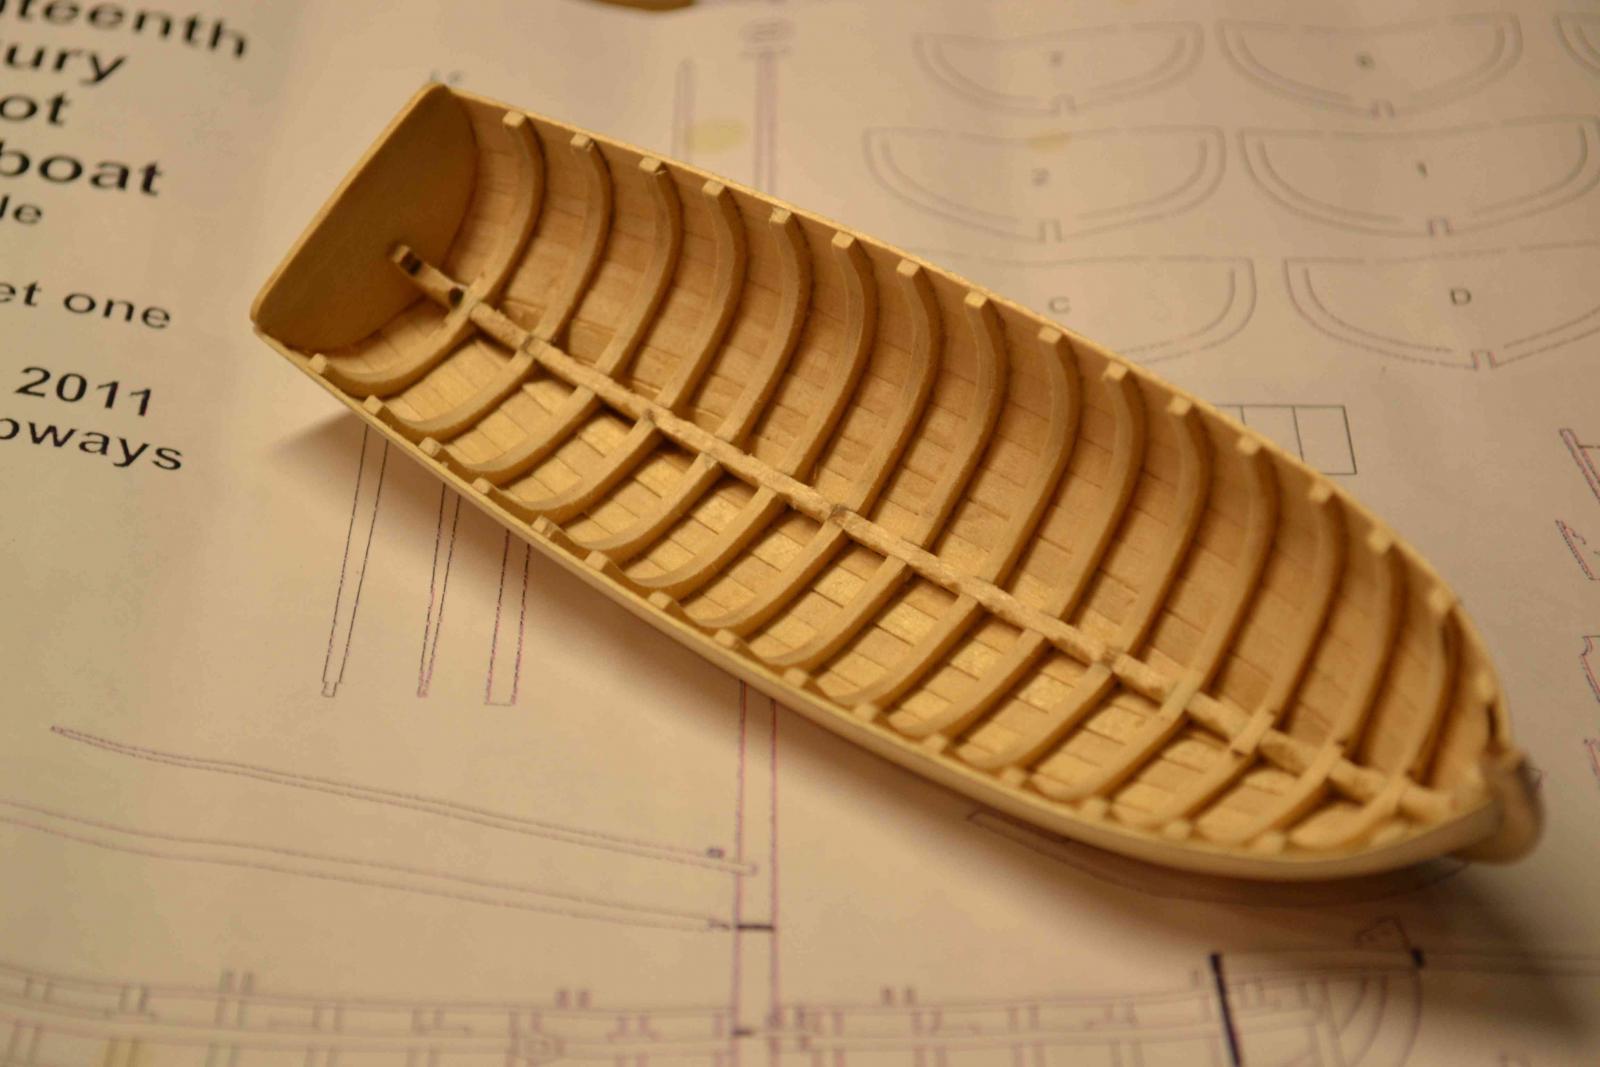
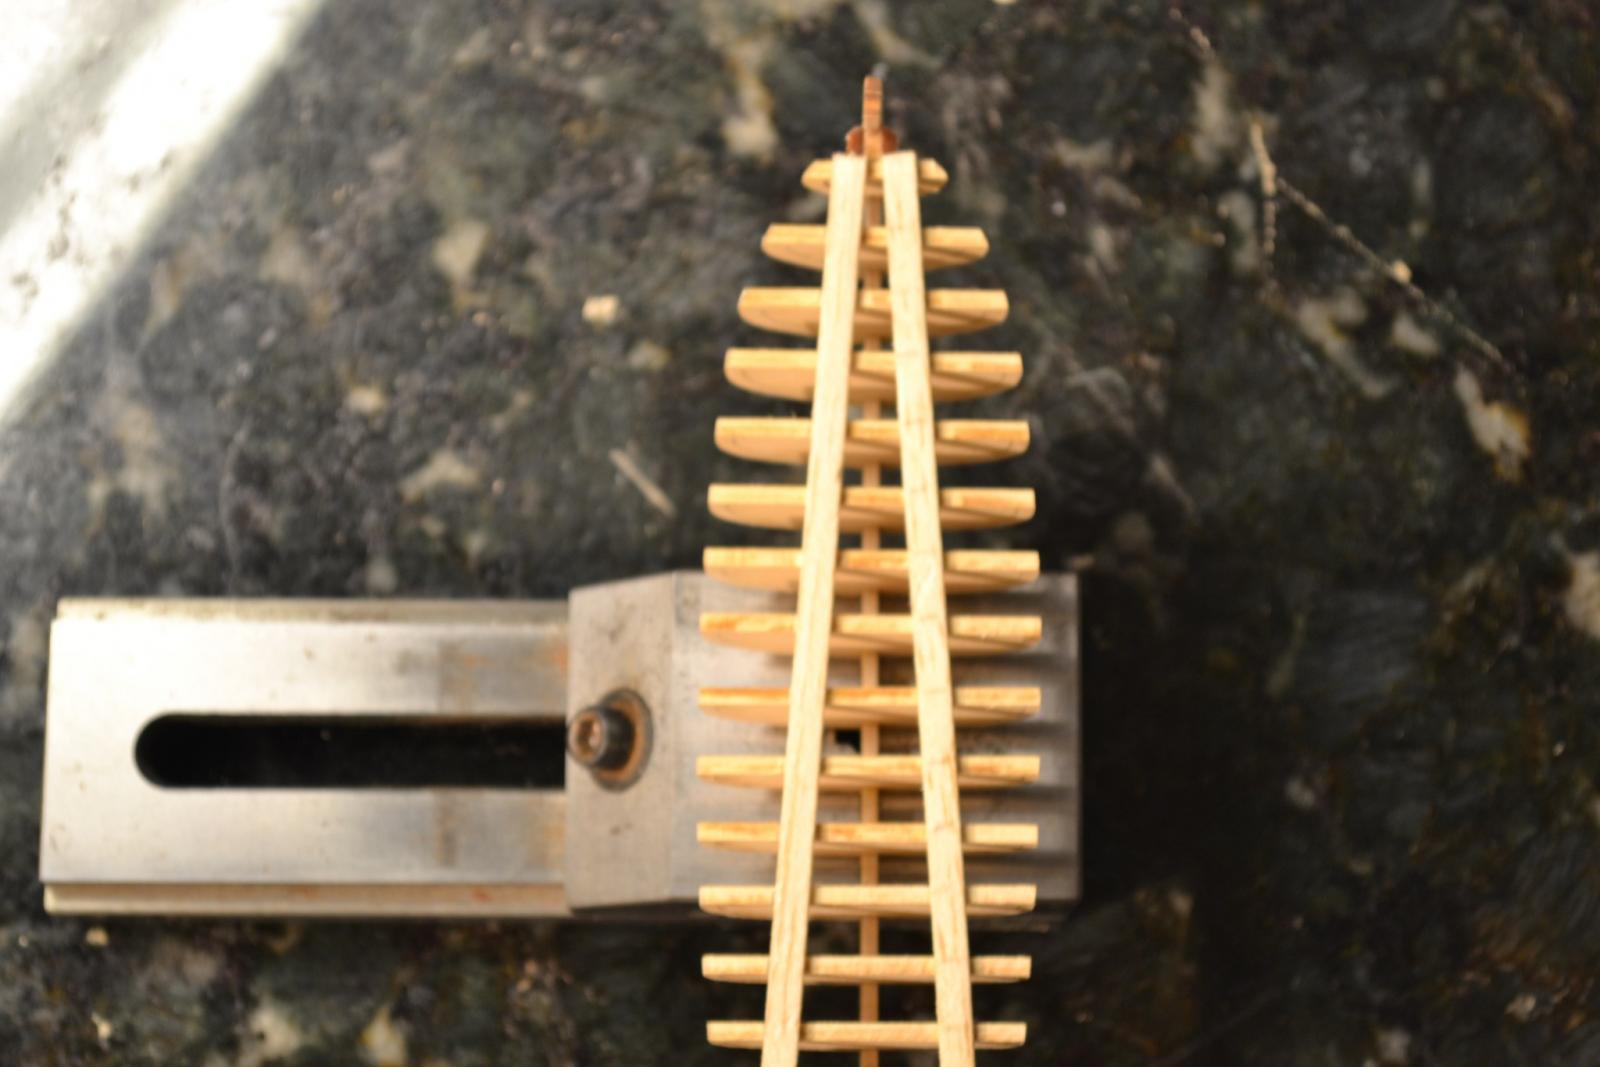
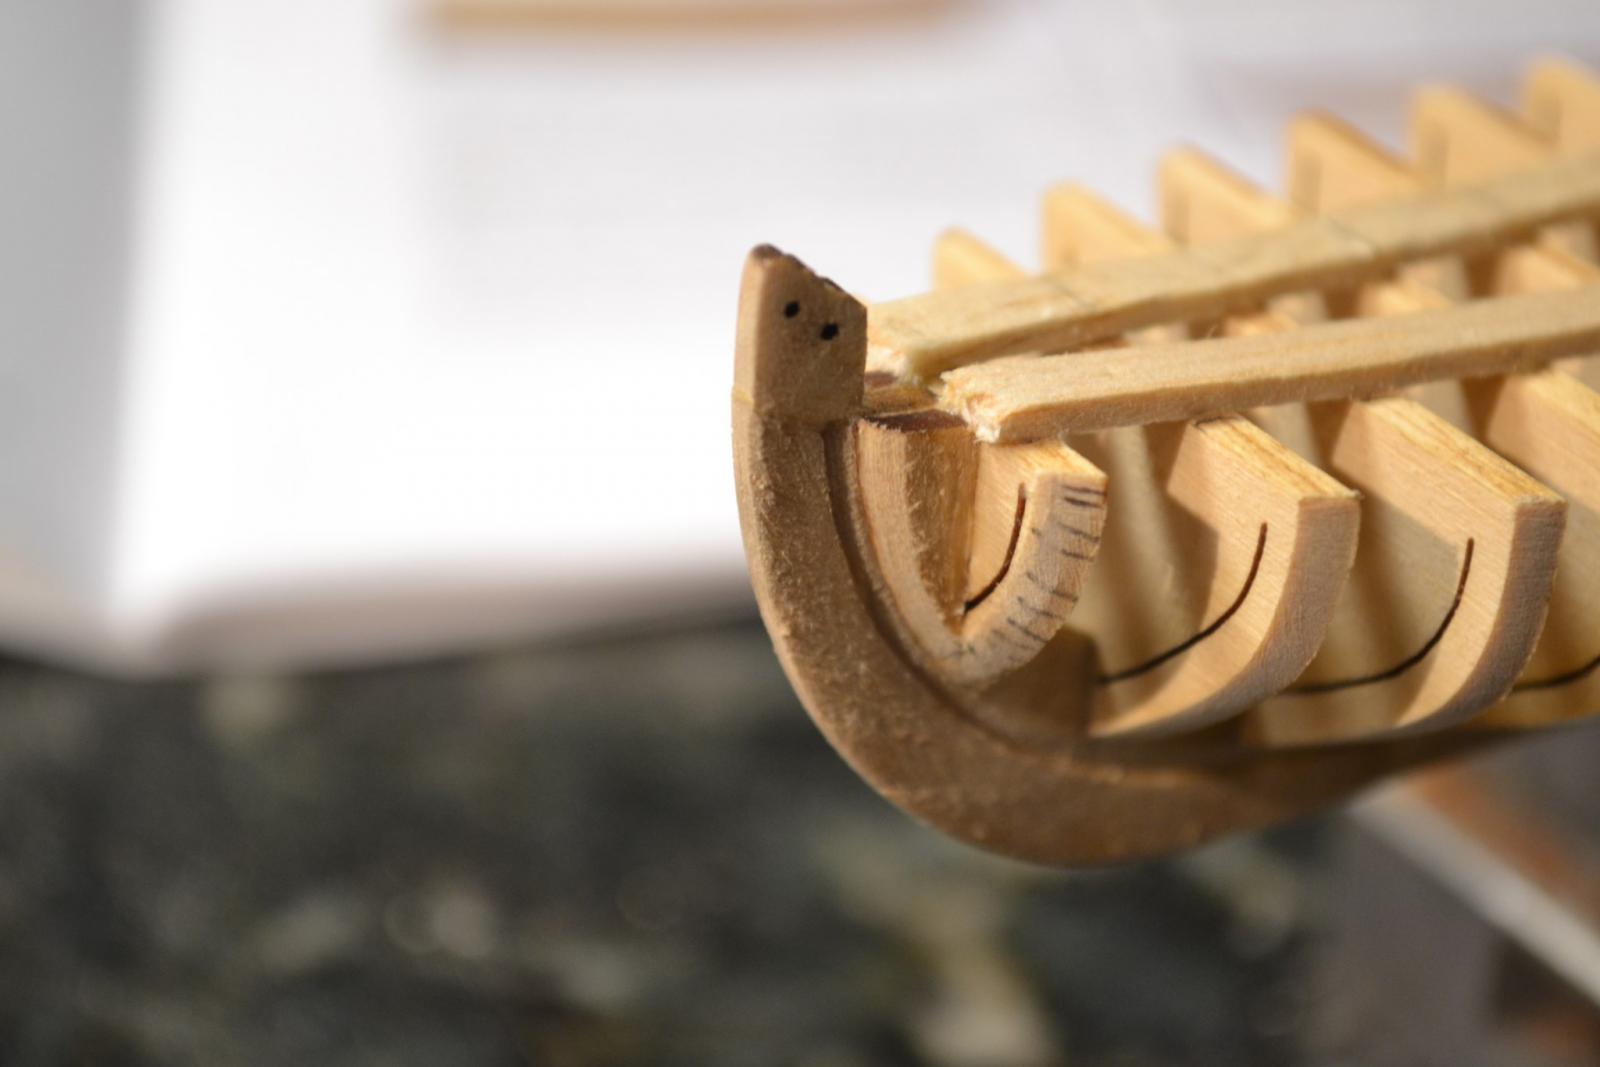
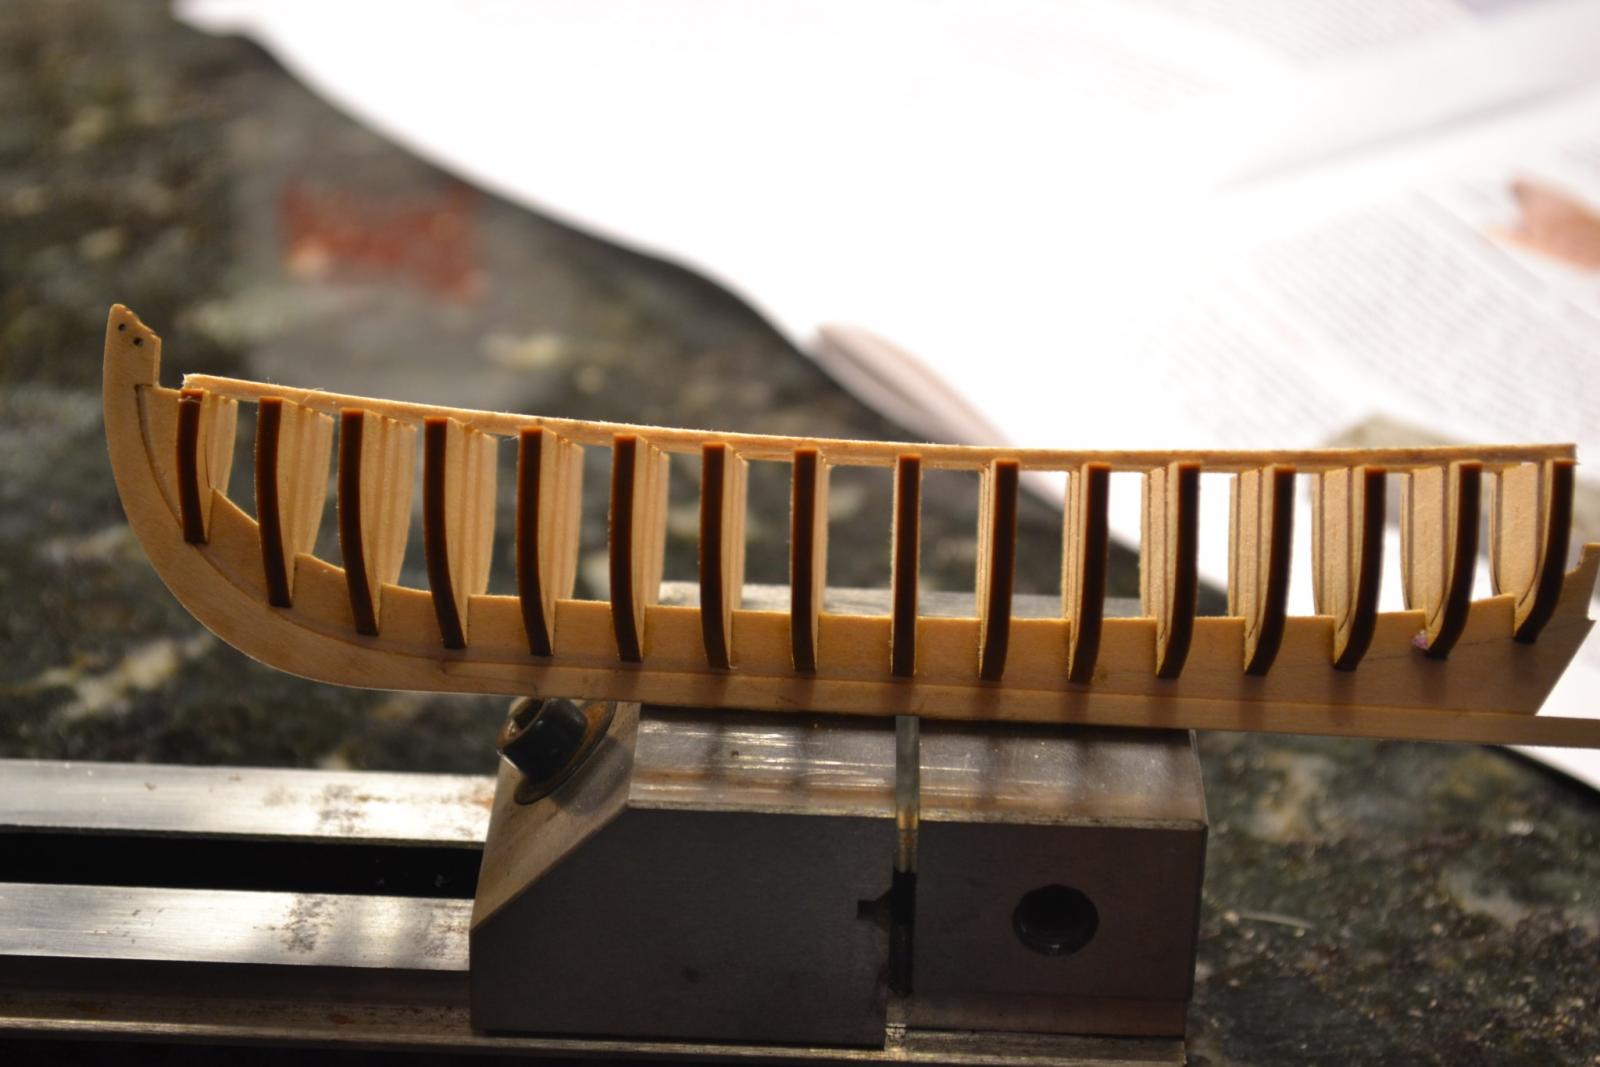
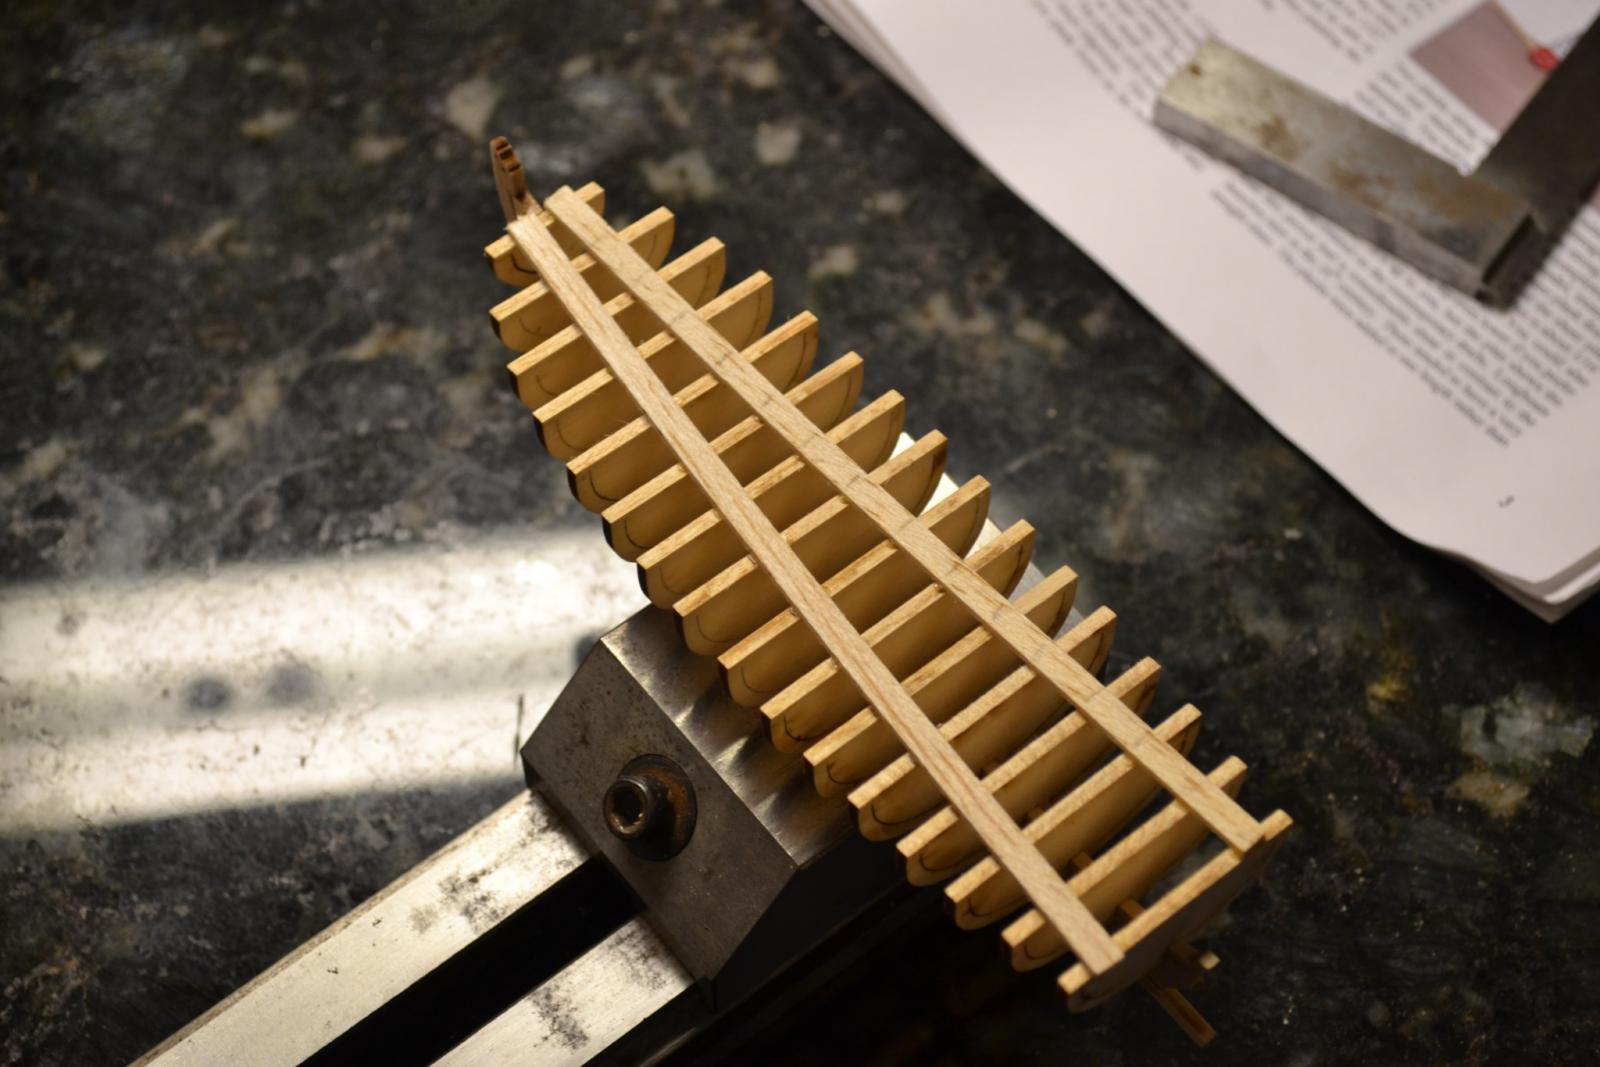
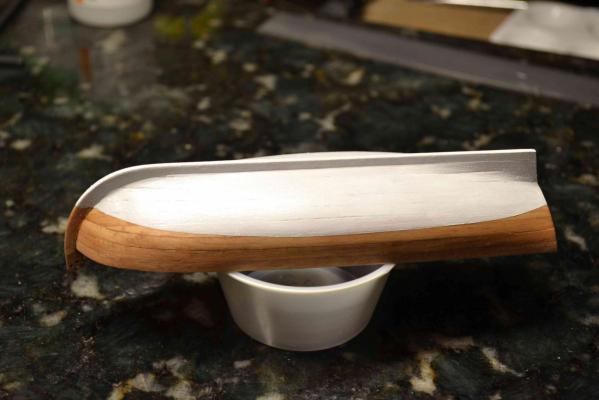
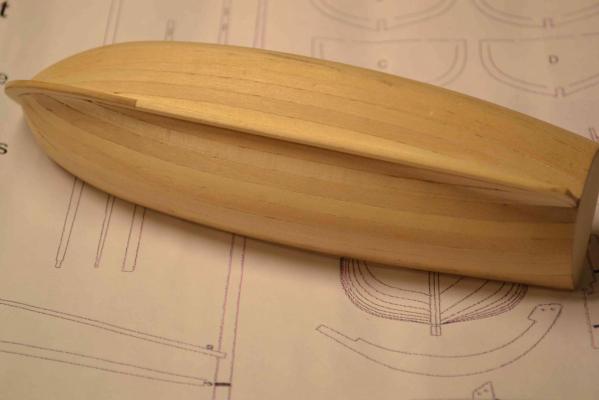
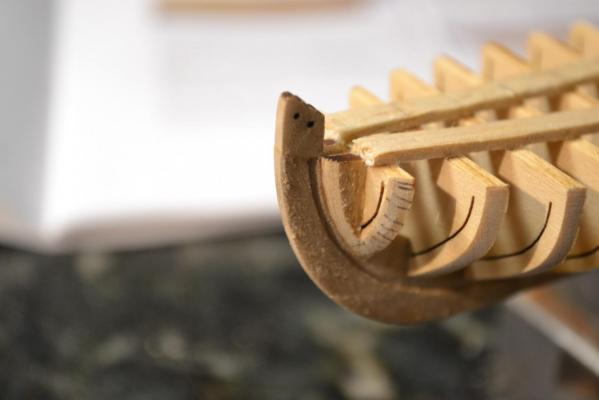
Thanks for the comments so far. The boat was only held in the vise for picture taking. First, let me apologize for not keeping a more in depth build log. I get wrapped up in the building and forget to actually take pictures. I have made some progress and the boat is planked. I made a few mistakes, such as not beveling all of the planks, and it shows. That's why i picked this kit first. Also, one other more serious problem was that I had a couple of planks near the bow come out really thin after sanding. Chuck's instructions said the planking on this kit was tricky, and it is. More so than I would have thought. Other than that, i think it is coming along pretty good.

- 37 replies
-
- 9
-
-
- model shipways
- 18th century longboat
- (and 1 more)
-
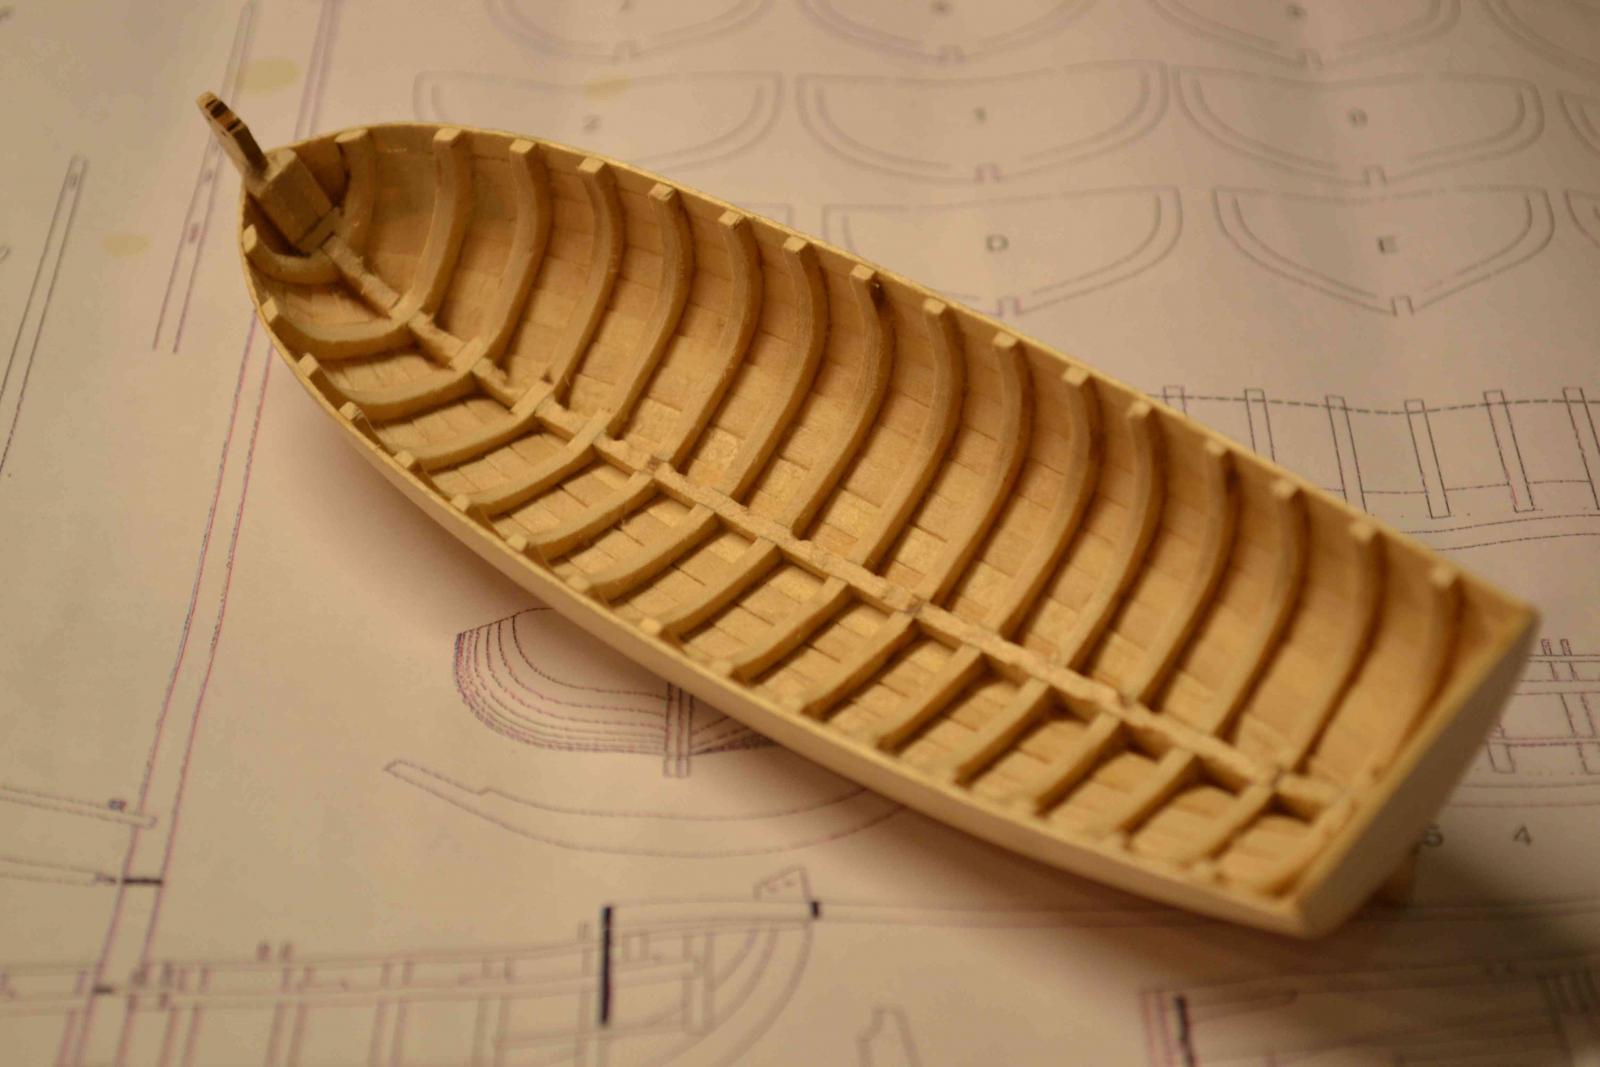
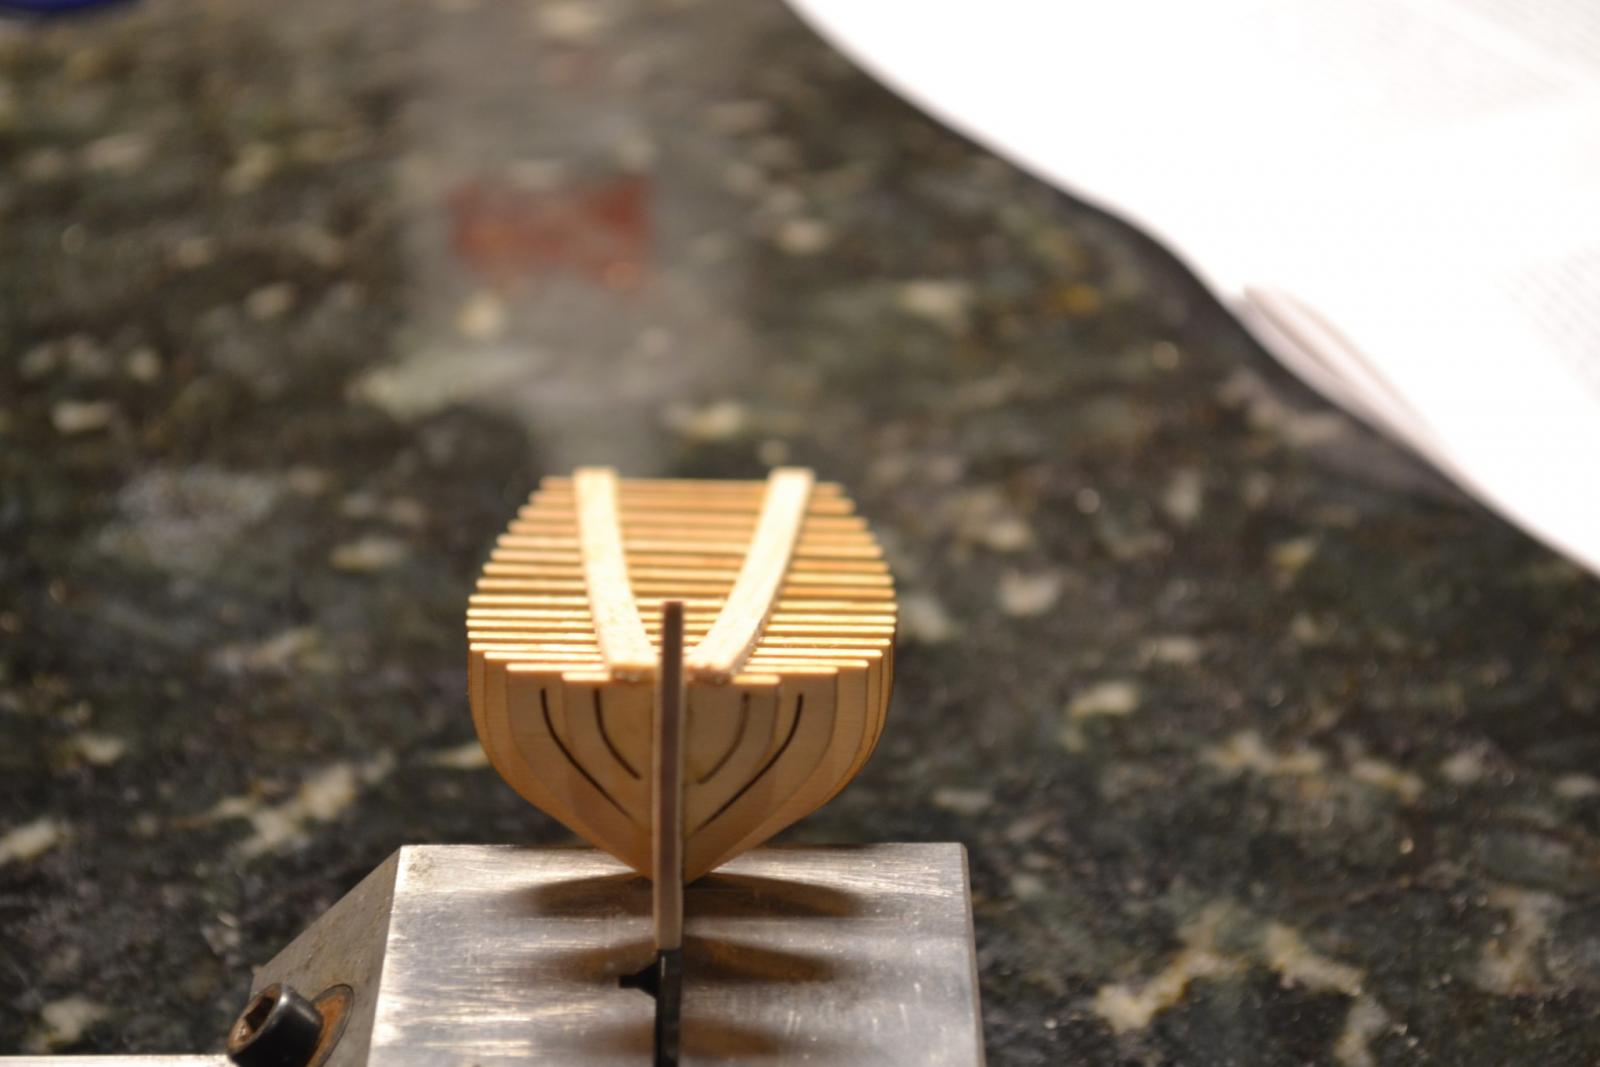
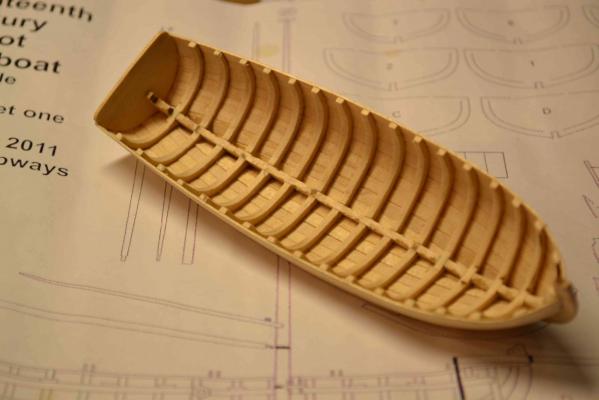
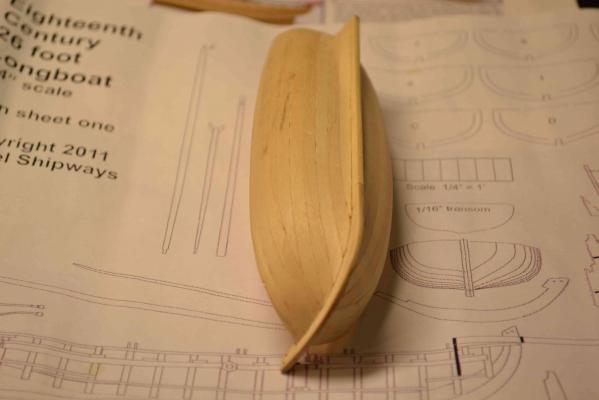
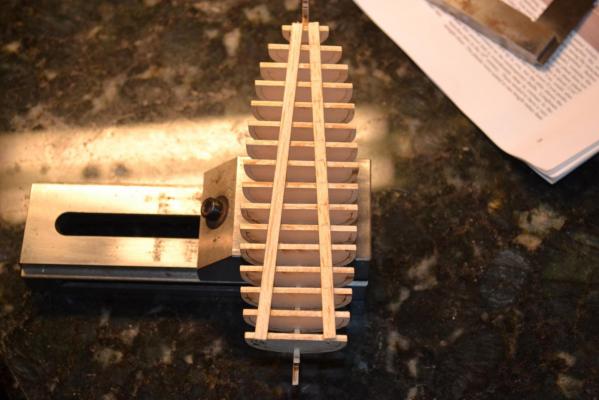
Here are a few pics after fairing of the bulkheads, Any ideas, criticisms, things I may do better are gladly welcome. Have a great day. Paul


- 37 replies
-
- 9
-
-
- model shipways
- 18th century longboat
- (and 1 more)
-
Hello Everyone, This is my first build of a wood ship, although this is not a ship, in over 20 years. Gearing up and re-training myself for the bigger ones, I decided to start here. I spent the last year building a dollhouse for my Granddaughters and promised myself I would not start another kit until this was done. Well, it is finished. I would like to thank everyone on this forum for providing such a great place to learn and I now hope to contribute to this great site. I have built this up to the point of putting the keel, false keel, bulkheads and actually fairing the bulkheads. After watching other builds take place, I have learned a lot and I hope to do it justice. This a great little kit. Paul


- 37 replies
-
- 6
-
-
- model shipways
- 18th century longboat
- (and 1 more)
-
Threads on miniature nuts & bolts
PAnderson replied to jhearl's topic in Metal Work, Soldering and Metal Fittings
John, I think I misunderstood the sizes you specified. I thought you were reffering to the pitch of the threads. Jewelers threads and watchmaking threads are mostly proprietary and don't always follow standards. I believe it would be in your best interest if you followed the machinist standards except in rare circumstances. Below are the smallest imperial threads. I have bought nuts and screws in these sizes before, mostly the 00-90 and 0-80. Of course there are metric equivalents. -
Threads on miniature nuts & bolts
PAnderson replied to jhearl's topic in Metal Work, Soldering and Metal Fittings
Your .6MM thread is in reality 42.37 threads per inch and your 1MM thread is in reality 25.4 threads per inch. All threads have standard TPI or pitch per the machinist handbook, even sub 1MM threads. Chances are really good any nuts you buy will fit any external thread in the same class OD's. Unlike larger threads, where there may be a fine pitch and a course pitch, smaller threads only have 1 common pitch. Paul -
Where are the Big Bismarck models Logs?
PAnderson replied to yvesvidal's topic in Plastic model kits
Good Day Gentlemen, I am new here but been signed up for over a year. I didn't really participate because I wasn't doing any wood ships at the time. I usually do plastic but that is about to change. I now have 3 kits but don't know which one to do first. I am currently working on Trumpeter's 1/200 Missouri with the deluxe photo etch set. Maybe I need to post that first. What a great site this is, so full of information. I can feel the frustration about the loss of the first site since I waas a member of the sister site that lost all of their data also. It never occured to me that sites like this would not back up their data. Paul