MikeB4
-
Posts
322 -
Joined
-
Last visited
Content Type
Profiles
Forums
Gallery
Events
Everything posted by MikeB4
-
 I'm leaning towards the New Bedford Whale Boat. I here that the Mayflower is a bear to plank because of the shape of the bow. I don't need another bear to wrestle at this time.
- 129 replies
-
- 2
-

-
- finished
- model shipways
- (and 1 more)
-
Thank you, once it was planked in was pretty stable. There was a point in this build where I thought I wasn't going complete this project. My first attempt at planking this boat was a disaster.
- 129 replies
-
- 5
-
-
- finished
- model shipways
- (and 1 more)
-
Finally finished after about 10 months. I feel good about this build I get a little bit better with each project. For those who have followed this log, thank you.
.thumb.jpg.00da1b8b8d57385890e065a1fb20bc90.jpg)
.thumb.jpg.1c9e28e6828c74c2dc895ba35586257b.jpg)
.thumb.jpg.d9d4e1a79ccbb2d12e4637ab009ebbd2.jpg)
.thumb.jpg.0ce7fc7a13617a90cf6bf0d025e9f2c9.jpg)
.thumb.jpg.089f0fc007eb3035e84719c96148bc41.jpg)
.thumb.jpg.95d74f3662b1087322ea7a7d102f340a.jpg)
.thumb.jpg.c13b3b8d213d9cb0b393cb79cff95c63.jpg)
- 129 replies
-
- 14
-
-
- finished
- model shipways
- (and 1 more)
-
After nine months or so this project is almost complete. I just finished up installing the rudder.
- 129 replies
-
- 10
-
-
- finished
- model shipways
- (and 1 more)
-
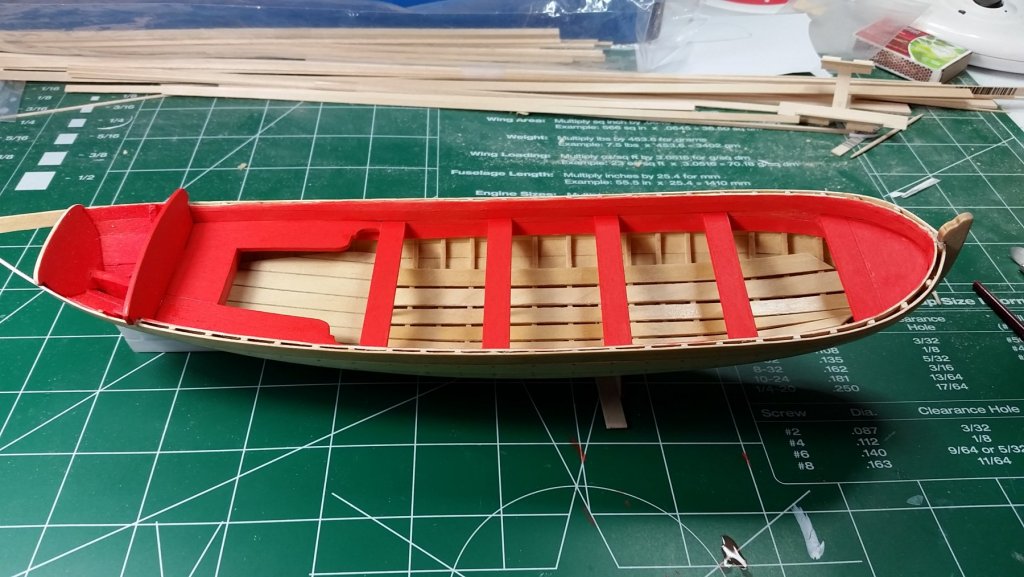
I brushed a coat of clear acrylic over it first. After that dried I sprayed a layer of fixative.
- 129 replies
-
- 1
-
-
- finished
- model shipways
- (and 1 more)
-
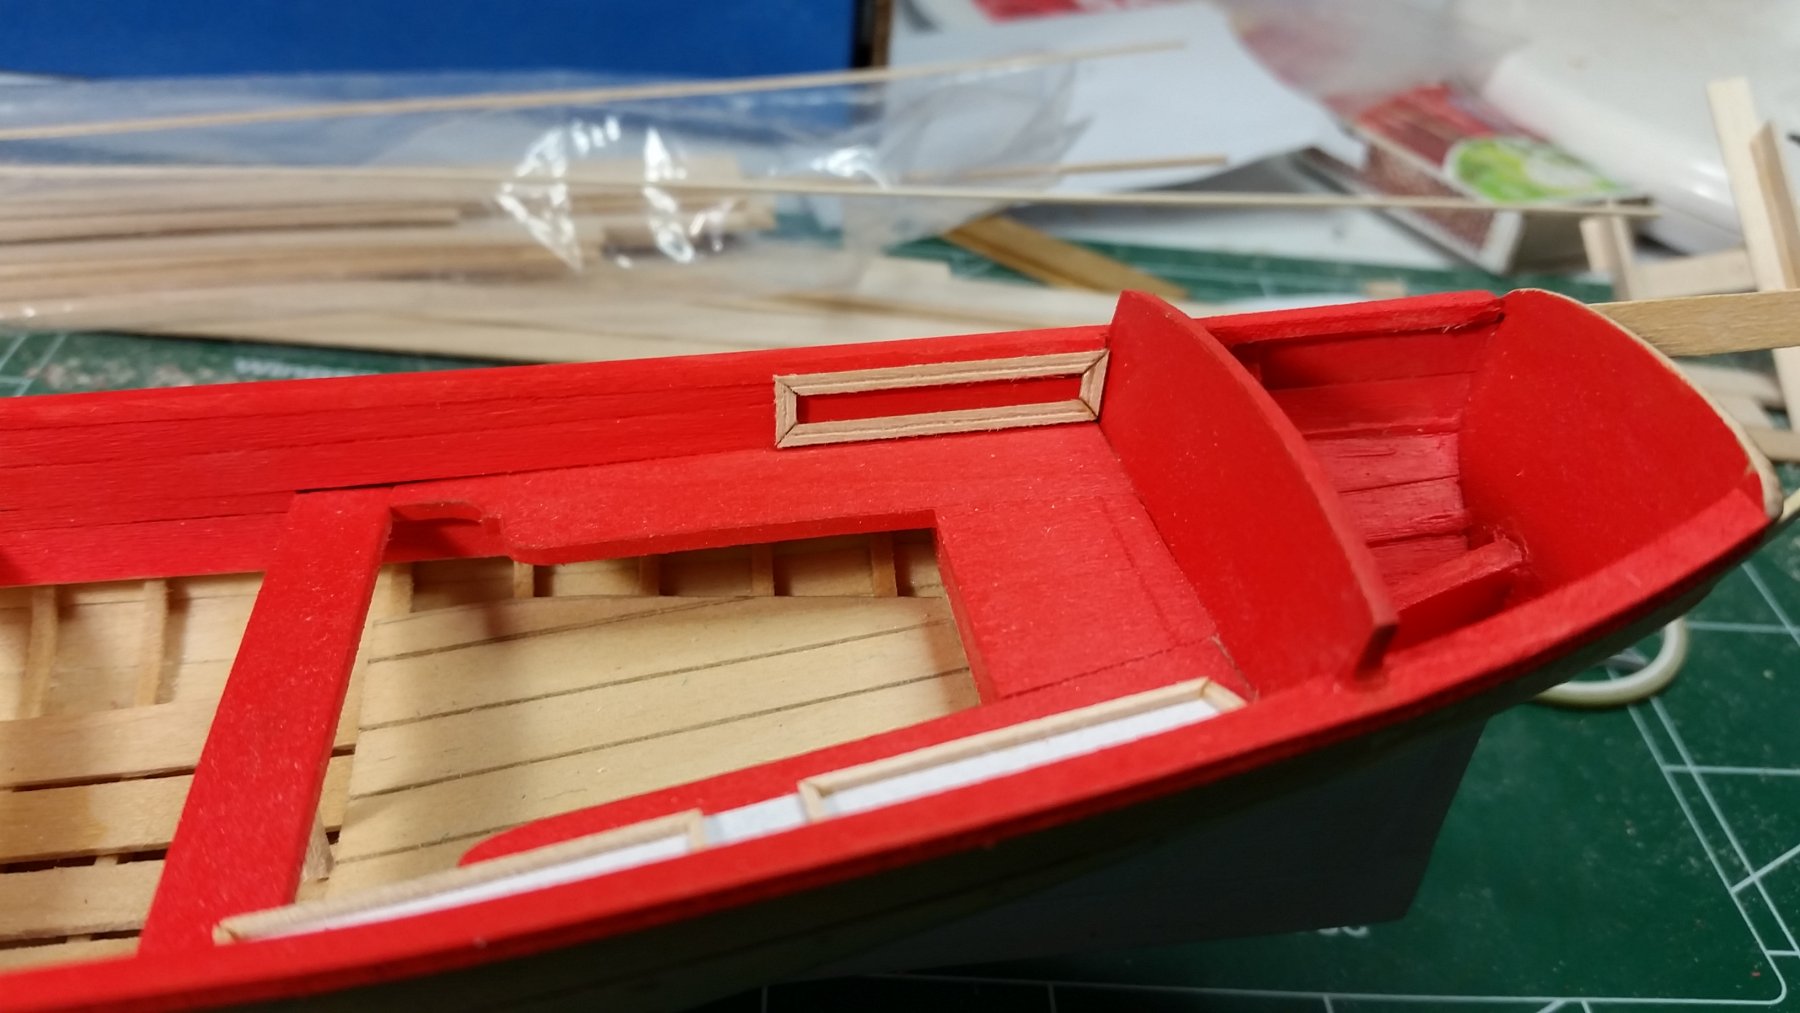
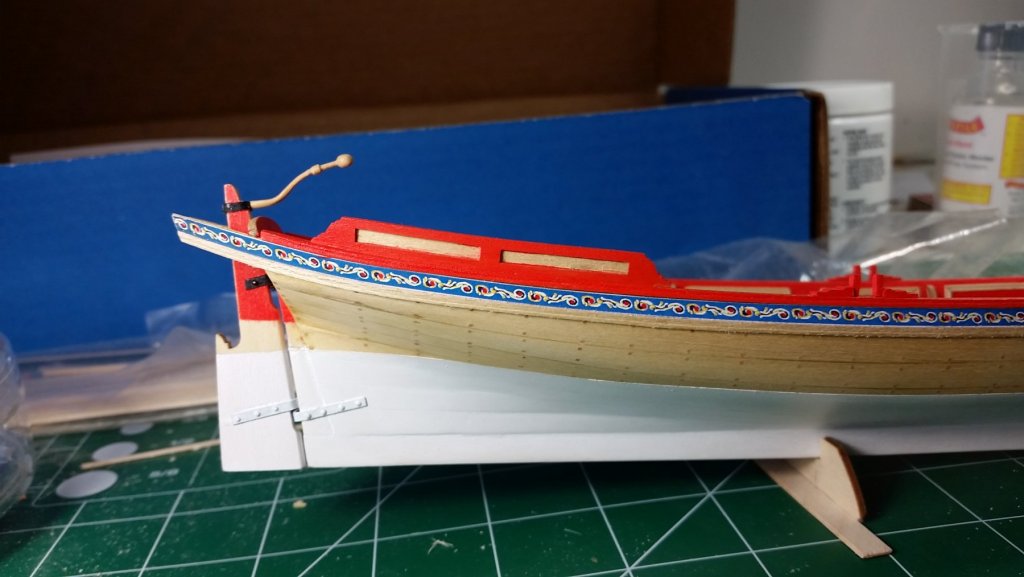
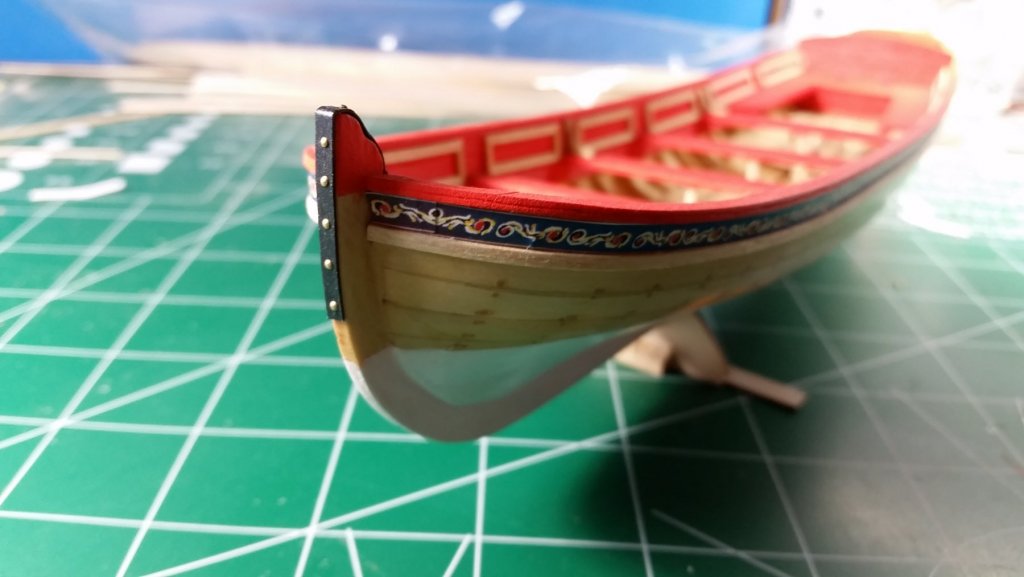
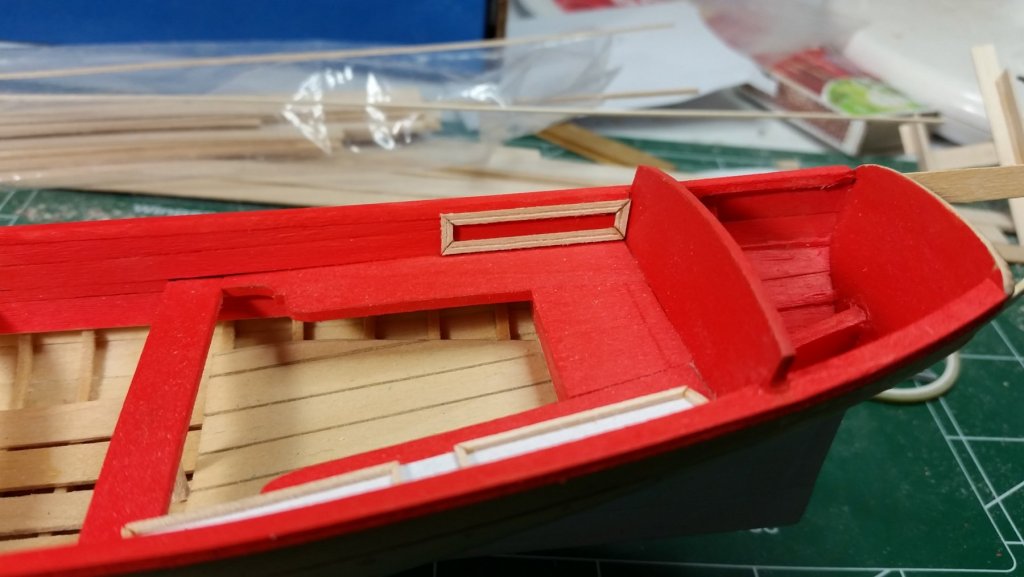
I installed the decorative stem bumper. I wasn't sure how I was going to do this at first. I have these really tiny nails that where just right for this and I had some black card stock lying around. I think I'm going to leave the nails their natural brass color, I think it looks good that way.
- 129 replies
-
- 11
-
-
- finished
- model shipways
- (and 1 more)
-
I've completed most of the inboard details. I've gotten to the freizes also. I sprayed fixative onto the model at this time.

- 129 replies
-
- 13
-
-
- finished
- model shipways
- (and 1 more)
-
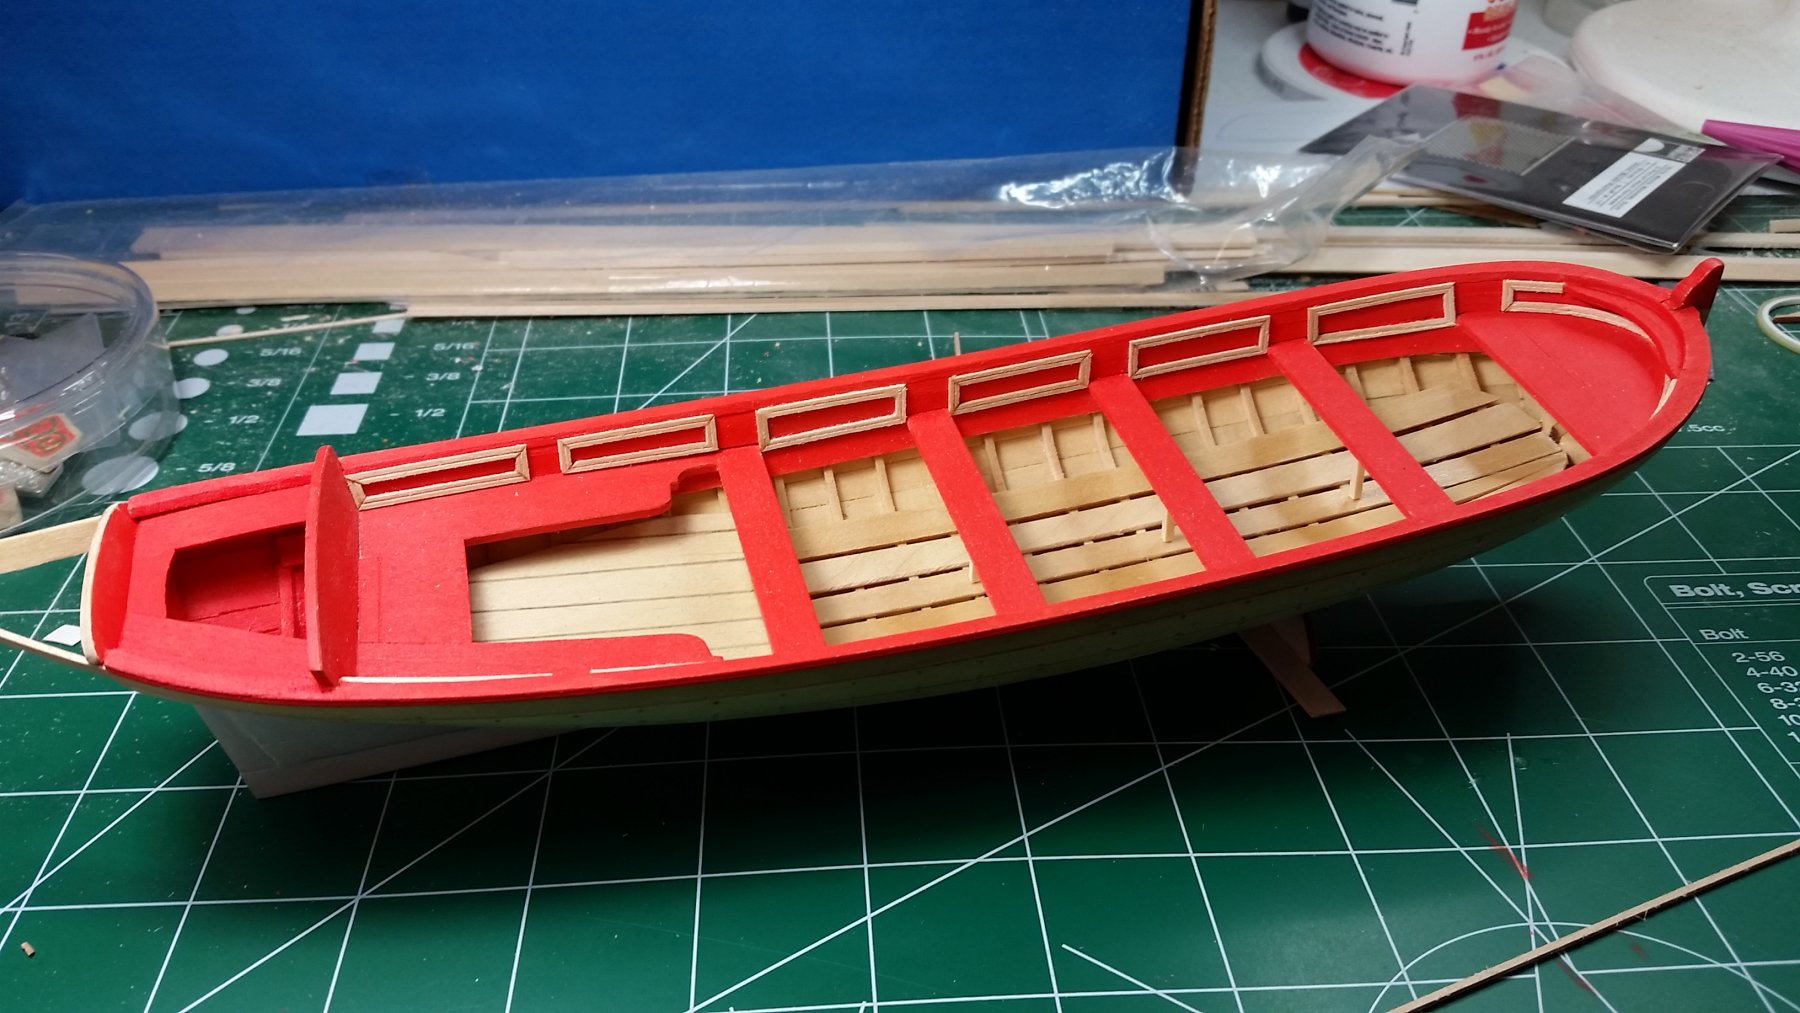
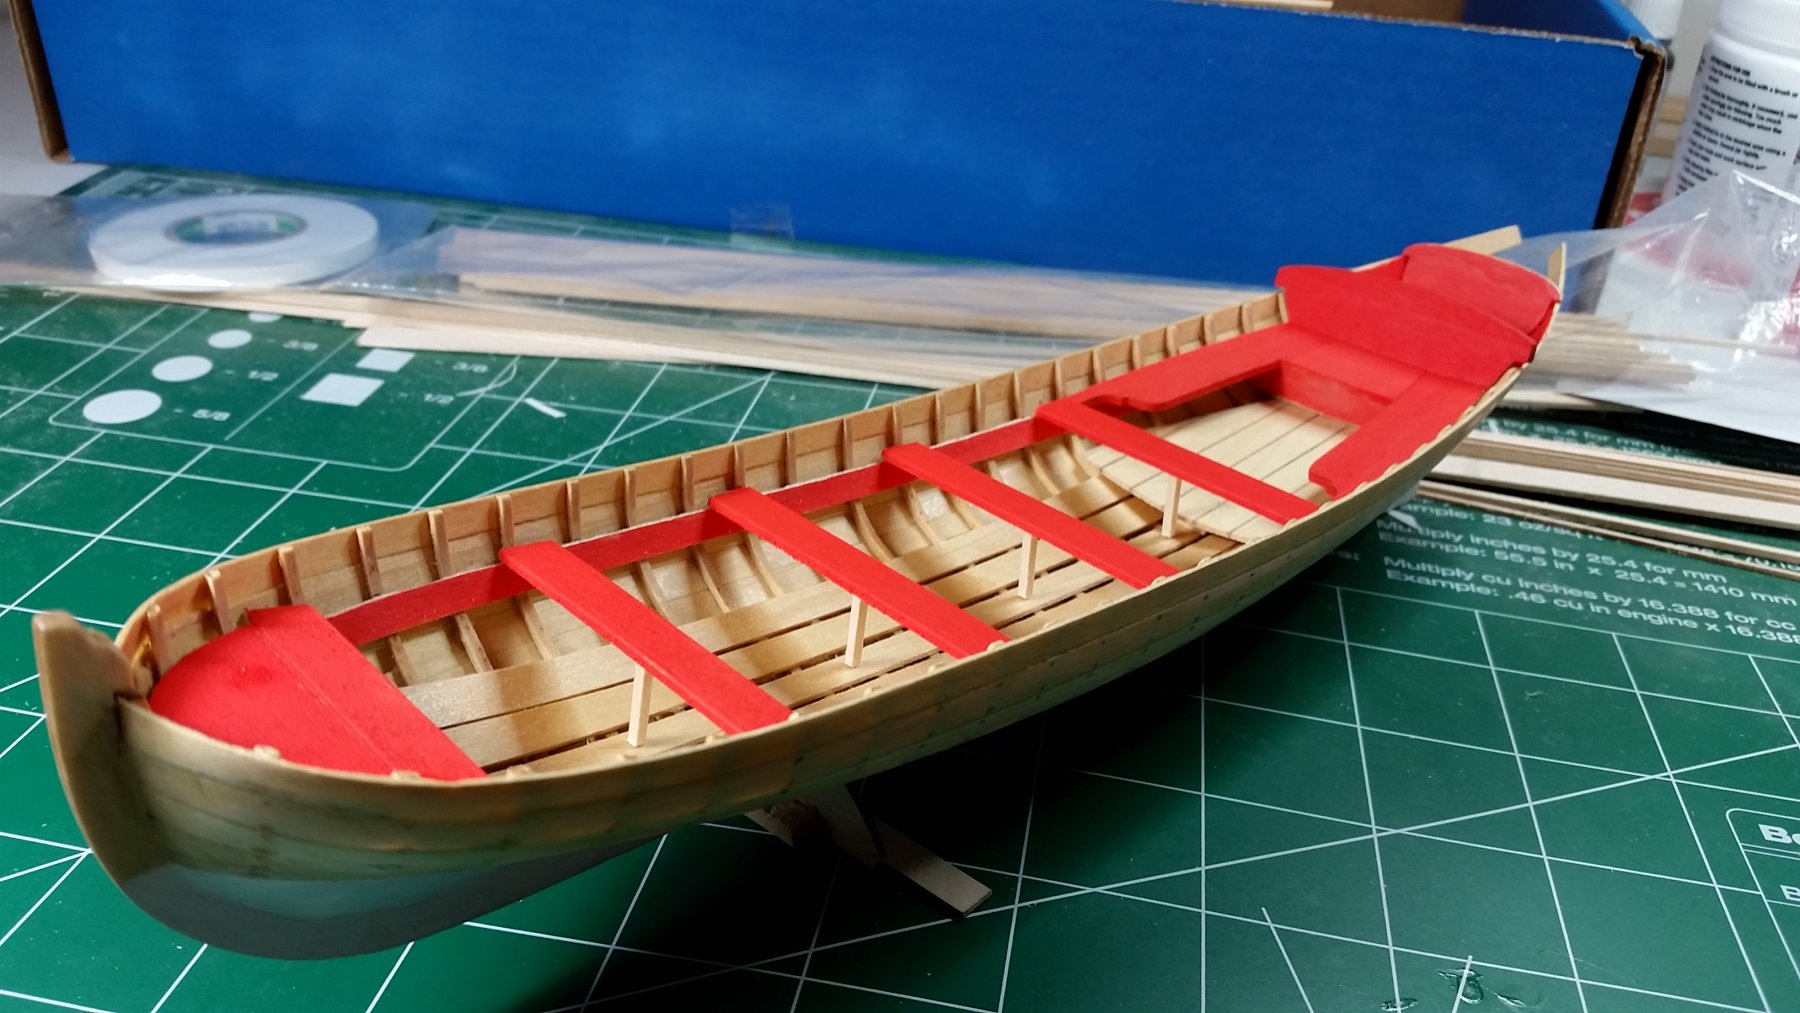
I've finally finished the panels. At this stage you start to find all your little mistakes. Fortunately nothing is a deal breaker. I realize all those highly accomplished builders out there made a million mistakes to get to where they are. Anyone who says they didn't isn't being honest. Over all I'm pleased with this build, it's not an easy one.

- 129 replies
-
- 11
-
-
- finished
- model shipways
- (and 1 more)
-
Mike, I agree It would be way to much work to have to build each panel over again if they didn't look good in gold. I decided just to leave them unpainted in their natural wood color.
- 129 replies
-
- 3
-
-
- finished
- model shipways
- (and 1 more)
-
Steve, Your longboat has come out excellent. Good craftsmanship, this is not an easy model to build.
- 165 replies
-
- 3
-
-
- finished
- model shipways
- (and 1 more)
-
I think that the .031 x .062 strip for the panels will look OK. Does anyone think these panels would look good panted in gold leaf?
- 129 replies
-
- 7
-
-
- finished
- model shipways
- (and 1 more)
-
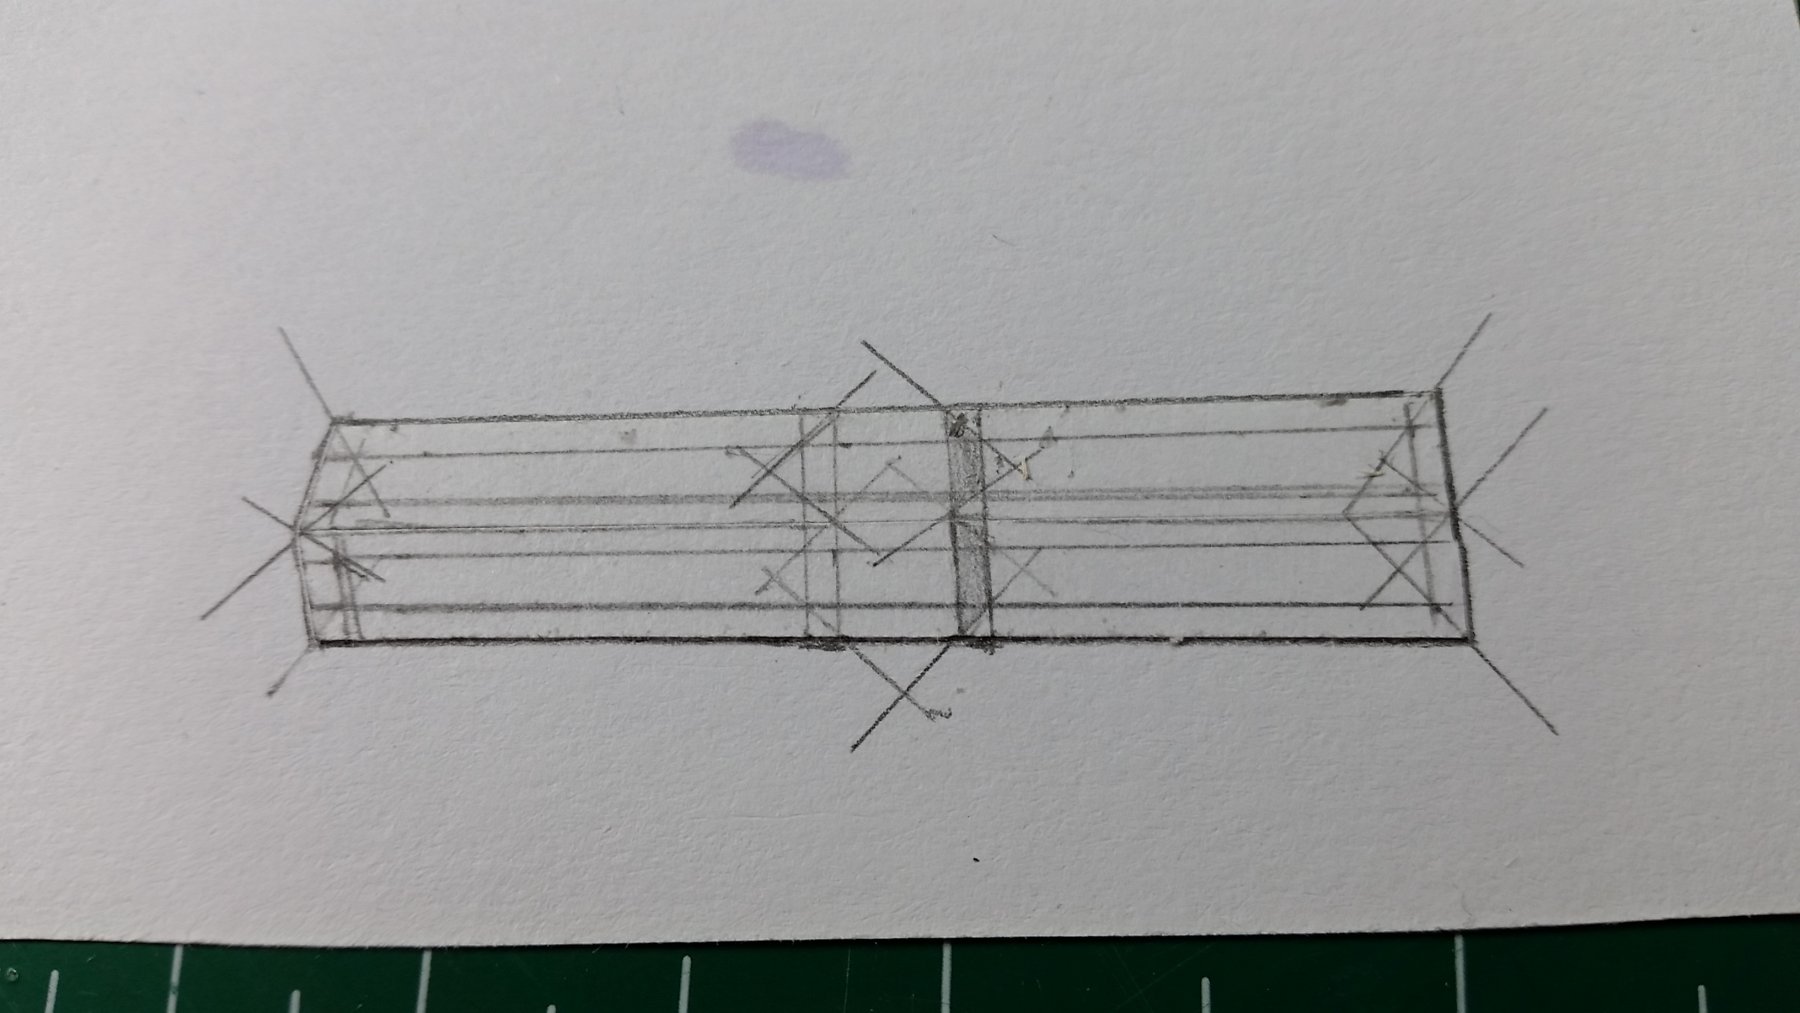
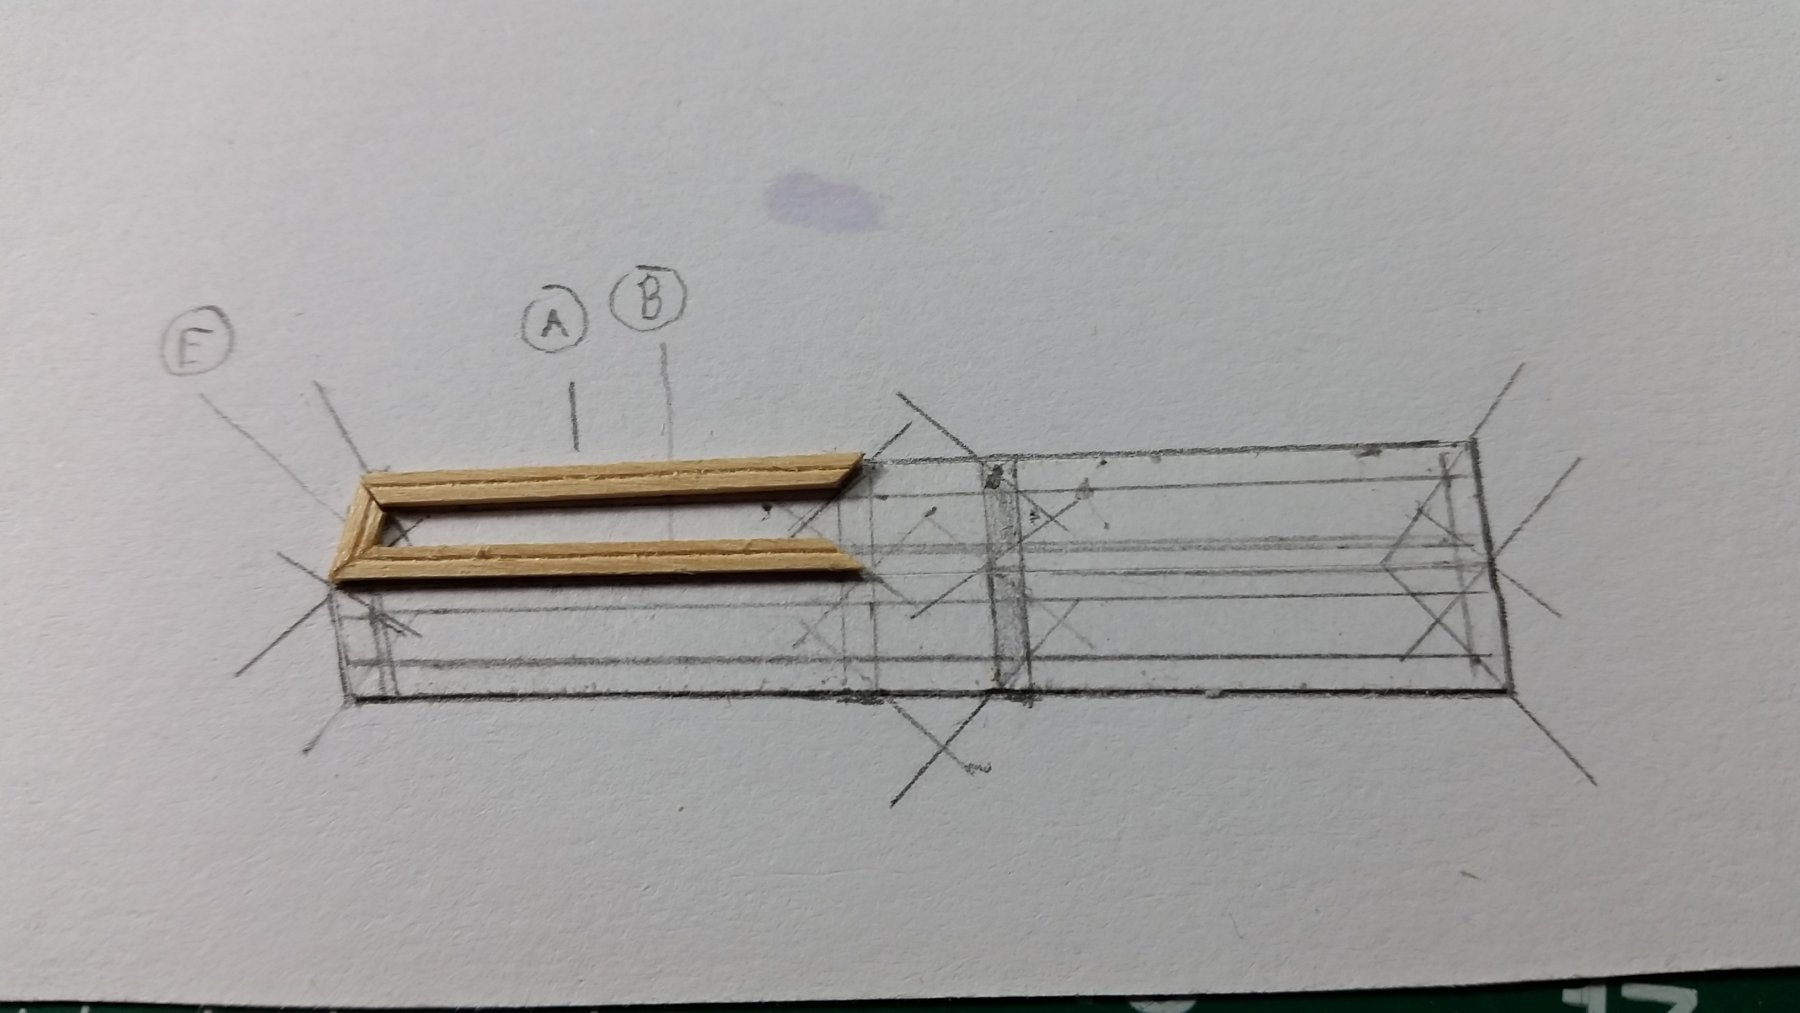
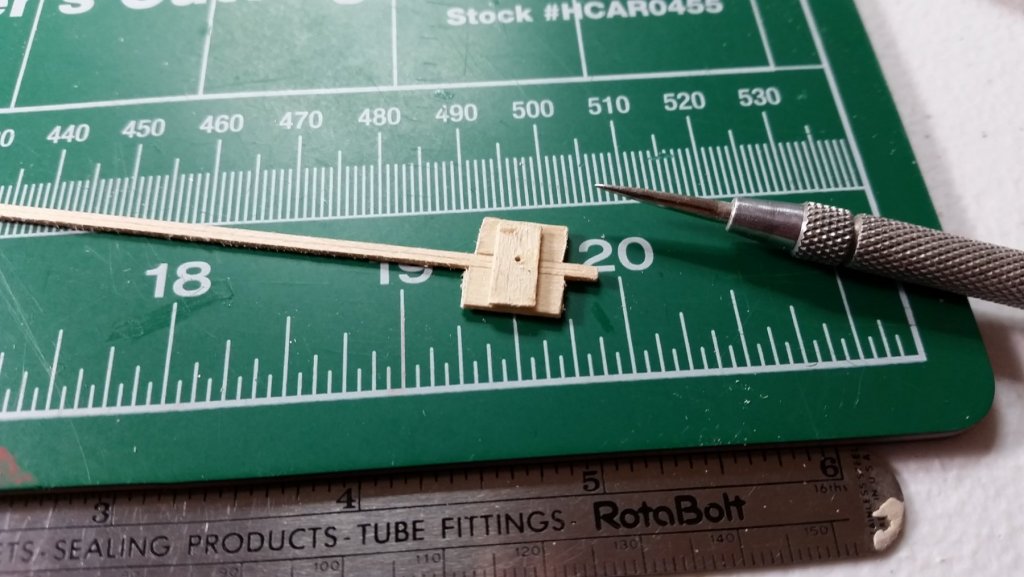
I had built some panels using .031 x .031 strips of wood which looked OK, but I needed to see how the 031 x .062 strips that are recommended in the instructions will look before committing to the former. I'm glad I did because I'm going with the later. My technique for scribing the strips was to build a jig that would guide my scriber evenly down the length of the wood strips as you can see in the picture below. I also deviating from the instructions concerning the actual building of the panels. I'm going to build them before I put them on the boat rather than build them on the boat as the instructions recommend. I've started with the cockpit panels first by creating a drawing to loft the panels off of.


- 129 replies
-
- 7
-
-
- finished
- model shipways
- (and 1 more)
-
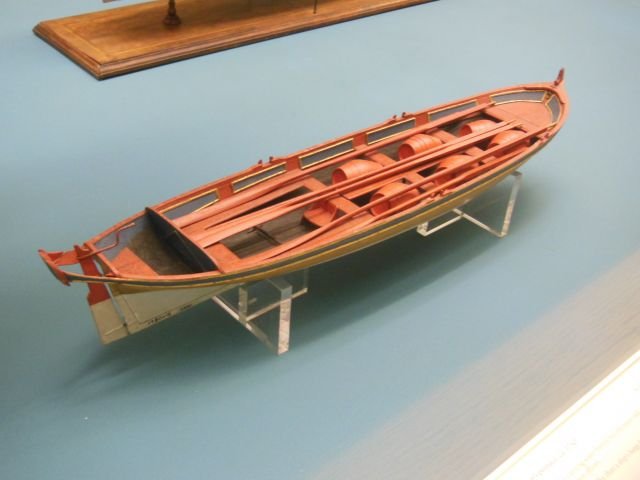
Thanks Steve, I'll have to get a bit creative. Fortunately this isn't a model of a specific boat from history but rather a kind of representation from that period. Looking at the original museum piece that inspired Chuck for this kit, it is very different. So with that said this build is more art than history.
- 129 replies
-
- 6
-
-
- finished
- model shipways
- (and 1 more)
-
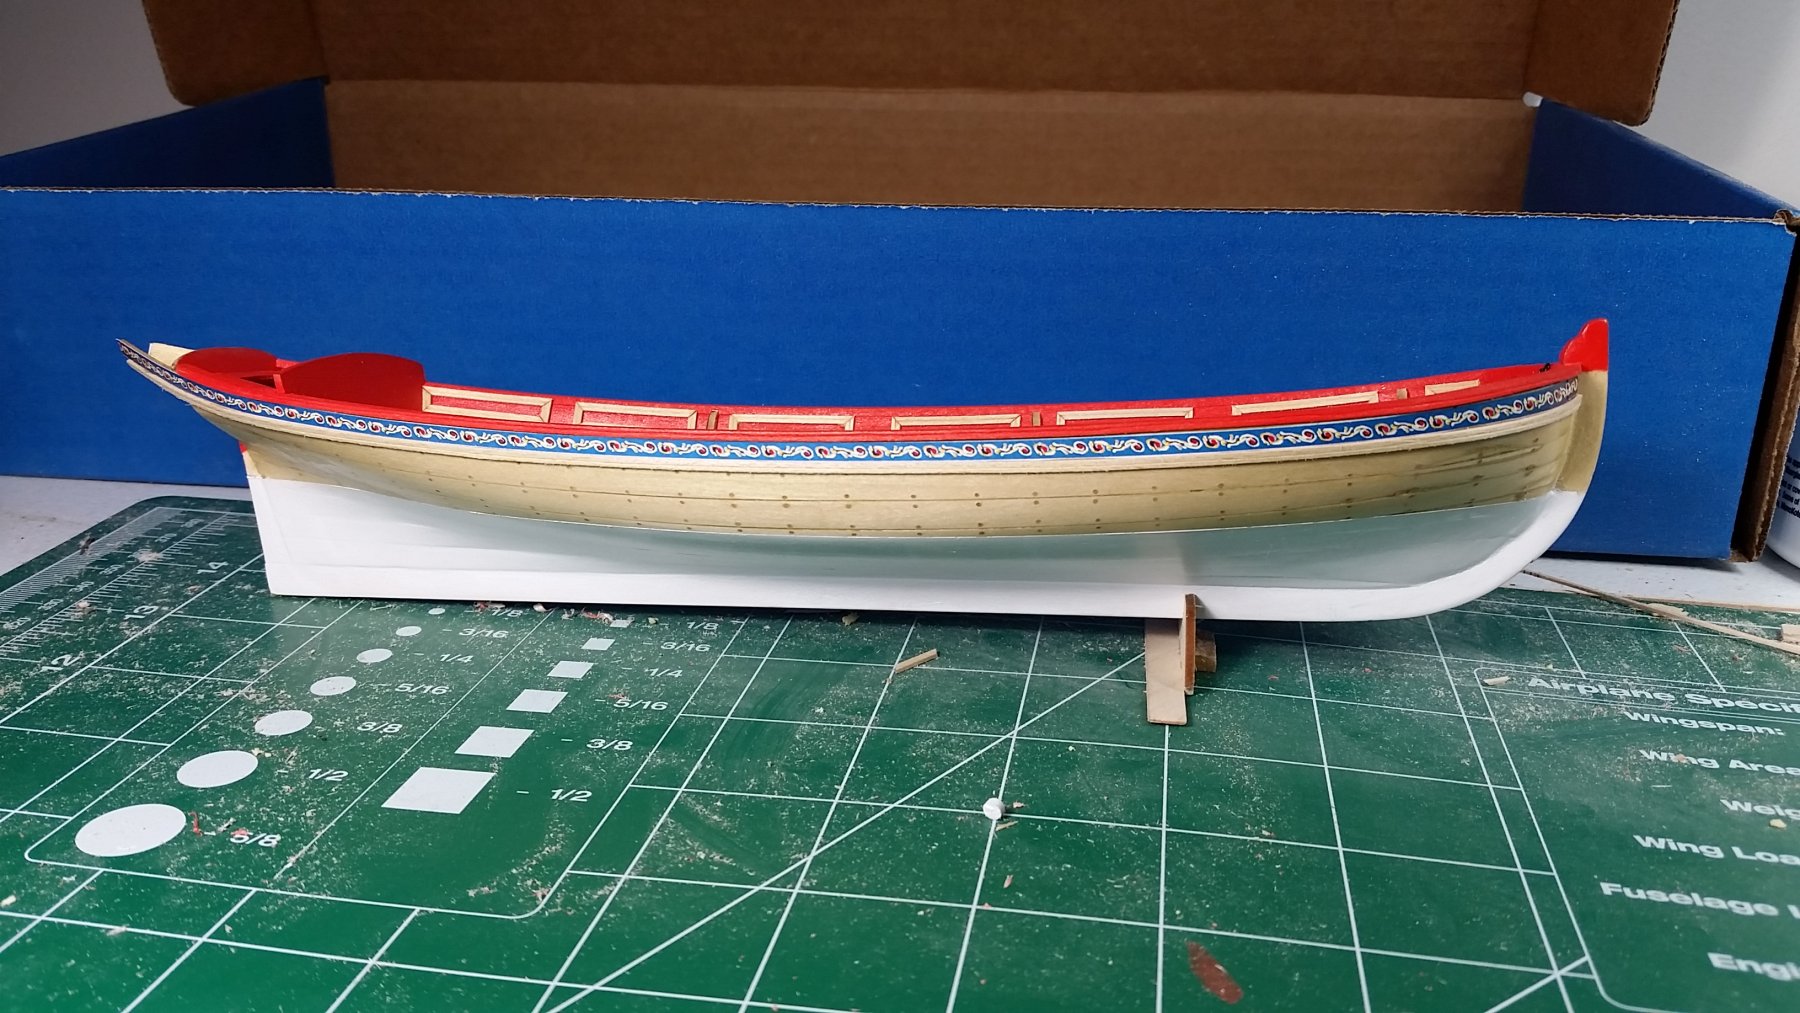
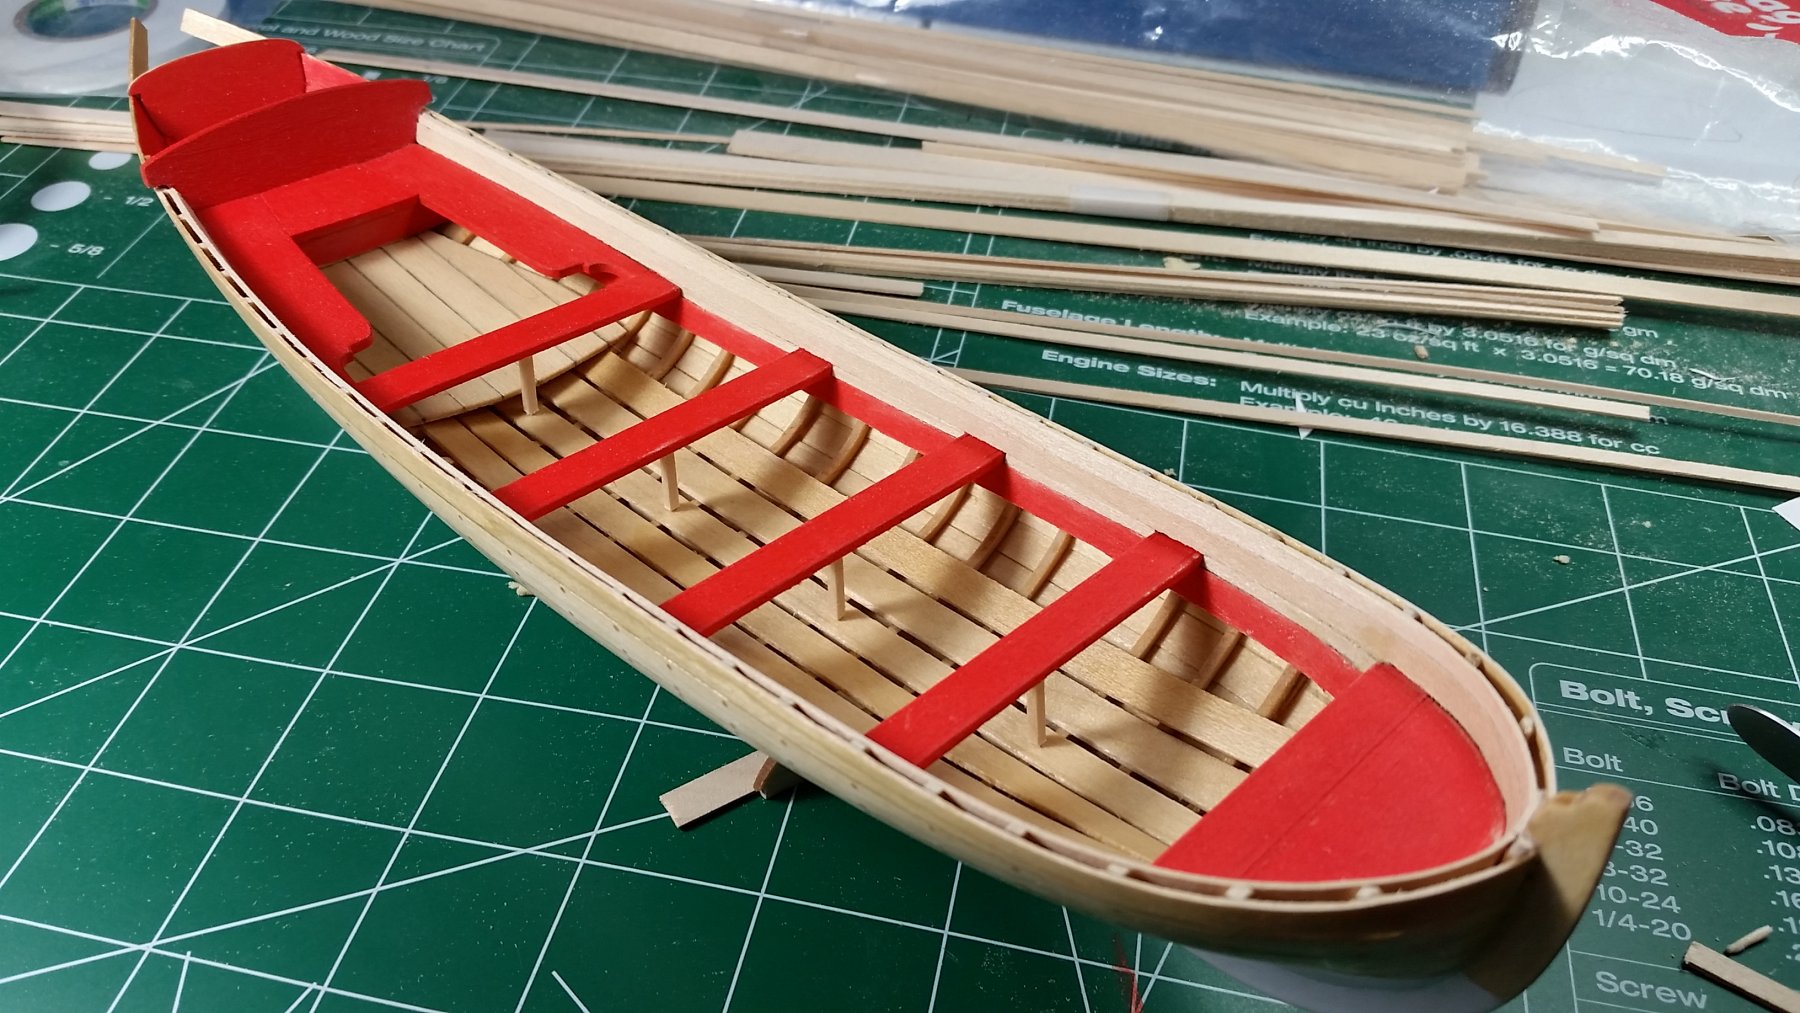
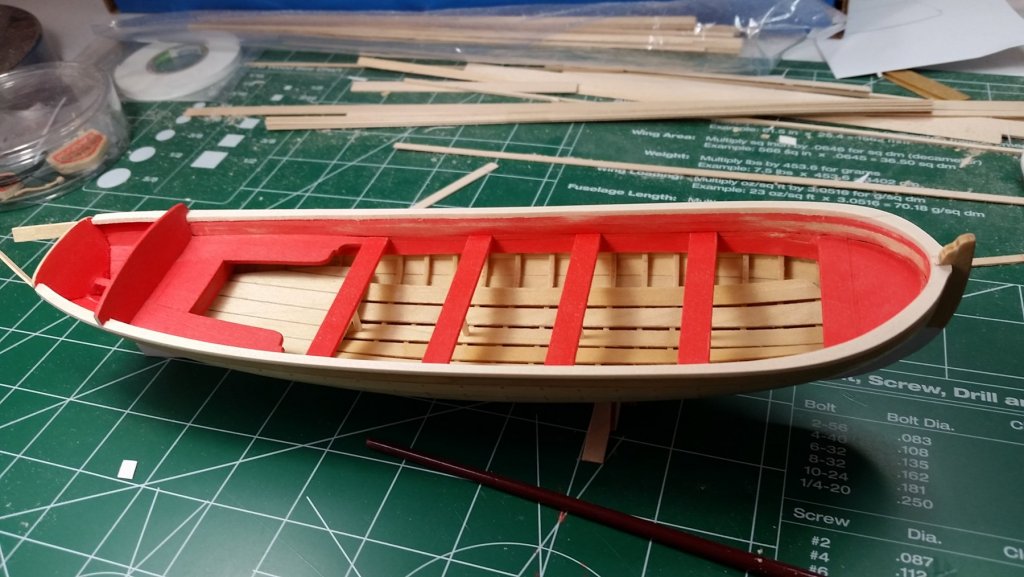
I've painted the cap rail. I did discover an issue. The distance between the top of the cockpit bench and the bottom of the cap rail is much narrower than it should be. This is going to be a problem with the panels. I guess I'll have to use 1/32 x 1/32 wood strips instead of the 1/16 x 1/32 supplied in the kit. I'm surely not going to rip the model apart at this point. No matter how hard I try, something always ends up off. It's a learning experience.
- 129 replies
-
- 8
-
-
- finished
- model shipways
- (and 1 more)
-
The book I'm referring to is by Willits D. Ansel. The book's title is, The Whaleboat: A Study of Design, Construction and Use from 1850 - 1970
-
Thank you for your advise gentlemen. I probably will start with the whaleboat next and then move on to either of the two schooners. I'm going to take a ride to mystic seaport soon. There's a book on building the whaleboat in their bookstore that maybe of help, that I'm going to purchase before I start the build. Also that will give me an opportunity to take pictures of the real boats.
-
I've sanded the cap rail to the appropriate width. I'm going to attempted to score a groove around the outer edge like Chuck does in the instructions. Of course I'll need to paint and repaint some of the areas that the sanding took the paint off of.
- 129 replies
-
- 8
-
-
- finished
- model shipways
- (and 1 more)
-
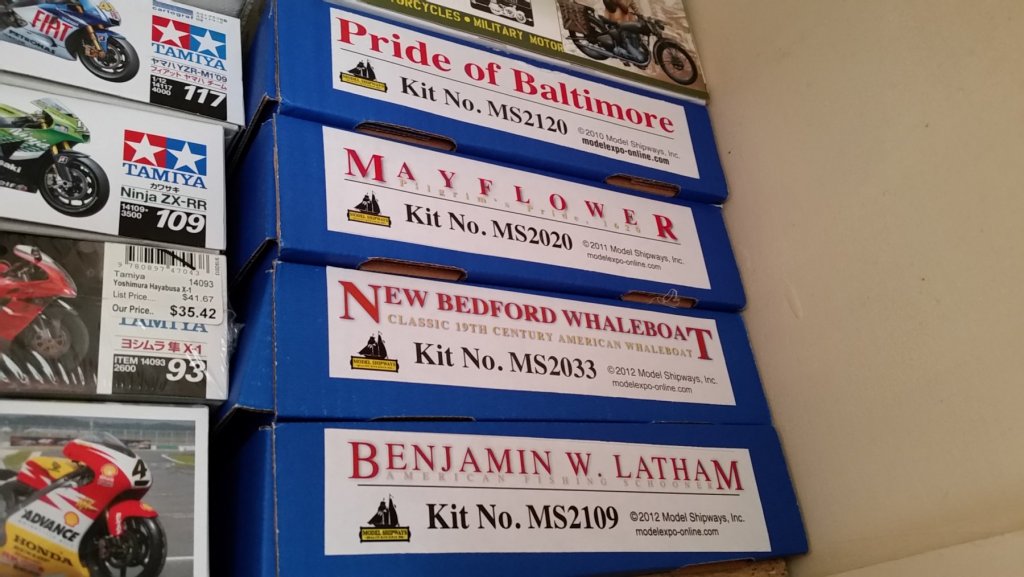
I have four Model Shipways kits in my closet waiting to be built. since I haven't actually built and completed a ship model yet, I'm wondering which out of the three ships is the easiest to plank for a first time ship build? The Mayflower Pride of Baltimore 2 Benjamin Latham
-
Eric, Great job! That's quite an accomplishment.
-
I got the cap rail on. Now I'll sand it down to size.

- 129 replies
-
- 8
-
-
- finished
- model shipways
- (and 1 more)
-
I'm using the basswood from the kit for the most part. the tiller was carved from boxwood, that's about it.
- 129 replies
-
- 4
-
-
- finished
- model shipways
- (and 1 more)
-
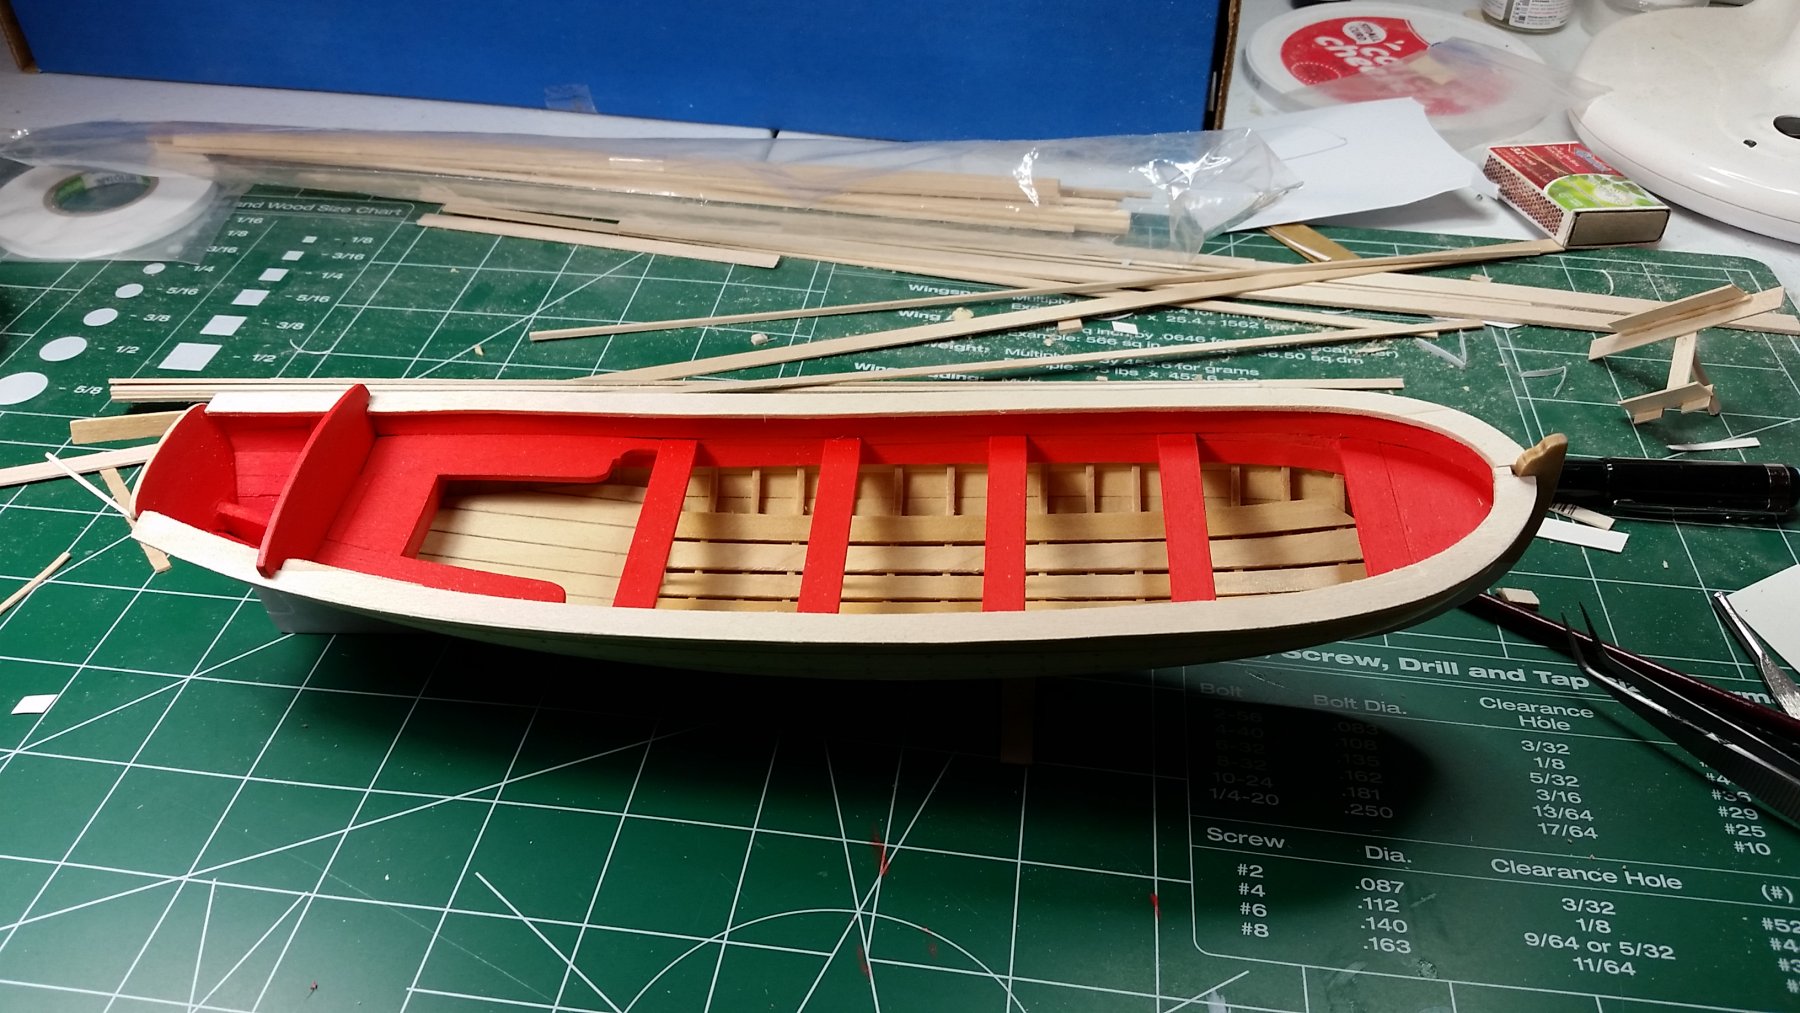
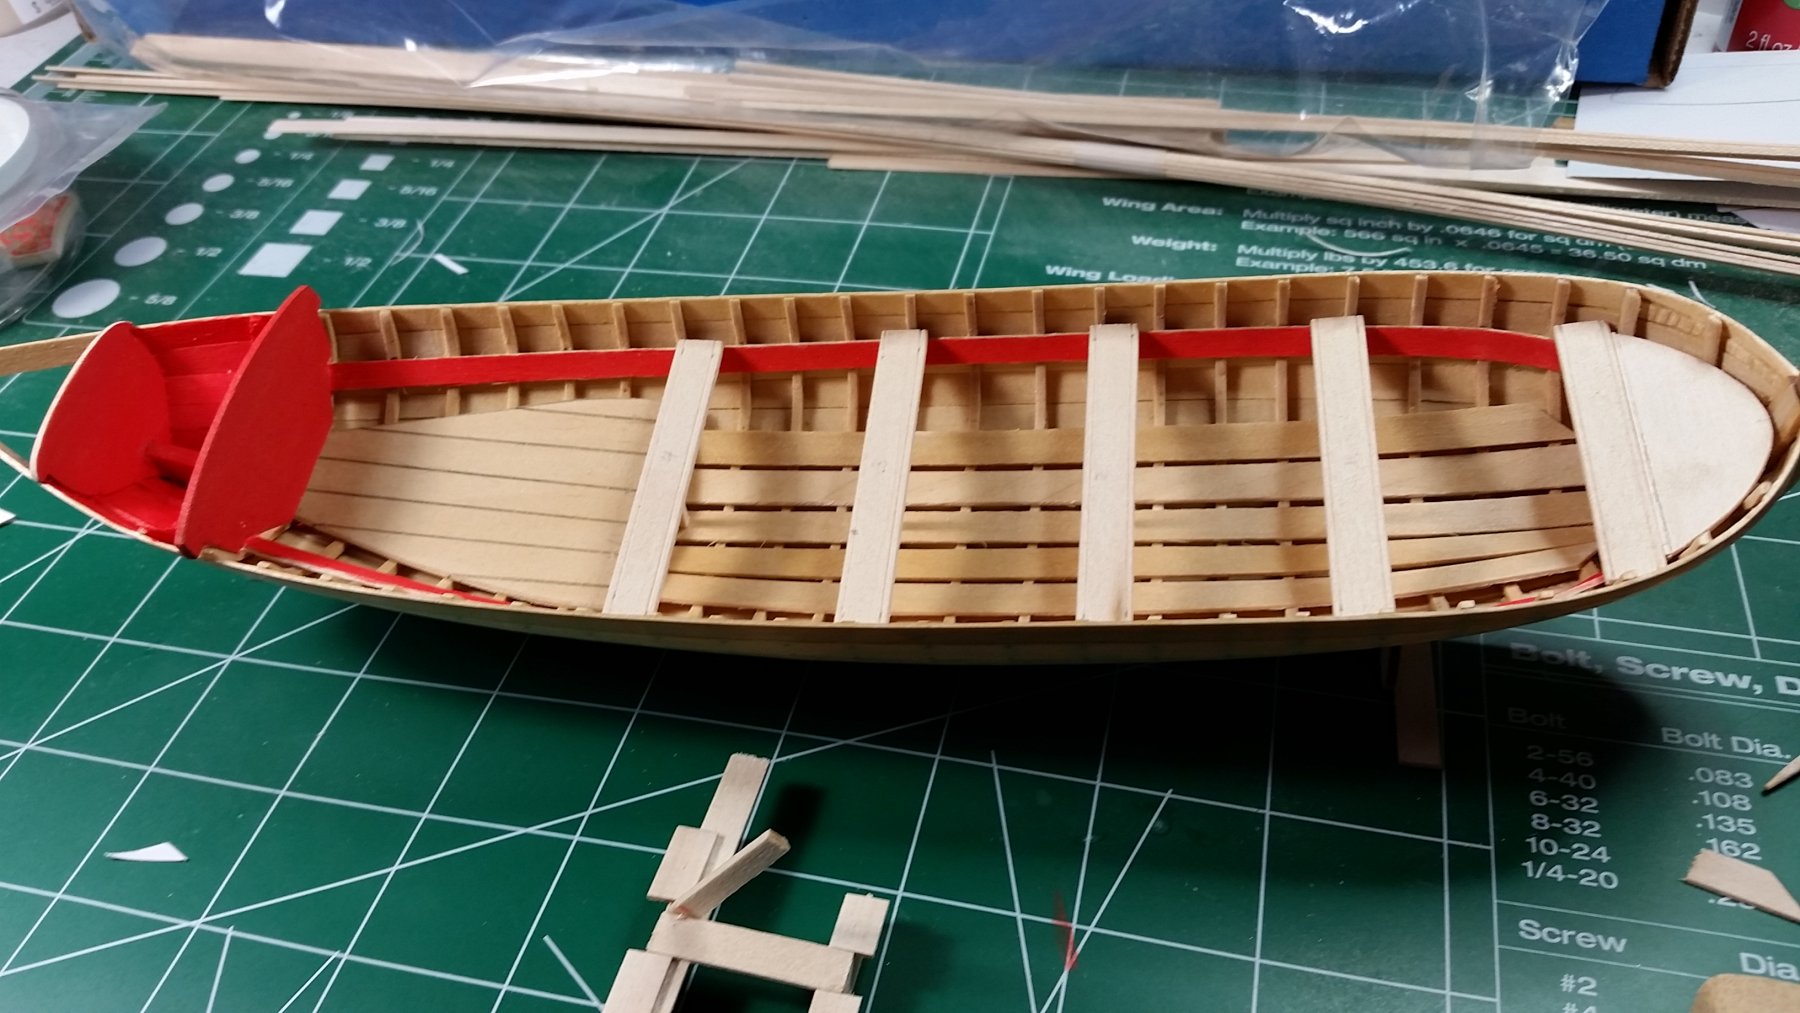
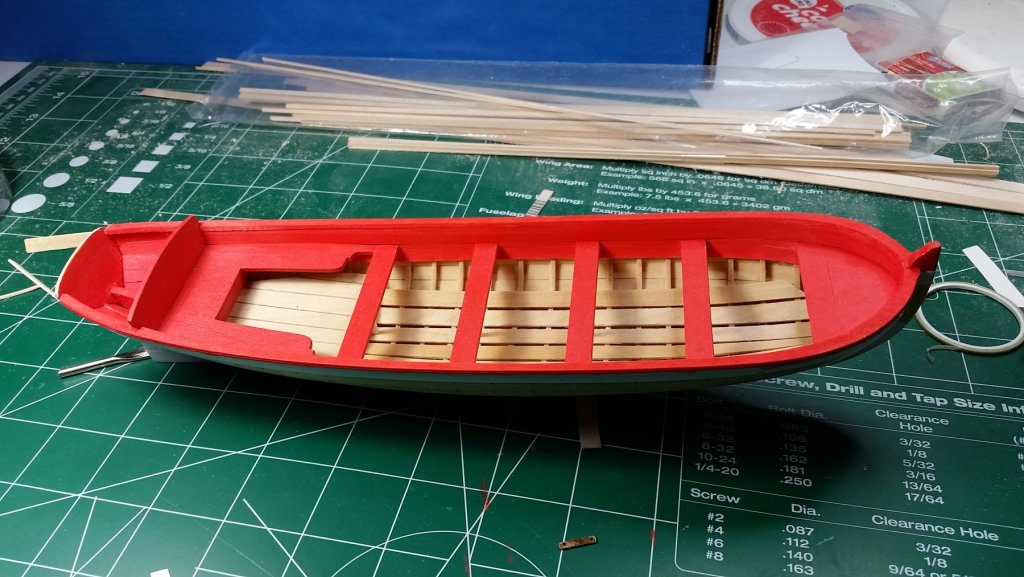
I've got the interior planking installed and painted. I'll give it a few more coats

- 129 replies
-
- 11
-
-
- finished
- model shipways
- (and 1 more)
-
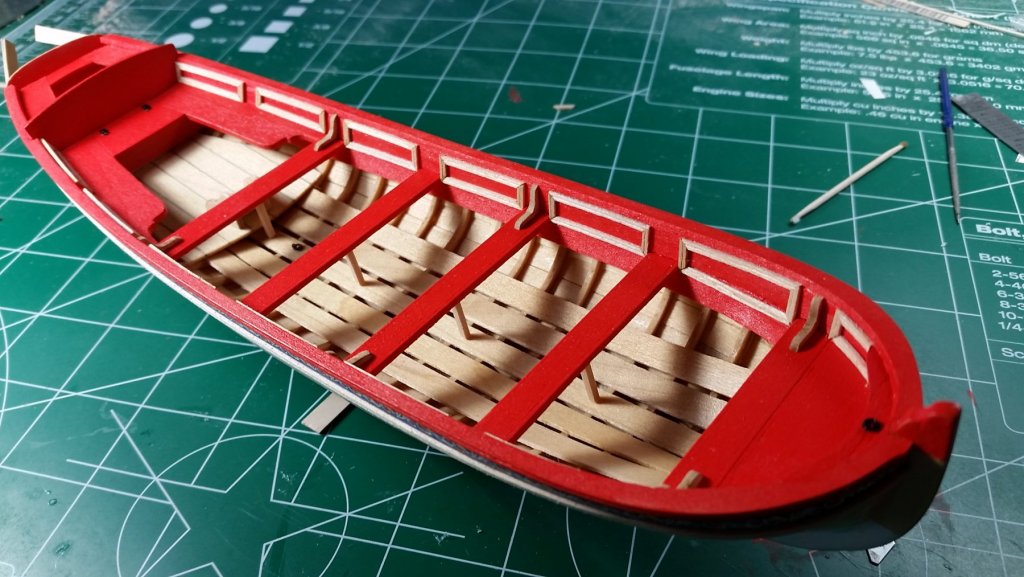
I've installed the cockpit seats and got them painted

- 129 replies
-
- 10
-
-
- finished
- model shipways
- (and 1 more)
-
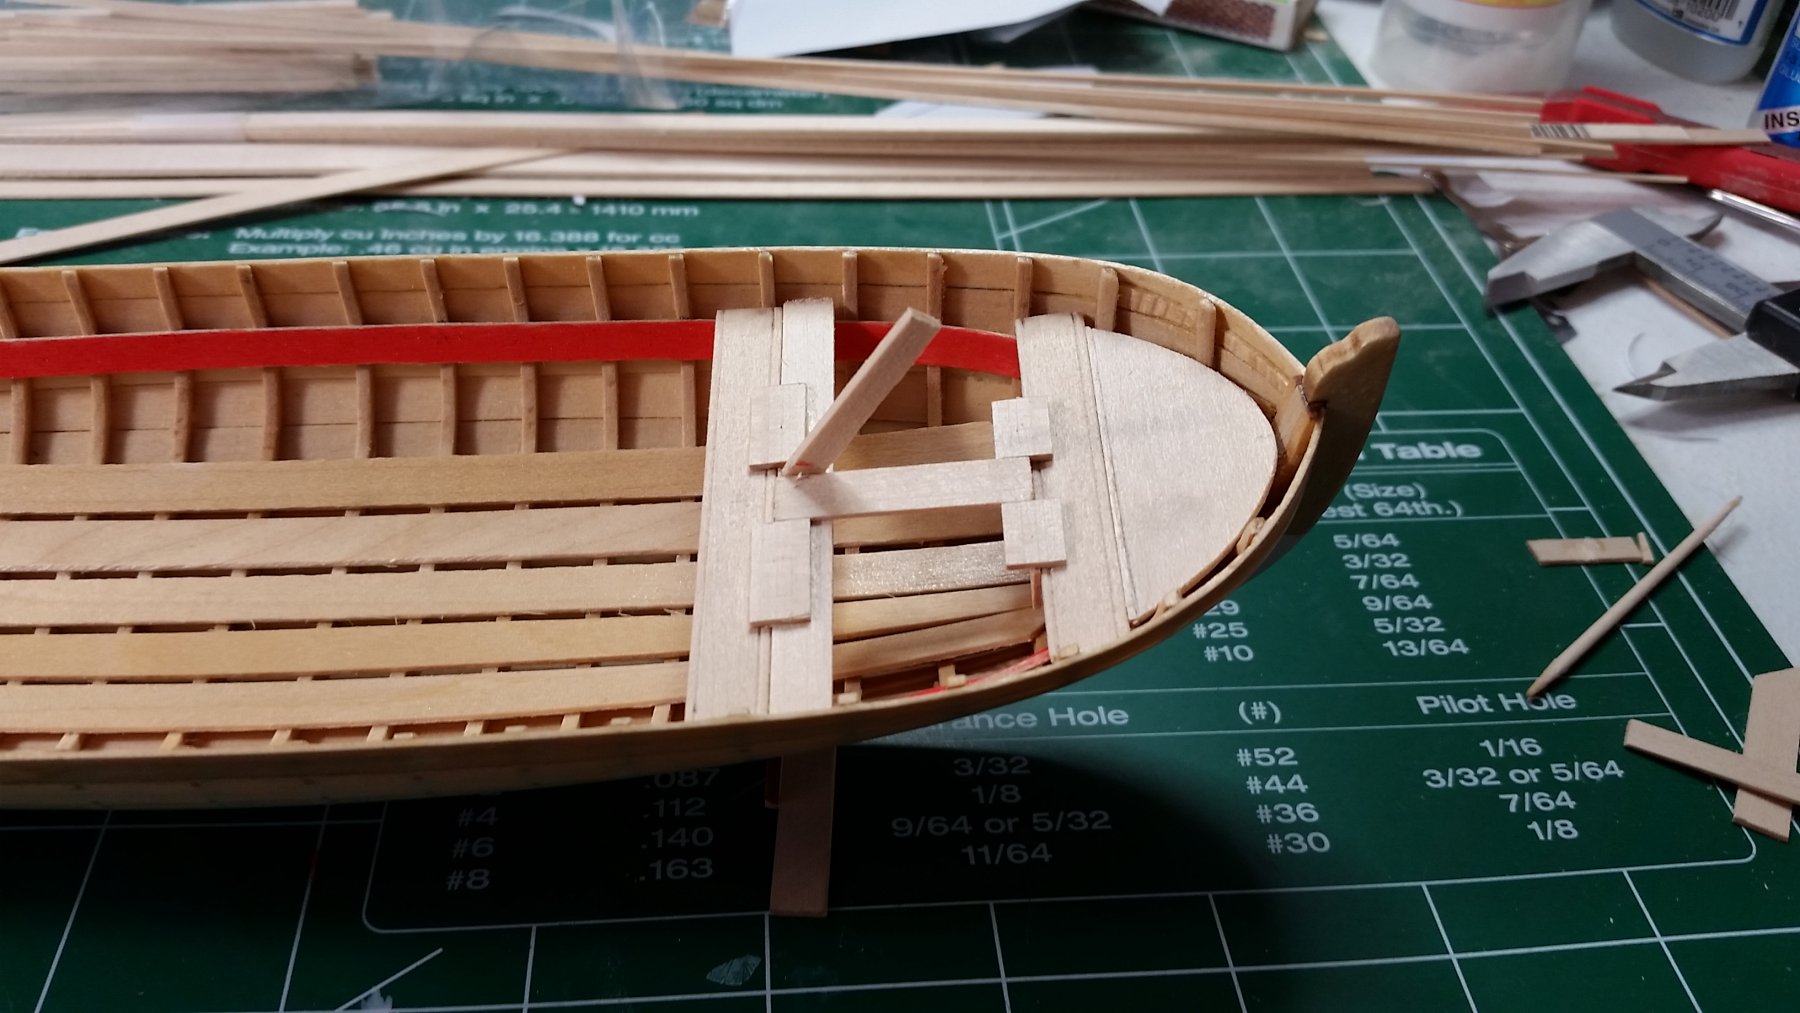
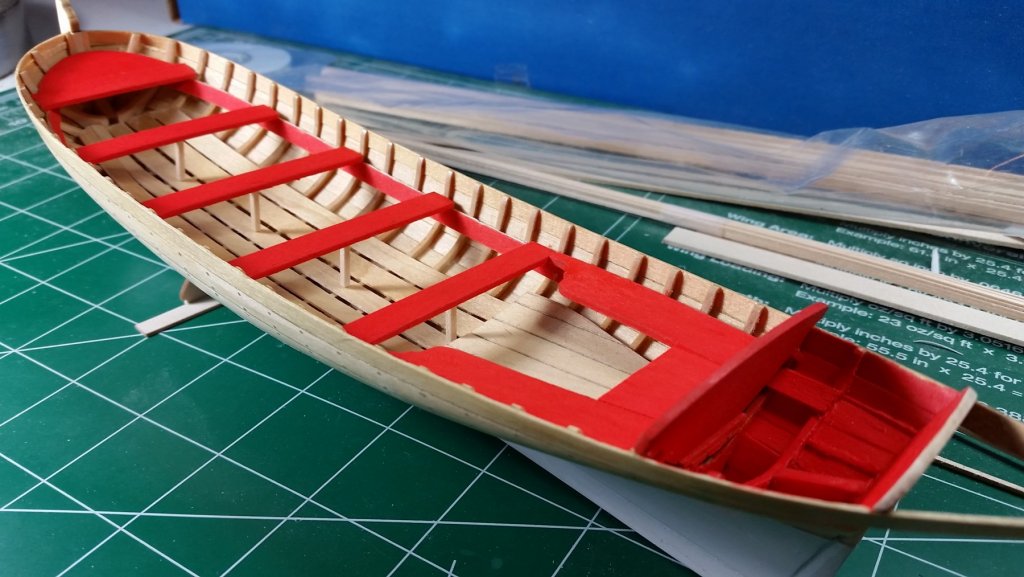
I created a jig to get the thwarts evenly spaced. I'm pleased with the results.

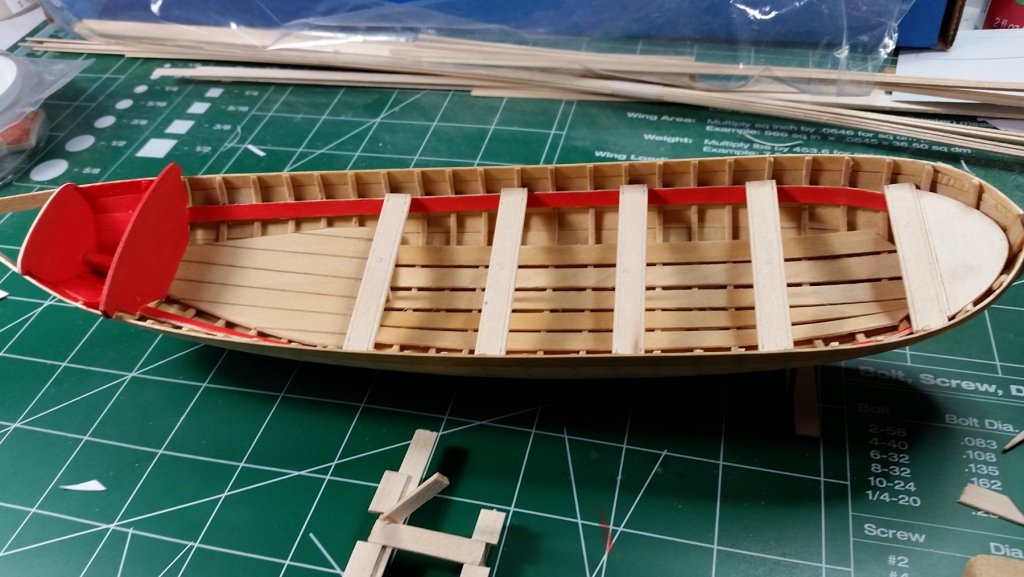
- 129 replies
-
- 9
-
-
- finished
- model shipways
- (and 1 more)
-
Mike, Yes, I had to bend the risers in order for them to fit correctly. I soaked them in water for about 10 minutes, at that point they're soft enough to bend into position. I started from the bow and worked my way back because there you have to bend the wood in two directions. you have to curve it slightly down as well as around the frames. working your way back it gets easier. I measured from the sheer down equally the entire length and I just marked it with a pencil.
- 129 replies
-
- 2
-
-
- finished
- model shipways
- (and 1 more)
.jpg.a2aee188629b07990ceb98aed98d8e6a.jpg)
.jpg.9ea695e2b0924ed87be2c98a5275a4d2.jpg)
.jpg.d83028b24e22117327ffe755bbc1175a.jpg)
.jpg.aca047d6461c8b8248a831ca5406b88e.jpg)
.jpg.8108ae0415362ec6afc807157634081f.jpg)
.jpg.2fdc180e40ca16221353729a2e2664e3.jpg)
.jpg.03da9922423d5f75bfdfe2ffd062e502.jpg)