HOLIDAY DONATION DRIVE - SUPPORT MSW - DO YOUR PART TO KEEP THIS GREAT FORUM GOING! (Only 60 donations so far out of 49,000 members - C'mon guys!)
×


MikeB4
-
Posts
322 -
Joined
-
Last visited
Content Type
Profiles
Forums
Gallery
Events
Everything posted by MikeB4
-
 Yes I agree, that's why I traced out the cap rail on a piece of card stock before installing the seat. So all I have to do is transfer it to wood. Having the outside dimensions correct it shouldn't be to hard to cut the inside edge and then fit it to the boat. The instructions doesn't have me trace out and install the cap rail for several more steps in the build. I think at that point it would be very difficult to trace it out.
- 129 replies
-
- 3
-

-
- finished
- model shipways
- (and 1 more)
-
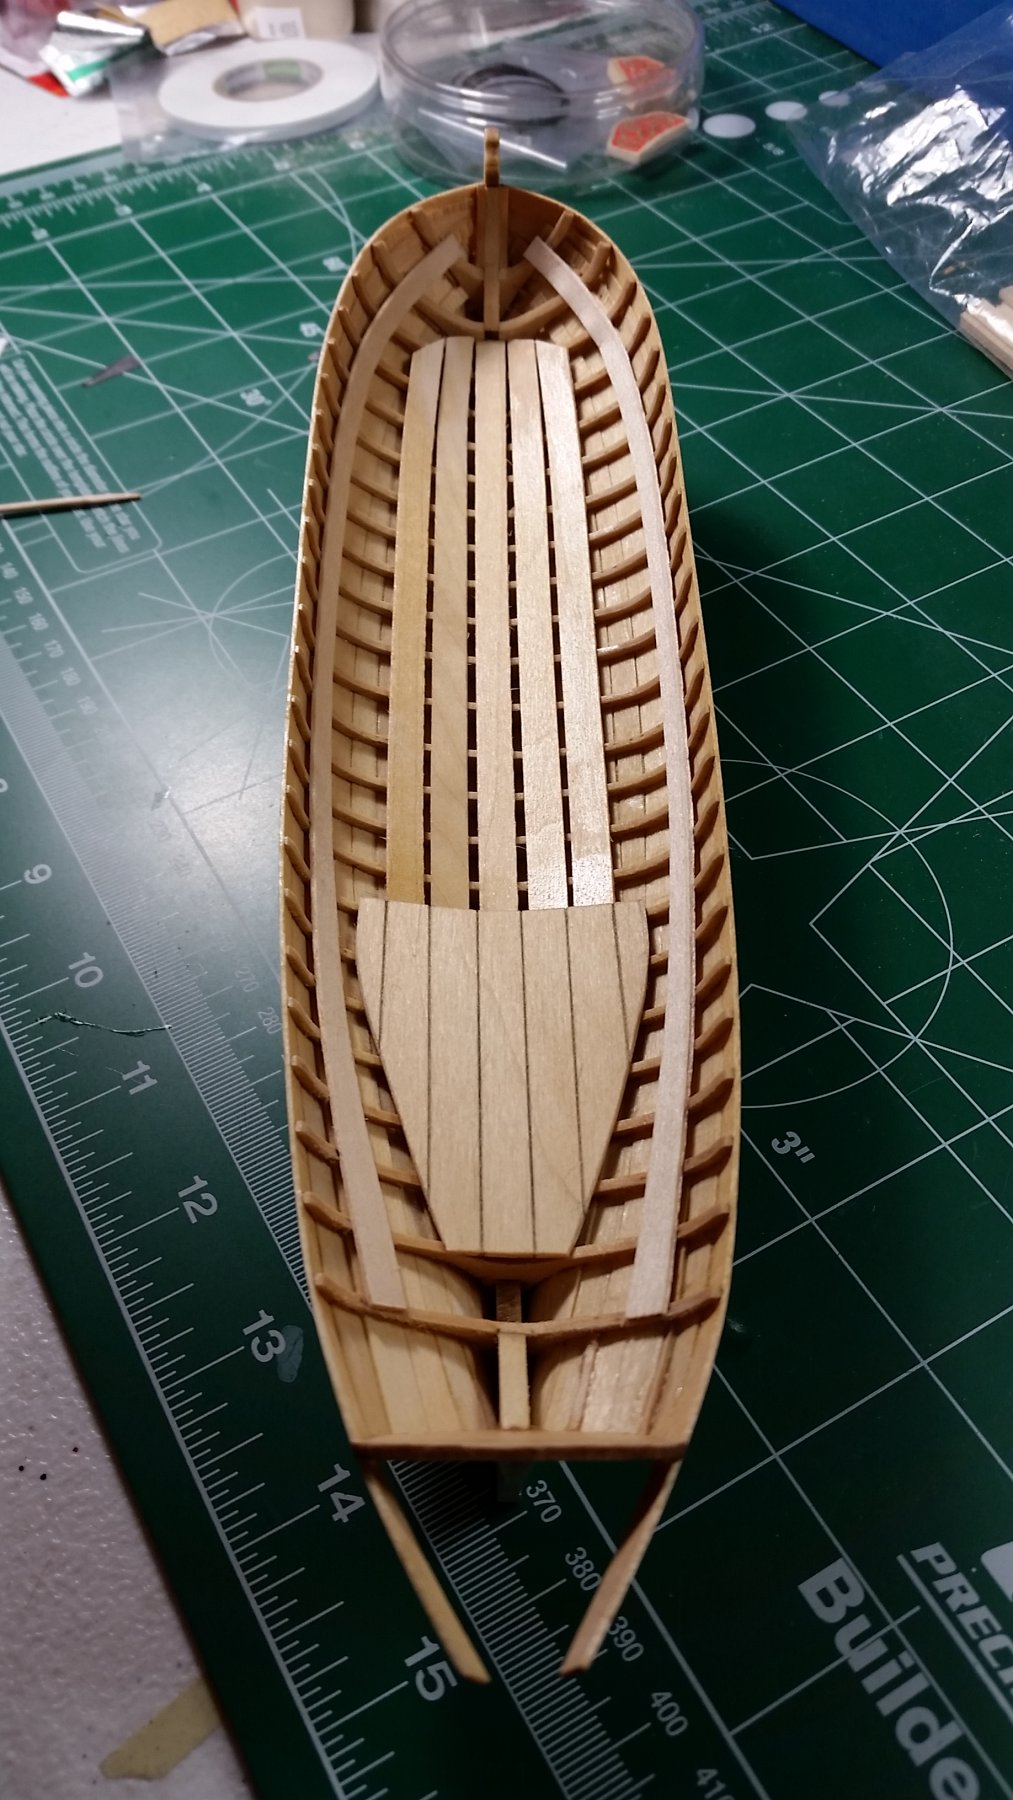
I got the back seat fitted and installed. I've put my first layer of paint on. I'll let that dry before putting the next layer down and continue the process until I'm satisfied with the paint job. One thing that I should mention is I created a template for the cap rail before installing the seat because I think once the seat is installed it will make it difficult to use the hull to trace out the cap rail.
- 129 replies
-
- 8
-
-
- finished
- model shipways
- (and 1 more)
-
Thank you, It's definitely not perfect by any means but I push my way through it and try not to obsess over some of it's imperfections. There's a certain level that you got to live with in order to to progress.
- 129 replies
-
- 2
-
-
- finished
- model shipways
- (and 1 more)
-
I've installed the risers. I'm slowly moving along.
- 129 replies
-
- 8
-
-
- finished
- model shipways
- (and 1 more)
-
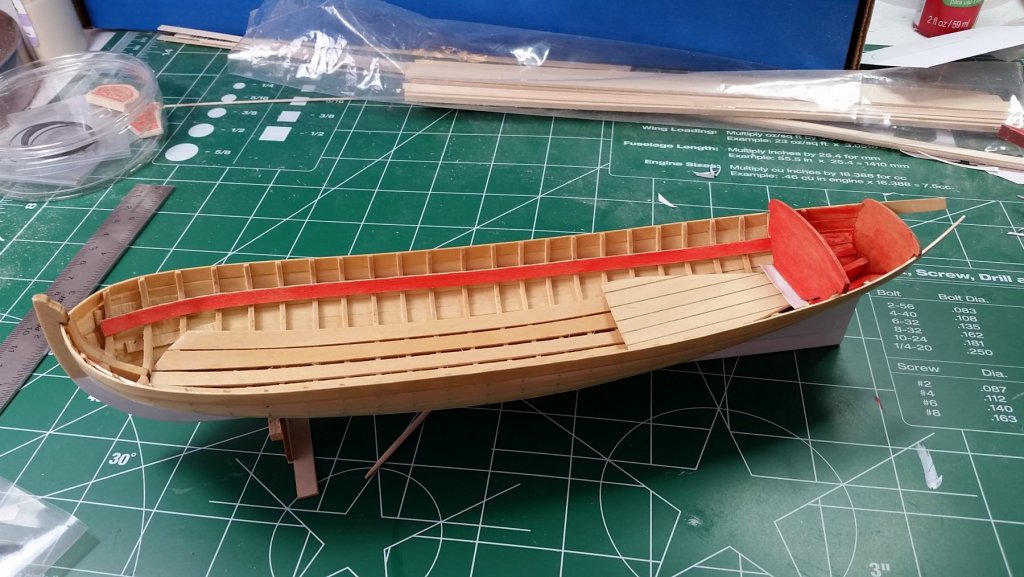
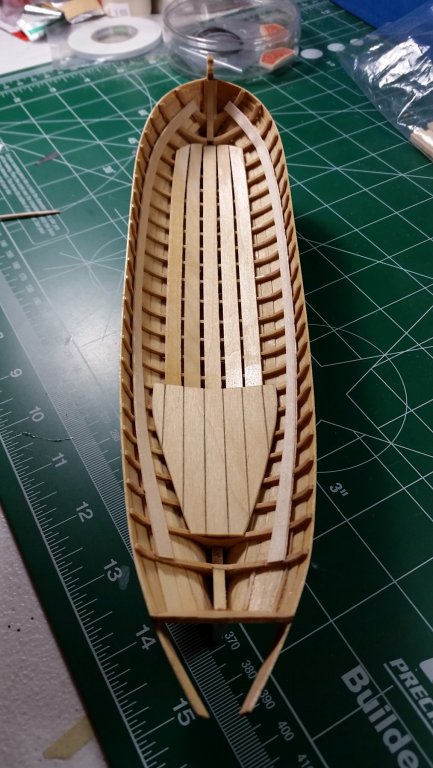
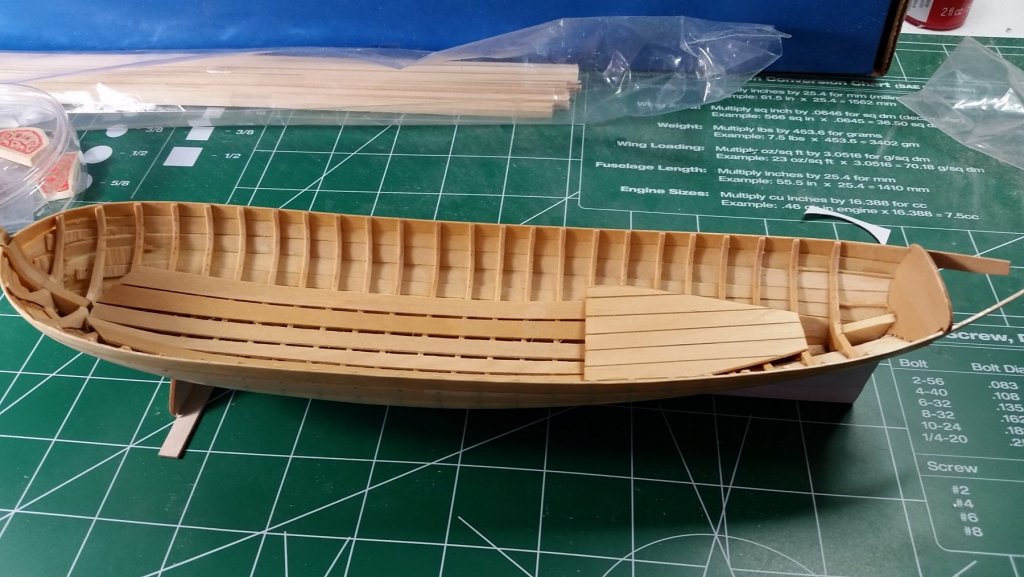
I installed the aft platform. I made it using a single sheet of basswood.
- 129 replies
-
- 8
-
-
- finished
- model shipways
- (and 1 more)
-
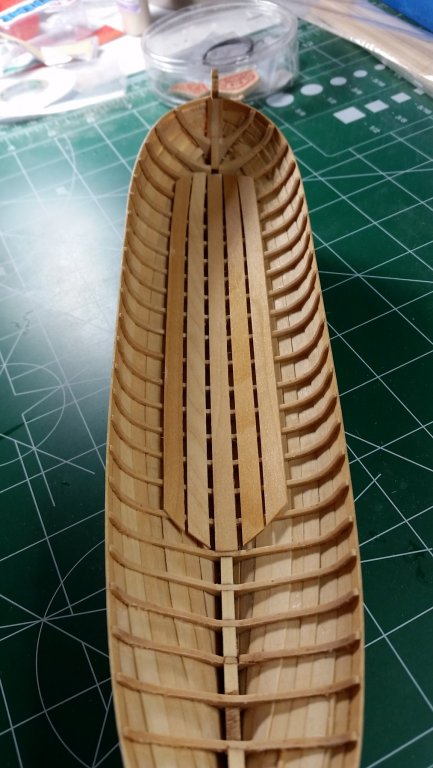
I've spent the evening laying down the floor boards. It's not perfect but I can live with it.
- 129 replies
-
- 11
-
-
- finished
- model shipways
- (and 1 more)
-
Thank you.
-
I went to my local hobby shop today and they had this model on the shelf. I had to buy it. I'll have this log to look to guide me with the build.
-
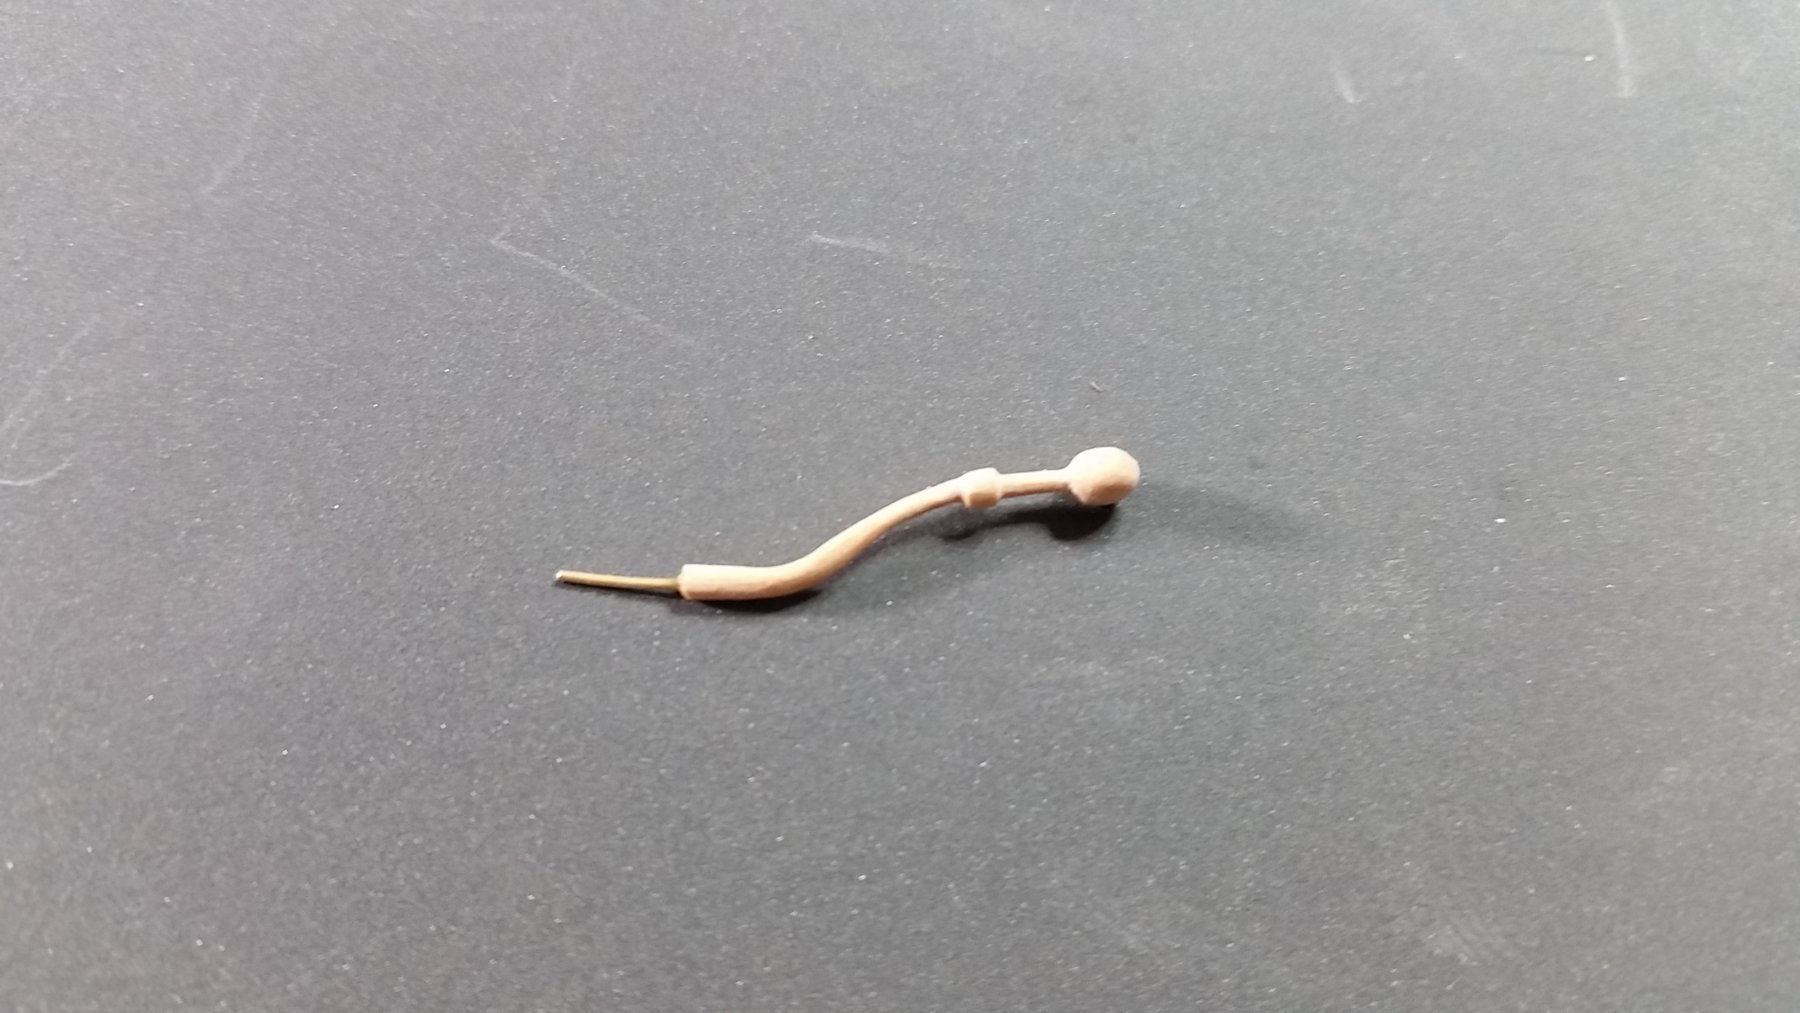
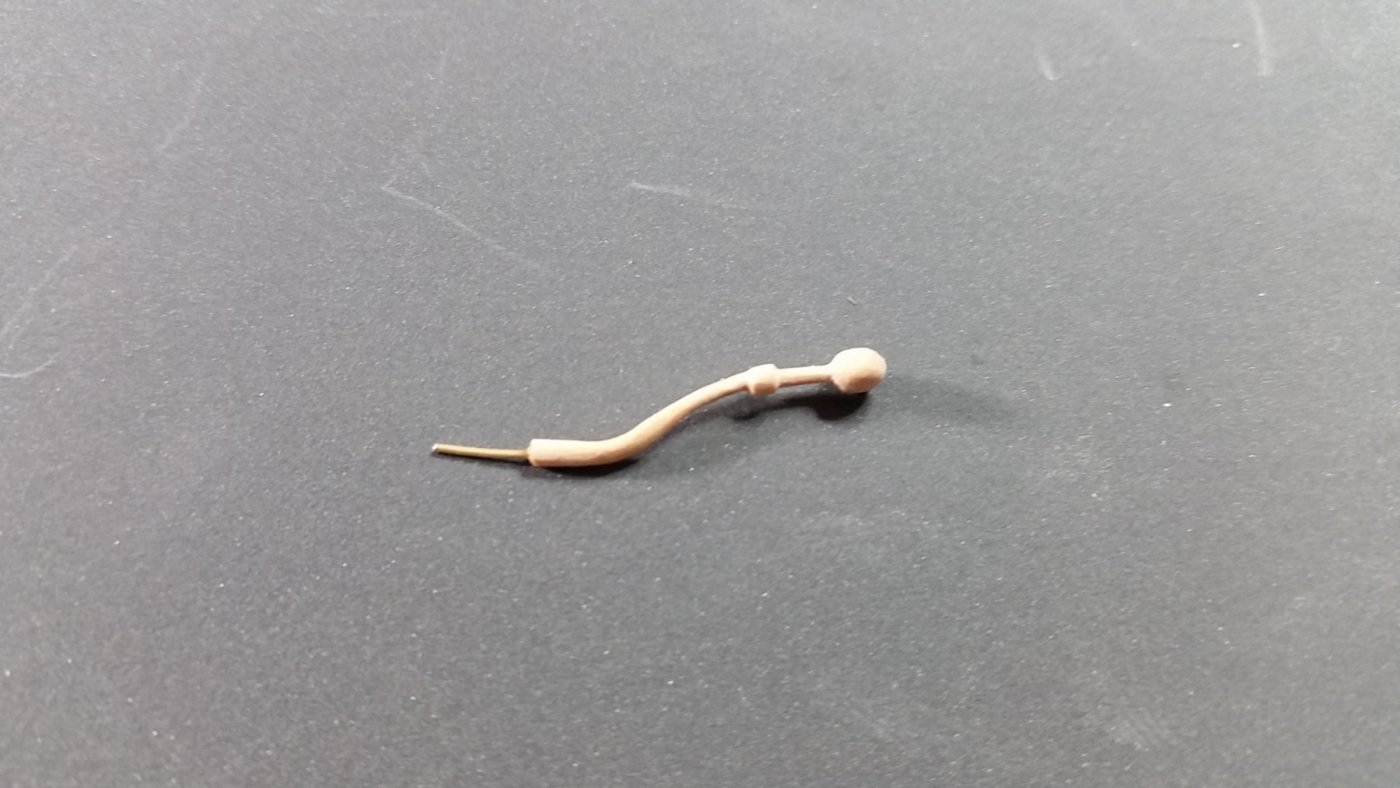
I just finished the tiller. This is my first experience with boxwood and I really like how it carves. I think I'll be doing a lot of carving in the future.
- 129 replies
-
- 8
-
-
- finished
- model shipways
- (and 1 more)
-
I thought it was going to be easier than the longboat also, but it's been quite a challenge for me. After I'm finished with this one I'm going to get away from building small model boats to building larger ships and boats. Maybe the planking will not be as difficult. I know every model is going to be a challenge in it's own way no matter the size.
- 129 replies
-
- 3
-
-
- finished
- model shipways
- (and 1 more)
-
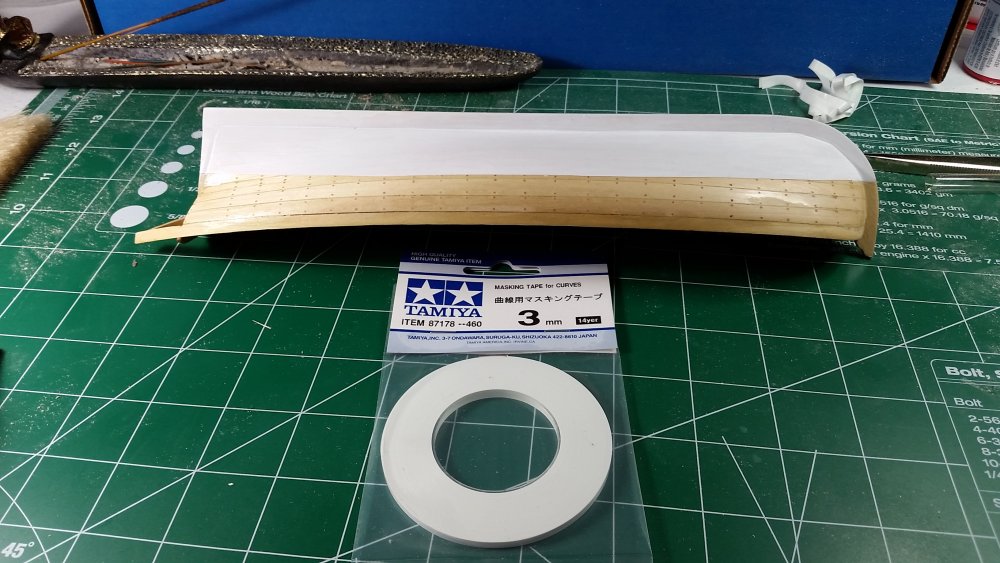
This tape is made to curve around things. It's much stronger than the yellow stuff and the paint doesn't seep under the tape like I've experienced with other masking tapes. Plastic model builders are buying this tape up like crazing because it really works well.
- 129 replies
-
- 3
-
-
- finished
- model shipways
- (and 1 more)
-
I've finished painting the waterline. Tamiya makes a new masking tape that is probably the best I've used so far.
- 129 replies
-
- 11
-
-
- finished
- model shipways
- (and 1 more)
-
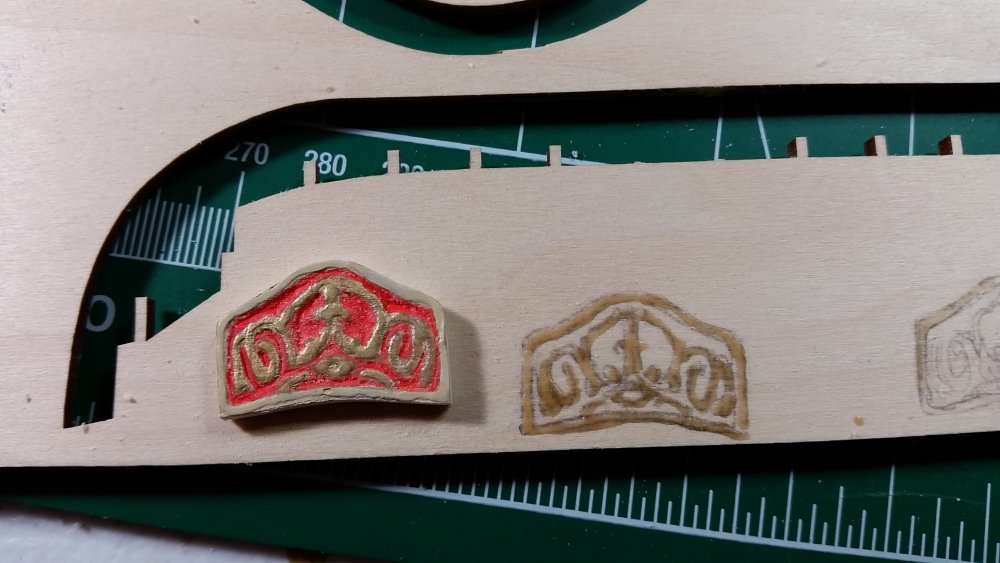
Using a technique with wood glue that I saw another member use, I carved out the decorative transom out of bass wood. I may try carving another one out of box wood to see how it comes out.
- 129 replies
-
- 6
-
-
- finished
- model shipways
- (and 1 more)
-
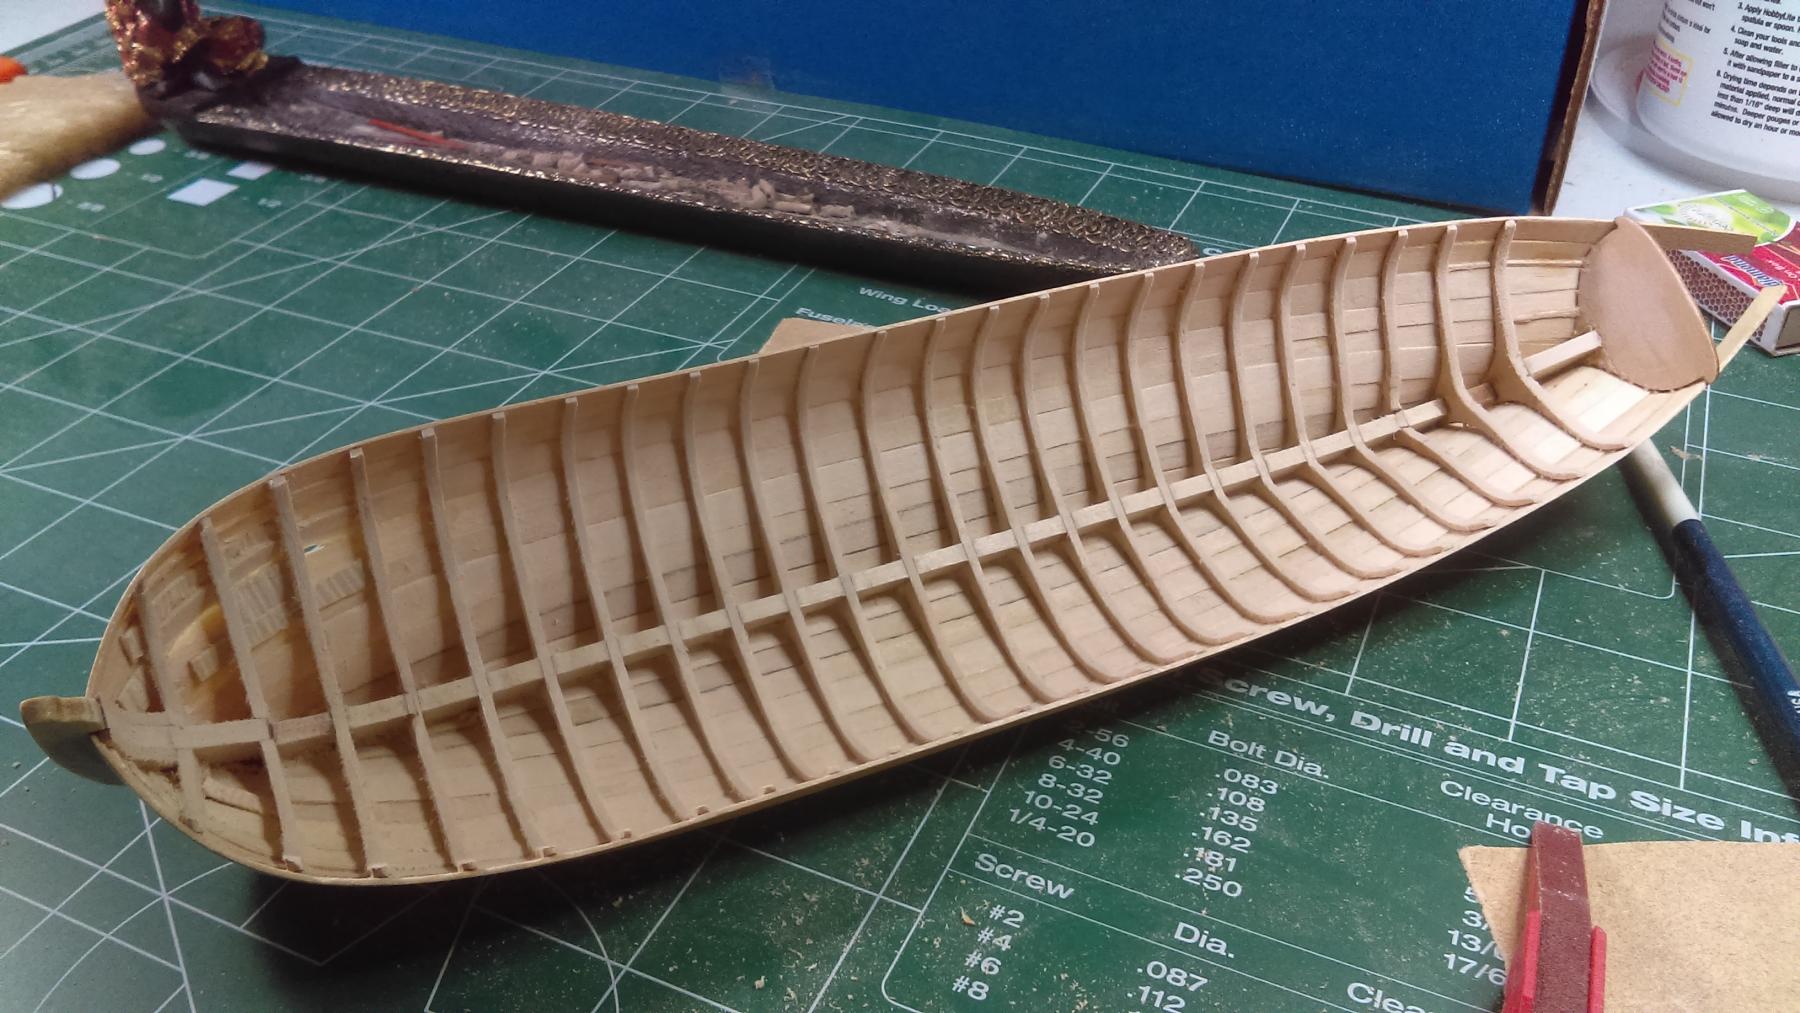
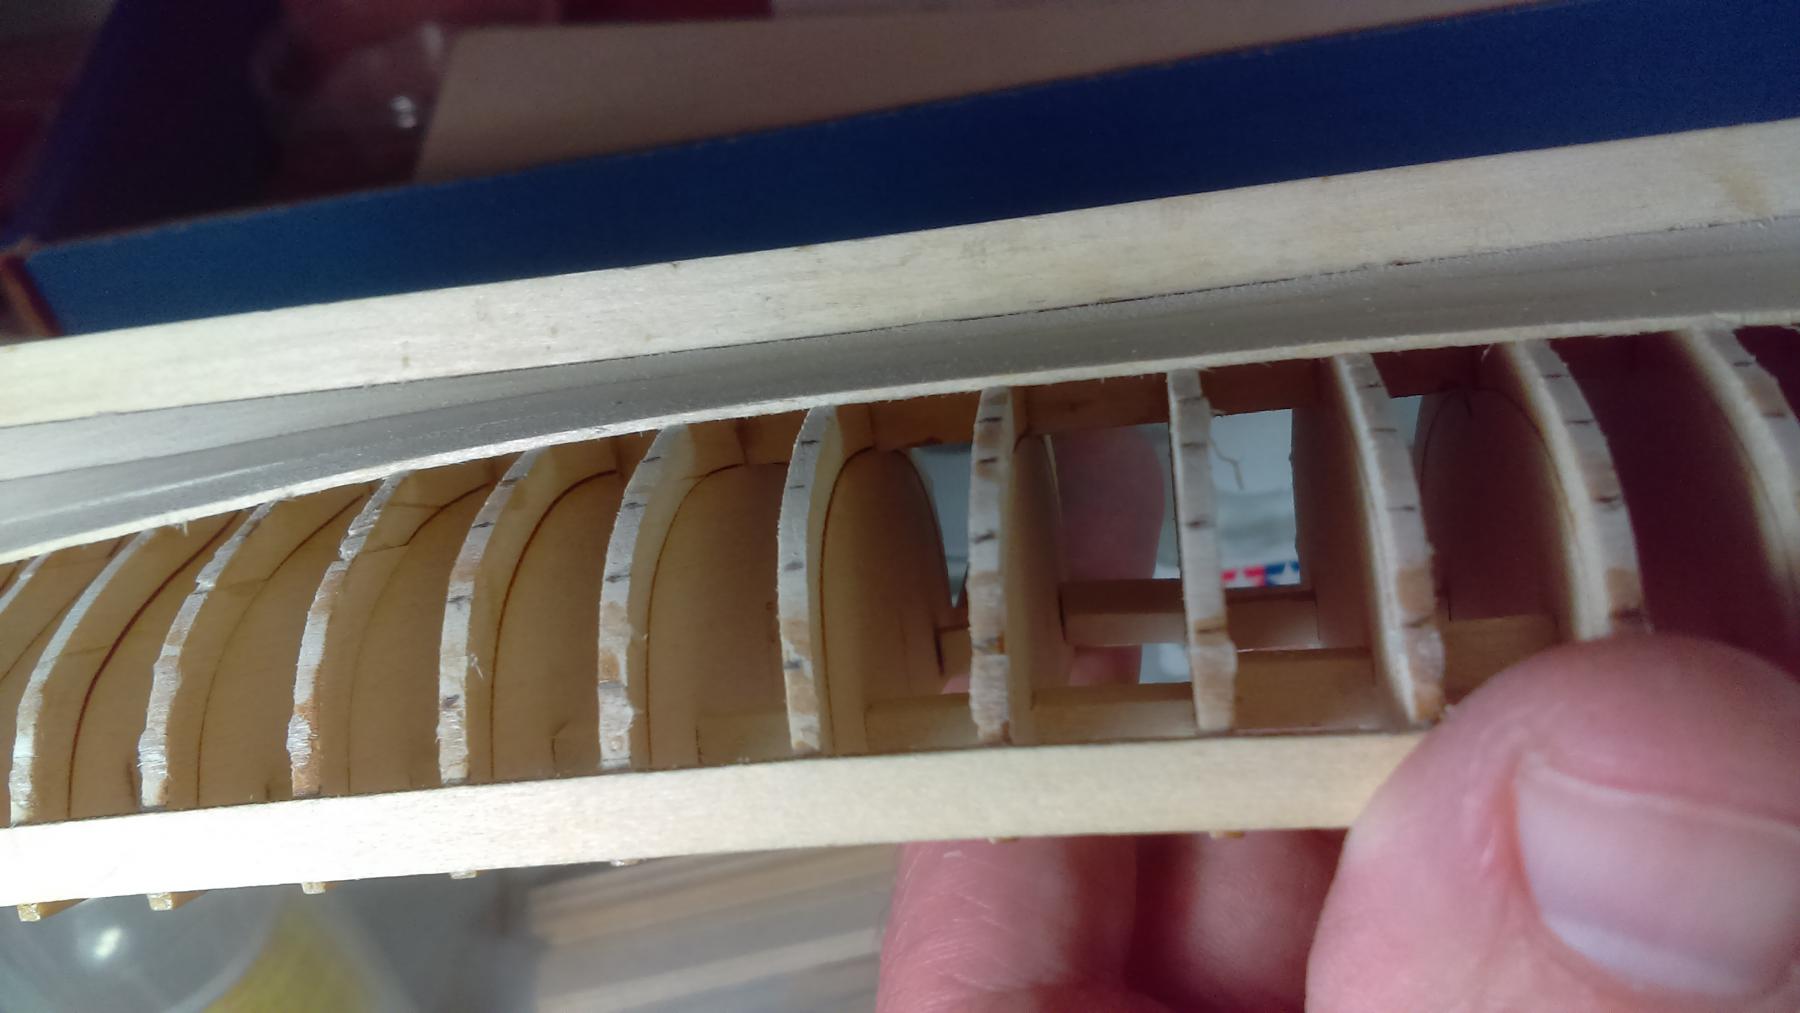
Finally got the inside frames sanded. This is another very time consuming process.
- 129 replies
-
- 6
-
-
- finished
- model shipways
- (and 1 more)
-
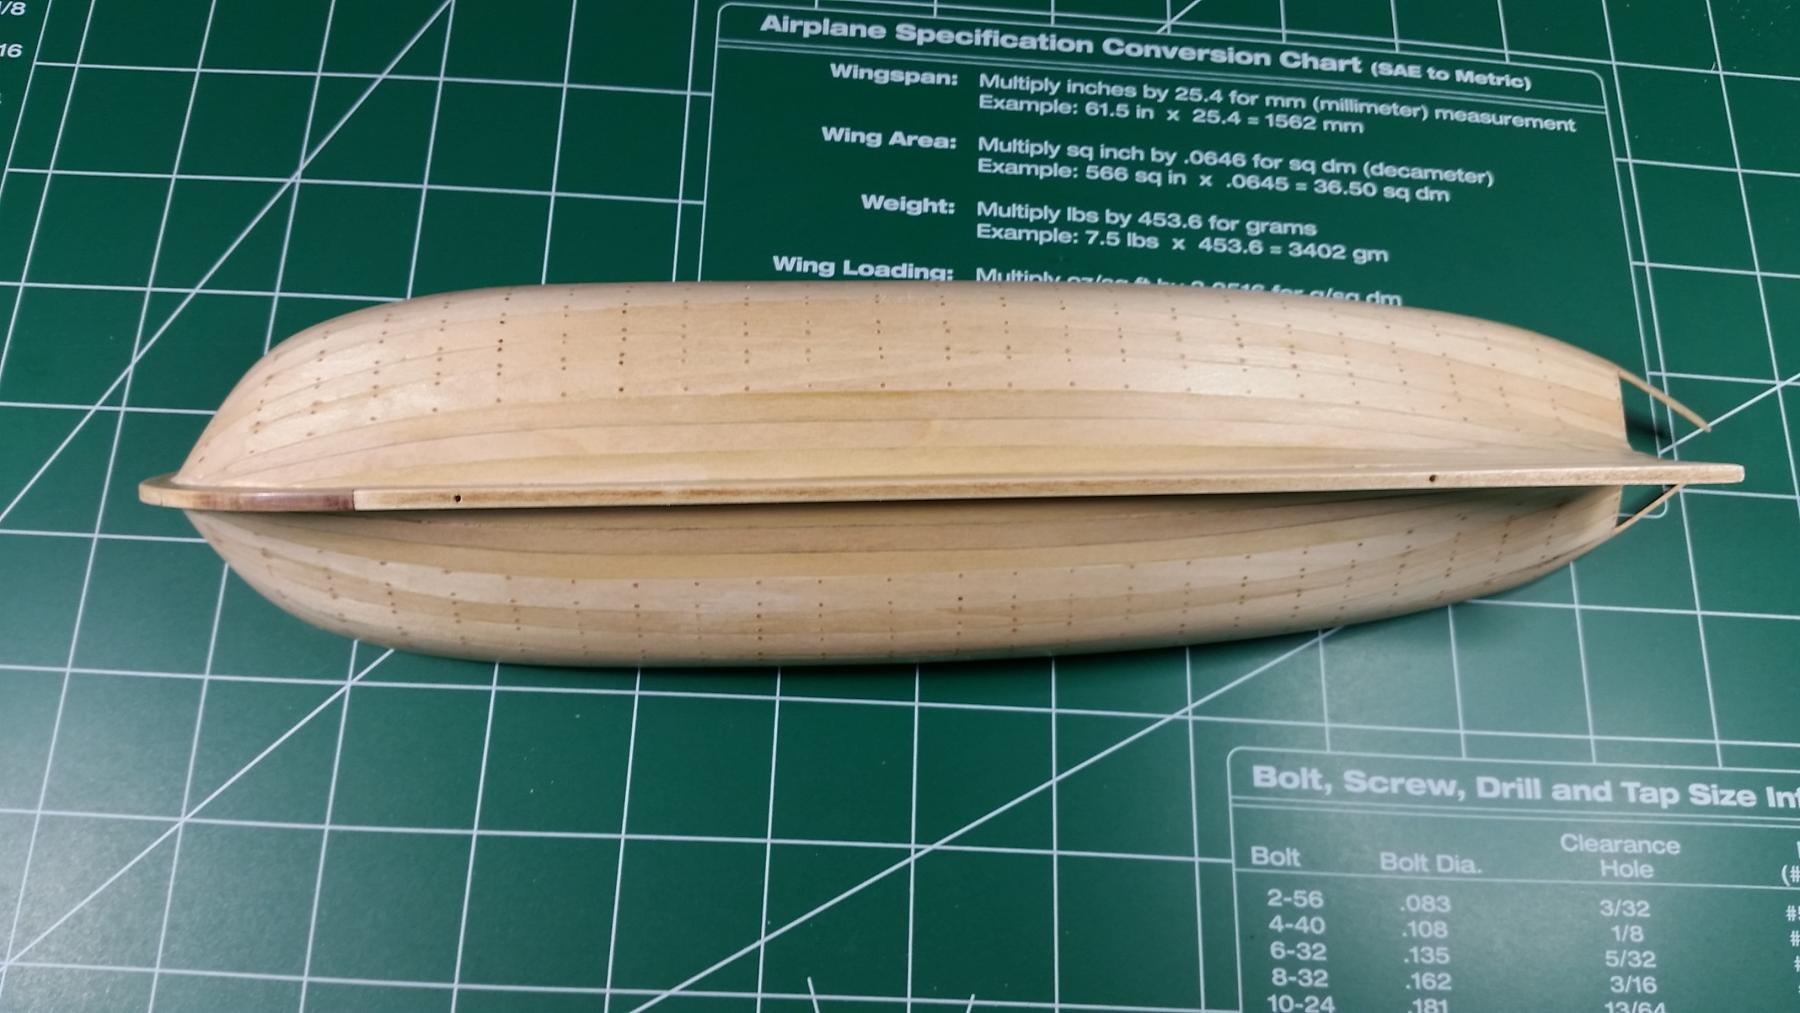
Finally got the tree nails completed. This is one of my least favorite parts of the build. It's so tediously boring and time consuming it's like driving through Kansas. It isn't perfect by any means but I can live with it. I used tooth picks for the nails and they are a little darker than I wanted them to be. I put a coat of WOP and will let that dry for a couple of days before I paint the waterline.

- 129 replies
-
- 9
-
-
- finished
- model shipways
- (and 1 more)
-
Chuck, You should ask your Public Library if they'd be willing to display your work. That could inspire some younger folks that might never have seen a model ship at the level you build them.
- 1,051 replies
-
- 4
-
-
- cheerful
- Syren Ship Model Company
- (and 1 more)
-
Thanks Gary, It can be challenging at times. But by working through it, I always learn something and get a little bit better at this. Mike
- 129 replies
-
- 2
-
-
- finished
- model shipways
- (and 1 more)
-
Steve, As far as the finish goes I've got a couple jars of Testors acrylic wash I'm going to consider using first. I'll have to test that out on some scrap wood first before committing to that. I'm going to use wipe on poly to seal the wood and I'm going to paint a water line probably white acrylic. Between the longboat and this one, I seem to have had a more difficult time planking this one for some reason I thought this boat would be easier because it's a little larger, I was wrong. They are both very difficult, I guess that's why they are considered advanced builds. This will be the last small build I'm going to do for a while.I'm looking forward to doing a much larger model which will have it's own challenges I'm sure.
- 129 replies
-
- 4
-
-
- finished
- model shipways
- (and 1 more)
-
Finally got the hull planked to my satisfaction. It's not perfect by any means but it's the best I'm going to do at this time. This little boat has been quite a challenge for me. My next boat is going to be the 1/16th scale New Bedford Whale Boat which is a very large model. I hope this will be easier to plank.

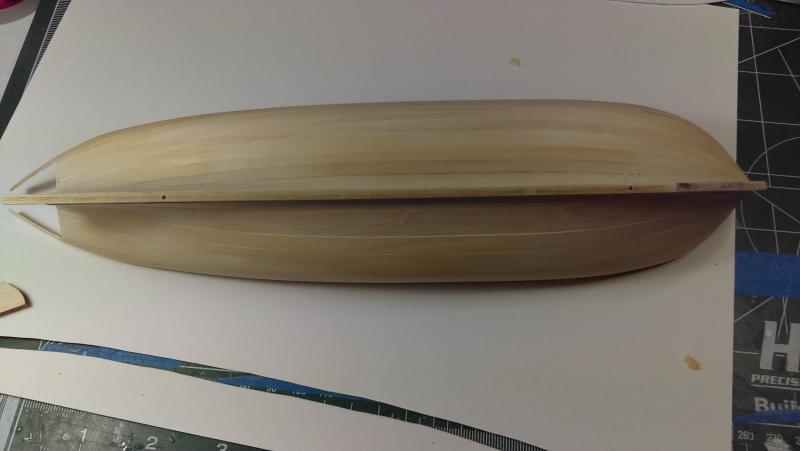
- 129 replies
-
- 7
-
-
- finished
- model shipways
- (and 1 more)
-
Welcome back, I'm looking forward to watching this build progress.
-
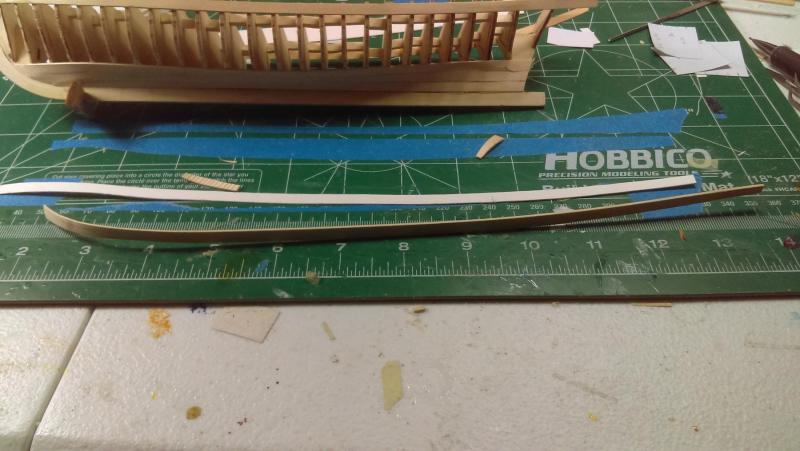
Mike, As i show in a previous picture I measured up the remaining space between the planks on each frame. Five more planks on each side will fit right. I then took a strip of painter's tape and covered the length of the sheer plank. With a pencil I traced out the bottom contour of the shear plank from stem to stern. This tracing will be the contour of the top of the next plank and so on. once I had it traced out I pulled the tape off of the plank and stuck it to a piece of card stock. I cut the the card stock to the size and shape of the plank, I took the paper plank and made sure it fit on the boat. Once it was right using a spray adhesive stuck the paper plank to the sheet of wood and cut the actual plank using that template. I do suggest cutting the width a little wider than it will finally be in the end. This allows you to shape it into place because there will be imperfections in the cut.The only bending I needed to do was at the bow. I hope this helps.
- 129 replies
-
- 6
-
-
- finished
- model shipways
- (and 1 more)
-
Although it's very slow going, spiling the planks definitely gives me a better fit. It'll be well worth it if the end result is to my satisfaction.

- 129 replies
-
- 10
-
-
- finished
- model shipways
- (and 1 more)
-
I'm using tick marks to guide my shaping and sizing each of the remaining planks.

- 129 replies
-
- 6
-
-
- finished
- model shipways
- (and 1 more)
-
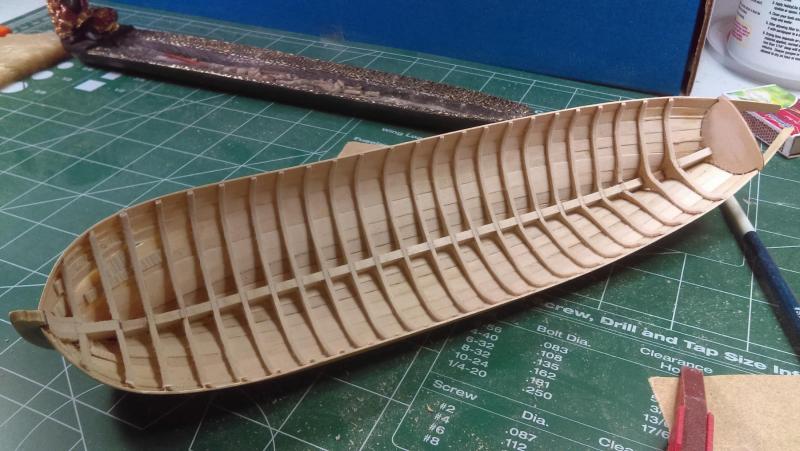
I fixed all the broken frames and sanded the excess glue. Now it,s time to start over.

- 129 replies
-
- 10
-
-
- finished
- model shipways
- (and 1 more)
-
Yes, I did soak the planks before bending them. The curve around the bow is where I ran into trouble.I couldn't get the bottom of the planks to angle inward towards the frame properly, so when I sanded, it was uneven, creating the mess you see in the picture above.
- 129 replies
-
- 1
-
-
- finished
- model shipways
- (and 1 more)