MikeB4
-
Posts
322 -
Joined
-
Last visited
Content Type
Profiles
Forums
Gallery
Events
Everything posted by MikeB4
-
 I'm back to start a new project. This time I'm going to attempt to build the English Pinnace. This is in a larger scale than the eighteenth Century long boat that I built last, but is still going to be a challenge to plank. I'm going to attempt to bend the strakes with heat only and not use any water. This is the advice that Chuck gives in his video. I'll see how that goes for me.
- 129 replies
-
- 5
-

-
- finished
- model shipways
- (and 1 more)
-
Eric, As far as working on this recently, yes I just finished the the last thing on this boat the weekend before. I found the time to take pictures on Saturday. If your asking me whether I worked on this consistently from beginning to end, the answer is no. especially in the last few months, I had very little time unfortunately to devote to this hobby. As far as whether I'll be building anything else, I will eventually since I do have seven boat and ship model kits in my closet. I'm in no hurry, I have limited space for displaying my models. It looks like your off to a good start on your next project, I'll be watching. Mike
- 100 replies
-
- 4
-
-
- model shipways
- 18th century longboat
- (and 1 more)
-
Yes, I'm going to shop around for a case that will fit and display this properly.
- 100 replies
-
- 2
-
-
- model shipways
- 18th century longboat
- (and 1 more)
-
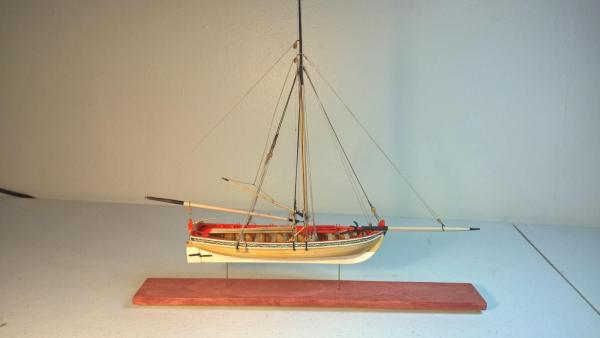
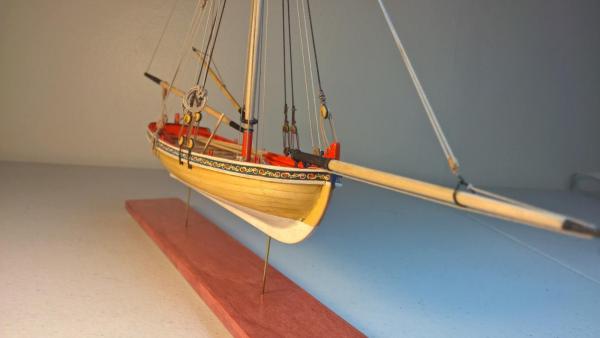
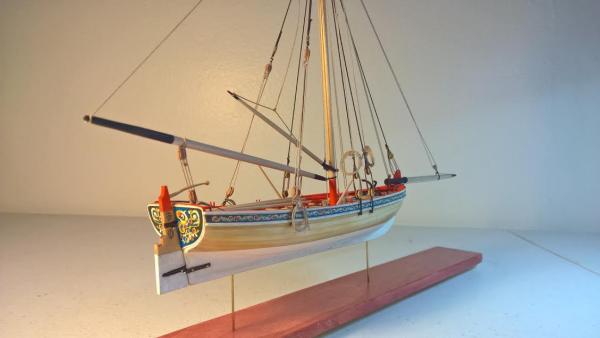
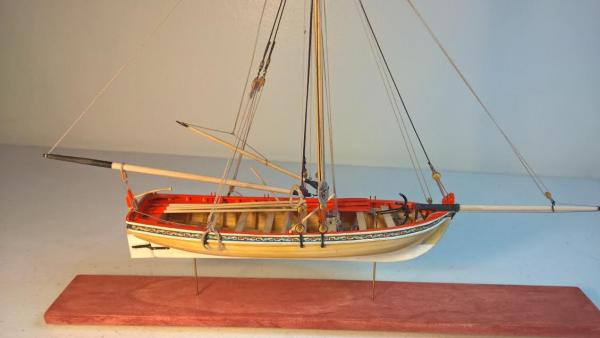
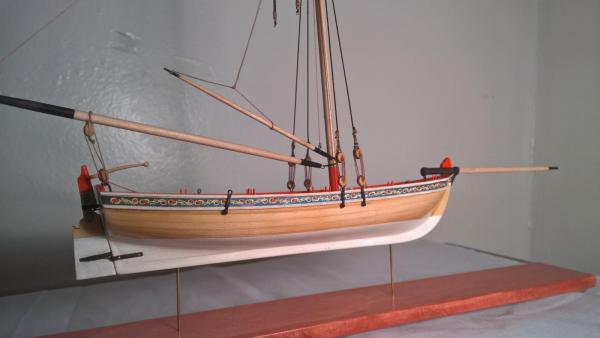
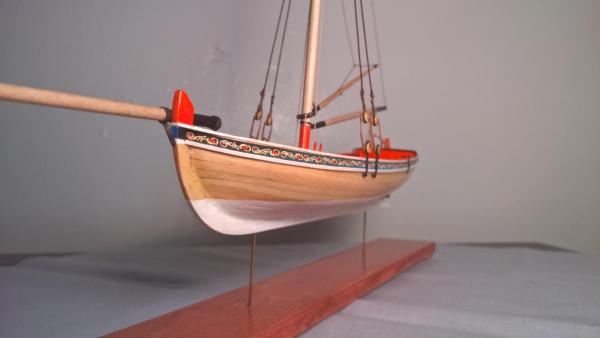
I have finally reached completion. This project has brought me both great satisfaction and agony from time to time. The fact that I got to build this challenging little model online with all of you is still amazing to me.I think about the models I built as a kid, I never dreamed of how someday we'd have this technology that would connect us all. This is a fantastic website and I hope it will be around for years to come.Thank you for all your support.


- 100 replies
-
- 15
-
-
- model shipways
- 18th century longboat
- (and 1 more)
-
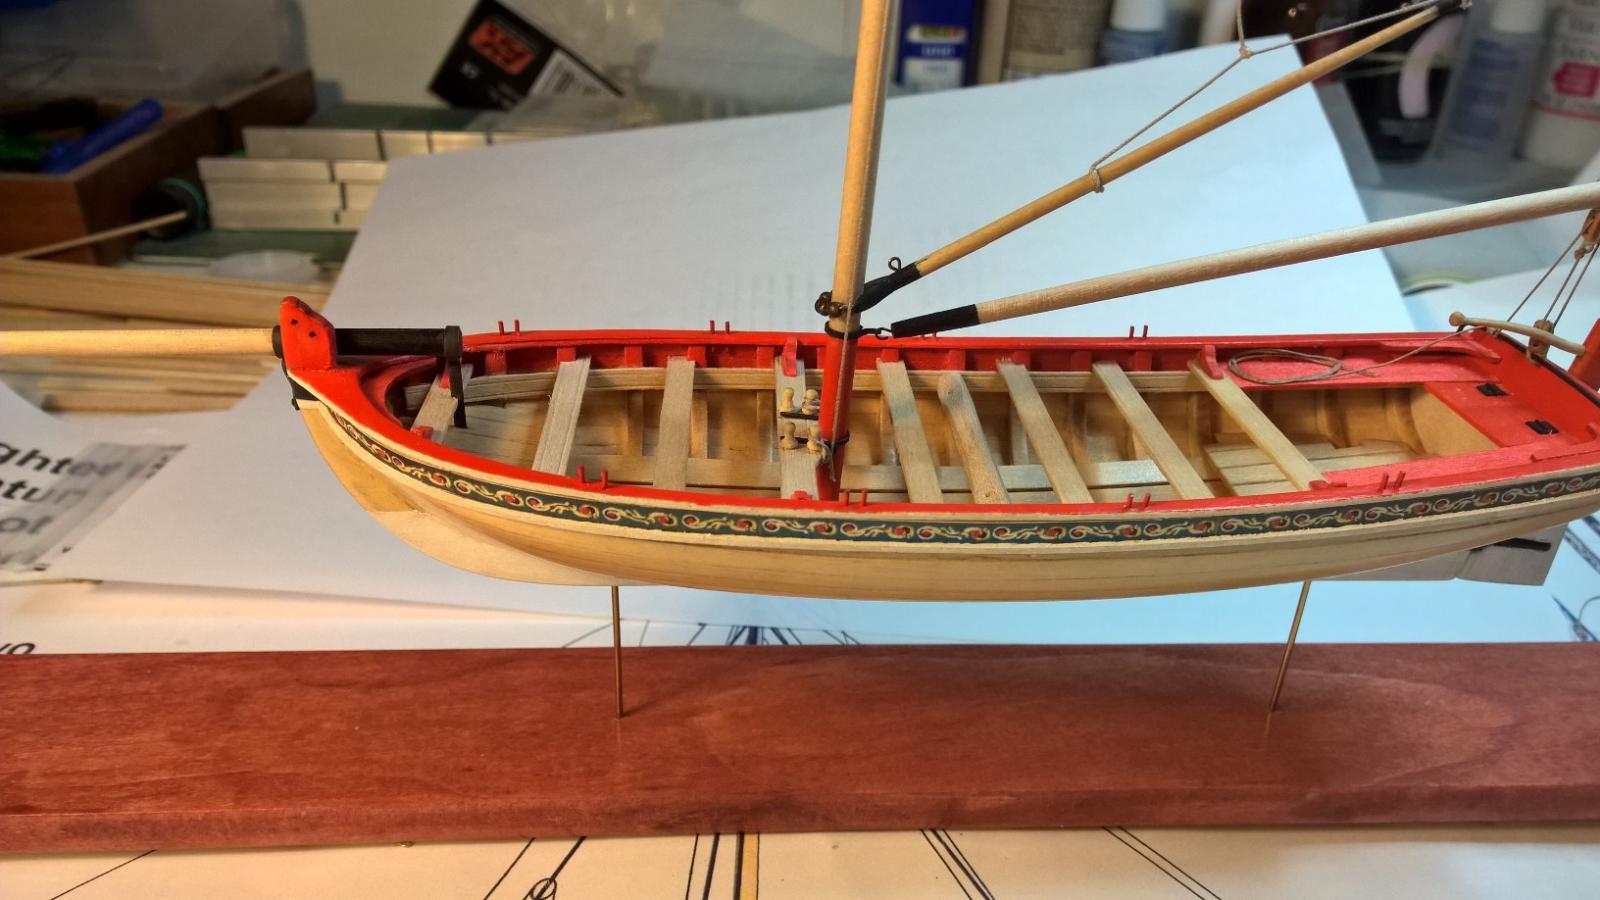
I've connected the shrouds and laniards. This is the first time I've actually done this on any model. It didn't come out perfect that's for sure, but I learned a lot and hopefully I'll get better at this over time.
- 100 replies
-
- 13
-
-
- model shipways
- 18th century longboat
- (and 1 more)
-
It looks great, you definitely have the skill it takes to stand out as a really good model builder and your only going to get better. May you have many more great builds to come.
- 222 replies
-
- 3
-
-
- 18th century longboat
- model shipways
- (and 2 more)
-
I miss placed the deadeyes that came with the kit and I've spent way to much time looking for them. them damn gremlins are t it again, Fortunately my Fair American kit had some that are the right size only made off walnut. They'll do, by the time I'm ready to build that Fair American kit I'll have upgraded most of the parts with better stuff than what comes in the kit anyhow.


- 100 replies
-
- 9
-
-
- model shipways
- 18th century longboat
- (and 1 more)
-
Thank you for that information, I'm going to purchase the paste and give it a try. Do you use an iron or a torch?
- 100 replies
-
- 2
-
-
- model shipways
- 18th century longboat
- (and 1 more)
-
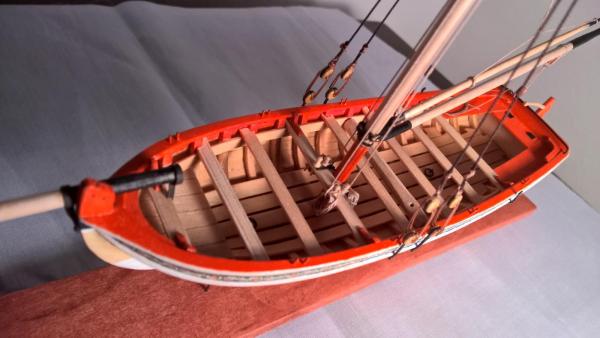
I don't know what your experience with ship model building is, this same kit was my first model and I didn't quite get the deck whittled out to the specs they needed to be. Once I got to the point where I was to install the deck furniture I found that everything didn't fit on the deck the way it should have. So if this is your first wood kit my advice to you is take your time and make sure you carve the hull to it's proper dimensions this is in my opinion the most important aspect of the build, it's your foundation basically everything is added to that hull and if it's off everything is off.
- 701 replies
-
- 7
-
-
- phantom
- model shipways
- (and 1 more)
-
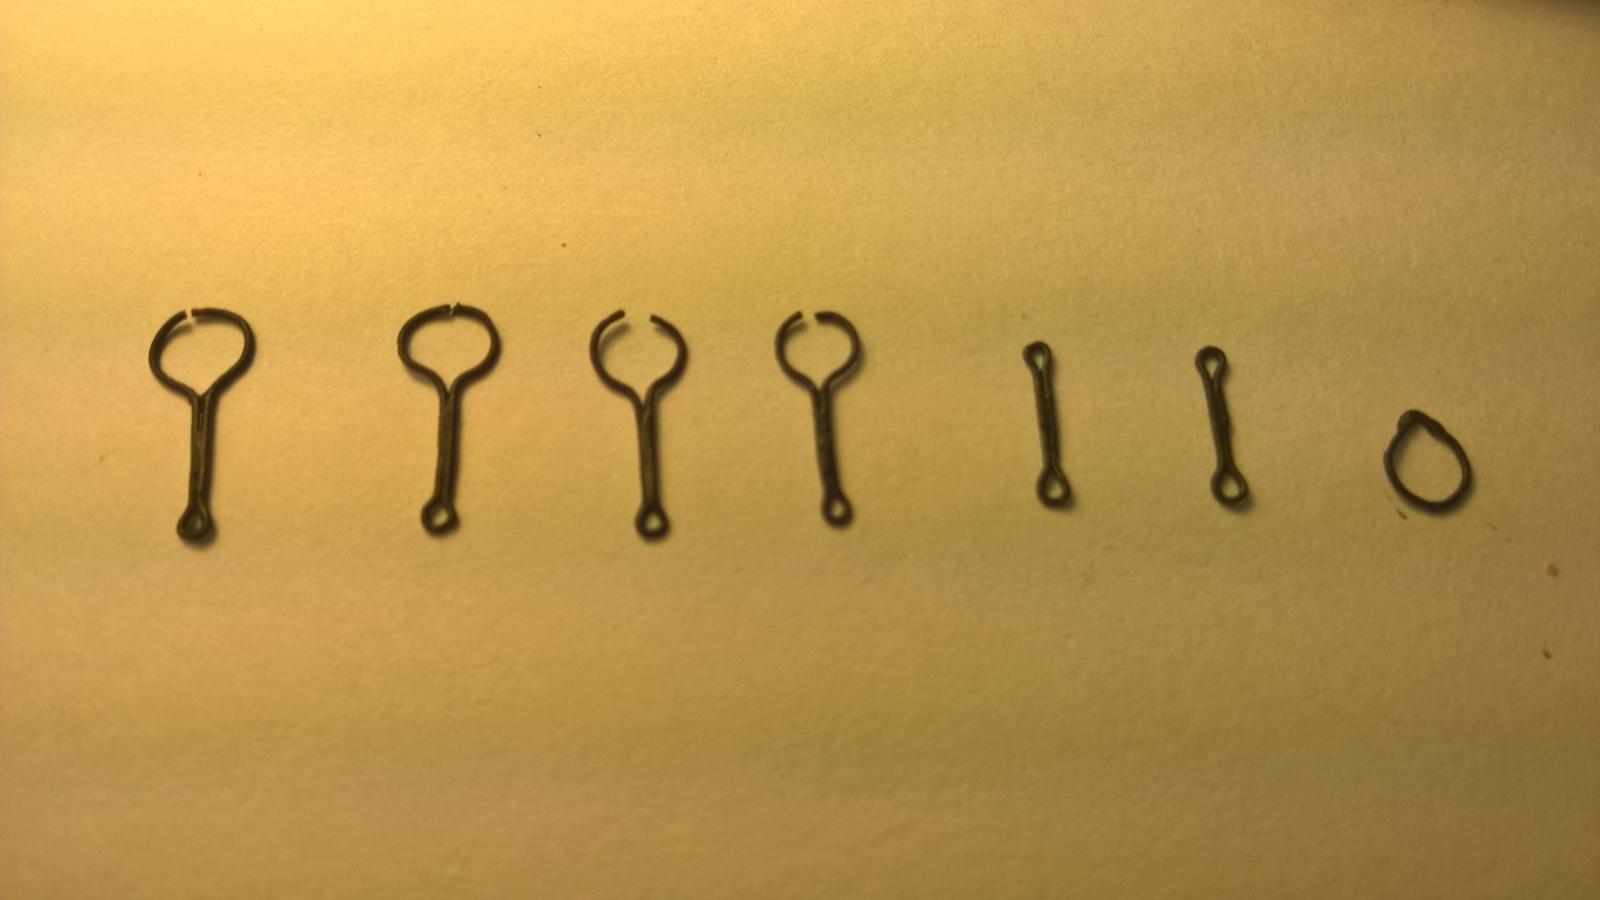
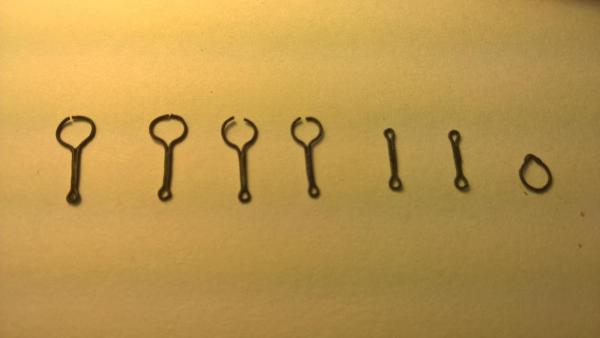
I have a pair off pliers that are specifically designed for looping wire. It's probably the most used tool I have in my toolbox besides my Xacto knife. I don't think I could effectively fabricate any of the iron work without them. Anyway they retail for only around $13 US dollars and they're well worth every penny.
- 335 replies
-
- 4
-
-
- 18th century longboat
- Finished
- (and 1 more)
-
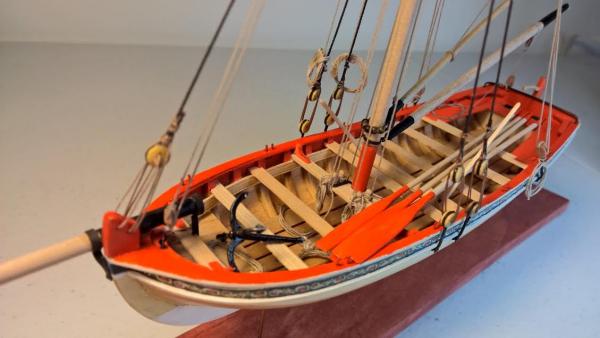
I finished the chain plates. I decided to make another attempt at soldering, which I had completely failed at the last time I tried. Although I'm pleased with the out come this time around it wasn't easy. It was quite a struggle to get the solder to flow. I cleaned the parts in acetone first to make sure there wasn't any oil on the surface of the metal. Then applied flux with a tiny piece of solder. The flux would bubble up from the heat and evaporate before the solder would reach it's melting point. once I got it to melt it would bead up and not flow properly because there was no flux on the part at that point. I managed to get the chain plates done but it took hours, Needless to say there's something here I still don't get when it comes to soldering.
- 100 replies
-
- 1
-
-
- model shipways
- 18th century longboat
- (and 1 more)
-
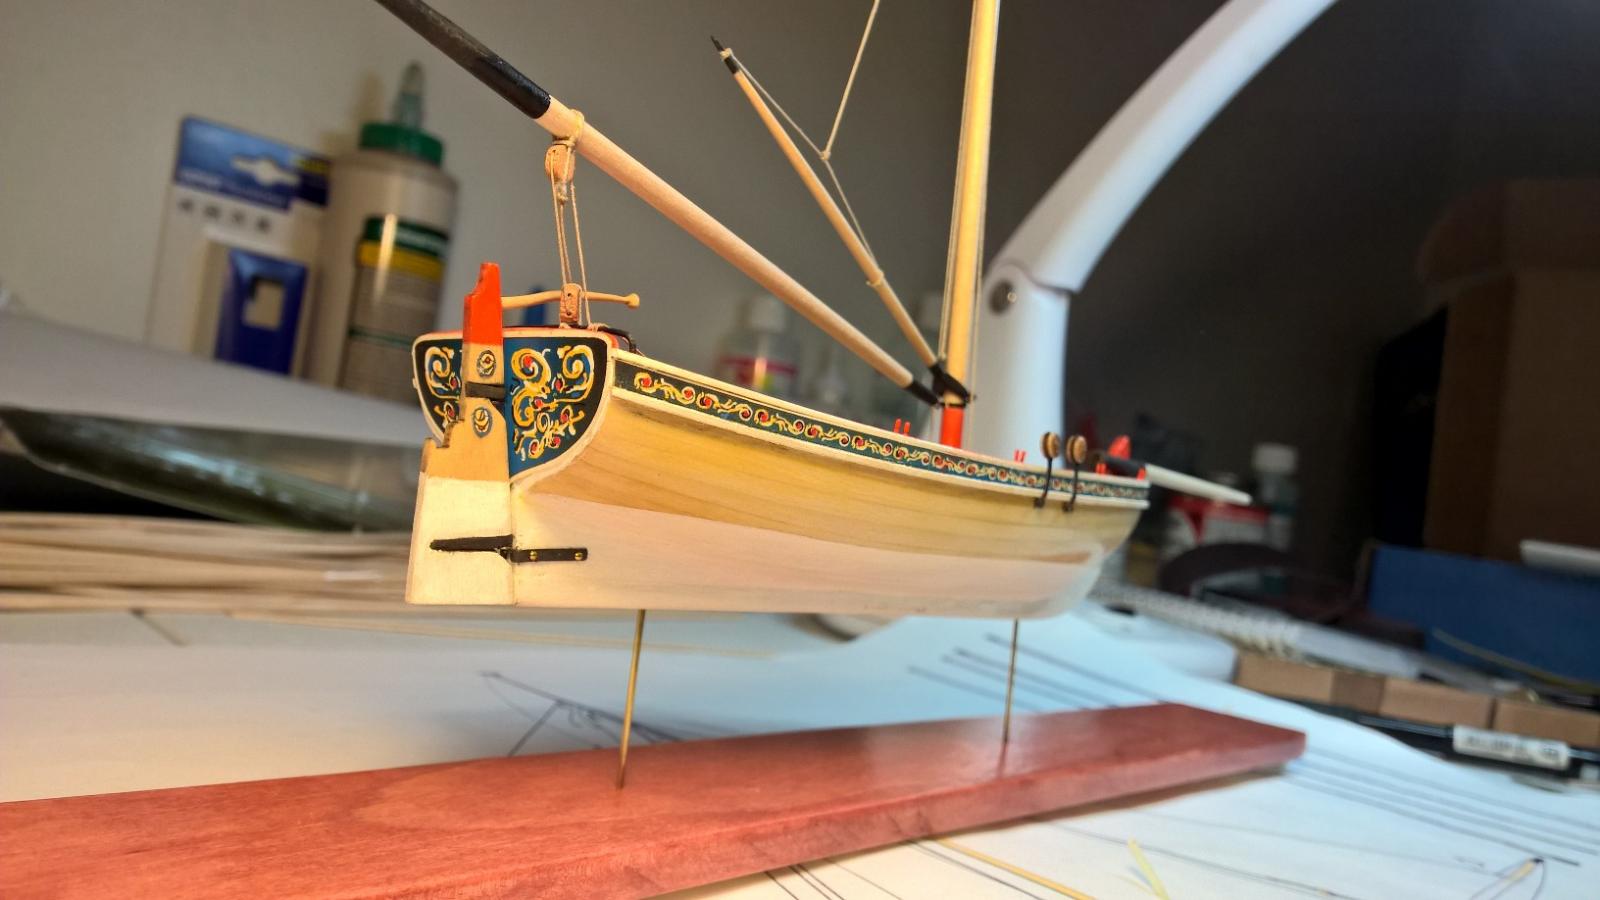
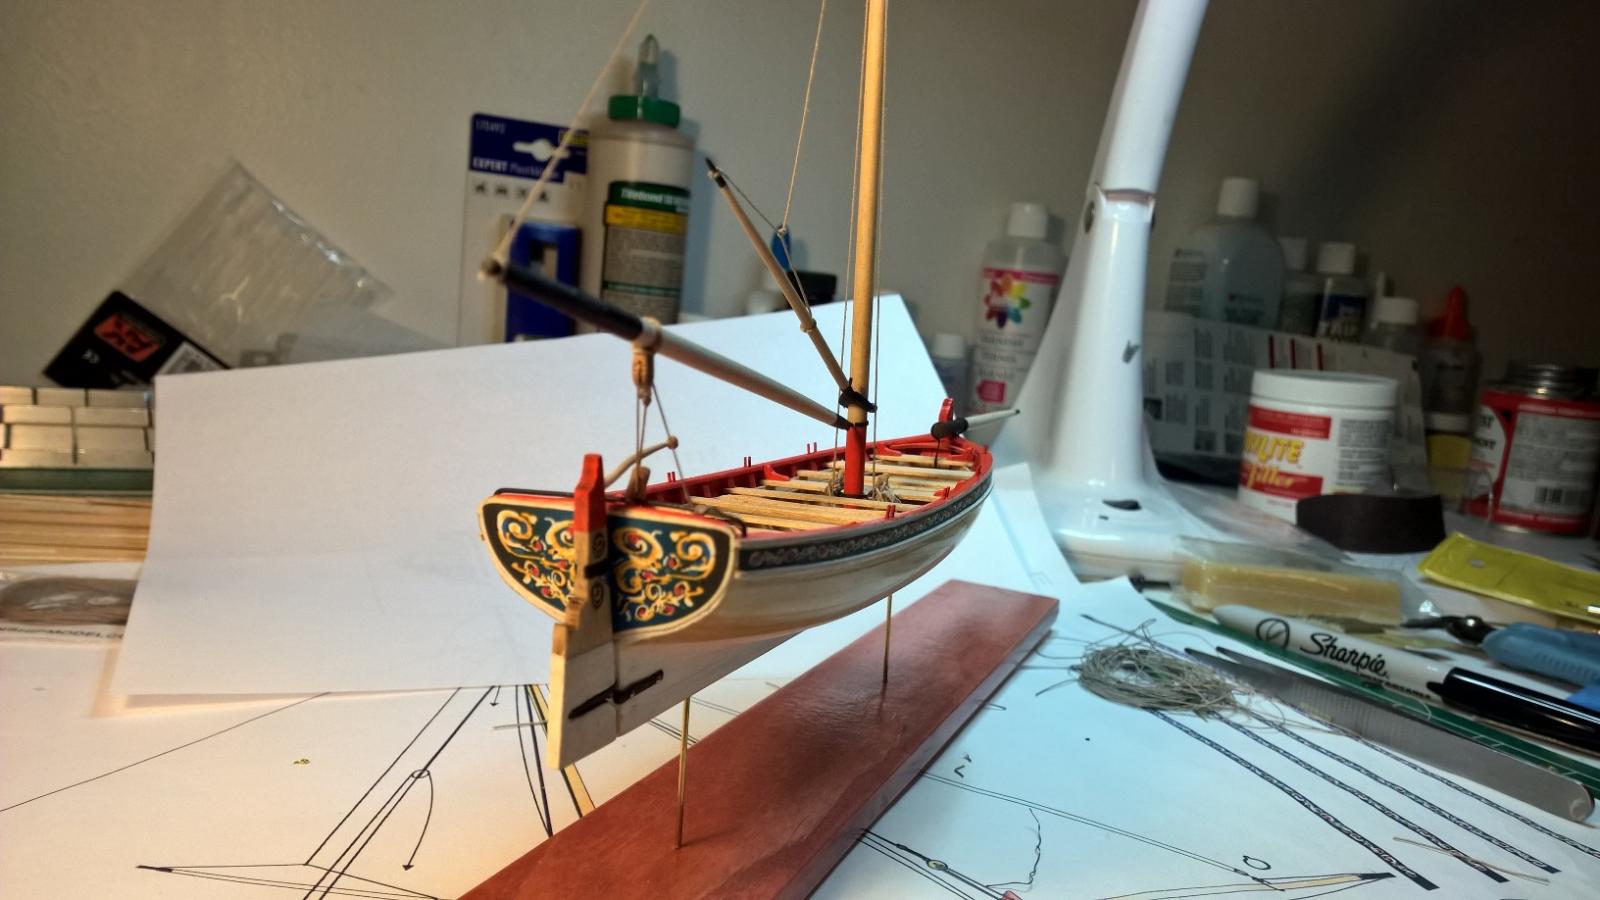
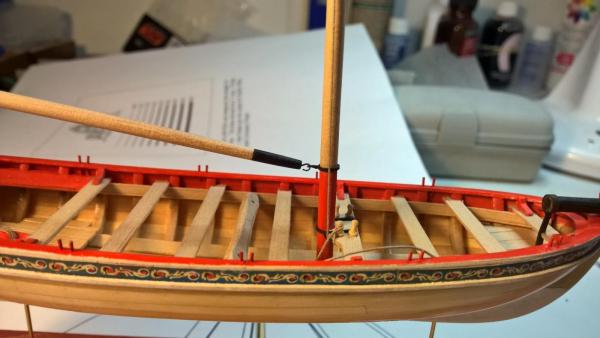
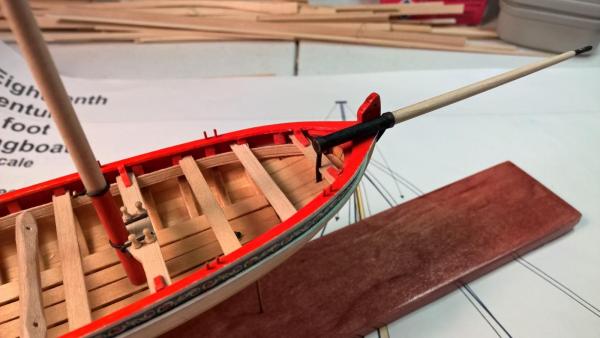
I got my gaff in place, I used wire rather than rope to put the parrel beads on. I still found it quit challenging getting it on to the mast.


- 100 replies
-
- 8
-
-
- model shipways
- 18th century longboat
- (and 1 more)
-
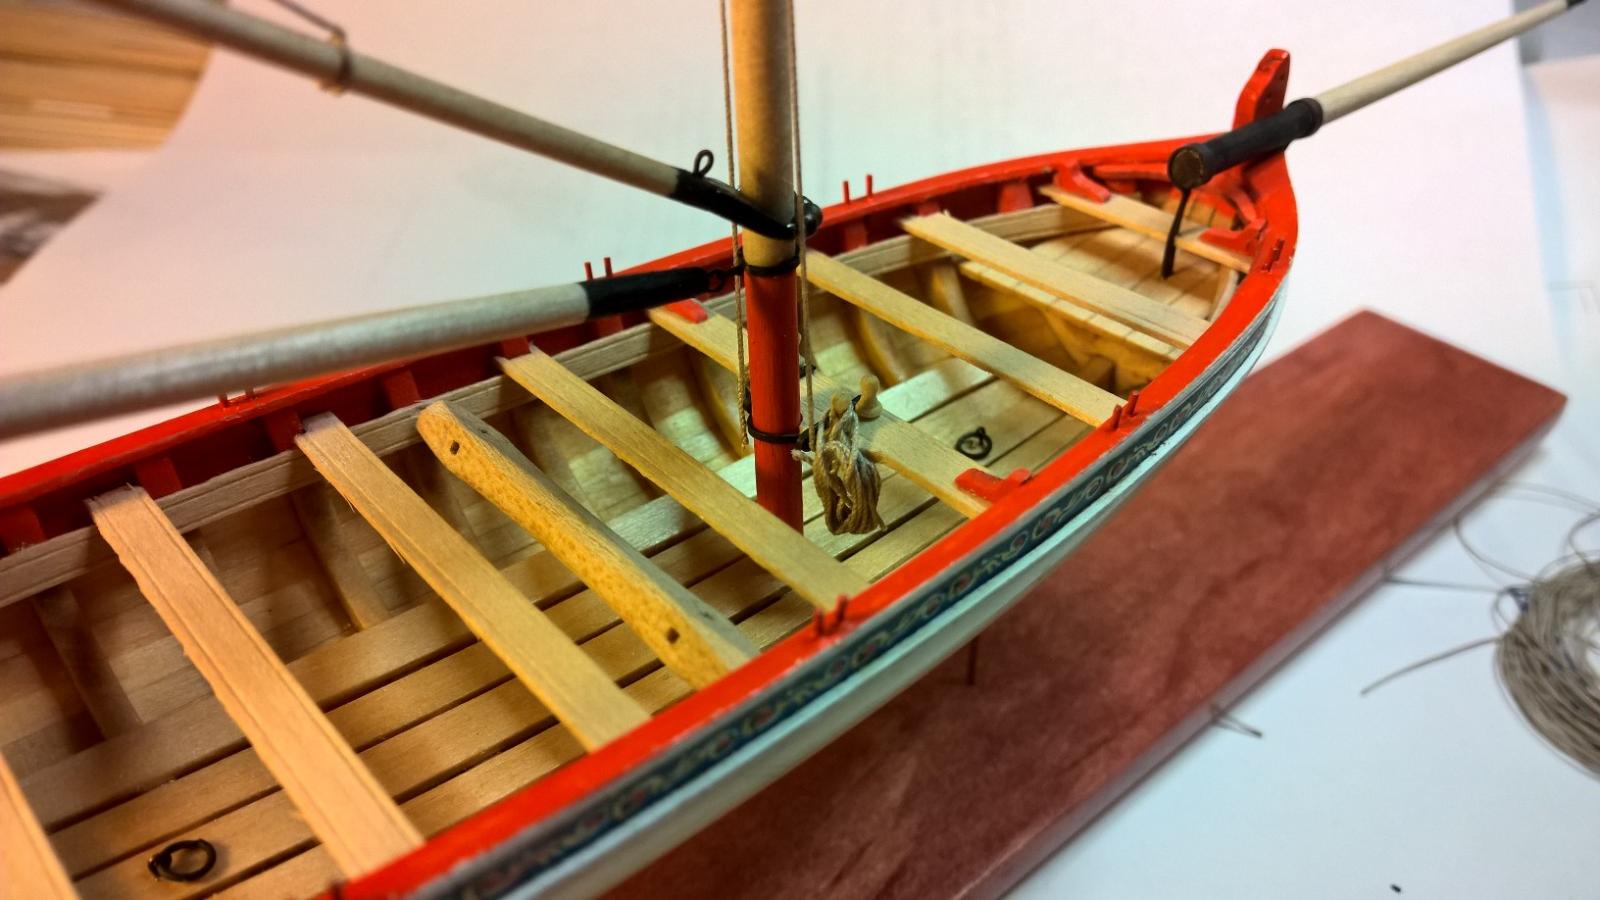
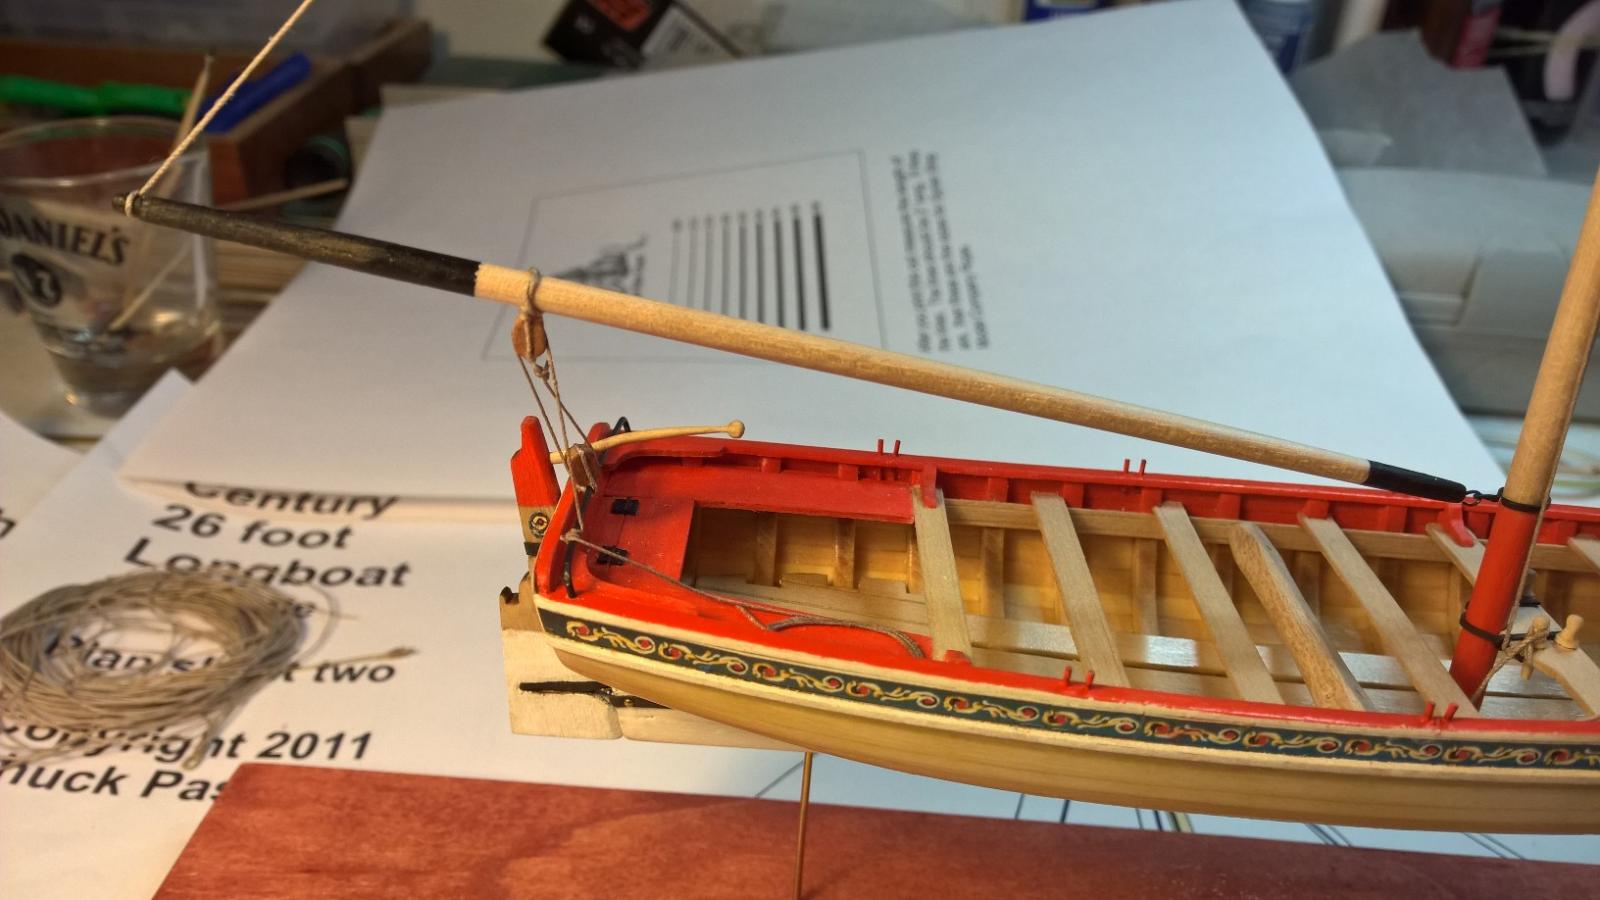
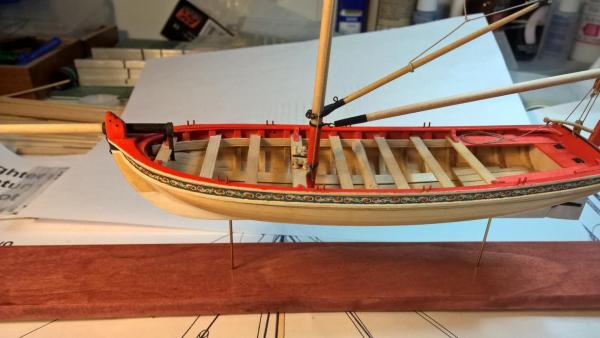
I'm slowly chugging along, I feel like I made some progress today.


- 100 replies
-
- 9
-
-
- model shipways
- 18th century longboat
- (and 1 more)
-
I've tried painting over brass with no luck, the paint doesn't adhere to the surface at all. I'm going to try putting the brass in vinegar before painting it, as Canute has suggested.
- 222 replies
-
- 3
-
-
- 18th century longboat
- model shipways
- (and 2 more)
-
Eric, How do you get the acrylic paint to properly cure to metal? I've found that most acrylic paints will chip off of metal parts real easy. Do you coat it with something after it's painted? Mike
- 222 replies
-
- 3
-
-
- 18th century longboat
- model shipways
- (and 2 more)
-
What did you use for paint on the chain plates?
- 222 replies
-
- 2
-
-
- 18th century longboat
- model shipways
- (and 2 more)
-
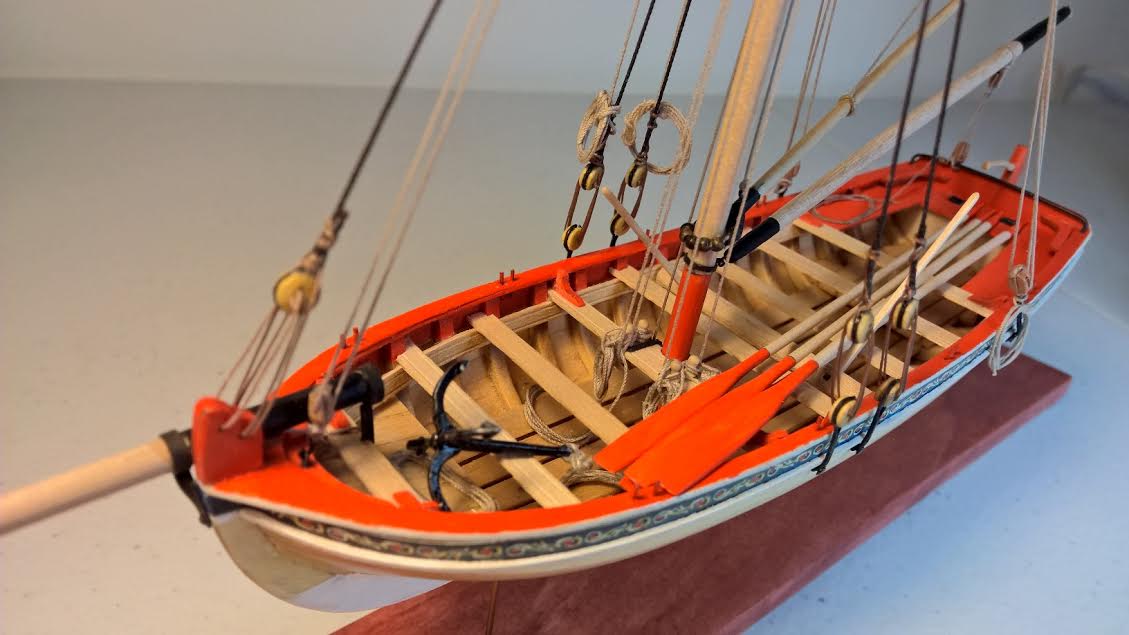
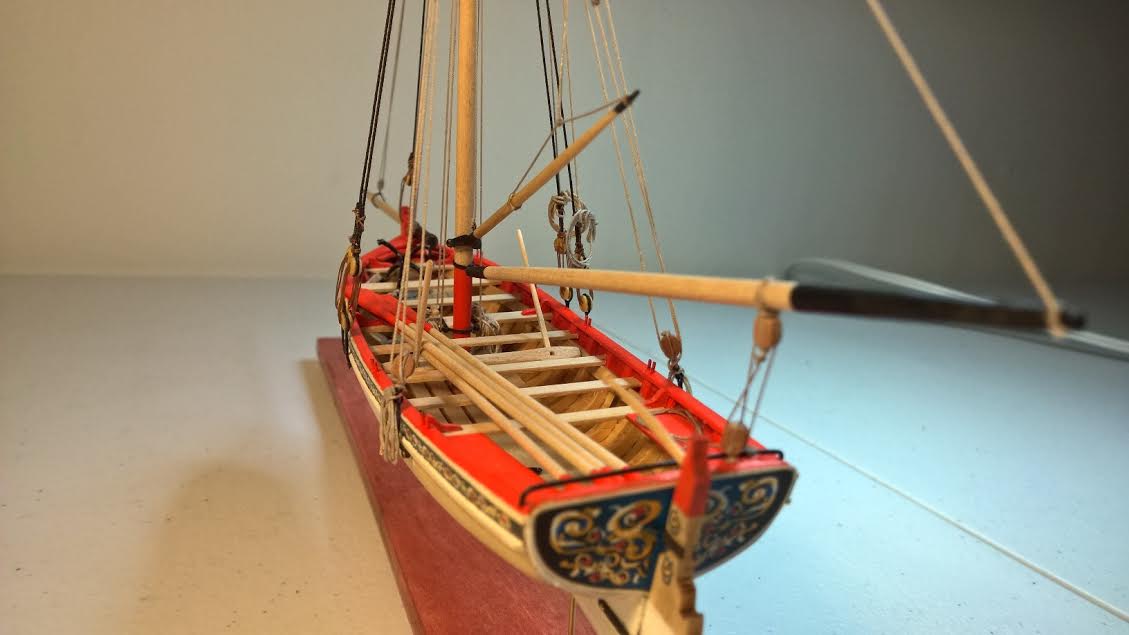
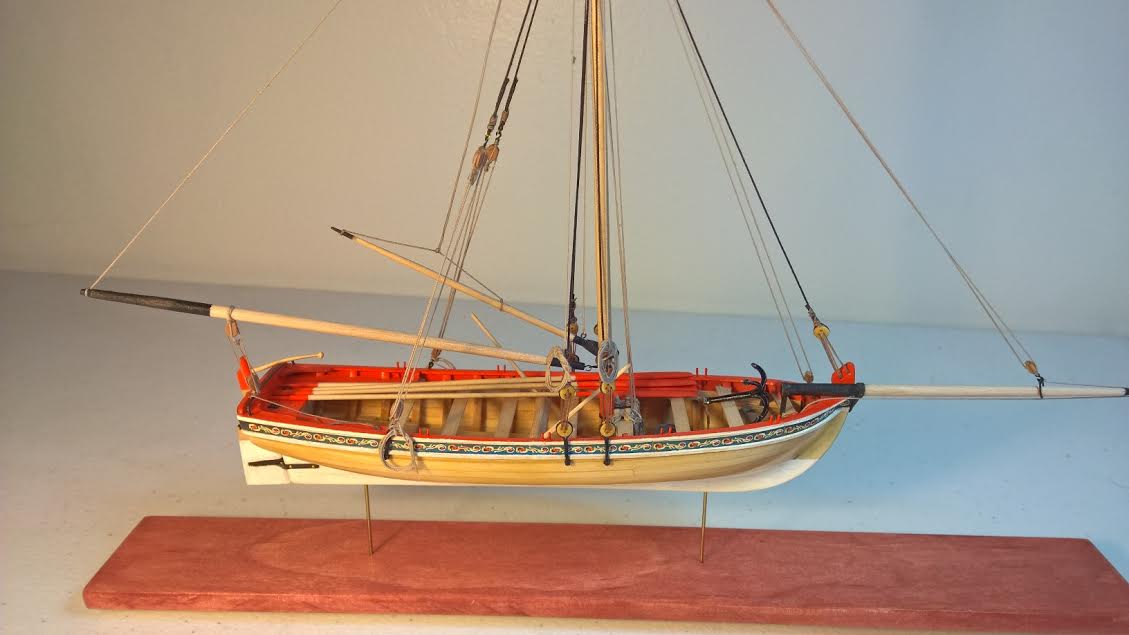
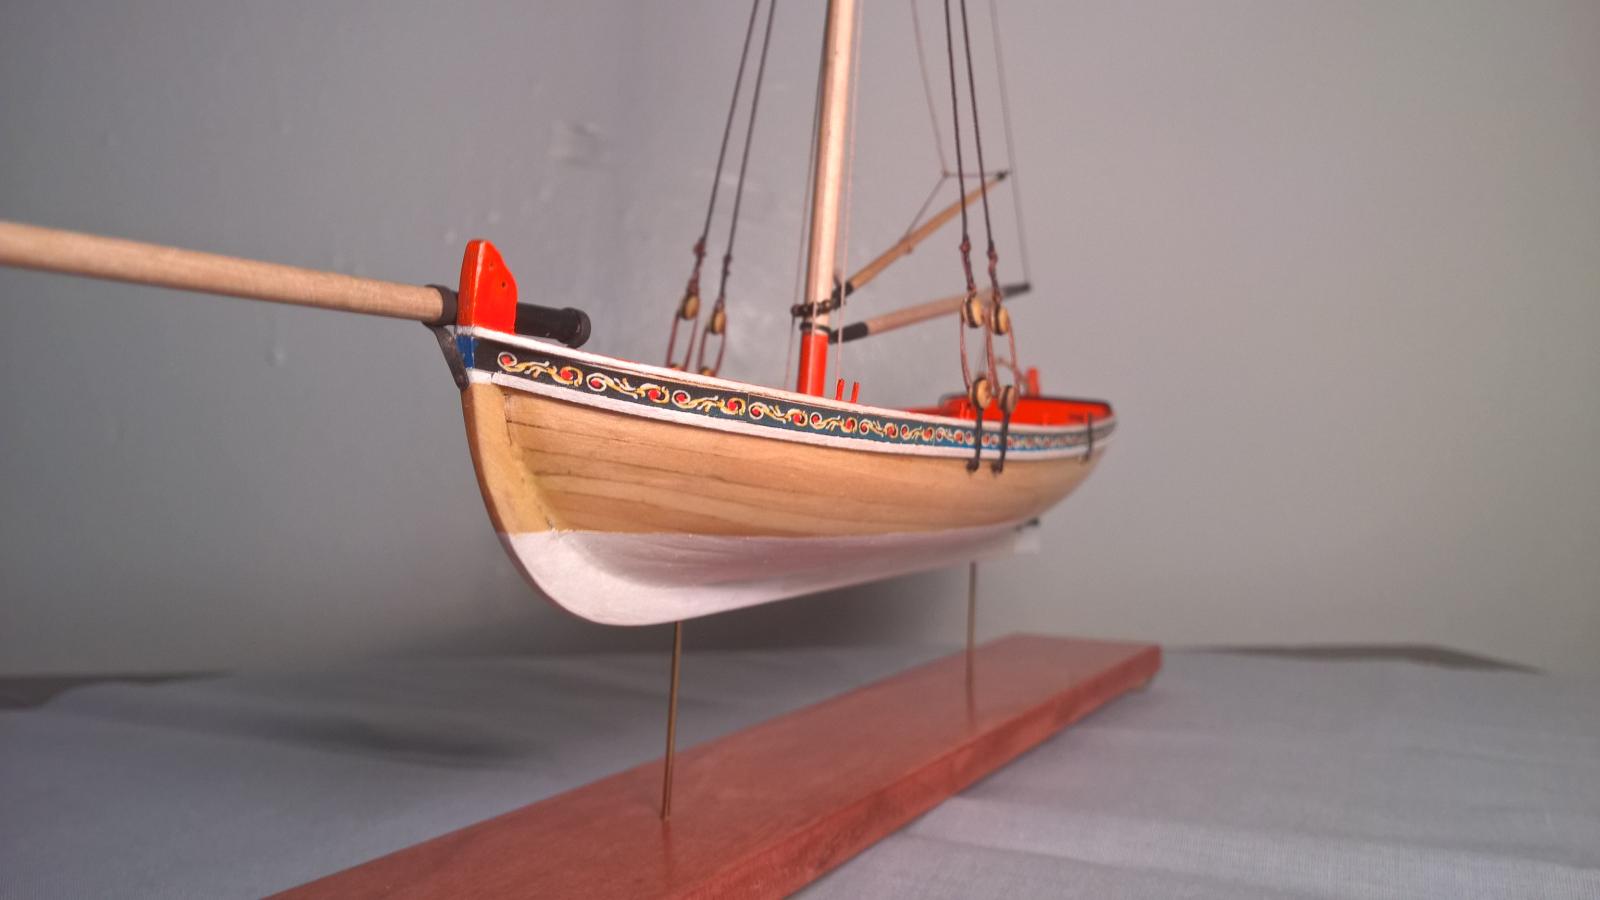
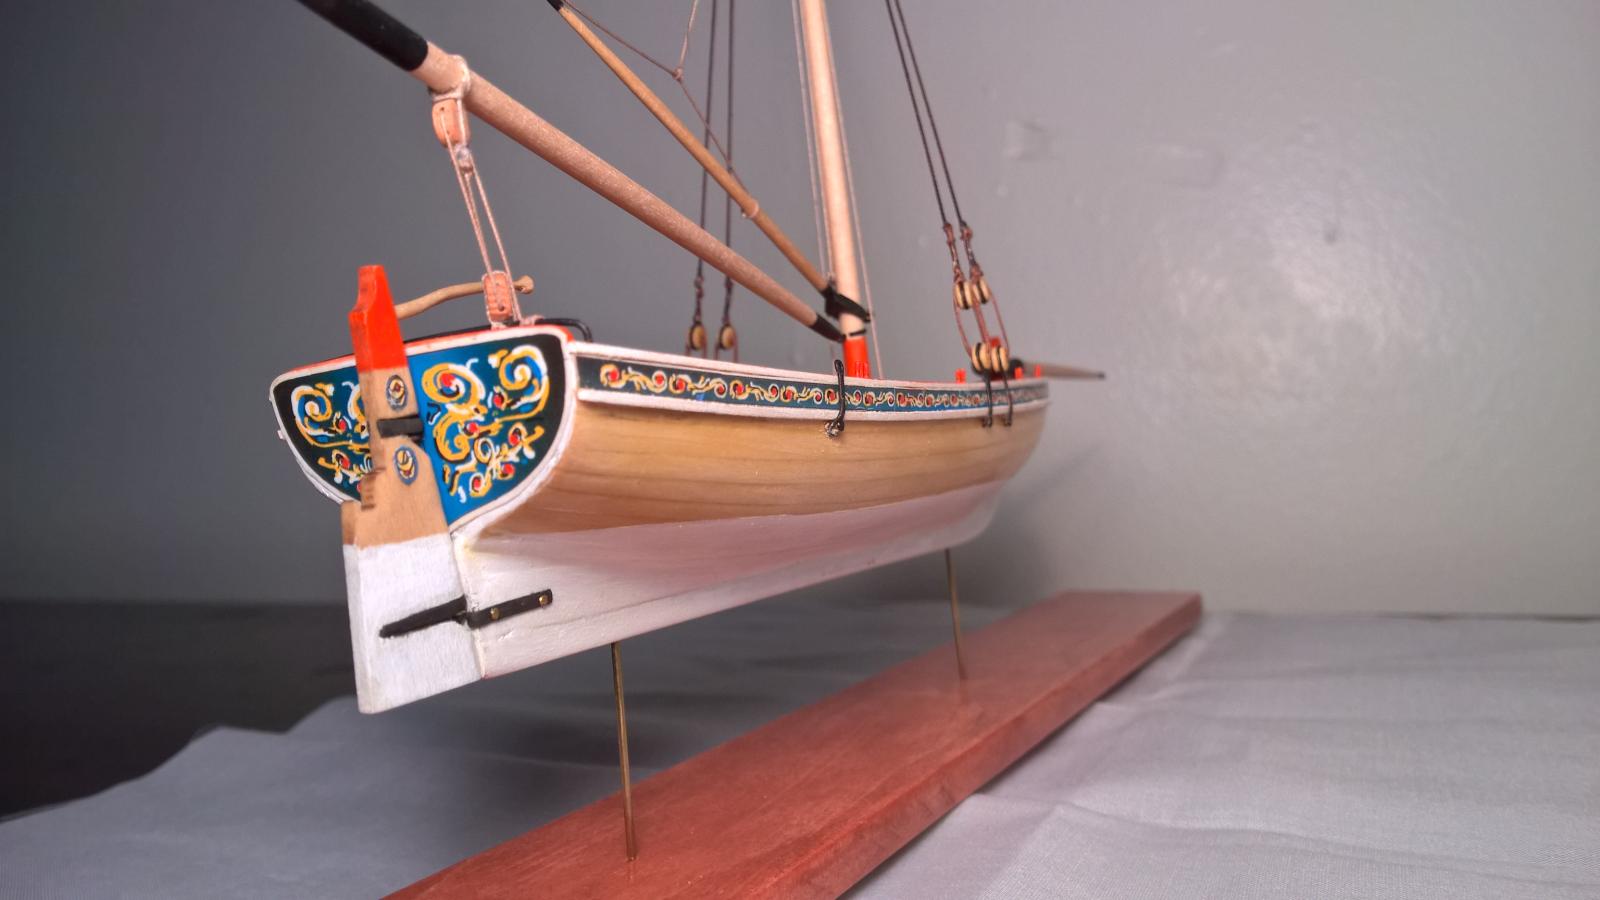
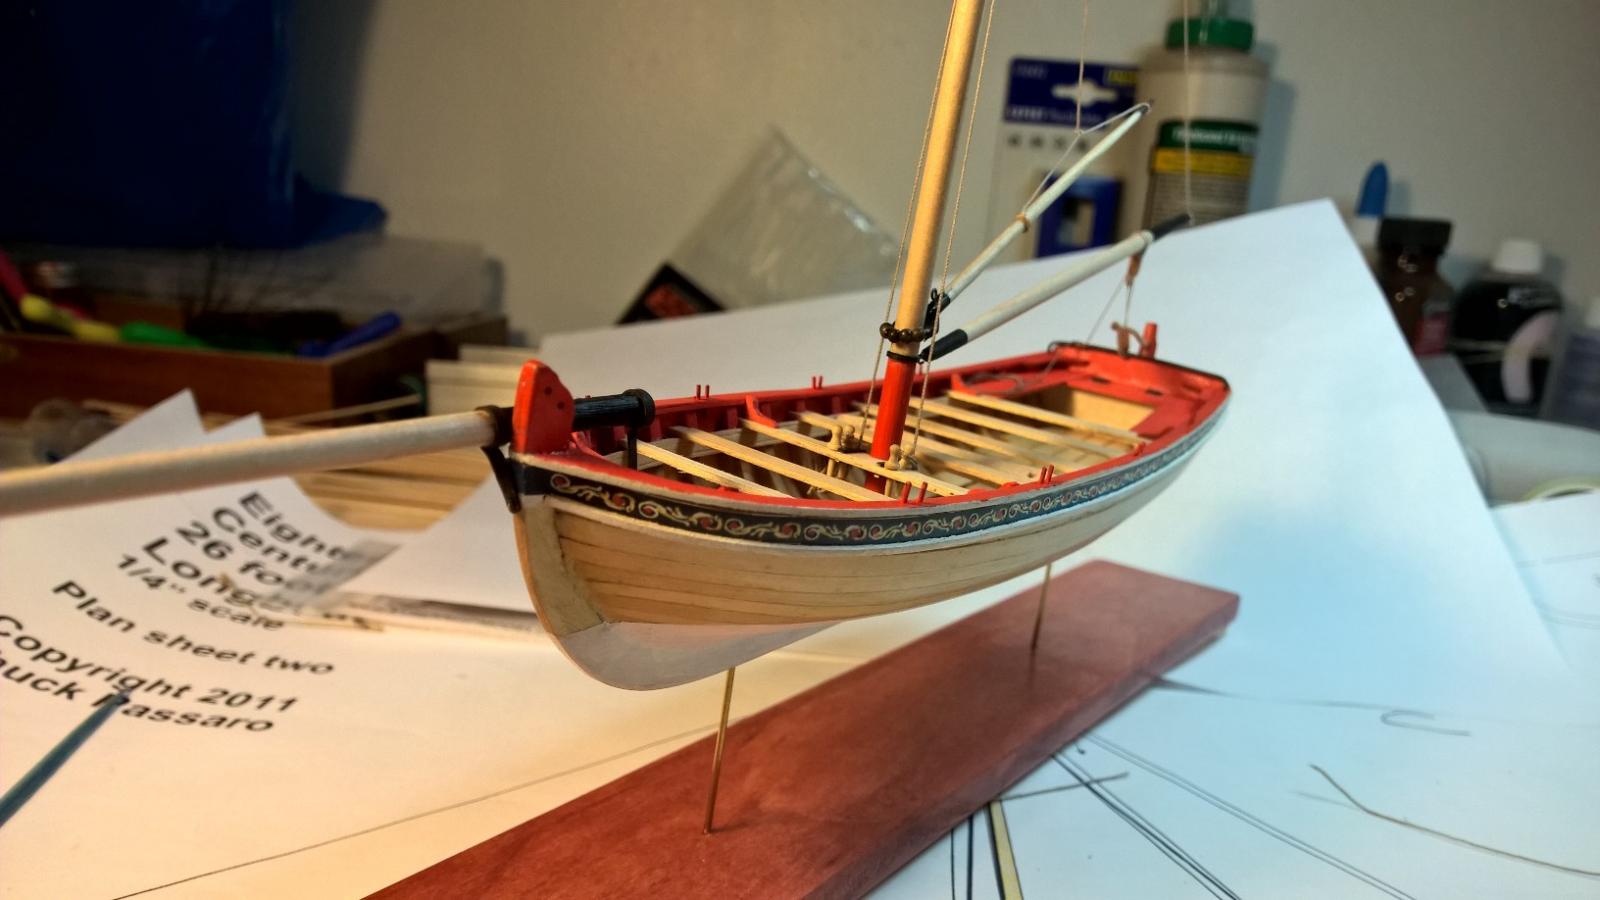
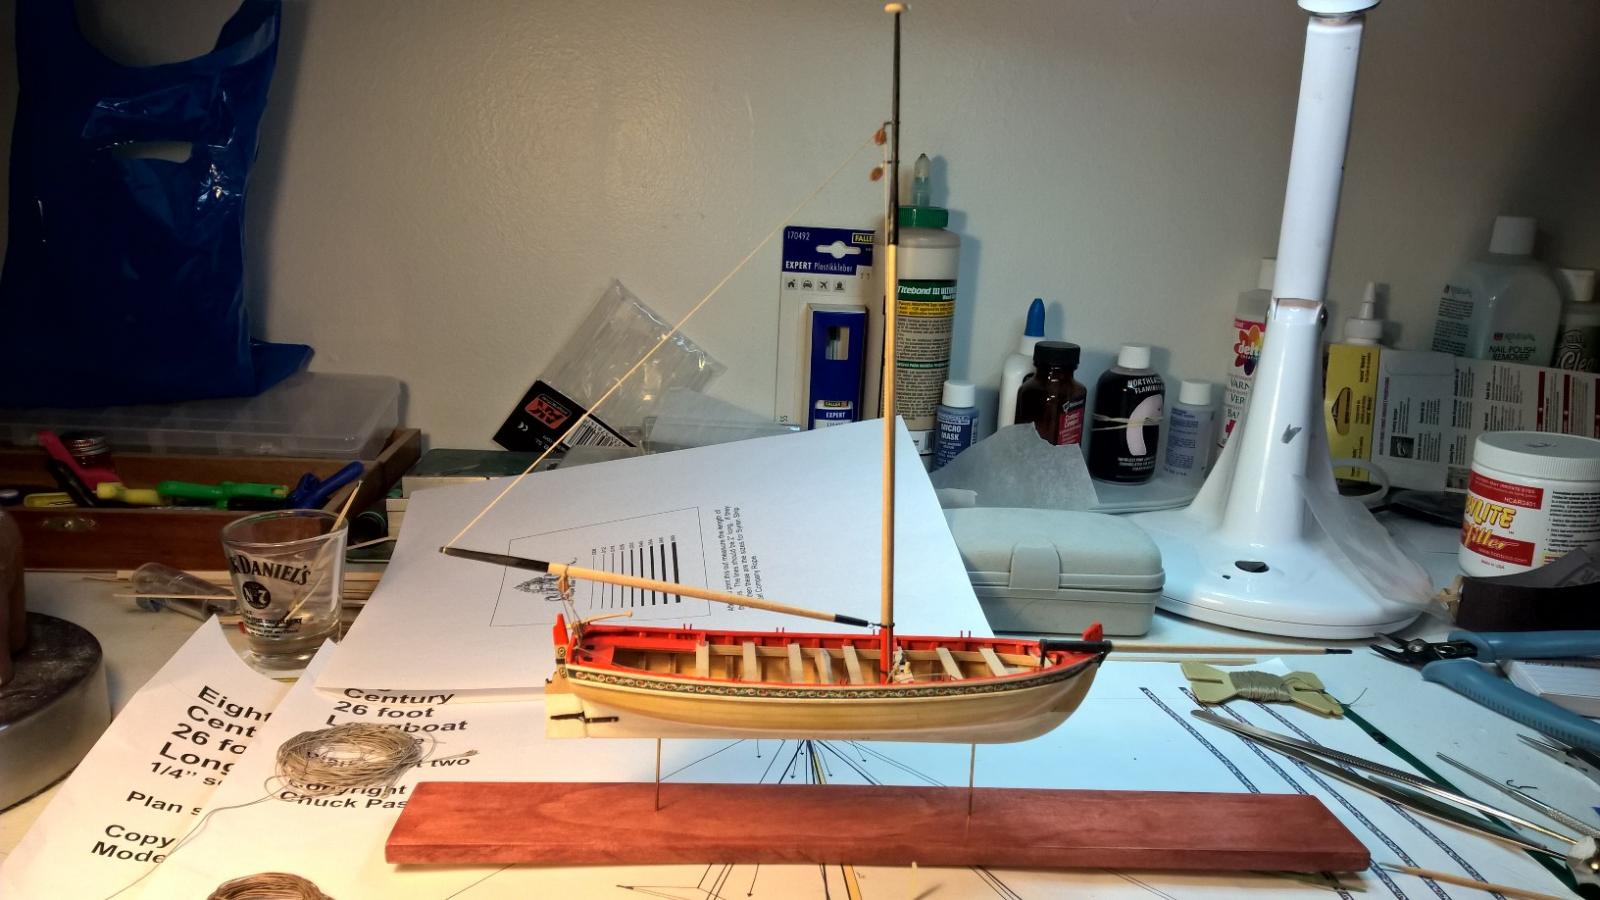
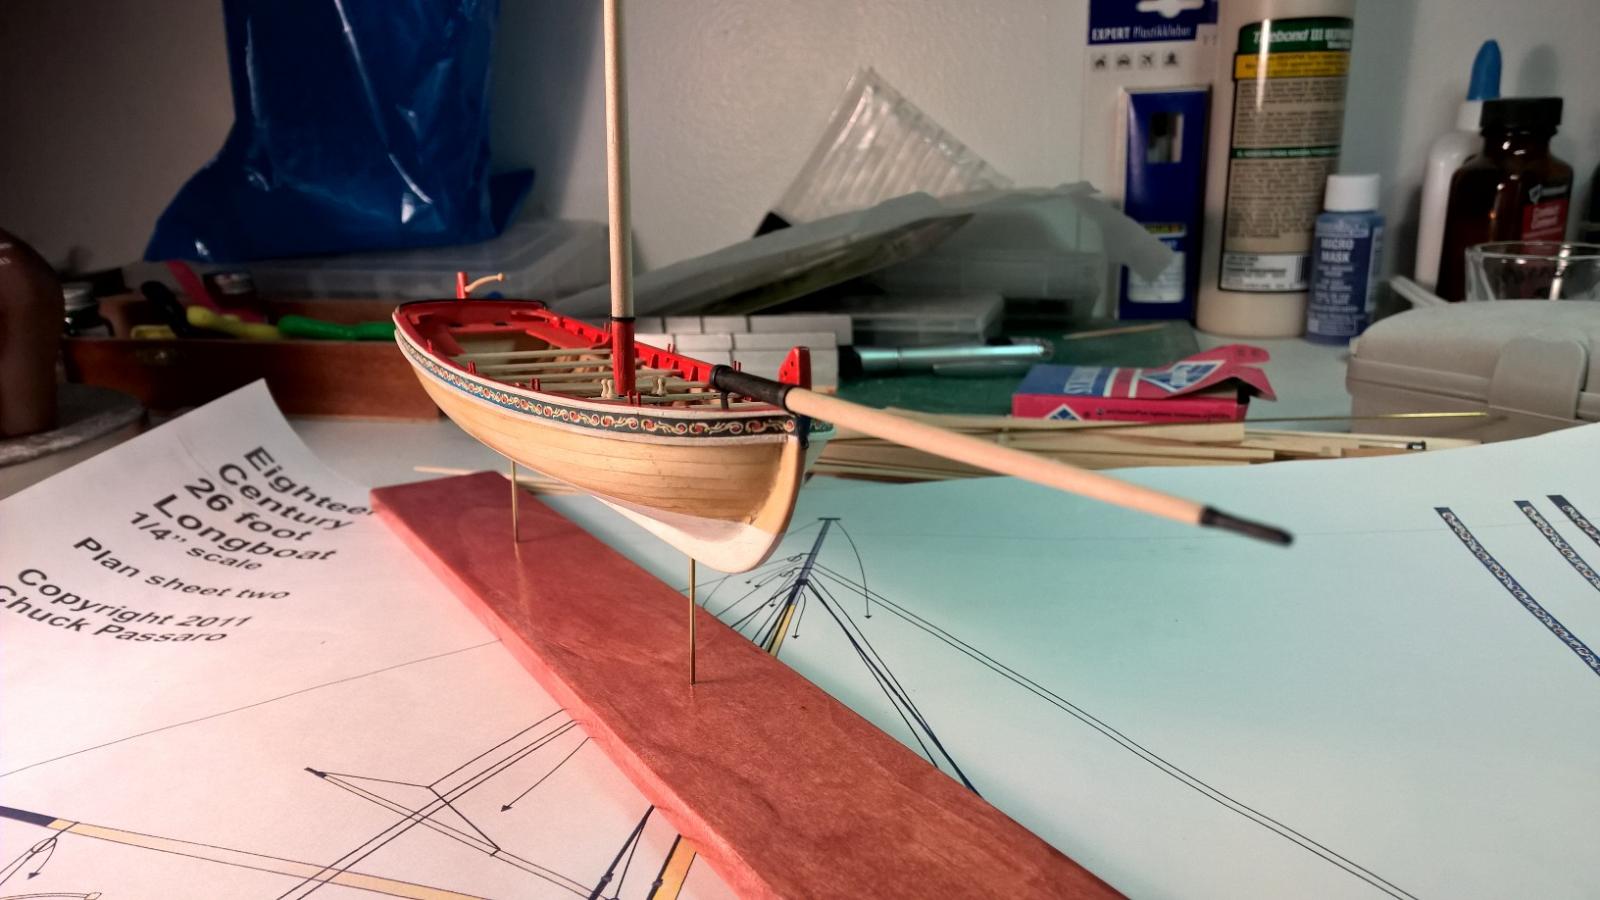
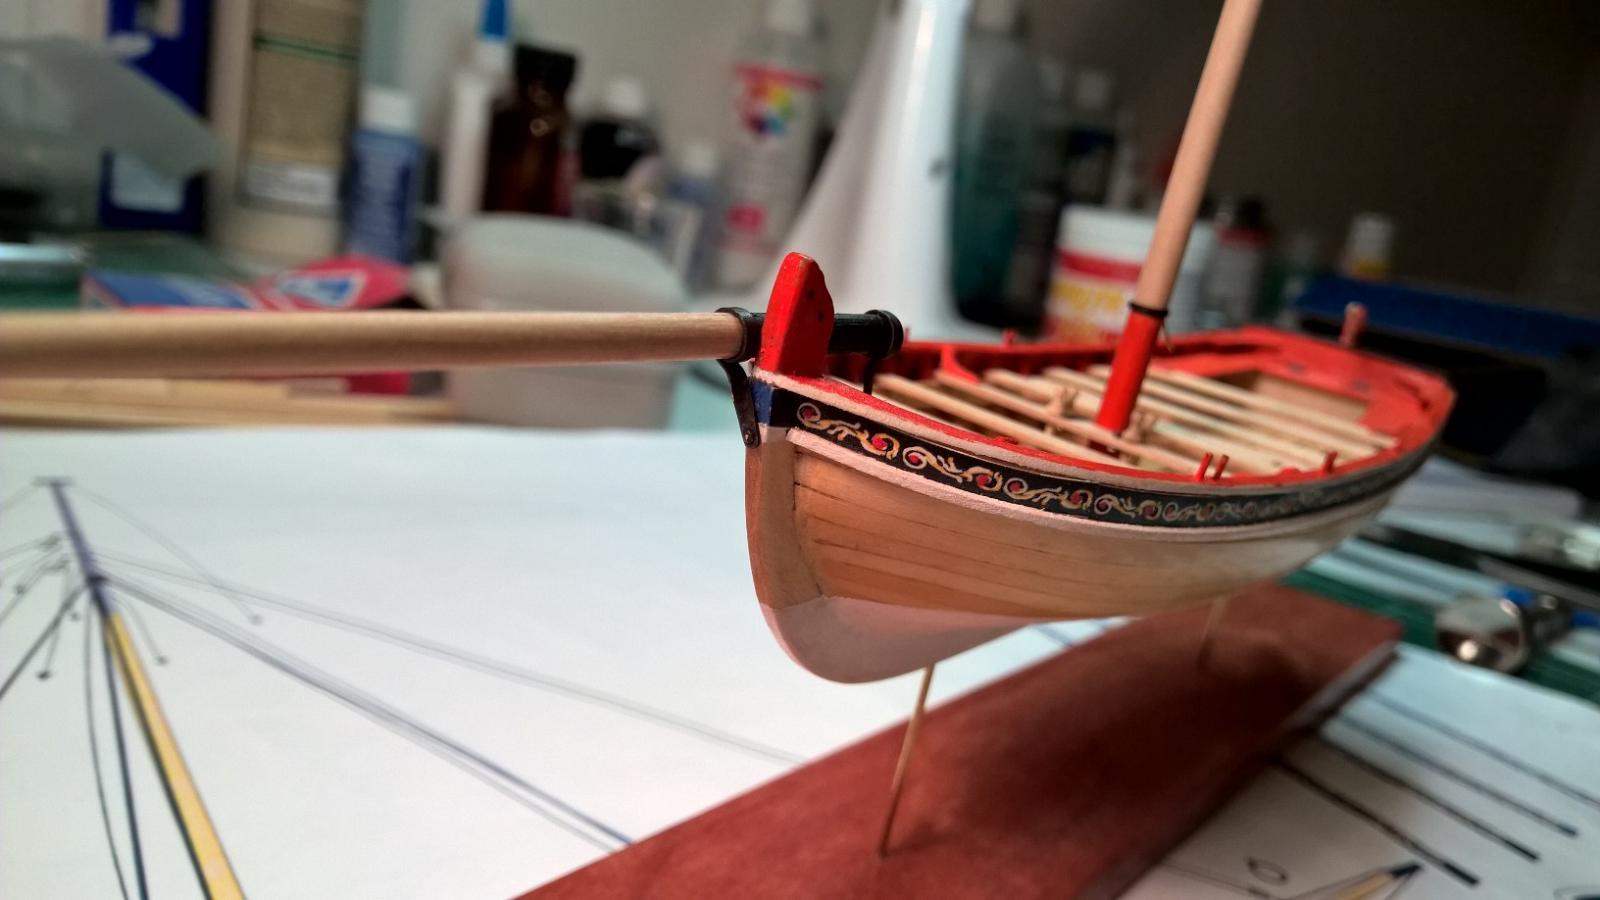
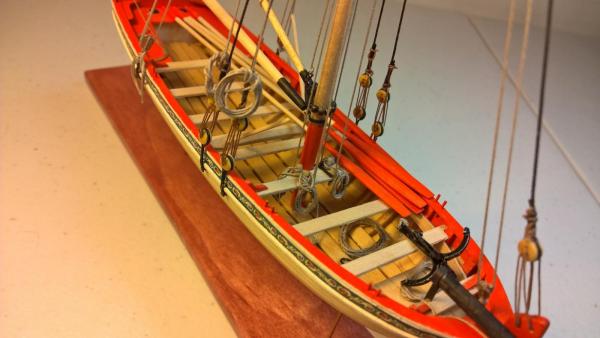
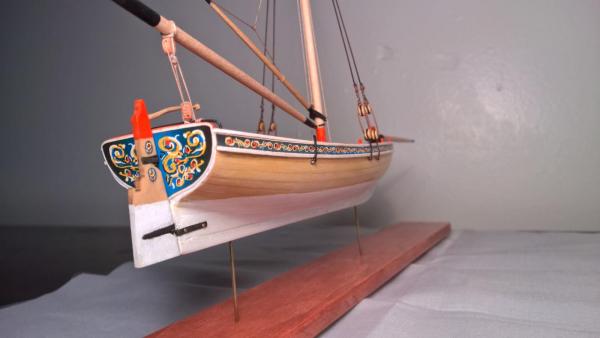
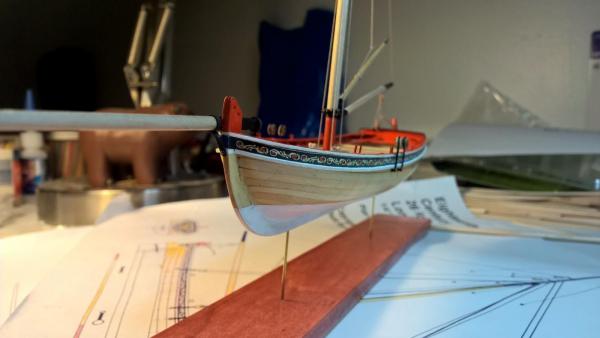
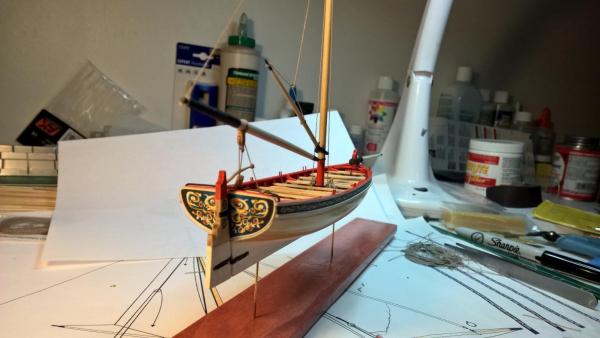
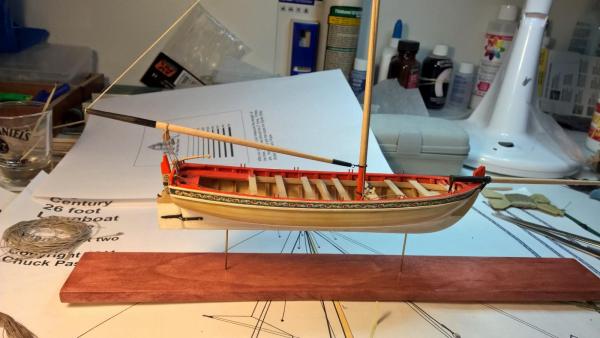
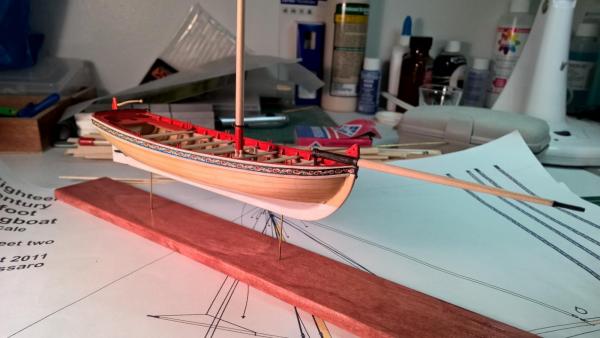
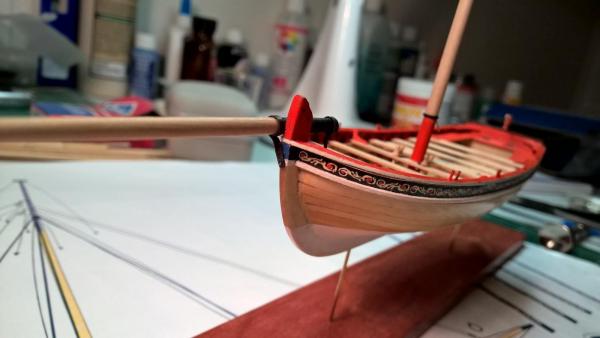
I completed the Jib. I also decided to mount the boat to it's base at this Time, I think this will make it easier to rig. You'll notice I extended the the front Iron band for the jib. it fastens further down the stem than what the directions show you. I did this because there's a piece of brass wire running from the top of the stem to right above the fasten. Yes, I broke the stem off, I almost made it threw the build without this infamous break. At least I know I'm in good company. I don't feel to bad about this Modification because looking at the original museum model it appears to fasten further down the stem also. I know this in no way makes mine a museum piece but at least I don't have to feel it's completely inaccurate.

- 100 replies
-
- 6
-
-
- model shipways
- 18th century longboat
- (and 1 more)
-
It's quite an accomplishment to complete this model, I can only hope to do the same. Good job!
- 33 replies
-
- 3
-
-
- model shipways
- 18th century longboat
- (and 1 more)
-
I'm not quite as far along as you are. With the rope rapped around the belaying pin and hanging over the thwart like real rope ,did you put something on the rope to harden it to keep it in that position? That came out really good.
- 37 replies
-
- 1
-
-
- model shipways
- 18th century longboat
- (and 1 more)
-
Eric, Where can you get those basic rigging tips? Mike
- 222 replies
-
- 6
-
-
- 18th century longboat
- model shipways
- (and 2 more)
-
You used a planer to create your mast. I ask this because I bought a kit of the schooner "Lively" all the wood is square I wasn't sure how I was going make the spars from square pieces of wood without a lathe.
- 335 replies
-
- 3
-
-
- 18th century longboat
- Finished
- (and 1 more)
-
Your boat is coming along nicely,Good work.
-
Eric, The diameter of both ropes are one size under what is recommended. It may have worked, but Chuck is really expedient about getting your order to you, so I might as well get the right stuff. I have plenty of things to work on in the meantime. Mike
- 100 replies
-
- 4
-
-
- model shipways
- 18th century longboat
- (and 1 more)