


Andrew B
-
Posts
12 -
Joined
-
Last visited
Content Type
Profiles
Forums
Gallery
Events
Posts posted by Andrew B
-
-
So YOU are the scoundrel that has been sniping all the Mamoli kits on ebay.


mike
I have been sniping a lot of kits on ebay the past month :x
- Canute, Elijah, mtdoramike and 2 others
-
 5
5
-
And Here I've been buying up Mamoli kits on ebay because I was assuming they would be gone forever, although the kits I bought I got for a small fraction of the original retail. I have yet to build any since I have like 19 other projects going on that I need to finish first. My first impressions from opening the box was that everything was very nice quality.
Glad to hear the model line will continue.
Next I'd be happy to hear someone buying Midwest's rights and restart production of their line. I got into the hobby with their kits and continue to build them with my own revisions for detail and accuracy.- popeye the sailor, Elijah, cdogg and 7 others
-
10
-
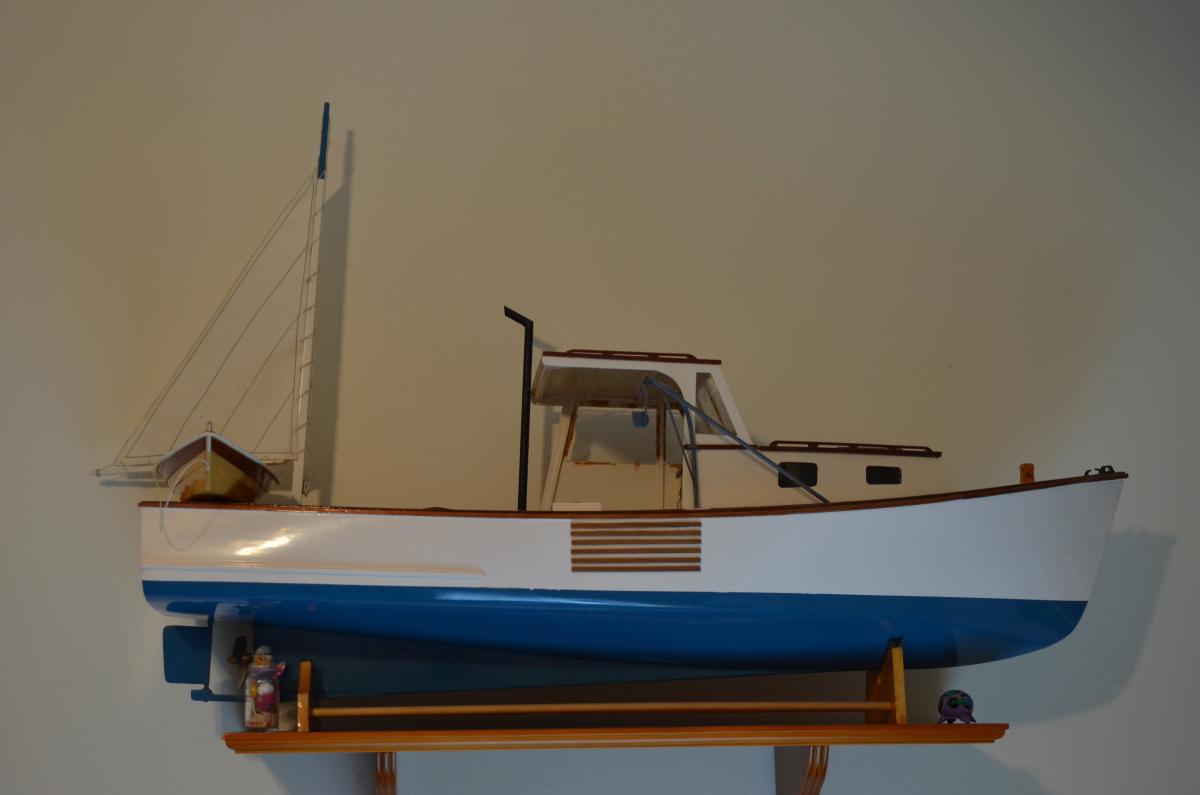
Andrew, excellent work on your model. What finish did you use on the cockpit trim and toe rail to get it to all match so well? I'm building the same boat right now and not sure how I'm going to finish those parts. I tried varnish on scrap, but I might need to use a stain. Anyone else have recommendations?
Sorry for the absence everyone, Hobbies died out with my last 2 years of school being stressful.
All the rails are mahogany coated in gloss minwax polyurethane, I prefer the color and grain structure of actual mahogany over staining balsa or basswood.
-
The hull looks amzing, What kind of Grain filler did you use ? the paint job is Fantastic
I used a few coats of minwax clear epoxy to stand the loose fibers for sanding, then filled the low area with spackle. To eliminate any grain showing I used a few coats of high build primer followed by 4-5 thin coats of Interlux Brightside white epoxy with wet sanding between the last 2 coats. For the bottom paint I used testors flat enamel and applied it with an airbrush. I am very pleased ith the finish created by the airbrush, up close it give the appearance of an ablative paint.
-
Haven't updated this in a while, I tend to get lazy with my forum threads.
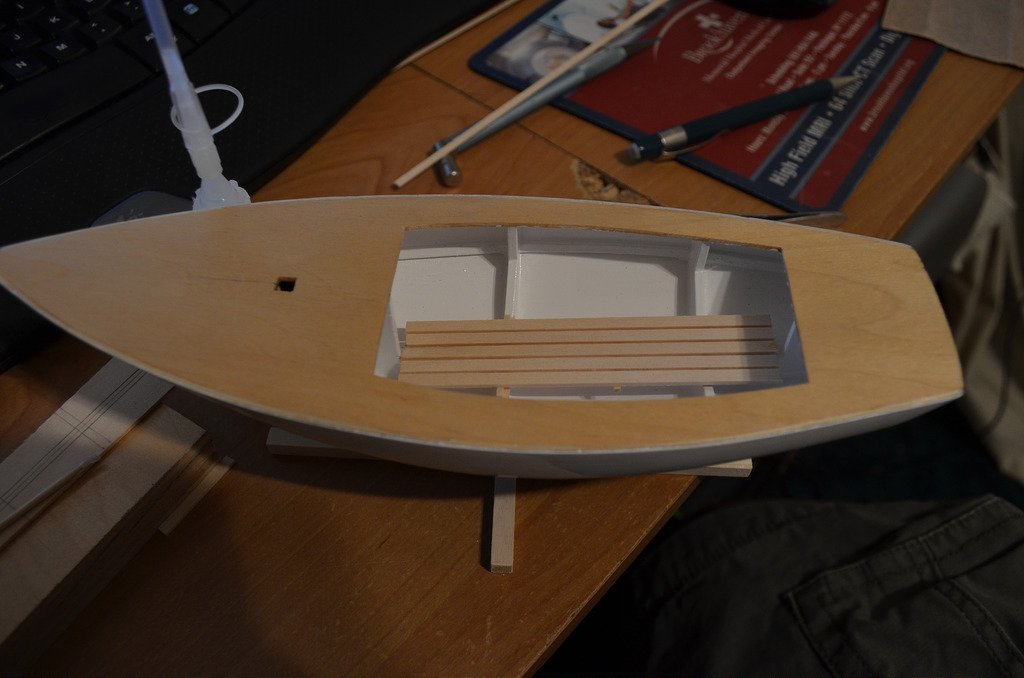
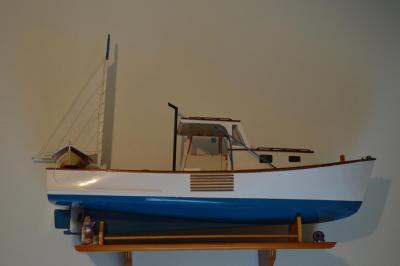
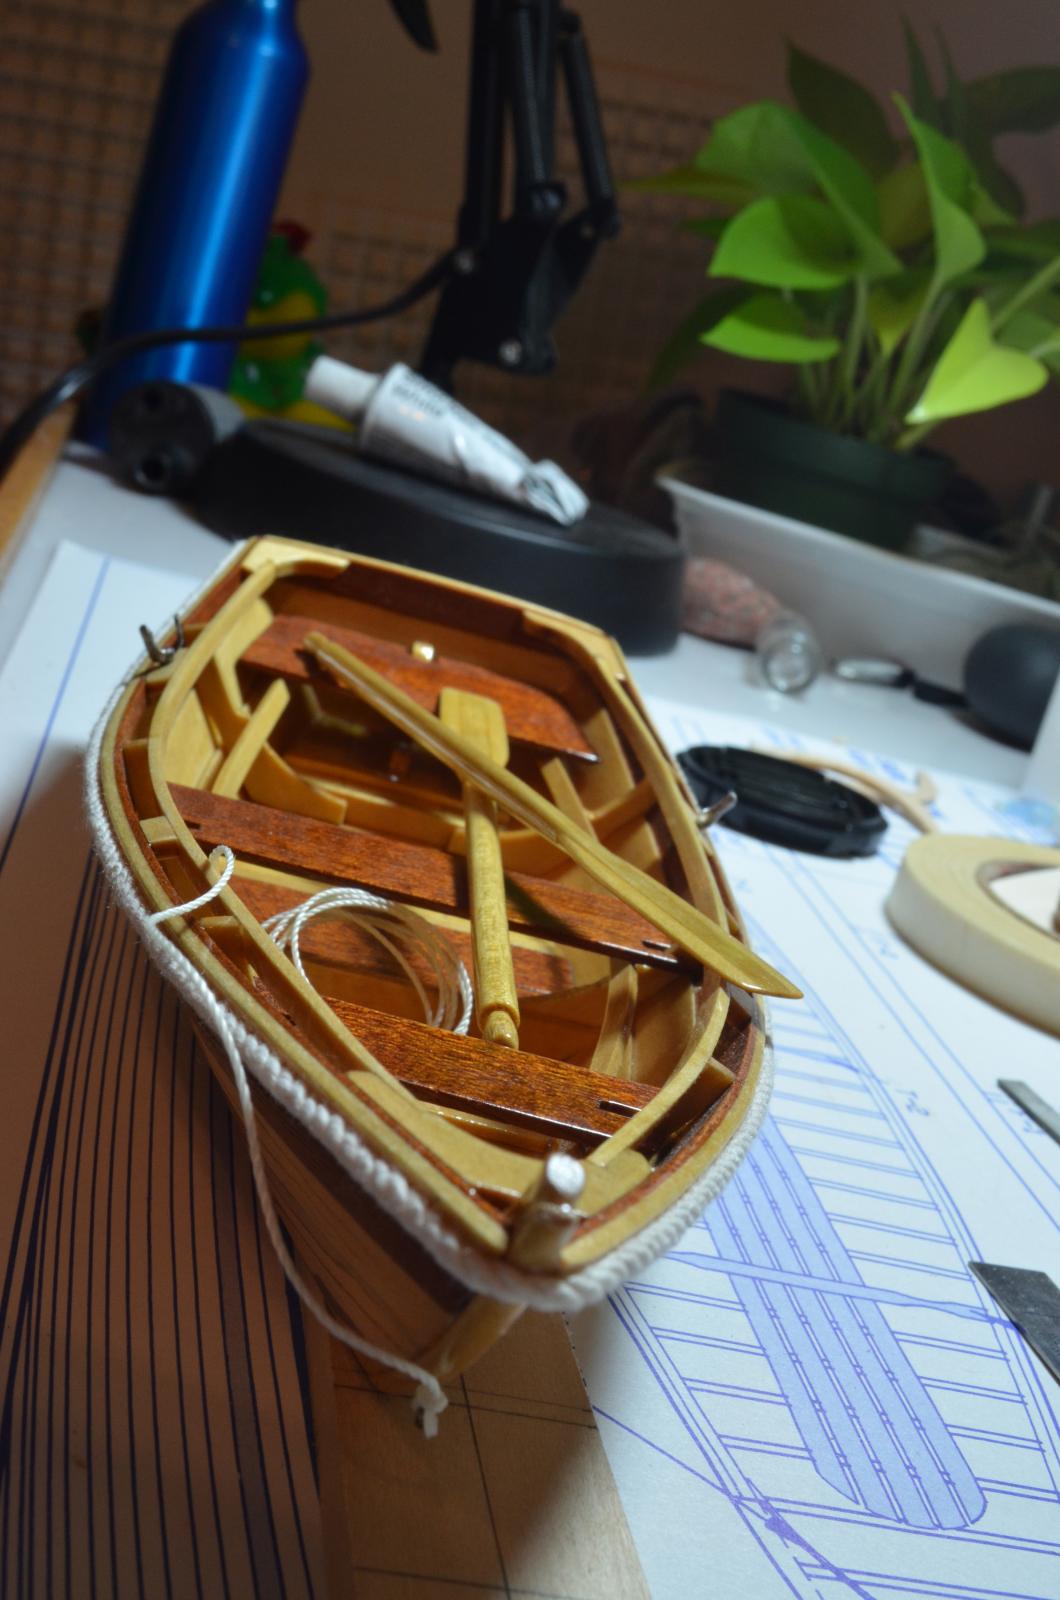
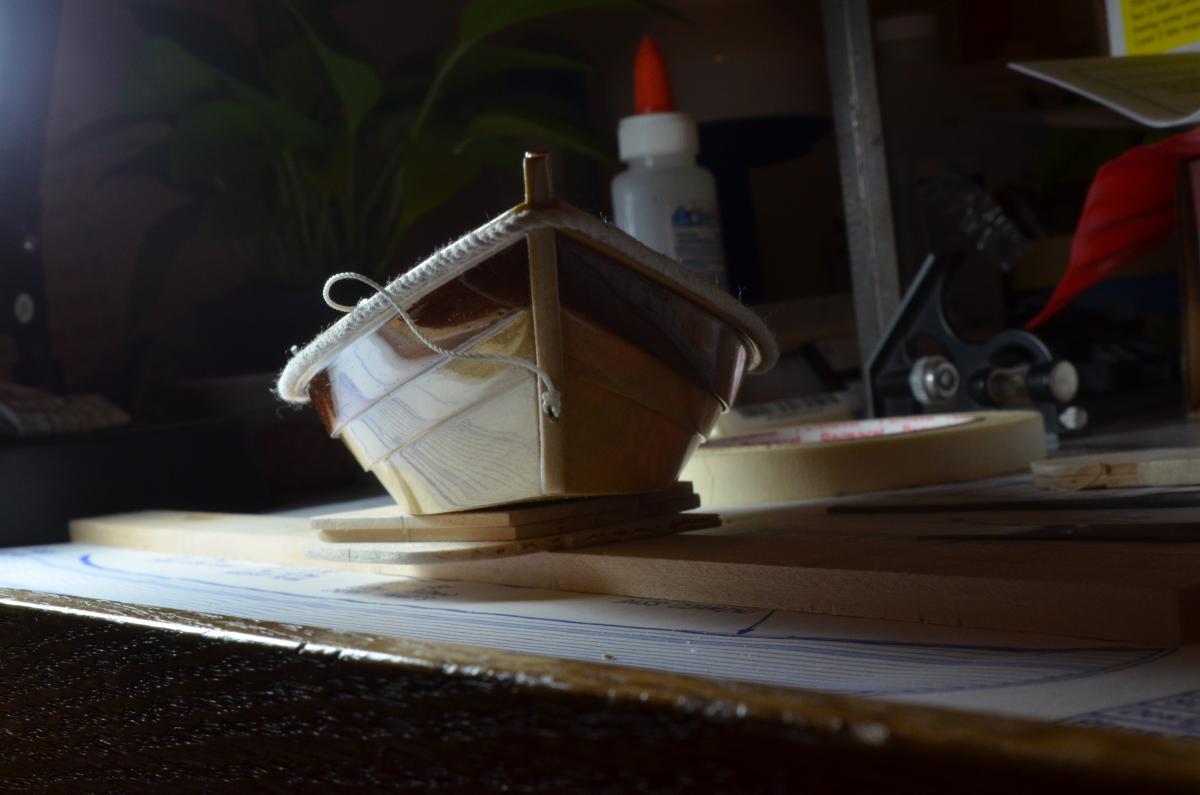
I have made some progress since the last update. I have built and installed the seats and floor, installed the rub rail and toe rail, and installed the cockpit coaming.
Now I am in the process of drafting a new sail plan. I am not completely satisfied with the rigging plan, plus my girlfriend (who the model is for) likes a gaff rigged setup more.
All that's left is to hang the rudder, place the deck fitting (which I will wait until I figure out the rigging plan to do), and rig the sails.
DSC_0146 by Batson Photography, on Flickr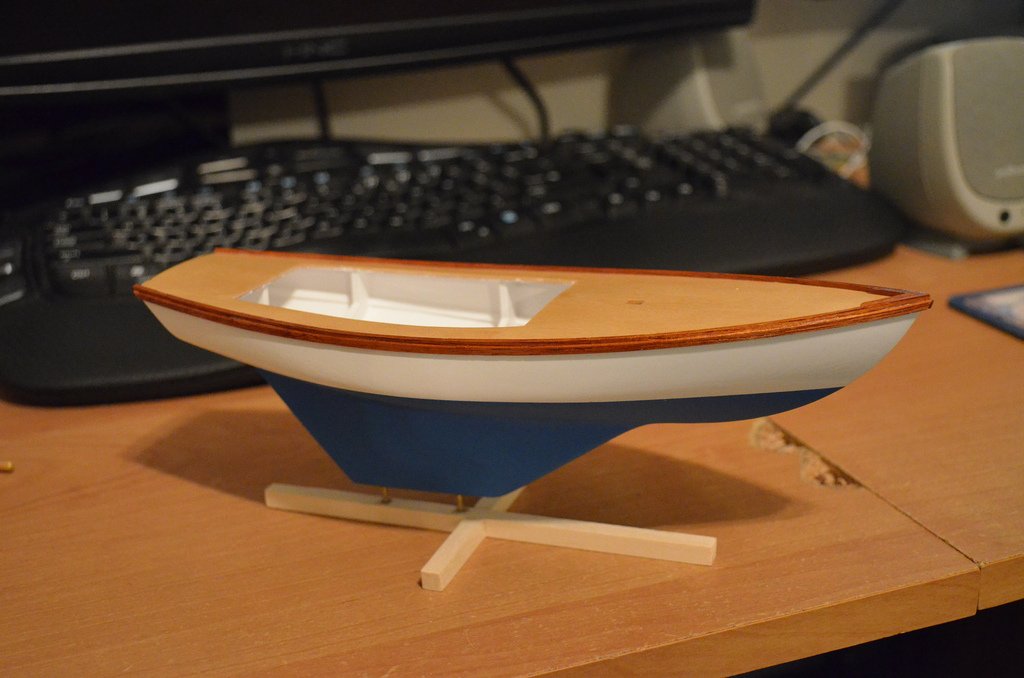
DSC_0147 by Batson Photography, on Flickr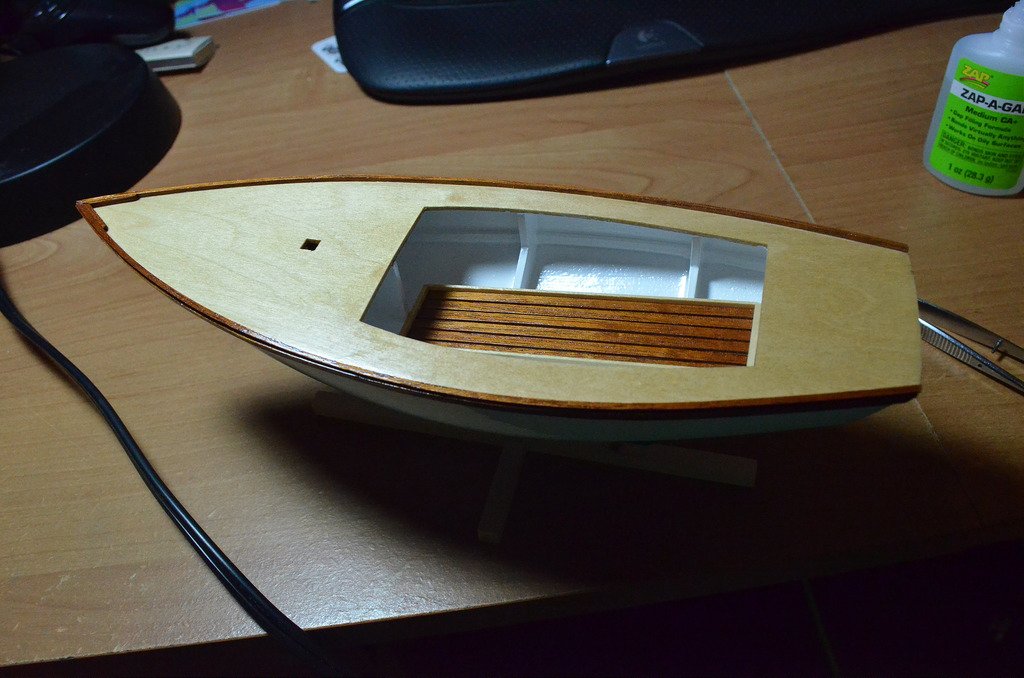
DSC_0149 by Batson Photography, on Flickr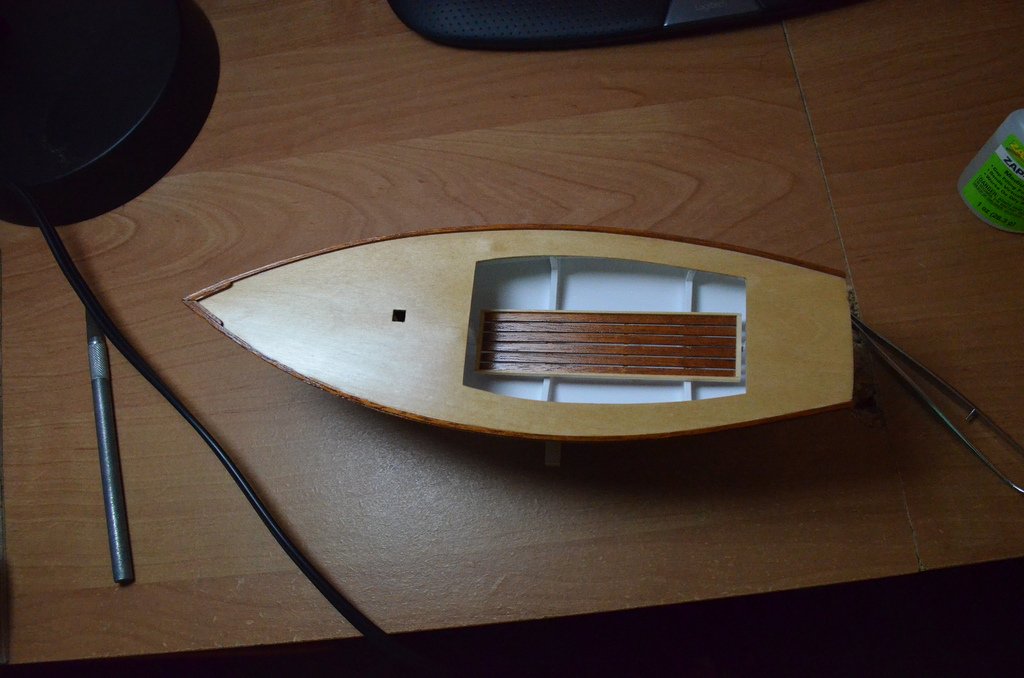
DSC_0150 by Batson Photography, on Flickr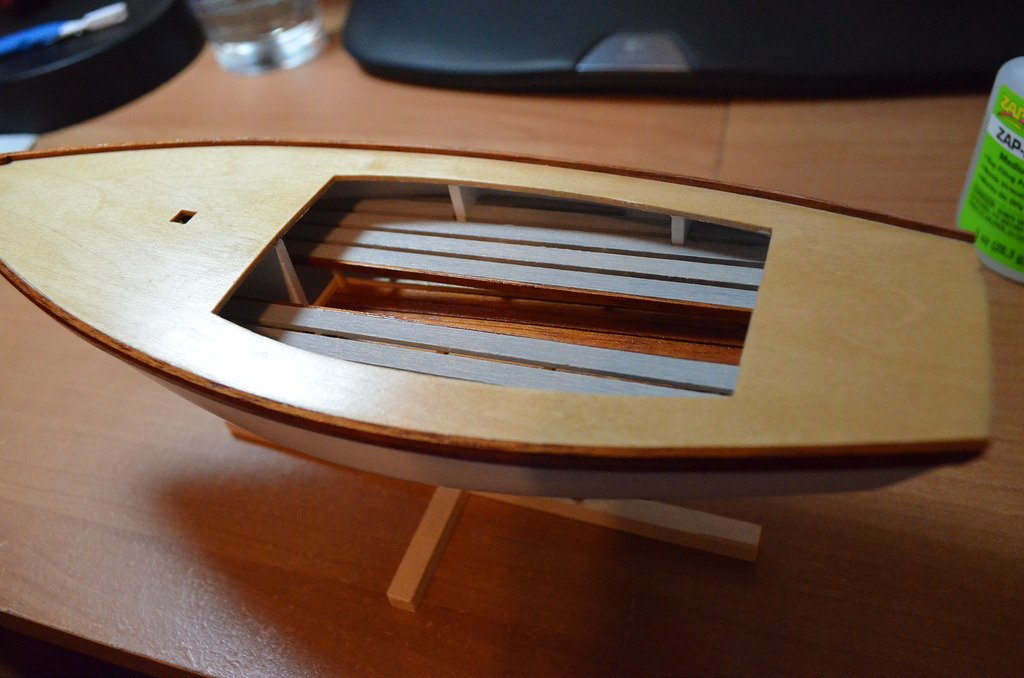
DSC_0153 by Batson Photography, on Flickr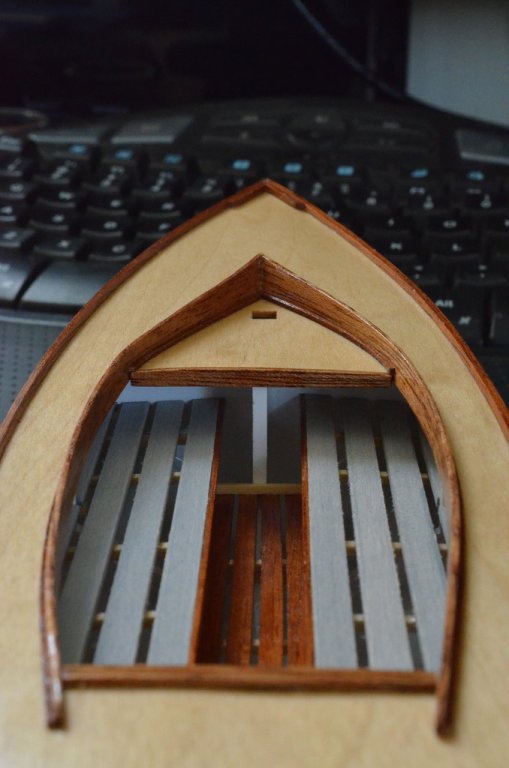
DSC_0154 by Batson Photography, on Flickr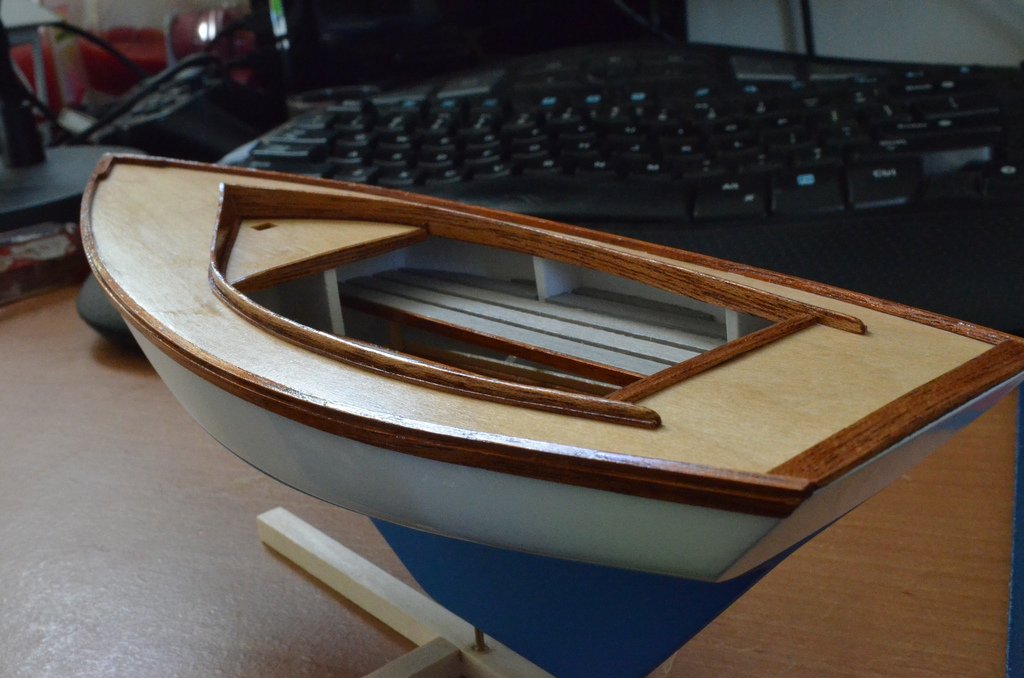
DSC_0155 by Batson Photography, on Flickr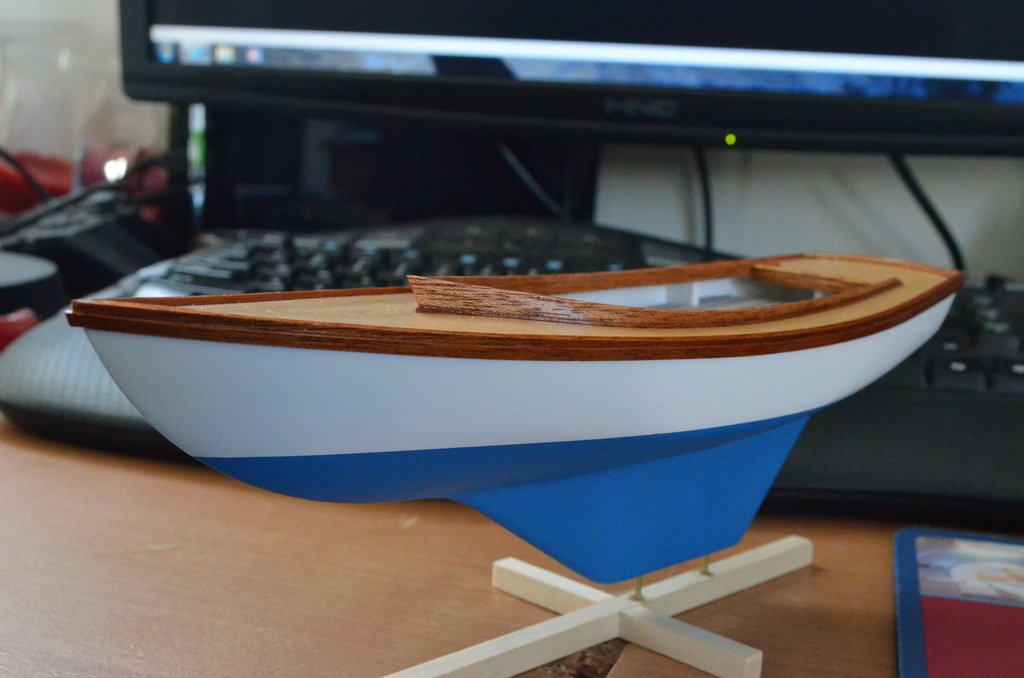
DSC_0156 by Batson Photography, on Flickr -
Beautiful Paint Job!
Thank you

I get overly fanatical about the finish of my models.
-
Finally made more progress. Working slowly as usual.
Achieved a nice smooth glossy finish on the white and then airbrushed the bottom.
DSC_0140 by Batson Photography, on Flickr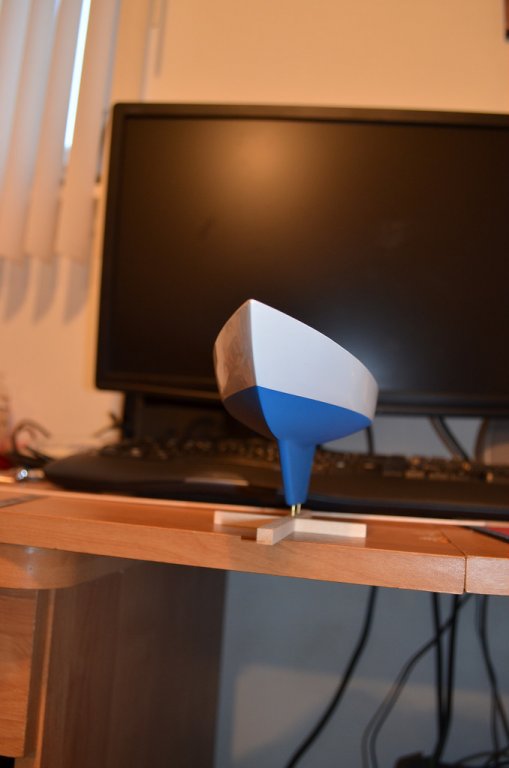
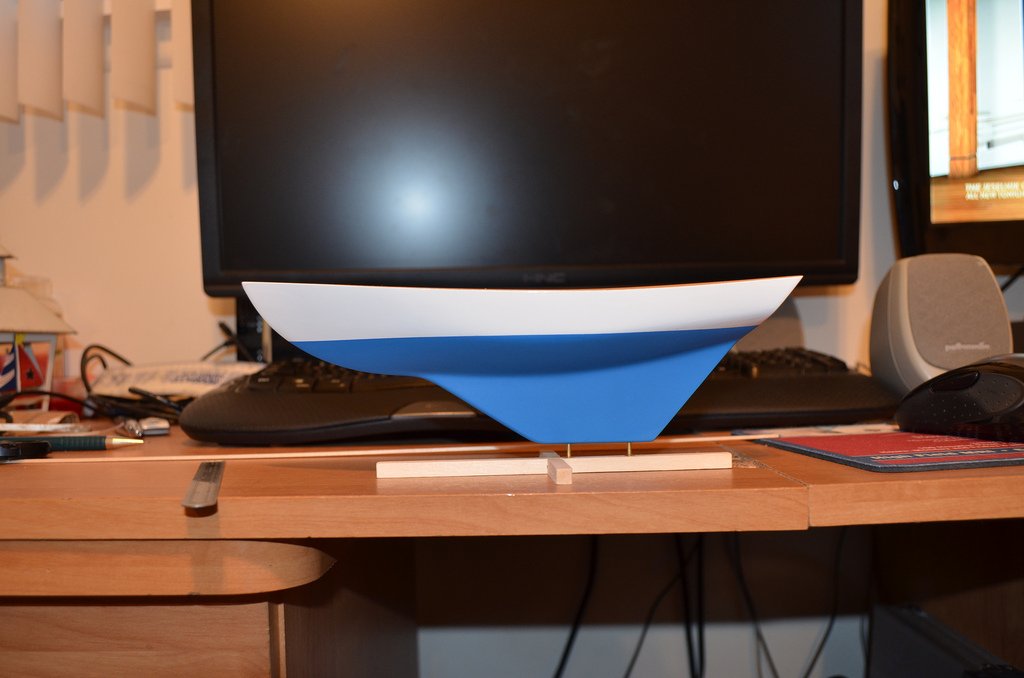
DSC_0141 by Batson Photography, on FlickrI had made the base from the suppied design. This is only to provide an upright means of working on it. I will be attaching the finished boat to a board and making a closed display case.
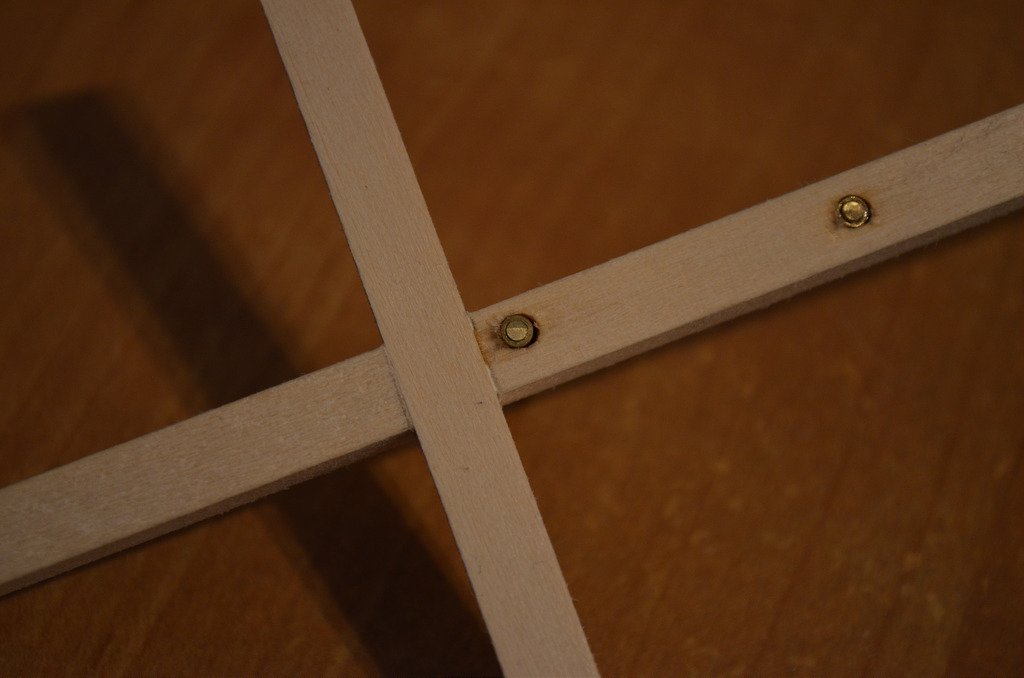
DSC_0142 by Batson Photography, on FlickrI had made the stand posts out of brass rod and tubing. The brass tube was glued to the stand and hull and the brass rod slid into it. This way i can remove the hull from the stand as many times as needed and i do not have to worry about ruining the keel and endges of the holes.
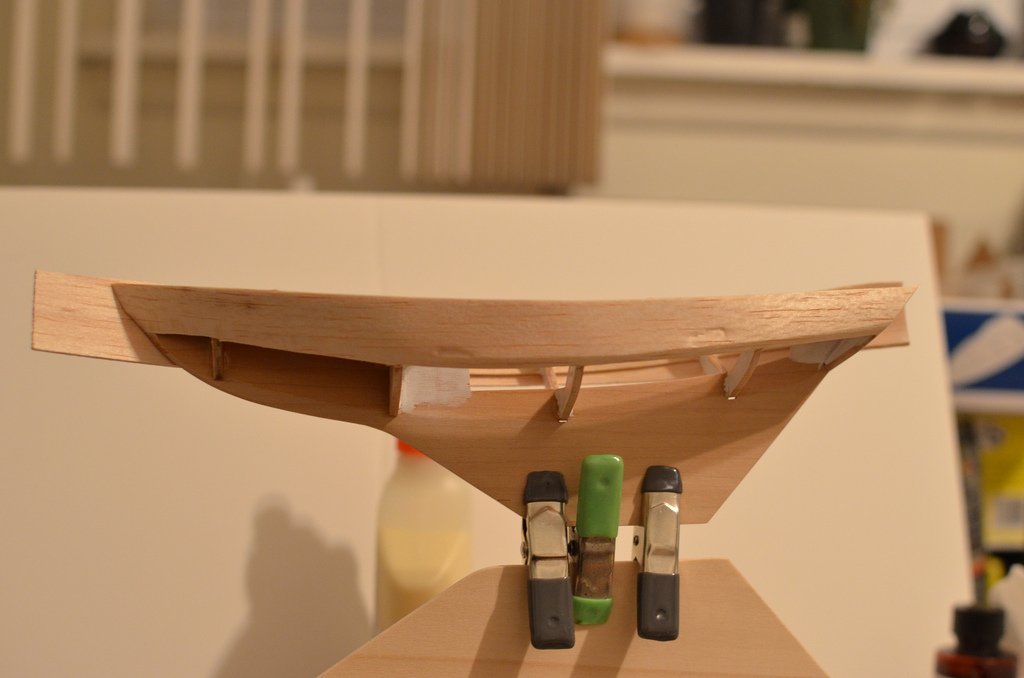
I made a template for the floor out of the floor from the kit.
DSC_0143 by Batson Photography, on Flickr
DSC_0144 by Batson Photography, on FlickrI built the mock up floor right over it. The finished floor will be mahogany planked.
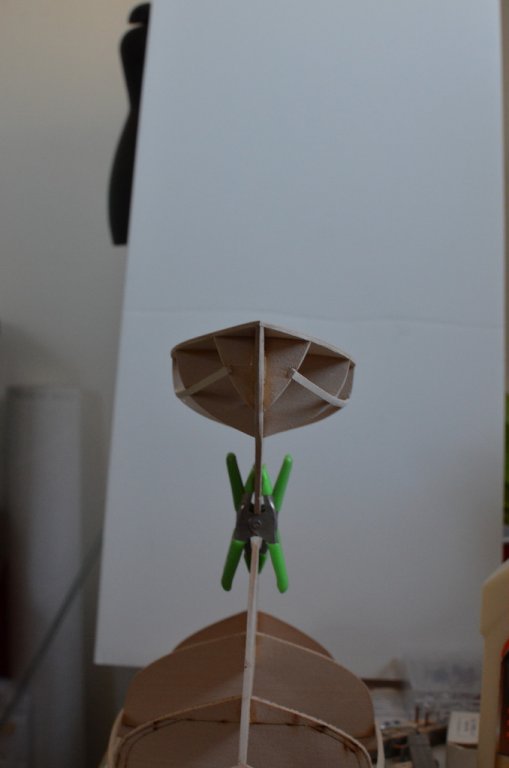
DSC_0145 by Batson Photography, on FlickrCurrently working on a template for the seats, constructed in similar fashion as the floor.
-
Looks good Andrew, I hope she likes it.
Thank you! She loves it so far, finally found a color she likes for the bottom paint. Just finished the, hopefully, last coat of white polyurethane. Once the hull if painted everything else should go fairly quick until I start rigging. This will be the first model I ever rigged sails on.
-
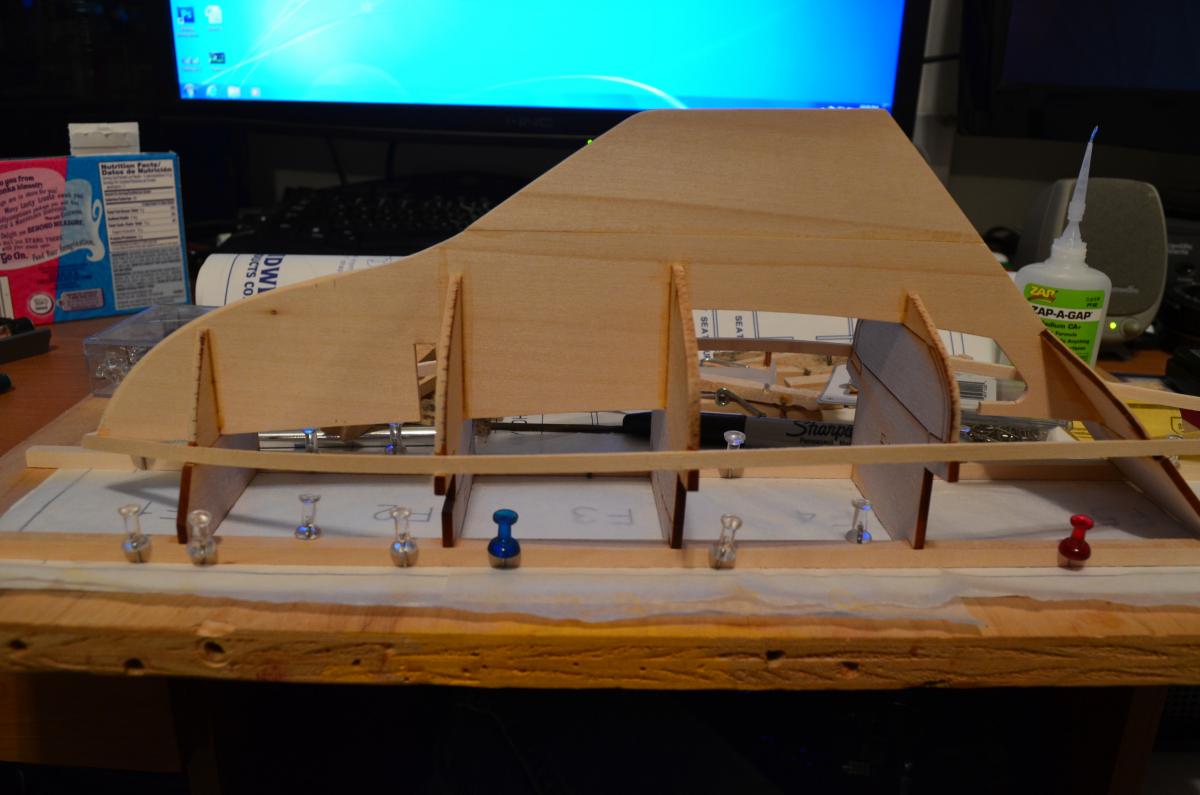
Started this build a while ago now and made slow progress while in class, finally have time to make a log and make more progress. I am building this kit as a gift to my gf, the John Alden Sloop was what I was originally going build, but it is far too big for where she wants to put it. That build has been sidelined for now and will be continued once I get to rigging this model.
The Sakonnet daysailer is based off a John Alden design and I have found archived plans that very closely mirror the hull in the kit.
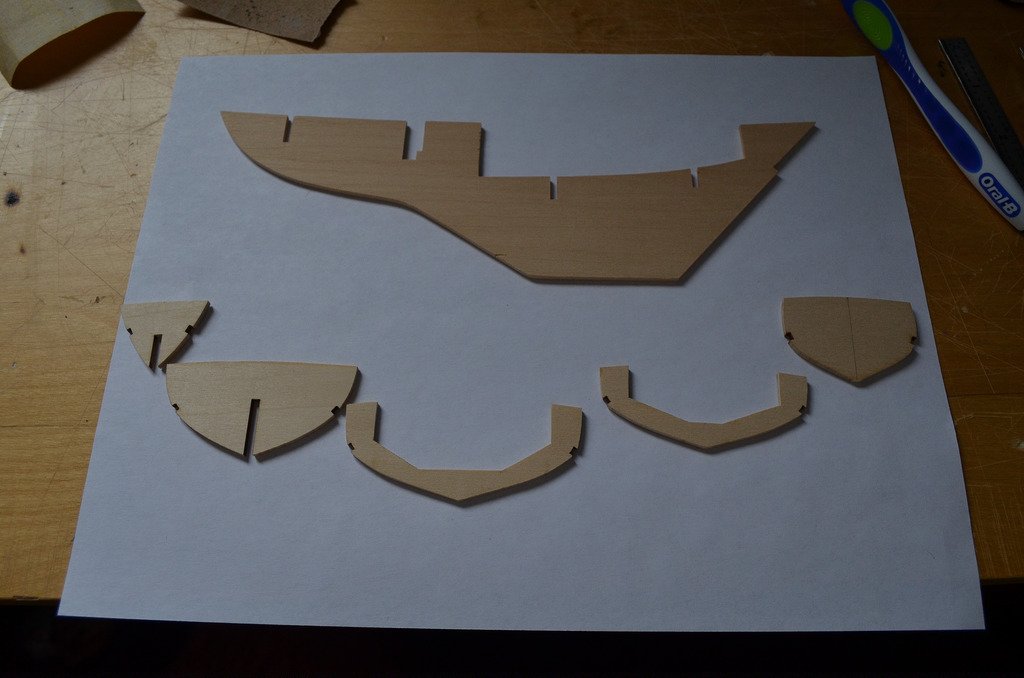
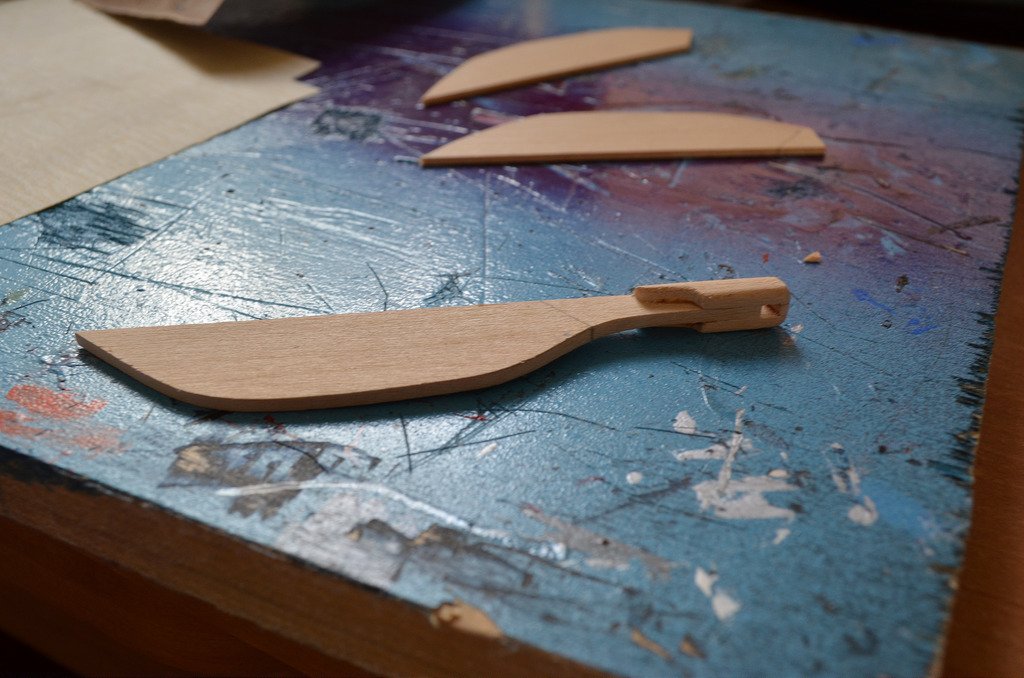
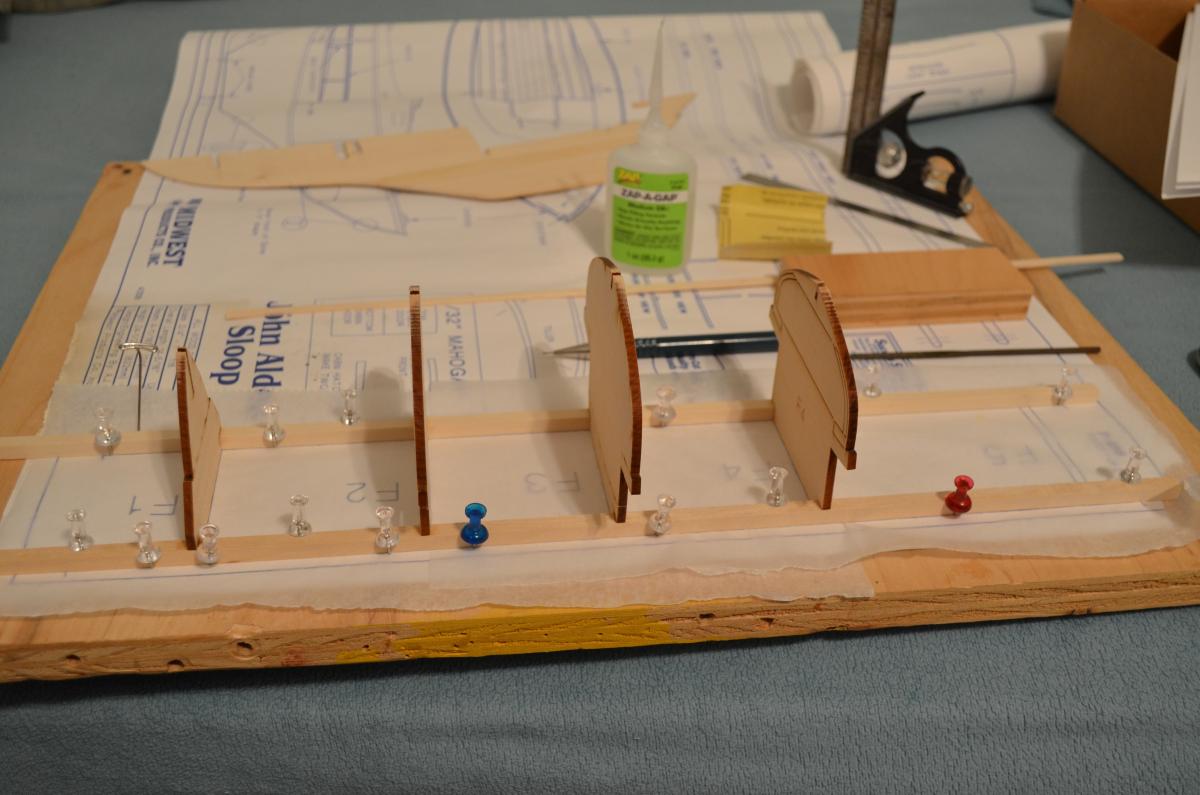
This kit is exceptionally small with simple lines and detail. Here the frames and keel are laid out on an 8.5”x11” piece of paper
Frames and keel prepped by Batson Photography, on FlickrThe frames and keel glued in place
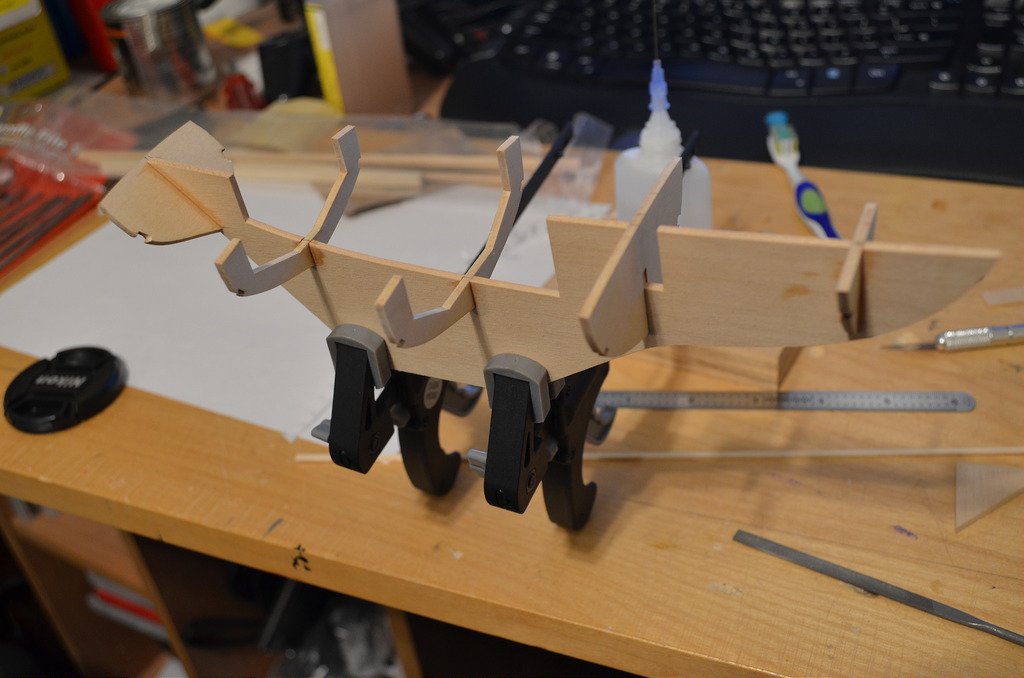
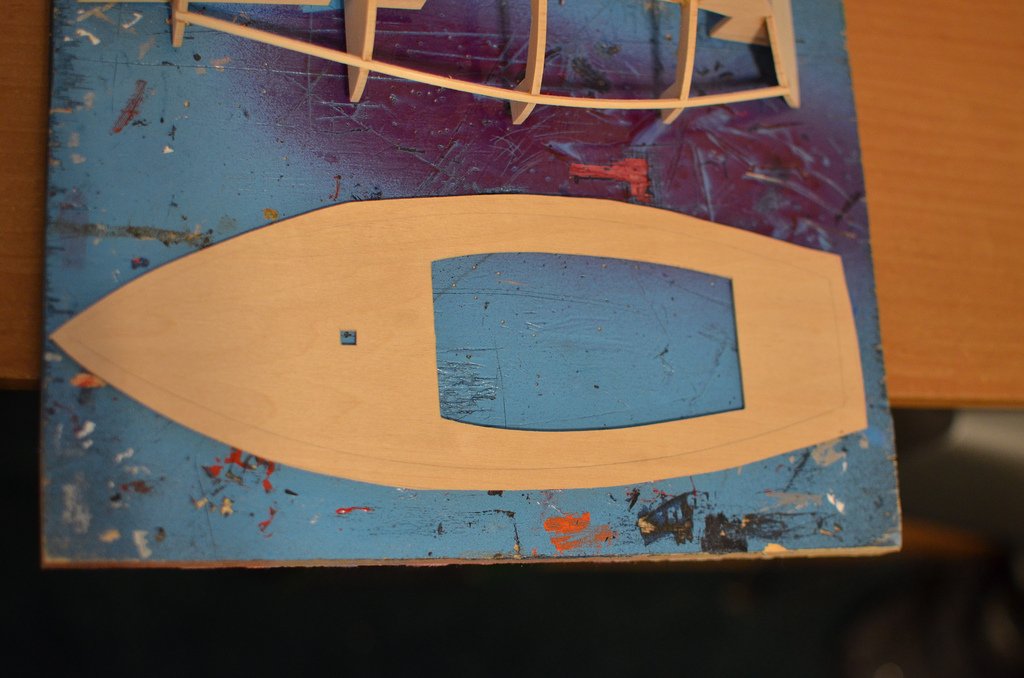
Frame and keel assembly by Batson Photography, on FlickrIf you look at the framed hull at the top of the picture, you can see I added the chine rail before the deck. I had read the directions so many times I had a false confidence and proceeded with gluing them in place without referencing the directions. By doing so the pre-cut deck did not line up because I had created a slight twist in the hull with the chines. After removing the chine, the keel straightened out, I glued the deck and replaced the chine. This worked out to my benefit as the included deck was not a uniform color so I cut the deck from a sheet of bass wood with a more uniform color and nicer grain pattern.
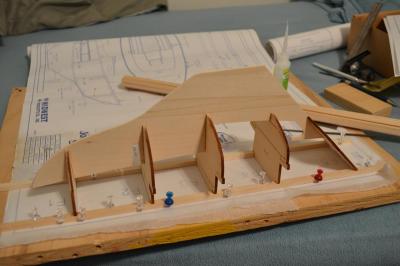
new deck by Batson Photography, on FlickrThe Daysailer with its big brother on the building board
framed hull and deck 2 by Batson Photography, on Flickr
framed hull and deck by Batson Photography, on FlickrPort side planked and trimmed, I found the planking slightly difficult as the sheets are fairly think for being bent in such a small area even after steaming.
Port side planked and trimmed by Batson Photography, on Flickr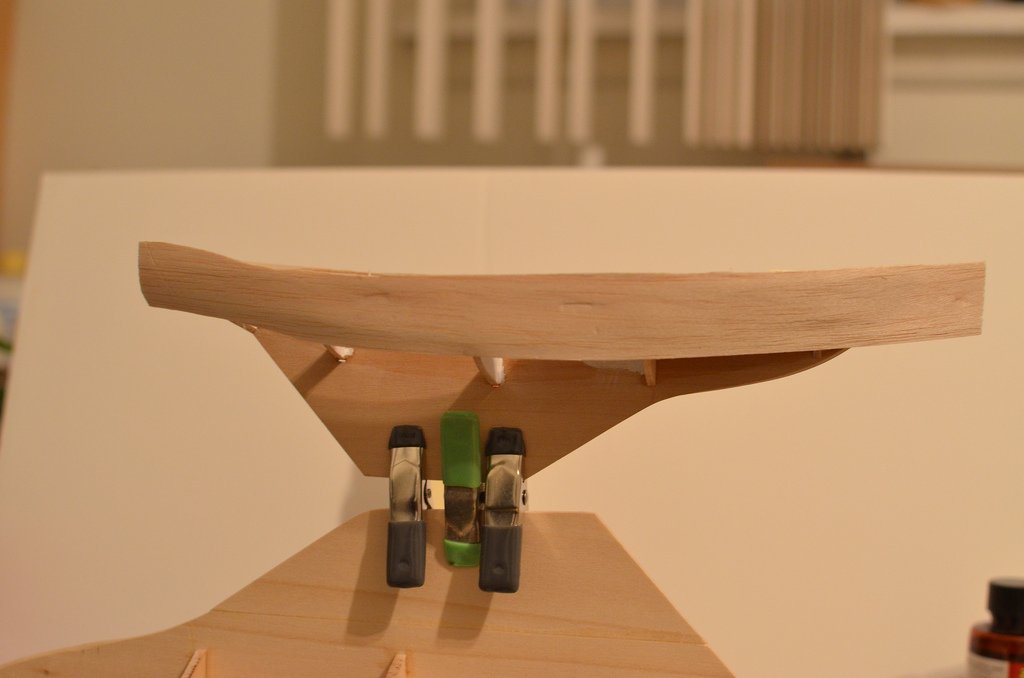
Starboard side plank by Batson Photography, on FlickrHull fully planked, sanded and filled, and making the keel thicker. The keel had developed a slight curve after planking the bottom of the hull from steaming the balsa sheet. To correct this I glued a piece of 1/32" basswood on each side of the keel. the keel look much more proportionate being thicker.
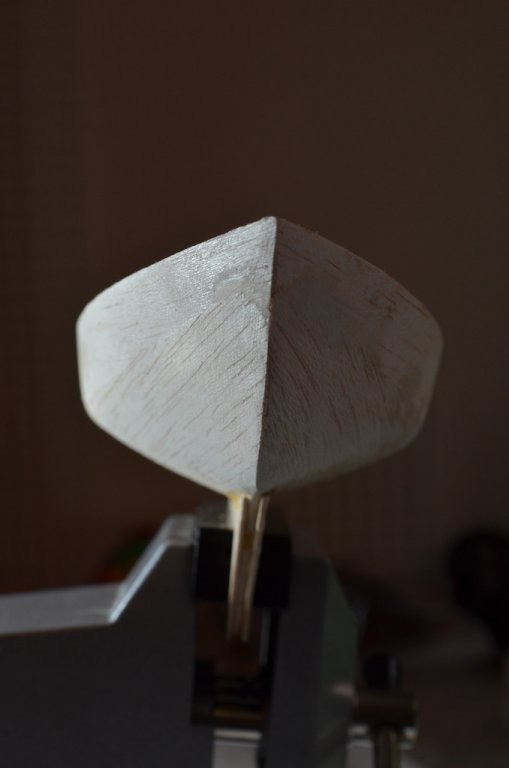
Hull by Batson Photography, on FlickrIn order to keep the seem between the keel and rudder smooth I also made the rudder thicker below the waterline.
rudder as supplied by Batson Photography, on Flickr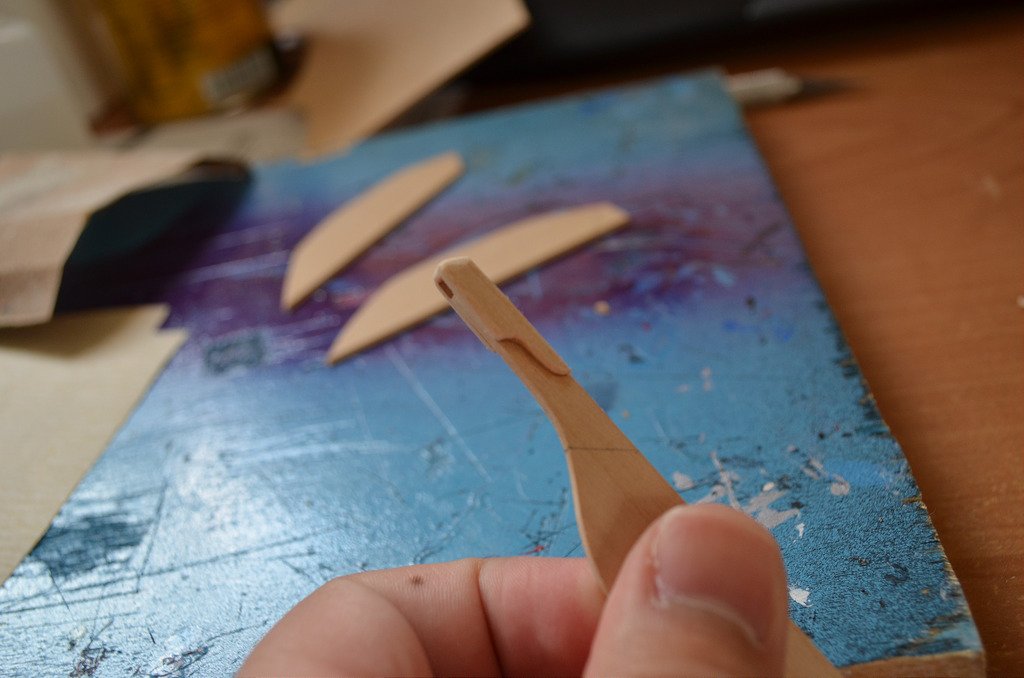
rudder as supplied 2 by Batson Photography, on Flickr
thicker rudder 2 by Batson Photography, on Flickr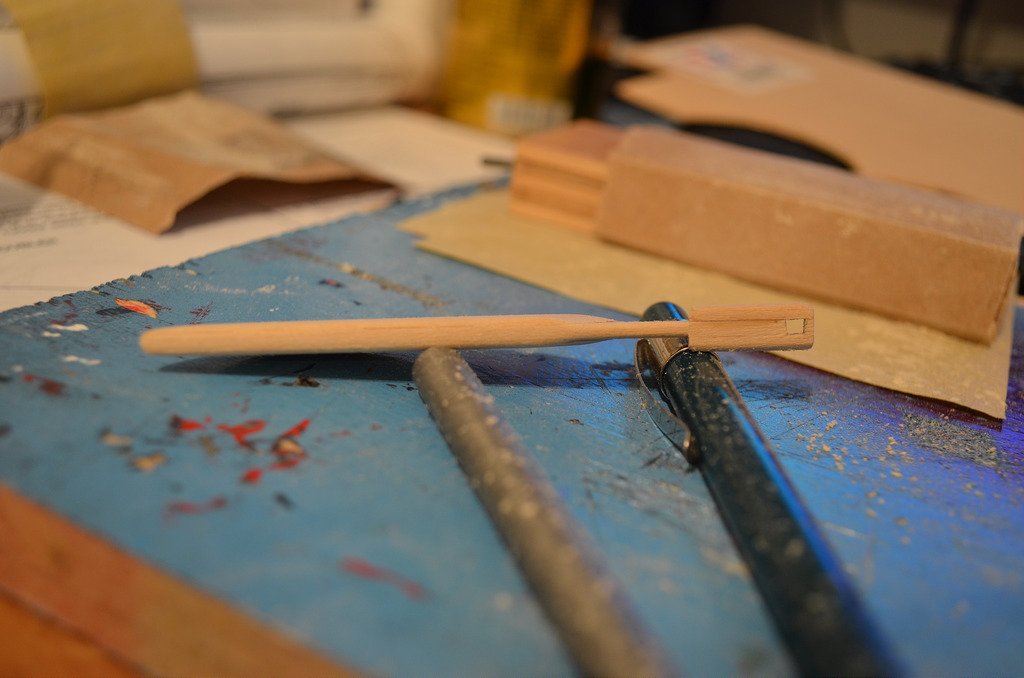
Thicker rudder by Batson Photography, on FlickrNow I have put a coat of primer on the hull and rudder and sanded it. It needs one more pass of filler and I will finally get to painting.
-
Hi Andrew!
It's great to see another Alden sloop a-building. Really brings back memories.
Your model building skills definitely look more than equal to the task, but if you have any questions about the sloop, I'm happy to help. I should have access to my old photos of the build itself, soon. (They've been trapped on a derelict hard drive). I wasn't planning on reconstructing the build log, but I can make the photos available to you if you want them.
Good luck!
Ron
Hey Ron, glad to see you are following the log. I just need to remember to pace myself and test fit everything 3 times. I catch myself starting to rush every once and a while with anticipation of getting to the end result.
I am curious what size rigging line you used as well as the quage of brass used for the rudder hinges (or was it extra kit wire?)
If you ever get access to the hard drive i would love to see pictures of the step by steps of the smaller details you had in the build log. Like the rudder hinges, block and tackle, and gaff fork. But no rush as it will be quite some time before I am even thinking about those steps.
Hello Andrew,
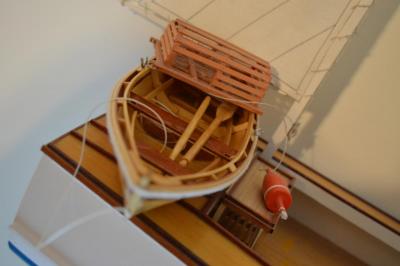
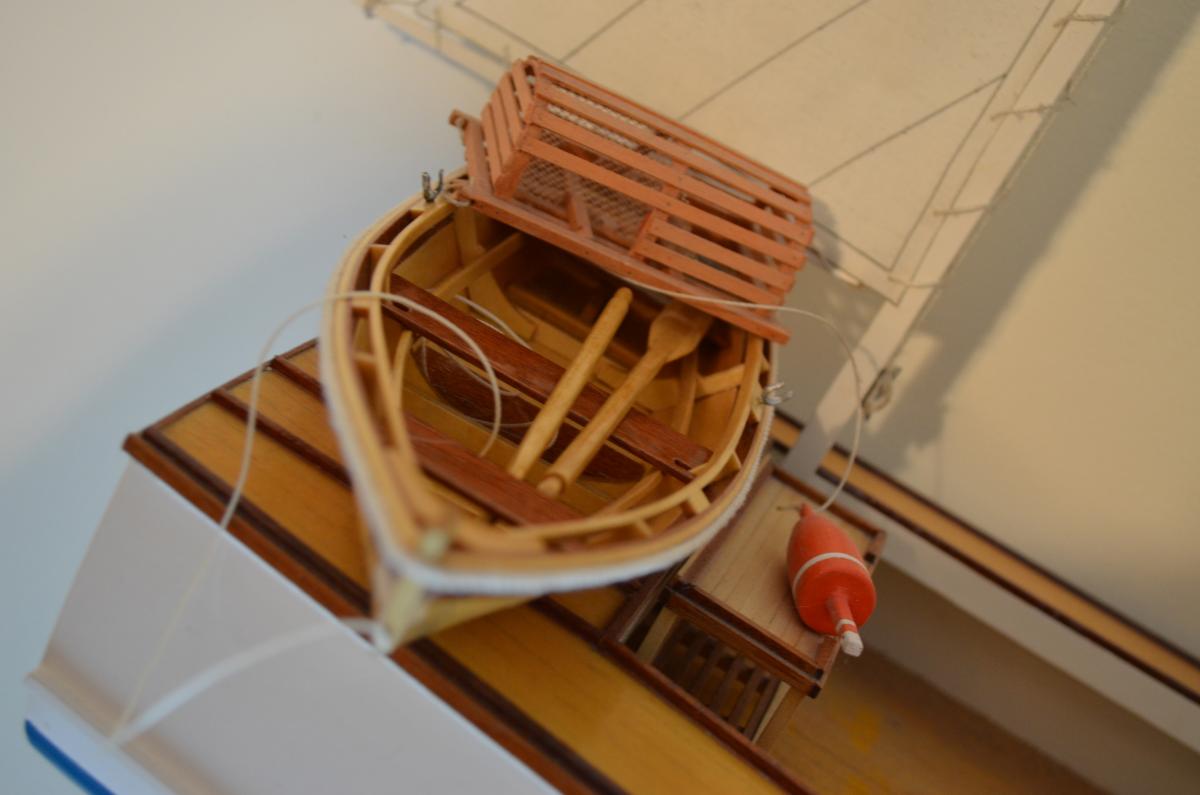
Welcome to MSW. I love the skiff with the lobster pot aboard. Nice work.
Bob
Thanks
Took way to many coats of polyurethane to get an even glossy finish.Hello Andrew, and a warm welcome to MSW from 'Down Under'.
Looking forward to following the build of your sloop!
John
Thank you, bear with me as progress will be slow. Between work ,school, and commuting between them its hard to find time to make substantial progress on my projects.
-
Hello everyone,
Been lingering on here for a while and it inspired me to get back into building again.
I'll start with a quick introduction, I am in my third year of college studying Naval Achitecture at SUNY Maritime College at fort schuyler. I have been building models my entire life off and on, started out with building plastic models with my dad, then wood boats, rc planes, and now back to boats. When I was 13-14 I had built the Midwest RC Lobster Boat, then I started a constructo HMS Bounty (story for another time), and last year i had built the Midwest Dinghy kit.

 My girlfriend and I usually make each other something for birthdays and valentines day (specially if either of us dont want something specific) and since she has been on a nautical kick lately I figured I would build here a small sailboat model. Having seen Ron's (rlb) excelent finished John Alden Sloop, I figured this would be a great kit for the task. After starting it I realized it is actually quite large, specially the height if the mast. So instead I will be building the Sakonnet Daysailer as a gift and keeping the John Alden Sloop for myself and also working on the peterboro canoe (will start logs for these soon). I intend to modify this kit to be more accurate to scale, using many of the techniques rlb had used. Instead of painting the bottom I am thinking of staining the planking below the waterline in place of bottom paint.
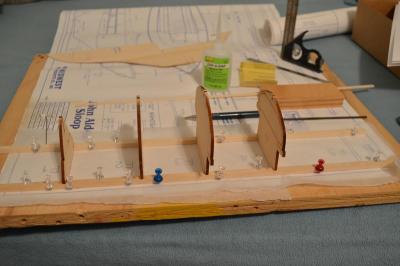
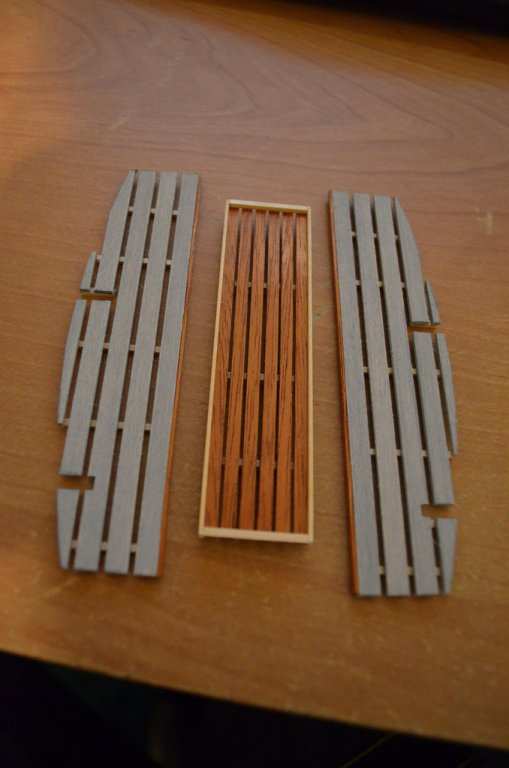
 arranged the planks alternating light and dark for both sides of the hull
 Sheer Strake glued on, need to line out the hull again to double check my measurements.


No modern materials for sails?
in Masting, rigging and sails
Posted
In reference to the drafting material- Are you referring to Starched Linen?
My Professor in college always used to tell us how his mother would wash the starched linen cut offs from his fathers office and make doll clothes for his sister. His father was a well regarded Naval Architect in the early 1900's. It has a very fine weave that seems appropriate for most ship models. From a quick google search it looks like you can still find starched linen available through book making suppliers (listed as starched linen), though i do not know if this is a modern substitute material and not the real thing we are talking about.