fmartins
-
Posts
82 -
Joined
-
Last visited
Content Type
Profiles
Forums
Gallery
Events
Everything posted by fmartins
-

Royal Louis by fmartins - multi-media
fmartins replied to fmartins's topic in - Build logs for subjects built 1751 - 1800
Oh... the wales would be painted black later to match of course... -
Royal Louis by fmartins - multi-media
fmartins replied to fmartins's topic in - Build logs for subjects built 1751 - 1800
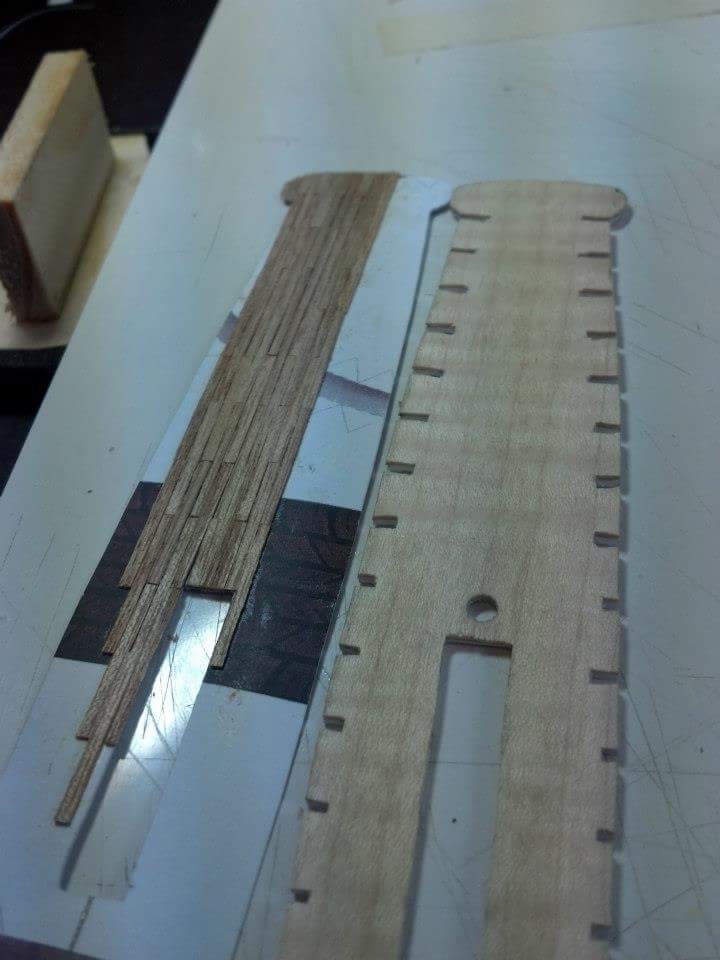
I was trying a few strips of veneer.. I have this beautiful yellowish wood I was thinking about using. Here I was seeing if it would look good... And the color kinda matches to color on the Parisian model... What's your opinion on that?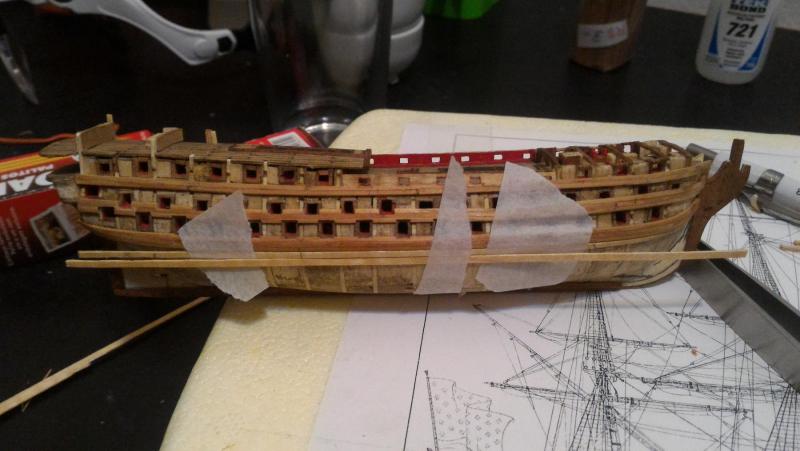

-
Royal Louis by fmartins - multi-media
fmartins replied to fmartins's topic in - Build logs for subjects built 1751 - 1800
Hm... I'll consider that... the wales I made were 1x1 mm cedar strips... I was also thinking about some wood veneer I have here... It is 0.6 mm or so... It would give a slight difference between wales and planks... but on the other hand, not much material left for sanding... What do you think? -
Royal Louis by fmartins - multi-media
fmartins replied to fmartins's topic in - Build logs for subjects built 1751 - 1800
Soon I'll have to start planning for the dreaded planking phase... ... anyone tried it at this scale? advice? please jump in no need to be shy... -
Royal Louis by fmartins - multi-media
fmartins replied to fmartins's topic in - Build logs for subjects built 1751 - 1800
Now, the same thing on the other side... Checking for symmetry... Glued... Checking again... Looks good...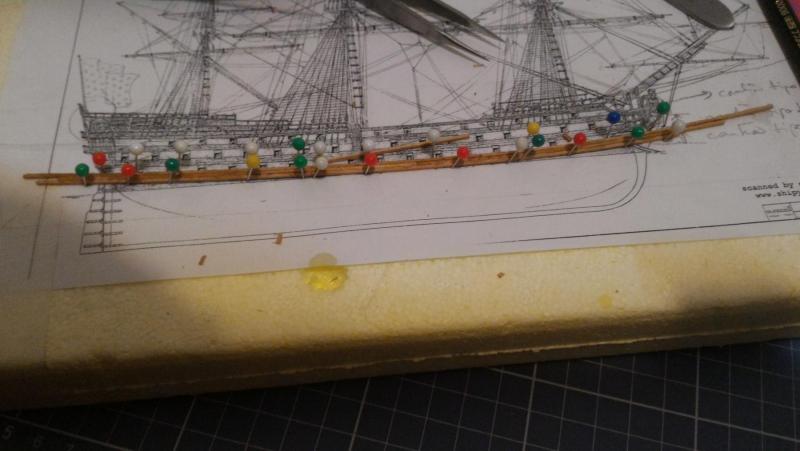

-
PRINS WILLEM by juzek
fmartins replied to juzek's topic in - Build logs for subjects built 1501 - 1750
I have a question... do you think you method of hull building would work in a smaller scale (20~40 cm hull size)? Do you have more pics on the "shape" preparations and fairing? I'm a beginner and I'm reaaly interested in this different construction method! -
Hi Mark! I'm late to your log, but I'm happy I took the time to read the whole build log from the start. This has been a masterclass for me, since I had no idea of the complexity of a plank on frame model. I wish I could do something like this... I really enjoy your detail-oriented spirit. She's just beautiful, no other words suffice. Congrats!!! I'll keep following in the back of the room, just taking notes to myself...
-
Drakar by cabrapente - FINISHED
fmartins replied to cabrapente's topic in - Subjects built Up to and including 1500 AD
Do you have a link for those plans... your ship is really beautiful! What is the hull size in cm? Congrats! -
Royal Louis by fmartins - multi-media
fmartins replied to fmartins's topic in - Build logs for subjects built 1751 - 1800
I couldn't agree more! Having fun is the essential thing in this and in any other hobby... Take that away and what else is there? -
Royal Louis by fmartins - multi-media
fmartins replied to fmartins's topic in - Build logs for subjects built 1751 - 1800
There's a ton of stuff that will be left out of scale. Without proper tools and materials there's only so much one can achieve. But since I just started this for kicks and giggles I'm kinda satisfied. If I could go back there's also a ton of stuff I'd have done differently, but that's ok. I'm having so much fun building it... I'm atually curious to see how it is going to turn out in the end... Thanks for dropping by! -
Royal Louis by fmartins - multi-media
fmartins replied to fmartins's topic in - Build logs for subjects built 1751 - 1800
Oh, and I forgot.... I promised before a picture of the carriages under the deck... It will be barely visible in the end, but I know it's there... and now you guys too So far so good..

-
Royal Louis by fmartins - multi-media
fmartins replied to fmartins's topic in - Build logs for subjects built 1751 - 1800
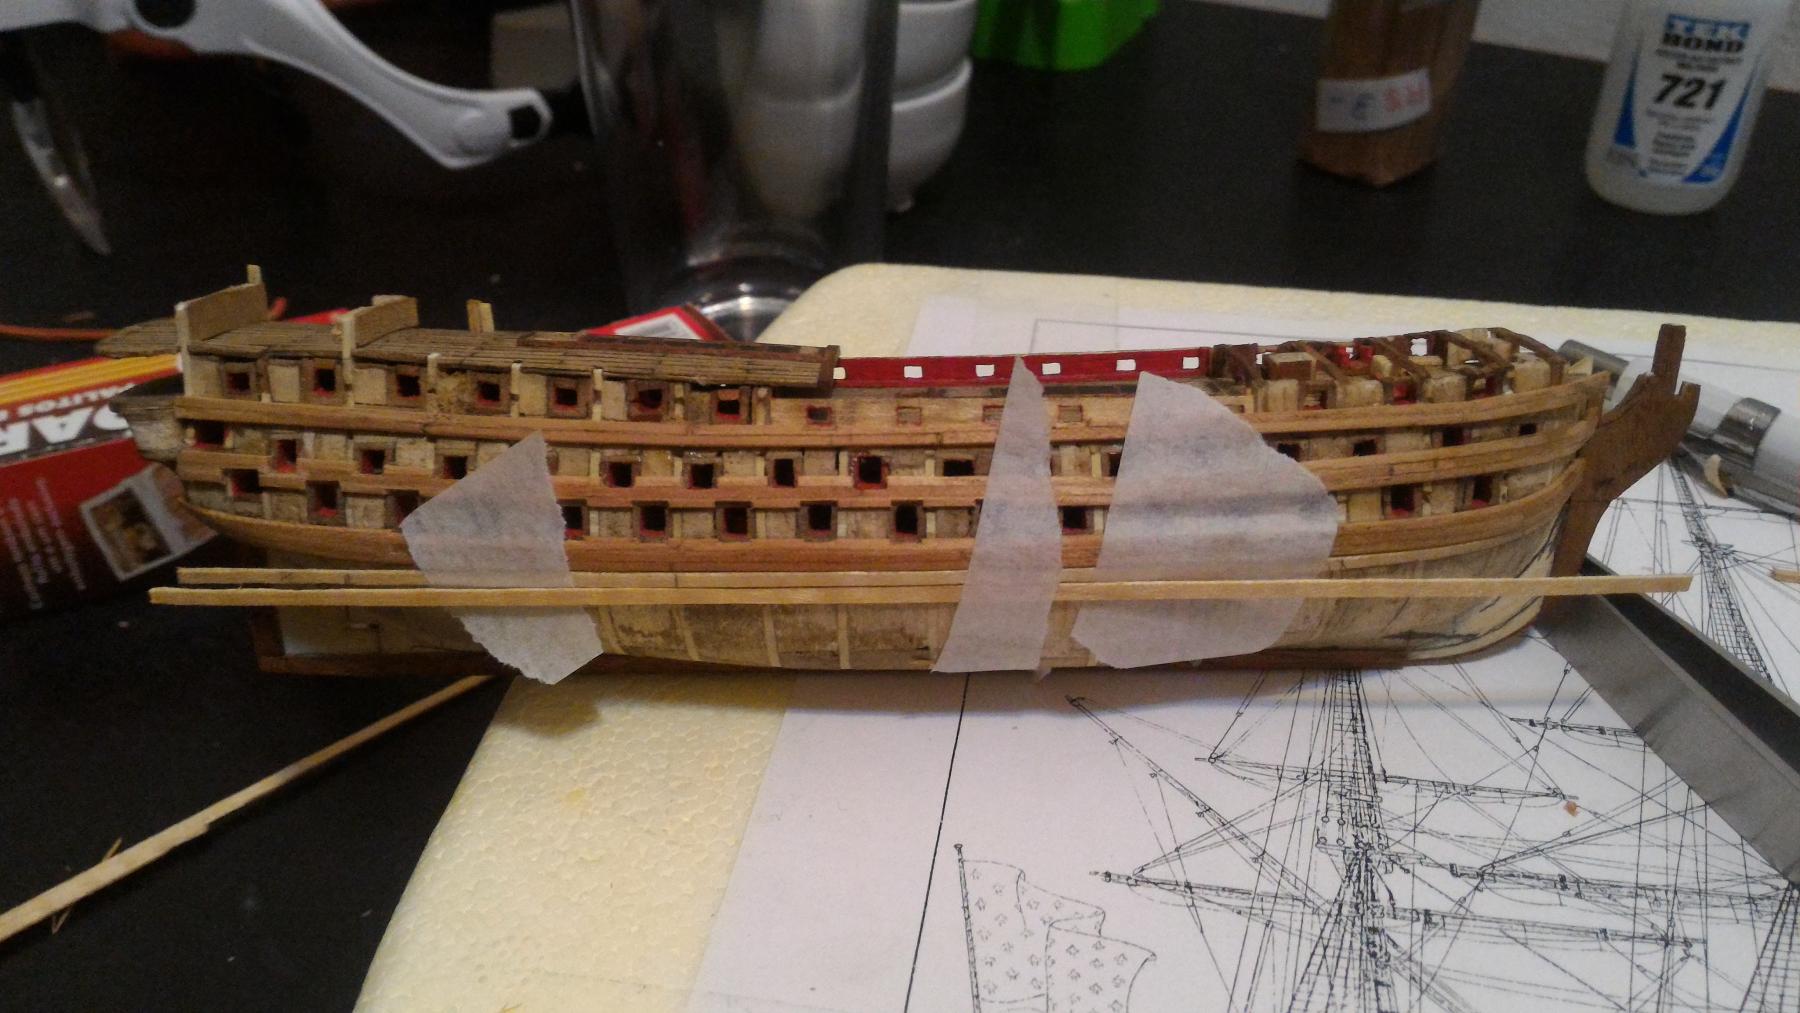
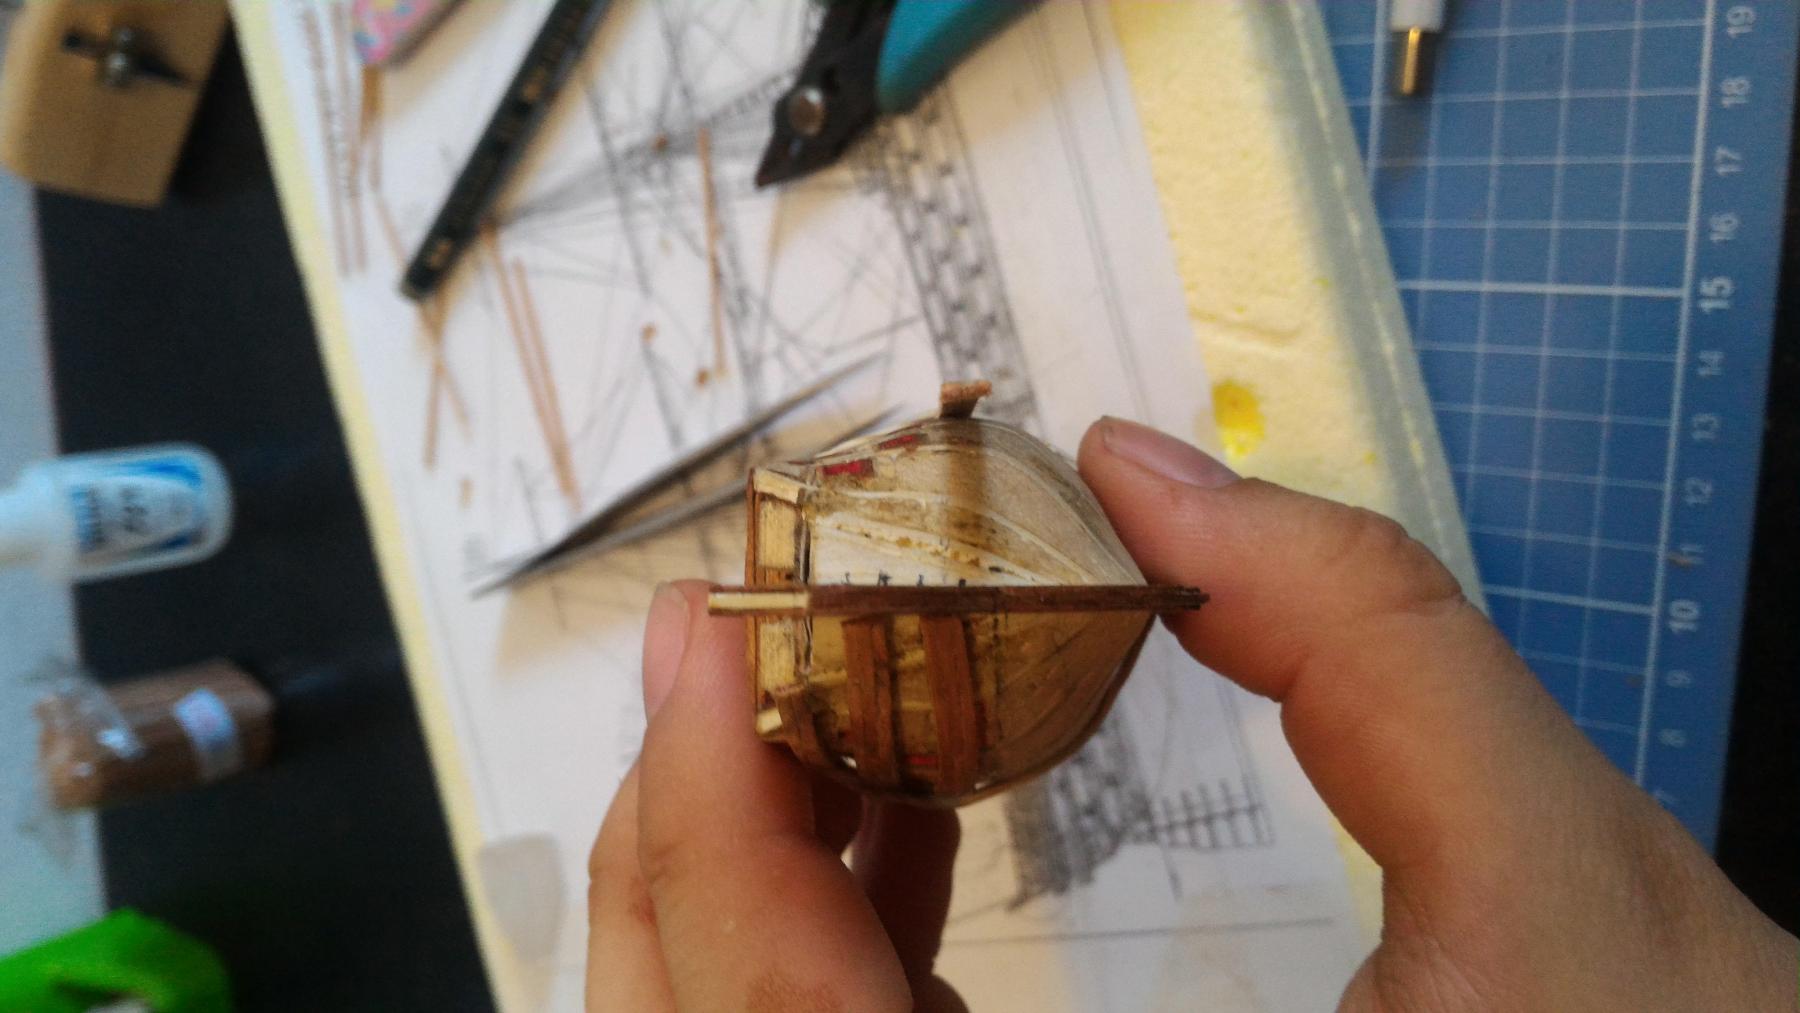
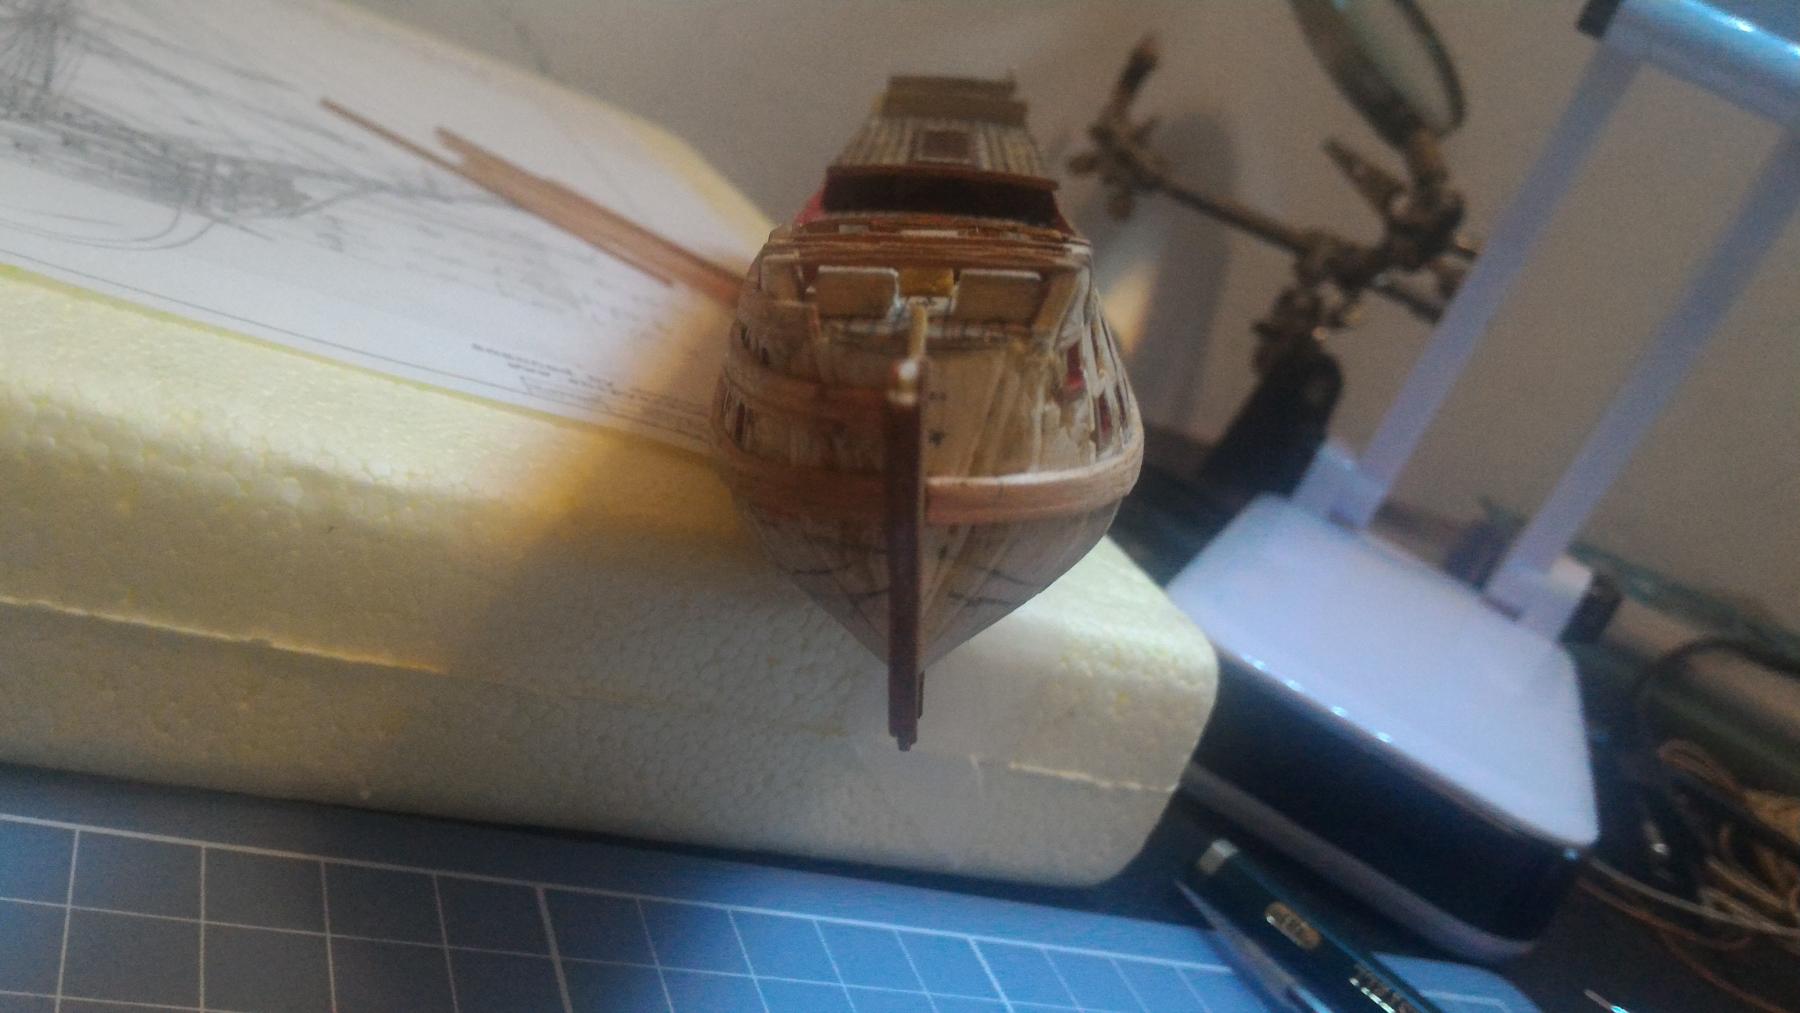
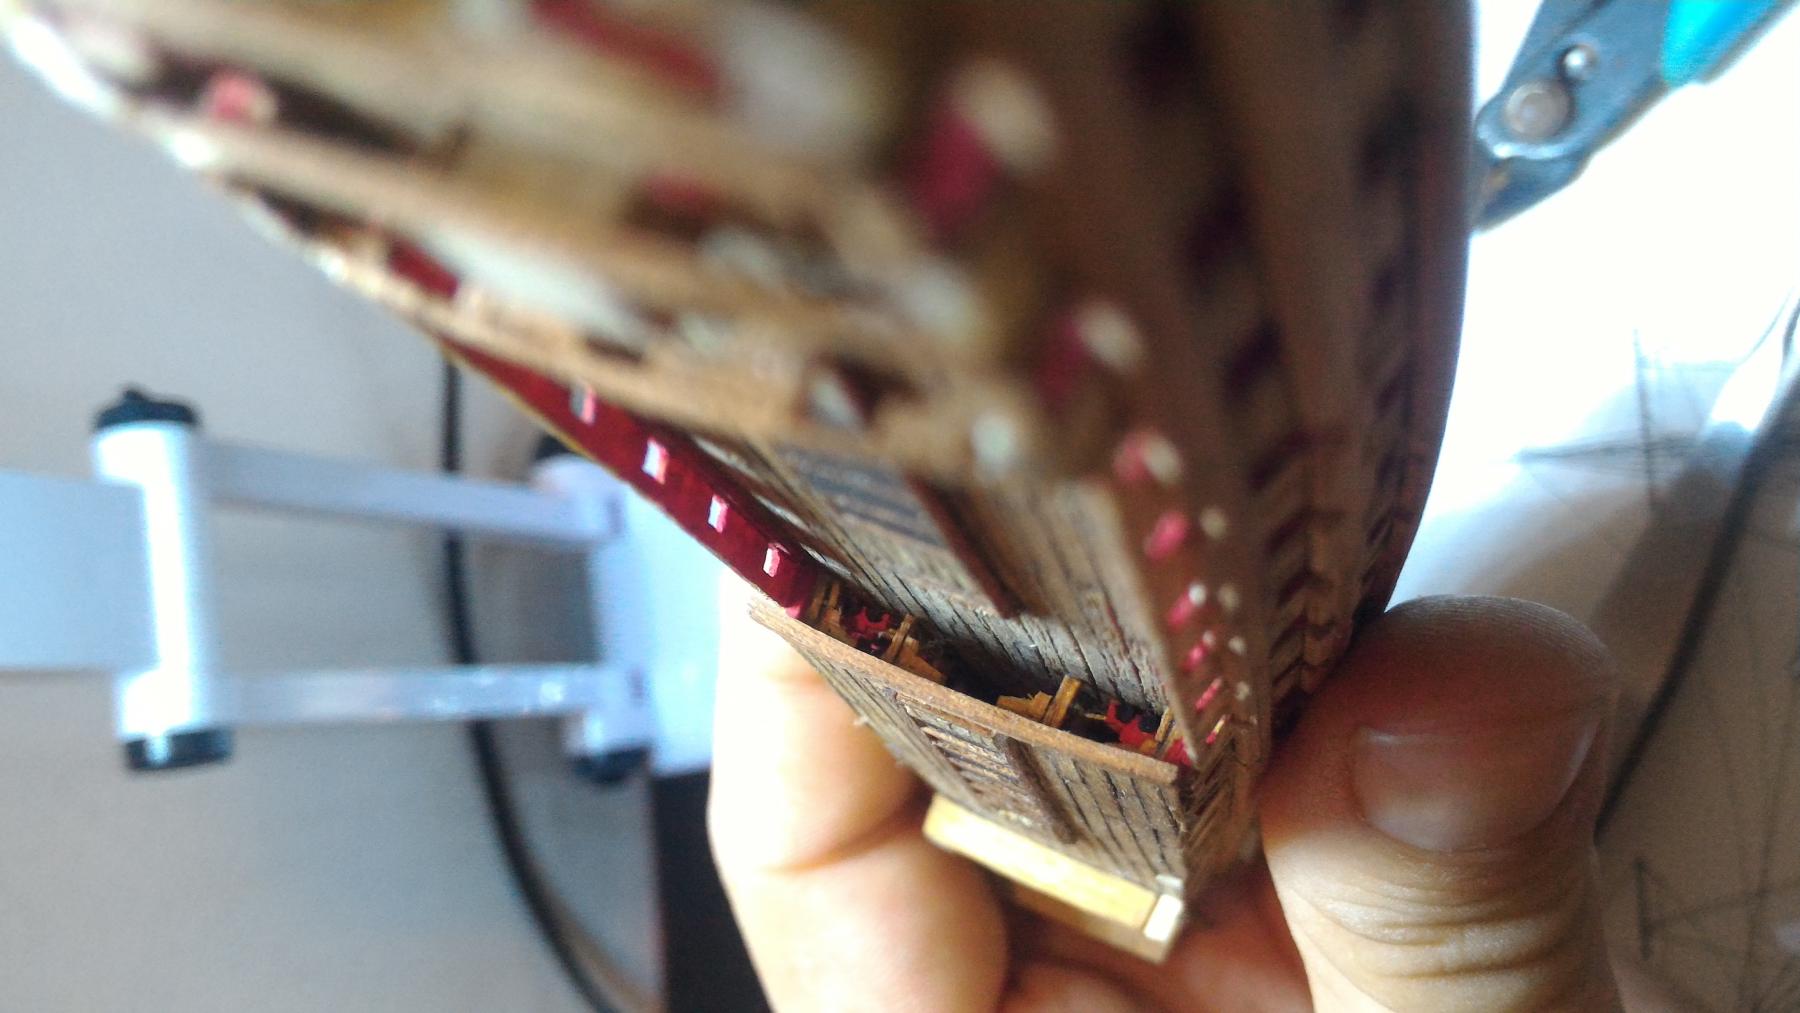
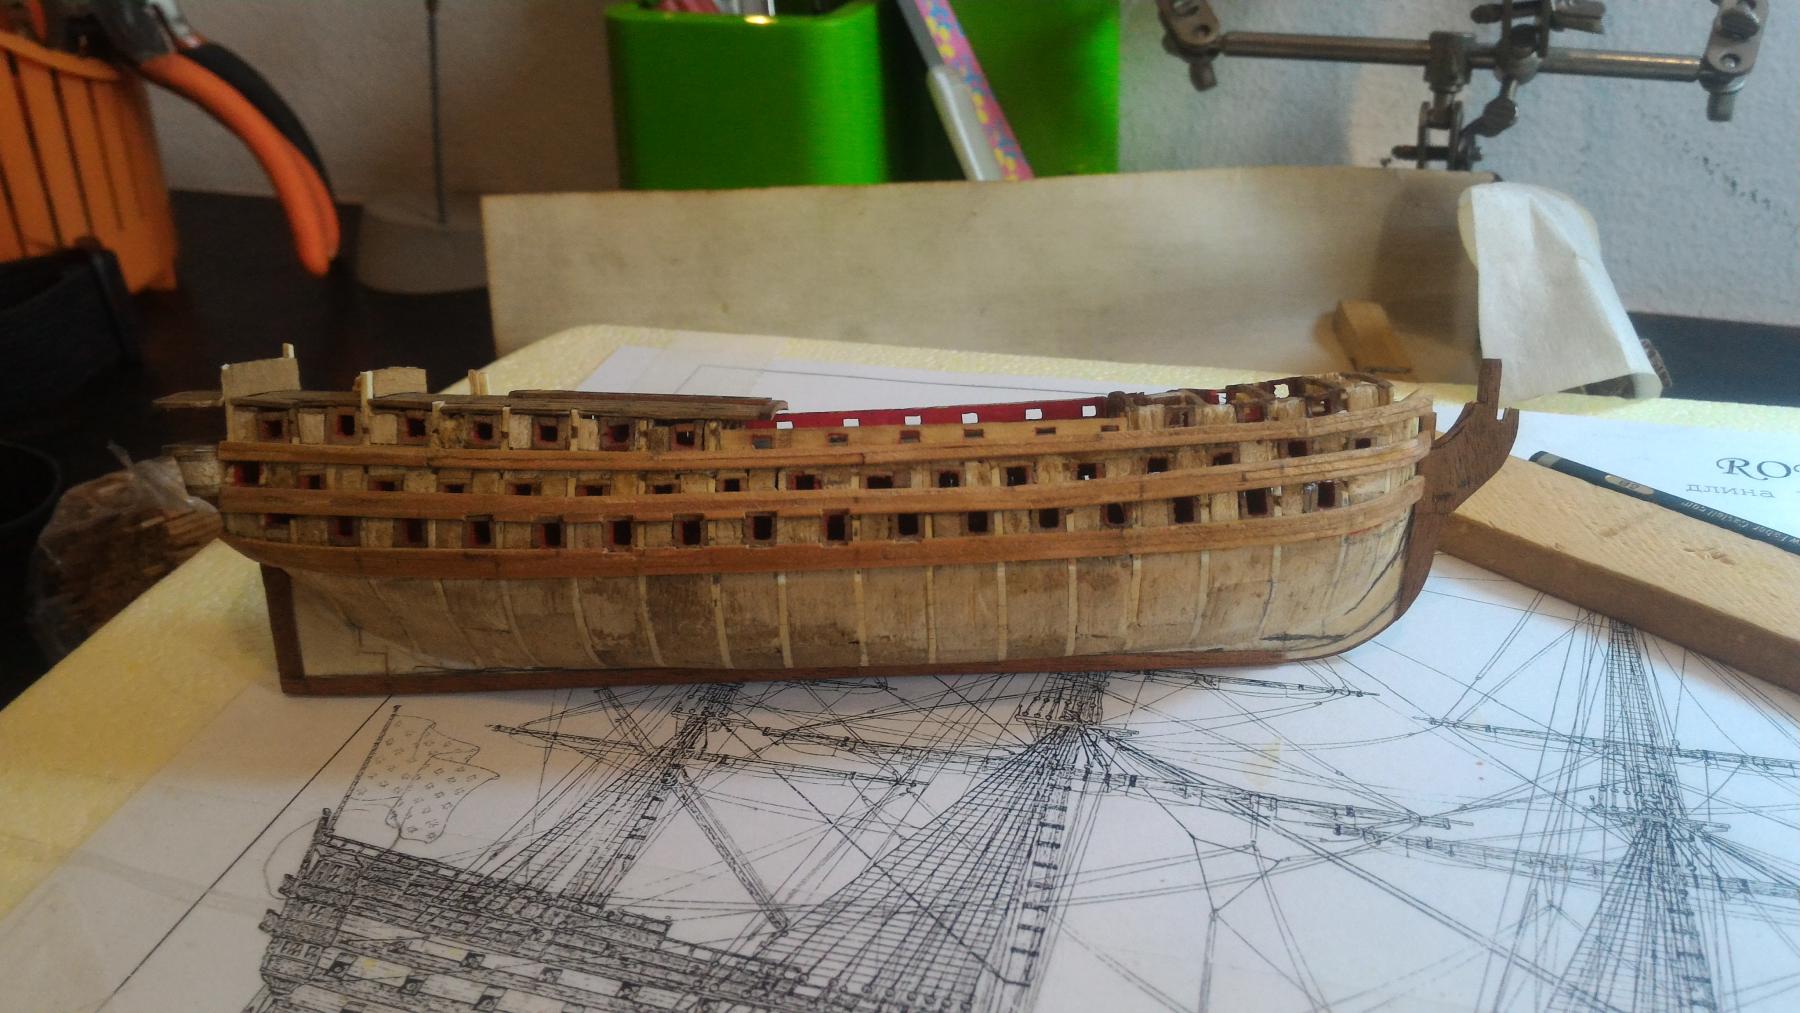
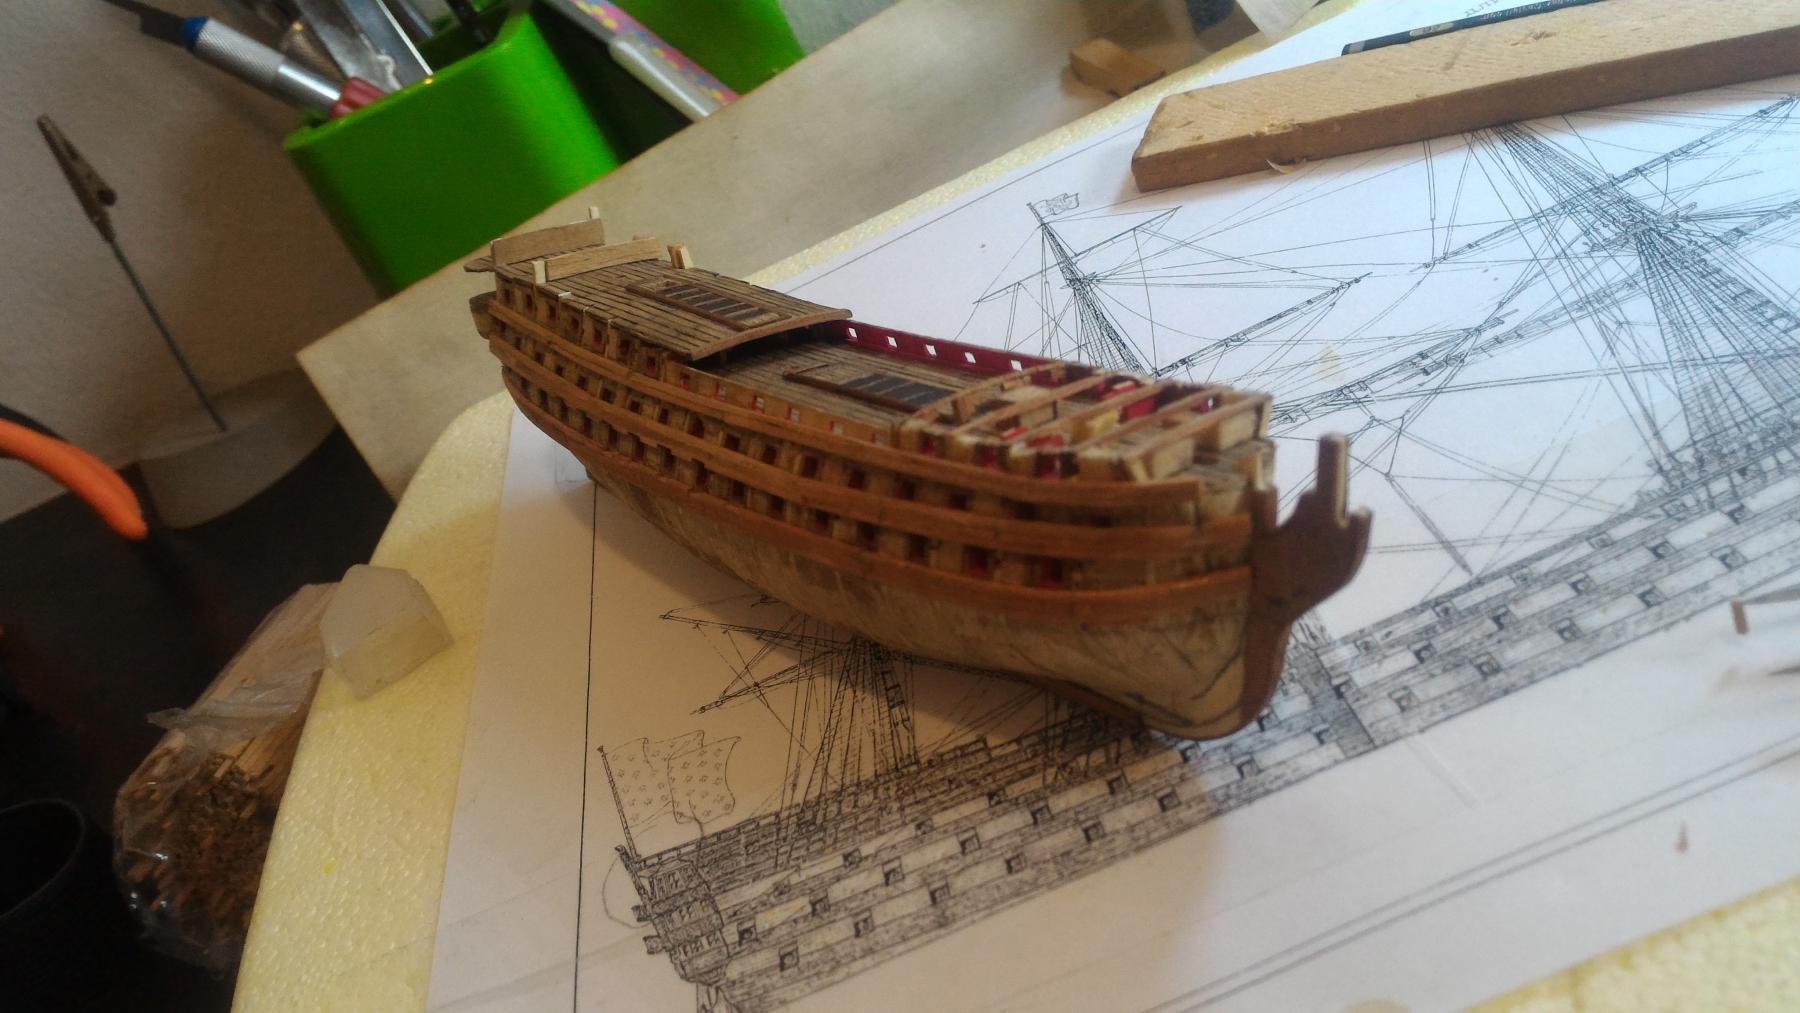
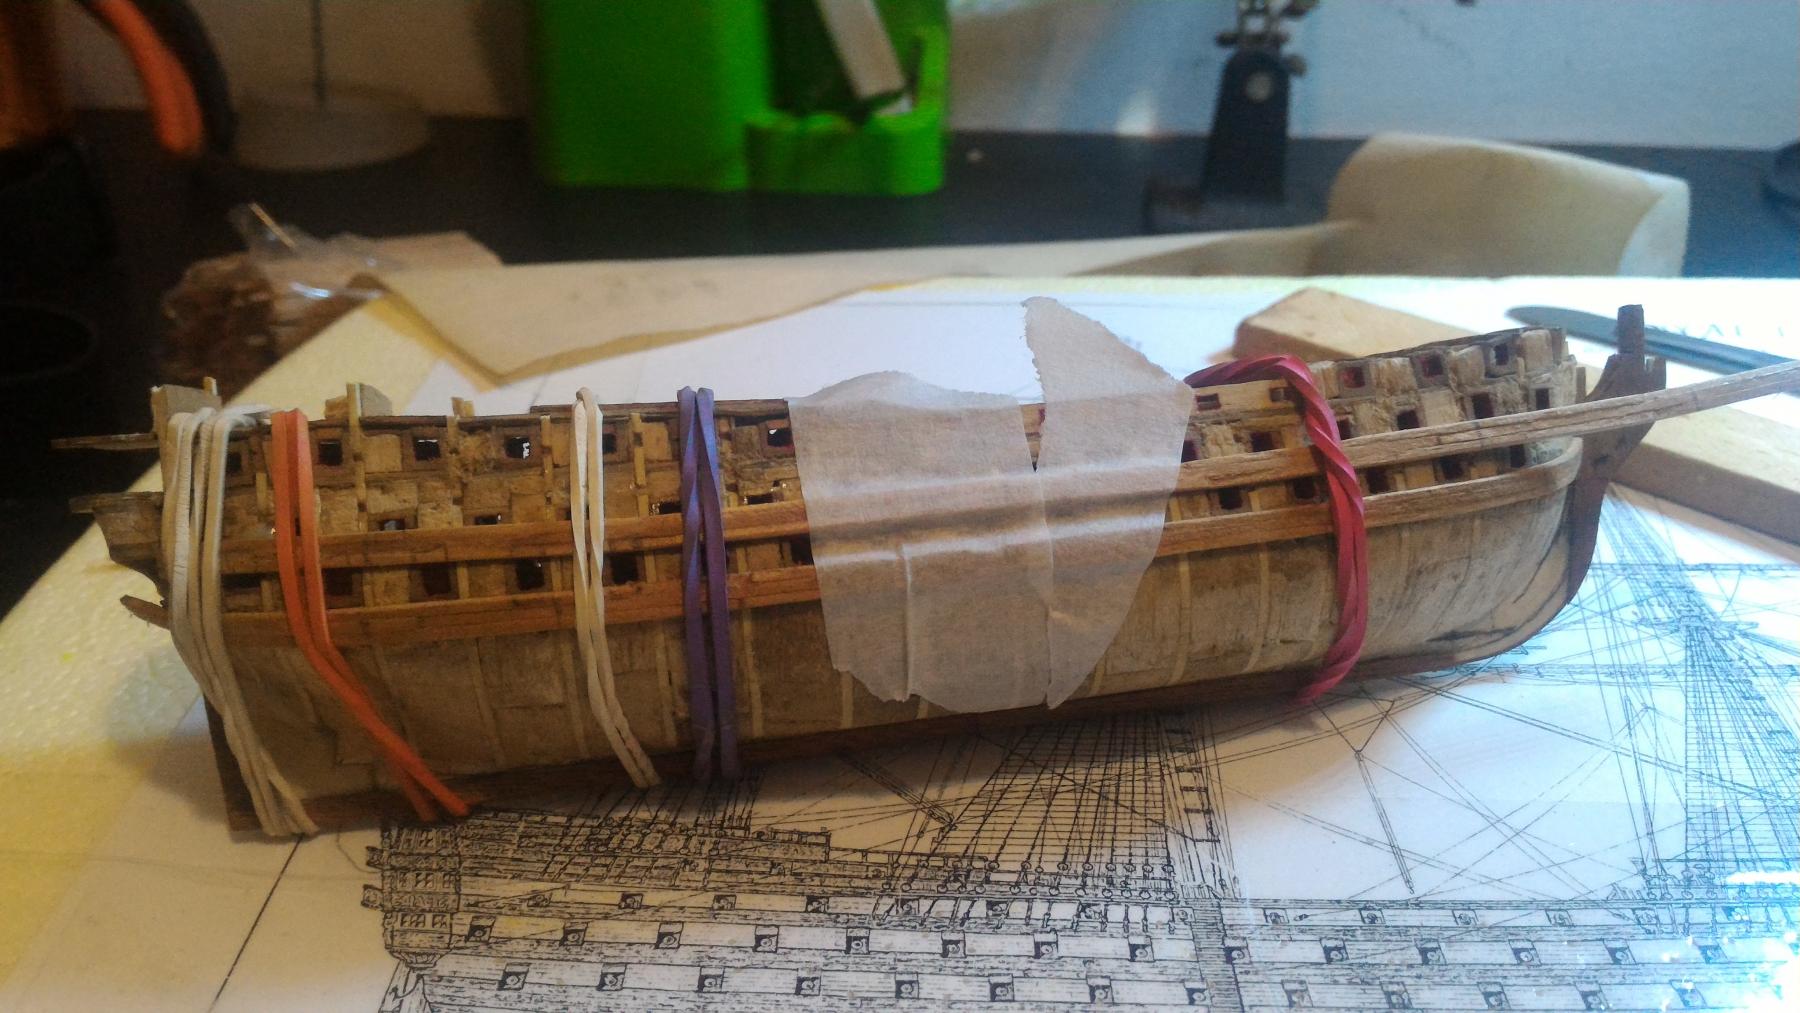
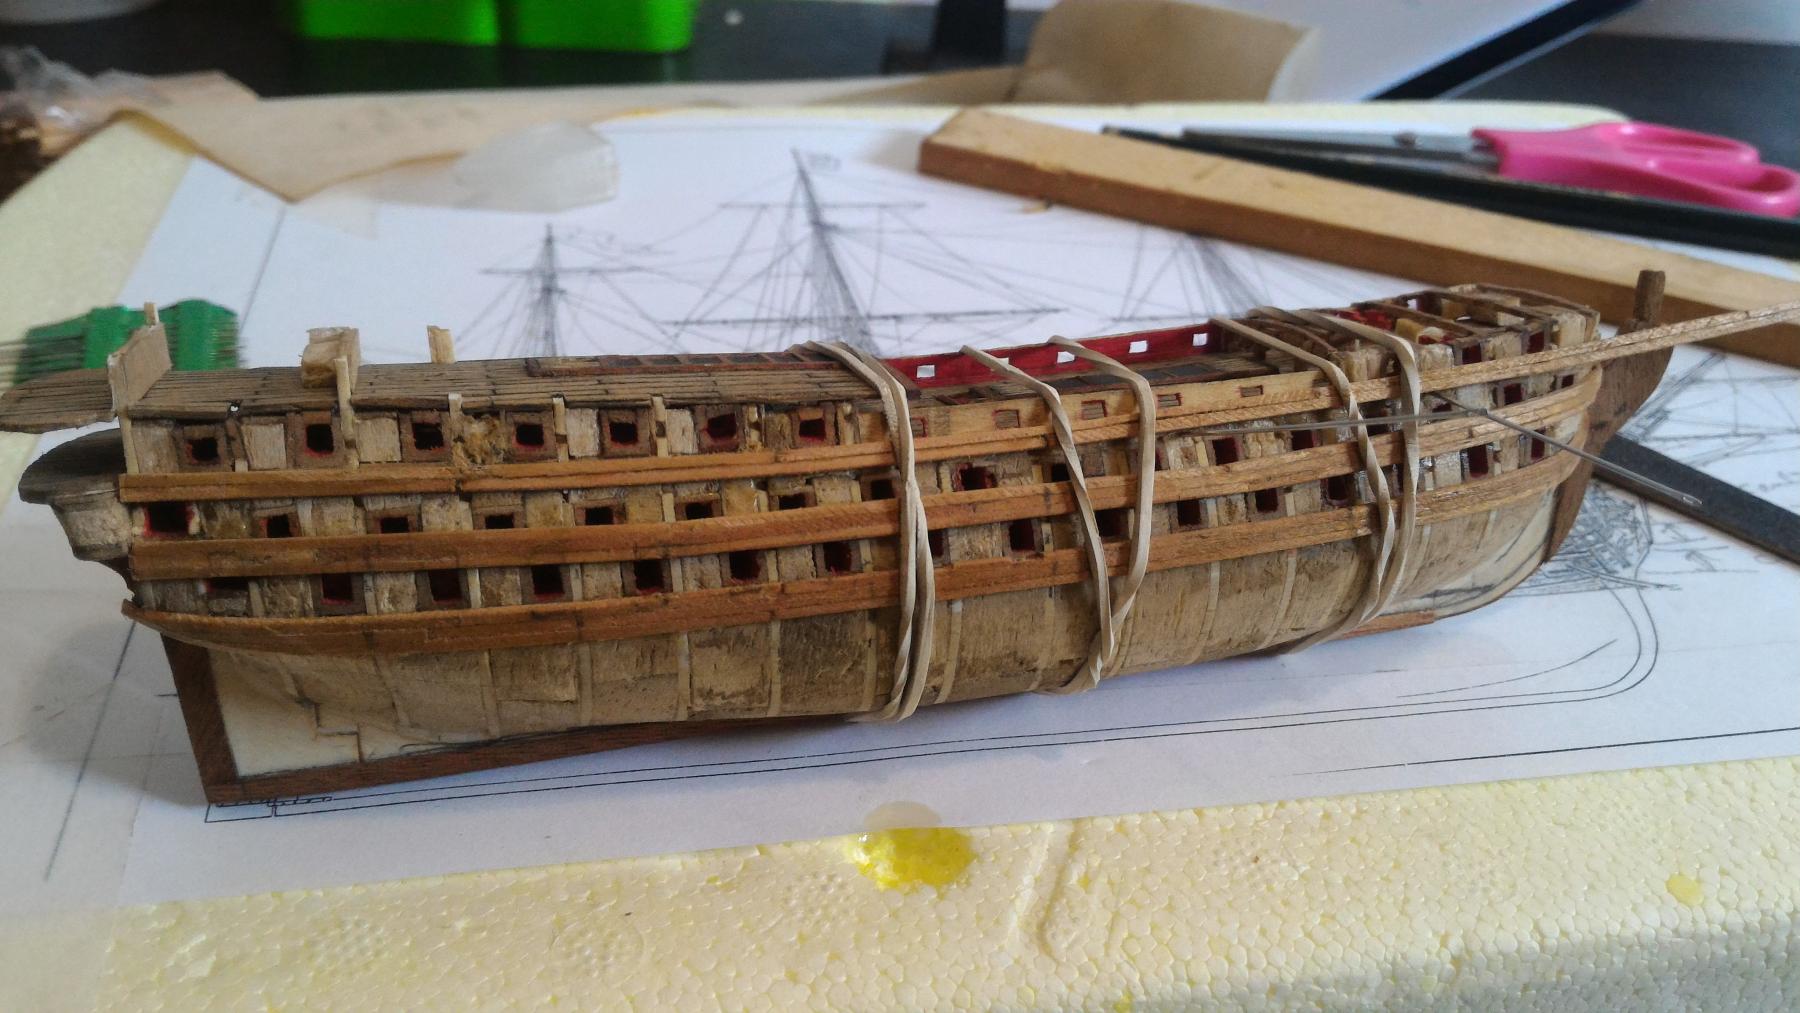
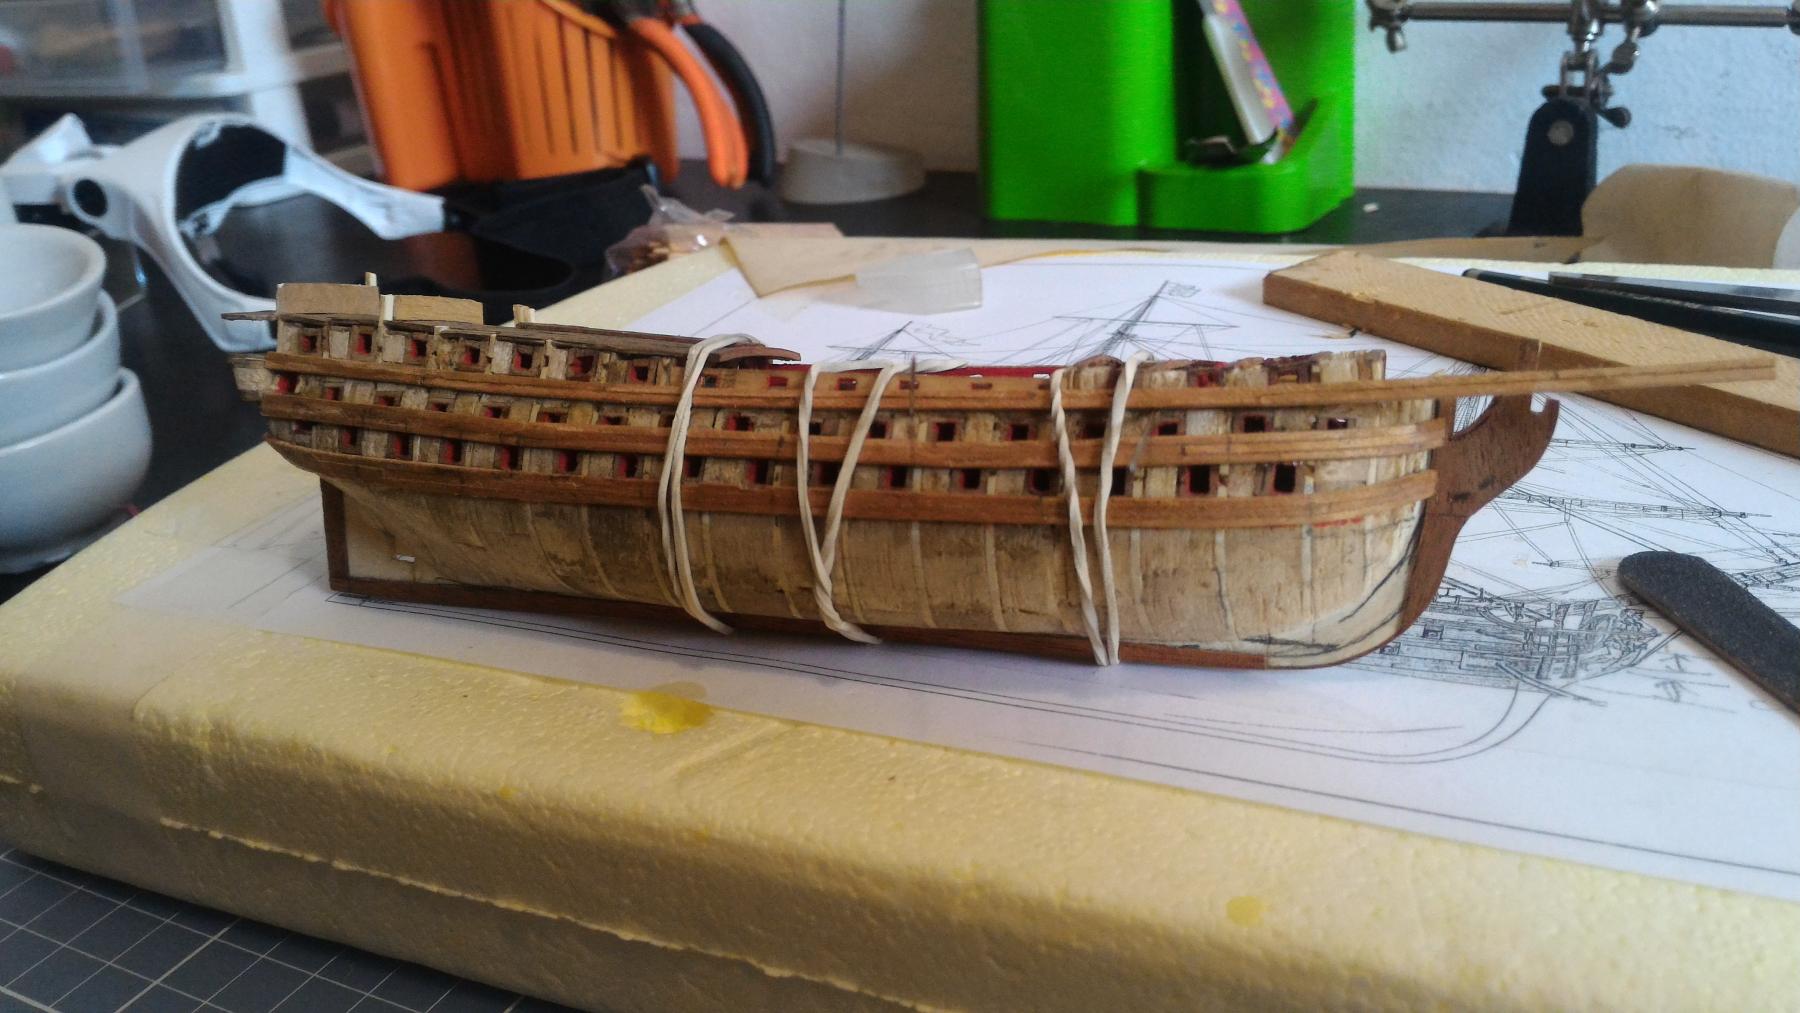
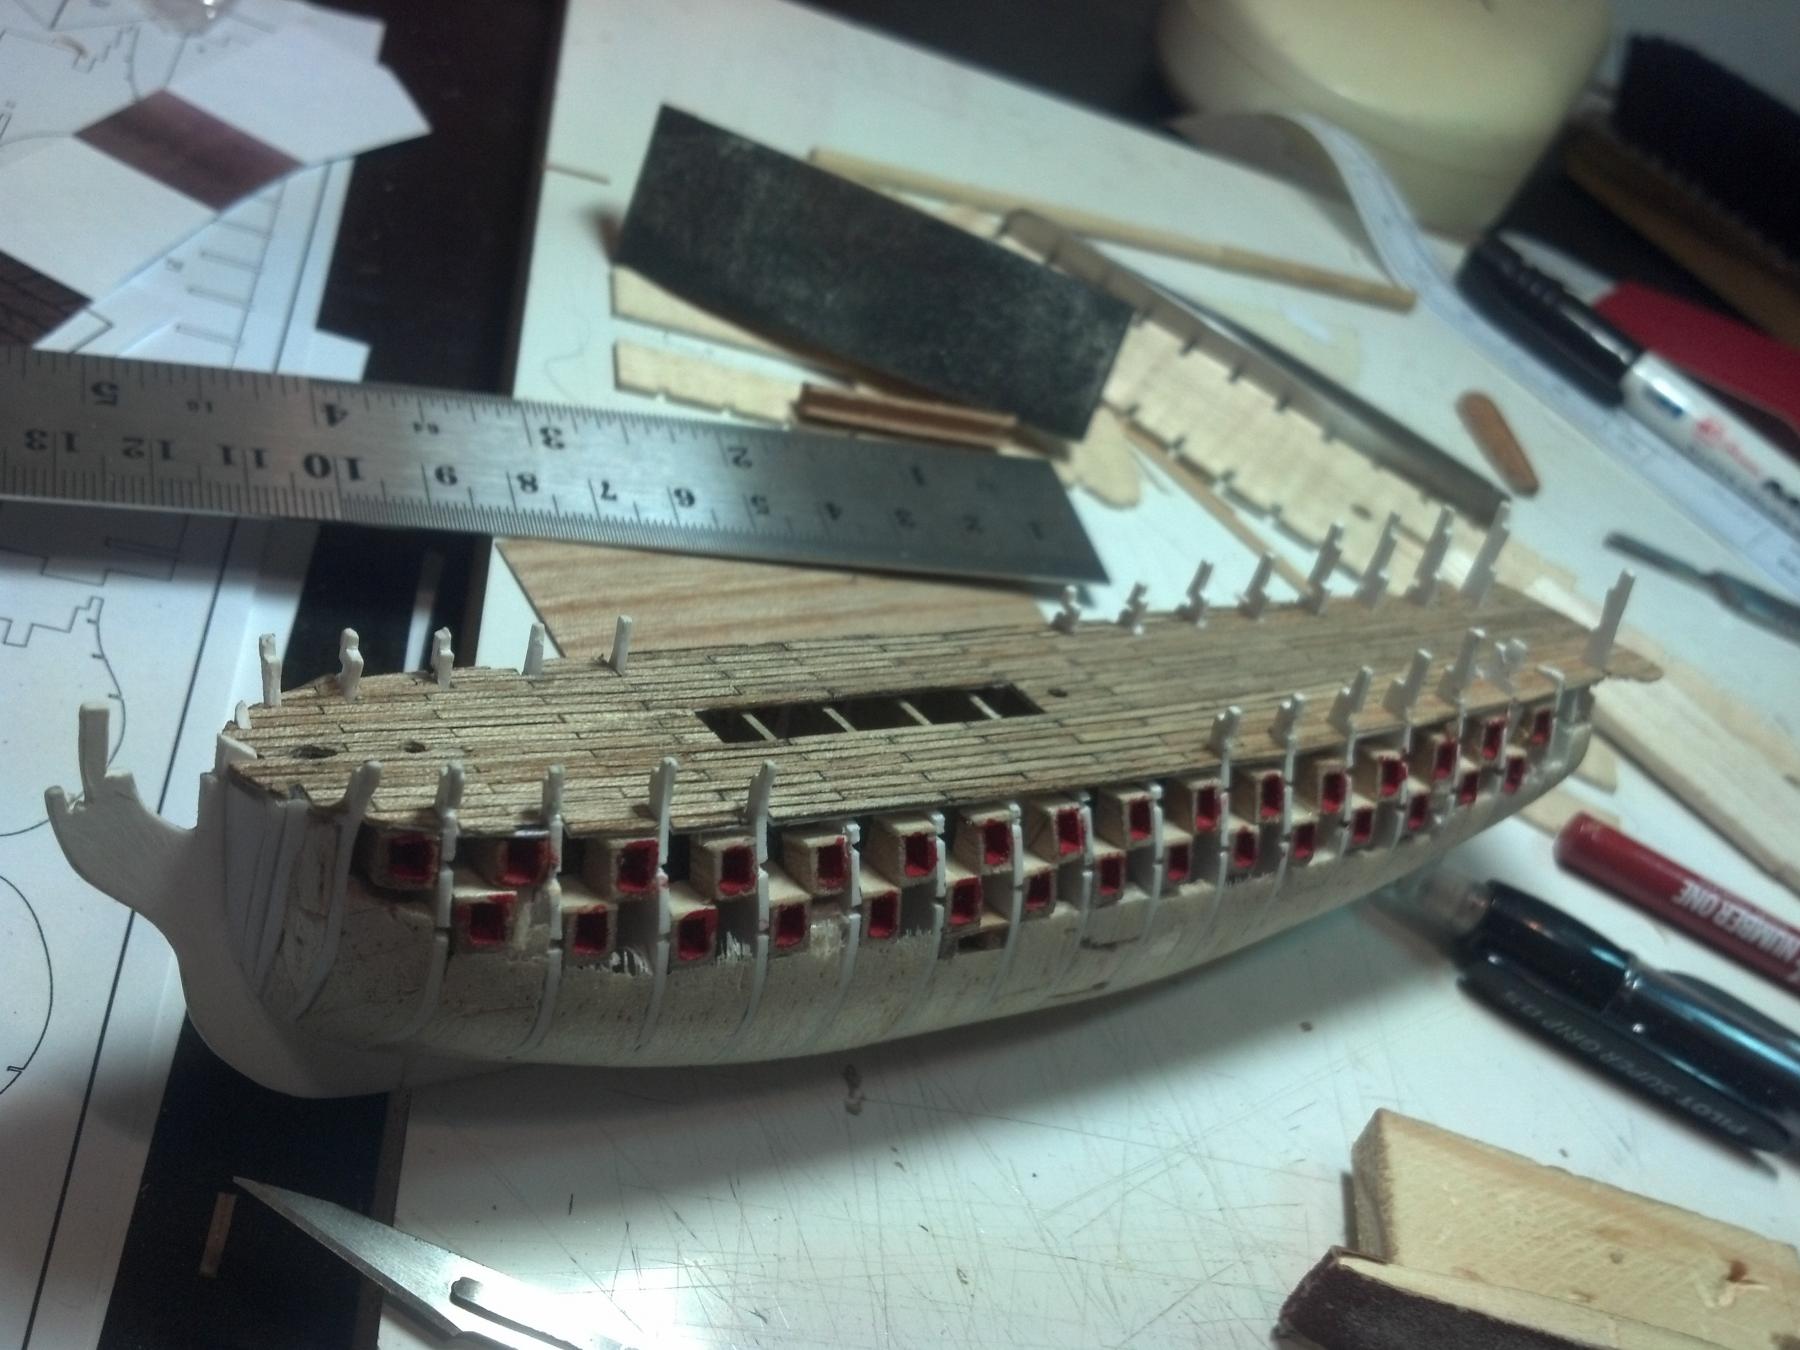
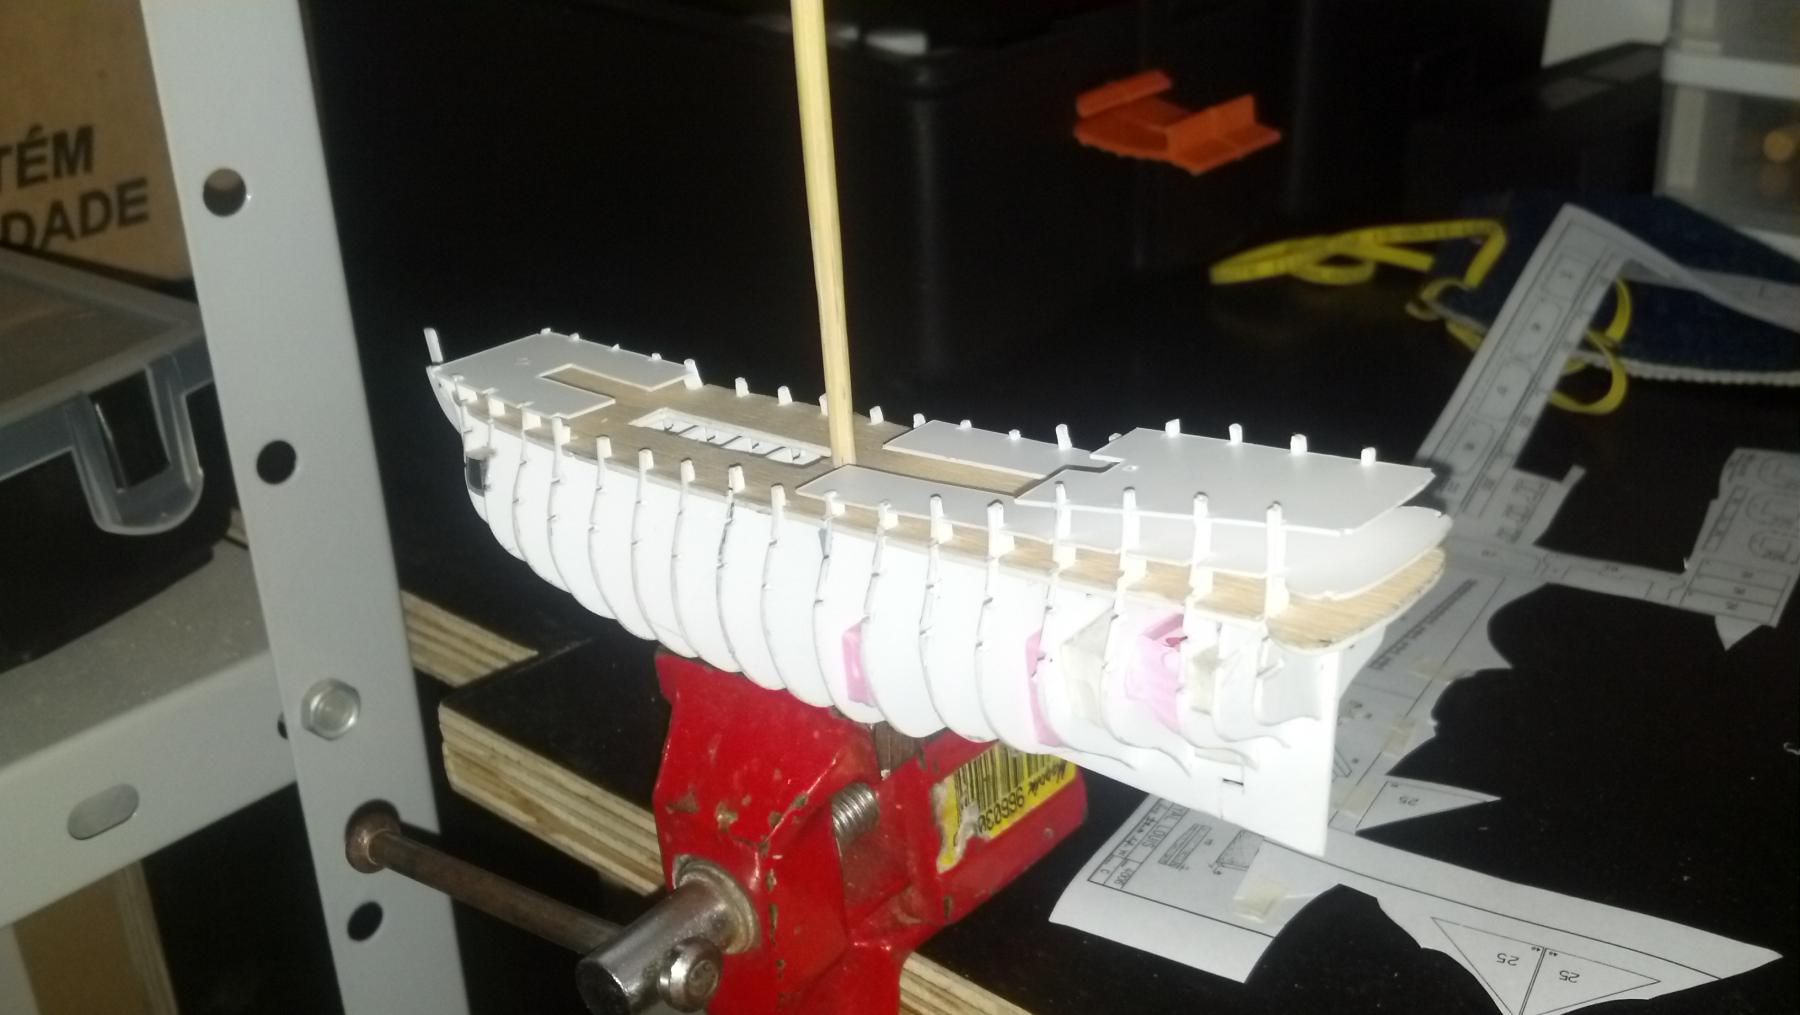
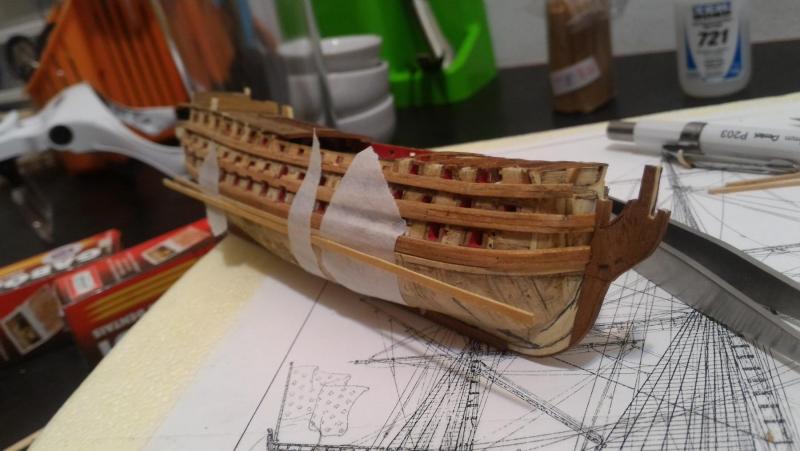
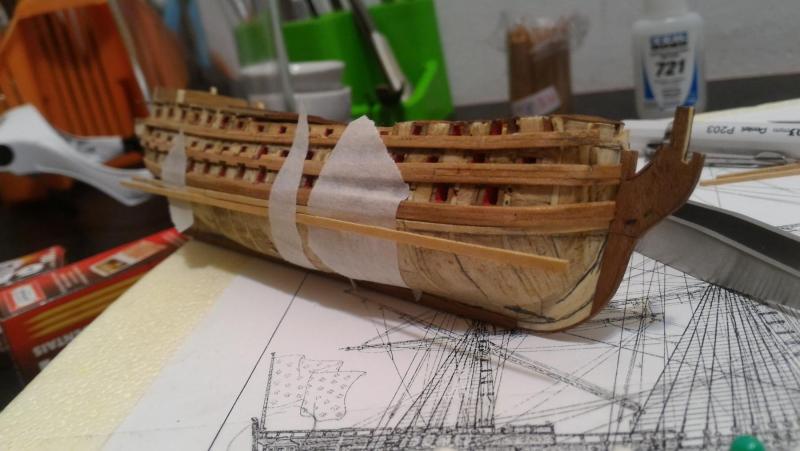
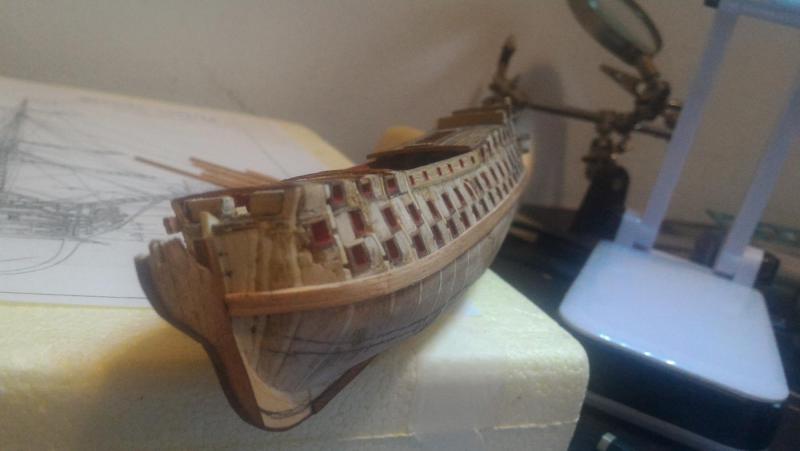
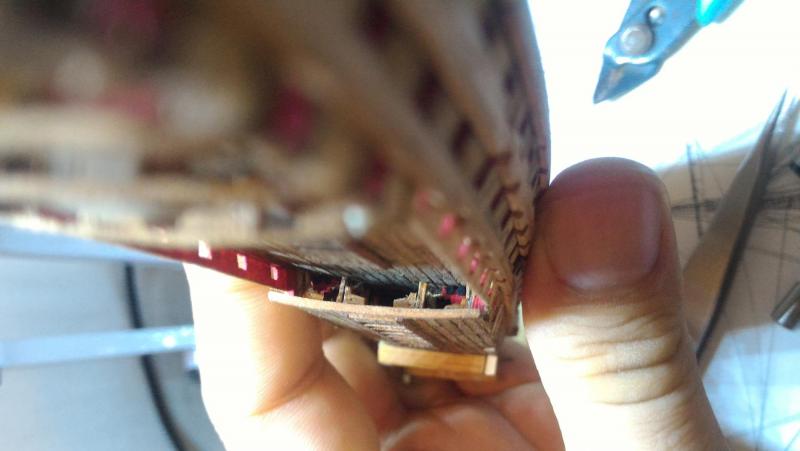
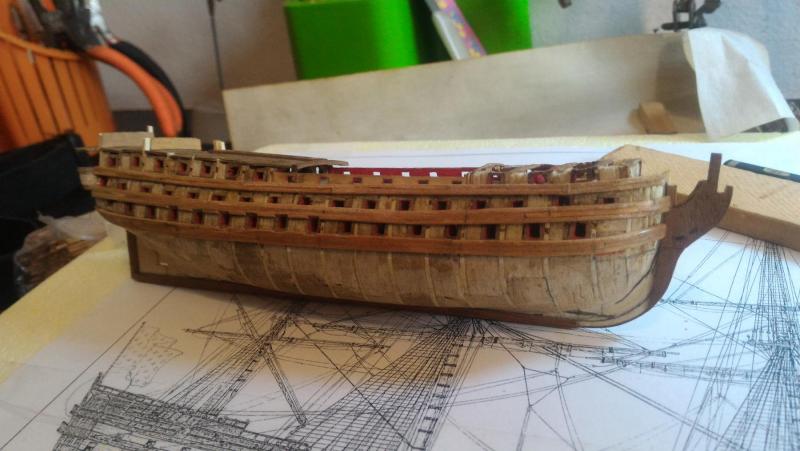
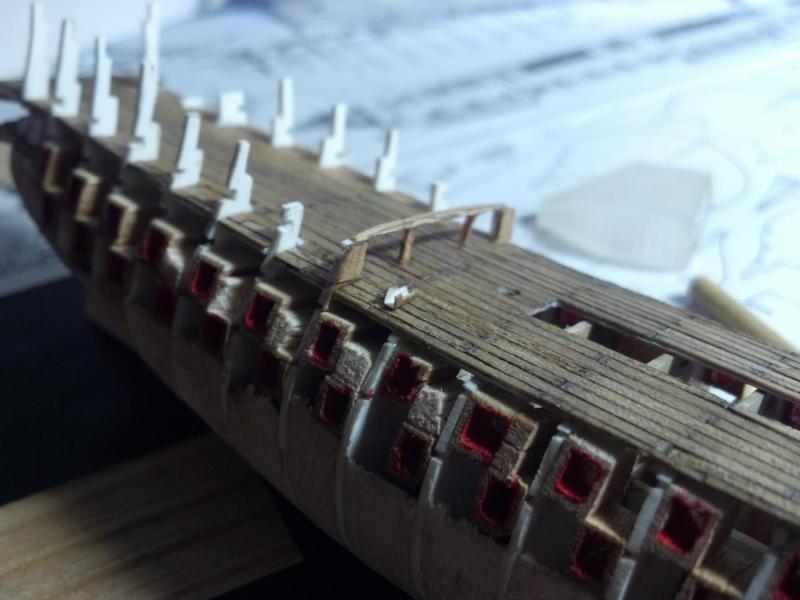
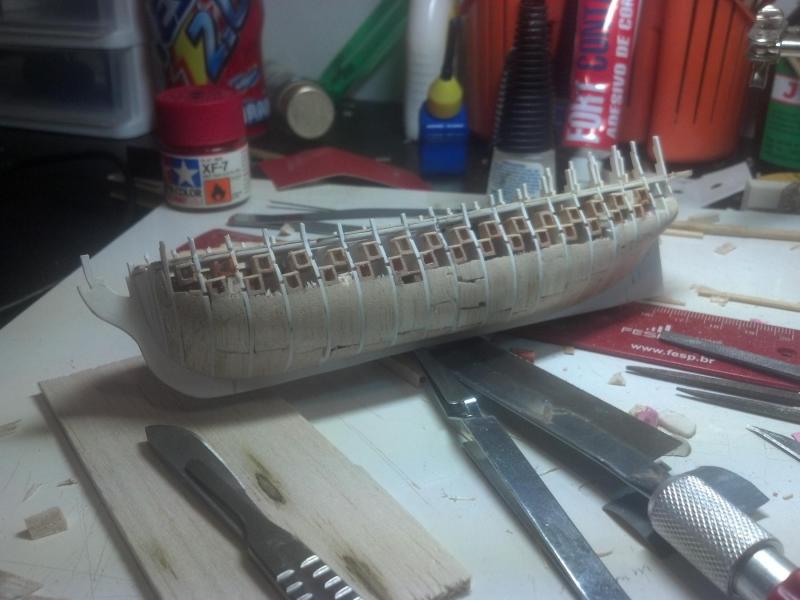
Well, wales glued... since the gunports are not in scale, I had to start cutting a bit. According to the plans, a few gunports cut into the wales but not so many as in my model... now I'm gonna have to live with it... living and learning... On my next model I'll be more careful about proportions. These bigger gunports make the boat look smaller overall instead of a larger ship as she was...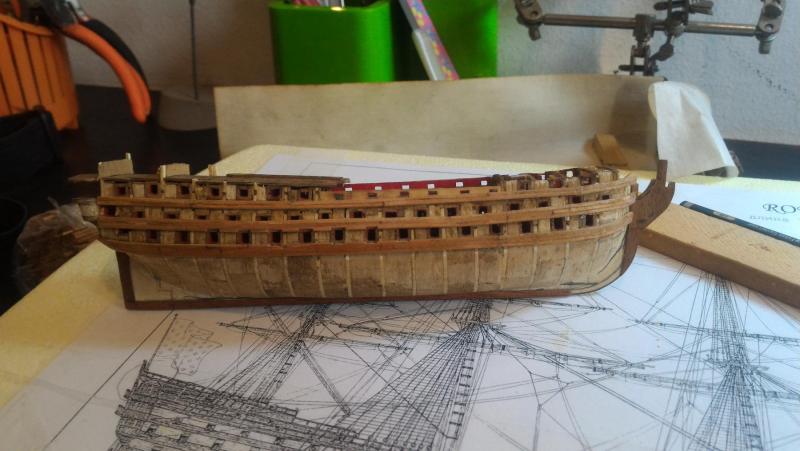

-
Royal Louis by fmartins - multi-media
fmartins replied to fmartins's topic in - Build logs for subjects built 1751 - 1800
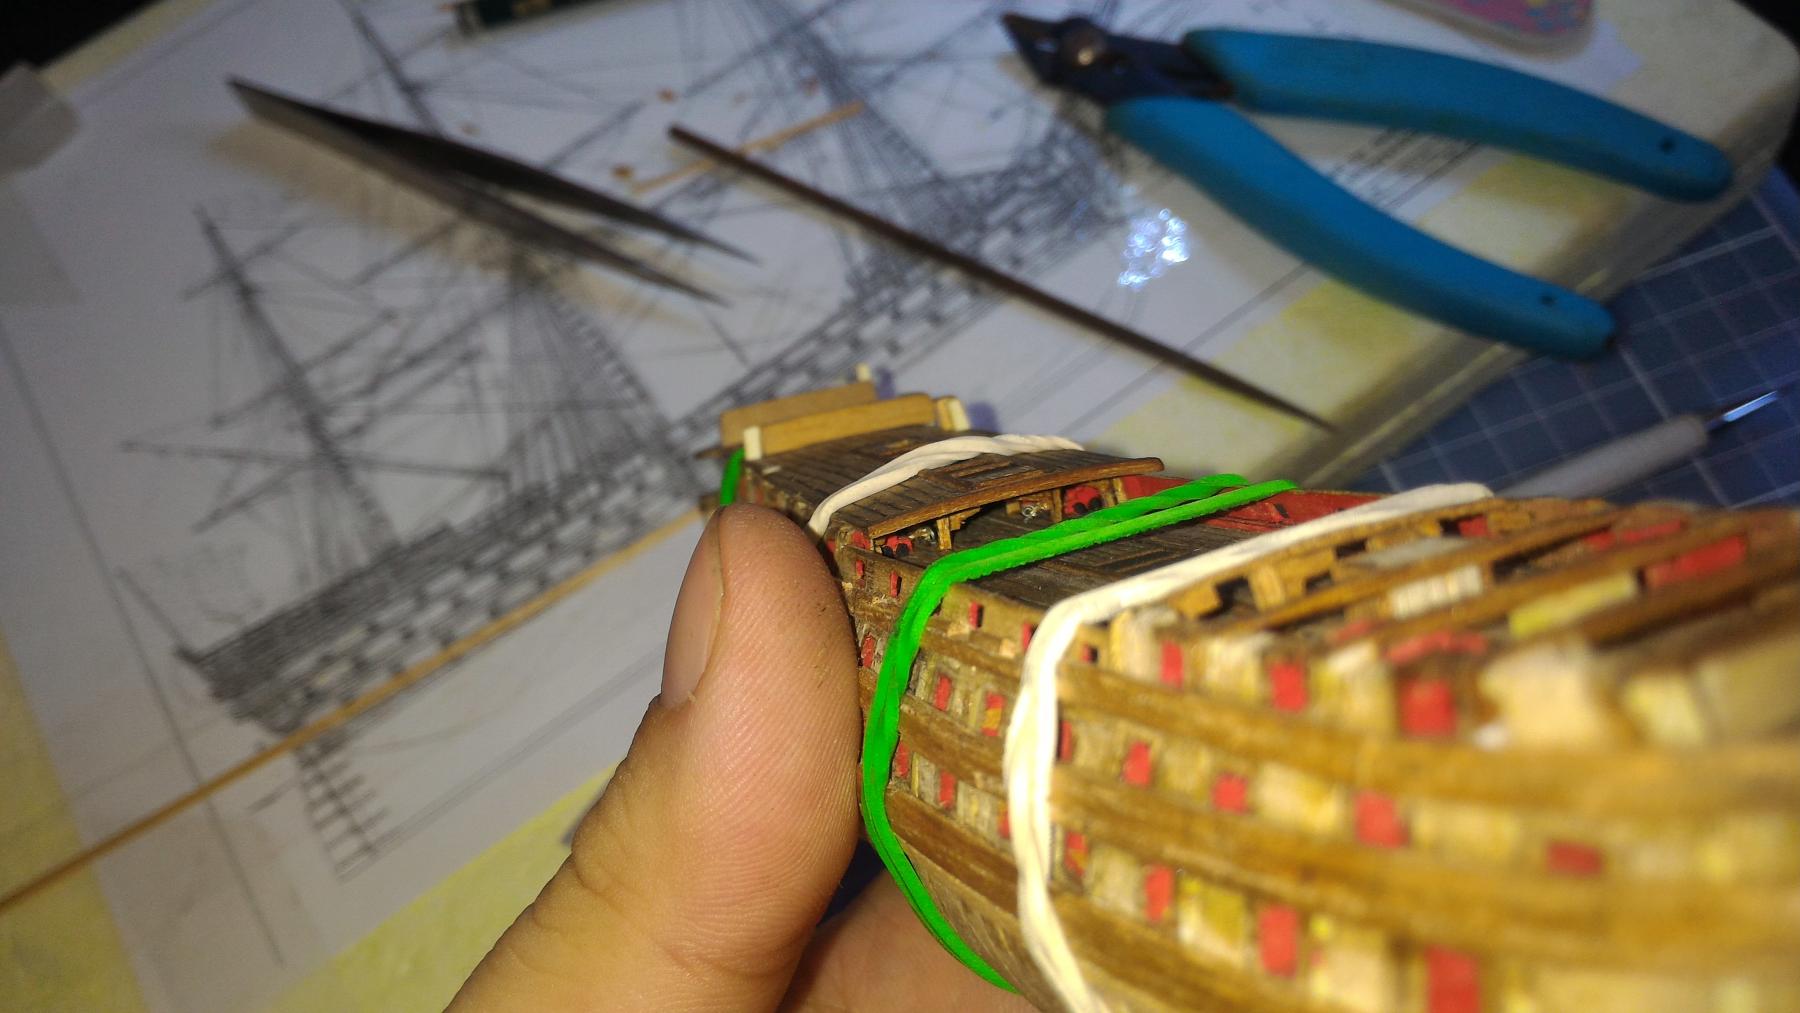
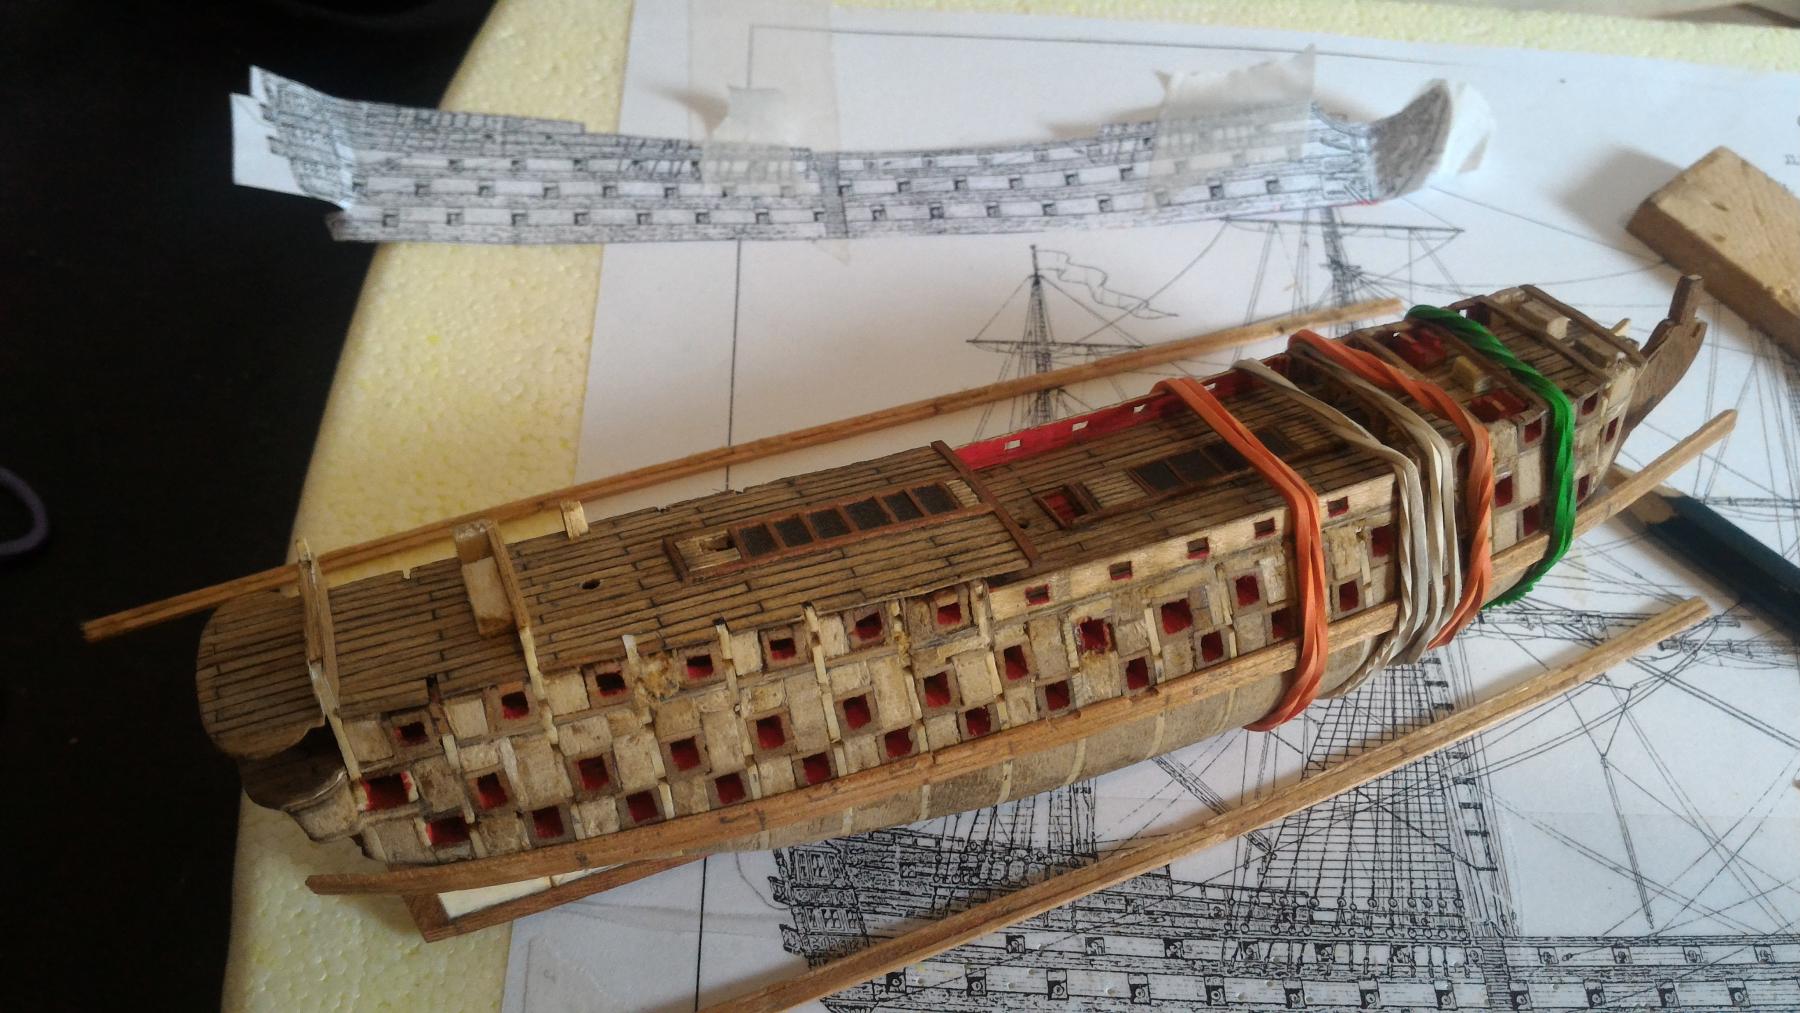
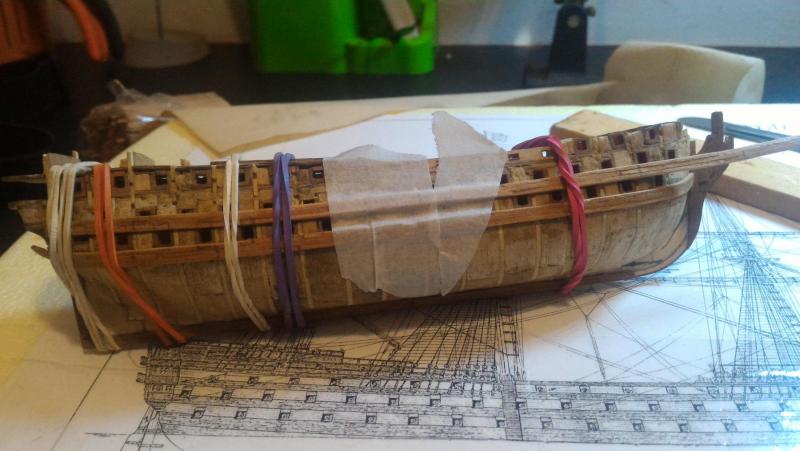
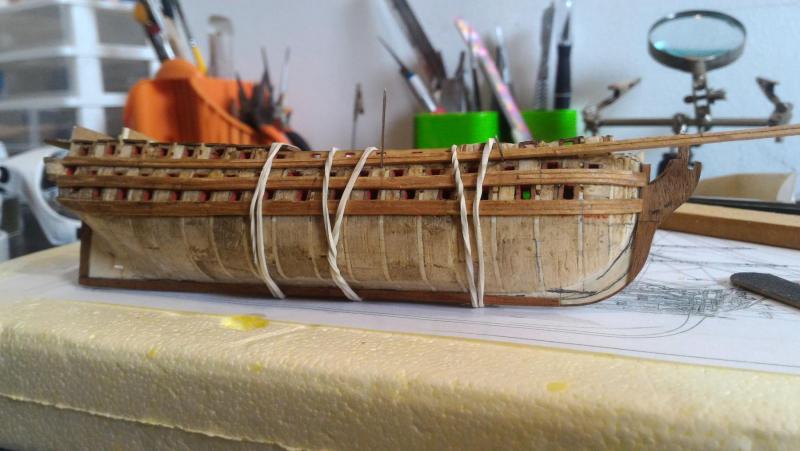
After a lot of sanding I was ready to the wales on the right (starboard?) side. With balsa wood pins would be pretty much useless so I resorted to use rubber bands and some tape to set the wales in place. I used CA glue sparingly on the bow and transom, just a bead to make sure they would hold.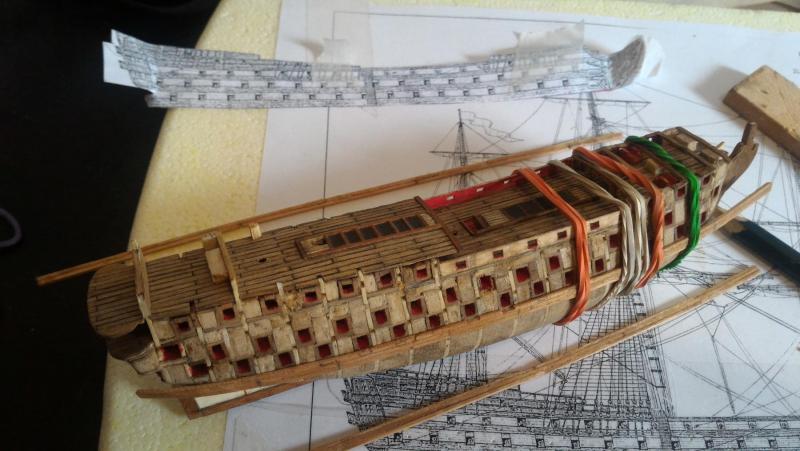


-
Royal Louis by fmartins - multi-media
fmartins replied to fmartins's topic in - Build logs for subjects built 1751 - 1800
Thanks a lot... I've been learning a lot from it... -
Royal Louis by fmartins - multi-media
fmartins replied to fmartins's topic in - Build logs for subjects built 1751 - 1800
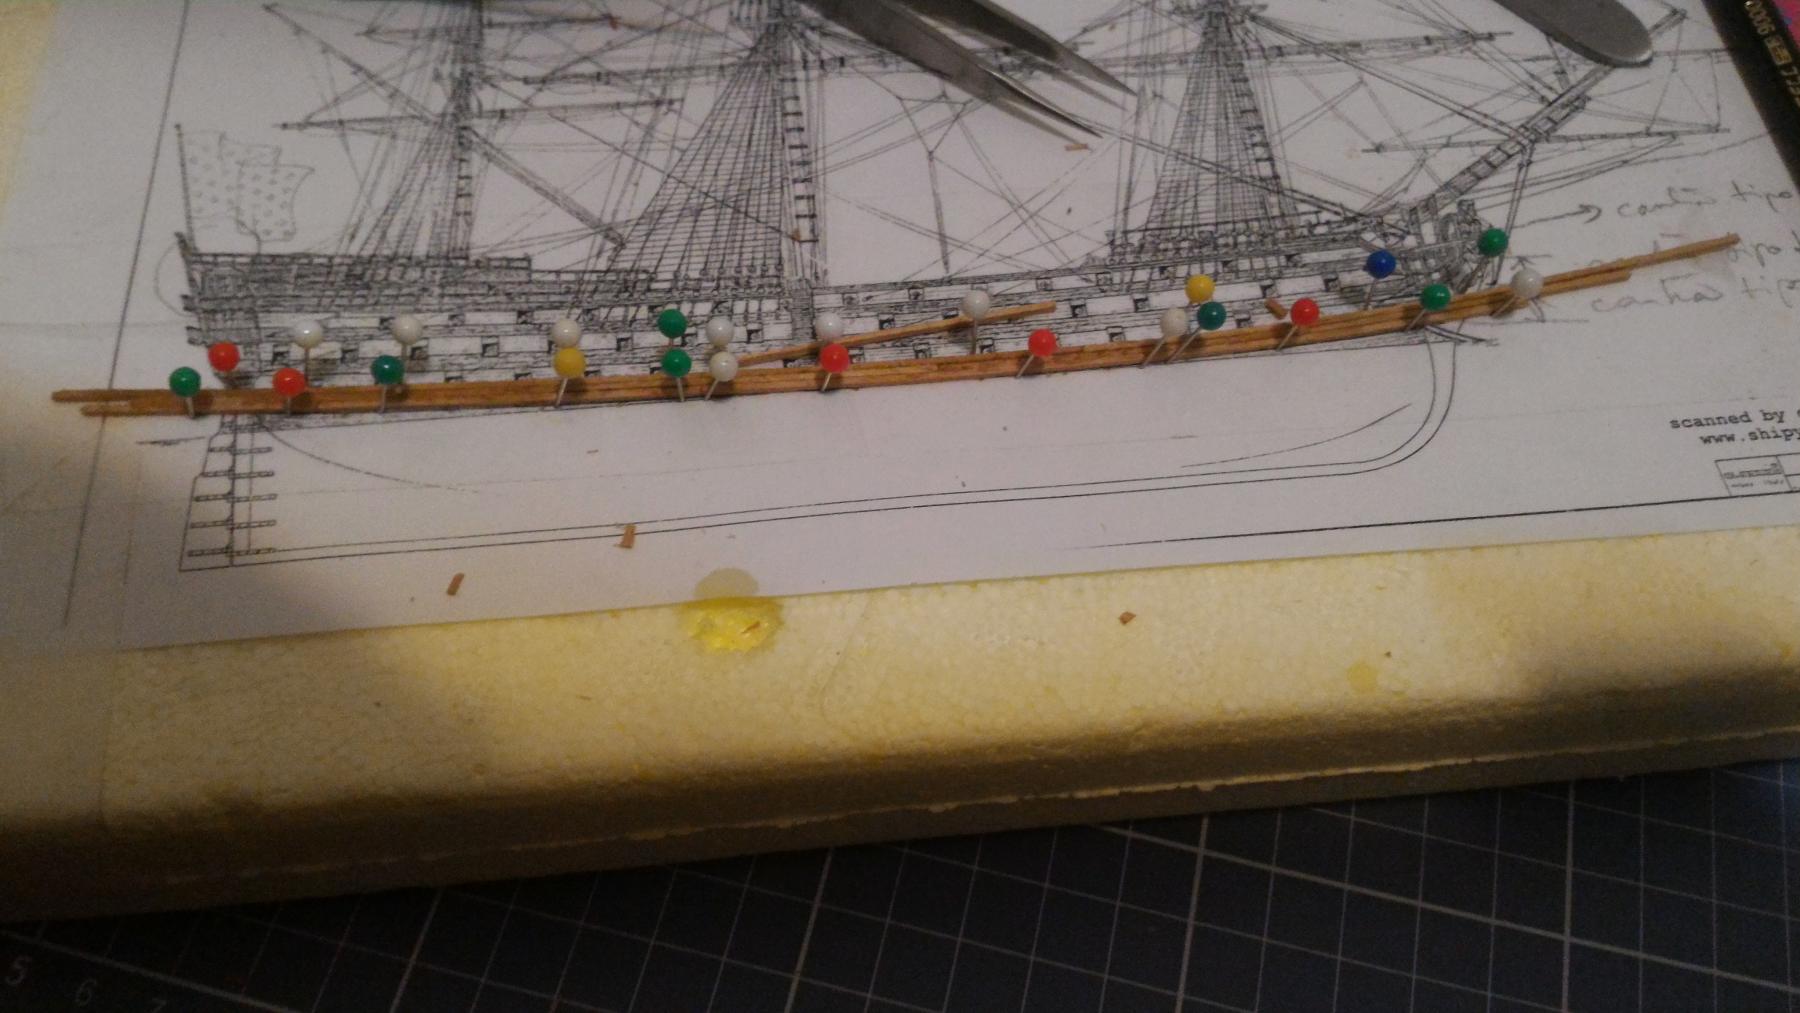
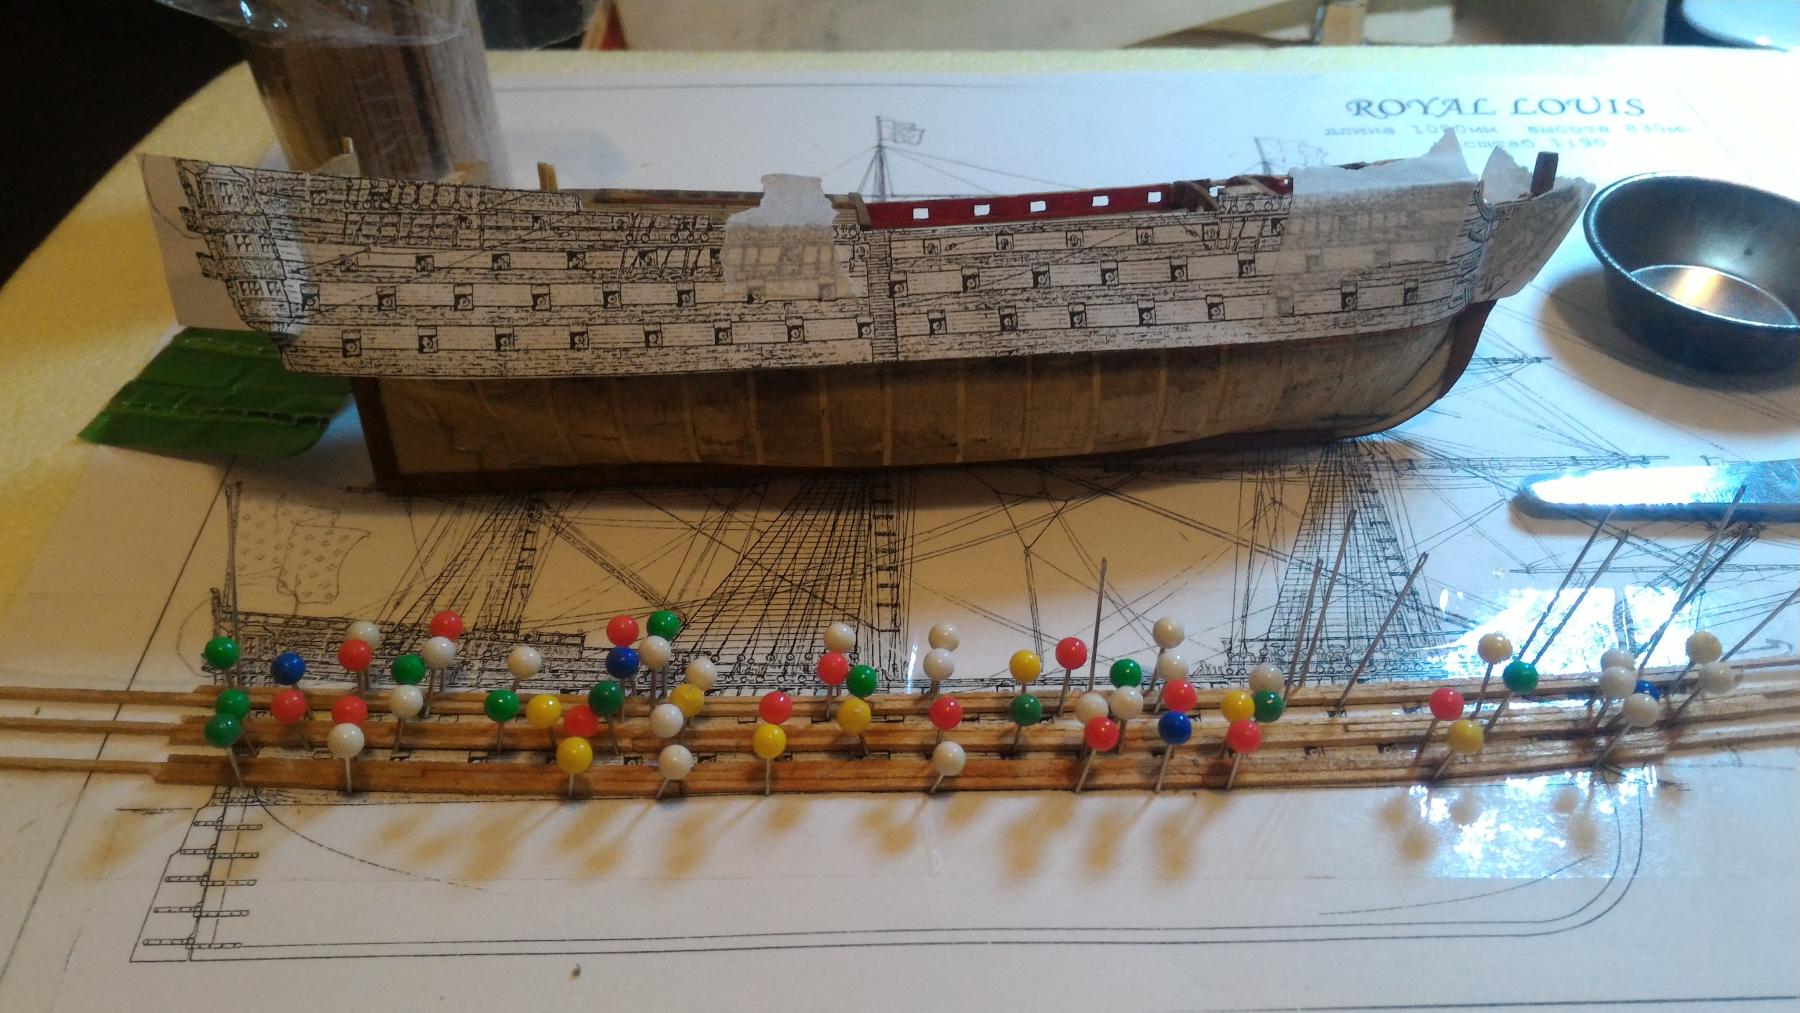
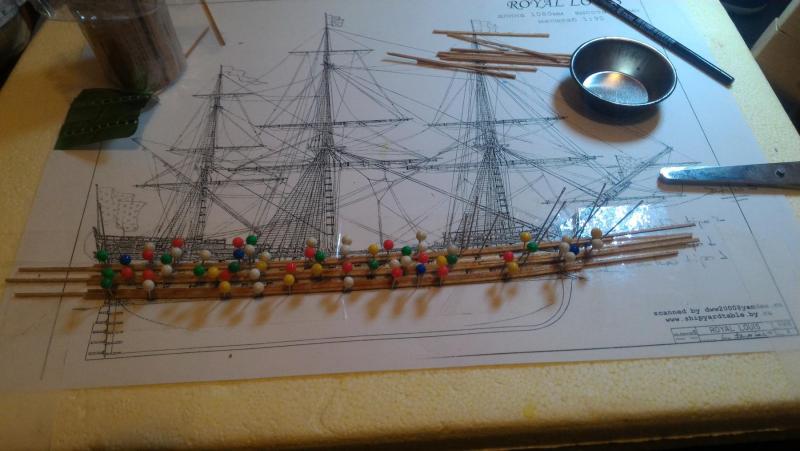
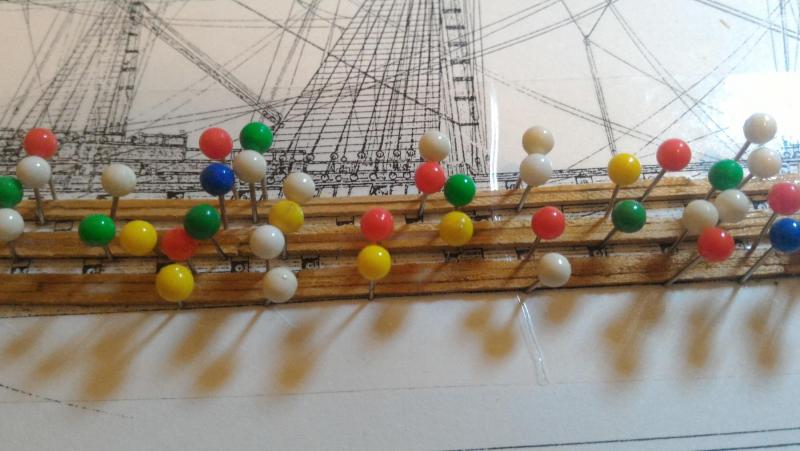
With the hull faired, I decided (wrongly I suppose) to glue the wales... I got a bunch of pink cedar strips lying around... But I was afraid of not being able to curve them properly. I saw a couple bending jigs and tried the best with a plank of styrofoam, a side picture of the Royal Louis (covered in tape so it wouldn't glue to the paper) and a few ball-point pins. No need for water or steam as they are really thin. A redimensioned side view of the ship to see if it would fit... So far it looks good...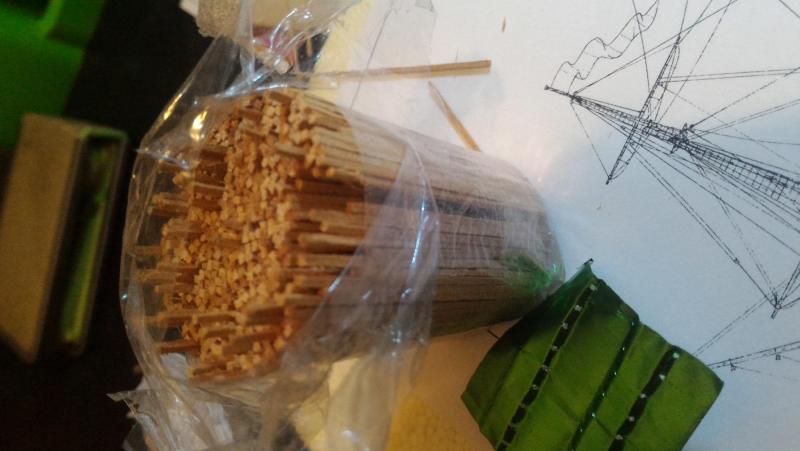

-
How difficult is it to learn how to make frames on the CAD software and then print it to size desired? I mean, this could open so many possibilities to me... do you think it'd be possible to do the same with some free software? Congrats again on your build...
-
Royal Louis by fmartins - multi-media
fmartins replied to fmartins's topic in - Build logs for subjects built 1751 - 1800
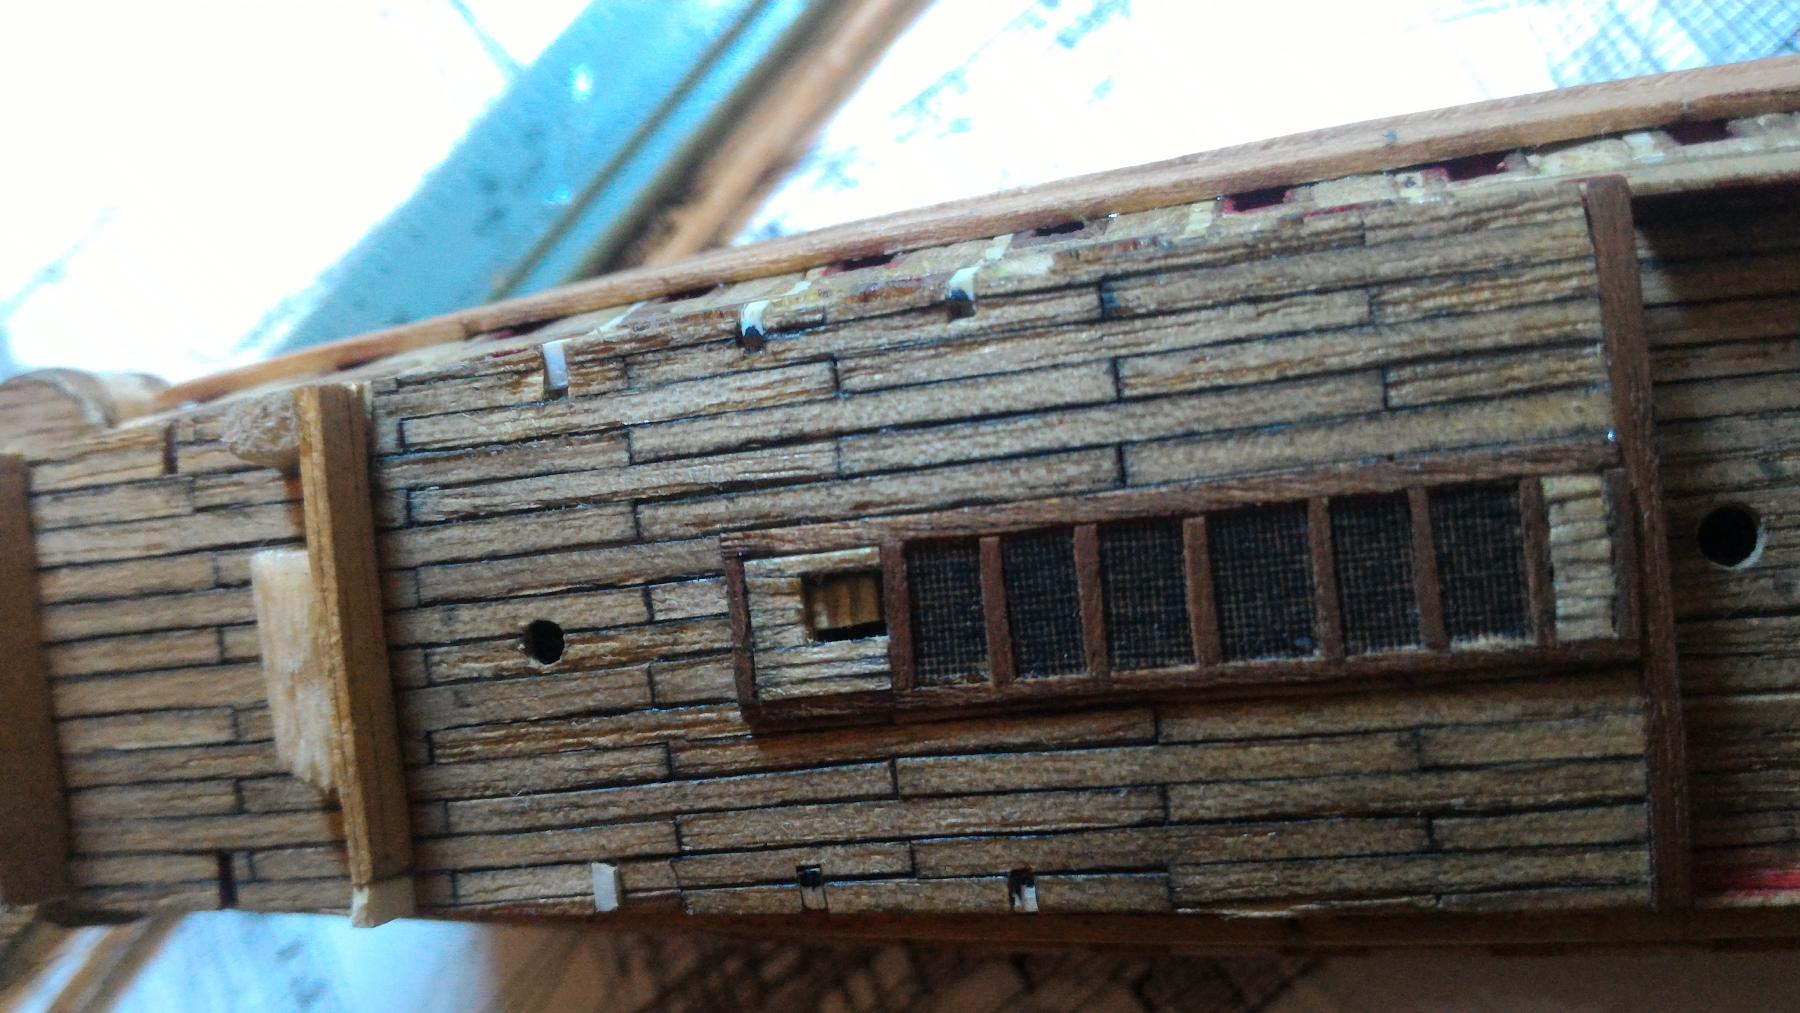
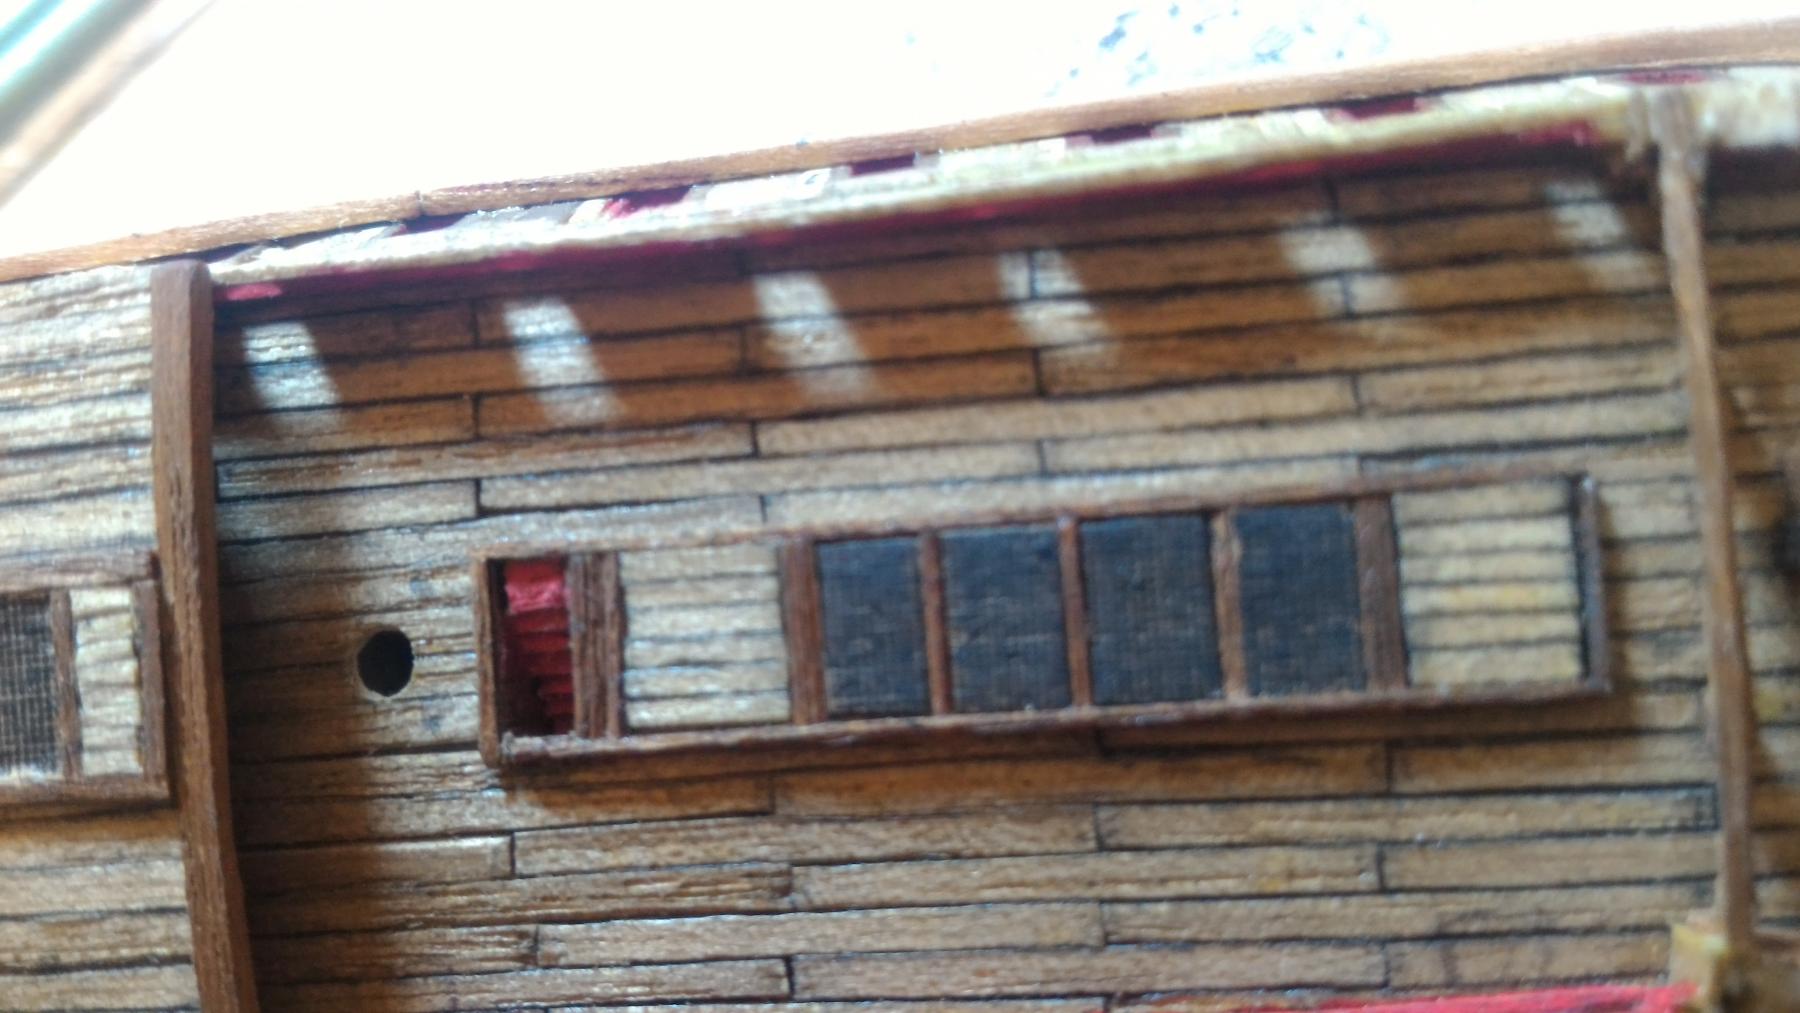
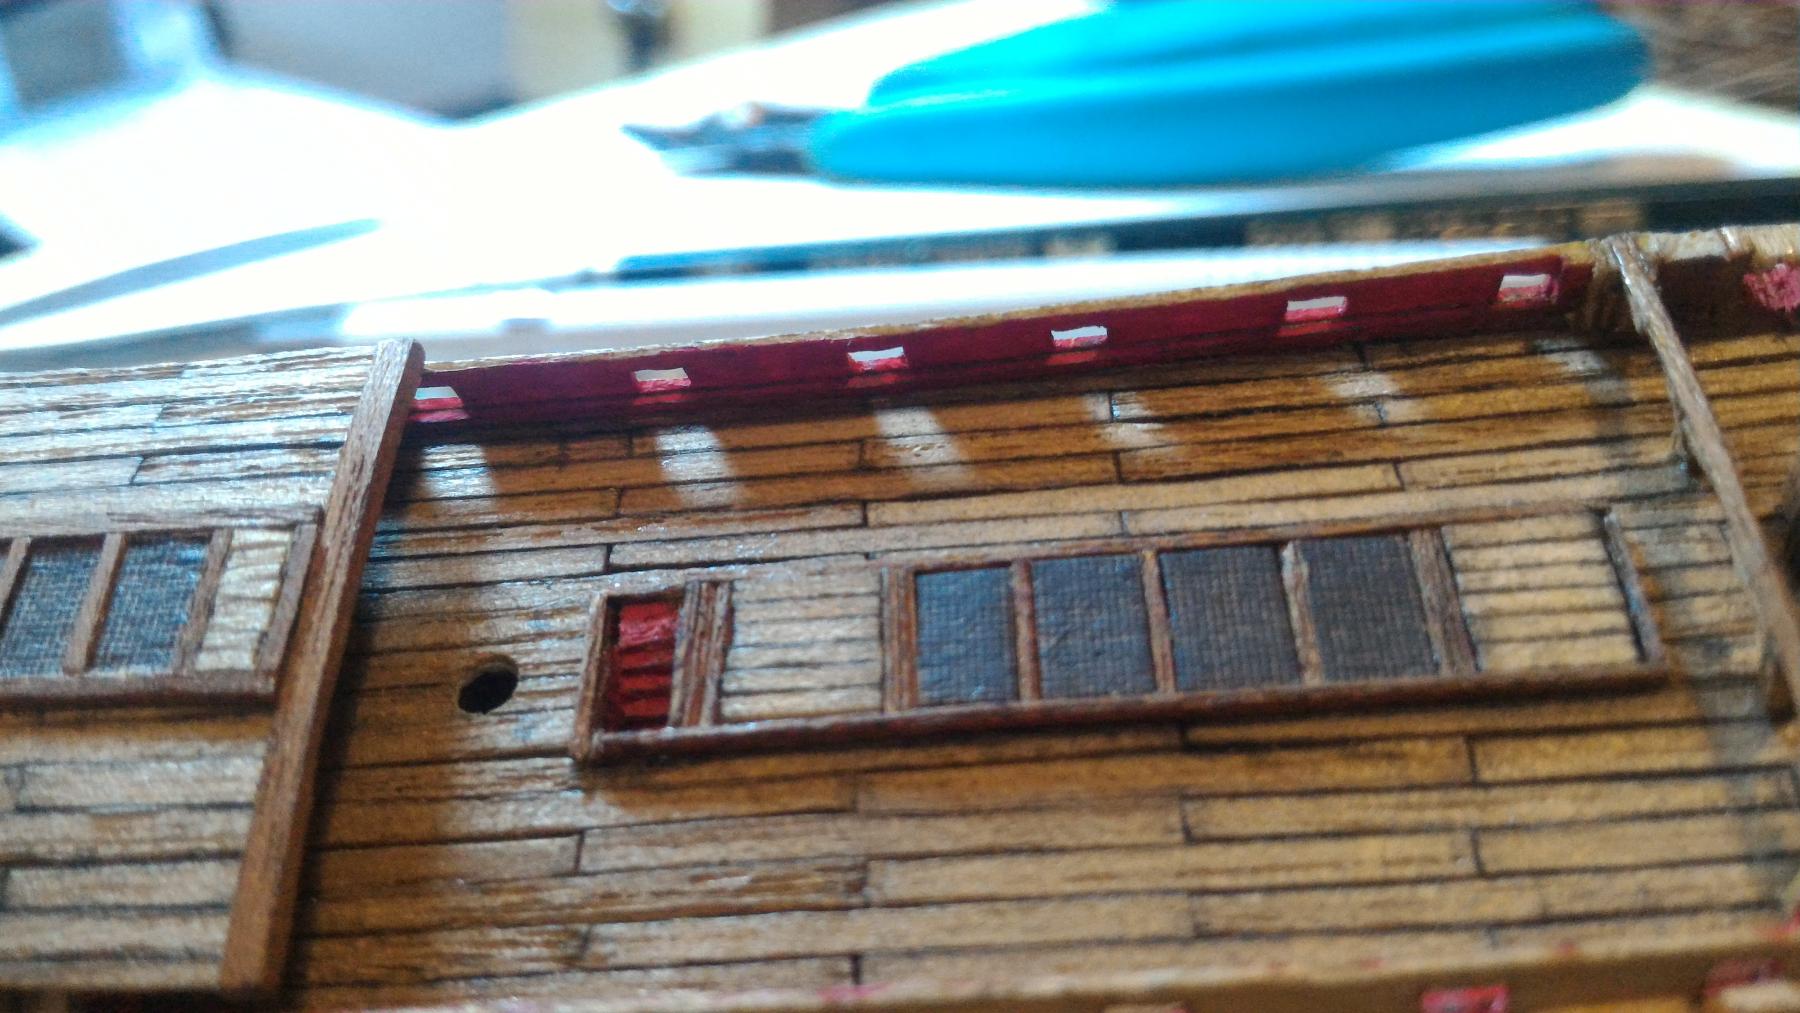
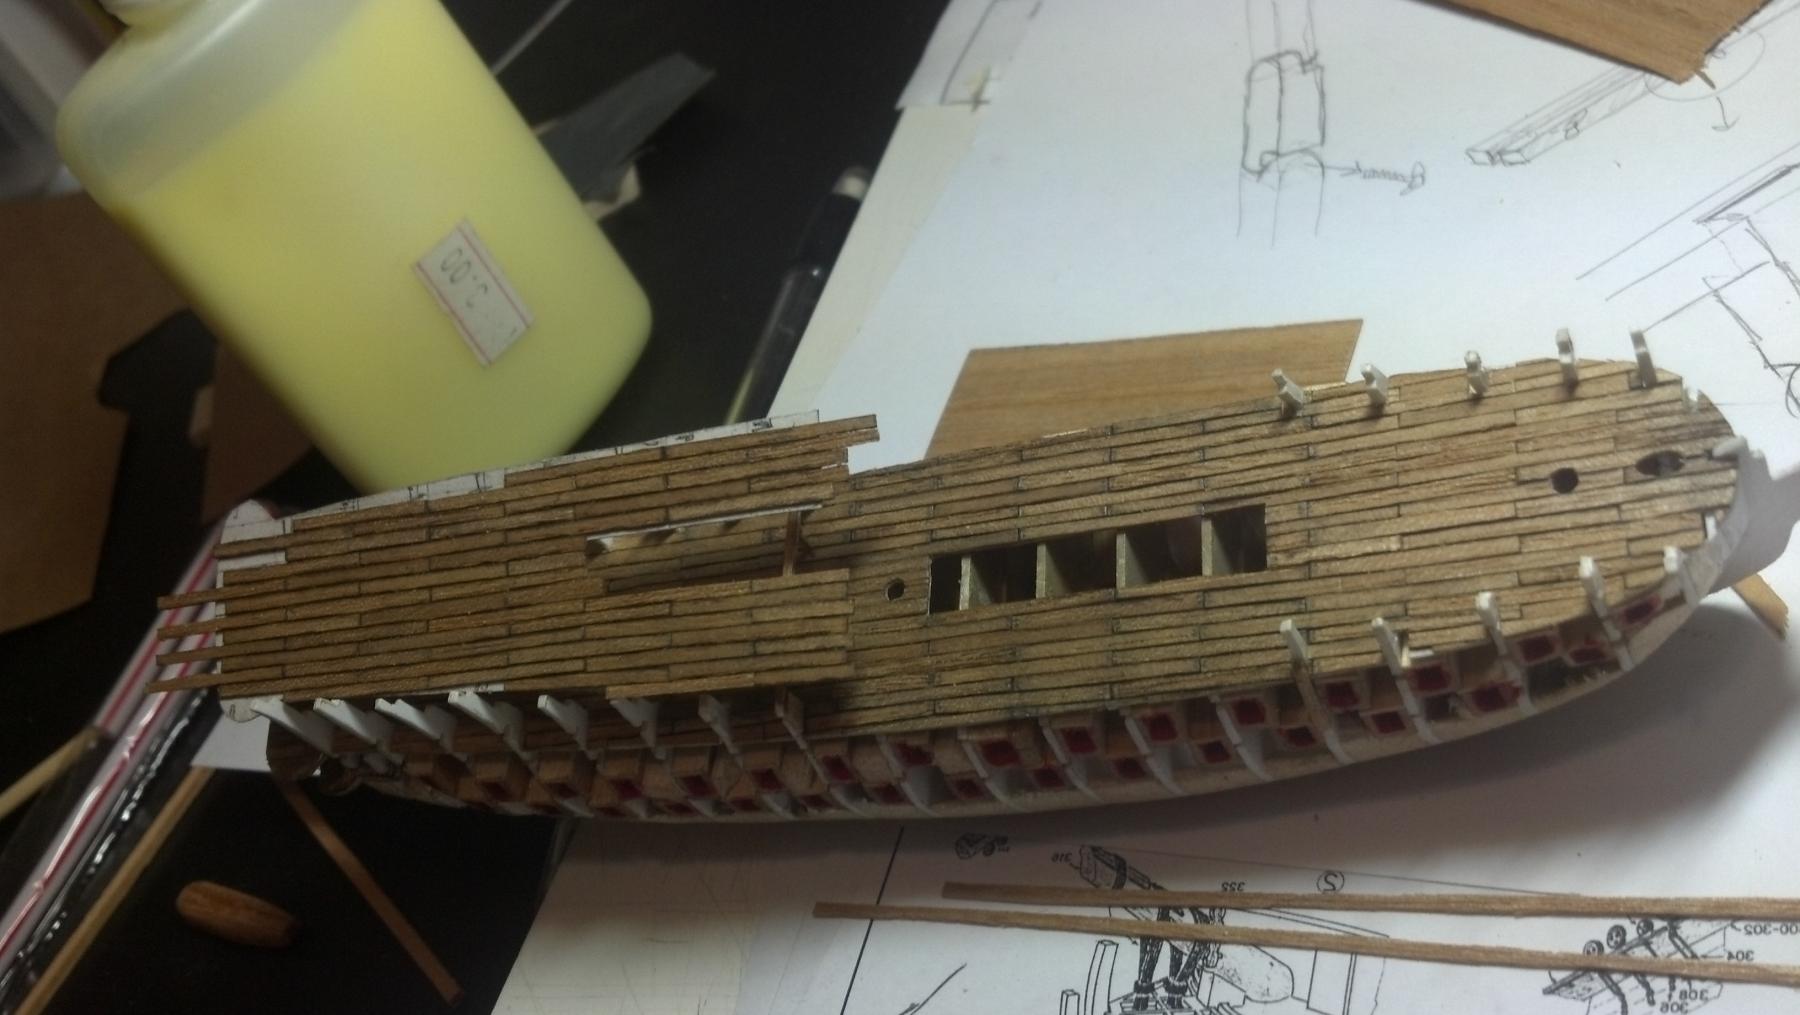
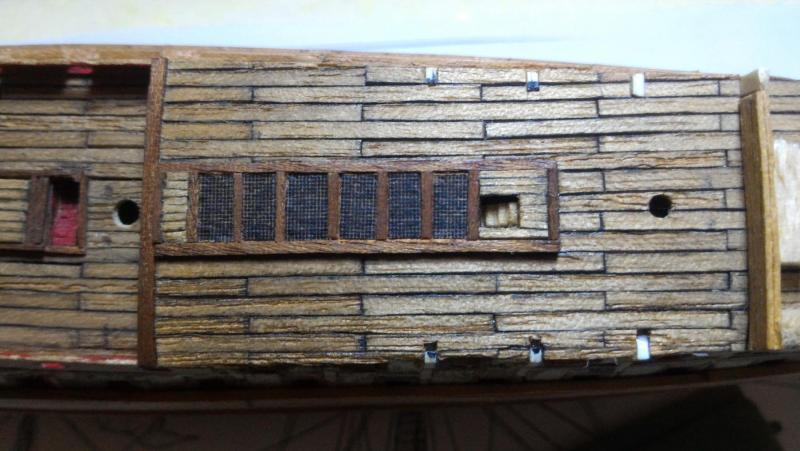
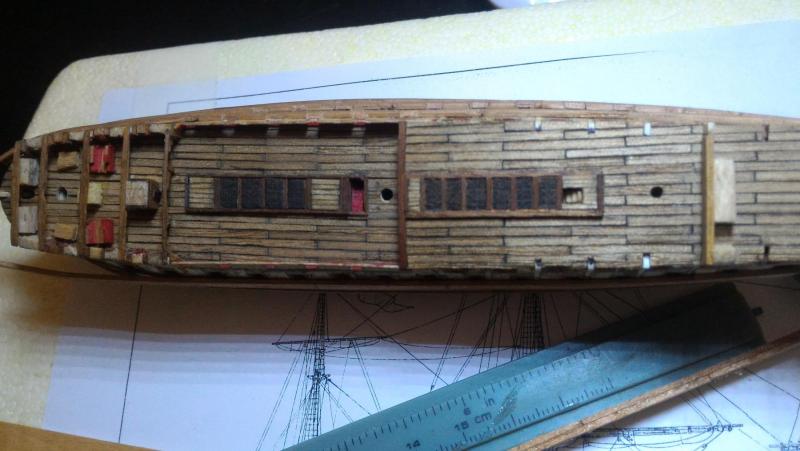
As for the gratings, I tried to make them in wood, but even the smallest I could do was so off in terms of scale that even I who don't really care for scale in this size wasn't pleased. So, improvising as usual, i just printed the gratings.... Some more details added the same for the second deck (still need to paint the stairs red like the parisian model). I also started building some more detail at the transom.


-
Royal Louis by fmartins - multi-media
fmartins replied to fmartins's topic in - Build logs for subjects built 1751 - 1800
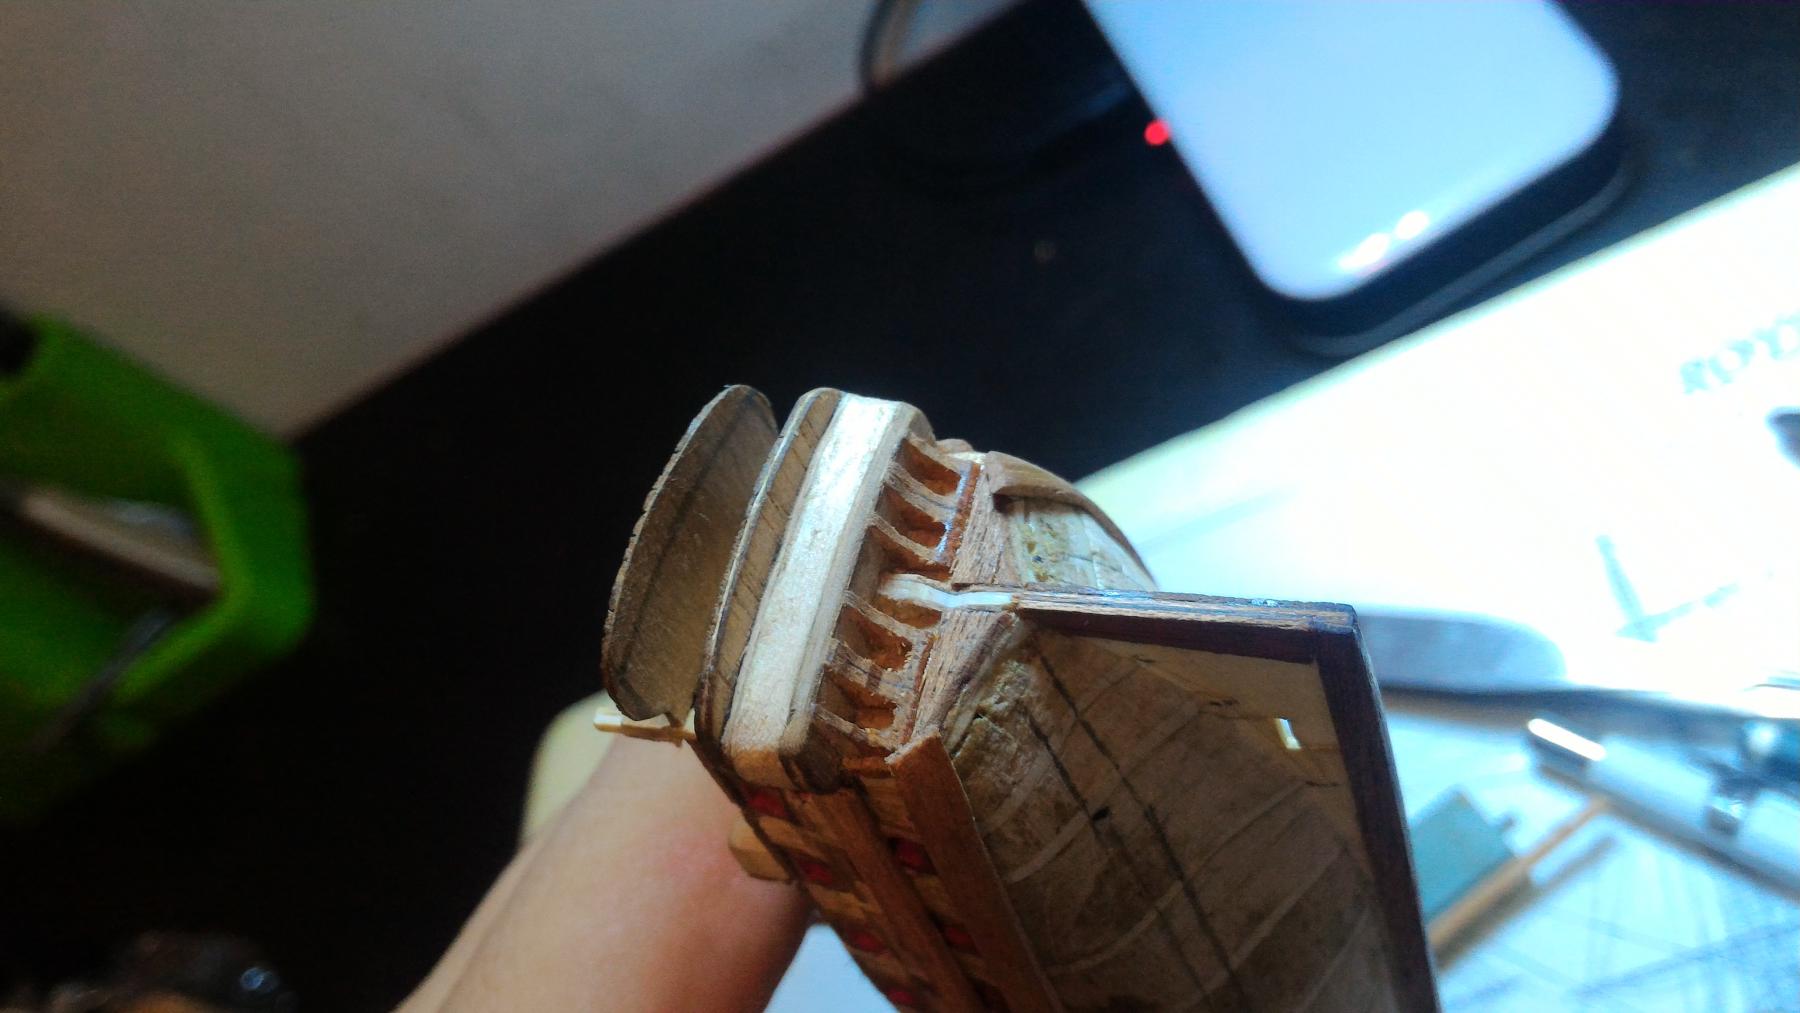
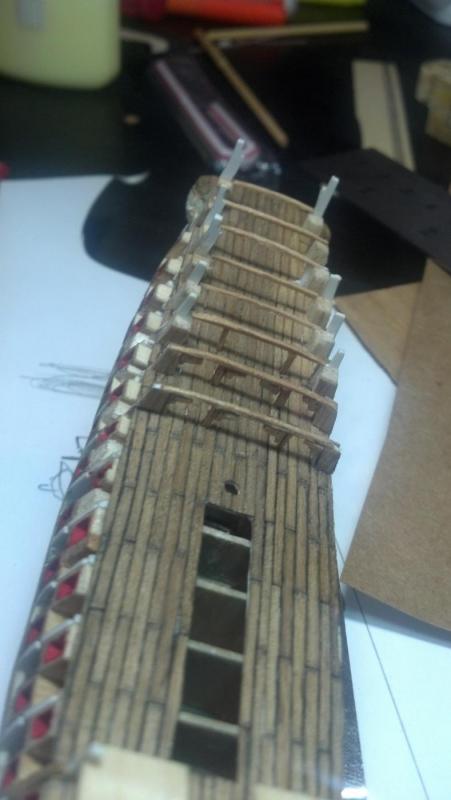
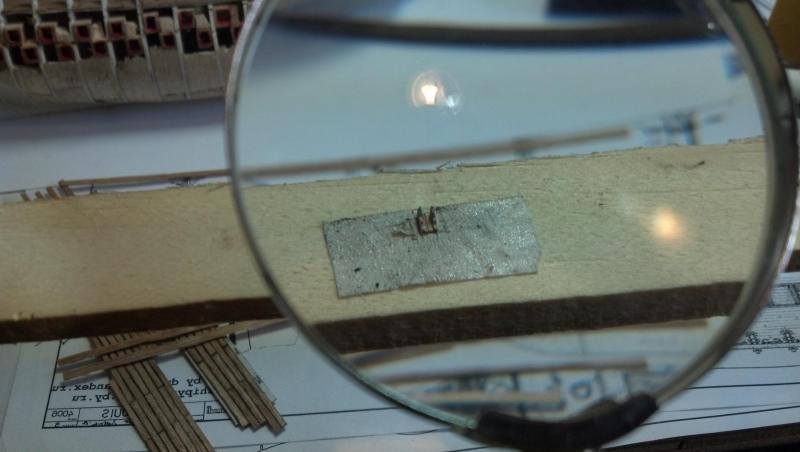
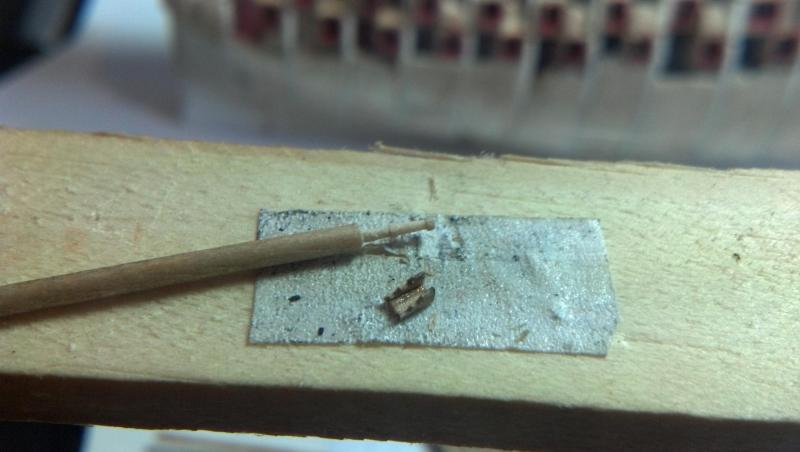
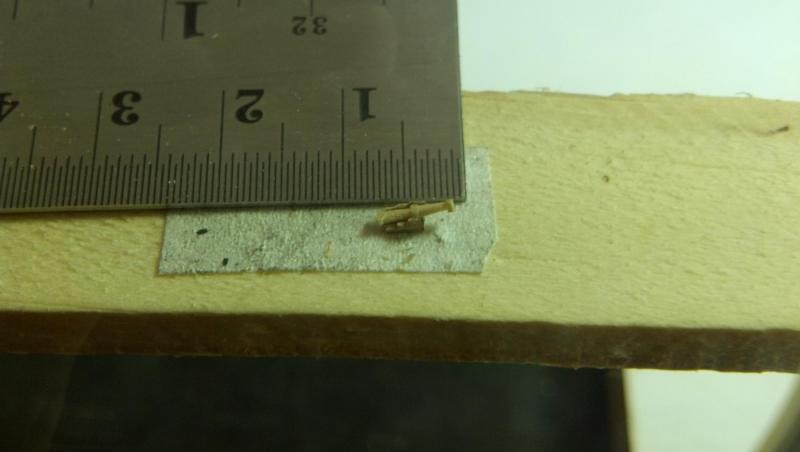
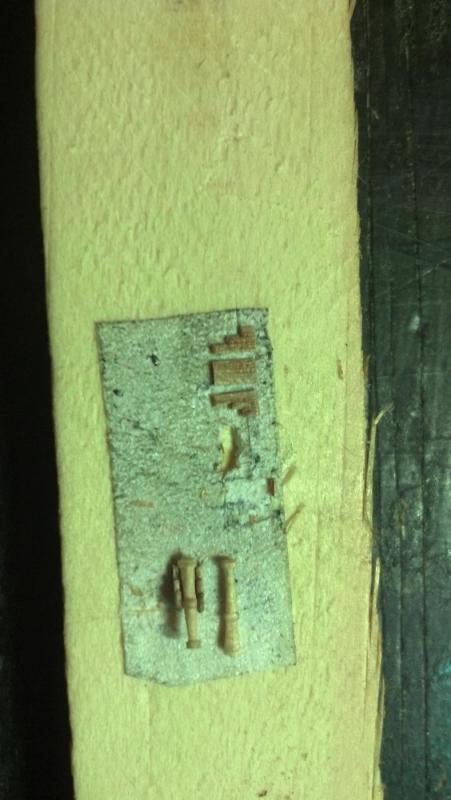
More balsa and a few strips of scrap wood to make the arcade stuff (don't know the name )... The balsa pieces also help to form the gunports. I totally forgot to take pictures, but I glued the gun carriages in to the their positions in the gunports (two of them may be seen from outside - more pics later...) under this second deck ( stupid me!). This is was a prototype for the gun carriages (the cannons themselves were not included as I thought I would break them easily - they'll be glued in the final stages of the model - if it survives...) First try - thick card. Not good. Second attempt - wood veneer (no idea what wood this is... I just bought a pile of scraps... ) Toothpick for the cannon... A second set... Both together... Ruler for size... (out of scale but still cool!) And my thumb for reference too... It'd be much easier to turn the cannons if I had a lathe or a rotary tool (I'll try to purchase one, 'cause doing all these by hand will be too time consuming and time is one of my restrictions lately).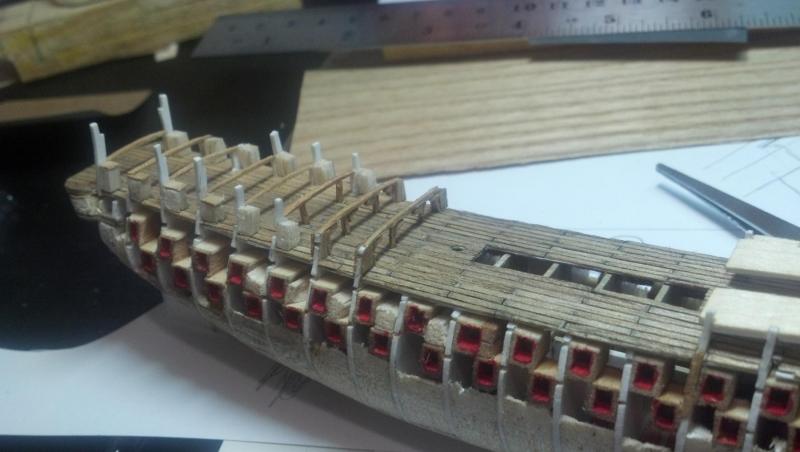


-
Royal Louis by fmartins - multi-media
fmartins replied to fmartins's topic in - Build logs for subjects built 1751 - 1800
Yes... It's my first build... It's all pretty messed up but I'm loving it... I'm even considering doing something bigger if it turns out "acceptable" in the end... The problem with this scale and all improvisation is that I'm spending a lot of time thinking about the next steps or ways to correct the mistakes I made in the planning... -
Royal Louis by fmartins - multi-media
fmartins replied to fmartins's topic in - Build logs for subjects built 1751 - 1800
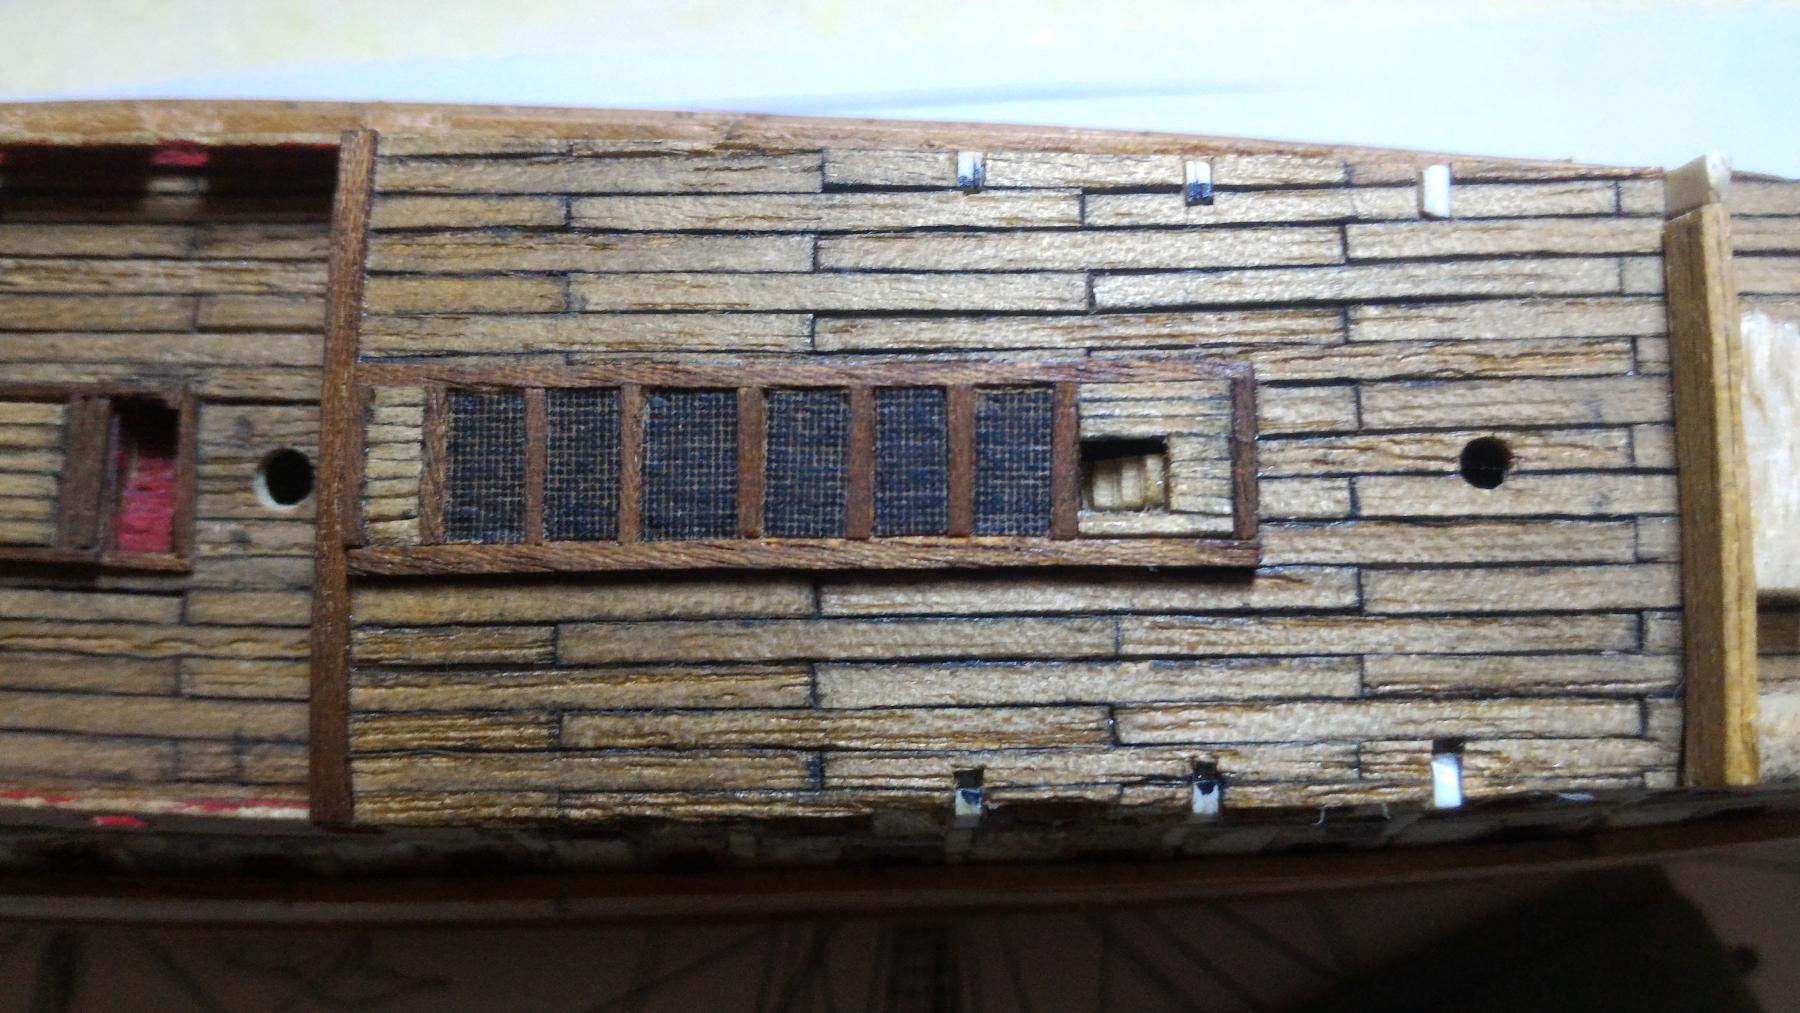
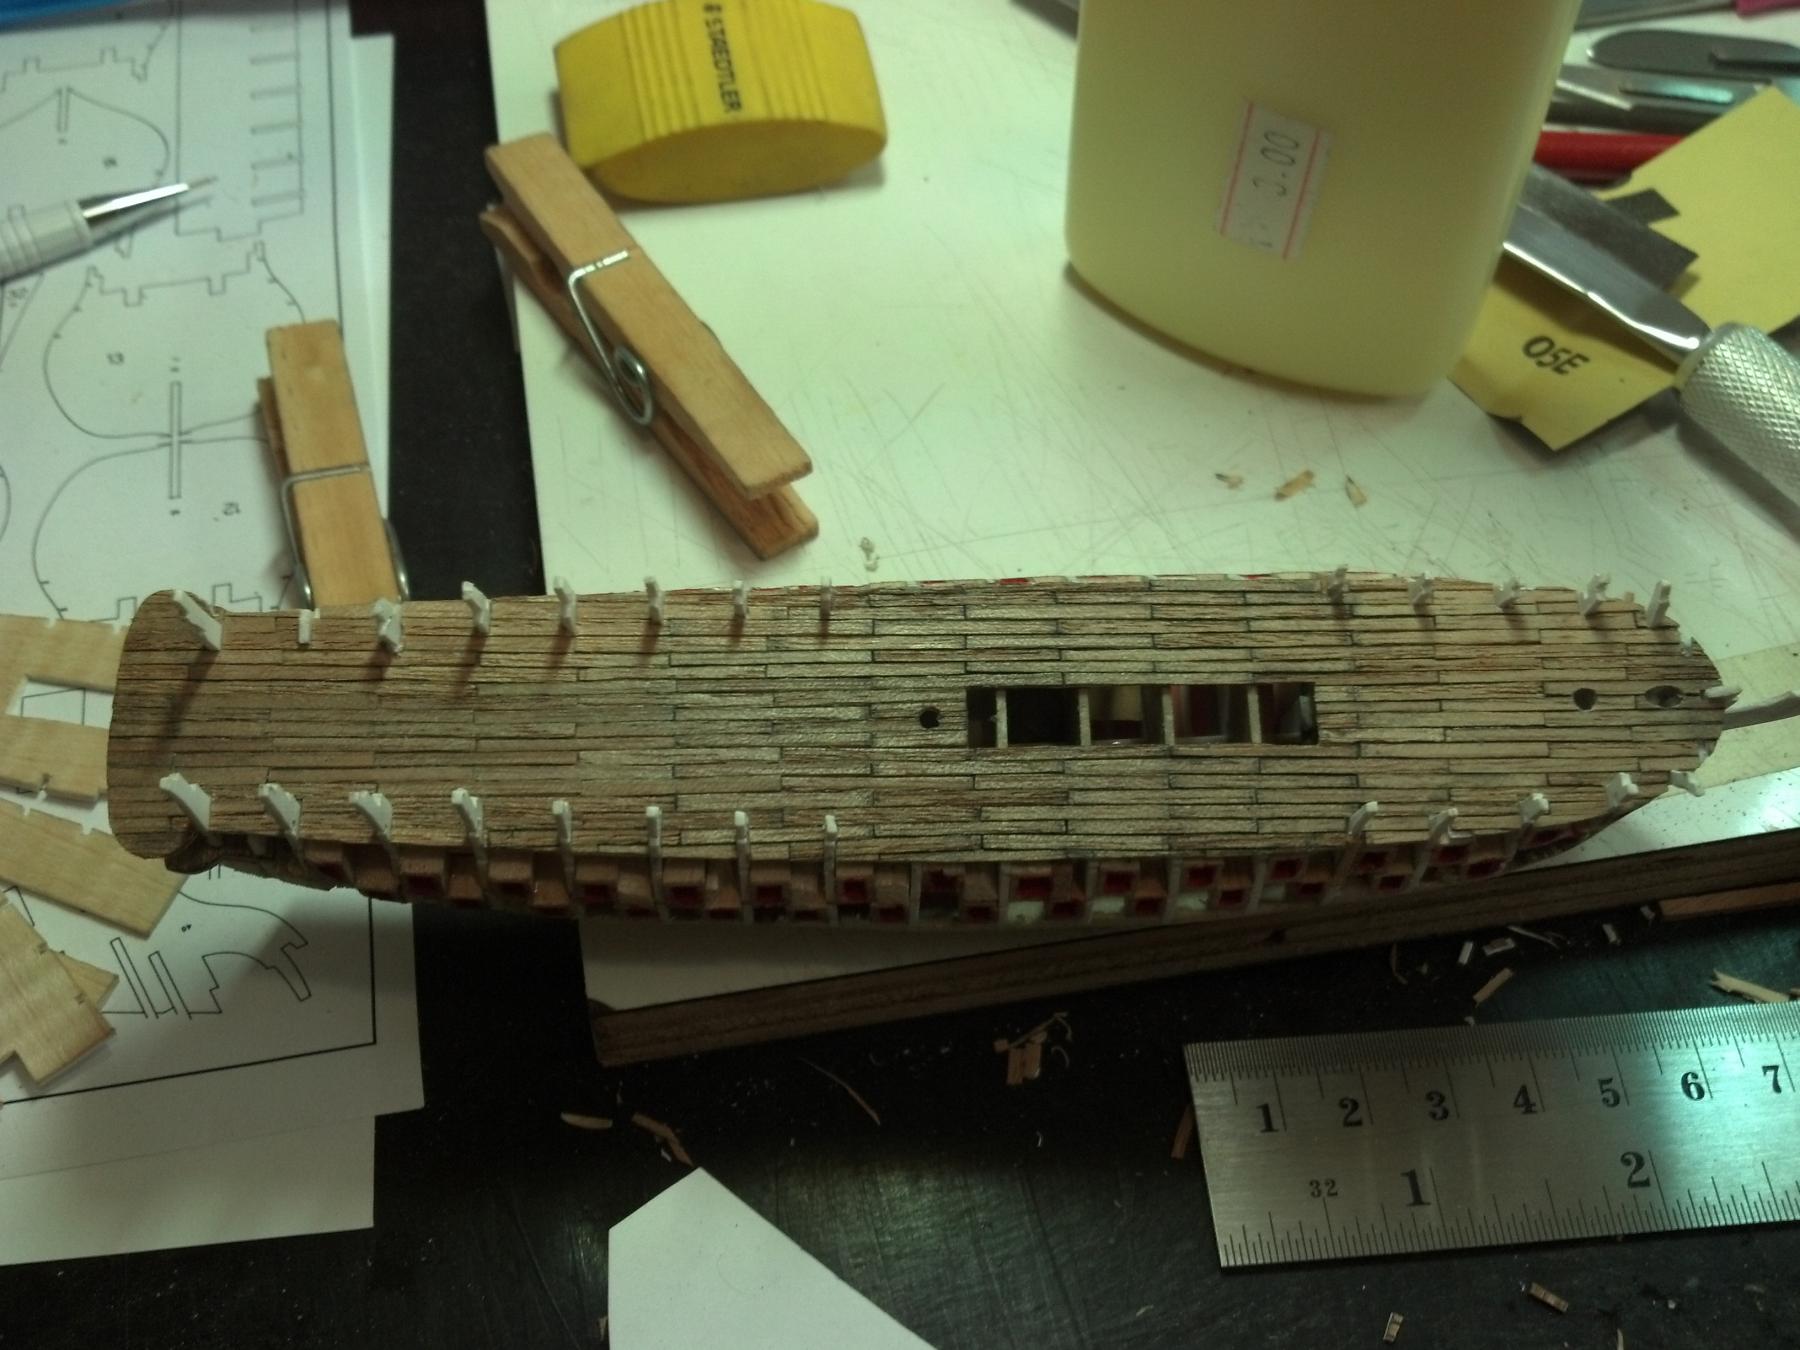
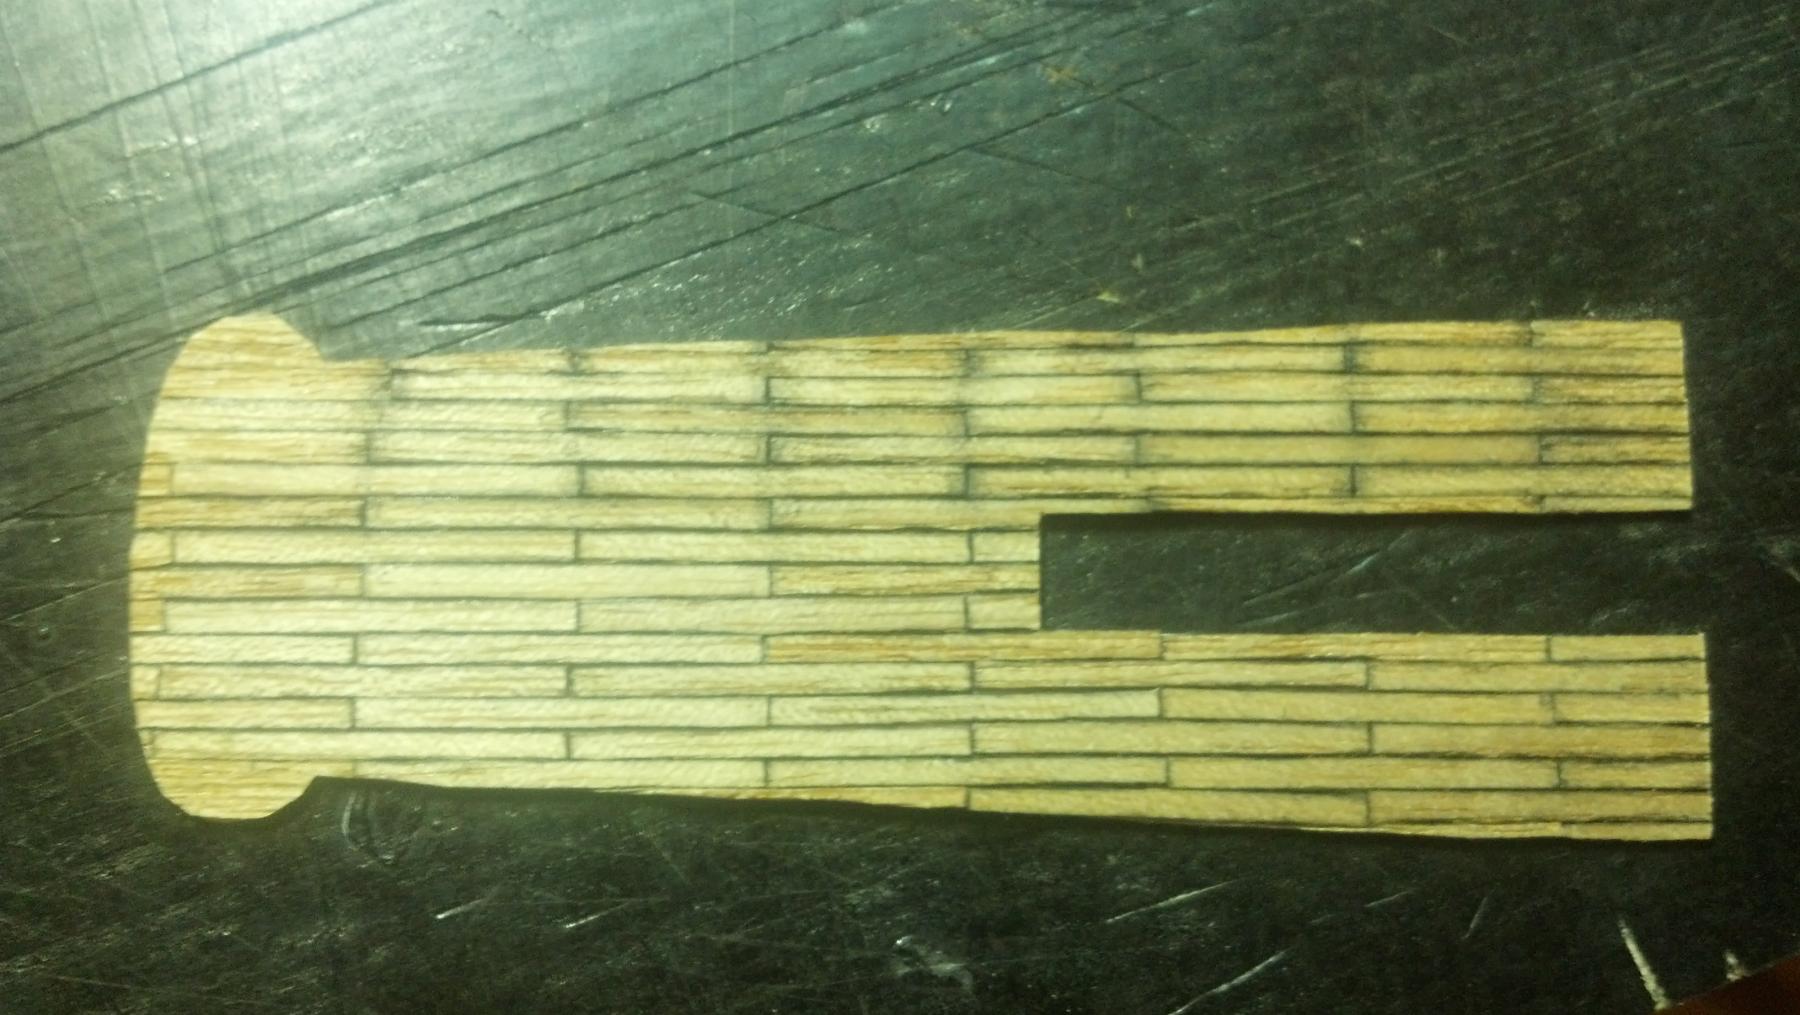
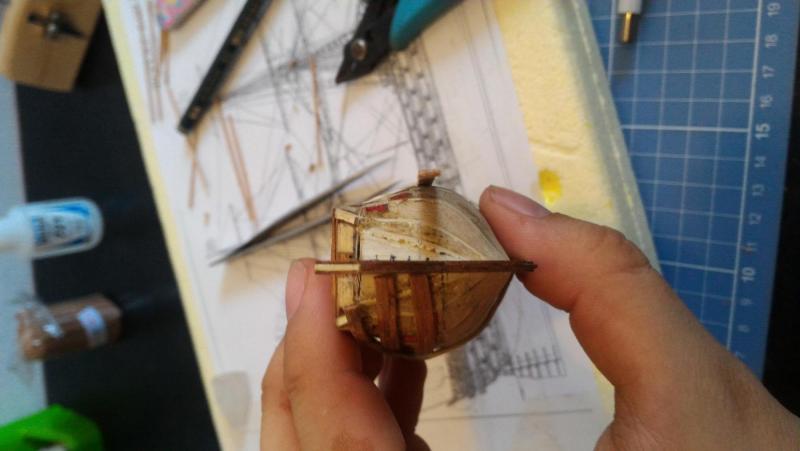
After a few attempts, I think that the deck planking was not so horrible... The hole you guys see in the middle section was the fruit of my illusion to add some real miniature grating ... All the gunports were also painted red. Due to the small size, I think I'll have to use CA glue to secure the bow planks in place, so instead of wood, I carved/sanded a plastic piece (to make it easier, I think...). The same was done with the other decks... With a bit of improvised weathering (yeah everything's improvised!!! )


-
Royal Louis by fmartins - multi-media
fmartins replied to fmartins's topic in - Build logs for subjects built 1751 - 1800
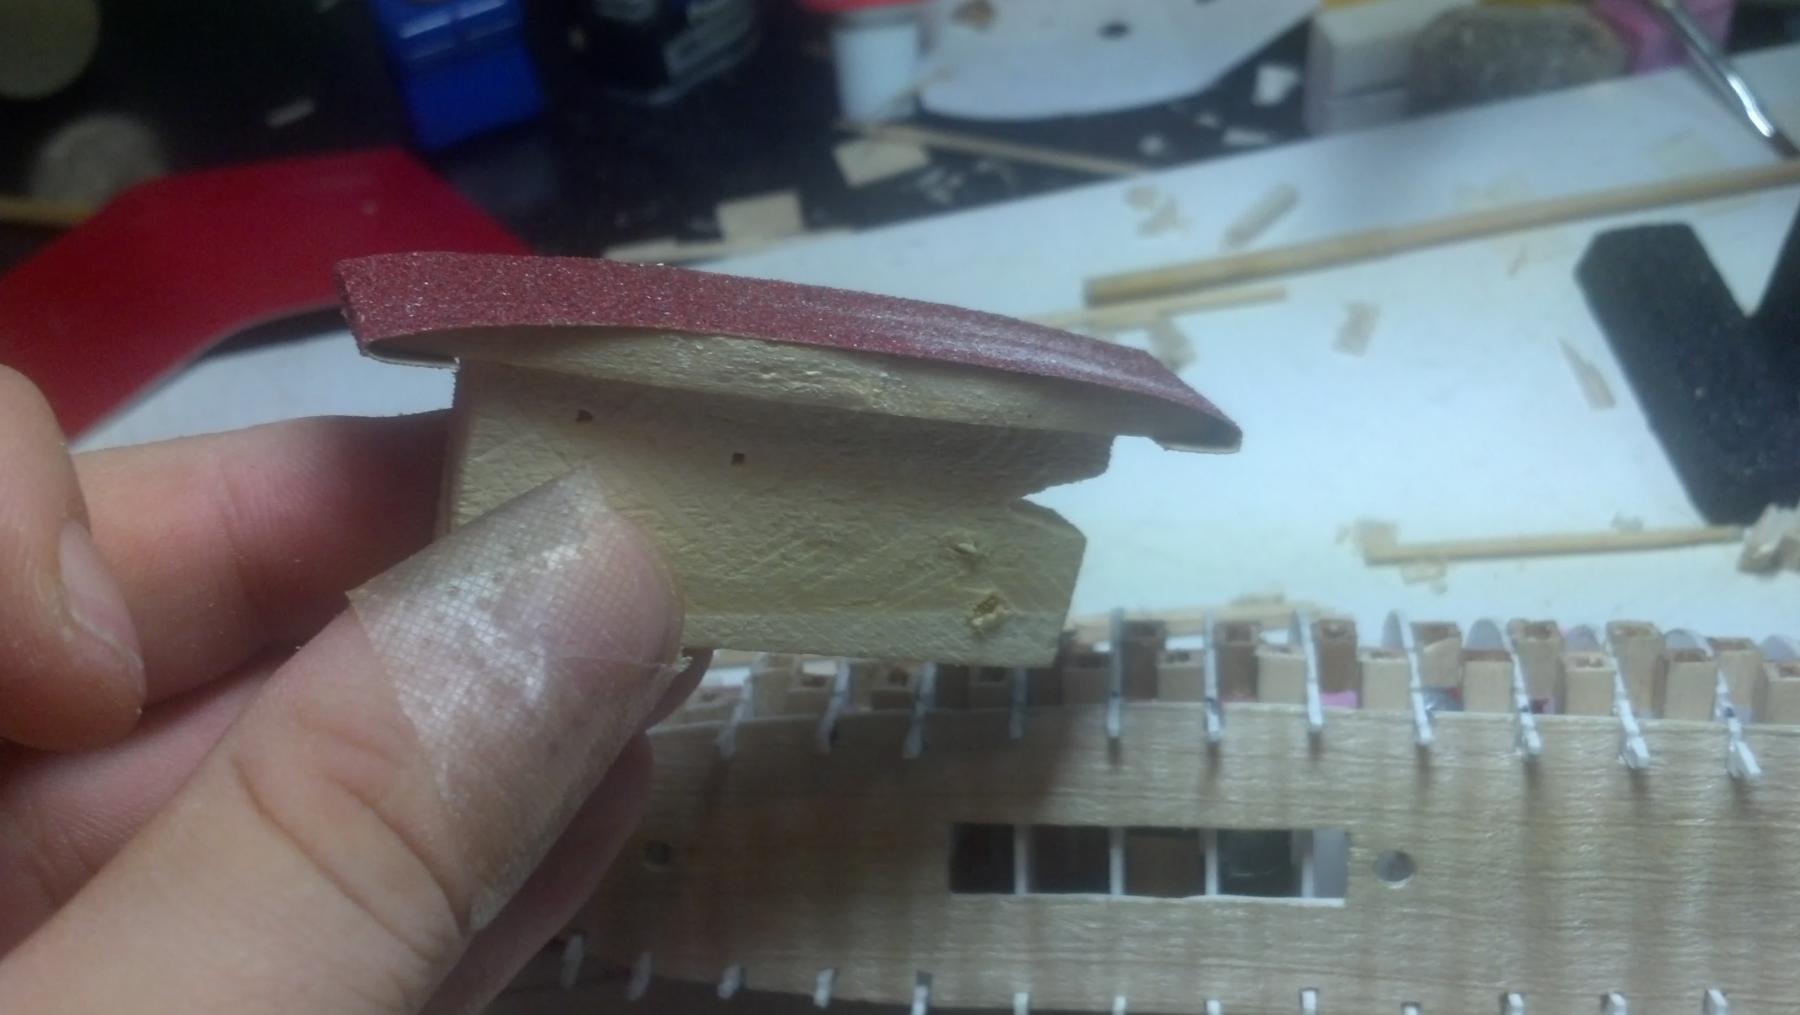
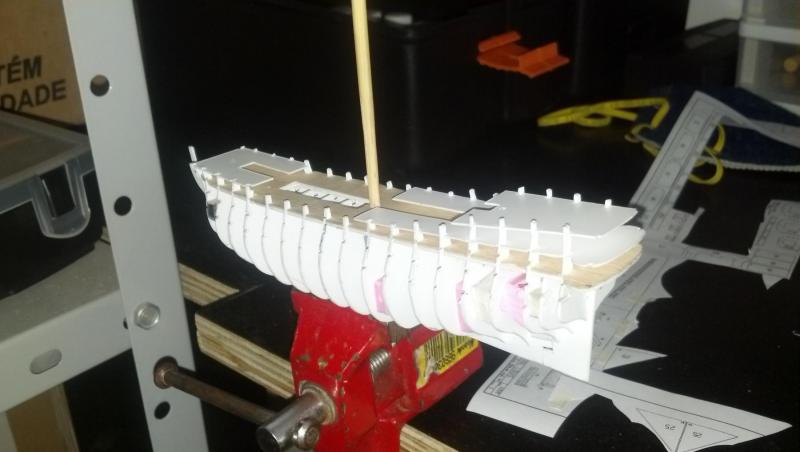
To fix the 'flexibility' problem, I also added some wood (balsa - I know it's not the best, but it was easy to find, easy to glue, and really easy to sand) between the bulkheads. This made all the fairing thing much easier... (improvised sand block in the lastpicture... ) The problem with the wood-covered styrene deck is that it's really flat. I could sand it to give it a more natural curve, but instead I thought of something else... I had some thick card paper lying around so I improvised some deck planking on top of it... Also, it's not the standard deck planking pattern (I only found a tutorial on deck planking a long way after I had done it). It's a bit out of scale but whatever, it's already pretty small for me ...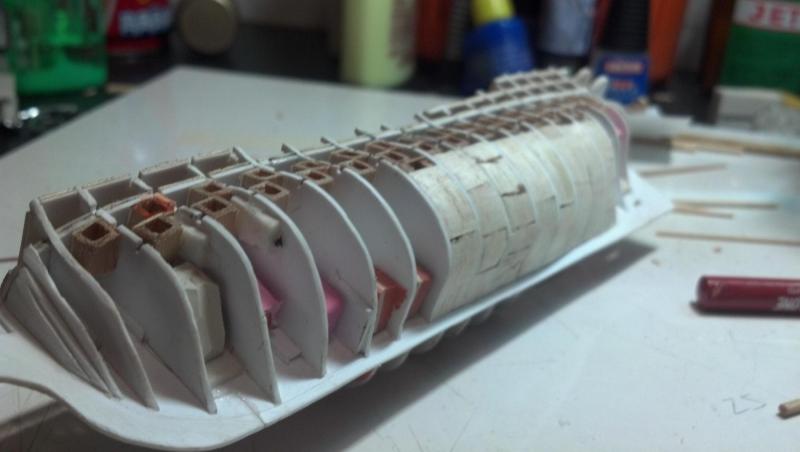


-
Royal Louis by fmartins - multi-media
fmartins replied to fmartins's topic in - Build logs for subjects built 1751 - 1800
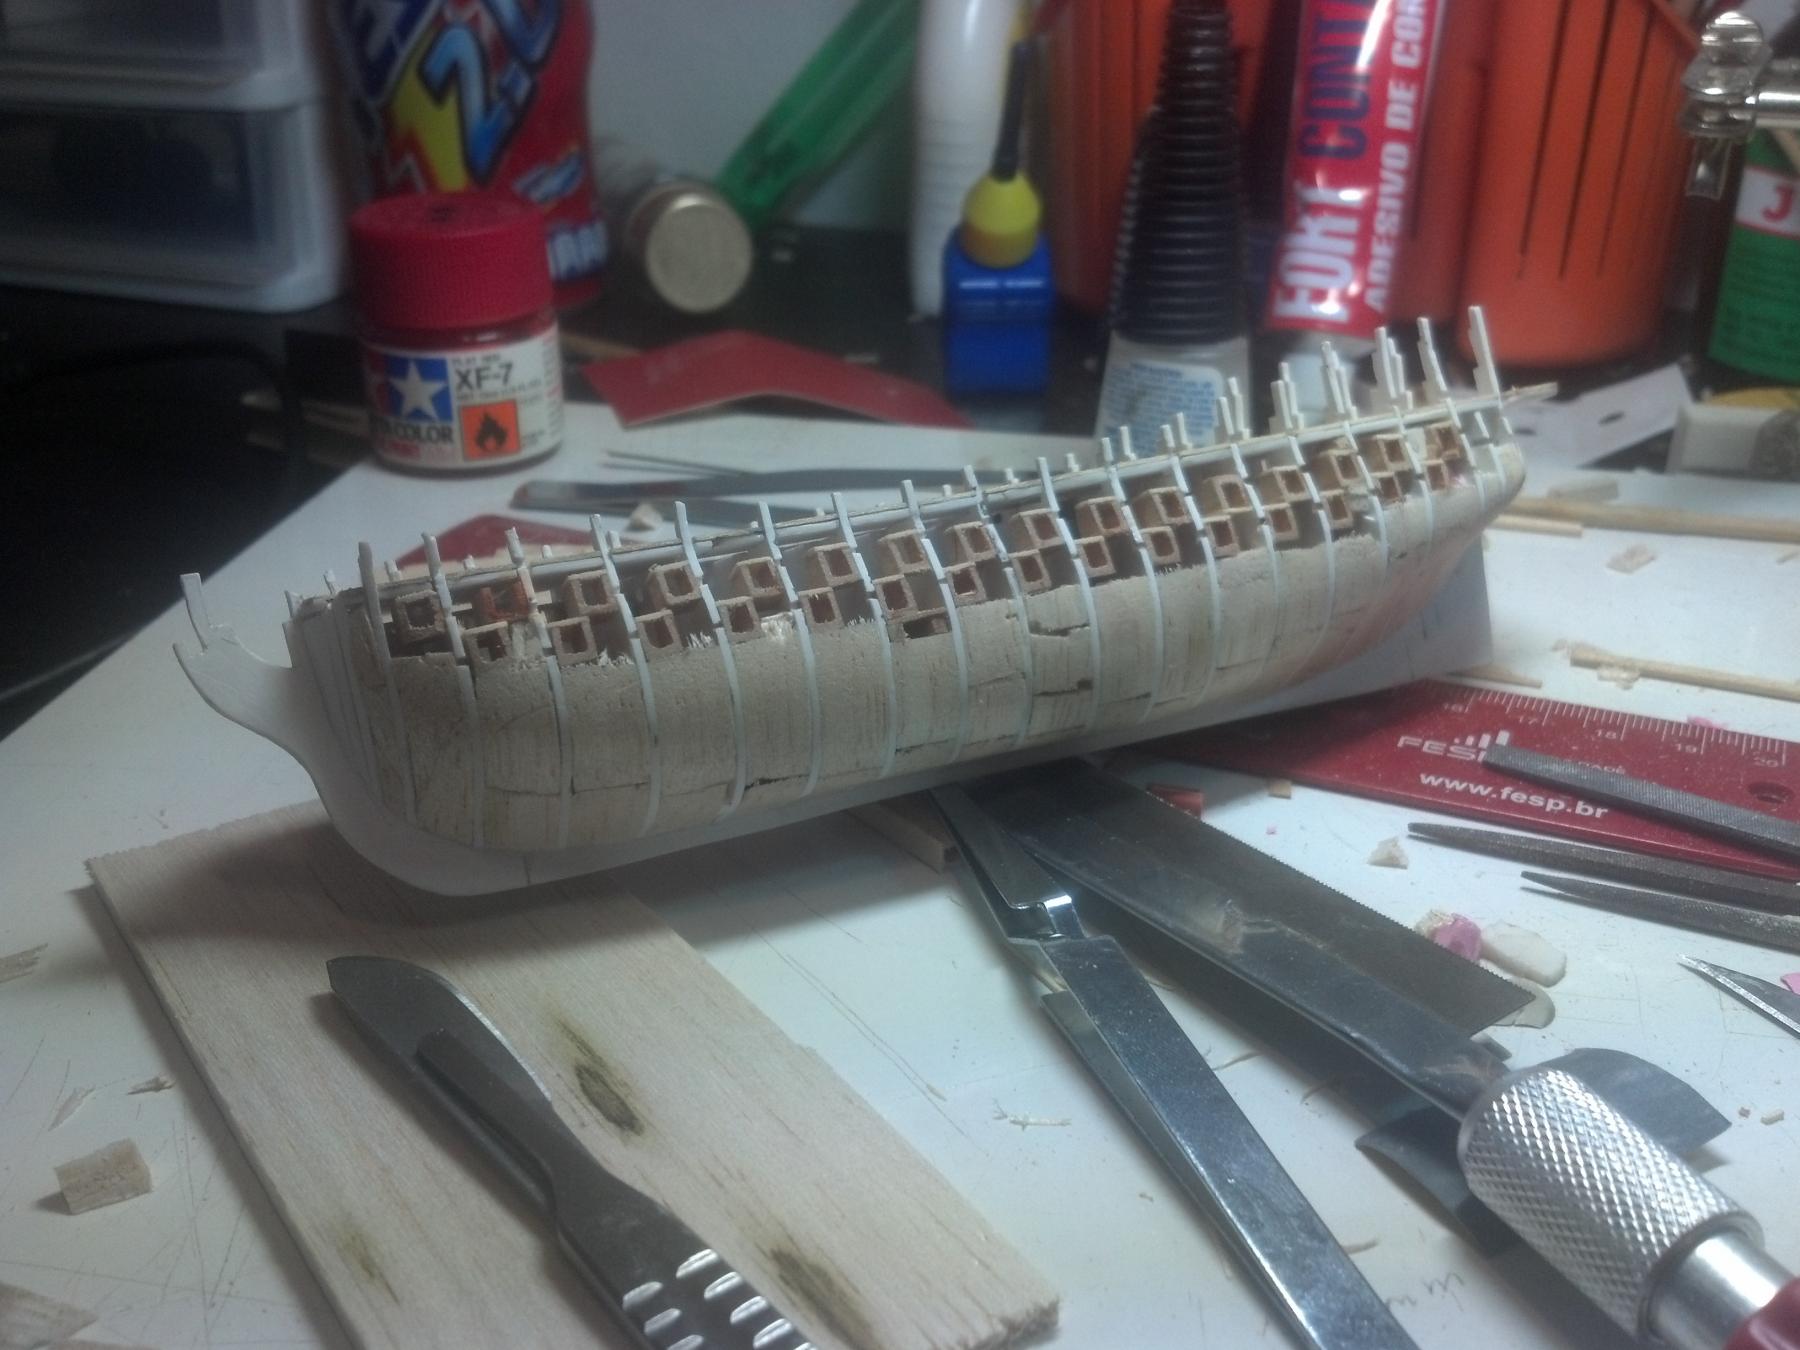
To deal with the fleixibility and to keep bulkheads at a 90 degree angle with the false keel, I glued a lot of rubber blocks between them... I also added the space for the cannon ports... The decks, however, were not glued. It was just a dry run to see if they would fit. I also started fairing the bulkheads, but with extreme care because, again, it was a bit fleixble ...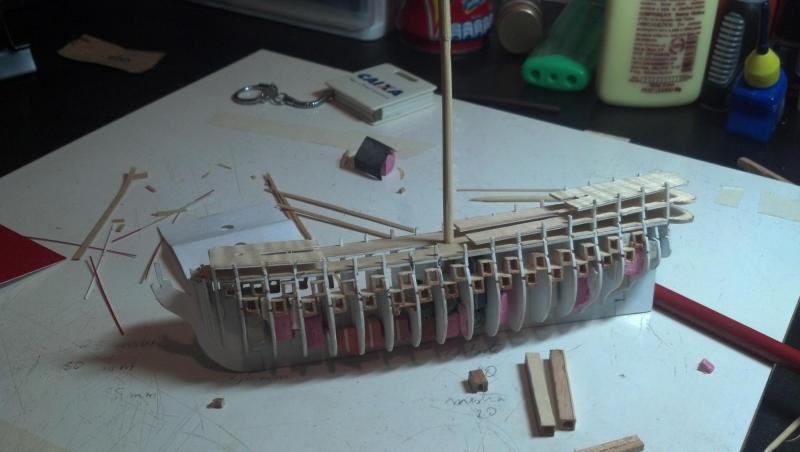
-
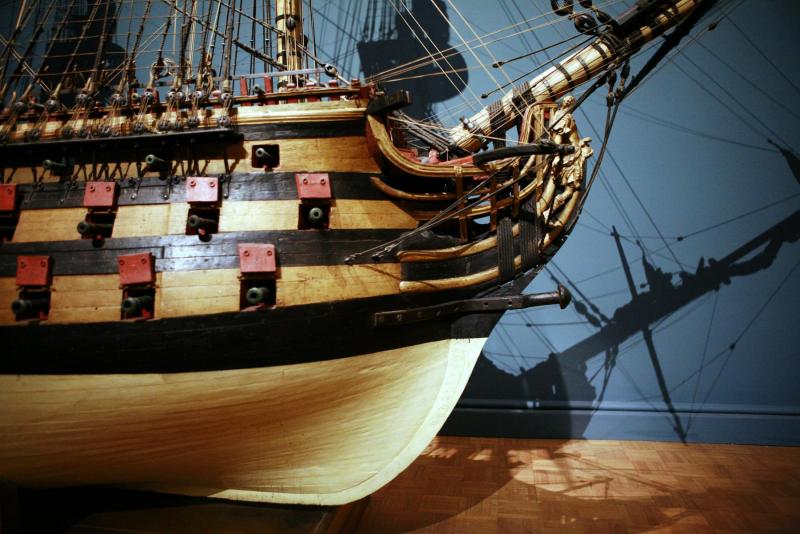
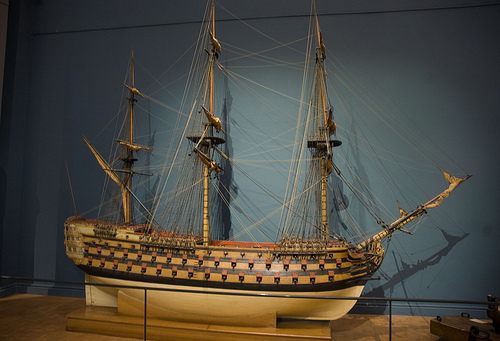
Before anything, English is not my mother language so please be kind to my mistakes (there will be too many I'm afraid) and lack of nautical jargon. Well, this is my first build. You may think it's a pretty bold move for a beginner to model such an intricate ship as the Royal Louis but I fell in love at first sight with the model at the Musée National de la Marine in Paris a couple years ago. At the time, I had no interest whatsoever in ship modeling, which is a pity, and missed the opportunity of taking hundreds of pictures at the museum. Either way, that's the one... The model at the museum is huge - I think it's larger than 2.5 meters (8.2 feet?). I wanted to build a model ship like everyone in the forum but I live in a small appartment in Sao Paulo Brazil so I had to settle for something smaller. I also didn't want to buy a kit (another risky choice for a rookie) so I got both model ship makers and historical plans to plan my build. In the end, I planned my little Royal Louis to have a 25 cm hull (9.8 inches?) and sit comfortably on a very small shelf when done. Another reason for the small size is that I don't have much time so, a larger model would take too much time preparing the wood, etc etc. I'm no Lloyd Mccafery so my model will be full of flaws and probably horrible in the end, but I guess it's a nice experience and you can only learn stuff by doing it. I really hope I can learn something from it. Lots of stuff will be out of scale or I'll end up using inadequate materials/techniques, but in the end I'll have fun. I used POB as a start as you can see in the next pic... The bulkheads are really thin, so wood was not an option (at least for my poor skills). I tried with a couples different types of wood but all of them felt too brittle to my taste, so the internal false keel / bulkheads were all made of styrene. They do have some flexibility but at least I didn't break all of the bulkheads. So far, so good.
-
PRINS WILLEM by juzek
fmartins replied to juzek's topic in - Build logs for subjects built 1501 - 1750
I'll have to follow this... again, I'm amazed by your building method... -
PRINS WILLEM by juzek
fmartins replied to juzek's topic in - Build logs for subjects built 1501 - 1750
Juzek, this is amazing! I am truly in awe due to your out-of-the-box thinking! I'd never think of building a hull from the shape like you did! Congrats!