RMC
-
Posts
933 -
Joined
-
Last visited
Content Type
Profiles
Forums
Gallery
Events
Everything posted by RMC
-
Joy. To my surprise it has all come out very well indeed - after some (sometimes) very painful, self-inflicted minor disasters. I will post some pictures tomorrow, all going well, with a description of the procedure and the disasters. It is a cautionary tale.
-
After much debate (my wife thinks I'm talking to myself) I have decided to take off the polyurethane (Estapol Matt) and clean the copper plates properly. The deciding influence was the coppering of the rudder. I would have been unable to duplicate the same finish as on the hull. Together, the two different finishes would have looked absurd. Although there's a risk of stuffing it up completely, I was very unhappy with the first effort. The manufacturer of the polyurethane has advised me that acetone will take it off, and I have tested some scrap plates that I have coated with the poly. It seems to do the job without too much difficulty. I will post some 'before' and 'after' pictures when I finish. (If it's a disaster, maybe I won't.)
-
Arthur: I used Humbrol Acrylic for the window frames and it does do a nice job, and for this type of job, I don't think that there is an alternative but to use a spray. It is, however, quite fragile and and touching up any damage with a brush is quite difficult. As well, with acrylics, cleaning brushes well is just about impossible. In all, where possible I'll stick to enamel, which if you take the time - lots of coats and sending lightly between coats - then give it a coat of spray polyurethane, gives an almost perfect finish. Acrylics are good for painting houses though ......
-
I bought one at BE's suggestion -and the extra bed. I'm very happy with it. The longer bed enables pieces to be turned up to about 300-350 mm in length, depending on the thickness of the material. One limitation is that the chuck will only handle material up to about 11mm in diameter. RMC
-
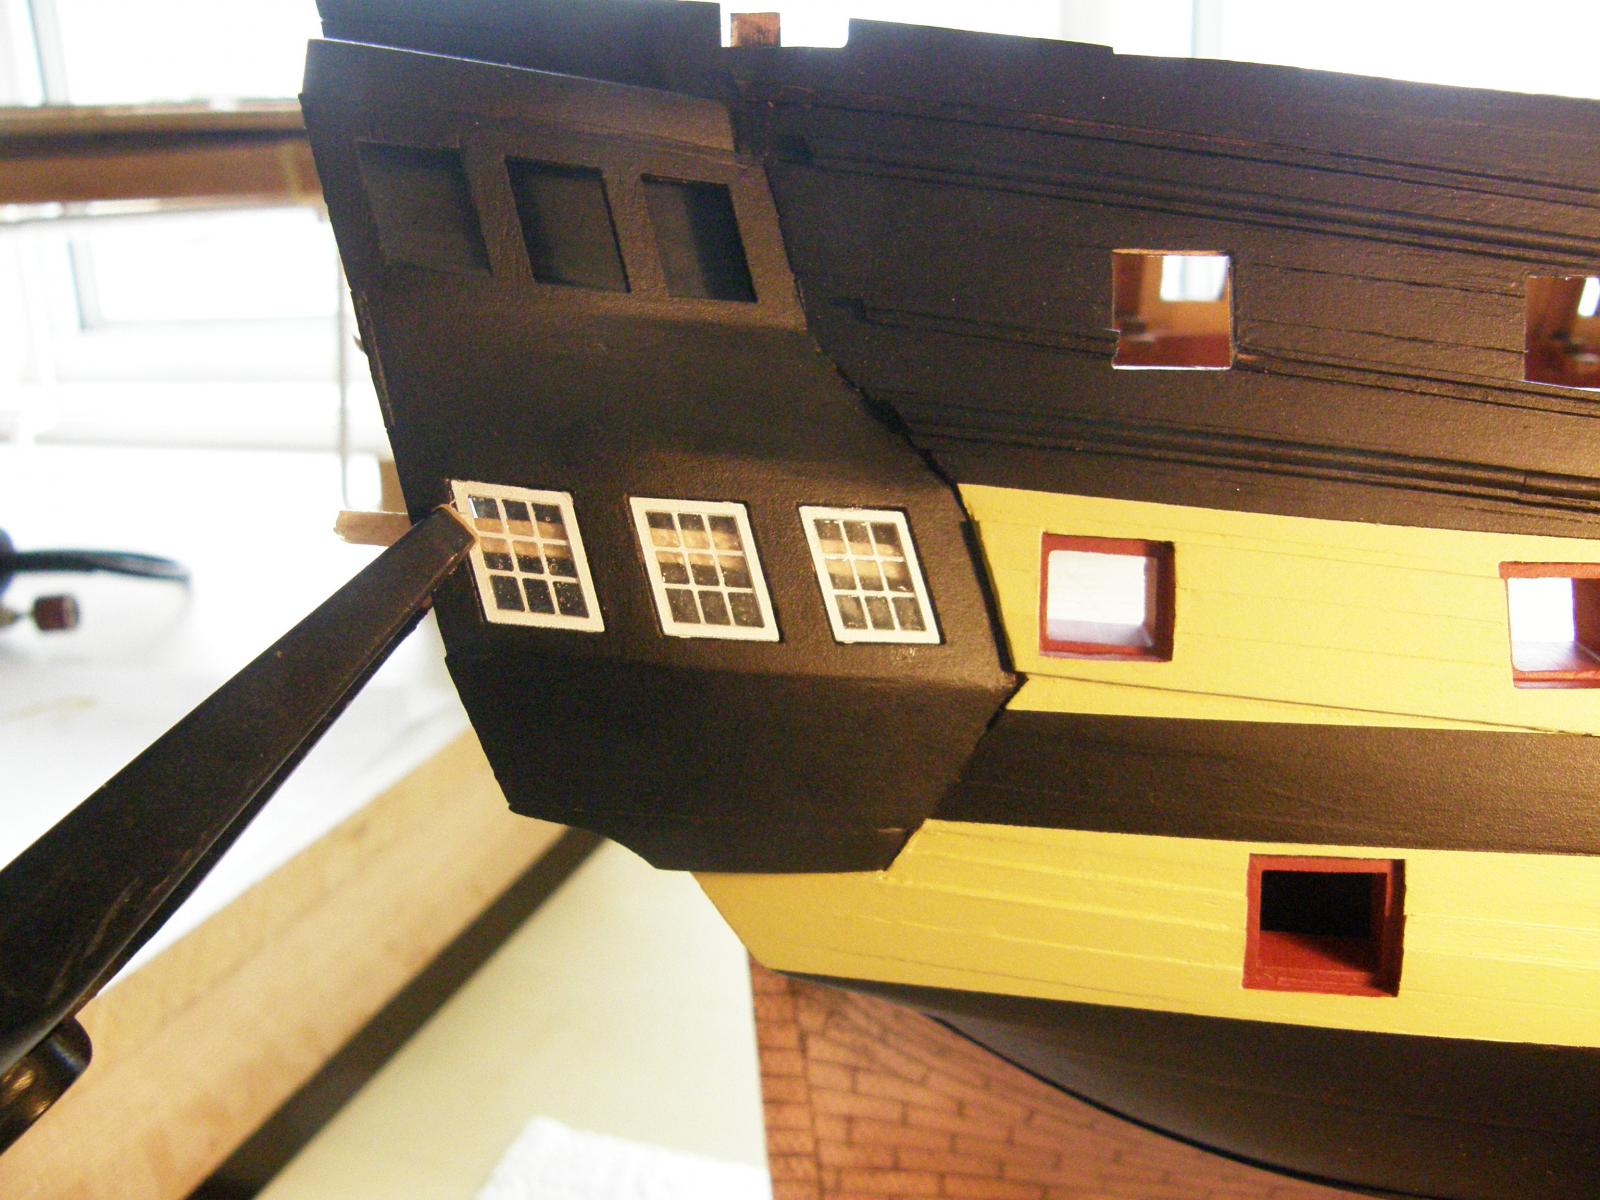
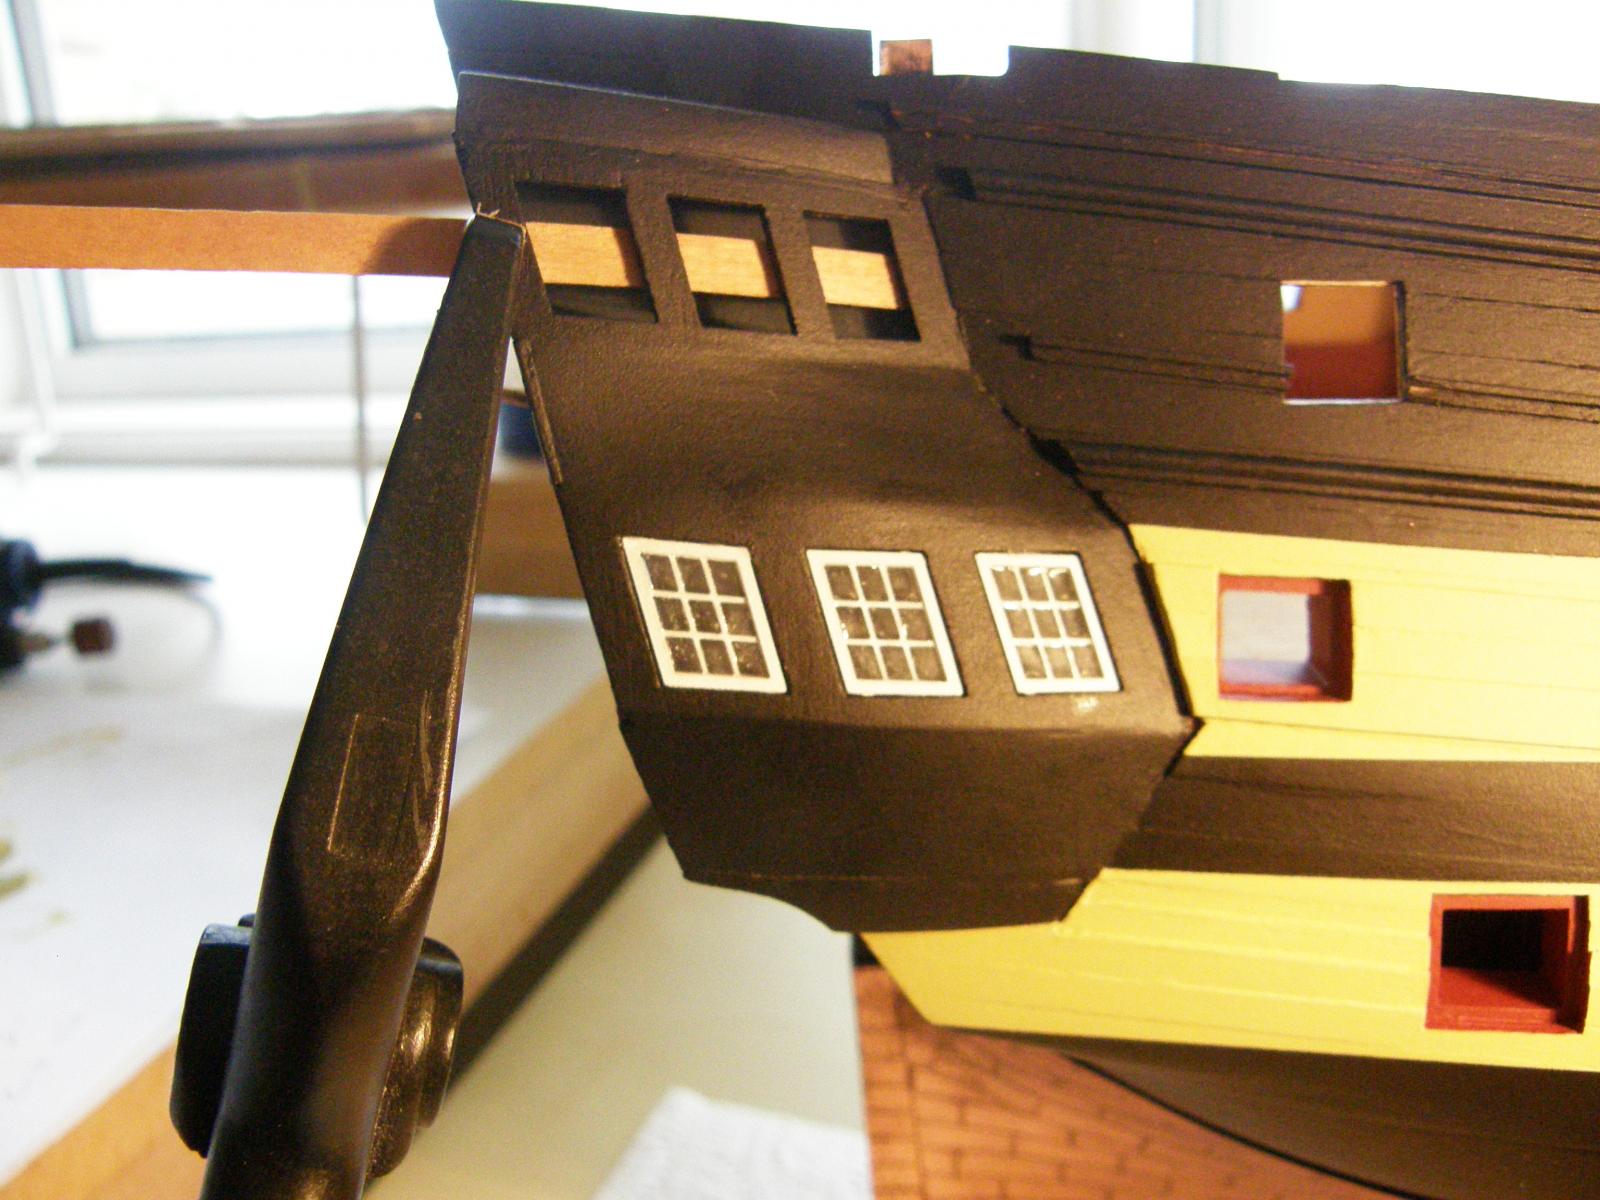
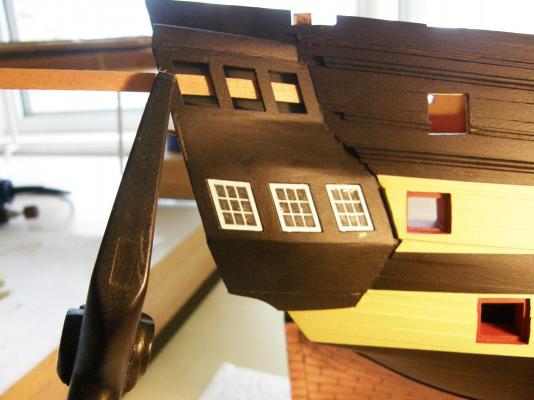
I decided to put the windows into the side galleries while waiting for the paint to dry on the rudder. It would have been far easier to put the windows on before mounting the galleries on the ship. Every time I tried to put a window in, it either fell into the gallery or fell out. This made me quite unhappy. Eventually I took a piece of scrap 0.6mm thick wood and pressed it into the gallery so that it bent to the shape of the gallery curve. It provide support to the window and fitting them turned out to then be quite easy. I again used Krystal klear for the windows. Unfortunately minor disaster then struck. I knew CA would fog up acetate: it didn't occur to me that KK would be similarly affected. I then had to cut out the fogged windows (it took quite some time to get it right) and redid them after the CA had fully cured. Fortunately I had only done one row of windows before I discovered the problem. KK is also a glue and I used it to glue the remaining windows in without any problem. The KK really does a very nice job it's realistic, tough and flexible - and can be cut out (if necessary) - just don't use it around CA.

-
Thanks Arthur, I'll take your advice.
-
I have just looked at the photos of the painted tops which appear to have fluff on them. A quick brush with a stiff paint brush took all of this off. The unpainted portion in the centre of the tops shows where the bolsters will go.
-
I've just come back from holidays and was able to make some progress, though not nearly as much as I planned. We've been having a hot spell of weather and the beach took precedence over boat building. The tops took me far longer than I expected. The holes that need to be drilled at the front of each one need care. The ply is prone to damage. Once I discovered that (while drilling the first hole) I put thin CA on the top and bottom where the holes were to be drilled. Once dry the holes drilled easily. You may see the coating of CA on the first three photos - particularly the photo of the underside in the first photo.. The trestle/cross trees proved to be quite fiddly. A simple jig was necessary to keep everything square. I fitted a trestle tree into the gap between two pieces of scrap 1x5mm and sqaring up the cross trees along the lines on the plastic gizmo (from my wife's quilting kit - little does she know). Here all the bits and pieces panted and coated with polyurethane. The spray poly finishes the paint work beautifully. This shows the finished mizzen topgallanr mast. The detail is not well shown in the photo and at the moment it is not really useful to show the others I have finished for that reason. My next major job is to finish and fit the rudder Having seen the workmanship of Arthur's rudder and the trouble to which he went, I am approaching it with some trepidation.


-
I have taken the model out of the storeroom and put it in better light. While I was waiting for the polyurethane to dry properly I finished painting the stern decoration and began work on the rudder. One of the really good things about this kit is the many self-contained projects that go to make up the whole. The stern decoration is fiddly and perhaps I have used too many colours for the period, but I'm quite pleased with it. I don't know how you could paint something like this in a smaller scale. Here I'll be doing my best to duplicate Arthur's work of his rudder. I presume the false keel does not extend to the rudder. Anyone wholooks at this log will be sick of coppering photos, and except for incidentals, these will definitely be the last ones. I won't know until I finally submit this post whether the photos have come out. To all, I hope you have a really happy and enjoyable Christmas and a very happy New Year. My family and I will be off on Christmas day for a few weeks to the beach south of Sydney where among other things I will try to finish the masts. Bob


-
Thanks BE and Jason. I must admit that I am a bit disappointed in the result, though it is acceptable. I made the mistake of doing the final cleaning in the store room under the house where the light is not as good as it could be. I'll know better next time. The polyurethane spray does give a very good and hard finish, and I suspect the diffused way the light is reflected off its the surface has something to do with the poor quality of the photos. Chris Watton uses a type of polyurethane spray, and I have noticed that the photos of the copper on the box the model came in seem to have the same diffused character. Once I get the model into good light it will be interesting to see if all of this is right.
-
These look a little better and when I can move the thing into better light I'll try for a last time. In the 'flesh' the result is not too bad.
-
I have just looked at the photos and unfortunately for some reason (perhaps low light) they haven''t come out. They are quite blurry. Very odd.
-
Here are a few photos of the coated plates. I certainly had hoped the cleaning would turn out better - but it's a bit late now.


-
Thanks for that Arthur. Your photos of the rudder will really help. I have finally finished the coppering of the ship. While I was careful with the CA when doing it, some still had to be taken off. I used CA debonder which is fairly effective on CA that has set hard, but it would have been far easier had I cleaned as I went. I found in cleaning the tarnish off the copper (with lemon juice mainly) , the tarnish reappeared in minutes. Between finishing the cleaning and putting on a coat of polyurethane was a bit of a race. The early signs suggest the result is acceptable, though the cleaning did not go as well as I would have liked. Nevertheless I have just finished and today is probably a good day to have done it. It's quite hot (about 35 deg C) and I have found that poly sets really well when warm. The false keel has turned out well, so with luck I have finished below the waterline. I will post some photos once the the polyurethane is fully hardened.
-
Hi Jason, as you can see I have decided (with misgivings) to use copper plates. I will however use the copper paint in the recesses of the rudder and hope it all works out.
-
Arthur: did you put plates on both the back of the stern post and the front of the keel? If so, was the gap between the two sufficient? Bob
-
BE and Arthur: Yes, upon reflection painting is not a good idea. I think I will use the plates as I did for the stem, though I have some concerns that the plates on the back of the stern post and the front of the rudder may leave insufficient space between them. Obtaining the copper tape will take some time (it doesn't appear to be readily available in Australia), especially at this time of the year, and I just want to get the coppering finished. Bob
-
I have made up a false keel and it looks as if it will finish the coppering off really well. Thanks for the suggestion Jason and thanks BE for the help. One by-product of applying the false keel has meant not so much trouble needs to be taken to make sure the bent plates from each side meet meet neatly in the middle of the keel. The false keel will cover them nicely. All of this should be finished in a day or so. I am now concerned about what to do with the area of the stern post close to the rudder. - whether to put plates on it, paint it copper or leave it painted black. There doesn't appear to be any mention of this in the instructions. I'm inclined to leave it black. Suggestions would be gratefully received.
-
Ah, I see. In the context though it may be gilding the lily a bit. As it will be painted over I will overlap at the join. Only you and I will know. Bob.
-
Thanks B.E. I can can laminate two pieces of timber to a depth of 2.4mm. A quick look at this depth on the model suggests it would be fine. 3mm looks too heavy. I will need to join two pieces of the laminate as the wood I have is not quite long enough. In the meantime I'll look 'scarphed' up in the dictionary. Bob
-
Hi BE Thanks for that. I'll give it a go. It really does finish off your Pegasus beautifully. At 1:72 what sort of thickness would you suggest? I have 0.5mm or 1mm timber, one of which which may be about right. If necessary, there's probably some thicker stuff somewhere around if I can find it. Regards Bob
-
Thank you all for the kind comments. Jason: thanks for your suggestion. While I have heard of a false keel, I really don't know how I would go about putting one on, or what it would look like. Unfortunately, what I know about period ships could be written on a tiny postage stamp with enough room left over for War and Peace. I would certainly like to like to give it a go if it is straight-forward as I am certainly suffering from copper fatigue.
-
I have finally finished coppering the other side to the waterline. The final few plates proved to be very fiddly and time-consuming. I have now started on the 1.5mm 'gap' at the bottom of the keel. While also time-consuming, it is proving easier than I expected. Some later photos will show how I am going about it. Here I put lines of copper paint along the edges of the bow. I hoped that if there were any gaps between the bow plates and those on the sides, this would disguise them. Fortunately the fit turned out to be quite good. As there are no dedicated plates for the bow, I decided to alternate plates from the two sides as I think having all the denser rows of rivets all on one side would look rather odd. Following Mitsuaki (Fake John Bull), I decided to bend the plates over the gap and the bottom of the keel. The rivets provide a good guide for the place to make the bend. I held the plate to be bent along the side of the keel and along the gap, and noted where, with respect to the bottom of the keel, the bend needed to be made (roughly along the row of rivets +/-). Having attached the existing plates in strips made for a uniform gap along the keel, so there was little variation needed in the position of the bend. Anyway, so far so good. I used a small hand-held vice to make the bends.


-
I have done the coppering according to the pattern shown in the kit, and indeed this is the way the copper plates fall naturally with the curves of the hull. Aside from my occasional stuff-ups, there is comparatively little wastage. My understanding is that this is the way it was done for ships of vanguard's vintage. Later I believe a row of whole plates were applied along the waterline and I presume the penultimate row of plates trimmed and then taken up to the final row. Others are far better qualified to answer your question, but I am sure if any of this is incorrect, I will be corrected soon enough.