HOLIDAY DONATION DRIVE - SUPPORT MSW - DO YOUR PART TO KEEP THIS GREAT FORUM GOING!
×


RMC
-
Posts
933 -
Joined
-
Last visited
Content Type
Profiles
Forums
Gallery
Events
Everything posted by RMC
-
Do you mean a commercial woodfiller Alistair?
-
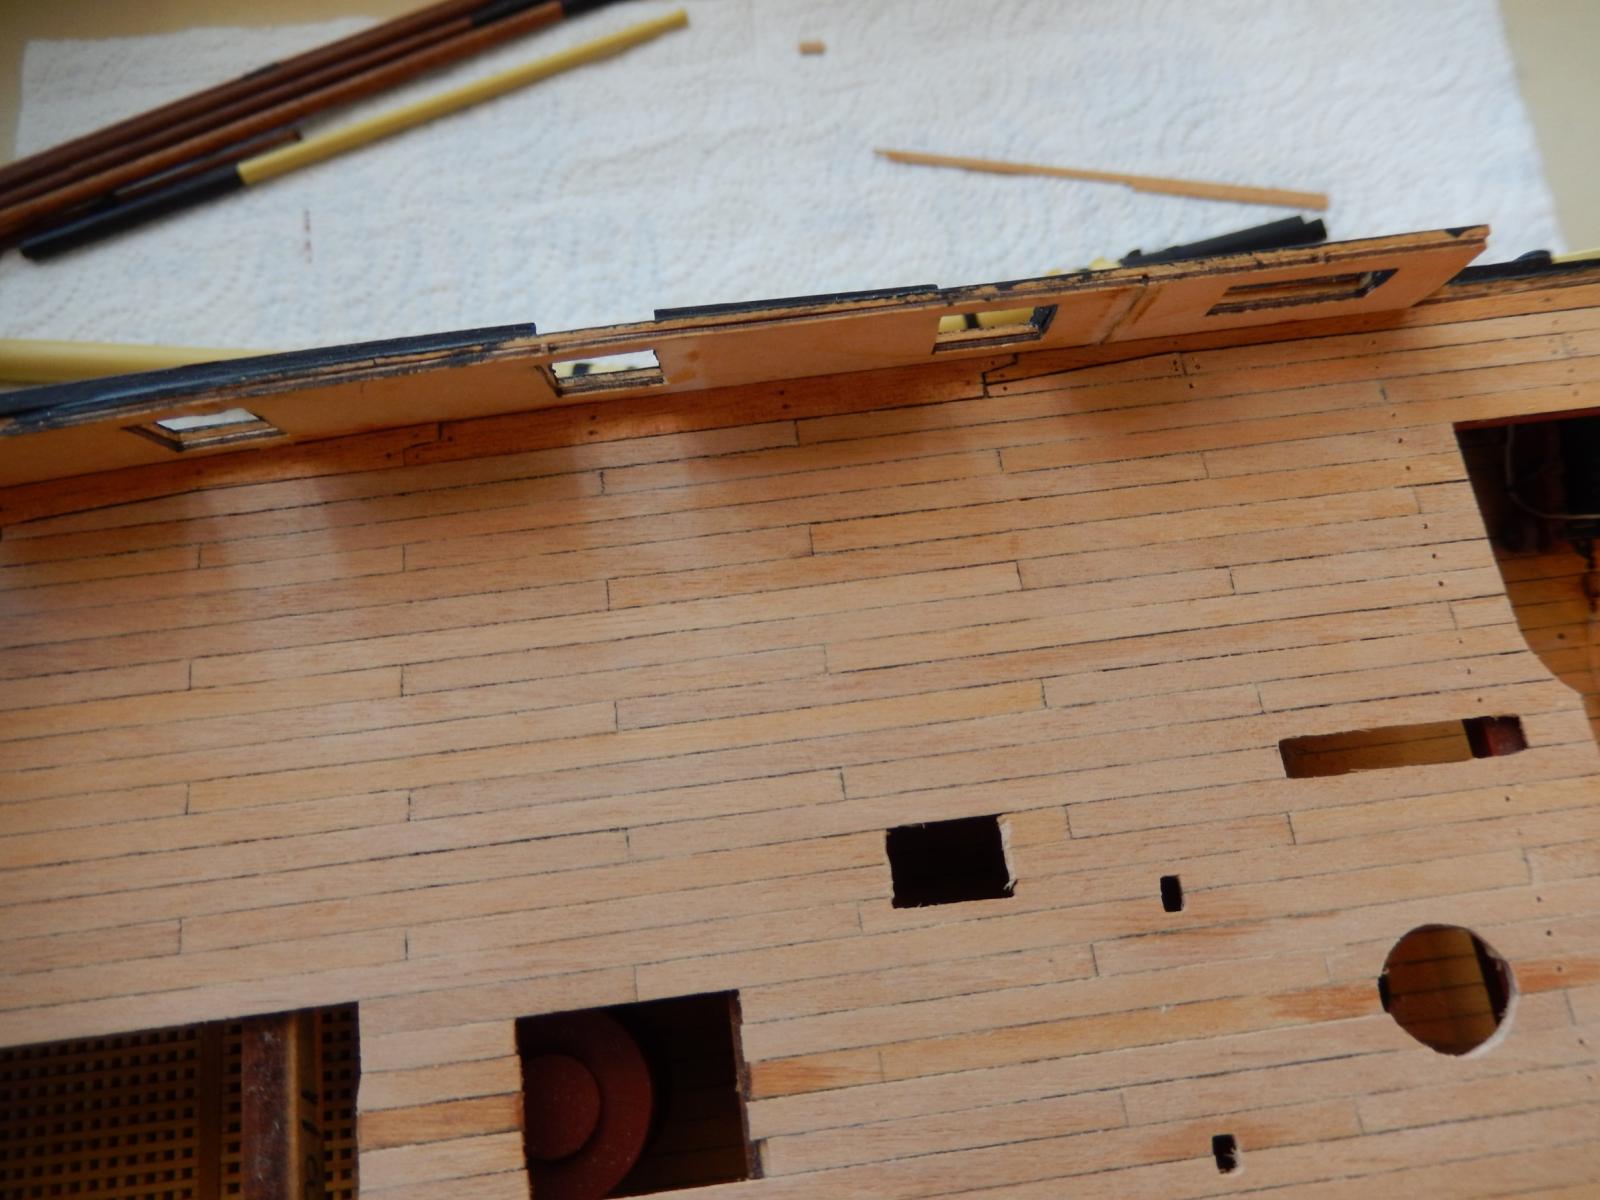
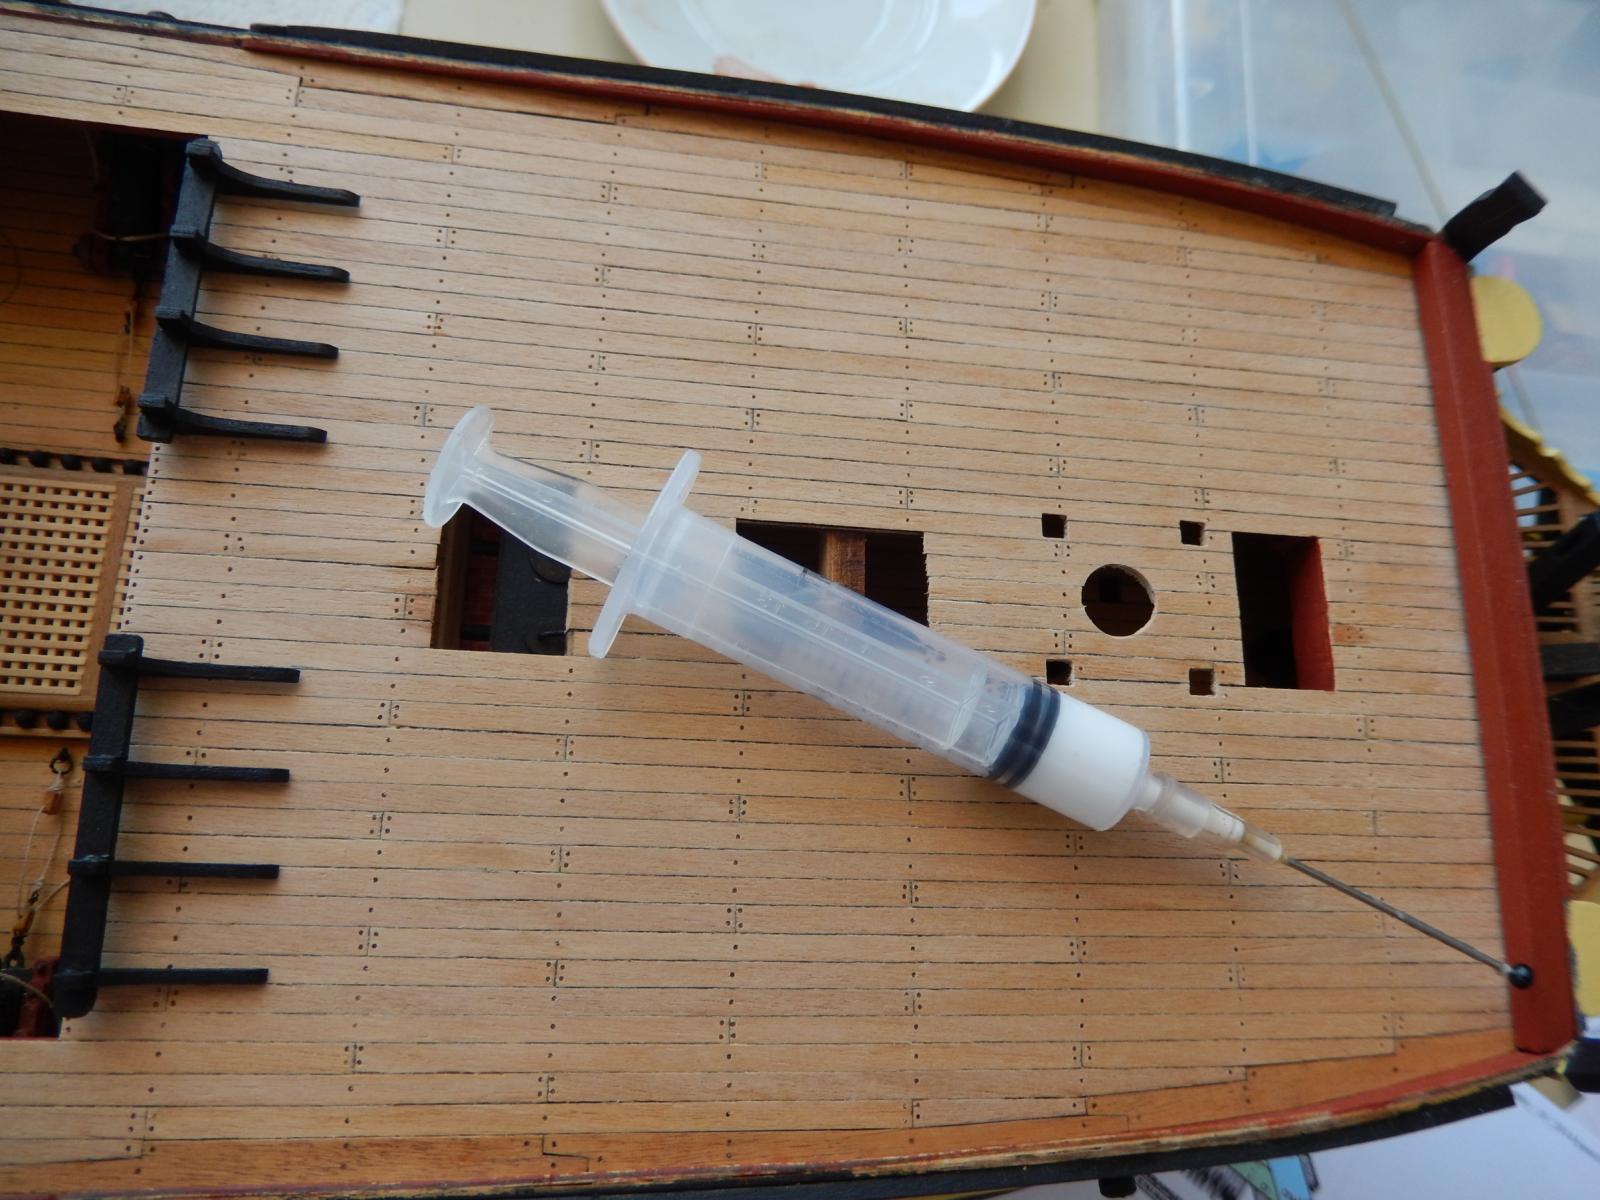
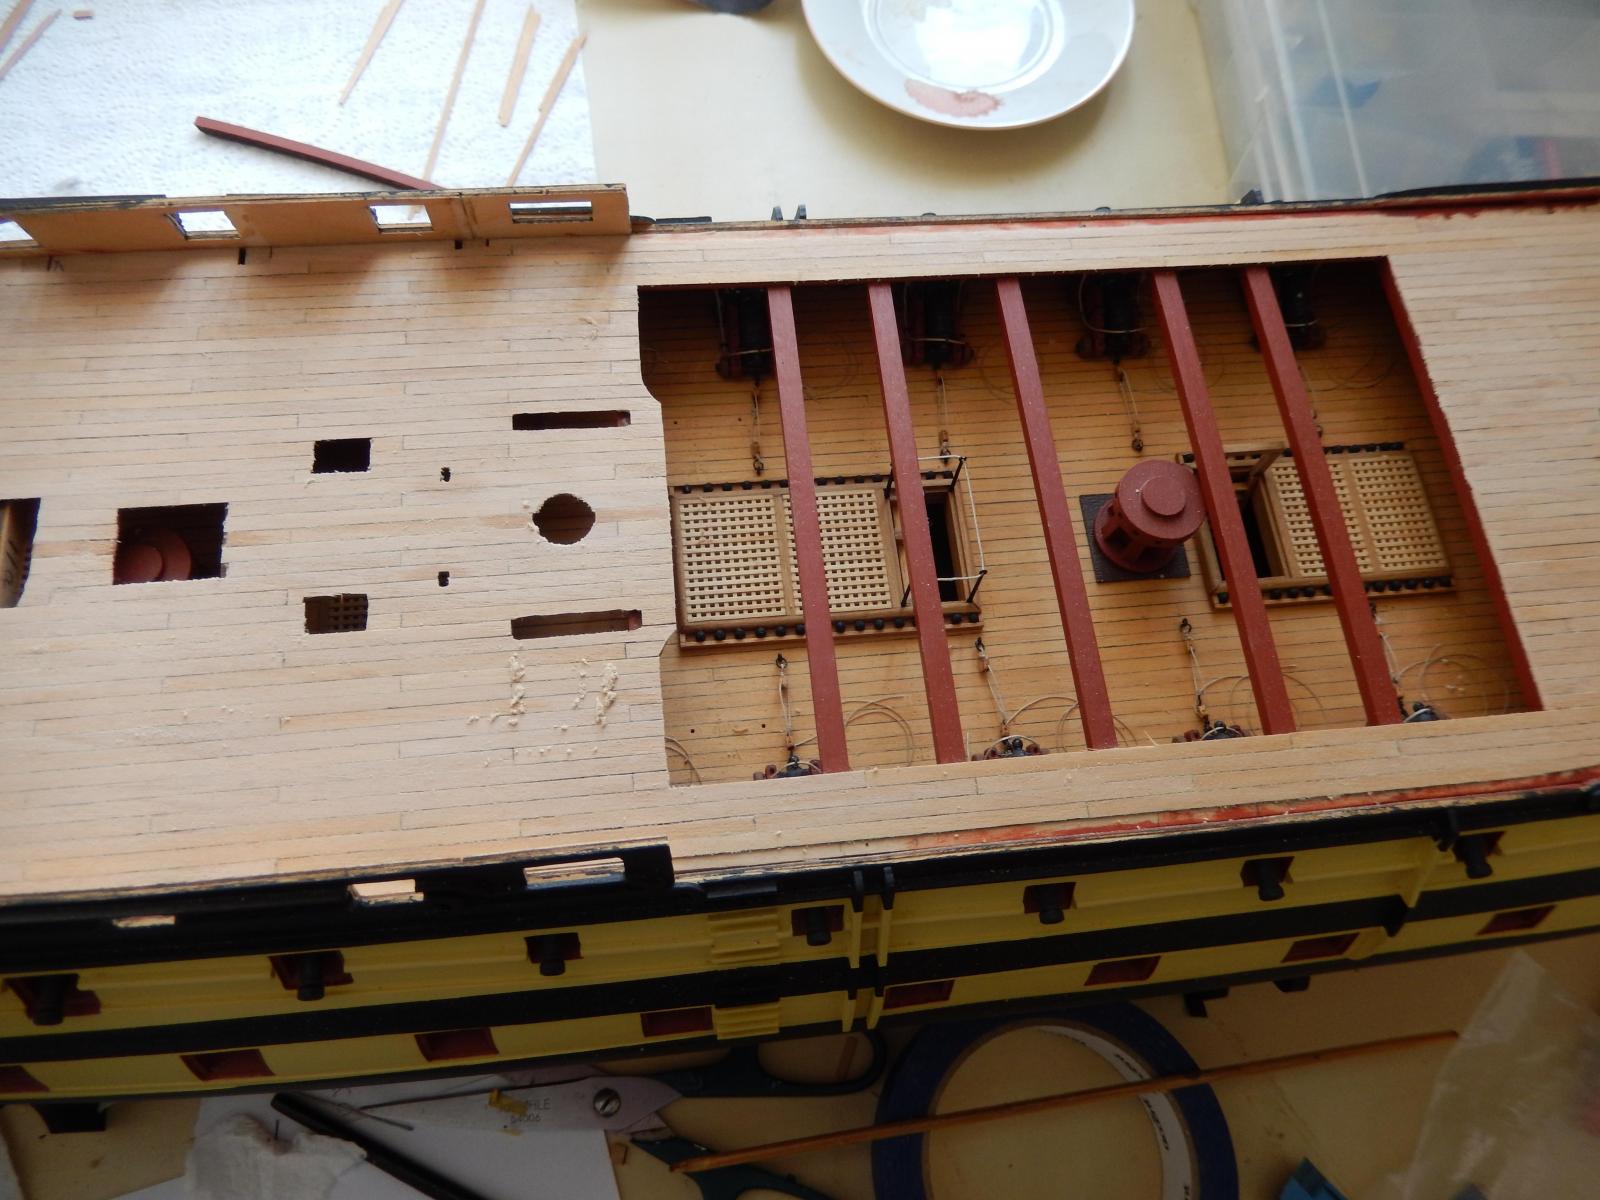
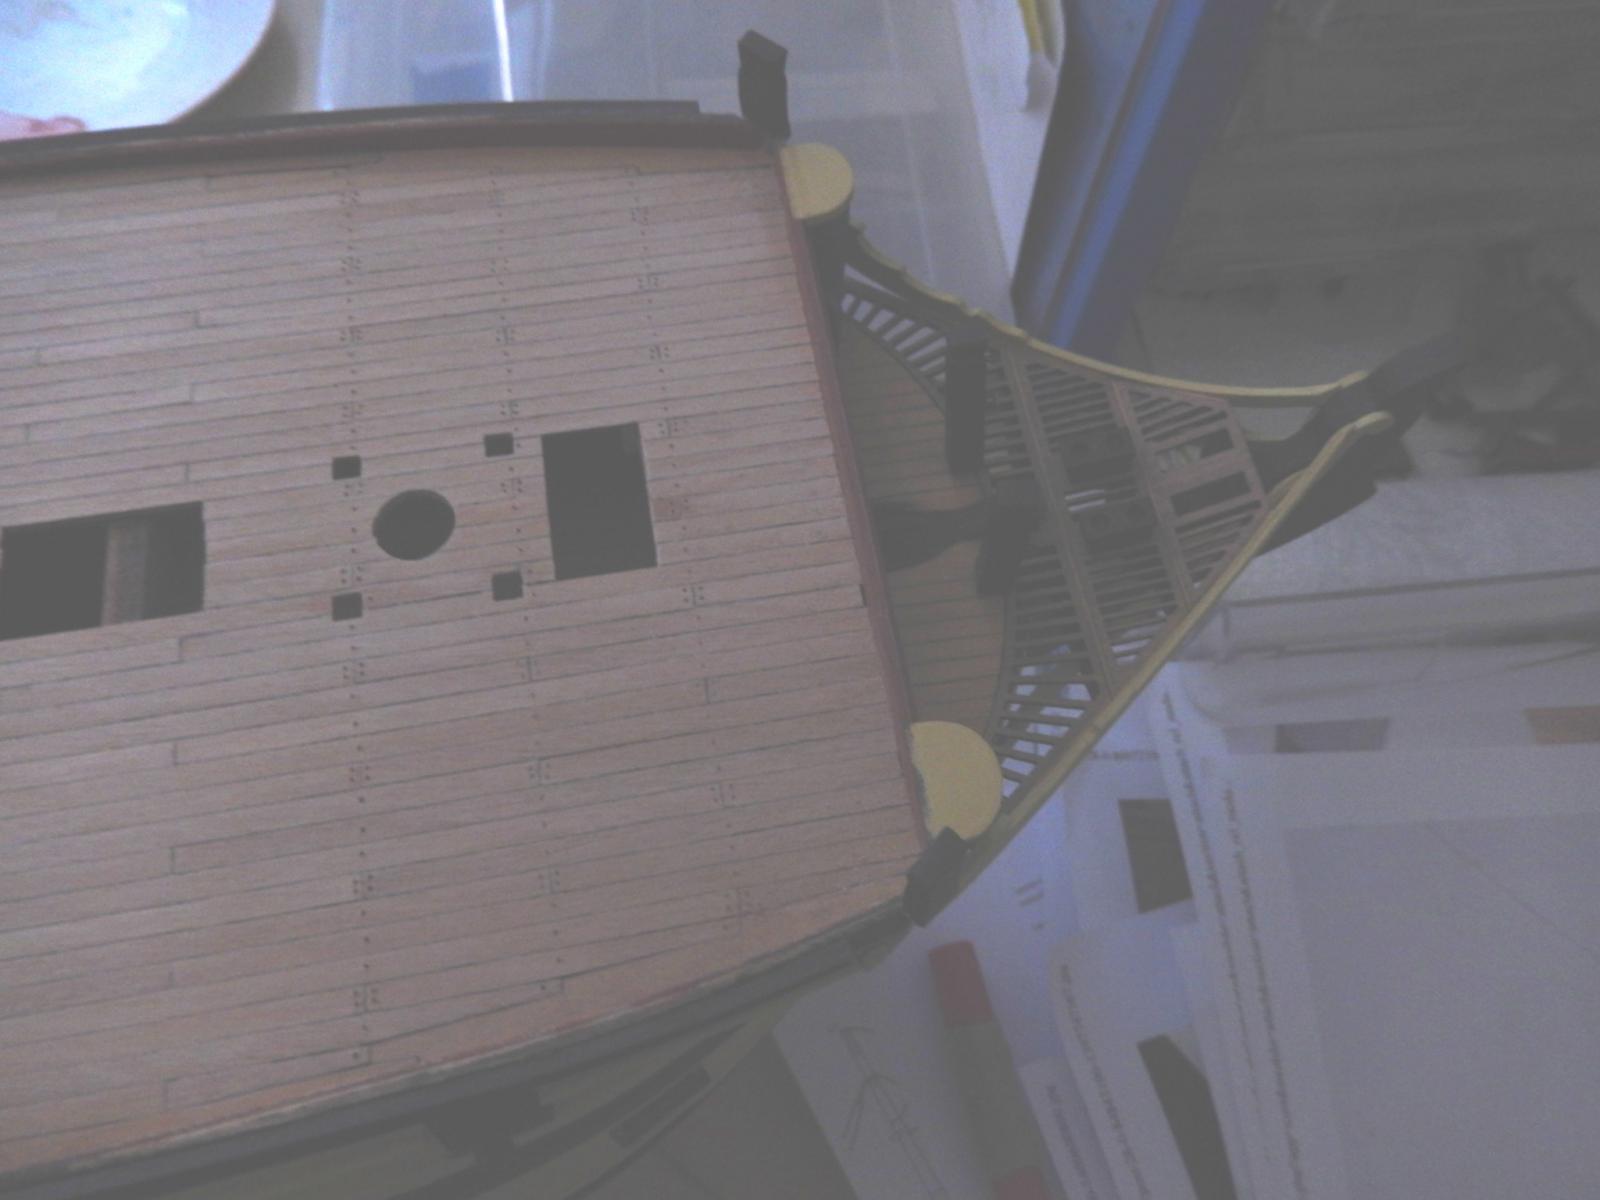
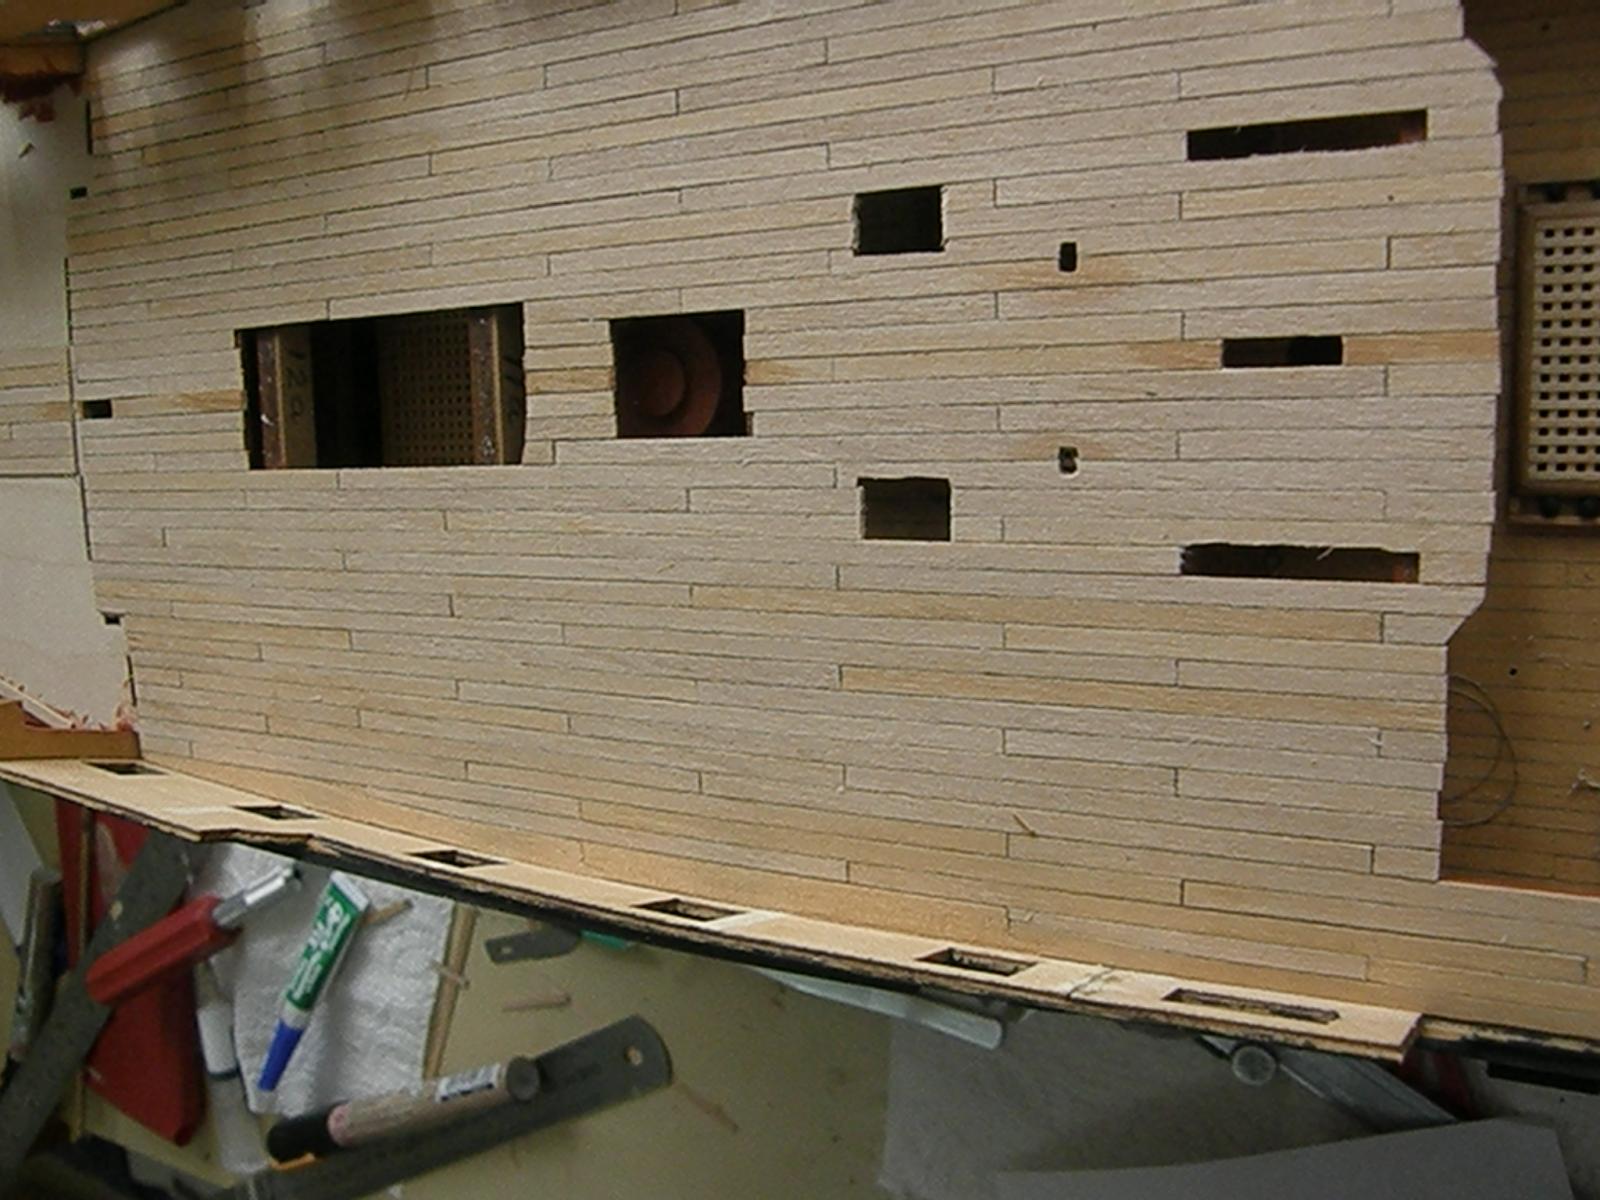
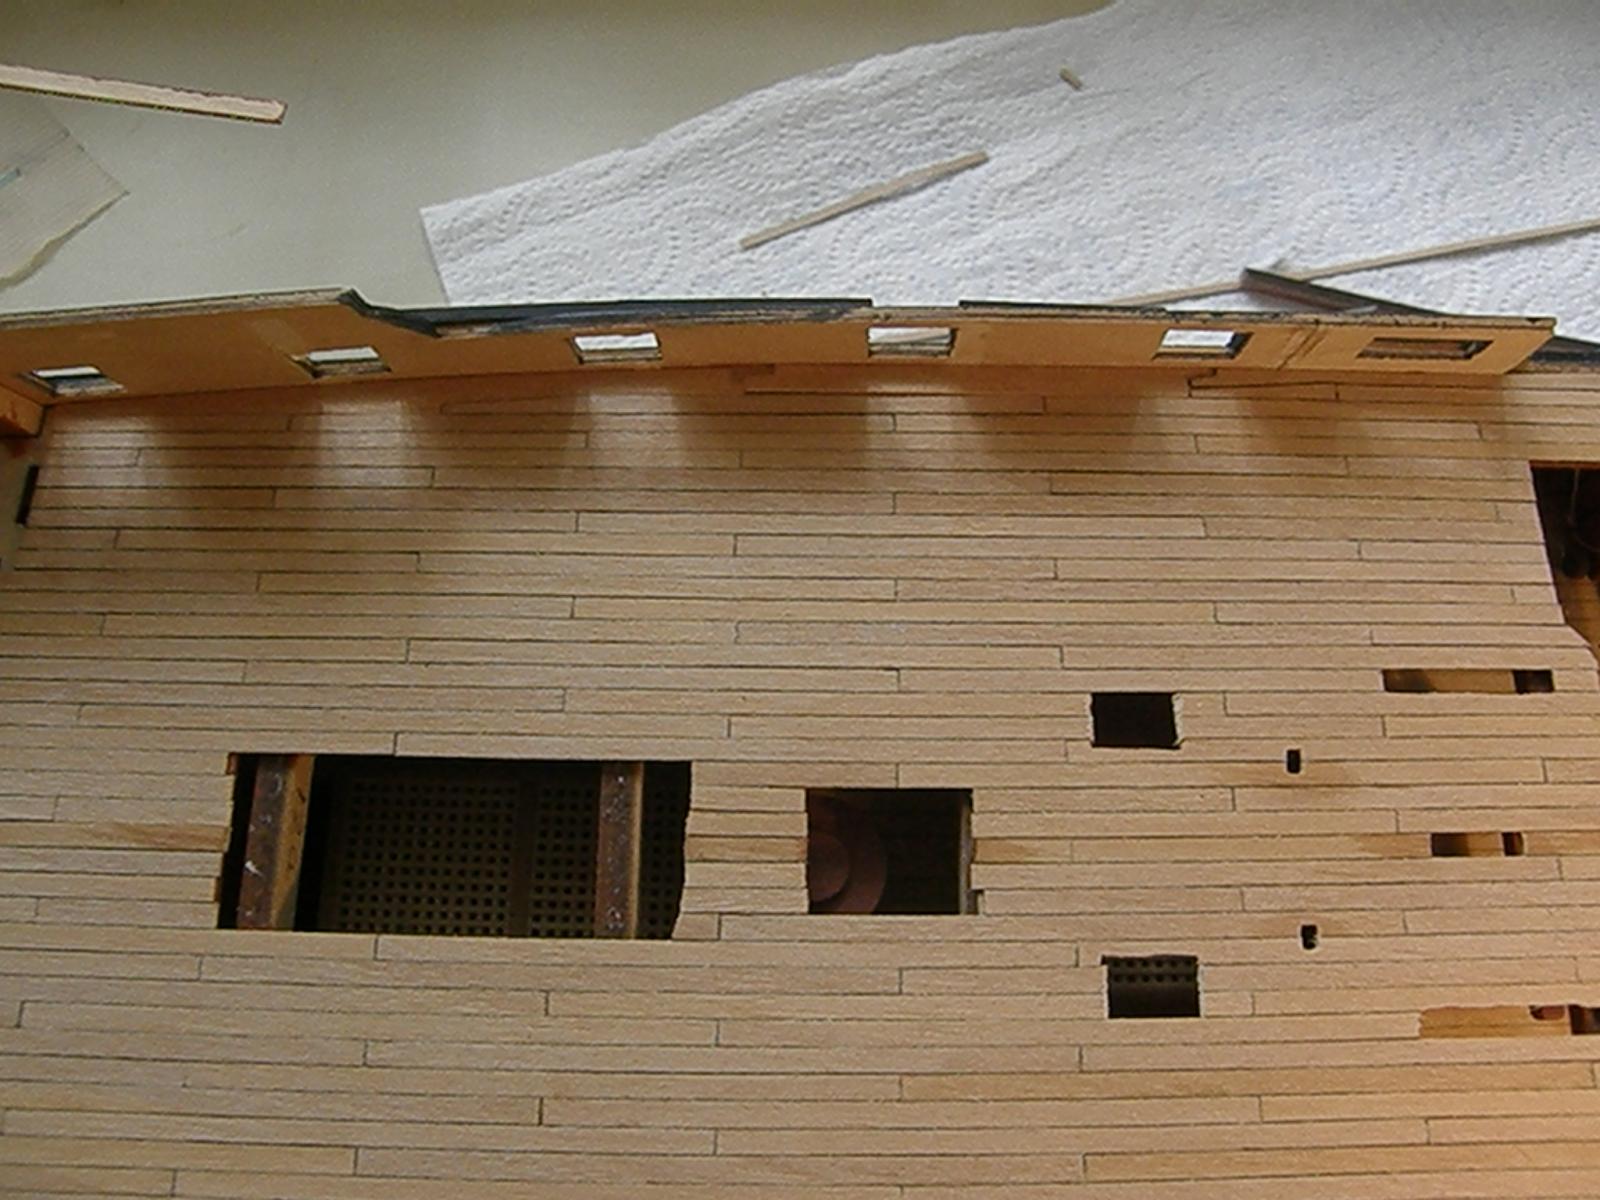
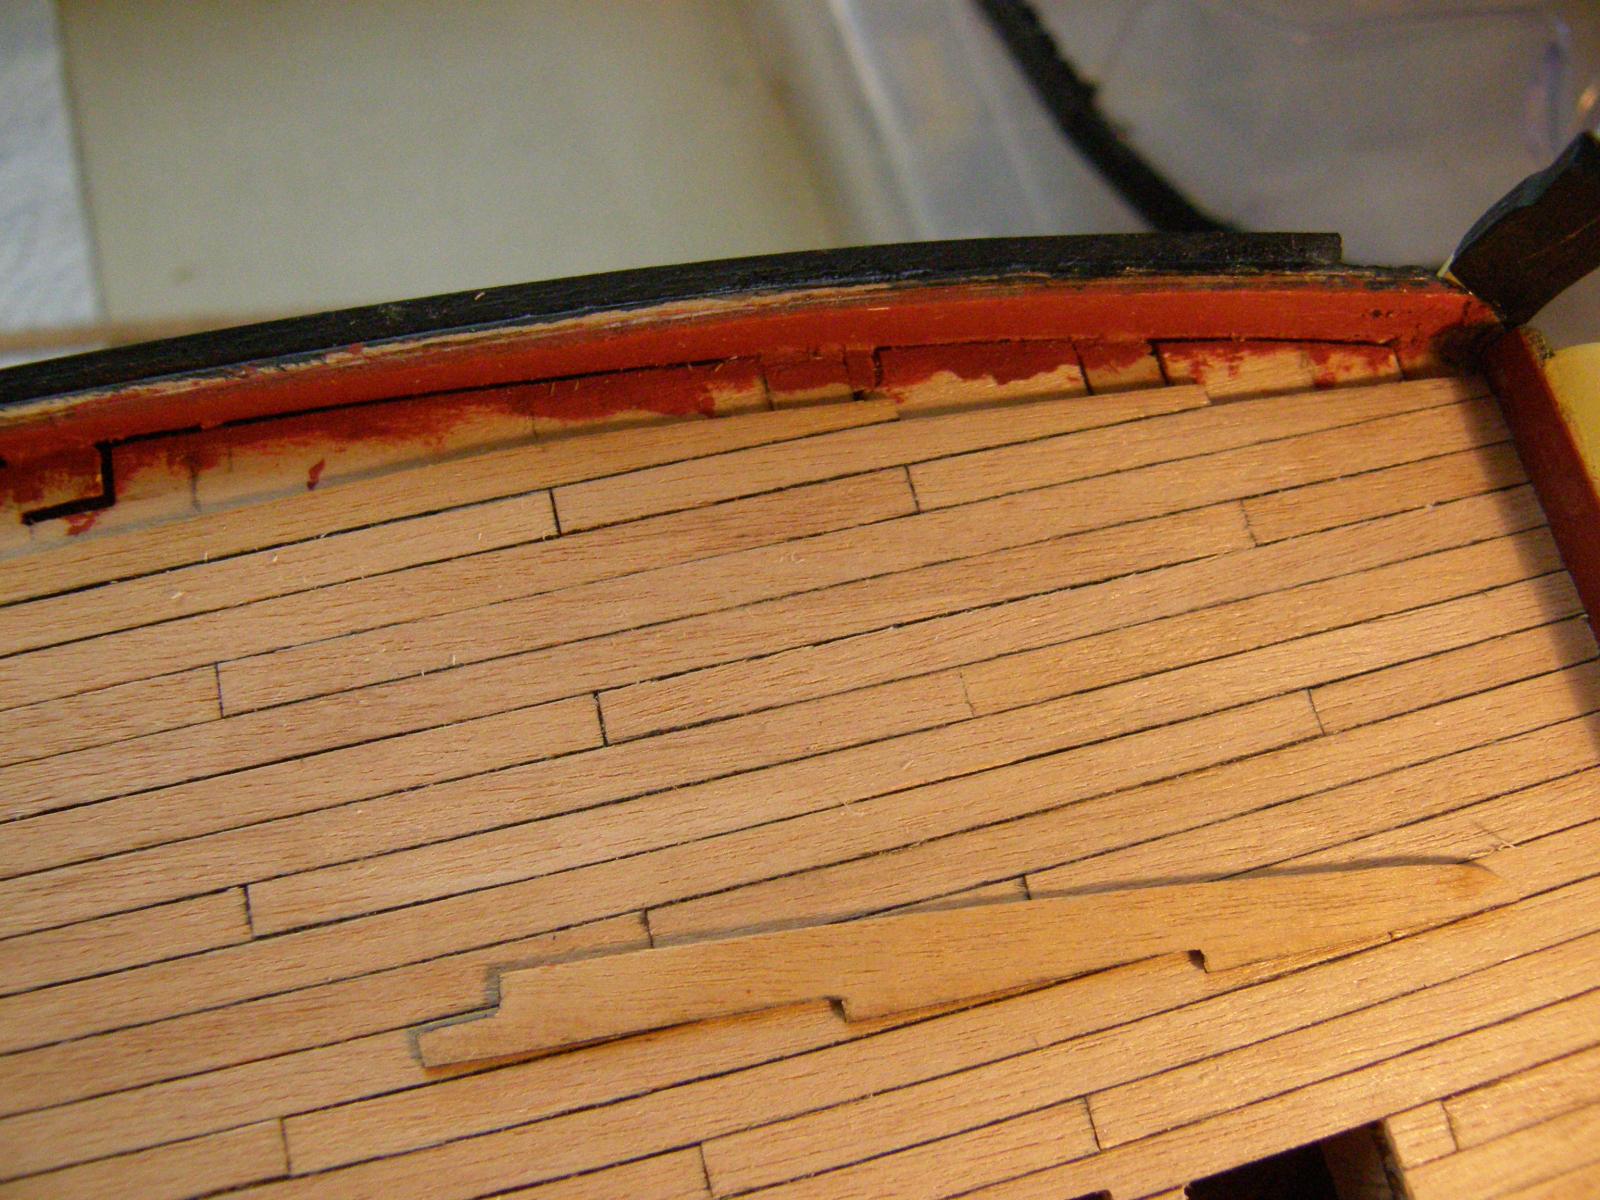
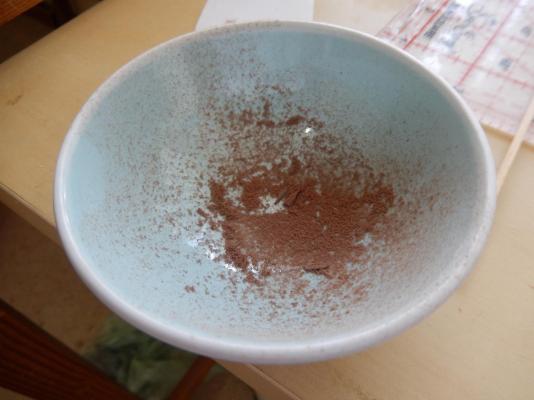
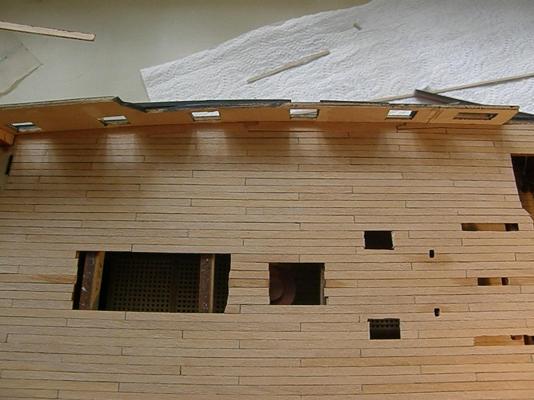
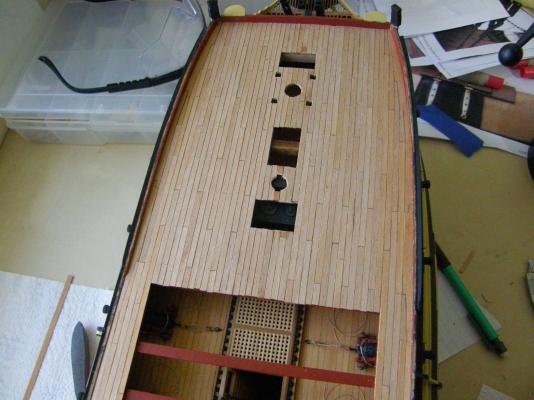
I have now laid the margin planks having first drilled th holes to simulate treenails. I decided to use some dark walnut sawdust to fill the holes. I then coated the plank with polyurethane Here are the results. I think the dark filling is a little too dark, but there''s not much I can do about it now. Much of this planking will be obscured so it's not all that much of a problem. When I get around to filling the holes in the remaining planks I will choose something a bit lighter. In laying the decking and for other fiddly gluing jobs, a hypodermic needle (point ground off) is ideal. I have also dry fitted the black assemblies (whatever they are) in the following photo. Putting it together so that everything is square proved to be moderately difficult, and I am not looking forward to putting the other similar structures together. I have looked at Arthur's (AEW) log where he described the process and it appears quite daunting.


-
Thanks Jason. It's exactly what I what I wanted. I'm getting rather sick of drilling (more) little holes though. Just to break the tedium, I'm finishing a few bits of deck furniture still to do. When I have finally finished the holes I'll fill them with some sawdust from some dark walnut and hope that looks the part. Incidentally, I was in Connecticut a couple of weeks ago. It's a beautiful part of the world, particularly at this time of year. Thanks again Bob
-
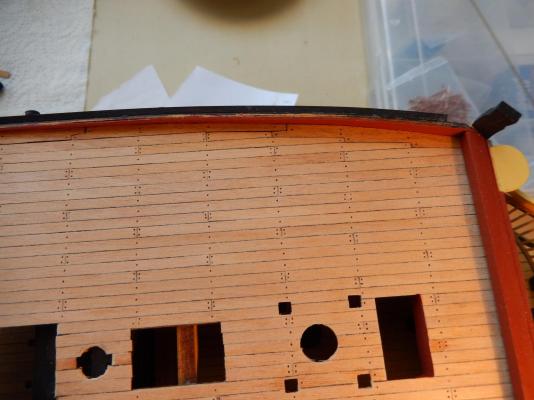
I am doing the tree nailing of the main deck, and a question has occurred to me: are tree nails put into margin planks? I have looked at a number of builds and from what I can see no one has put them in. Moreover, Julian, in one of his books which shows deck planking, does not show tree nails in the margin planks. If there are none, how are the planks held down?
-
After all this I have now discovered to my profound relief, that the program that enabled editing of photos taken on my old Olympus camera also works for my new Nikon. I suspect my wife will be even more pleased. Brian: Alistair is right. Your Paint manual is really valuable and should be made widely available. All the best and thanks again. Bob
-
Brian, thanks very much for all your trouble. I have just done some more playing and this time it may have worked. In any event please don't delete your post as it is a really valuable resource - and probably a better way of doing than I have found (assuming I can remember what I have done). Success. Joy.

-
The post above is out of order. Strange things are happening. Coming back home last night the inflight entertainment for my seat on two flights went down so I'm definitly not winning my battle against technology at the moment.
-
I'm having all sorts of trouble in resizing the picture. I have tried 1900x1425 and this only shows a part of the photo in Paint. It's very frustrating. I will try to download it now to show what I mean.
-
I have no idea where the picture went to. But the 1700x1150 gave a file size of 114.42 KB so I'll work up from there. The following photo is 2048x1536 - the same size as my old camera's photos. The bottom of the photo has been chopped off and despite a lot of playing around I can't get the full picture.

-
Hi Brian Thanks for you reply. I have just been playing with Paint. I will try 1700X1150 which should get me under 2 megs. I'll try that now. This didn't work out - so back to the drawing board.
-
Here is an experiment. Well I just found out that the file IS too big. Alistair: i don't think I would get my monies worth out of photo shop so I'll look at some of the alternatives first at least.
-
I returned from holiday this morning and am looking forward to getting back to work on my Vanguard. Unfortunately my camera gave up the ghost while I was away, and I now have a potential problem. My defunct camera took photos of 7.1 megapixels (it will soon became apparent that my ignorance regarding all of this stuff is profound), the replacement I bought is a 16 megapixel job. (I deliberatlely didn't buy one of the 22 megapixel cameras as I thought this would almost certainy exceed the maximum file size for the MSW website.) Now I wonder whether the Jpeg file created by the 16mp camera is too large to download onto the website. Moreover I have yet to figure out how to download photos from the new camera to my computer. The manual supplied is couched in the usual hieroglyphics so I can forsee much gnashing of teeth in the near future. Advice is encouraged.
-
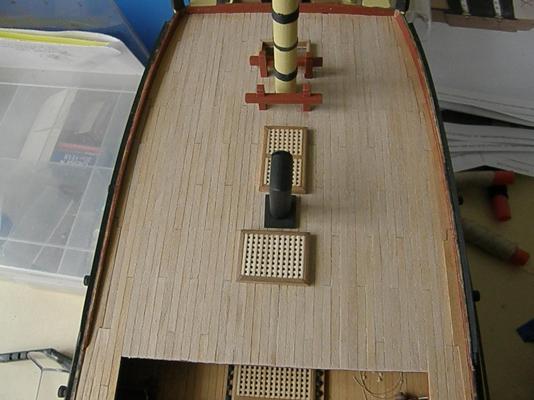
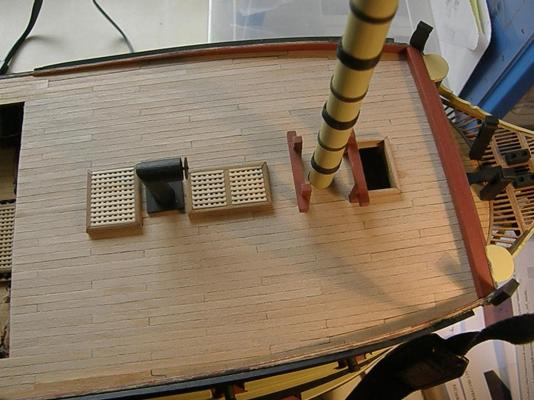
Thanks Arthur and Alistair. Fortunately the chimney is only dry-fitted in these photos. It does seem rather odd though that the chimney should point towards the stern. I guess that's why I put the thing as shown. At least I have learned the very hard way that before gluing - check the plans ... and again.
-
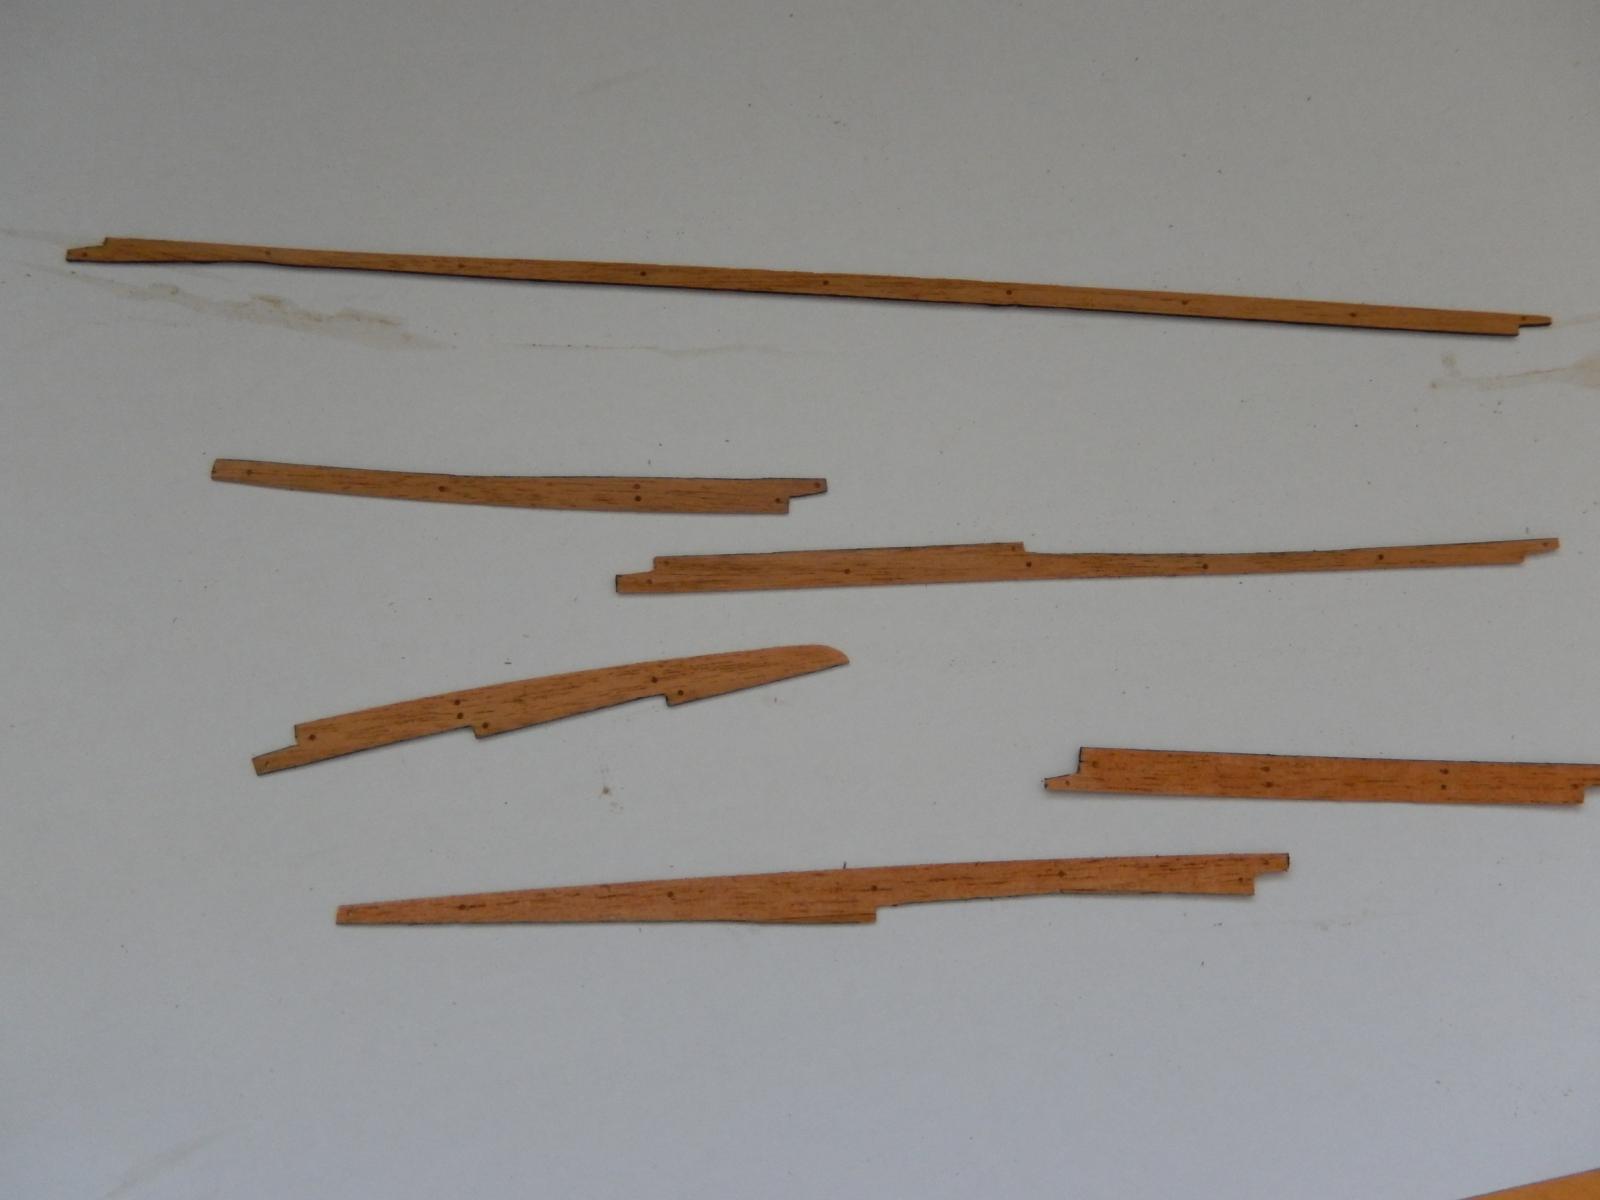
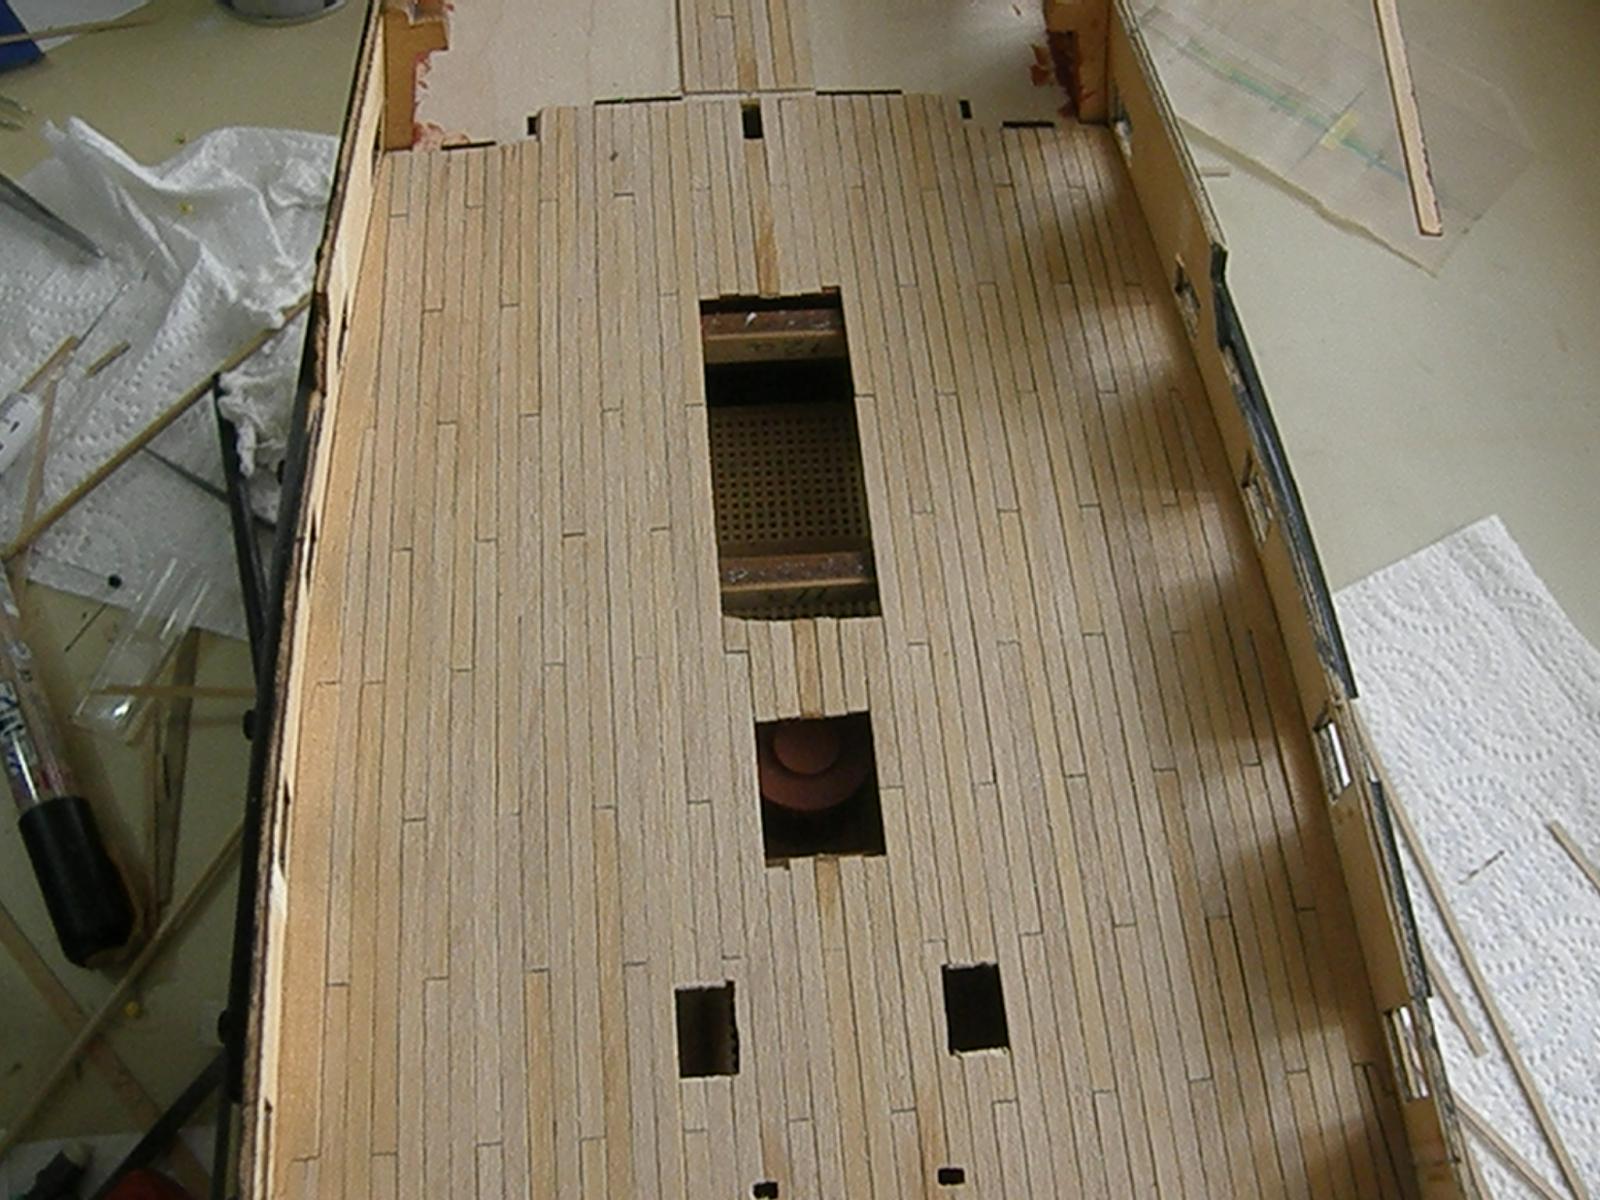
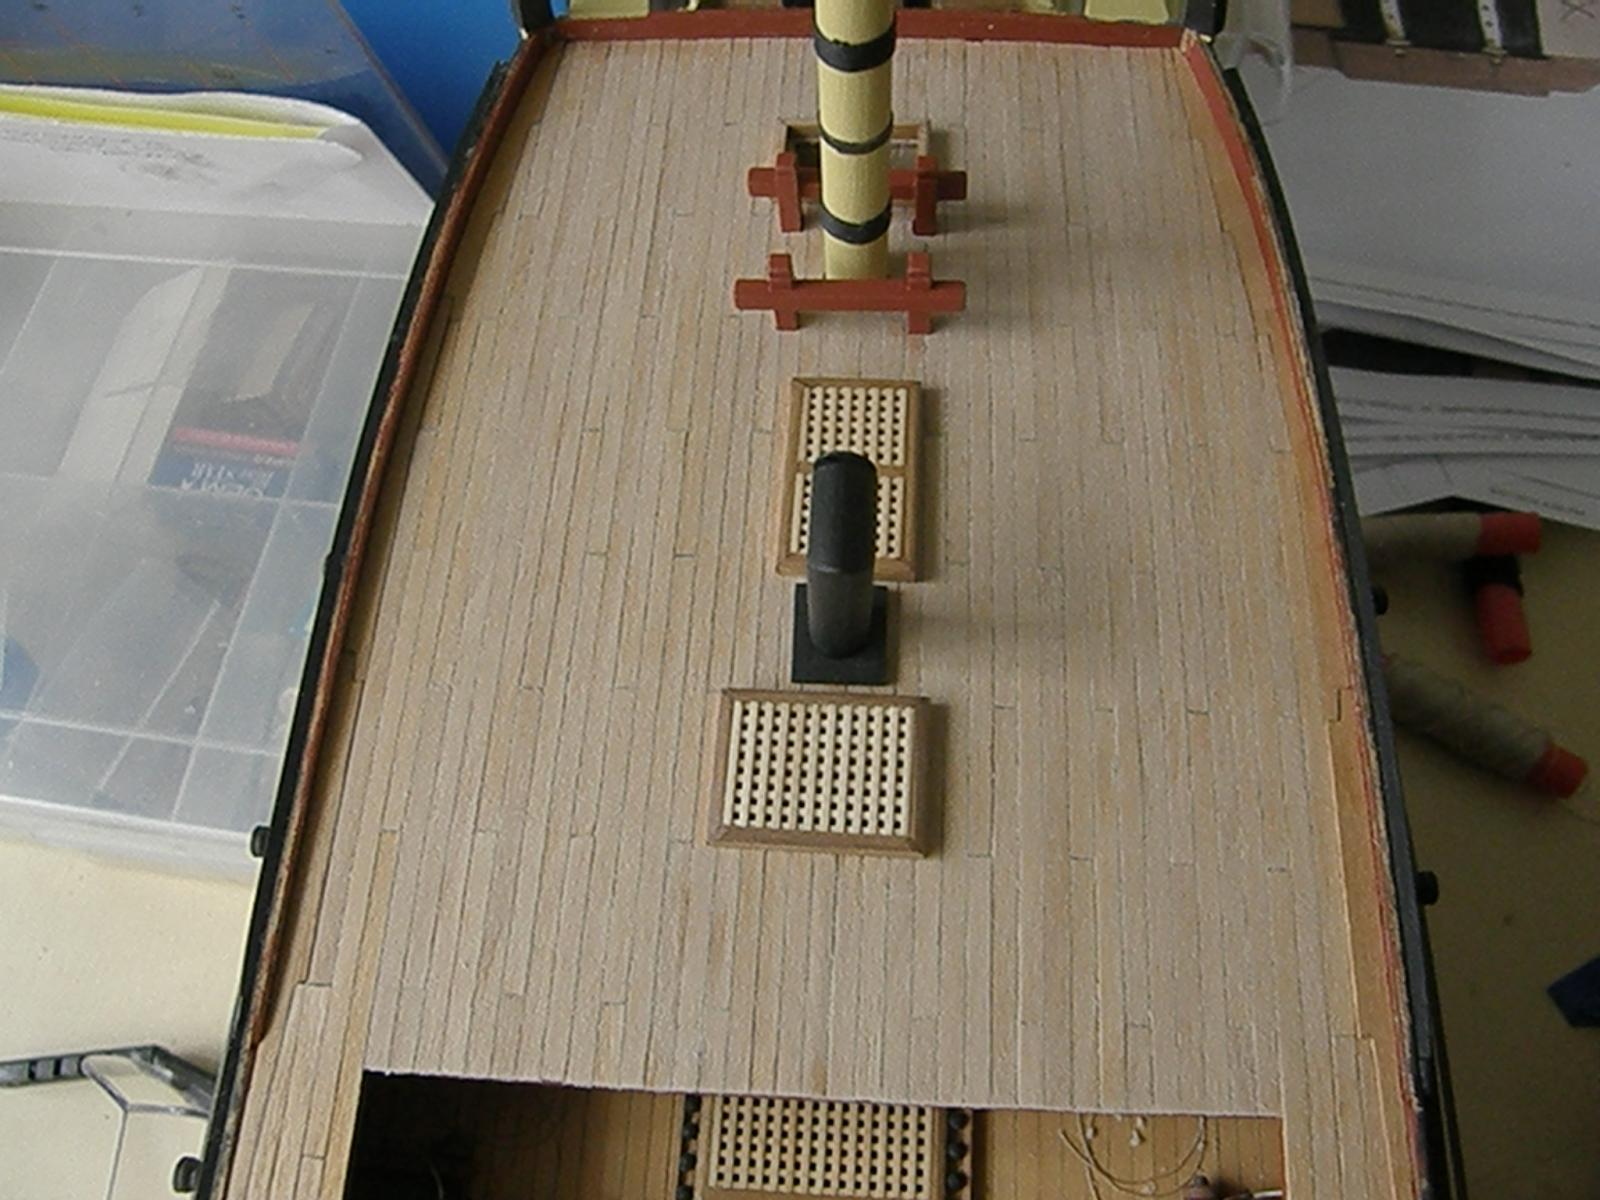
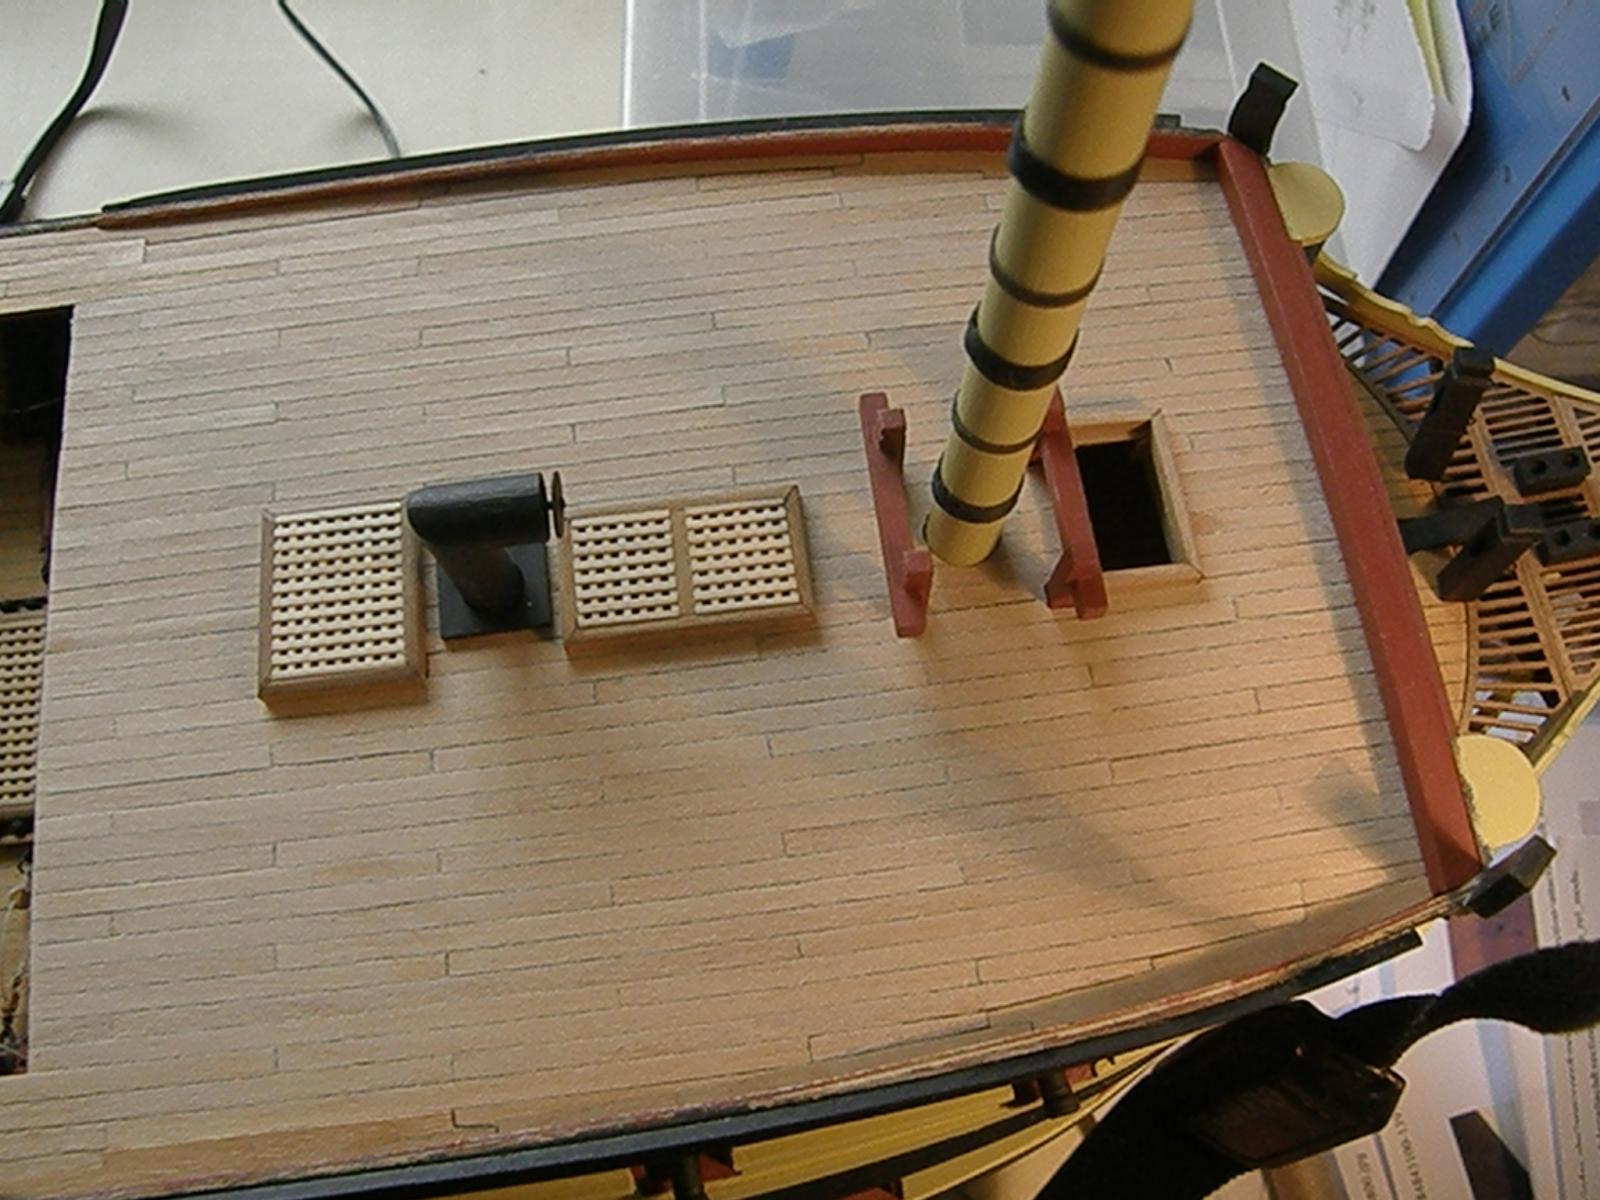
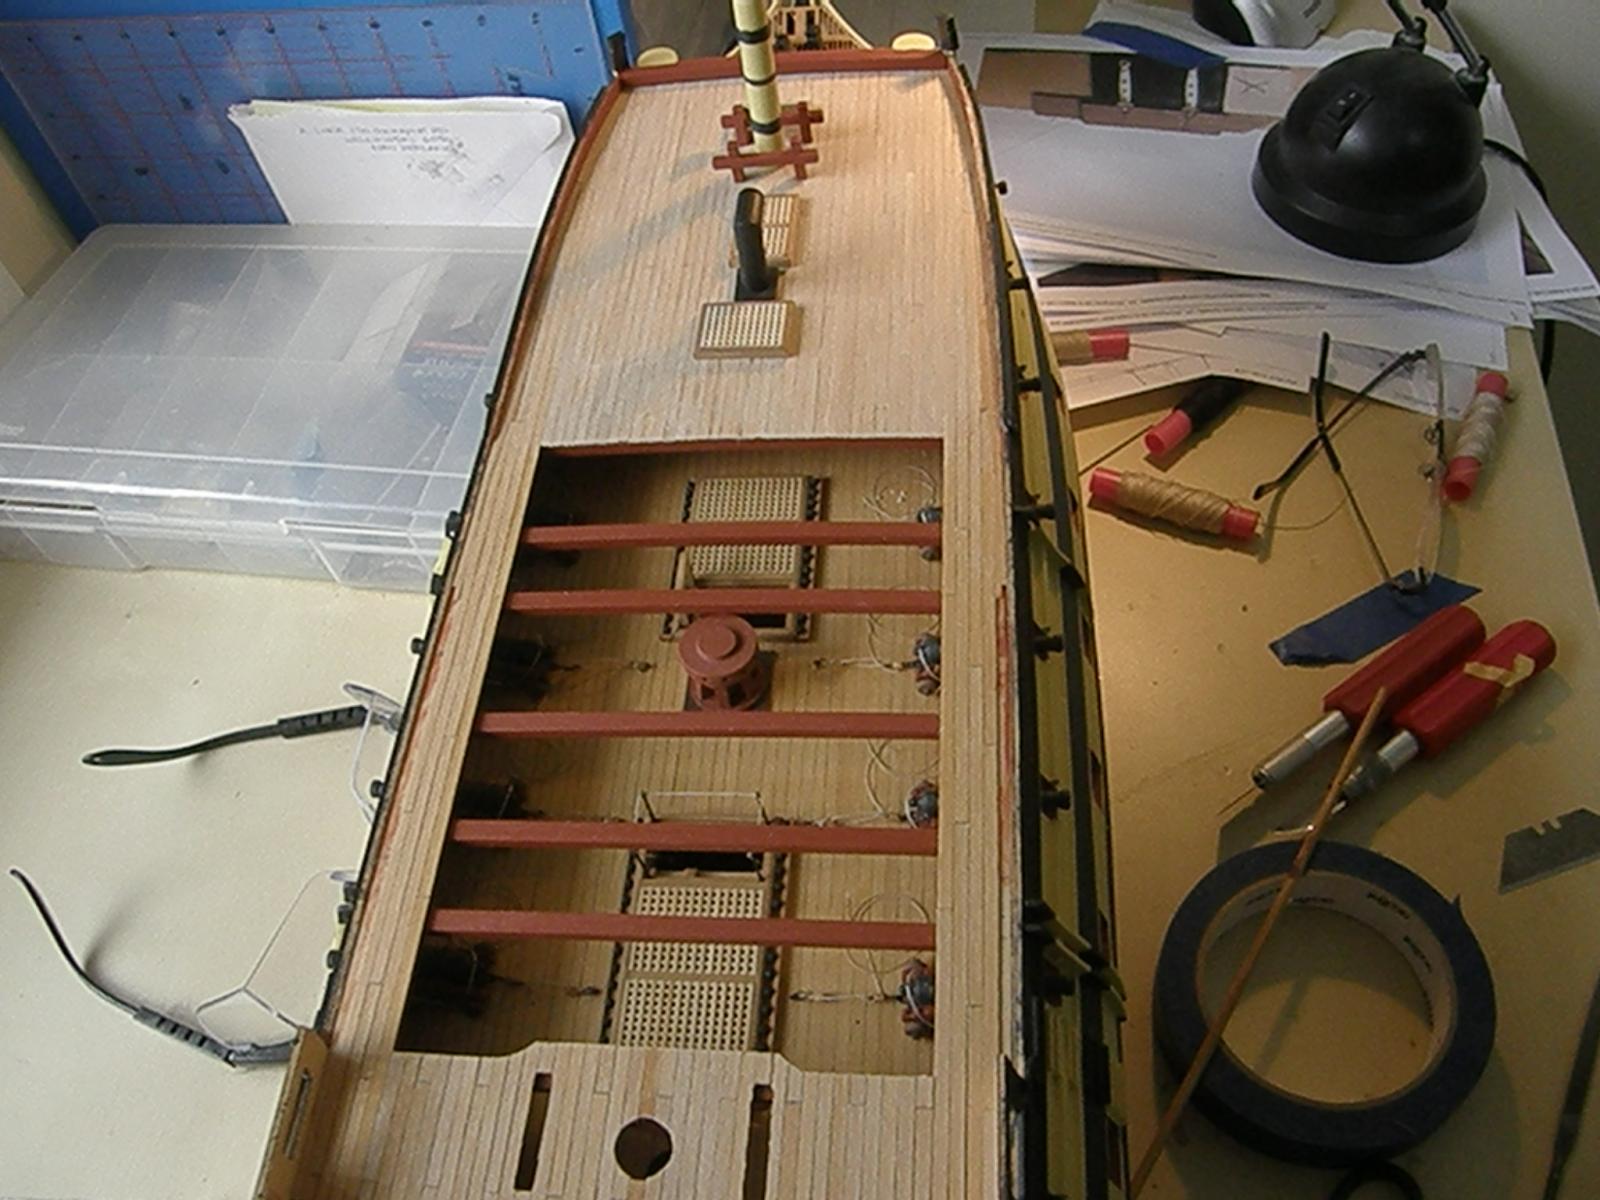
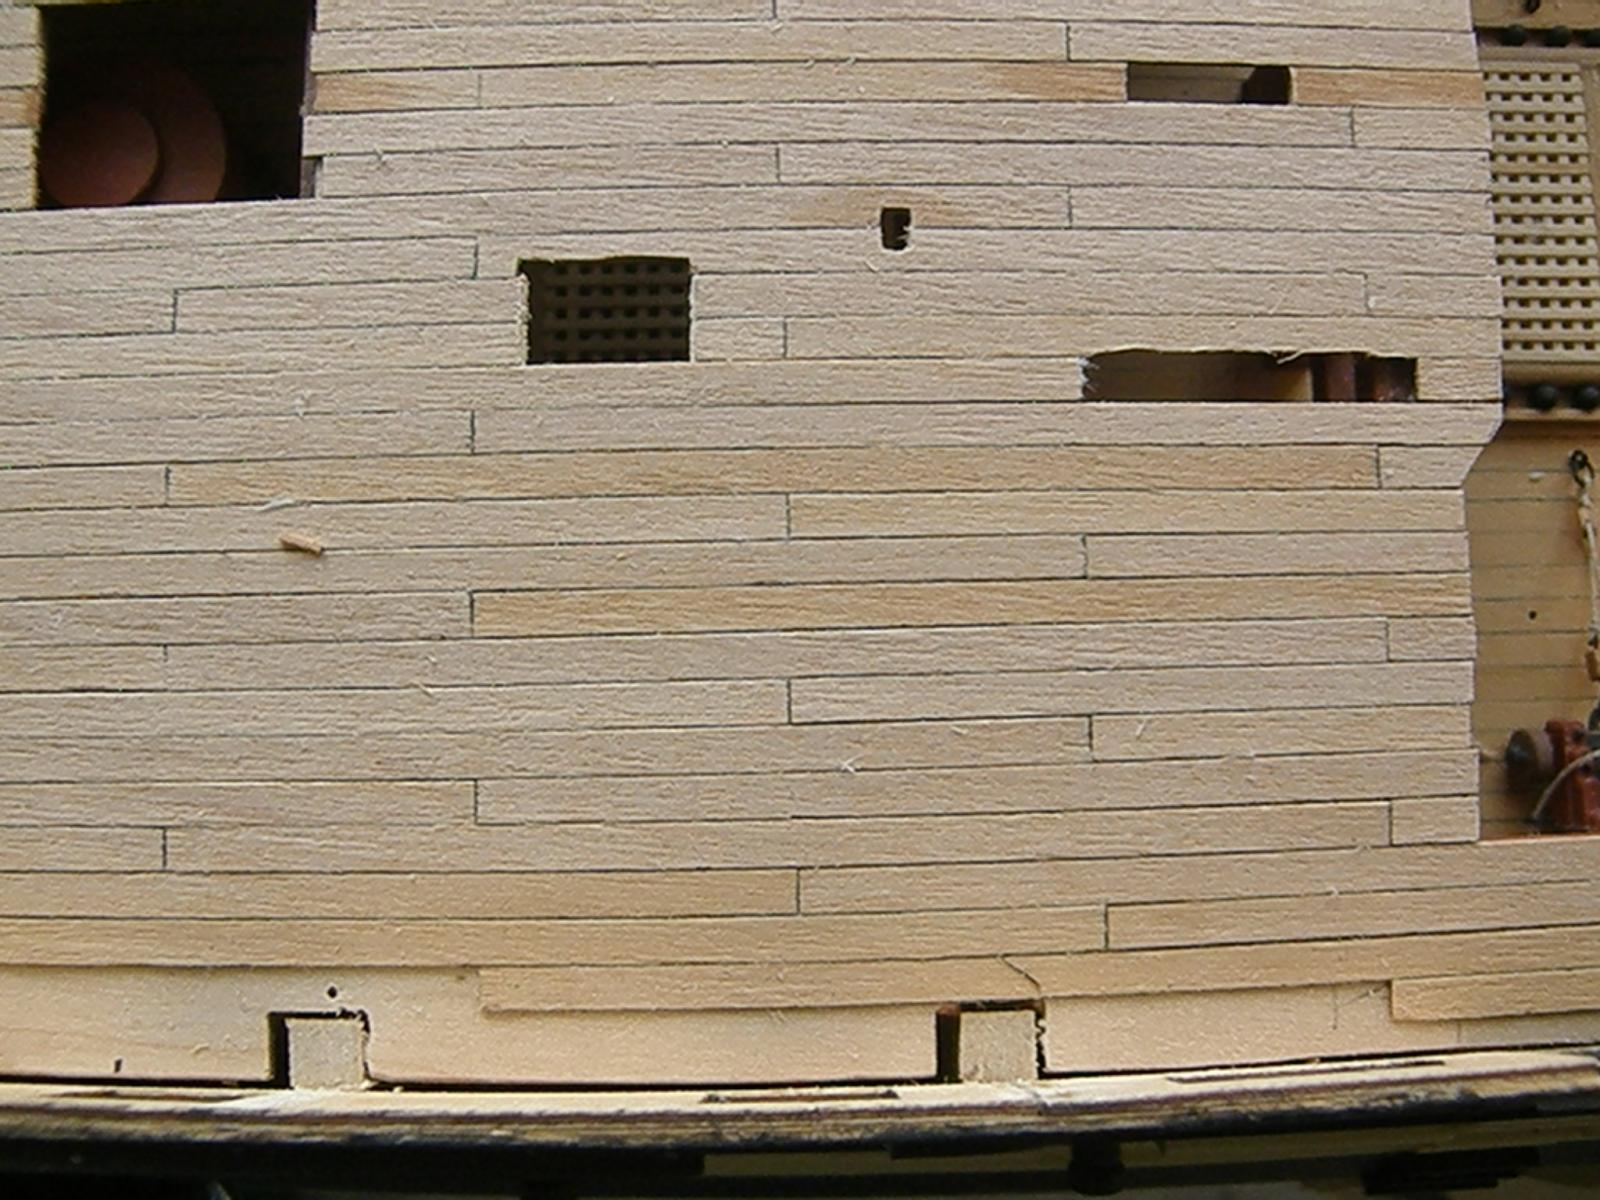
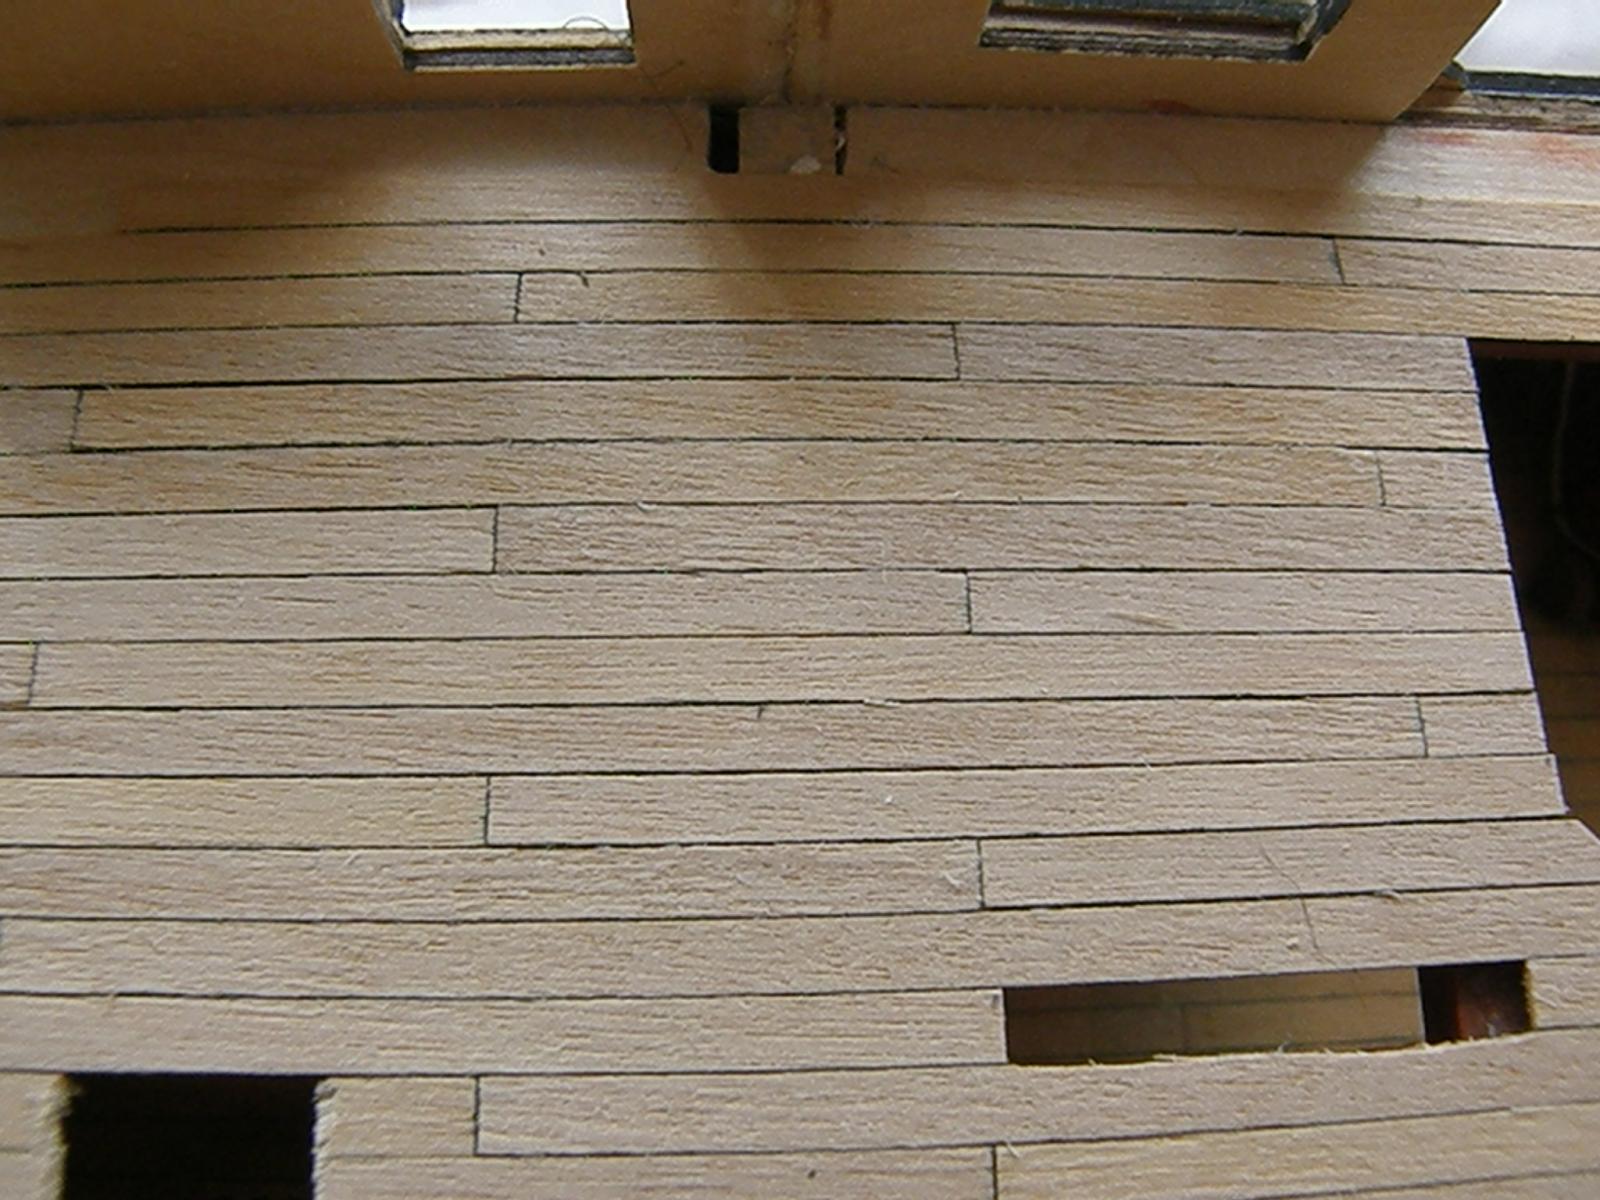
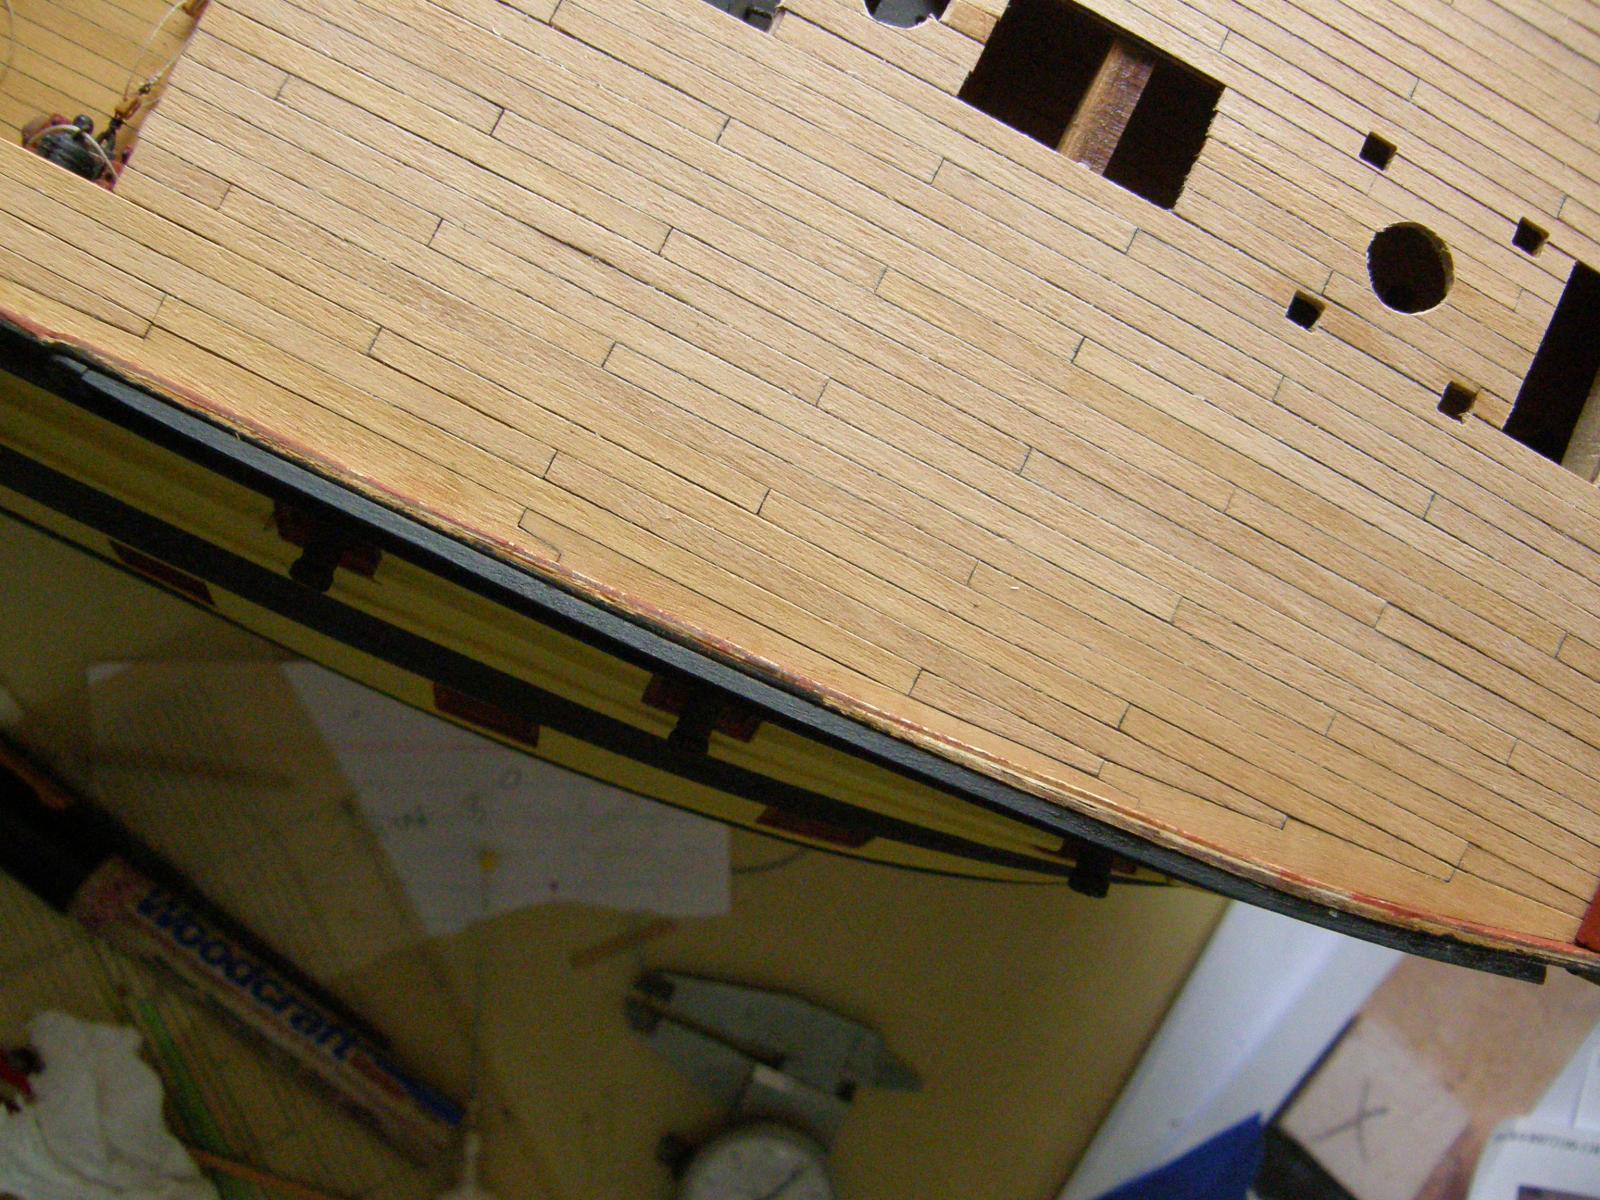
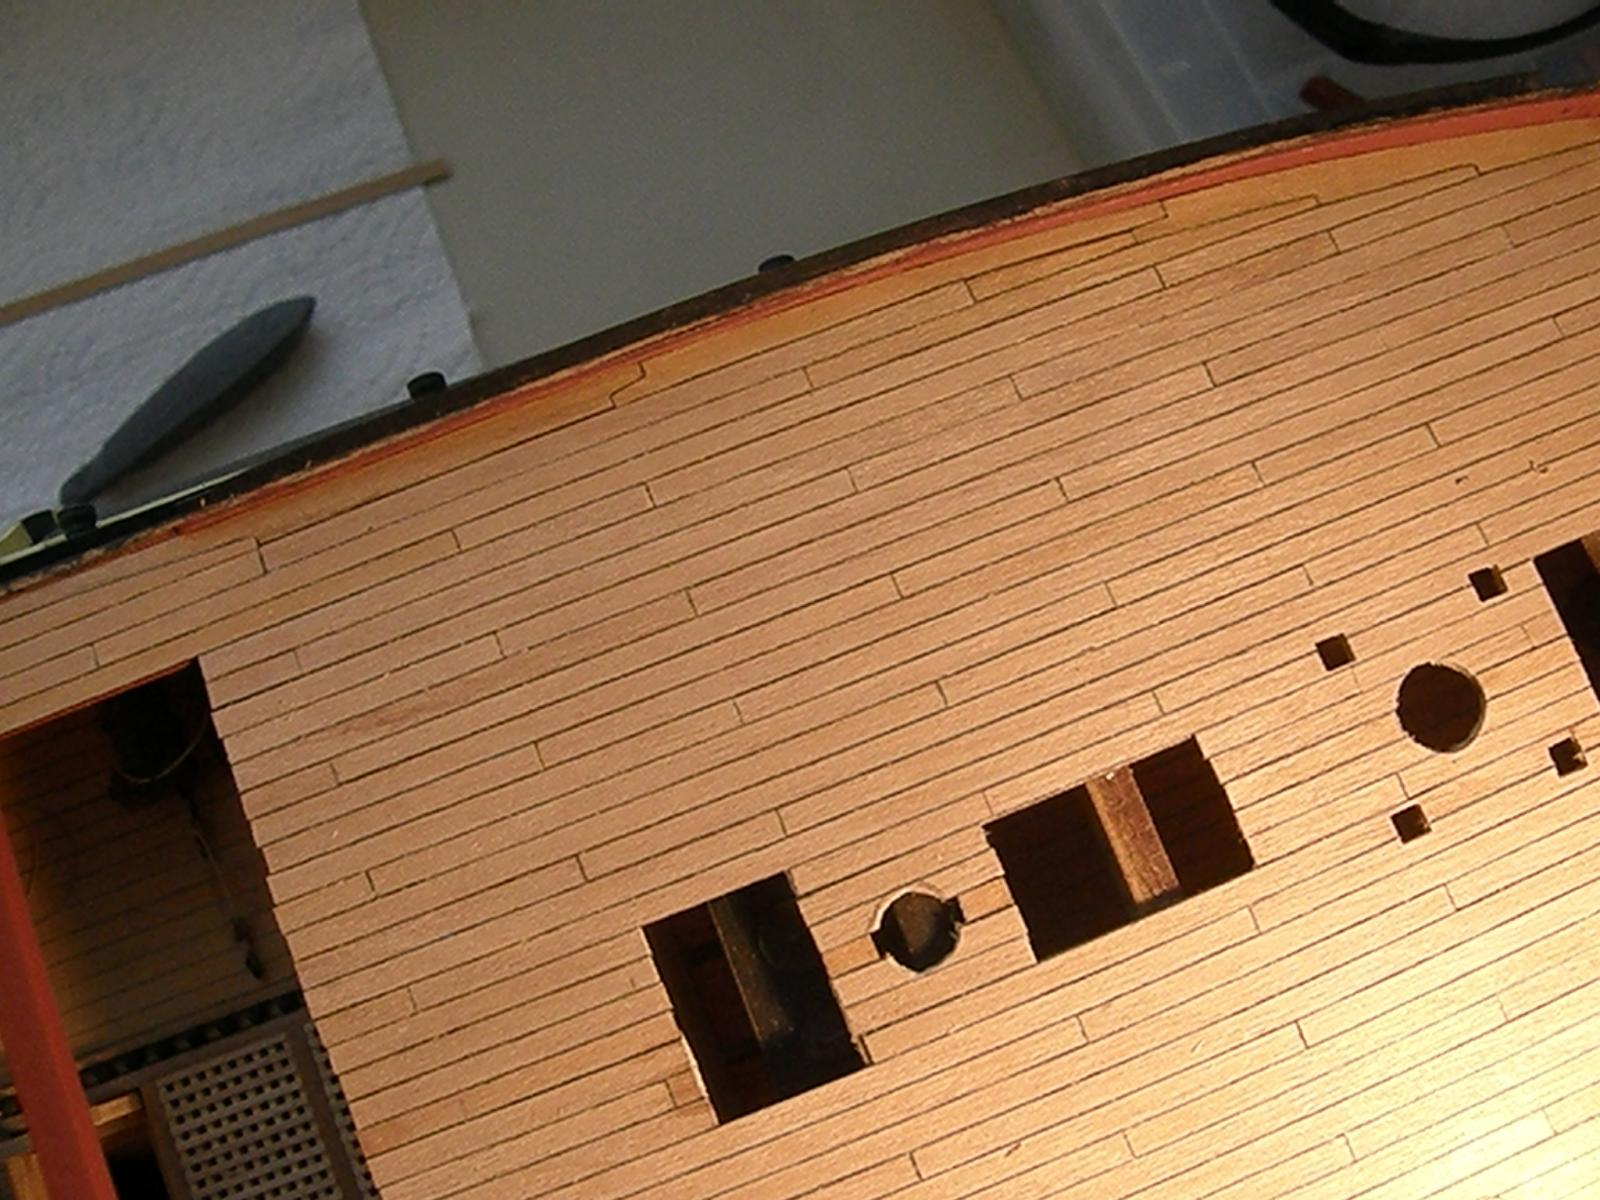
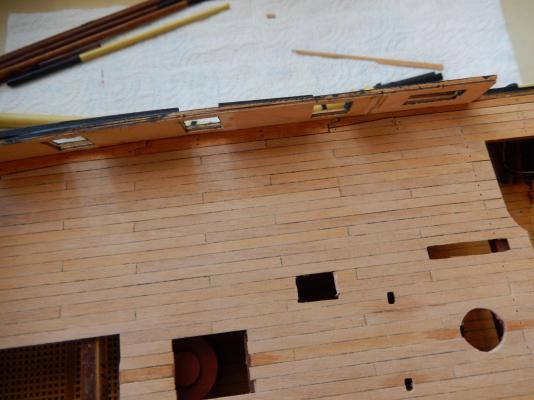
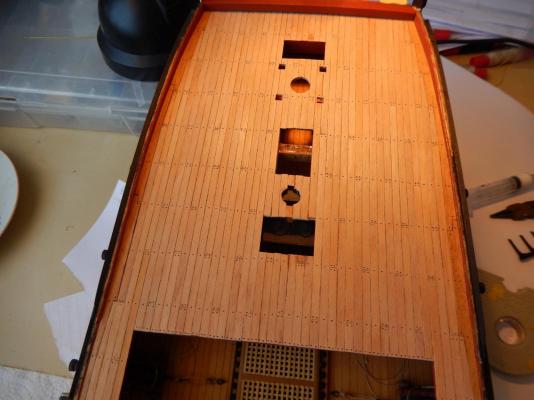
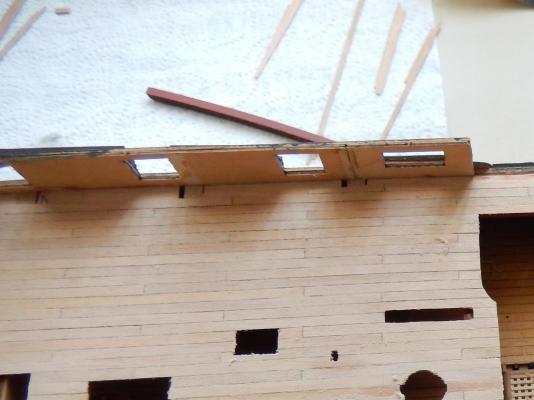
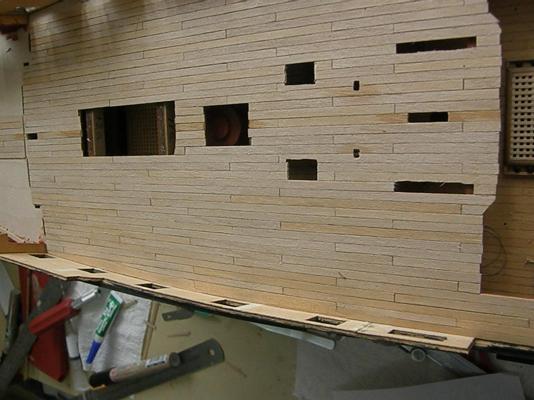
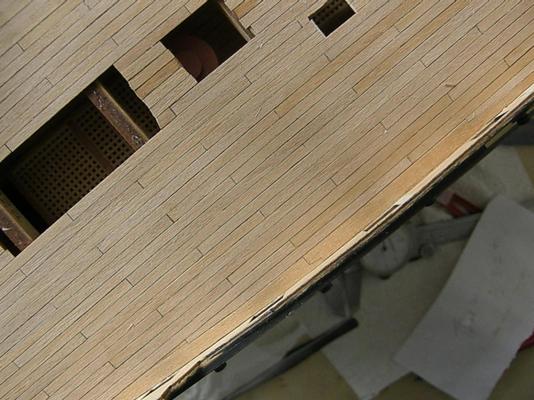
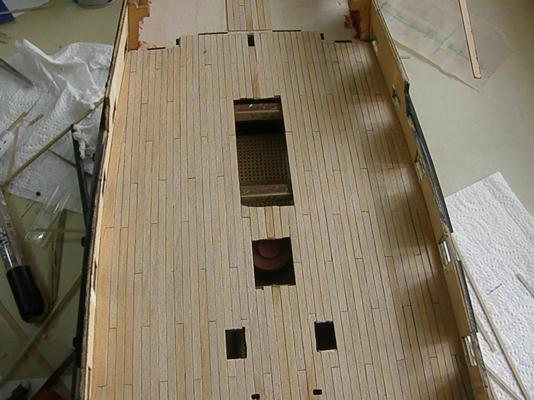
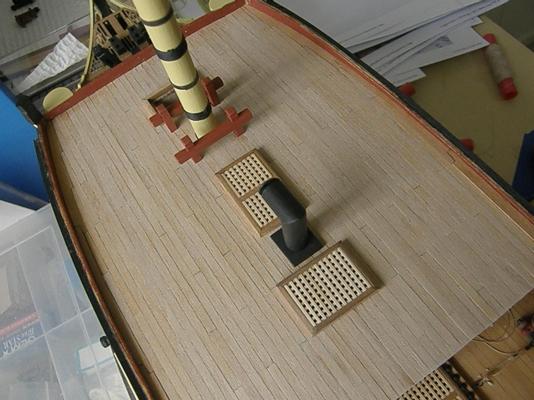
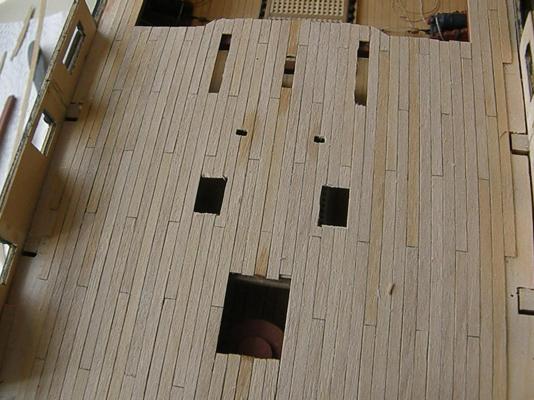
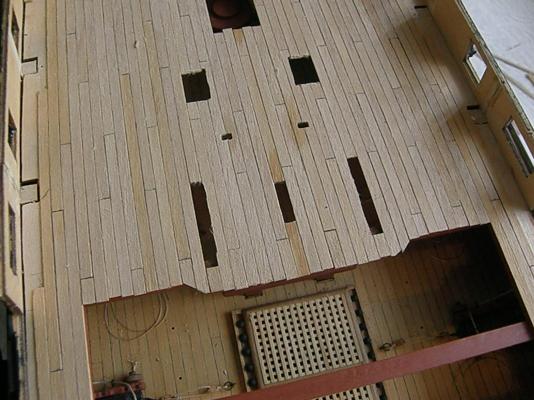
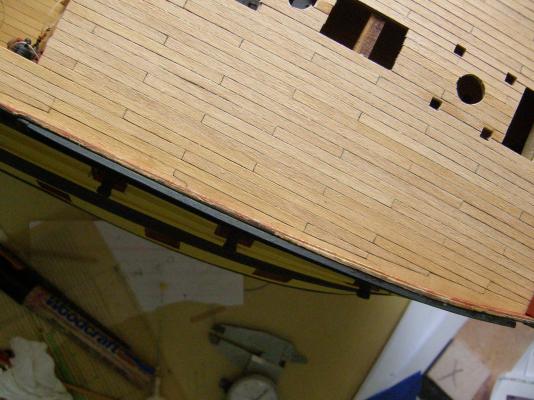
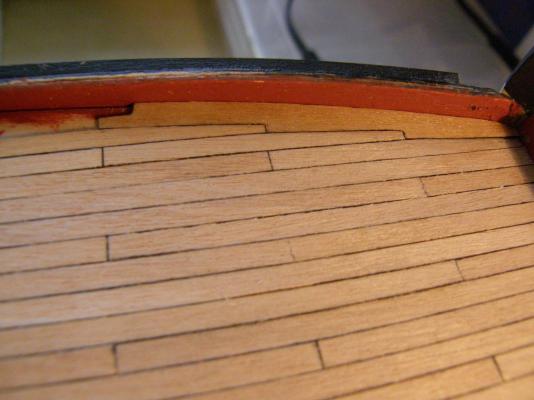
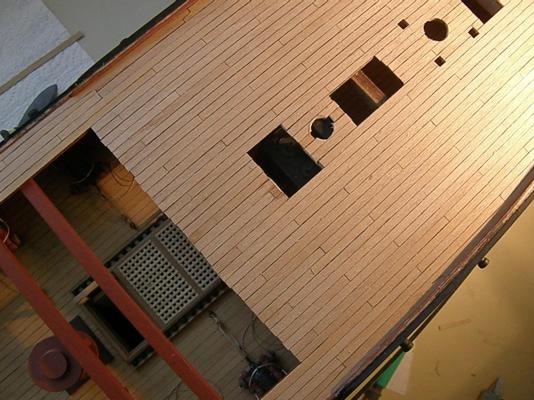
Except for the planking behind the screen, the deck planking and the margin planks (dry fitted) are complete. I have used a Stanley knife blade to scrape back the planks on the front deck (it gives a better finish than sanding I think), though there is still some work to be done on it. I have not yet done the tree nails. I will do those before I coat the lot in polyurethane. This will be my last post for about 6 or 7 weeks. I am going on holiday on Friday, so the whole lot will stay as is. I just hope I remember where I put things when I get back. The first few photos below show the margin planks on the rear deck. The margin planks were very time consuming, but really make a difference to the finish of the deck. The last few photos show the semifinished front deck. I'm pleased with the result.

-
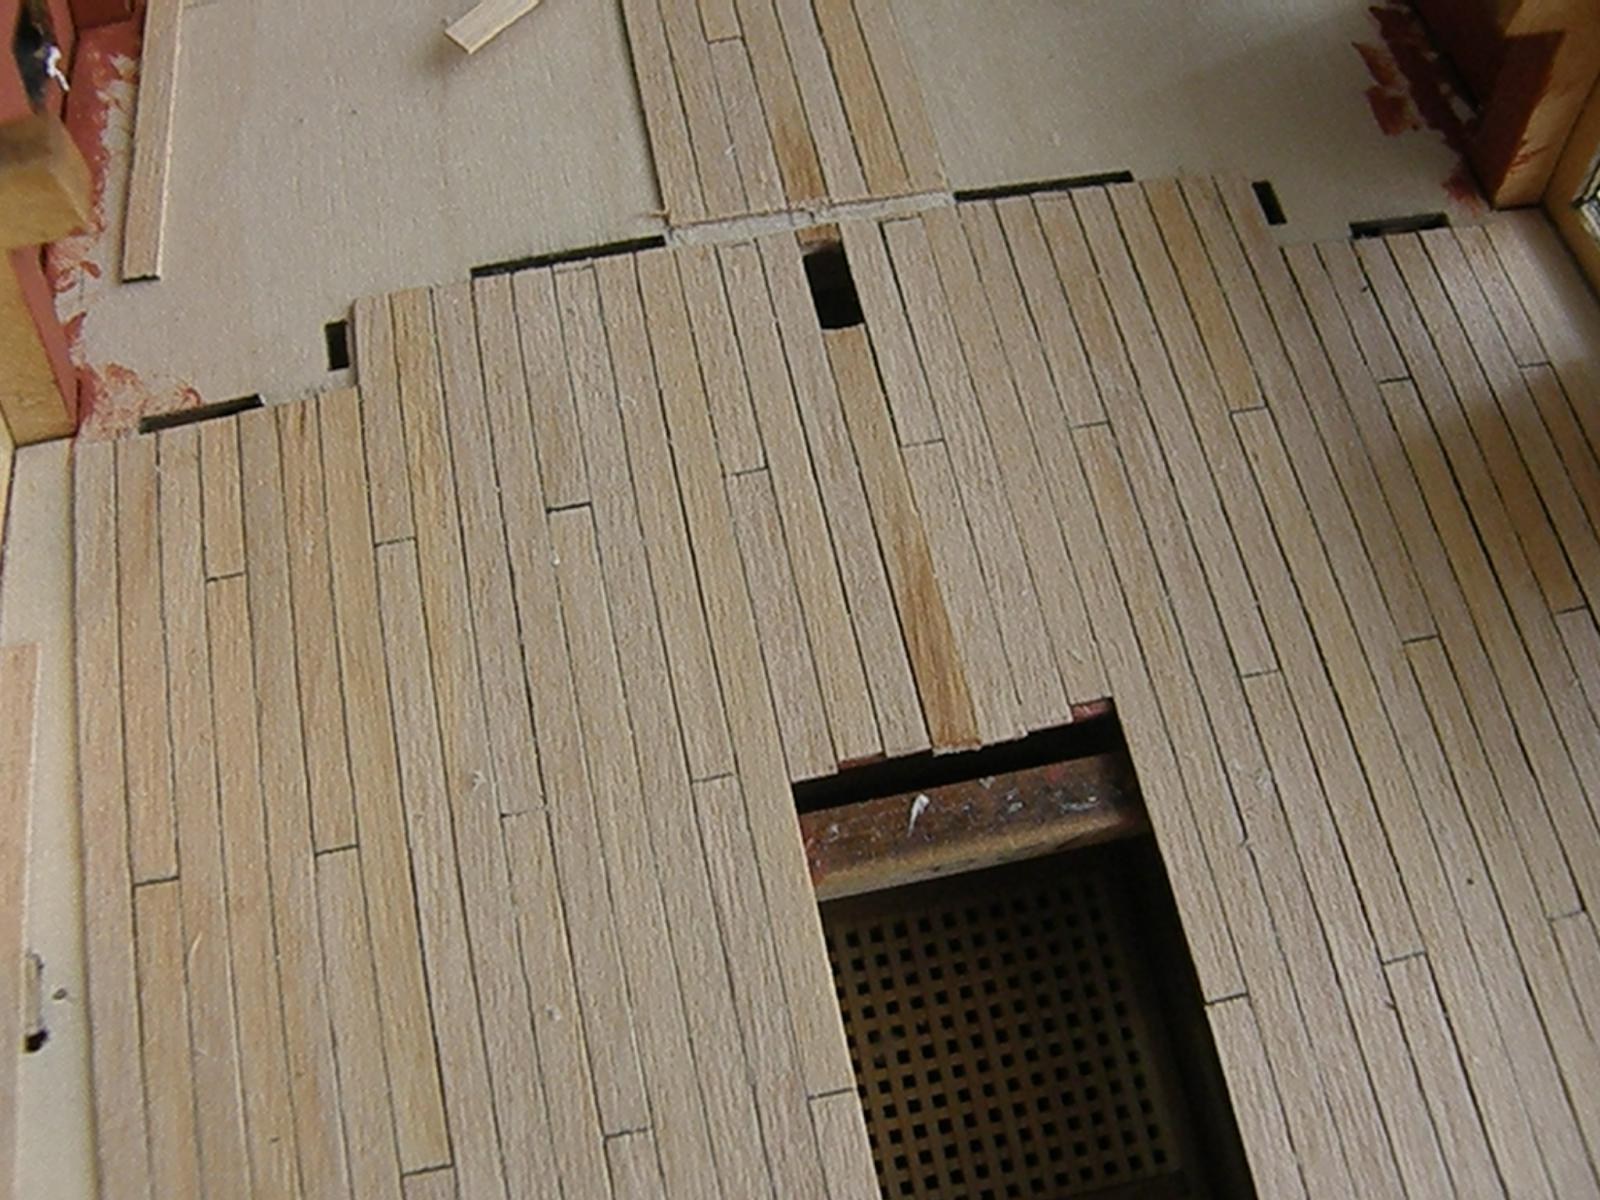
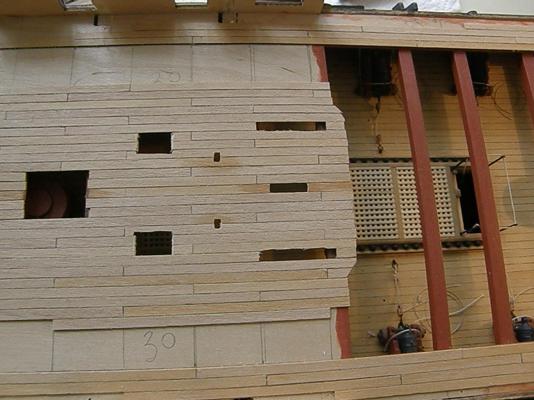
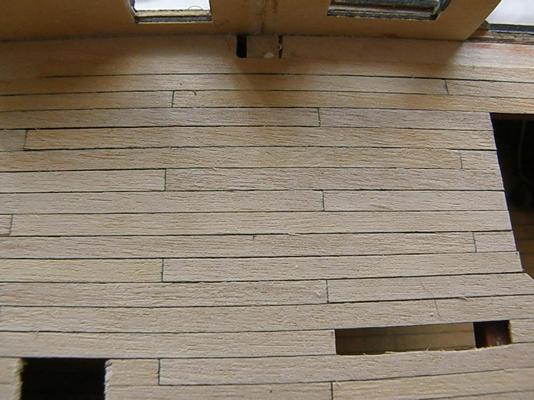
I have now finished most of the deck planking on the rear deck. My concern has been to make sure the planking from the front deck along the sides over the lower deck matched up with the planks on the rear. In the process I found my centre plank over the rear deck is a little less than 0.5 mm off centre so that adjustments had to be made. Moreover the planks varied in width from about 2.9mm (only a few) to 3.3mm (again only a few). Most were about 3.1 +/- mm. On balance these differences are an advantage as it is possible to adjust the overall width of planking on either side of centre by choosing planks of the appropriate width. I used a four butt shift as my pattern of planking. After each four planks on either side of centre I checked the gap between the planking I laid from the centre of the rear deck to the planks extended from the front deck. If there was a difference in the gaps on the two sides I adjusted the total width of the next 4 planks laid on either side of the centre. The first photo shows the gap to be filled on either side. Now the completed decking. The planks on both sides fit nicely - to my profound relief. Towards the rear, provision has been made for the screen bulkhead assembly. The planking behind the screen has yet to be completed.

-
Fair enough. I look forward to the finished (and sturdy) product- and hope this makes some small contribution to your future sanity. RMC
-
It seems a bit odd to design and build such a beautiful model as the Bellona and then leave the project fallow. I'm hoping that by the time I finish Vanguard (which will probaly take another couple of years) the Bellona will finally be on sale. RMC
-
Yes Alistair, I'm really pleased with the decking so far. There are some quite demanding bits to come .... Last words (from me at least) I'll use the Morope on the shrouds and for the anchor rope (it comes in 2.5mm diameter as specified in the kit). I'll think about what to use in the other applications. My only concern with the Morope is it 'having a life of its own'. That may be fine for people (though I can think of some exceptions); for rope - it's a bit of a pain.
-
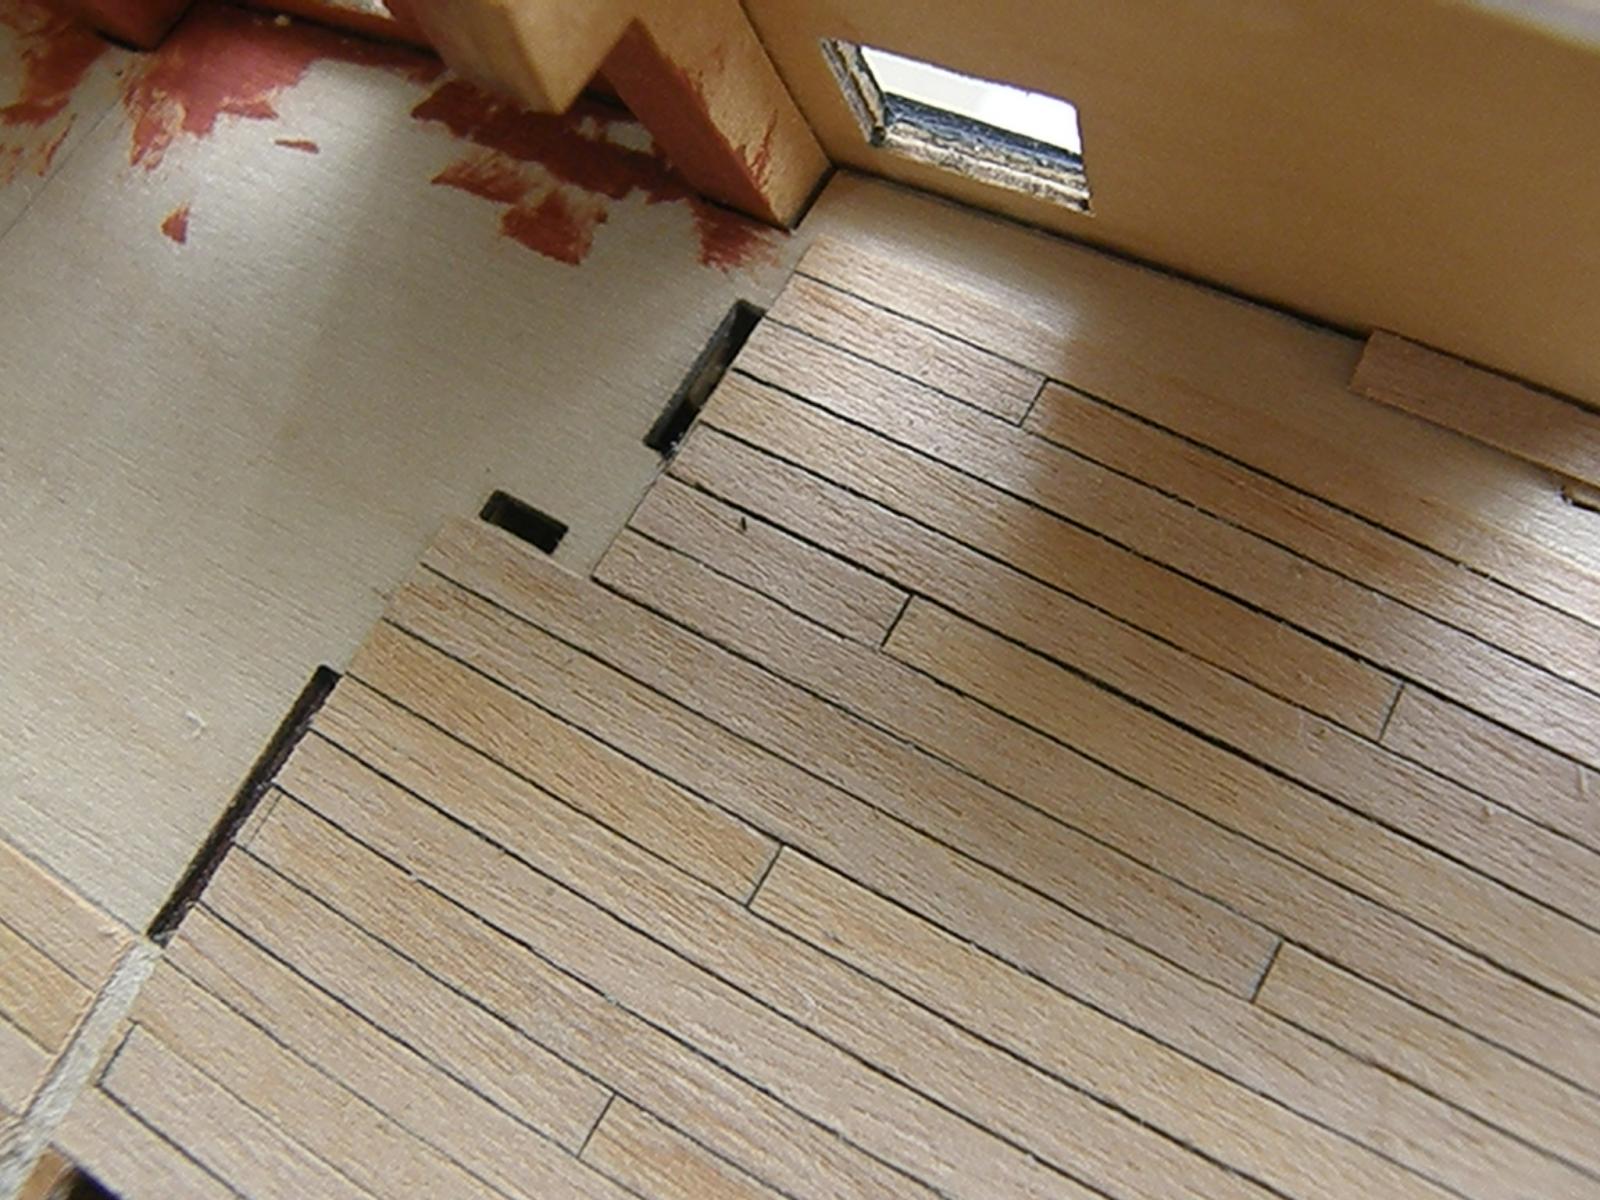
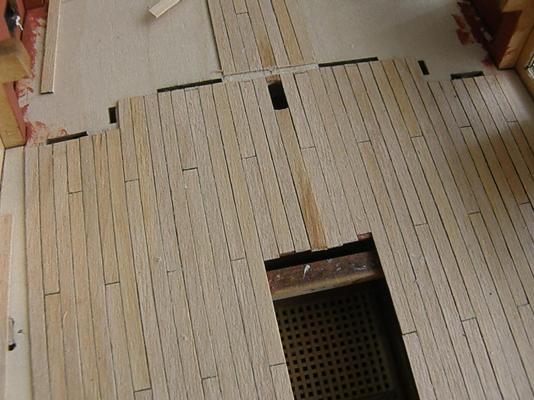
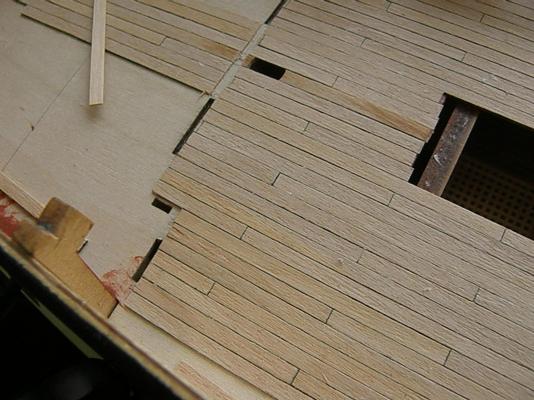
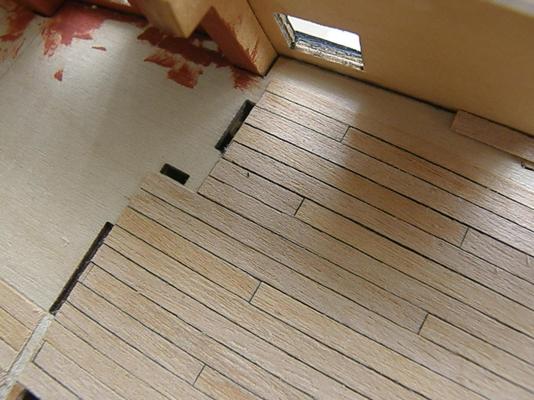
Well the Morope business certainly provoked rather more passion than I expected. Thanks for all your contributions.. I have been doing a bit of deck planking. I hadn't heard of a margin plank, nor joggling before. I got hold of a book by Keith Julier and used it as a guide to both the pattern of planking and the rules for joggling etc. I have now done the front deck. In the followning photos the margin planks are only dry-fitted as I would like to put another coat of red paint on the on the sides. The deck planks have not been scraped back/sanded nor coated with polyurethane. I first dry-fitted the last deck plank and the margin plank. Working on both planks enabled a little more leeway in adjusting the fit. Once there was a good fit, the last deck plank was glued in place, leaving the margin plank dry-fitted, but firmly in place. The edge over the lower deck has not yet been trimmed.


-
Well Im not sure what to make of all this. At scale 1:72 does it make any real difference? I had thought that when I first found that there were two types of ropes, that RH rope may be easier to coil one way LH easier to coil the other and from what Alan has written, this is likely the case. I certainly found in rigging the guns, that the thread supplied refused to go where I wanted it to go, and the larger diameter threads did not look very life-like, nor easy to work with. I have only just arrived back from a few days away and will look at BE's Pegasus when I get a chance. We have had some amazingly bad weather (about 100mm of horizontal rain, 100km/h winds and huge seas) and I have things to do as a consequence. Thank you all for your interest and research.
-
Alan: in the rope website you recommended, there are a couple of suspicious characters in ads on the leftside of the reference material. They come from Lugarno - the suburb in which I live. Is this spooky or just a product of technology that I haven't caught up with?
-
Good grief. I had no idea. I thought rope was rope .. so there you are. I'm off for the weekend where I will contemplate this information over a glass or two. Thank you both for your efforts.
-
Thanks Alan for taking the trouble.
-
Alistair has kindly sent me some samples of Morope. The quality is really excellent. I have looked on the Morope website and among other things it specifies left and right handed rope. This seems rather odd to me, so can anyone suggest the applications of the two types. Does it really matter? I intend to replace the kit-supplied rigging with Morope, and I hope not to go to the expense and then stuff it up.