HOLIDAY DONATION DRIVE - SUPPORT MSW - DO YOUR PART TO KEEP THIS GREAT FORUM GOING!
×


RMC
-
Posts
933 -
Joined
-
Last visited
Content Type
Profiles
Forums
Gallery
Events
Everything posted by RMC
-
Alistair: I'm having trouble with the messenger for some reason. Anyway I'm glad the letters finally arrived. I think I could have paddled over and delivered them more quickly.
-
Arthur: thanks for the tip about the eyelets in the timberheads. I went to the rigging diagrams to find them - and they would have been a bit of a pain to fit once the timber heads were on the model. I found all of this to be the most difficult part of the model so far, though the decoration on the stern facia and galleries looks pretty daunting. Question: I have been away for a few days where I had the chance to almost finish the masts. I have painted the lower masts and while looking at the photo on the kit box, noted that most of the upper masts (aside from black trim) are done in stained wood. I then went to the instructions (always a last resort) which also mention staining the wood on the upper masts, though they are not all that clear to me. I have looked at yours and Len's and both of you seem to have painted the upper masts in the same way as the lower - they look really good. I haven't decided what to do with them. Do you have any idea which is likely to be more historically accurate? Does it really matter? Aside from that, I am hesitating fitting the catheads. Things poking out the sides are an invitation to disaster.
-
Hi Arthur Just a clarification: in my first sentence in my last post I have mixed head rails and timber heads.. Anyway, I just thought to have a look at the photos on the kit box again. The main headrails there seem to be painted black. Chis Watton (I presume) then seems to have run some of the decorative metal strip - painted yellow - along the bottom of the headrail. It's all a bit difficult to see though. In any event, the tops of his main head rails are black. Perhaps I painted mine black subliminary as a consequence, but really, the very top of my headrails when yellow just looked too rough - although perhaps a bit more patience would have helped.. The timber heads in the photo on the kit box are black too, and with the laser cut, the raw timber finish looked out of place given all of the other painted surfaces.. I'm reasonably happy with the result so far and I'm not sure that sanity (let alone temper) would survive another few days working on the bow.
-
Thanks for your comments Arthur. 1 . Yes originally I had painted them yellow - so yes, personal preference -though I was a bit sorry in the end as I had painted the inside of the holes blue which looked quite good. The main reason for the black was that there were irregularities in the tops of the laser-cut pieces in my kit, and the yellow highlighted them no matter what I did. 2. You're right about the sets of ease. Bugger. 3. I nearly had heart failure when I first read your comment. However the timber heads (it took me some time to figure out what there were) are fortunately only dry-fitted at the moment. You have just saved me from making a large mistake. Thanks again, Bob
-
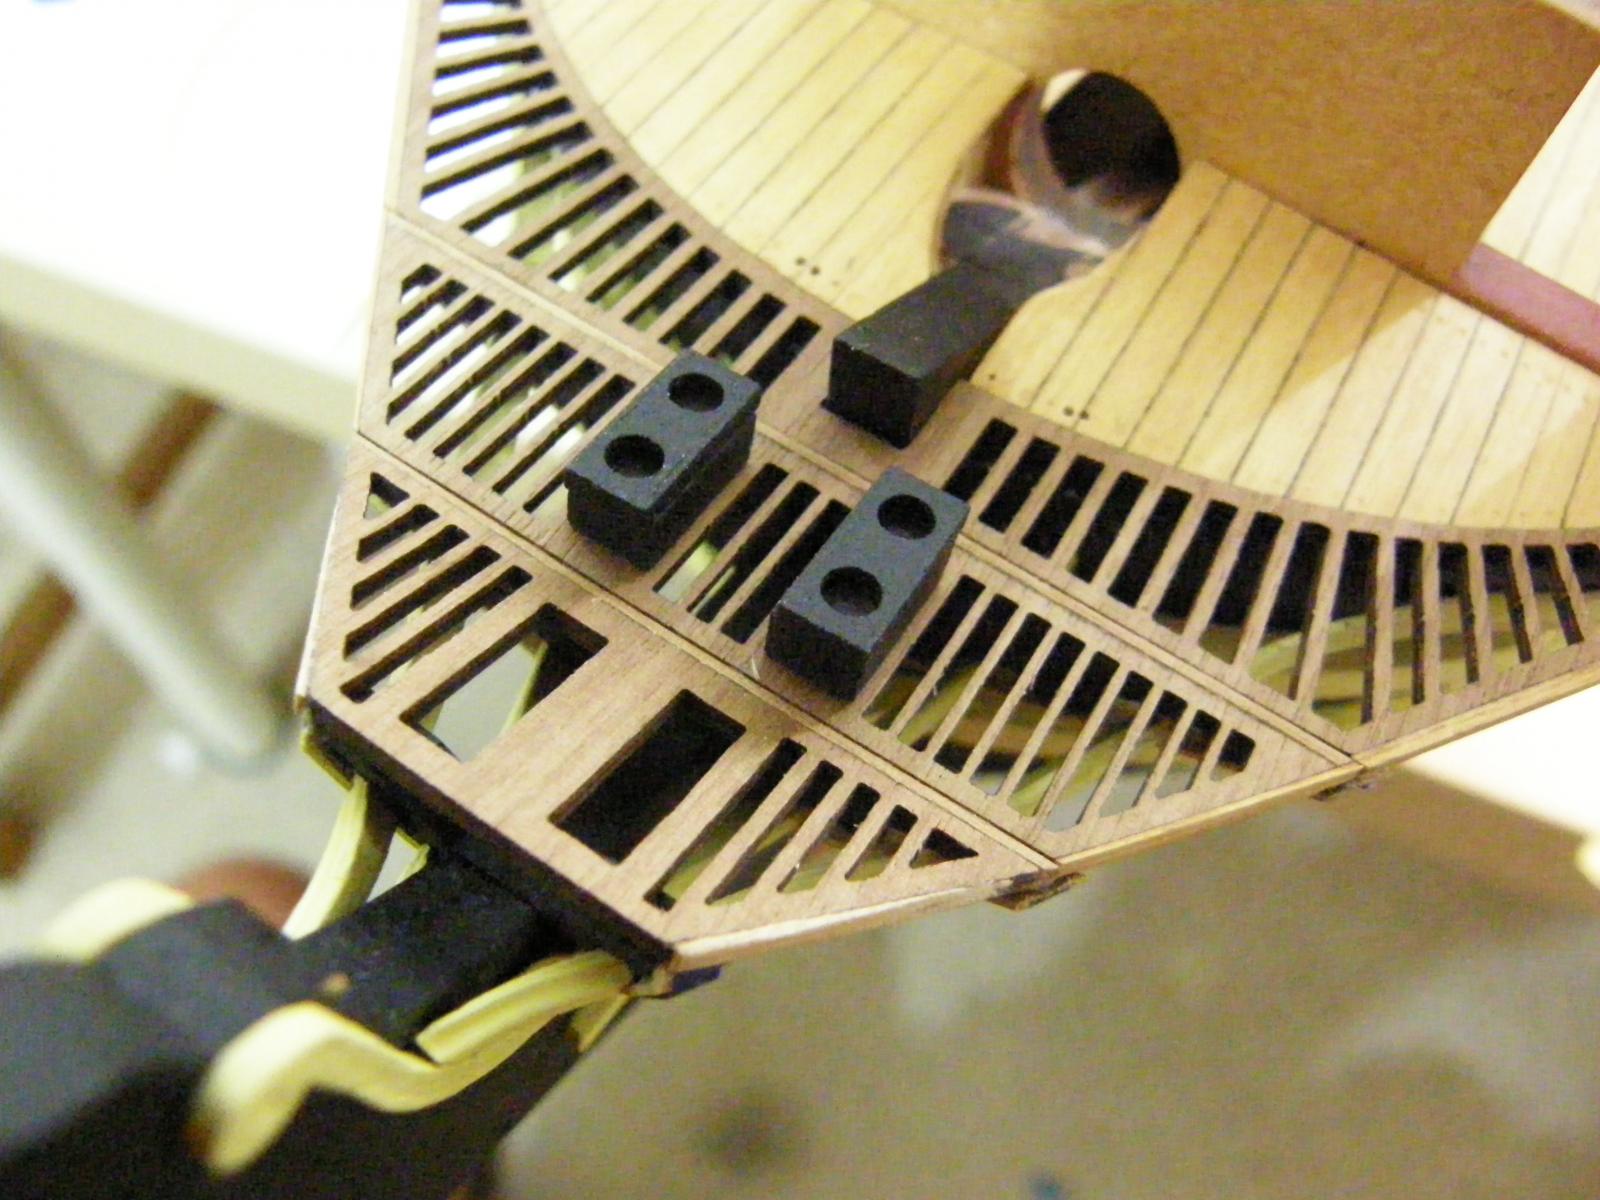
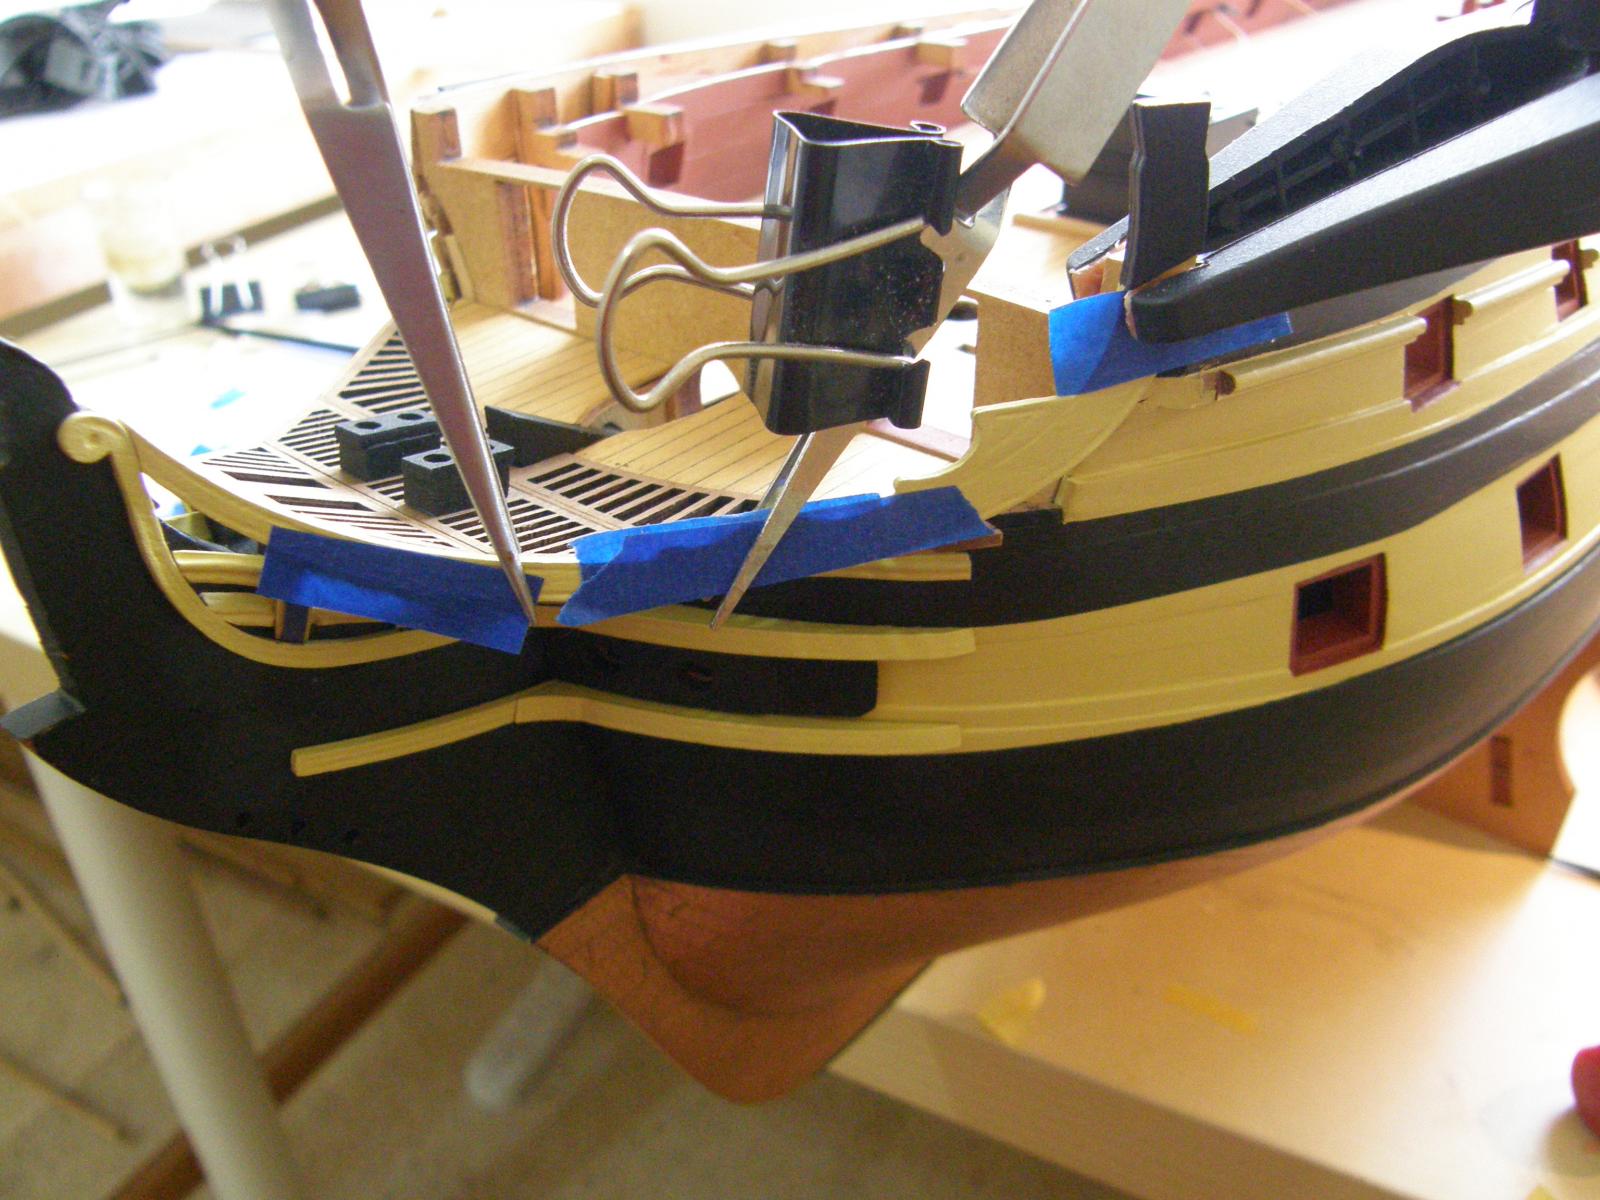
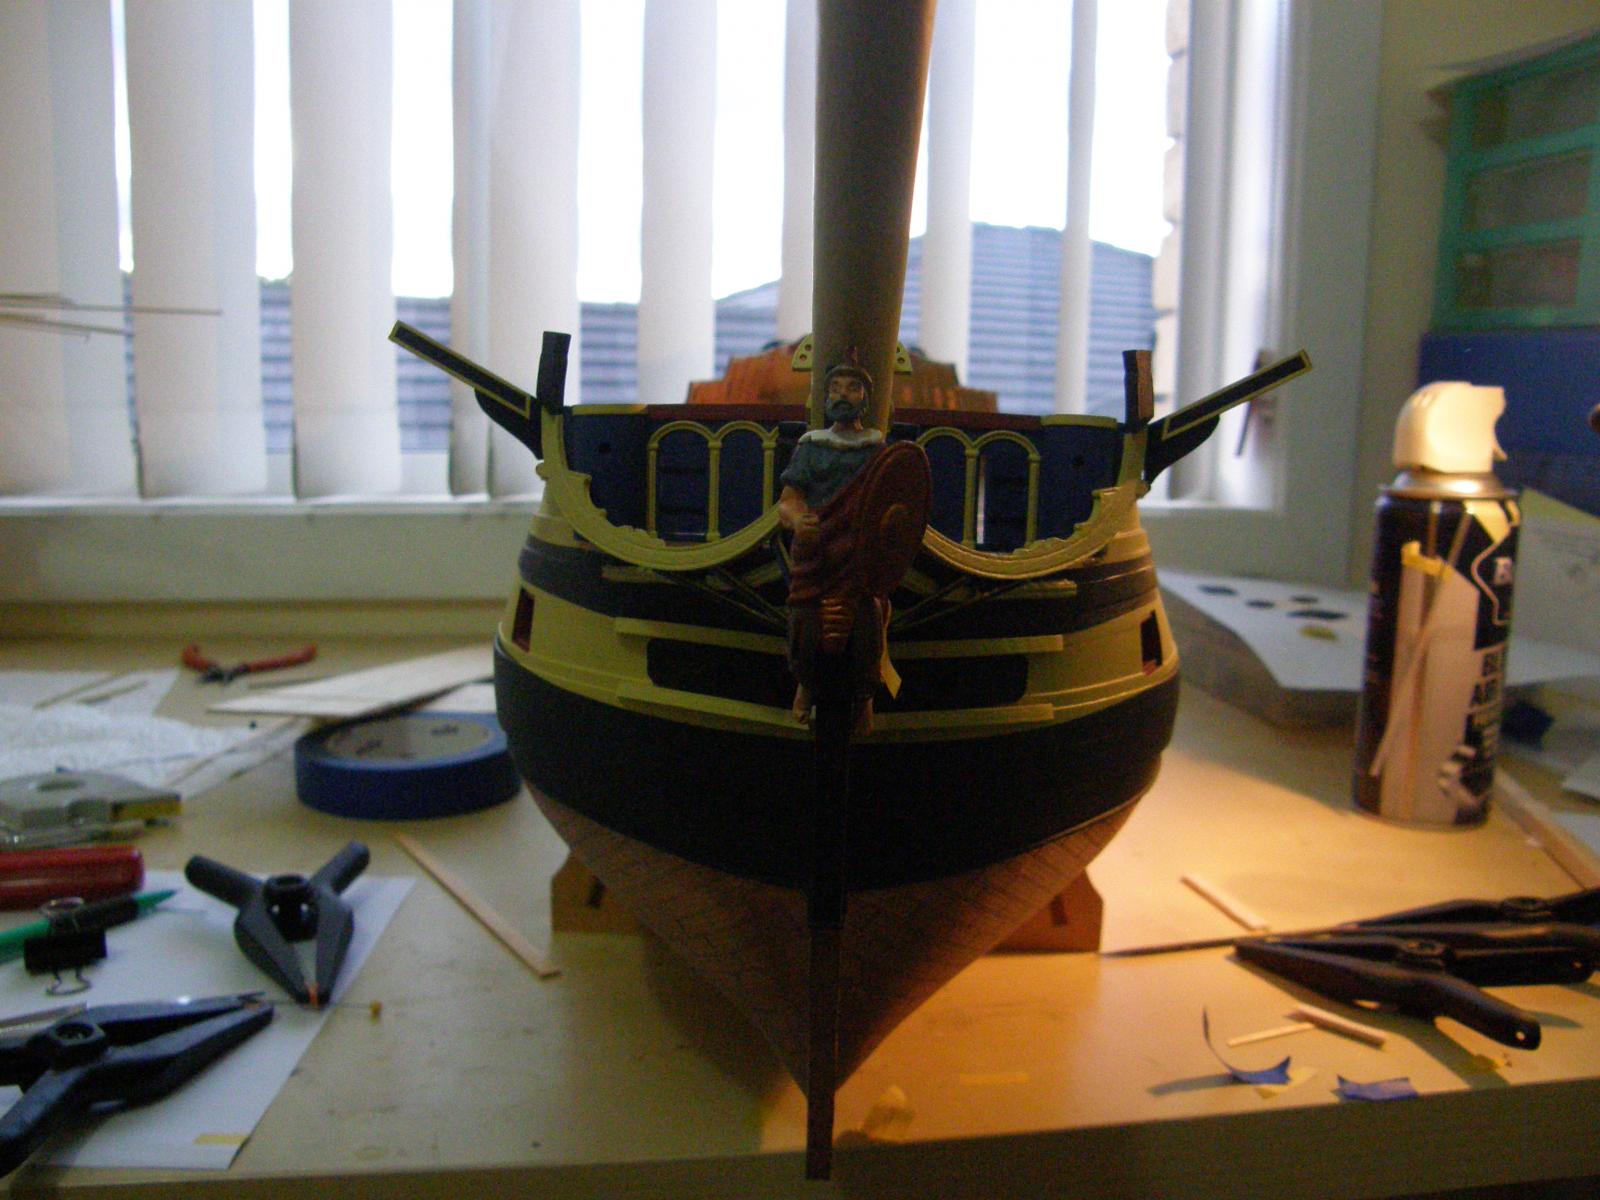
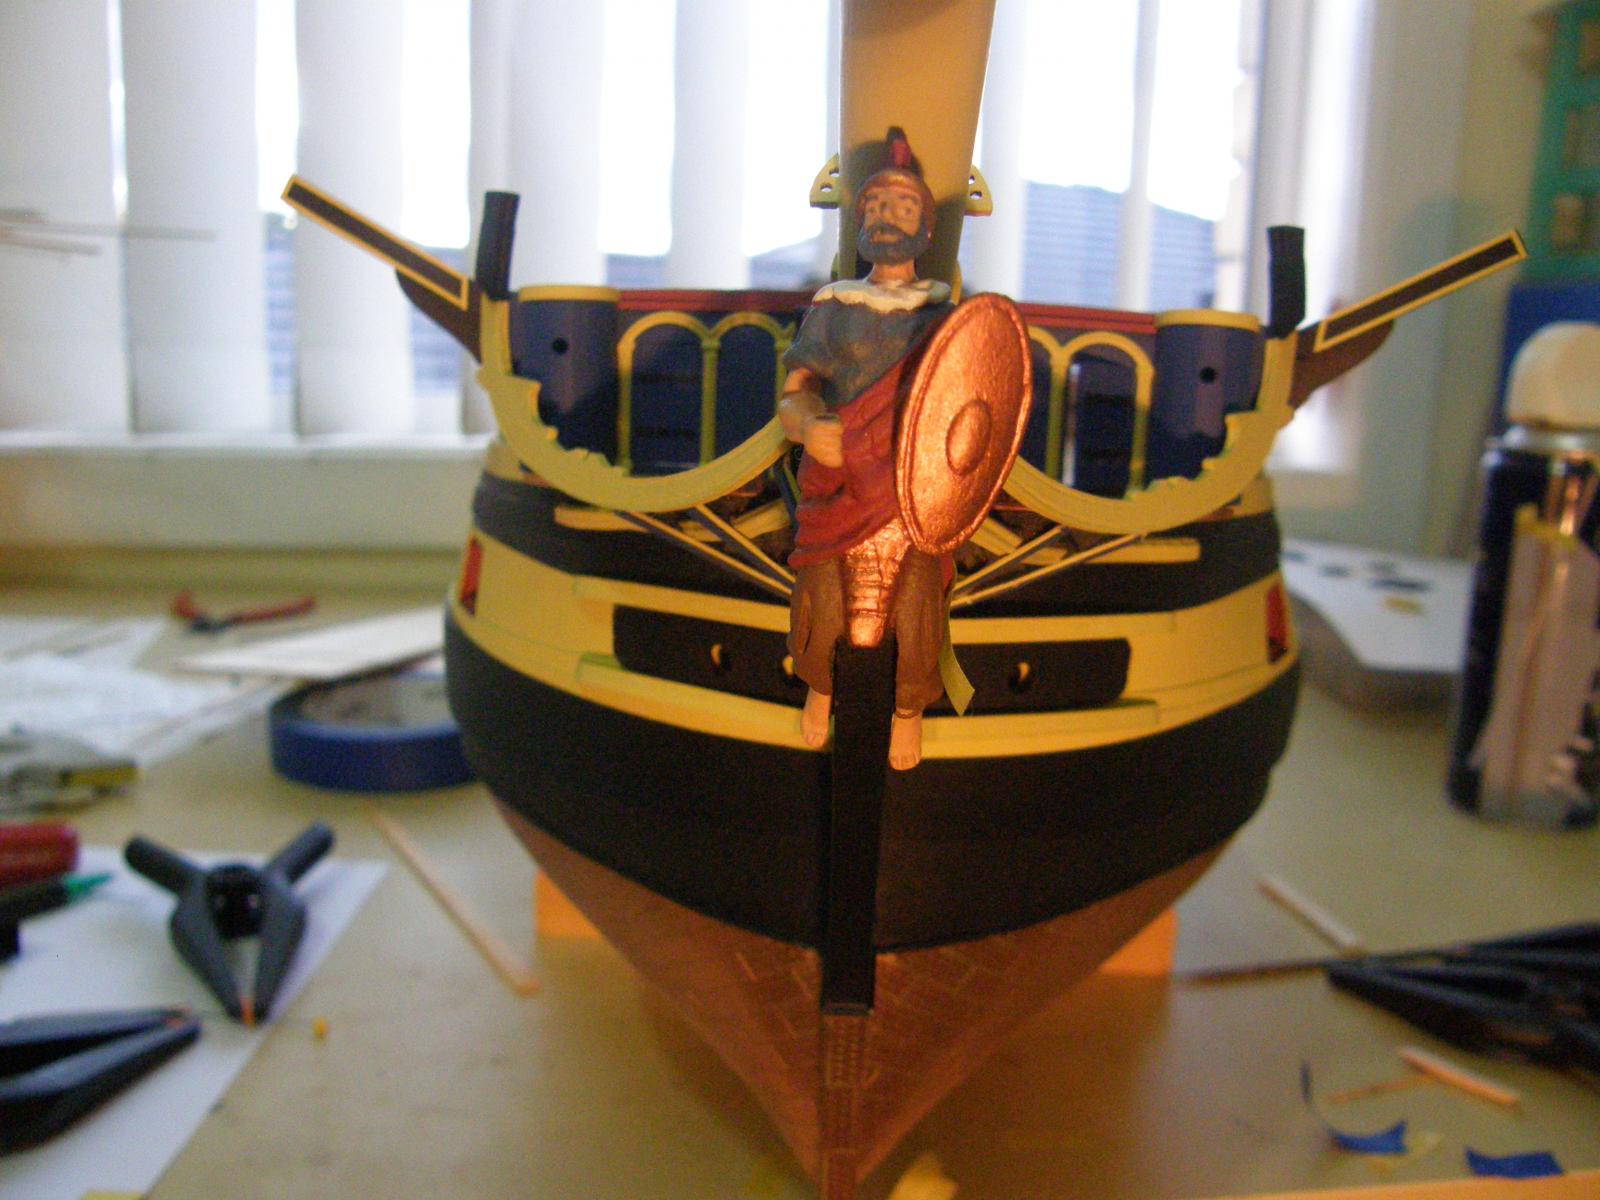
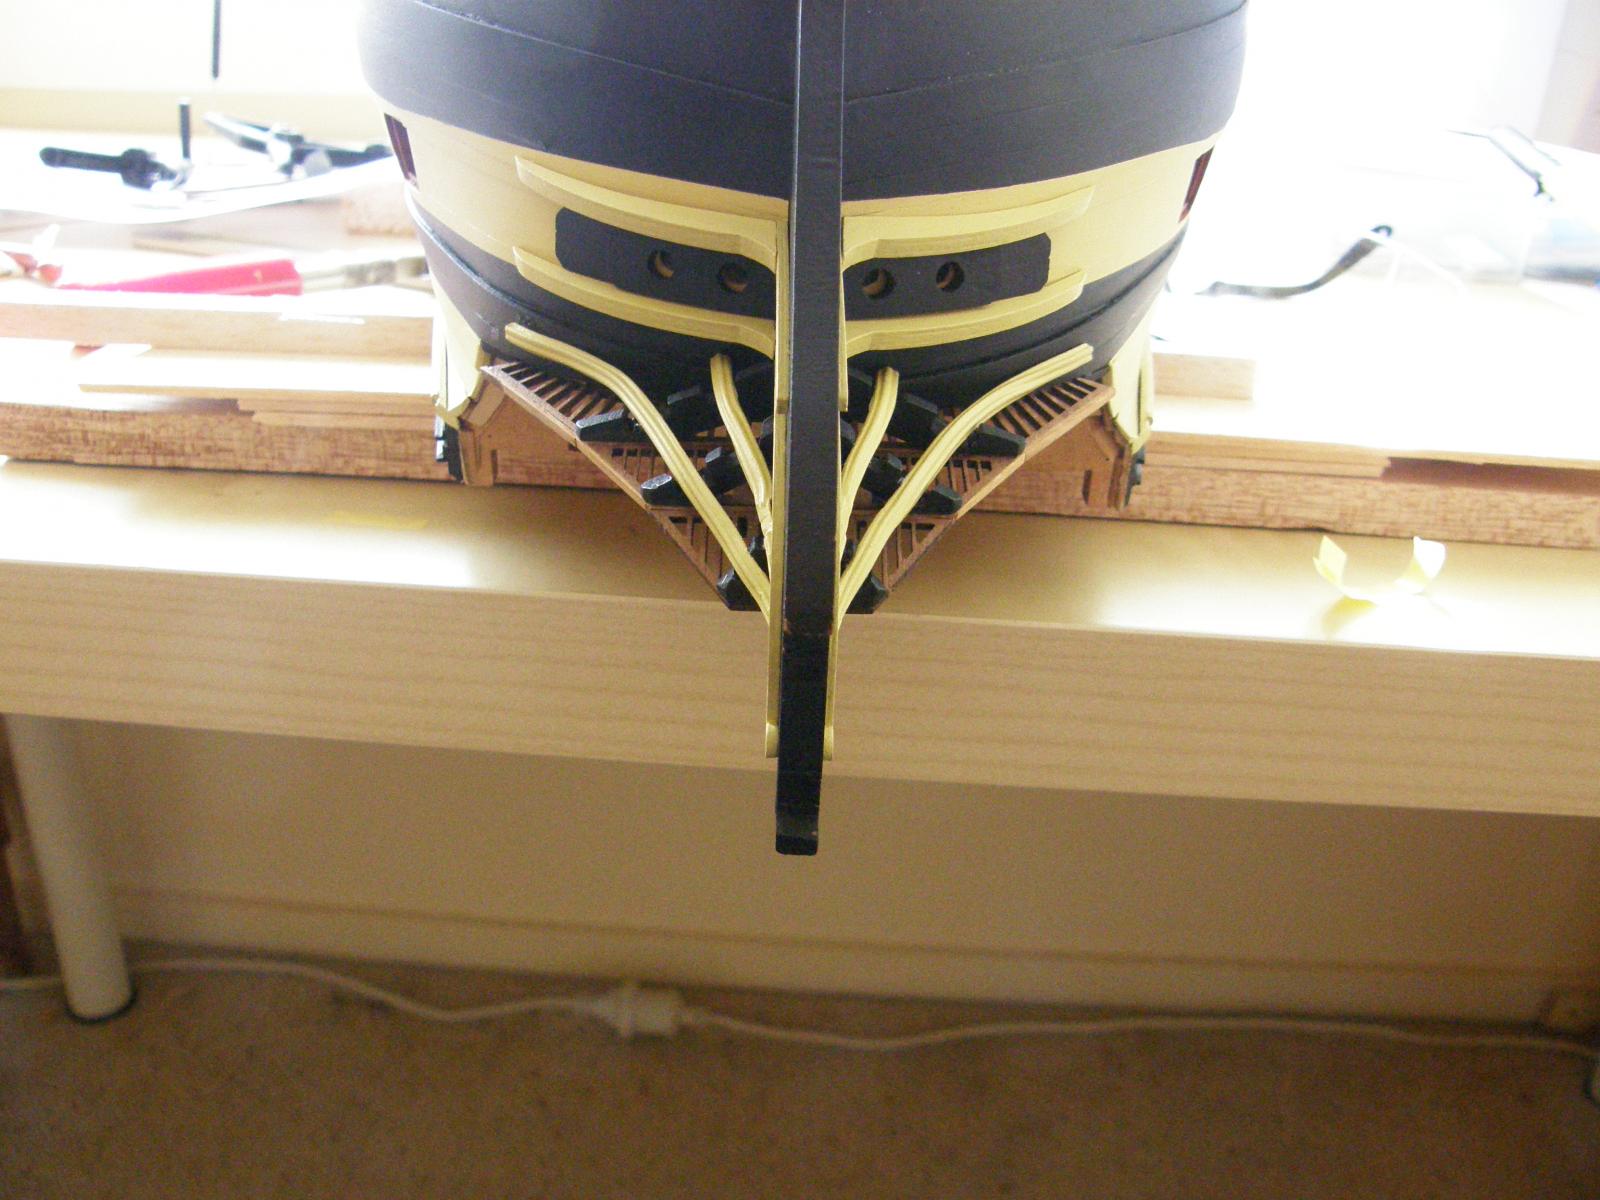
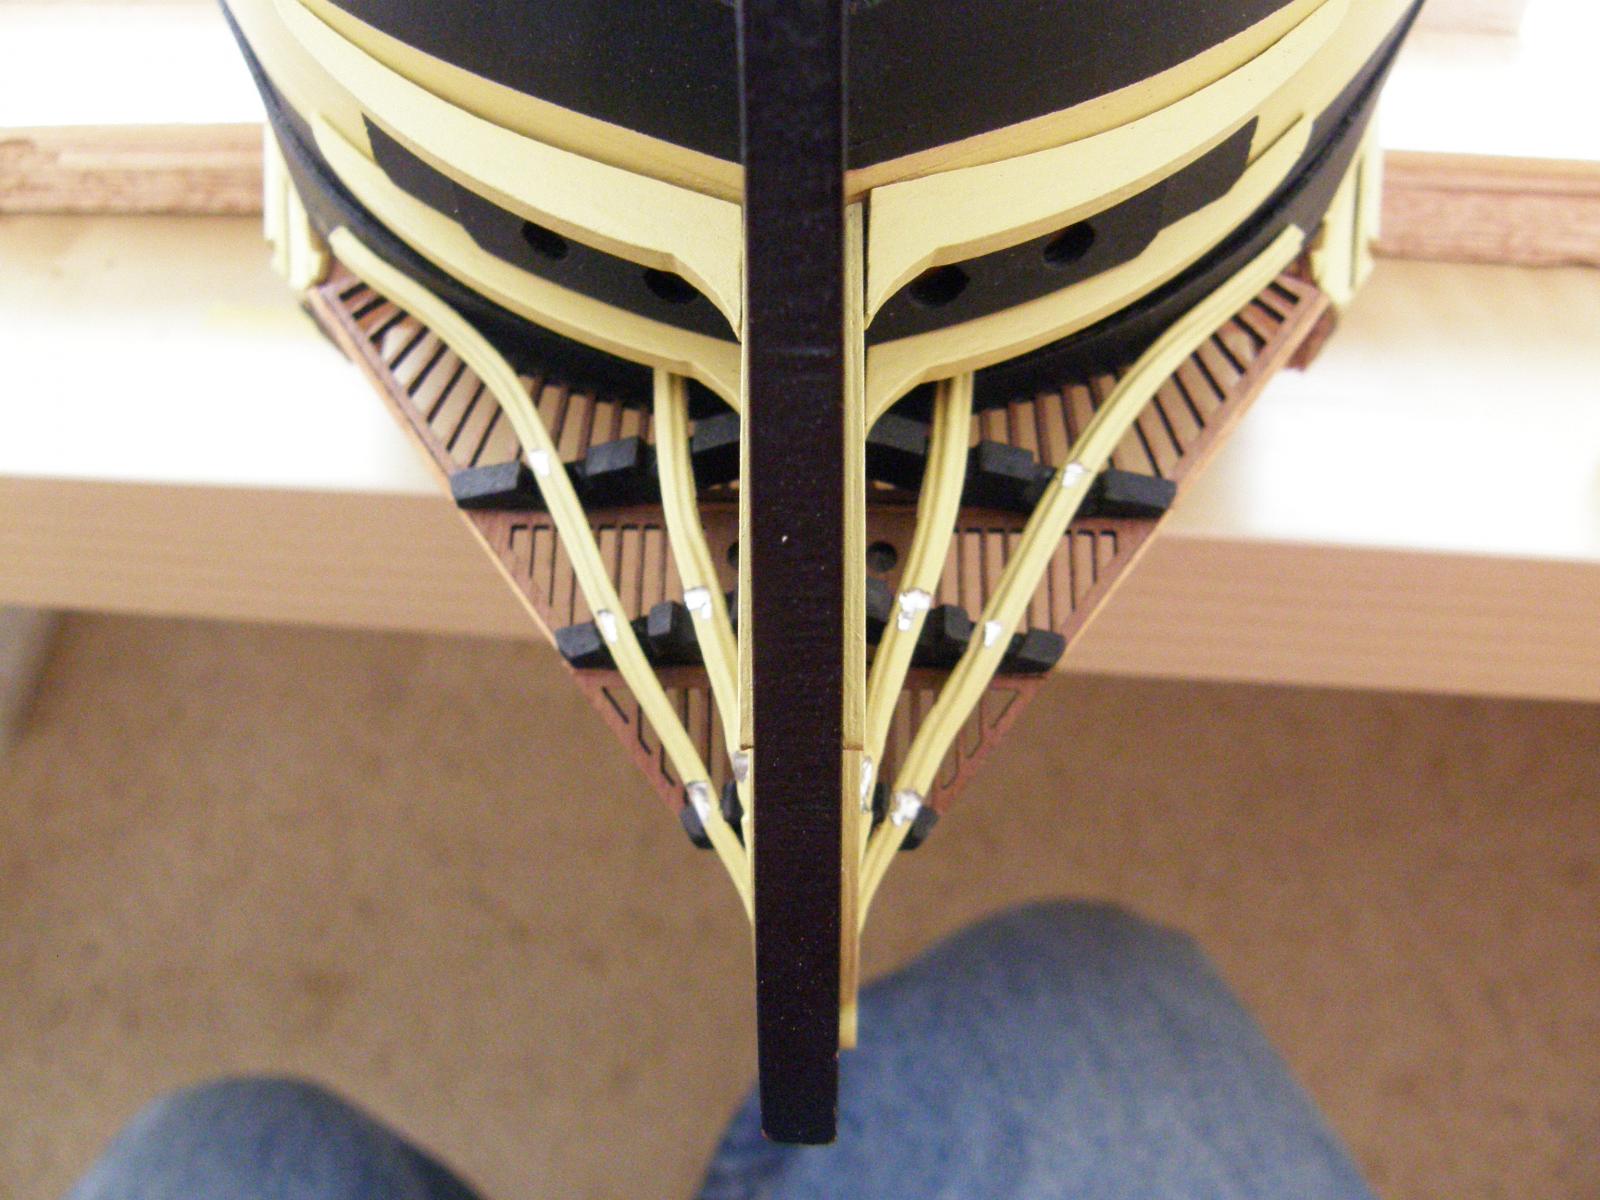
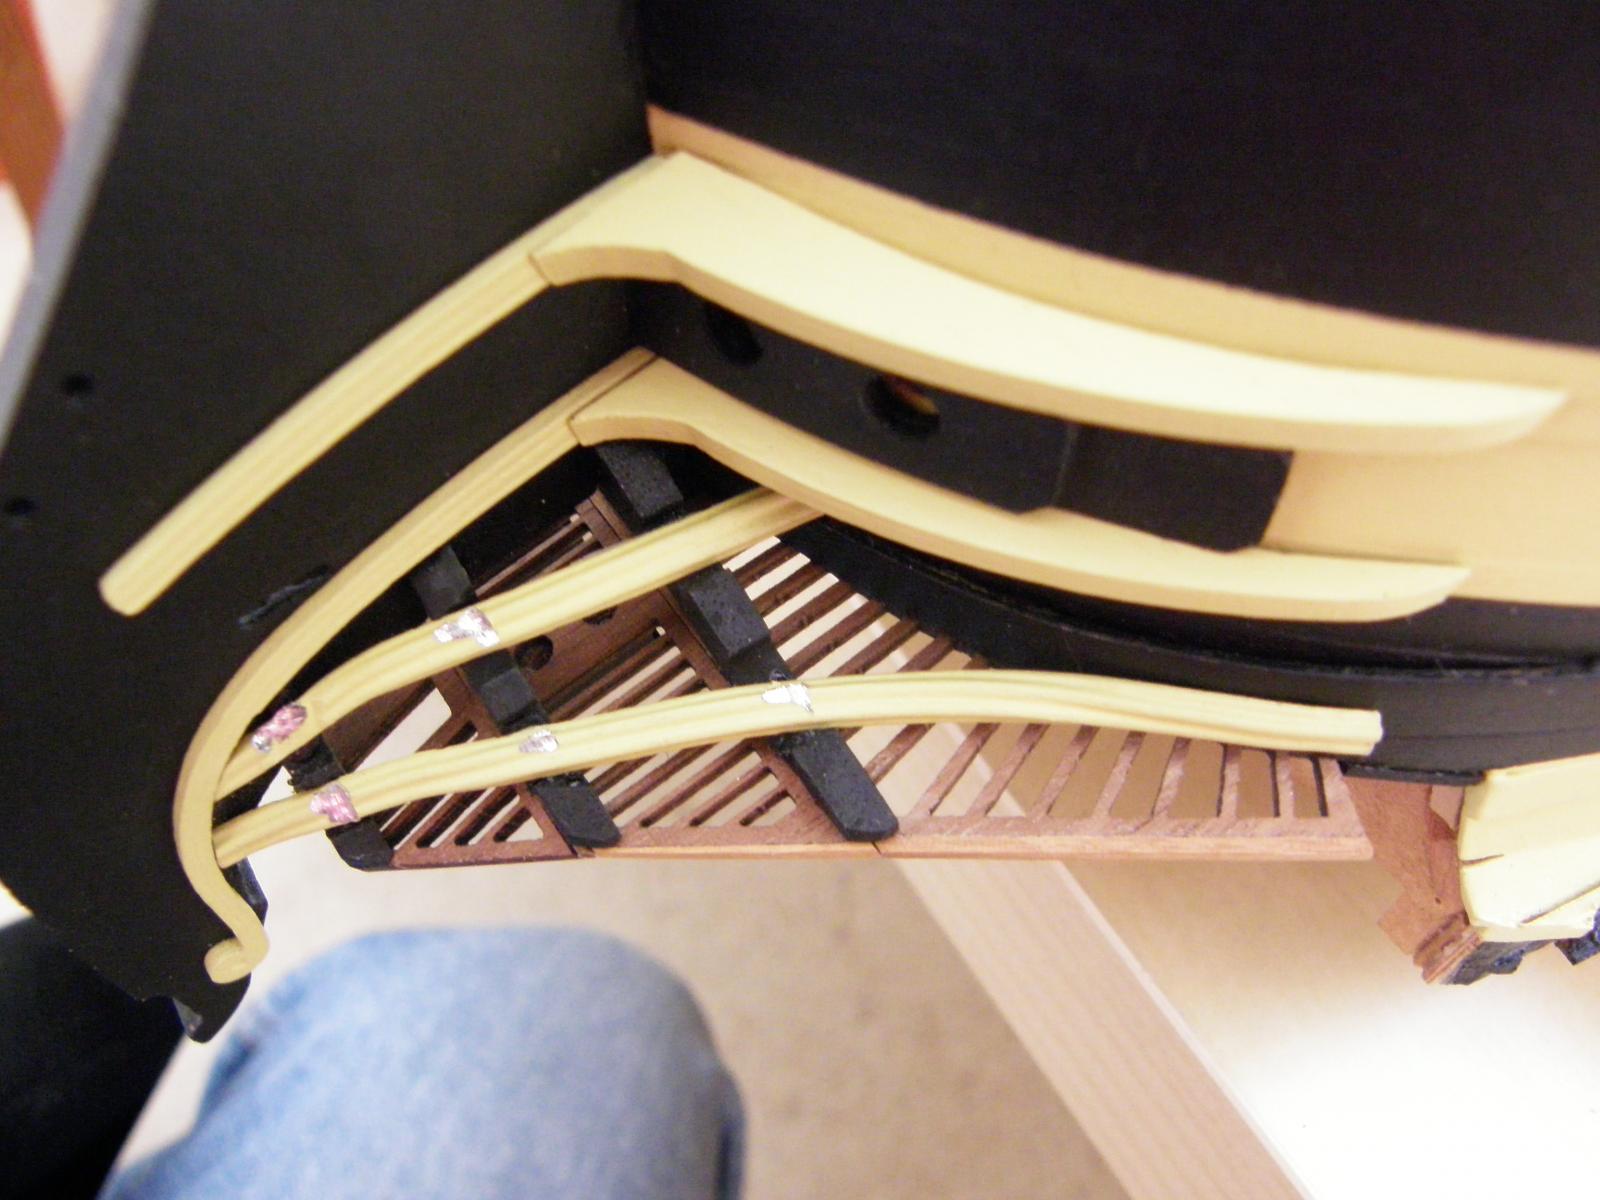
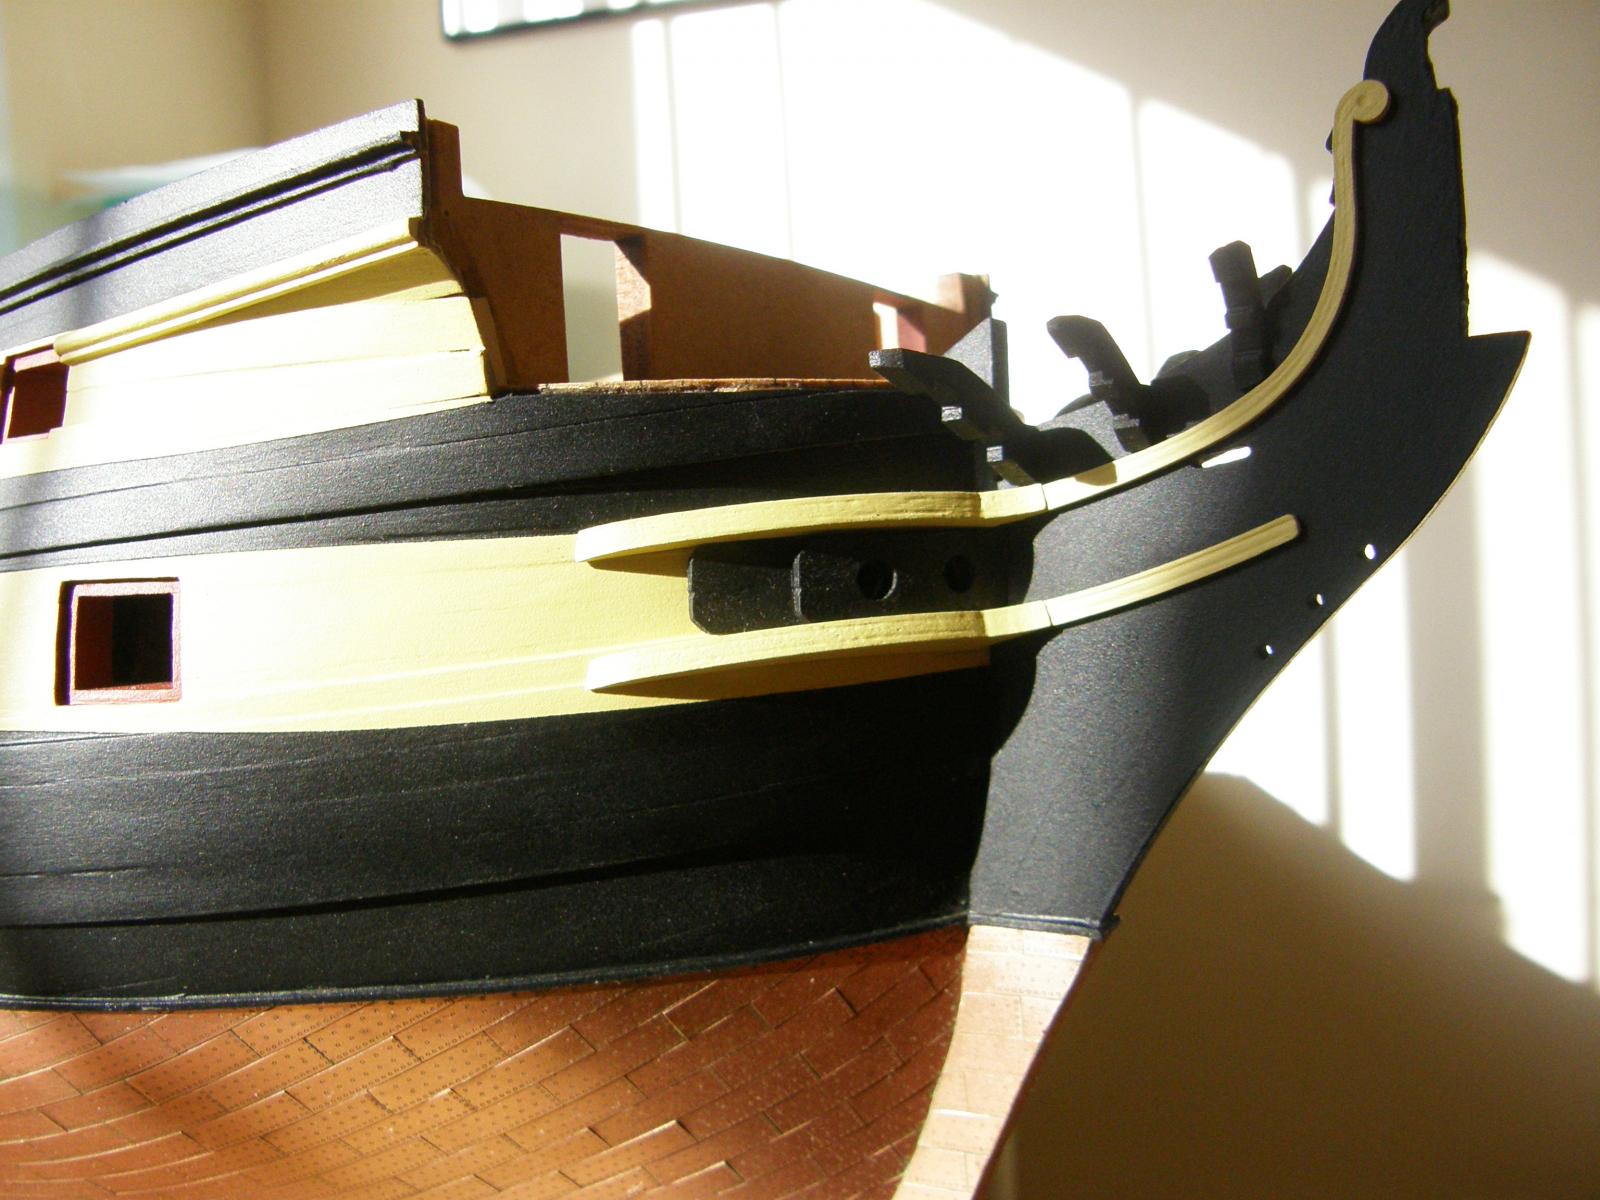
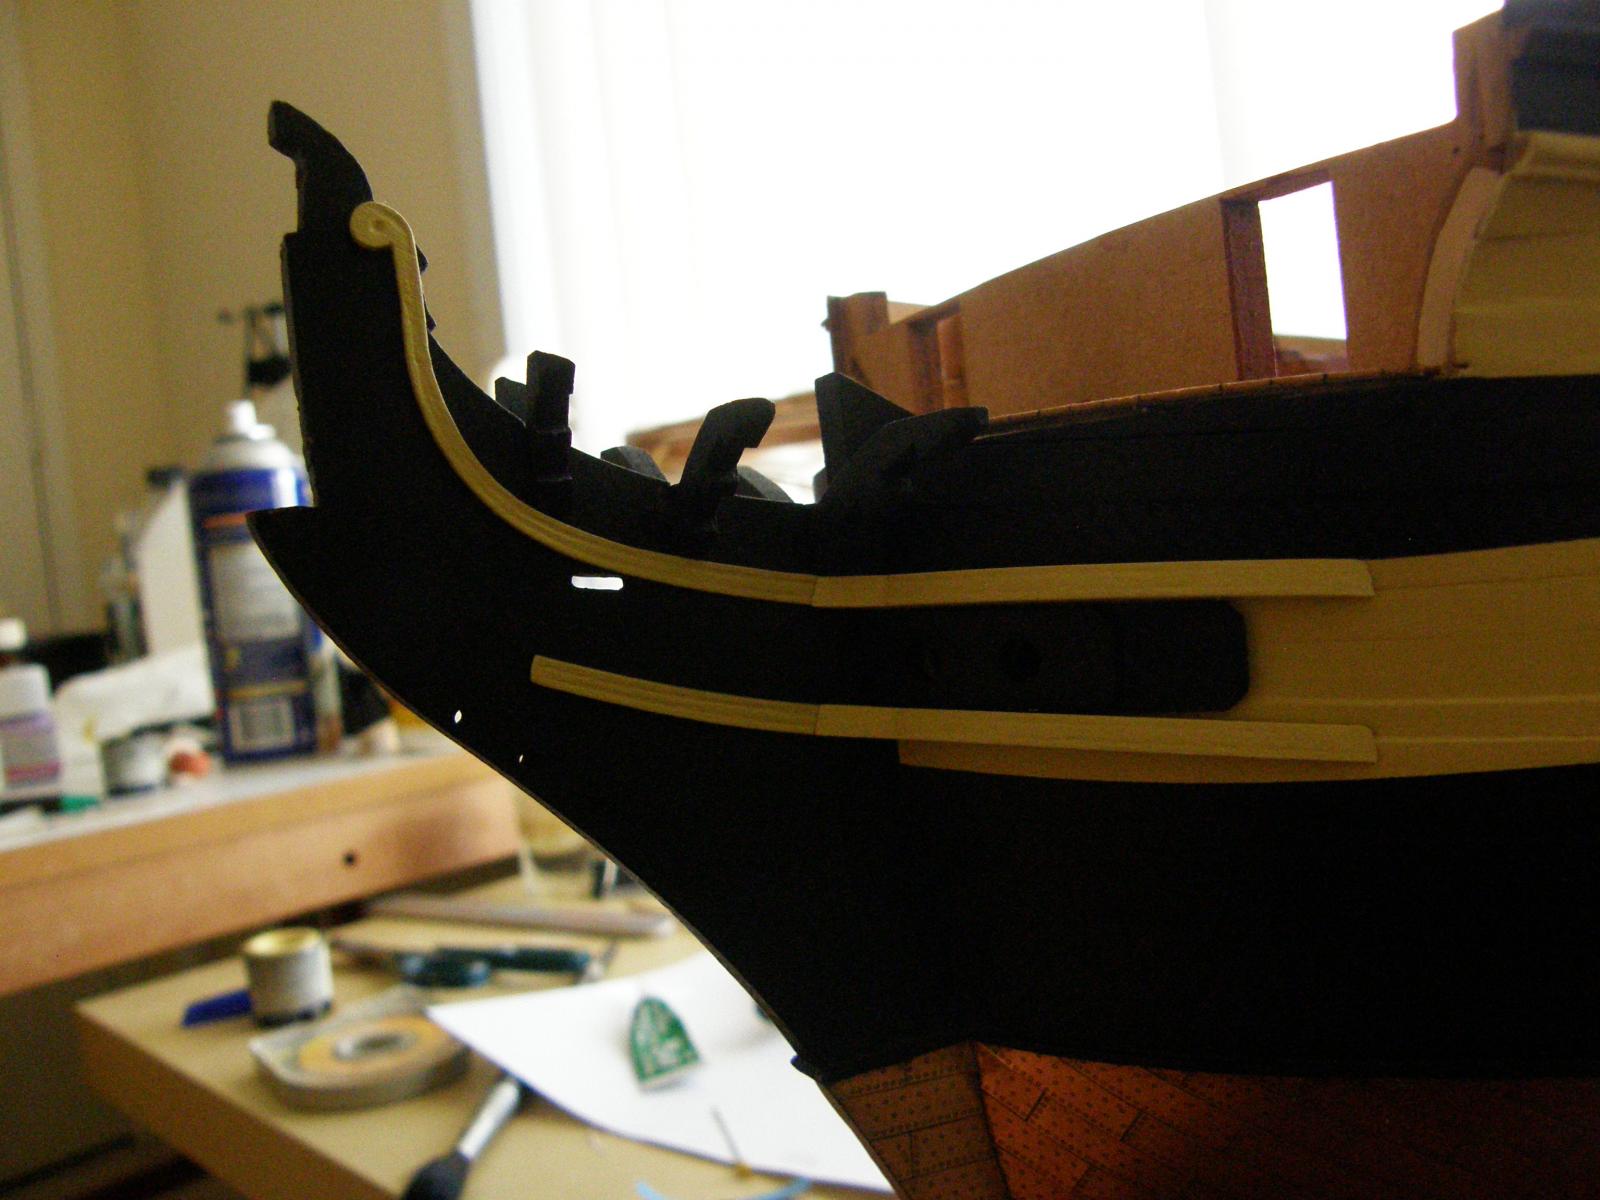
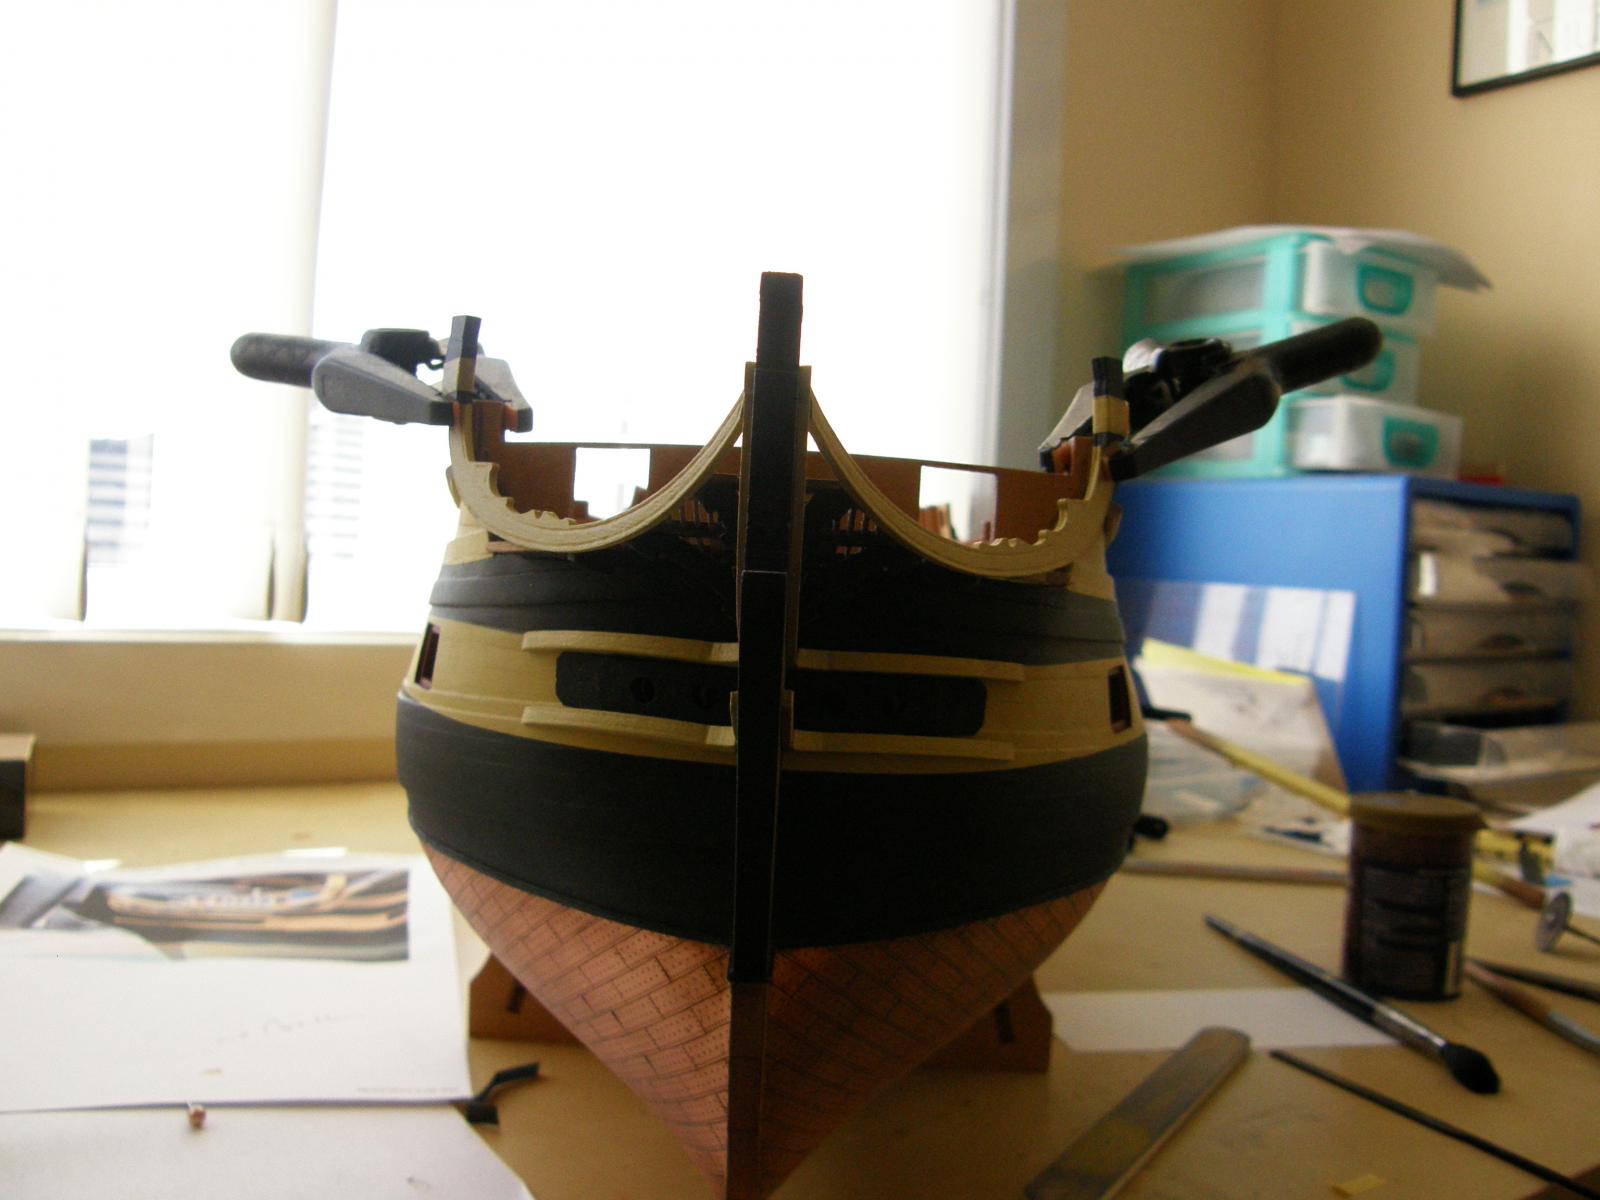
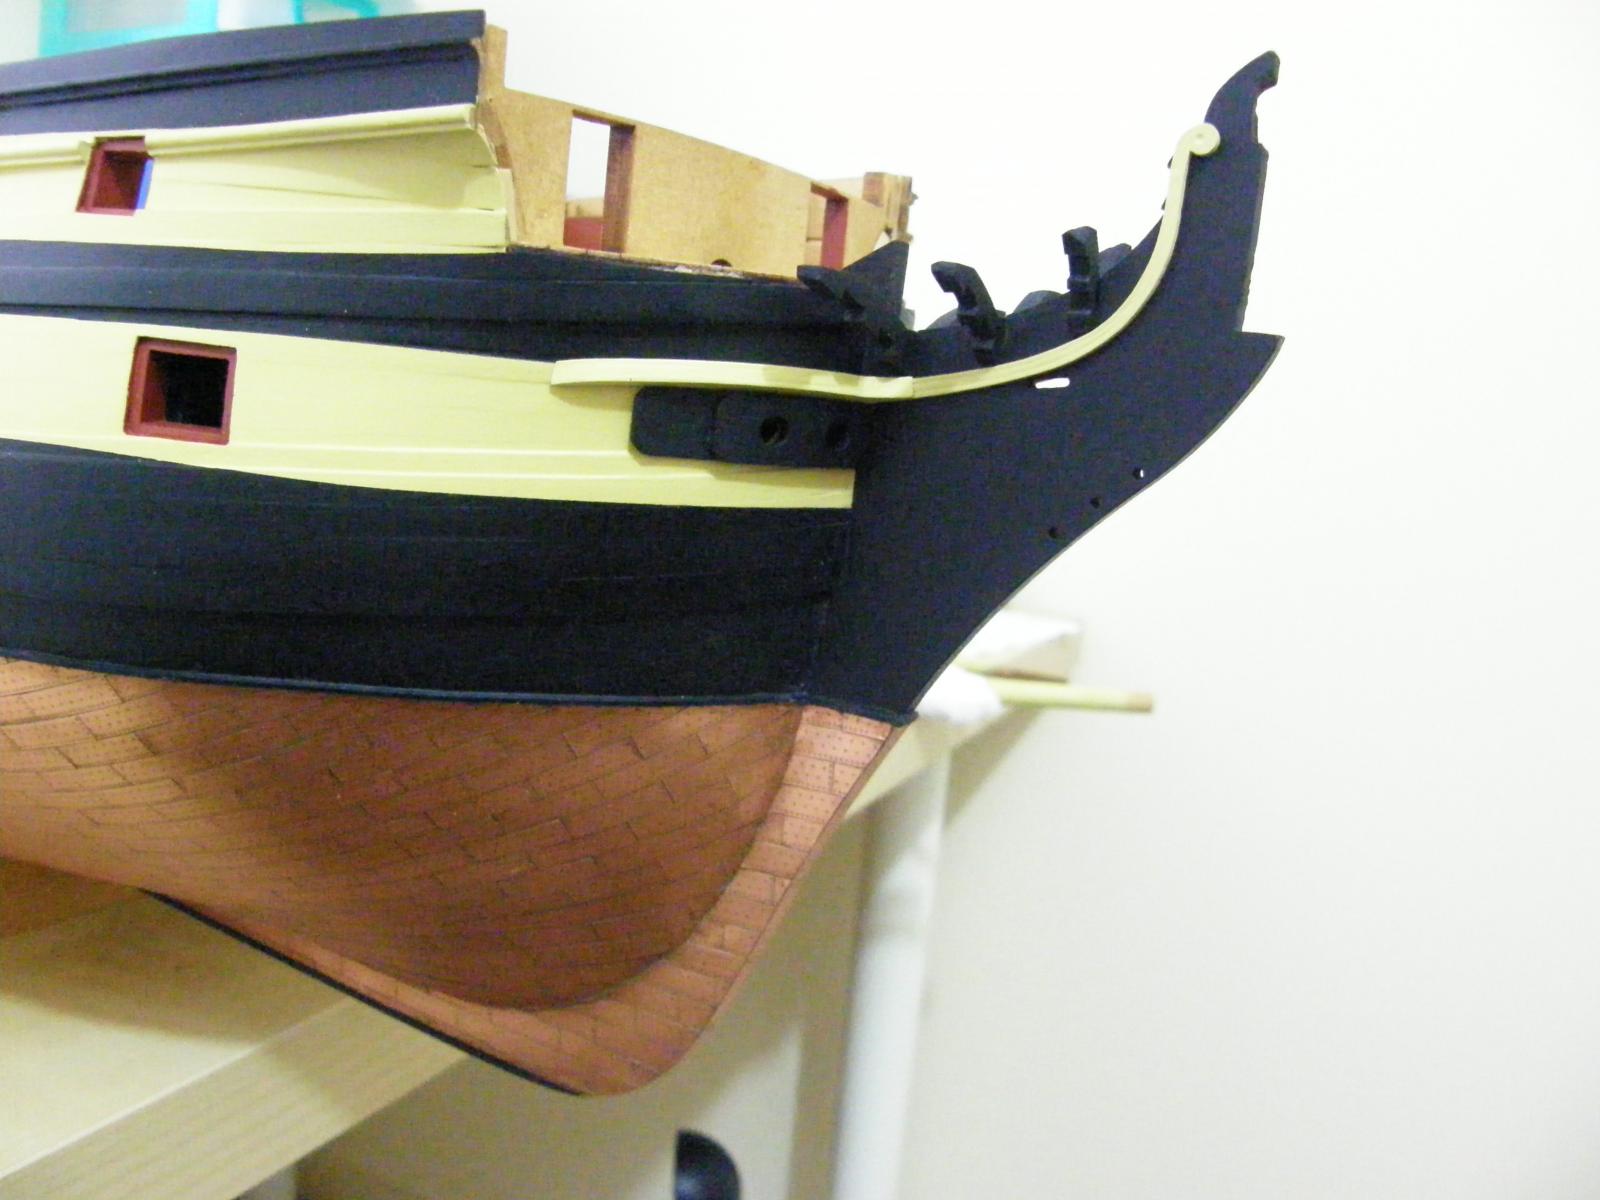
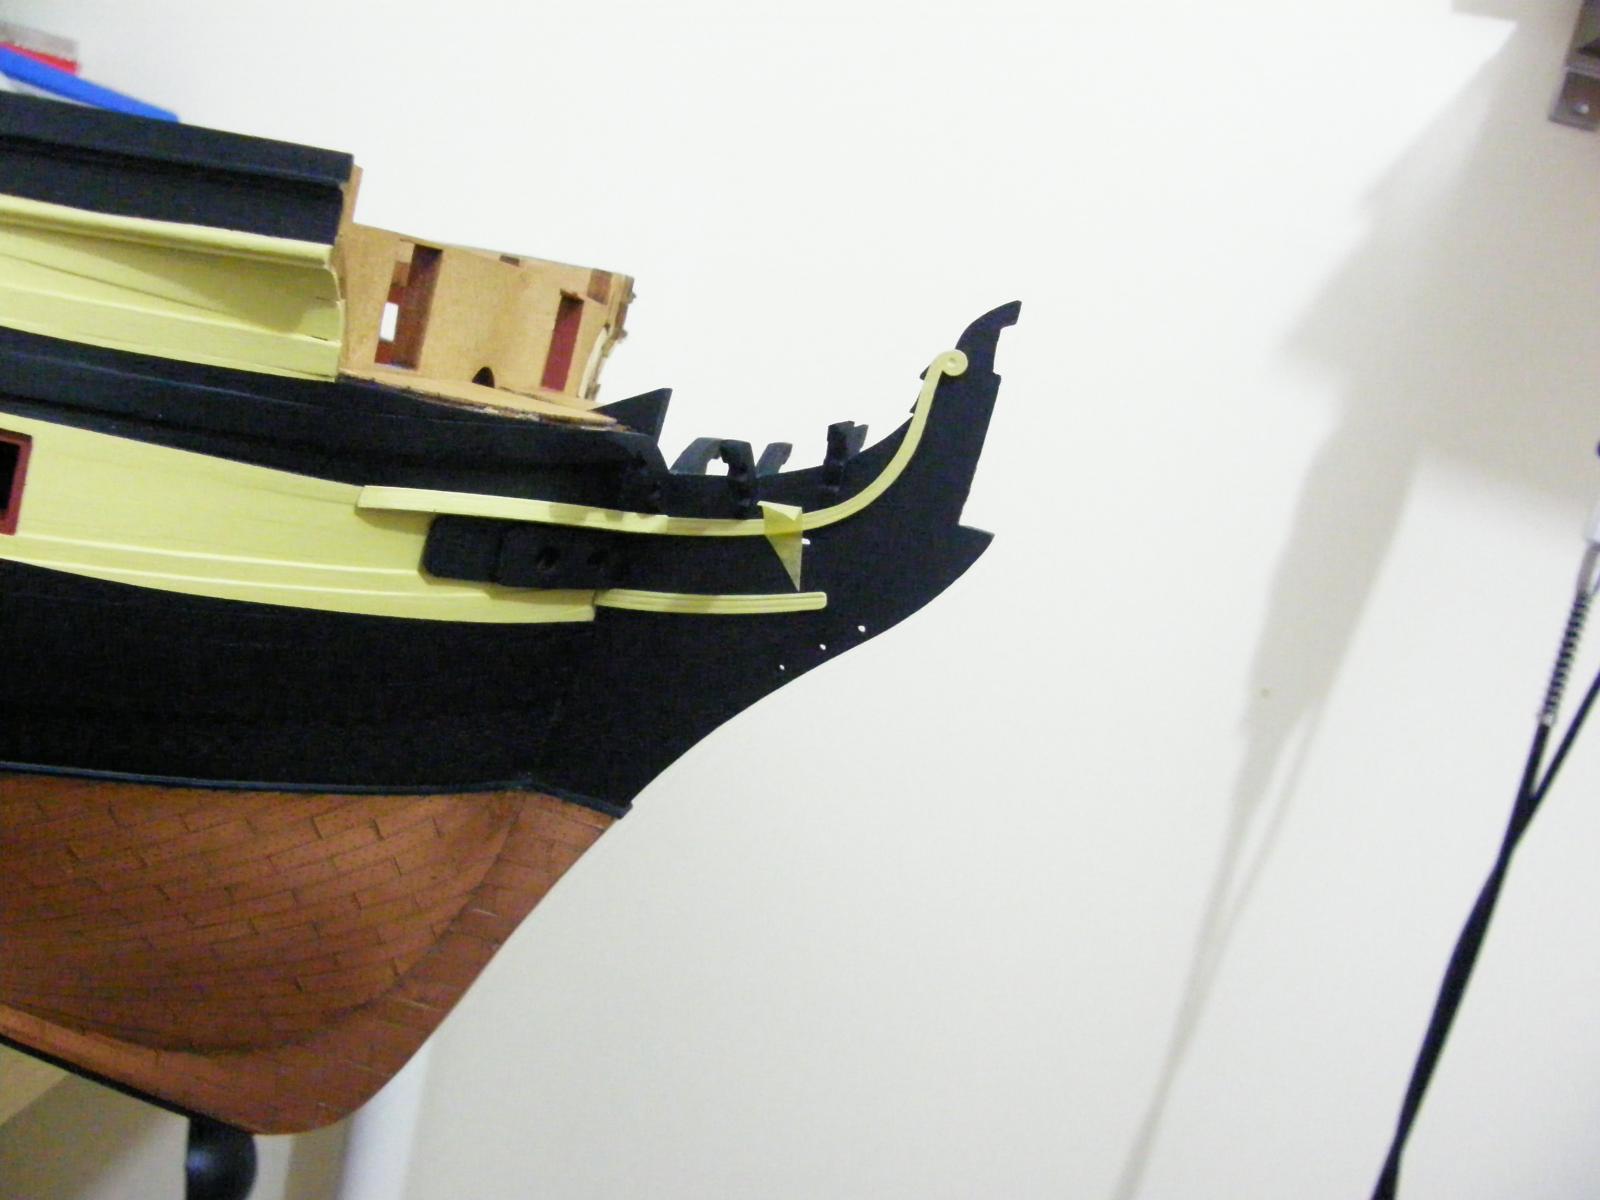
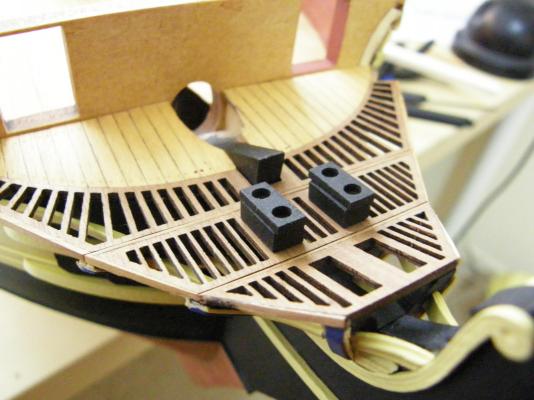
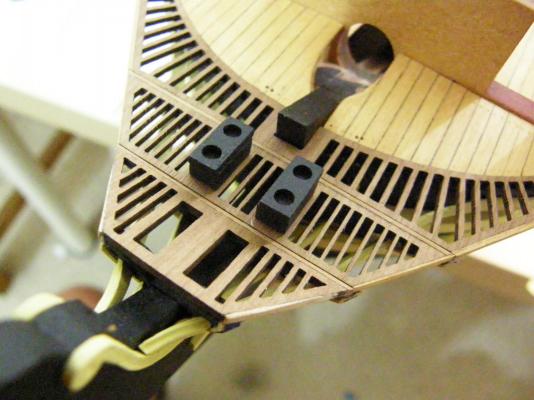
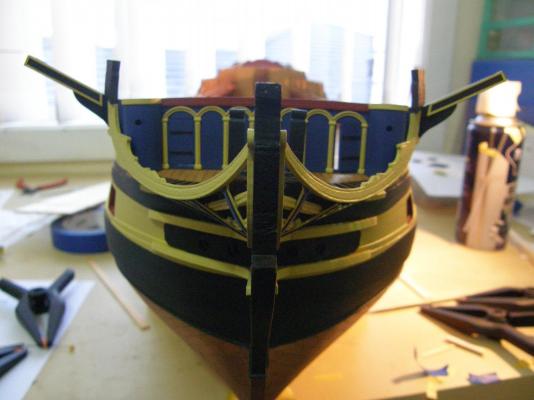
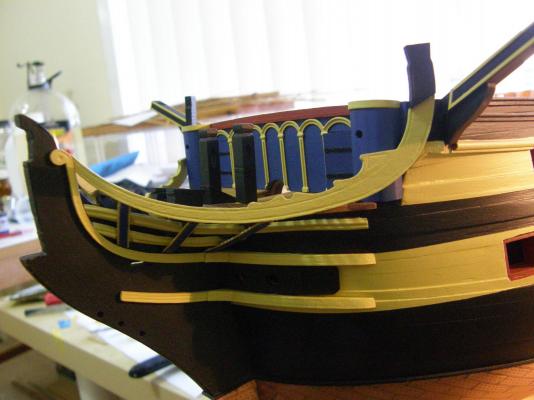
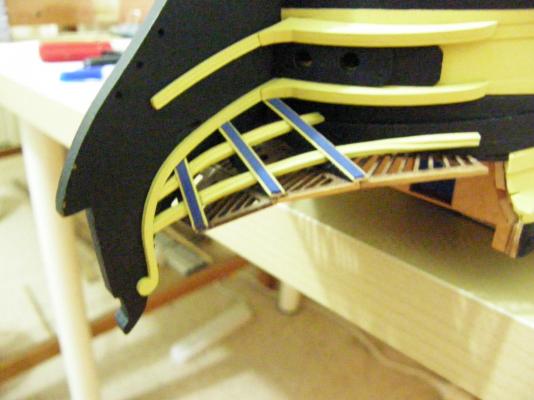
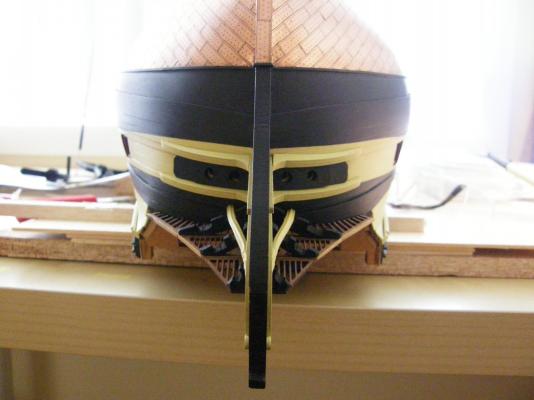
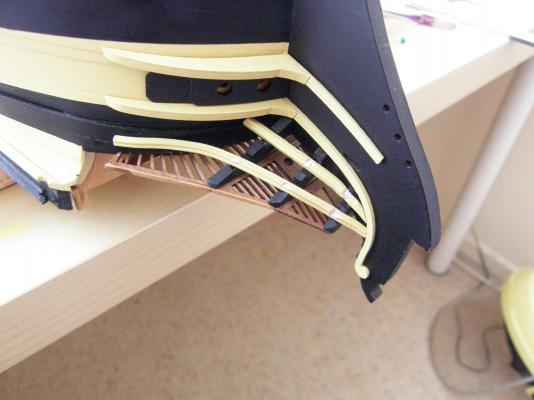
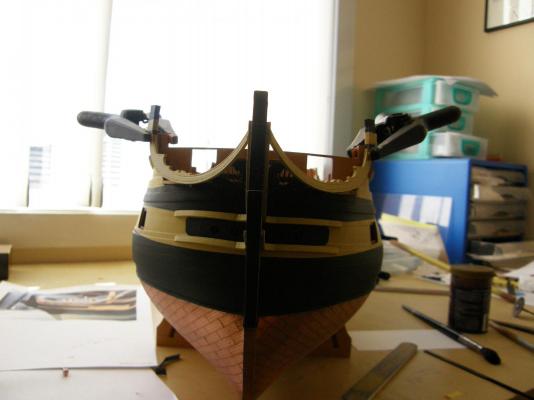
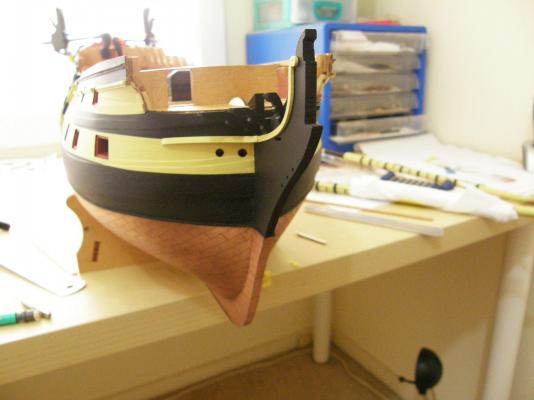
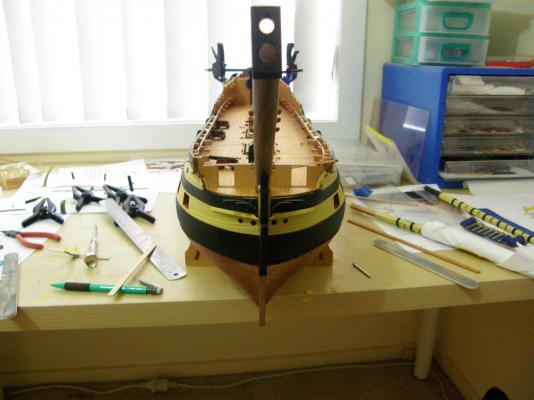
Well the bow bits and pieces are all but finished. There is some minor touching up to do. I found that the side of the forward grating needed very thin pieces of strip to enable the top headrail to remain flush without pressure. The first couple of photos show this. Here the first headrail is being glued into place. The catheads are dry-fitted at the moment as are the two posts (whatever they're called) that fit beside the bowsprit - also dry -fitted. While doing all of this, I couldn't resist dry-fitting the figurehead to see what it all looks like. I just realised that I haven't put the little crowns on the ends of the catheads - so there's another small job. I noticed too, a couple of spelling mistakes in my last post, so with that confession, my concience is now clear.


- 949 replies
-
- 10
-

-
Thanks for the kind comment Alistair. It looks as if a combimation of Australia and NZ Posts ended up with the Bermuda Triangle. If you have any trouble with your transfers I still have the second sheet I bought.
-
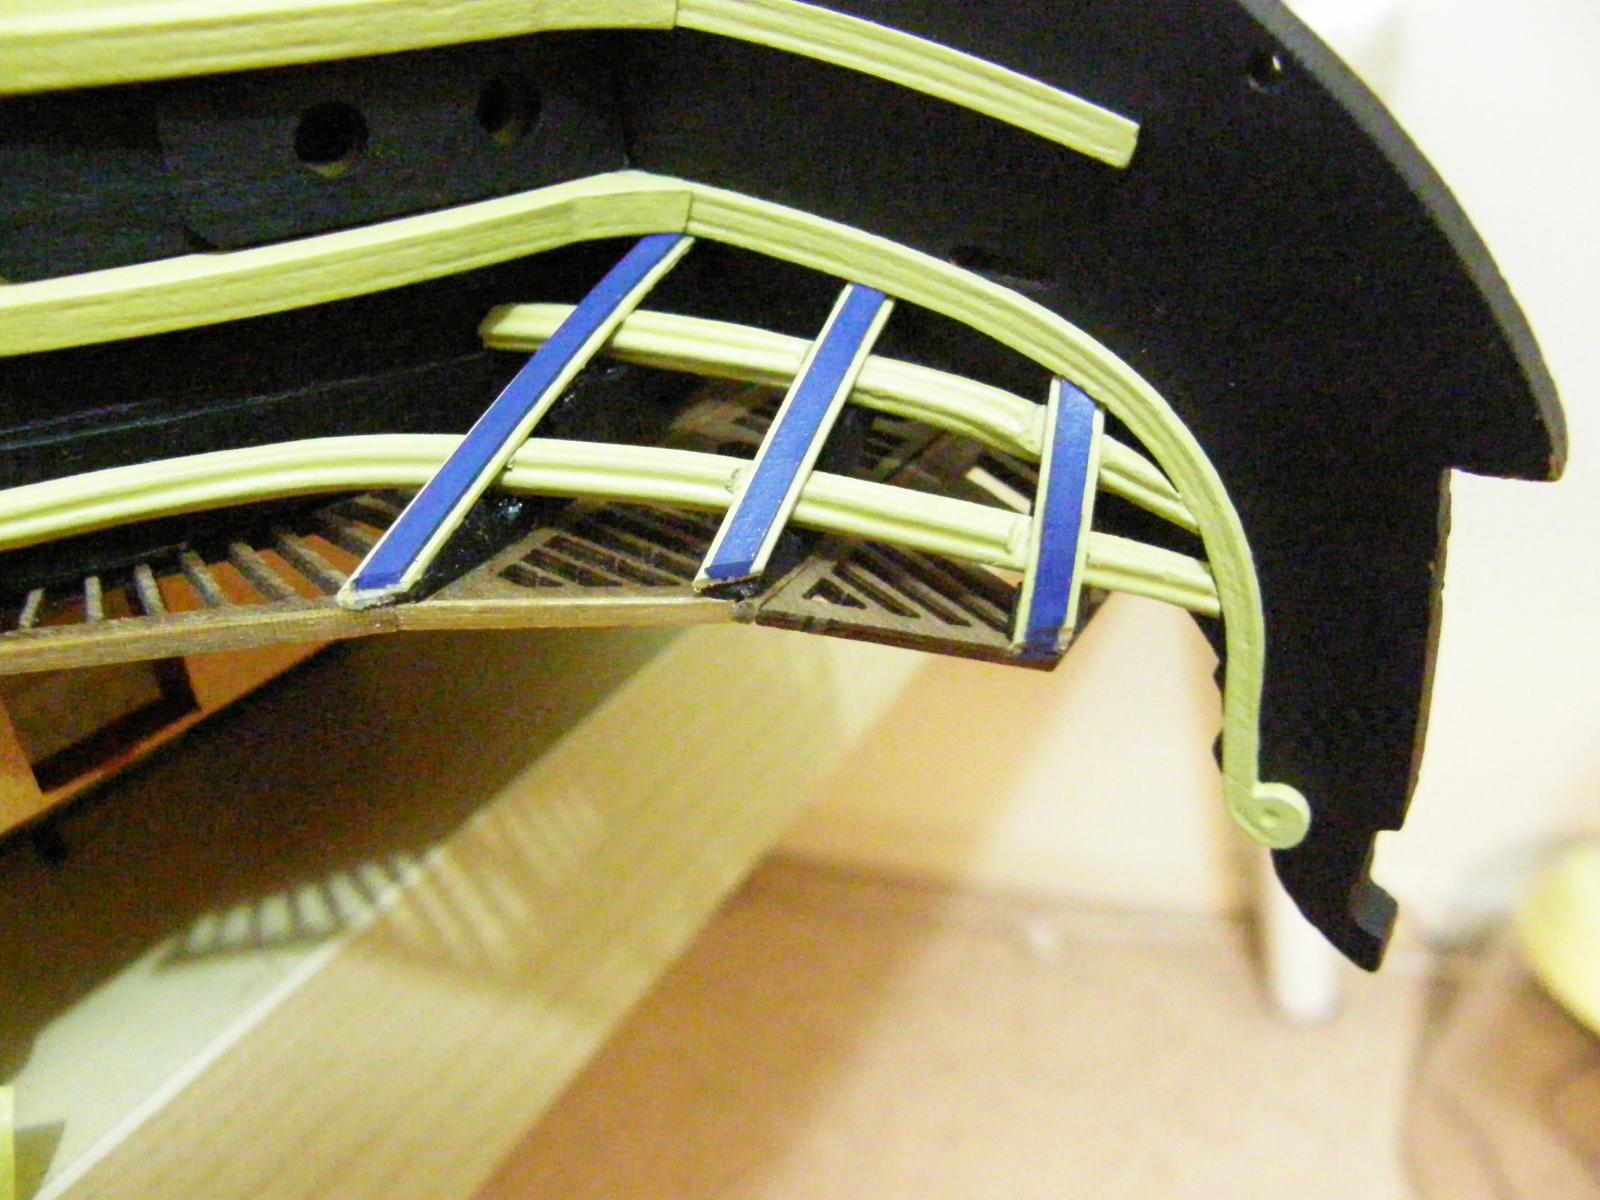
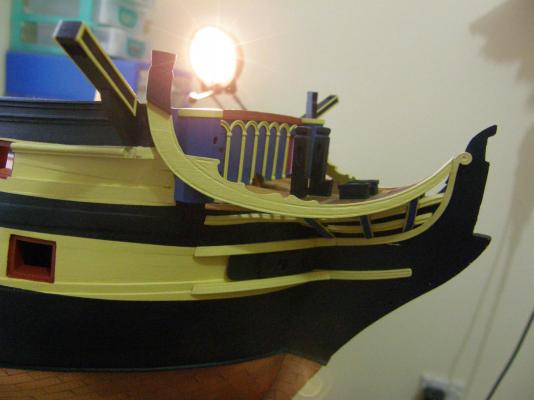
Puting the decorative strips over the headrails was a bit of a nightmare. It's taken most of two days. For those who may do it in the future I suggest fitting them one at a time. Each time, dry-fit the top head rail so that it is flush with both the grating and the end of the strip. I made the mistake of fitting all of the strips to the grating supports, then making a mess of the trimming the strips flush with the grating. I cut a some of the strips fractionally too short so that there was a small, but obvious gap between the strip and the top head rail. I had to redo the lot. The decorative strip closest to the stem was particularly difficult to get right, and even now I'm not all that happy with it. Had I had the foresight, I would have trimmed the front grating support far more before fitting it. Doing it again does not bare thinking about Here are the results. It's almost six o'clock here on a cold winter's day and the sun is well and truely over the yardarm. Cheers.


-
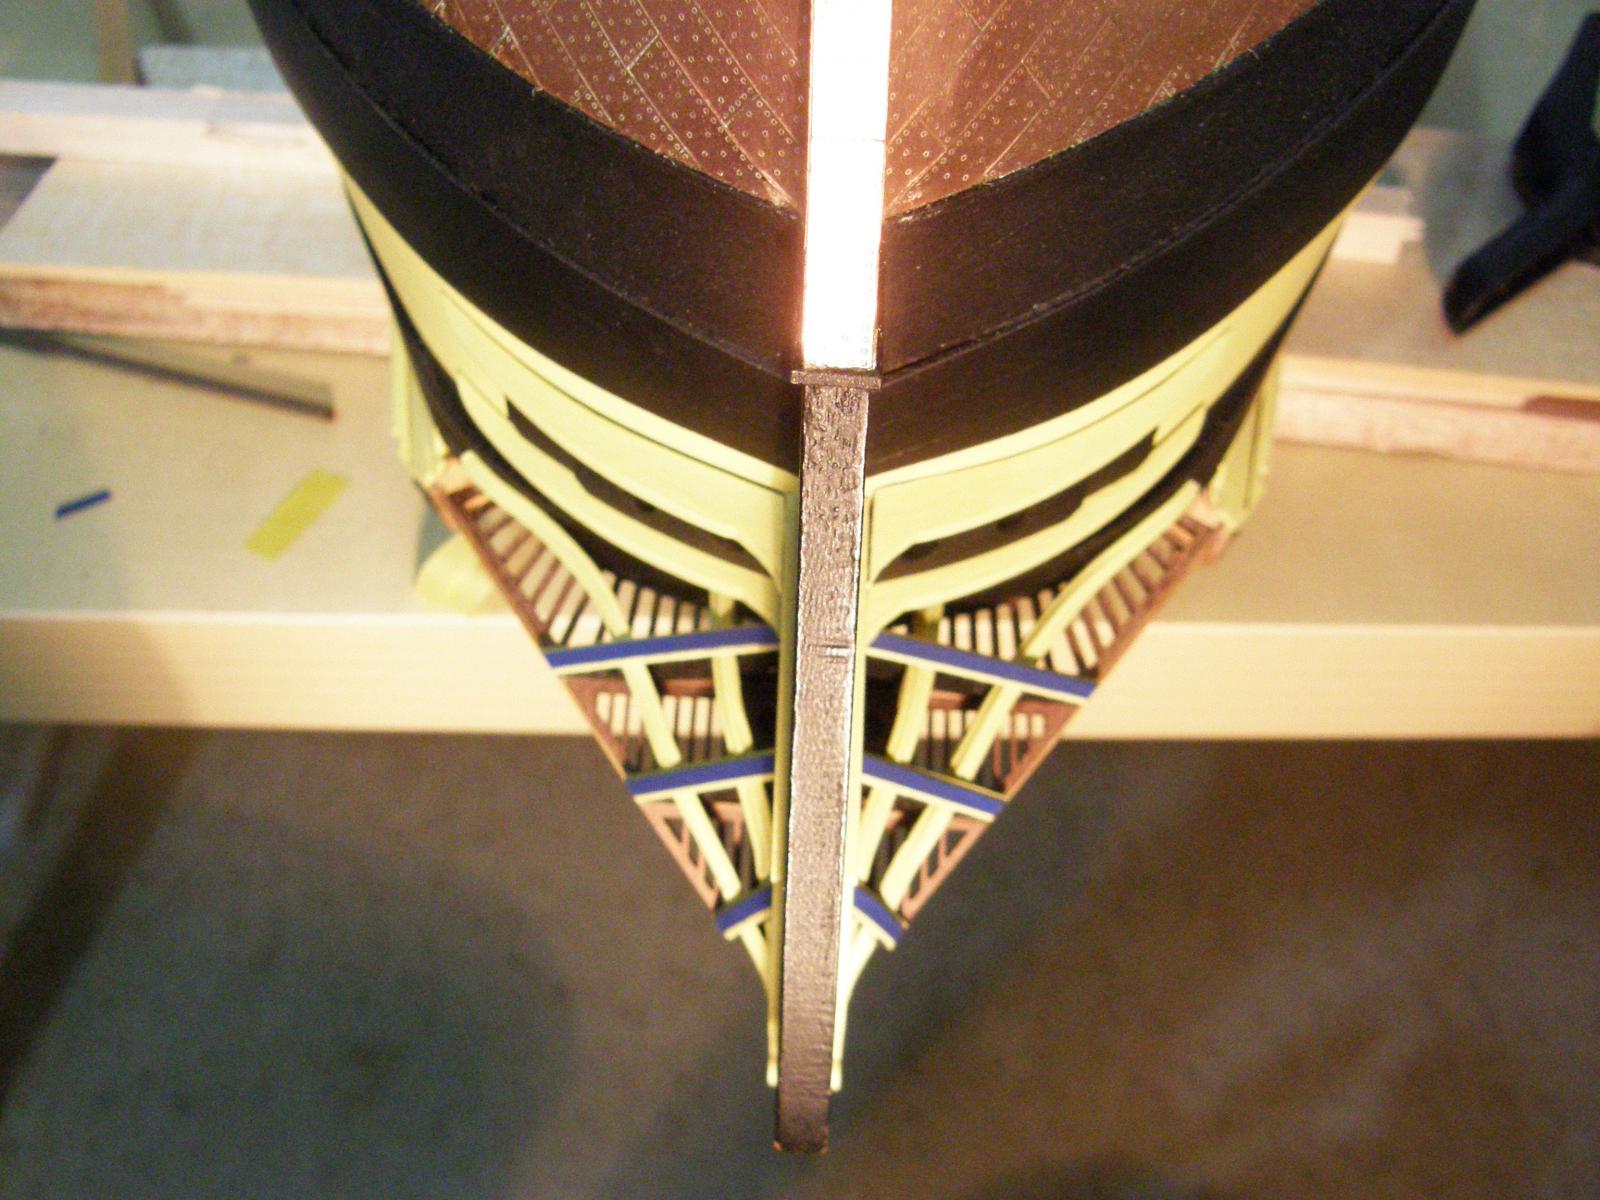
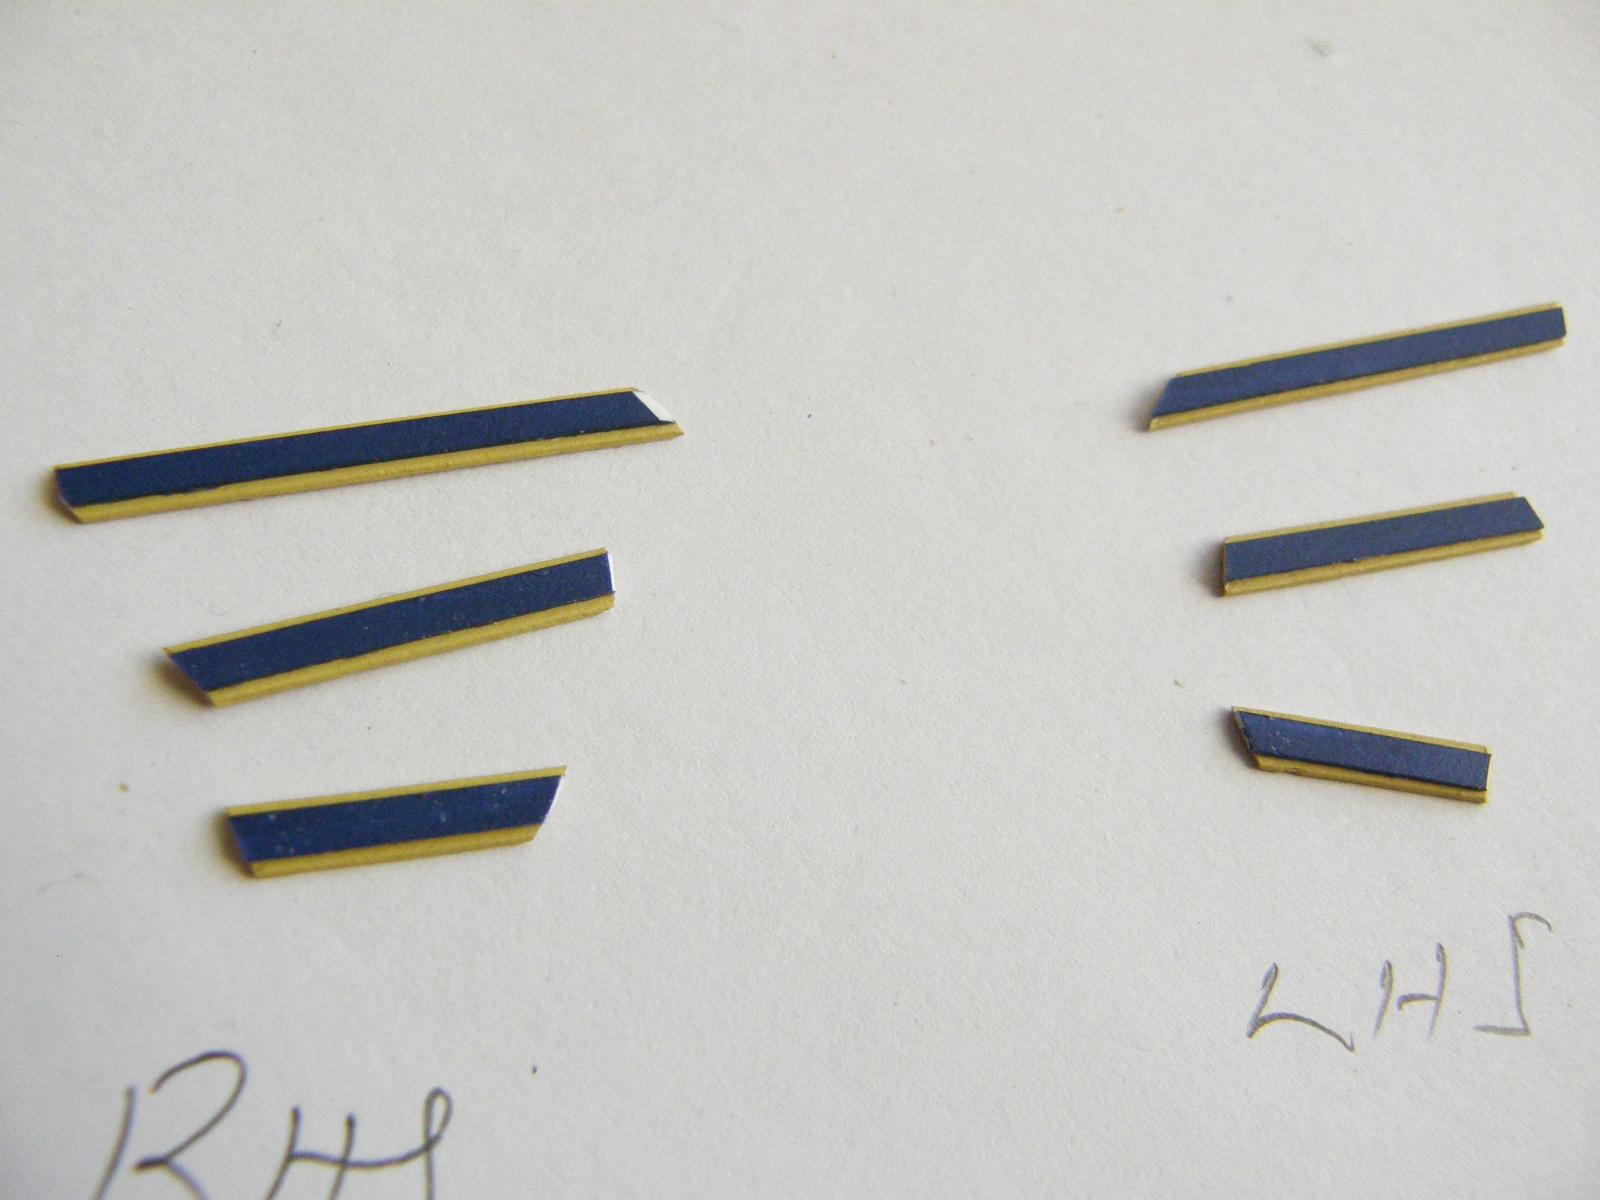
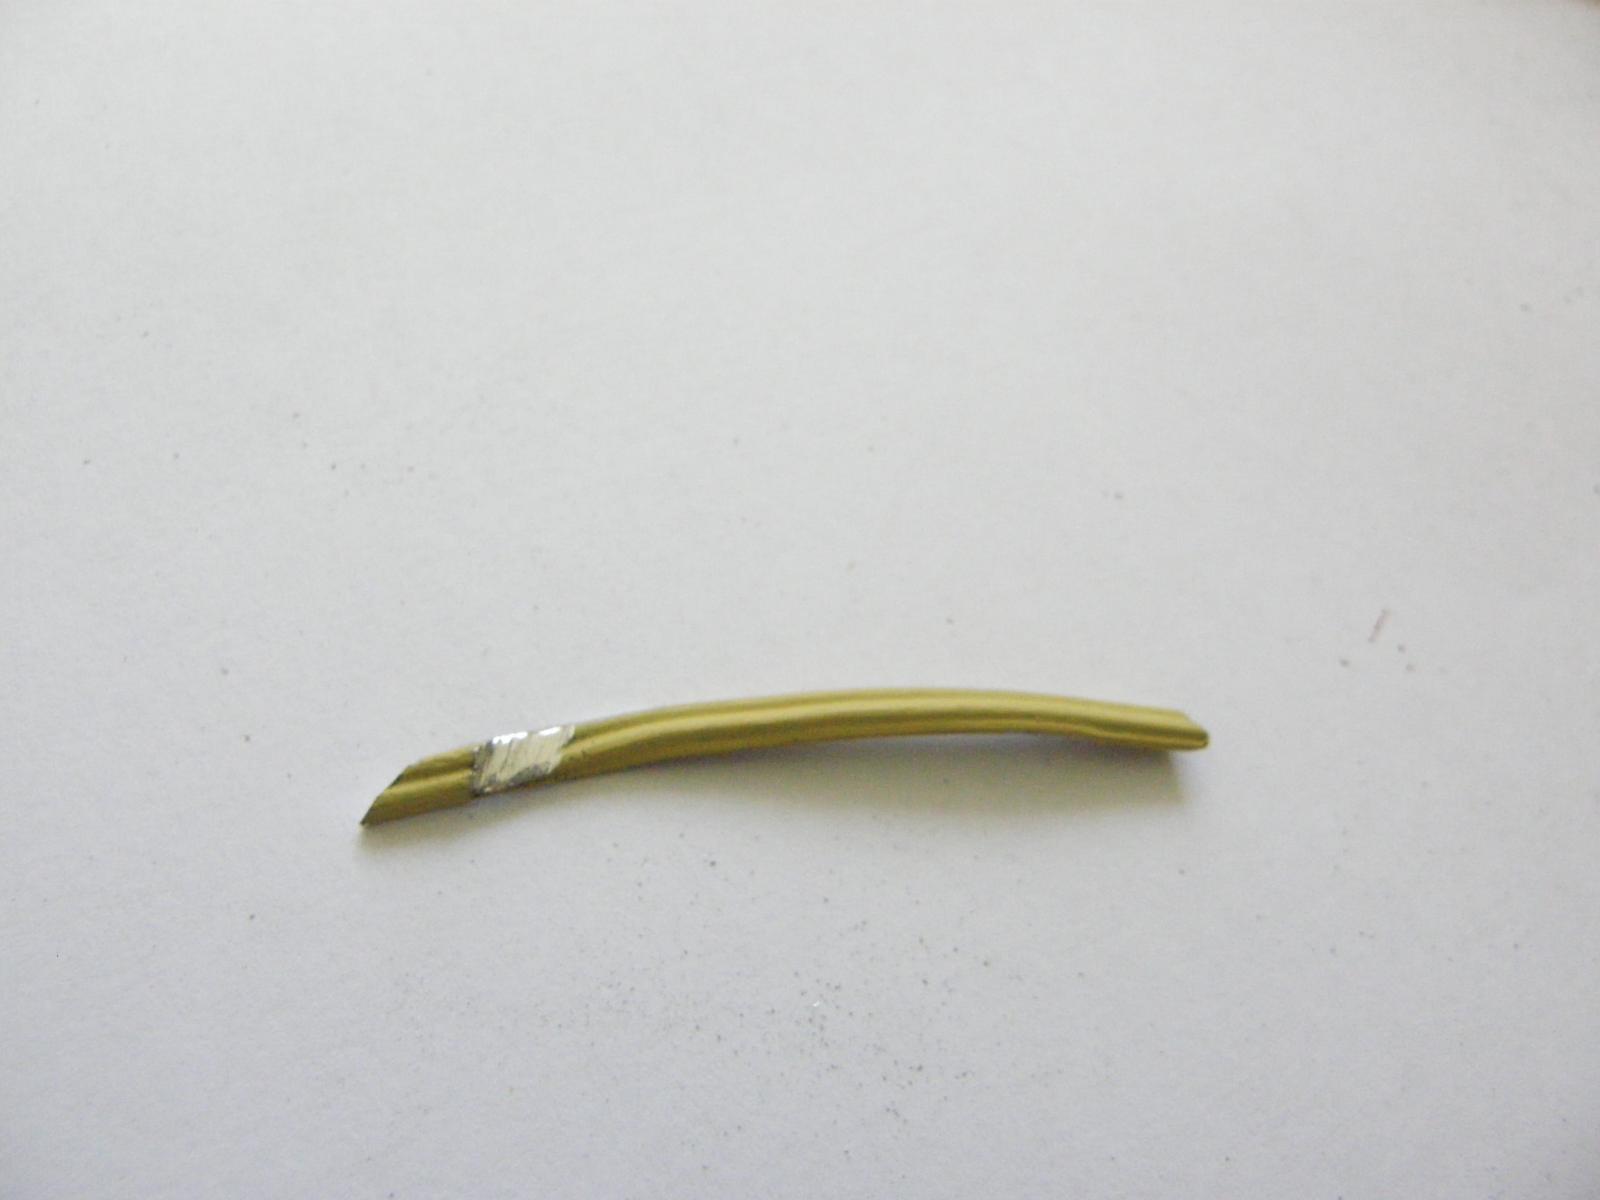
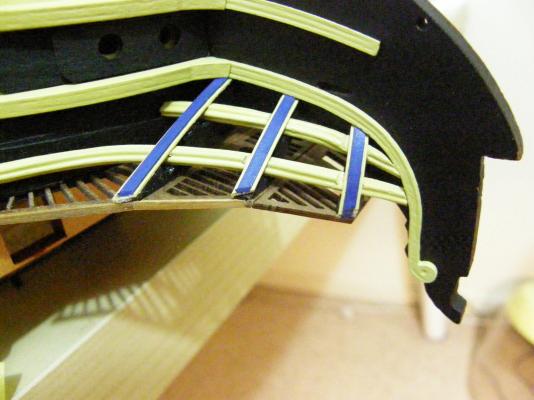
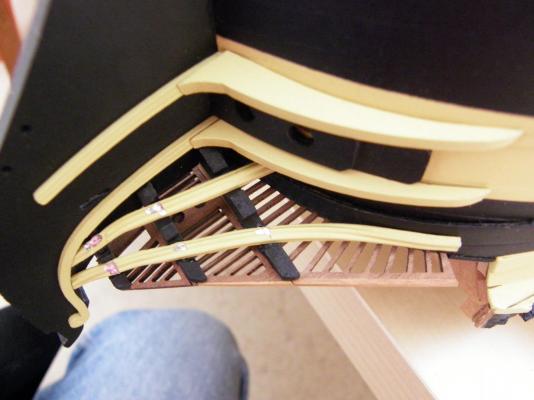
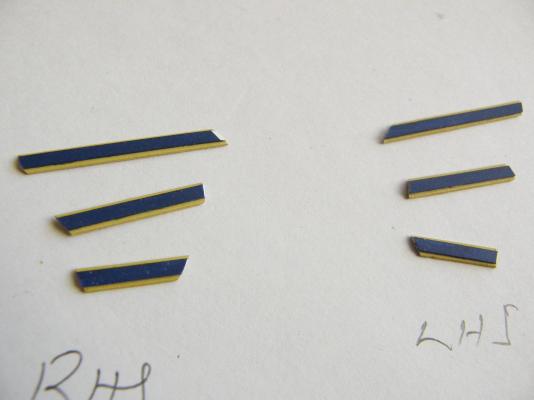
I have finally installed the middle and lower headrails. Making the two sets to fit and to be reasonably symmetric nearly drove me up the wall. Putting the decorative wallnut strips over the headrails and the supports for the gratings also provided real problems. The instructions specify 1x3mm strip. I tried this but the strip proved to be too inflexible and too thick to give a neat result. I have test-fitted 0.5x3mm strip (painted yellow) laid over with a 0.4x2.0mm styrene strip (painted blue). Even so, once the headrails were in place it became necessary to further file away some of the metal so that the decorative strip would fit flush with the supports. The use of the styrene was entirely necessary to preserve whatever good humour I have remaining after all this - which, according to my wife, turned out to be not all that much. Fortunately I felt absolved from guilt in using it as I had kept in mind Arthur's comment about the benefits of age and treachery. I have now touched up the bare metal and of course have to wait for the paint to dry before finishing the whole lot off. I'll be glad to see the end of it.

-
Arthur: I hadn't noticed the mistake in the instructions on p.11. I simply read the bits about painting parts 52 and 53, installed them, and passed over the reference to part 46 completely. I put it down to age. I've been told it has some advantages, though remain to be convinced.
-
Small warning. While waiting for still more paint to dry, I decided to partially complete the poop bulkhead assembly - and here is a small trap. If you are one who, where possible, paints the various components while still attached to the sheets of ply, there may be a small unpleasant surprise here. There are two sets of Parts 54 and 55. On the plywood sheet when viewed from any one side the the two sets are (unfortunately) identical. They should be mirror images. Having not noticed this, I painted the all of the components on the same side of the plywood sheet and thus the wrong side of one of the sets. I am now waiting for even more paint to dry.
-
Ships name lettering
RMC replied to Ian B's topic in Discussion for a Ship's Deck Furniture, Guns, boats and other Fittings
Try Letraset transfers and see what you think. You can see an example in my build log for Vanguard. Best of luck rmc -
Thank you all for your 'likes' and kind remarks. I have been away for a few days which has at least enabled some of my painting to dry properly. I am hoping to have the headrails and all the other bits of the bow finished towards the end of the week.
-
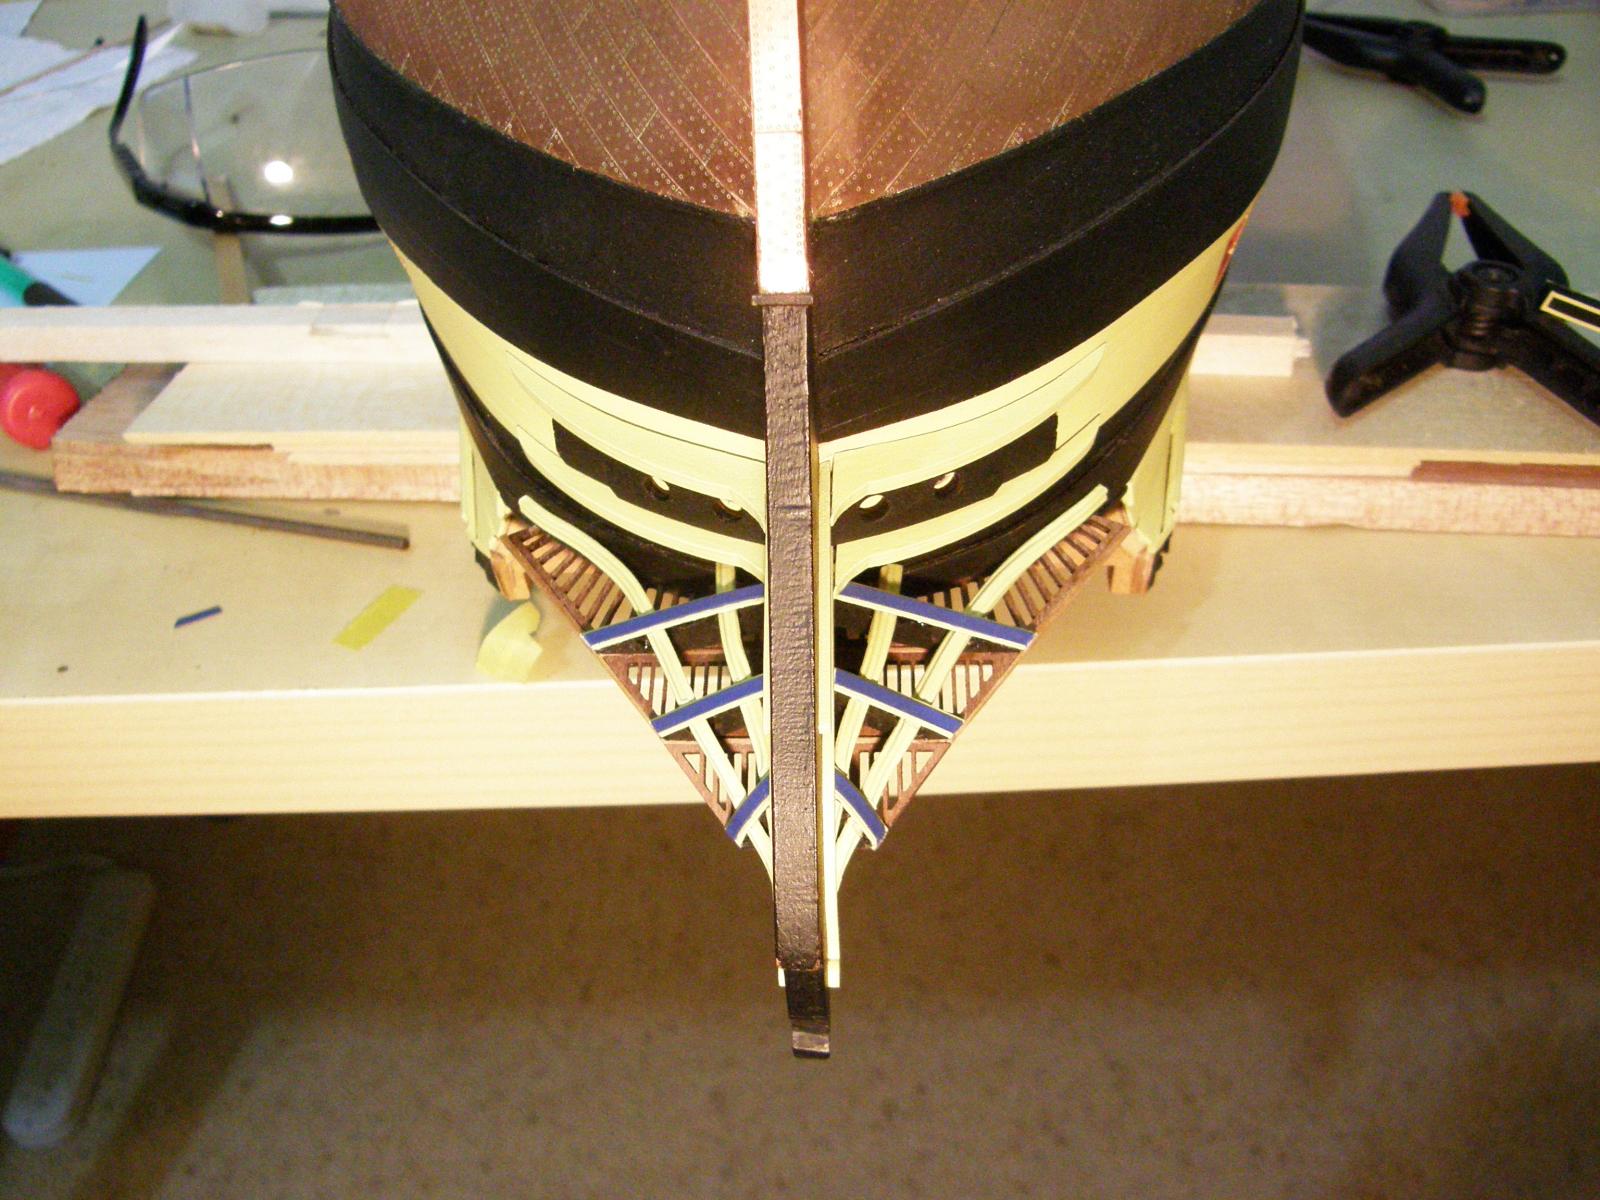
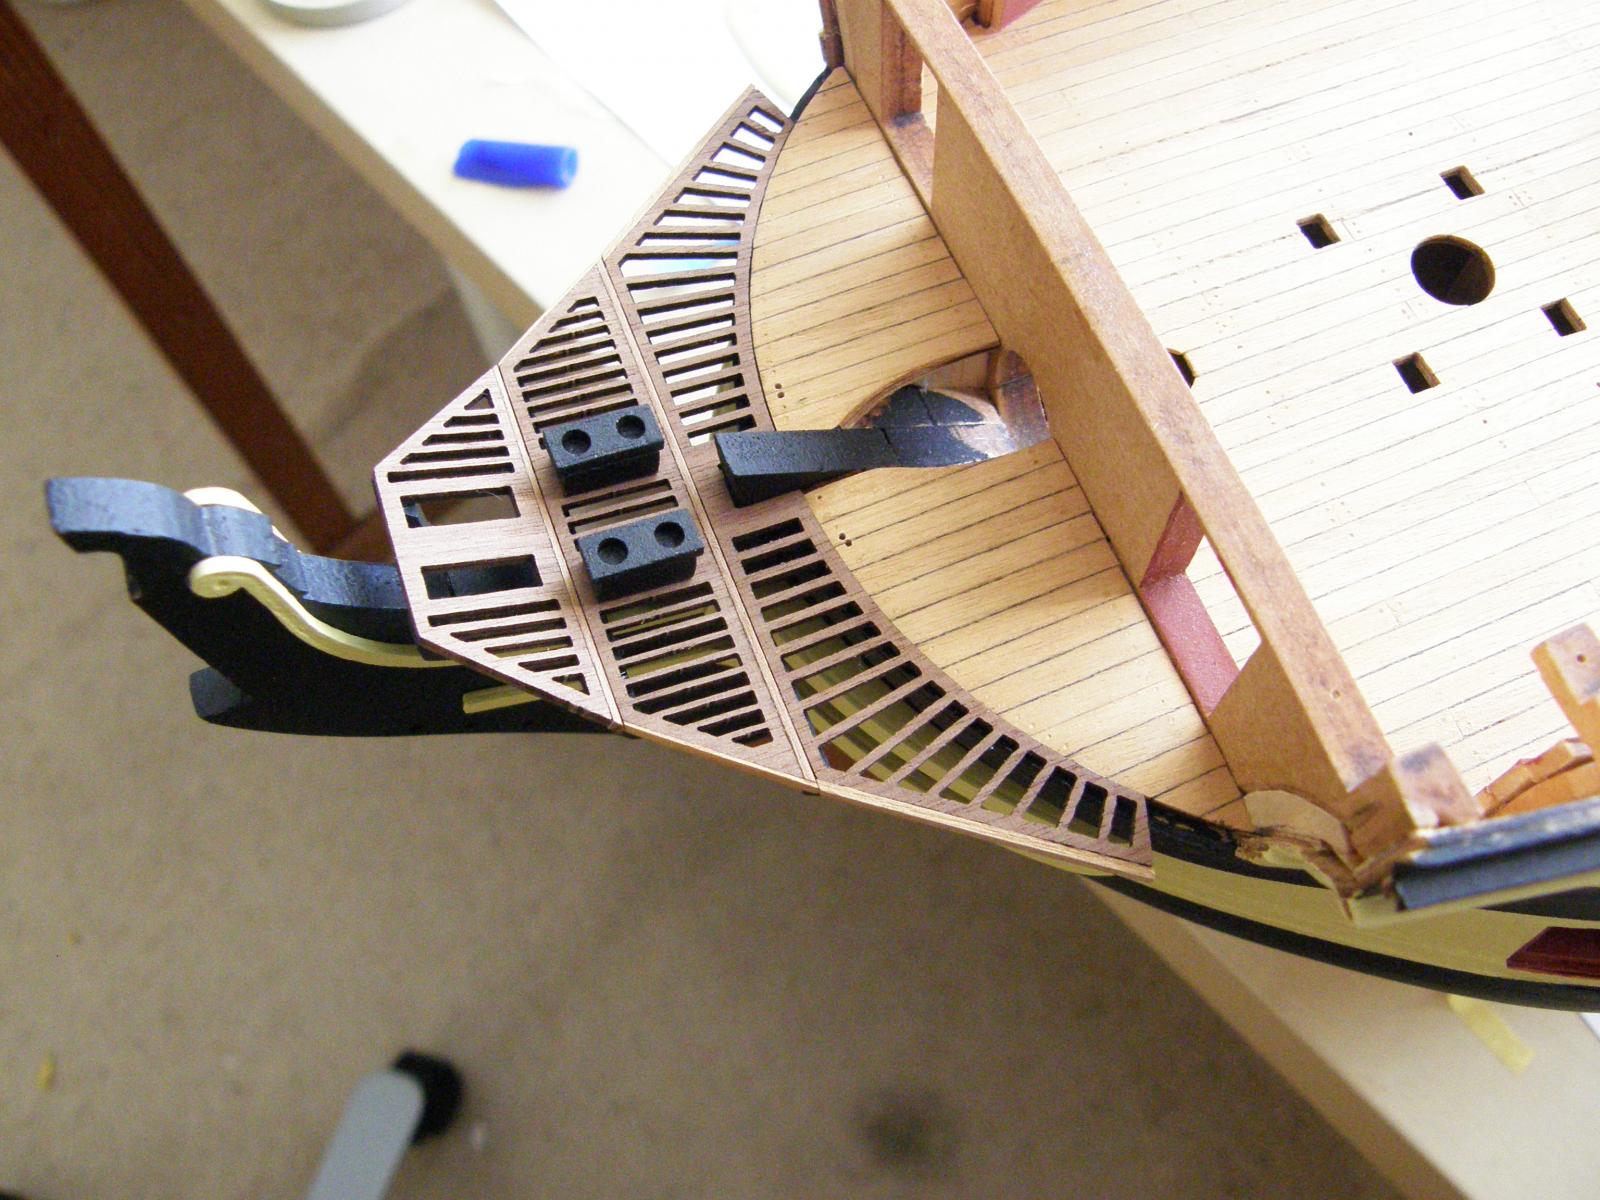
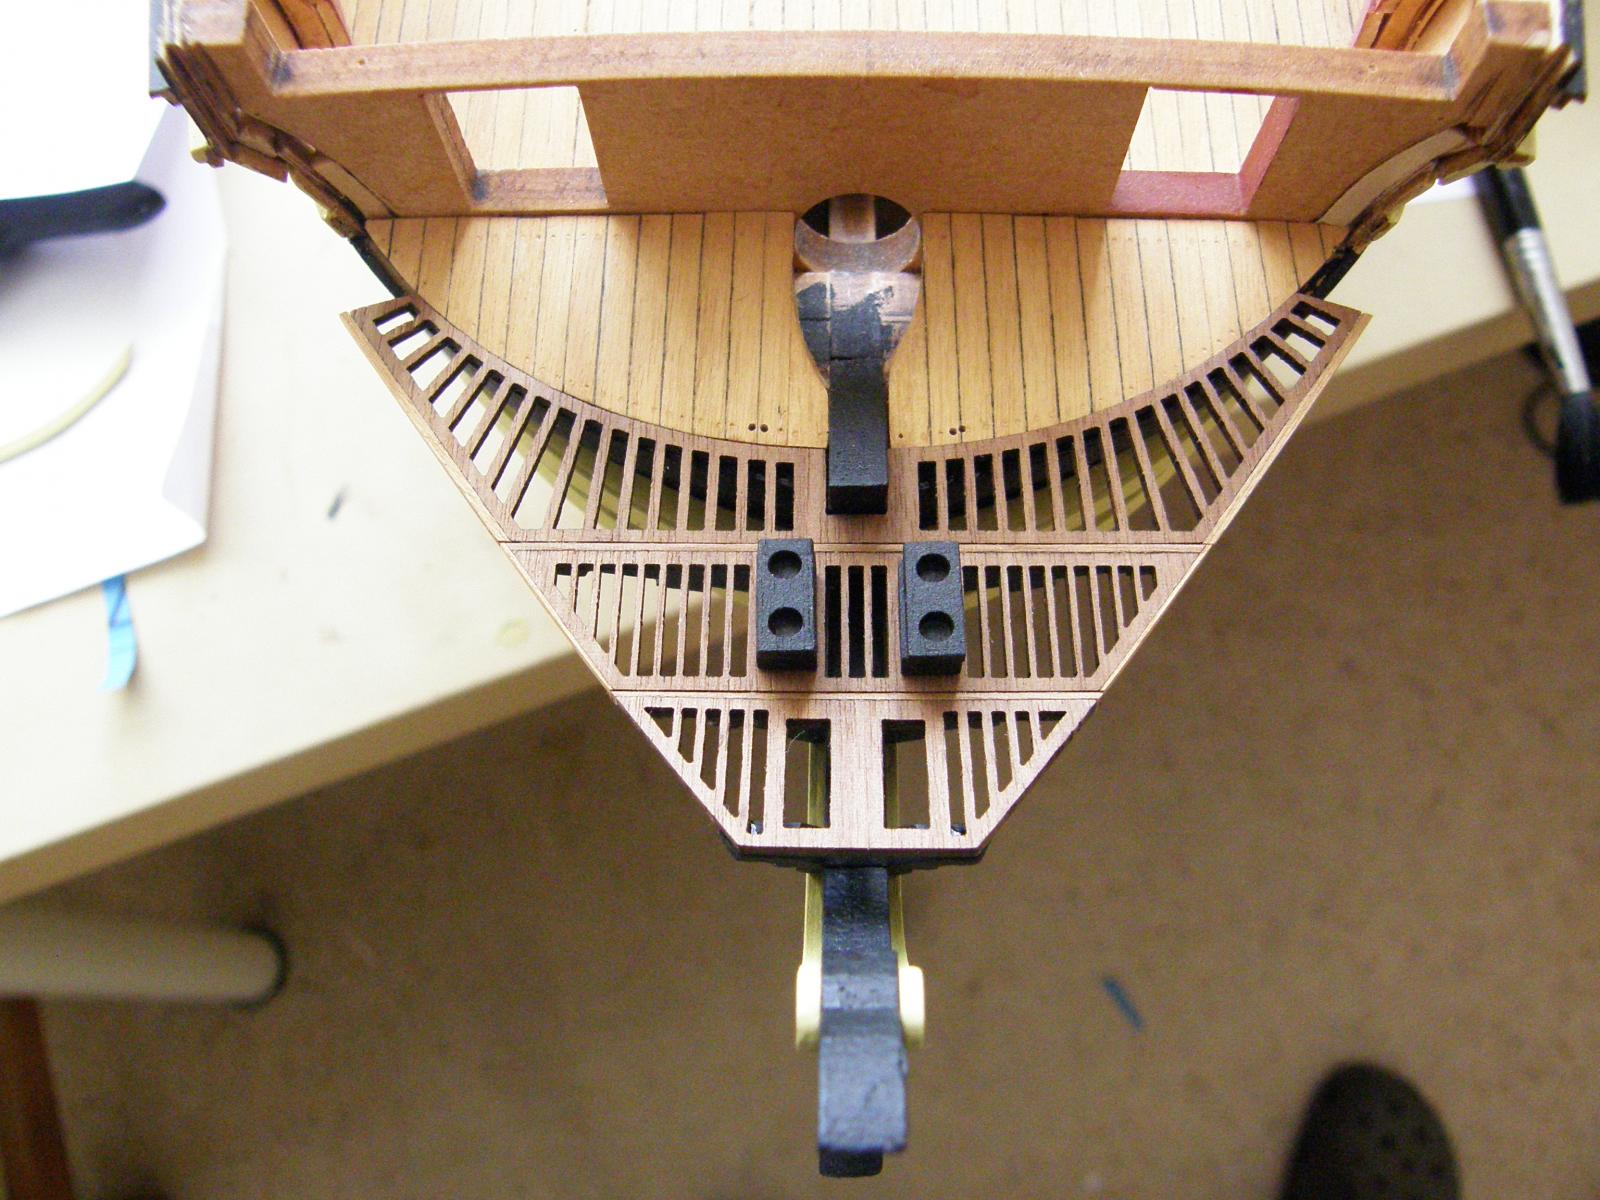
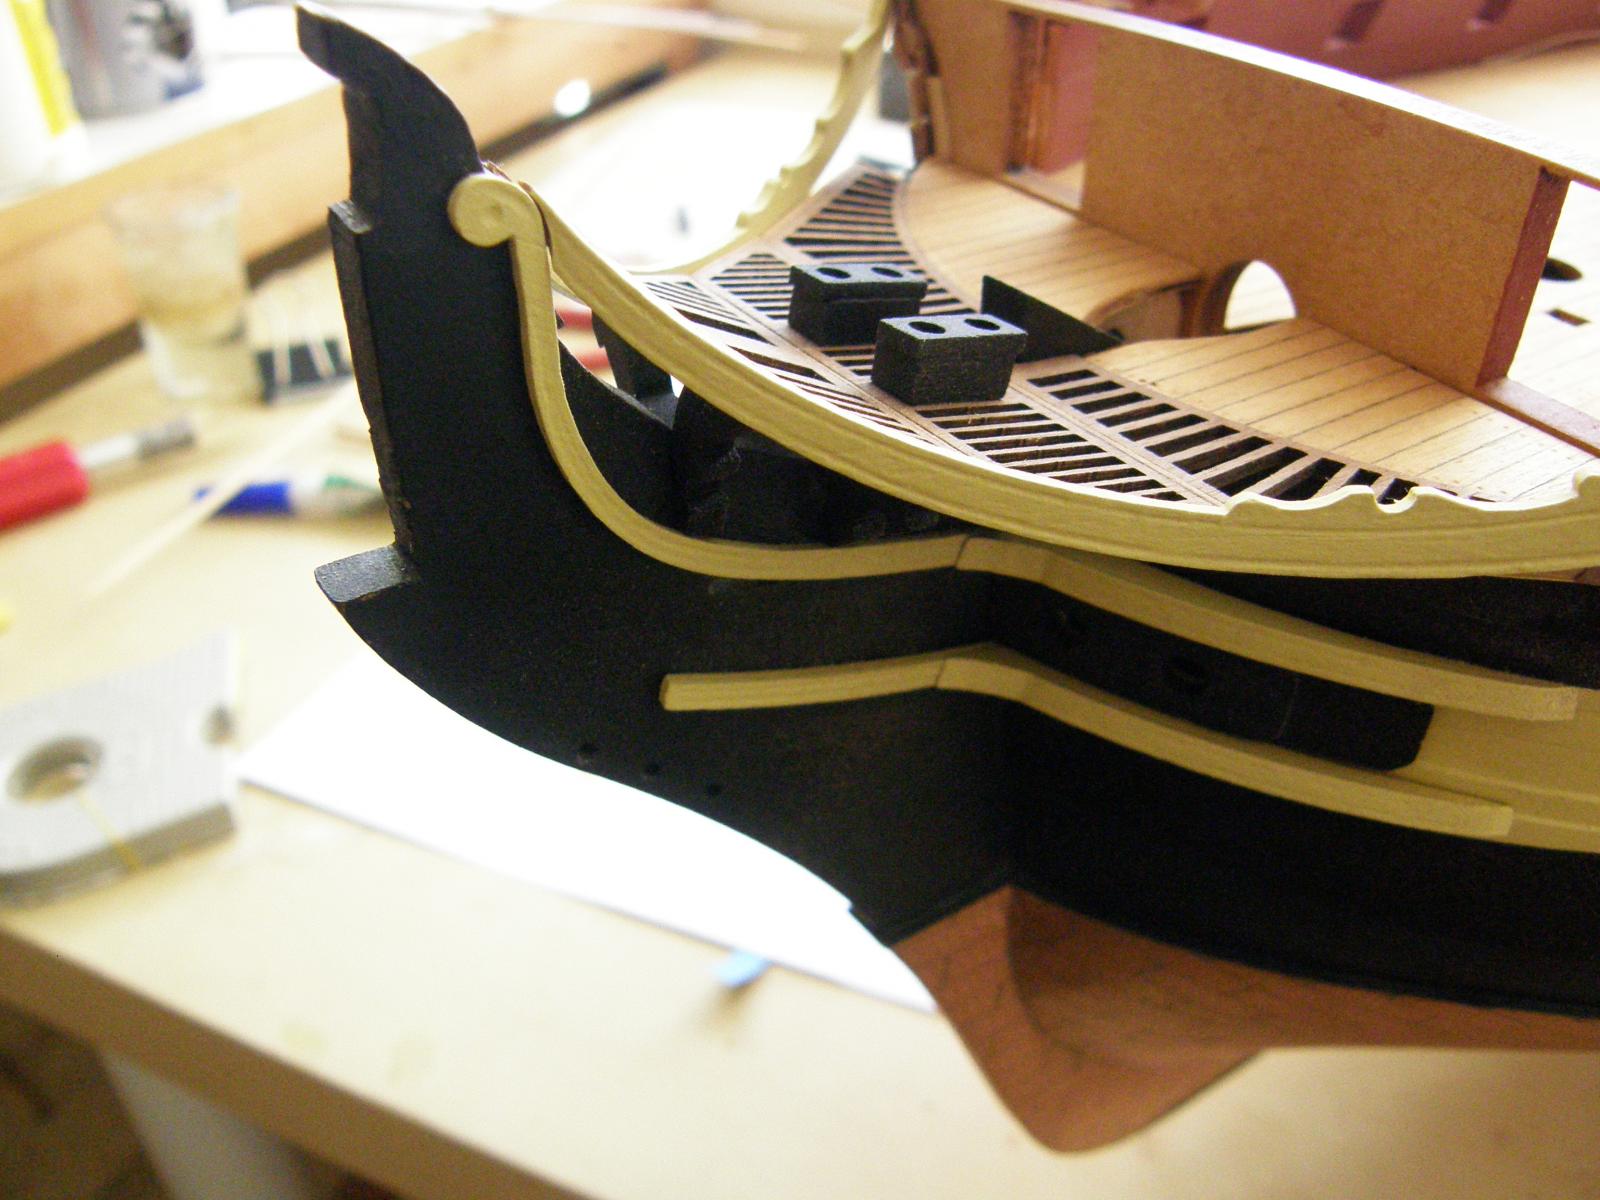
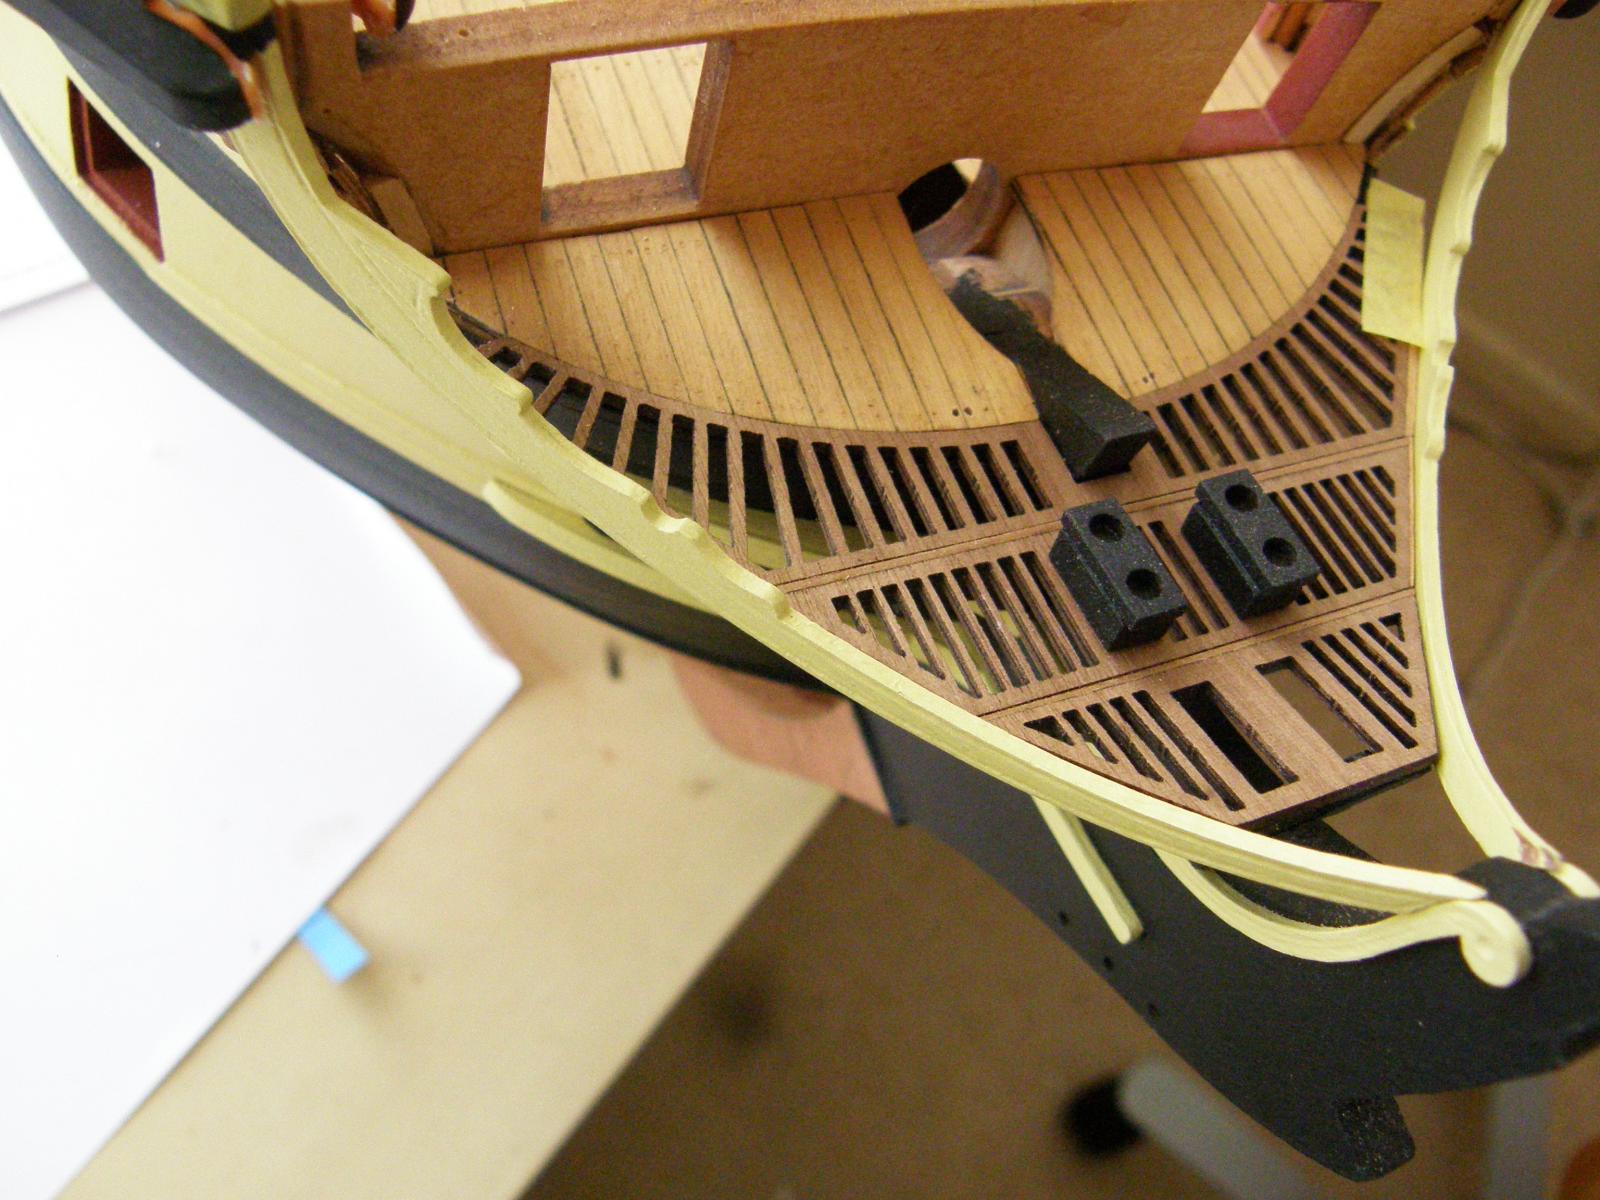
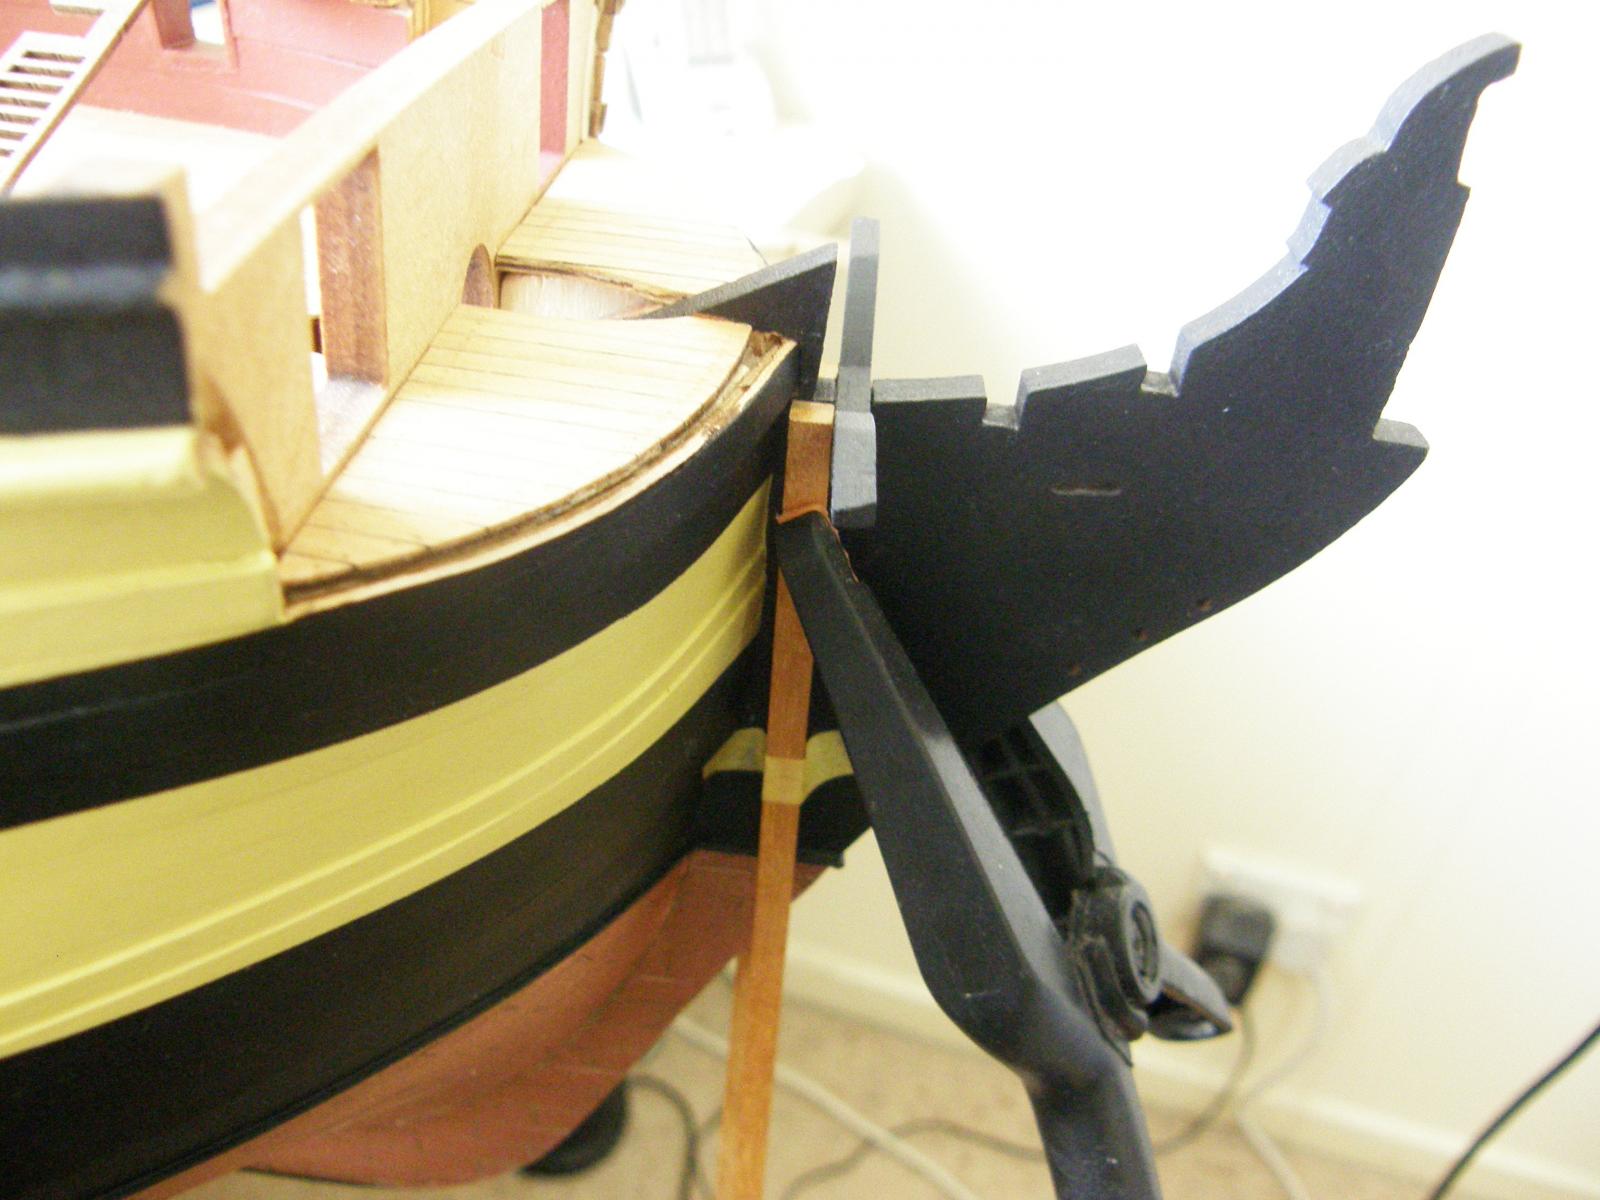
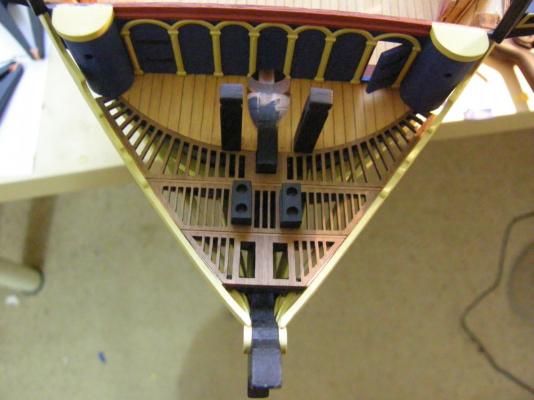
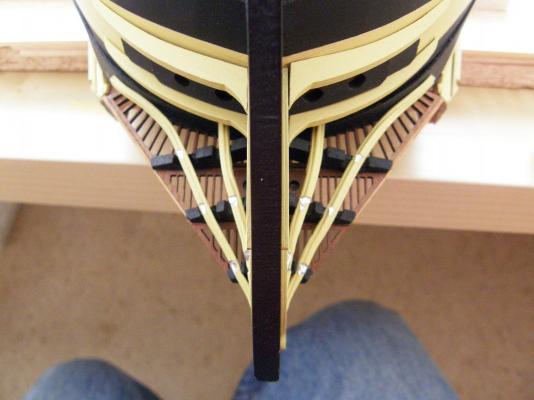
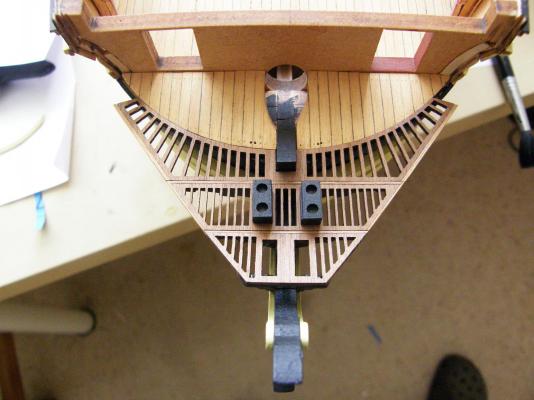
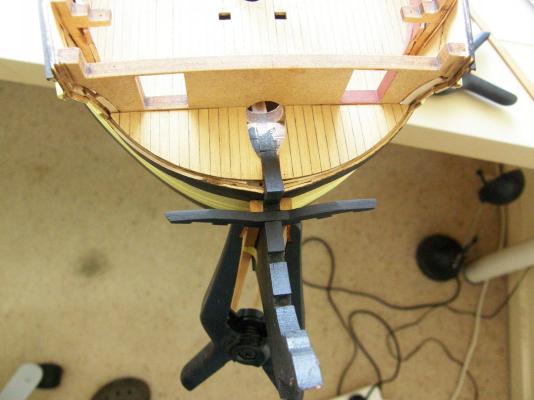
The bow grating and decoration are proceding very slowly. I found the middle headrails very frustrating. The first few photos show the completion of the hawse hole and grating. For those who have not reached this stage, before final fitting make sure you trim and prepare the supports for the gratings so that the decorative trim for the middle and lower headrails is flush with the top of the notches provided. You will need to put wallnut strip over them later - which I suspect will be very difficult indeed - particularly for the front support. My solution is shown later. Preparation for fitting the top head rails. I got a bit carried away with sanding, but a bit of touch-up paint has already disguised it. Here are the headrails dry-fitted. A bit of touching up needs to be done. This is where things turned nasty. It took hours to get the middle headrails fitted and symmetric. I had not anticipated the need to adjust the notches to receive them. Doing it on the model was rather fraught. As well, to enable the wallnut strip to cover the grating supports I found it necessary to file the decorative strip. The last photo shows this. Even with this it's going to be difficult. The decoration here looks a bit messy but looks fine on the model.


- 949 replies
-
- 13
-
-
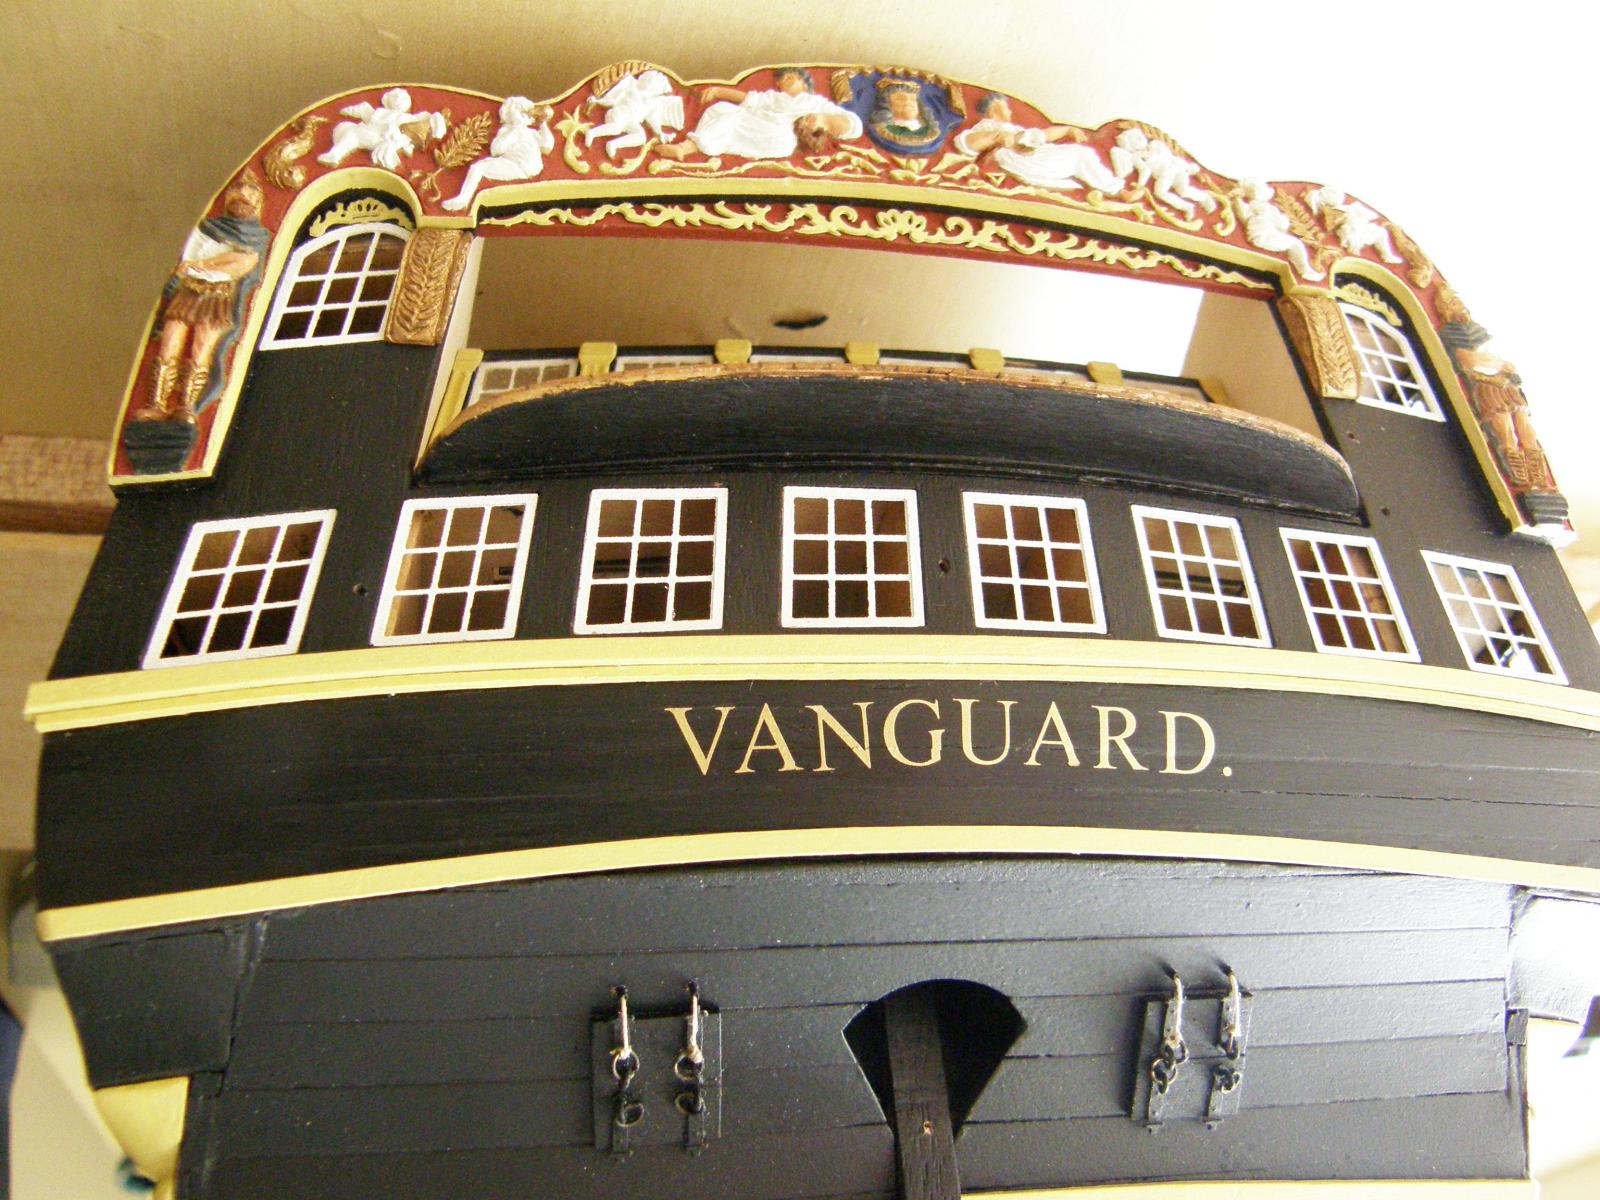
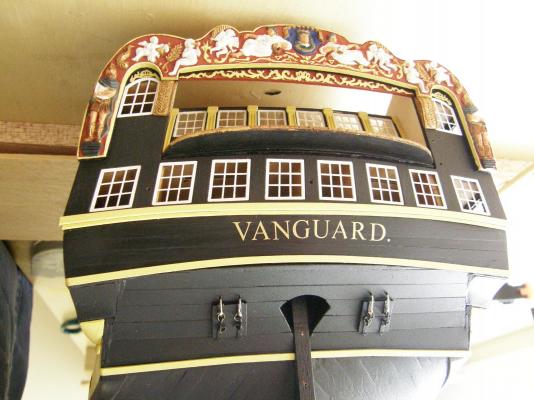
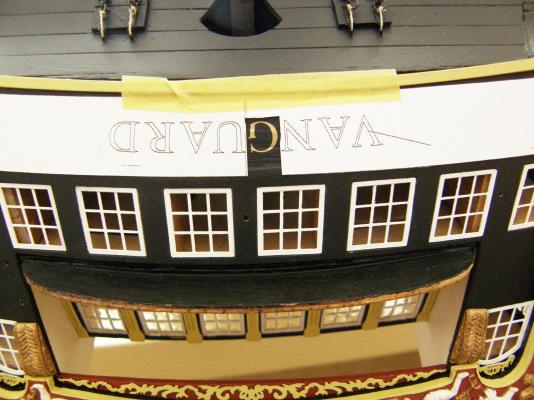
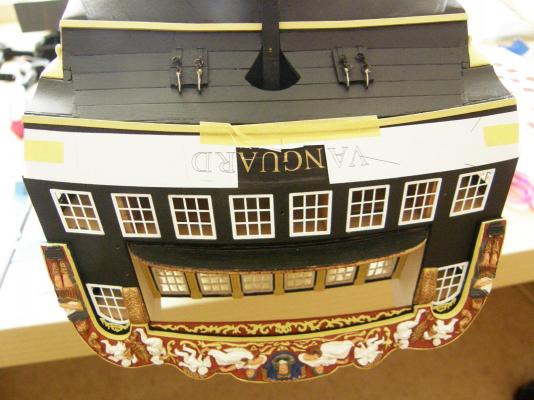
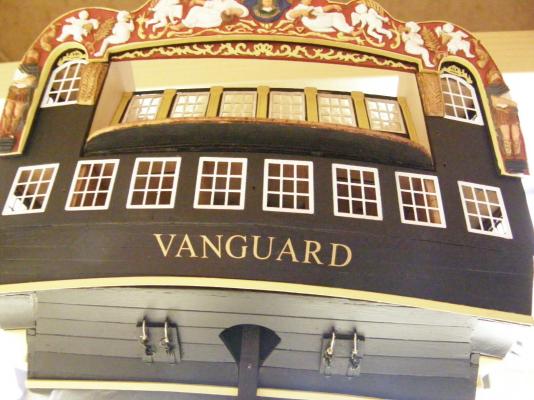
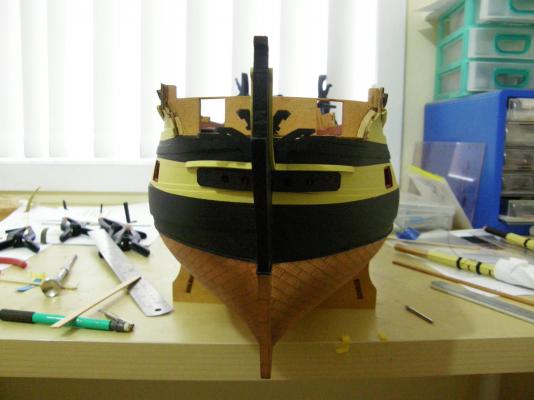
The full stop is now on. The name is a bit high, but replacing it doesn't bear thinking about. The strip above (2x2mm and 1x1m)has now been attached and seems to have worked out acceptably. It is the same width as the decorative strip supplied and I hope my 'strip' and the kit's which will go on side galleries will not look inconsistent. I have just sprayed that stern panel with polyurethane (the photos were taken beforehand). The letraset letters are a bit more fragile than the advertising would suggest and the poly should protect them. I am at the stage now when I can complete the bow and stern decorations. Once that is done the guns are supposed to go on, then the next deck. Until now I have been able to put the model upside down to do various bits and pieces. Once the guns etc, are on, it would be difficult to turn the model upside down again. Can anyone think of anything that can be done now before the thing is irrevocably the right side up?

-
Lucky they didn't use hash tags.
-
Hi Alistair I ran out of the letters you kindly sent - the 'U's. I ended up buying 2 sets of letters just in case, and of course this time I didn't screw up a single letter when I was applying them. (I think using the bamboo skewer (the bamboo is a little softer than the paddle pop stick and being sharper allows you to get into the small impressions between the planks) made the difference. I now have more letters than I know what to do with - so if anyone wants them ... ...and I will put on the fullstop.
-
If I stuff this up - it's on your head ...
-
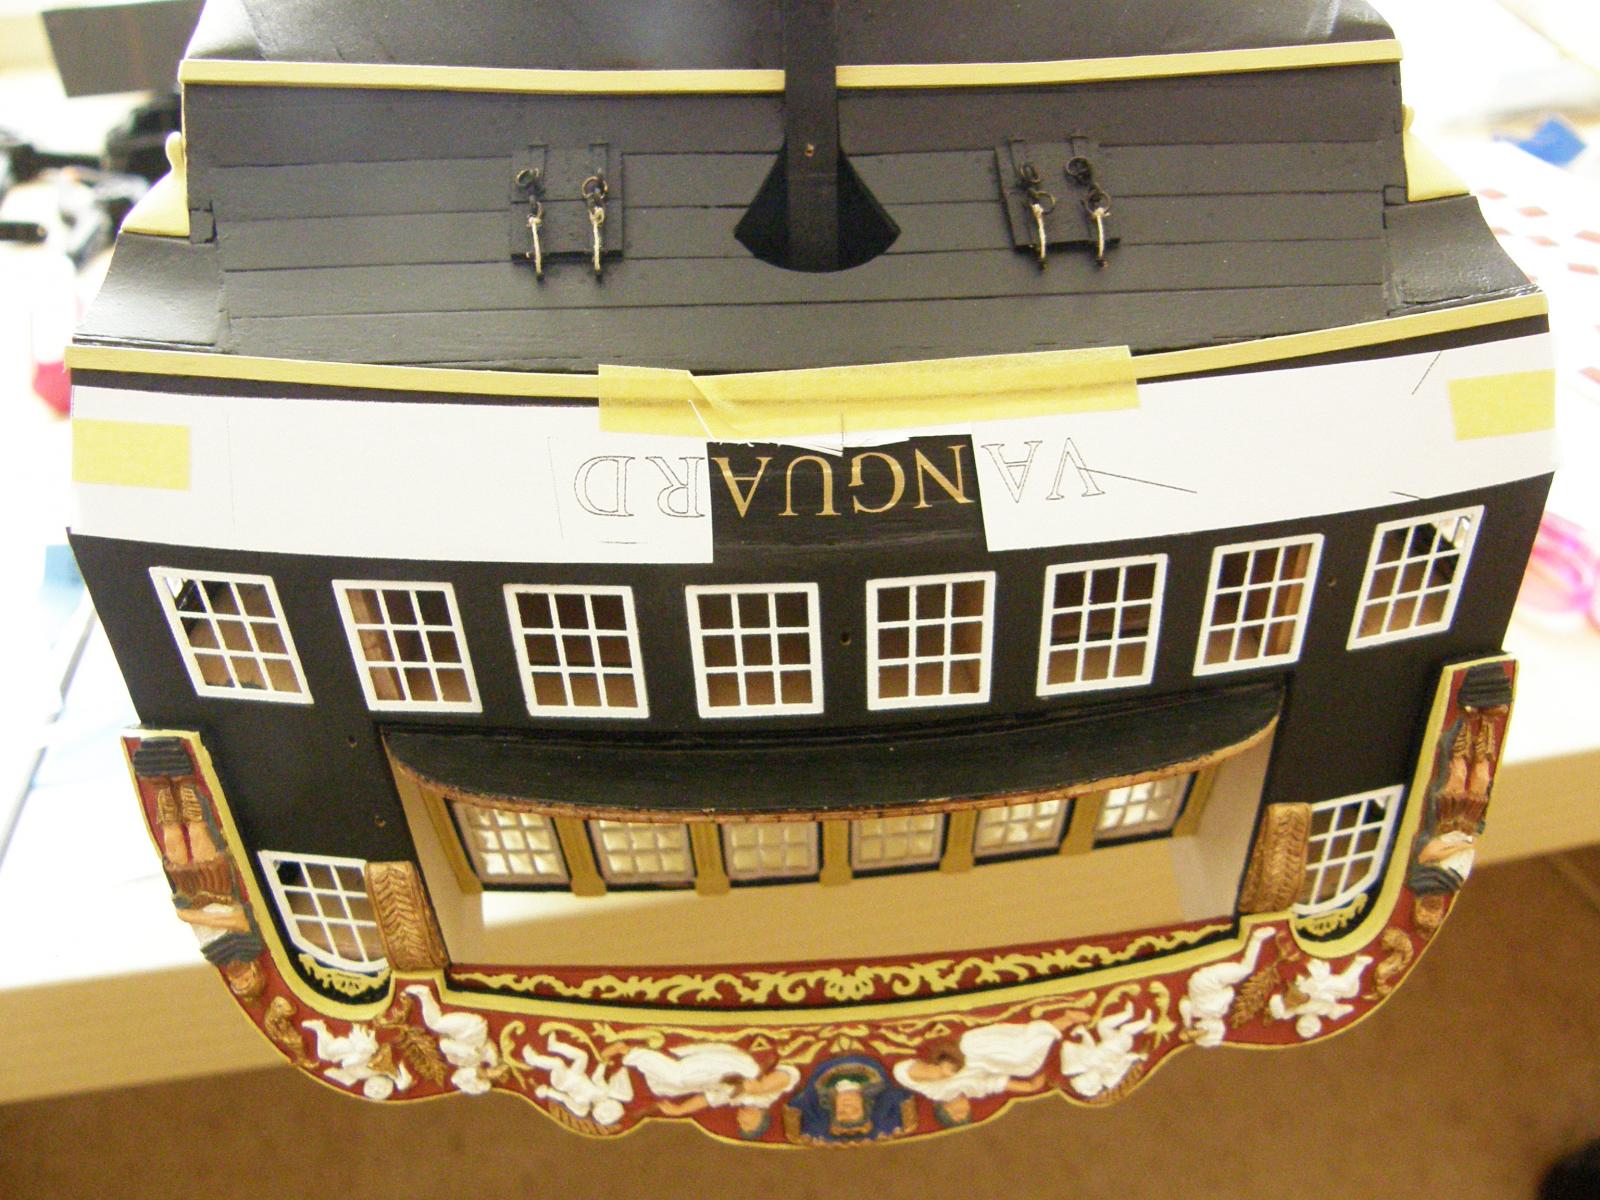
While waiting for more paint to dry, I finally got around to putting the name on the stern. As suggested by Jason, I used a Letraset transfer. Unfortunately the largest Times New Roman transfers are only 5mm high, rather than the 10mm of the kit etchings. I do think the kit letters are a bit obtrusive, but I am concerned that the 5mm letters are just too small (comments welcome). Incidentally the 'burnisher' supplied with the Letraset turns out to be a Paddle Pop stick (a 'water ice' may be more familiar to non- Australians) and is not worth a sausage. With the irregularities in the surface, I found a baboo skewer with the point shaped like a flat scewdriver did the trick. I used Mitsuaki's method of spacing. I put the lettering up a mill or 2 higher than I intended, but at this stage I'm going to leave that problem. I have to put on the decorative strip above it and I'll then see how the whole thing looks. The decorative strip supplied is not long enough to go across the stern, nor is it of particularly good quality. Rather than try to seemlessly join 2 pieces I will use a strip of 2x2mm and a strip of 1x1mm and see how that works out.
-
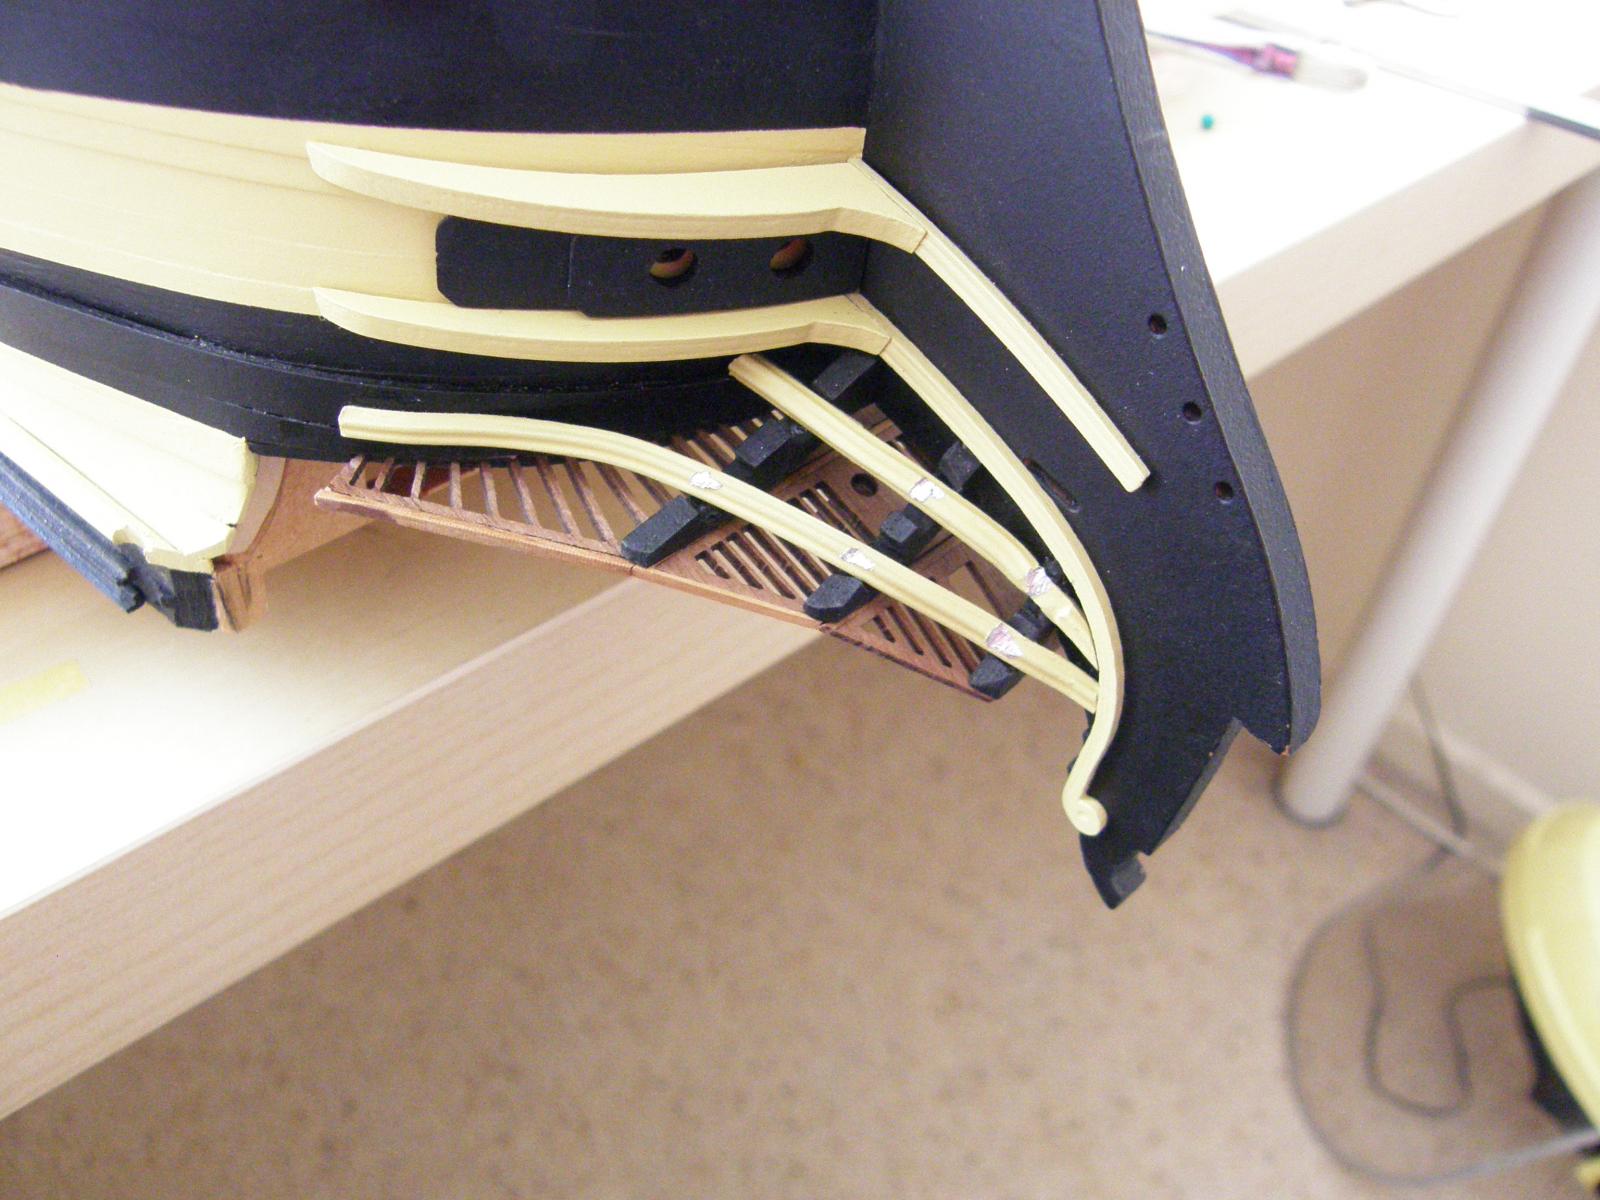
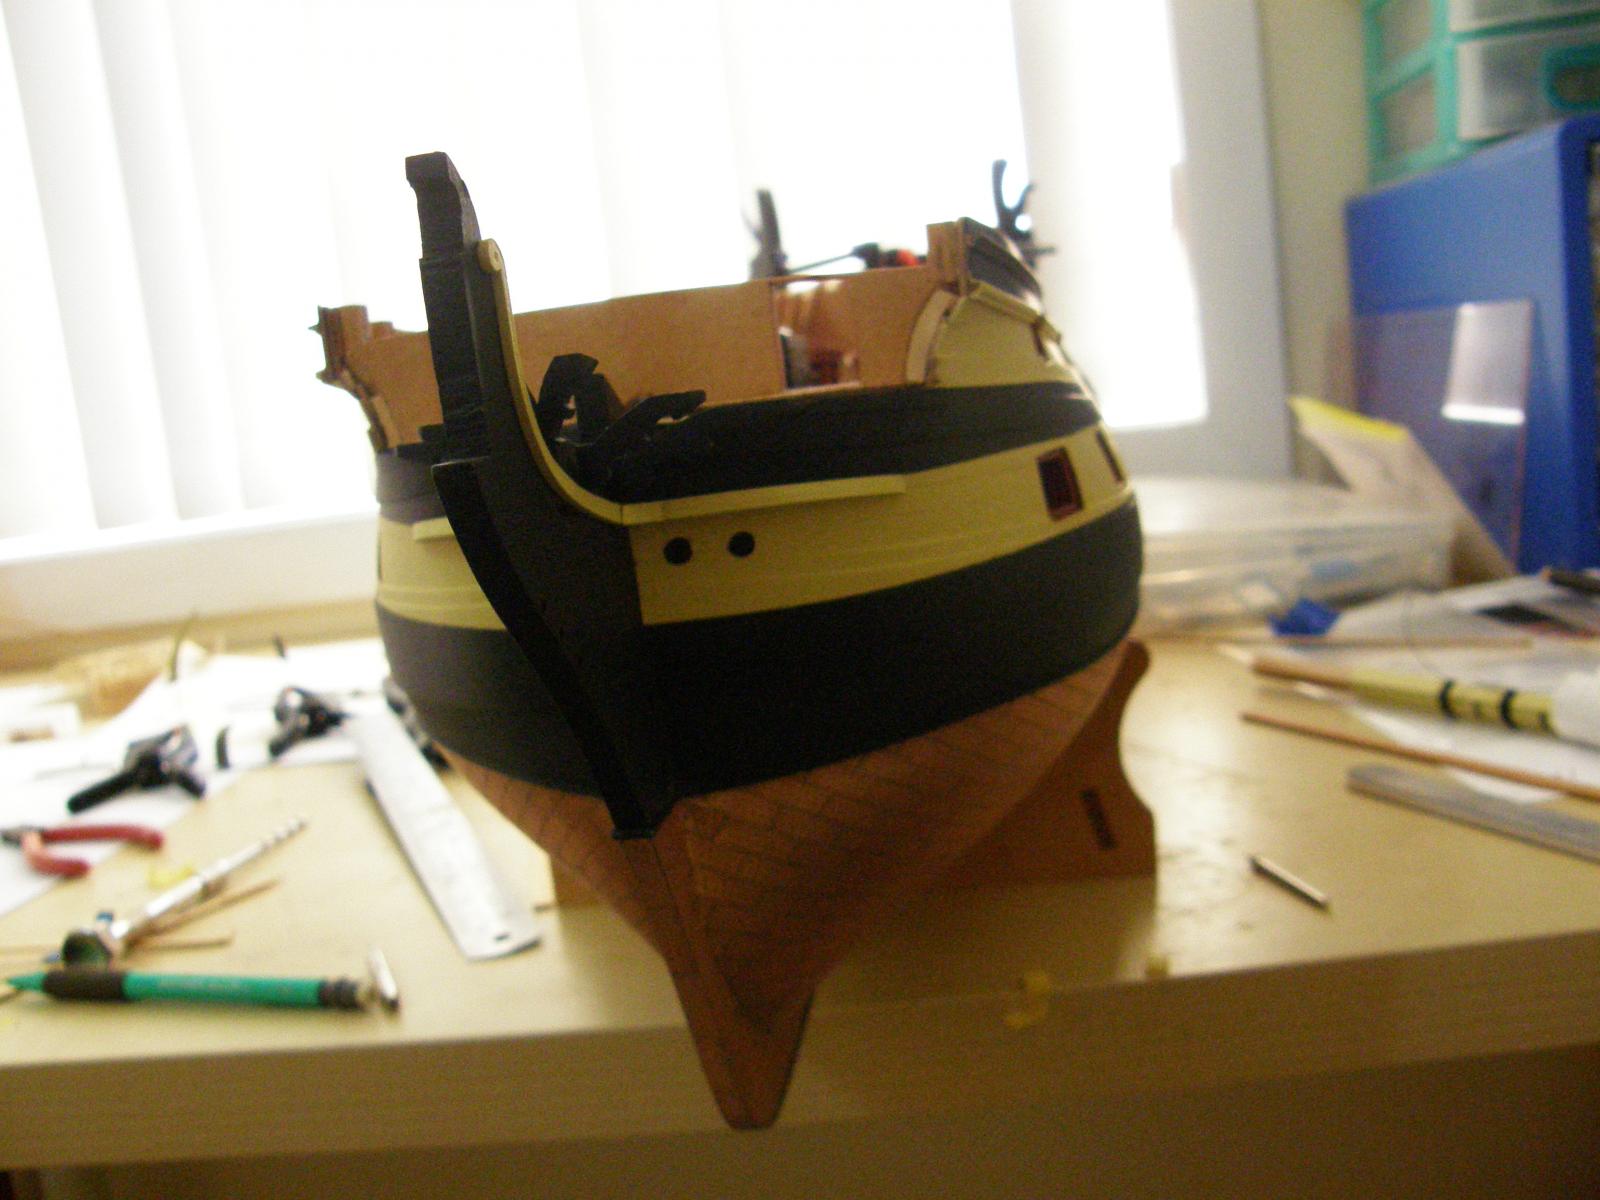
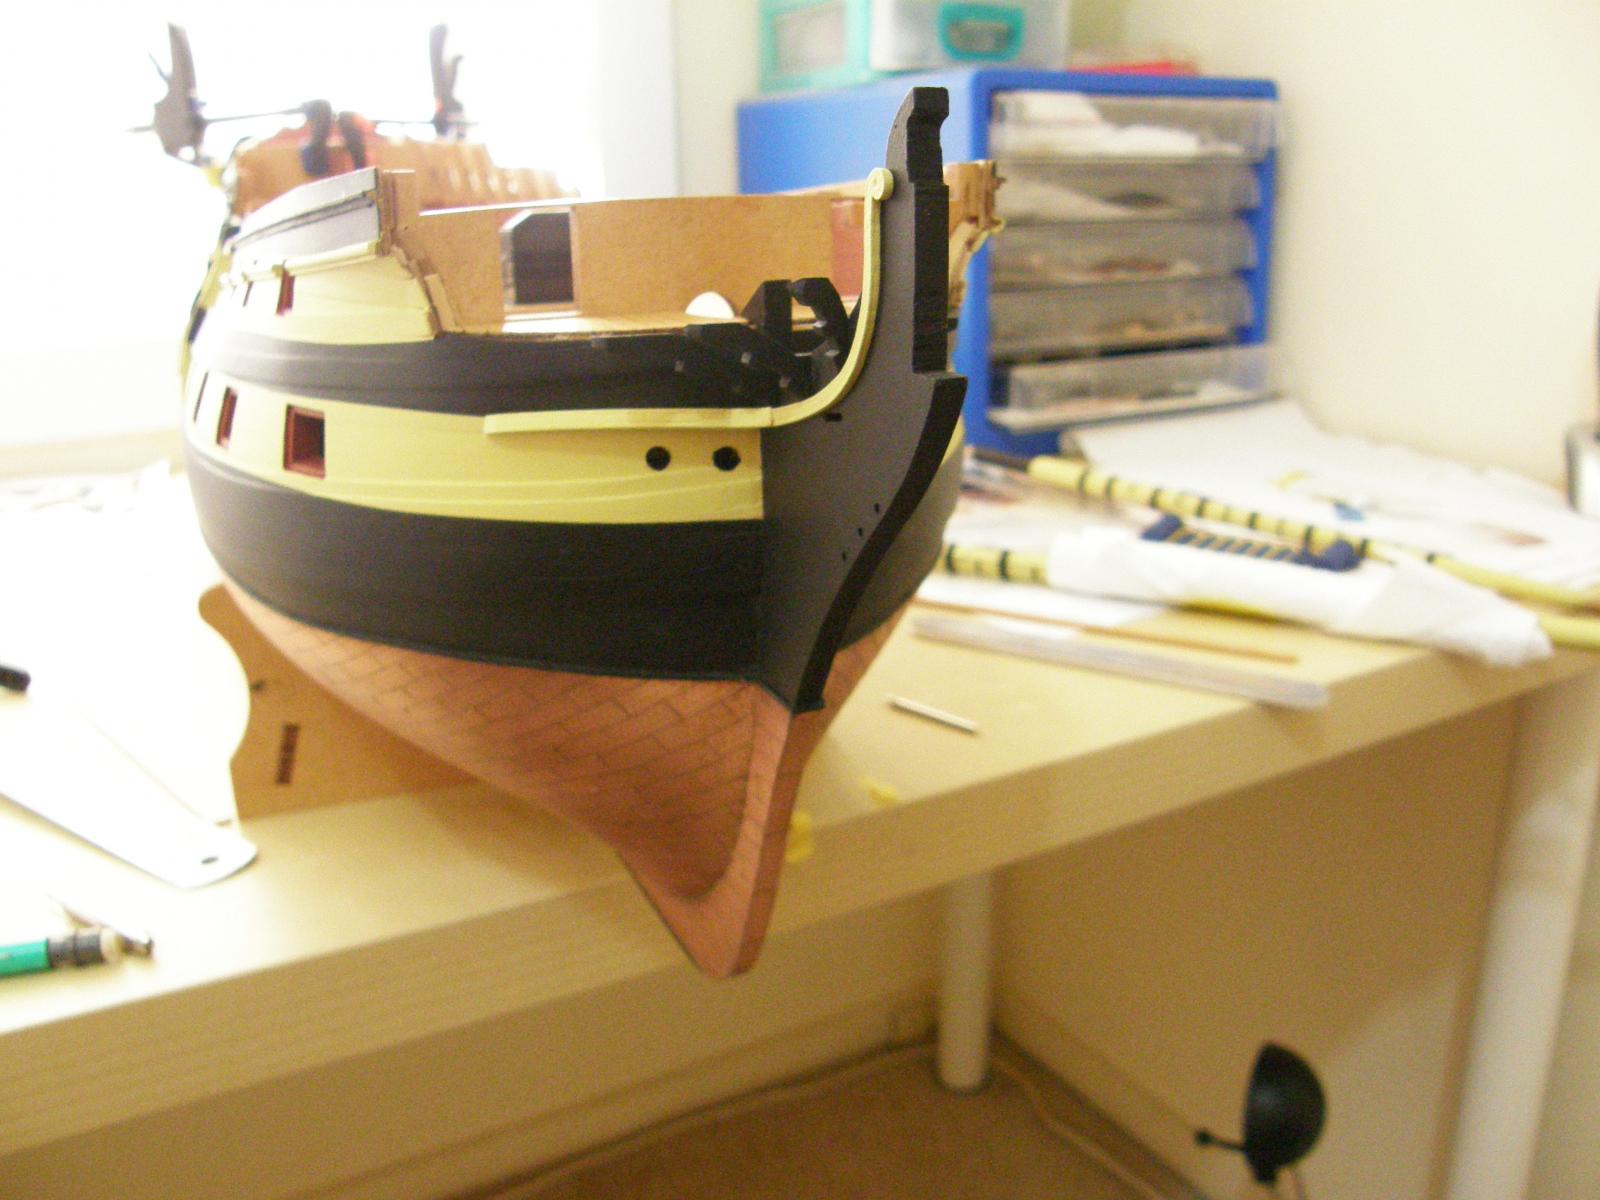
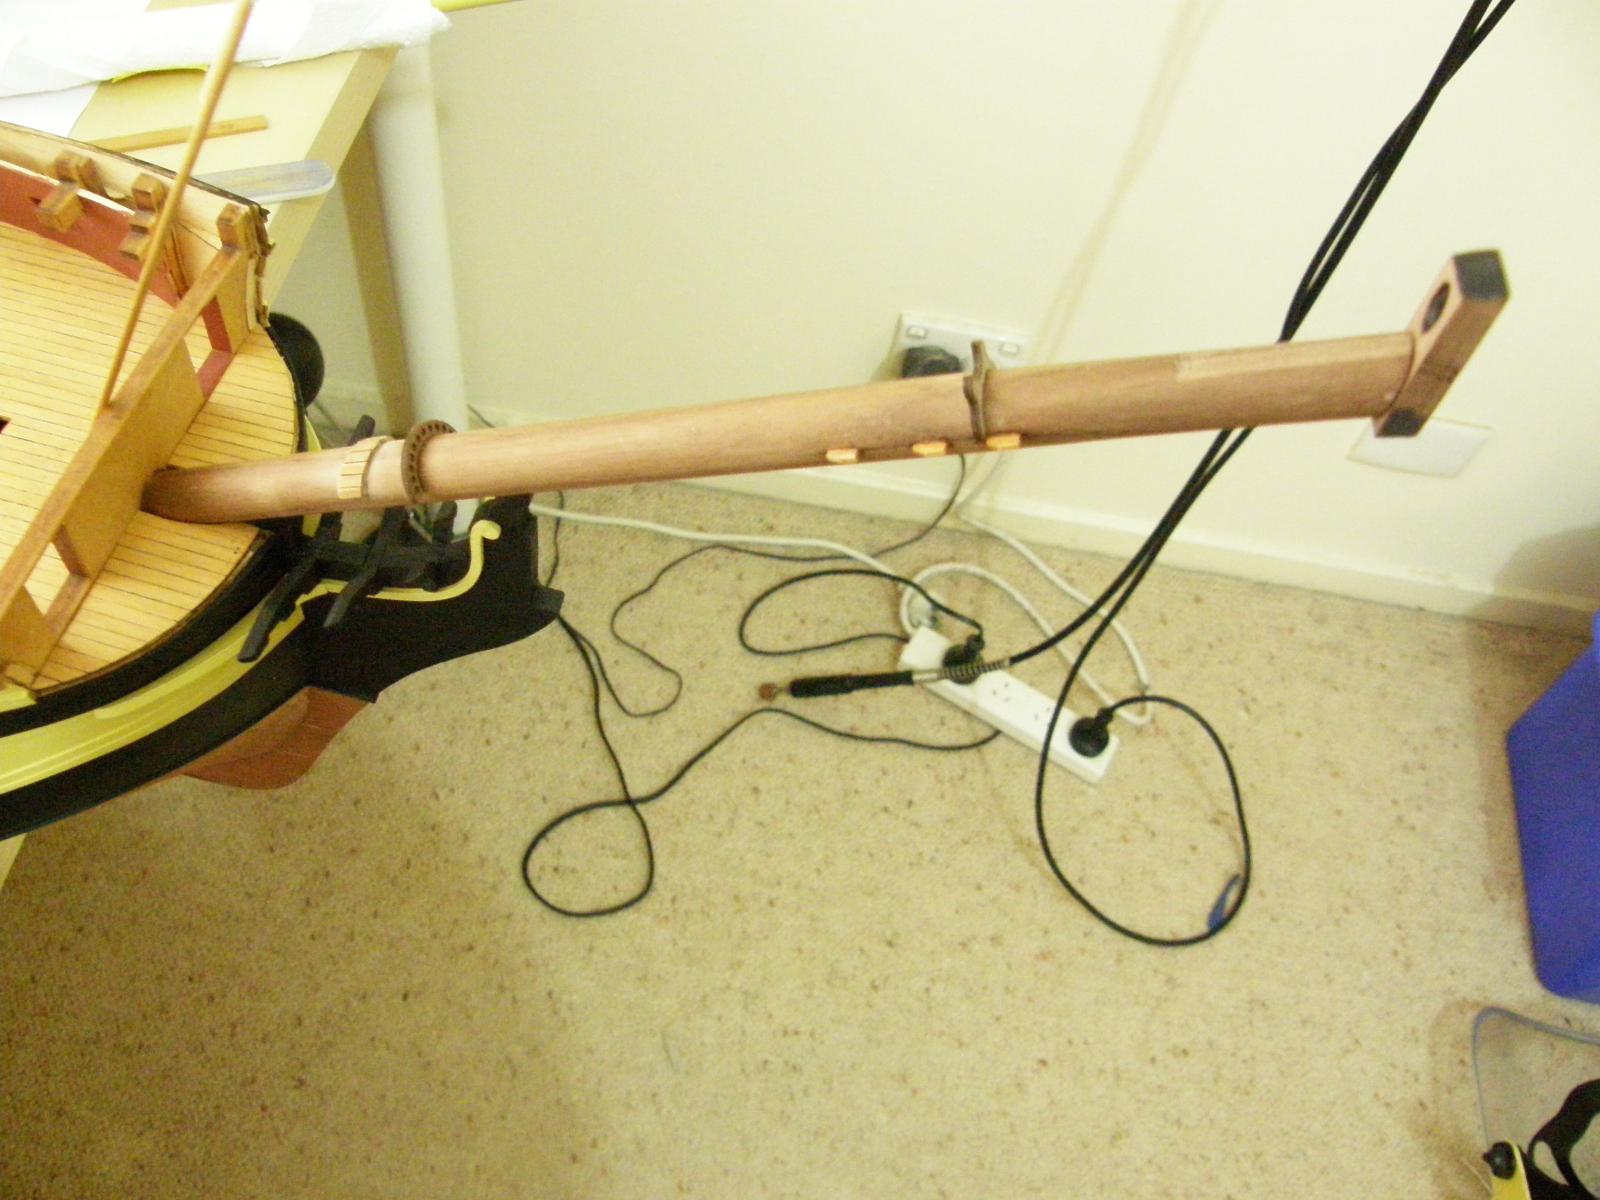
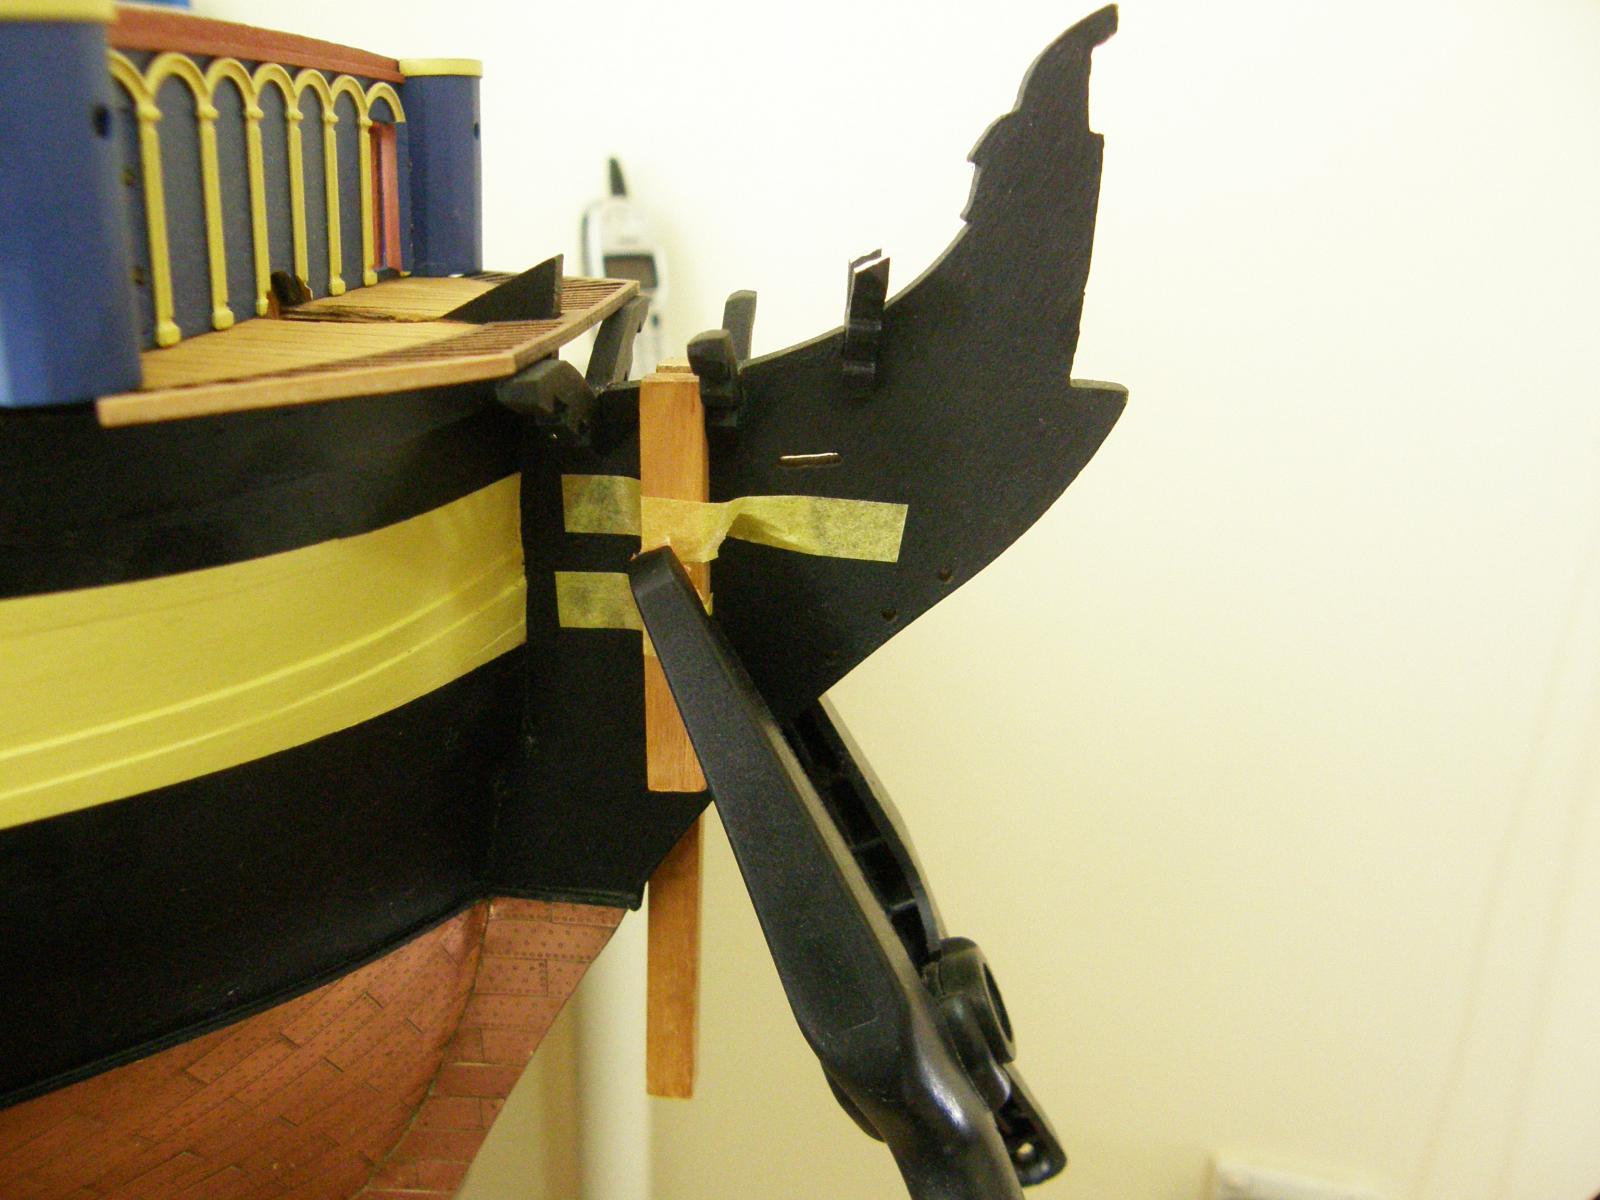
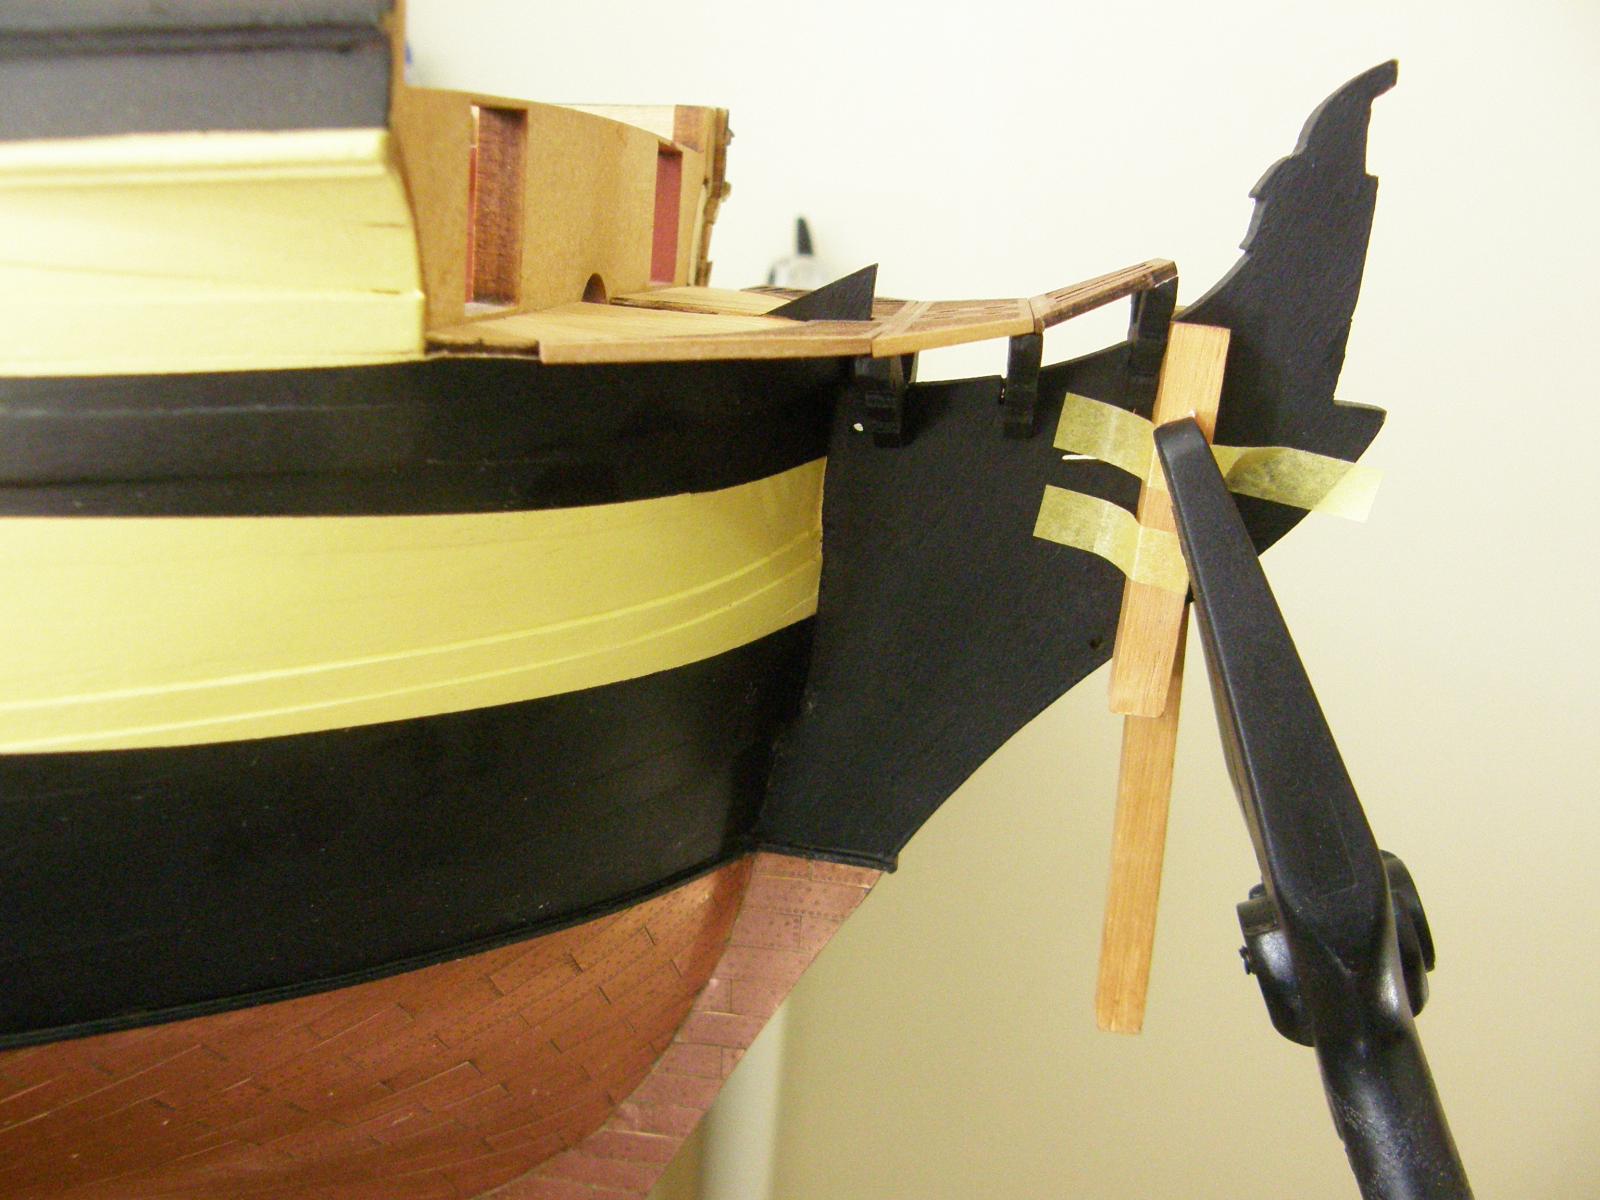
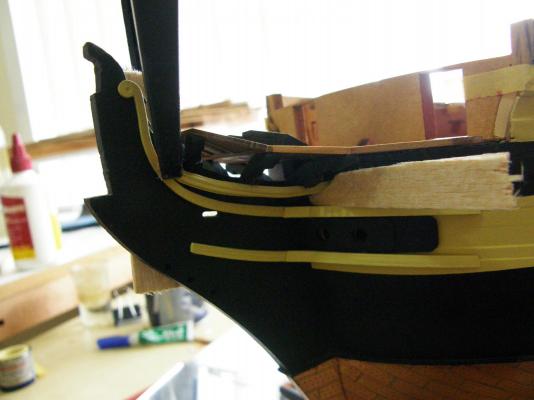
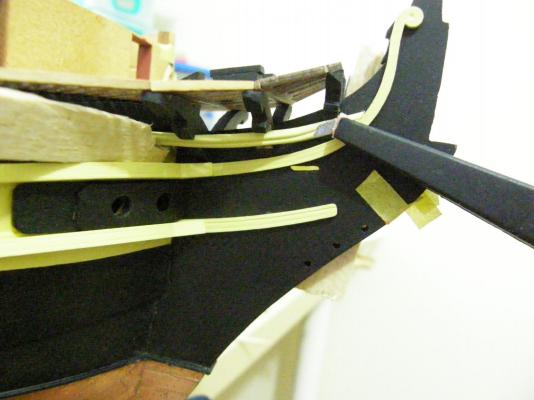
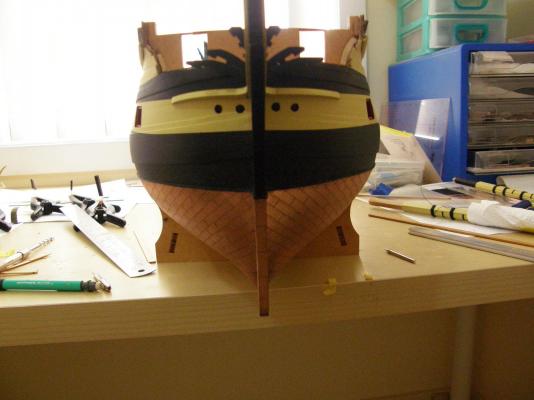
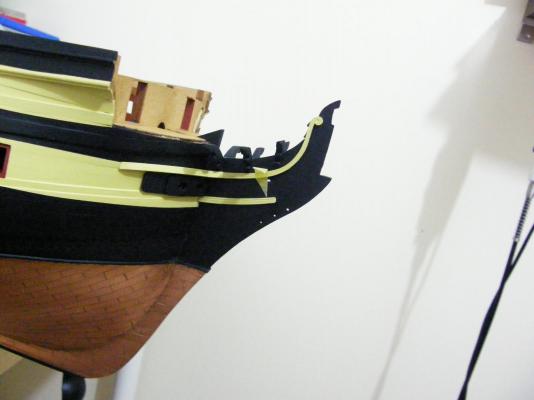
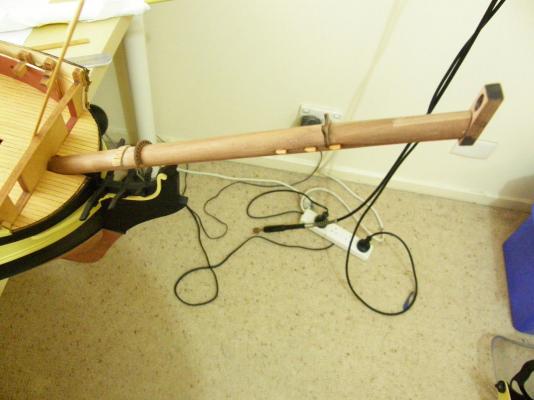
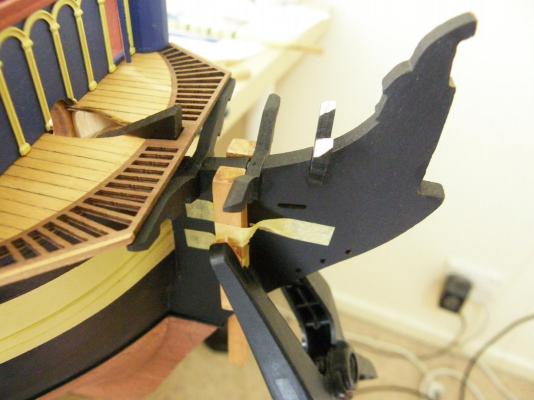
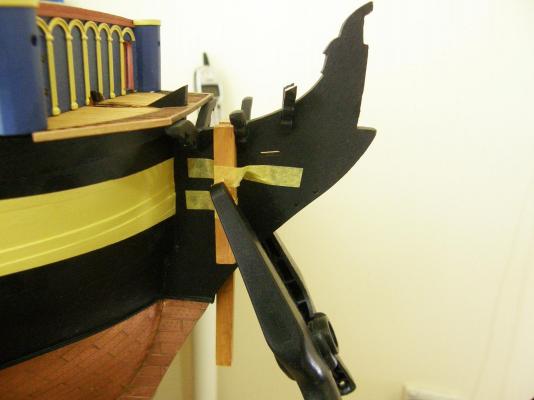
The bits and pieces that decorate the bow are proving to be quite demanding. Bevelling the cheeks was very time-consuming and fiddly. Once the top cheeks were attached it was then easy to glue the hause hole patterns and the lower short decorative strip (which must be parallel to the middle headrail - the tape that can be seen is there to mark consistent slopes for the cheeks on both sides). Then things got interesting. With the lower cheeks sloping upwards at the same angle as the lower decorative strip, getting a nice close fit of the lower cheek and the hause hole pattern required the hause hole pattern to be bevelled as well - on the model. This was not good for my nerves. Fortunately things turned out acceptably, though I have to repaint the lower cheeks which will take the best part of 3 or 4 days before I can attach them. I have also been working on the masts and have finally got around to the the bowsprit and jib boom. The following pictures show the bow sprit. The cap is dry-fitted - getting the correct angle of the holes is a bit of a pain. I found using a small conical abrasive attachment for my ersatz dremel worked better than trying to use a drill.


-
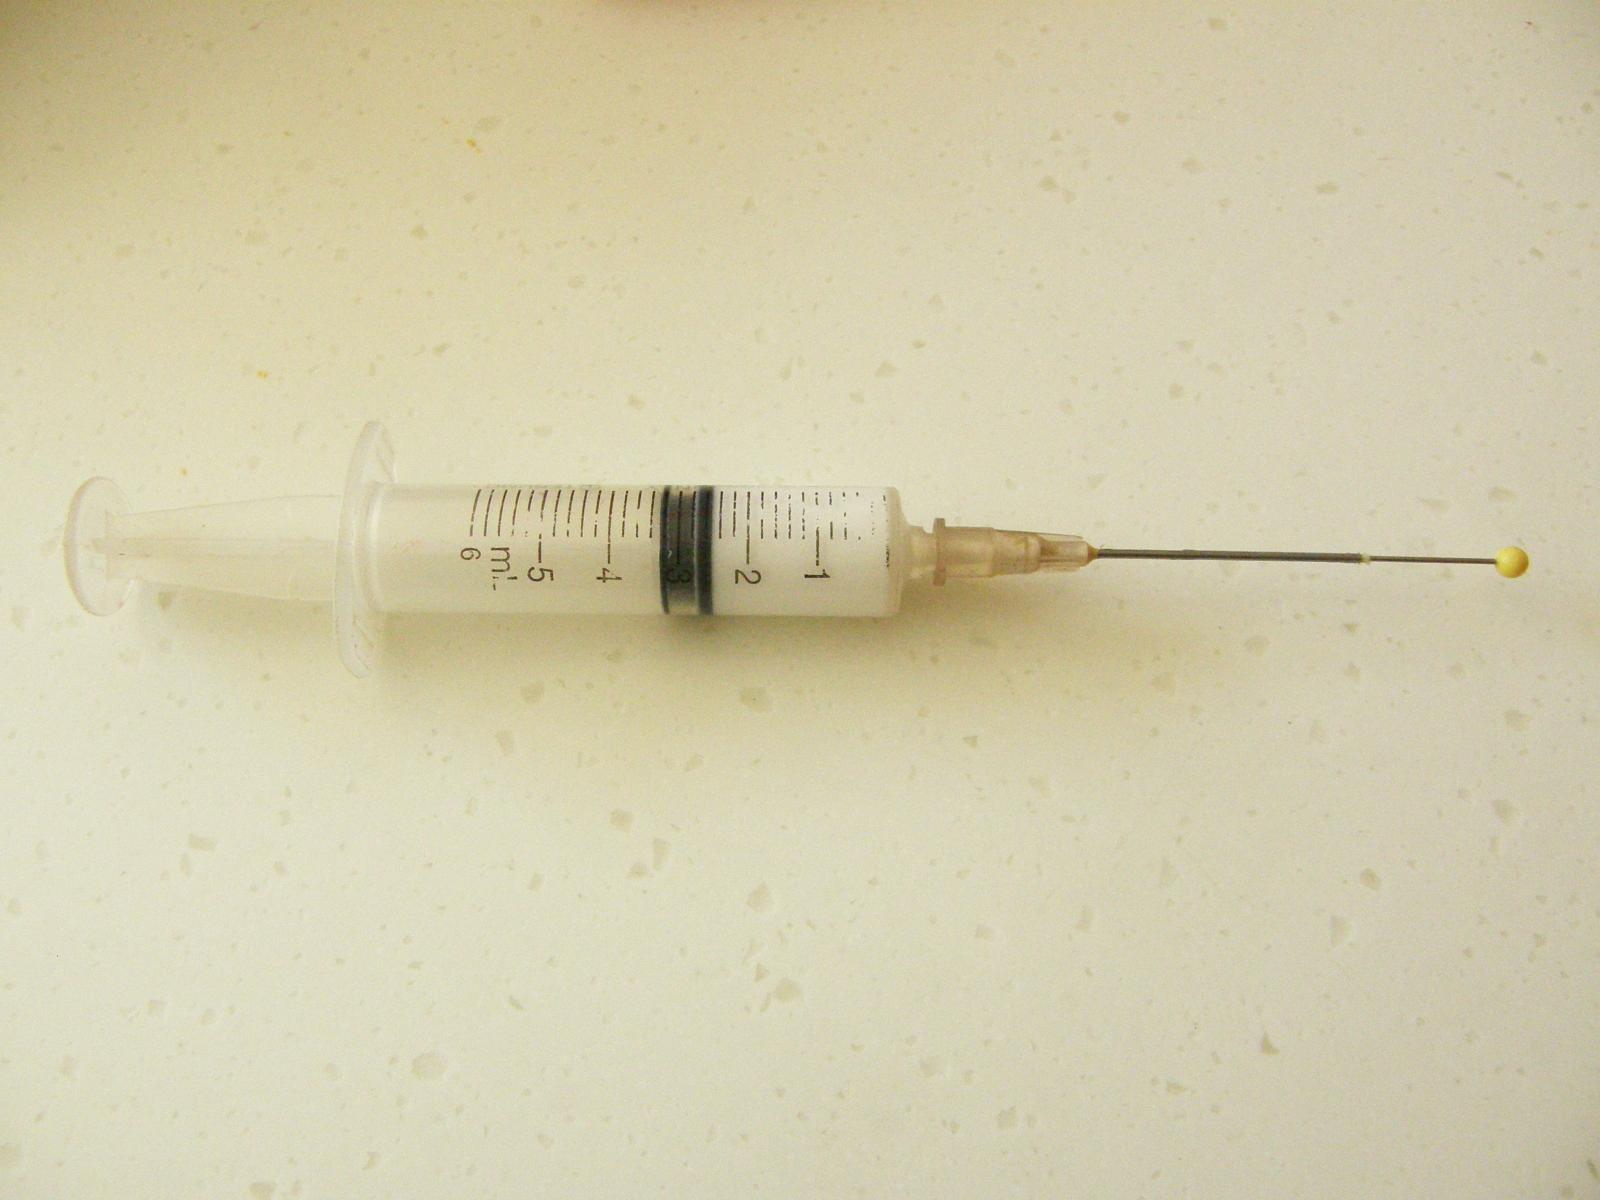
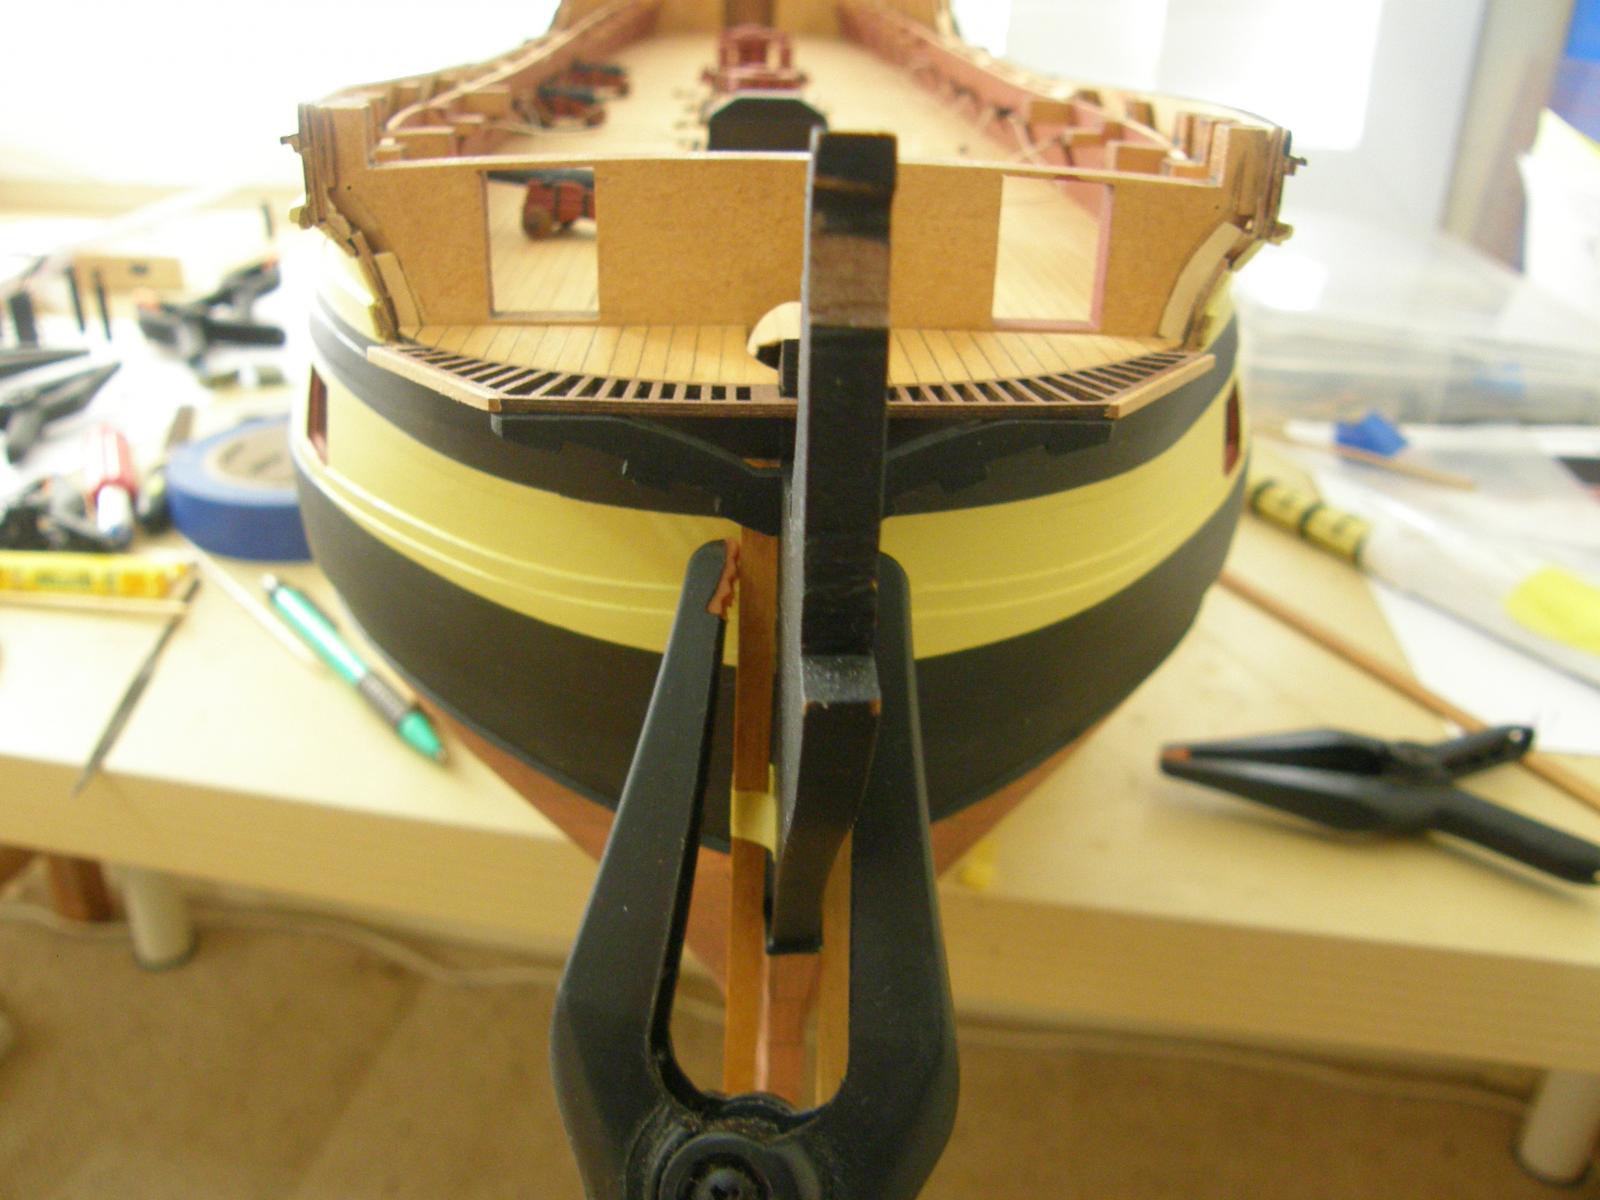
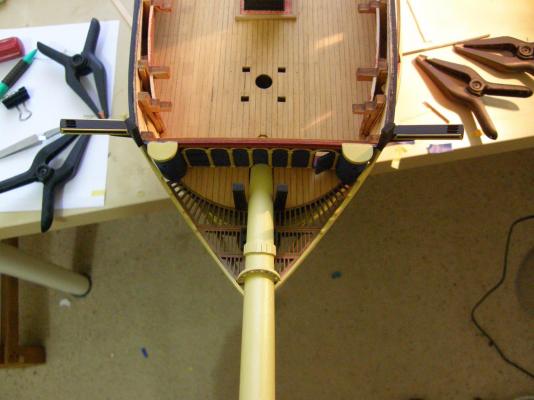
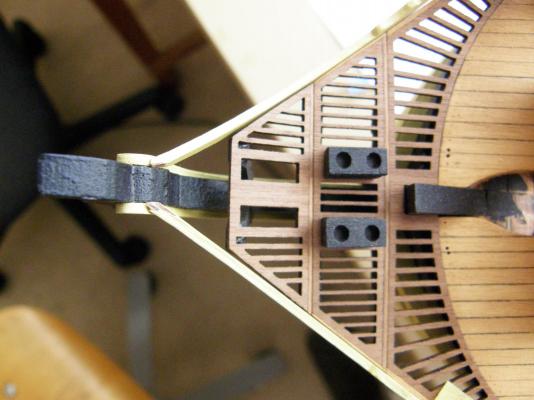
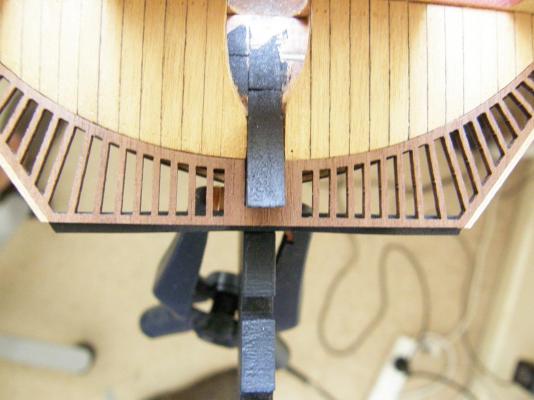
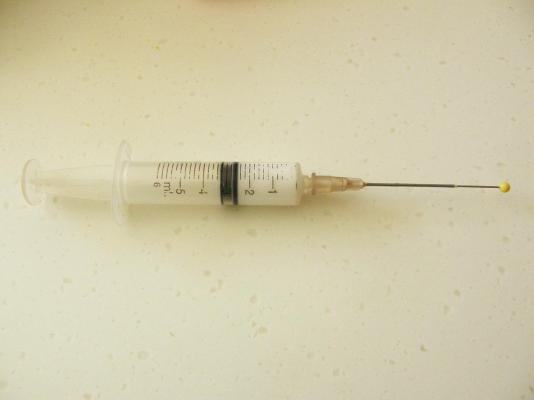
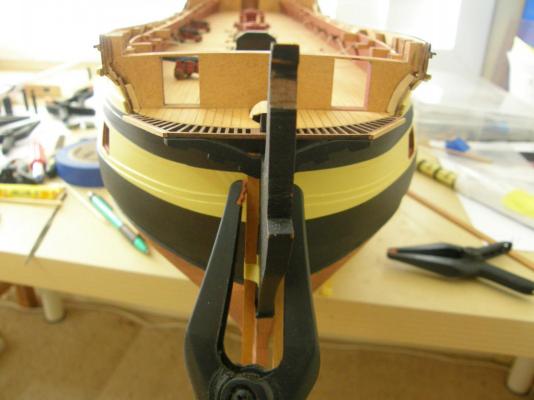
Getting the supports for the gratings both square and level proved tricky. For the first, I finally used 2 pieces of sqare stock clamped to the prow to provide the square, then leveled it by eye against the bottom of the doorway. Once the first was correctly positioned and glued, the positioning of the middle and forward supports was fairly easy. I used PVA wood glue which allows adjustment before setting. A medical hypodermic syringe (point ground off) is really useful for positioning small amounts of glue accurately. The glue also lasts indefinitely. However, bringing the last grating flush with the end of forward support (ie: +2mm forward) has brought an unforseen consequence. Without adjustment to the forward support, the angle of the forward grating is at too severe an angle to allow the top head rail to be flush with the top of that grating. It was therefore necessary to file down the top of the support by about 1mm to provide the appropriate angle. Once the glue has fully set further adjustment - and another coat of paint - may be necessary.


-
I was going to say 'as interesting as watching paint dry', but somehow I couldn't bring myself to write it. Though I do think that Fomula 1 is like watching very loud paint dry - or going round in circles.