RMC
-
Posts
933 -
Joined
-
Last visited
Content Type
Profiles
Forums
Gallery
Events
Everything posted by RMC
-
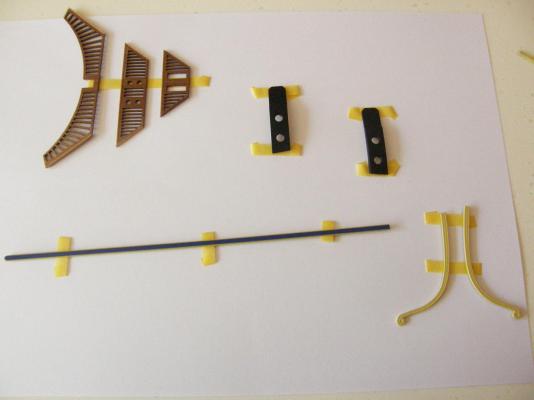
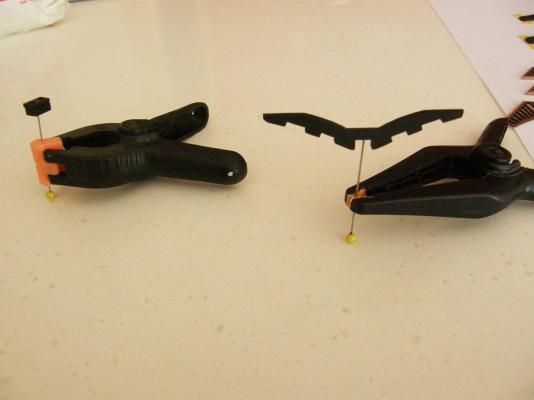
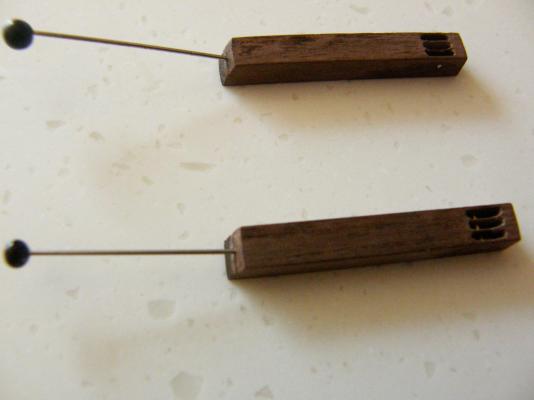
I am still painting the headrails etc. While waitng for the paint to dry (about as exciting as Formula 1 motor racing) it occurred to me that a couple of painting tips may be useful. At the risk of telling people what they know, here goes. To avoid getting fingers in the way, I have found Tamiya tape is excellent in holdng small flat pieces steady for painting and spraying. For holding pieces that need coats on more than one side, a pin and a clamp are useful. For those using enamel paints (I use Humbrol) whenever possible use 2 or 3 coats of spray polyurethane to finish off. It both protects and gives a far better finish than paint alone. Incidentally, I no longer shake the Humbrol cans to mix the paint. For flat paints it doesn't do a very good job. The esters (I think that's the term) that make the paint flat are often left in the bottom of the can; and when you shake the can the paint builds up on the inside lid and sides of the can - so it won't close properly. The paint then goes off. I think the latter is part of a cunning plan by Humbrol ... Consequently I use a piece of wood strip to stir the paint for about a minute or so. I have started on the cathead using Mitsuaki and Arthur's work as a guide. I had no idea drilling 6 slots whould take all day.
-
Thanks all for the kind comments, though it's a bit early to claim success. Hubris has got me before.
-
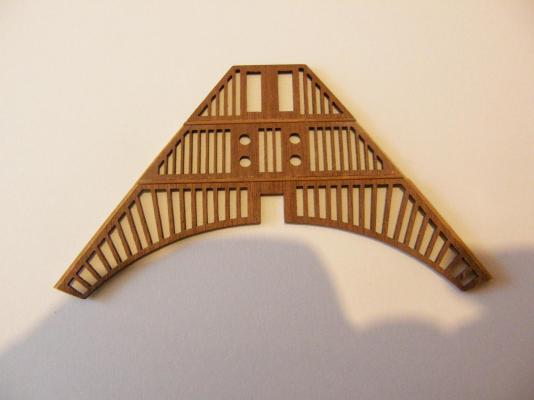
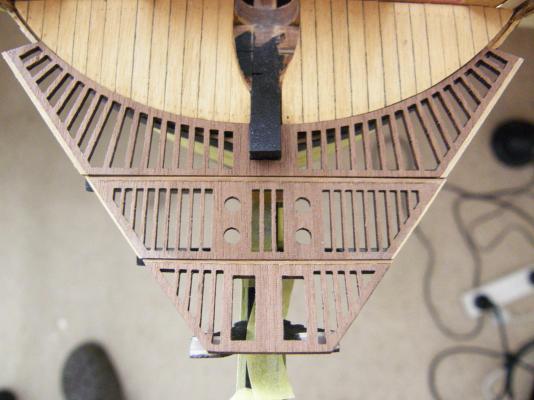
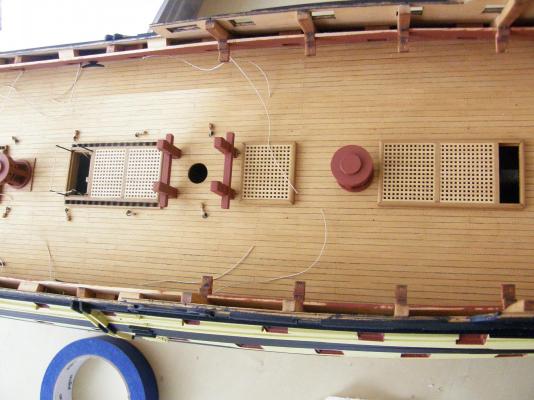
Well it didn't. Finally, joy. The gratings are dry fitted. The painting of all the components is taking forever. The yellow Humbrol paint needs to dry a full 3 days if it is to be sanded.


- 949 replies
-
- 11
-

-
Something strange happened and I lost the photos. I'll see if this works.
-
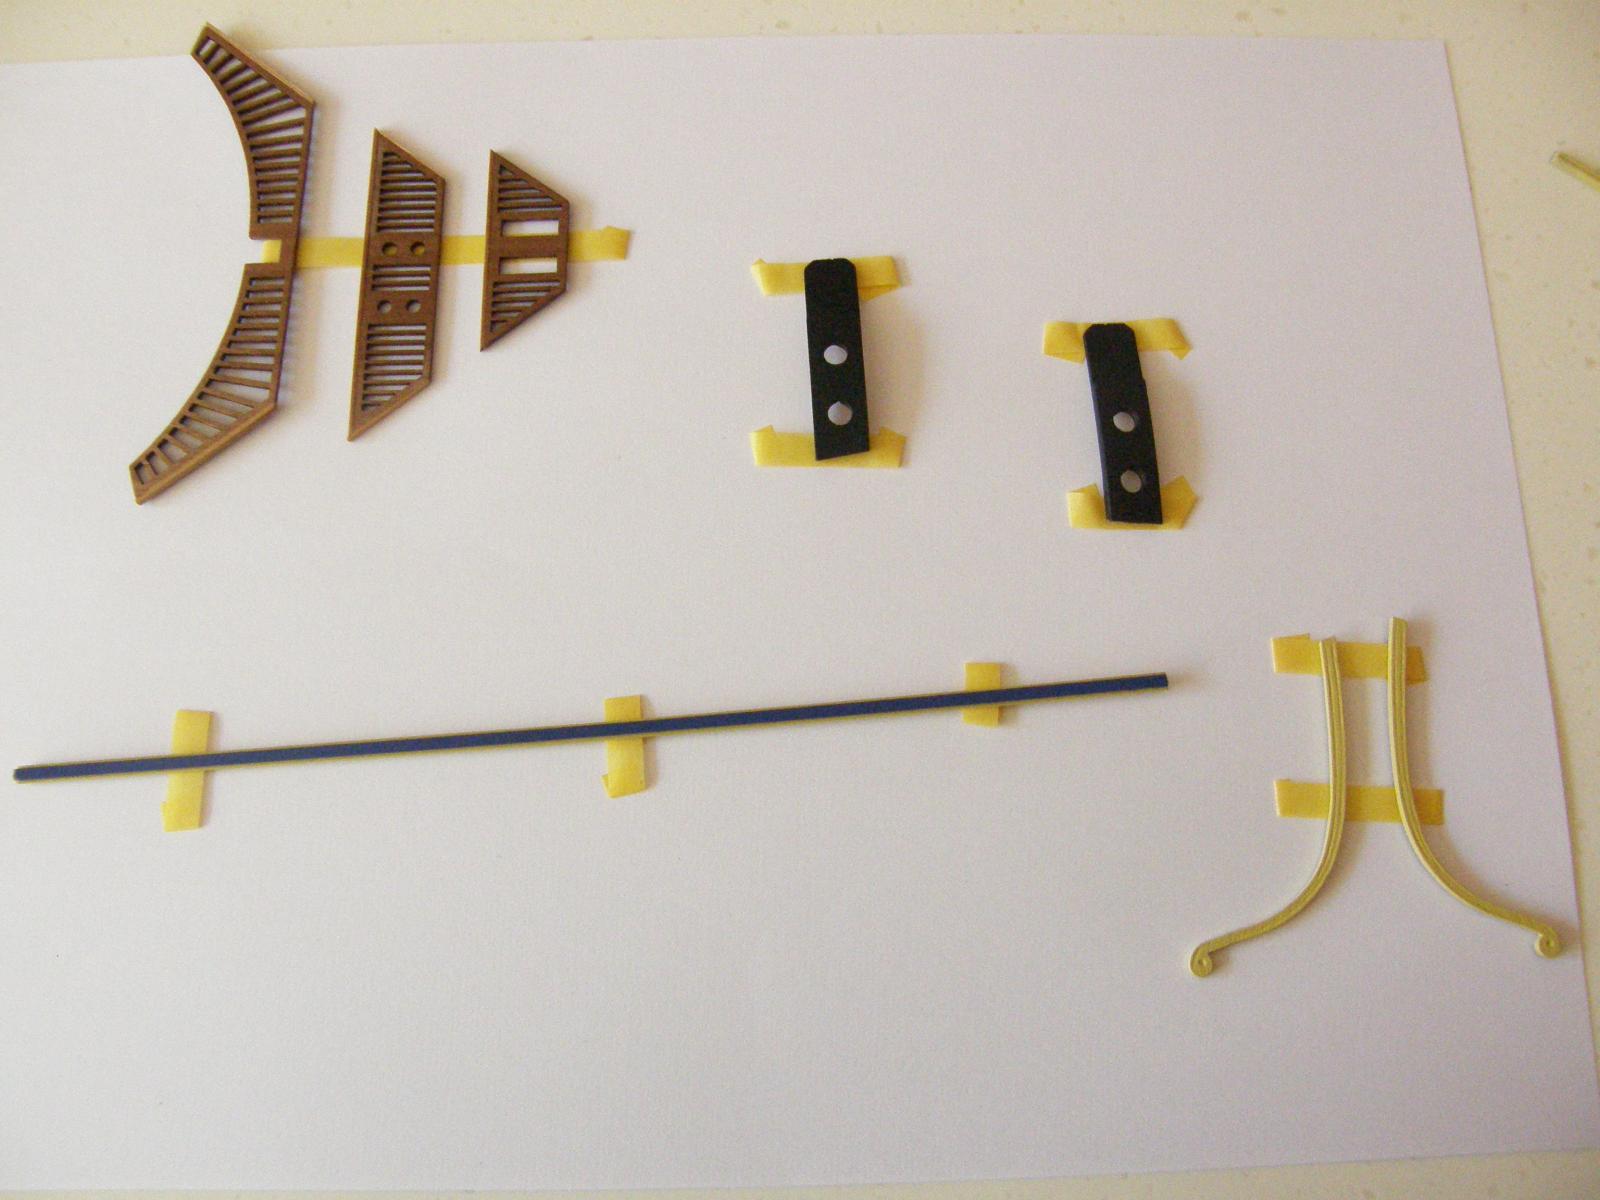
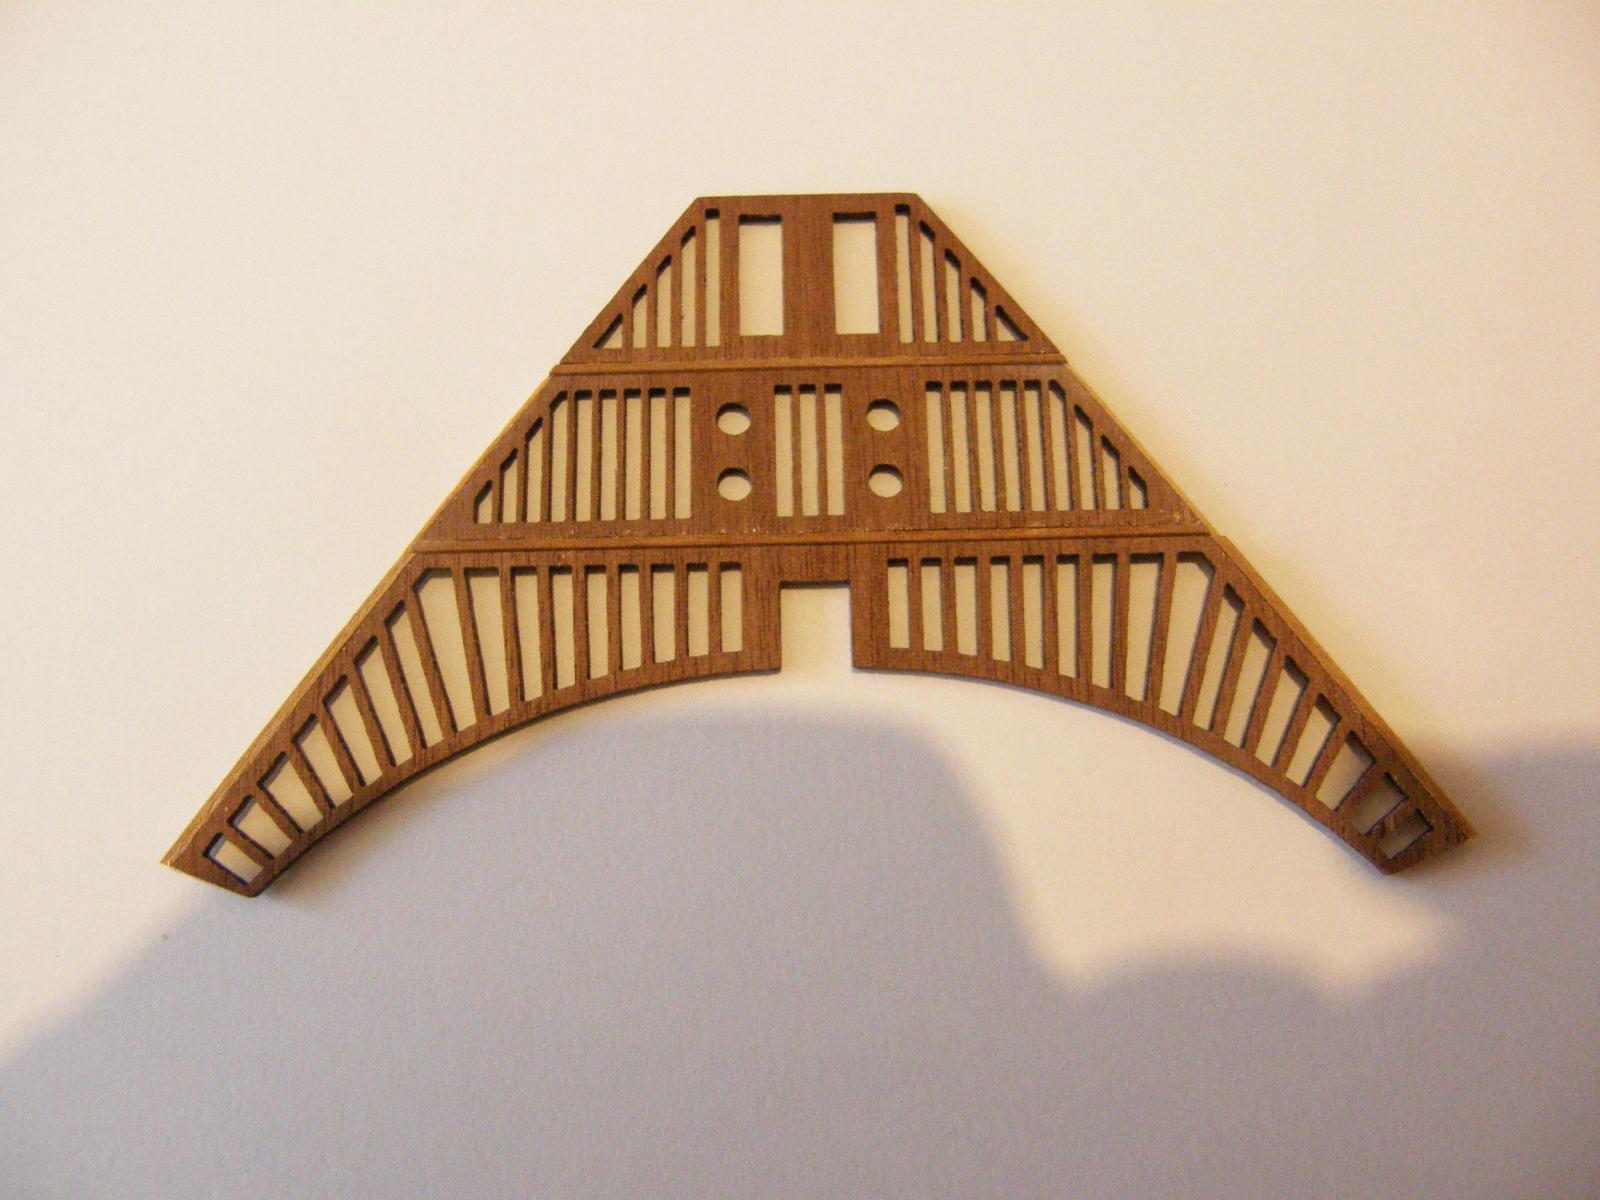
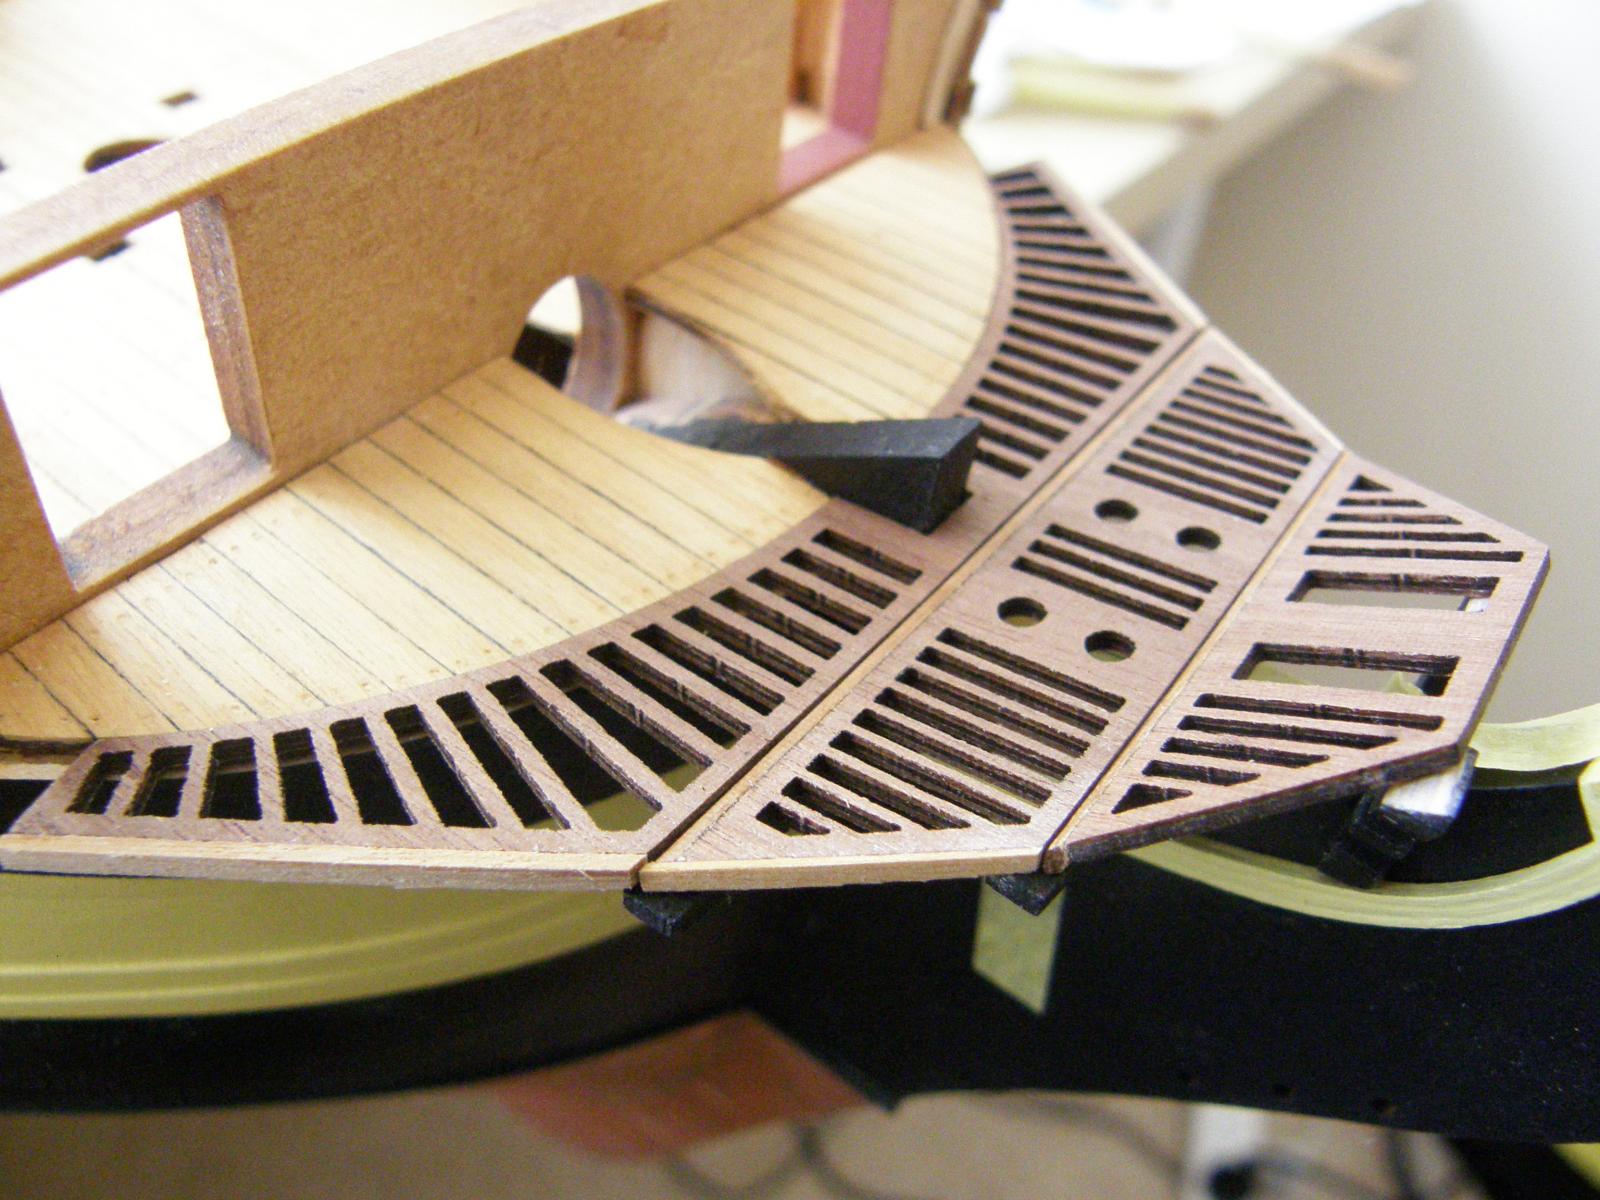
I have begun fitting all the bits and pieces of the headrail assembly. The three gratings when (dry) fitted were about 2mm too short. Rather than put a piece of 2mm strip at the head of the three gratings (Arthur suggested that doing so made it difficult to fit the main head rail (part 123) to the bottom headrail (90) and the stem) I decided to glue 1mmx2mm strip to the rear and front of the second grating. This takes care of the 2mm problem. Of course this creates another problem. The gratings do not fit together flush. To deal with this I stuck a piece of 1mmx2mm strip (trimmed to 1.5mm) to the sides of the first grating and 0.5mmx1.5mm to the middle grating. The result to my (pleasant) surprise was pretty well perfect. Whether all of this makes for an easier fit of 123 and 90 remains to be seen.
-
Thanks Arthur, I'll certainly do that.
-
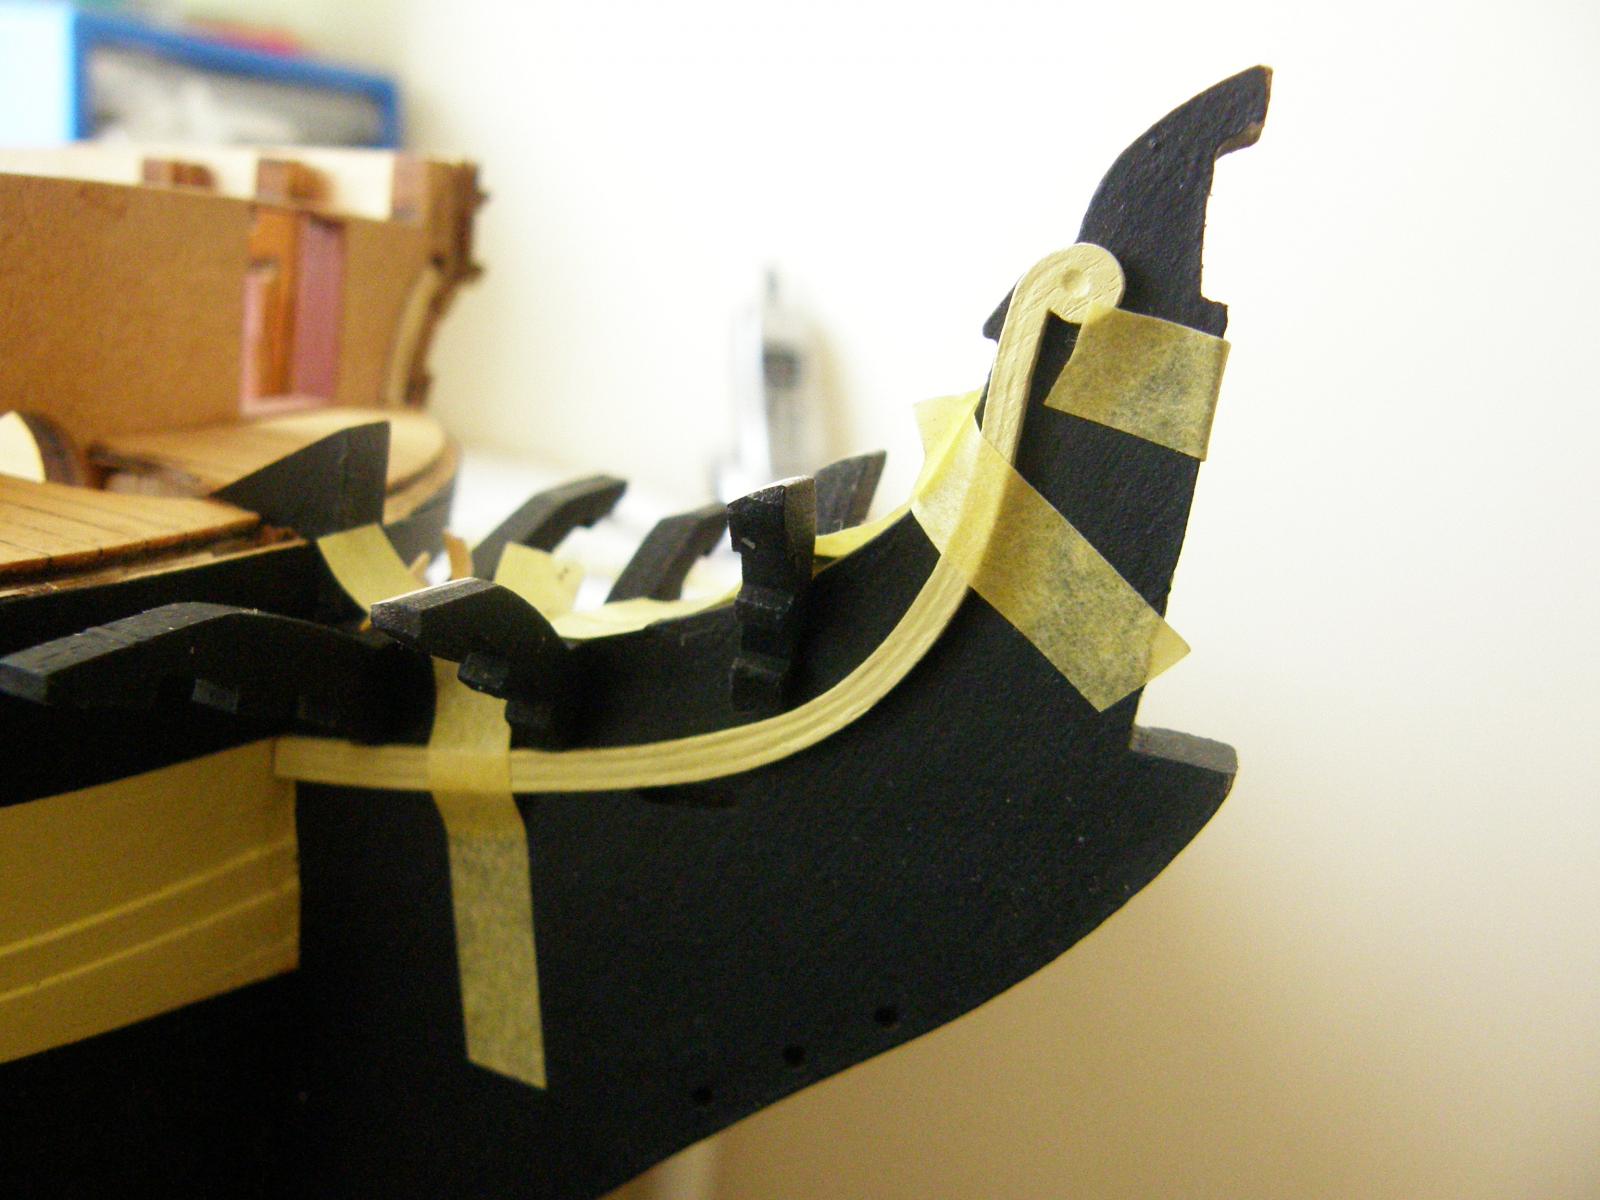
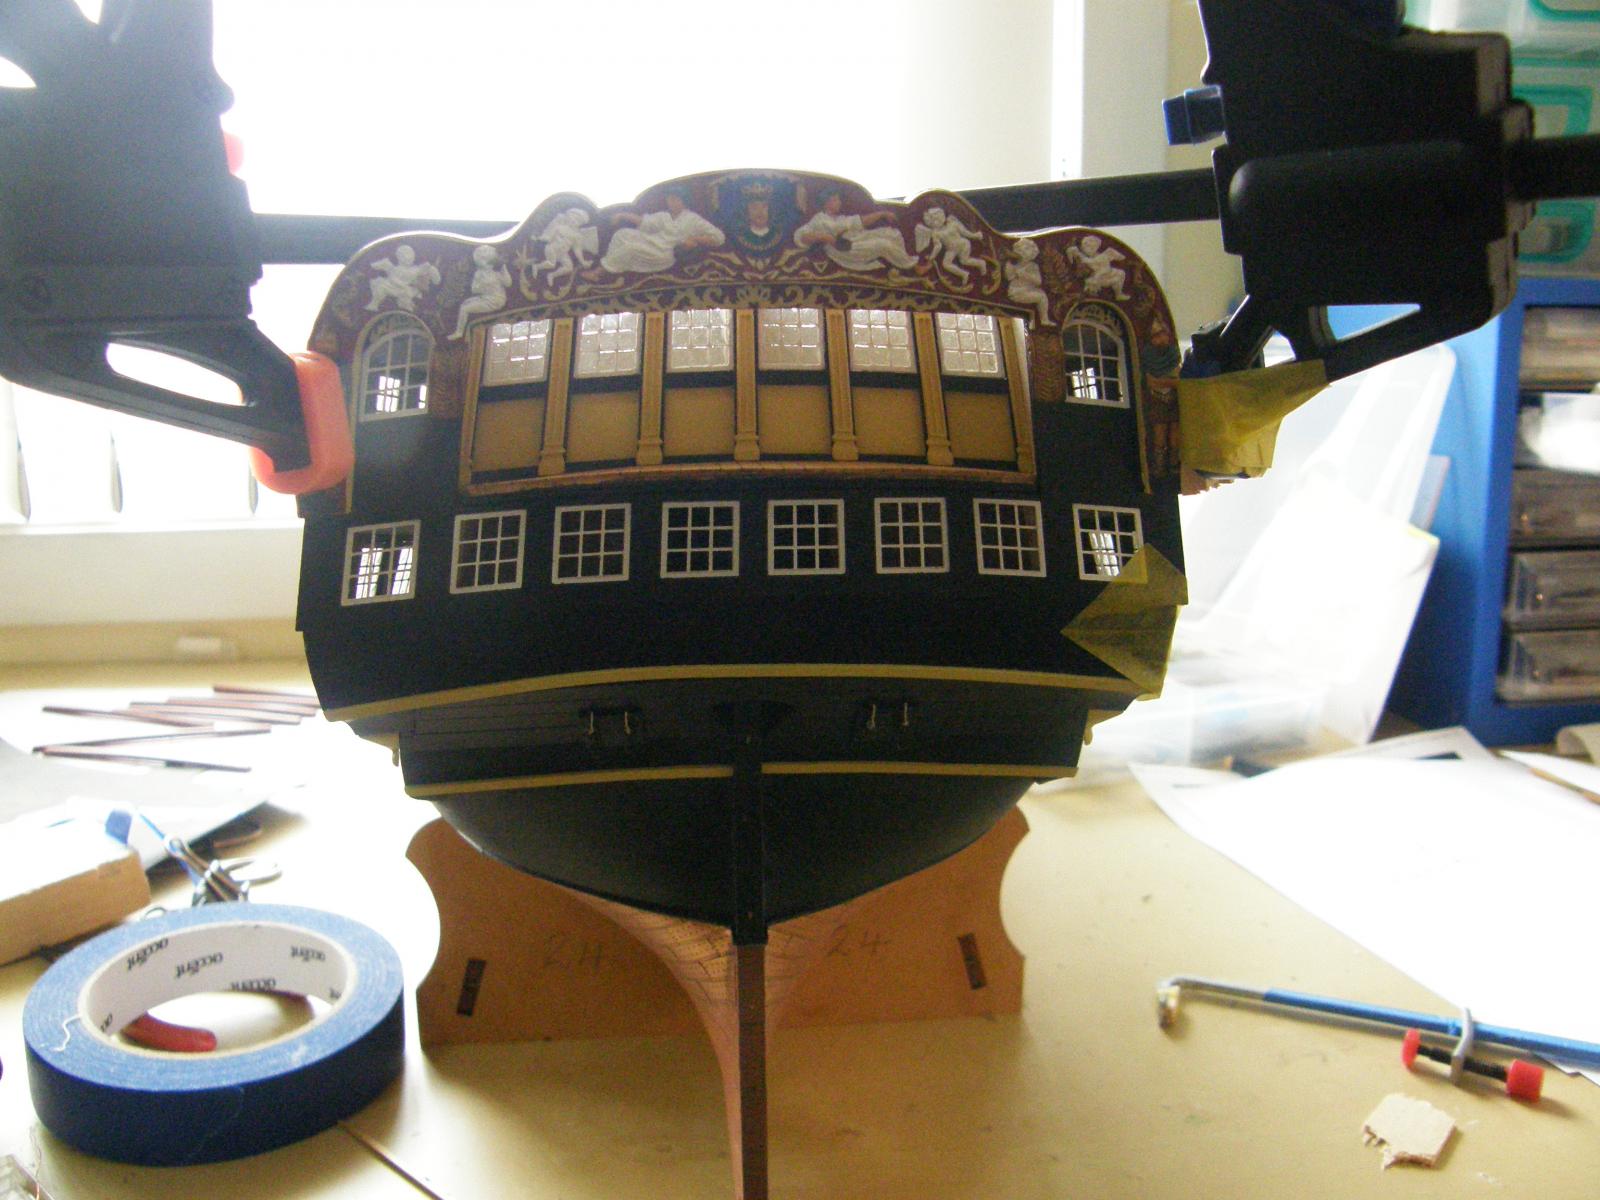
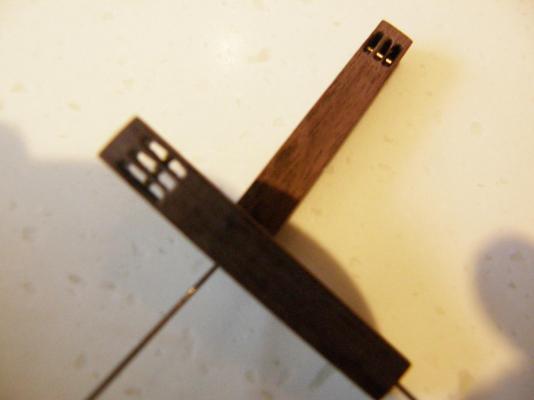
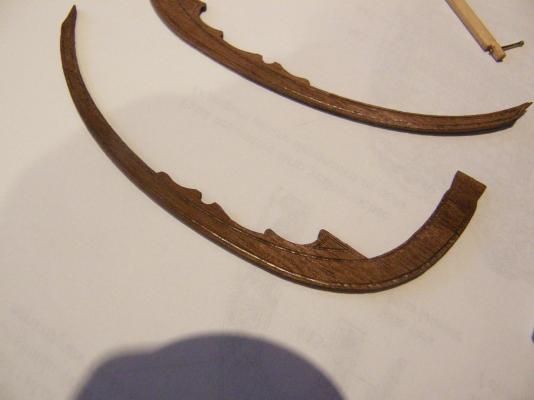
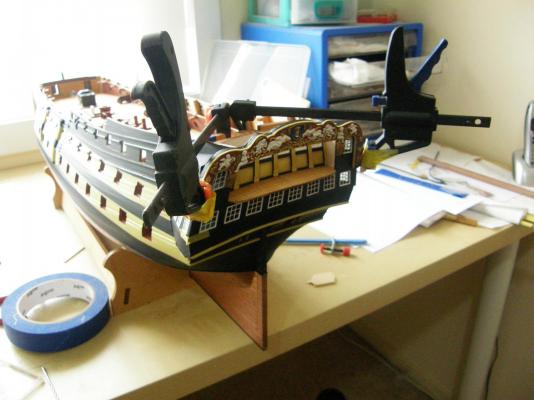
Joy. The glue has held and the facia and decoration are now apparently fixed to the stern. (Thanks for your good wishes Alistair - and thanks all for the 'likes'.) In the meantime I have decided to work on the bow section, as I am now thoroughly sick of the stern. I have tried to put a little embellishment on the cheeks in the same way as Mitsuaki and Arthur. Without something, they look rather two dimensional. To scribe the lines, I simply put a copper nail through a bit of 3x2mm strip, and cut a notch in the strip to the required distance from the edge of the respective cheeks. For the edges of the cheeks I went over the scribed lines by hand with the small cutting tool shown in the two pictures following. This provides a 'U' shape (in cross section) to the edge. For the scallops (sp?) I used an old french curve (from my school days) and scribed along its edge with a nail. It all seems to have worked quite well, but of course everything still needs to be painted.

-
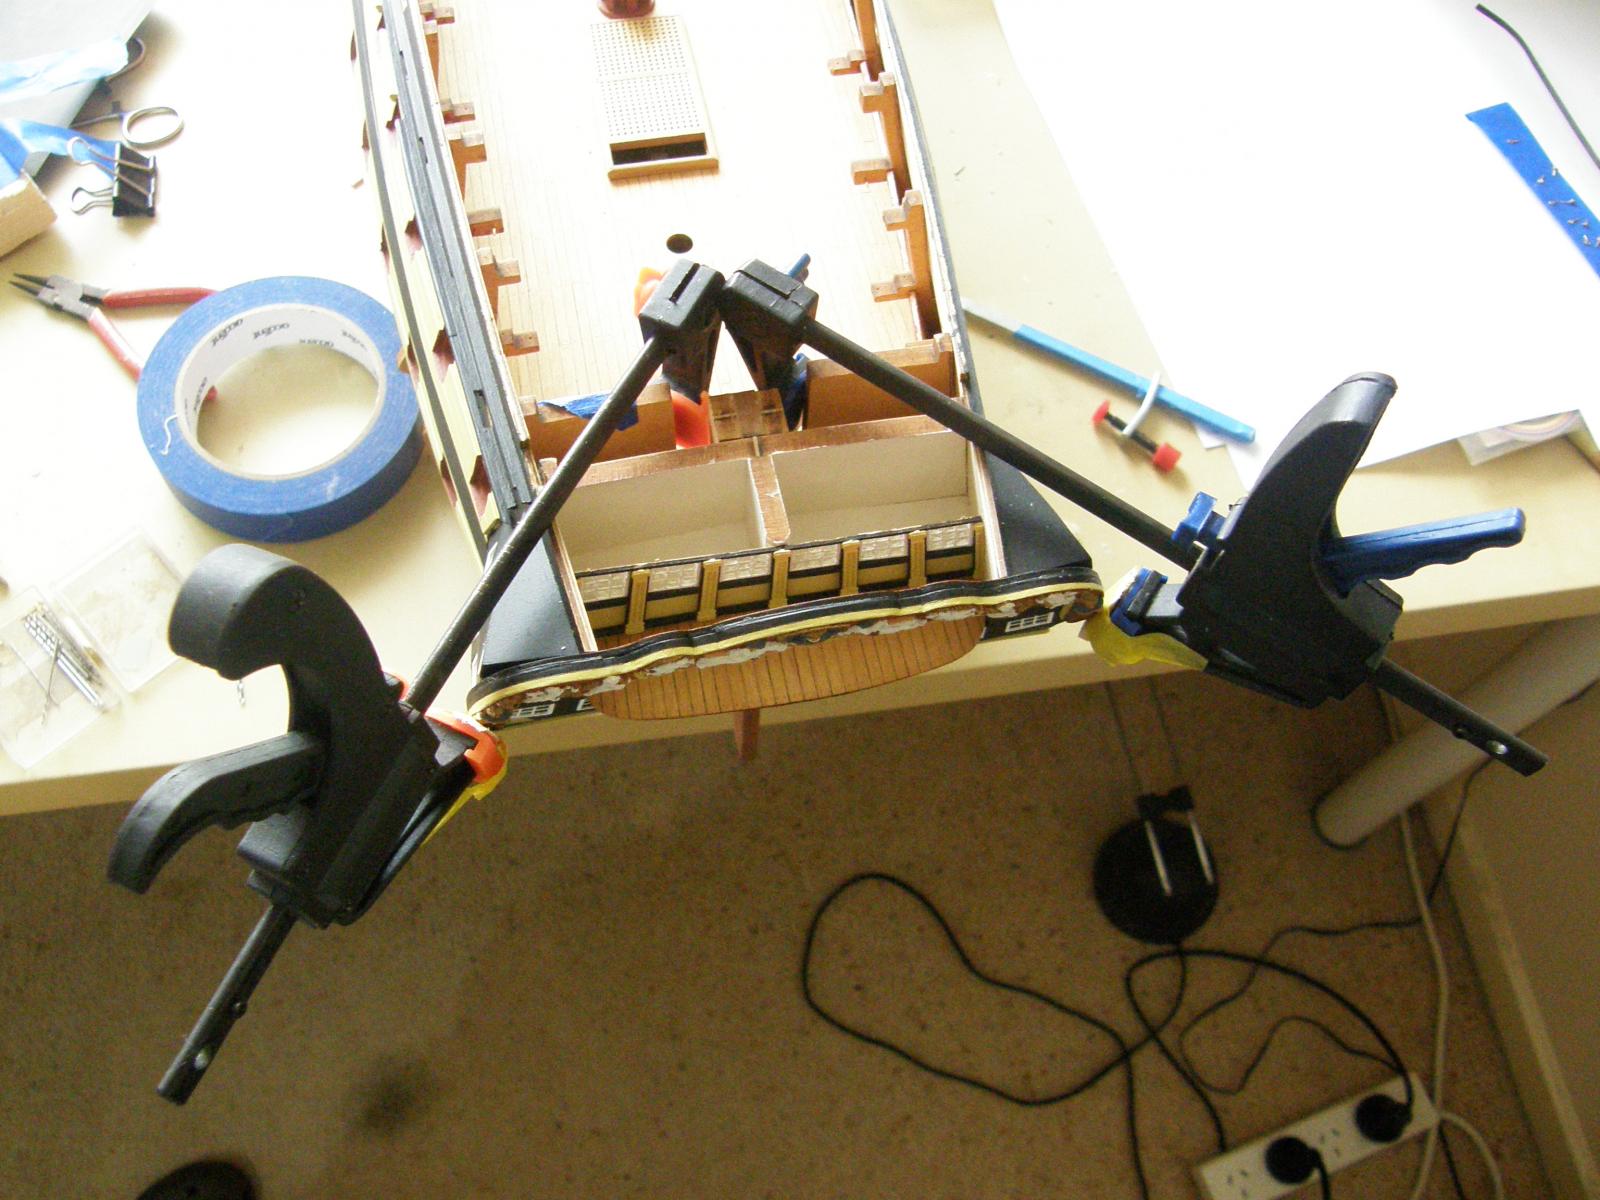
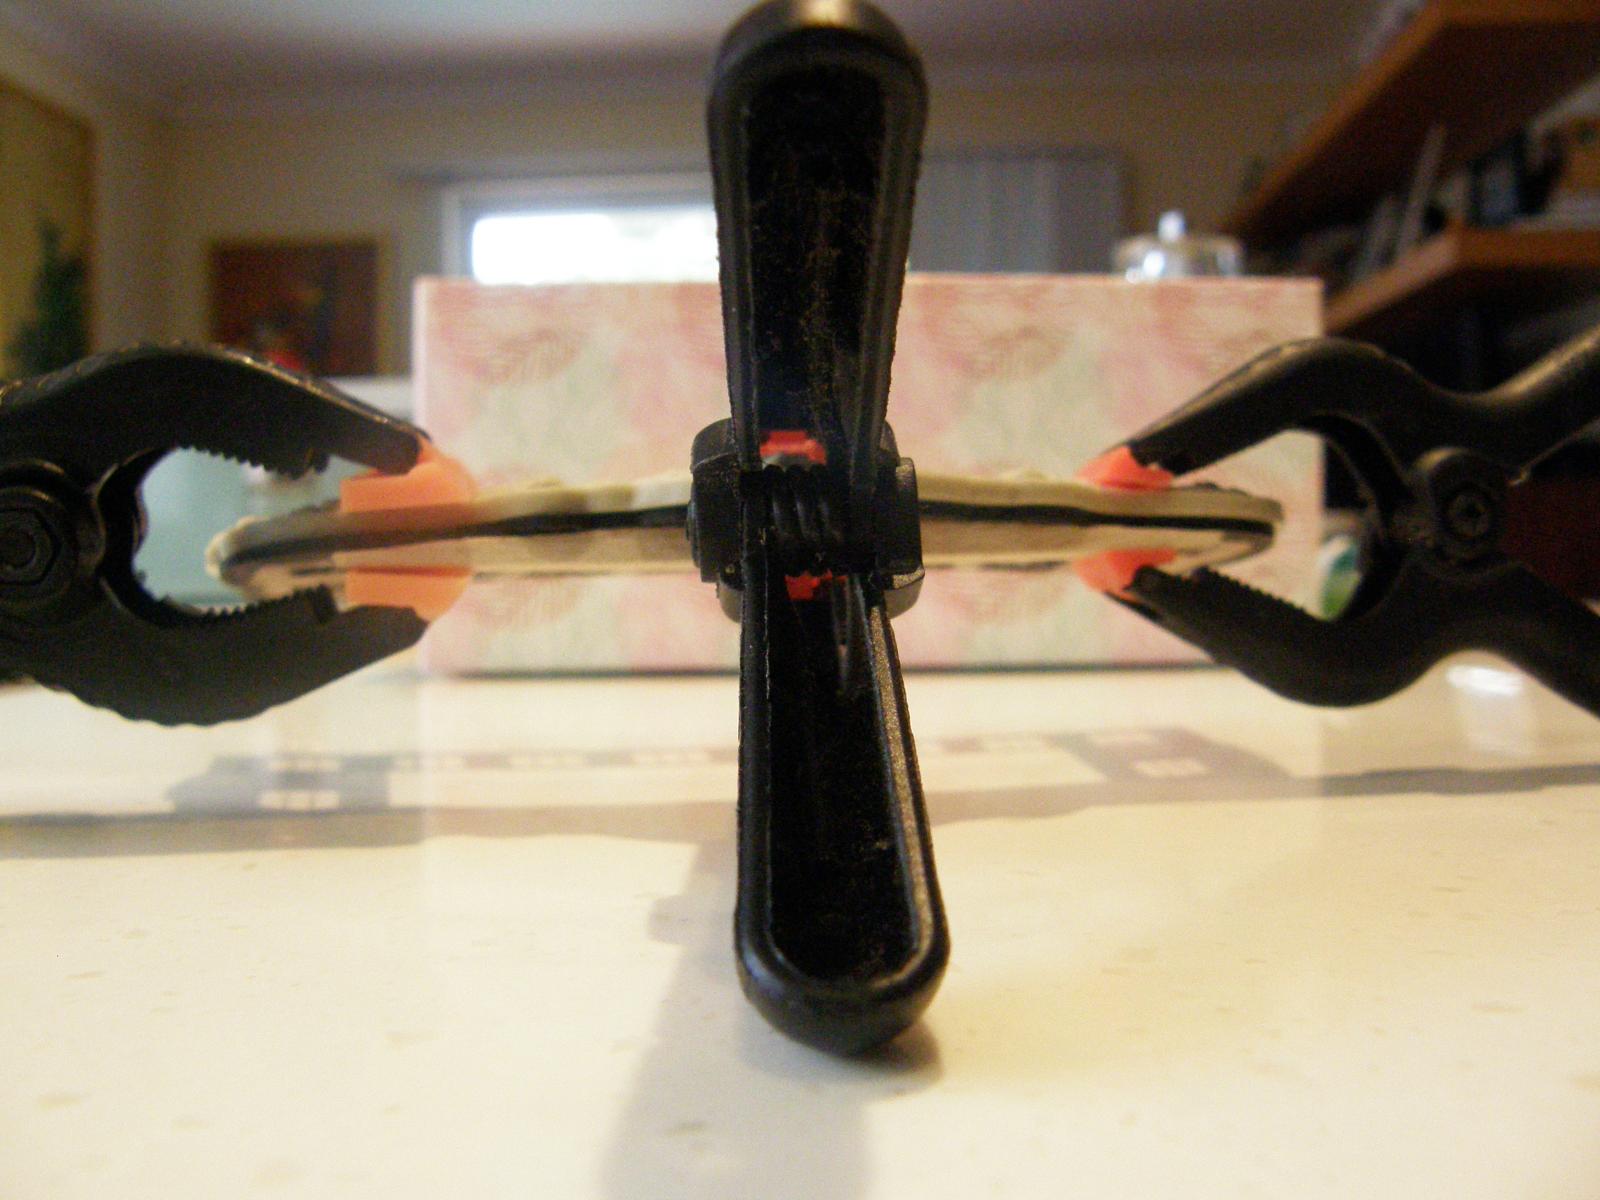
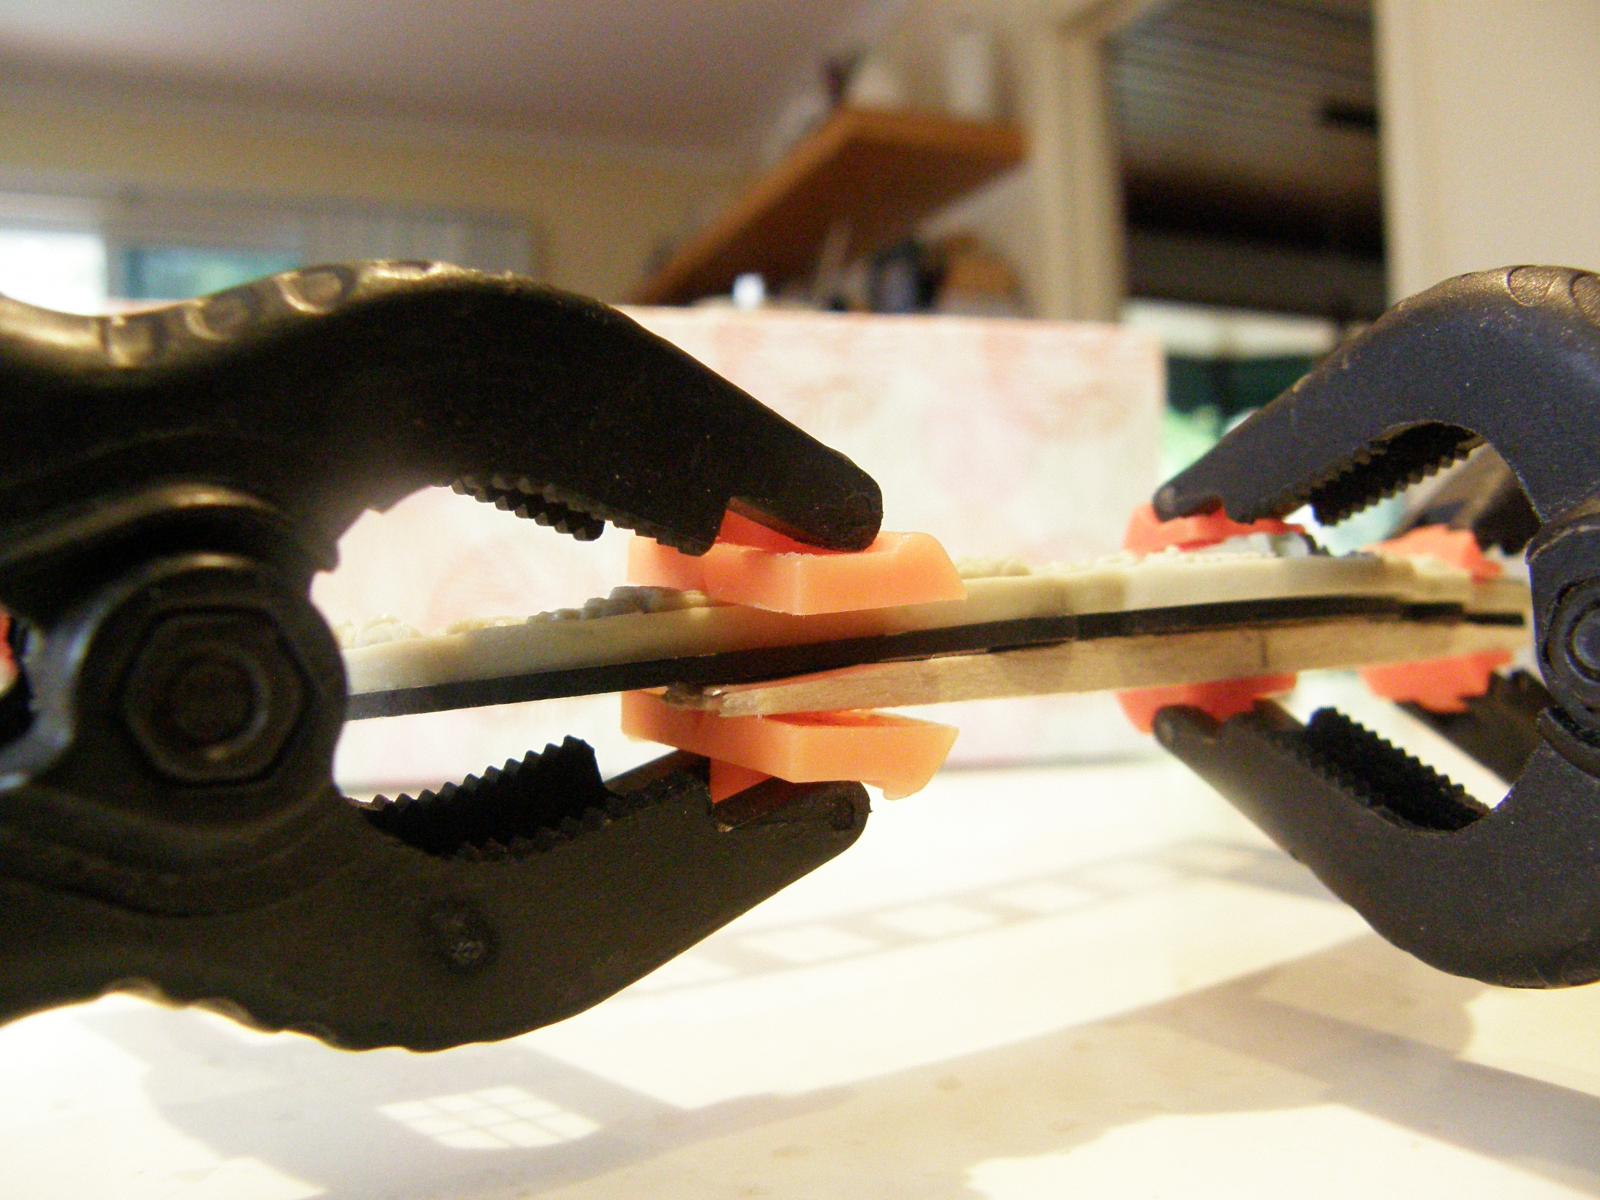
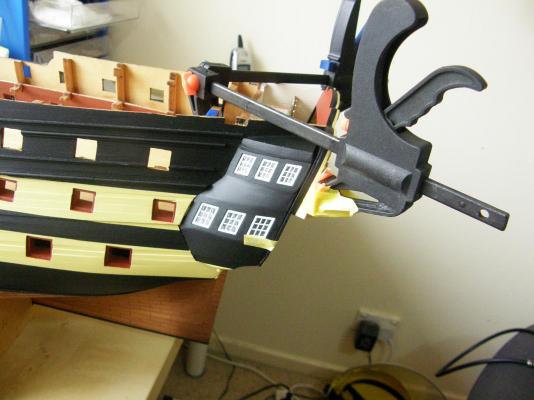
Finally attaching the facia has been a concern. I have had a great deal of trouble figuring out how to effectively clamp the facia to the stern. To prevent the clamps slipping (and to prevent damage to the decoration) I stuck a wedge-shaped piece of balsa to one of the prongs of each of the clamps to account for the slope of the stern (when viewed from the side). There is a slight curve in the facia assembly and the glue will have to resist some stress. I would like to have used CA gel for the whole job but that would risk clouding the glazing. I ended up using CA on the middle three supports (well away from the glazing) and white PVA everywhere else. I just hope the whole thing doesn't come apart when the clamps are removed tomorrow.

-
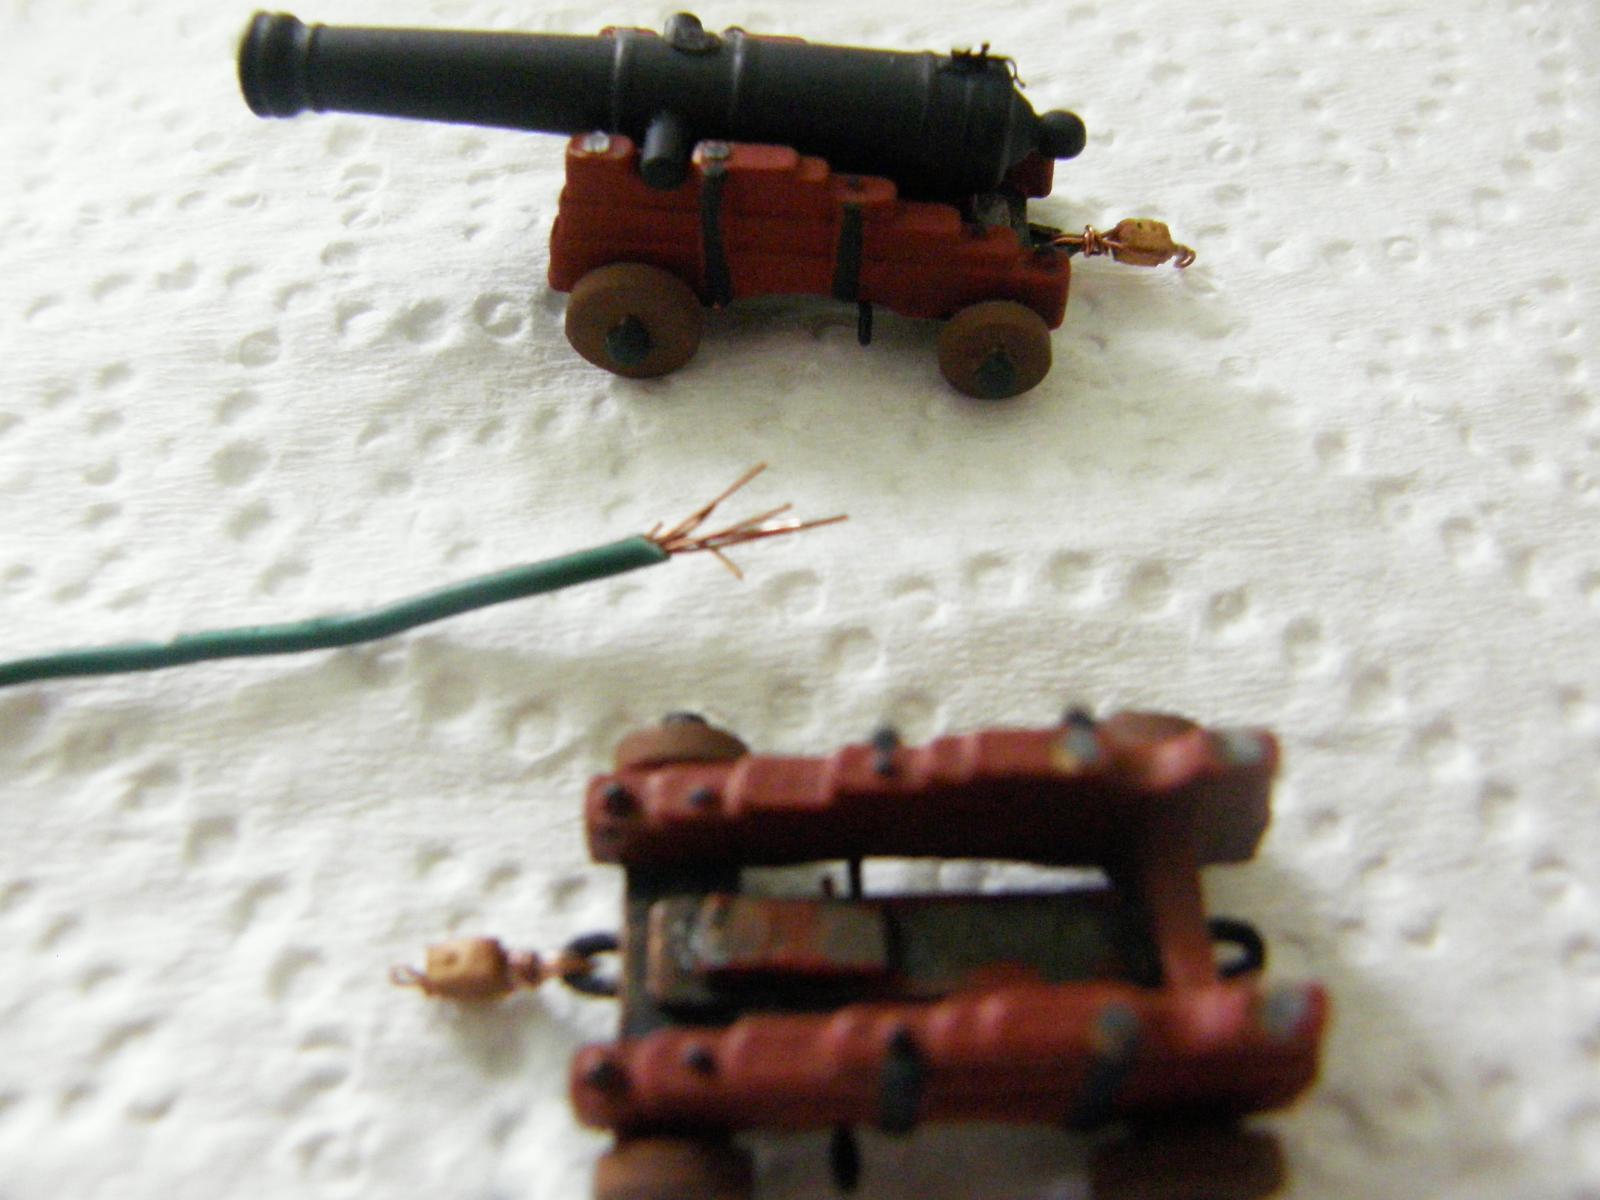
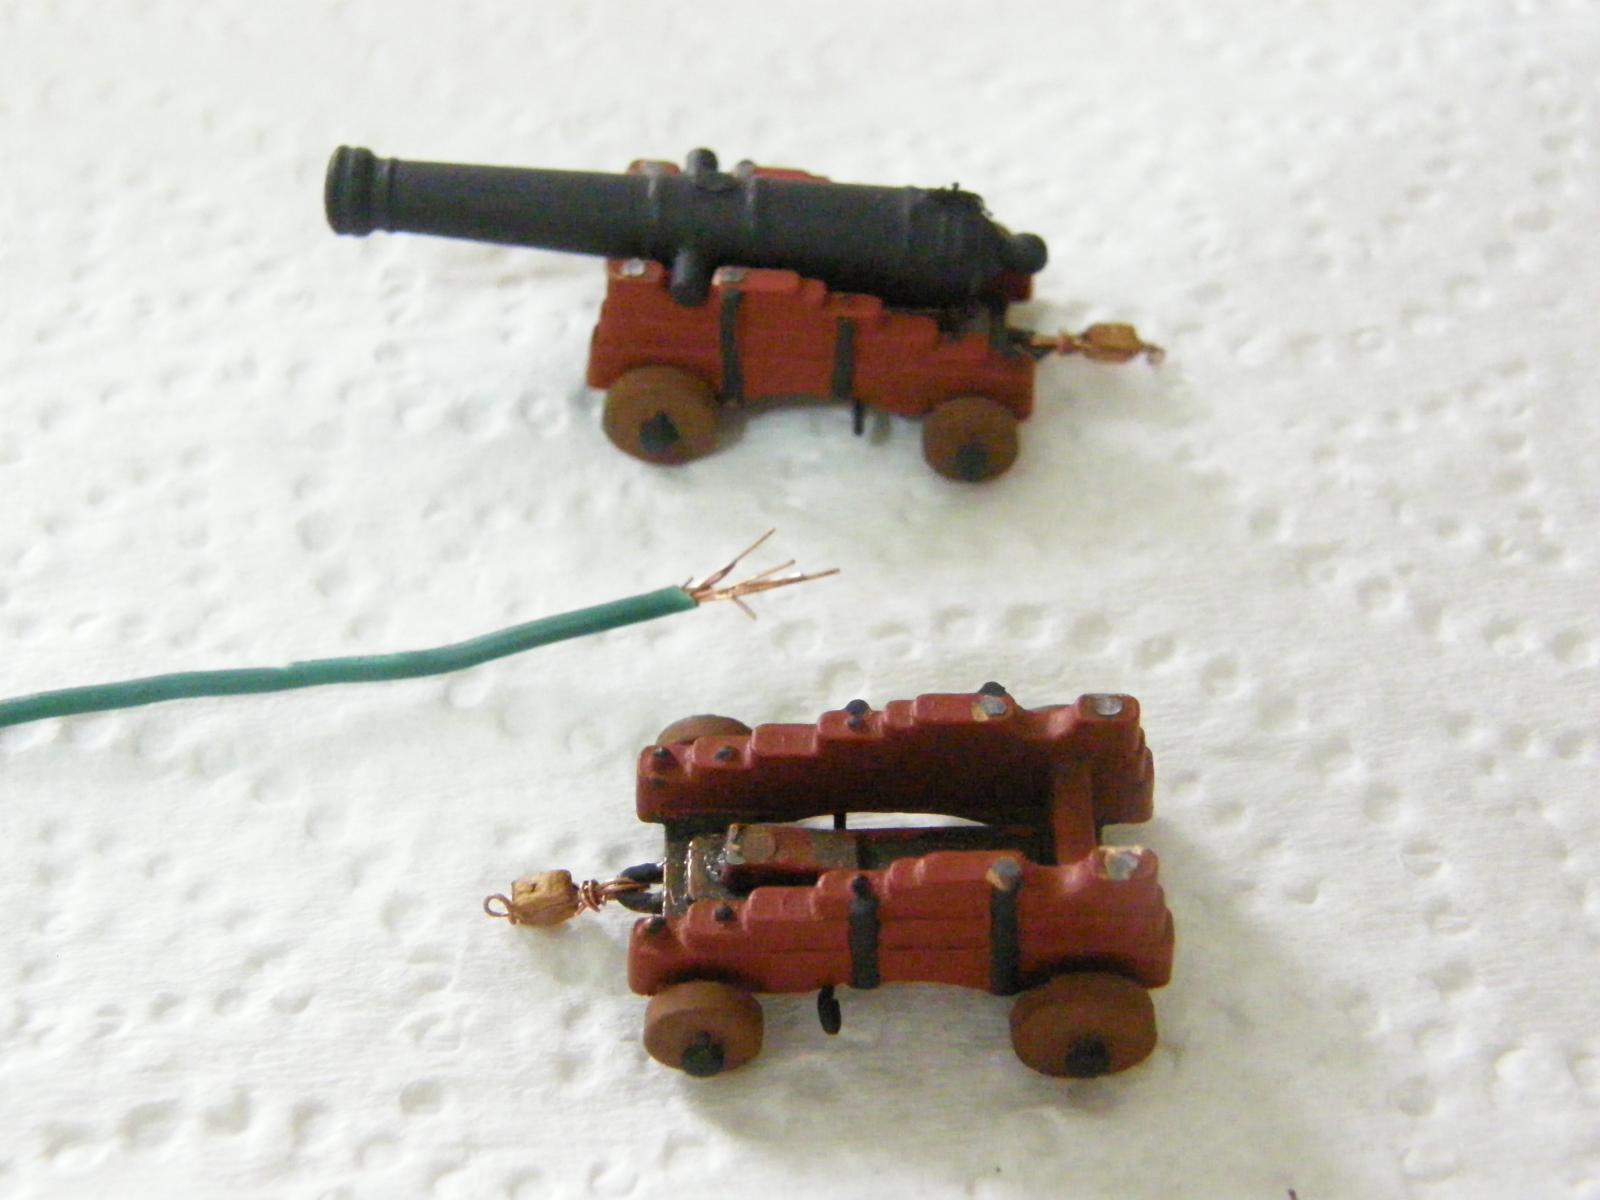
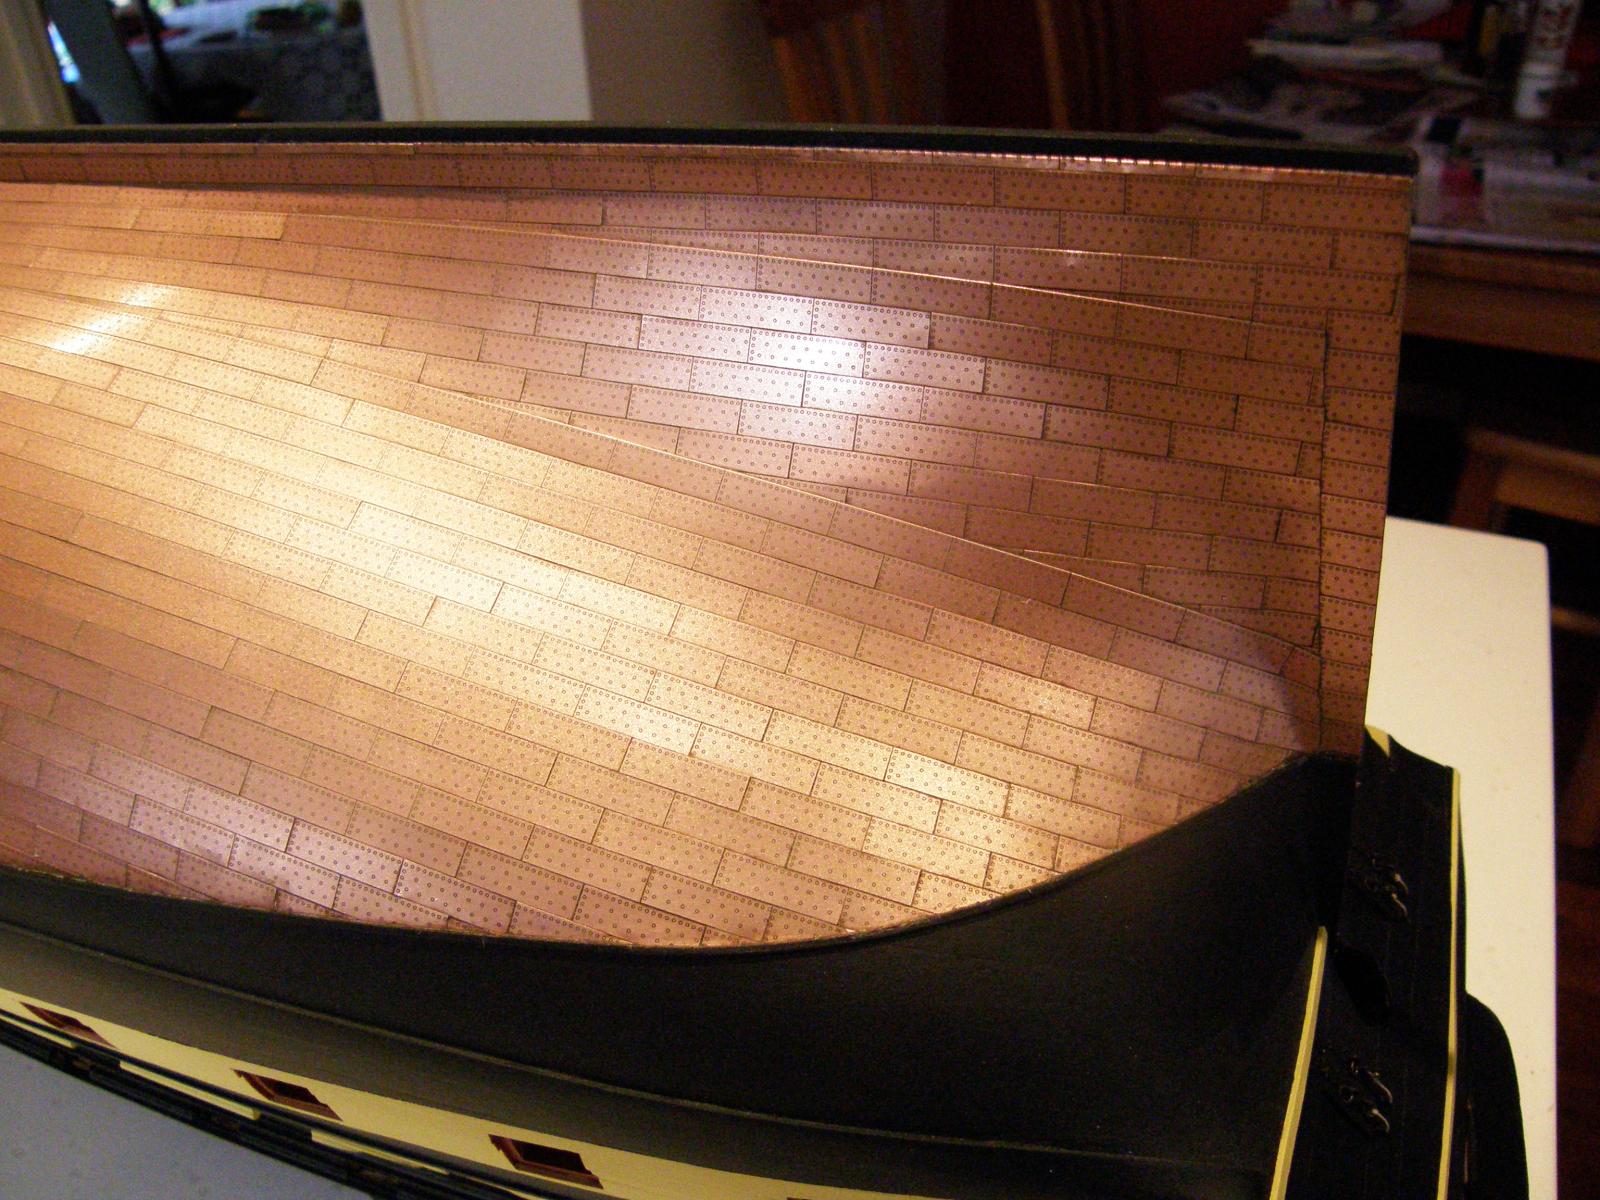
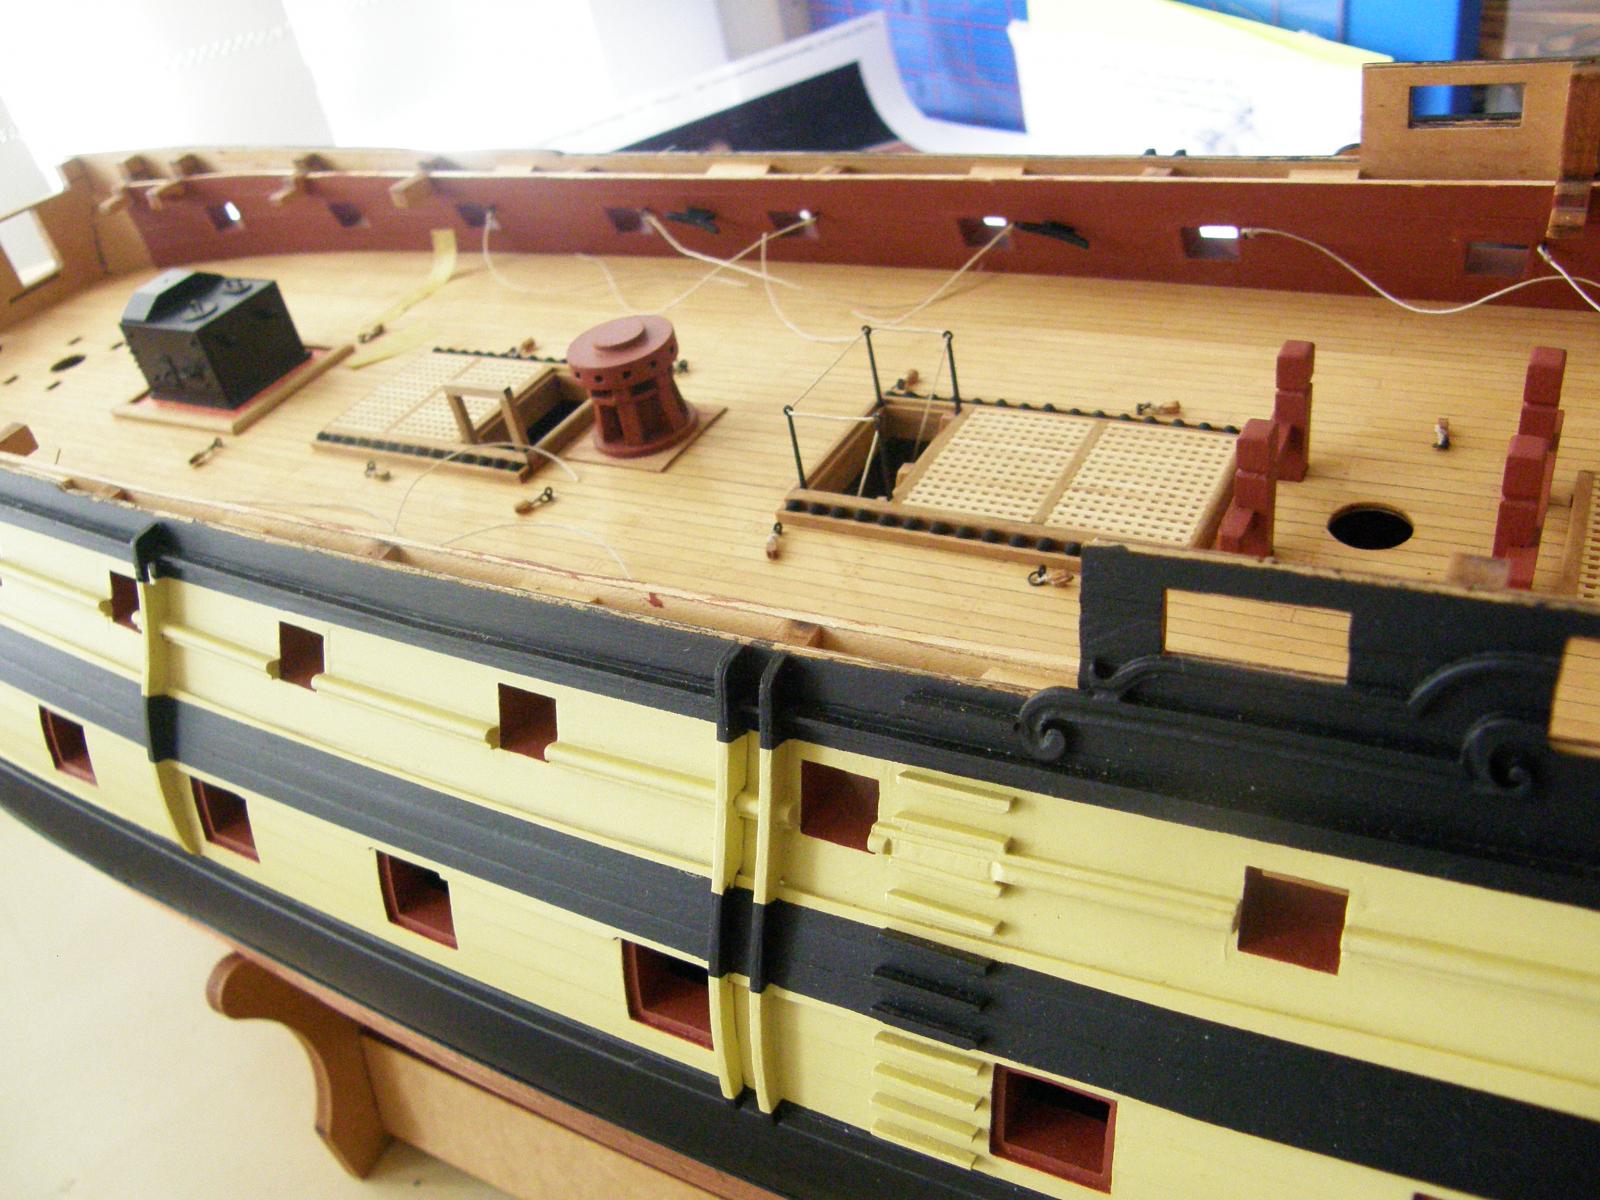
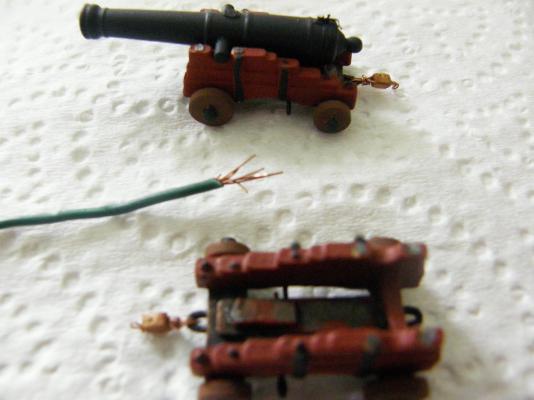
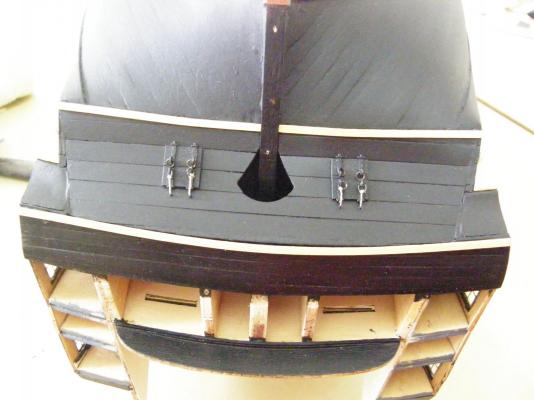
After a week away the copper seems to be behaving itself. I have begun rigging the guns in preparation for putting on the next deck. I have decided not to fully rig them - at least on this deck. Most will be obscured and I don't know if I have the patience at the moment to do as good a job as Arthur and Len who have set the standard. For rigging the block on the ends of the guns I am experimenting with fine copper wire instead of thread, It seems to be more manageable and more in keeping with the appropriate scale. Comments welcome.

-
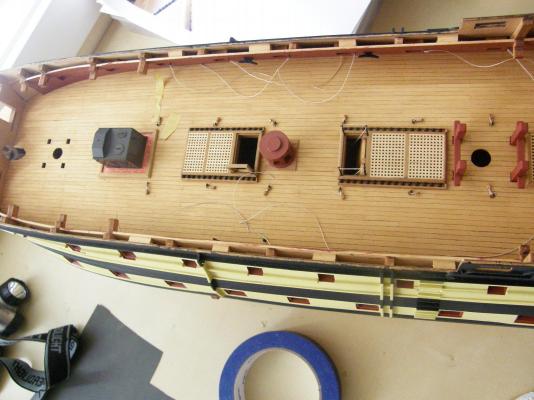
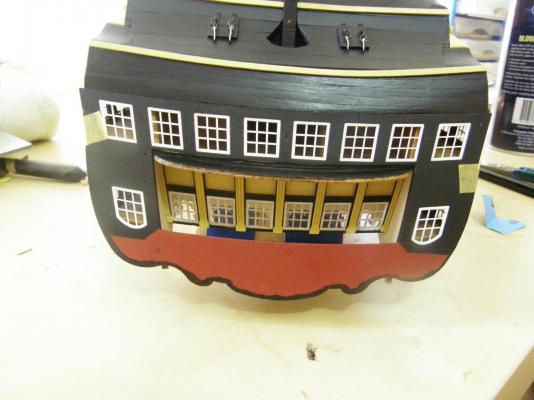
Len Thanks for the thought and the comment. Fortunately before attaching,the bricks, I dry fitted the next deck to see if there was likely to be a height problem. It was a bit too close so I sanded down the bottom of the frame for the bricks until the whole assembly fitted under the deck without touching - though it's still close. I am quite worried about attaching the gun port lids. With all the moldings near their tops it's not obvious how I can fit them without hacking into the hull. I wish I had anticipated this problem earlier.
-
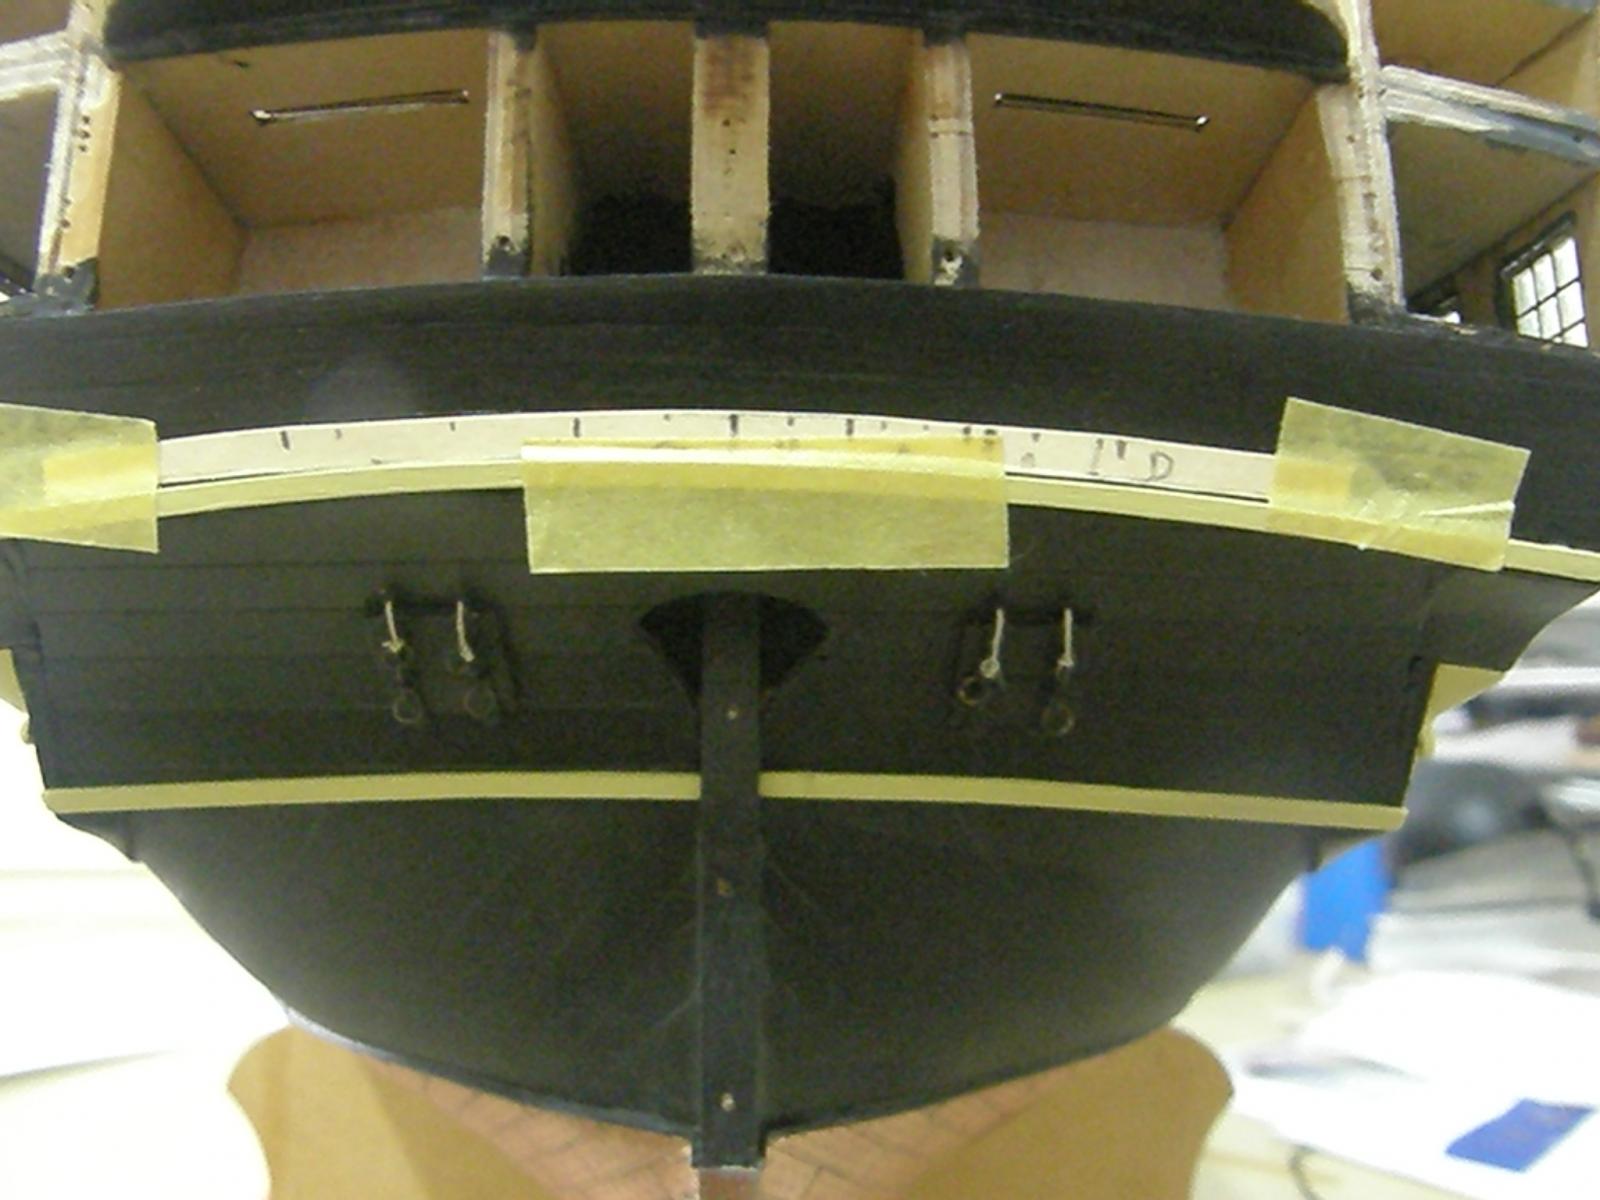
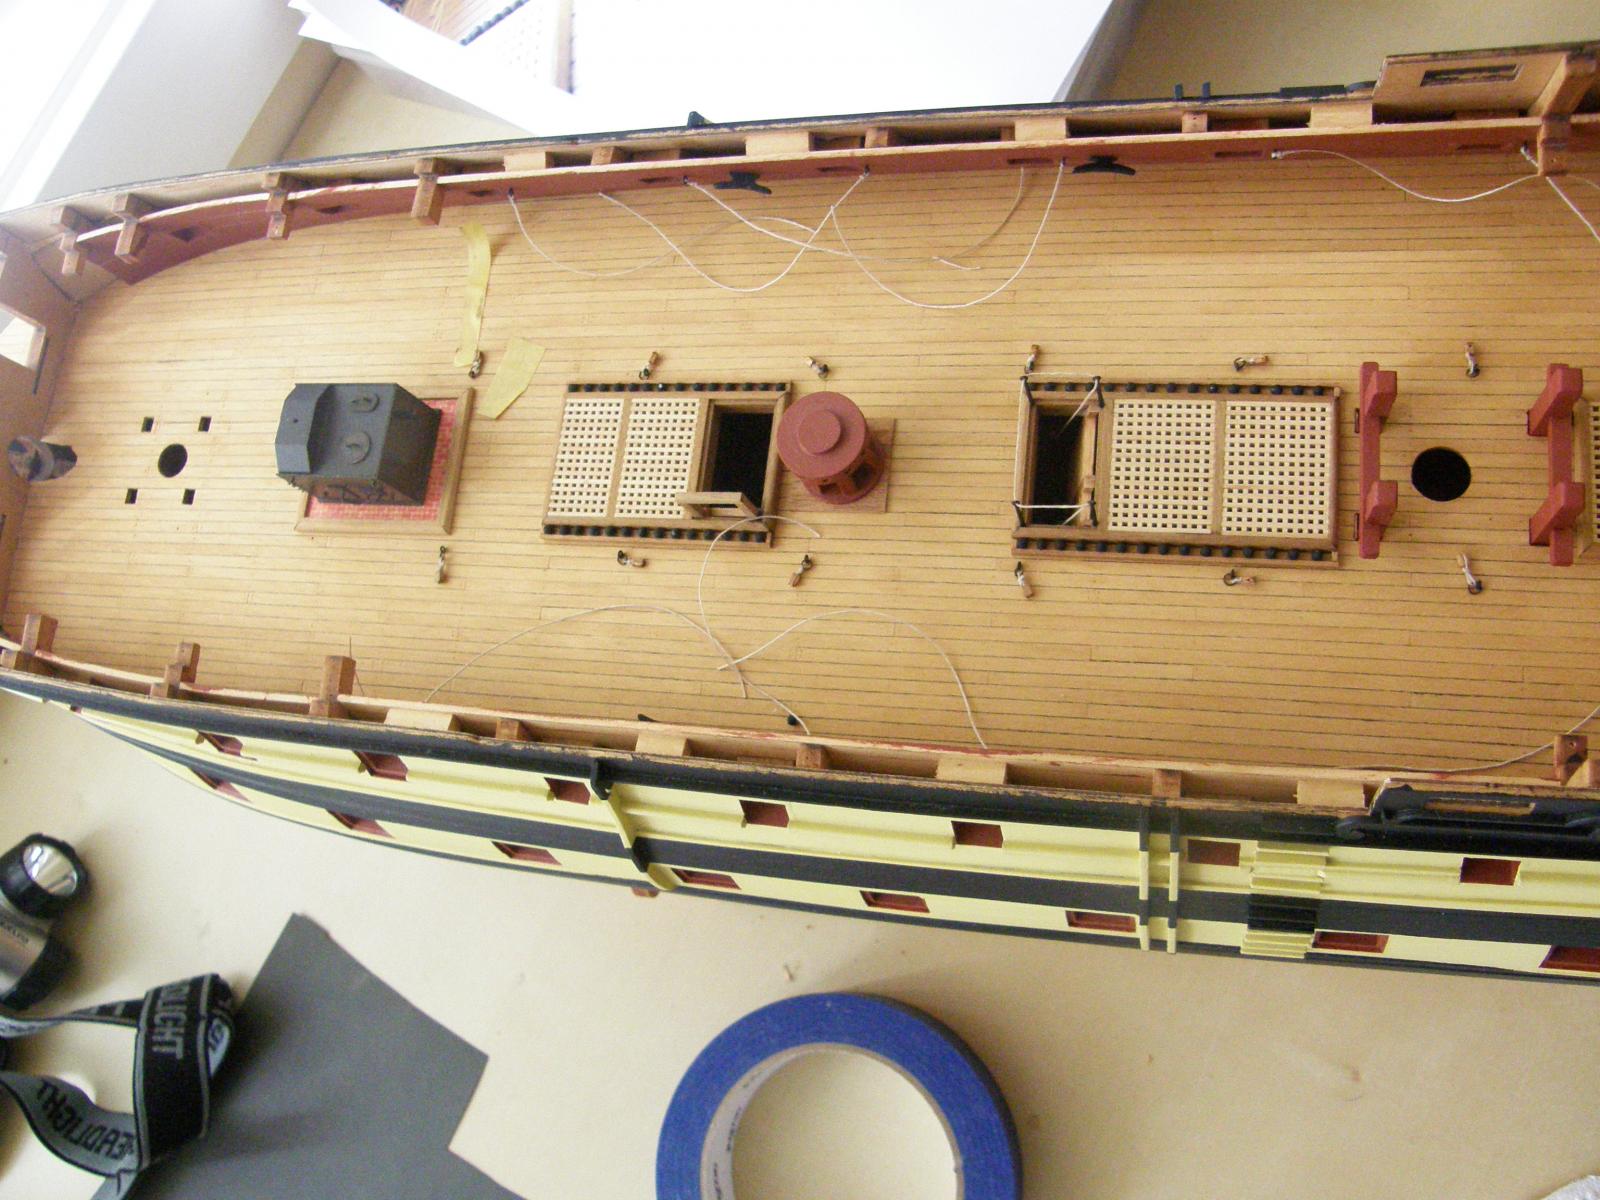
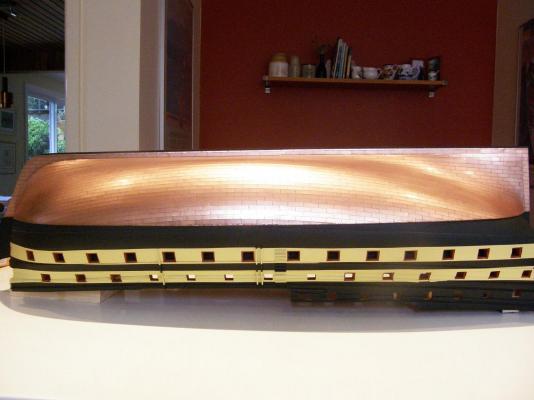
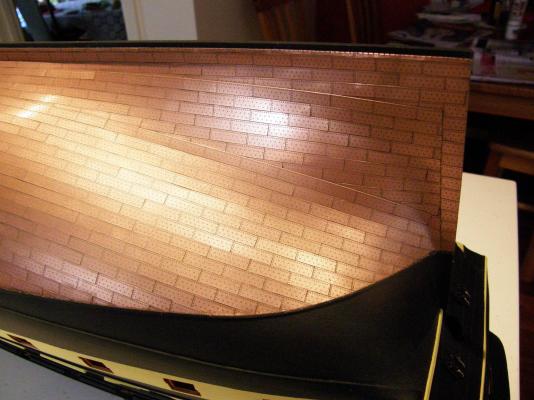
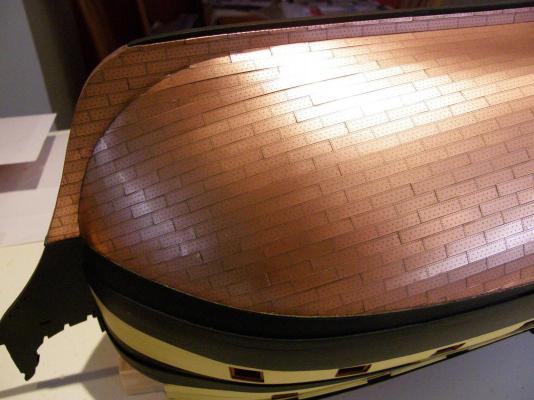
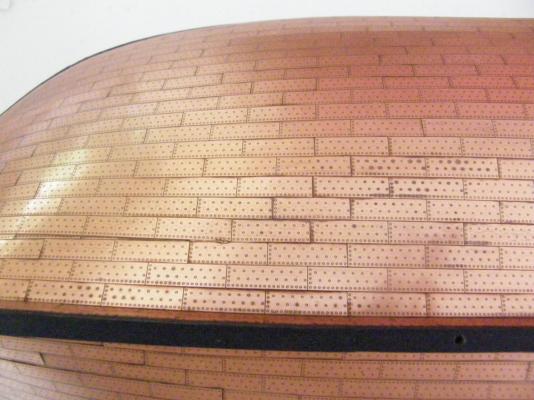
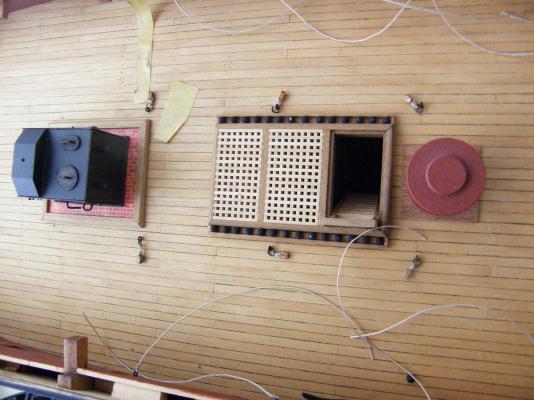
There has been no further deterioration in the copper after 2 days, so maybe it will be OK. I am going away for a week tomorrow and if it remains OK I will have a bit more confidence. Hubris has got me before. The first three photos give an indication of the overall result. The next two show the affected area. The area here is in shadow. While waiting for a further copper disaster, I tried a letraset (a subset of which was kindly sent to me by Alistair) to put the name on the stern. I cut and attached some stiff cardboard to the required curve to use as a guide while putting on the letters. It worked quite well, though the letraset didn't. The result was one perfect G and the use of a broader- than-usual vocabulary. It does look promising however and I have now found where I can get them in Sydney. I shall try again. Alistair only has 'FLY' to do. If I do this again I'll pick a ship with a shorter name. In this case I may just settle for G. I have finally attached all the deck furniture, and started the rigging for the guns. I borrowed (stole) Len's idea of putting bricks under the stove. The 'bricks' are from a model railway shop.


-
The copper has not further deteriorated in the last 36 hours, so here's hoping. I have started putting on the deck bits and pieces while giving the copper further time to perform its atrocities. (Photos will follow tomorrow all going well.) The letraset has shown promise (a perfect 'G') , but is far more fiddly and time consuming than I had hoped. Unfortunately I have run out of the letter "U". Perhaps others have had more success, and I will try again, but I suspect I will end up with the brass etchings.
-
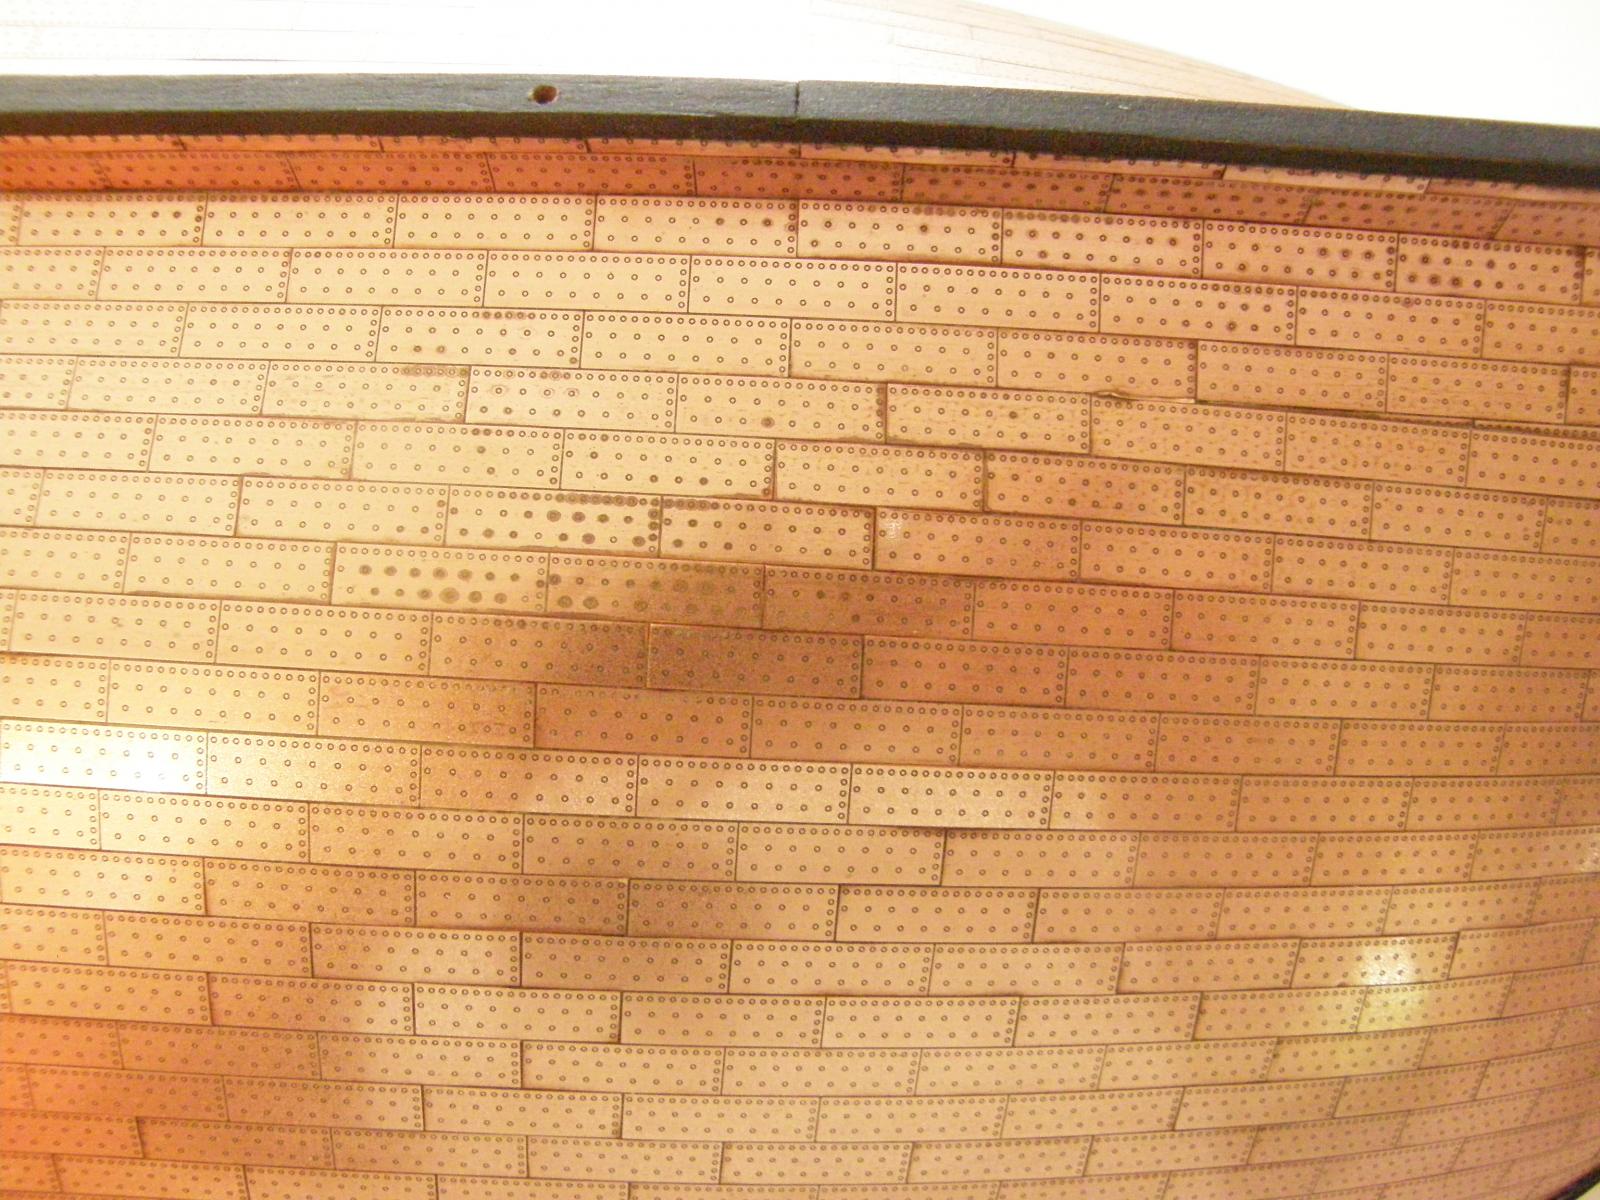
Hi Alistair Thanks for you concern. The copper supplied does appear to be quite odd. Some plates - only a few - seem to behave differently to the rest. I certainly haven't figured out what's going on. The reaction is obviously with one or more of the polishing/cleaning products I have used. A clue however is that the small affected patch was a spot I cleaned off at the last minute some tarnish with Brasso. I polished it off but I may not have used xylene as I did the rest, just methylated spirits. Independent of this however, some plates don't behave as others. I wonder whether the plates supplied come from different batches? Anyway, if the finish doesn't deteriorate any further, I can live with it I guess.
-
Thank you all for the advice. I will follow it as best I can. I have just looked at the sealing of the copper. Again there has been some sort of reaction. It is VERY depressing. It is in a small area on one side which, when the model is mounted, will not be seen, but if experience is a guide the affected area will increase. I will leave it alone for a while to see what happens. If it does get worse I will strip it off again and apply Alister's method, though it will take some explaining to my wife.
-
Hi Alistair It certainly does. Your method seems much more satisfactory.
-
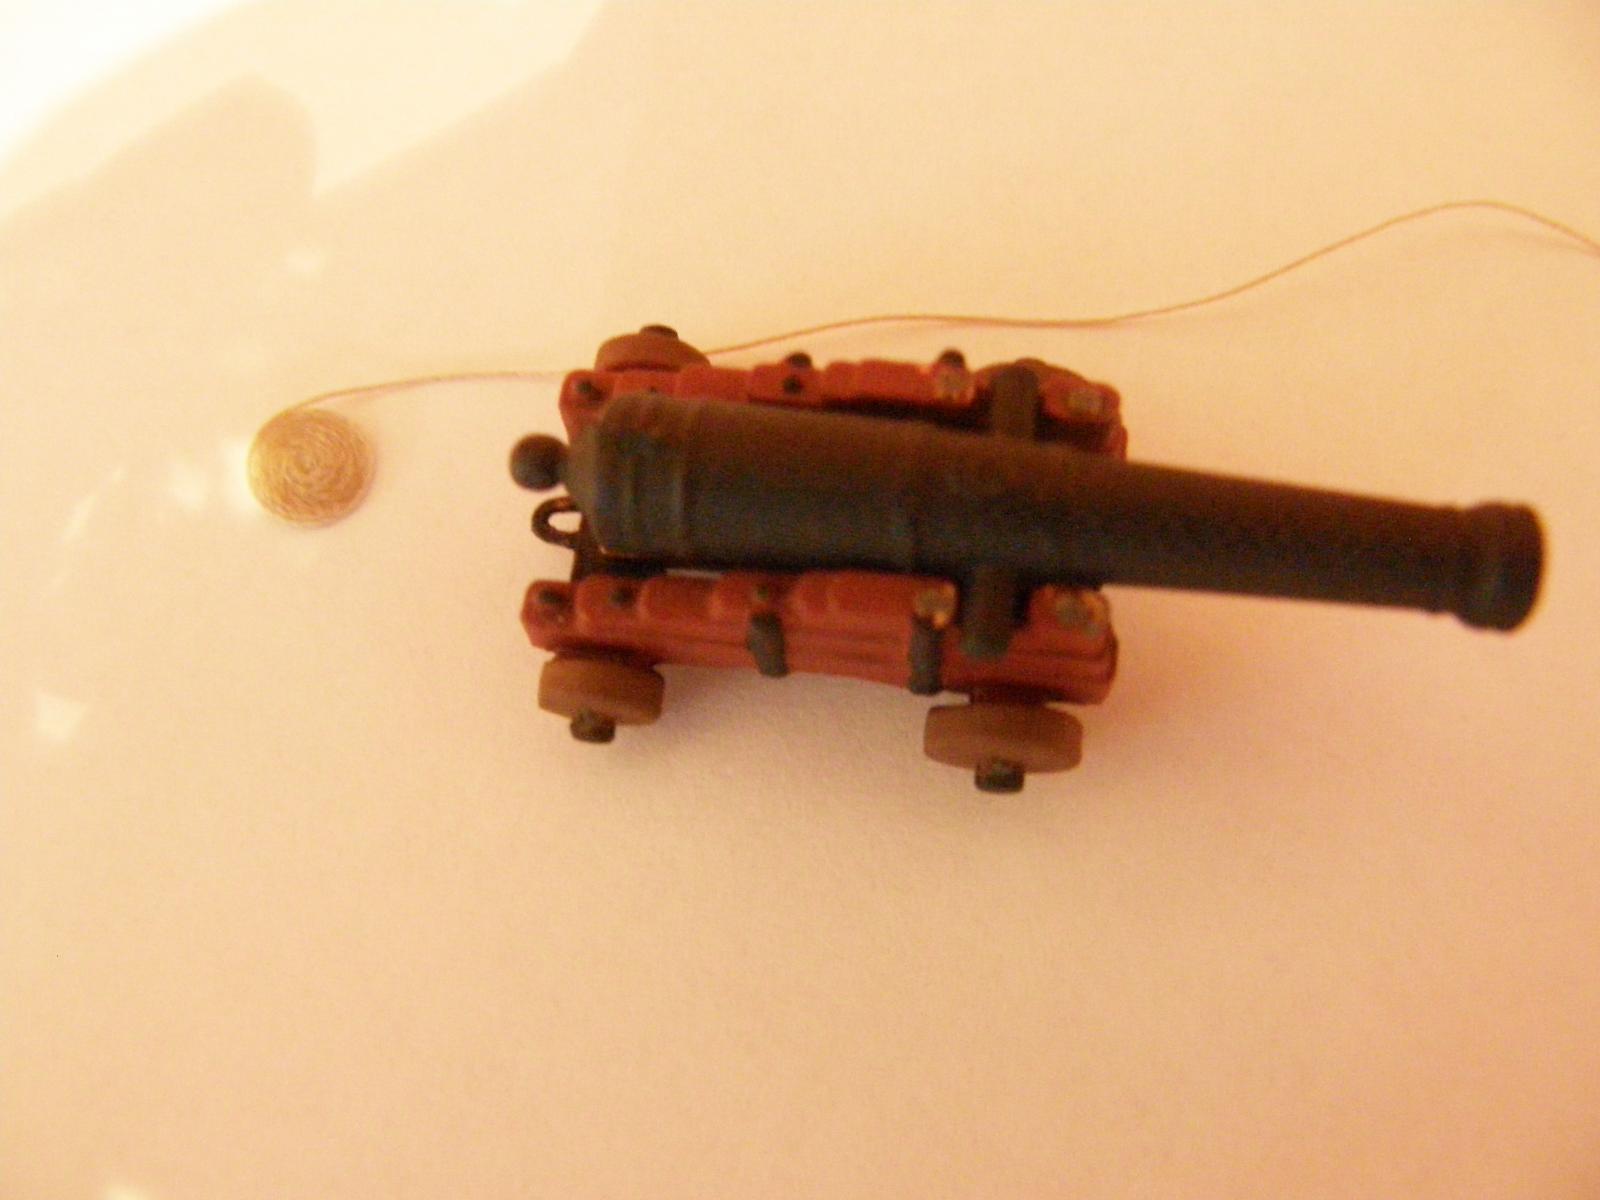
I have finally given the copper a coat of sealer (5 coats actually) - Tamiya PS55. The product was recommended by Brian C who has used it successfully on his ships. The early signs are good, though I've been sucked in before. I will leave it overnight to dry, though it seems to be completely dry now - after less than 30 minutes. In the meantime I have been working on the rigging of the guns, At this scale it's quite difficult. Any guns that will be hidden by the upper deck will remain unrigged. My masochism only goes so far. I have made an experimental rope coil using a method I happened to come across in model ship world mark 1. A photo is attached with a gun to show scale. To my eye the coil looks rather odd. I have looked at the coils of others, and it almost seems there are as many ways of making them as there are modellers. I would like to get it (reasonably) right. - advice would be welcome.

-
To all: thanks for your kind comments. The facia still has to be attached to the stern and I have concerns about how to clamp it on for gluing. (Suggestions welcome.) Choosing the right glue is also a problem. (Gel) CA fogs the windows and other glues take some time to set - so clamping of some sort is necessary. I will probably use CA in places not near the windows I have already glazed on the side, and either Krystal Klear or ordinary wood glue for places which are close to the glazing. I now regret glazing before sticking the whole lot on. BW: the resin does bend fairly easily to the required curvature.
-
Thanks Timmo for the encouragement. Bob
-
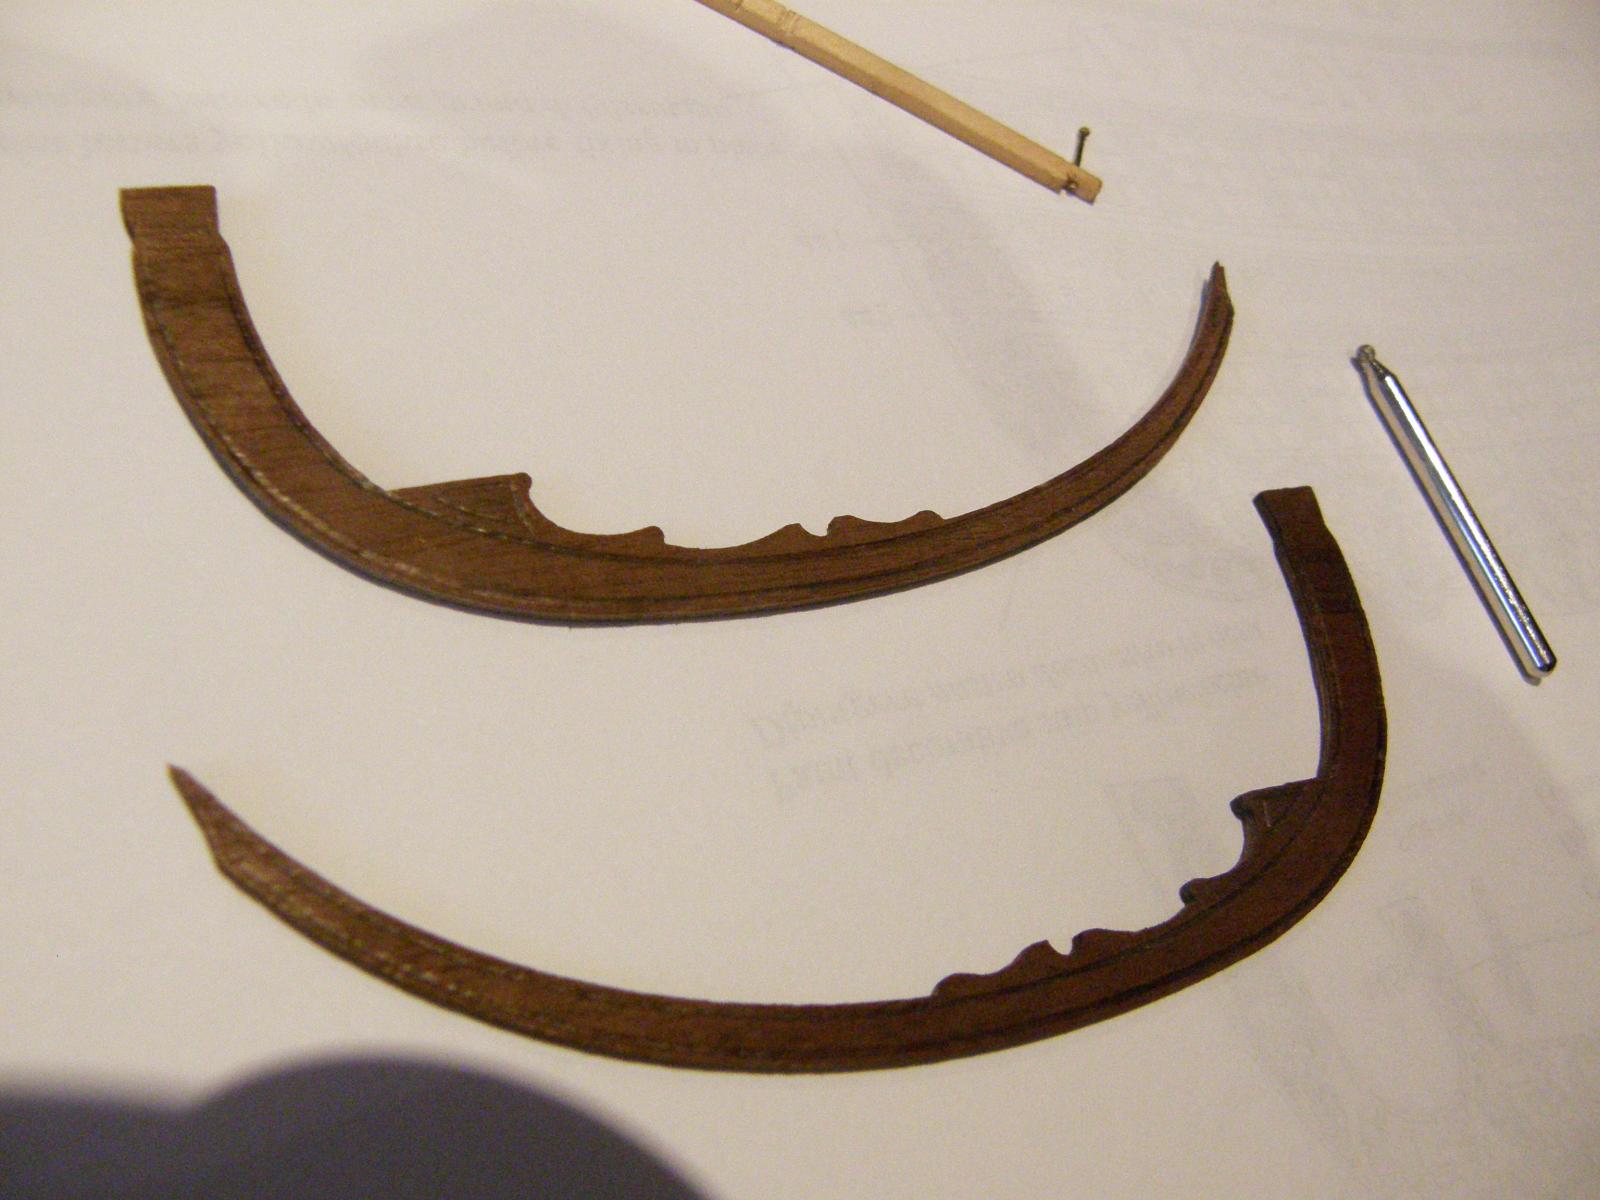
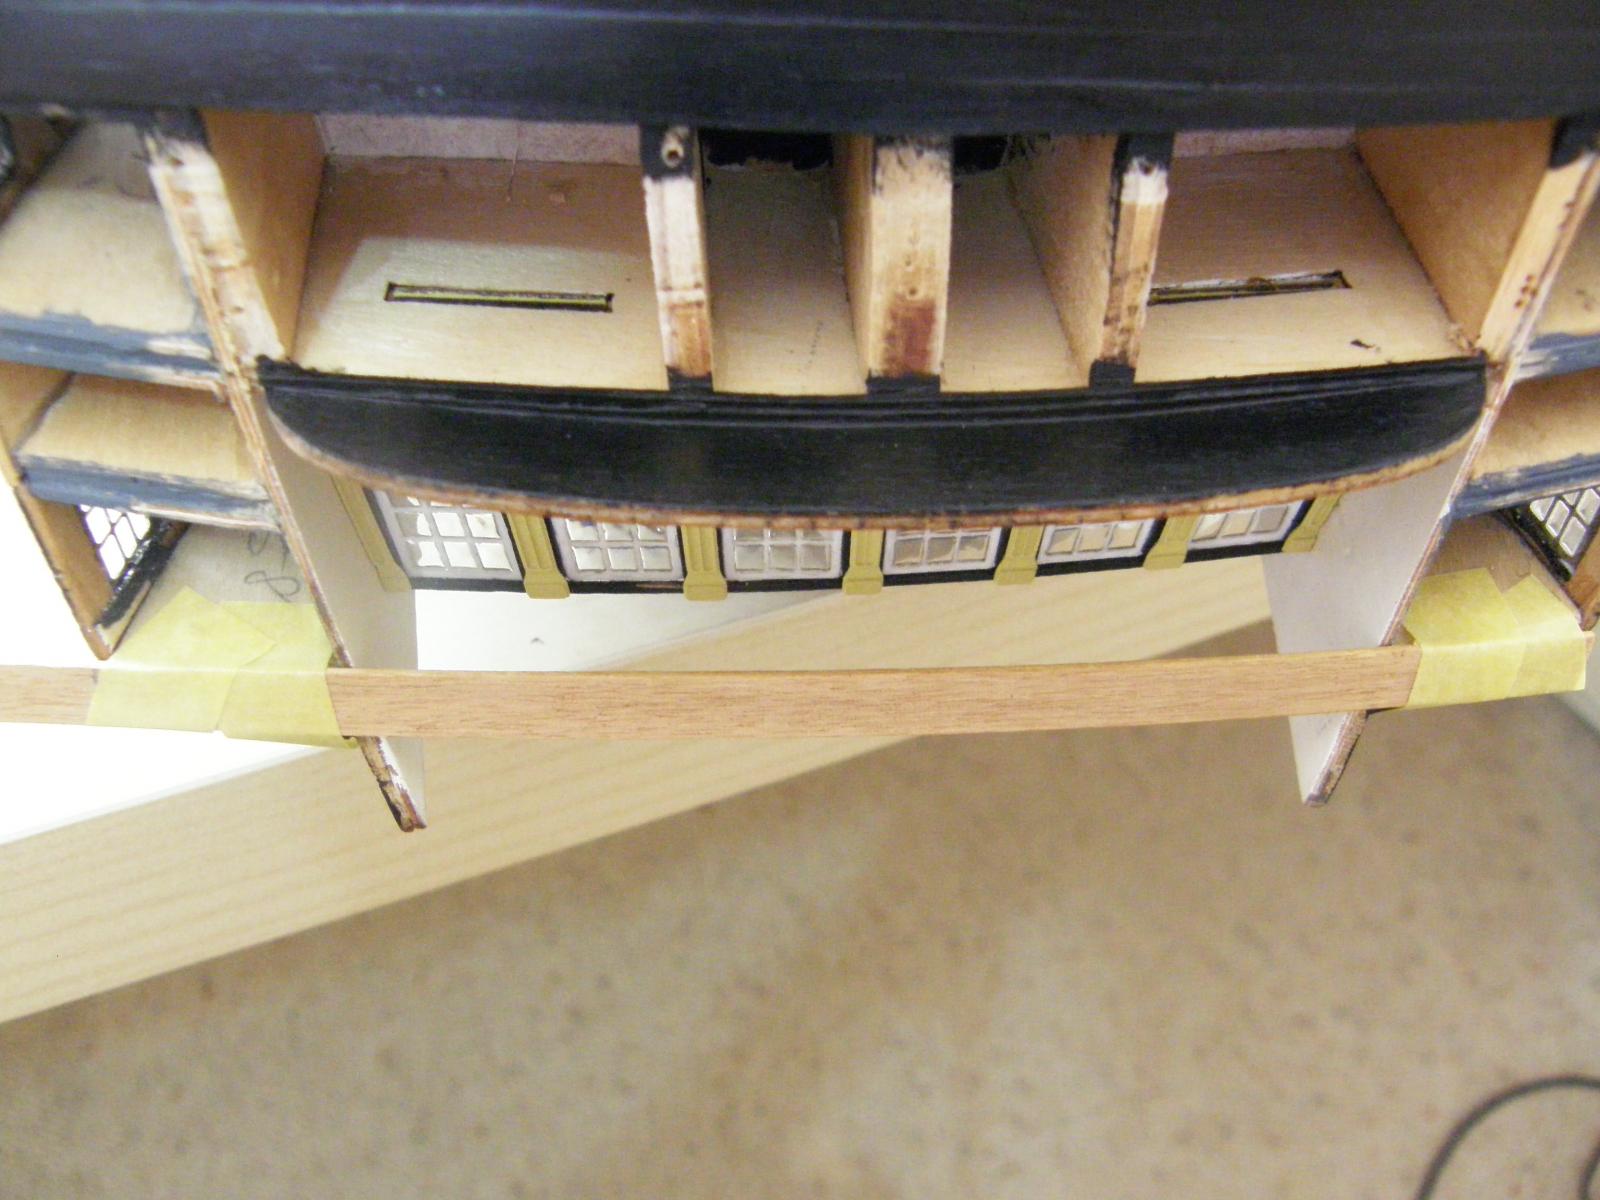
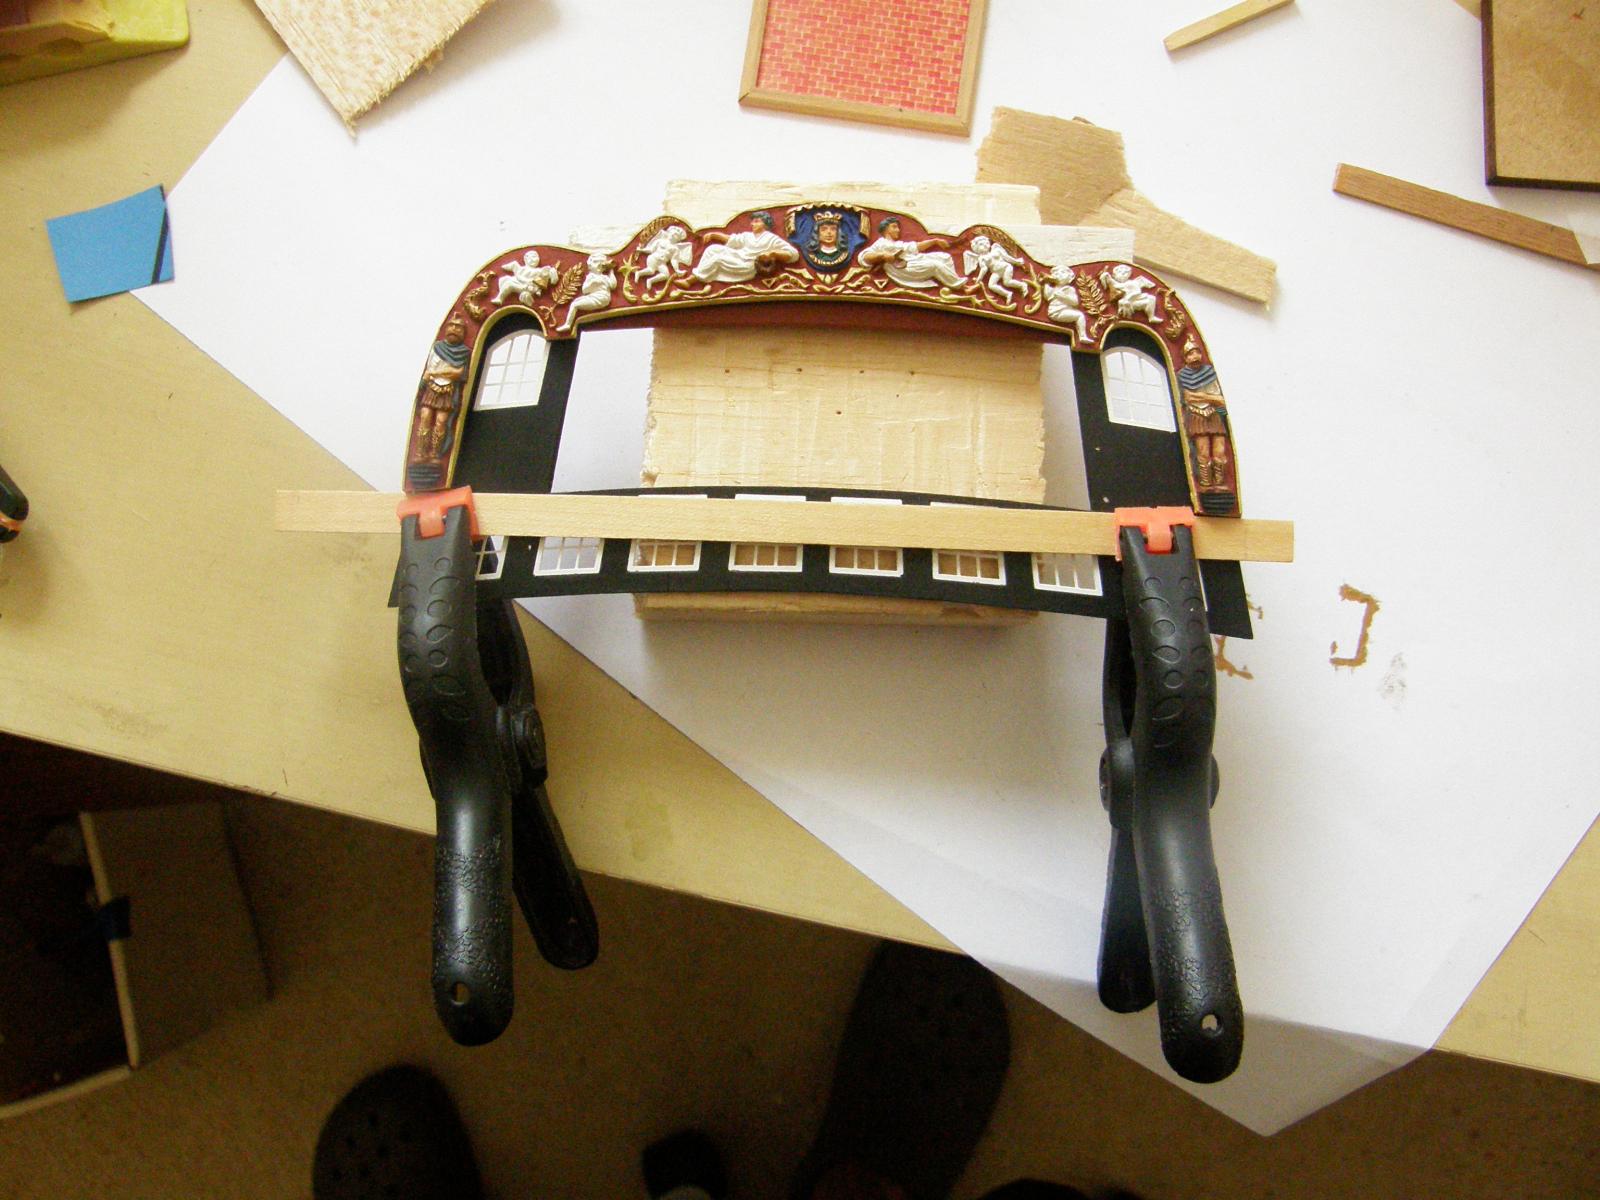
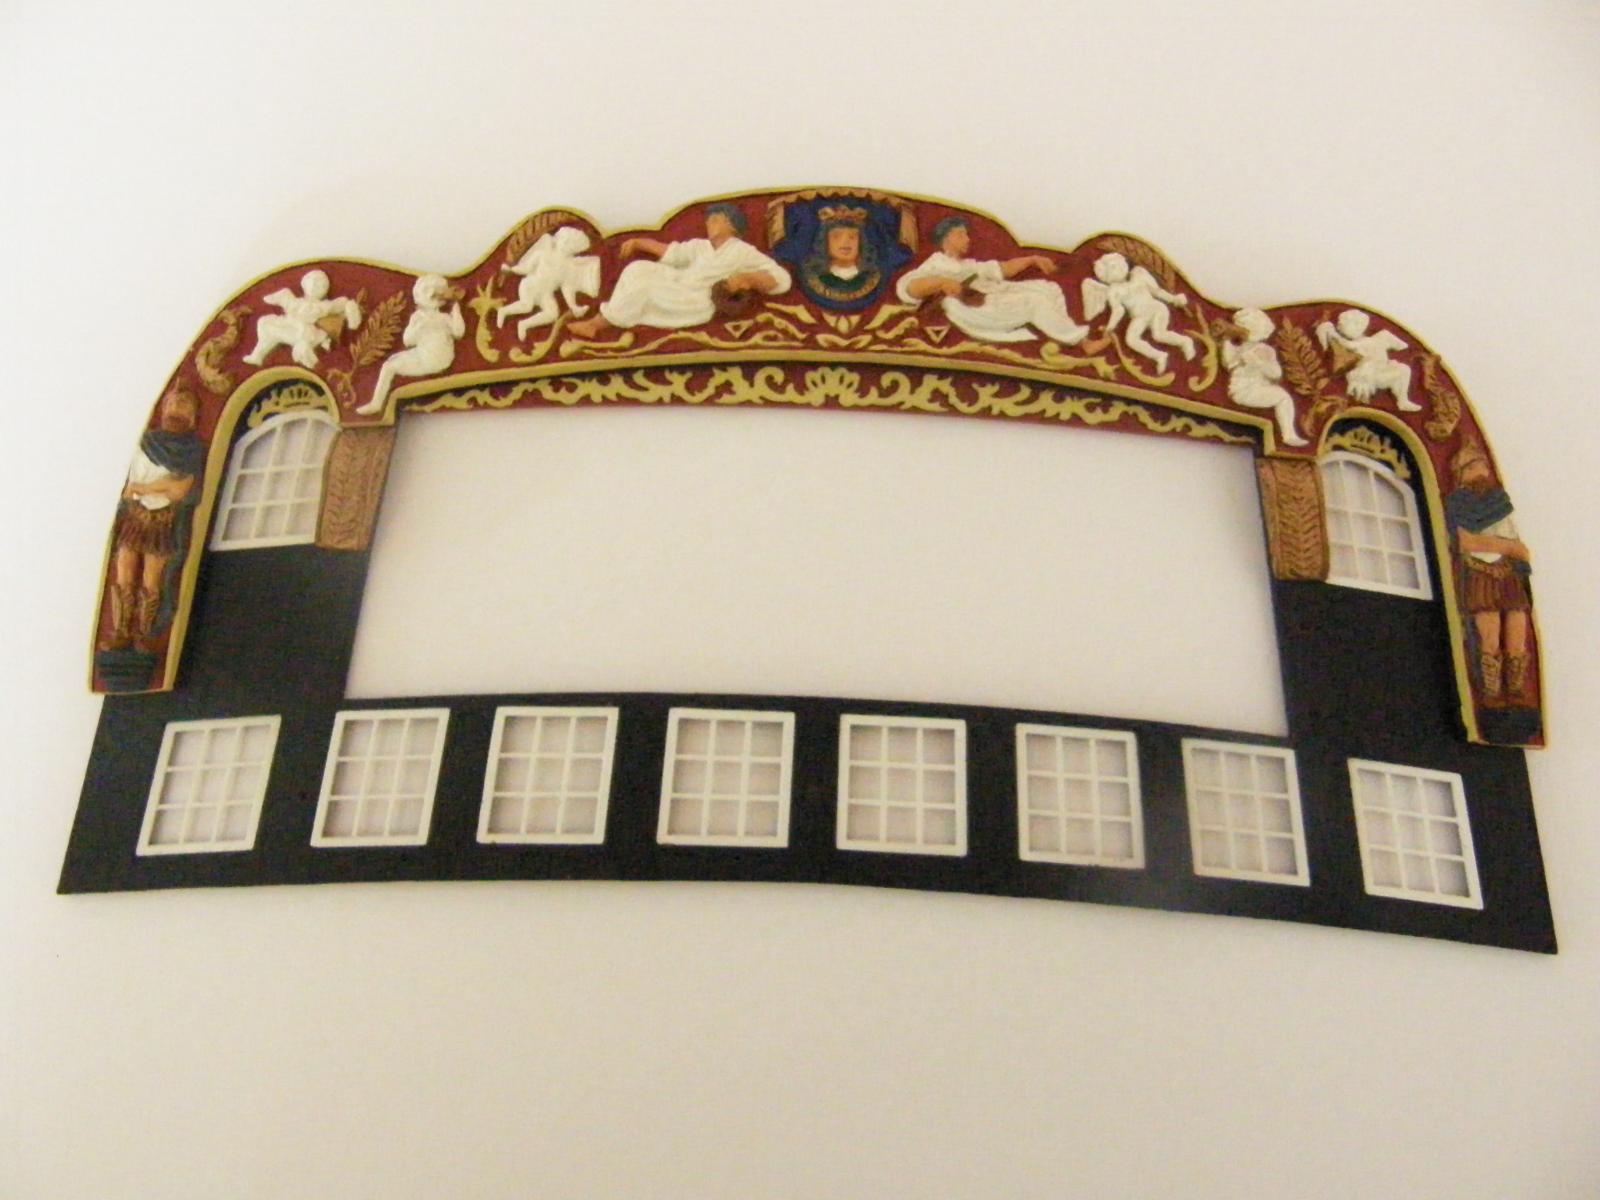
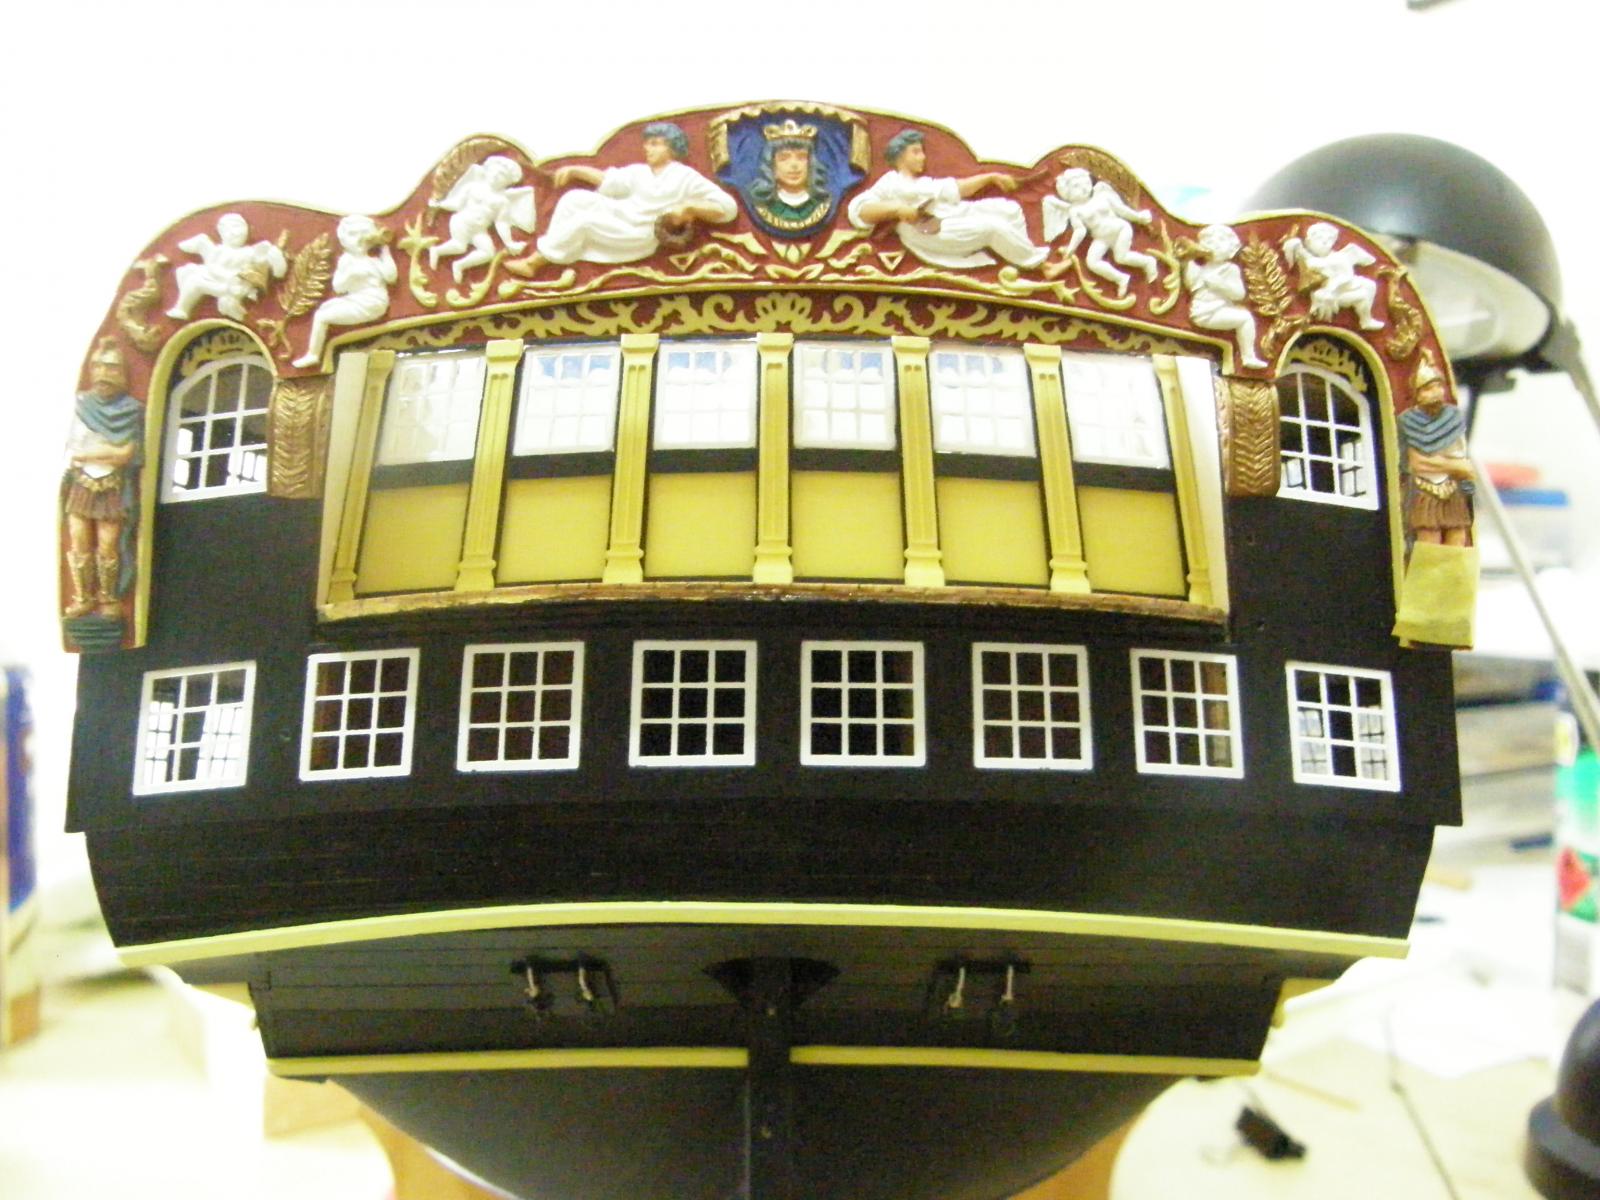
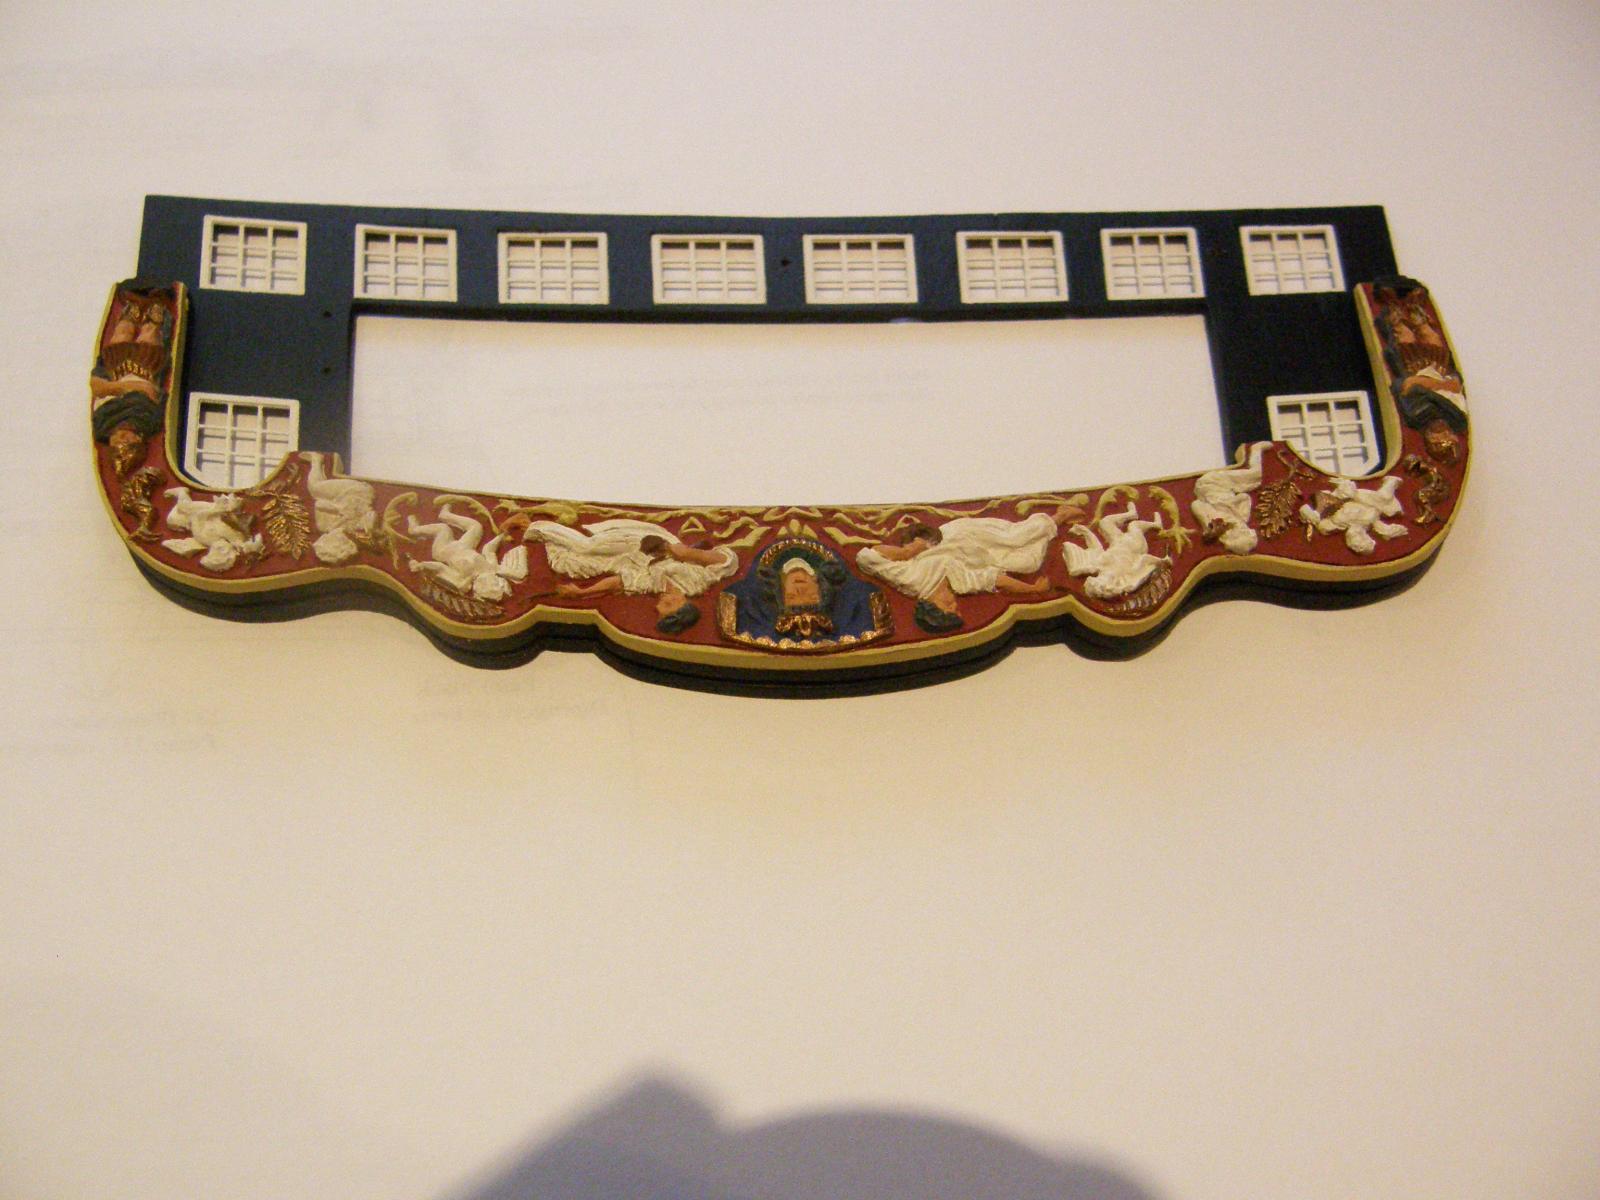
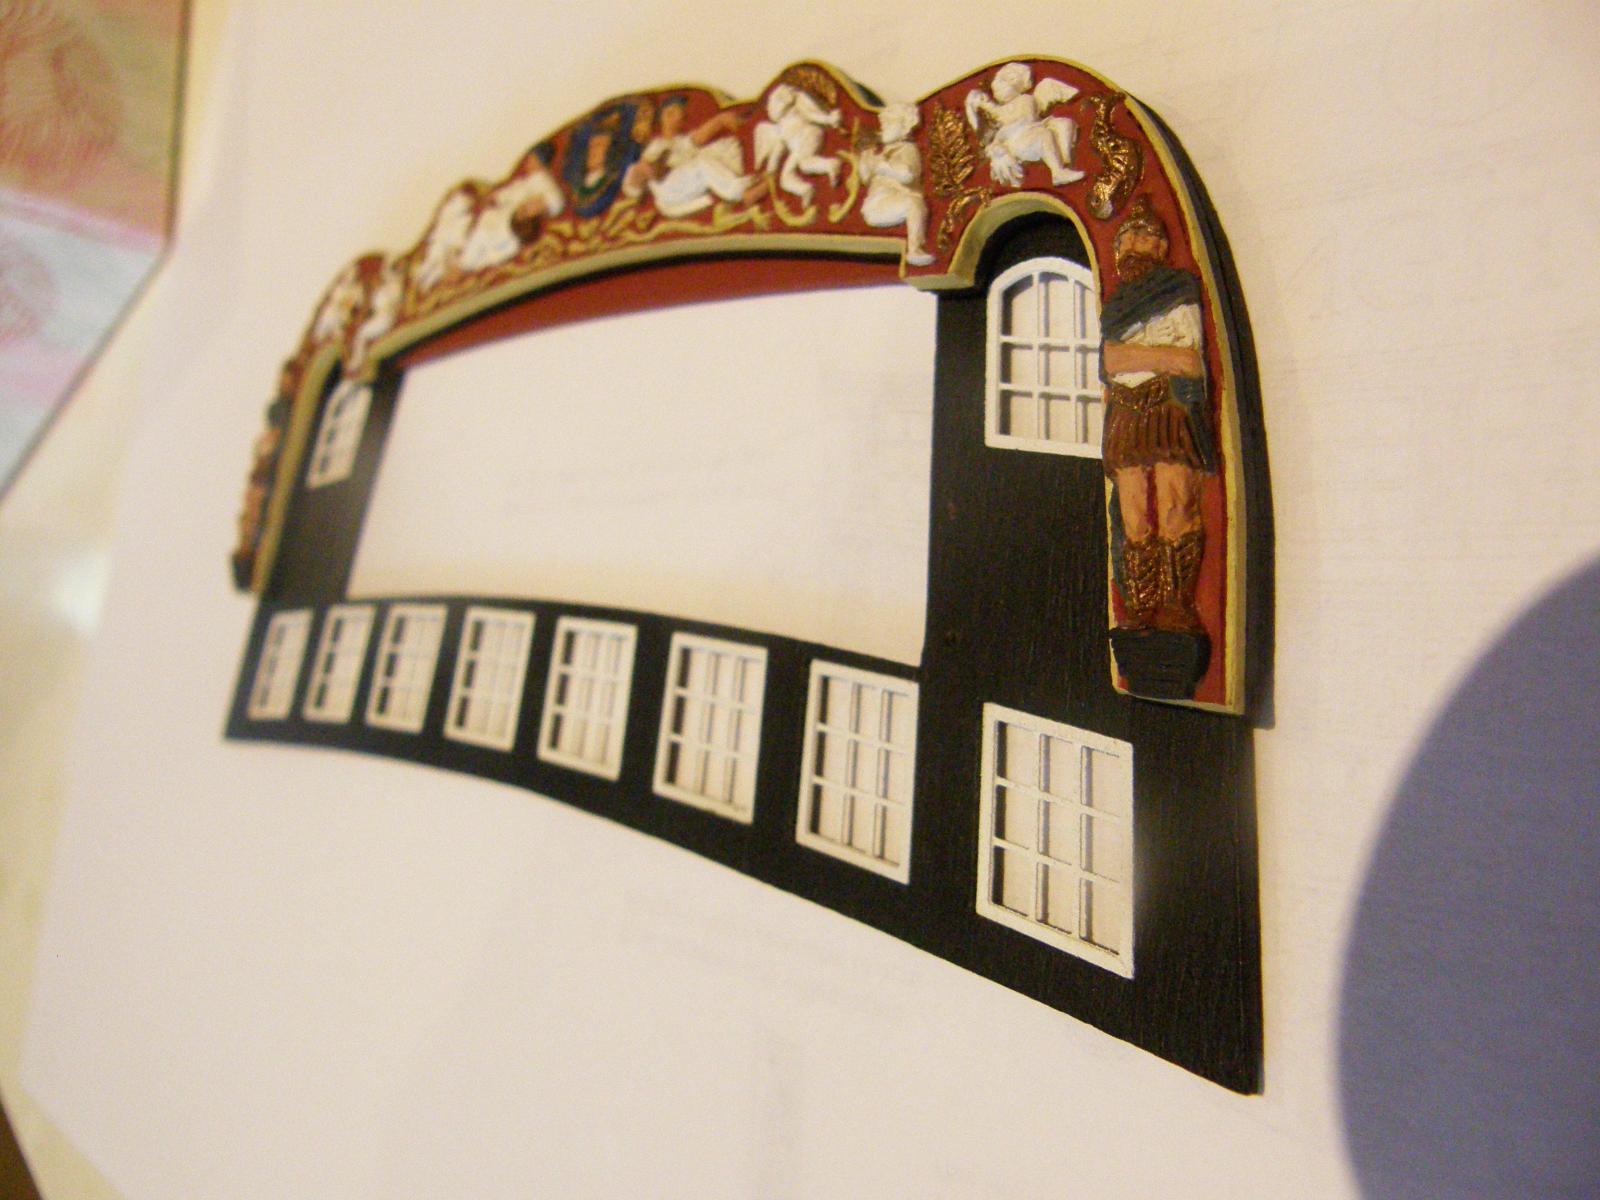
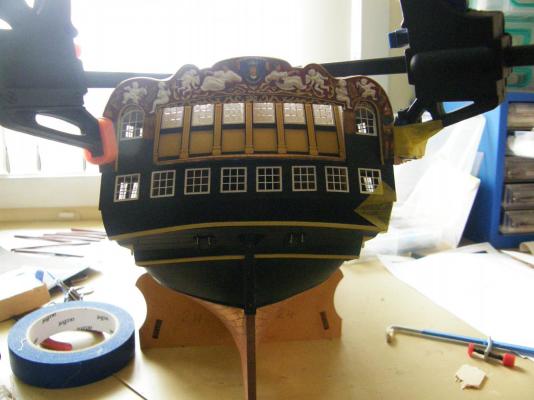
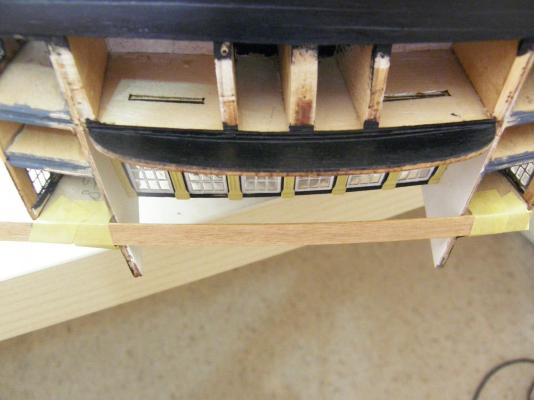
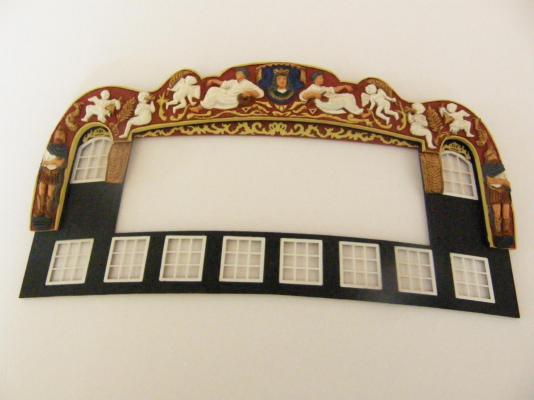
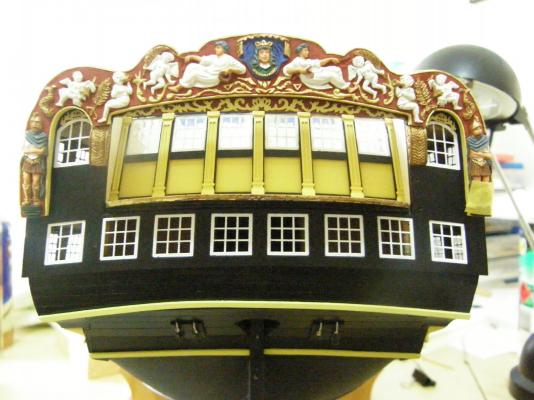
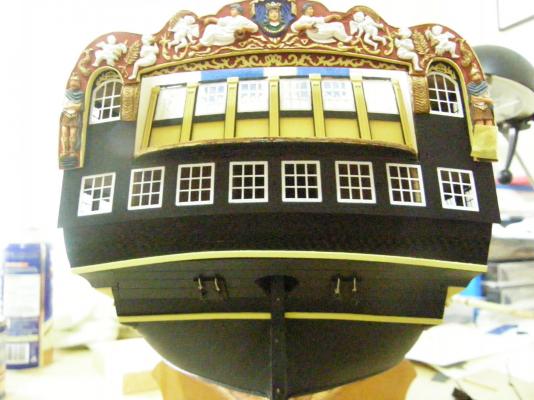
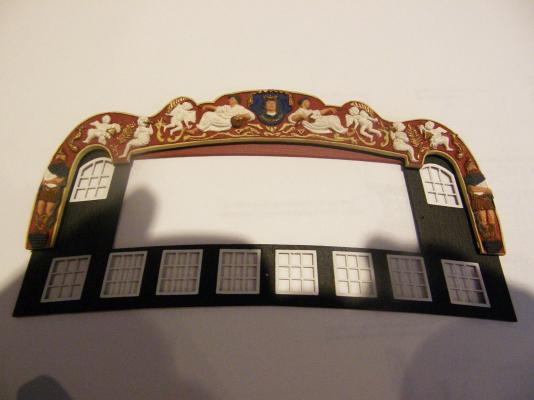
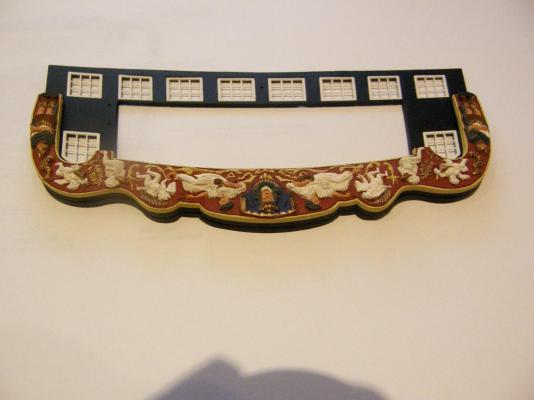
I have now applied most of the decoration. Applying it accurately on the model would have been quite difficult. I was still .5mm out on one decoration - those who may be interested may care to find where. The first two photos show how the required curvature of the facia was derived. A piece of timber strip was taped to where the facia will be attached, and the curvature drawn on a piece of paper. I then used this as a template to shape a piece of balsa. I then pressed the large decoration and the facia together over the shaped piece of balsa. To get the decoration to the correct height I clamped a piece of strip across the facia so that the decoration only had to be moved laterally to position it correctly (no photo, sorry). The gold decorations on the facia required quite a bit of filing to obtain a good fit, and the two small decorations above the top windows did no fit and needed to be trimmed. A fair bit of fiddling was needed on the stern to make the facia fit properly, but the dry-fit shown suggests it should turn out reasonably well. On a different note. I have discovered that Xylene will take off any residual polish on copper better than anything else I have tried. I am now waiting to apply the clear matte sealer. It must not be too humid (<65%) and it has rained virtually every day for the last fortnight. I didn't rain for two months before that!


- 949 replies
-
- 10
-
-
Jason: yes there are. Putting them on accurately will be difficult if the facia is already attached the the model. Consequently I have pretty well decided to apply as much of the decoration as possible to the facia before attaching it to the model. I shall try to provide the required curvature of the facia off the model. I will use Krystal Klear (the window stuff) as an adhesive - though I need to test whether it will properly adhere to the resin molding by using one of the 'spares' supplied with the kit. It is flexible and I hope will provide any 'give' necessary when the whole lot is attached to the model. If the KK doesn't work I will use gel CA, which I now use on most applications. I am concerned not to get glue - of whichever type - all over the place.
-
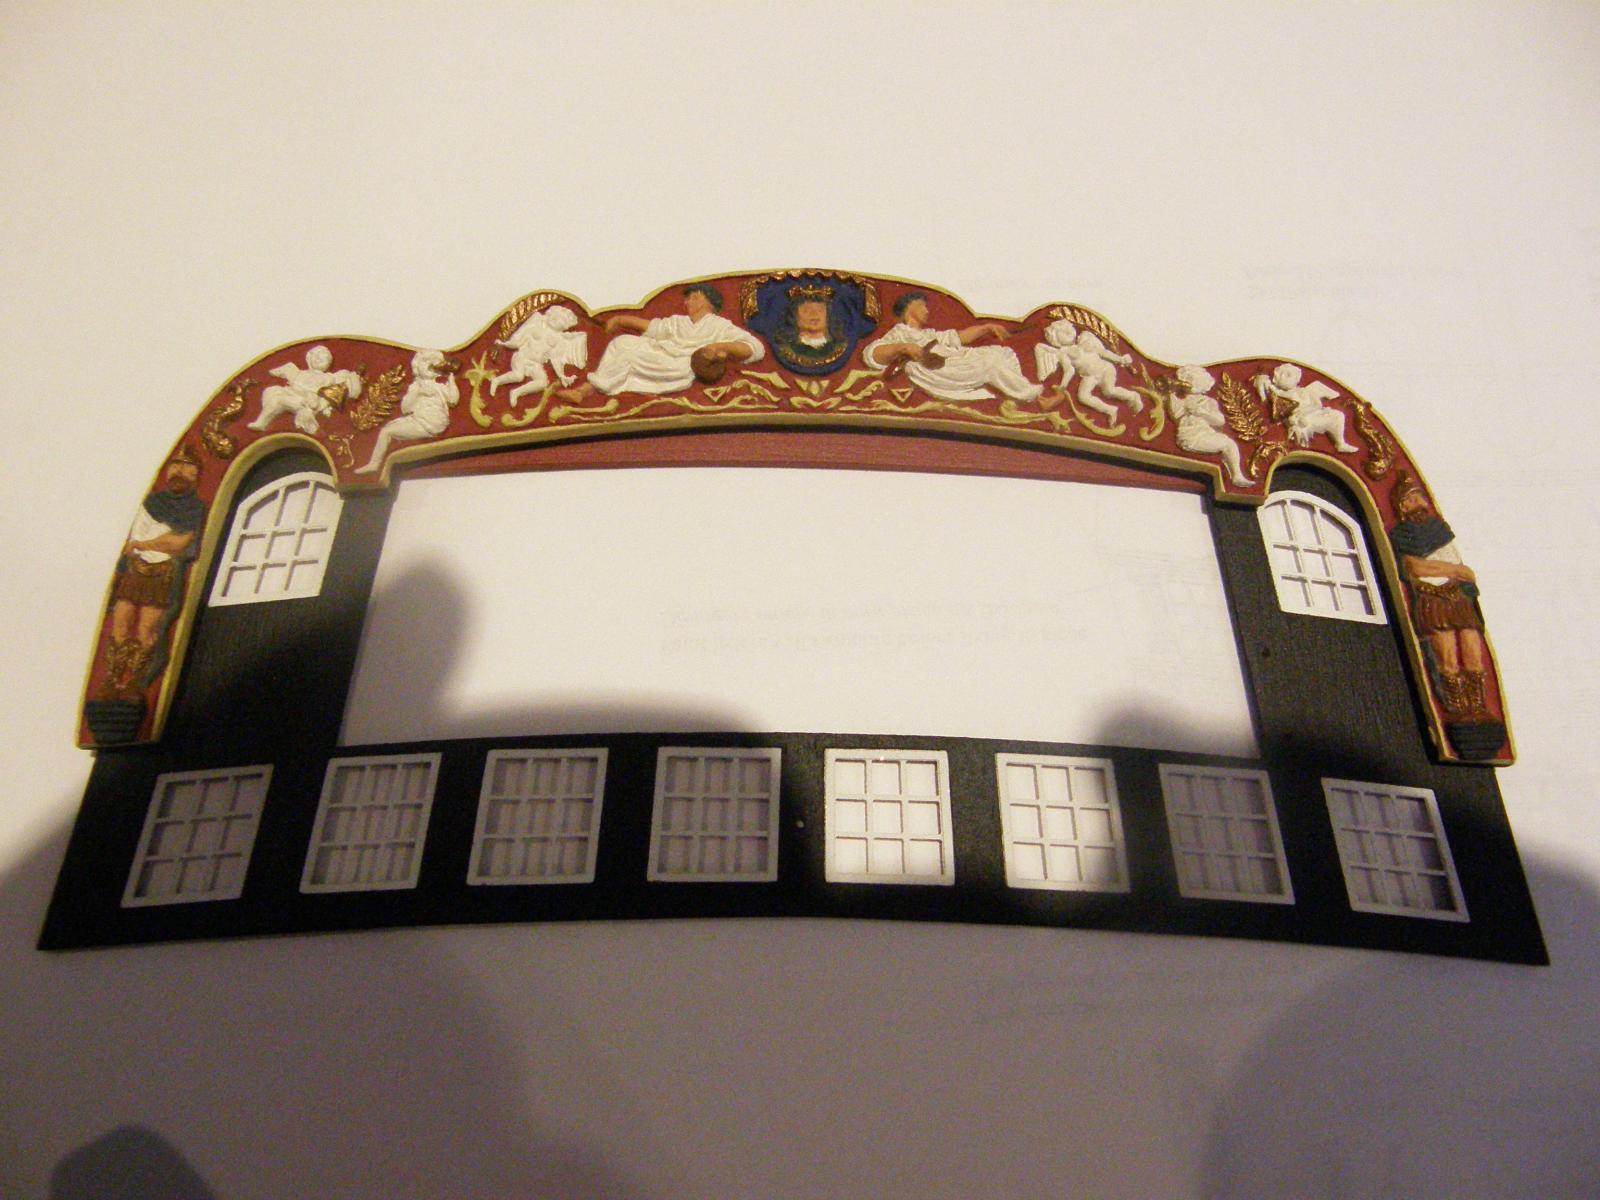
I have now painted the area below the facia, though does not yet have a coat of polyyurethane. The decorative wooden strips have been painted and attached. These were pre-bent using my little bending machine (I don't know what else to call it) a photo of which appears earlier in this log. The 2x1mm strip was quite splintery, and it is a good idea to coat the strip with a little thin CA first to prevent breakage. Here is the facia dry-fitted The following give some idea of what the facia and the decorative molding look like. I am very tempted to attach the molding to the facia as well as some of the cast decorations before putting the facia on the model. It would make things far easier. A potential problem is that the facia will have a slight curve when attached. Gluing all the bits and pieces onto it without any 'give' in the glue may result in trouble. Comments/suggestions welcome. The two bits of ply poking over the top of the facia will have to be filed down flush.This, and the need to lower the facia so that the windows are obscured (others have had the same problem) suggest the plans need revision.

-
Daniel: thanks for taking the trouble to show me your method. I certainly provided a beautiful result. Unfortunately I have no idea how I would duplicate your work. I think this is an area where kit manufacturers should think about ways to make it easier (and more accurate) for novices like me and so many others. If you make a mess of it , it spoils the whole model. Kind Regards Bob
-
Hi Luca I have been very impressed with the overall quality. The timber is very good (I have seen some better, but the difference is marginal - anyway, you will probably paint it) and I was shortchanged on some 12mm dowel, which was annoying, but not a real problem. I suspect it's who actually packs the kit. The fittings are excellent. The plans are very good indeed, though there are a couple of minor things which require you to be clairvoyant. Since I bought mine, Amati may have corrected the very few problems. Assistance from this website is likely to solve any remaining problems you may have. The kit is quite demanding, but I would highly recommend it.
-
Thanks Alistair. I will take you up on your kind offer. I will send you a note with my address etc. Upon mature (?) reflection I have decided to try the Letraset first. (I did think I would rename the bloody thing "FLY' but it didn't get off the ground. Next time I'll build a ship with a shorter name.) A couple of glasses of NZ sauv blanc over dinner possibly helped making the decision. Incidentally, if you make it to Sydney sometime, the drinks are on me. I have also emailed Letraset to see if they have some 8 mm hidden away. I have found it doesn't hurt to ask, and sometimes you strike it lucky. And thanks BE for your trouble. Your work and reserch was the final influence.
-
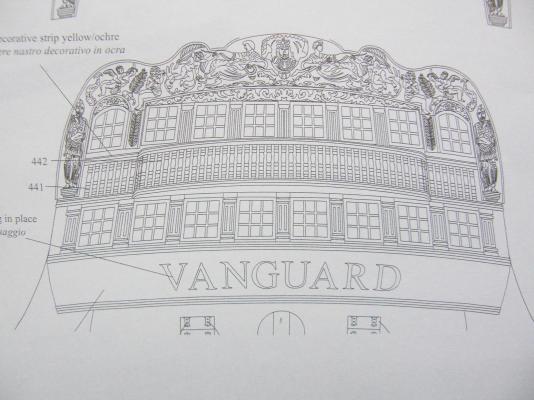
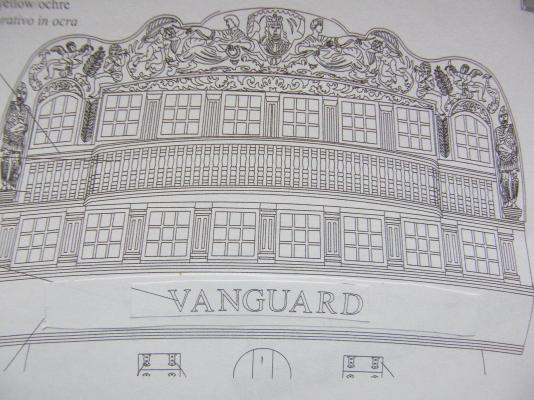
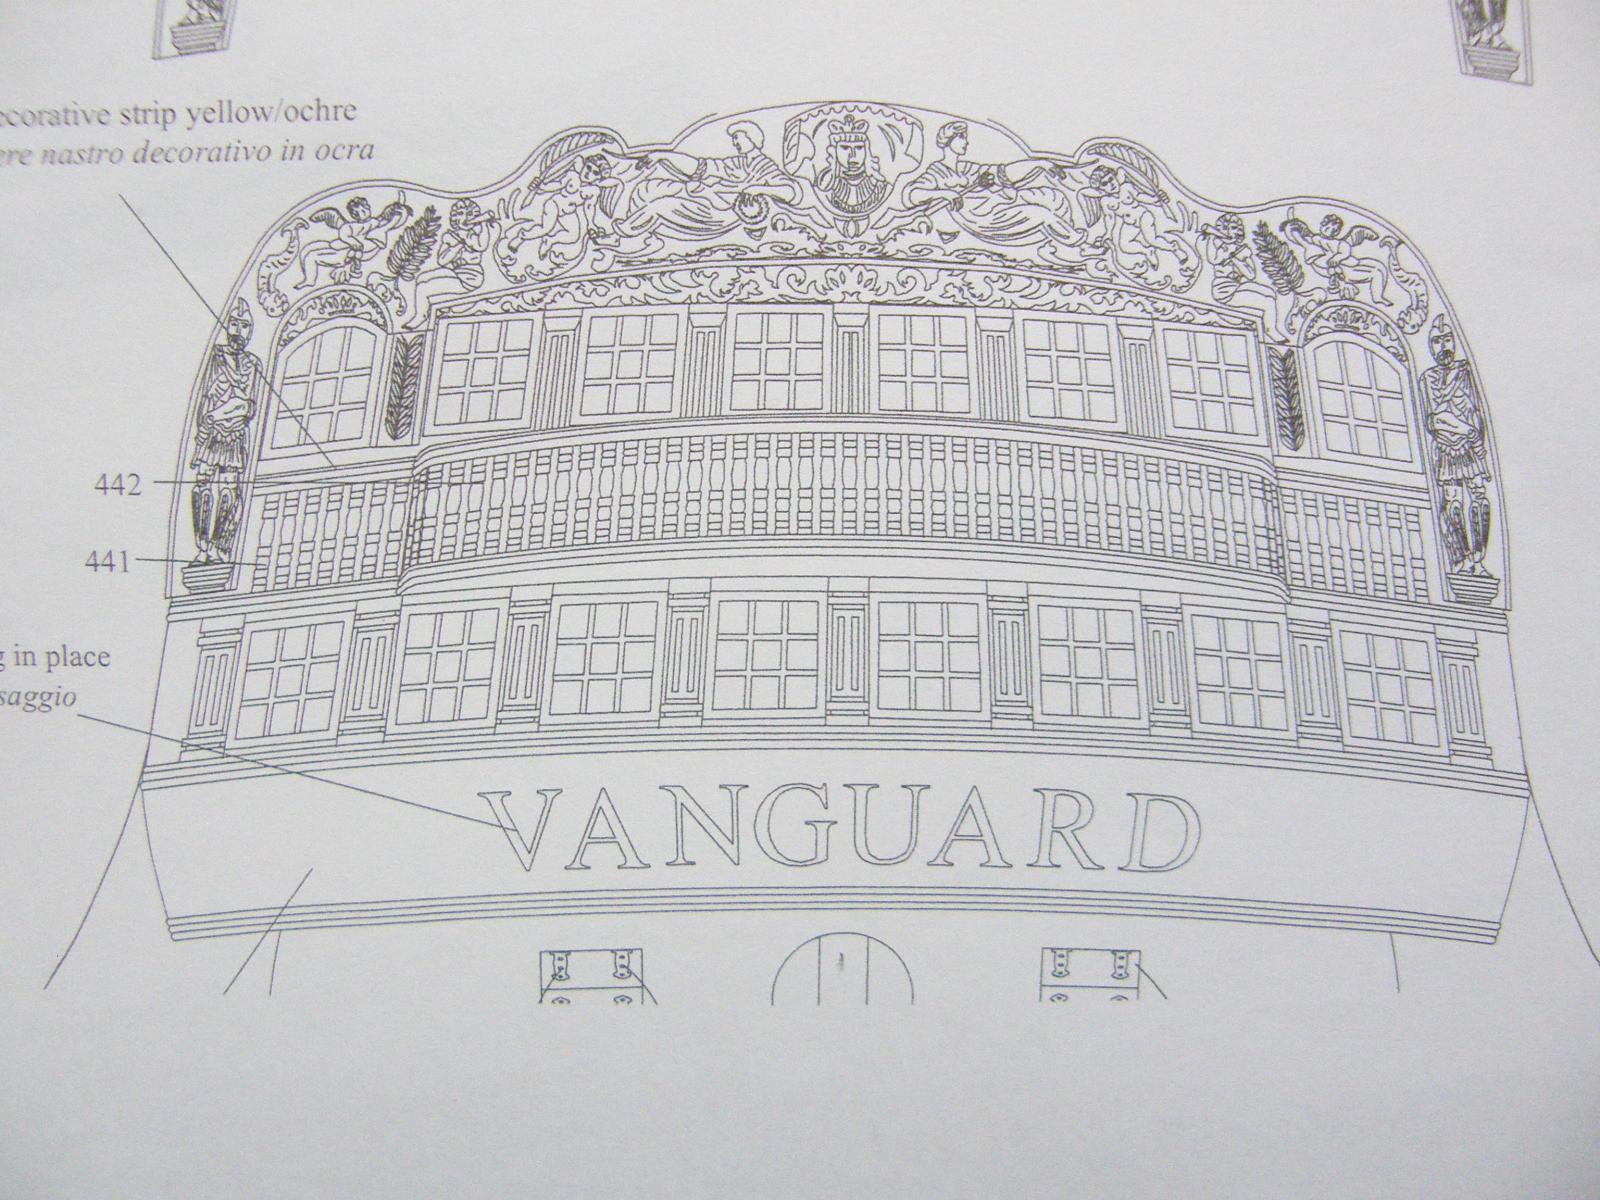
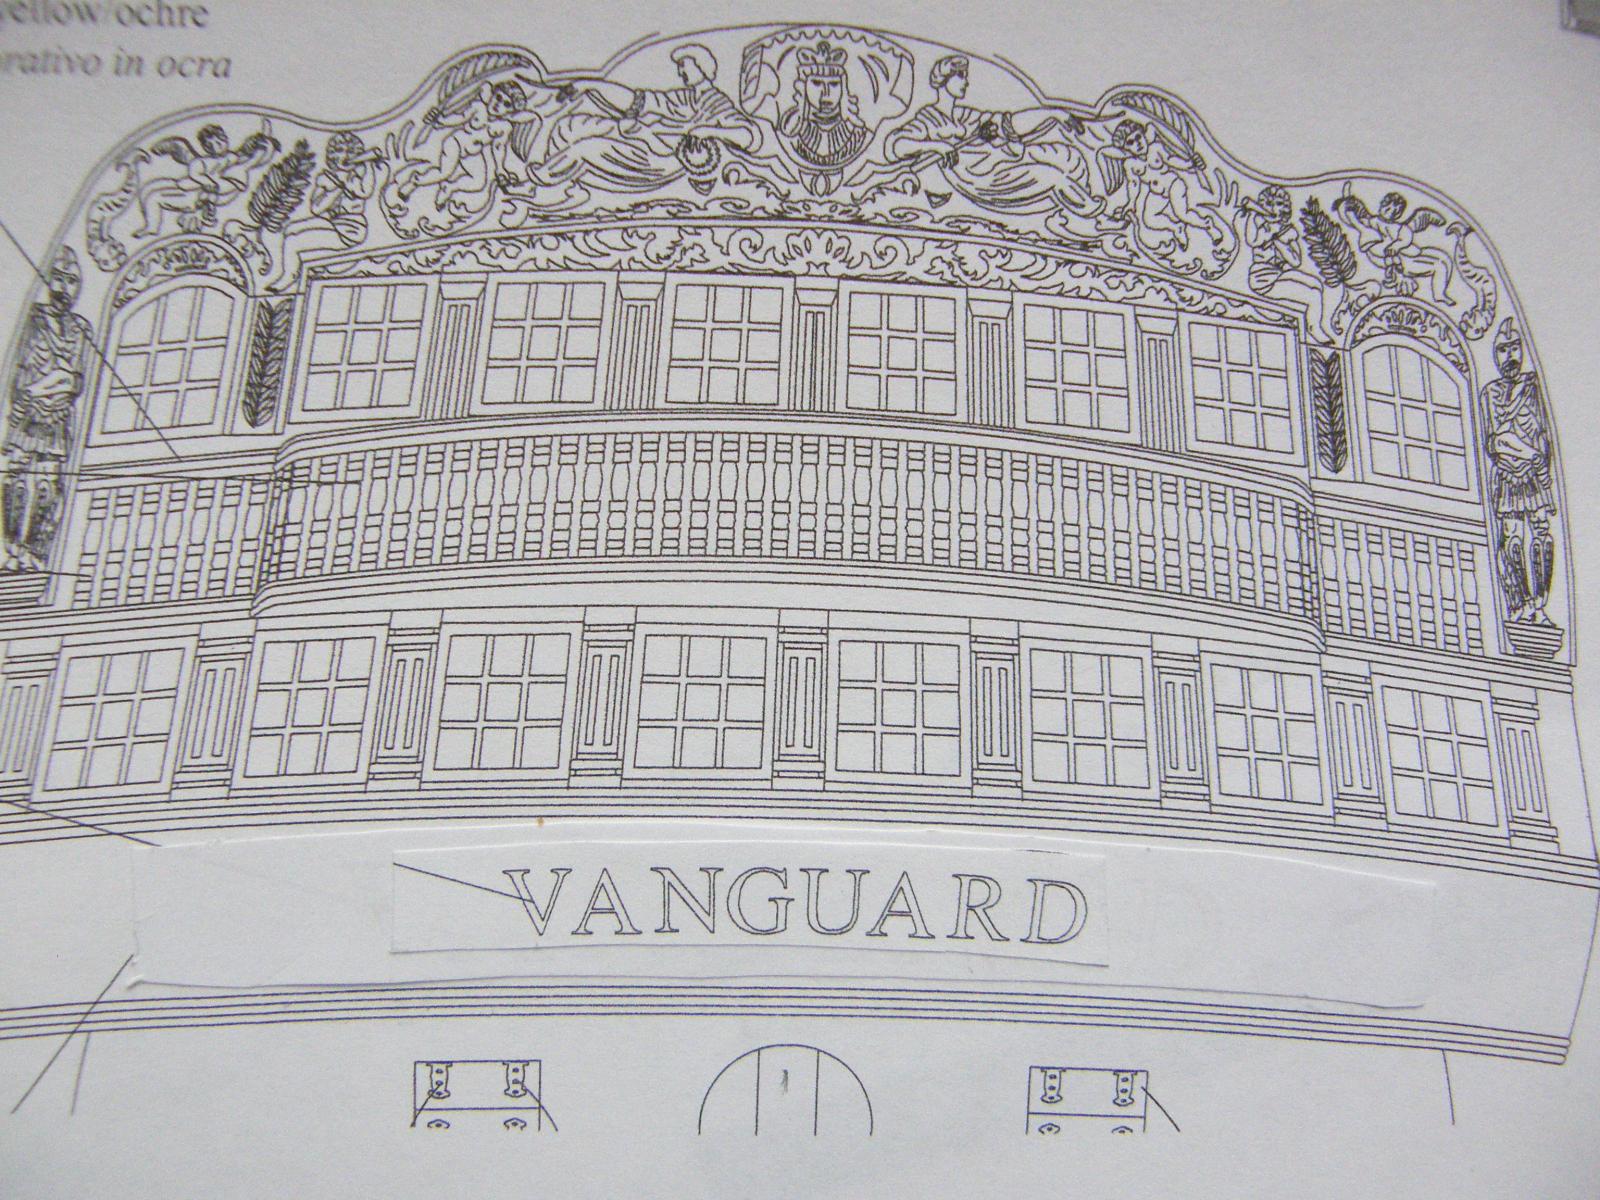
I have just photo-reduced VANGUARD from the full-sized plan. The two photos attached compare the 8mm with the 5mm letters. I am now rather undecided. I am leaning towards putting on the 8mm letters supplied with the kit. If I mess it up I can sand back the affected area and put on the Letraset letters, so all will not be lost. Feedback is welcome. This comes directly from the plan. Here is the 5mm version.