


harvey1847
-
Posts
528 -
Joined
-
Last visited
Content Type
Profiles
Forums
Gallery
Events
Posts posted by harvey1847
-
-
thanks Jack!
That explain all. I thought it was a device that actually copy a bulkhead from a pre-existing form or pattern like in real life the carpenters copy figure heads with a special tool join with the mill... All clear now!
This is not a figure head of course but I saw one of them in the restoration of a church years ago.
Thanks,
Daniel.
-
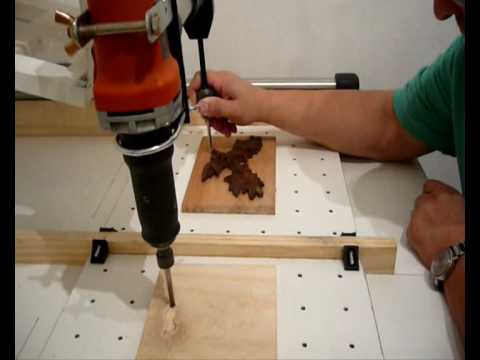
As I mentioned yesterday, I've been working exclusively manually with a coping saw and the matter was of my complete satisfaction,
Hi again Jack,
Yesterday I was pretty tired to answer you propperly. Sorry to insist, but I was asking you for the method rather than a single picture of the components that made up the coping saw, I can even see a hand drill, a hamer, clamp, a screwdriver... !!
Any pics of you working on that copy system? like a small practicum or am I asking a lot?
Excellent progress and rate of bulkheads!
Best wishes and keep going.
Daniel.
-
if I use the coping saw, it takes me more or less the same time to cut but the result is 99.5% accurate, and consequently the finishing stage is minimal and I save a lot of time. Moral: I save time with the same result.
Hi Jack!
Any pics of that coping saw method? I never hear about it before...
Thanks in advance.
Daniel.
-
Hello Jack!
beautiful work and beautyful posts! thanks for that. I´ll be here watching and learning...
Best wishes!
daniel.
-
WOW Piet!
It´s amazing to see al last that beauty with all the stuff on the deck and everythin done. I don´t know how many tons weights a torpedo but i would put some more "tension" on that little rod (chain) that holds it by making it on a "V" and sharp shape rather than the smooth curve that it does.Don´t know if I have explaiened myself...
Best wishes Piet!
-
Hello Richard!
Sorry about the mess or little problem that you have corrected and thanks for the advise for others. I always work on the premise that "God sees everything" so I always try (and I say try) to do it right but believe me that my Triton has gabs, huge gabs that I´ll have to fill with chips of wood... wait to see the images and you´ll see, you´ll see...

The stern and I think I´ve said it before it is not the part I am specially proud of. For the stern timbers and its constrution I´m following parts #70,#71 and #72 from Ed´s HMS Naiad. (not any more. edit 19/11/2014)
Hope to post some pics this next week... fingers cross.
Best wishes and keep going!
Daniel.
-
Amazing work Ed!
I read and re-read lots of the post and the fantastic conversations you all have. This log as the the Naiad was, is a pleasure for the eyes.
Even when cutting from thin pencil lines, I have to remember - inside the line? on it? or outside? - probably because of my unsteady pencil hand.
We have a "proverb" here in Spain... " The carpenter long and the blacksmith short "
Best wishes!
Daniel.
-
Hey Randall!
Excellent work and excellent explanation about the way you have been making the frames. I took lots and lots of pics and I do post every single step of the parts I am making. You are absolutely right. These logs are intended to show us lots of pictures of the little or enormous progress done so far and share them with all of us rather that writting and writting.
Keep going! I have been "out" for a while but I´ll be back soon posting pics and a few words.
Best wishes!
Daniel.
-
Hello Guy!
Saw your post yesterday...
Yes some of the frames are not square!
Can you slightly "move" some of them with wedges or something? The disaligment it´s pretty tiny... Maybe those temporary ribbans have tricked the frames a little bit out.
She´s looking more and more rich every single post you add. Keep going!
Daniel.
-
-
Hello Vladimir!
I just did that piece on porpouse looking the different logs around, specially Ed´s Naiad. I thought that this piece would do an extra reinforce to all than fashion timbers (tramsons). I´ll try to find the sketch of it tomorow and post it here.
happy week ahead!
Daniel.
-
Hello Piet!
Excellent job and work. Beautiful! Your log it´s much more than a log ¿? With all that info you clever post it´s like reading a piece of history.
Keep going! I´ll be here clicking likes and reading and re-reading your log. It´s a pleasure.
Best wishes.
-
-
Hola a todos! Hello All!
Hope July is treating all of you ok!
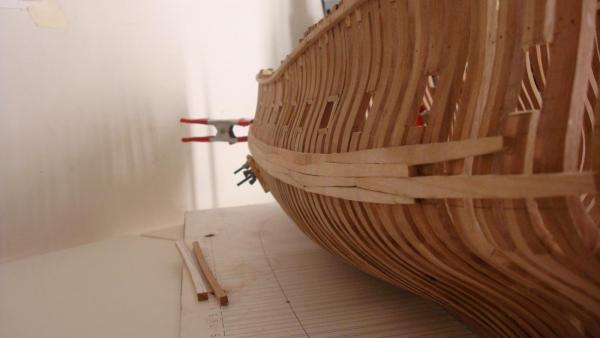
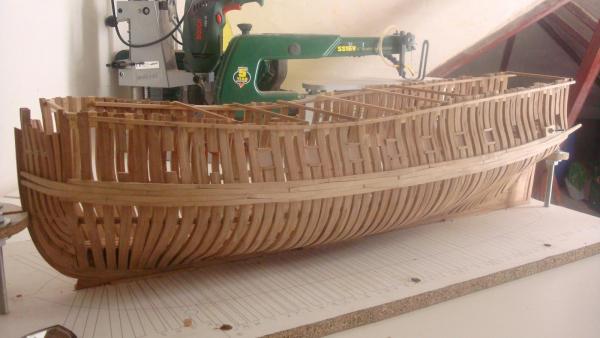
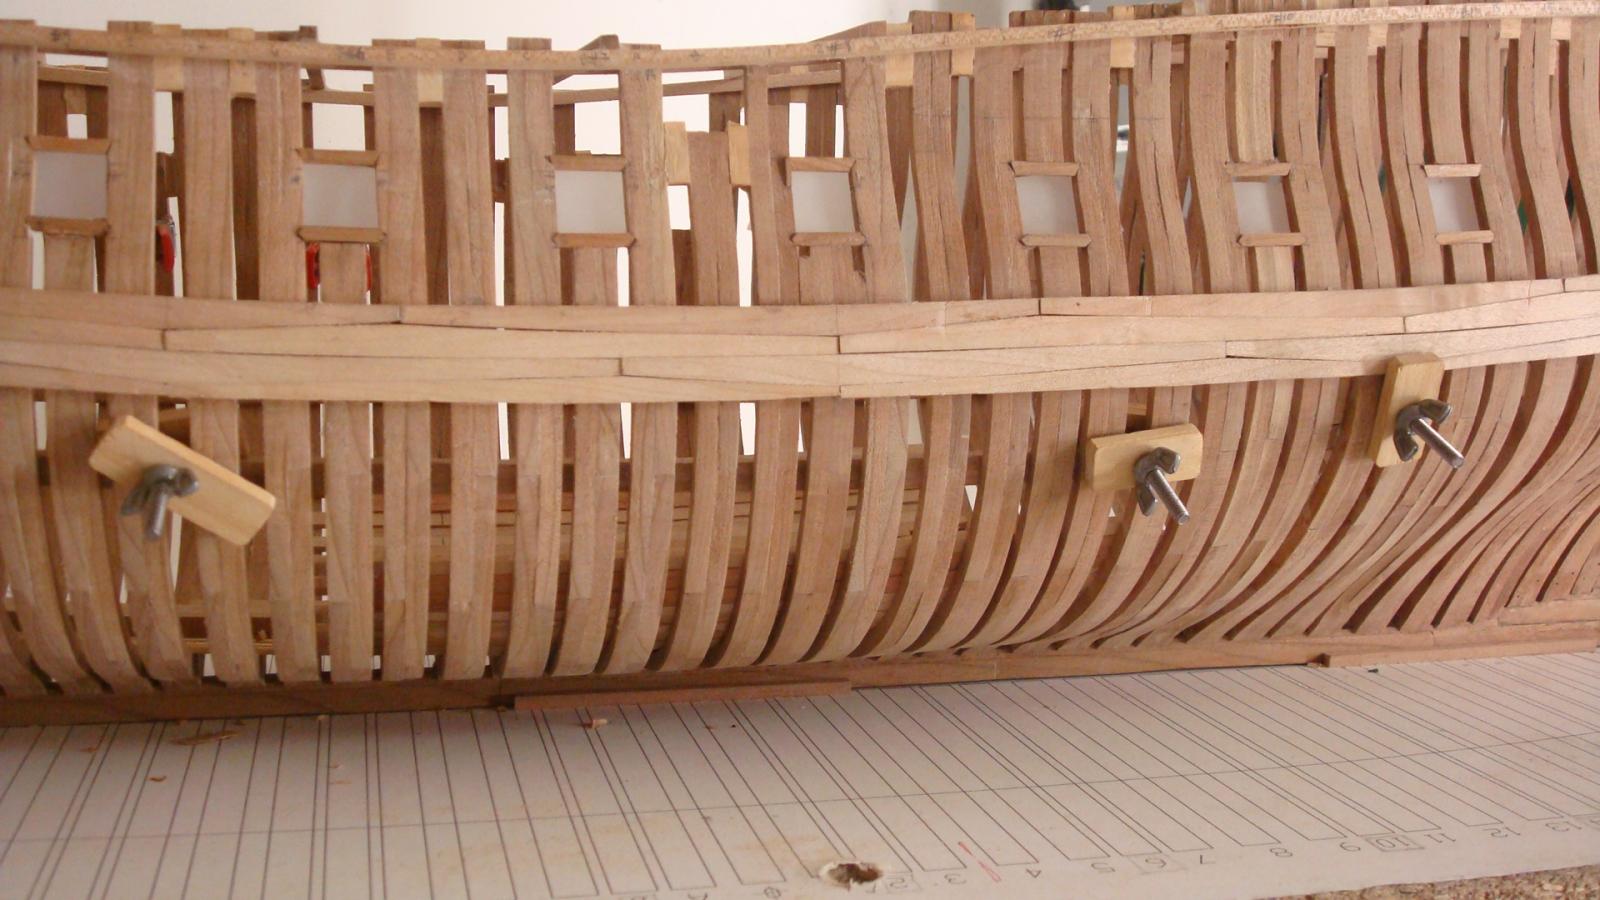
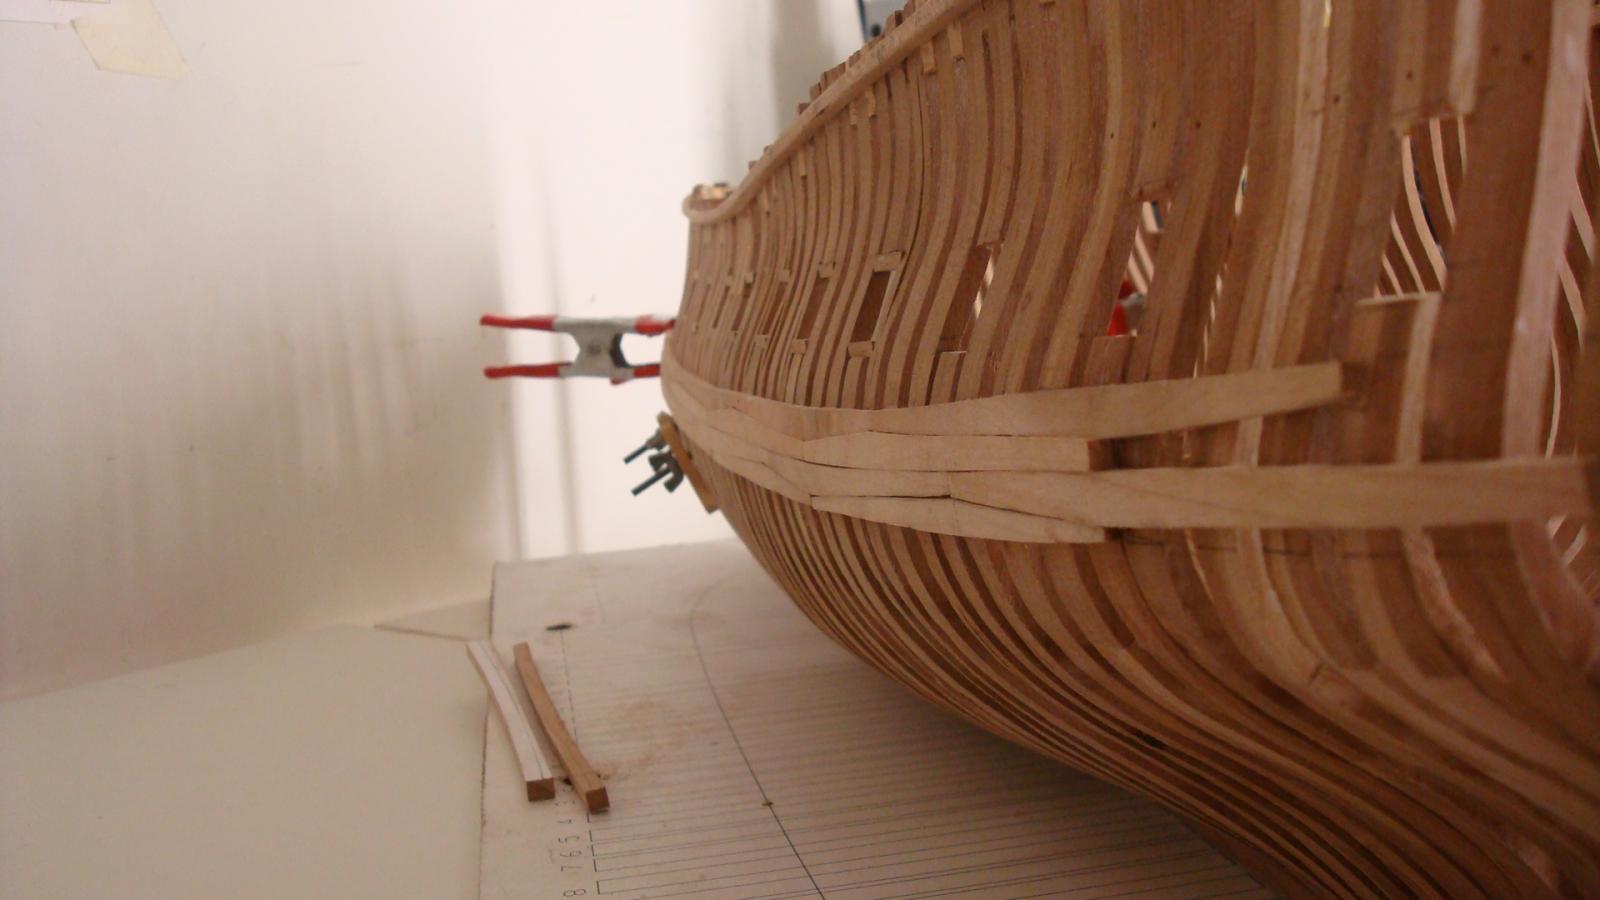
Finally I have almost complete the main wale... I´ve been planking and making the joinery for the gun ports at the same time. I have also started with the stern post. Let´s see how the work will come out in this another tricky part of the "building".
Here some pics,,,

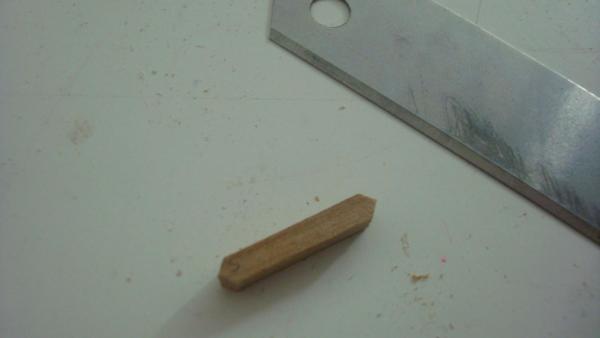
And these are my first LD beams. It´s amazing that small camber on them.
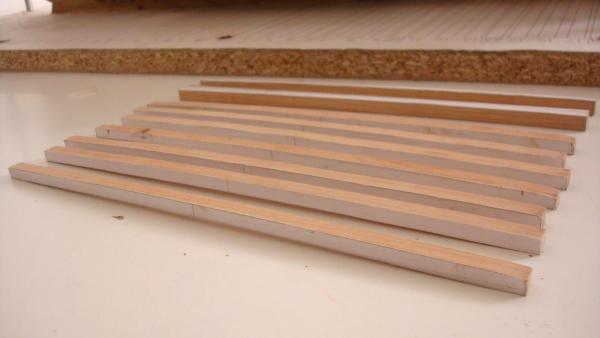
Just a try. I couldn´t resist...

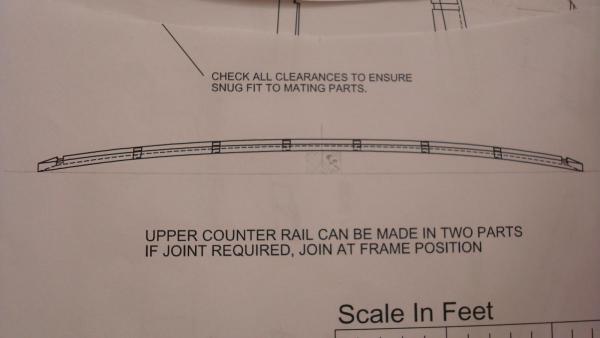
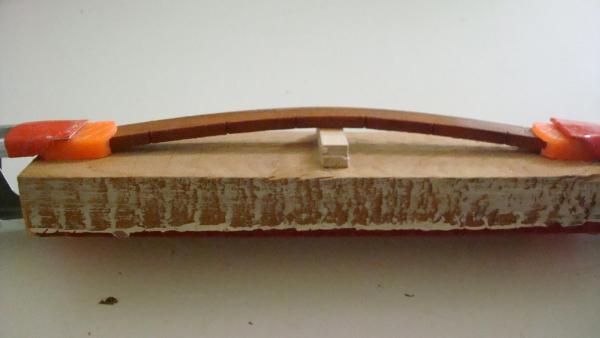
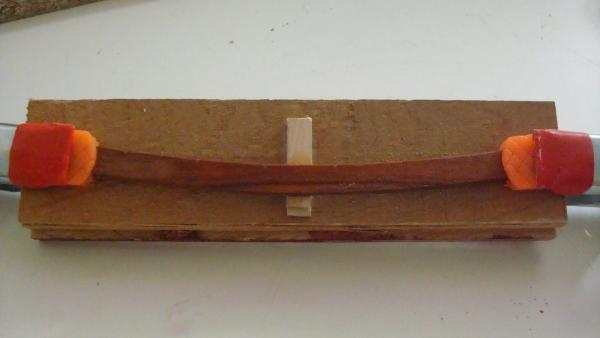
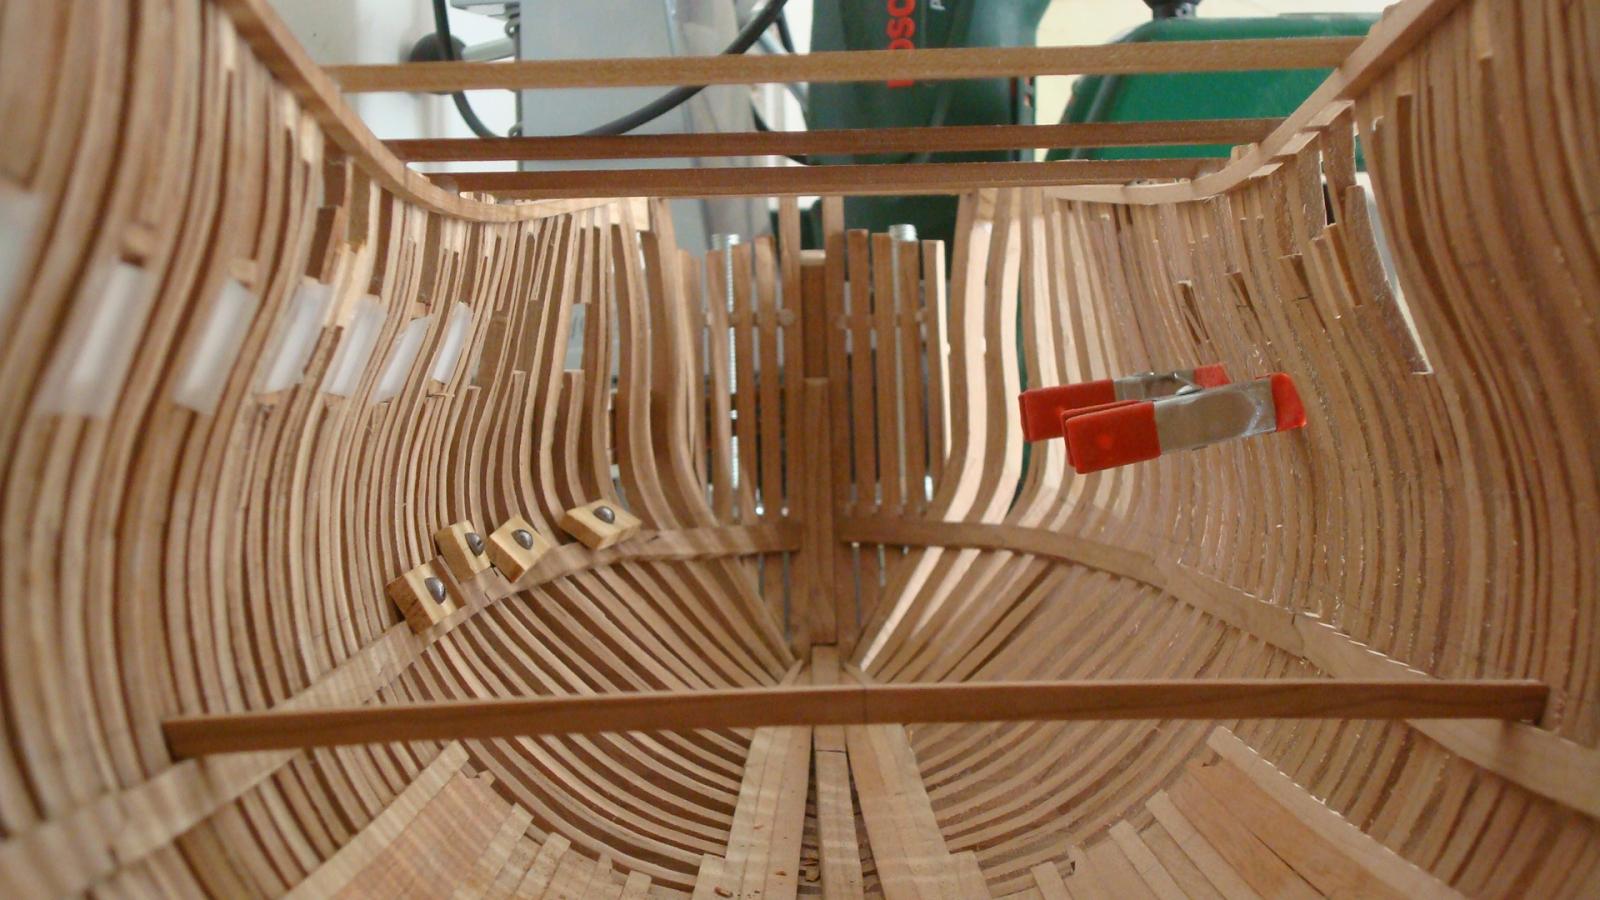
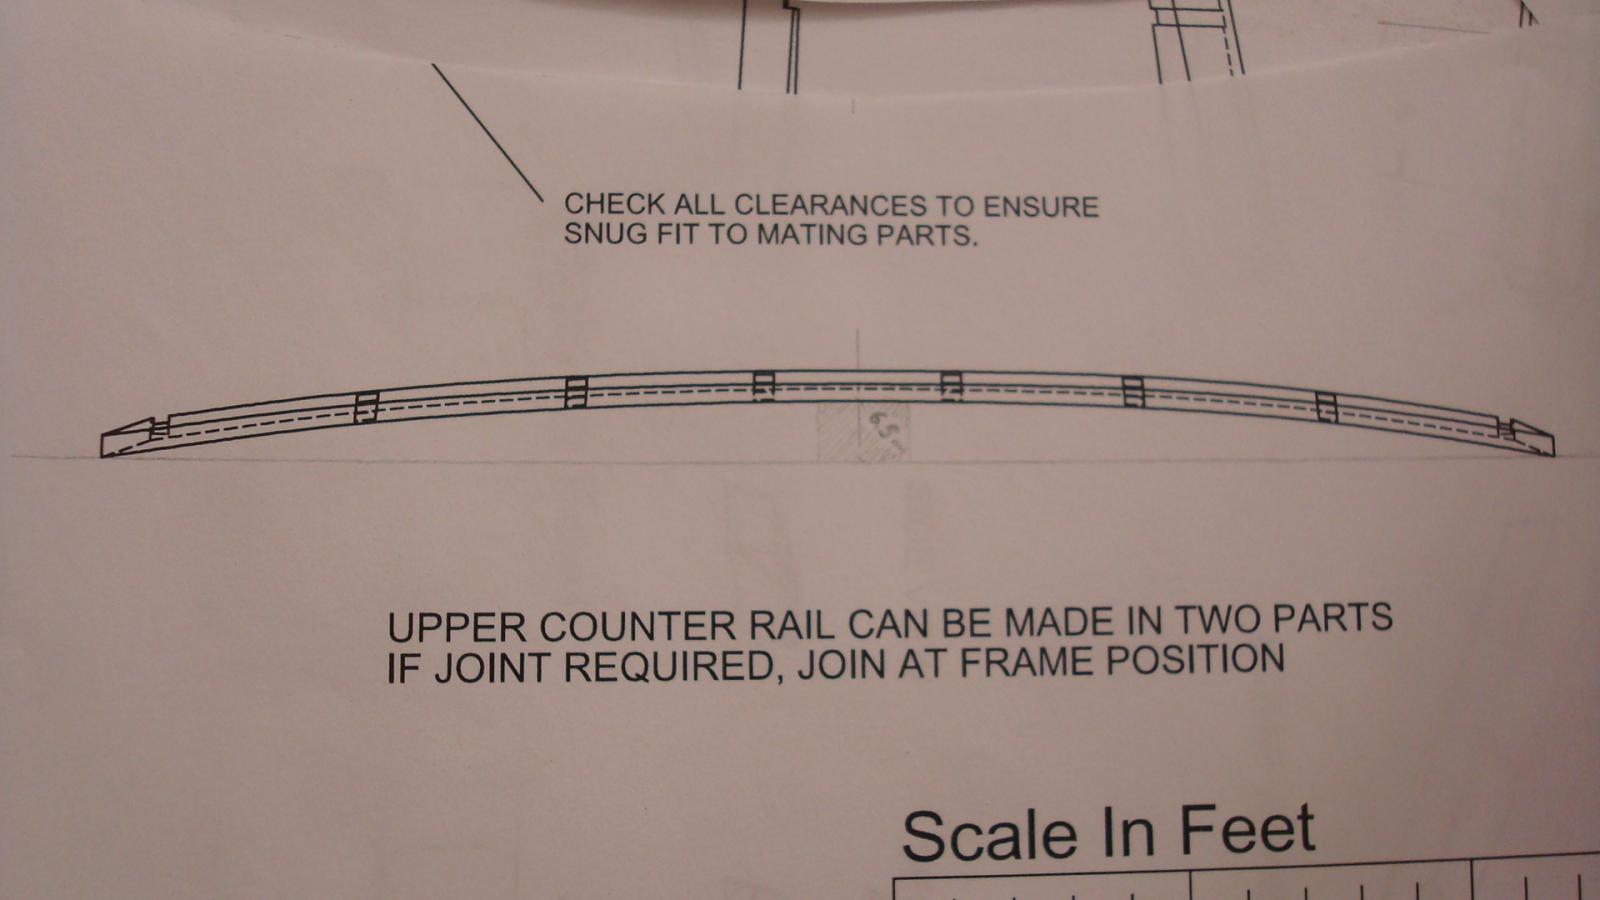
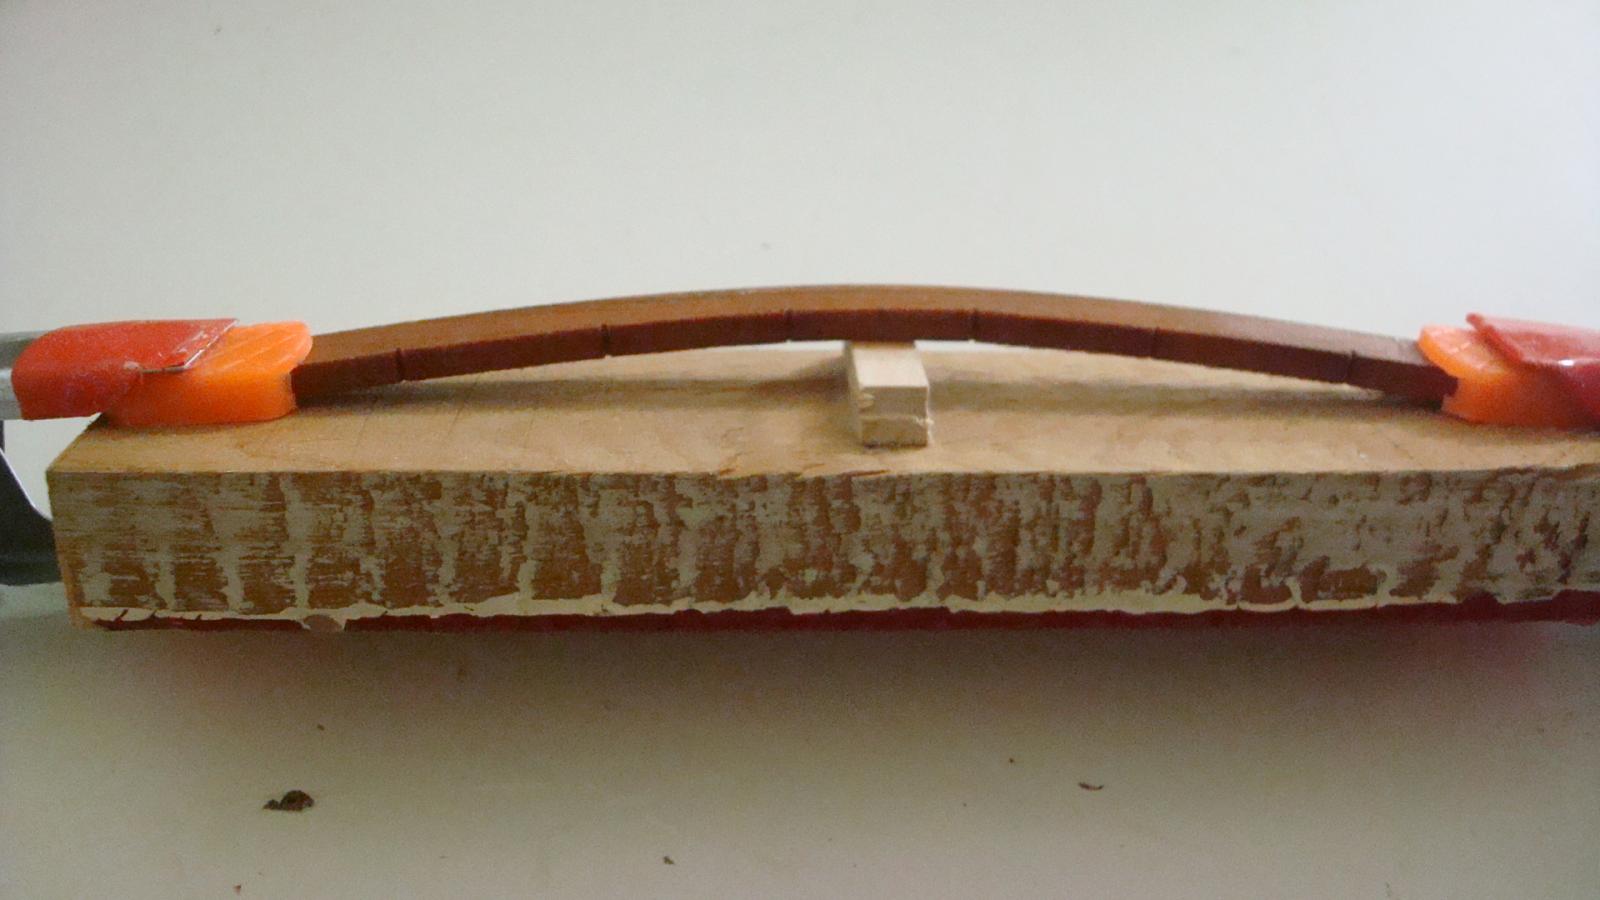
And here´s the upper counter rail. Instead of boiling it I left it on water (in 2lt bottle of coke i.e.) for 24h or more. Then I clamped it using a jig and let it dry for more than 3 days.
And that´s all for now...
Guy, That ship it´s called Franky Boy!
Richard, I´ll be posting more pdf´s soon. I just make them when I need them, If you need some specyfically on the stage you´re right now just ask it for. No problem at all. I do enjoy to work on CAD.
Hey Ray! It´s Sierra Vista close to Mesa Verde? I spent a whole year there, at Mesa Verde, back on ´92!
Best wishes!!
Daniel.
- sonicmcdude, WackoWolf, the learner and 5 others
-
 8
8
-
No rush with this hobby like someone said to me once...
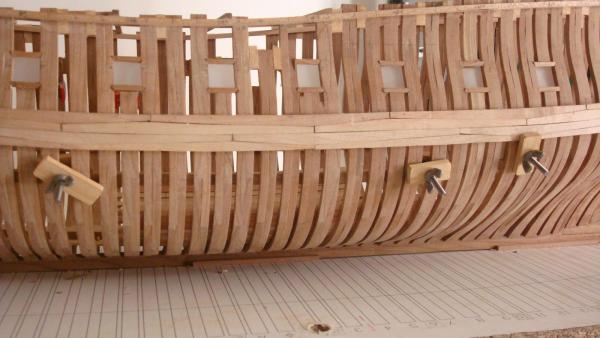
Something that I forgot to tell you, It's important to hold the frames together with an elastic or with a jig if you are not going to erect them right now.
Daniel.
-
Hello Randy!
There is quite a color disparity between the more midship frames and further aft (lighting in the first picture makes it look worse than it is),
I had the same "problem" and believe me that the color will change in two or three months... There's something with the wood that even when it's dry and cut is still somehow "alive".
Congrats with the frames! One thing that worked with me was make them in a "industrial" way.
Best wishes and happy modelling!
-
Hello Mick!
Looking good! If I were you I would leave more "meat" and specially up on the frames that make the gun ports. Just an opinion.
Happy week!
Daniel.
-
As with many details, Young America’s exact configuration is unknown.
Well, certanly your work will keep us studing for a long time how the hek they were built... even future generations will be able to study How these beauties were built looking your 1:72 YA!!
Best wishes!
-
-
Not that sharp Richard... believe me.
with all the variables like the levelness of the floor, the work bench, the model, etc.
To be honest all the scarfs has been done "to the eye". I try to make all the joints true to the frame avoiding the level of the model or the table, if it makes sense to me (the line I´ve marked) then I cut the scarf but always looking al the line true to the frame.
I do guess that working on 1:48 the aligment with the wood stick will work. (and it´s working) Hope my flat it´s still on level after ten years...
Next proyect I´ll use a "bridge" or something to meause from above like you and others, that´s for sure.
-
-
-
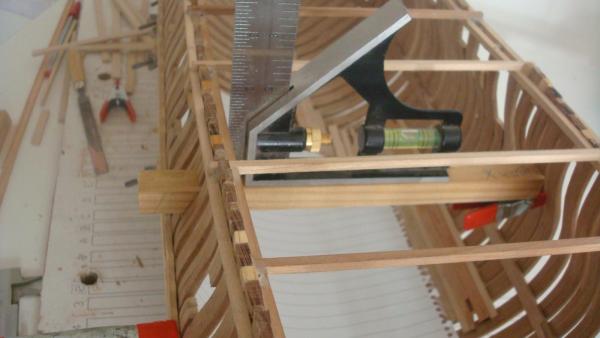
Hi again!
I don´t Know what is happening with the camera but all the pics look kind of blurry... I´ll clean the lens.
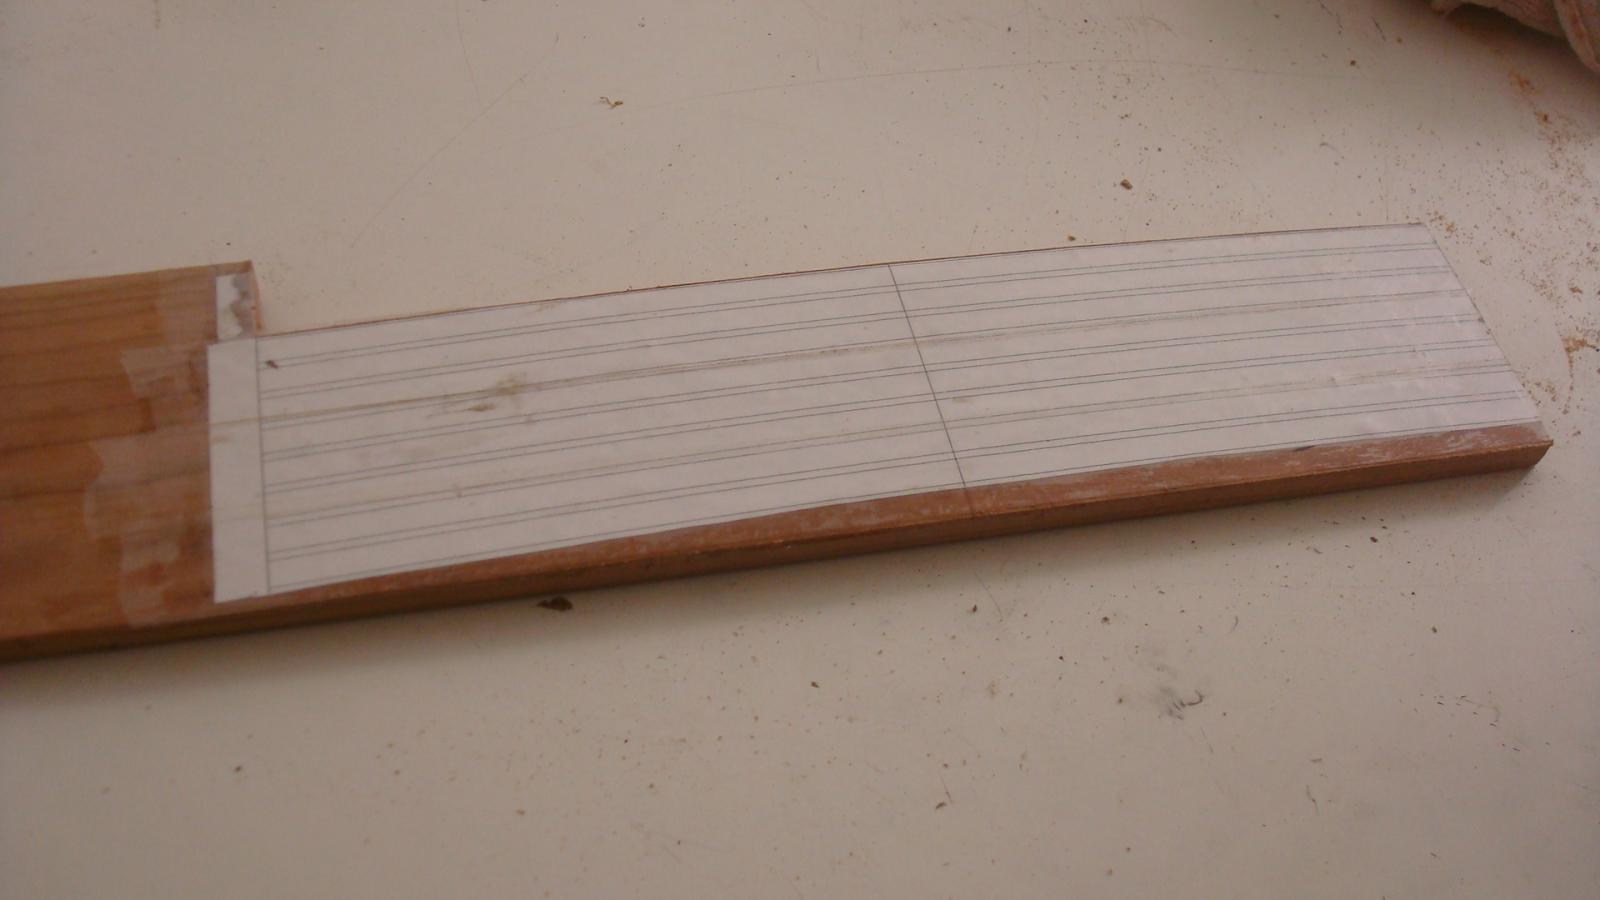
Here are some pics of how I make the lower deck beams and my pdf.
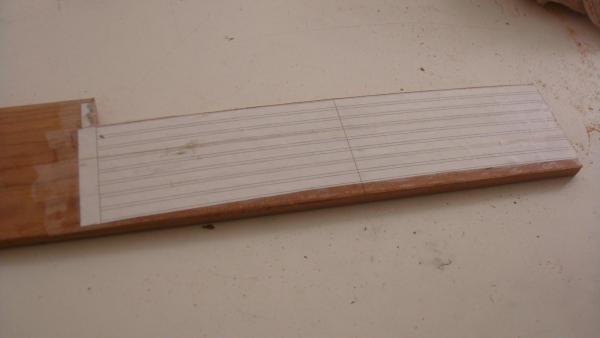
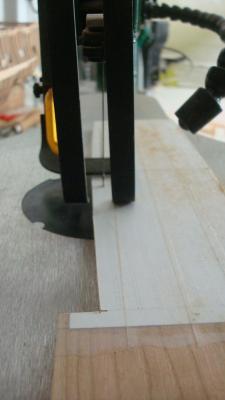
I use a rasp to sand the up side and the down one.
Here´s the pdf. I have copied it from the plans are available.
Happy summer and July 4th ahead!
Daniel.
-
Hello All and thanks for the coments! Really appreciate all of them...
I am still working with the main wale and I´ve started with the gun ports. Pretty tough stuff, measuring, chiseling, trying with one piece repeating again the same piece...
I have also make a pdf with the camber of the lower deck beams. I need to Know the space between the floor of the hold and the lower deck beam to start making the bulkheads of the different "rooms". I also need to put all the hooks and breast and mast bases so I´ll be working a lot these days.
Richard! I have been doing a "research" looking for good plans for a longboat, but nothing arround is relaible to me. I guess I will have to redraw one plan out of a AOS book or something.
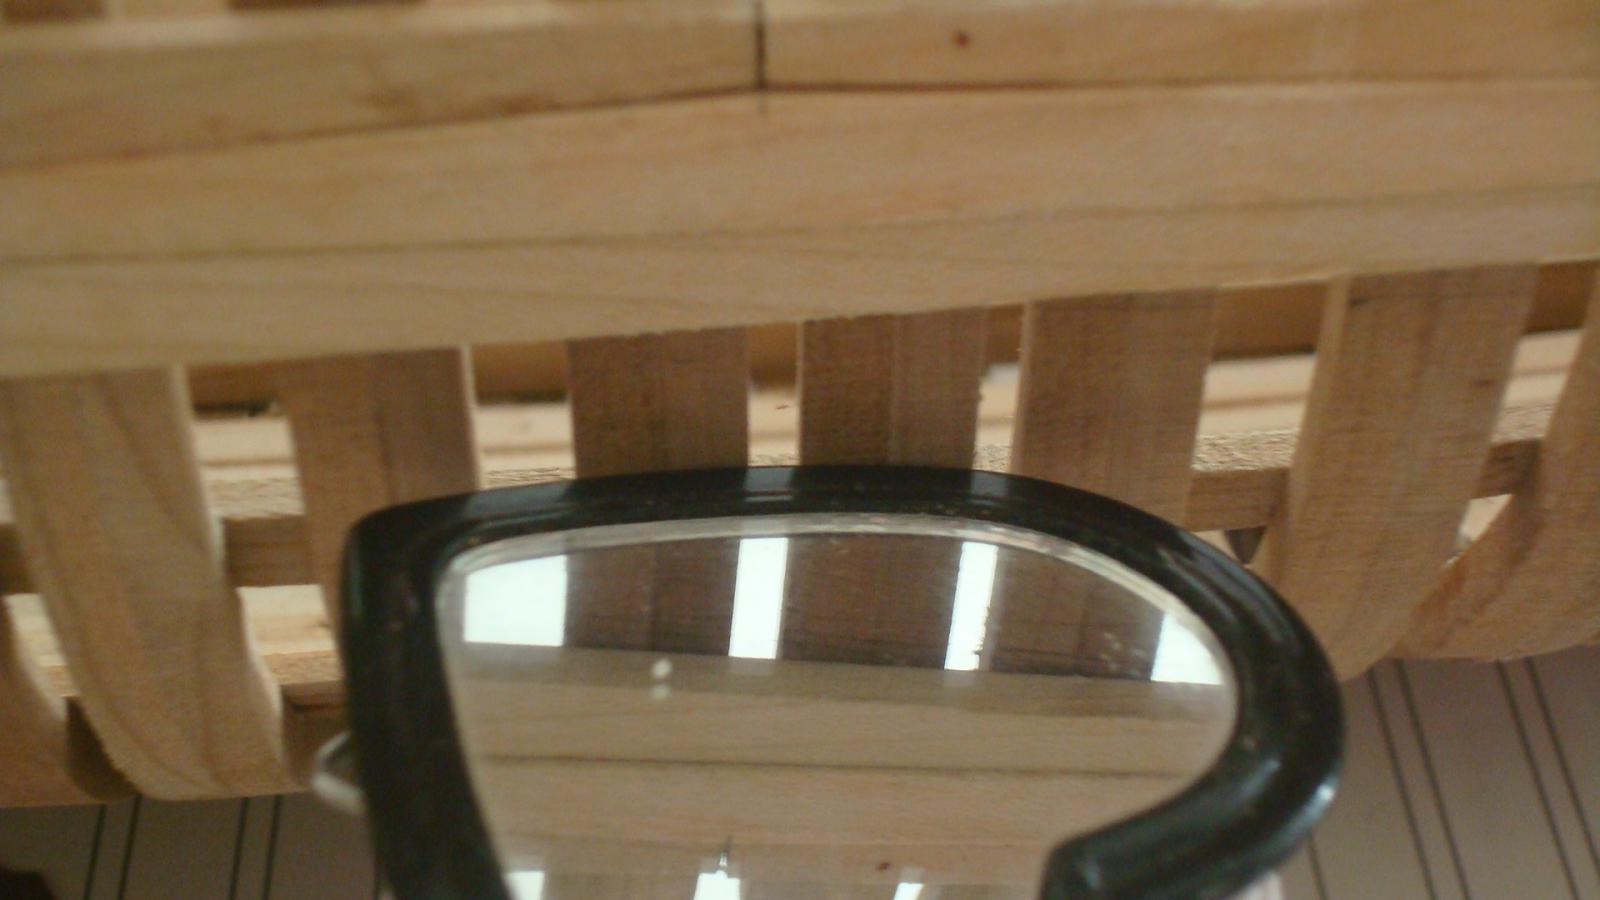
here are some pics...

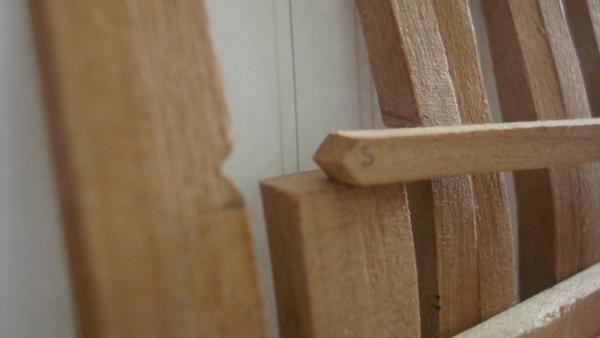
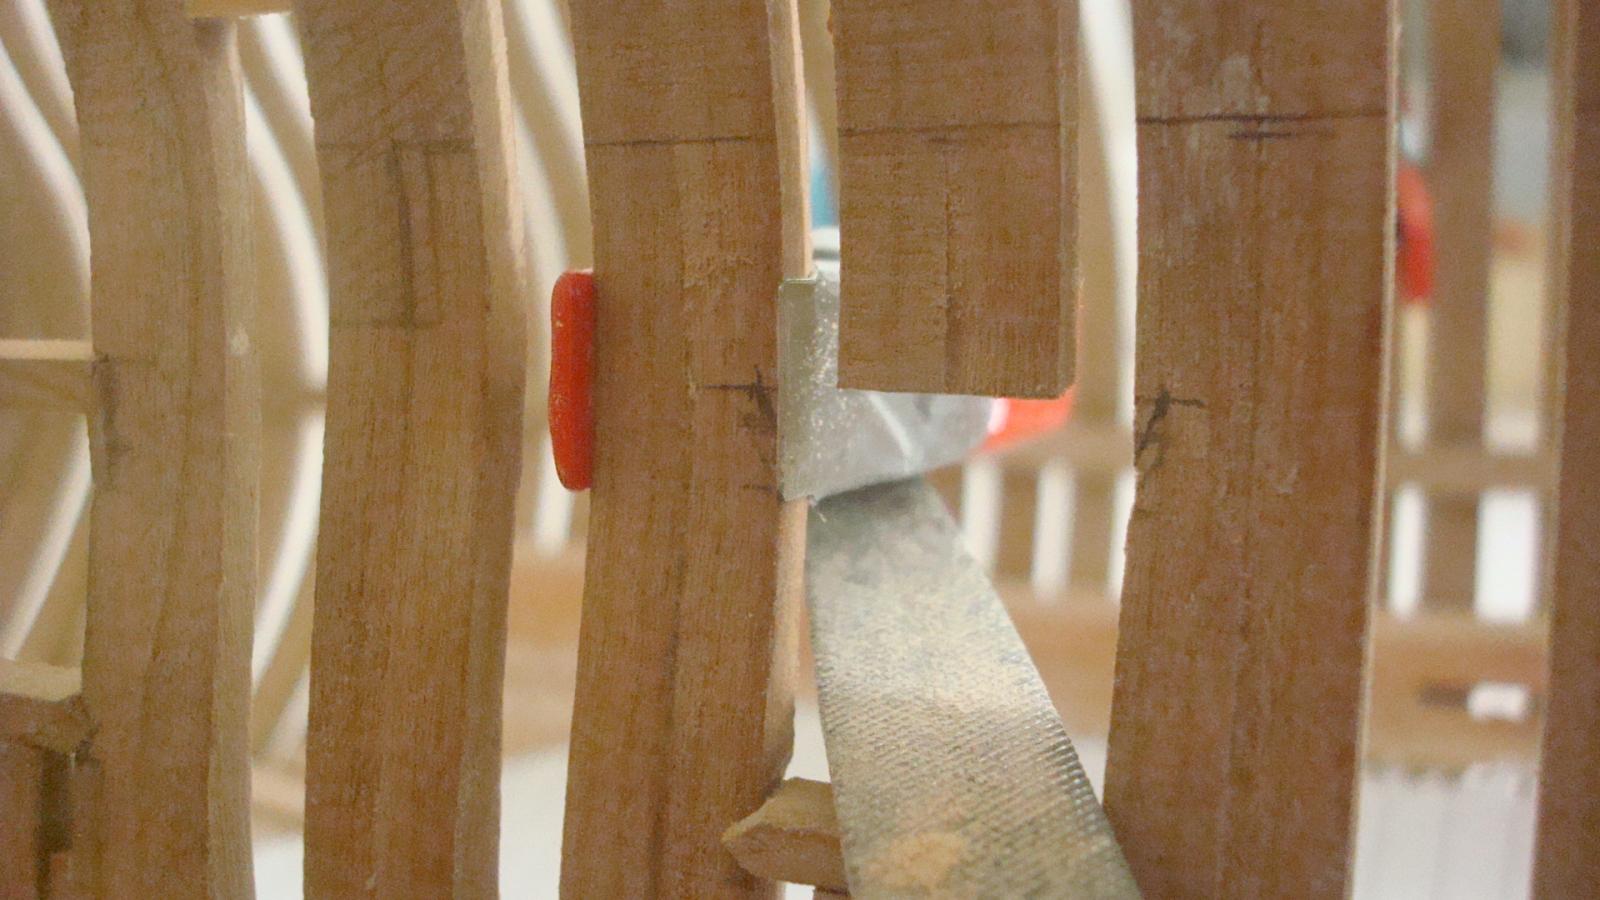
I use a little mirror just to ensure that the plank is true to the frames.
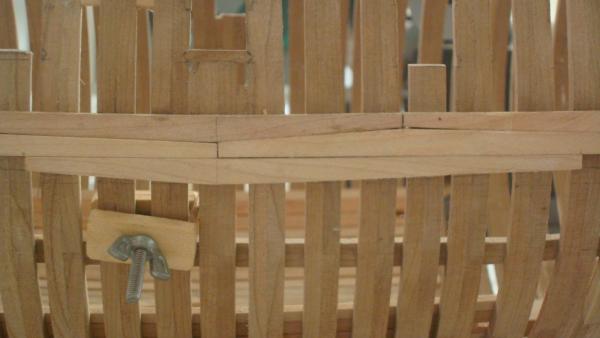

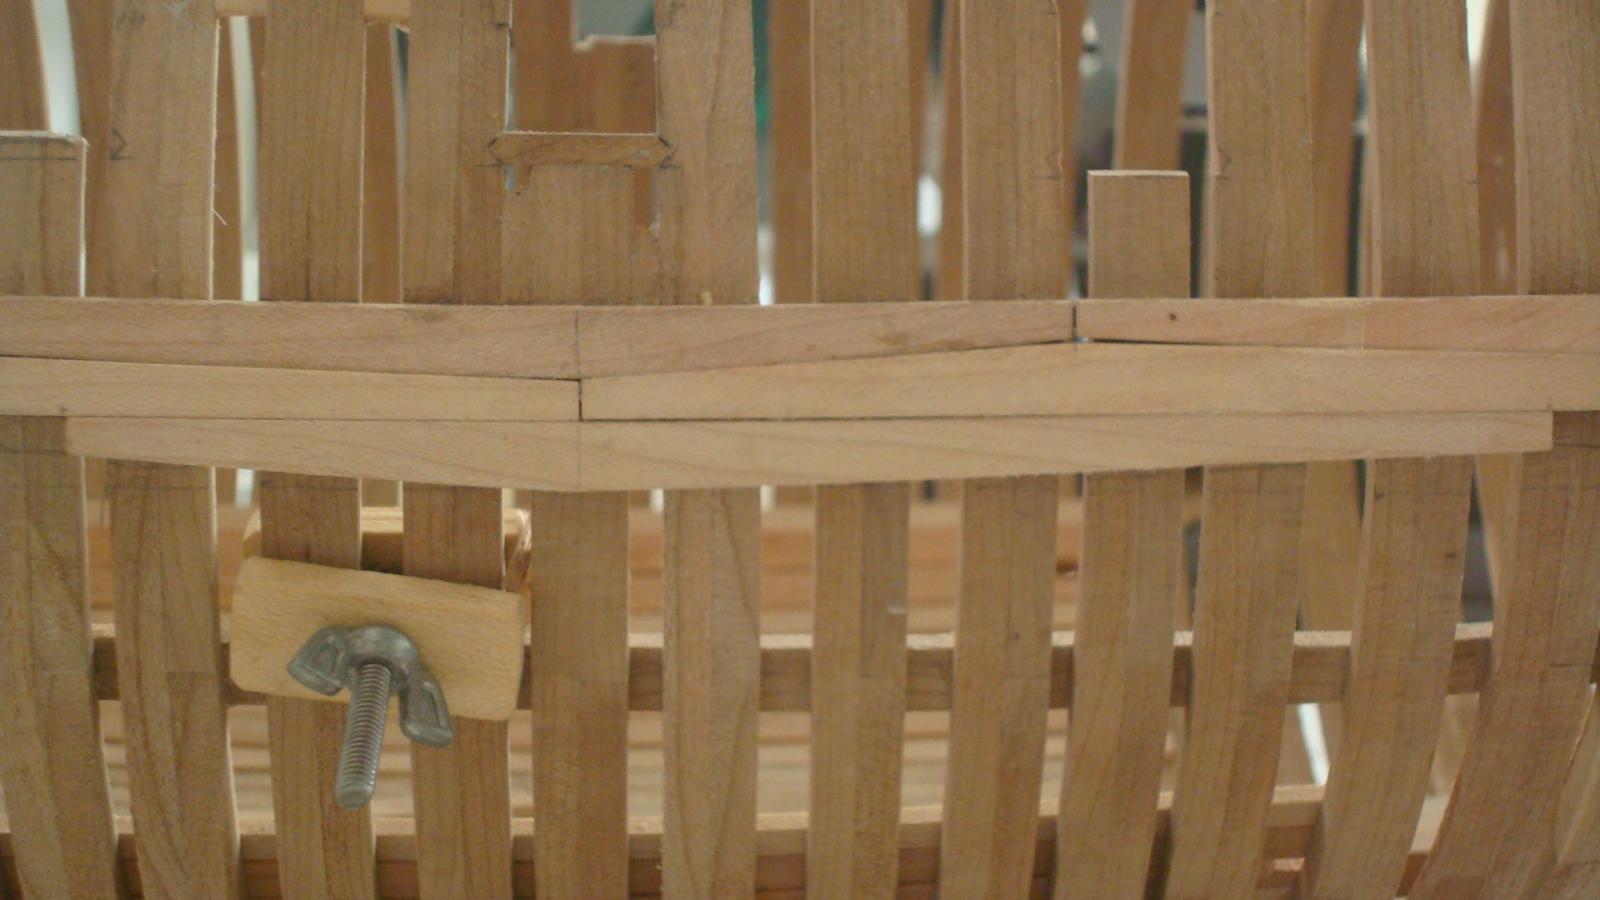
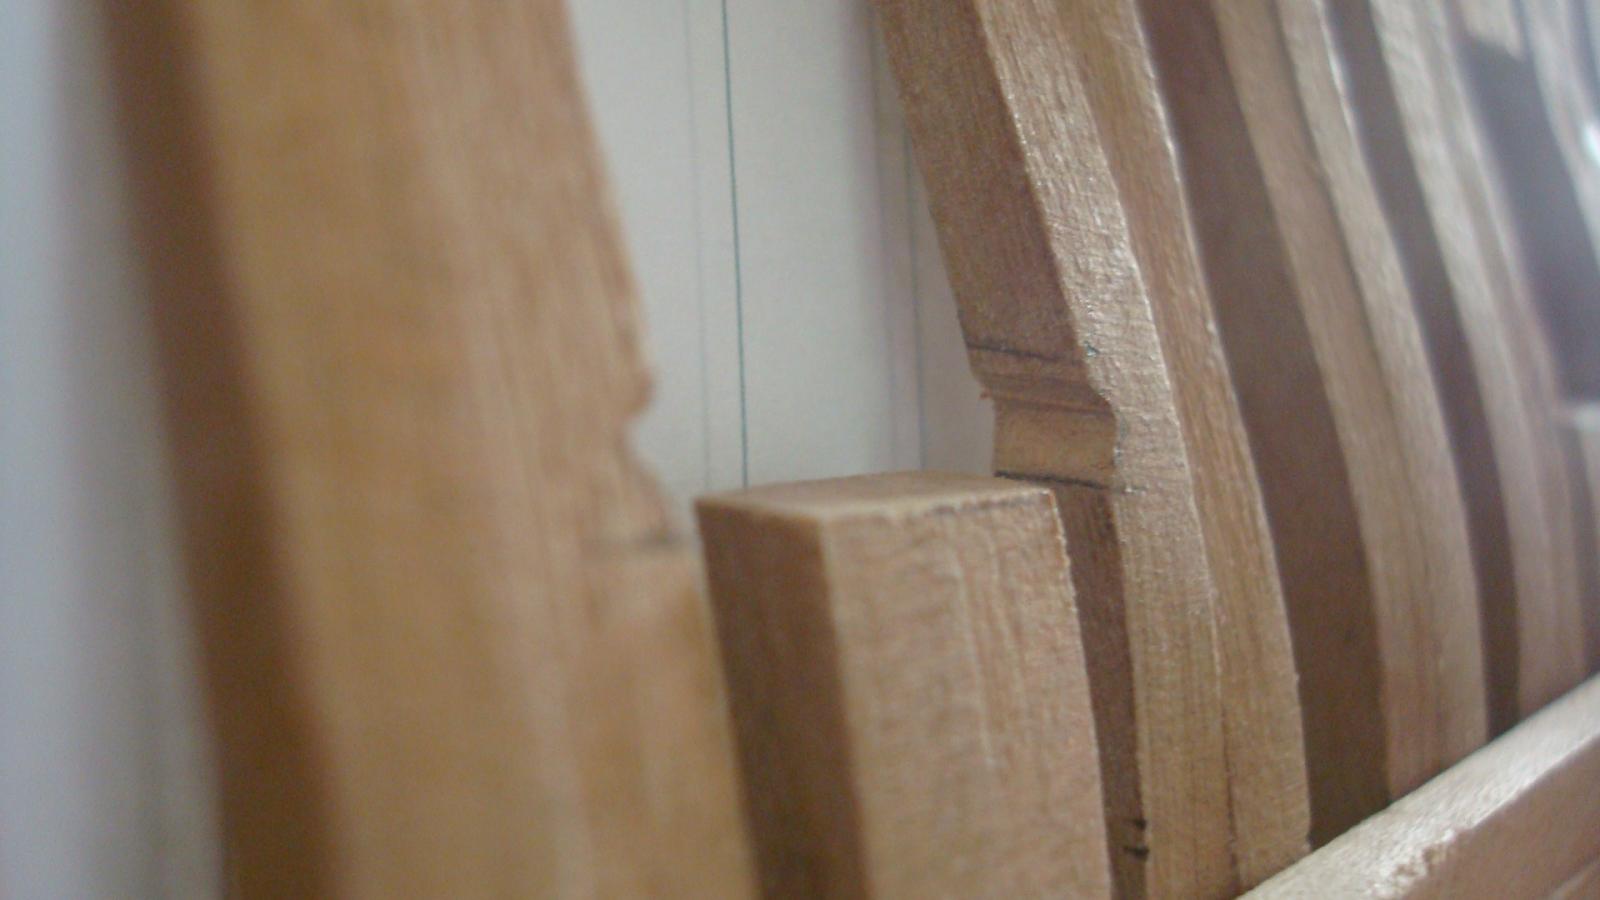
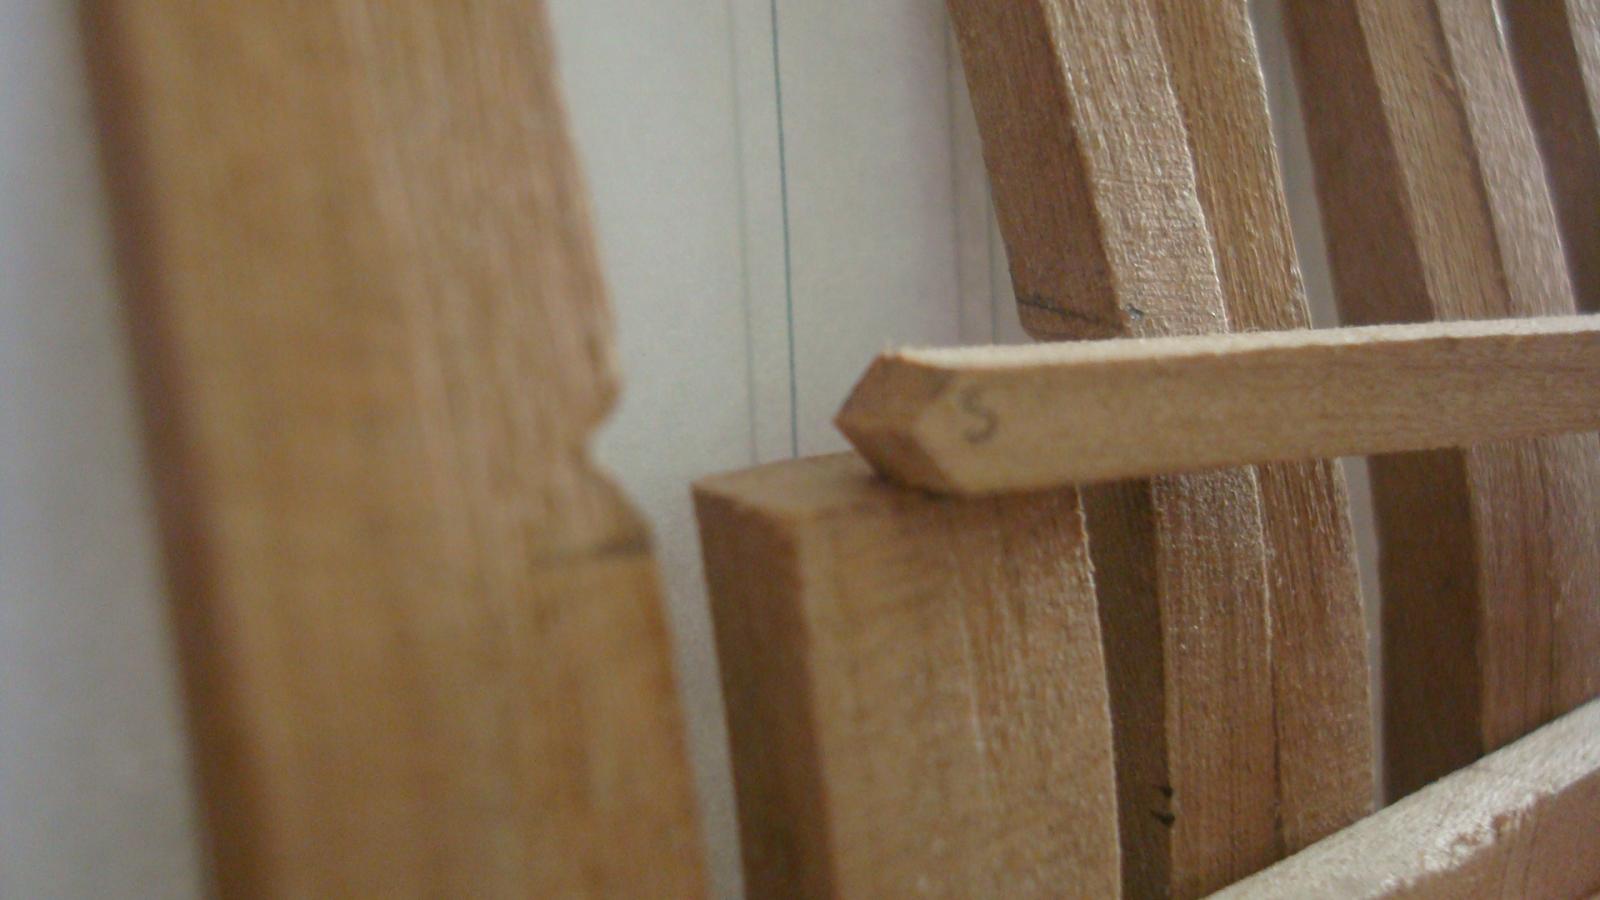
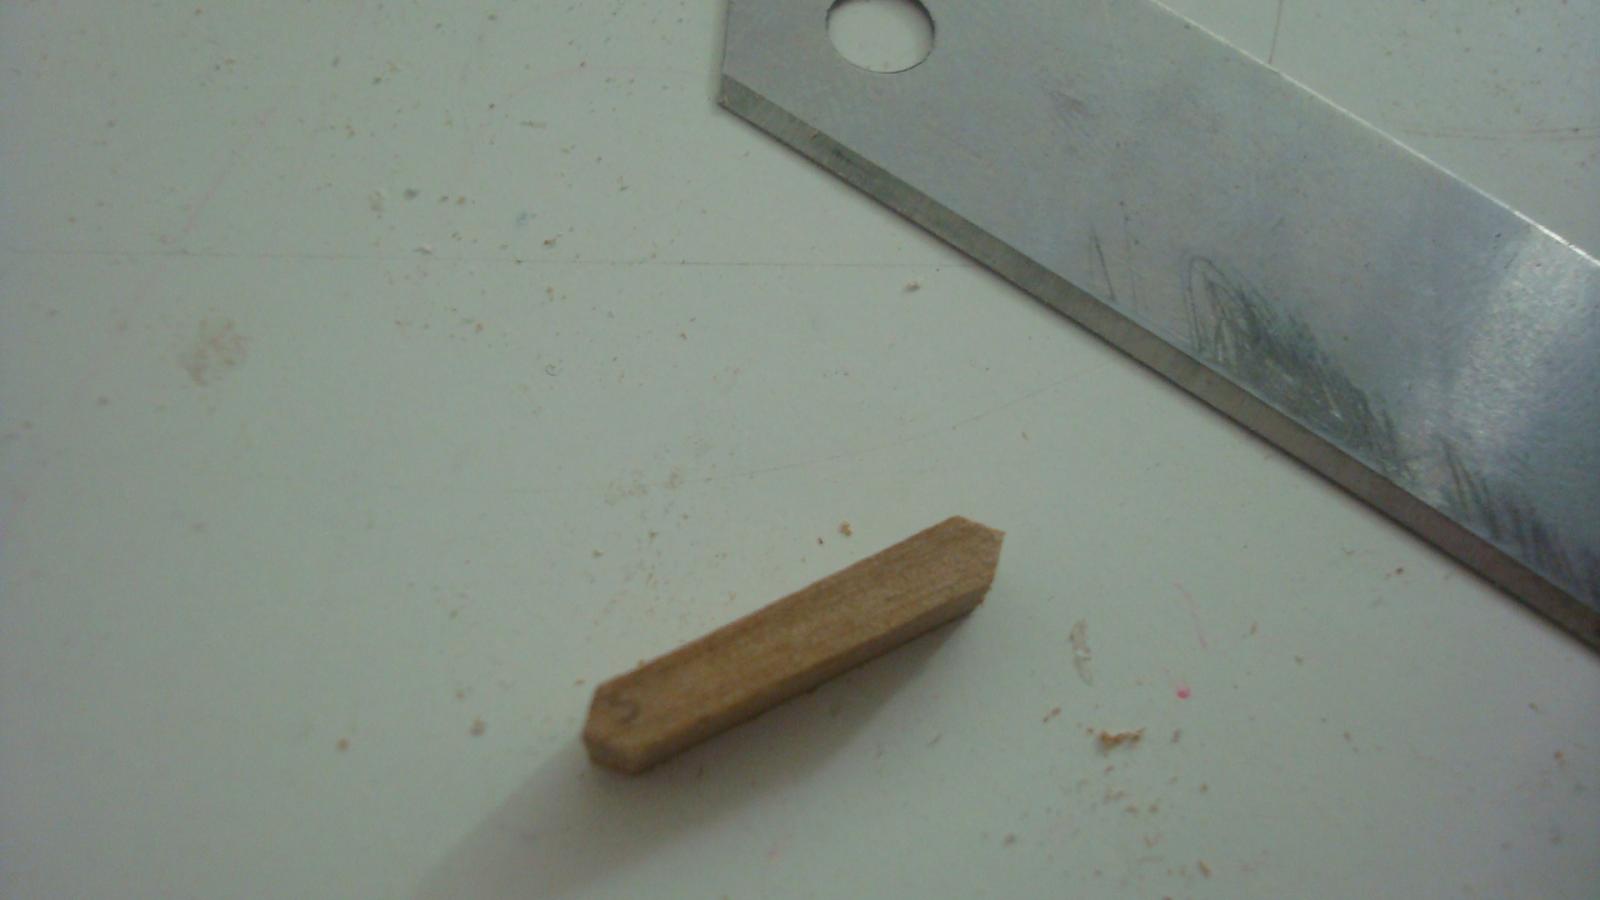
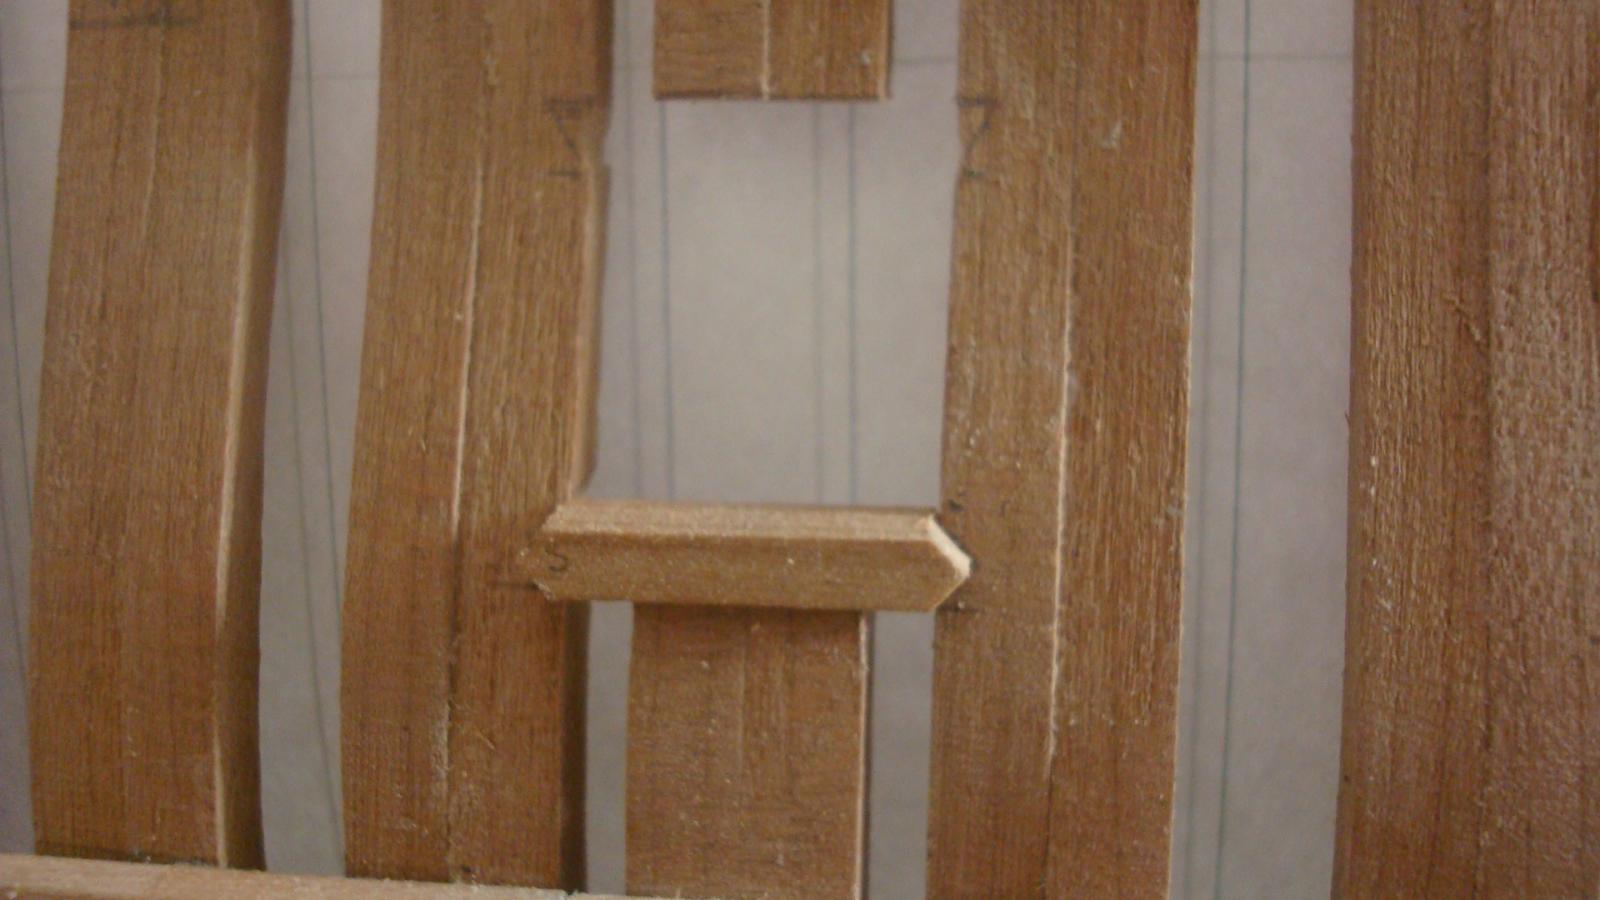
This was my first attempt. Gun port #8. I did a little bit os surgery cause I did the sarf too low on the upper beam.


Using a square pine stick of wood is "must be". It really helps a lot.
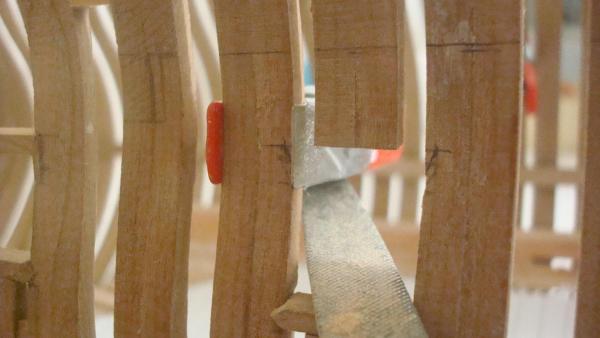
I used a clamp to avoid damaging the frames while I am sanding the frames. (up or down)
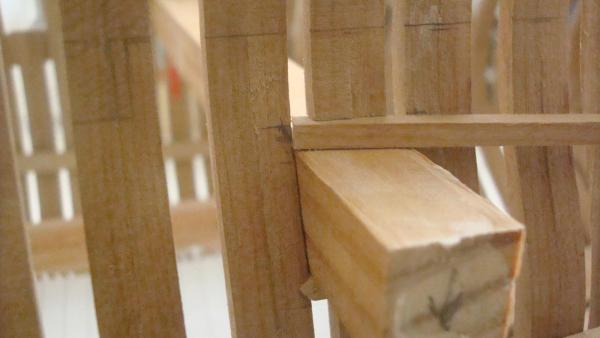
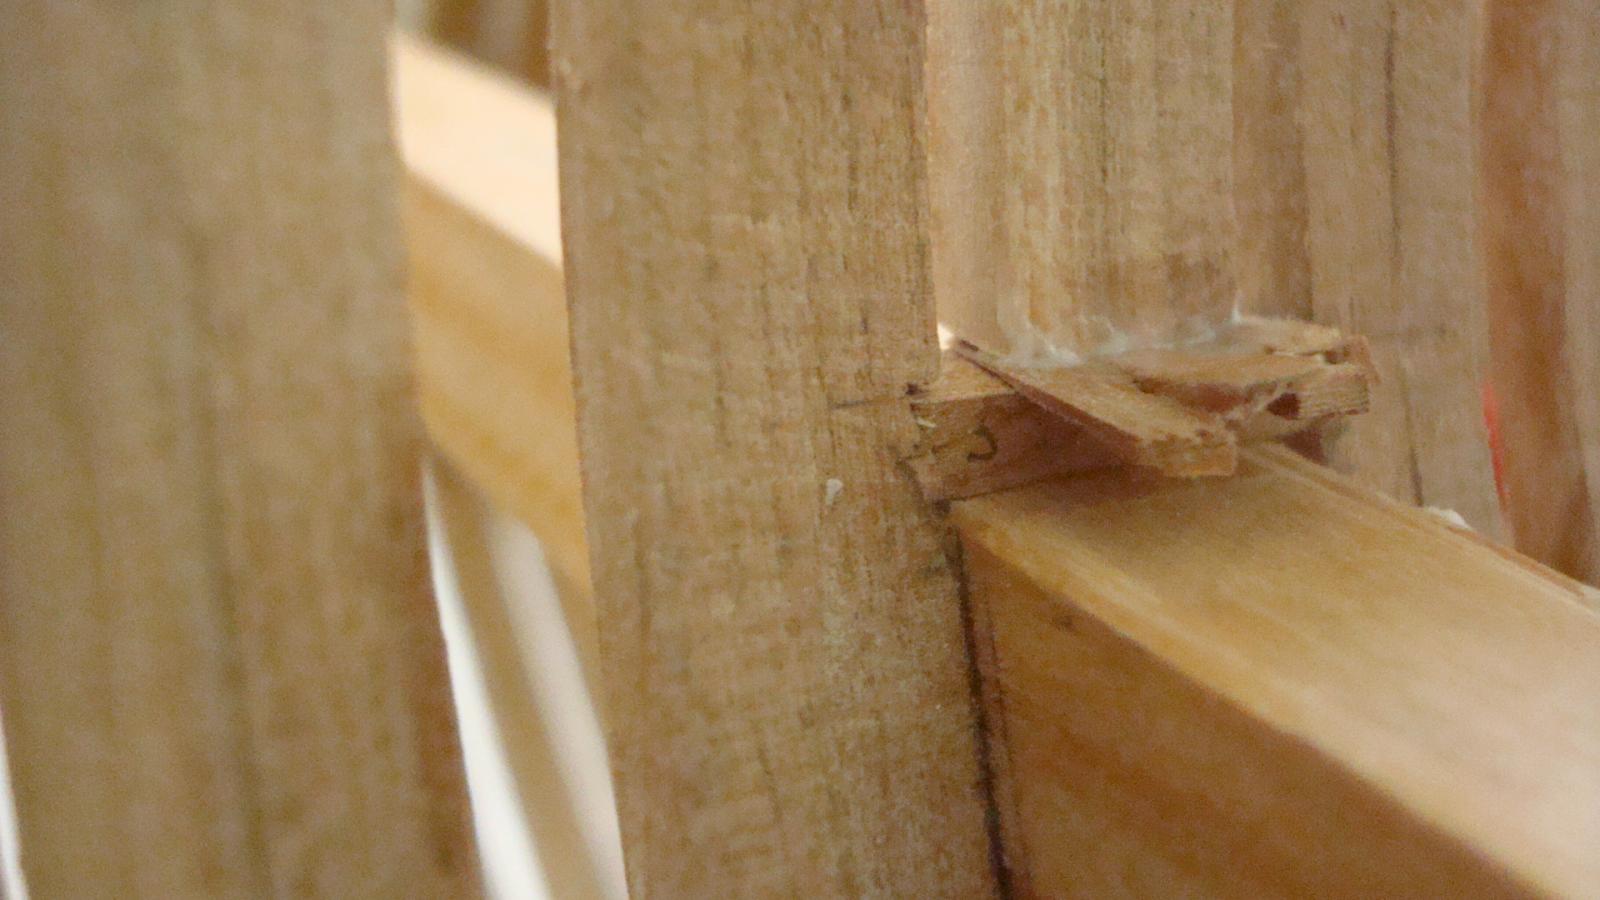
Even with all the "care" one put on sanding there is always gaps, at least on my work. I glued small chips of wood, let´em dry and then trim them with a blade. All of this will be sand of course.
Good luck!
Daniel.
- jaerschen, WackoWolf, sonicmcdude and 3 others
-
6


hms triton; first attempt at plank on frame
in Cross Section Build Logs for HMS TRITON
Posted
Hello Mick!
I´d go for the wood "wood for triton 007.JPG" for the wales and waterails and "wood for triton 008.JPG" for the interior and exterior planks above the wale.
Next time remember to click (once you have all the pics uploaded) on "Add to the post" (on red) so can describe every single pic you attach to the post...
Best wishes!
Daniel.