Daliab
-
Posts
136 -
Joined
-
Last visited
Content Type
Profiles
Forums
Gallery
Events
Everything posted by Daliab
-
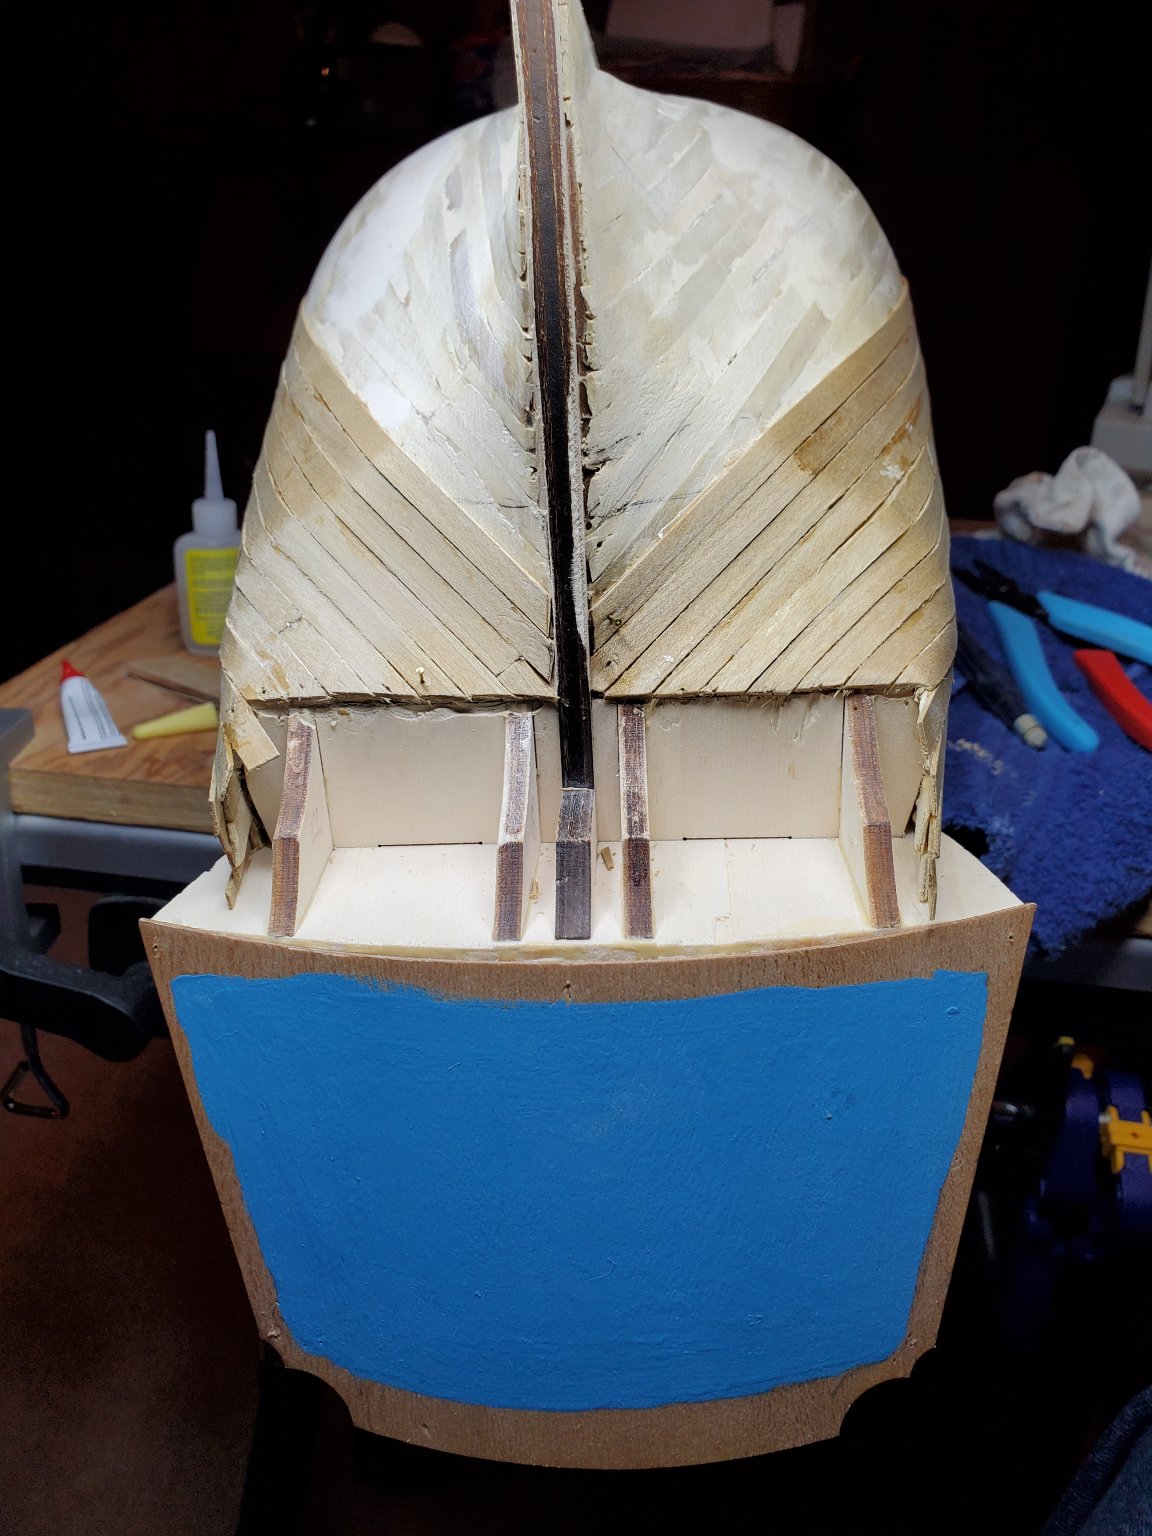
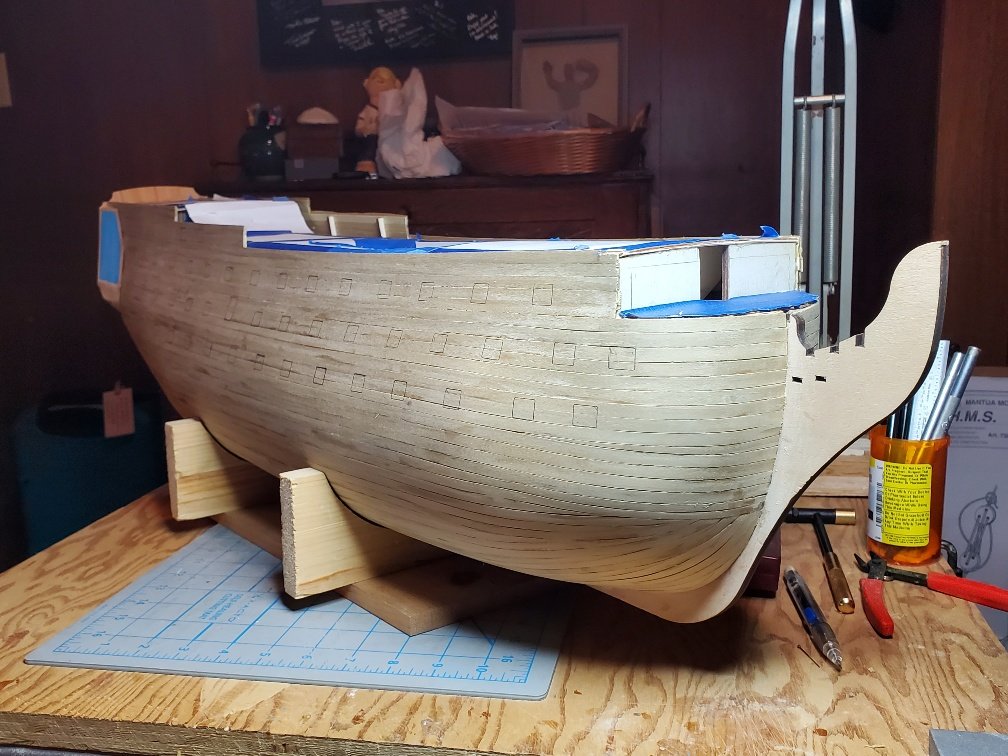
 Mispeltyoof...... I had the same problem and received a lot of help from David56 who is building the Vic also. He added a picture that helped me get started. Below is the picture of my stern. I have just started coppering the hull. Hope the picture helps you out with your issue. I went into your build page and saw how you were bending your planks between two blocks of wood. Word to the wise, I soaked BOTH ENDS of the planks for about 10-15 minutes. This helped me a bunch especially in the stern area because the bend of each plank is so aggressive after the last bulkhead. Because you soaked the plank, it bends and twists without splitting or breaking when making that aggressive bend after the last bulkhead. INADDITION: look at this site. If your primary language is English, this site has instructions for Manua/Panart kits that are only in English. Helped me so I don't have to wade through all of the language instructions. https://www.mantuamodel.co.uk/downloads/2-uncategorised/37-english-translations
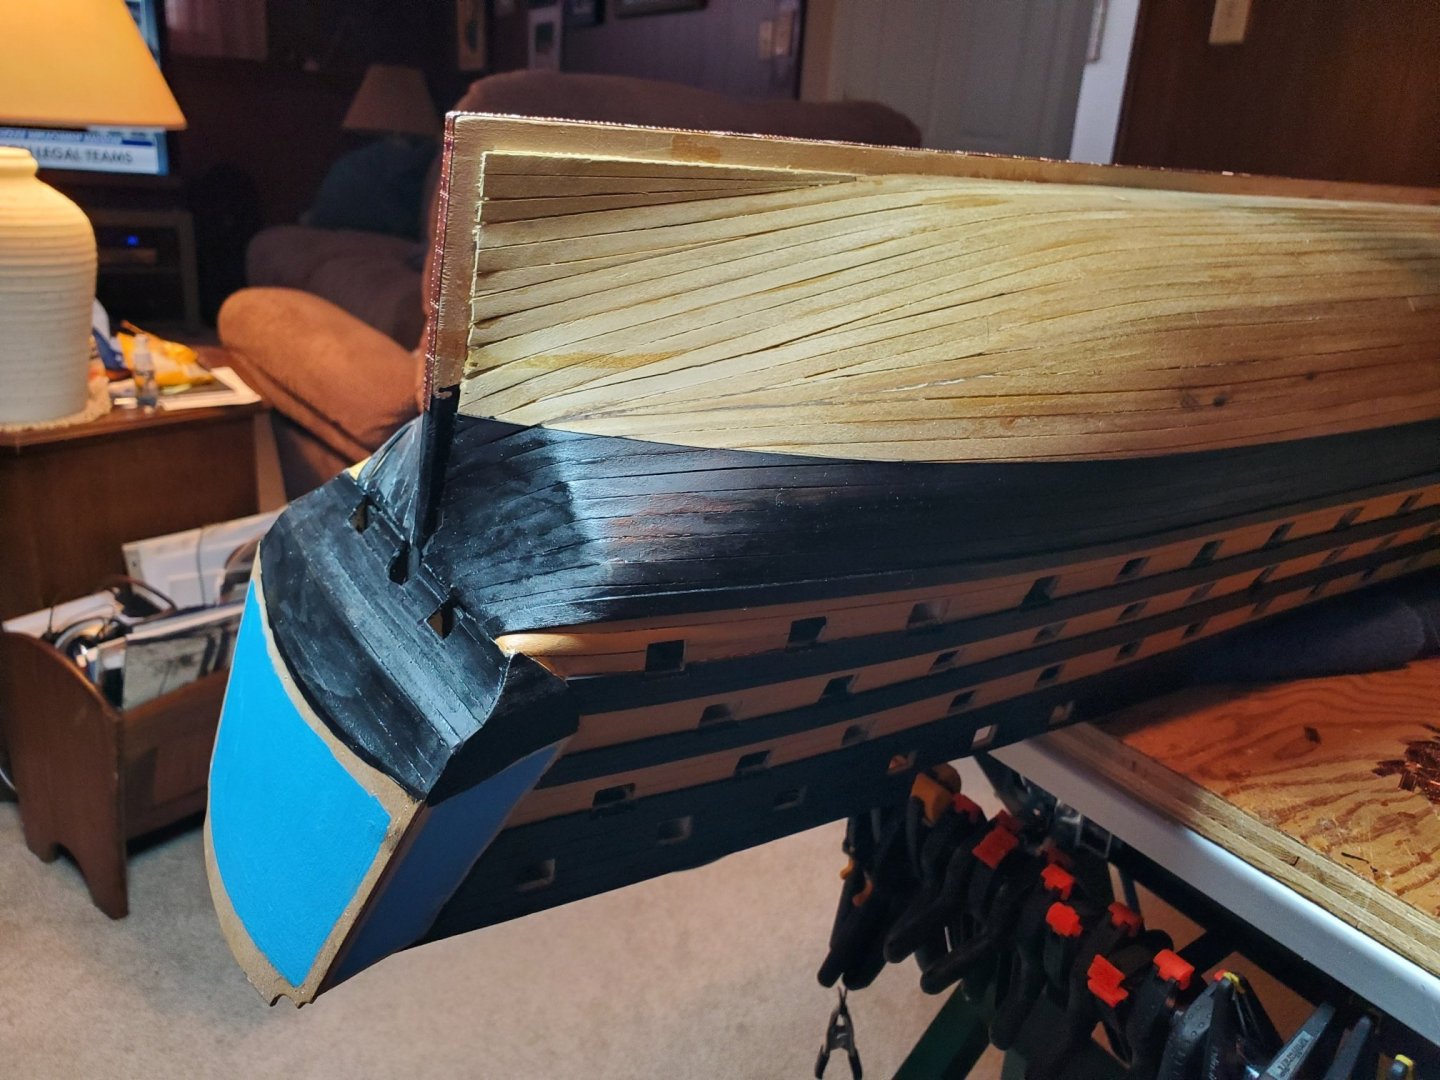
-
Thank you David56 and Grandpa Phil for your sage advice. Will be making the plunge soon.
-
Hey, you're really coming along nicely. The only fear I have is running out of copper pieces. I have a couple of paint touch ups before I start the copper plating myself. Any tips you have before I dive into it? Keep it up, your doing great.
-
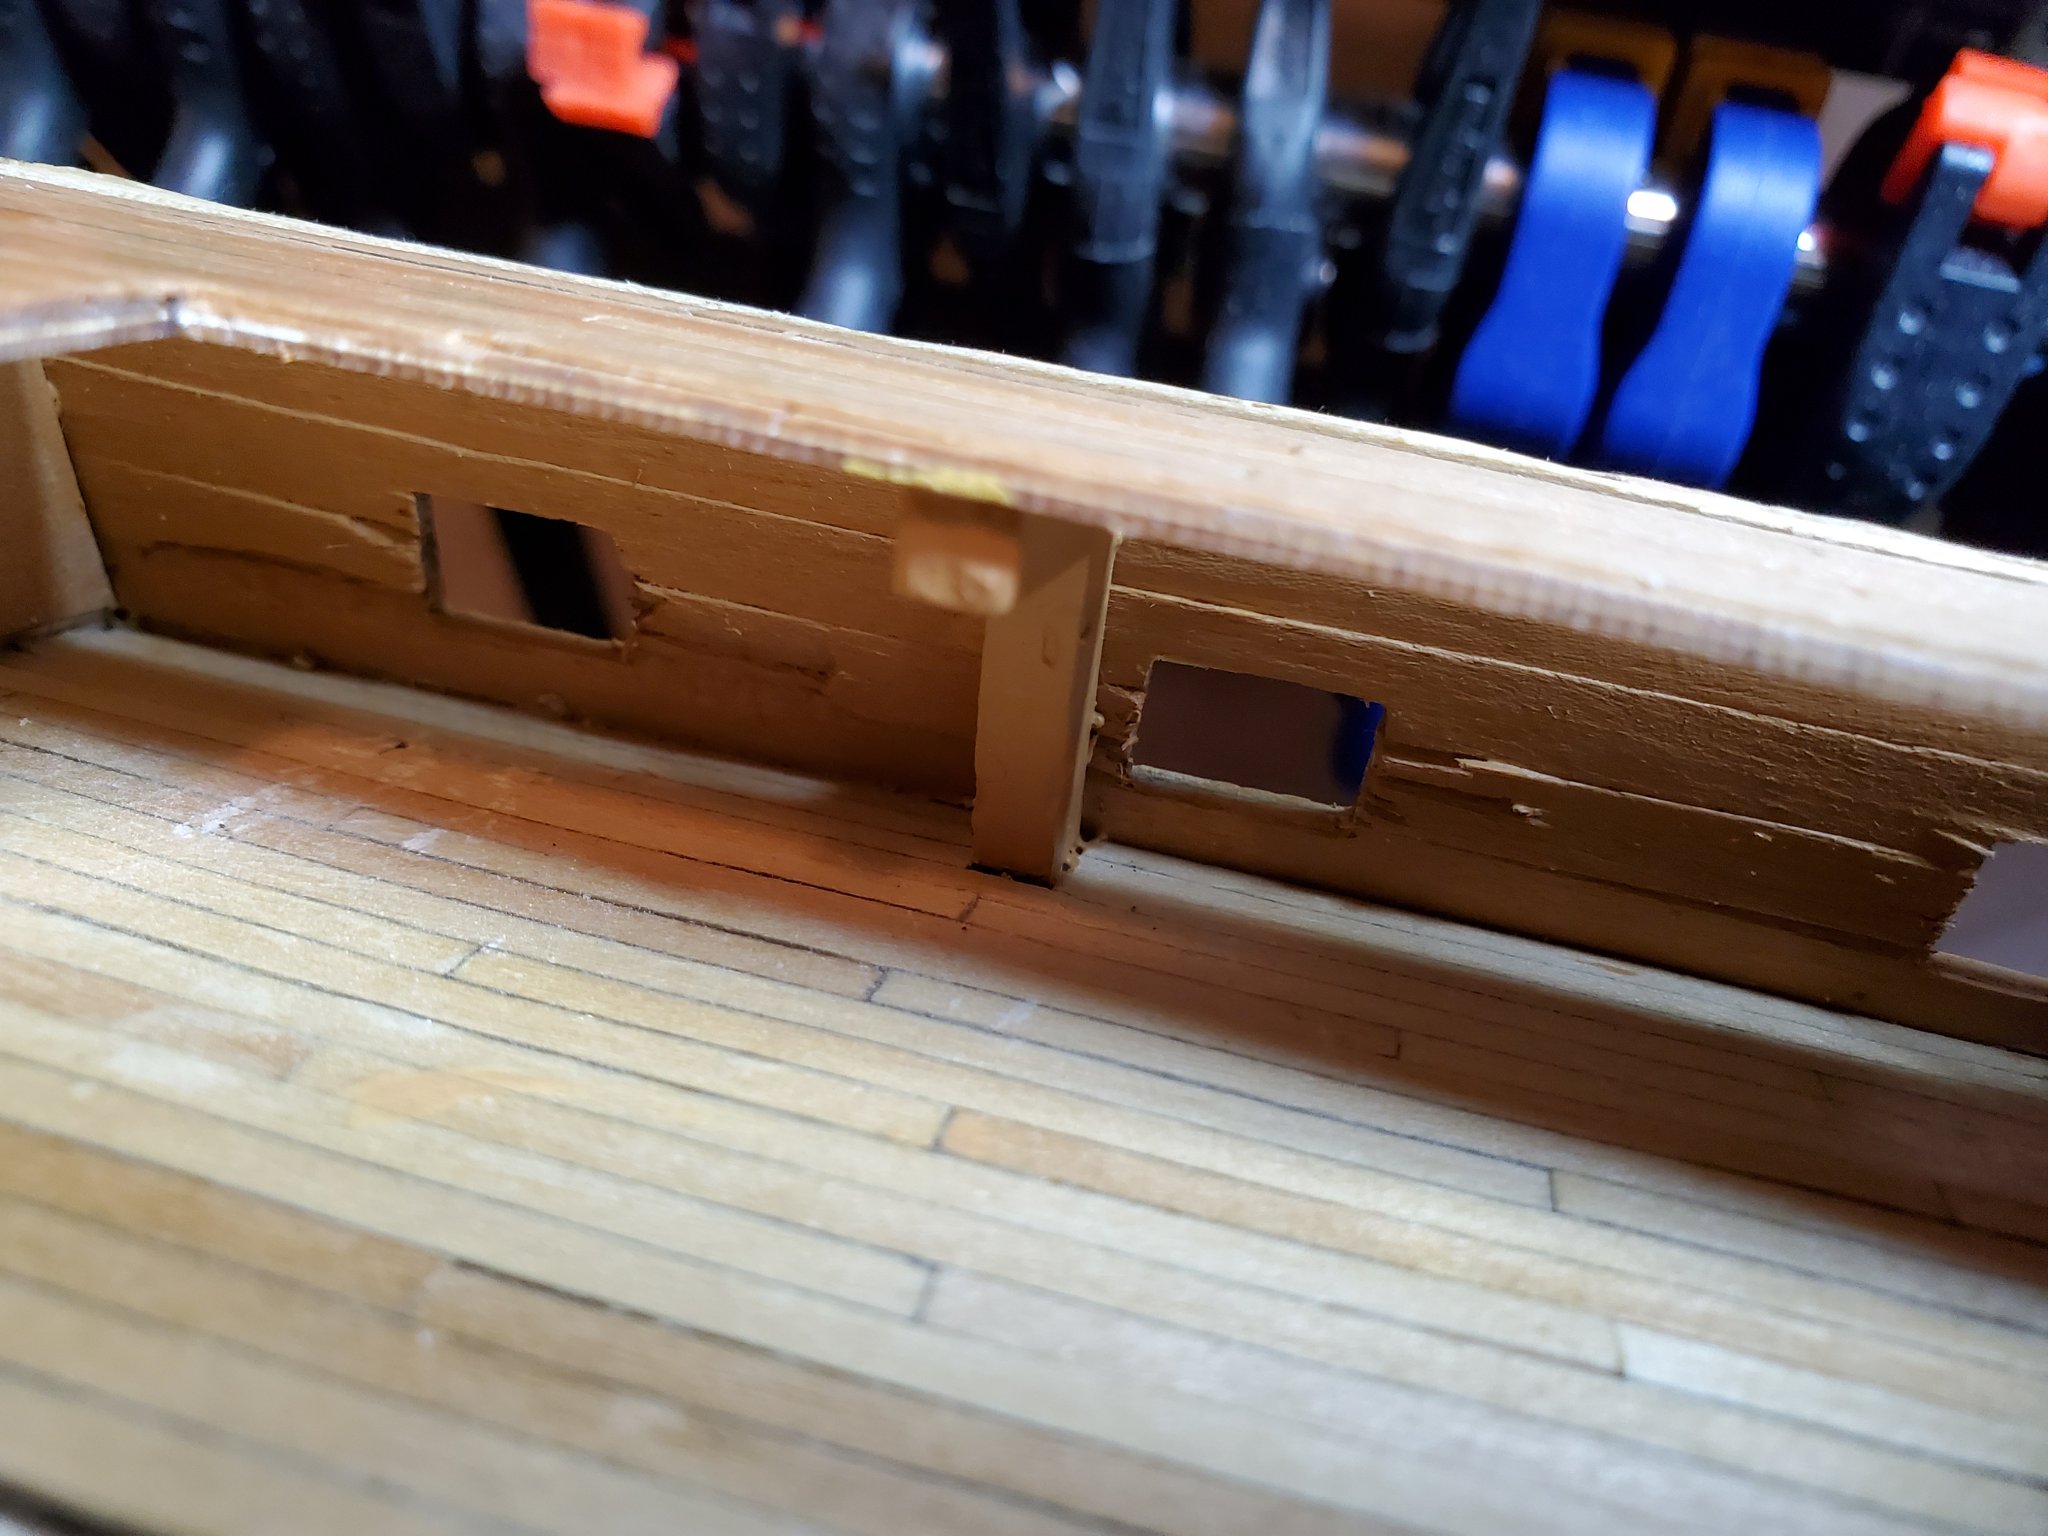
David56... thanks for your input. Lucky for me it only happen on 2 ports on the inside of the second deck and not really visible unless you really look for it. Think most of the damage will be hidden by the cannons and ropes. Can't reach inside to repair and sand the blowouts as it is to far back to reach. Will chalk it up to another lesson learned for future builds. Use more glue and sharper blades!
-
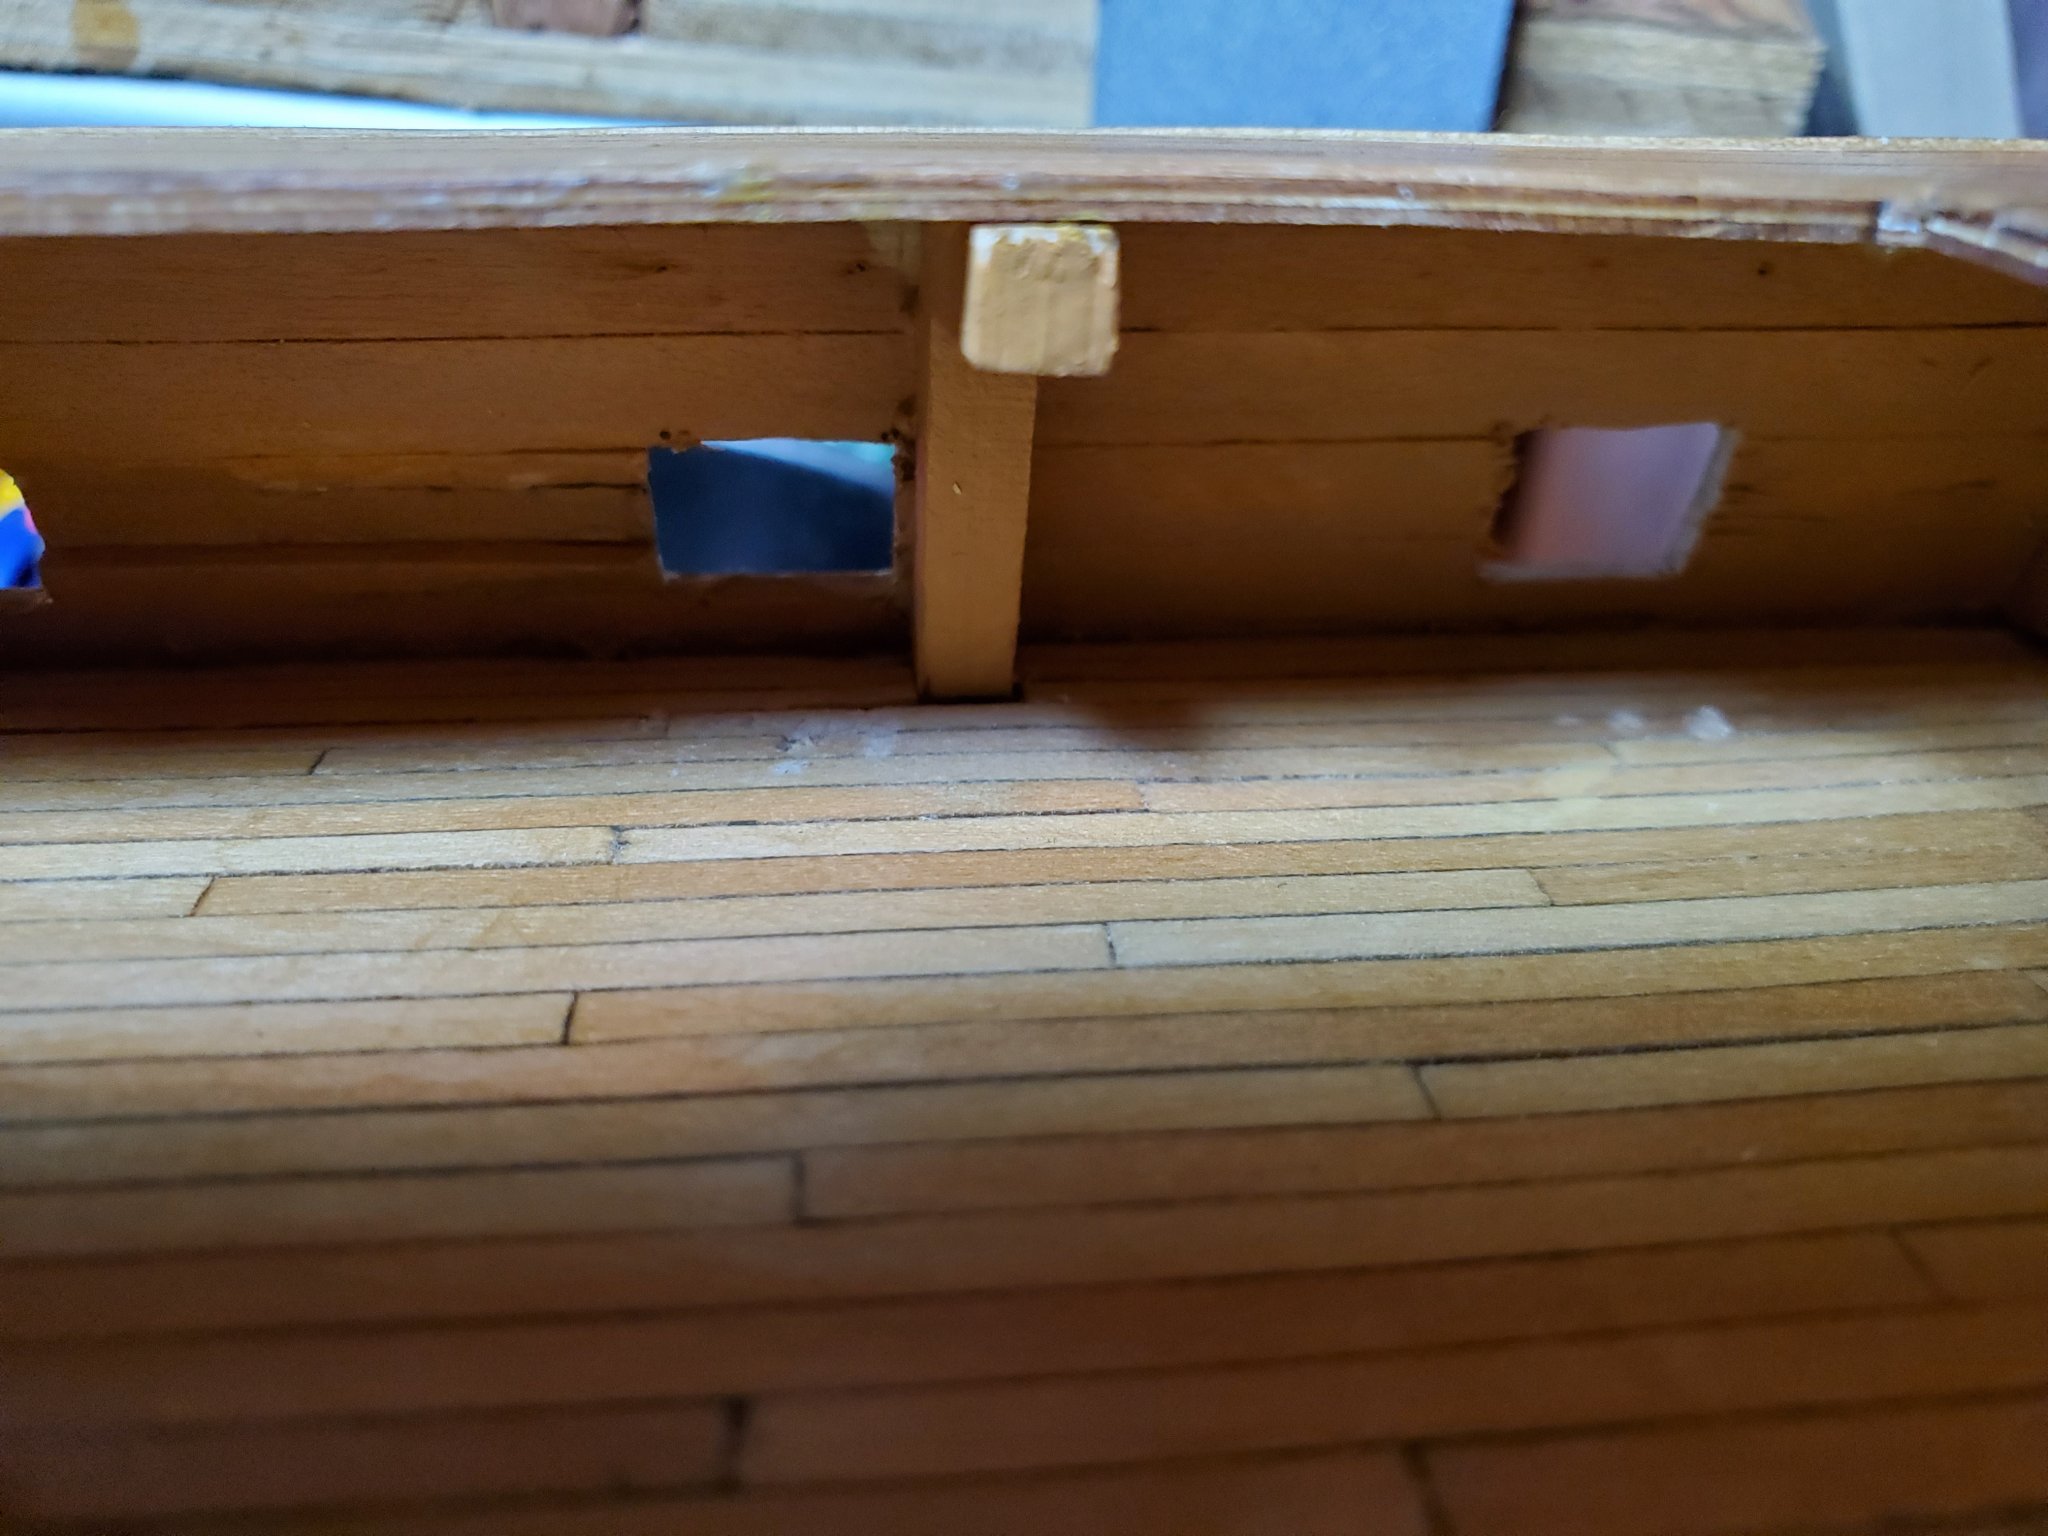
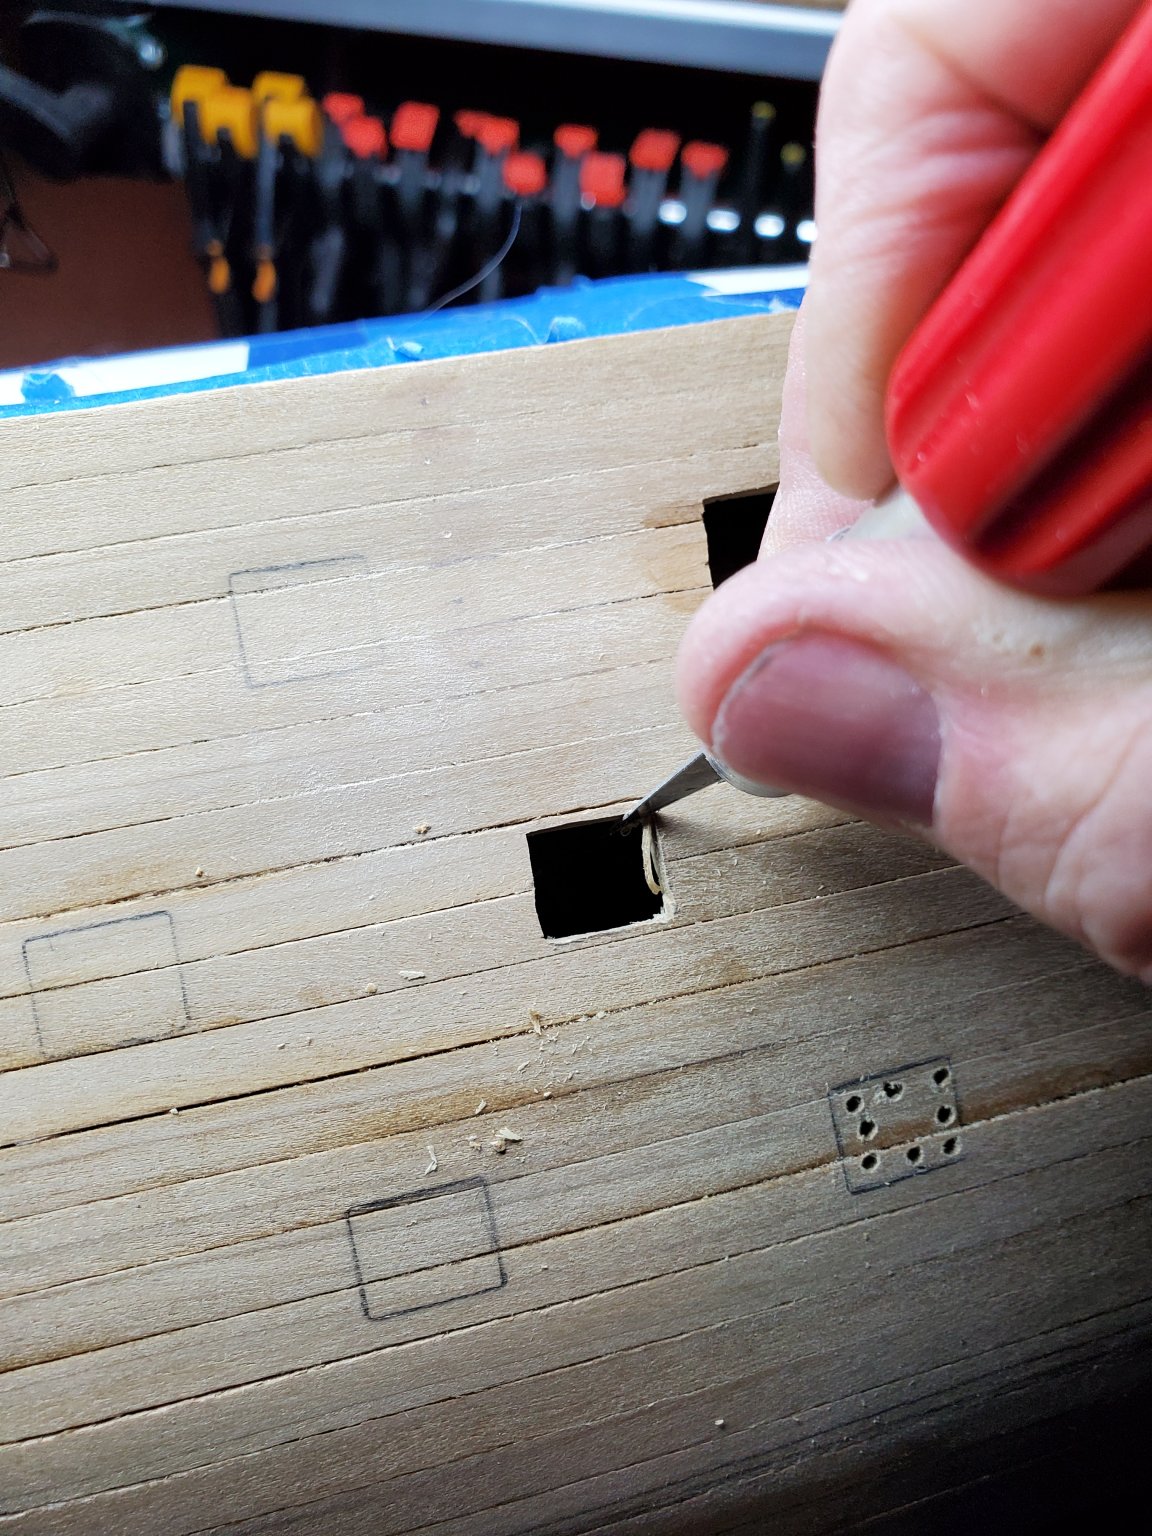
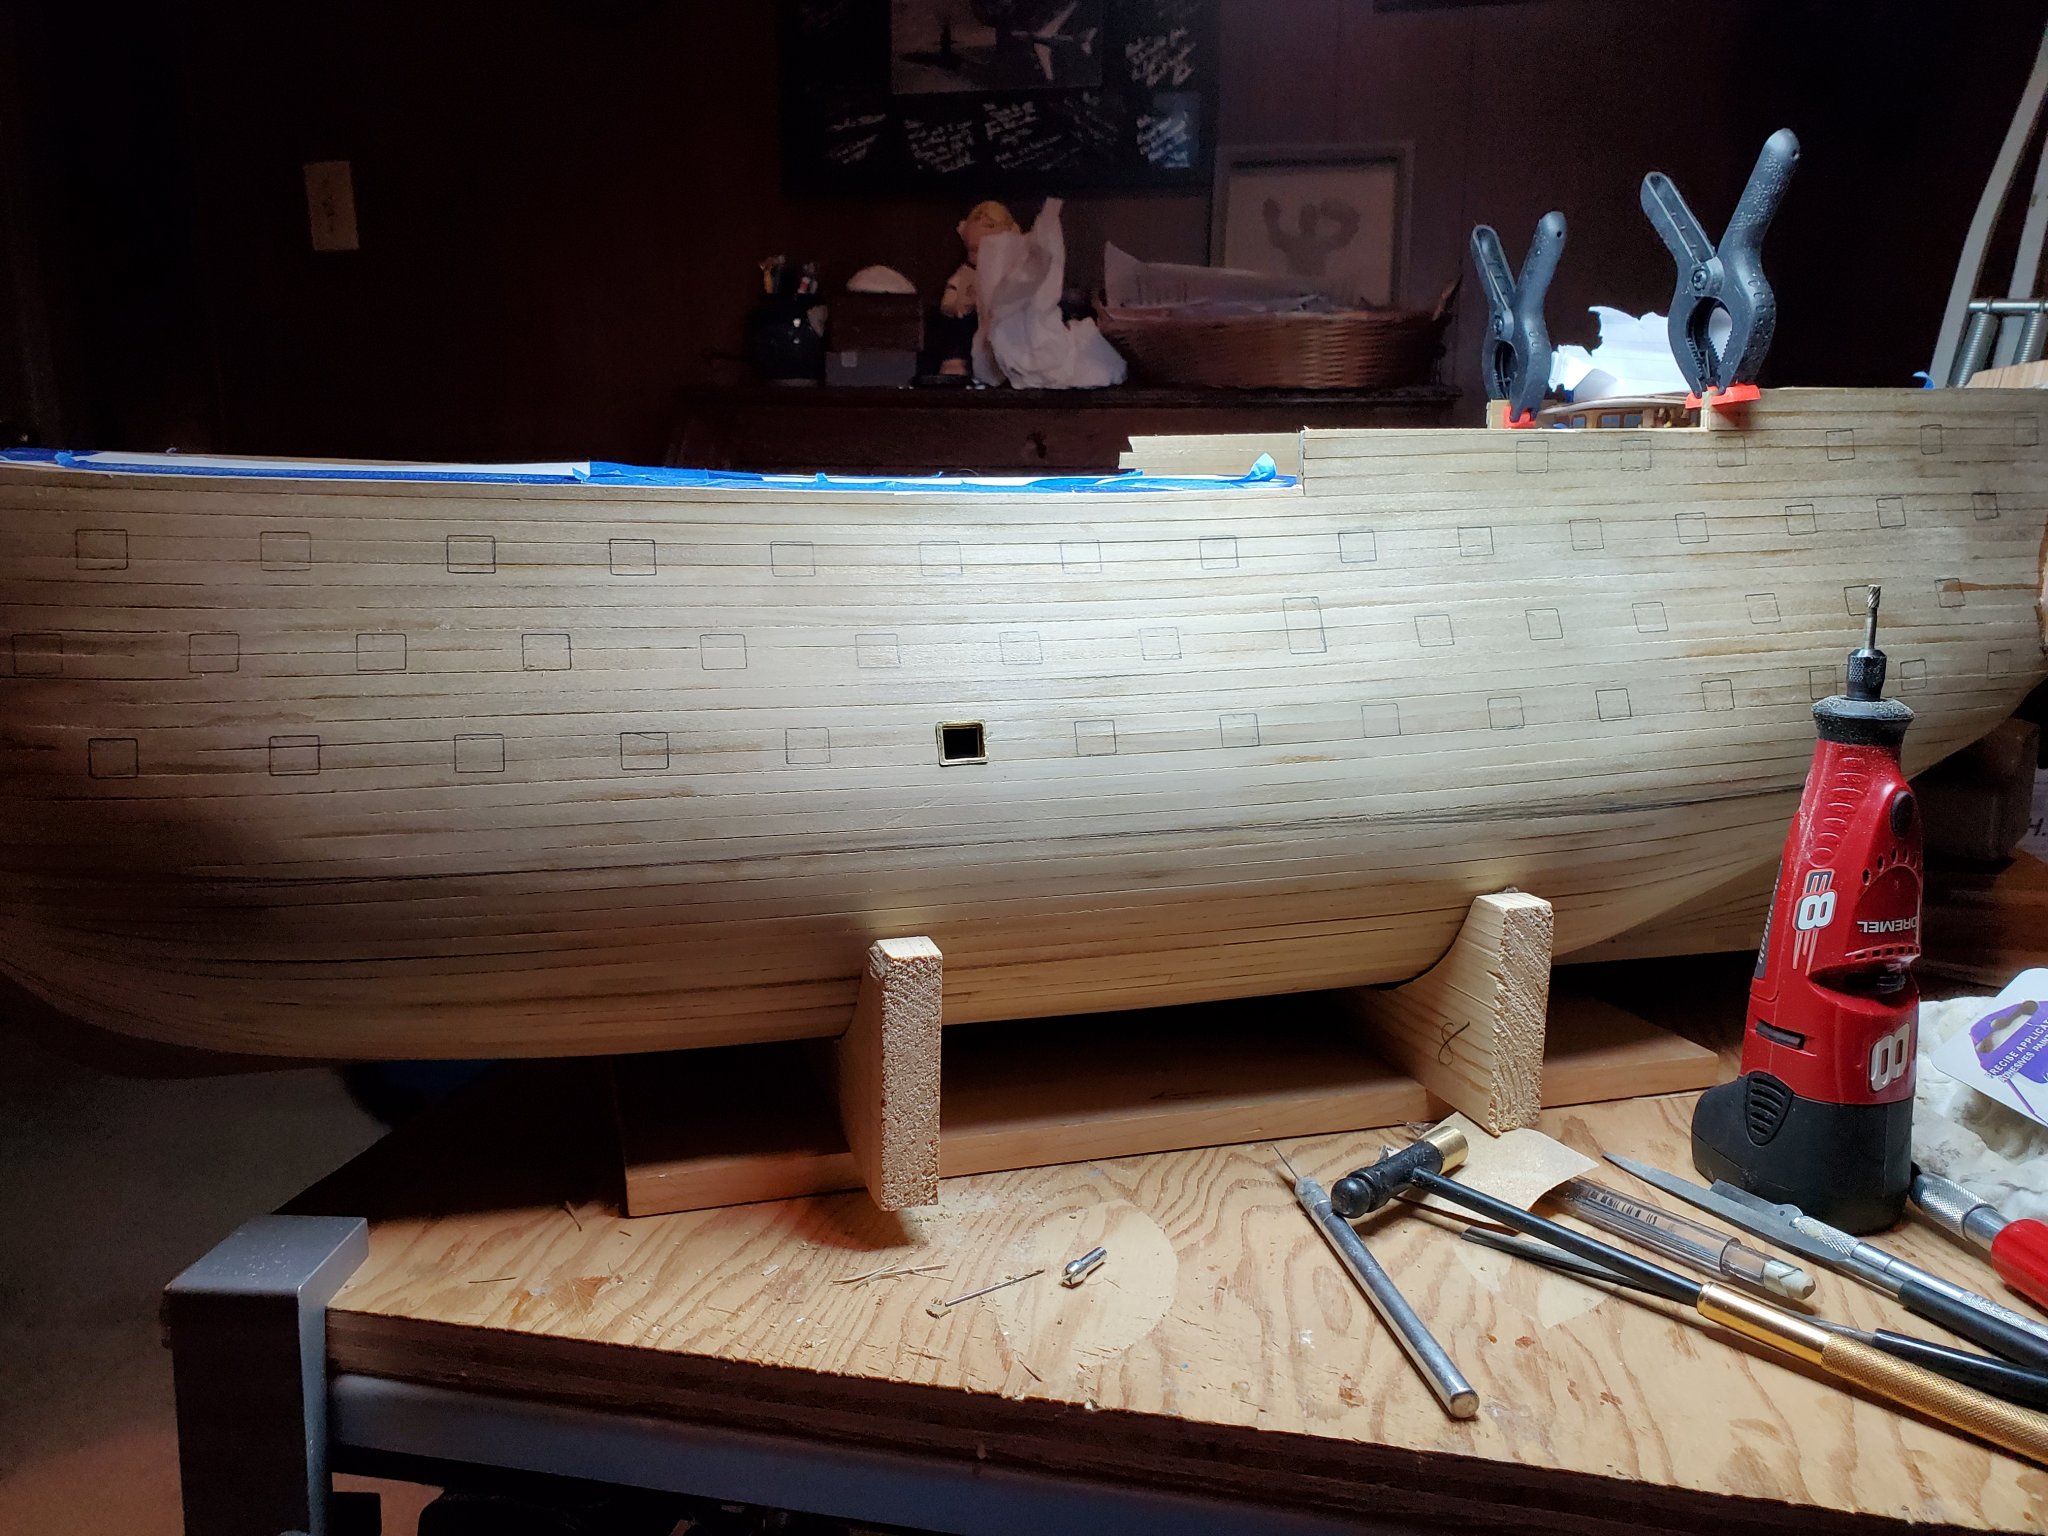
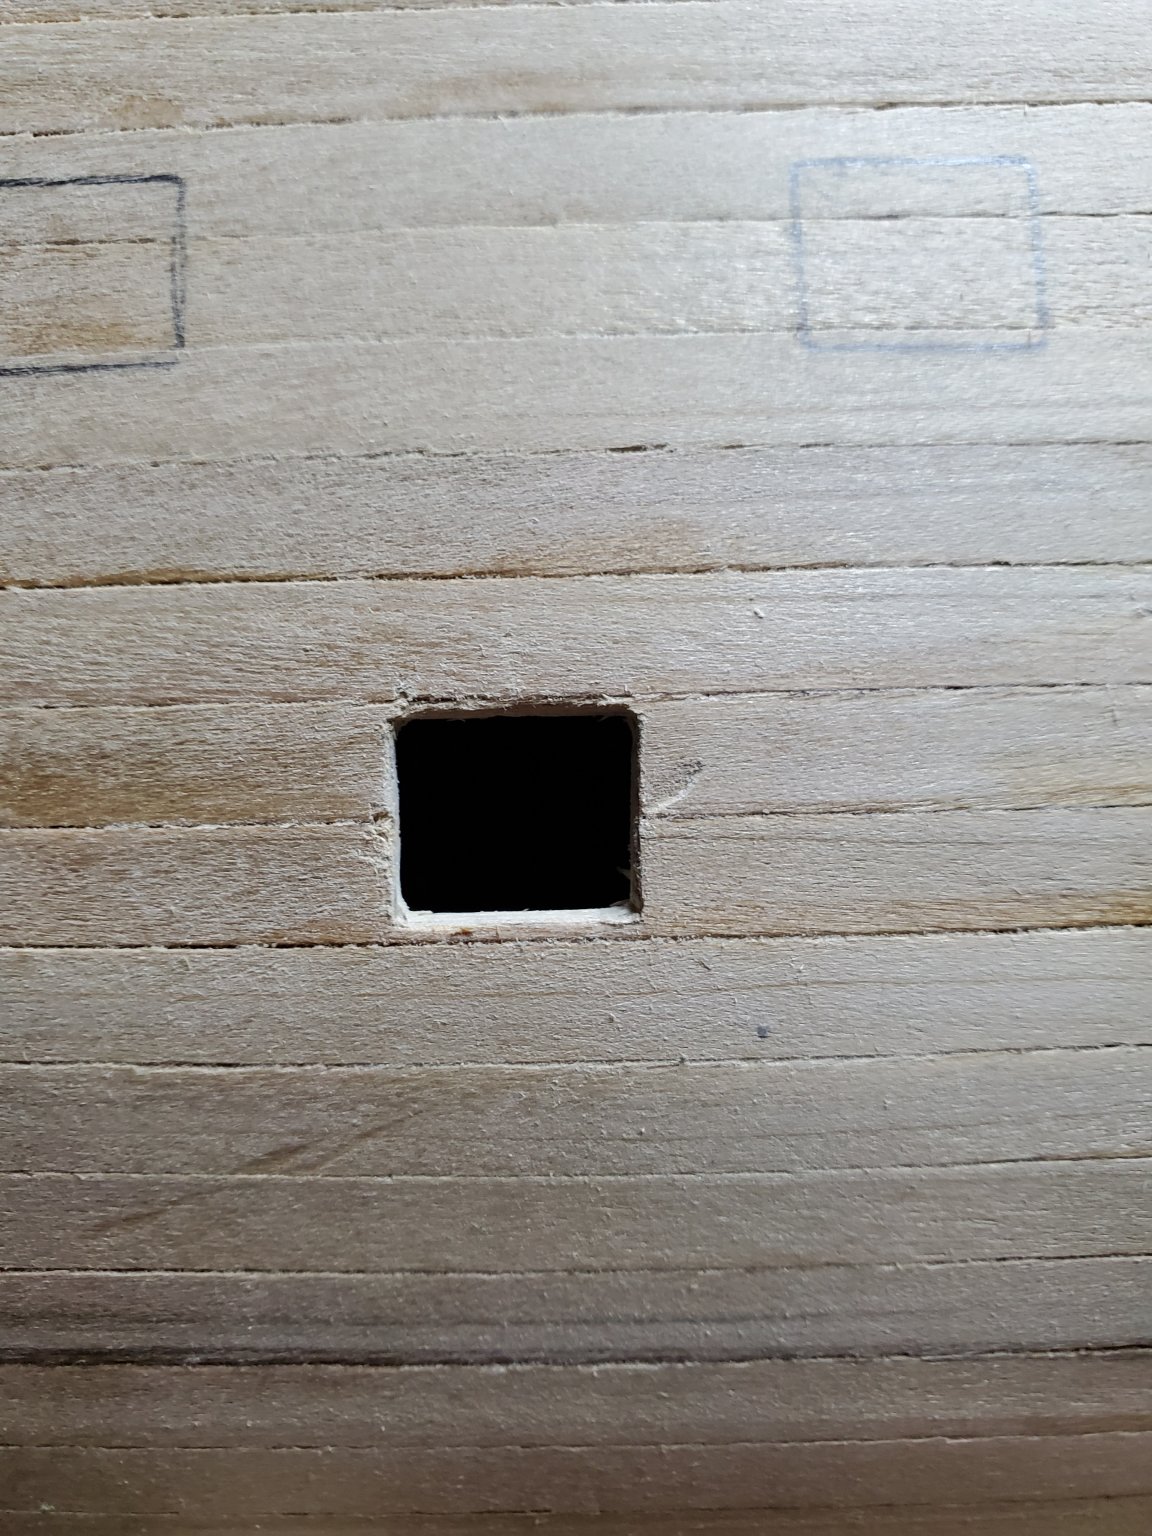
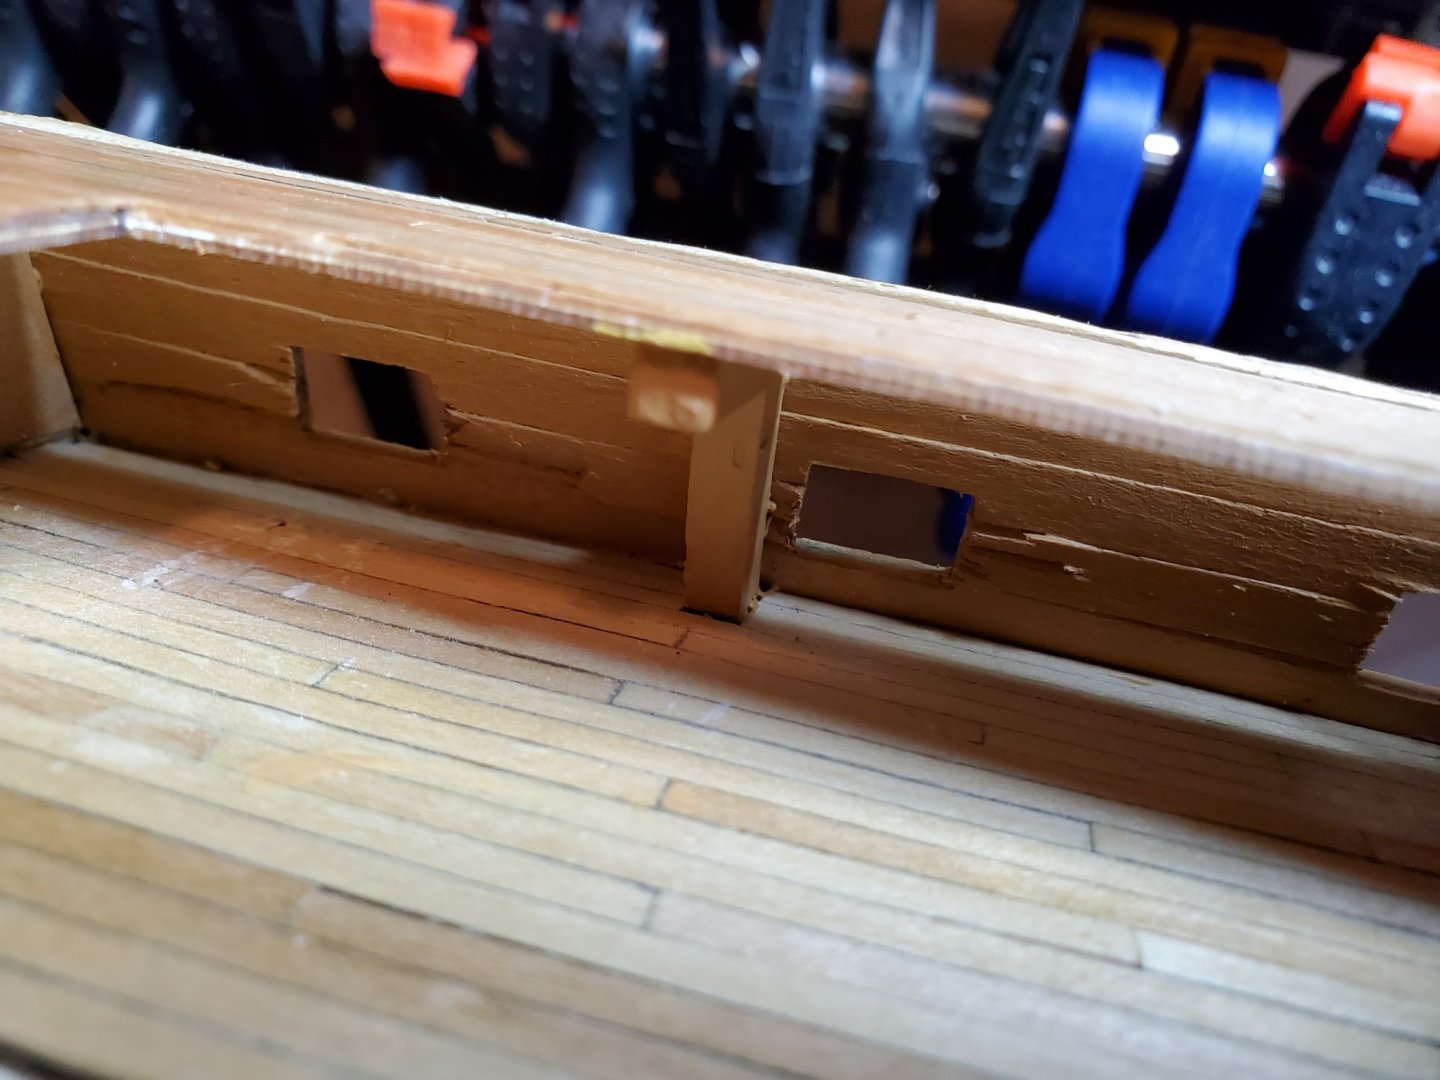
A couple of things that I hoped to get sharing my build log and reviewing other folks build logs was to see how they built their ships, retain some of the good ideas, learn from others mistakes, and to share with you my mistakes. The very first mistake I did was in my initial log entry by placing the wrong bulkhead in the wrong slot. BUT, I was able to recover from that. The second and third mistakes were by cutting out the ports for the cannons. As you can see from the first photo using a dremel tool to make holes to get get an xacto blade in to remove the material, I ended up drilling to far into the model and damaged the below deck. Lucky for me a cannon will be covering my mistake. The third mistake was done when removing the material from some of the gun ports. I ended up blowing out small sections of the first layer of planking from inside the ship. Lesson learned was drill more holes and always use a sharp xacto blade.

-
David56, how goes the coppering of the hull? Hope all is going well. Look forward to your latest updates.
-
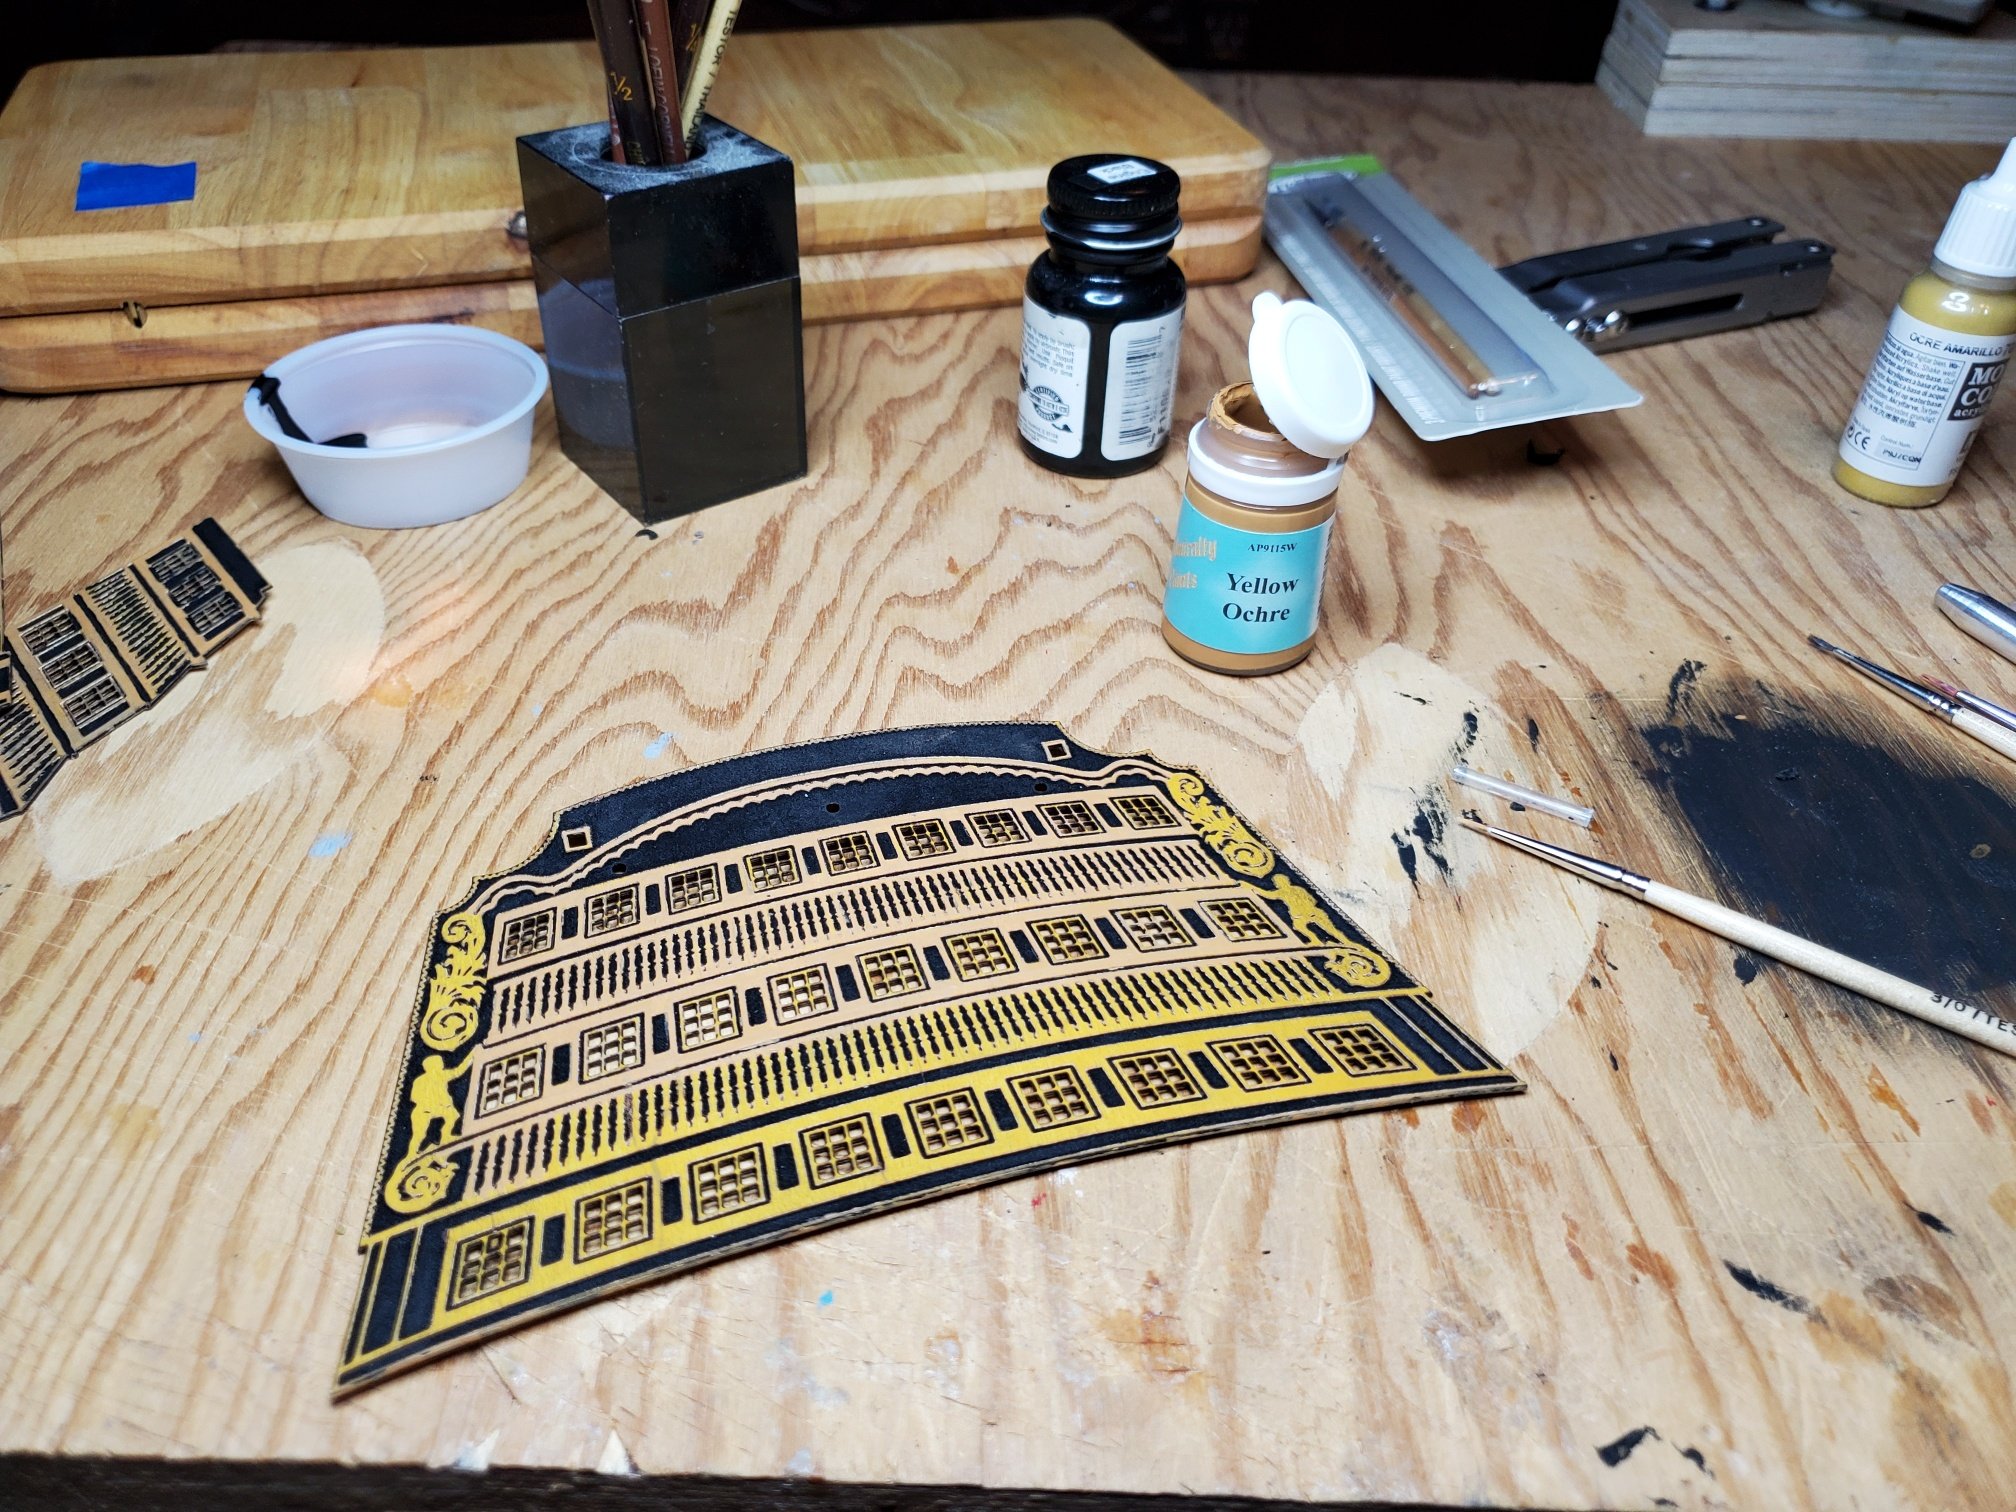
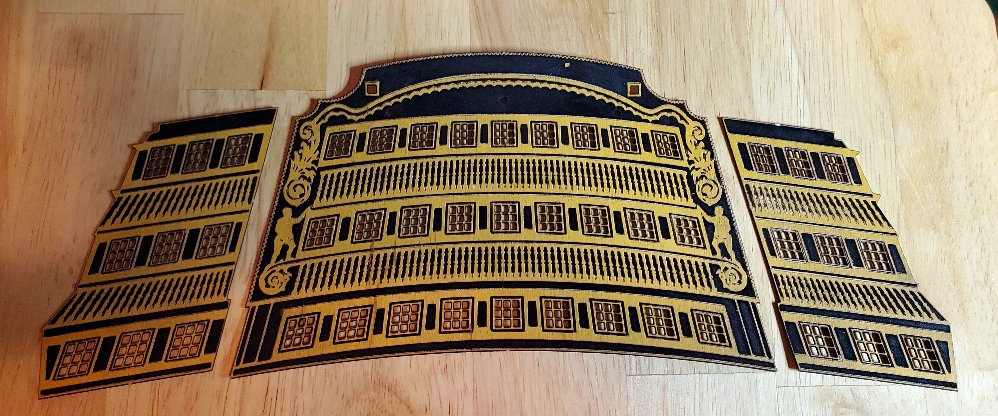
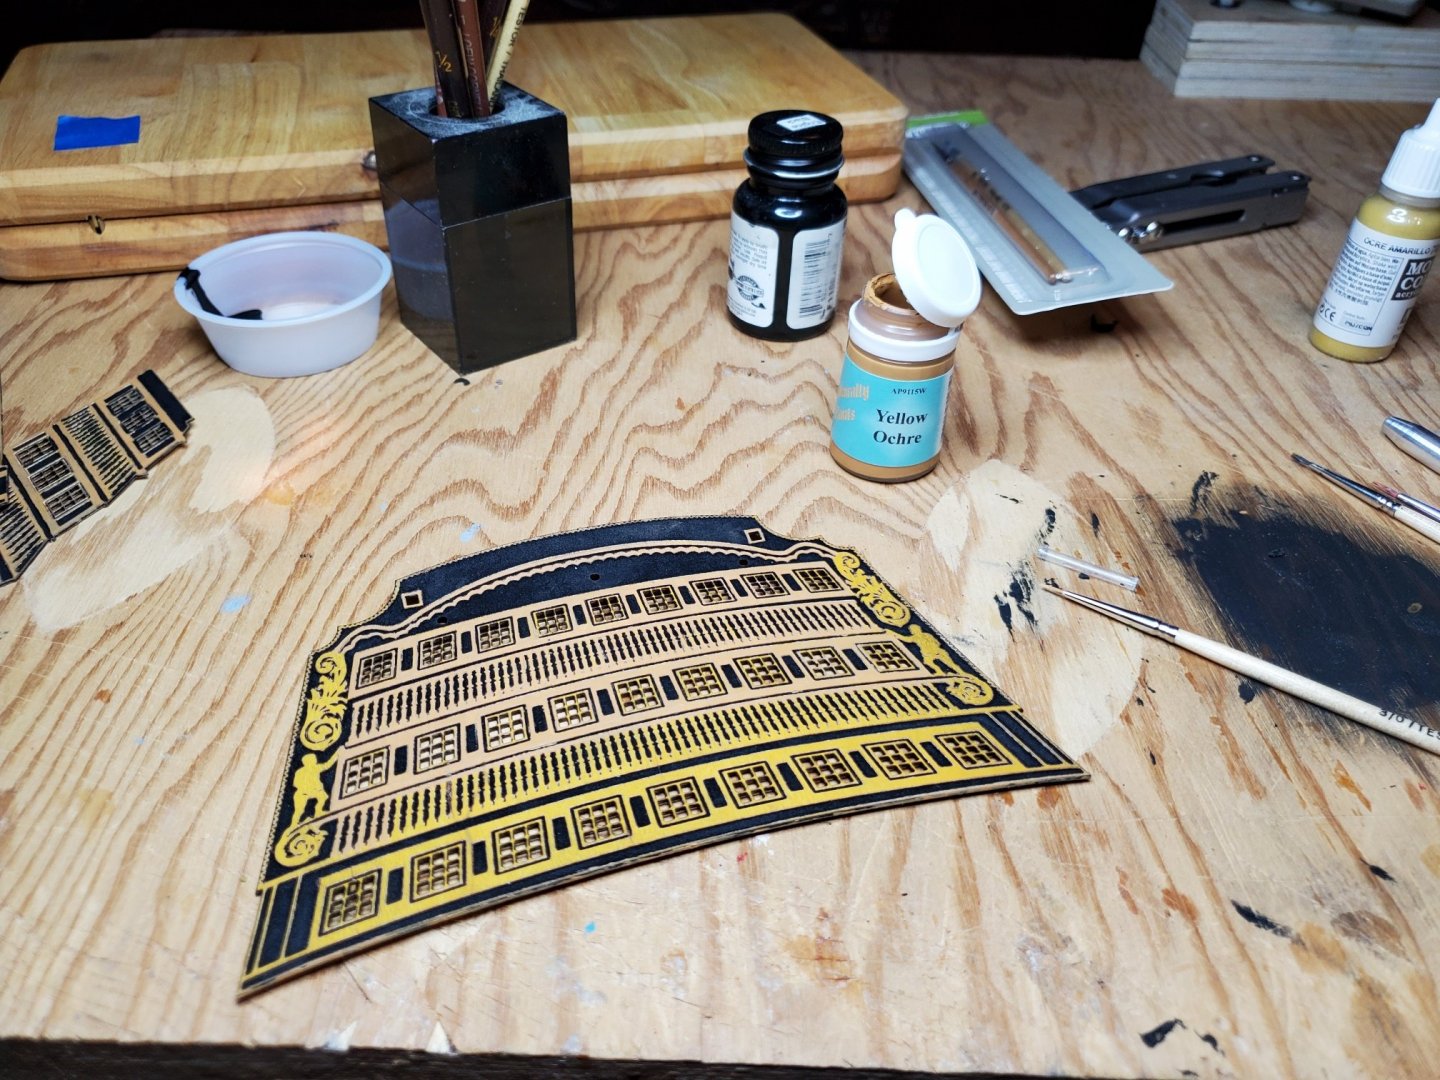
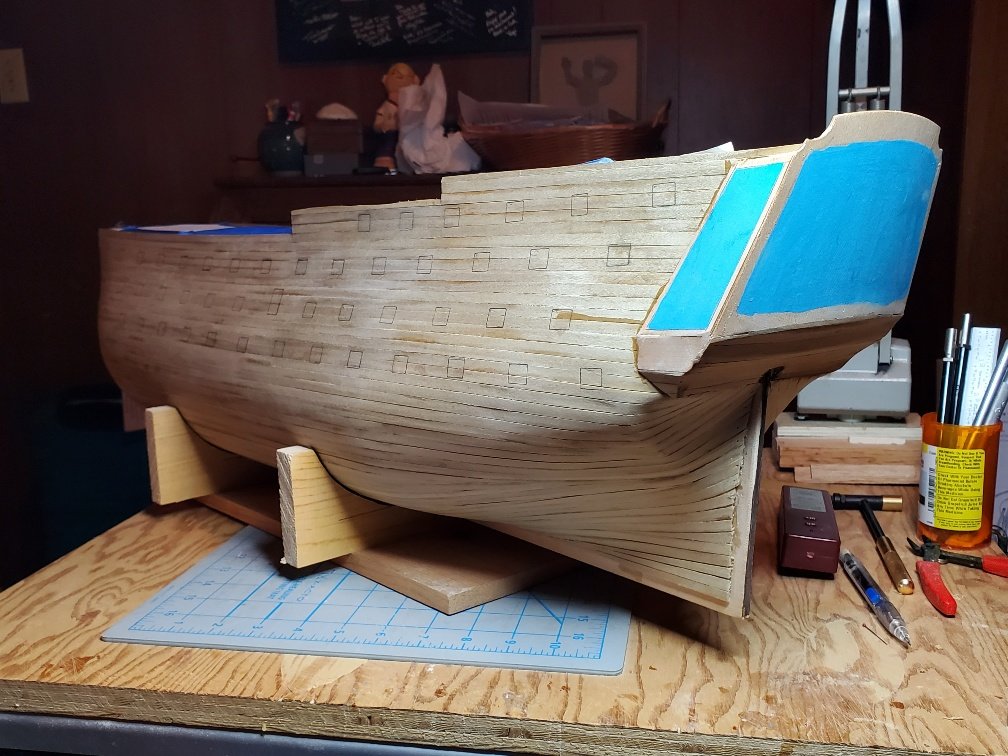
The Vic has been in dry dock for a couple of weeks while I've been away on vacation in Malta and Lisbon. Now back to Nebraska in time for all of the wind and snow which equals to spending time in the building of the Vic. As stated in previous logs, I was having a paint dilemma with which paint to use. In the end, I decided to use the Admiralty Paint's Yellow Ochre which was more orange than Vallejo's but was more to the present paint of the original Vic. Although the paint went on pretty easy on the main ship, it open up another can of worms. As you can see the stern pieces were already pre-colored which did not match either of my choices of yellow ochre. Using a very small brush and a very large magnifying glass, I've had to spend a lot of time painting over the factory yellow. Time consuming but hey.... It's snowing outside.

-
Thanks for everyone's input. Ended up using the Admiralty Paint's Yellow Ochre (AP9115W) middle one on the sample. It was the color that was recommended in a larger HMS Victory paint set. The Vallejo's yellow ochre was to yellow for my liking and real thick paint.
-
Yellow Ochre Paint
Daliab replied to Daliab's topic in Painting, finishing and weathering products and techniques
Thanks for everyone's input. Ended up using the Admiralty Paint's Yellow Ochre (AP9115W) middle one on the sample. It was the color that was recommended in a larger HMS Victory paint set. The Vallejo's yellow ochre was to yellow for my liking and real thick paint.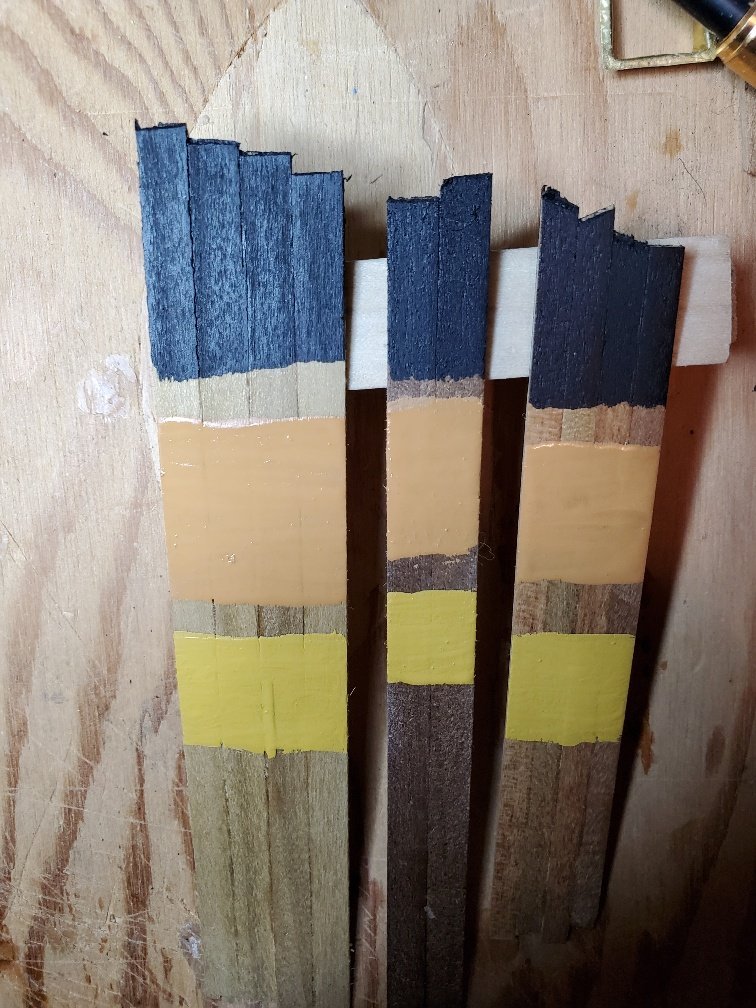
-
Yellow Ochre Paint
Daliab replied to Daliab's topic in Painting, finishing and weathering products and techniques
Gregory, Could be. I read an article a couple of months ago that the Victory was going under some renovations. In the renovation a paint expert took samples of the 72 different paint layers and said the original color was more of a lemon color. Lots of folks don't like the new color and have even stated real life it has a pinkish tint to it. See the two links on the same subject and they can't even come up with the same color. https://www.telegraph.co.uk/news/uknews/11908365/Restored-HMS-Victory-raises-eyebrows-with-new-pink-shade.html https://www.dailymail.co.uk/news/article-3142737/Admiral-Nelson-s-HMS-Victory-painted-LEMON-colour-museum-scrapes-72-layers-paint-original-look-40million-restoration.html -
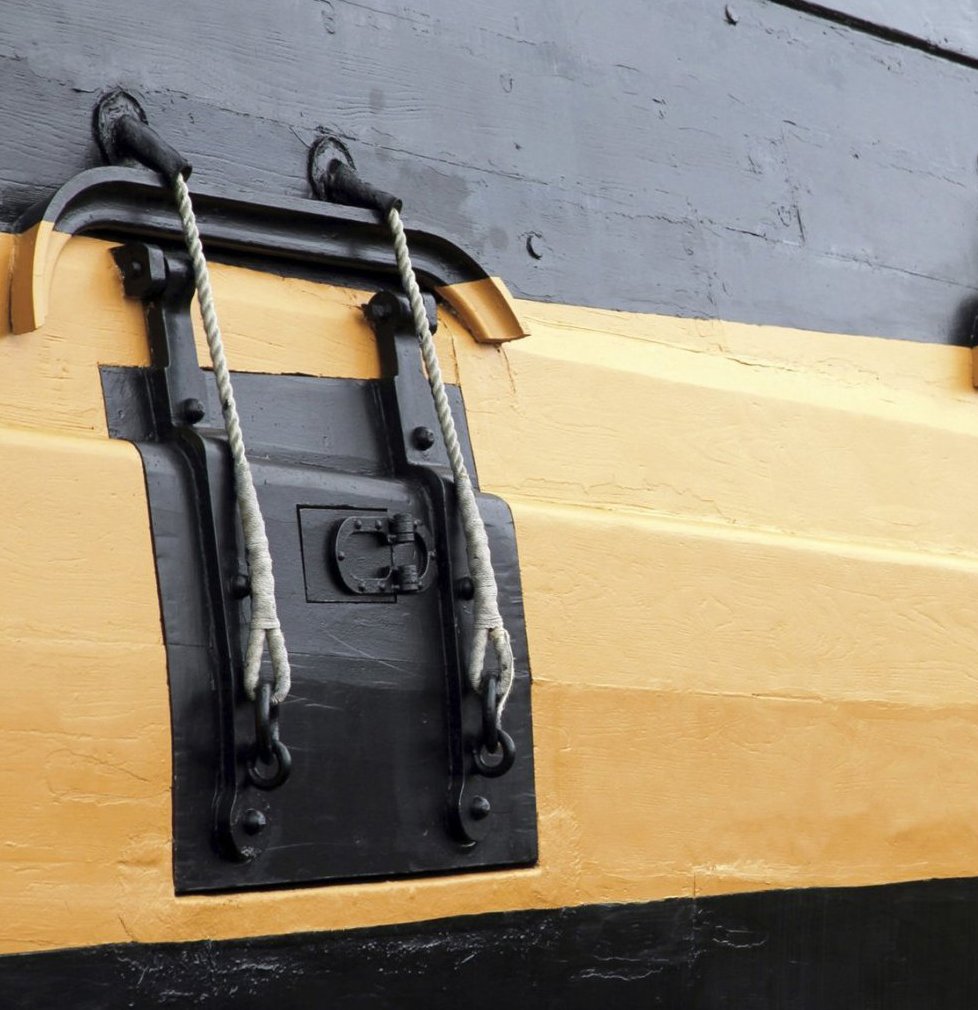
GrandpPhil..... the stern pieces came already painted a different ochre that neither one of mine matched. Think what I will do is use the below yellow ochre and add some of the darker ochre and take some of the bright yellow out of the paint. Just need to mix enough to do the entire ship. I'll just paint over the factory pieces colored their ochre color for what I end up with. Think I'll try for the below picture.
-
Yellow Ochre Paint
Daliab replied to Daliab's topic in Painting, finishing and weathering products and techniques
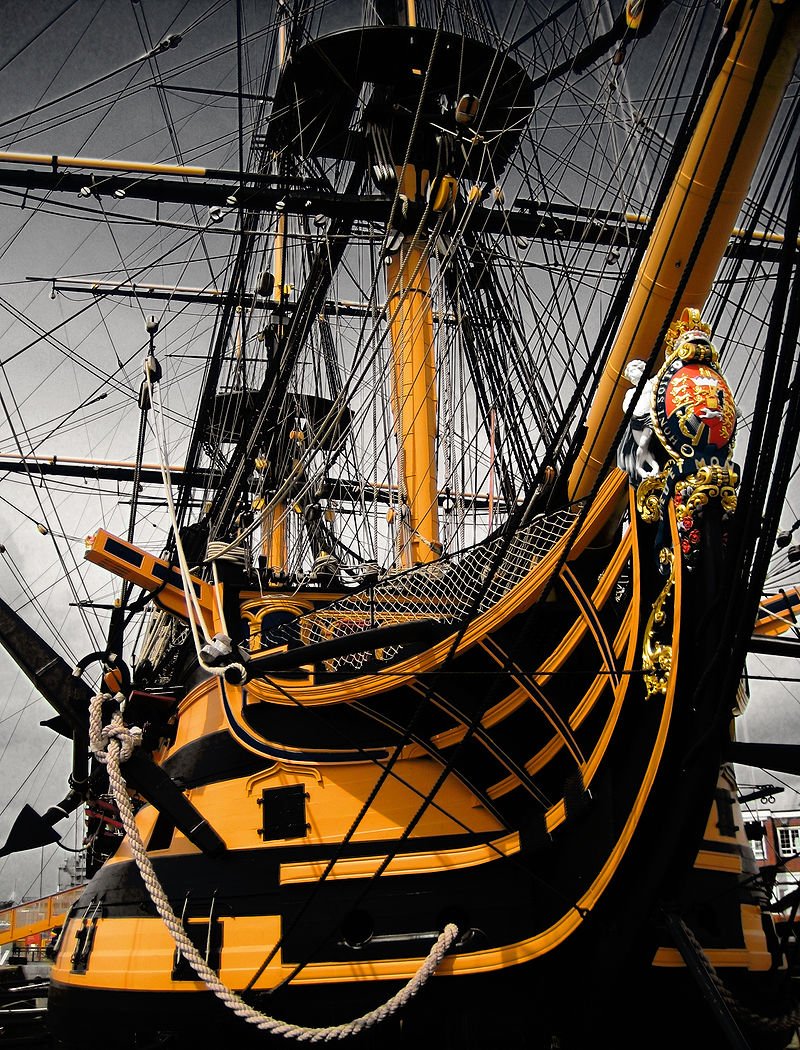
First picture is the new color scheme and the one on the right is the traditional color everyone thinks of when they think of the Victory. Problem I have is neither one of the colors labeled yellow ochre I have are the below color. Think I will use the scheme on the right as a model. May have to mix some of the darker ochre with the bright ochre color to knock off some of the brightness a bit to darken up the bright yellow look. Just need to mix enough to do everything.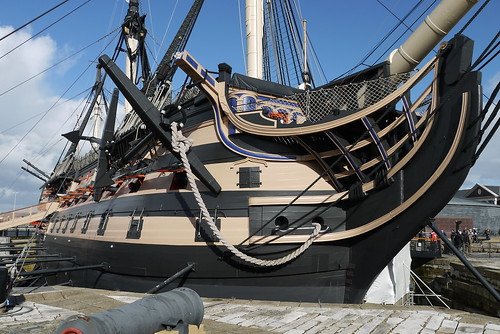
-
GrandpaPhil..... Agree but.... look at the ochre and black color of the stern pieces in the previous post. It's almost more of a yellow color but not as bright as the yellow on the sample. Wife's input is yellow and black would make the Victory look more of a bumble bee. What does she know... don't tell her I said that! Just kidding. Thanks for your input.
-
Interesting finding.... Witch way to go? Paint used.... Vallejo's Yellow Ochre (70.913) and Admiralty Paint's Yellow Ochre (AP9115W). Top is Floquil Engine Black. Middle color is Admiralty's Yellow Ochre. Bottom color is Vallejo's Yellow Ochre. Wood used: L-R a light Mahogany, Walnut, regular Mahogany. Which Ochre is correct for the Victory? Older pictures of the Victory was more of a yellow color but the newer color scheme is more of the middle color. Surprised by the stark difference between the two yellow ochre colors. Thoughts?

-
Looking forward to seeing your pictures. I have port side gun openings cut out and now working on the starboard side now. Very time consuming.
-
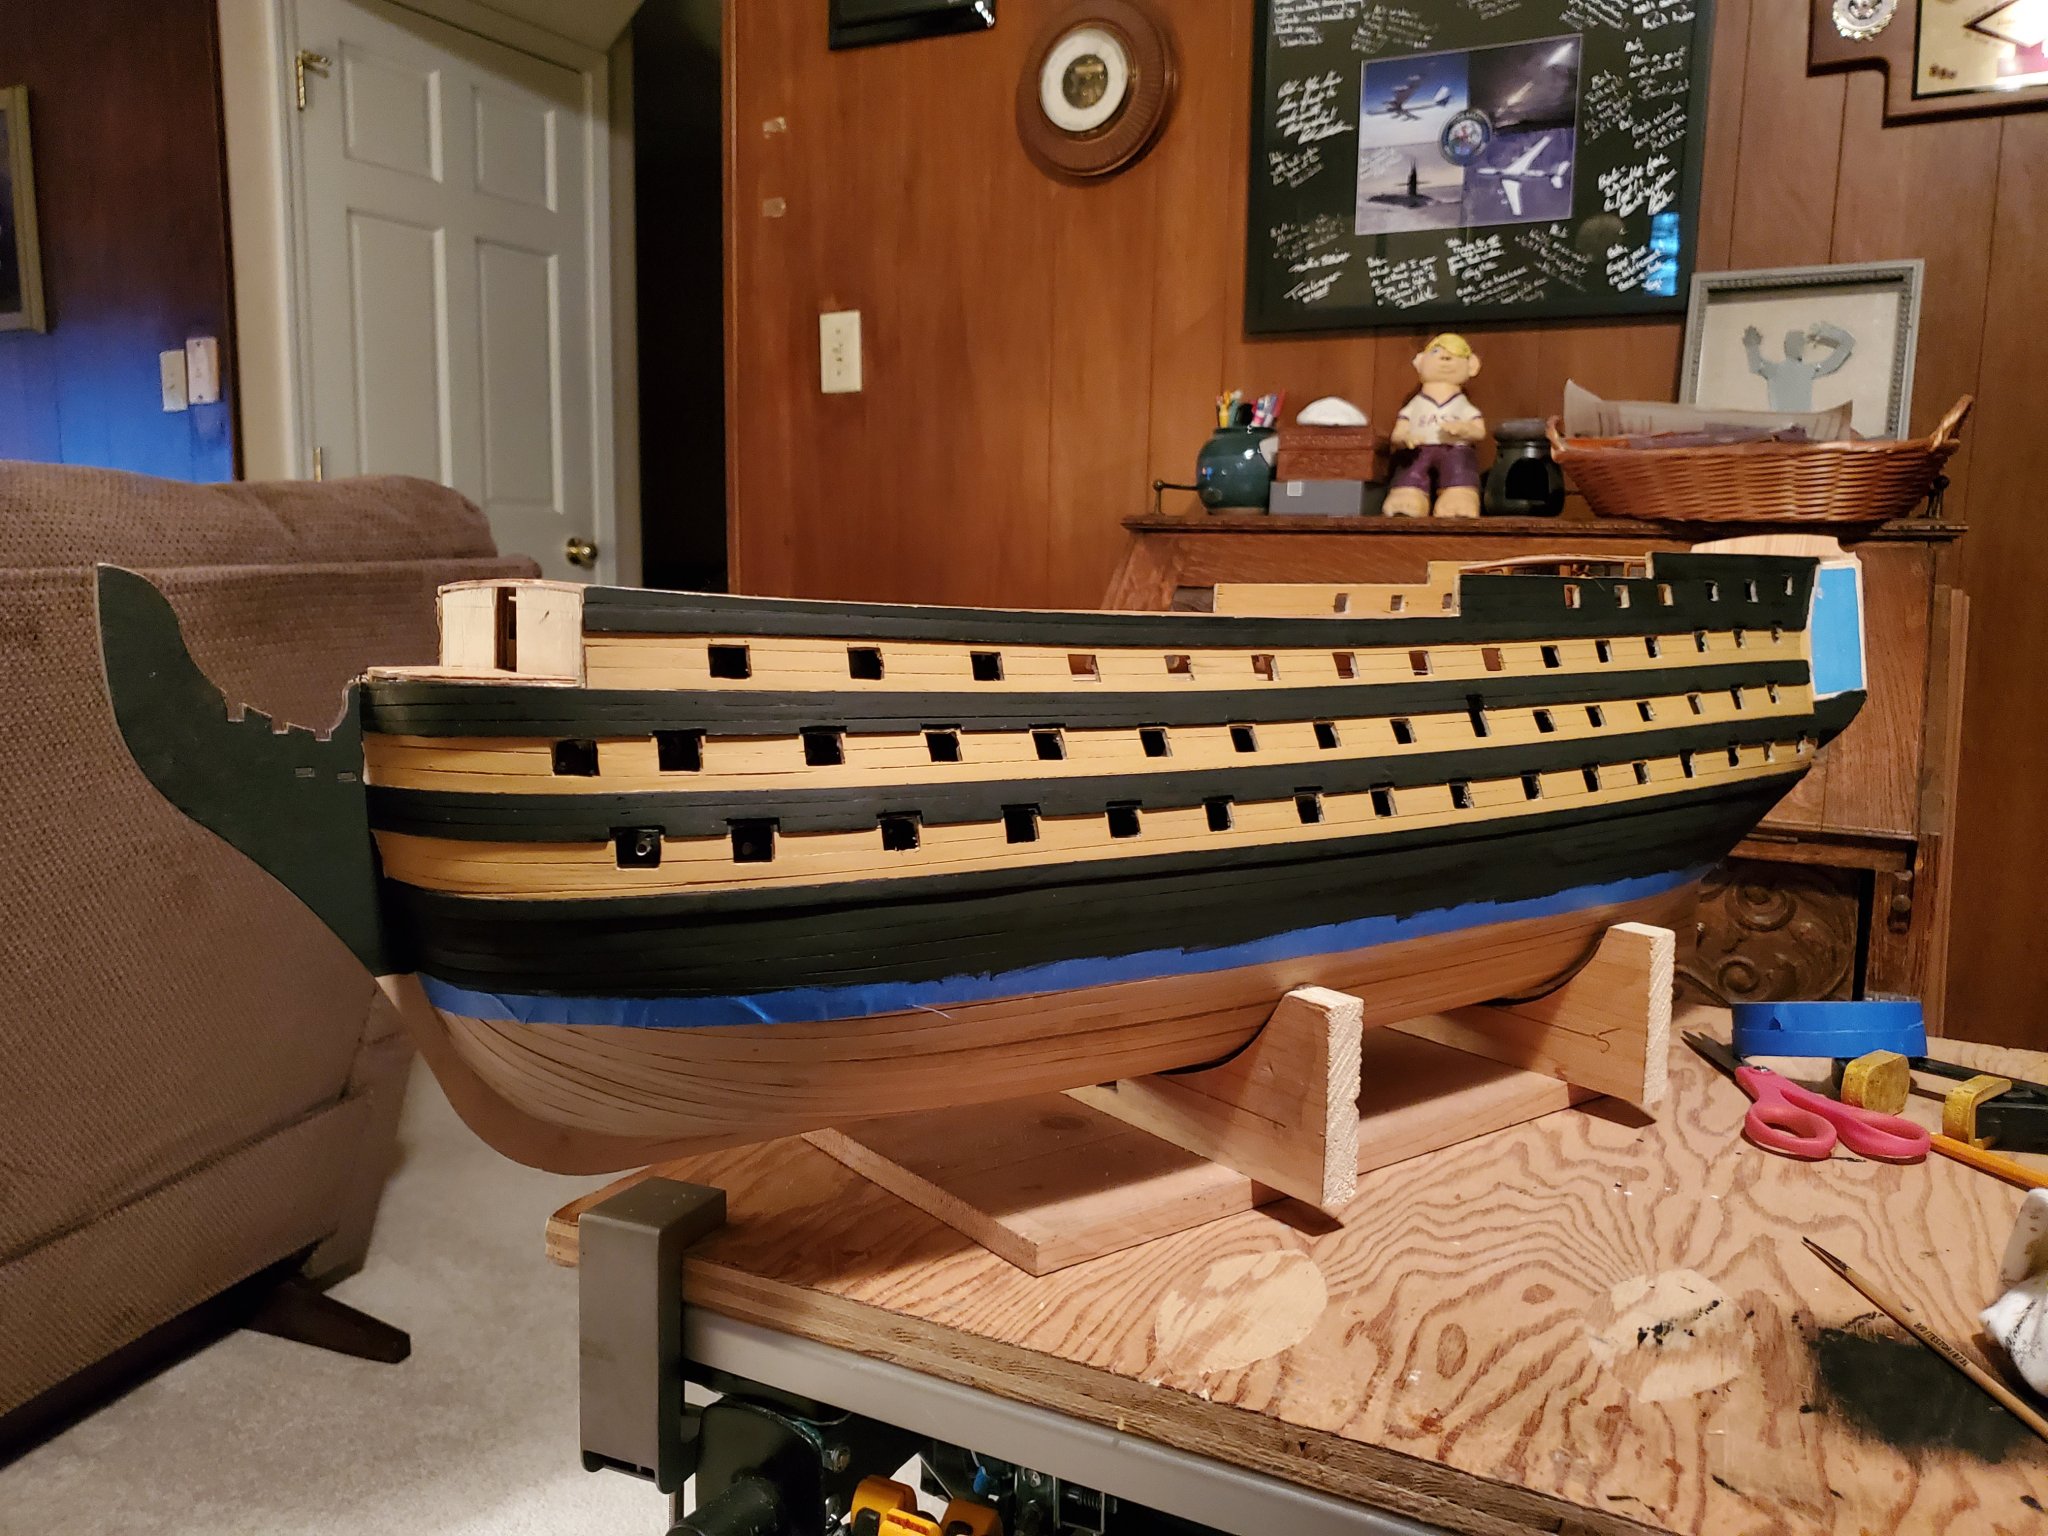
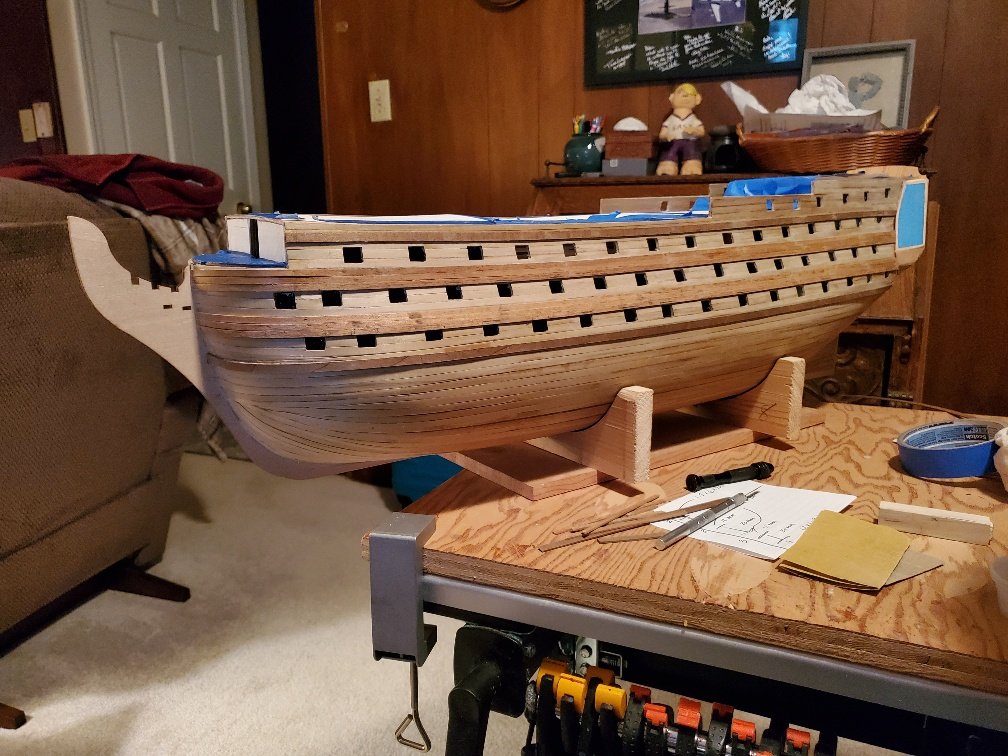
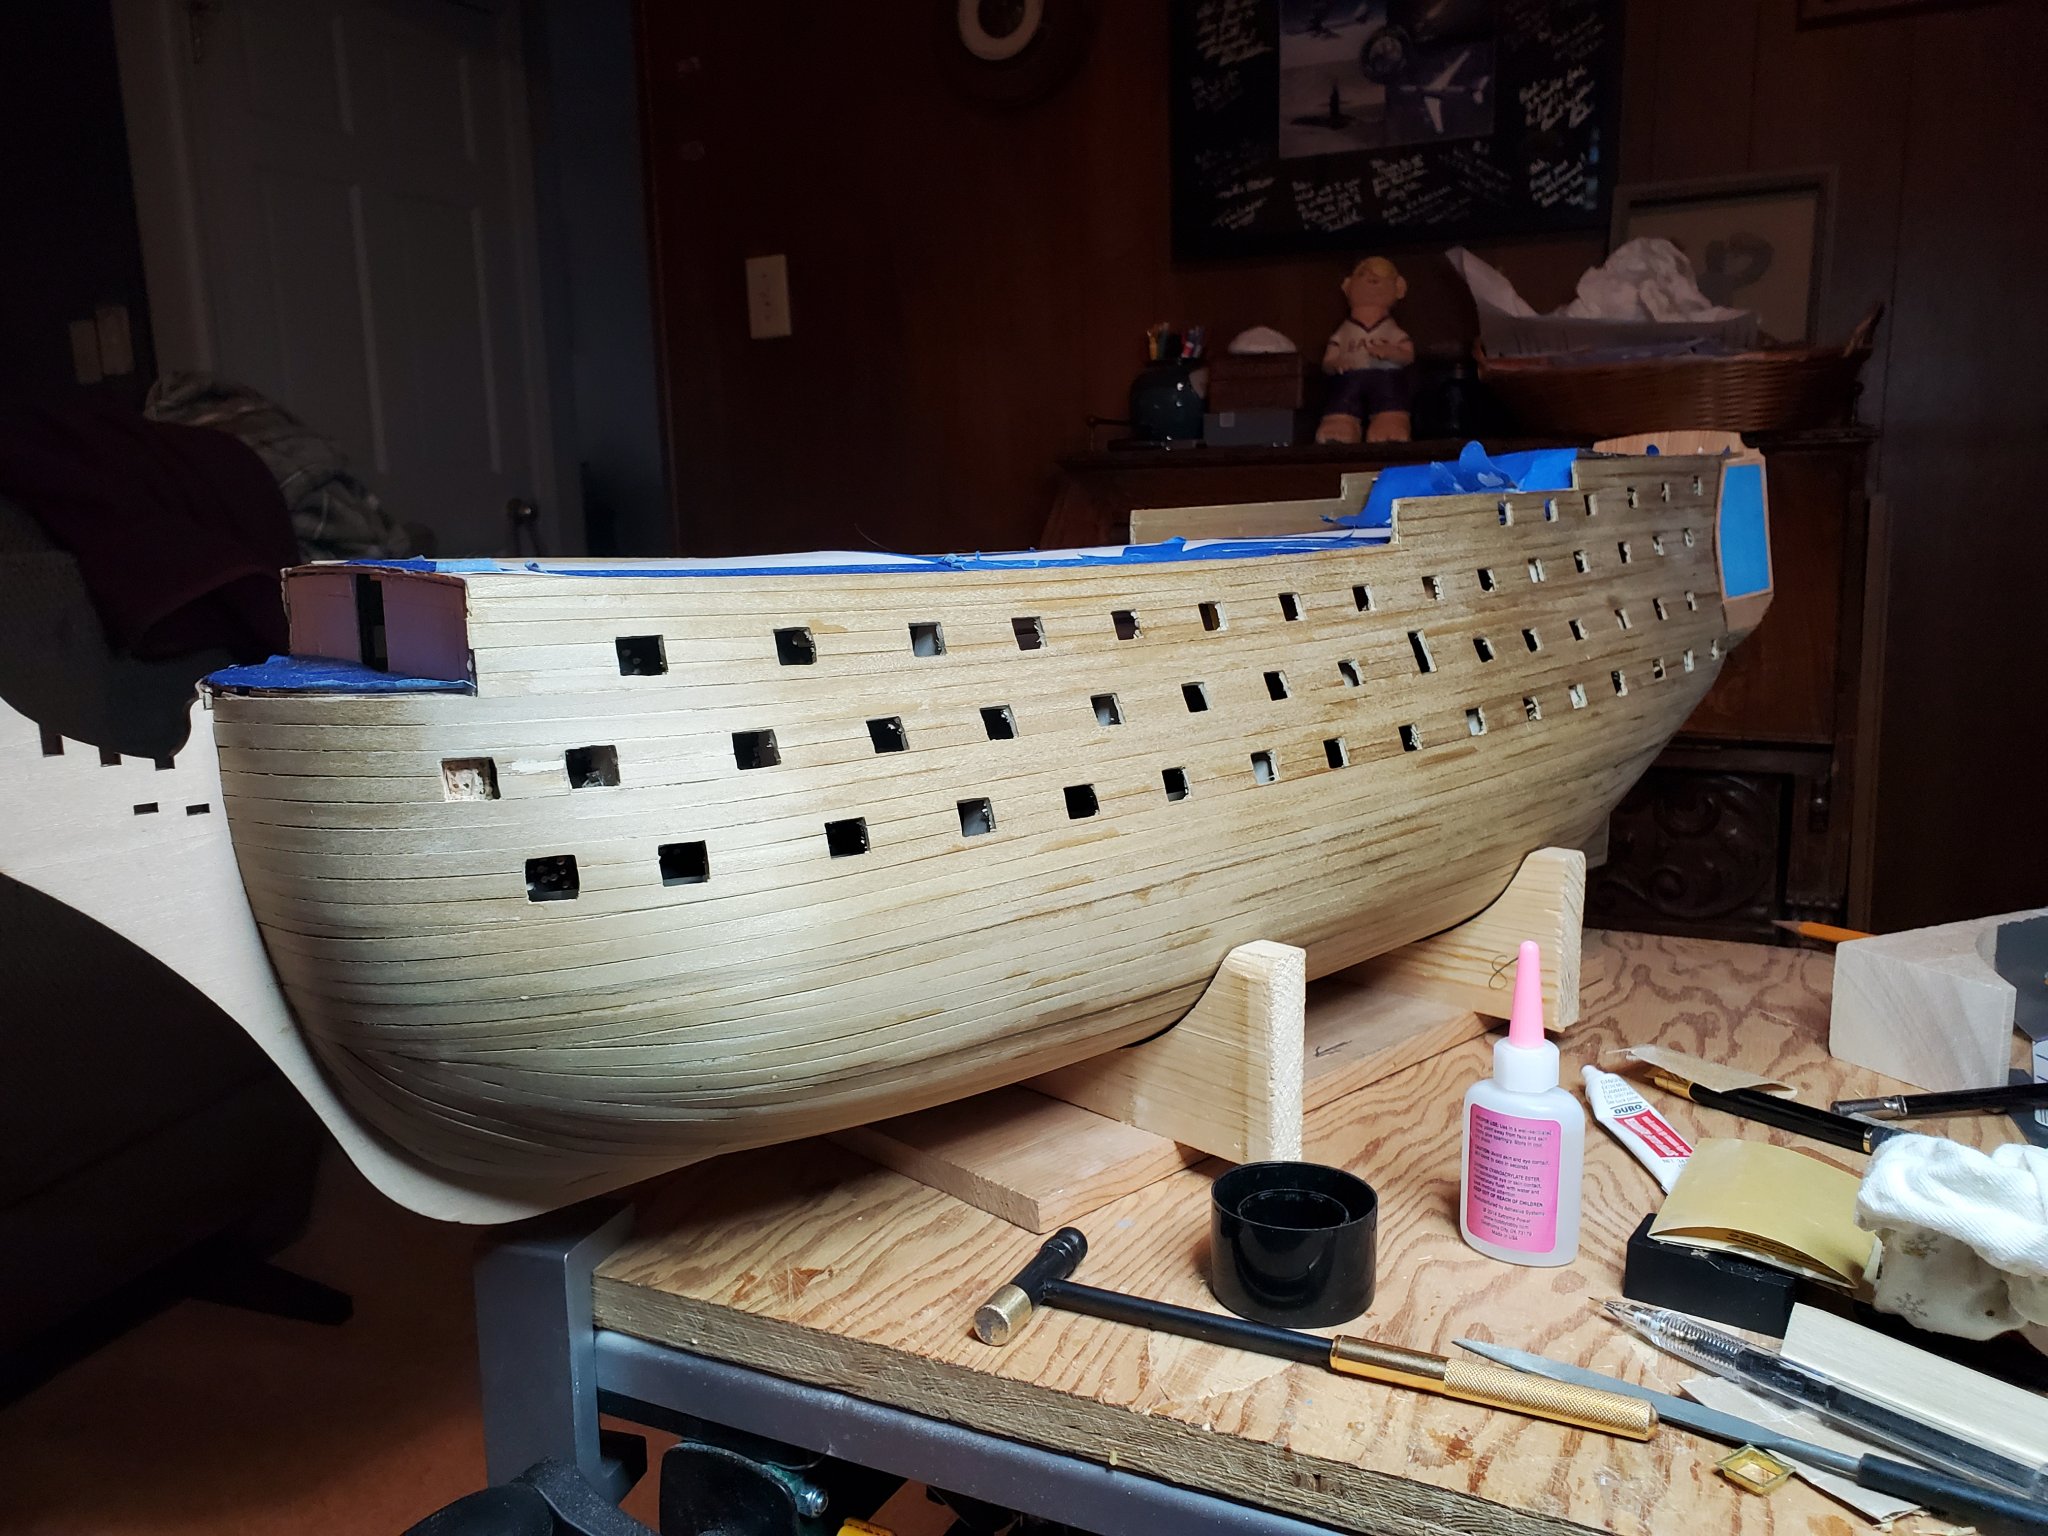
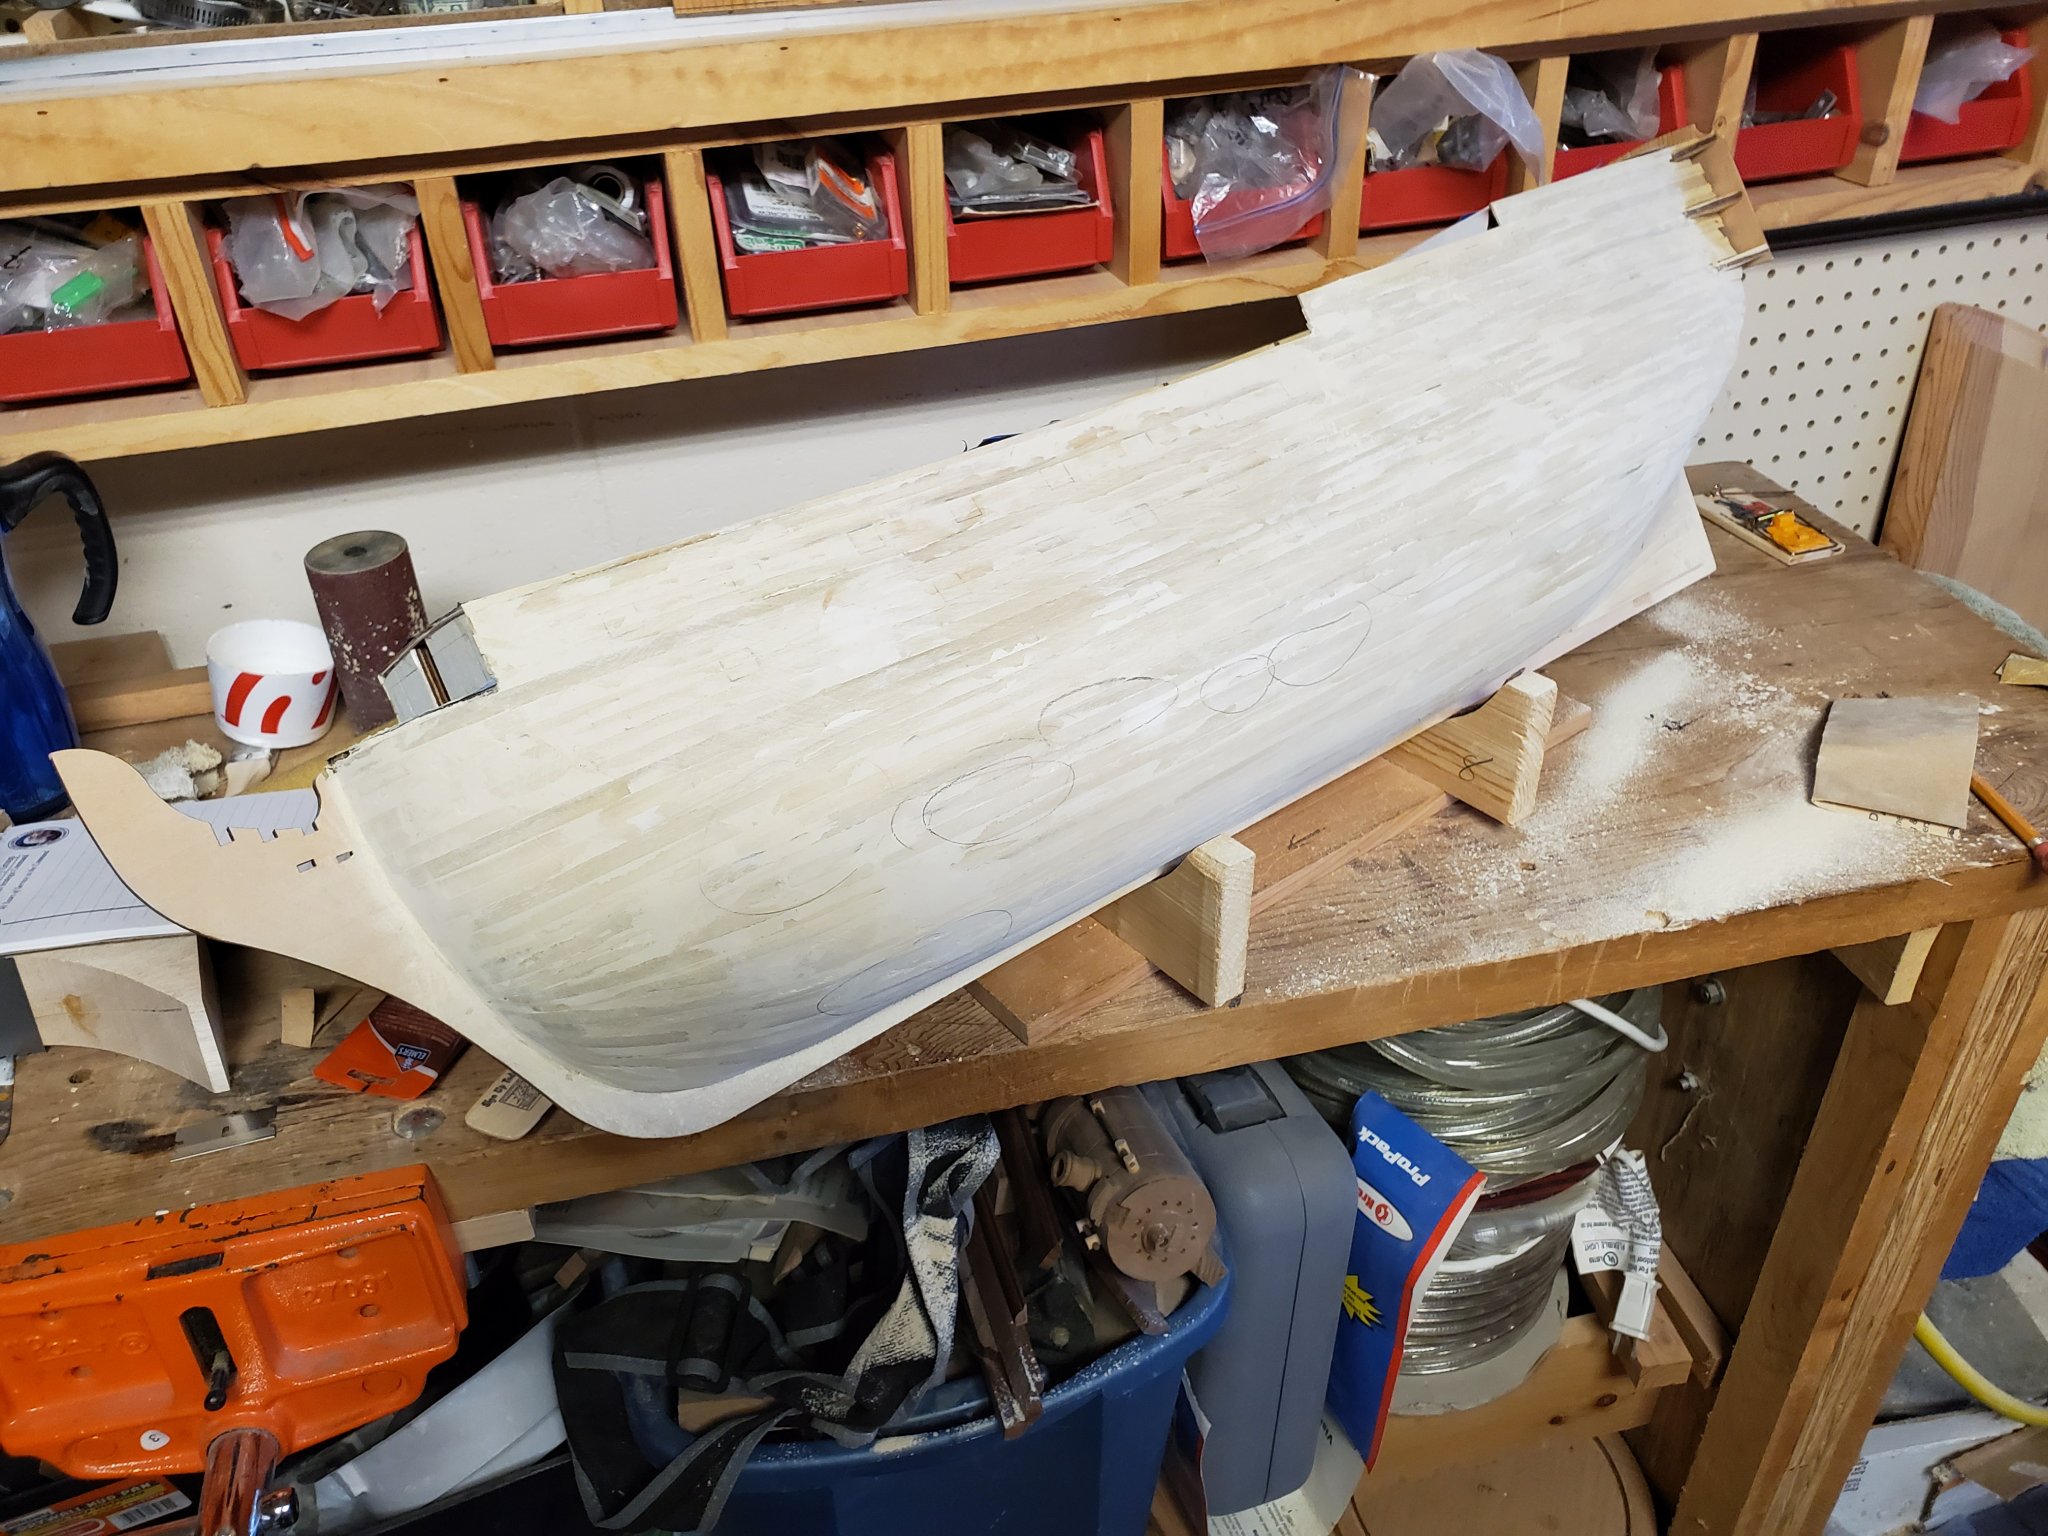
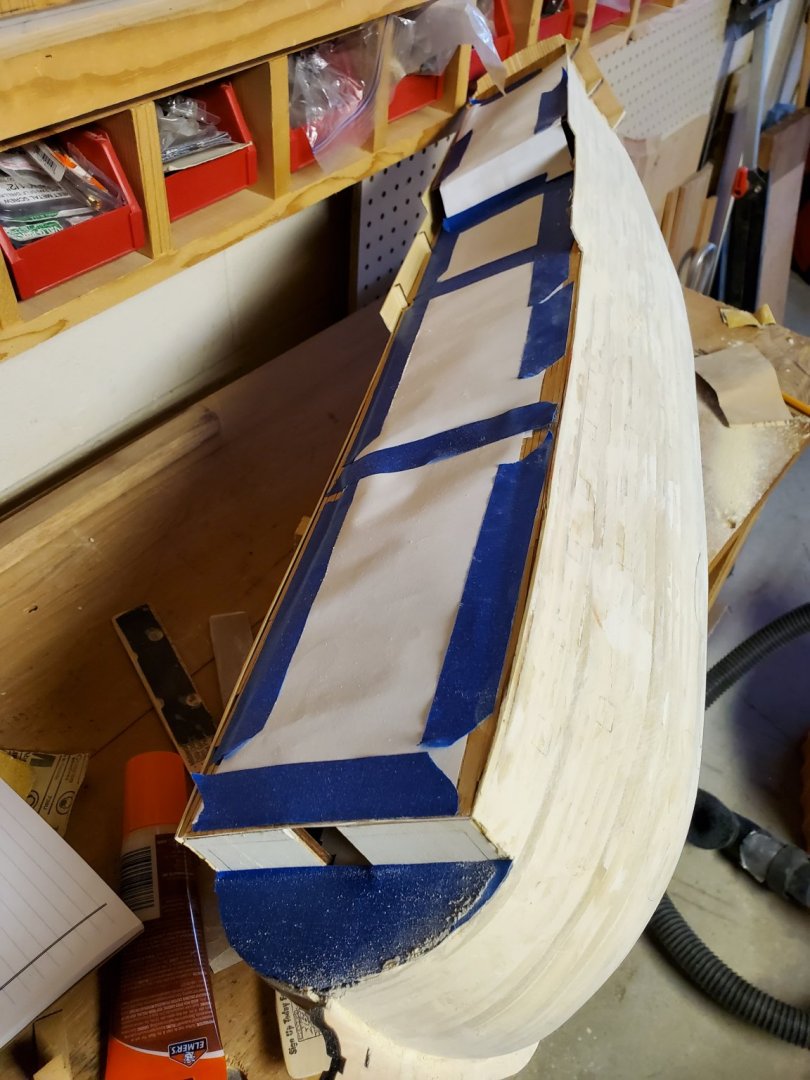
Second layer of planking finished and sanded. In addition, I finished planking the stern, laid out the gun ports, and scribed the water line. Ready for the next step. I think it's coming along fine if I don't say so myself. This is my first double planked on frame model and my second wooden ship model ever. So far two months in the making.
-
Guess what came in the mail today? The yellow ochre and red ochre paint I order from the United Kingdom more than two months ago. Didn't know if the package was lost in the mail or never shipped. As it turns out the package went from the UK to the United States by way of Barbados. Glad I finally got the paint as it restores the faith I have in the original company I order the paint from. At the time I didn't want to state the name of the company and still won't as I do not want to taint their reputation. What I will do is send them an email offering to pay for the paint received as they made the transaction good by reimbursing me the payment made. Seems only fair. Now I will start ordering other items from them in the future.
-
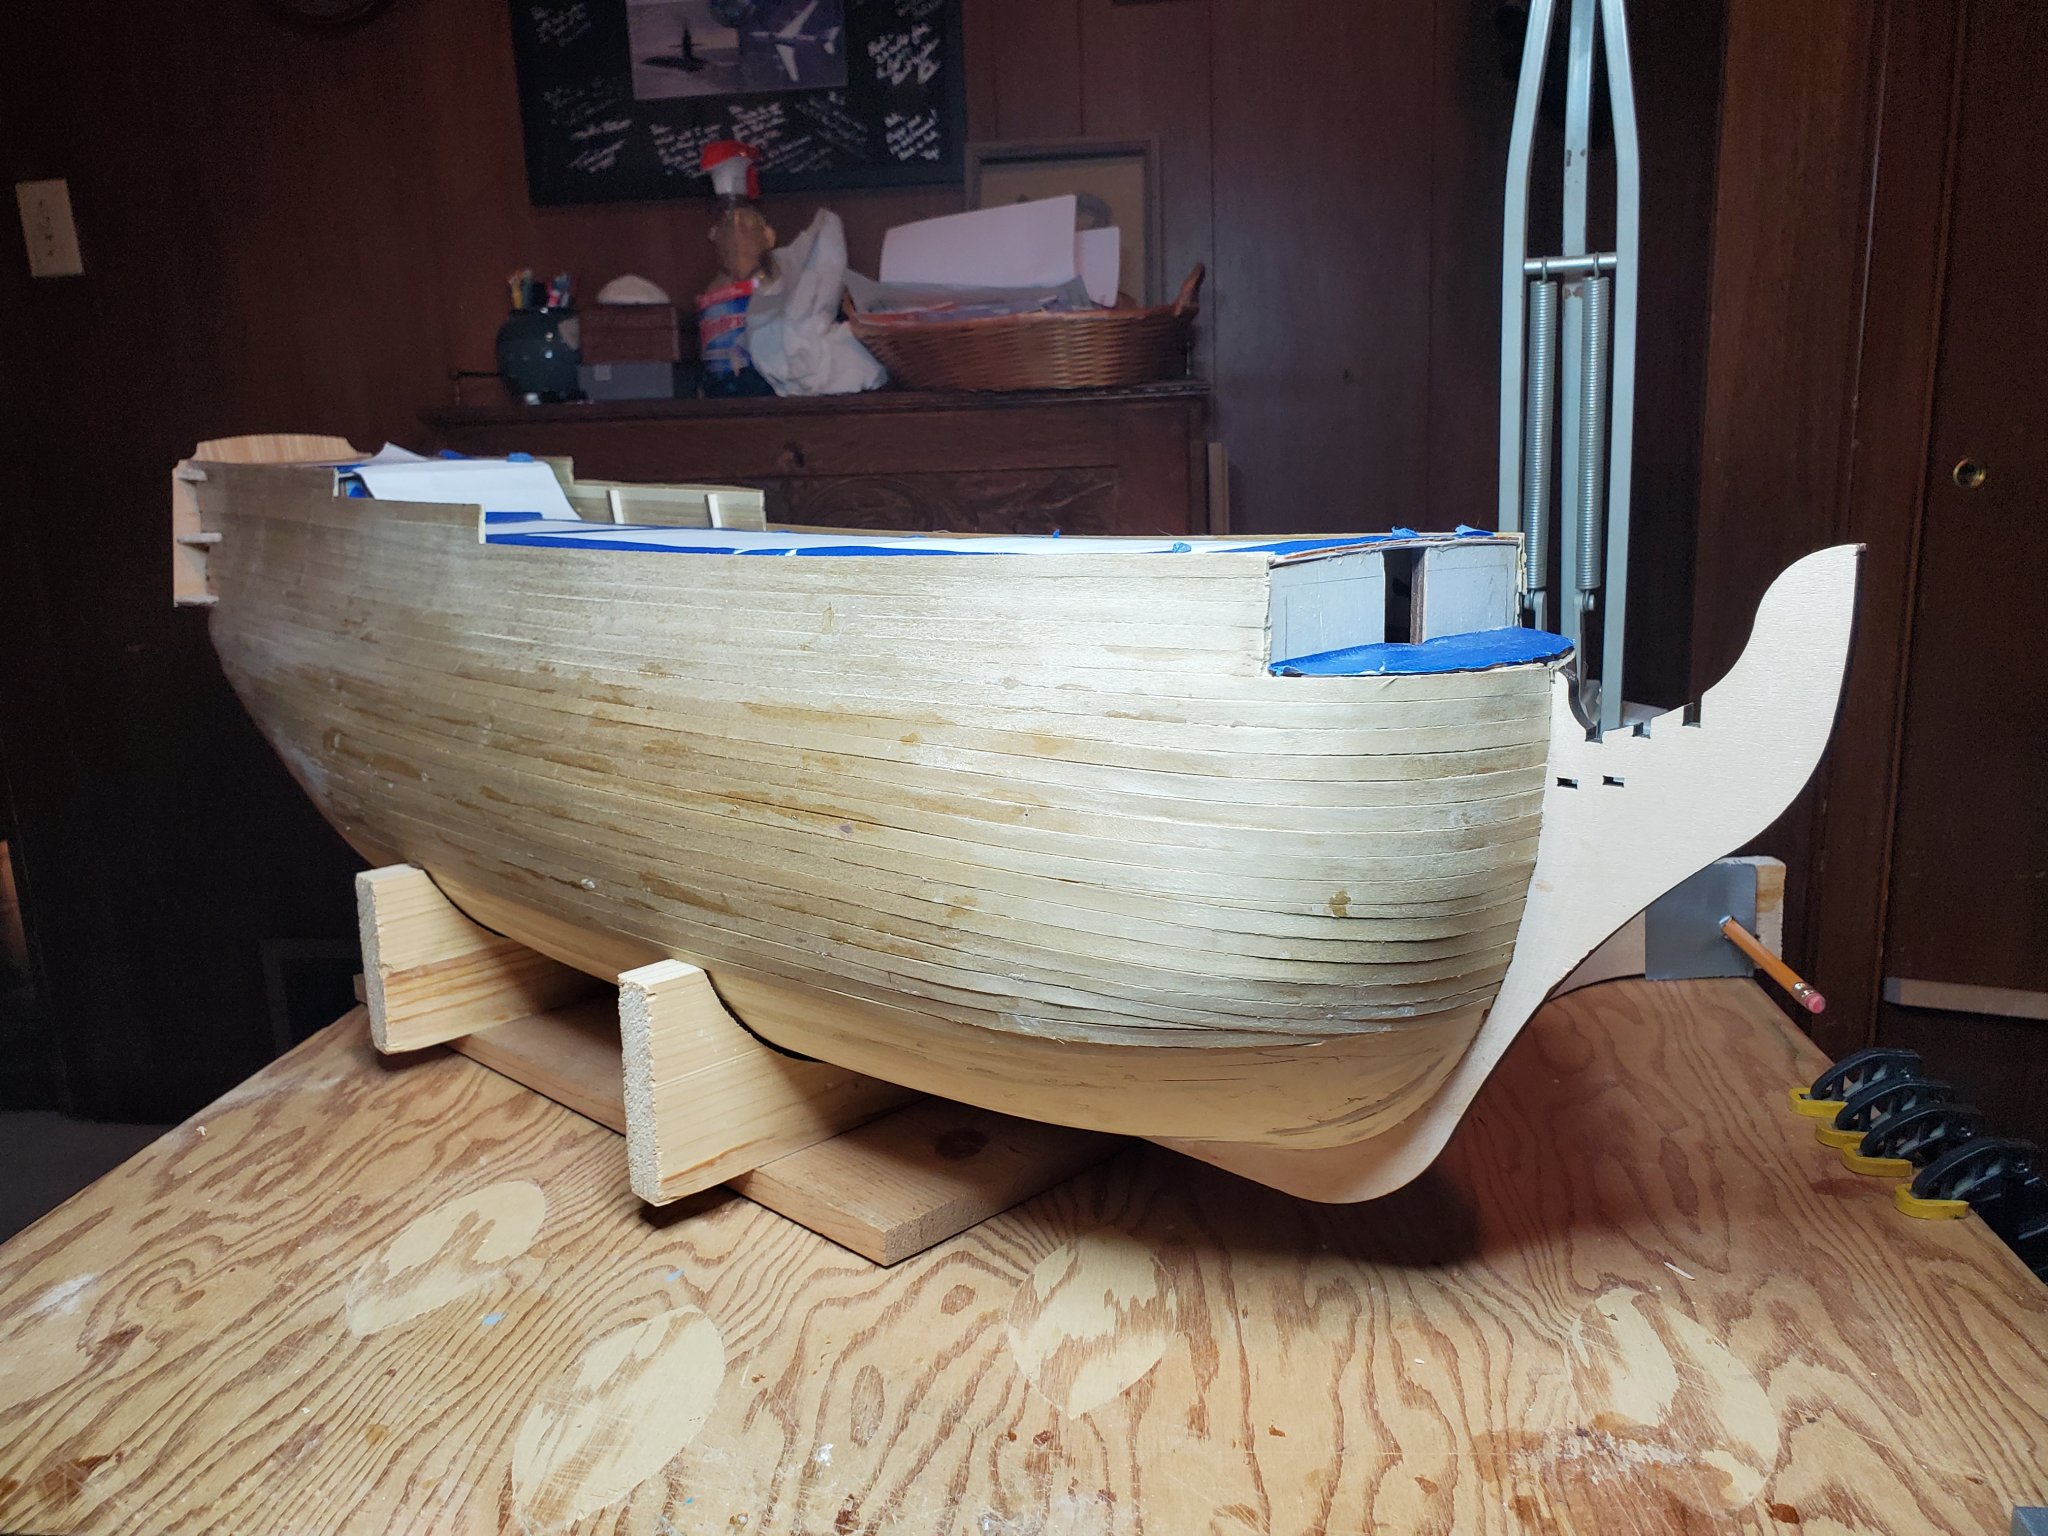
About 3/4 done on the 2d planking. Working below the water line right now. Thanks to David56 for some advice on finishing off the stern and prepping the hull for the 2nd layer.


-
Apply wood filler, sanding, apply more filler, sand again.....the process seems to never stop. One thing I'm learning.... cover the opening to the lower deck and main deck. Sawdust gets in all those spaces!

-
Returning to building the ship tomorrow after a week in the Dominican Republic. Dodged the winter storm across the US. David56 it's really looking good! I finished the first layer and did some sanding and wood filler. How smooth did your ship need to be before you started the 2nd planking? I look at it and think good enough but....? I compared with the previous pic you posted on 30 Oct and mine looks like yours below the water line. Hope mine comes out as good as your is going. Keep plugging away at it. You're blazing the trail.
-
Thanks for your input. Unfortunately the only place I found yellow ocher in the UK was at the company I originally ordered it from. Although it stated you could track the shipment, I was not able to do so for a month. Al the other places were out of stock or you needed to buy the complete set of Victory colors. Found a different brand in the US.... so far it's ok but haven't done anything bigger than an inch on tops of bulkheads. Time will tell Again thanks for the inpit.