

uheynitz
-
Posts
34 -
Joined
-
Last visited
Content Type
Profiles
Forums
Gallery
Events
Posts posted by uheynitz
-
-
I hope so!
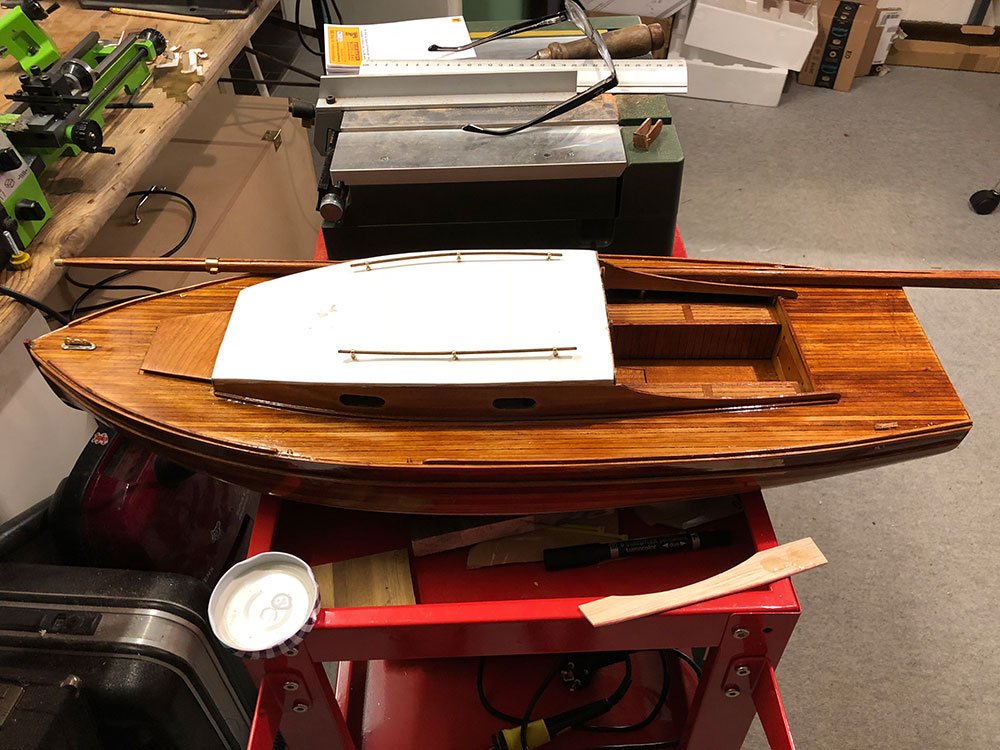
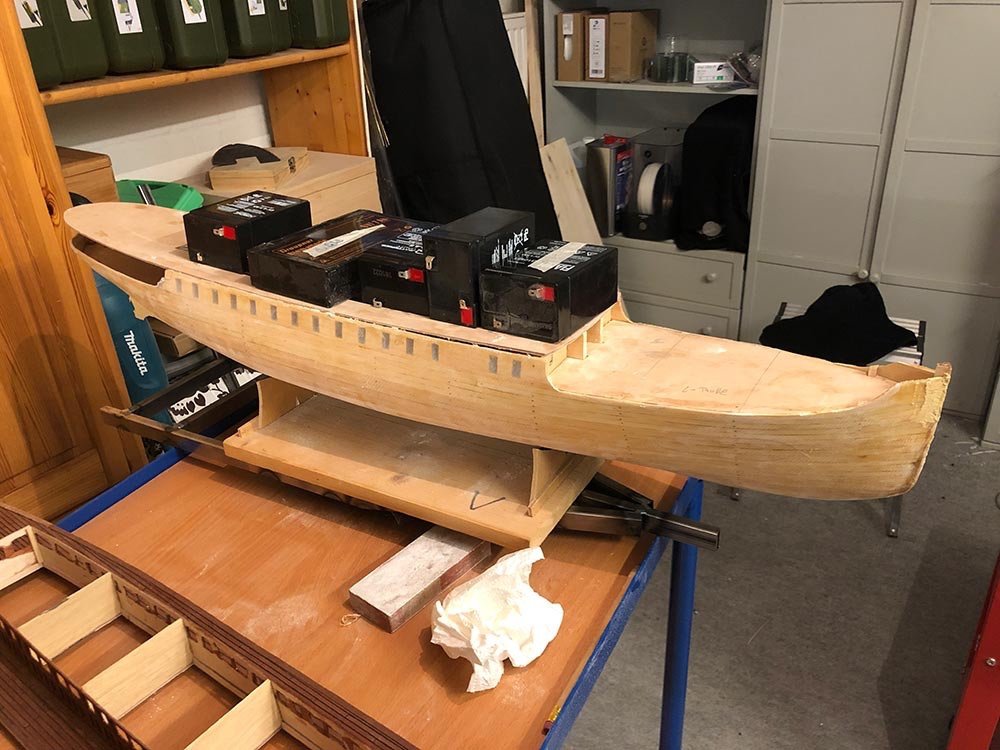
My rule is: everything heavy off the top and in the bottom.
That's why I also 3D printed the beautiful brass funnel new. Now it weighs only a quarter.In addition, the boat is equipped very spartan. Motor, small servo, receiver. No sound module, light batteries.
- Mirabell61 and mtaylor
-
 2
2
-
Hi, Nils,
yes, the BOHUSLÄN will sail remotely.
The hull is completely covered with fiberglass mat and epoxy and should be tight.
Inside I have impregnated it with G4. It's almost a plastic hull now.
Greetings, Skip- Mirabell61 and mtaylor
-
2
-
The Bohuslän has - like most steamers from this period - a "sharp" keel.
This is ignored in the kits of Cheap Boats and NCB.
I represent this with the help of T-profiles. These are available from architectural supply stores in PS or brass.
Since the profile may have to withstand some driving, I use brass.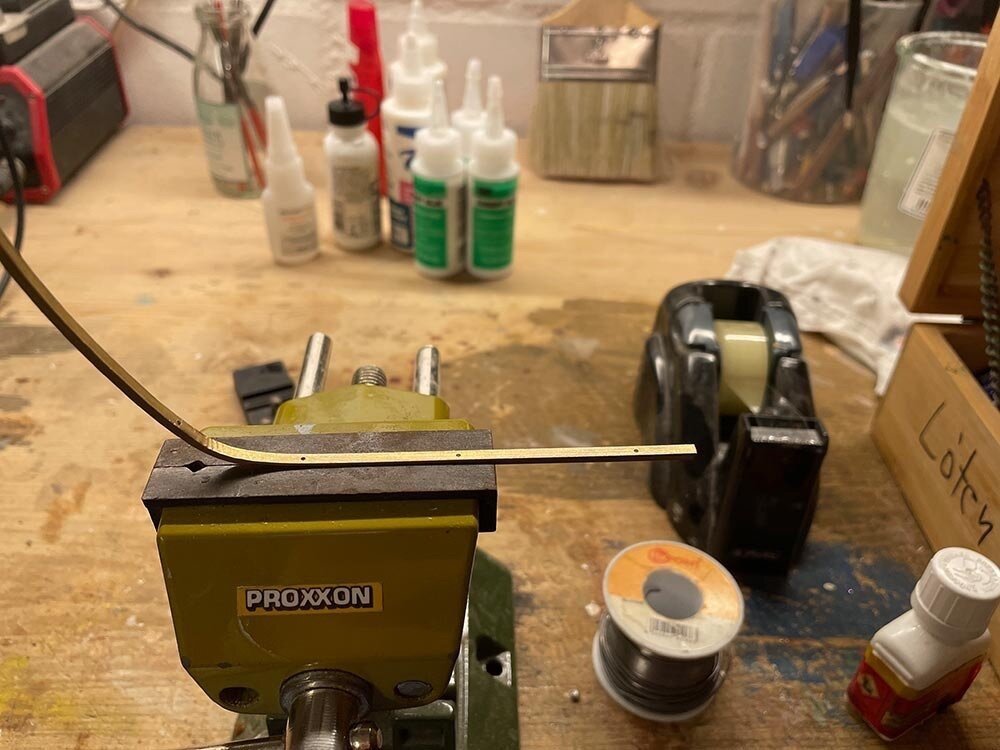
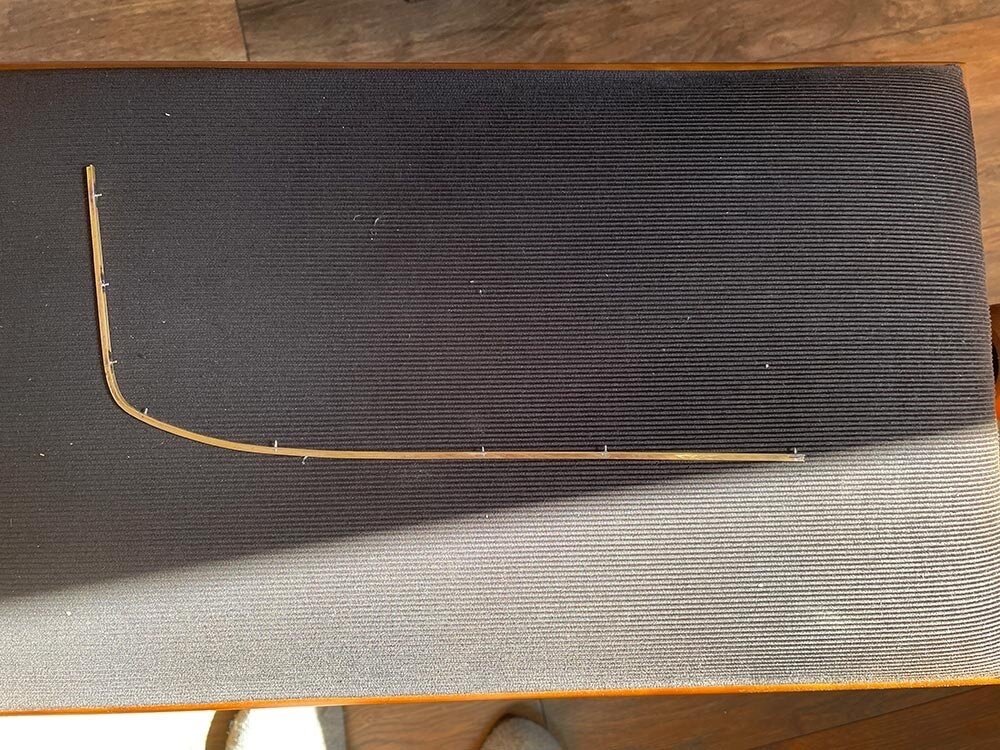
Where necessary, they are bent into shape and soldered to a pin every few centimeters to hold the profile in the fuselage.
After roughening the gluing surface, they are glued with Endfest. The combination holds excellently.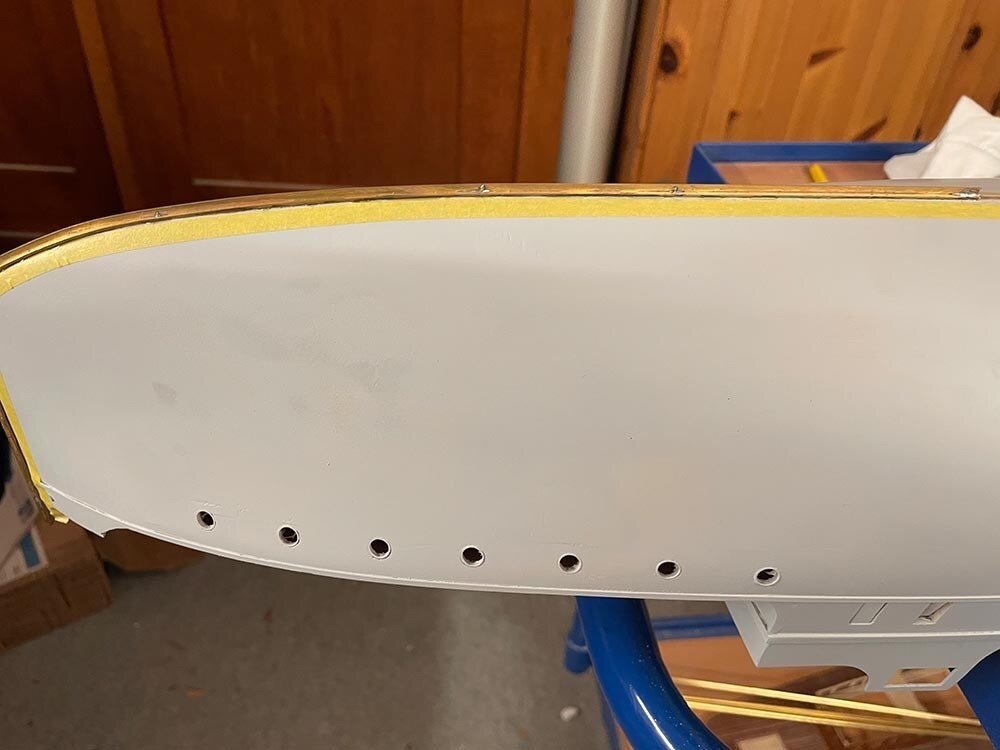
- mtaylor, chris watton, Mirabell61 and 2 others
-
5
-
As I mentioned before, I like the hardware set in the kits from Billig Boats. There are many finely detailed brass parts. I was particularly taken with the funnel of the "Bohuslän". A really beautiful part!
And then this:
I have kept the whole once to the construction plan. The funnel is no less than 3 mm too small in diameter. This is a medium catastrophe for a scale of 1:50 and not to be tolerated at all.
I had already wondered why the chimney looks so spackelig with the many beautiful Bohuslän models.
So new construction.
So I sat down at the computer and redrew the funnel in Fusion 360 and printed it out on my filament printer.
Here is a first result with printed reinforcements: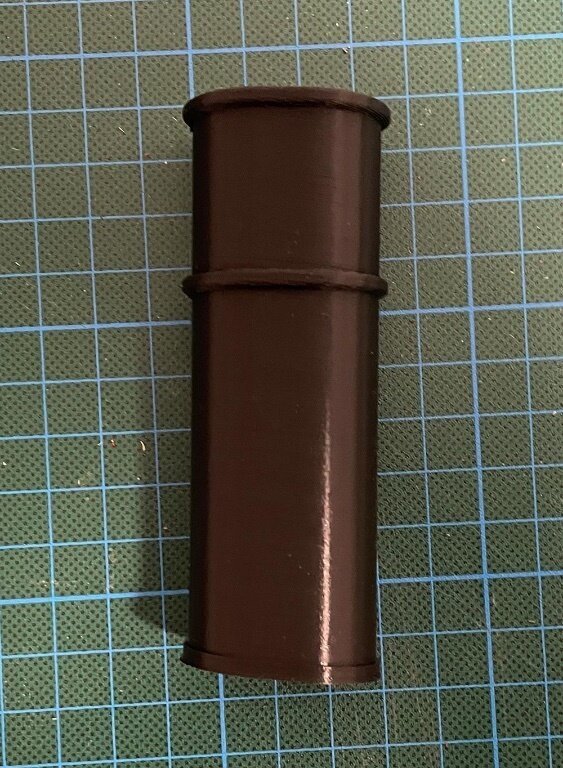
- mtaylor, Mirabell61 and GrandpaPhil
-
3
-
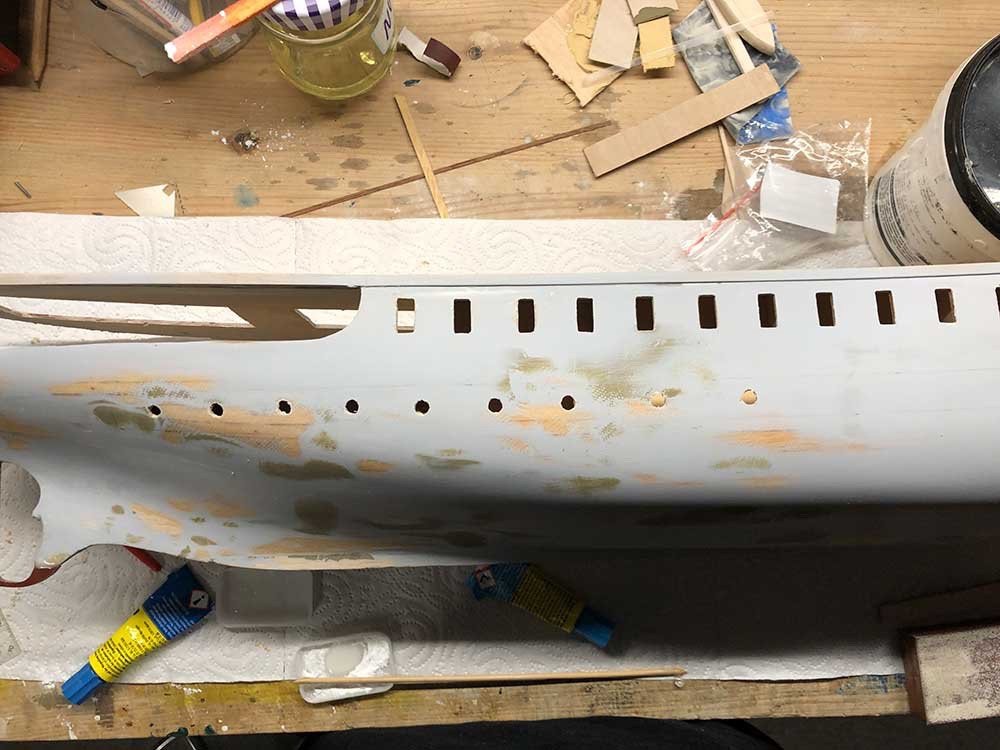
I love it when the hull is smooth as a baby's bottom after a few spatula & sanding passes.
Today is the last sanding with 400 wet, then the rub rails, rudder hook and portholes.
And then off to the garden for painting.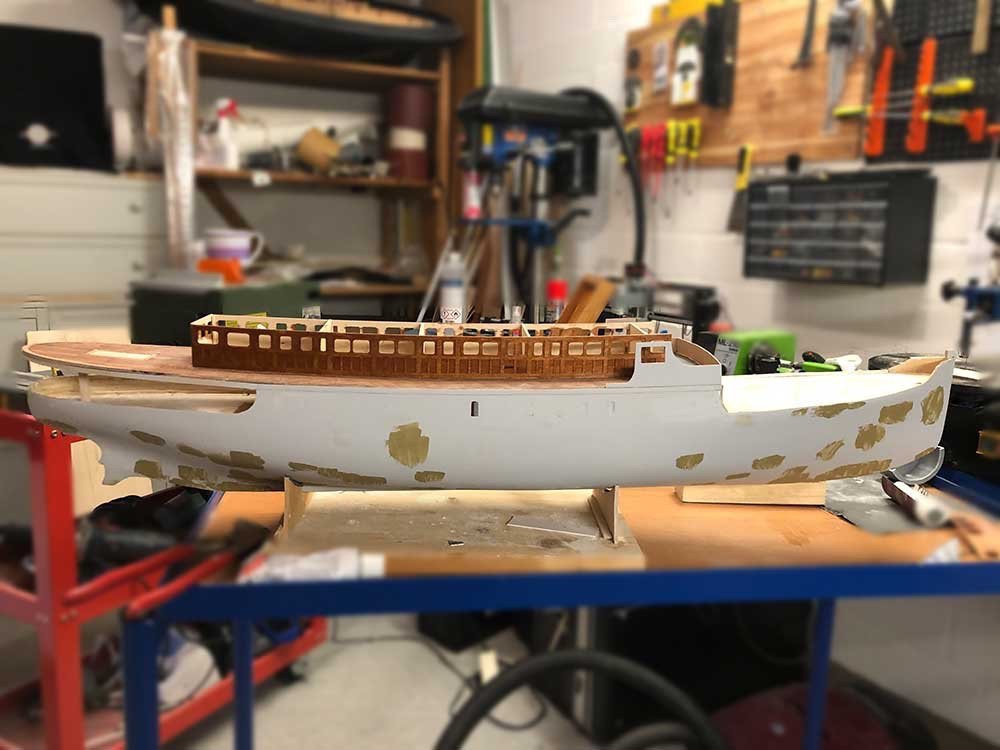
For the portholes in the hull, Billing Board included injection molded parts (the gray porthole), which is way too rough for me.
So I invested in brass portholes without imitation screws (the portholes in the original are not attached...) (brass porthole on the left), but they look like glued-on rivets - like portholes from 60s kits.
- mtaylor and GrandpaPhil
-
2
-
The art of the vague...
...or just missing is also over. Or as Franz would say, " Passt scho."
Sometimes I think that the term "fit inaccuracy" was coined for wooden construction kits of the 60s and 70s, and then especially for Billing Boats. Mismeasurements of 3mm are unfortunately not uncommon with the "BOHUSLÄN", which also explains why the lines printed on the wood are up to 1mm wide (Because then it's always the modeler's fault...).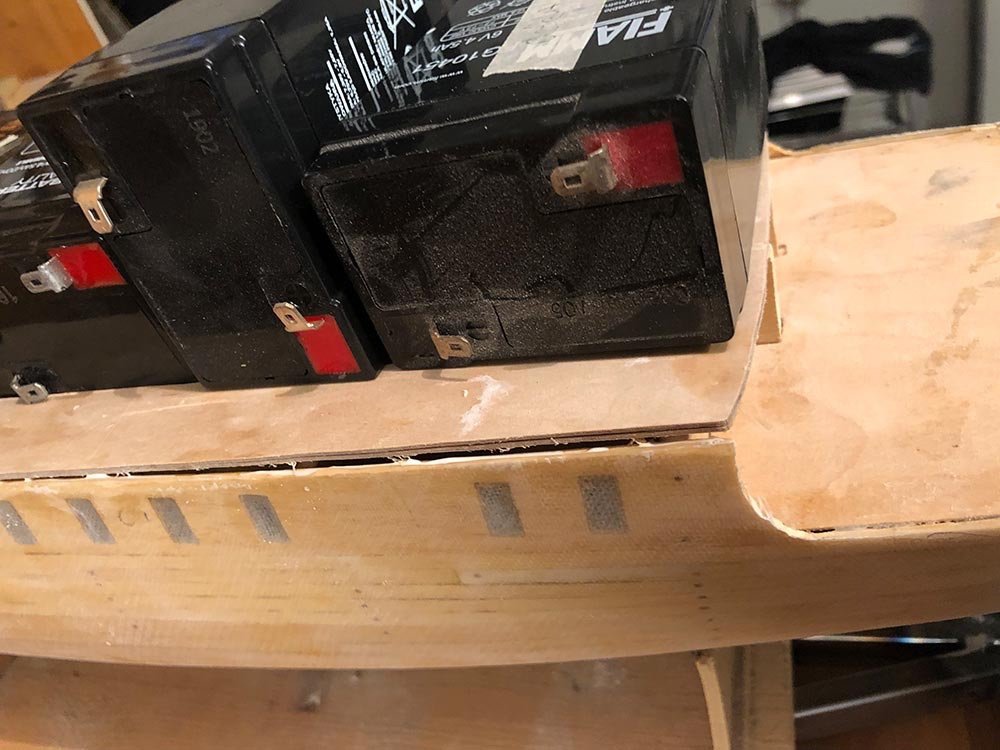
No matter, then just something is glued (we are model builders), and the result is then - hopefully - a really nice steamer.
- clearway and GrandpaPhil
-
2
-
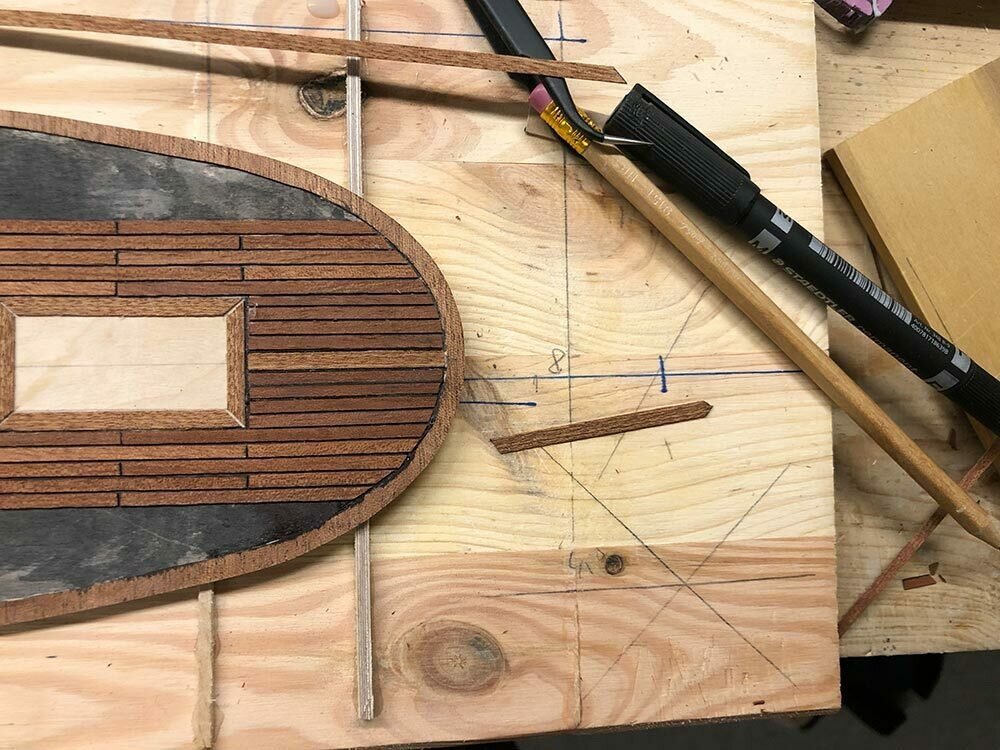
The deck, previously painted black, is covered with mahogany planks. There is nothing between the planks yet, but I have made a few promising attempts with black colored putty.
- yvesvidal, GrandpaPhil and mtaylor
-
3
-
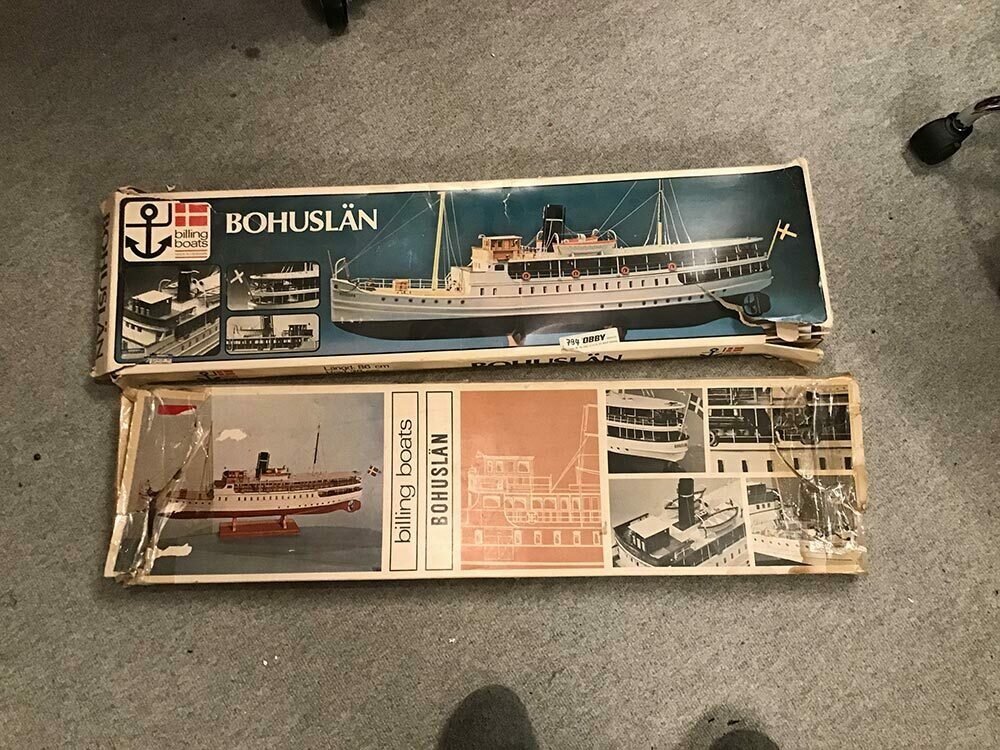
Since the weather is subterranean right now, and I don't have too much to do, I will continue with a project that has been close to my heart for many many years: the SS BOHSULÄN.
When I was 18 years old, I had bought the kit, and immediately put it aside, because it seemed much too difficult to me at that time. Then I had lost the kit, and at the same time the kit was no longer produced by Billing Boats. Sh...
In the meantime there were several producers who tried their hand at the BOHUSLÄN, with more or less success. At the moment there is still a kit that is distributed by Krick. However, this kit is out of the question for me for several reasons, mainly because it does not match the original in many points and proportions.
The BOHUSLÄN is still based in Gothenburg and makes many trips there every summer. There is a very active Facebook group where you can view many photos and videos of the BOHUSLÄN.About the build:
In the meantime I fortunately own two construction kits from Billing Boats, which has the advantage that you can sort, use or sort out the good and the bad parts from each kit.
I also planked and laminated the hull a year ago; this will be finished soon.
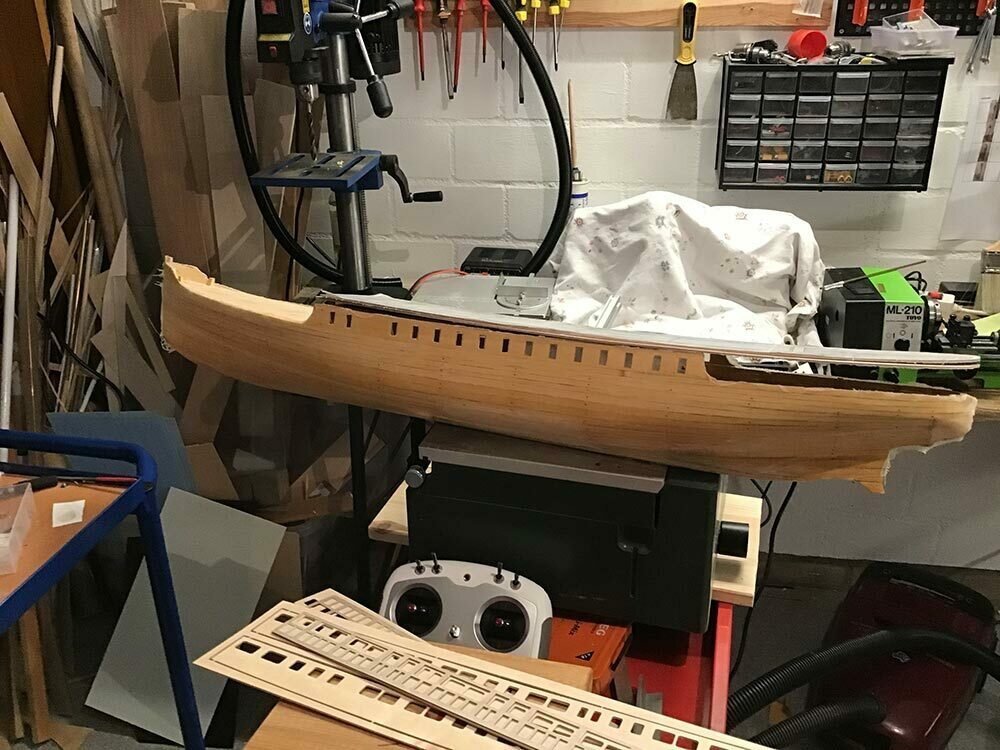
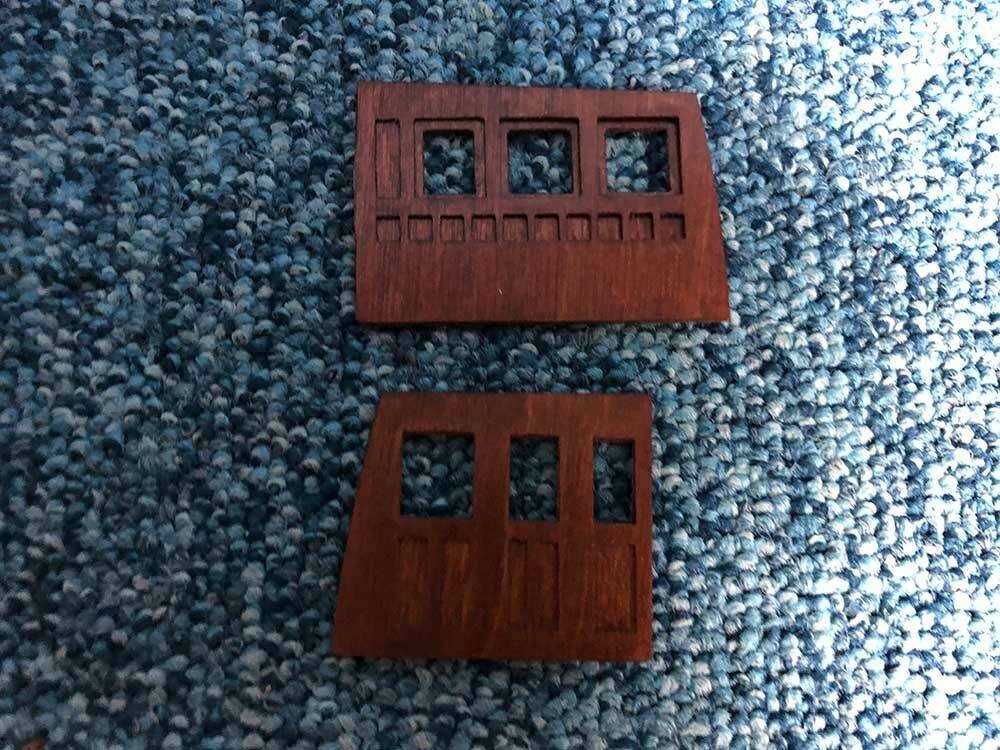
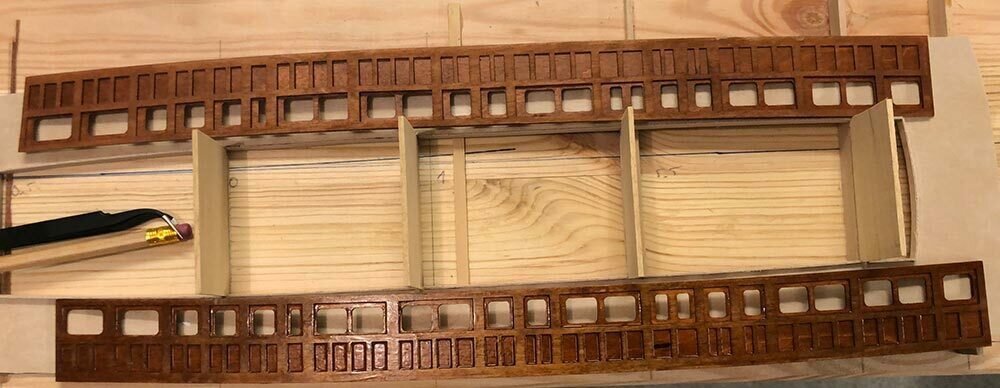
Eye-catchers on the steamer are in any case the beautiful teak panels, I had these milled so that no crooked windows creep in here.

This is what it will look like at some point:

The BOHUSLÄN is getting a double main deck to get to the engineering.
Since this has a decent deck jump, I have form-glued the two decks and now continue to build on a deck jump gauge so that this does not "lose" itself.
Only when the superstructure is finished is the hull jump adjusted so that everything fits nicely.
This is an unusual way of working for me. I usually always build from the bottom up.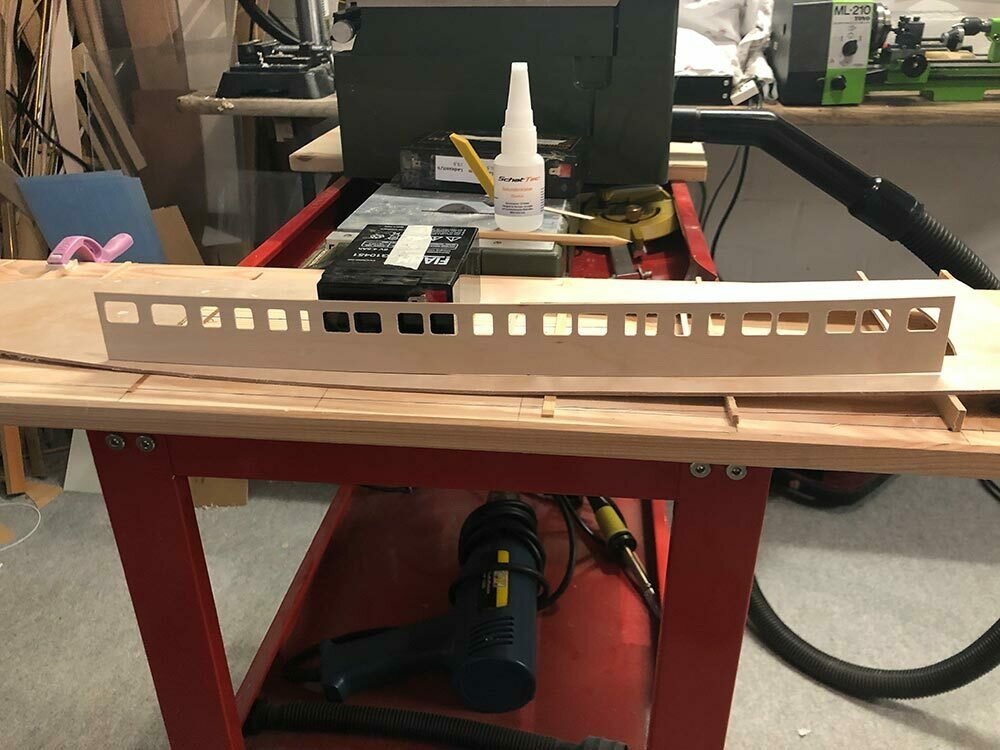
After half a day it looks like this:
- GrandpaPhil, yvesvidal and mtaylor
-
3
-
Dear colleagues, after my BOHUSLÄN thread was unfortunately hijacked, I deleted it and repost my content. Therefore, the request to all who are concerned: Publish your models in their own threads and do not use foreign threads for discussions with other members of the forum. Thanks!
Skip Uwe
-
Hello, Mr. Pucko, you are glad to live in Gothenburg. BOHUSLÄN arrived at packhuskajen…
For all BOHUSLÄN Lovers who do NOT live in Gothenburg: There is a Facebook-Group with a lot of Detail-Fotos:
https://www.facebook.com/groups/105318641847/Best Regards, Uwe
-
Hello, Mr. Pucko,
Good News, I guess. I am actually working at "Bohuslän" an I have been a little afraid of mismatches awaiting me (in Moment I'm still working at the hull).
Now I'm exited to realize what batch my kit is from
 !
!I will let you know.
All the best
Uwe
-
Hi, puckotred,
I prefer long planks, one from bow to stern. I am so far to start planking and will try to use balsa.
I will report how it works.
But you're right: It's not a model for beginners… :mellow:
Uwe
-
Hi, puckotret,
do you think it would be better to take balsa-stripes to plank the hull? I guess if I take stripes 100cm long they must fit to the hull…
Uwe
-
-
I scanned some Detail Photos of Bohuslän I made 30 years ago in Gothenburg.
I guess they are helpful for model building, I made them for this case.
The file is 21MB, you can find it here.
Regards, Uwe
-
Hello puckotred, Not yet, I will start the next days. Did you find the Bohuslän in the Harbour? I made some detail fotos some years ago and will post them in the next days.
regards
Uwe
-
Hello,
I bought a Nordic Atlast BOHUSLÄN kit in Germany, it's great in wooden details. I still own an BOHUSLÄN kit made by Billing Boats which I didn't start to build.
If I compare the kits, I see the quality of the fittings made by Billing Boats is much better. They are made of brass, which is a problem, if you want to make the model working. For example the funnel is too heavy.

SS Bohuslän by uheynitz - Billing Boats - 1:50
in - Kit build logs for subjects built from 1901 - Present Day
Posted
Dinghies & Skylights
For the Bohuslän dinghies, I had decided early on to 3D print, having found a great and suitable STL. My first prints from PLA were unsatisfactory. When I printed the boat in one piece, I had to work with support structures that destroyed the whole delicate planking display. When printing from two pieces (front and back), I didn't need support structures, but I couldn't quite get rid of the seam at the glue line. In the end, I printed the boat in resin and split it lengthwise, and I'm completely satisfied with that.
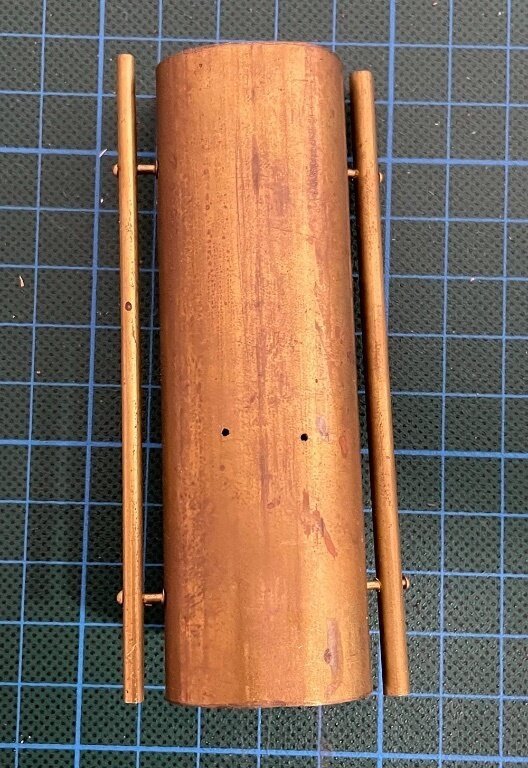
Foundation of the funnel
This is a mix of construction methods per excellence. The funnel itself I printed out of PLA and glued soldered brass tubes to it. I assembled the skylight classically from PS and printed the fans in resin. Then I got the urge to experiment and printed the whole ensemble again in resin. The result is strikingly good, but more than three times as heavy as the "mix" version.
Skylights
The skylights are included with the hardware set as beautiful all-brass parts. This is nice, but unfortunately also unusable. So I printed them in transparent resin, which is still covered with etched brass struts.
Greetings, Skip