Jack Panzeca
-
Posts
233 -
Joined
-
Last visited
Content Type
Profiles
Forums
Gallery
Events
Everything posted by Jack Panzeca
-
 Thank you, David B. And thanks for looking in.
 -
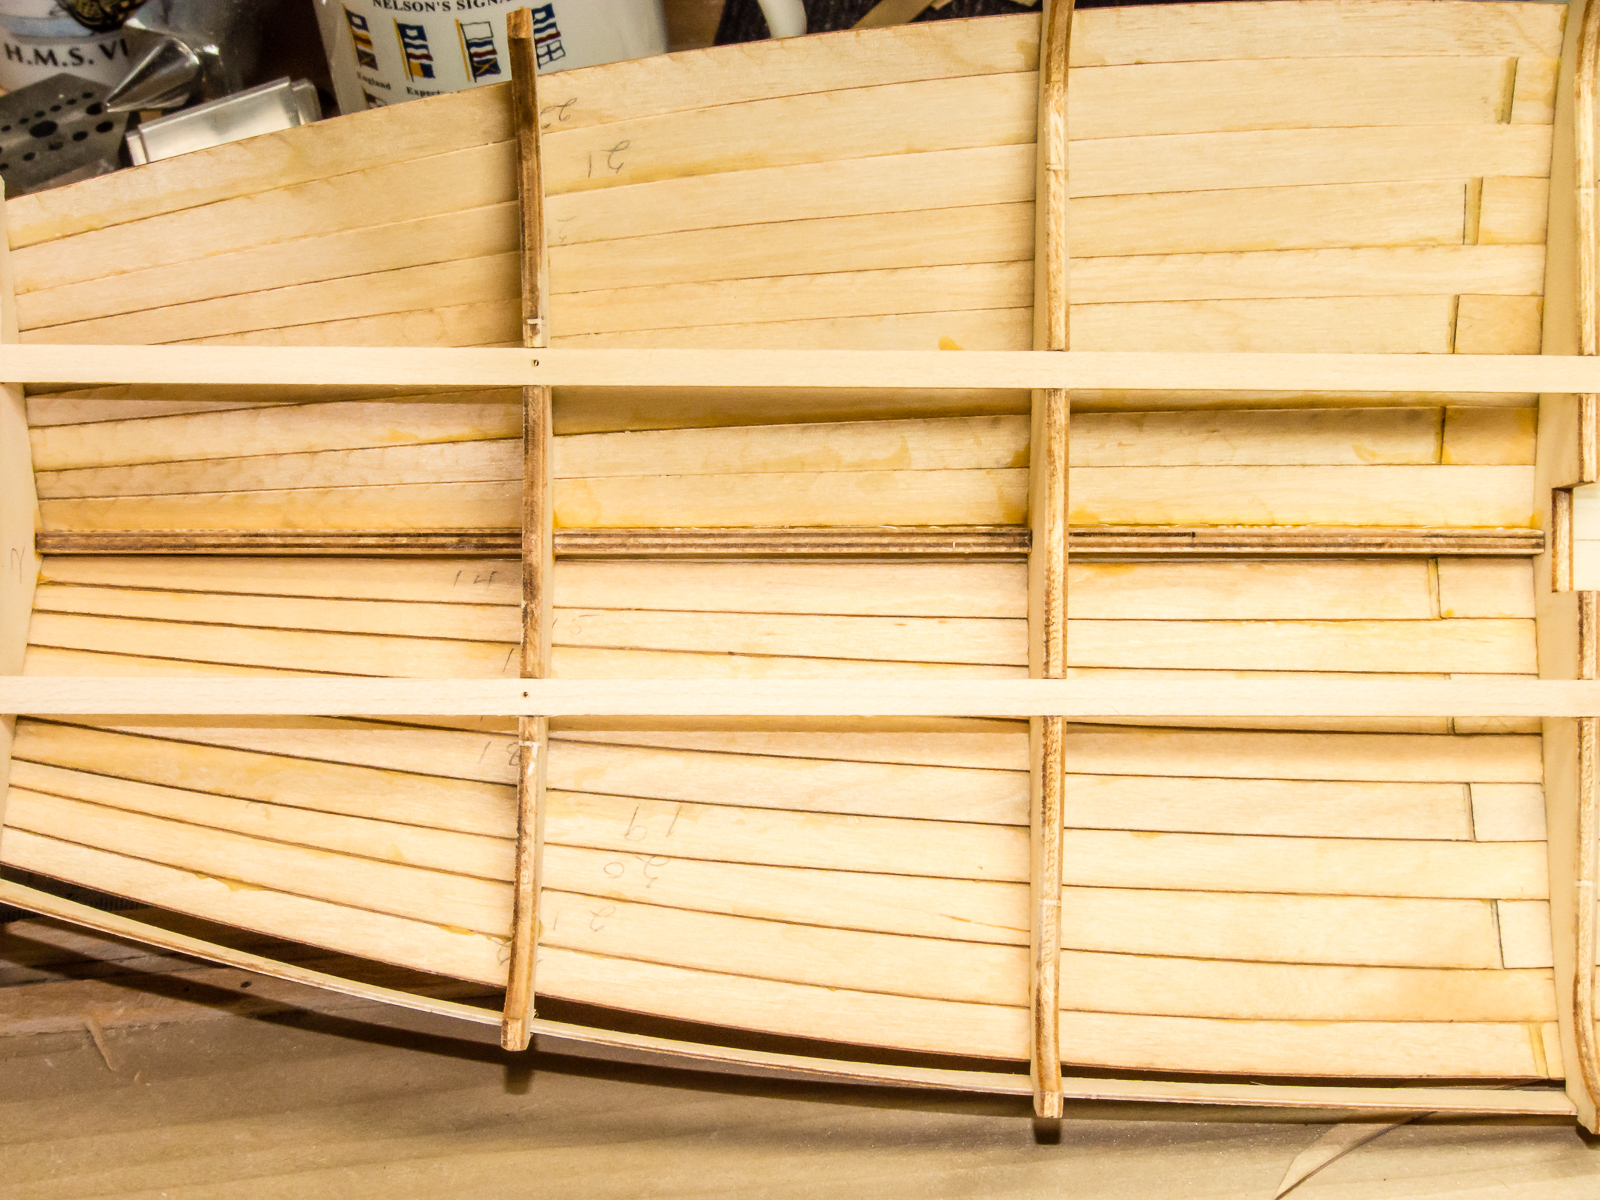
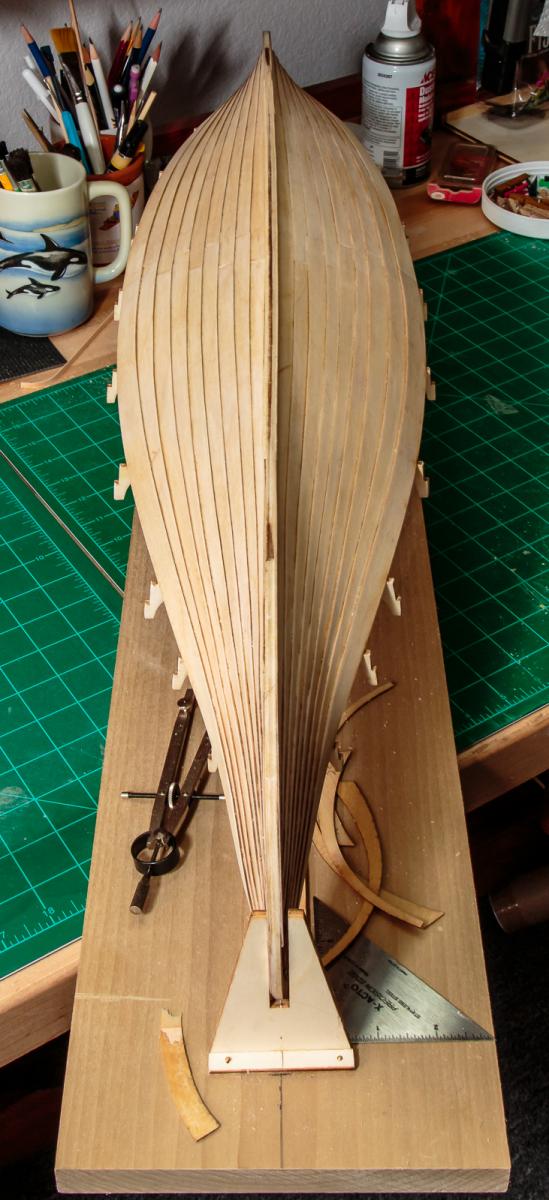
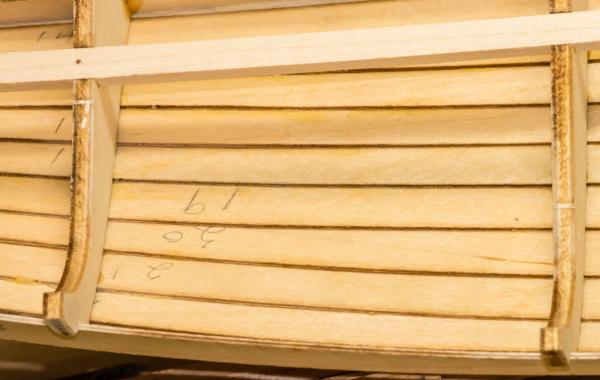
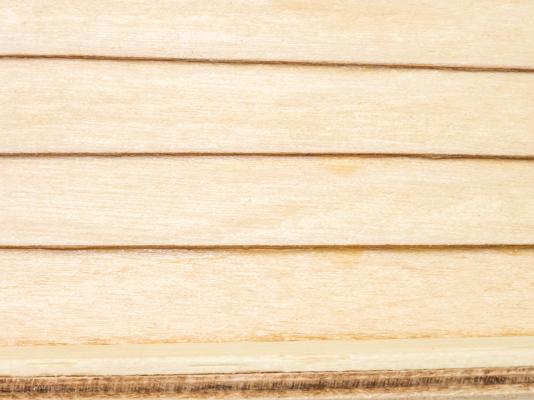
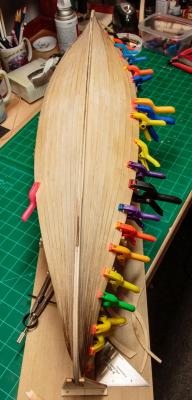
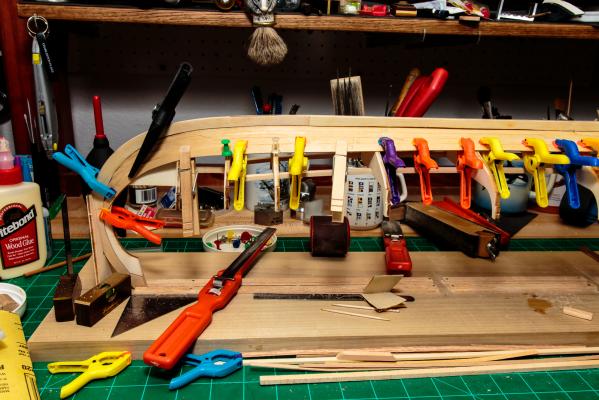
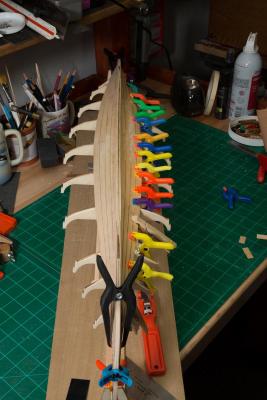
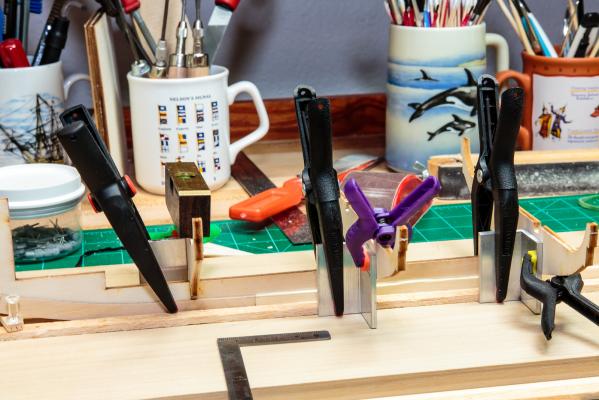
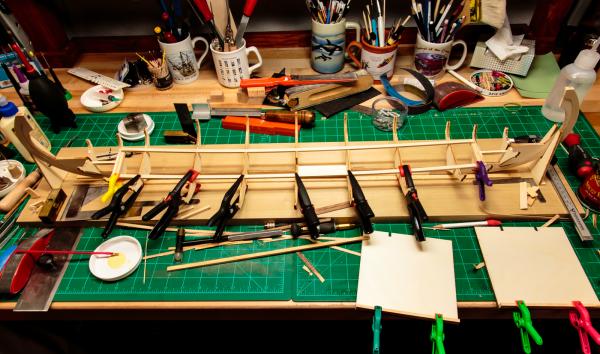
Please let me know if this is what you are looking for. One problem I had was keeping the glue off of the outside surface where the planks overlapped. I applied the glue with a toothpick but when I clamped the planks out came the glue. I wiped it off immediately but I am still left with some sanding.
-
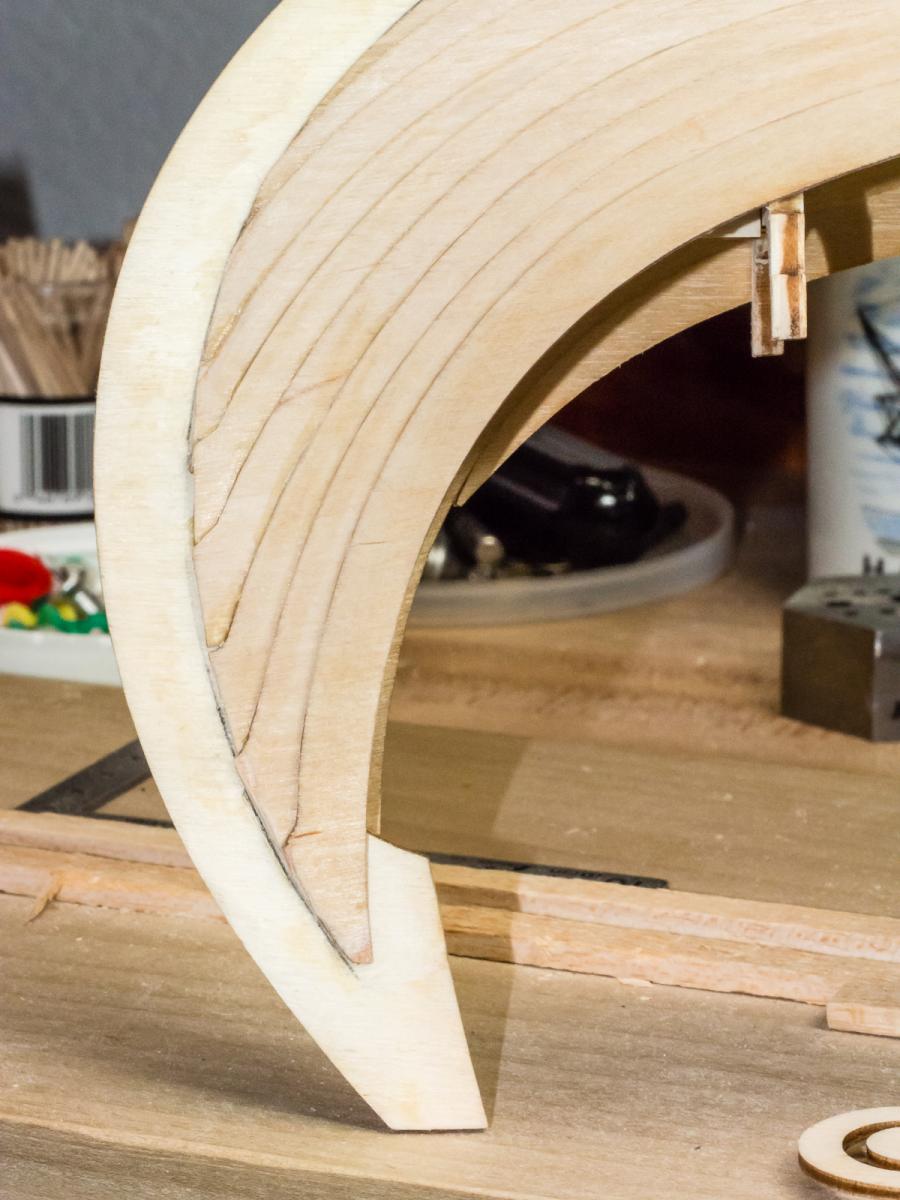
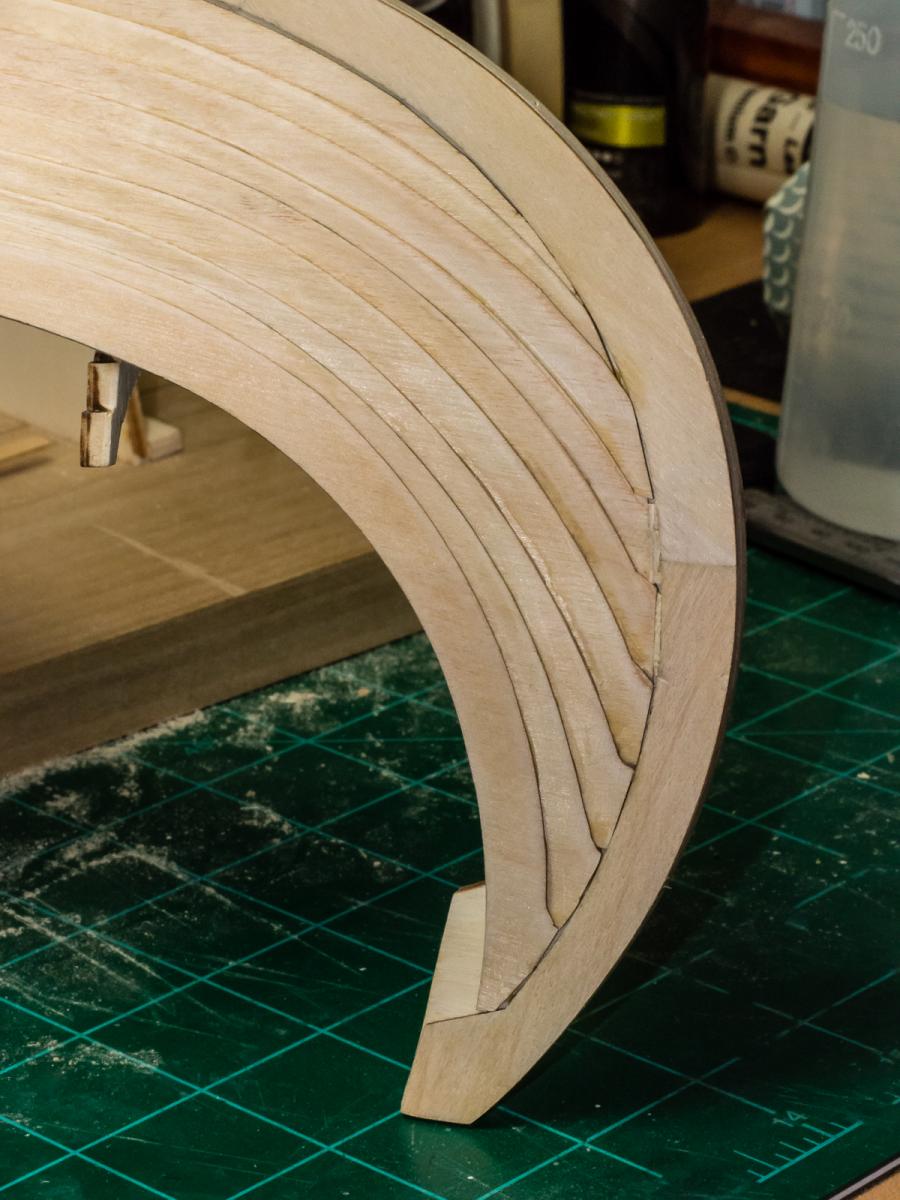
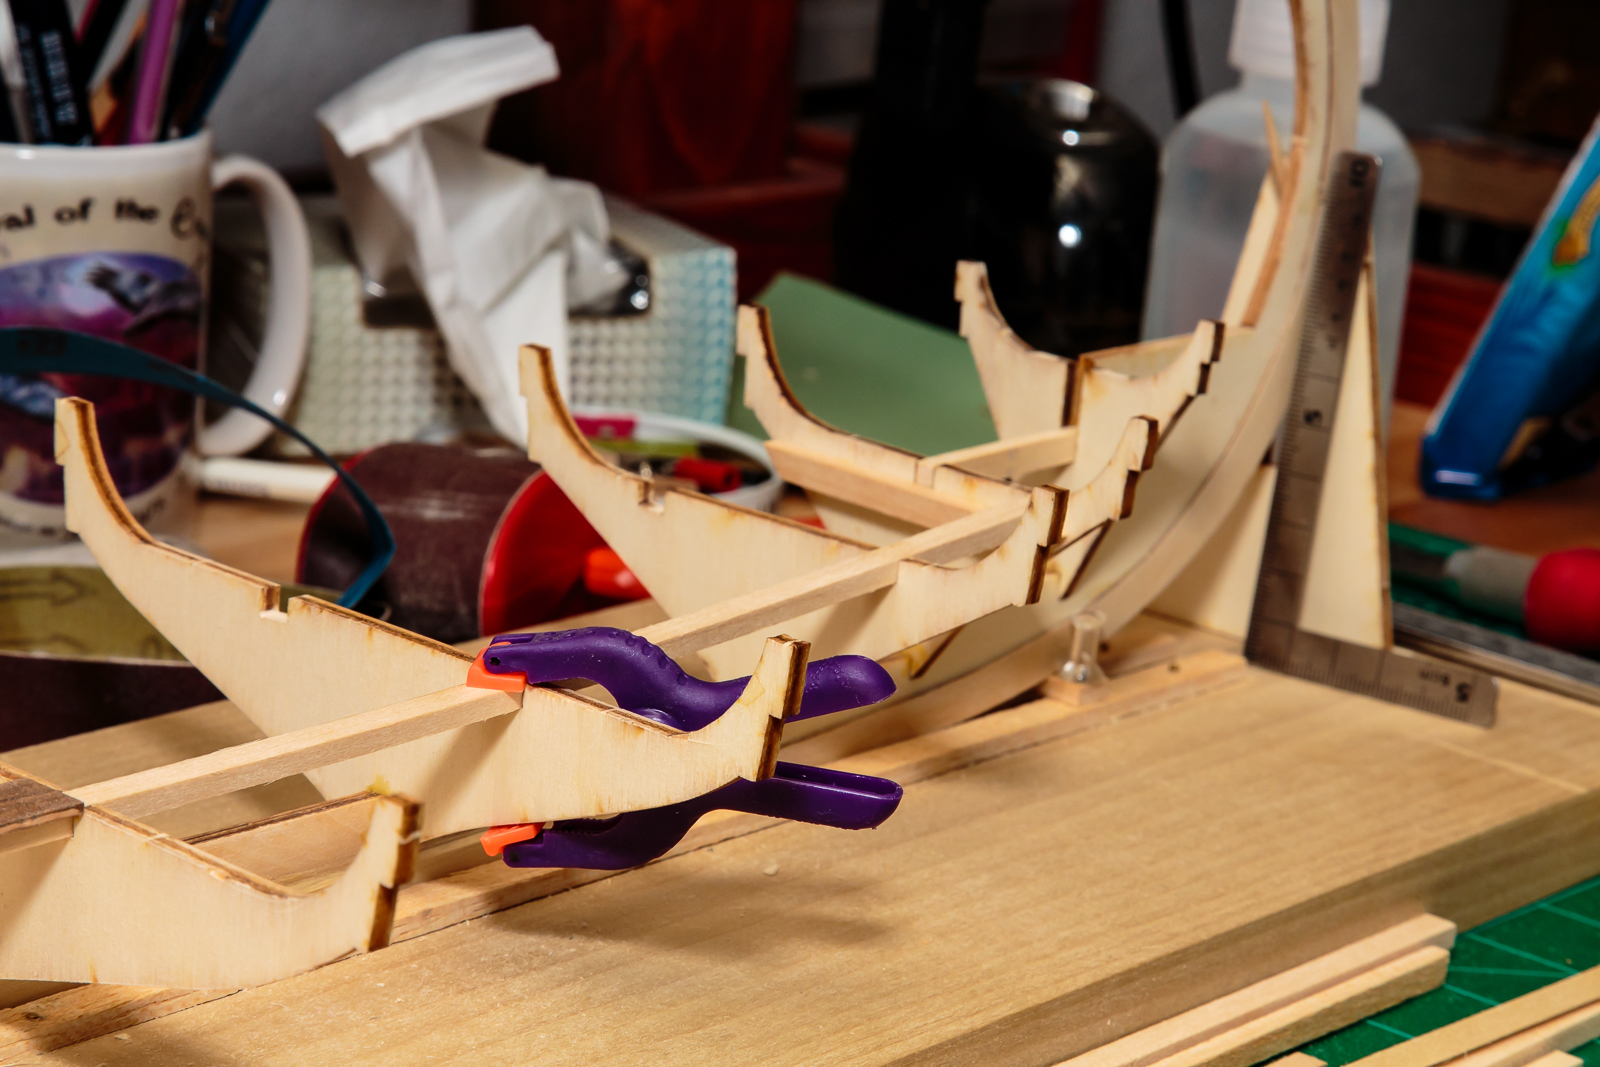
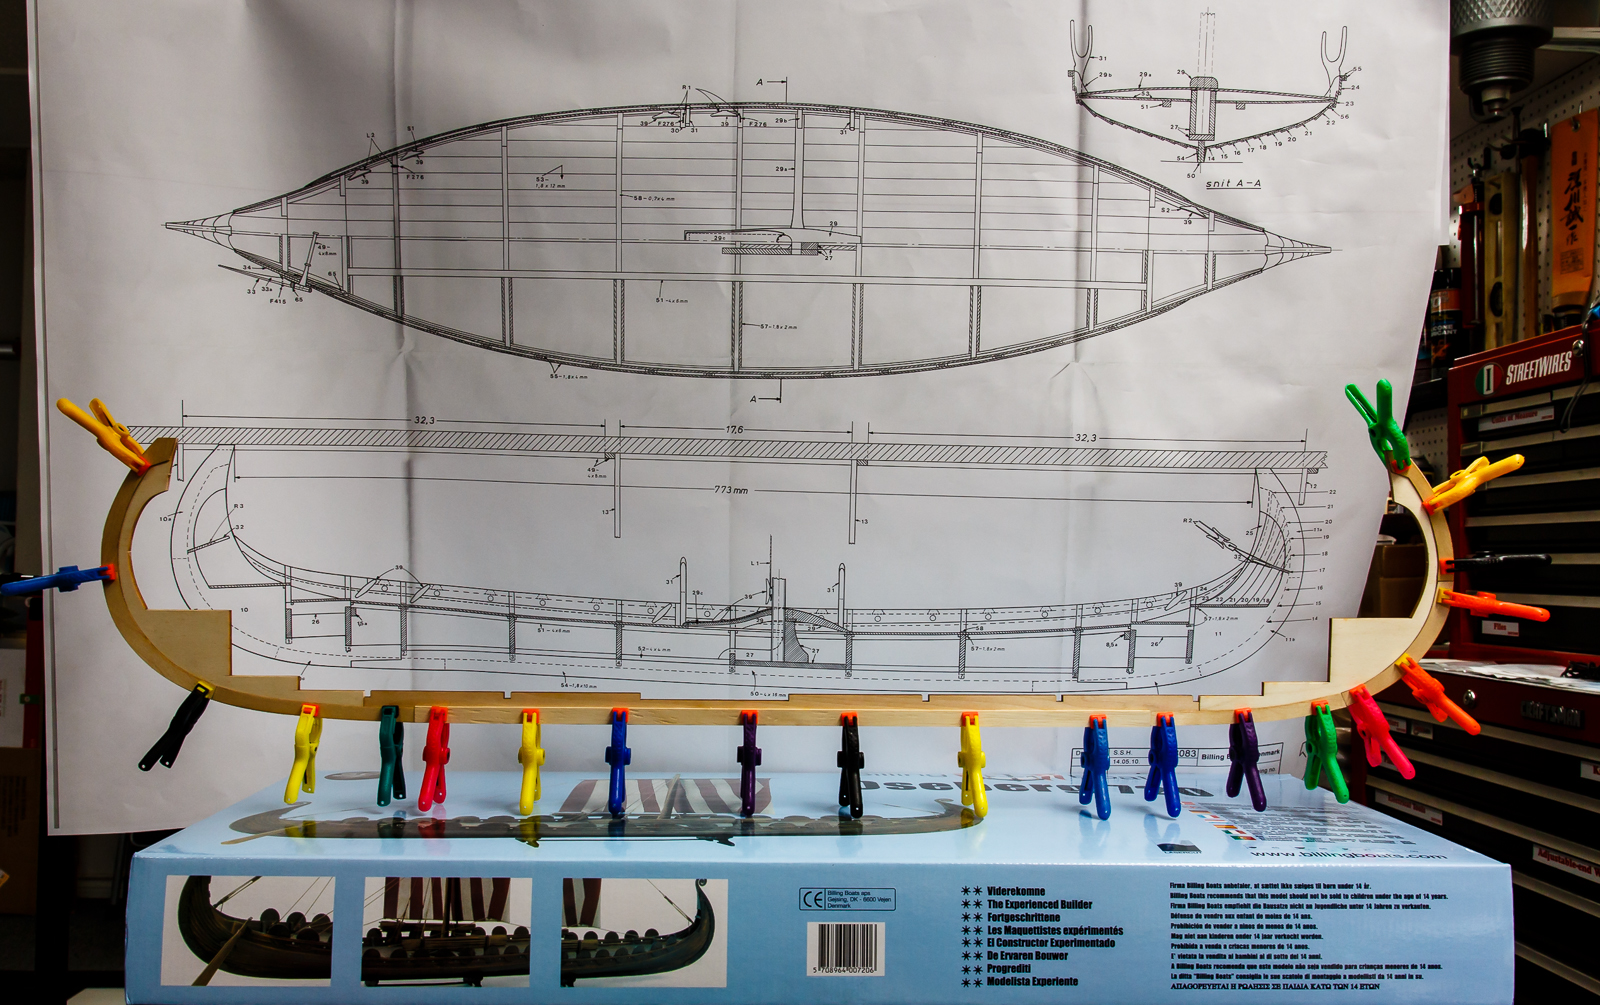
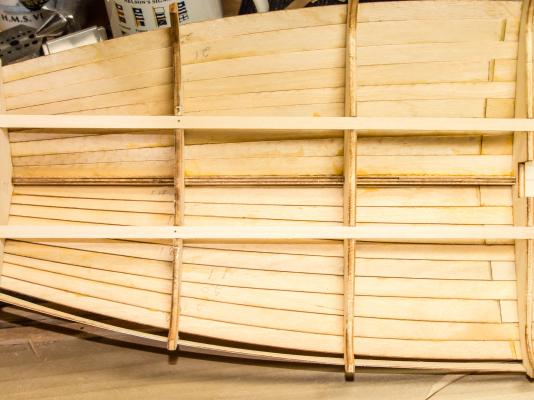
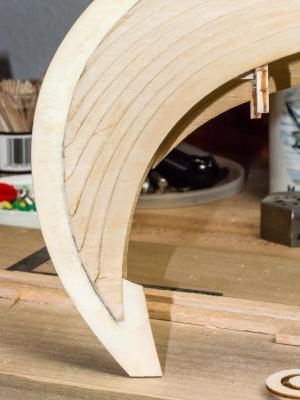
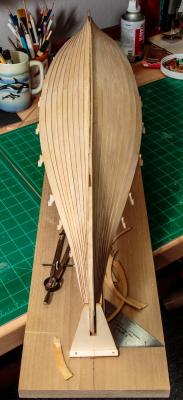
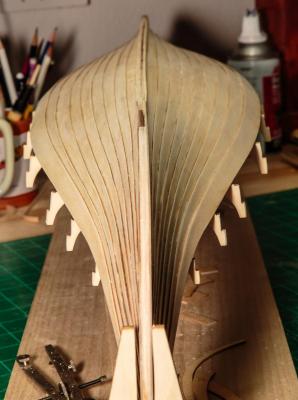
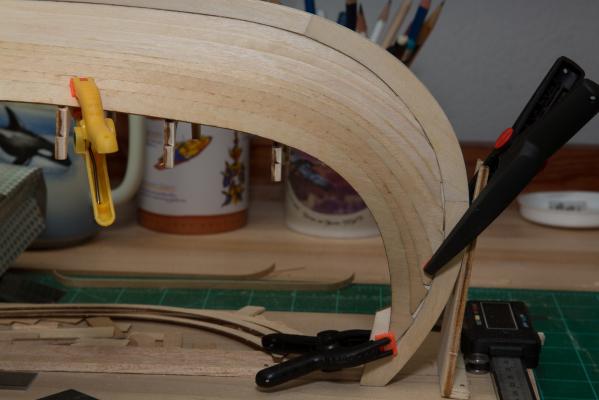
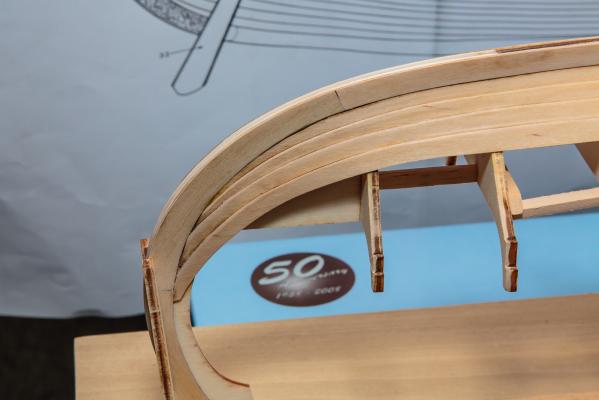
The last couple of days have been spent figureing out what comes next. There are plywood strips glued to the keel all the way up the curves of the bow and stern to give a way to form the curve of the planking. Once the planking is in place the strips on each side have to be removed to allow the scrollwork to to be installed. The instructions (what little there are) don't mention it. I learned it from Von_Kossa build log and it makes the entire scroolwork installation look and work better. I used alcohol to soften the glue and they popped right off. Next is the dry fit of the scroolwork. The scrollwork ties together with the last two planks at both ends. The top of the bulkheads where the last two planks go need a little more fairing. It took me a while to figure it all out but with the help of coach Von_Kossa's log I am ready to glue for keeps tomorrow.


-
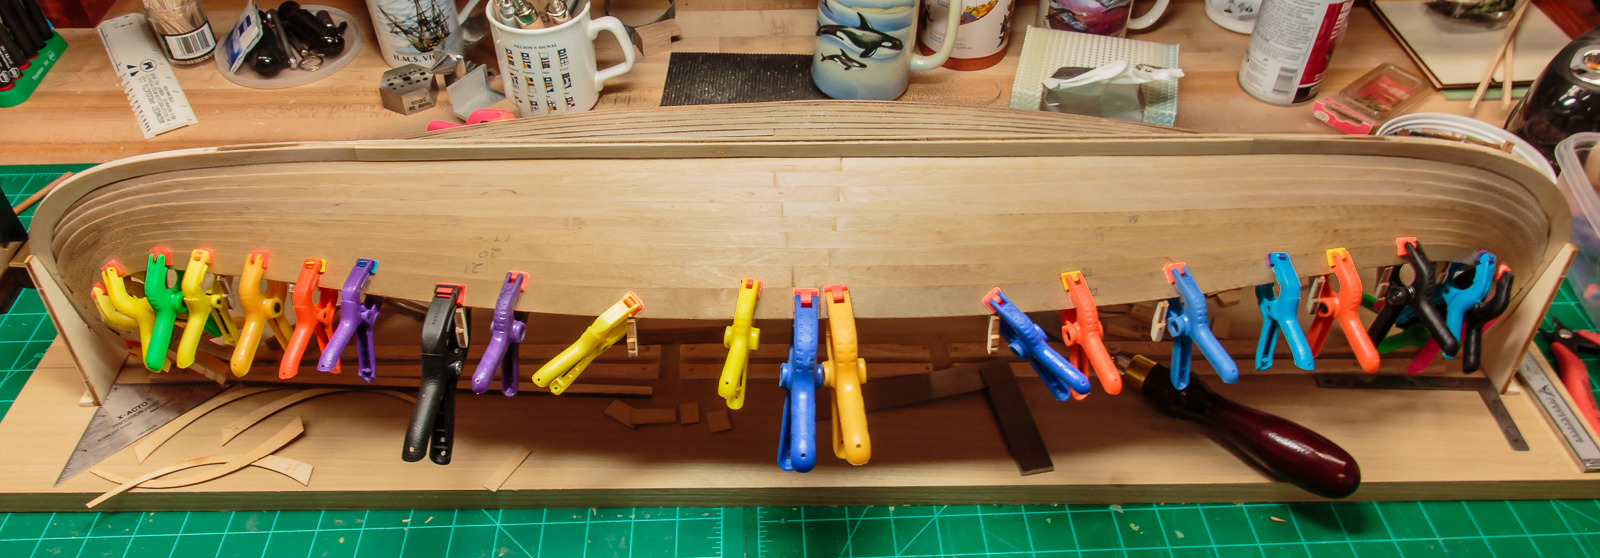
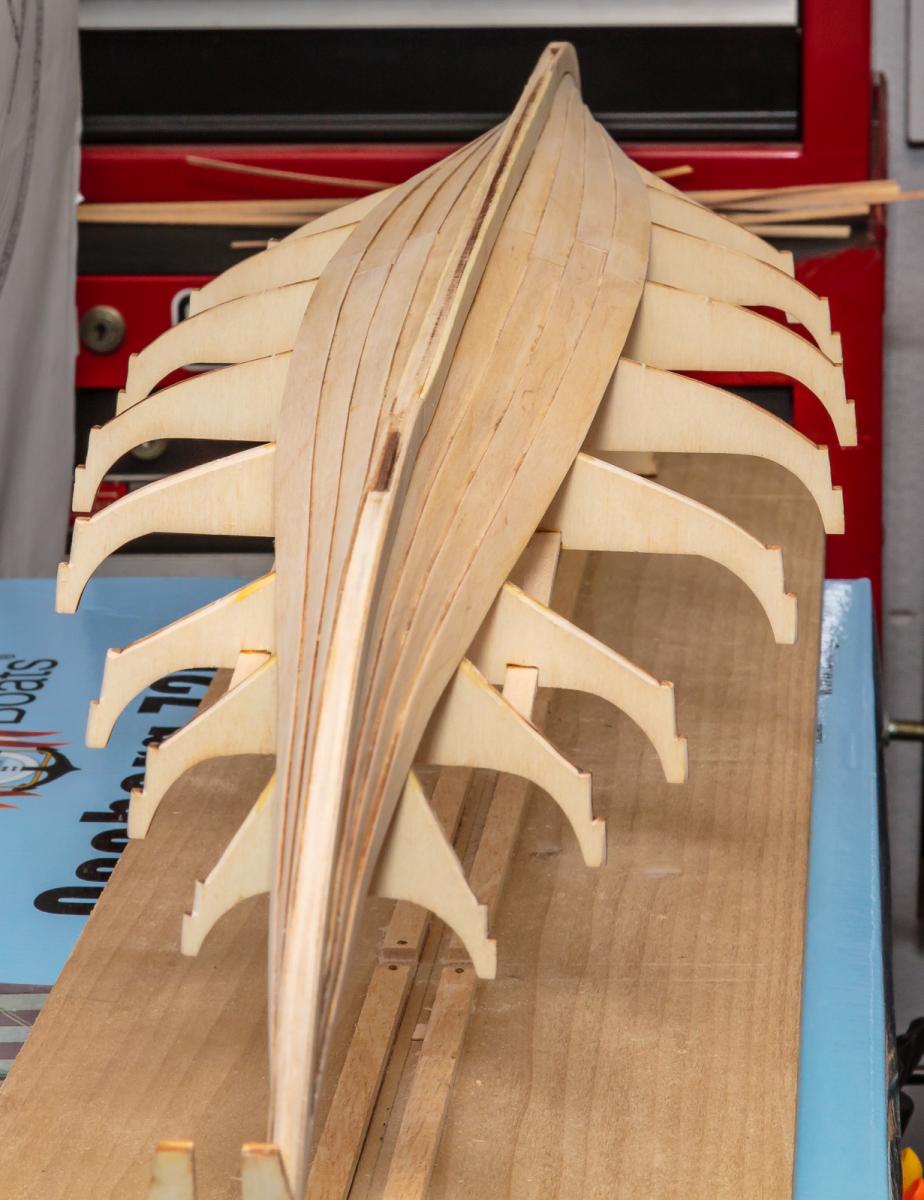
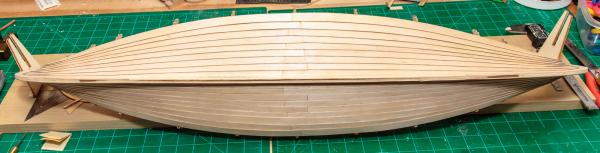
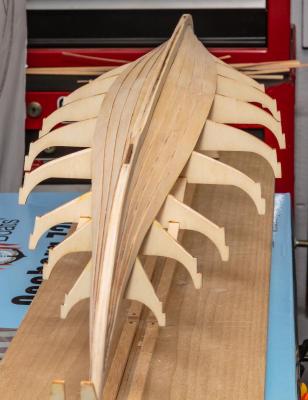
I finished the lower part of the hull but had a little false start. On my first plank of the day I got the distance between the overlap of two planks about 2 mm too close and I did not notice until 3 planks later. I have always used water to loosen PVA glue but I heard alcohol mentioned on MSW and it sure works faster than water. Thanks for the tip. I sure do like the lines of this ship. The Vikings must have been a tough bunch-crossing the ocean in an open boat.

-
Hi Zeus-cat, I am so inspired by this build that I started one myself. It is a wealth of information. I like this deck plan better than the one in the instructions too. I plan to do something similar on mine. Hello Von_Kossa, Thank you for rebuilding your log. It has been a great help.
-
Hi Bindy, Thanks, The planking so far has been uneventful. The planks are laser cut plywood (hard to fabricate on my own) so I did a quick dry fit of the last few planks to make sure that I did not run out of bulkhead before I ran out planks or vice versa. They fell in place nicely. Hello Von_Kossa, I don't normally work so fast. I little bit of life caught up with me this weekend and I got very little time with my toys. Hopefully I will have more time this week. Thank you both for looking in.
-
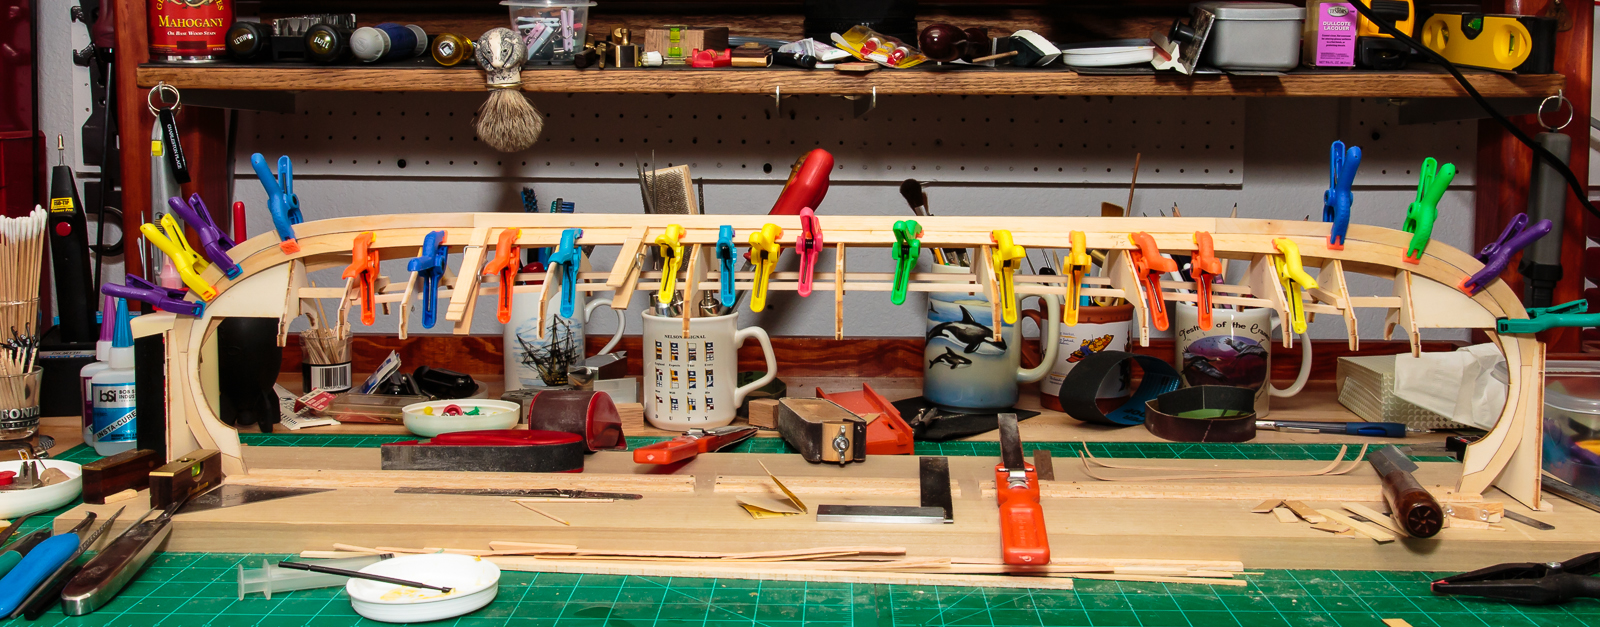
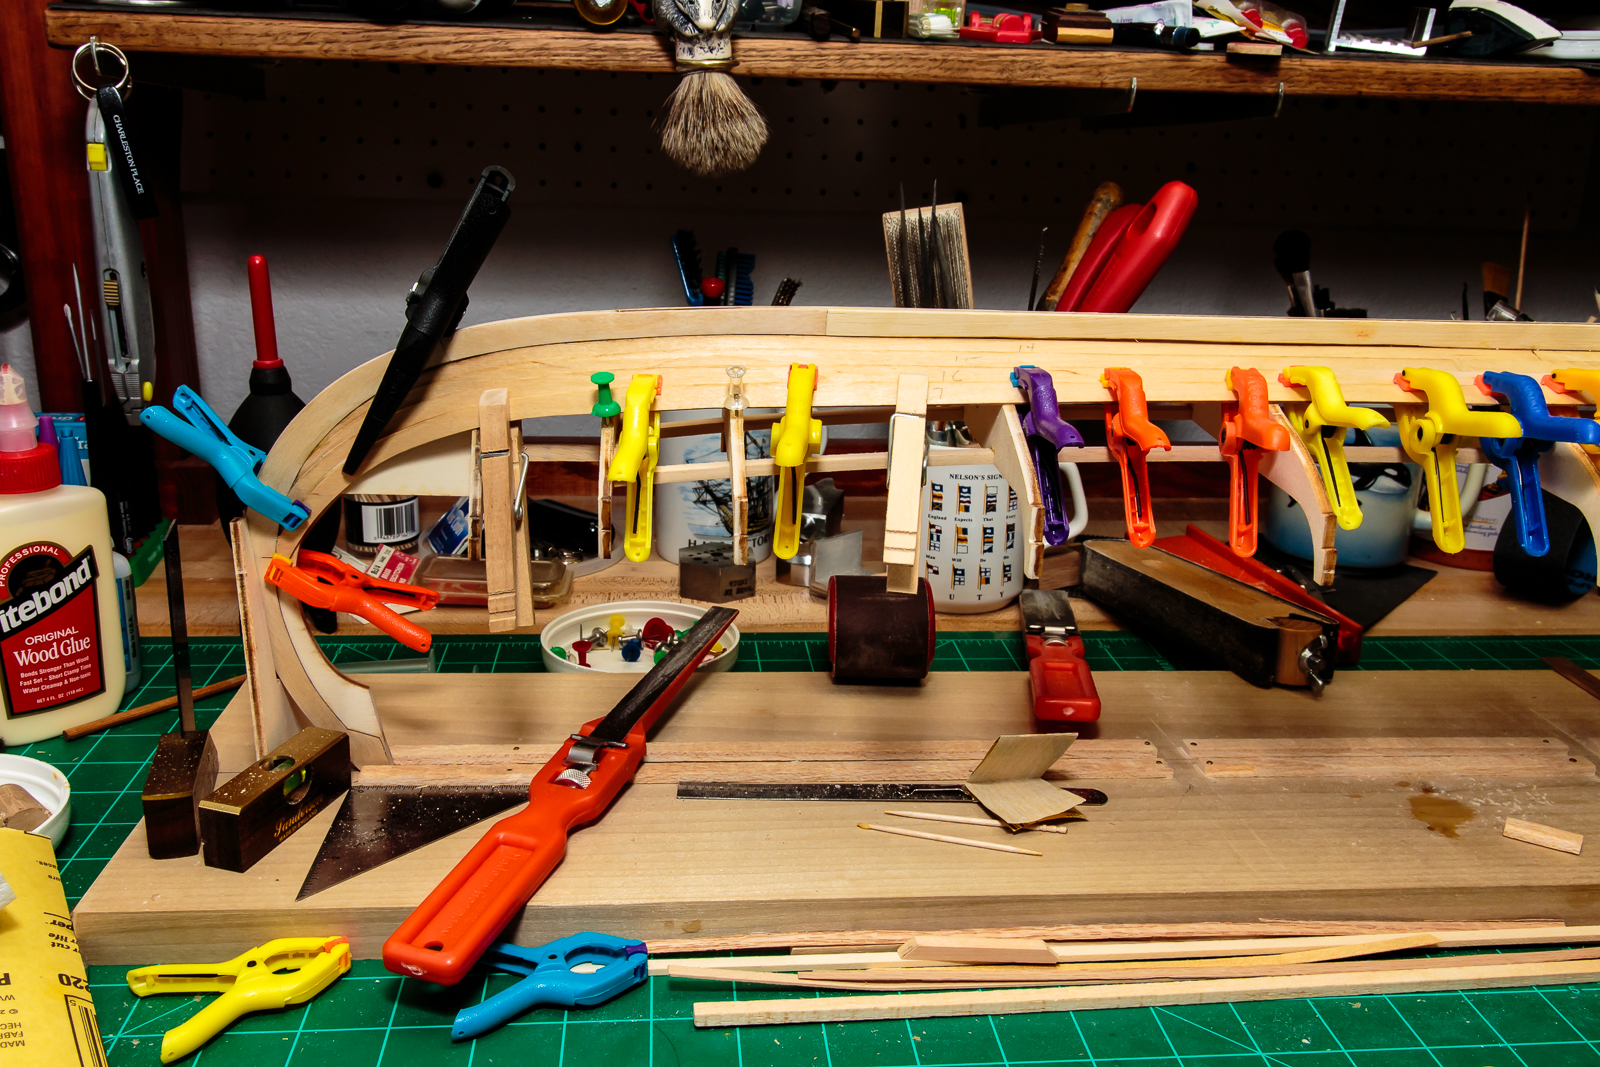
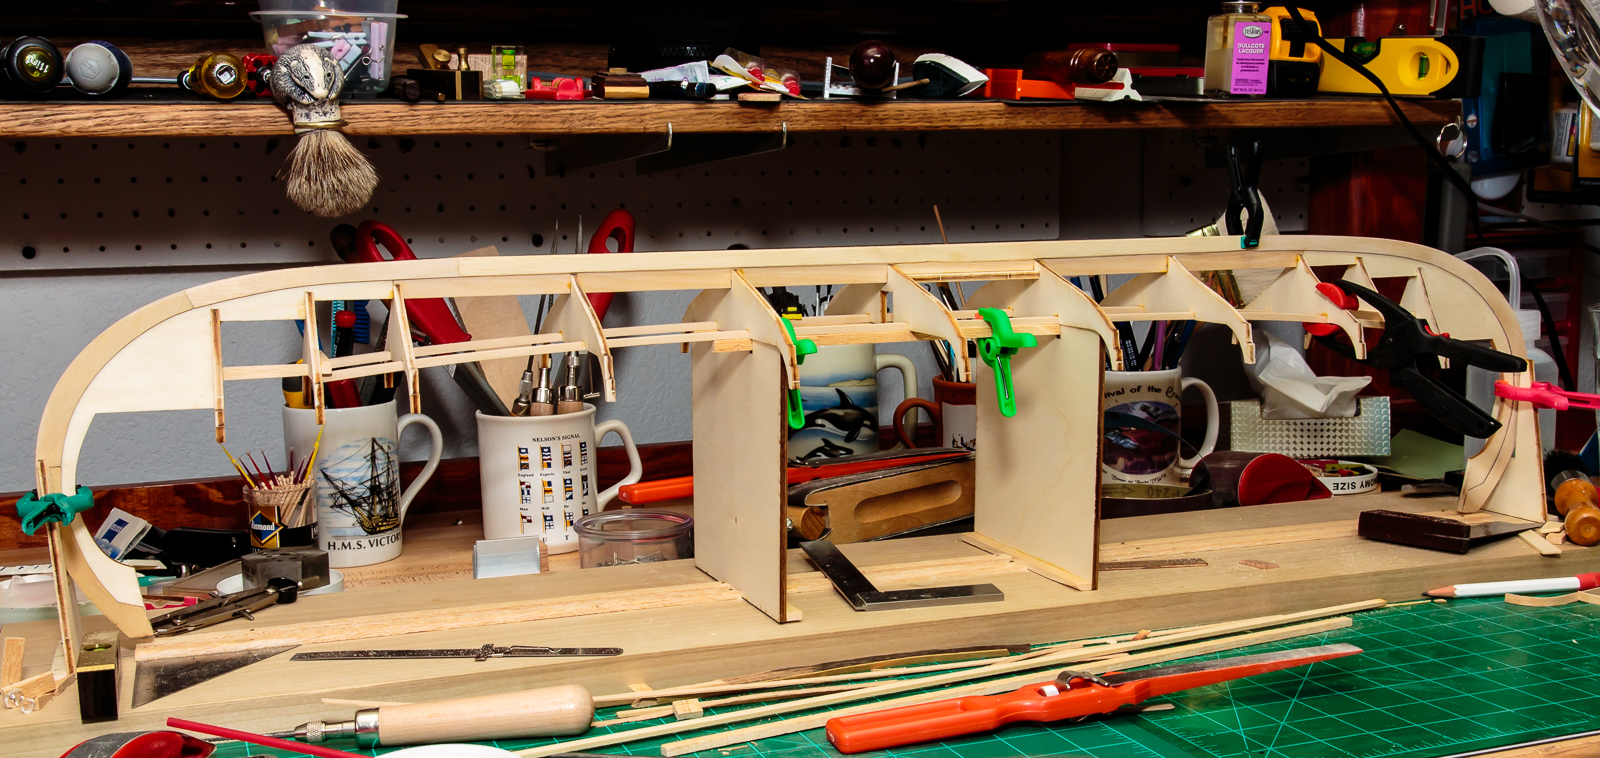
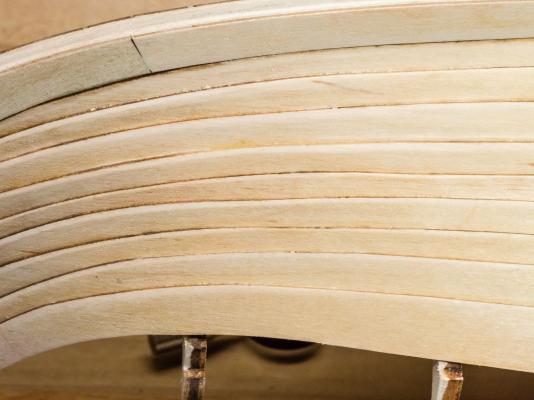
I got a start at the planking. It is 1mm laser cut plywood and bends easily. Each plank is overlapped about 1 mm and needs a little adjustment to get it just right at both ends. I did a little coarse sanding but it has a long way to go.

-
I read through your build log again looking for more that I missed. I am sure that I will have many more questions. Thanks,
-
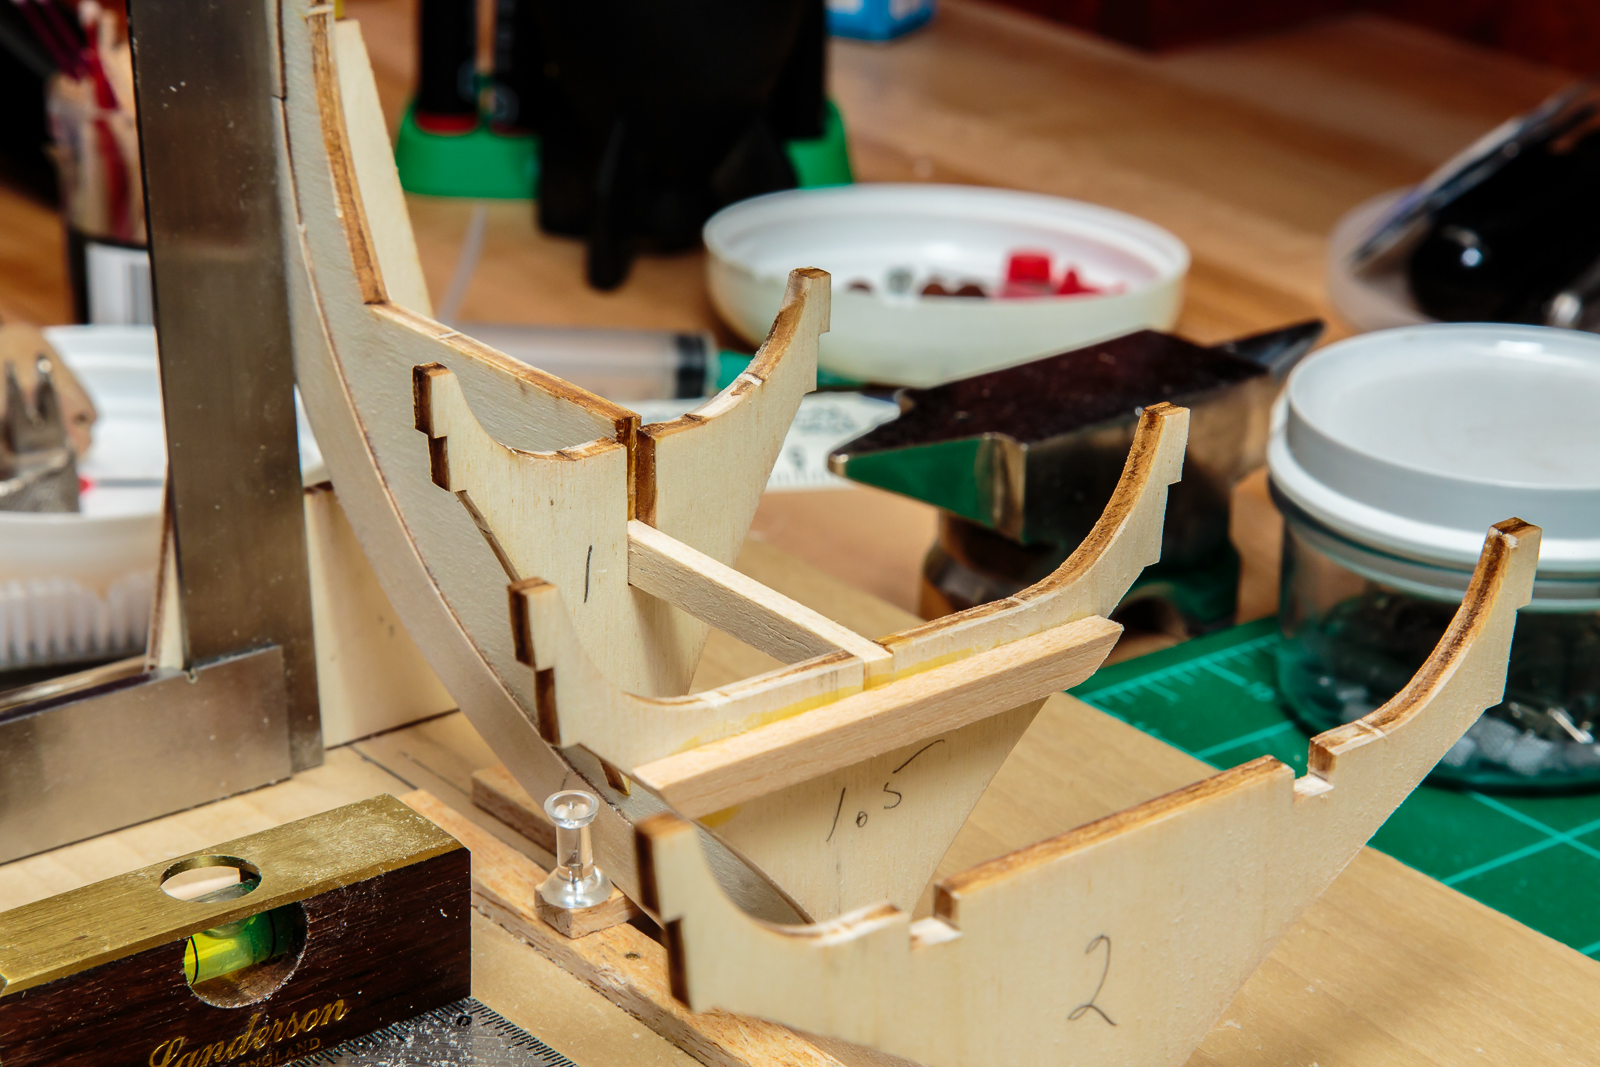
Hello Von_Kossa, Thank you for the help. I will do it the way you suggest. If I had realized earlier that I would remove the two layers below the scroll work I would not have glued it so well. Thanks again for your help, it is greatly appreciated.
-
Hi Kamil, Thanks for looking. I love the lines of the Oseberg and I hate rigging so I am having fun. Bugra thanks, glad you are here. Hello Von_Kossa, Your build is what inspired me to build this kit. Your work is truly beautiful. The size and detail is so much nicer than the smaller kits. I spent some time today working out the planking and I have a couple of questions for you if you do not mind. How did you separate the scrollwork plywood? It really is too thick and I would like to do the same as you. Also, how did you fill the area between the 2 pieces of scrollwork where they come together at the top? I am sure that I will have more questions later and your help is greatly appreciated. Thanks again.
-
Hi Bindy, Thanks for the encouragement. I have been following your build I must say that you have the most positive attitude I have ever seen. It is infectious. Hi David B, Thanks, Jack
-
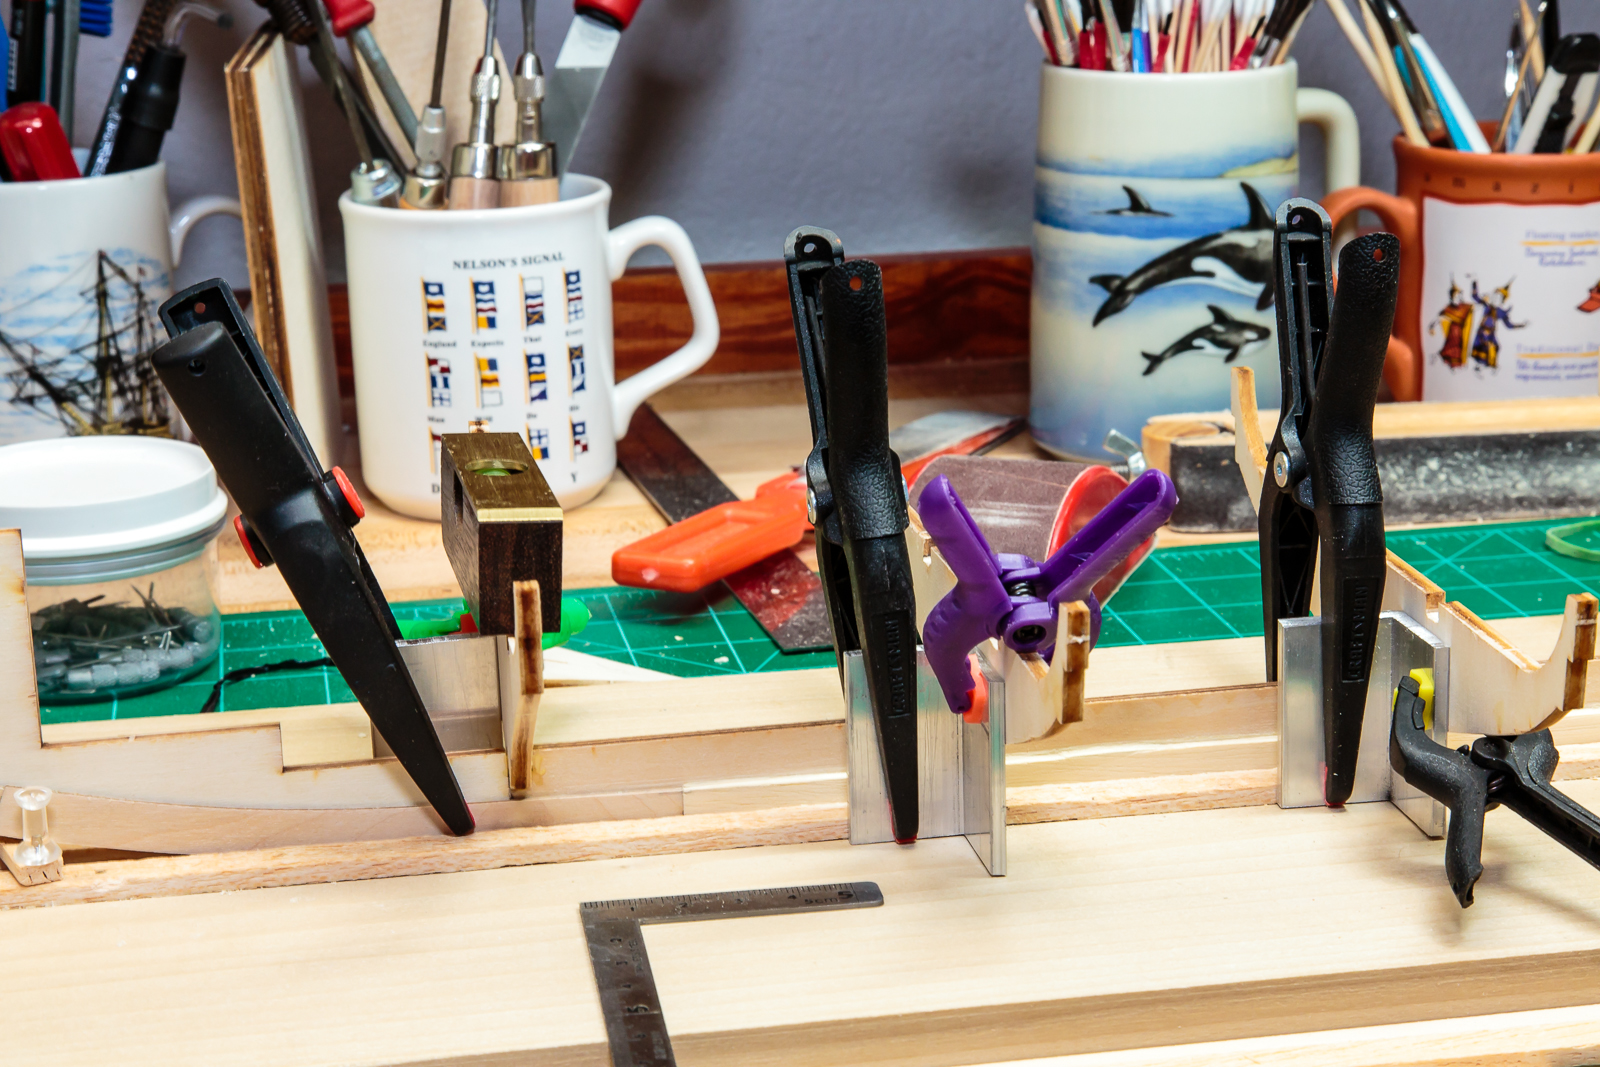
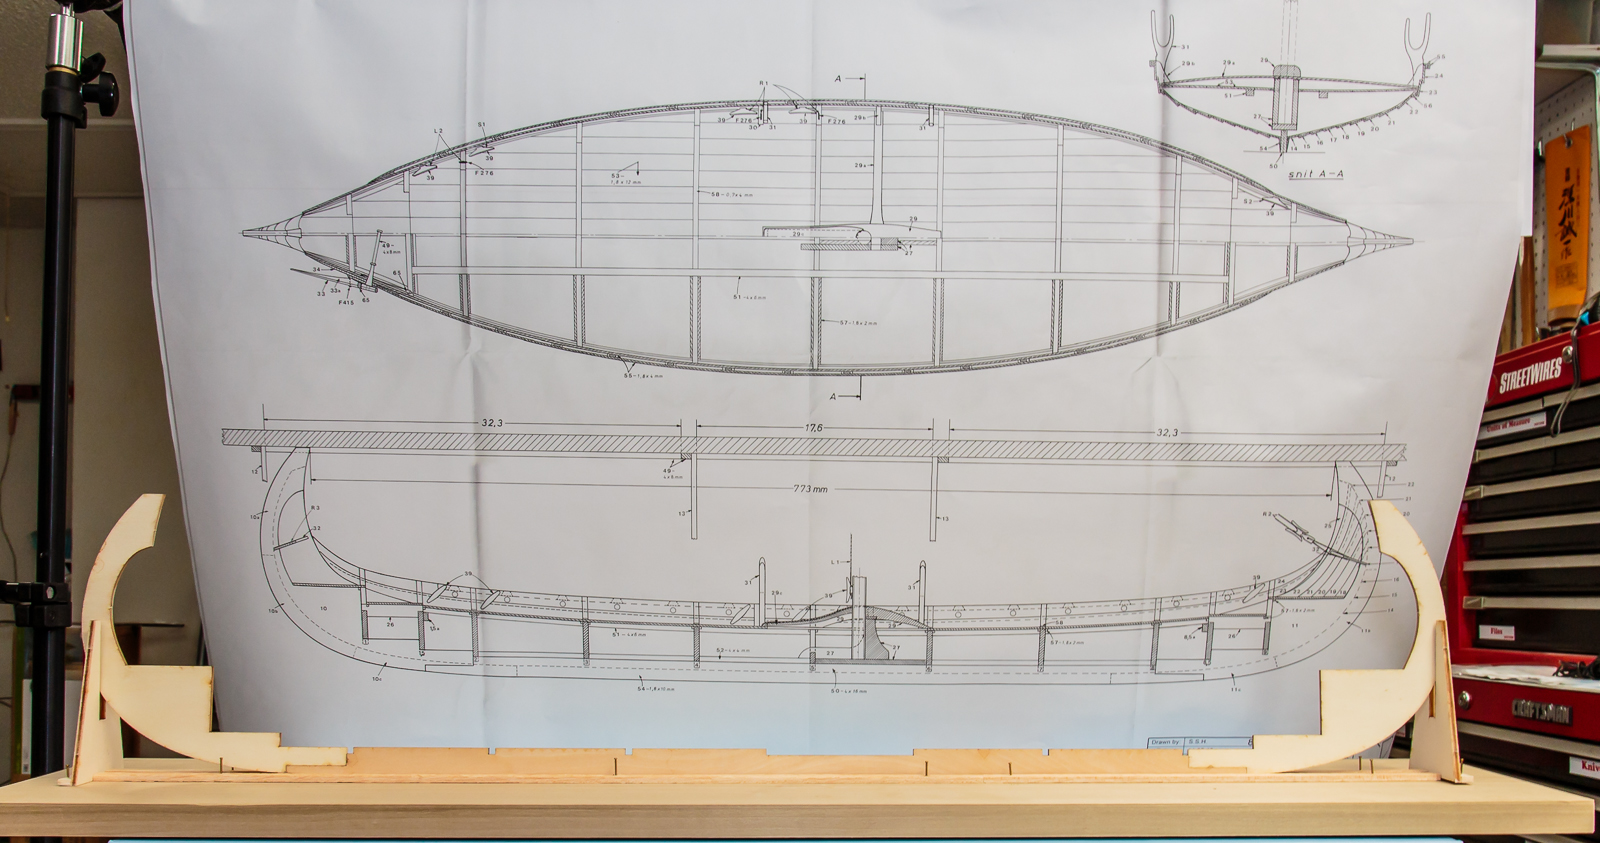
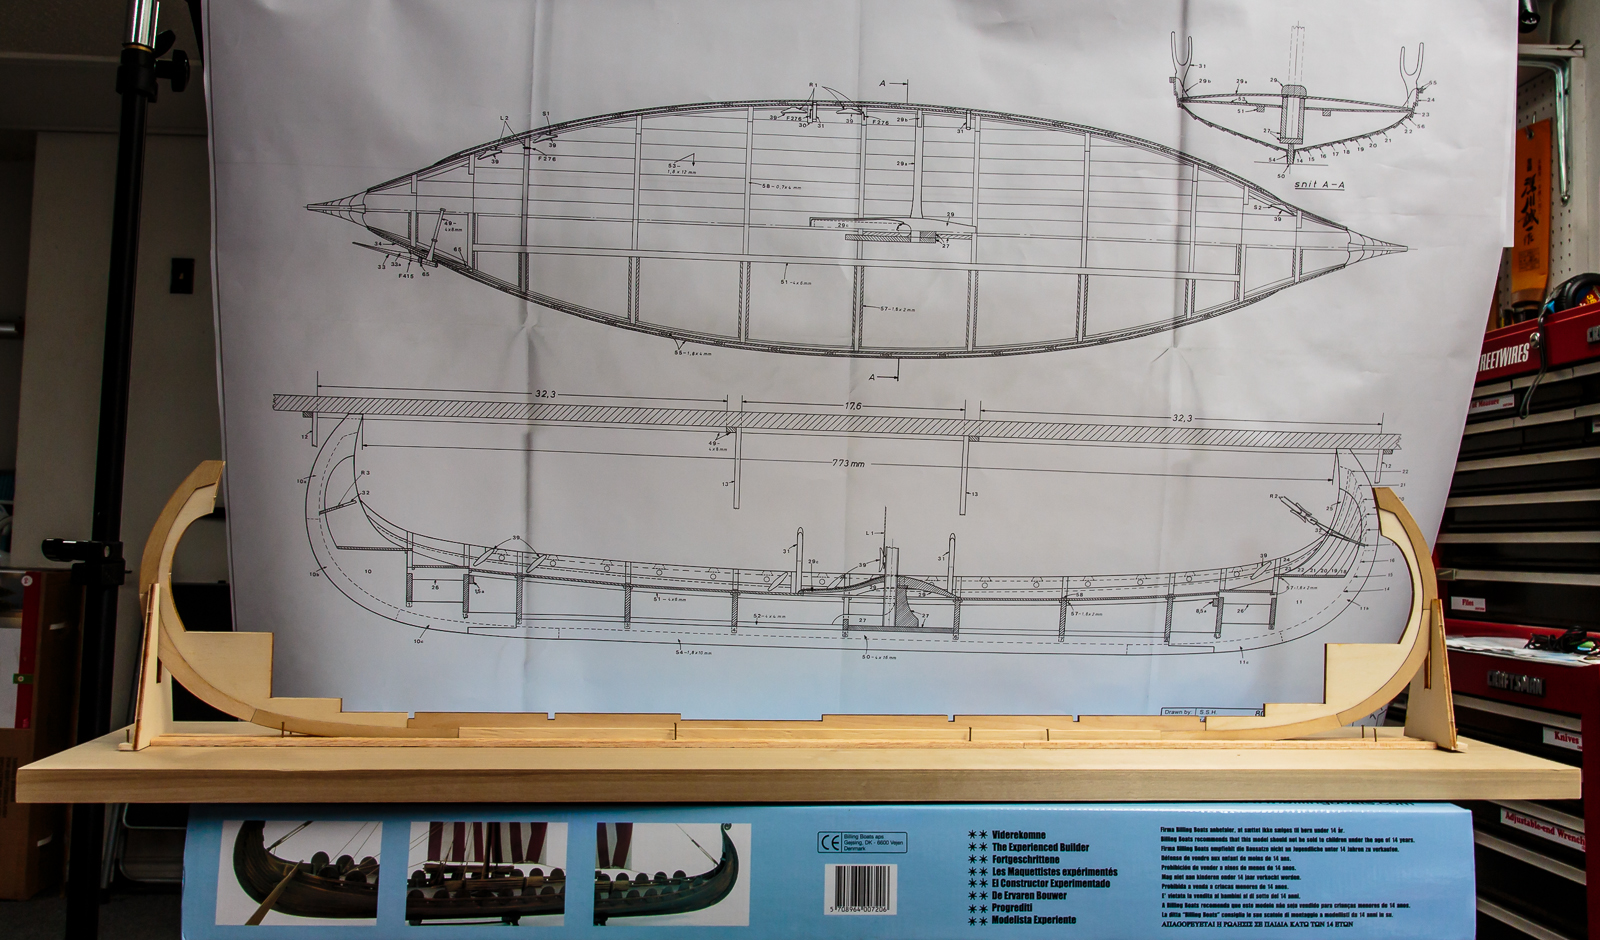
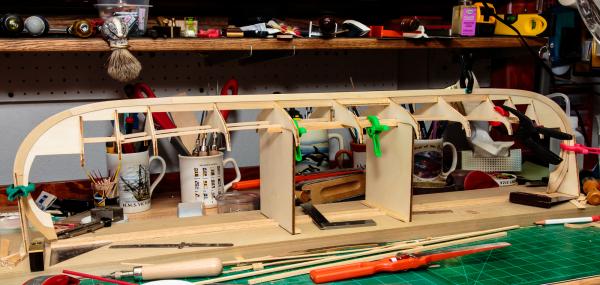
Hi David B and Anja, Thanks for looking. I am very impressed by Von_Kossa's build. It is what inspired me to choose the Billing Boats kit. Here are a few more pictures: I used aluminum angles to square up the bulkheads. Number 3 was slightly warped. I got rid of most of it when I added the strips at the top of the bulkheads and I can straighten the rest during planking. The kit supplies everything except the base board for a build board. I really like the ability to turn it upside down to plank. The last time I did it sort of freehand in my lap.


-
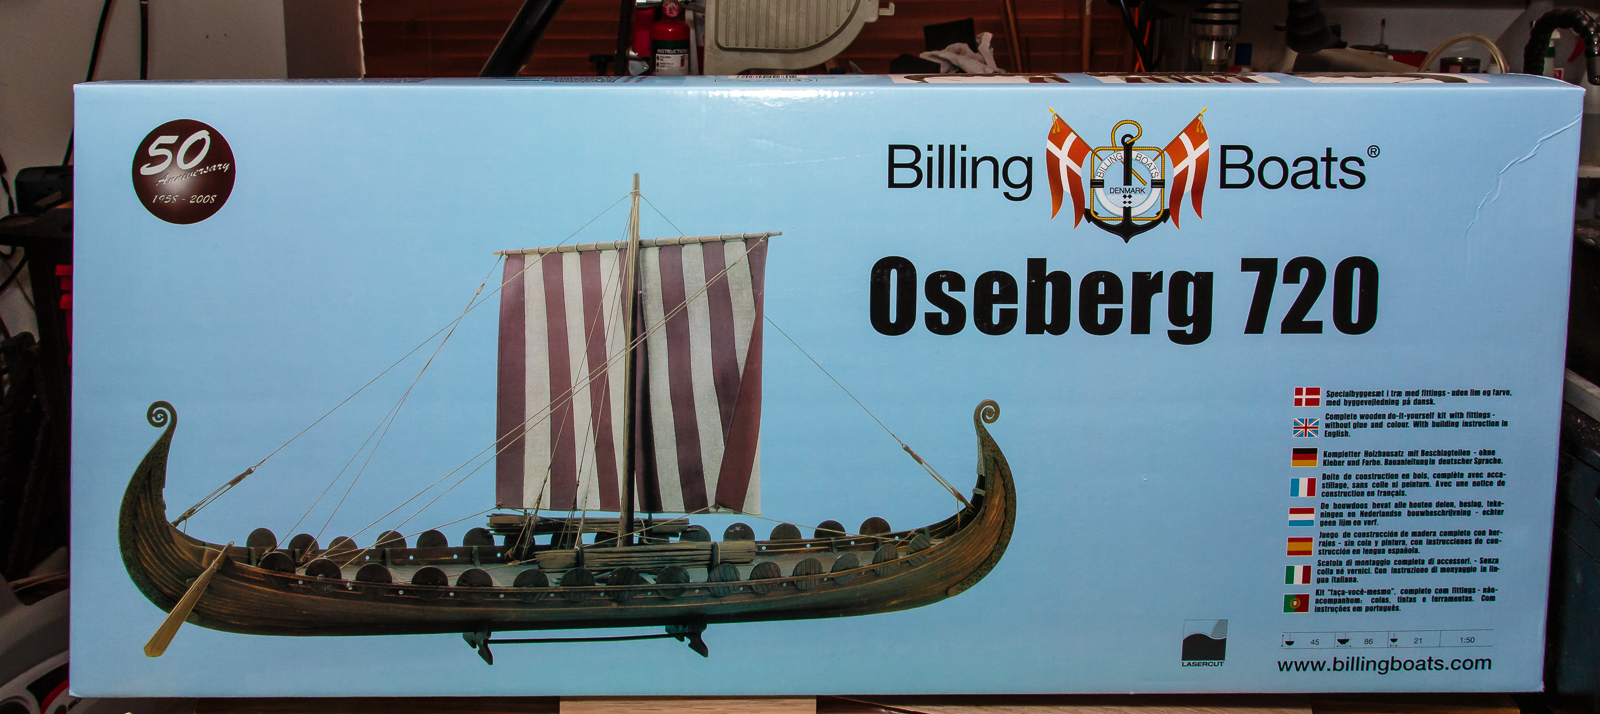
Greetings Everyone, This is my first build log and I missed the ritual box opening. I was already putting things together before I realized I should have photographed it first. The plans and directions are pretty sparse but it is a fairly straight forward ship. The keel had a slight bow in it but I used a little warm water and bent it a little past straight and it dried nice and flat. This is the kit version with the plywood scrollwork and shields. The keel and bulk heads leave a lot of exposed plywood edges and my plan is to cover them with oak veneer. The deck planking is Obechi which is soft, brittle and in my eye a little ugly. I have already ripped a few oak planks and they should work fine. I am happy to be here and doing this. More soon.