Jack Panzeca
-
Posts
233 -
Joined
-
Last visited
Content Type
Profiles
Forums
Gallery
Events
Everything posted by Jack Panzeca
-
 Hi Vivian, it is god to see you working a little. The windows and doors look great. I also really like the weathered look of the deck. I have that decision ahead of me on the Oseberg soon. Your ship looks wonderful and I am happy to see you feel well enough to work on it.
 -
That is a really great link. Now I am even more undecided about what to do about the shields! I have not spent enough time on what to do with color. I have not begun to build the shields but that day is coming. I am also torn with the stain decision: should I use the dark stain to resemble the museum ship that was buried for a thousand years, or a more natural oak color as she might have looked in real life? More research in my future I guess. Thanks for the kind words and encouragement. I knew the first minute I unpacked the kit that I would cover the plywood. Thanks for looking.
-
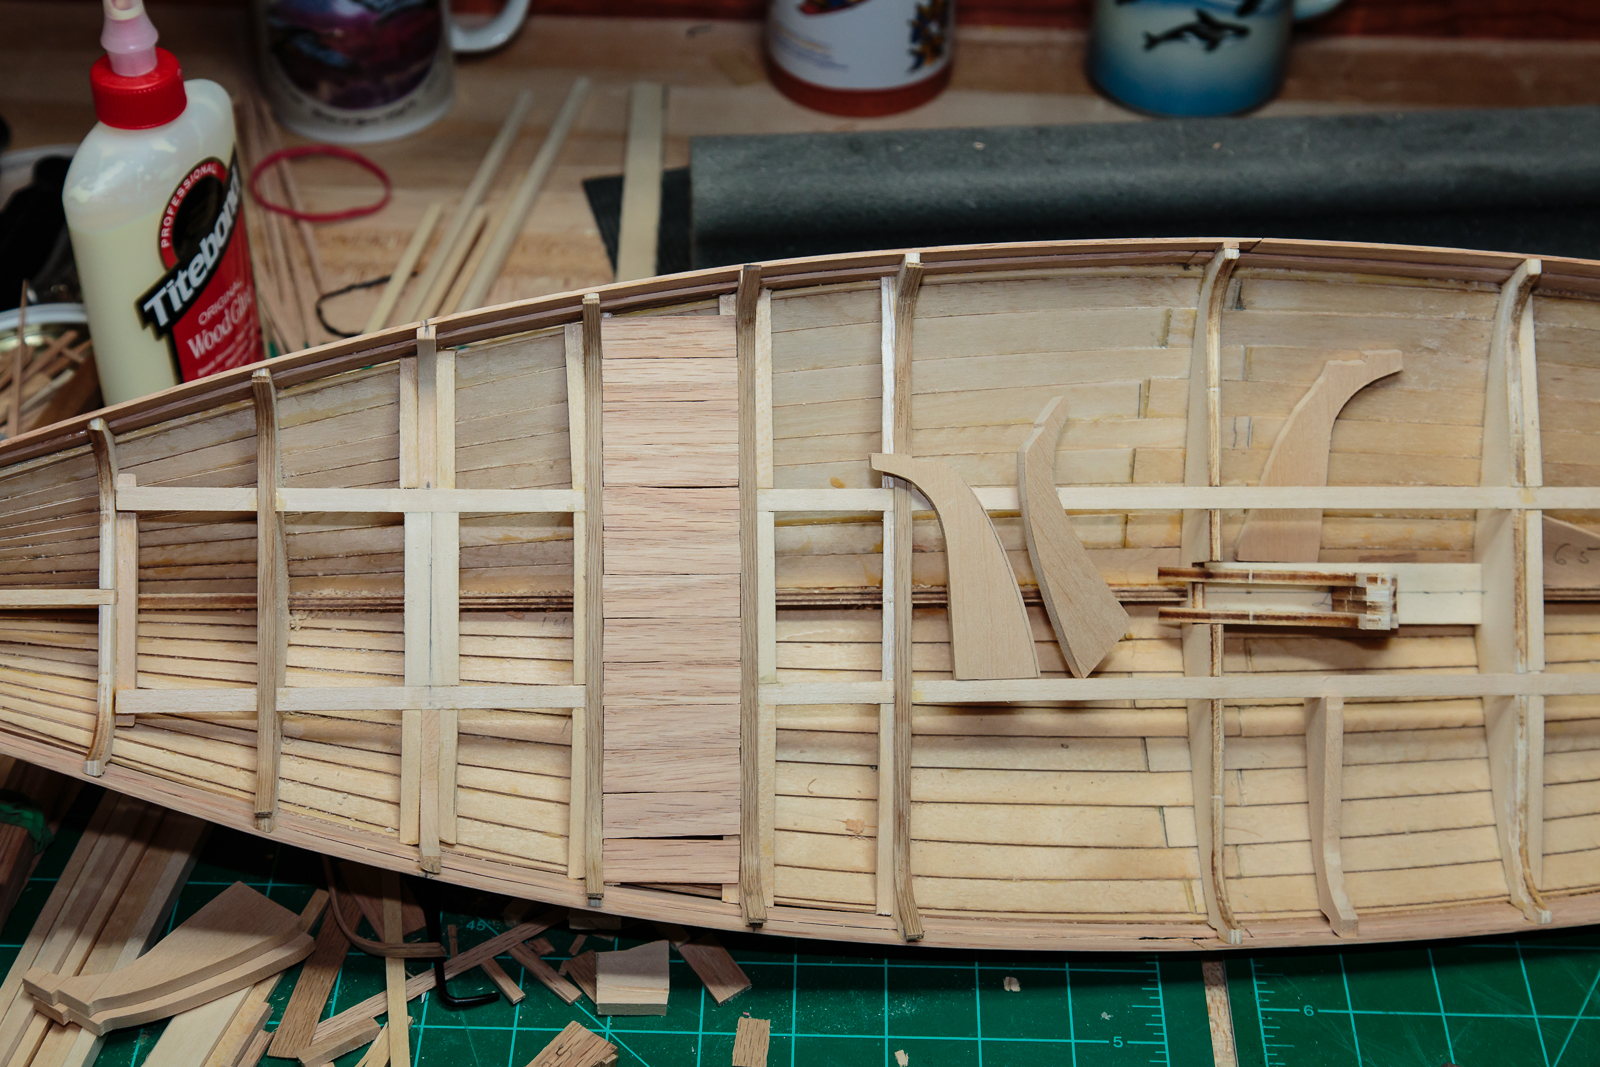
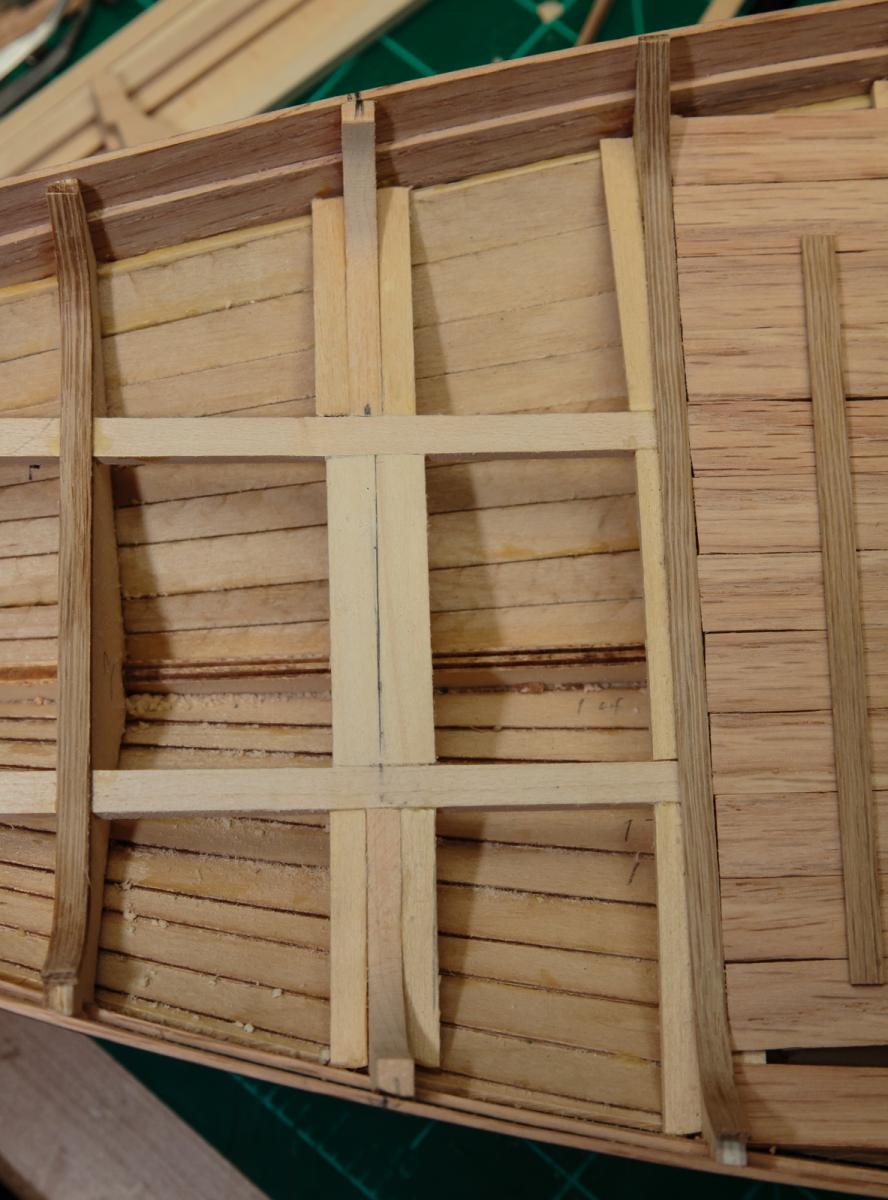
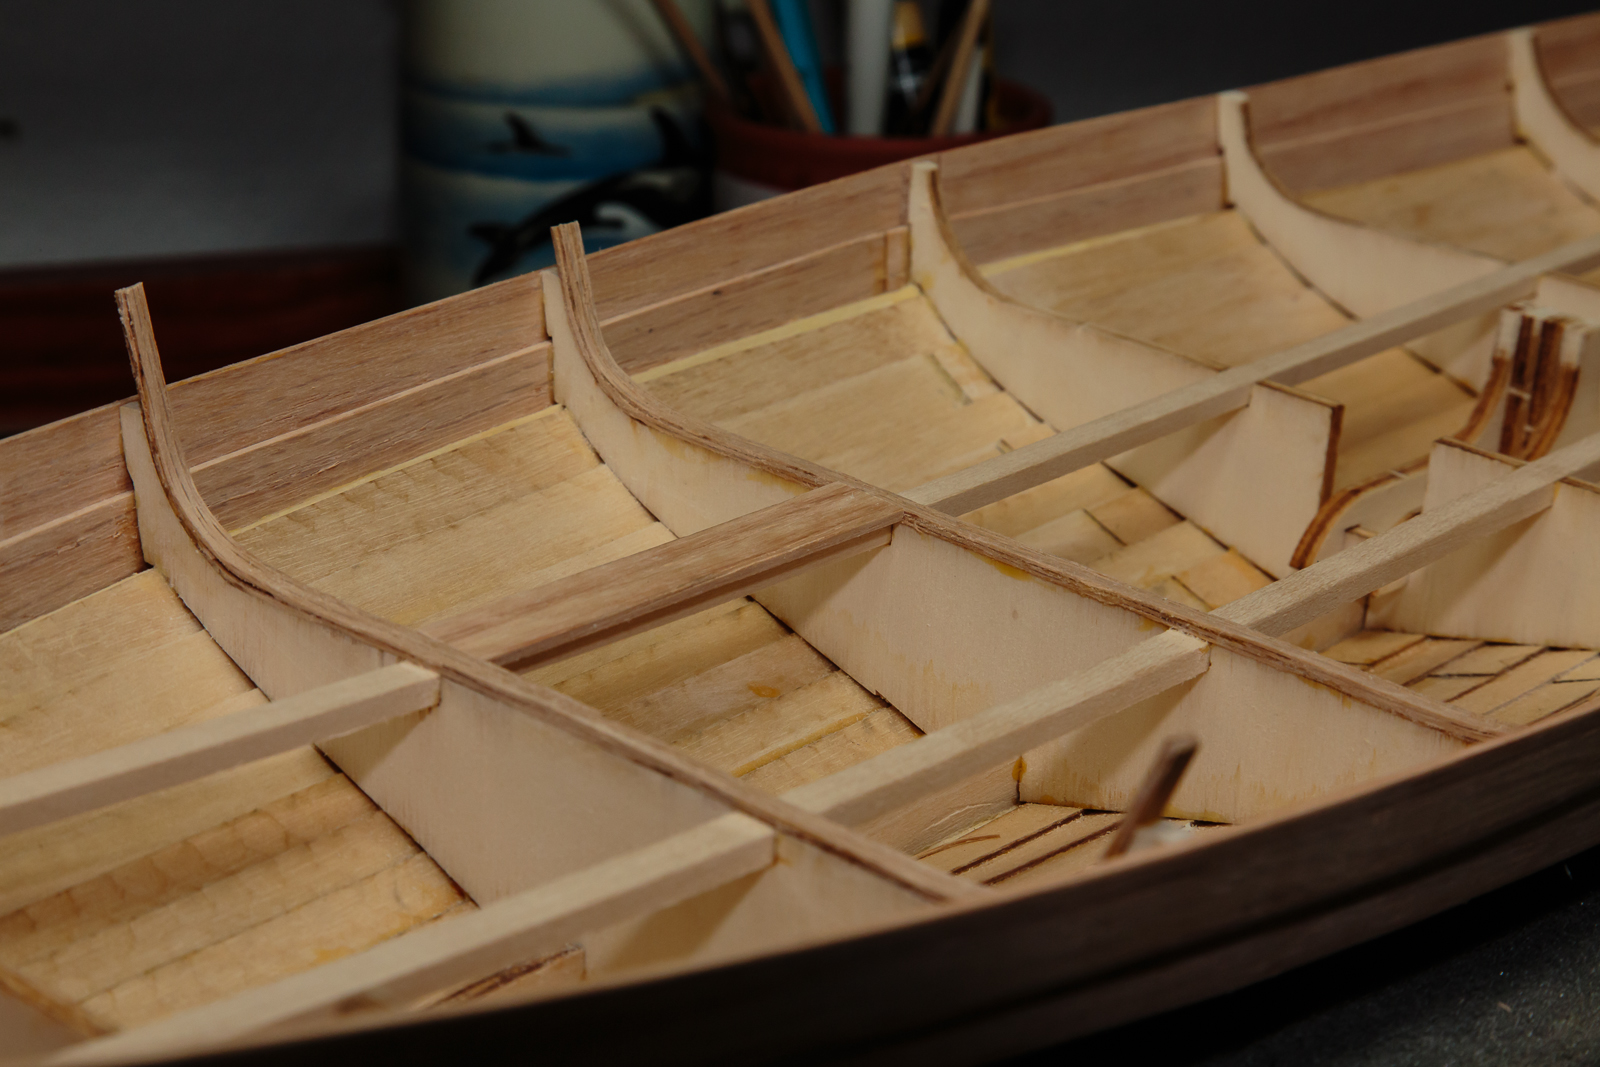
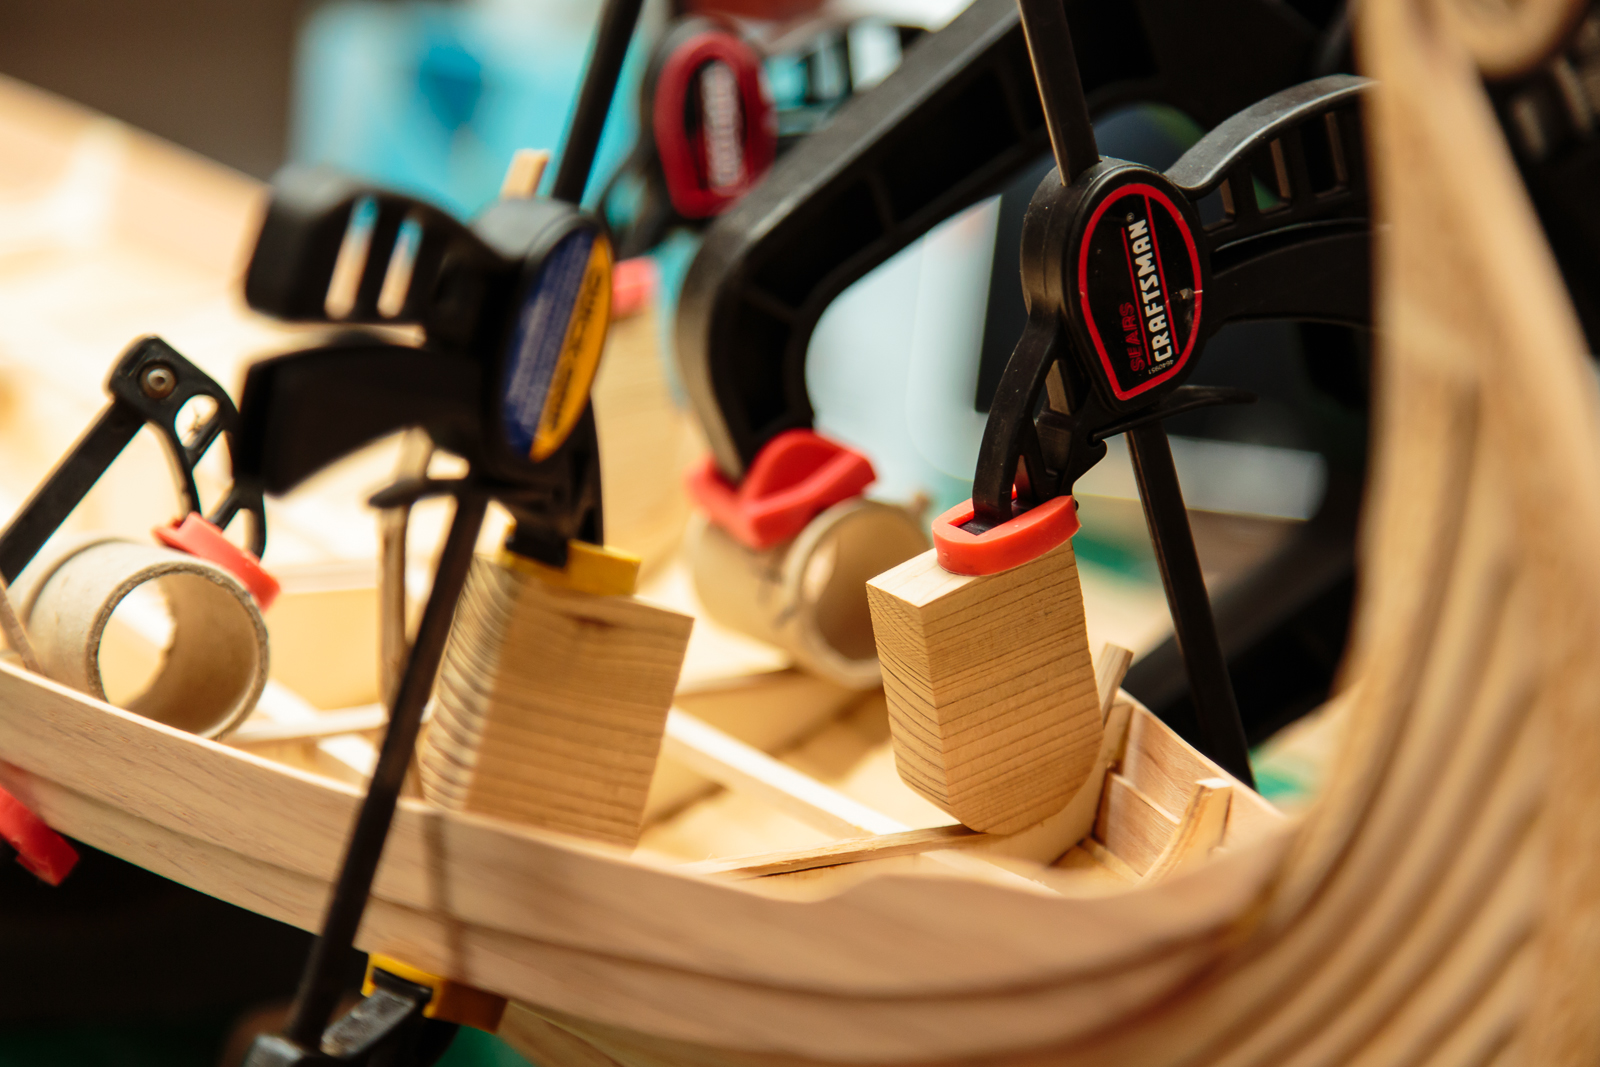
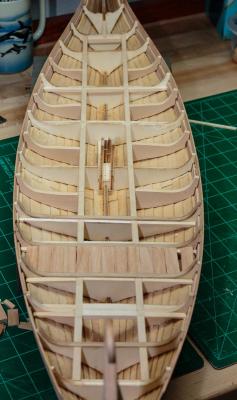
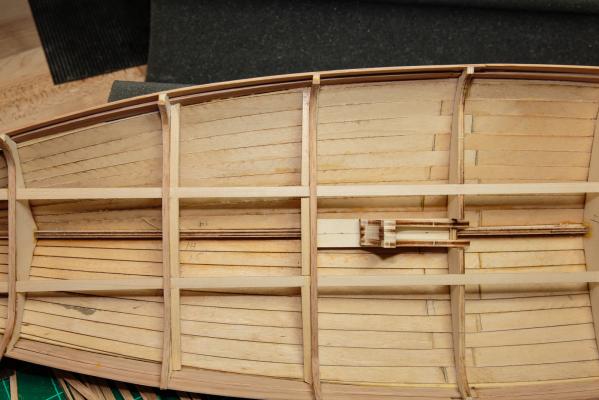
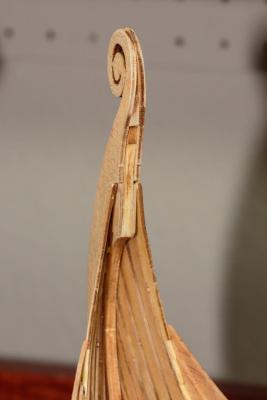
Here is a small update on the added bulkheads. They really do look nicer than the spacing provided by the kit. I traced one of the ends of the plywood kit bulkheads and and cut a cardboard template. Then I transferred the shape to a stack of 3 or 4 pieces of basswood and cut them out on a scroll saw. After they were separated I would measure the space where each one was to live and cut the tails appropriately. Since all they support are the planks, for the center of the bulkhead I just glued in a piece of basswood wide enough to stick out on either side of the oak strip. All of the extra bulkheads are cut but I still have a lot of oak to bend and a whole lot of planks to cut and sand. I will do a mock up to see how caulking looks. Surely the Vikings had something they used for waterproofing.


-
Hi Bindy, we missed you, happy you stopped in. Thanks for the kind words. Speaking of photography, who does your avatars? I photograph mostly birds and landscapes and I almost never do people. In the time since I have been looking in you have had at least 4 avatars. All interesting composition and lighting, of course a good subject always helps. The new one is great.
-
Hi Nigel, Thanks for the kind words, they mean a lot coming from you. Your work is truly amazing. I am a better photographer than I am a model builder but I am working on it. This website is the best thing to happen to the hobby. Having access to the resources here as well as be able to learn from and be inspired by the artisans here is a real gift. Thanks for looking in and I am happy that you enjoyed the log and my photographs.
-
Hi Don, That sounds like a good solution, let me know how it works. Thanks for dropping by.
-
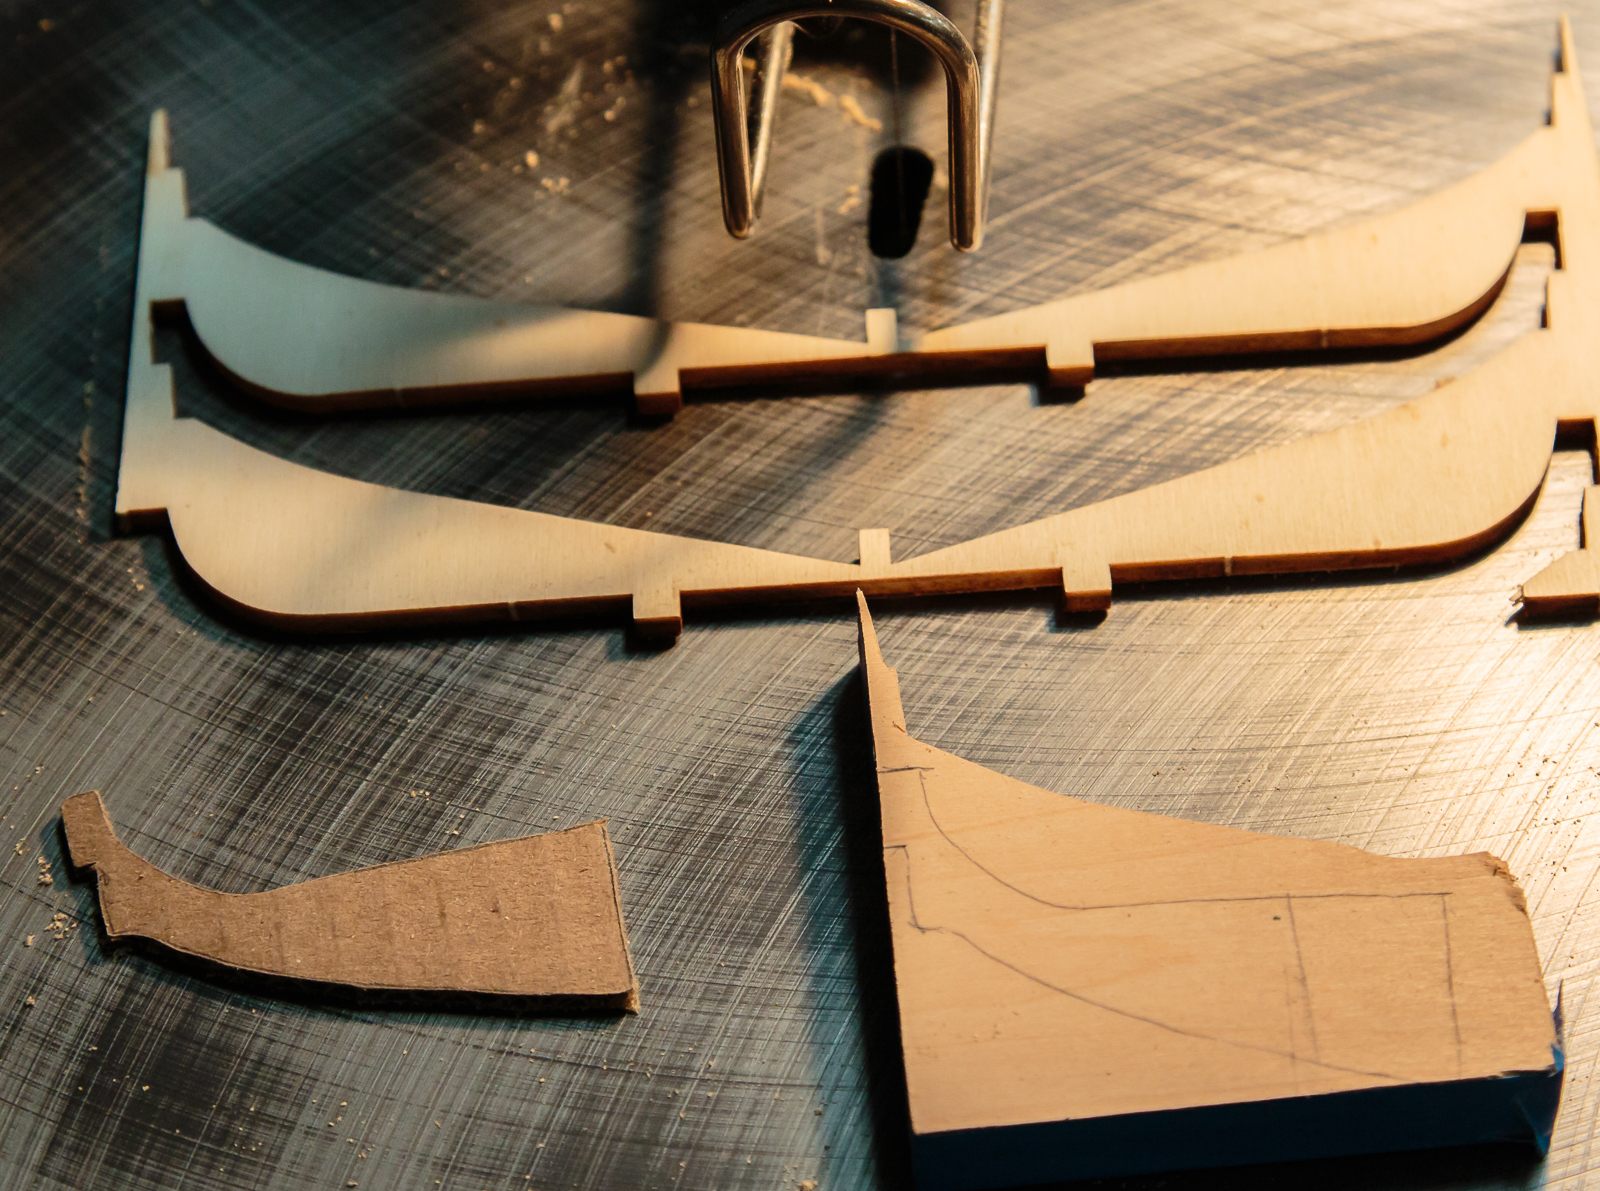
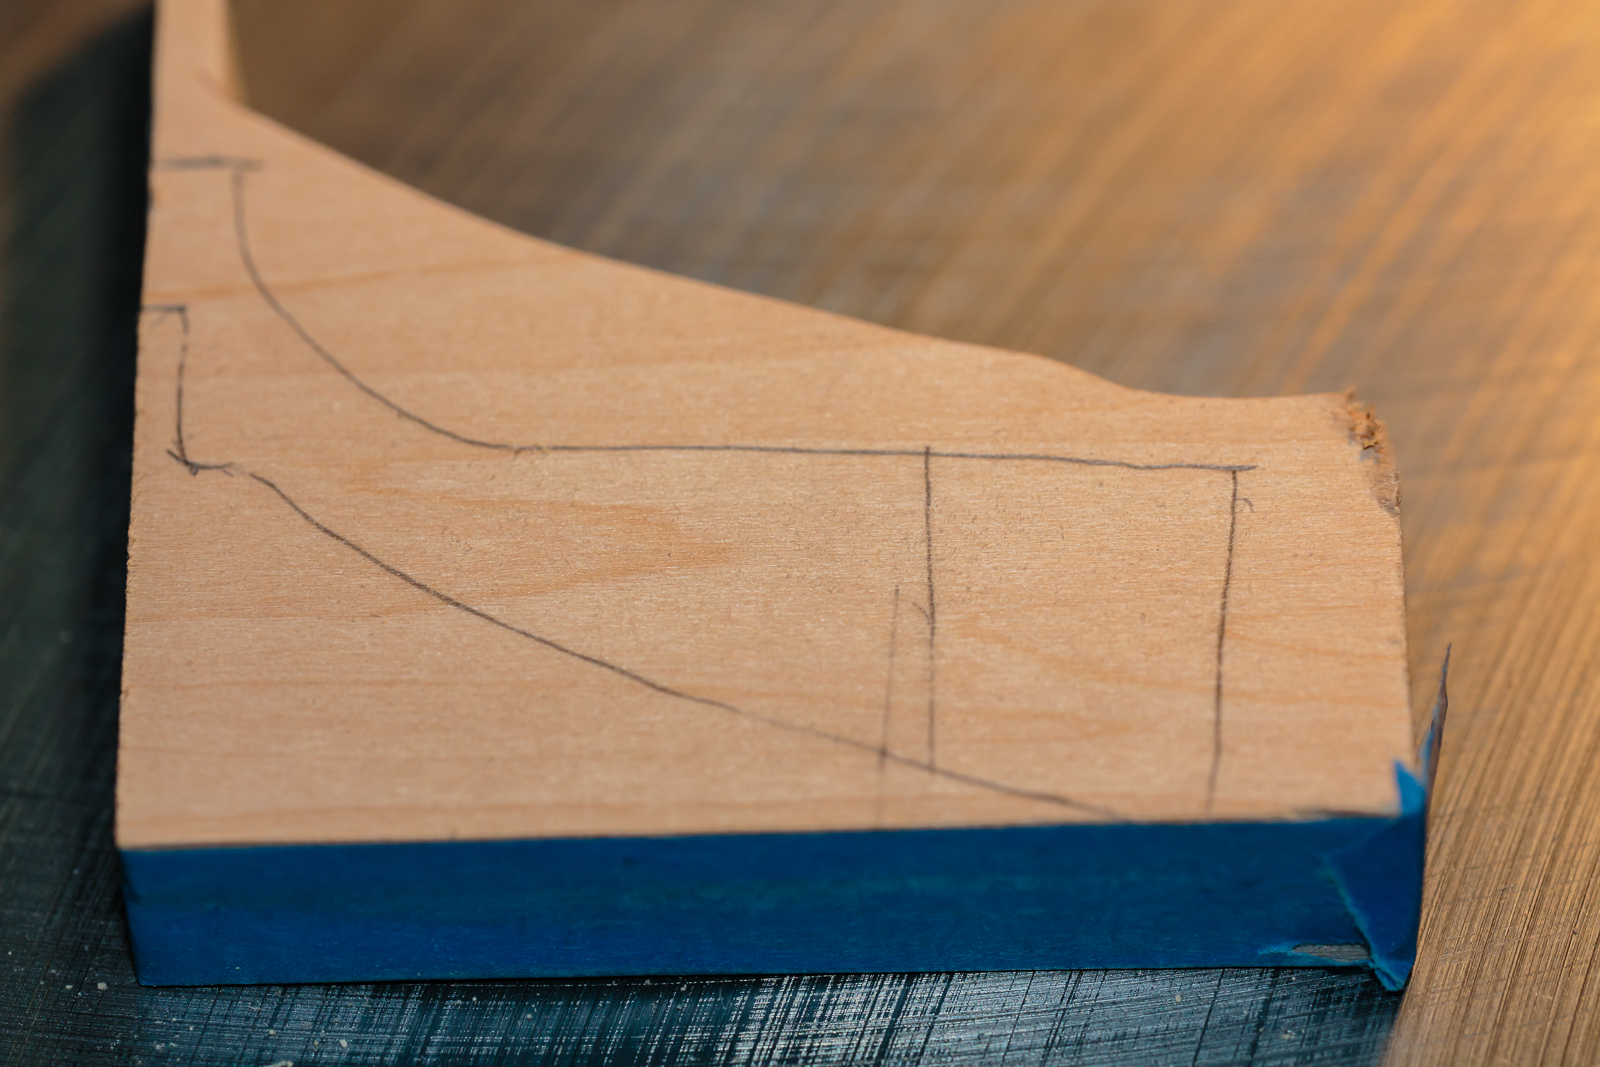
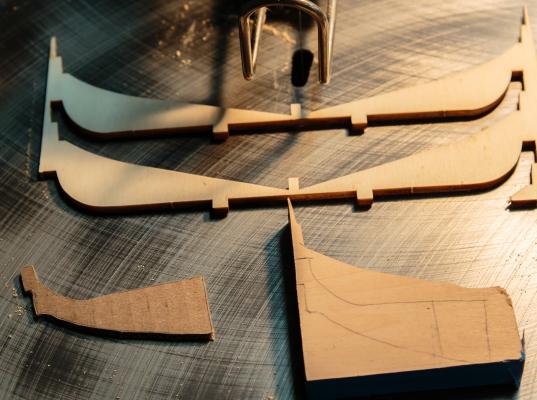
Ha, you caught me. I was going to try to avoid doing them. Oh well, no getting away from them now. Here is a look at a rough cut of two of the additional bulkheads. I had a piece of red oak the correct thickness. I obviously like oak and have a fair assortment on hand. I traced the laser cut out left over from the kit bulkheads and I need to adjust the height to account for the fact that if I use the oak I will not need to add the oak strip as was done on the plywood bulkheads. I will have to study this a little since the strip turns up and the grain continues up as well. With the new ones the curve cuts across the grain. The difference in the look is pretty obvious. I can always cut them out of junk wood and add the strip.

-
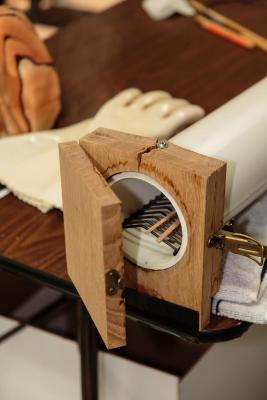
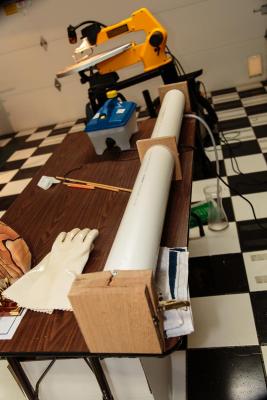
Thanks Pete, The steam box has been a big help. I have a fair amount of experience with it now and I am working on a redesign. The steam generator works great but the box could use a better condensation drain, vent and door. My barbecue gloves are perfect for avoiding burned hands. Thanks for looking in.
-
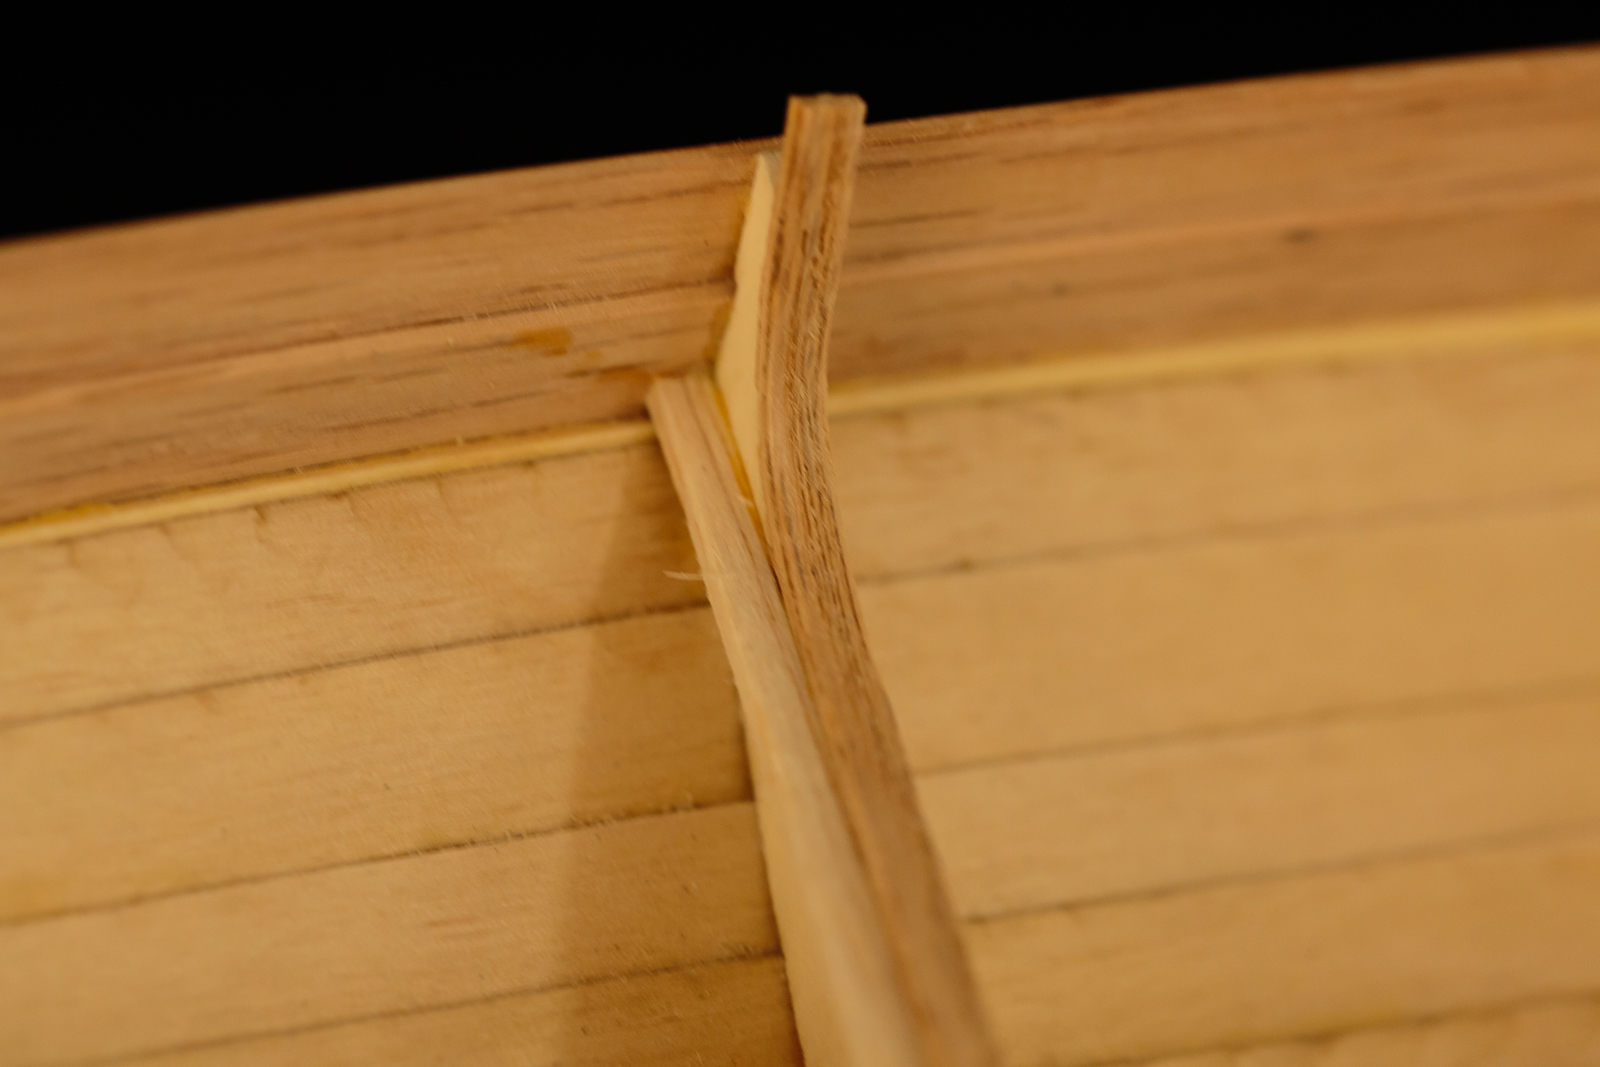
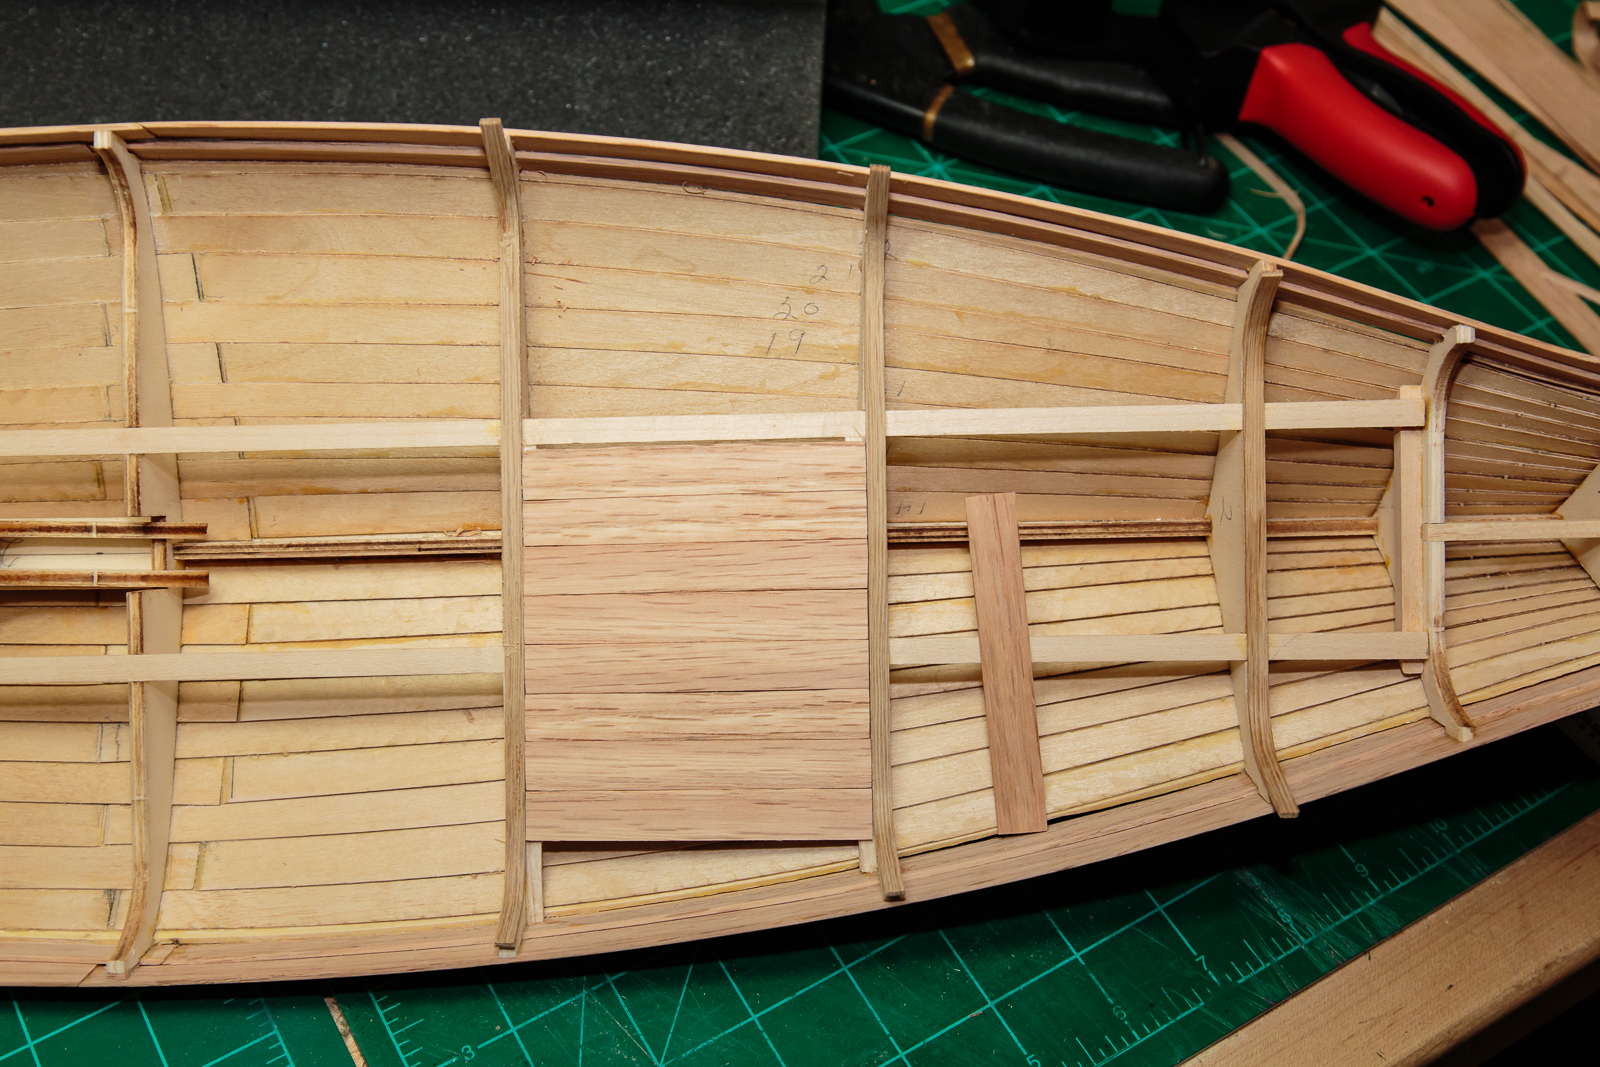
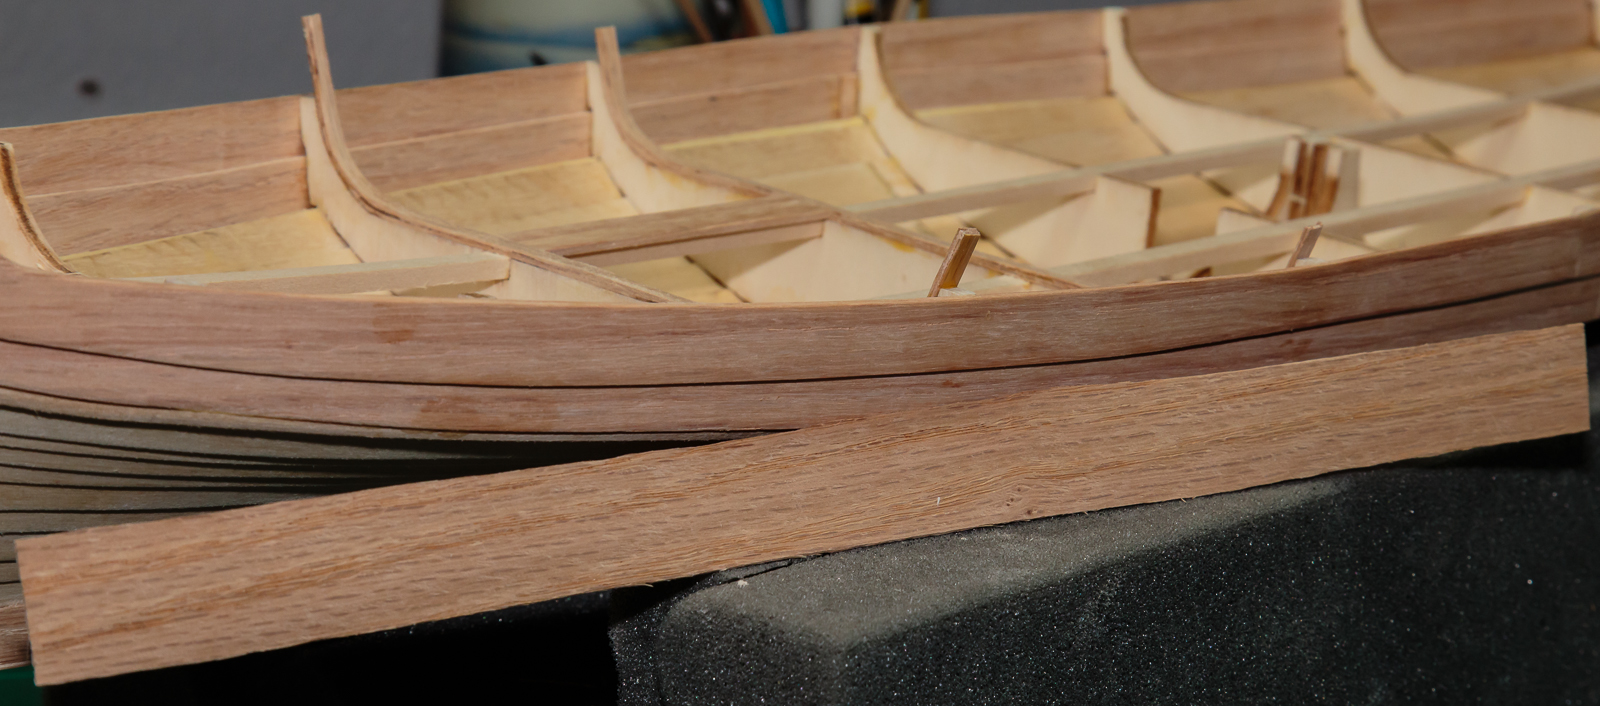
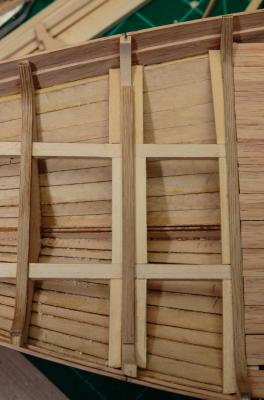
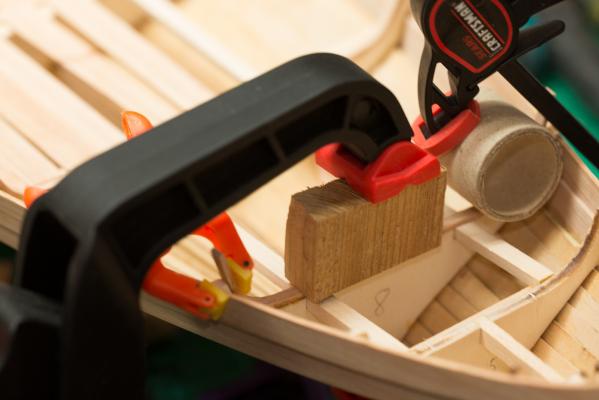
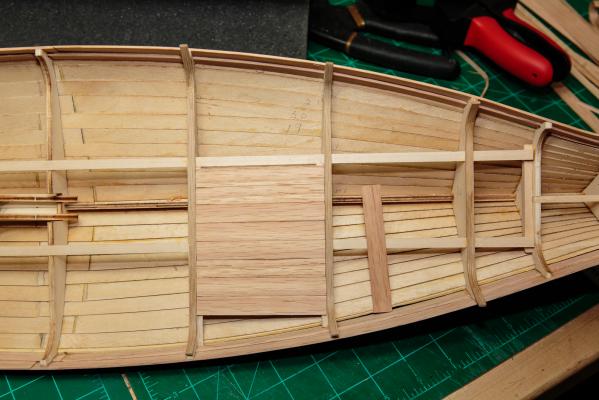
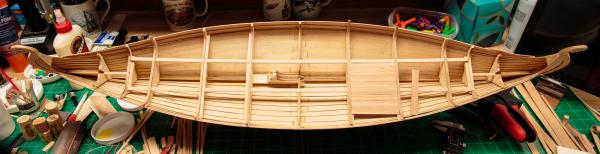
I started on the deck. The planks fit between the bulkheads. The Oseberg was made primarily of oak so along with the rest of the modifications the planks will be made of red oak. The top of the bulkheads are exposed plywood ends. The kit has fewer bulkheads than the ship so the planks are longer than the real thing. I had a false start with the bulkhead strip. The planks are 1/6 in thick so I thought I could use three layers of the oak veneer that I used on the keel. (3 layers plus the thickness of the glue was pretty close to the thickness of the oak planks.) The veneer bent around the curves easily but was so brittle that I could not get it to hold a sharp edge on the long side. It looked a little sloppy where the planks butted up to the strip. I decided to rip 3/16 inch pieces of the planking material to use as the strips. Soaking the oak was not enough to get it to bend to the curve of the bulkheads without breaking so I went to the steam rig. 15 or 20 minutes was enough and rather than build a form I just pulled them out of the steamer one at a time and pressed them into the curve using a bit of an old packing tube and clamped them into place until they set. Even with the steam, trying to bend the strips with my fingers, it was difficult not to crack the wood but the tube made it easy. Clamping required a little creativeity. Next was to add a frame to hold the planks at the same level as the top of the bulkhead. I will probably face that small bit of visible plywood where the bulkhead turns up with oak veneer. I say probably because I have not tried it yet and do not know if it will work. Stain may work as well. There is still a ton of work to do on the deck and mast foot. Updates as they happen. Thanks for looking. Thanks to all for the "Likes".


-
Hi Bindy, it is good to hear from you. Thanks for looking at my photography, very happy that you liked it. When I get around to updating the website I will let you know. I hope that you are well and look forward to your return, we miss that permanent good attitude of yours. This was made in the Florida Everglades a couple of years ago.

-
Hi Nils, thanks for looking in. The black background photos were done with the "Latest Full Profile of Your Build" in mind. The photos looked so good that I thought about doing everything in the future with the black setup. I quickly realized that moving the work over to the photo setup was not a good idea. Too much time and effort for each little happy snap. The ship is a lovely shape. The build is a long awaited gift for my Admiral. Thanks for the kind words. Hello Rowan, happy to have you looking in. I really appreciate the kind words and encouragement. My finger is much better but I don't think that it will ever be the same. I have been watching your HMB Endeavour log with great interest. Your work is beautiful. The Endeavour will be my next build. I started it years ago and put it away when I realized that I was over my head. My skills are improving with practice and I will be ready to tackle it after I finish the Oseberg. I hope that all is well with you and yours.
-
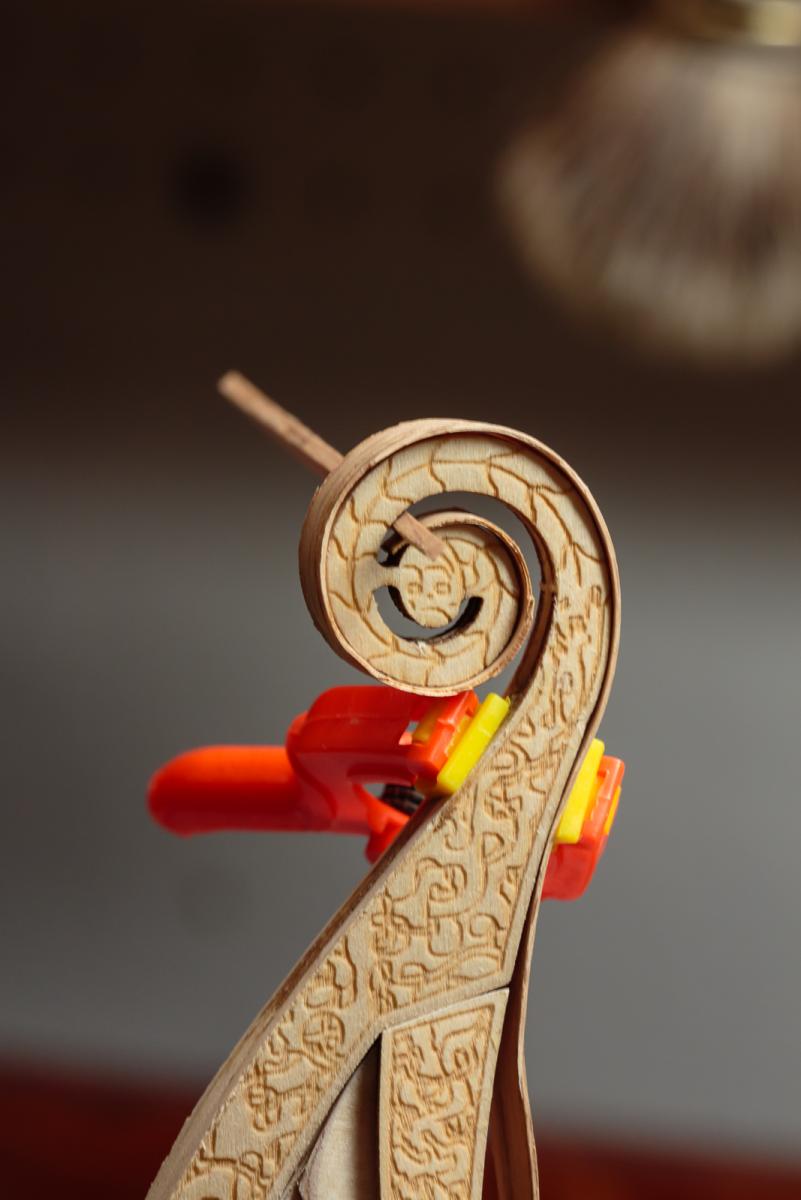
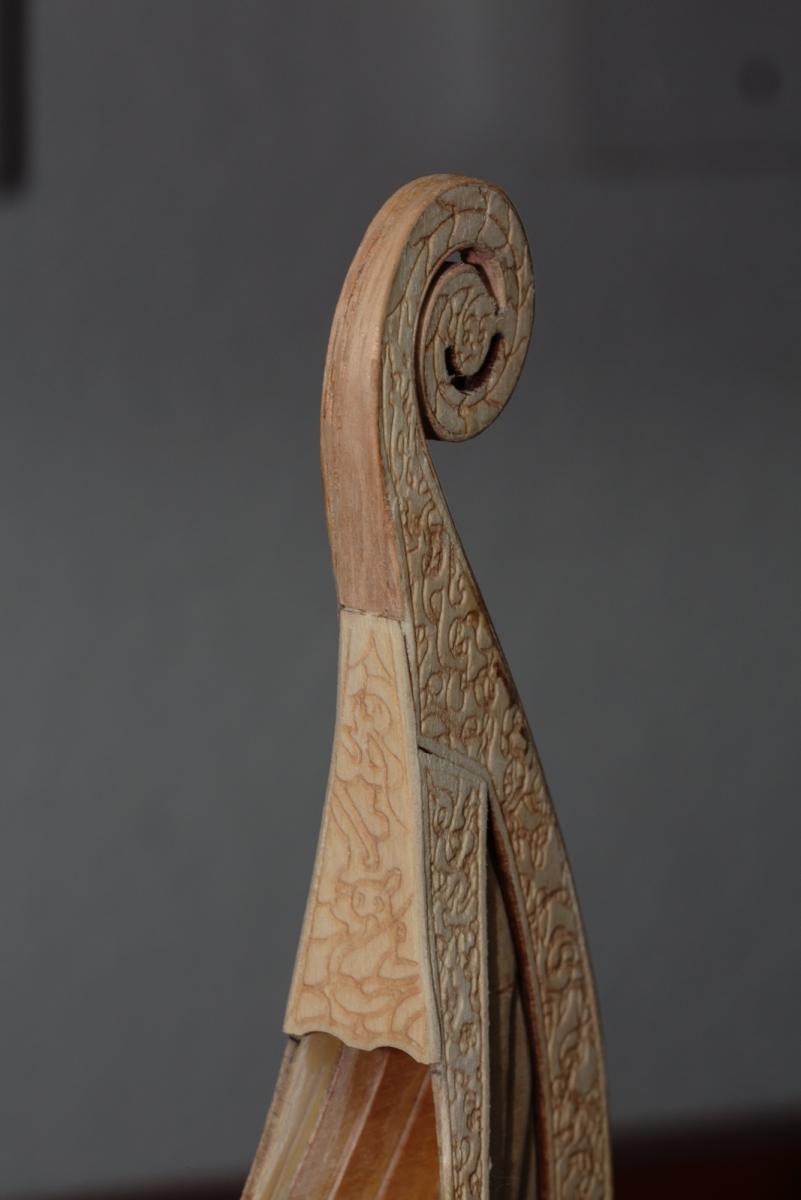
Hi Pete, welcome to the build. The scrollwork is part of the kit. It does take a little adjustment to make it work. It is in fact the reason I chose this kit. It is also a large scale, nearly 35 inches stem to stern. I started the build with changes in mind and they have worked out pretty well so far. Hello Don, welcome as well. The Billing Boats kit was the only one I found with scroll work of any kind. I knew that I was not ready to try that on my own. One thought is that you could print the pictures of the scrollwork from my log to scale for yours and use them as a pattern. If you need any additional views I will be happy to take the photos. Von_Kossa has a wonderful build log on MSW as well Oseberg Von_Kossa I have learned a lot from his experience.
-
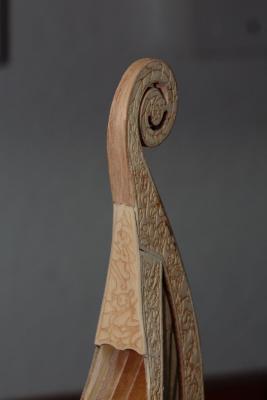
I have been struggling with the same issue. It is difficult to tell from the museum pictures if those lines go all the way around the scroll. I have been tempted to do just what you suggest but I am afraid of damaging the veneer. I believe that once everything is stained the scroll will not look so different. For now I think that I will leave it as it is. That does not mean that I will not change my mind later. I plan to start on the deck in the next few days.
-
Thanks Bindy, it is amazing how much detail you get from a hi res digital image. Photography has been my hobby much longer than ship building (nearing 60 years) and I work at it all the time. Take a look at http://www.27birds.com to see some of my work. I have not updated the site in several years but it is on my list of things to do soon. It is spring here and I am anxious to get out and chase flowers and bugs. Thanks for looking.
-
Wood often differs in color when cut from different lots. I studied your deck pictures and the most I could see was a very slight difference. The stain should certainly even out the difference. Are you planning to use a dark stain like the actual ship? That would certainly do the trick. If you have a little of each batch of wood you can put them side by side and stain them with both a medium oak and a dark walnut and get an idea of how they would look together.
-
Hi Norseman, Welcome to the party. This kit is a lot of fun to build. I will follow along and please let me know if I can help. You are off to a great start keep it up and good luck.
-
I love the way the deck finished up. I really like the pattern at the bow, stern and the mast foot. Keep it up, I need the guidance. You are very welcome, I am glad that I could help. You certainly made good use of the wood.
-
Hi Von_Kossa, I agree that the veneer solves some problems but creates some of it's own. Like you (I learned it from you) I have made adjustments to get the final layer of veneer to match up with the kit parts and so far so good. The inside of the curve is a real challenge to make it look natural and integrated but with careful and tedious sanding it is coming together. As always thanks for you support.
-
Thanks Keith, it is a labor of love and oddly enough it came out just the way that I envisioned it. Thanks for looking in. Hi David B, thanks, great to have you here. Thanks to all of you for the likes, they are greatly appreciated.
-
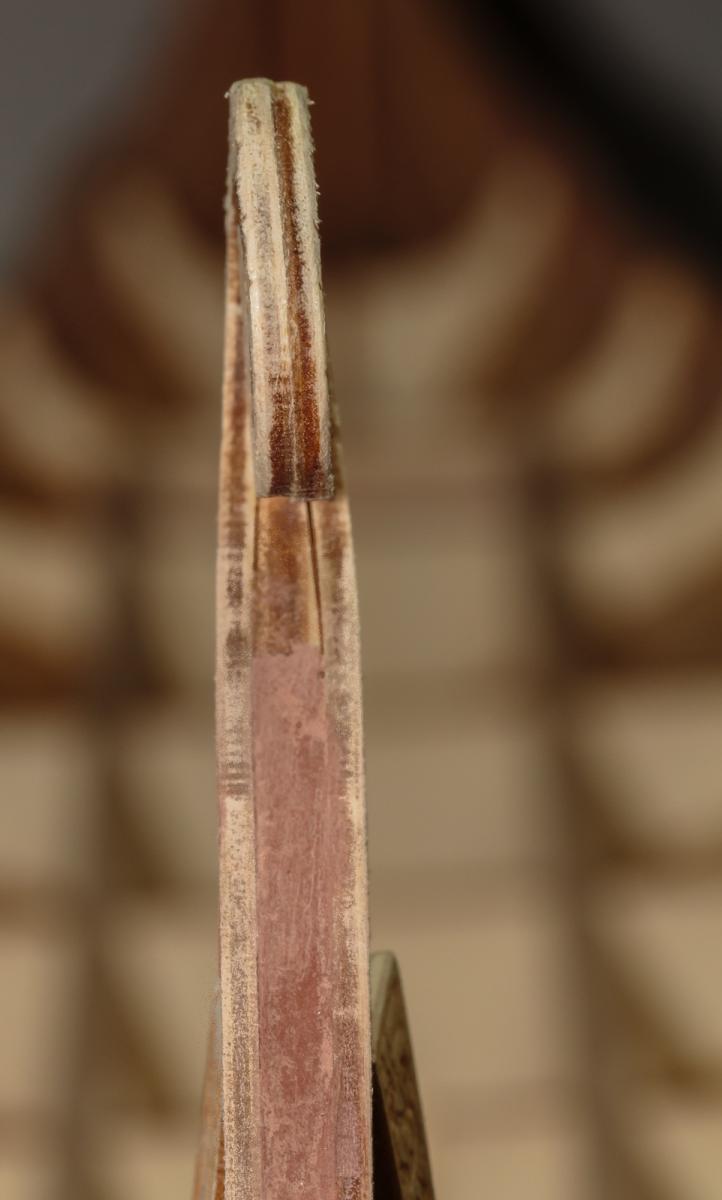
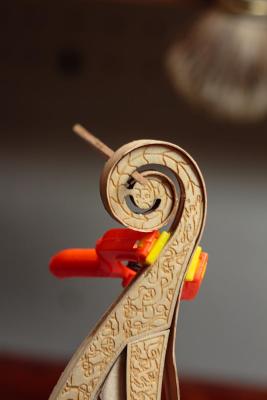
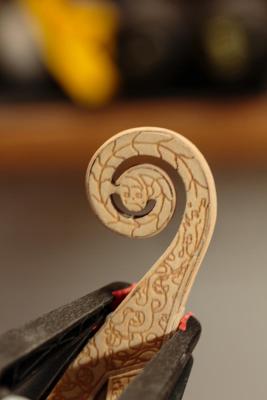
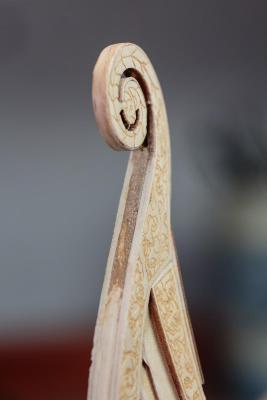
The plywood edges are just ugly. I have intended all along to cover them. I actually worked out pretty well. Here are the before pictures: I used 1/64 red oak veneer which was fairly flexible but would not come close to making the tight curve on the inside of the scrollwork without cracking. I steamed it for about 15 minutes and wrapped it around a ¼ inch dowel and clamped it until it dried. It held the bend well and it fit right into place. The second piece was a little more difficult because it was a tight squeeze with two strips in the same spot. It also required a little sanding to get clearance between the two at the inner most part. All I got done today (all day) was the stern, the bow should go faster since I have it figured out now. I still need to tie in the keel and touch up the sanding. The pictures show all the flaws but it looks really nice in real life.


-
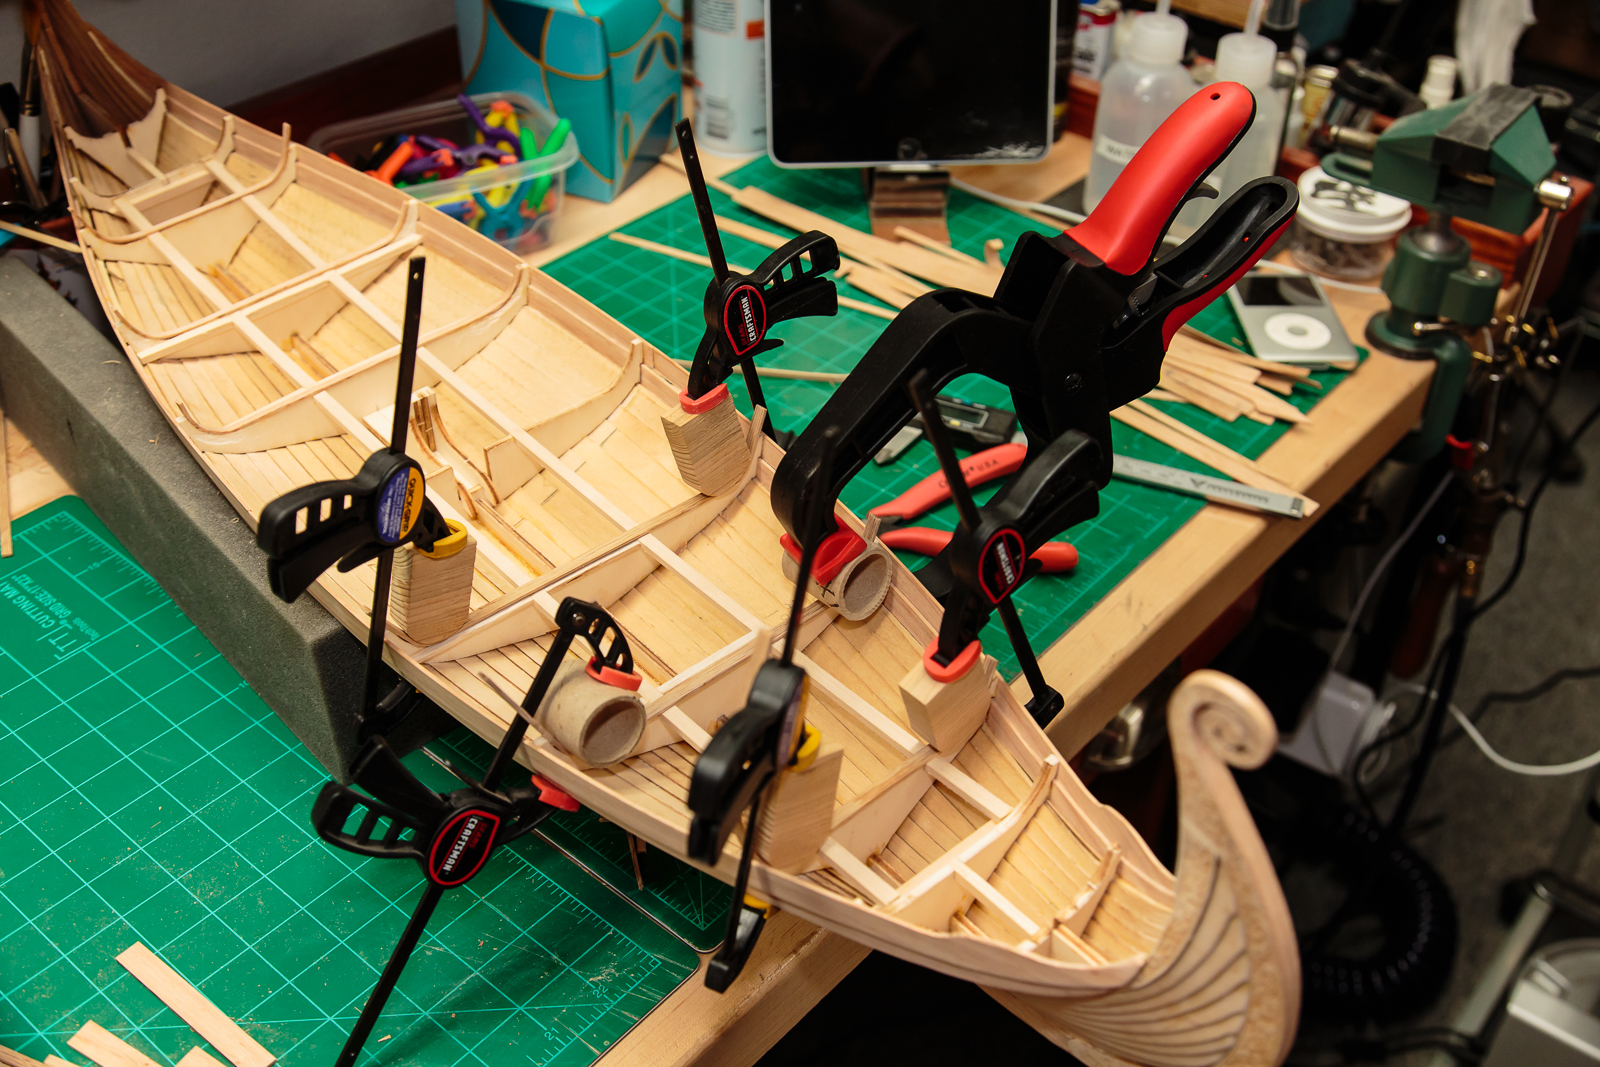
Thanks Bindy, I have the two mast feet sitting out on the workbench and the the comments from everyone who sees them is 100% in favor of the new one. The kit maker should be ashamed.
-
Truly amazing work. The beauty of your build leaves me staring at the monitor and shaking my head. The woodwork (along with everything else) is brilliant. Your project is very inspirational. Thanks for sharing.
-
Happy that you are back and relieved that we did not have to launch the great armada rescue. Your project looks great. As others have mentioned the contrasting wood colors are really nice. I usually sand early just to get it out of the way and get an idea of the final look. Popeye's suggestion of molding around the doors is brilliant. Feel better.
-
Hi Dee Dee, Welcome Aboard! The more the merrier. I read somewhere on this forum that you should build a ship that you love. Well, I love this ship. I love the lines, I love what the Vikings did with them. I am working on the last parts of the hull. Mostly oak veneer on the keel. The interior has a lot more work than it looks. 90% of the planking is straight forward but that last 10% is a challenge. Thanks for looking in.
-
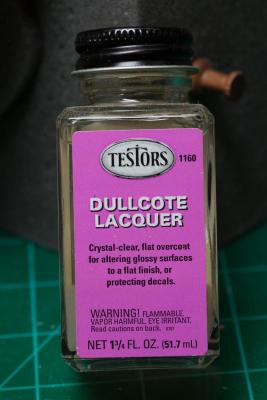
Hi Marc, I think the flags look great. Dullcote will protect them as well as take the shine down a little.
- 85 replies
-
- 2
-

-
- yacht mary
- mamoli
- (and 1 more)