DONATION DRIVE - SUPPORT MSW - DO YOUR PART TO KEEP THIS GREAT FORUM GOING!
×


Jack Panzeca
-
Posts
233 -
Joined
-
Last visited
Content Type
Profiles
Forums
Gallery
Events
Everything posted by Jack Panzeca
-
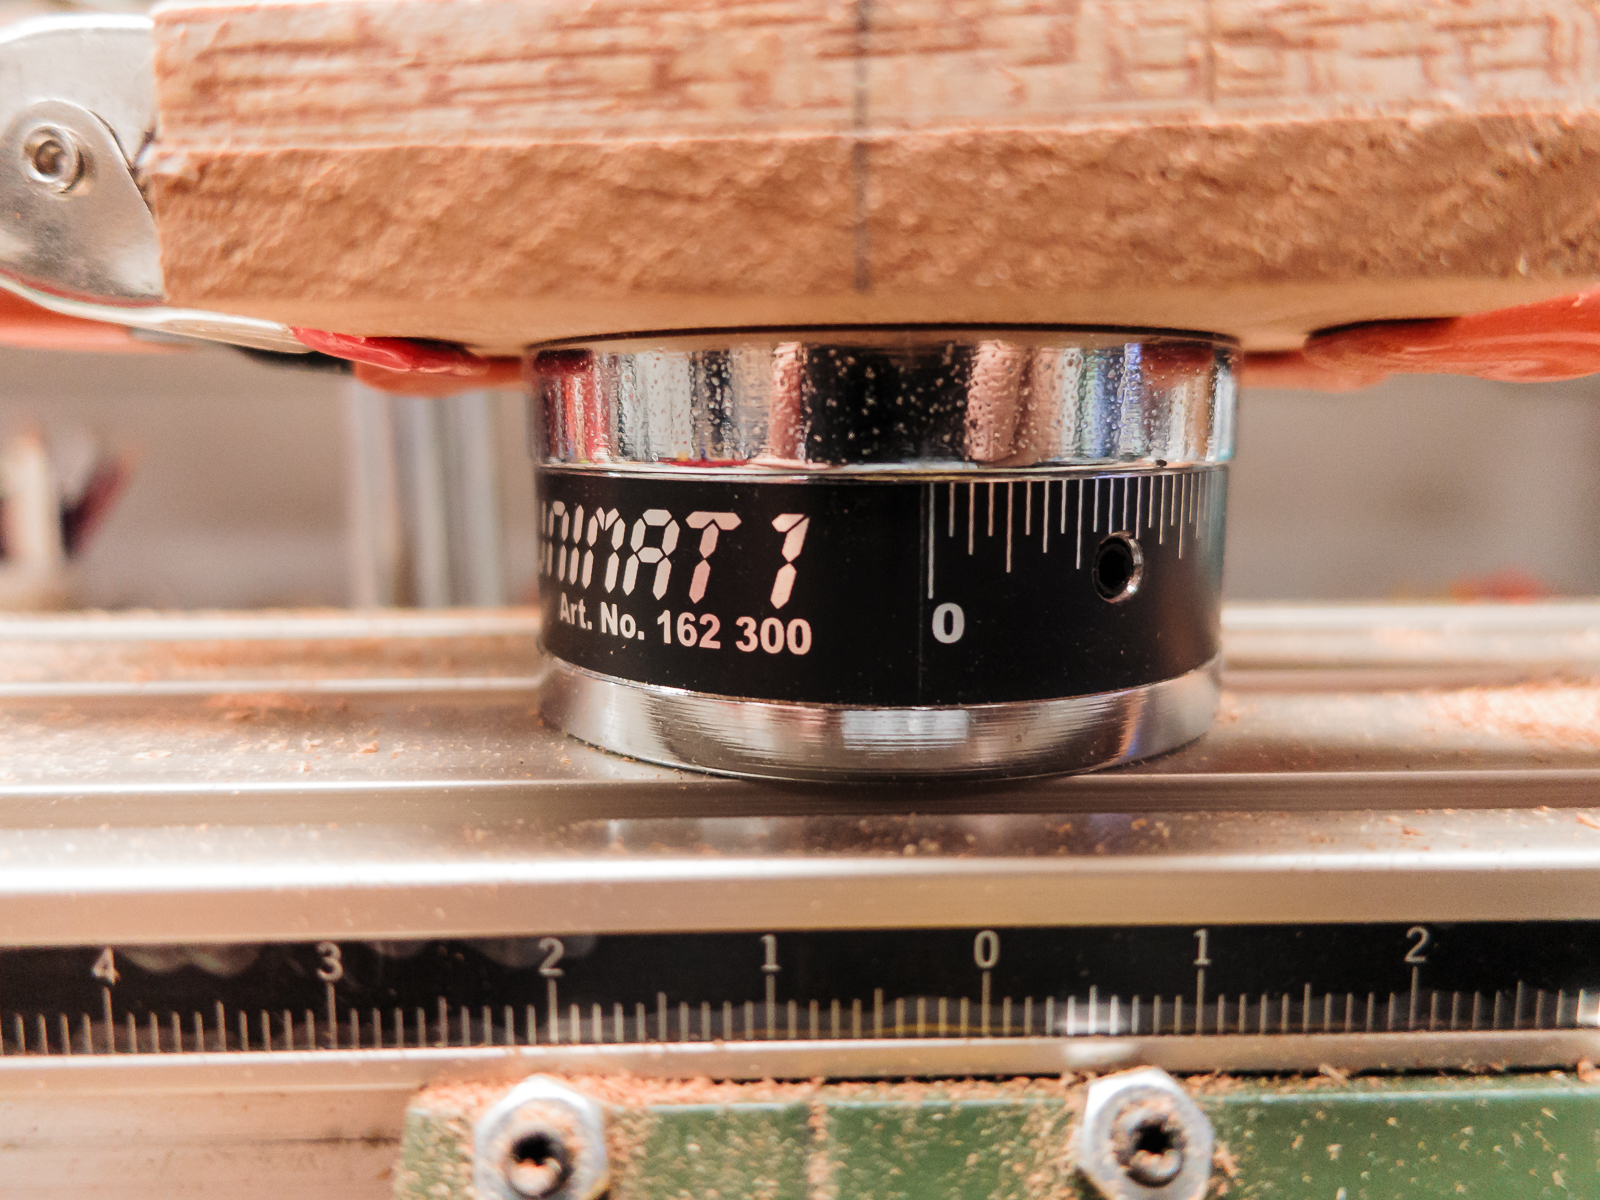
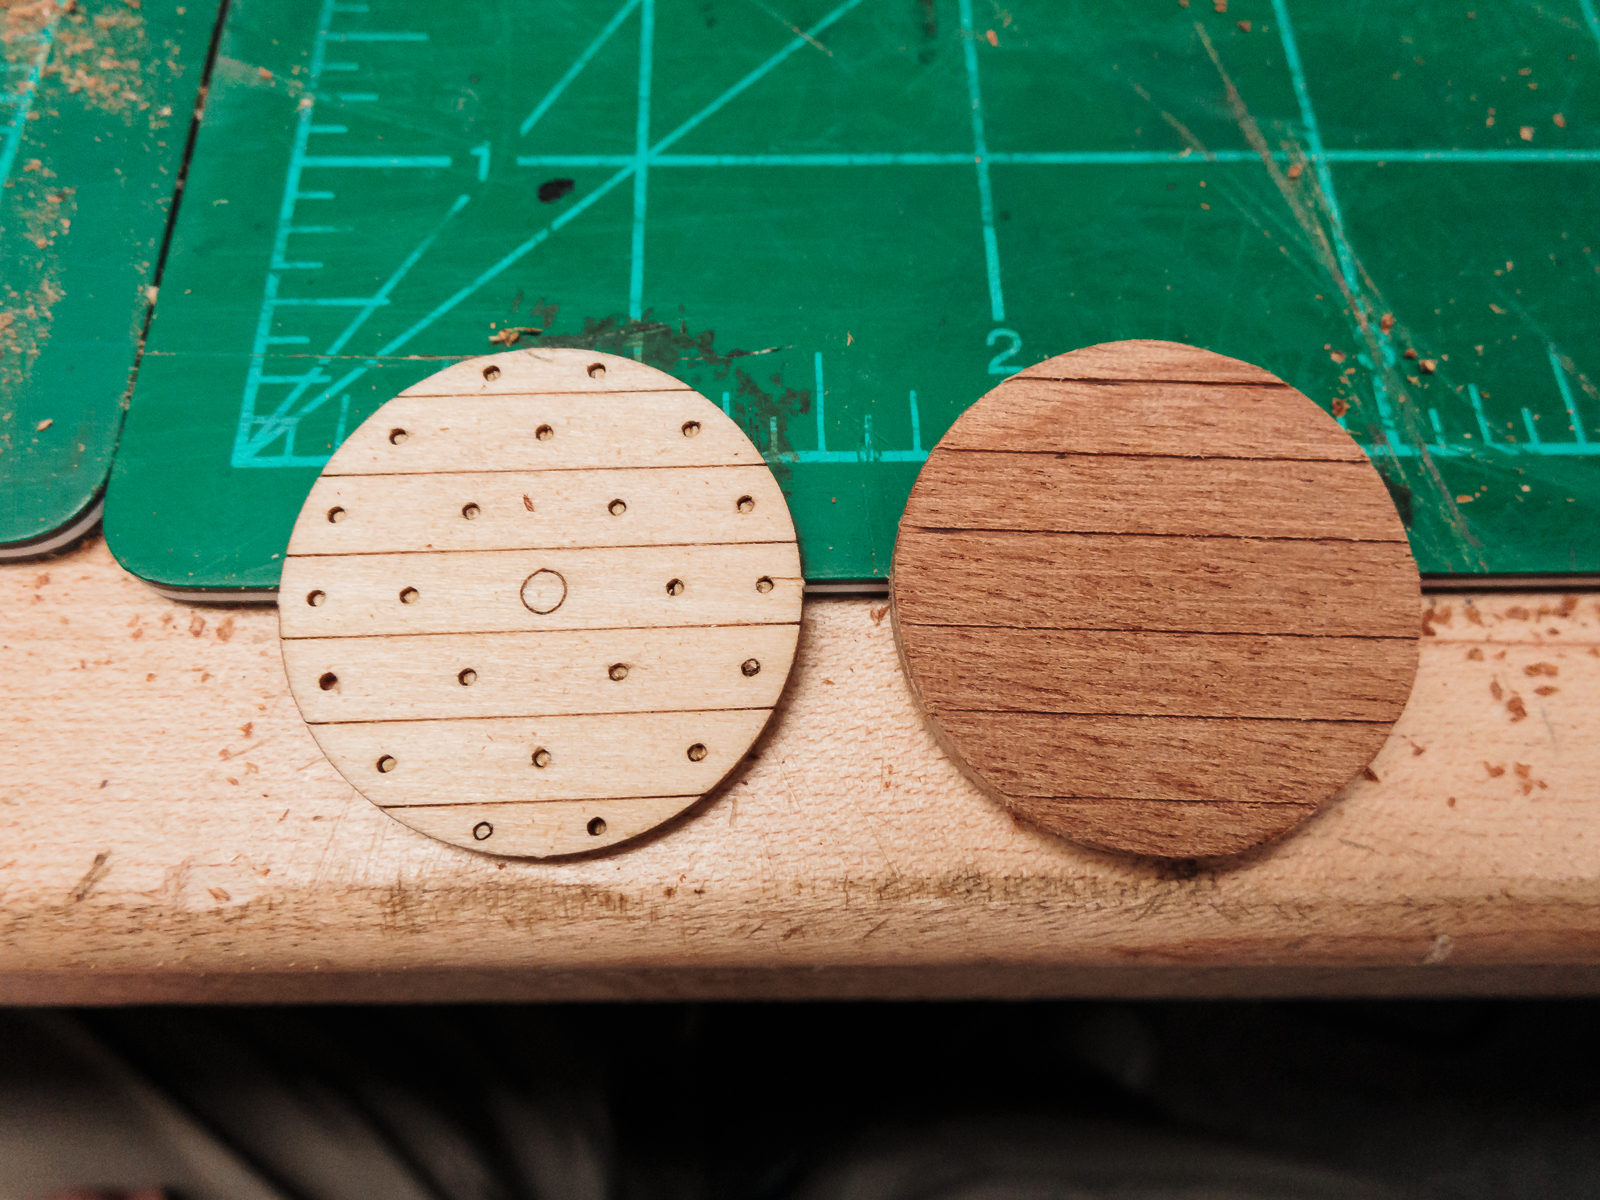
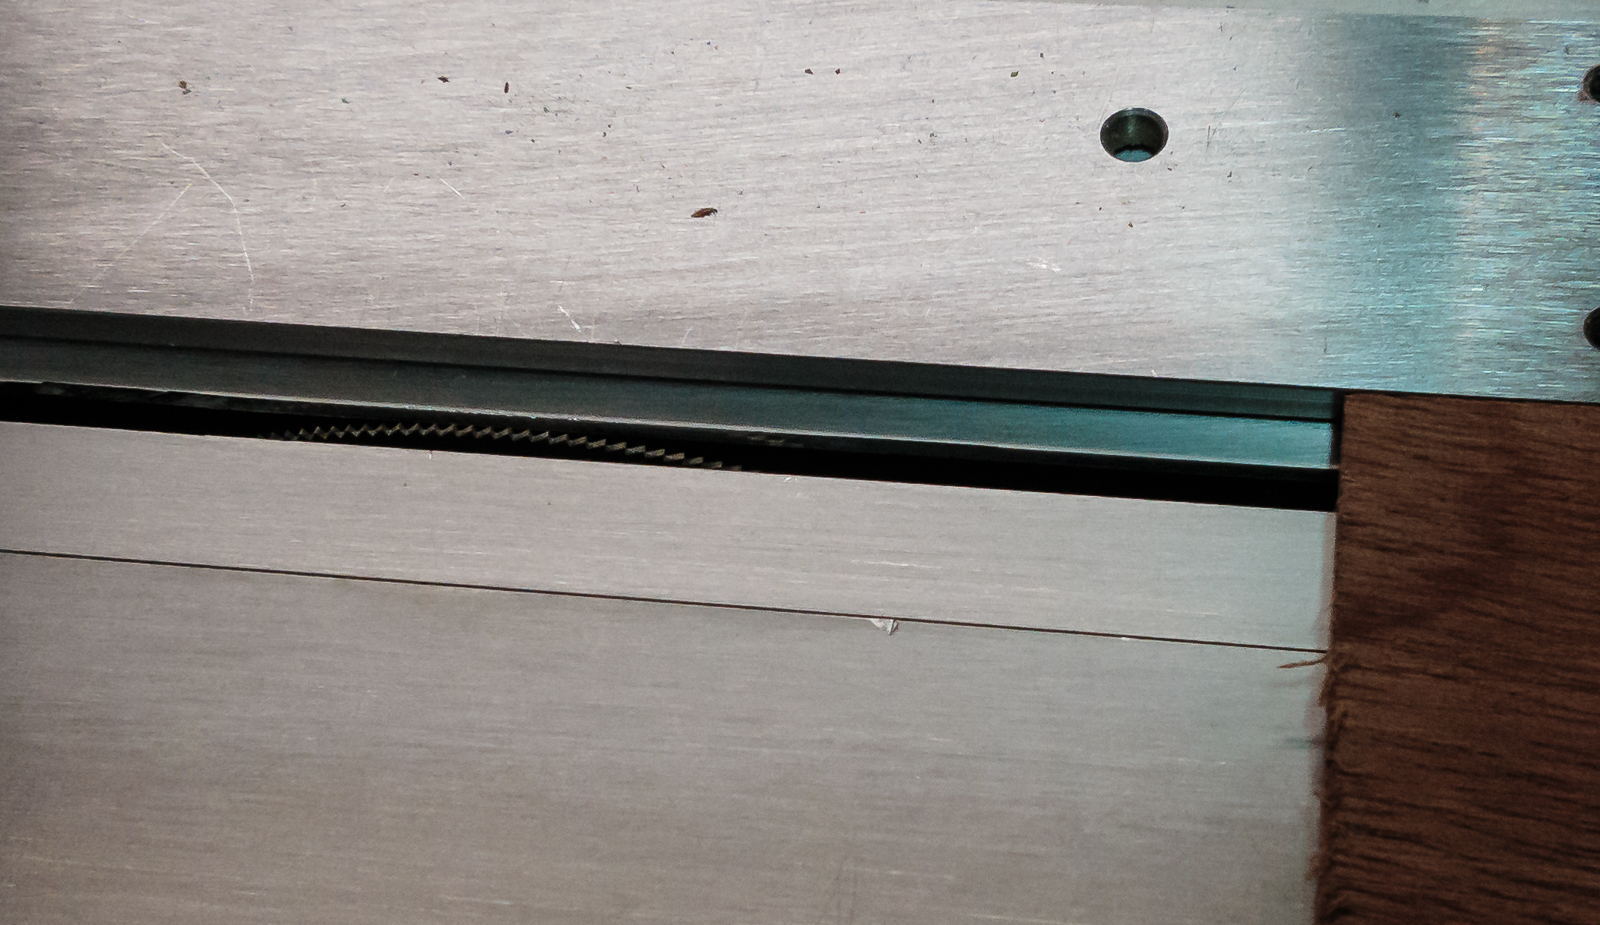
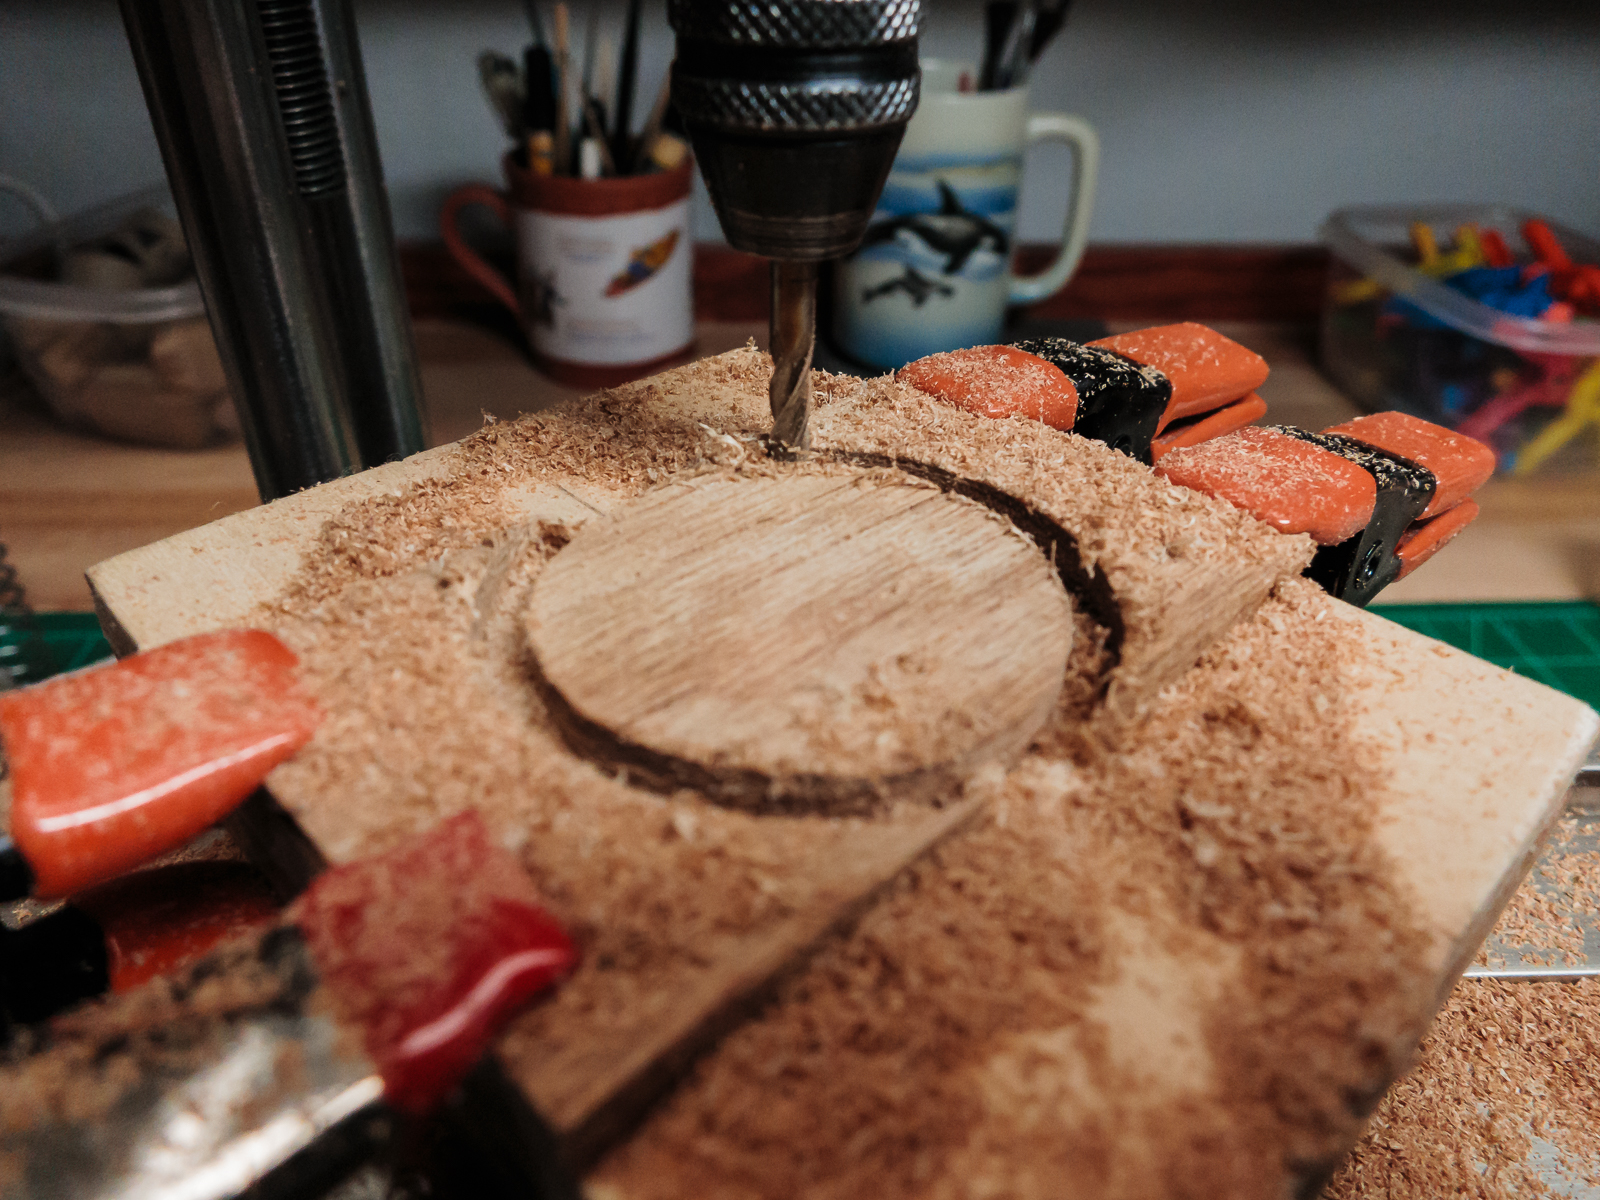
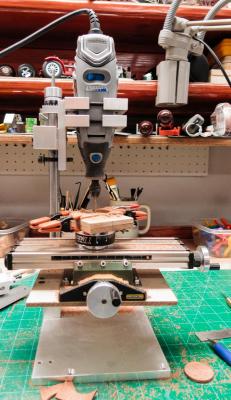
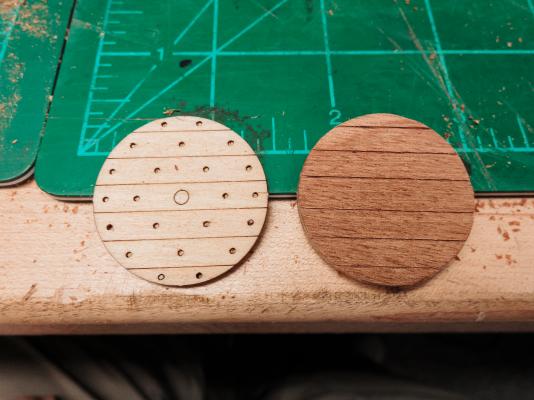
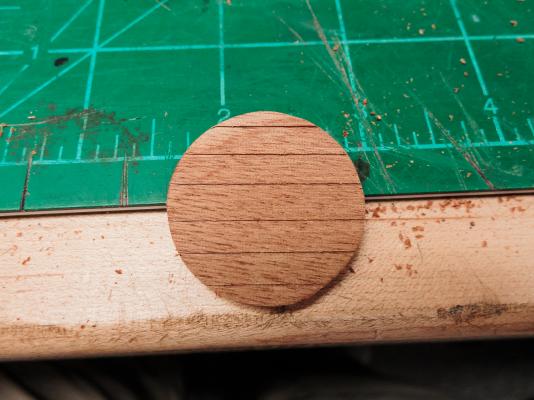
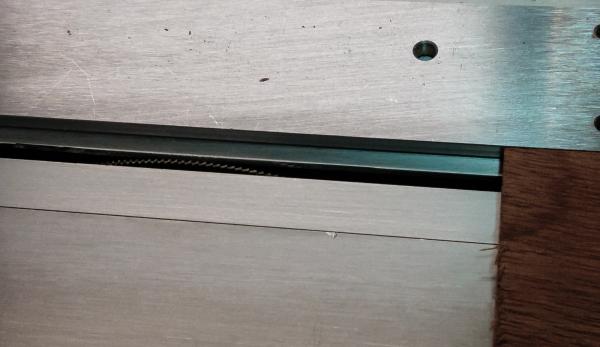
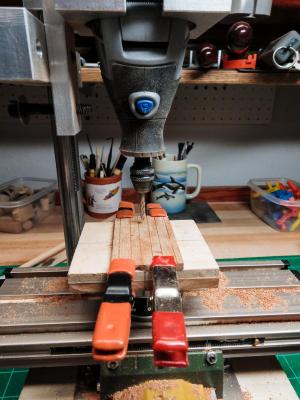
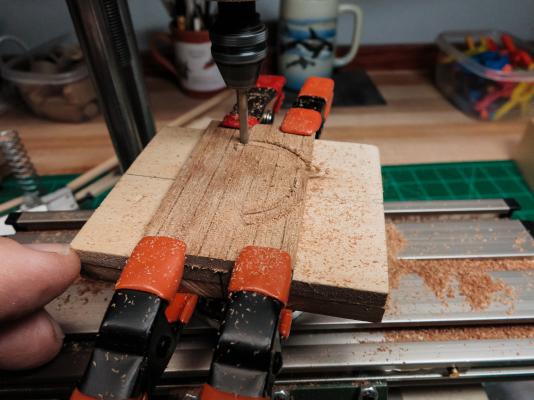
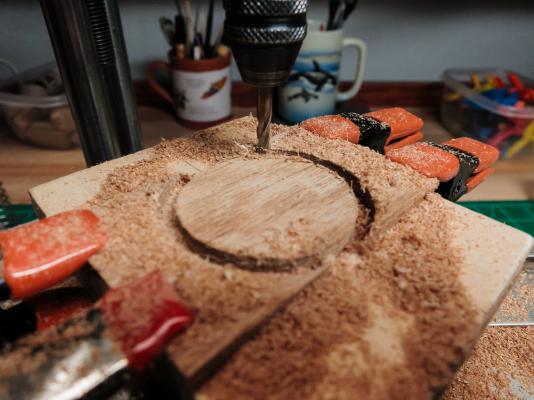
 The mast is oak and I tapered it using power drill and sandpaper method. This is a very simple mast and took no time at all, I did make a huge mess. The shields will be next. The kit version is (as usual) laser cut plywood. I felt the need to improve on that. The choices are to build the shields out of planks or cut the disks and score to look like planks. Chuck Passaro demonstrated a technique on his HMS Winchelsea Quarter Gallery columns that I thought was really interesting so I decided to try it on the shields. There are 30 of them and I have a pile of mahogany given to me by a friend that is close to the correct thickness and can be quickly dimensioned by the thickness sander. I would have taken me a week on the old Preac but the new Byrnes will handle it in no time. I used a .016 kerf blade raised 1/64 above the table. I spaced the cuts 5mm apart and they lined up nicely. I cobbled together a mini mill using a Vanda-Lay drill press with a "Z" axis fine adjustment attachment, a Proxxon X-Y table and a toy rotary table that I got years ago with a Unimat 1. I set it up on the rotary table and cut out the shield, using a 3mm end mill. The mahogany is soft enough to use a smaller mill but that was the smallest I had on hand. I did not dimension the strips for the test because I wanted to prove to myself that it would work before I spent the time. Now all I have to do is score and cut 30 more. I will score in long strips before I cut shield size pieces. Thirty identical things taxes me enough but the thought of over 100 gun ports and canon carriages for a ship of the line seems beyond my concentration level. I guess the maximum ship for me is a frigate.
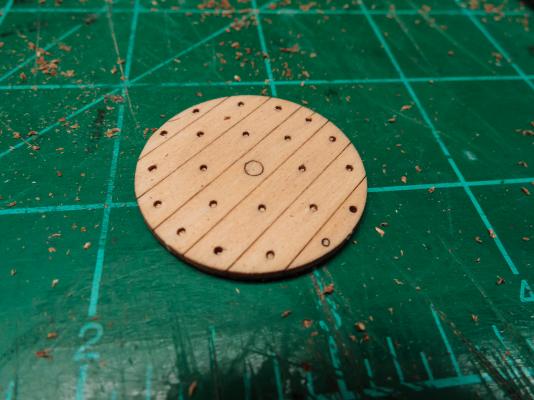

-
Hi Grant, I think that is a good idea. A small tutorial with examples and open it up for suggestions and questions. There are two types to consider: build log pictures and more formal gallery images. Let me think about the outline and we can collaborate before we start.
-
Hi Grant, Welcome aboard. I have really enjoyed doing the log. It is nice to discuss shipbuilding with others who actually are actually interested. I took a quick look at your Victory. Amazing, the talent on this forum is endless. I will enjoy going through it in detail soon. Thank you for looking in and the kind words. I will throw in a little photography occasionally. Maybe I should do a photo topic in Shore Leave. I avoid photography sites because they are so negative and nasty.
-
I only recently discovered your log. It is a real pleasure to see. Your work is beautiful.
-
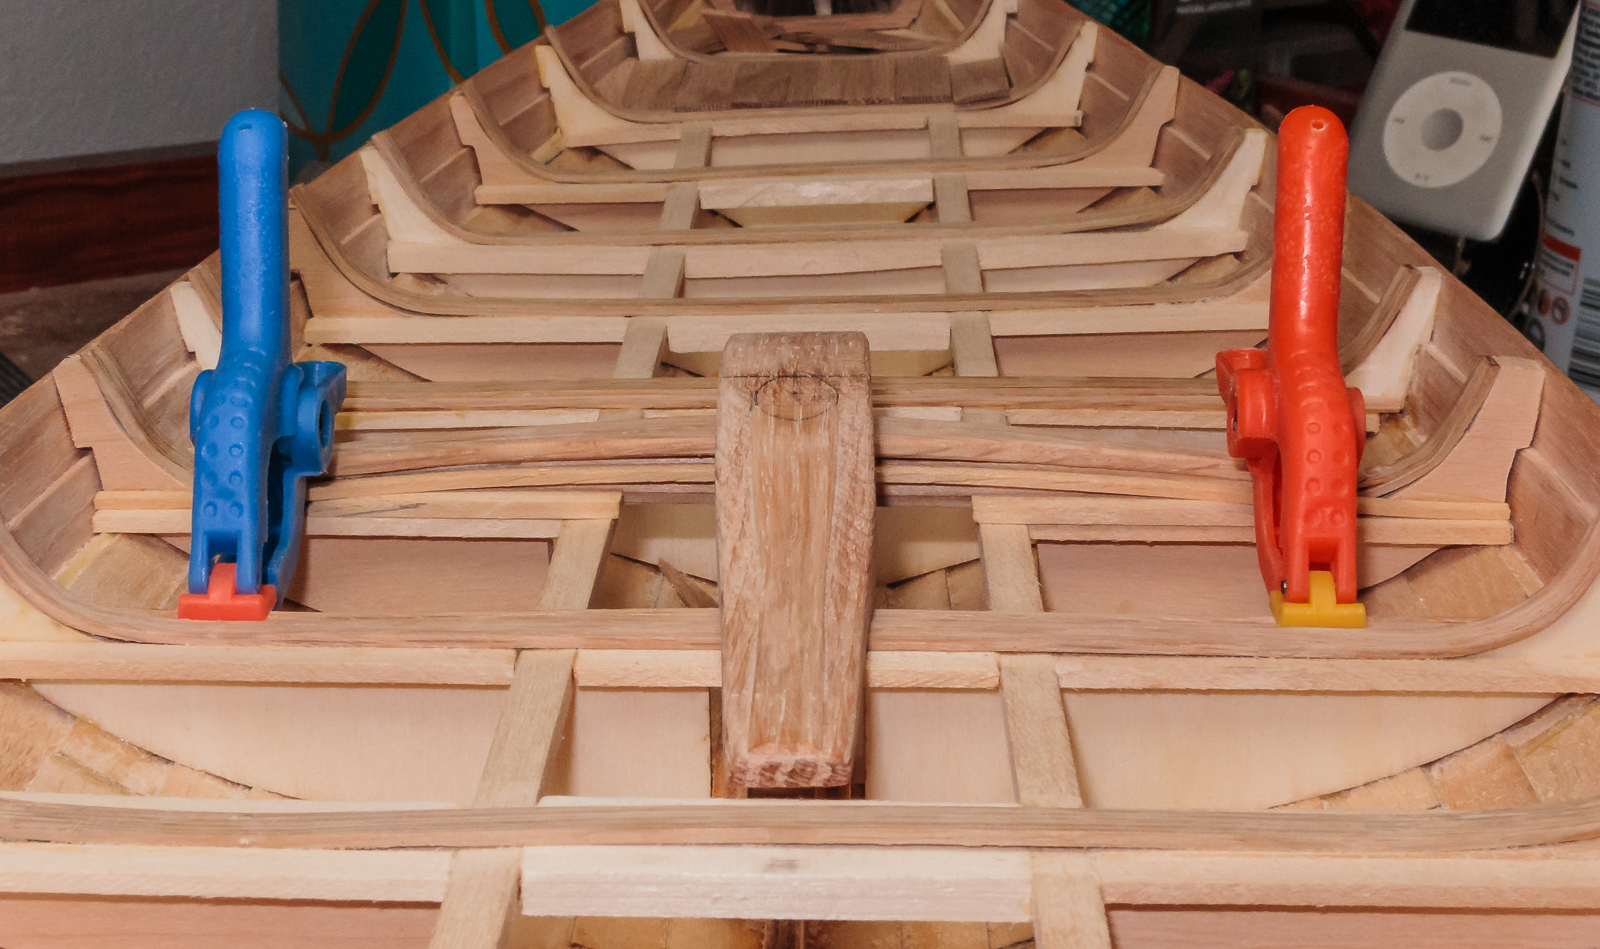
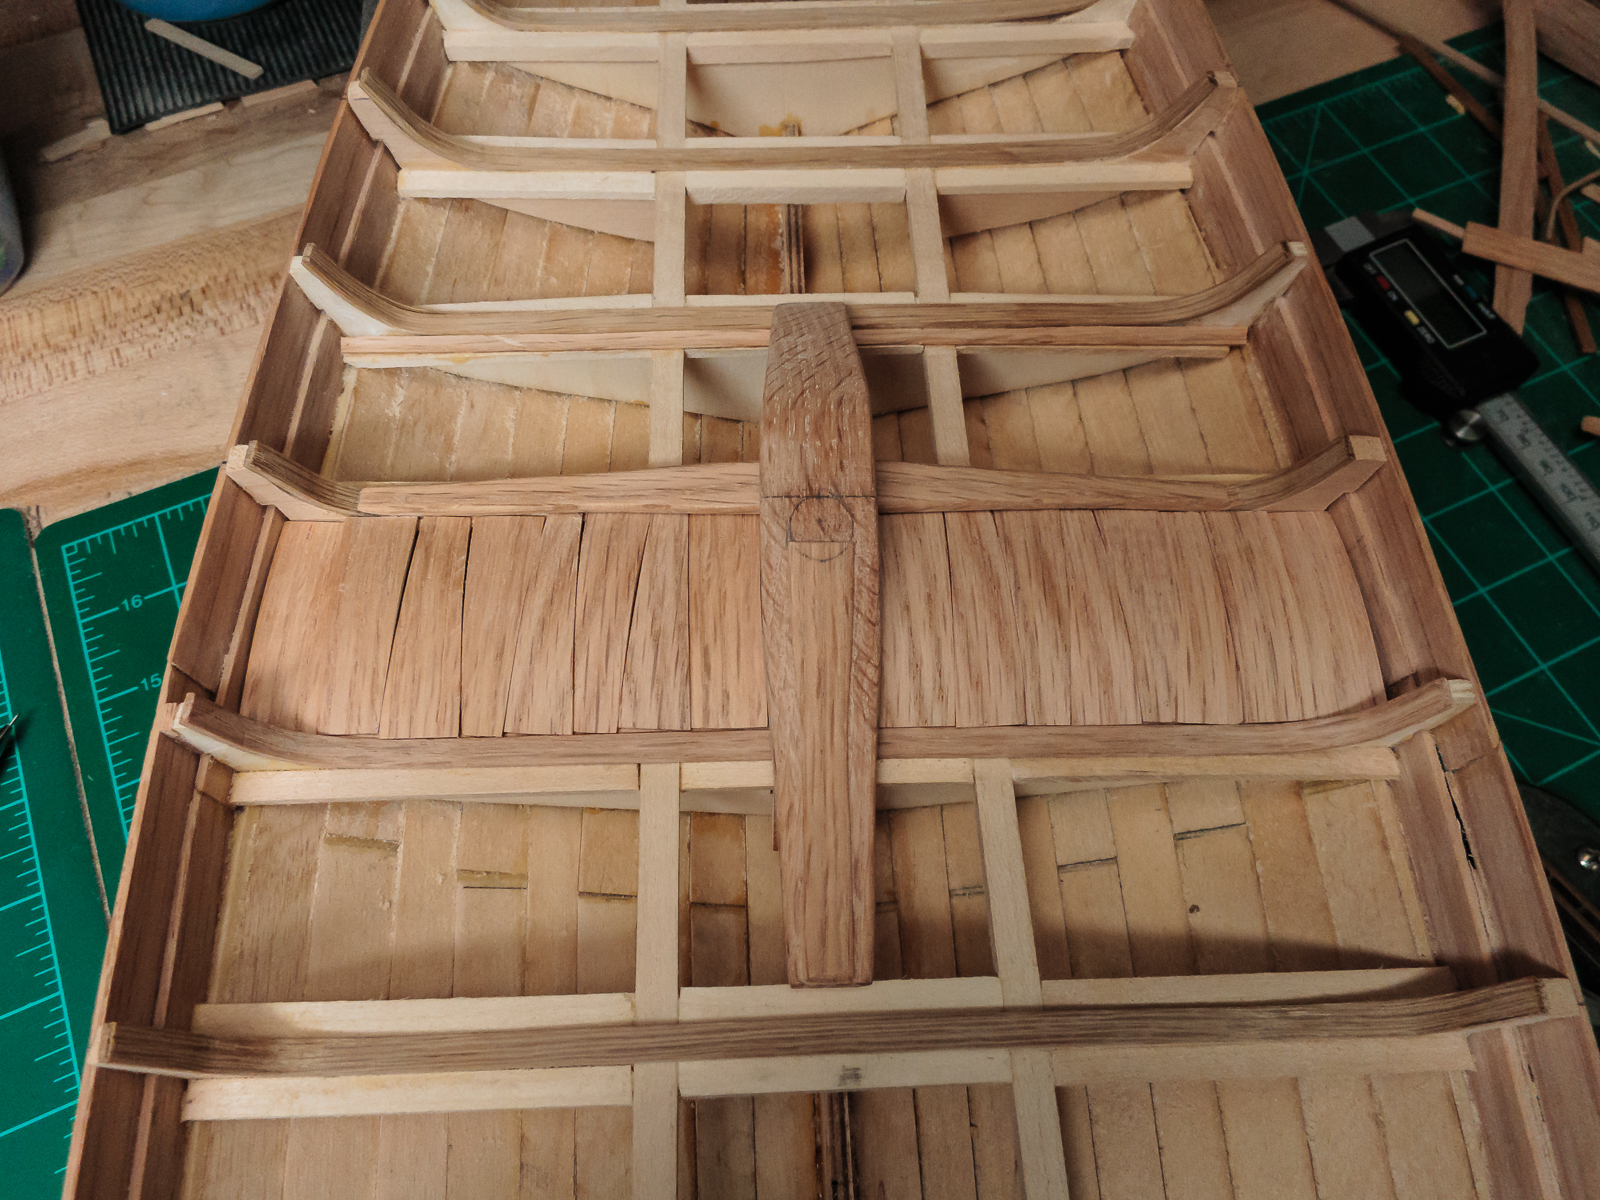
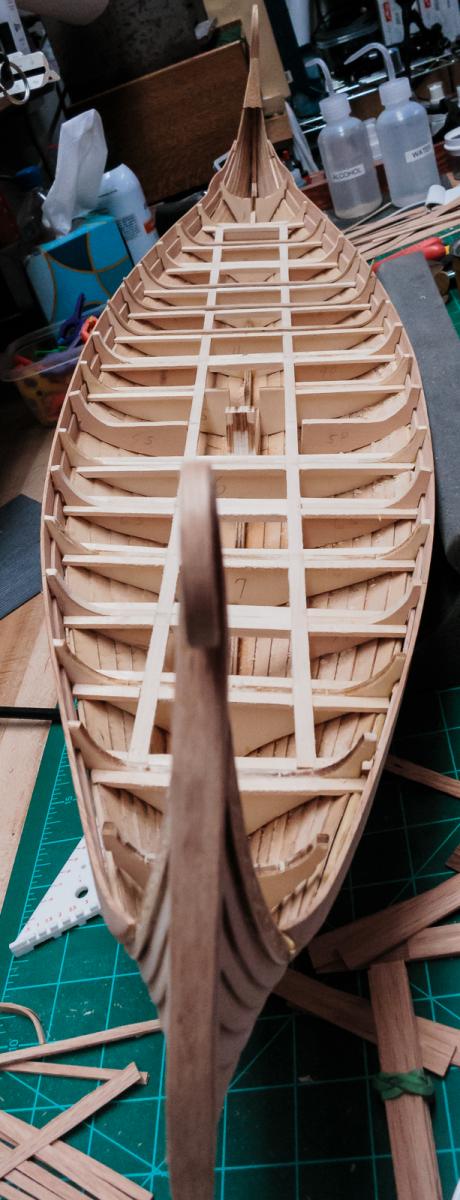
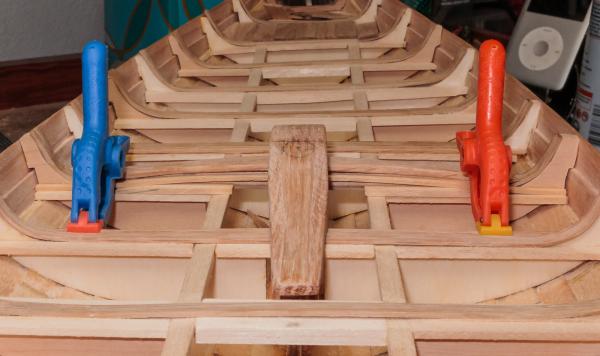
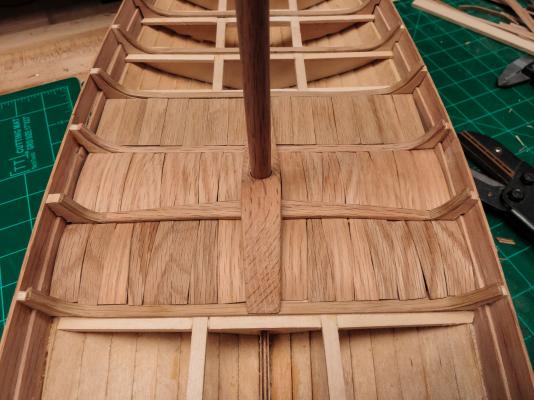
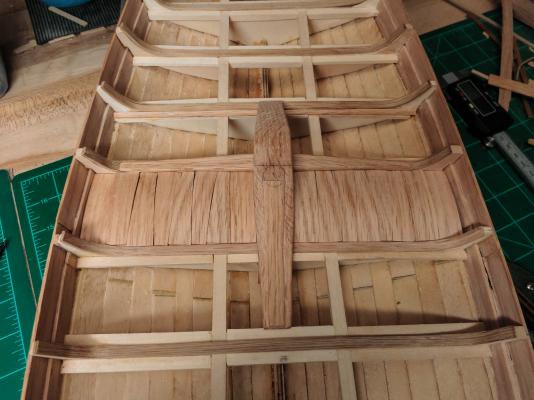
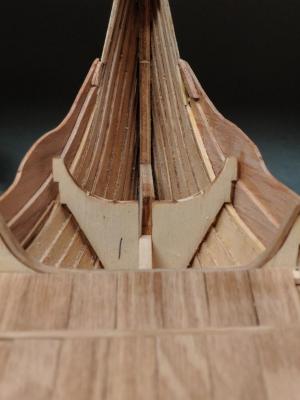
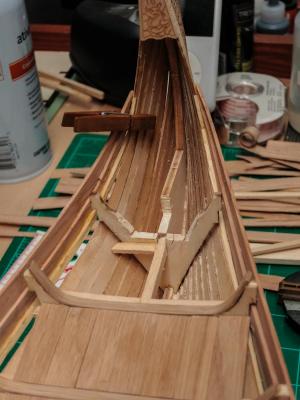
Next up is the mast foot, partner and the planking around them. The planks are 1/16 inch thick. The 2 rows adjacent to the mast are slightly curved so I reduced the thickness to 1 / 32 inch to make them easier to bend. The planks are about 1 ½ inches long. I soaked them in water and wrapped them around a mailing tube end and let them dry and cut to length. The kit version of the mast foot and partner were both plywood and were replaced with oak. The partner is made of oak about ⅛ thick. It mounts on a curve and ties into the bulkhead. The kit version has it tying into the hull and adds knees on top to make it look like the bulkhead existed. Since I added the extra bulkheads I did not need to do this. Then I added the ledge under the partner to hold the planks. Since the bent planks are thinner I raised the ledge on the far side to bring them up flush. Here are the curved planks with one row of flat laid in loose. I will bag them and keep them with the others until I am ready to install permanently. They really fit together well but keeping them in place long enough to take a picture was maddening. I think that I will work on shields for a while to give myself time to think about nailing the hull planking. One of the reasons I am not gluing the planks yet is in case I decide to nail access may be helpful. The nails were round headed iron rivets. in some pictures square washers can be seen in a few places.


-
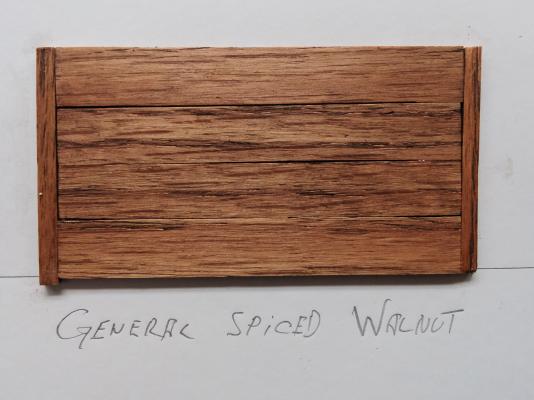
Hi Keith, thanks for the kind words. The thought of crossing oceans in similar ships with a deeper draft is mind boggling. They were definitely tougher than most. Hey Pete, thanks for looking in, your Herreshoff Buzzards Bay is absolutely beautiful. Hello Bindy, my children are grown and they still think that I am Santa Claus. The stain choice continues to drive me nuts, it will probably be one of those last minute dart throw decisions. On the other since it is so hard to chose I probably cannot go wrong whatever the decision. Thanks to all the "likes".
-
Jolly Roger by KAT
Jack Panzeca replied to KAT's topic in - Build logs for subjects built 1501 - 1750
This certainly sounds like fun. I will pull up a chair in the corner and watch with interest. If you get a chance checkout a song from 1976 by Roger McGuinn called "the Jolly Roger". It really sums up the pirate life for me. -
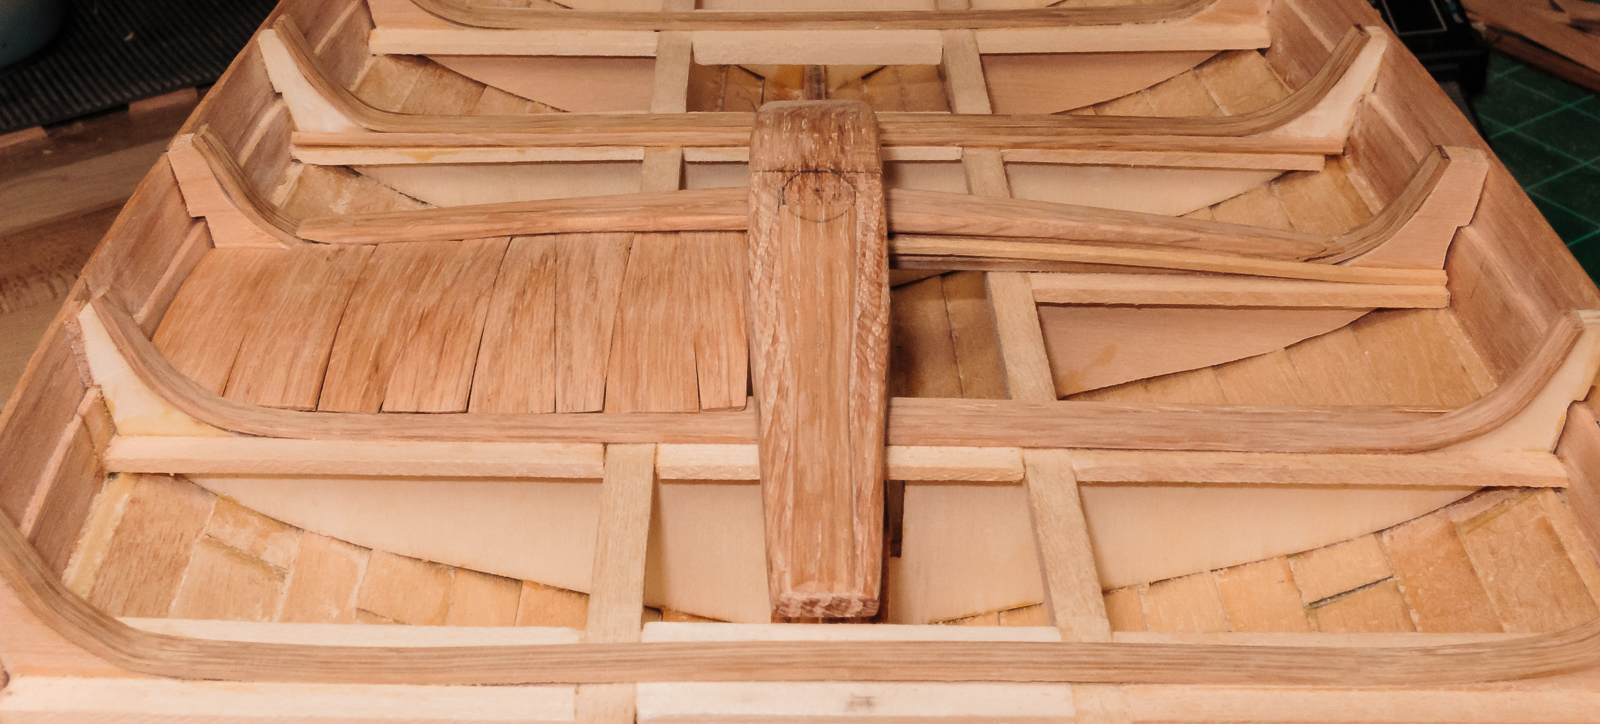
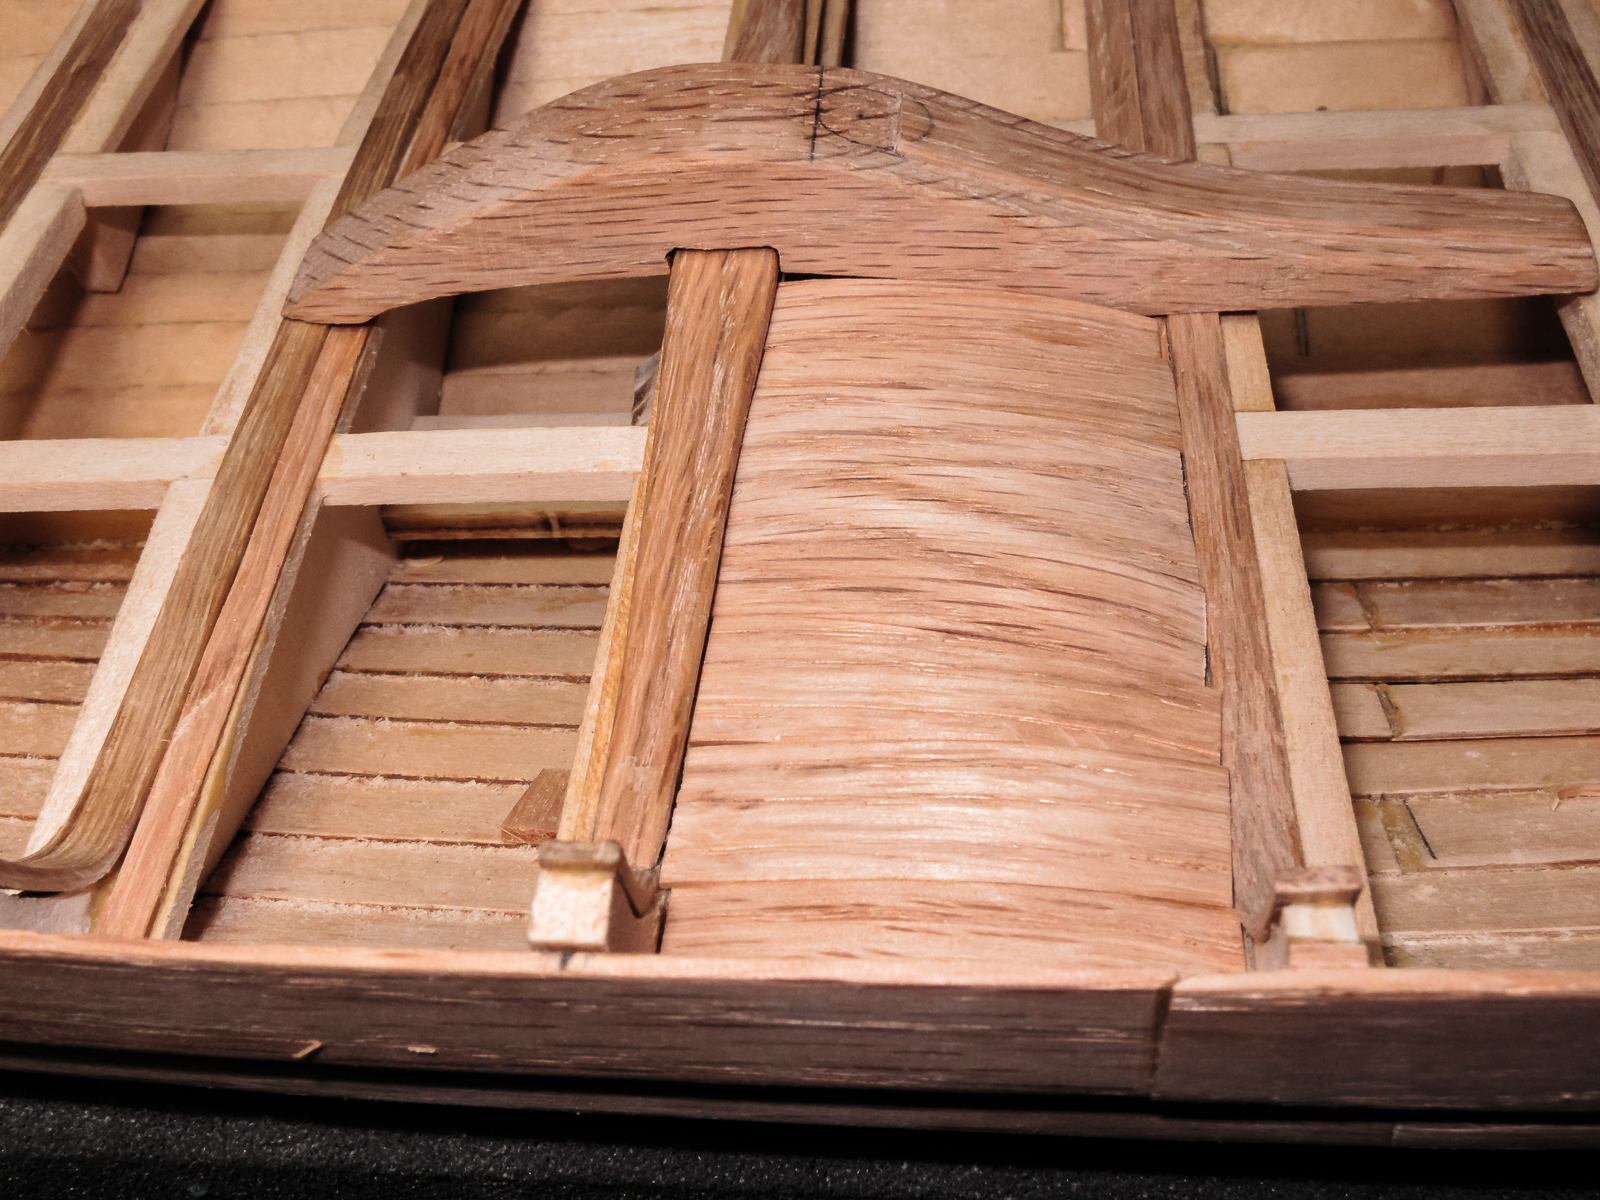
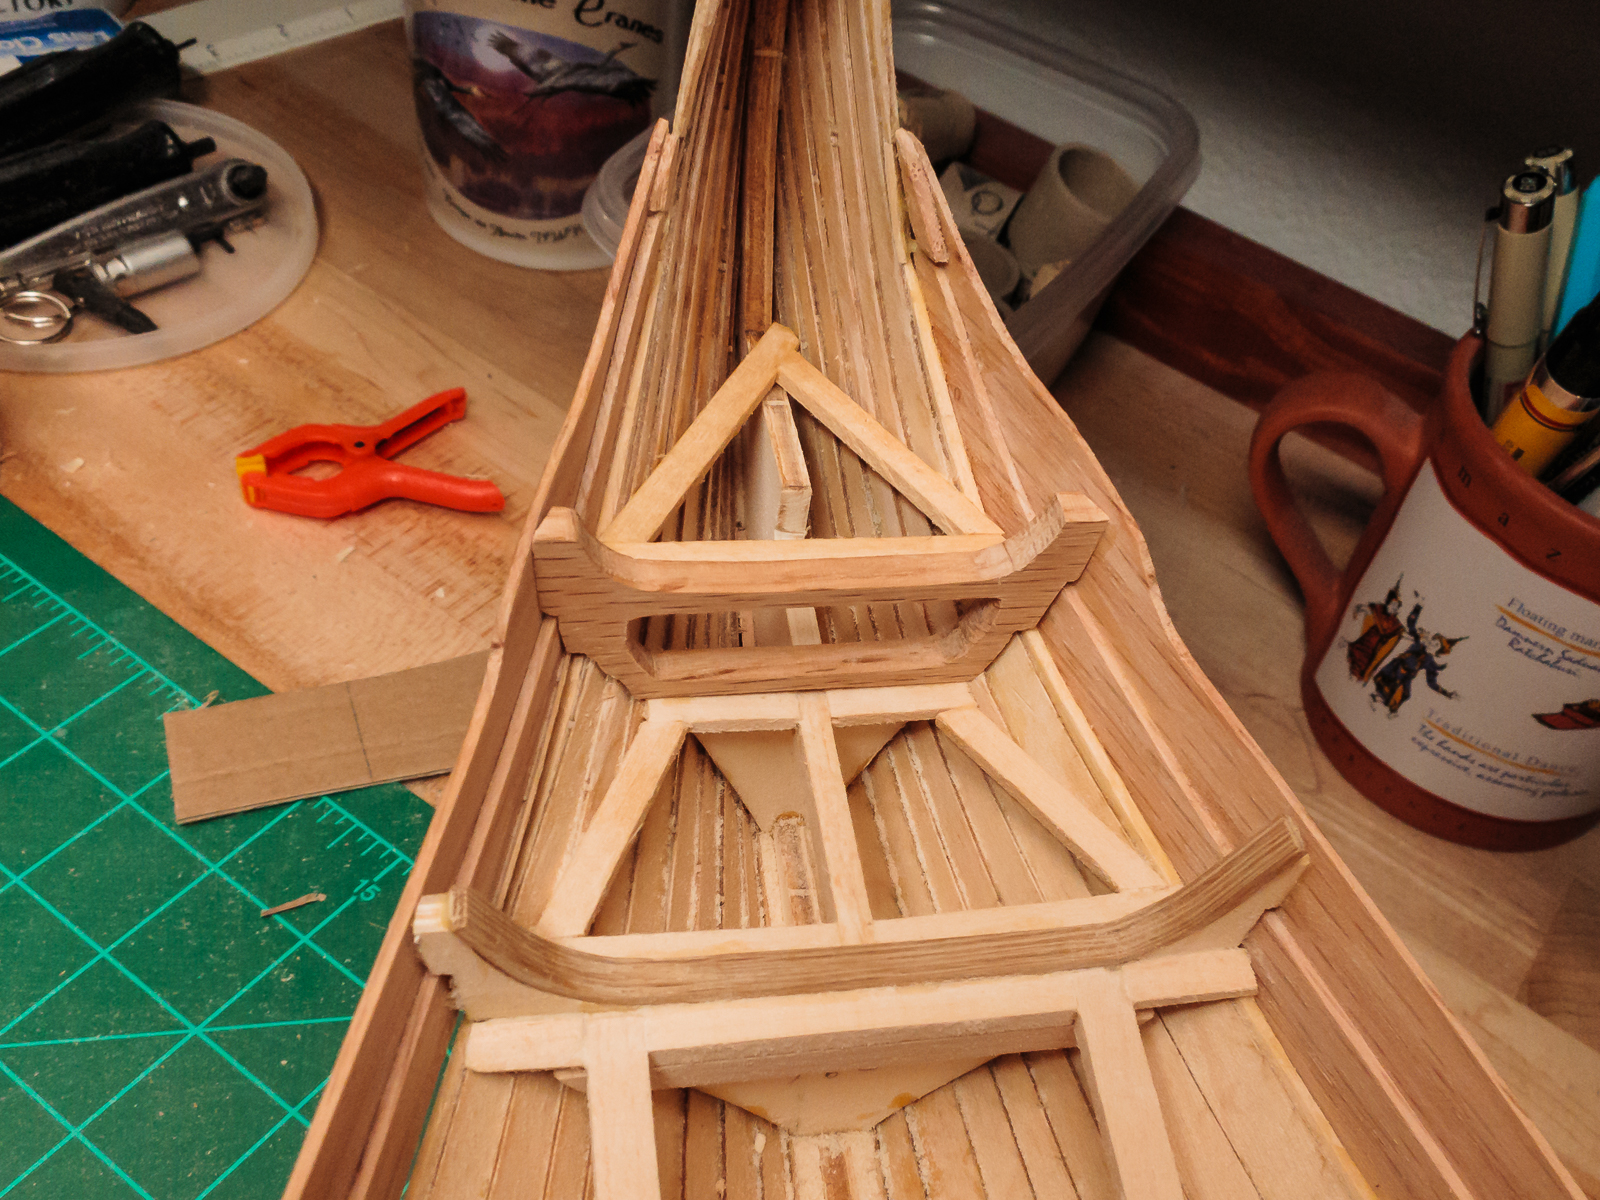
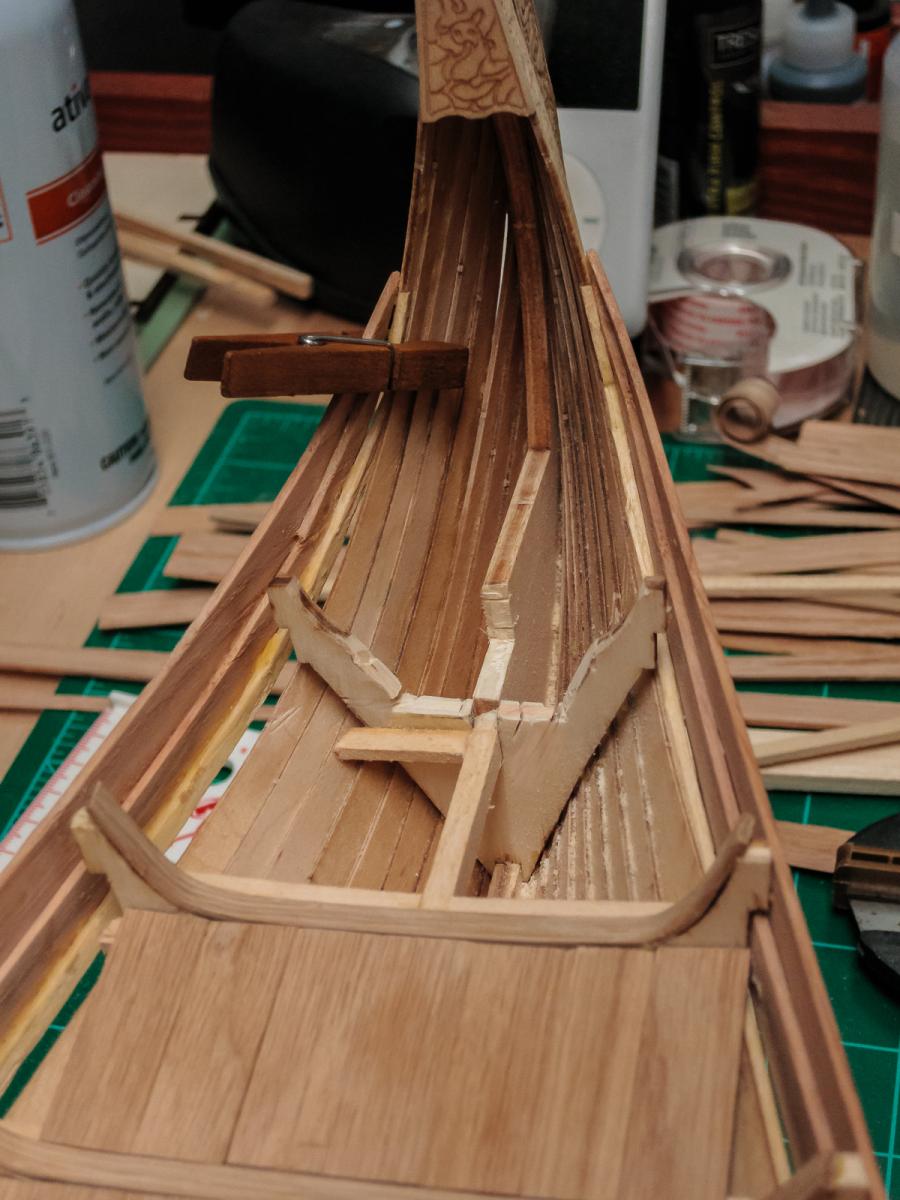
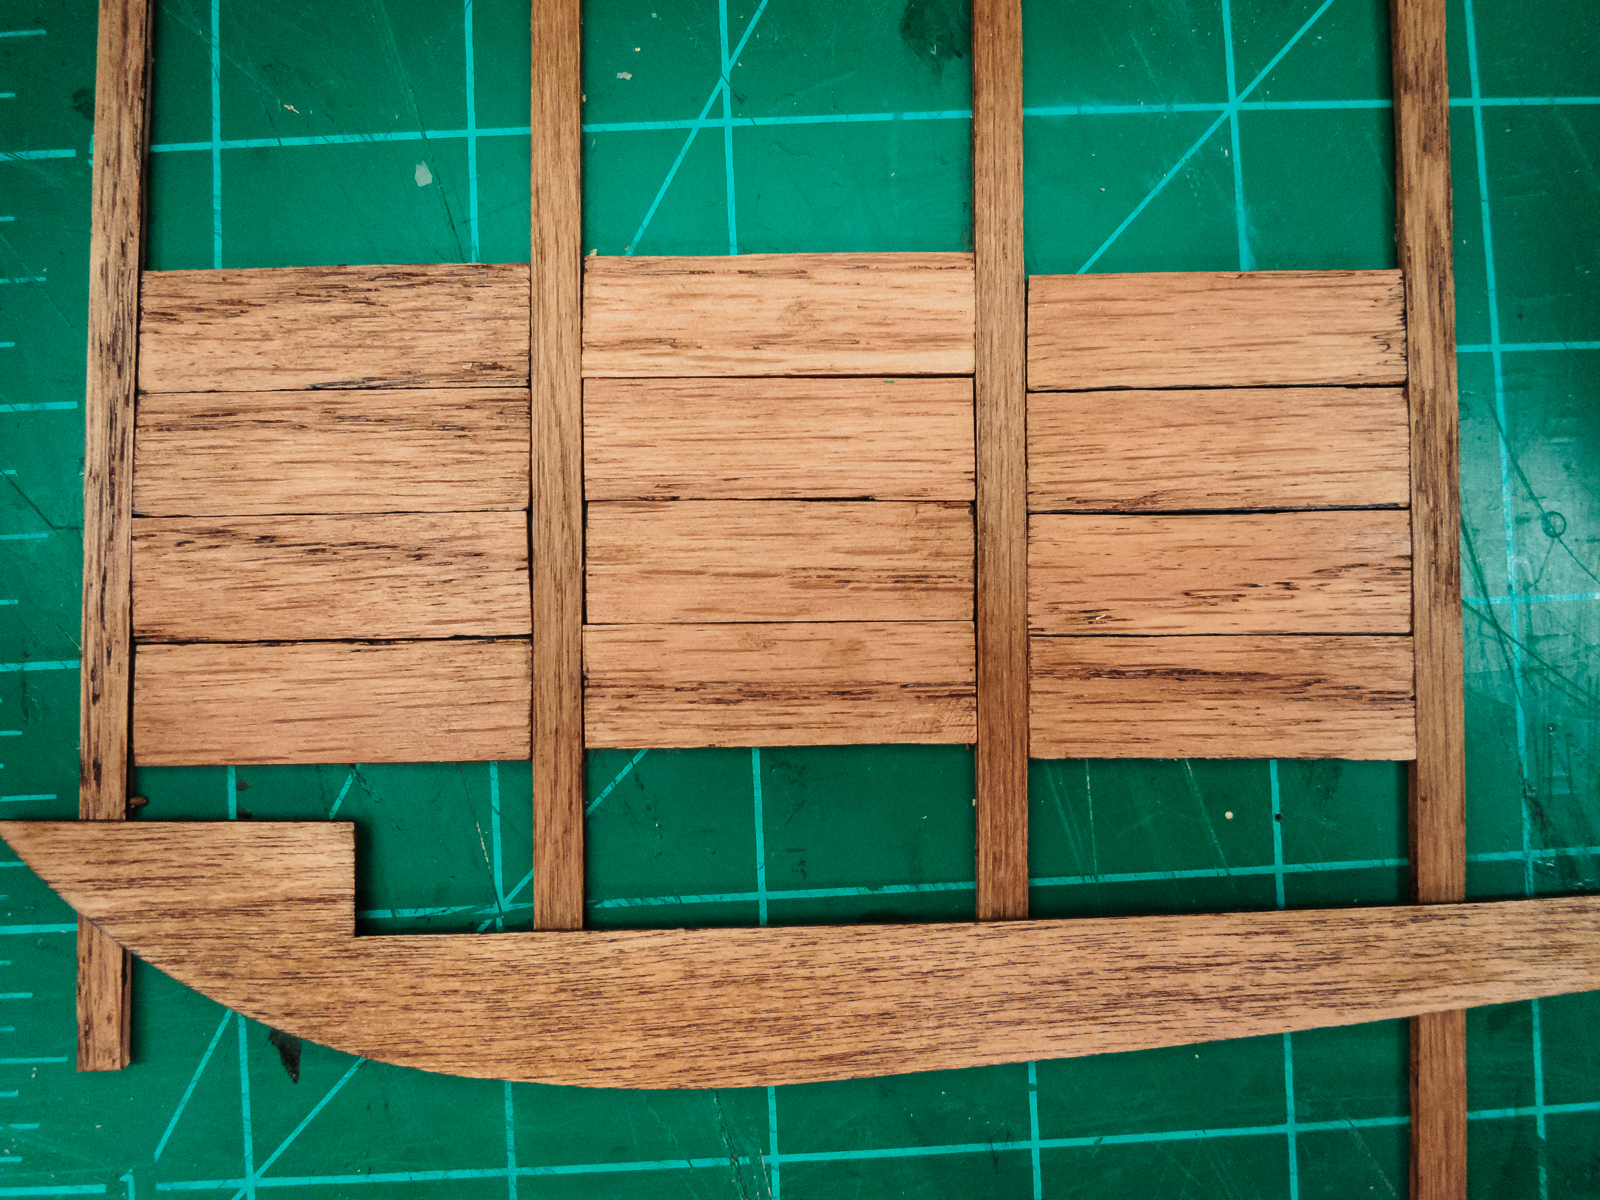
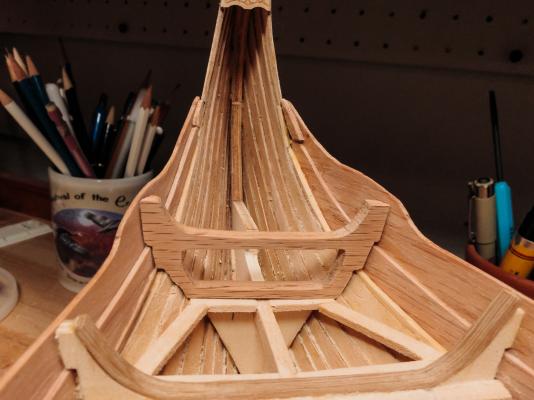
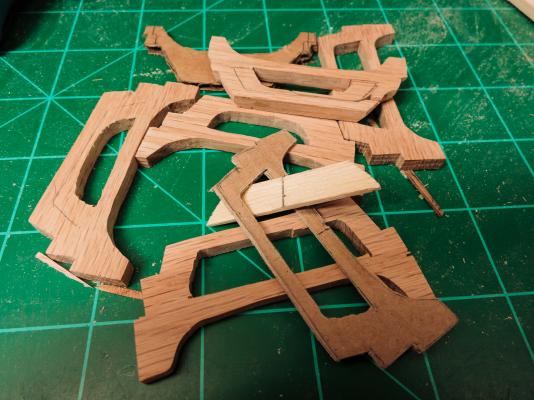
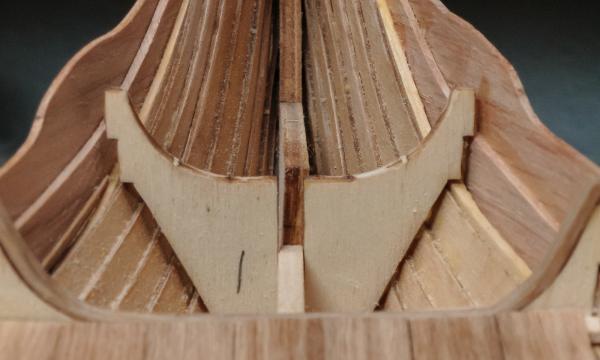
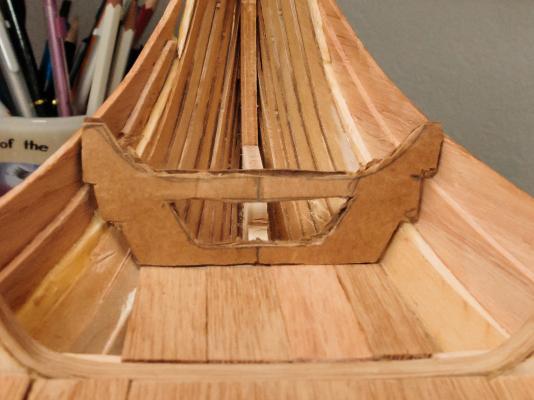
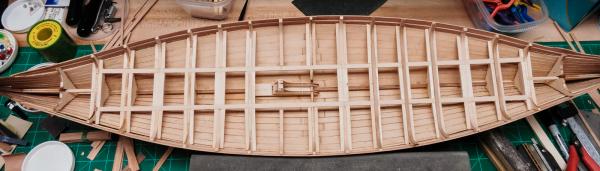
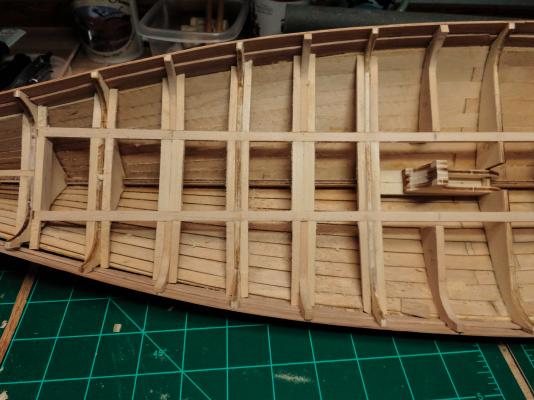
When the idea of the bow and stern storage (?) compartments came up I thought that I would cut out a bit of the bulkhead and add an oak strip at the top. It would match the other bulkheads and would act as the top of the compartment. It soon became obvious that this solution would be less than attractive so I cut the bulkhead away at the level of the deck. I made a templet from cardboard and cut several attempts from oak with a scroll saw. Remember that I am the one that likes oak. It is hard wood and a pain to work with in these small pieces. The second photo is a partial pile of the throwaways. I finally got two that I like. The planking is cut and laid in loosely, some of it still needs a little work. Next is the mast foot and the associated bits and then finish the planking for keeps.


-
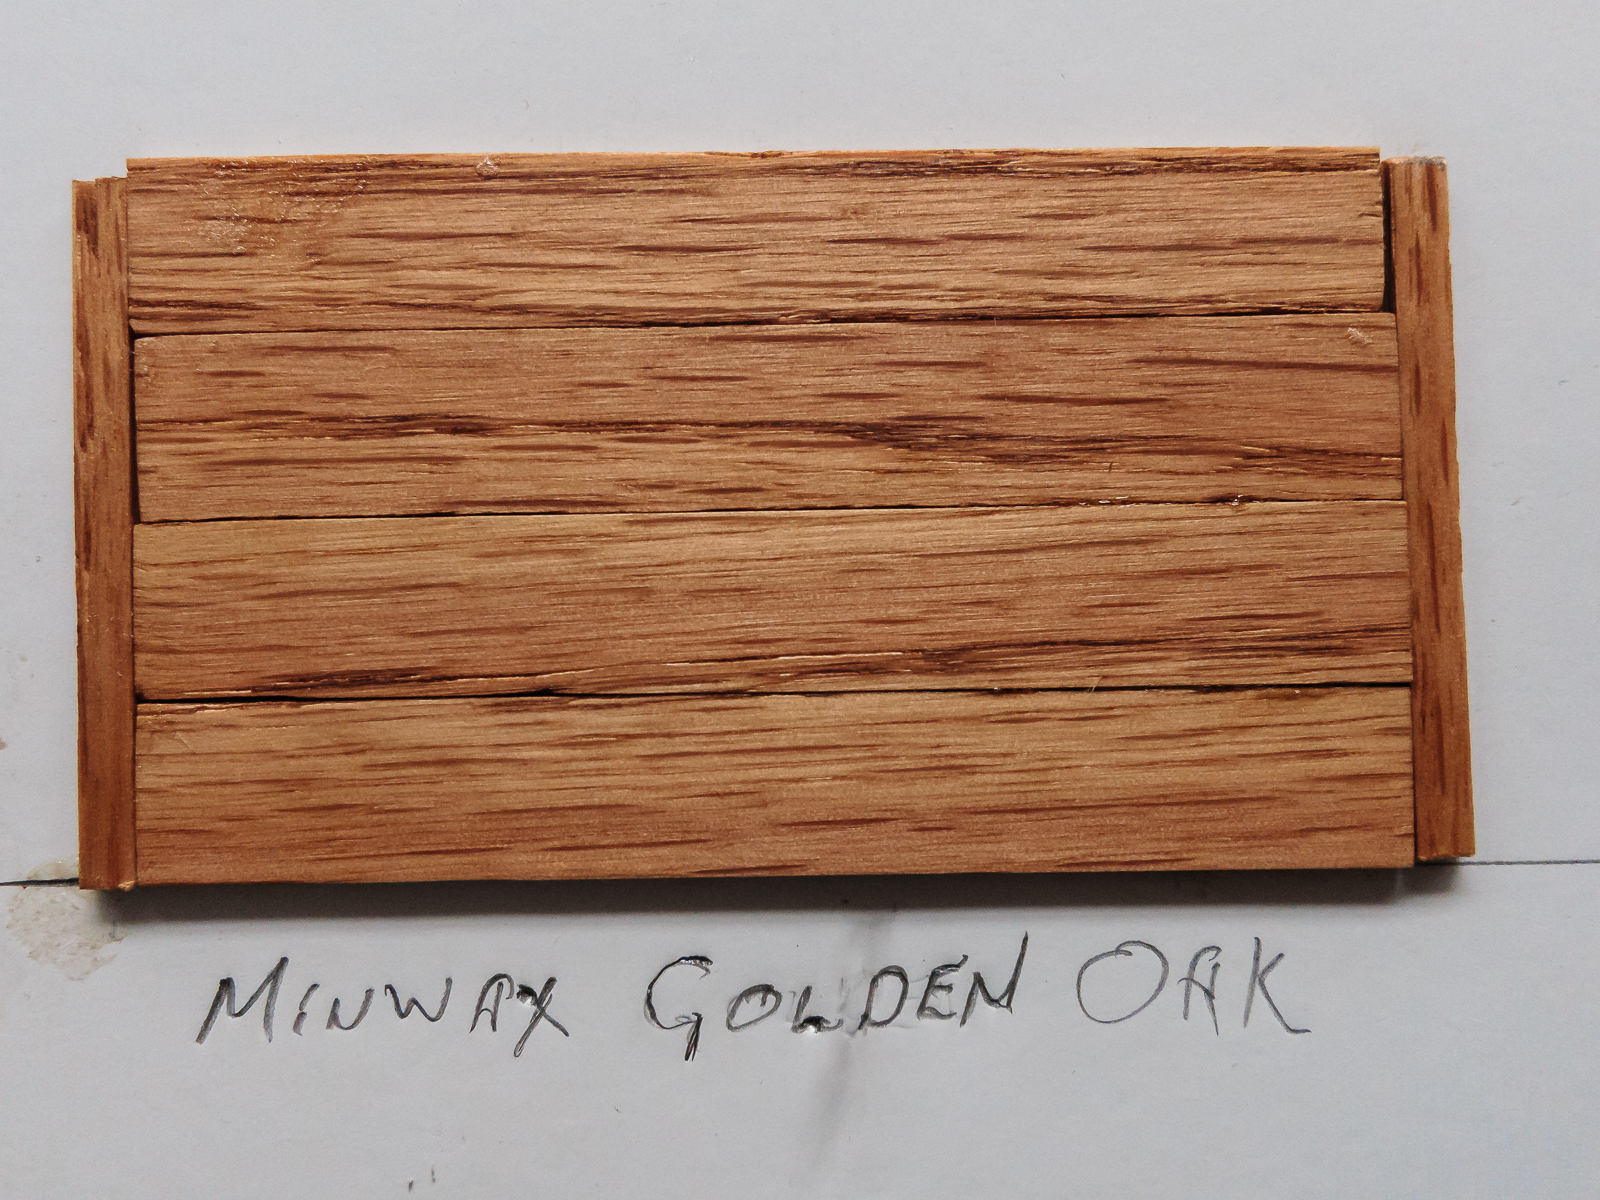
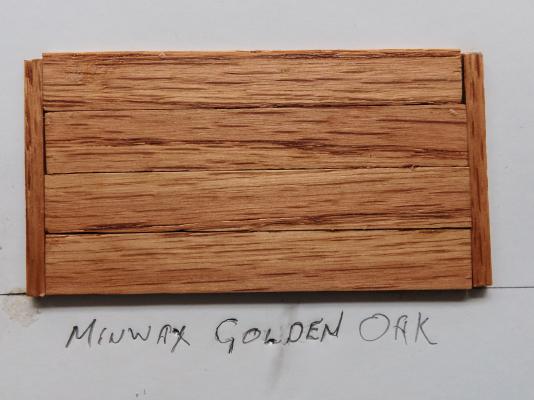
Hi David and Vivian, It is a really tough decision. The only one that I can dismiss out of hand is Golden Oak. Even "The Admiral" is no help. Every time she enters the shipyard and looks at the test panel she picks a different stain. I have to make up my mind soon because I want to stain the inside of the storage compartments before I glue the planking in place. Also, thanks for the likes. Update coming soon.
-
Hi Bill in Idaho, it is never to late to join the fun. Thanks for looking in on the build and also the photos. Your kind comments are greatly appreciated.
-
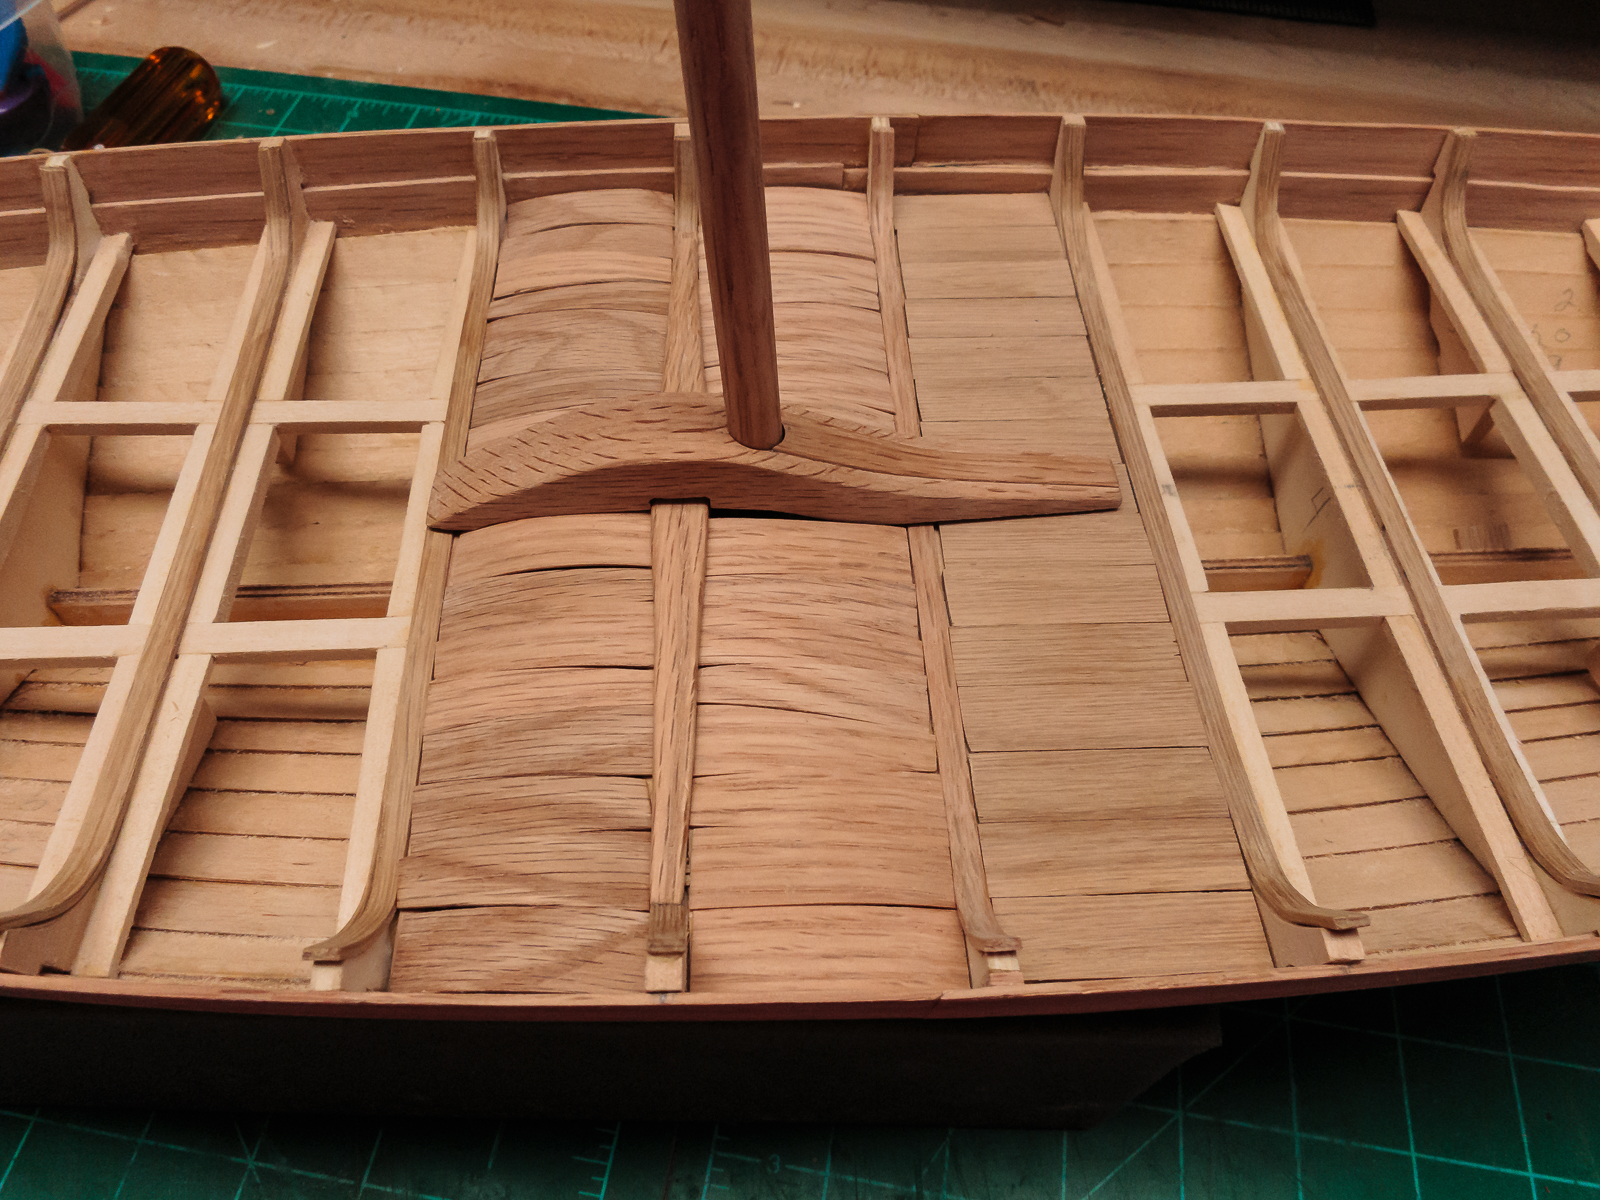
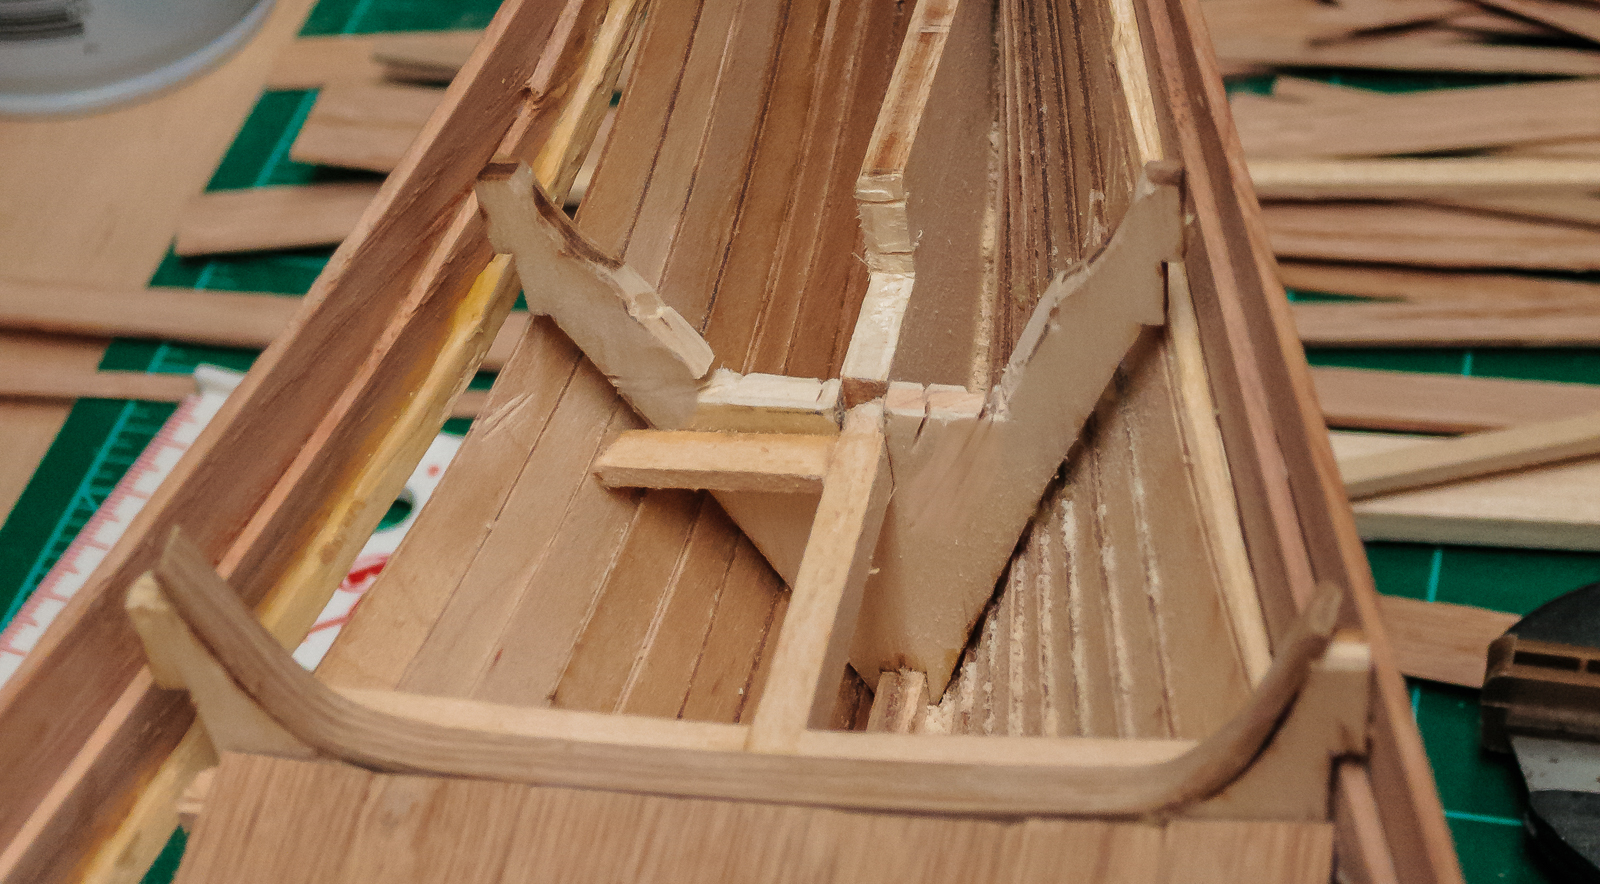
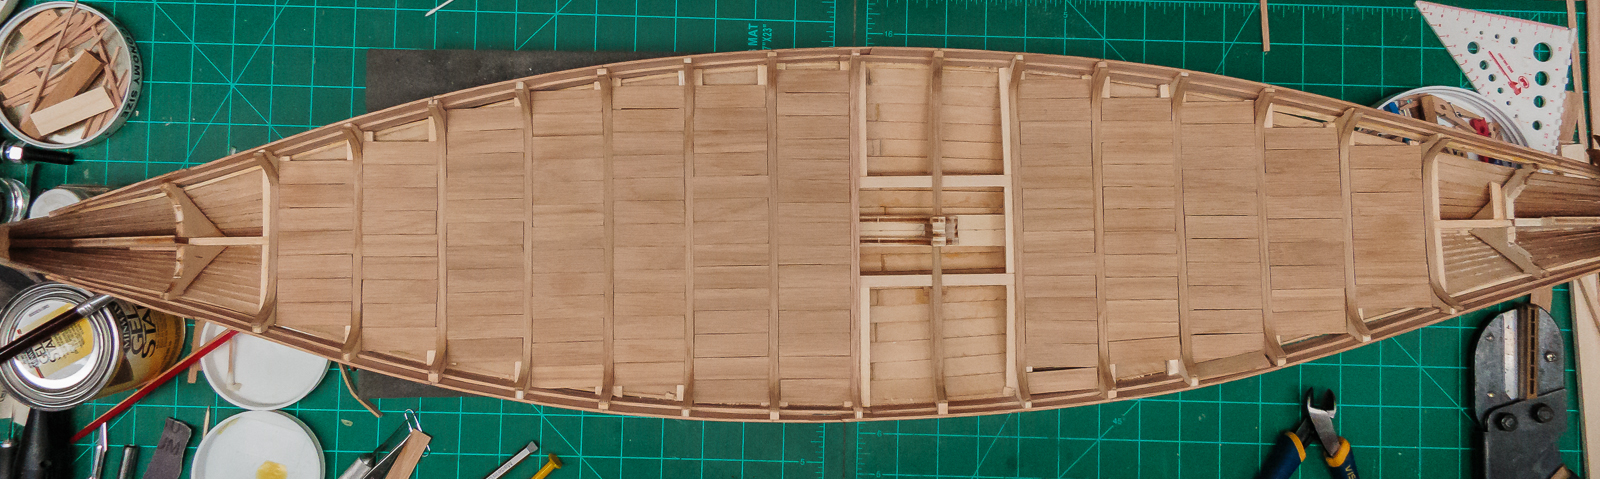
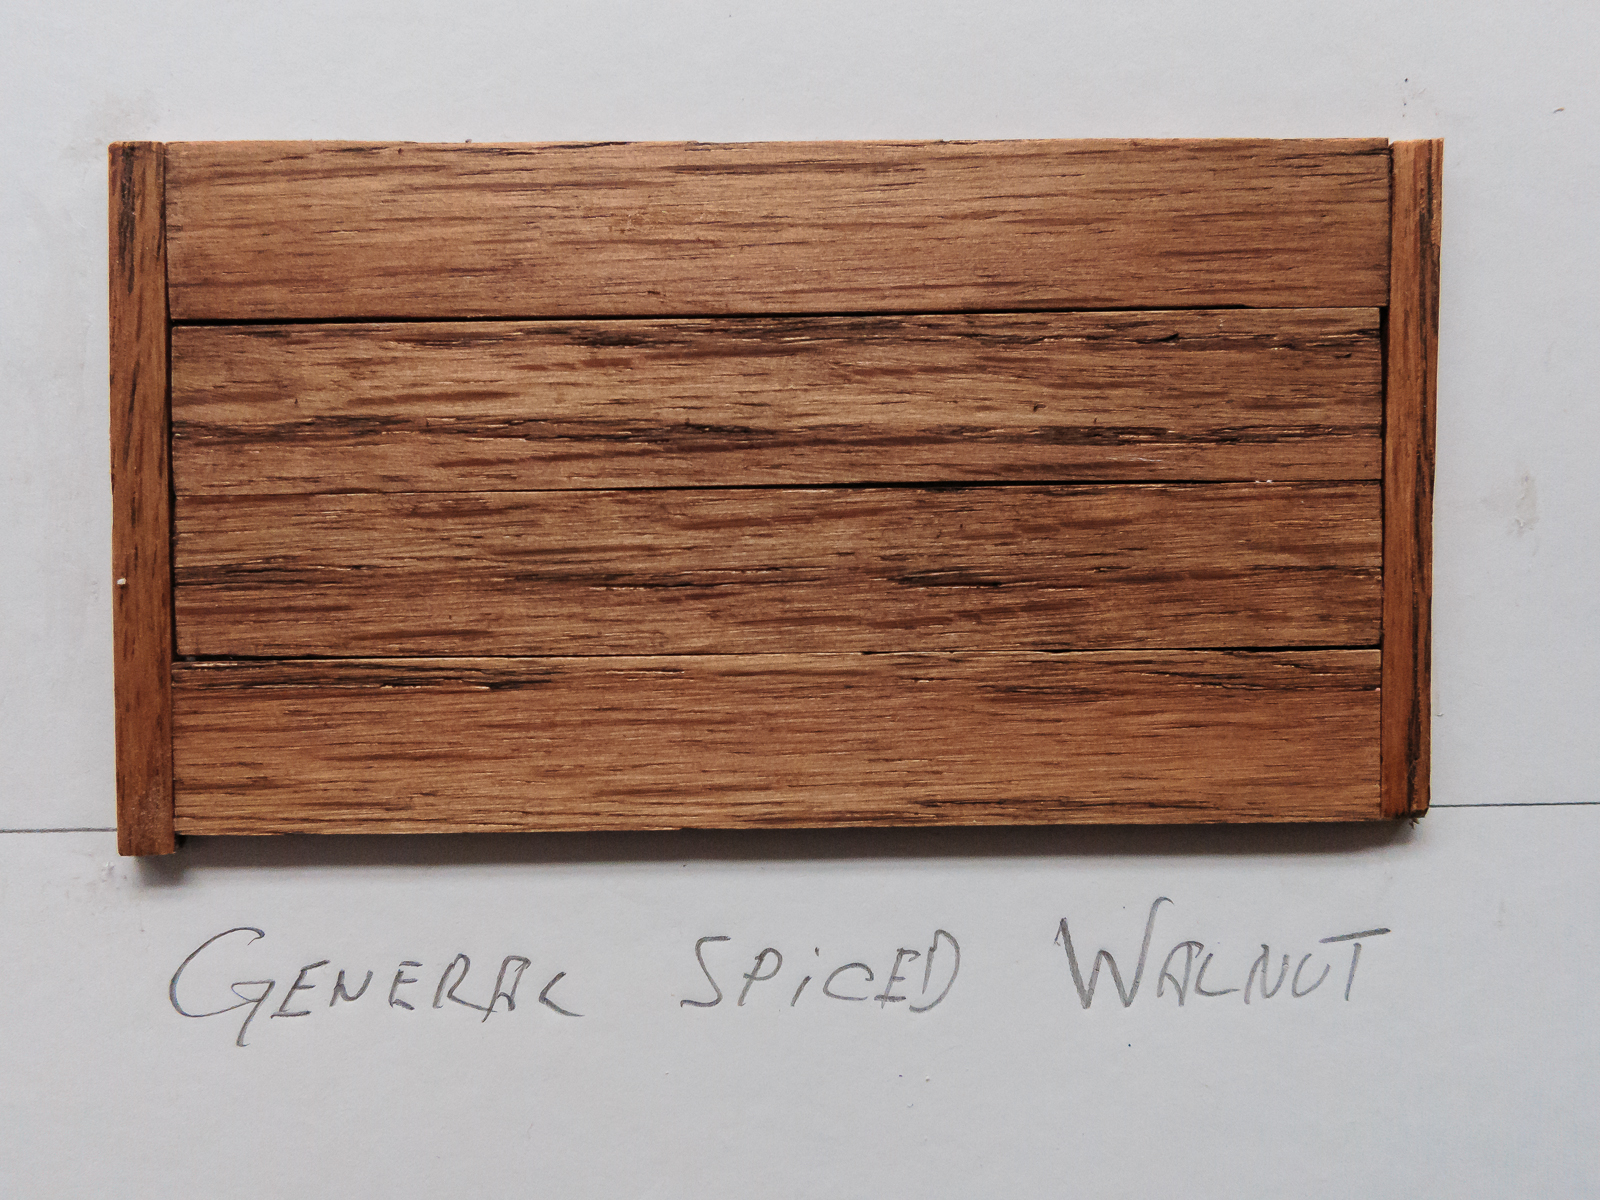
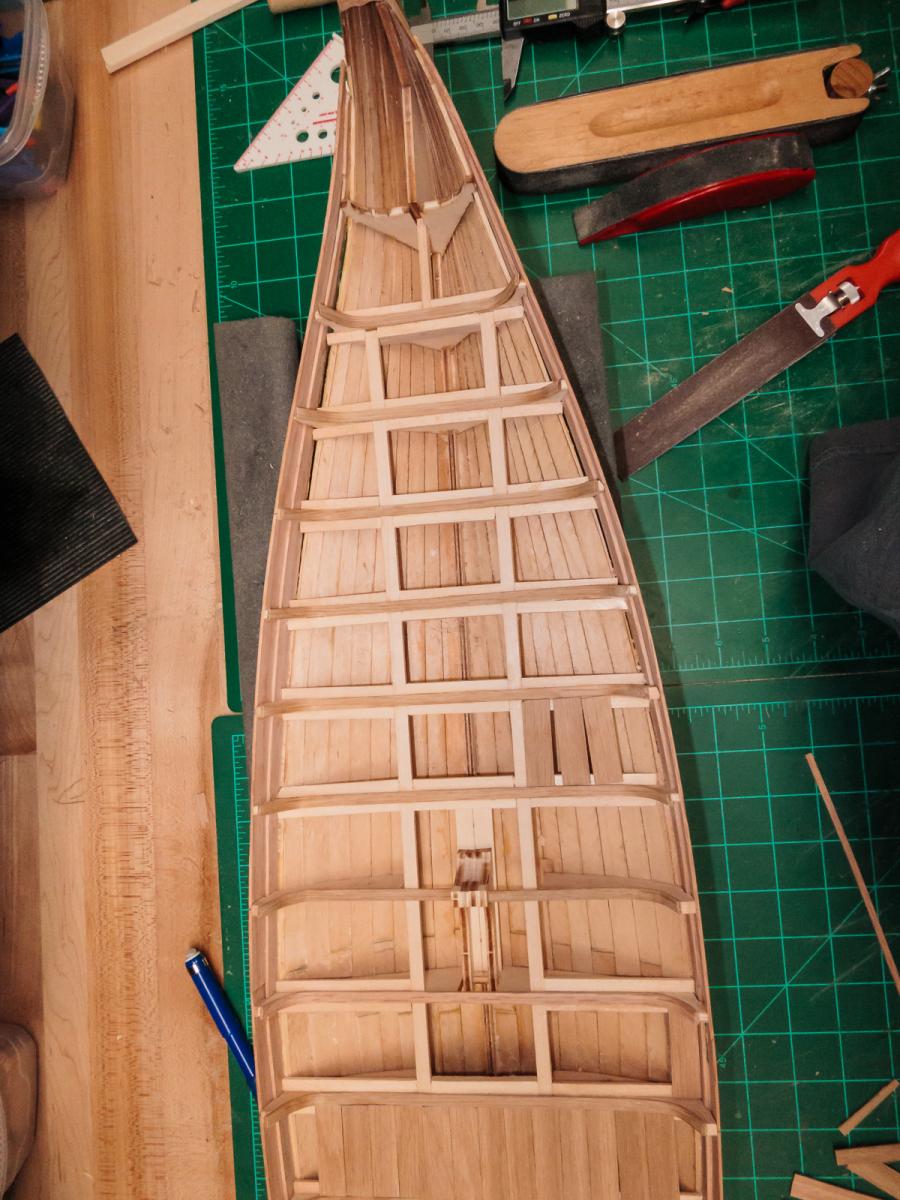
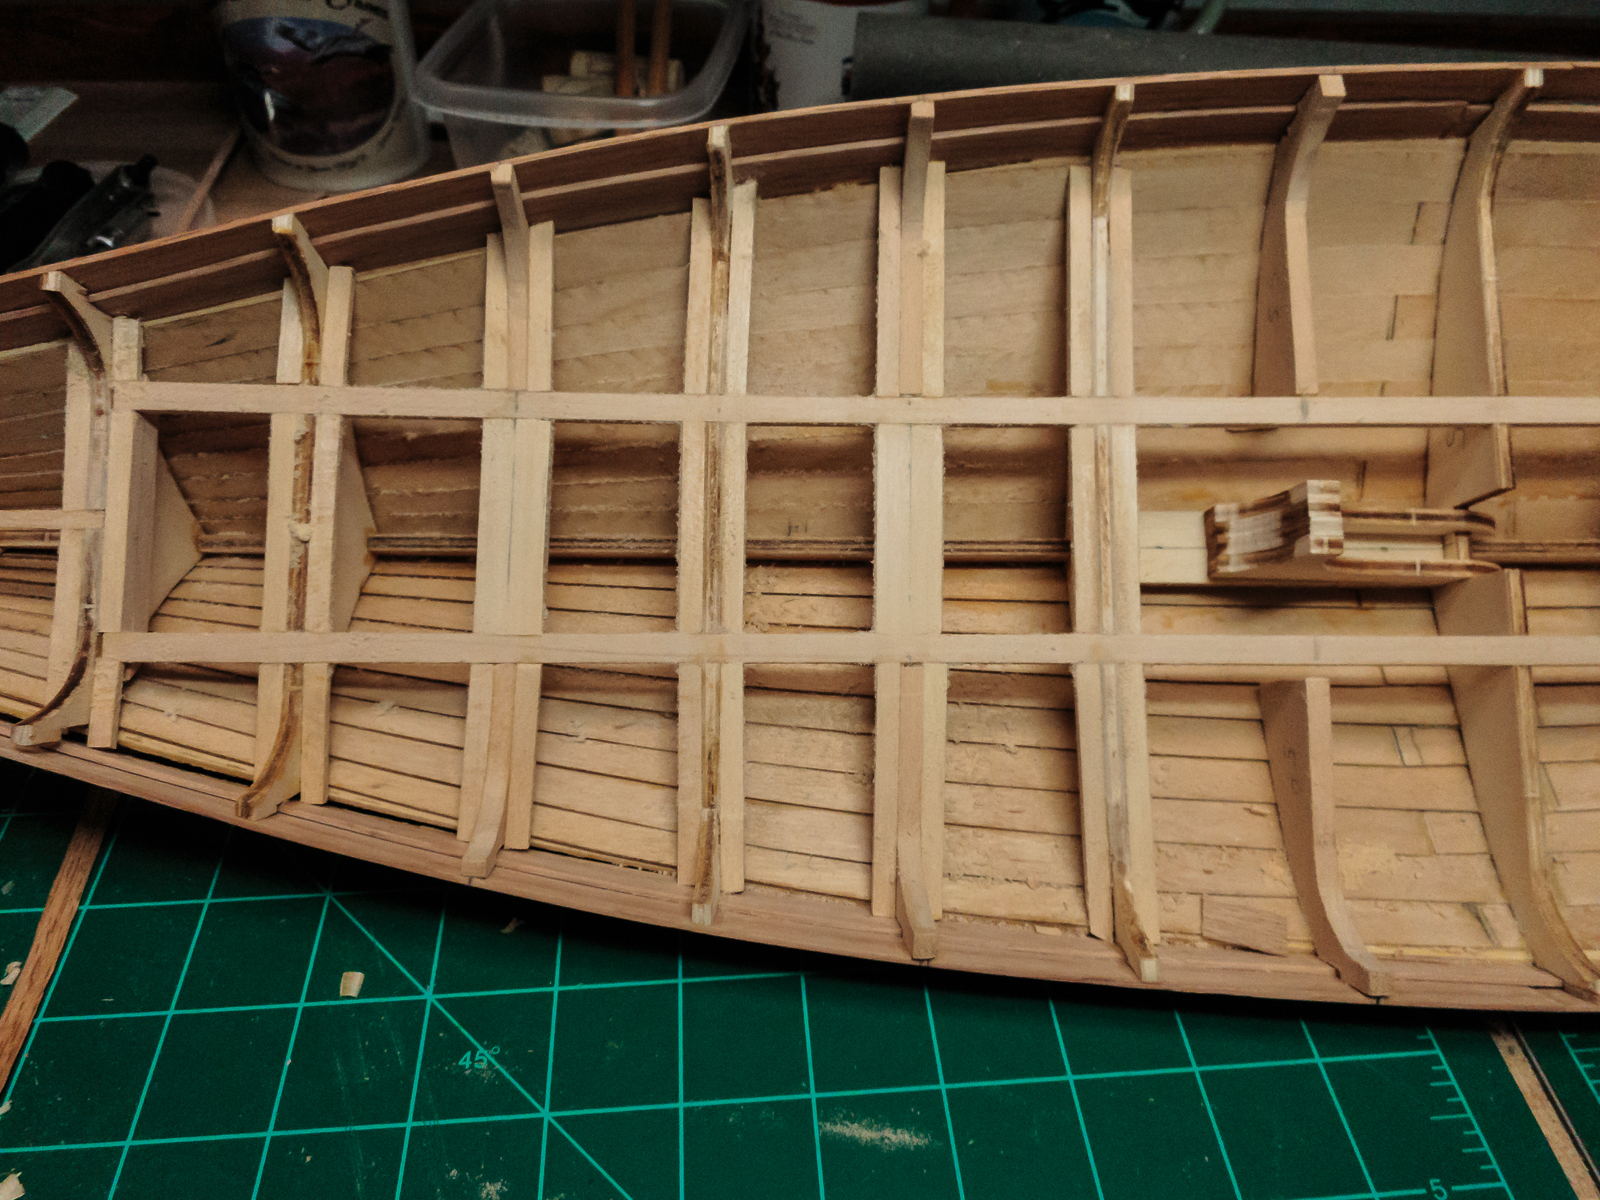
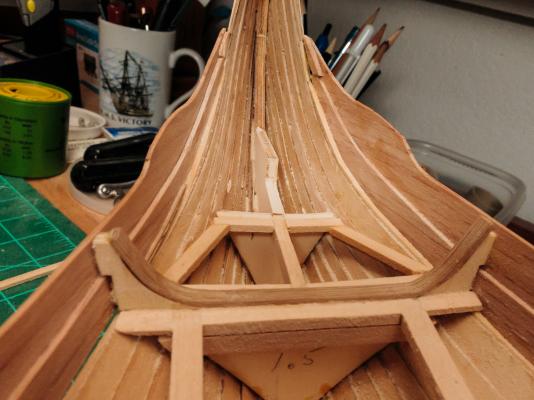
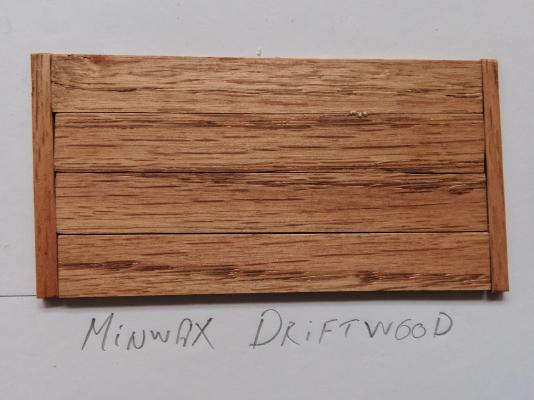
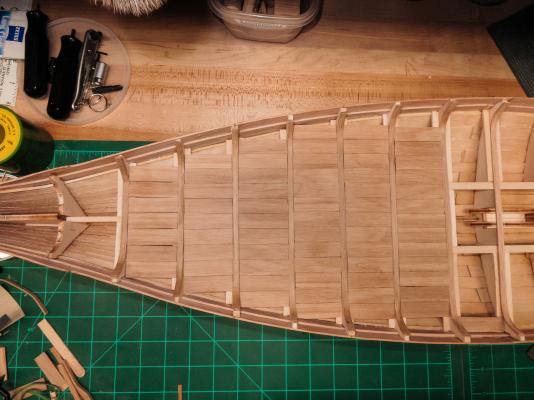
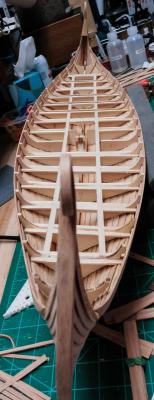
I finished cutting the easy planking, the tapered pieces at the sides and each end as well as the bent pieces at the mast foot are next. The planks are just placed loosely and since they were cut and sanded specific to each space I will take them out and bundle them up until I am ready to glue them in place. I jumbled them up once already and it is like putting together a jig saw puzzle to get them back where they belong. But first I thought I should get Von_Kossa's latest challenge out of the way. The actual Oseberg (photo from Von_Kossa's build log) has an open compartment at each end of the ship that is not accounted for by the kit. Those spaces get really crowded so I want to do the cutting before I finish framing. Von_Kossa said that when he started to do the cutout he felt like he was destroying his model. When I was doing it I actually did pop the top two planks loose. Oh well, more room for my hands. No real harm, they will glue back easily. Better to find the weakness now than later. Here are the latest stain tests. I took all four photos at the same time with the same light and the same camera. The color temperature was matched so the comparison will be accurate. The wood is domestic Red Oak. The choice is not easy. I think I will pin up the board and stare at it a while. Comments welcome.


-
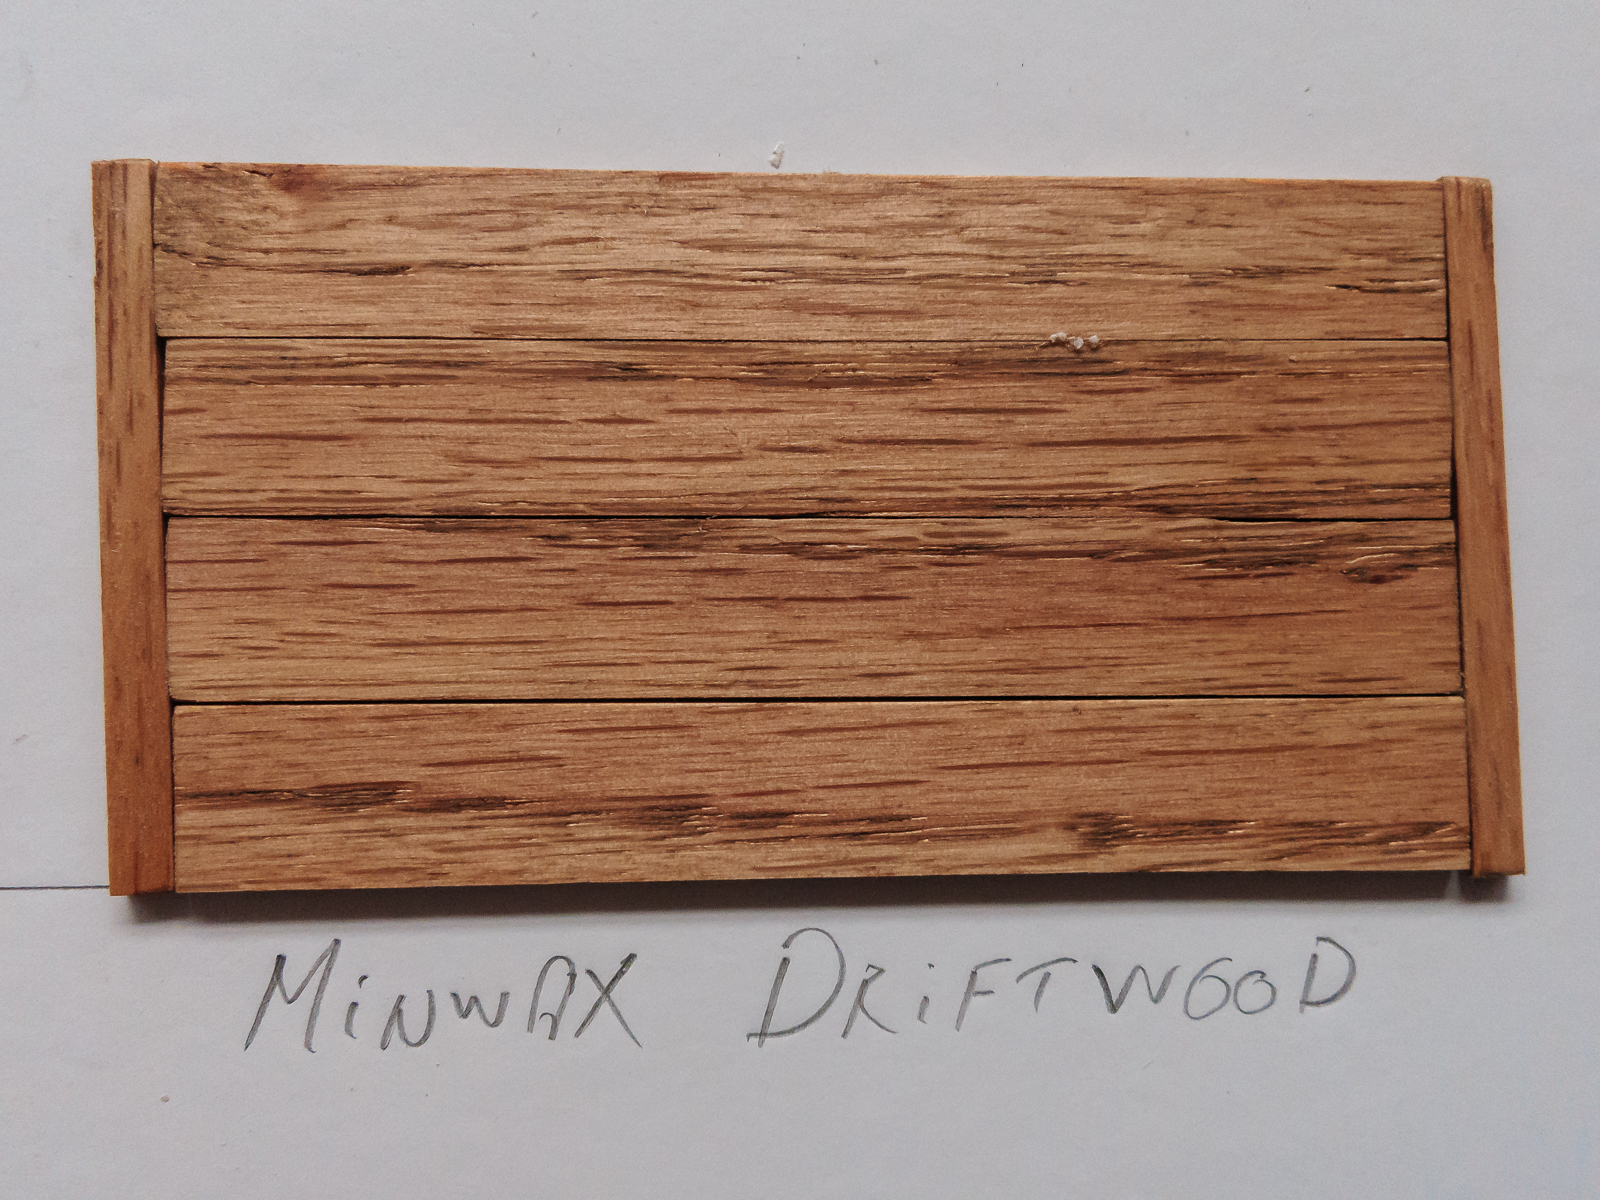
Thanks David, the saw sure is fun. The Driftwood stain is here pictures soon. Thanks Pete, happy that you are looking in. I checked out your build and it is really beautiful.
-
Nice work as usual. I like the junk wood. The toothpicks are much better than the painted brass. Looks Great.
-
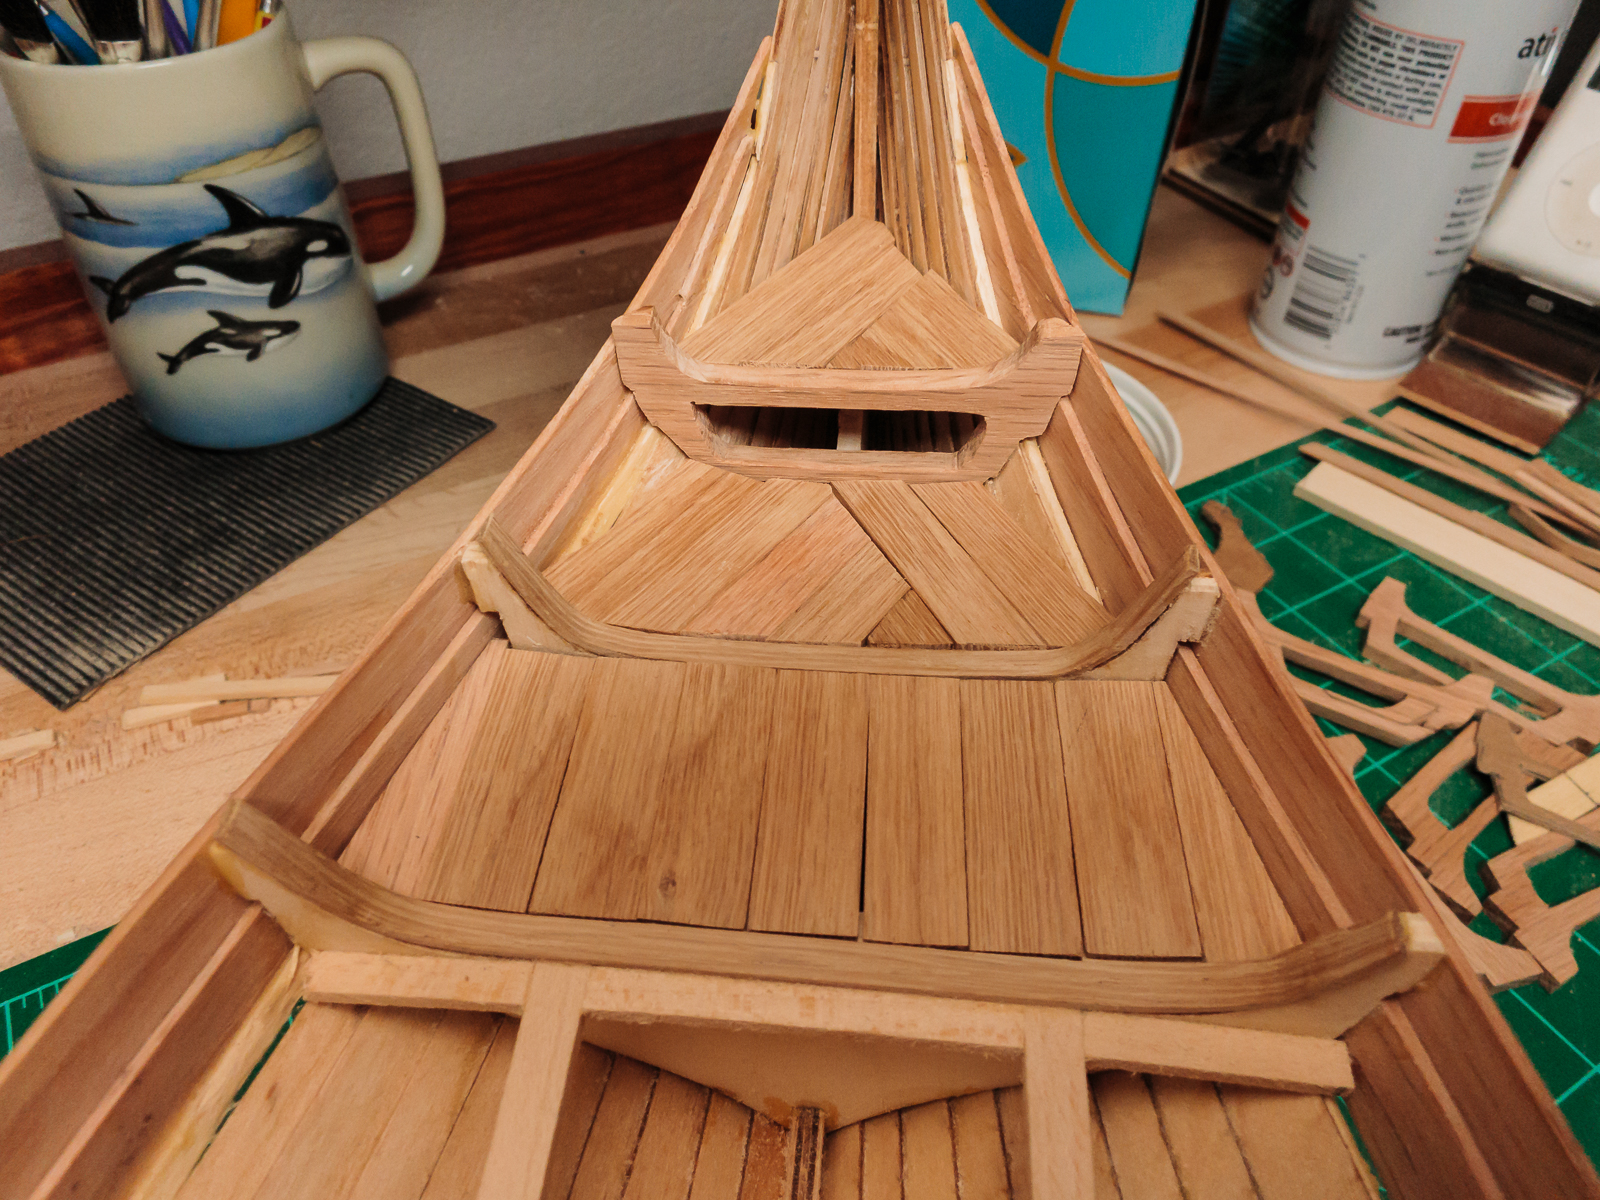
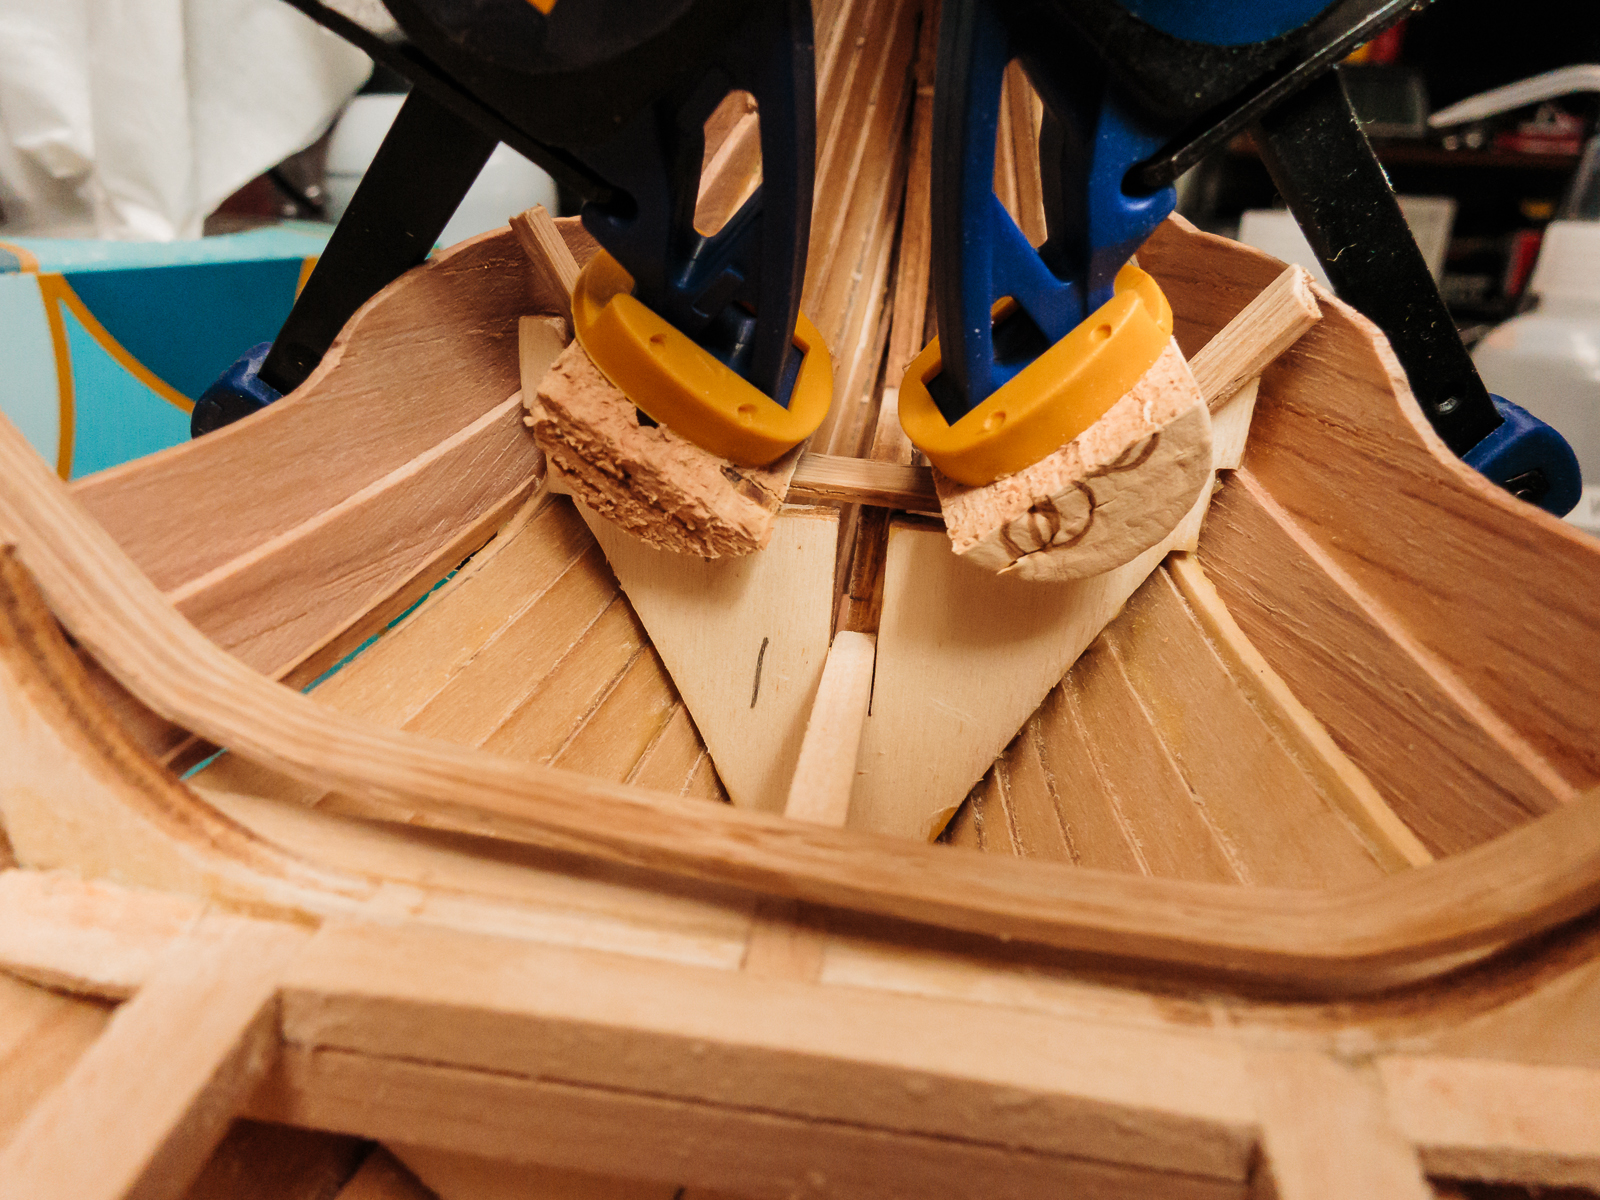
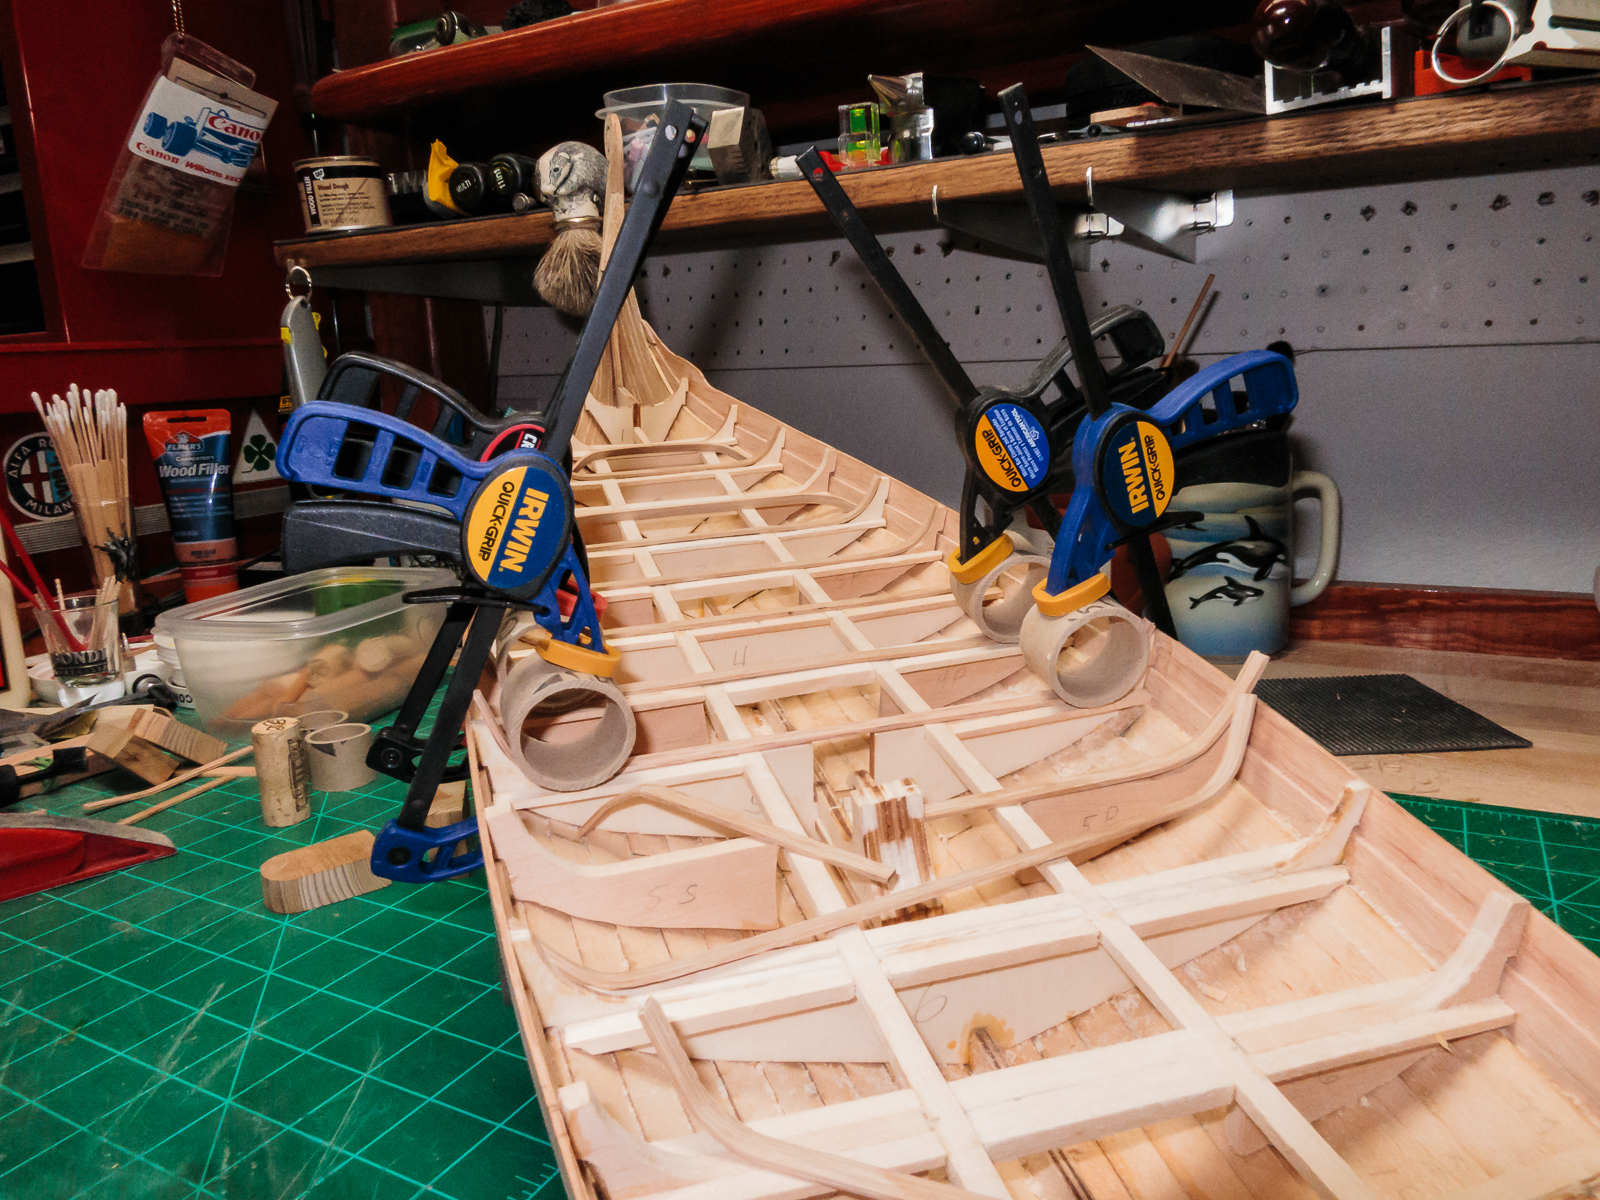
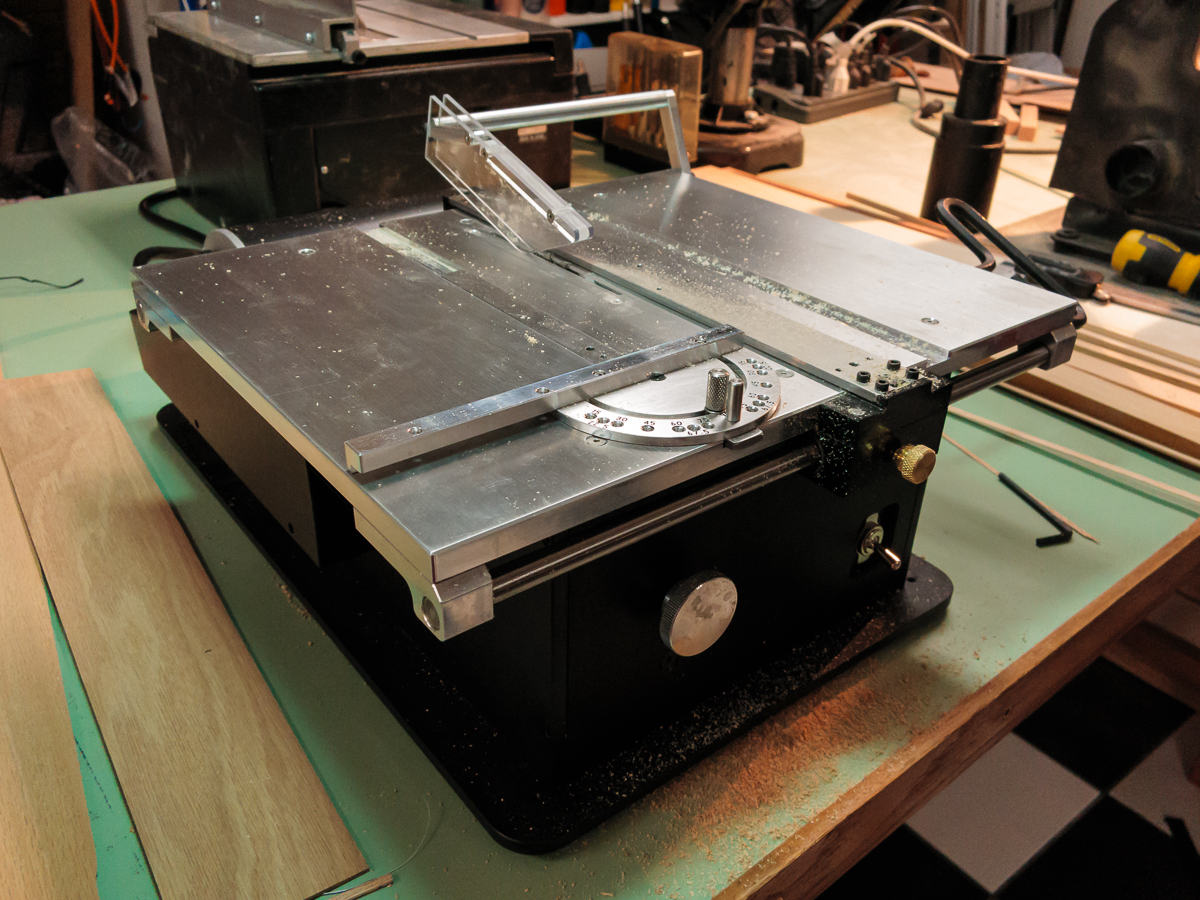
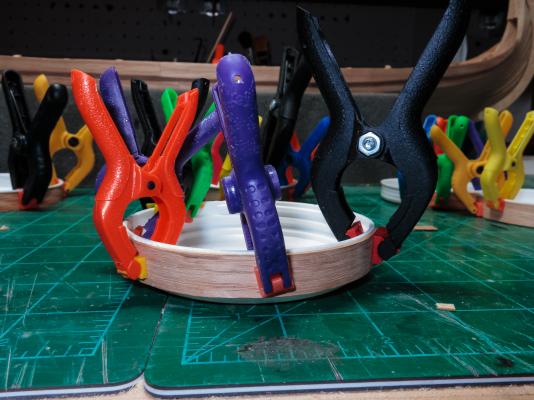
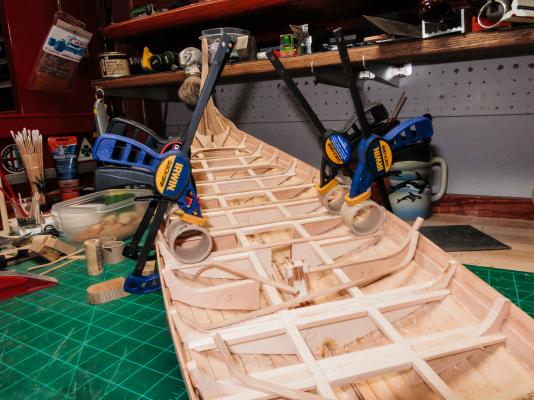
The first thing that I have to say is that Santa showed up at my house (he got his dates confused) and left a new saw. The Byrne's saw is not a saw. It is a Work of Art. I was in the construction business for more than 40 years and around cutting devices for longer than that. Nothing in my experience prepared me for this saw. Things that I have struggled with (long rips for starters) are now routine. My previous saw was an old Micro Mark/Proxxon and there is no comparison. In case I was not clear I love this saw. I cut the the caps for the bulkheads, bent them and glued them into place. The curves are difficult to hold and needed some creative clamping. The wine corks came in handy and the wine was handy too. I ripped about half the planks and cut them to length in record time they laid in nicely. Since it is not a good idea to use power tools when you are tired I will leave the rest of the deck planking for another day.


-
Now you have REALLY given me something to think about !!! How did you cut the inside portion of the frame? Another thought: how did the Vikings keep water out of this hole on the open sea?
-
Hello Hans Christian, Thanks for the links. It is nice to see the reconstruction. You should consider starting a build log so that we can follow your progress. Thanks again. Hi Dee-Dee, thanks for the encouragement. Santa did arrive! The Byrnes saw is truly incredible. If you have any photography questions please let me know. Hello Vivian, I hope that you are well. Thanks for looking in. I am setting up the stain tests on a piece of foam core so that I can keep track of the results. I love the moth as well. Mother nature went to all that trouble and they only live a week or so. Hey David B, thanks, I have had a lot more practice with photography. Hi Pete, thanks for looking in. I have more stain tests to come but I really like the aged oak at this point.

-
Congratulations Marc! She really is beautiful. I am amazed that you had time to finish at this time of year. The flags look great. Like David B I wish that I could see her up close.
-
I have been looking closely and it scares me to death. I plan to do all of the flat parts first and when I can't avoid the area around the mast I will force myself to do it. Yours is beautiful and I look at it frequently to get ideas on how to proceed. I am happy that your build is ahead of mine. Thanks for the encouragement.
-
Hi David B, the Driftwood is on the way, thanks for the recommendation. I am sitting around like a kid waiting for Santa Byrnes to arrive. I plan to spend the entire weekend making saw dust. Thanks Vivian, I like the Aged Oak very much as well. David B suggested Minwax Driftwood so I will test that also and put them side by side and you get to judge again. I am happy that you both liked the images. It was really fun to get outdoors and play before it gets really hot here. Here are a couple of close ups of the Atlas Moth posted above. It is a facinating insect. They are about 9 inches wide and the wing tips really do look like snake heads. Incredible evolutionary adaption.


-
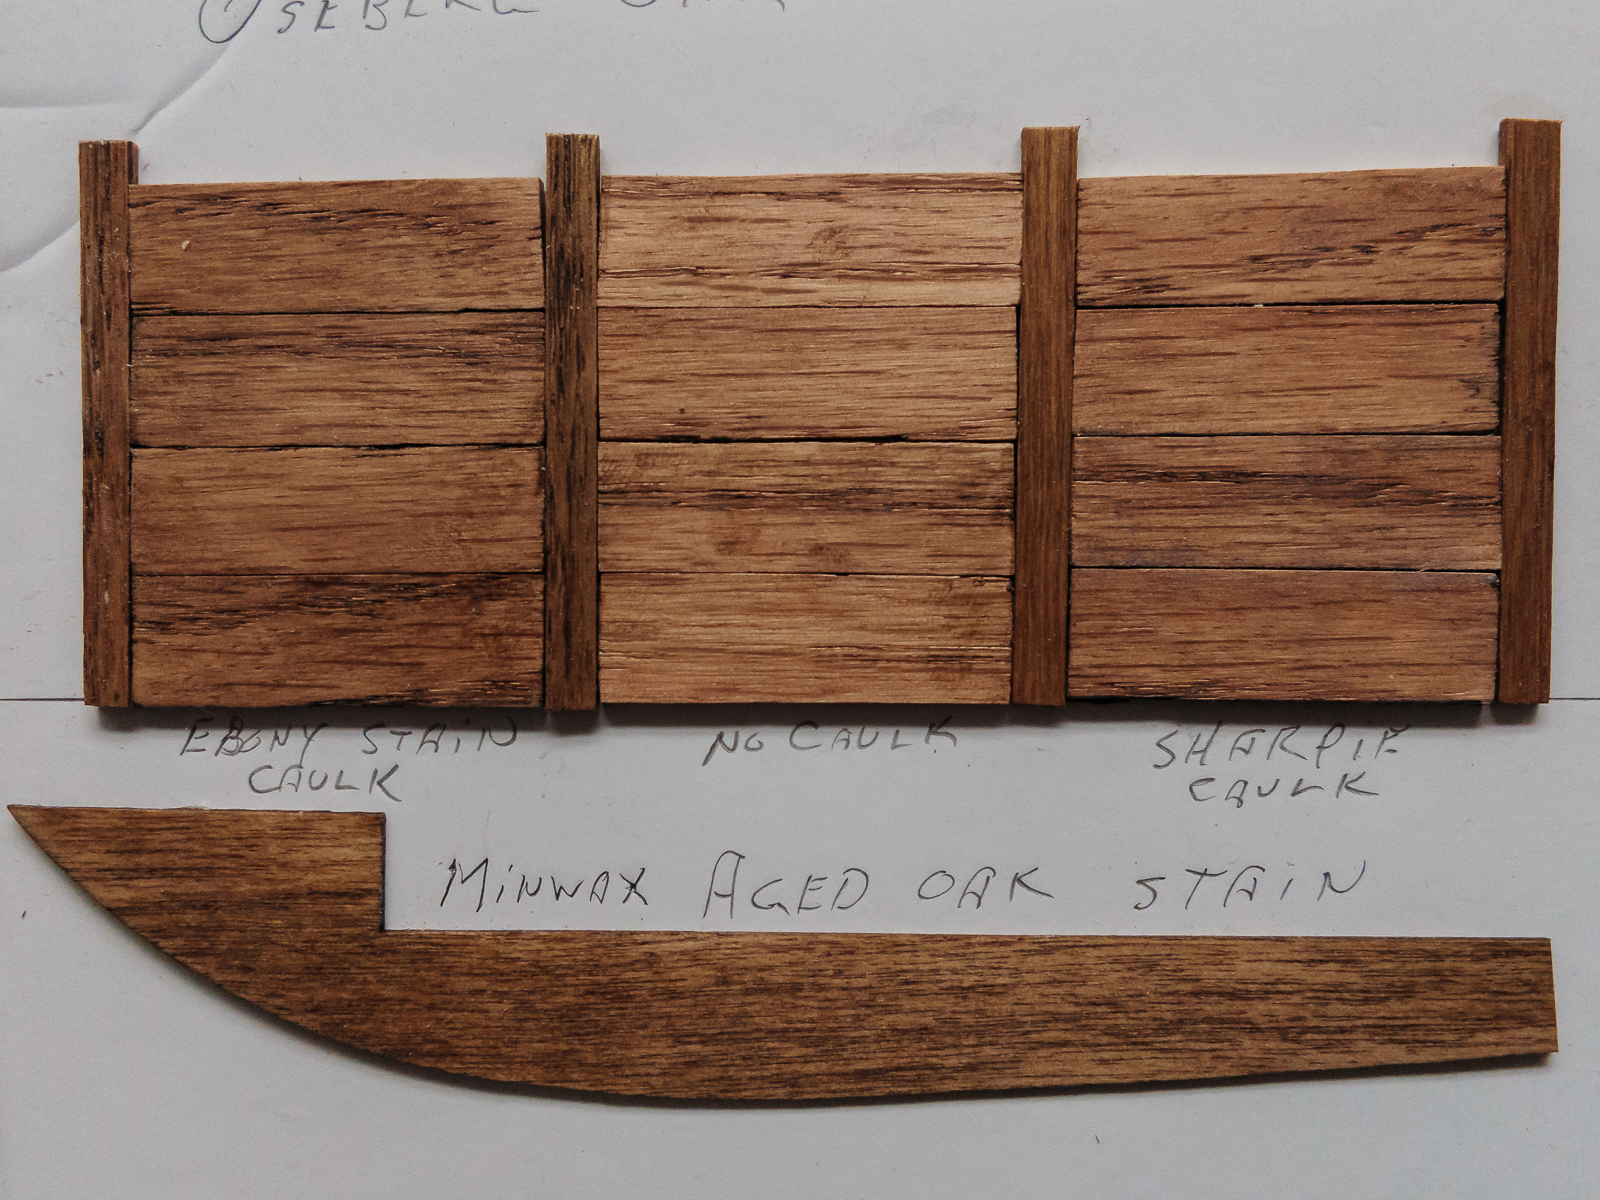
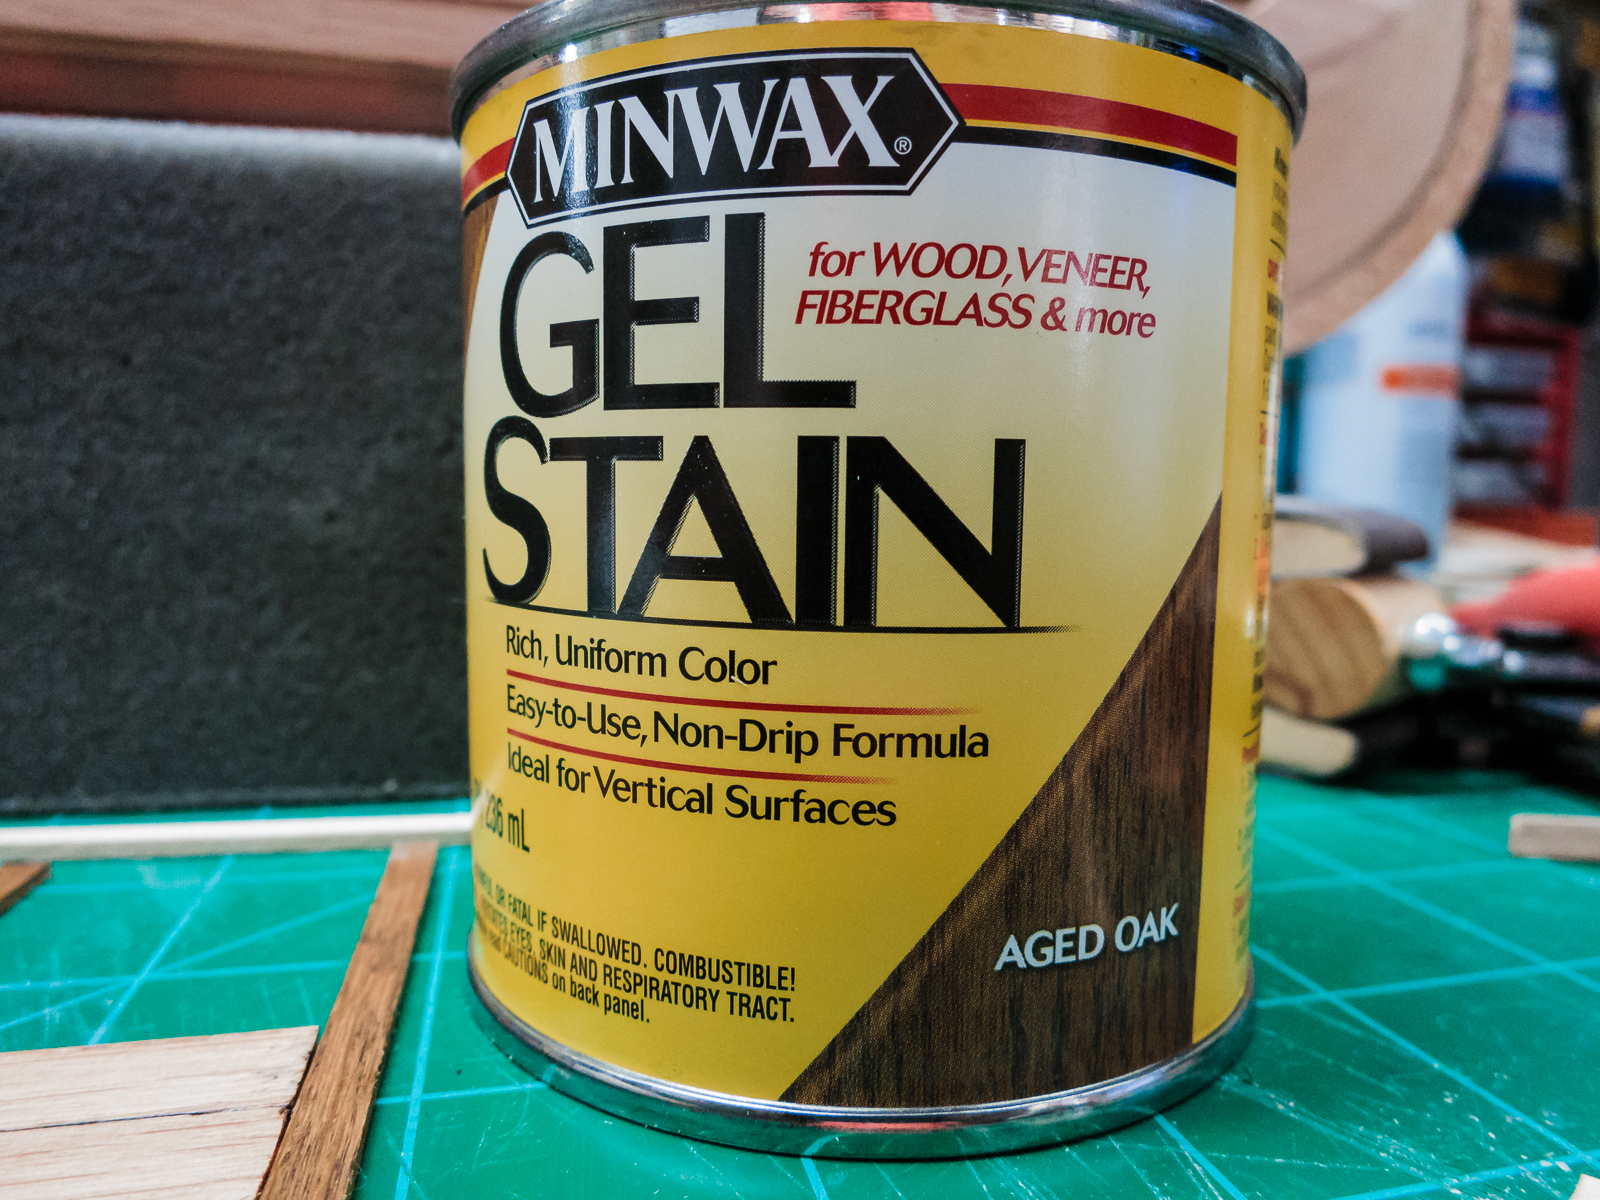
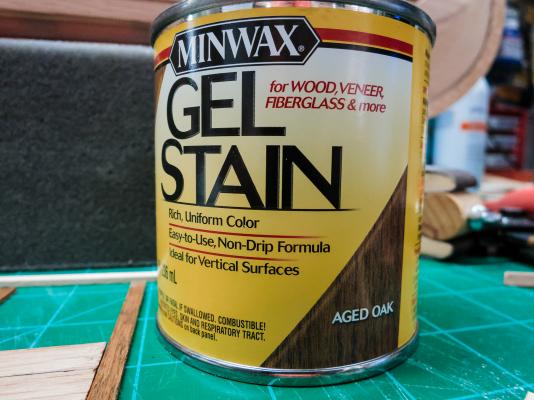
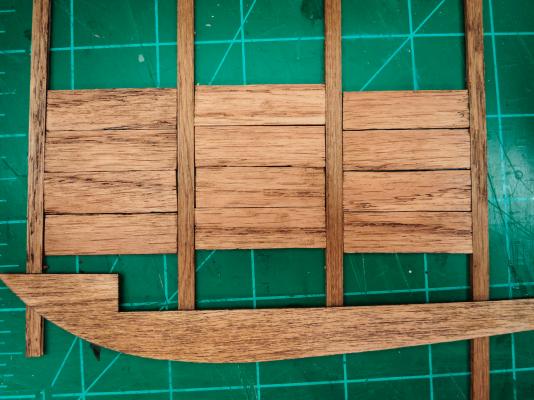
I have been slow to post lately for two reasons. First, it is spring and I have been out chasing bugs and flowers. The second reason is that I have been stalling. I have a lot of oak to cut and since my Admiral was kind enough to order a Byrnes saw for my fathers day "surprise" I have waited rather than struggle with my old saw. The Byrnes will arrive tomorrow so the updates should increase. I have finished the added bulkheads and the planking supports attached to the bulkheads. The next step is a day of steaming and bending of the oak caps for the bulkheads and the deck planks. This is a quick stain test using Minwax Gel Stain color Aged Oak. I have been looking for a stain that would not be as dark as the ship after it was buried for 1000 years (walnut) but not as new looking as, say, golden oak. I ran into a sample of this aged oak at a local store and decided to give it a try. I hope that this gets the Vivian seal of approval . The plank set on the left has ebony stain on one side to simulate caulking, the center group has nothing and the right group has black Sharpie on one side. I am not sure that it makes much difference. The Sharpie was easier to control than the stain. Pencil did not show up at all. The piece at the bottom of the picture is the same plywood as used for the hull planks. It matched better than I expected.


-
Yes you would! Thanks, the nudge does me good.
-
My photography mentor used to say that the nicest thing that you could say about another photographer is "you are killing me". Well, your planking is killing me. Very nice.
-
Hi Vivian, I was about to start the Amati kit of the Oseberg when I found Von_Kossa's build. I put it in the closet and bought the Billing kit. His work is wonderful. The Billing Boats kit is larger than most Viking boat models and it is the only one I could find with the scroll at both ends like the actual ship. I love the toys (tools) too. My other hobby (photography) lends itself to large collections of gadgets as well.