DONATION DRIVE - SUPPORT MSW - DO YOUR PART TO KEEP THIS GREAT FORUM GOING!
×


Jack Panzeca
-
Posts
233 -
Joined
-
Last visited
Content Type
Profiles
Forums
Gallery
Events
Everything posted by Jack Panzeca
-

Can i live without a BYRNES TABLE SAW
Jack Panzeca replied to shihawk's topic in Modeling tools and Workshop Equipment
I do agree with the majority, especially Grants psychological evaluation and practical analysis as well as Greg's recipe. All I can say is that it brings a smile to my face and it has improved my accuracy. What's not to like. -
Hi Vivian, Your ship looks wonderful. How will you cover your electrical work over the cabin? I am looking forward to the rigging and sails. You are almost done, great job!
-
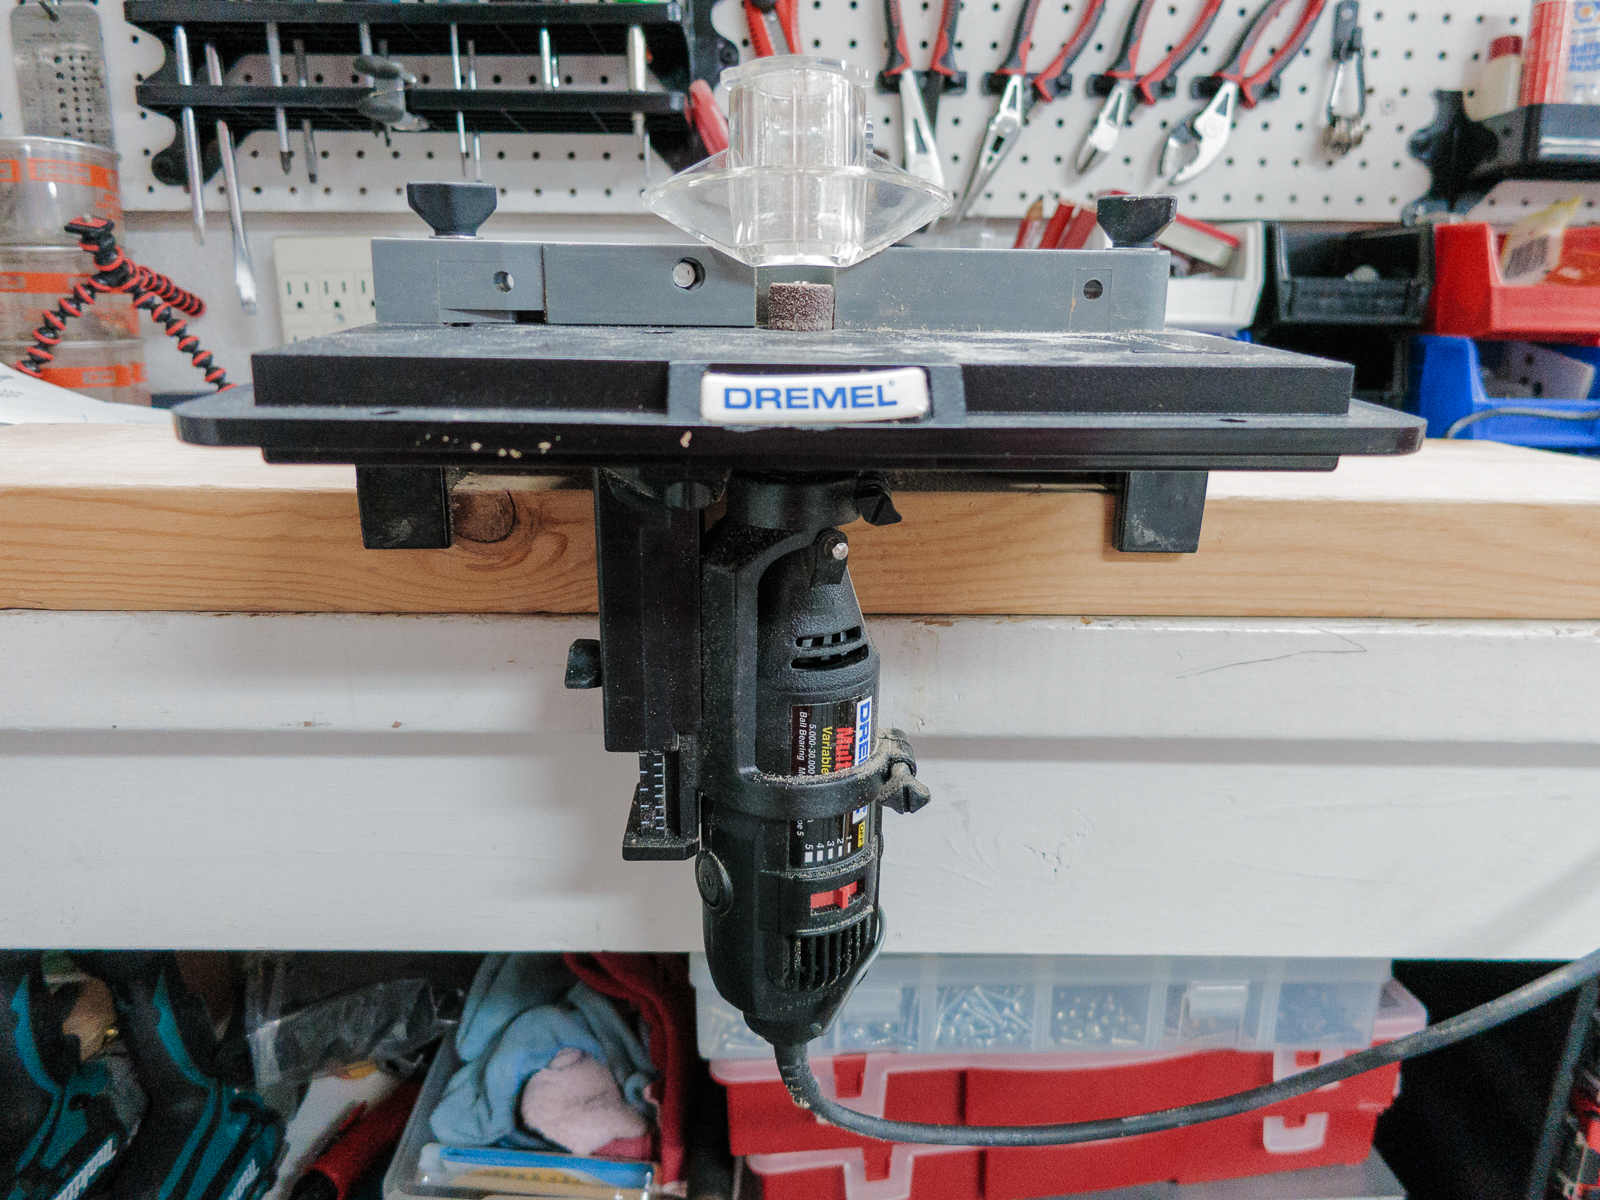
Hi Brian C, Thanks for dropping in and the birthday wish. It was the big 70! I don't feel any older, yeah right. I really like your "Bismarck". Hey David B, Thanks for the support. The Dremel table has been very useful. You mentioned your Foredom. I just recently got my hands on one and the quality improvement over other rotary tools is amazing. Hello Cristian and Matti, Thank you for visiting and the kind words. I have really enjoyed the build and the build log and the support of the members here is wonderful. Thanks to all the "likes" you are much appreciated.
-
Hey Grant, You would think that with all the effort to pose those pics I could have cleaned up the sawdust a little. Thanks for dropping by and the kind words.
-
Hi again Bill, I forgot to mention that the bit is a ⅛ shank with a collet, standard Dremel stuff.
-
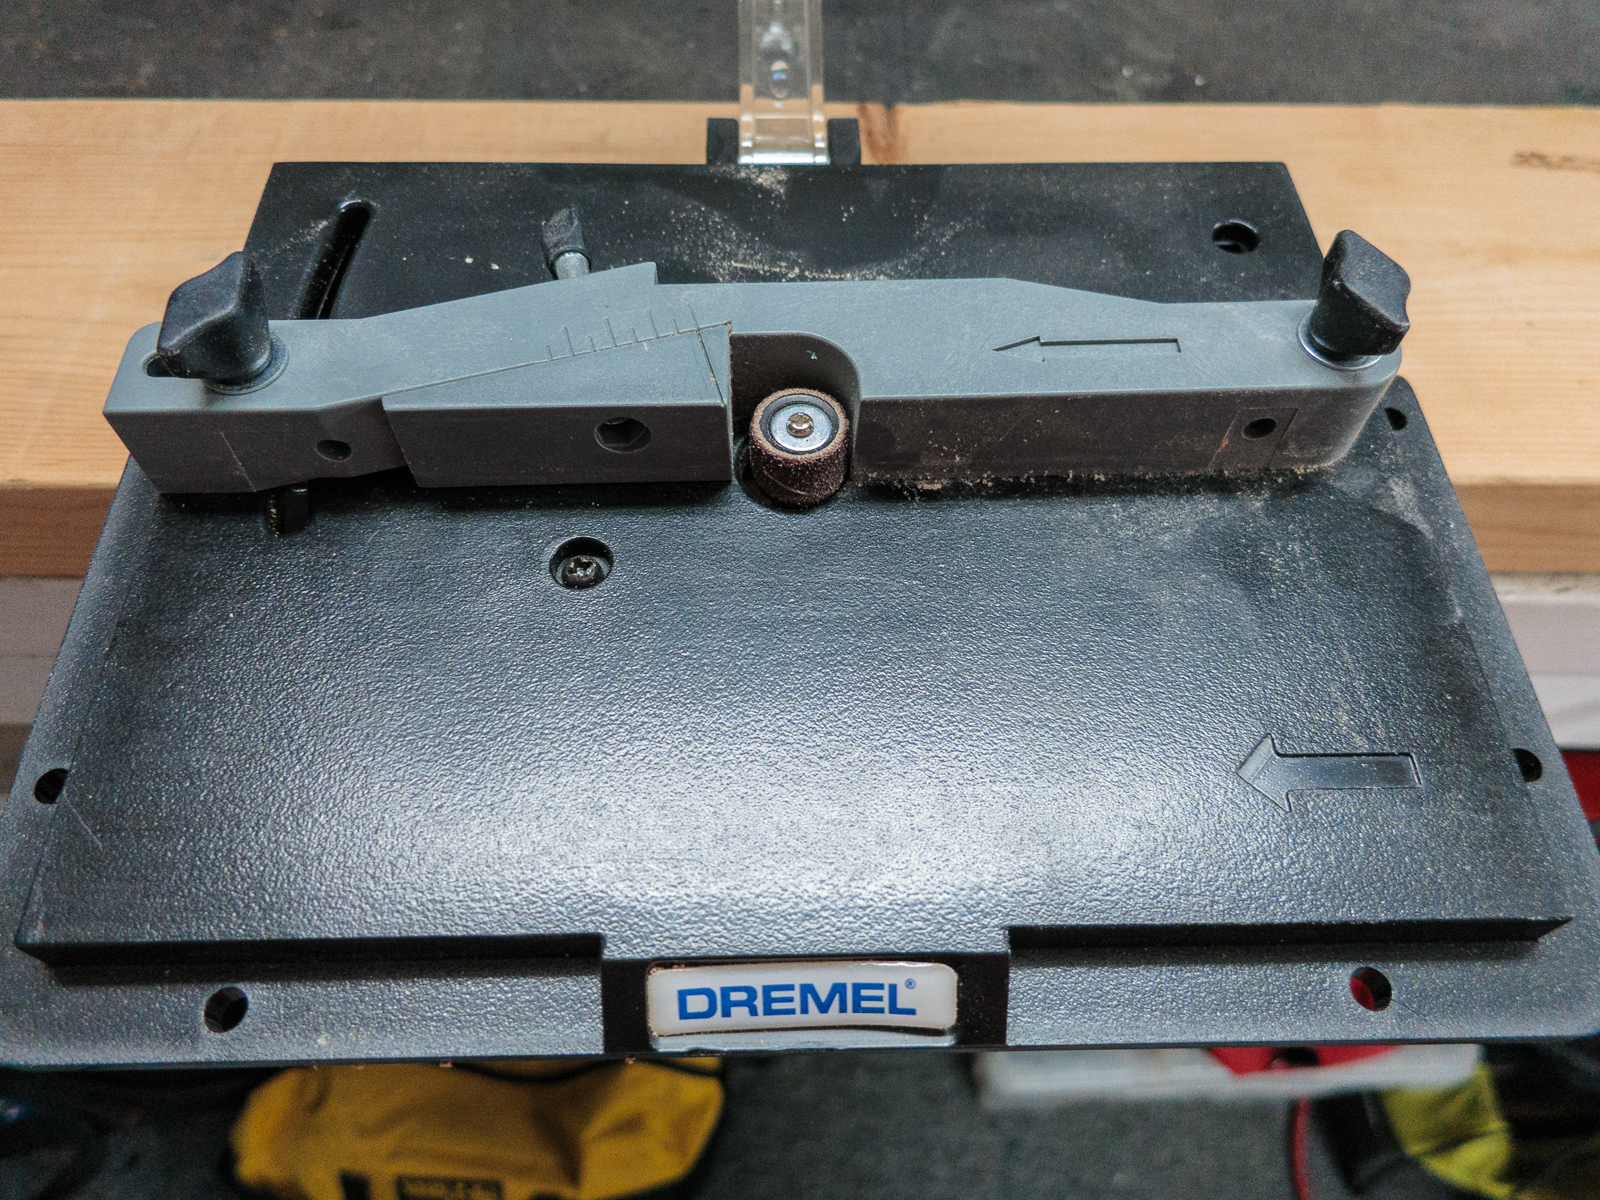
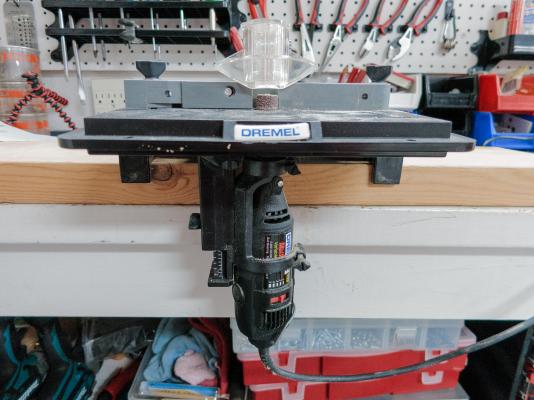
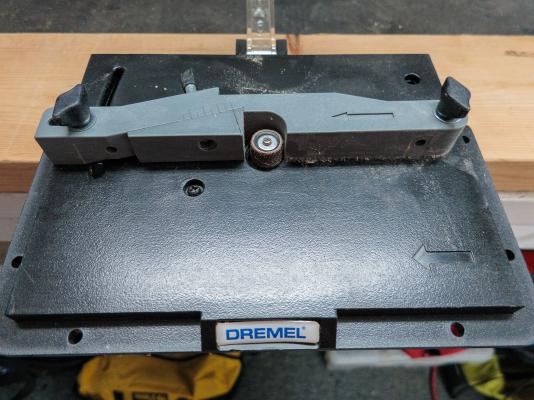
Hi Bill, Thanks for dropping by and the kind words. The table is just a Dremel that I have had for many years. It is attached to a 2x6 and the Dremel tool hangs off the edge of the bench. The 2x6 is heavy enough to keep it in place while it is in use. The fence is adjustable and removable. I use it mostly for routing and sanding. Vanda-Lay Industries have a really nice aluminum one as well.

-
Micro Power Sanders
Jack Panzeca replied to mtaylor's topic in Modeling tools and Workshop Equipment
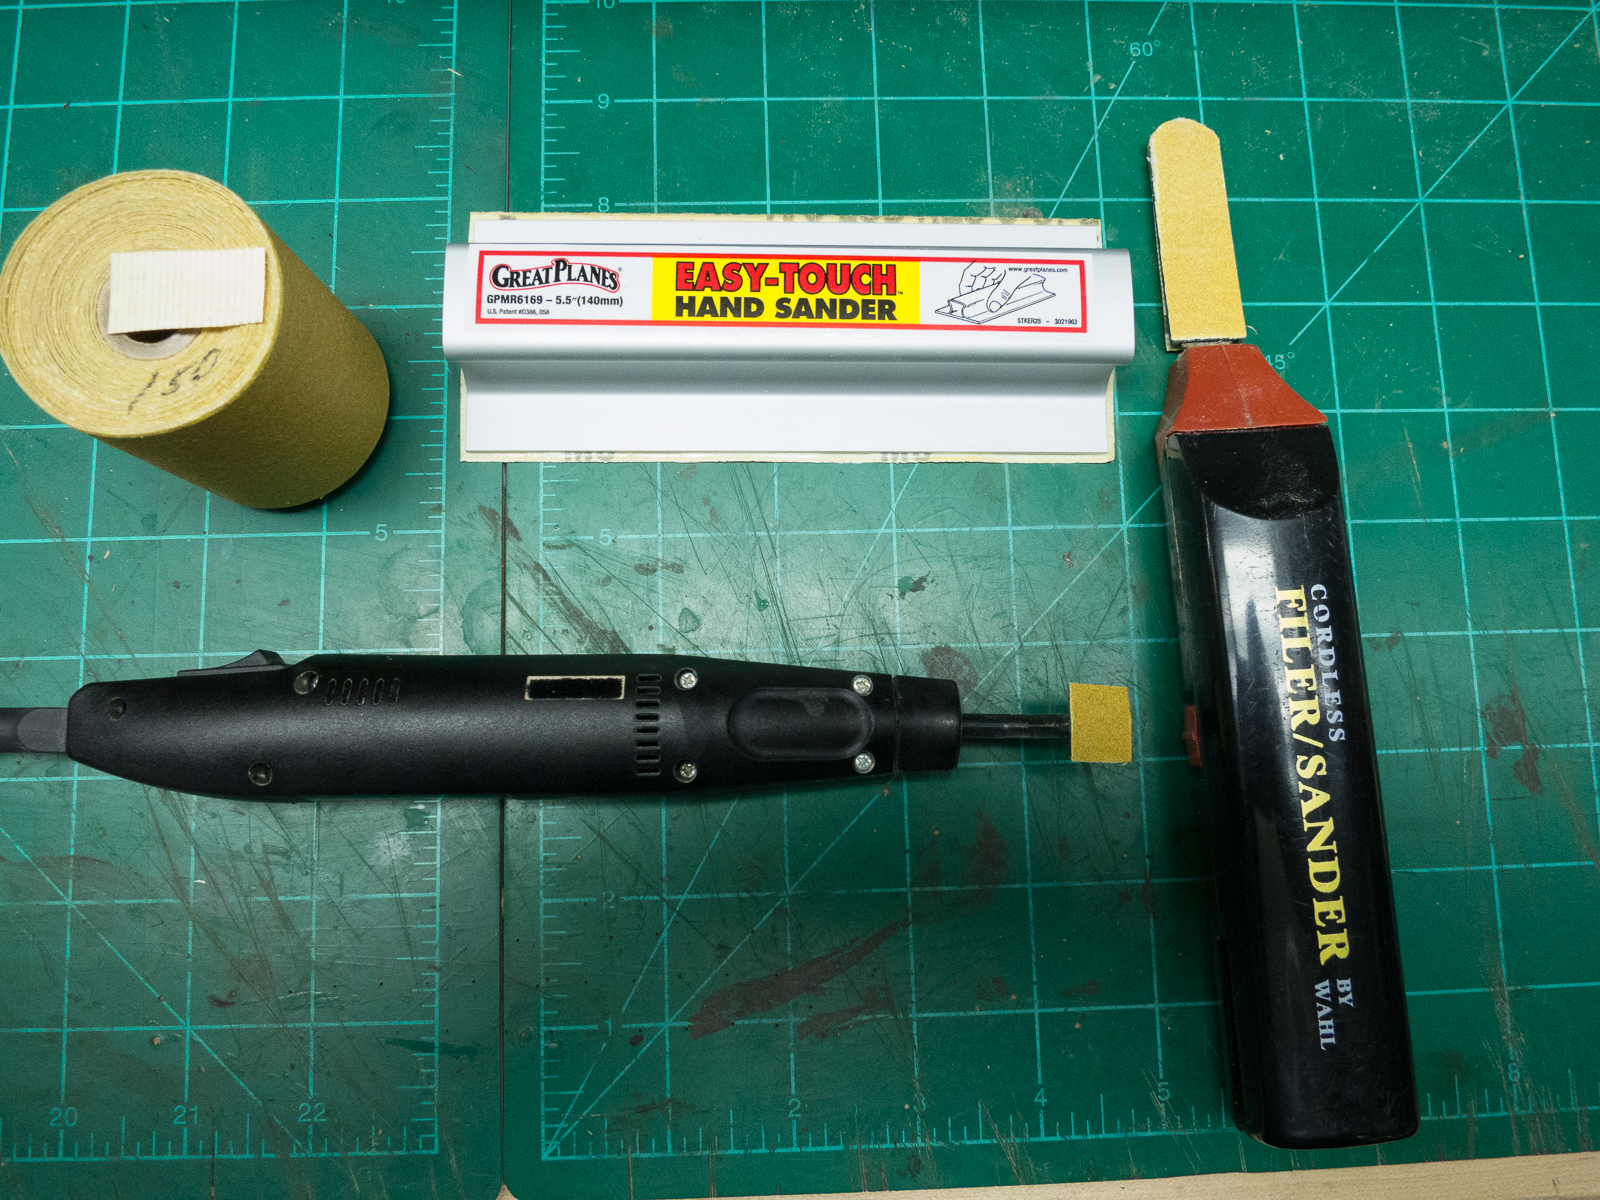
I have been using Great Planes sticky back sandpaper that was meant to be used on their aluminum hand sander. I got it from Tower Hobbies. The roll is 12 feet long and cost about $8.00. I just cut a piece off and stick it to the pad. It sticks well and the grit lasts longer than the Micro Mark version which is hugely expensive. I bought this roll when I started the Oseberg and as you can see the roll seems to last forever. I have had both of these tools for more than 10 years. The pen sander just chugs along and with no signs of giving up. I have had to replace the tips over the years because I just wore them out. The Wahl sander is cordless and I have replaced the battery and now the switch is going south. I will replace it when it finally gives up but I will probably buy the corded version.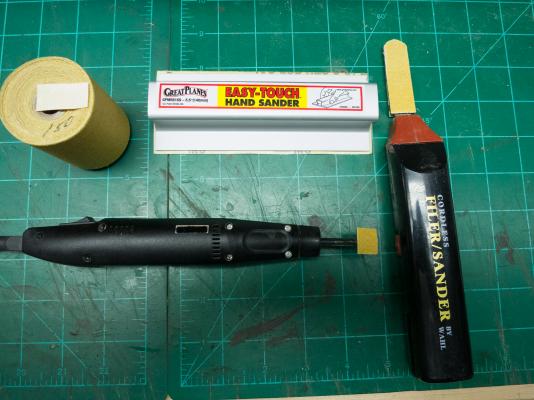
-
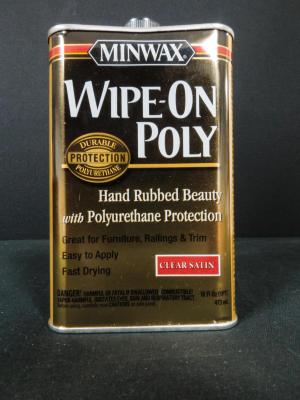
Hi Von-Kossa, The wipe on poly that I used is oil based, but be careful, MINWAX makes a water based version and it gets very bad reviews. Check post # 200 to see what the oil based can looks like. The water based version comes in a plastic bottle. The oil based type is very easy to apply. No lap marks. I just finished fabricating the rest of the little bits, cleats, oar racks, wood rigging pieces (I do not know what to call them) and the rudder mounting bits. Pictures soon. Sail making next. I will use yours as a guide, thanks for the help. Talk to you soon.
-
Hi Mike, I like what you are doing. The practice frames are a great idea. A plank on frame model is on the horizon for me and I hope to learn with you. I have considered Lumberyard myself and your experience will help me decide. Have you contacted Lumberyard about the substandard material? Maybe they will replace it. I purchased a small amount of sheet stock from them to see what the quality was like and it was very nice clean wood. Good luck and keep up the good work.
- 969 replies
-
- 2
-

-
- hahn
- oliver cromwell
- (and 1 more)
-
Hi Dee Dee, Sorry about the rework. It is satisfying when it's finished. The wet well is certainly water tight. I love your work.
-
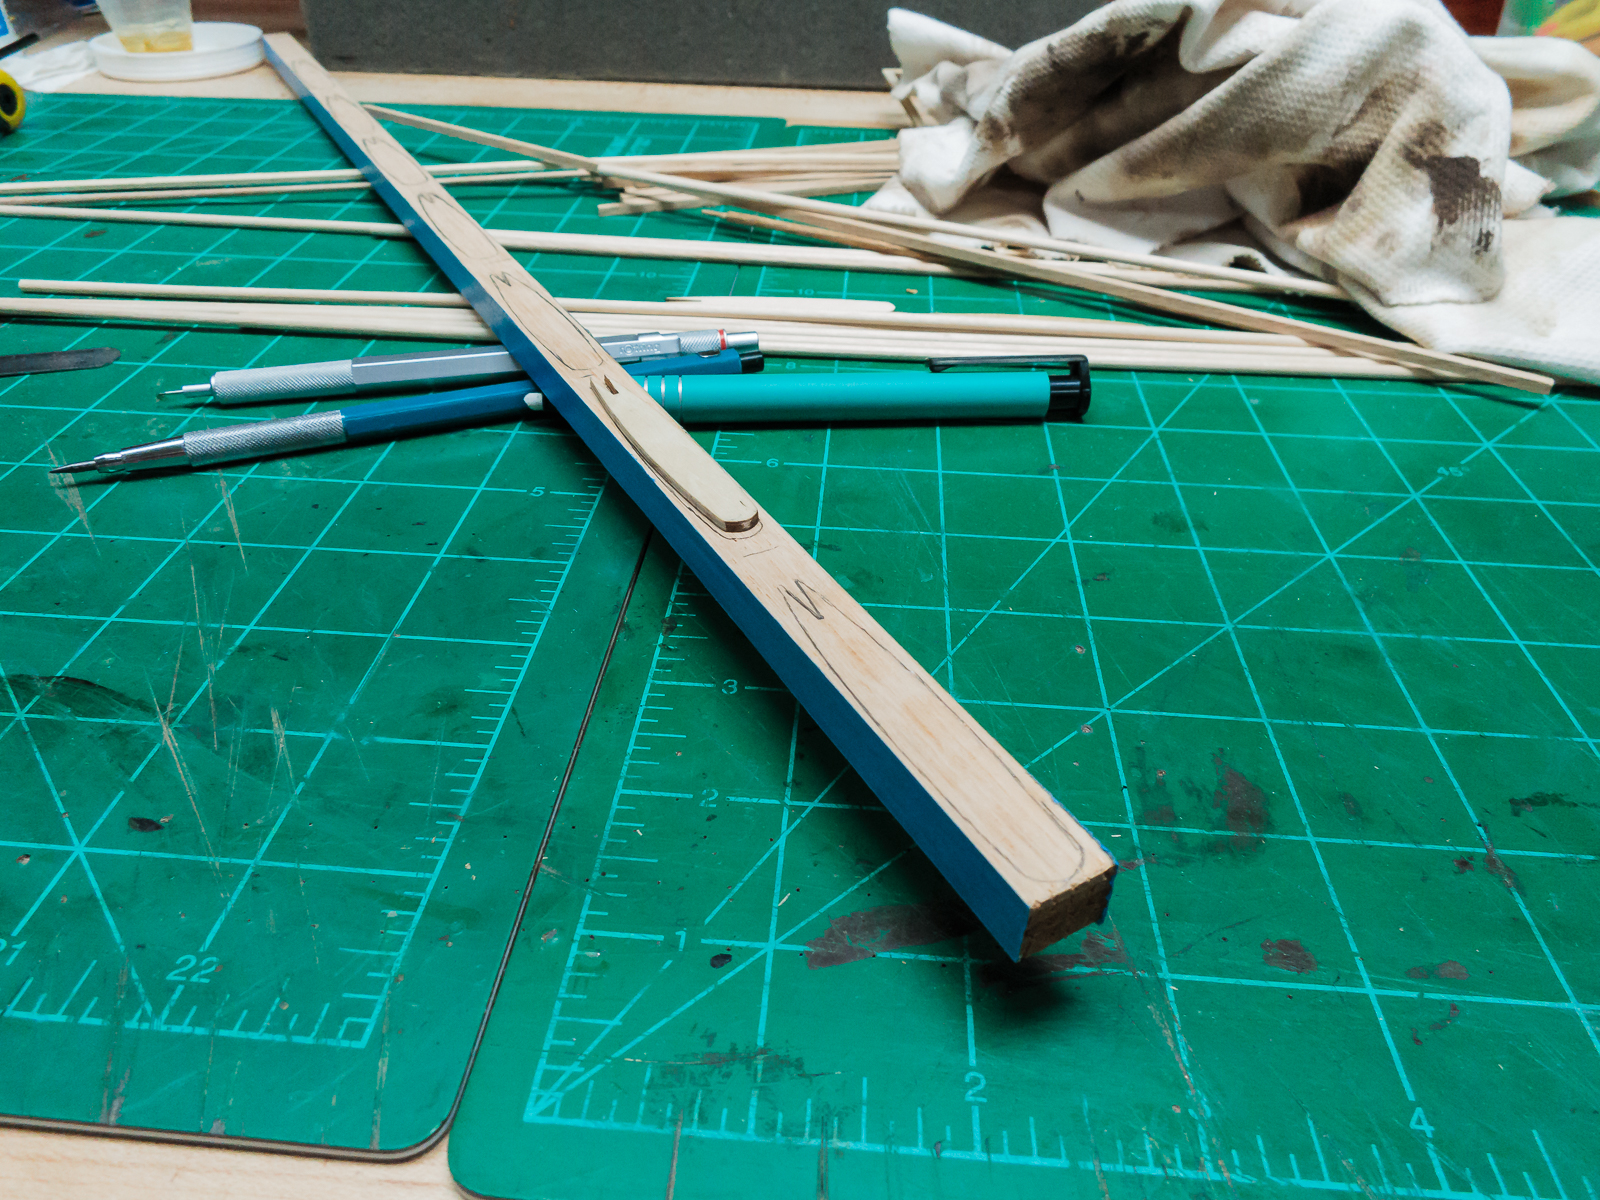
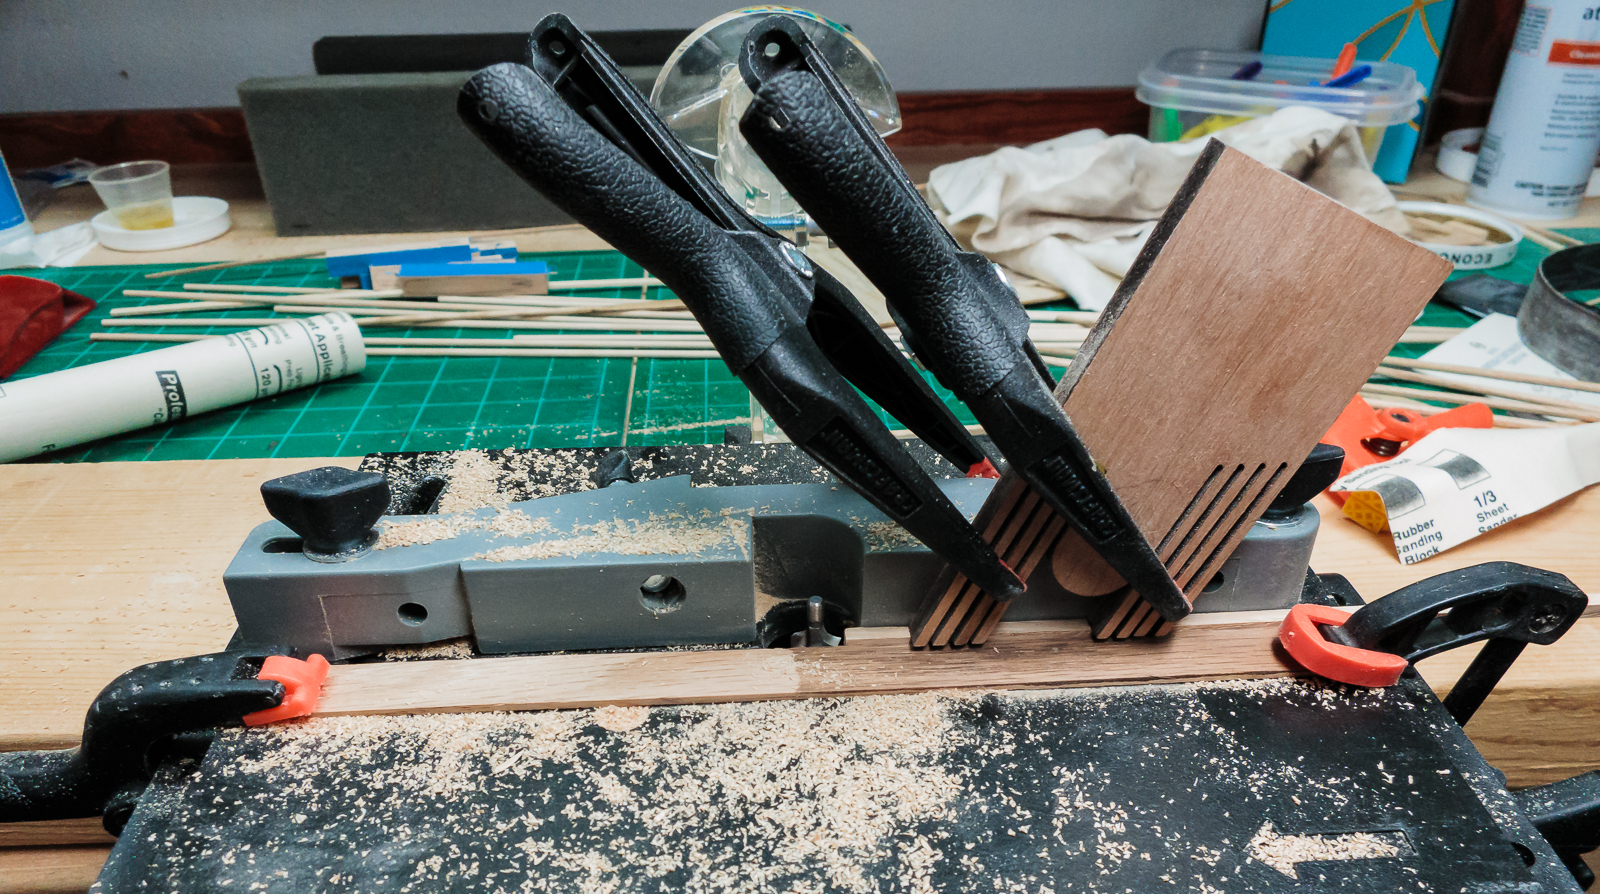
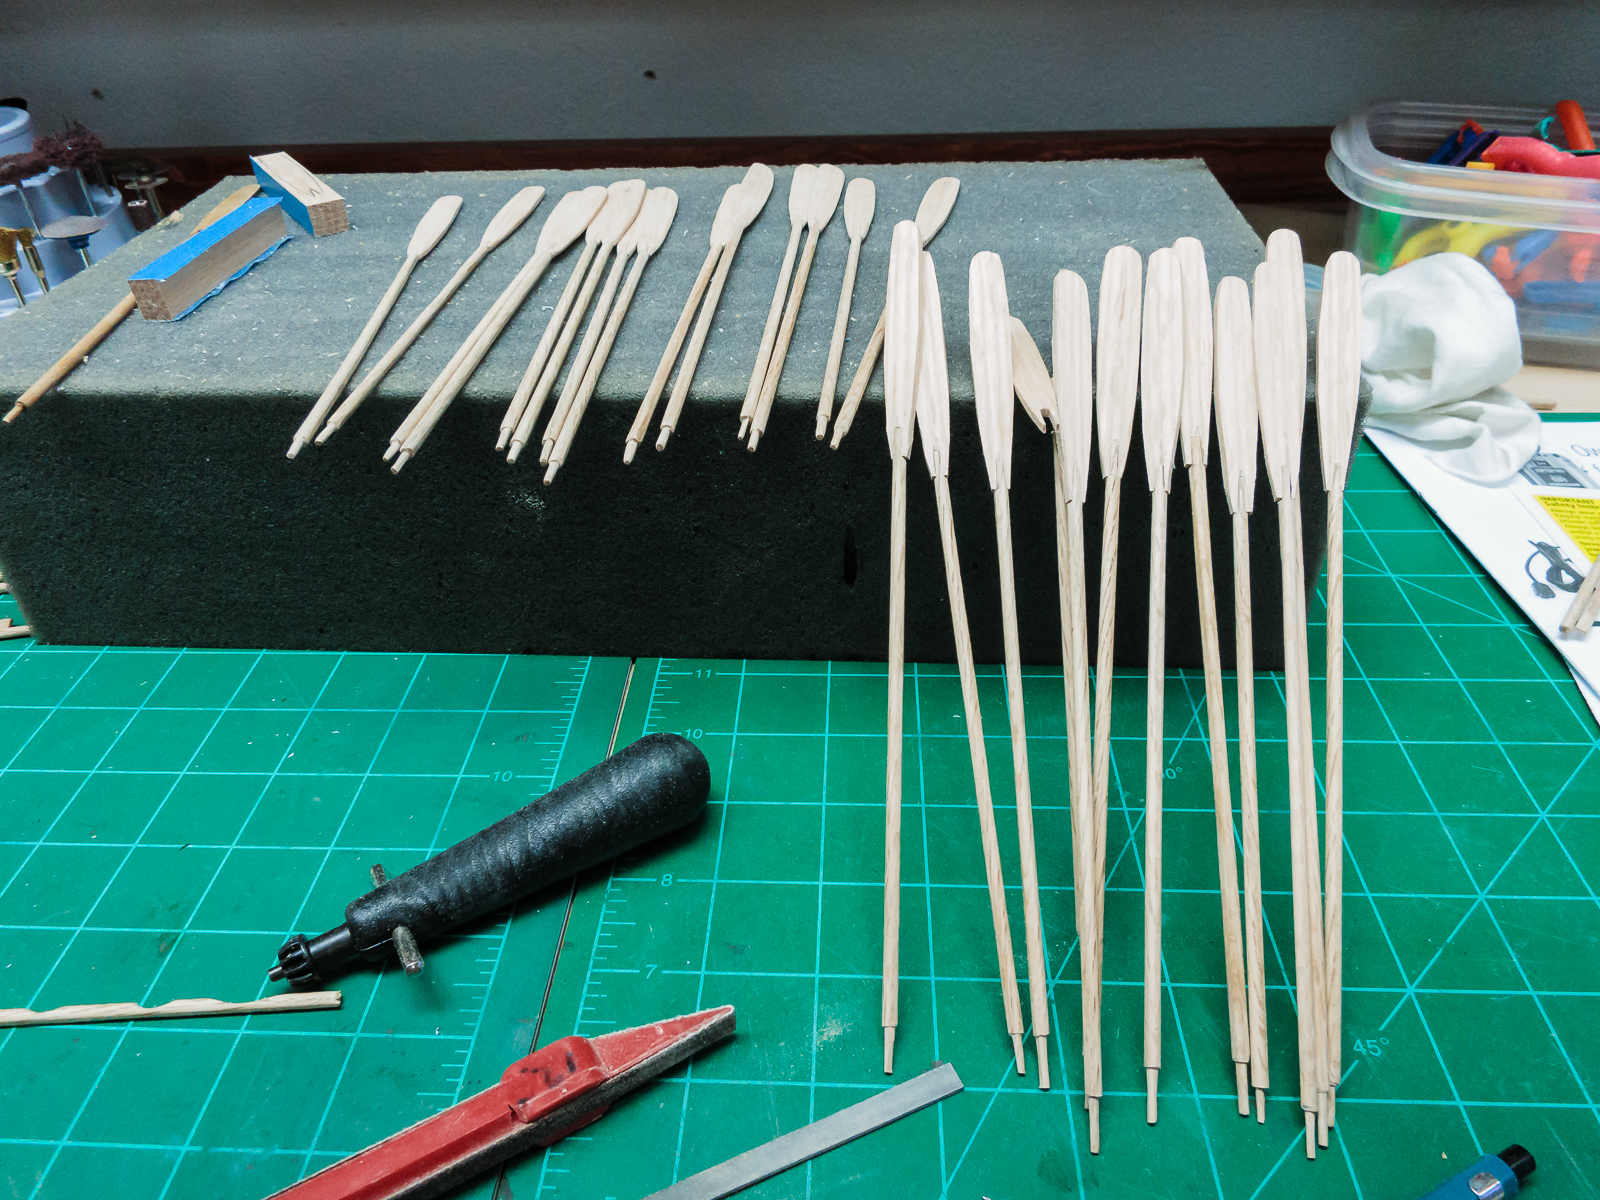
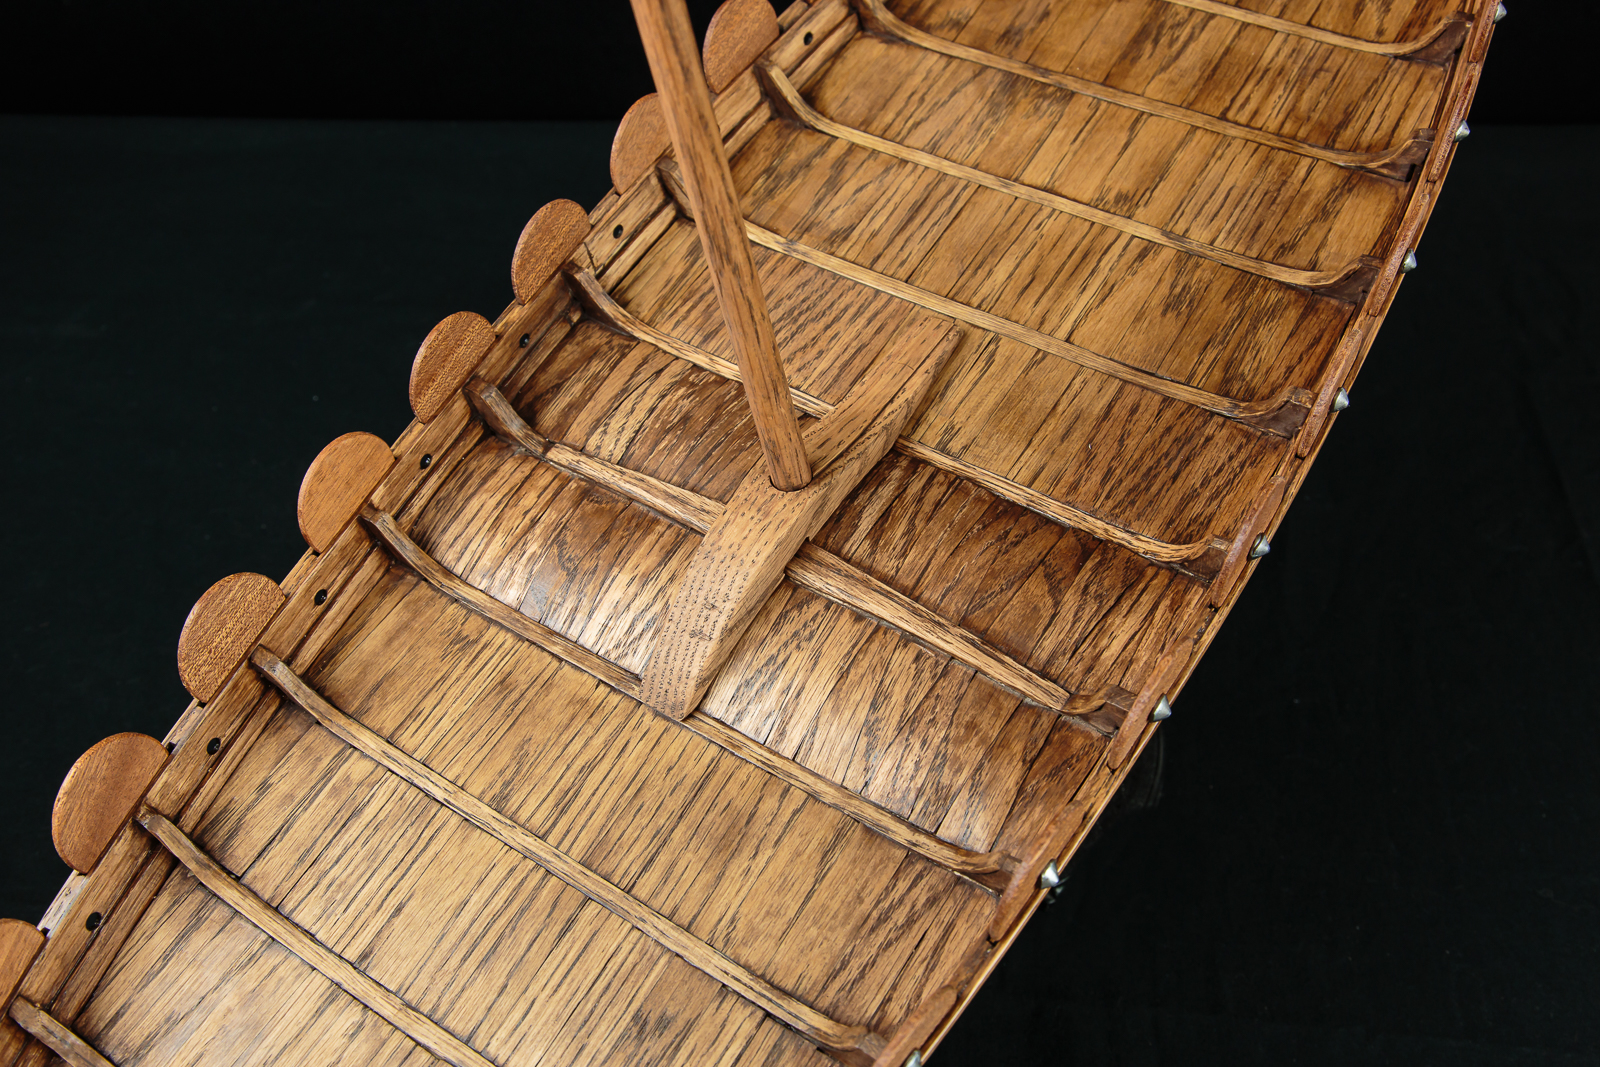
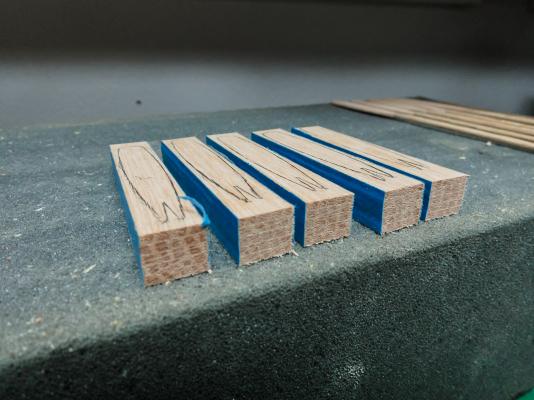
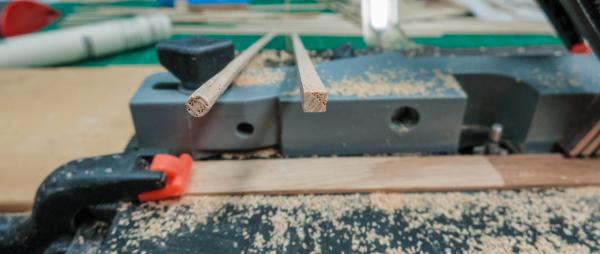
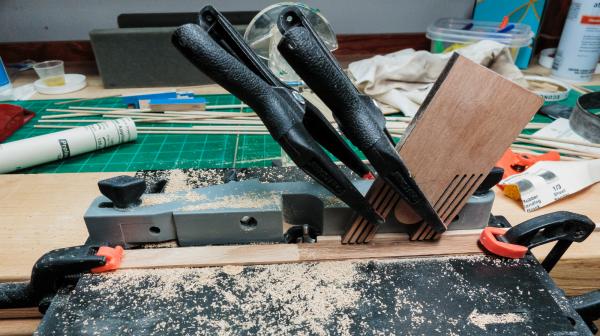
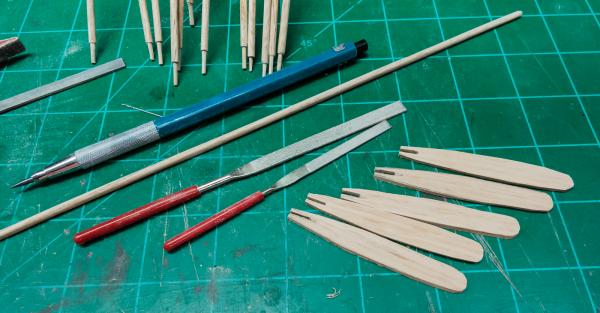
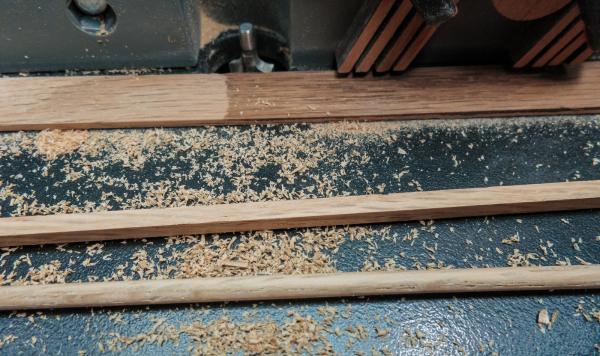
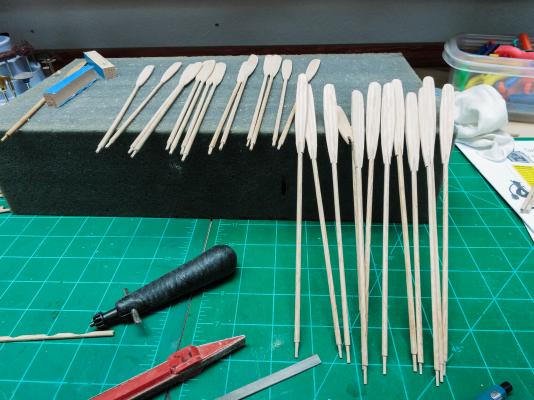
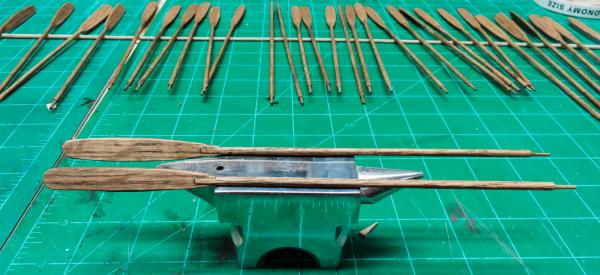
Here is the oar update, I have been working a little slower lately because a little consulting work has gotten in the way of hobby time and the Oseberg is a birthday present for the Admiral and her birthday is not until late December. I don't want to finish it too early because then I will have to come up with another present. The first step was to cut oak strips 2x12.5 mm. I cut five strips and taped them together and copied the shape of the kit supplied paddle portion, then cut them into individual pieces. Originally I intended to cut them out with a scroll saw but since there was so little material to remove I just used a 1 inch belt sander. I cut the notch where the dowel joins the paddle with the scroll saw and filed it out to the correct size. For the round portion of the oar I cut 3x3 mm square dowel and routed off all four corners and got them close to round and finished them off in a drill motor with hand held sandpaper. The routing was tricky since the dowel is so small so I rigged a feather board and guide to keep my fingers away from the blade. Then I sanded one end flat to fit into the paddle and the other end reduced the circumference to make it into a handle. The last step was to glue them together and finish the fine sanding. There were a lot of steps and a LOT of sanding in this process. 30 oars stained and ready to row.

- 275 replies
-
- 13
-
-
Hello Cristi and Bill, Thank you for dropping by and for the kind words, they are much appreciated. I enjoyed visiting both your logs. Cristi I admire your ability to work more than one project at a time. I could never manage it. Bill, happy that you are back in the shipyard. I have been working on oars lately and real life has slowed my progress a little. Thanks again for looking in. Also, thanks to all the "Likes" they really mean a lot.
-
Hello My Friend, The oar holes look great. I know that you are getting ready to stain and I wanted to tell you about something that I learned the hard way when I stained mine. I sanded everything in preparation for staining. The directions on the can made no mention of the grit to be used and I used 400 on the deck. It looked terrible, the stain would not soak into the wood. I went to the manufacturer's website and there it stated not to use greater than 180 grit. I sanded the deck back to bare wood with 180 sandpaper and tried again. It worked much better and the deck looks great. This is a little like checking the care instructions after you buy the shirt. Hang in there buddy, your build has always been an inspiration to me.
-
Hi Theo, Very nice work, I look forward to seeing the lantern complete. Your project is a true work of art. Thank you for sharing.
-
Great work Mike, she is beautiful. I look forward to your Syren. Congratulations
-
That all looks really wonderful. I was raised in Louisiana so peppers are alway welcome. I think that I will take a break and go find some meat to eat.
-
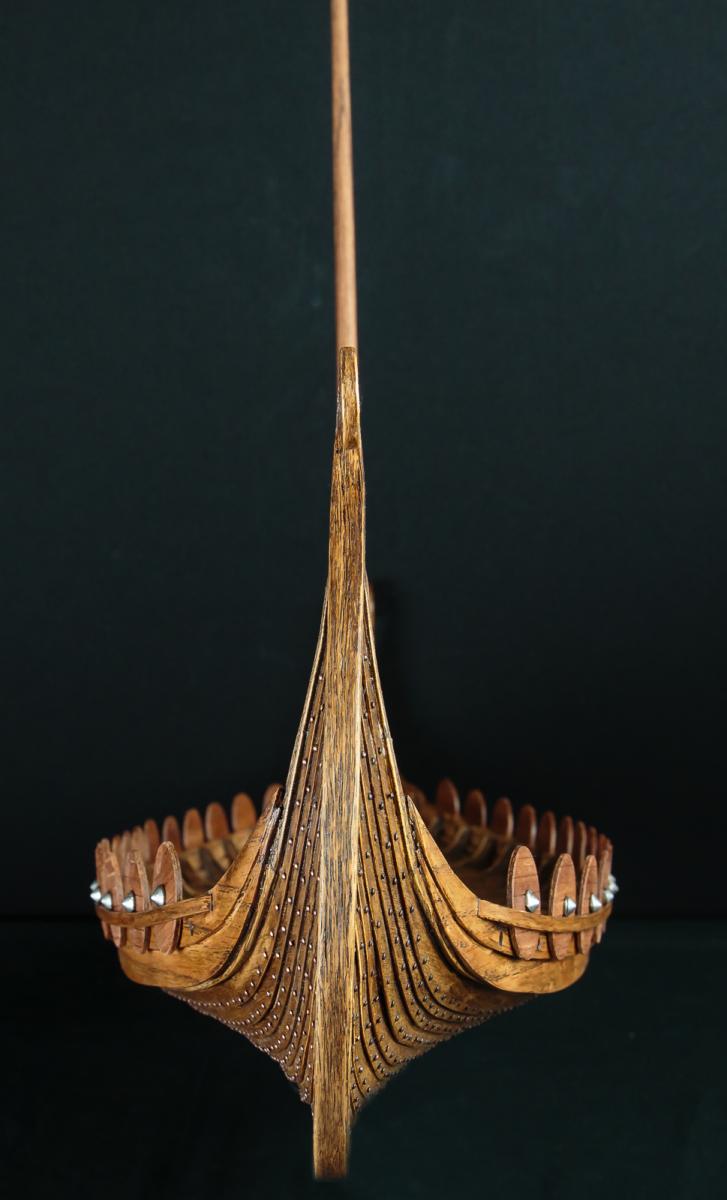
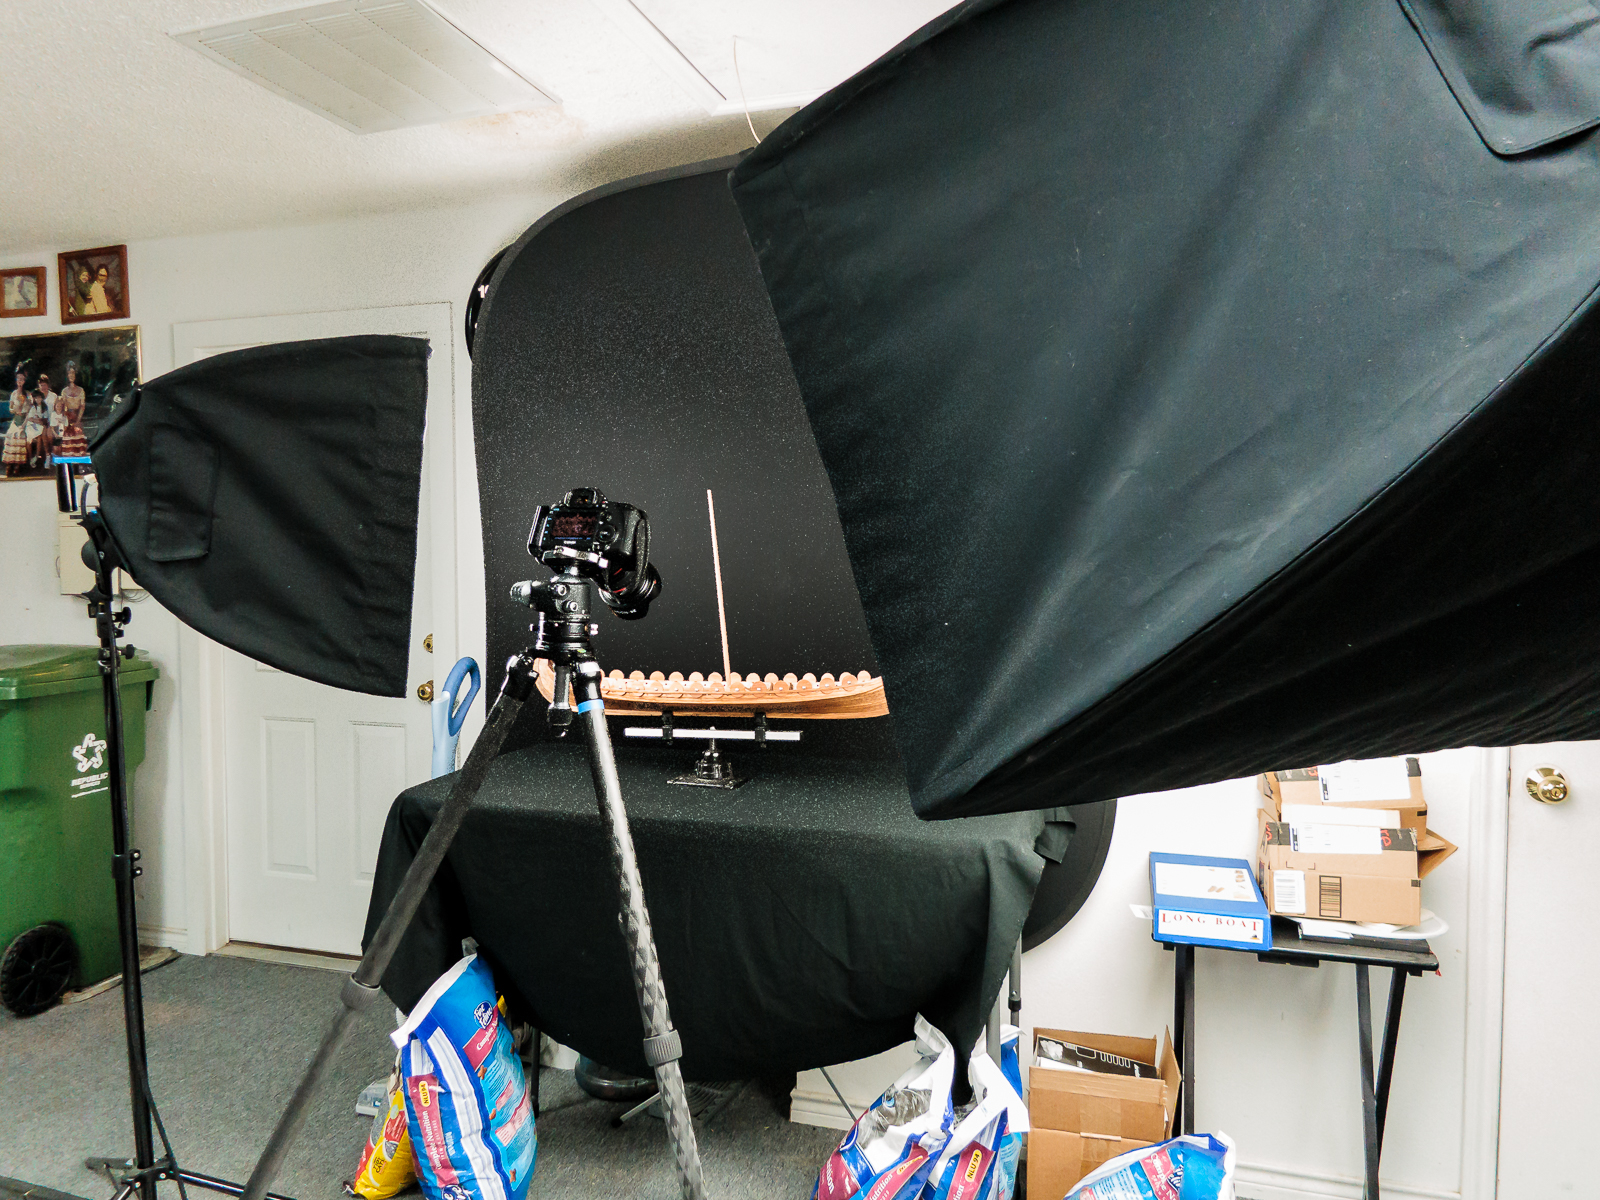
Thanks Grant, Brian, Bindi and KeithW for the kind words and noticing the photography. I felt it was time for a portrait session. Hi Bindy, Welcome Back! We have missed you. KeithW you have great eyes. The ball head and L plate are Really Right Stuff and the tripod is also. The tripod is a little overkill for indoor short lens work, it's main use is for birds with a 10 pound long lens. It is a very stable platform. My 32 year old daughter moved back in and brought her 2 cats with her so the food lives under the photo set. I guess thats what they mean by the "boomerang generation". They leave for a while and come back again. The admiral and I like having her around. Thanks to all the "Likes" they are truly appreciated.
-
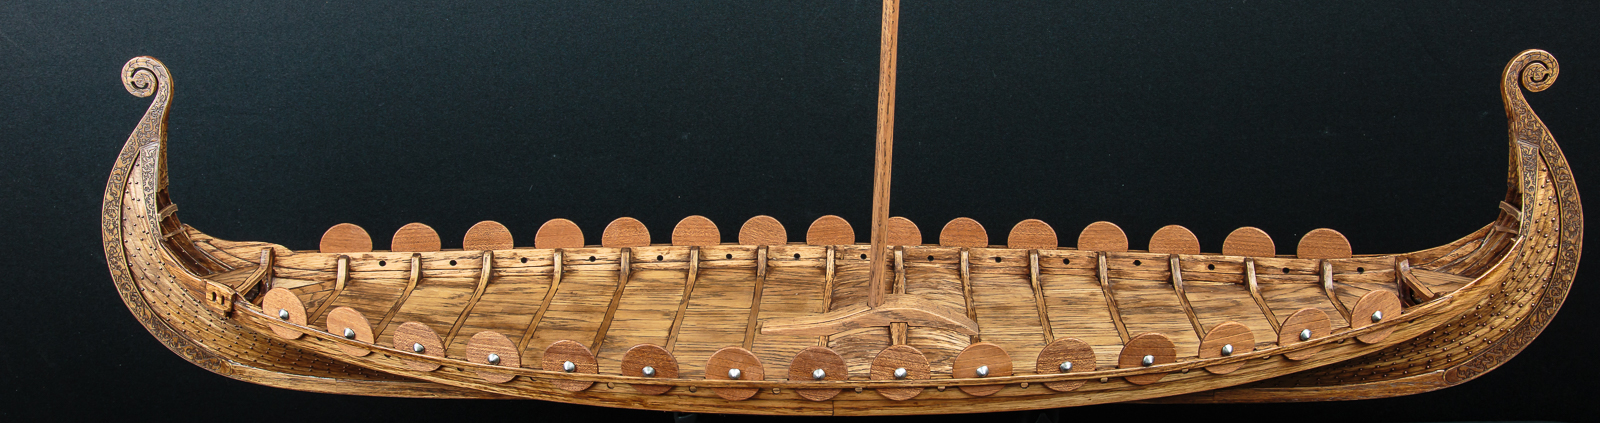
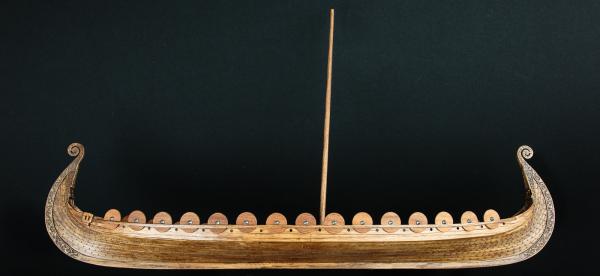
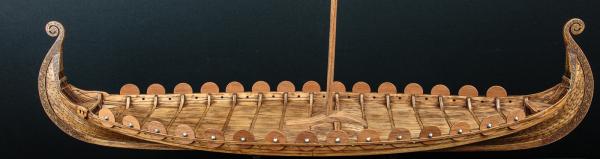
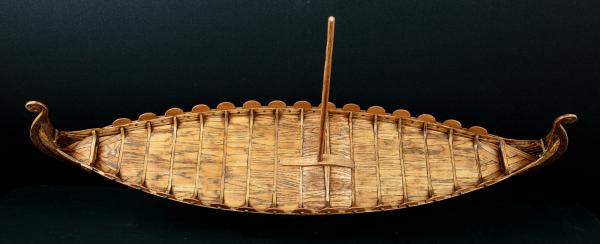
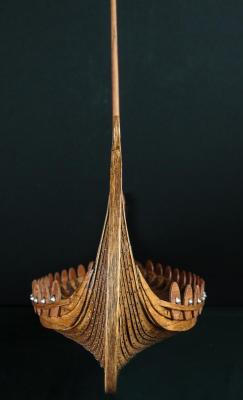
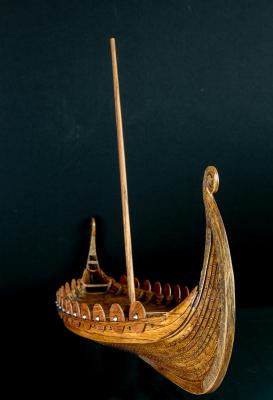
The ship has come to a nice milestone so I decided to take some studio shots for this update. This is what the set looks like. I pulled out the big Spiderlite soft boxes for the shoot.


- 275 replies
-
- 14
-
-
Hi Vivian, The shields really made a difference. And the time spent looking for the center ornament really paid off. The oars are next but after that will come the dreaded sail. My daughter has promised to teach me to sew but I am not holding my breath until she does. As always thanks for the encouragement and kind words.
-
Yes I began modeling about 15 years ago but never got into a groove because of my job which required a lot of travel. I gave up until I retired and now it is fun and gets better as my skills improve. Your work is an inspiration, thanks.
-
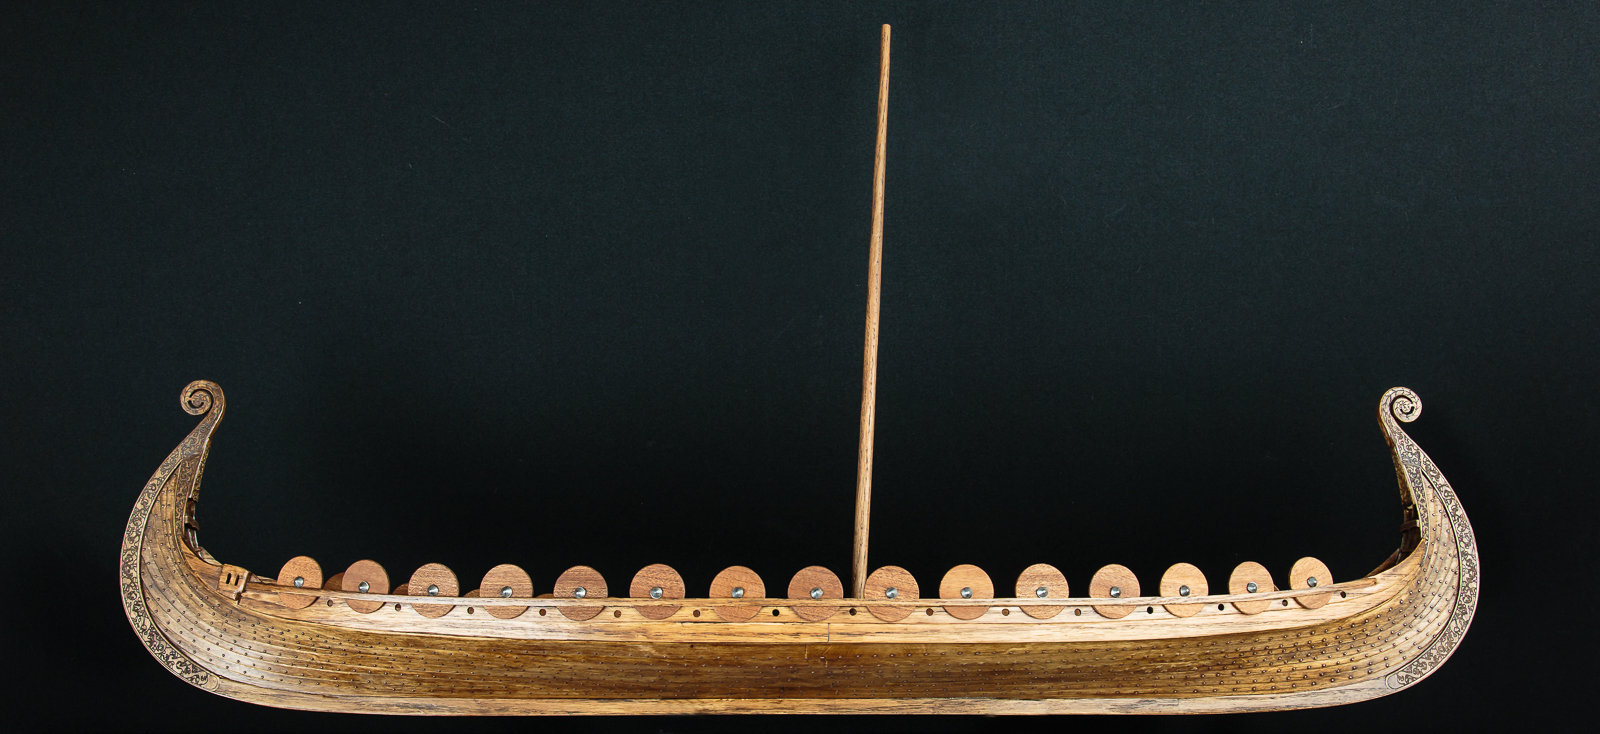
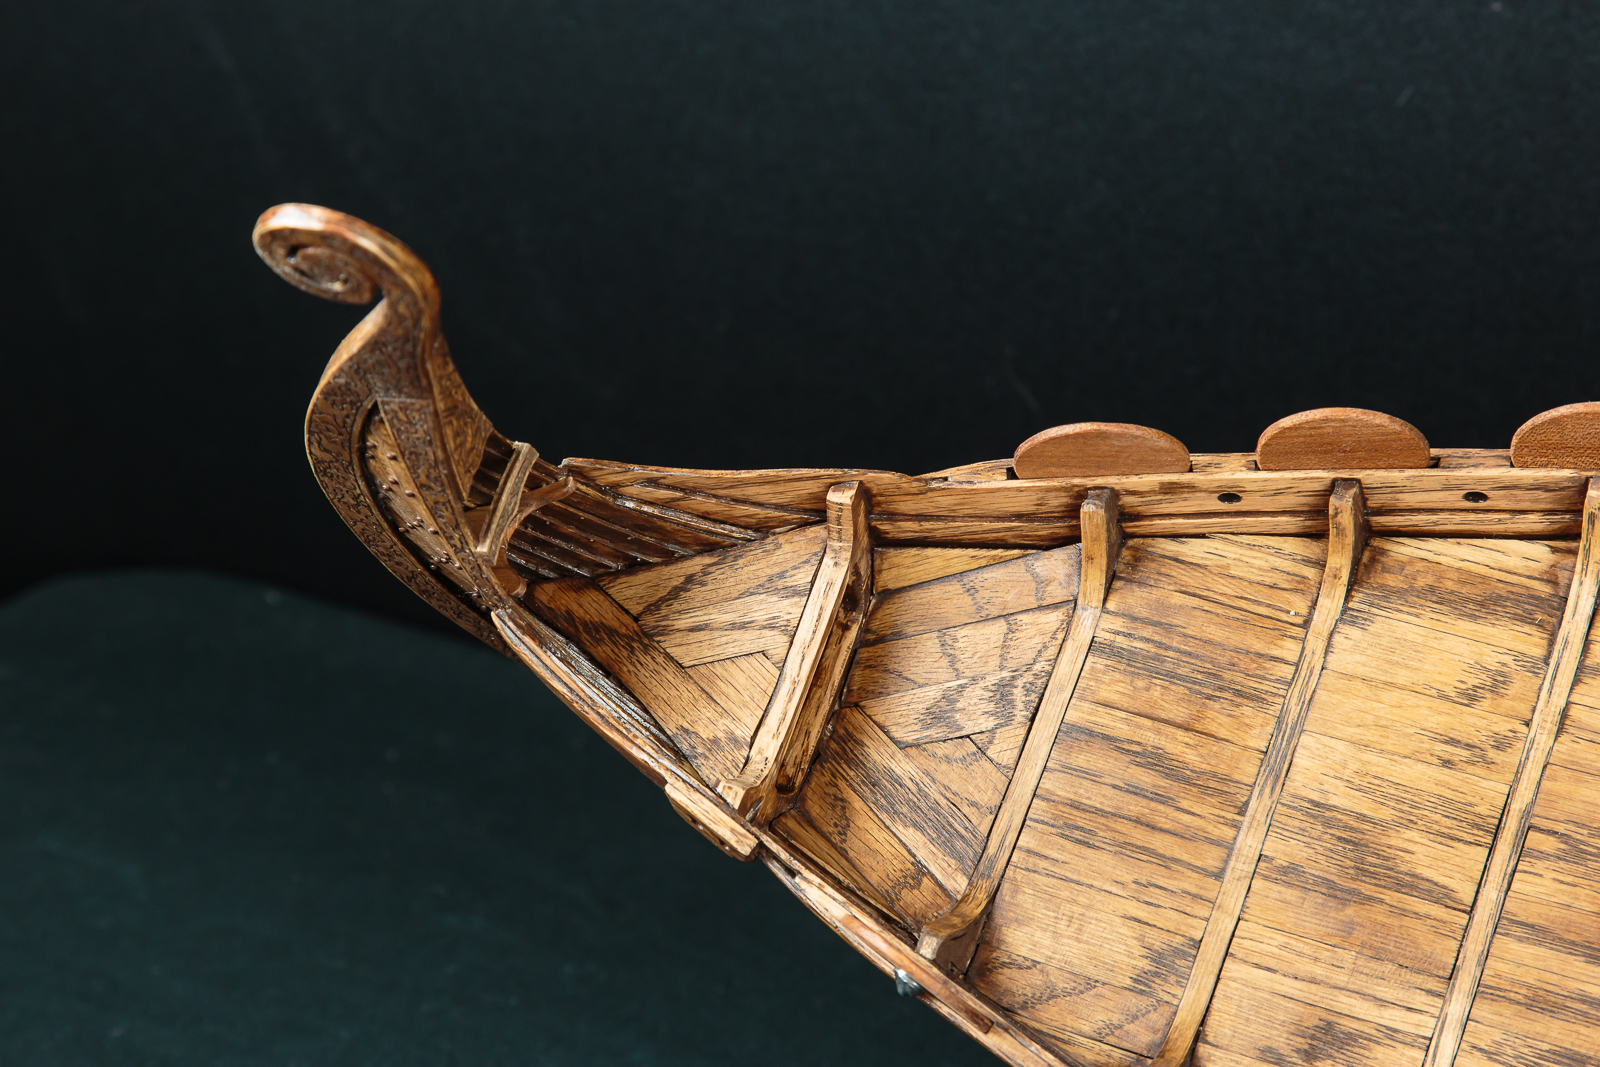
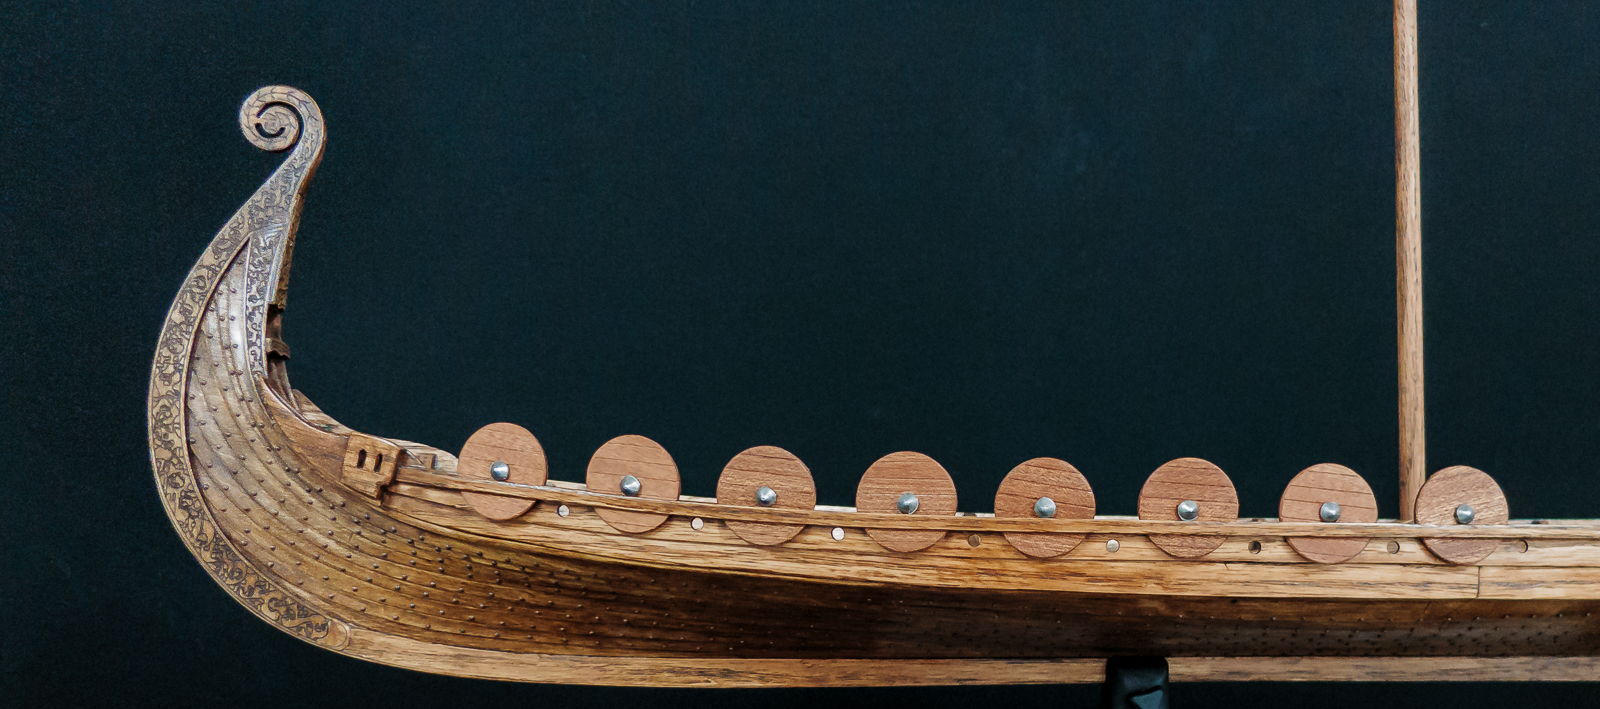
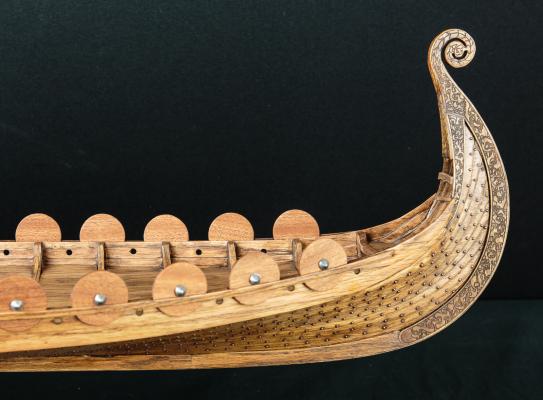
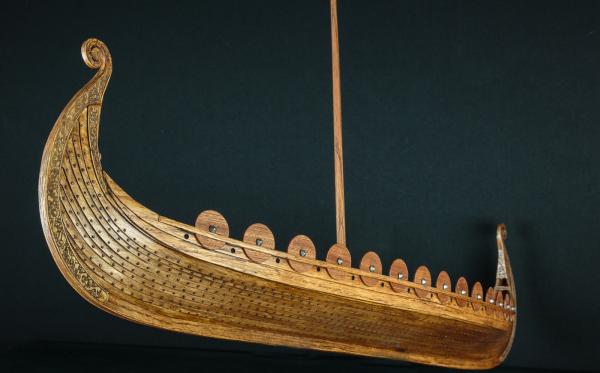
I have been working on the shields. Finding the right center ornament has been very time consuming. I settled on cone head Hungarian hob nails. The shield on the left is supplied in the kit. The hob nails are next in the image below. I cut the head off and ground it close to flat. The construction of the new shields is documented earlier in the log. To finish them off all that was done is to ease the edges, glue the nail head onto the center and odd a coat of wipe on poly without stain. I did tests and the poly alone worked best on the mahogany. The hob nails were right size and crudeness for a ninth century shield. I finished 8 of them and here is how they will look on the ship.


-
Hello Bob, Your work is truly inspiring. Happy Anniversary and Happy Birthday. This hobby sure has a lot of folks in the same demographic. A few weeks from 70 myself. Great work.
-
Hi Vivian, Great update. The details are just terrific. I love the hatch covers, doors and stairs. I have had mixed results with "Blacken It" as well. Keep up the beautiful work, you are on the downhill side now.
-
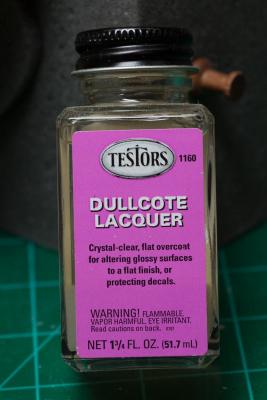
It is polyurethane clear finish. You can wipe it on like stain. I used the satin finish because I do not think shine is appropriate for this model. When it is finished I will decide if a coat of Testors Dullcote is needed.