Jack Panzeca
-
Posts
233 -
Joined
-
Last visited
Content Type
Profiles
Forums
Gallery
Events
Everything posted by Jack Panzeca
-
 Hello dragzz, Thanks for dropping by and the kind words of encouragement.
 -
Thanks Marc, I stained the deck twice. It was blotchy the first time so I sanded it back to raw wood and did it again. It came out much better the second time. More pictures soon.
-
It is oil based stain and I finished with a coat of Minwax Wipe On Poly. The stain I used is General Finishes "Spiced Walnut". I did have a difficult time getting it to stain evenly. I ended up thinning the stain 50/50 with mineral spirits.

-
Hi Von_Kossa, I tried to make them myself using the technique that Alexi Domanoff, a MSW sponsor, posted on Utube. Here is the link: https://www.youtube.com/watch?v=WIiI9BrdE3o. I was not very successful and finally abandoned the attempt. I was not able to get a consistent size head. Take a look and give it a try you may master it better than I did.
-
Hello Von_Kossa, Thanks for the help with the shields. I saw on your log that you will space the nails at 10 mm. You will be happy with it. It really looks great. Hi Dee Dee, Absolutely not your fault. I am the old guy with the out of date rubber bands. Thanks for the tip on the pins. Also, thanks for the kind words and encouragement. Good Evening Vivian, Thanks for the help picking the stain earlier and all the encouragement. I agree the lines of this ship are really special. Thank you to all the "likes" out there it is comforting to know that you are watching.
-
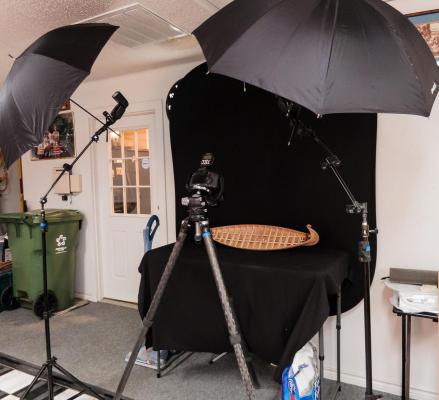
Hi Grant, thanks again. I will gather my thoughts on depth of field and try them out on you first and then combine them with the first PM and open a thread in "Tips and Tricks". Hello Pawel, Thanks for dropping by and for the kind words. I hate the shields included in the kit. Please check post 142 on page ten of this log to see what I have done. I am still looking for an appropriate center ornament and trying to decide what to do with the edges of the shield. Hi Ulli, Great to have you aboard. This is a fun project but you are so right about both the patience and the oaths. I cut and fitted the planks and laid them into place. Every time I touched the ship the planks would jump into the next space or further, sometimes the floor. I could not glue them in place because I had just decided to do the nails and I wanted to keep access to the inside of the hull until that was finished. So I bagged them up for a while until this weekend and now they are permanently in place, at least I hope so. Hey David B, thanks for the encouragement. The shots on the black background are shot with a Canon 5D Mark lll but the workbench shots are with a Canon PowerShot S110. It takes beautiful images and gives the photographer a great deal of control. I started this log with the big camera and it was really difficult to handle with all the clutter of the workbench. Also, the sanding dust was not good for it. The PowerShot is small and sits on the edge of the bench ready when needed. It is closed tight when the power is off and wakes up in a few seconds when it is time for action.
-
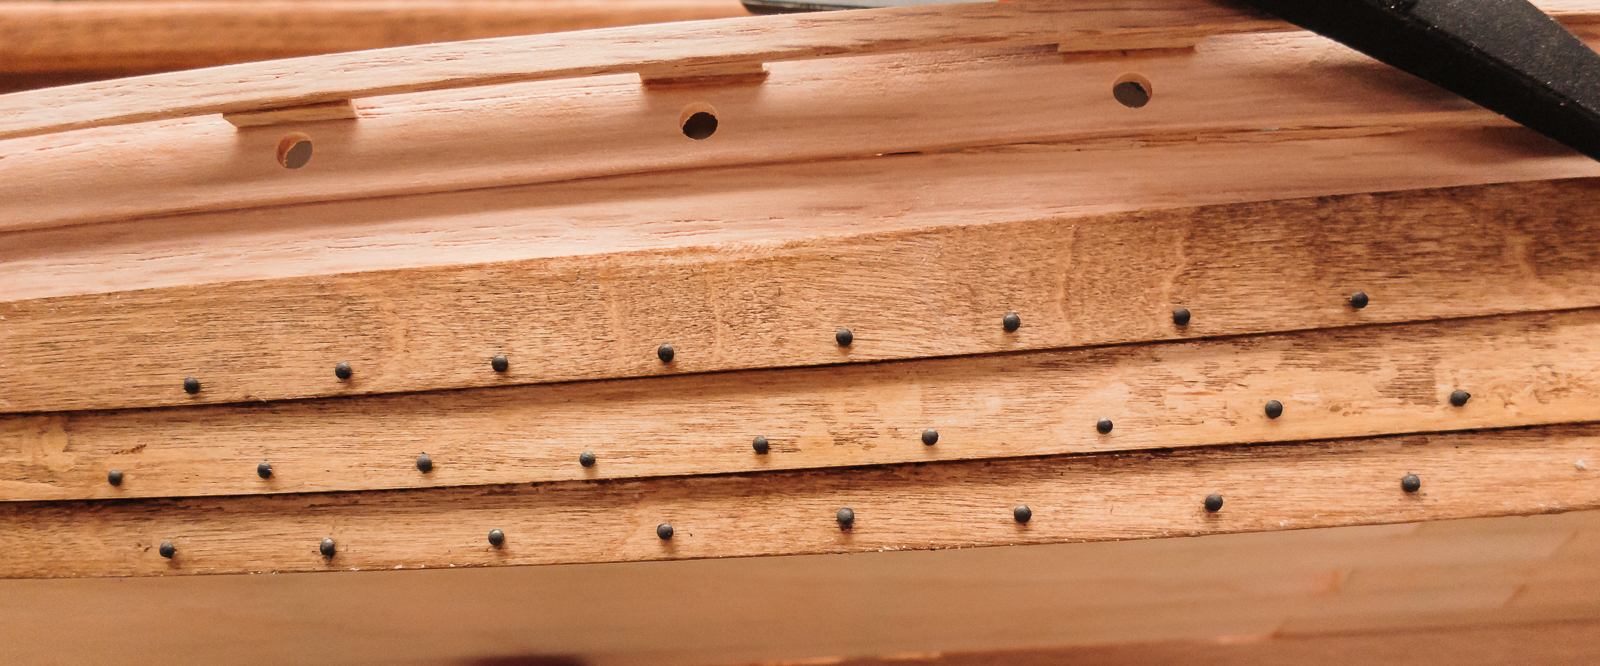
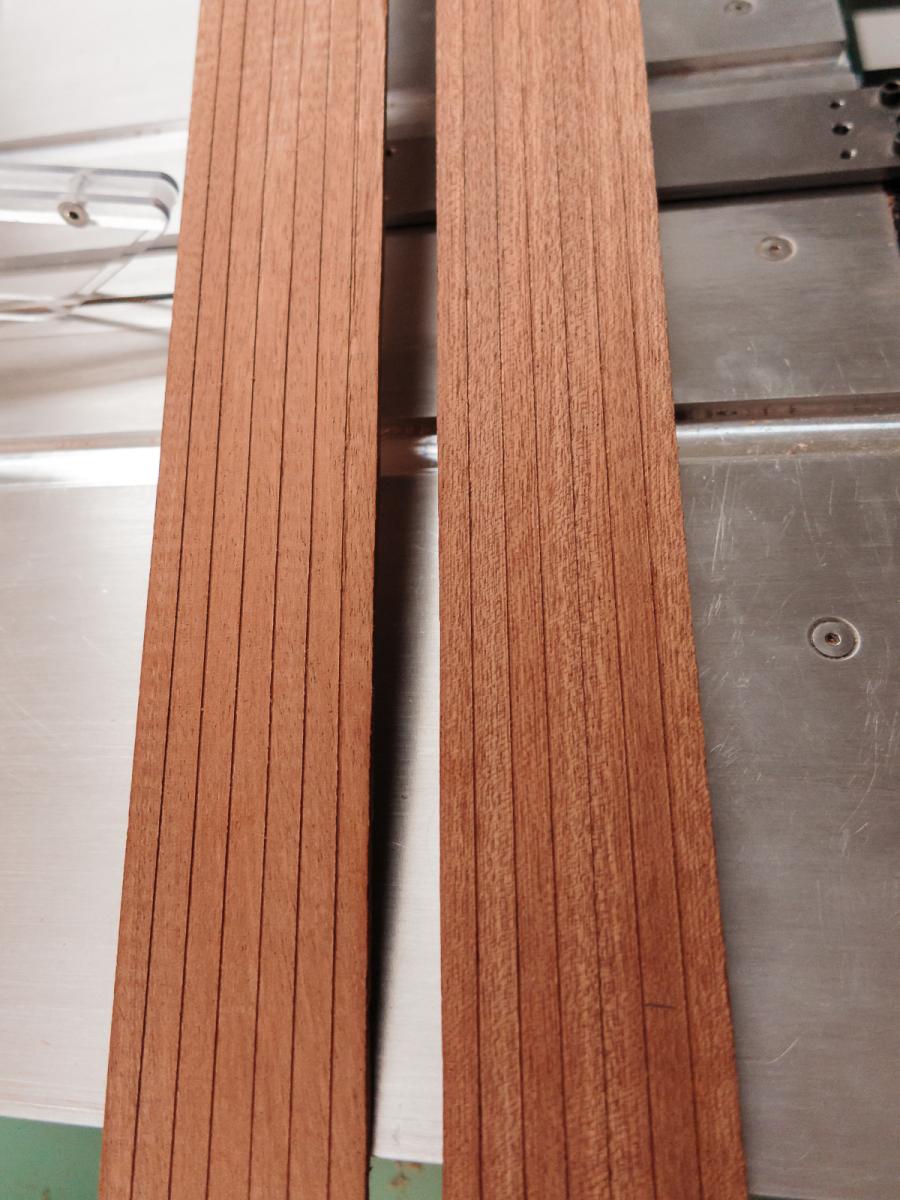
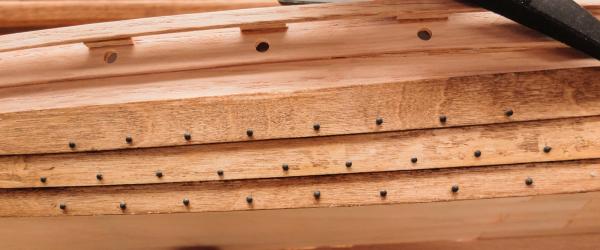
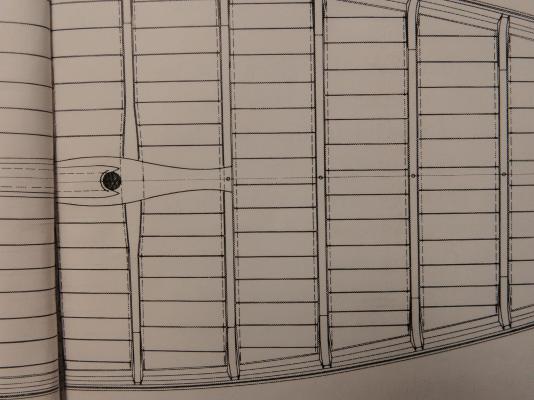
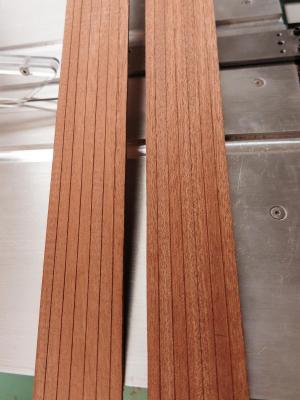
H Hi Von_Kossa, Sorry about the oops! I have had my share of mistakes and re-dos, I just fix it and forget it as soon as possible. I was not planning to use nails on the shields. I really like the look of your shields (post #23 and 25 of your log). What did you use for the center ornament? The nail head diameter for the plank nails is 1.62 mm. They could be a little smaller but they really look good the way they are. To blacken brass I use a product called Blacken It from Micro Mark. It is similar to the acid mix used to blacken guns. Take a look at this link http://modelshipworld.com/index.php/topic/1167-using-blacken-it/. I got the spacing of the plank nails from two places. I have used two books and numerous internet locations to research the Oseberg. The books are: I got 18 cm from the second book here and I got 8 inches (about 20 cm) from a web site. I was unable to find it again. I did a test to see if the 20 cm or if 40 cm looked better at this scale and the results are below. Everyone who looked at the test agreed that the closer spacing looked best. I did increase the spacing from 8 mm to 10 mm just to compromise a little and save a few holes. The references in both the book and the website were not Oseberg specific but general to shipbuilding of the time and place. You may be right about the Oseberg. Please let me know if I can help.


-
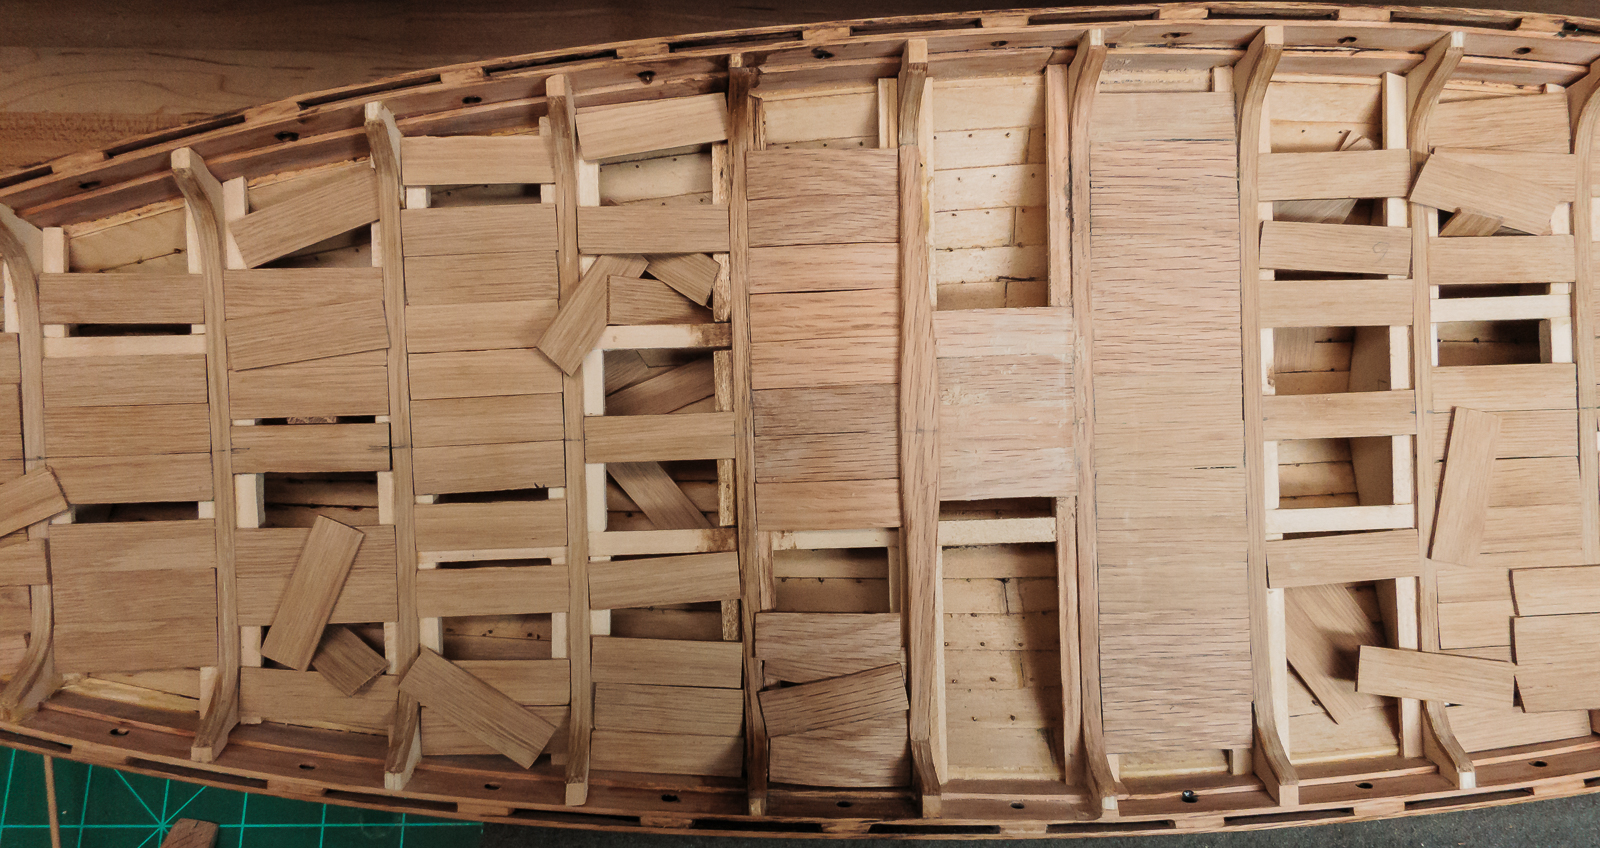
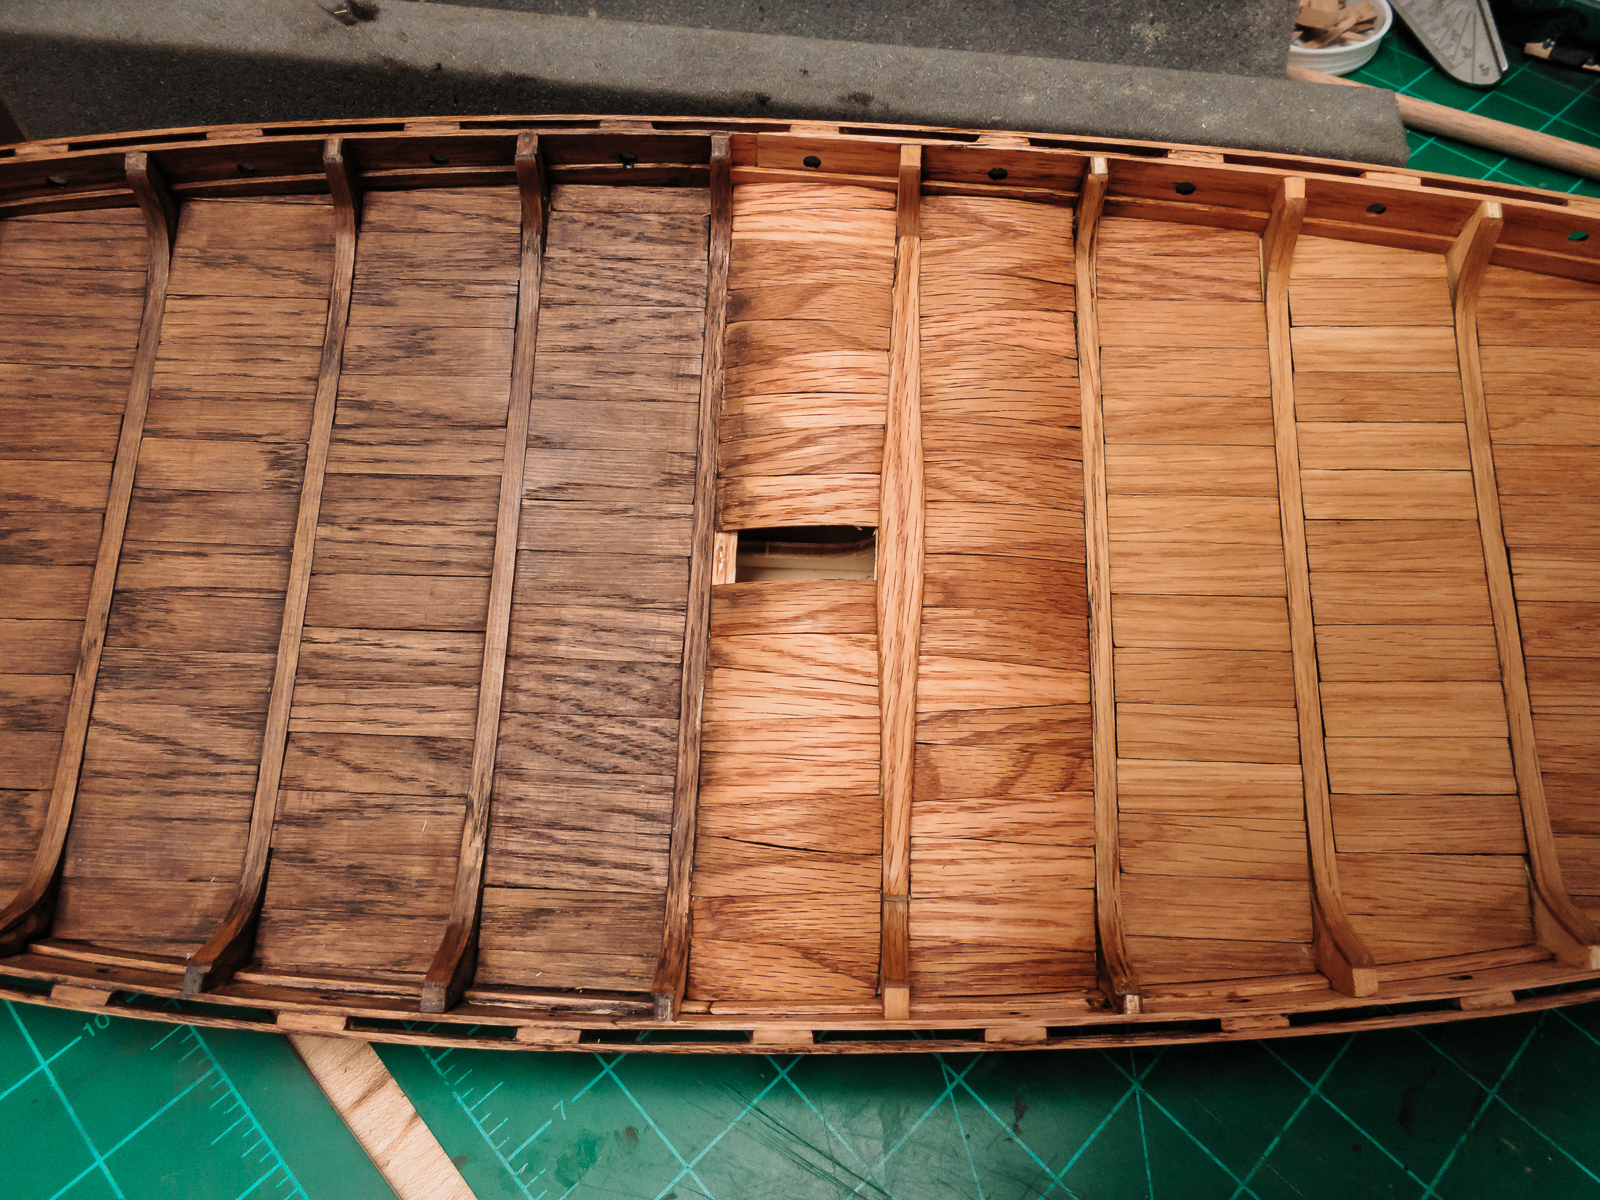
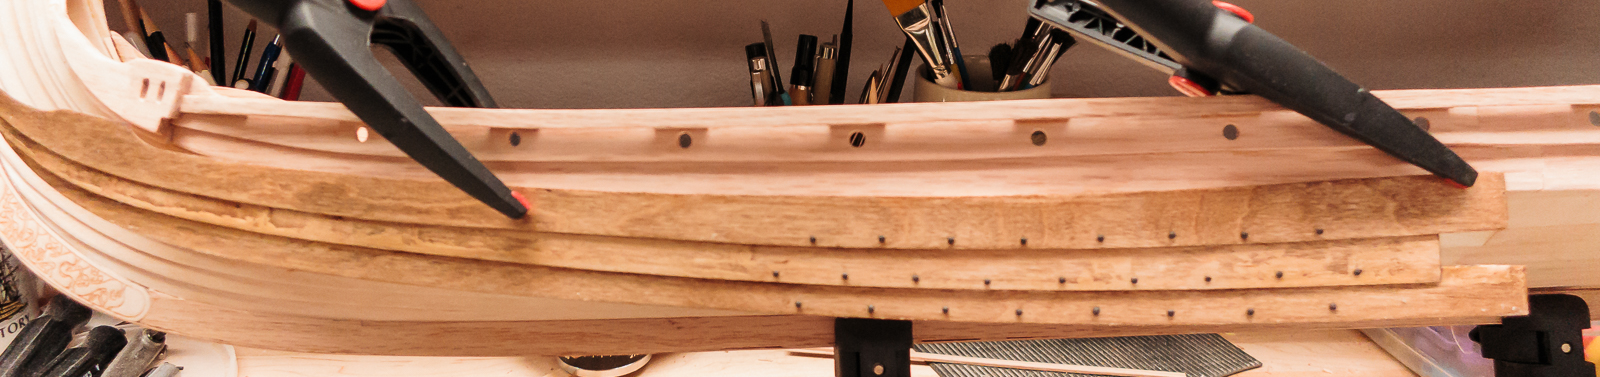
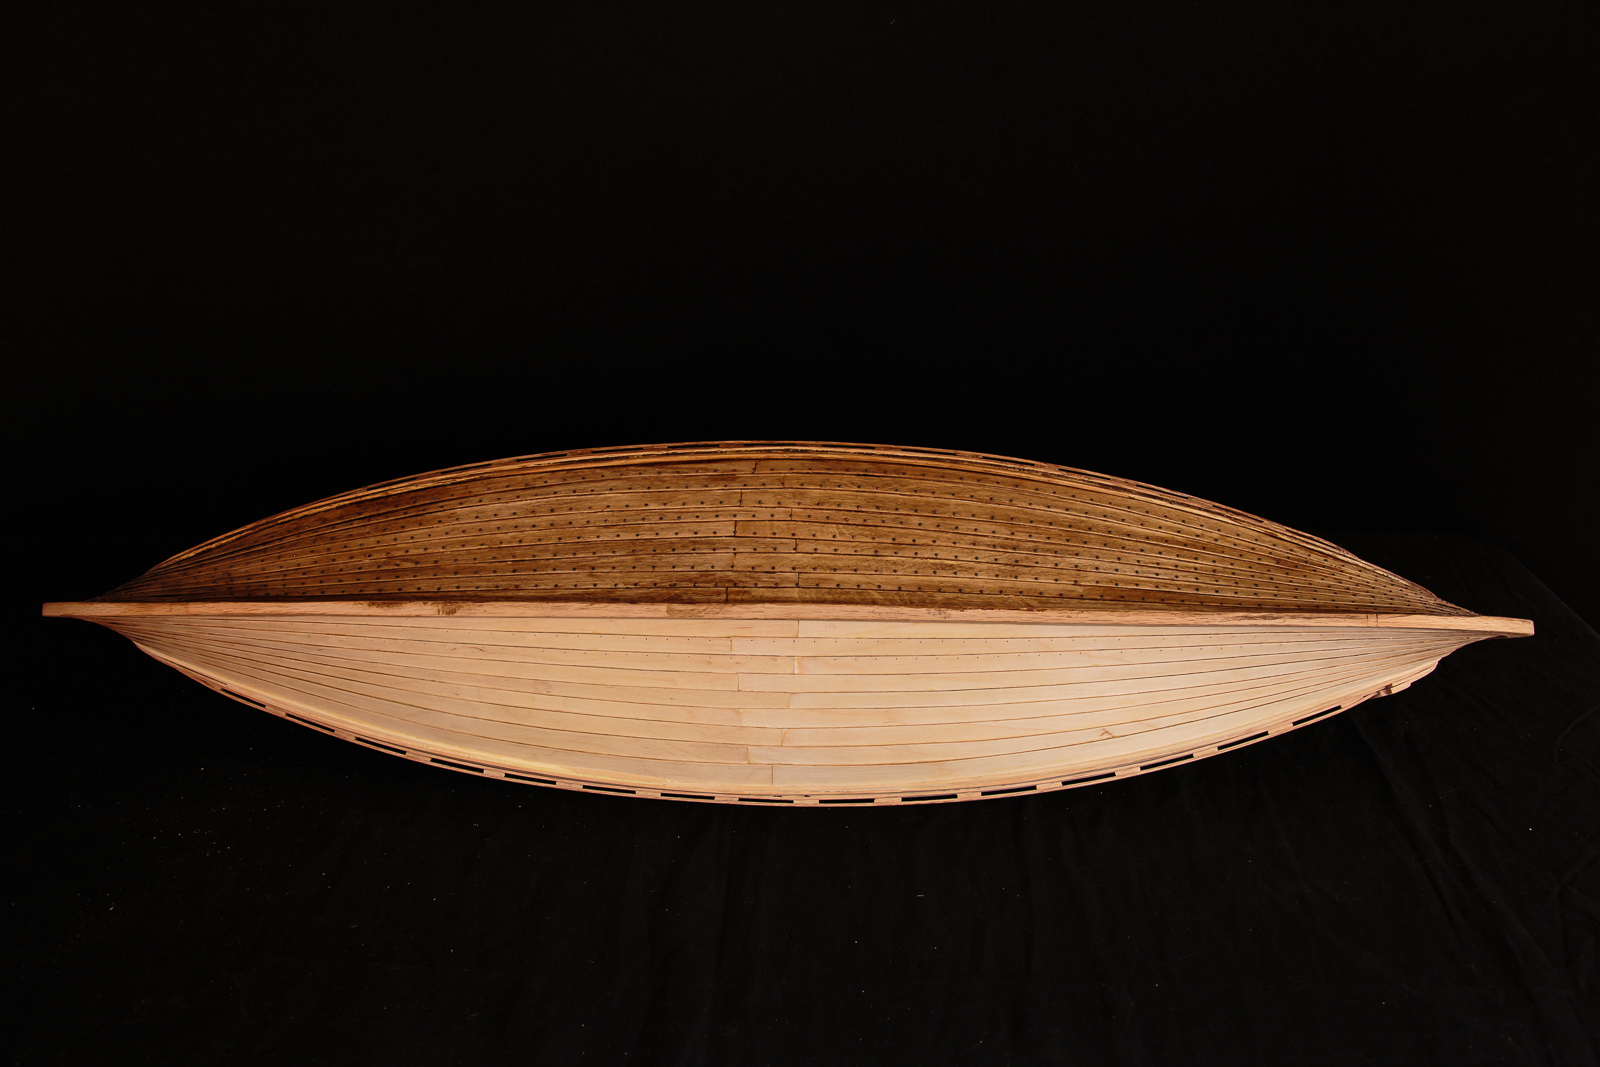
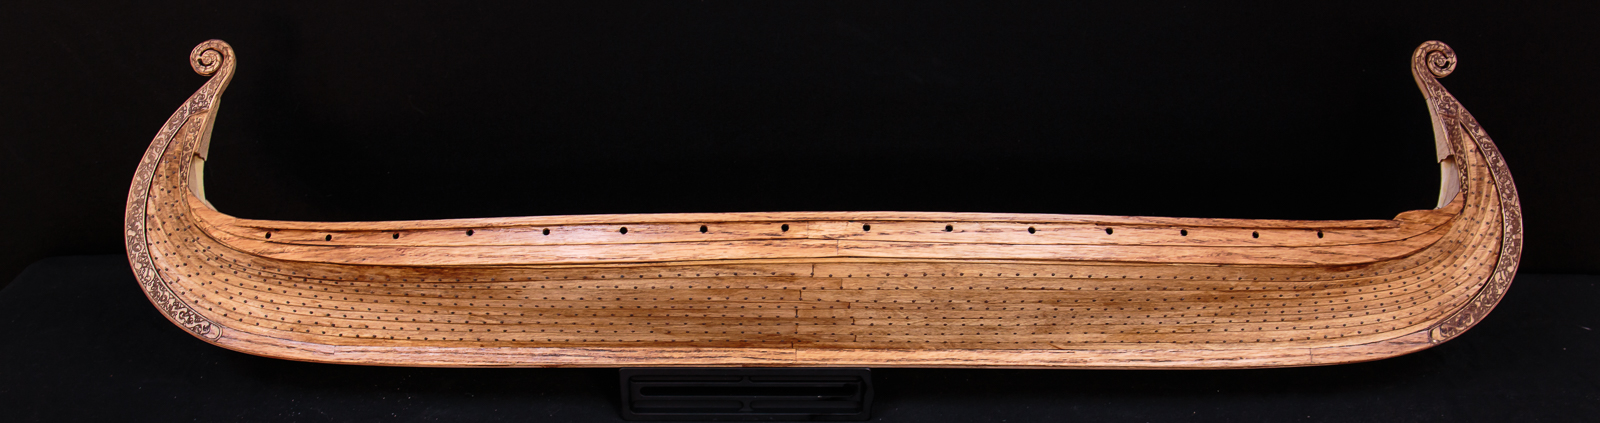
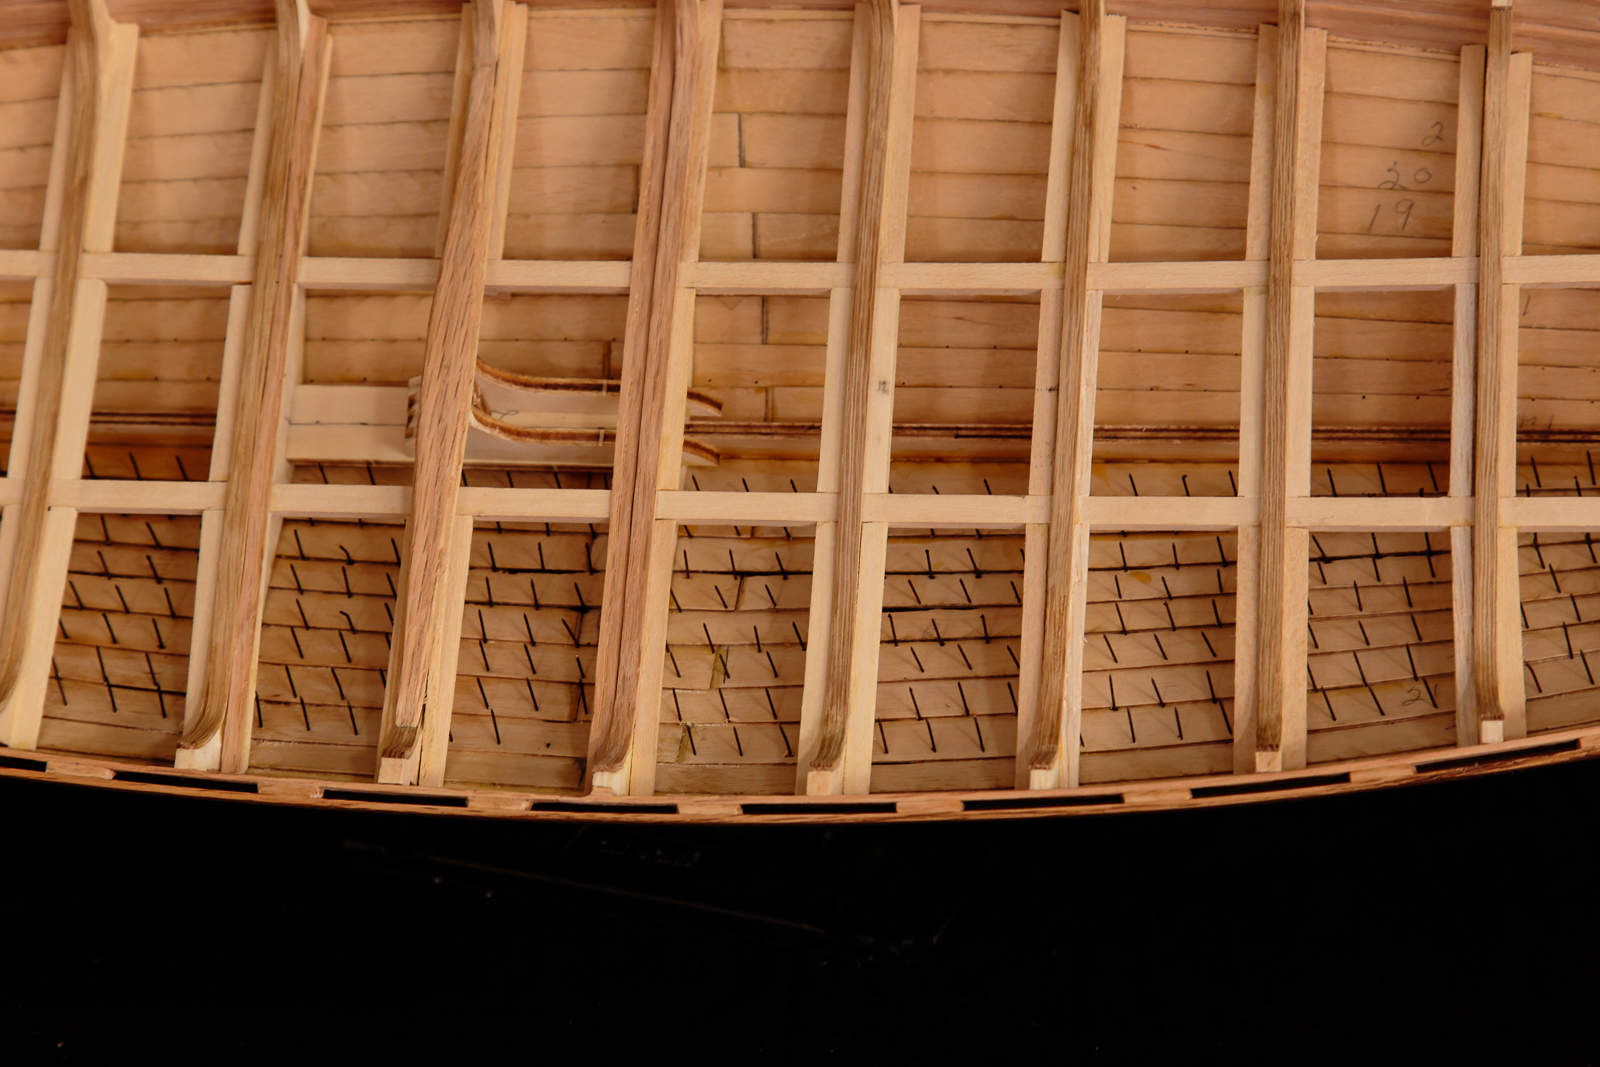
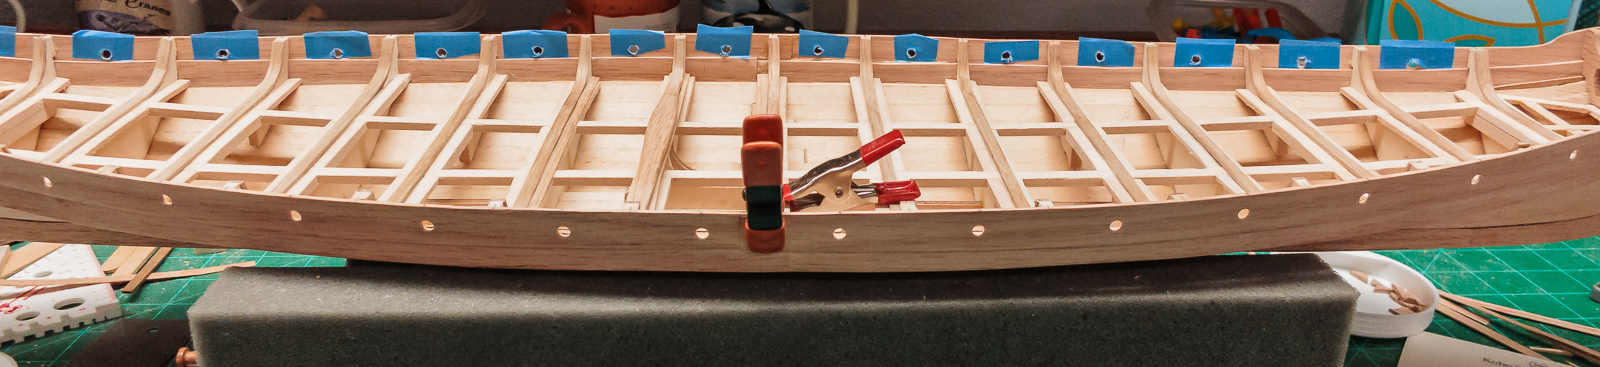
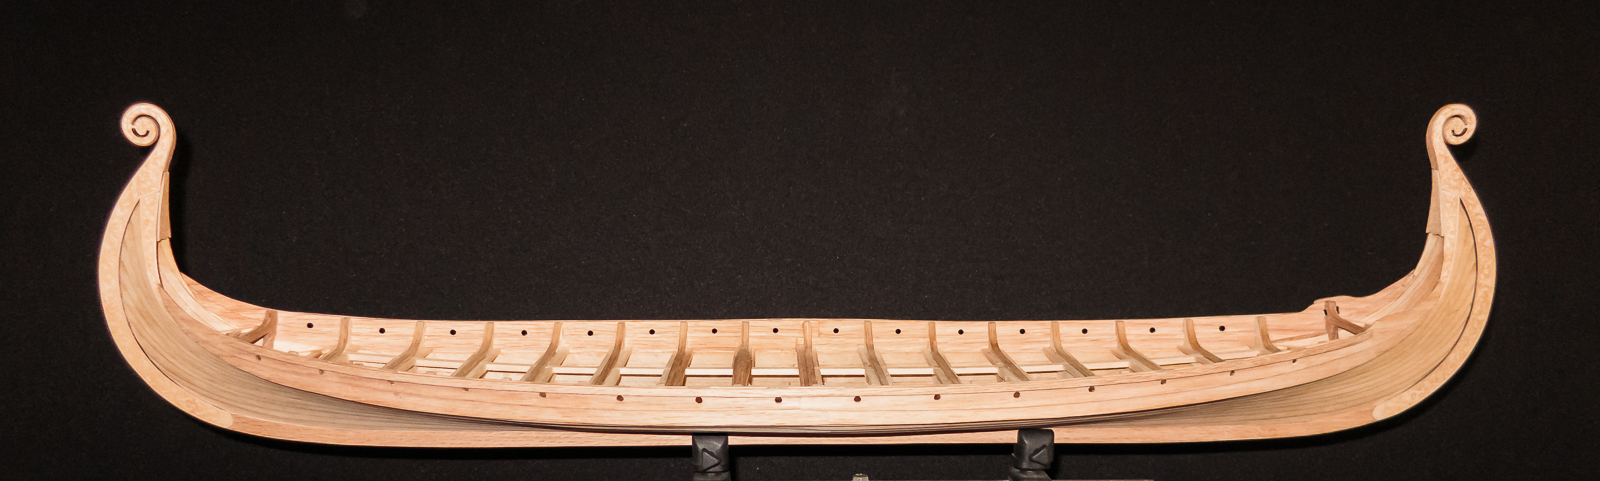
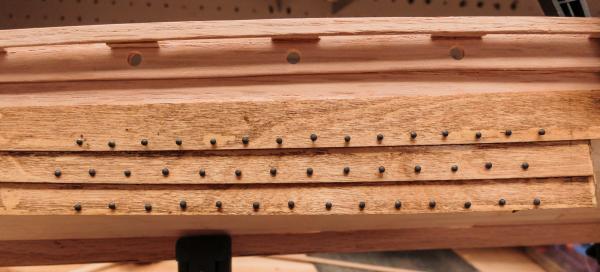
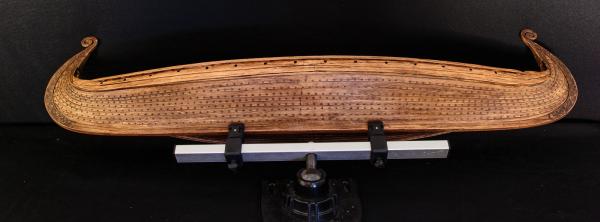
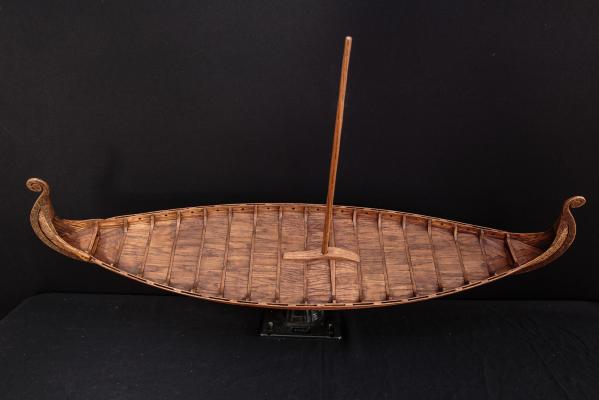
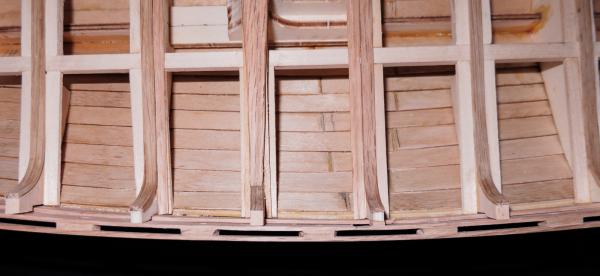
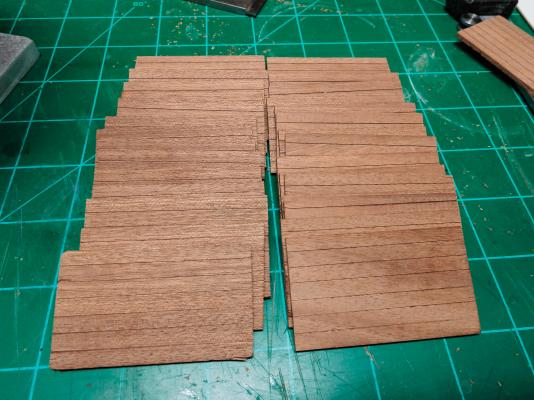
This update has been a long time in development. Since the last update I finished the second 720 nails, planked the deck and stained the deck and cavities at the stem and stern. The second set of nails went more quickly as usually happens after all that practice. The kit plans call for the planking to be in line from bulkhead to bulkhead but the book I have been using calls for the planks to be staggered. I had cut and tapered the planks back months ago and packaged them up to hold until I finished the nails. Well the "best laid plans" rule applies here. I picked them up in order and put rubber bands around them with nice little labels. The rubber bands in the shipyard are at least 10 years old and a large number of them gave up and the planks got jumbled in the plastic bag. Dee Dee: this photo is for you. You knew I was going the muck this up. It took longer to complete the filler planks at the end of each row than it did to straighten out my pile of unlabeled planks. I set up the center line and glued one than two planks down the center and then worked my way out to the edges. The image below has the stain on the left and just pre stain on the right. The pre stain sure shows off the grain. I love oak. The curved and wedged planks at the mast foot came from Von_Kossa and looks really great. Thanks Pal. I still have some cleanup to do on the stain (glue spots and such) and then I will add some wipe on poly. The mast and foot are just loosely placed. Oars, shields, rigging and sail are next. Thanks for looking in. This sure is fun.


- 275 replies
-
- 12
-

-
Hi Grant: Thank you thank your Admiral for me. I will send you something about exposure and depth of field as soon as I get a chance. Where do you think I should post the photography tips? Hello Von_Kossa: How are you my friend? Happy to have you back in action. The nails are Constructo 80022 12mm long and 0.59 mm diameter. What did you use for your shield center ornament? I have been scouring the craft shops but nothing that looks as nice as yours. Hi Nils, Thank you for the kind words and encouragement. Also, thanks to those "likes" out there.
-
Hi Marc, This is the best result of my "bug and flower" hunt last week. I am trying to work out attending the NRG Conference. Good luck on your "Utrecht" I will follow along when you start the log. I finished the Oseberg nails (unless I decide to nail the deck planking). I am working on the deck planking now. I should have an update soon. Thanks for dropping in.

-
Hi Vivian, Happy to hear that you are feeling well. Sorry about the hole in your deck, you might want to consider a second led in the cabin and run the wires into the switch box and leave them. In case of a future problem all you have to do is connect the wires. Your saw is just what the doctor ordered. I personally believe that it is not possible to have too many toys, I mean tools. I have been meaning to ask you if you built models of your designs when you were doing architectural design? The way you furnished the cabin shows a special talent. Your ship looks great.
-
Hi Ulises, Great build, it looks great. If you want to look at the Minwax Aged Oak that David B mentioned take a look at my Oseberg log (post # 162). I definitely agree with Mark and would pre bend the beams to unload the bulkhead tops. Thanks for sharing.
- 786 replies
-
- 1
-
-
- Royal Louis
- Finished
- (and 1 more)
-
Hi Nigel, Thank you for looking in and all the kind words. I was amazed how much difference the nails made as well. I actually first bought the Amati kit and upgraded before I started. The Billing Boats kit was larger and the only kit out there with the scrollwork provided. The thing that I like the least is the large amount of plywood used and all the exposed ends. I had committed to covering these early on. Adding bulkheads to get the deck planking the right proportion was not something I planned on but with the urging of Von_Kossa I am really glad that I did it. When I purchased the kit I liked that it had wooden shields but they are really sad so replacement was a given, again the inspiration came from Von_Kossa. I was spending a lot of time wishing that I had cut all the hull planks from oak but now that the nails are there that is no longer a problem.. Thanks again for dropping by.
-
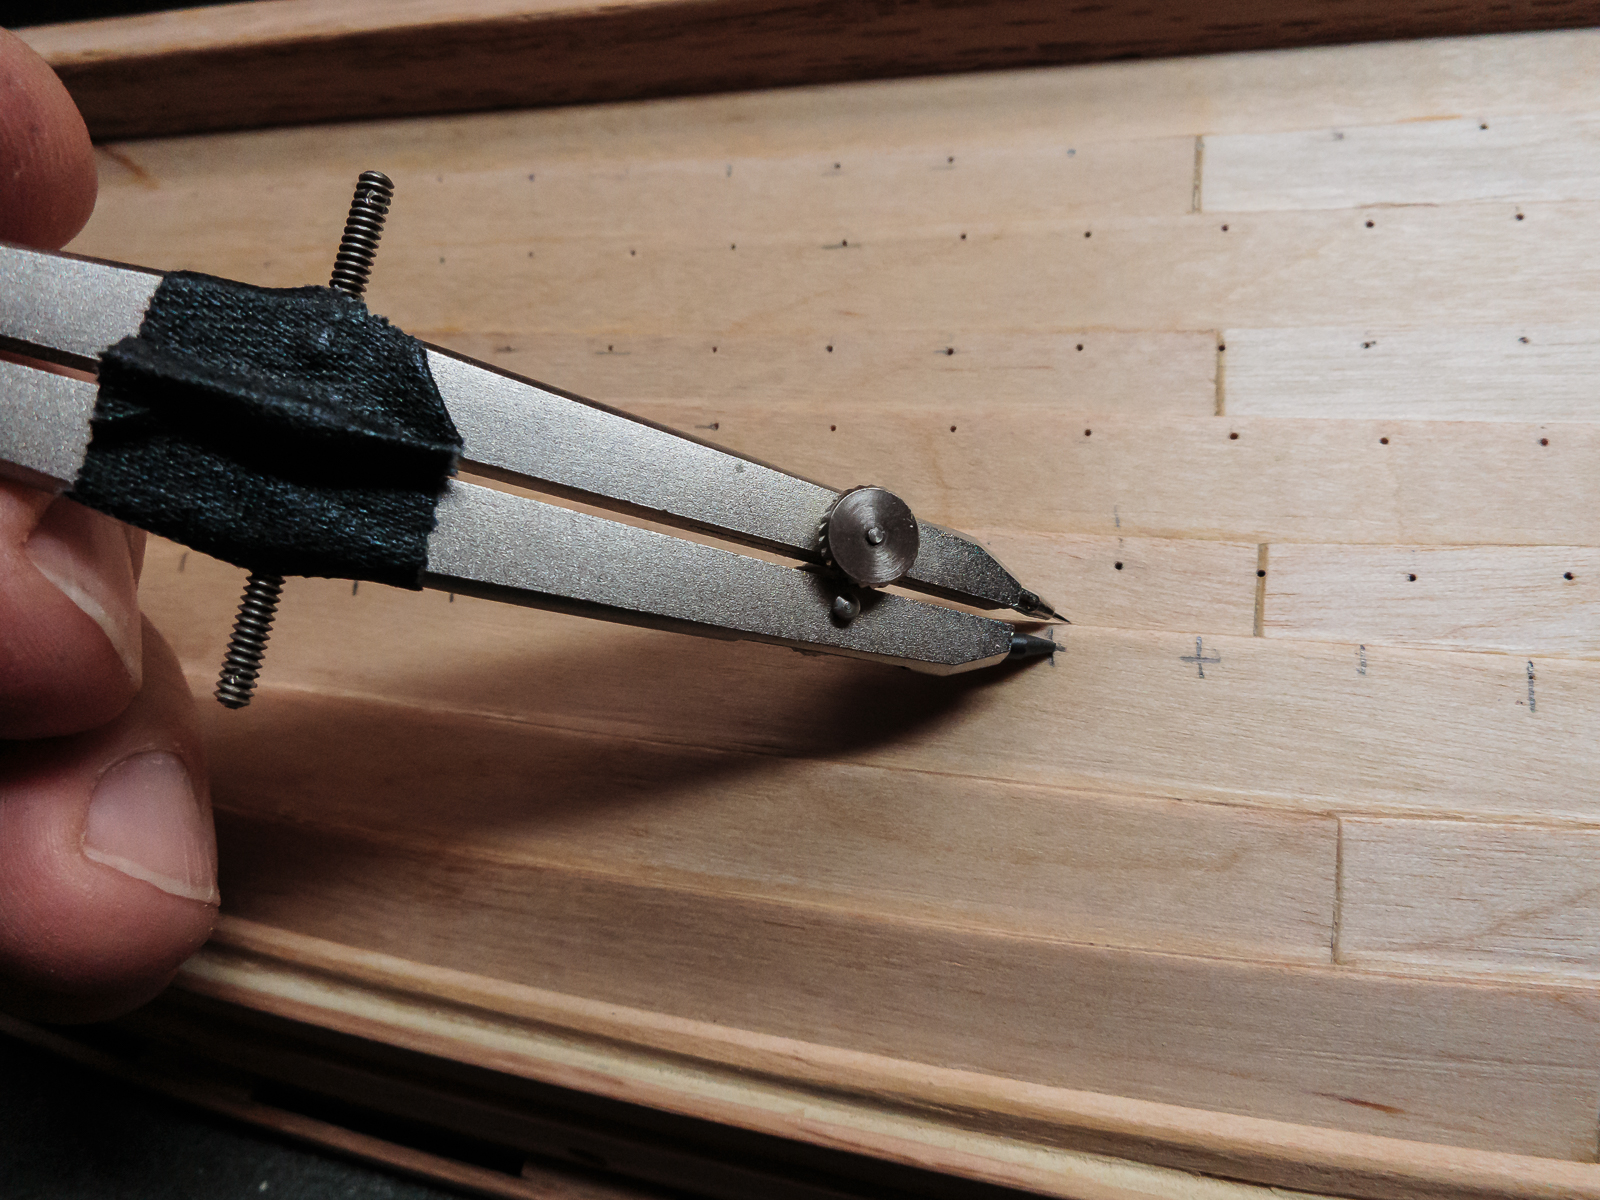
Hey Marc, Thanks for dropping by. I see you have a new name and a new hat. The name is perfect for you and the hat looks great. Is your peak season winding down? This is the beginning of "brown" season in Texas. Happy that you found the log, this is a fun ship to build and a very pleasant group of watchers. I just joined the Nautical Research Guild in honor of the new merger. I used a divider with one pencil point to mark off the 10 mm spacing starting where the planks join together and working out to the stem and stern. Then change the spacing to about 1.5 mm and run the metal point along the edge of the plank and mark each of 10 mm points. Easy! Originally I used wood doors on the steamer tube and that was a bad idea. The all PVC version works much better. Glad you like the photos, I am going out chasing butterflies and moths on Saturday. Thanks again for dropping by. Are you building anything now? I really enjoyed your "Mary".
-
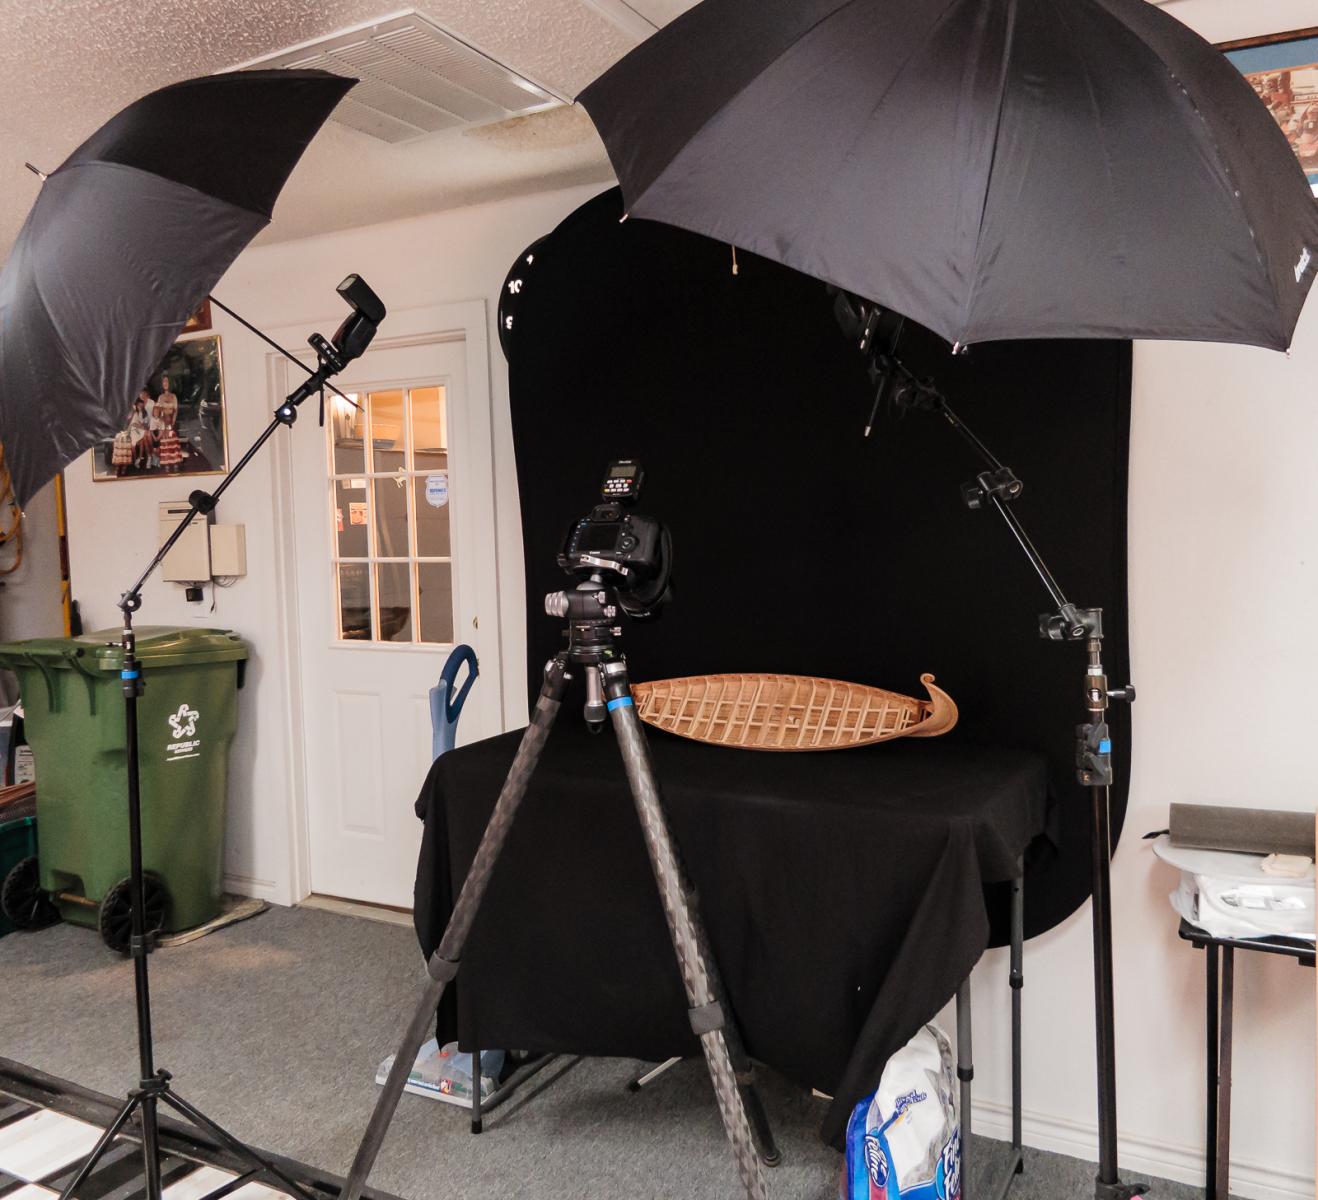
Thanks Grant, the nails were definitely the right decision. Real life, not to mention all those nails, has intervened lately so I am still late on the photo tips. I am working on them, just not as fast as I intended. Thanks Davit B, sainthood would certainly be a stretch. The process was tedious but the result was worth it. Hi Dee Dee, thanks, the chaos is semi intentional. The real Oseberg pattern appears sort of random. I think that it has to do with the different curve rates of the planks throwing the spacing off. The photos were done with a set. The umbrellas are white on the inside to bounce the flash onto the ship in a diffused, soft manner. The black outside also has the function of blocking the awful fluorescent light from the ceiling. The shipyard was originally a garage. Thanks, Keith, I have to admit that it is turning out better than I expected. Now all I have to do is not screw it up. Hi Pete, thanks for the kind words as well. I did the wall side first in case it did not look good. The Oseberg has a definite wall side because of the rudder. Hello Vivian, thanks. The stain is Minwax Aged Oak (one of the samples shown previously). I was nervous before I started but I applied it inside the storage compartments at the stem and stern first knowing that I would cover most of it up if it was ugly. But, as you can see it looks very nice. This is a gel stain and although it looks good it is a little unpleasant to work with. Thanks to all the likes. I may play with the shields a little bit and take a little longer break from the nails.
-
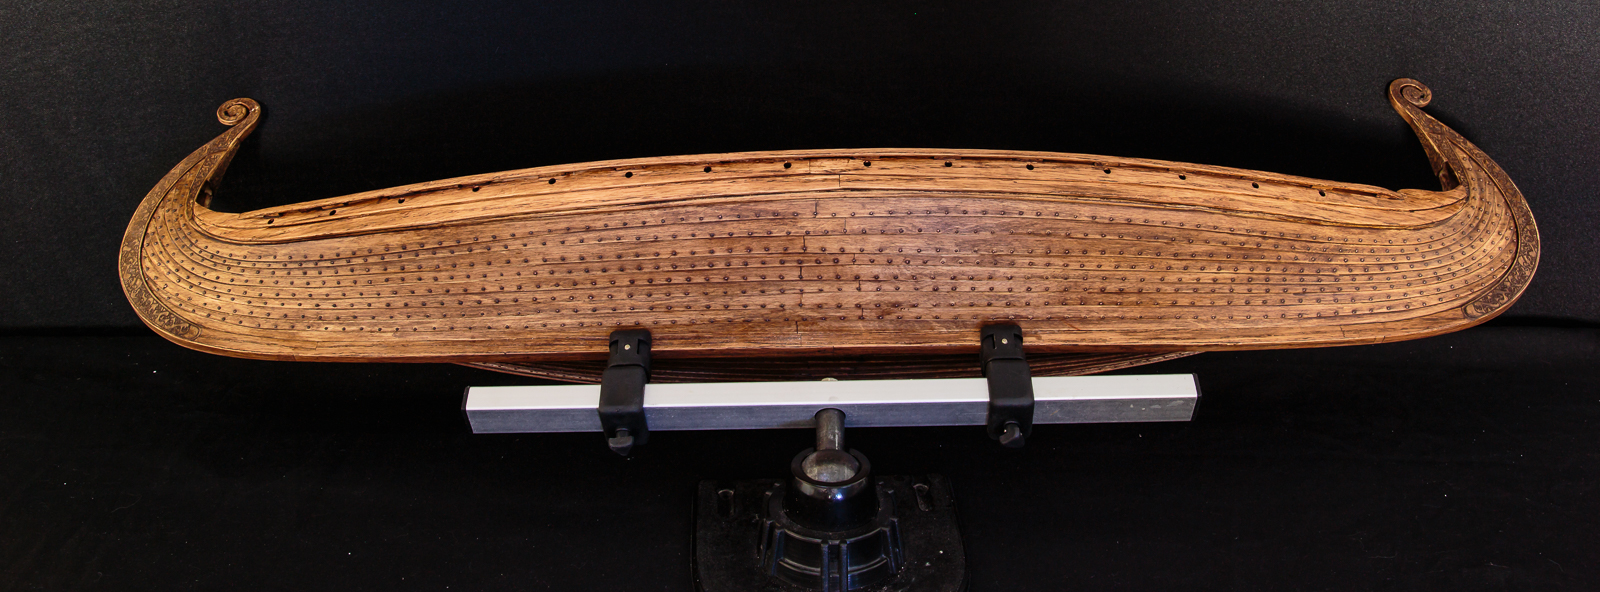
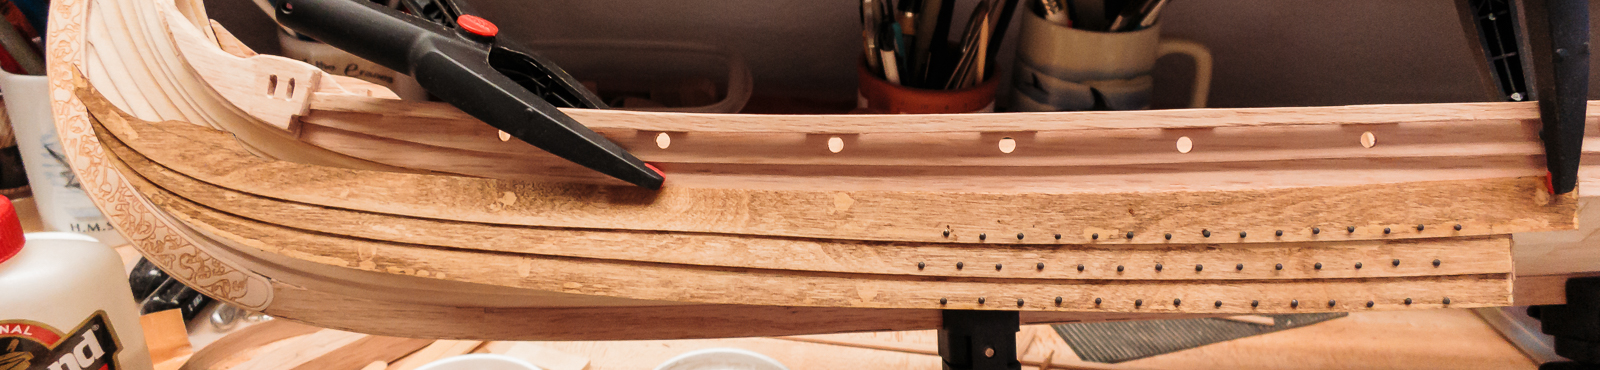
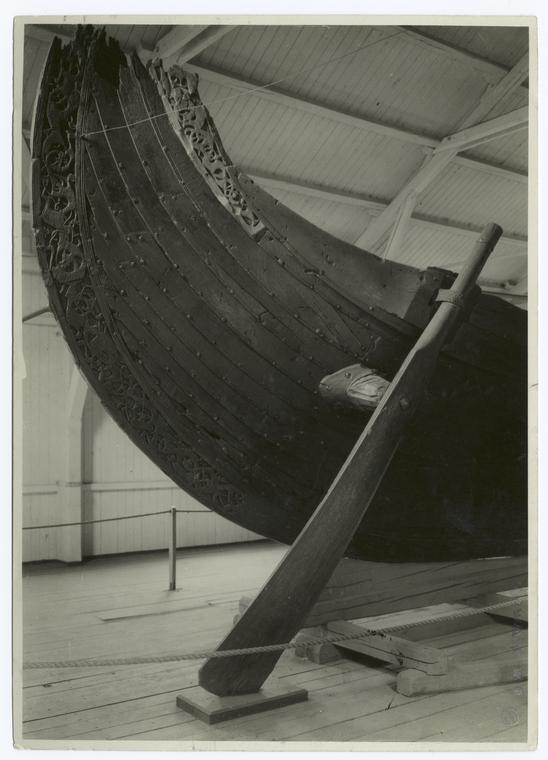
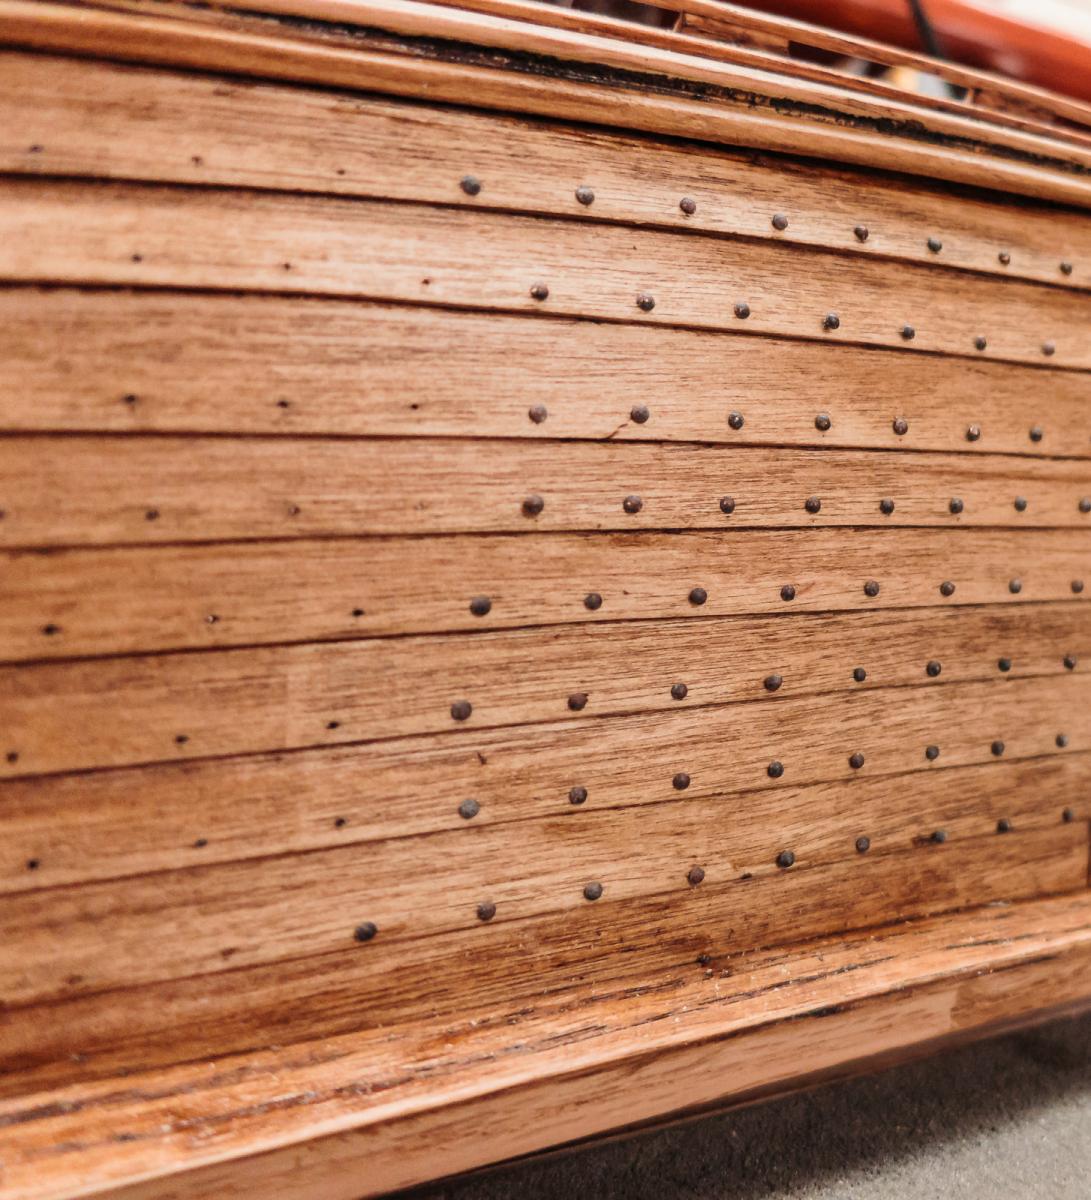
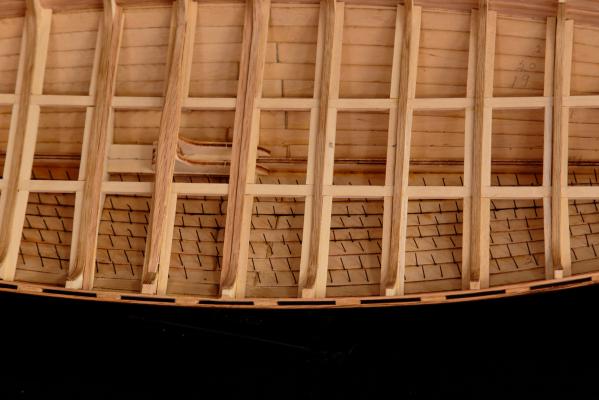
Time for another update. The kit makes no mention of the iron nails that hold the overlapping planks together. I felt that the ship would really be incomplete without them so I decided to spend a few weeks and do it. The nails are about 200 mm apart on the Oseberg but do show some randomness. That scales out to 8 mm. I did a couple of test planks 1 at 8 mm and 1 at 16 mm. I was hoping that the 16 mm spacing would look great and save me about 700 nails. Oh well, no luck. I did widen the spacing to 10 mm. I bought the smallest brass nails that I could find and blackened them using the method sited in various places on MSW but I specifically read it in Augie"s Confederacy log (great log by the way!). I marked the holes with dividers and patiently drilled the 720, ½ mm holes. It took over a week to mark and drill and insert all those nails. I broke several bits in the process. I forgot to mention that this is only the port side. I will place a drop of CA at the base of the nail forest and cut them off before I glue the deck in place. I decided to go ahead and stain after the holes were drilled and before the nails were inserted. I spent some time cleaning up the glue that was left where the planks overlapped so the stain would go on evenly. I had cleaned up carefully when the planks were glued but the best laid plans... I still have some touch up to do on the stain and I will add the wipe on poly at the very end. I have taken a couple of days off to decompress after the first half and it is back to work tomorrow.


- 275 replies
-
- 16
-
-
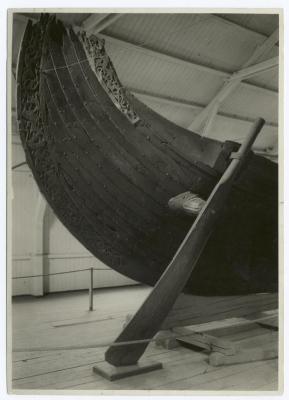
Hi Vivian, Thanks for checking in. I agree with you about the lines of the ship. It is very beautiful and a lot of fun to build. The Oseberg was a burial ship and was found with a decorated sleigh, four wheeled cart, wooden chest, a bucket and other things. With your skill as a miniature furniture builder you should have a great time and create a very unusual model. Thanks for all the kind words. Hello Dee Dee, The problem solving is my favorite part. It has gotten easier since joining this forum. The experience and information available here makes everything easier. I stacked the deck planks port to starboard, by row, wrapped with a rubber band and labeled. That does not mean that it won't be a jigsaw puzzle when the time comes to finally assemble. One row has already come loose and scattered in the bottom of the storage tub. Hi Matti, Thanks for checking in and the gracious words. The oak additions have worked out so nicely that it makes me wish that I had recut the entire hull from oak. Too late now. Thanks all for the "likes".
-
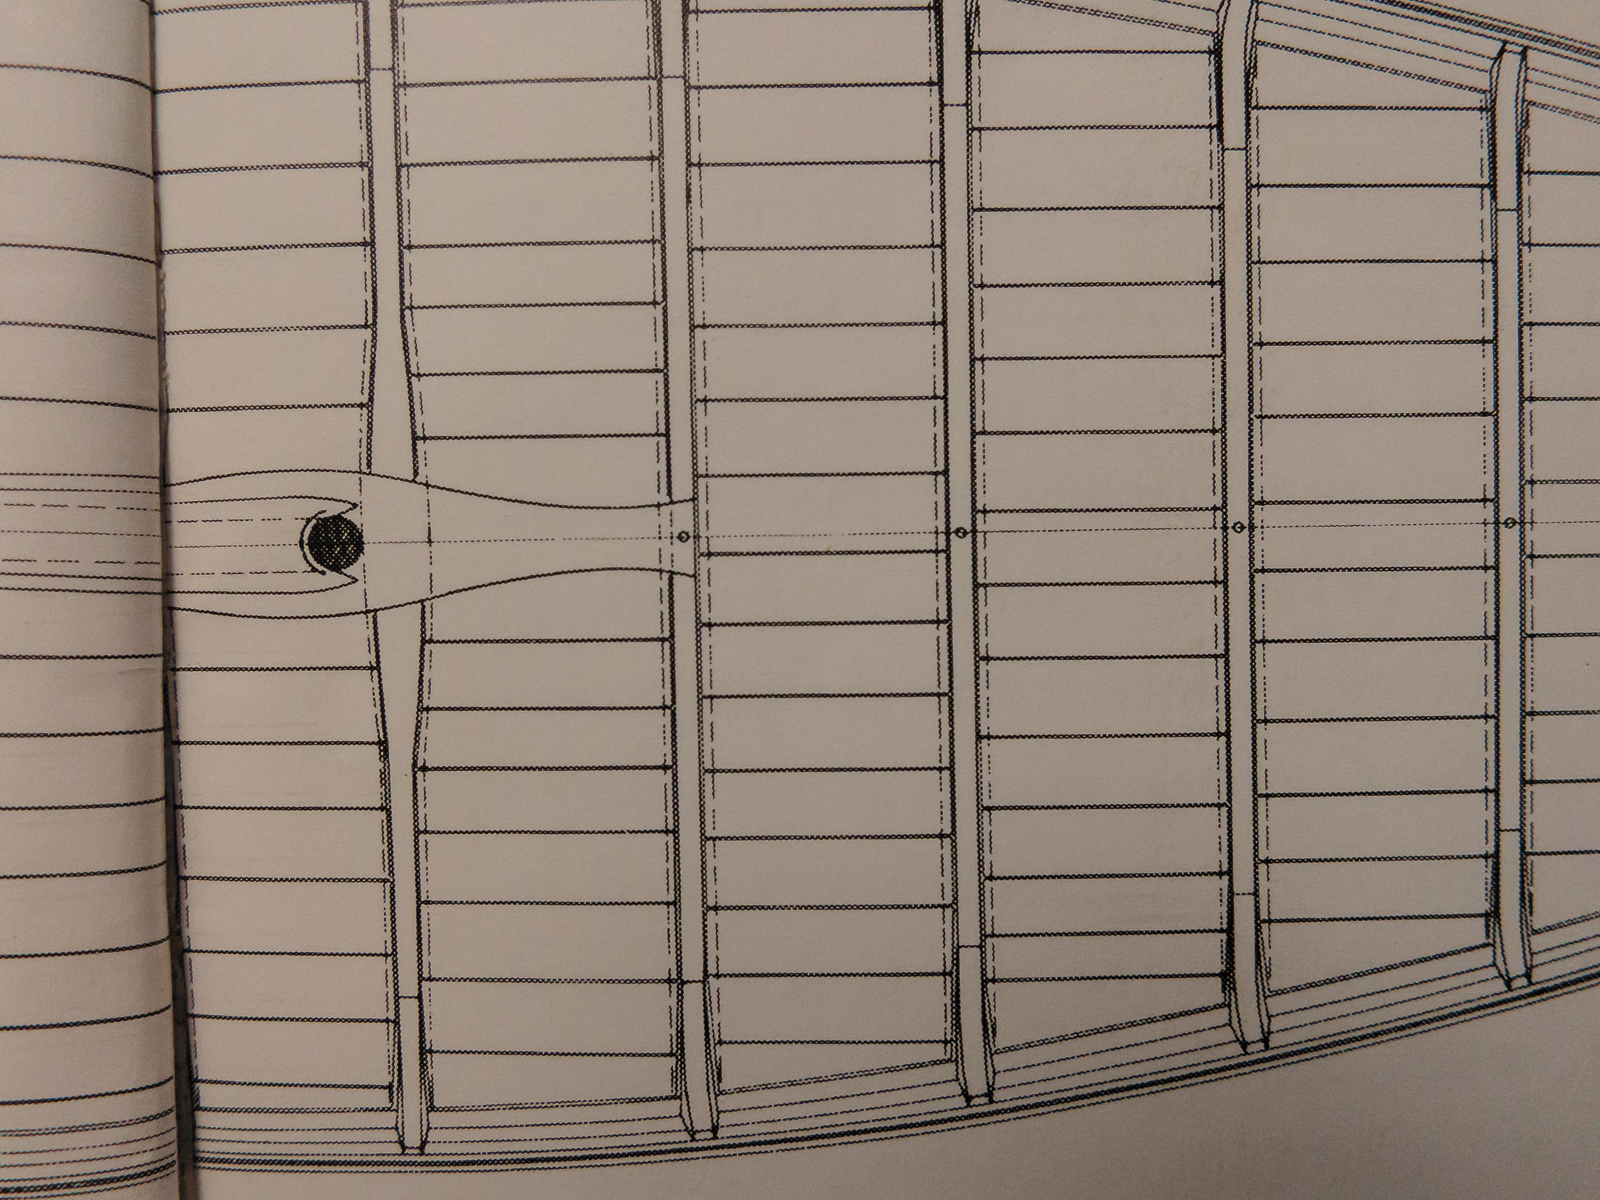
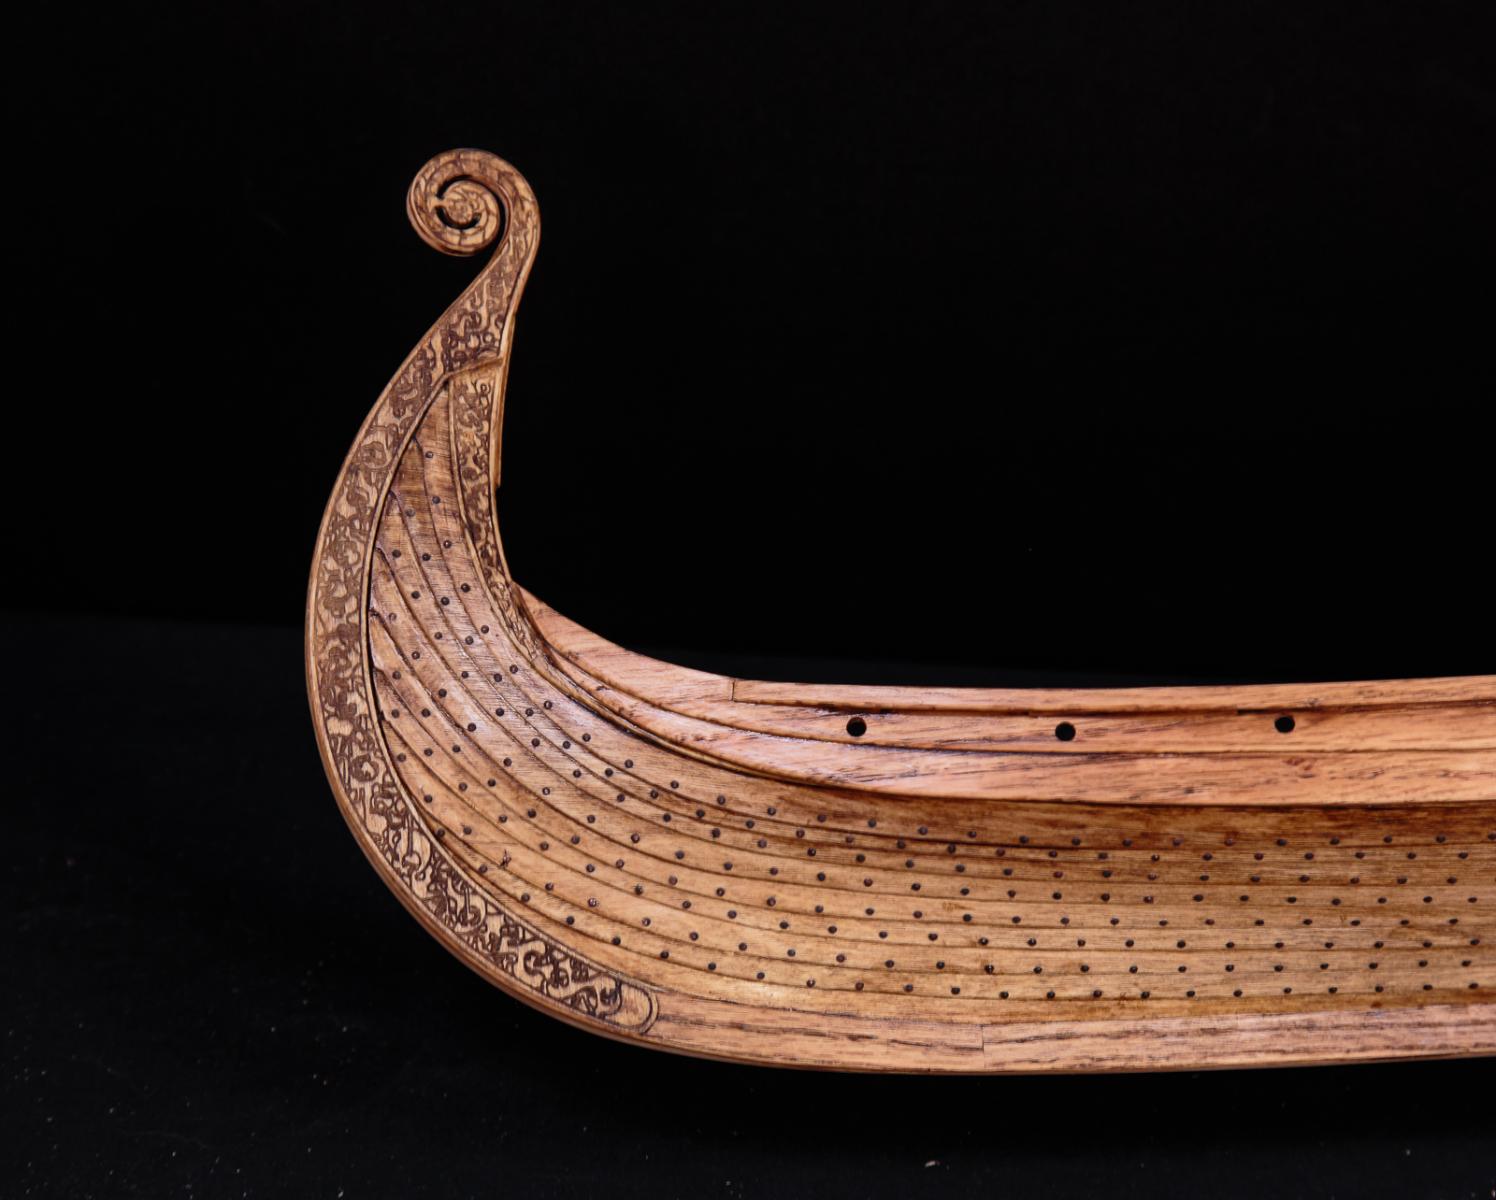
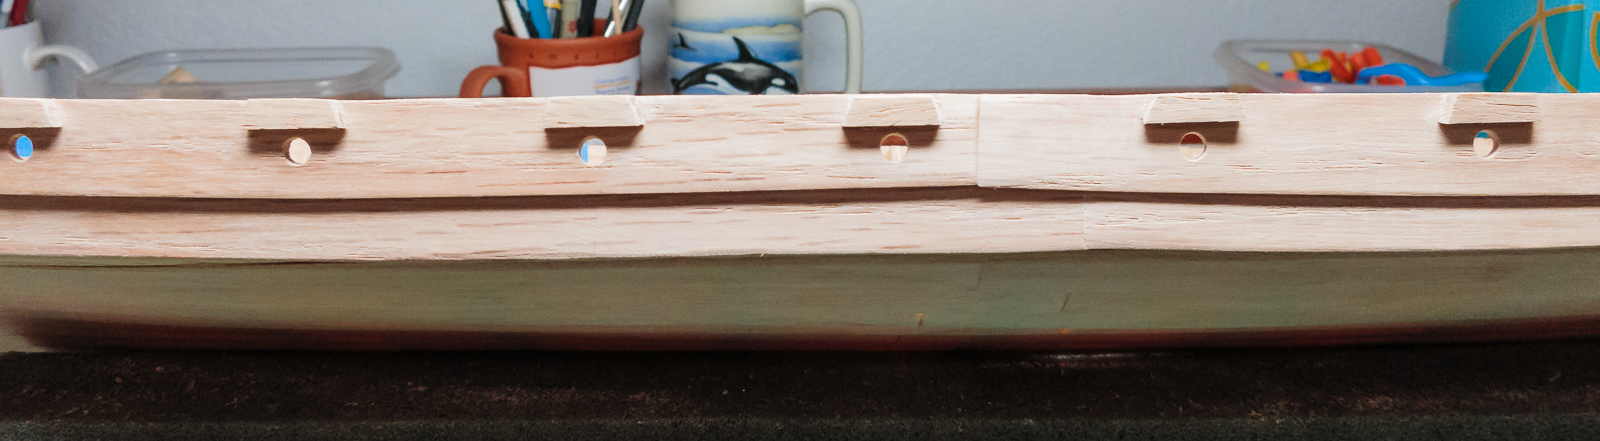
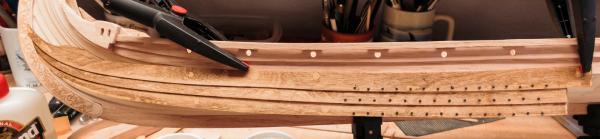
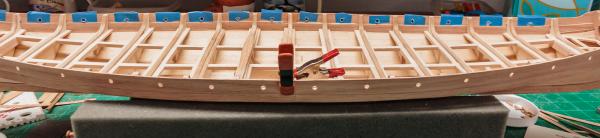
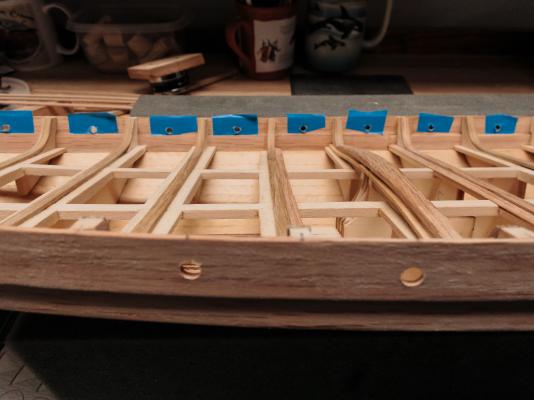
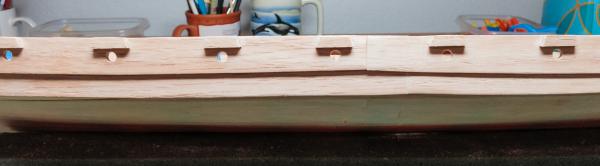
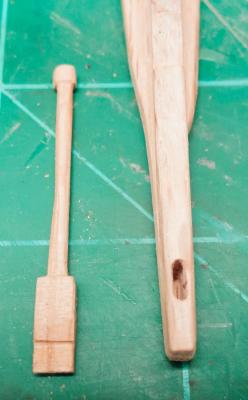
I said that the simulated iron rivets were next but I lied. I could not find any brass nails locally so I had to wait for them, they just arrived. I will do a test layout and decide on the spacing. I also played with the oars. As usual I will do them from oak. For the test I cut a strip of 3.5mmx3.5mm oak and routed off all four corners to create a round dowel. It worked well enough but I need to figure out some sort of jig since working on something that small freehand put my fingers way too close to the router bit for comfort. The oar blade was cut out using a scroll saw. I had a crisis of confidence when I started to work on the oar holes. The realization that I was about to drill 30 holes into my ship was nerve racking to say the least. I laid them out and checked them many times. The are positioned mid way between each bulkhead. I did find that the spot where the top planks on the port side come together had a little hump (about 1mm by 150mm) which I sanded off to make it level. I put masking tape behind each hole to help prevent splintering. The shield rails were next and they are made of oak pieces at each bulkhead covered with a strip 1.5mmx4mm. I had a board long enough so I made them out of a single strip on each side. I installed the rudder support to give the strip a place to land where it meets the rudder. The shields just drop in. Nails, oars and shield decoration are next. I am still looking for a proper center piece for the shields. The bead supplied with the kit is both too small and too ugly.
-
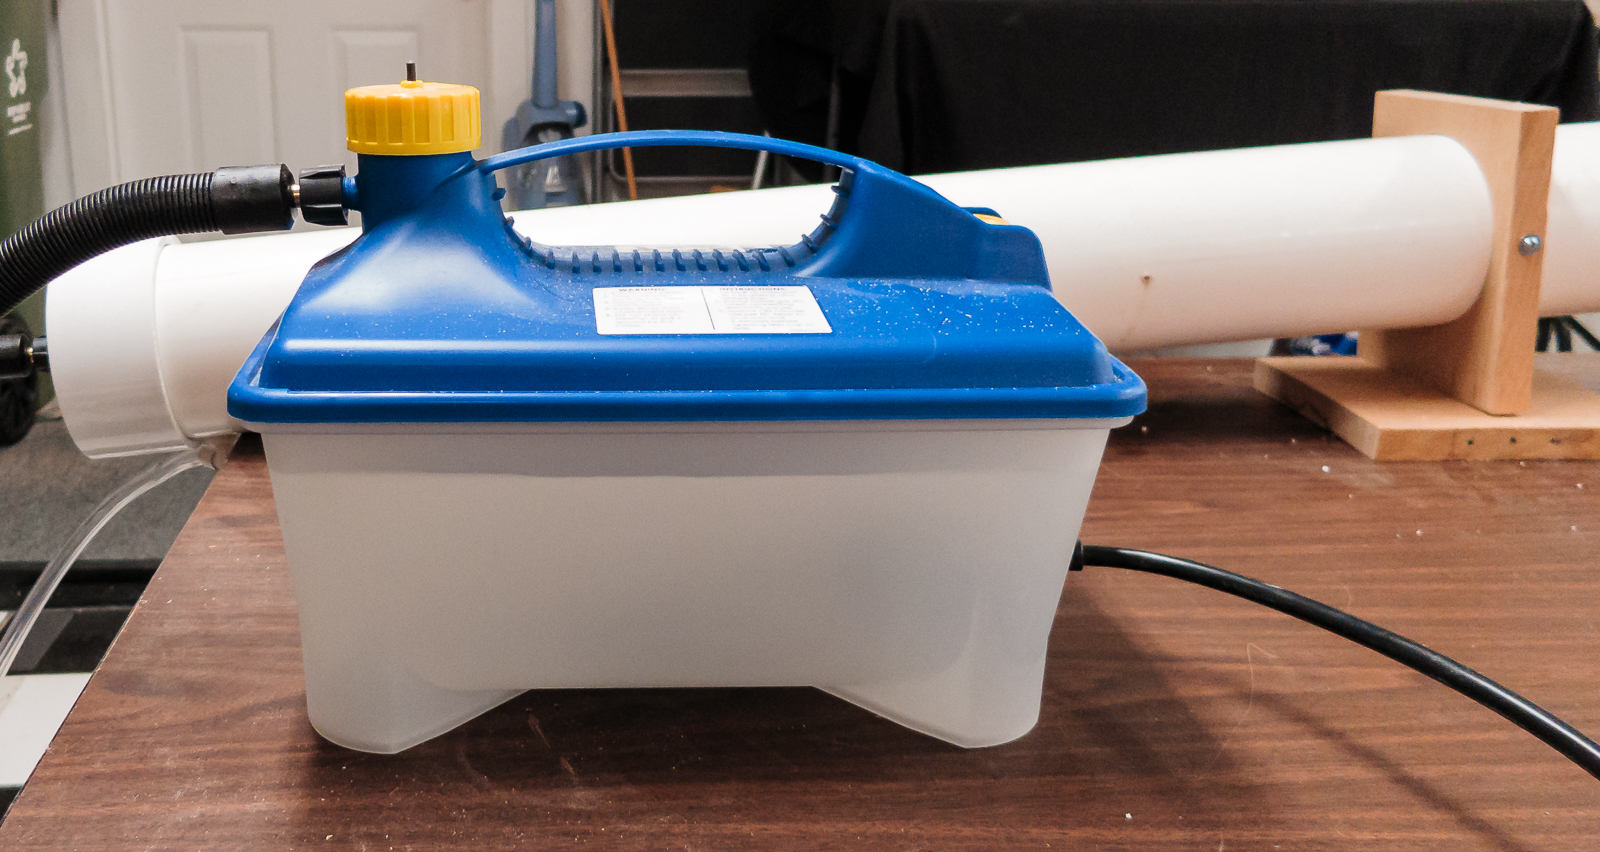
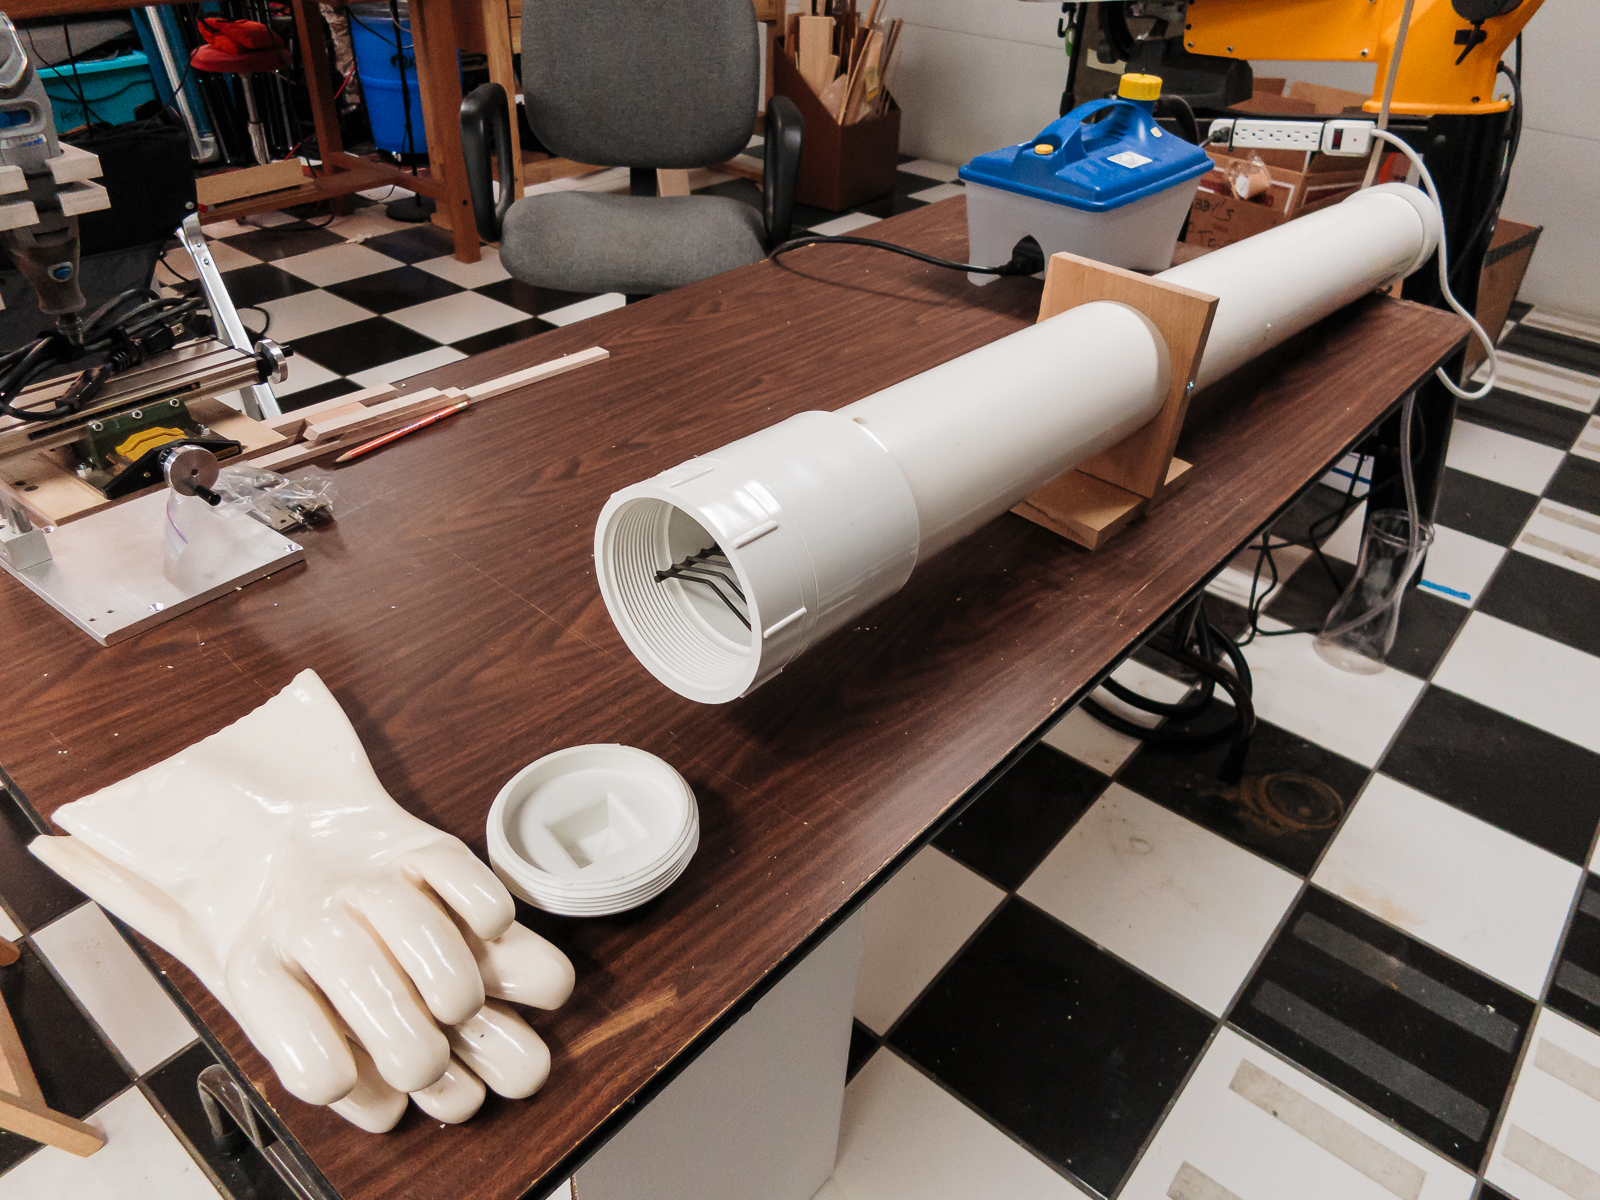
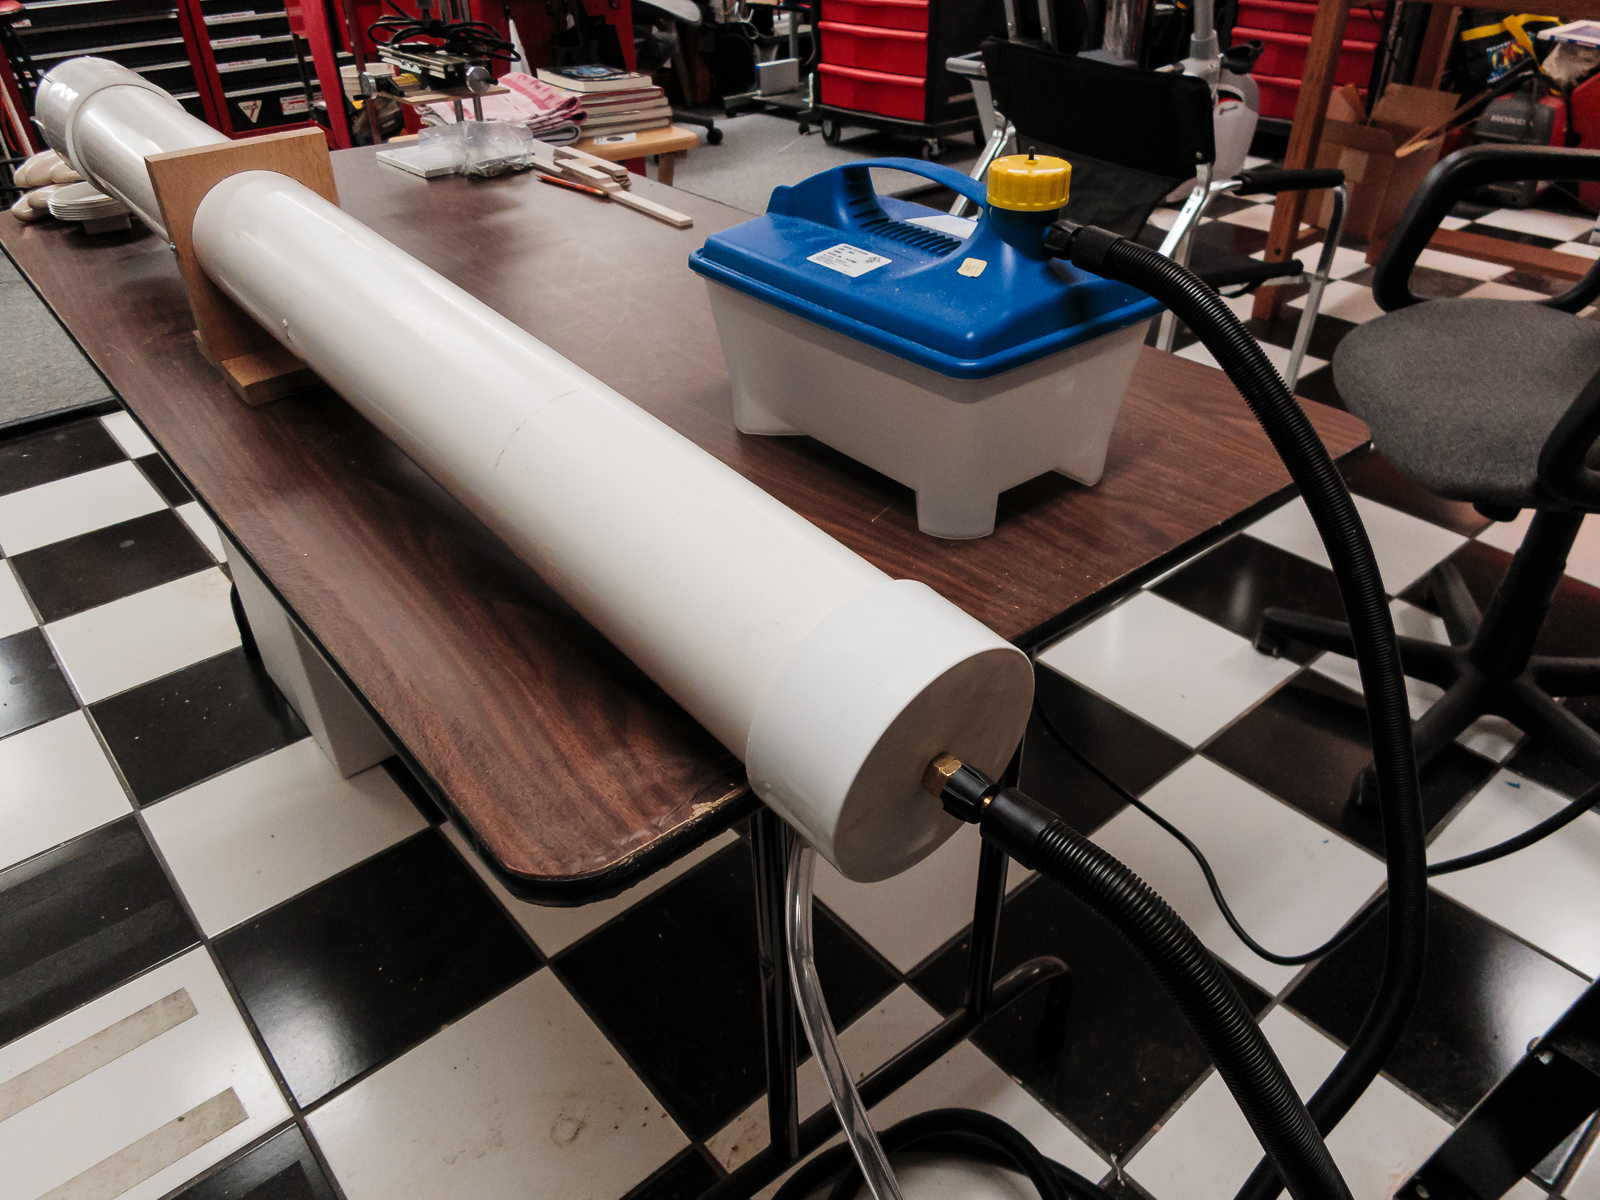
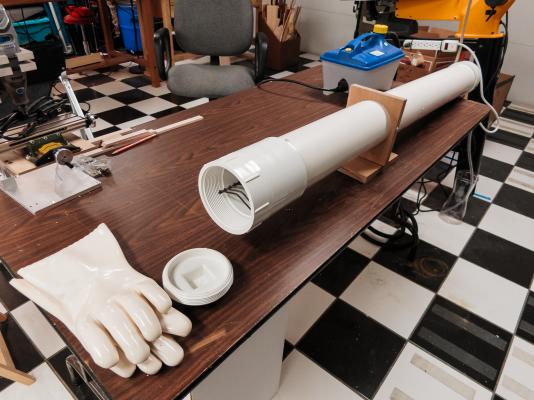
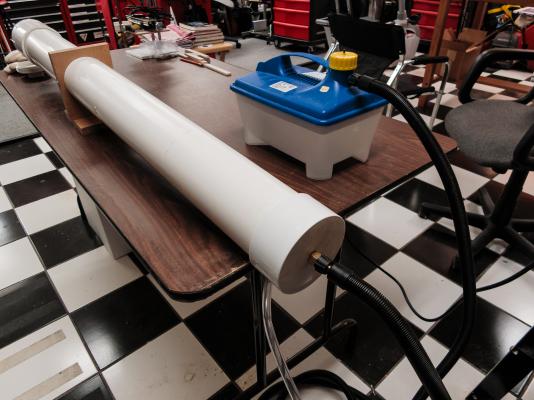
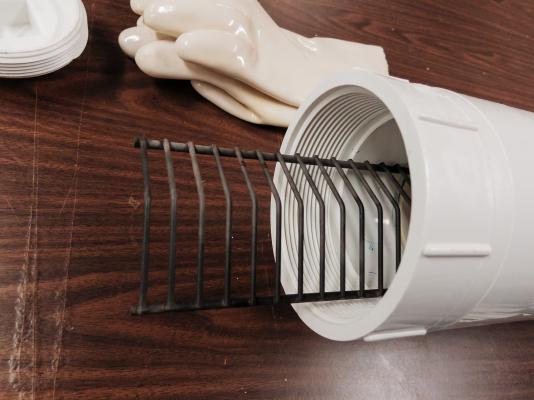
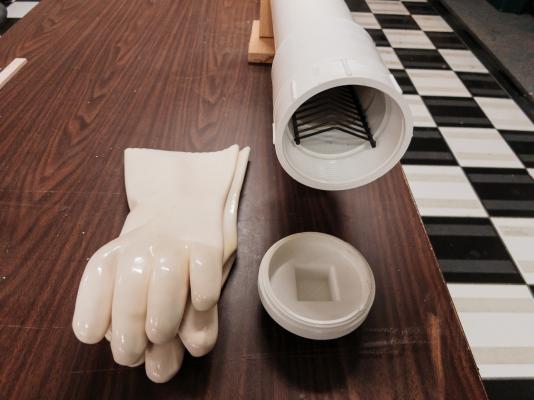
Hi Scott, Welcome to the party. Thanks for reading the log. This ship is a lot of fun to build and the bashing is helping me develop my skills. I really enjoy the wood work and solving problems. I don't think that I would be doing half as well without the truly incredible amount of help from this forum. The experience and artistry here is amazing. The steamer is a great toy. It came from Rockler here in the US. http://www.rockler.com/steam-bending-kit-w-free-bentwood-carryall-plan-download Their plan for a wooden steam box was not very realistic so I used 4" PVC with wooden end caps. That was not a very good idea either. I did a long overdue and much needed re design this past weekend. The version 1 leaked and split the wood ends. The blast of steam when the door opened required wearing barbeque gloves. The new one has a solid PVC cap on one end with a hole drilled for the steam input hose. The condensate drain is in the bottom of the pipe near the back. The front is a clean out plug that is much easier to open than the previous hinged gate. The front is elevated to allow the condensate to drain. There is a steel rack to keep the wood out of the muck, I may want to change to some sort of plastic rack later but the steel rack has not marked the wood so far and it was carried over from version one with many hours of use. It really makes bending easy. Thanks for looking in.

-
Hi David B, Keith, Vivian, Grant and Pete, thanks for dropping in and all the kind words and encouragement. Also, thanks to all the "likes". Sam, I have started laying out the nails on the hull. I did a rough scale off the museum photographs and they end up way too close together for this scale so I will do a test piece before I go too far. Grant, I have not forgotten the photography tips I promised. I will get to it soon.
-
Hi Vivian, Great work on the stairs, hold cover and boxes. I love the weathered effects you use. It looks like a "Real Working Ship" to paraphrase Andy's screen name. I hope that you are feeling well.
-
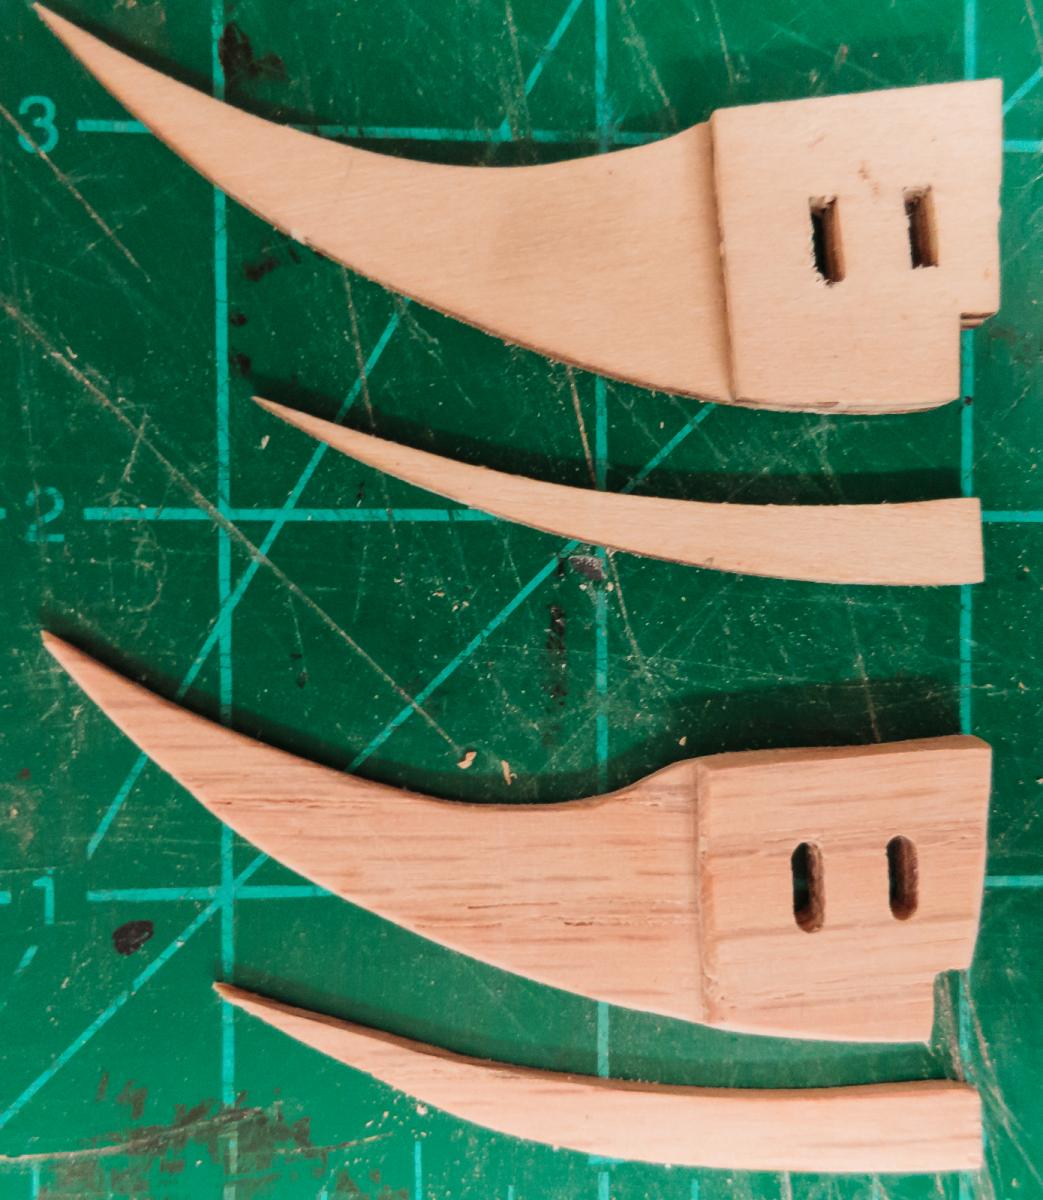
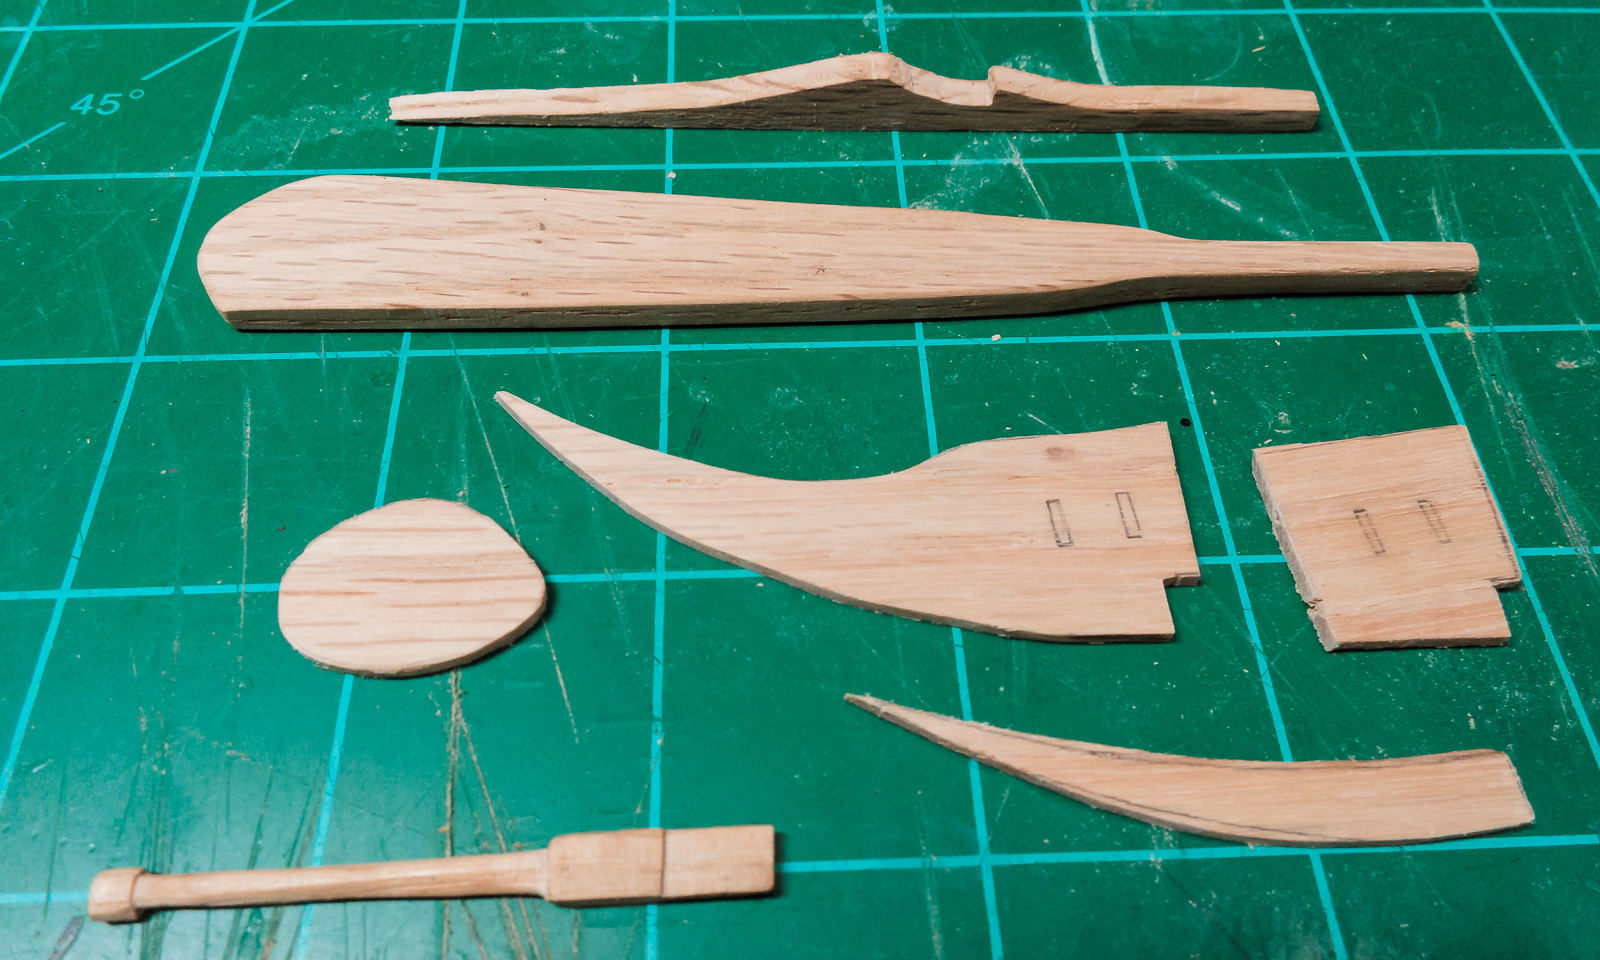
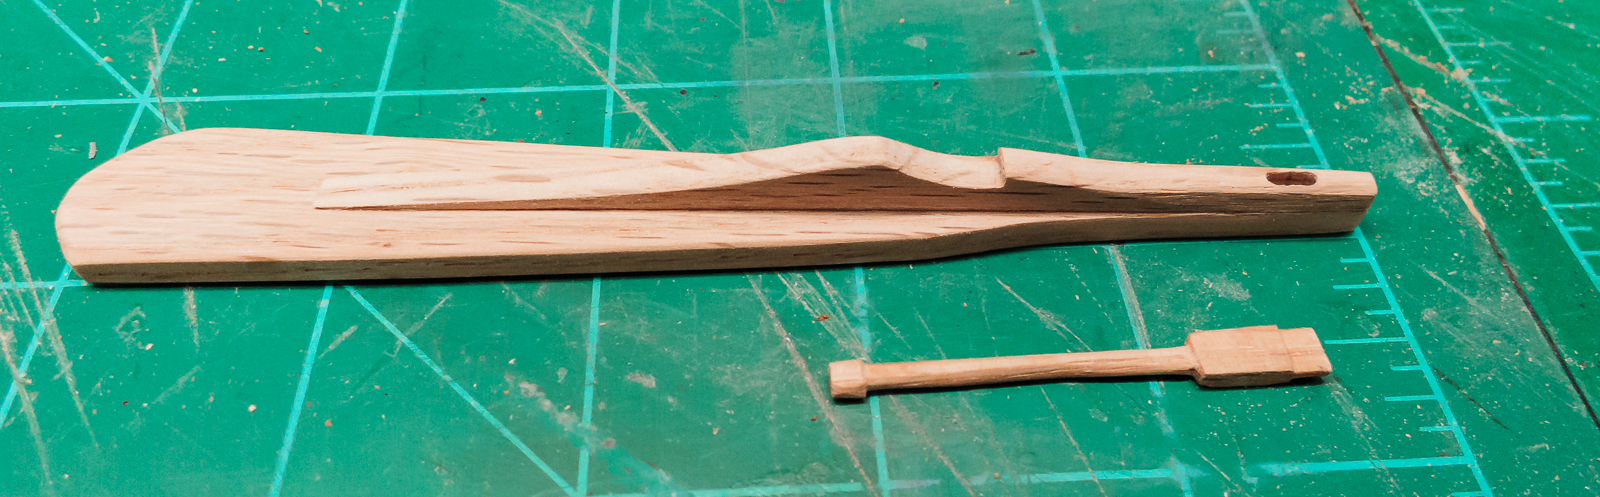
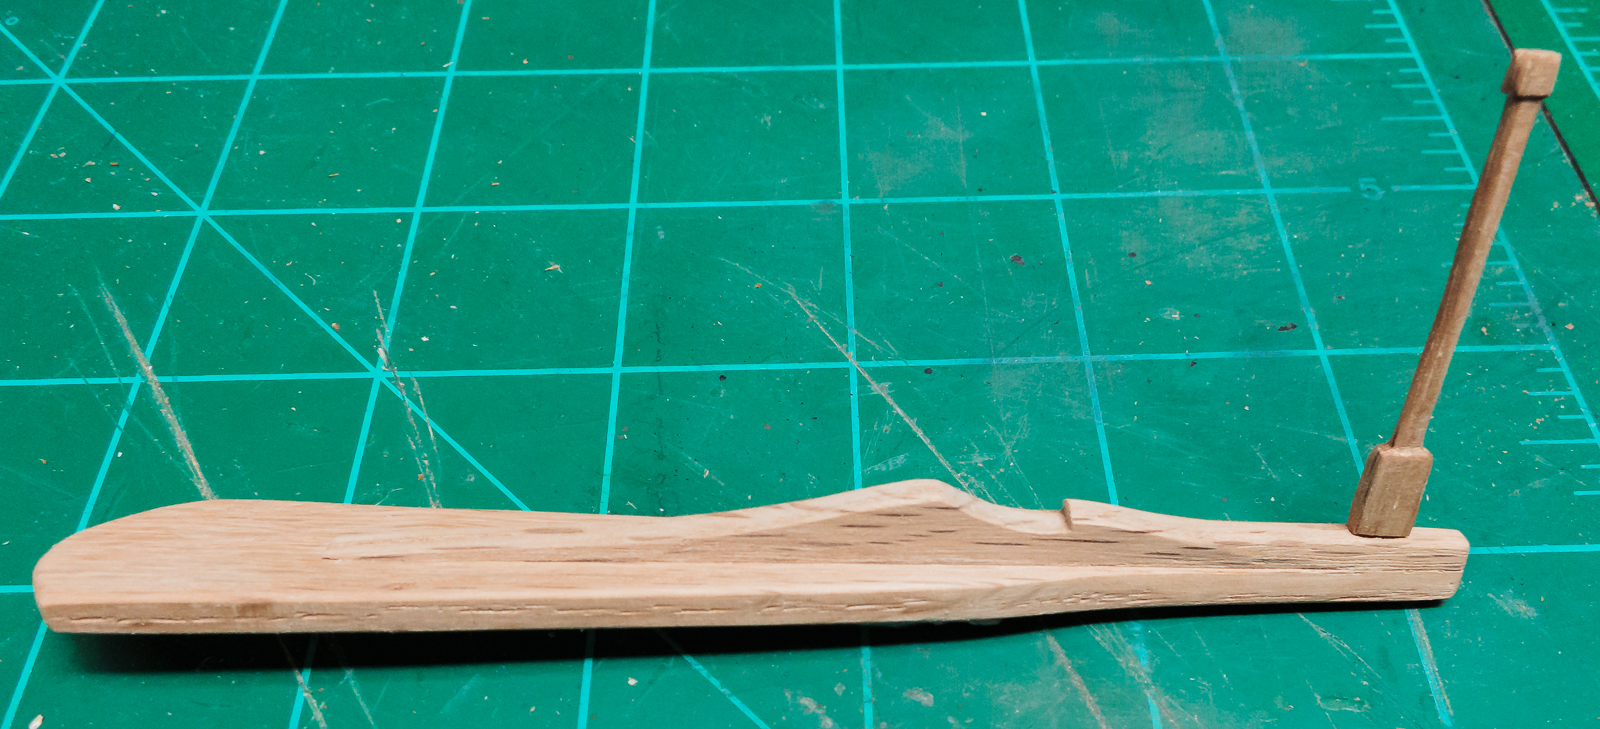
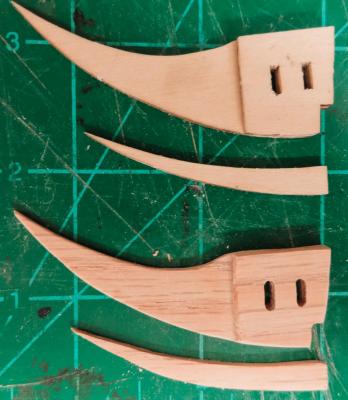
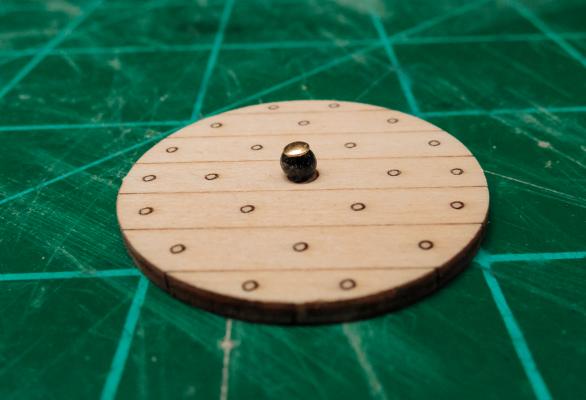
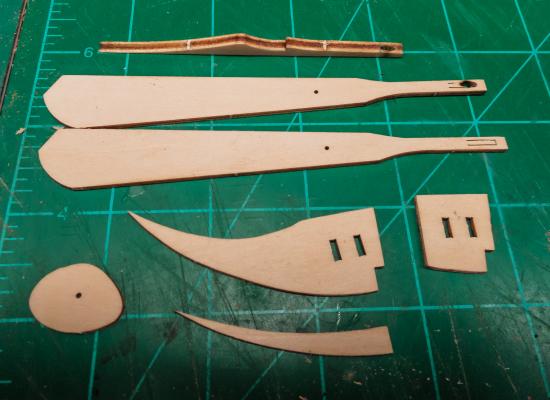
After proving to myself that I could actually do the shields the way that I planned I scored the strips and cut them into smaller pieces and cut the circles as shown in the last update, 32 in all. 30 for the ship and 2 spare for screw ups. I am still researching how I will decorate them. The rudder supplied with the kit is the usual plywood so as usual I felt the need to replace them. The mounting pieces were cut from 1/16 in oak and I was having control problems with my skip tooth scroll saw blades. The wood was hopping around and driving me nuts. After an exhaustive search of every place I could have hidden blades from myself I found a pack of very nice blades I picked up in Japan 15 or so years ago with 36 teeth per 25mm (about 1 inch). They cut like butter with great control. The rudder itself is 5/32 inch oak and I put the pieces together and cut a 1 mm slot for the rudder handle. The handle was carved from a piece of 2.5 x 5 mm oak scrap and placed into the slot. I think that the hull plank nails are next. The were iron with a few showing washers. I am still working out how to do this. In re-reading this before I posted I realized that I have been switching back and forth between metric and fractions of inches. I promise to pick one and and stick with it (as much as I can anyway).


-
Hi Grant and Lecsandro, Thanks for dropping by and especially for the kind words. I have been laying low for a few days during the holiday but it is time to make some more sawdust. Working on an update now.
-
Looks great, glad you caught it sooner rather than later.
-
Hi Bindy, Years ago I visited the Victory and took many pictures. I even took the "Modelers Tour" where, for a few pounds, they let you explore many places the regular tour is not allowed. As life would have it I never got around to the Victory and now I can't remember the details anyway. At least I still have the pictures (somewhere). It will be a long time before I develop the patience to anything with that much repetition. Thanks fro stopping by.