


kpnuts
-
Posts
1,034 -
Joined
-
Last visited
Content Type
Profiles
Forums
Gallery
Events
Everything posted by kpnuts
-
Italari 1/12 Mephistopheles by kpnuts
kpnuts replied to kpnuts's topic in Non-ship/categorised builds
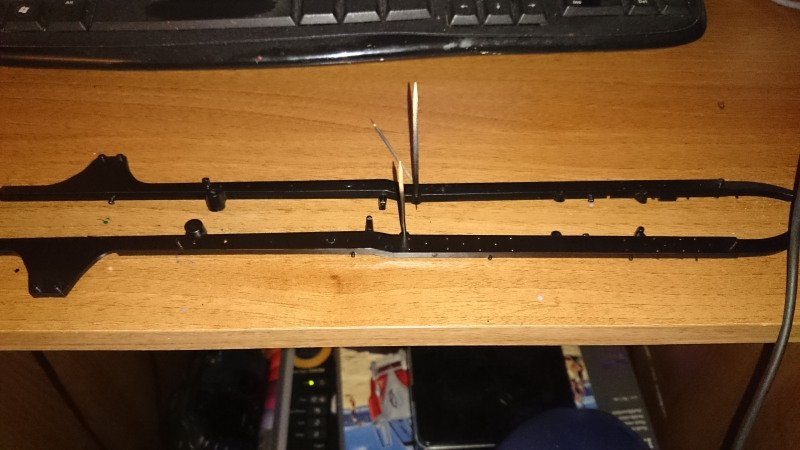
Heres another update on this.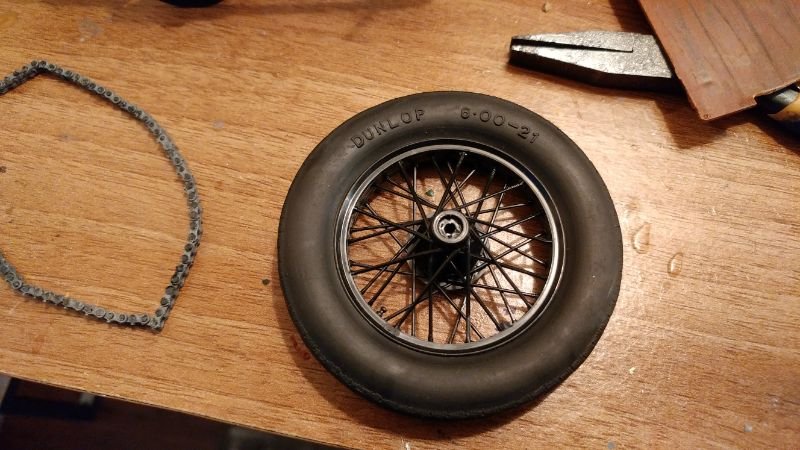


- 32 replies
-
- 10
-

-
Citroen Traction Avant by kpnuts - FINISHED - Heller - 1/8
kpnuts replied to kpnuts's topic in Non-ship/categorised builds
Time for another update.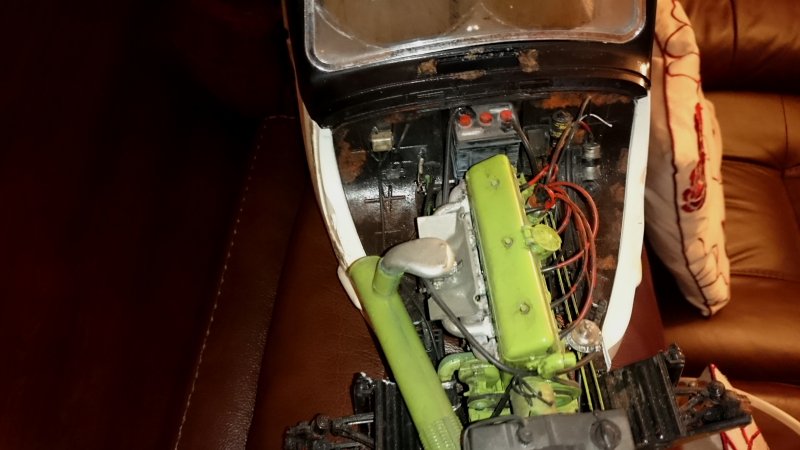


- 86 replies
-
- 12
-
-
Citroen Traction Avant by kpnuts - FINISHED - Heller - 1/8
kpnuts replied to kpnuts's topic in Non-ship/categorised builds
Beautiful I feel I know every part of your brother's car intimately having built this 3 times must have been a joy working on the full sized car. -
Citroen Traction Avant by kpnuts - FINISHED - Heller - 1/8
kpnuts replied to kpnuts's topic in Non-ship/categorised builds
You really wont be sorry it is an amazing kit I've built it 3 times now, this was my first then I built a custom then I cut the roof off and built it as a hot rod put a 7 litre v8 in it (cant seem to find pics of that one I will keep digging but I do have over 30,000 pictures of models I've built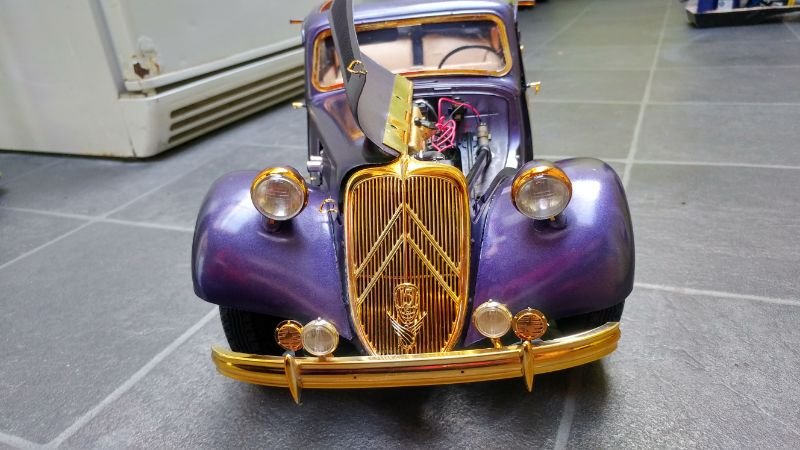

- 86 replies
-
- 12
-
-
Italari 1/12 Mephistopheles by kpnuts
kpnuts replied to kpnuts's topic in Non-ship/categorised builds


-
Citroen Traction Avant by kpnuts - FINISHED - Heller - 1/8
kpnuts replied to kpnuts's topic in Non-ship/categorised builds
Next update.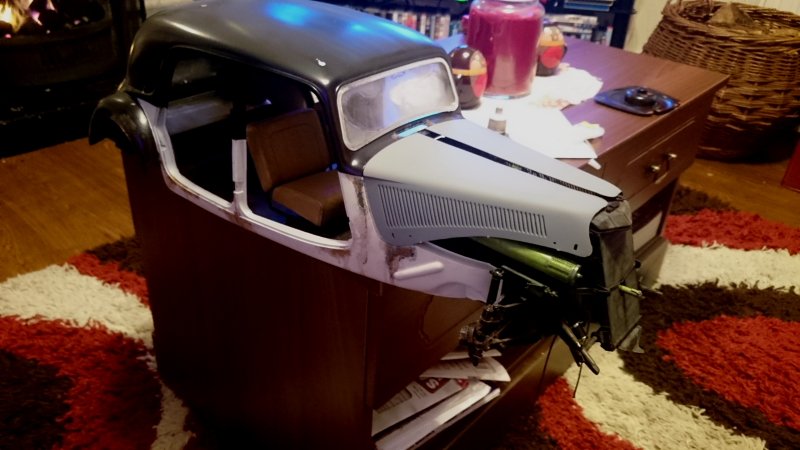
- 86 replies
-
- 12
-
-
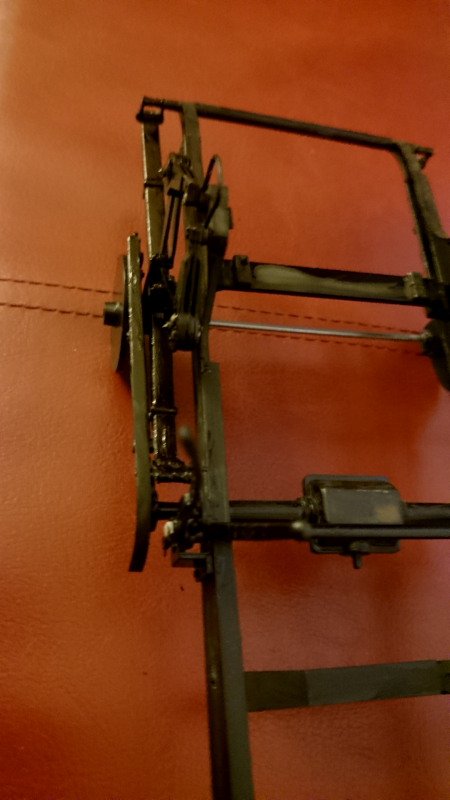
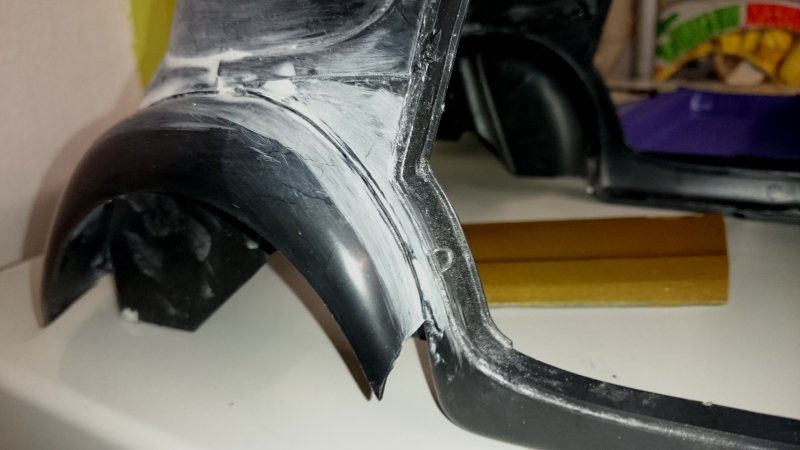
Hi all well I just couldn't stand looking at those sloping shrouds any more.
- 82 replies
-
- 1
-
-
- artesania latina
- cutty sark
- (and 1 more)
-
Italari 1/12 Mephistopheles by kpnuts
kpnuts replied to kpnuts's topic in Non-ship/categorised builds
Heres the next update.


- 32 replies
-
- 10
-
-
Italari 1/12 Mephistopheles by kpnuts
kpnuts replied to kpnuts's topic in Non-ship/categorised builds
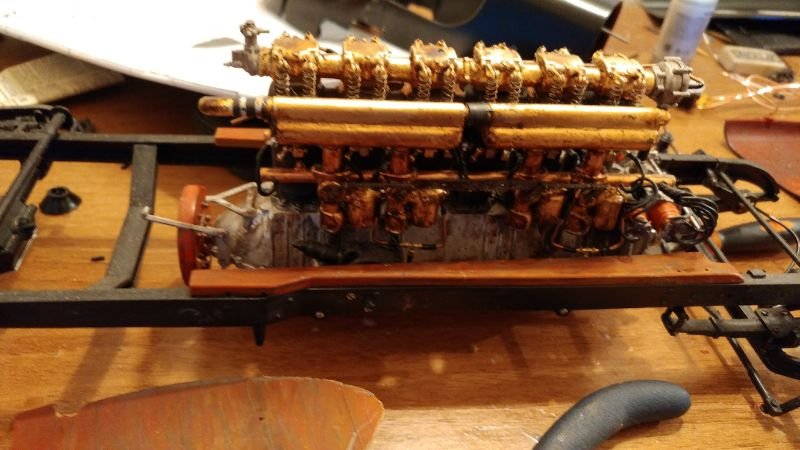
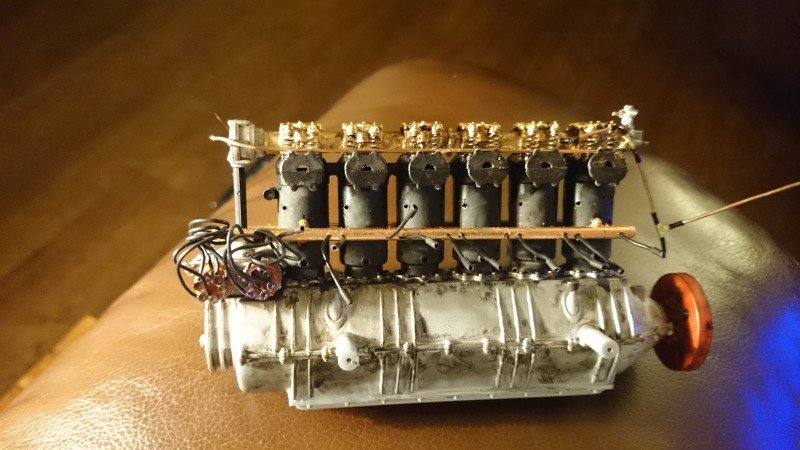
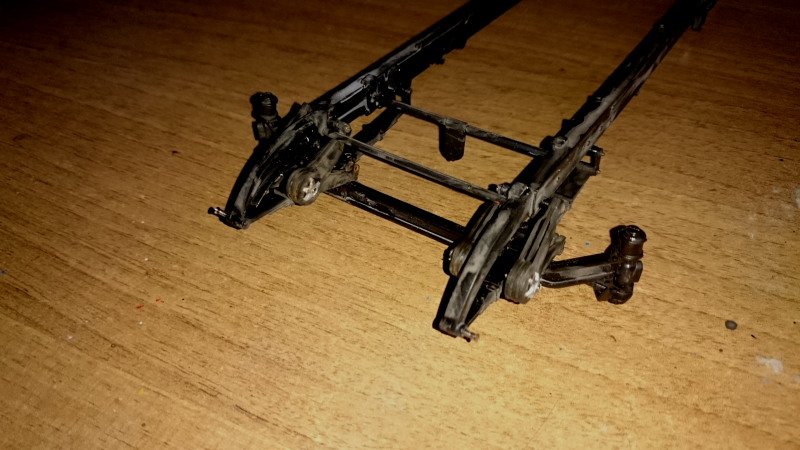
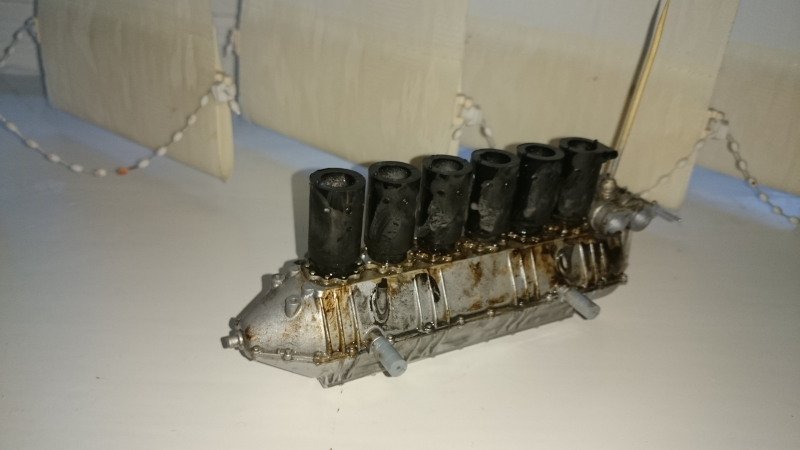
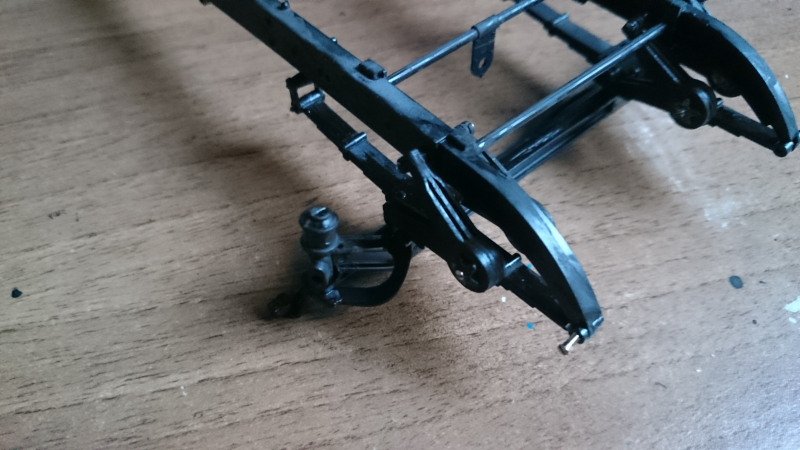
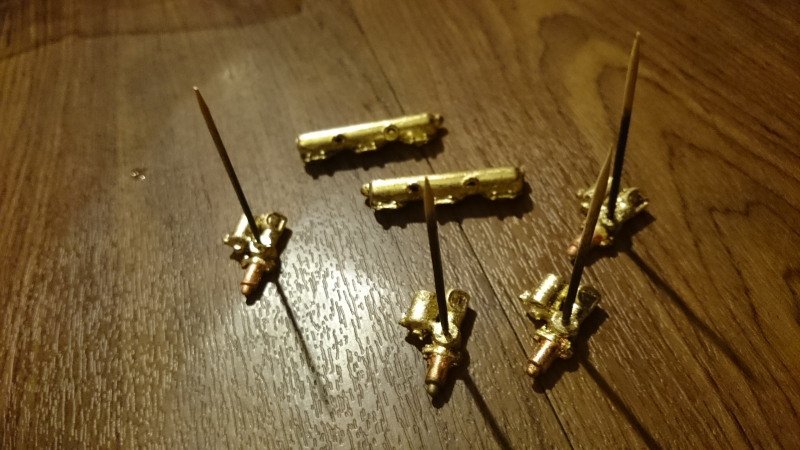
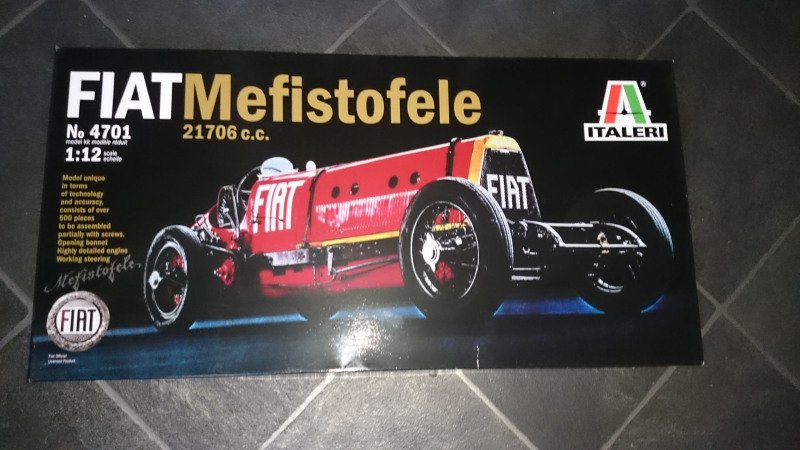
It was ernest Eldridge dream child 21 litre aero engine, it must have took some guts to drive it no brakes total loss oil system (they would have been sitting in hot engine oil after every run) done on French country roads in the run there was a co pilot to pump the extra air and petrol into the system. The car as known now is after the world record run when it was sold as a race car and got the name mefistofeles and painted red when ernest had it it was simply called the beast. -
Citroen Traction Avant by kpnuts - FINISHED - Heller - 1/8
kpnuts replied to kpnuts's topic in Non-ship/categorised builds
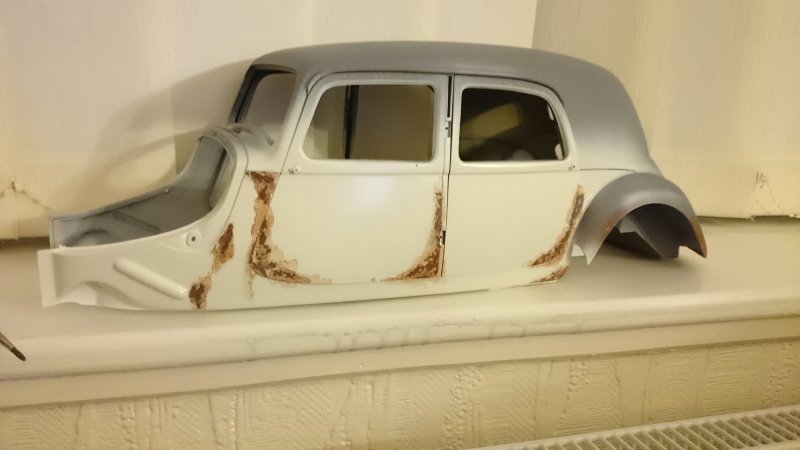
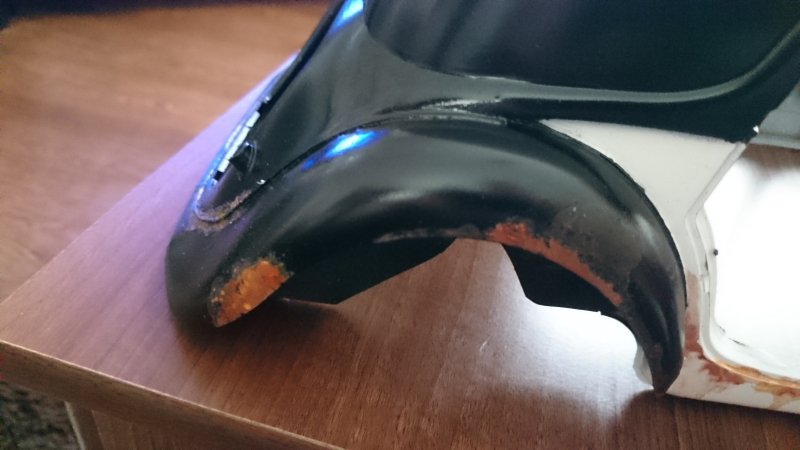
Going to have a few dents -
Citroen Traction Avant by kpnuts - FINISHED - Heller - 1/8
kpnuts replied to kpnuts's topic in Non-ship/categorised builds
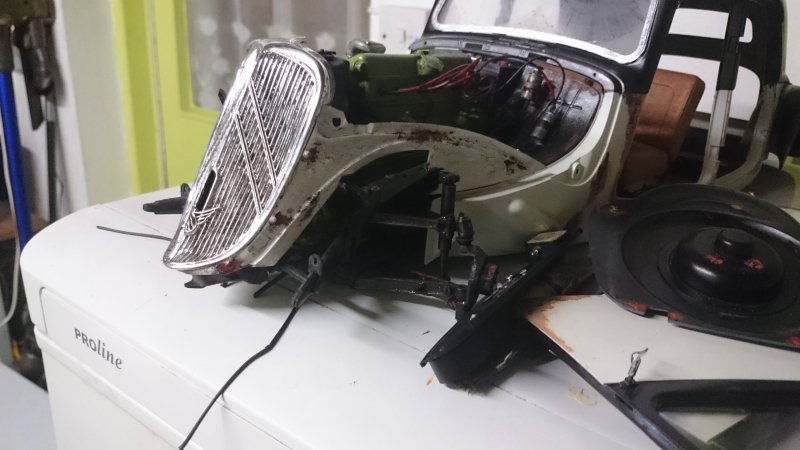
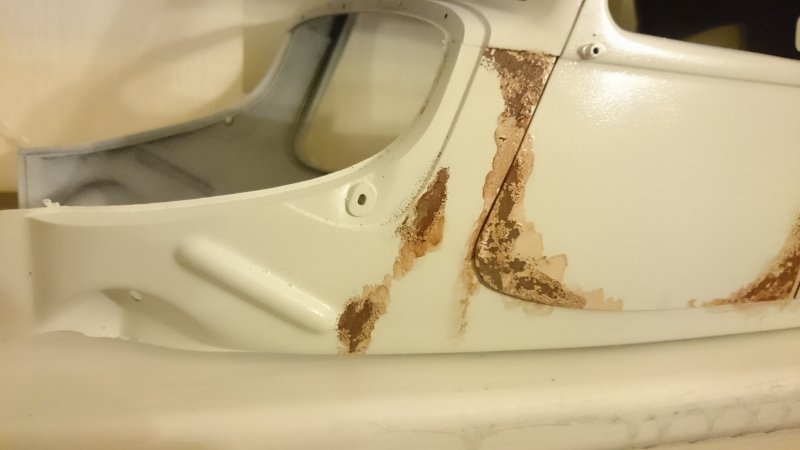
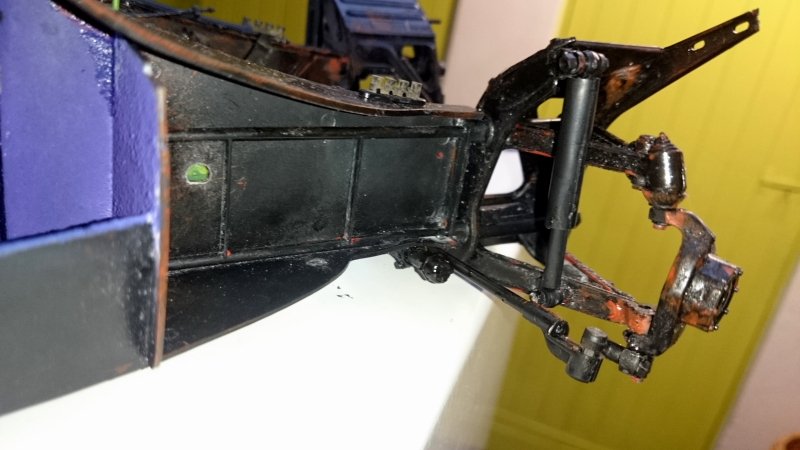
Theres no blending or anything in those pics so the rust is not very convincing yet. -
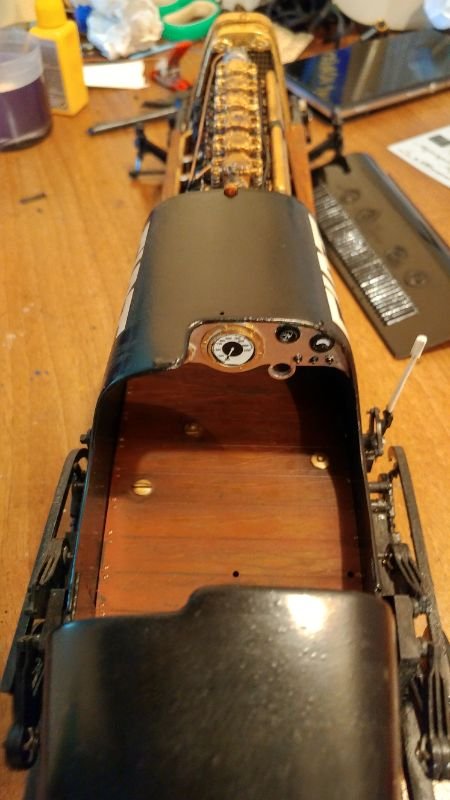
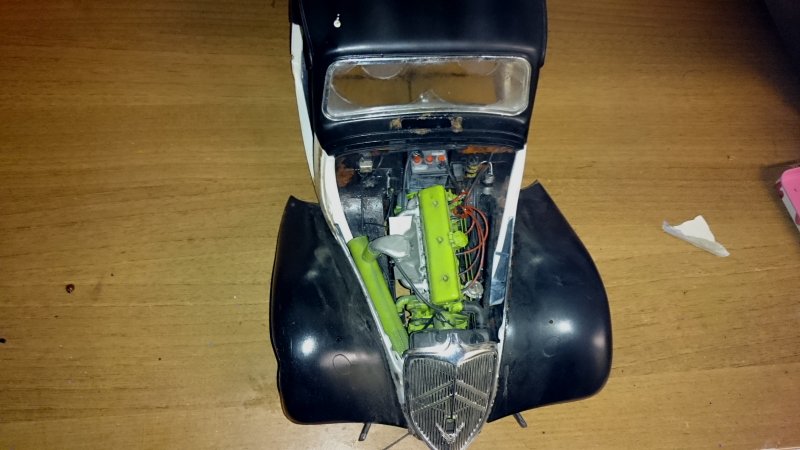
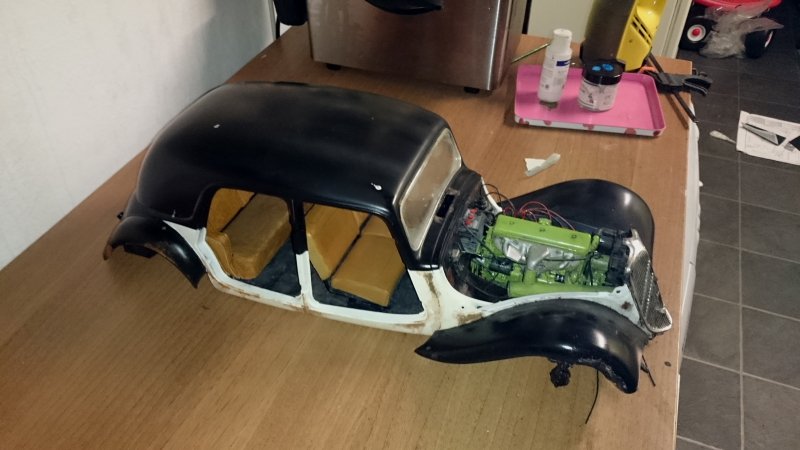
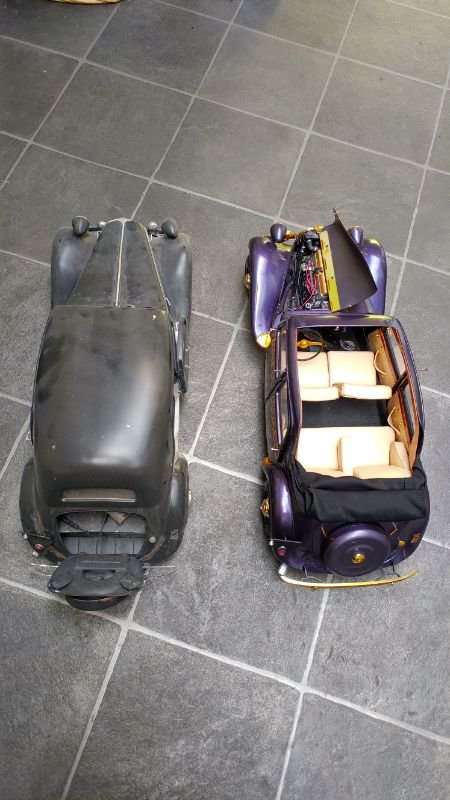
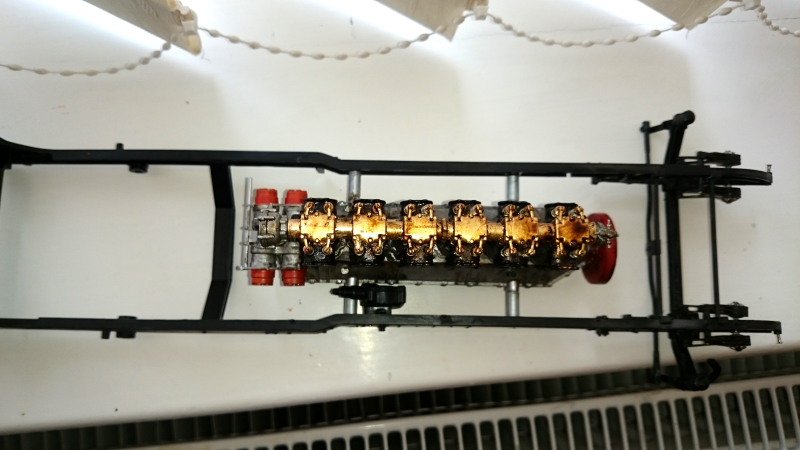
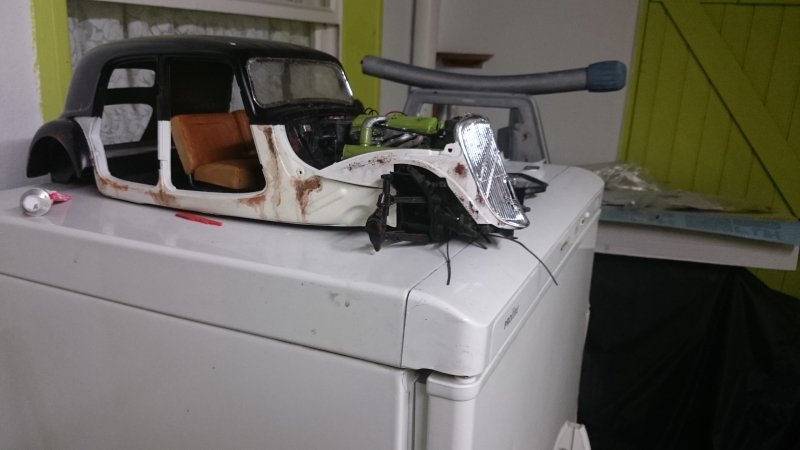
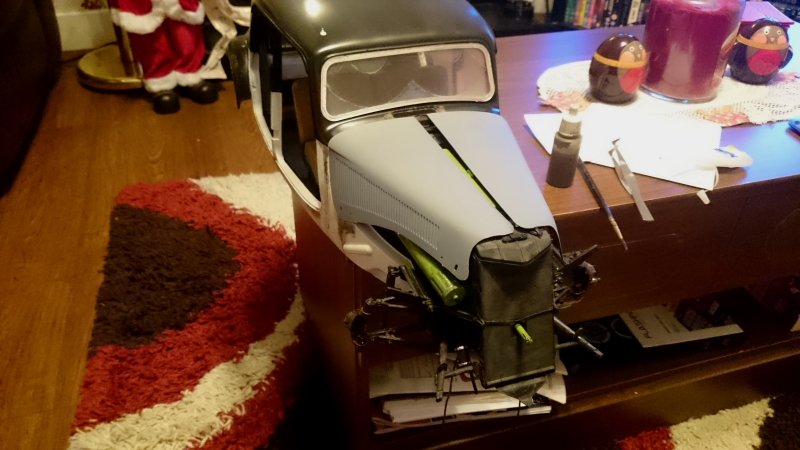
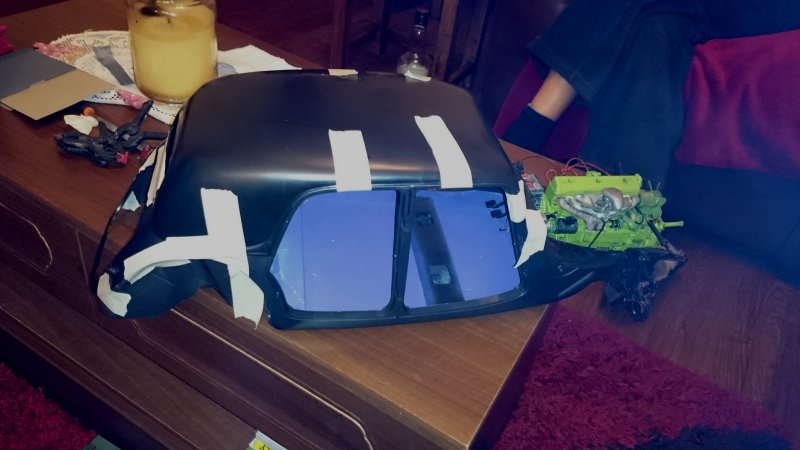
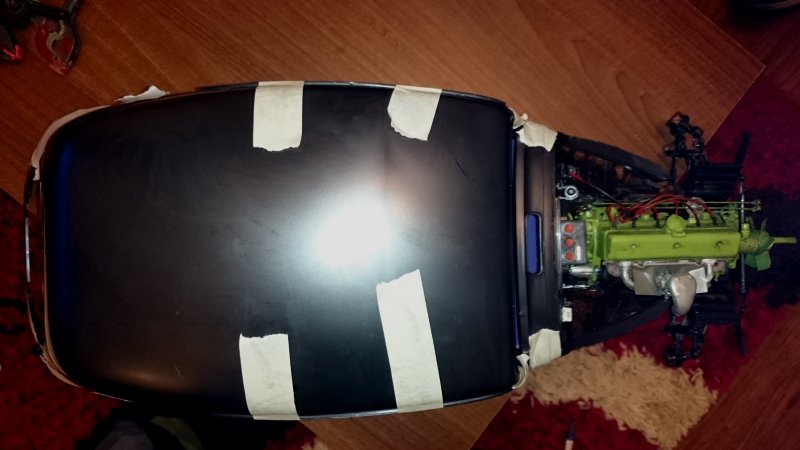
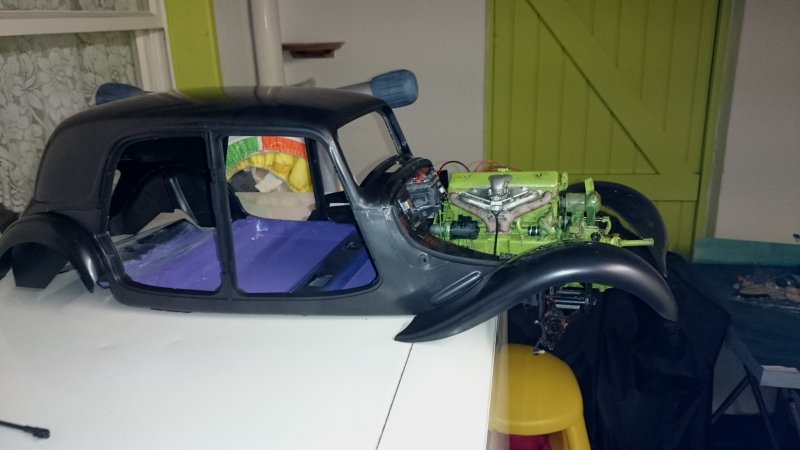
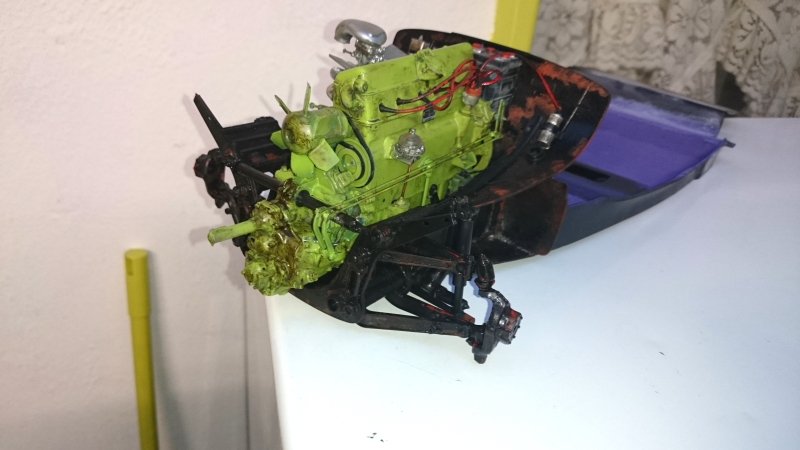
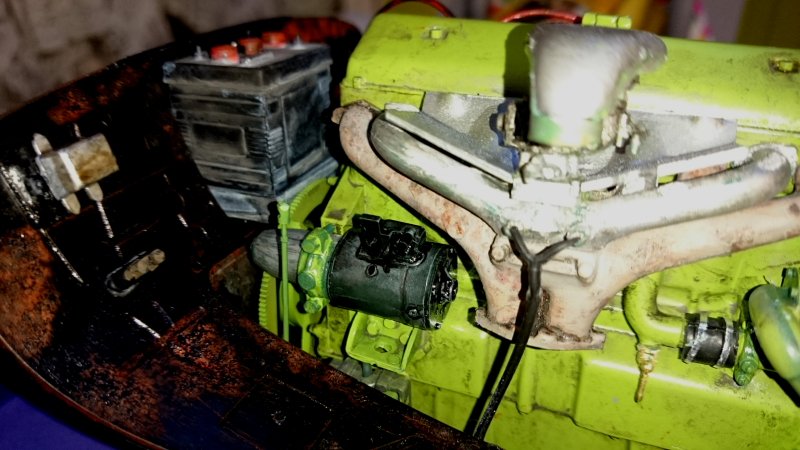
Hi all another car build, this is an incredible kit but I didn't build this version (it's the one in the museum) I will be building it as the world speed record car (most notable difference is it will be black. I did all the copper and brass pieces with copper and brass leaf.


- 32 replies
-
- 15
-
-
Citroen Traction Avant by kpnuts - FINISHED - Heller - 1/8
kpnuts replied to kpnuts's topic in Non-ship/categorised builds
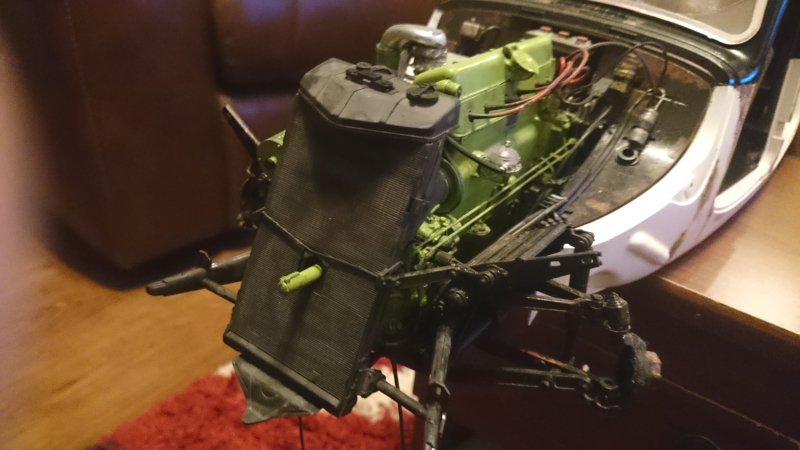
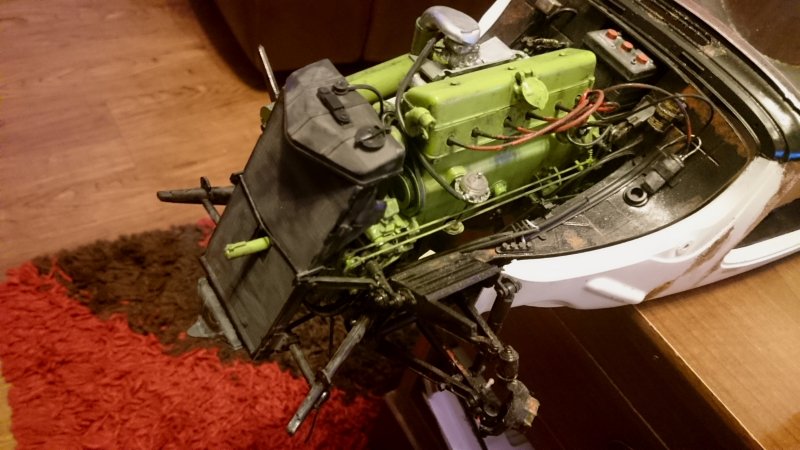
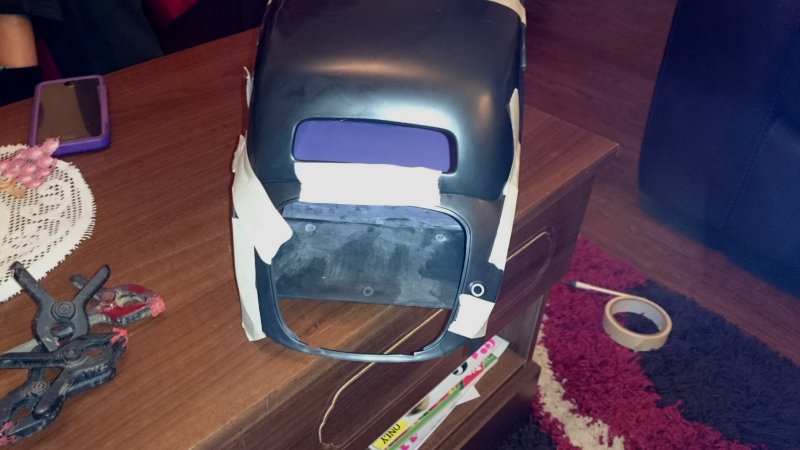
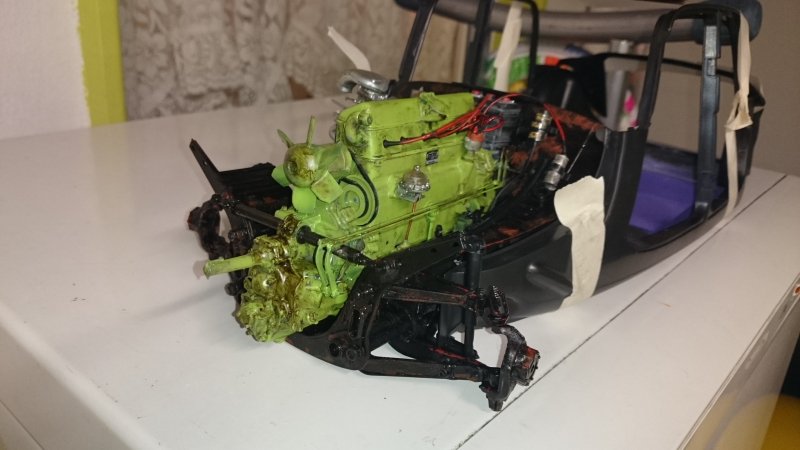
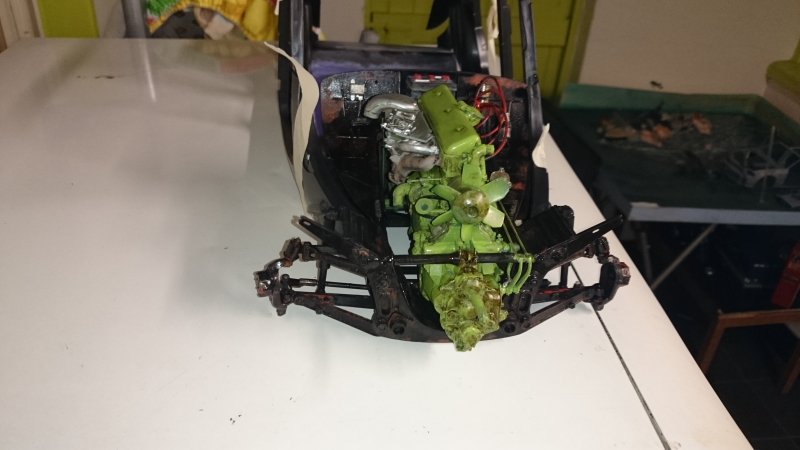
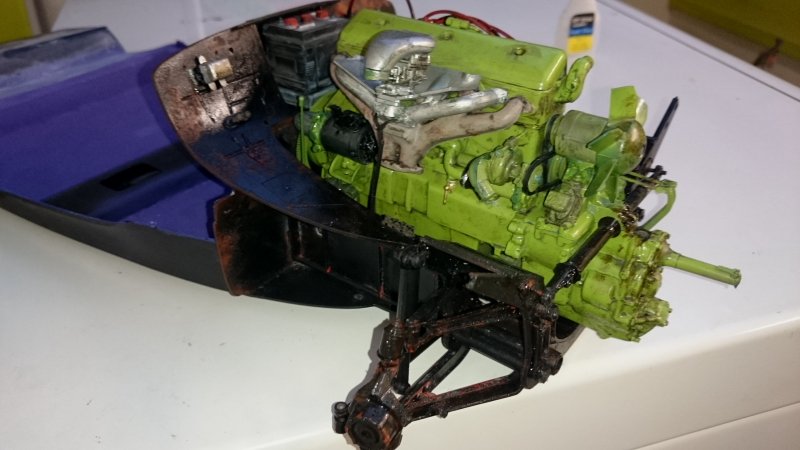
Here is the next update (I have literally dozens of these builds to add to this section)


- 86 replies
-
- 16
-
-
Citroen Traction Avant by kpnuts - FINISHED - Heller - 1/8
kpnuts replied to kpnuts's topic in Non-ship/categorised builds
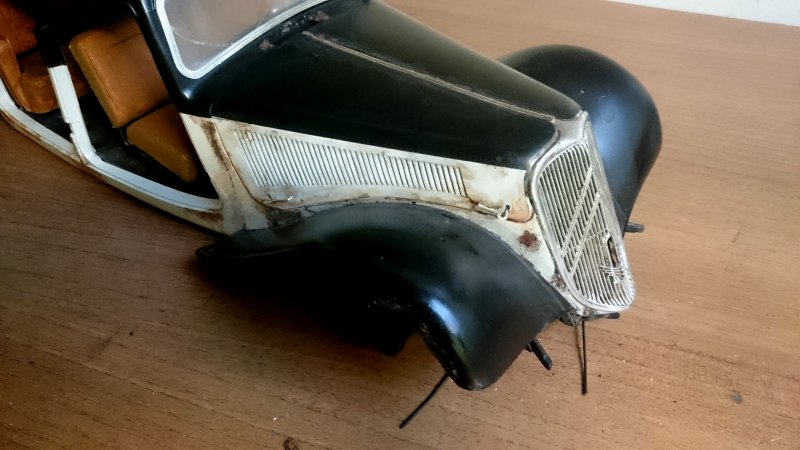
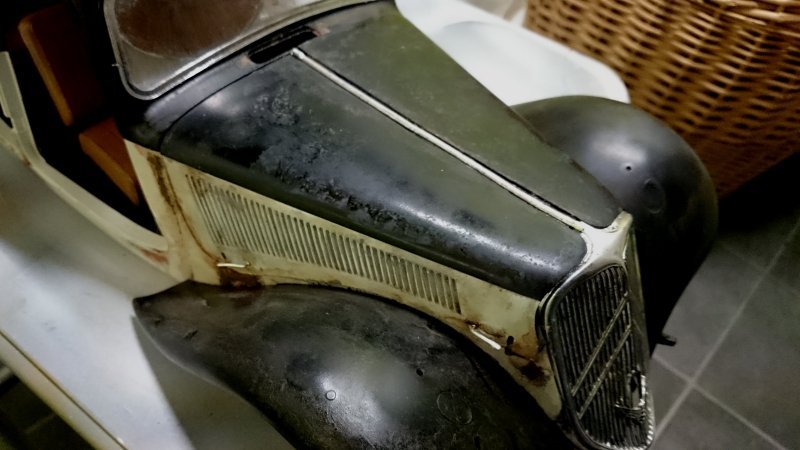
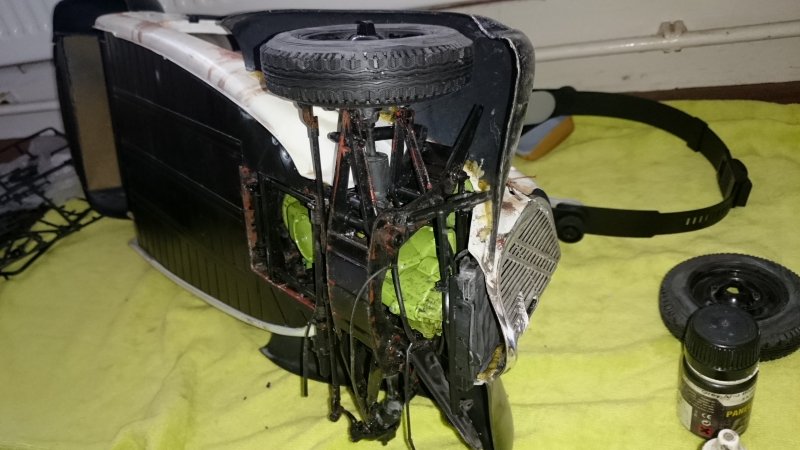
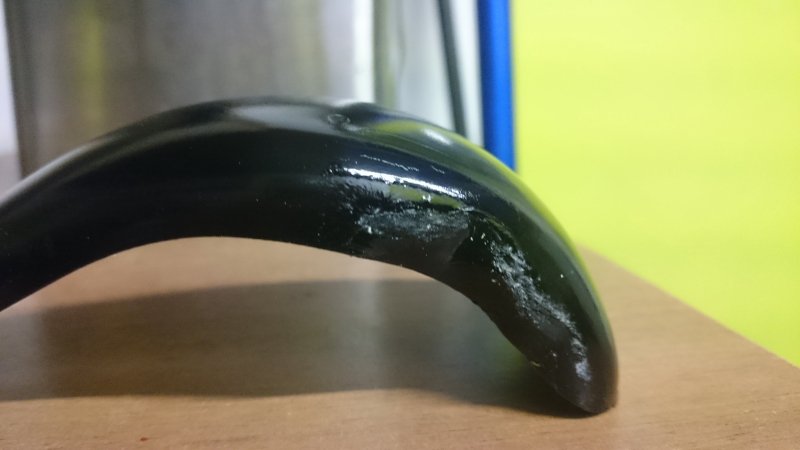
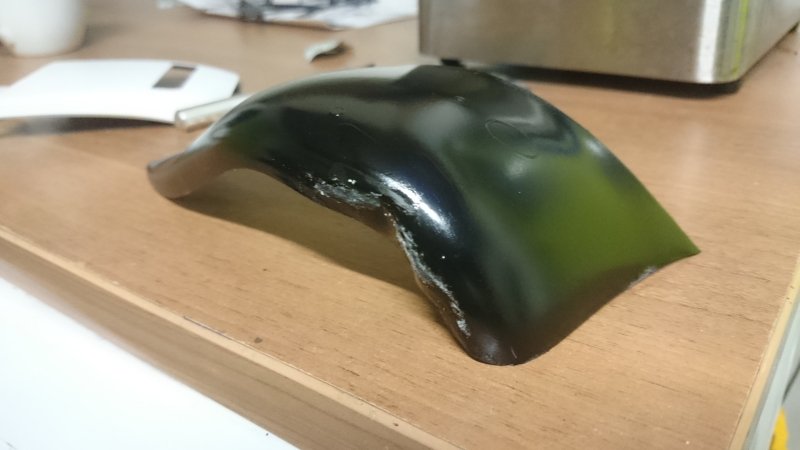
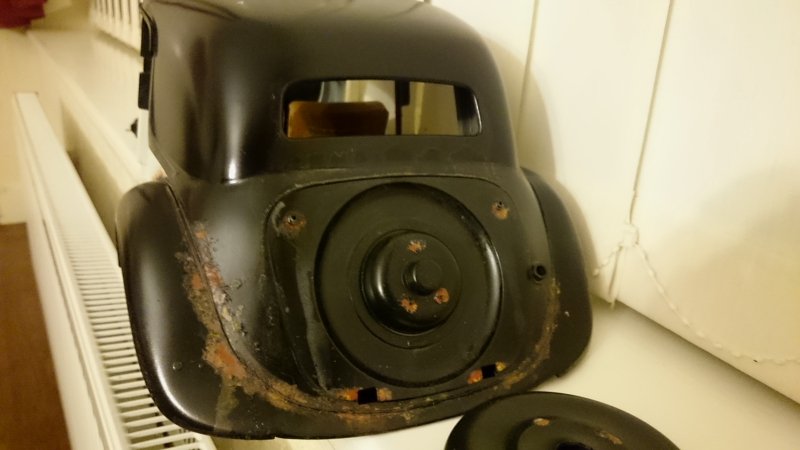
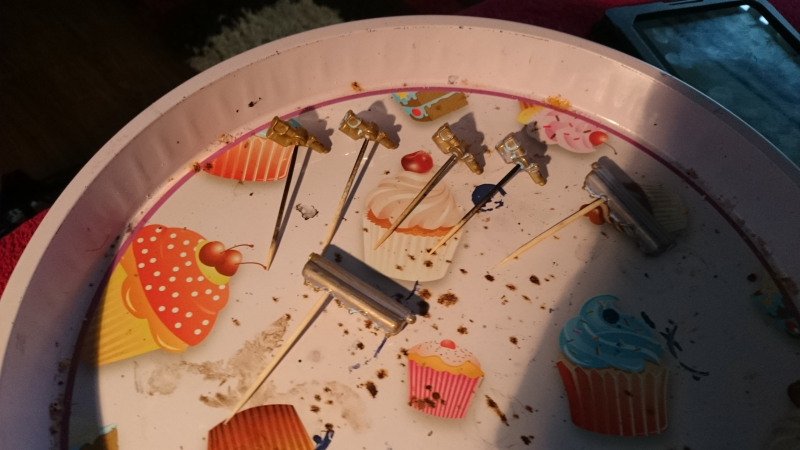
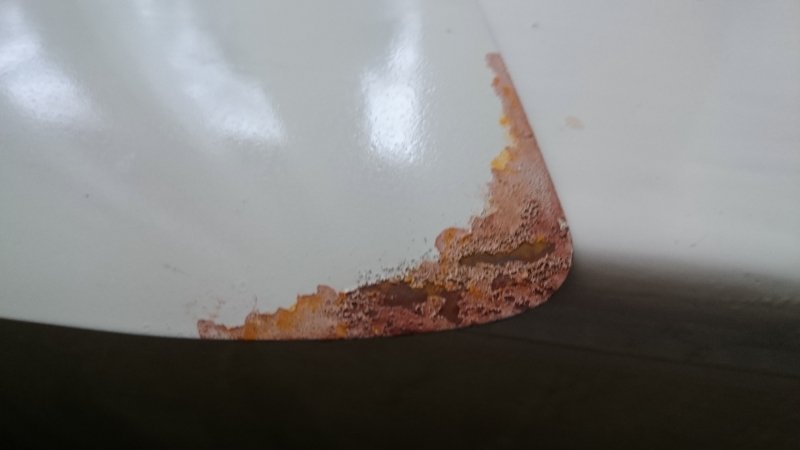
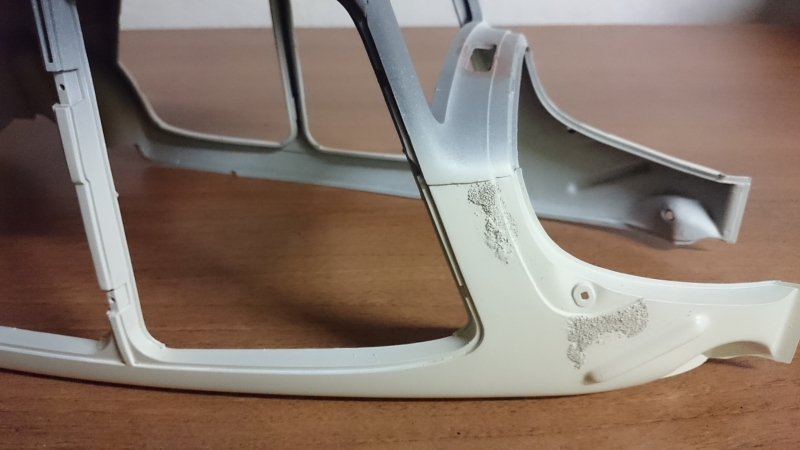
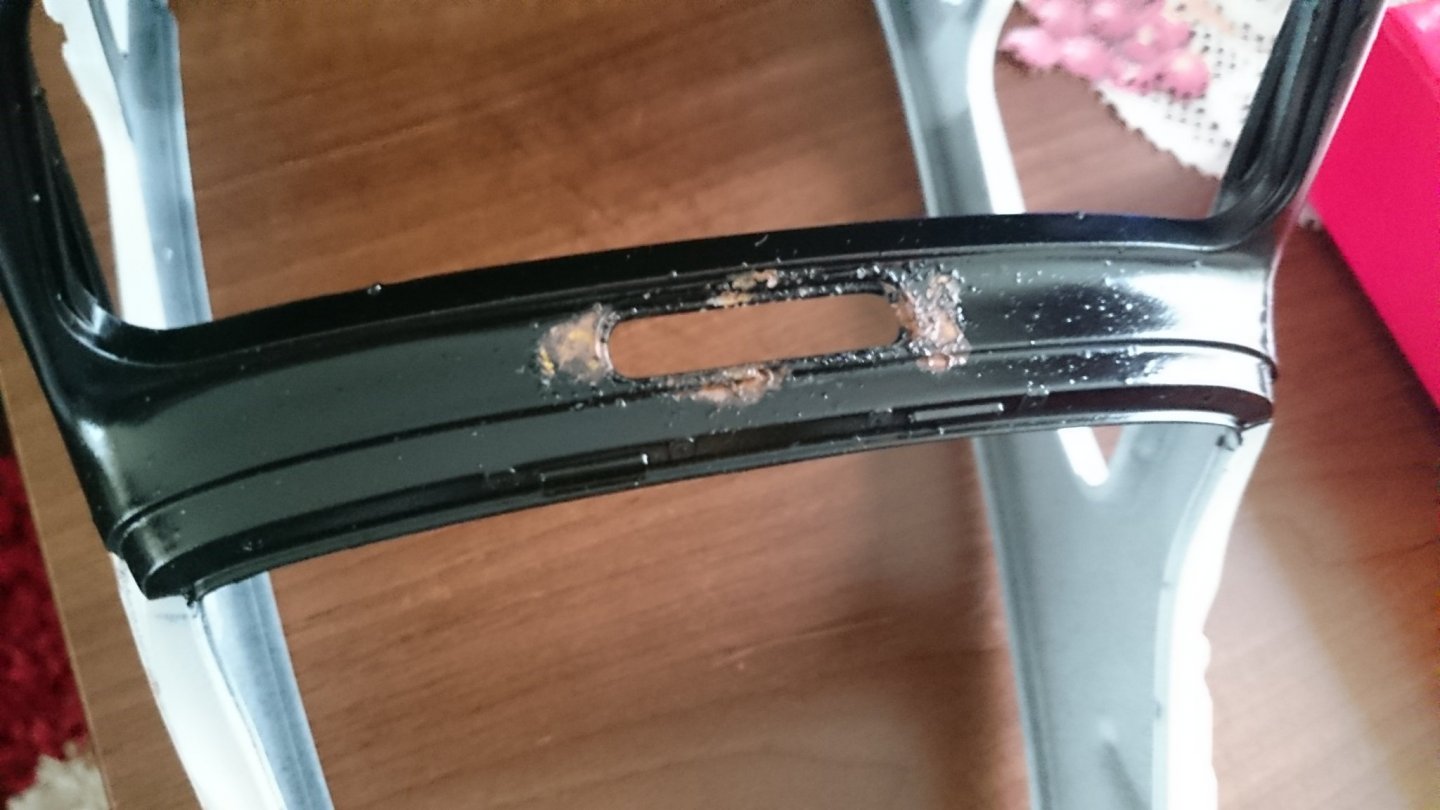
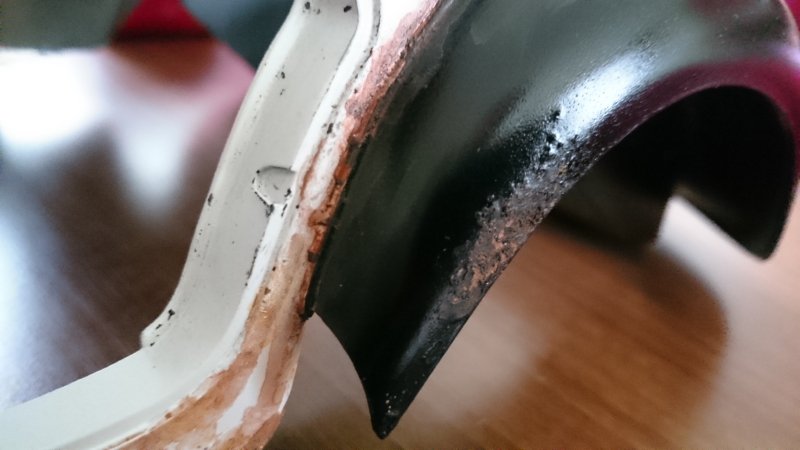
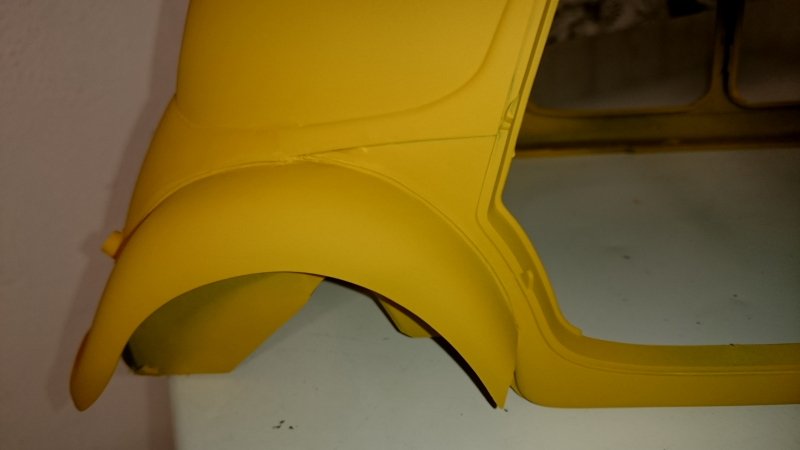
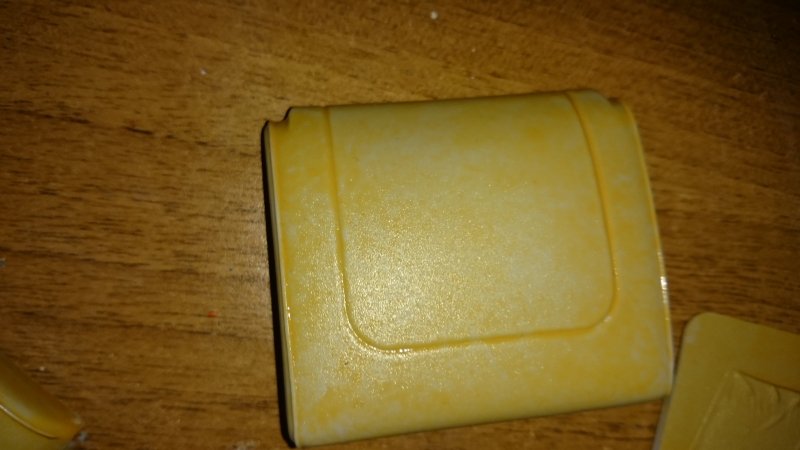
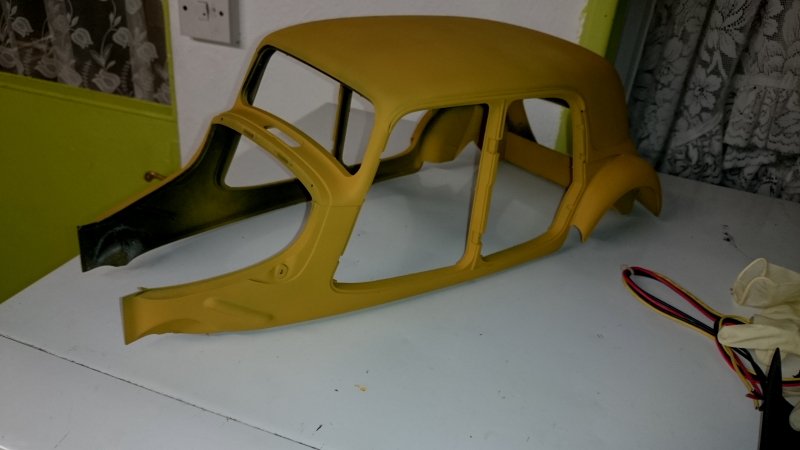
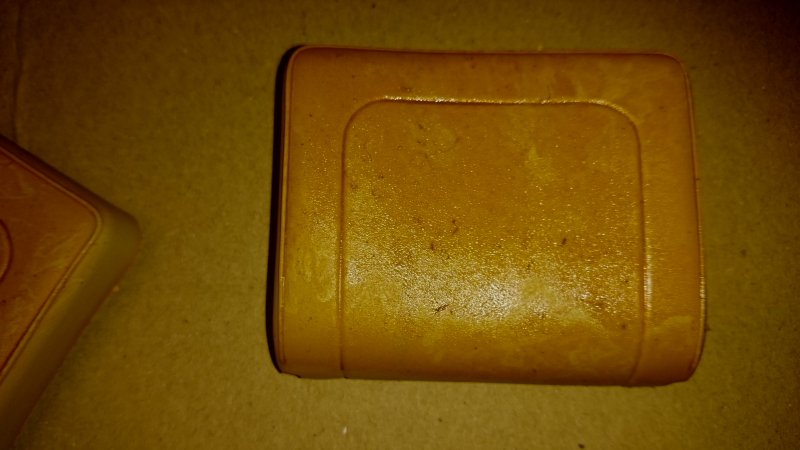
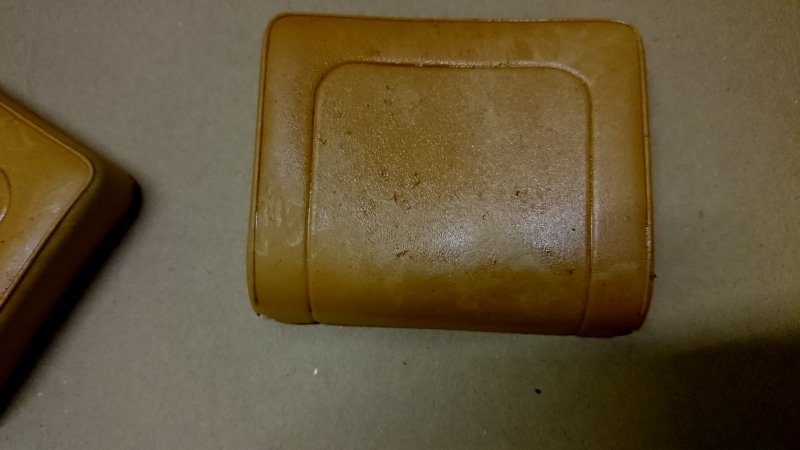
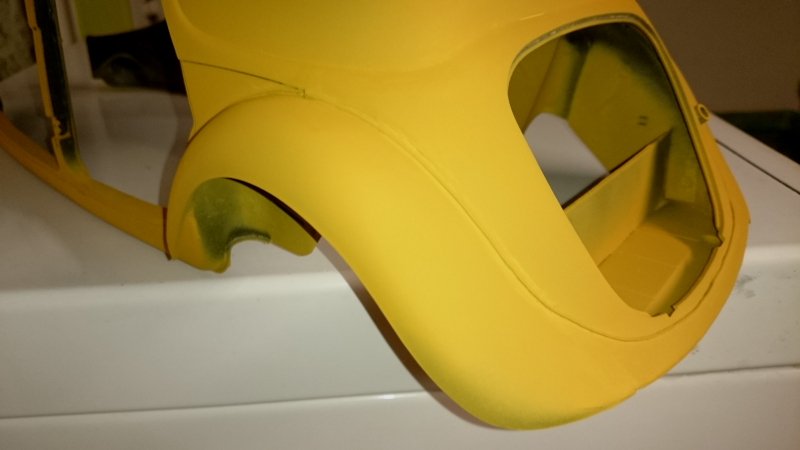
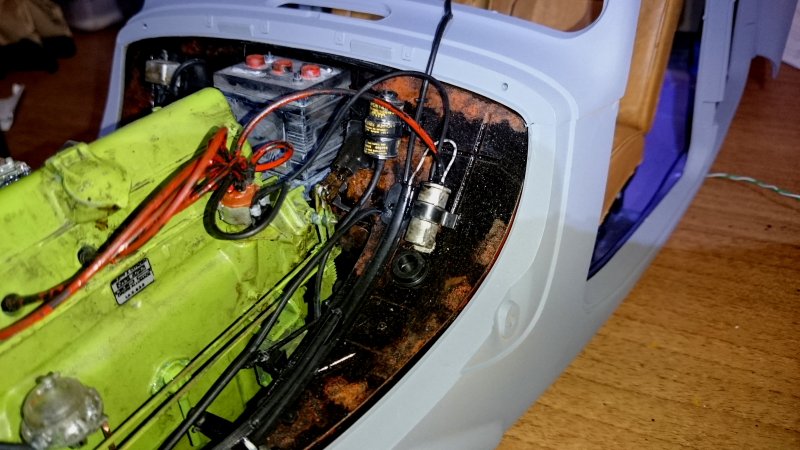
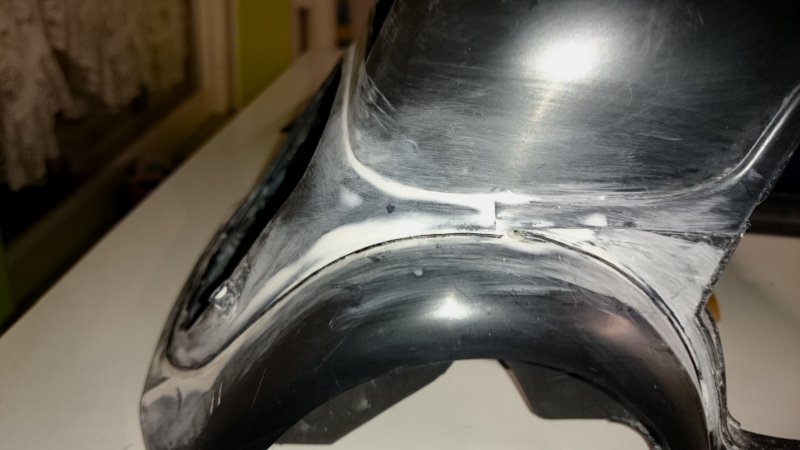
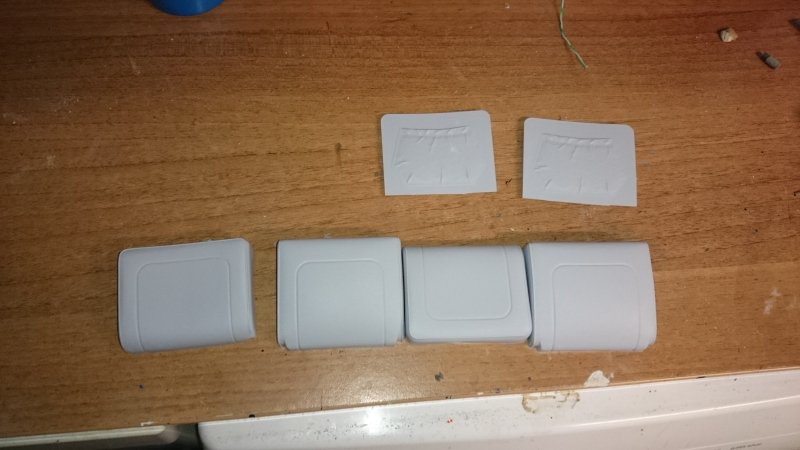
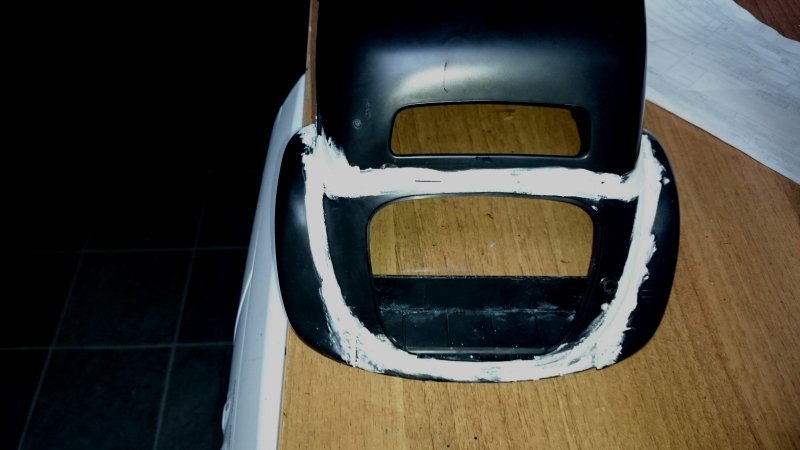
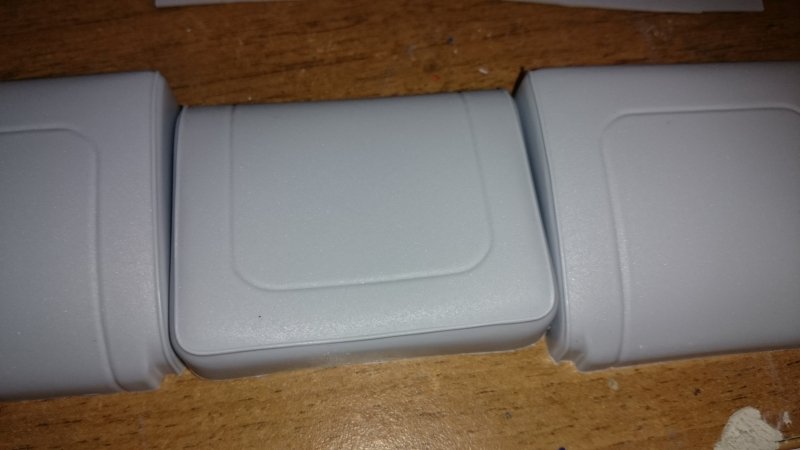
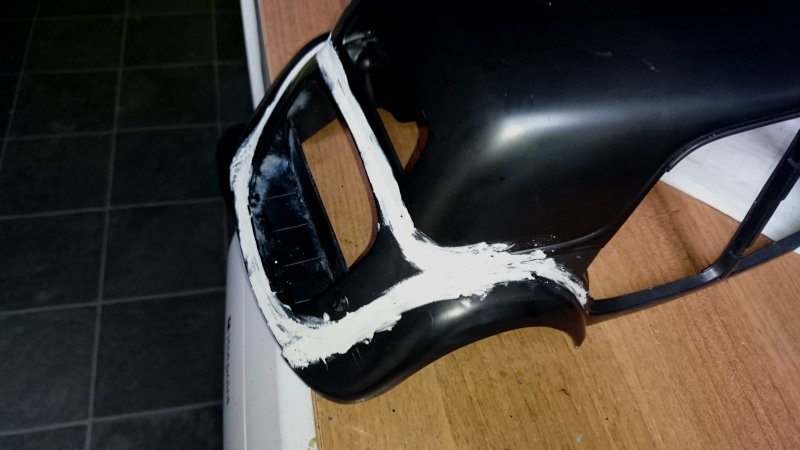
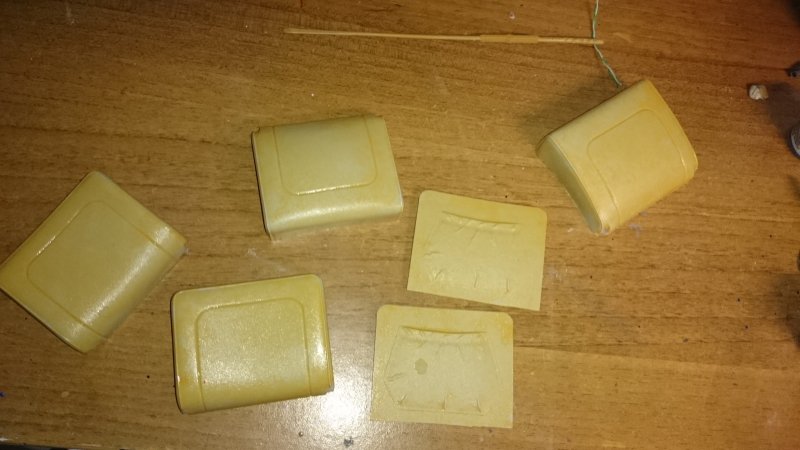
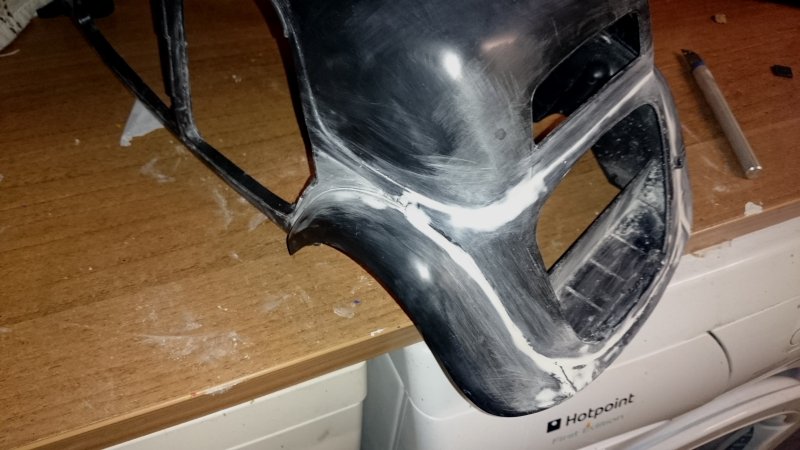
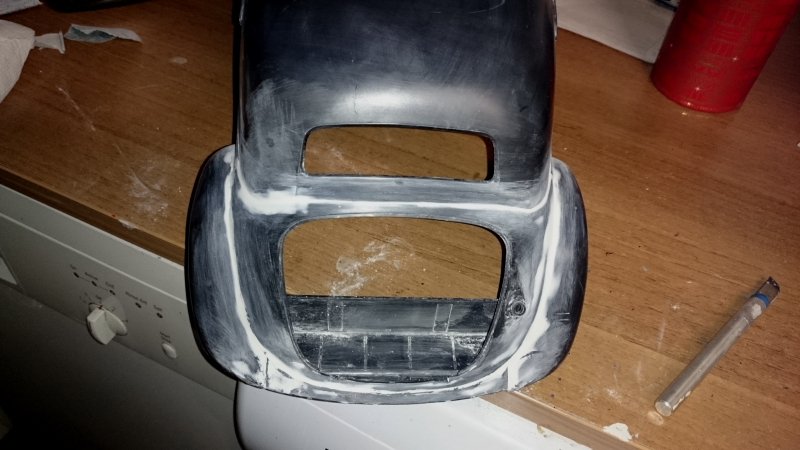
Thanks guys. The yellow was filler primer( it goes on very thick and dries quite soft so is easy sanded) (I thought when I sprayed it on it would reveal loads of imperfections but it didn't) The salt technique I use is mostly the same as everyone else uses So here is the tutorial. Firstly let me say I'm not saying I'm good at this or that isnt any of my own ideas (well apart from the plastic ageing)all the rust techneques I use here have been used by others, perhaps not all at the same time or combined with other thchneques, so here it is, hope it is of some use. Firstly this is old spare parts and I am going to spray the overall top colour black, simply because I think it will show the effect off best, first I paint the rust colour on the part roughly where I want the rust, If I want blistering bubbles in the paint I use pva glue and a cocktail stick. please excuse the blured pic, its difficult to use the camera whilst applying the glue, I allow that to dry then apply a few more dabs around and on that one and allow those to dry next I use sea salt in a grinder (you get more uneven grain sizes than table salt Now there are 2 methods you can use now, water, or hair spray the bottom one is just water which is applied where you want the rust only the top part I applied the hairspray all over it (I decant the hairspry into a lid from the can so if I wanted I could only apply it where the rust is, I've done it all over on the top piece I will explain why in the next step) now wee sprinkle the salt all over whilst everything is still wet. then allow it to dry. then we spray it all black you can see from the water one that some of the salt has already fell off now we brush all the loose salt off that is as far as you can go with removing paint on the water and salt one, however with some warm water and a stiff brush you could also remove all the black paint from the hairspray part if you wanted to, the advantage of this method is if the salting has not shown enough rust you can show more like this. The next stage (this wont work on the hairspray one ) is to use some cellulose thinners I like to use the dirty thinners I clean my brushes in as it helps with the staining , I also have a special brush with very few bristles left so it cant hold much, I literally shake the tin and whats in the lid is what I use(WARNING THIS MELTS PLASTIC BE CAREFUL) I literally just run it down the seams to give the rust tracking and bubbling you get. Here endeth the rusting -
Citroen Traction Avant by kpnuts - FINISHED - Heller - 1/8
kpnuts replied to kpnuts's topic in Non-ship/categorised builds
Happy to do so I did a tutorial when I built this originally as I had so many people saying they wish they knew how I did it. I also had loads telling me i should be ashamed of myself for ruining such a great kit and what rubbish techniques i was using it nearly put me off modeling, luckily I was on decent forums like this and they convinced me to continue ( dont listen to the bashers (theryre everywhere)) I consider this the best dio I have ever done (even over the warspite dio) we all have a build we never think we will beat and this was mine. -
Citroen Traction Avant by kpnuts - FINISHED - Heller - 1/8
kpnuts replied to kpnuts's topic in Non-ship/categorised builds
It's easy mate the body is just the salt method the windscreen is just masking .I'm happy to post how I did it if anyone is interested. -
Citroen Traction Avant by kpnuts - FINISHED - Heller - 1/8
kpnuts replied to kpnuts's topic in Non-ship/categorised builds
Heres another update.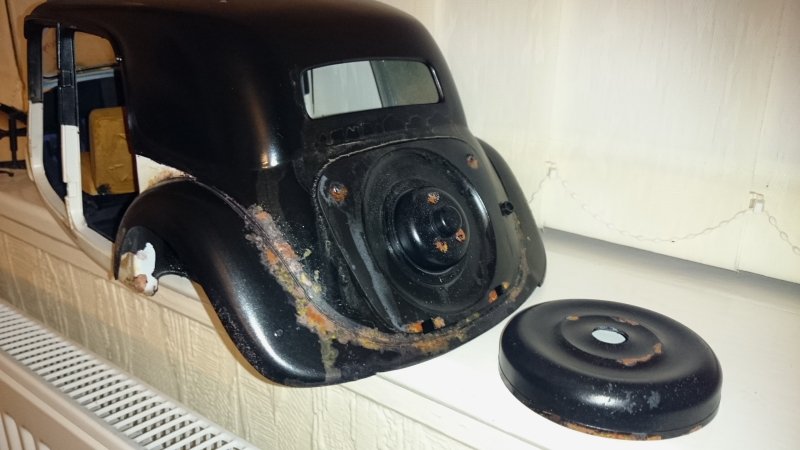
- 86 replies
-
- 16
-
-
Gundam FXA-05D /RX-178 super Gundam by kpnuts Bandai
kpnuts replied to kpnuts's topic in Non-ship/categorised builds
More progress on this awesome kit, what a pleasure to build the fit is superb- 11 replies
-
- 11
-
-
AH64 A Helicopter by kpnuts - Academy - 1/48 - PLASTIC
kpnuts replied to kpnuts's topic in Non-ship/categorised builds
Kits like this should be banned. I like to think I'm an ok modeller but I'm really struggling with this pig of a kit, if I were a youngster with no experience in modelling I would have given up and probably never touched a kit again. Dont these kit manufacturers realise when they release a kit like this they're shooting themselves in the foot, every new modeler is potentially lost with a kit like this. I'm just glad I decided before I started building it I was going to depict it blowing up.- 32 replies
-
- 10
-
-
Citroen Traction Avant by kpnuts - FINISHED - Heller - 1/8
kpnuts replied to kpnuts's topic in Non-ship/categorised builds
Thanks I feel encouraged to post another installment.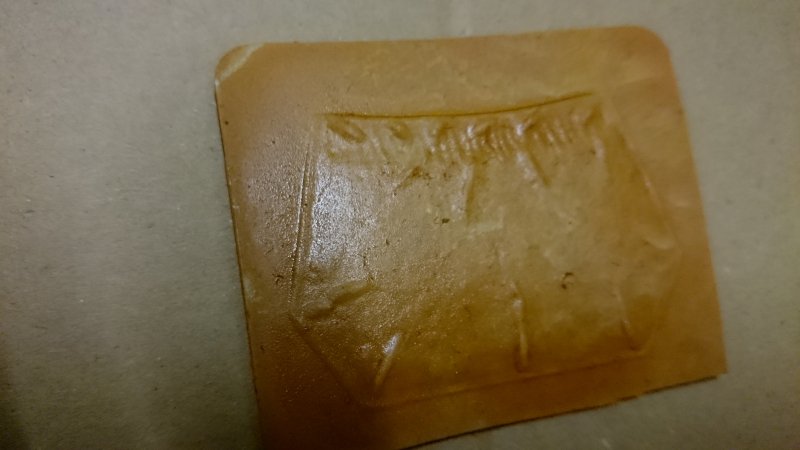


- 86 replies
-
- 14
-
-
Beautiful I built their dual phaeton but it was nowhere near this standard of greatness
-
Citroen Traction Avant by kpnuts - FINISHED - Heller - 1/8
kpnuts replied to kpnuts's topic in Non-ship/categorised builds
Hi all another installment.
- 86 replies
-
- 14
-
-
Citroen Traction Avant by kpnuts - FINISHED - Heller - 1/8
kpnuts replied to kpnuts's topic in Non-ship/categorised builds
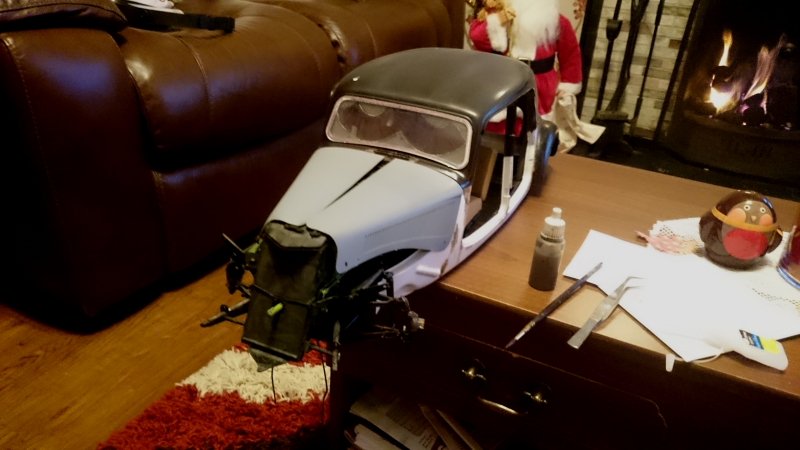
Thanks yves. As I said at the start the model was actually finished long time ago but I did add that rubber. -
Citroen Traction Avant by kpnuts - FINISHED - Heller - 1/8
kpnuts replied to kpnuts's topic in Non-ship/categorised builds
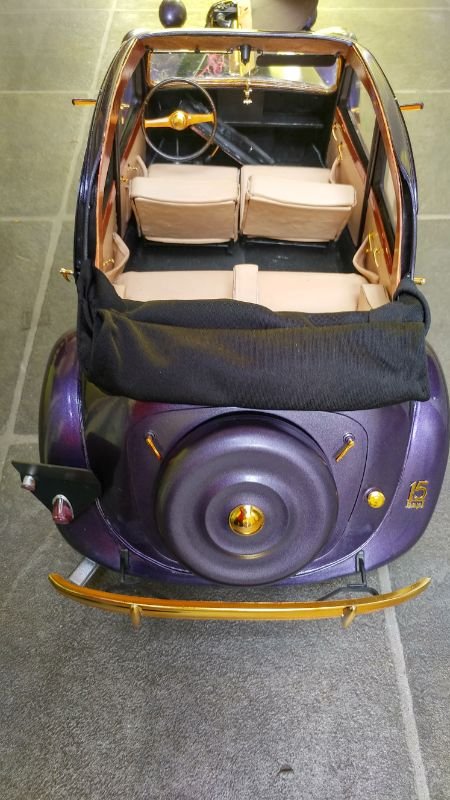
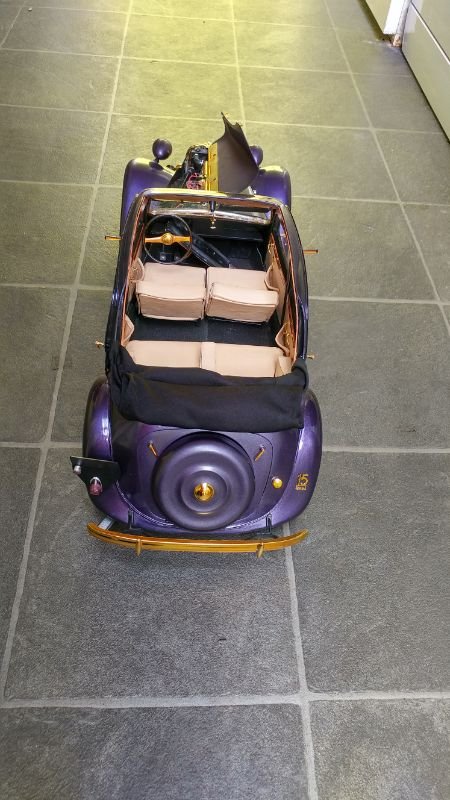
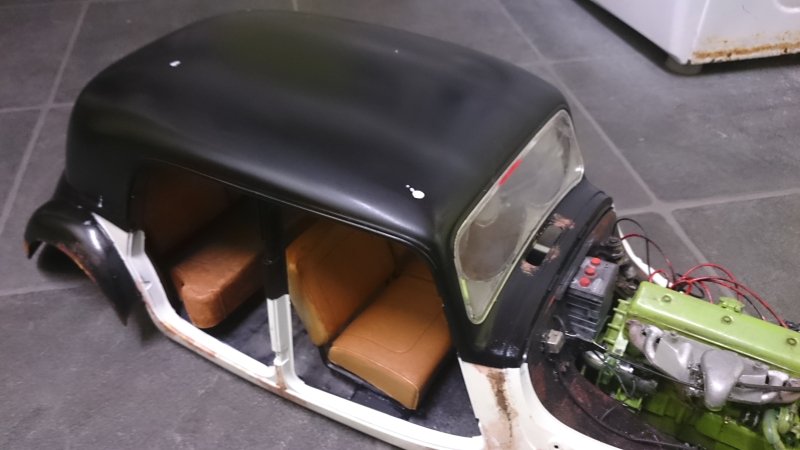
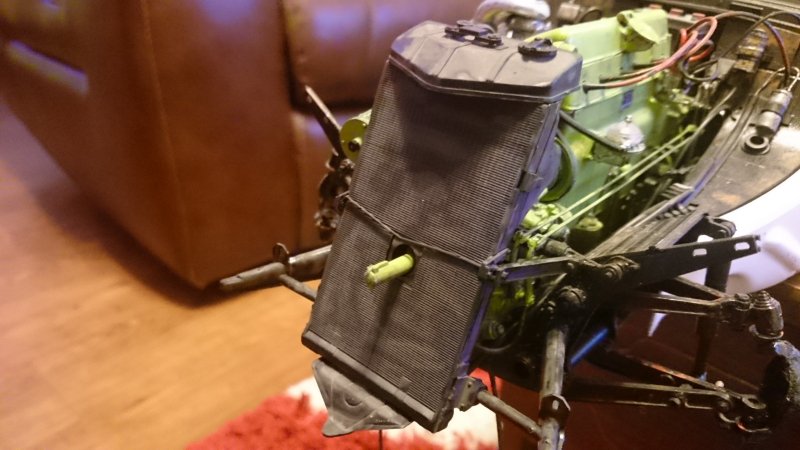
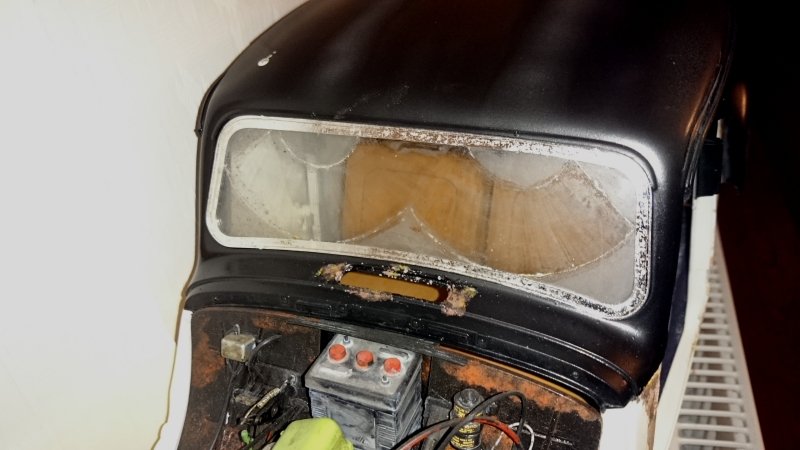
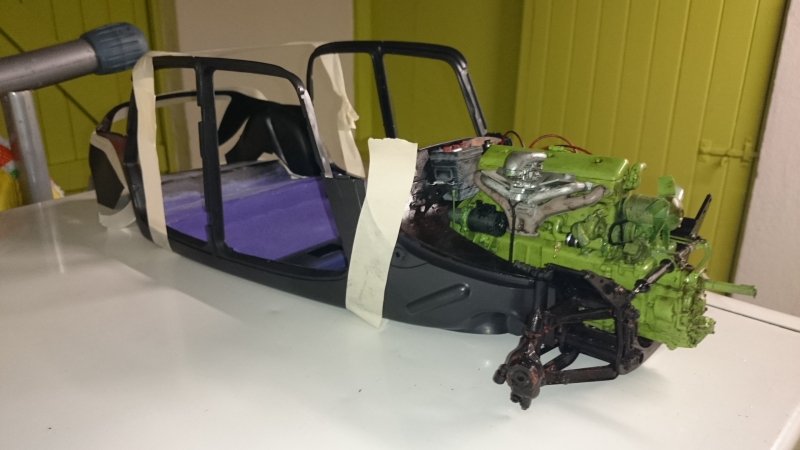
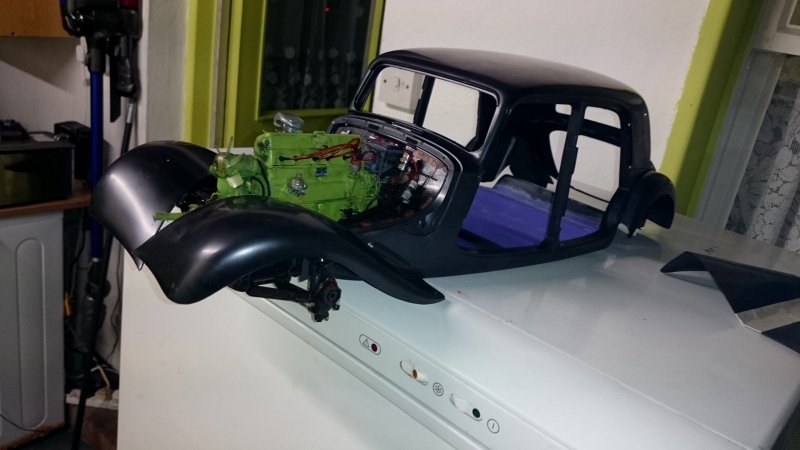
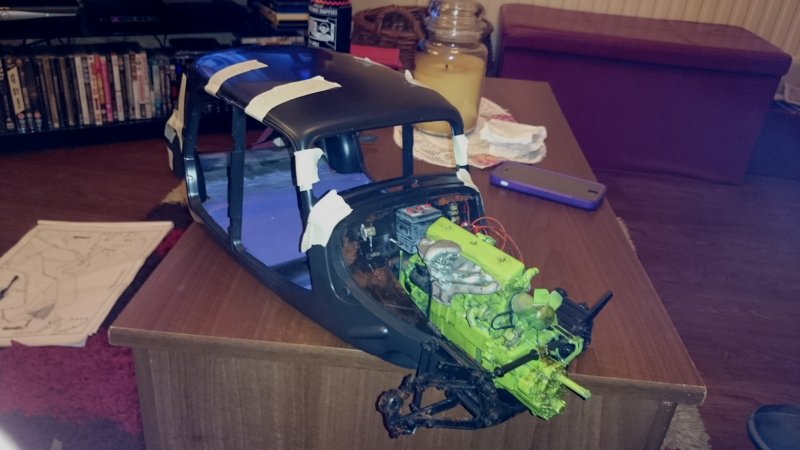
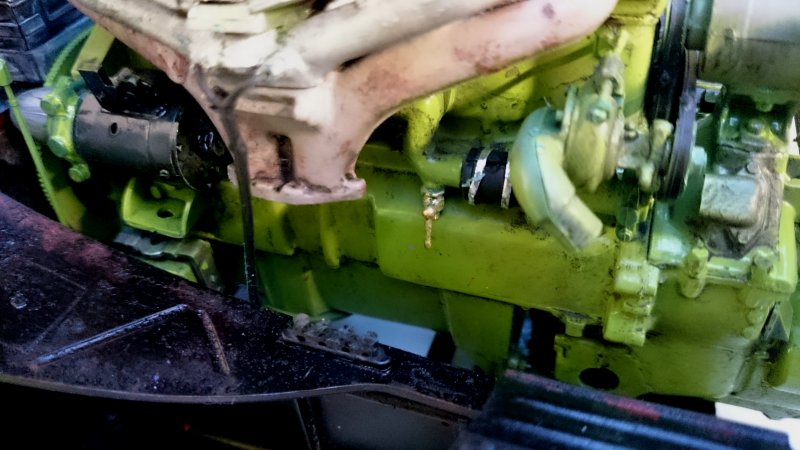
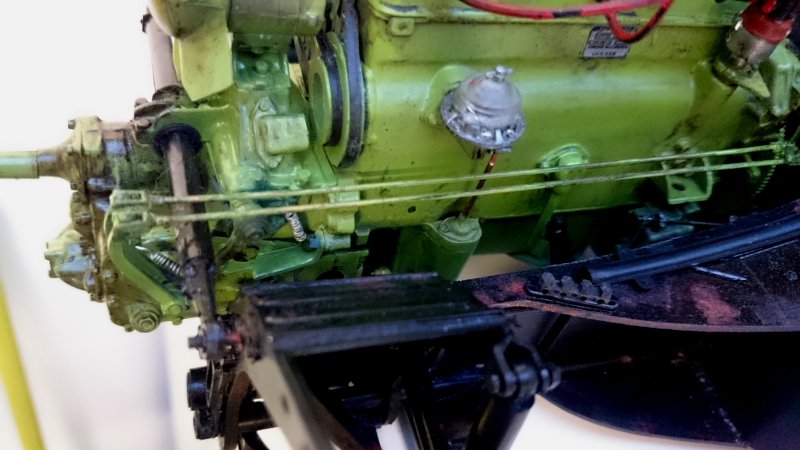
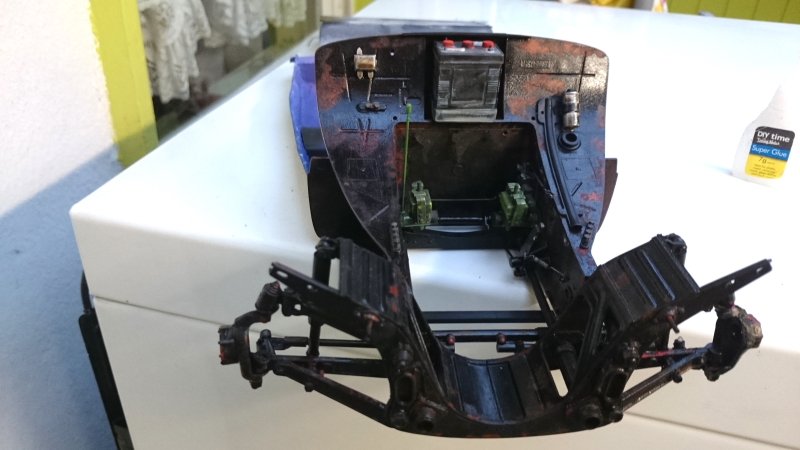
Thanks for the nice comments. Here is the next installment. I should mention the carpet colour will change as citroen were going to send me the colour code for a blue colour I'd chosen but never did so I changed the body colour which meant changing the carpet colour.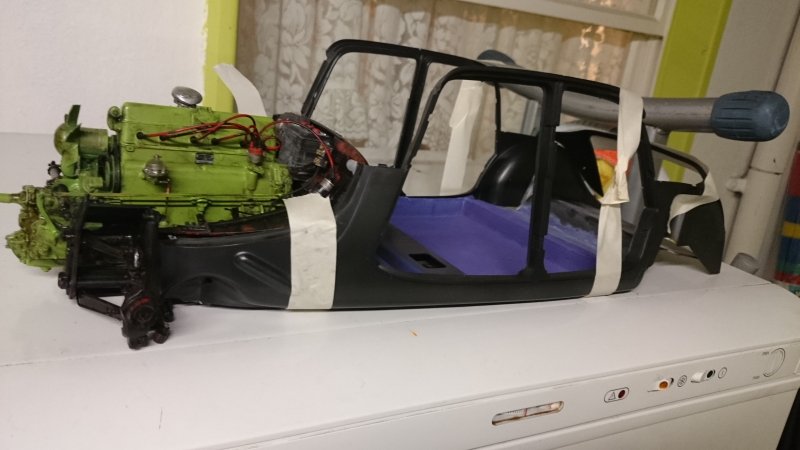


- 86 replies
-
- 16
-
-

-
Citroen Traction Avant by kpnuts - FINISHED - Heller - 1/8
kpnuts replied to kpnuts's topic in Non-ship/categorised builds
Hi here is the next installment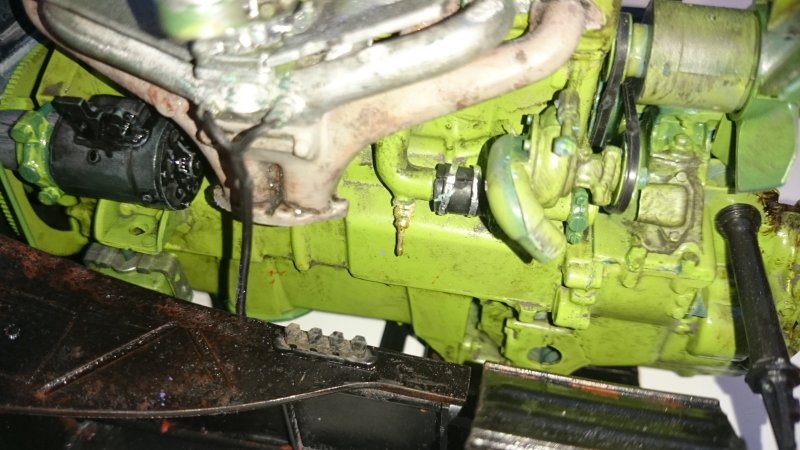
- 86 replies
-
- 13
-
